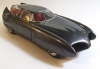
93Z34 Posted August 10, 2009 Posted August 10, 2009 I love what you did with the body mods Raul, but more importantly, I'm dying to know how you did the seats on this car. I love the added detail and the pleat outlining the inner seat panel. What did you use for material to make that seam and how did you do it? Your car looks absolutely stunning to say the least!!!!!
Raul_Perez Posted August 10, 2009 Author Posted August 10, 2009 I love what you did with the body mods Raul, but more importantly, I'm dying to know how you did the seats on this car. I love the added detail and the pleat outlining the inner seat panel. What did you use for material to make that seam and how did you do it? Your car looks absolutely stunning to say the least!!!!! Thanks, Brian!! The pleat was done with 32 gauge wire that I get from a company called Train Control Systems. You can find them at www.tcsdcc.com Their prices are very reasonable and you can get the stuff in several colors. It is simply superglued in place with a toothpick; then I spray a bit of Testors Dull Coat over the whole thing to kill any gloss and hide any glue tracks. Good luck,
Fuel Coupe Posted August 10, 2009 Posted August 10, 2009 clean little build Raul. Just stumbled on this one...
MikeMc Posted August 10, 2009 Posted August 10, 2009 Wowser!!!!!To make that grill as unique as the rest of it...go with Black Chrome....a few mist coats of Tamiya smoke... keeps it shiny but not blinding!!! That Hemi is perfect with the quads!!!
Raul_Perez Posted August 10, 2009 Author Posted August 10, 2009 Wowser!!!!!To make that grill as unique as the rest of it...go with Black Chrome....a few mist coats of Tamiya smoke... keeps it shiny but not blinding!!! That Hemi is perfect with the quads!!! Interesting idea, Mike!! If nothing else, this one needs a but of a black wash to make it look more realistic. Thanks,
Fletch Posted August 10, 2009 Posted August 10, 2009 Keeps getting better with each update Mr Perez. I need to get back to mine, just been to busy with life to get much modeling accomplished. One other thing you might consider for the grille is an India Ink pen. They are sold by many craft stores such as Micheal's, the come in various sizes, the most useful for modeling purposes are the .5 and .05 tips. Run your lines down the sides of the ribs on the grille, give it an hour or so to dry enough to handle and you're good to go.
59 Impala Posted August 11, 2009 Posted August 11, 2009 WOW, Raul, she is lookin great. She looks much better right side up It's been awhile since I've posted anything here and I am liken what I see with your build. I love the color choice you made and the stripe really sets it off. The body work really looks killer. I also like the stance. Keep us posted on the updates. Great work my friend. Dan
Raul_Perez Posted August 11, 2009 Author Posted August 11, 2009 Keeps getting better with each update Mr Perez. I need to get back to mine, just been to busy with life to get much modeling accomplished. One other thing you might consider for the grille is an India Ink pen. They are sold by many craft stores such as Micheal's, the come in various sizes, the most useful for modeling purposes are the .5 and .05 tips. Run your lines down the sides of the ribs on the grille, give it an hour or so to dry enough to handle and you're good to go. Thanks, Dave!! Yeah, I have ink pens. Depending on the depth of the grooves, they can give a nice, consistent line. WOW, Raul, she is lookin great. She looks much better right side up It's been awhile since I've posted anything here and I am liken what I see with your build. I love the color choice you made and the stripe really sets it off. The body work really looks killer. I also like the stance. Keep us posted on the updates. Great work my friend. Dan Thanks, Dan!! I think that will be the last time that I post a picture of a car upside-down!! Well, it's time to get back to the madness...I need to get the interior finished... Later,
curt raitz Posted August 11, 2009 Posted August 11, 2009 Dang, dude... I can see why you waited for the engine, it looks big 'n mean in this little Ford I see you really had to "shoehorn" it to fit lookin' forward to seein' it Friday
Pat Cardz Posted August 11, 2009 Posted August 11, 2009 Awesome work Raul! I just got caught up with all the body work, which is very well done BTW(as if U didn't know)! I look forward to seeing the rest of the interior because that seat looks great with the piping. Keep at er!
Alyn Posted August 11, 2009 Posted August 11, 2009 I'm just happy to see you were able to get the glue off the roof
Raul_Perez Posted August 11, 2009 Author Posted August 11, 2009 Awesome work Raul! I just got caught up with all the body work, which is very well done BTW(as if U didn't know)! I look forward to seeing the rest of the interior because that seat looks great with the piping. Keep at er! Thanks, Pat!! I'm just happy to see you were able to get the glue off the roof No...I just smoothed it out with a little Bondo and painted over it!! Later,
Alyn Posted August 11, 2009 Posted August 11, 2009 All kidding aside, MR. P., you are really bringing out the best of the 40 Ford while eliminating the bad. Lot's of nice subtle little design choices; the difference between a good modeler and a great one.
Modlbldr Posted August 11, 2009 Posted August 11, 2009 Raul- That is turning out to be one beautiful build. The work that you have done is top notch. I really cringe at the thought of chopping a vehicle like this because none of mine have ever seemed to fair so well. The way you did it looks very simple. I may have to try again soon. Keep up the great work and let us see some of that interior. Later-
Raul_Perez Posted August 12, 2009 Author Posted August 12, 2009 All kidding aside, MR. P., you are really bringing out the best of the 40 Ford while eliminating the bad. Lot's of nice subtle little design choices; the difference between a good modeler and a great one. Thanks, Alyn!! It is always risky changing a design...some modifications fit well and balance the design while other mods just don't blend well with the rest of the design. It's a good thing that model building is a relatively inexpensive means of trying your hand at automotive design!! Raul- That is turning out to be one beautiful build. The work that you have done is top notch. I really cringe at the thought of chopping a vehicle like this because none of mine have ever seemed to fair so well. The way you did it looks very simple. I may have to try again soon. Keep up the great work and let us see some of that interior. Tom, It's good to hear from you!! Yeah, this type of chop is relatively simple...much more so than the method where you split the top and add material to compensate for the angle of the "A" and "C" pillars. Give it a try!! Later,
Raul_Perez Posted August 15, 2009 Author Posted August 15, 2009 Here are a few pics of the interior before it gets installed into the body. The pedals, seats, the center console, the interior door handles (that are actually the exterior door handles) came from the Revell '41 Willys Street rod. The PE "Ford" speaker covers and the seat belt buckles are from Model Car Garage. The PE dash insert and the radio faces are from Model Car Garage. The seat belts are cut from black construction paper. The steering column and wheel are also from the Revell '41 Willys. If all goes well, I'll spray the final coat of clear on the body later today and this onw will be "Under Glass" in the next couple of weeks... Later,
Dr. Cranky Posted August 15, 2009 Posted August 15, 2009 Gorgeous, well-executed work, buddy. Can't wait to see more!
E St. Kruiser50 Posted August 15, 2009 Posted August 15, 2009 Hey Raul Been followin' this since ya started and it's lookin' REAL GOOD . Built me this Standard Coupe a few years back with standard 24 inchers, and on the ground as usual. These are fun kits. As Ajulia (Tito) would say - KEEP ON WITH DA KEEPIN ON - dave
Raul_Perez Posted August 15, 2009 Author Posted August 15, 2009 Gorgeous, well-executed work, buddy. Can't wait to see more! Thanks, Virgil!! What are you working on these days?? Hey Raul Been followin' this since ya started and it's lookin' REAL GOOD . Built me this Standard Coupe a few years back with standard 24 inchers, and on the ground as usual. These are fun kits. As Ajulia (Tito) would say - KEEP ON WITH DA KEEPIN ON - dave Thanks, Dave!! Those are some seriously BIG wheels on that Ford!! And, where is Tito these days?? Later,
RodneyBad Posted August 15, 2009 Posted August 15, 2009 With alot of builds here, I'm left Speechless. How many times can One say WOW, Awesome? The Interior looks Fantastic. Outside door handles inside. Nice idea. Love the hemi Nice colors.. How do ya get More Zoom on pics with Firefox? Explorer has a magnification option (I don't use Explorer tho)
Alyn Posted August 15, 2009 Posted August 15, 2009 (edited) Great looking interior detail along with some clever thinking. How do ya get More Zoom on pics with Firefox? Explorer has a magnification option (I don't use Explorer tho) Hold down the "Ctrl" key and press + To reset, "Ctrl" and "0" (the zero above the alpha keys) Press + three times for a Mazda zoom Edited August 15, 2009 by Alyn
Raul_Perez Posted August 15, 2009 Author Posted August 15, 2009 With alot of builds here, I'm left Speechless. How many times can One say WOW, Awesome? The Interior looks Fantastic. Outside door handles inside. Nice idea. Love the hemi Nice colors.. Thanks, Rodney!! Yeah...the door handles from the Willy are pretty small and look pretty good in the old Ford. Great looking interior detail along with some clever thinking. Thanks, Alyn! Now let's see how much of it will actually be seen once it's nested under that chopped top!! Later,
RodneyBad Posted August 16, 2009 Posted August 16, 2009 Great looking interior detail along with some clever thinking. Hold down the "Ctrl" key and press + To reset, "Ctrl" and "0" (the zero above the alpha keys) Press + three times for a Mazda zoom Thanks. It enlarges the text but not the pics.
Recommended Posts
Create an account or sign in to comment
You need to be a member in order to leave a comment
Create an account
Sign up for a new account in our community. It's easy!
Register a new accountSign in
Already have an account? Sign in here.
Sign In Now