DREAMSCALE CONCEPTS Posted May 11, 2024 Posted May 11, 2024 1960 corvette on the bench! Paint work is done, wet sand and polish next! Haven’t decided on an engine just yet, definitely something crazy, twin turbo, blower? Any suggestions??!!
DREAMSCALE CONCEPTS Posted May 11, 2024 Author Posted May 11, 2024 Mock-up! Going to polish the body 3 more times and then assembly. 1
DREAMSCALE CONCEPTS Posted May 18, 2024 Author Posted May 18, 2024 I have decided to go a different route with my AMT 1960 Corvette! After several times trying to correct the paint job problem and making it worse, stripping it 3 times and sanding, I’ve decided to do my own thing once again! I've cut the windshield hoop off and cut the whole interior section out of the body and filled it in with a one seat old Indy car style cockpit. I think this could be the beginning of an outta this world custom 1960 corvette! I’ll post the progress! Thanks! 1
LennyB Posted May 18, 2024 Posted May 18, 2024 I see some kind of wacky blower offset to the passenger side. After all one does need to see the road ahead ?
DREAMSCALE CONCEPTS Posted May 18, 2024 Author Posted May 18, 2024 6 minutes ago, LennyB said: I see some kind of wacky blower offset to the passenger side. After all one does need to see the road ahead ? Weber fuel injected big block 60s road racer!
DREAMSCALE CONCEPTS Posted May 18, 2024 Author Posted May 18, 2024 I know the black paint doesn’t look bad in the pictures but if you zoom in you will see what I mean! Lolll awful!
Kenmojr Posted May 19, 2024 Posted May 19, 2024 I am kind of partial to C1 Corvettes, especially 1958, 59 & 60... LOL For a powerplant how about a Viper or Ferrari V12?
espo Posted May 19, 2024 Posted May 19, 2024 Like your new design. There was a time when two seaters like these owners would have a fabric cover over the passenger area with a zipper in the center so that it could be parked with the cover zipped and no roof or unzipped and just have the driver's area open.
DREAMSCALE CONCEPTS Posted May 21, 2024 Author Posted May 21, 2024 I did some filling and sanding and wet sanding before spraying it white so i could see where I missed! Almost there! 1
rbarlow1 Posted May 22, 2024 Posted May 22, 2024 Hey, are you spraying this stuff out of an airbrush? Because if so, you need to adjust something, that looks like some really tough orange peel. If it's coming out of a can, it's tougher to explain. It looks to me like somehow you've got a lot of paint coming out but it's also drying before it hits the surface. Or something. Alternatively, that could just be sanding dust that you haven't wiped clean - you might want to wash it with a soft tooth brush and dishsoap and let it airdry before painting if that's the case. For the finish sanding: you need to take that filler down further so that it feathers. There's a clear dividing line here now - use coarser paper to take it down (I wouldn't go lower than around 320, and use a really light touch), then work your way back up to 800/1200 or so (at least) before primer. You might also want to invest in a scriber (15 bucks maybe) and you could then use it to recut the door jambs and gas cap. Just some suggestions. I love the concept. 1
DREAMSCALE CONCEPTS Posted May 23, 2024 Author Posted May 23, 2024 On 5/22/2024 at 12:19 PM, rbarlow1 said: Hey, are you spraying this stuff out of an airbrush? Because if so, you need to adjust something, that looks like some really tough orange peel. If it's coming out of a can, it's tougher to explain. It looks to me like somehow you've got a lot of paint coming out but it's also drying before it hits the surface. Or something. Alternatively, that could just be sanding dust that you haven't wiped clean - you might want to wash it with a soft tooth brush and dishsoap and let it airdry before painting if that's the case. For the finish sanding: you need to take that filler down further so that it feathers. There's a clear dividing line here now - use coarser paper to take it down (I wouldn't go lower than around 320, and use a really light touch), then work your way back up to 800/1200 or so (at least) before primer. You might also want to invest in a scriber (15 bucks maybe) and you could then use it to recut the door jambs and gas cap. Just some suggestions. I love the concept. Thanks! I will definitely use this advice. I have filled in the door jams so the body has become 1 piece. I went out and purchased an airbrush system because I am sick of rattle cans ! Anything can effect them!
mrm Posted May 23, 2024 Posted May 23, 2024 Pretty interesting concept. What kit did the wheels come from?
DREAMSCALE CONCEPTS Posted May 26, 2024 Author Posted May 26, 2024 On 5/23/2024 at 6:55 PM, mrm said: Pretty interesting concept. What kit did the wheels come from? The wheels didn’t come from a kit! The wheels came from Jay’s Resin wheels on eBay! Lots of cool wheels too be had! Check him out!
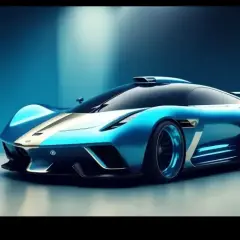
DREAMSCALE CONCEPTS Posted May 26, 2024 Author Posted May 26, 2024 I have chosen the body color for my “Sebring Special “ 1960 Amt Corvette! Gonna fine tune the paint and trim! If I can find some old school circular number decals from that era, maybe I’ll put them on! 1
DREAMSCALE CONCEPTS Posted May 26, 2024 Author Posted May 26, 2024 Going together pretty well so far made an interior tub from junk parts and flat stock. I made a small shifter and boot from a needle applicator and a chrome plastic shifter ball. It’s coming out pretty well, more details to come! 1
NOBLNG Posted May 27, 2024 Posted May 27, 2024 I like the colour combo too.? Is that white primer DupliColor? I get a dry “fuzzy” texture with it that I don’t with the grey stuff.
DREAMSCALE CONCEPTS Posted May 28, 2024 Author Posted May 28, 2024 On 5/26/2024 at 6:46 PM, espo said: Like the color combination. Thanks, I wanted that early 60s road racer/ Chevrolet concept.
DREAMSCALE CONCEPTS Posted May 28, 2024 Author Posted May 28, 2024 10 hours ago, NOBLNG said: I like the colour combo too.? Is that white primer DupliColor? I get a dry “fuzzy” texture with it that I don’t with the grey stuff. The white primer is Rustolium along with the white gloss paint. I don’t like Duplicolor because of a blushing result I encountered on the same model before I totally stripped it down to the kit white.
DREAMSCALE CONCEPTS Posted May 28, 2024 Author Posted May 28, 2024 The Corvette is coming together slowly but surely. I had a lot of problems with this kit which I created myself with the paint. I must’ve stripped this car 3 times before I got it right . Then I was looking at some early corvette concepts and road racers and decided to raid my junk pile for the parts to put me in the right direction I wanted and go! The car still has a ways to go but I’ve been determined to finish this one because of all the trouble it has given me ! No matter how bad it gets, be patient and it will work itself out! Here’s what Ive done so far! Thanks 2
DREAMSCALE CONCEPTS Posted May 30, 2024 Author Posted May 30, 2024 Hello guys. I’m sorry to say that this thread has come too an end because this model car has been destroyed. To many things have broken on this car while I was trying too assemble it. I guess all the paint stripping weakened the styrene on the body causing it to become brittle or something. I WILL purchase another one to pursue my vision of this model car. Thank you.
Musclecarbuilder Posted May 30, 2024 Posted May 30, 2024 1 hour ago, DREAMSCALE CONCEPTS said: Hello guys. I’m sorry to say that this thread has come too an end because this model car has been destroyed. To many things have broken on this car while I was trying too assemble it. I guess all the paint stripping weakened the styrene on the body causing it to become brittle or something. I WILL purchase another one to pursue my vision of this model car. Thank you. Man that sucks, I know the feeling.
espo Posted May 31, 2024 Posted May 31, 2024 Sorry to hear about the plastic body issues. I ran into the same thing stripping the paint on an older kit from the original era of this Corvette and the same thing happened. I understand that there have been a few changes in the makeup of the styrene that is used through the years.
DREAMSCALE CONCEPTS Posted June 1, 2024 Author Posted June 1, 2024 On 5/30/2024 at 7:46 PM, Musclecarbuilder said: Man that sucks, I know the feeling. I have purchased a new kit and will be replicating the car, same color same everything! I can’t let this one go! I’m going on vacation so I’m gonna start it when I return!
DREAMSCALE CONCEPTS Posted June 1, 2024 Author Posted June 1, 2024 I have purchased new kit and will be replicating the exact model car! I will inform you guys when I start!
Recommended Posts
Create an account or sign in to comment
You need to be a member in order to leave a comment
Create an account
Sign up for a new account in our community. It's easy!
Register a new accountSign in
Already have an account? Sign in here.
Sign In Now