Foxer Posted September 24, 2010 Share Posted September 24, 2010 nice ... nice ... nice! I like the way this is headed. Quote Link to comment Share on other sites More sharing options...
Raul_Perez Posted September 24, 2010 Author Share Posted September 24, 2010 I made it home safely. Almost didn't make it to the airport though. Almost fell asleep going down that big hill. But I made it and I am home. Get this done and I got the kit I sent myself the day before yesterday. Will get it going soon. I'm glad to hear that you got home safely. It was a pleasure meeting you and I hope to see you again sometime. nice ... nice ... nice! I like the way this is headed. Thanks!! I need to find a new source for the type of primer I like to use. The hardware store in town where I was buying it went out of business and the other stores don't carry the same brand. Here's a few pics of how it looks now while it waits for some sanding and a bit more primer. The basic shape on the right side and the rear is done. The left side still needs the filler panel for the running board and the rib on the bottom to be added. Here's how the top of the body lifts off for assembly. Well, that's all for now...I've still got a lot of fabricating and a bit of putty work to do before this one gets a final coat of primer... Later, Quote Link to comment Share on other sites More sharing options...
Clay Posted September 24, 2010 Share Posted September 24, 2010 Raul, it looks great. Can't wait to see this one finished!! Quote Link to comment Share on other sites More sharing options...
Jantrix Posted September 24, 2010 Share Posted September 24, 2010 (edited) Wow. I'm really seeing a styling difference between this and your Stude. The Stude looked very modern and would have been right at home in the 5th Element. This one screams black and white 1940's sci-fi movie to me. I'm really enjoying watching this come together. I'd like to see more art deco influences here, I think it will really fit the build. Maybe some Cord/Mercedes exhaust tubes from the hood sides through the fender and some Delahaye style chrome around the lower edges of the body. Edited September 24, 2010 by Jantrix Quote Link to comment Share on other sites More sharing options...
Bernard Kron Posted September 24, 2010 Share Posted September 24, 2010 The addition of the rear drive system is really starting to make the connection with the vibe of the flic. :D Is that a hubcap you used for the "drive nacel"? Quote Link to comment Share on other sites More sharing options...
curt raitz Posted September 24, 2010 Share Posted September 24, 2010 The addition of the rear drive system is really starting to make the connection with the vibe of the flic. Is that a hubcap you used for the "drive nacel"? Of course it's a hubcap...he's gotta find someplace to use up the tires and wheels!!! Quote Link to comment Share on other sites More sharing options...
Raul_Perez Posted September 24, 2010 Author Share Posted September 24, 2010 Wow. I'm really seeing a styling difference between this and your Stude. The Stude looked very modern and would have been right at home in the 5th Element. This one screams black and white 1940's sci-fi movie to me. I'm really enjoying watching this come together. I'd like to see more art deco influences here, I think it will really fit the build. Maybe some Cord/Mercedes exhaust tubes from the hood sides through the fender and some Delahaye style chrome around the lower edges of the body. Thanks!! This one was not intended to align with the 5th Element movie, which is why it has a different look. Yes, this one has much more of an art deco feel. I'm not planning on adding exhaust tubes out the side, (only because it is intended to be a hover car with everything exhausting out the back), but I am planning on adding some chrome side trim to help break up the large areas on the sides where the wheels were. I'll probably go with 3 stacked trim pieces near each of the wheel areas. The addition of the rear drive system is really starting to make the connection with the vibe of the flic. Is that a hubcap you used for the "drive nacel"? Actually, it's two hubcaps...One as an outer ring to fit the inner diameter of the tubing I used and one inside of that for the exhaust. Of course the inner one is from a Chevy Later, Quote Link to comment Share on other sites More sharing options...
Jantrix Posted September 24, 2010 Share Posted September 24, 2010 I'm not planning on adding exhaust tubes out the side, (only because it is intended to be a hover car with everything exhausting out the back), Well I was figuring the tubes wouldn't be for exhaust but rather to bring coolant to the reactor core. Don't want to over heat do ya? Quote Link to comment Share on other sites More sharing options...
Raul_Perez Posted September 25, 2010 Author Share Posted September 25, 2010 Well I was figuring the tubes wouldn't be for exhaust but rather to bring coolant to the reactor core. Don't want to over heat do ya? I like the way you think!! Here's a couple of pics I modified in PowerPoint to get an idea of how I want the trim to look. I may move the pieces on the rear up a bit. I'll play with it some more in PowerPoint before I decide on the final location, but this gives a general idea of how it will look. And here's one with the "cooling lines" coming out from the engine area to where the SuperCool radiators are tucked away in what once was the wheel openings But...there's still a lot of fabrication to do to the left side before I get to that point... Later, Quote Link to comment Share on other sites More sharing options...
Clay Posted September 25, 2010 Share Posted September 25, 2010 Raul, that looks great. O agree about the over heating, don't want a reactor explosion now do ya? Quote Link to comment Share on other sites More sharing options...
Tumbler75 Posted September 25, 2010 Share Posted September 25, 2010 Simply amazing Raul! I was thinking along the same lines when the idea was mentioned of "coolant tubes" to give a bit of a "Art Deco" look. Really love where this one is going! I think the three peice trim idea to break up the fender areas is going to be a very well deserved and brillant idea. Keep up the outstanding work. I can't wait to see more. Quote Link to comment Share on other sites More sharing options...
Raul_Perez Posted September 25, 2010 Author Share Posted September 25, 2010 Raul, that looks great. O agree about the over heating, don't want a reactor explosion now do ya? Thanks, Clay!! No...we don't want a reactor explosion in this one... Simply amazing Raul! I was thinking along the same lines when the idea was mentioned of "coolant tubes" to give a bit of a "Art Deco" look. Really love where this one is going! I think the three peice trim idea to break up the fender areas is going to be a very well deserved and brillant idea. Keep up the outstanding work. I can't wait to see more. Thanks!! I did a bit more work in PowerPoint to get a more 3D / chrome representation of the trim and the coolant lines this afternoon. Once all the body work is done and it's primed, this is how I'll decide the final shape, size and location of the trim that will be added before it's painted. Later, Quote Link to comment Share on other sites More sharing options...
Jantrix Posted September 26, 2010 Share Posted September 26, 2010 This is some of the chrome treatments I was thinking of. I like where this is going. Quote Link to comment Share on other sites More sharing options...
Greg Cullinan Posted September 26, 2010 Share Posted September 26, 2010 (edited) This is looking cool,where do I find the Stude? Edited September 26, 2010 by Greg Cullinan Quote Link to comment Share on other sites More sharing options...
Raul_Perez Posted September 26, 2010 Author Share Posted September 26, 2010 This is looking cool,where do I find the Stude? Here you go... Studebaker Hover Car Quote Link to comment Share on other sites More sharing options...
Raul_Perez Posted March 9, 2011 Author Share Posted March 9, 2011 While waiting for the black basecoat to cure on the BAT car, I got back to work on the 2239 Chevy. So far it has a black base coat and I finalized the design for the side trim. With a little green screen magic, here's the car superimposed over a scene from the 5th Element heading into the garage. Here's the green screen shot before I added the trim and colored the body in PowerPoint. Time to print the side trim onto sticky-back paper, apply the paper to 0.06" styrene, cut out the trim, then get it sanded to final shape and glued to the body before the final basecoat of black is applied... Later, Quote Link to comment Share on other sites More sharing options...
made007 Posted March 9, 2011 Share Posted March 9, 2011 great! dont forget to post some pics Quote Link to comment Share on other sites More sharing options...
Raul_Perez Posted March 9, 2011 Author Share Posted March 9, 2011 nice to see this one back up there great! dont forget to post some pics Thanks, guys! This will be my last "flying" car build for a while. I've got several other projects I've started that I need to get back to... Later, Quote Link to comment Share on other sites More sharing options...
Clay Posted March 9, 2011 Share Posted March 9, 2011 So what else is new Raul? Looks good so far with the paint and everything. Quote Link to comment Share on other sites More sharing options...
Raul_Perez Posted April 17, 2011 Author Share Posted April 17, 2011 While waiting for the paint on the Alfa Romeo BAT5 to dry, I had a bit of time to build an engine for the 2239 Chevy. Here are a few pics: Well...back to the bench for a bit more building... Quote Link to comment Share on other sites More sharing options...
Clay Posted April 17, 2011 Share Posted April 17, 2011 Looks good to me Raul, will it fit under the hood? Quote Link to comment Share on other sites More sharing options...
Raul_Perez Posted April 17, 2011 Author Share Posted April 17, 2011 Yeah...it fits really well, but you can't see much of it once it's in the car... Quote Link to comment Share on other sites More sharing options...
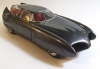
Raul_Perez Posted April 17, 2011 Author Share Posted April 17, 2011 Here's a picture of the engine in the car. This one needs a serious color sanding before it gets a final coat of paint and some clear... Quote Link to comment Share on other sites More sharing options...
Dr. Cranky Posted April 17, 2011 Share Posted April 17, 2011 You are hitting a HOMERUN with this one. Great gizmology and great imageneering! Keep it coming, chap. Take your vitamins and keep it going! Quote Link to comment Share on other sites More sharing options...
Randy D Posted April 17, 2011 Share Posted April 17, 2011 Hello Raul, Looks like another winner for sure!!!! Randy Quote Link to comment Share on other sites More sharing options...
Recommended Posts
Join the conversation
You can post now and register later. If you have an account, sign in now to post with your account.
Note: Your post will require moderator approval before it will be visible.