streetmachine11 Posted February 28, 2013 Posted February 28, 2013 (edited) here's my new project i picked up last weekend. plan on finishing this up for the gearz contest but well see what happens. started on the engine and made a fuel injection/engine harness to add some more detail. and the harness.... block backwashed and valvecovers finished harness mocked up thanks for looking and questions or comments welcome jason Edited July 16, 2013 by streetmachine11
Davewilly Posted February 28, 2013 Posted February 28, 2013 Looks pretty good so far. Good luck with the contest!
Blown03SVT Posted February 28, 2013 Posted February 28, 2013 Stellar job creating that harness. Any details about how you made it if you don't mind me asking?
martinfan5 Posted March 1, 2013 Posted March 1, 2013 Stellar job creating that harness. Any details about how you made it if you don't mind me asking? Agreed, nice start
streetmachine11 Posted March 2, 2013 Author Posted March 2, 2013 Stellar job creating that harness. Any details about how you made it if you don't mind me asking?Eric, the fuel injection harness is made from 32 gauge wire and the wire harness loom is made from 24 gauge wire wrapped with the 32 gauge wire then it was all painted semi-gloss black. this is my first attempt at detailing a newer car so it took some time but im happy with the outcomethanks for the comment :-)jason
streetmachine11 Posted March 8, 2013 Author Posted March 8, 2013 ok so here is a small update. the temp sensor and wire is in also the hoses with hose clamps amd belt system is on. here is the engine bay with the brake lines from the master cylinder to the abs controller. also both a/c lines with the fill tube and fitting cap. there is also a small body harness. and with the engine set in place with body in place i plan on doing the heater hoses, battary harness, and wheel wells tonight. thanks for looking and questions or comments welcome jason
jrherald420 Posted March 8, 2013 Posted March 8, 2013 (edited) Great work!! At first i thought the harness looked pretty bad but with it all hooked up and the engine sitting in the bay its a great addition! And again great work!! What color did you use for the valve covers? Edited March 8, 2013 by jrherald420
streetmachine11 Posted March 16, 2013 Author Posted March 16, 2013 Great work!! At first i thought the harness looked pretty bad but with it all hooked up and the engine sitting in the bay its a great addition! And again great work!! What color did you use for the valve covers?james, thanks for the comment! and the paint is aerosol vht flat bluejason
vintagedragfan Posted March 17, 2013 Posted March 17, 2013 very nice work on the detailing Jason, it is turning out great!
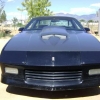
Johnny1973 Posted March 21, 2013 Posted March 21, 2013 What color are you going to paint the Mustang?
Ford guy Posted March 22, 2013 Posted March 22, 2013 Nice detail work. The wiring looks awesome Jason. Roy
streetmachine11 Posted March 23, 2013 Author Posted March 23, 2013 got a lot of progress done in this project. to get the ride height where i wanted it i raised the wheel wells and wheel well openings about 1 1/2 to 2 scale inches. before the drop.... wheelwell modifications after the raised wheel wells, lowerd suspension and fender flares and the spoiler rear spoiler with front splitter. thanks for looking and questions or comments welcome jason
streetmachine11 Posted March 23, 2013 Author Posted March 23, 2013 What color are you going to paint the Mustang?john- the mustang will be metallic red, flat black and carbon fiberthanks-jason
Johnny1973 Posted March 23, 2013 Posted March 23, 2013 Nice color choices.Body work started to look good.
Henchmen4Hire Posted March 25, 2013 Posted March 25, 2013 I really like the engine, I hope mine look that good when I try to do a realistic paint job. Also, could you do a quick walkthrough of how you're going to blend the fender flares to the body? I'm doing the same thing right now and am thinking of simply using white glue to fill the gap between the body and fenders, then letting that harden and sand it till it looks nice.
streetmachine11 Posted March 30, 2013 Author Posted March 30, 2013 I really like the engine, I hope mine look that good when I try to do a realistic paint job. Also, could you do a quick walkthrough of how you're going to blend the fender flares to the body? I'm doing the same thing right now and am thinking of simply using white glue to fill the gap between the body and fenders, then letting that harden and sand it till it looks nice.hench, on this particular build the sharp line where the flare meets the body is intentional. it will be cleanned up a little but wont be filled. but normally i use the tamyia putty or automotive glazing putty to blend in flares. just keep in mind when you do flares or a widebody to build as much as possible with styrene. this makes your bodywork little to none also gives you a better product and something that wont crack overtime
streetmachine11 Posted May 24, 2013 Author Posted May 24, 2013 time for a much needed update. this project has come a long way since the last post i just havent had a chance to post :-) it was finished in time for the gearz entry date but didnt get it entered as I fought with sizing issues on the pics and ran out of time. Anyway, on to the progress Opened the doors and trunk. The black plastic in the engine bay is the raised wheel Wells raised wheel Wells and driveshaft tunnel Painted the wheels with alclaid. For my first attempt im happy with the results. Drilled out crossmember thanks for looking and questions or comments welcome jason
Recommended Posts
Create an account or sign in to comment
You need to be a member in order to leave a comment
Create an account
Sign up for a new account in our community. It's easy!
Register a new accountSign in
Already have an account? Sign in here.
Sign In Now