Lovefordgalaxie Posted April 8, 2013 Posted April 8, 2013 Usually, my builds are quick, and there is barelly time to take some pictures of the process. This model I'm building is taking a good while, as I'm in the middle of a big ptoject on work, so maybe a WIP would be possible with more than maybe six or seven pictures Anyway, I started building this 1966 Ford Fairlane 500 about two weeks ago. Right now I have all parts painted, and just final assembly is now remaining. To remedy my delay on posting here sooner, i'll be posting the pictures in about 3 or four replies untill I catch myself. I'm sorry about that, and next time you will have real time updates. When I start a kit, the very first part I like to paint is the body. Why? Well, because if I mess up on the body, I wouldn't even bother building the rest. Had some bad experiences detailing carefully frames, interiors and engines, and then messing up the body, having no way to finish the model up on the standard I would like it to be when finished. On this build, I started with the hood. The real car has a fiberglass hood, with an air intake. The model by AMT has a two part hood, with a separate part for the air intake, and it has to be carefully glued and filled/sanded to merge the air intake into the hood without leaving any seam, or evidence that it was once a separate part. This took me almost a week of after hours work. Then I prepared the body to paint. Those 1966 Ford Fairlane 500s with a R-Code 427 V8 were only produced in Wimbledon White, so Wimbledon White it would be!! I went to my favorite 1/1 car paint store, and had a can of synthetic enamel mixed into tyhe correct color. I like working with synthetic enamels, and I even like the extra time they take to cure. 1966 Fairlane 500 WIP by Lovefordgalaxie, on Flickr After the body had all tyhe mold lines sanded, and it was as smooth as I could get it, I airbrushed the paint on bare plastic. 1966 Fairlane 500 WIP by Lovefordgalaxie, on Flickr 1966 Fairlane 500 WIP by Lovefordgalaxie, on Flickr 1966 Fairlane 500 WIP by Lovefordgalaxie, on Flickr 1966 Fairlane 500 WIP by Lovefordgalaxie, on Flickr 1966 Fairlane 500 WIP by Lovefordgalaxie, on Flickr
Lovefordgalaxie Posted April 8, 2013 Author Posted April 8, 2013 After the paint was dry enough, I aplied the nice kit's decals for the FORD lettering on the hood, trunk lid, and also the Fairlane 500 scripts on the rear quarters 1966 Fairlane 500 WIP by Lovefordgalaxie, on Flickr 1966 Fairlane 500 WIP by Lovefordgalaxie, on Flickr 1966 Fairlane 500 WIP by Lovefordgalaxie, on Flickr After that, I started working on the other kit's parts. The first step was to glue the major sub-assemblys together, and using super glue as filler, to make the seams to disaper. 1966 Fairlane 500 WIP by Lovefordgalaxie, on Flickr 1966 Fairlane 500 WIP by Lovefordgalaxie, on Flickr Also assembled the front end of the unibody "frame", so I could get it painted as a unit, just like the real car woud be. 1966 Fairlane 500 WIP by Lovefordgalaxie, on Flickr
Lovefordgalaxie Posted April 8, 2013 Author Posted April 8, 2013 Then it was time to paint to start on all the remaining parts 1966 Fairlane 500 WIP by Lovefordgalaxie, on Flickr 1966 Fairlane 500 WIP by Lovefordgalaxie, on Flickr 1966 Fairlane 500 WIP by Lovefordgalaxie, on Flickr 1966 Fairlane 500 WIP by Lovefordgalaxie, on Flickr 1966 Fairlane 500 WIP by Lovefordgalaxie, on Flickr 1966 Fairlane 500 WIP by Lovefordgalaxie, on Flickr 1966 Fairlane 500 WIP by Lovefordgalaxie, on Flickr 1966 Fairlane 500 WIP by Lovefordgalaxie, on Flickr
Lovefordgalaxie Posted April 8, 2013 Author Posted April 8, 2013 And here is where I am at the present moment: 1966 Fairlane 500 WIP by Lovefordgalaxie, on Flickr 1966 Fairlane 500 WIP by Lovefordgalaxie, on Flickr 1966 Fairlane 500 WIP by Lovefordgalaxie, on Flickr 1966 Fairlane 500 WIP by Lovefordgalaxie, on Flickr 1966 Fairlane 500 WIP by Lovefordgalaxie, on Flickr 1966 Fairlane 500 WIP by Lovefordgalaxie, on Flickr 1966 Fairlane 500 WIP by Lovefordgalaxie, on Flickr 1966 Fairlane 500 WIP by Lovefordgalaxie, on Flickr 1966 Fairlane 500 WIP by Lovefordgalaxie, on Flickr
Roadracer Posted April 8, 2013 Posted April 8, 2013 Very nice work Tulio! You are a master at paint work! Amazing!!
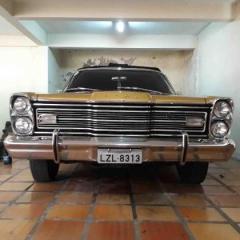
o-man Posted April 8, 2013 Posted April 8, 2013 Can't wait to see the finished project. Love how the grill turned out
freakshow12 Posted April 8, 2013 Posted April 8, 2013 very nice work. you may want to double check body to chassis fit as I am building this kit again and after the glass is in the body does not want to settle in afound the firewall. have seen this on every variant of this kit. the 67 fairlane the cyclone. also not to nitpick BUT since you are turningh out a nice correct ford, the heads are blue on the real car
TooOld Posted April 8, 2013 Posted April 8, 2013 Your finished builds are always so impressive , it's nice to see a W.I.P. of one . It's as beautiful going together as it is when it's finished ! Thanks for sharing and PLEASE do more of these .
Dr. Cranky Posted April 8, 2013 Posted April 8, 2013 Excellent progress, and top notch building skills. Clean, clean, clean.
Lovefordgalaxie Posted April 8, 2013 Author Posted April 8, 2013 Thank you guys for all the comments. For sure I was not expecting so many!!! very nice work. you may want to double check body to chassis fit as I am building this kit again and after the glass is in the body does not want to settle in afound the firewall. have seen this on every variant of this kit. the 67 fairlane the cyclone. also not to nitpick BUT since you are turningh out a nice correct ford, the heads are blue on the real car Yes, I noticed this when I built my first Fairlane, and had a LOT of trouble with the body to frame assebly. I did a dry fit, and it was going to happen again, so this is what I did: I cut about 2 mm from the base of the windshield, and glued the rear window as high as possible without showing the edge of the glass. This apears to have solved the problem, because the body fits nicelly, at least on a dry fit test. About the heads, well, I know they were supposed to be blue, but Ford had some cool accessory parts for this engine, and I'm representing a R-Code 427 with a set of accessory heads. Just to meka sure all those Camaros on Mopars will only see the Fairlane's rear end!!!! The one thing I'm in doubt is about the side windows provided with the kit. They do fit, but I'm not sure if I will isntall them.
freakshow12 Posted April 8, 2013 Posted April 8, 2013 That's exactally what I did with mine in regards to fit. That is the only way to solve it that I see. Like you I have built every variant and am currently on this one now. I am leaving the side glass out on mine. I am also fitting some t bolt headers and slicks to keep the mopars away lol. Again. Very nice build
Elliot949 Posted April 8, 2013 Posted April 8, 2013 I am a HUGE 66/67 Fairlane fan and I am Diggin this build...
Lovefordgalaxie Posted April 8, 2013 Author Posted April 8, 2013 Just glued the body to frame, and it fit like a glove!!! Hope to finish the Fairlane this evening.
Recommended Posts
Create an account or sign in to comment
You need to be a member in order to leave a comment
Create an account
Sign up for a new account in our community. It's easy!
Register a new accountSign in
Already have an account? Sign in here.
Sign In Now