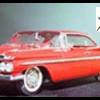
59 Impala Posted December 12, 2013 Posted December 12, 2013 (edited) This is another Tin Indian that I want to replicate. I never knew that this car even existed until I saw this picture on the net. Here are some pics of this build. I had to glue the top in place and use putty to fill the voids. I also had to cut the top of the body so the top would fit where it's supposed to set. The wheel base looks wrong. lie too short. I'll have to figure out what to do to fix this. Thanks fer lookin. Dan Edited January 5, 2014 by 59 Impala
dragcarz Posted December 12, 2013 Posted December 12, 2013 Great idea Lewis, haven't seen this one built up in a long time. Are you using the kits chassis or are you kit bashing?
Guest Posted December 12, 2013 Posted December 12, 2013 Cool project Dan! To fix your wheelbase, all you have to do is re drill the holes for the axle. You may also have to move your fenderwells. I don't remember having that problem with the one I built. But, it's been a couple years since I built it. I know at one point AMT used that chassis under the '70 and changed the wheelbase. You might be better off to just get yourself a '66 and use it for a parts donor. One suggestion I can make concerning this kit is get your bumpers from the Modelhaus. They're worth every single penny!
59 Impala Posted December 12, 2013 Author Posted December 12, 2013 Thanks guys. I'm not sure what I'm goin to do about the chassis yet. I thought about using the chassis from the Revell 66 but I don't have a spare. I'm sure that I'll get something figured out before I get er done. The Revell chassis would need some work to get it to fit but it is a way better one to use fer sure. We'll see what happens. Dan
59 Impala Posted December 14, 2013 Author Posted December 14, 2013 NICE project Lewis! Yeah, that's what I thought. :lol: Dan
a/gass Posted December 14, 2013 Posted December 14, 2013 Dang I did this same car - but I did it off memory and got the decal placement really close just the trunk is a little wrong lol - guess I should get a new hood and finish it.
59 Impala Posted December 15, 2013 Author Posted December 15, 2013 Well, I got a little more work done on this tonight. I'm almost done with the body work. Here are some pics as it is now drying hanging upside down so no dust bunny's gather on top of the body. This pic shows where I had to do a little work because of sink marks. Bummer. More sink marks. Now here it is after painting. This one I like cause there is no seam on the body where I had to cut and install the top. Now I have to figure out what I'm gonna do about the chassis for this build. I don't like the one in the kit at all. But, I may have to use it anyway. We'll see. Thanks fer lookin. Dan
59 Impala Posted December 26, 2013 Author Posted December 26, 2013 I finally got some work done on this car. The color is on and here are some pics of what she looks like as of today. I'm letting it dry a coouple of days before I polish it and then put on the decals. Thanks fer lookin. Dan
gtx6970 Posted December 26, 2013 Posted December 26, 2013 Swaeeet I've had this same car on my todo list for some time,,sadly thats as far as it's ever gone. so I'll ck'ing in to watch
FordRodnKustom Posted December 26, 2013 Posted December 26, 2013 Looks great so far. Would the chassis from the Revell 67 Chevelle or 66 GTO work?
jeffbrad Posted December 26, 2013 Posted December 26, 2013 Boy that picture brings back memories.Sure looks like Dragway 42 in W.Salem Oh. Arlen Vanke was the MAN in NE Ohio back in those days. A local guy in Barberton where I grew up ended up with one of Arlen's 63 Savoy Max Wedge cars. Drove it on the street. Not much but he did it. Had to go to the Akron airport to get avgas.As for a chassis, how about the Lindberg 67 442 for a donor?
59 Impala Posted December 26, 2013 Author Posted December 26, 2013 Thanks guys for the kind words. The chassis from the 66 or 67 will work with some work but I have to use what I have. Yep, Jeff, that's dragway 42. I grew up in Akron and I remember seeing the 66 in the Knafel showroom back then. I'm kinda excited to get these "Tin Indians" built. I have a friend back in Mogadore who used to work on them back in the day. More to come. Dan
59 Impala Posted December 29, 2013 Author Posted December 29, 2013 Well, I got the decals on and next is the BMF. Here are some pics with the decals on. I don't know who made the decals, but they are thicker than most other decals I've used. Also, once they touched the body, they were stuck in place. The Knafel Pontiac on the right side is a little crooked and there was nothing I could do cause it was stuck in place. But, that's Ok, it's still a "Tin Indian". Thanks fer lookin. Dan
Metalmad Posted December 29, 2013 Posted December 29, 2013 The GTO looks awesome ! Nice execution on this build !
59 Impala Posted January 5, 2014 Author Posted January 5, 2014 Thanks Seth. Sorry it took so ling to respond. I just finished this this morning. Here are some pics of what she looks like now. I deleted the heater and radio. This isn't a very good kit but I had fun building it anyway. Thanks fer lookin. Dan
Recommended Posts
Create an account or sign in to comment
You need to be a member in order to leave a comment
Create an account
Sign up for a new account in our community. It's easy!
Register a new accountSign in
Already have an account? Sign in here.
Sign In Now