Brett Barrow Posted June 24, 2014 Posted June 24, 2014 Hmmm...I can see no power brakes (but even drag cars need to stop), but no alternator? How does an engine run without one? The alternator is for keeping the battery charged. This car does not appear to be running a magneto, the distributor that fires the plugs is getting voltage from the coil and battery. Hook up the battery charger between rounds. 1970 was the first year for the new Pro Stock class, they didn't have to run factory engine accessories like Super Stock and lower stock classes did. These cars still ran drum brakes all the way around because discs have a tendency to drag and would scrub speed.
Brett Barrow Posted June 24, 2014 Posted June 24, 2014 First step I took in filing down the fender flares is marking the engraved line for the chrome trim with a fine Micron marker. Drag cars didn't have the trim, so everything outside this line needs to go. Took the bulk off with a coarse nail stick. Once all the marker was gone, I just shaped the flare with a little 400 grit wet-or-dry. I can't say exactly how long it took to do these, but I had all 4 done in the span of a WWF match (the wife's a fan... ) Not perfect, but muuuuuch better and they're good enough for me! Also filled the marker lights and side mirror notches with Bondo Professional Finishing Glaze. I luurve this stuff. Don't know how I ever got along without it! The 'cuda script on the taillight panel needs to go, too. The Sox & Martin car didn't have it (they were most likely built from body-in-white base Barracudas anyway). And that's the necessary body modifications!
cruz Posted June 24, 2014 Posted June 24, 2014 Okay guys, I am having a dumb moment..... So, you say the carb lines are going into the cool can?
Mark Posted June 24, 2014 Posted June 24, 2014 Okay guys, I am having a dumb moment..... So, you say the carb lines are going into the cool can? In the picture of the engine compartment, the main fuel line goes forward from the fuel tank (it's below the coil in the picture), into the cool can, then comes out where it splits off into the lines going to the carbs...
bob terry Posted June 24, 2014 Posted June 24, 2014 The cool can would be filled with ice before each round to keep the fuel from vaporizing.
Muncie Posted June 25, 2014 Posted June 25, 2014 Bruno's pic shows how the cool can itself if plumbed, this shows how the fuel lines are routed to the carbs - Note that the 1:1 lacks an alternator and power brake booster. I wonder what the thing on the driver's side is, a tach drive? Brett, I'm really looking forward to your build (and getting my kit when the hobby shop calls) The cylindrical object in front of the driver side valve cover is a mechanical rev limiter. There is a splitter attached to the tach drive on the distributor body with two cables - one for the mechanical tach and one to the rev limiter. The tach, rev limiter, splitter and cables were available from several suppliers - Moroso, Stahl, Stewart Warner and Jones-Motrola. Wasn't Sox and Martin hooked up with Stewart Warner?
tim boyd Posted June 25, 2014 Posted June 25, 2014 The cylindrical object in front of the driver side valve cover is a mechanical rev limiter. There is a splitter attached to the tach drive on the distributor body with two cables - one for the mechanical tach and one to the rev limiter. The tach, rev limiter, splitter and cables were available from several suppliers - Moroso, Stahl, Stewart Warner and Jones-Motrola. Wasn't Sox and Martin hooked up with Stewart Warner? Thanks Muncie...I thought it might be that but I didn't know for sure. And thanks guys for handling Marcos' question on the Cool Can. Best regards, all. TB
Brett Barrow Posted June 25, 2014 Posted June 25, 2014 Brett, I'm really looking forward to your build (and getting my kit when the hobby shop calls) The cylindrical object in front of the driver side valve cover is a mechanical rev limiter. There is a splitter attached to the tach drive on the distributor body with two cables - one for the mechanical tach and one to the rev limiter. The tach, rev limiter, splitter and cables were available from several suppliers - Moroso, Stahl, Stewart Warner and Jones-Motrola. Wasn't Sox and Martin hooked up with Stewart Warner? Ah-ha! Makes total sense. There is a Stewart Warner decal on the front fender, so I'd assume that was the supplier. I don't plan on adding much detail, but really just working with what's in the box to produce a semi-accurate model. There are several cases of correction by omission on this one (battery, alternator, brake booster, wheel well trim, etc...).
cruz Posted June 25, 2014 Posted June 25, 2014 Thank you for clearing the cool can issue, never imagined those lines going into this from the carbs but of course pictures don't lie!
mikemopar70 Posted June 25, 2014 Posted June 25, 2014 First step I took in filing down the fender flares is marking the engraved line for the chrome trim with a fine Micron marker. Drag cars didn't have the trim, so everything outside this line needs to go. Took the bulk off with a coarse nail stick. Once all the marker was gone, I just shaped the flare with a little 400 grit wet-or-dry. I can't say exactly how long it took to do these, but I had all 4 done in the span of a WWF match (the wife's a fan... ) Not perfect, but muuuuuch better and they're good enough for me! Also filled the marker lights and side mirror notches with Bondo Professional Finishing Glaze. I luurve this stuff. Don't know how I ever got along without it! The 'cuda script on the taillight panel needs to go, too. The Sox & Martin car didn't have it (they were most likely built from body-in-white base Barracudas anyway). And that's the necessary body modifications! Nice job on these wheel lips!!
Sixx Posted June 25, 2014 Posted June 25, 2014 Inaccuracies or not, I am still building another one to display it next to my recently completed one! Yeah Cruz, ya gotta coz that one you did was a killer!!! I totally love that one man!!!!!!! :-)
caine440 Posted June 25, 2014 Posted June 25, 2014 Ordered my first one yesterday. One of many as I can think of several other Pro Stock Cudas that this will be great for.
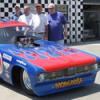
cotto Posted June 25, 2014 Posted June 25, 2014 Wow Cruz, as usual, this is a beauty, you couldn't pick better rims and tires for this thing. Do you have pictures of the engine?
cruz Posted June 25, 2014 Posted June 25, 2014 Yes Jay, I do have photos but I must apologize to you for not posting them, at least right now I can't because the model is featured on the current issue. Once the next issue is available, I will place all the pictures on the Under Glass section of the forum for all to see. I just hope Harry is okay with this picture.....
Brett Barrow Posted June 26, 2014 Posted June 26, 2014 Love that 'cuda, Marcos! Can't wait to see it in the magazine. How's this for cool - a stock 'cuda (with shaker hood) in Sox & Martin colors! From the 1970 Chicago Auto Show. I'm guessing it's just a gussied-up show car since there's no record of Sox & Martin running a Super Stock car that year. I wish I could find more pictures, but this is the only one I've seen.
Brett Barrow Posted June 26, 2014 Posted June 26, 2014 (edited) More E-body hole-through-the-oil-pan goodness. Note that the sump on the stock oil pan was in the middle, but drag racers want a rear-sump pan because that's where the oil wants to go under acceleration. So they had to get creative... An actual Sox & Martin fabricated aluminum pan (most likely from later than 1970 due to the scavenger line holes, those didn't come into Pro Stock until a couple of years later) This one's probably more like what was on the 1970 car. Edited June 26, 2014 by Brett Barrow
jjsipes Posted June 26, 2014 Posted June 26, 2014 Just recieved mine and the Plymouth decal for the quarter panel is not corret from pictures I have. Revell has the letters striaght up and down where on the real car the have the typical lean to them. Looks like we will be needing the Slixx decals afterall. The Sox and Martin name and the Plymouth name doesn't really show the correct look like the Slixx decals has as well. Overall great kit alot of potenial with it. Now lets hope Revell will re-engineer a "All New Tool" Challenger. Lots of potential out of that as well.
Brett Barrow Posted June 26, 2014 Posted June 26, 2014 And there's also a couple small sponsor stickers missing off the front fenders, Fram and Champion Spark Plugs (they could never print those in register anyway!) Also there's only the "Drag 500" part for the tires. I'm guessing these were all omitted to avoid licensing fees. I'm holding out hope for a VRM decal sheet with their engine-turned gold and silver leaf treatment. They're amazing, I have their Kurtis Midget decals. I've been mocking up several potenial street machines with the stock hoods from the 2 n 1. I'm really regretting filling in the marker lights and mirror mounts on both bodies I have, now I'm going to have to pick up another!
Brett Barrow Posted June 26, 2014 Posted June 26, 2014 Stumbled across this thread last night, tons of potential SS/DA cars in there. Just need the shaker hood from the stock kit and a Torqueflite and you're there. http://board.moparts.org/ubbthreads/showflat.php?Cat=0&Number=6344980&page=6&fpart=all&vc=1 This one is pretty cool - the "Sun Kissed Cuda"
oldscool Posted June 26, 2014 Posted June 26, 2014 One detail that no one has mentioned are the front tires. They will need to be swapped for some tall skinny ones which means the kit wheels may not work.
Brett Barrow Posted June 26, 2014 Posted June 26, 2014 Mockup with kit wheels and tires. One detail that no one has mentioned are the front tires. They will need to be swapped for some tall skinny ones which means the kit wheels may not work. The tires from Revell's 62 Vette can be used with minimal modification to the front wheels . Trim the lugs off the wheels and they fit fine. The wheels will need to be narrowed to fit. Shows promise. They might be a little too tall, though. Still looking. Somebody needs to come up with a good Stock class front tire...
oldscool Posted June 26, 2014 Posted June 26, 2014 (edited) Actually, I think the old AMT skinny Firestones may be about right. Your mockup looks god. Edited June 26, 2014 by oldscool
Brett Barrow Posted June 26, 2014 Posted June 26, 2014 Actually, I think the old AMT skinny Firestones may be about right. Your mockup looks god. They might be. They're just a little bit smaller OD than the Revell Vette tires. About a scale 1.5" smaller. Now I need to find some AMT Keystones...
tim boyd Posted June 26, 2014 Posted June 26, 2014 (edited) Just recieved mine and the Plymouth decal for the quarter panel is not corret from pictures I have. Revell has the letters striaght up and down where on the real car the have the typical lean to them. L Jason...just checked my kit and reference material and you are correct. Thanks for noting that... I've updated my Fotki album with this info and credited you with noticing it...TB Edited June 26, 2014 by tim boyd
Recommended Posts
Create an account or sign in to comment
You need to be a member in order to leave a comment
Create an account
Sign up for a new account in our community. It's easy!
Register a new accountSign in
Already have an account? Sign in here.
Sign In Now