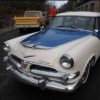
TFchronos Posted November 10, 2014 Author Share Posted November 10, 2014 (edited) Looking good and nice color. Sure looks like a lot of body work for making it a non t/a. Btw any luck on finding the correct rims? Gotta be. That's what I noticed about the 1/1 pic. The wheels looked like they had a "dish" to them I thought it might be the angle, but the more I looked they looked like center lines with a dish to them. After some help from Glenn, I believe they were wire basket rims without the baskets. As for finding them in scale I haven't had any luck yet, but I'm still searching. The closet thing I have in scale is from a '57 Nomad are center lines like these. . I'm currently working on modifying them over as best I can. I have shaved off the nubs (can't think of the proper name off the top of my head) and have them soaking in brake fluid to de-chrome them. After that I'll try taking some putty to try to give them a dish closer to the 1:1. If it works out I'll look into getting either Alcad II or Spaz Stix spray can chrome to re-chrome them. Unless I can find better rims in scale before then of course. Snag for the kit's engine. Straight from the box the tail end of the left side transmission was broken off, if that's not enough what's not broken was bowed out over an 1/8th. The left side looked like a banana, I didn't think to get pics I just went straight to fixing it. Here's what it looks like at the moment. Of course this only happened because it was the one time I didn't examine the entire kit. The hood is finally good enough for the scoops so I'll get onto that today. You can see the template in the tops of the photos. Thanks for looking! Edited November 16, 2014 by TFchronos Quote Link to comment Share on other sites More sharing options...
TFchronos Posted November 16, 2014 Author Share Posted November 16, 2014 Quick update on fixing the engine. Quote Link to comment Share on other sites More sharing options...
20venom08 Posted November 17, 2014 Share Posted November 17, 2014 Looking good, great job Quote Link to comment Share on other sites More sharing options...
Tonioseven Posted November 17, 2014 Share Posted November 17, 2014 Nice progress so far. Quote Link to comment Share on other sites More sharing options...
w451973 Posted November 17, 2014 Share Posted November 17, 2014 The 59 El Camino has some dished rims "kind" like that except they have rivets like the Center Lines. It's the issue with the pink car on the box. Maybe they could work for you. Sorry I don't have a pic or lead for you. Quote Link to comment Share on other sites More sharing options...
TFchronos Posted November 18, 2014 Author Share Posted November 18, 2014 Thank you Mark, Antonio. Thanks for the info Dennis, I think I have the rim dilemma solved. I have been modifying the Centerlines that came from my '57 Nomad and think I've made them look fairly accurate to the 1:1 rims. I was planning to update today showing the progress of the first one. De-chromed. Some spot putty. And after more putty and a ton of sanding here's the first of four. I'm going to go over it with some 2500 grit then spray it gloss black and attempt to chrome it with Spaz Stix mirror chrome and hopefully it will look good. Thanks for looking! Quote Link to comment Share on other sites More sharing options...
Draggon Posted November 18, 2014 Share Posted November 18, 2014 Yep, those rims look just right. I'm amazed you were able to sand down that putty in such a small area. Quote Link to comment Share on other sites More sharing options...
w451973 Posted November 18, 2014 Share Posted November 18, 2014 I think you got it. Quote Link to comment Share on other sites More sharing options...
slusher Posted November 19, 2014 Share Posted November 19, 2014 (edited) Some real impressive work so far Jonathan. Your really taking care of the problems as they come along.. Edited November 19, 2014 by slusher Quote Link to comment Share on other sites More sharing options...
TFchronos Posted November 22, 2014 Author Share Posted November 22, 2014 Thanks Glenn, Dennis, And Carl. It was a little easier then I expected, I honestly thought it would end in disaster. I'm thankful lady luck was on my side this time. With making the rims out of the way my last and greatest challenge (I think) will be making the pin stripes. I got the other three rims done over the past few days and after it warms up a little (more like if it will) then I will see about spaying them gloss black in preparation for an attempt at chroming. Also, it can't be seen well the the picture but on the 1:1 there was a black stripe that warped all the way around the car towards the bottom thus the pin striping along the bottom of the door. I got that on a little earlier in the month and forgot to put up the pics. The hood was done as well, the reason why the fronts are missing from the scoops is because I'm going to try to do them as two parts like a 1:1. I got some fitting issues with the hood now so I'll have to see about getting that fixed. Thanks for looking Quote Link to comment Share on other sites More sharing options...
TFchronos Posted December 10, 2014 Author Share Posted December 10, 2014 (edited) Thought I'd take some time to redo the posts that were lost. The rims were chromed using Spaz Stix Mirror Chrome over a Rust-O-leum X2 Gloss Black. Made the aftermarket steering wheel that was on the 1:1. In my last update and after a lot of problem solving I was able to make all the decals needed for the car. They were printed on Testors White Decal sheets, one thing I would like to note about printing on this paper. They say to use these settings Plain Paper - Normal Quality - Portrait Mode. I'm sure results will vary between printers but for my printer (HP 6500A) I got better results changing the type of paper from Plain Paper to Matte Semi Gloss Photo Paper. The sharpness and color turned out a lot better. I did run into a slight delay the other day. After a closer examination of the rear of the 1:1 I noticed that the tail light area was painted black rather than body color (as I had it painted) So after removing, striping, and repainting the part I put it back on and proceeded to get the last of the stripes on. Yesterday I got two thin coats of clear on it and hope to put one or two more heavier coats on either today or tomorrow. Thanks for looking! Edited December 10, 2014 by TFchronos Quote Link to comment Share on other sites More sharing options...
Custom Hearse Posted December 10, 2014 Share Posted December 10, 2014 WOW Jonathan! Those wheels came out excellent! The paint is real nice as well! Keep up the awesome work!!! Quote Link to comment Share on other sites More sharing options...
Davewilly Posted December 10, 2014 Share Posted December 10, 2014 Look sgood...Great job on converting the wheels! Quote Link to comment Share on other sites More sharing options...
JTalmage Posted December 10, 2014 Share Posted December 10, 2014 Very cool! I would love to build a tribute car for my Aunt. She had a red '79 Esprit w/ silver interior. Quote Link to comment Share on other sites More sharing options...
Hopsing Posted December 11, 2014 Share Posted December 11, 2014 The wheels turned out awesome! Nice work! Quote Link to comment Share on other sites More sharing options...
TFchronos Posted December 11, 2014 Author Share Posted December 11, 2014 WOW Jonathan! Those wheels came out excellent! The paint is real nice as well! Keep up the awesome work!!! Look sgood...Great job on converting the wheels! Thanks Marshall and Dave! I was really surprised at how well they turned out too. To be honest the rims and the stripes were the two things I didn't know if my skill level could pull off. I'm truly grateful that lady (as well as dumb) luck were on my side for this for the rims and looks like the stripes as well lol. Quote Link to comment Share on other sites More sharing options...
TFchronos Posted December 11, 2014 Author Share Posted December 11, 2014 Very cool! I would love to build a tribute car for my Aunt. She had a red '79 Esprit w/ silver interior. Thanks Jesse! I think AMT or one of them made a '79 Trans am kit, My younger brother picked one up off the "great" auction site last year. The wheels turned out awesome! Nice work! Thank you Steven! Quote Link to comment Share on other sites More sharing options...
Draggon Posted December 11, 2014 Share Posted December 11, 2014 Yea, those wheels are a masterpiece! Quote Link to comment Share on other sites More sharing options...
damop6v8 Posted December 11, 2014 Share Posted December 11, 2014 Cracking build so far! look forward to the finished car Quote Link to comment Share on other sites More sharing options...
1 bad55 stan Posted December 11, 2014 Share Posted December 11, 2014 Great stuff mate,lookin real good... Quote Link to comment Share on other sites More sharing options...
TFchronos Posted December 13, 2014 Author Share Posted December 13, 2014 Thank you Glenn, Damian, and Stan. Alright, got it cleared and aside from some the the decals losing some color in some areas I think it turned out pretty good. Which is a huge relief for me with T- 12 days and counting everything needs to go right from here on out. The stripes did end up being thicker than I wanted but I'm glad they were, any thinner and I don't think my clumsy fingers would have be able to cut them out. I still have the hood to do, the front part of the scoops are being a little difficult to make, that's the only thing holding it up. Thanks for looking & commenting! Quote Link to comment Share on other sites More sharing options...
Faust Posted December 13, 2014 Share Posted December 13, 2014 Man, you don't see people take T/As and make Formulas of them very often! Well, at least not in the 1:1 world! I love what you've done! Those wheels are amazing, and your attention to detail (like the steering wheel center) is amazing! Great work all around! Quote Link to comment Share on other sites More sharing options...
hjracing Posted December 14, 2014 Share Posted December 14, 2014 Amaizing job! Quote Link to comment Share on other sites More sharing options...
Tom Geiger Posted December 15, 2014 Share Posted December 15, 2014 Cool! I'm so happy that the stripes worked out for you! You will have to let us all know his reaction! This is one of those gifts that confirms that it's better to give than to receive! Quote Link to comment Share on other sites More sharing options...
slusher Posted December 17, 2014 Share Posted December 17, 2014 So glad to see you got the stripes on Jonathan, decals can be a nightmare. Really looking good... Quote Link to comment Share on other sites More sharing options...
Recommended Posts
Join the conversation
You can post now and register later. If you have an account, sign in now to post with your account.
Note: Your post will require moderator approval before it will be visible.