cobraman Posted December 31, 2014 Share Posted December 31, 2014 Not sure which kit this was but since they were the same it really doesn't matter. Bought this at a good price on ebay. It has been started and is missing some parts but I thought I would try and save it. Not as bad as some of the glue bombs some of you have tackled. I'm molding on the front end as a first step. I will for sure replacing the crummy 2 piece tires and the wheels. May perhaps change the engine as well. It is missing some parts so if anyone has window glass and or a firewall for either of these kits I would be happy to do a swap for something. Quote Link to comment Share on other sites More sharing options...
MsDano85gt Posted January 1, 2015 Share Posted January 1, 2015 I may have a spare of both...... working on 3 versions of this kitone yellow monroe handler, one in white, a custom version in light blue and a parts car i may be able to make a 4th from.......pm me what types of things you mite have of interest to trade we can work something up i've got he firewall and glass Quote Link to comment Share on other sites More sharing options...
iBorg Posted January 1, 2015 Share Posted January 1, 2015 This kit cries out to be mixed with the AMT Nascar Fords..... Quote Link to comment Share on other sites More sharing options...
MsDano85gt Posted January 1, 2015 Share Posted January 1, 2015 This kit cries out to be mixed with the AMT Nascar Fords..... my " custom" build of one of these does have a "nascar/truck" ford engine for power lol i opened all the body vents on my kits looks soooo much better Quote Link to comment Share on other sites More sharing options...
slusher Posted January 1, 2015 Share Posted January 1, 2015 i built a mustang II about 6 years ago Ray and changed the wheels and tires also.... Quote Link to comment Share on other sites More sharing options...
cobraman Posted January 4, 2015 Author Share Posted January 4, 2015 Making some headway on this rebuild. I got lucky in so much as very little was really glued or painted but it is missing a few parts. One of our friends here has what I need the most ( glass and firewall ) and we worked out a trade . I have mocked up what I have right now. I need to try and lower it some more. The engine is from the Thunderbolt kit. Have not thought about a paint color yet so any suggestions would be welcome. Quote Link to comment Share on other sites More sharing options...
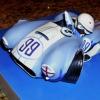
Dave Van Posted January 4, 2015 Share Posted January 4, 2015 Spotted this last April at the Charlotte 50th show........ Quote Link to comment Share on other sites More sharing options...
cobraman Posted January 4, 2015 Author Share Posted January 4, 2015 Nice pic. Looks like they got the ride height right on this kit. Looks pretty high doesn't it ? Quote Link to comment Share on other sites More sharing options...
MsDano85gt Posted January 4, 2015 Share Posted January 4, 2015 Making some headway on this rebuild. I got lucky in so much as very little was really glued or painted but it is missing a few parts. One of our friends here has what I need the most ( glass and firewall ) and we worked out a trade . I have mocked up what I have right now. I need to try and lower it some more. The engine is from the Thunderbolt kit. Have not thought about a paint color yet so any suggestions would be welcome. in the pic it looks like the firewall is part of the body ray by firewall are you meaning the front radiator shell? which i don't see in the pic..... nice mach up work so far Quote Link to comment Share on other sites More sharing options...
slusher Posted January 4, 2015 Share Posted January 4, 2015 Ray, your mustang looks great mocked up. You could look on line at some of these and I painted mine a med blue metallic. I wish I would have went with white but that's me.. Quote Link to comment Share on other sites More sharing options...
horsepower Posted January 4, 2015 Share Posted January 4, 2015 I think he's installed the firewall all ready as it's not a part of the body molding but makes the underhood compartment complete, and yes the front core support is missing, and I doubt that the kit piece will work with the BIG 427 in place, I'd use a radiator out of one of the mid '90s NASCAR kits and just fabricate filler panels for each side. I know you've already got the glass, but in the one I drug out of storage, the stock Windows from both the '74, & '77 kit and the windows from the"Fireman" Pro Stock kit ALL fit in my body. I like the big block but if I ever get around to mine I'm going to use the 3.8 supercharged V-6 from the '90 Thunderbird Super Coupe, I think it would have made a great phantom version that Shelby, or the factory should have made. Quote Link to comment Share on other sites More sharing options...
horsepower Posted January 4, 2015 Share Posted January 4, 2015 (edited) True blue pearl with white or silver Shelby stripes, or deep black, with matte black Mach I striping, it would appear as ghost stripes not really showing until the light hit it right, and to make sure, do the whole car gloss black and do the stripes with a semi gloss, or flat clear, that way the shades and tints of the black would match. Really want a black that appears really deep, make the last coats with clear, two parts transparent blue, and one part transparent smoke tint then top coat with straight clear, there is nothing as deep appearing as a true blue-black for depth and reflections. Edited January 4, 2015 by horsepower Quote Link to comment Share on other sites More sharing options...
Jeremy Jon Posted January 4, 2015 Share Posted January 4, 2015 Looks much better Ray, neat project, cool ! Quote Link to comment Share on other sites More sharing options...
mustang1989 Posted January 4, 2015 Share Posted January 4, 2015 (edited) This is different. I'll be in on this one Ray and great mock up so far! Colors.......................white with the dual red stripes down the middle maybe? I've seen that set up on the II's and it looks cool to me. Edited January 4, 2015 by mustang1989 Quote Link to comment Share on other sites More sharing options...
MsDano85gt Posted January 4, 2015 Share Posted January 4, 2015 i look forward to seeing where it goes Quote Link to comment Share on other sites More sharing options...
cobraman Posted January 4, 2015 Author Share Posted January 4, 2015 I do have the front radiator core. I don't have the instruction sheet so I thought like most kits there would be a separate firewall. There is no detail on the "firewall" molded to the body so we will have to see if there is anything in the spare parts box. Quote Link to comment Share on other sites More sharing options...
MsDano85gt Posted January 4, 2015 Share Posted January 4, 2015 i have ya covered pics to follow clarification none of the parts trees i have have a seperate firewall there is not one what you see is "supposed" to be a firewall many older revell kits are this way very lackluster detaling on firewalls usually just flat plastic...... Quote Link to comment Share on other sites More sharing options...
MsDano85gt Posted January 4, 2015 Share Posted January 4, 2015 heres a pic of the jeep honcho i grafted a amt plymouth duster firewall onto due to its lack of detail..... now it has a nice master cylinder a place for heater hoses, and a wiper motor plus other busy details for the eyes...... Quote Link to comment Share on other sites More sharing options...
cobraman Posted January 5, 2015 Author Share Posted January 5, 2015 Still plugging away on this one. I did not care for the molded in tail lights that this kit has so I sanded them off. Will think of something else to do. I also drilled holes in the rear panel to make room for some aluminum exhaust pipes. Looks like I need to apply some putty on the rear panel below the spoiler. Not sure if I should sand off the louvers that are on the rear panel. Quote Link to comment Share on other sites More sharing options...
MsDano85gt Posted January 6, 2015 Share Posted January 6, 2015 would probly look cleaner smooth ray.......may follow your lead exhaust exit holes out rear very cool the actual monroe car according to box art pics appears to have a side exit style pipes.... Quote Link to comment Share on other sites More sharing options...
microwheel Posted January 6, 2015 Share Posted January 6, 2015 This is looking really cool so far Ray Quote Link to comment Share on other sites More sharing options...
cobraman Posted January 7, 2015 Author Share Posted January 7, 2015 Moving right along......I did remove the louvers on the rear panel but that photo was very bad. I have the body almost ready for paint, just have some primer touch up to do. I thought the interior was finished till I saw this pic. : ) Some touch up is called for . Hope to possibly shoot some paint tomorrow. I'm thinking since it is a kind of crazy car it needs a crazy color. I have just about made up my mind it will be Prowler Purple with black rear window louvers and also a section of the hood. Quote Link to comment Share on other sites More sharing options...
horsepower Posted January 7, 2015 Share Posted January 7, 2015 Love the purple idea, Ford had a great purple in the mid '90s called "true violet" I did a couple of R/C race cars in it. Quote Link to comment Share on other sites More sharing options...
slusher Posted January 8, 2015 Share Posted January 8, 2015 Nice progress Ray, the interior is looking really nice.. Quote Link to comment Share on other sites More sharing options...
cobraman Posted January 8, 2015 Author Share Posted January 8, 2015 Thanks guys. If you mess up you sure can't hide it from the camera. Quote Link to comment Share on other sites More sharing options...
Recommended Posts
Join the conversation
You can post now and register later. If you have an account, sign in now to post with your account.
Note: Your post will require moderator approval before it will be visible.