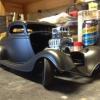
Stray Posted March 2, 2015 Share Posted March 2, 2015 (edited) Yep, another modeller who has had a too long break from building and is now starting again. I did a search and there was a few 67 Chevelles that were built by returning builders. Anyhow, this is an AMT version, as most of the ones I fopund on here are the Revell kits. This is one I built not long before stopping almost 20 years ago, and it has been in boxes and moved house many times and has generally been knocked about. Luckily enough it is mostly complete, only missing the radiator support panel and one front spindle, as well as the left engine pipe. All of which I should be able to scratch or kit bash. What started as a standard rebuild I think is going to become a bit more detailed. After seeing the quality a lot of you folks produce it has inspired me to go a bit further. So for starters the front swaybar on this kit is utter crud and is molded into the chassis, then up the side of the frame and just stops there. So I removed that for starters and have drilled the mounts to make a new one. The steering detail on this kit is severly lacking also, so I have to search references to see what I can do about that. Anyhow, all in all this should be a nice little build to see if I still have it in me. If anyone has any input feel free, critiques or tips or straight up hatred will all be taken on board. Thanks for looking. Here is where I'm at after getting most of the bits stripped. Edited May 21, 2015 by Stray Quote Link to comment Share on other sites More sharing options...
mustang1989 Posted March 2, 2015 Share Posted March 2, 2015 Welcome back Stray. This looks to be a good build! Quote Link to comment Share on other sites More sharing options...
gilsdropshop1 Posted March 2, 2015 Share Posted March 2, 2015 keep picks comin! Quote Link to comment Share on other sites More sharing options...
Scalper Posted March 2, 2015 Share Posted March 2, 2015 Welcome back... looking foward to more. Quote Link to comment Share on other sites More sharing options...
Stray Posted March 3, 2015 Author Share Posted March 3, 2015 thanks for looking folks Well my eyesight certainly isn't what it used to be, I need a magnifyer now! The kit brake boosterwas pretty poor so a bit of a scratch was needed. Todays effort. I have ordered some styrene and teeny-tiny drill bits with the alclad order, so waiting for them to turn up. Then I can plumb this master cylinder for the brake lines as well as the reservoir retaining clips. A little bit of clean up and this should look okay on the firewall. Quote Link to comment Share on other sites More sharing options...
Stray Posted March 5, 2015 Author Share Posted March 5, 2015 Have started paint on the engine. I haven't got the old wire that I once used and can't even remember where I got that from either. I had stripped it out of some electrical cable or something. So I will be making do with what I have now. Sorry about the picture quality but I only have my iphone at the moment for pics until I get around to buying an SD card for the camera. Here is the booster, painted and drilled and waiting for brake line detail. Man... like my eyes my hands are nowhere near as steady as they were 20 years ago! Quote Link to comment Share on other sites More sharing options...
Stray Posted March 5, 2015 Author Share Posted March 5, 2015 Also my reference pics say that the front bumper should be open. So I have dechromed all the shiny parts because I got me some Alclad, and here is the pic of the stripped front bumper/grille piece with the cutout. Quote Link to comment Share on other sites More sharing options...
Stray Posted March 6, 2015 Author Share Posted March 6, 2015 Making linkages for the box. Quote Link to comment Share on other sites More sharing options...
Stray Posted March 6, 2015 Author Share Posted March 6, 2015 Quote Link to comment Share on other sites More sharing options...
slusher Posted March 6, 2015 Share Posted March 6, 2015 Real nice work so far... Quote Link to comment Share on other sites More sharing options...
66belair Posted March 6, 2015 Share Posted March 6, 2015 You are doing some nice work there for someone who's been out of modeling for awhile. Gonna have to watch and see how this goes. Quote Link to comment Share on other sites More sharing options...
mustang1989 Posted March 6, 2015 Share Posted March 6, 2015 Heeey man!!! That's lookin' good so far!! Quote Link to comment Share on other sites More sharing options...
Bob Ellis Posted March 6, 2015 Share Posted March 6, 2015 It's funny, but I never built the AMT version in all these years. Just the Revell. How do they compare? Quote Link to comment Share on other sites More sharing options...
Stray Posted March 7, 2015 Author Share Posted March 7, 2015 Thanks for looking guys I can't believe how I used to wire up the kit distributers and paint the dashes as a kid without the need of glasses. Now it's hard enough to find the pieces on my desk if I'm not wearing them! Bob: I haven't done the revell kit, the only chevelles I have built is this one and the monogram Heavy Chevy 1970 one. So I can't actually compare this AMT version but I will say that the detail is quite lacking in some areas. Some of the panel lines are a bit shallow, and others are deeper. Most things fit together quite well, and some detailing is very well done, where other areas are not. Like the chev emblem on the front quarters. The one on the left is holding up kind of okay after the thin prime, but the emblem on the right panel is almost buried so it is going to be hard to pick that out when detailing, especially after a couple layers of paint are added. It's odd how AMT would go and add something like the alternator bracket, which is good detailing, and then do such an appalling job moulding in the sway bar, and the kit dizzy is lacking also, but like most kits the dizzy is actually just the cap stuck to the manifold. If I can I might do the Revell kit some day, just to compare. One obvious difference I have noticed in the ones people have built on here is when they show the chassis the gearbox crossmember is completely different. But looking at reference pics the AMT one appears to be correct. Quote Link to comment Share on other sites More sharing options...
Stray Posted March 7, 2015 Author Share Posted March 7, 2015 (edited) Okay first use of Alclad and I gotta say I am impressed. I think I did get a little much on the front bumper, as I was trying to do a pass from each side and from the bottom then the top to cover all the angles and nooks in the part. But I am pleased with the finish. I will refine my use over future build, but will let this be for now. Wheels with flash on. Edited March 7, 2015 by Stray Quote Link to comment Share on other sites More sharing options...
Stray Posted March 7, 2015 Author Share Posted March 7, 2015 So, like I said just before the kit distributer on this was as simple as you can get. And I went and managed to lose it when I was stripping all the parts anyway, it's probably gone down the sink. So I went through my leftovers and found an old dizzy cap from some other kit years ago. I cleaned up the top of it and thought what the hell... so I glued some styrene tube to the bottom of it and then some rod inside that. That gives me a proper distributer, not just a cap as most kits have. I drilled out some 1mm rod and wired it to use as the regulator on the side, then squashed flat some more 1mm rod to bend up into the clips. It is drilled and ready for wiring, just need to figure out something for the wire boots. I might have to drill some more of the 1mil rod and use that as it would look good in scale with the wire I have for the leads. Anyhow, here's some pics, still crappy quality sorry. Quote Link to comment Share on other sites More sharing options...
Snake45 Posted March 7, 2015 Share Posted March 7, 2015 It's funny, but I never built the AMT version in all these years. Just the Revell. How do they compare? I've built both. They were both fun builds and went together without problems. The Revell kit's body is more accurate, and looks much more like a '67 Chevelle. If we didn't have the Revell kit, we'd all happily build the AMT one, but the Revell's shape is just more accurate. Quote Link to comment Share on other sites More sharing options...
Rotorbolt73 Posted March 7, 2015 Share Posted March 7, 2015 (edited) It's funny, but I never built the AMT version in all these years. Just the Revell. How do they compare? The Revell is more closer to 1/24 scale with the AMT is a smaller 1/25th scale. You can tell the Revell kit is patterned off the old Monogram 1/24 64 GTO kit just by comparing the chassis plate / suspension parts and engine bay/ firewall areas.. they are practically the same parts.. I've built both kits and tend to like the Revell version mostly because I like 1/24 scale better. But they are both great kits either way.. Edited March 7, 2015 by Rotorbolt73 Quote Link to comment Share on other sites More sharing options...
Stray Posted March 8, 2015 Author Share Posted March 8, 2015 Not much of an update tonight as I went out with a buddy today, I did get me some more styrene and some paints though I decided to just drill out some boots for my leads. I seriously need some new eyes. Quote Link to comment Share on other sites More sharing options...
tbill Posted March 8, 2015 Share Posted March 8, 2015 looking good so far! and I can so understand the needing new eyes.......... Quote Link to comment Share on other sites More sharing options...
Snake45 Posted March 8, 2015 Share Posted March 8, 2015 The Revell is more closer to 1/24 scale with the AMT is a smaller 1/25th scale. You can tell the Revell kit is patterned off the old Monogram 1/24 64 GTO kit just by comparing the chassis plate / suspension parts and engine bay/ firewall areas.. they are practically the same parts.. I've built both kits and tend to like the Revell version mostly because I like 1/24 scale better. But they are both great kits either way.. Um...no. The Revell is 1/25 and the Revell and AMT '67 Chevelle bodies are within a hair of each other in wheelbase, overall length, and front and rear widths. I just compared two unbuilt bodies to confirm this. What you say about the Monogram 1/24 GTO chassis might be true. They might have used the same masters to cut the molds for both kits, but scaling them to the two different sizes. You can see that they also did this with the 1/24 Monogram '70 Boss 429 Mustang and the 1/25 Revell '69 Shelby and '69 Mustang--the chassis and some other parts are VERY similar but two different sizes. Quote Link to comment Share on other sites More sharing options...
Stray Posted March 9, 2015 Author Share Posted March 9, 2015 Talk about frustrating! I made some lead clips from styrene as well as the boots and a whole lot of fiddling later I have the dizzy wired now. This is the diagram I used for the correct firing order of a 396BB so it better be correct because I am not going to pull that apart now! Quote Link to comment Share on other sites More sharing options...
Stray Posted March 10, 2015 Author Share Posted March 10, 2015 A bit of plumbing. I don't know how you guys keep your builds so clean. I seem to get fingerprints and glue everywhere. I tried my best to avoid touching the chrome but I have panda paws for hands. Quote Link to comment Share on other sites More sharing options...
Quick GMC Posted March 10, 2015 Share Posted March 10, 2015 Your wheels turned out awesome, they have that bright metal sharpness, pretty great for your first time with Alclad. It took me forever to get consistent results. Quote Link to comment Share on other sites More sharing options...
Rob McKee Posted March 10, 2015 Share Posted March 10, 2015 Wow Stray, you definitely still have it! Very nice detail on the engine. Quote Link to comment Share on other sites More sharing options...
Recommended Posts
Join the conversation
You can post now and register later. If you have an account, sign in now to post with your account.
Note: Your post will require moderator approval before it will be visible.