Daxman
-
Posts
214 -
Joined
-
Last visited
Content Type
Profiles
Forums
Events
Gallery
Everything posted by Daxman
-
41 Chevy Truck - Jet Powered
Daxman replied to Daxman's topic in WIP: Model Trucks: Pickups, Vans, SUVs, Light Commercial
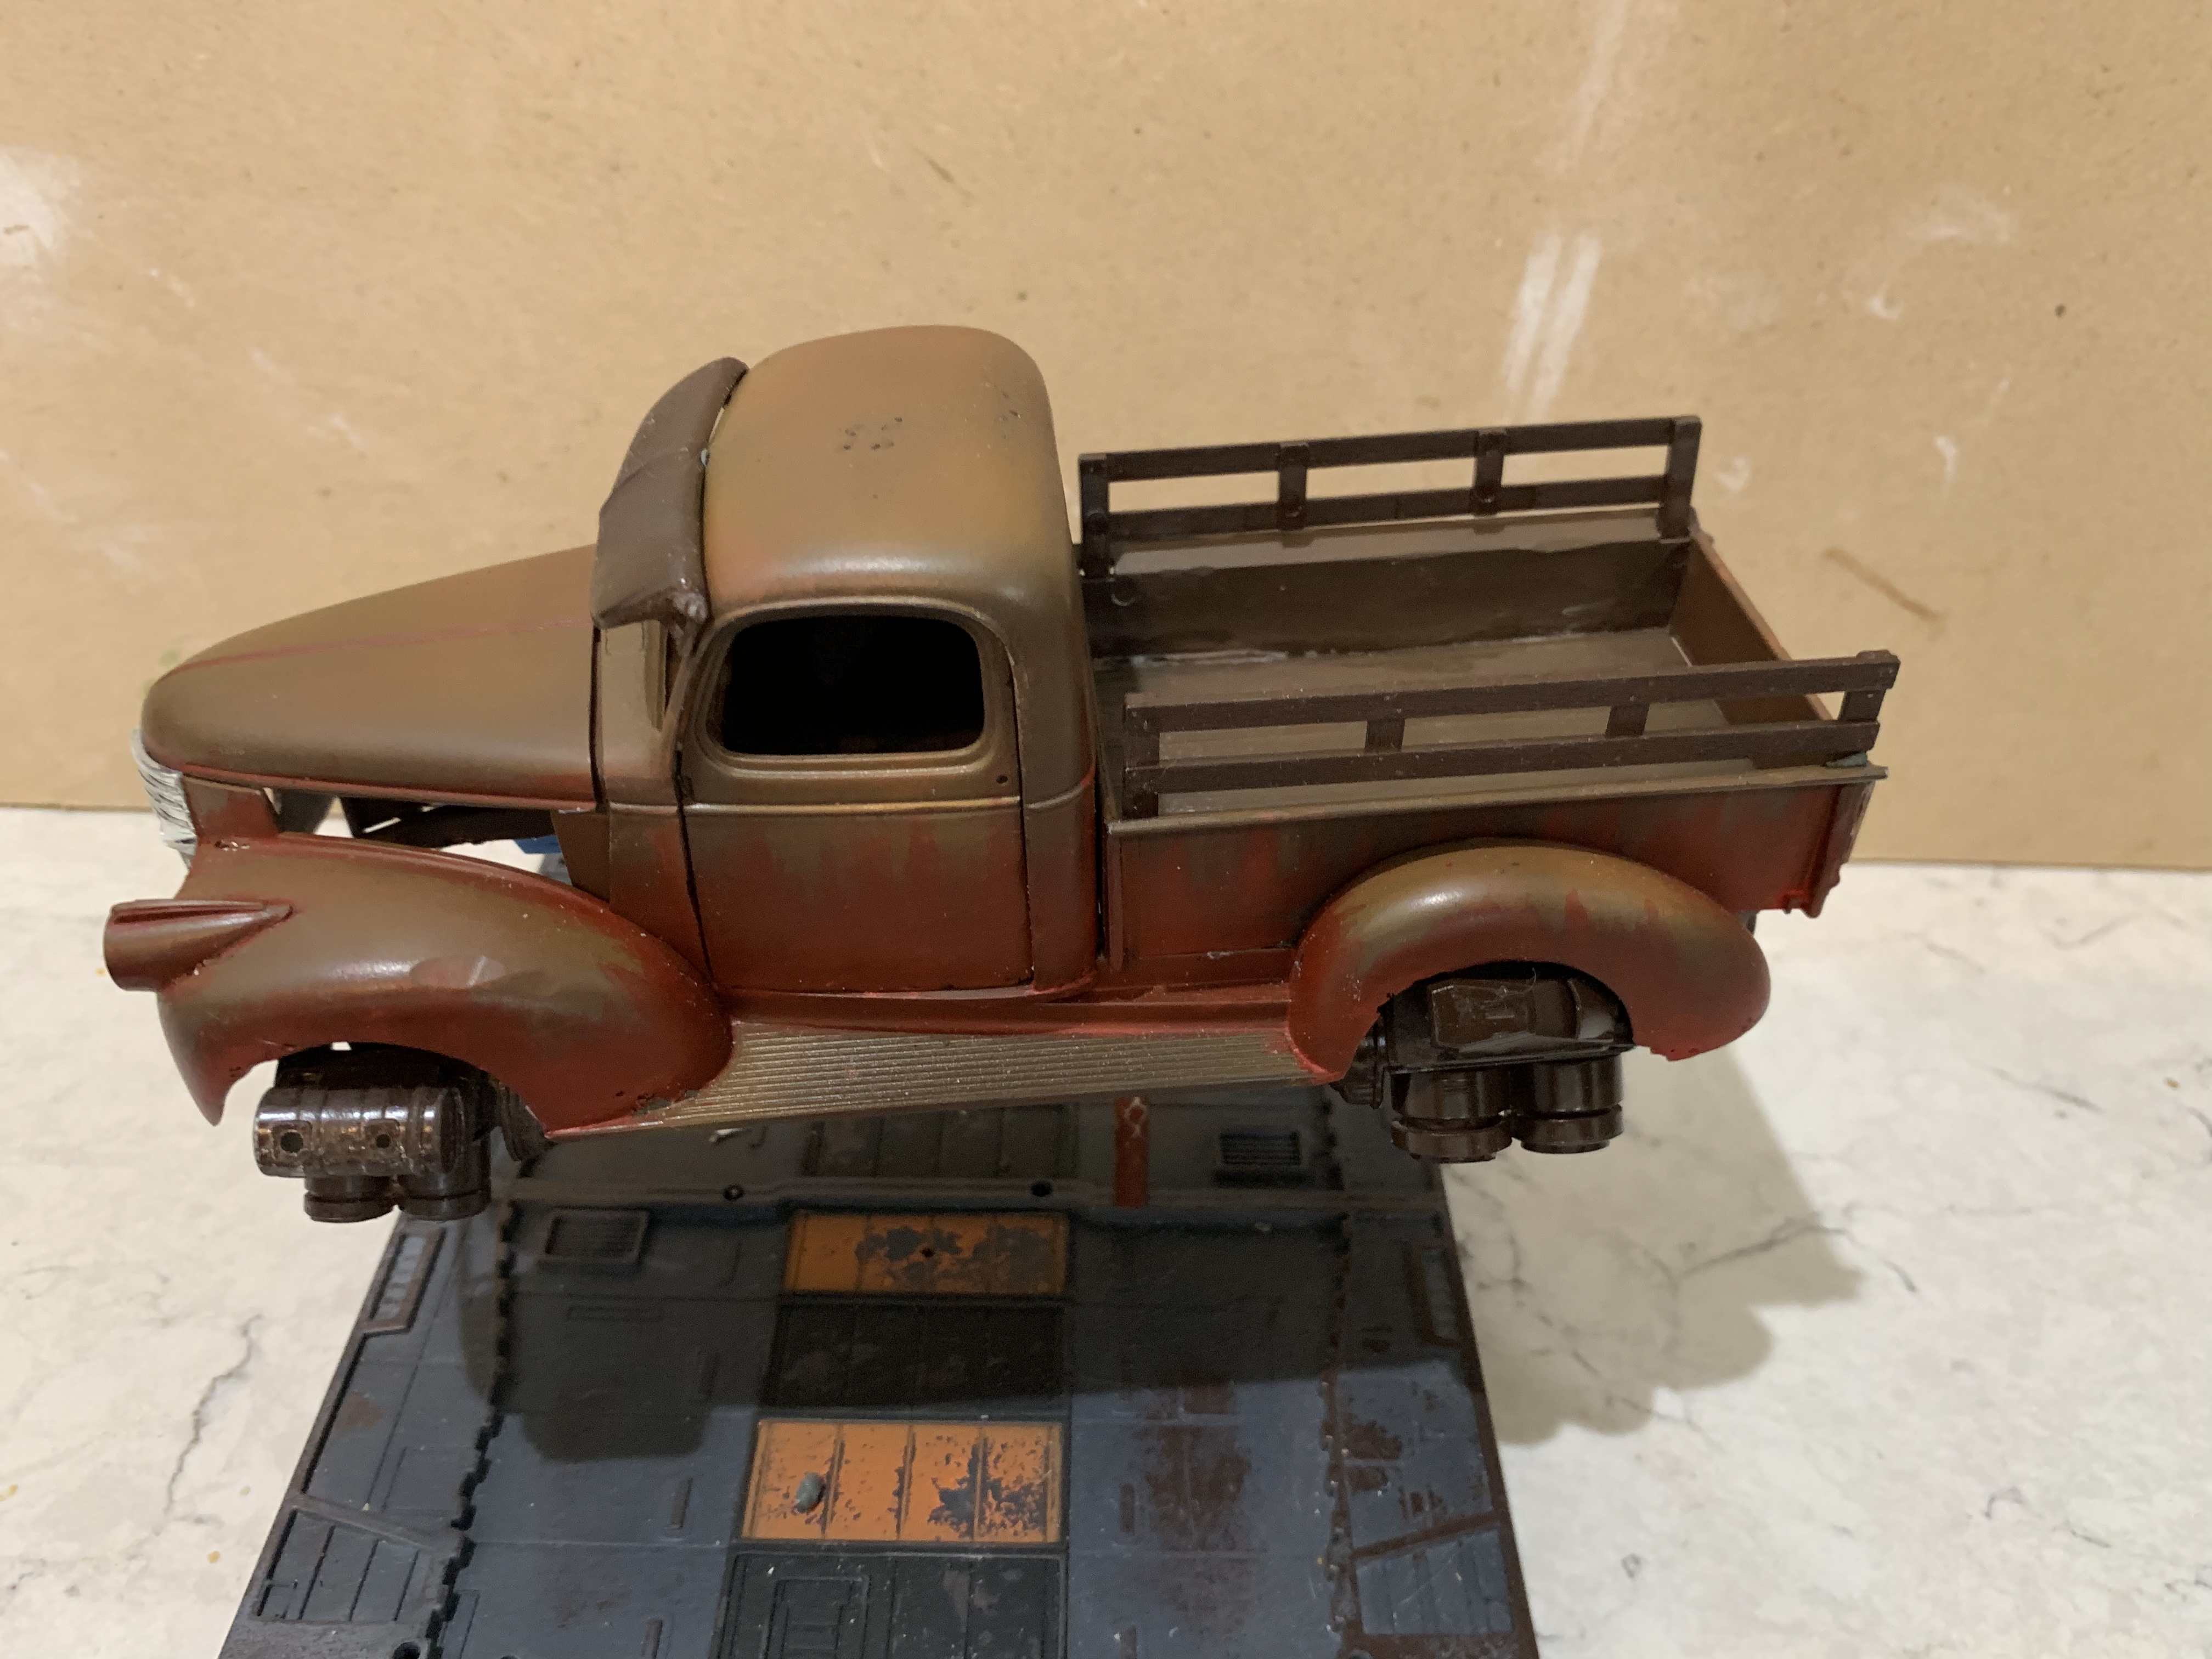
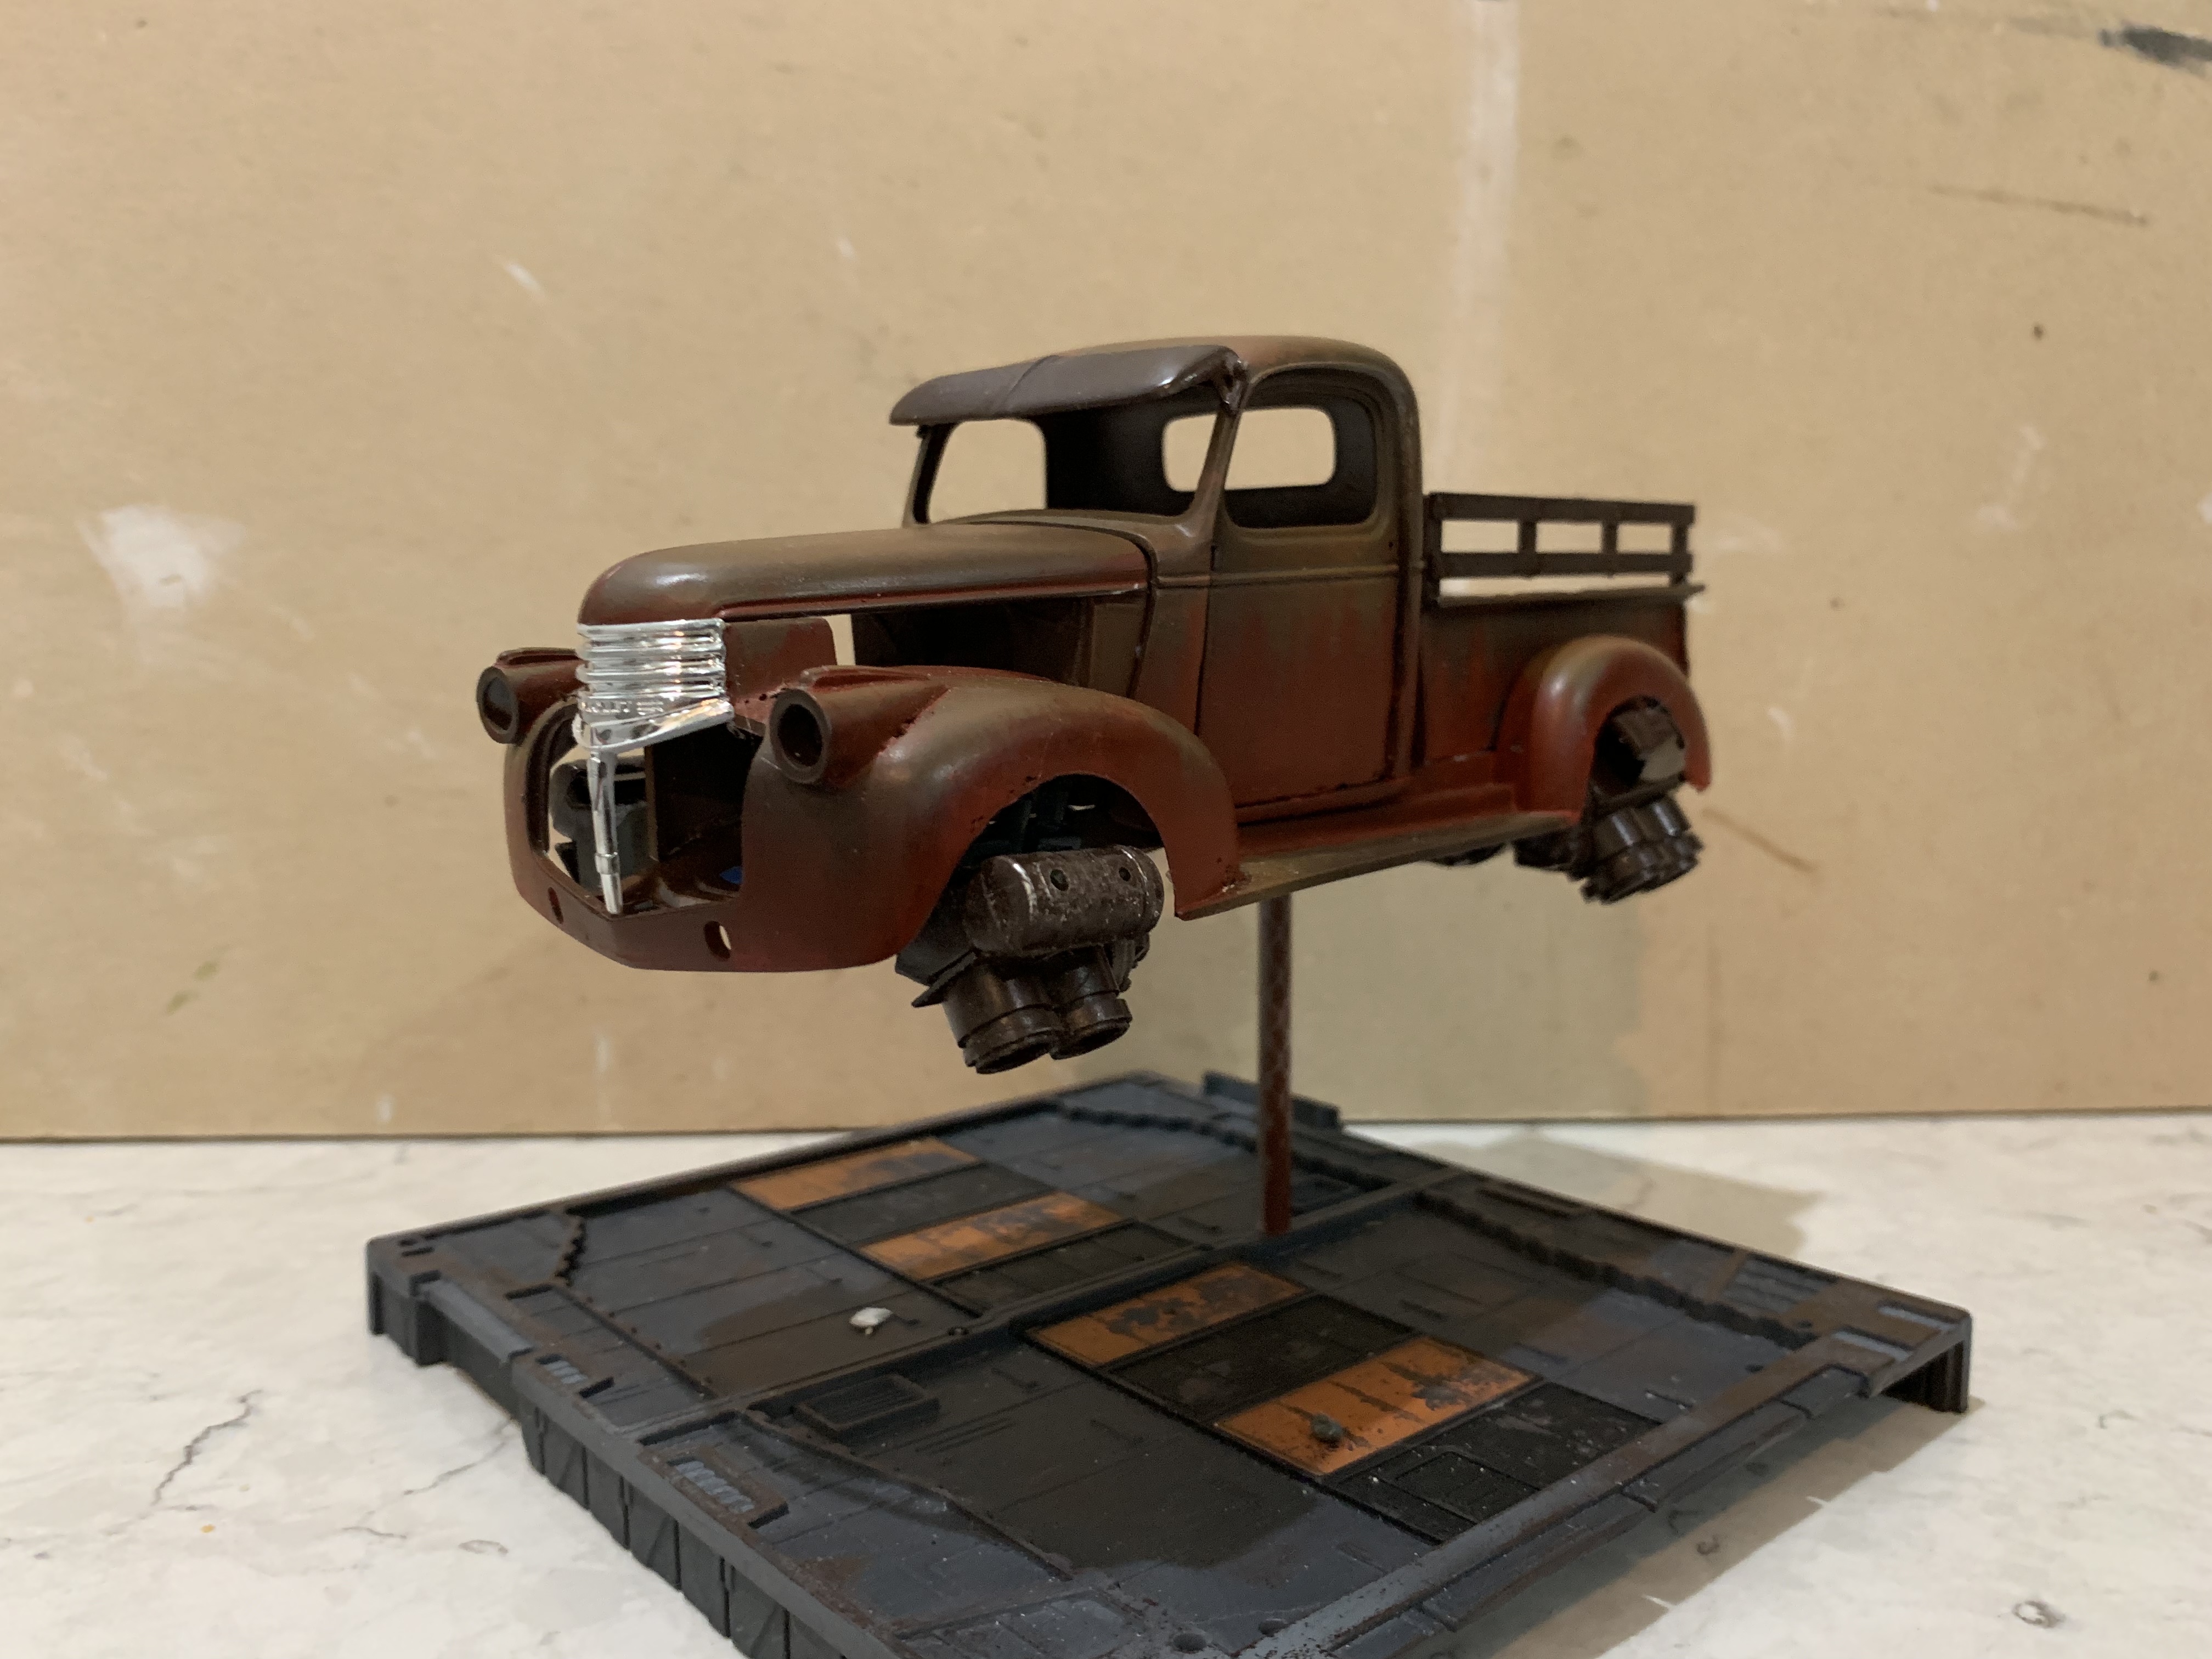
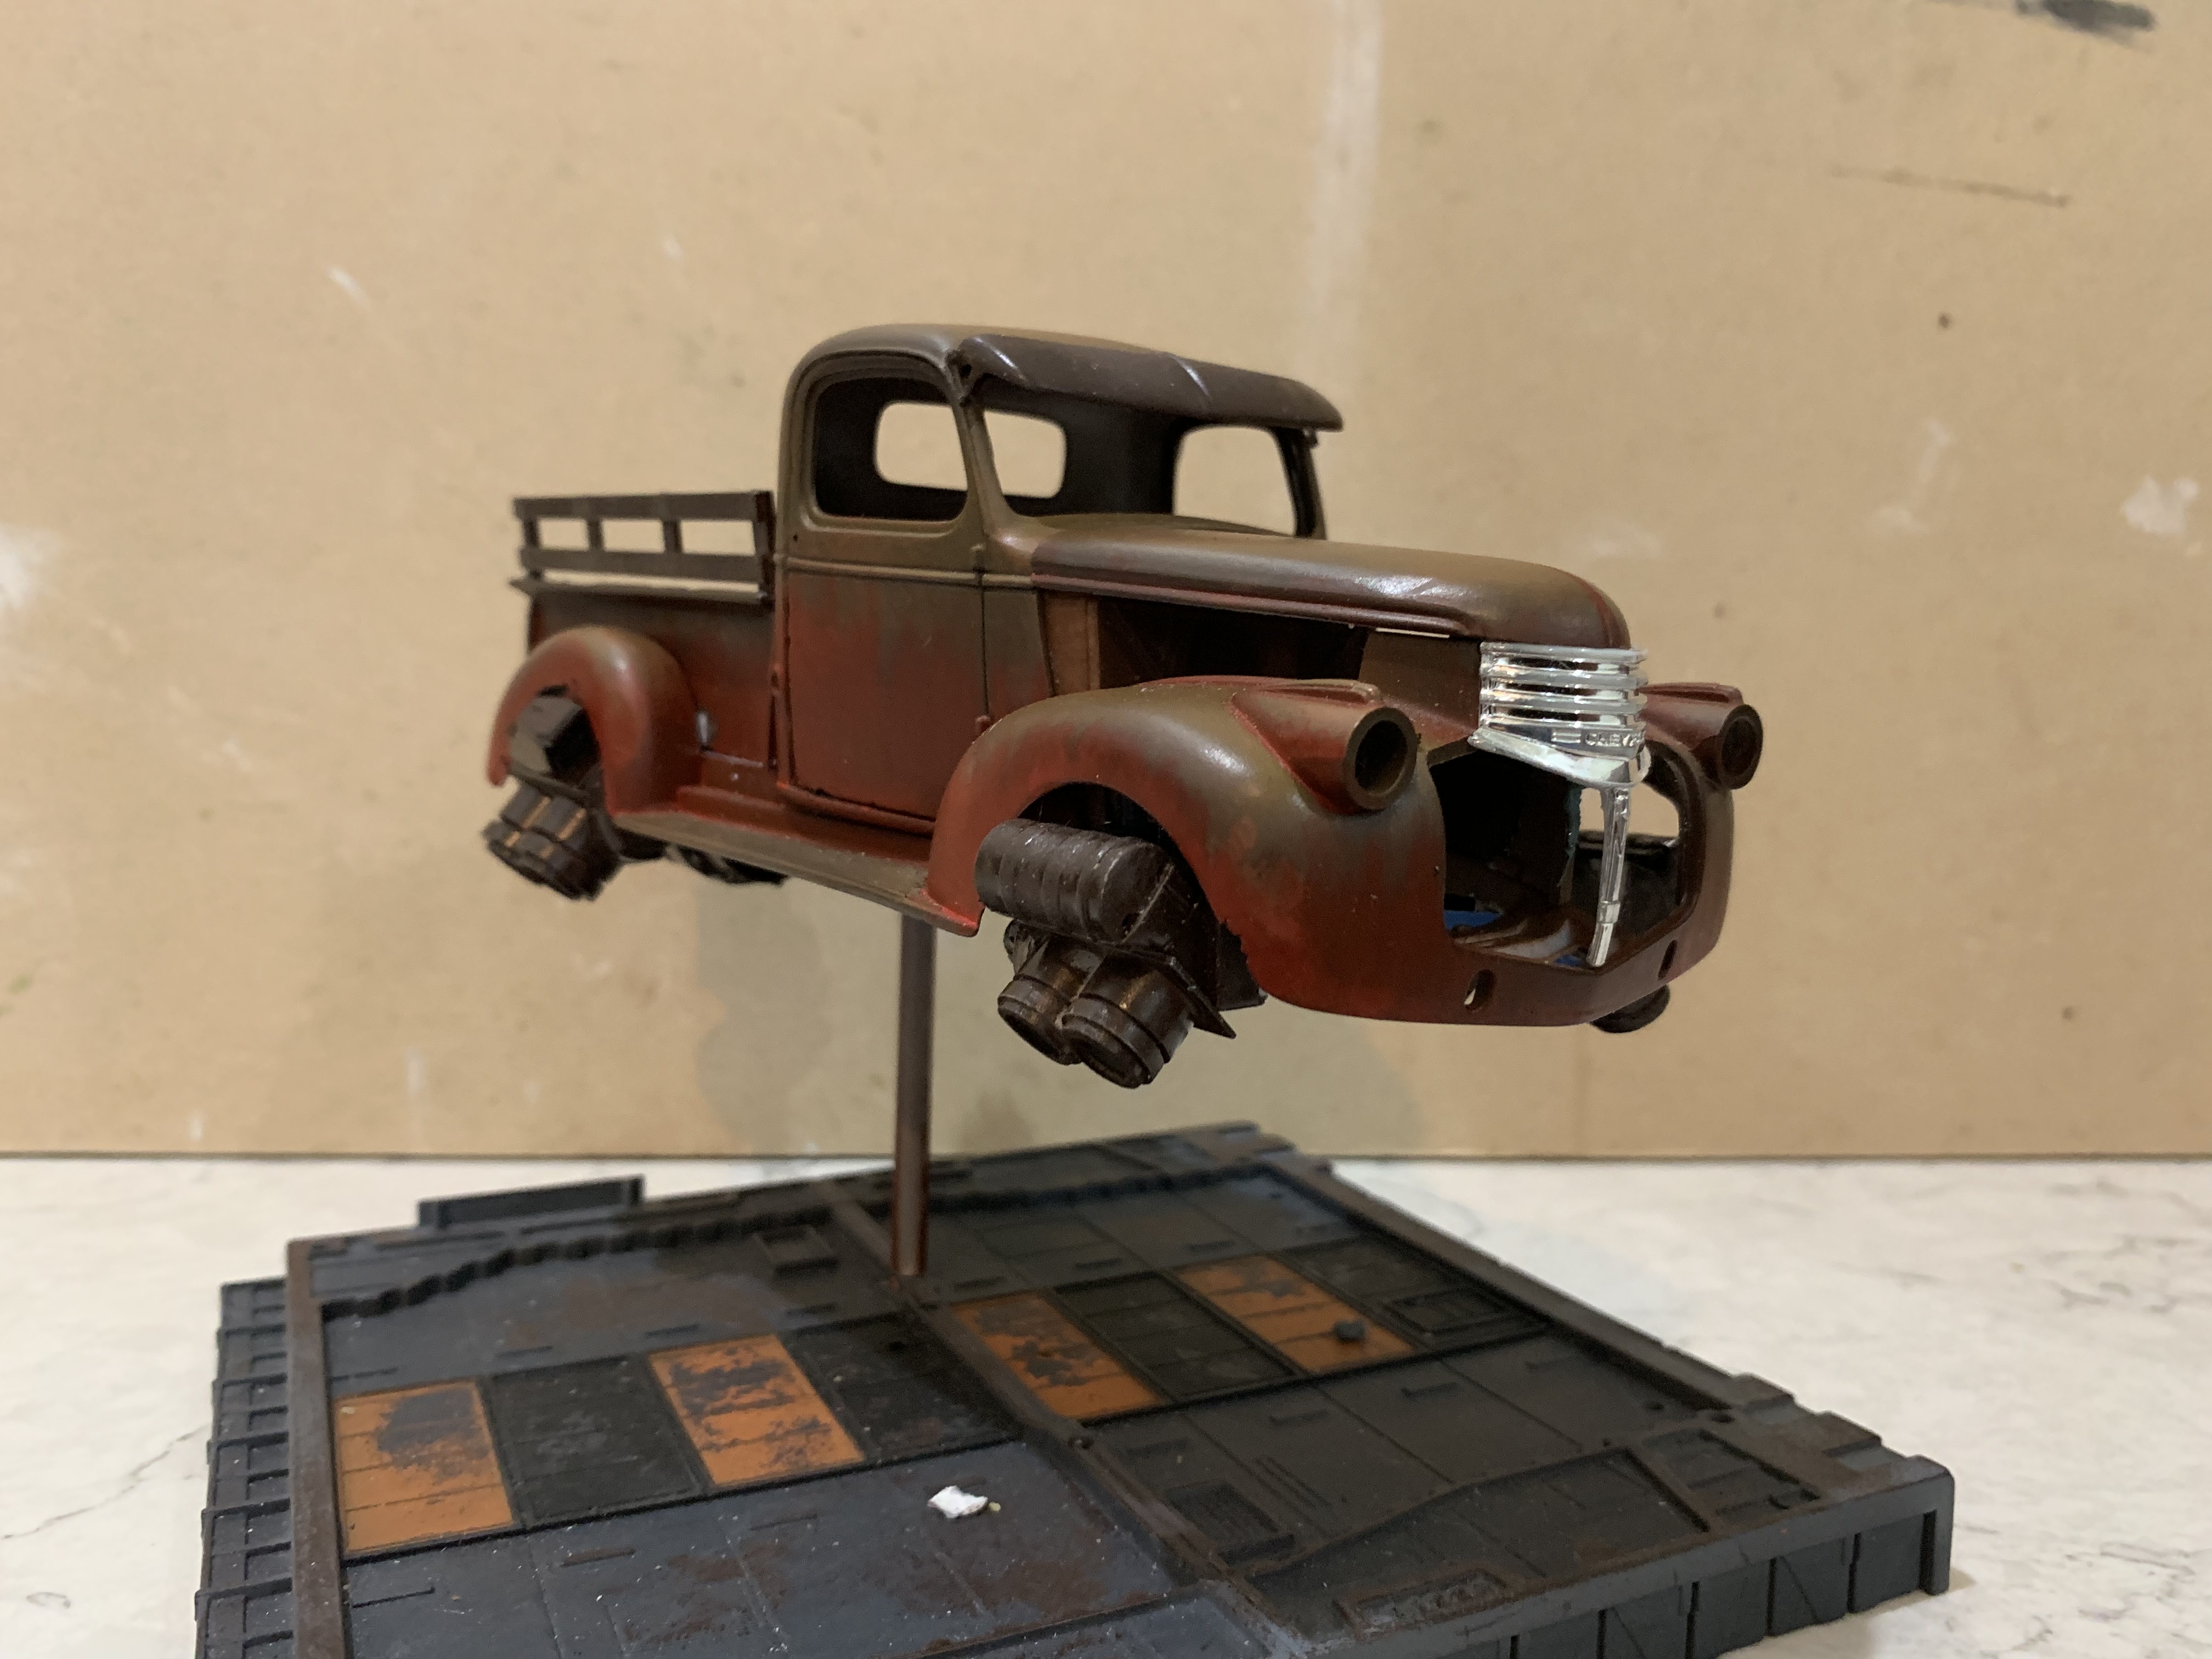
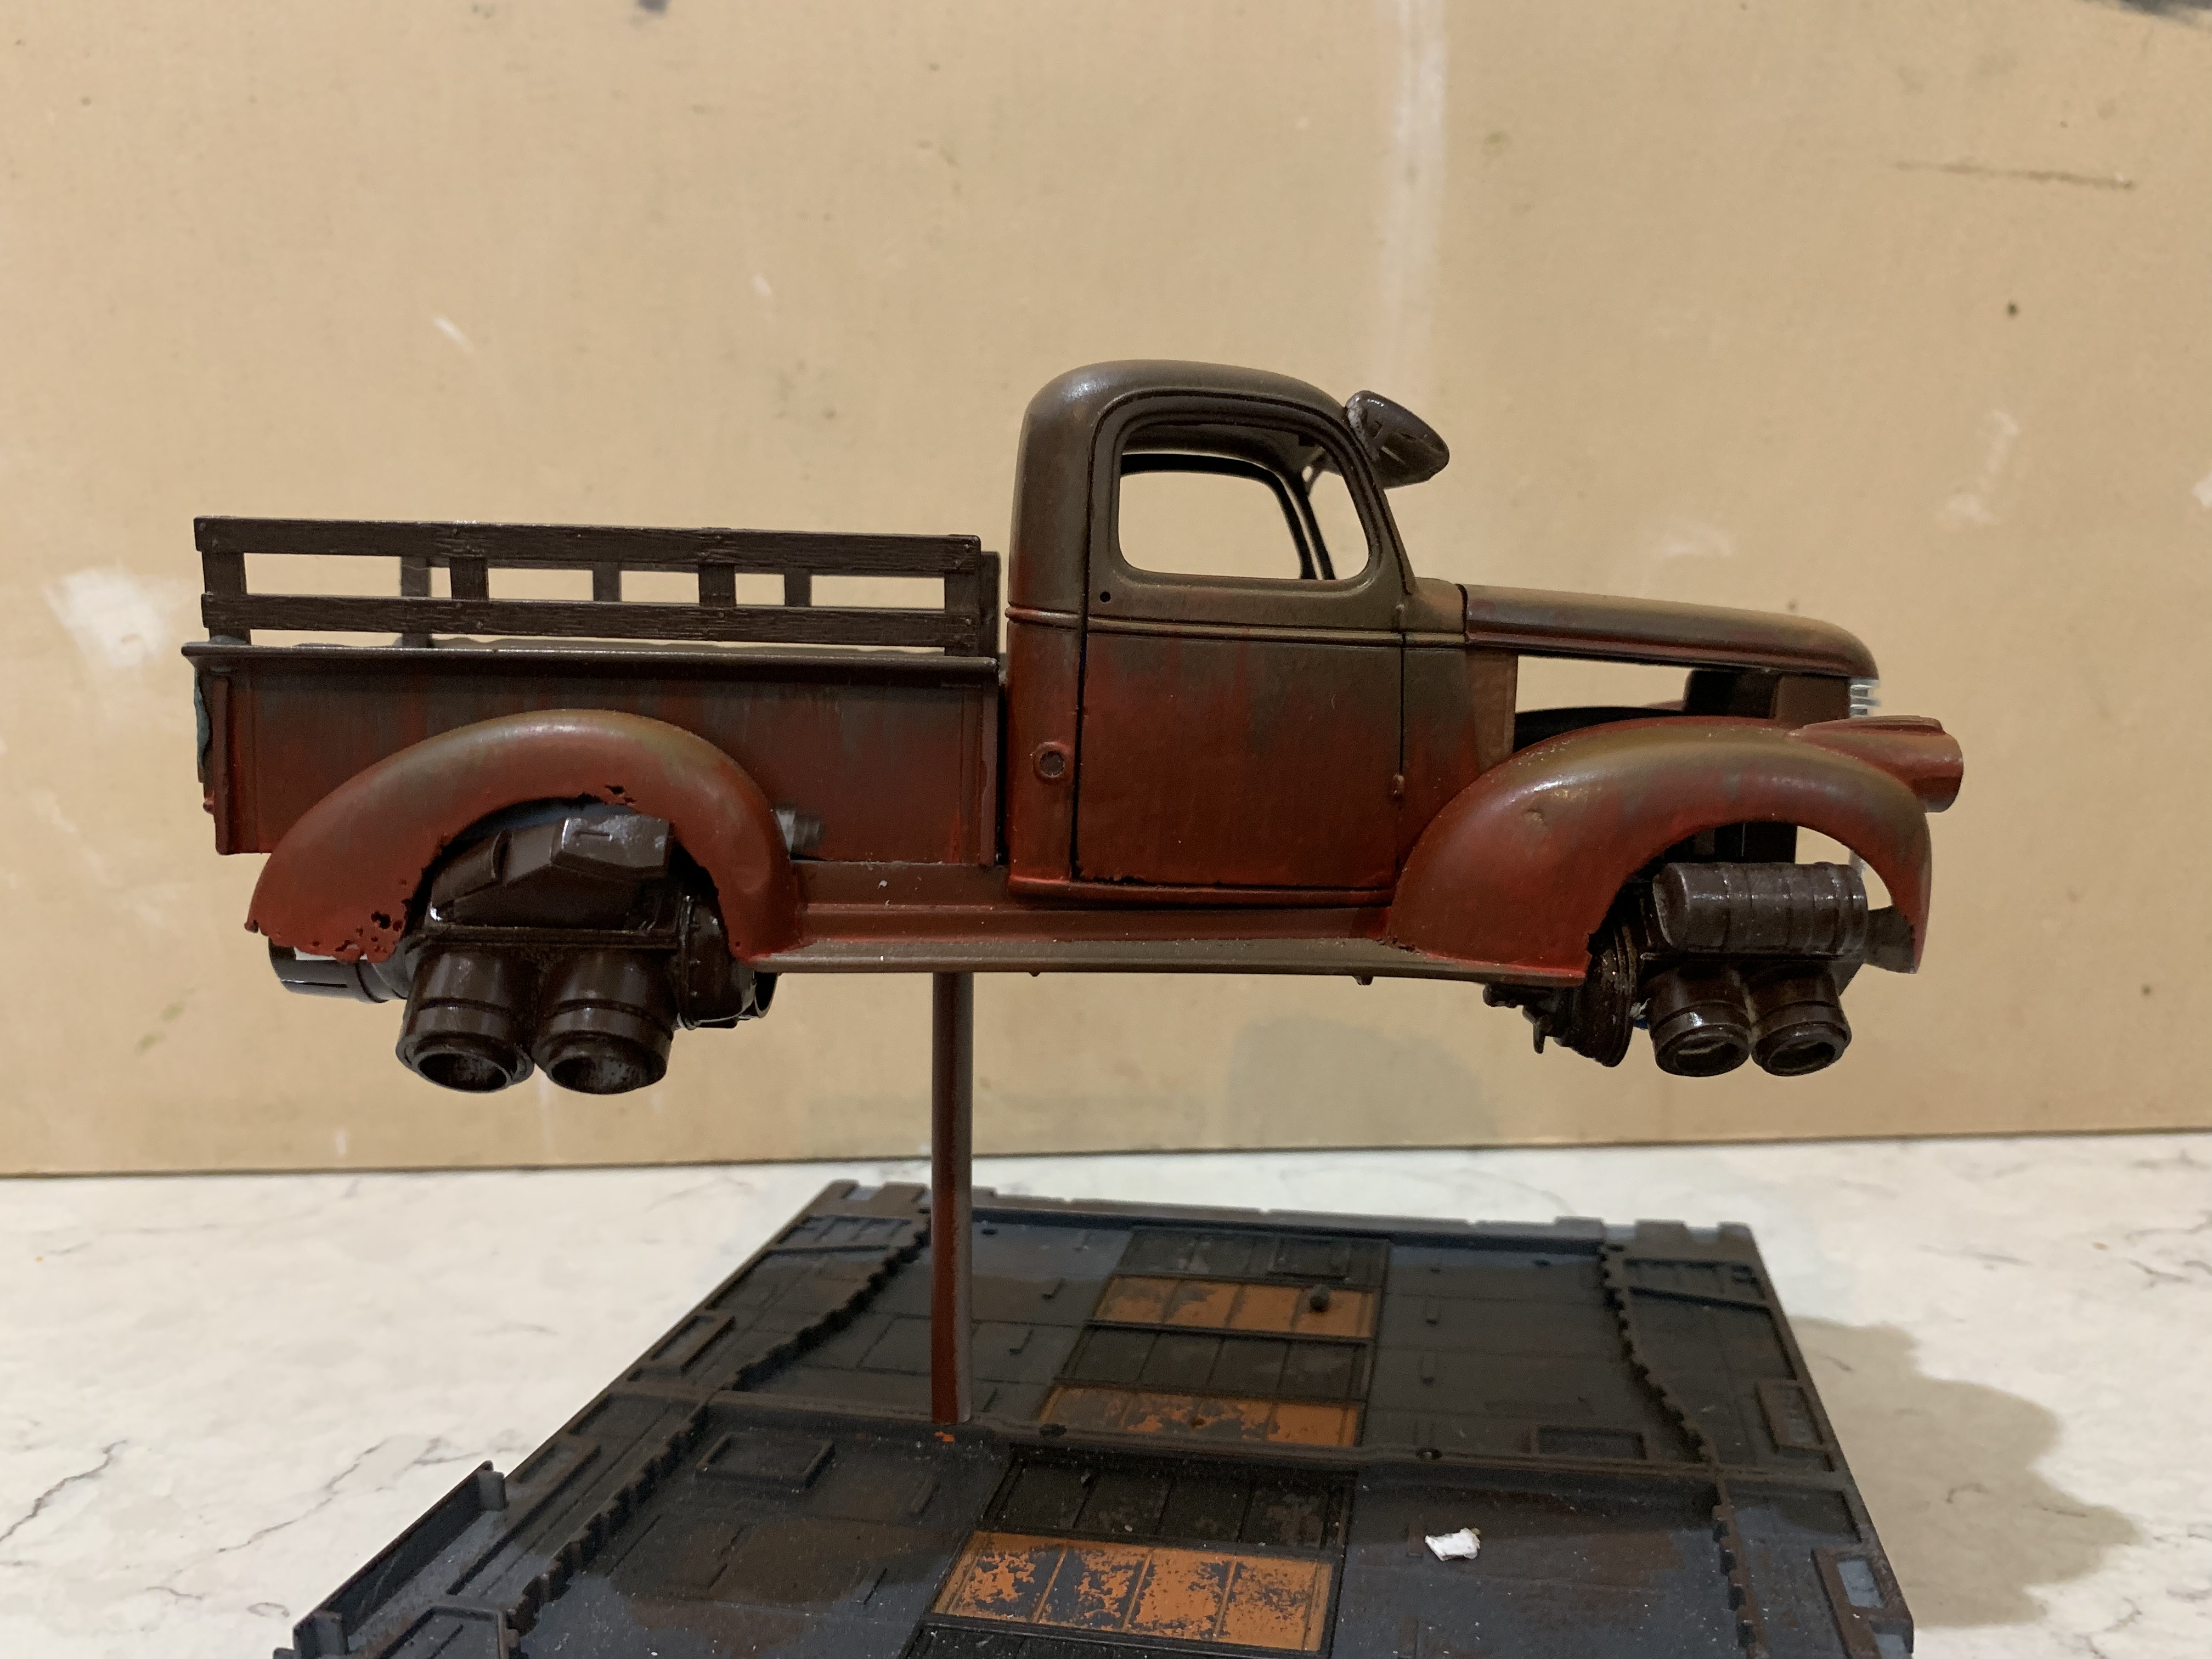
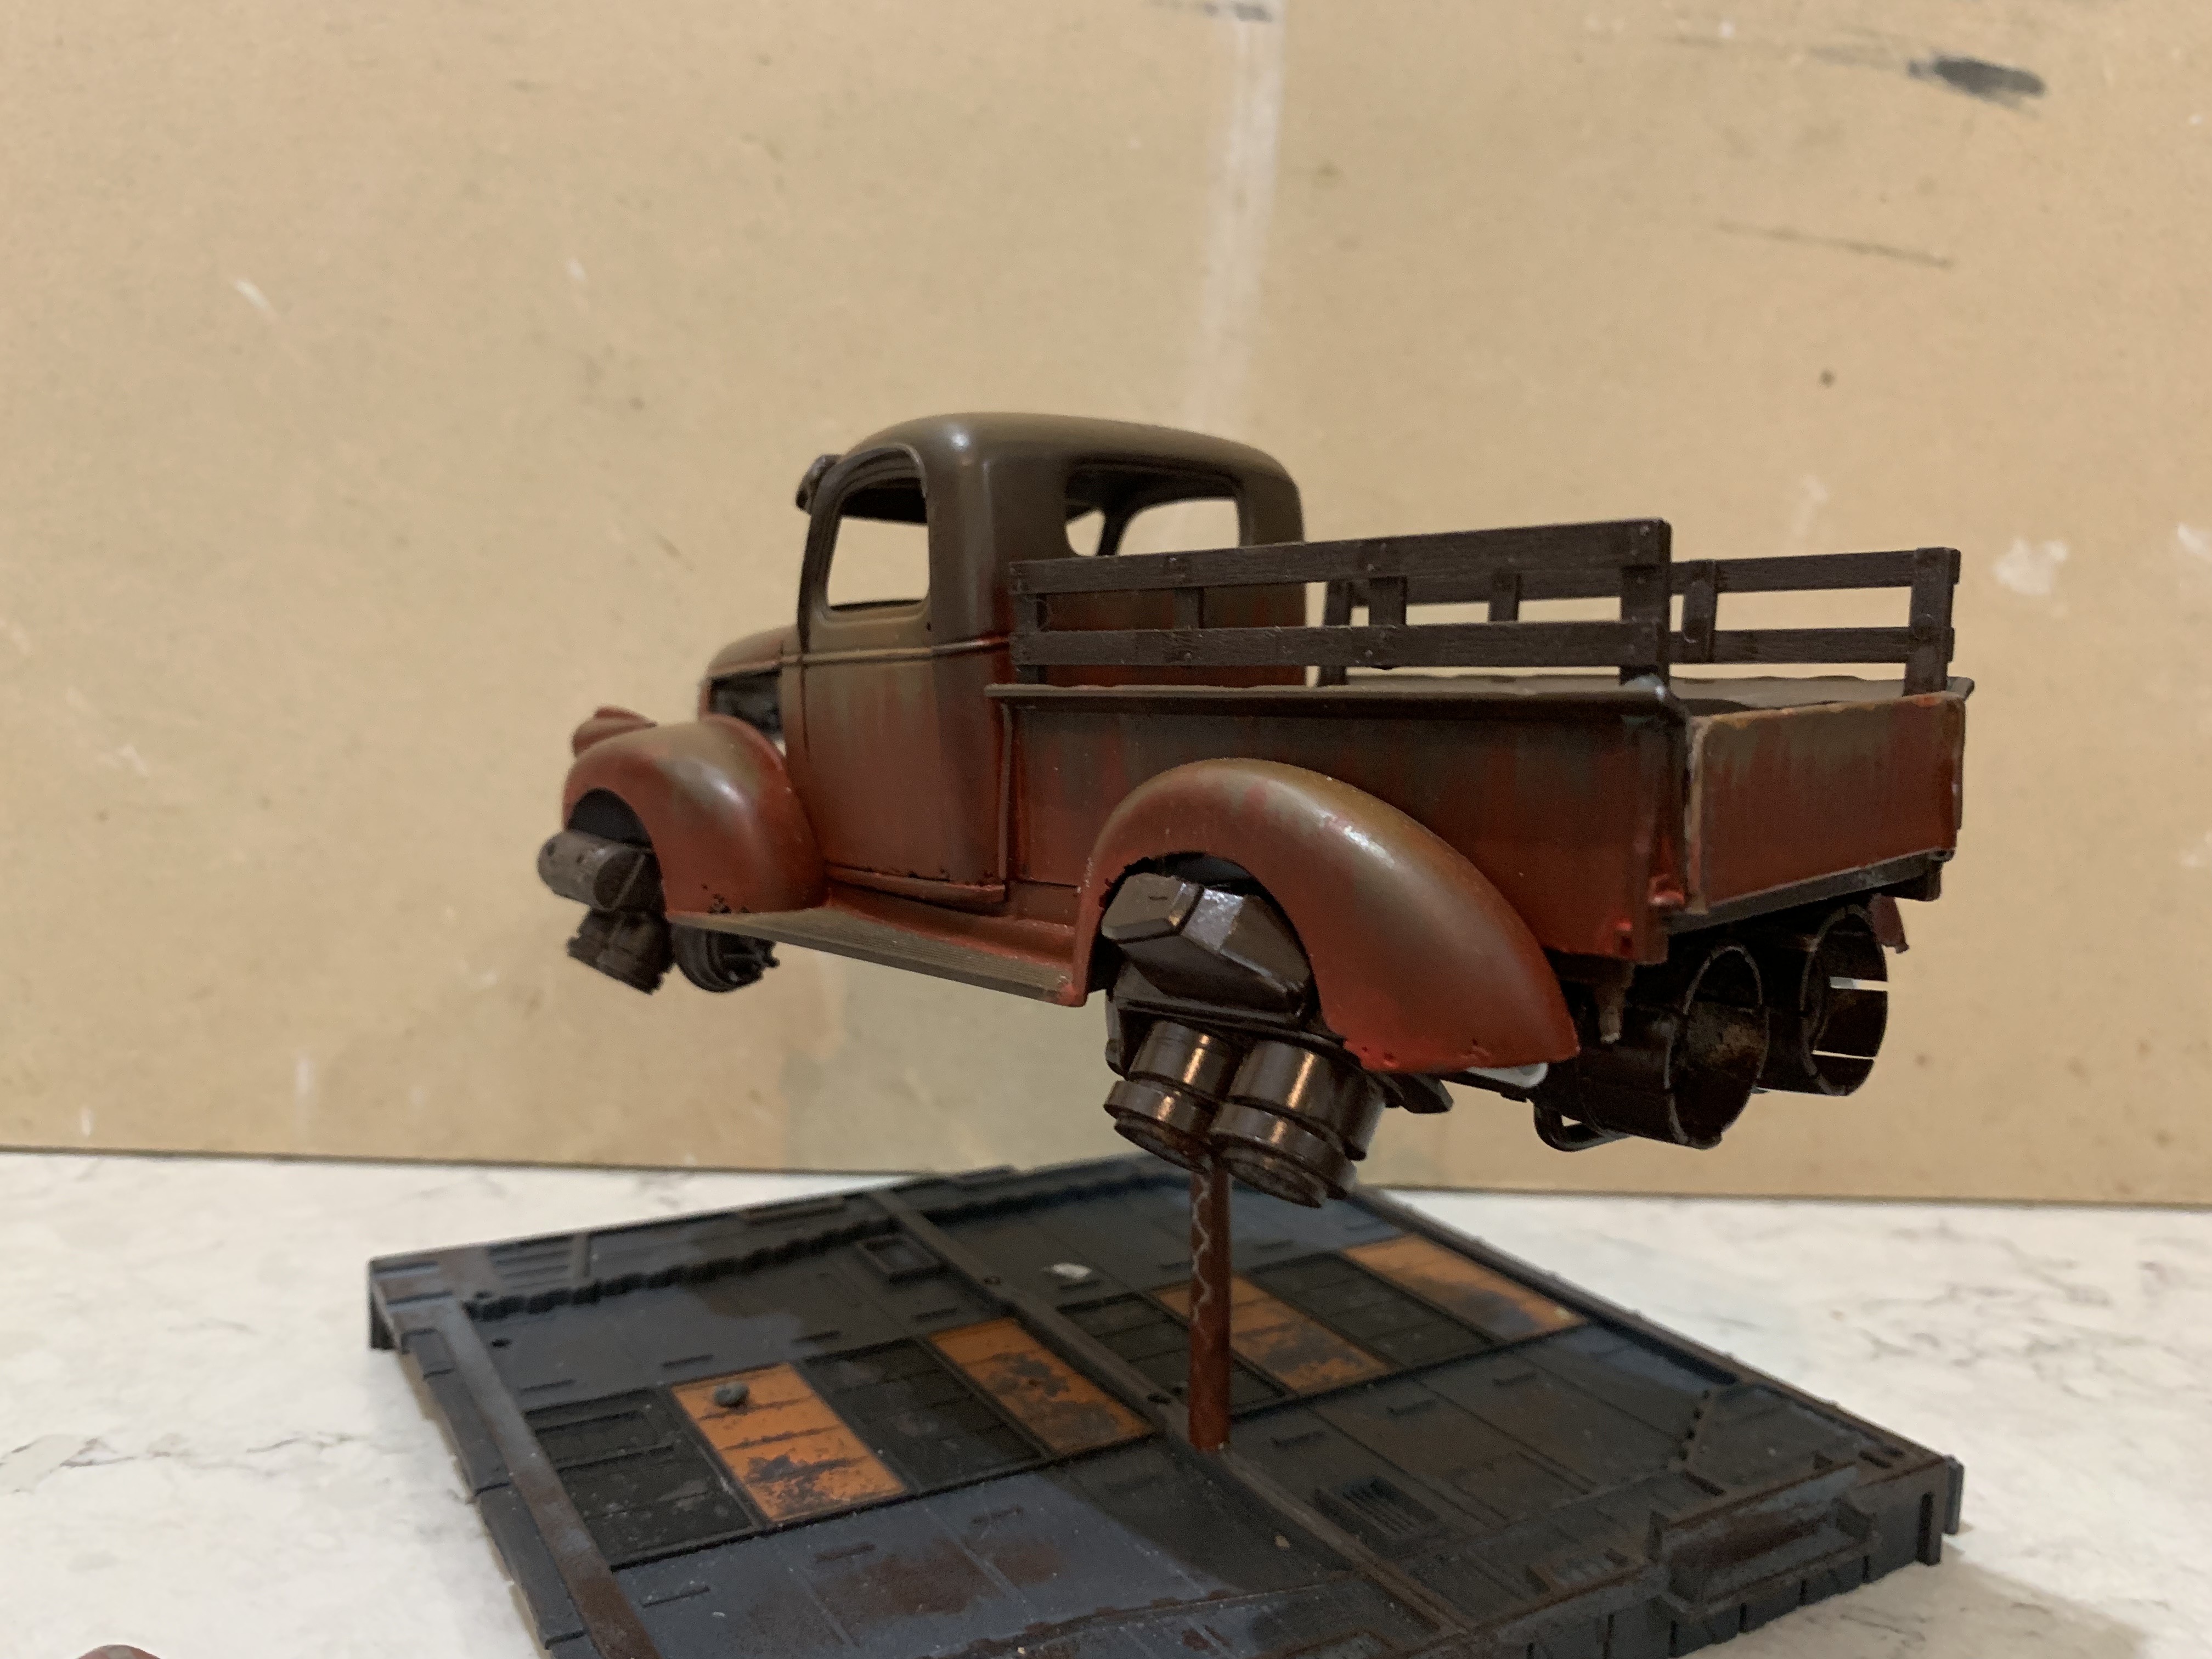
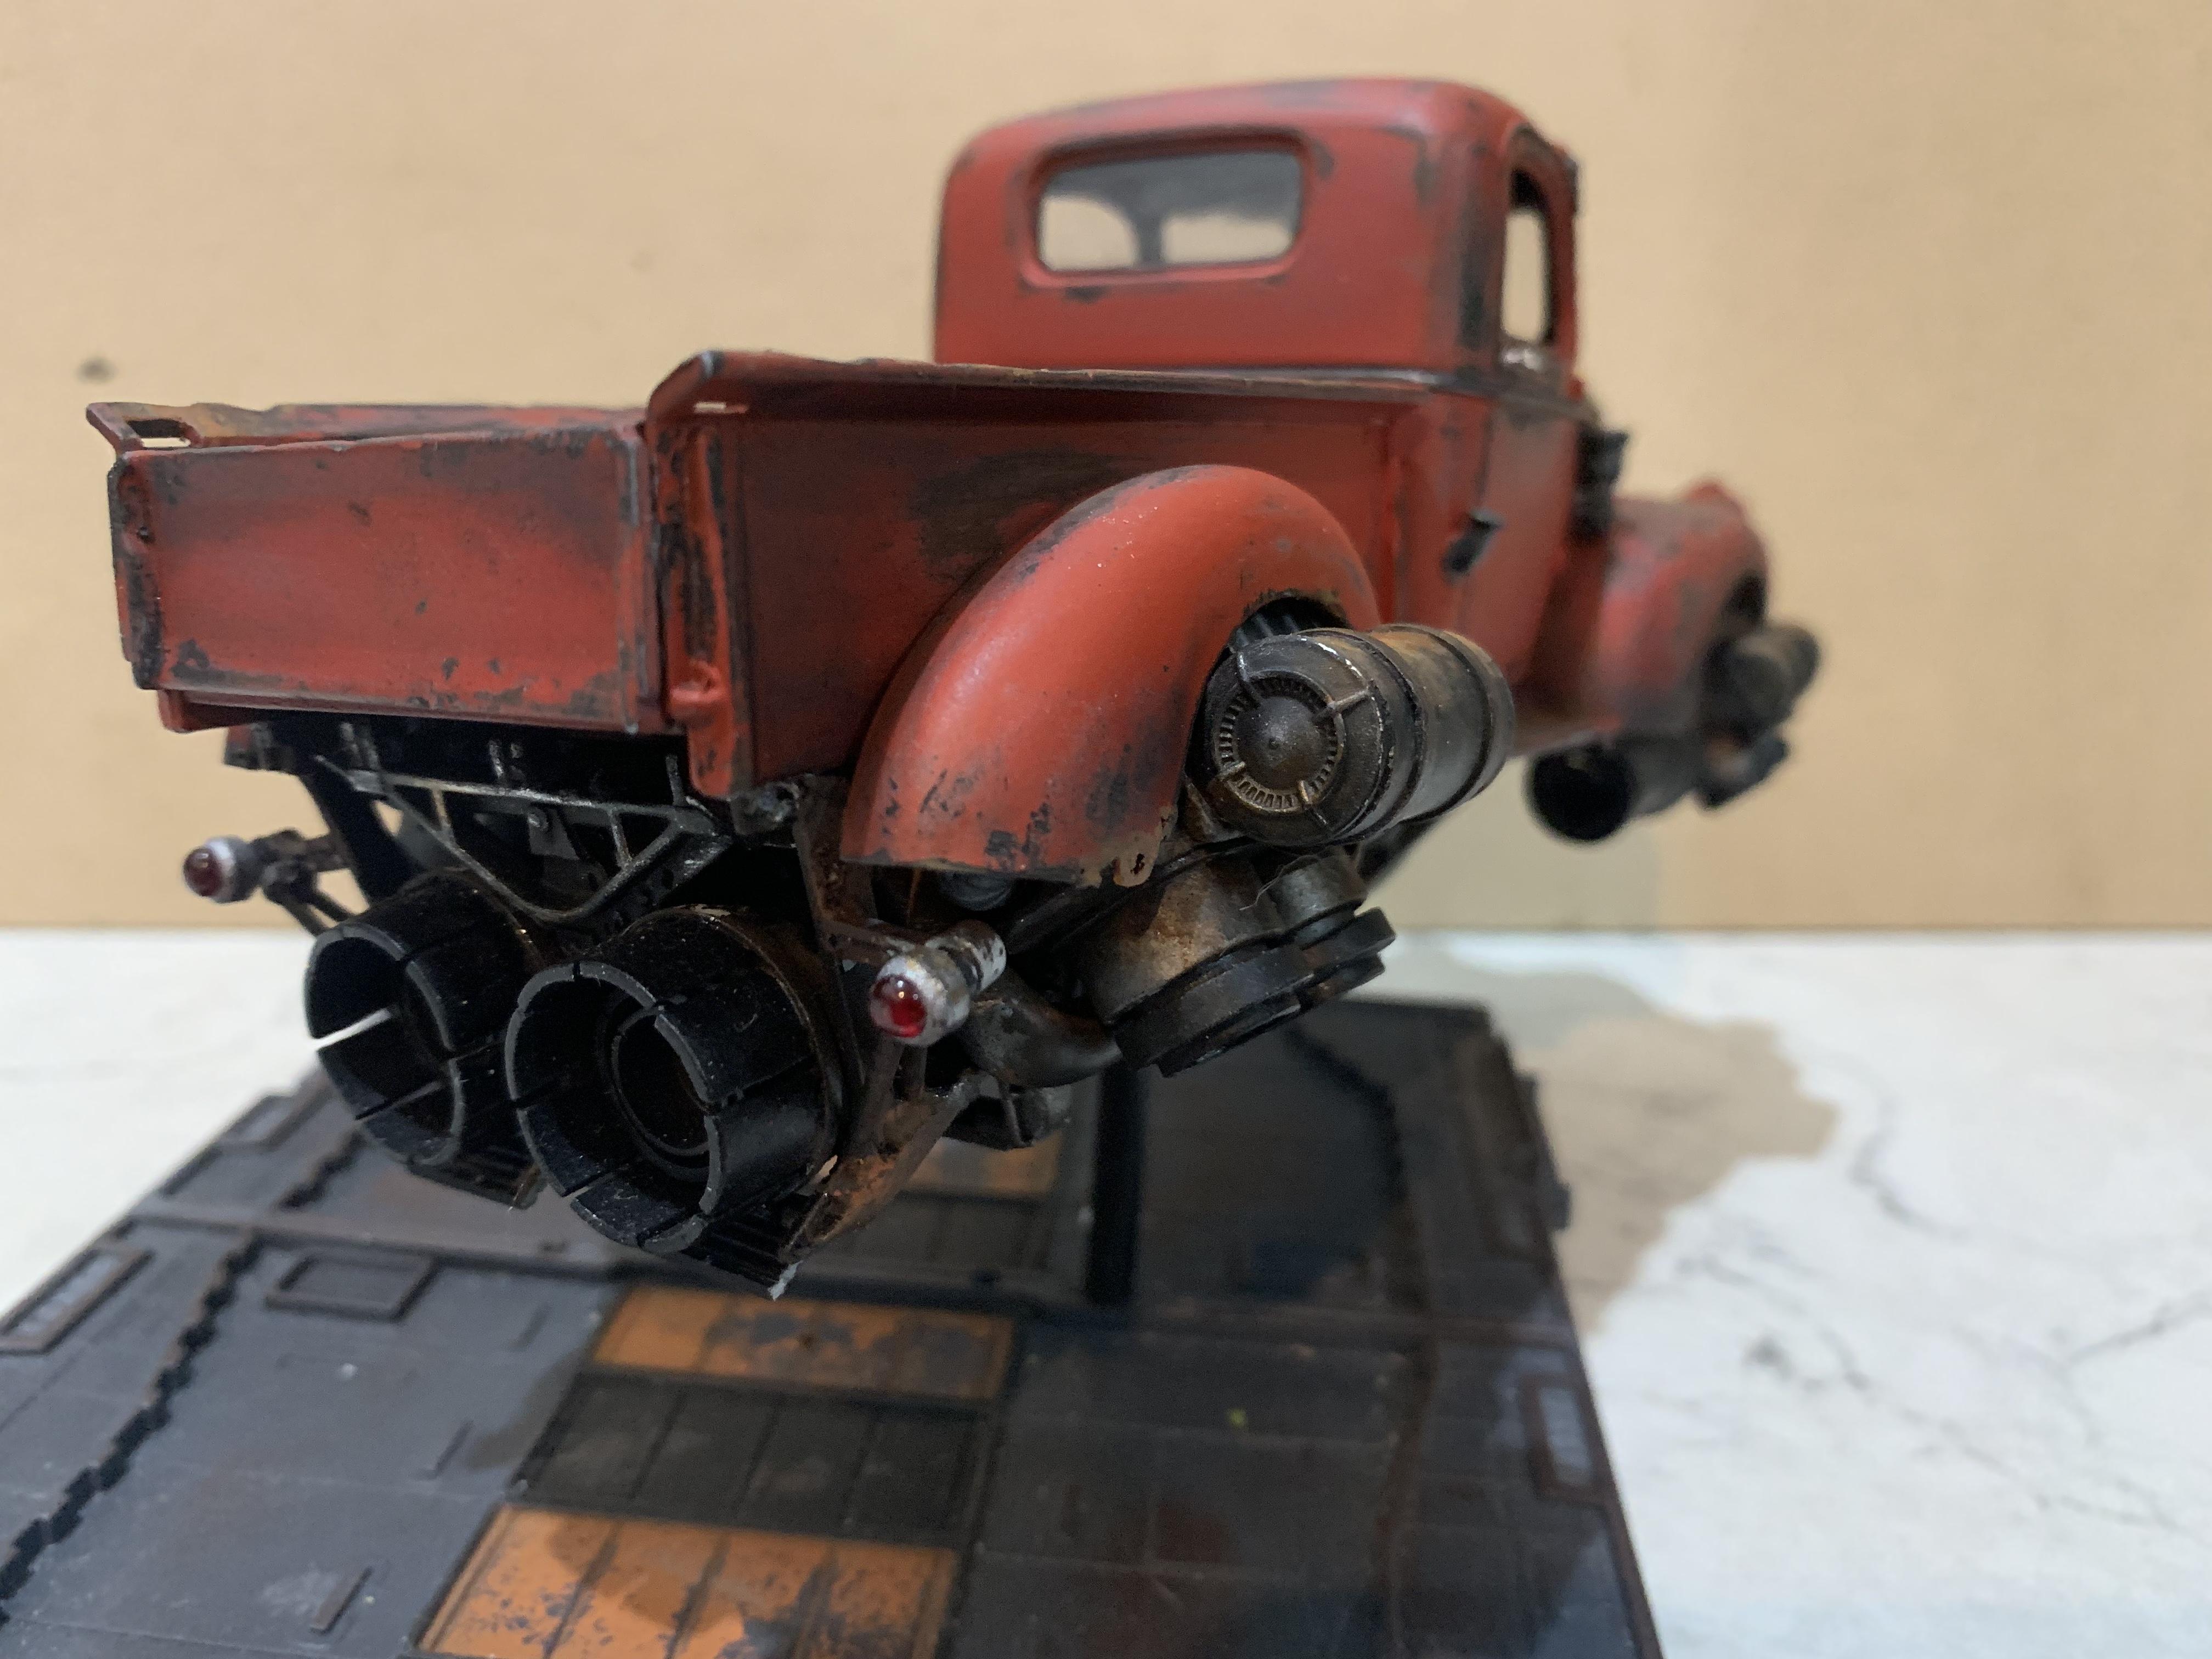
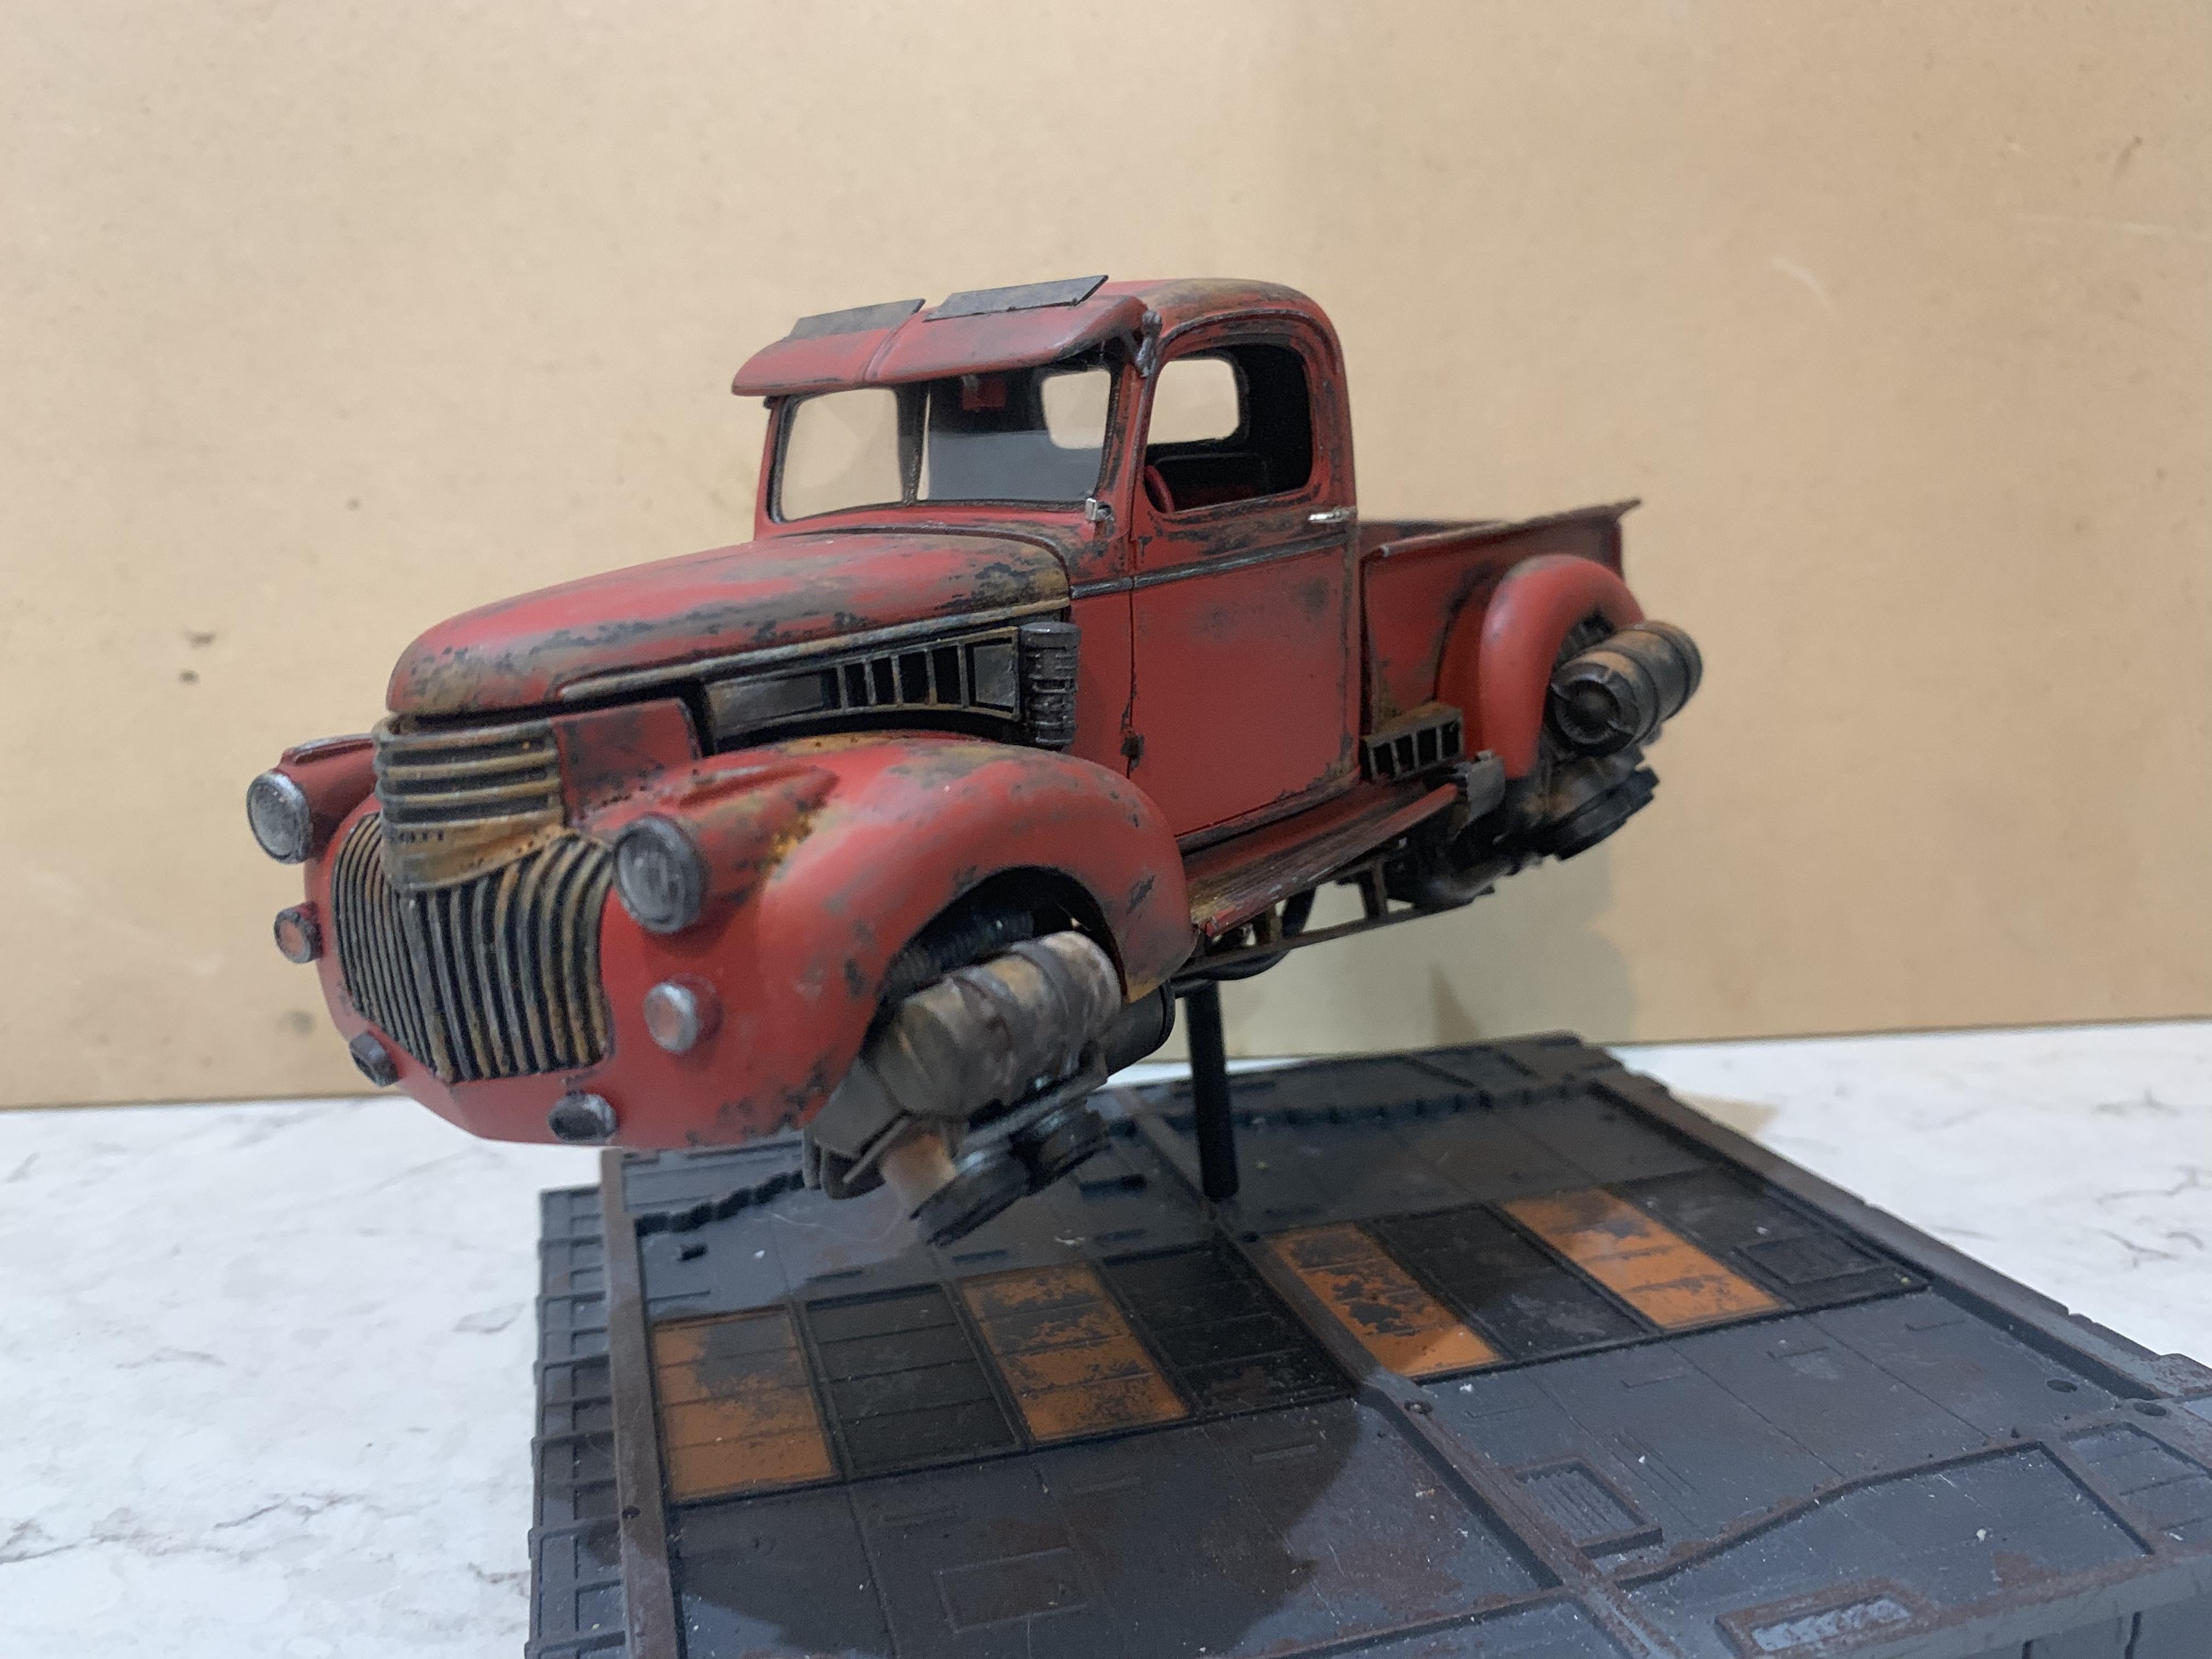
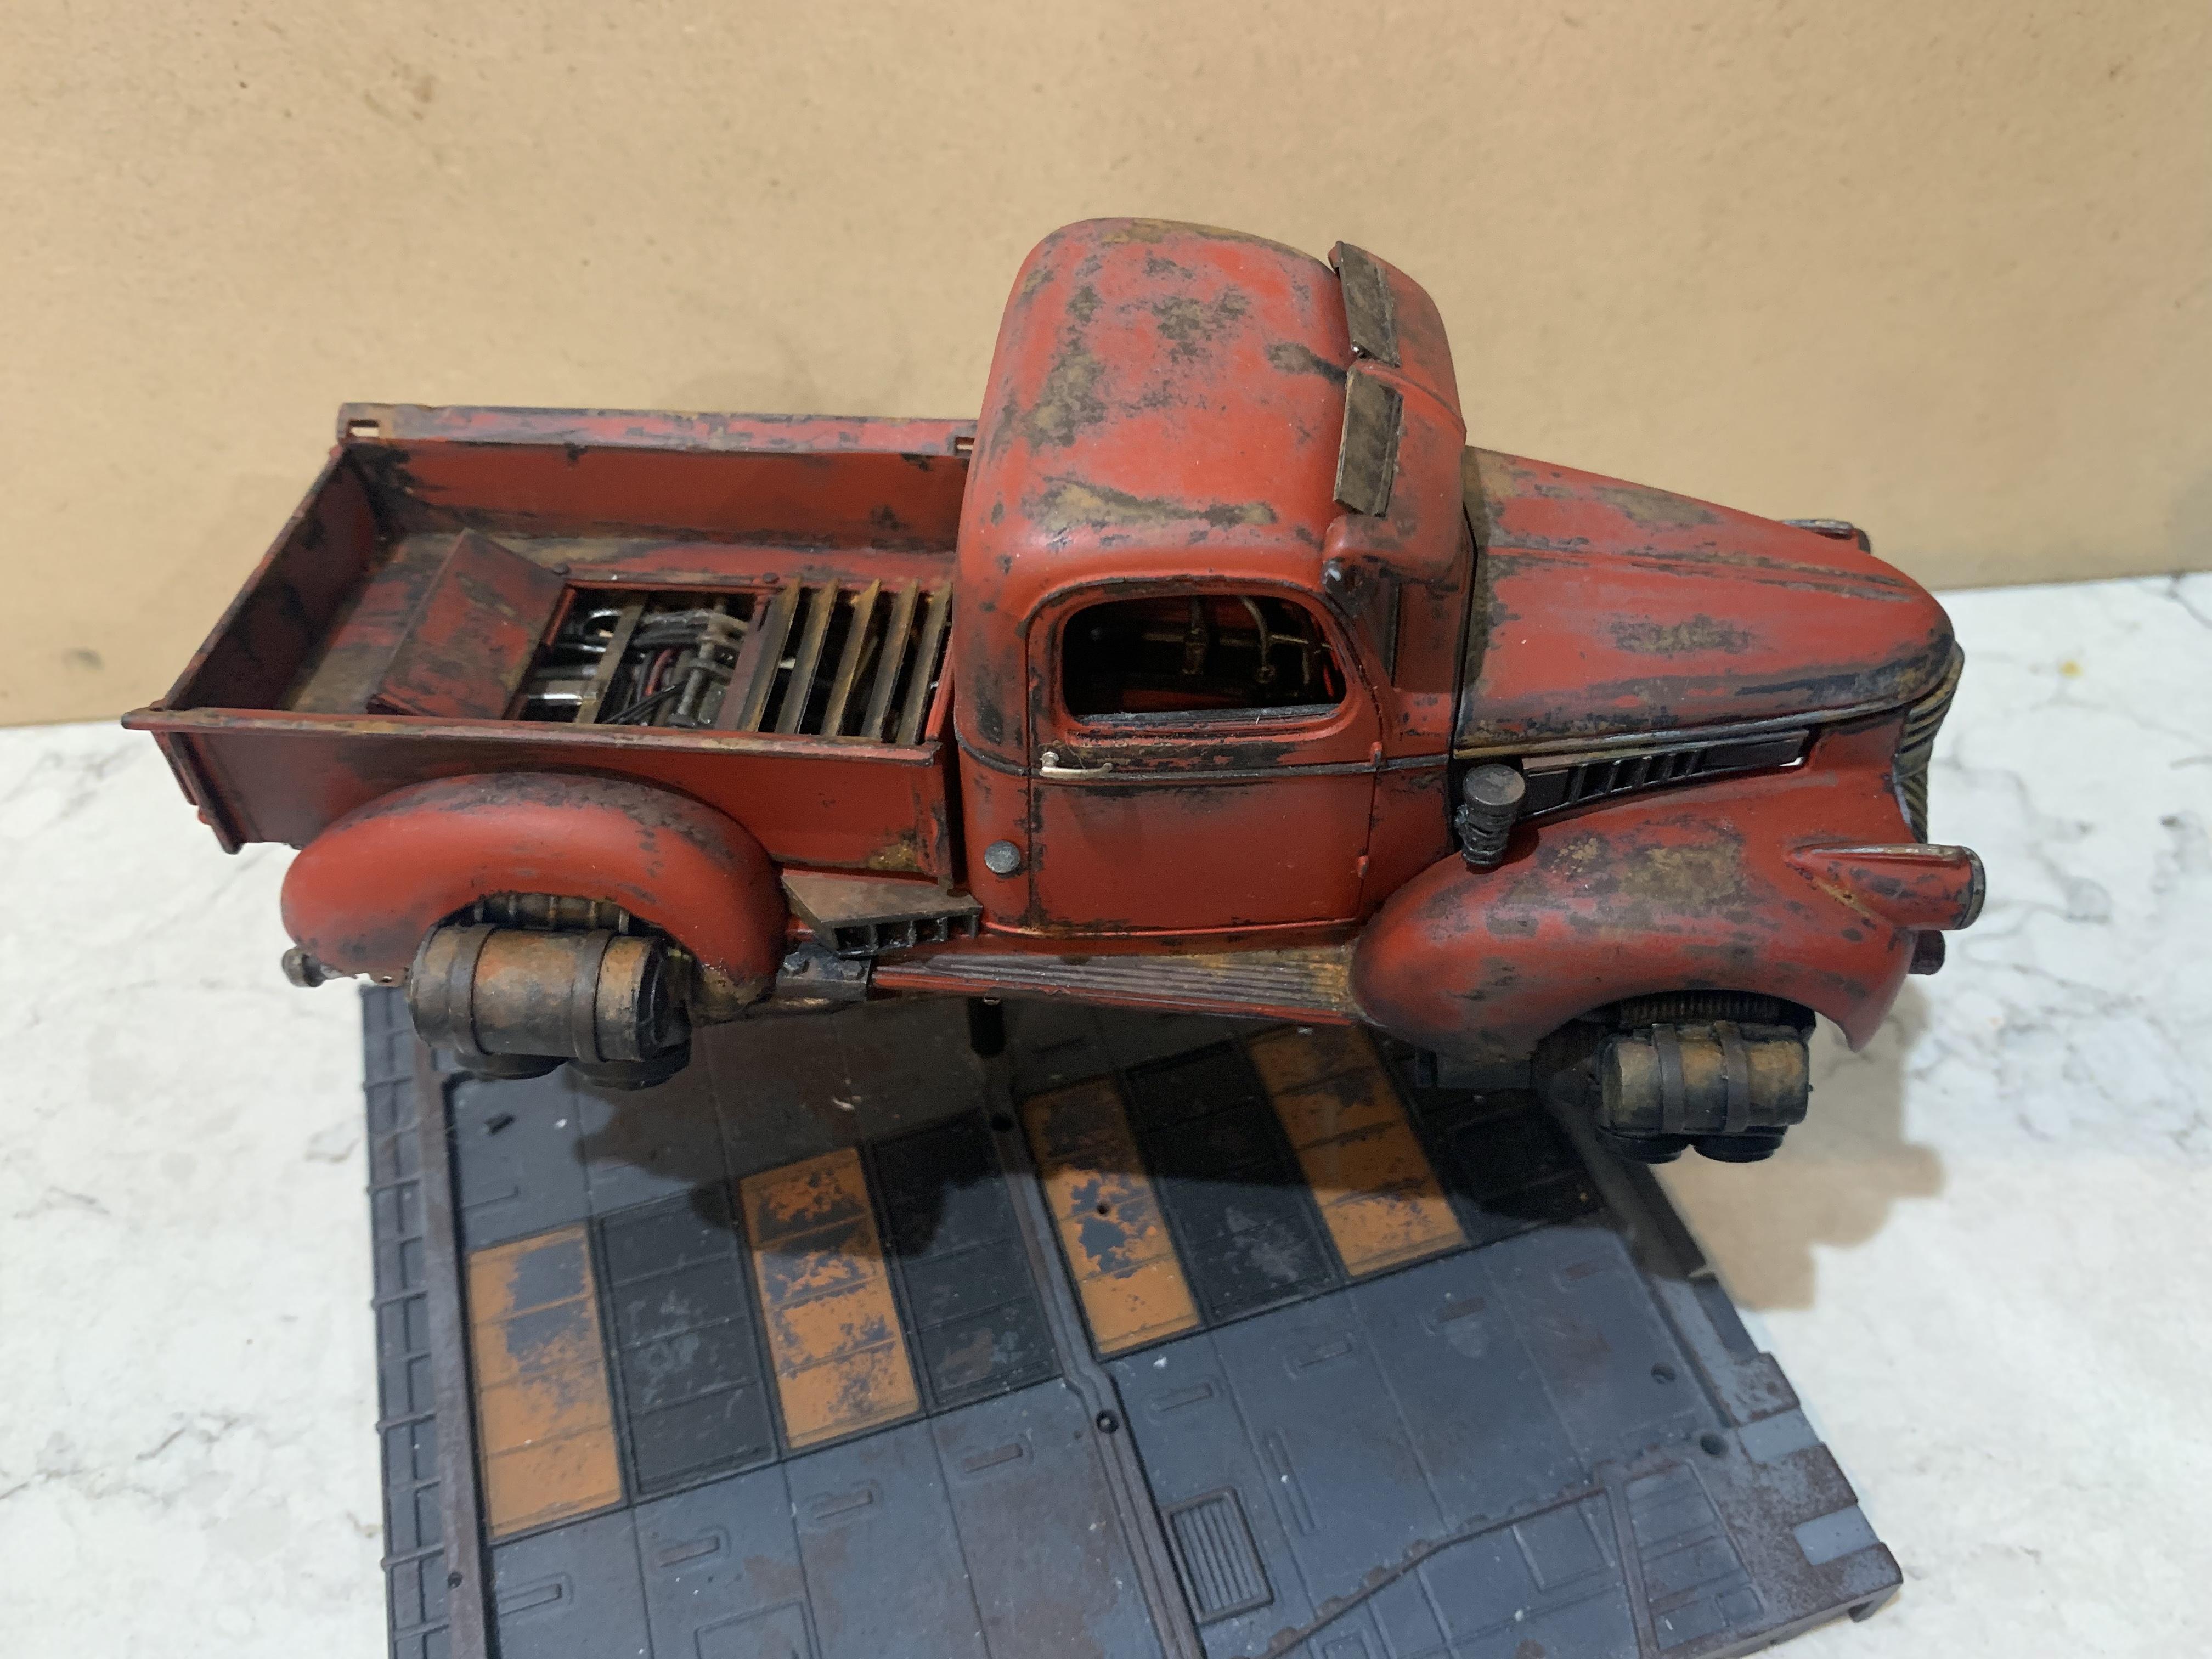
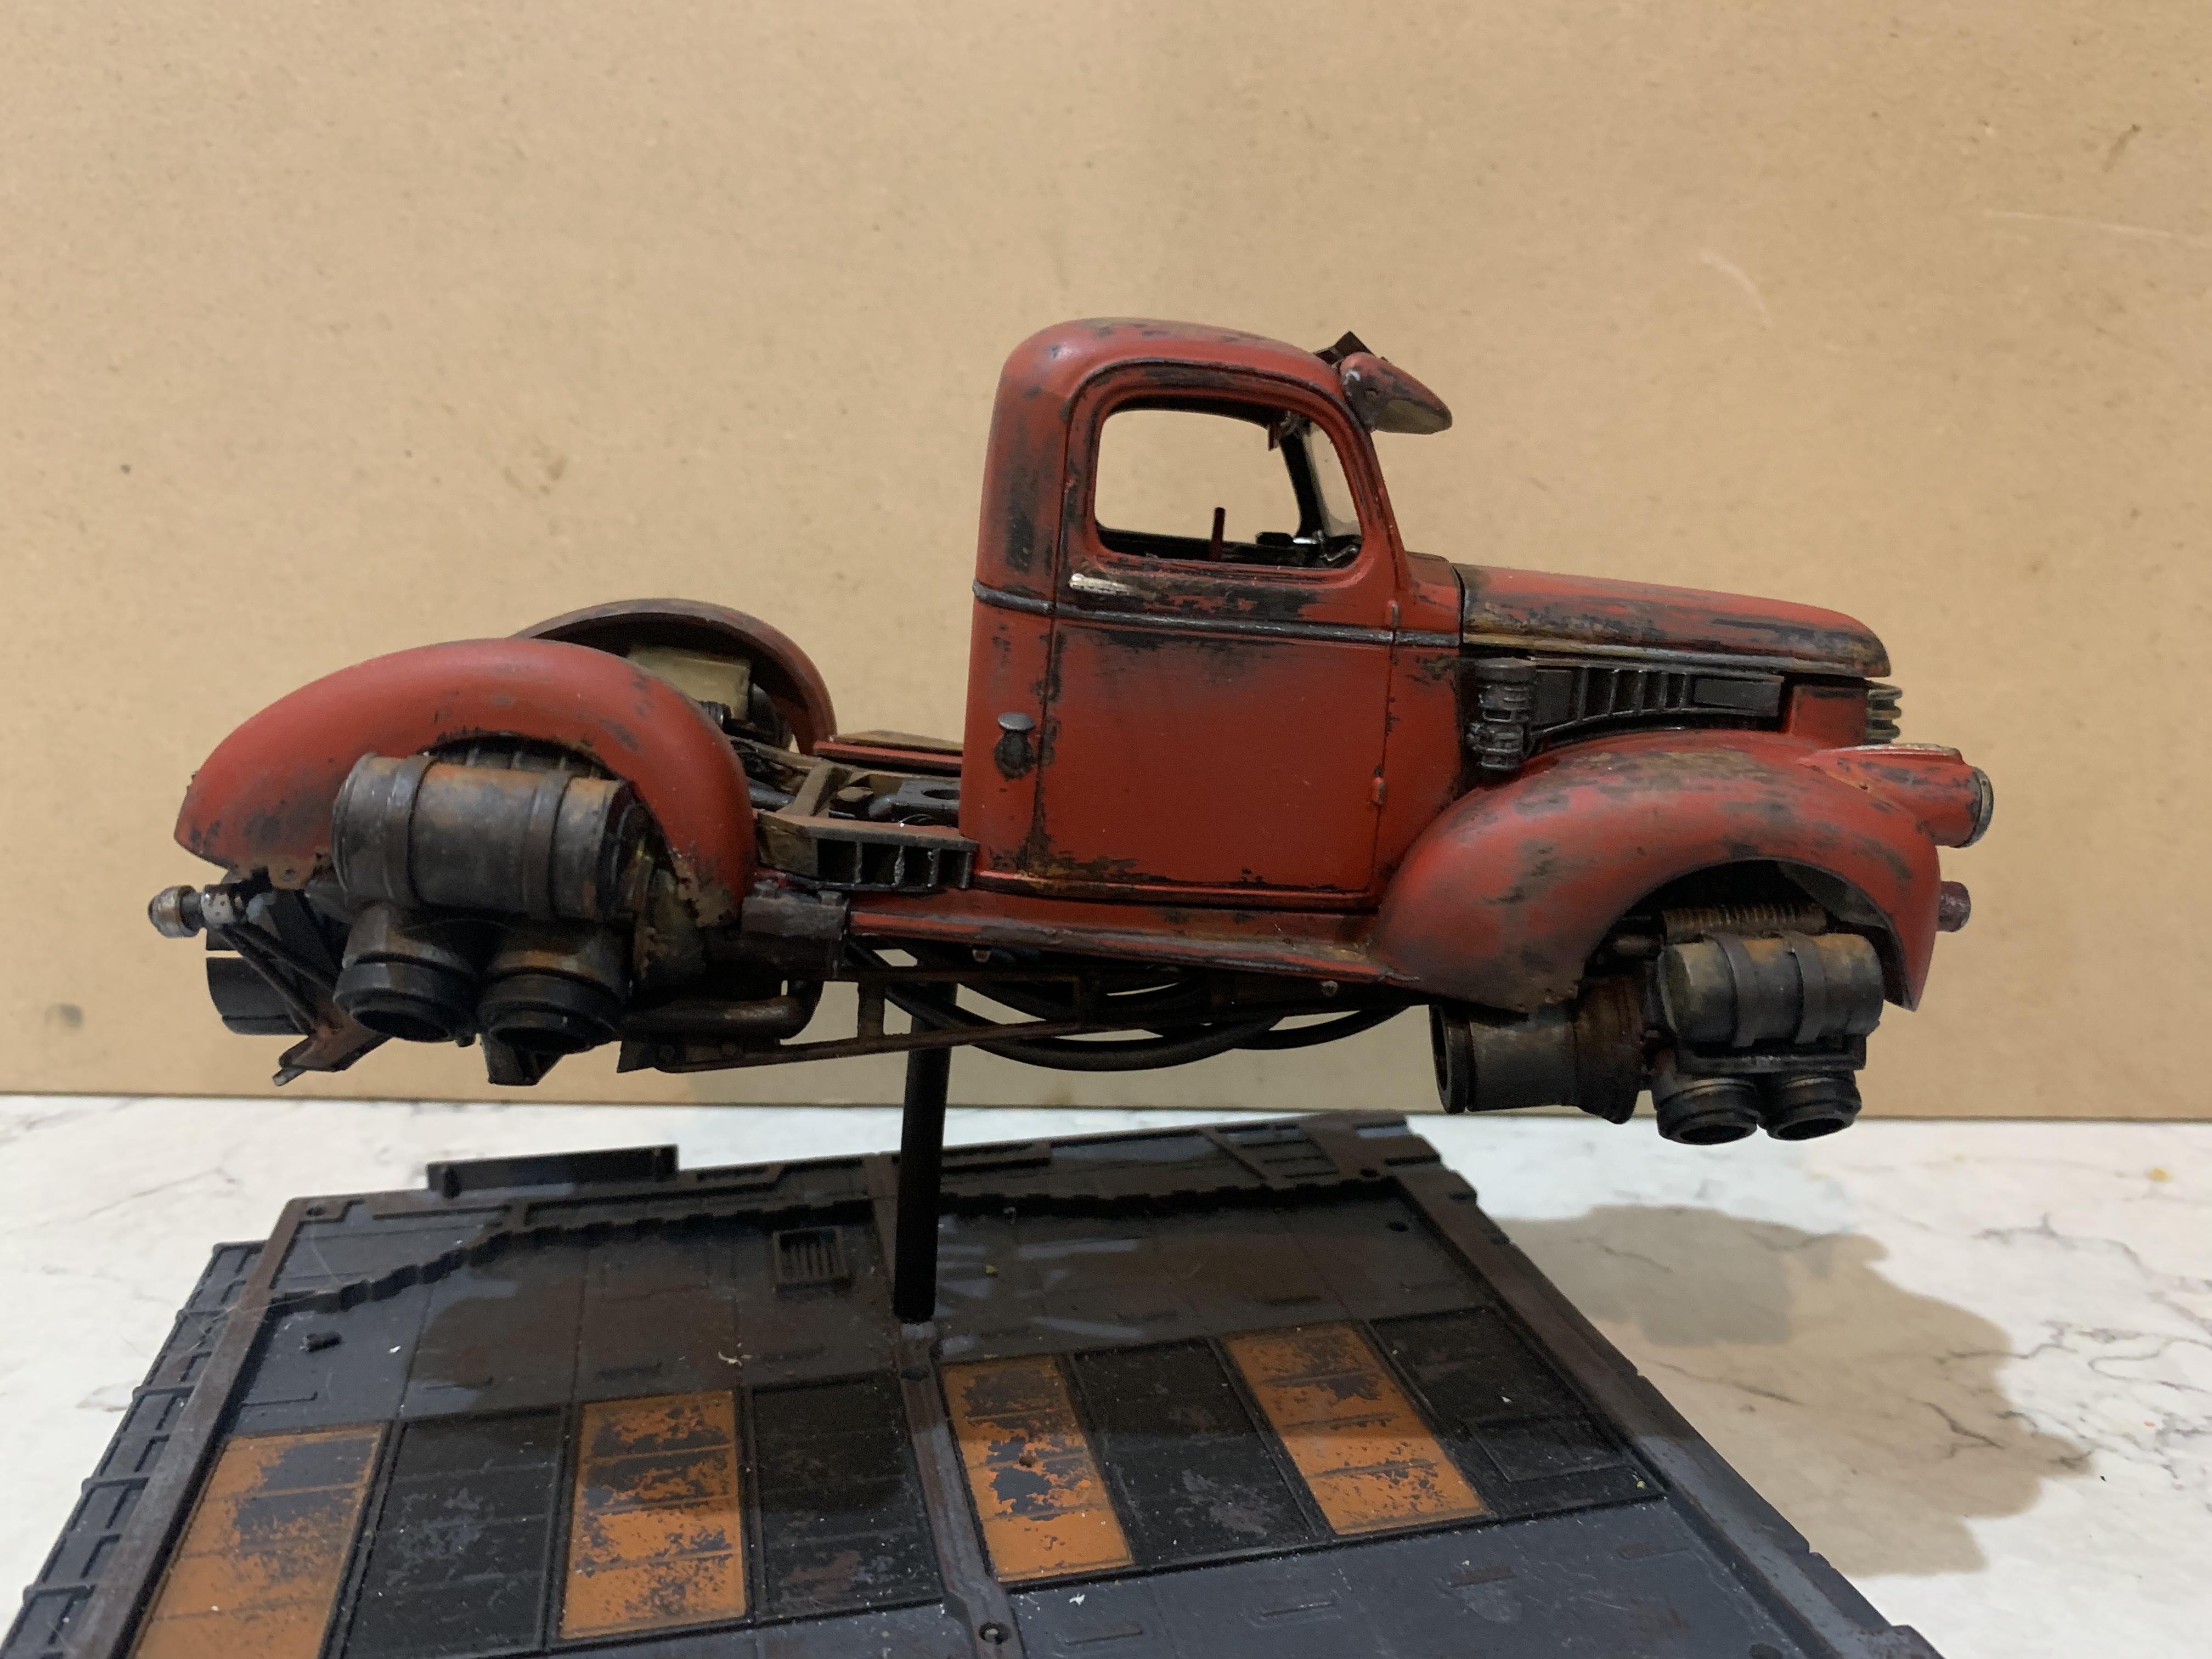
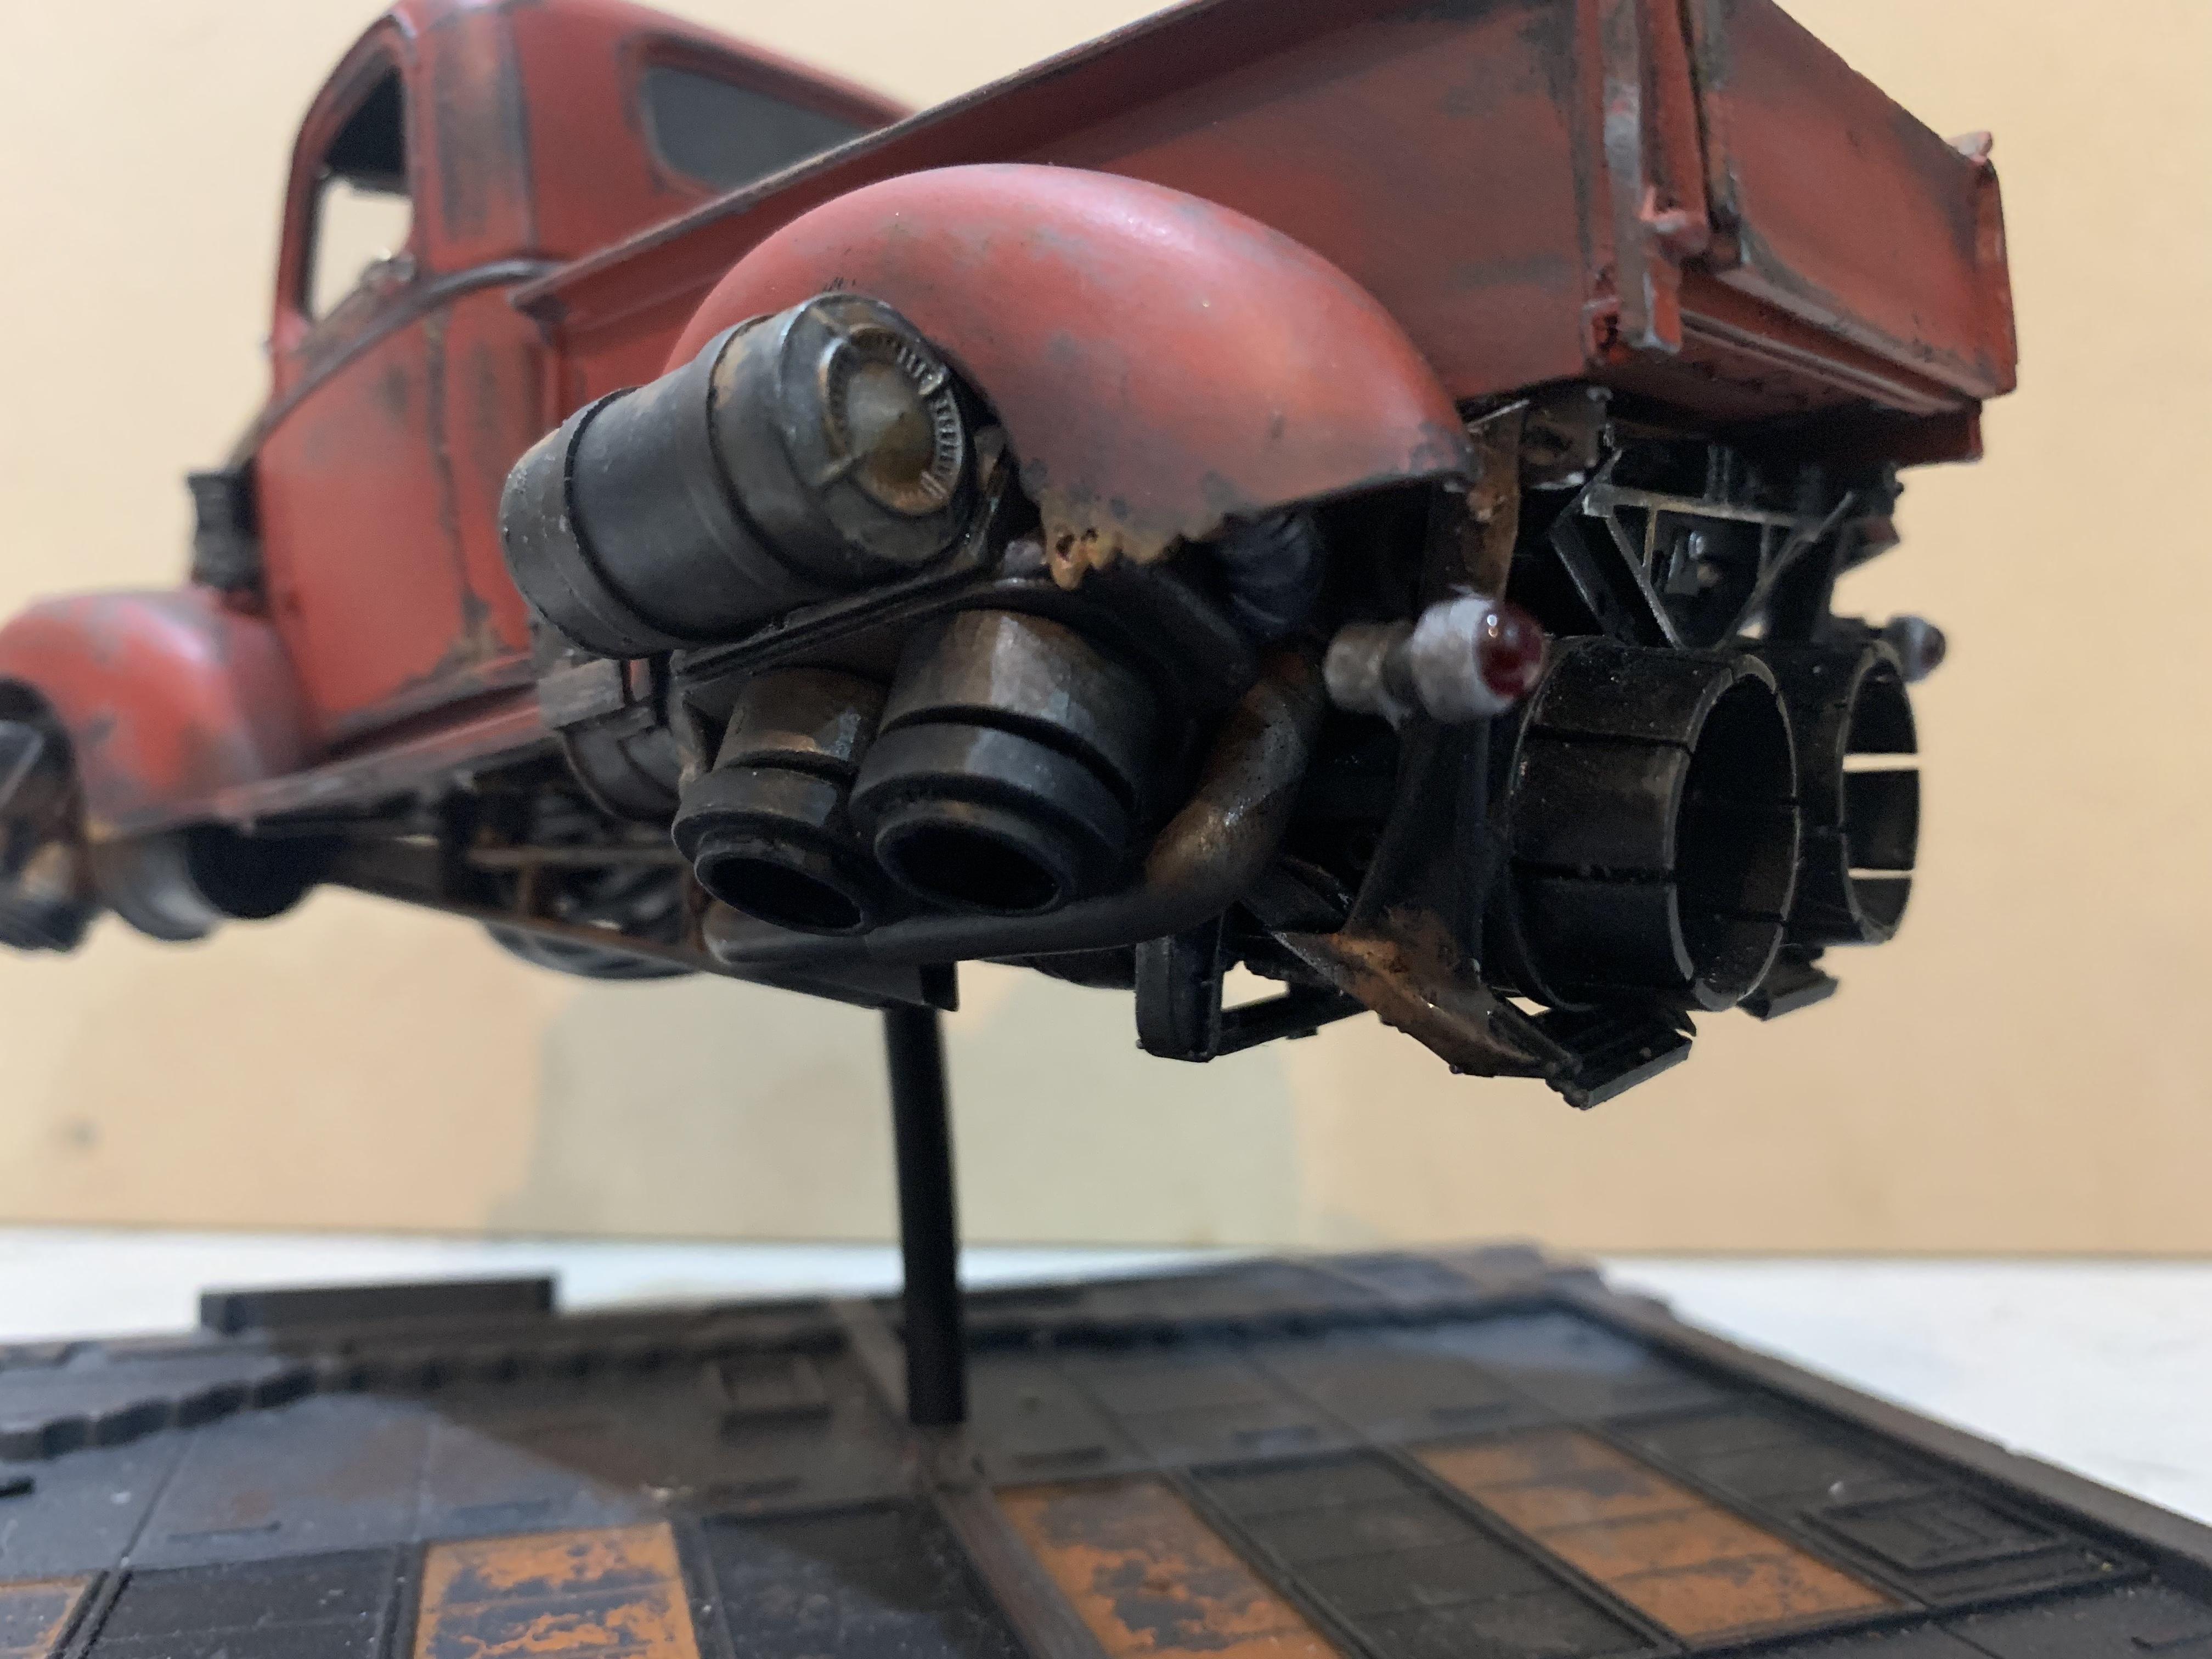
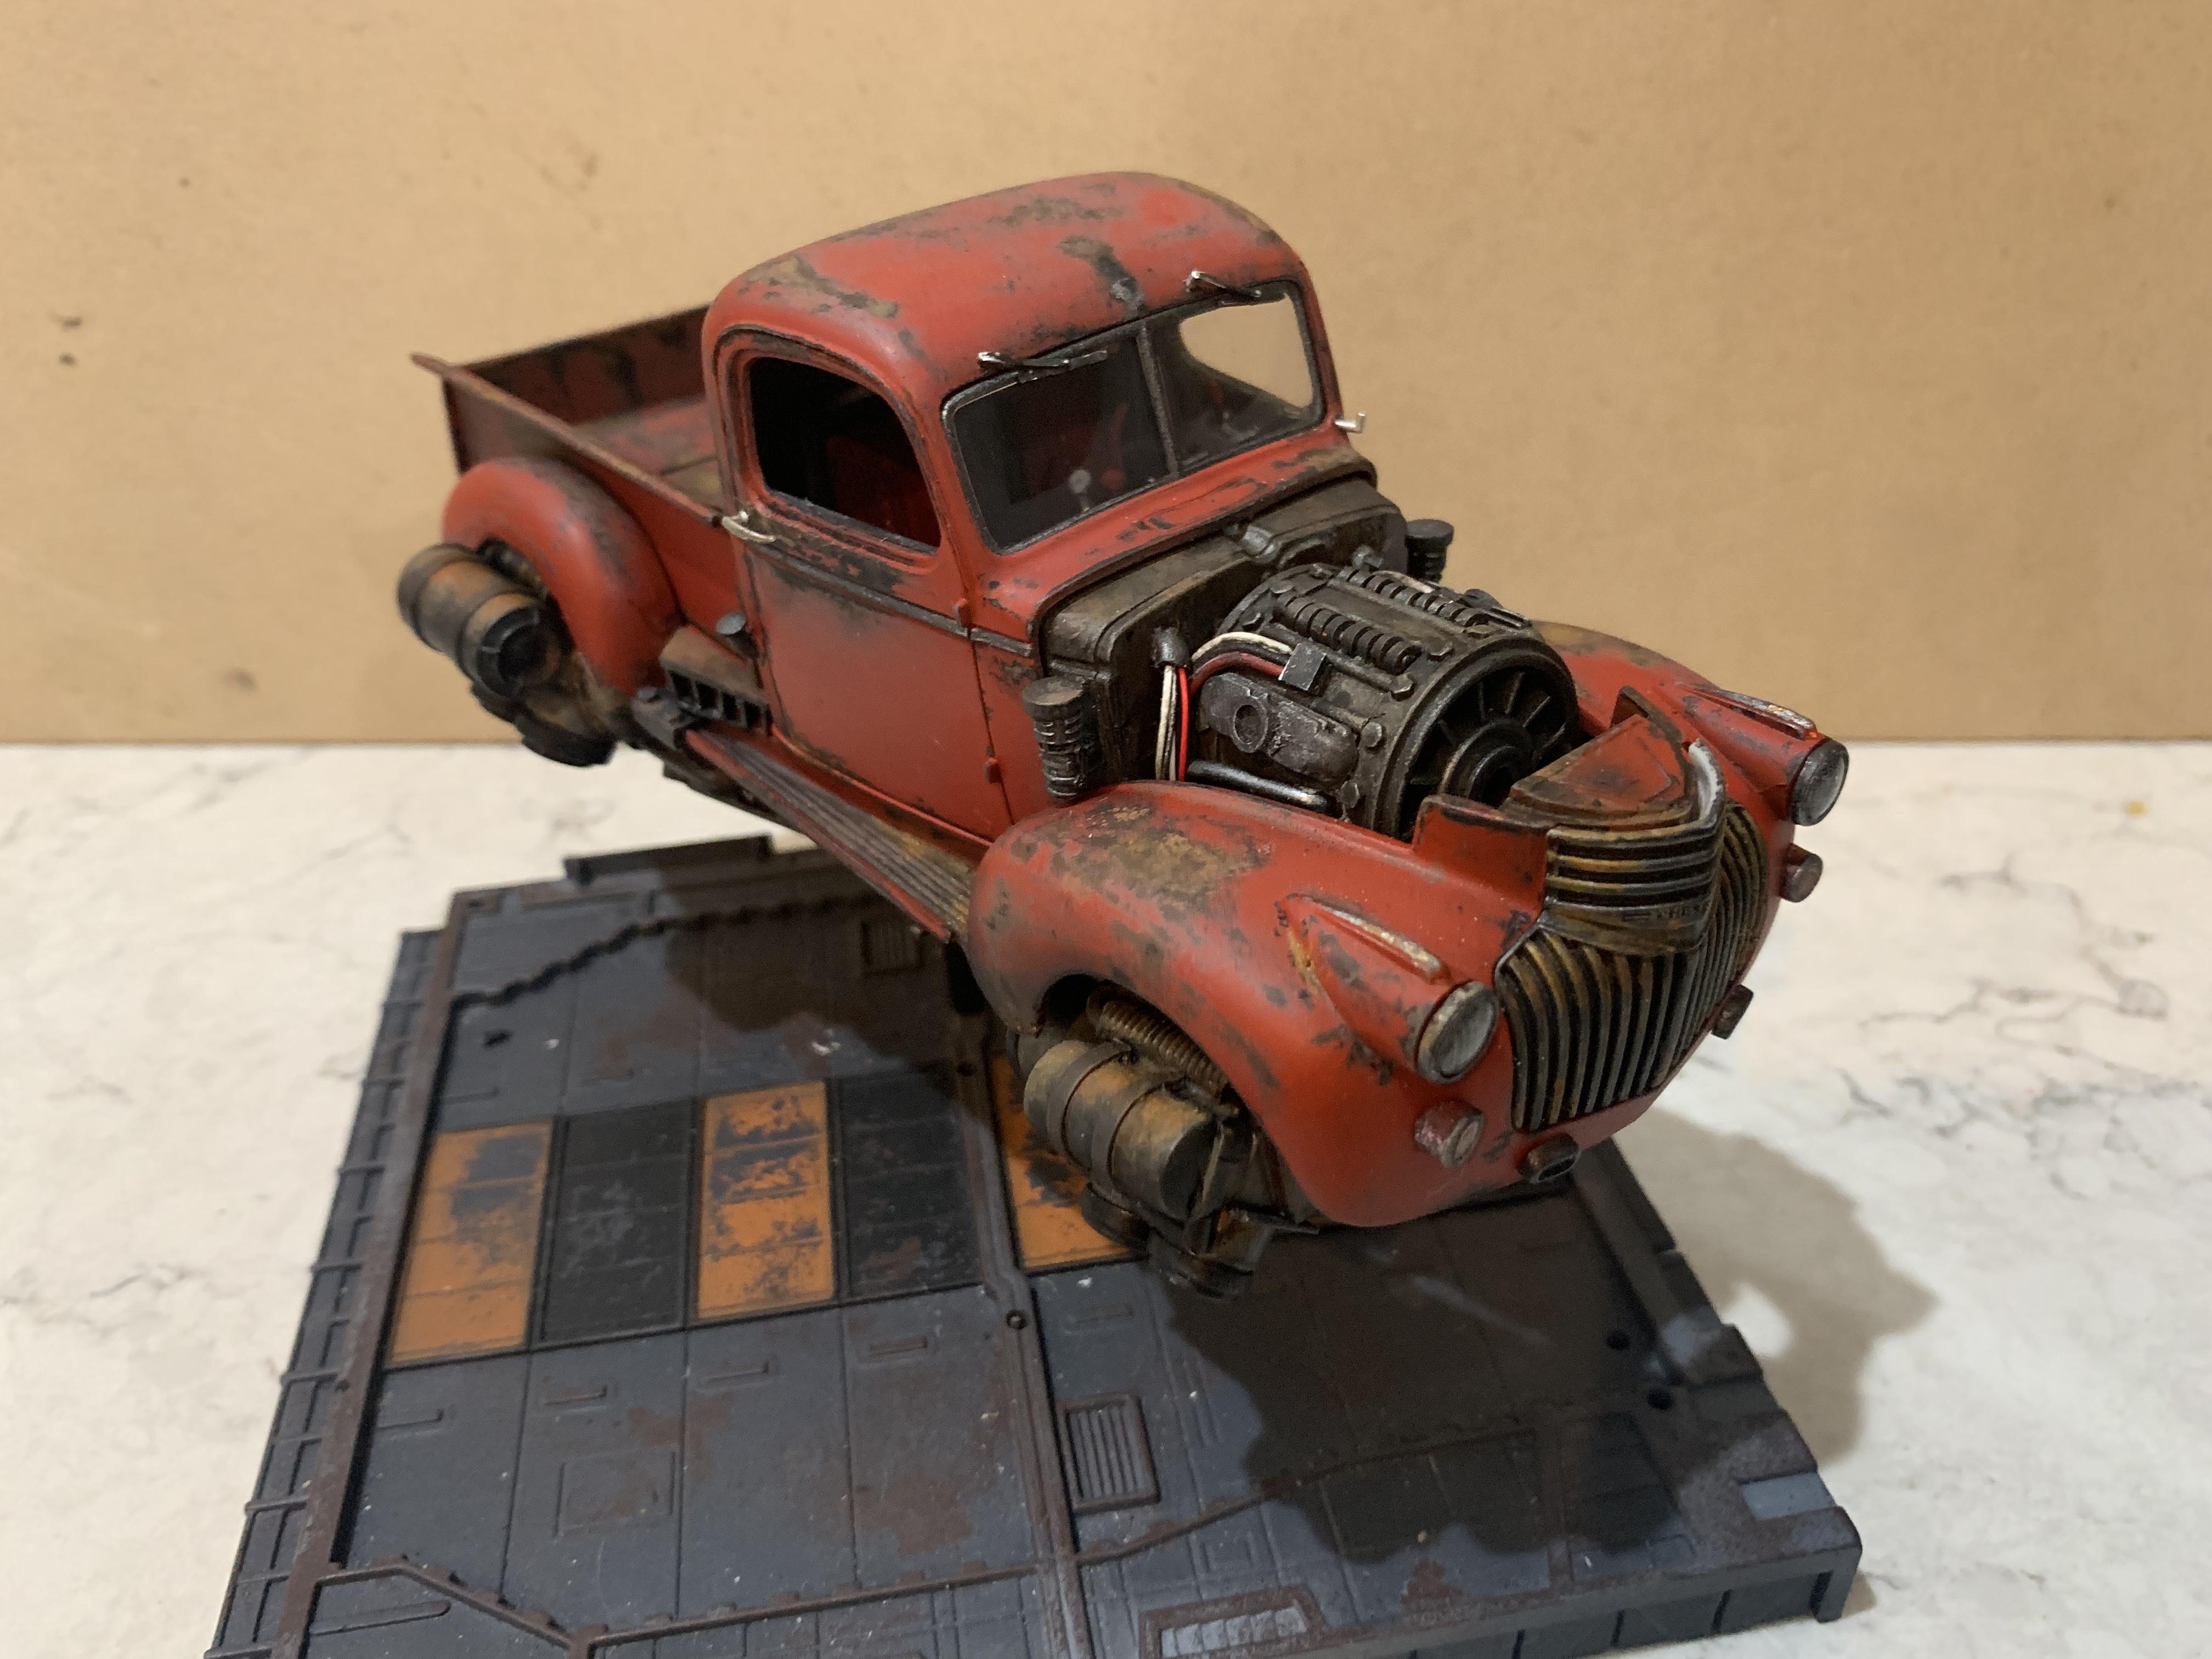
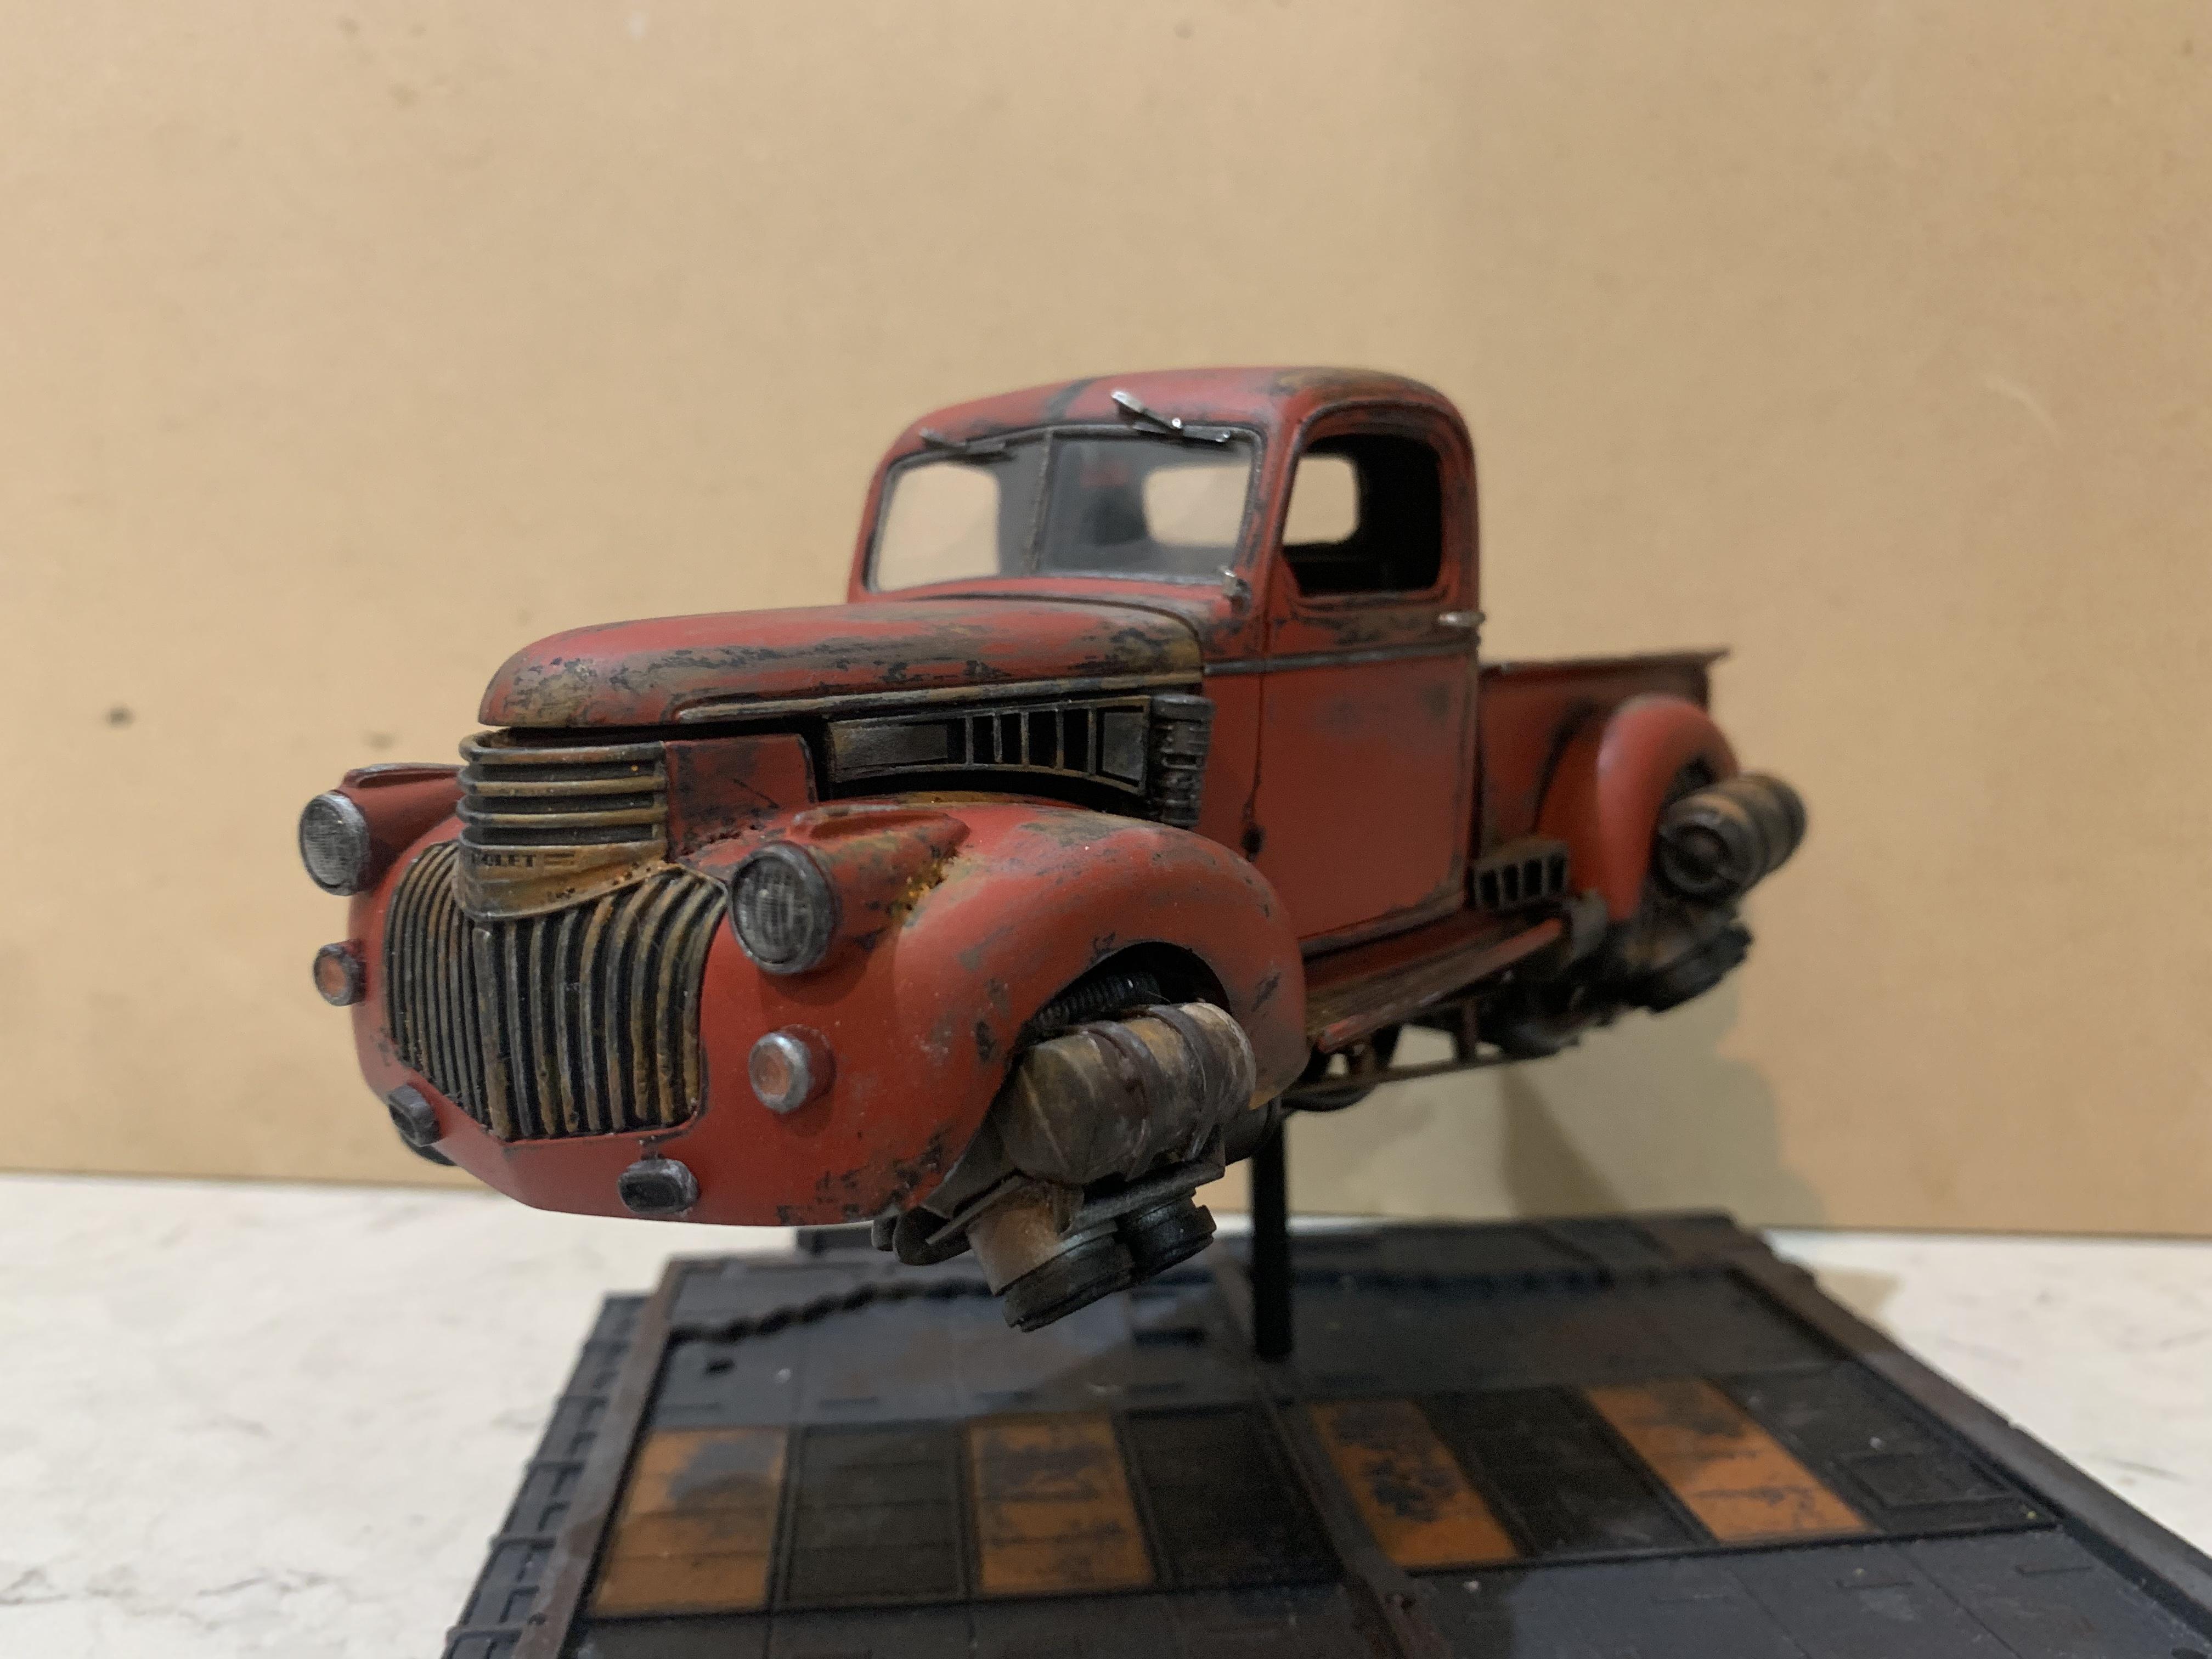
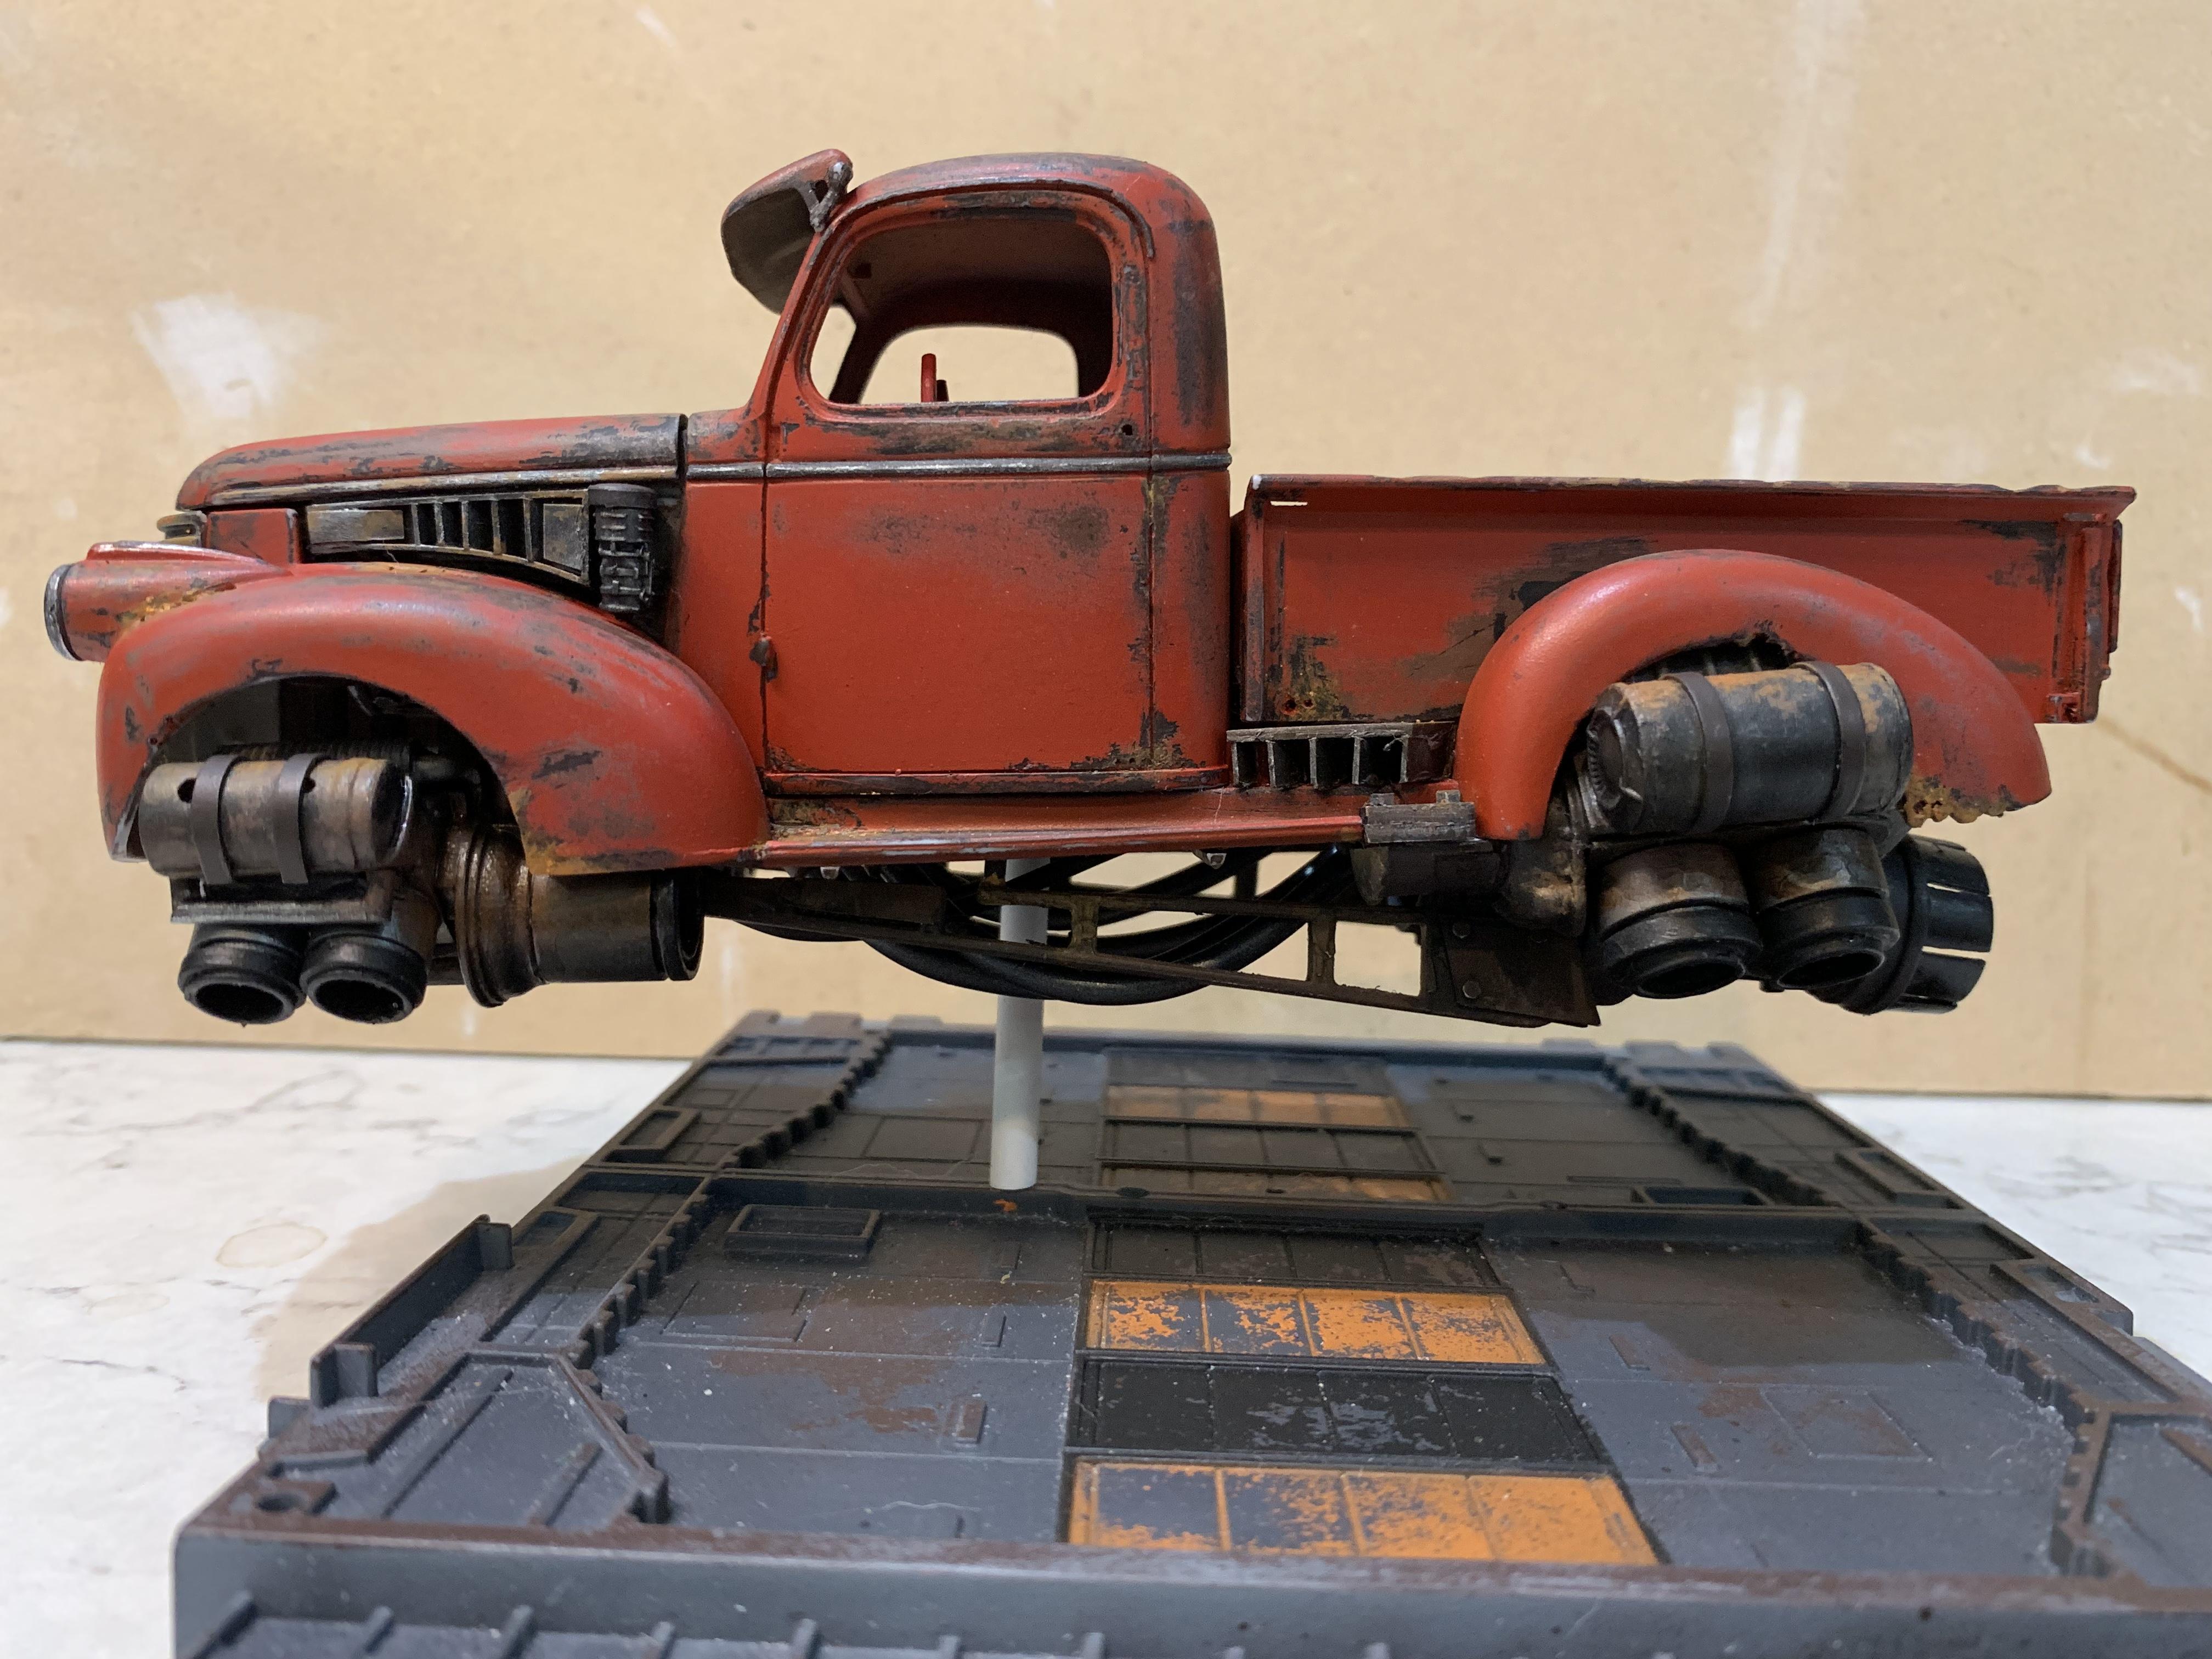
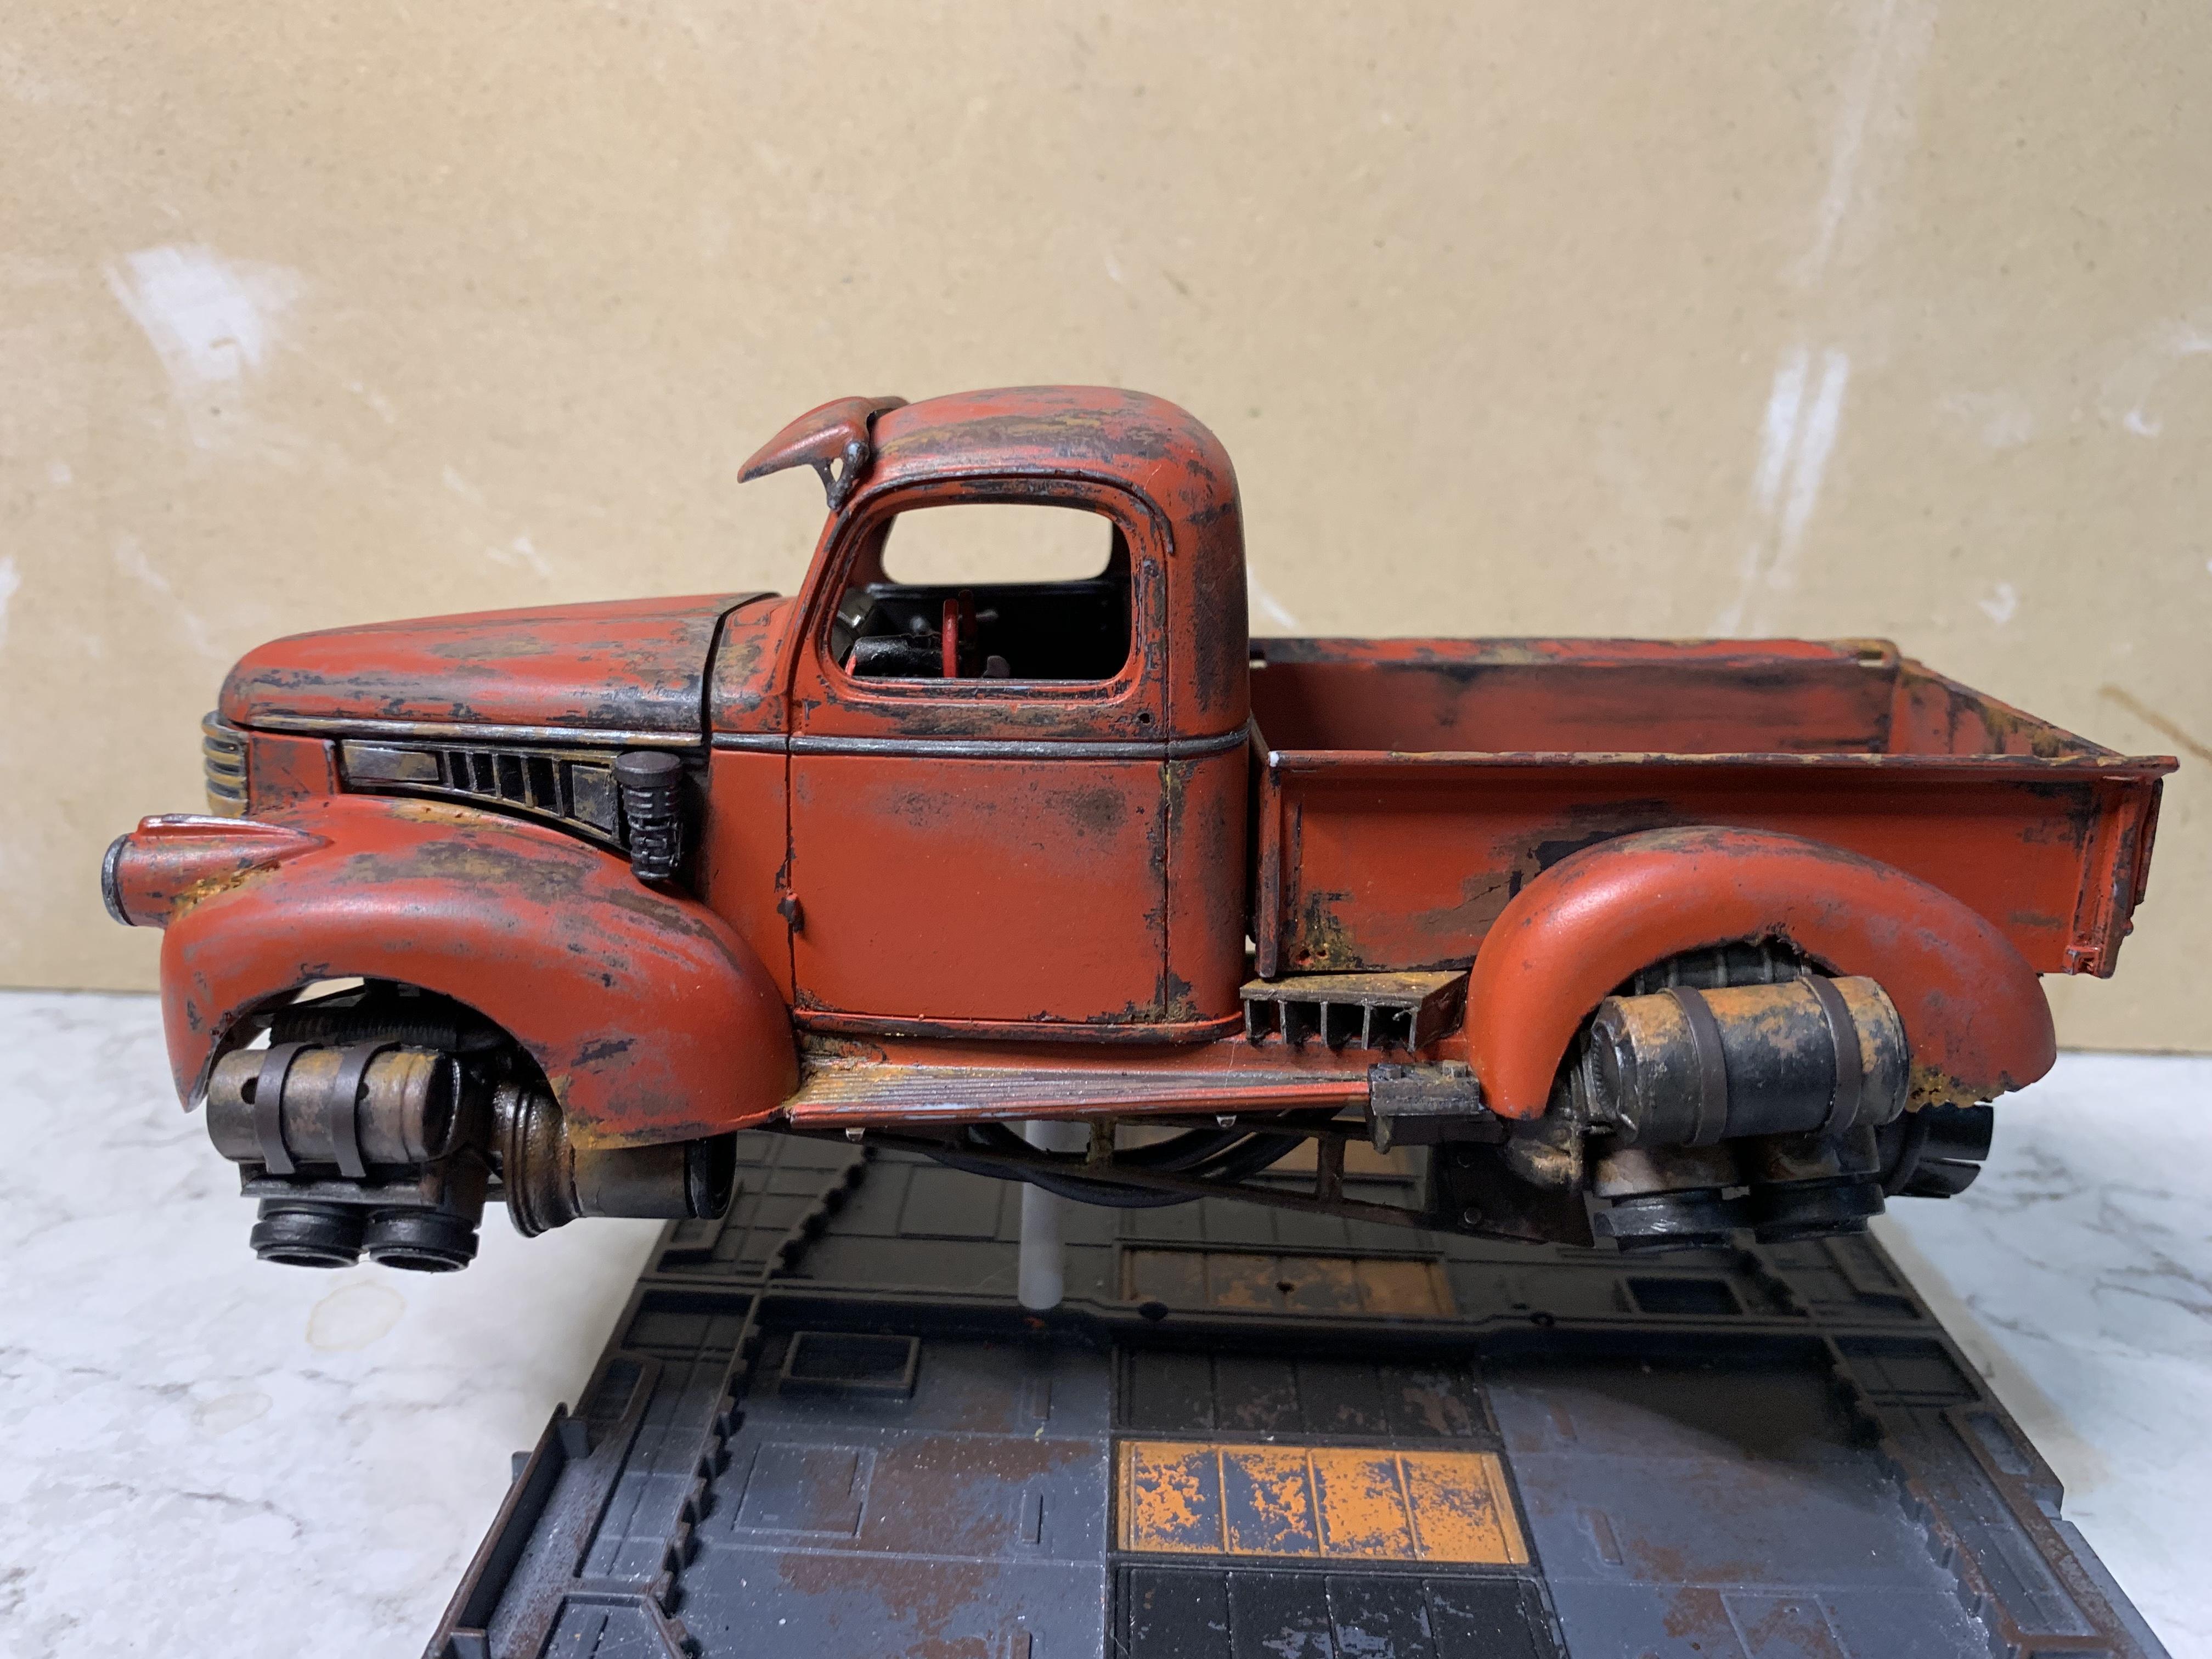
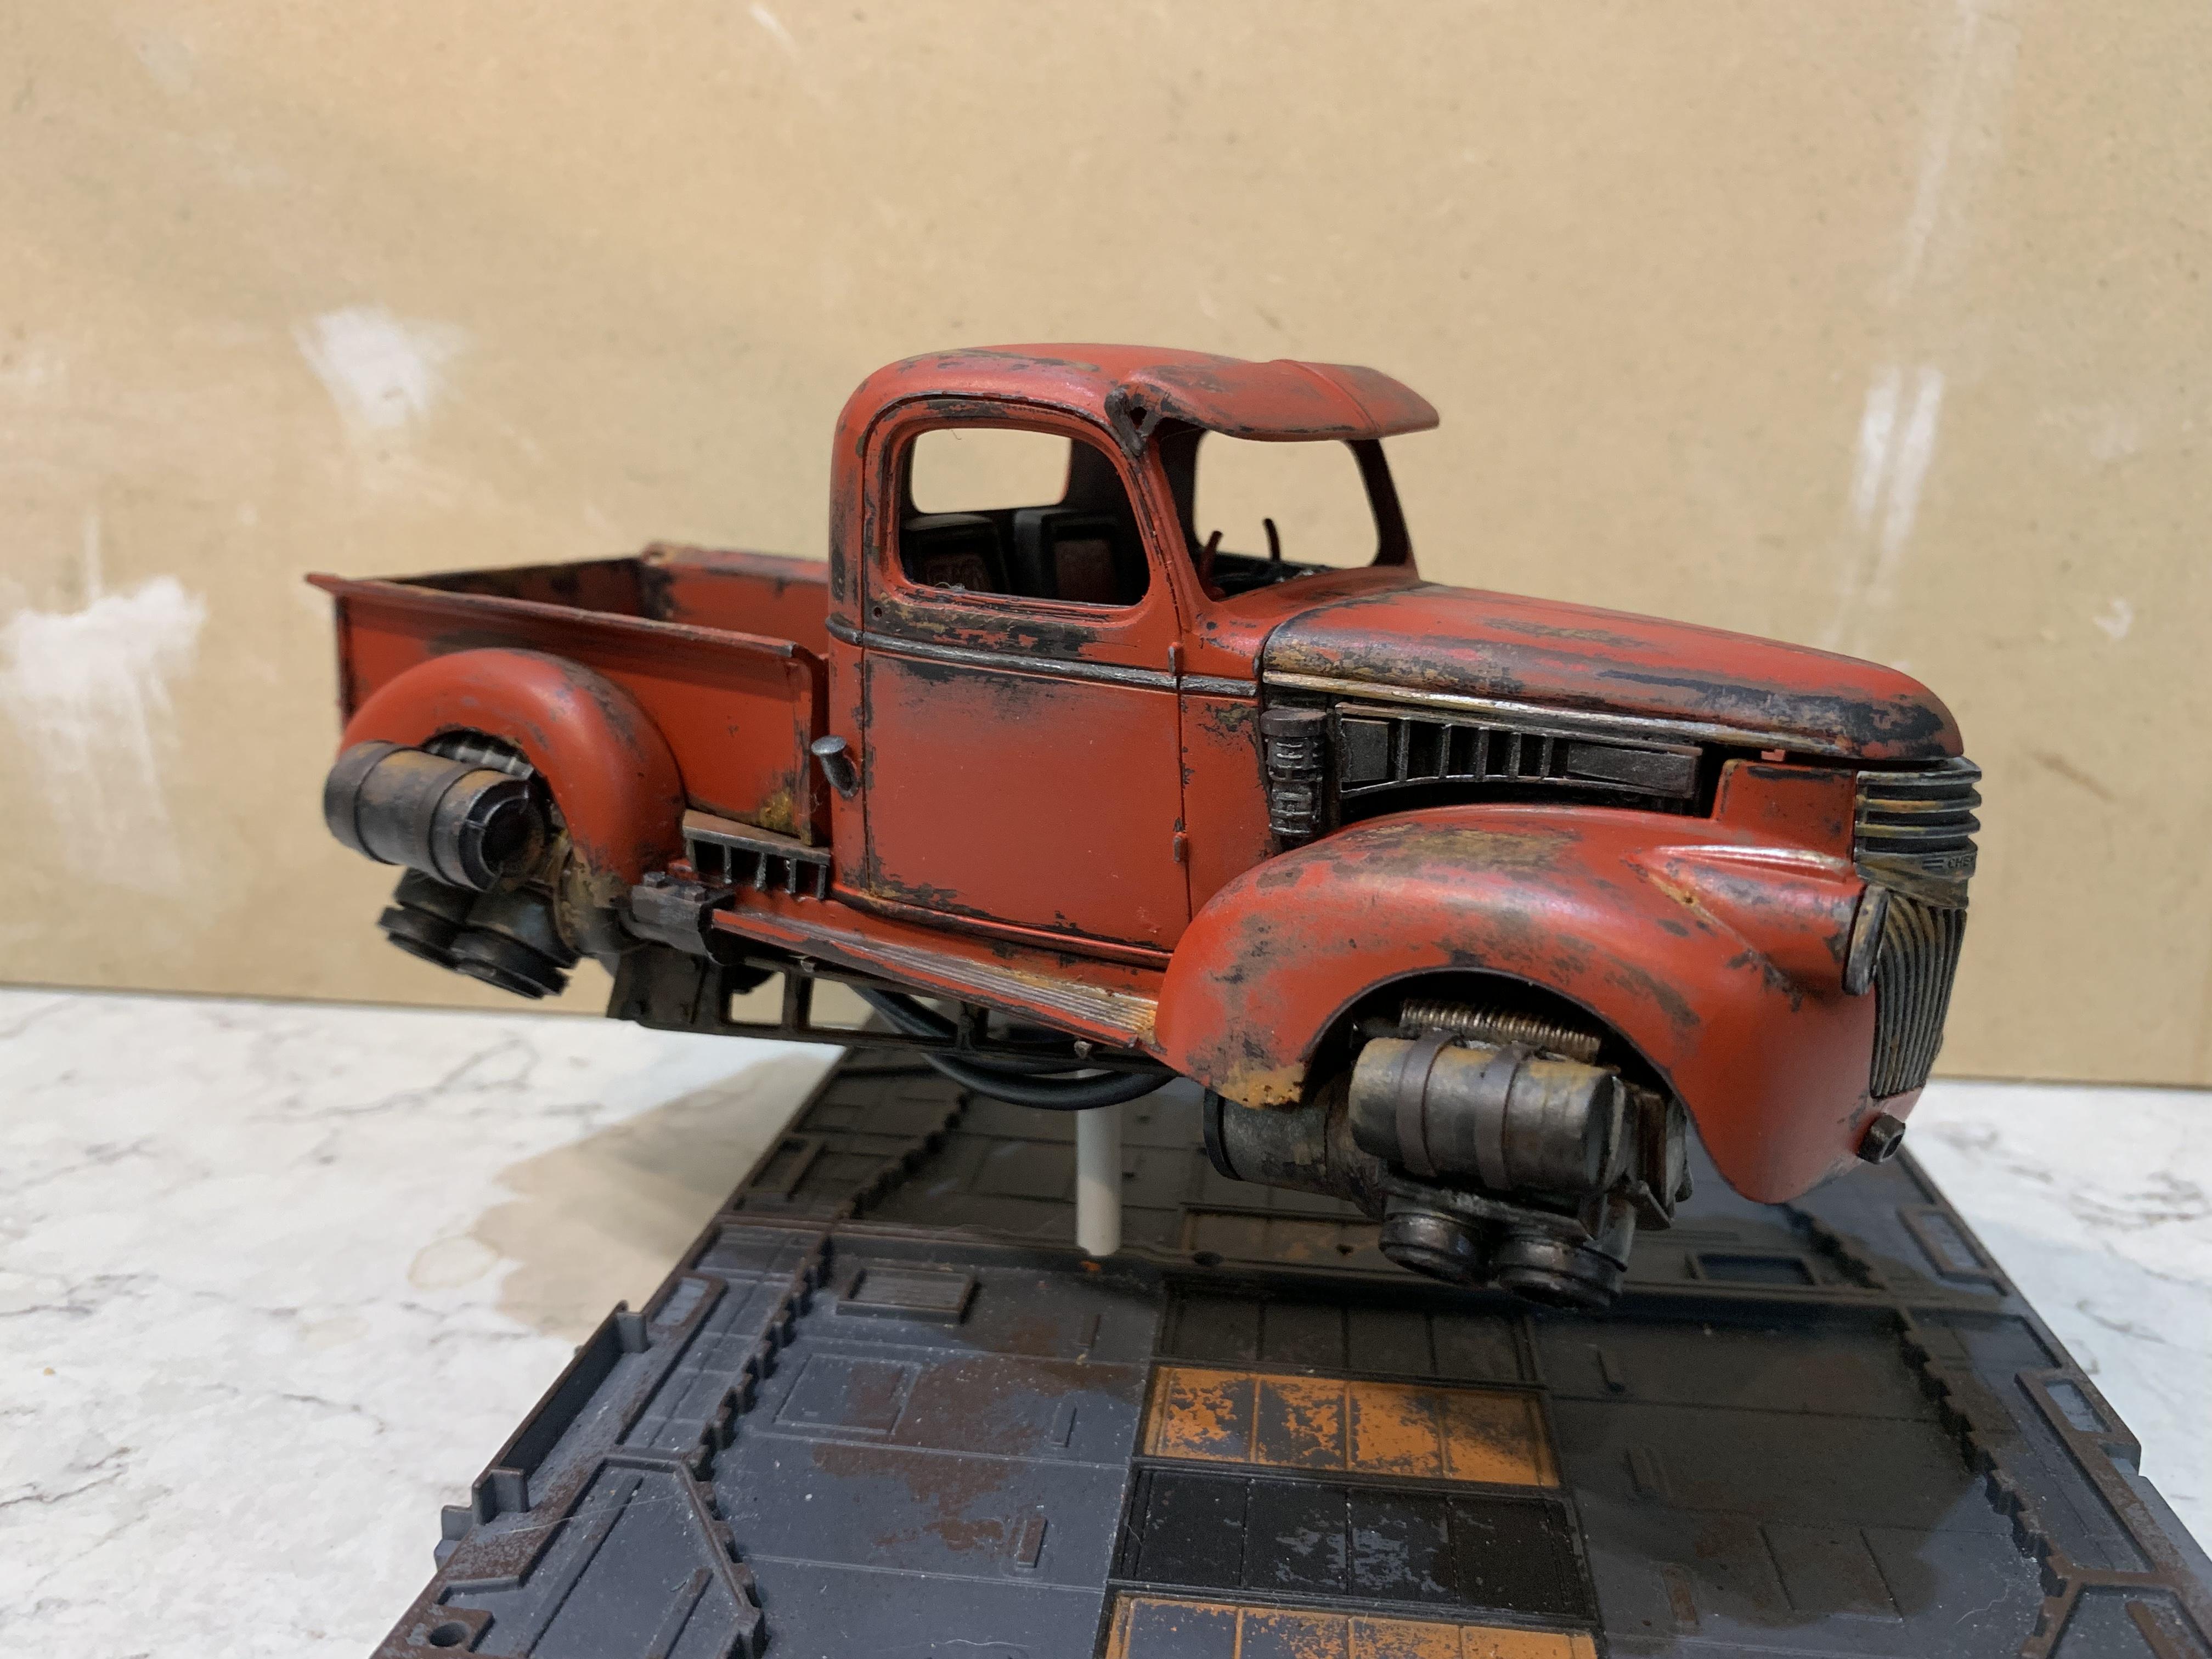
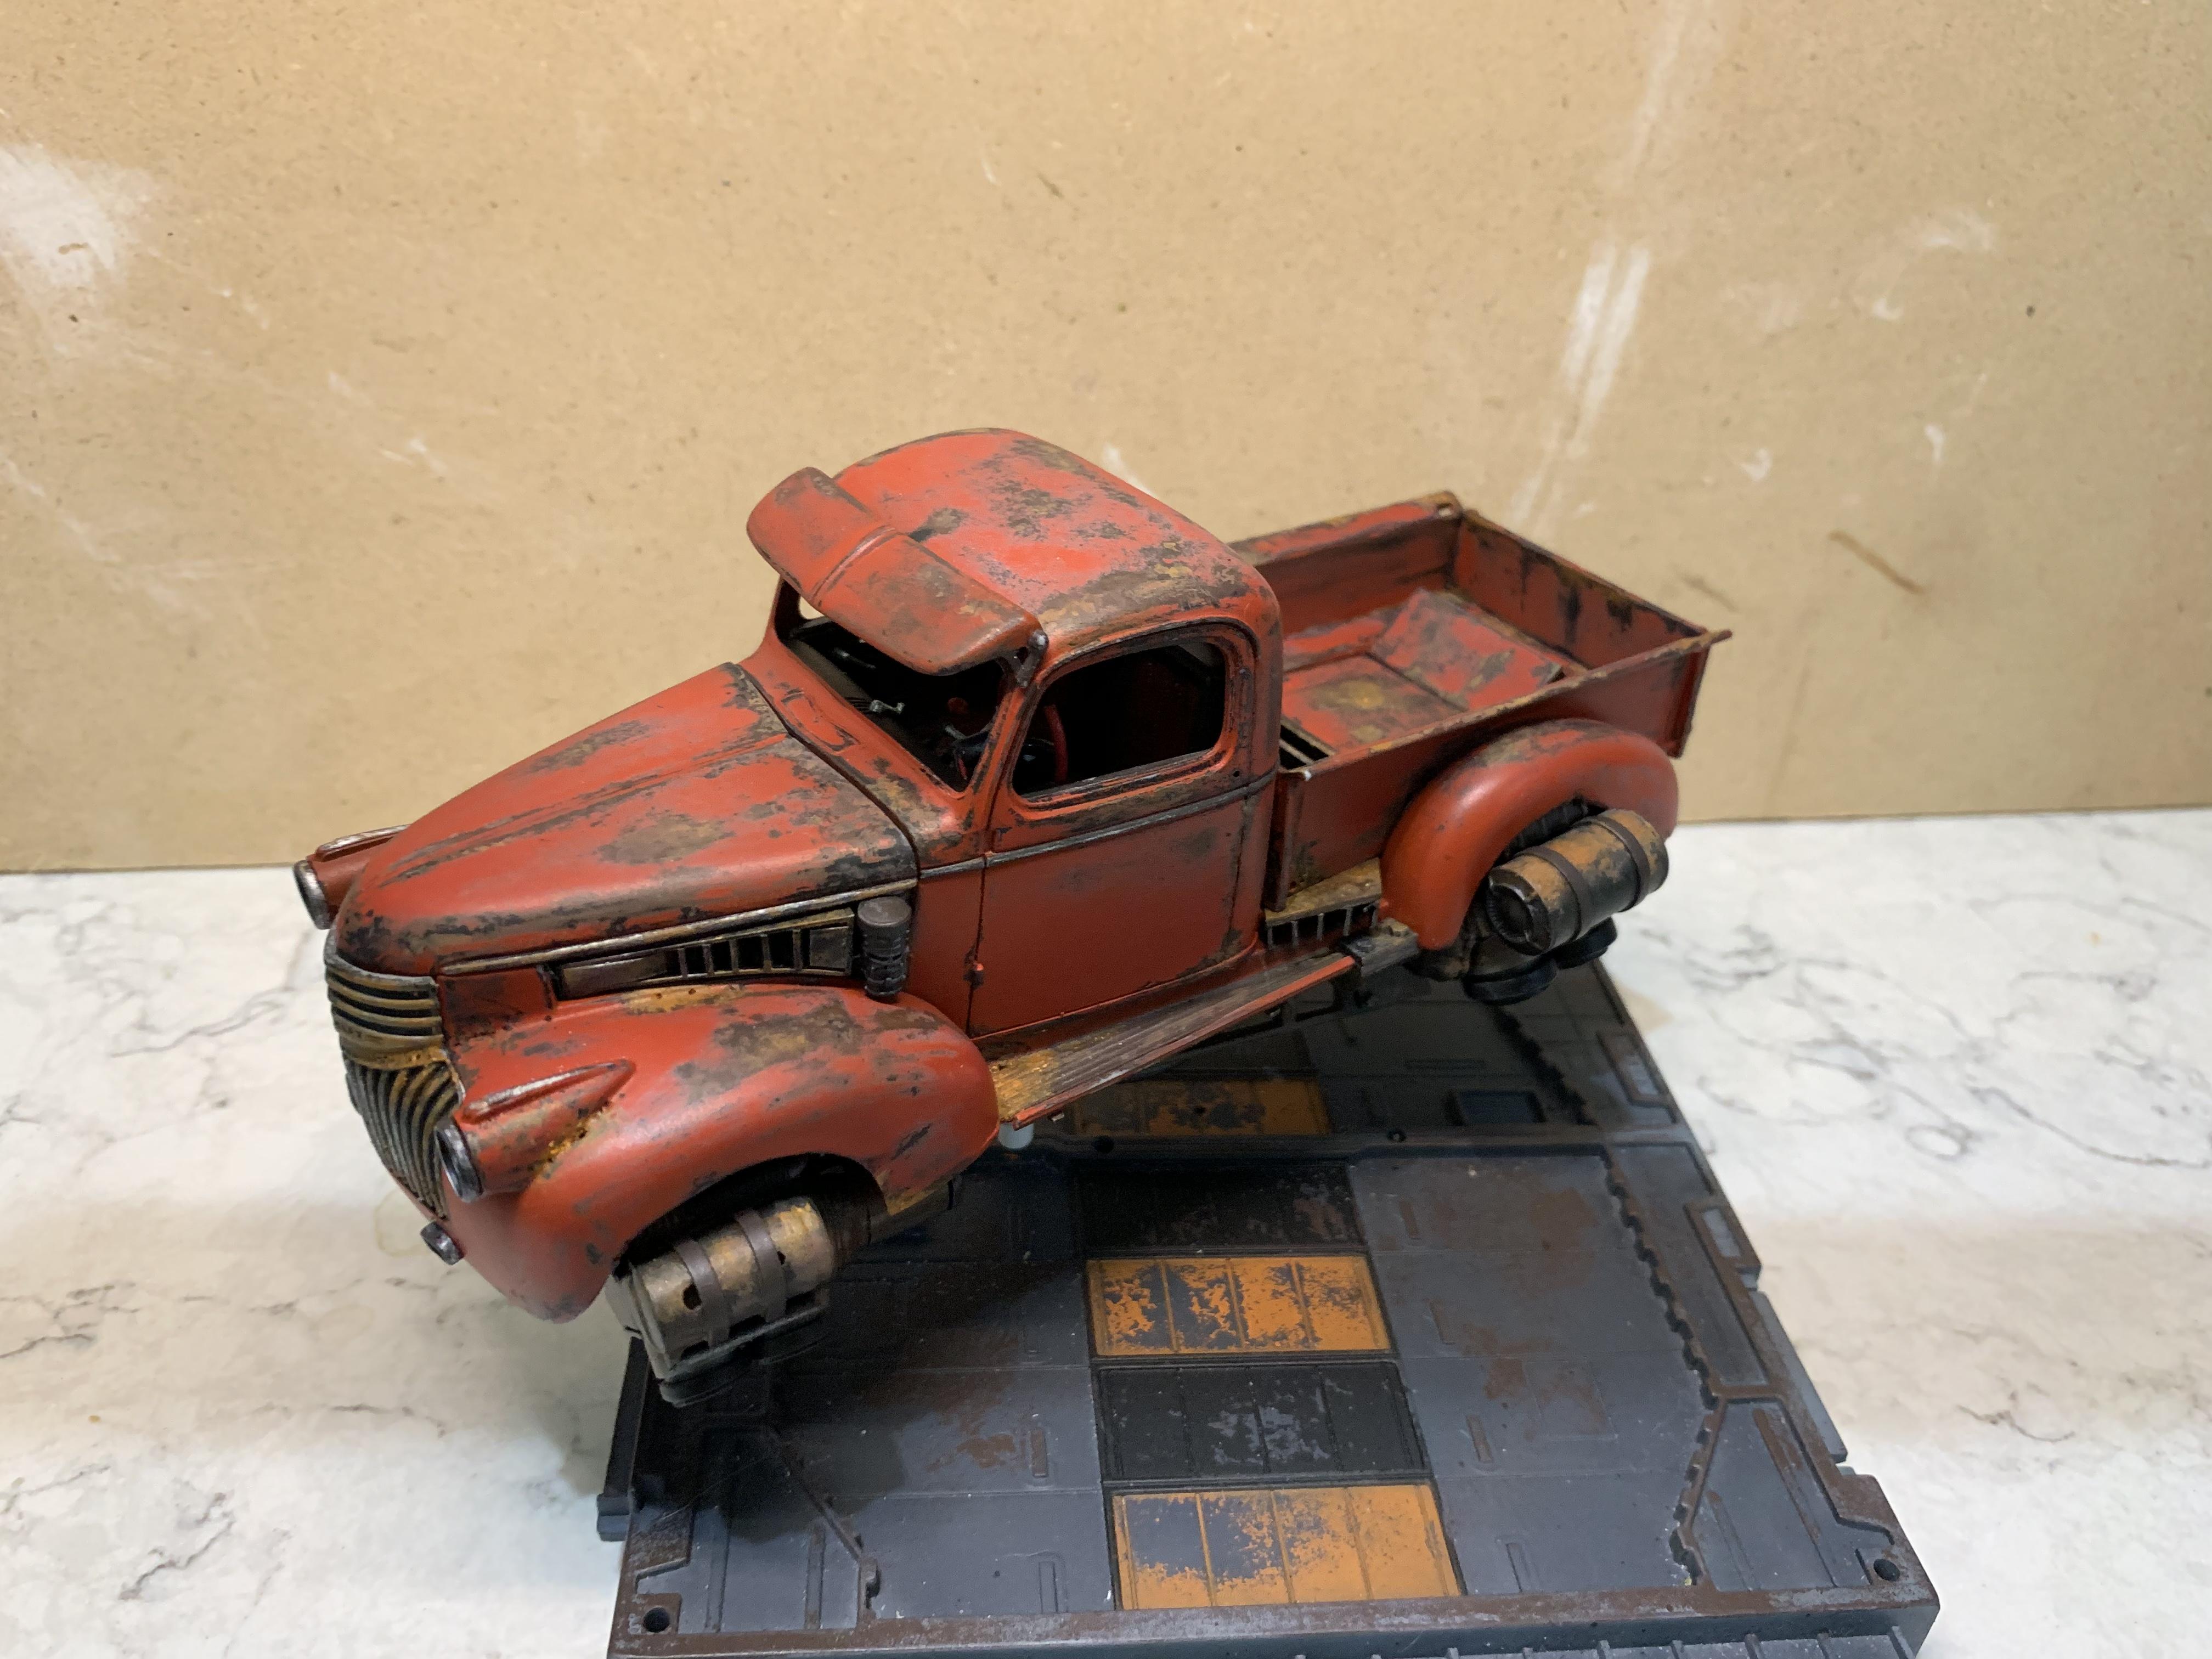
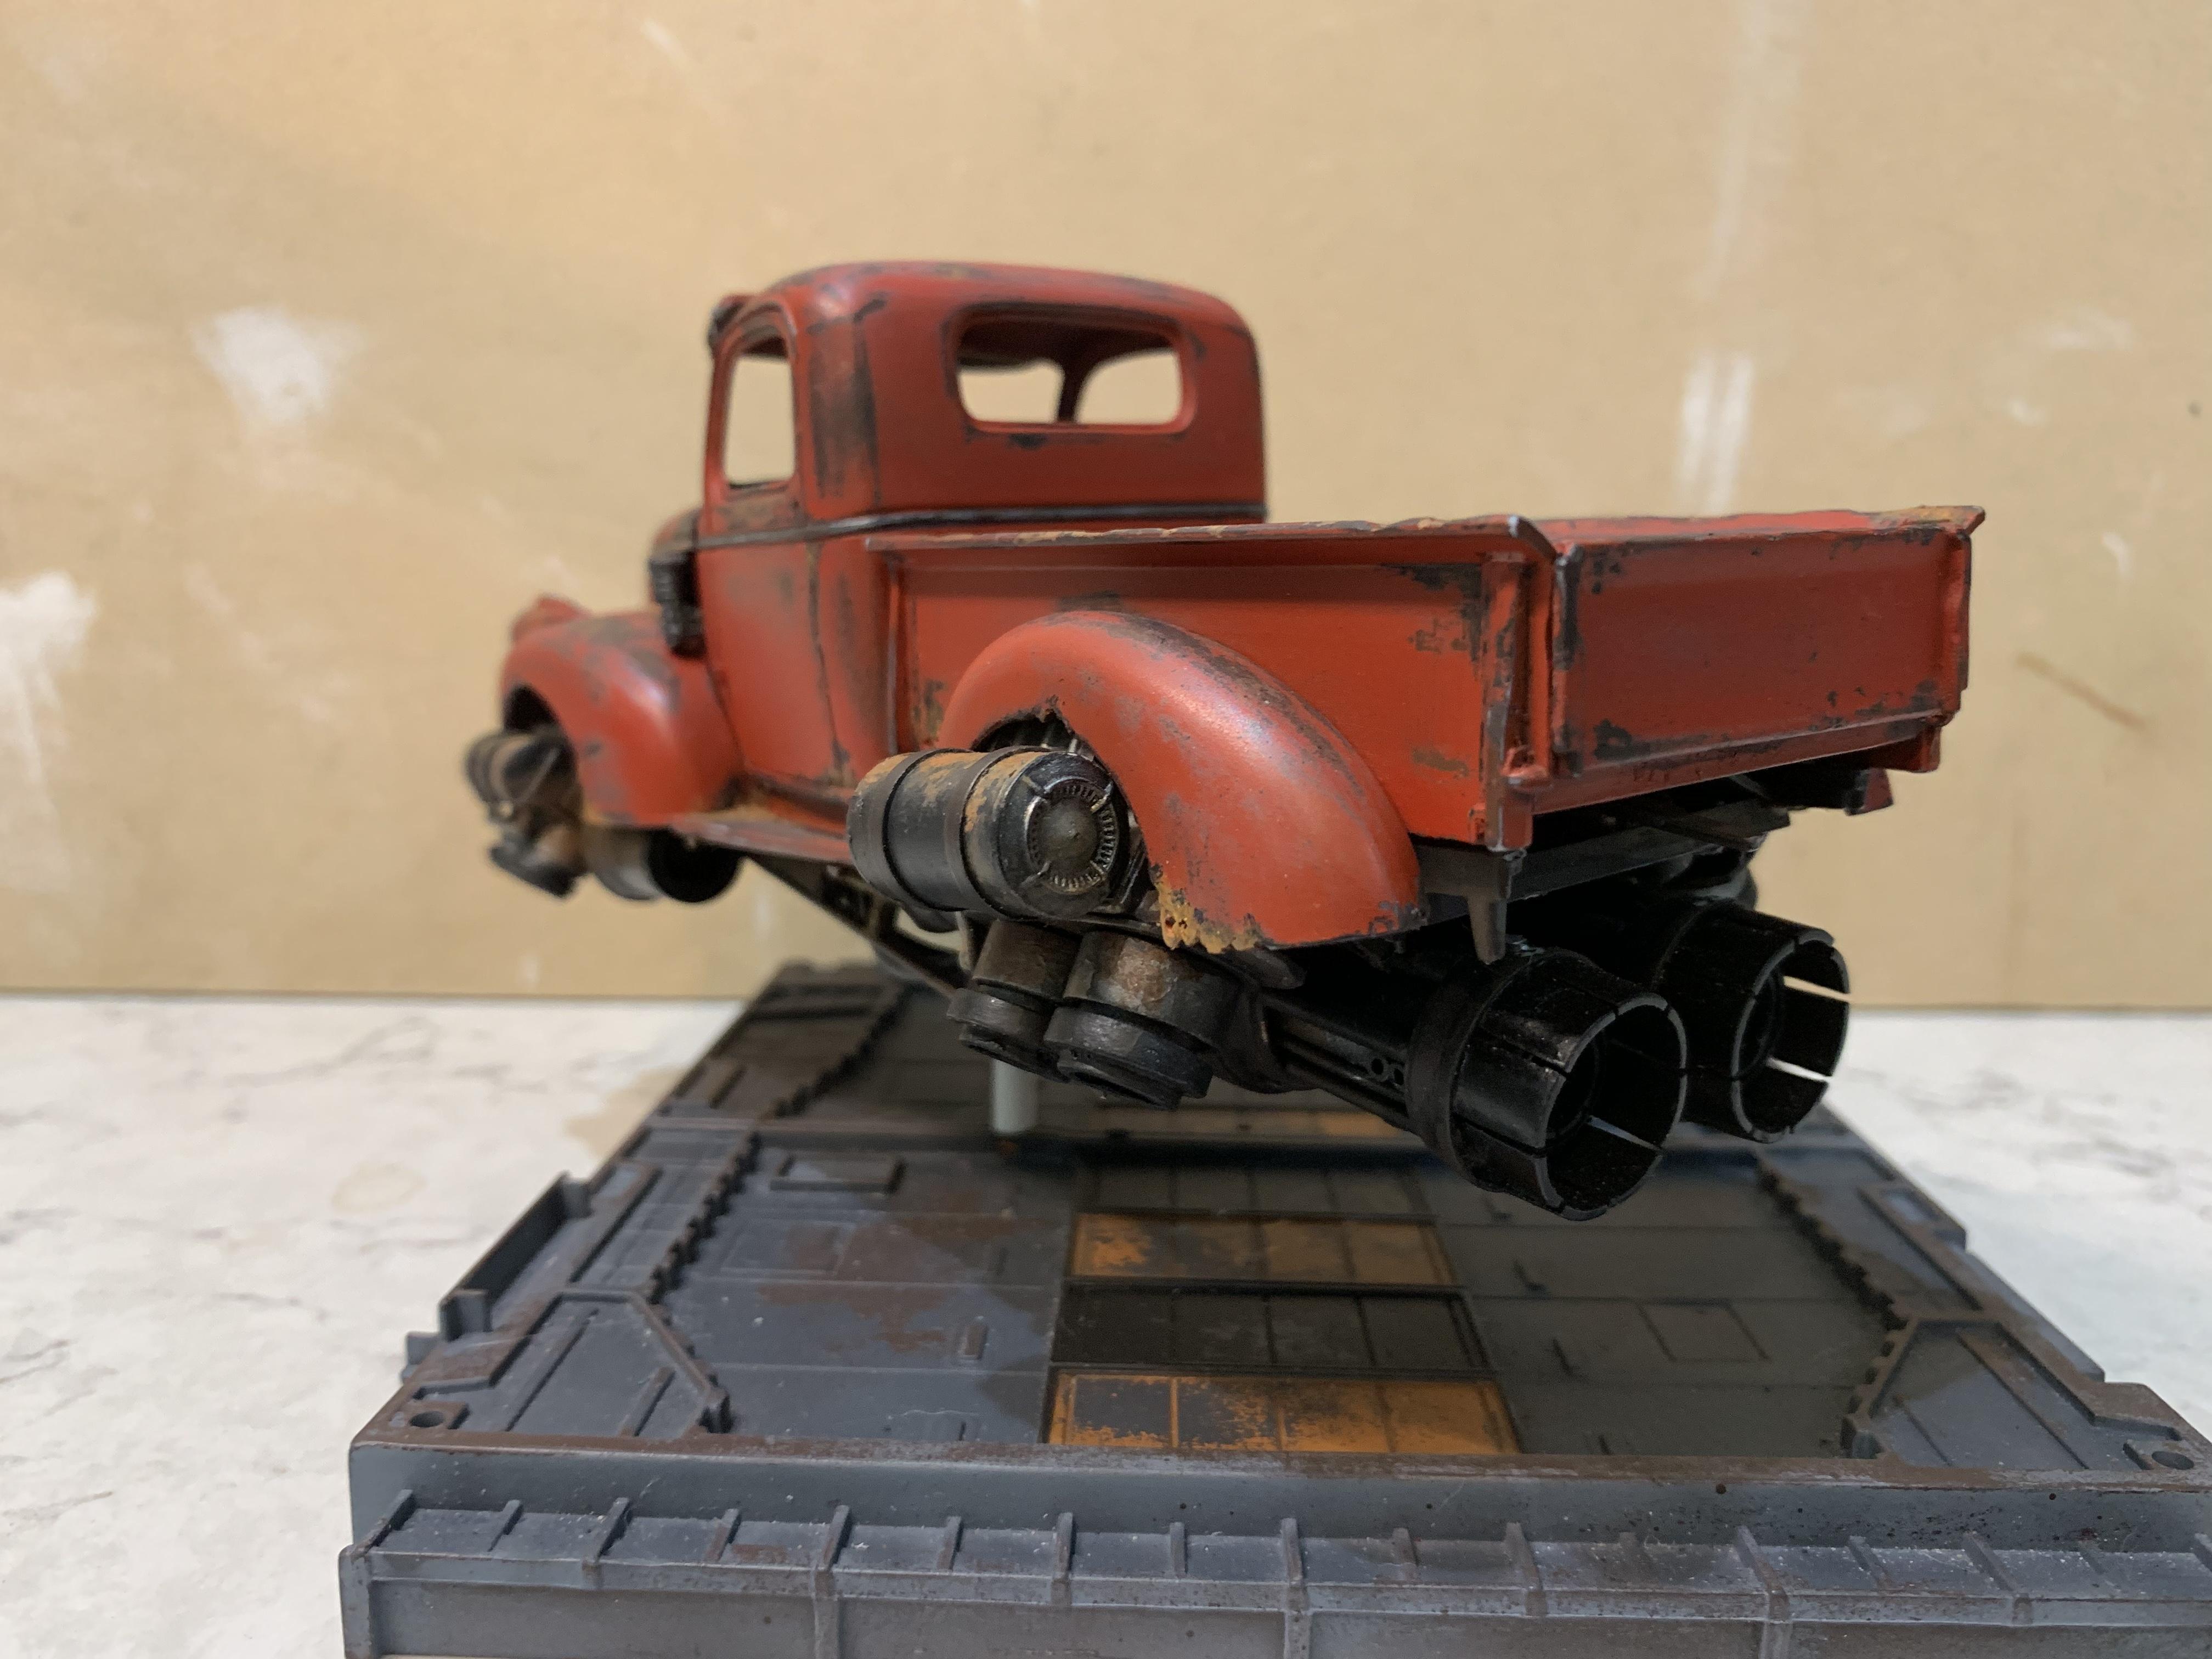
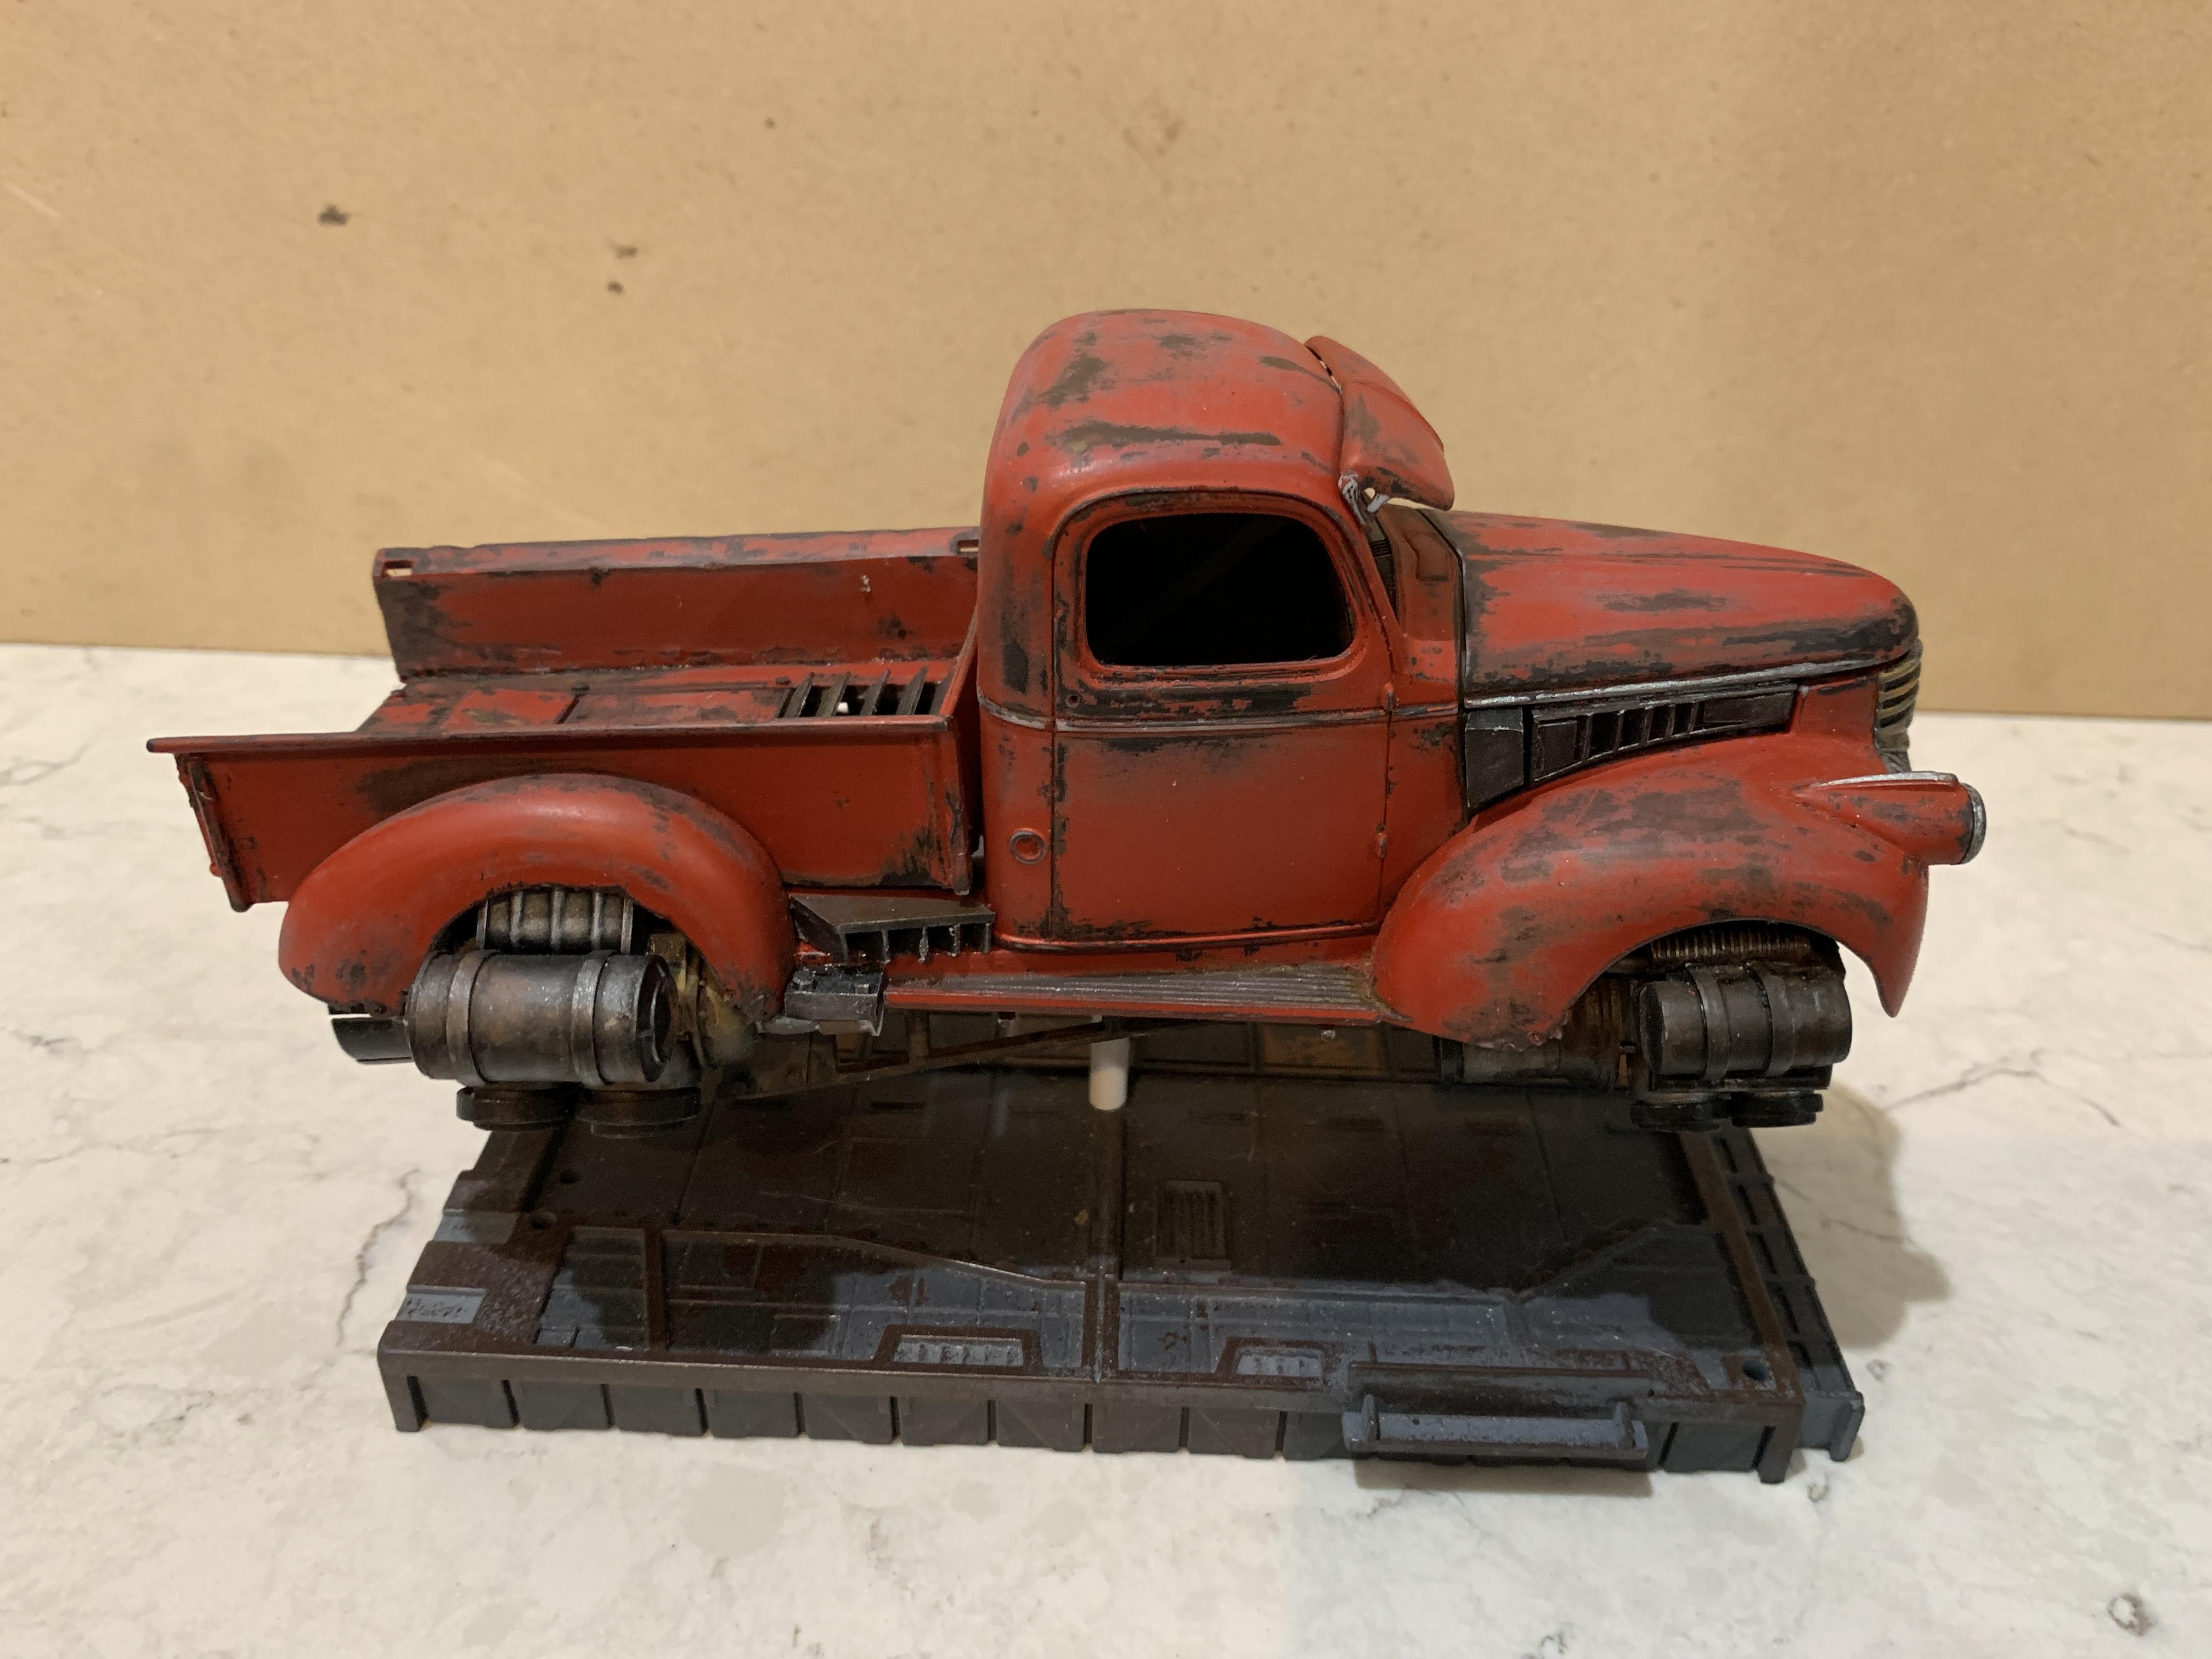
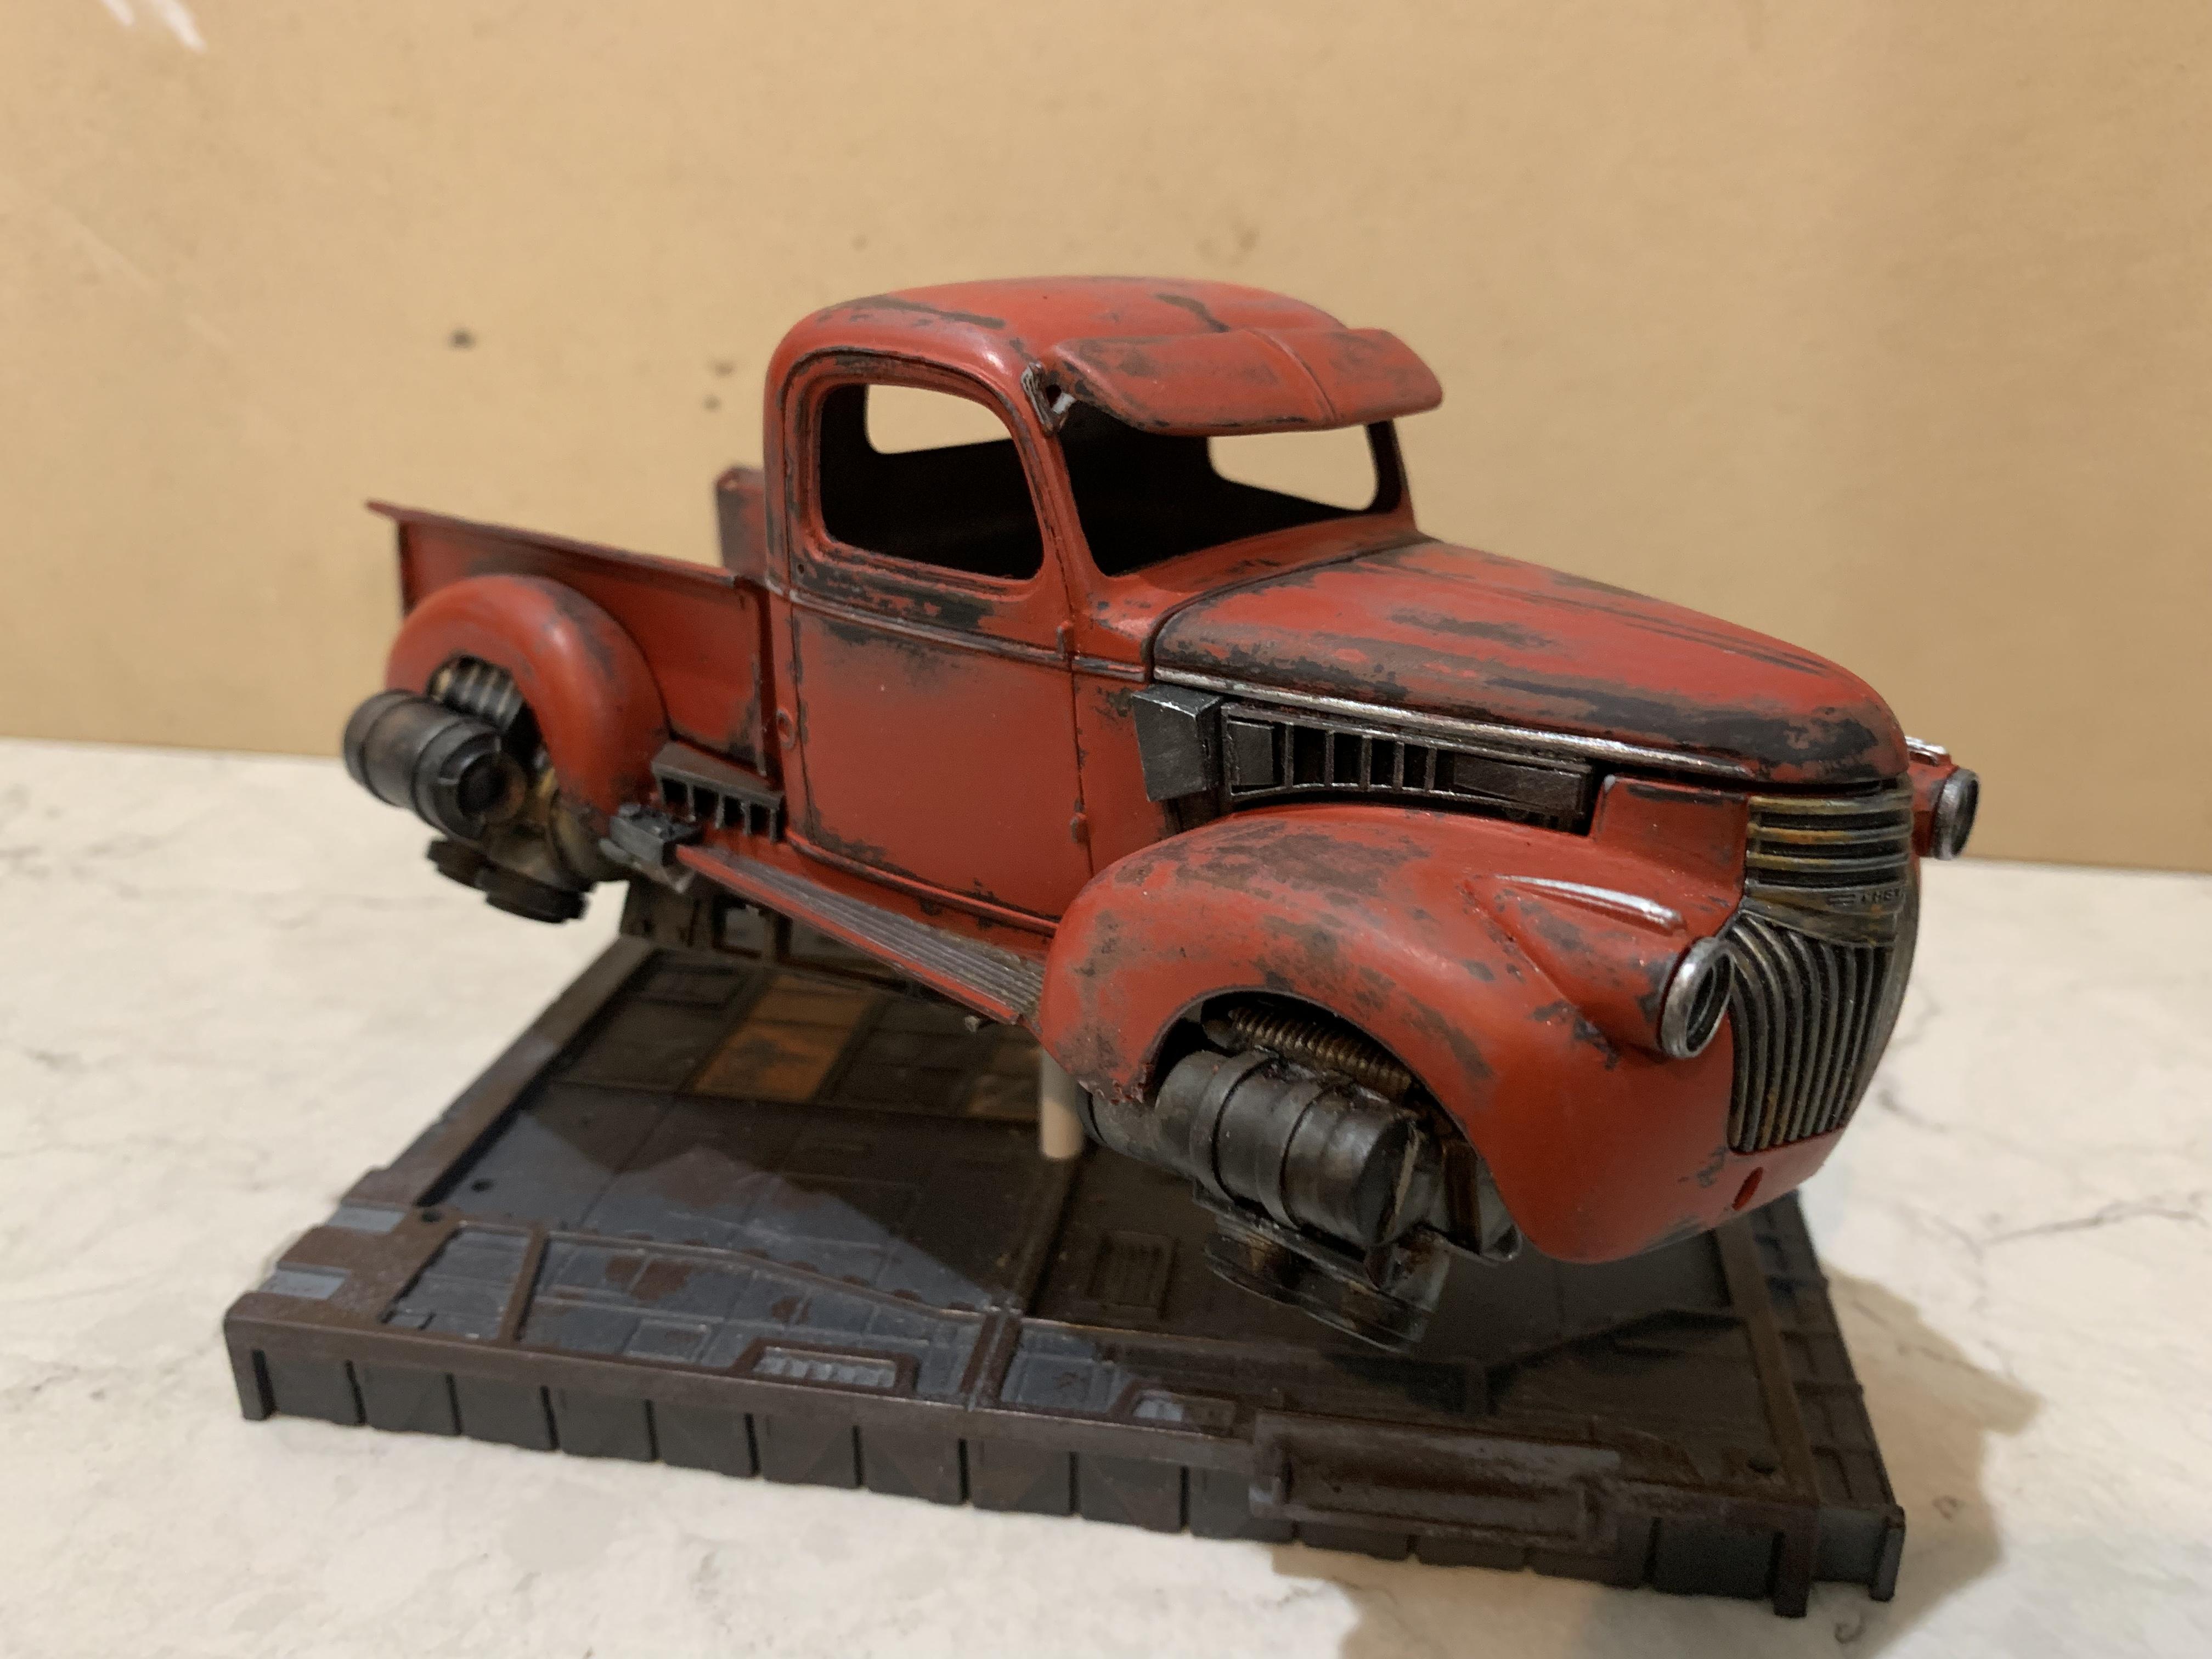
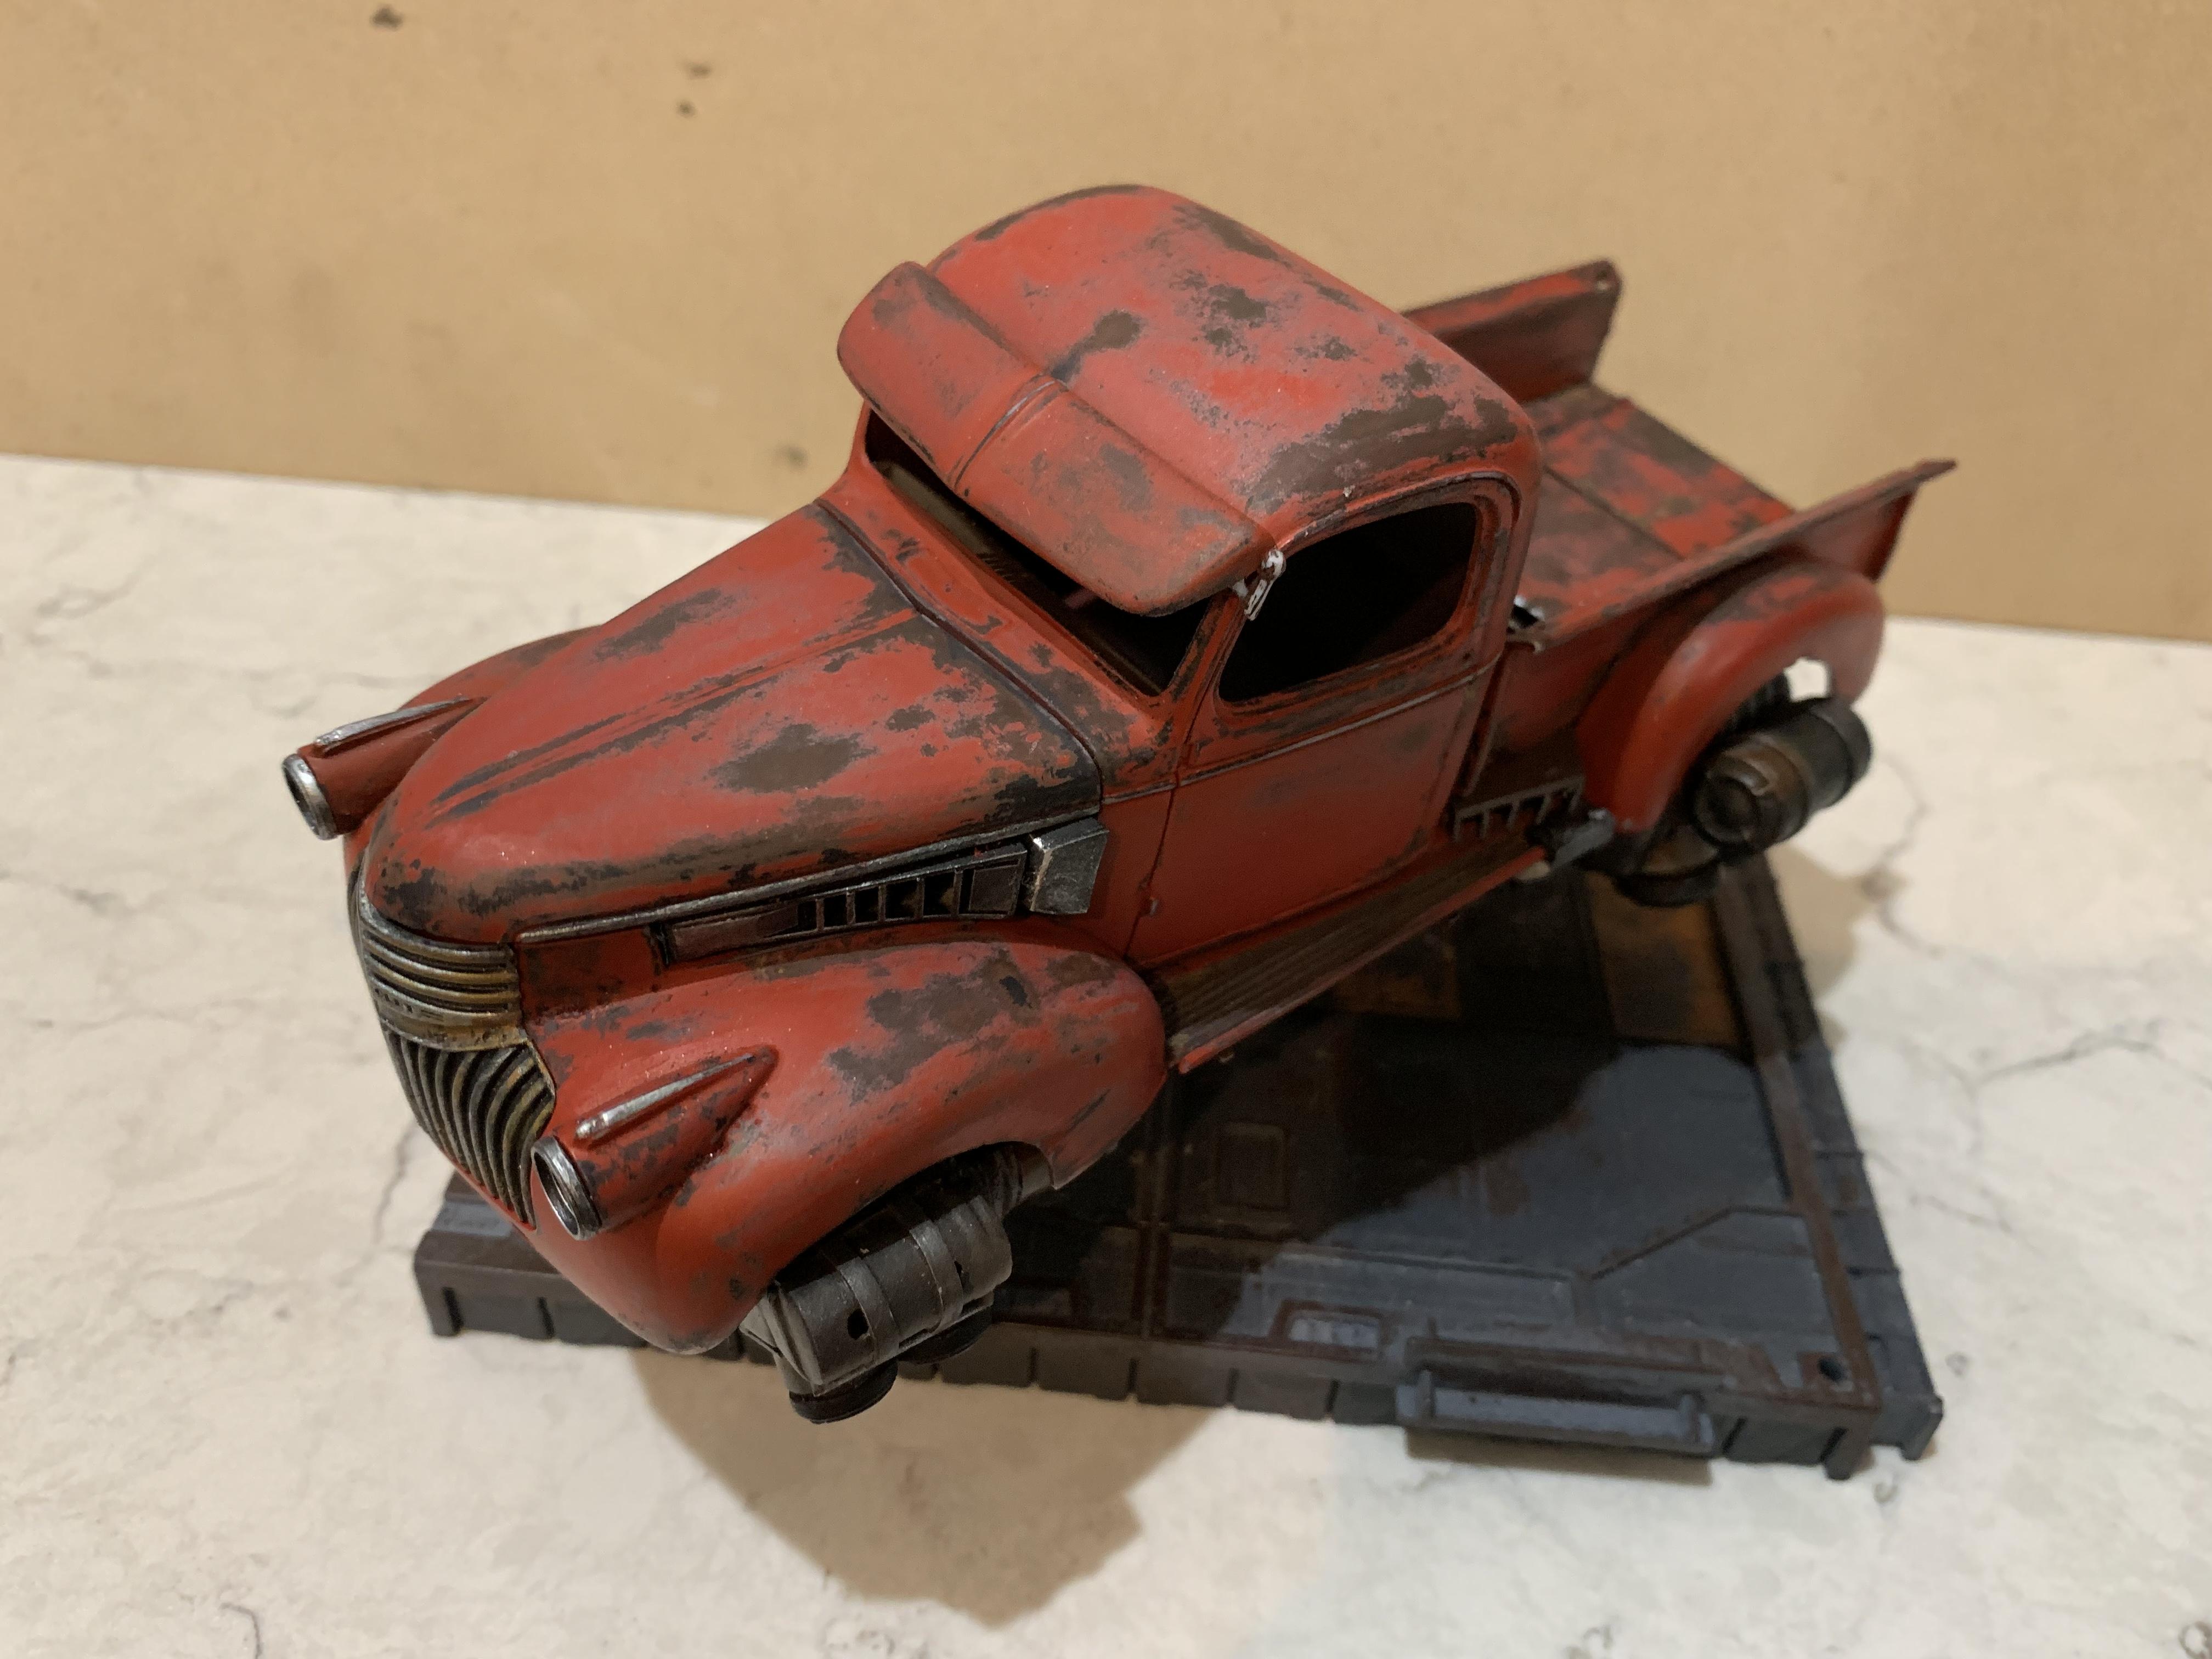
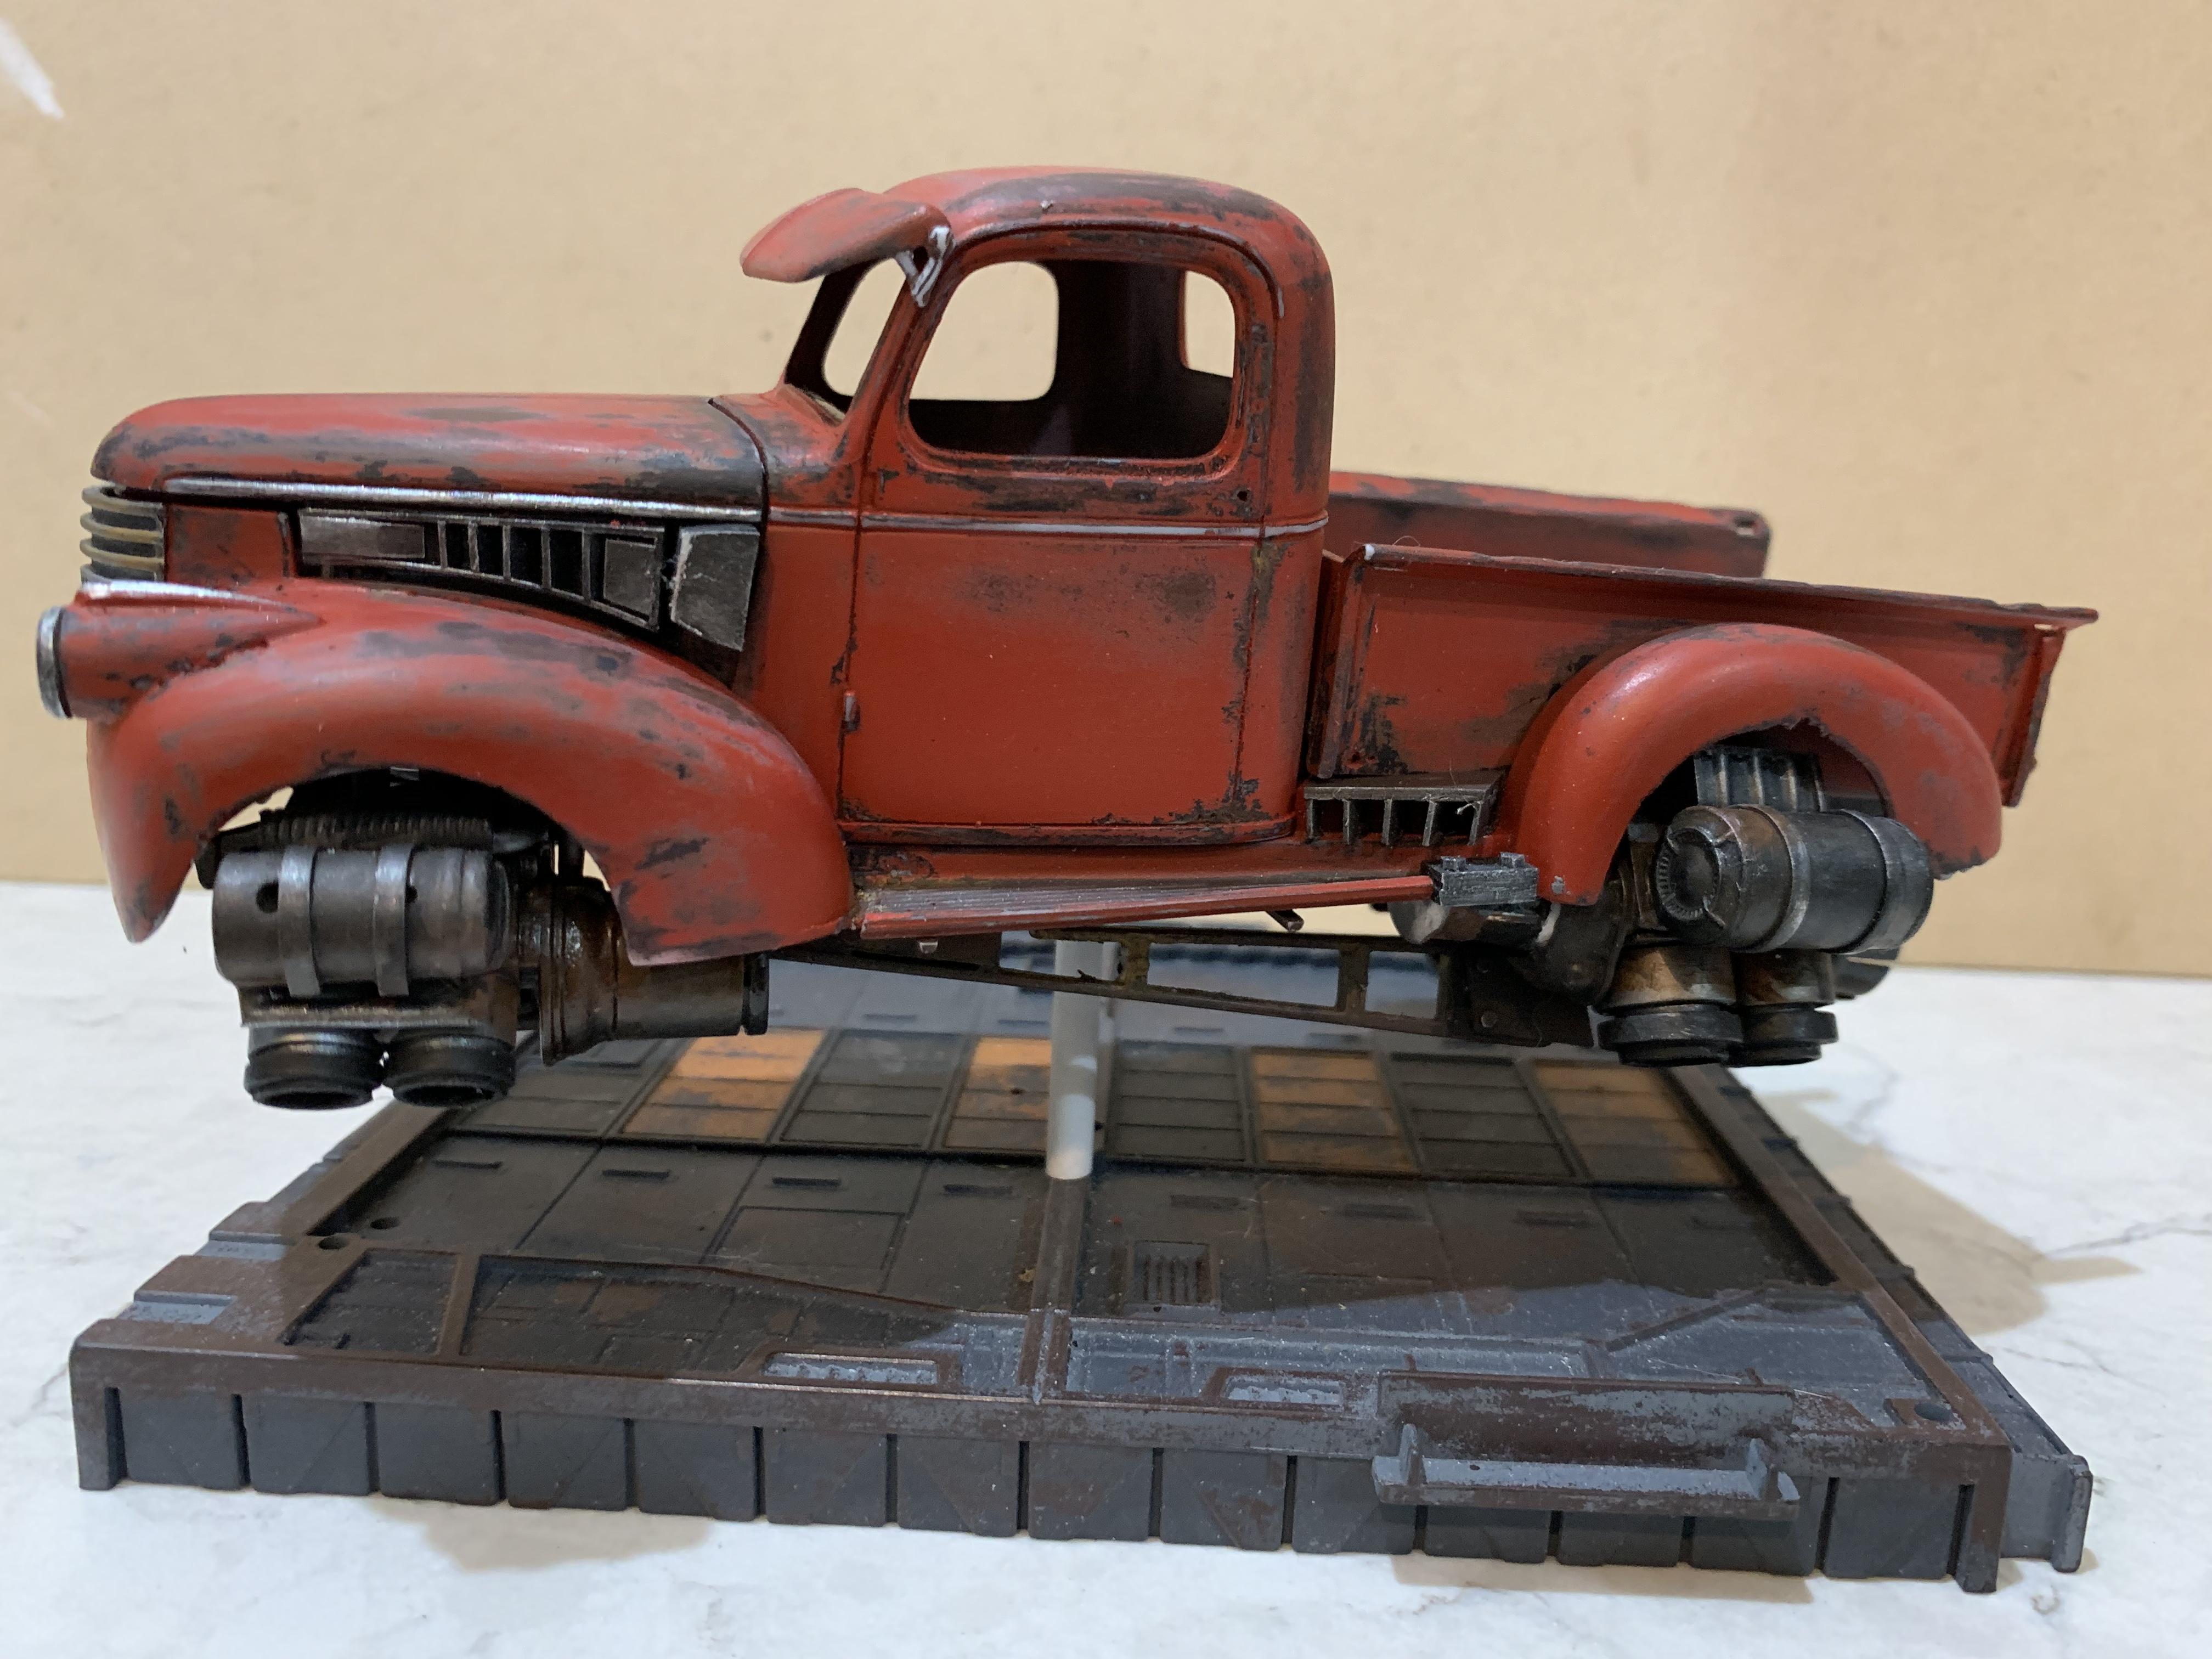
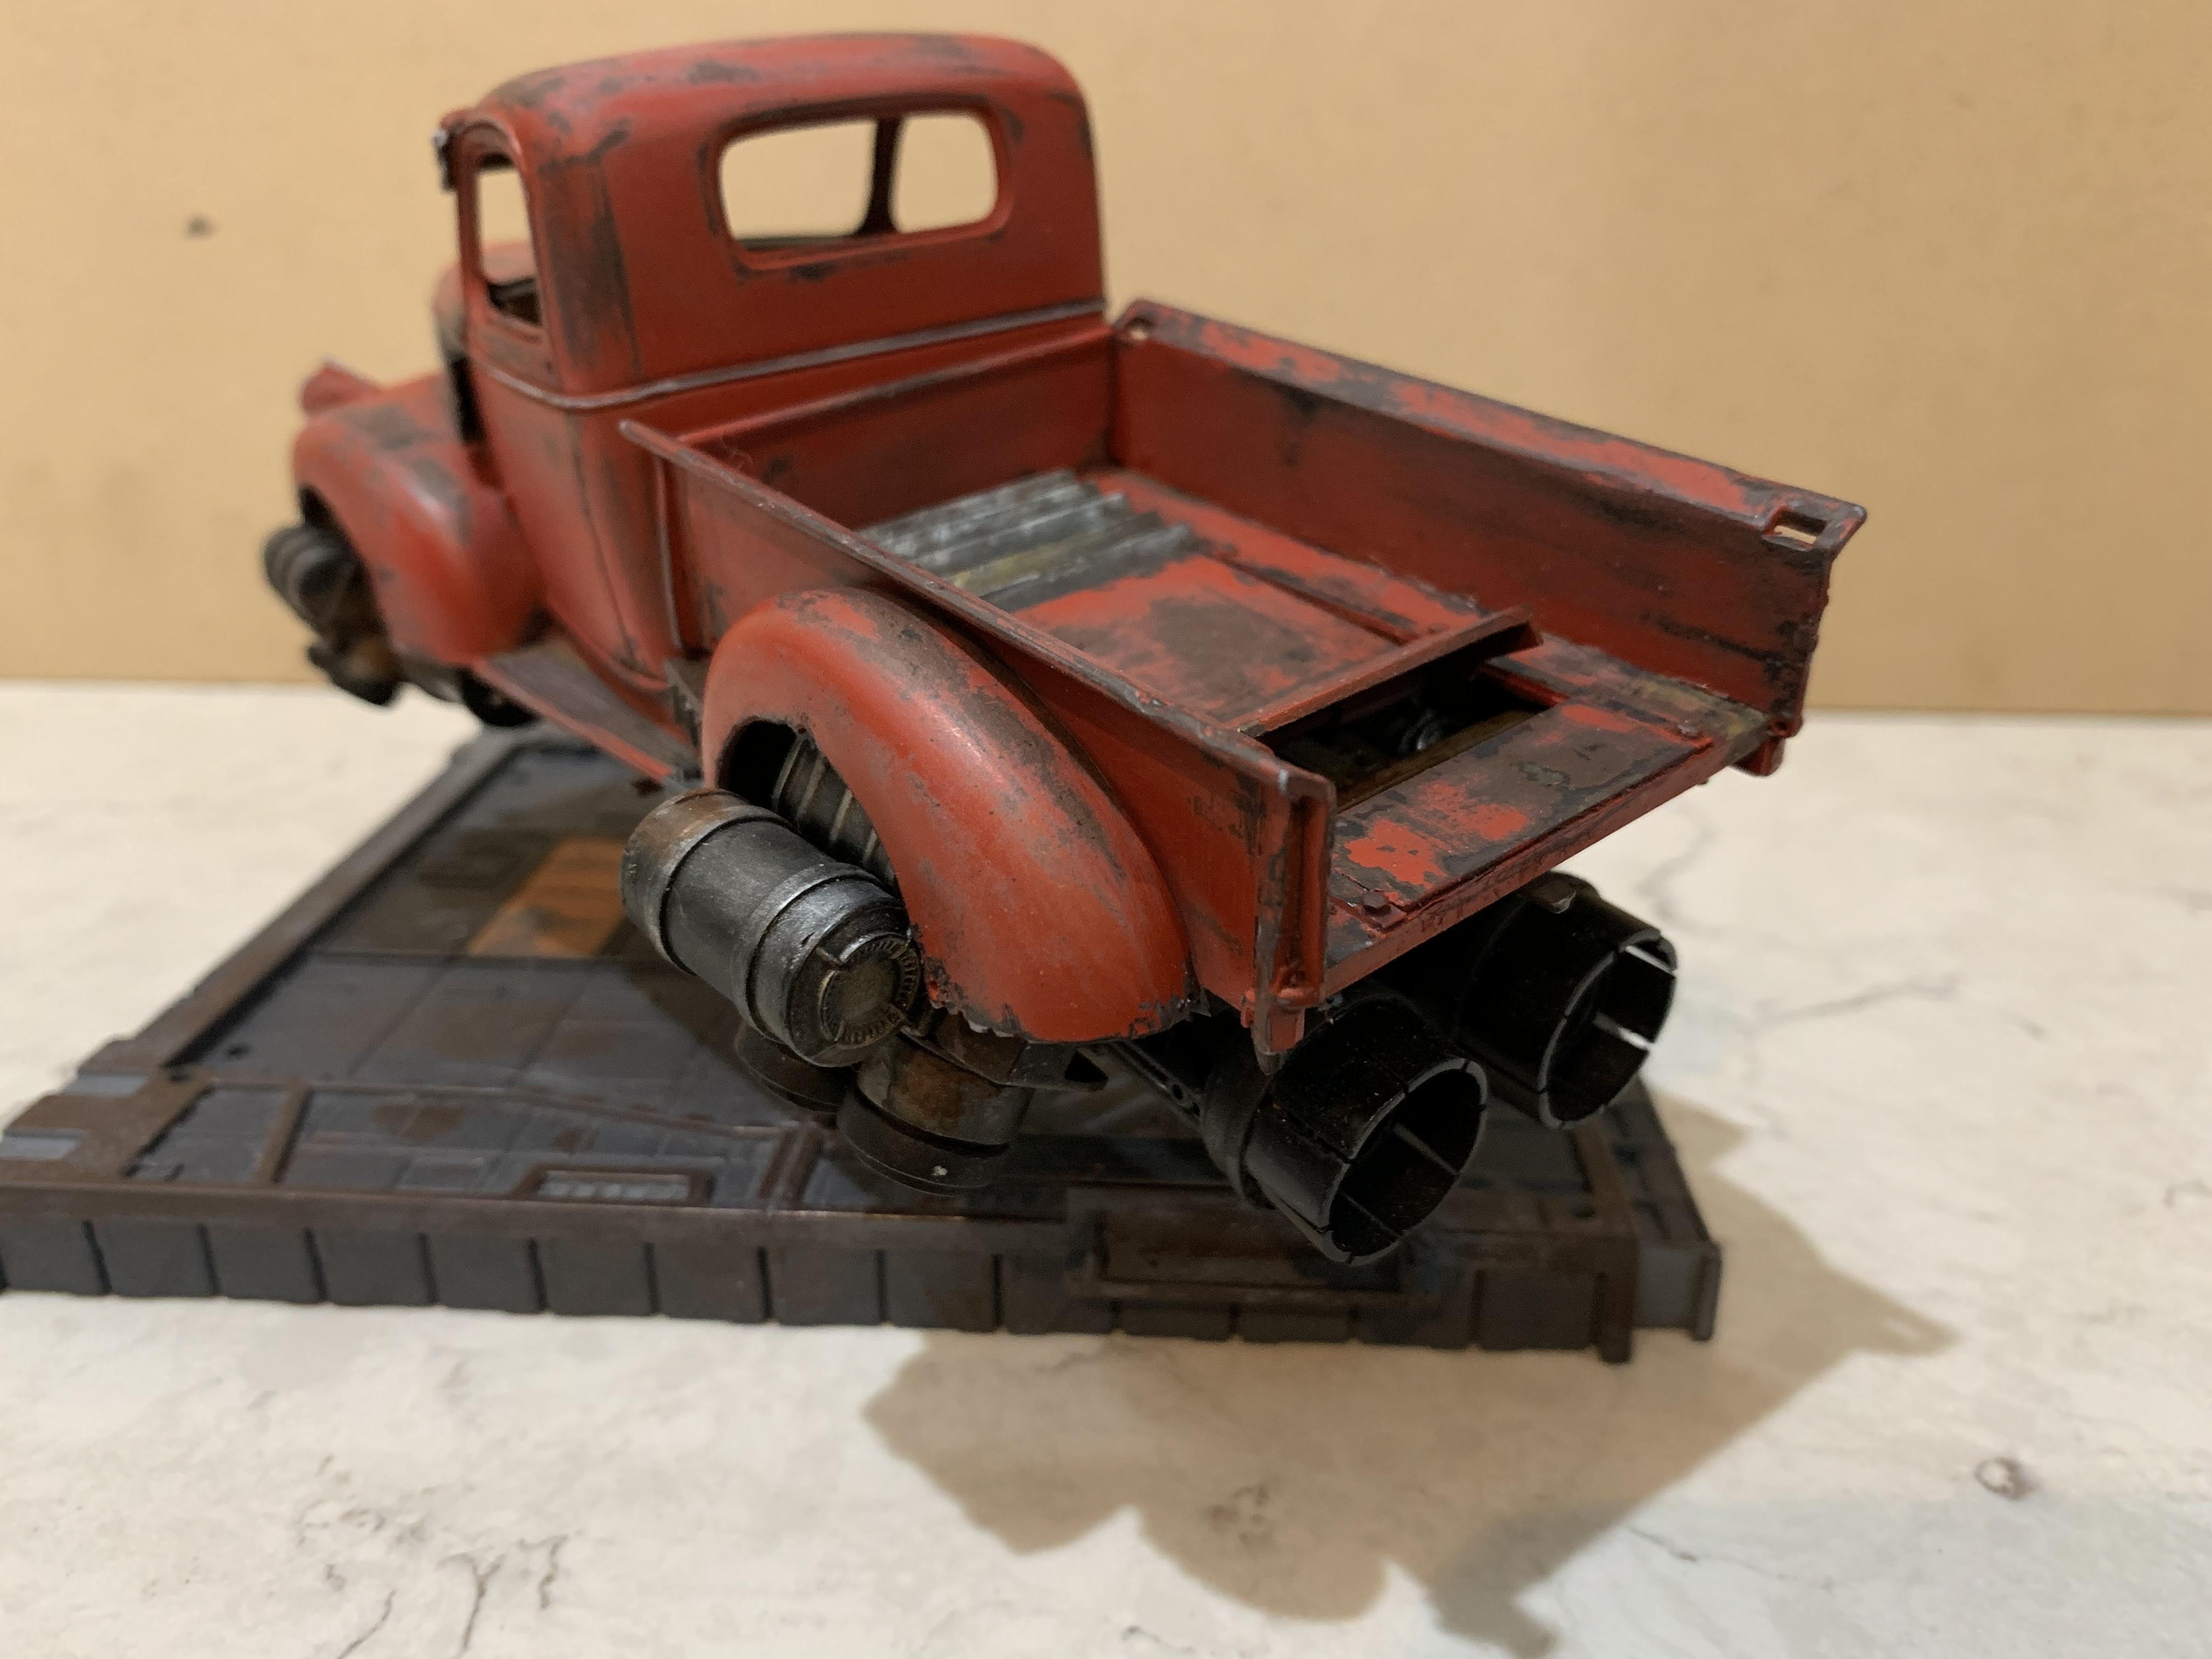
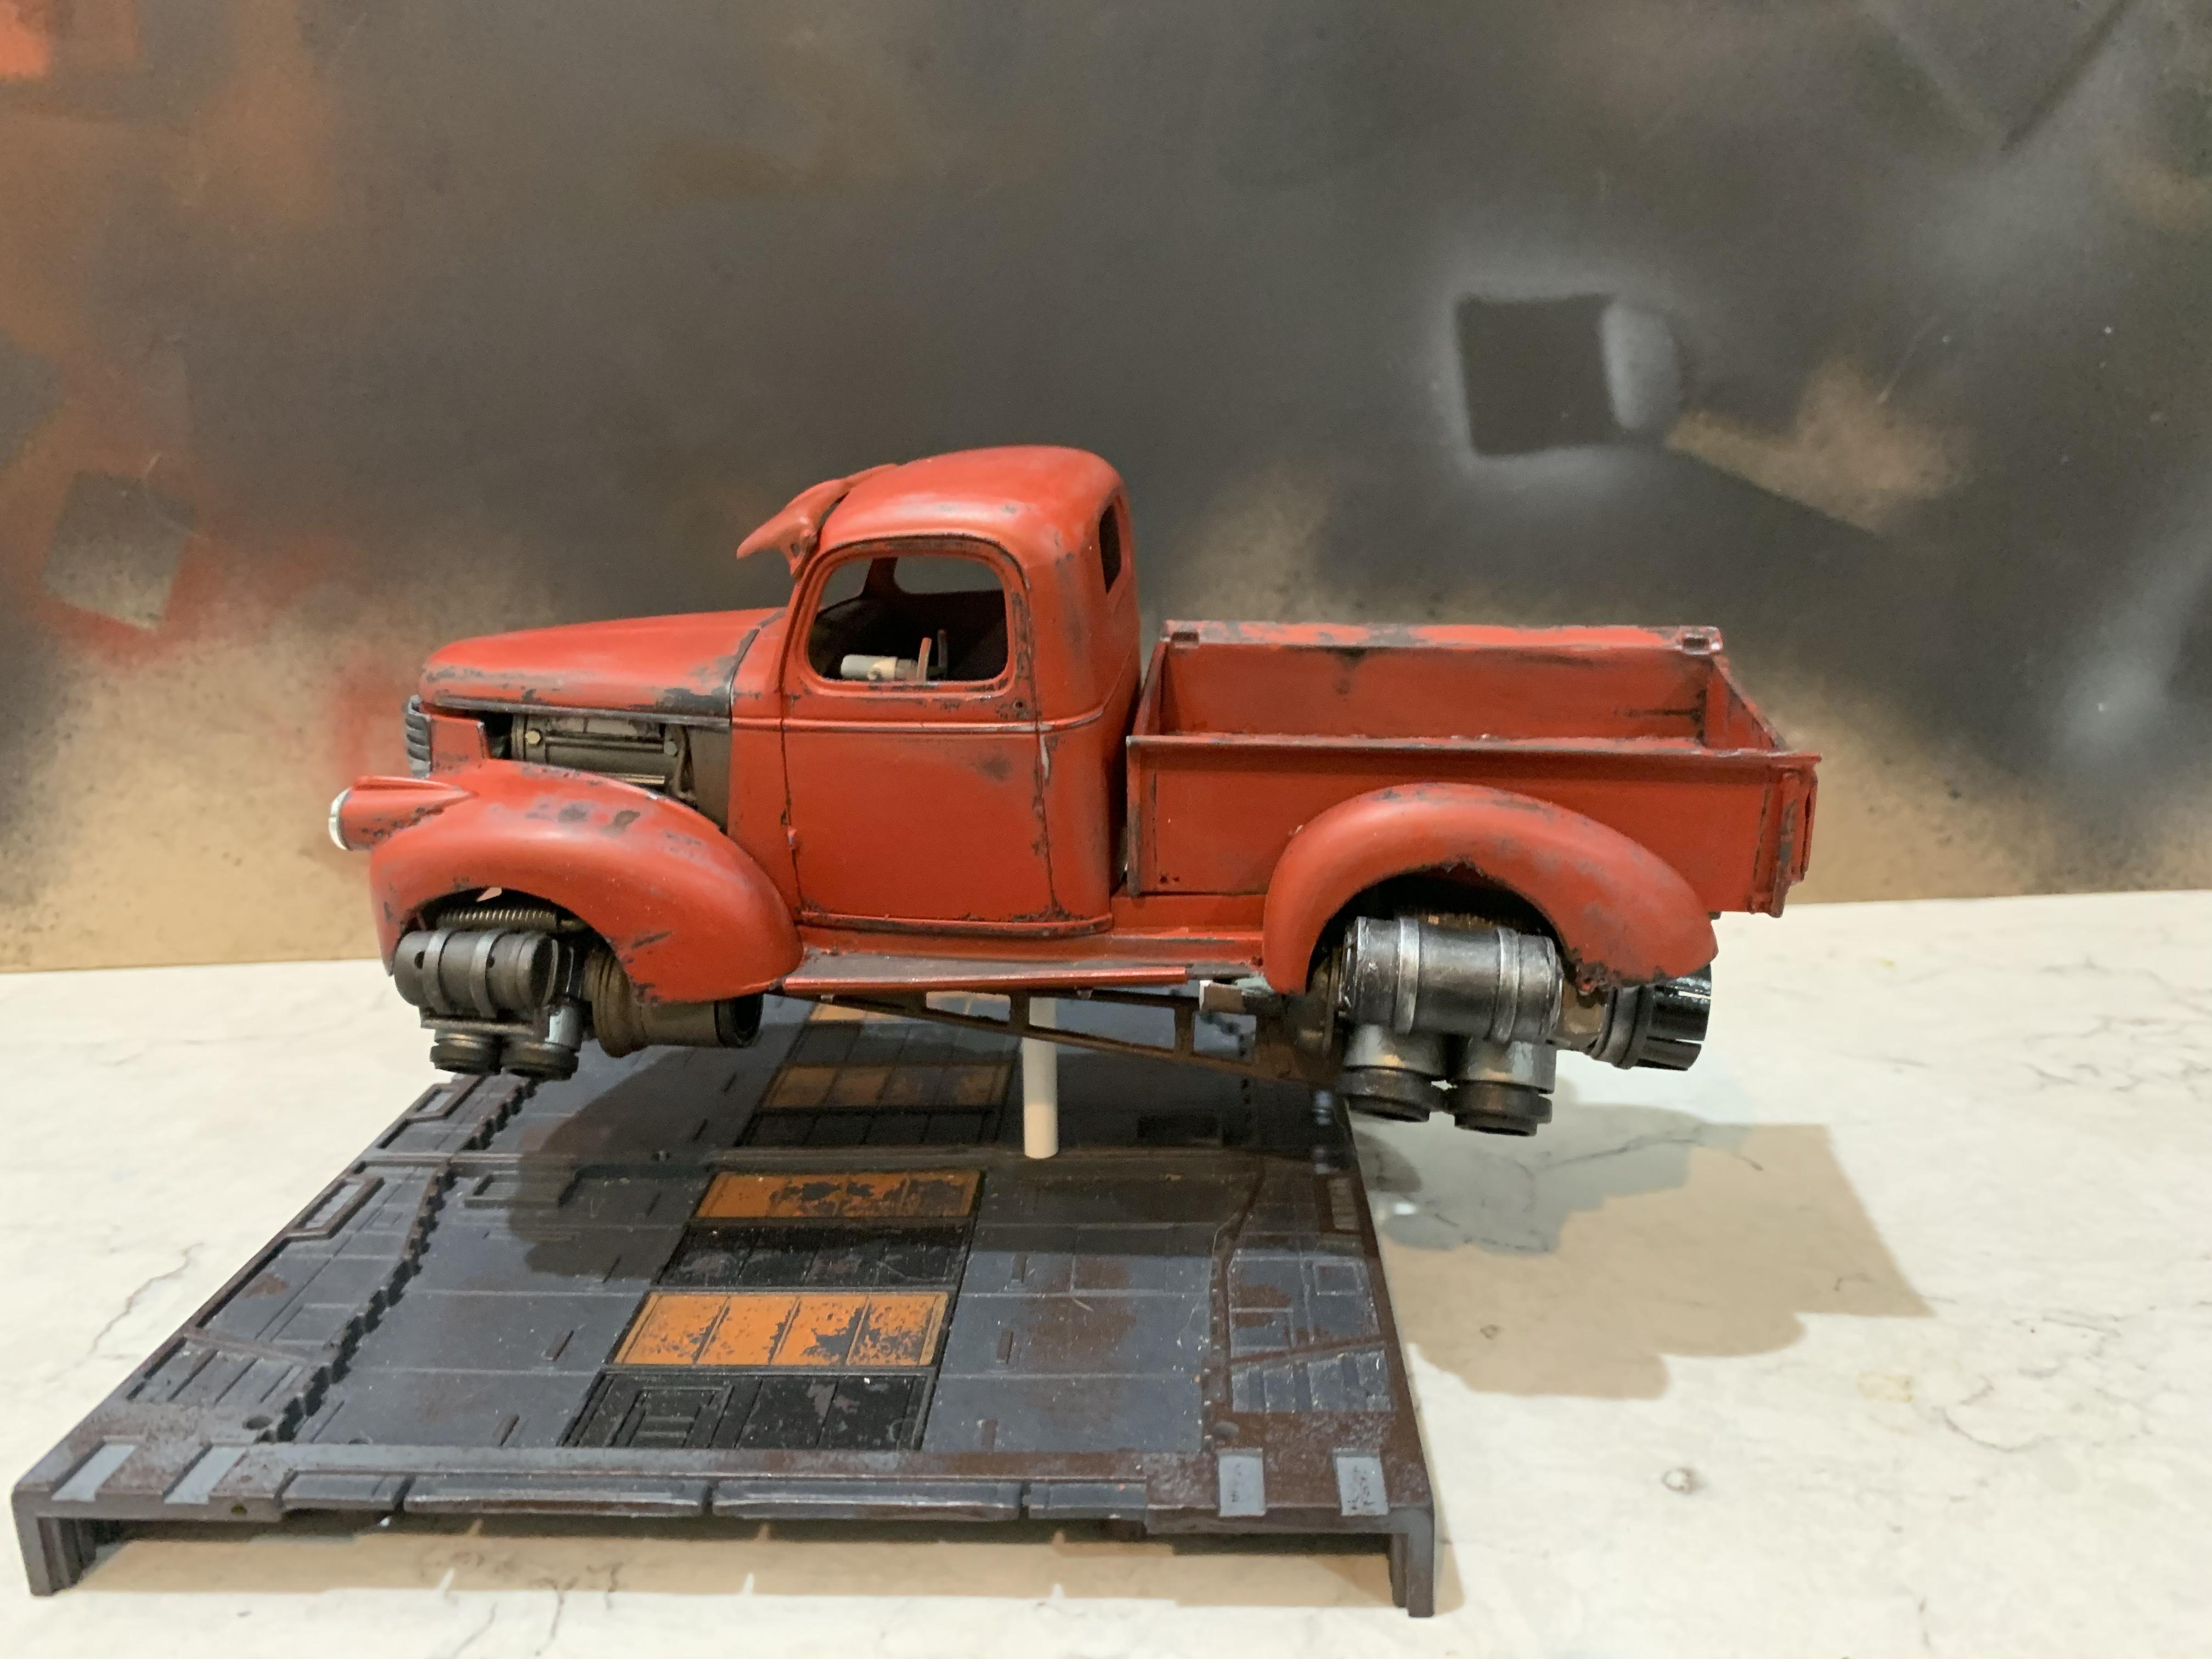
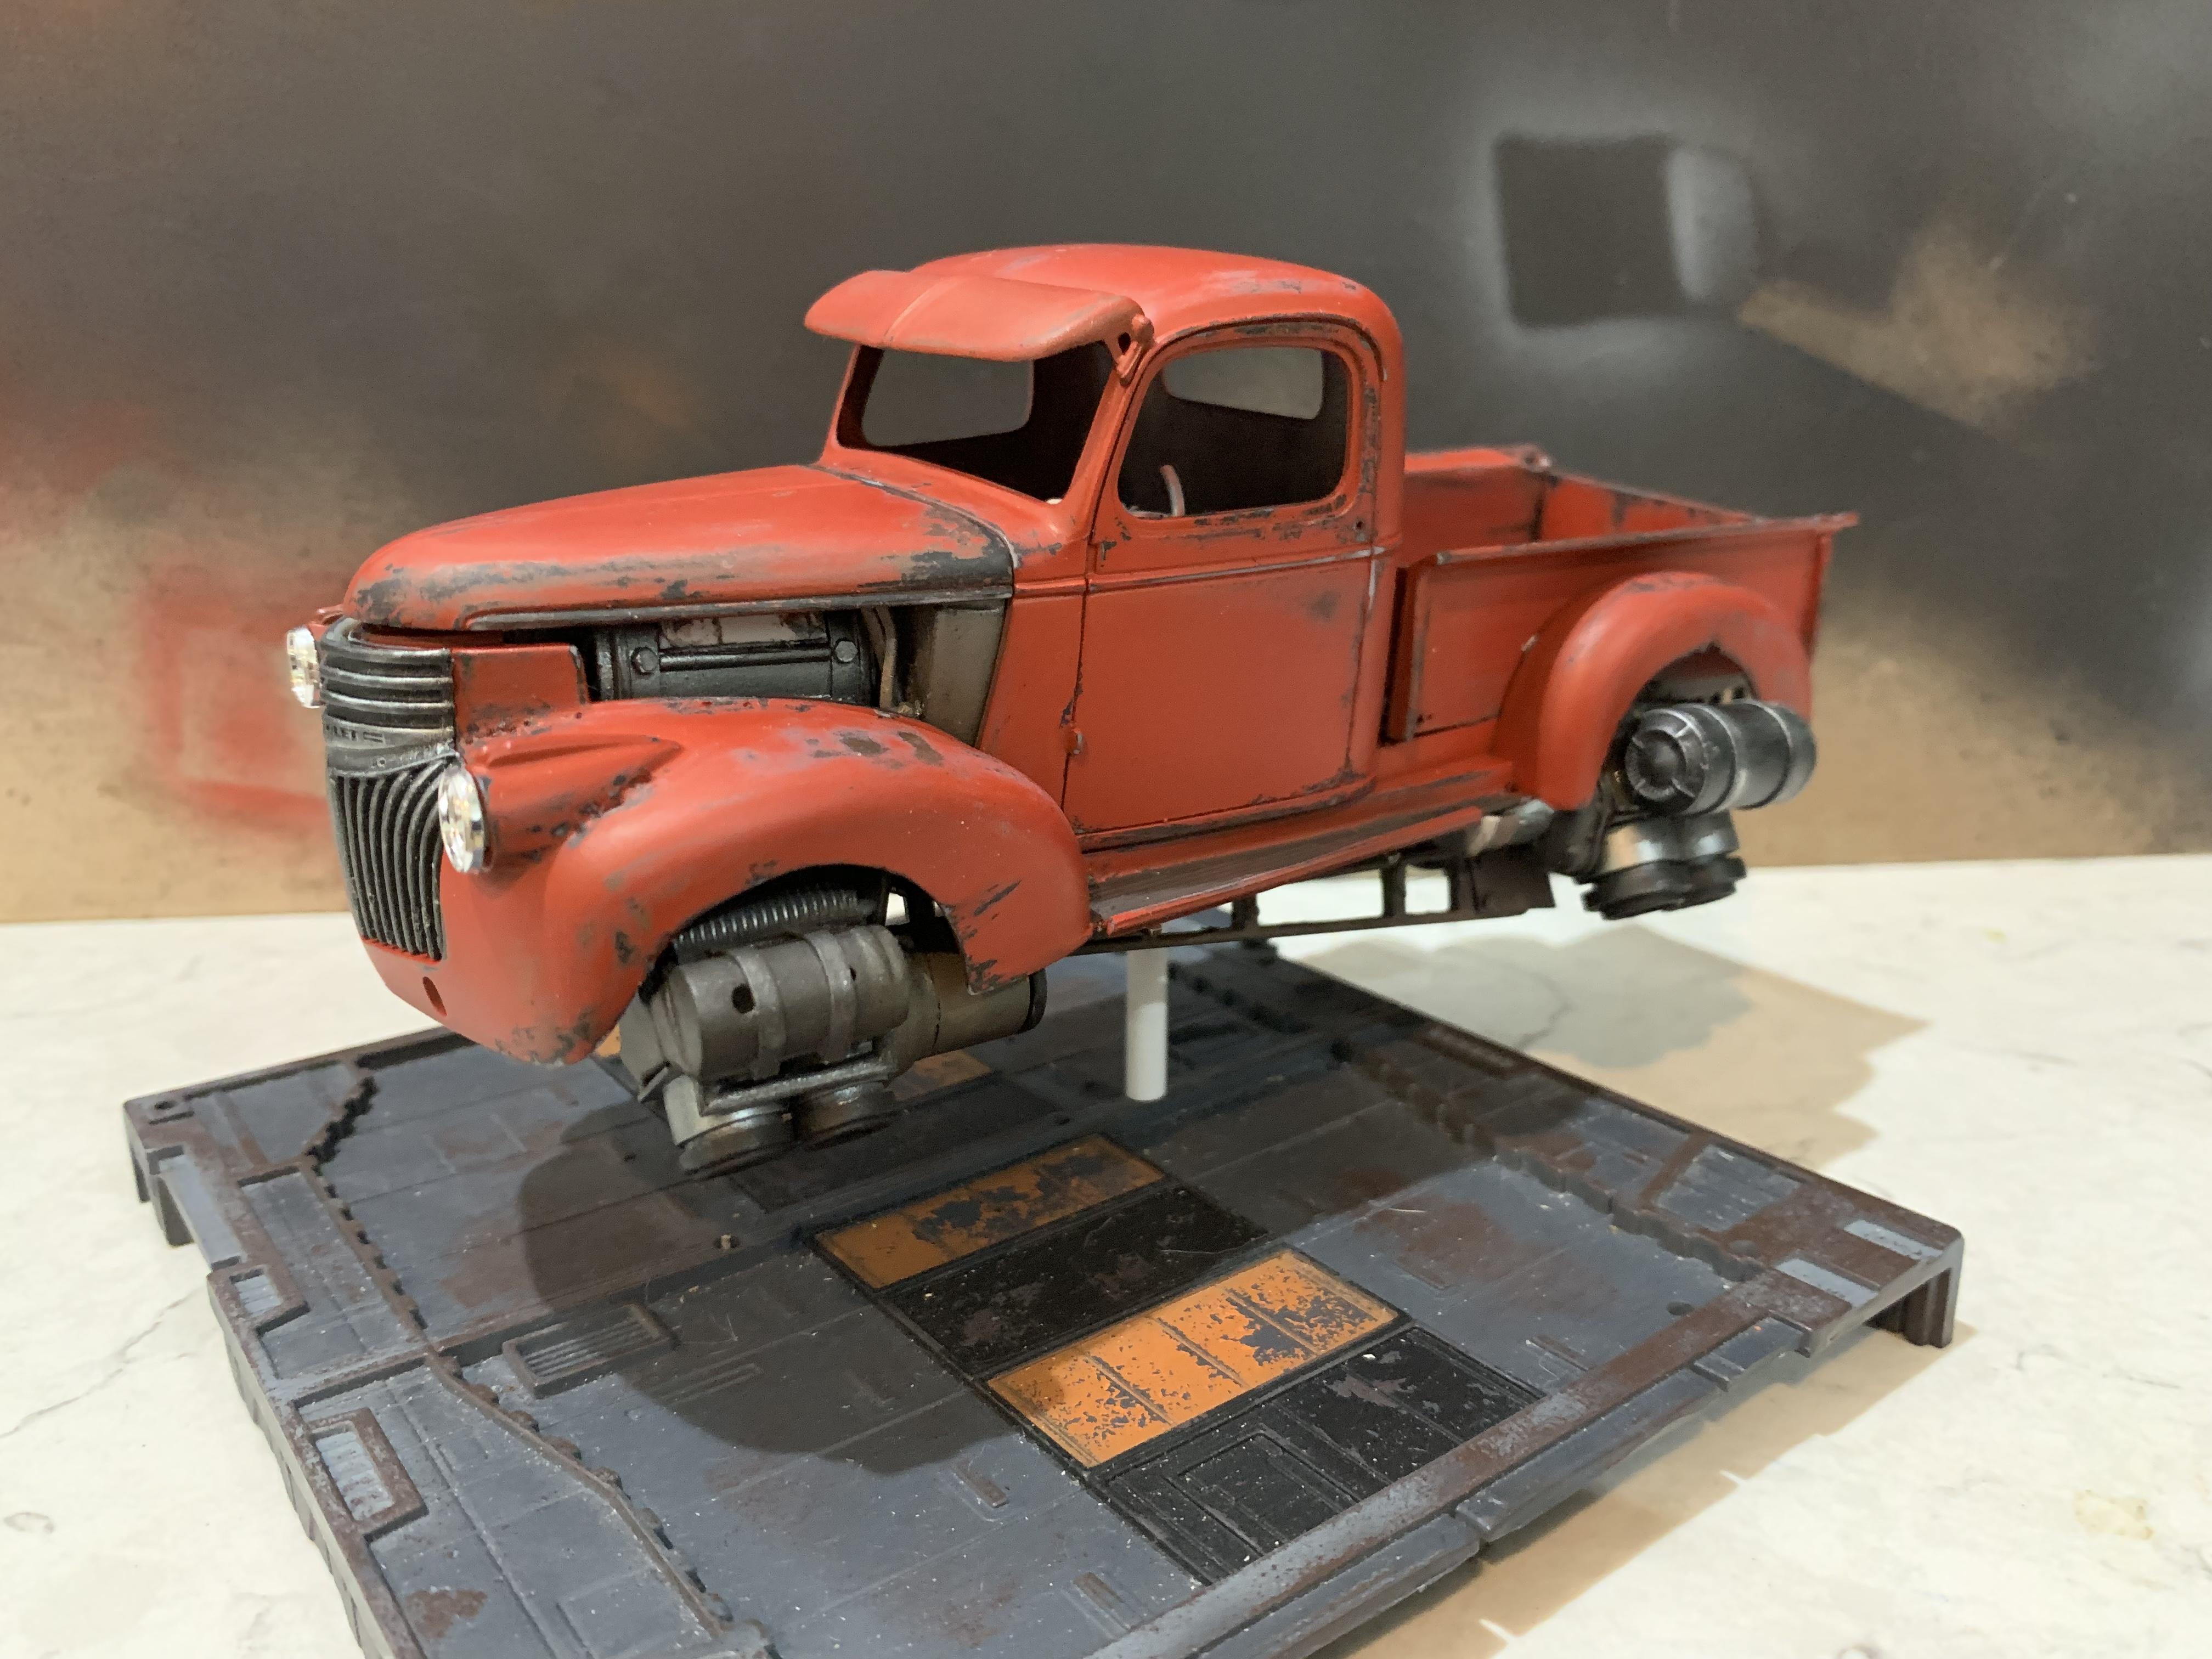
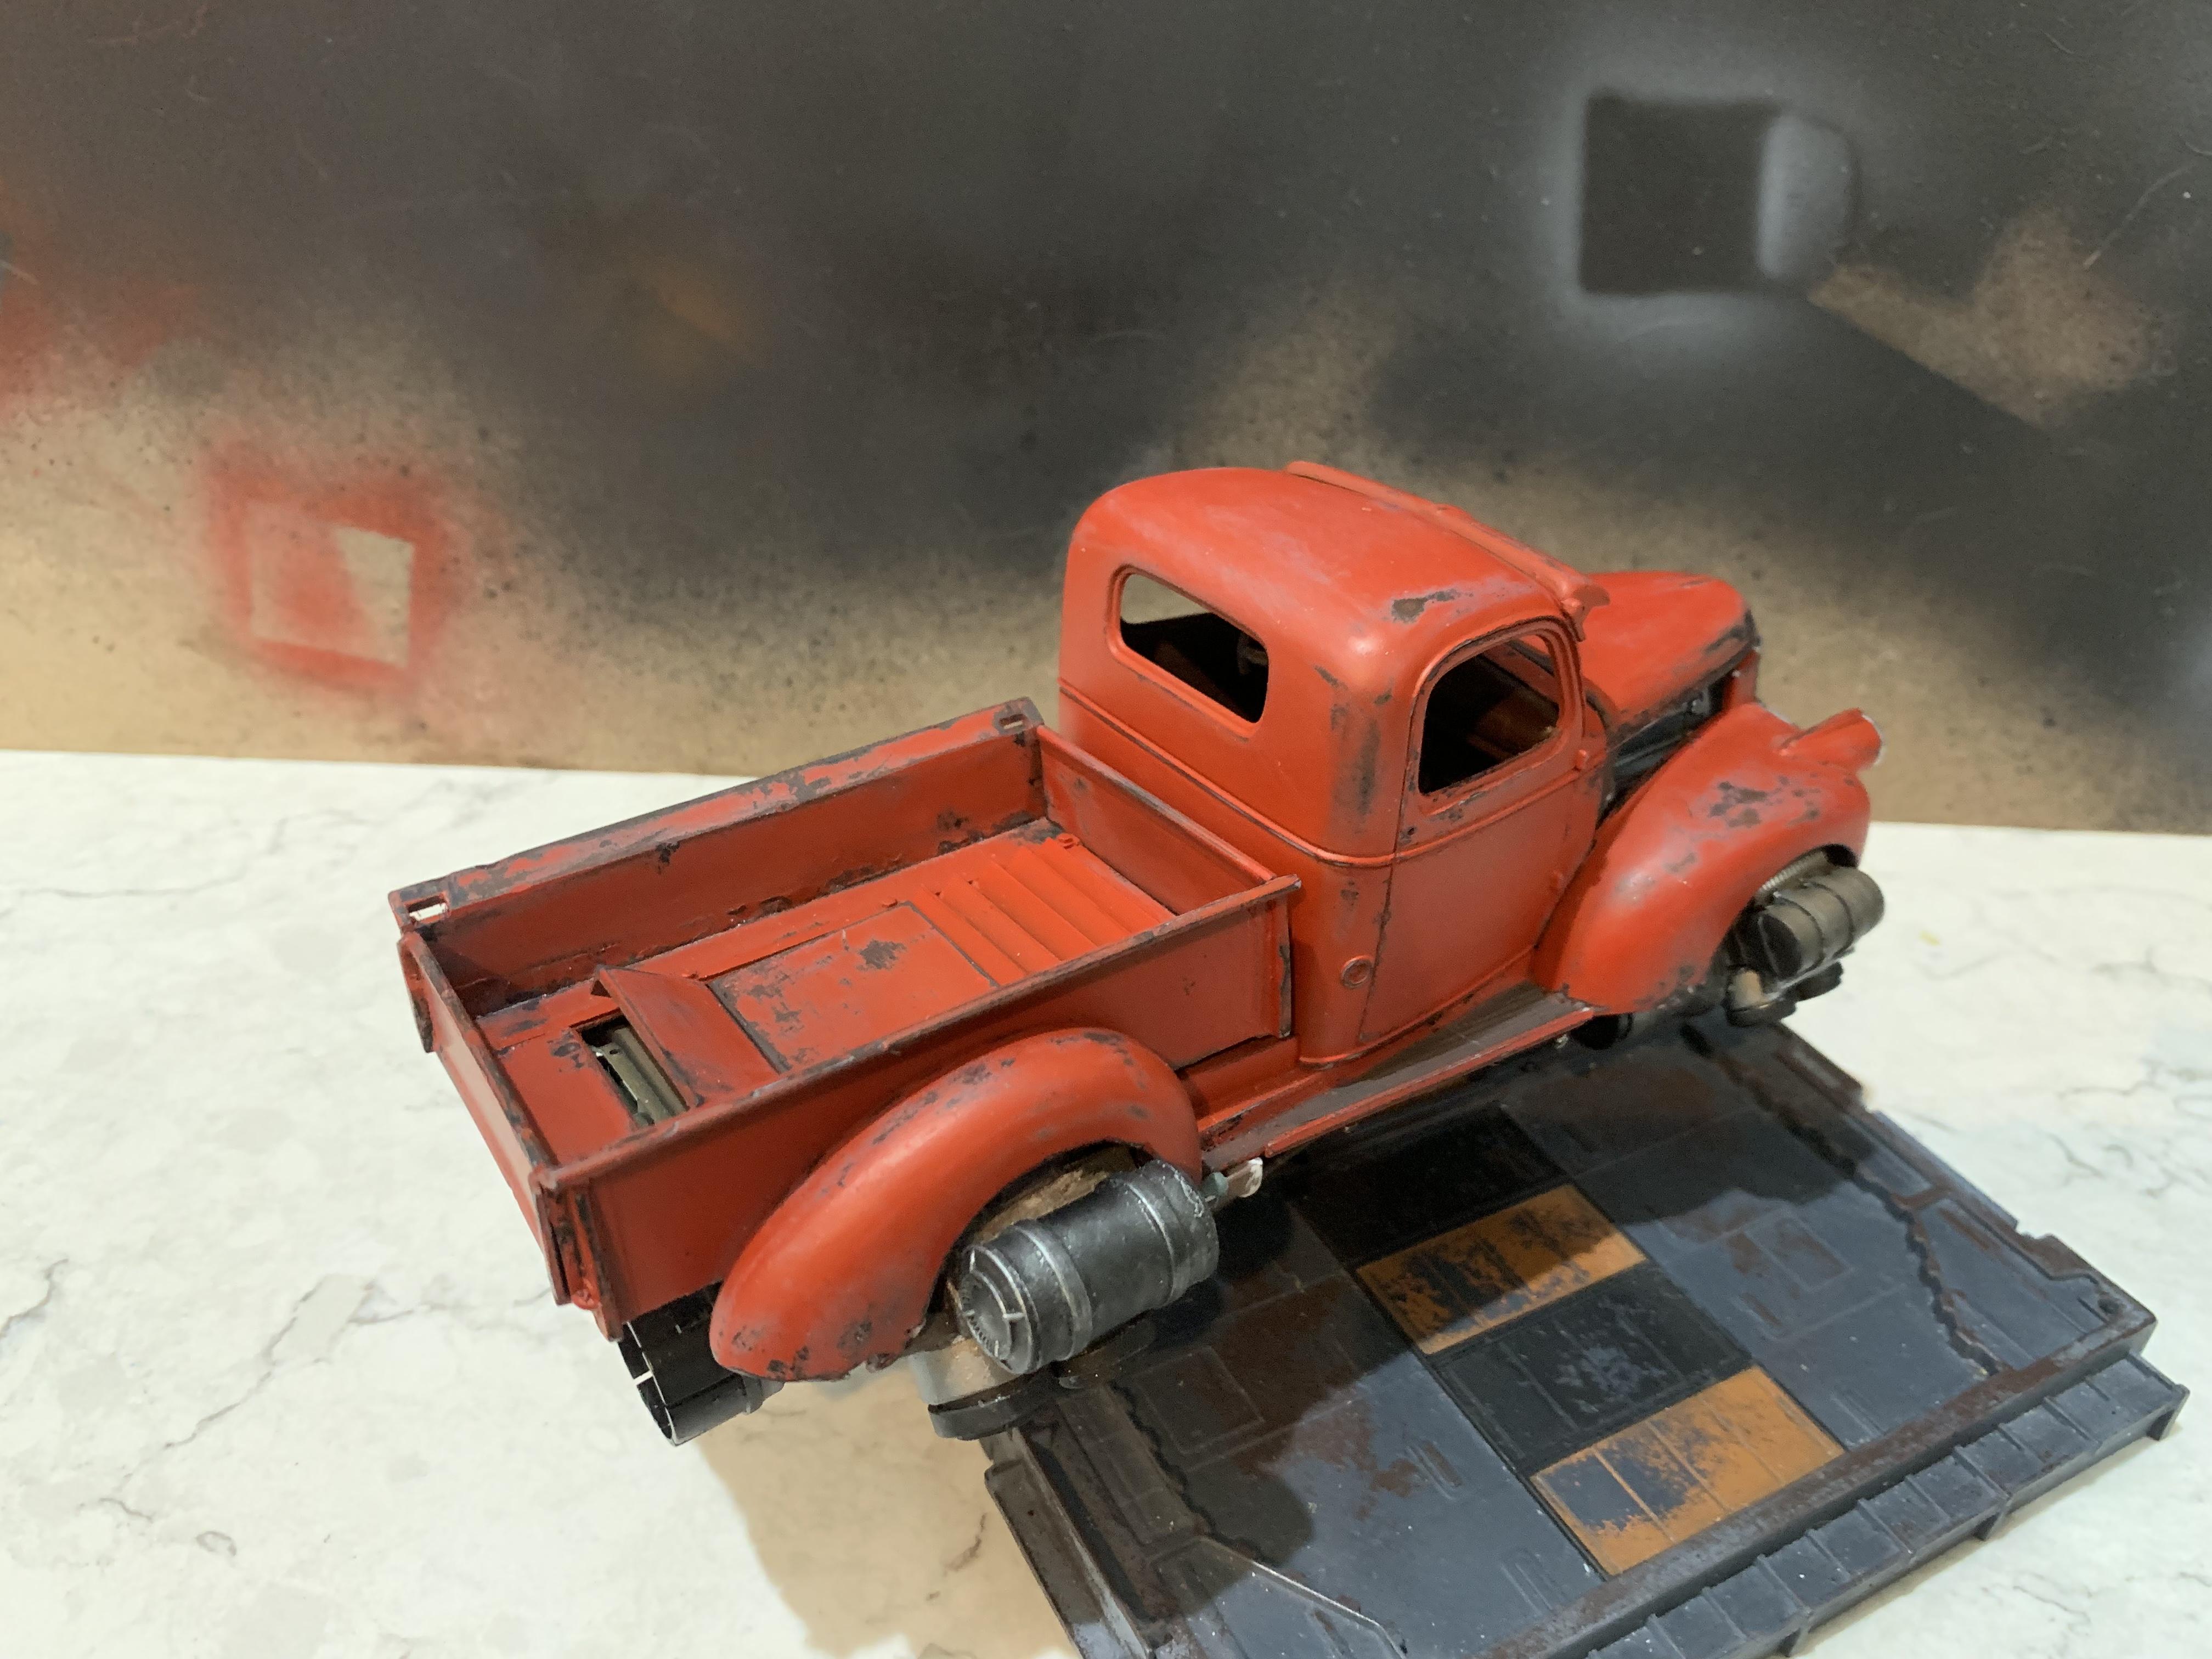
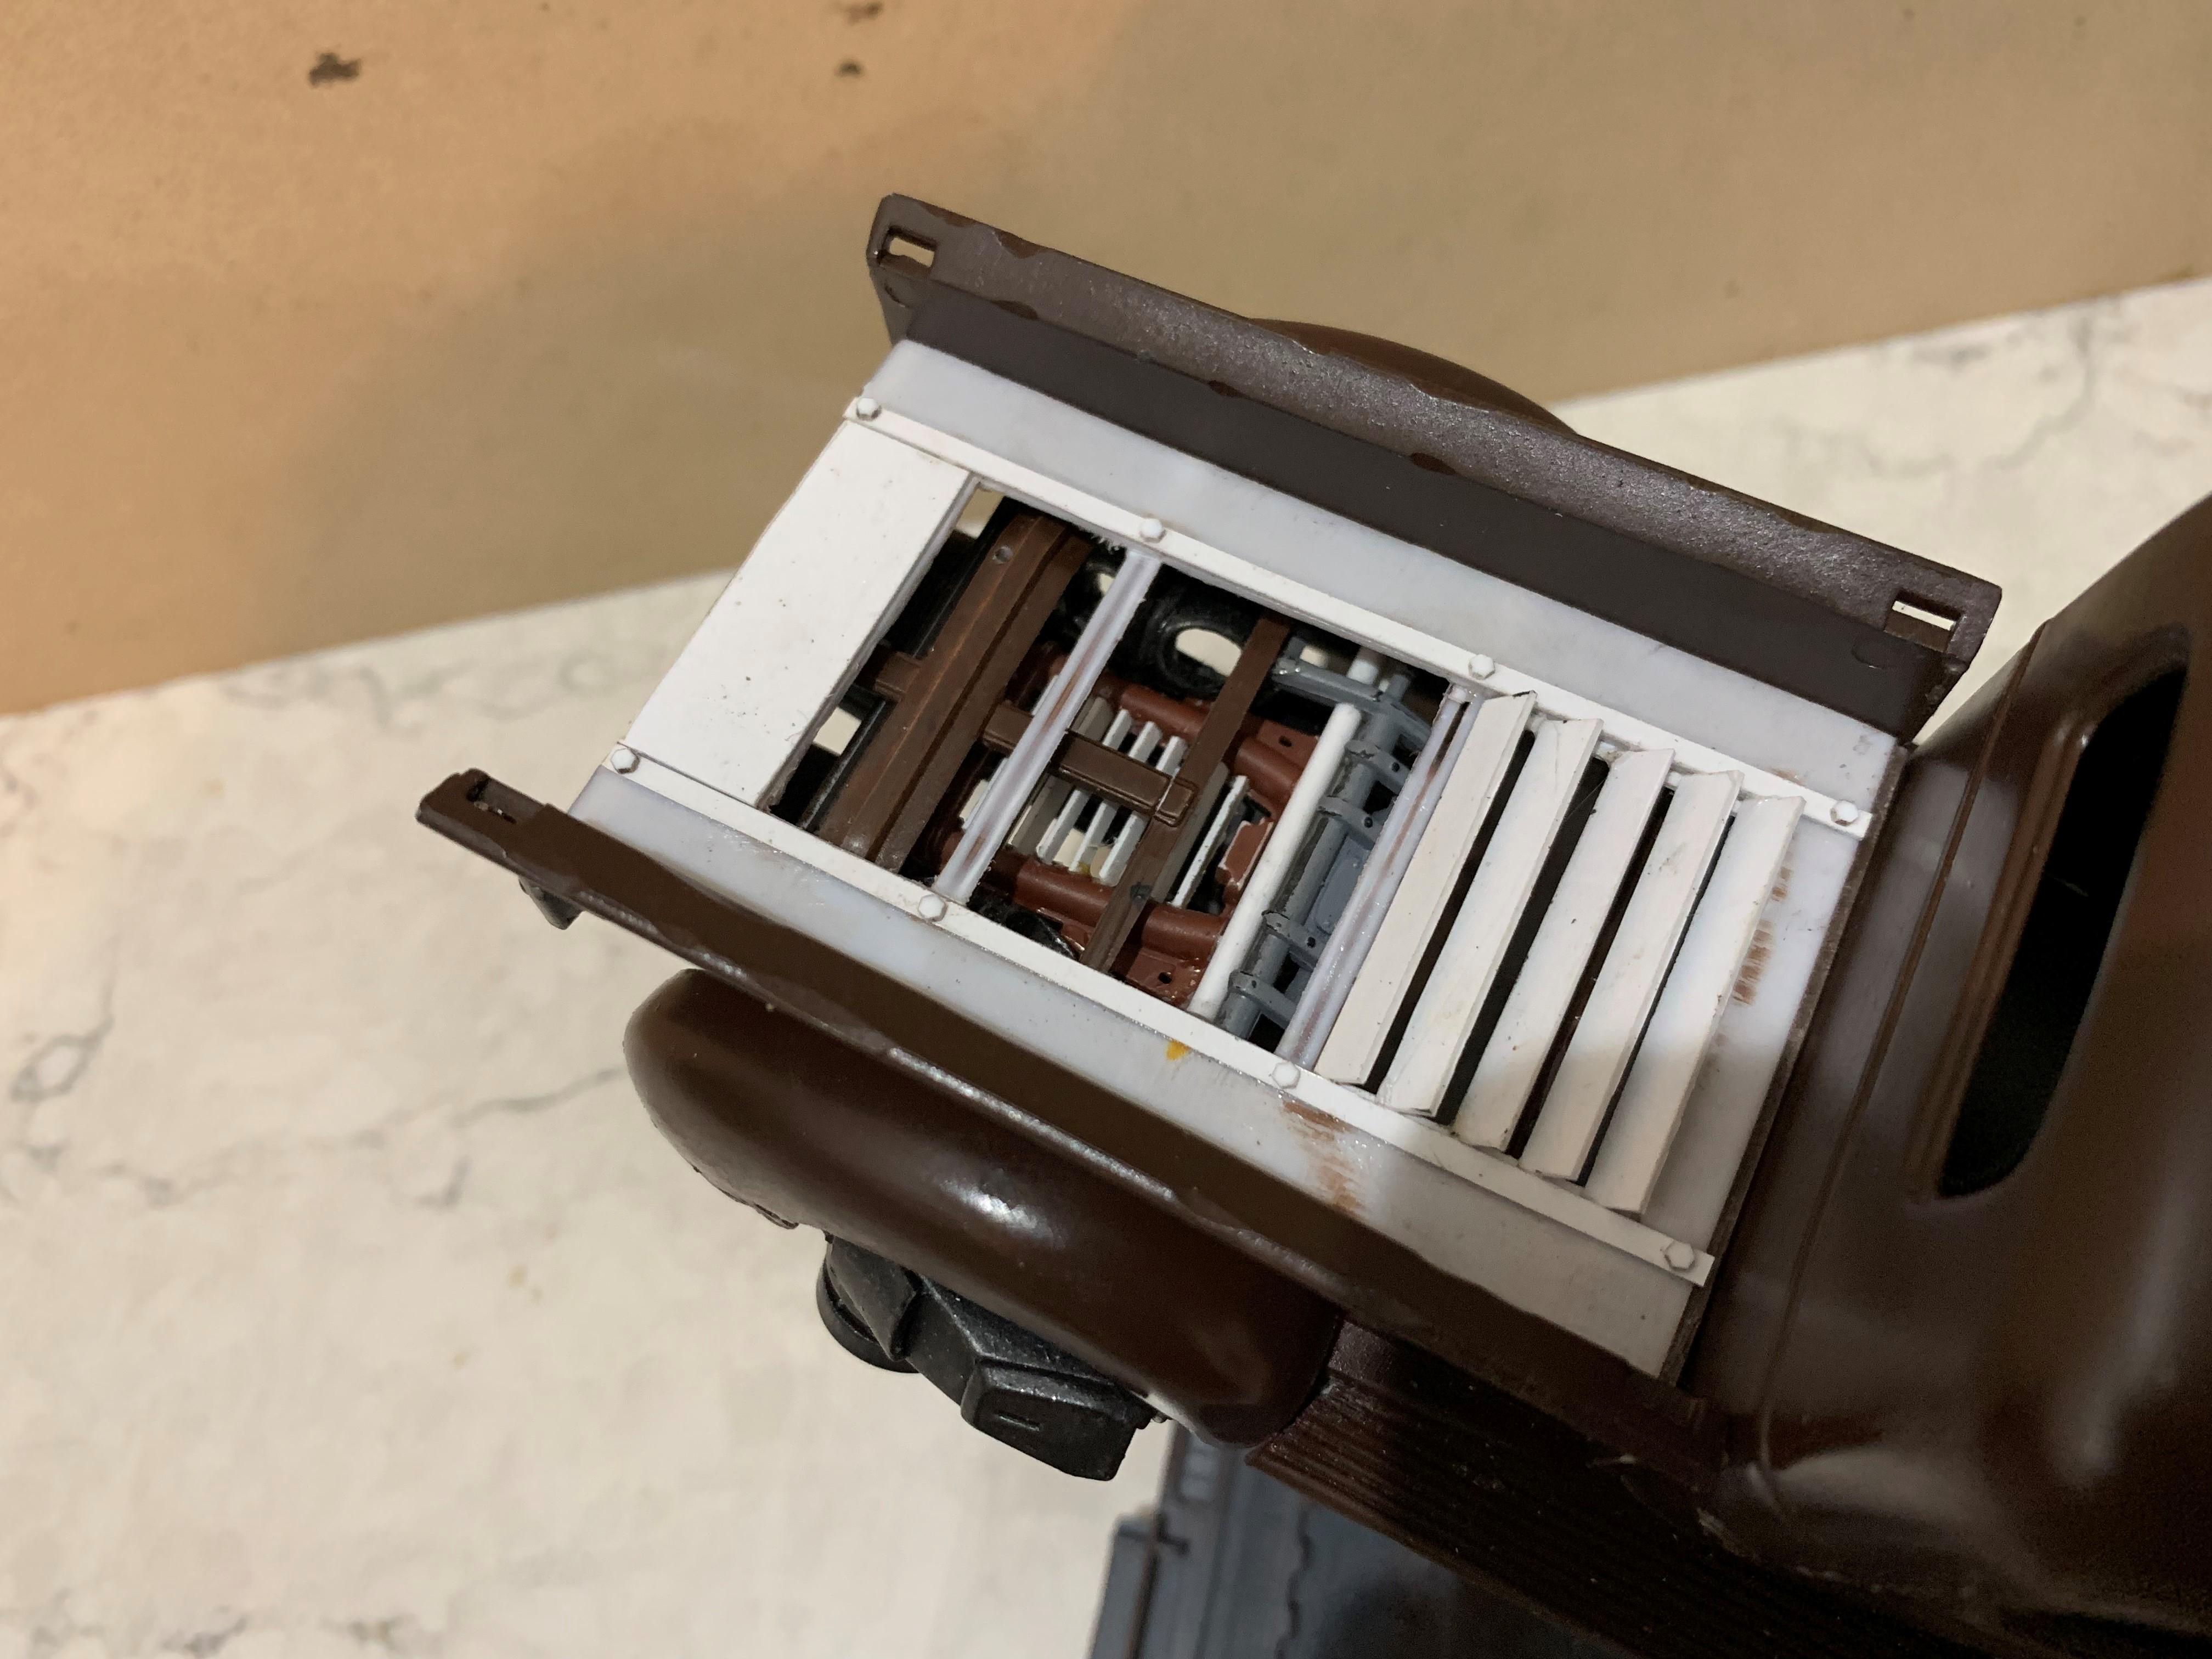
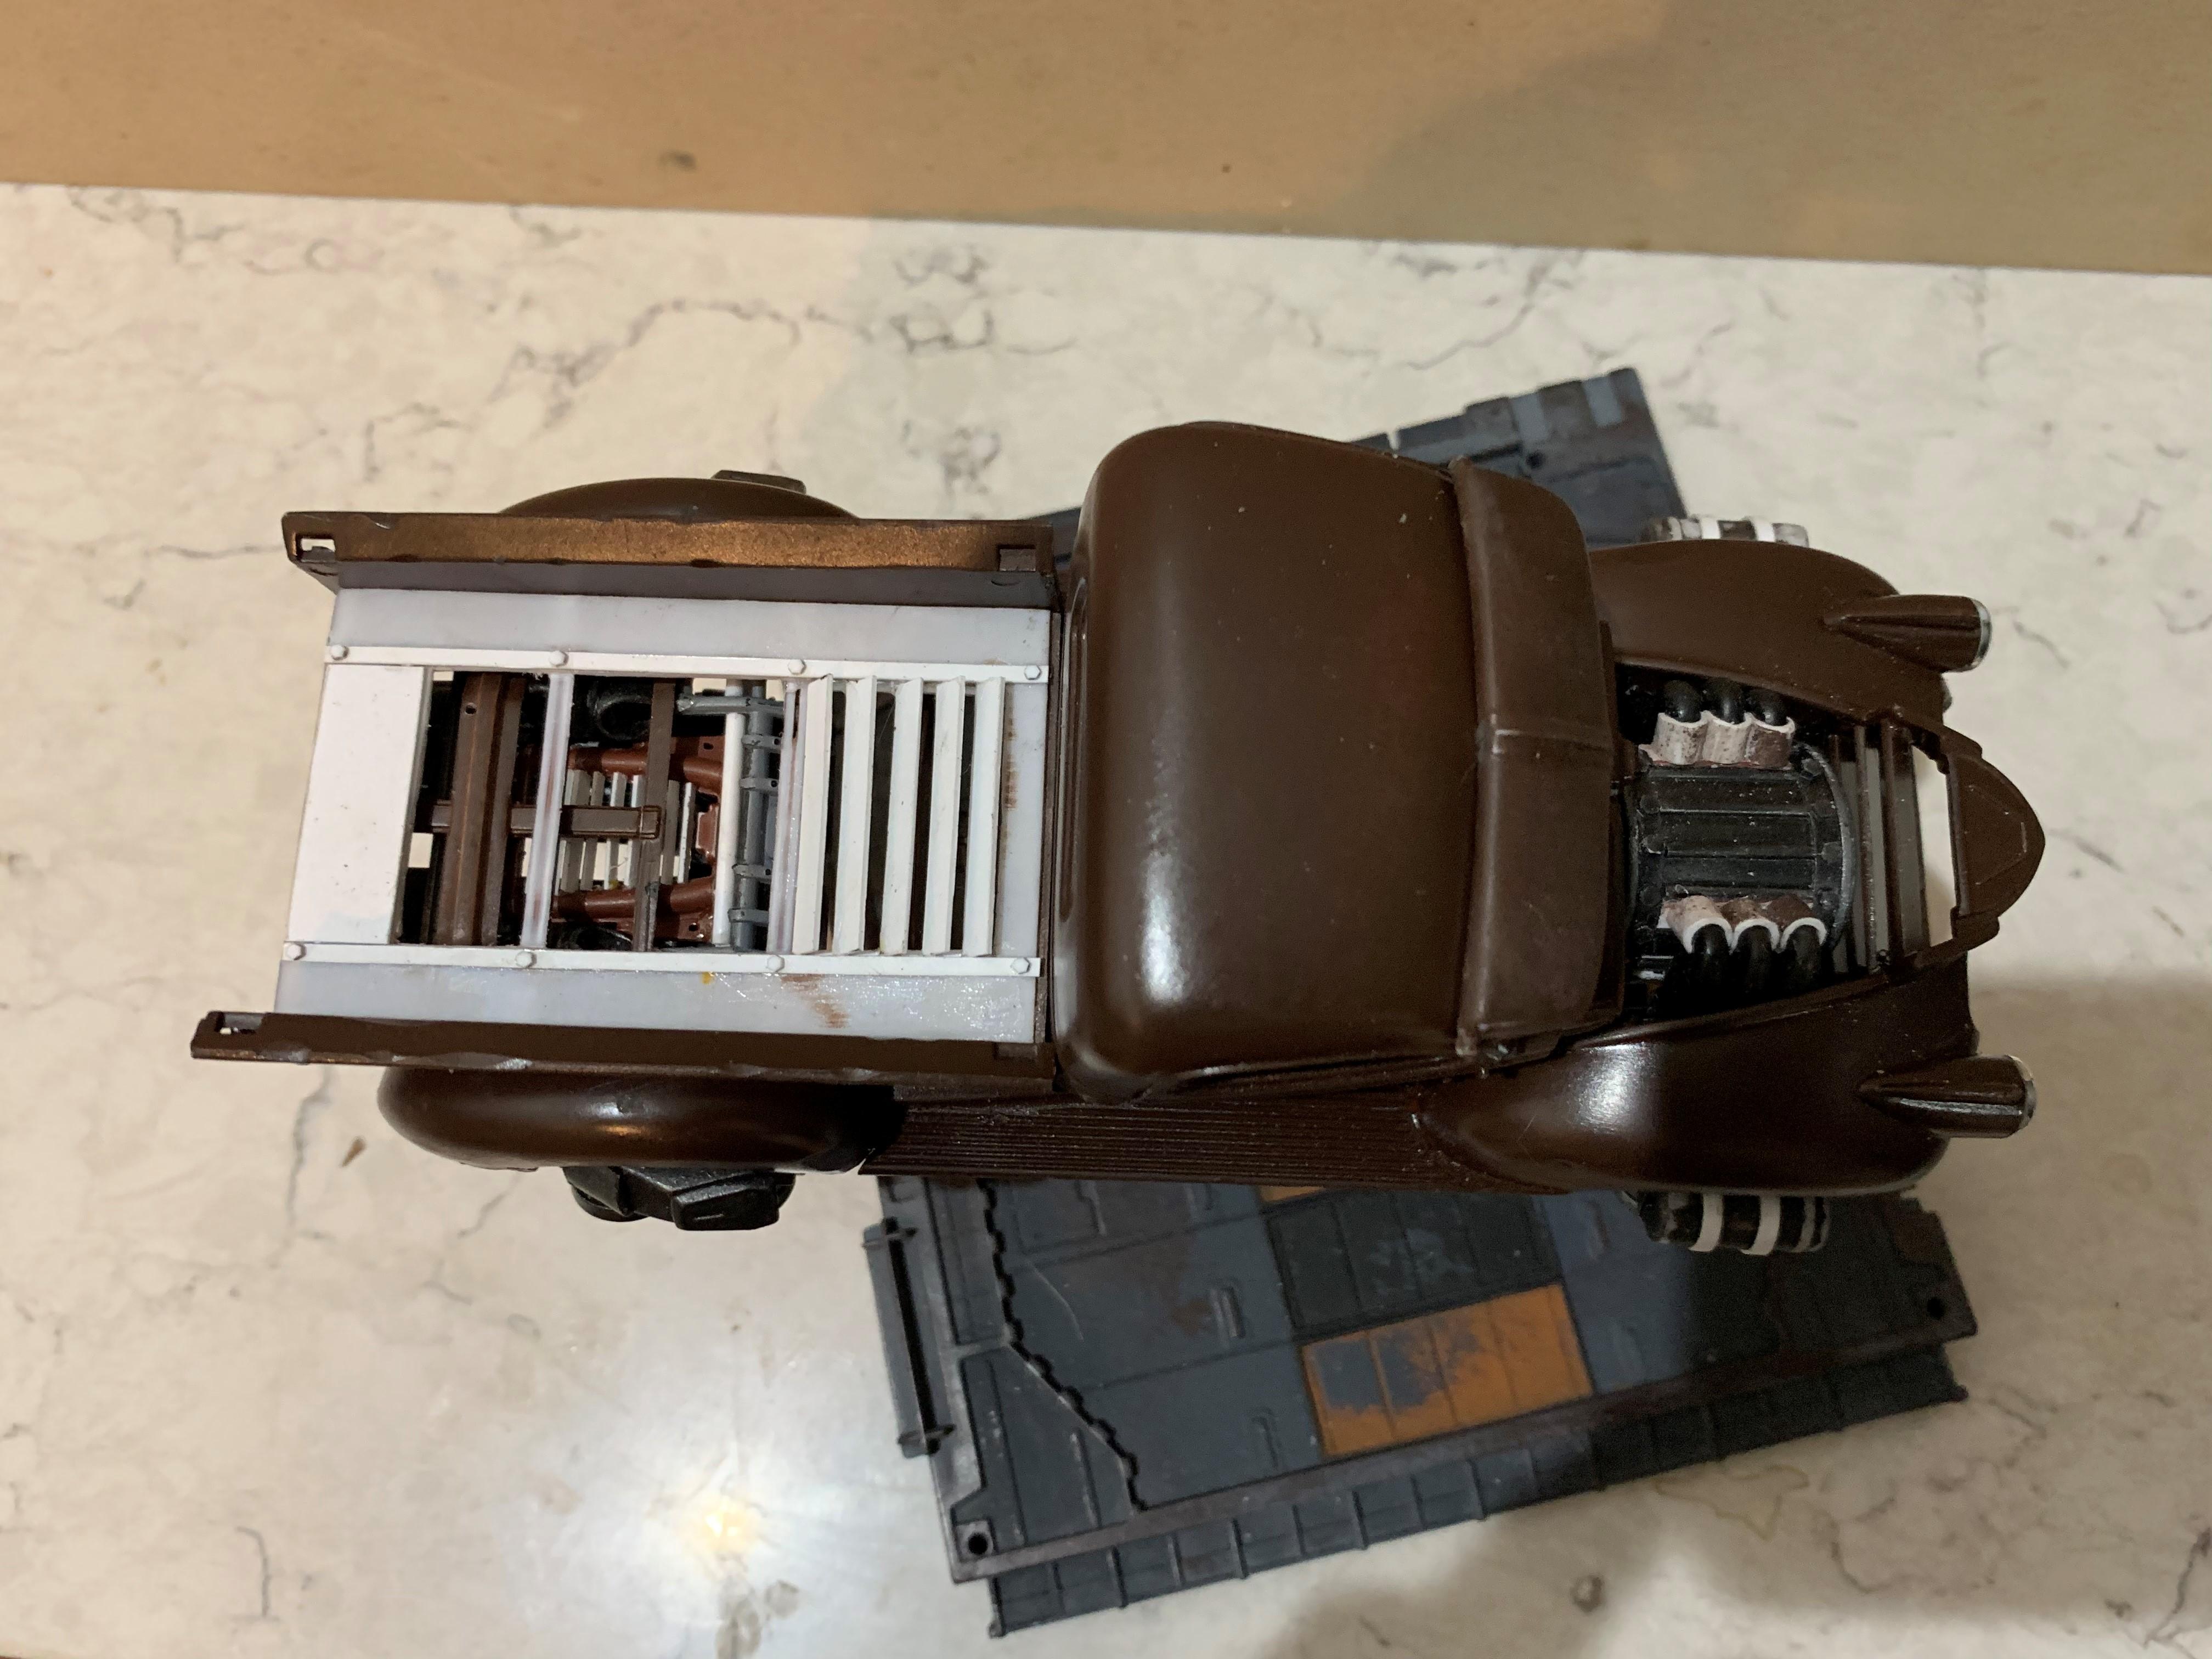
The kit comes with wooden side rails for the bed. I might include them when it's finished. It definitely gives it a farmer truck look. The model is almost complete. I have added lots of little details since my last photos. I have photos with the visor on and off. I will probably have it on when it's complete. Not 100% decided yet. I beefed up the frame at the rear of the truck. It now has a cage surrounding the two rear turbines. In the earlier photos, they had no support. I also filled voids with bent styrene rod as pipes. I made some tail lights and might add rear amber turn signals. I added wiring under the hood. With the visor off, you can see that the windshield wipers are mounted from the roof. Rear turbine cover is off so you can see the wiring. The large cover comes off completely. The smaller cover is hinged. I made some front turn signals out of styrene tube and some clear sprue. I'll be adding the driver's spotlight and side mirror soon. I like it without the bed! The next time I put up photos it should be done. Hopefully this week. Thanks for looking.
-
41 Chevy Truck - Jet Powered
Daxman replied to Daxman's topic in WIP: Model Trucks: Pickups, Vans, SUVs, Light Commercial
I use styrene rod, painted with Tamaya matte black. For the hoses under the frame of the truck, I used .125" diameter. On my VW jet car I used heat shrink tube that I found in a pack at Home Depot. It works great and has a rubber texture. Keeps it's shape fairly well when you heat it.
-
41 Chevy Truck - Jet Powered
Daxman replied to Daxman's topic in WIP: Model Trucks: Pickups, Vans, SUVs, Light Commercial
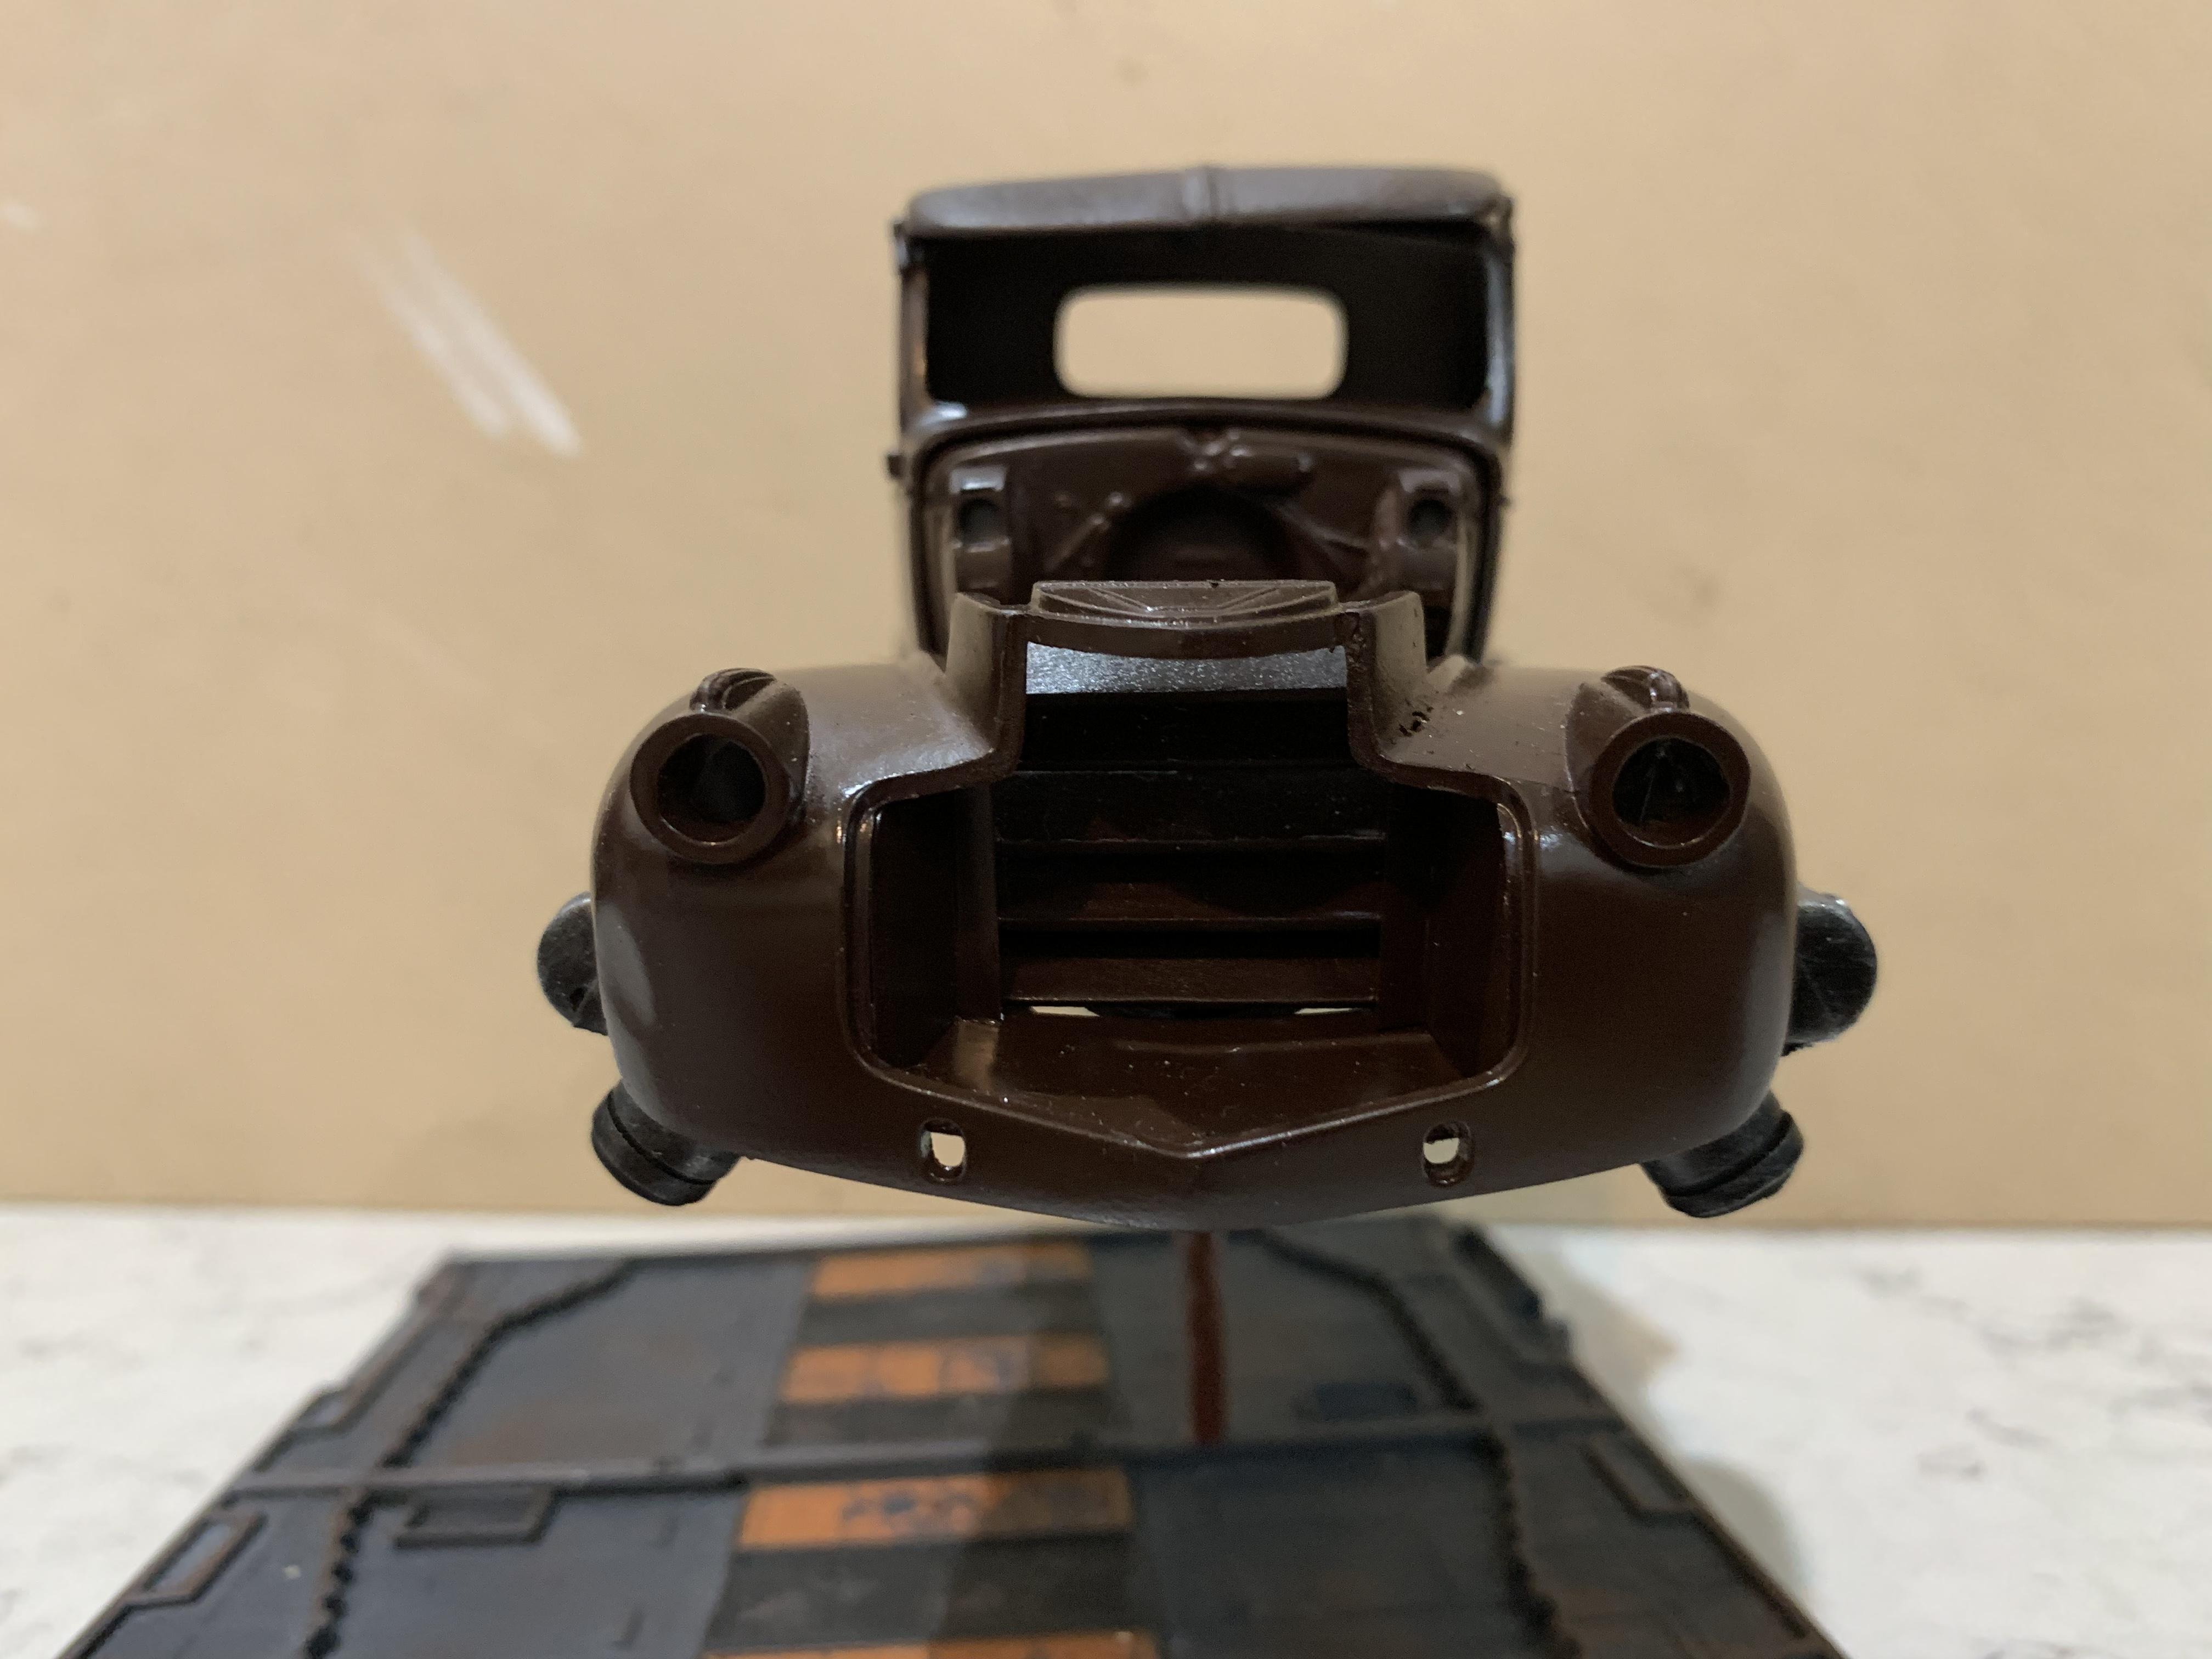
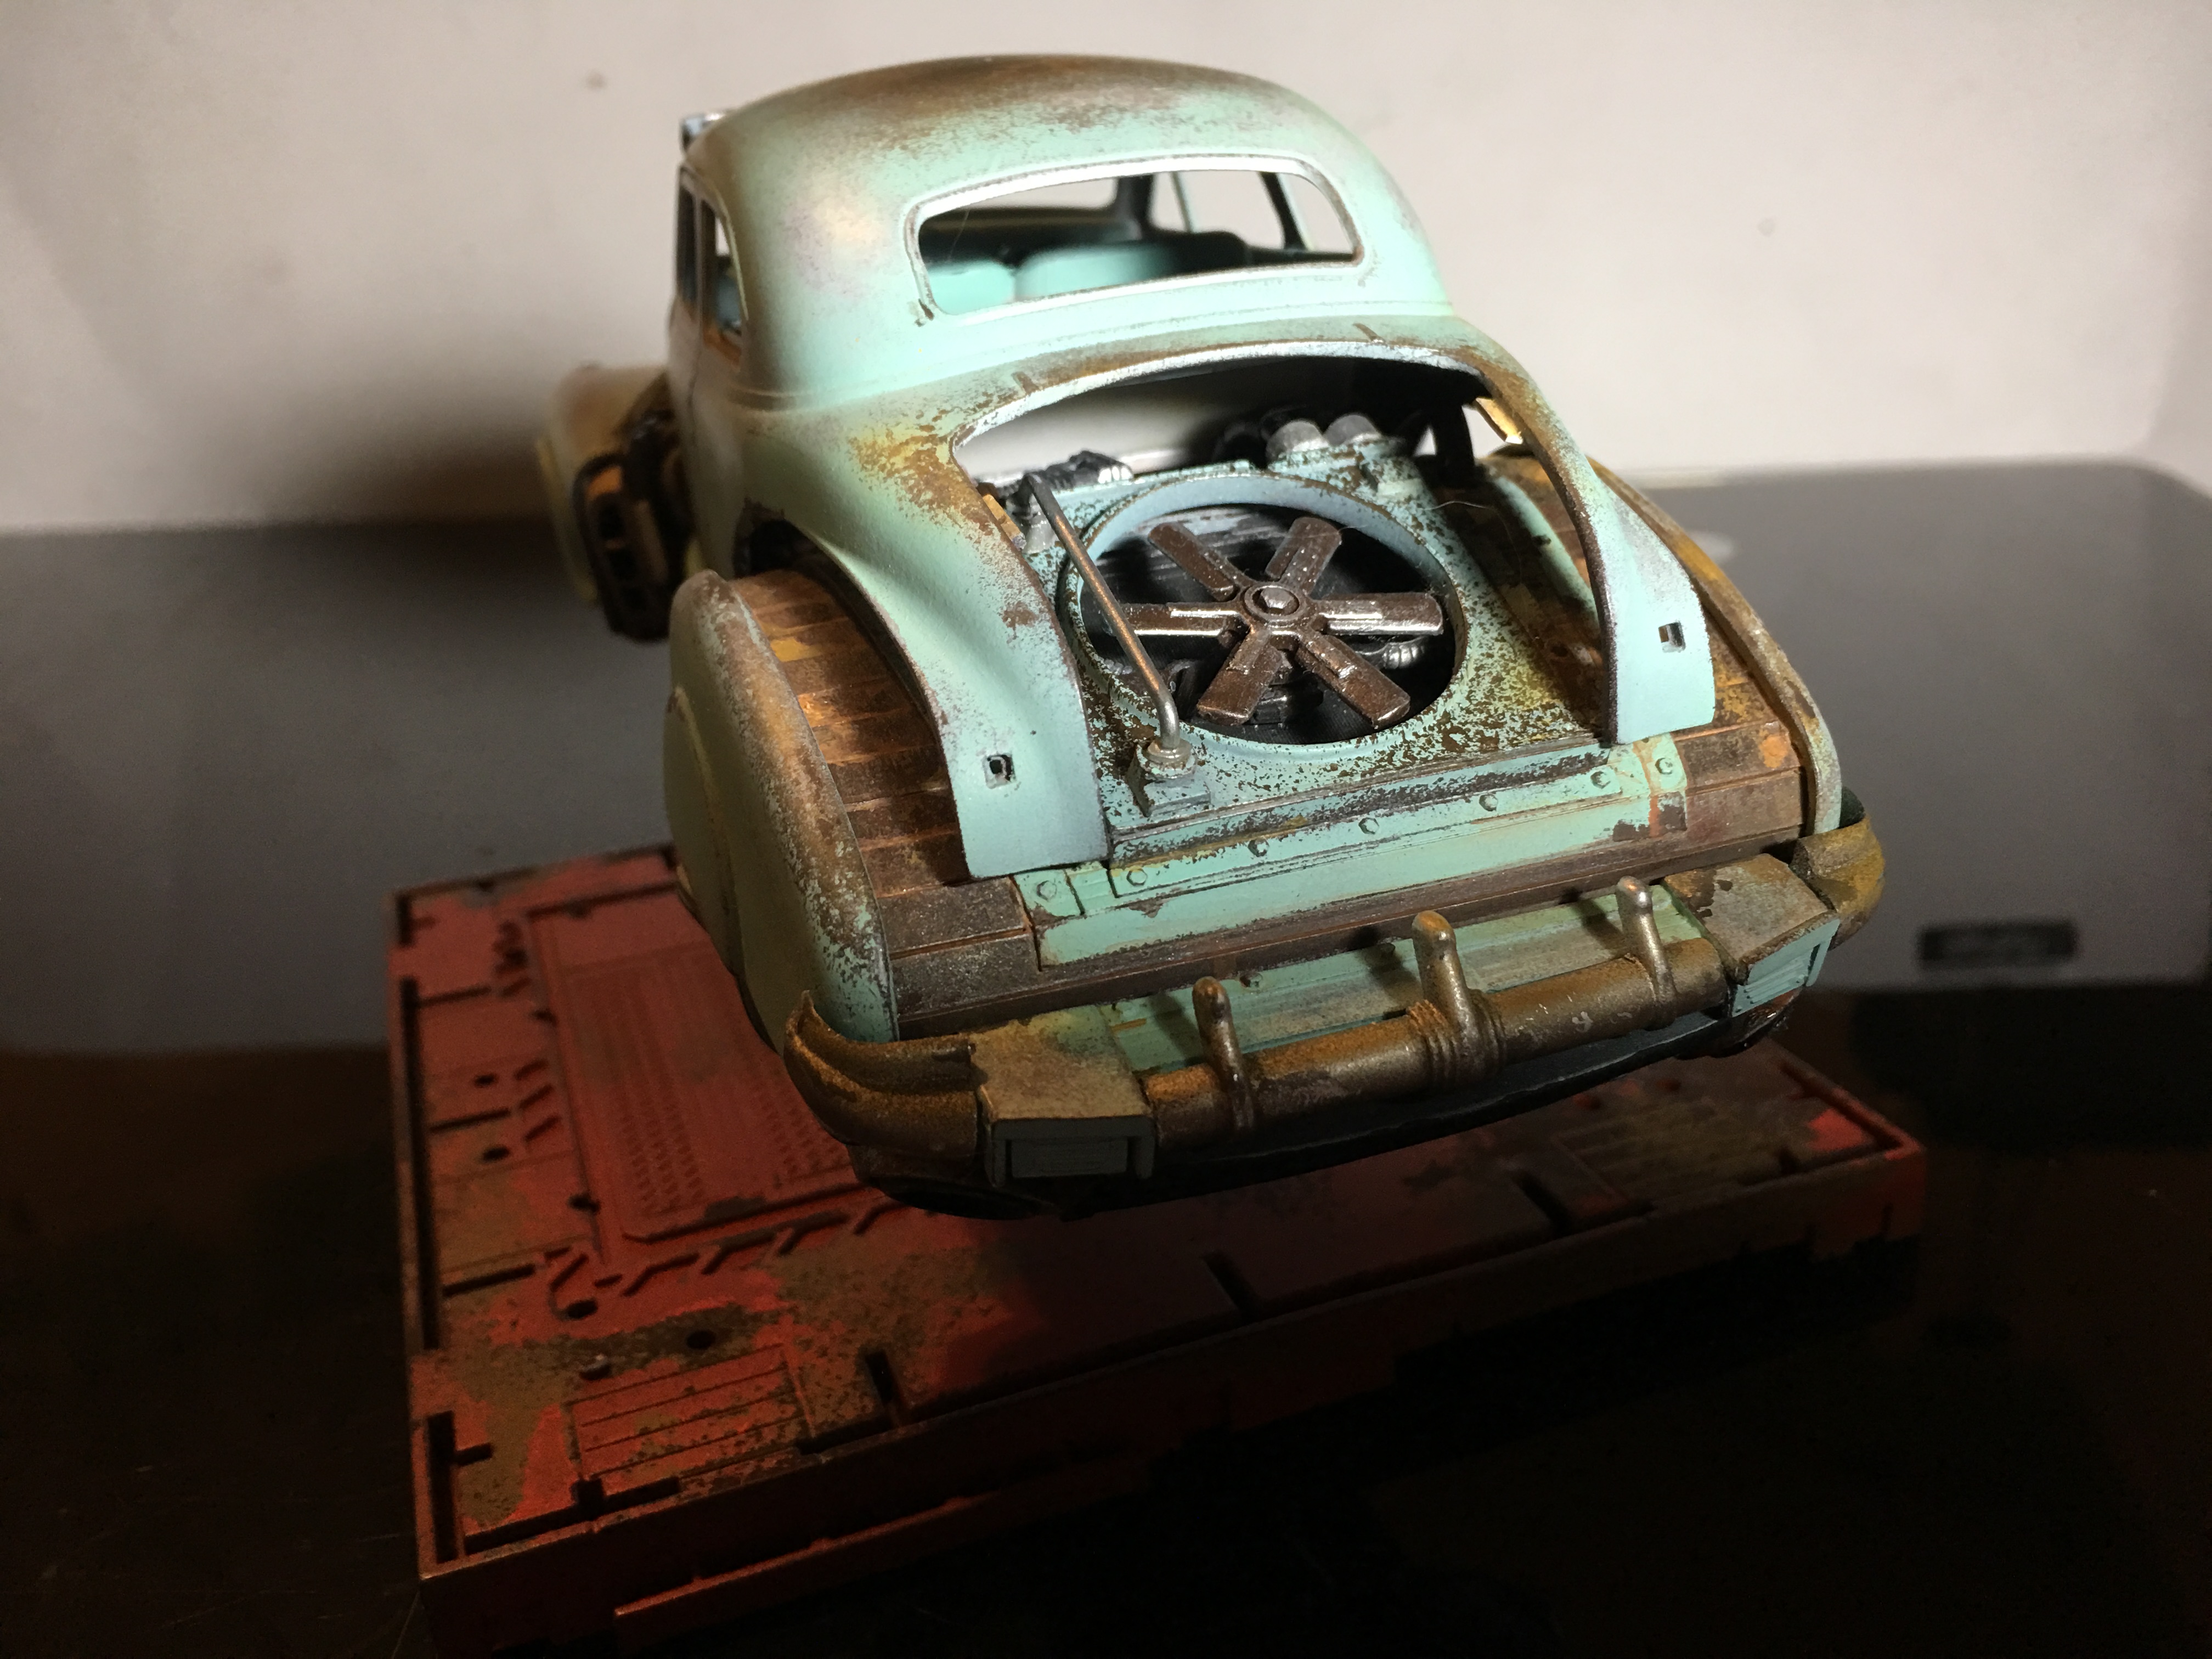
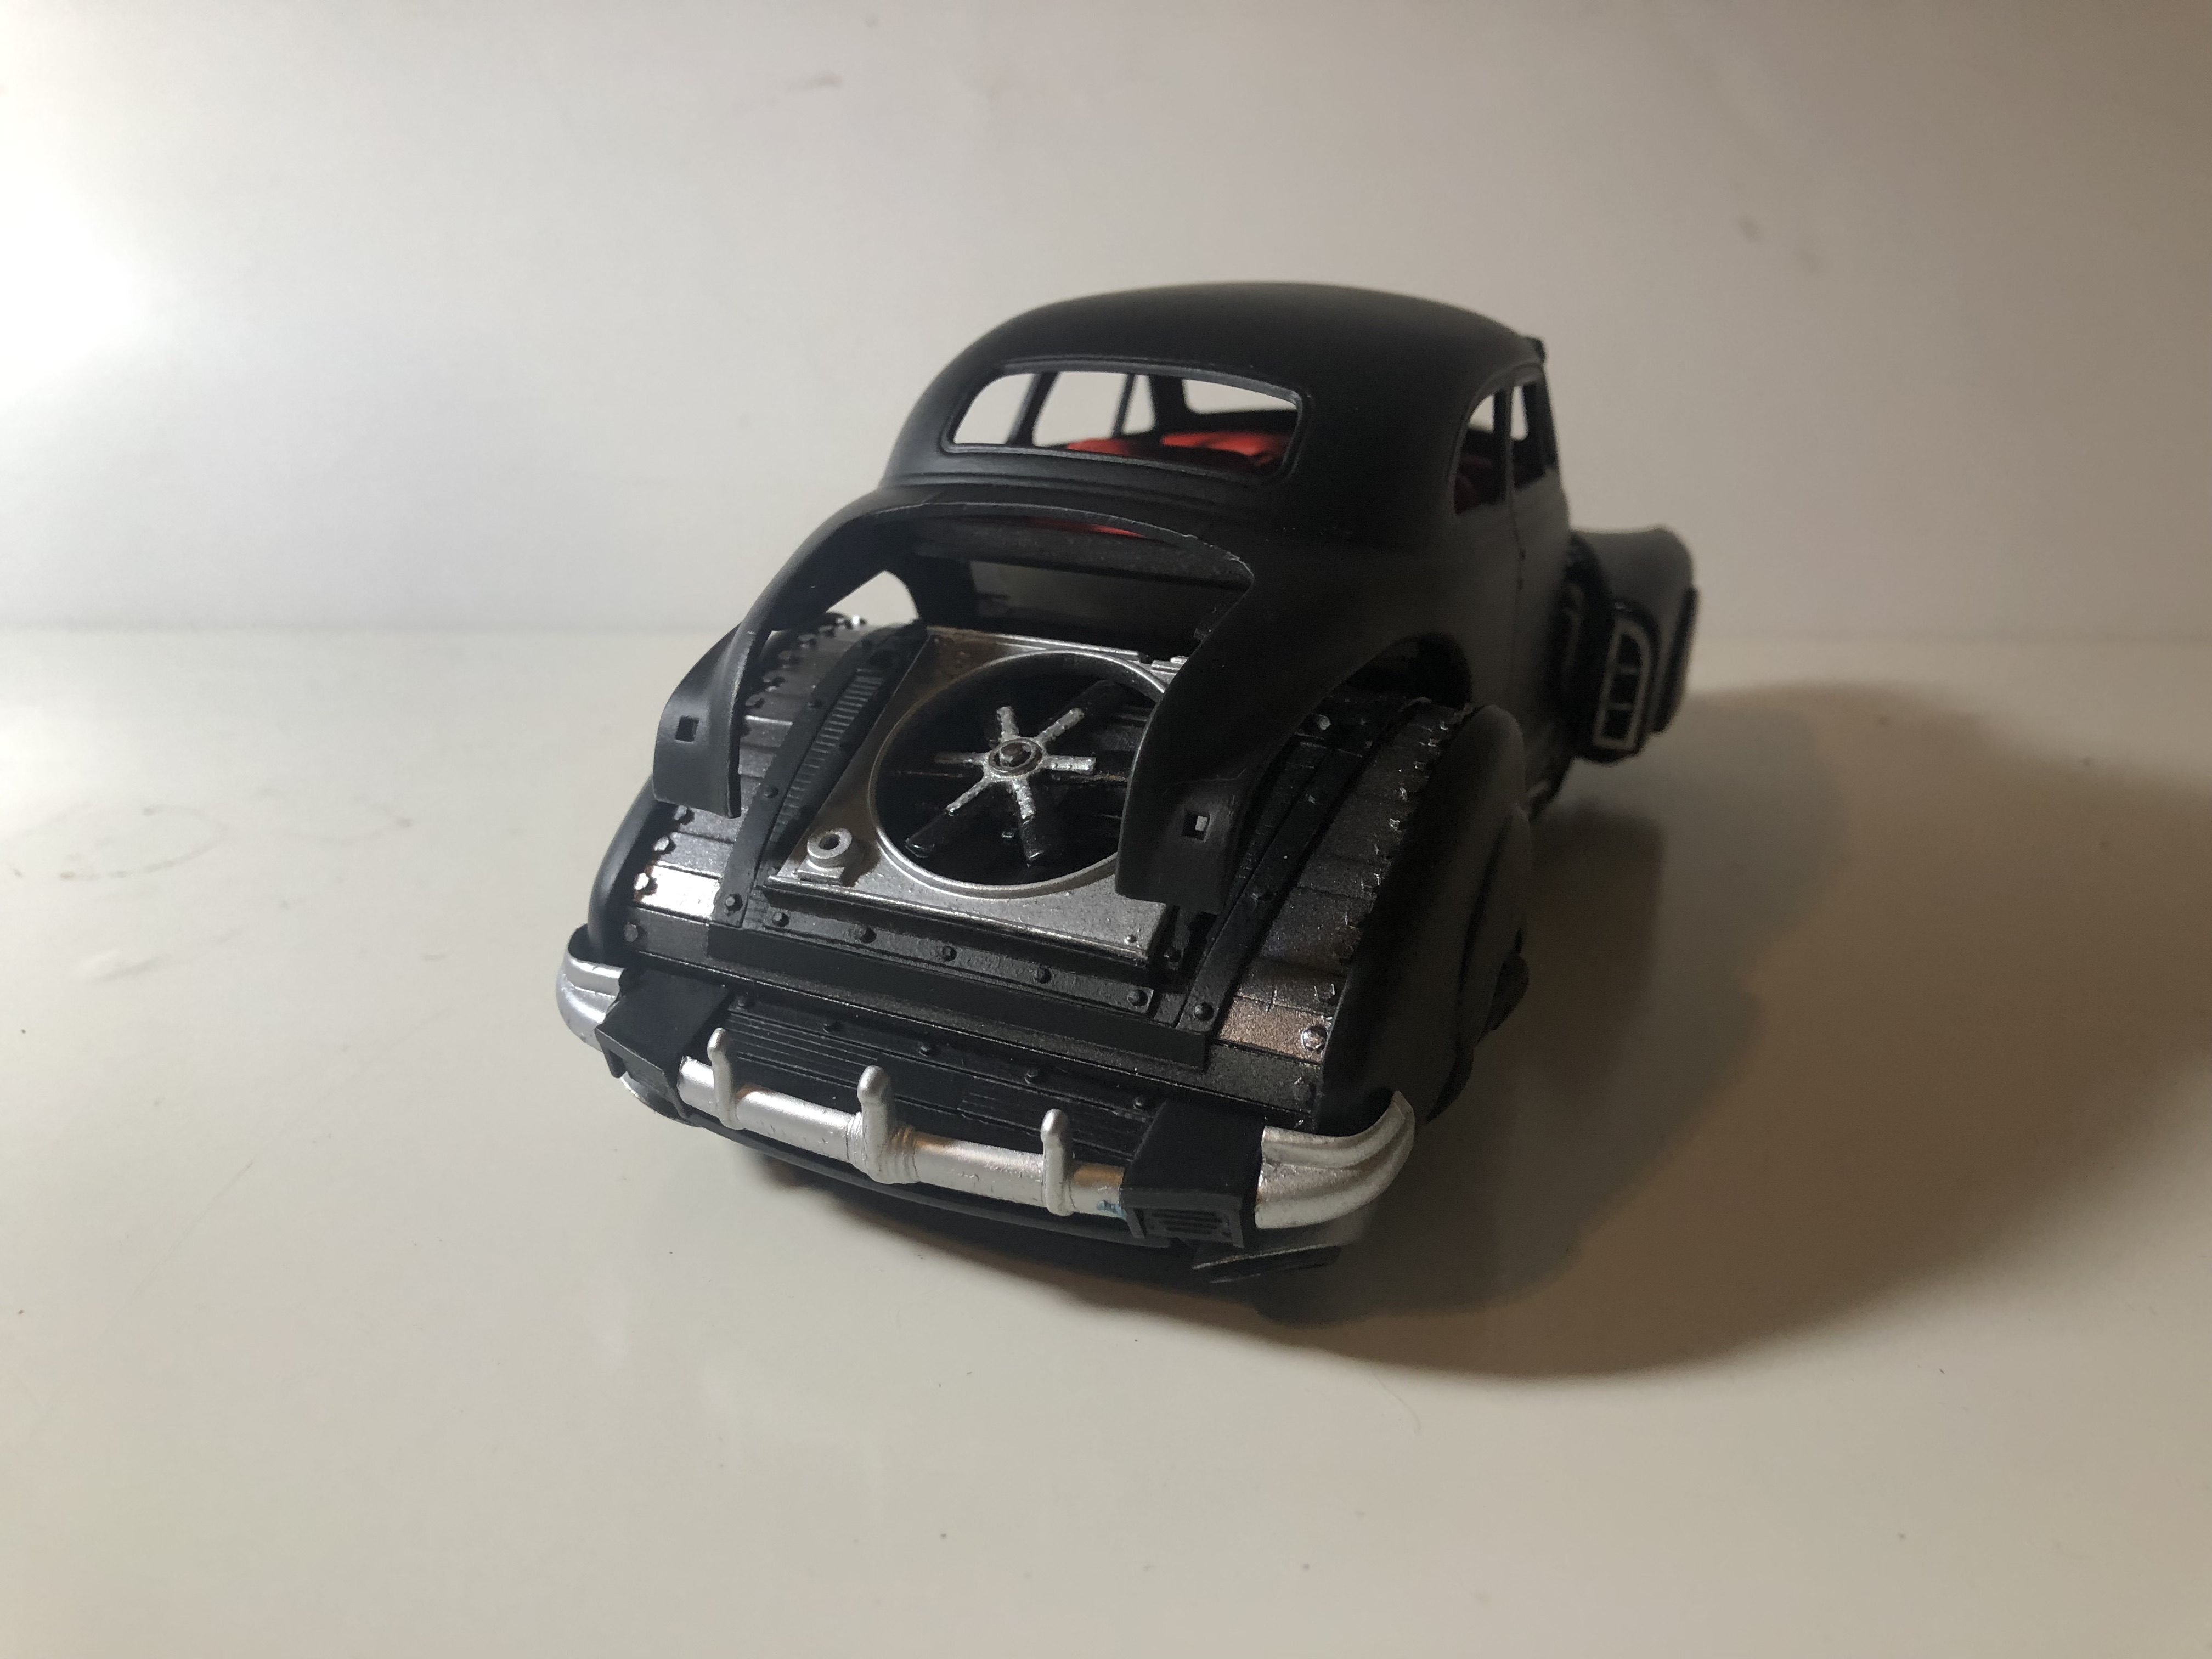
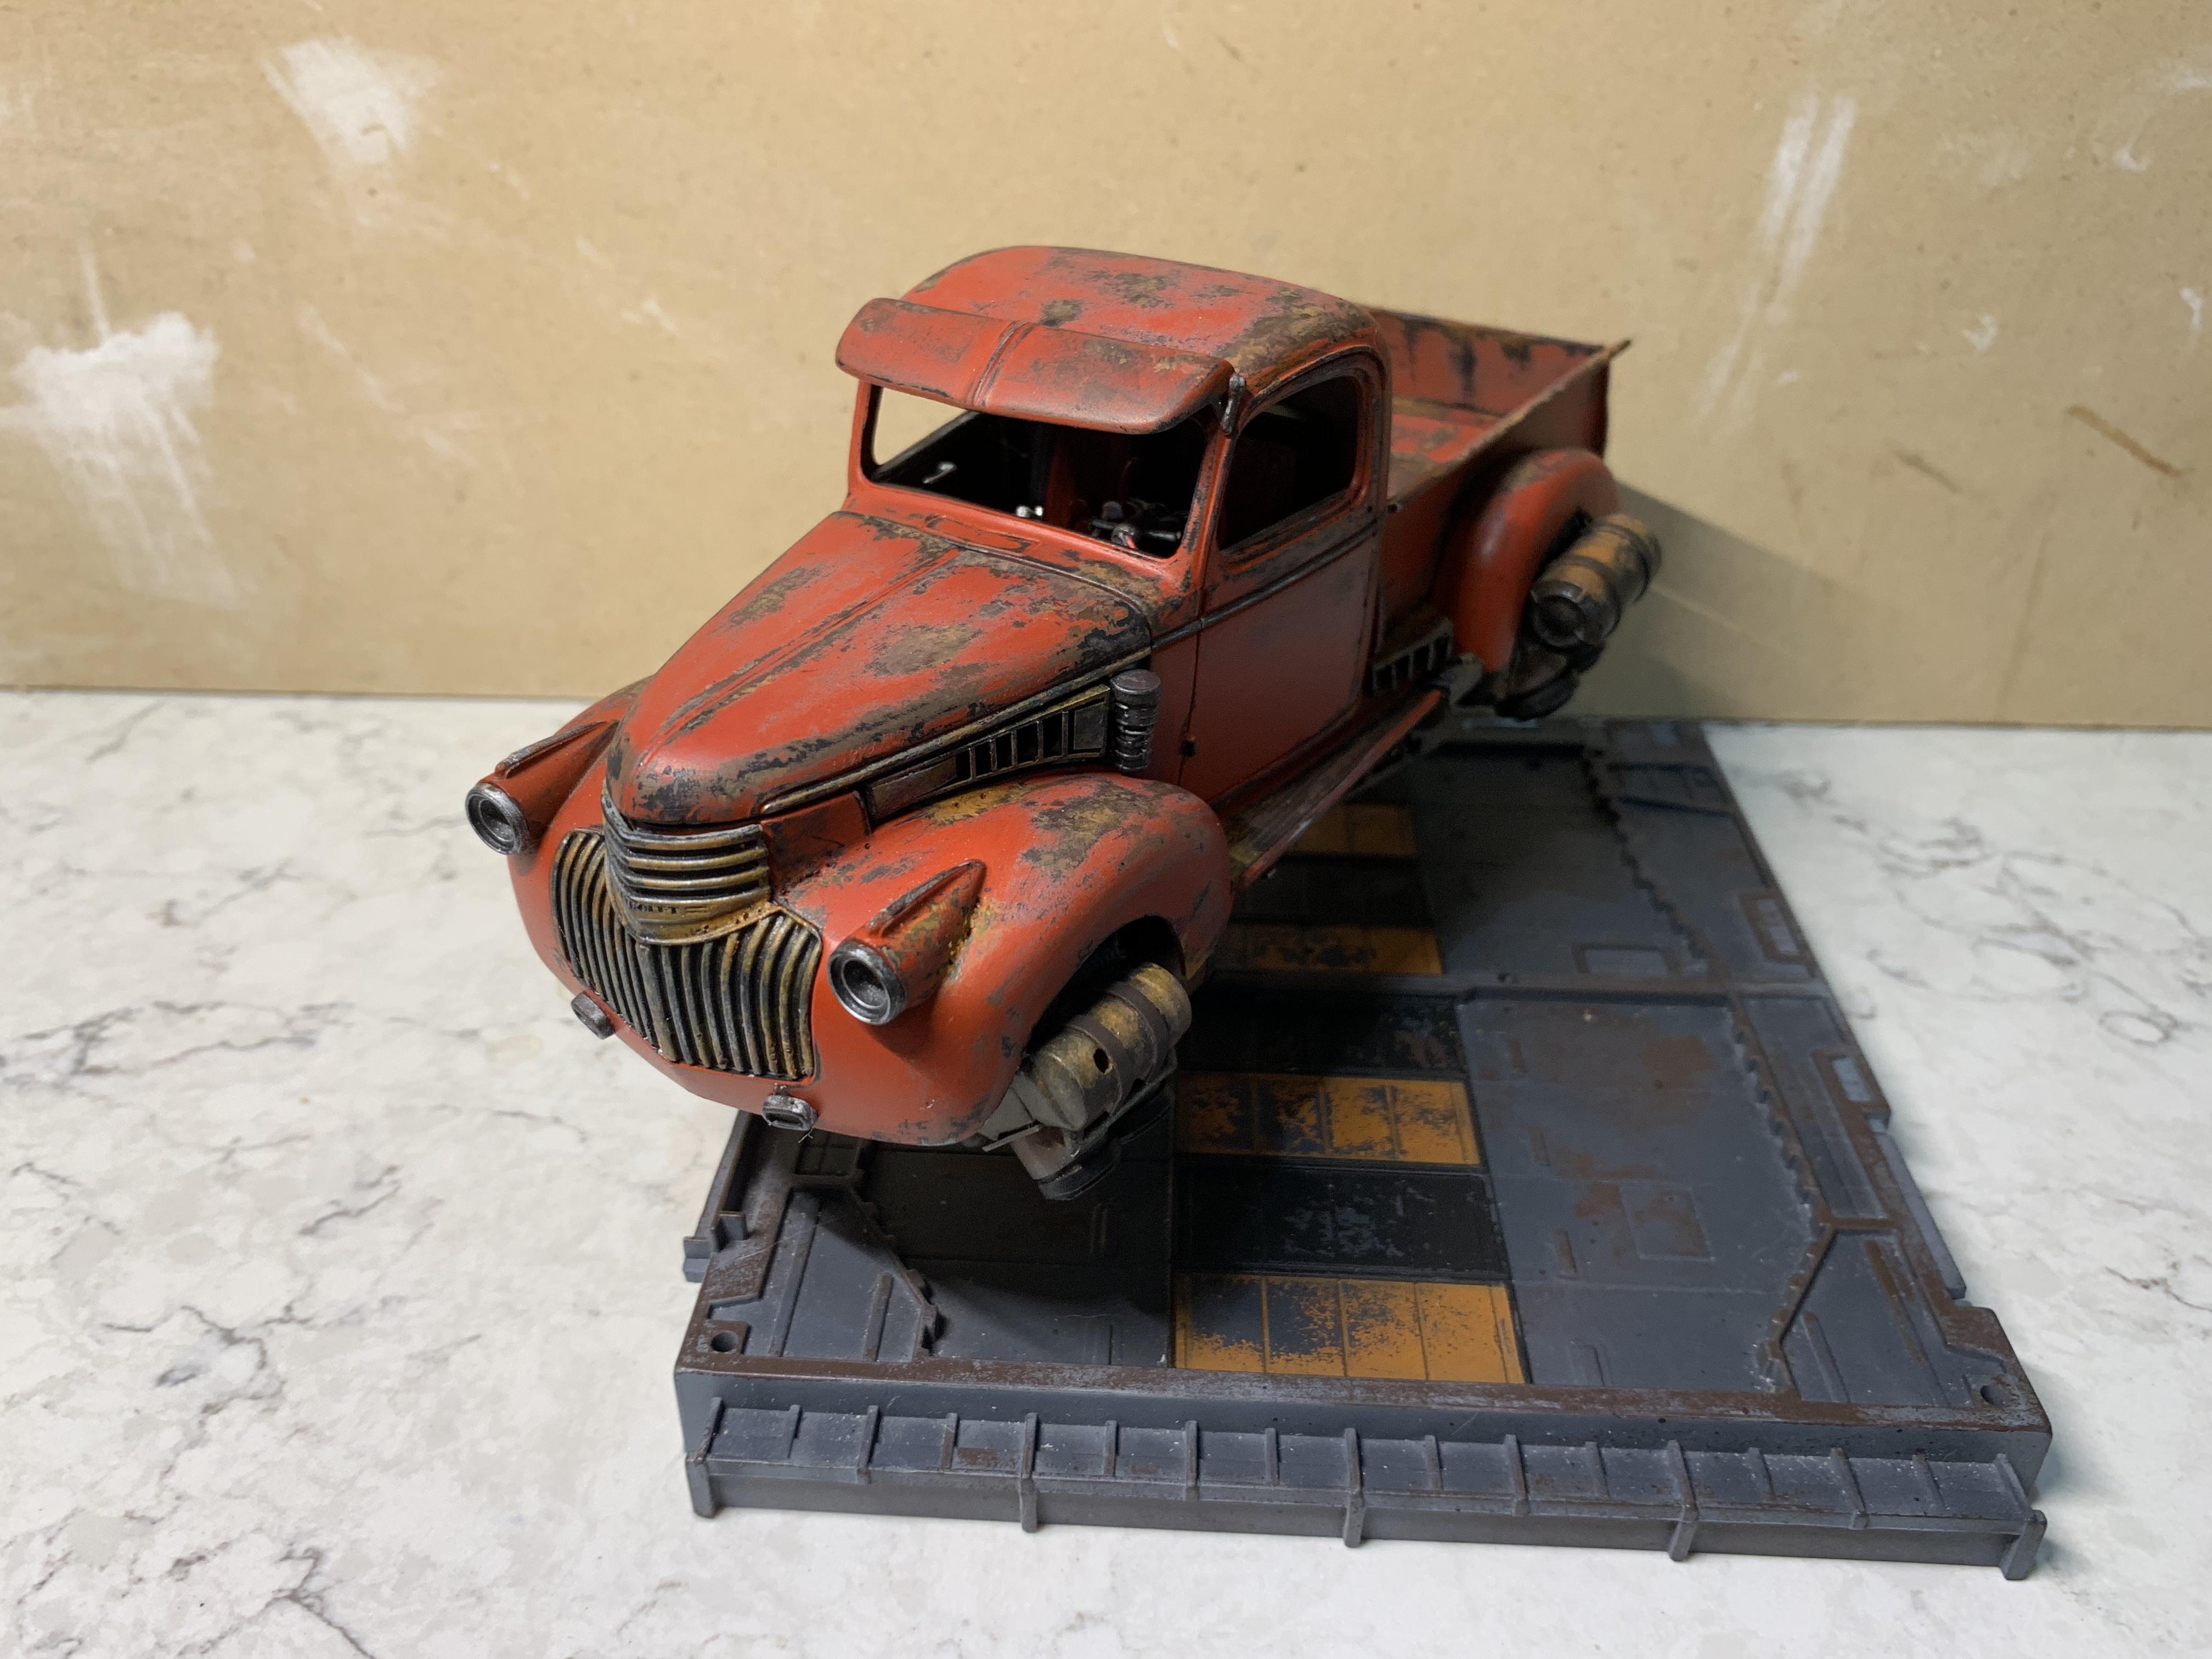
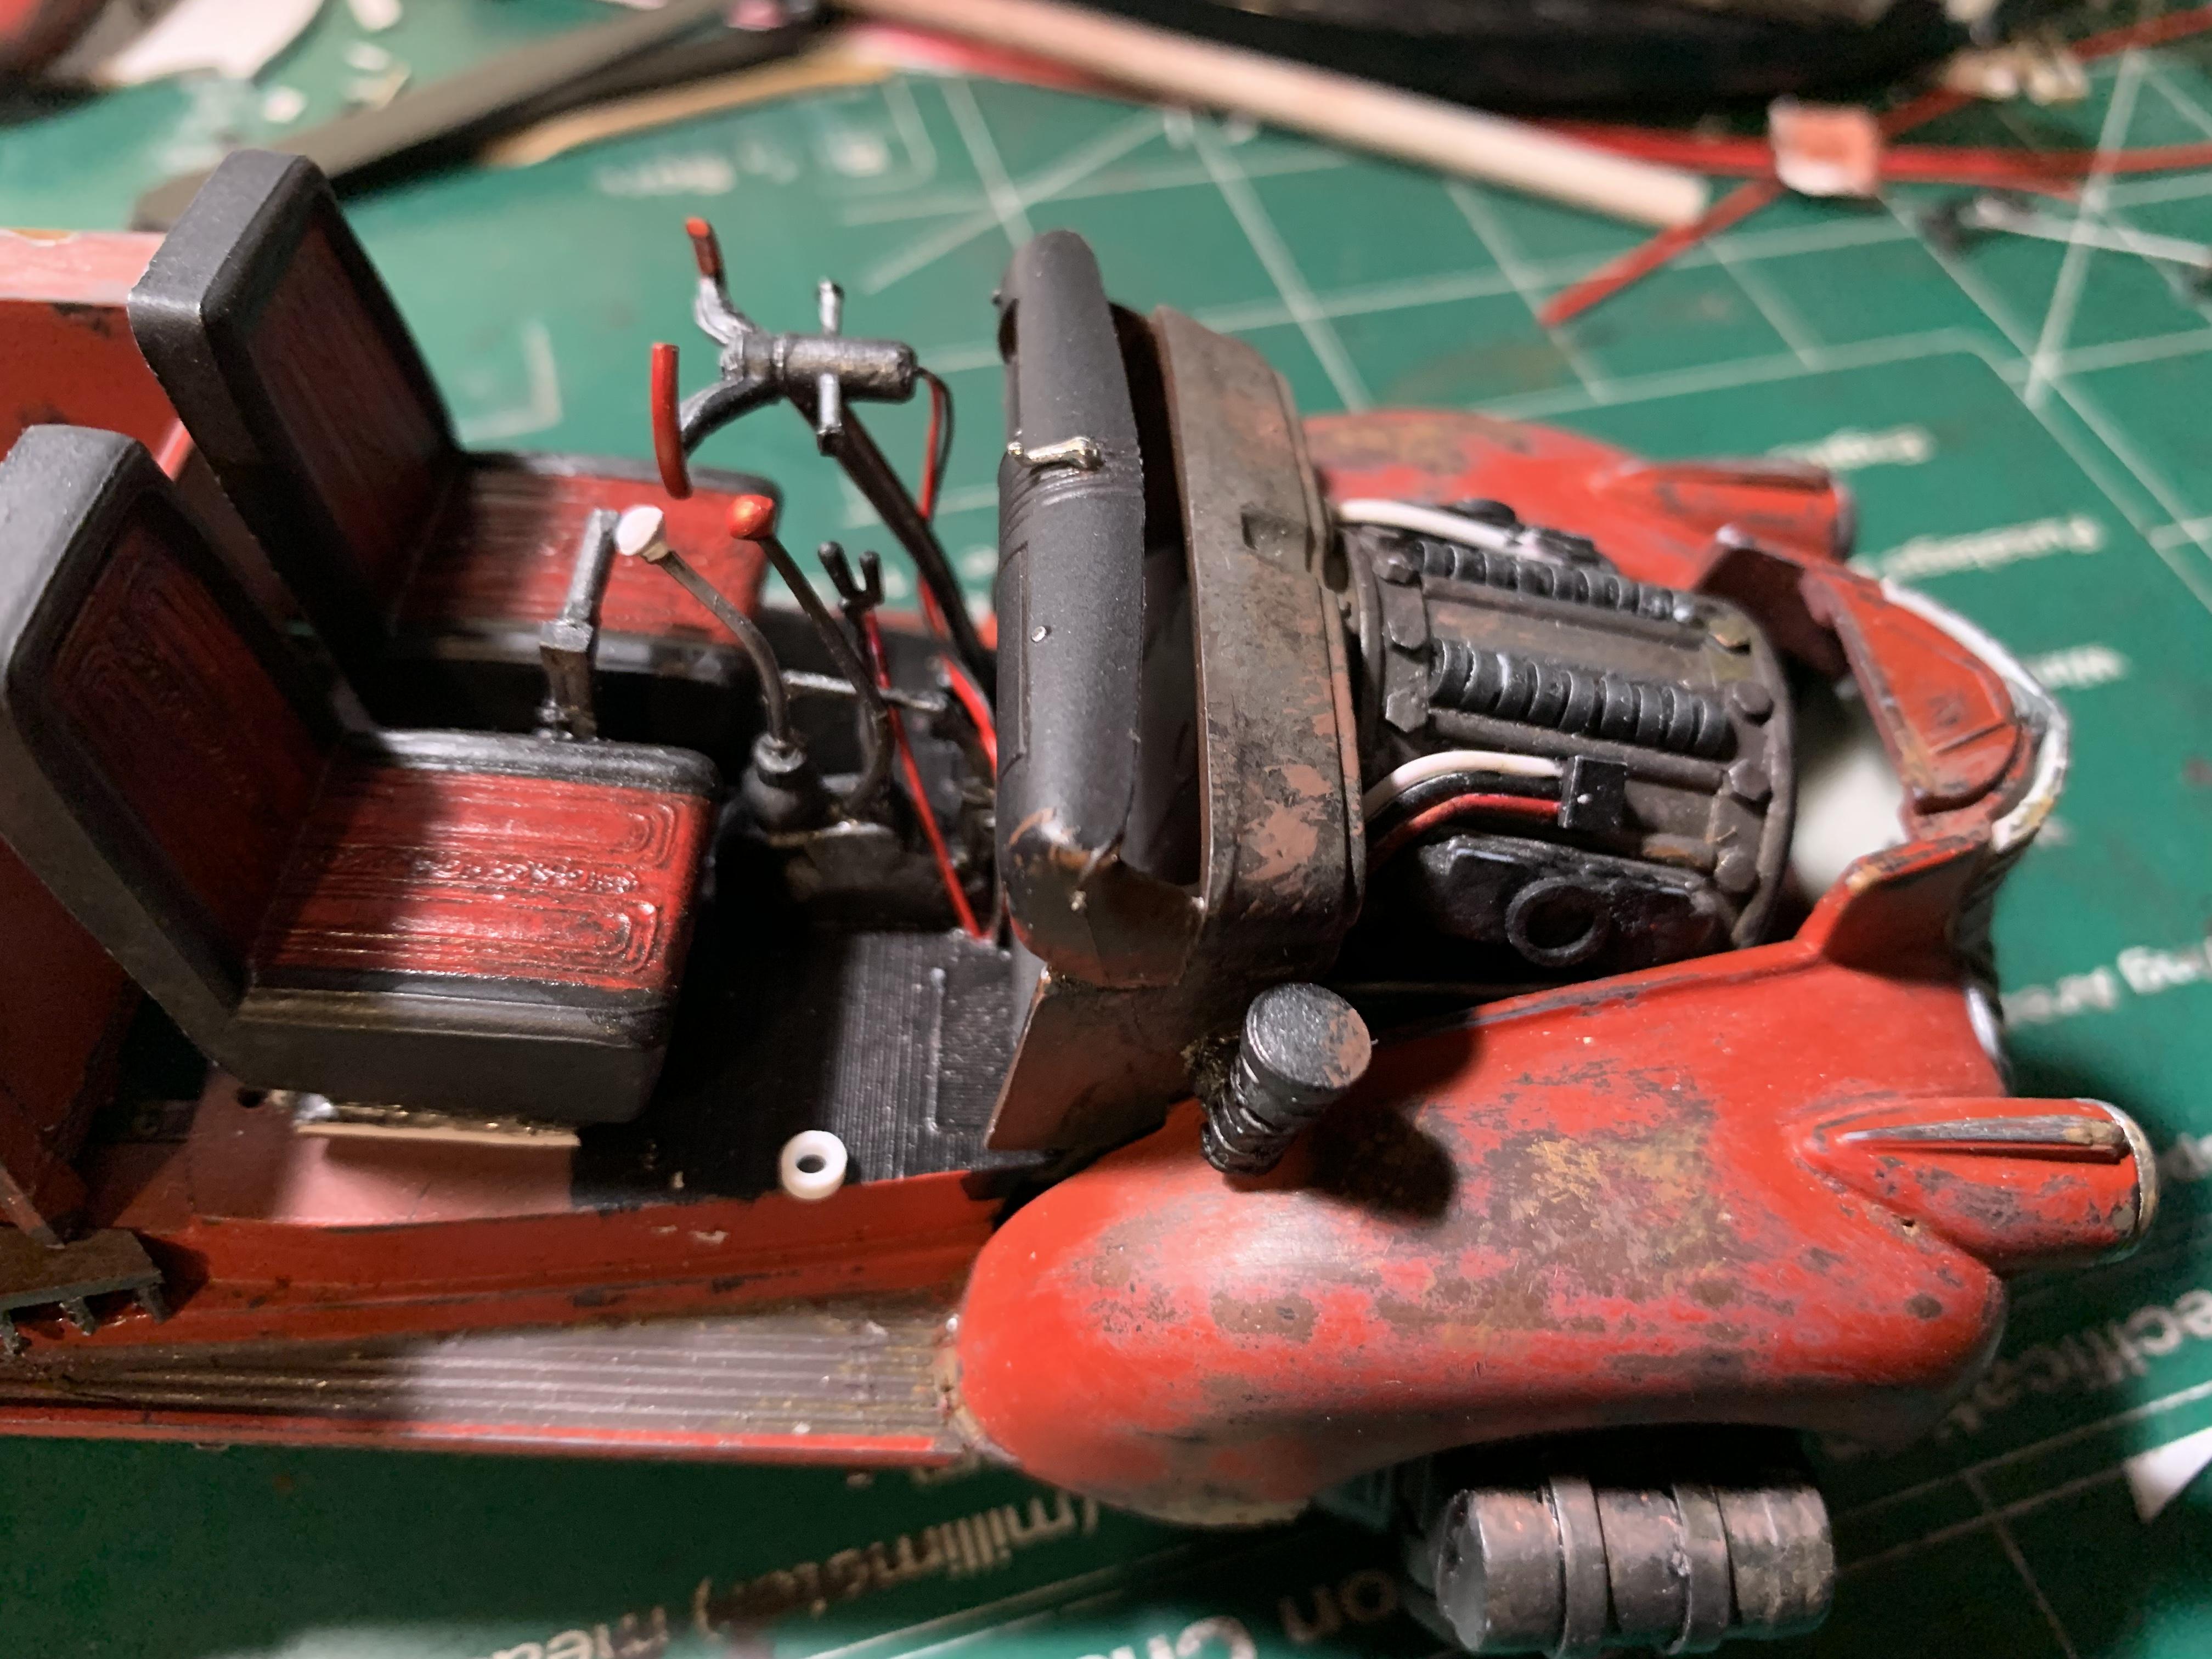
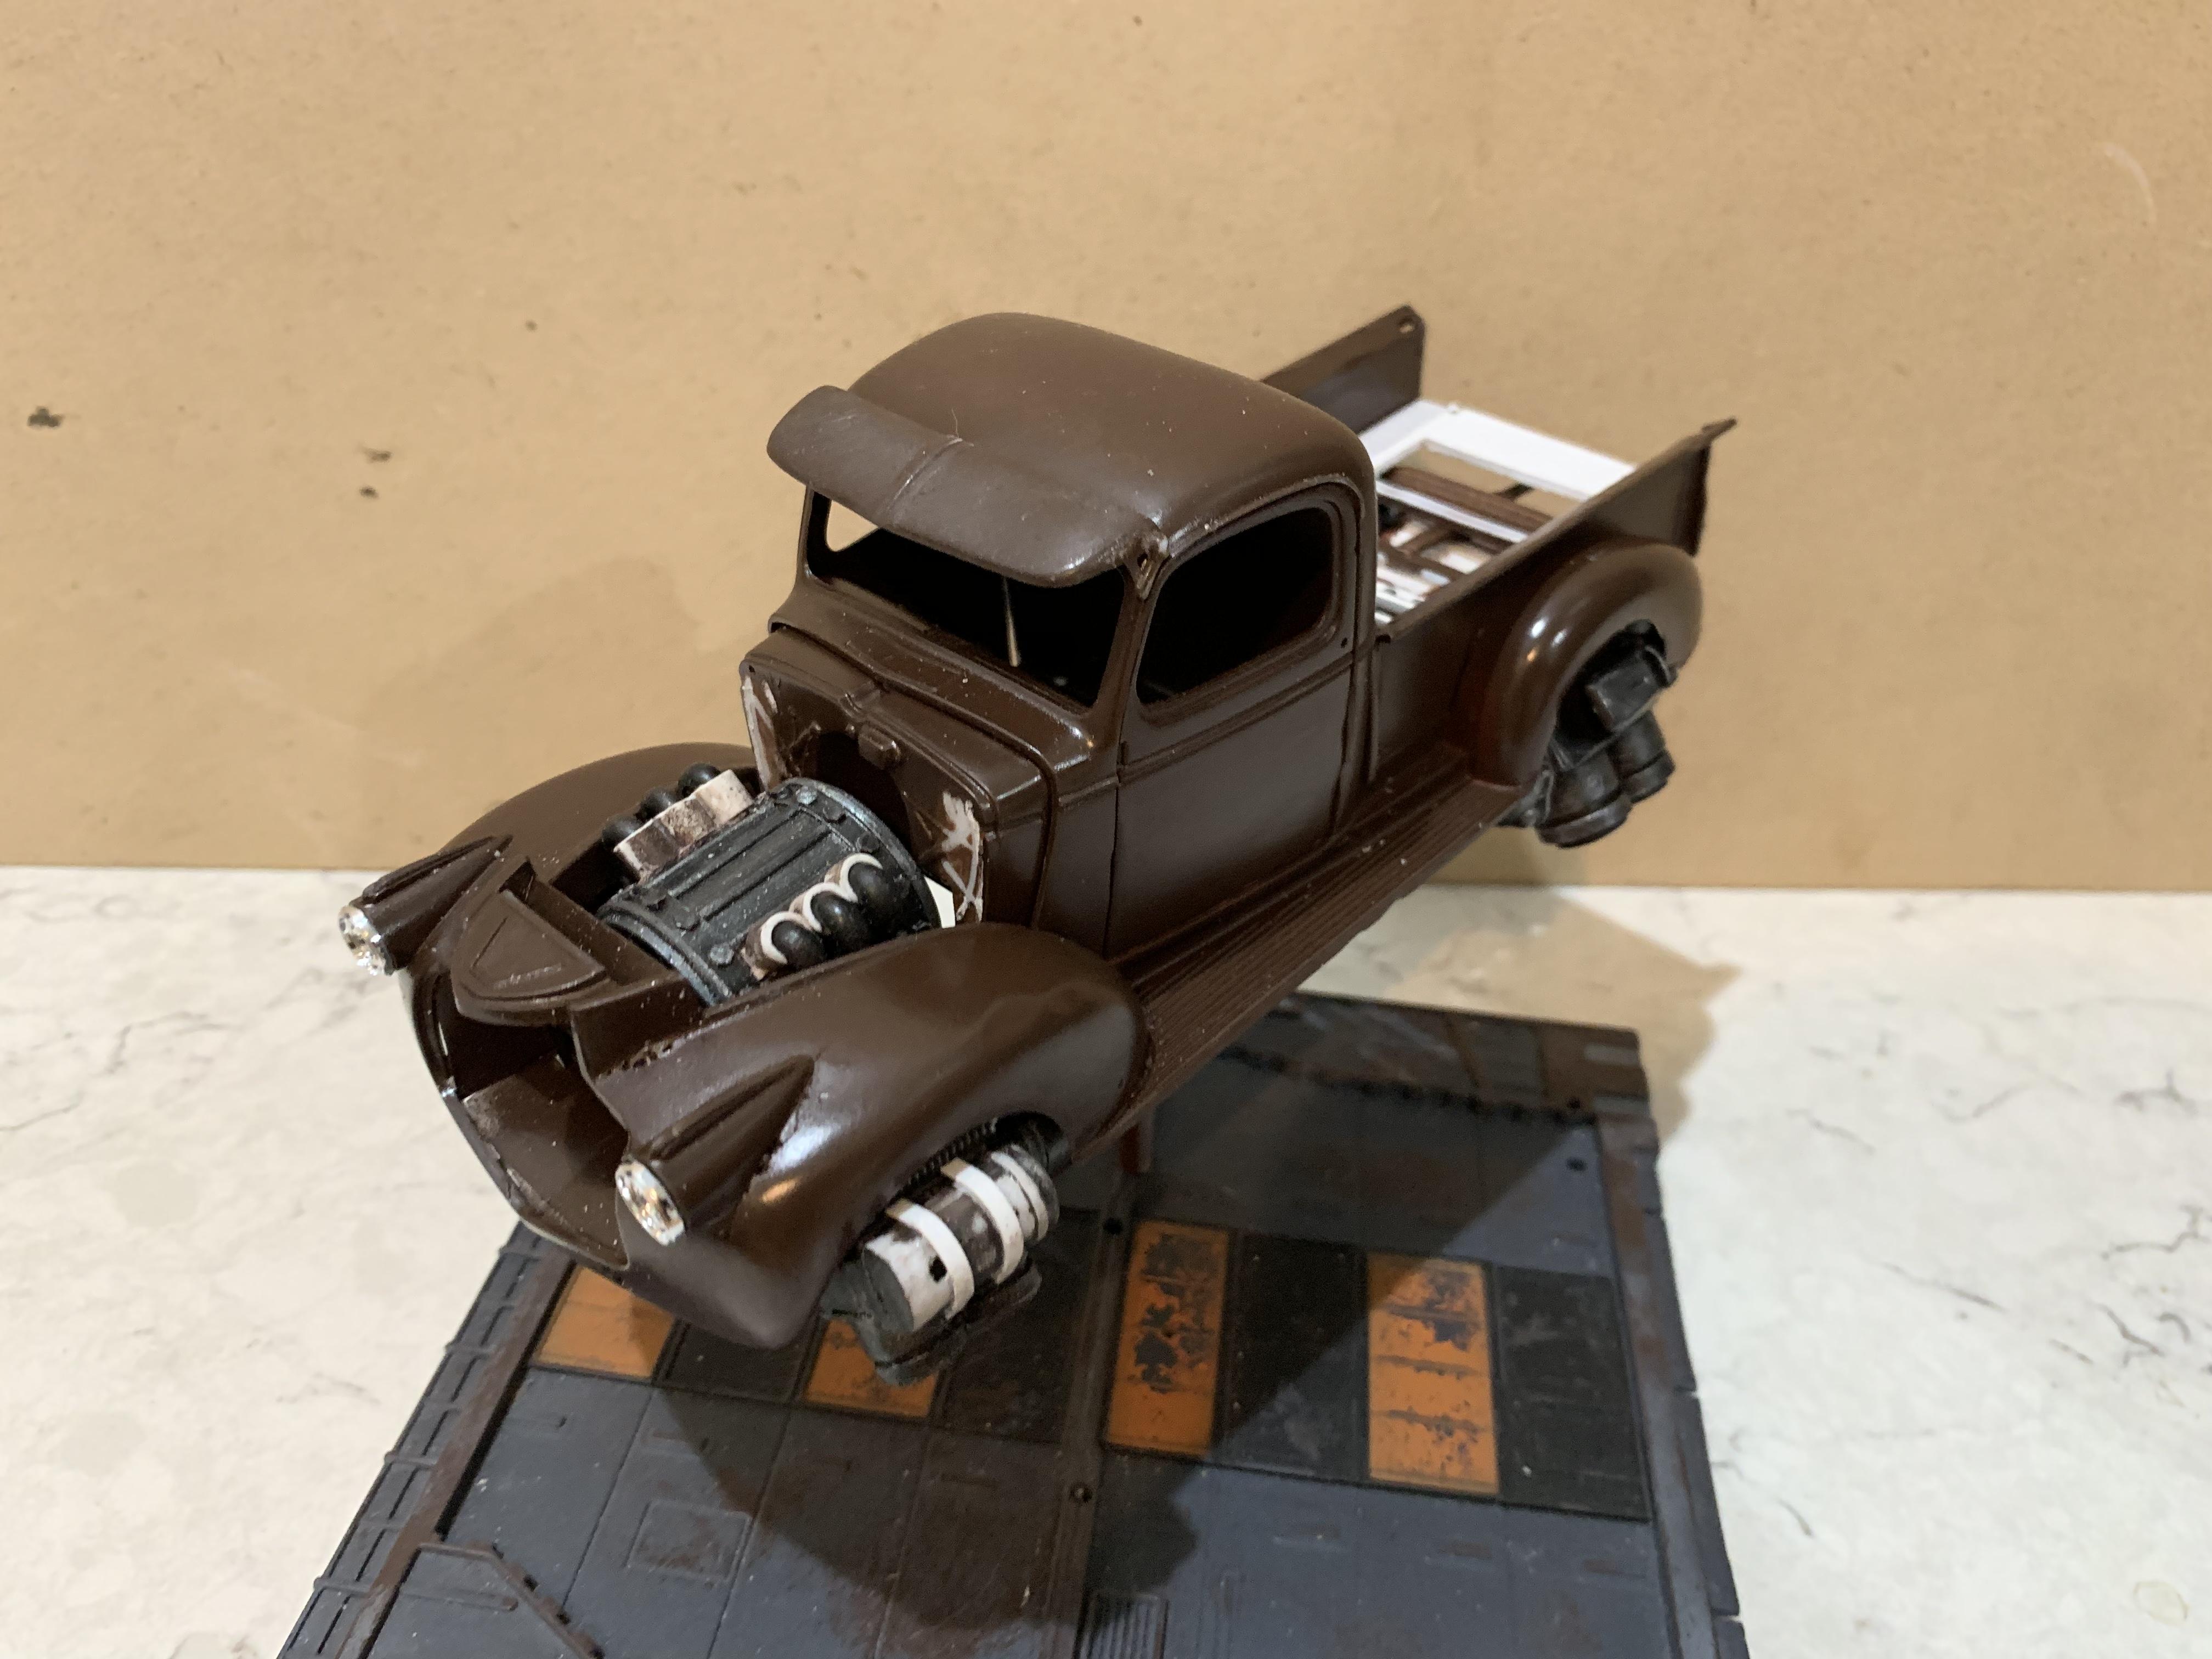
I can't believe how quickly this one is coming along. It's almost done! There are a few things left to do. I've decided to go without bumpers. I like the look of the grill. I don't want to break up the lines. I just used turn signals from another kit to cover the bumper holes. The two holes in the driver side turbine will need to be covered or plugged. I can't believe I got this far without addressing it. One of the holes is visible in the photo above. I might just make a cap to go over it. The front looks great without a bumper, but the rear looks incomplete. I think what I'll do is create a frame that looks like it's holing up the two large rear turbines. Right now they don't appear to have enough support. I may add more plumbing as well. I need to do streaks and a final wash. Can't forget the soot. The visor is not in it's correct position in the photos. It's a bit too high. I'll be putting in the final pieces soon! Turn signals, brake lights and mirrors. I'm happy with the "power plant" under the hood. My original thoughts were to put the fuel tank under there. All my hover cars have large fuel tanks. I was going to keep the tradition.... That changed when I removed the 2 side cut outs from the hood. I wanted something cool to appear through the gap. So I created this generator looking thing. One of the best parts about making hover cars, is that you don't have to make everything have a realistic purpose. It's up to you how much realism you want to set. A fuel tank would have just been a steel box, I think the generator gives it more interest. I figured that A hover car would need a few extra flight controls. I cut the wheel into a flight yoke. There's a ton of levers that unfortunately won't be seen. Thanks for looking!!!!
-
41 Chevy Truck - Jet Powered
Daxman replied to Daxman's topic in WIP: Model Trucks: Pickups, Vans, SUVs, Light Commercial
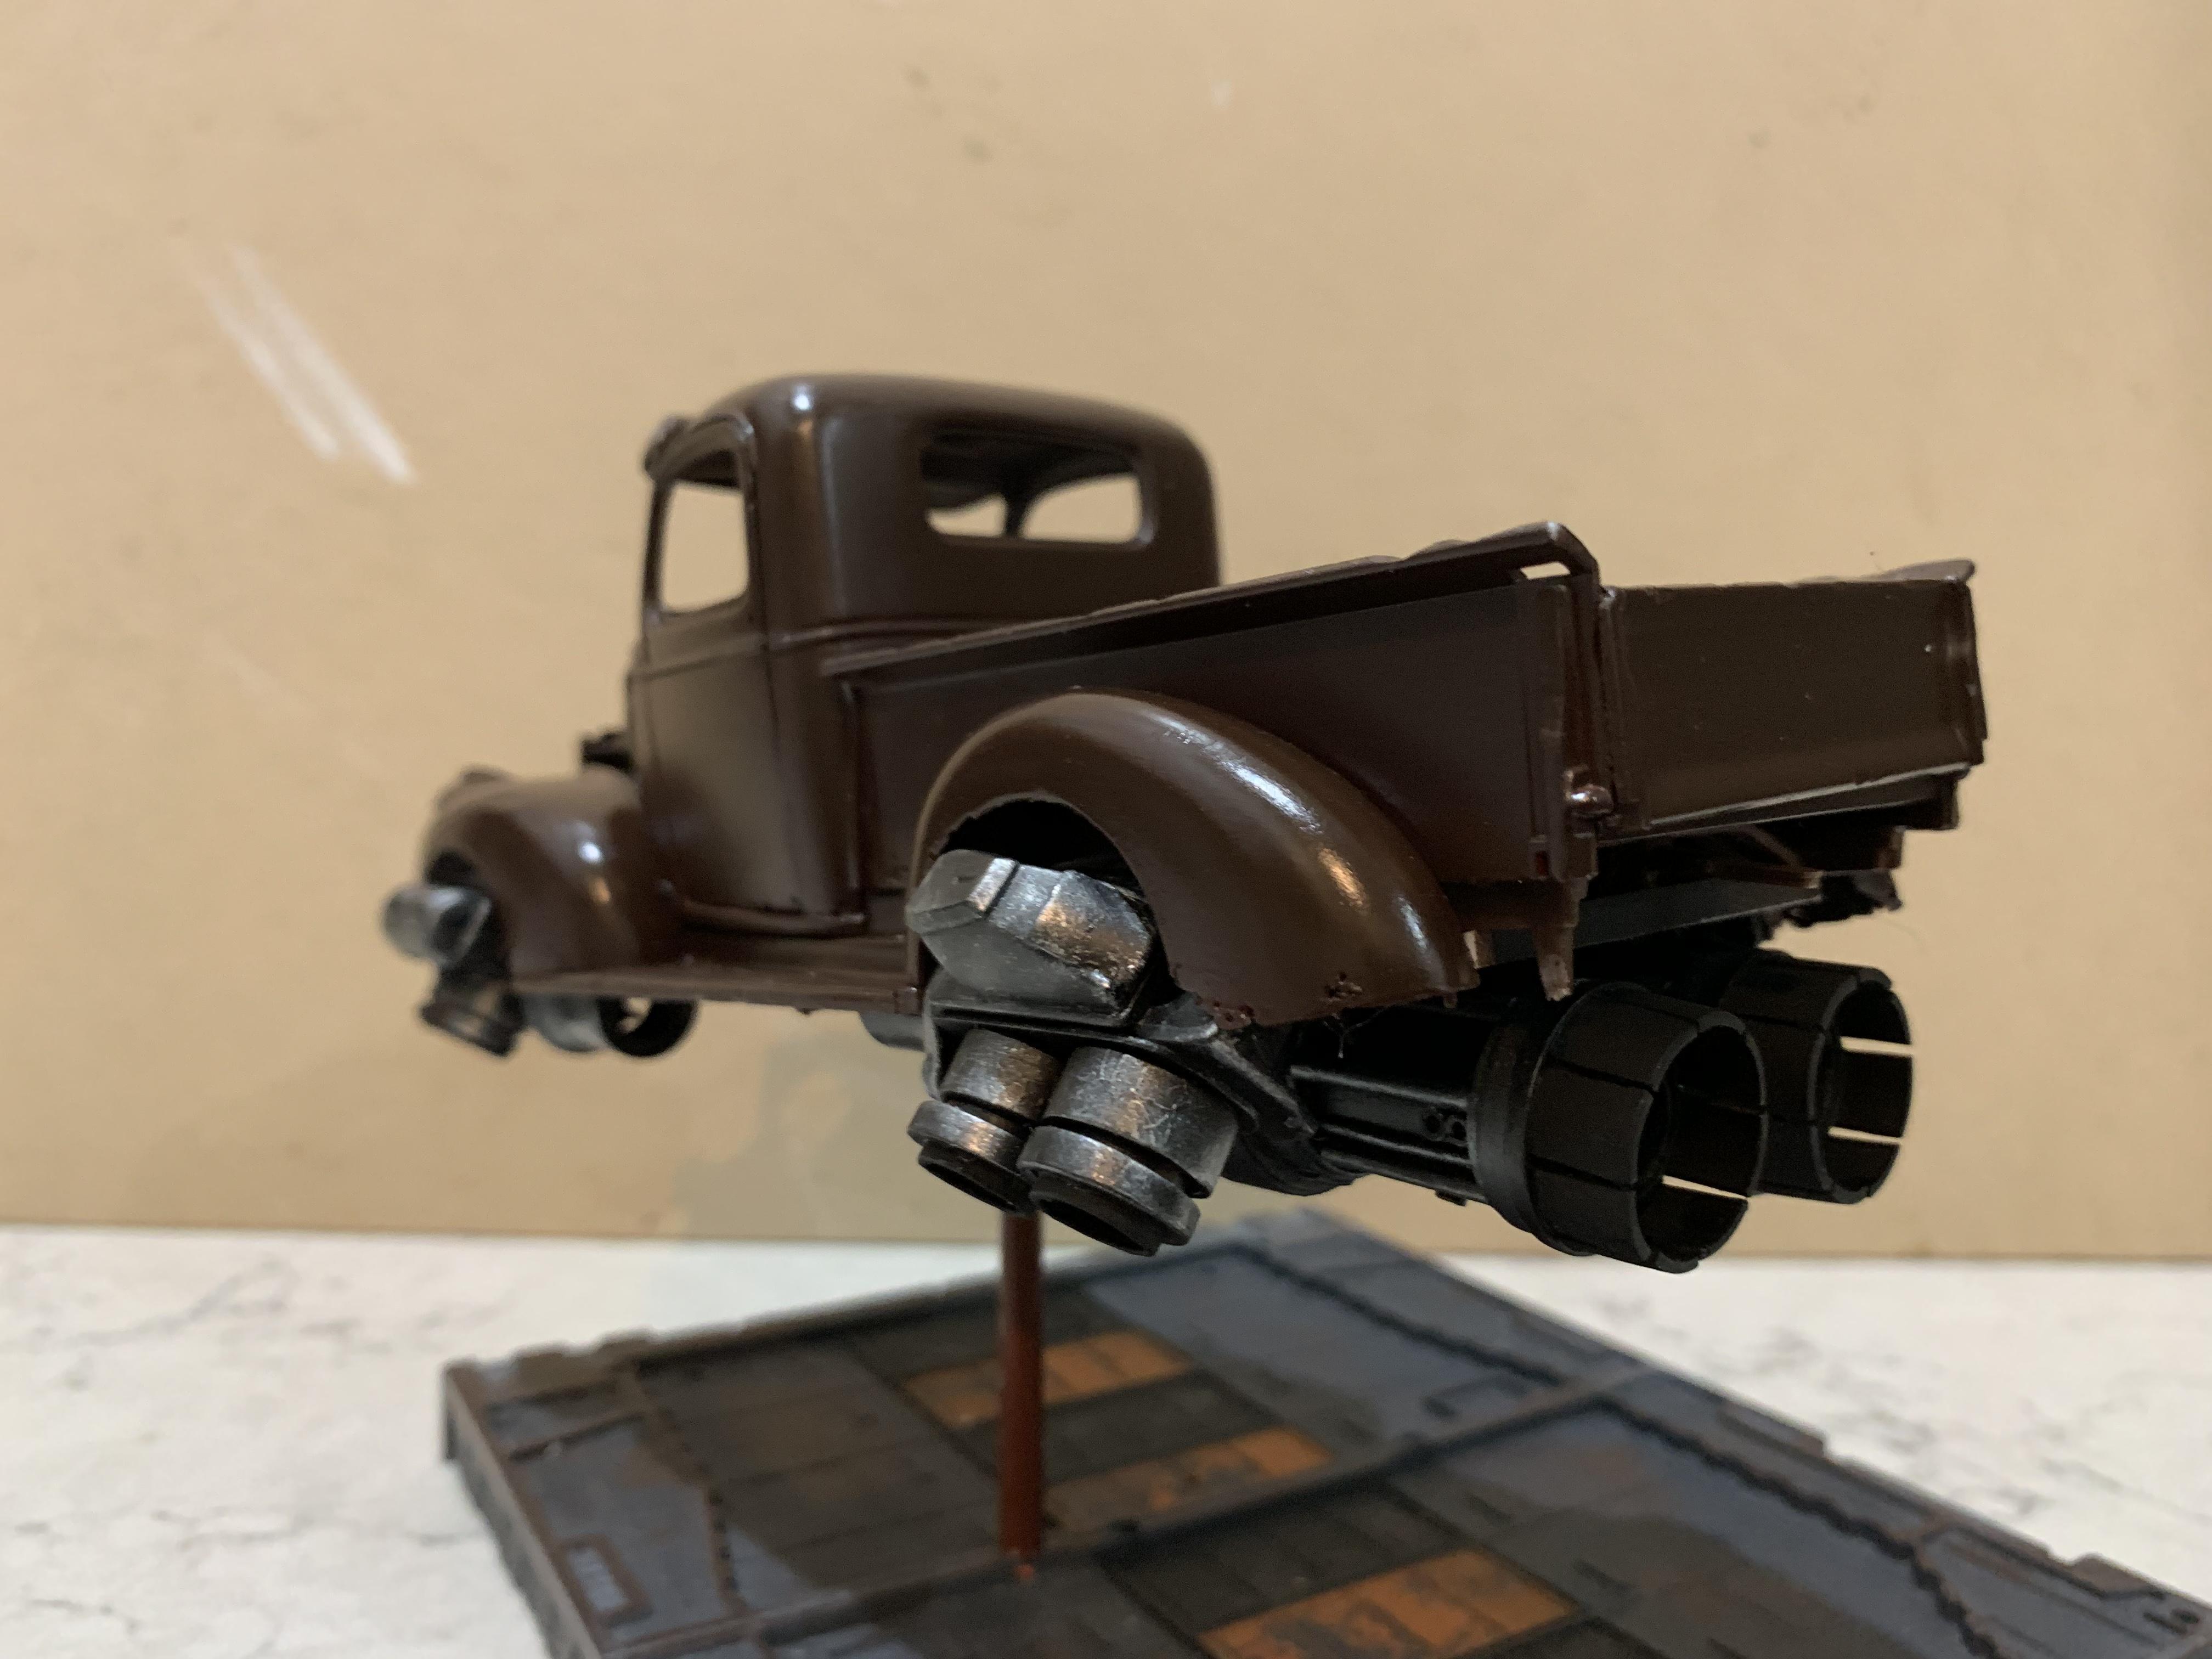
I added some more details. Under the rear wheel wells, I added half a supercharger. It gave some needed bulk to the rear side thrusters. I'm really happy with the hood side cutouts. I used the piece that was removed and added some thin styrene to create the intake grill. I love the grill on this truck. I plan to fit a lot of hoses under there.
-
41 Chevy Truck - Jet Powered
Daxman replied to Daxman's topic in WIP: Model Trucks: Pickups, Vans, SUVs, Light Commercial
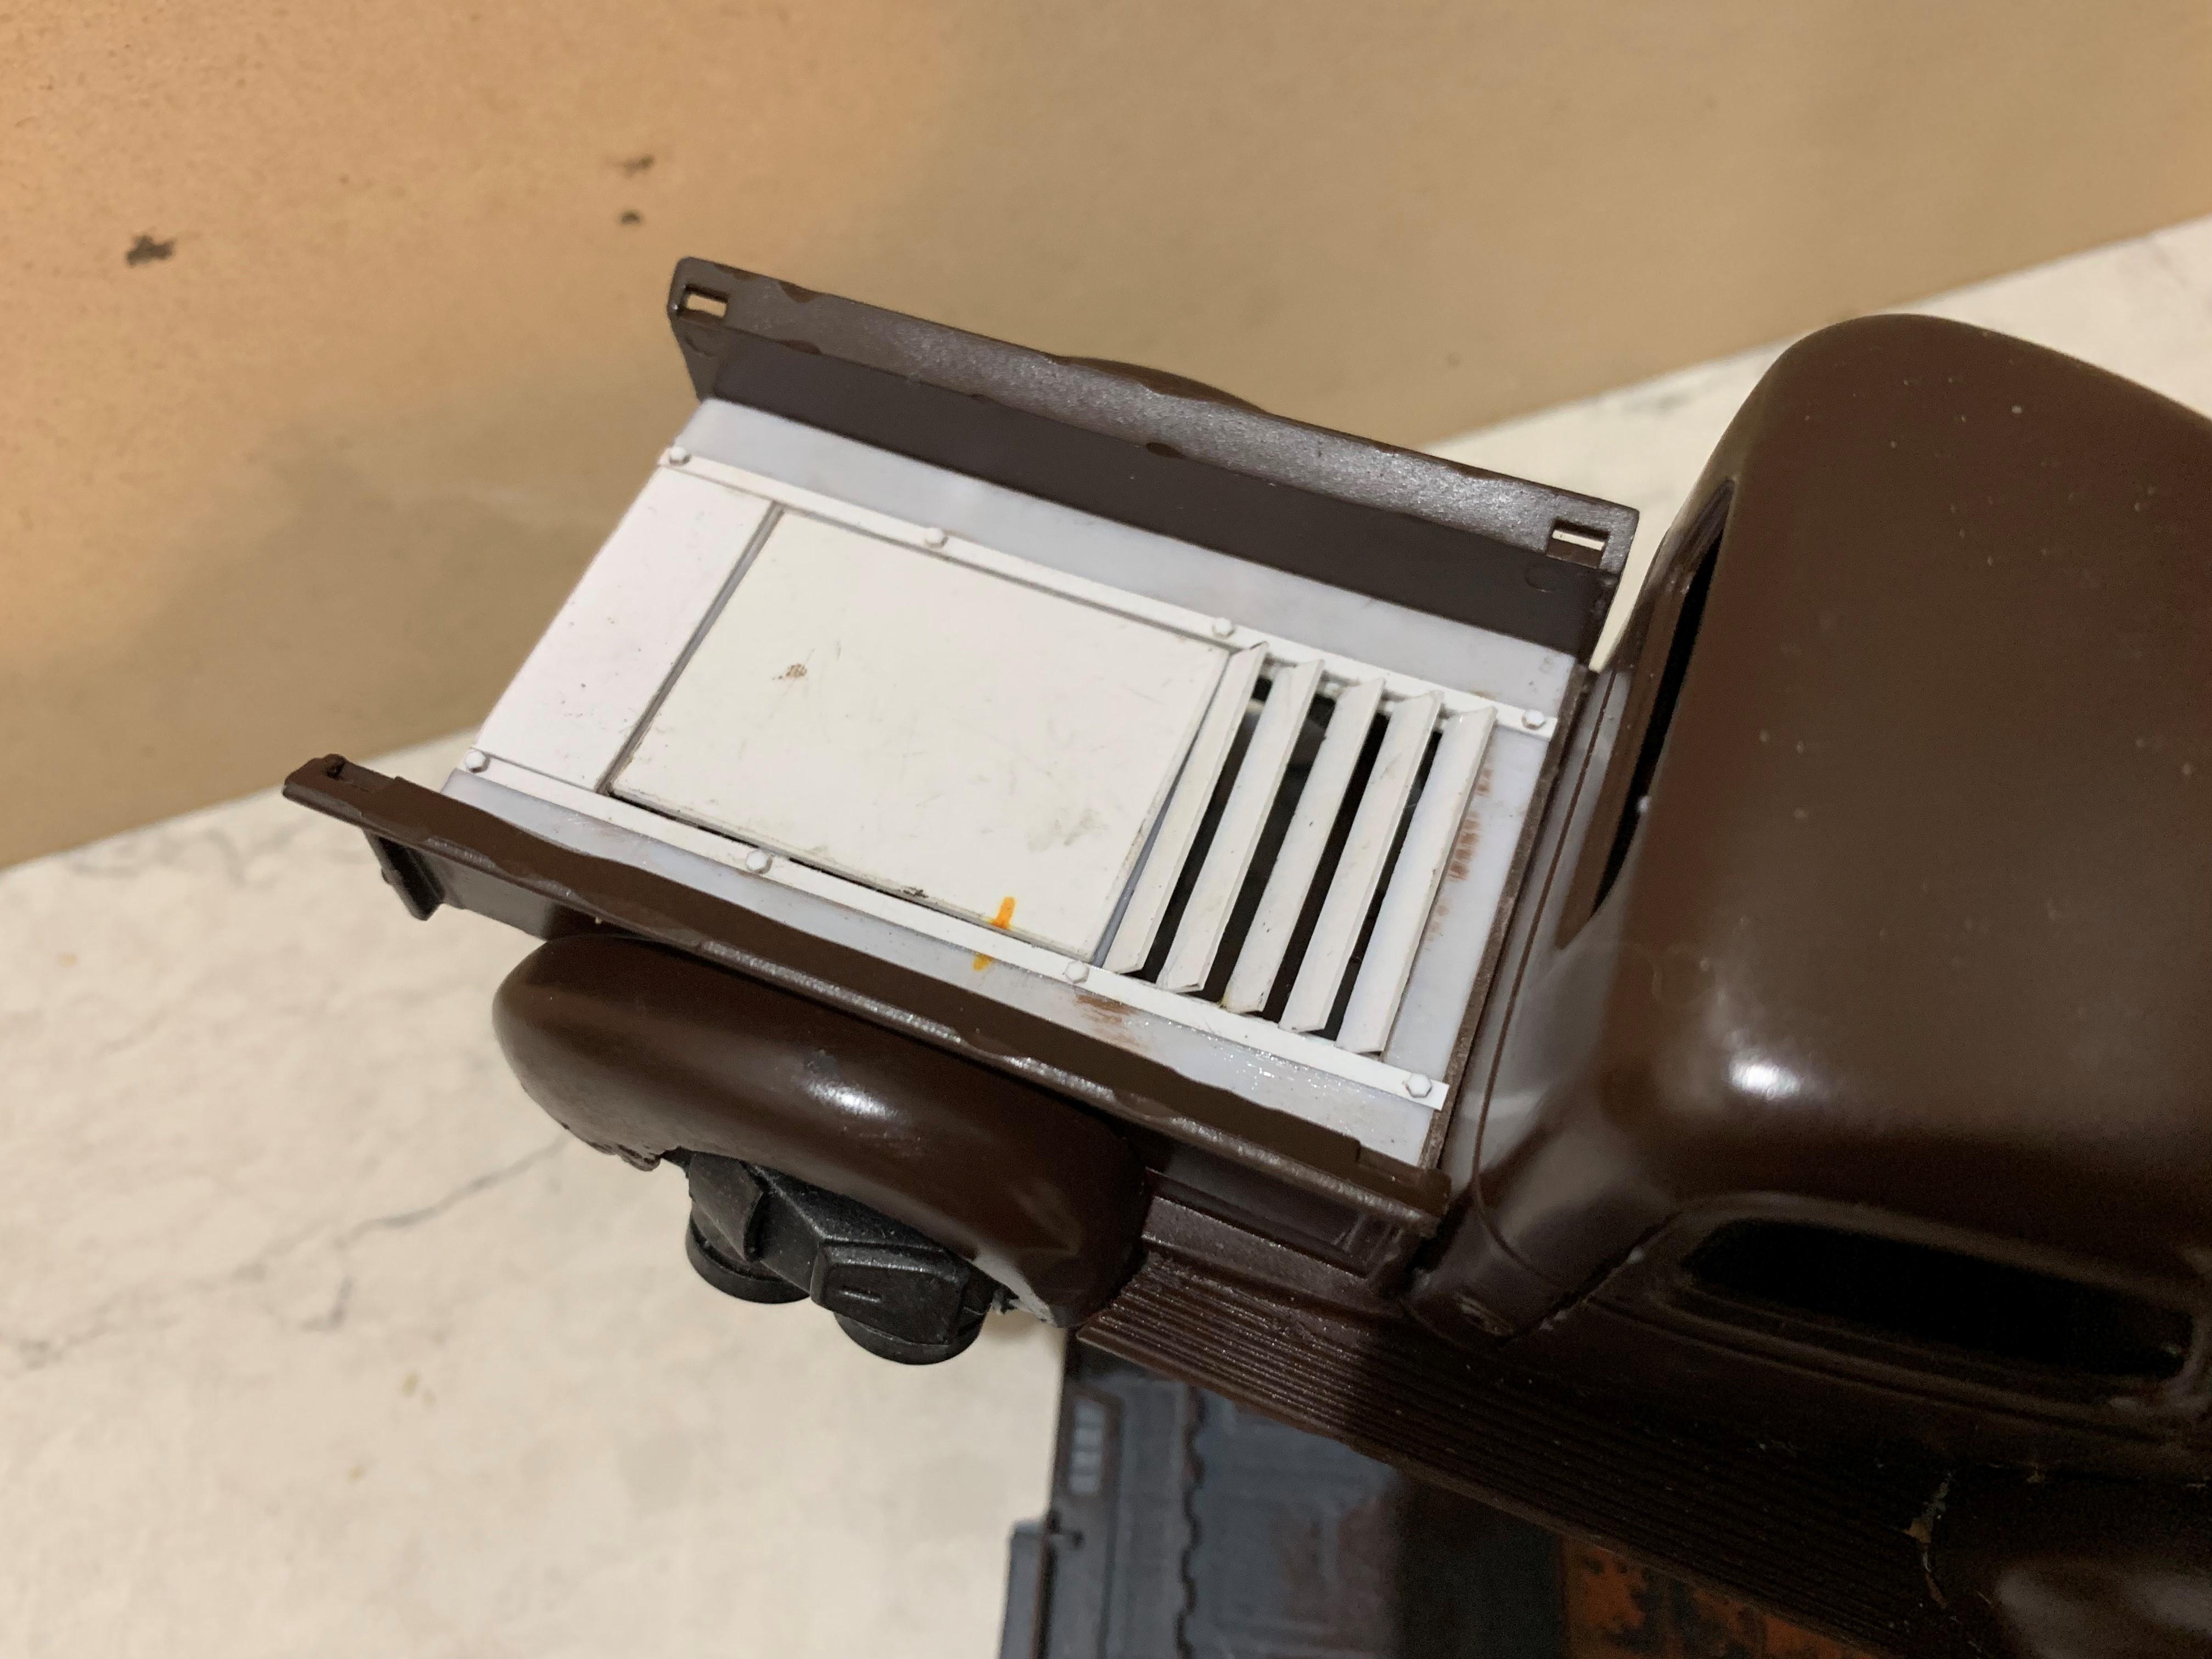
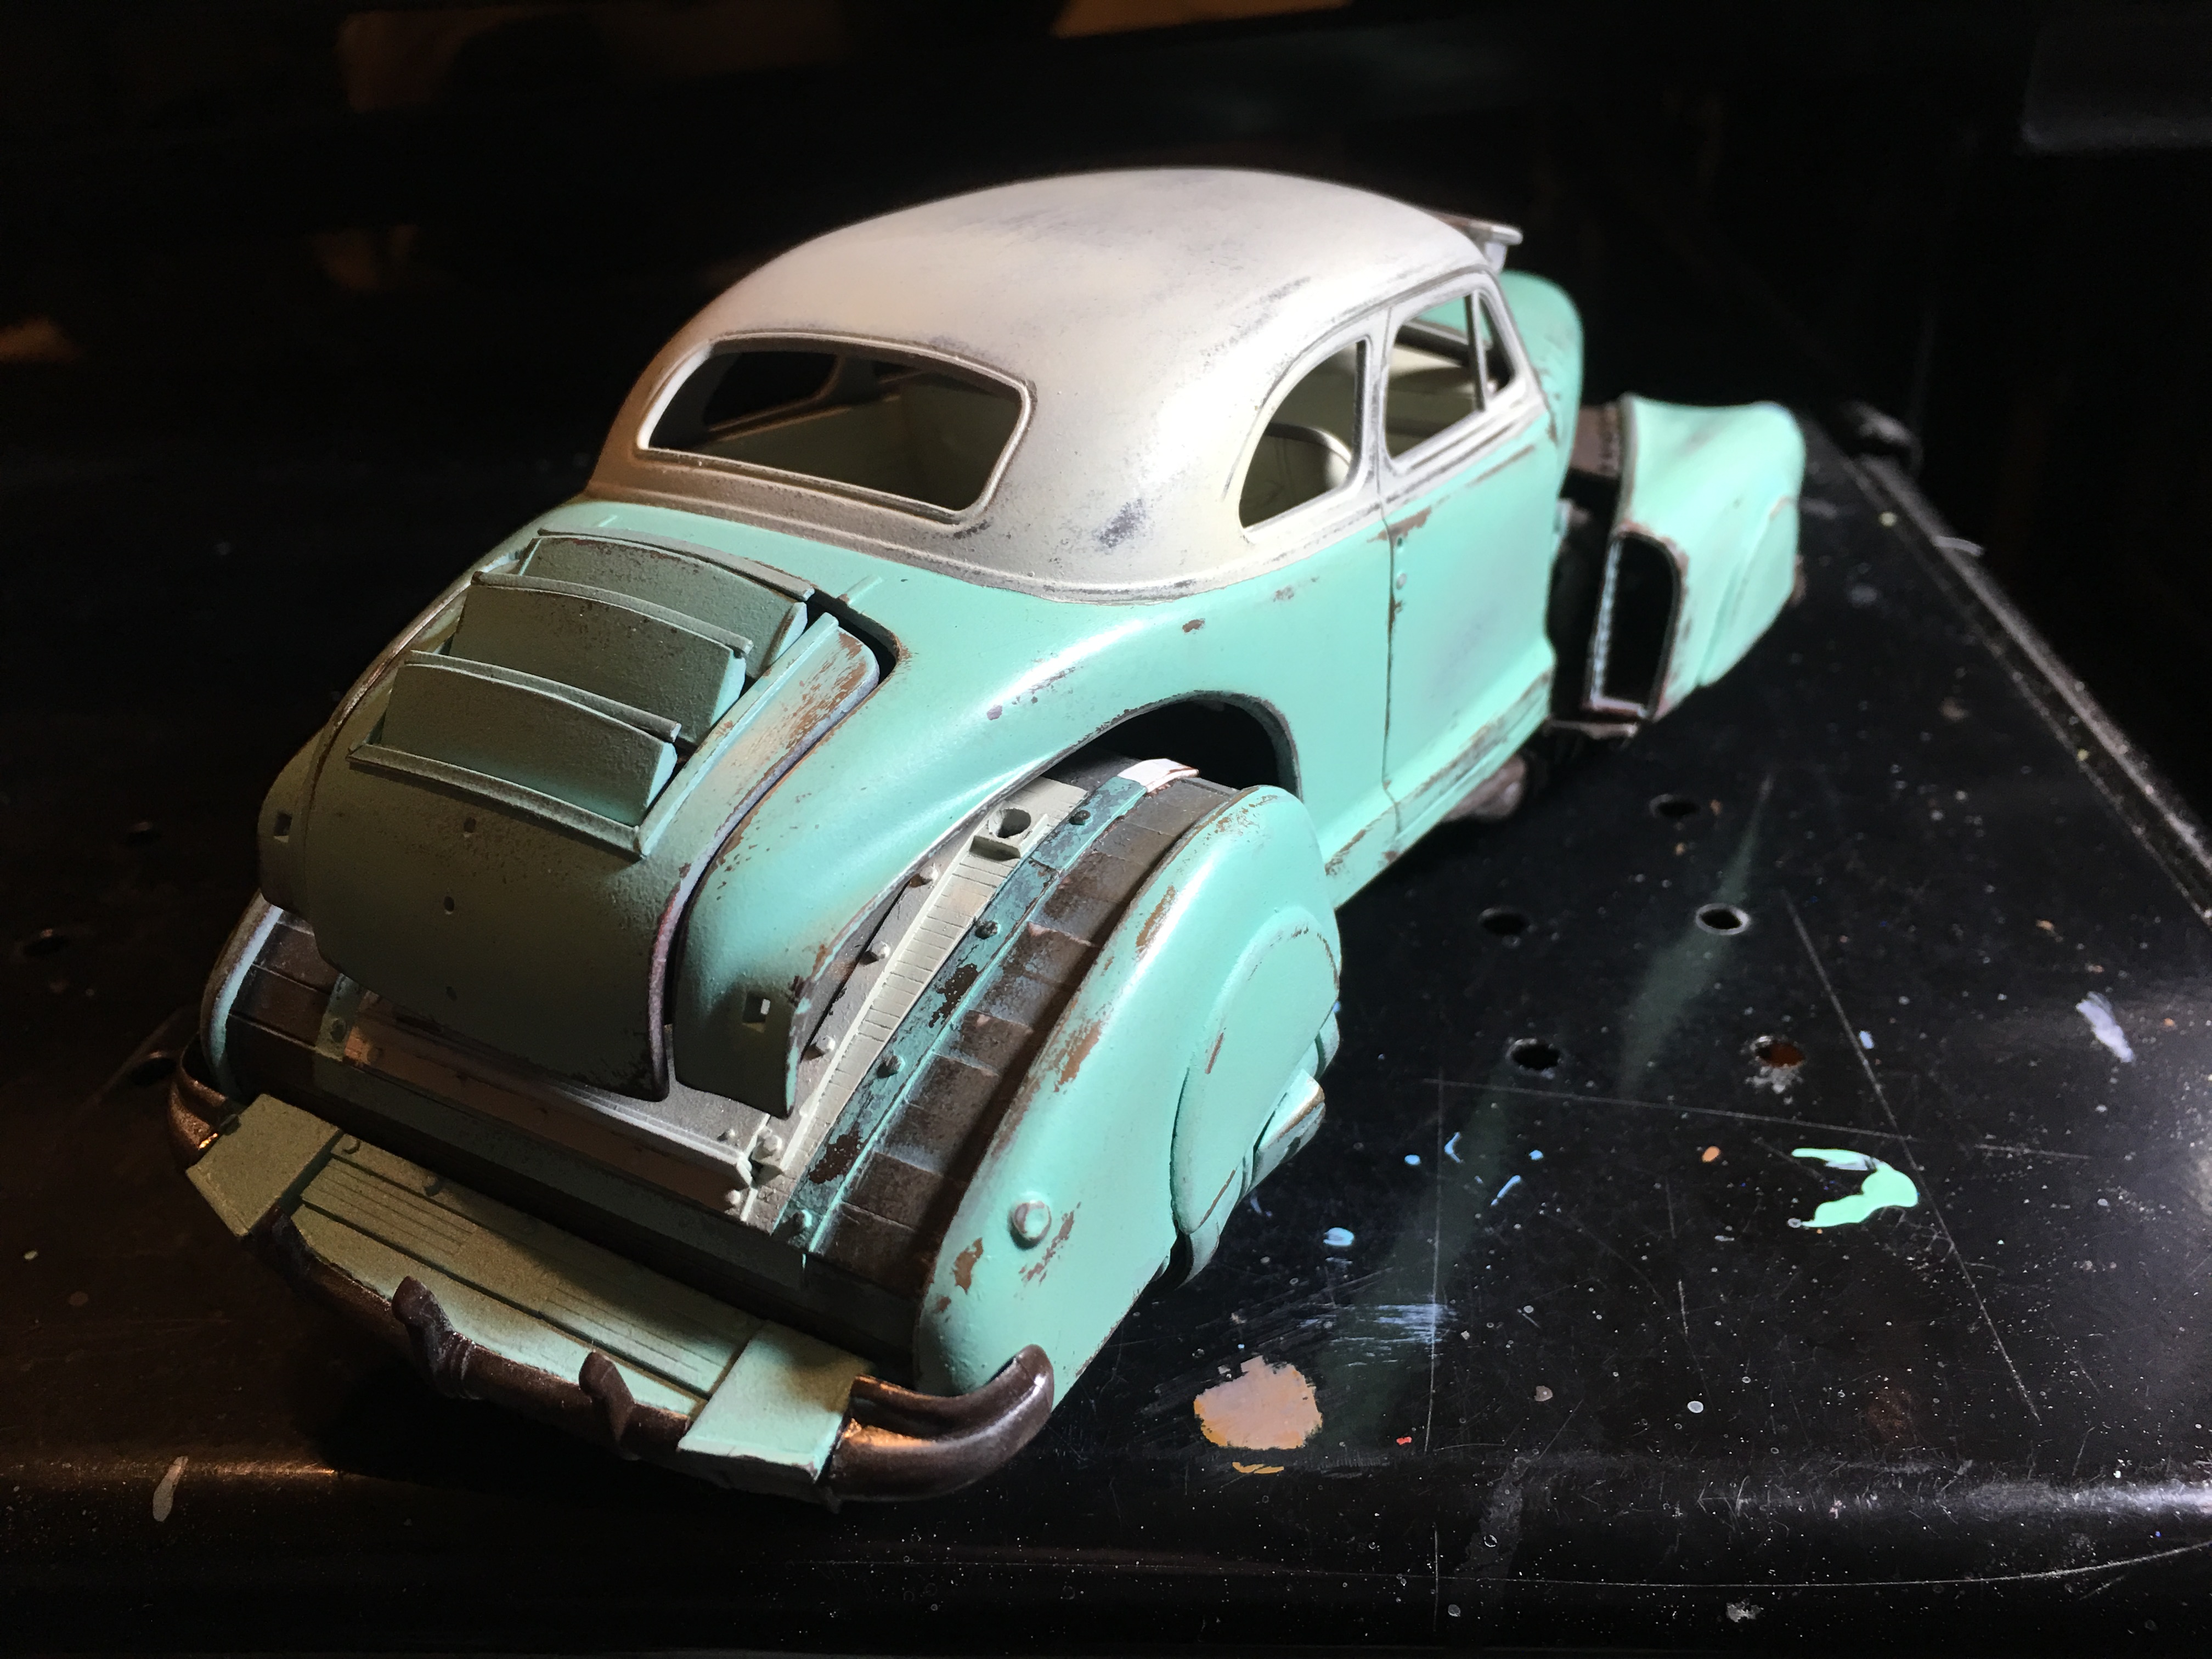
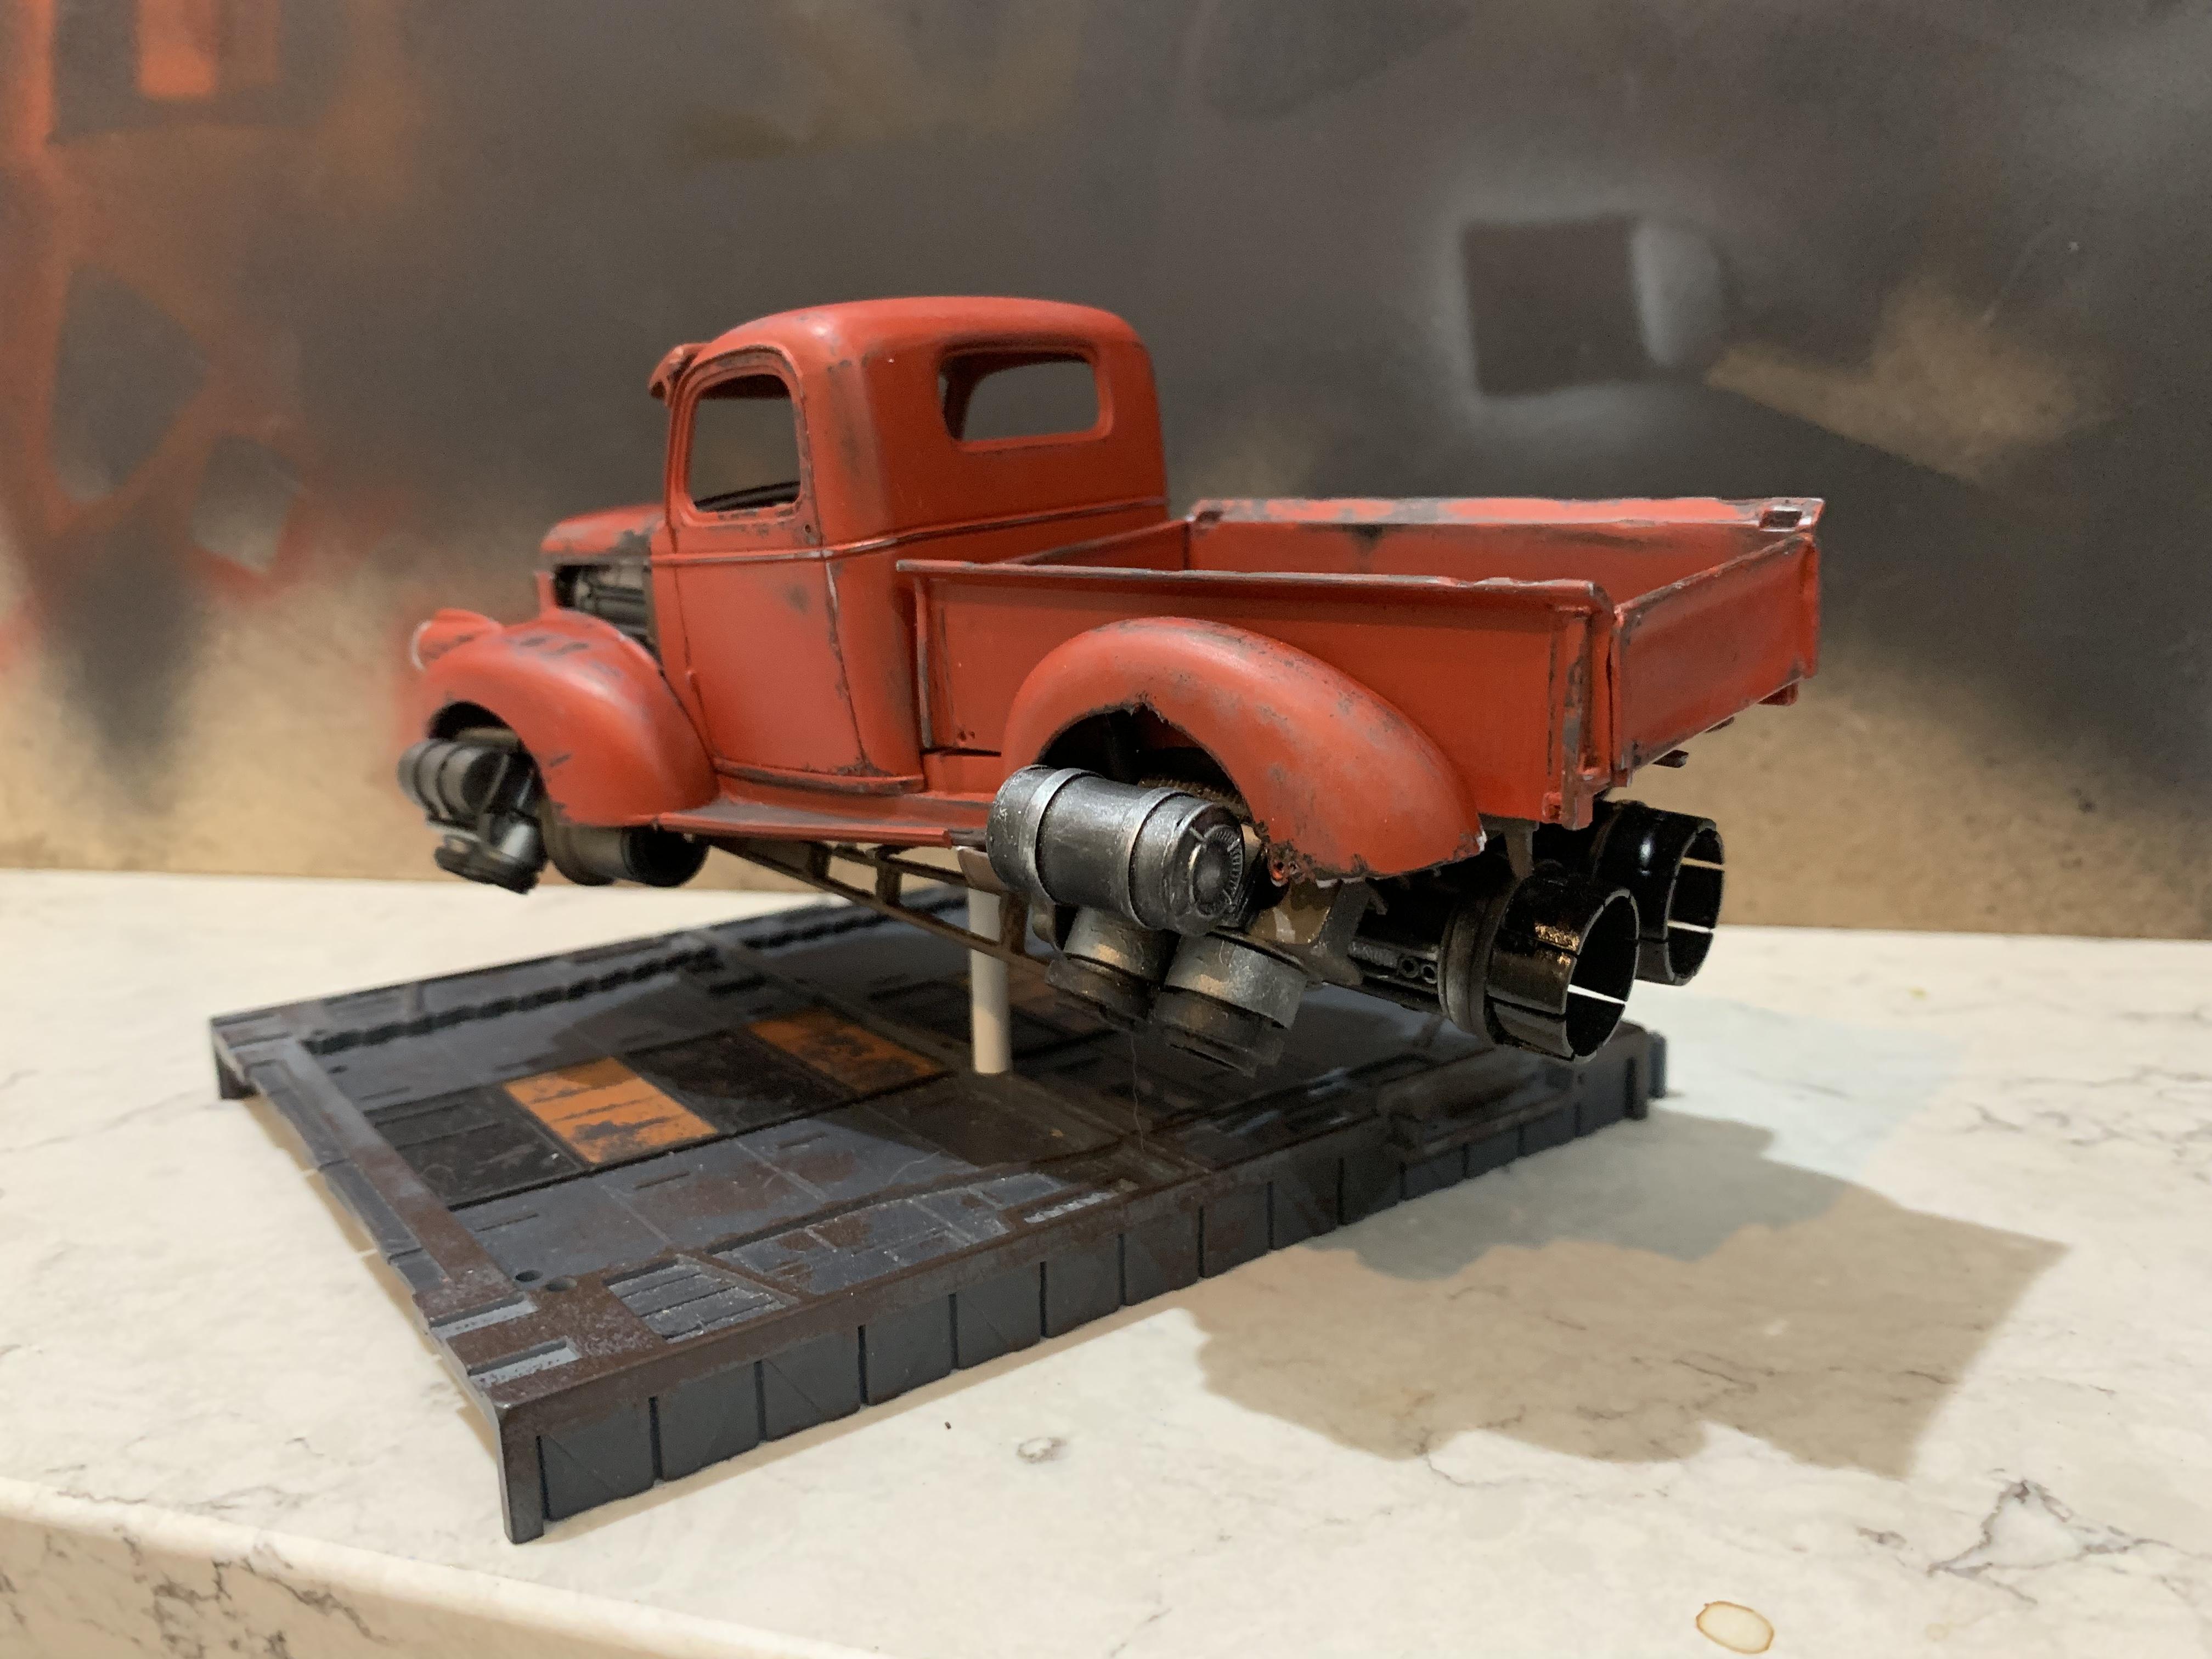
I painted it with Vallejo Air Red 71.003 RLM23 two nights ago and started the weathering last night. I'll be adding more. I hope to add more hoses and hopefully some realistic looking wire harnesses. I haven't weathered the visor enough yet. Not sure that I'm going to keep it red. I changed the rear turbines to match the front more closely. Much better! I will probably do more weathering on the bed. The vents and the access panels might look good in bare steel or gun metal.
-
1966 Ford 1 ton dually
Daxman replied to bill lanfear's topic in WIP: Model Trucks: Pickups, Vans, SUVs, Light Commercial
Very nice!! -
41 Chevy Truck - Jet Powered
Daxman replied to Daxman's topic in WIP: Model Trucks: Pickups, Vans, SUVs, Light Commercial
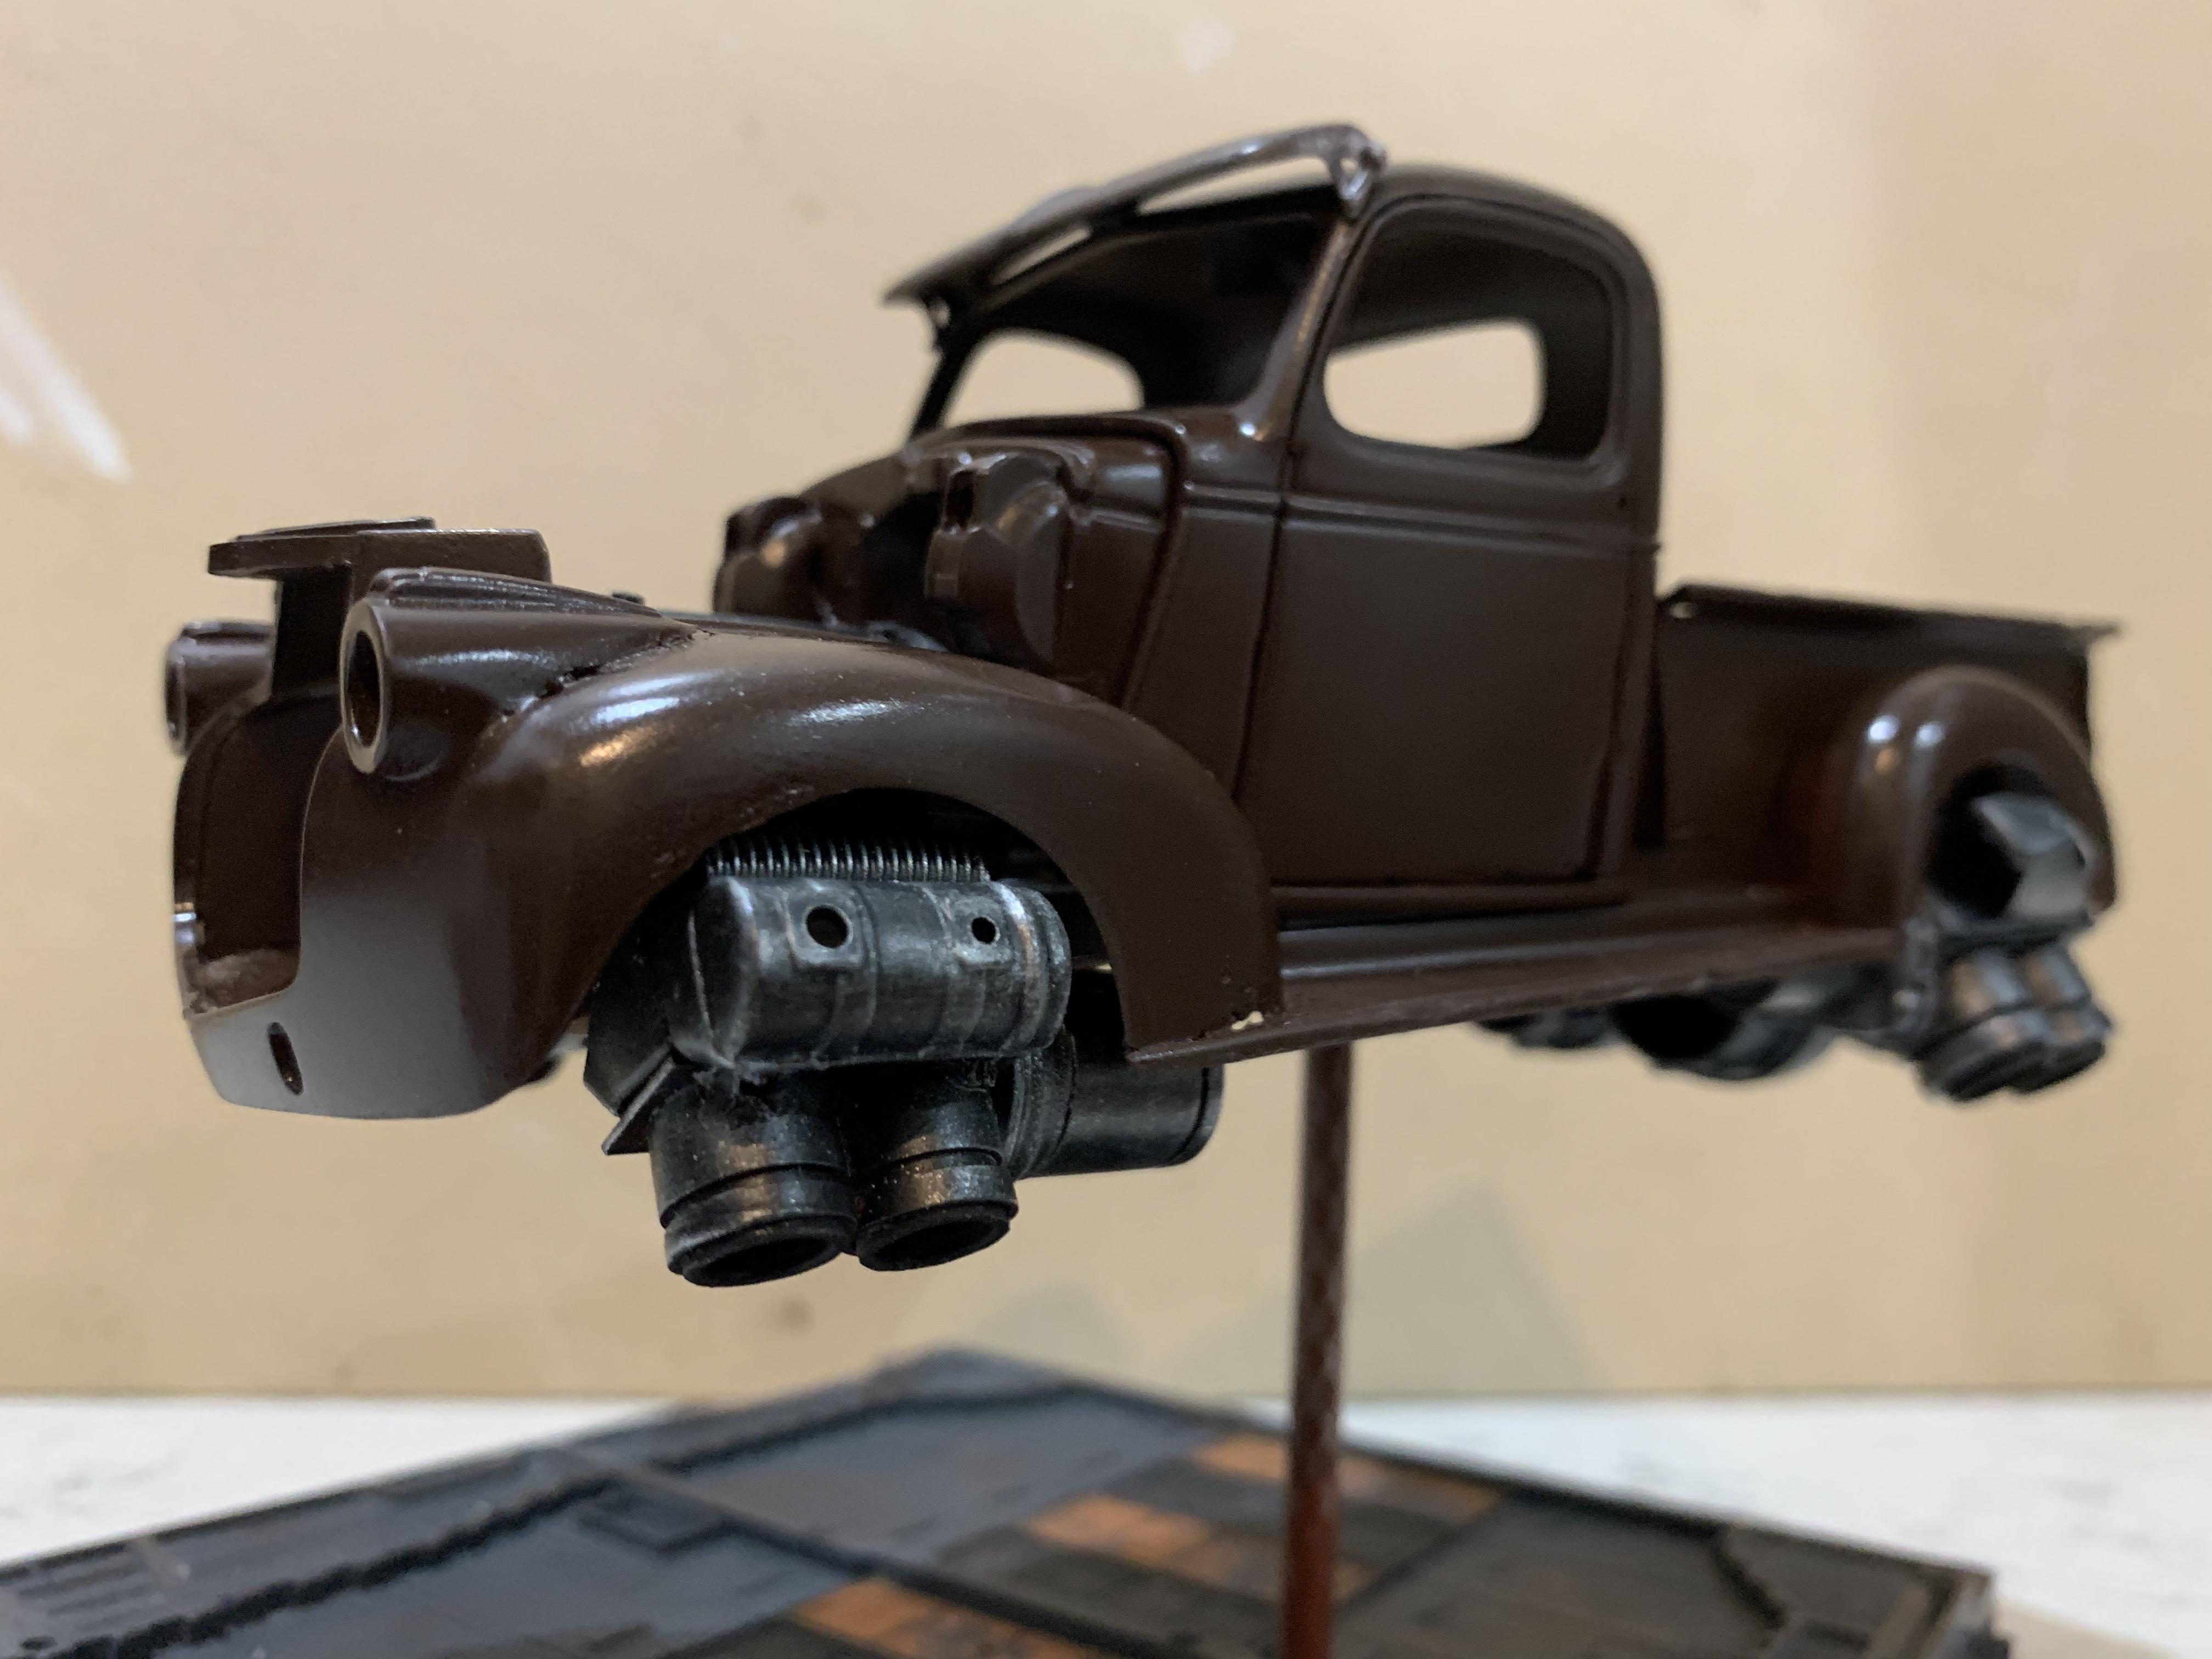
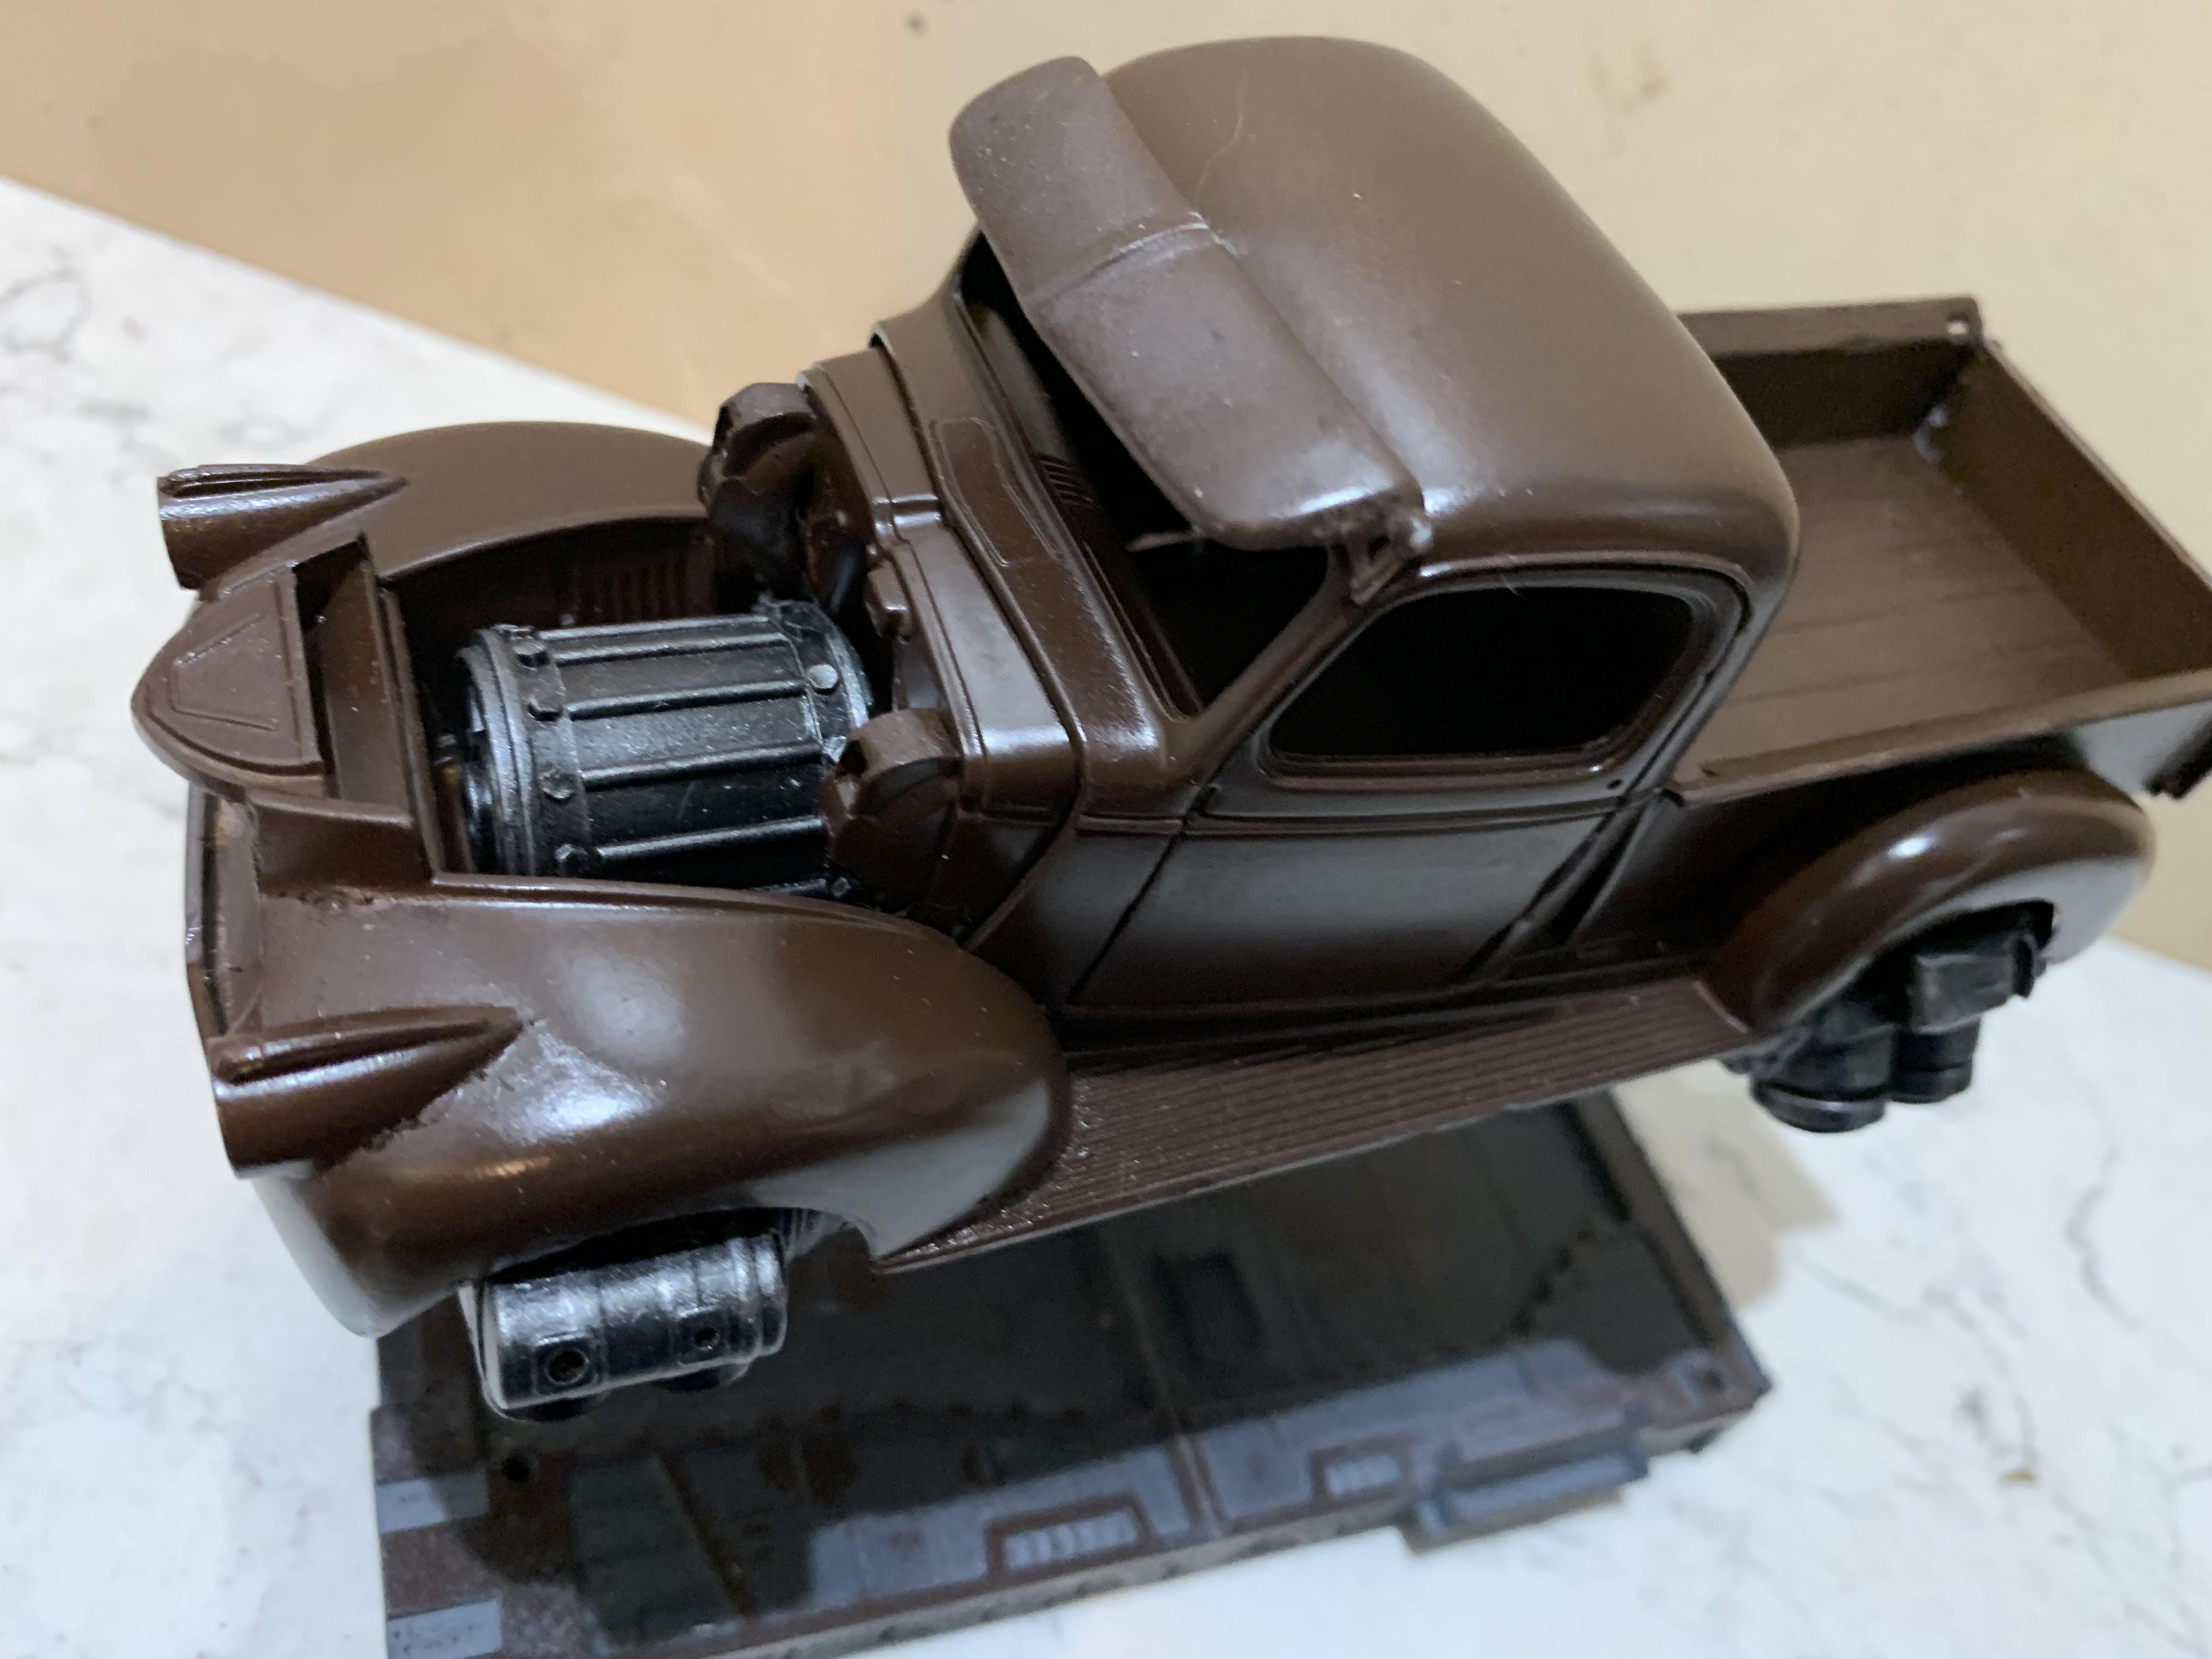
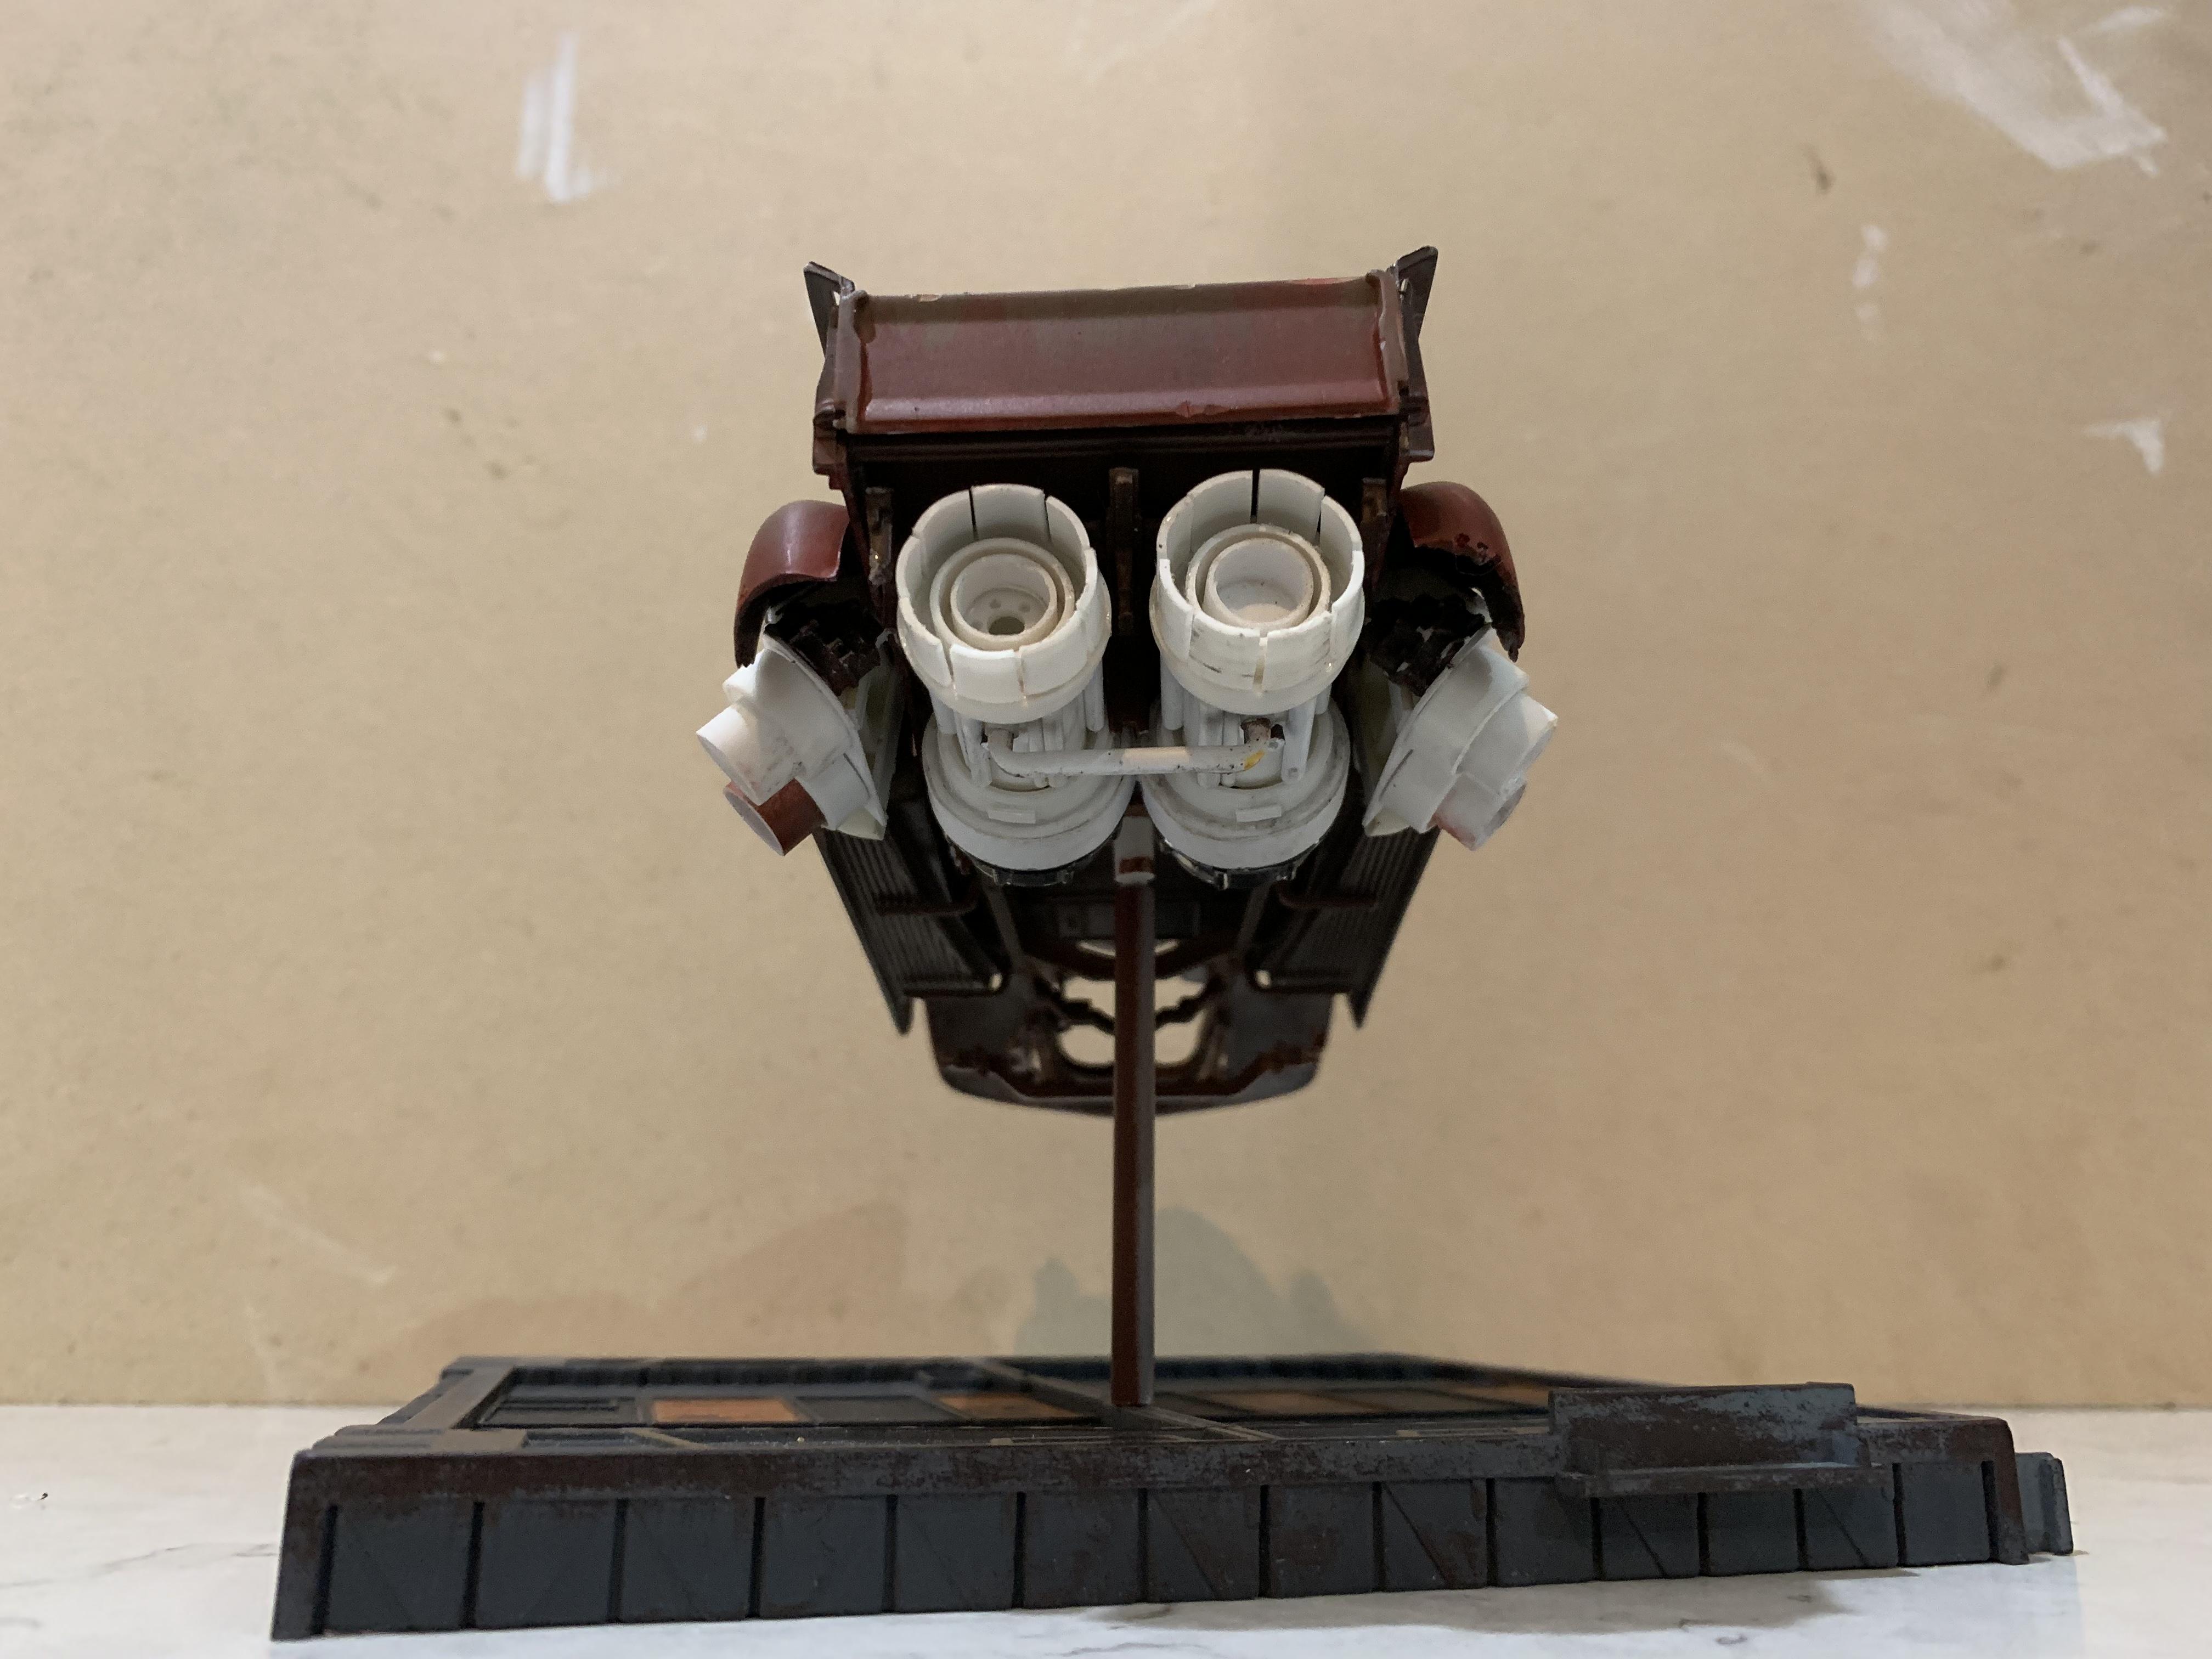
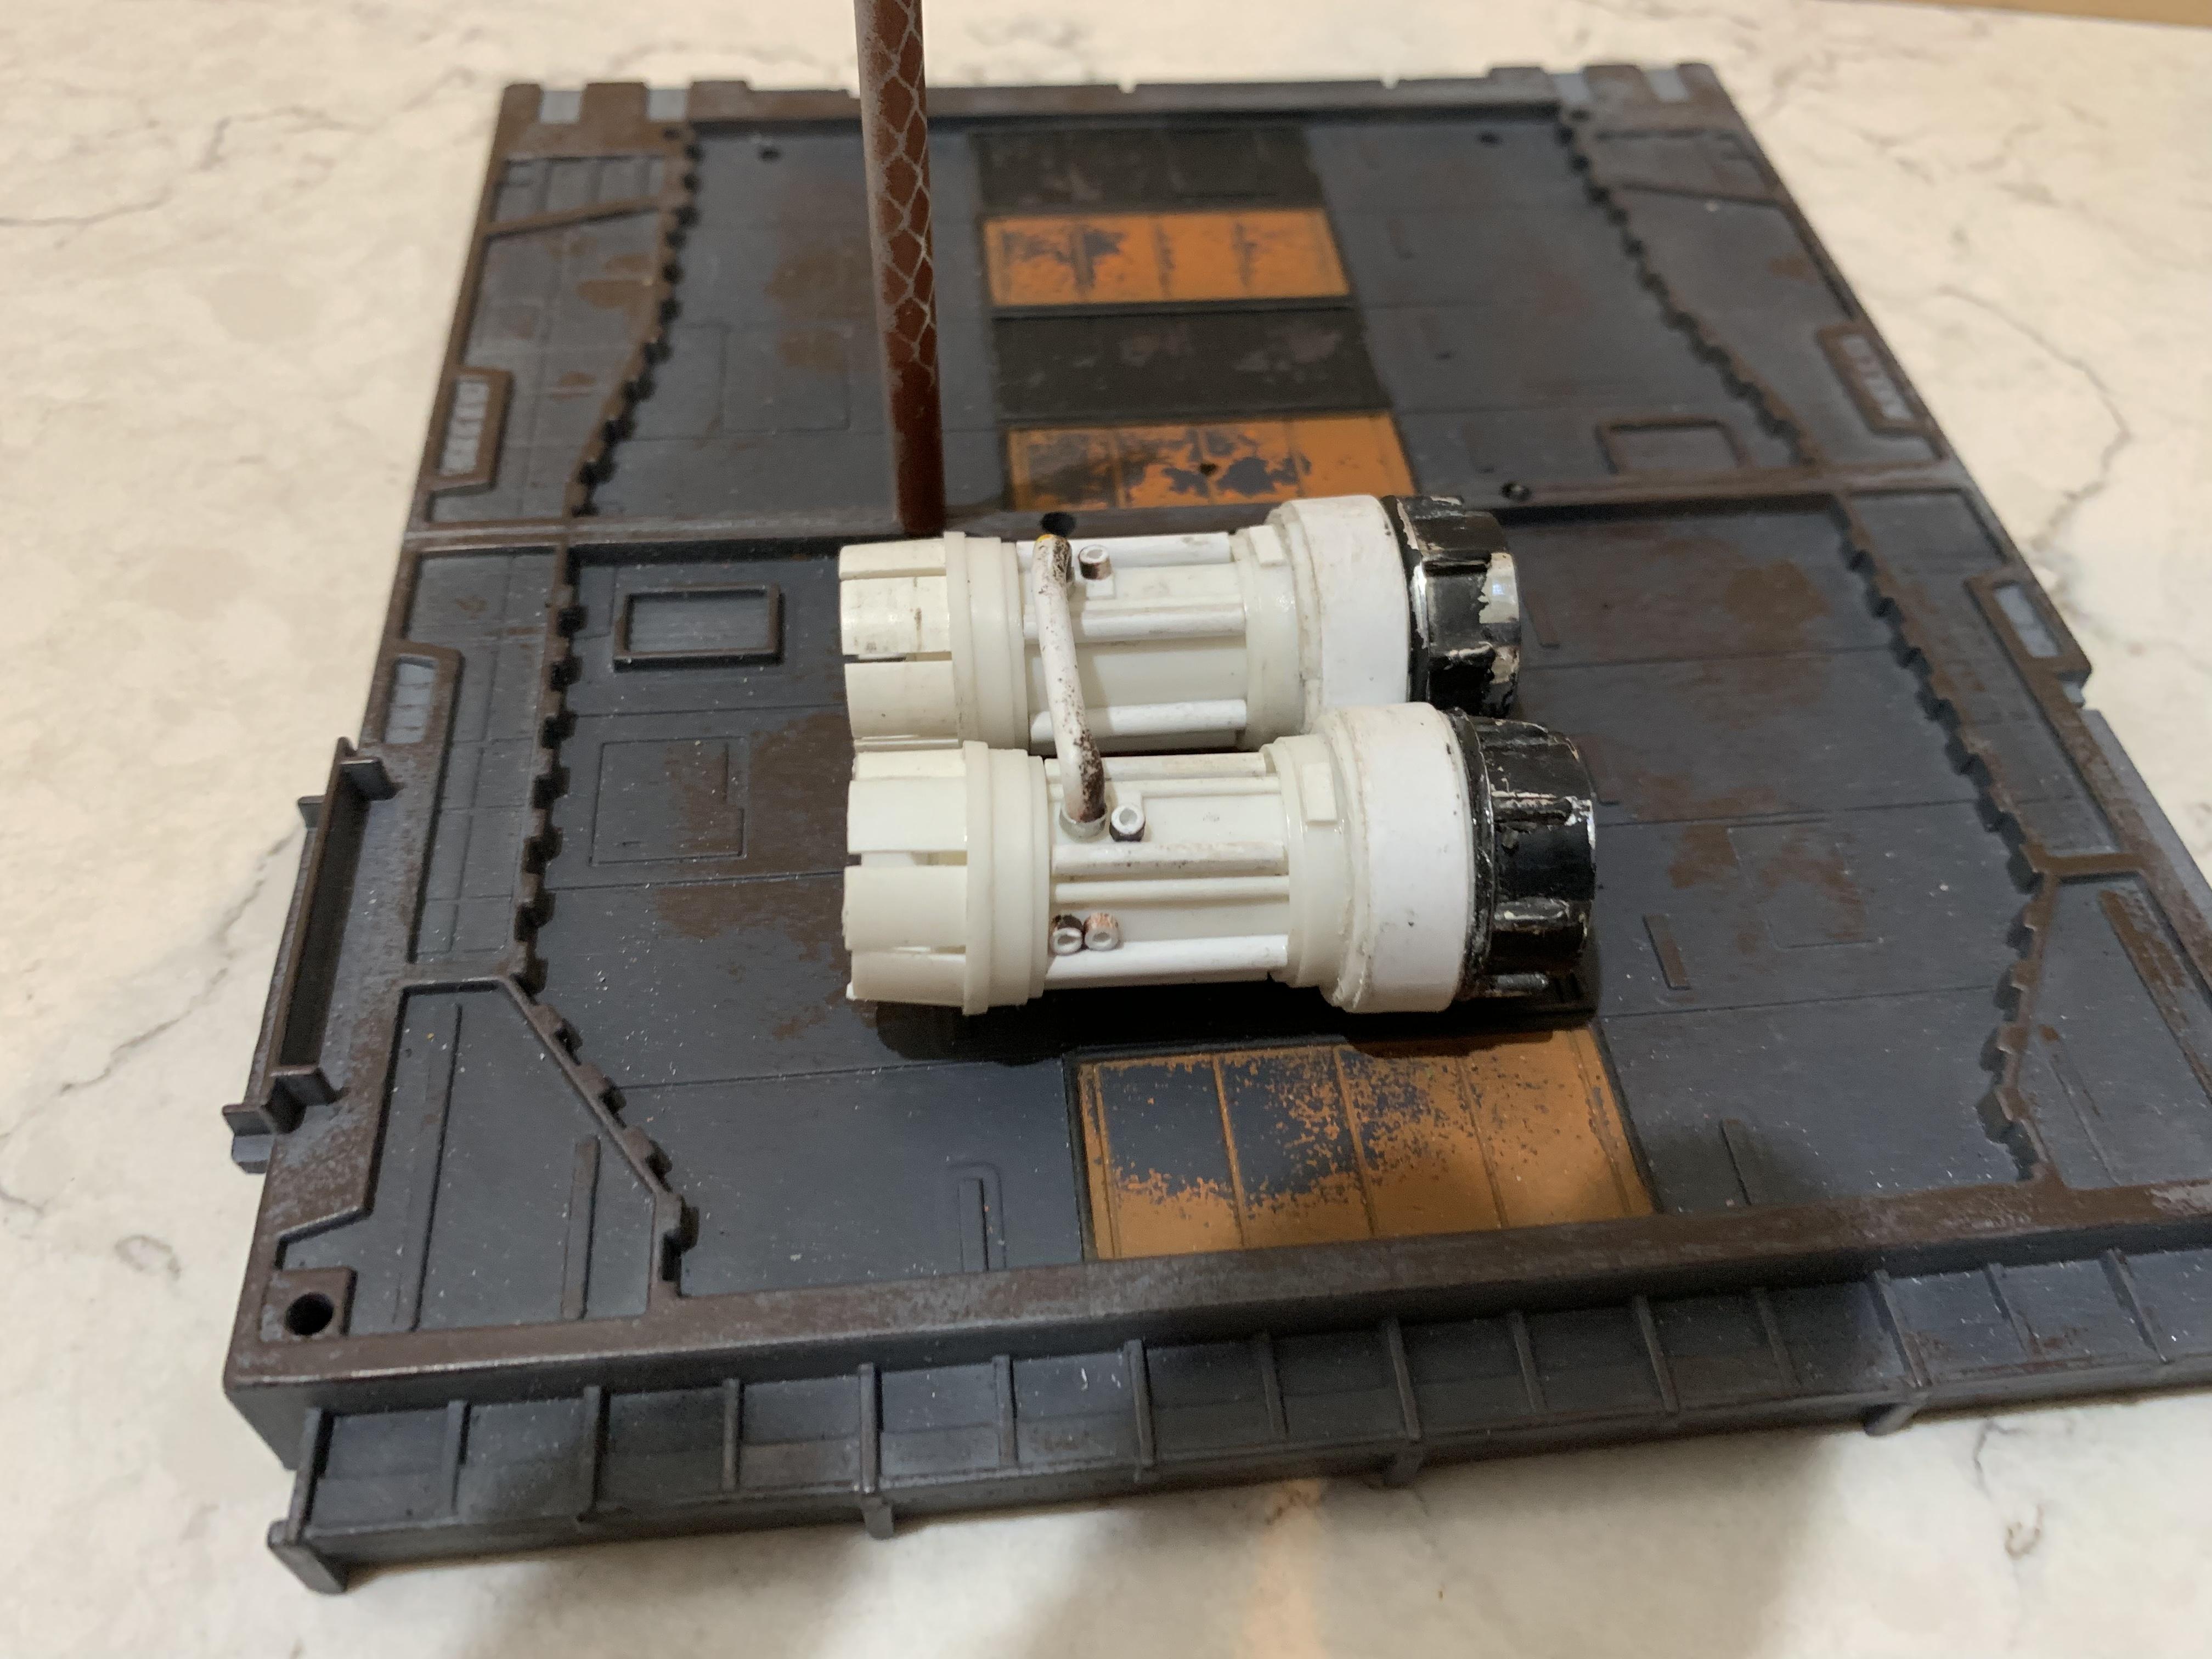
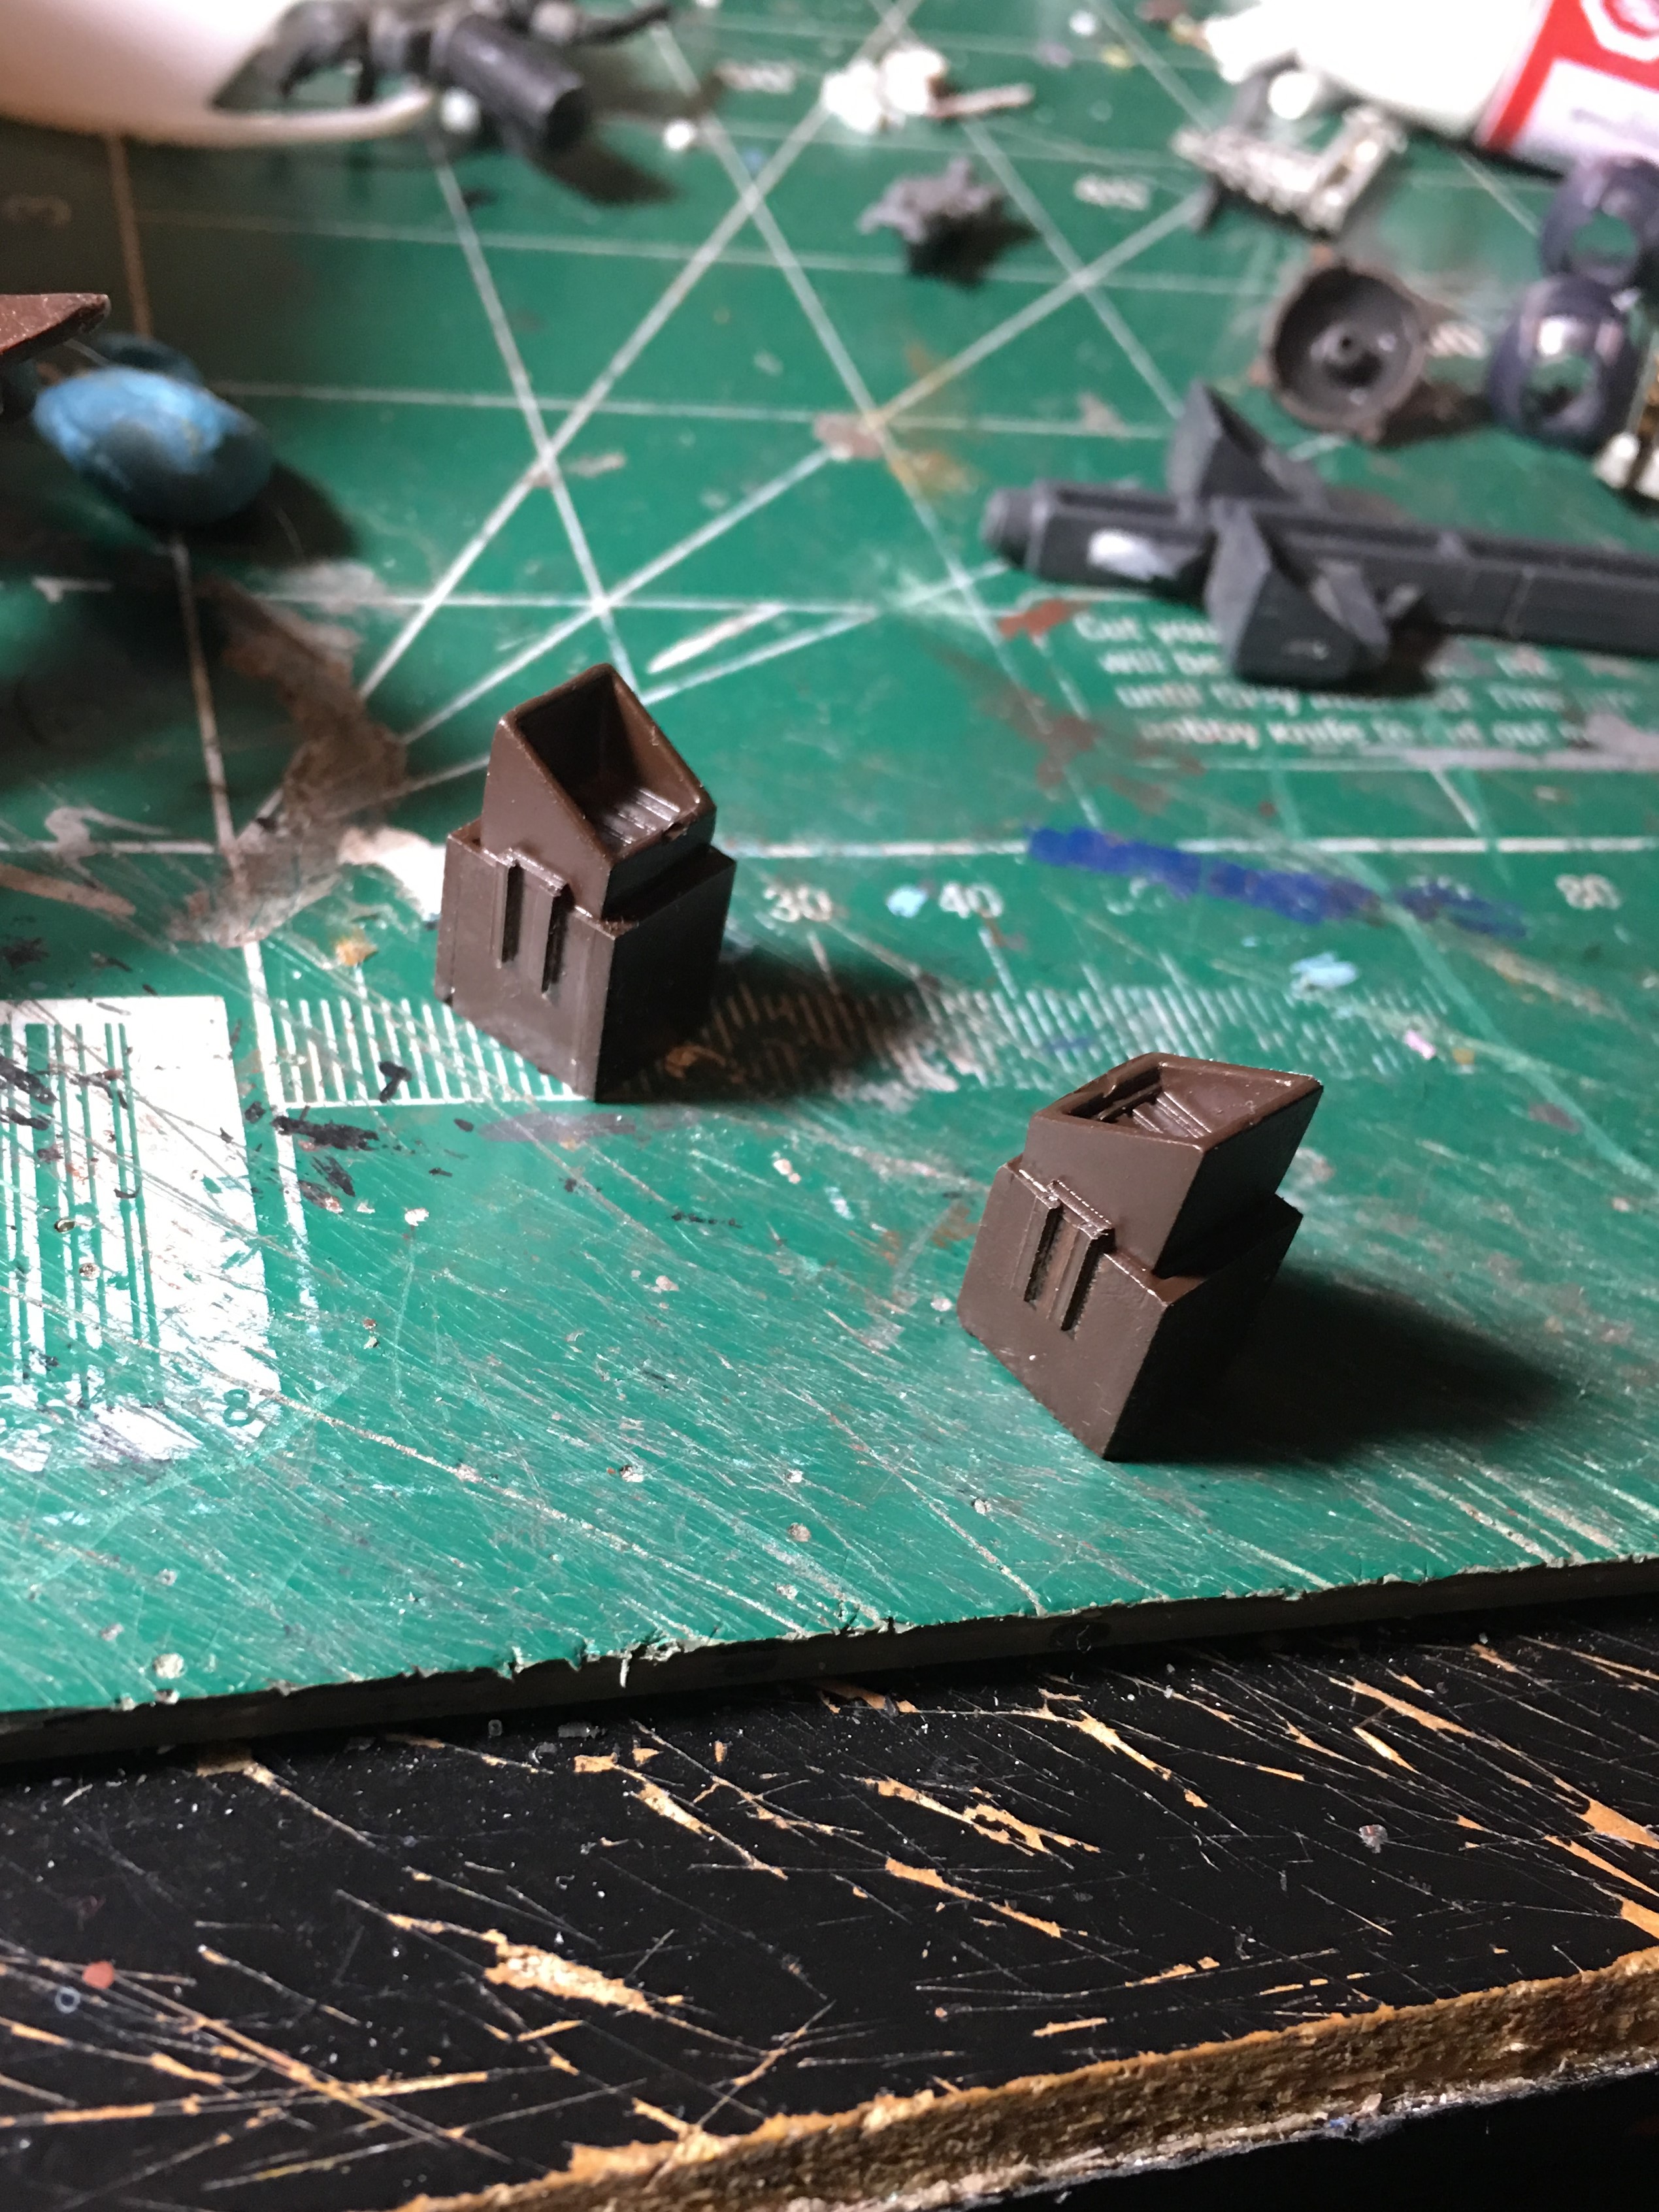
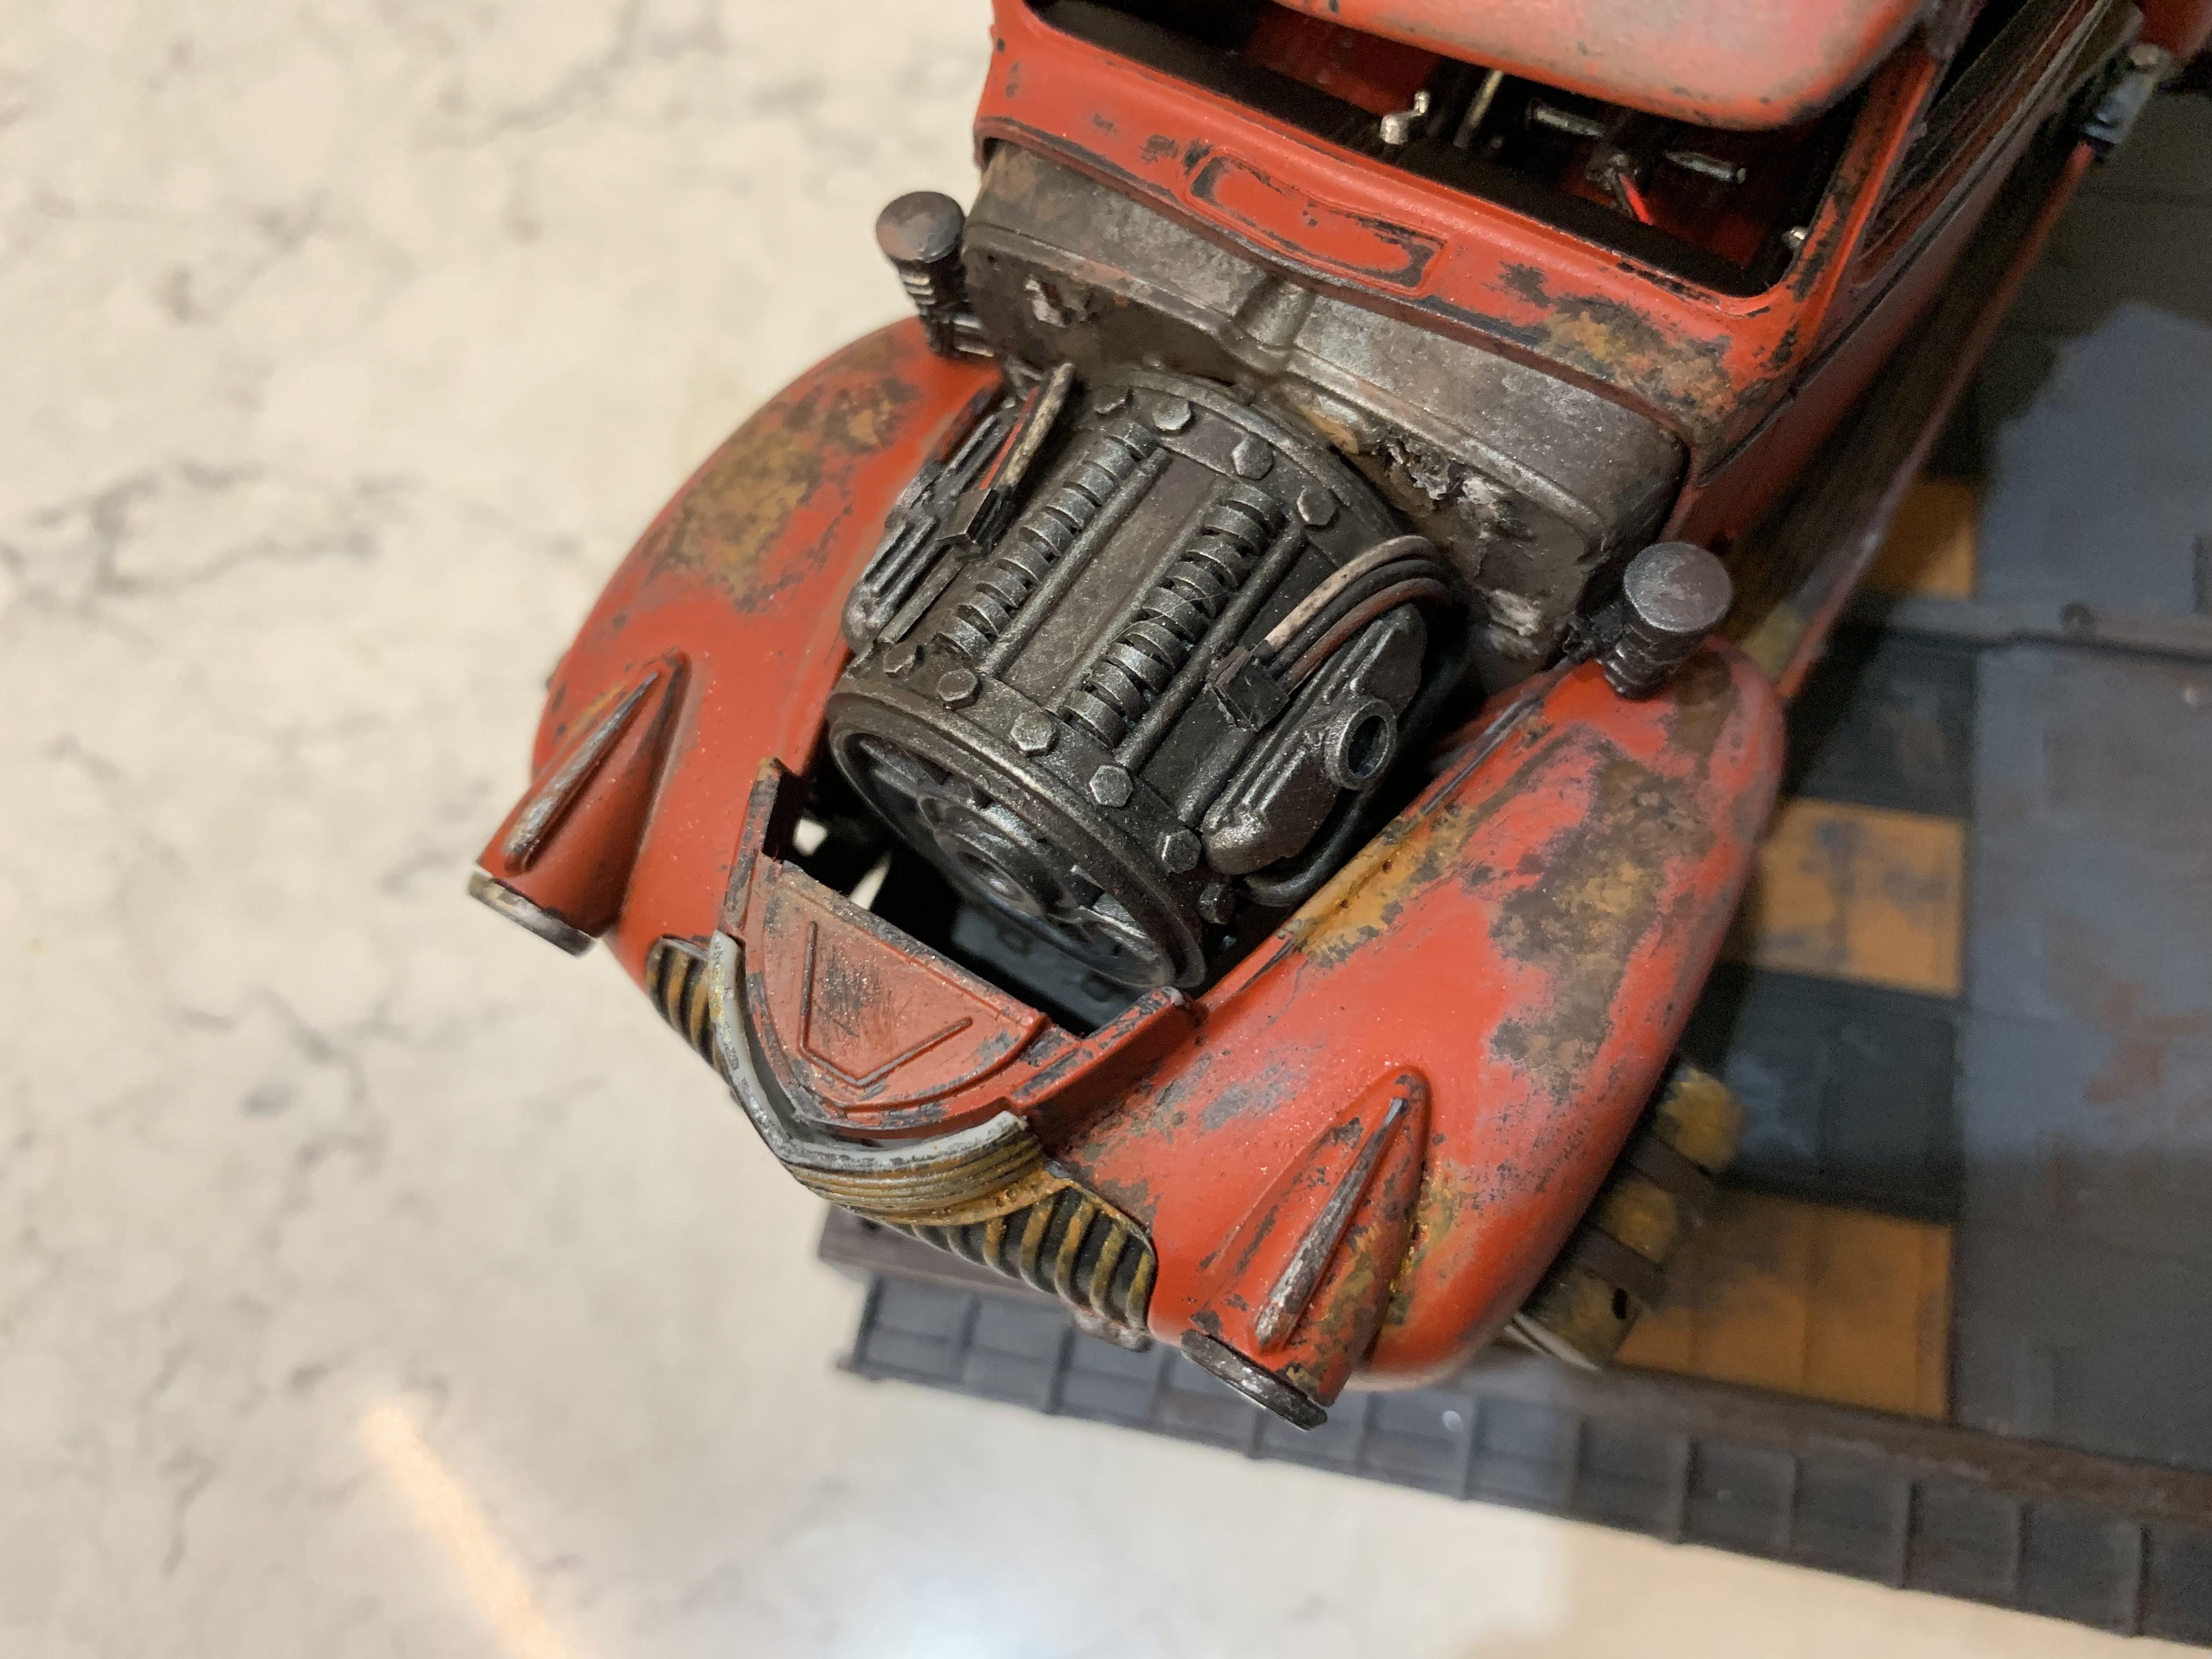
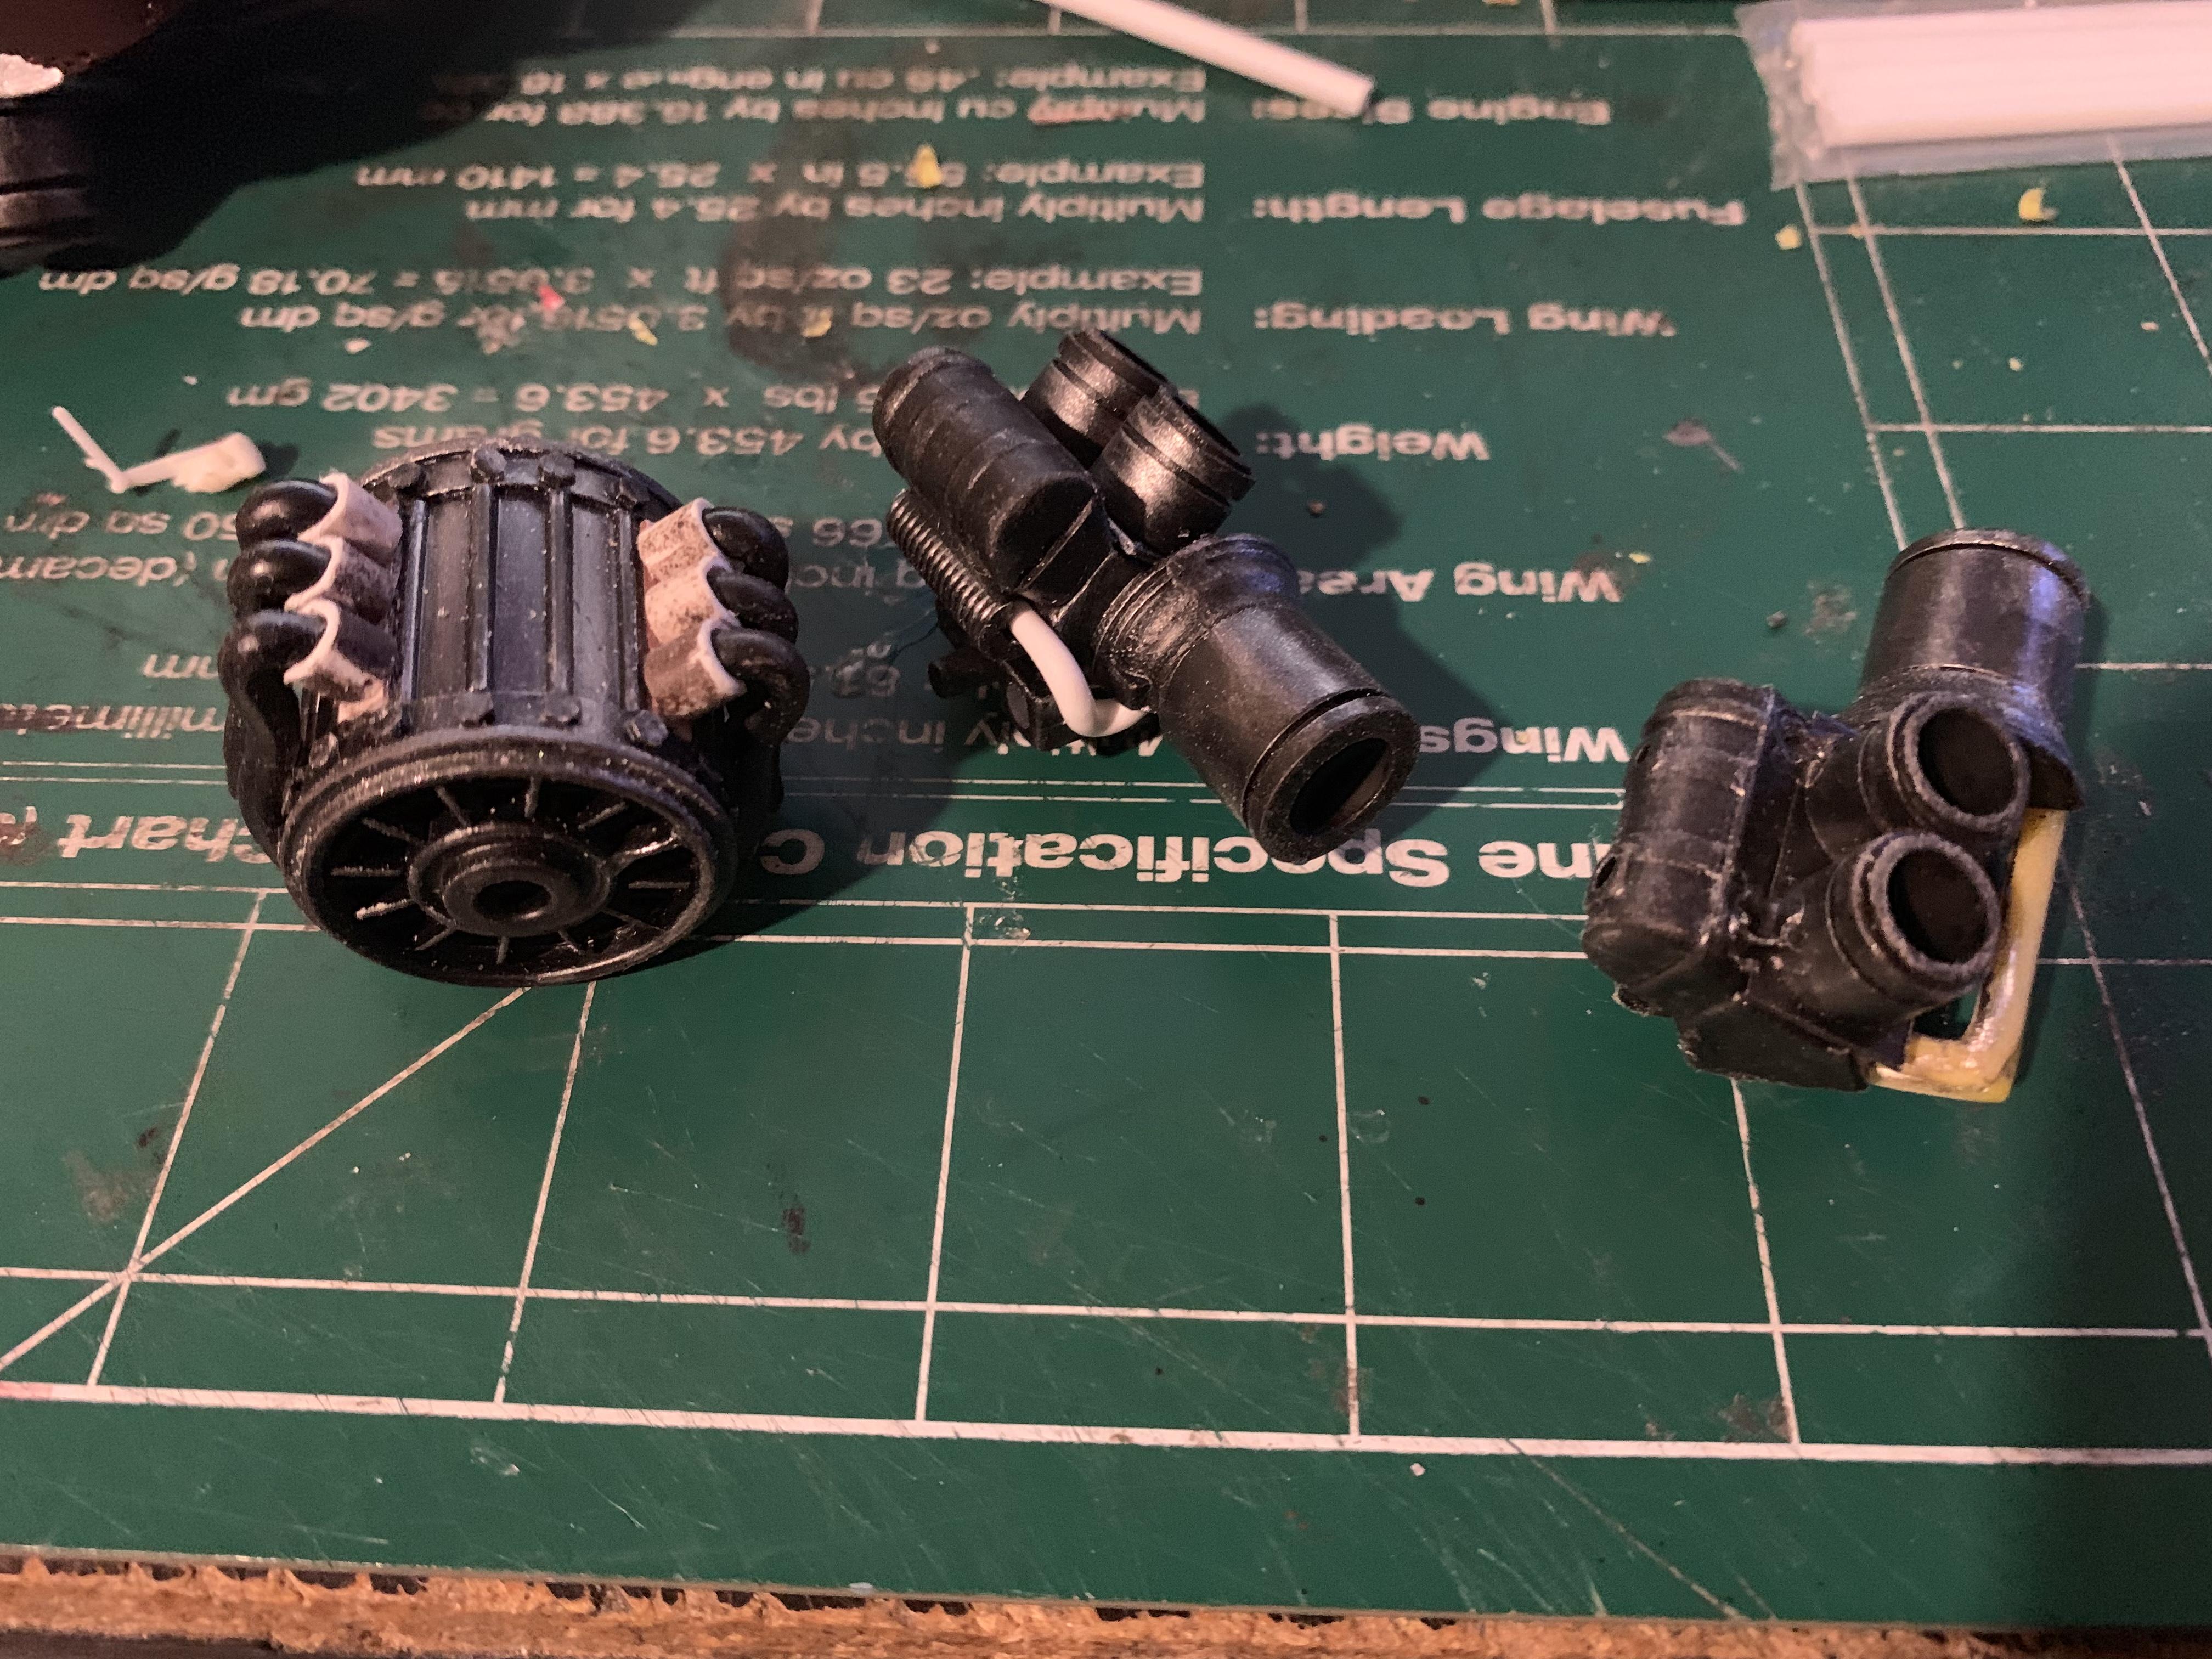
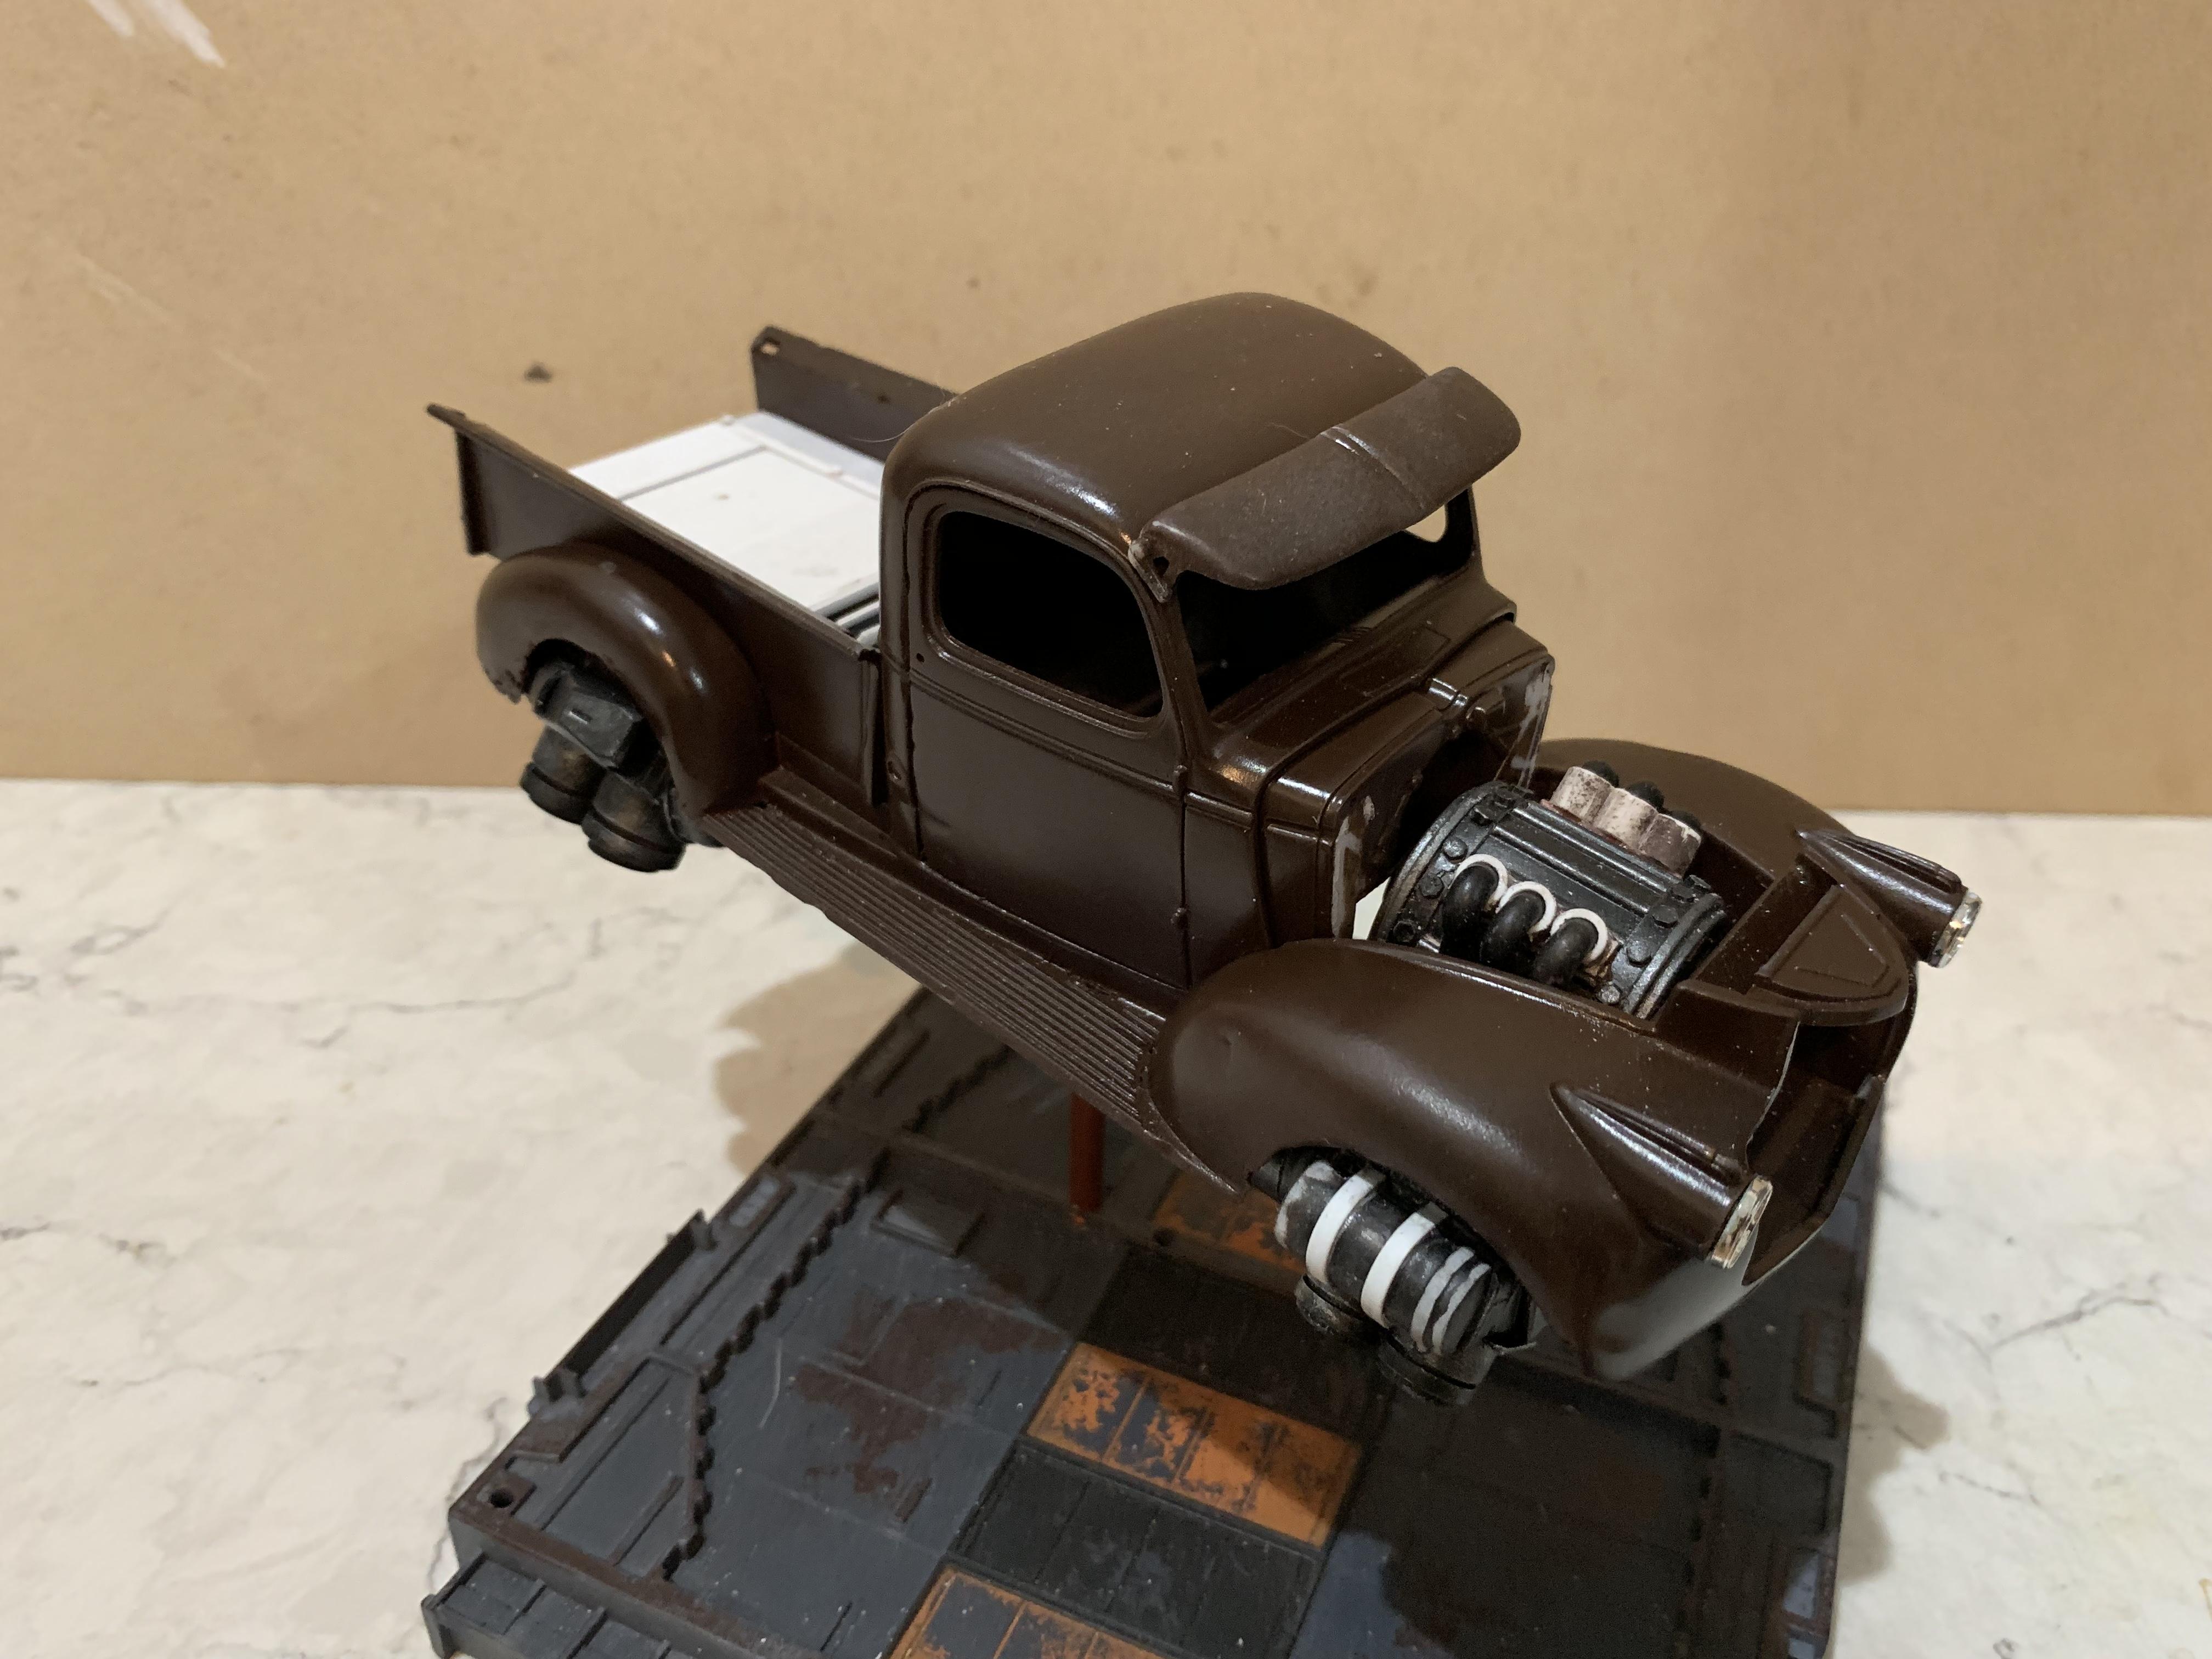
Here's the two front thrusters and what looks like a generator. The generator goes under the hood. Since I'm removing the sides of the hood, I needed something interesting that could be seen. I was thinking of putting the fuel tank under the hood as I do on most of my hover cars, but that's boring to look at. This fills the void and has a cool Dieselpunk feel to it. I'm all about vents and intakes. Big turbines gotta breathe. There's a removable cover that goes over the two turbines, but the slats remain open. I crammed the area around the turbines with miscellaneous parts. There are suspension parts from a Jeep Wrangler and front bumper headlight bezels from a El Dorado. Remove the cover when you need to make repairs. Here's a photo without the bed. It's still just a mock up, not fully glued. Many of the parts are crooked in the photos. I ordered a new kit from Amazon to replace the hood I lost. It'll be here in a few days. I'll be ready to start painting the body soon after. Thanks for looking!!!!
-
41 Chevy Truck - Jet Powered
Daxman replied to Daxman's topic in WIP: Model Trucks: Pickups, Vans, SUVs, Light Commercial
Thank you all!!! I was searching for something interesting that would peek out of the two removed side covers. I really like the idea of big intakes feeding all of the turbines, but I just cant find anything that fits the shape. I need to fill the space with something and the theme is "steampunk junker" So I took 2 rims from a 1/25th semi and wrapped it with styrene. I use the hexagon rod styrene for the bolt heads. The front facing the grill has blades like a turbine. I'll include photos of it later. I experimented with different grills. This one was the best. It's recessed deep and looks aggressive. There's rust holes in some of the seams. I've moved the two main thrusters down to give more clearance for the side thrusters and the rear bumper. The fenders, doors and bed are full of dents and dings. I lost the hood last weekend! I have searched everywhere. I think I left it under the hood of my daughter's car. It's a long story and I feel like an idiot. I need to purchase another kit. I've searched all the hobby stored here in town and can't find it. I'll probably have to order it. I will find and put up a few that I have. I just need to find them on my phone. I have a couple on my PC. The side thrusters are 1/2 a V8 engine block with a few large diameter styrene tubes attached. You can see the transmission housings facing towards the middle of the car. My son gave me a few of his old Gundam kits when he moved out. If you have any interest in building a hover car, I highly suggest taking parts from your kids Gundam kits. They're never going to build them anyways........ I use wheel rims for the main body of the intake and exhaust. Lots of styrene tube of different diameters.
-
41 Chevy Truck - Jet Powered
Daxman replied to Daxman's topic in WIP: Model Trucks: Pickups, Vans, SUVs, Light Commercial
Thanks guys!!! I'm really enjoying this build. The original grill that comes with this kit is a large solid chrome piece. No gaps between each of the fins. I attempted to separate them, bad idea! A few of the fins broke off and they were too flimsy. Looks like I'll be scratch building a grill. Right now I'm imagining this truck in a medium 50's green. My daughter suggested a 50's cream. If you've seen my previous builds, this will probably change a few times. I opened the sides of the hood. I'll need to find something interesting to fill the void. Mechanical pieces, plumbing, wires. Thanks for looking!
-
41 Chevy Truck - Jet Powered
Daxman replied to Daxman's topic in WIP: Model Trucks: Pickups, Vans, SUVs, Light Commercial
I like them too. I really wanted to make this into a traditional old beater truck. Rusted out, with tools in the back and torn seats. I had it sitting on my desk mocked up on 4 wheels. It looked cool, but I just wasn't excited about it. It sat on my desk for around 5 months and eventually got pushed behind my monitor. I started scratch building the big turbines about a week ago for a 71 Hemi that was going to be my next project, but I tried them on the 41 Chevy and they just looked too good. So I need to come up with a clever name for it...... -
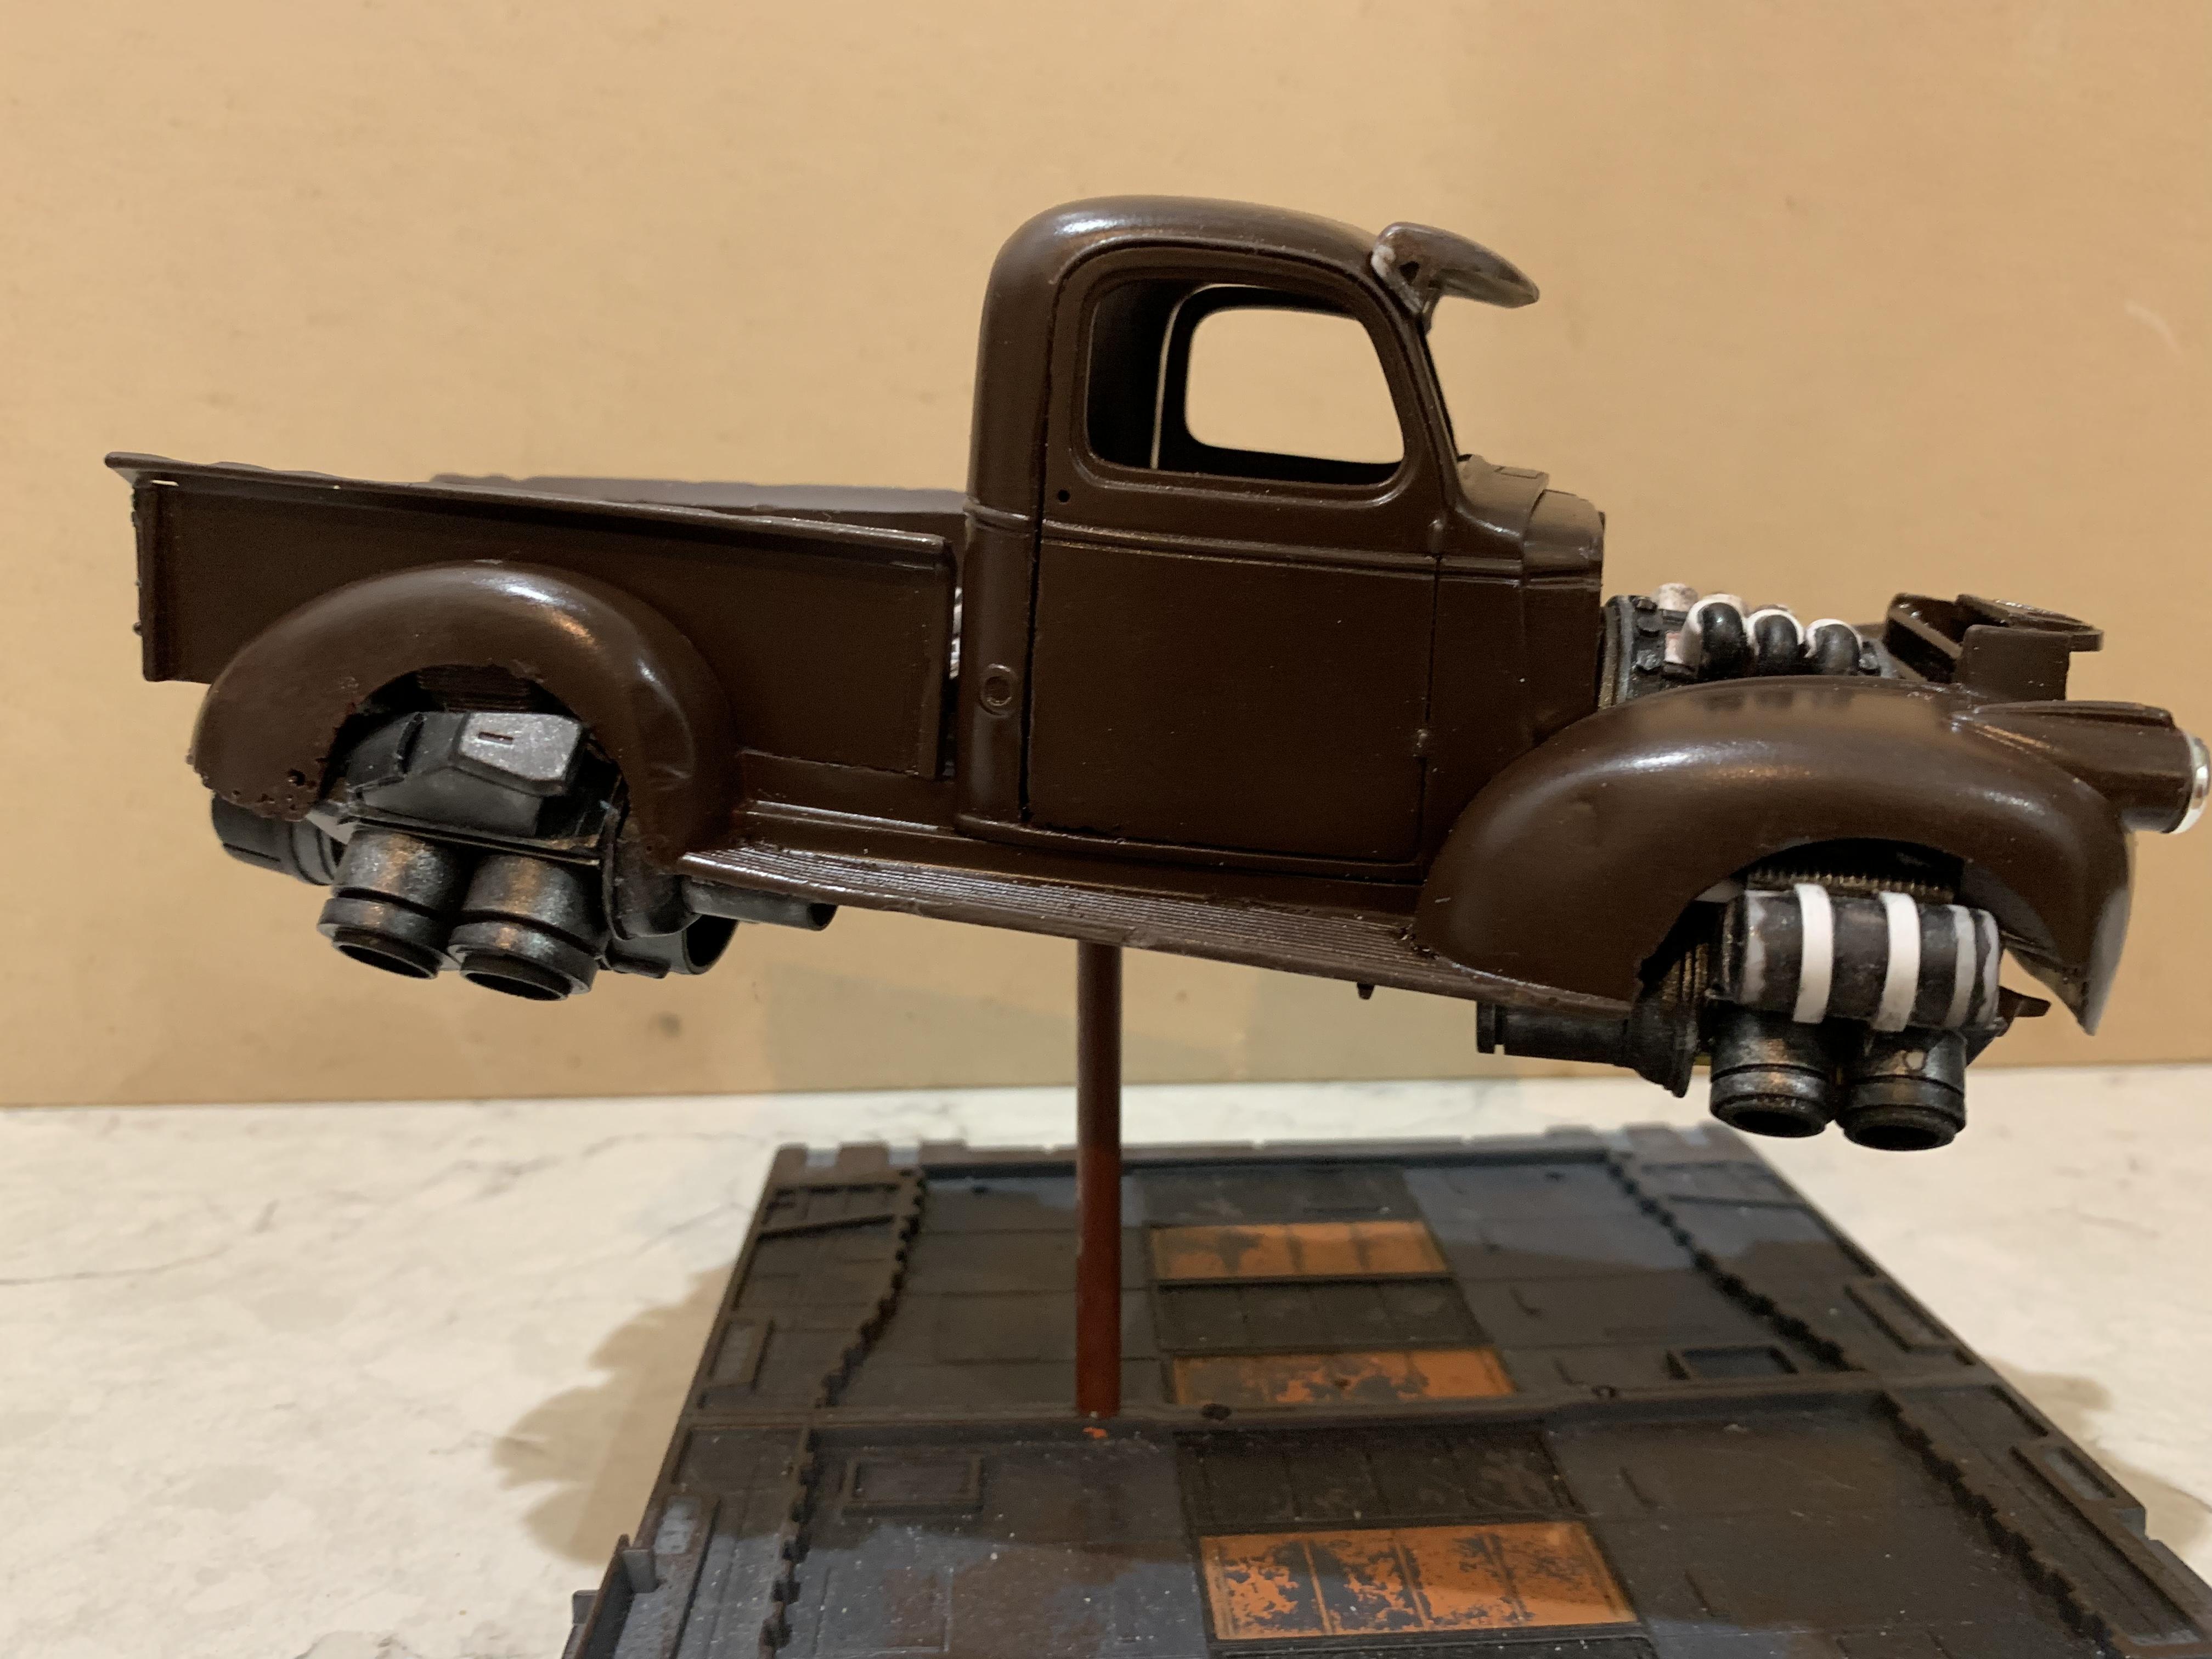
I had started this back in March. It was going to be a rusted out, heavily weathered old pick up. I was actually going to make a model with wheels for a change! I experimented with layering thin layers of paint, for the weathering. I wasn't happy with the way it was turning out and ended up putting the kit away for a few months...... Broke it out a few days ago and decided to make it into a jet truck, what else? I'm not sticking with this color, it will change. Just need to figure out where this whole thing is going to go....Is it a work truck? A delivery truck? Built for speed? I'll be trying to figure out a color scheme for the next few months....I'll probably end up repainting it a few times over. I love that fat exhaust I'll be replacing the little fins around the 2 rear exhaust. I made these temporary just to see how they looked. For me, the most difficult part of building one of these hover cars, is the action in the wheel wells. It's difficult to find parts that fit into the space and still look as if they preform some kind of function. I used half of a V8 and the air cooled cylinder block of a VW plus some styrene tube to make a V-TOL type take off system. I'll be adding more bits and pieces as I go. I still have to figure out what kind of front steering/propulsion I'm going to put on. This is usually the second most difficult part. Thanks for looking. I'll post more as i go.
-
I just started my 6th jet vehicle, two days ago. It's a 41 Chevy truck. I'll get a few photos of the new project up on these forums within a couple days. I'd love to show all of my jet vehicles in one single post. I try to do that as well. How is your 49 Ford coming along?
-
Thanks for all the positive comments!!! I have a few more photos with the trunk and hood removed.
-
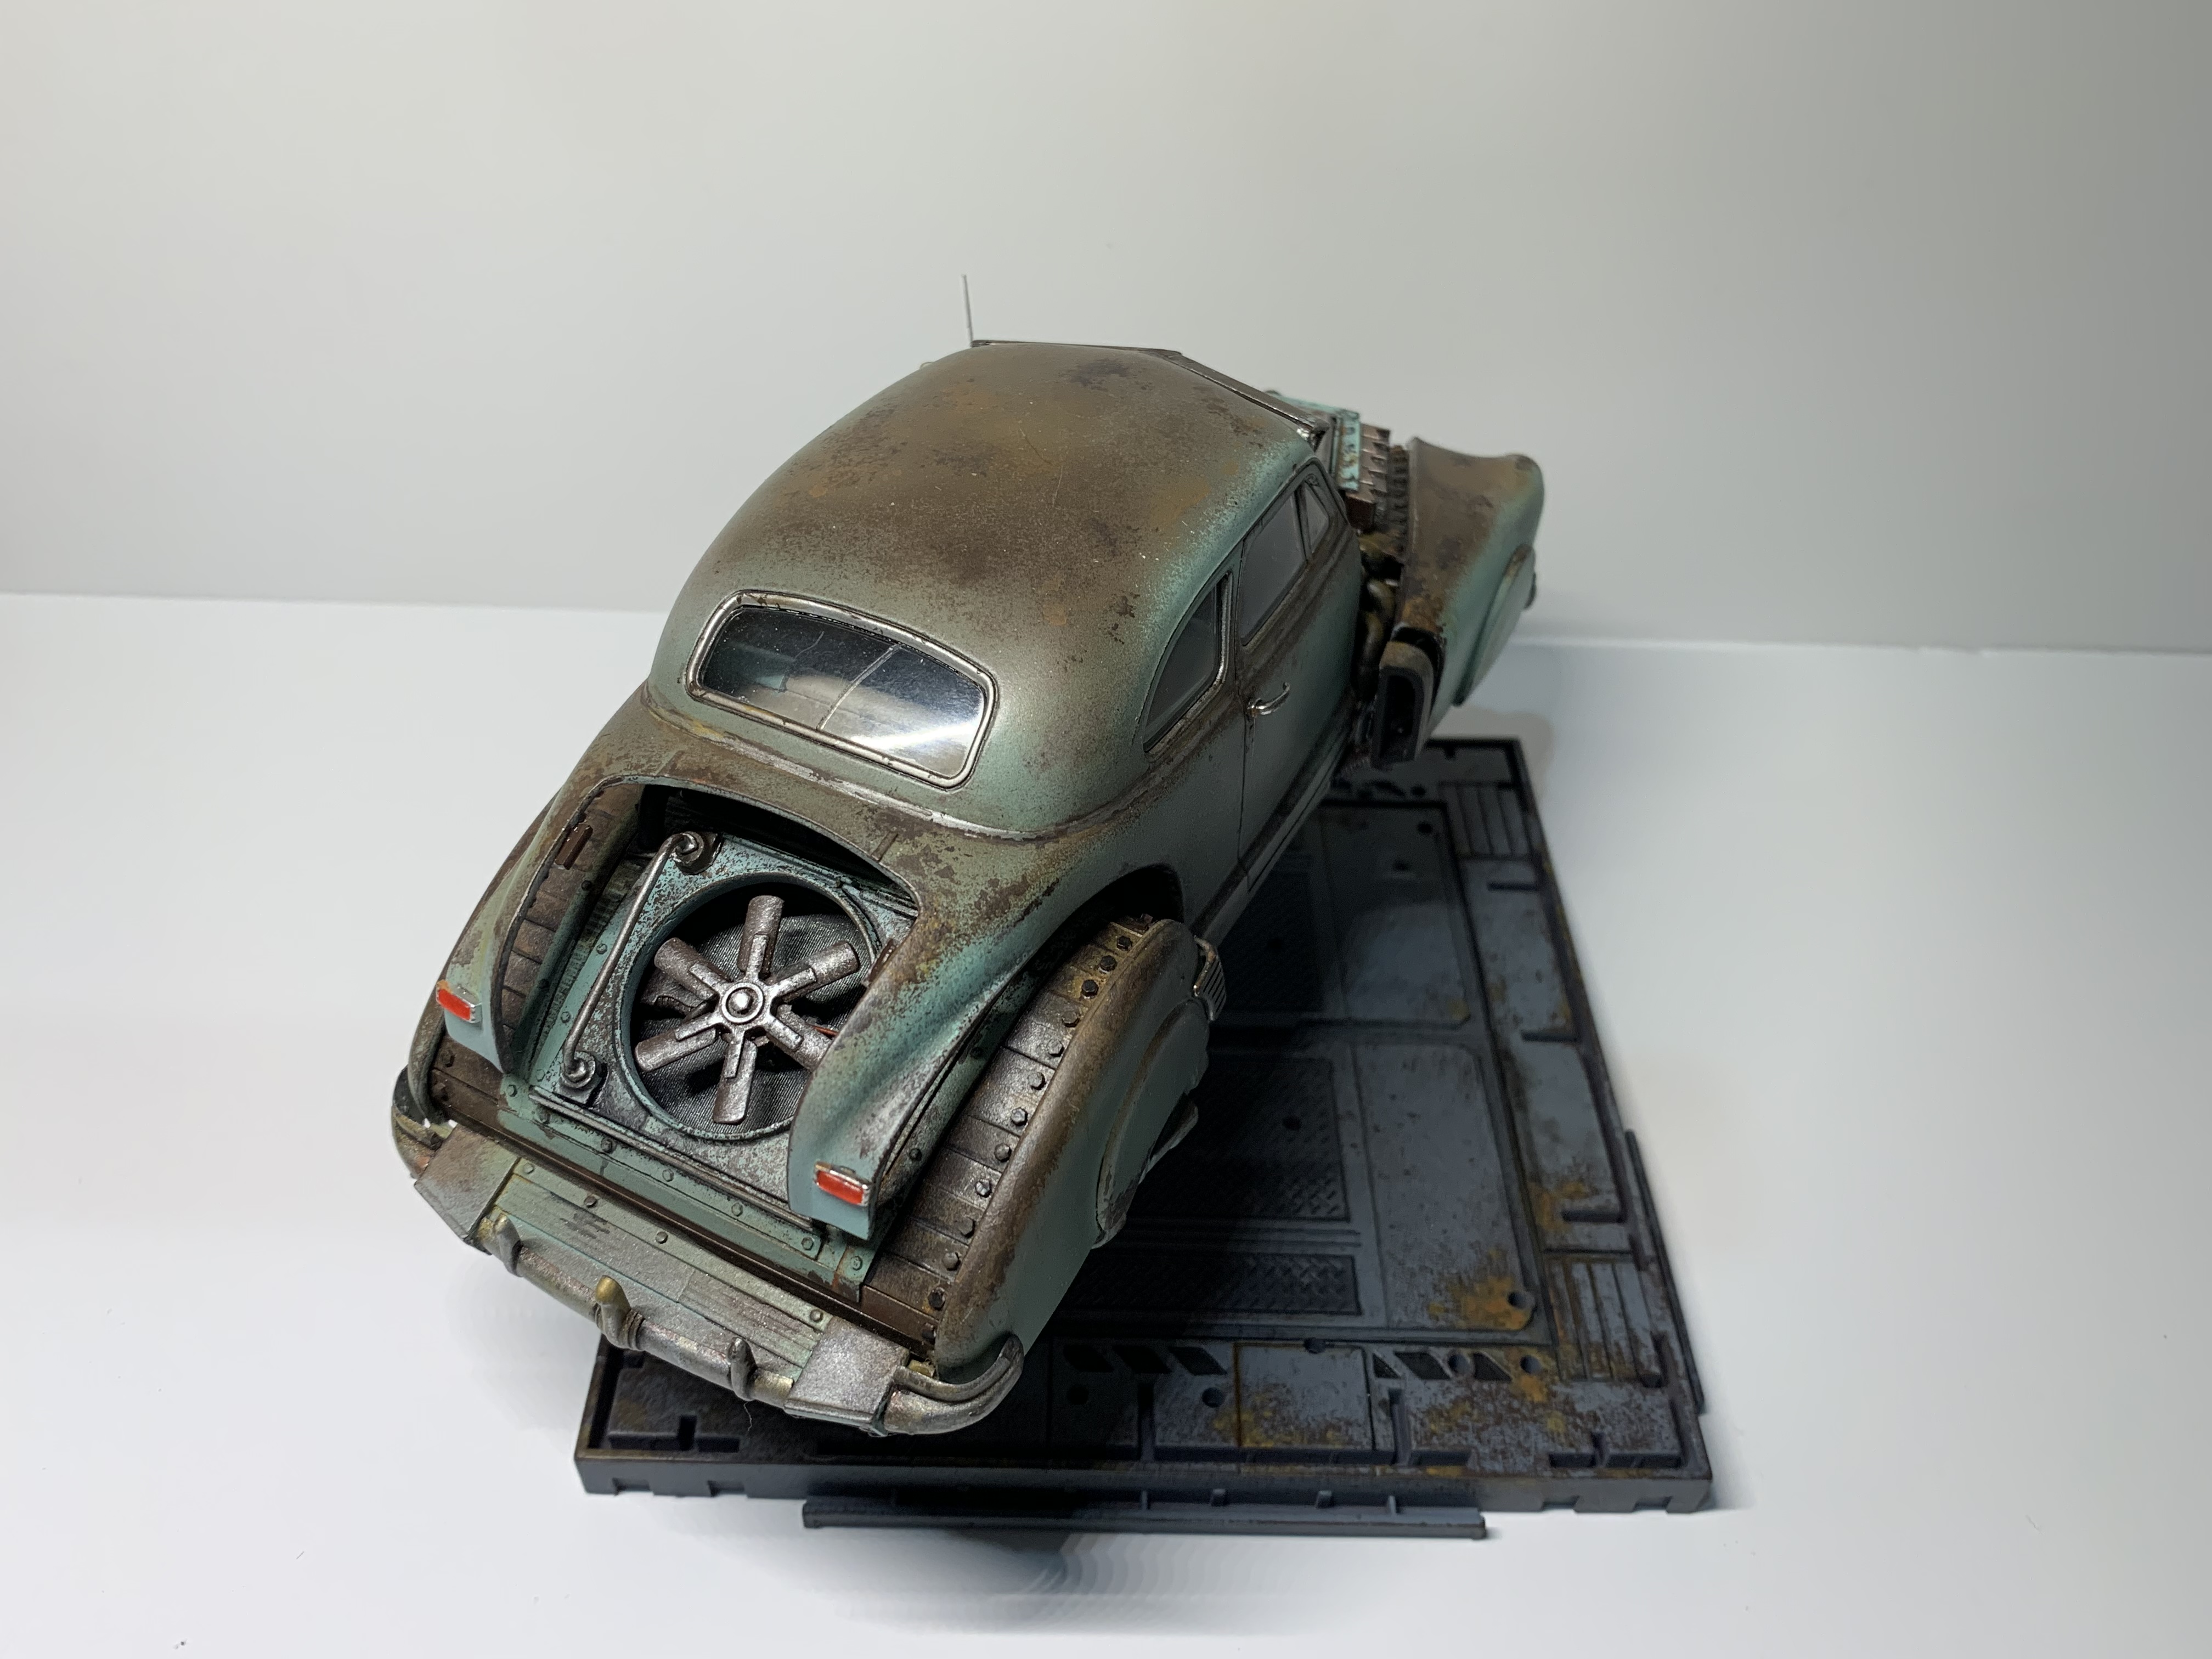
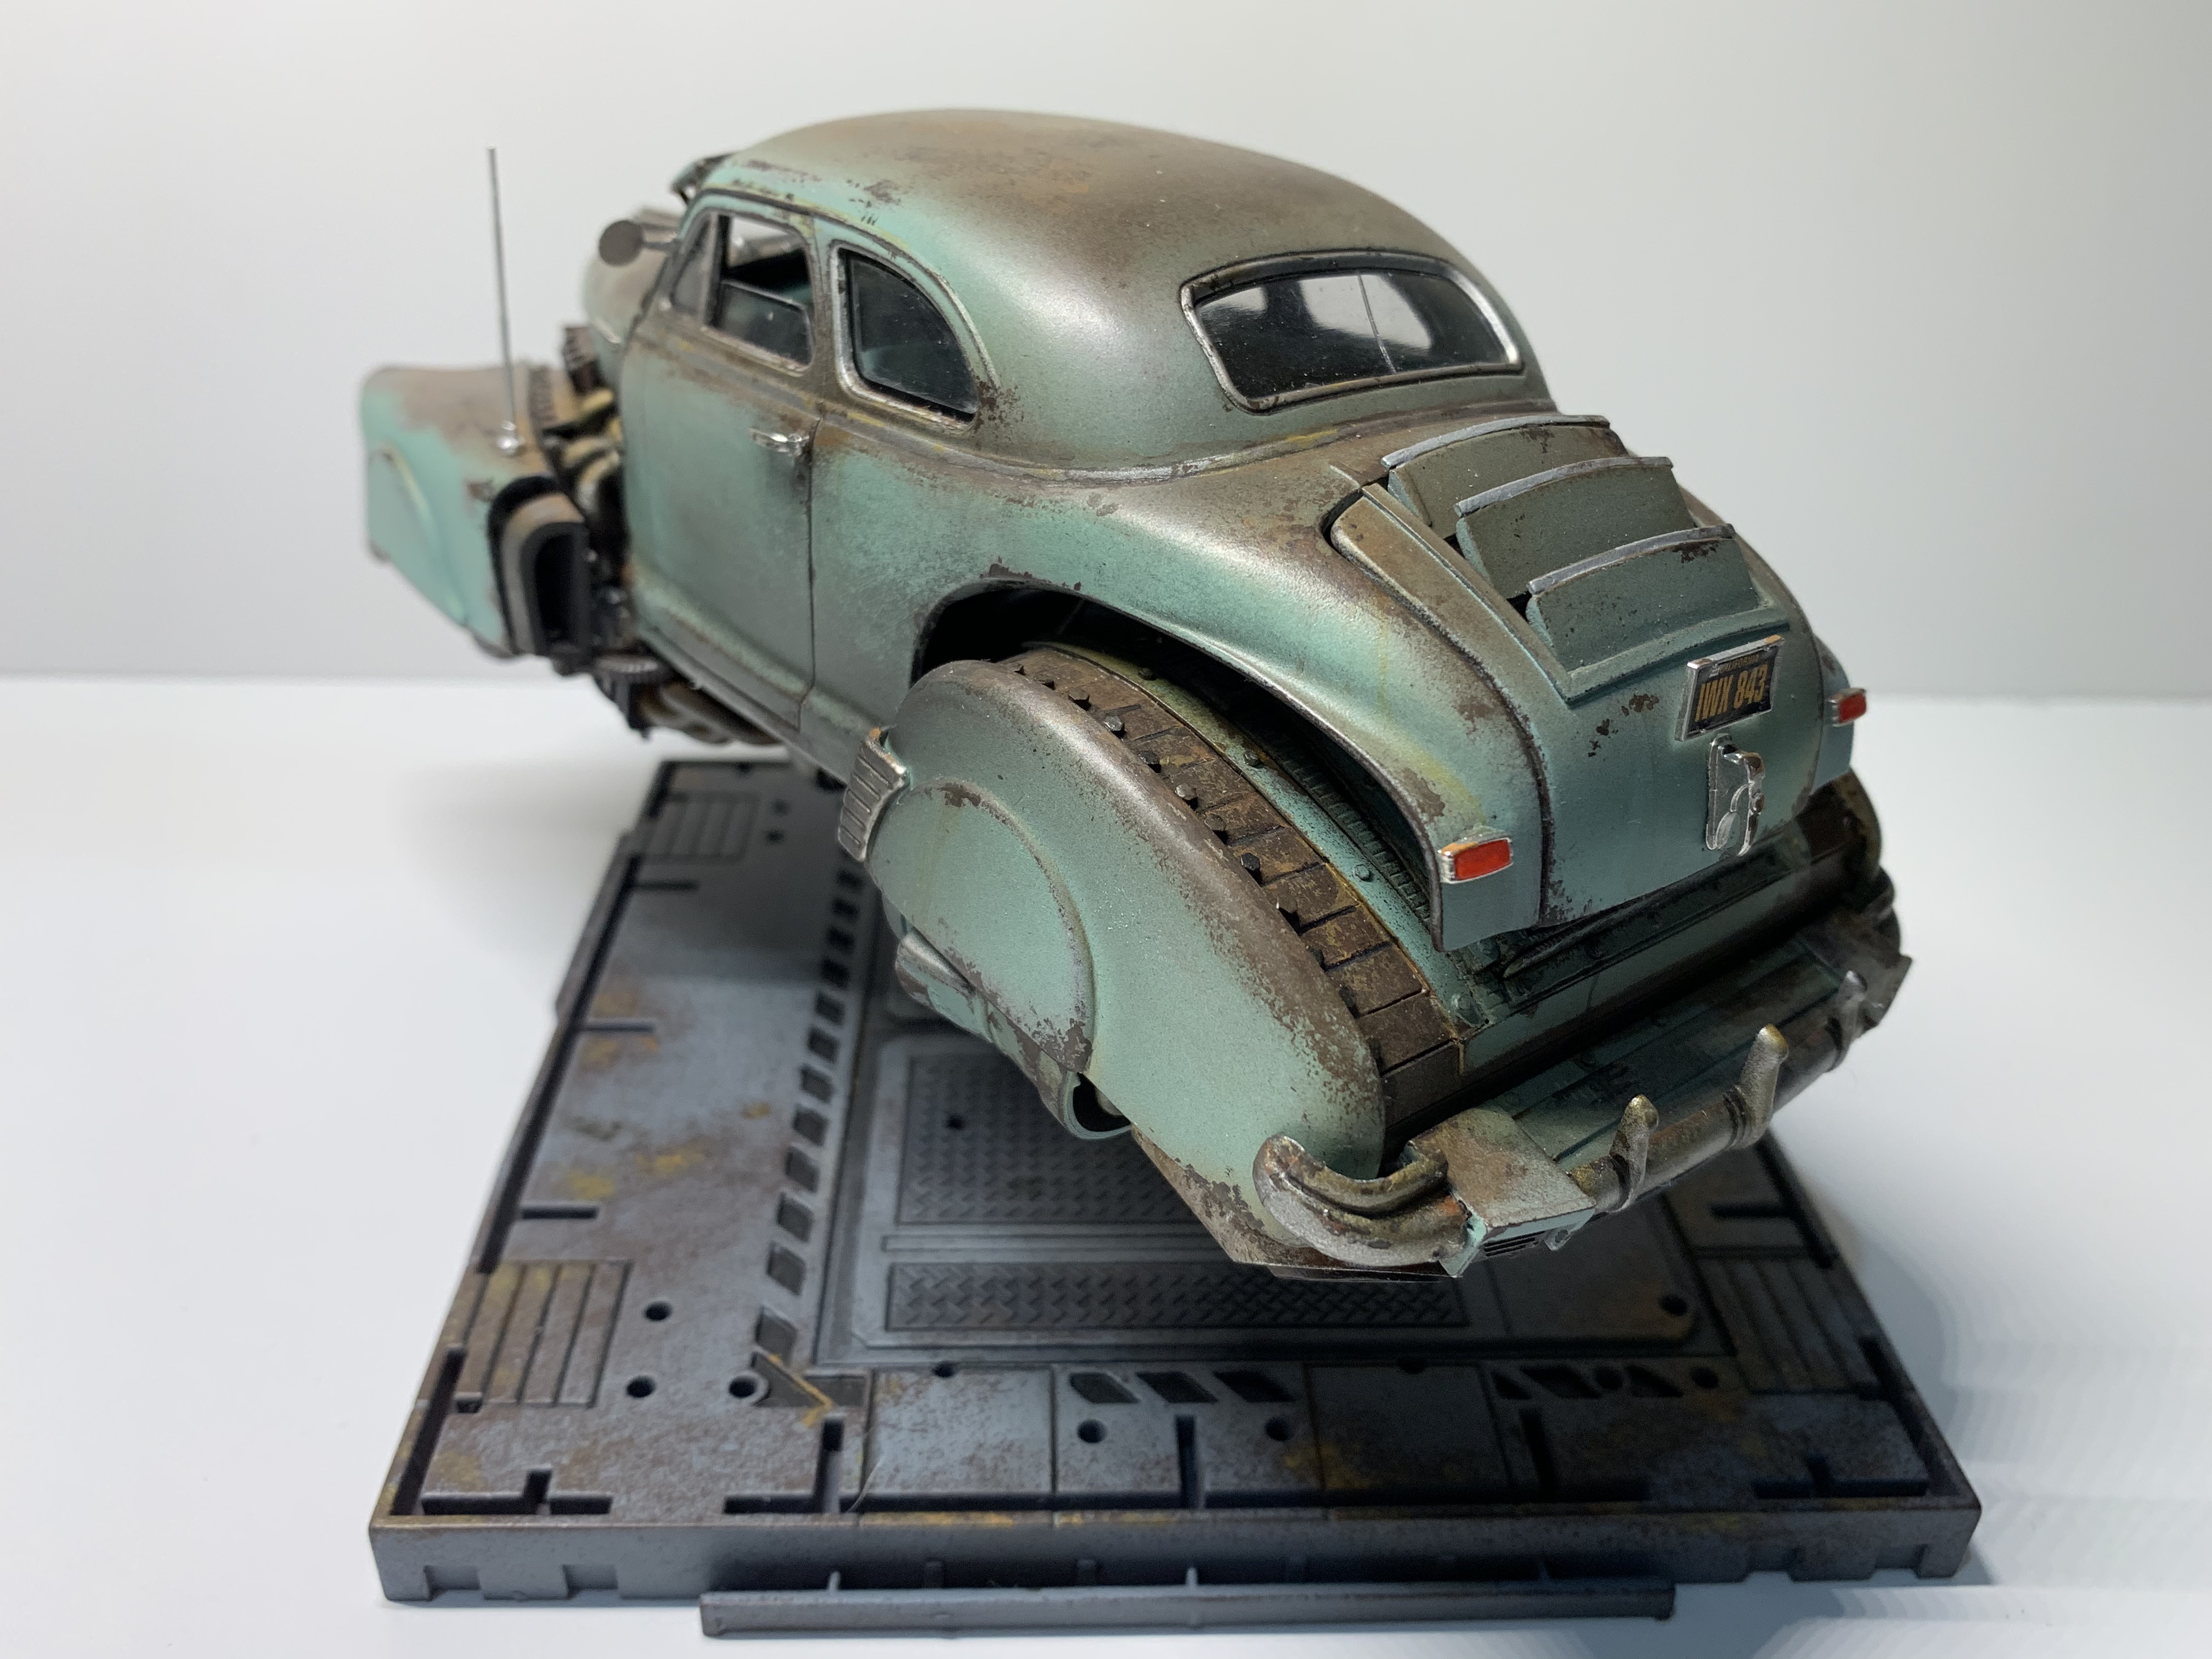
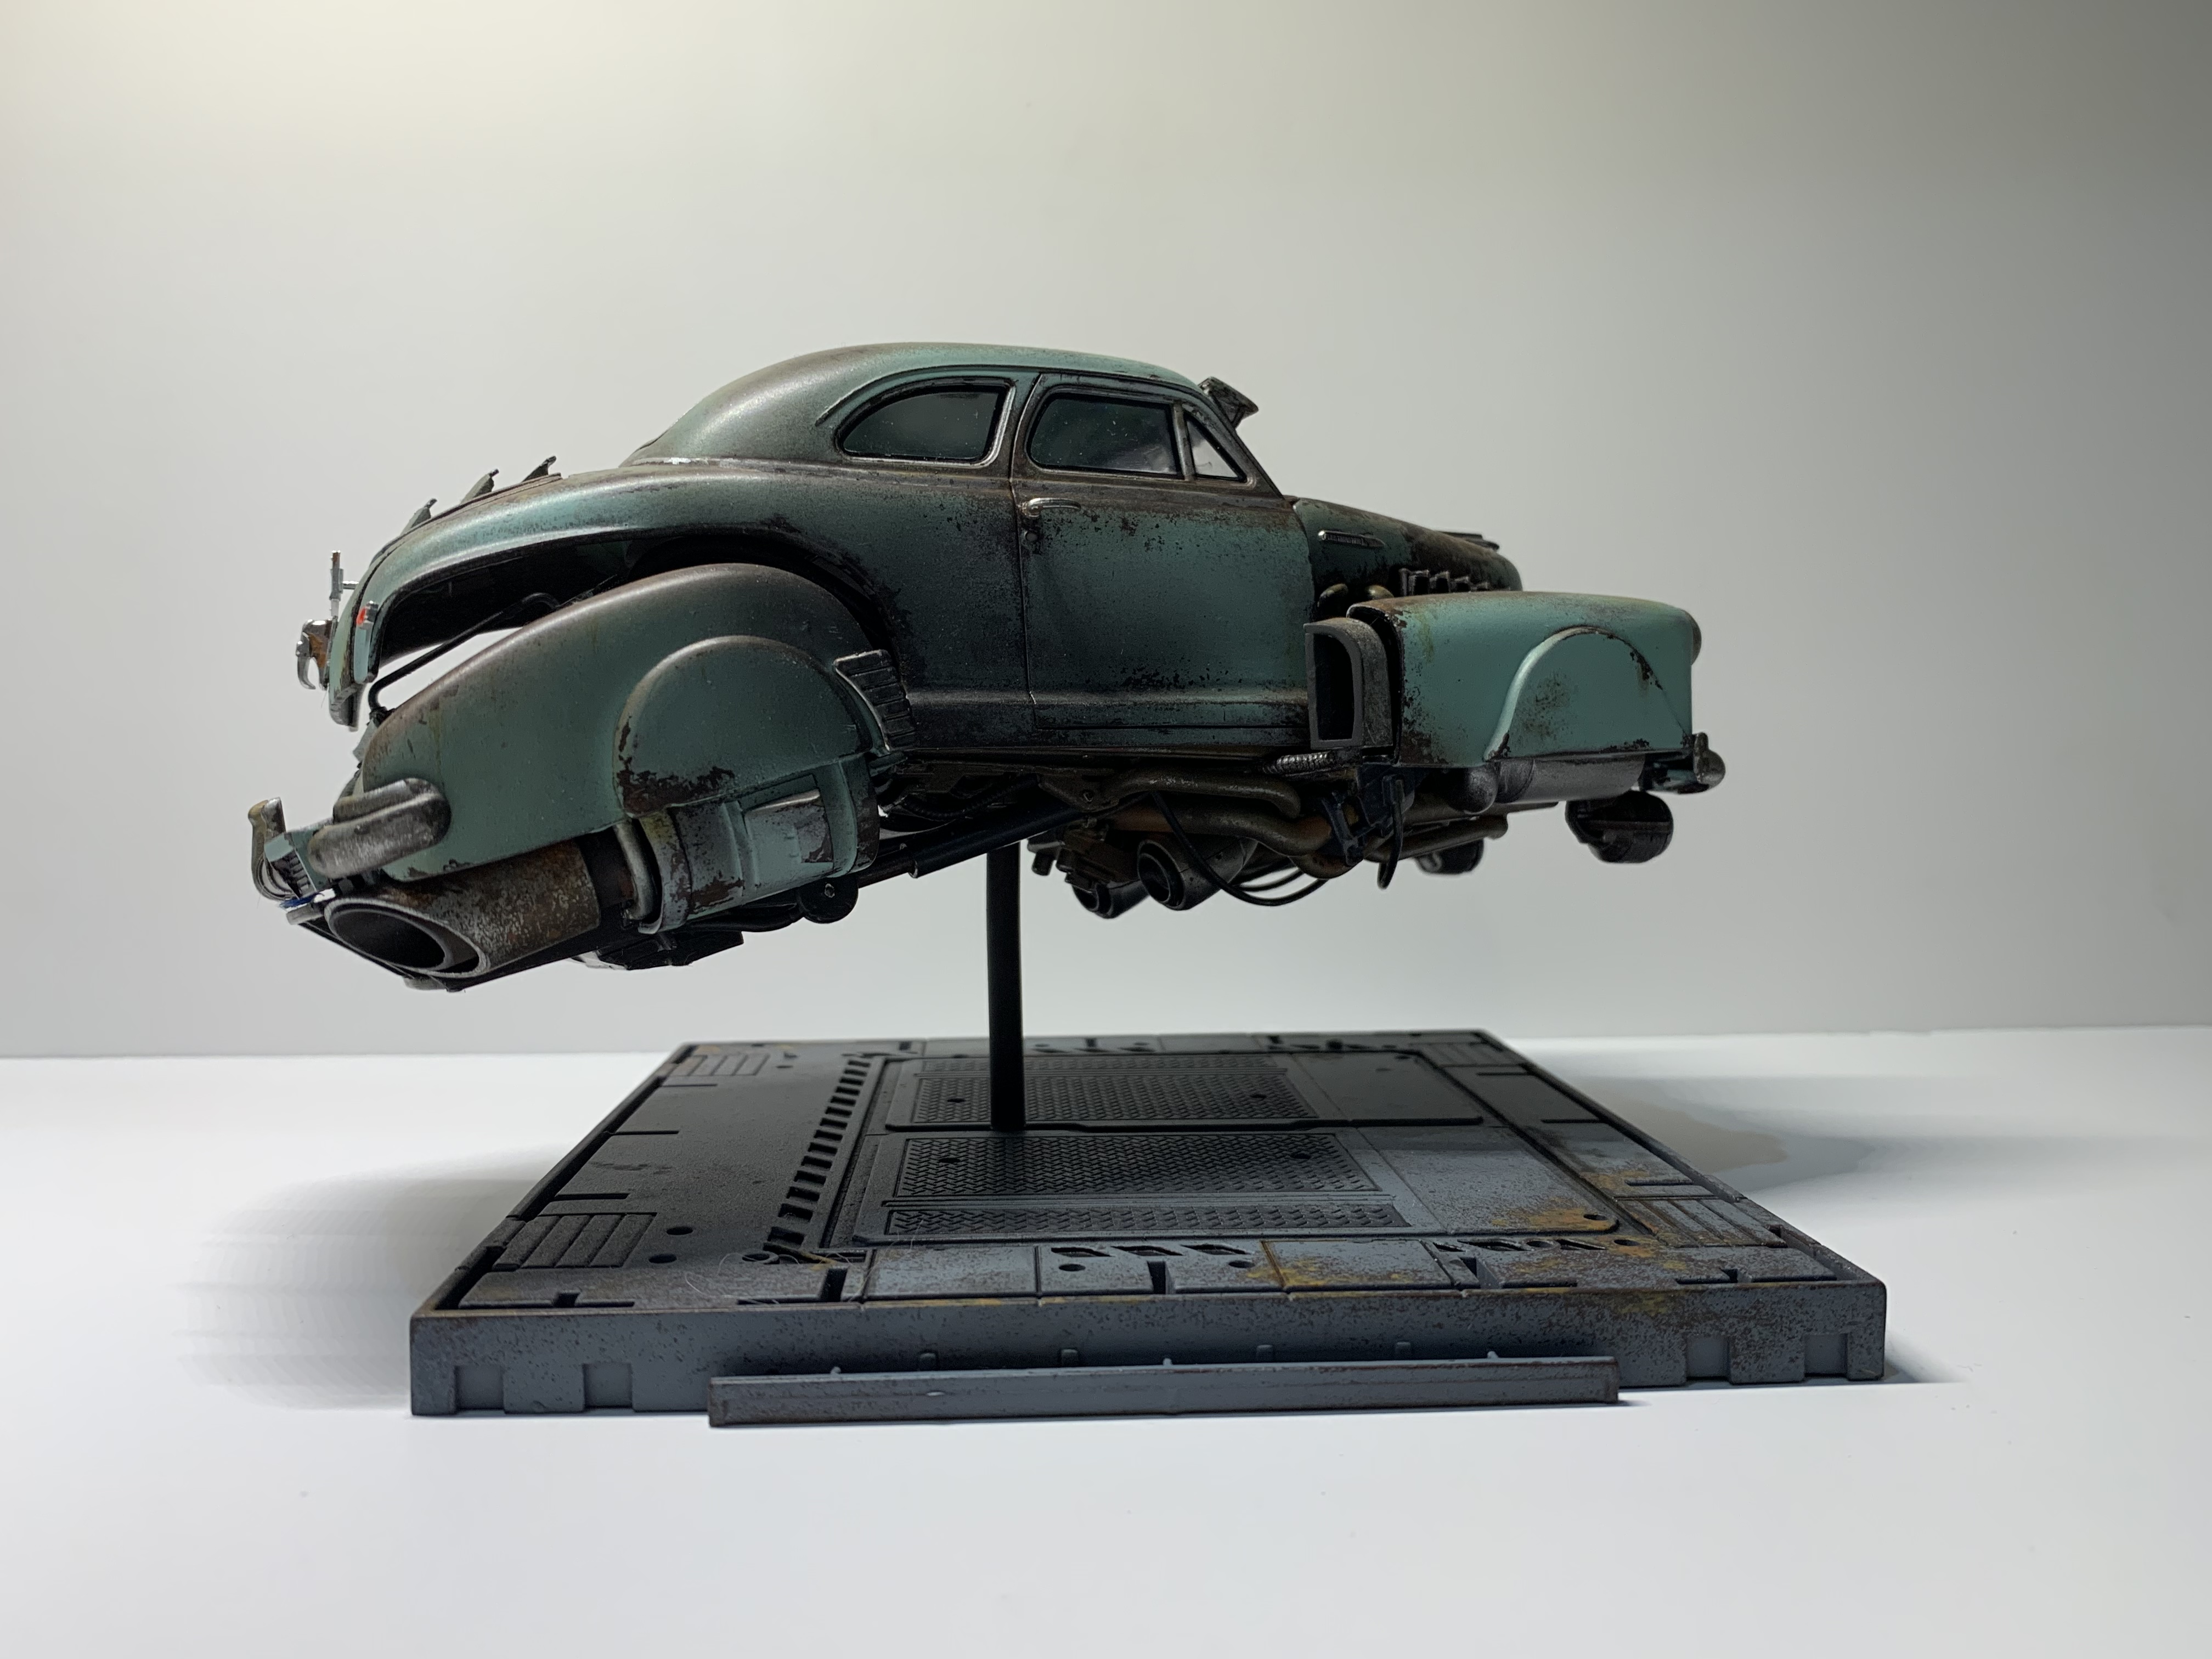
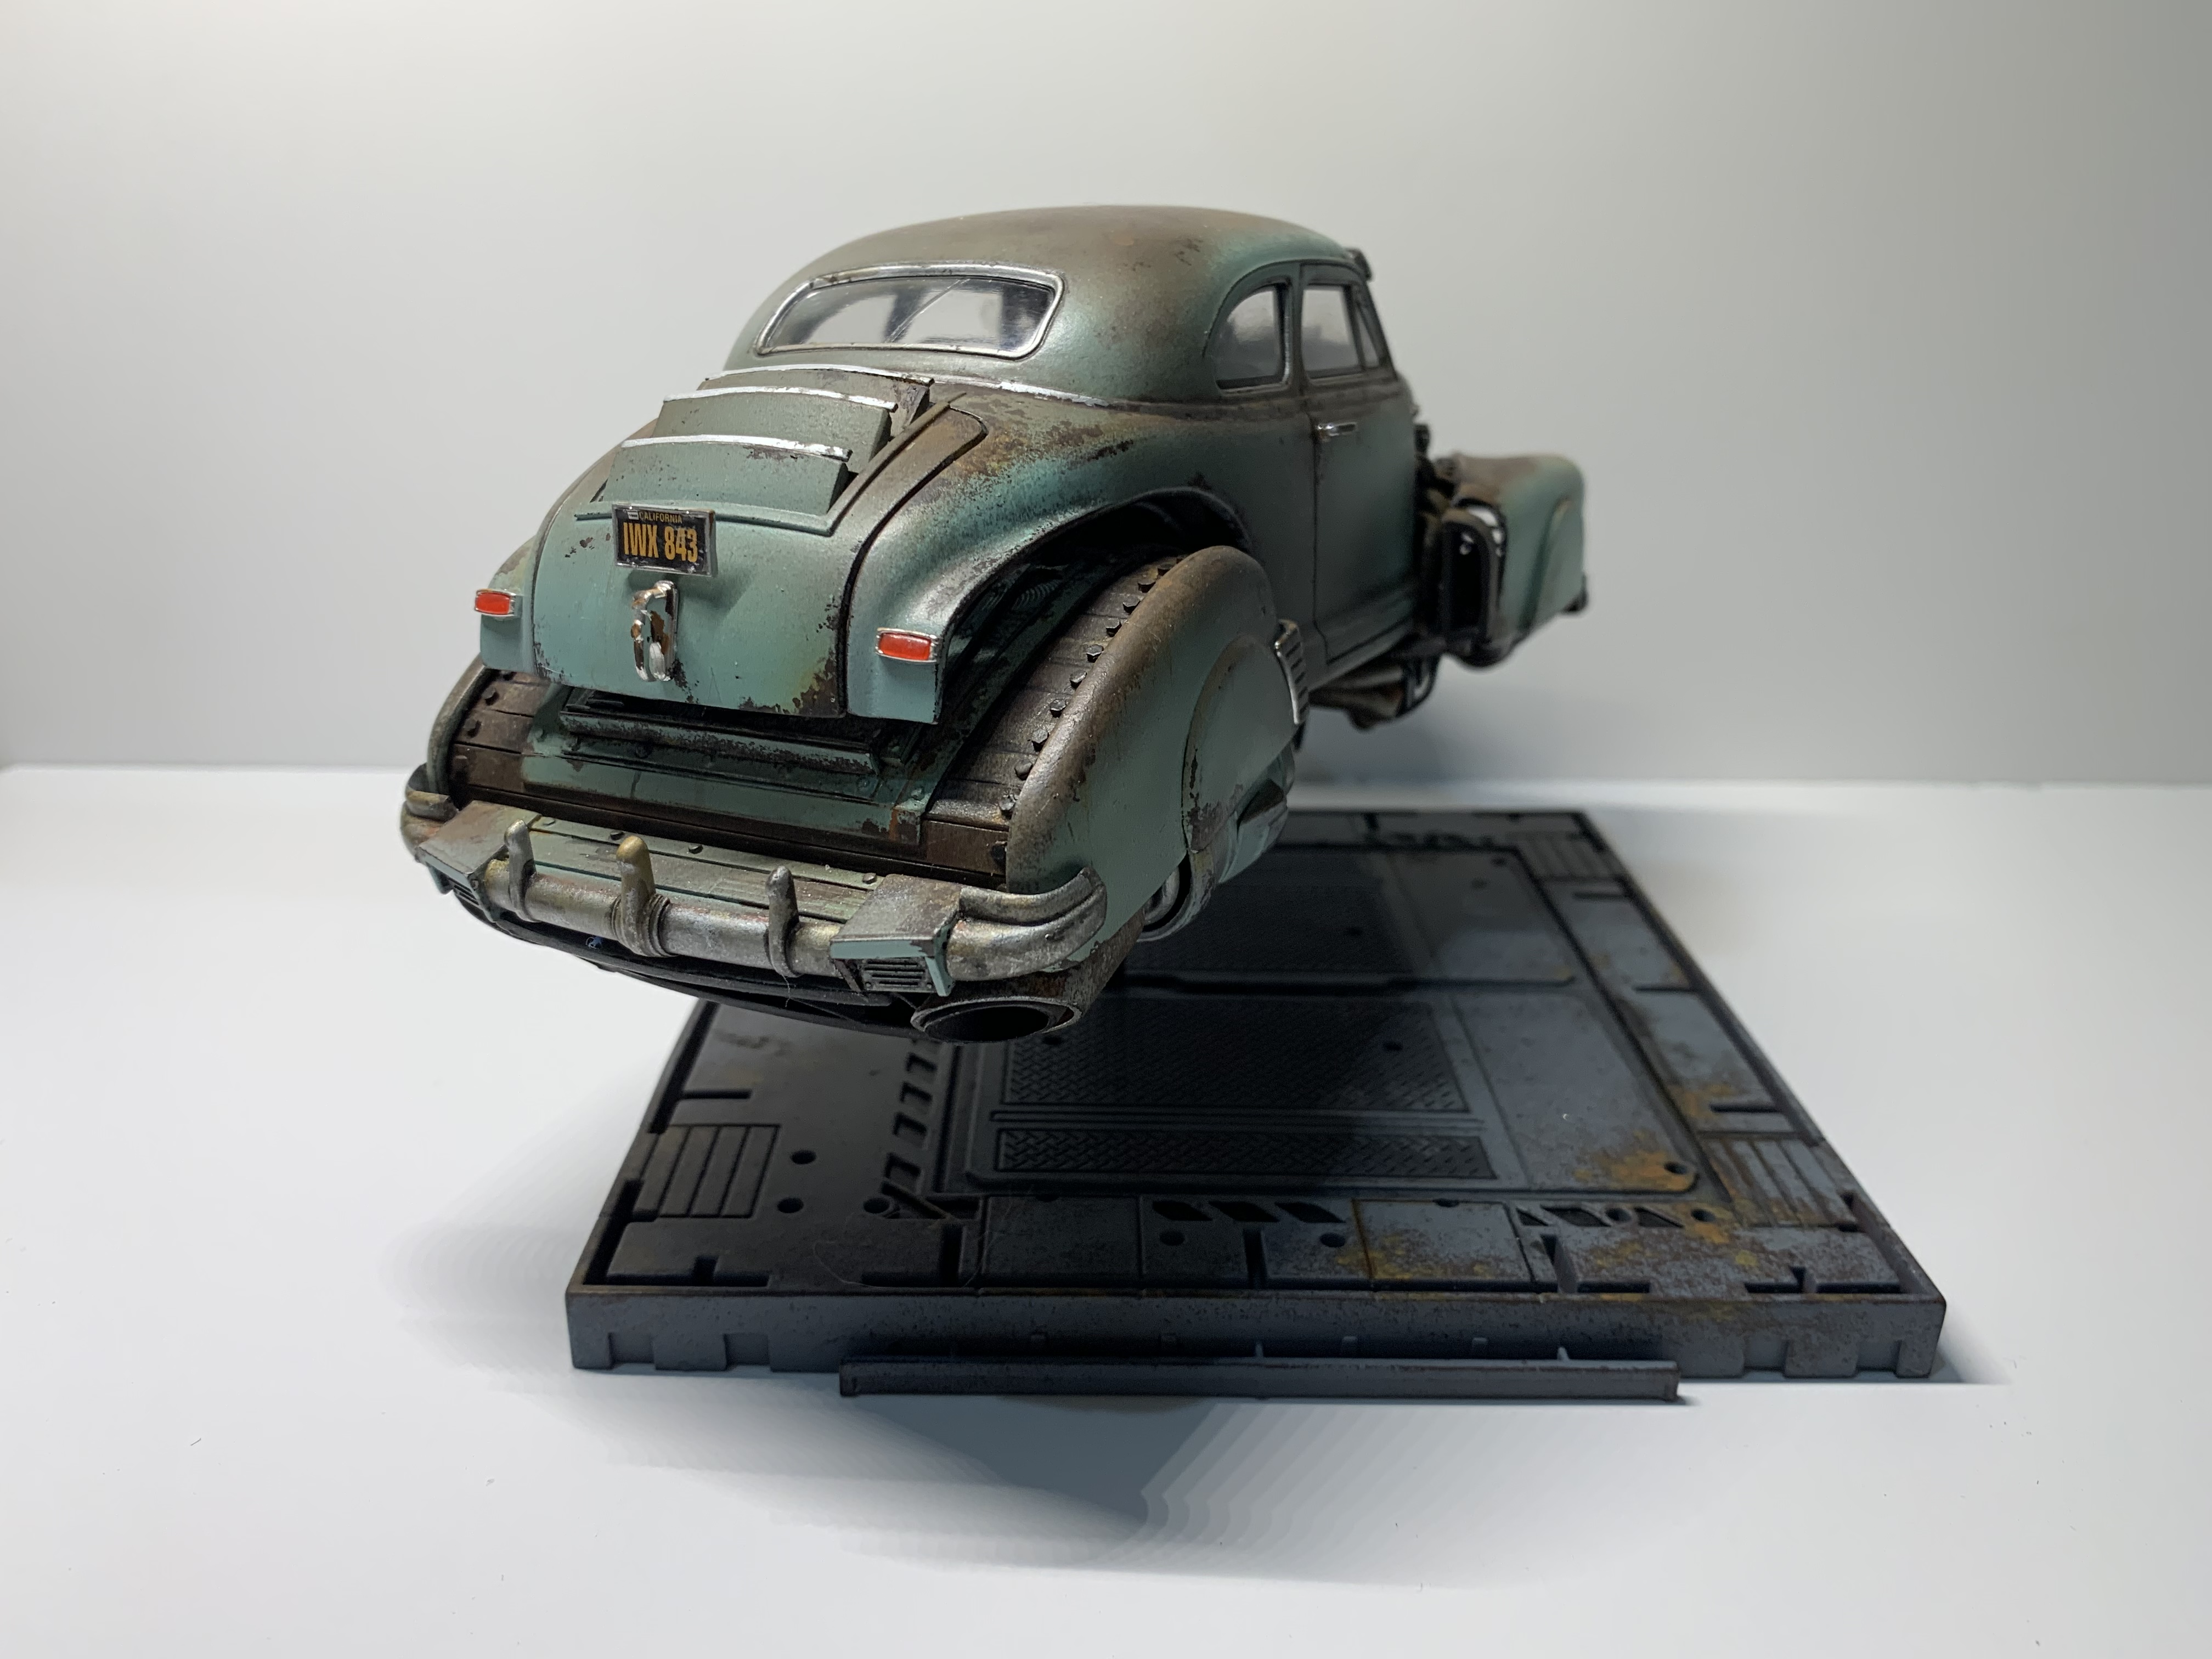
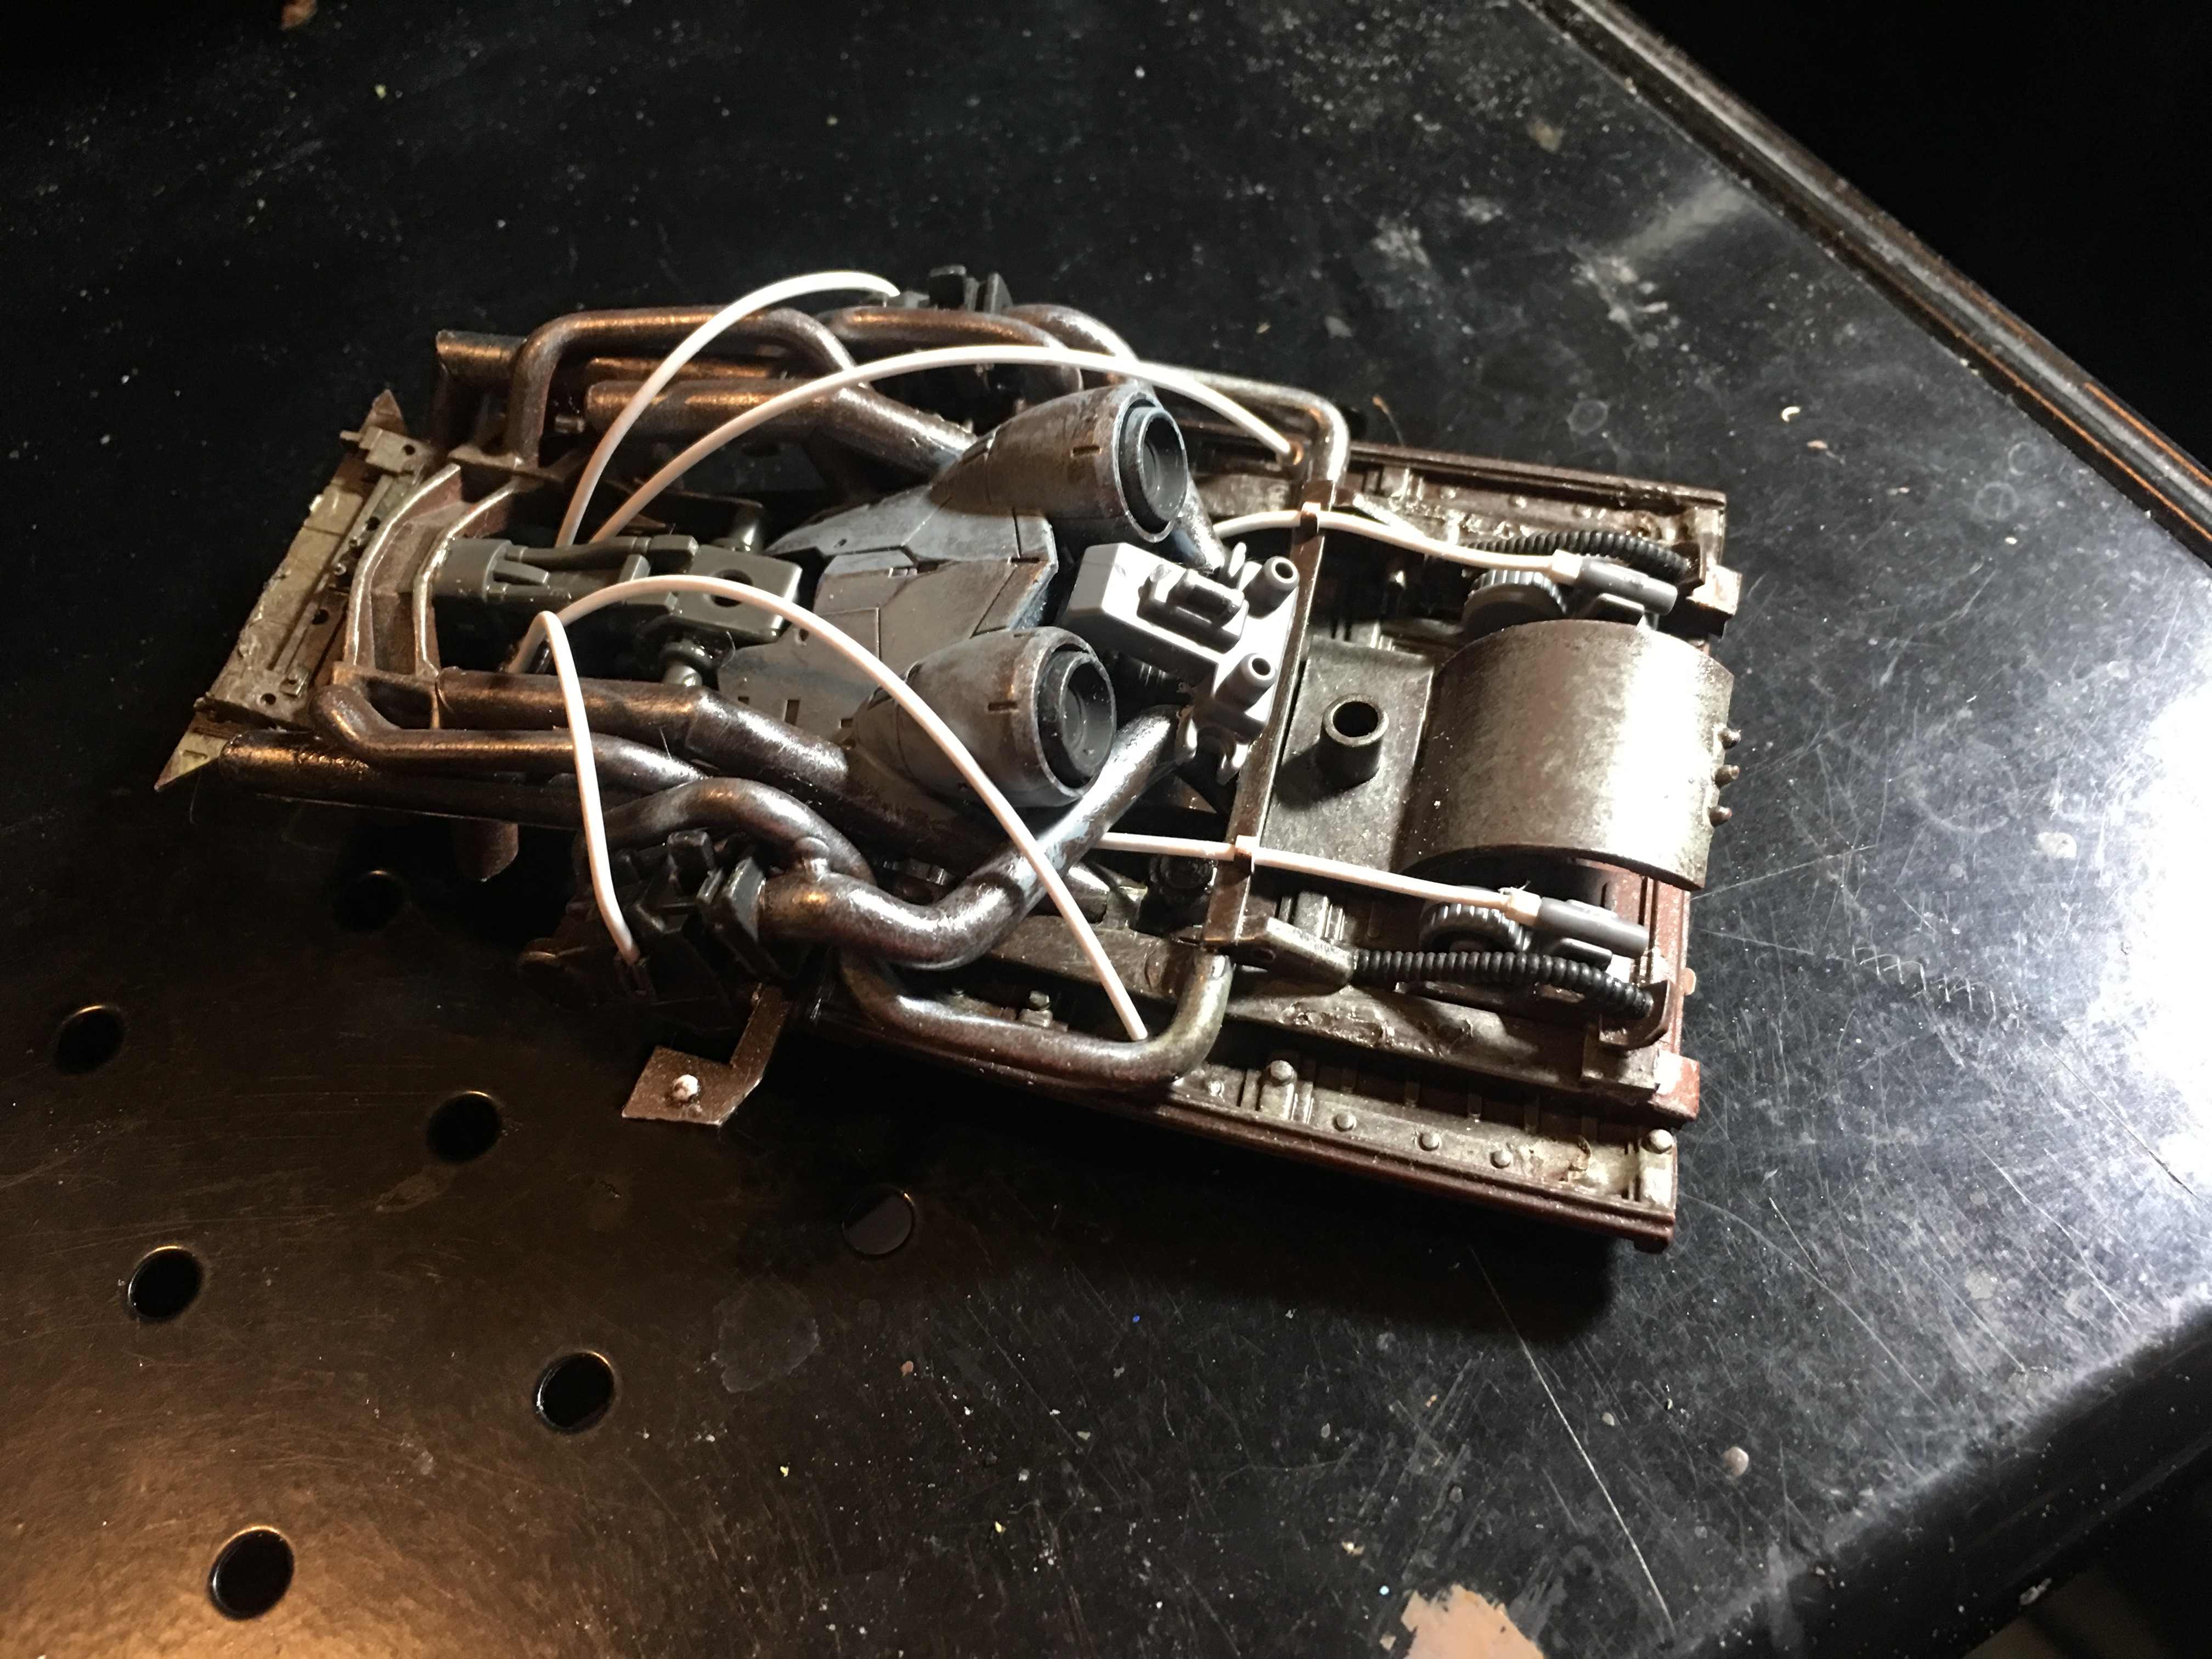
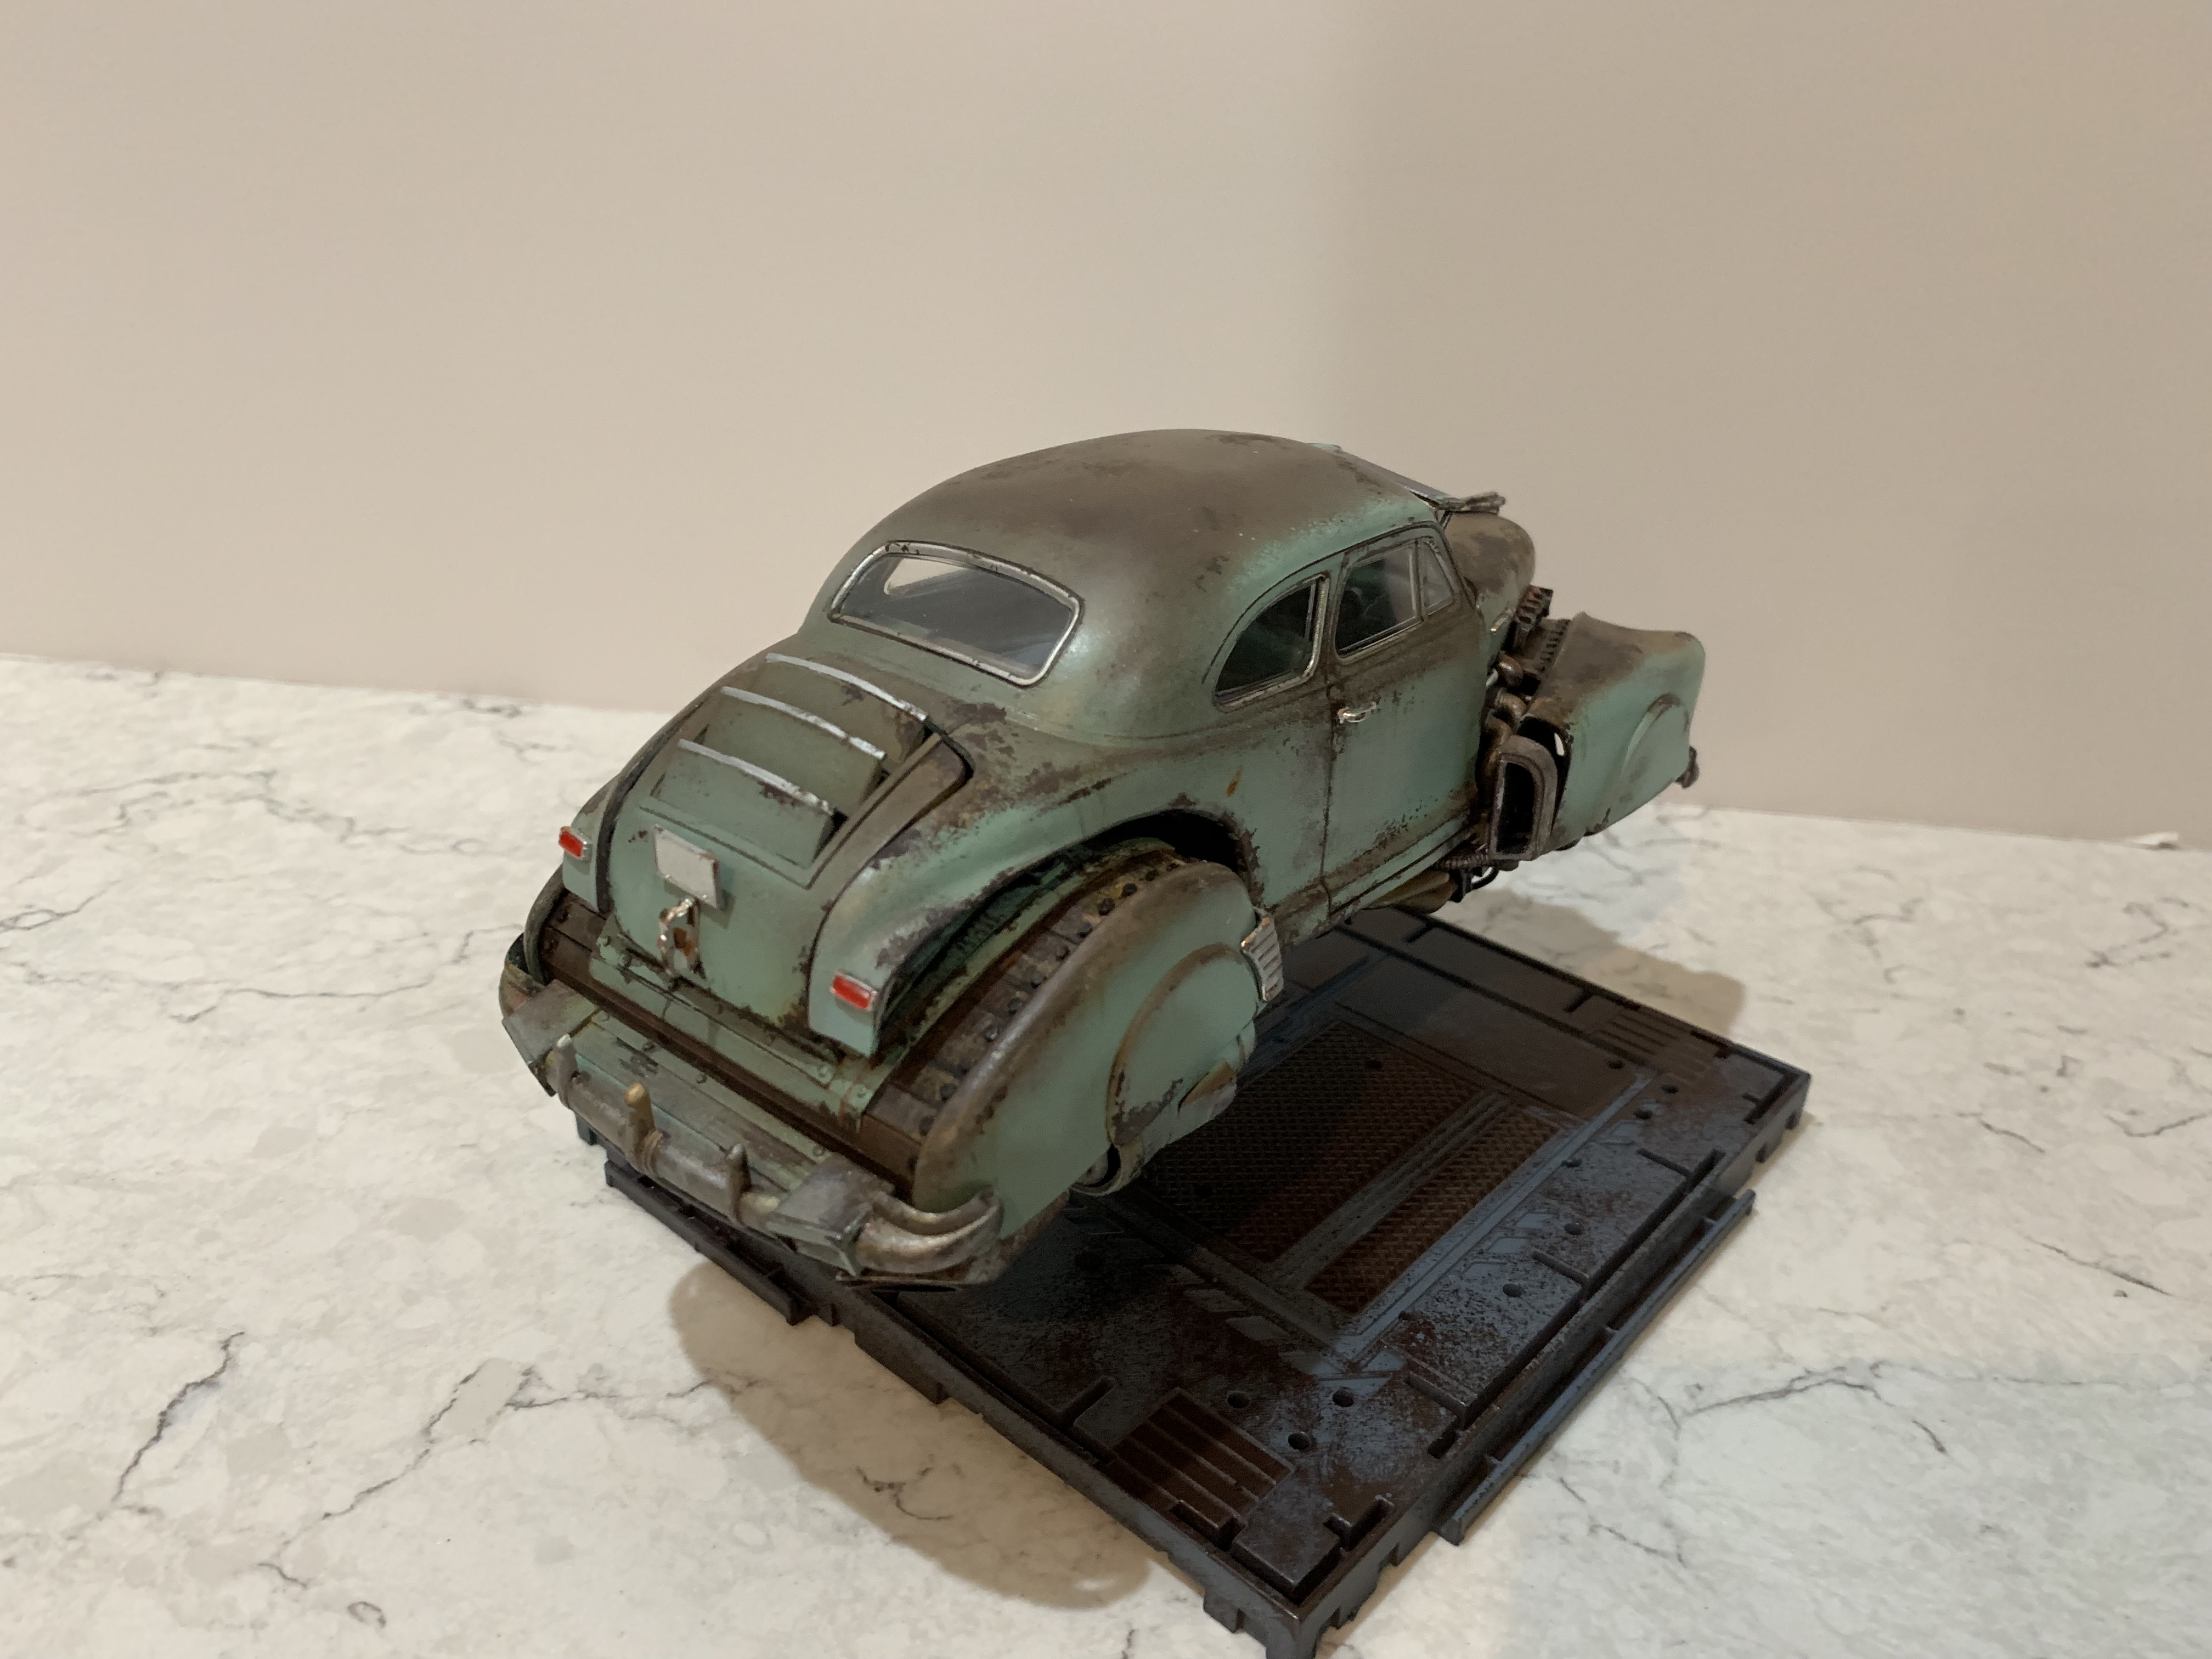
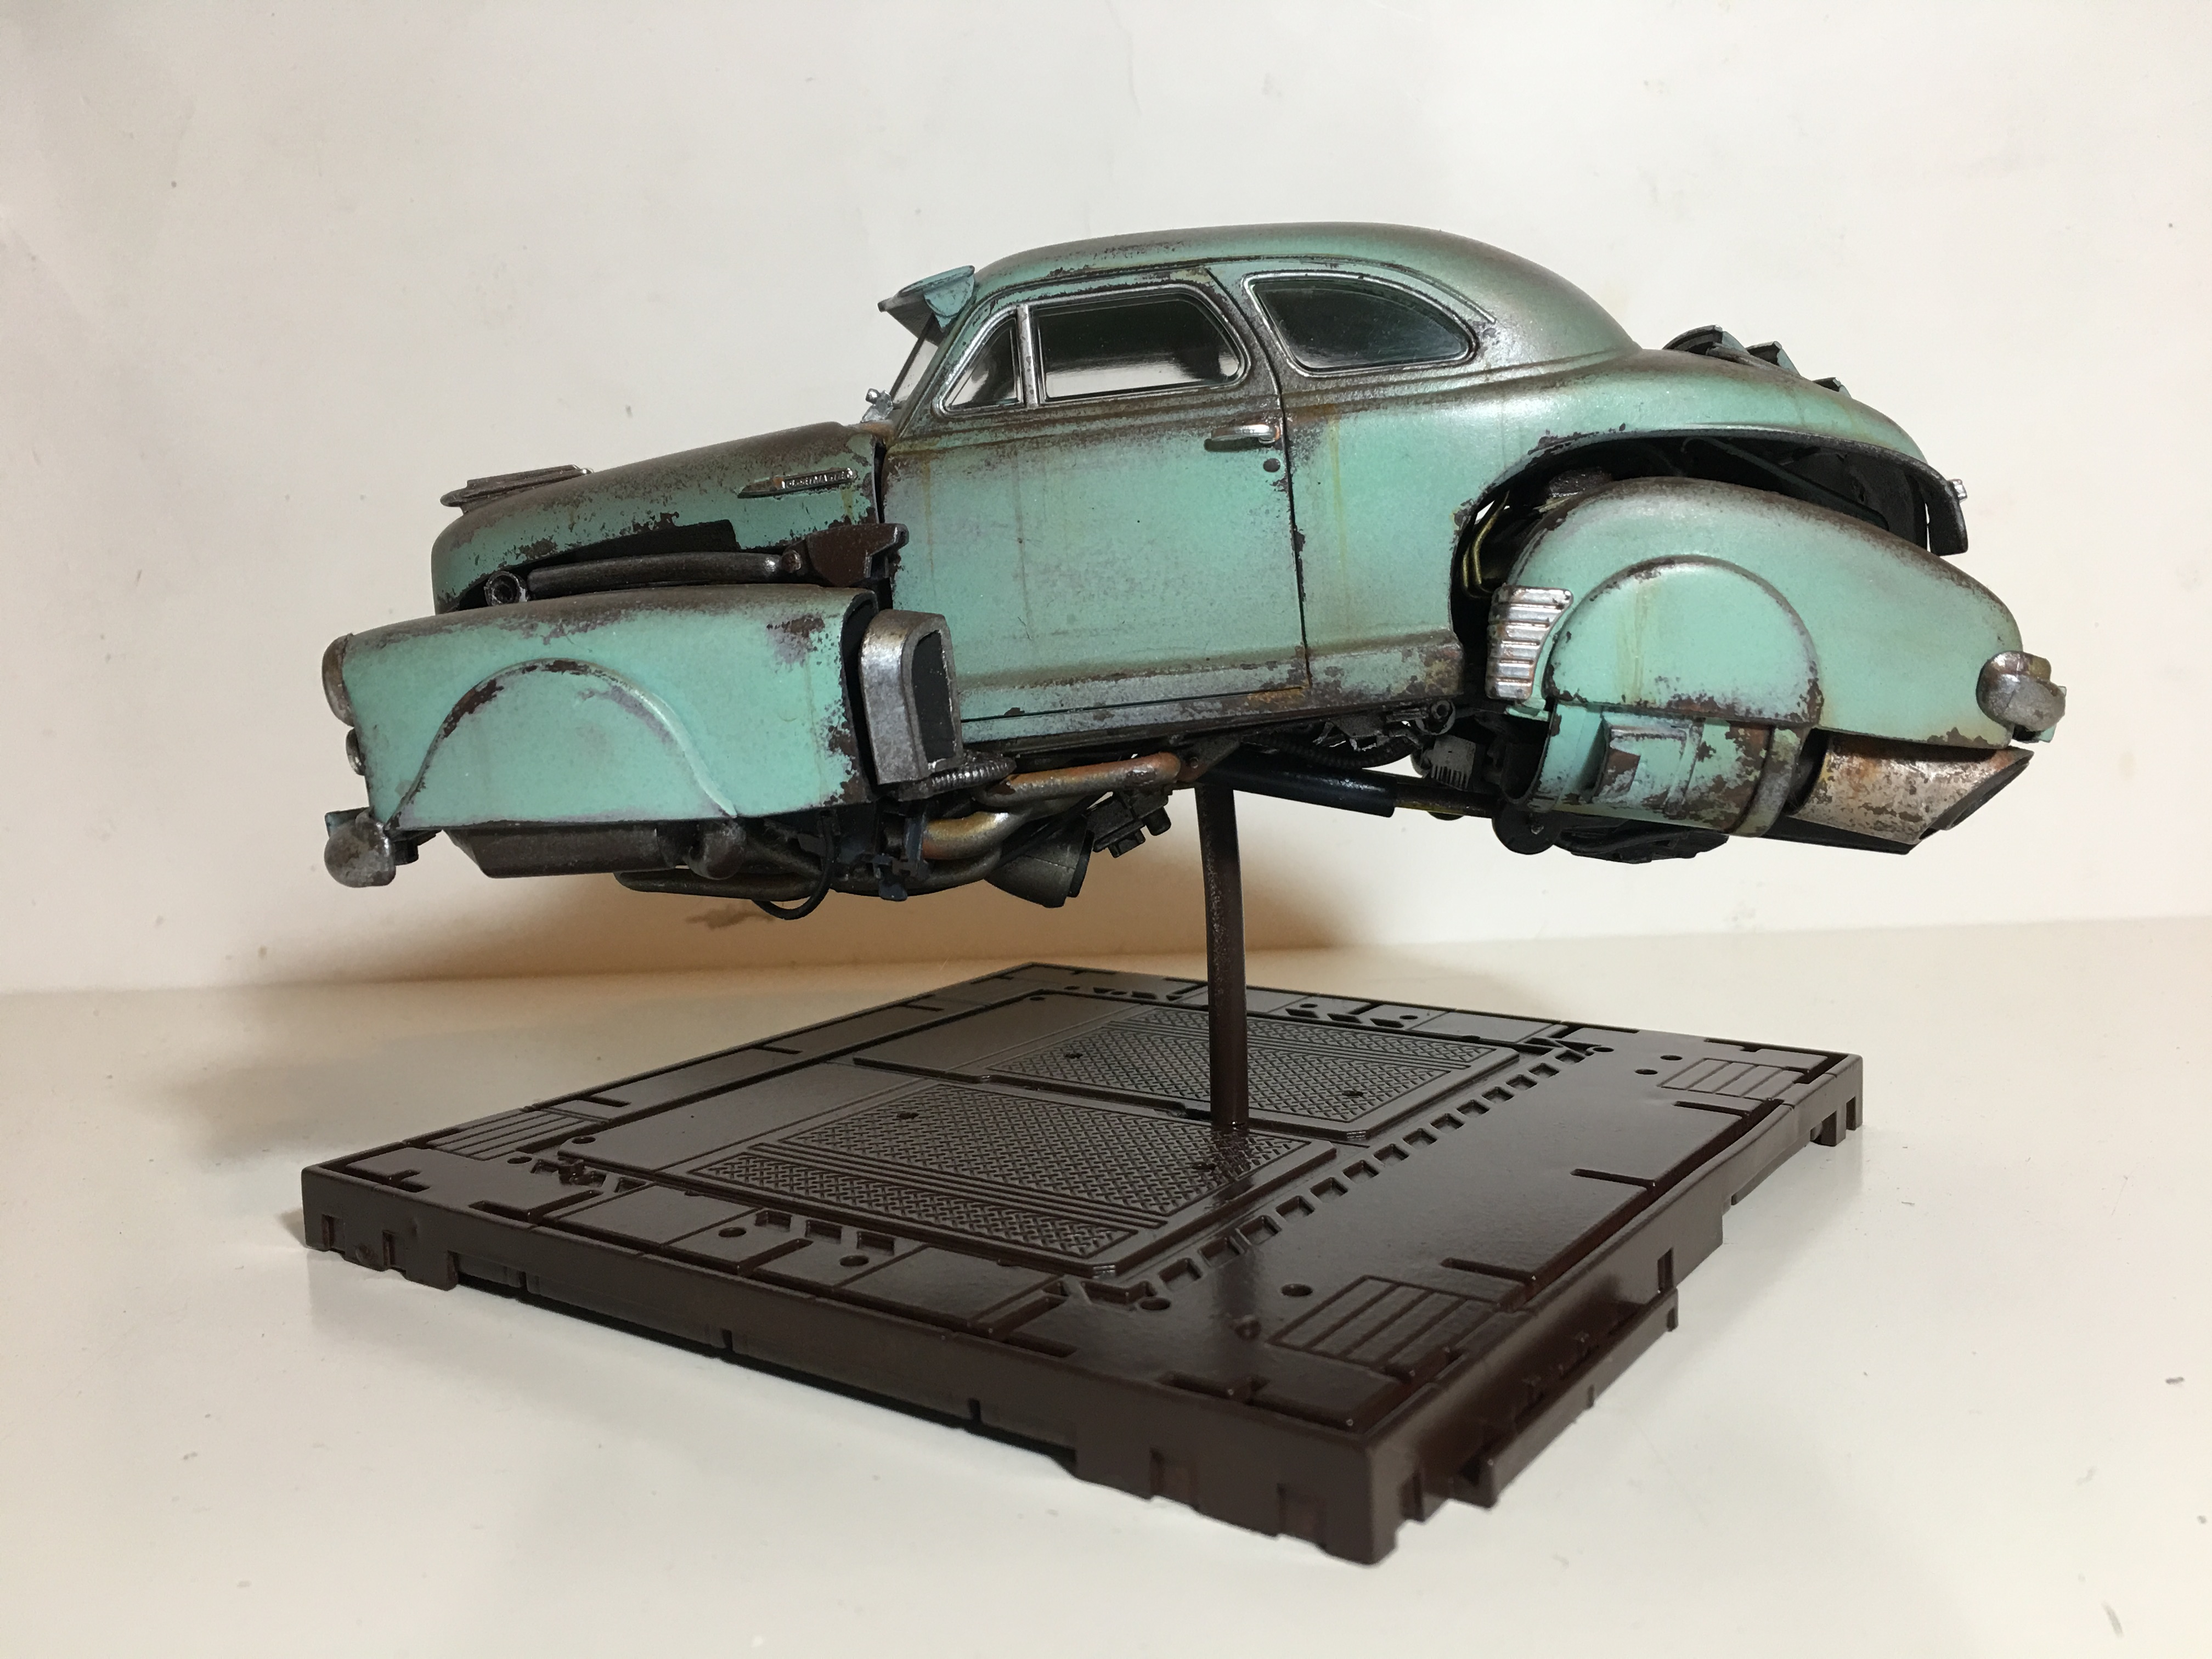
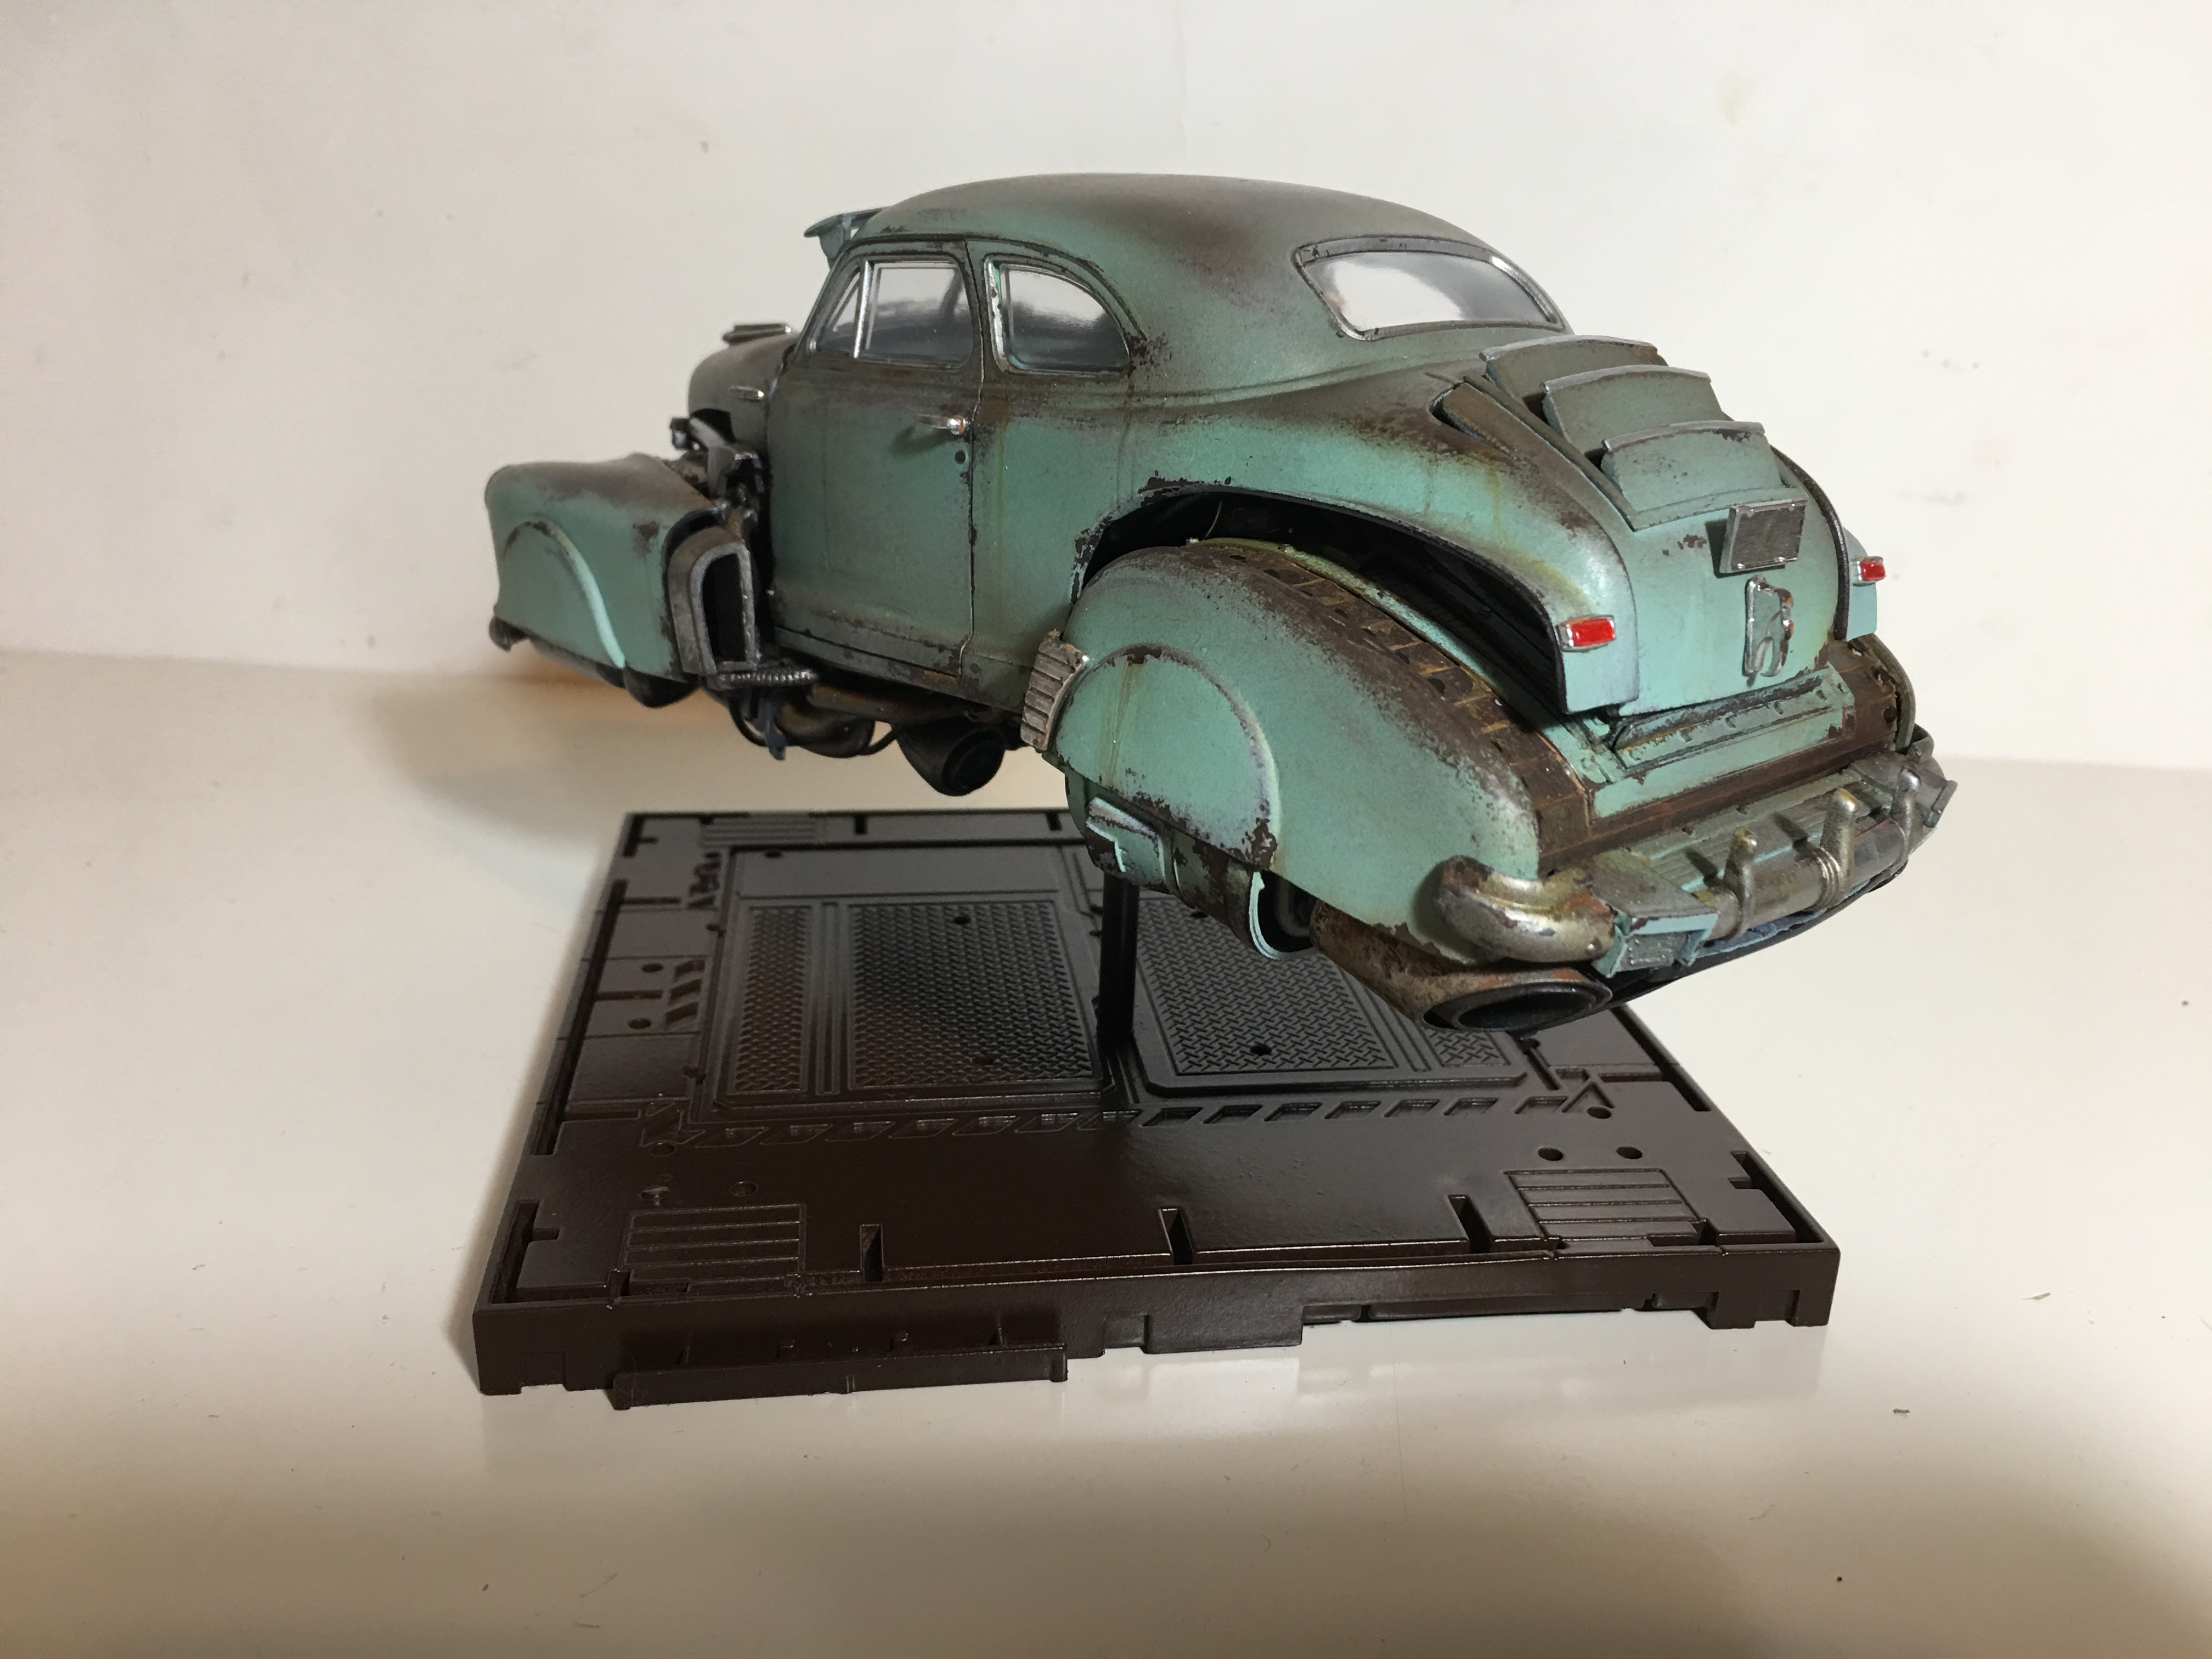
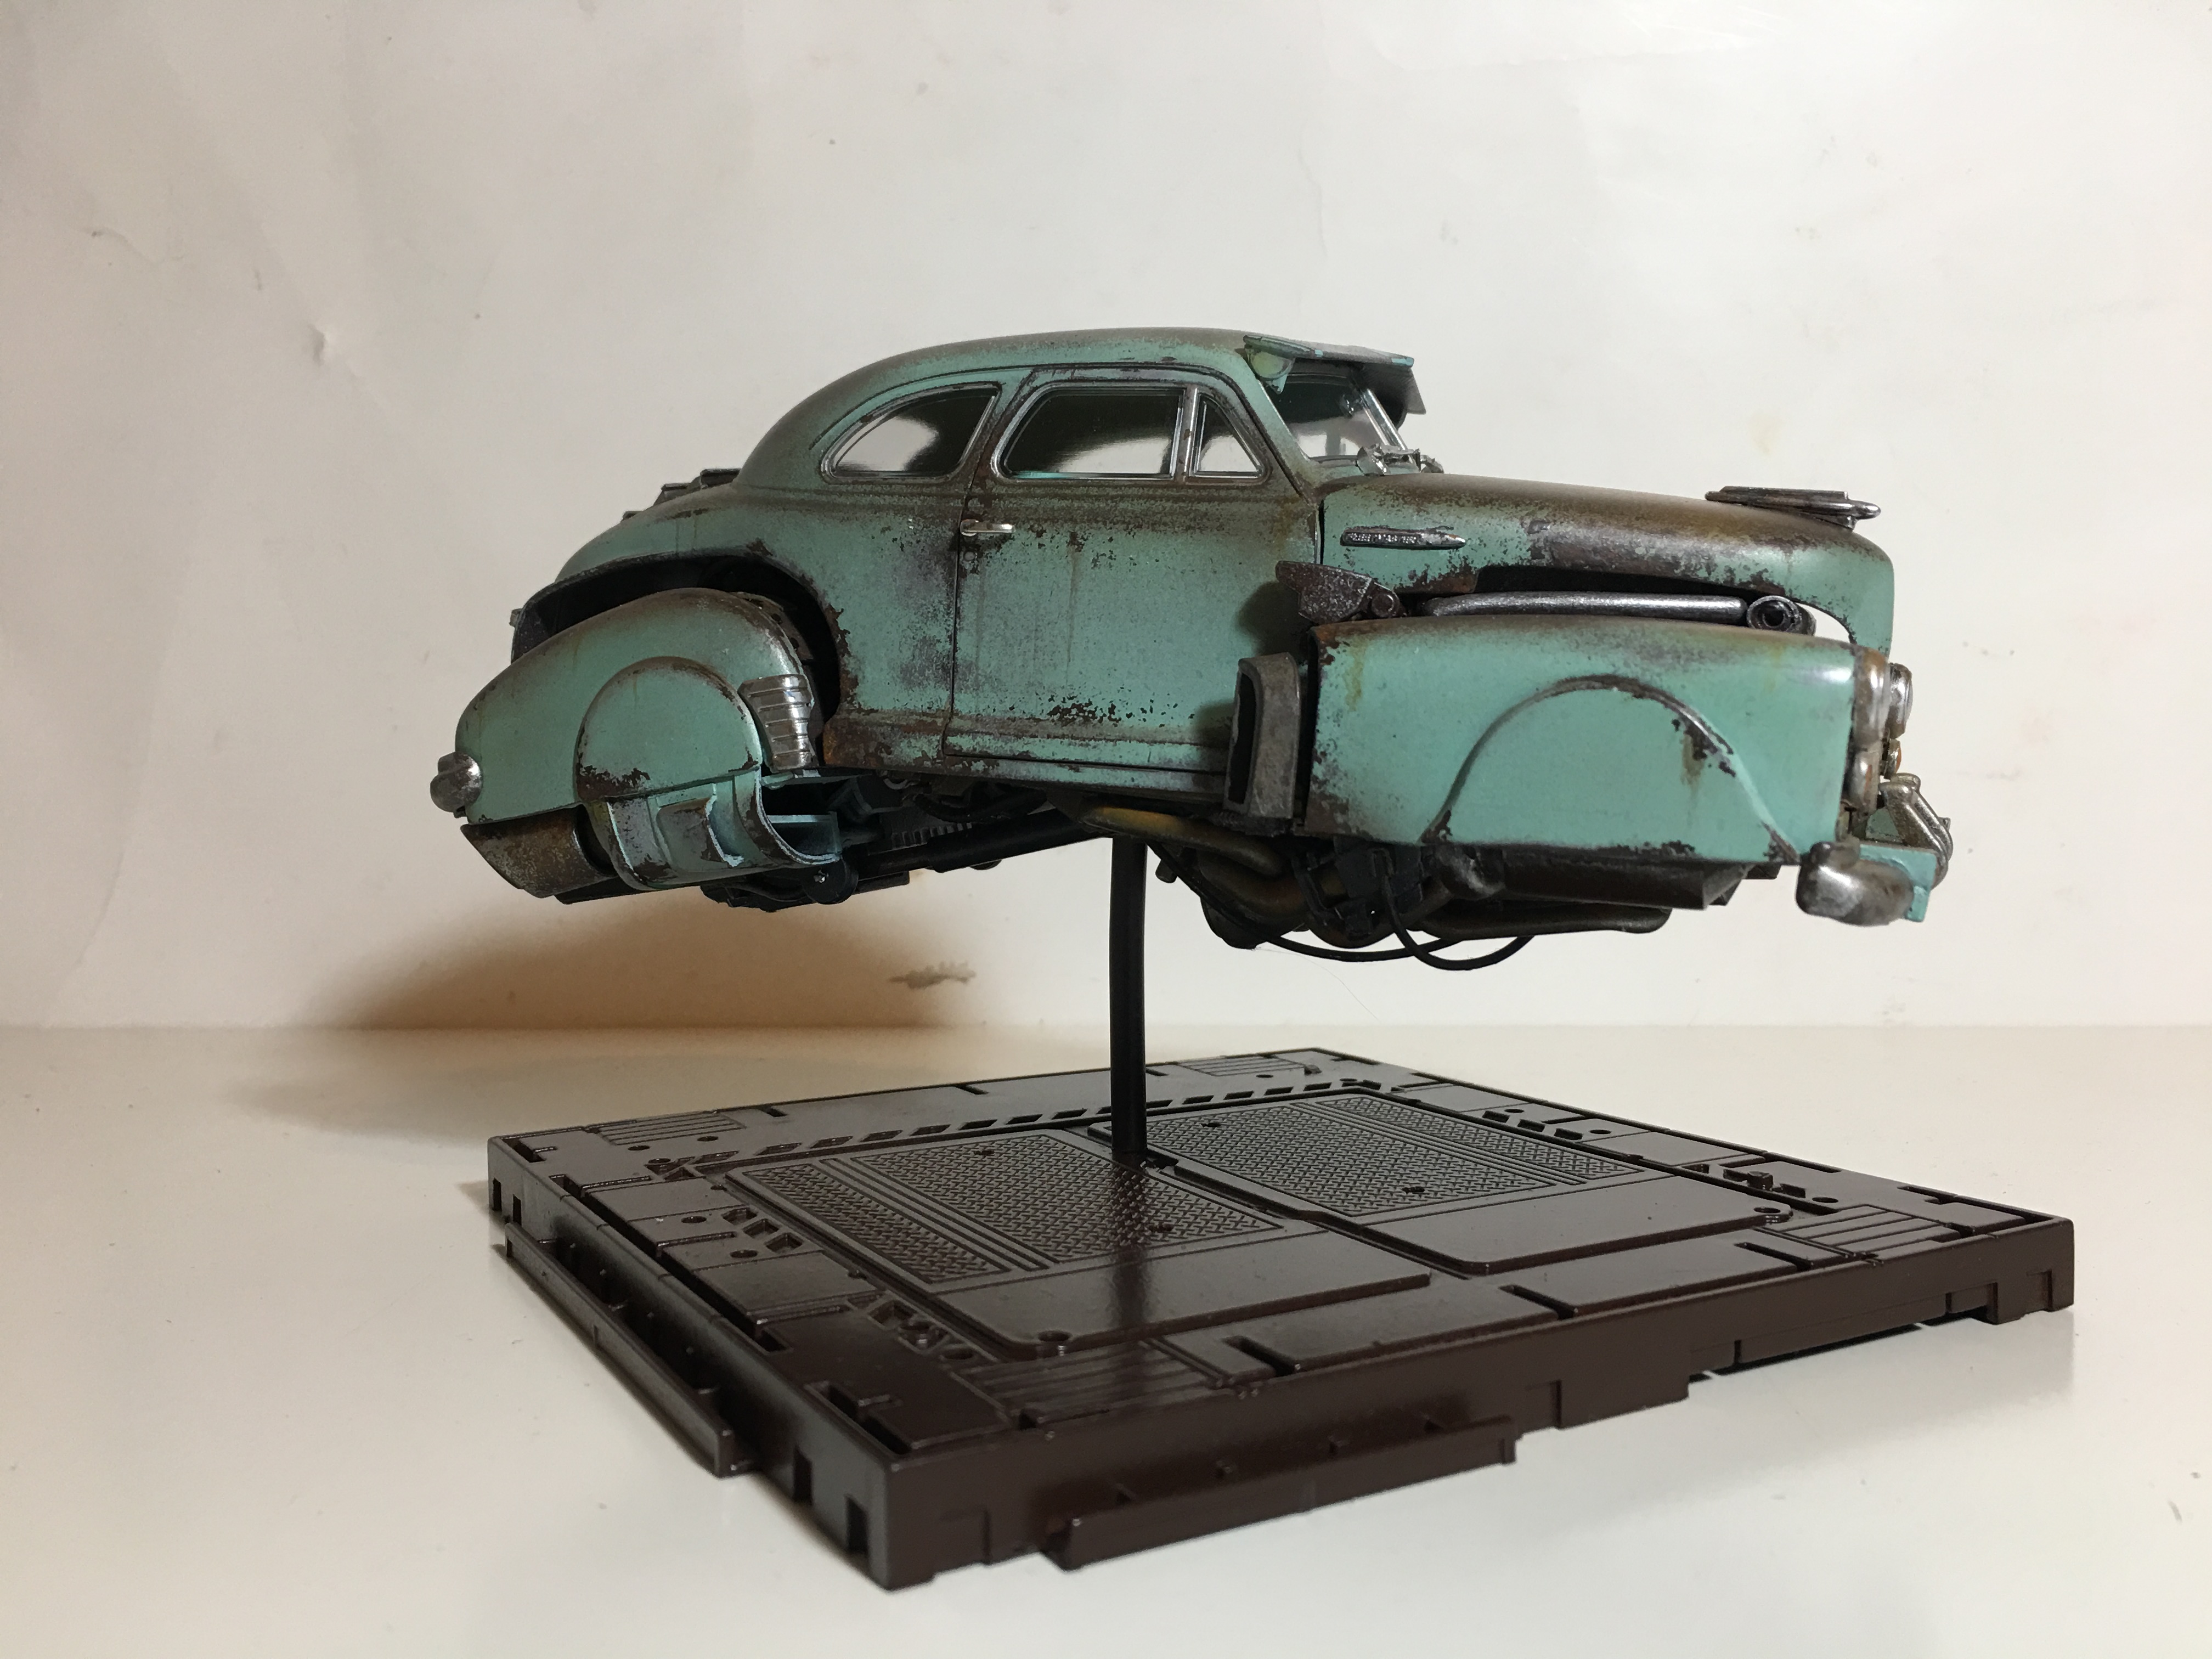
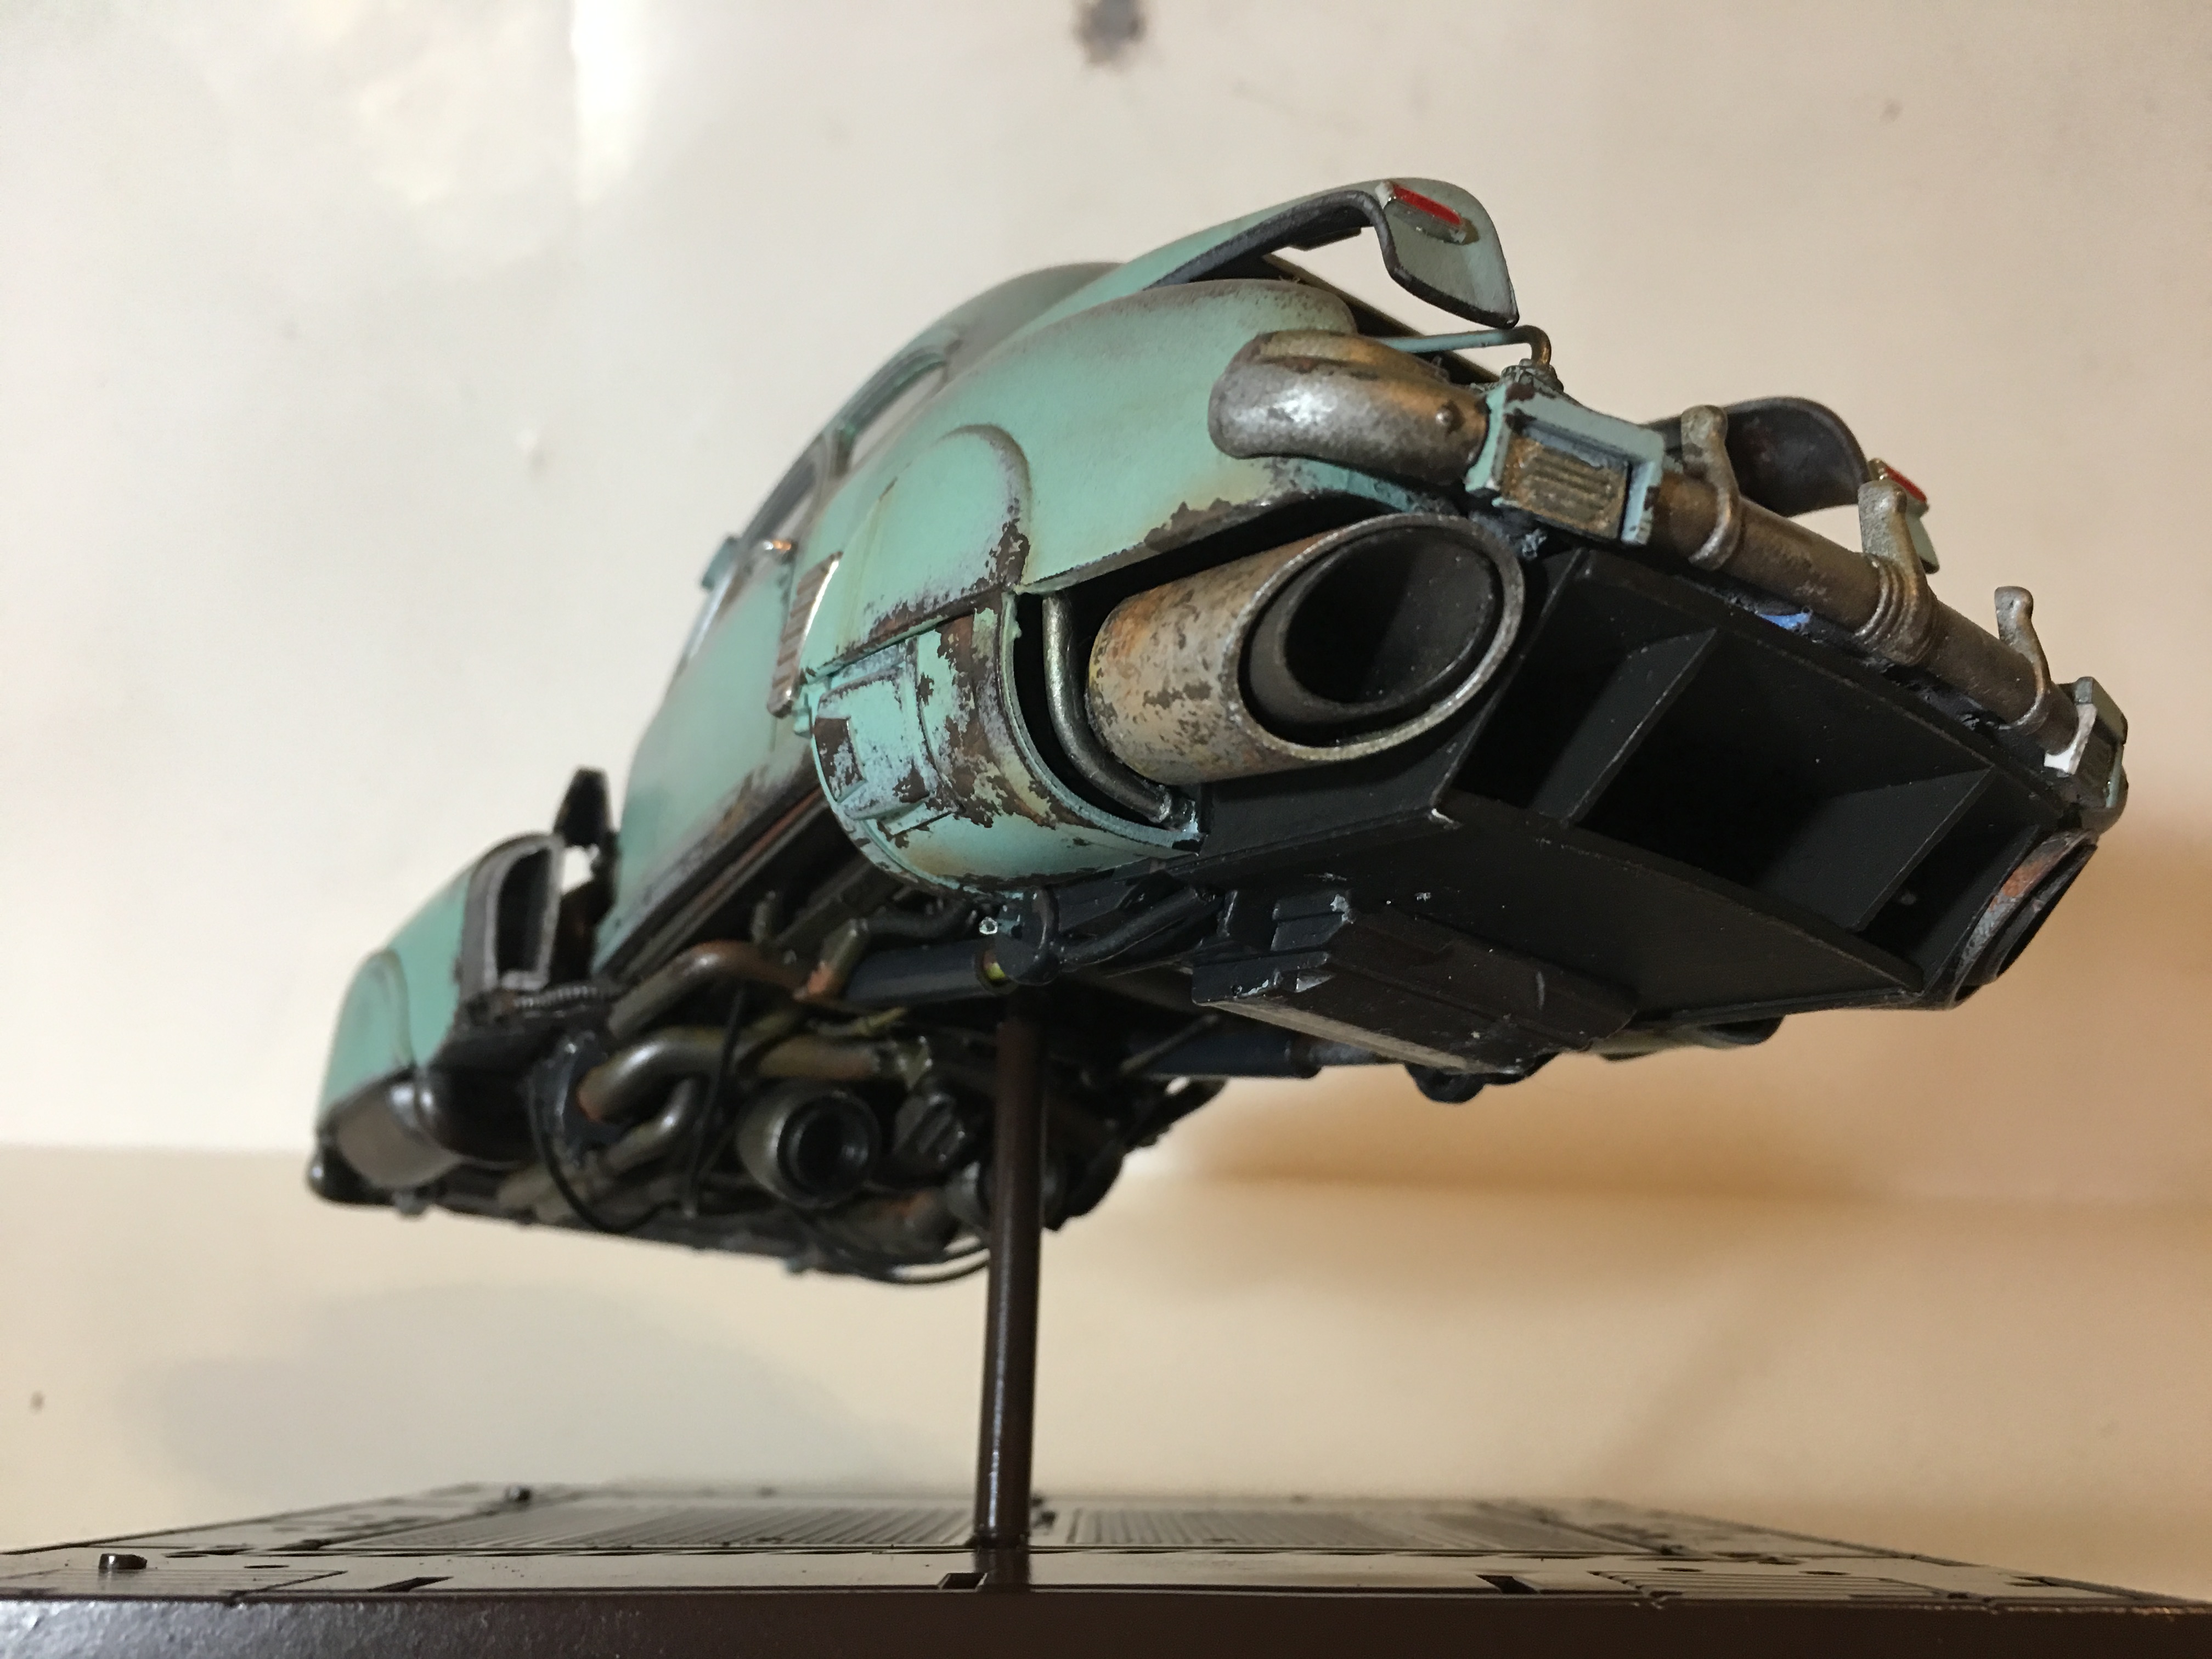
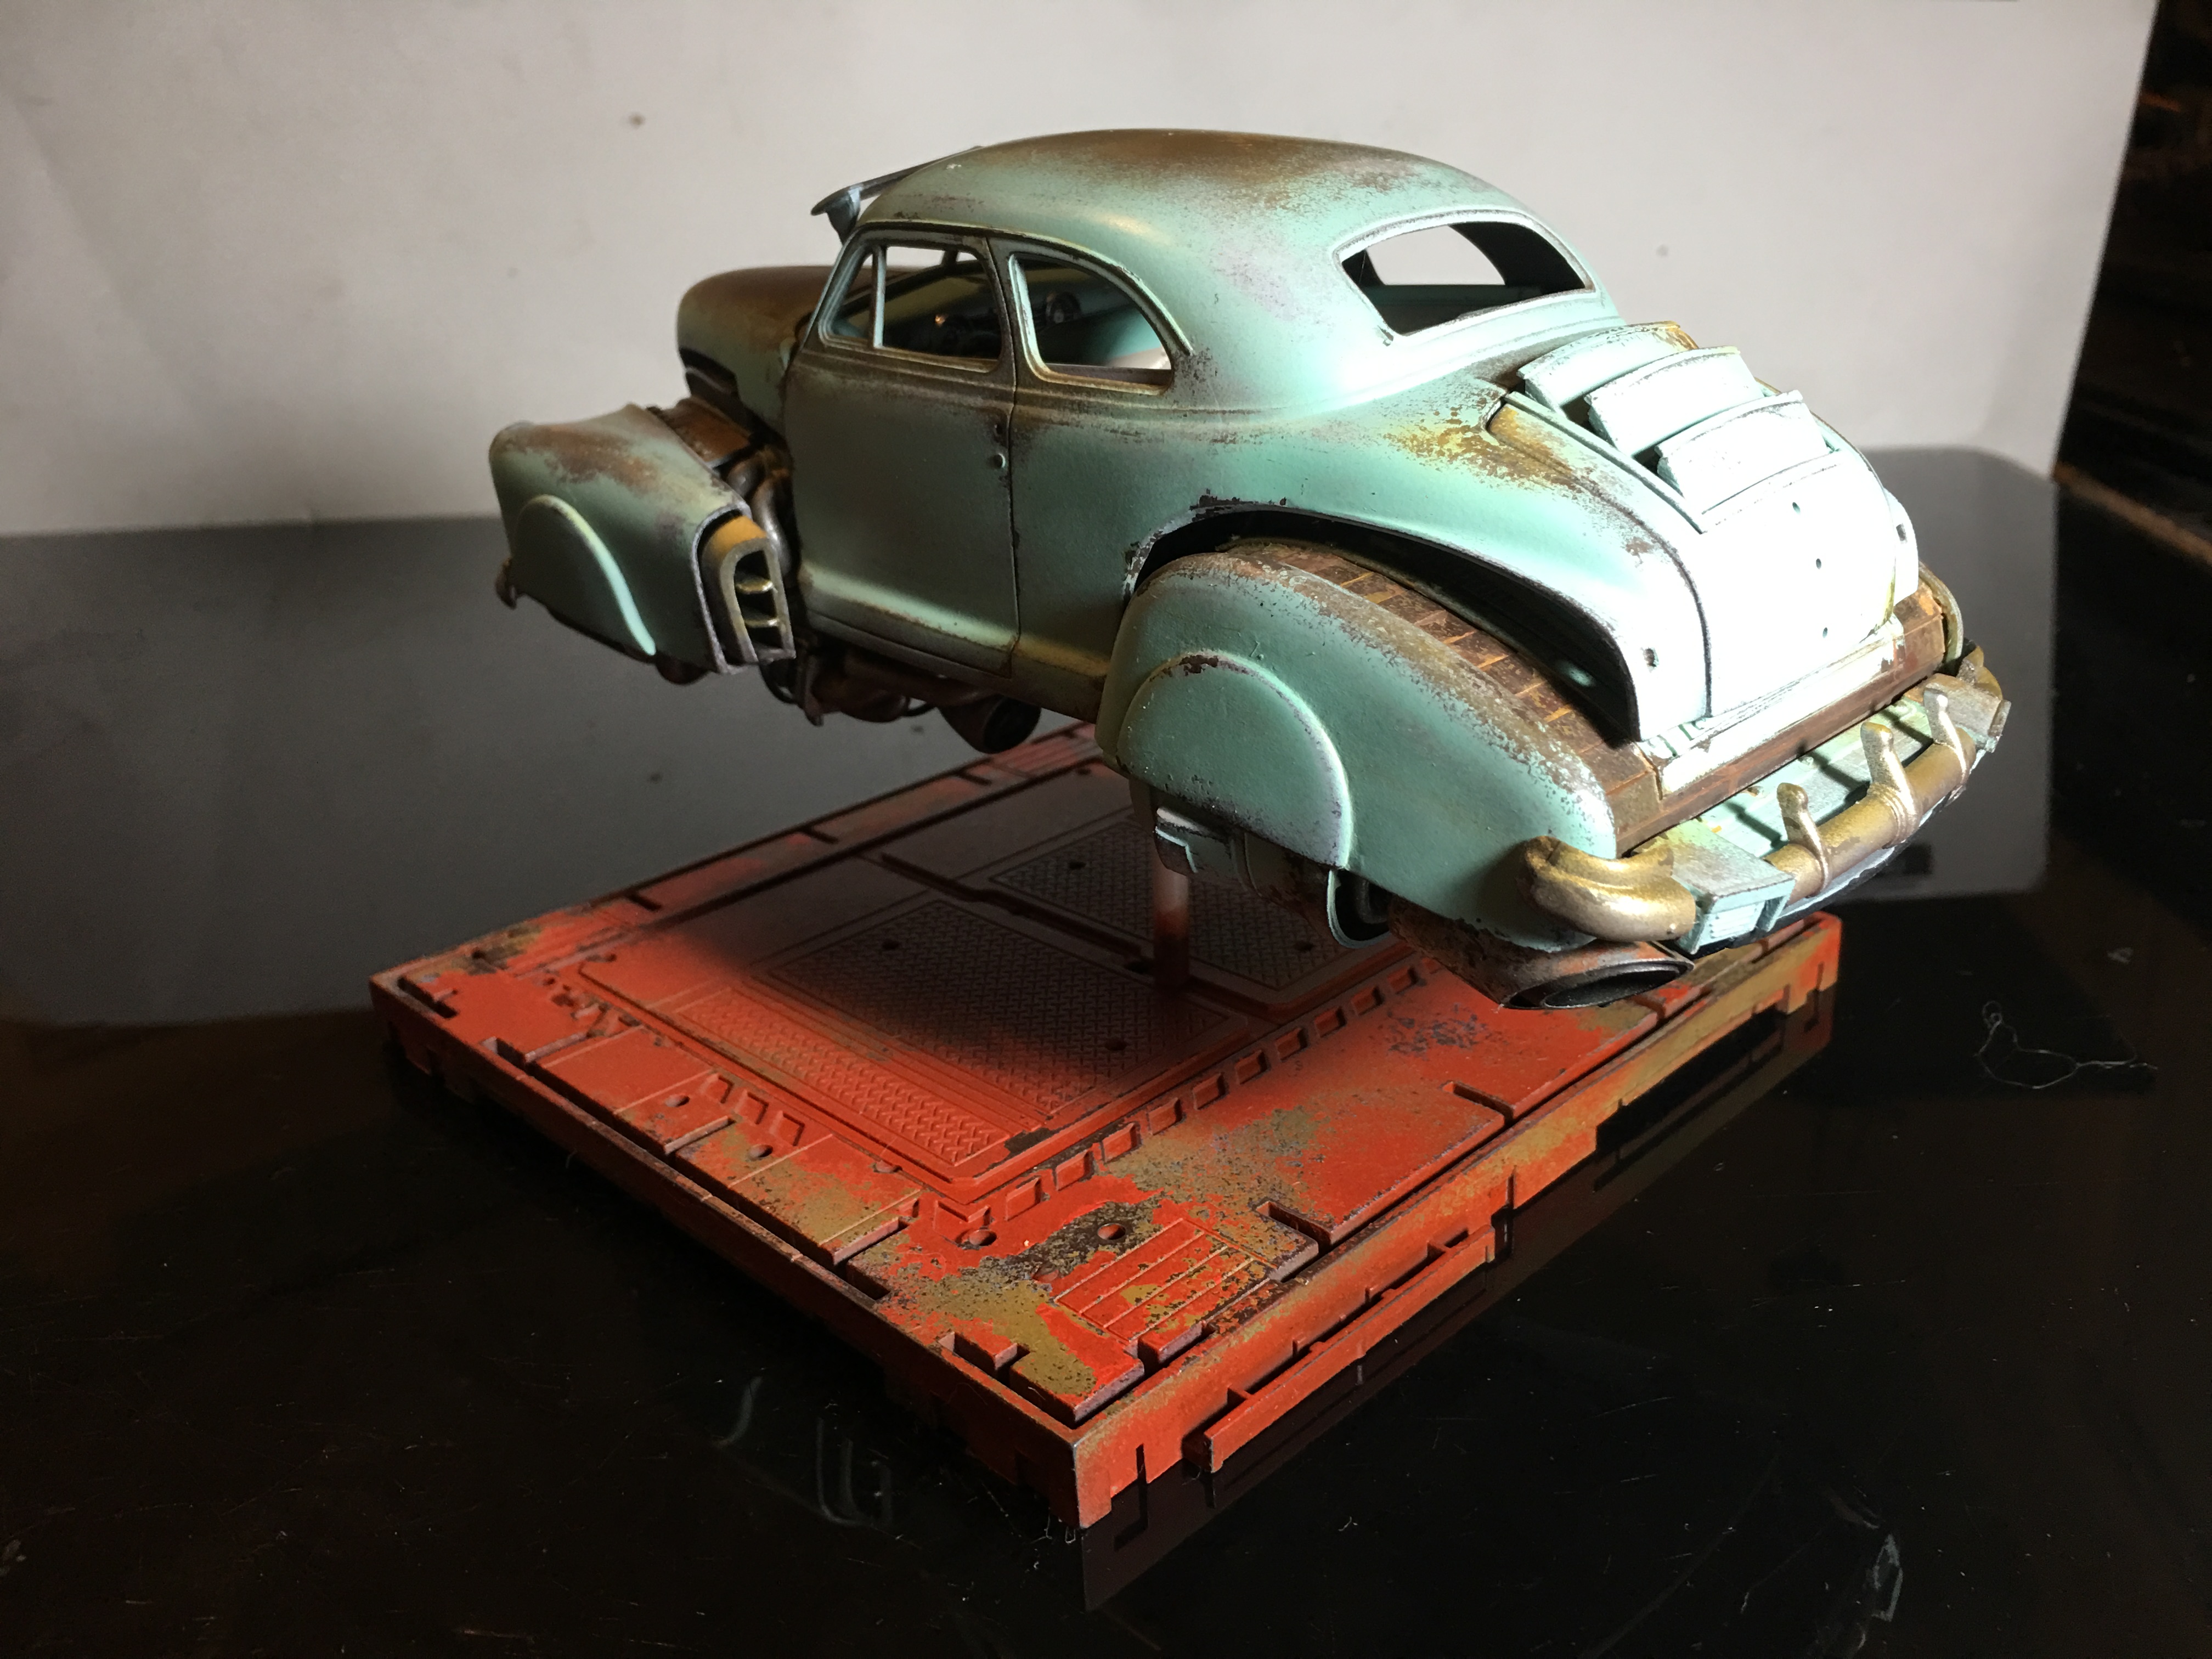
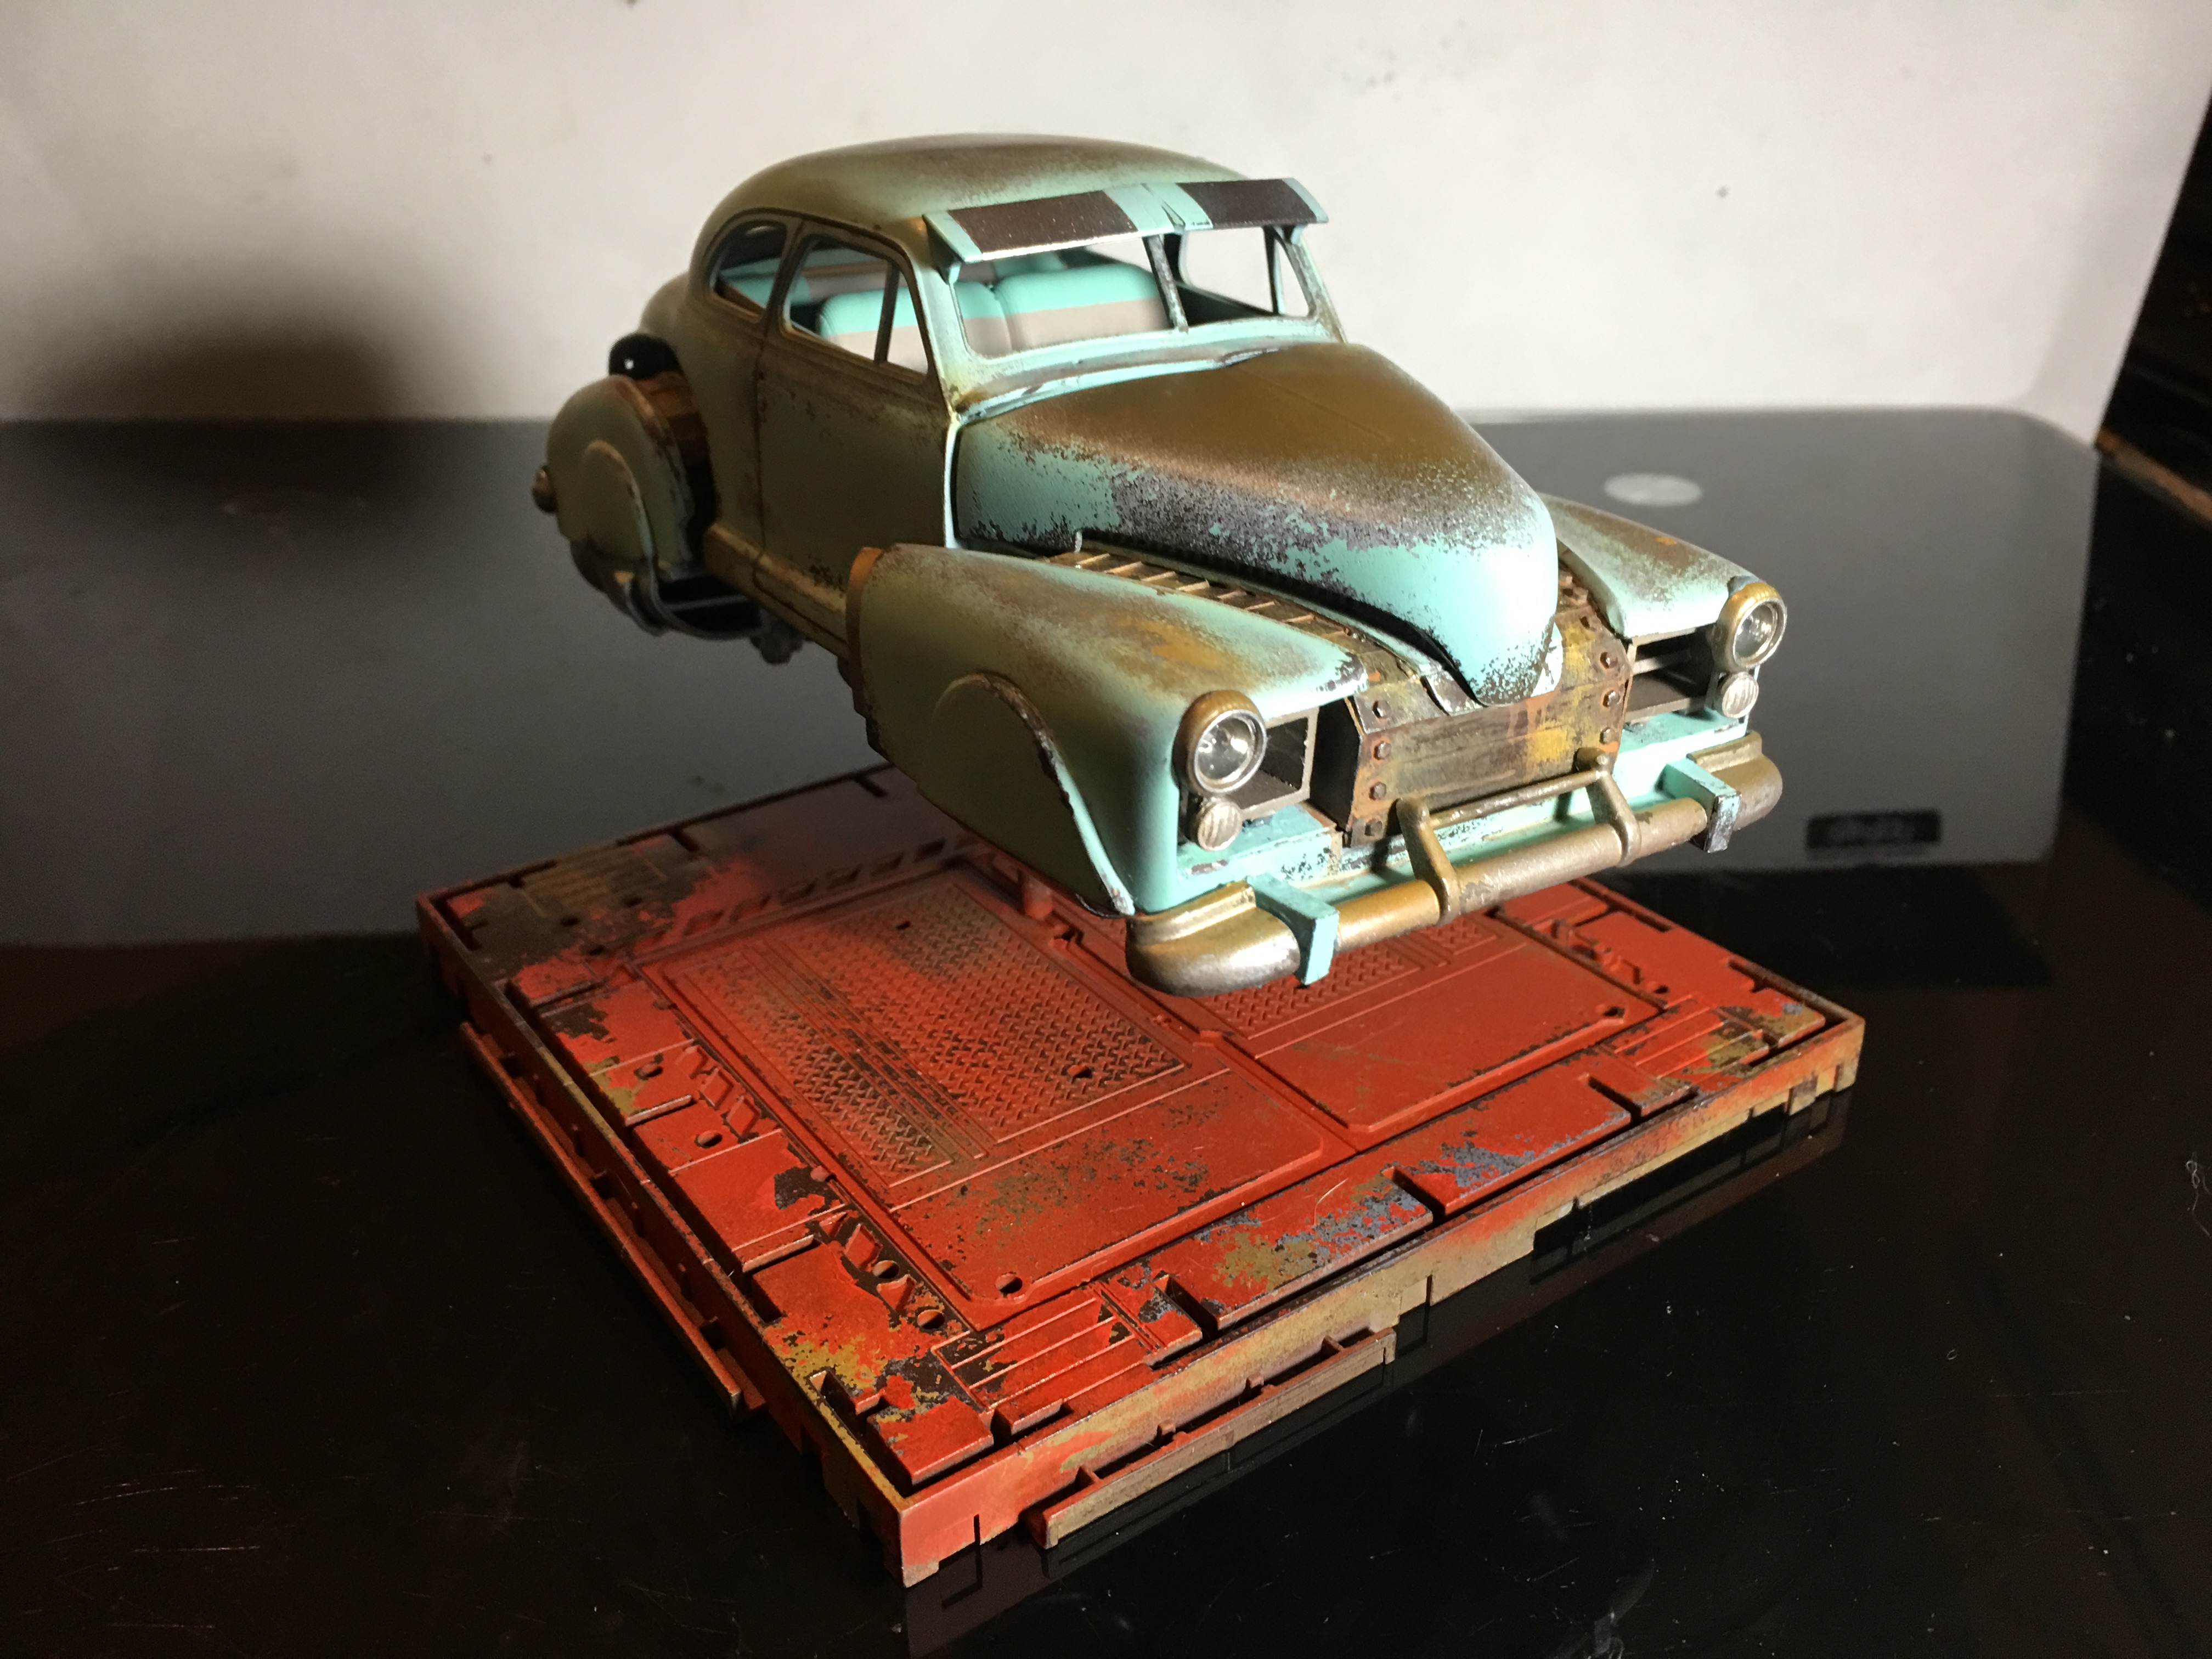
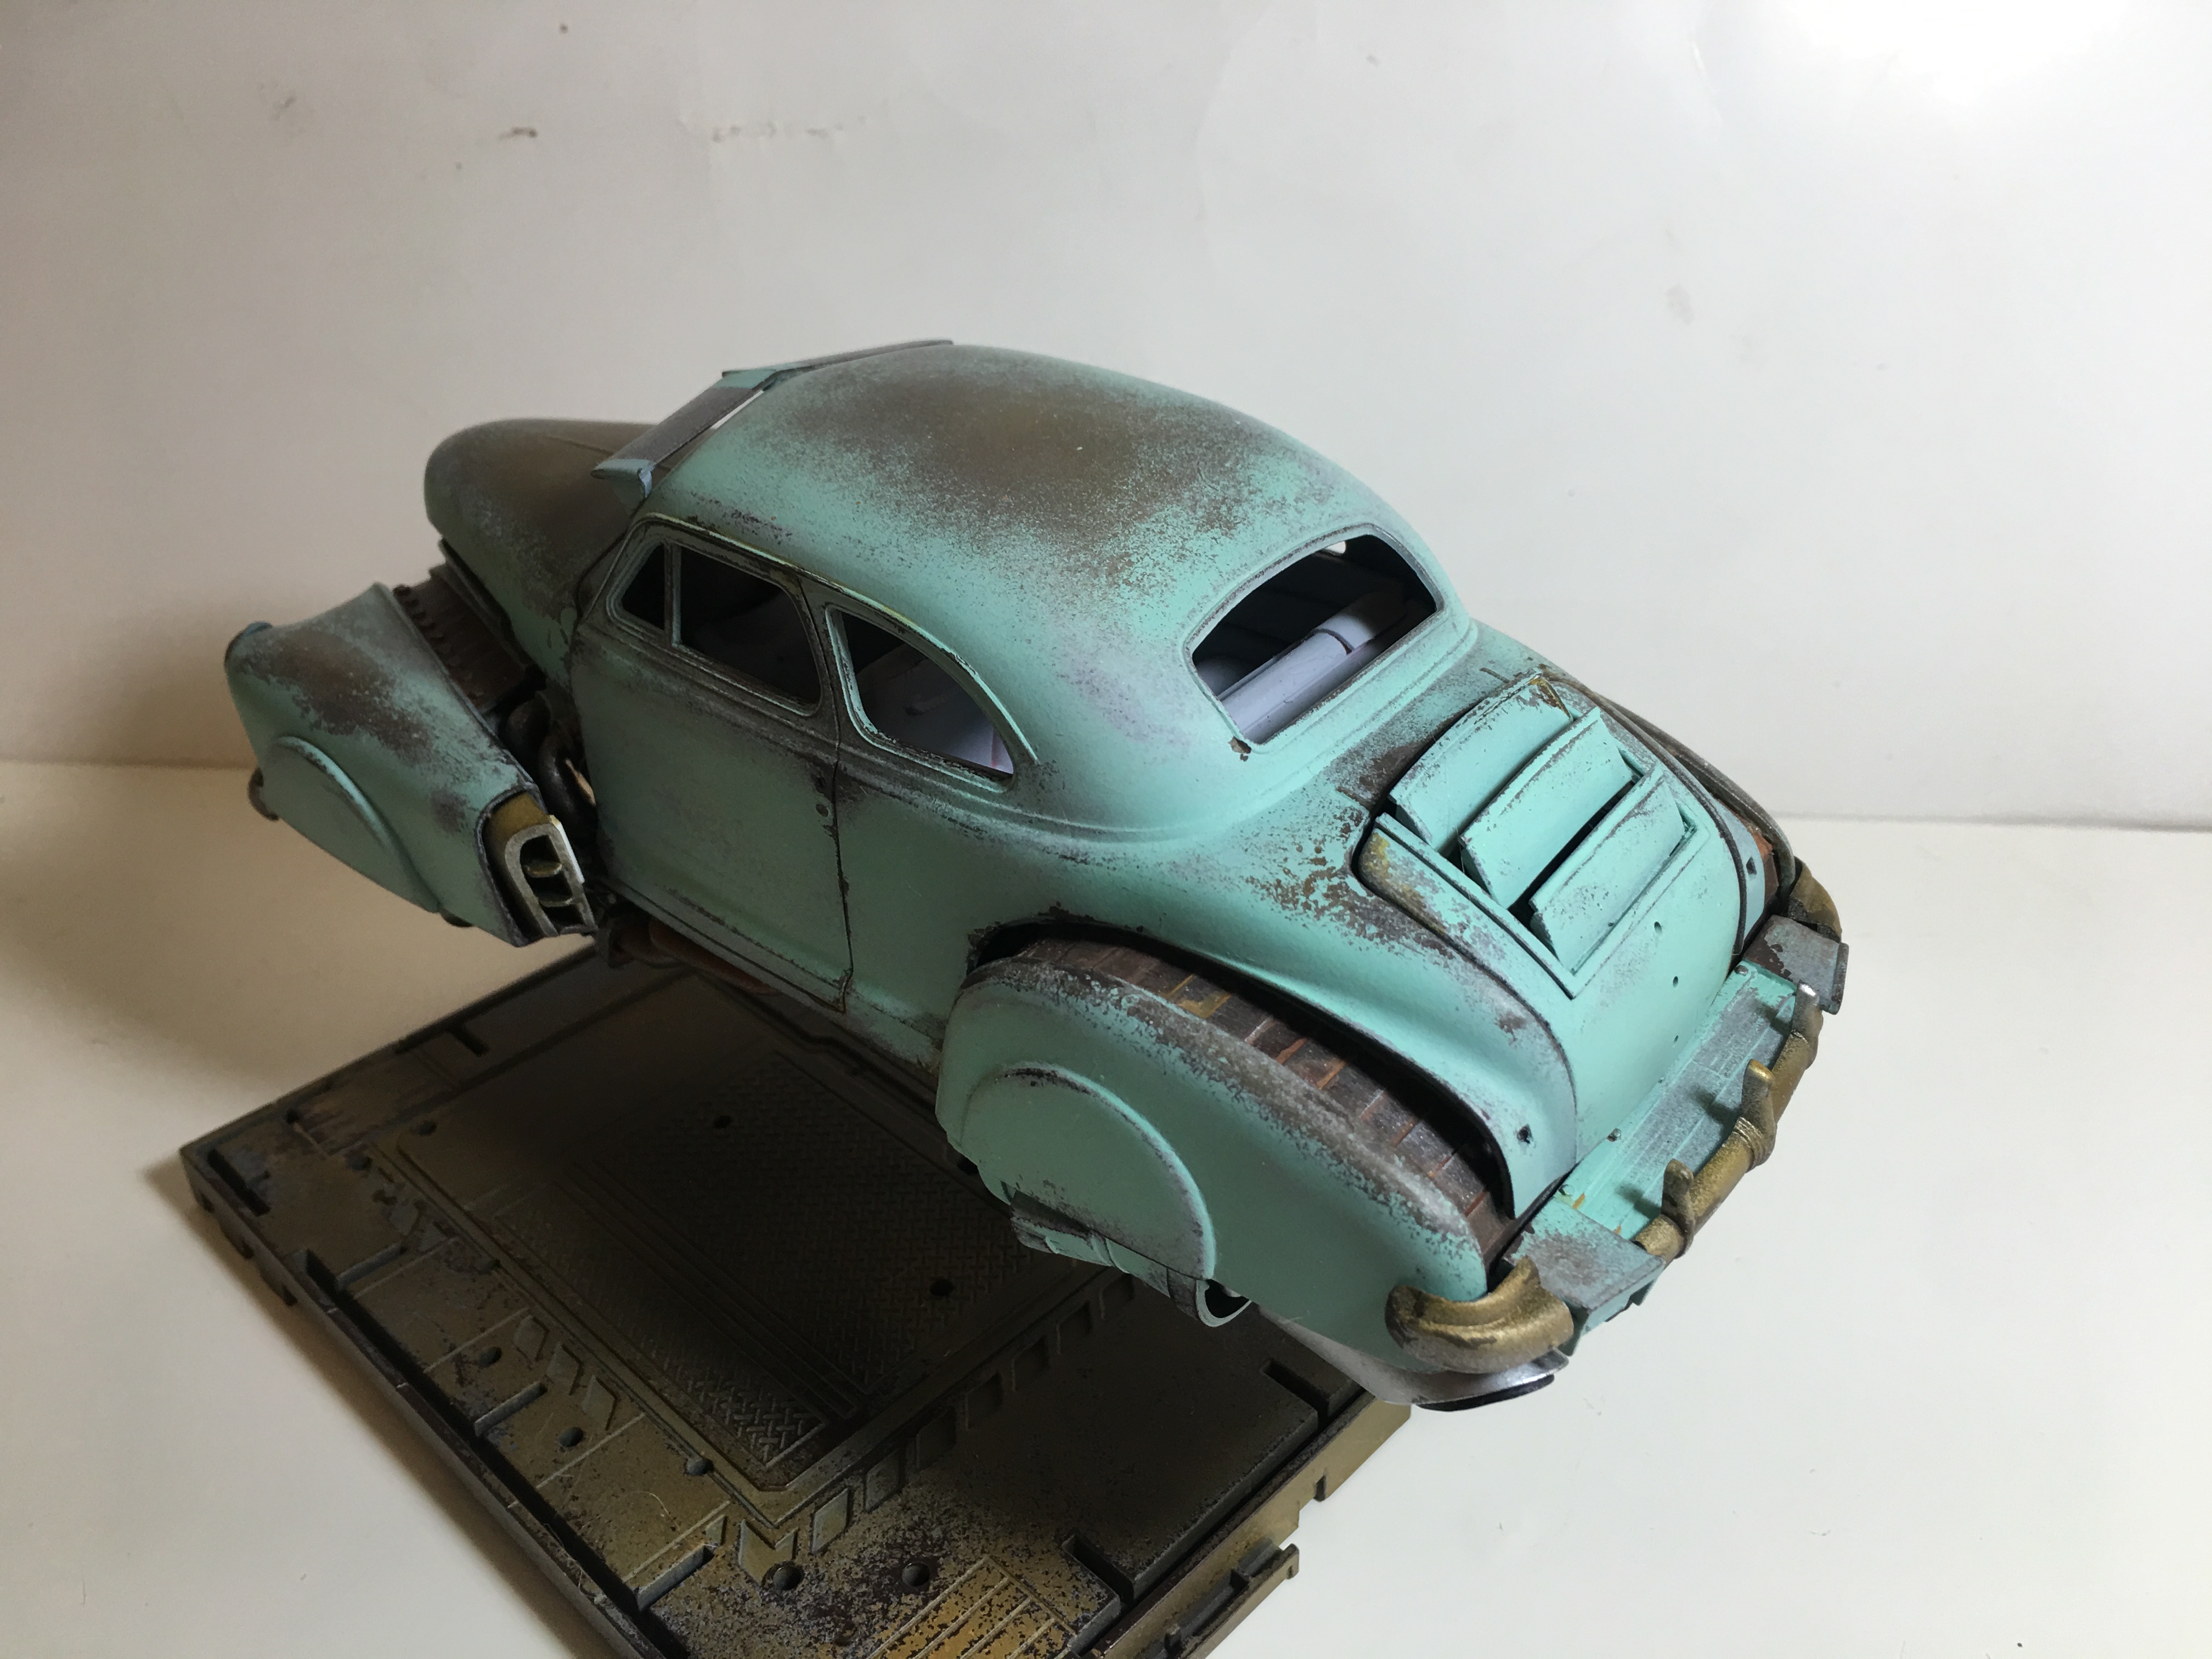
I finished my 5th Jet Car today. This was a great model kit to build. I knew when I first picked up the box that it would be a great car to turn into a hover vehicle.There's lots of scratch build items throughout. There's probably half a Gundam model worth of parts on the undercarriage (thanks to my son who donated 2 Gundam kits for this project). All of the pipes and hoses are solid styrene rod bent with heat. The rear fenders/turbines are hinged and pivot downward slightly. Someone forgot to weather the base of the antennae......... I accidentally cracked the rear window last night while trying to rub fingerprints off of it. I'm so upset with myself. Luckily the car is weathered and it doesn't stand out too badly. I hope.. The large landing lights were added last week. Very happy with the results. Here's a good view of the undercarriage. I also painted the window weather stripping black. It really added some good detail. Thank you for looking!!
-
Love the color. Amazing model.
-
Thanks JC! I still have a little more final weathering left to do. I need to go over some of the chrome parts again. They don't all match with rust coverage. I need to dirty up the windows slightly. I need to add soot behind the turbines. This is a scary step for me. I'm putting it off as long as possible. Thanks Tom! I have another base that will work a little better for this. i like the idea of the yellow "hazard" area. I'll give it a try. You'll enjoy it. You get to stretch your imagination and go a little crazy with it. I'm starting to think about my next jet car project. A 50's panel van or a 57 Chevy. This made me laugh. As I stated, I am the absolute worst when it comes to picking a color. I seriously need to get better at this aspect of model building. It would cut my build times down dramatically. This car has been in the Easy Off bath 4 times. I could have easily finished this a month ago if I had picked 1 color. As far as the reassembling, most of the car is built in segments. Both front fenders are one piece. Both rear fenders are one piece. The undercarriage with all the pipes and gadgets were permanently glued. The interior was all one piece. I use many pre-drilled holes and styrene pins to hold some of the parts together during mock up. Loctite makes a product called FunTak. It's a plastic putty used to temporarily glue things together. It's amazing. It's like Silly Putty, but it holds plastic together. It can easily be removed leaving behind no residue. I use this a lot. It's holding the visor, bumpers, and a few of the pipes in the photos below.
-
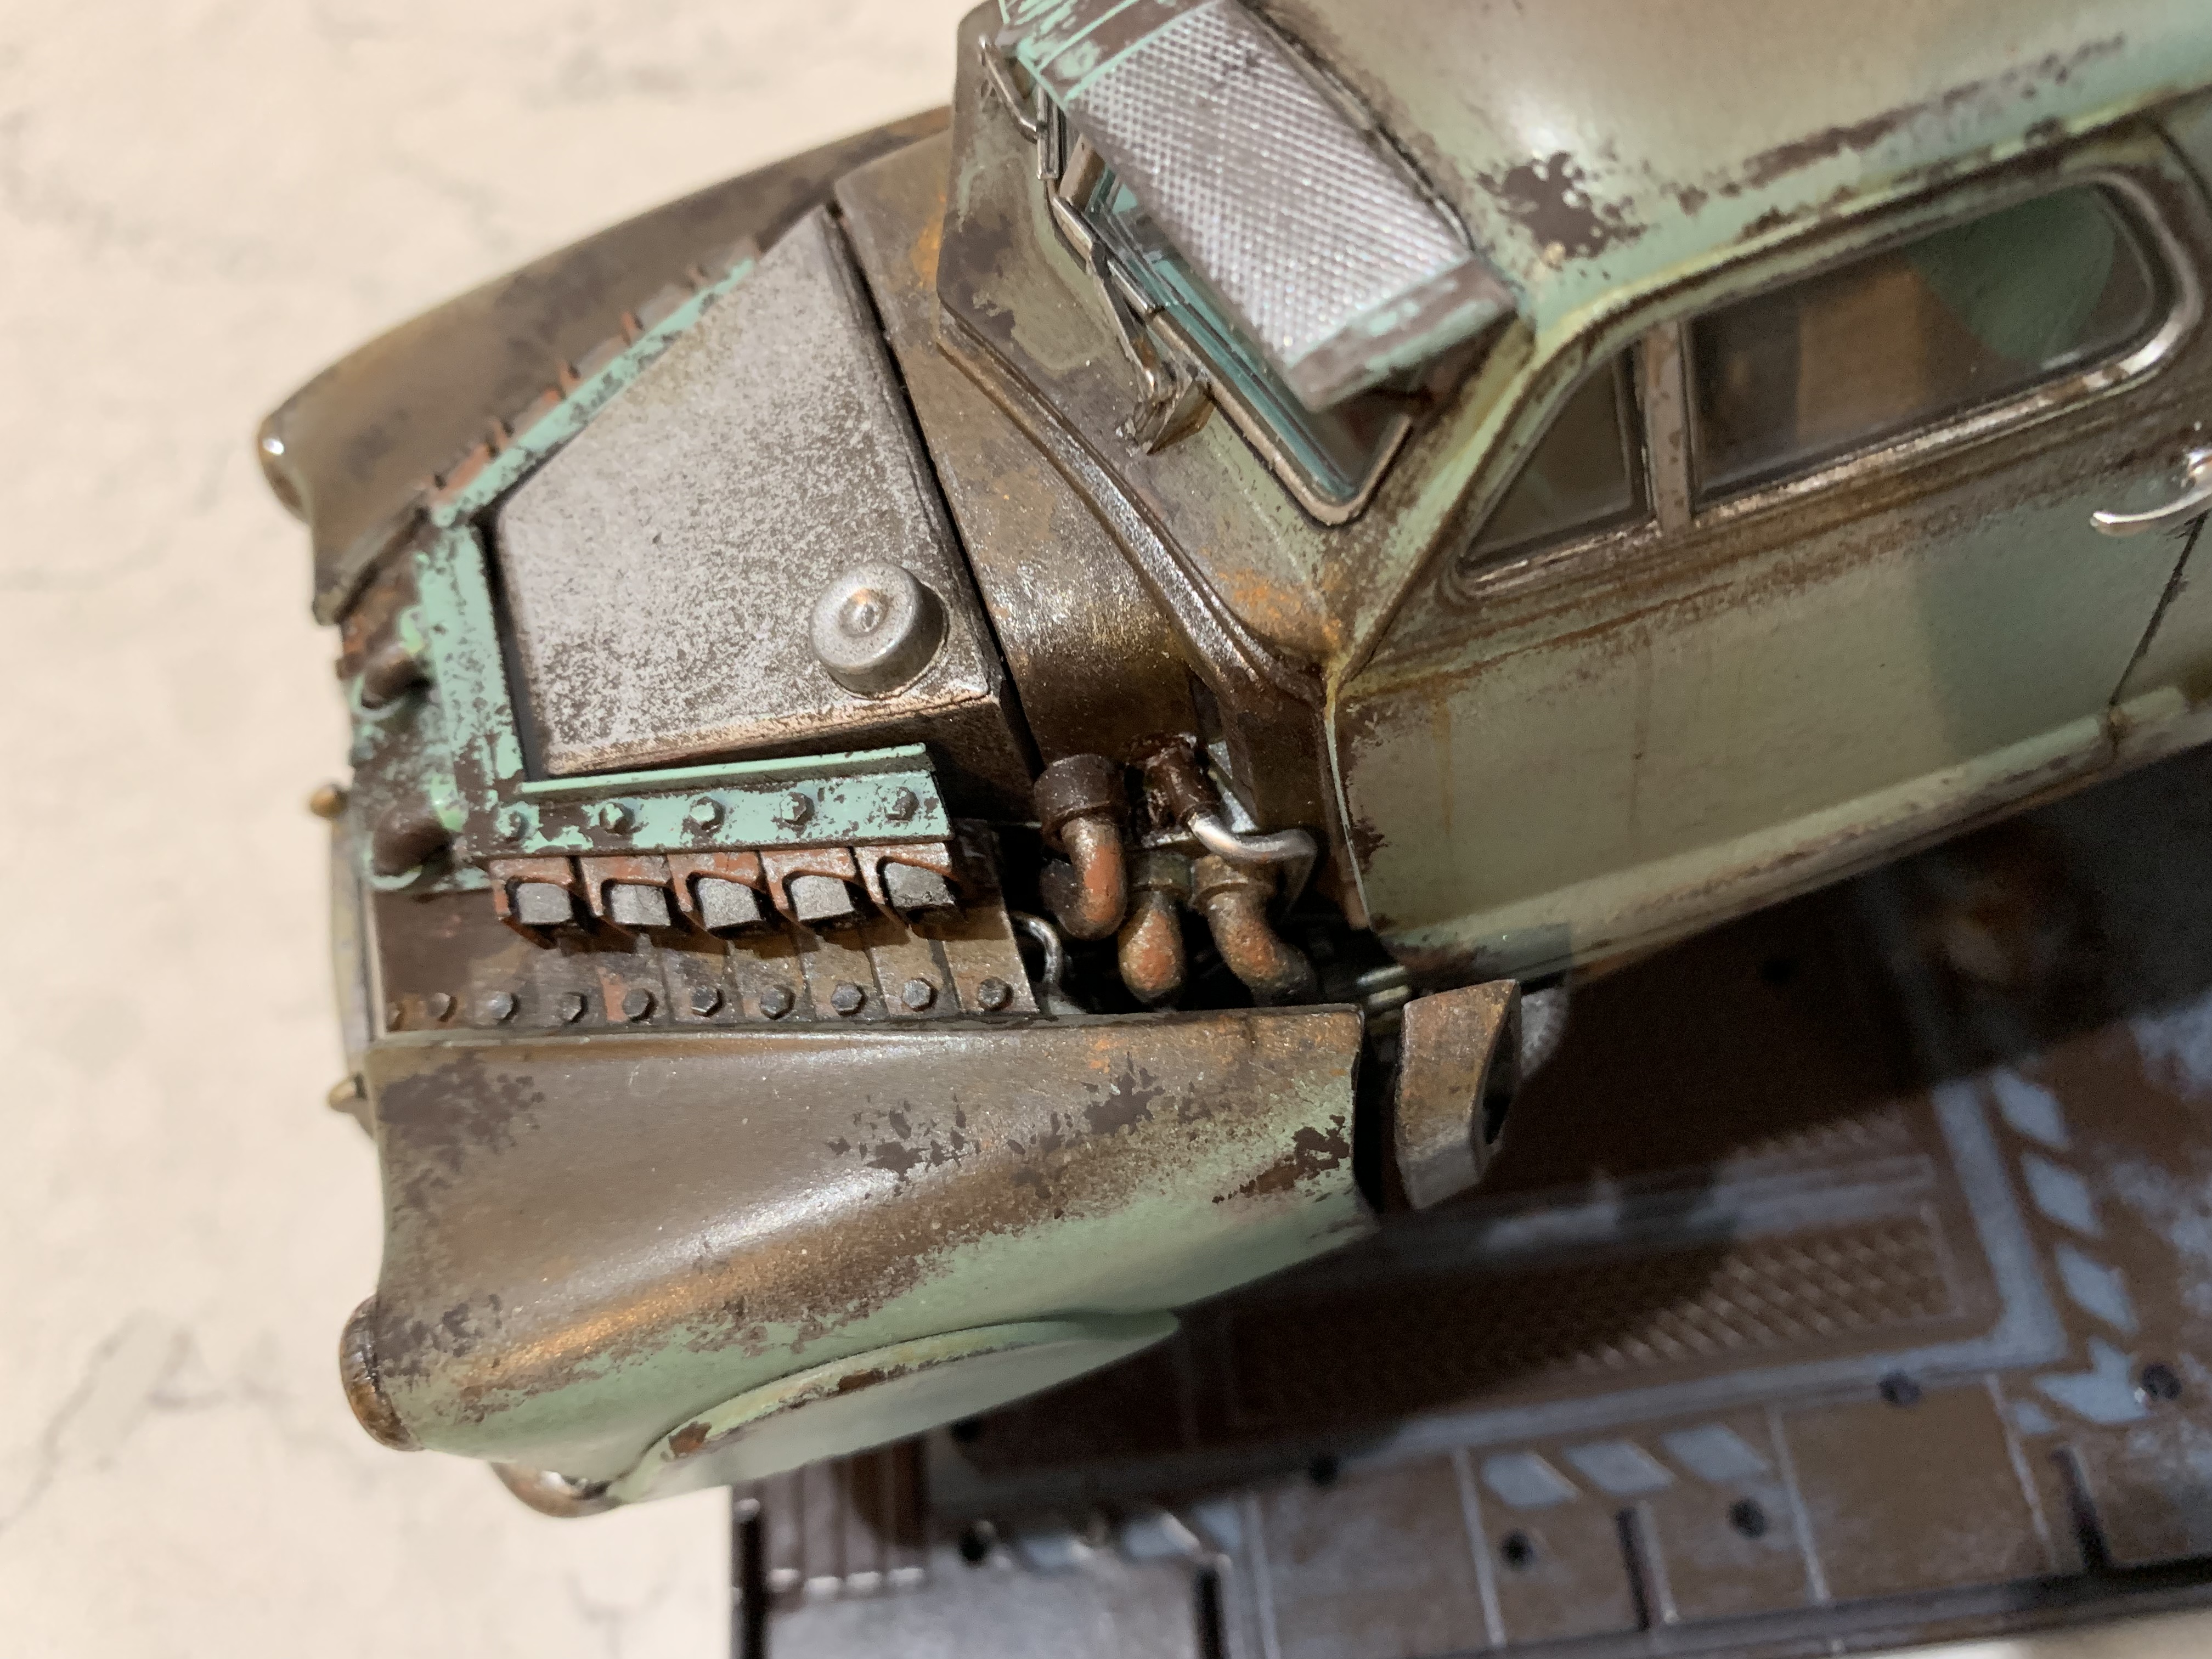
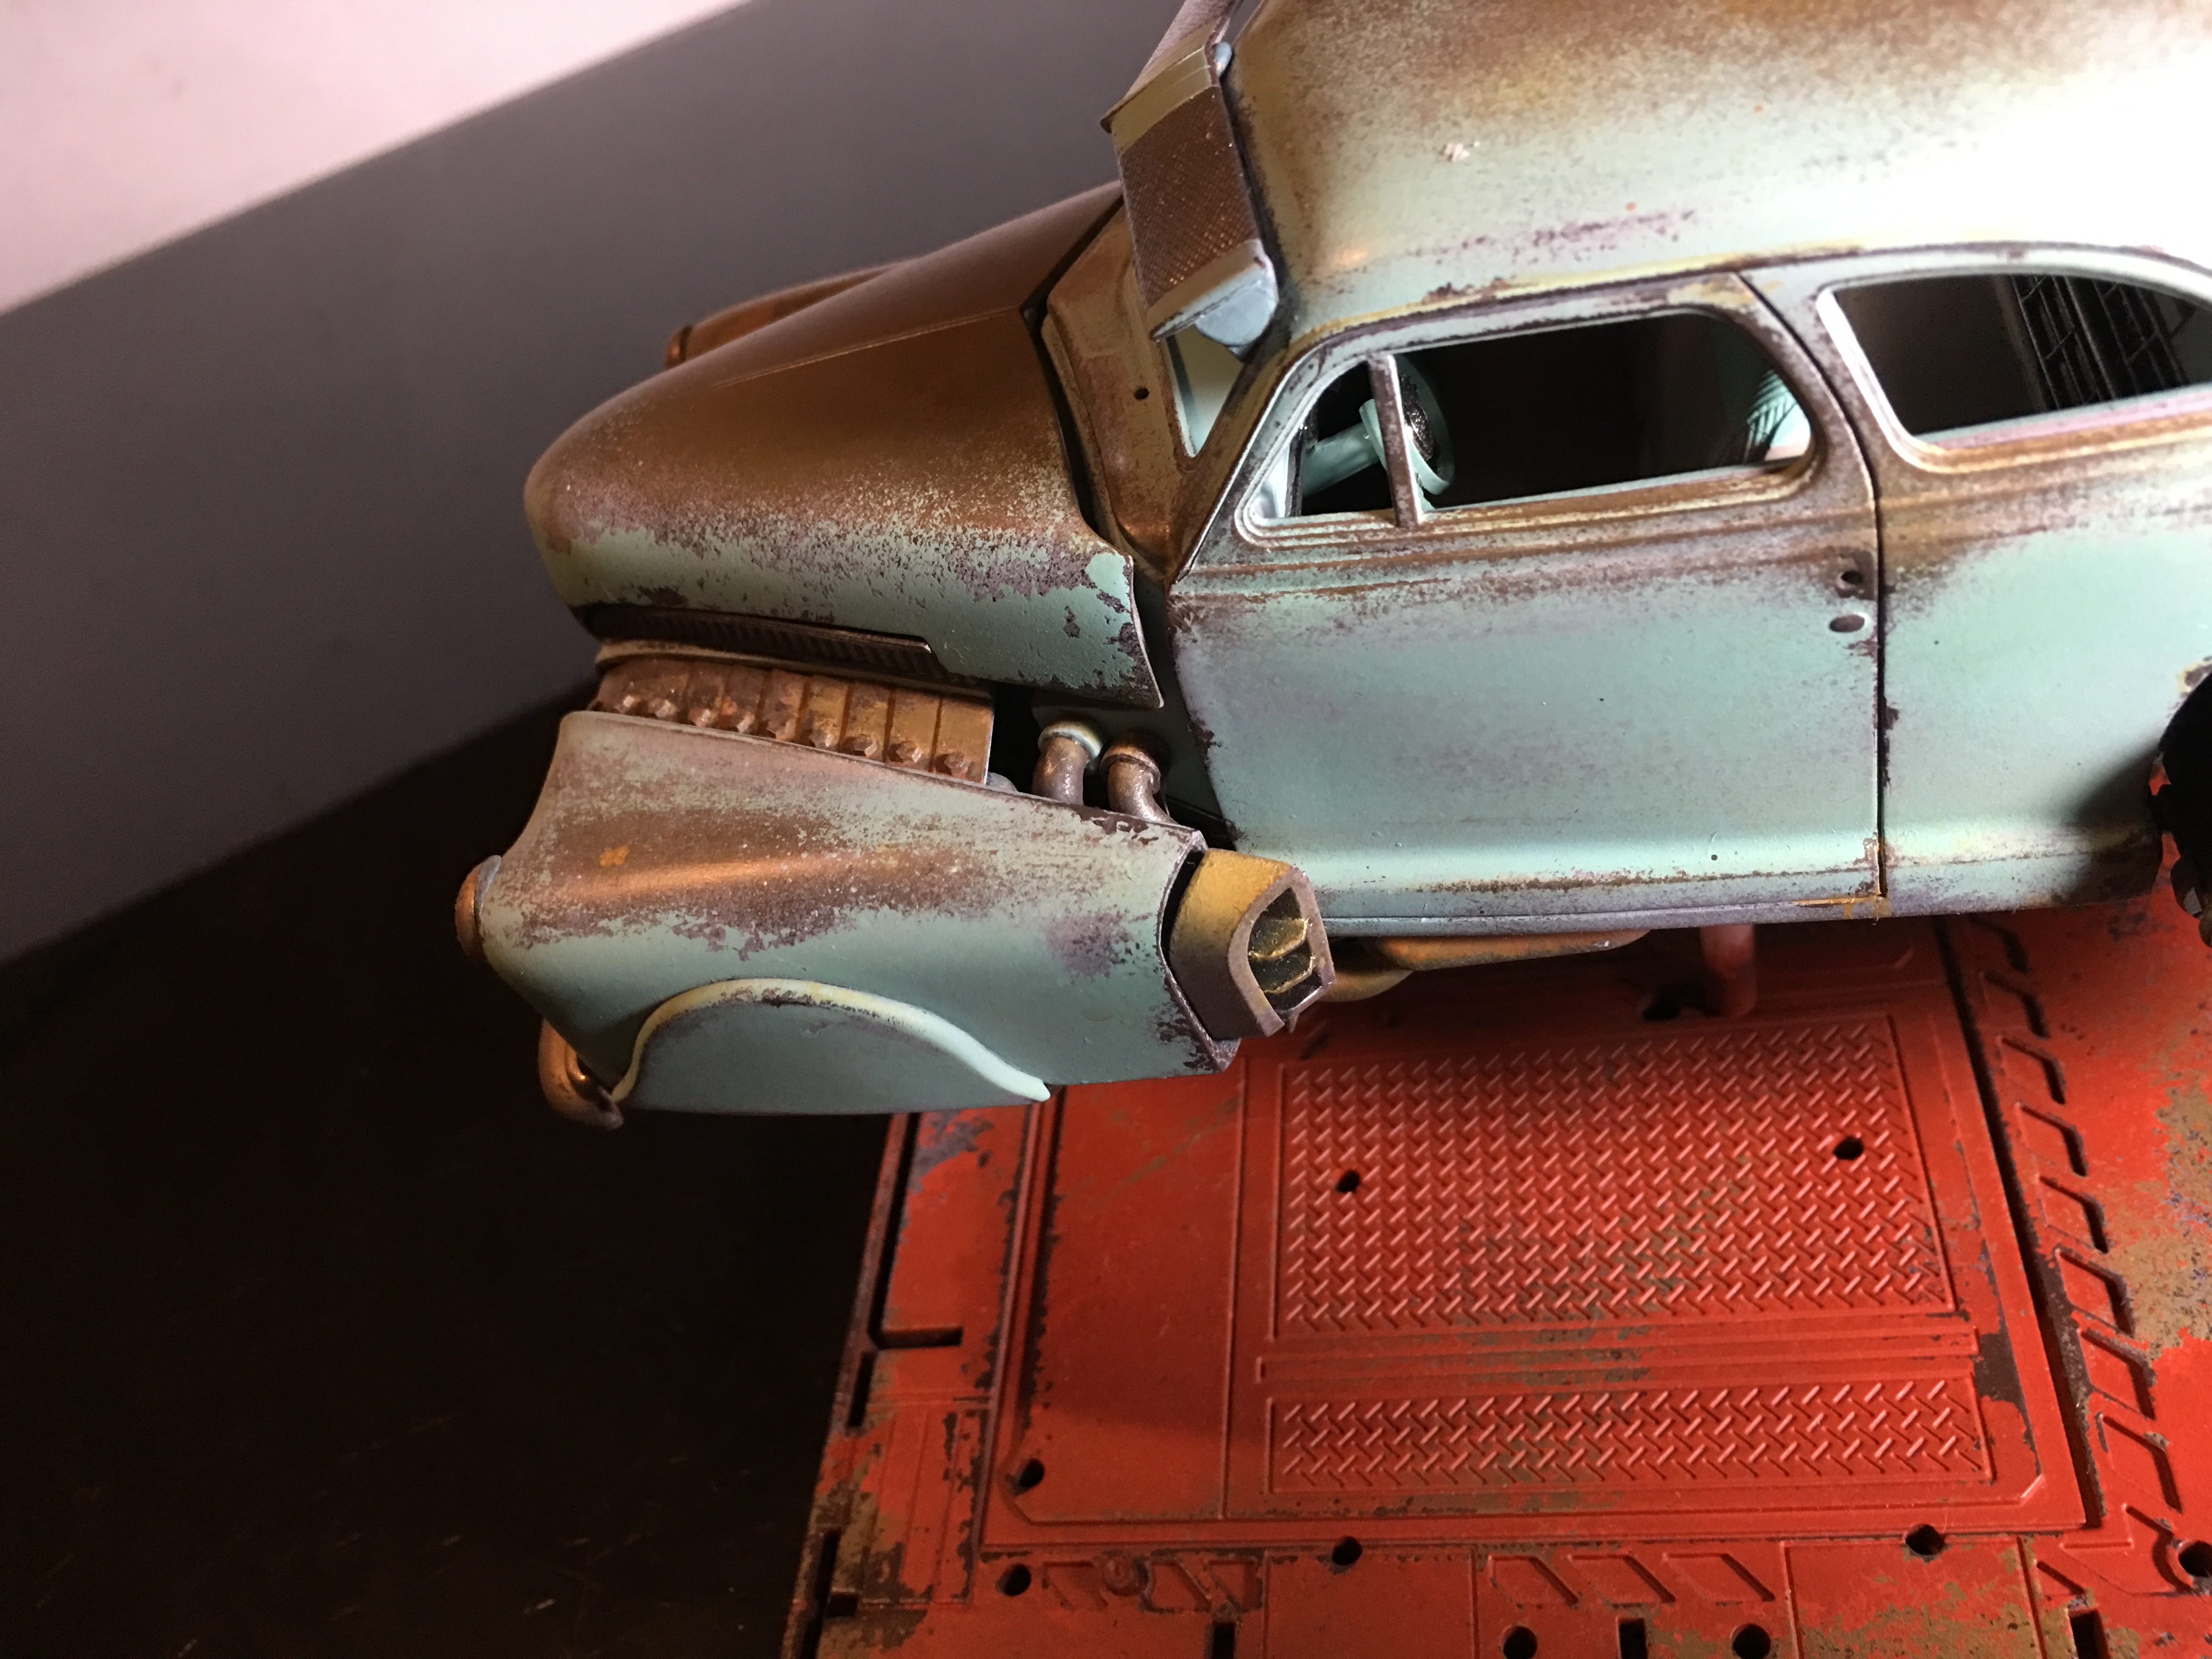
I thought I'd be done this weekend. I wasn't happy with the hood fitment and the pipes coming out of either side, so I started again. I needed something to hold the hood level, and something to bring a little more style to the front end. I fabricated some new heavy steel ports made from square styrene tube. They remind me of the exhaust coming off the side of World War 2 planes. I'm very happy with these. I think it needed the detail and it needed to look more mechanical than just pipes. They don't serve a purpose other than to look cool. I also added two more pipes inside the fender gap. The more the merrier. I have more weathering to do. Not finished yet. I may still add lights to the undercarriage. Landing spotlights of some sort. I removed the visor supports and replaced them with much thinner styrene rod. Details under the hood.
-
I changed the fin design that was under the edge of the hood. It was causing fitment issues that I couldn't repair. I added some pipes and a few more gadgets sticking thru the side. The hood now rests better, although not in these photos evidently... Need to add more soot and rust highlights. I also need to even up the weathering on the chrome and paint the chrome strip above the door handle. I should have done that already! I plan to add 2 - 4 spotlights under the car. Hopefully I'll be done by next weekend.
-
I've seen a few videos of people using magnets to hold doors closed. Seems like a good idea. Hopefully I can get it to fit.
-
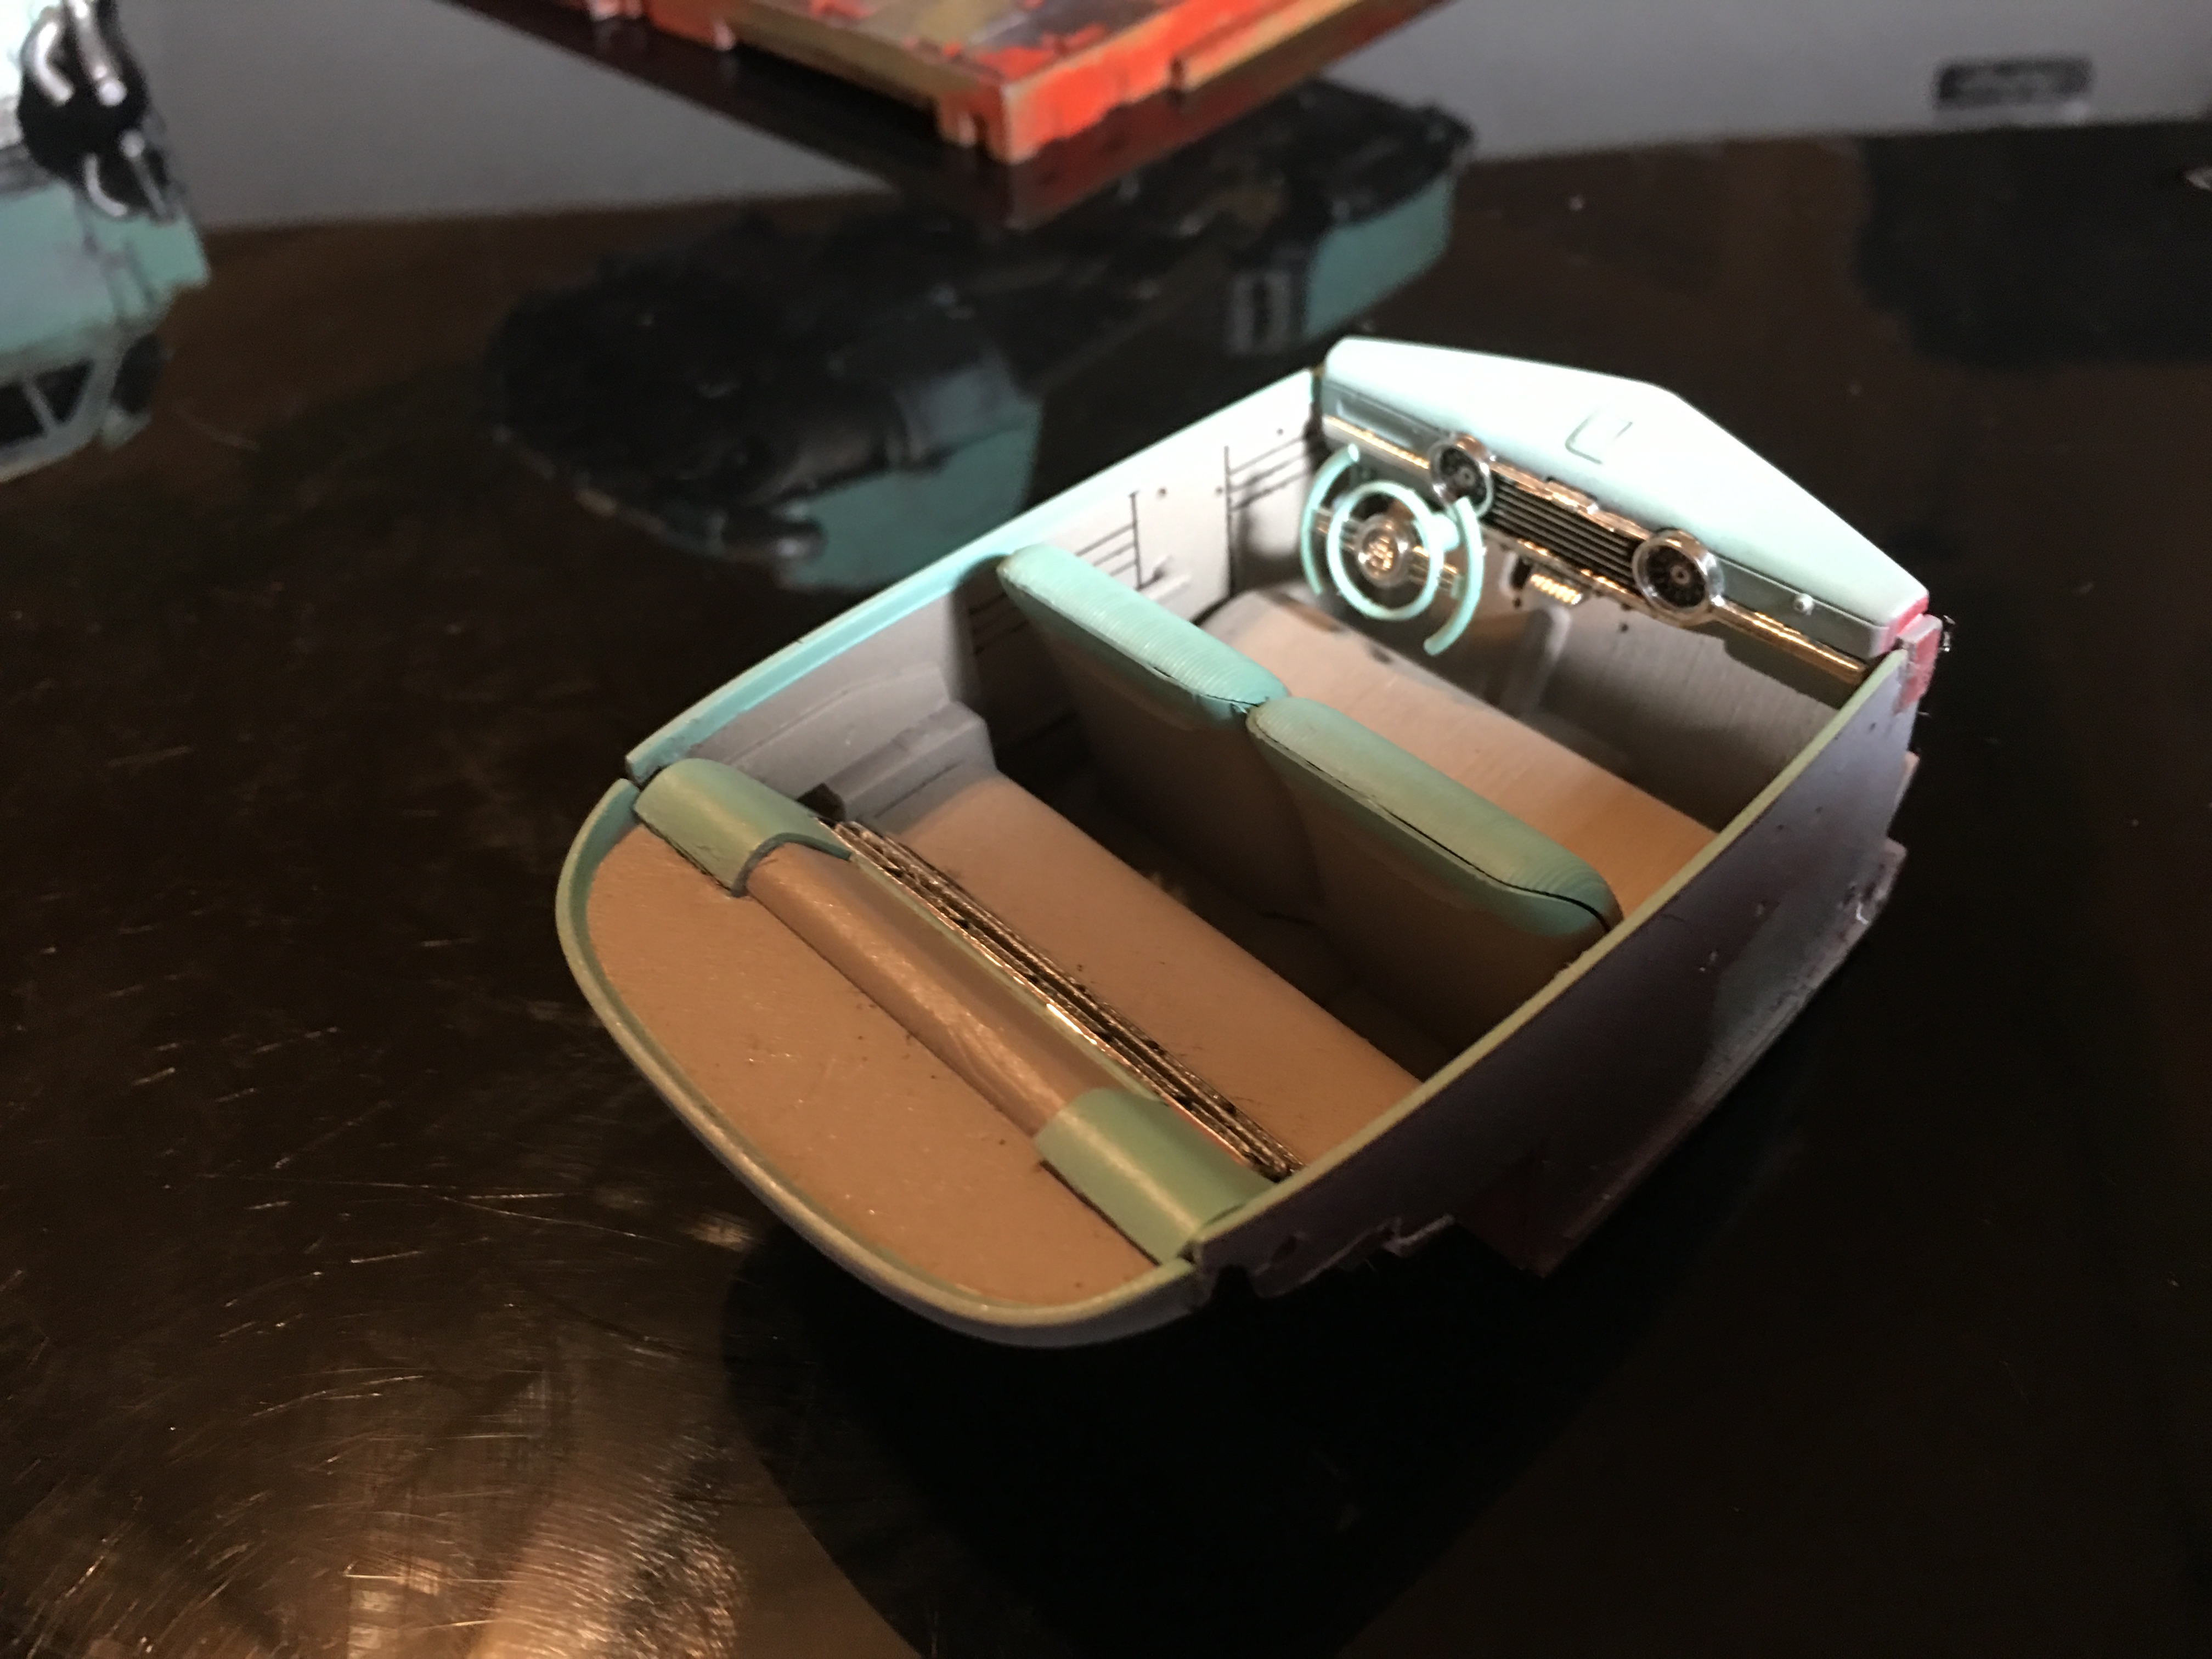
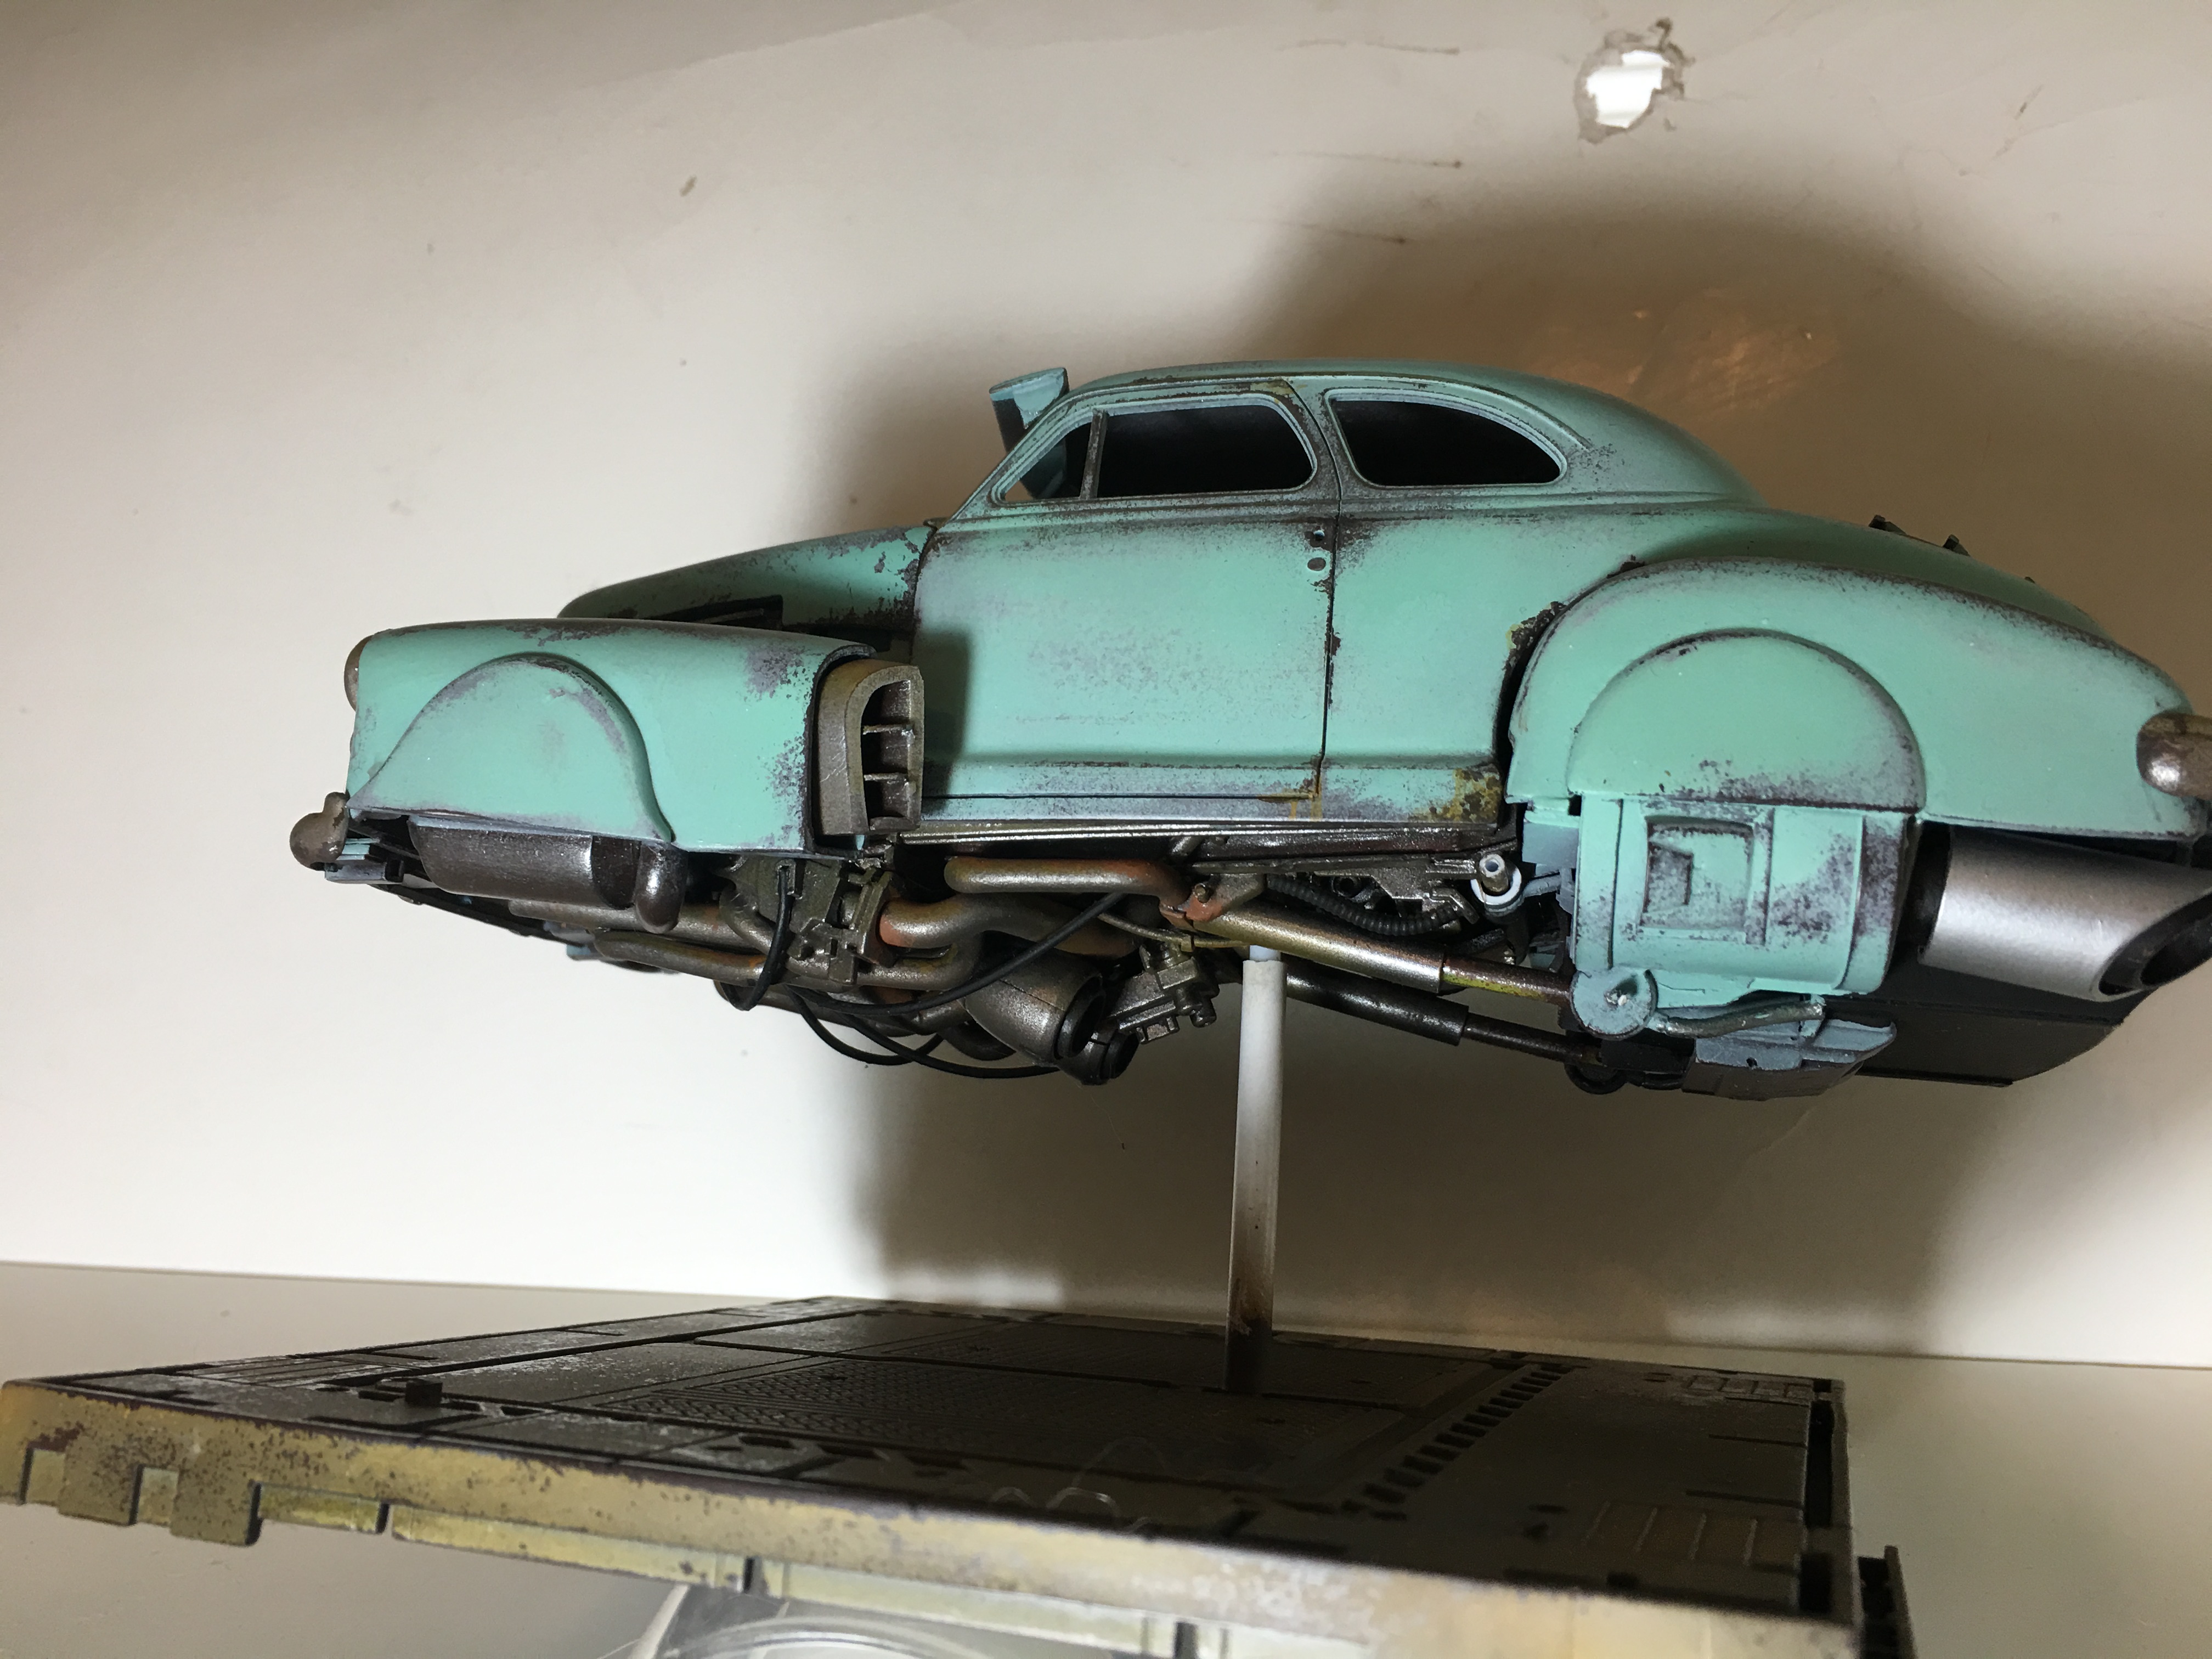
I experimented with a contrasting color for the base. I love the way the paint chipping turned out. Unfortunately, I don't like the red against the blue car. I added rust highlights. Still much more to do on the weathering. I plan to hit it with some more highlights as well as streaks. I want the engine bay to have grease and oil stains. Can't forget the layers of soot! I'm happy with these front intakes behind the headlights. They're a little too thick, so I plan to bevel the edges down. The hood has a problem fitting when the car is hovering on it's stand. The chassis flexes and the hood won't sit properly. Hopefully this gets fixed when I final glue the model. The shot below is my favorite part of the car. There's a lot going on with pipes. I want to add more to fill in the dark gap. I'm also not 100% happy with the exhausts on the front fenders. They're a bit too thick as well. I may change these. This will be oily and greasy. A better view of the plumbing. I will add a lever or two from the floor for flight controls. I had to cut part of the rear seat out to make room for the rear engine. I had nothing to cover the hole with, so I added another intake. Why not? I hope to add more detail to the undercarriage. More smaller gauge hoses and pipes. It's close to being done. I work so slow that it might take a few more weeks. I need to start putting on the final chrome pieces, like the mirrors and trim. I need to finish weathering the exterior as well as the interior. I need to make flight controls. Final plumbing. Repaint the base. Install the glass...then it should be done.
-
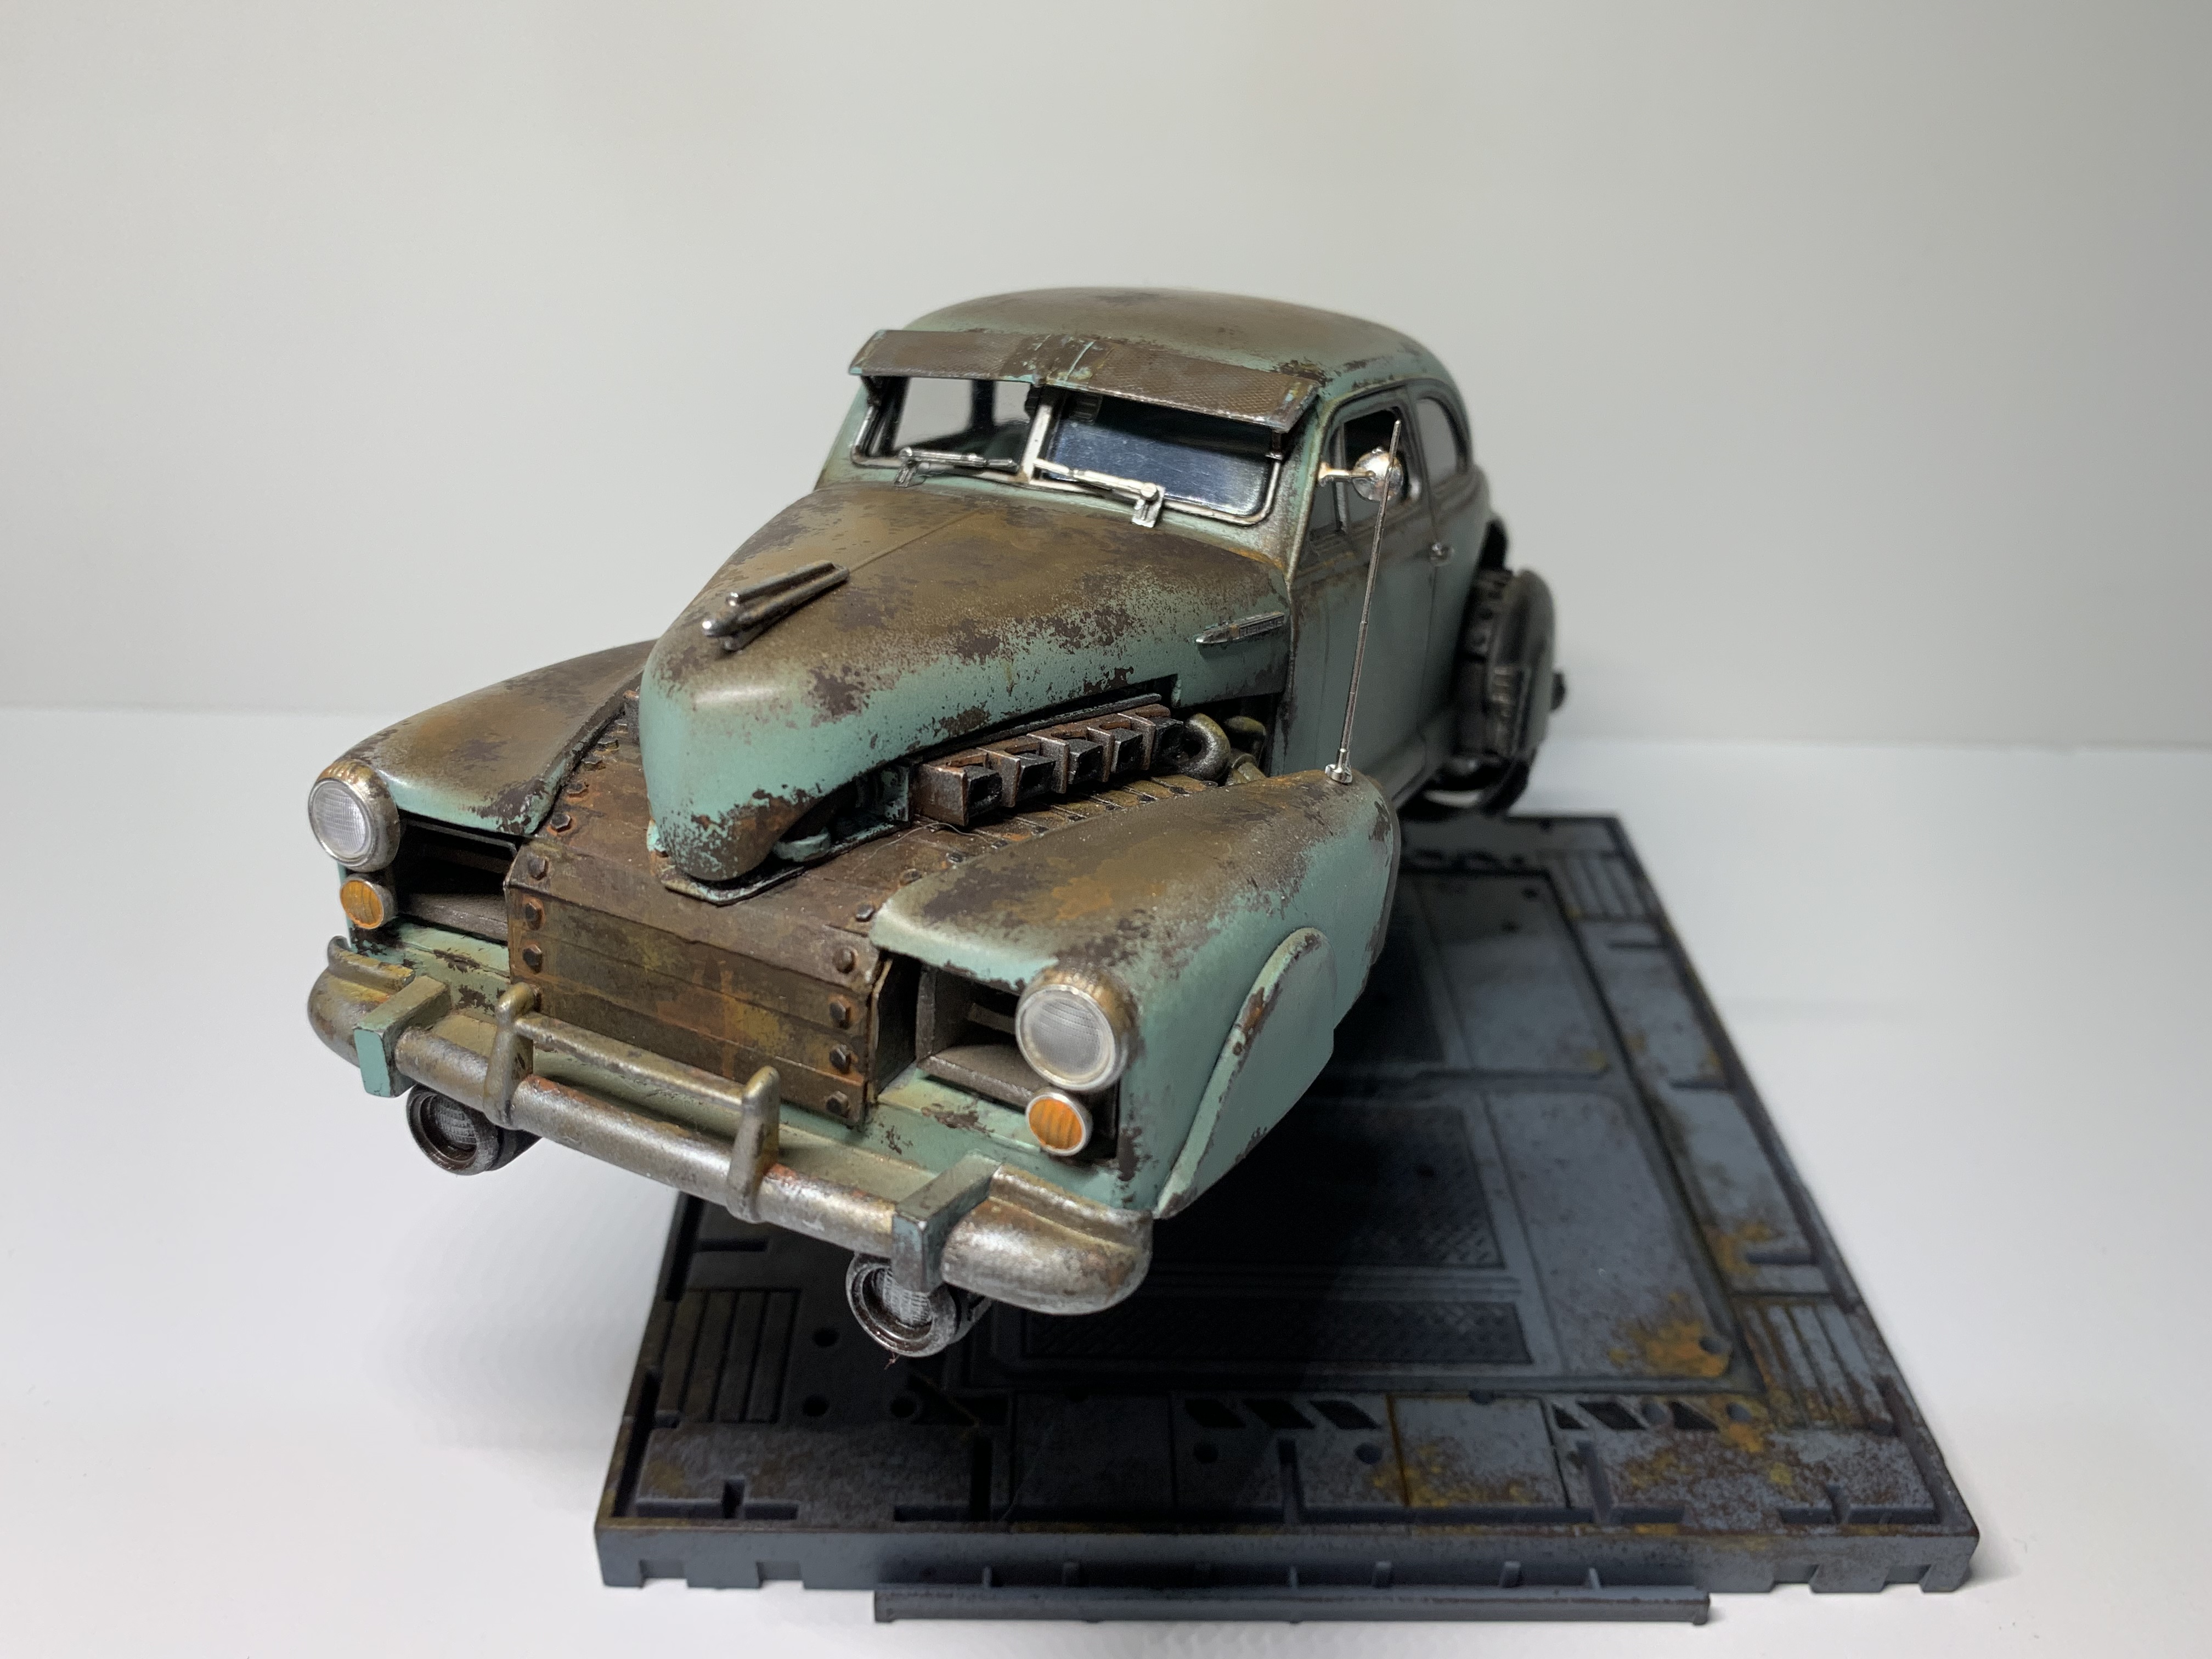
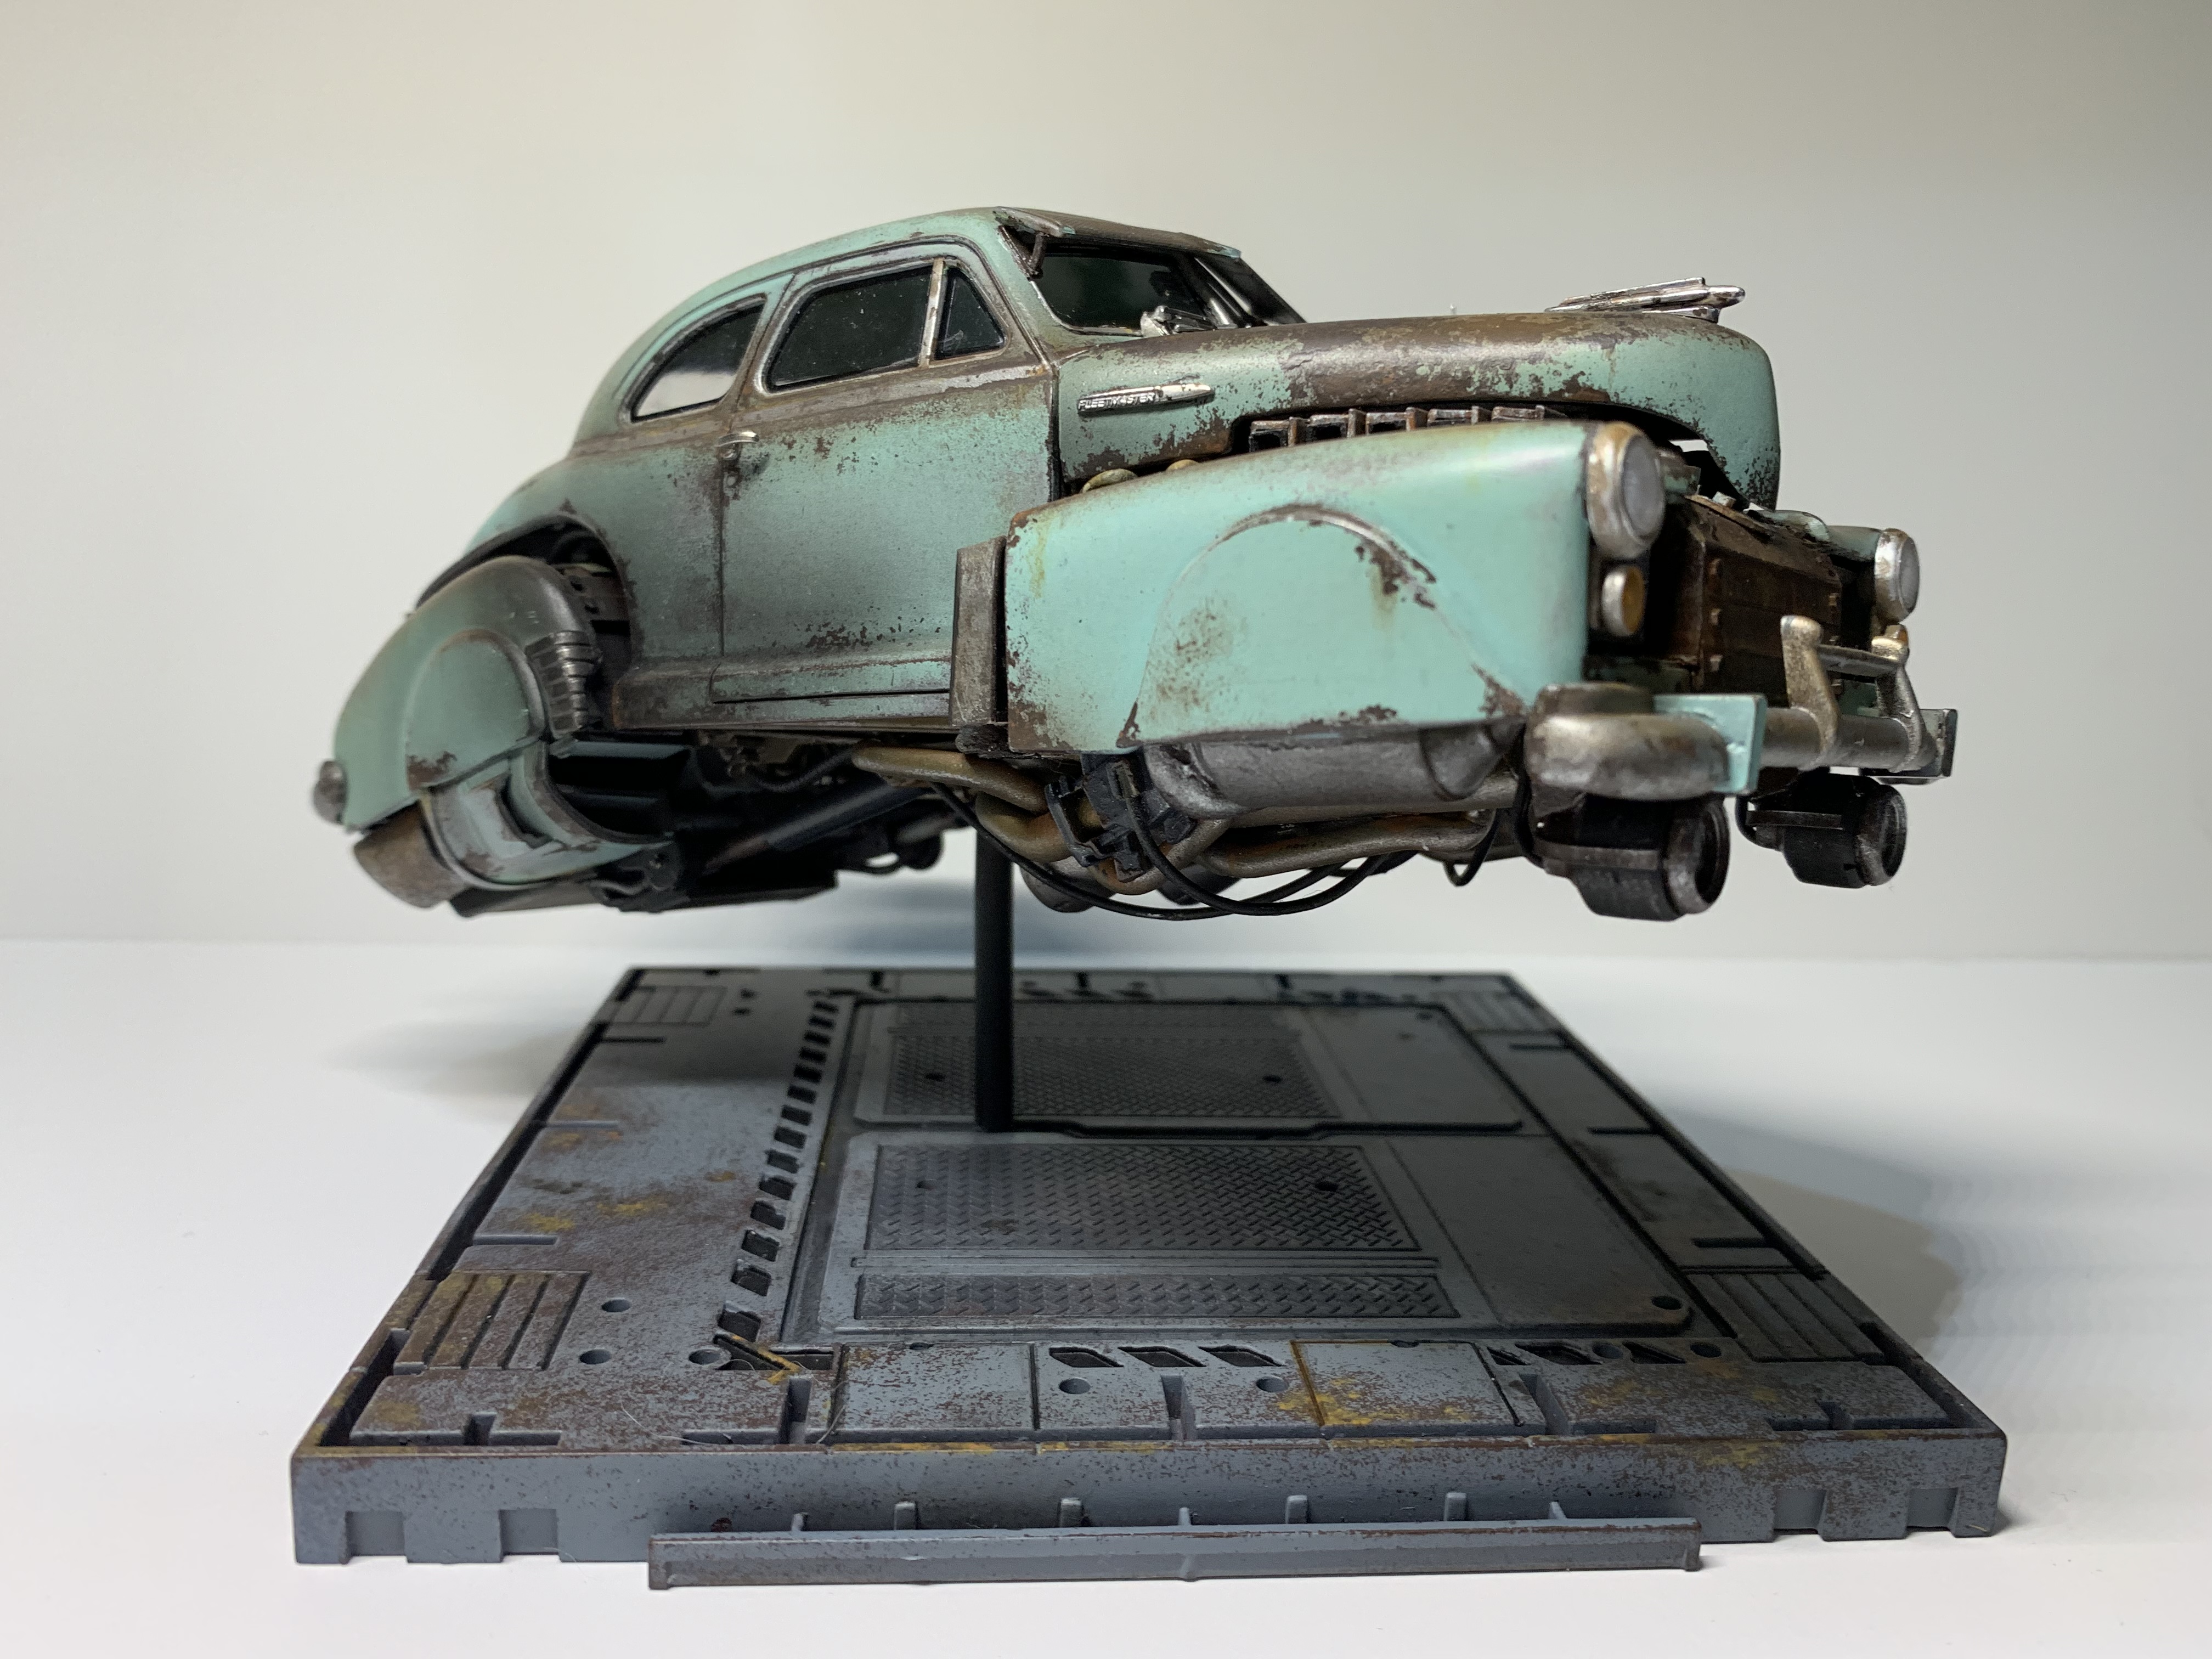
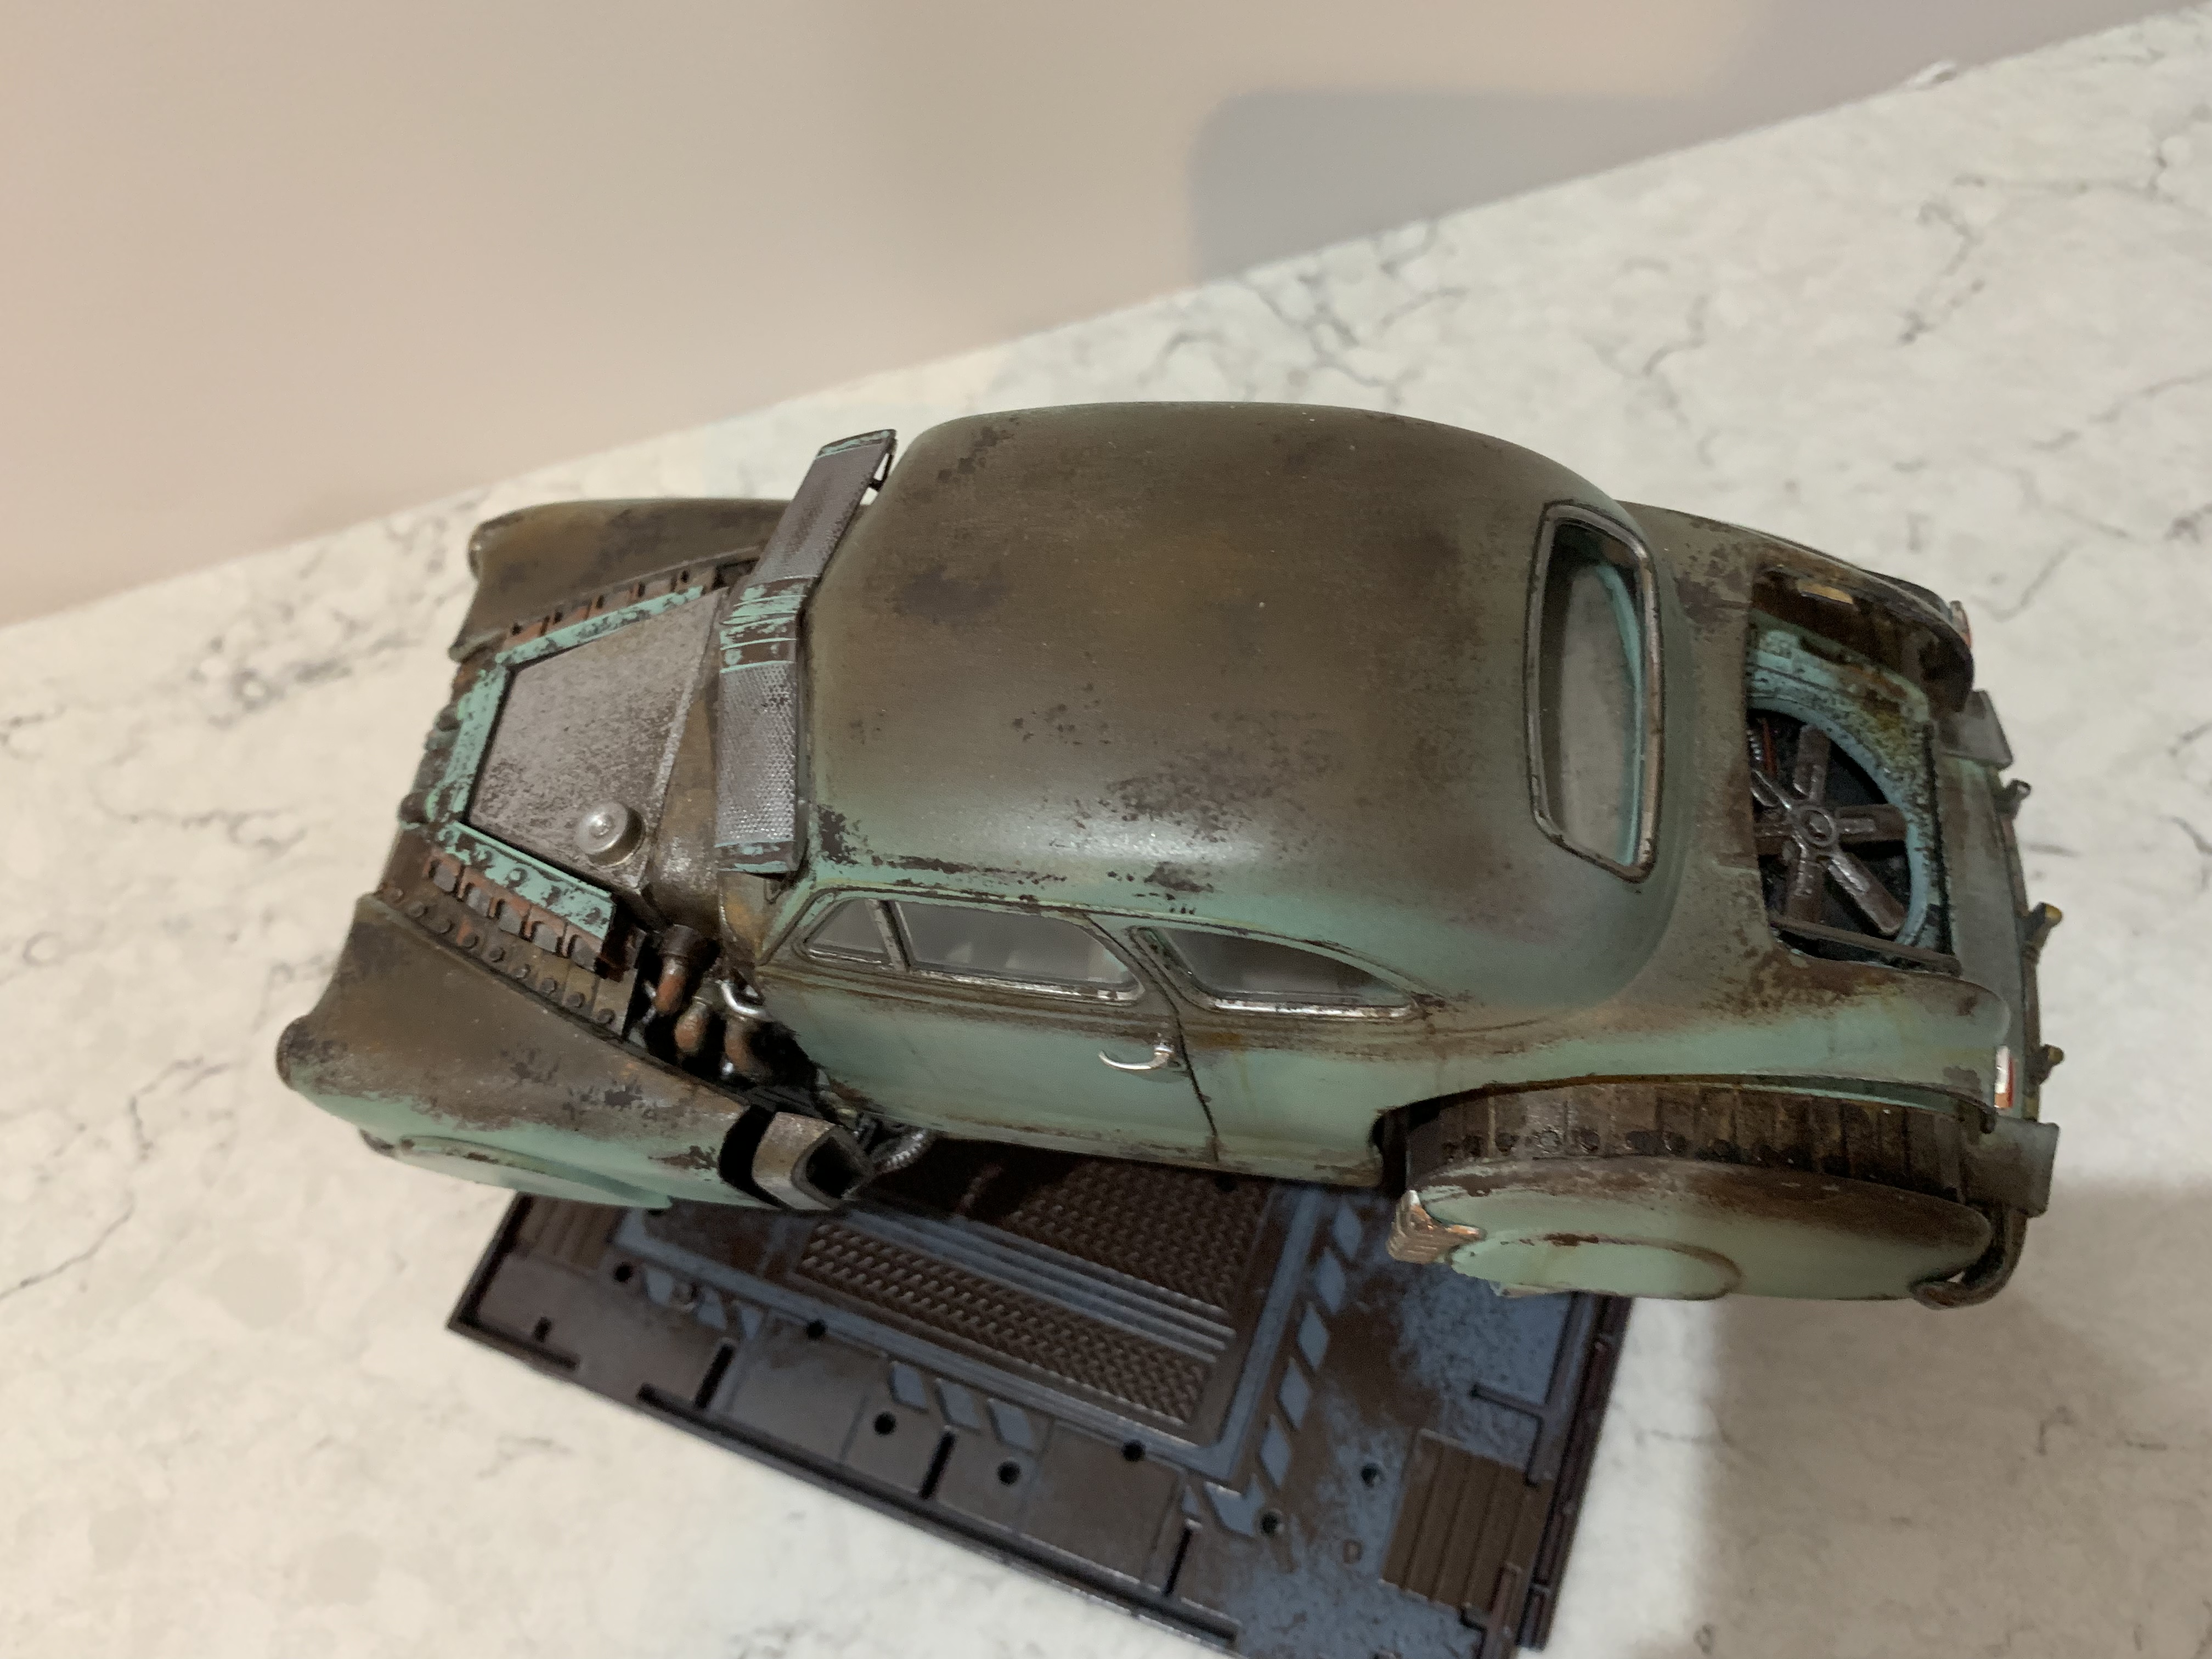
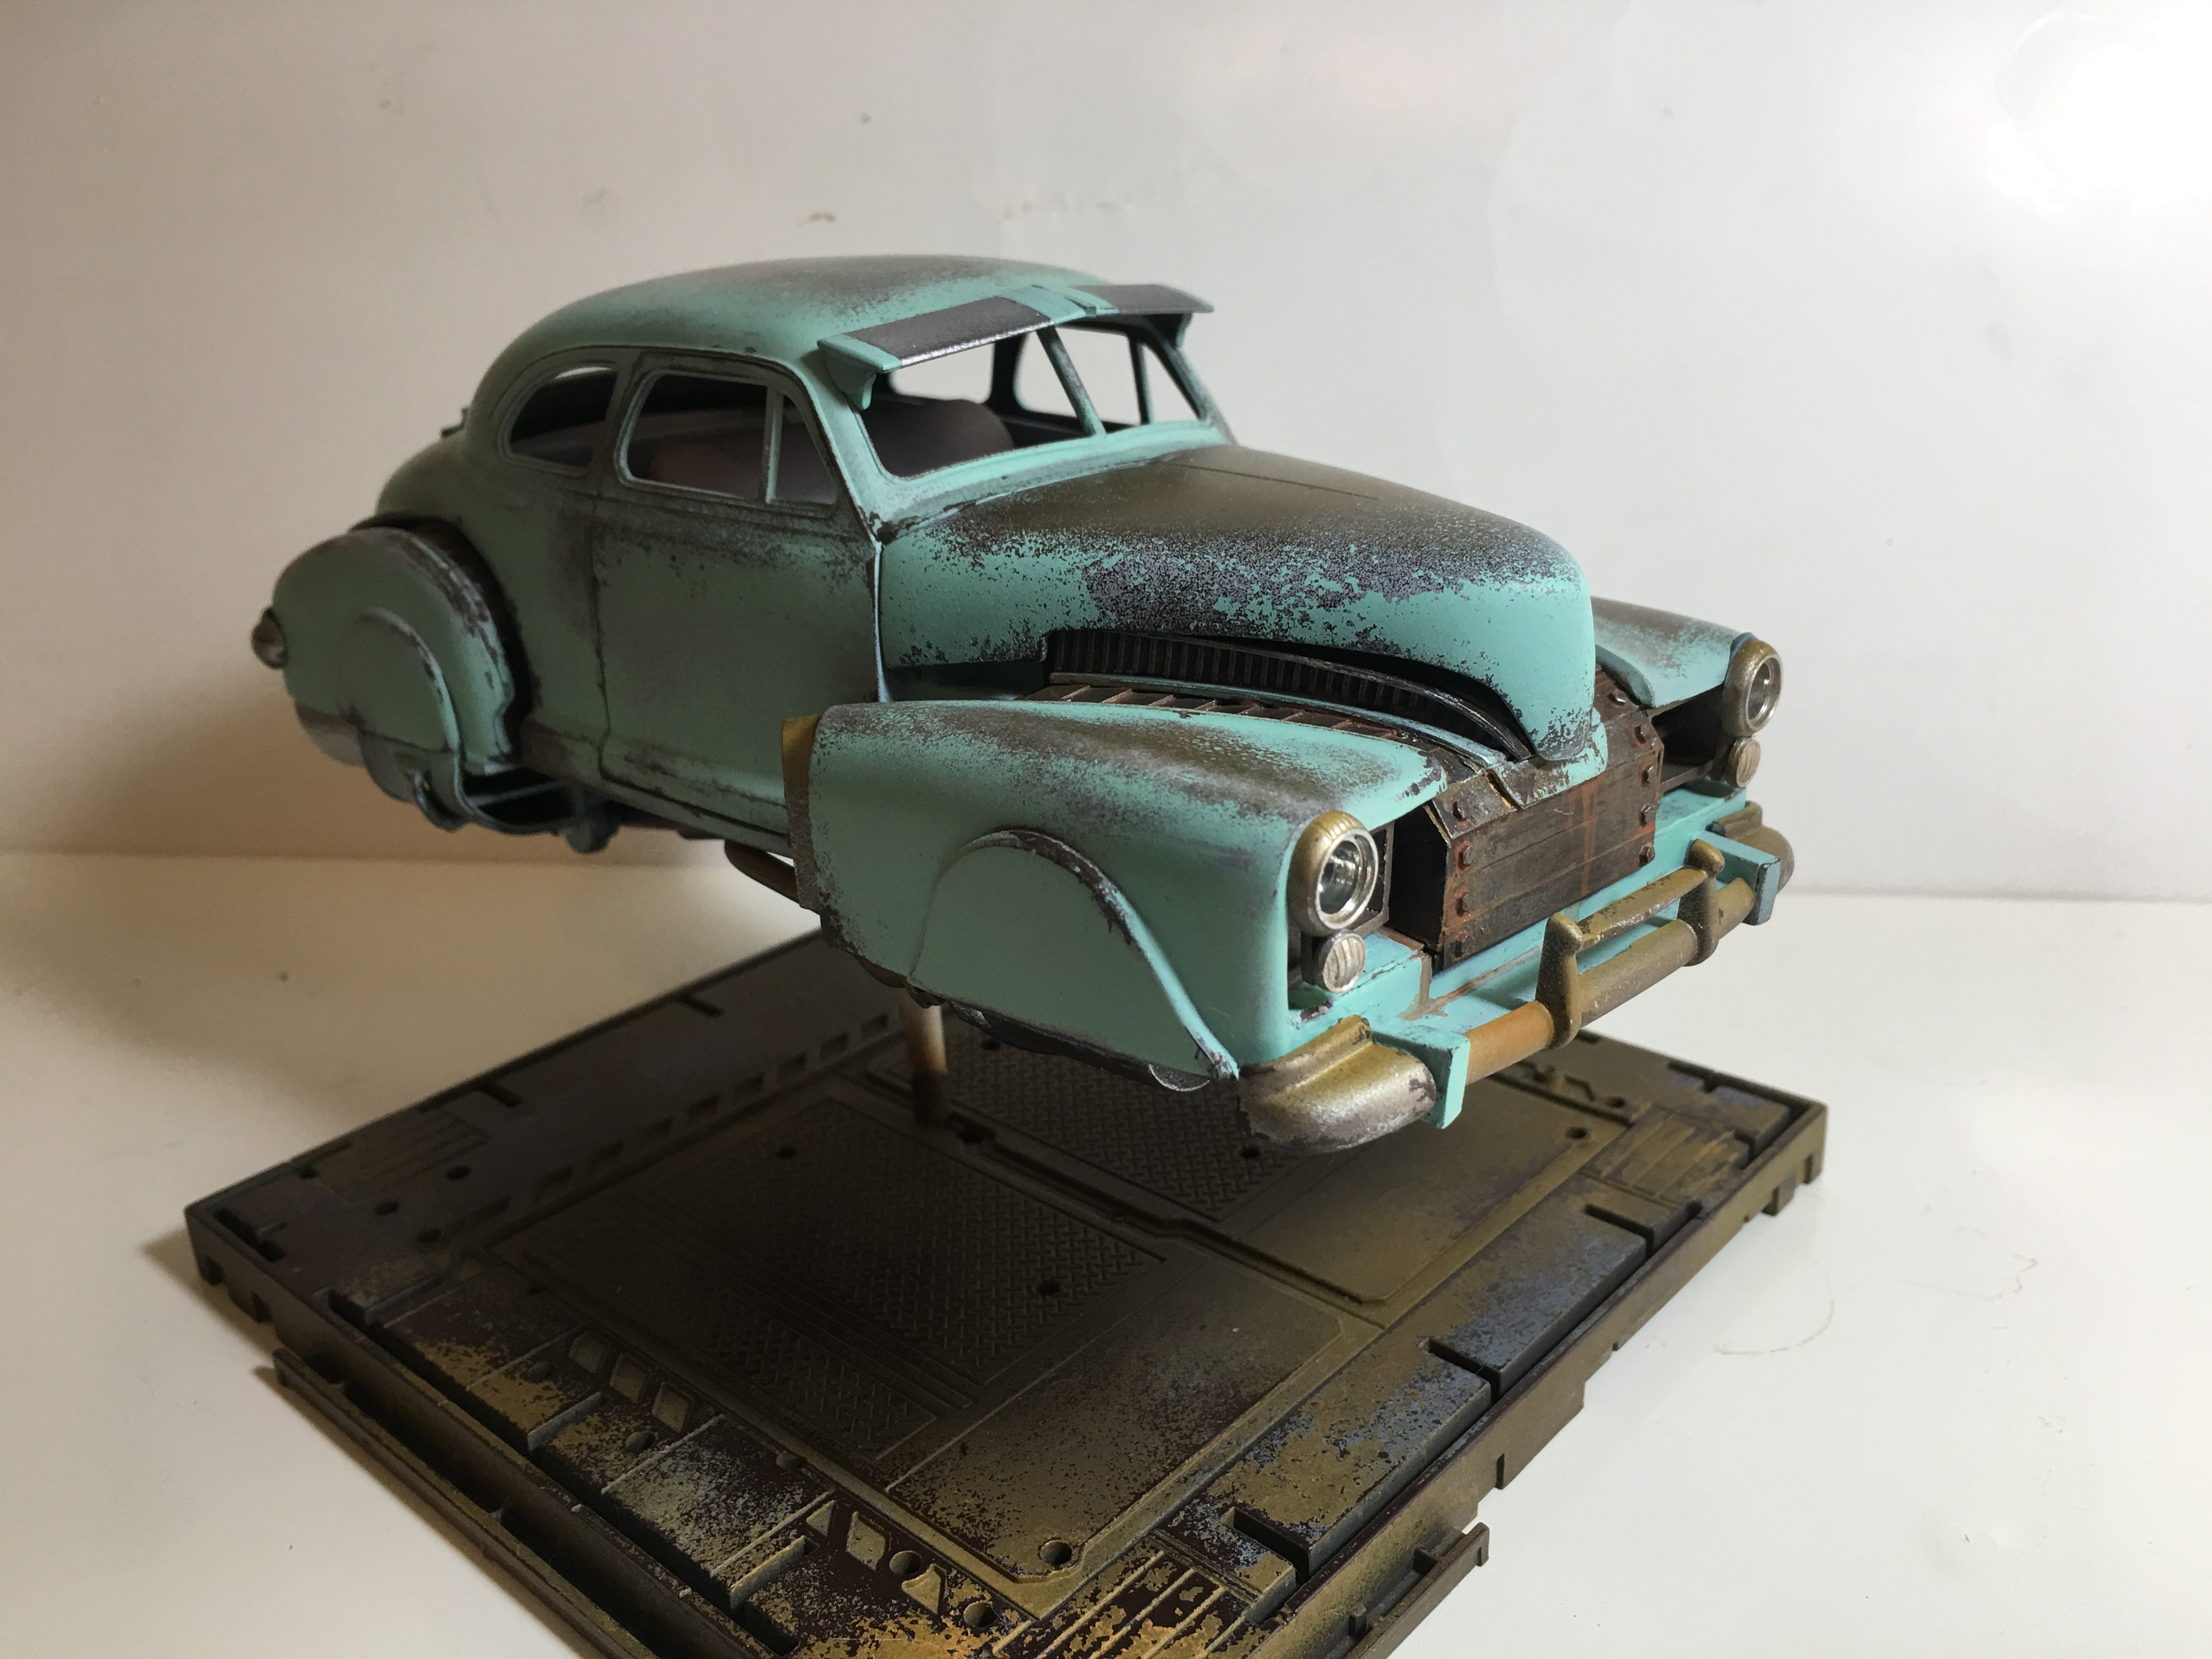
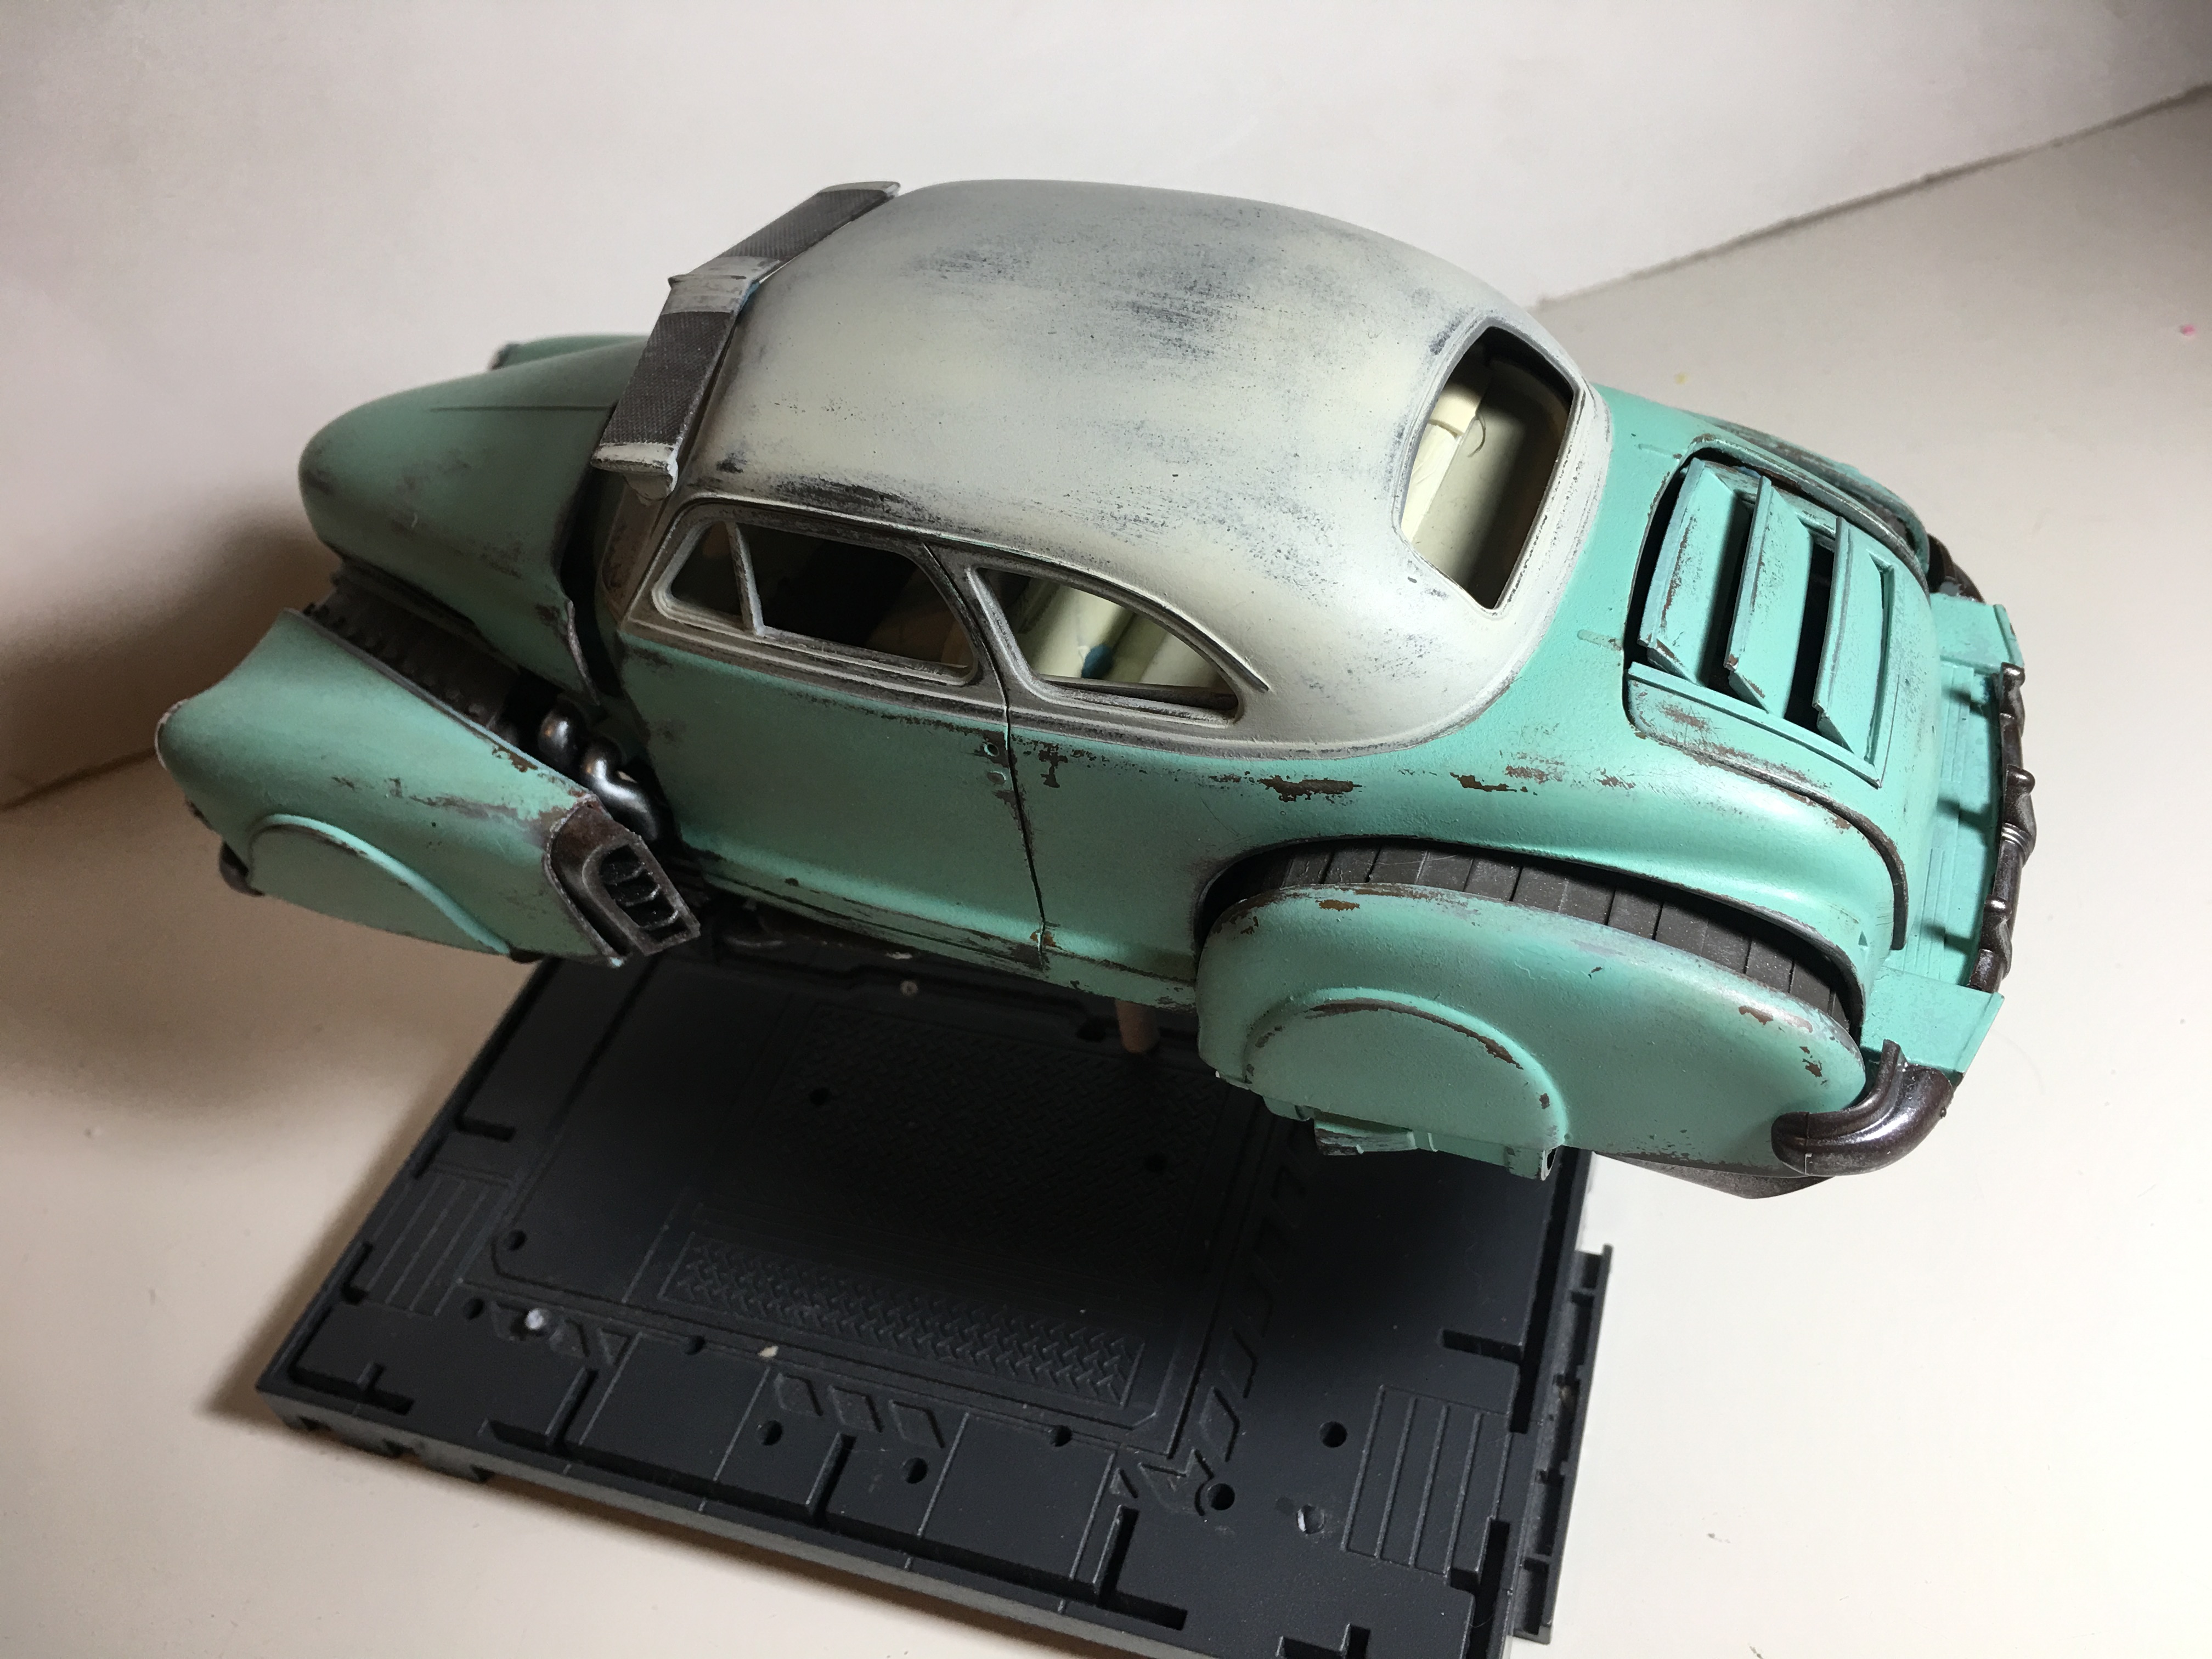
I'm going back to the aqua, single tone. All my hover cars are two tone with one of the colors being white. It's time for a change. Yes, the fender inserts are part of the original fender where it met up with the door. I loved the look of the matte black, but I couldn't envision it as the final style. Clean builds are not my thing. Hopefully this will be the last time I strip the paint. I tried the hairspray technique once again and am happy with the results so far. I still need to add more effects to the weathering. Just wanted to show some progress. I need a lesson on weathering chrome. I made a new set of front intakes. These are recessed behind the headlights, not as aggressive as the last. I think I prefer these, as they are a little more subtle. I tried to get a good shot of the underside of the car. It's by far the most detailed hover car undercarriage I've ever done. There's a lot of stuff going on under there. When the model is complete, I need to mount it to this base in a way where the underside is more visible. Maybe a sharp banked turn to one side.
-
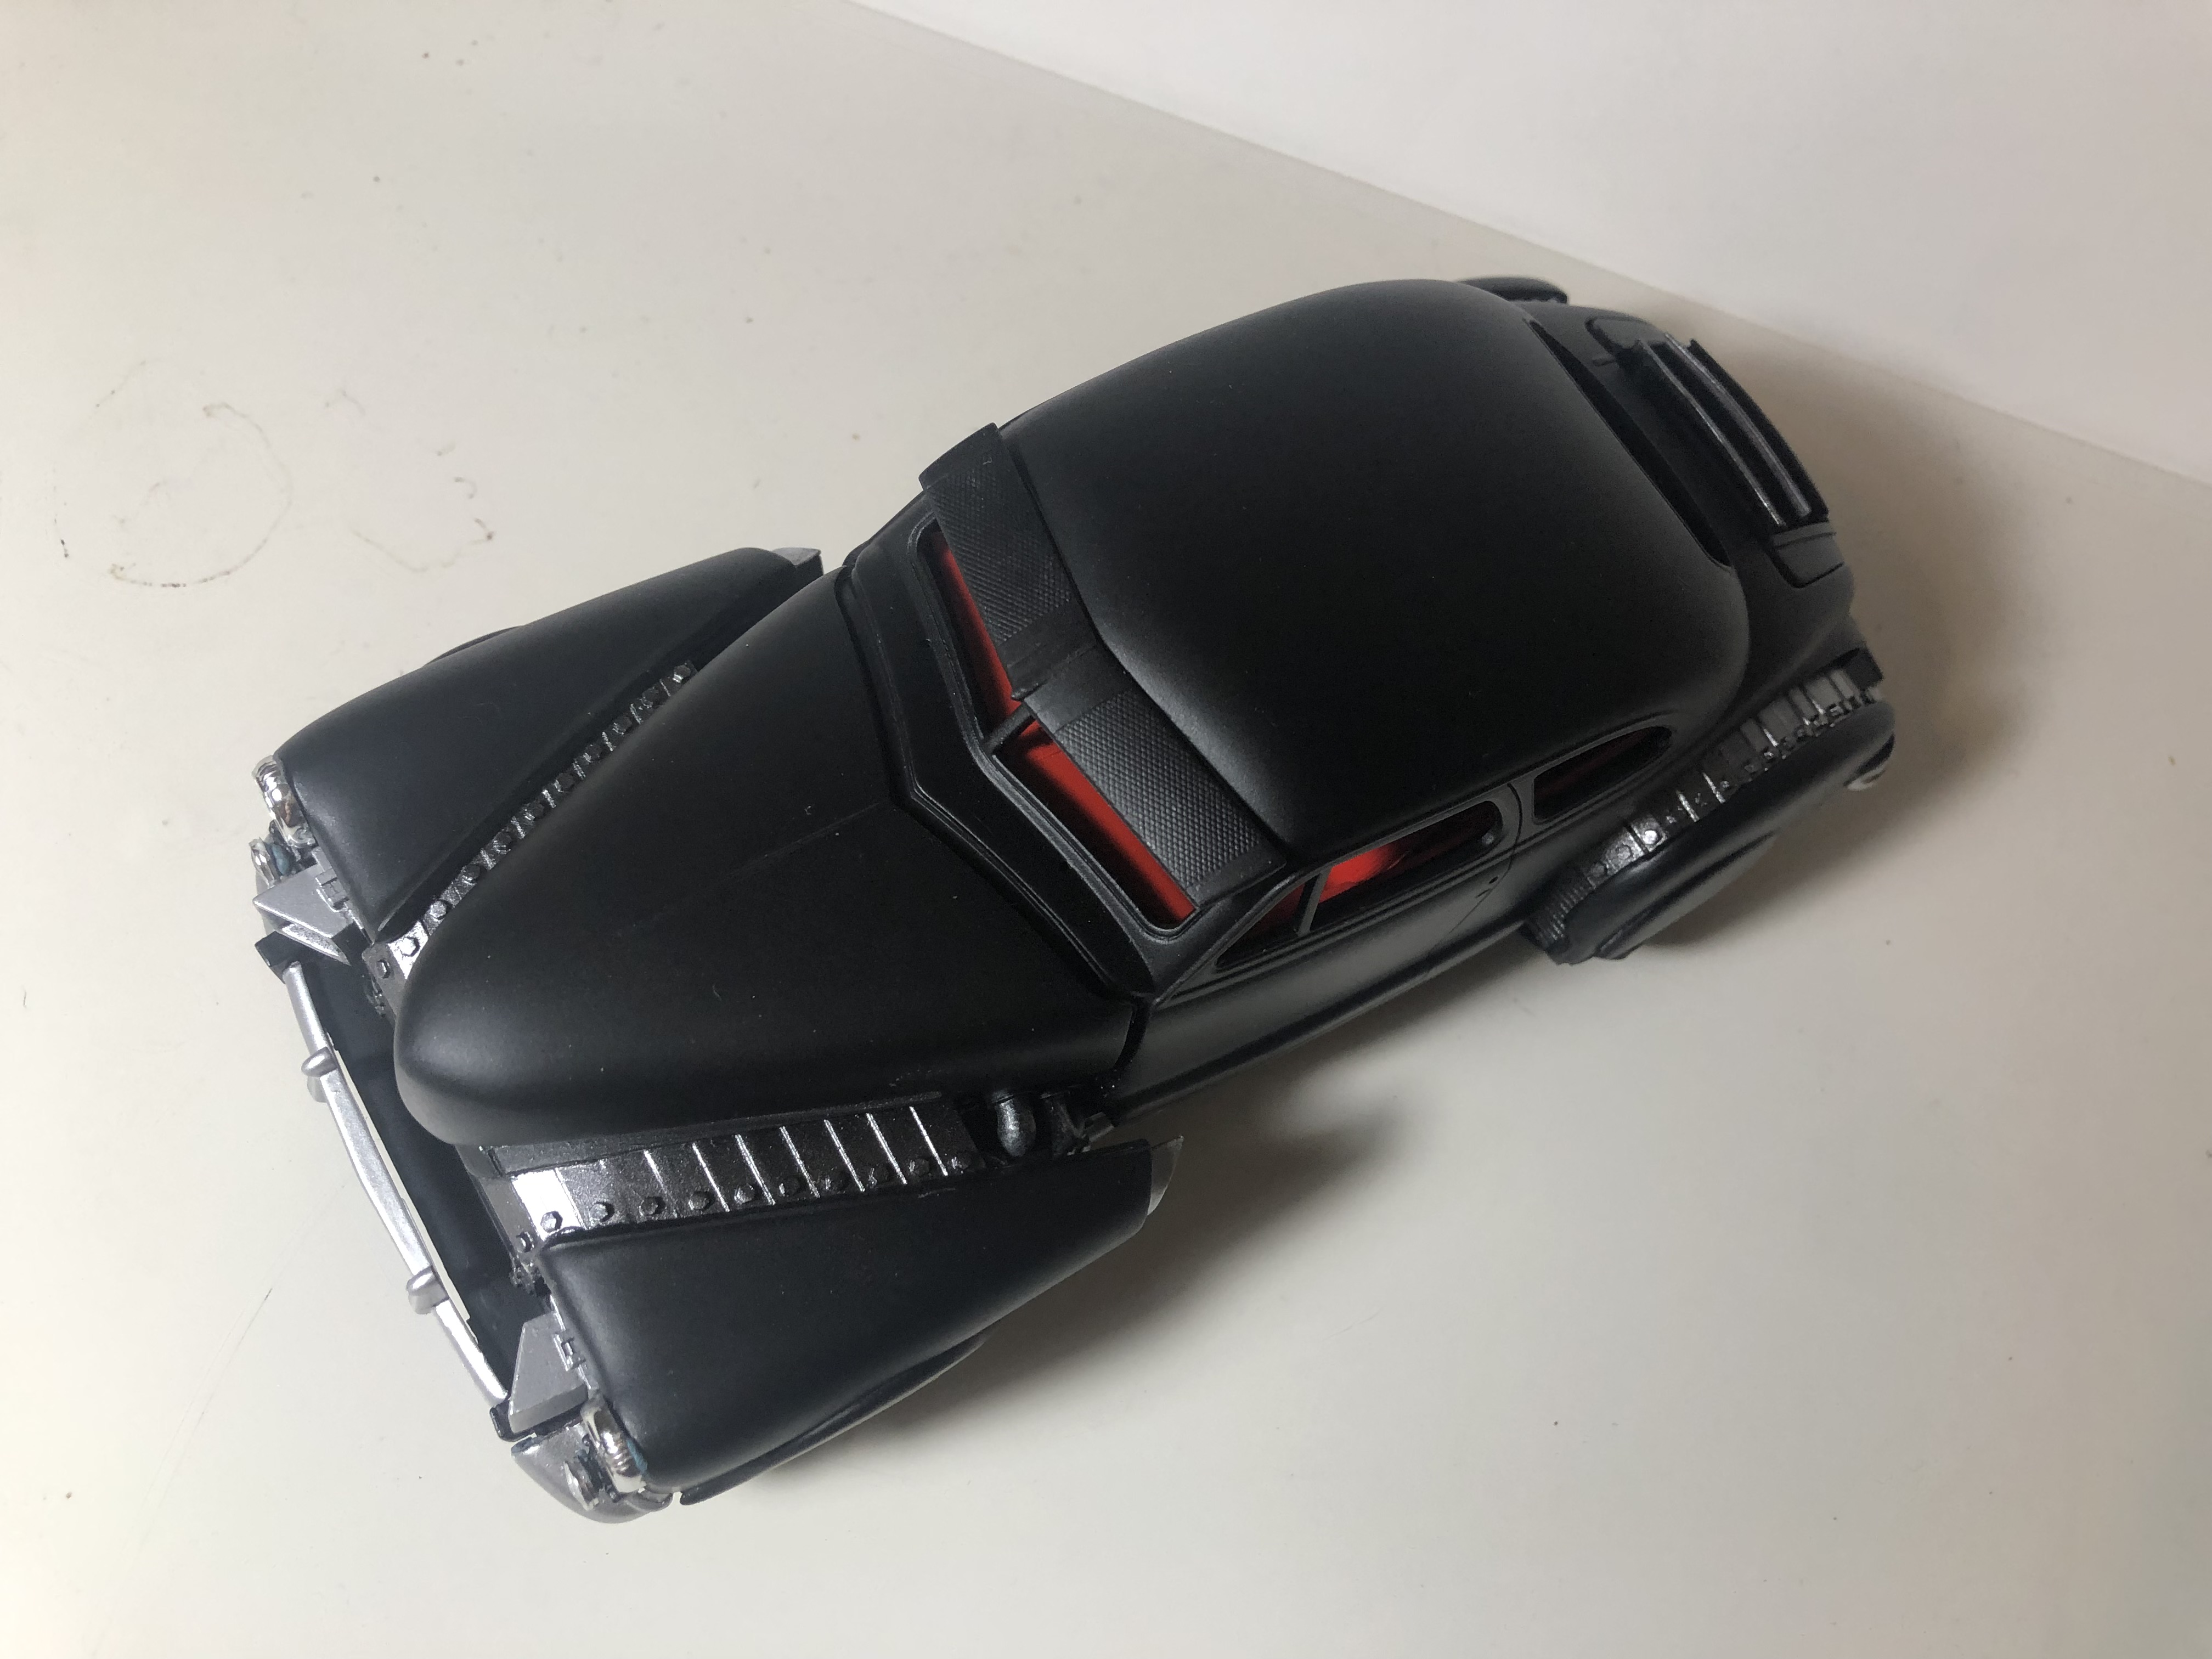
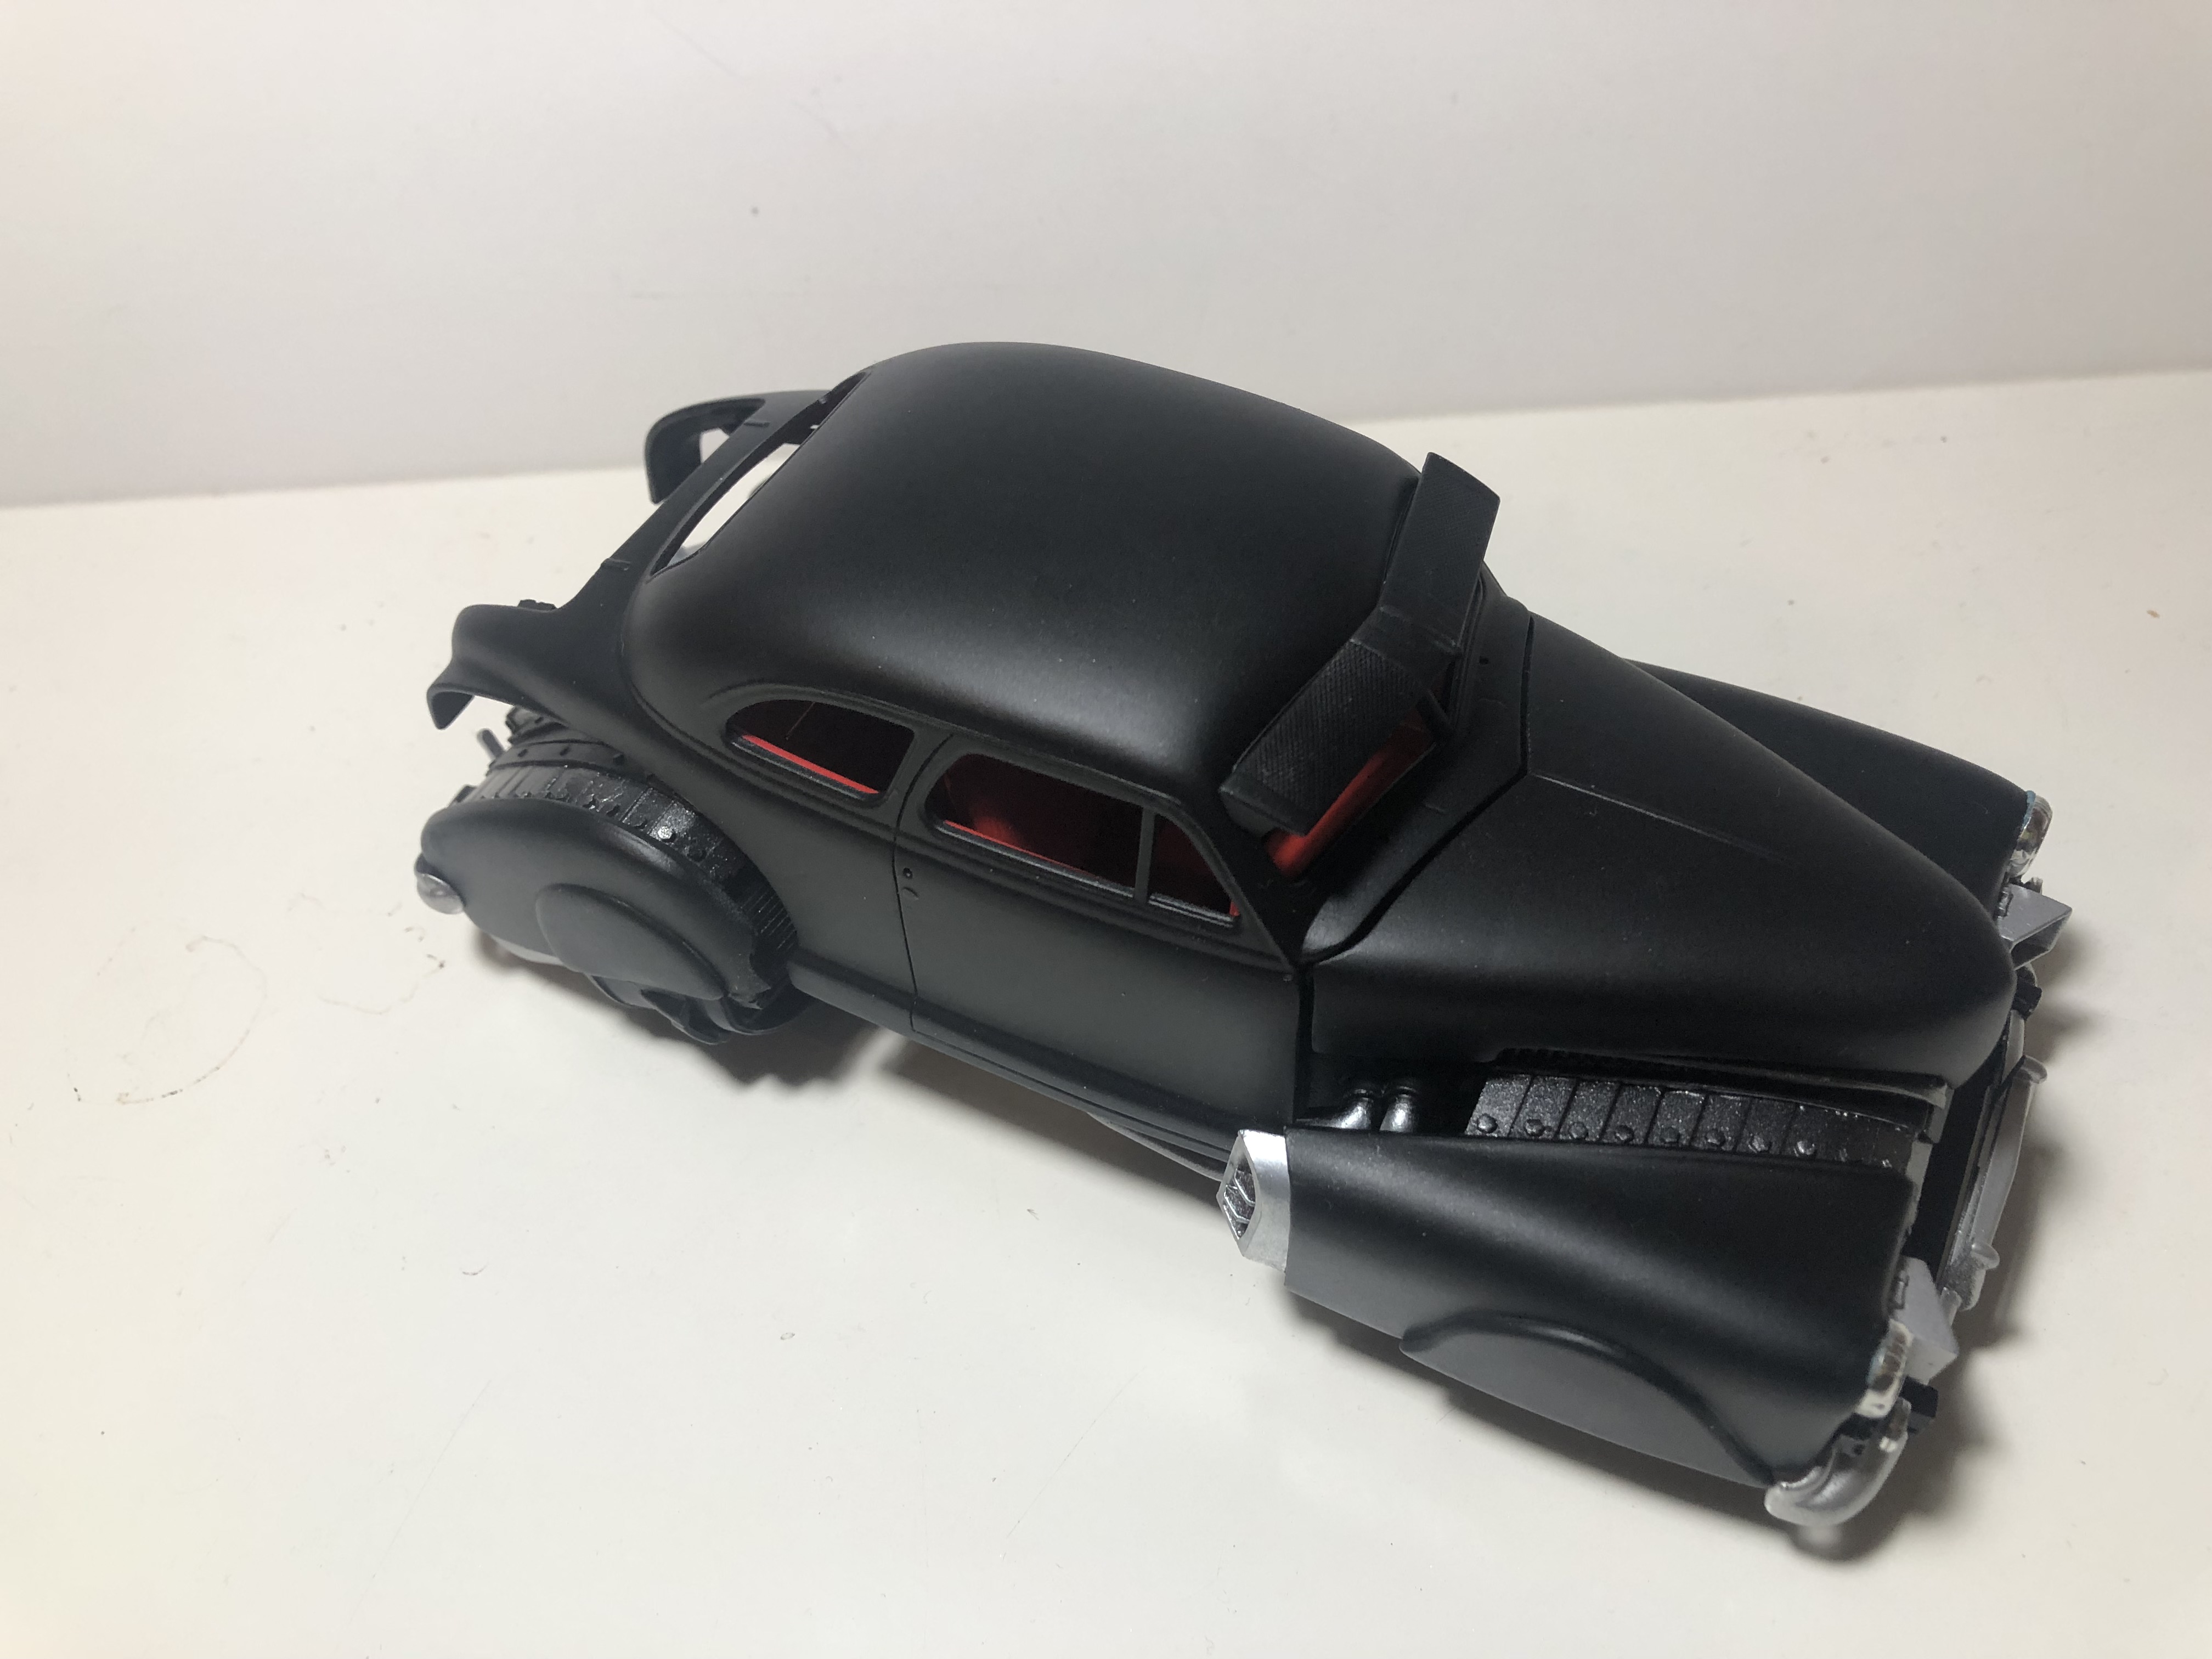
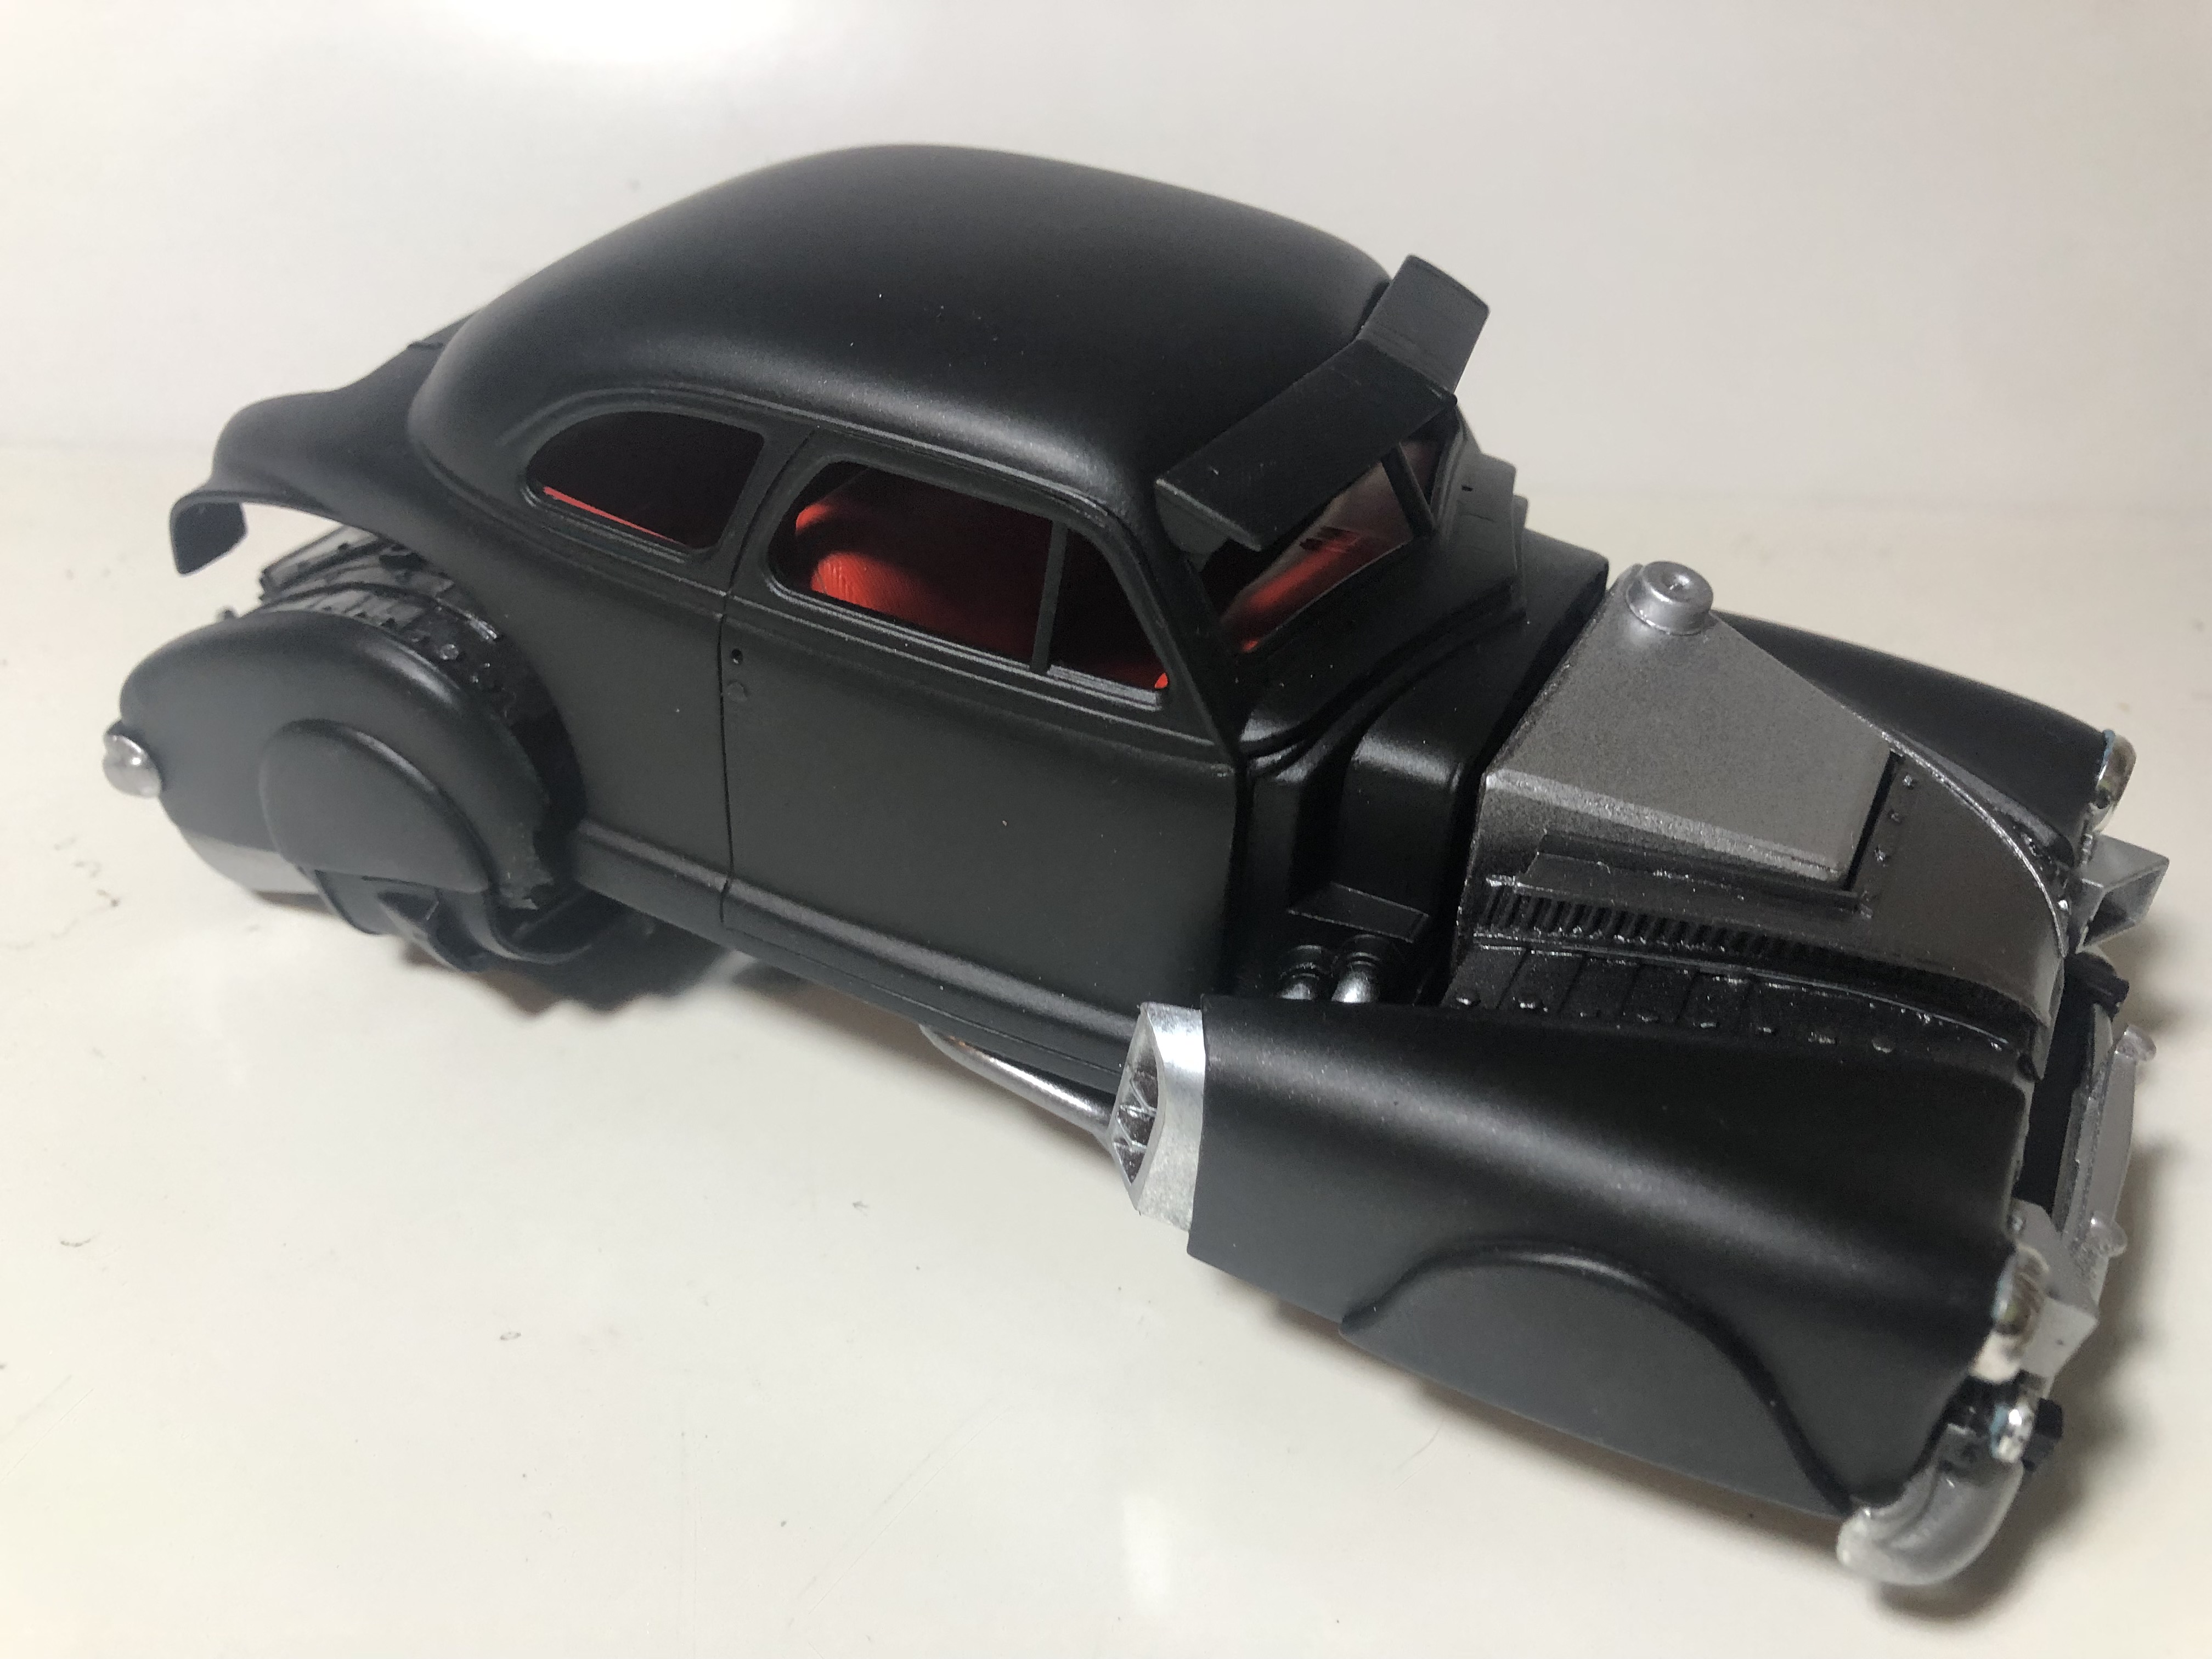
I changed my mind on the color again... On the side of the model box there was a photo of this car in gloss black. It looks like a villain's car, very sinister. I kept toying with the idea of flat black and gunmetal. I decided to give it a try. I also like the idea of a red interior. It's going to be tough for me, but I'll be doing this without any rust and corrosion. I will have to do some kind of wash to bring out the highlights. Still not sure where this is going. I'm toying with the idea of adding blue "heat" highlights to the silver pipes on the undercarriage. I'll need to practice on some spare pieces as I've never attempted it before. This kit has a ton of chrome parts to add. I've dulled them down with satin clear and can't wait to add them to the finished model.
-
I fit the front jet exhaust deflectors inside the front fenders. Not as I had originally planned, but I like the look and will probably stick with it. I'm having issues lining up the hood with the detailed finned piece I added. I need to do a little more work on the hood before it will all fit properly. Here's a good view of some more plumbing lines. The two front intakes now painted body color. I have temporary turn signals placed below the headlights. I think that I'll use Bare-Metal Foil for the chrome trim. I'll need to do some research on weathering metal foil. Haven't used the stuff in years. Under the hood, working on the fuel tank. I just got done removing the intake fan at the rear from the fan shroud. They came molded as a single unit. Thanks for looking!!
-
Nicely done. Great weathering and attention to detail.
-
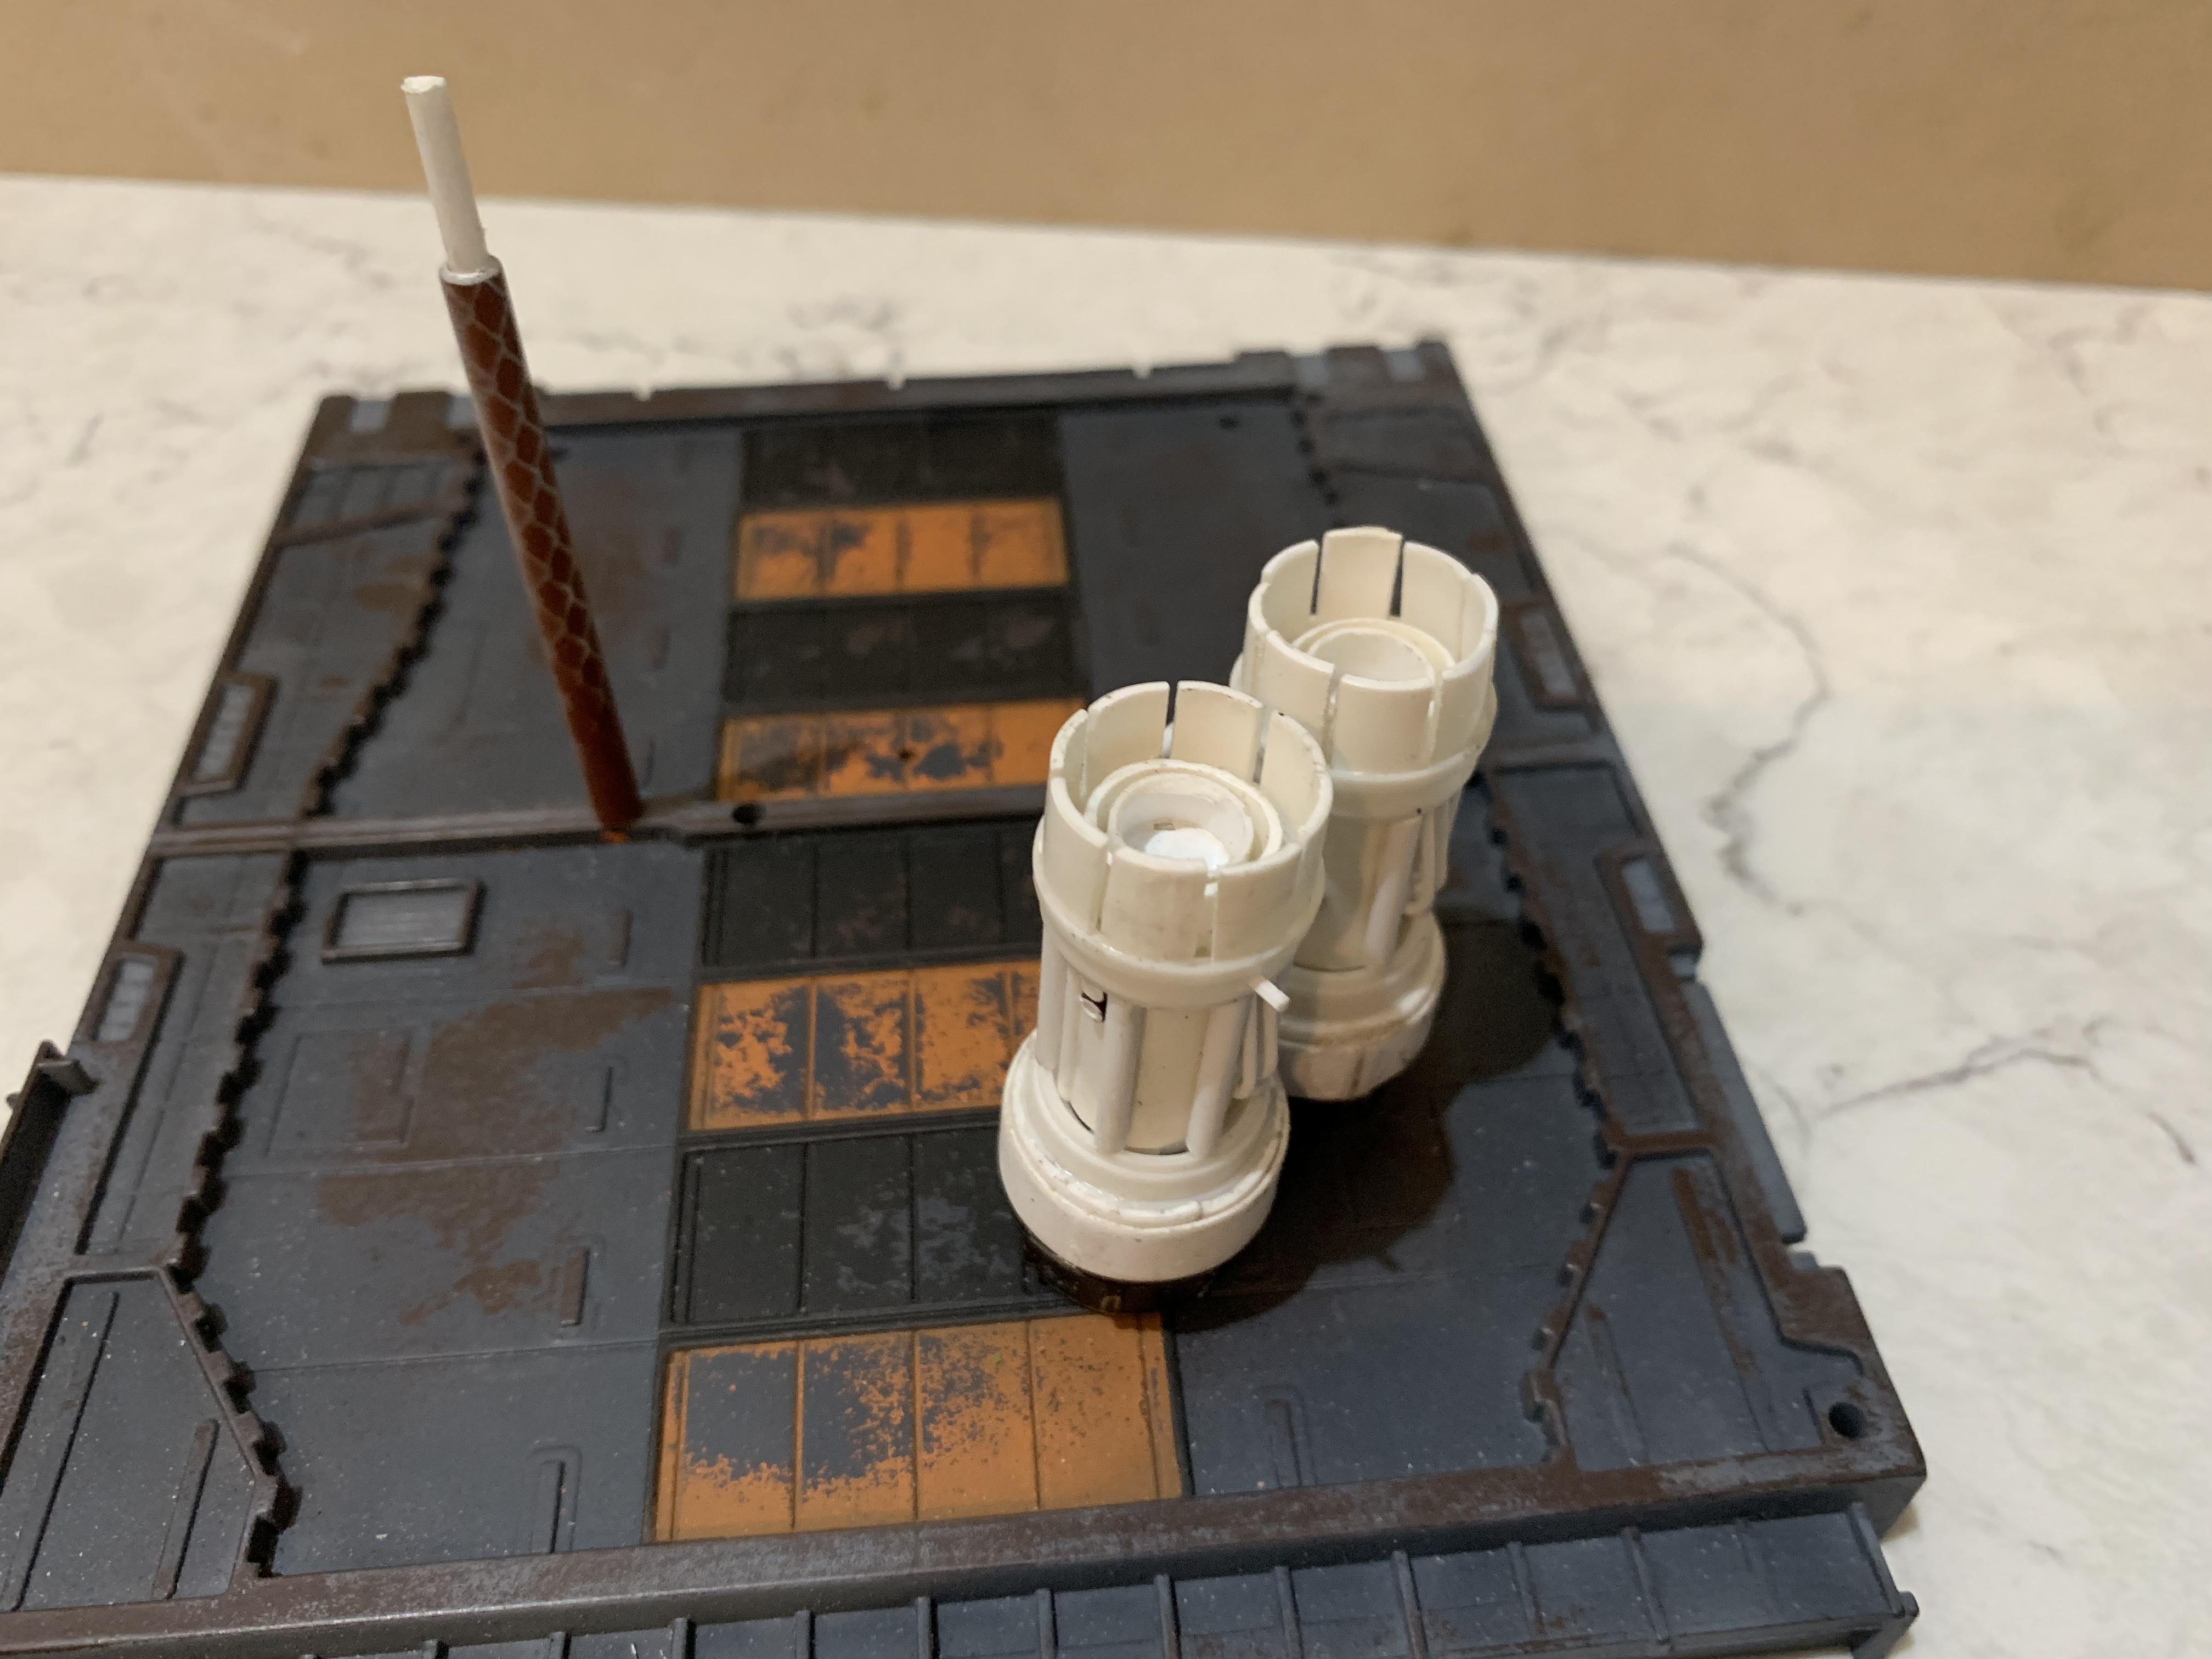
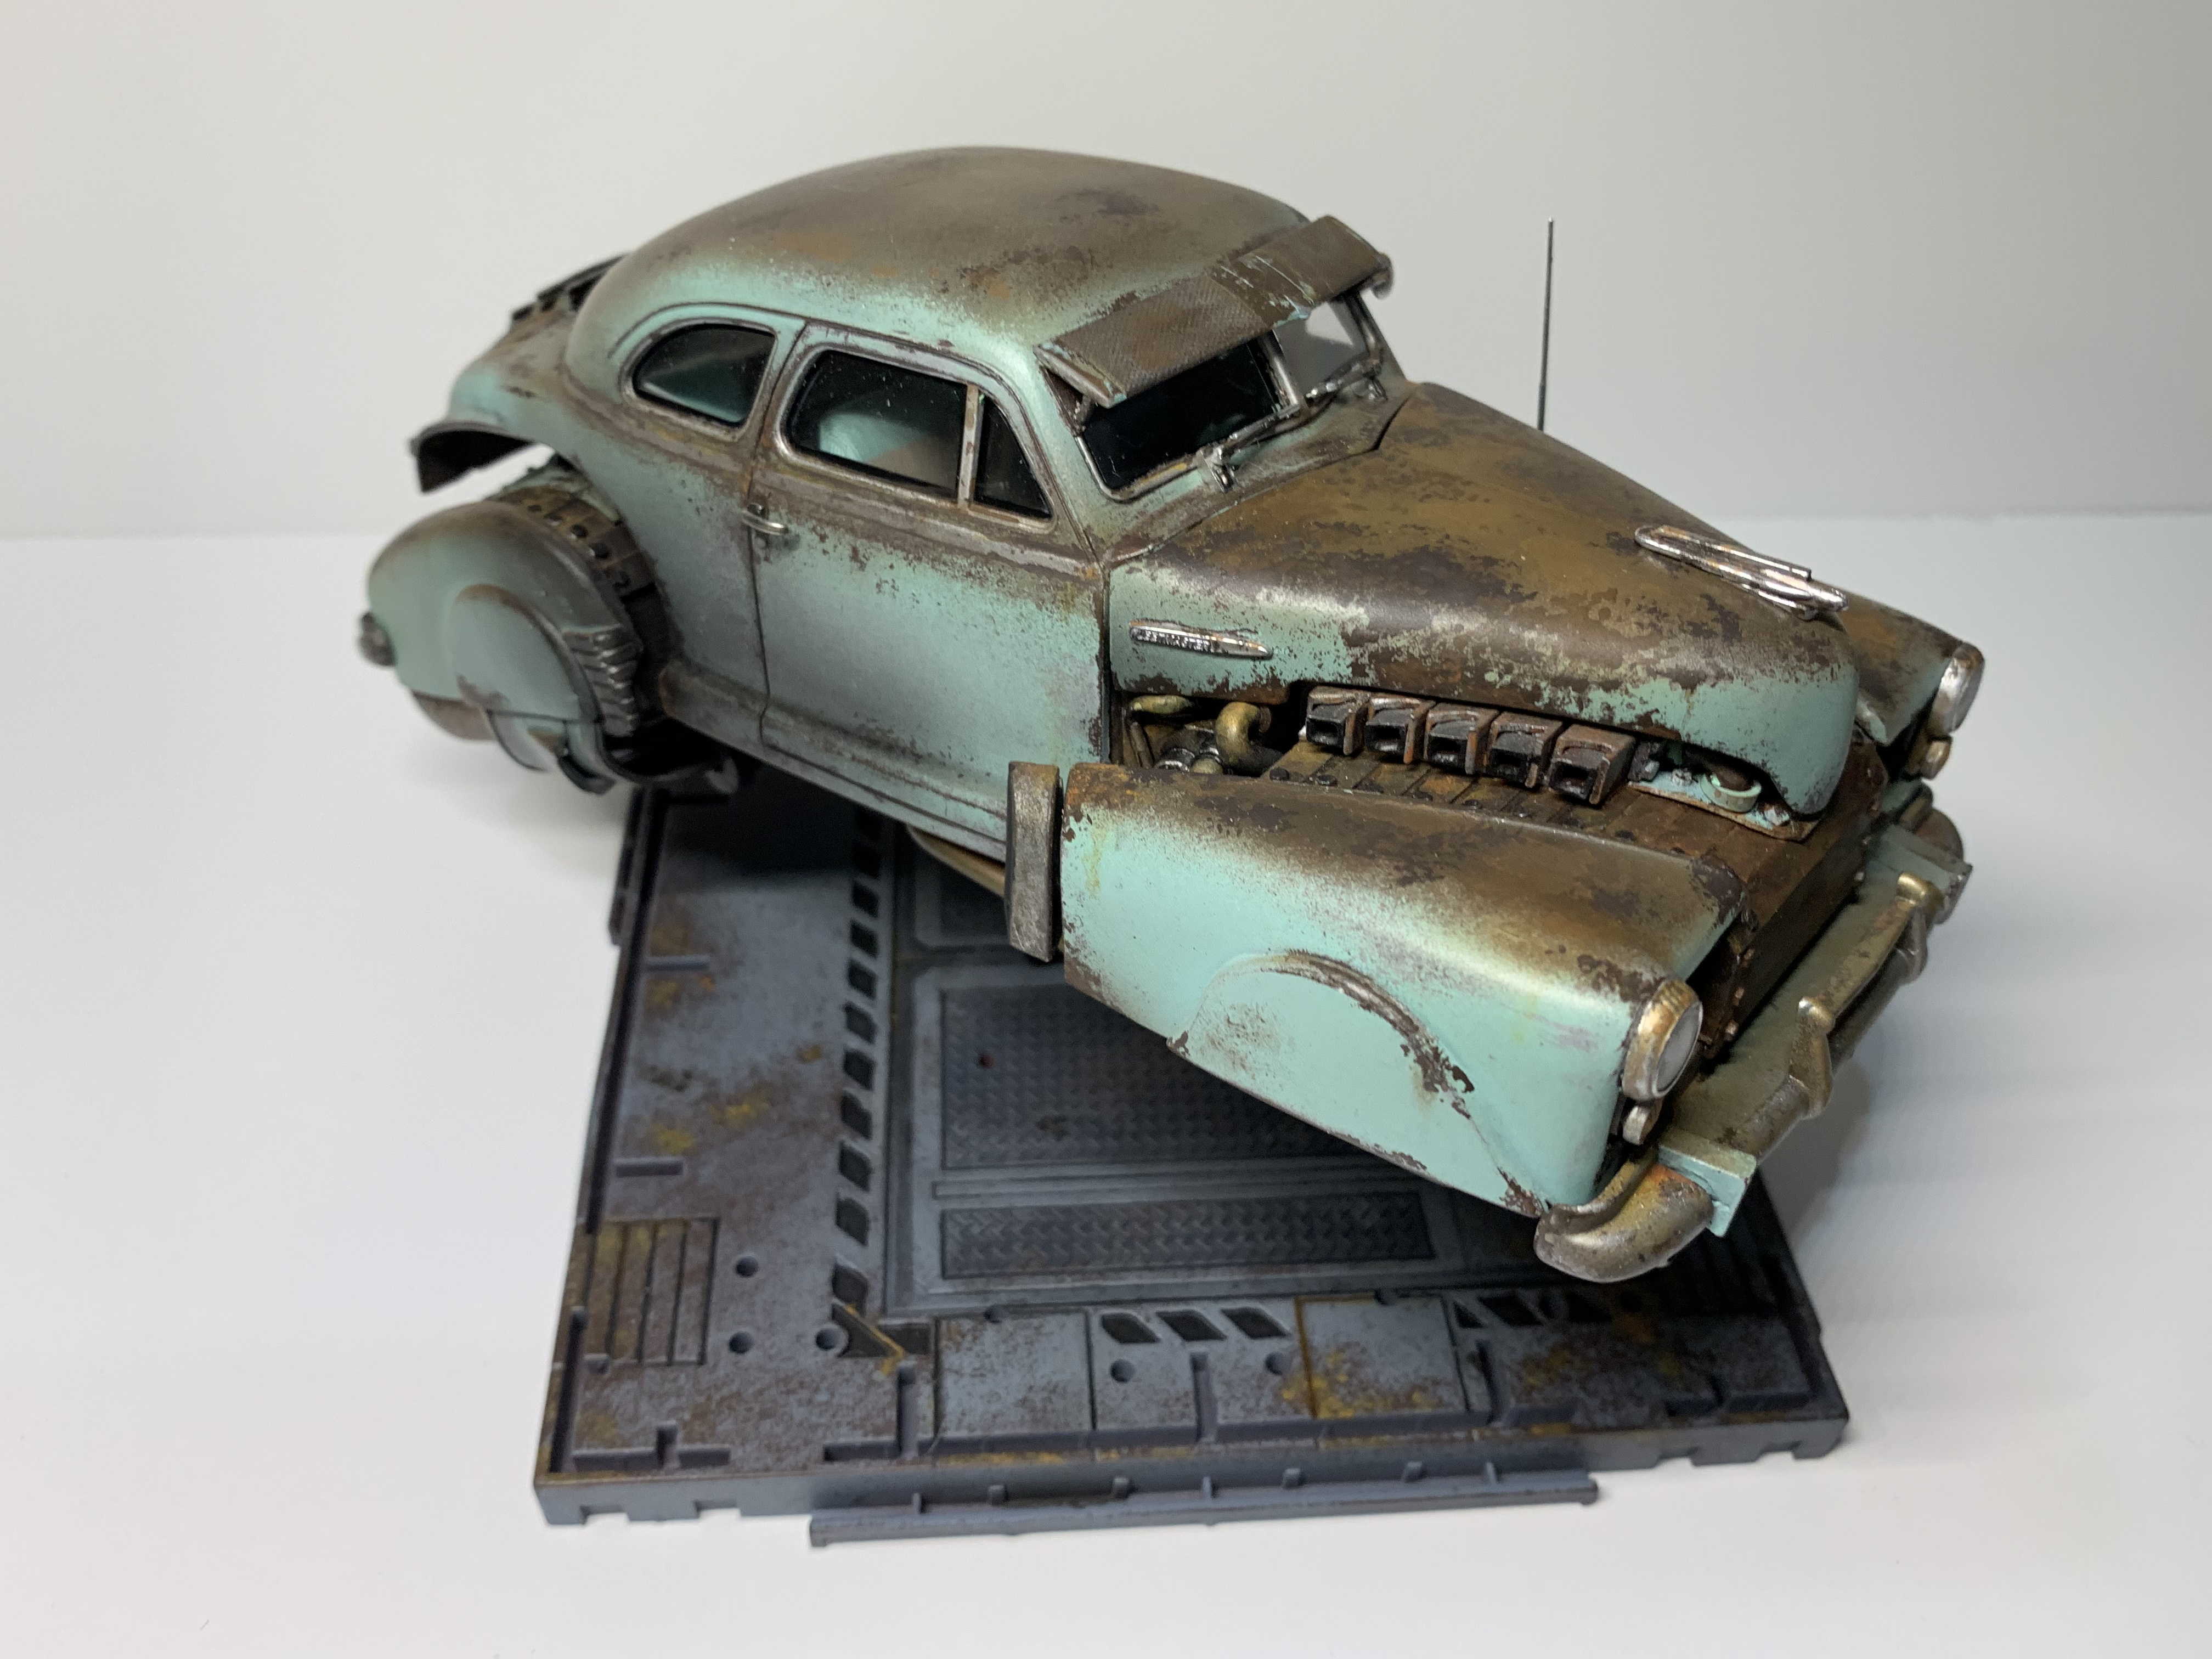
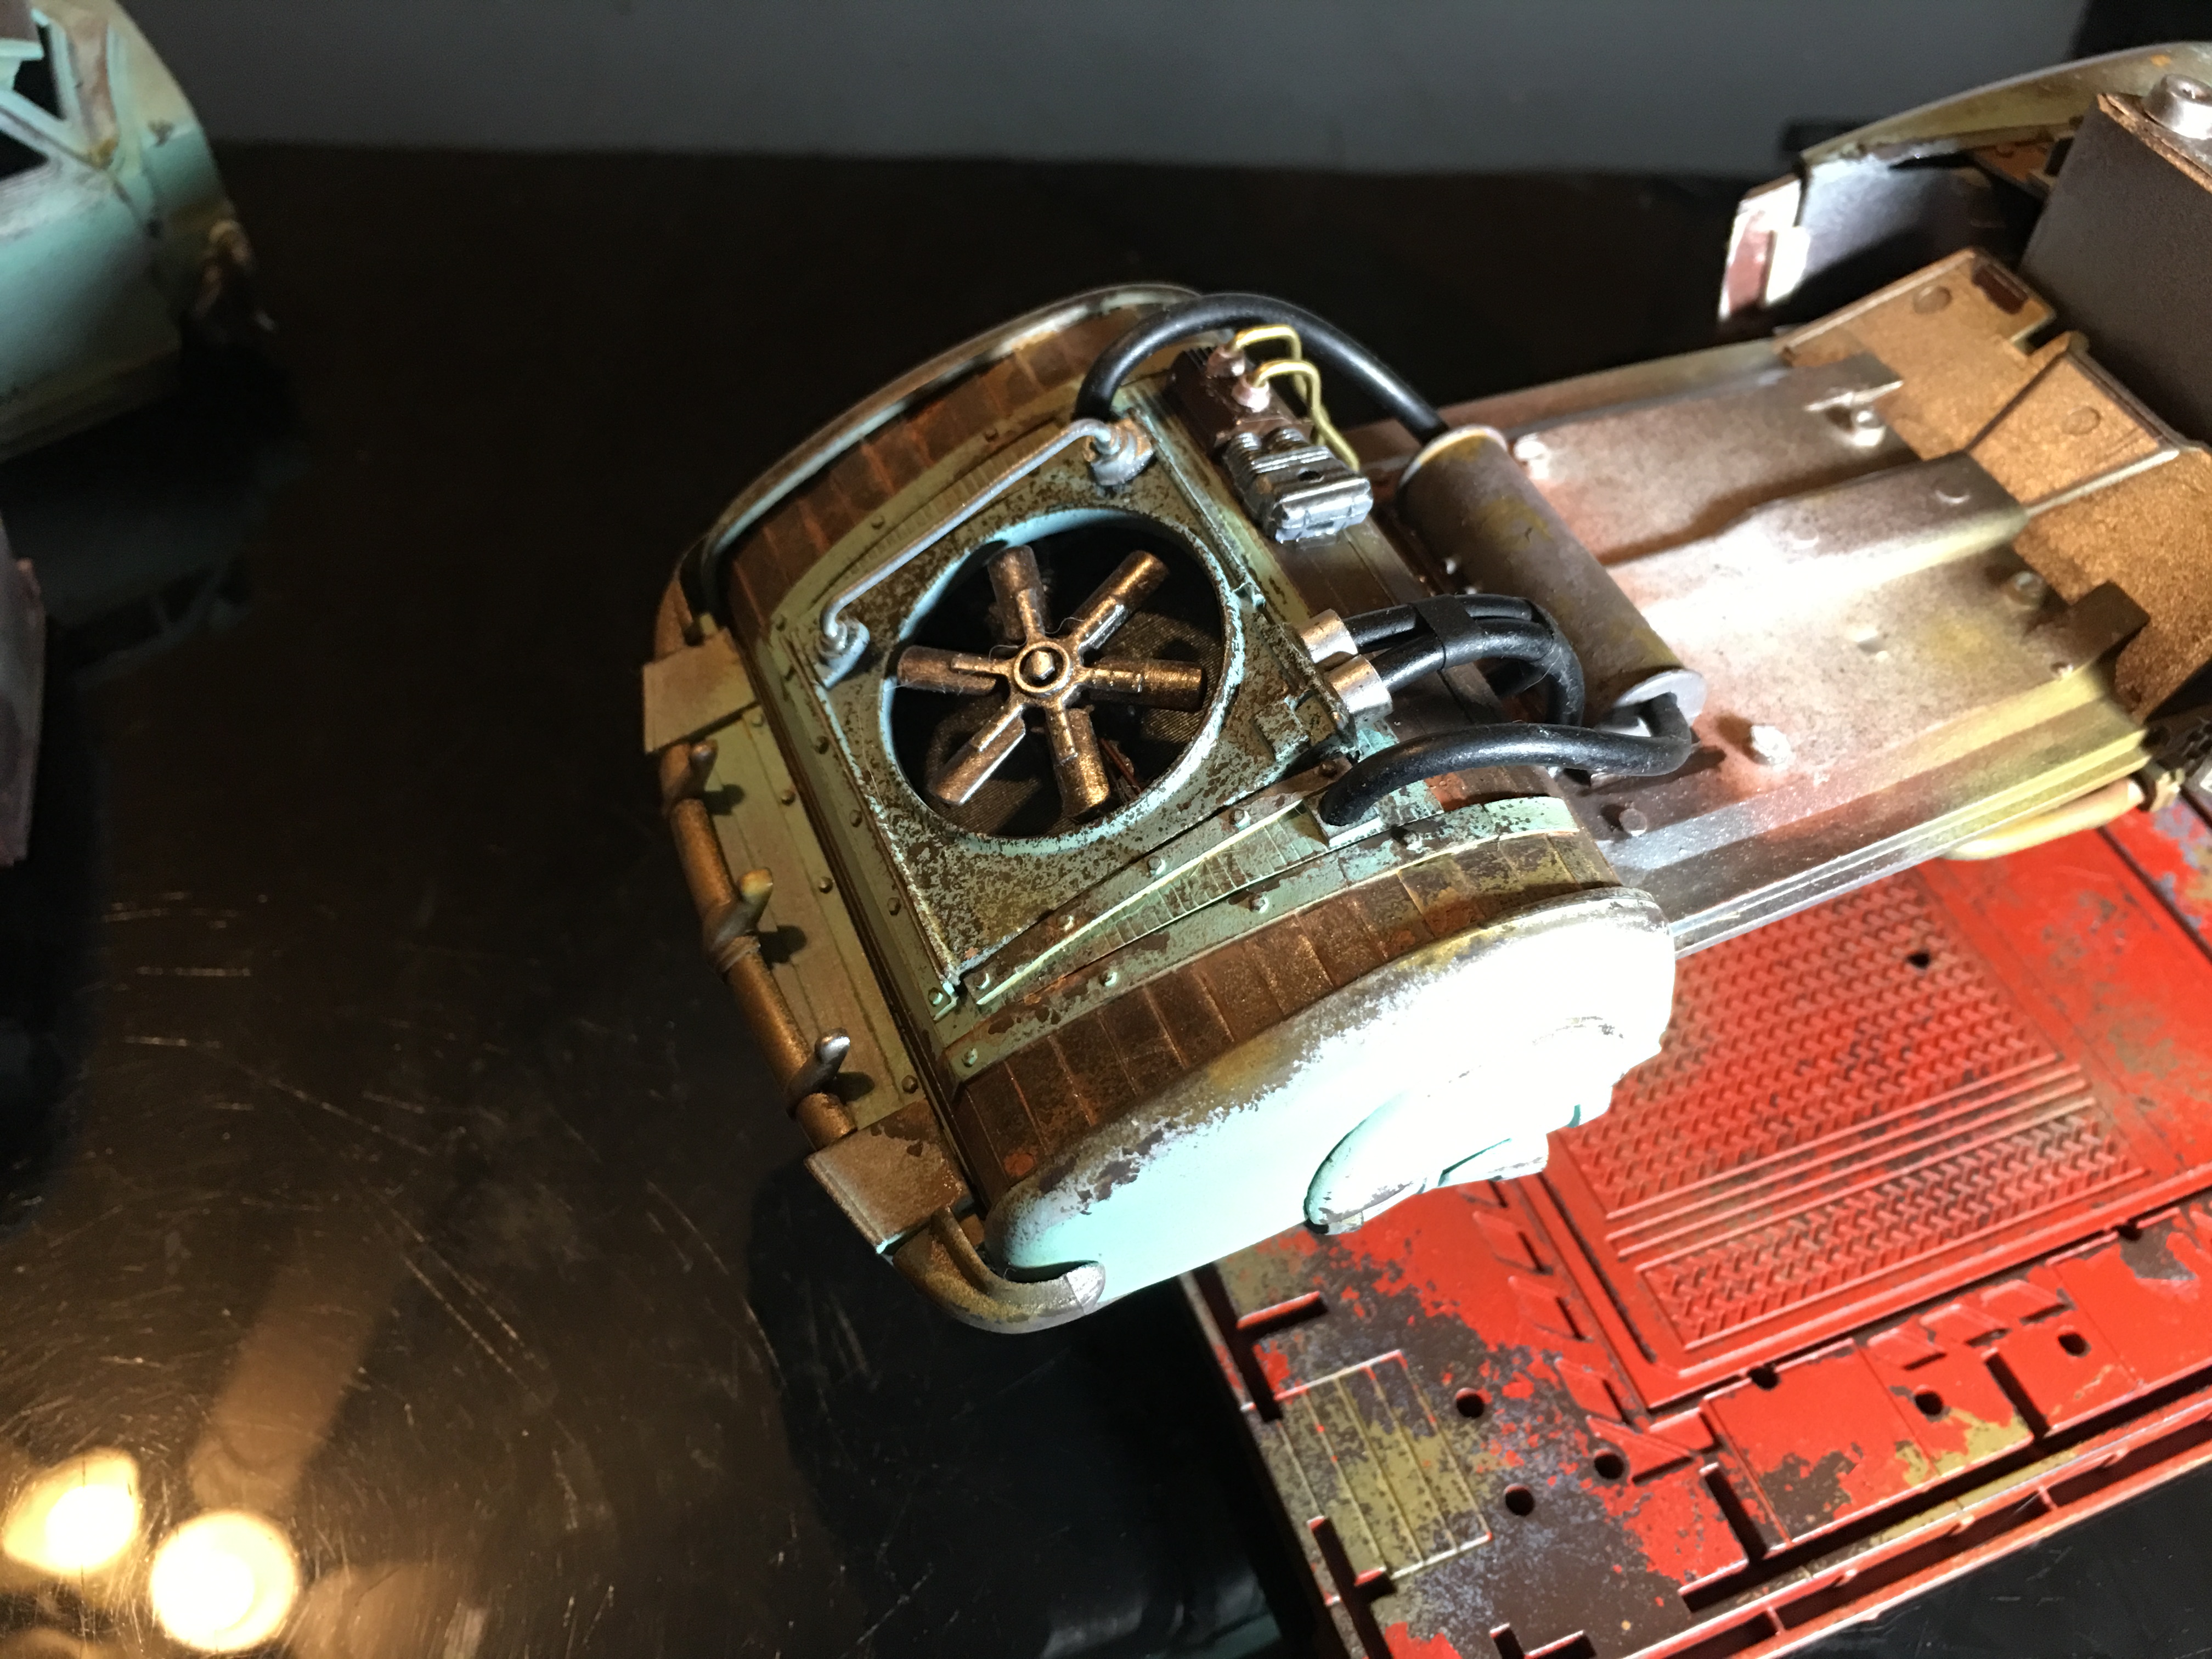
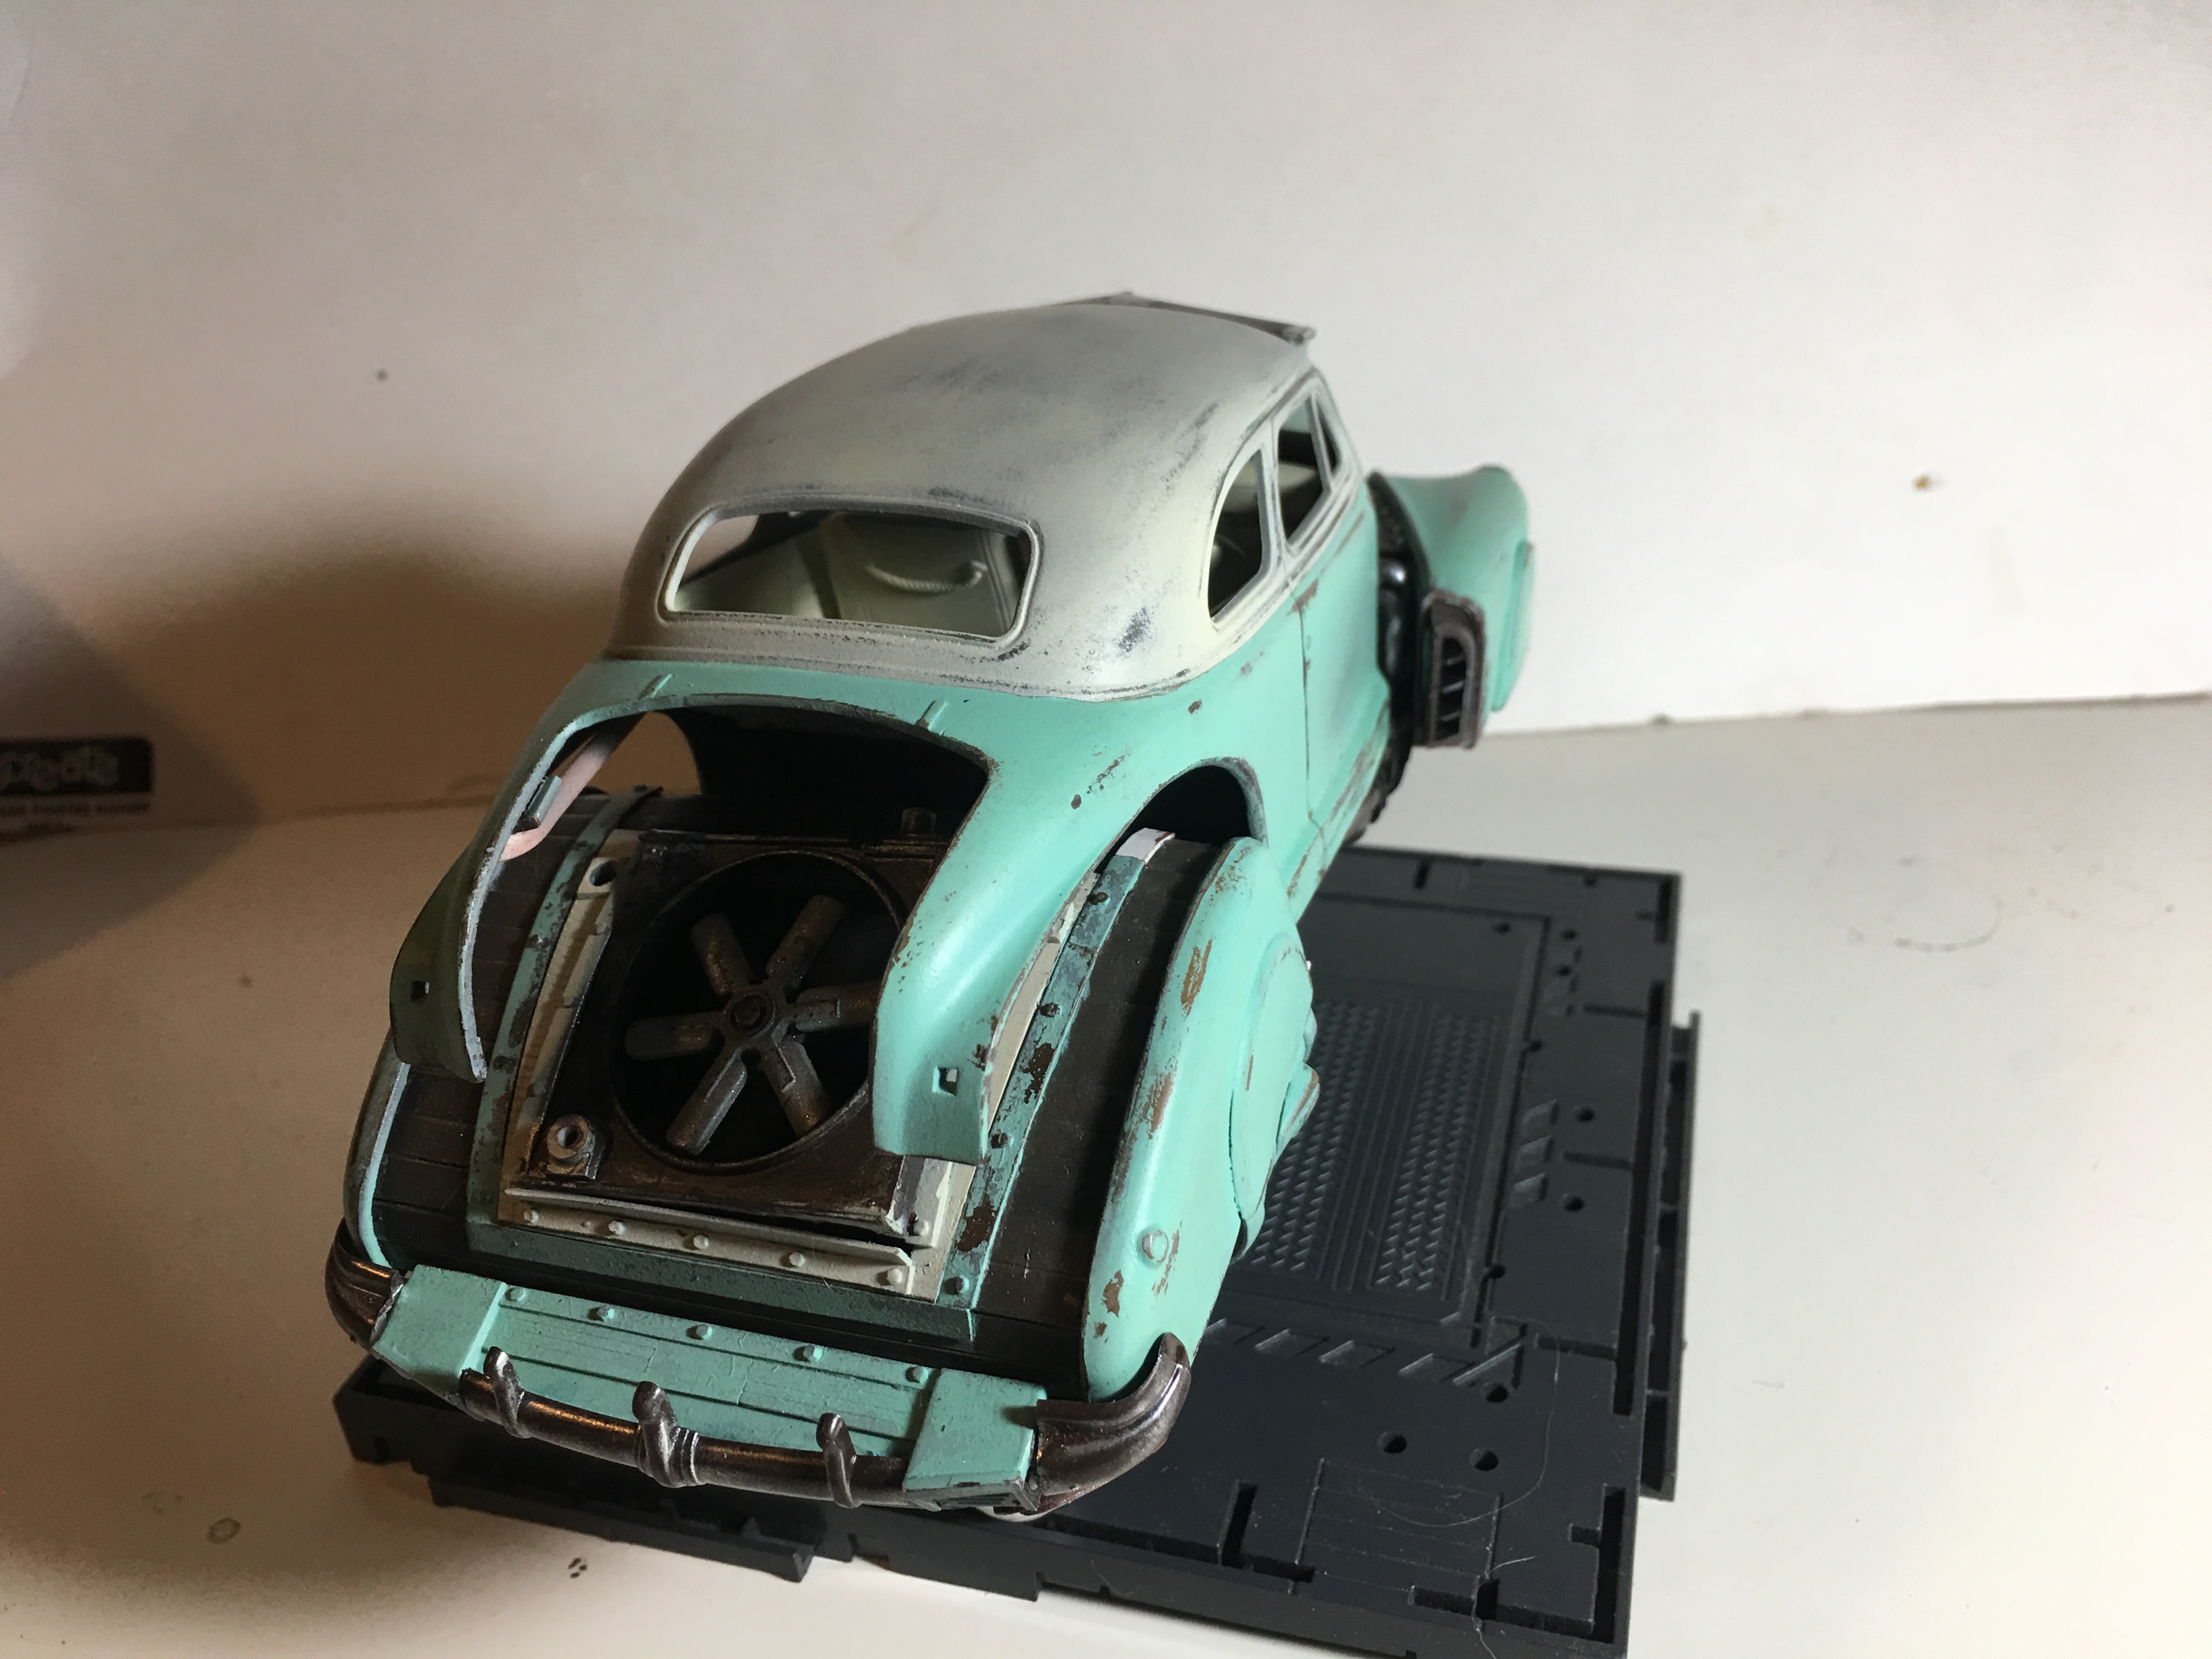
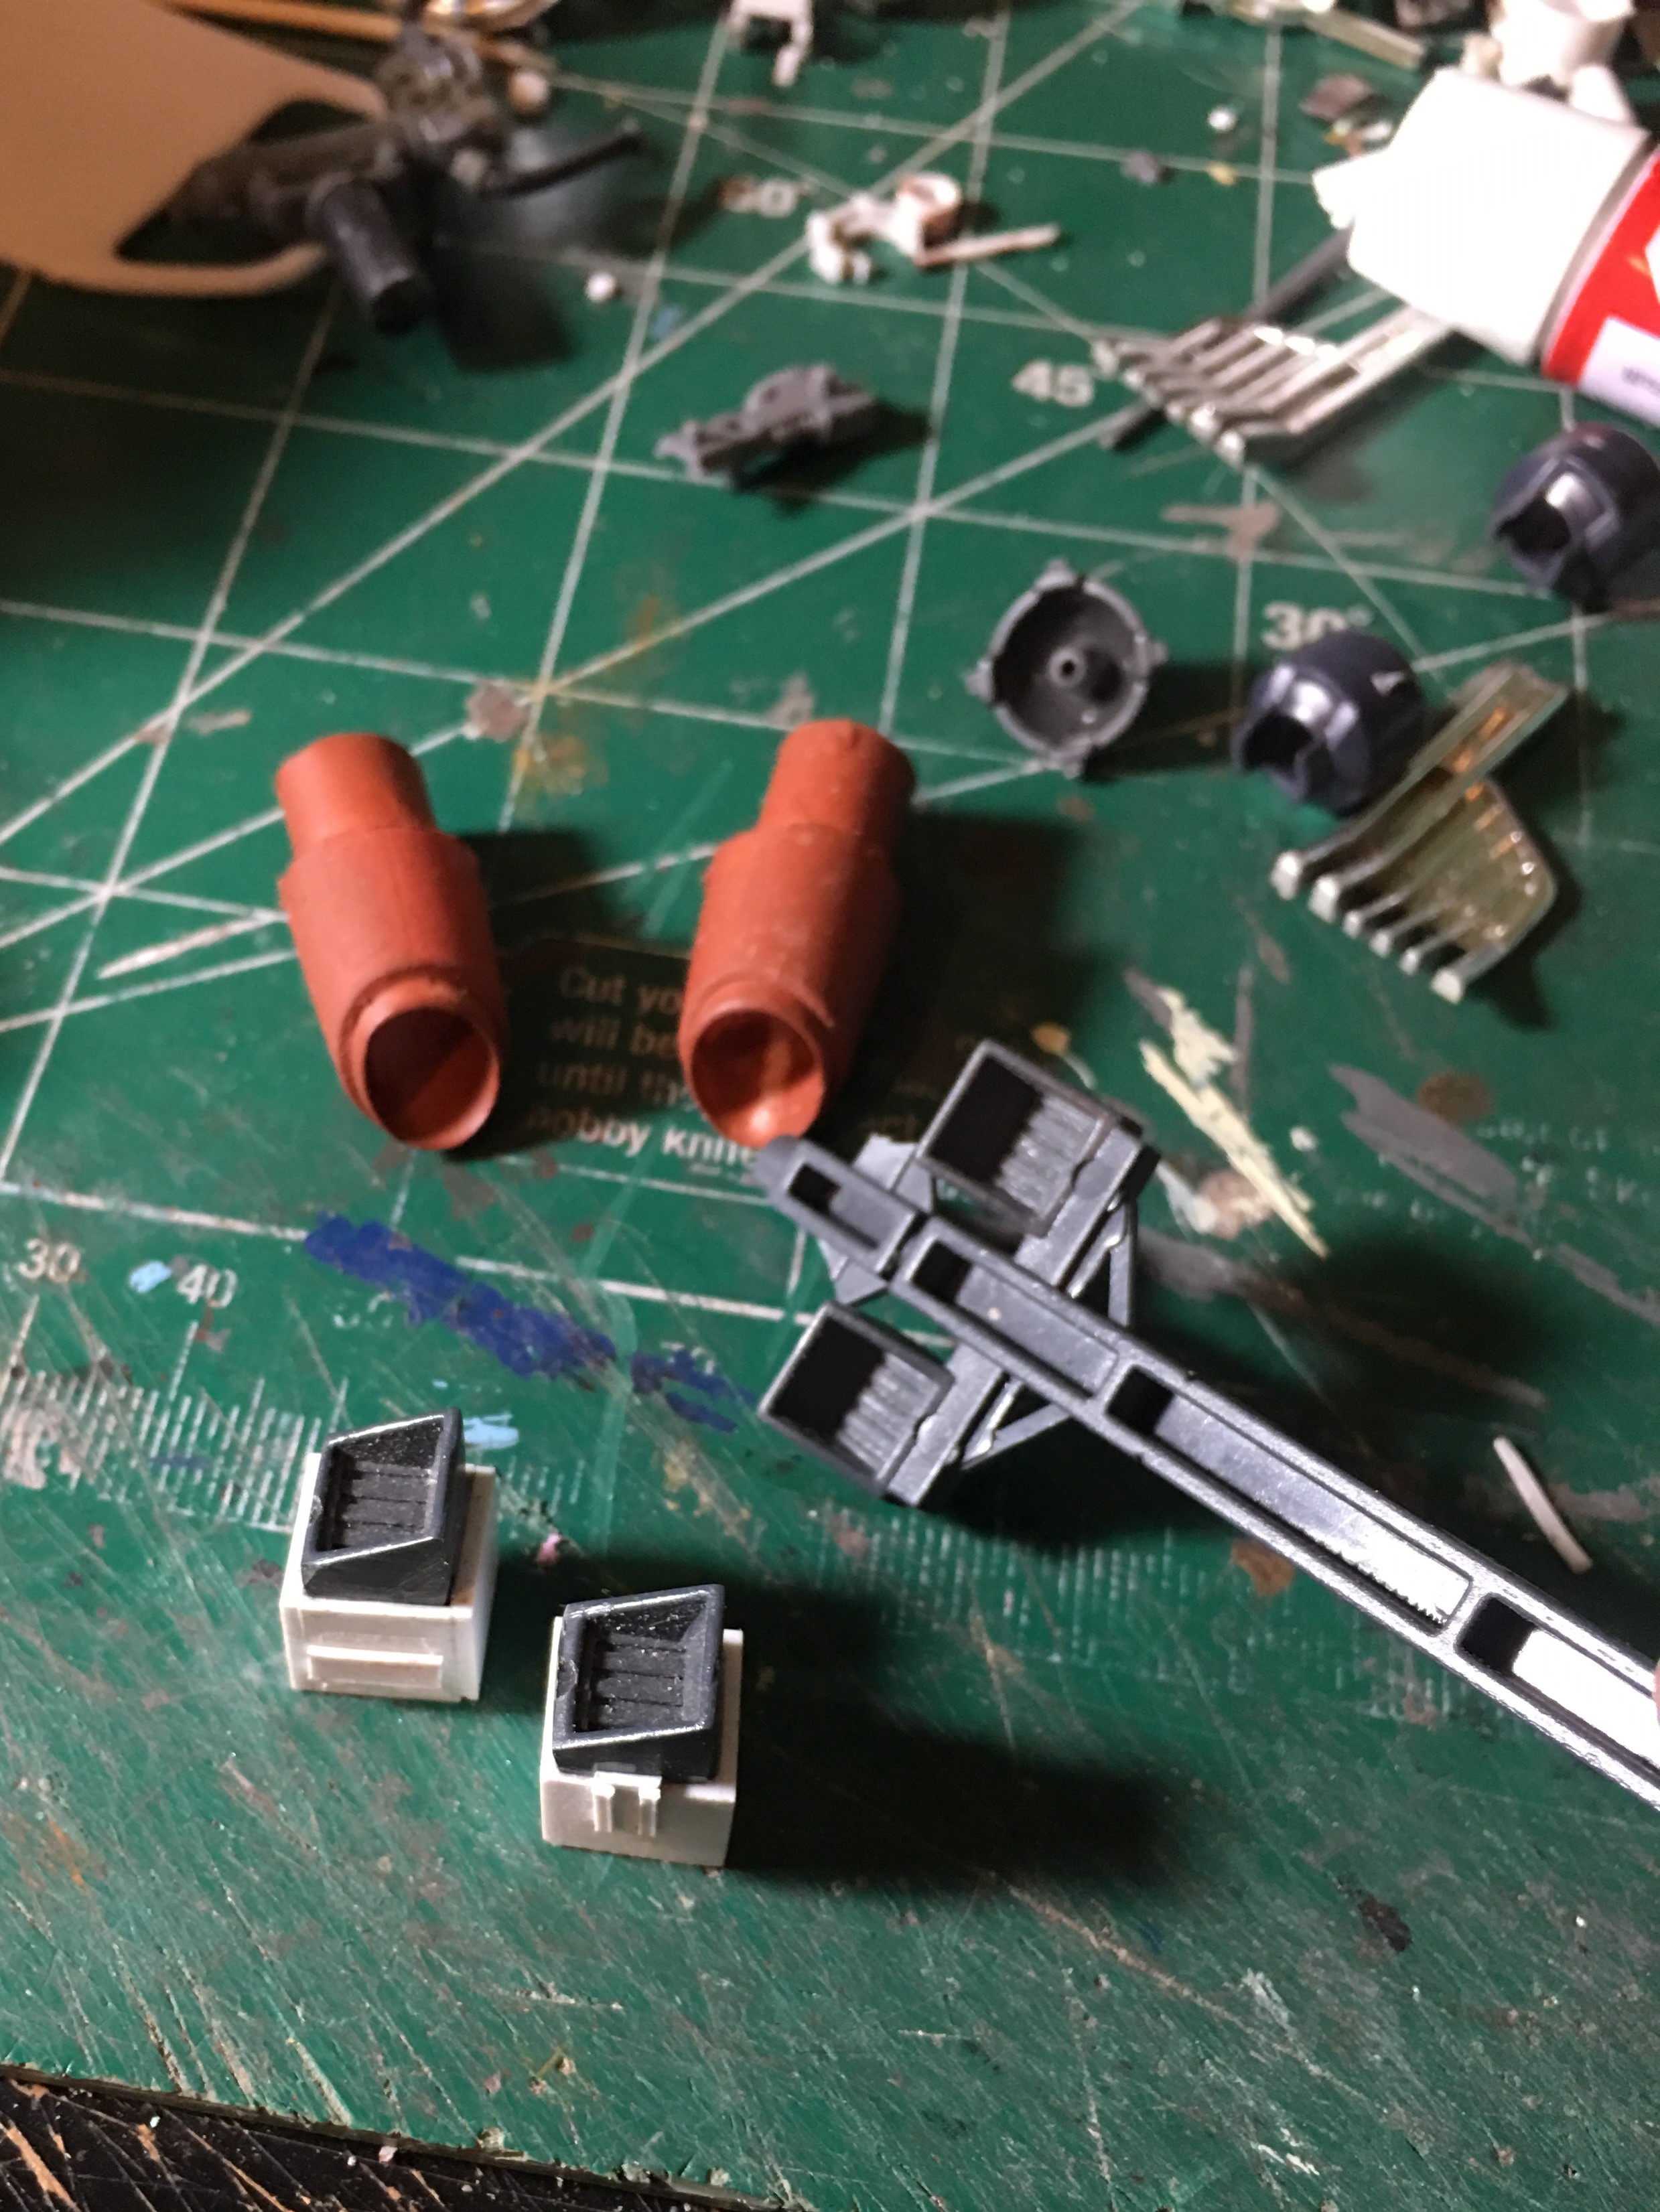
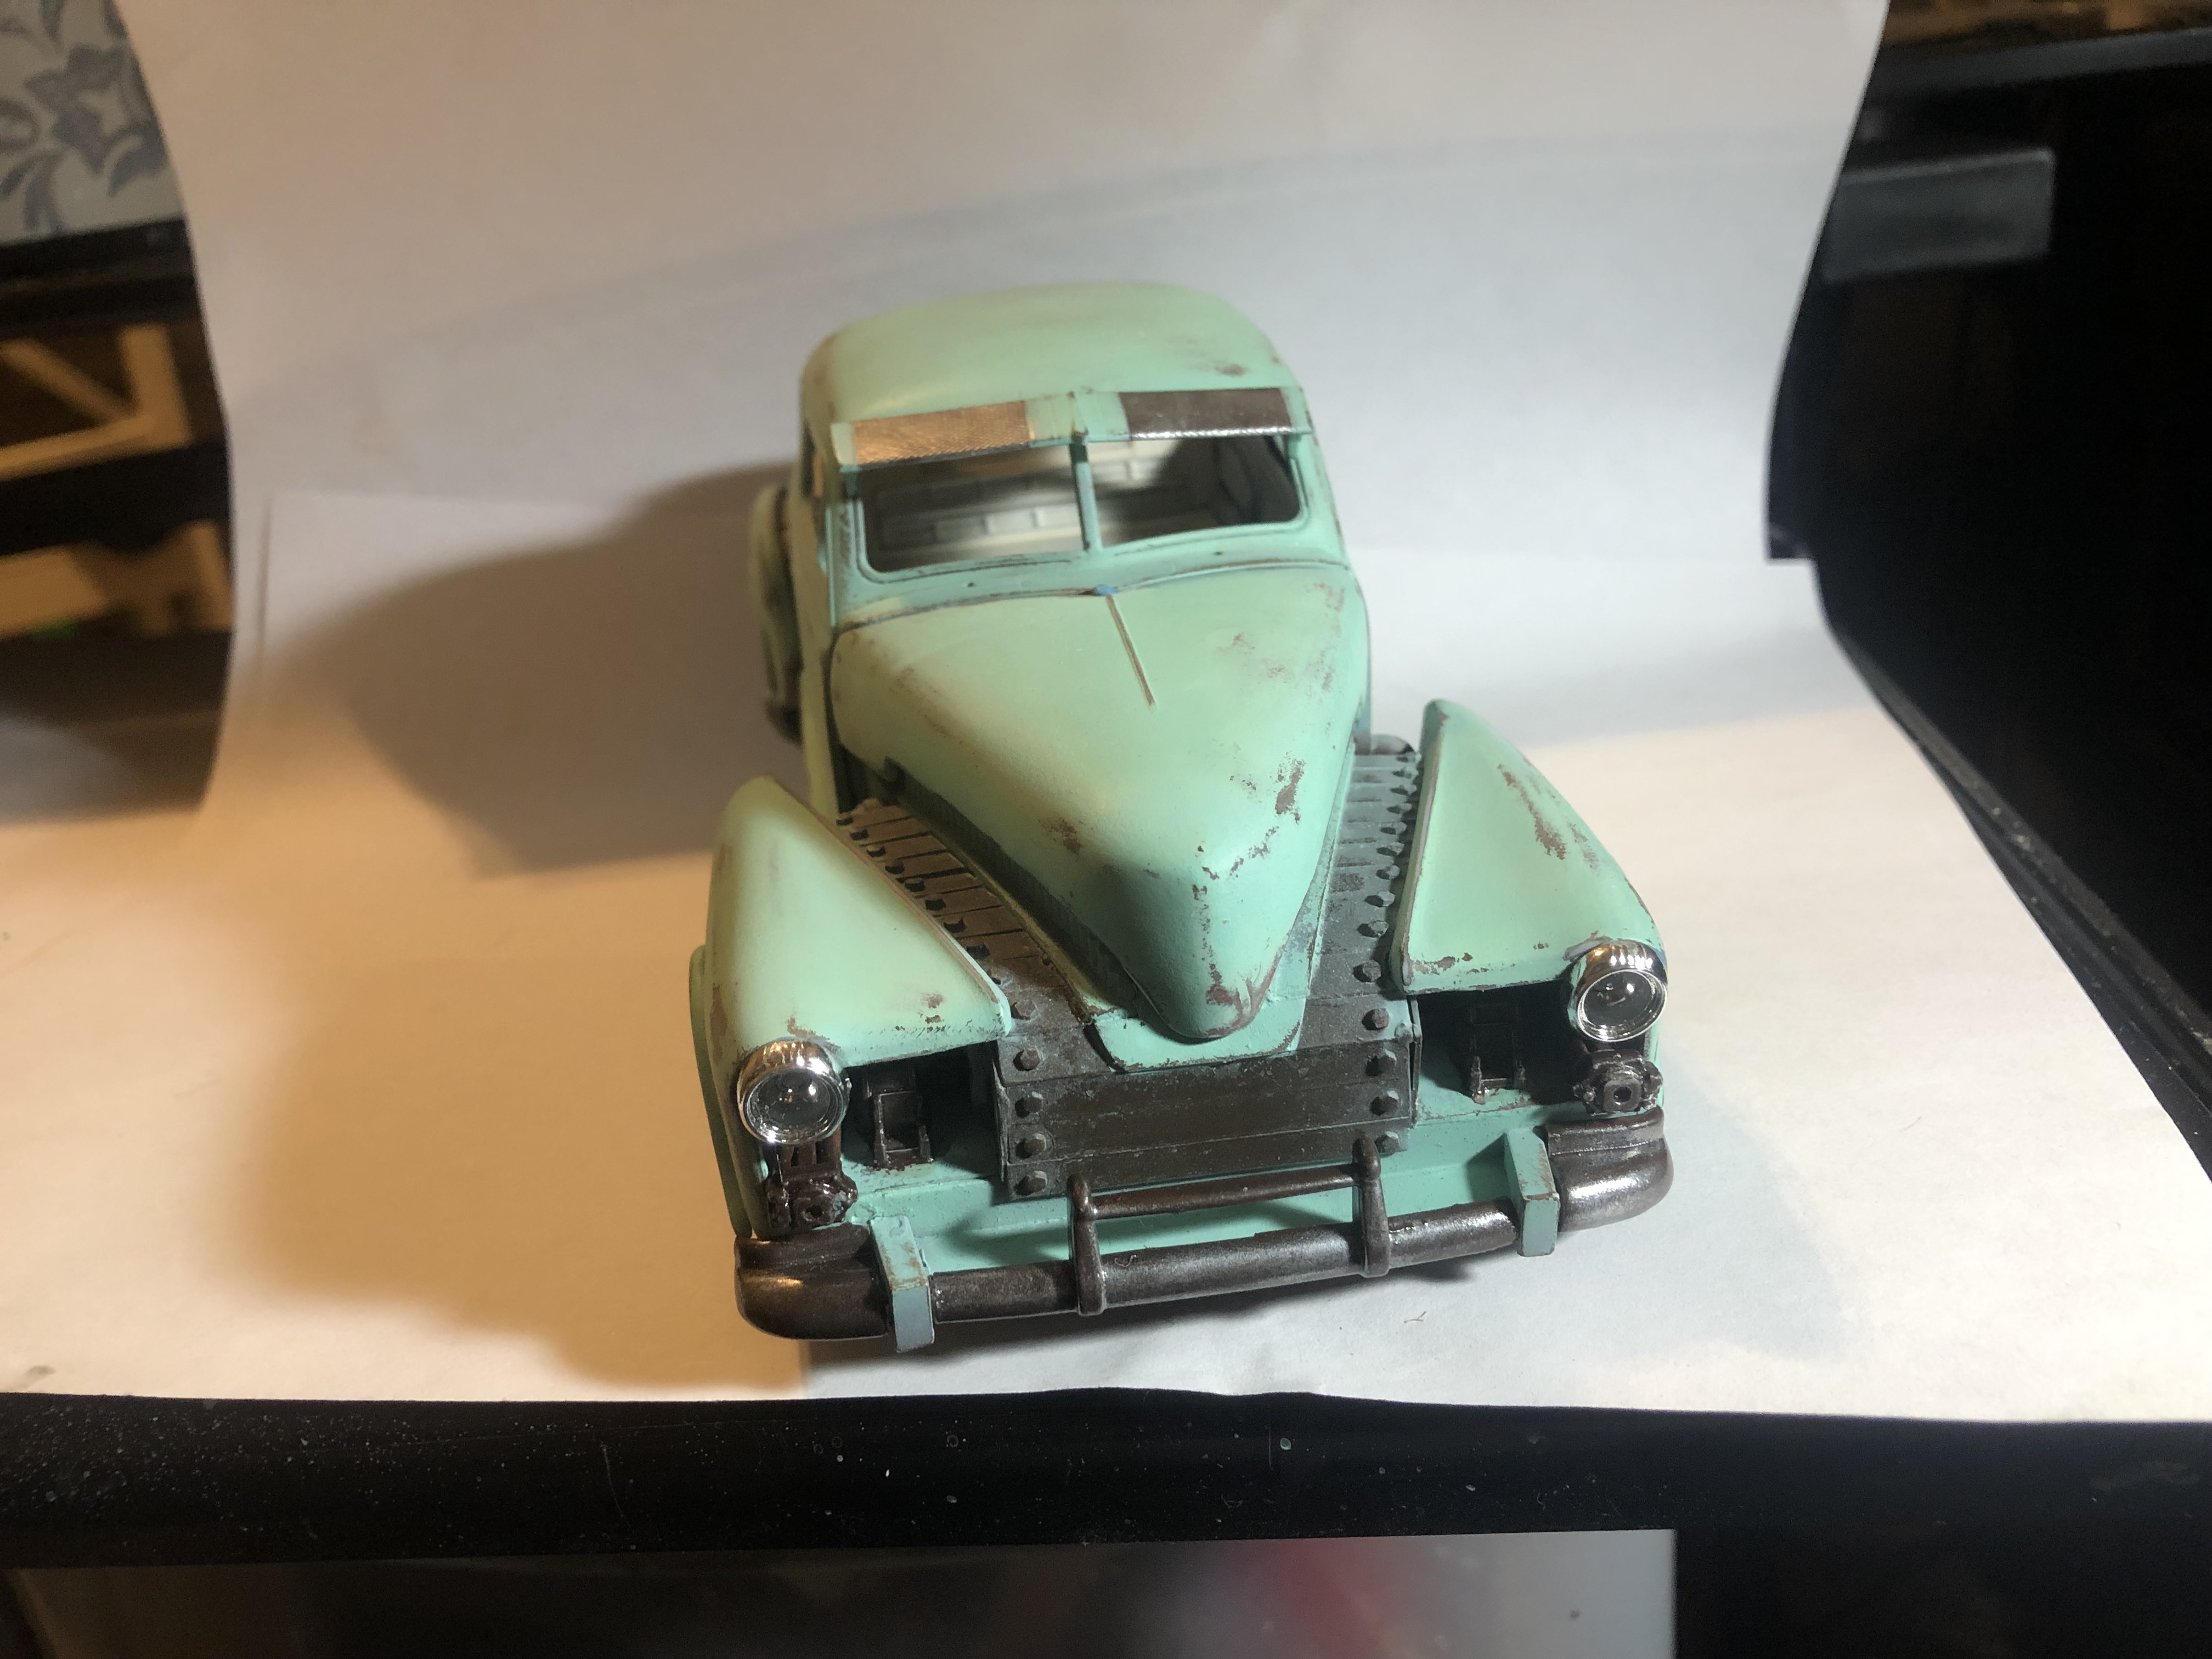
I painted the top and visor with antique white. I love two tones! Sorry Tom! For the intake at the front. I cut out most of the original grill as shown in the early photo below. I wanted a large intake area to feed the front side turbines. I made a experimental grill out of some thin styrene. I wanted to show that the center design of the slats would continue down the grill. It also splits the grill into a right side and left side separate intake. I liked this idea, I just didn't like the look of the grill. So instead, I made the slats continue down, separating the two intakes. I placed some Gundam mechanical looking parts into the cavities for detail. Still not happy........ I decided to go extreme. I made 2 versions of different intakes. One round and one square. Here's the round intakes. I thought for sure, these were going to be the better of the two. Here's the square intakes. They fit the cavity better and they look like they belong. I'll be using these. I am going to paint the front angled sticking out part the same as the body color. I attached a carburetor to a Gundam piece and it became a Steam Punk turn signal. I'll mount a amber lens to the end and I don't think anyone will know it was a carb. The addition of these two square intakes at the front of the car has got me more motivated. I had lost some steam, but I think It'll move a little faster now that I'm happy with the front of the car. Thanks!!


.JPG.a074450fc06bc1a326c81e2b22c6f13f.JPG)