Daxman
-
Posts
214 -
Joined
-
Last visited
Content Type
Profiles
Forums
Events
Gallery
Everything posted by Daxman
-
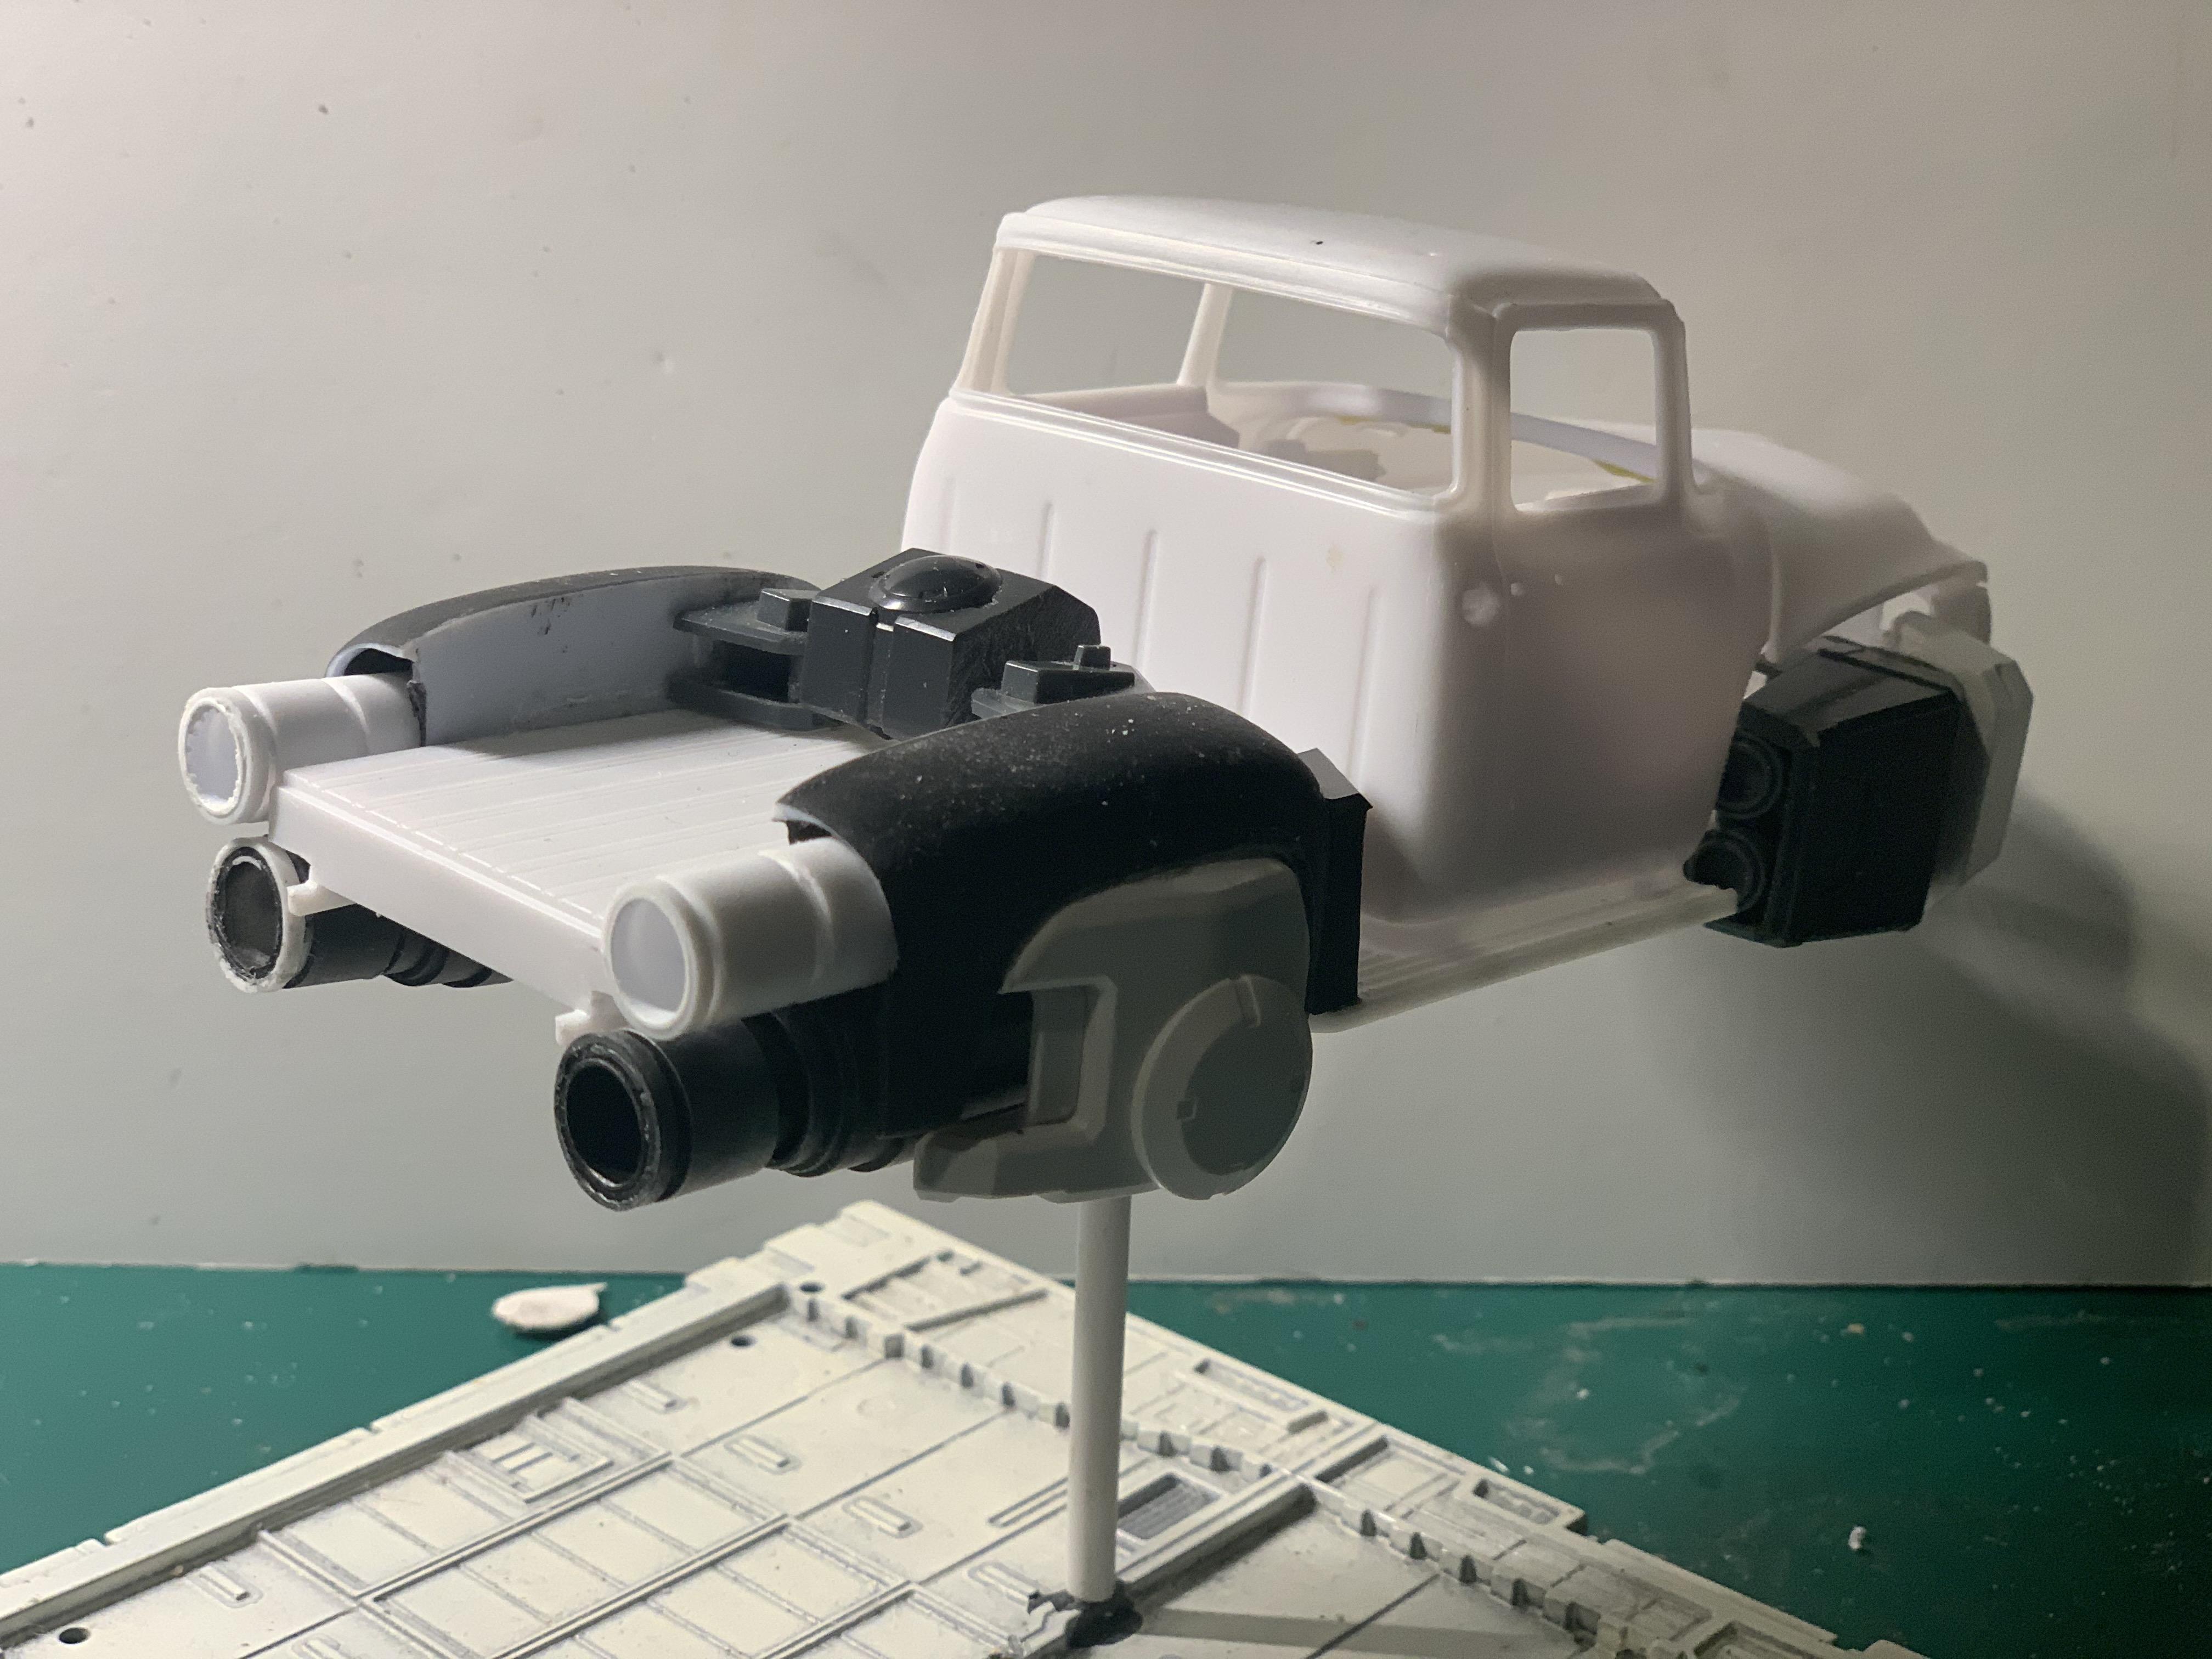
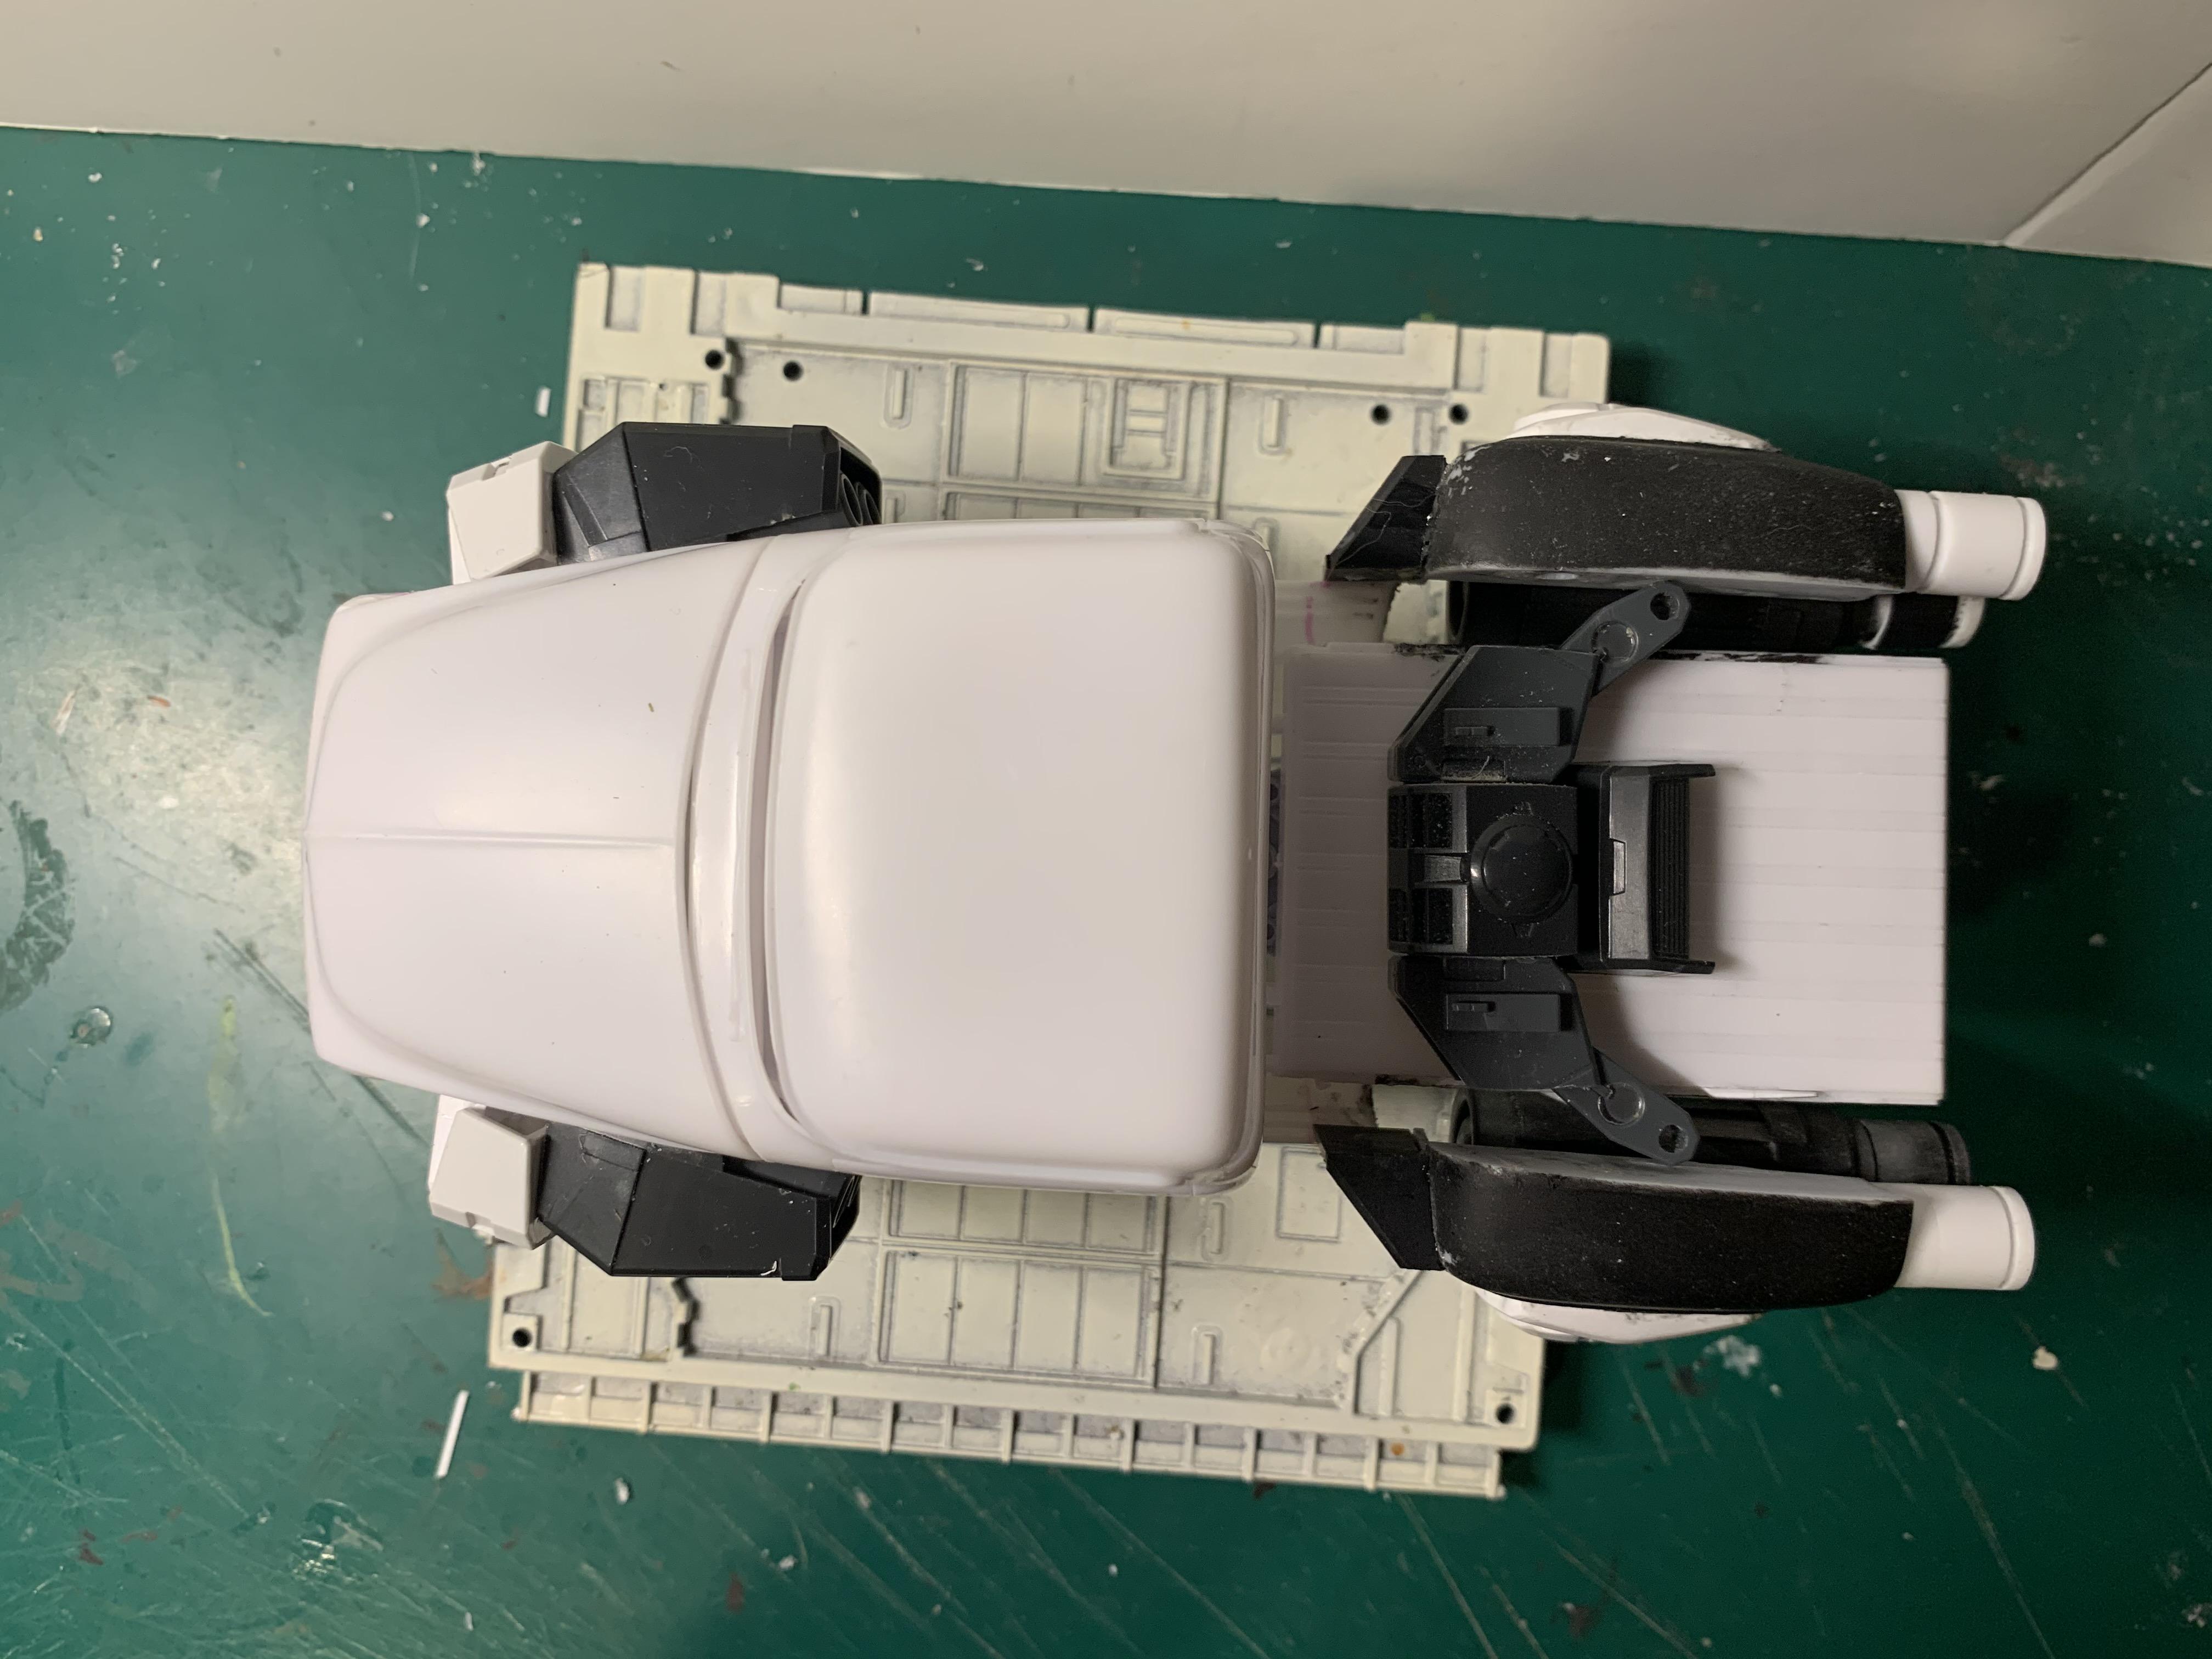
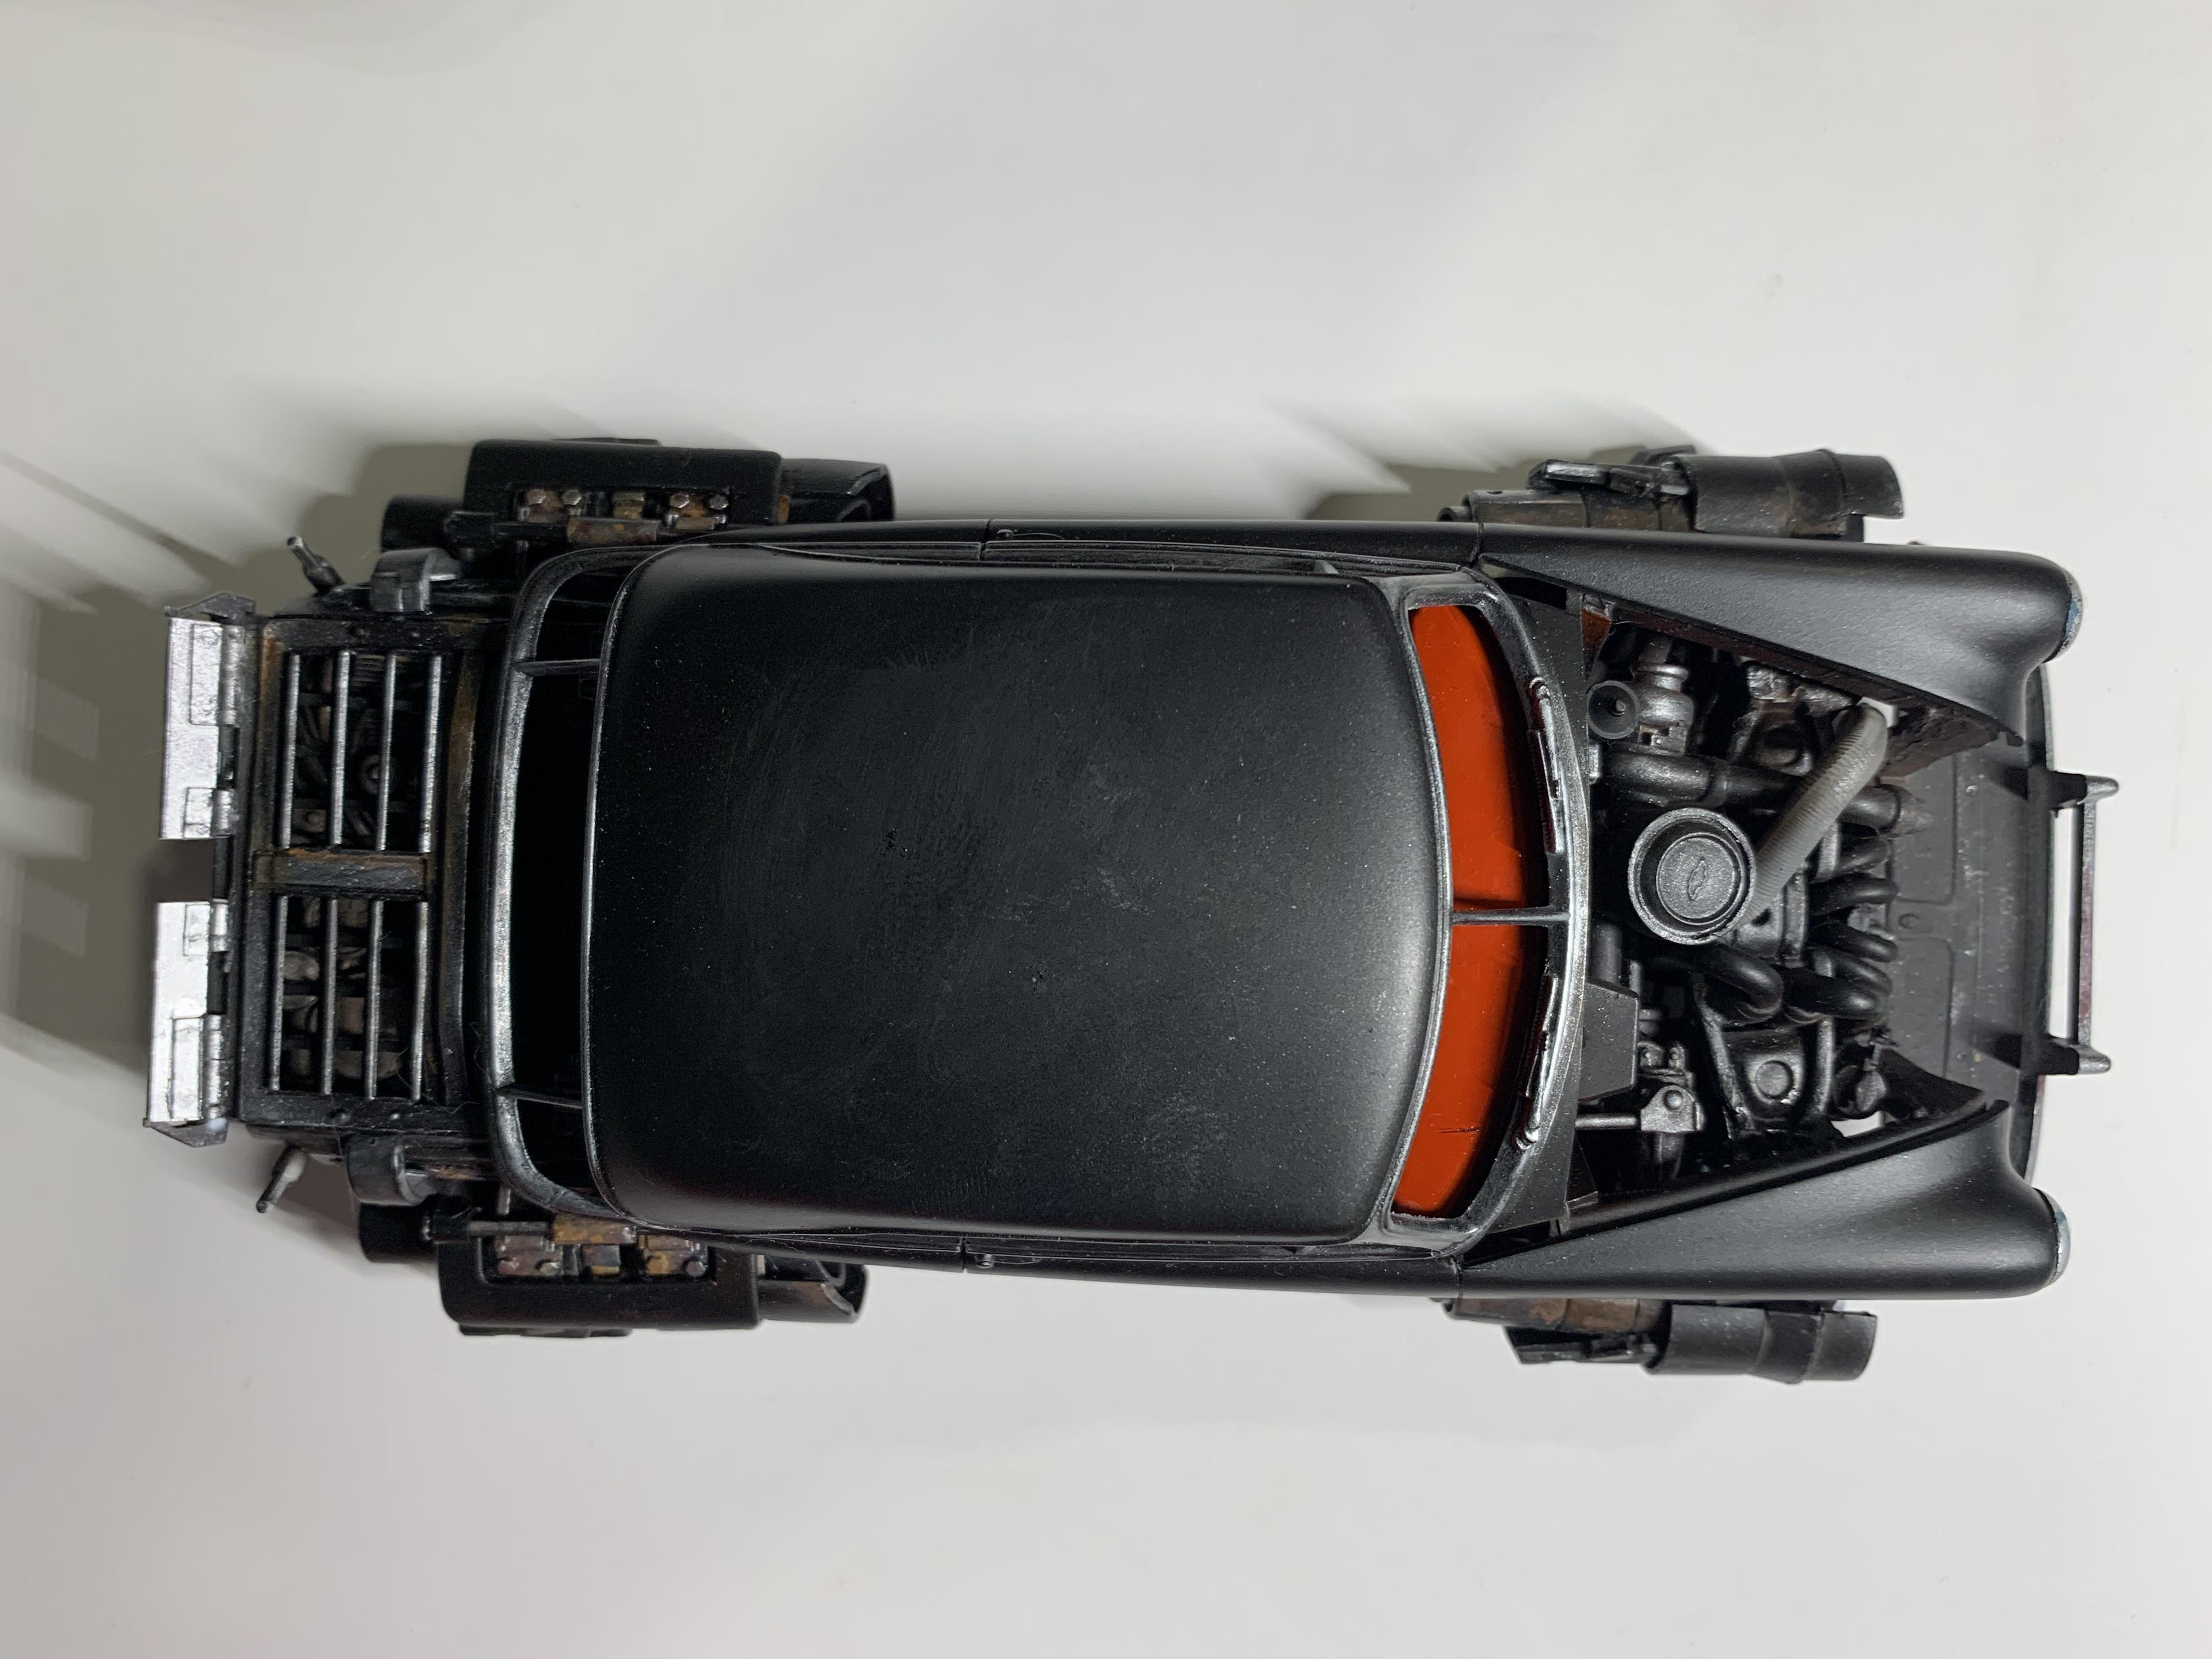
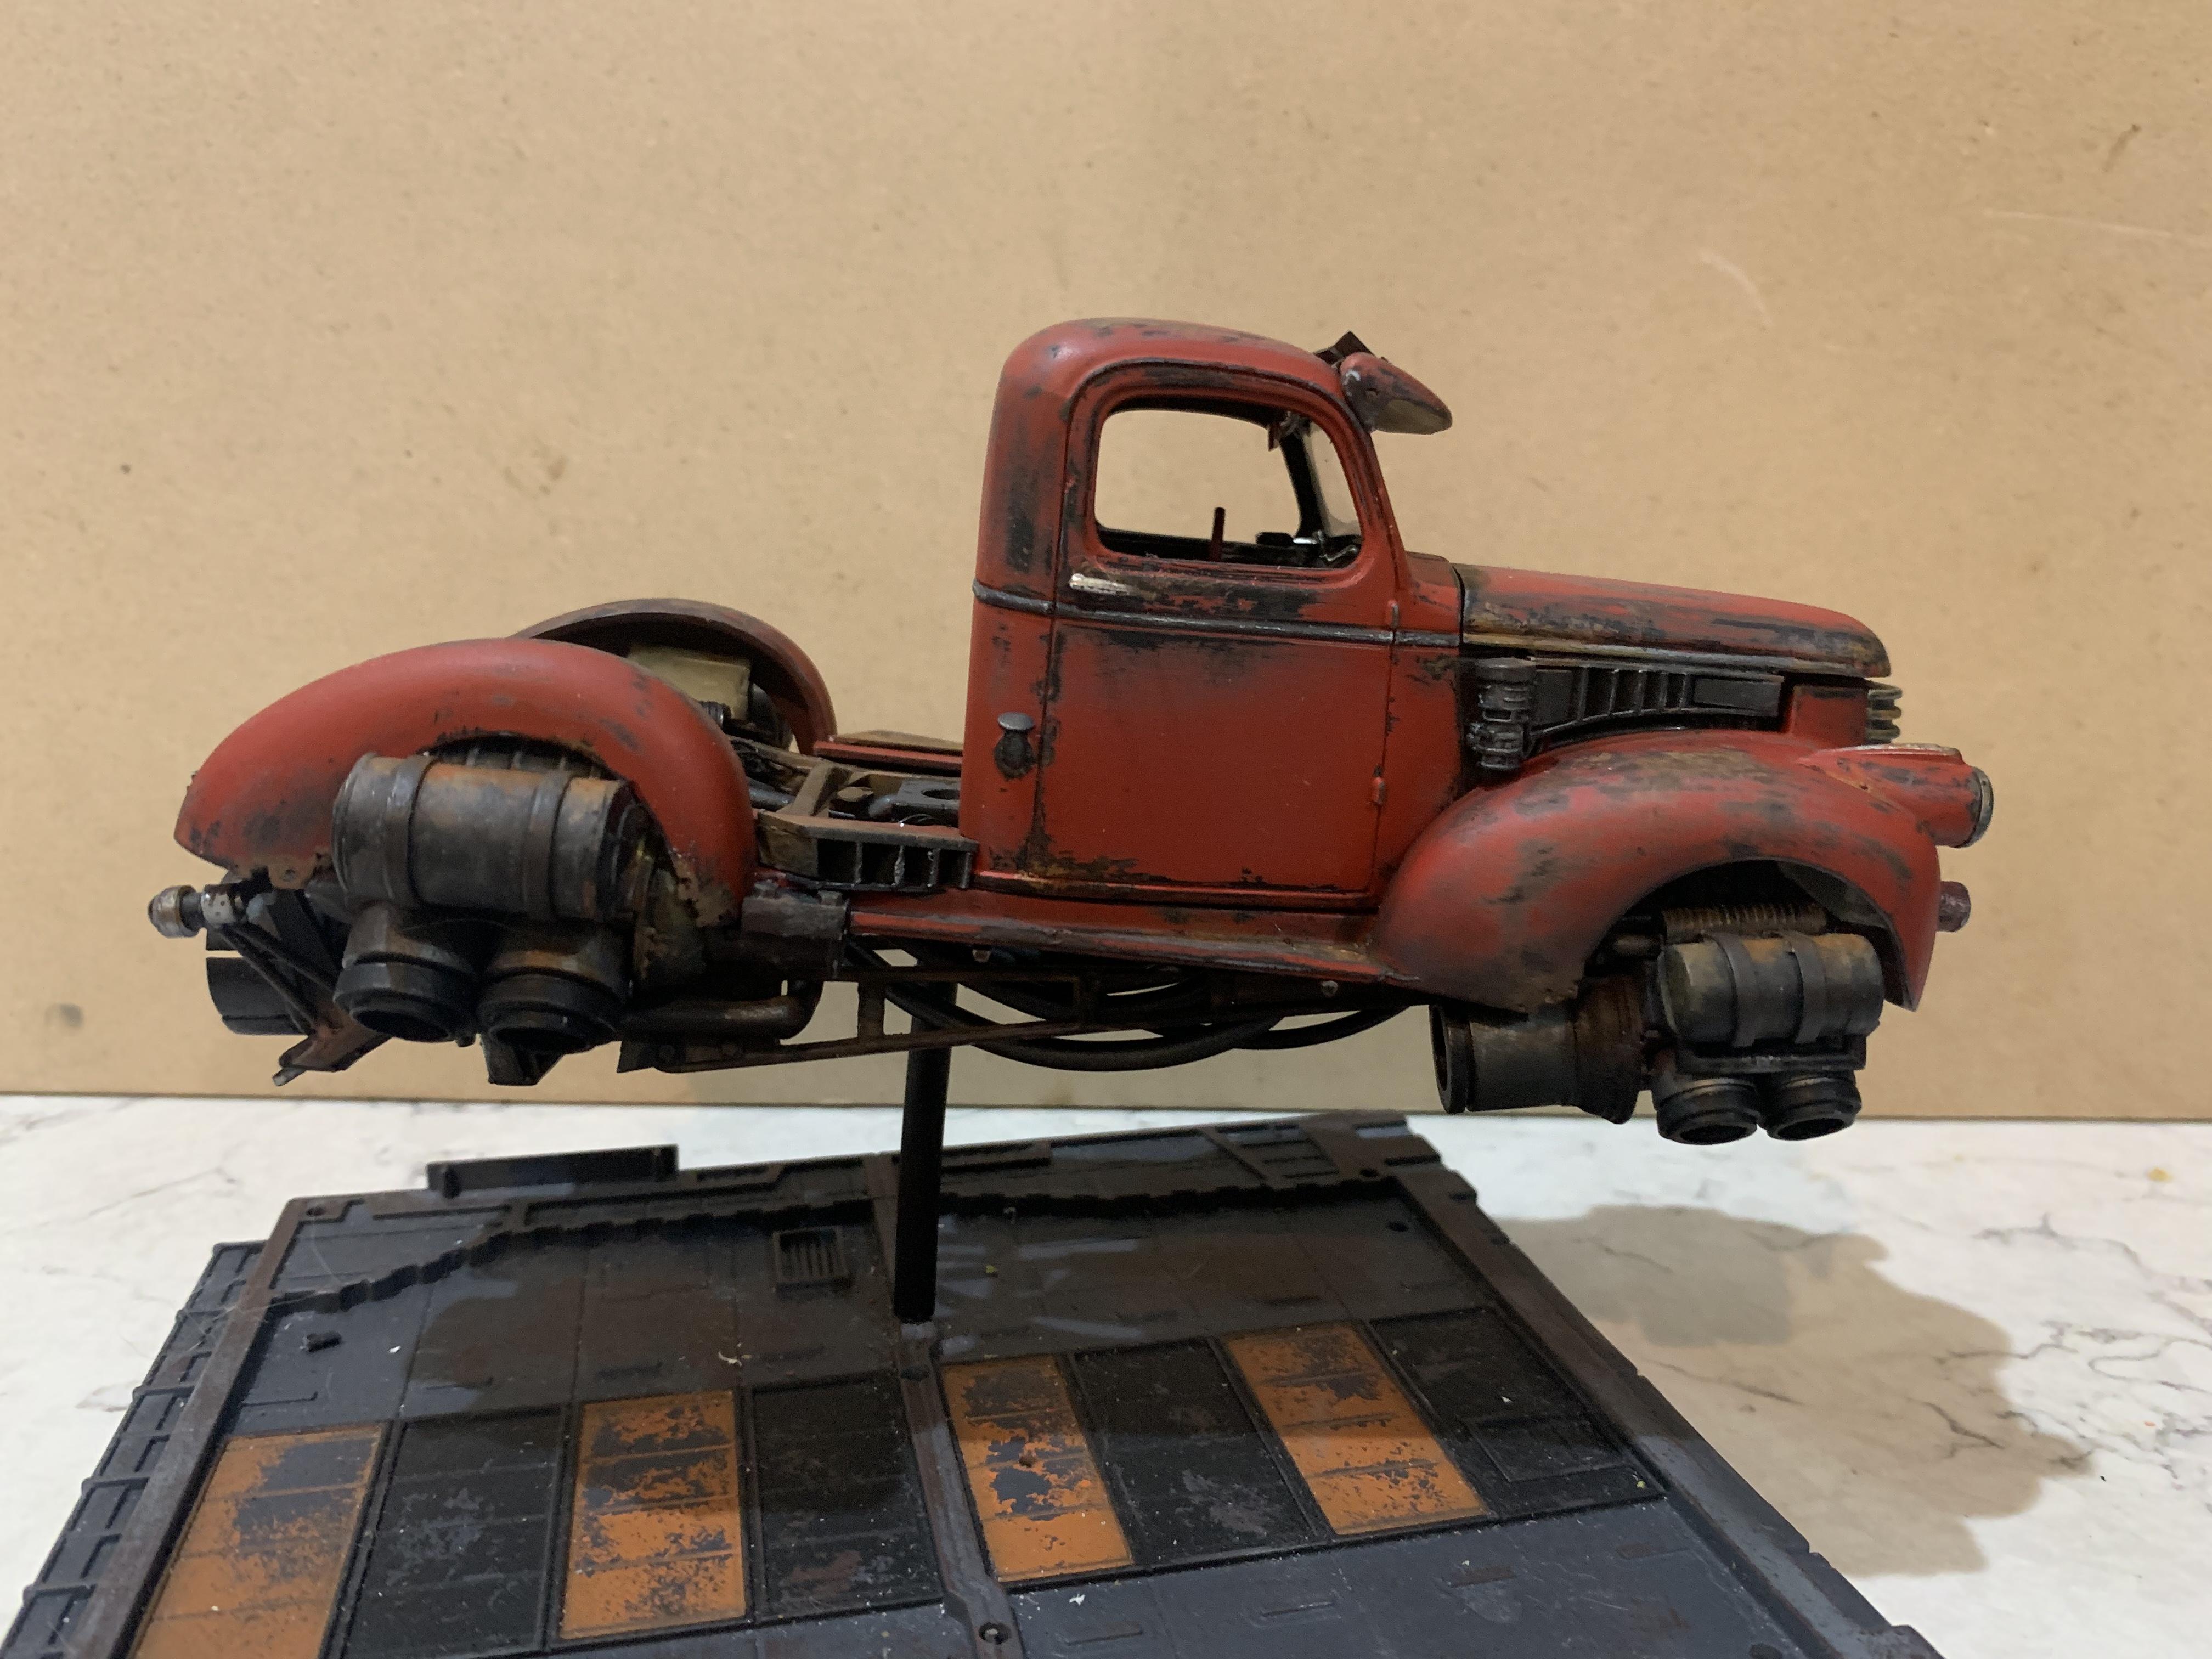
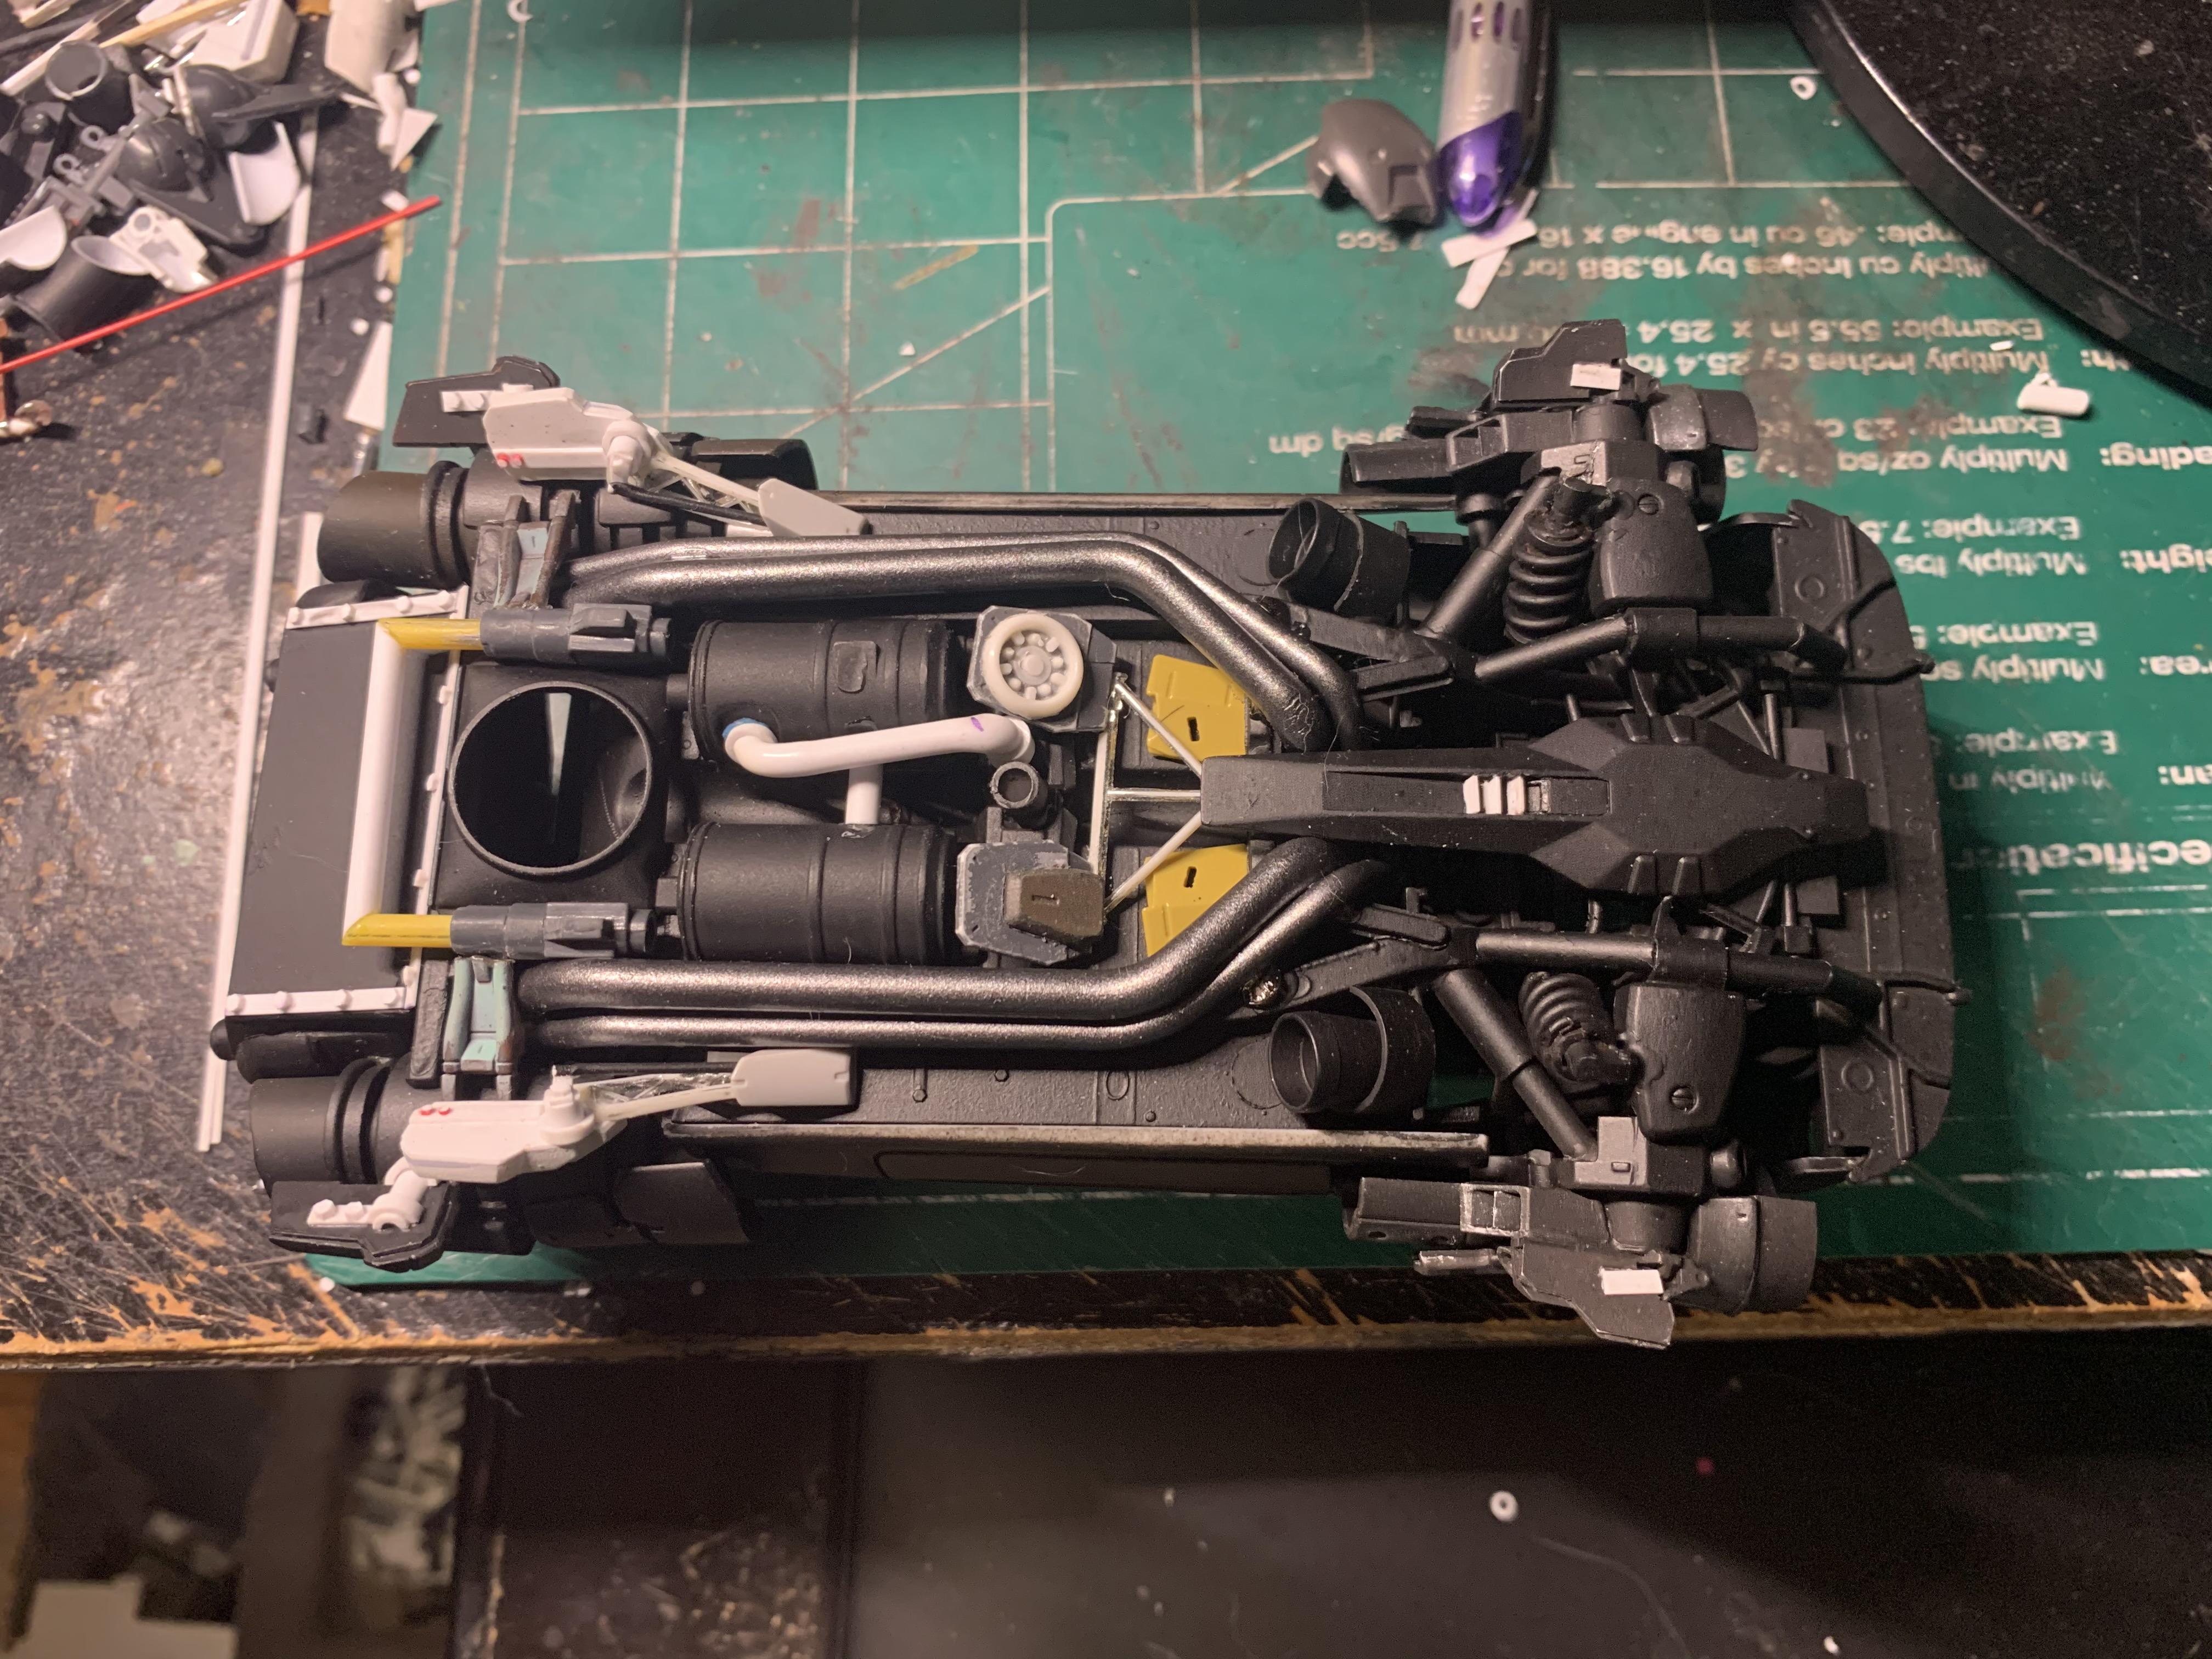
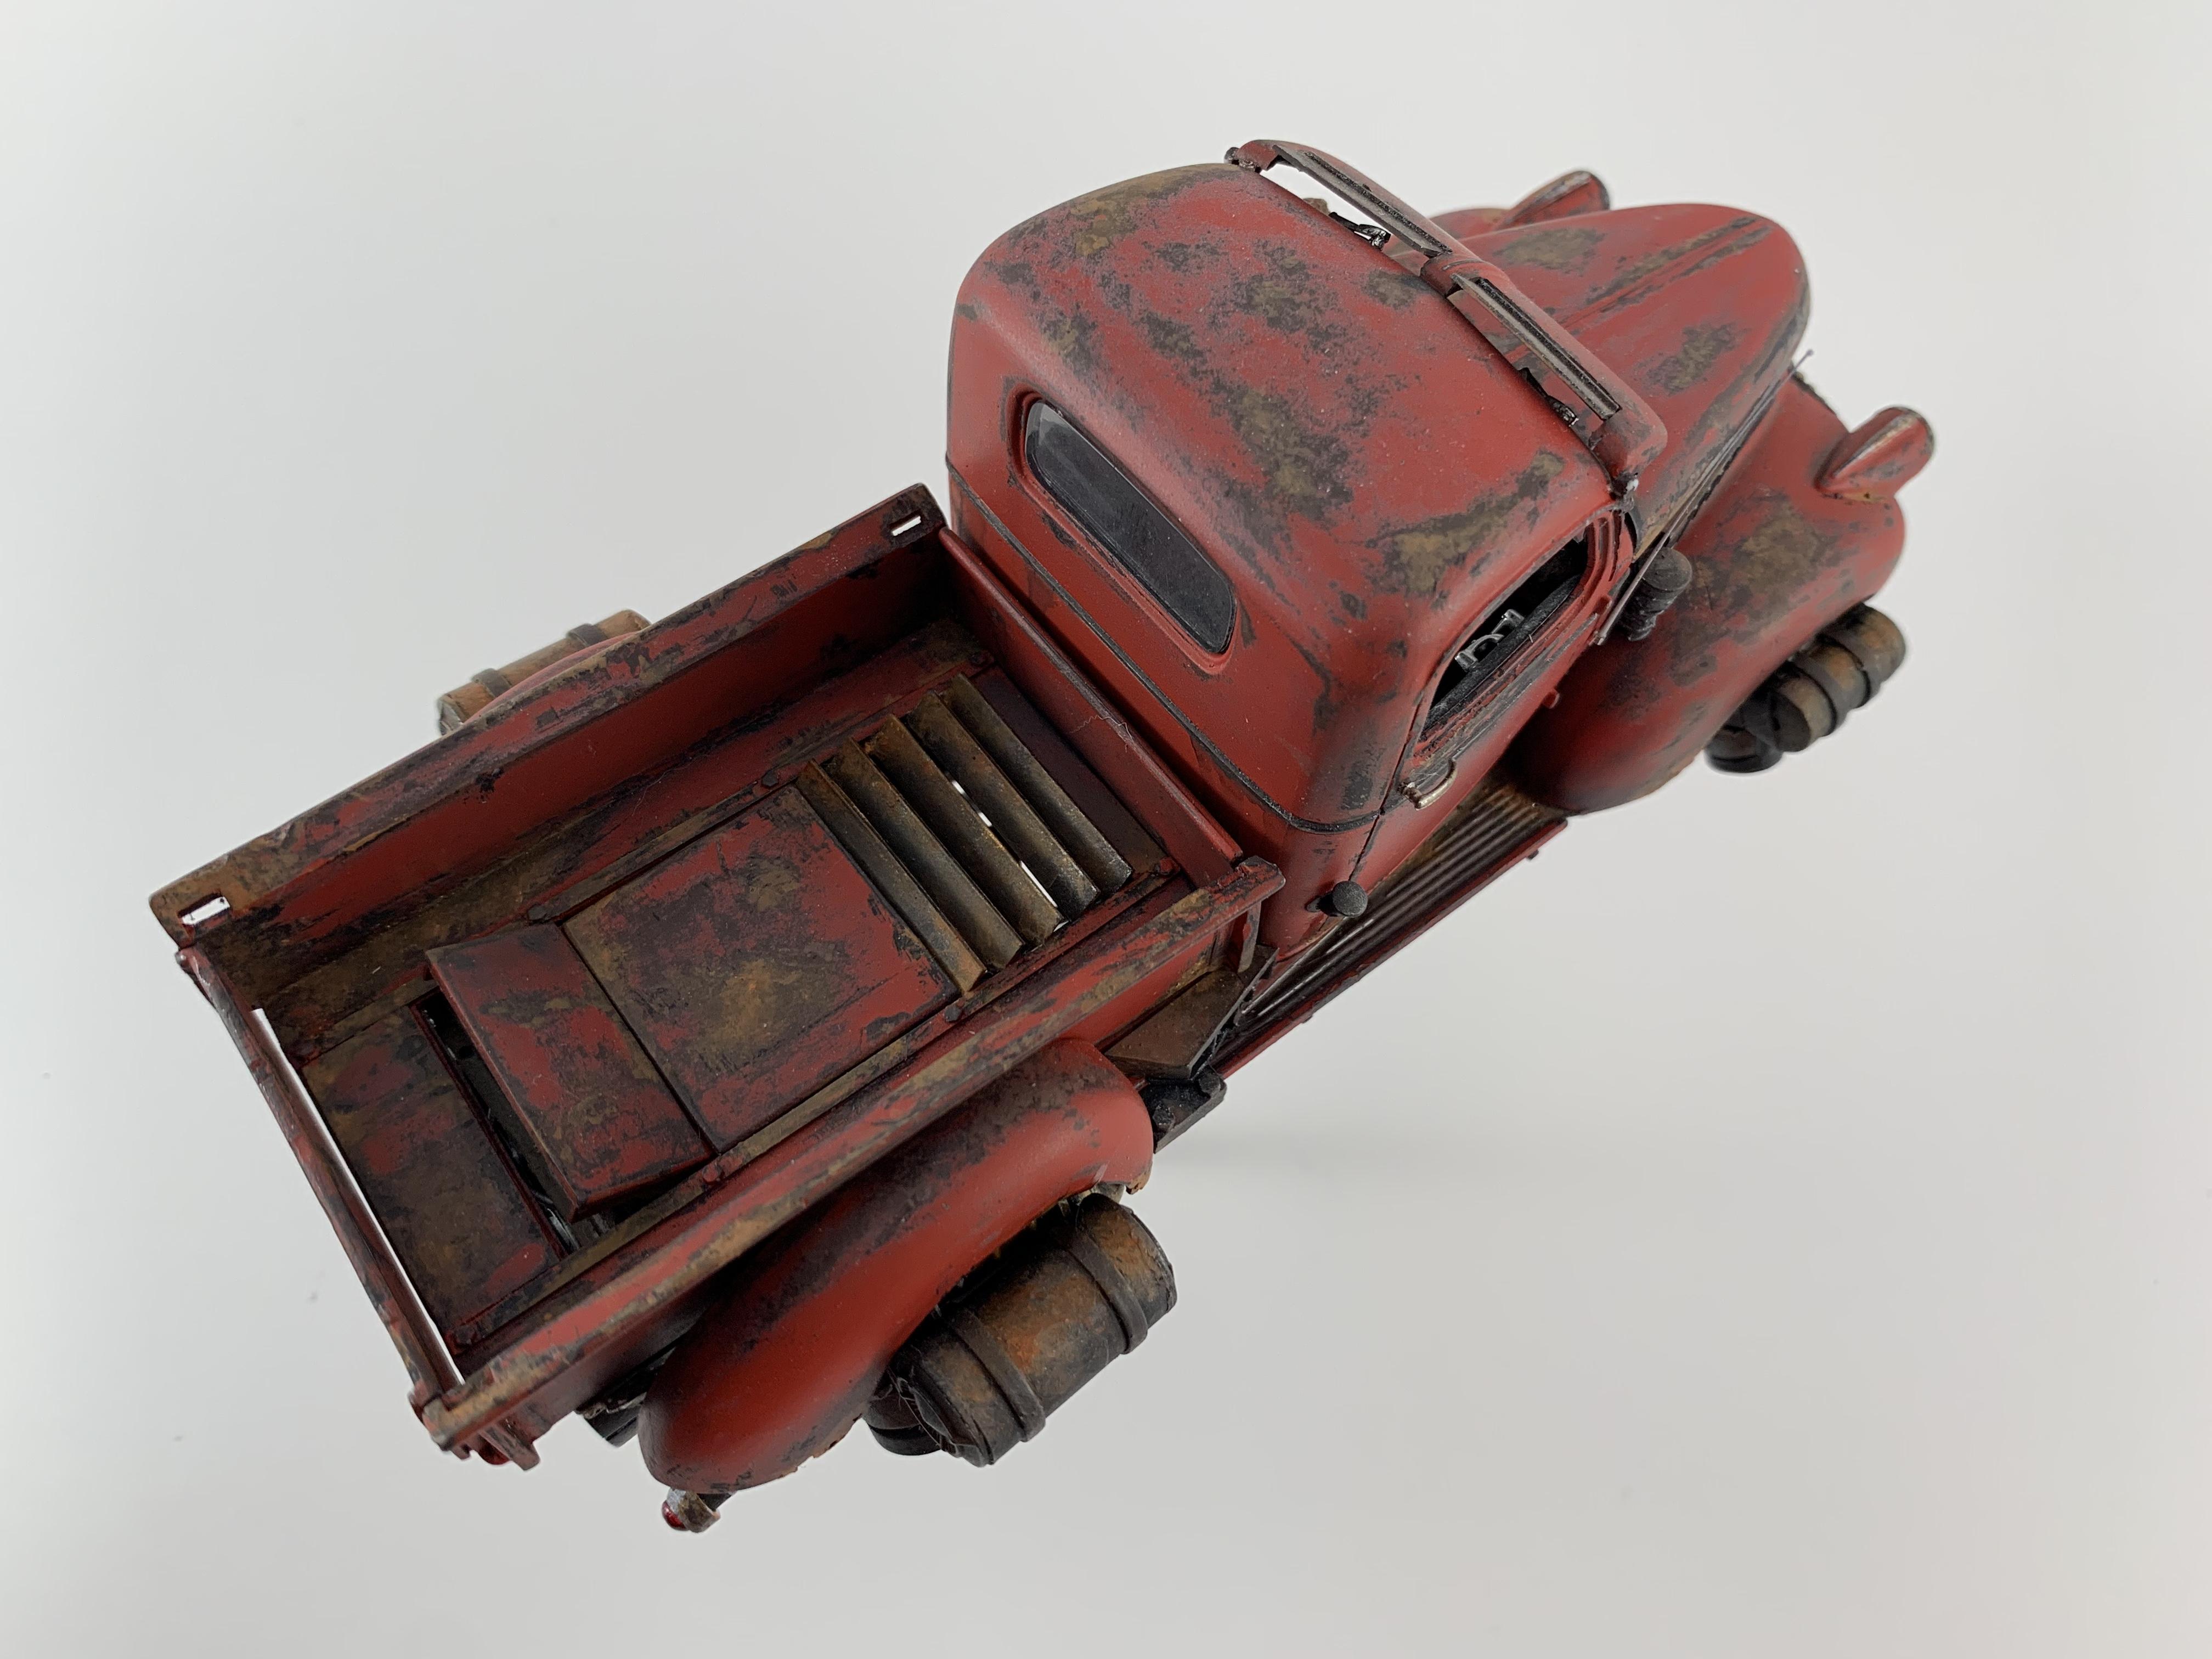
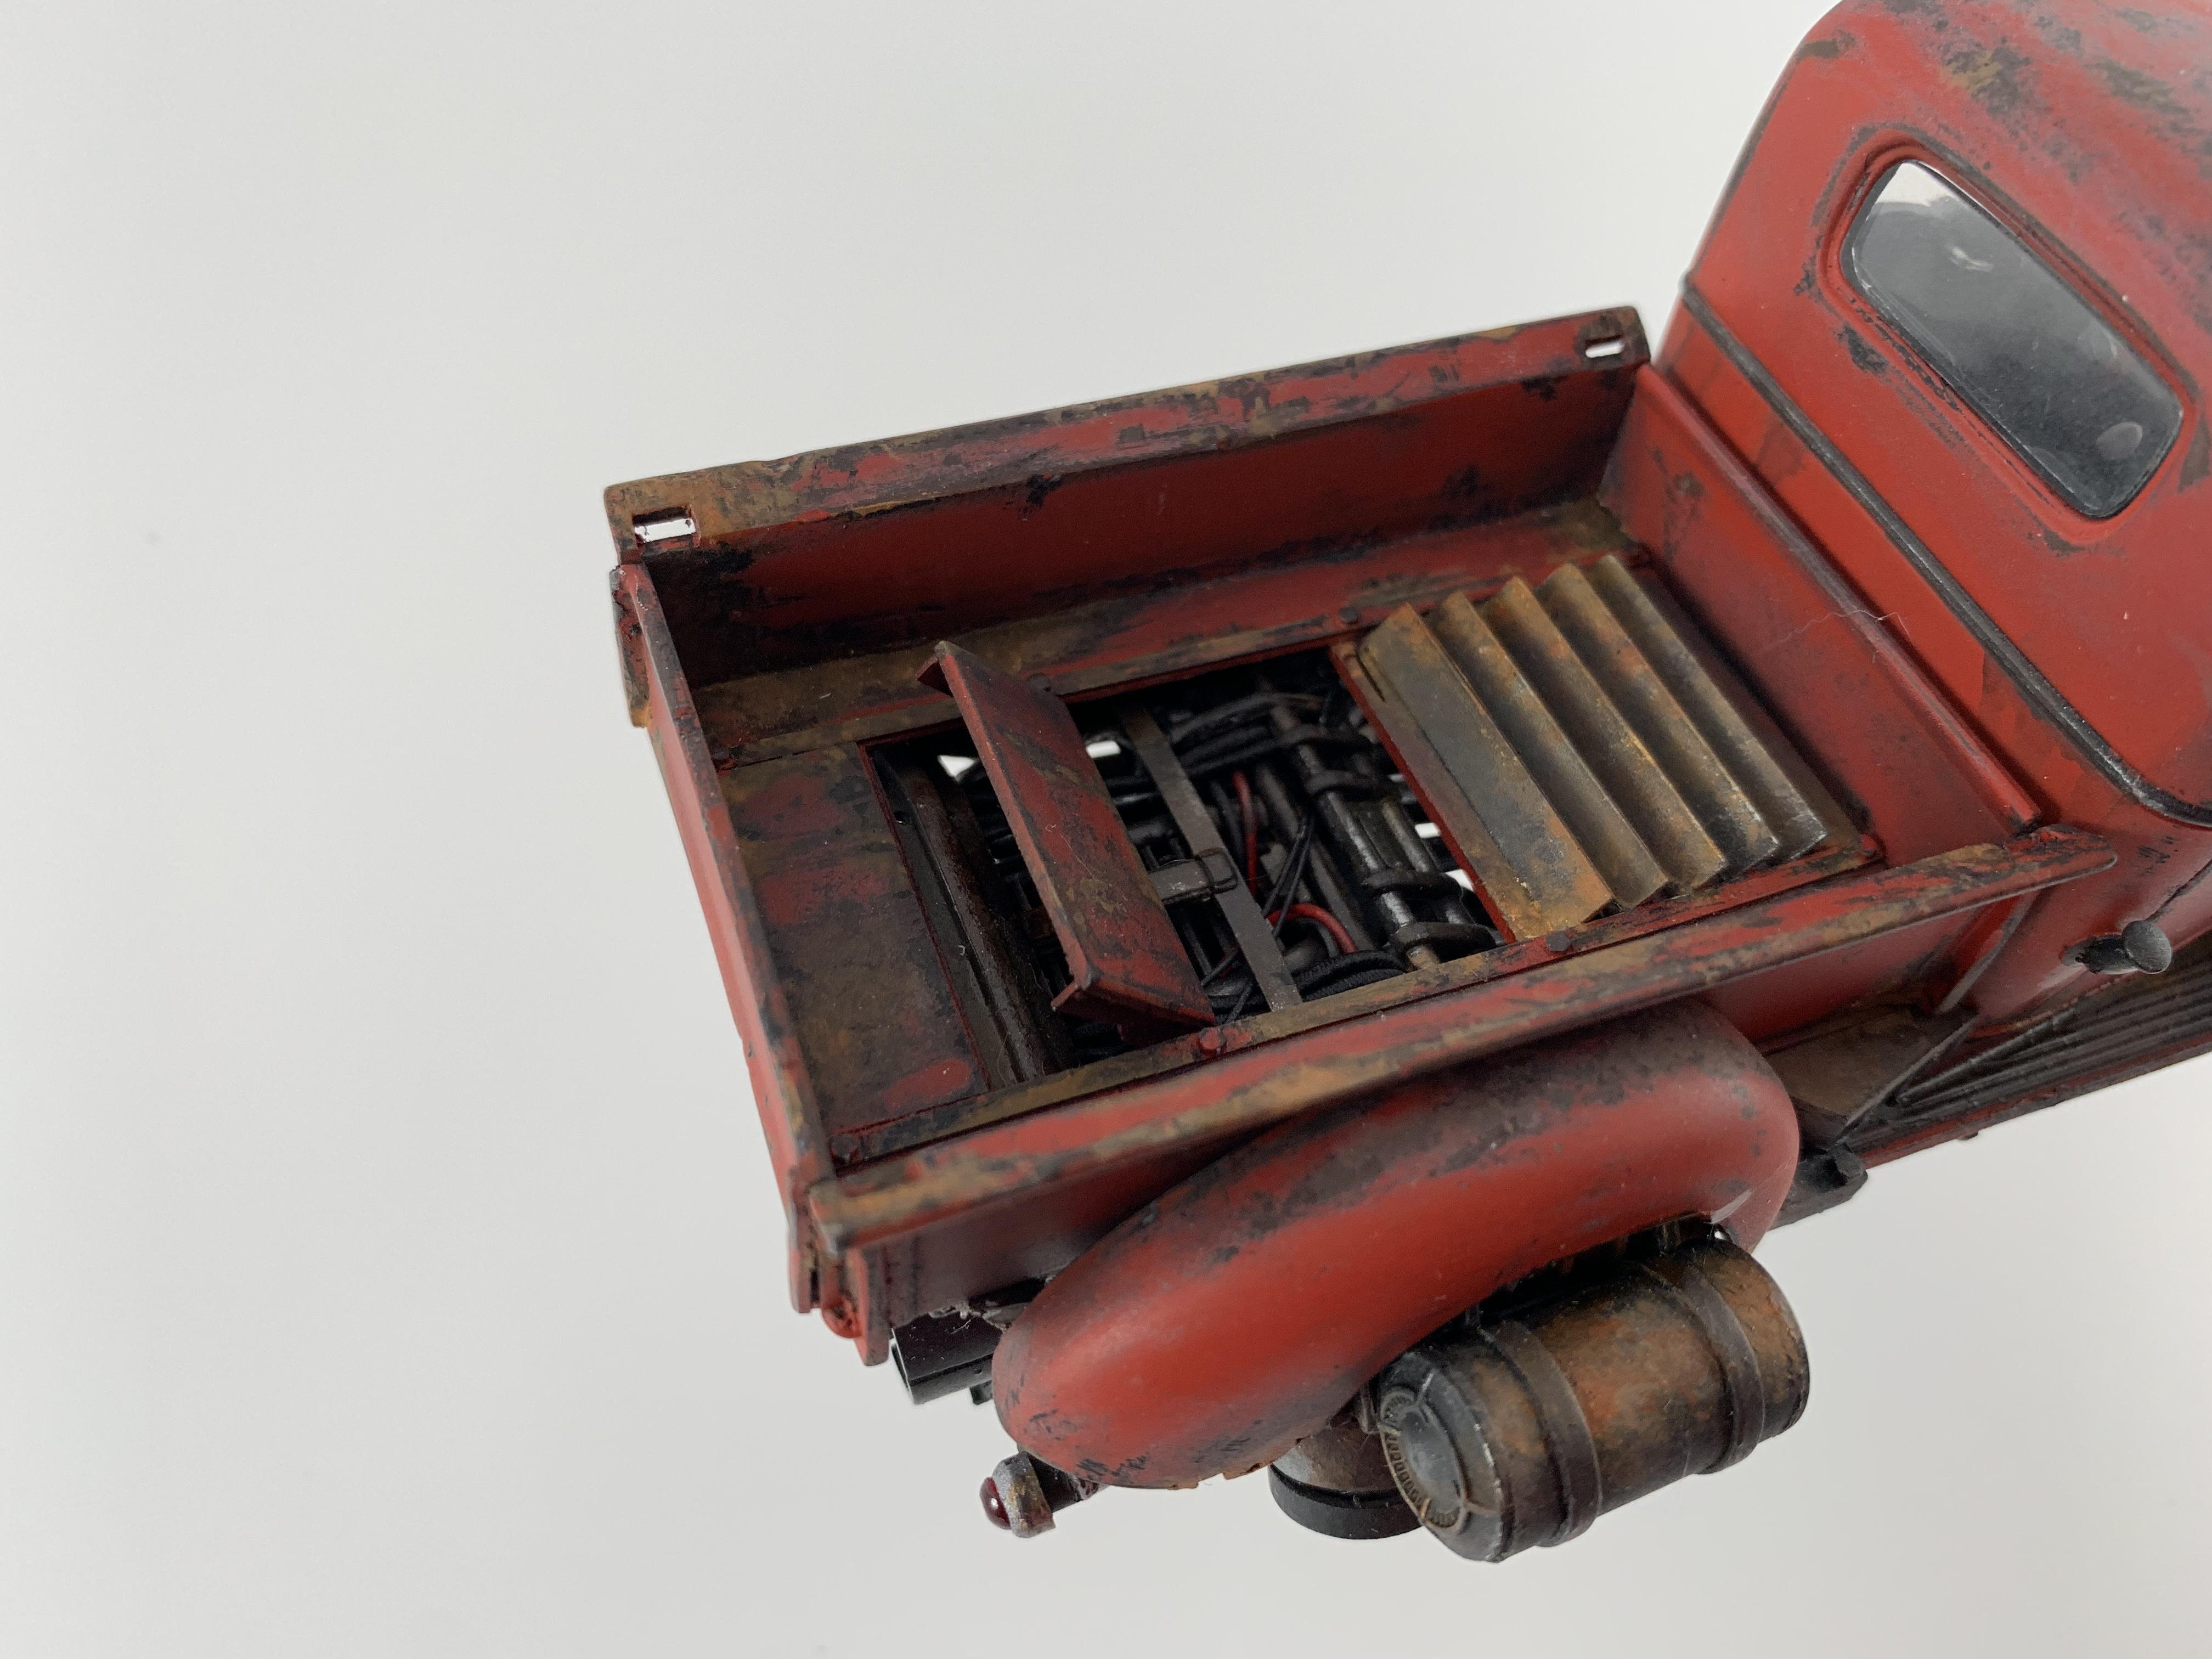
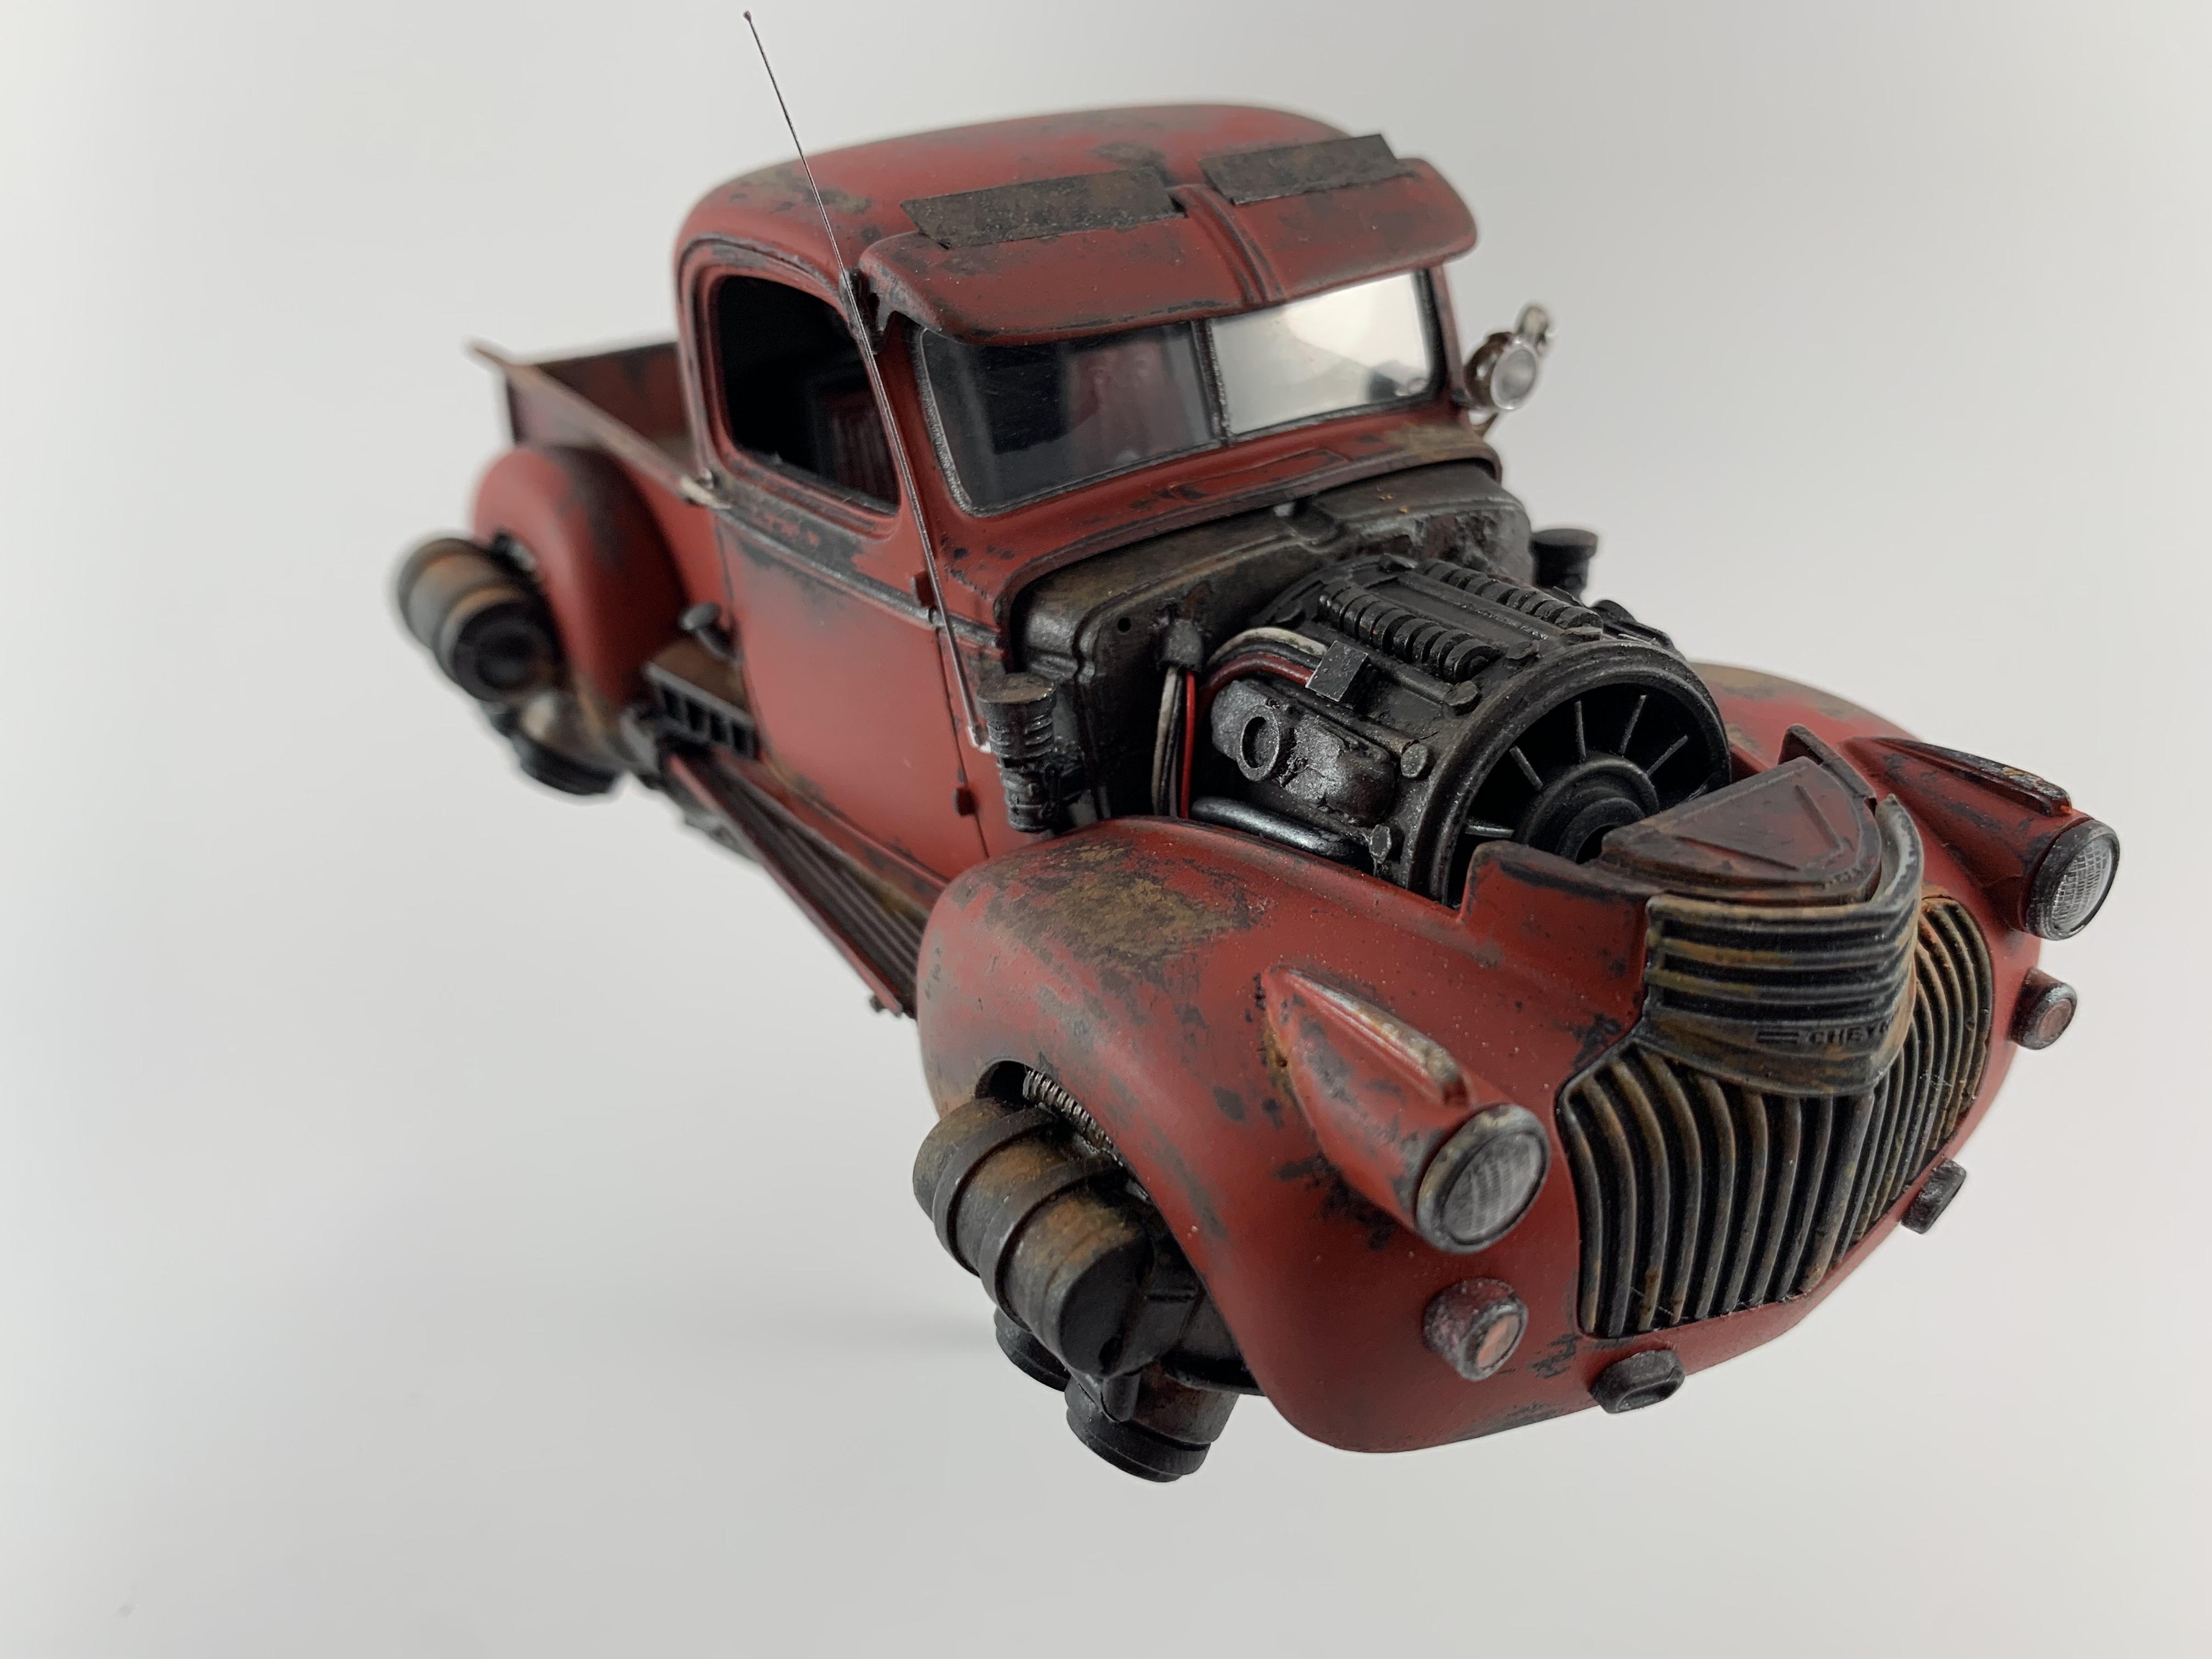
 Here's my ninth hover vehicle. I have been working on this for a few weeks now. I'm currently have the truck 80% complete trying to figure out the paint scheme. I have some of the photos from the beginning. You'll see where ideas were changed. Here's where I started I removed the front fenders to the doors. Reduced the size of the front grill. Added these two large turbines from a Gundam kit. People always ask where I get my parts. It's Gundam kits. They have so many parts with intakes, thrusters, vents..so many interesting pieces. The front turbines were made from Gundam Virtue's backpack thrusters. They took the shape of the fenders that I removed. I had planned to have the two rear thrusters only held on by the arm assembly in the bed of the truck. It would appear as if the rear turbines could separate from the bed and pivot. This idea was later scrapped. On the front, you can see the two cylindrical thrusters sticking out the back of the shroud. I tried to mimic this with the rear thrusters coming out of the rear fenders. I also added an intake for the rear that's attached to the running board. I crafted a matching intake grill for the rears. From the top down view, you can see how far the rear fenders stick off the side of the bed to line up with the front "fenders". I love this top down view. Here's a close up of the hack job I did to the front thrusters. It's two Gundam pieces cut, then glued together with strips of styrene for the fins. The styrene tube on the inside is for mounting to the body.
-
41 Chevy Pickup Hovercraft
Daxman replied to Daxman's topic in Model Trucks: Pickups, Vans, SUVs, Light Commercial
Thank you brother! I just quickly checked out the 3 links in your signature. If there's something in the Kansas air, I'll bottle it up and trade you for some of that Quebec air.You sir.......are AMAZING! Your level of craftsmanship is out of this world. -
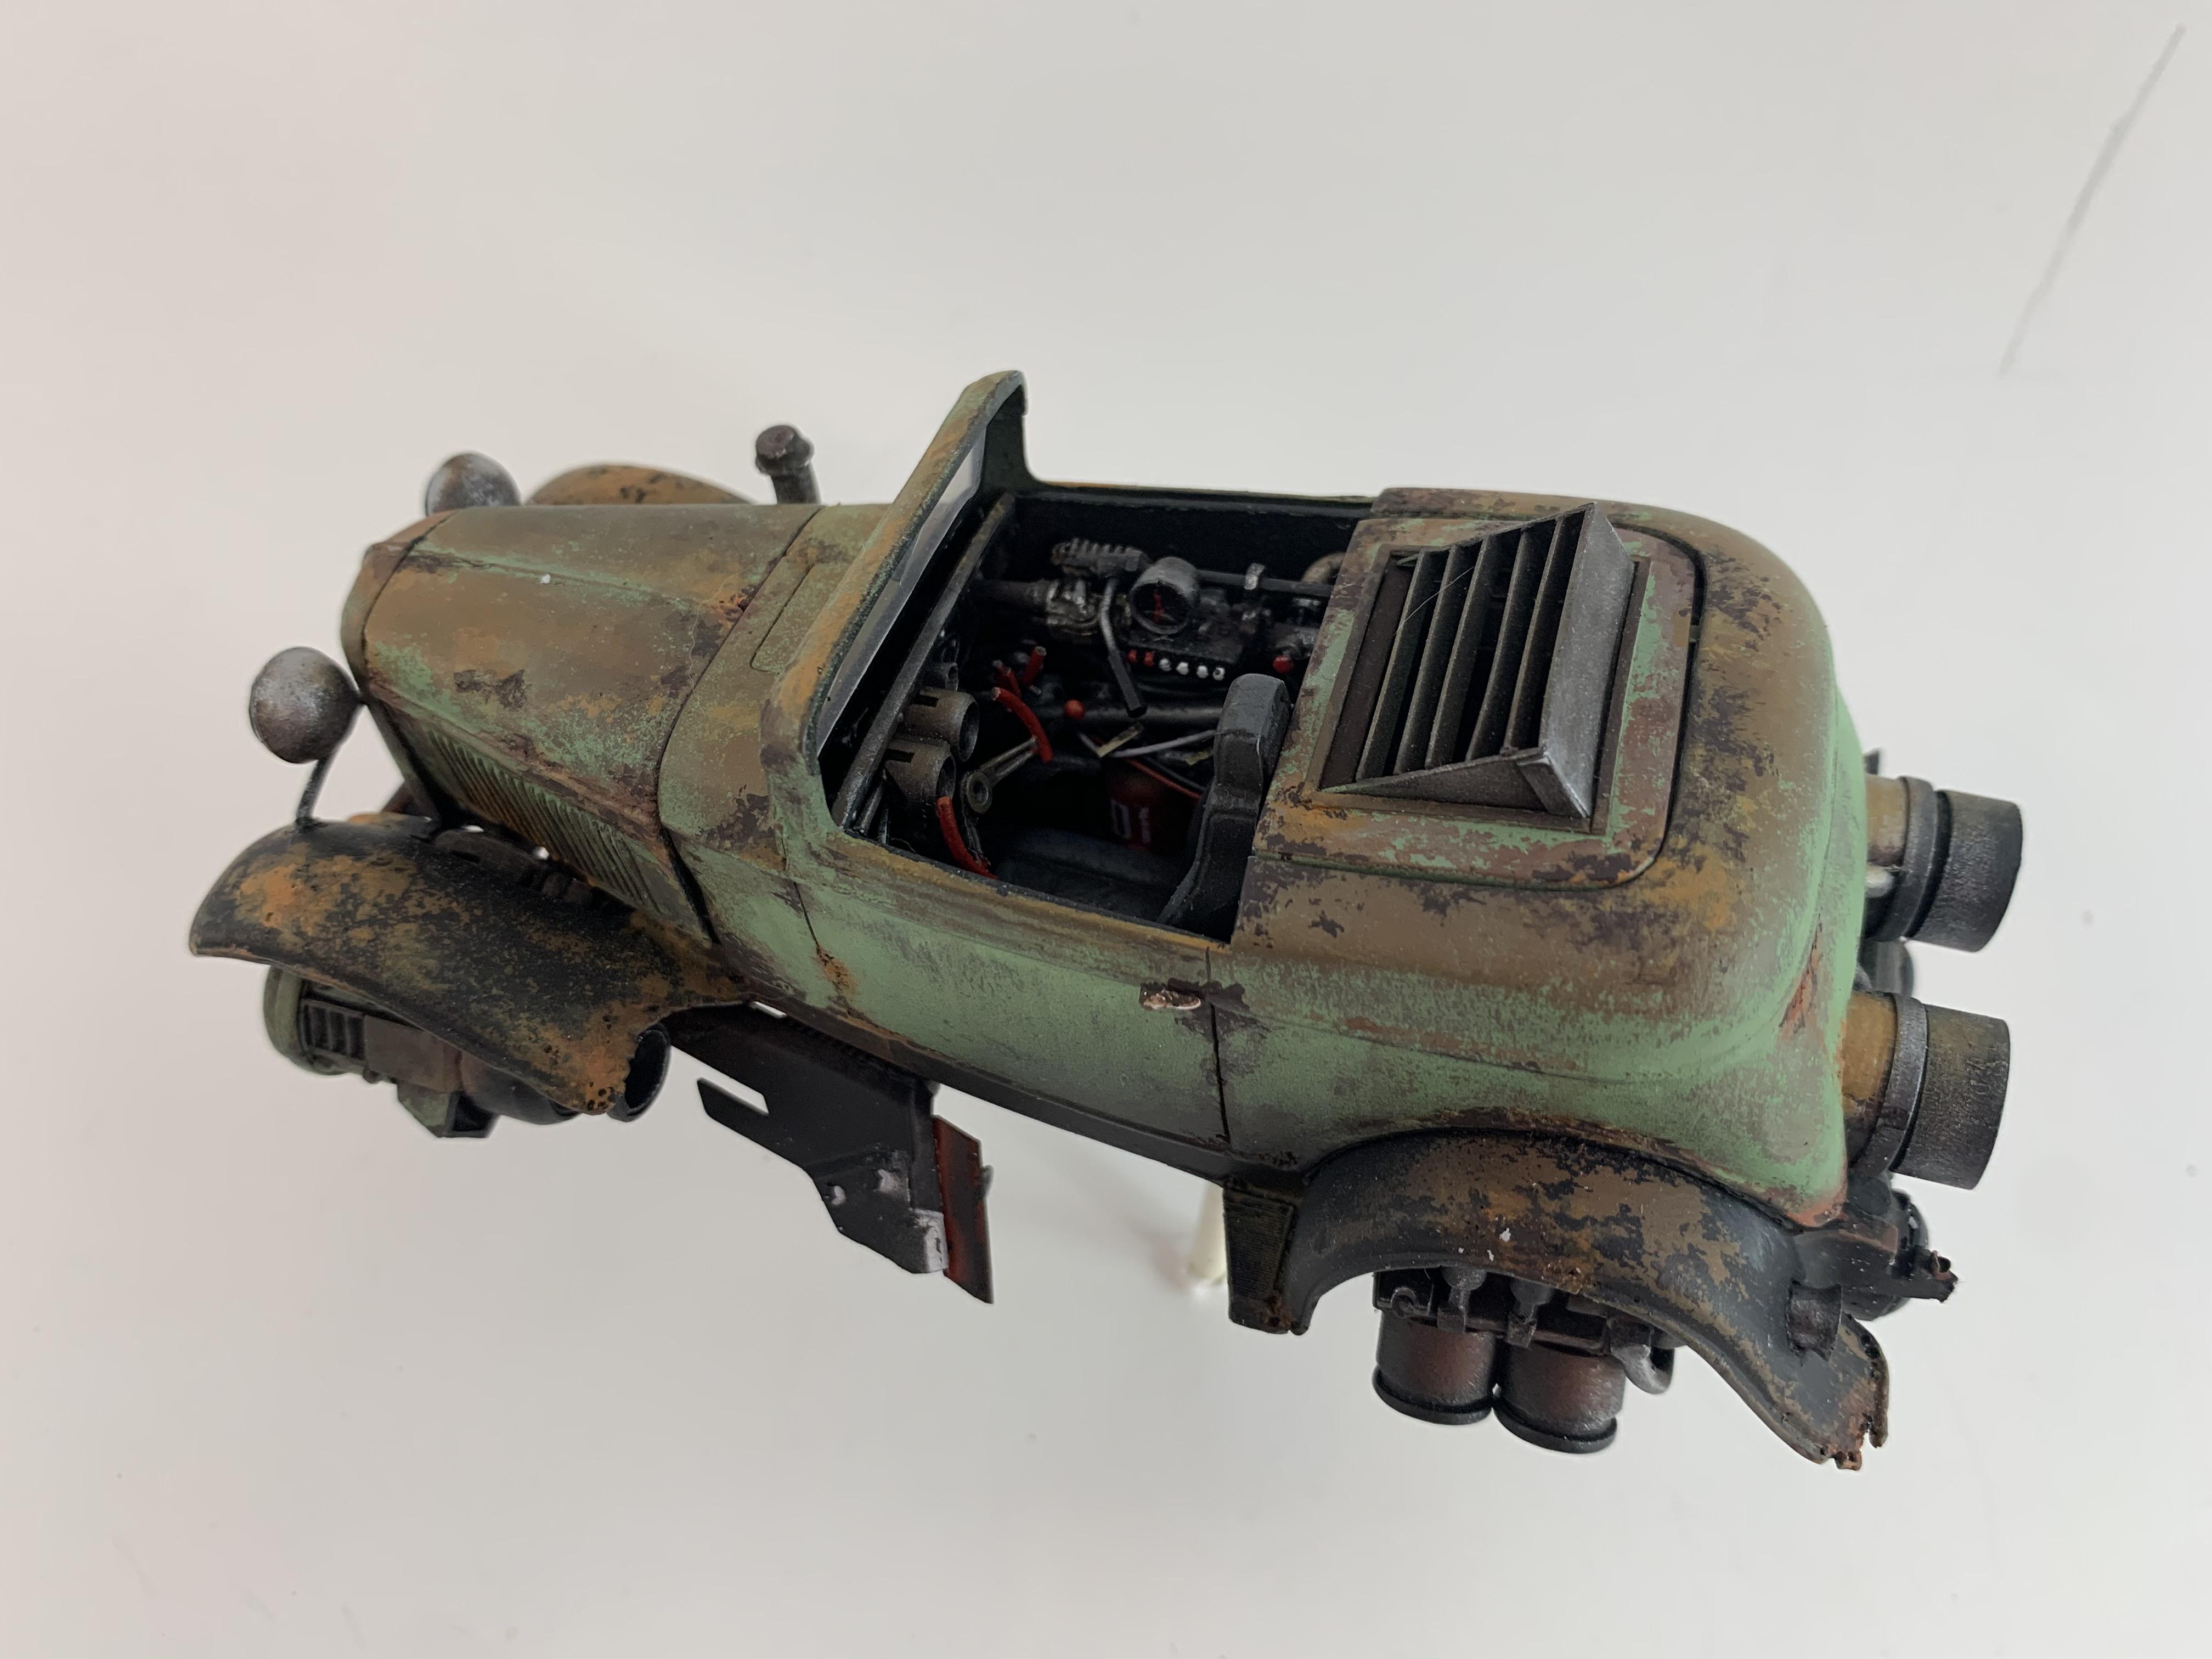
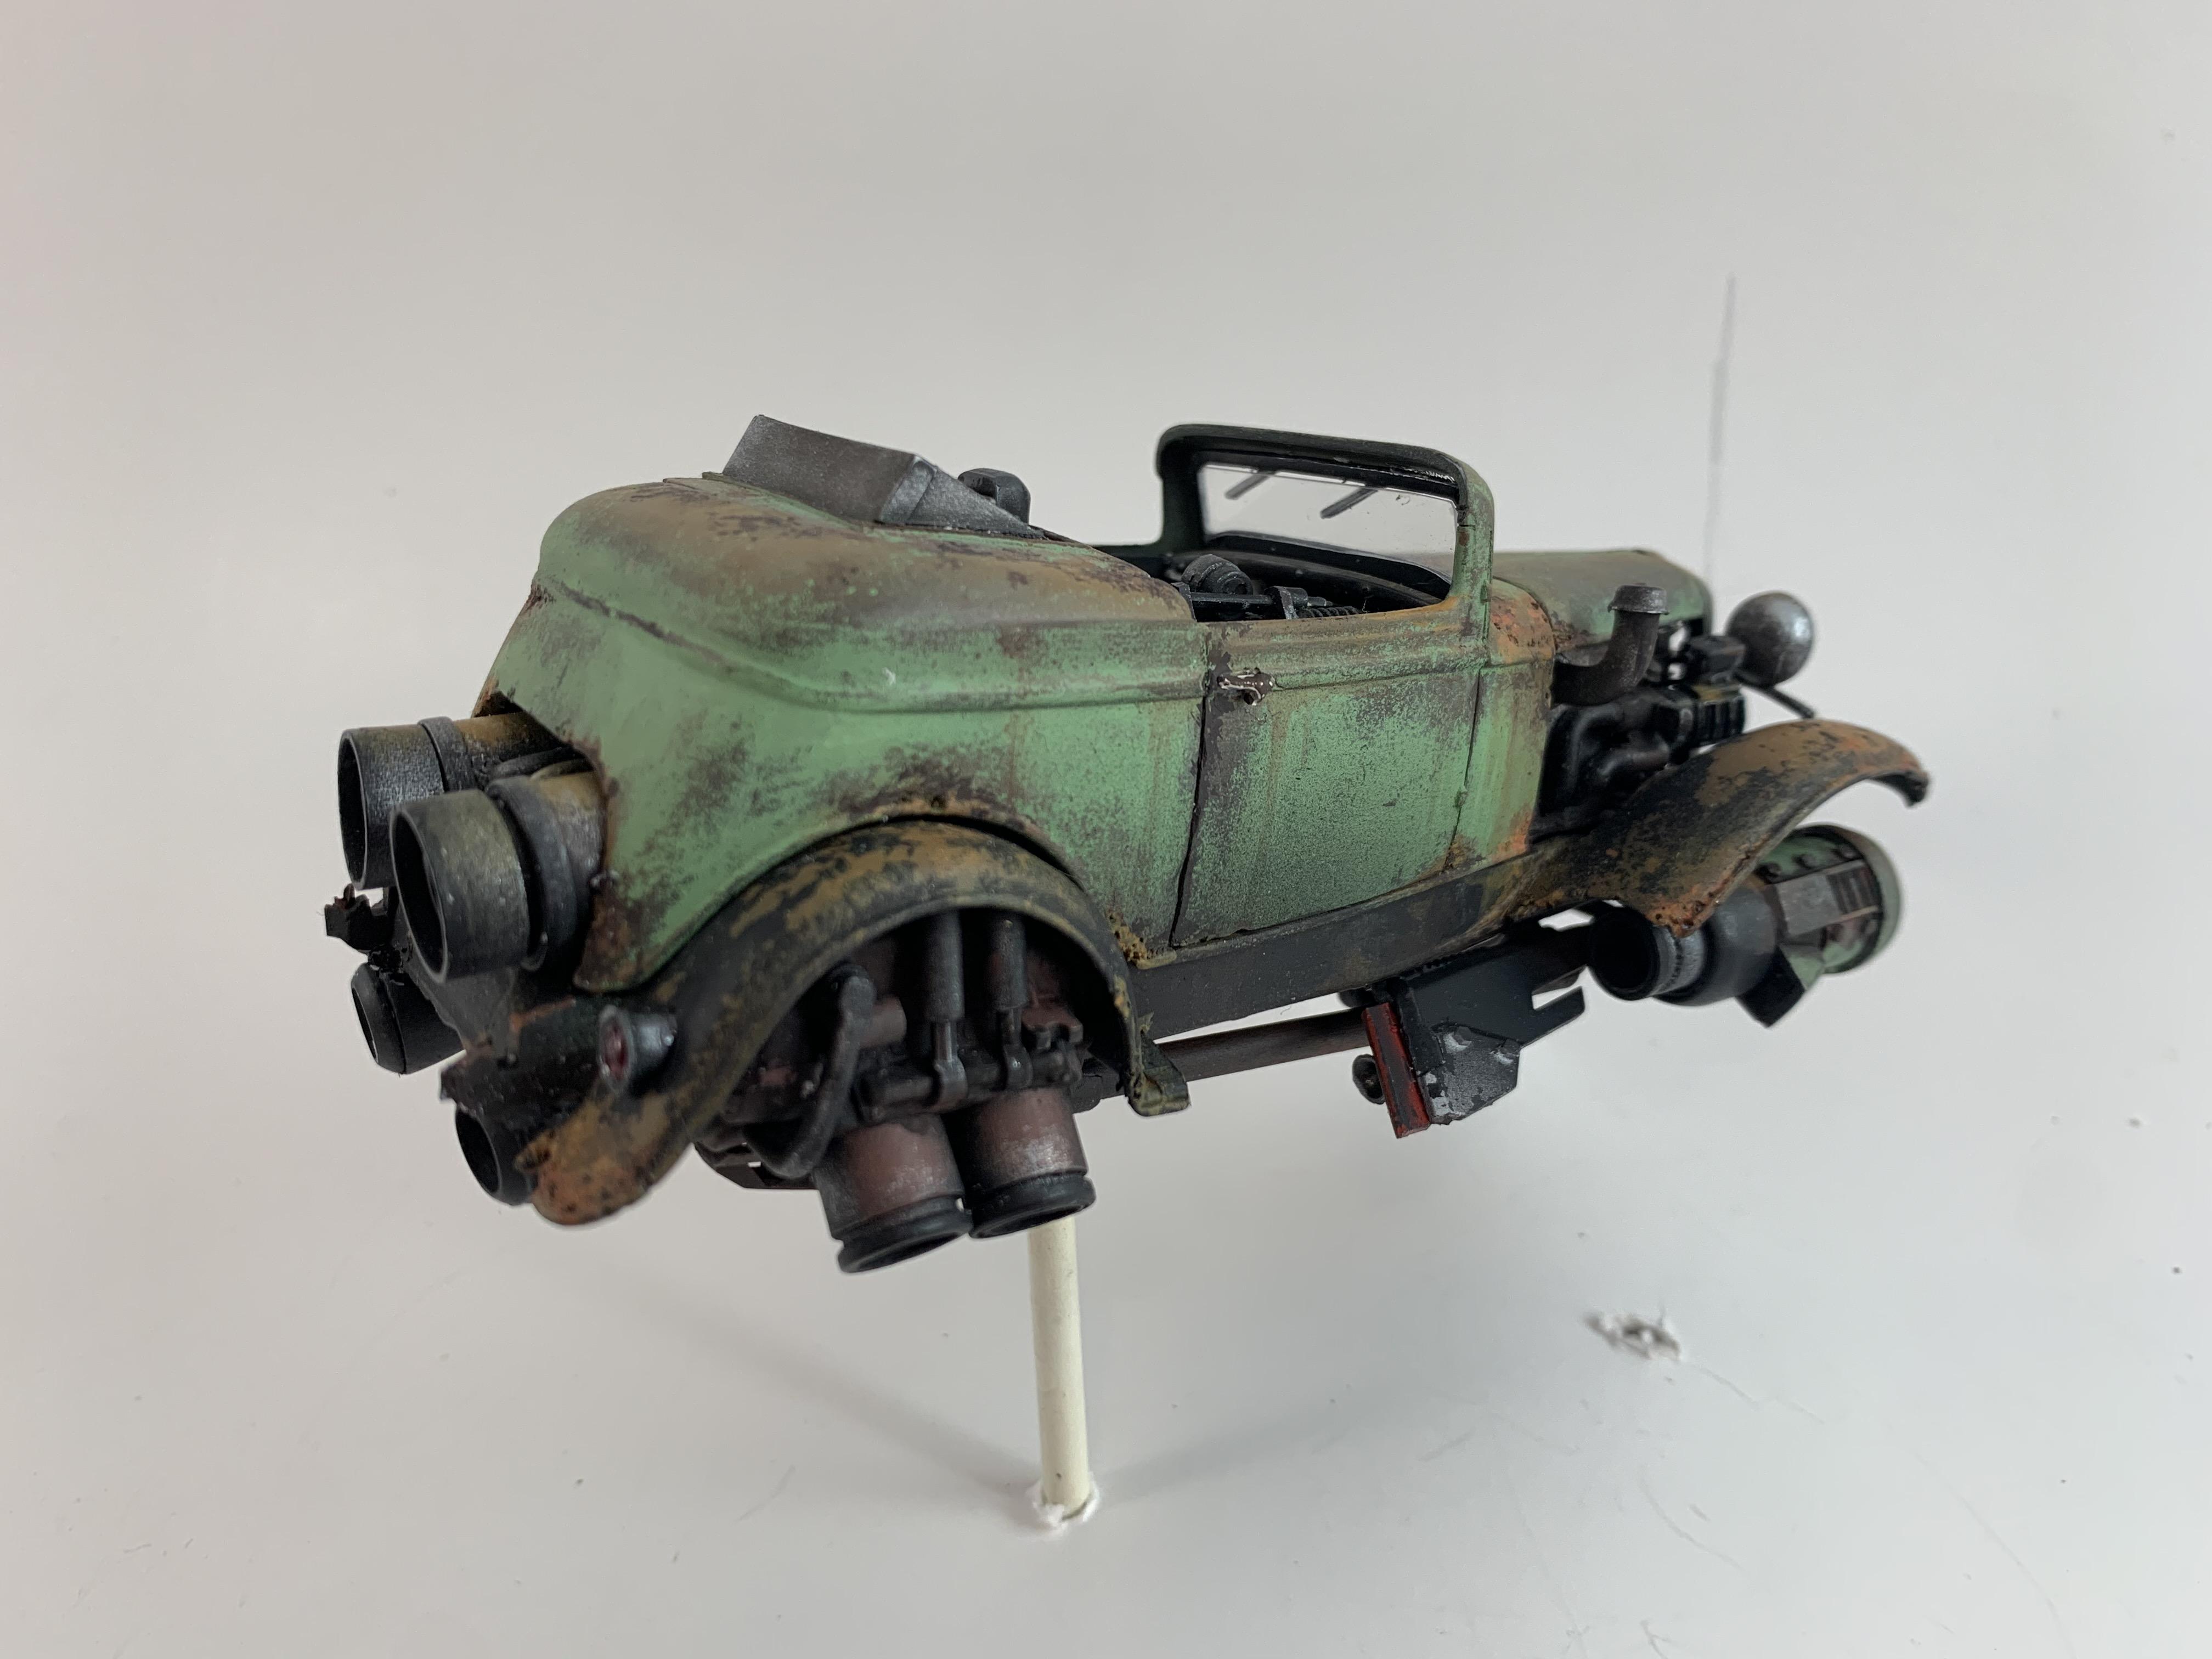
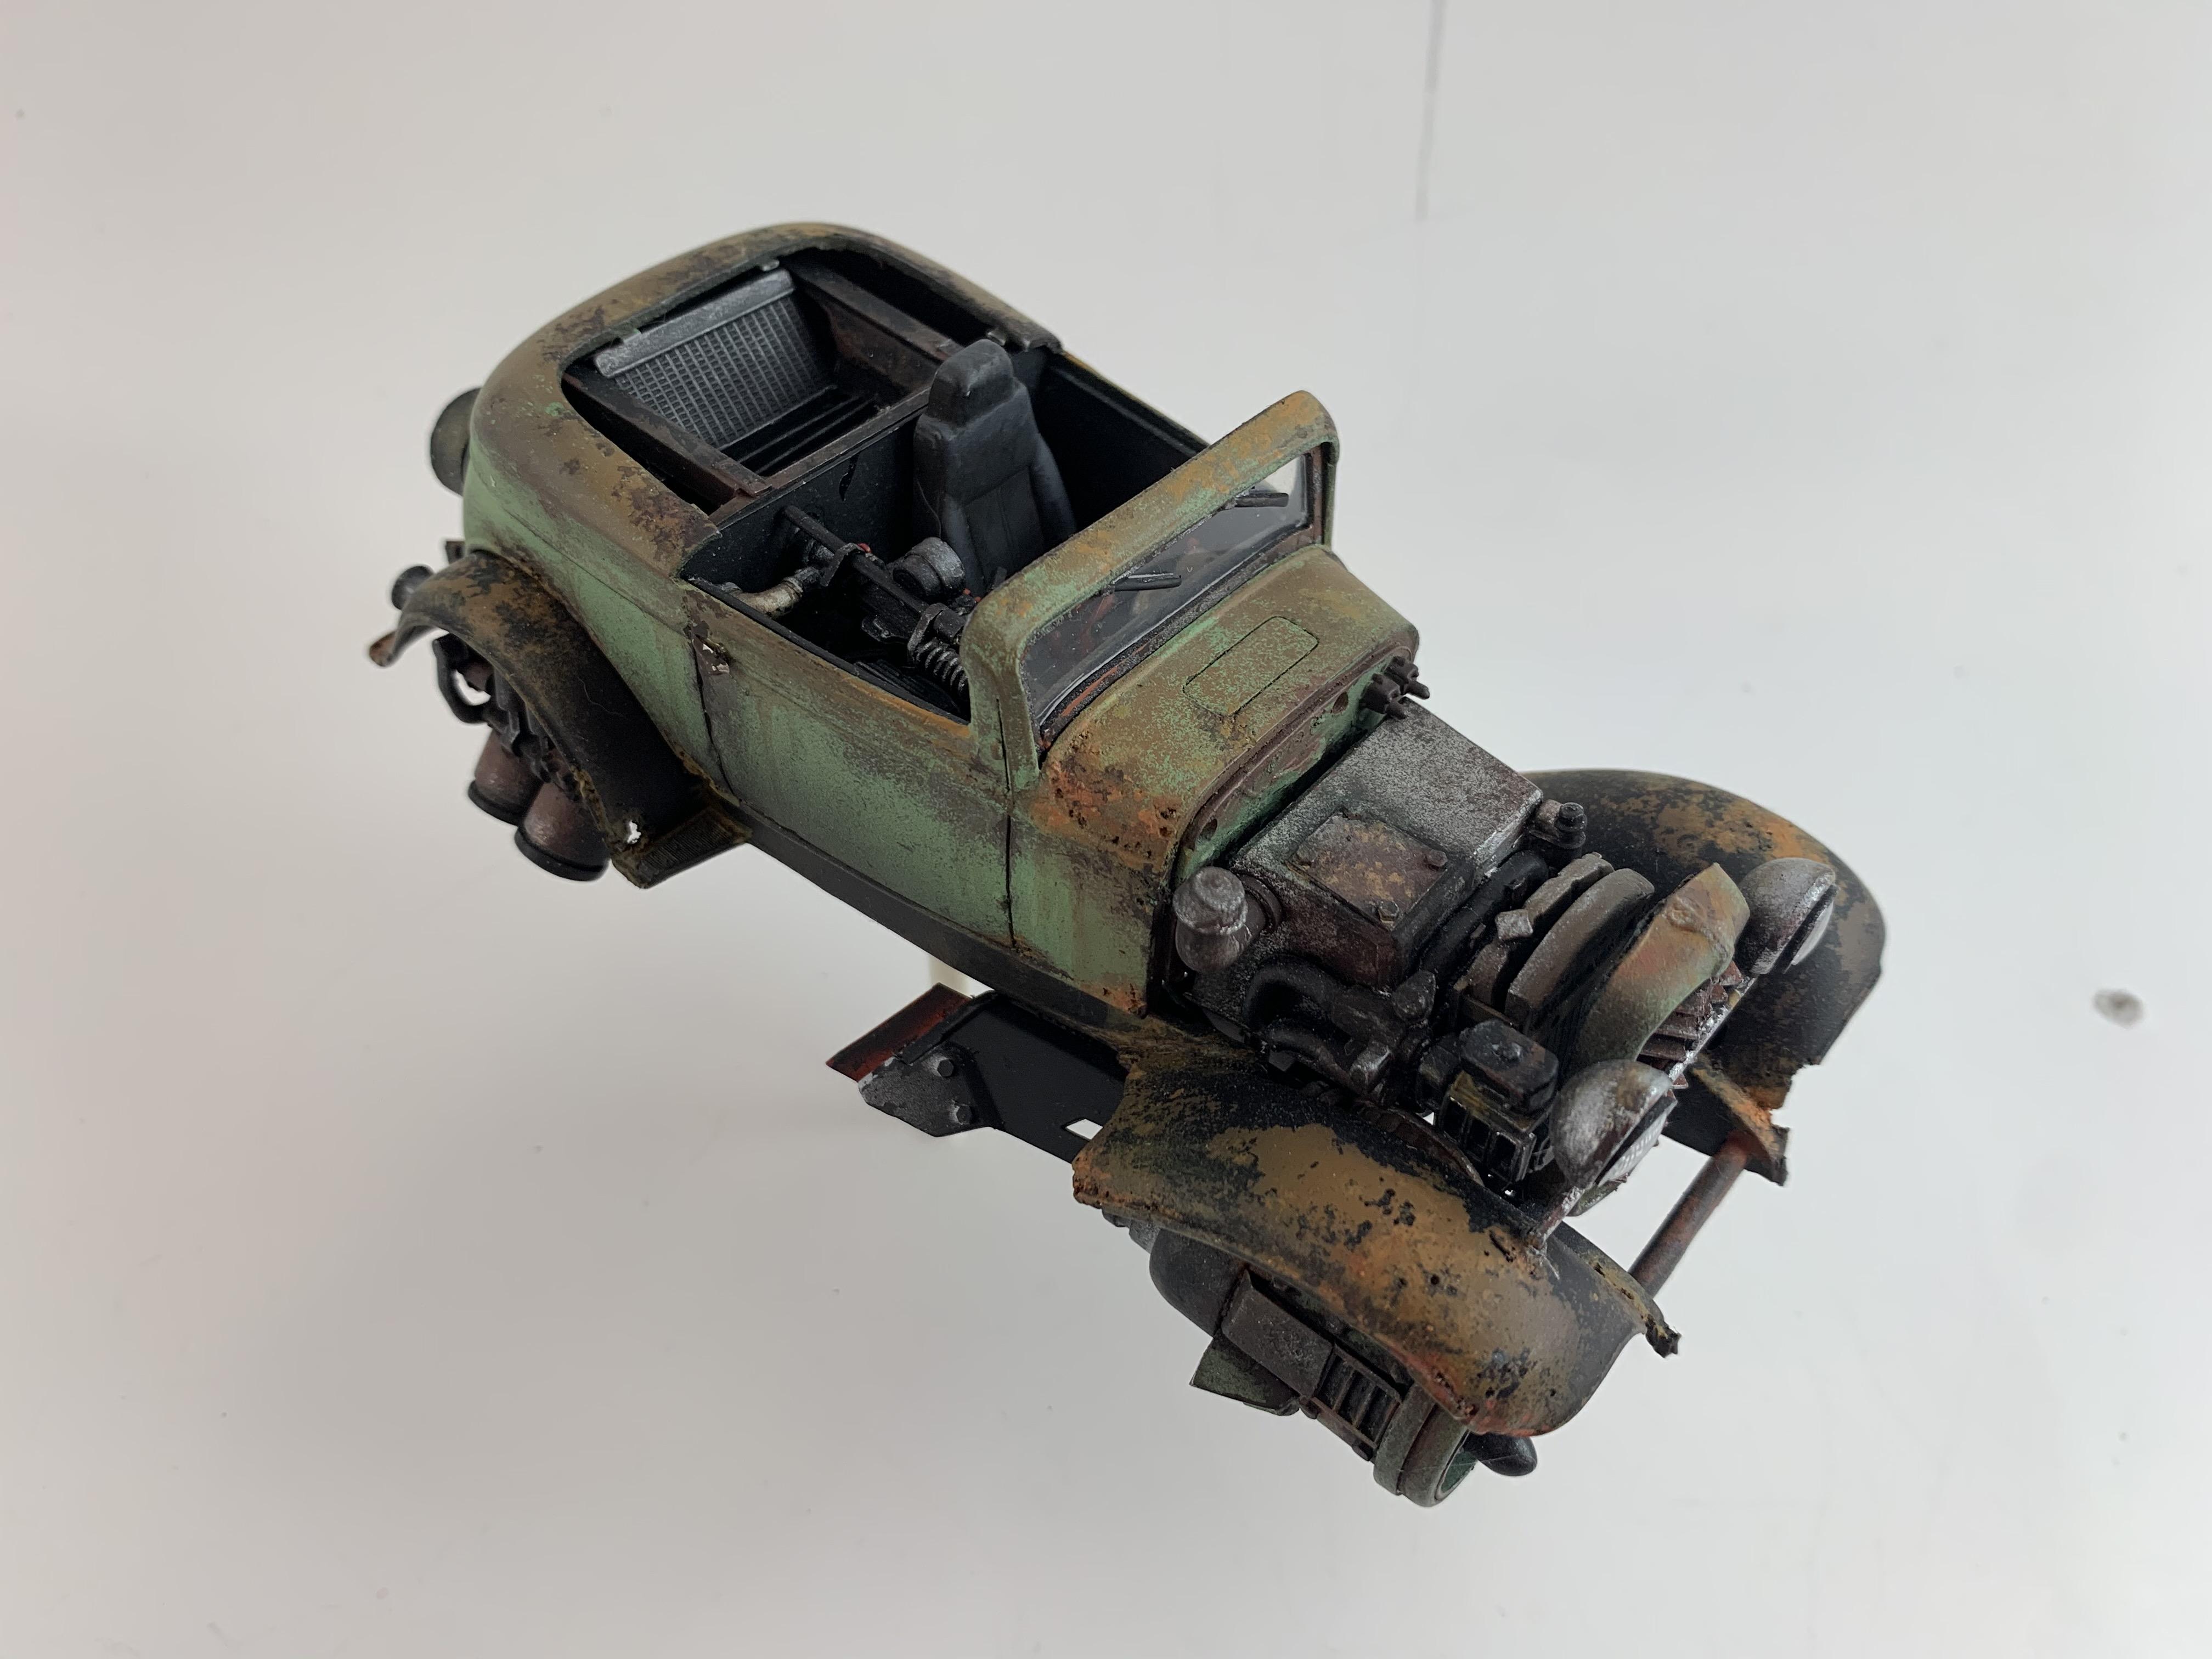
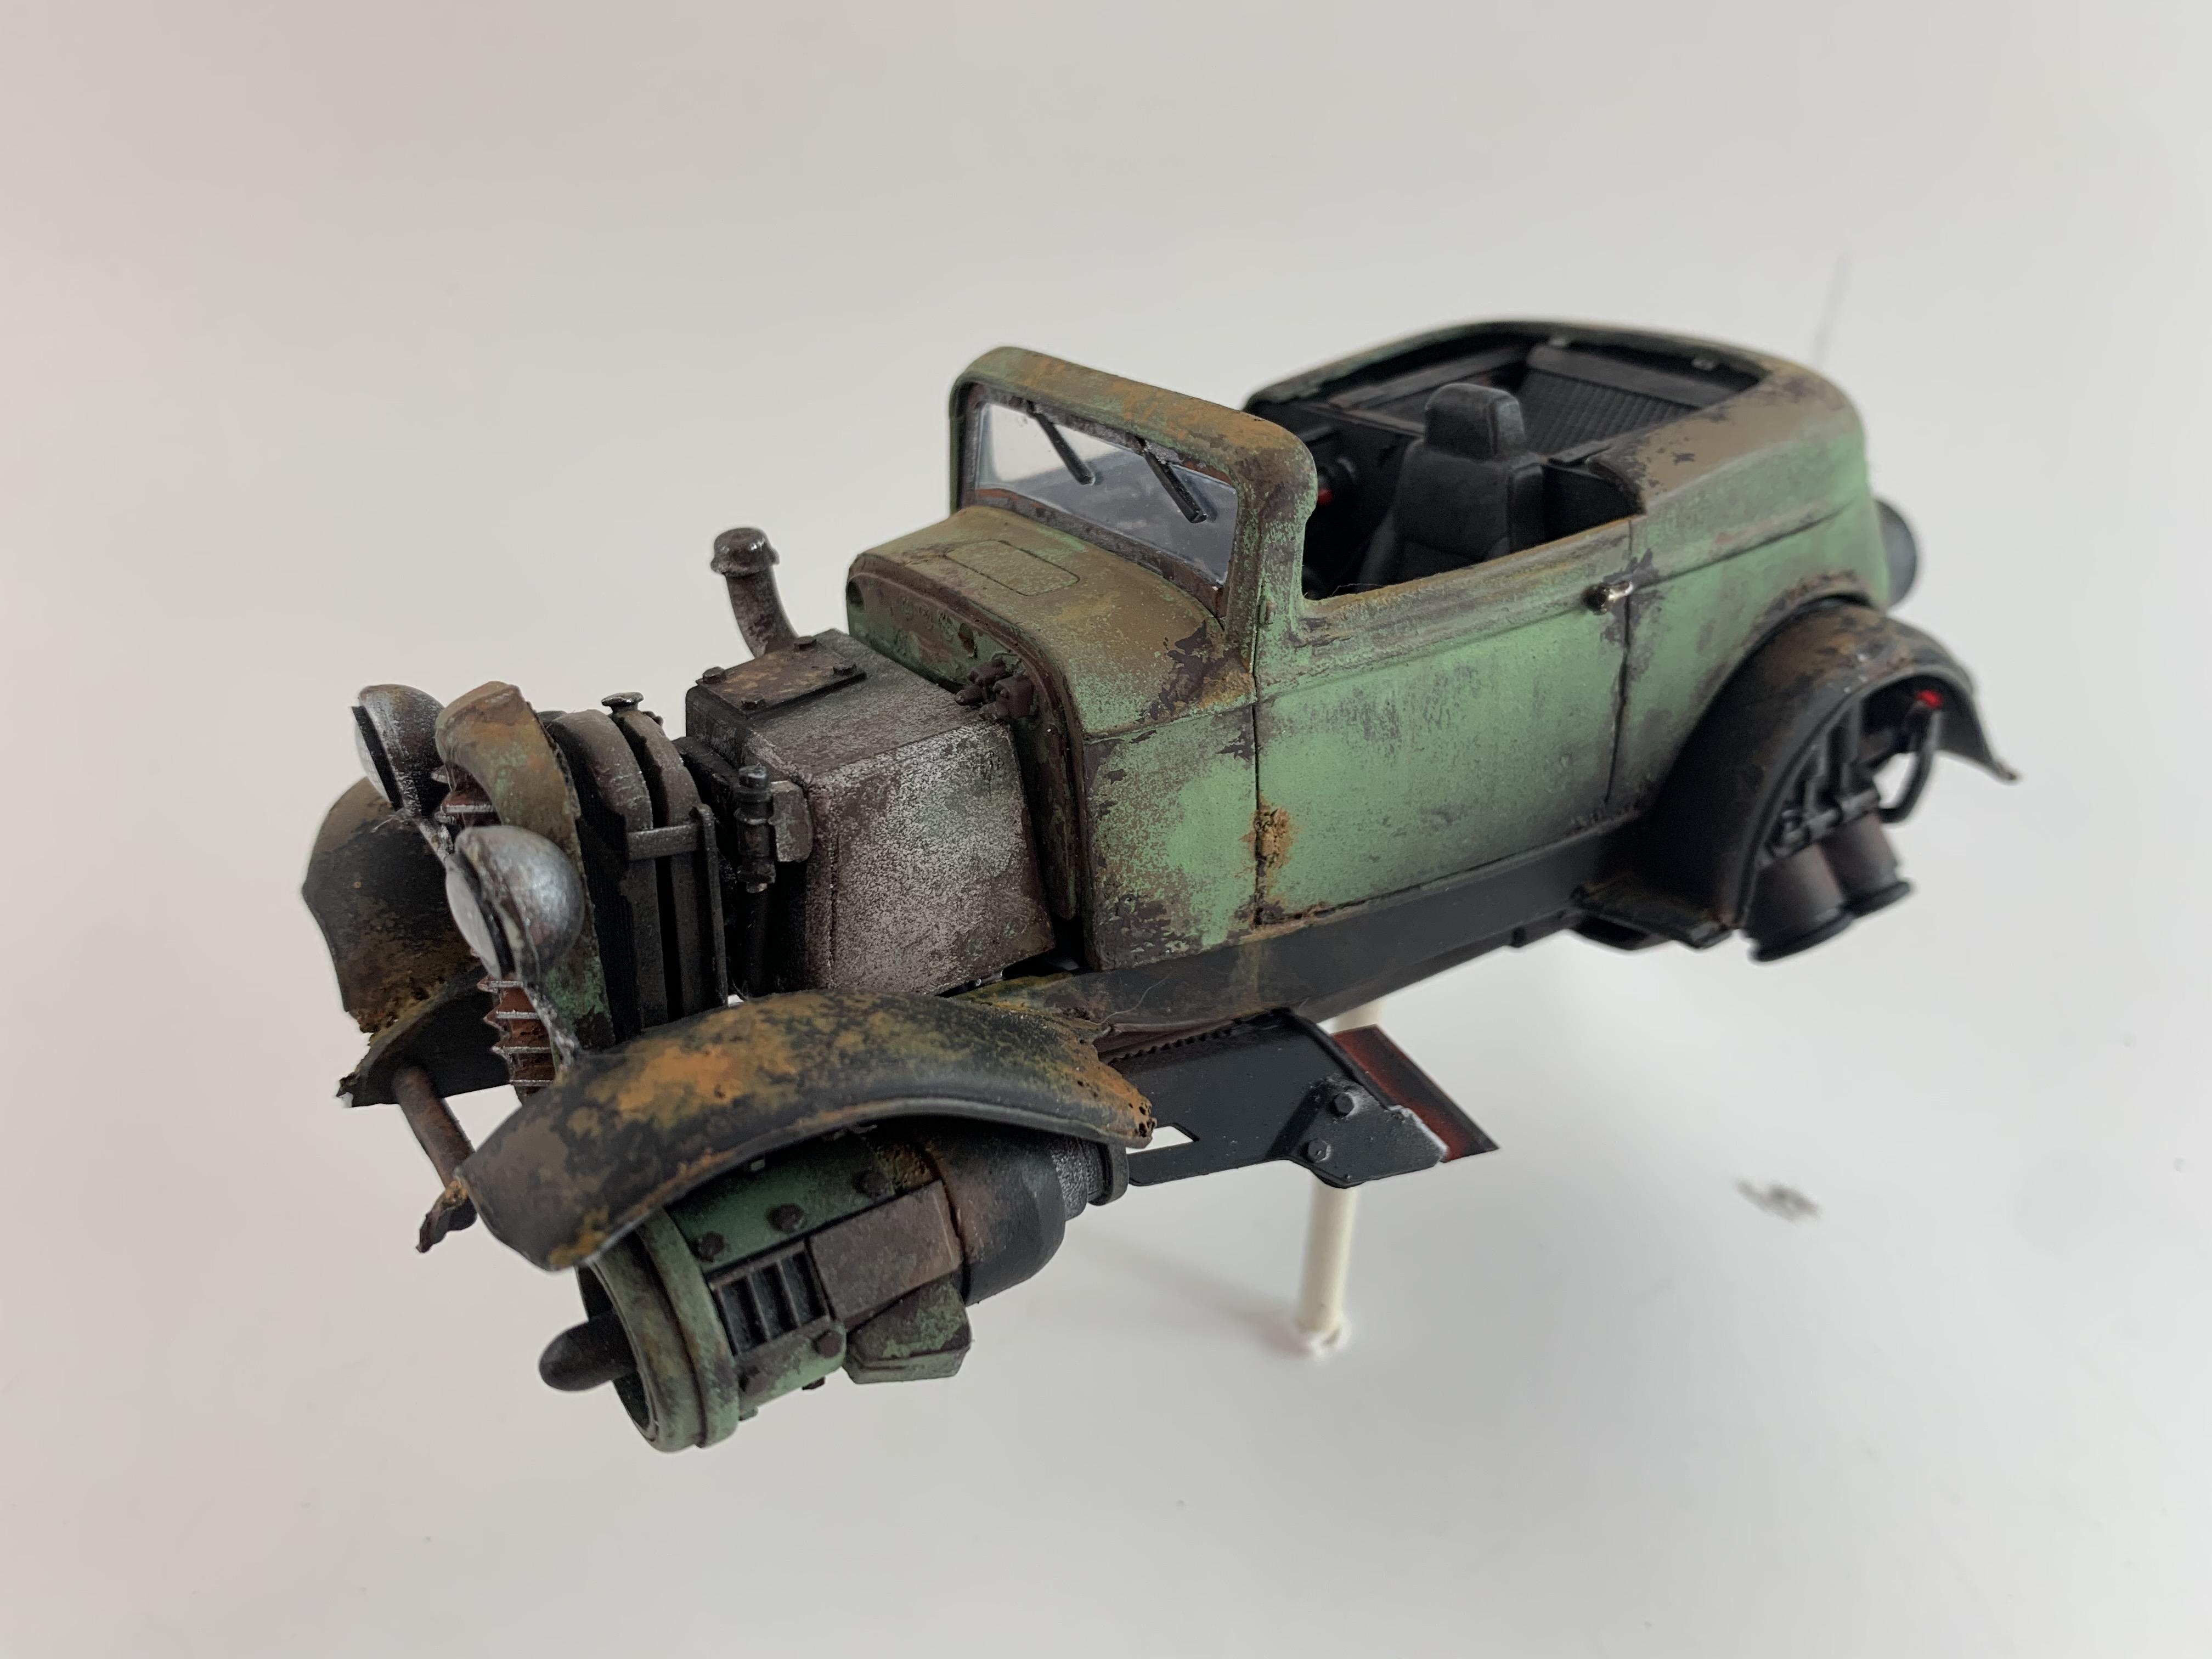
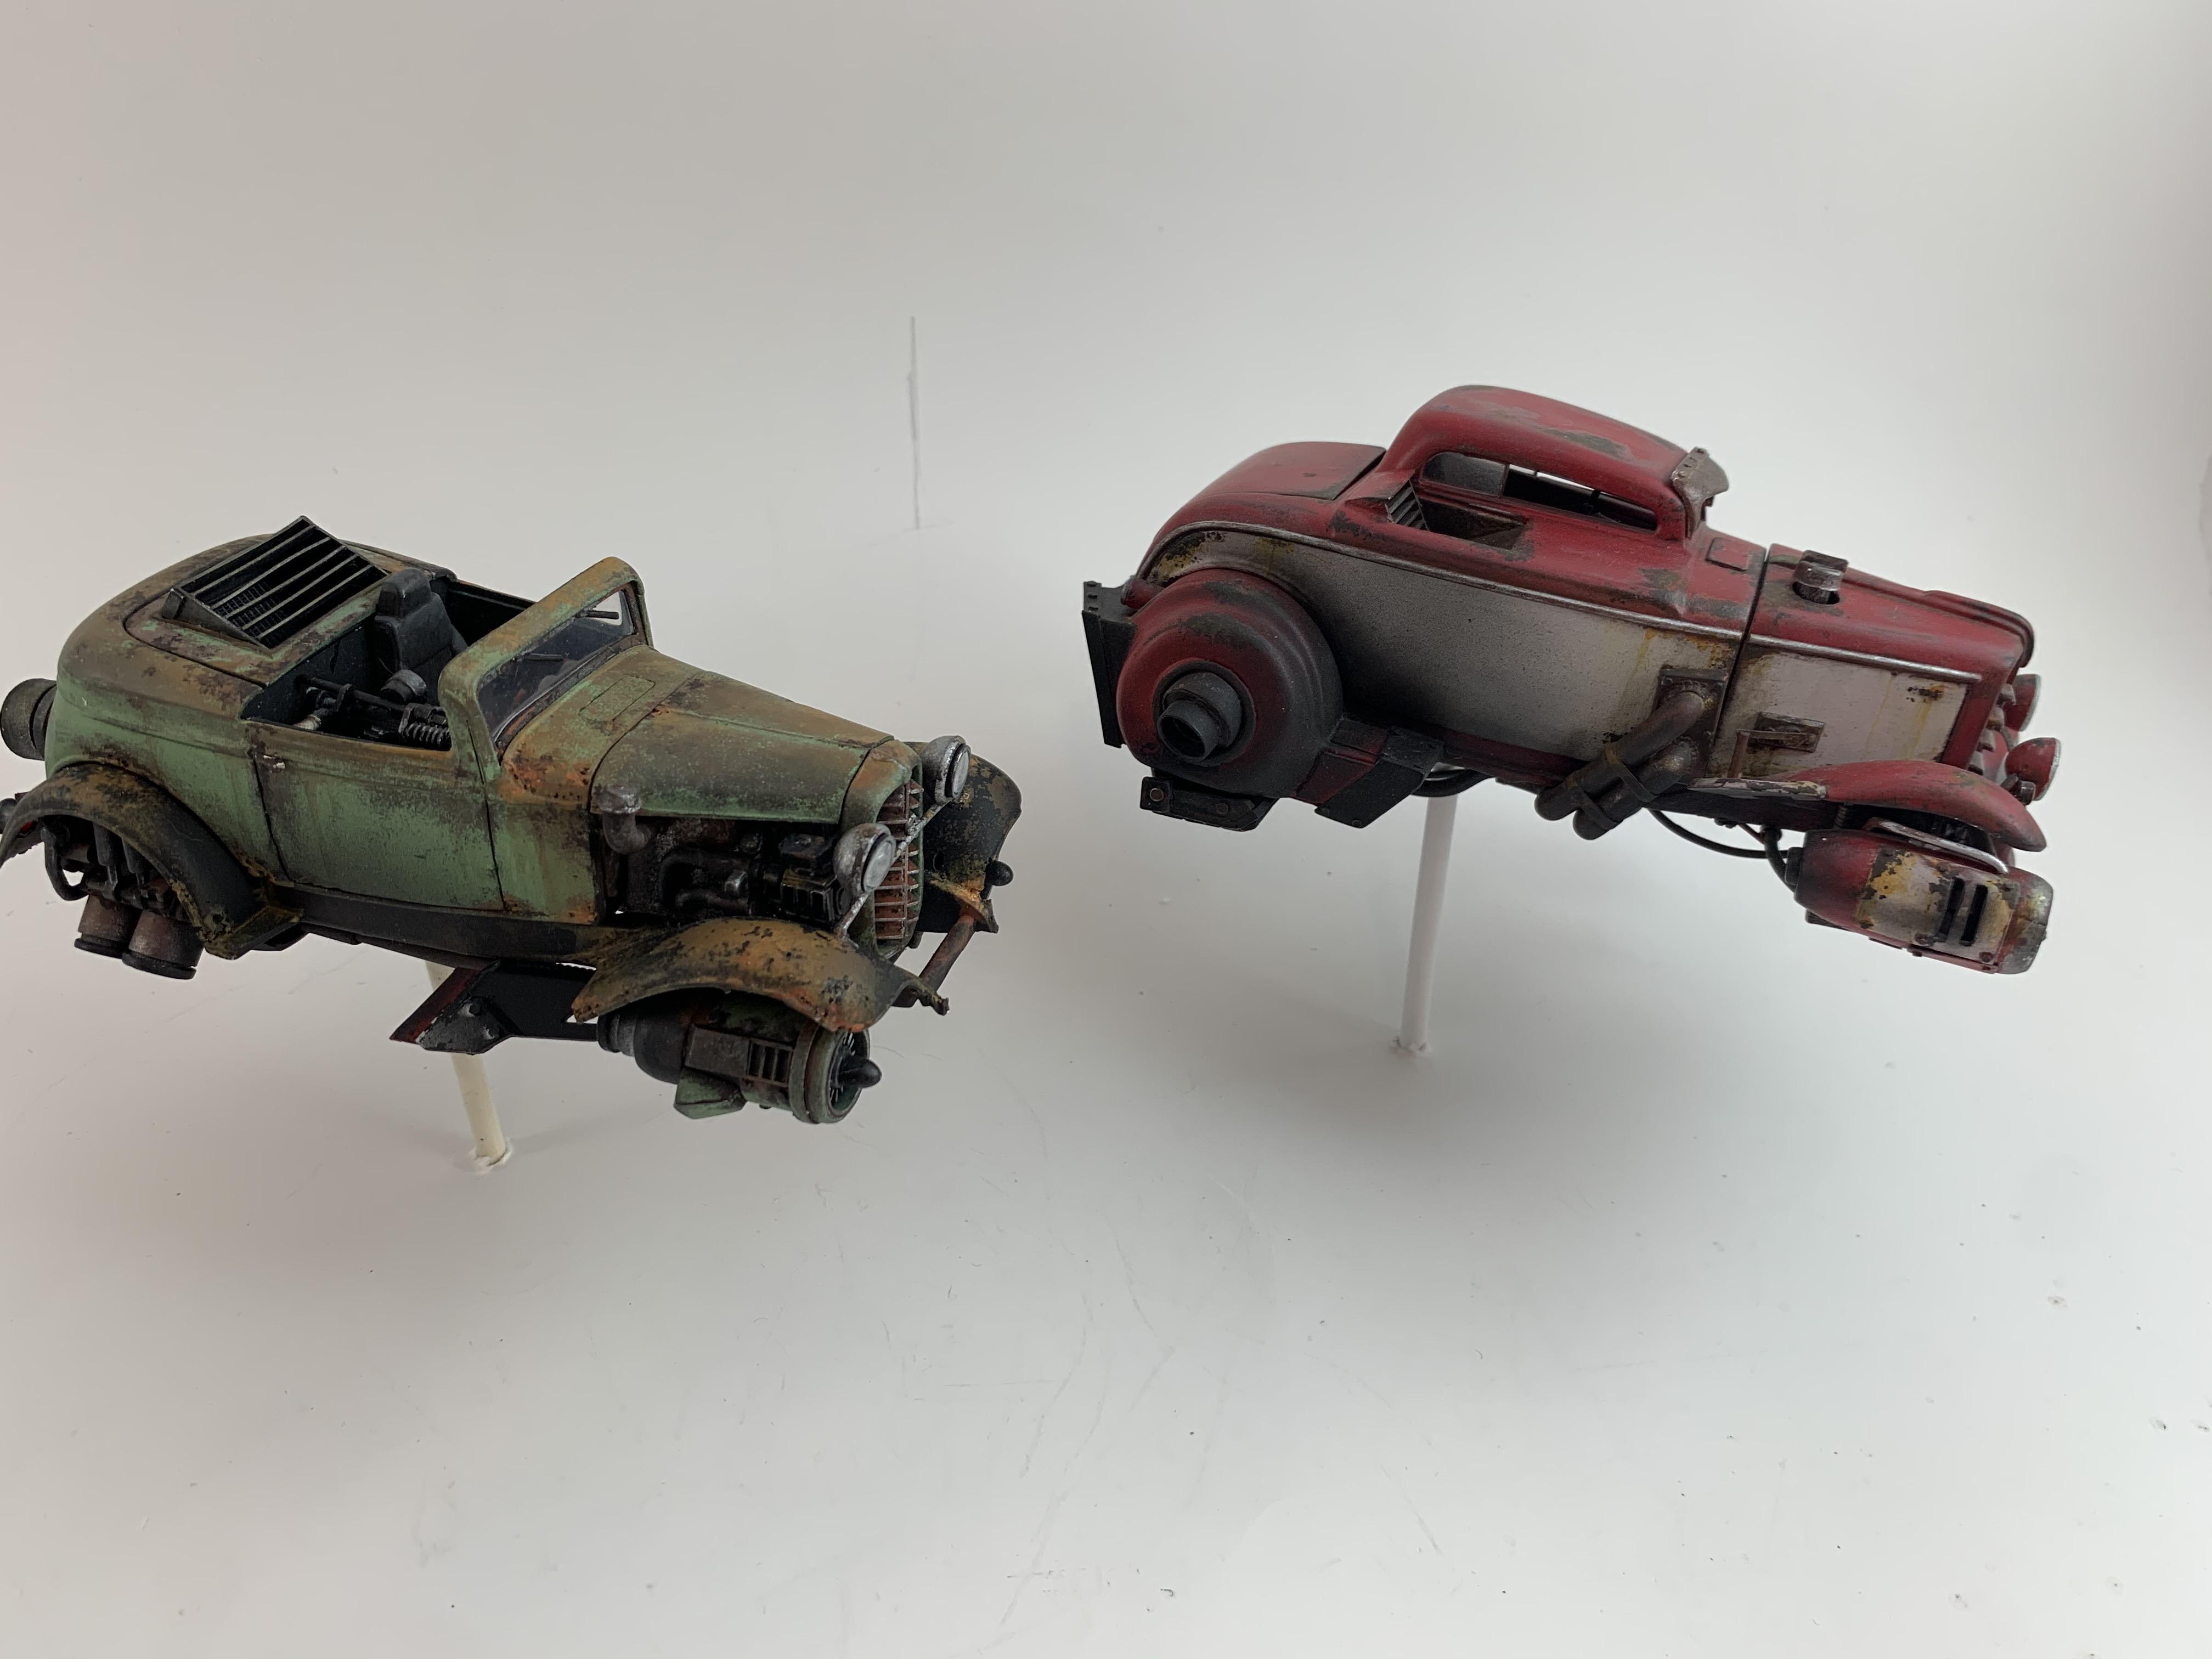
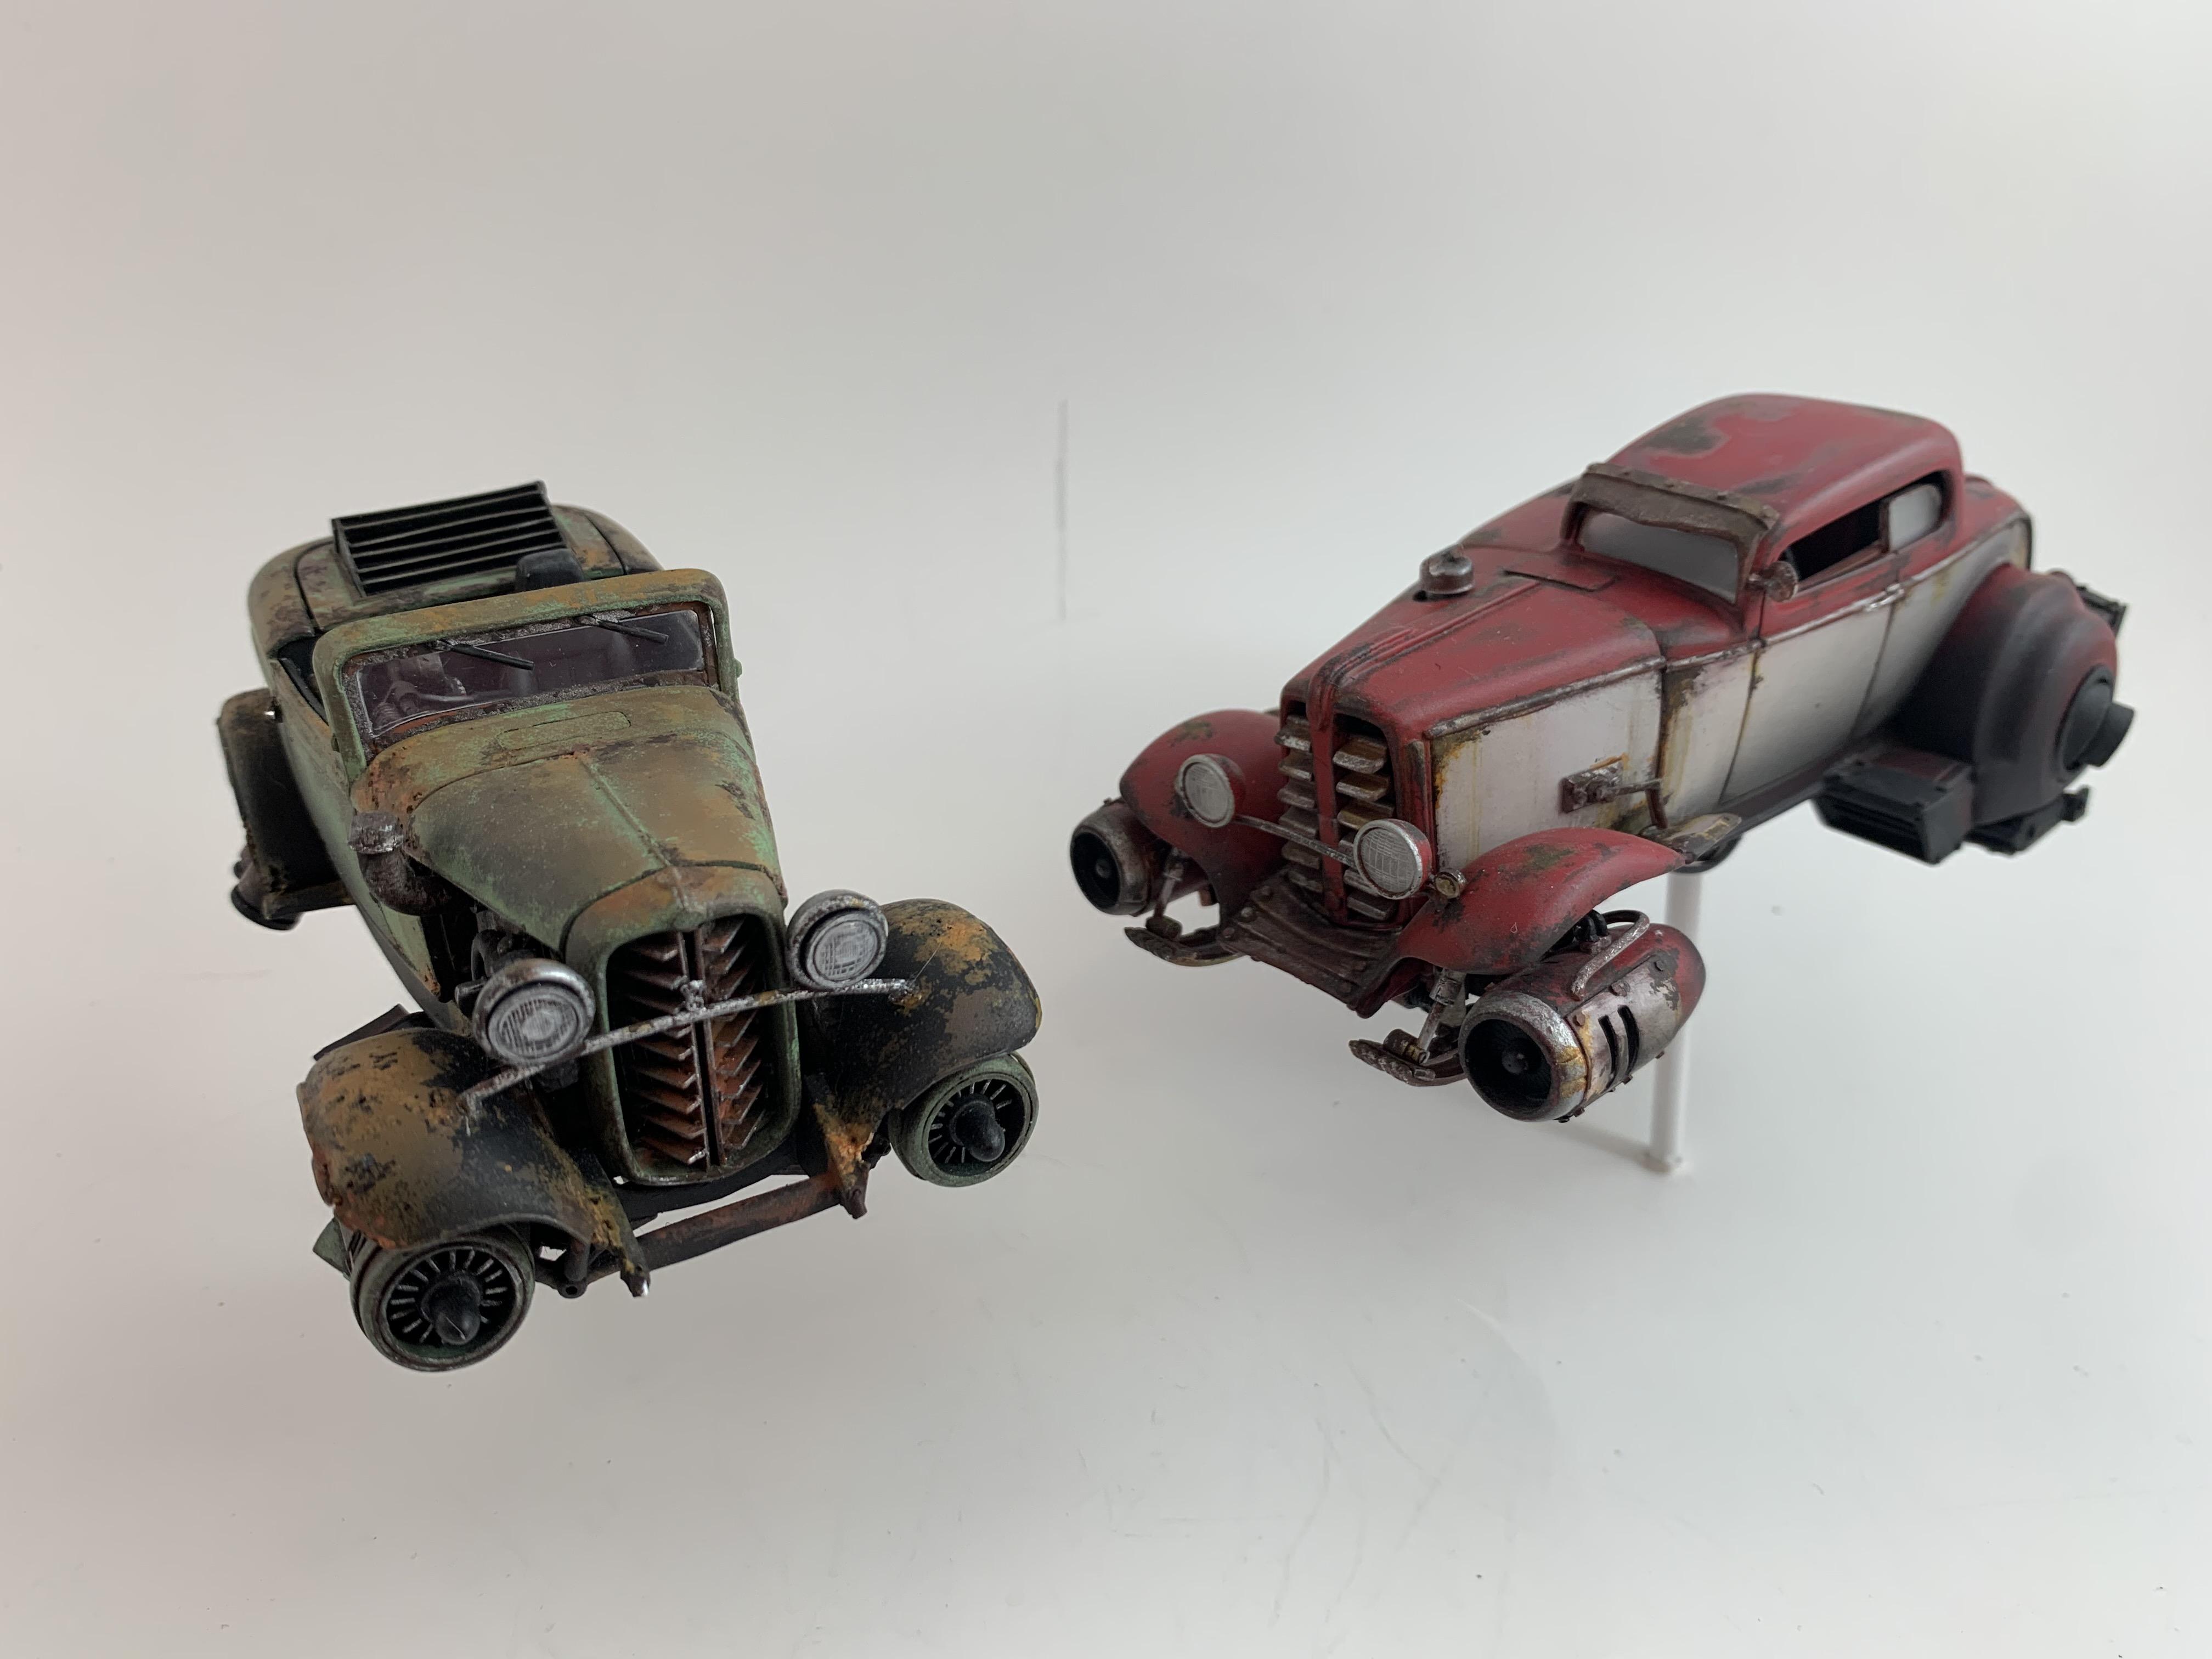
When I try to describe these vehicles to people who haven't seen them, I say they're a mix between Mad Max, Star Wars Pod Racers, and the Manga series Initial D. I picture them in a post-apocalypse timeline. A world that is rebuilding itself after a great catastrophe. People build these jet cars and compete against others in some weekly no holds barred races. And just like the people of today, they would want their vehicles to have some style.
-
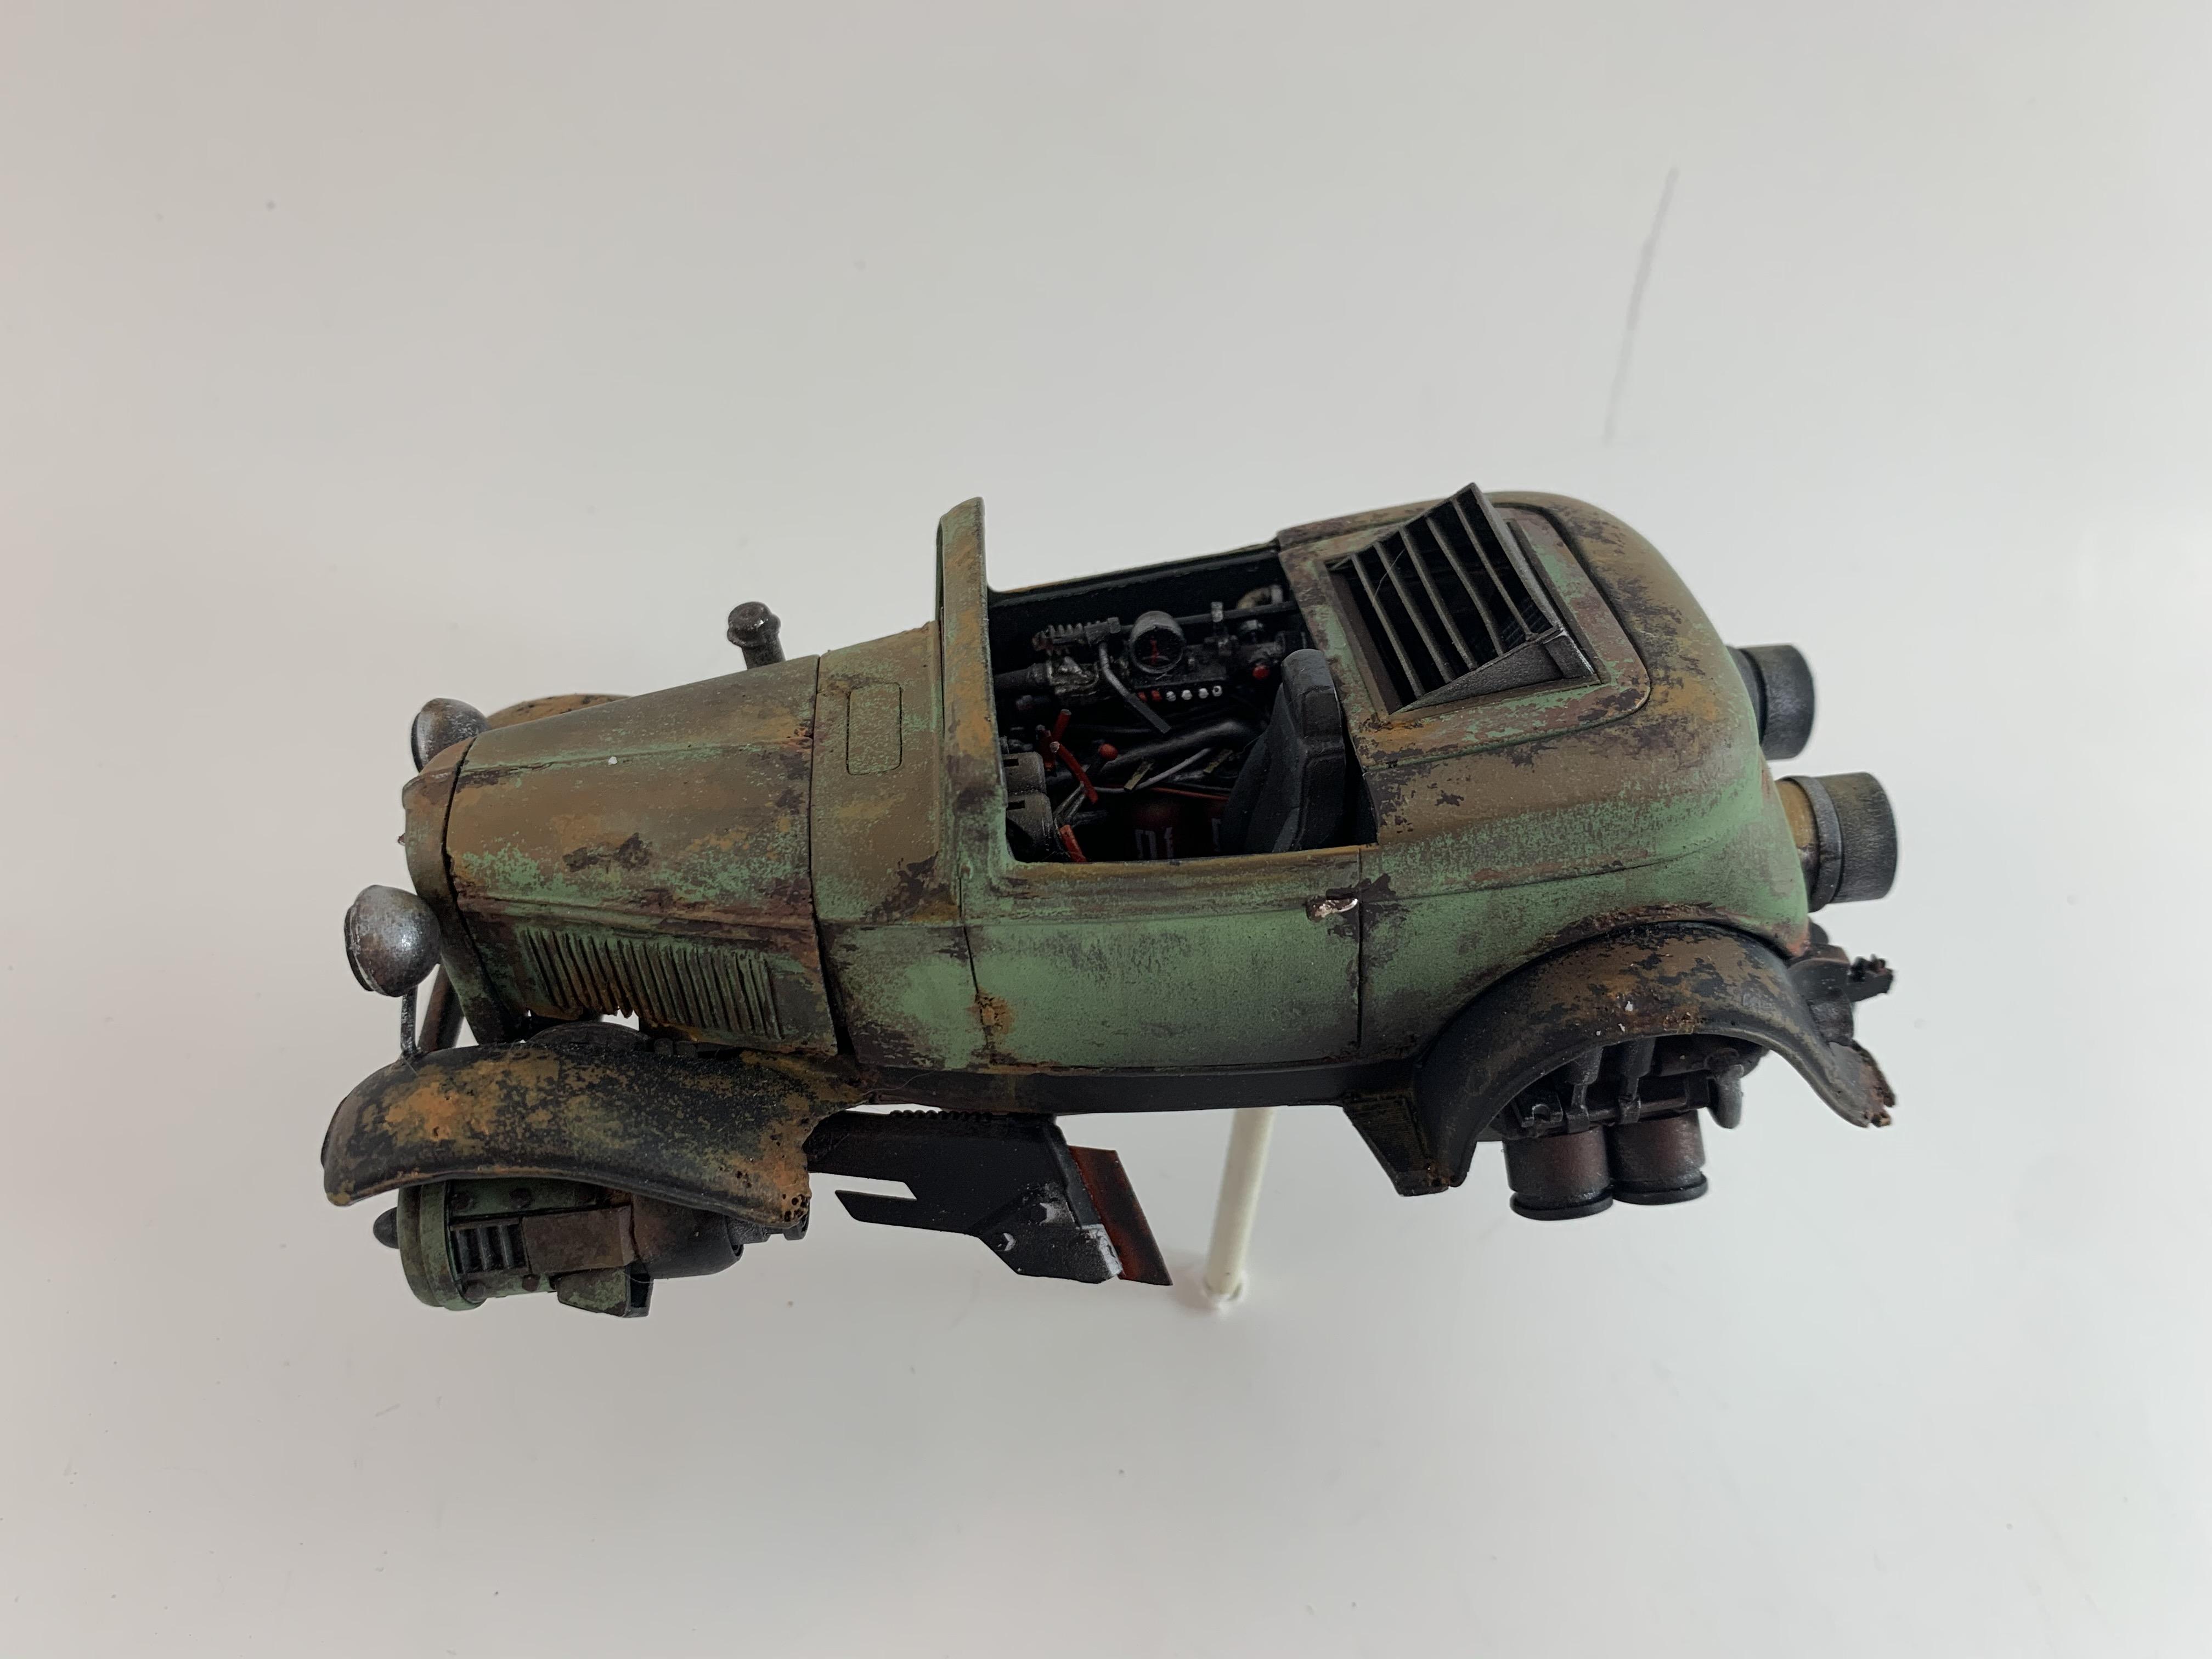
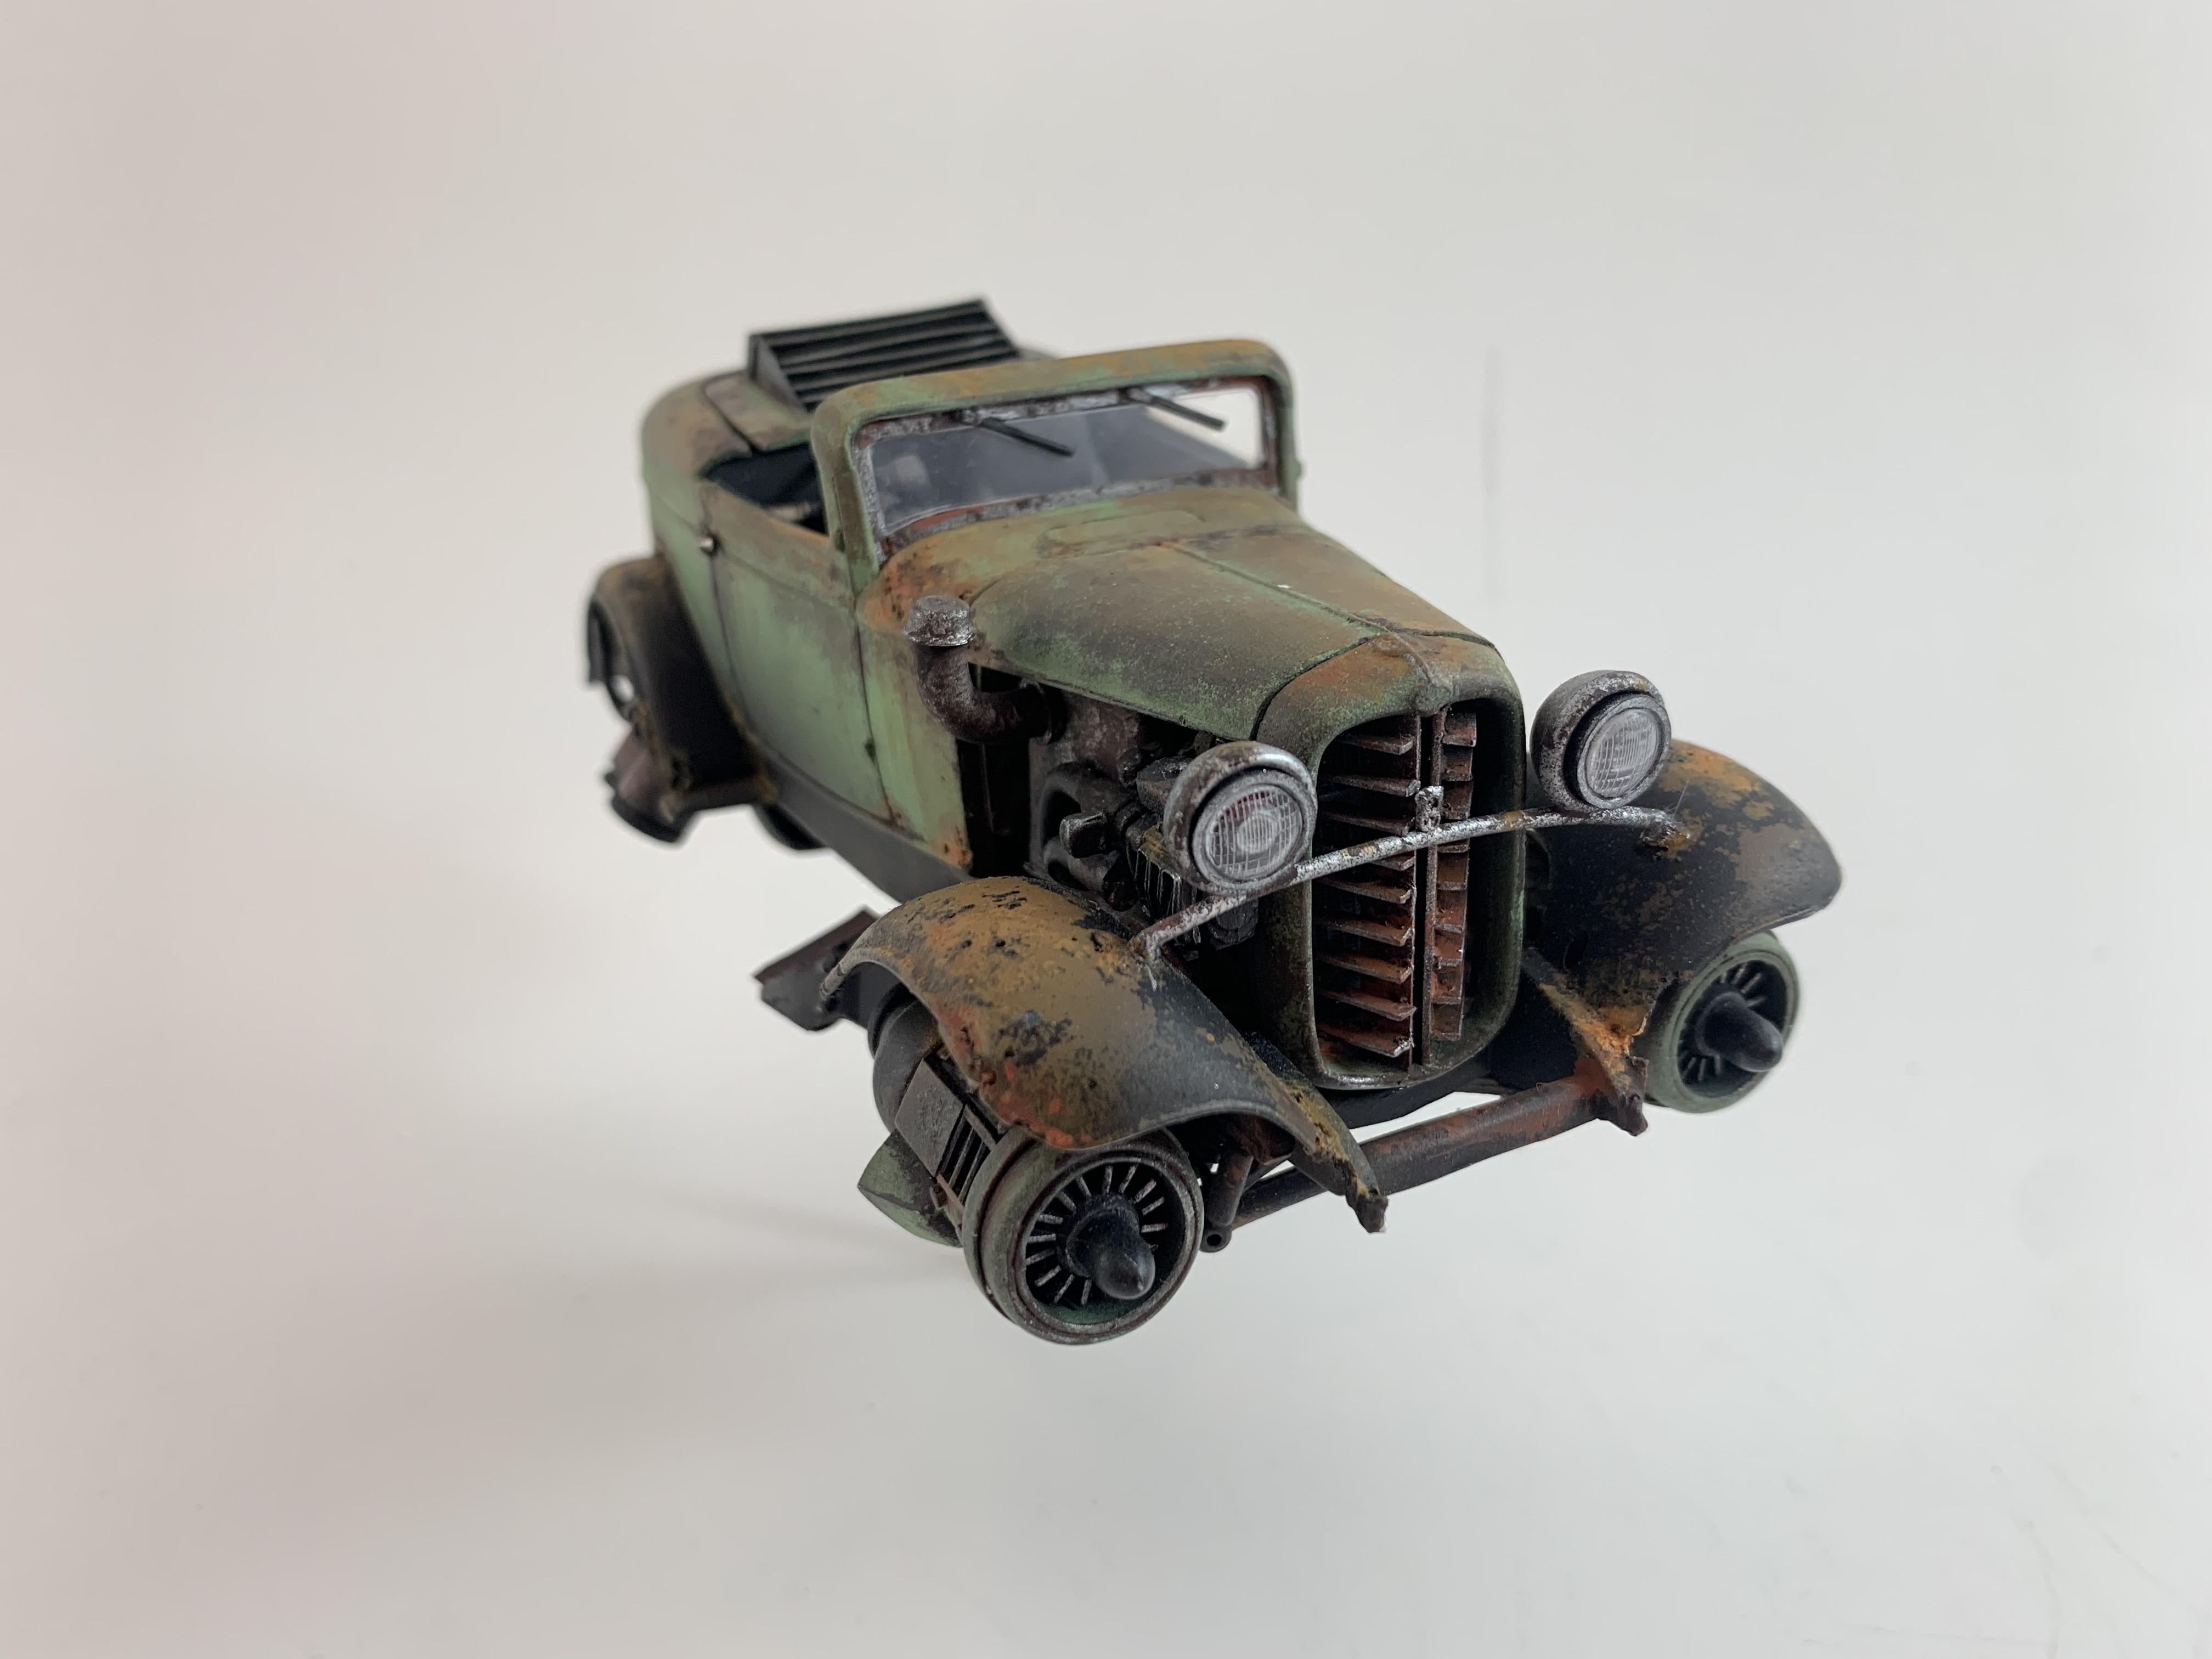
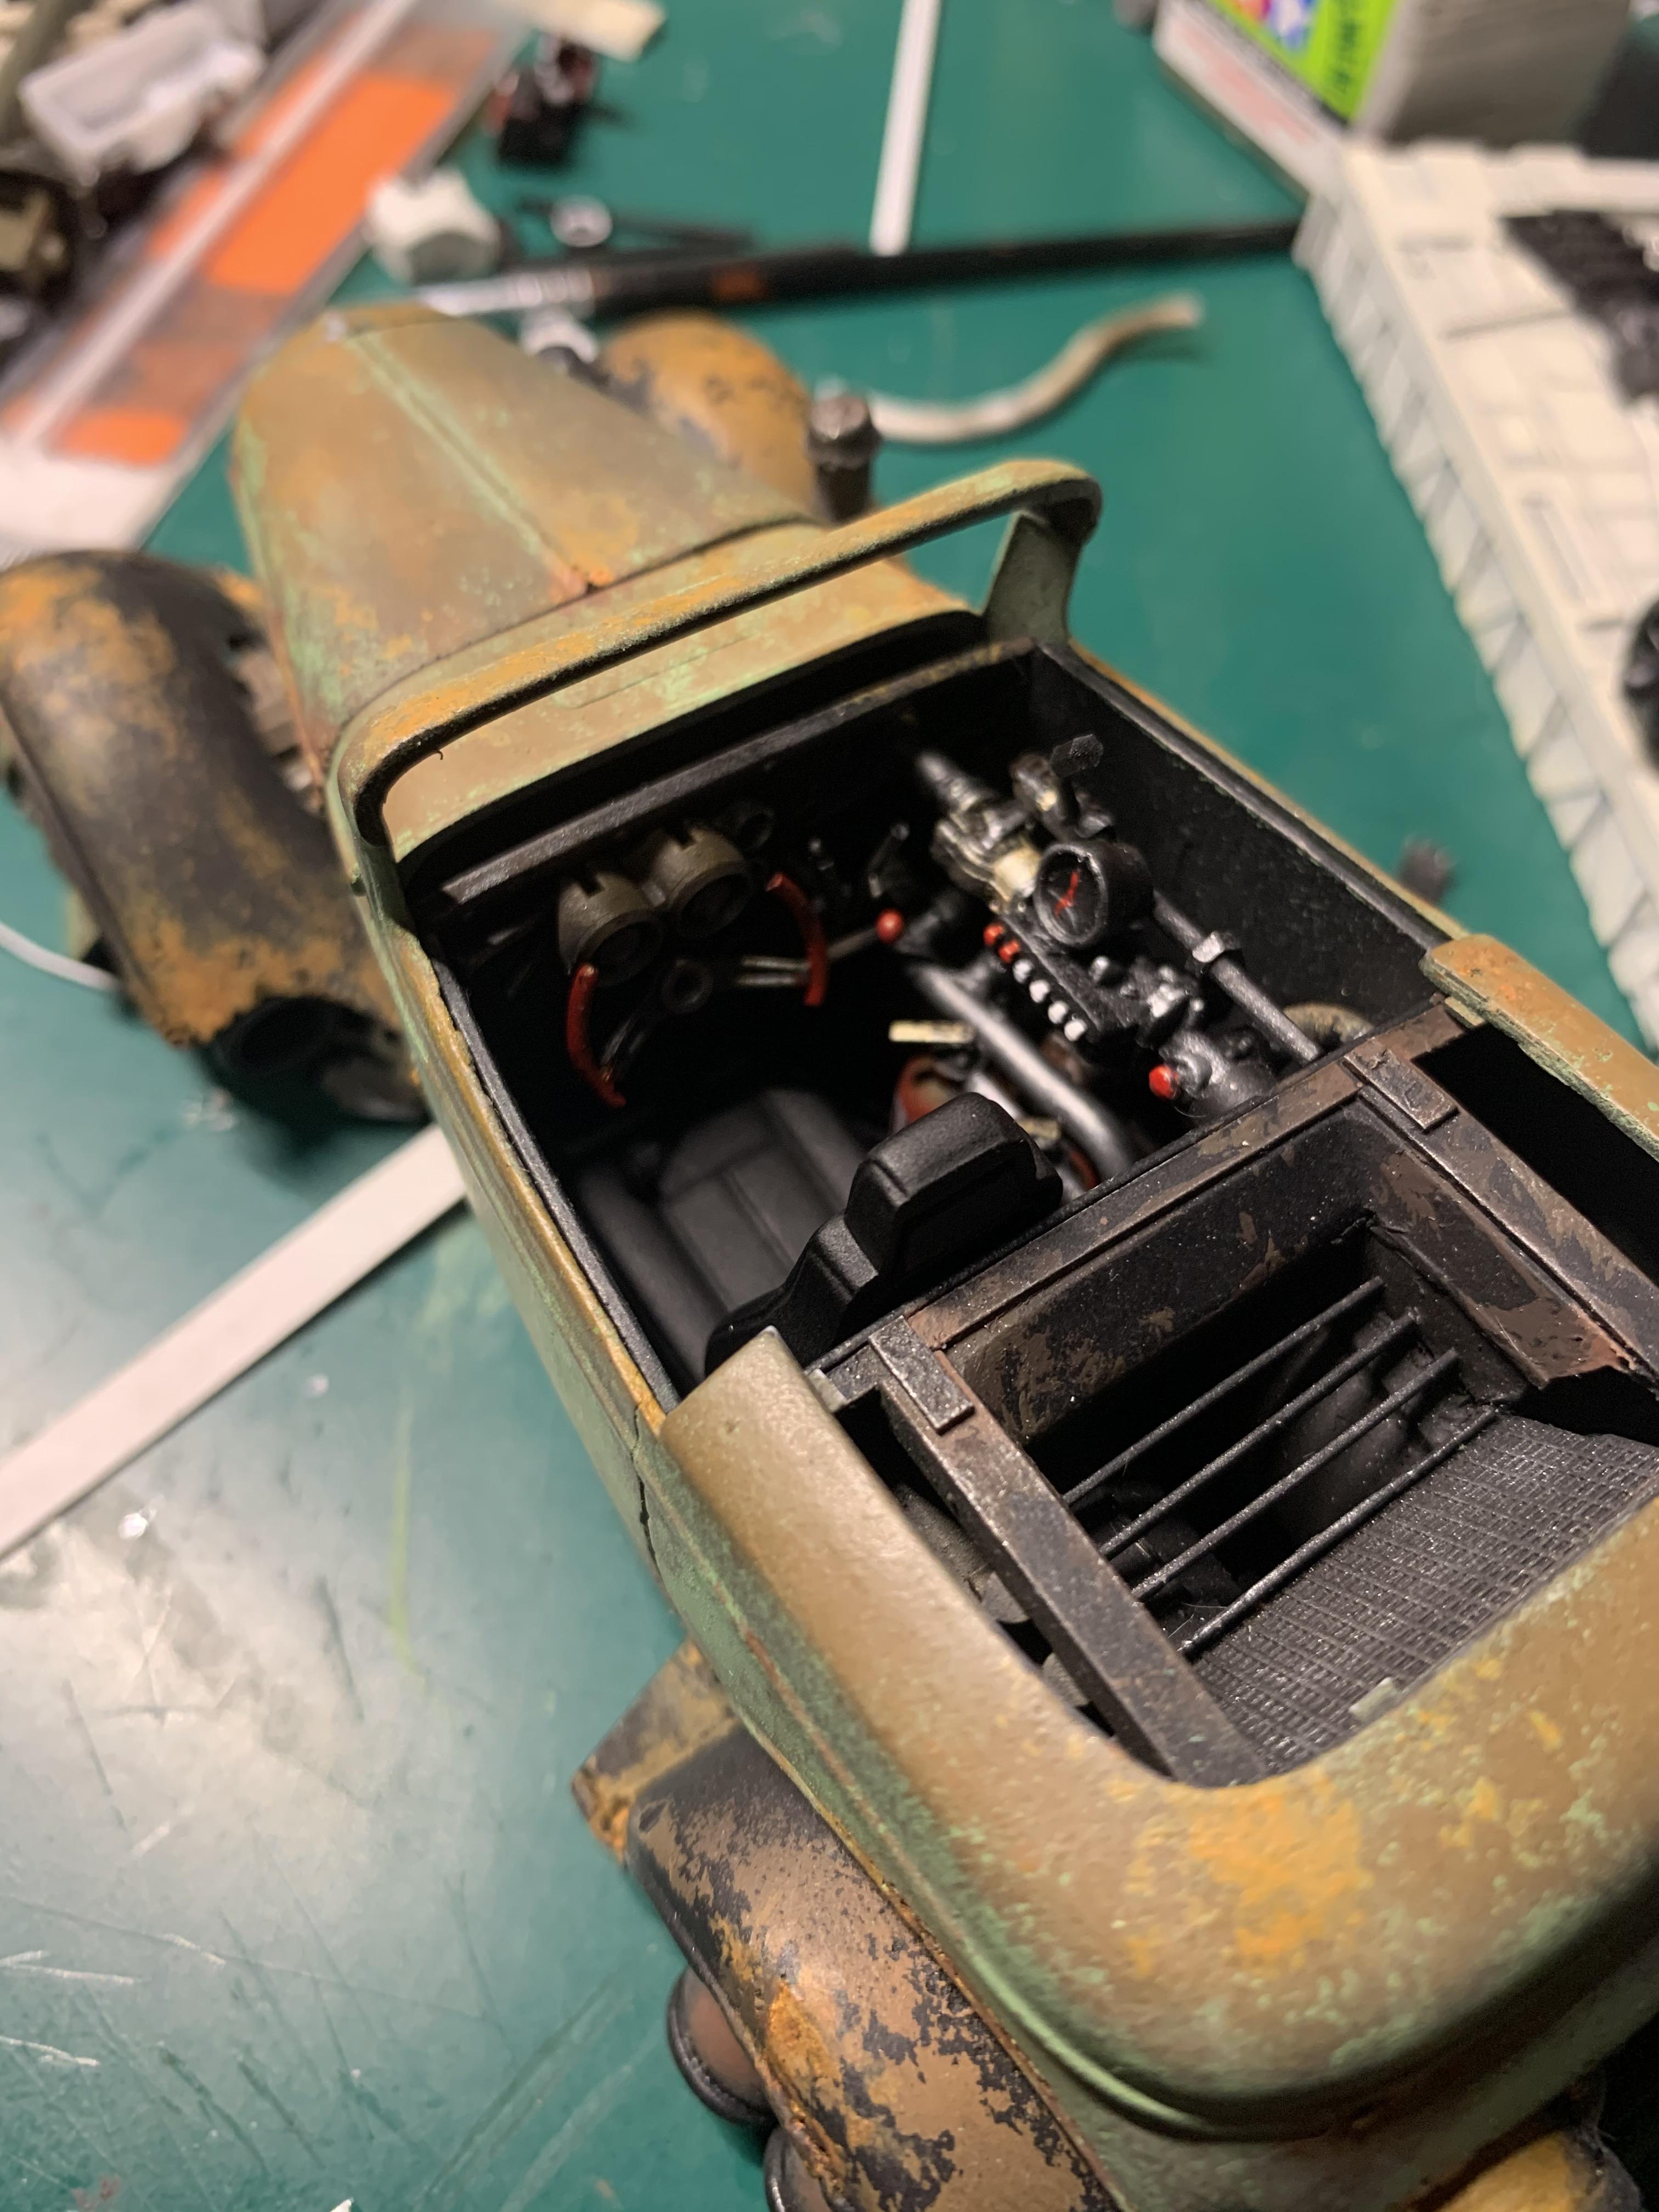
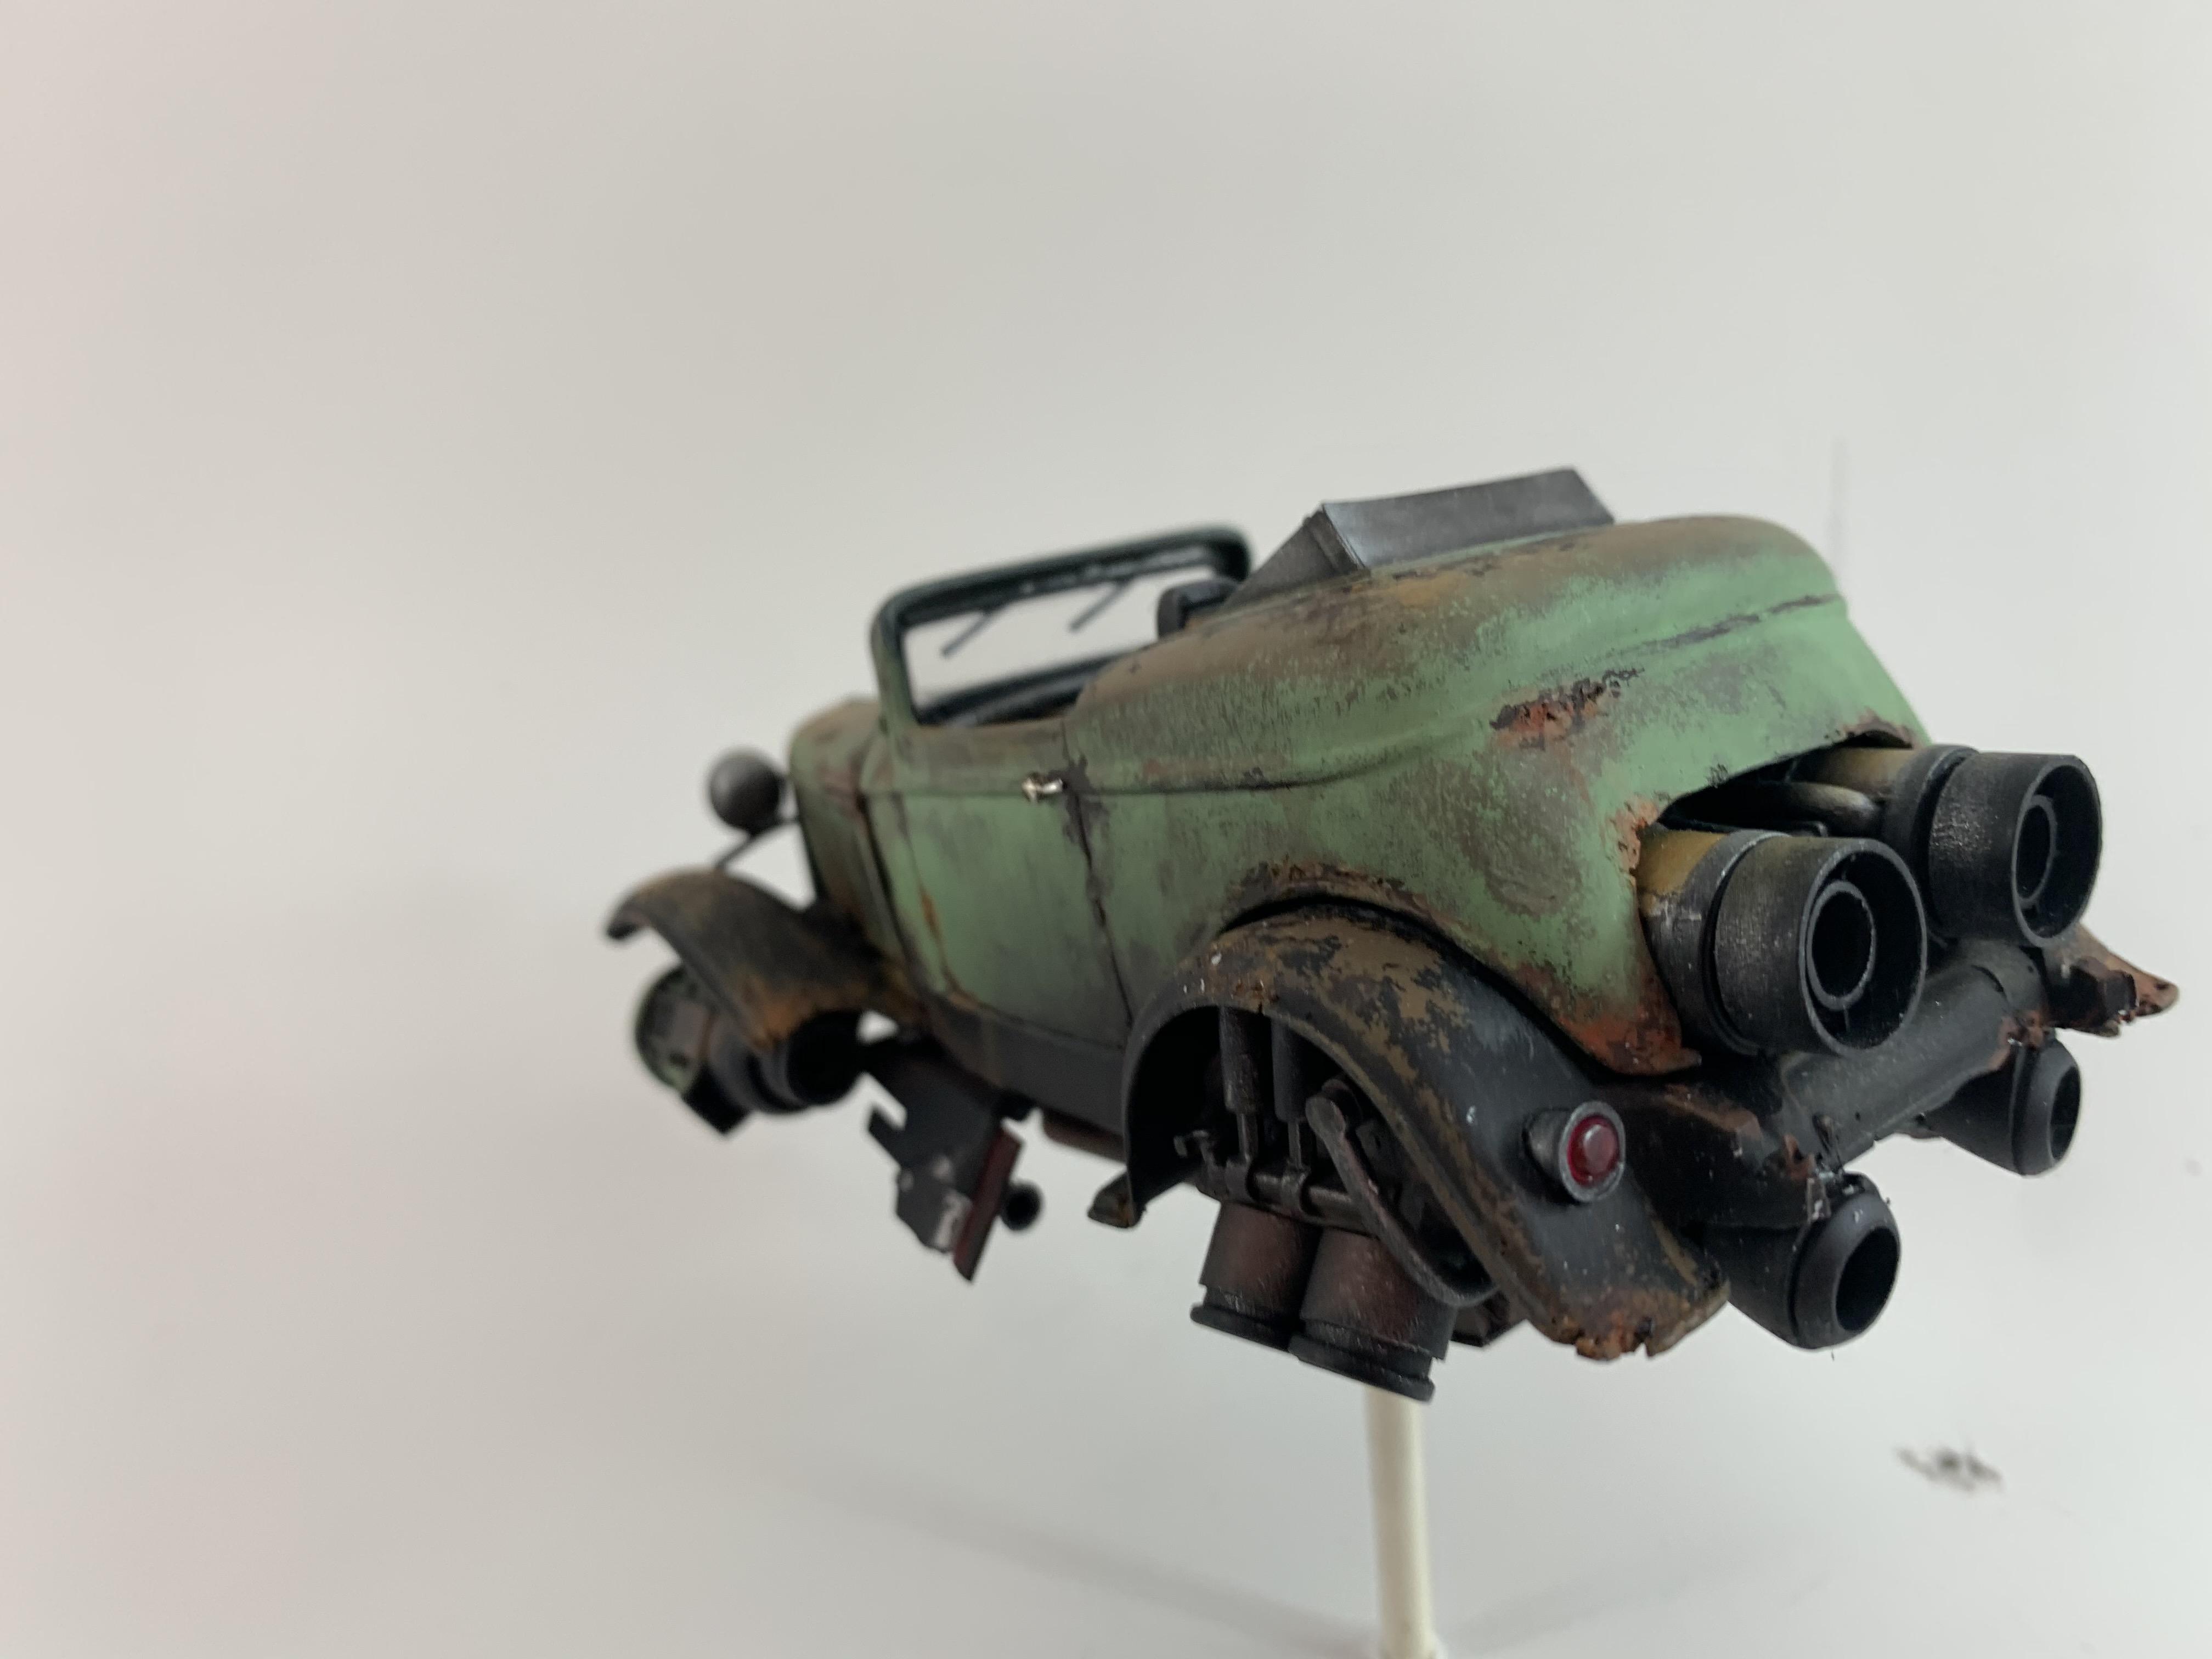
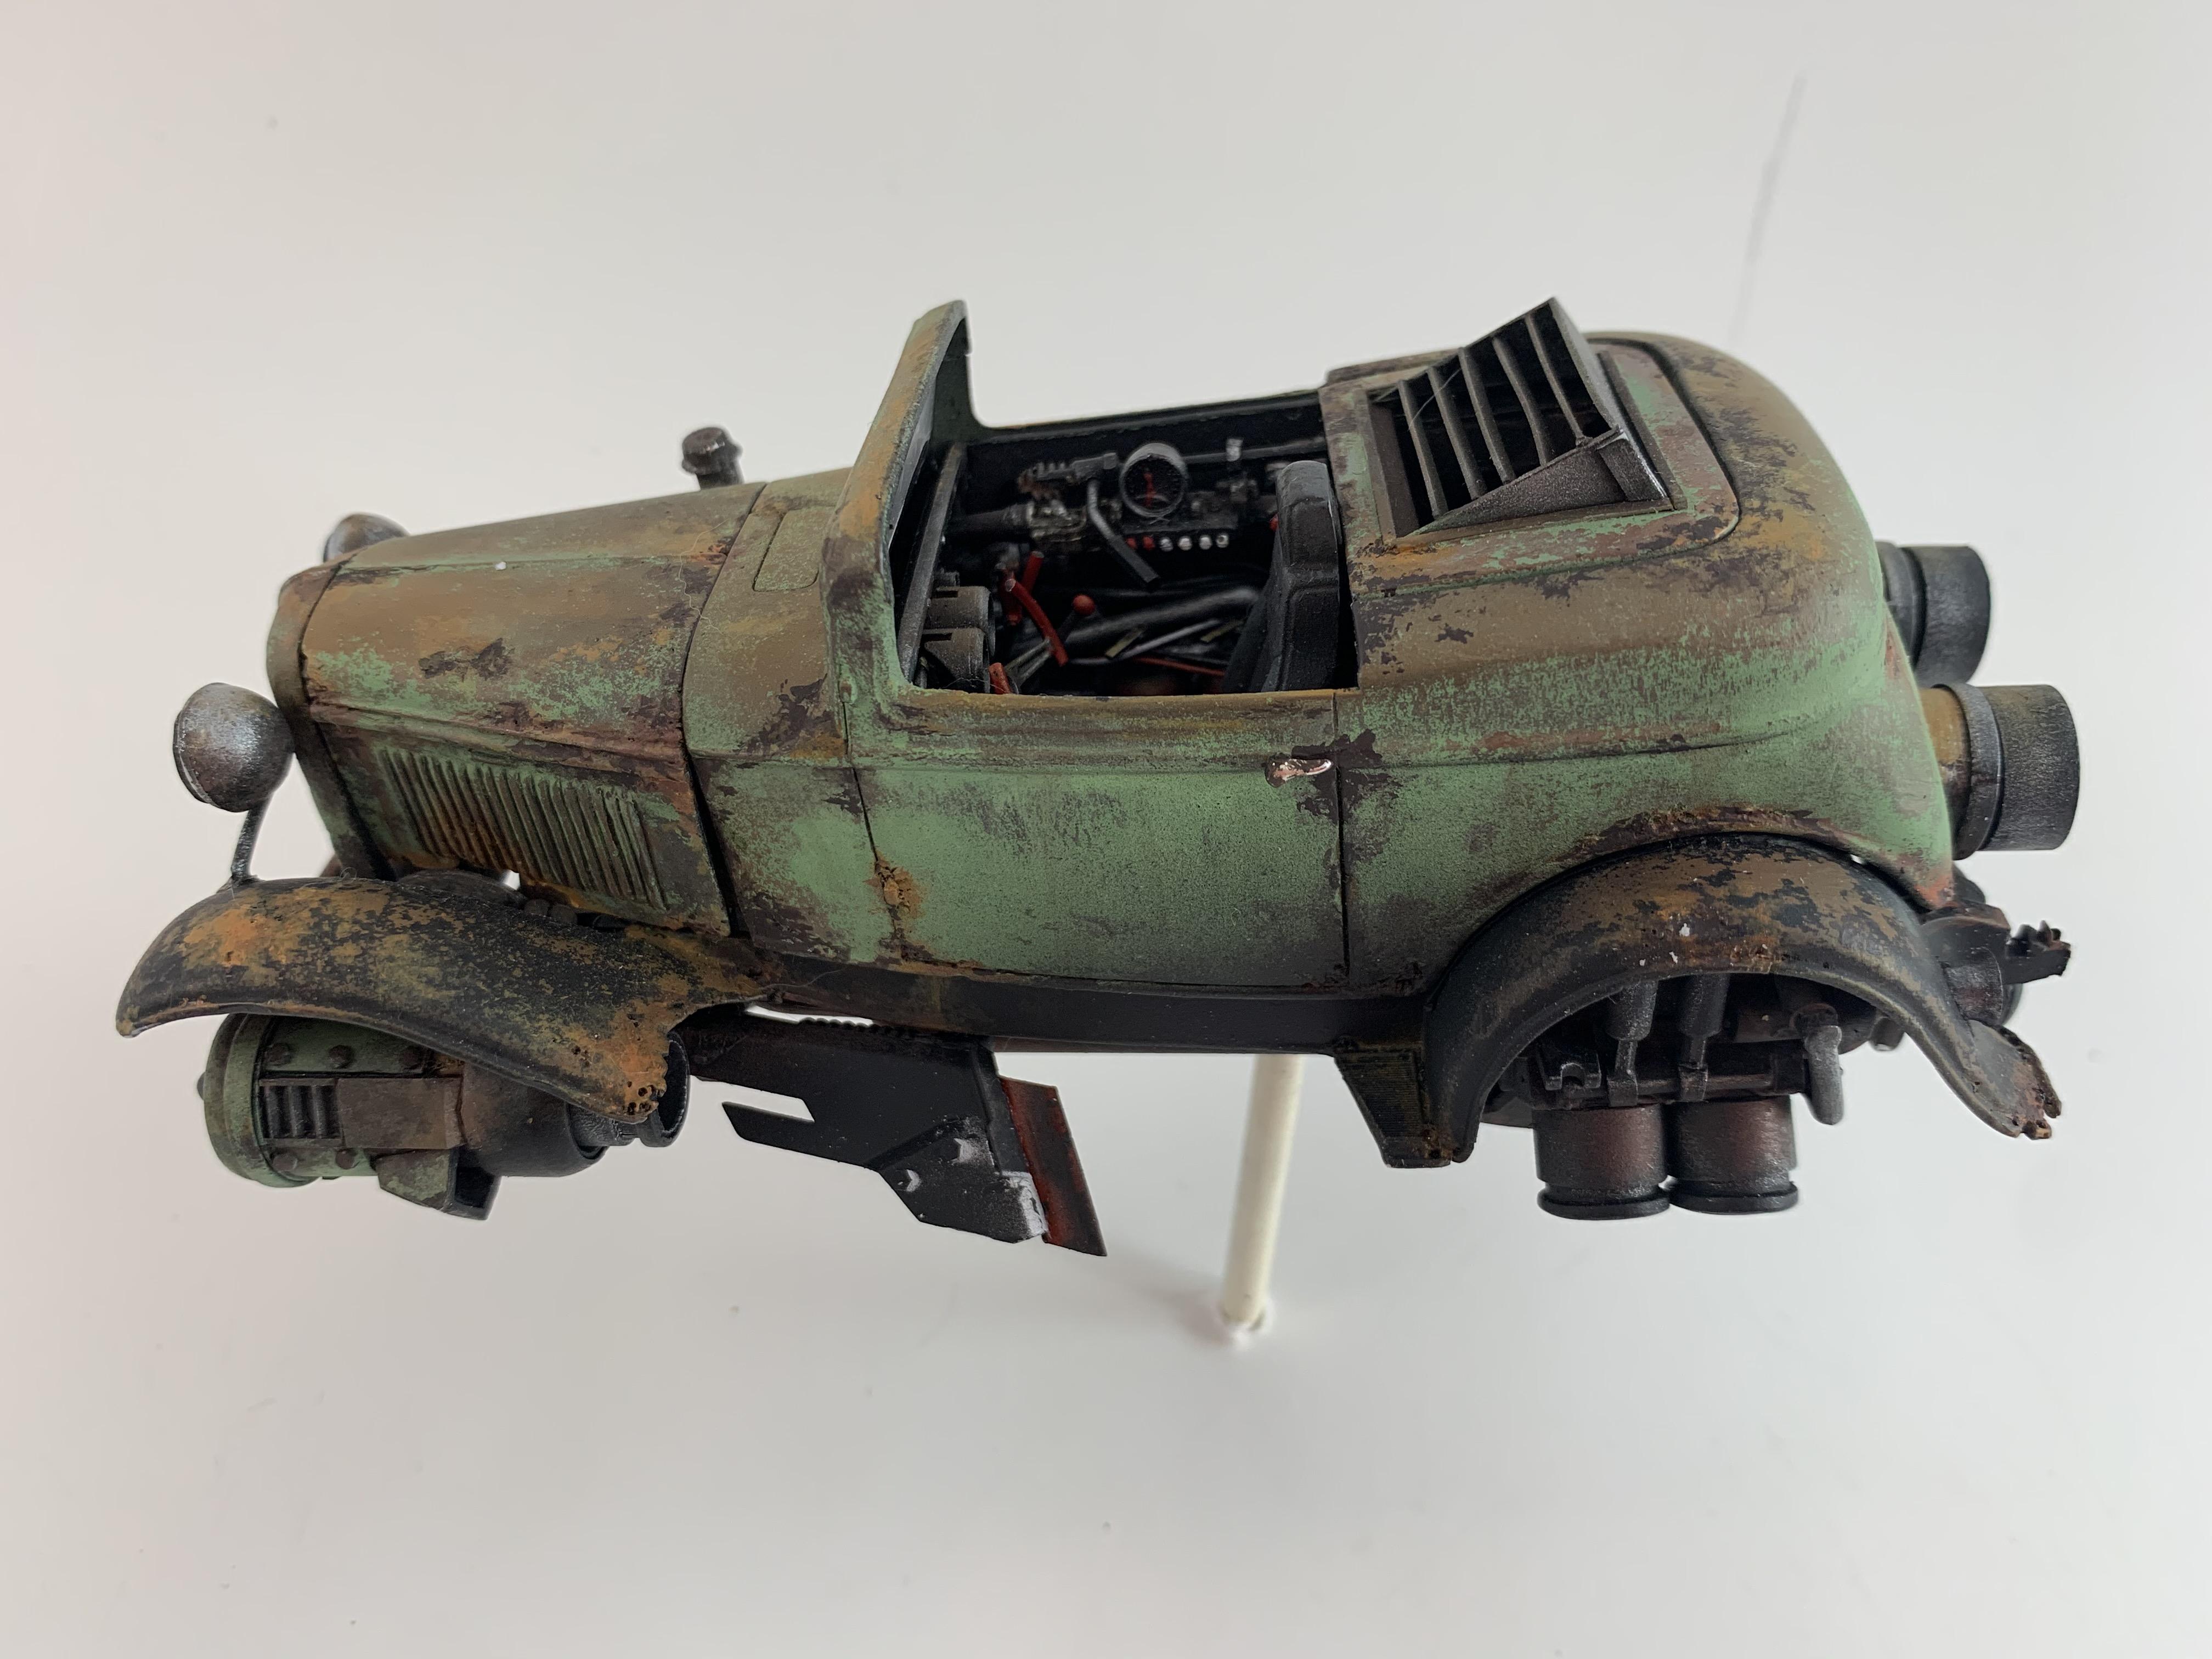
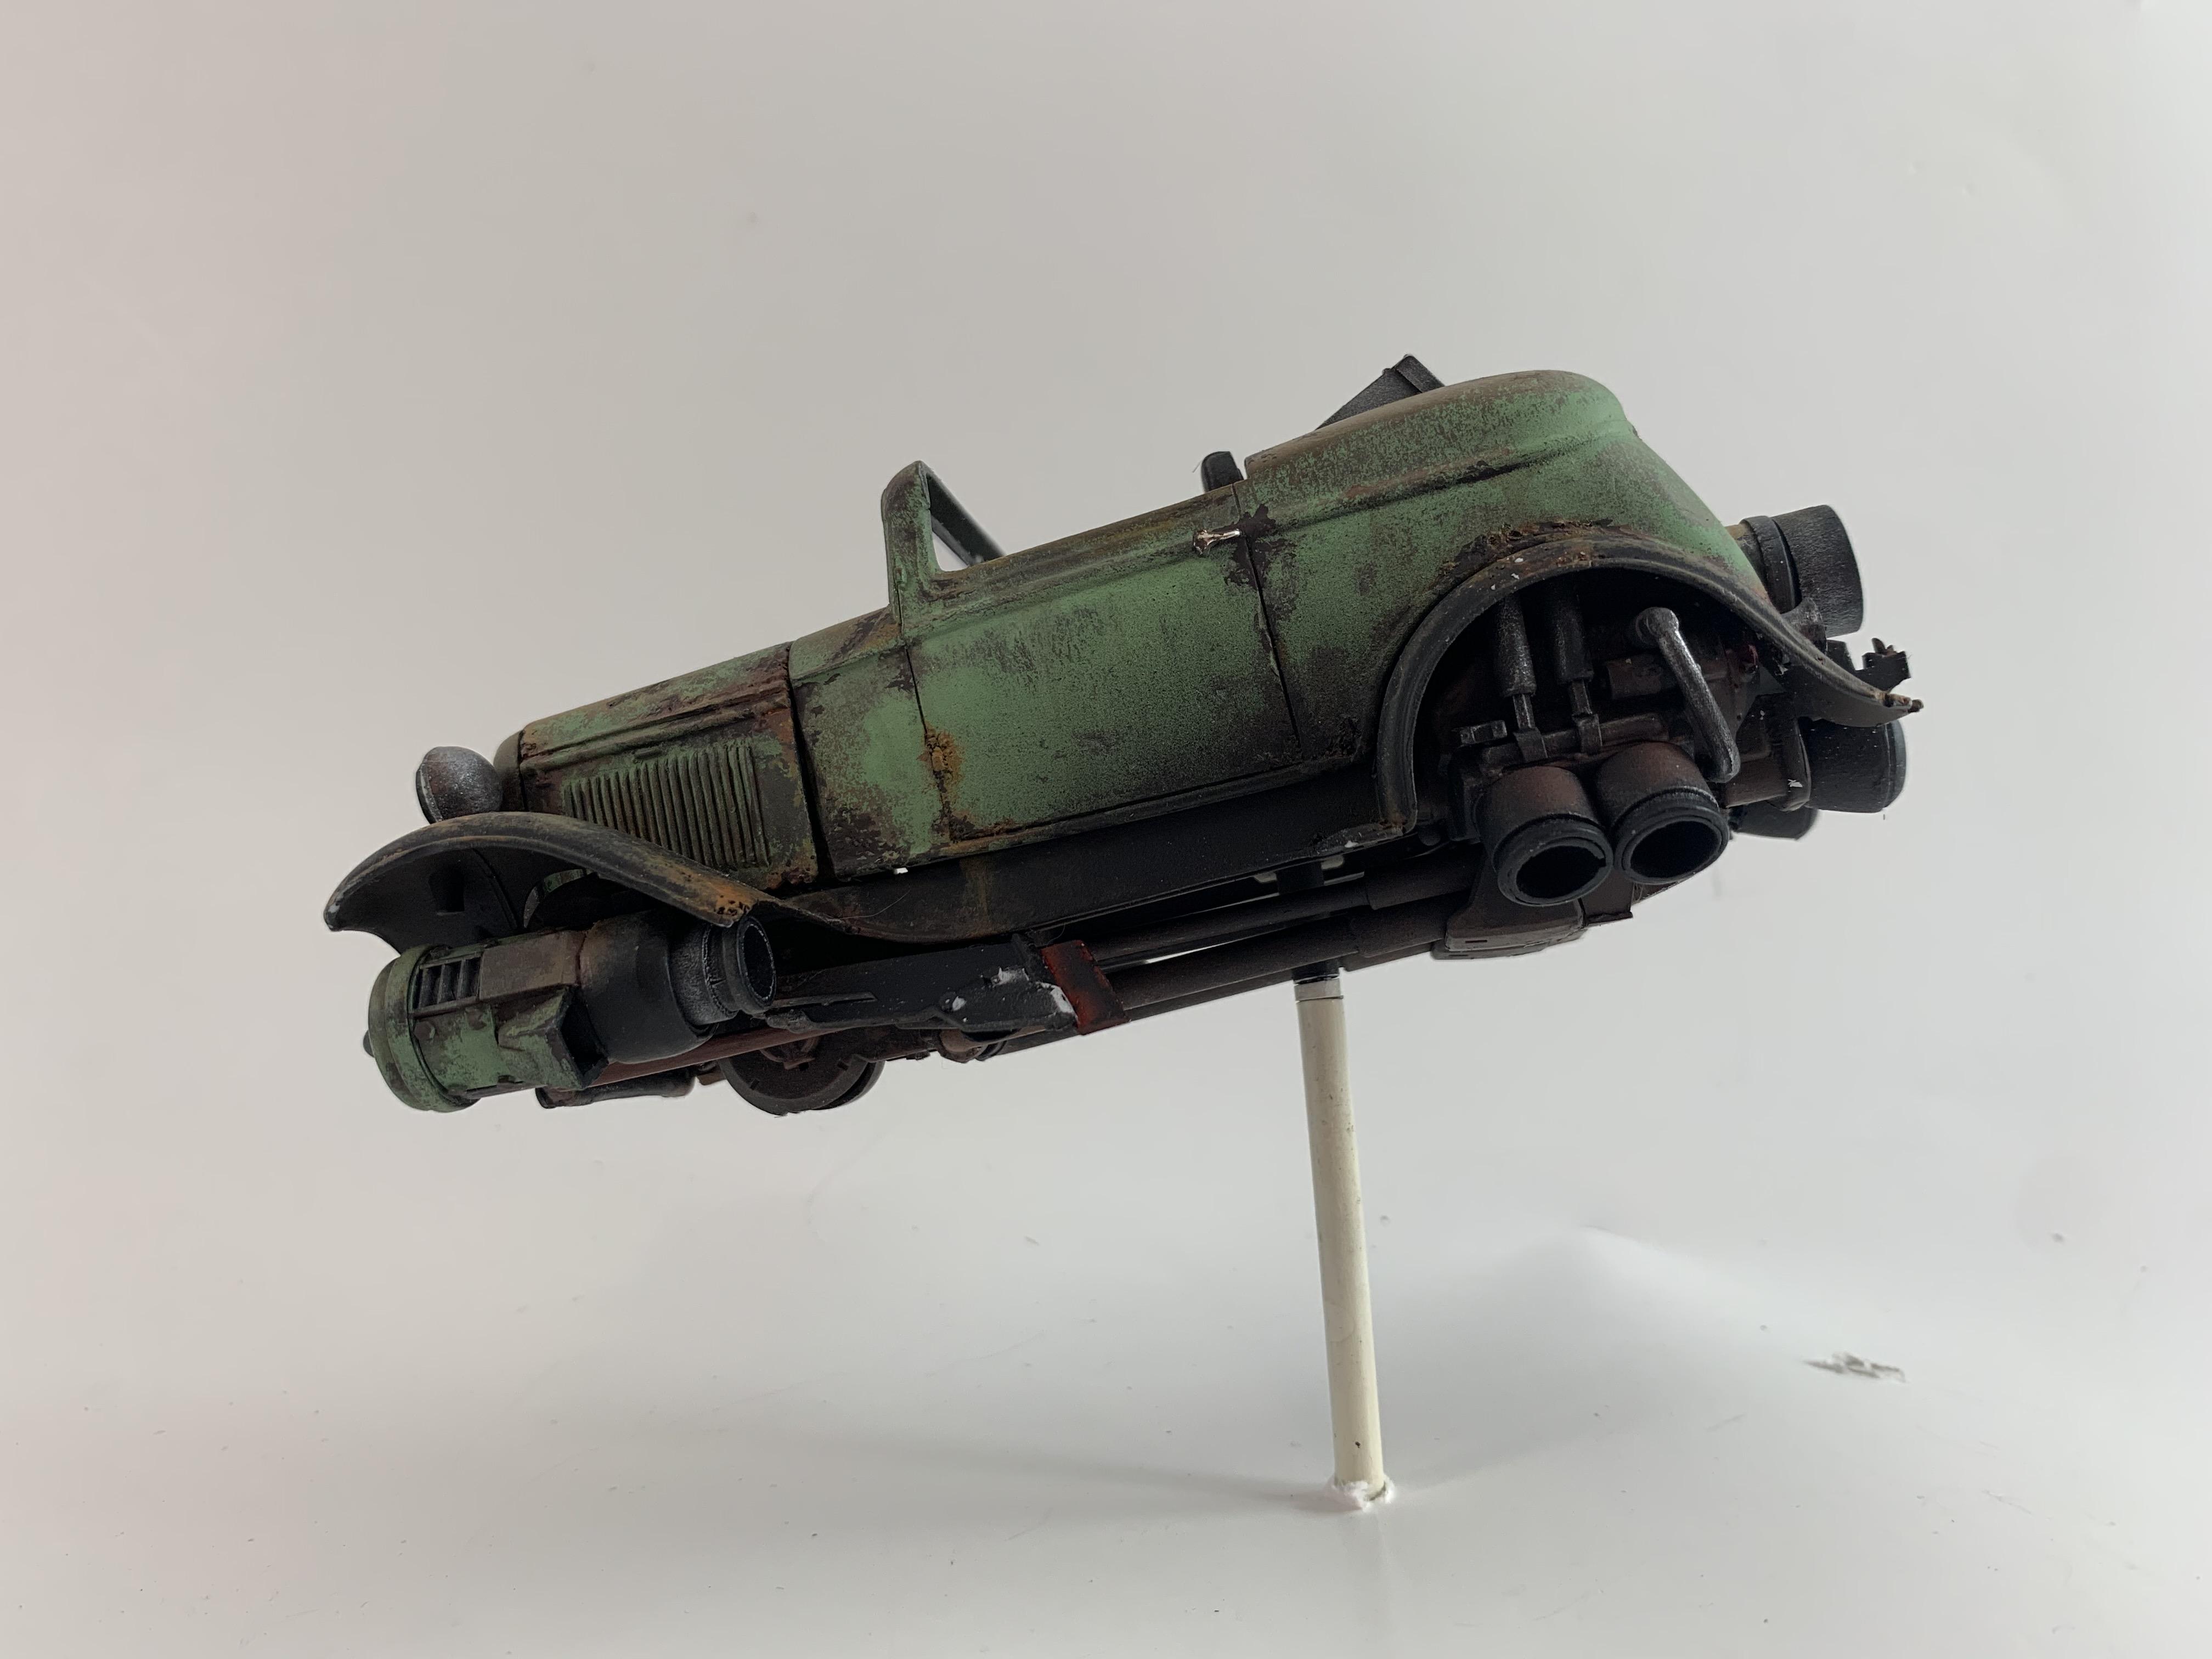
Hello, Here's the 8th hover car for my fleet. This was a fairly quick build, not too many modifications made to the body. I wanted this one to look as if it was built straight out of a junkyard. I cut the roof off, making it into a convertible. I filled the passenger compartment with as many flight controls and gauges as possible. A large fuel tank under the hood. There's a taillight from a 67 Mustang that makes up part of the mechanical devices under the hood. Custom grill Thanks for looking!!
-
41 Chevy Pickup Hovercraft
Daxman replied to Daxman's topic in Model Trucks: Pickups, Vans, SUVs, Light Commercial
No I haven't. I'm up to 8 hover craft now and another in the works. I've been really busy with work and haven't found the time to post on the forums lately. I'll get my two latest builds up this weekend. Number 7 was this cool 51 Bel Air. This was a fun one to build: http://www.modelcarsmag.com/forums/topic/152694-51-chevy-bel-air-jet-car/?tab=comments#comment-2250833 Number 8 is another 32 Ford: And my work in progress 56 Ford Pick Up: And I'll really try to get a single post up that shows all my hover vehicles. Thanks for following along!!!
-
Thanks! I just started adding hoses until I filled all the empty spots. Not yet. I'd really like to show them all in one forum post. I said I was going to do it after I finished my last jet car. It's something I've been meaning to do. Maybe I can get to it this weekend.
-
Thank you! Here's a few more pictures. Better shot of the grill
-
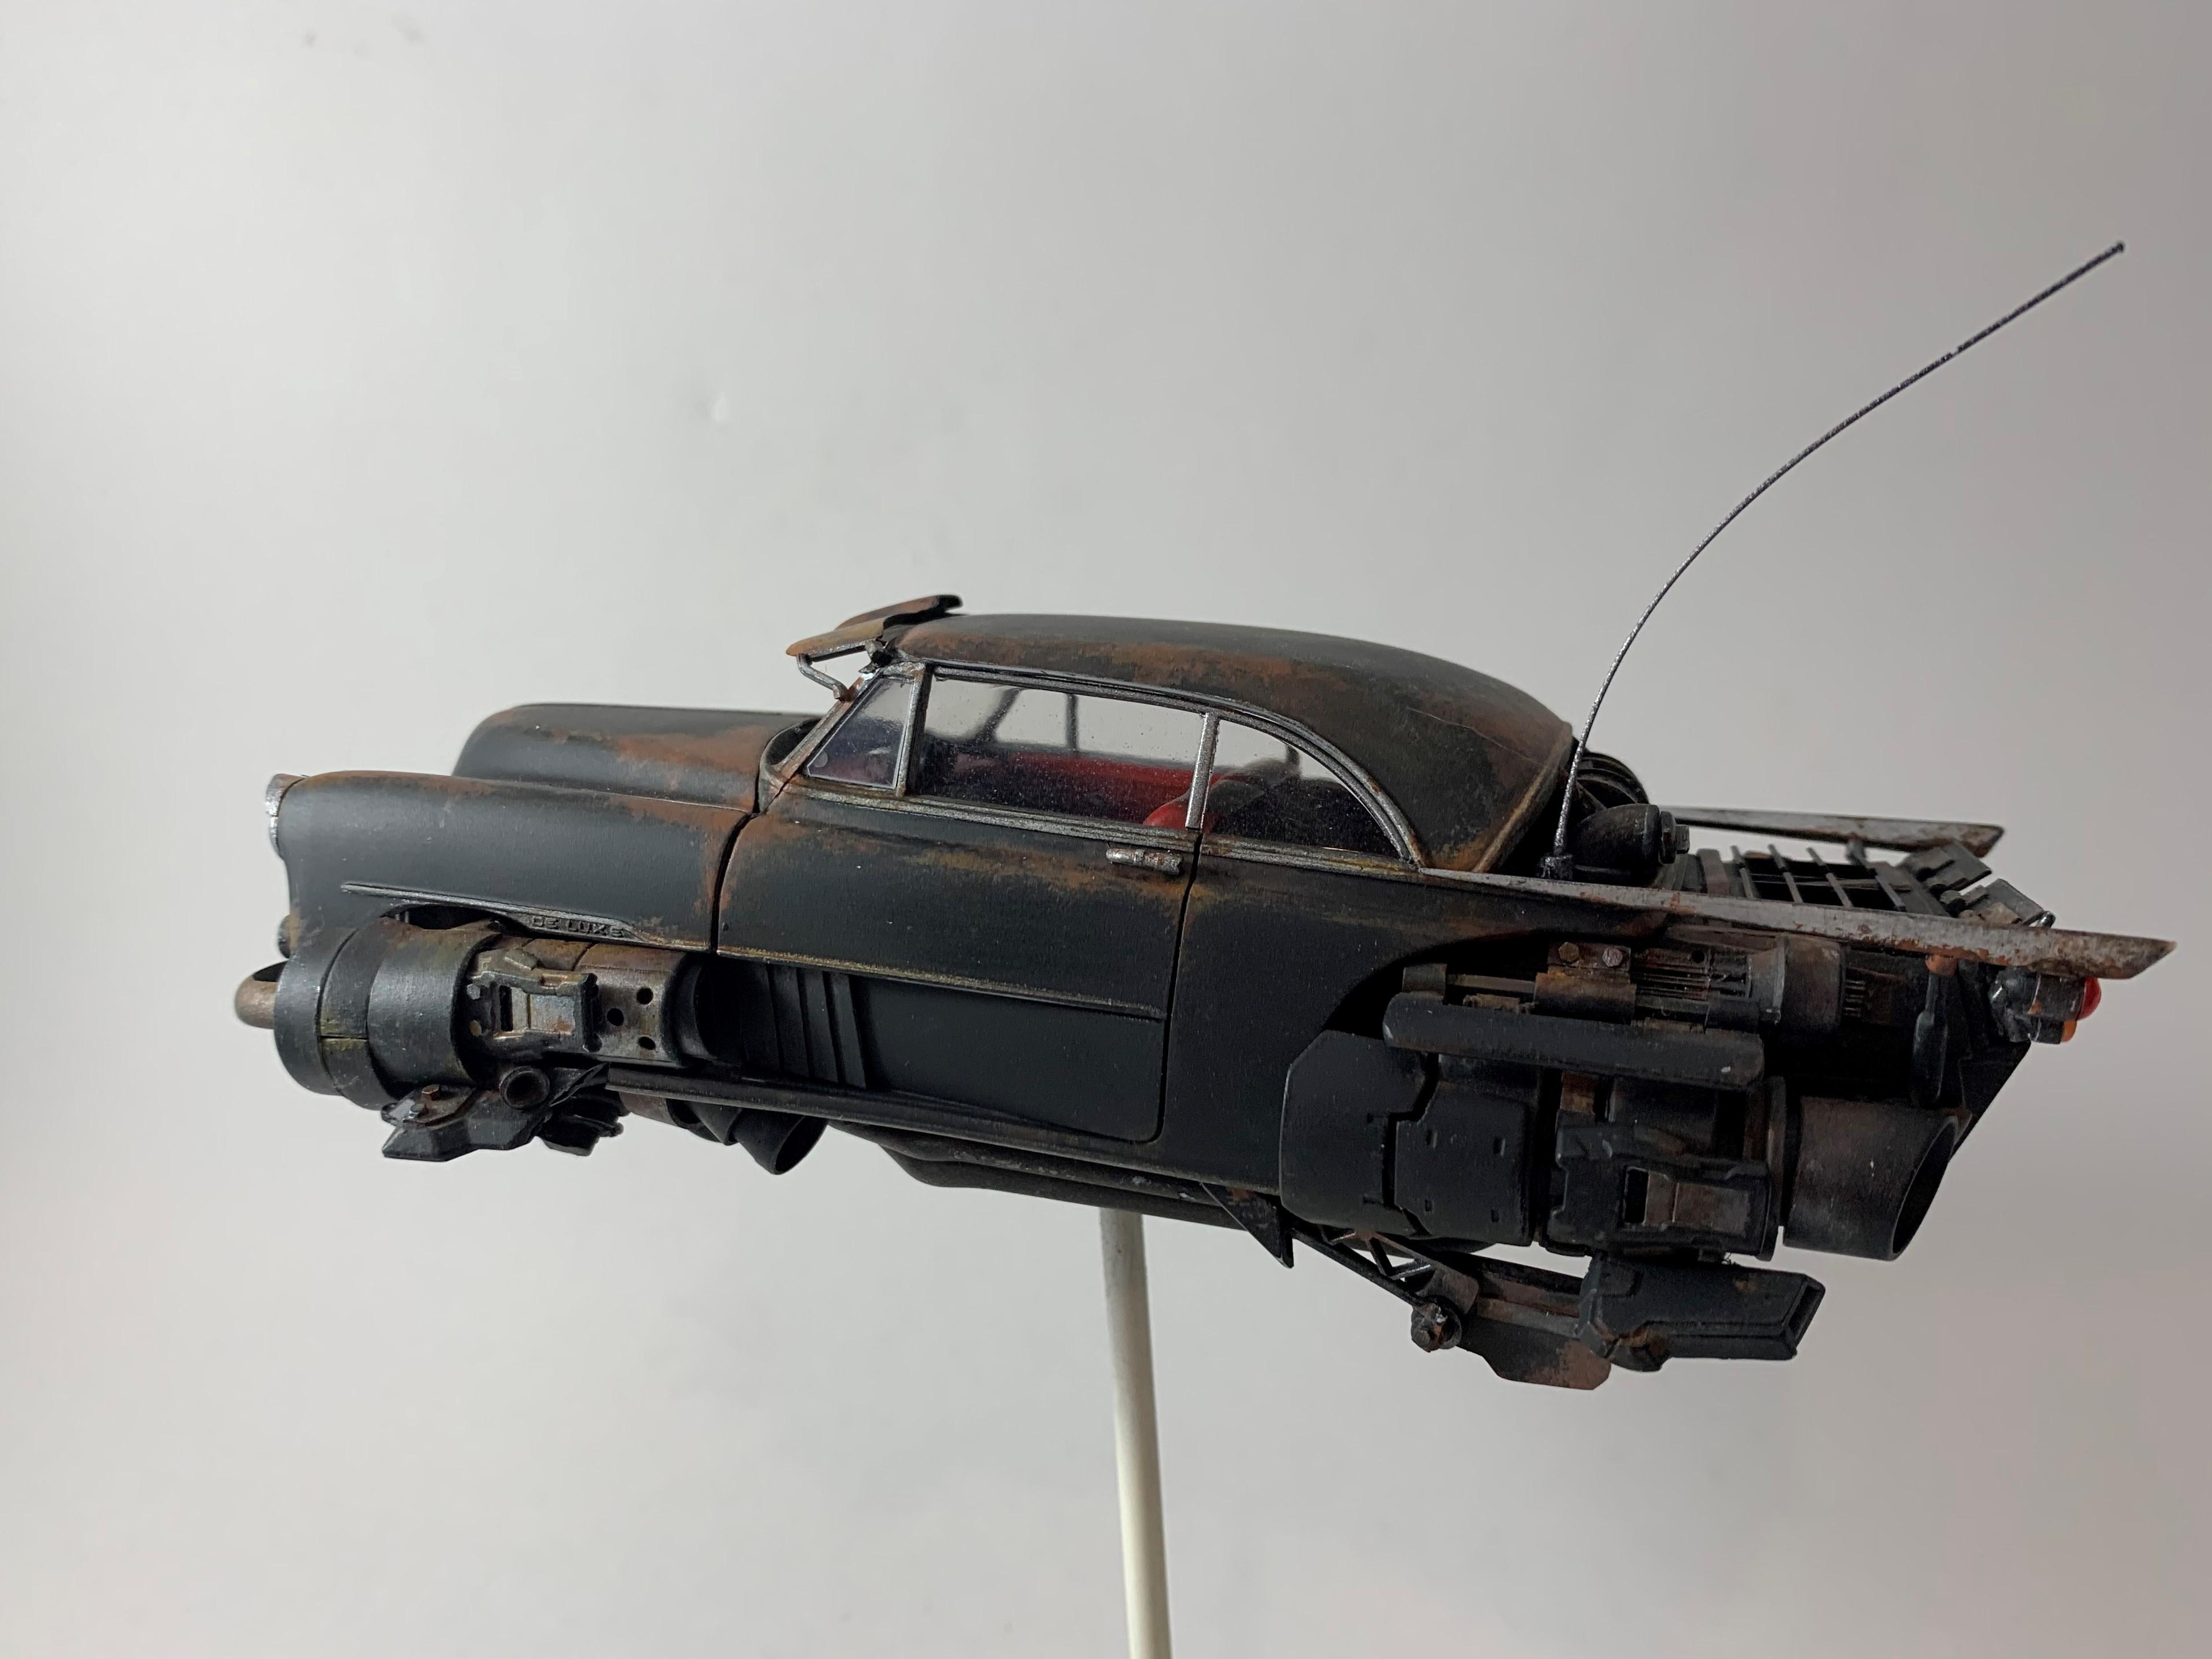
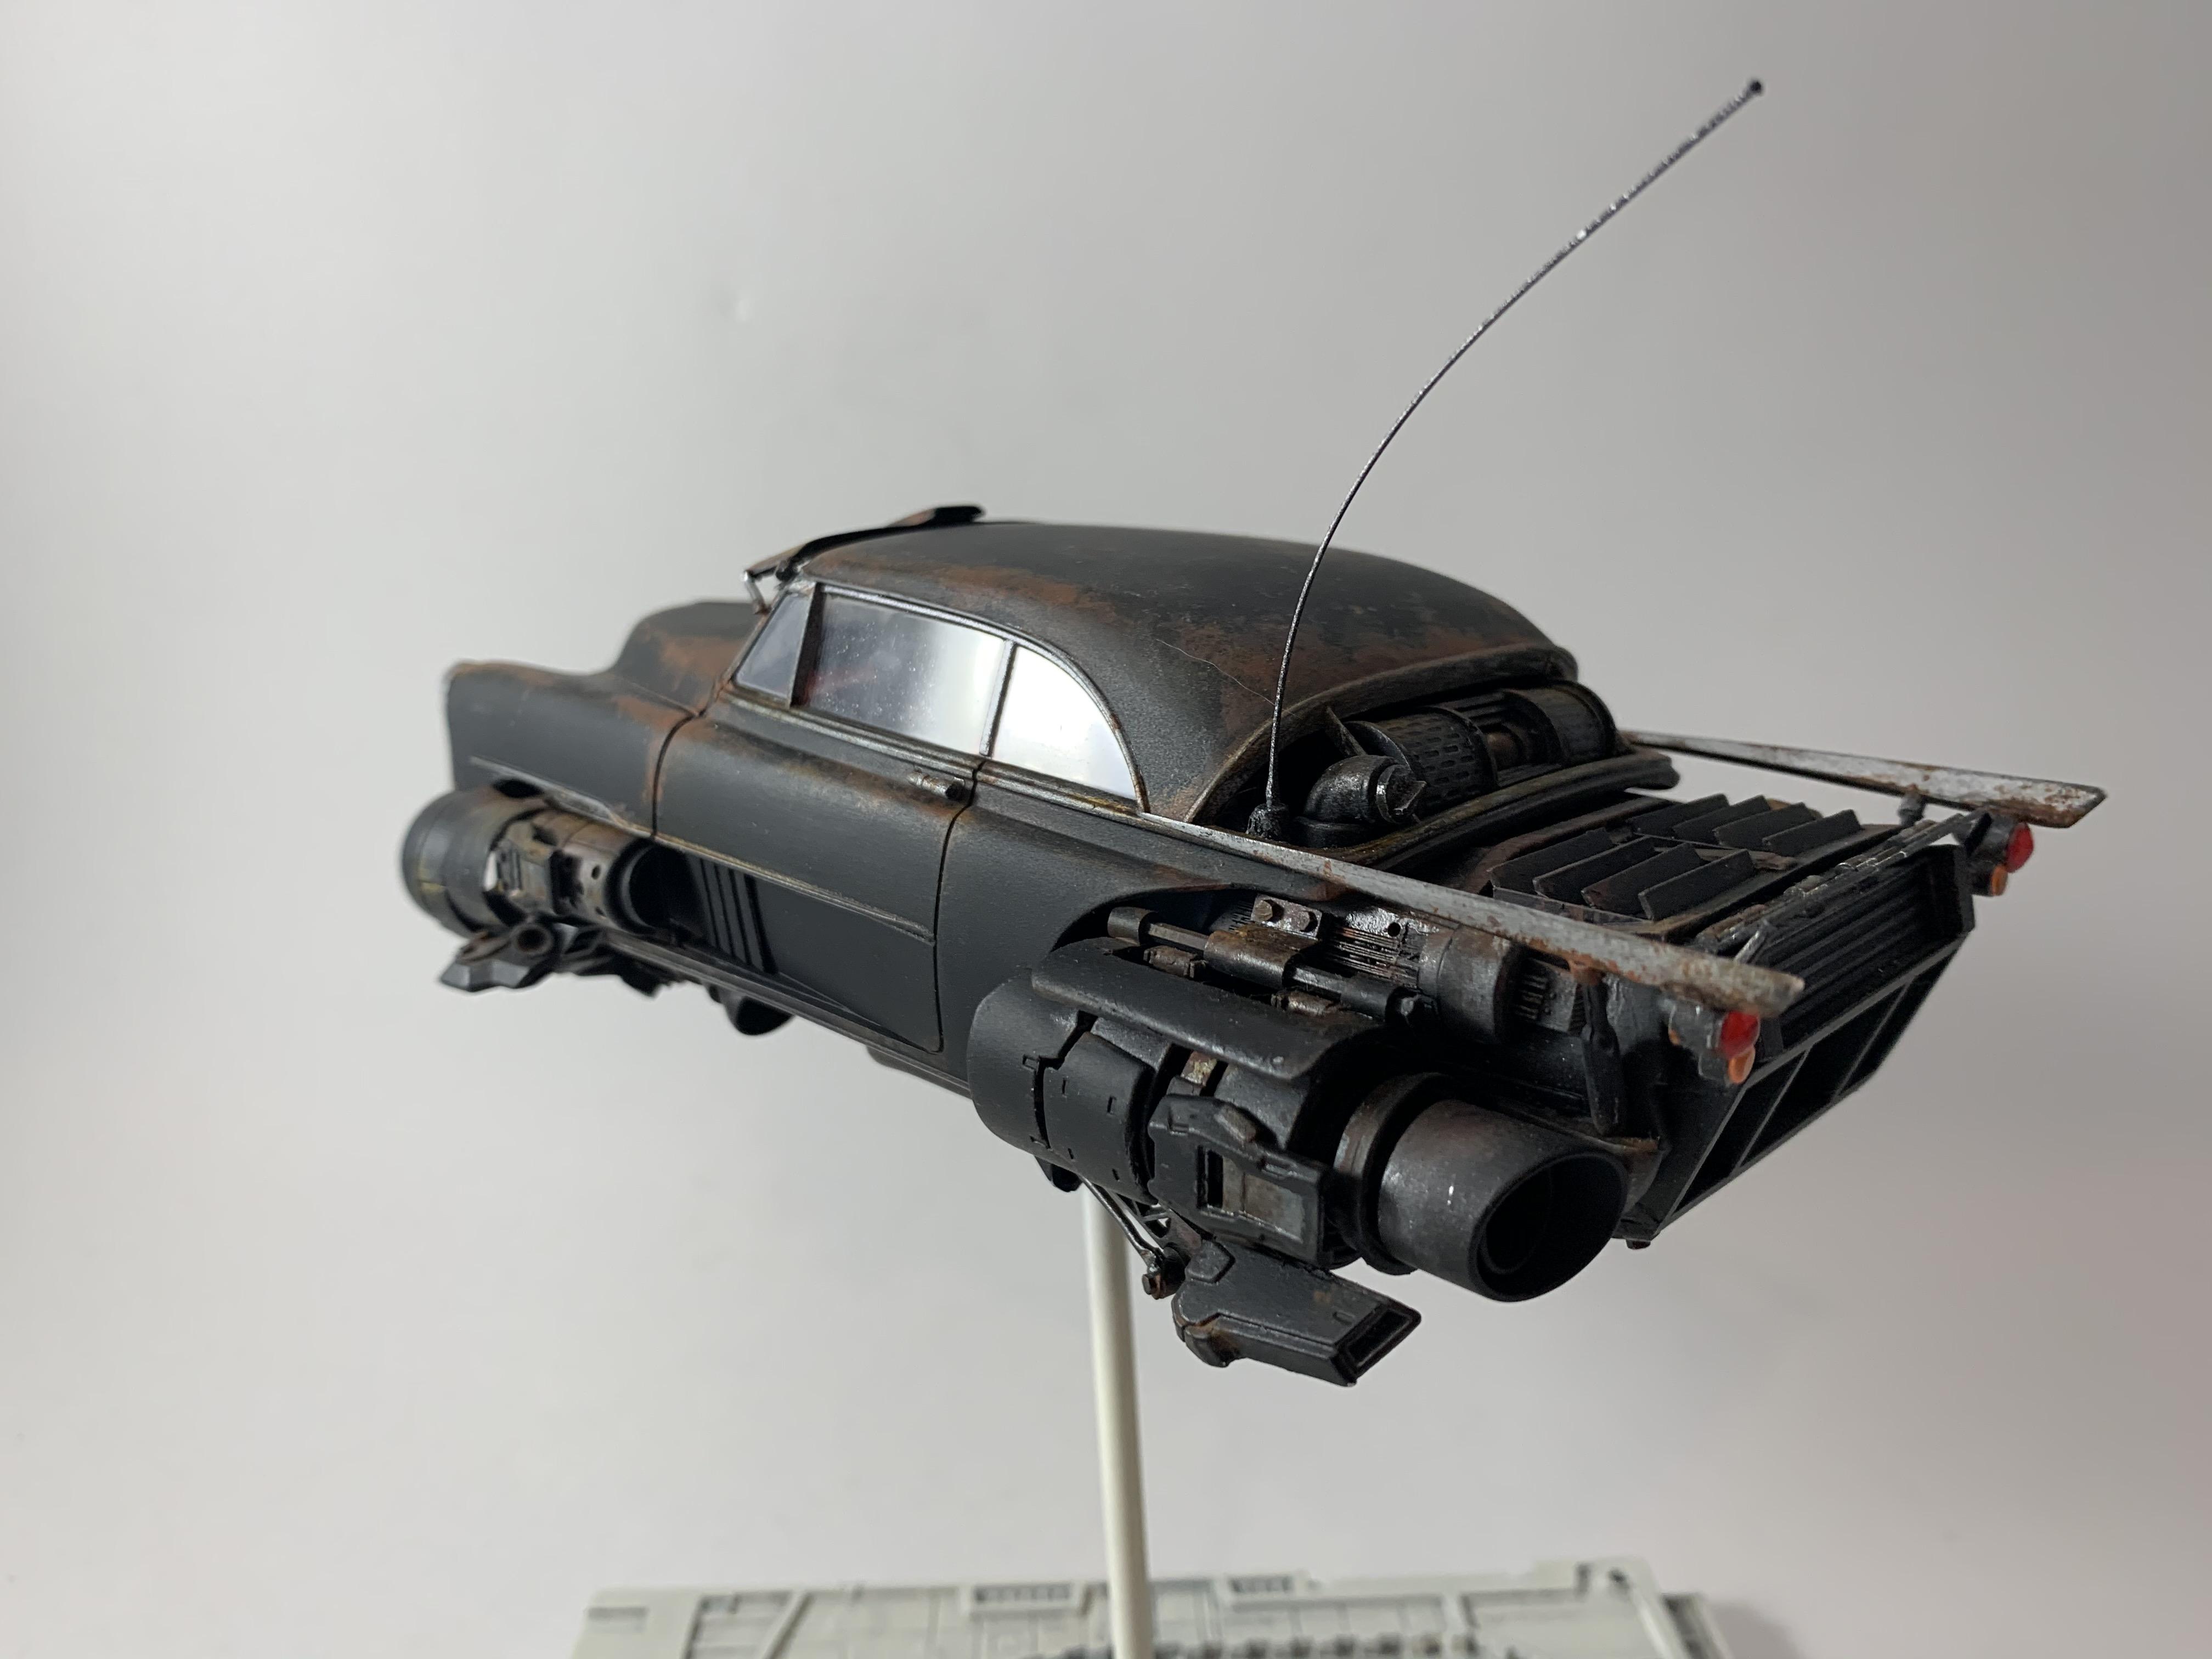
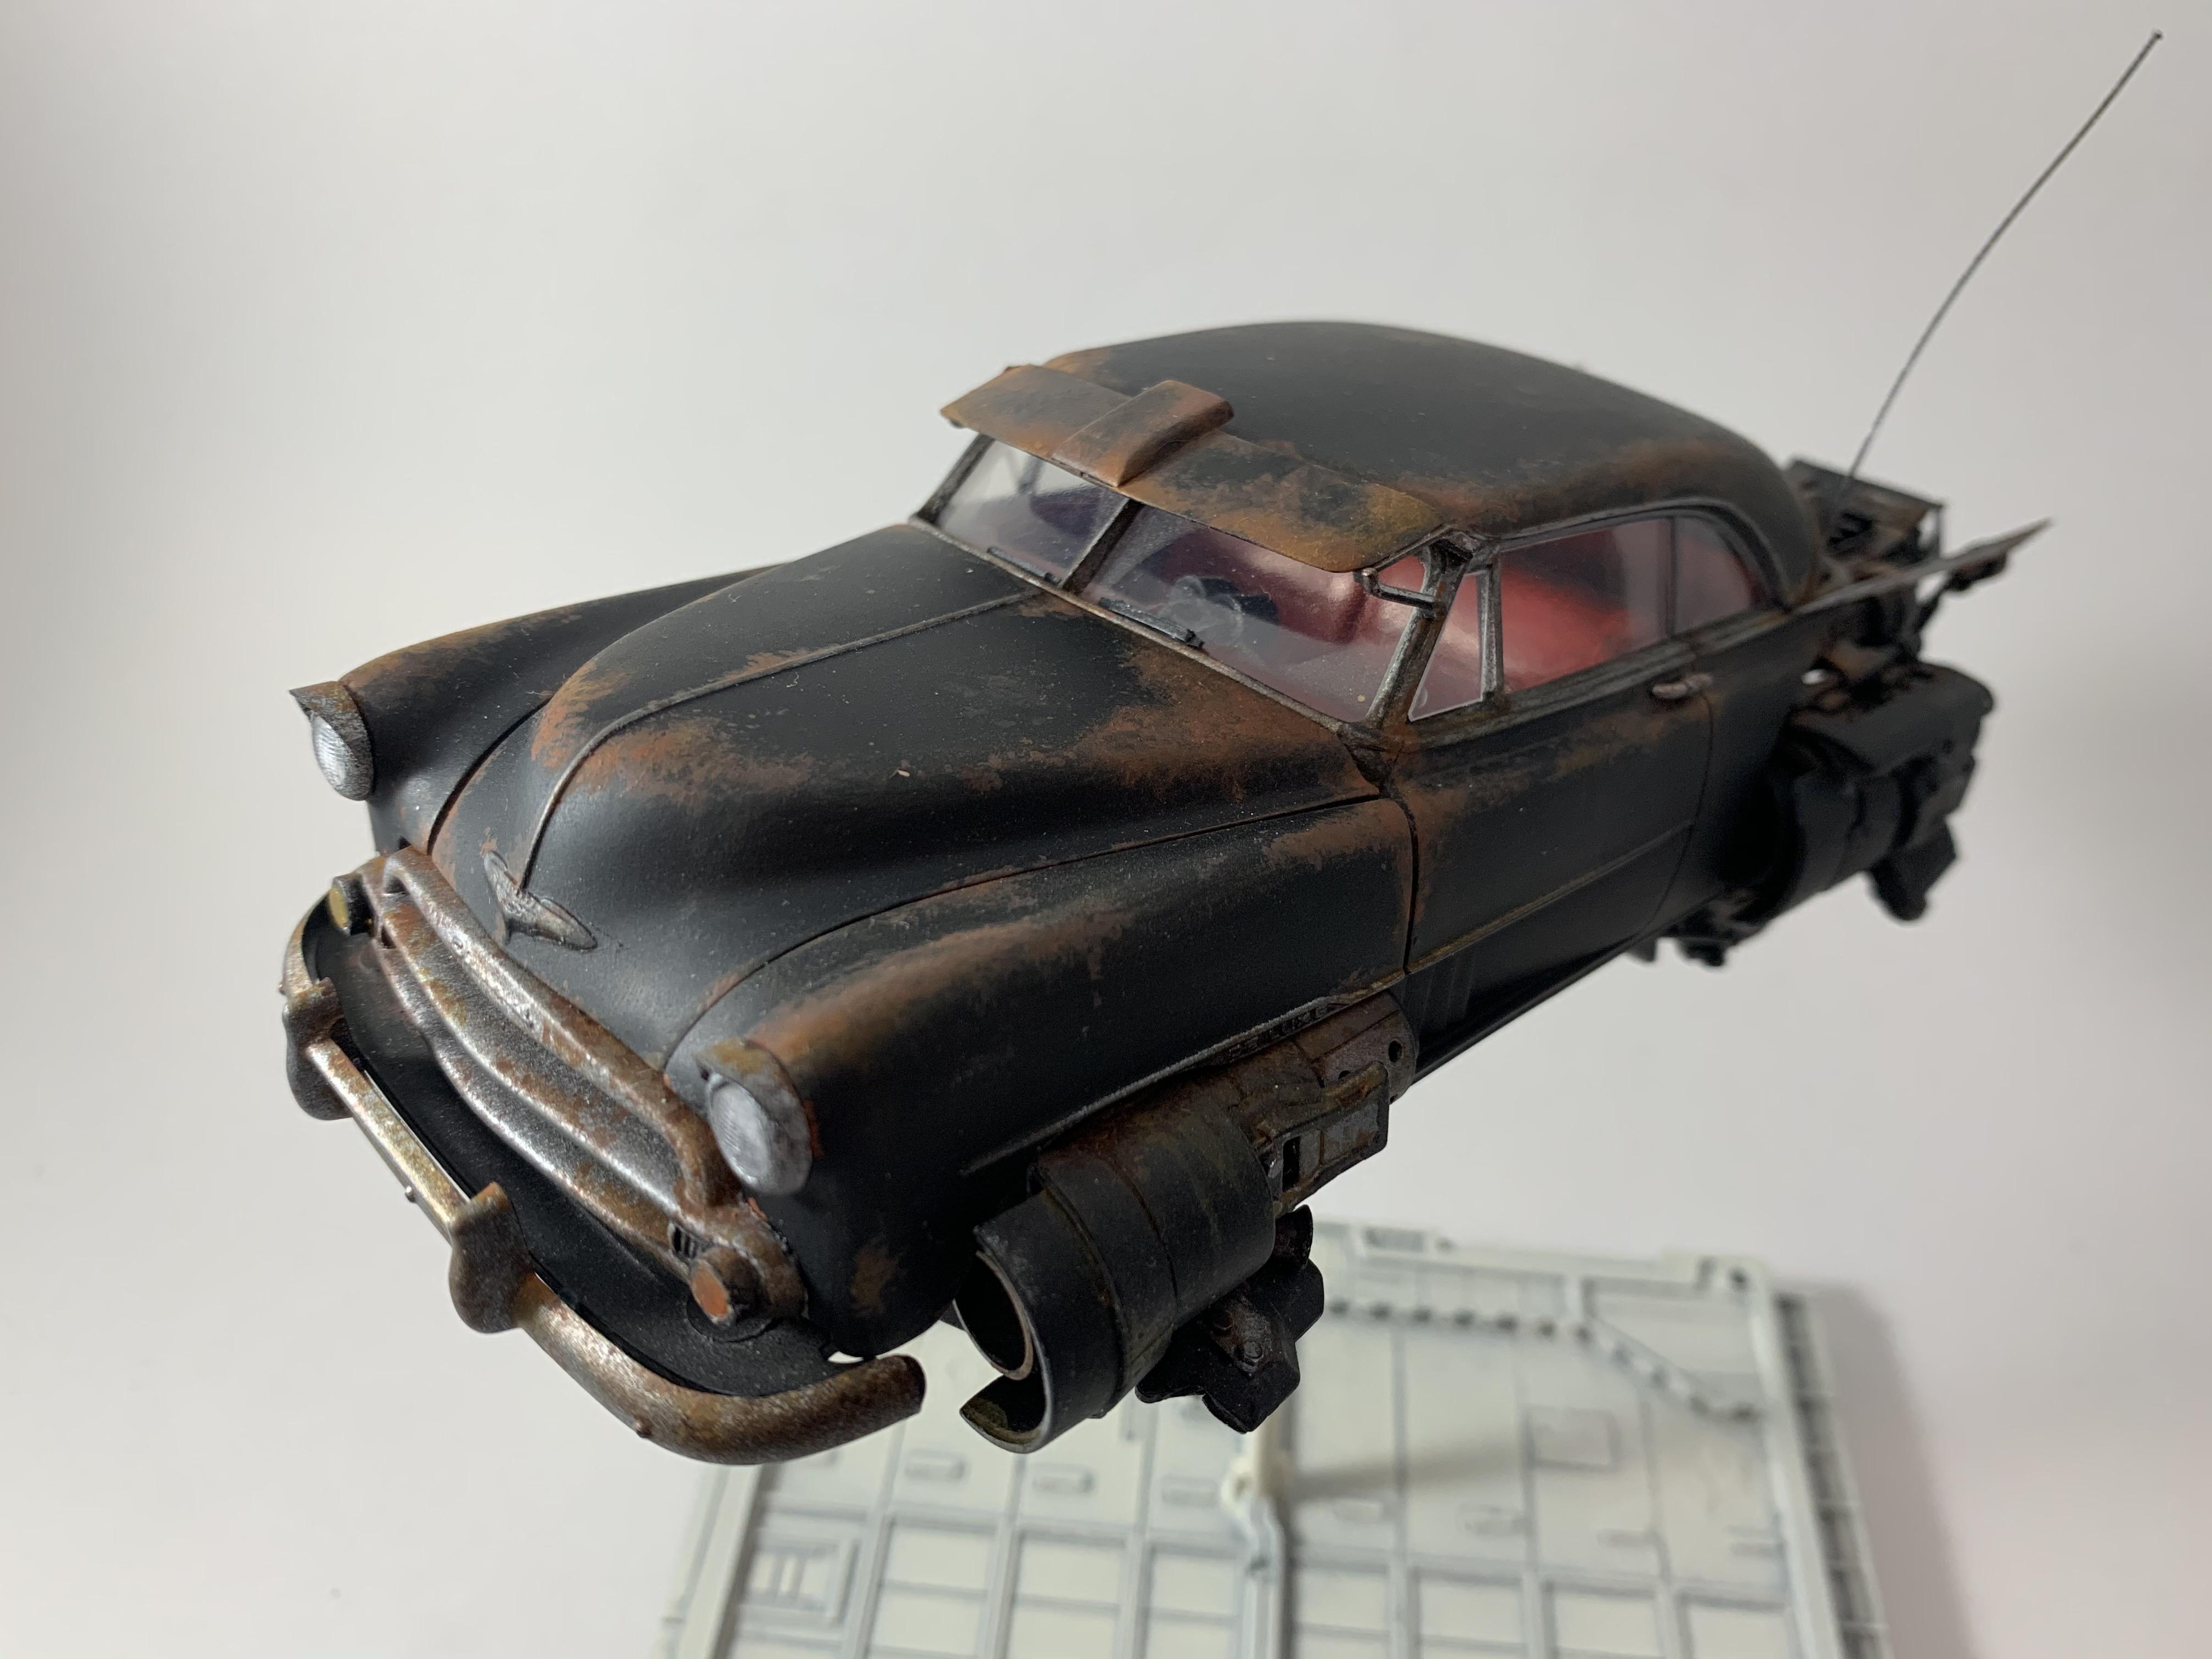
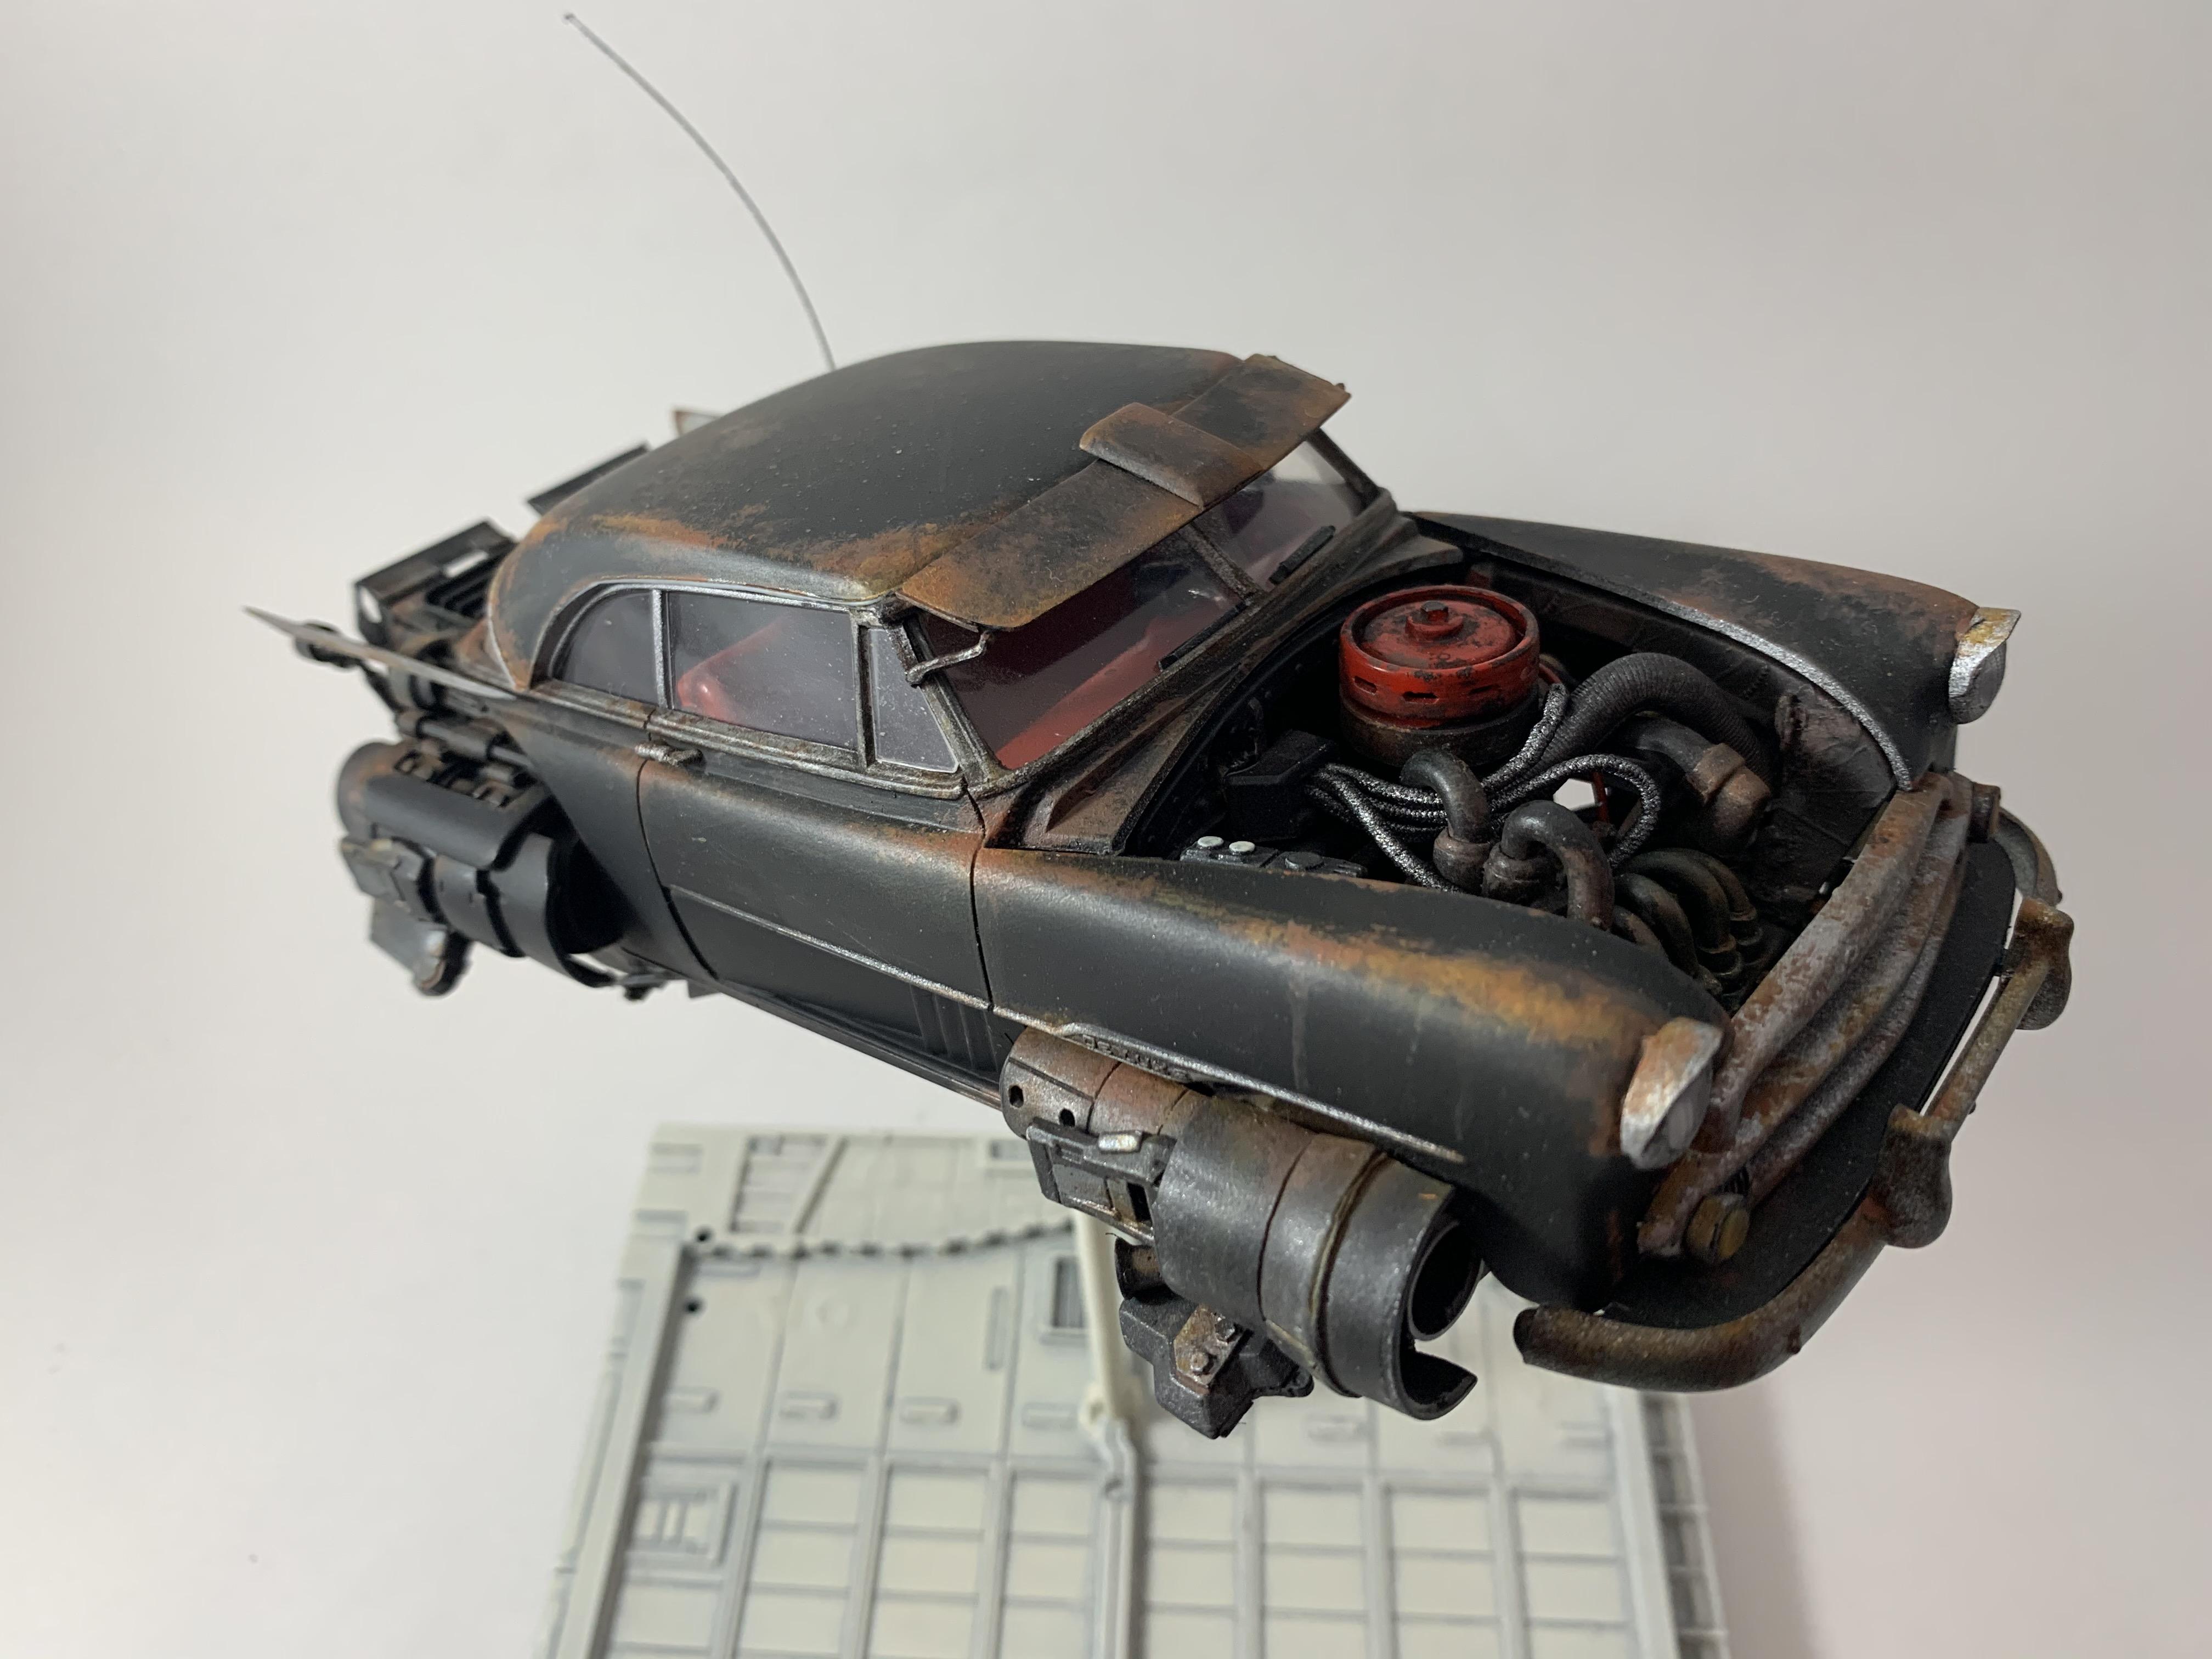
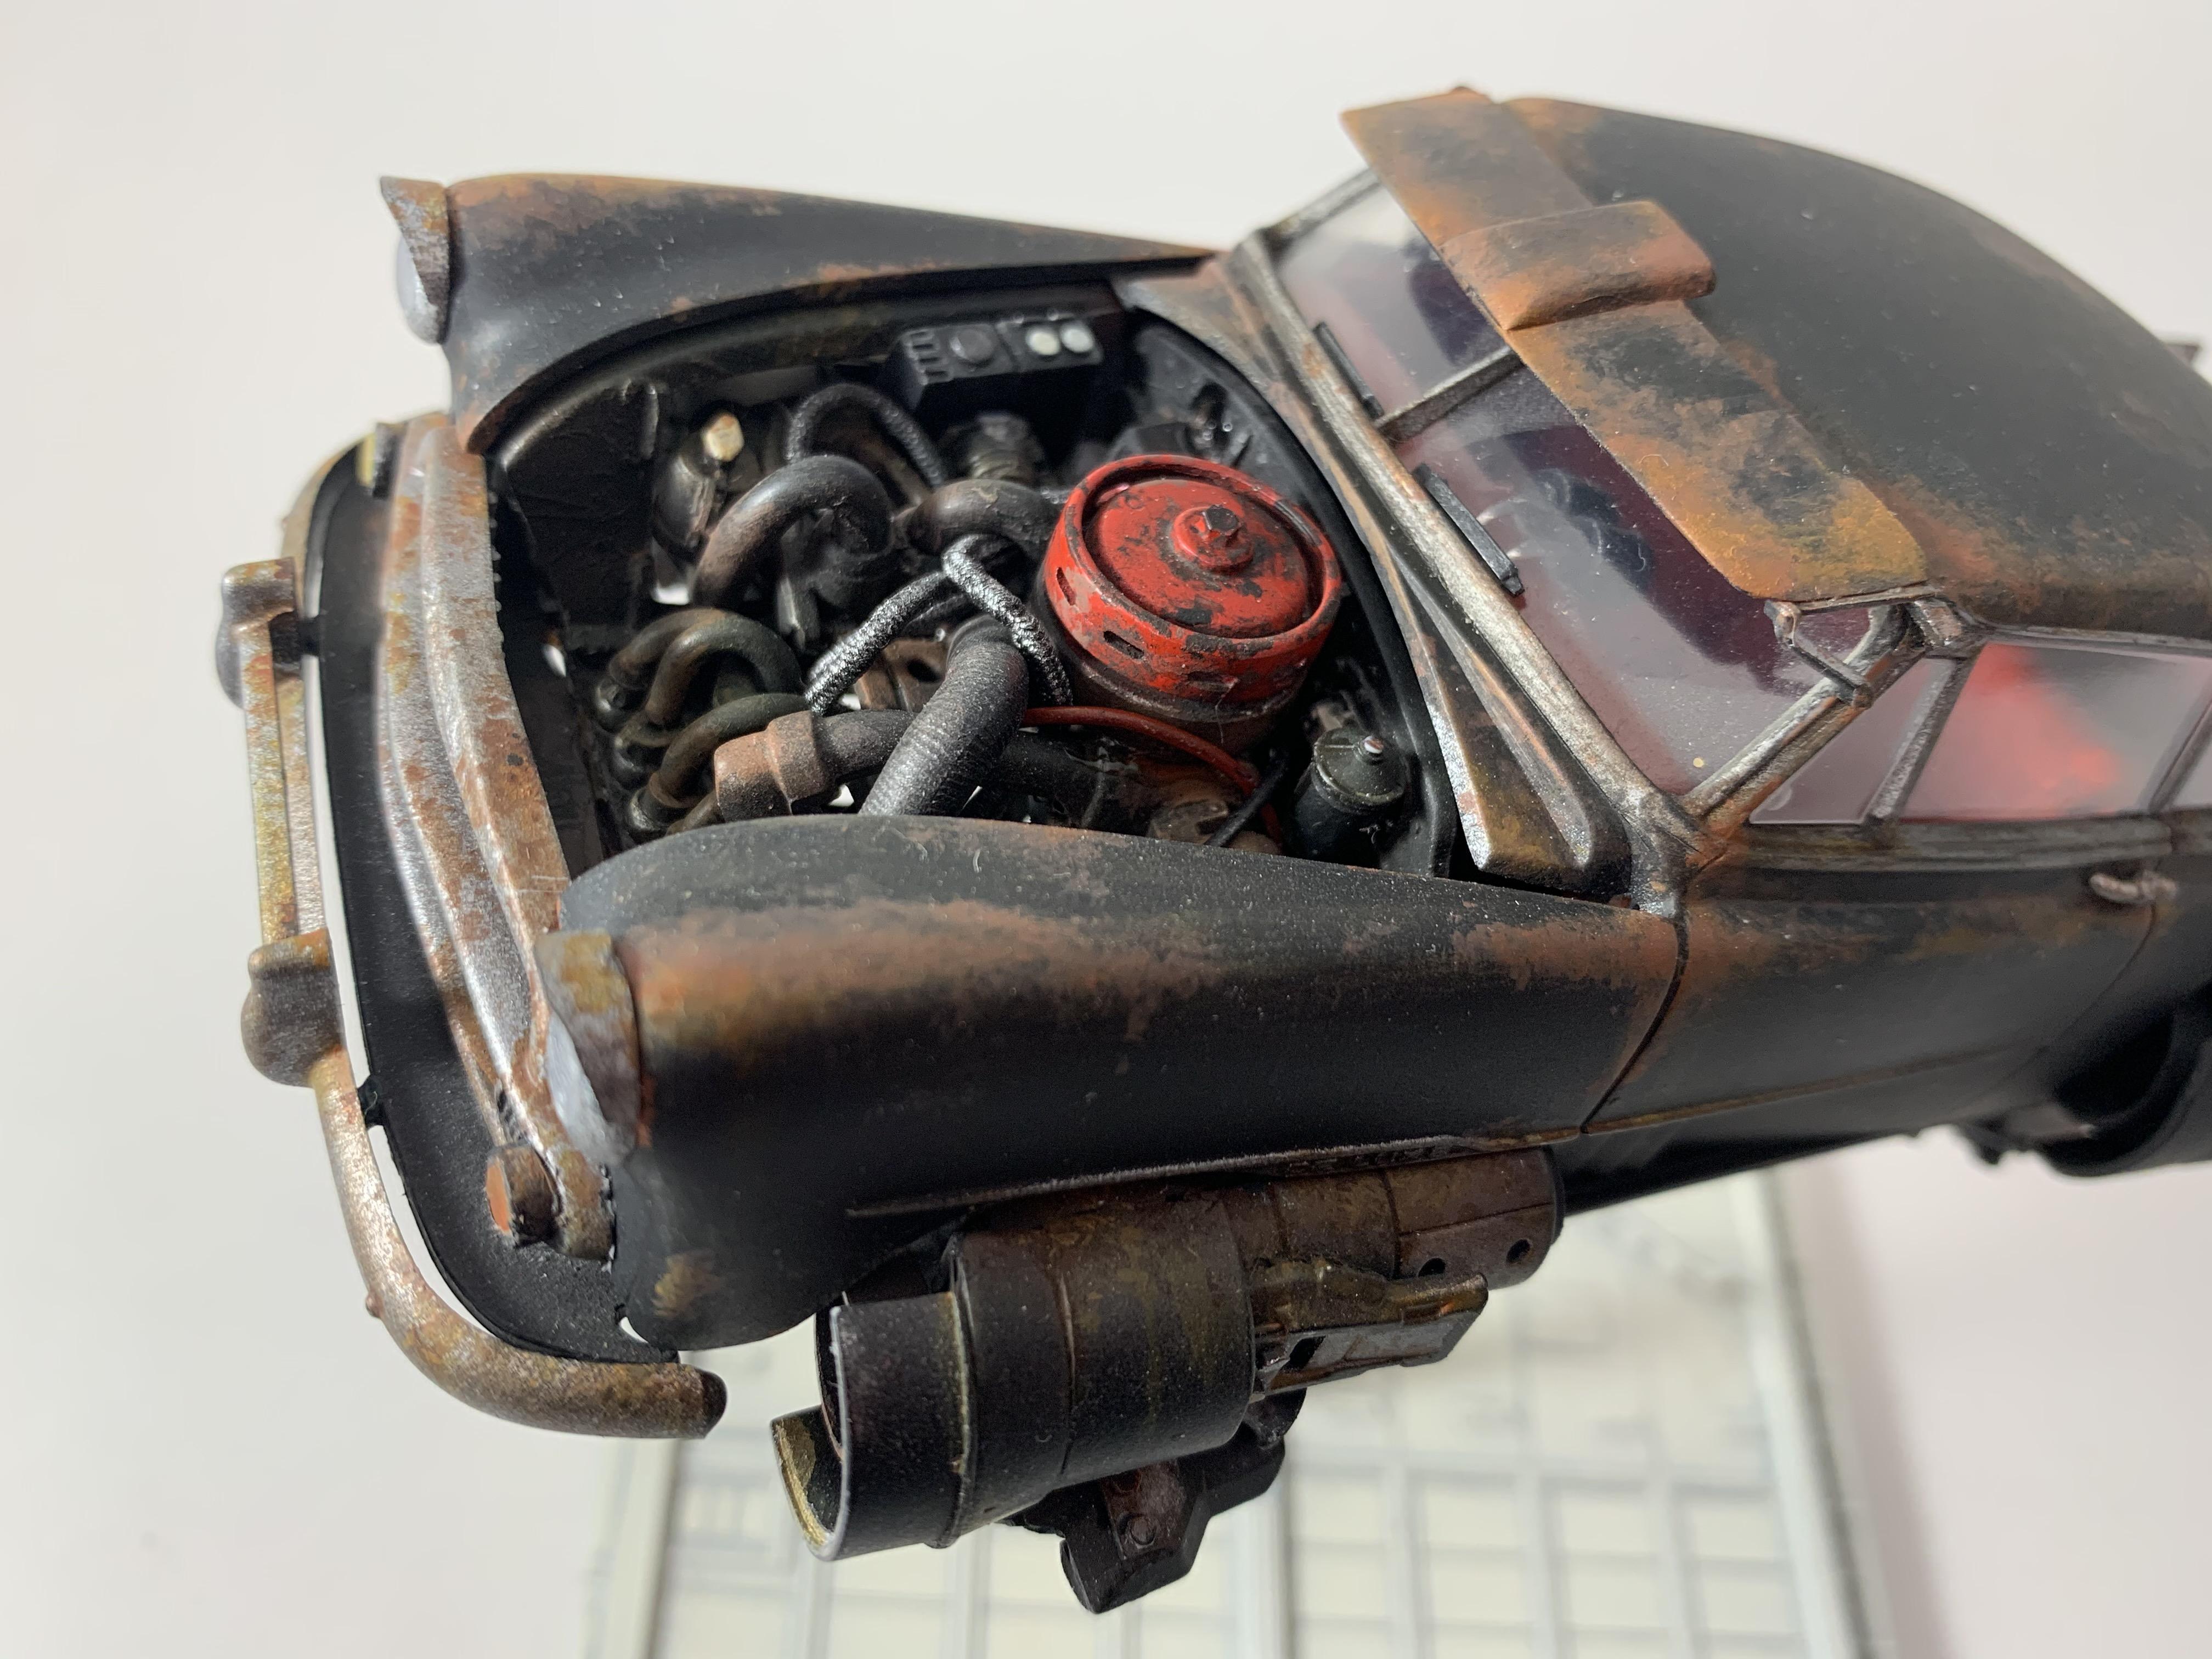
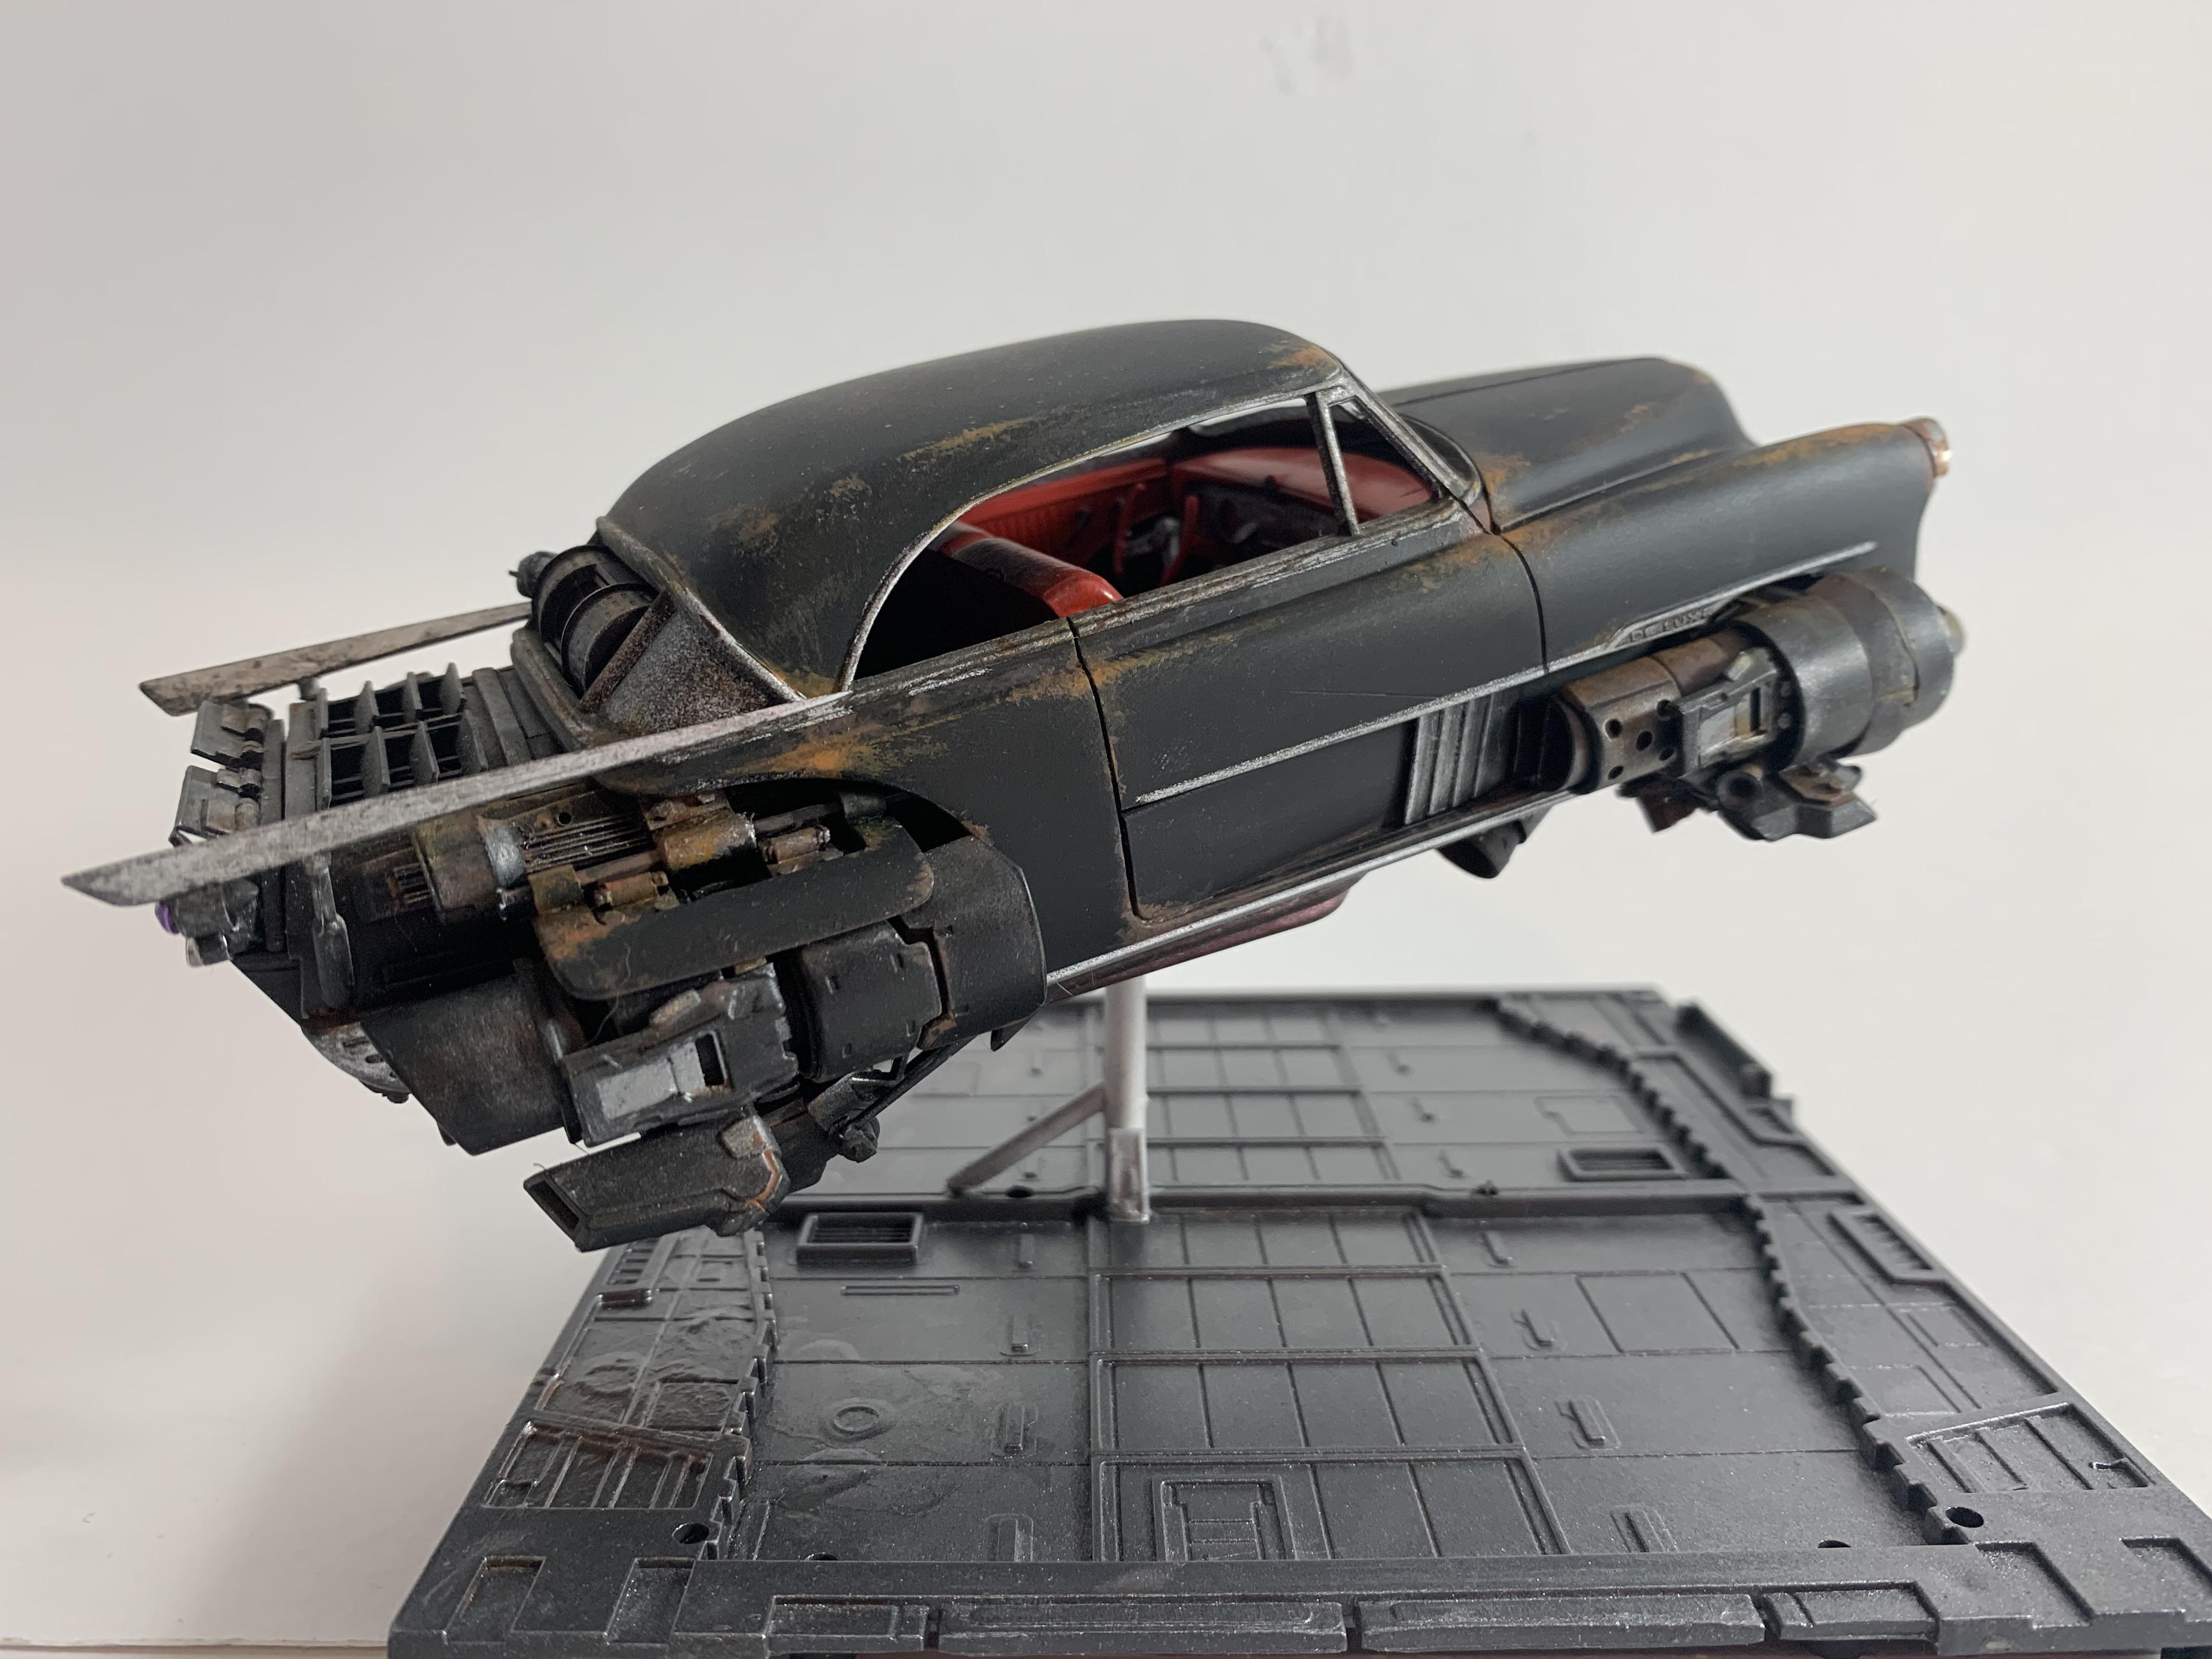
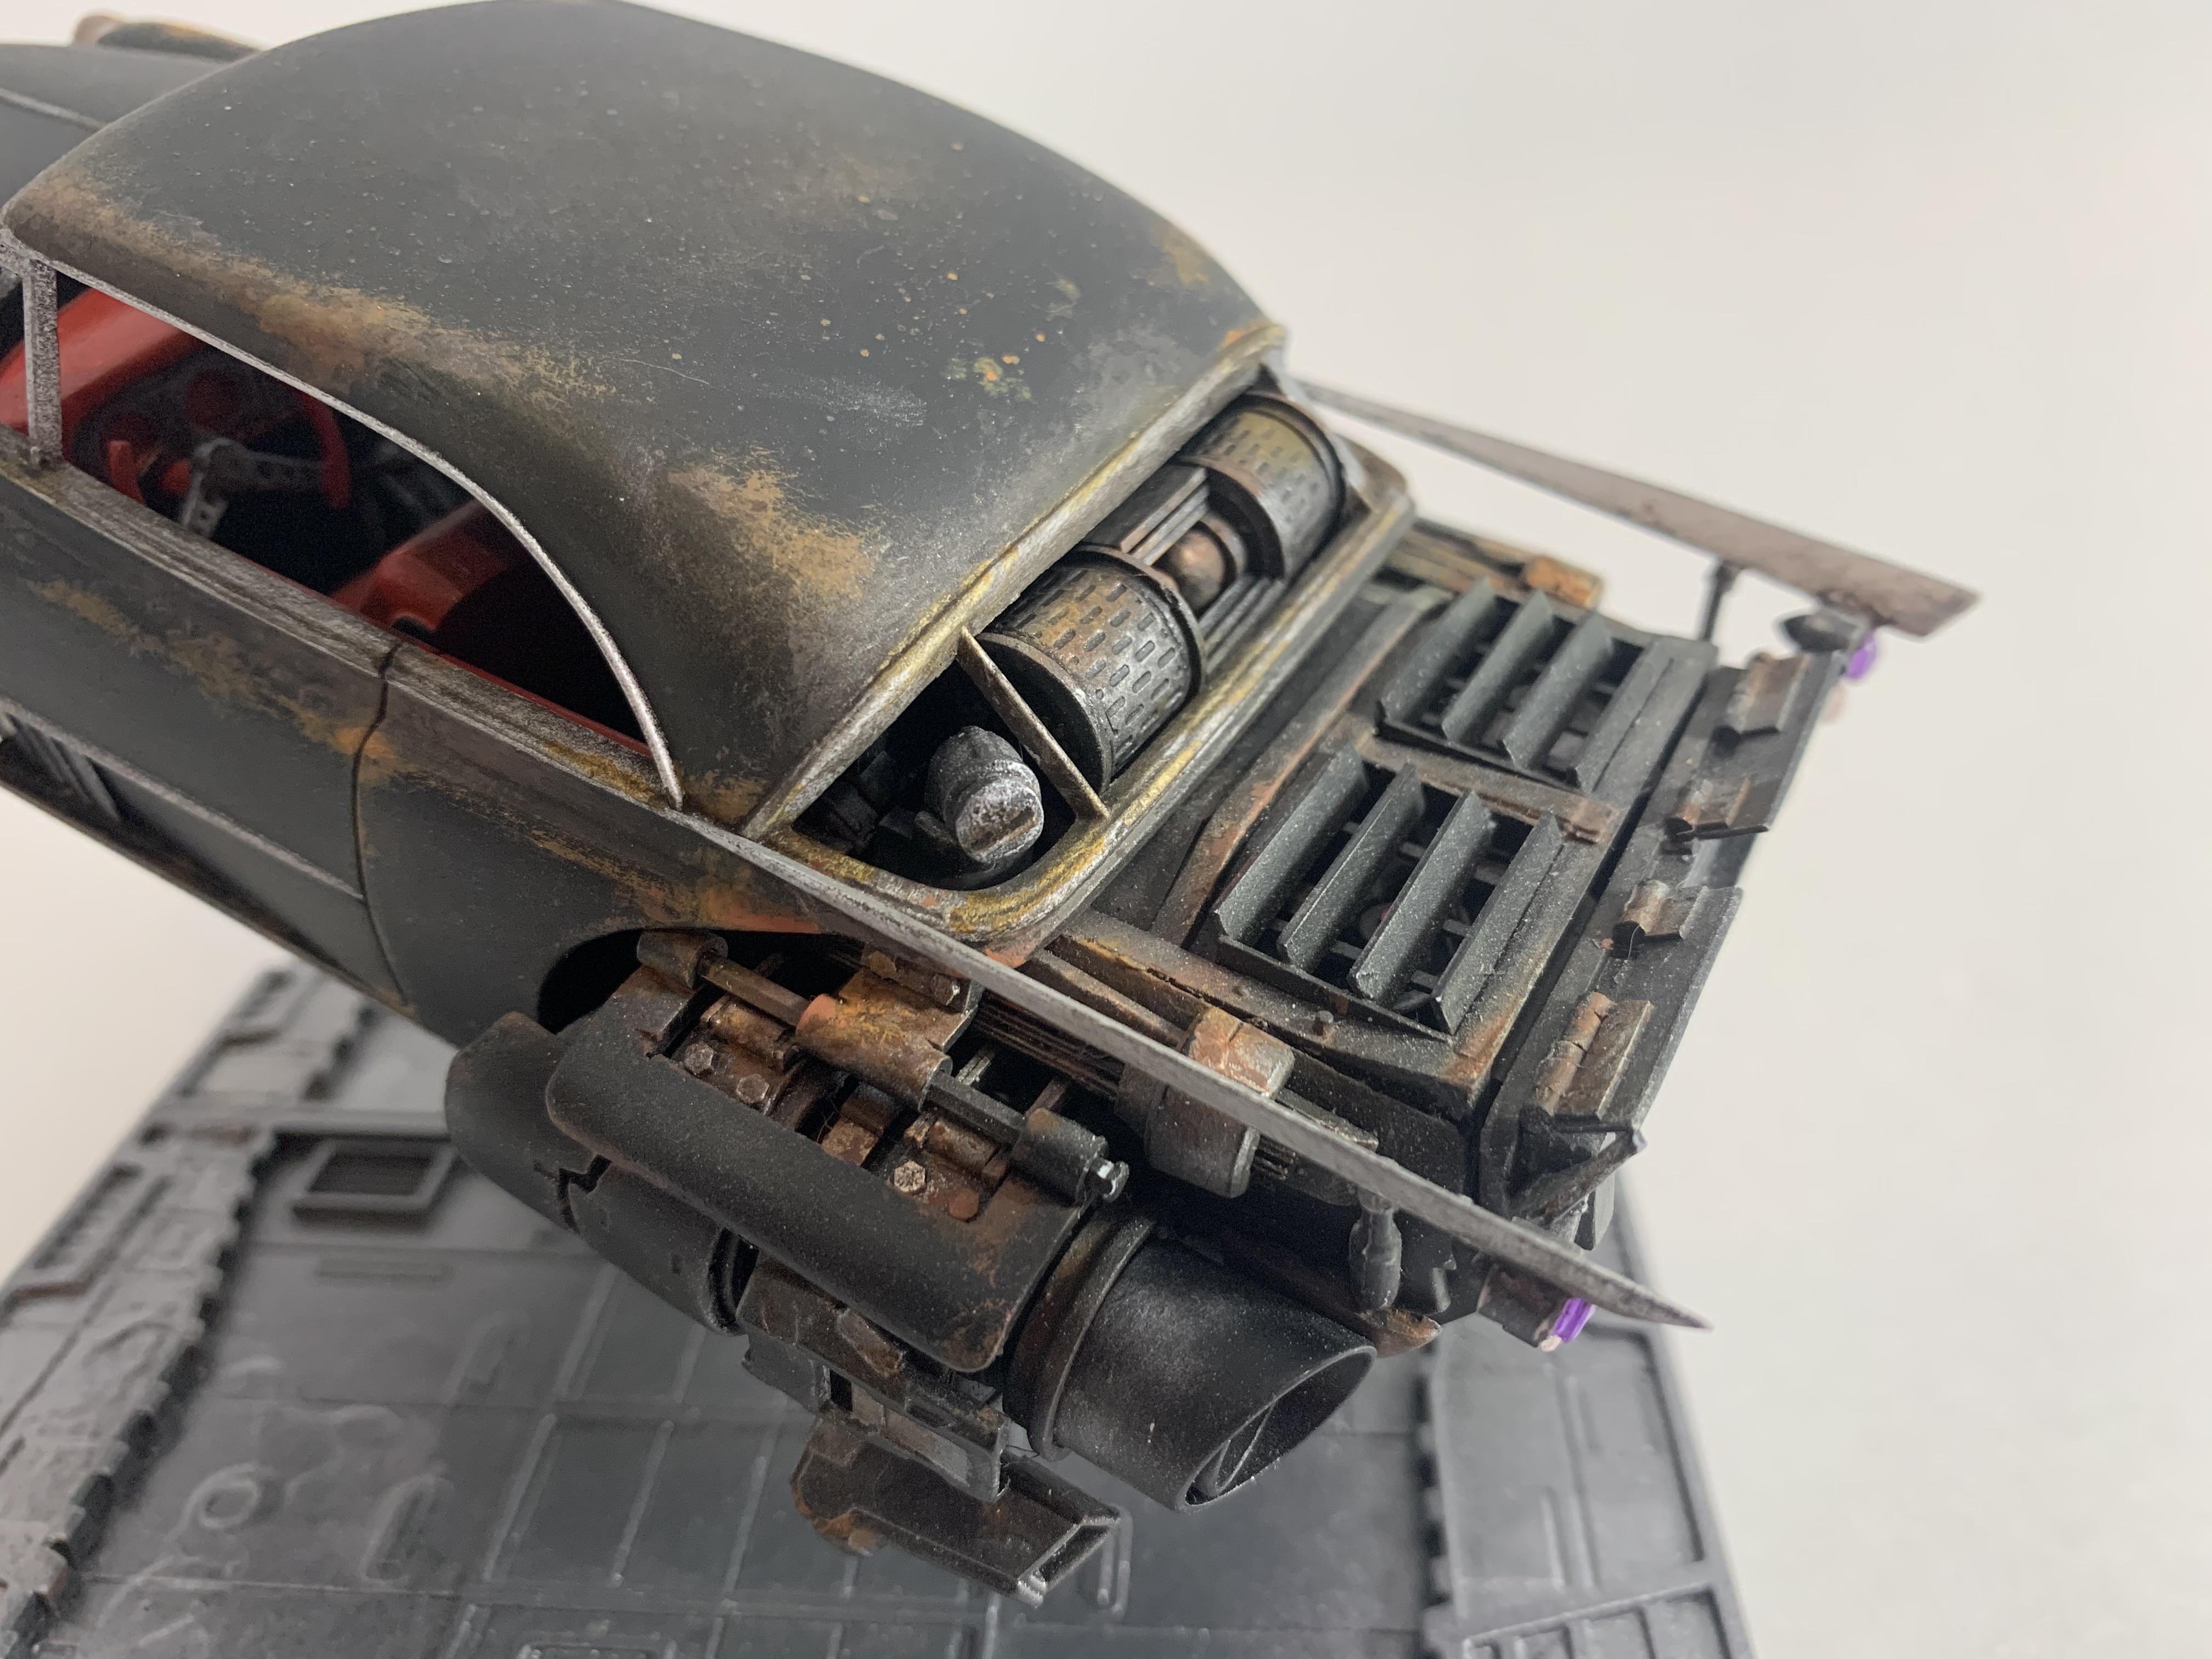
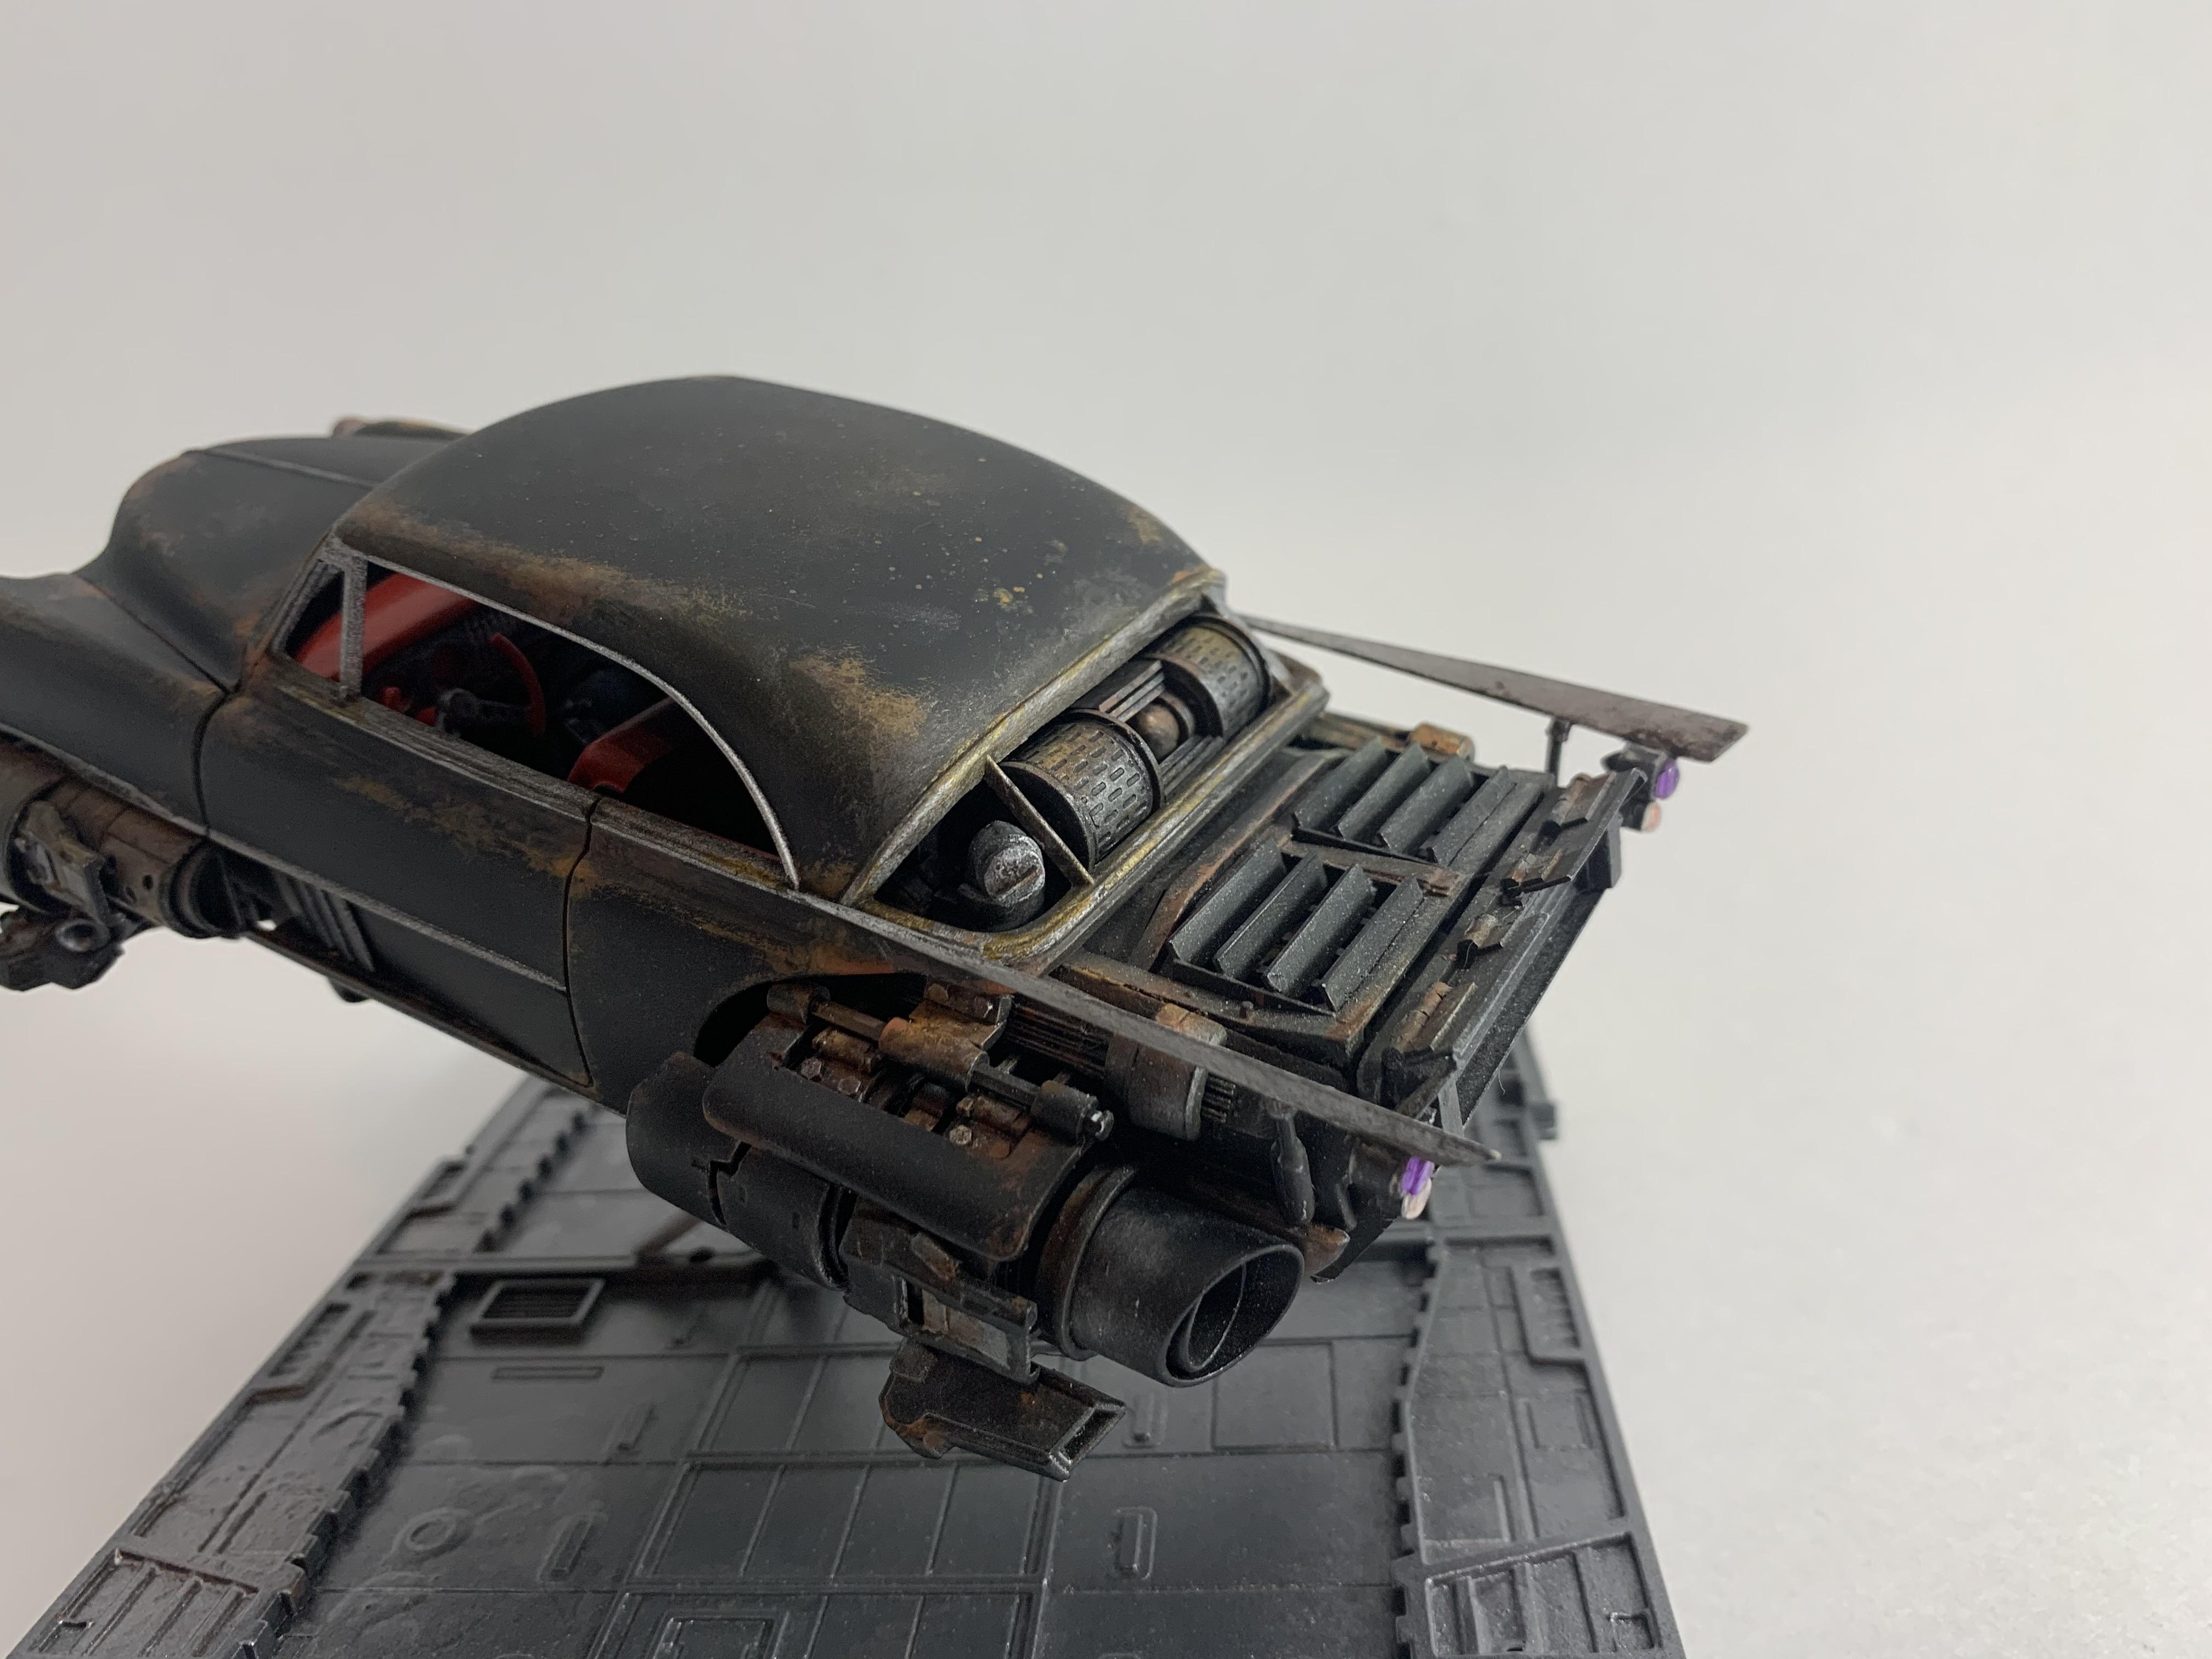
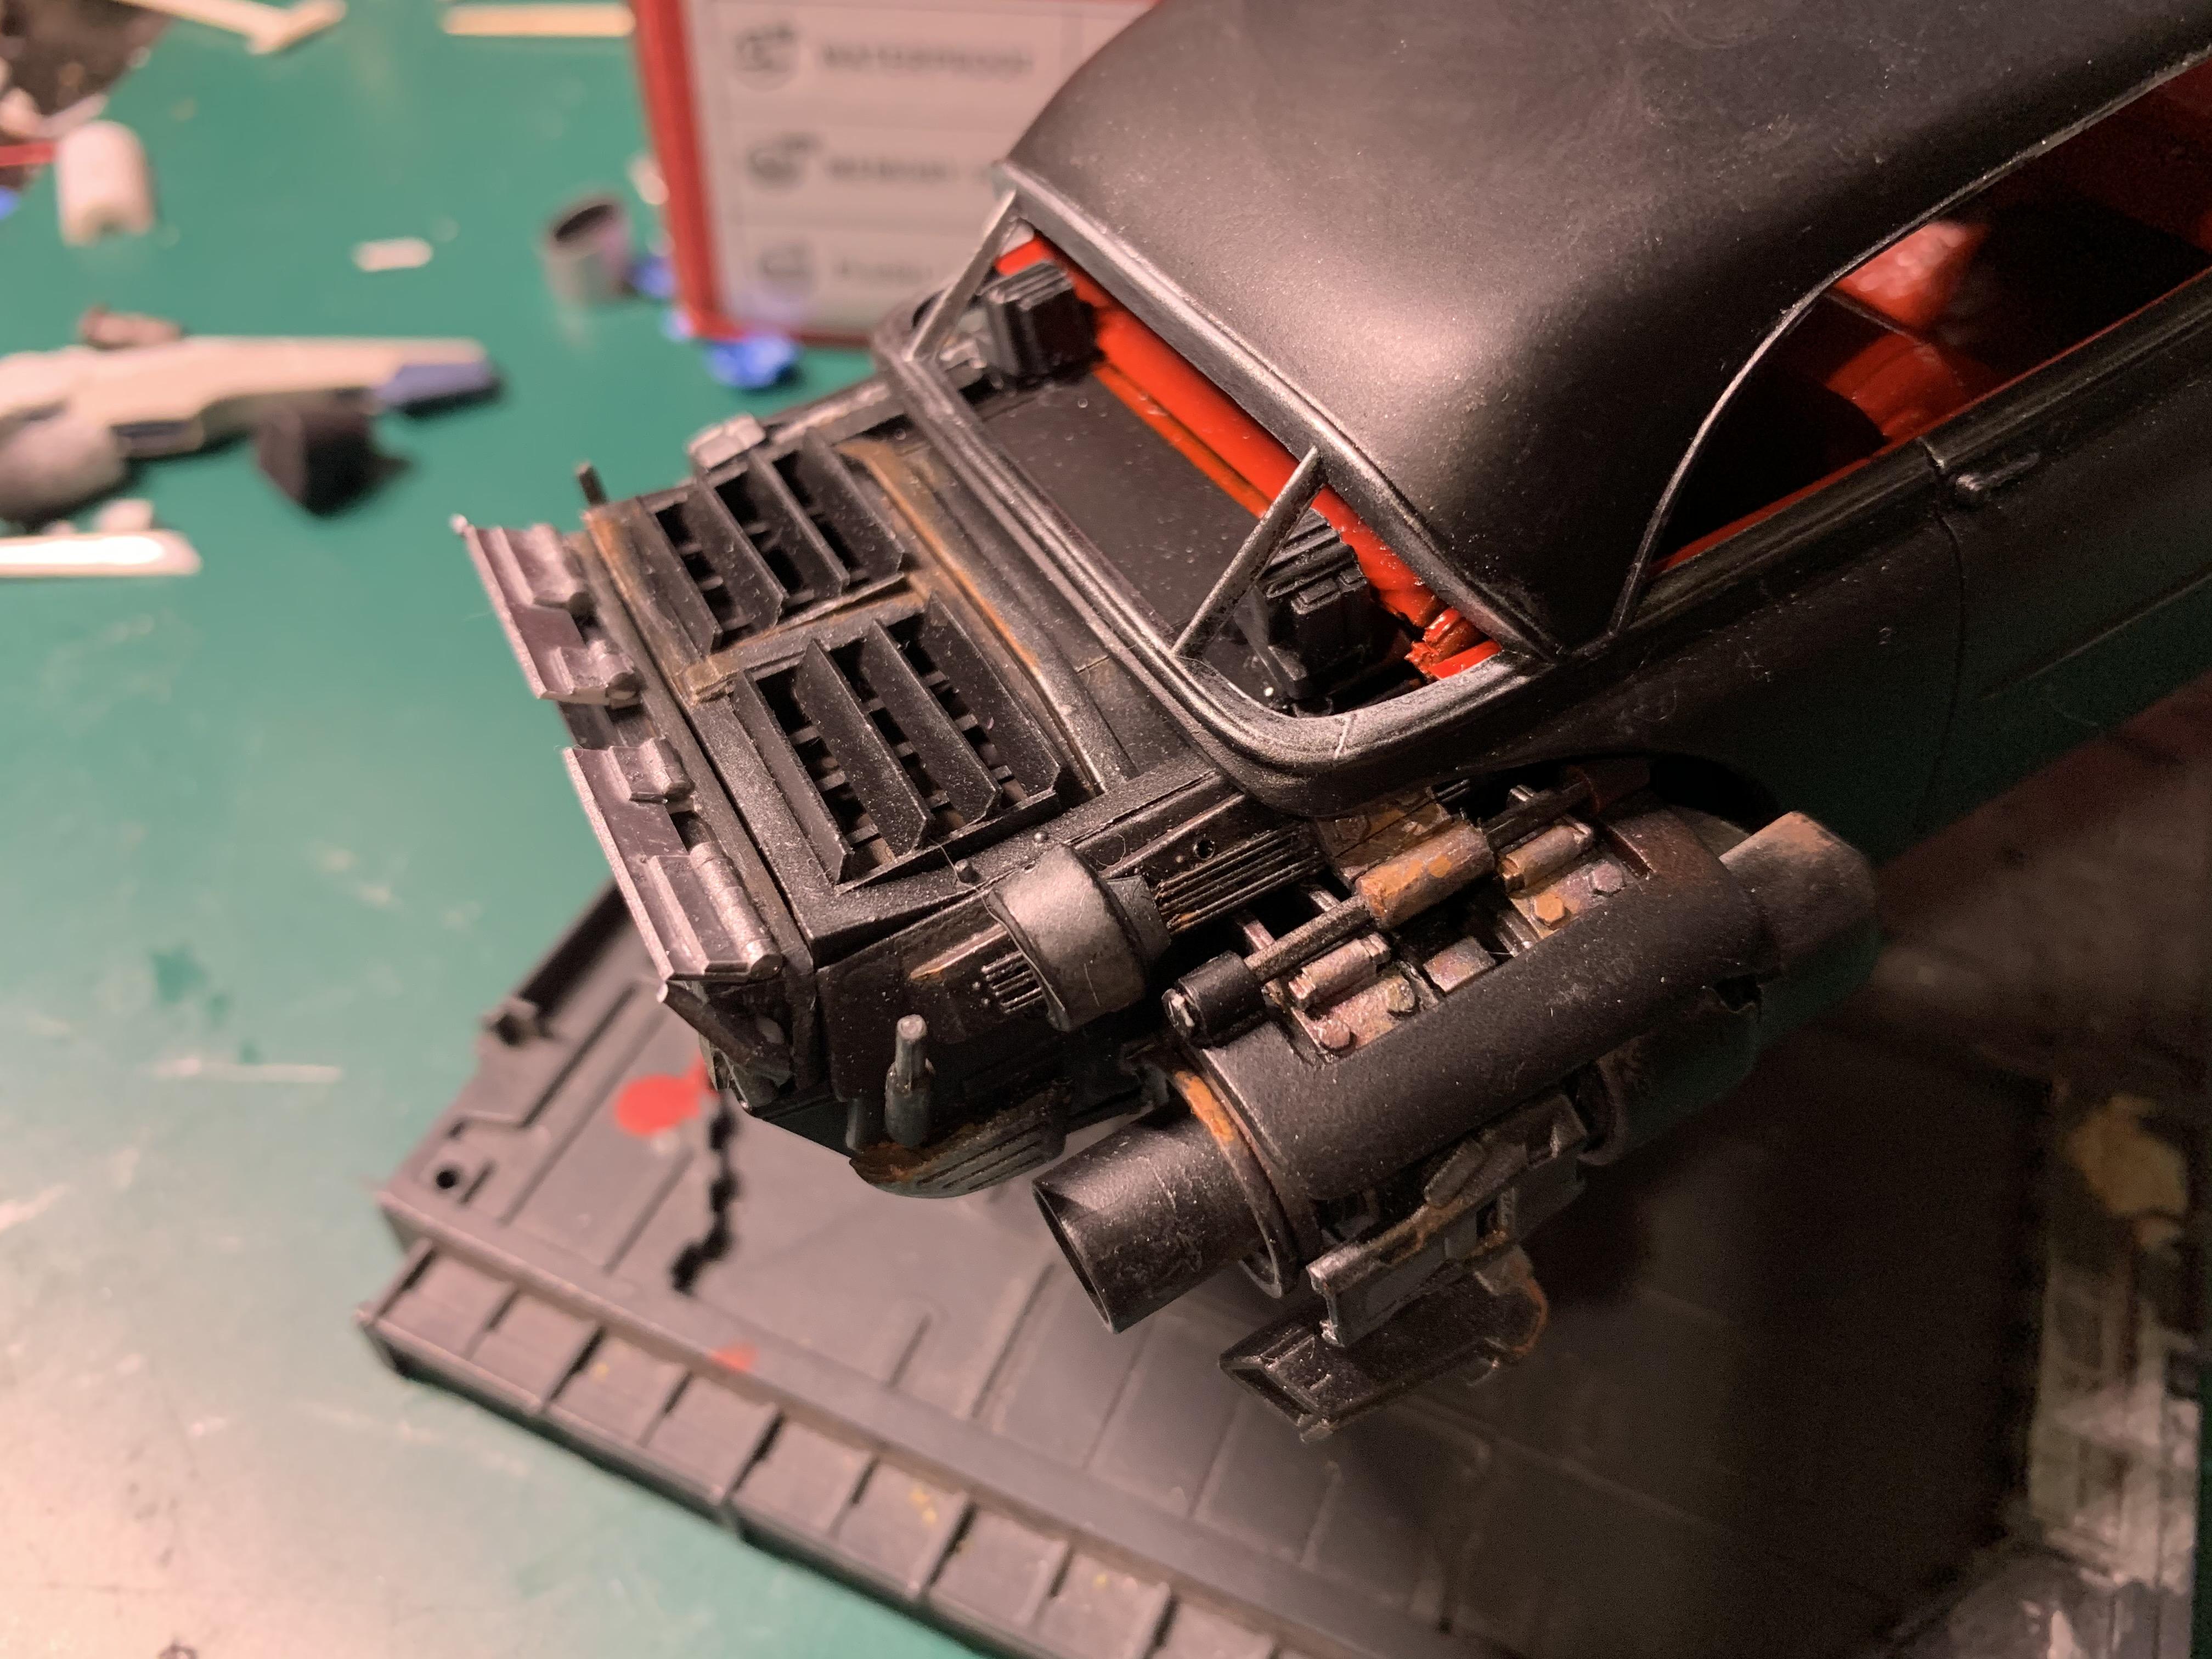
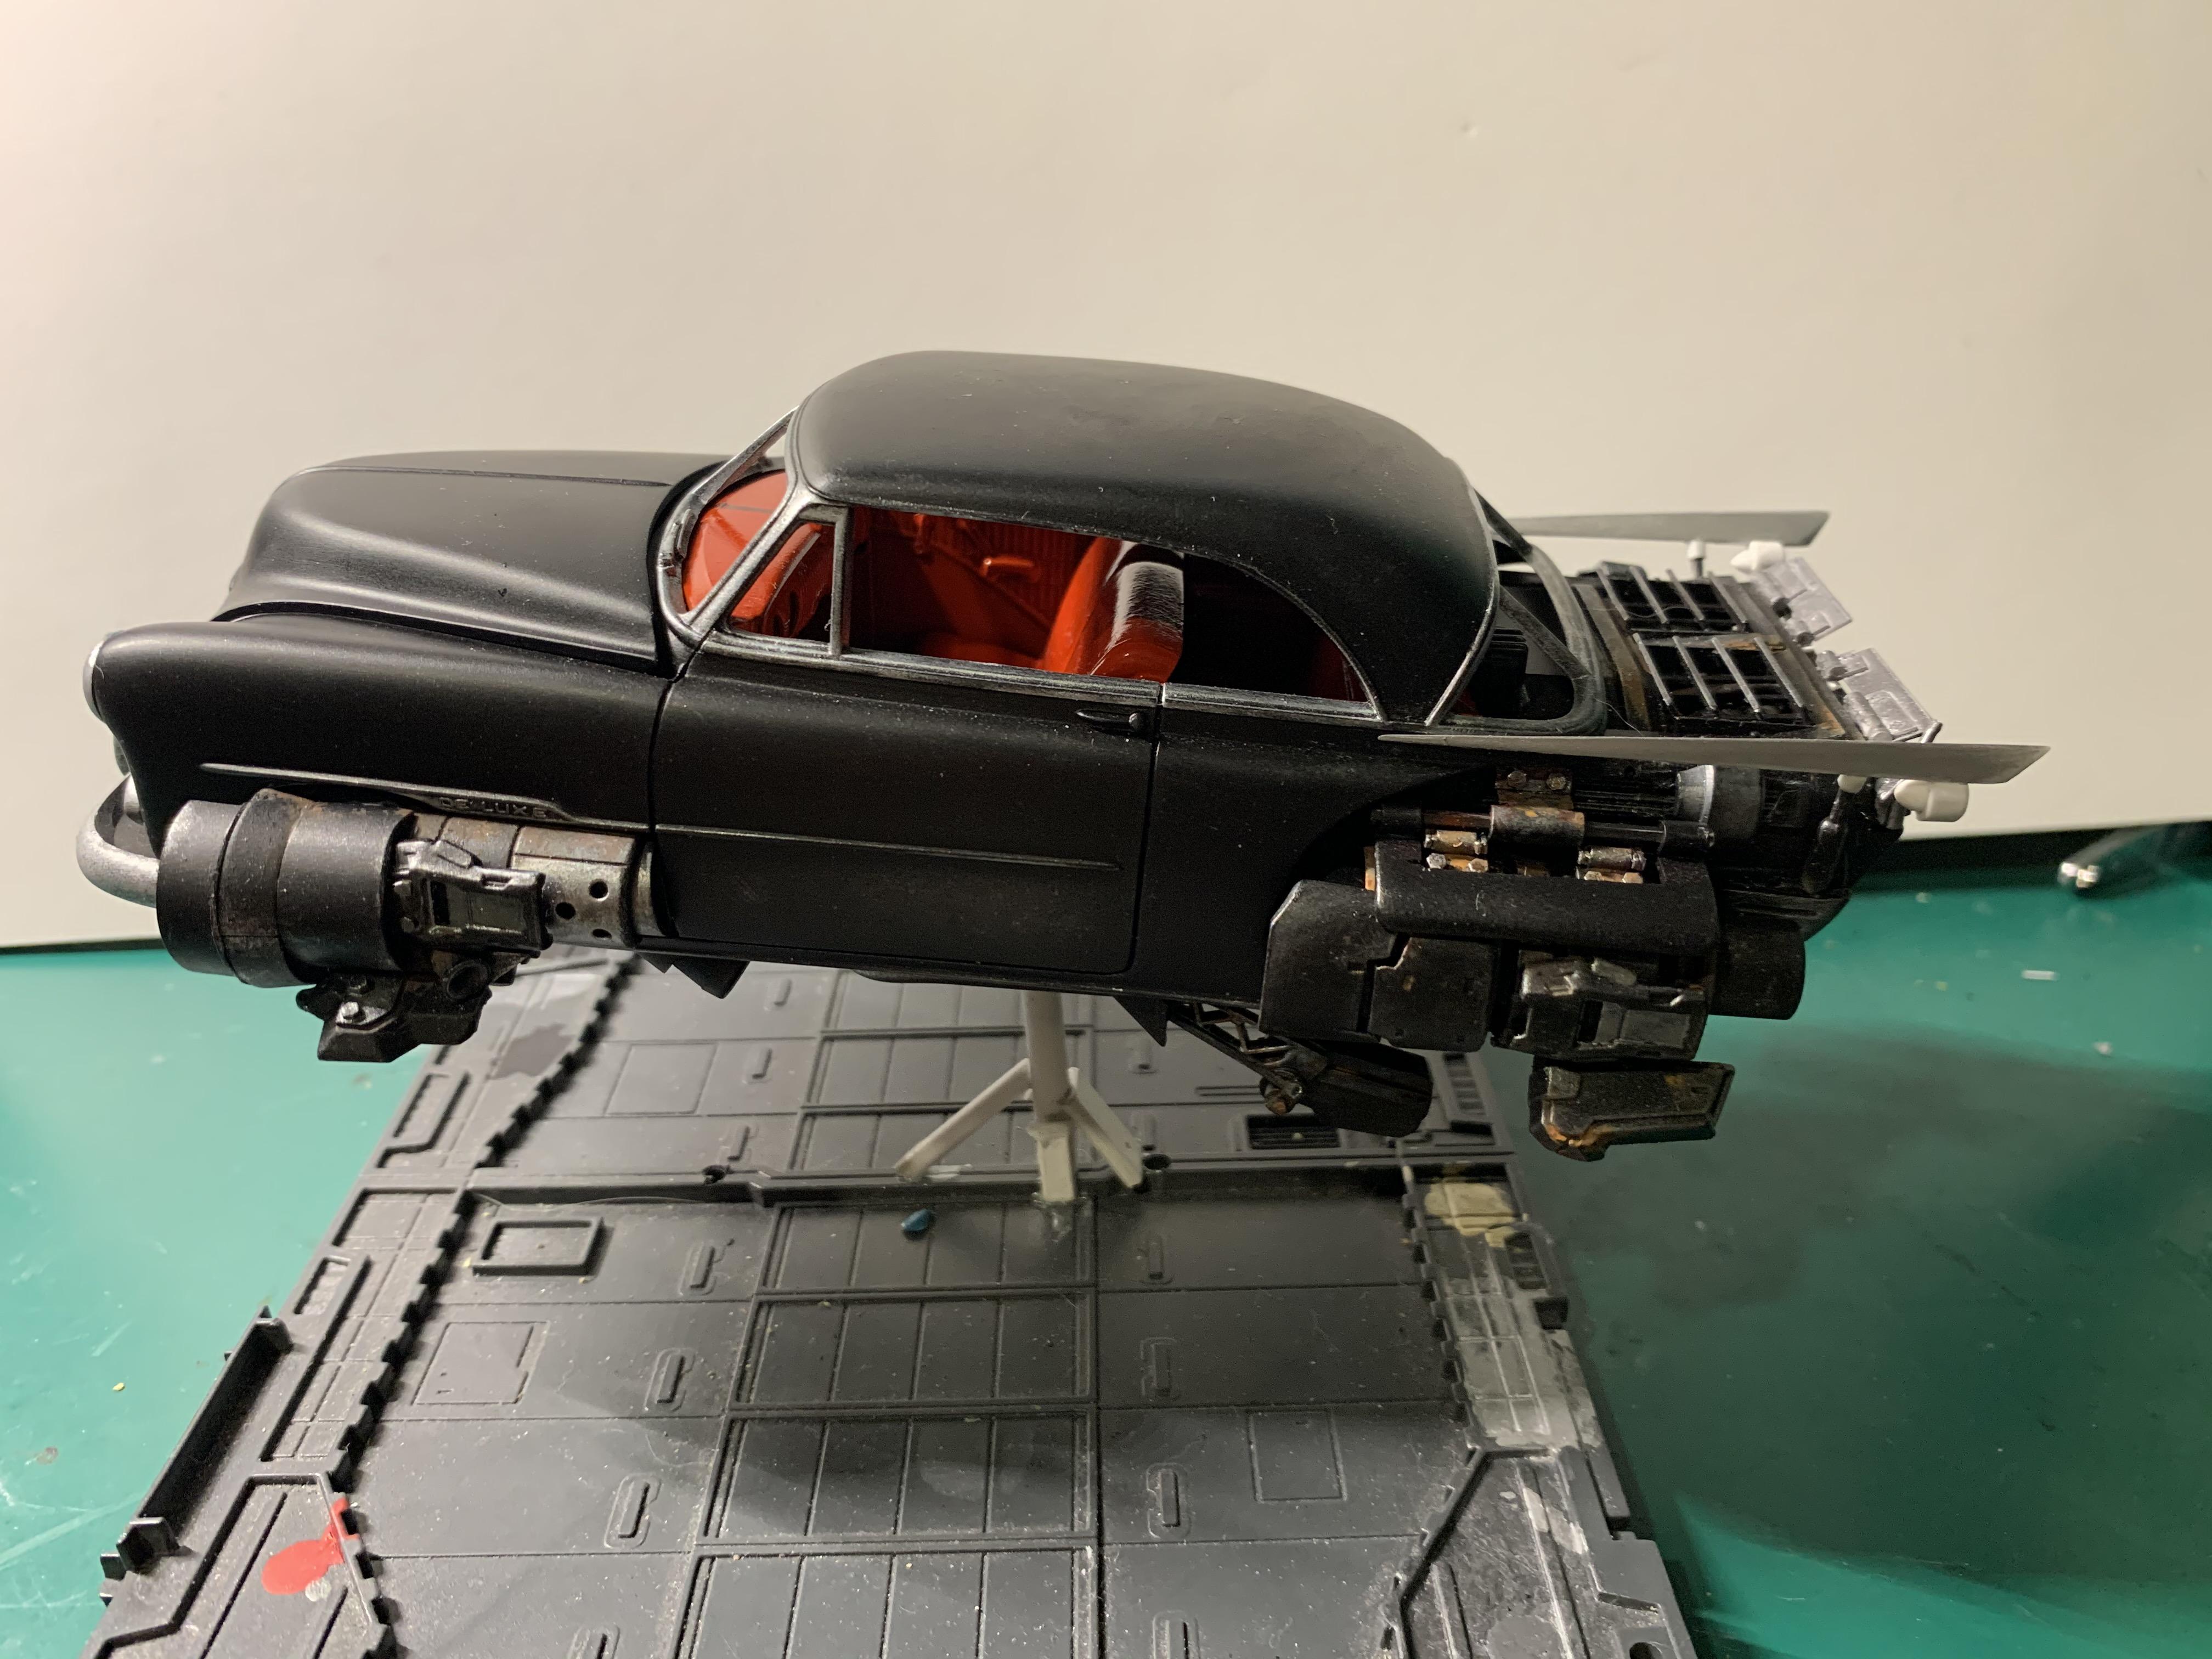
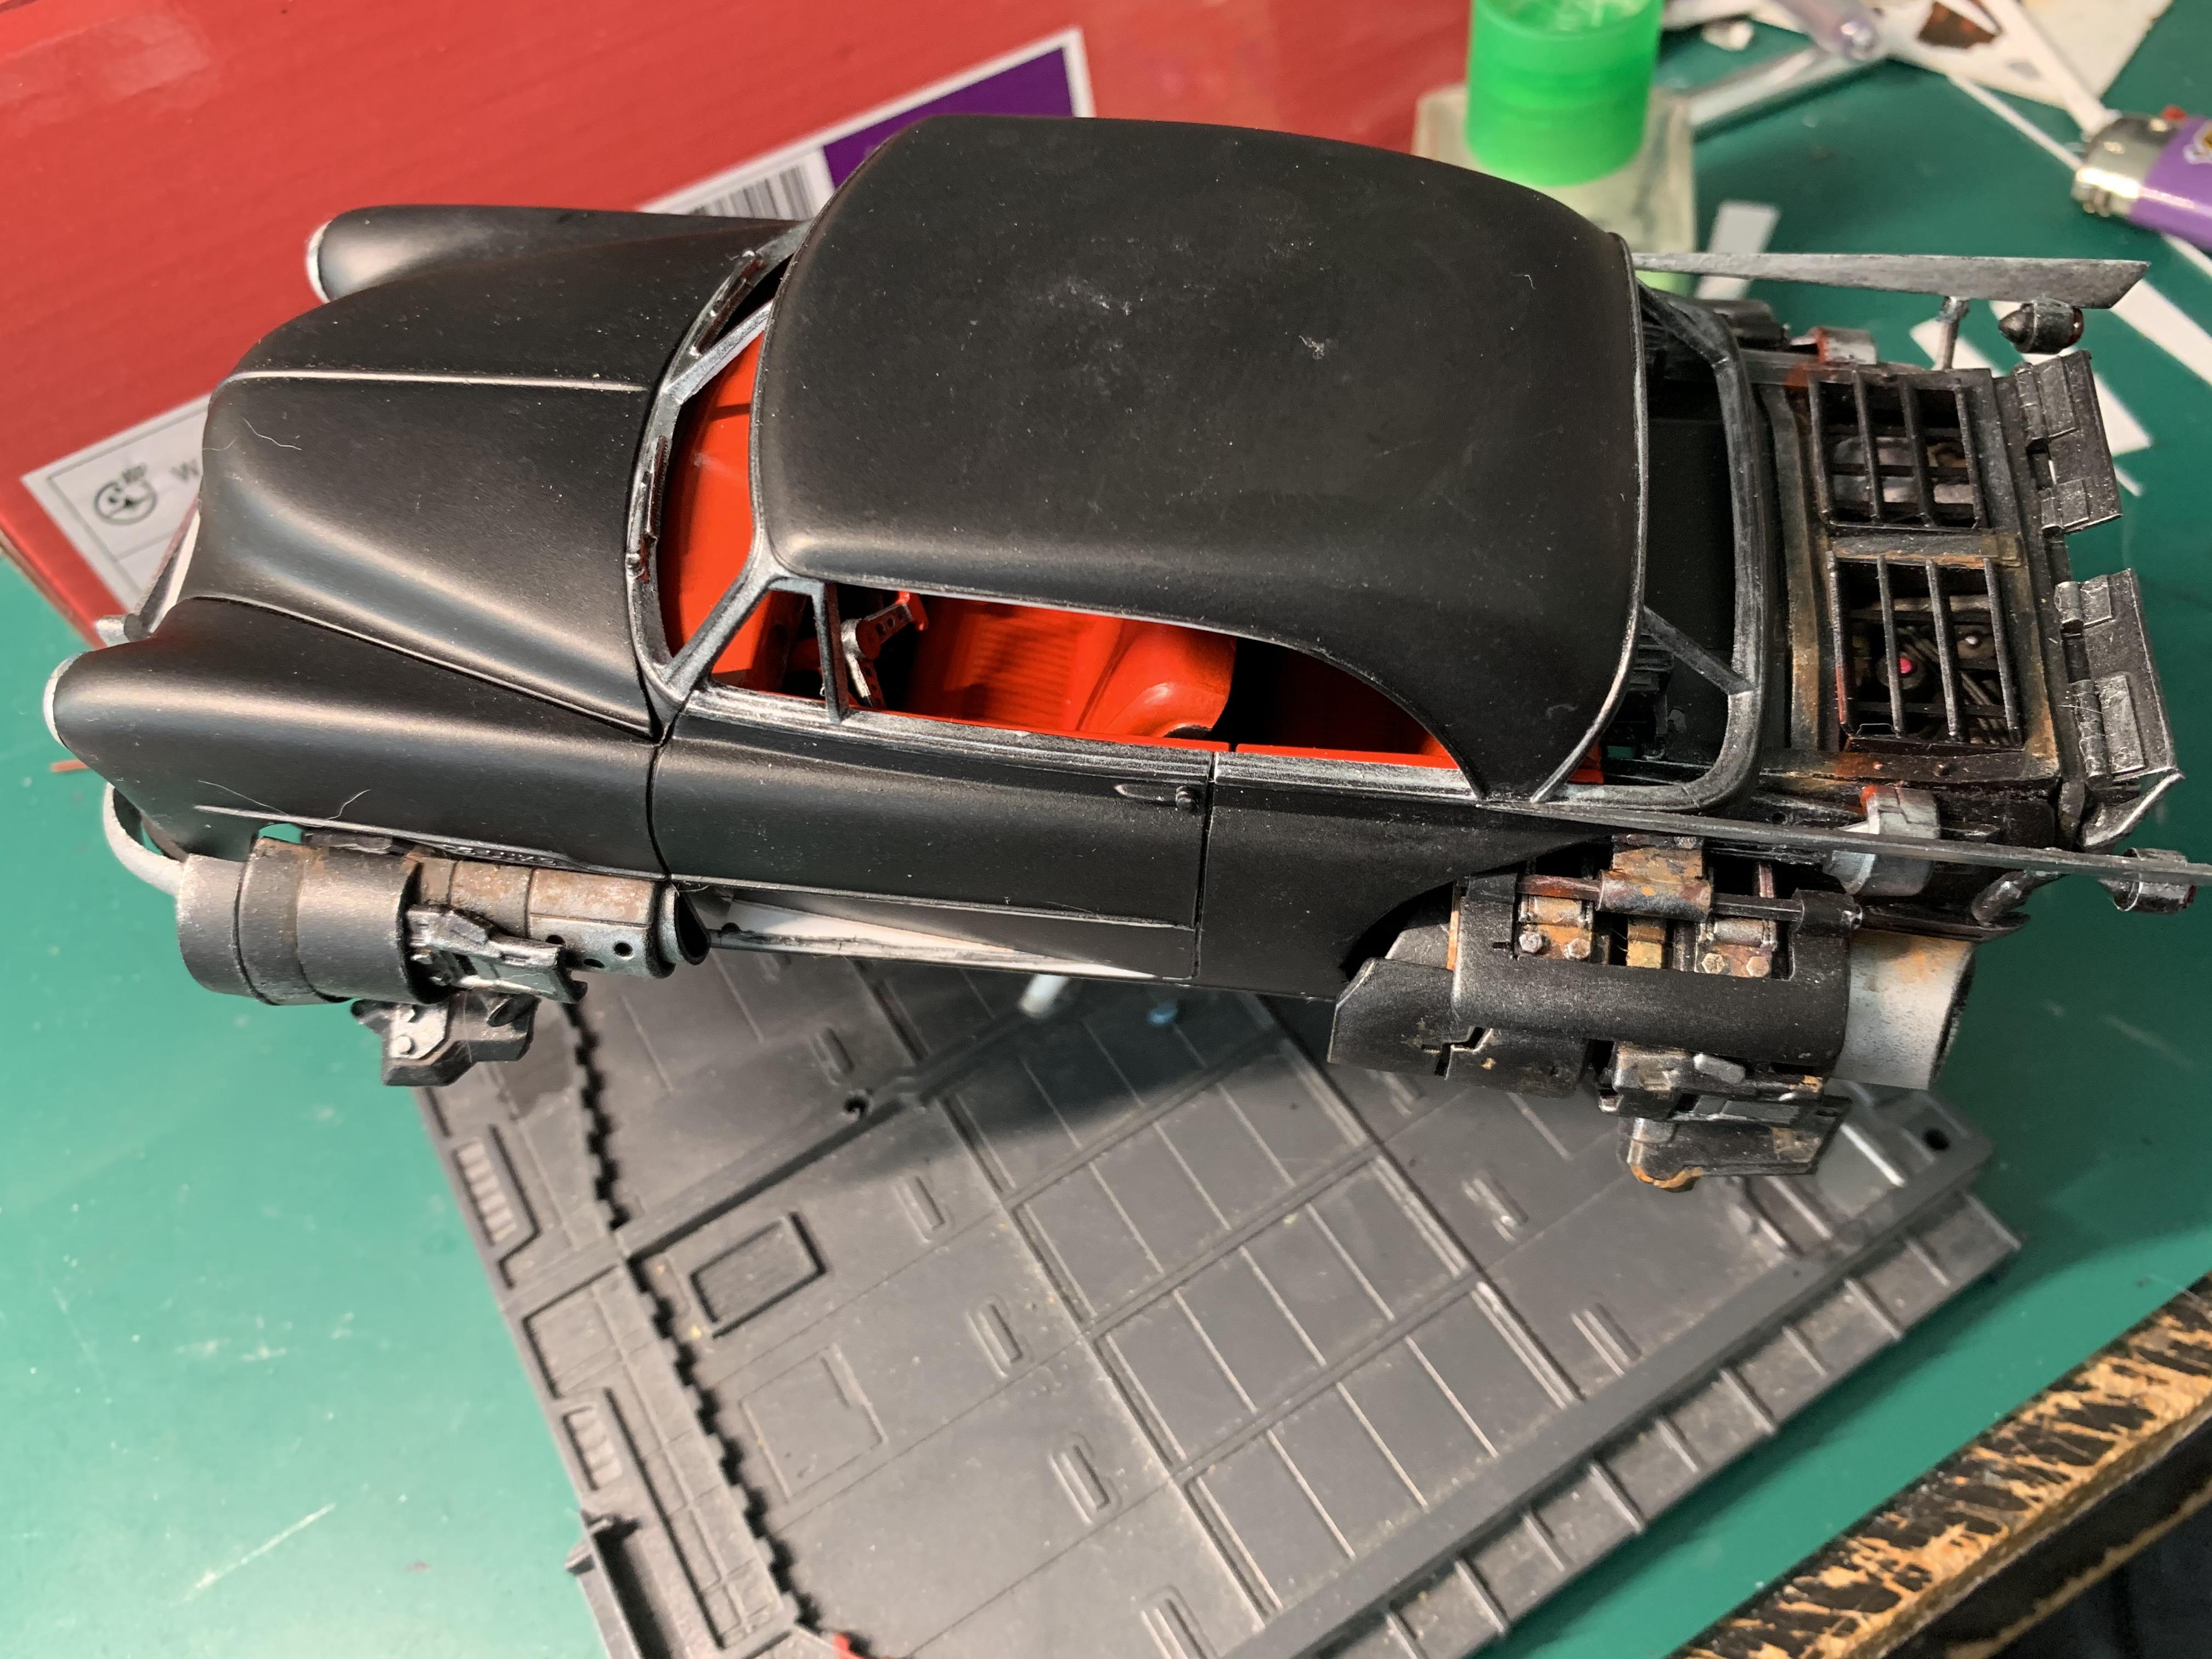
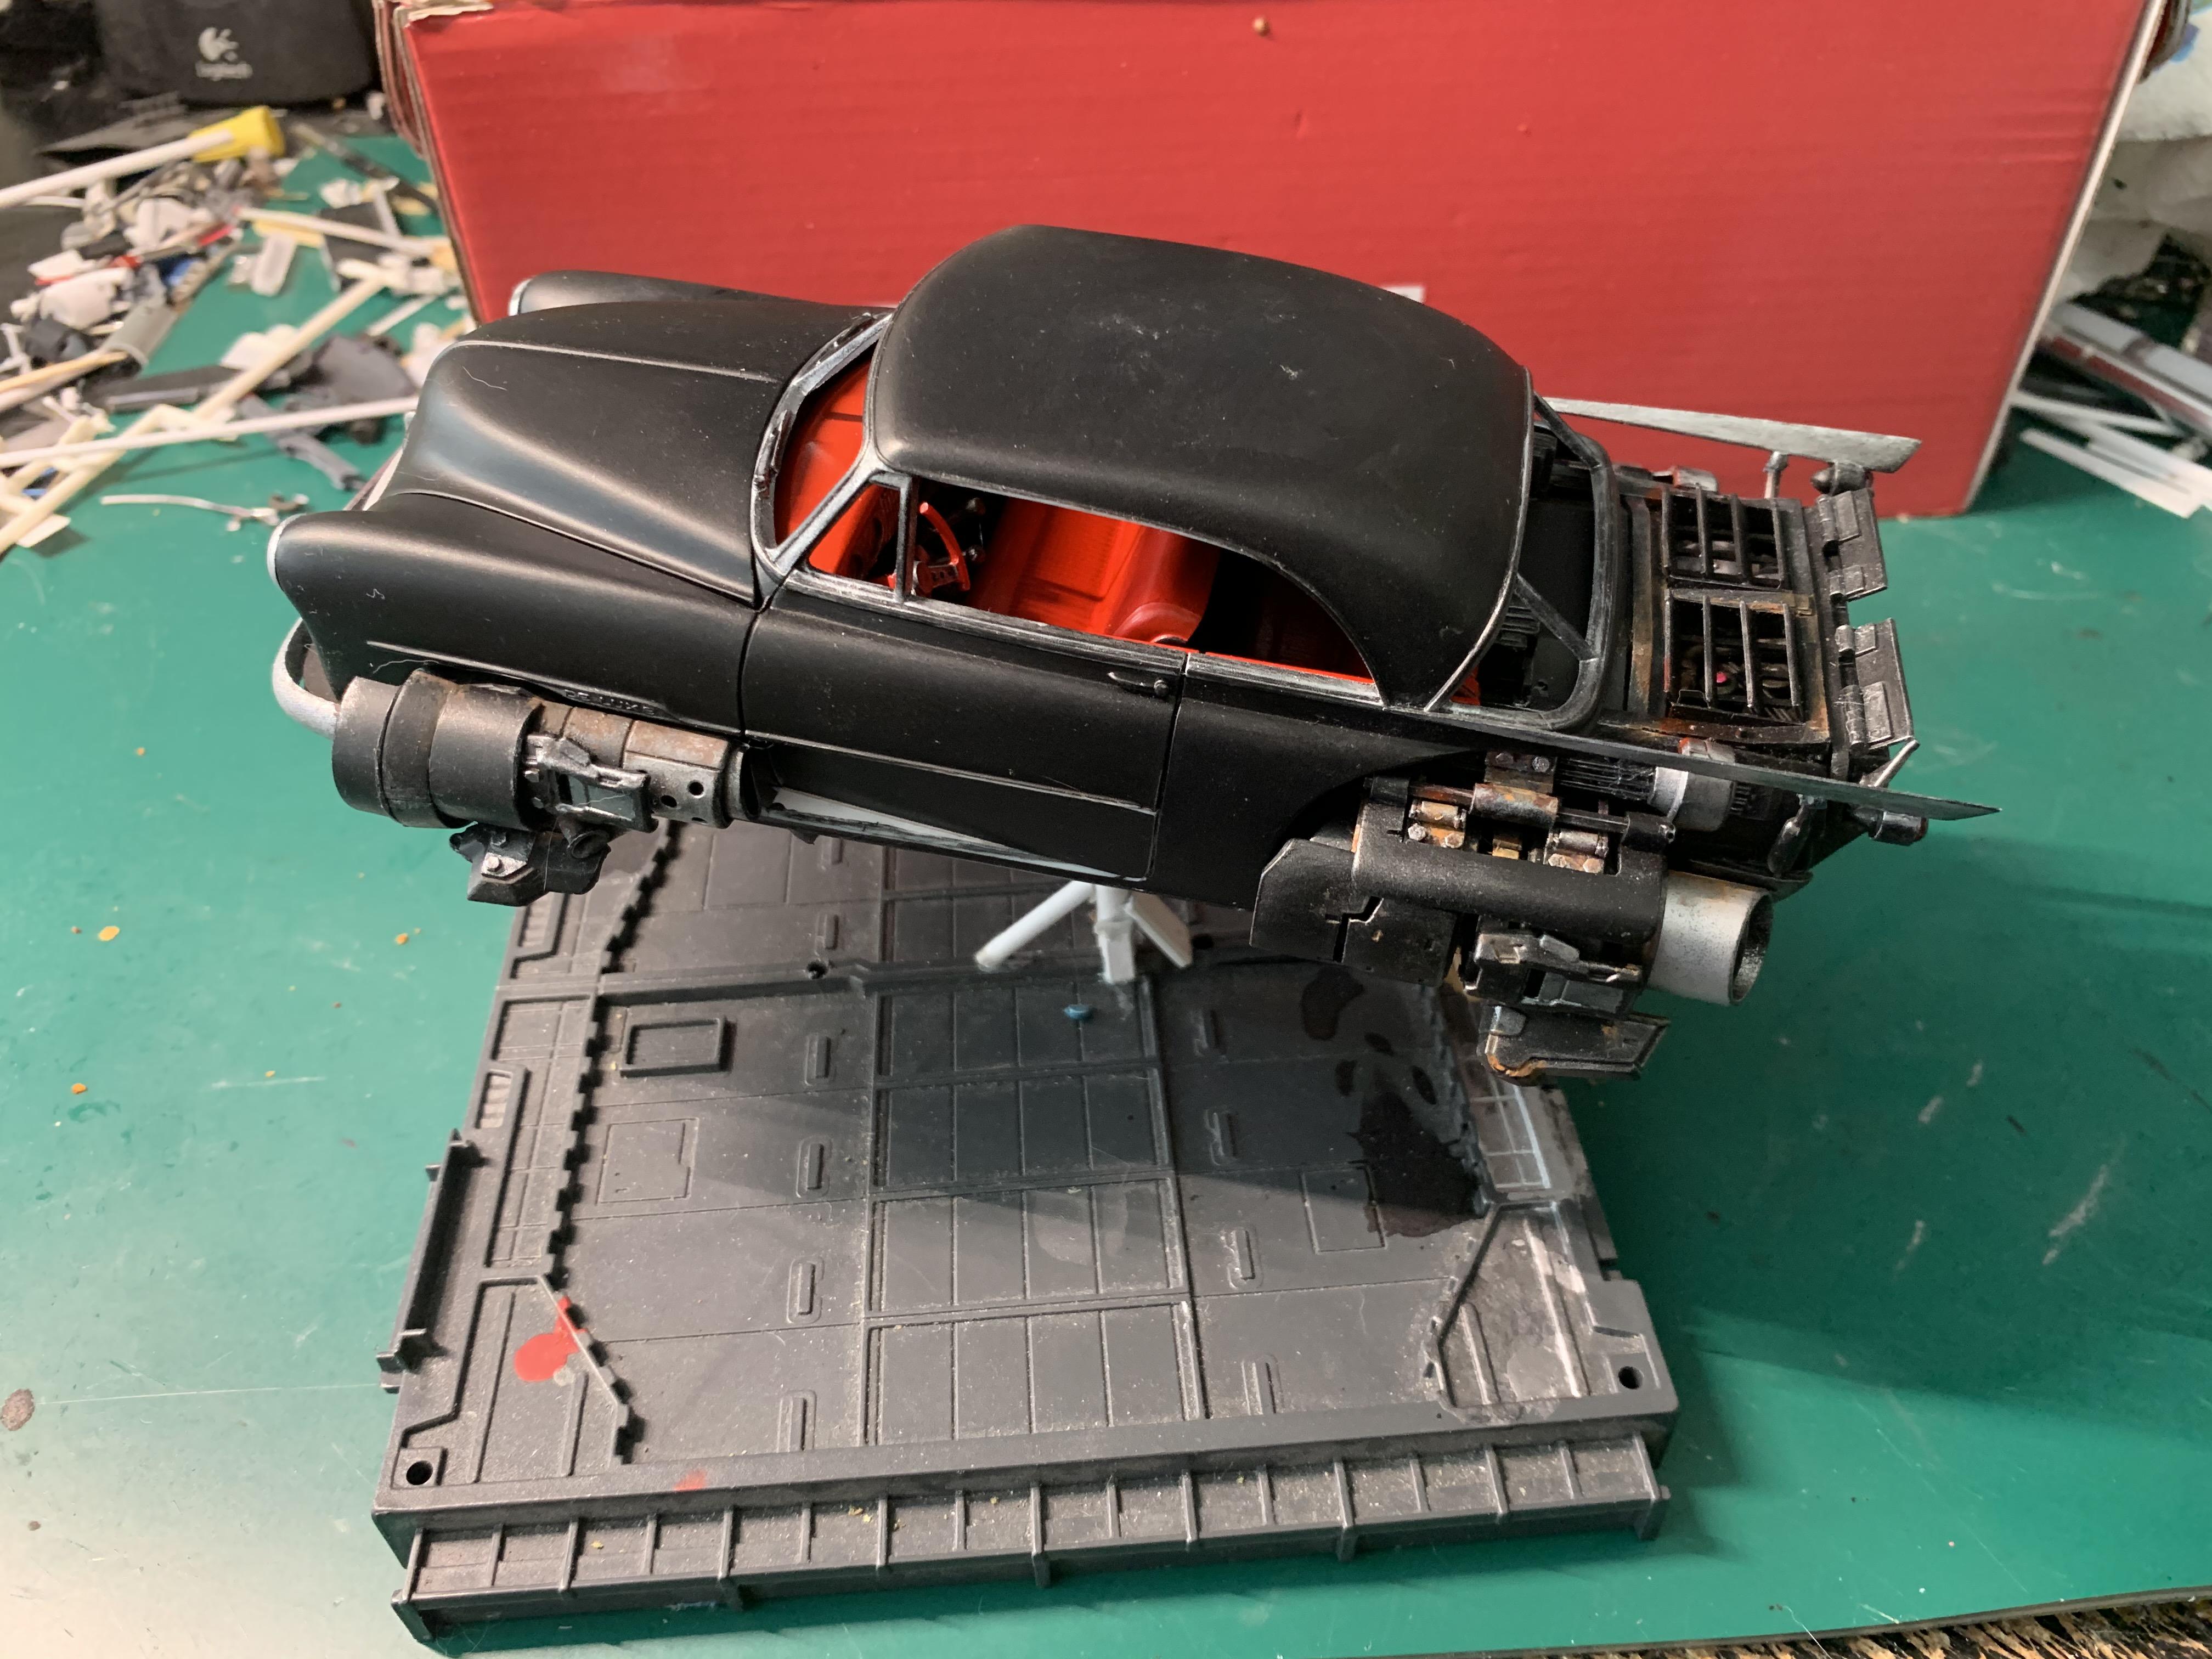
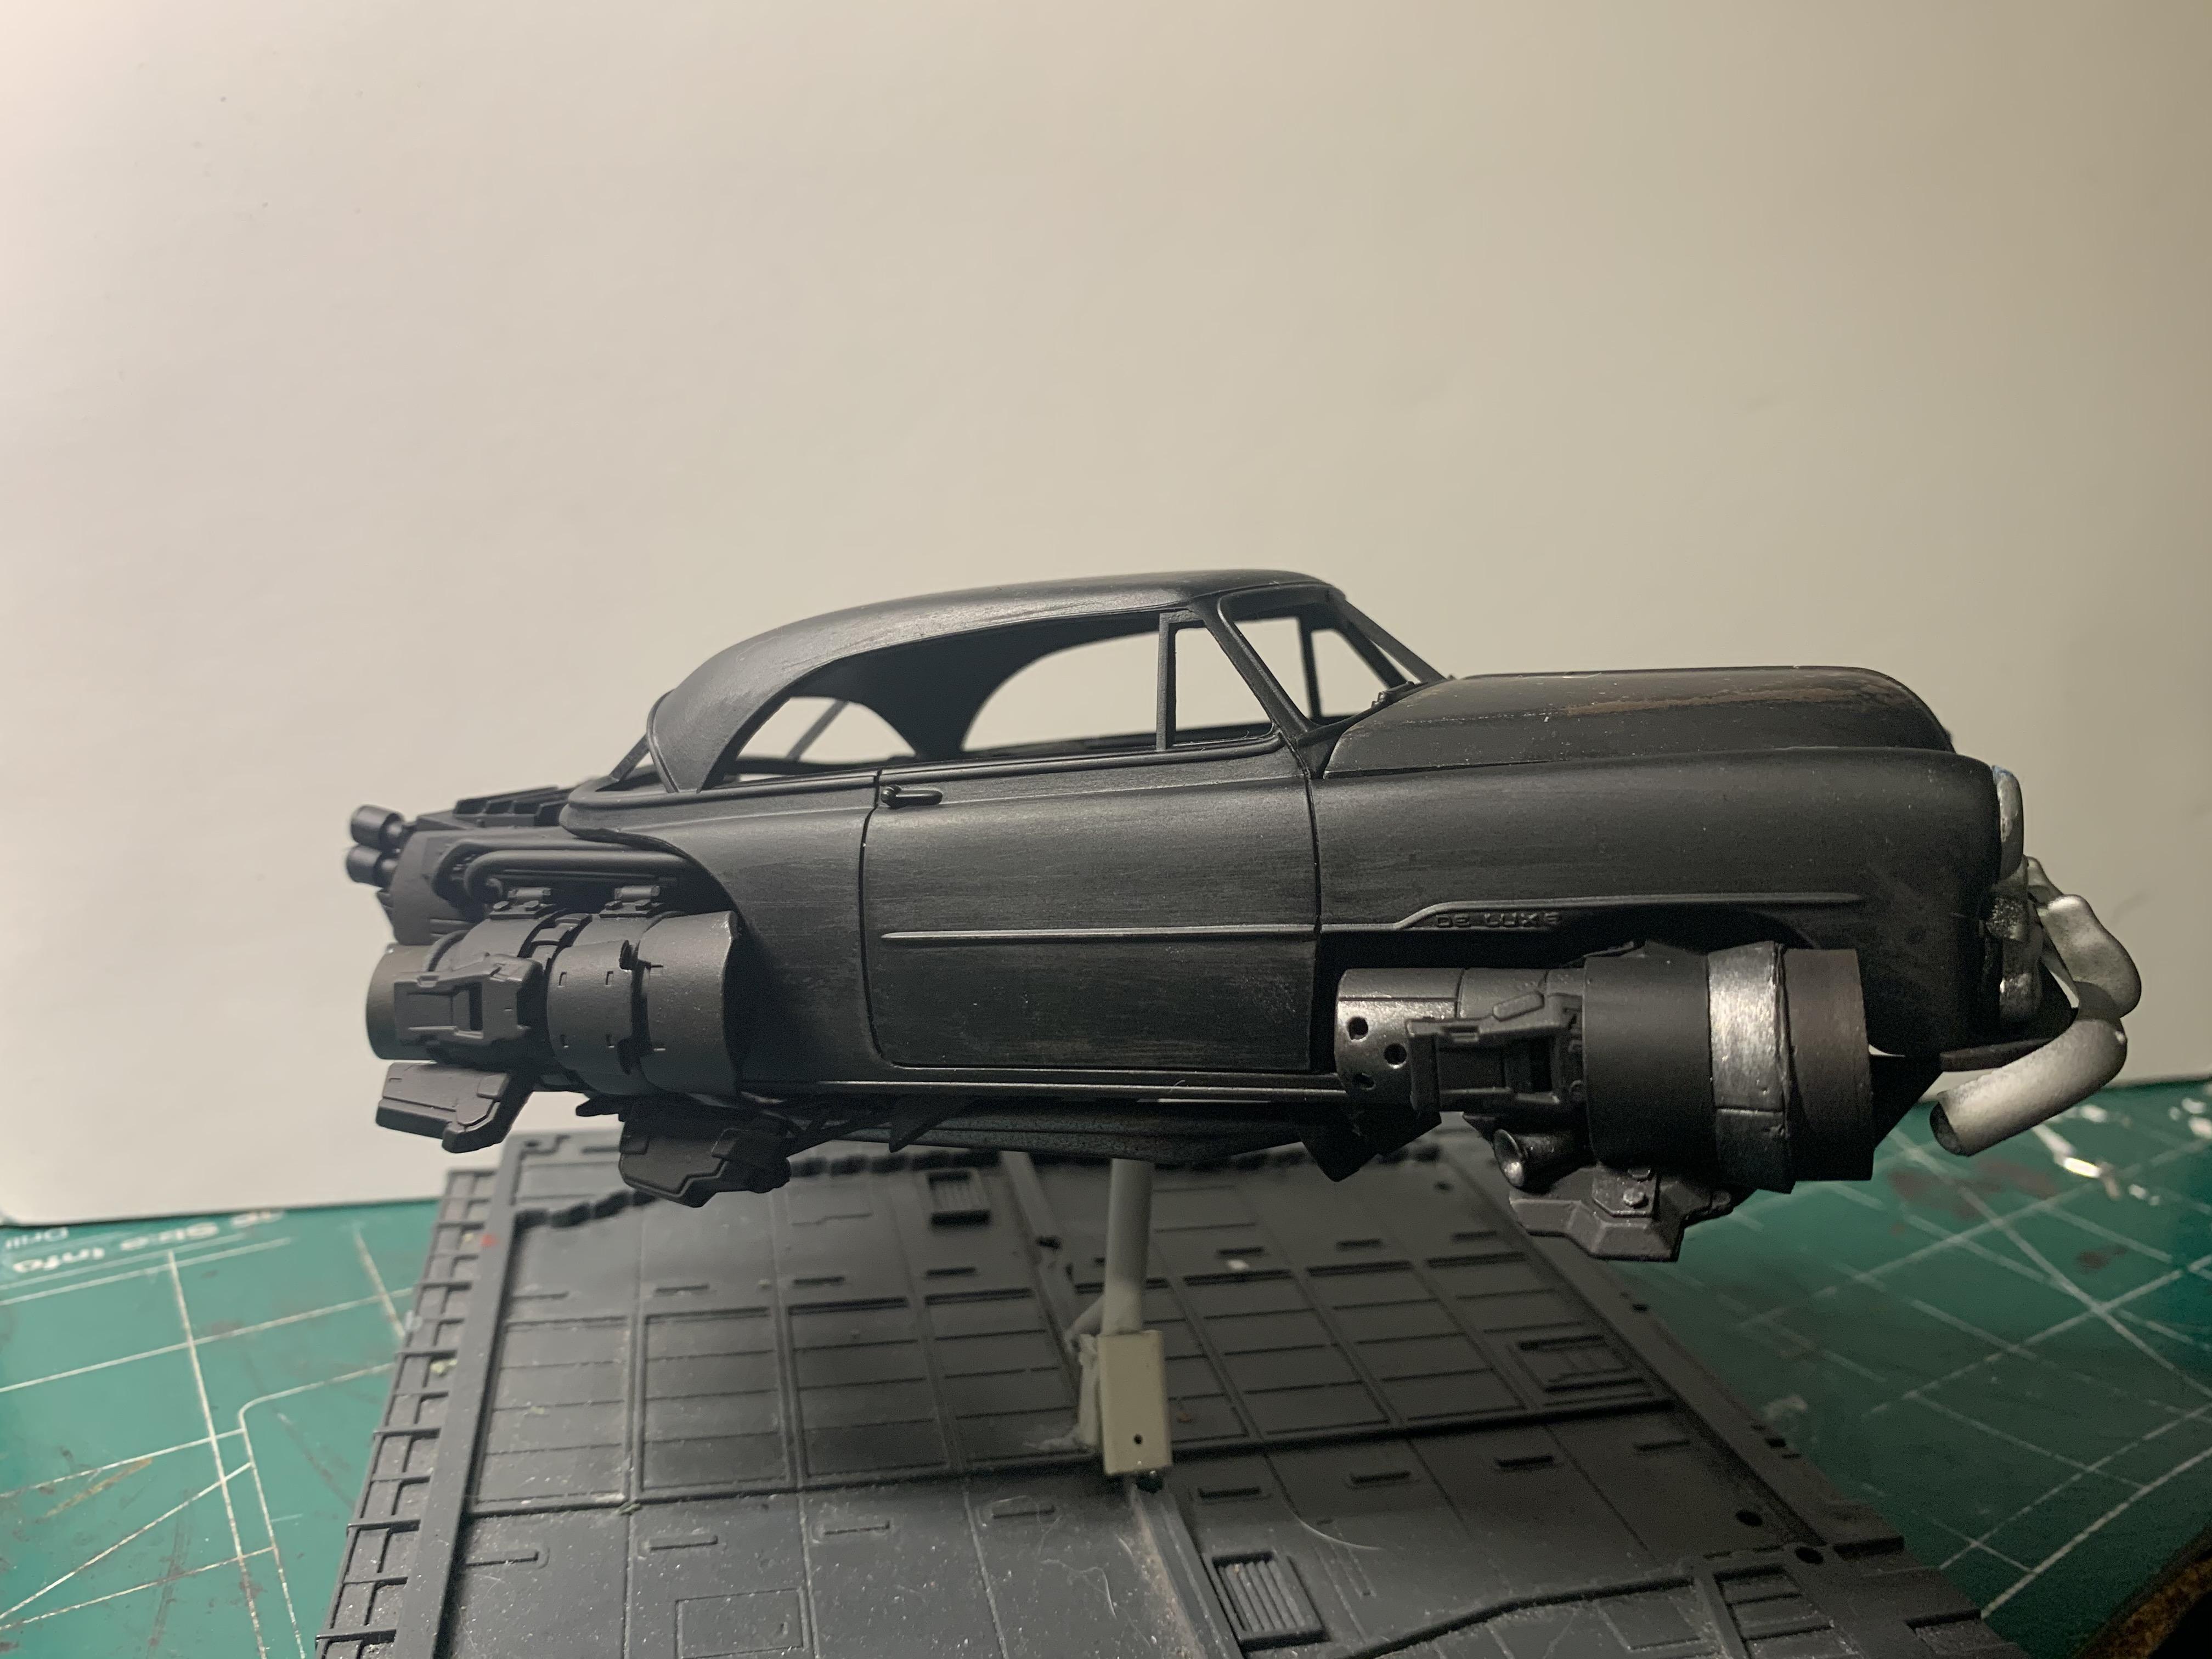
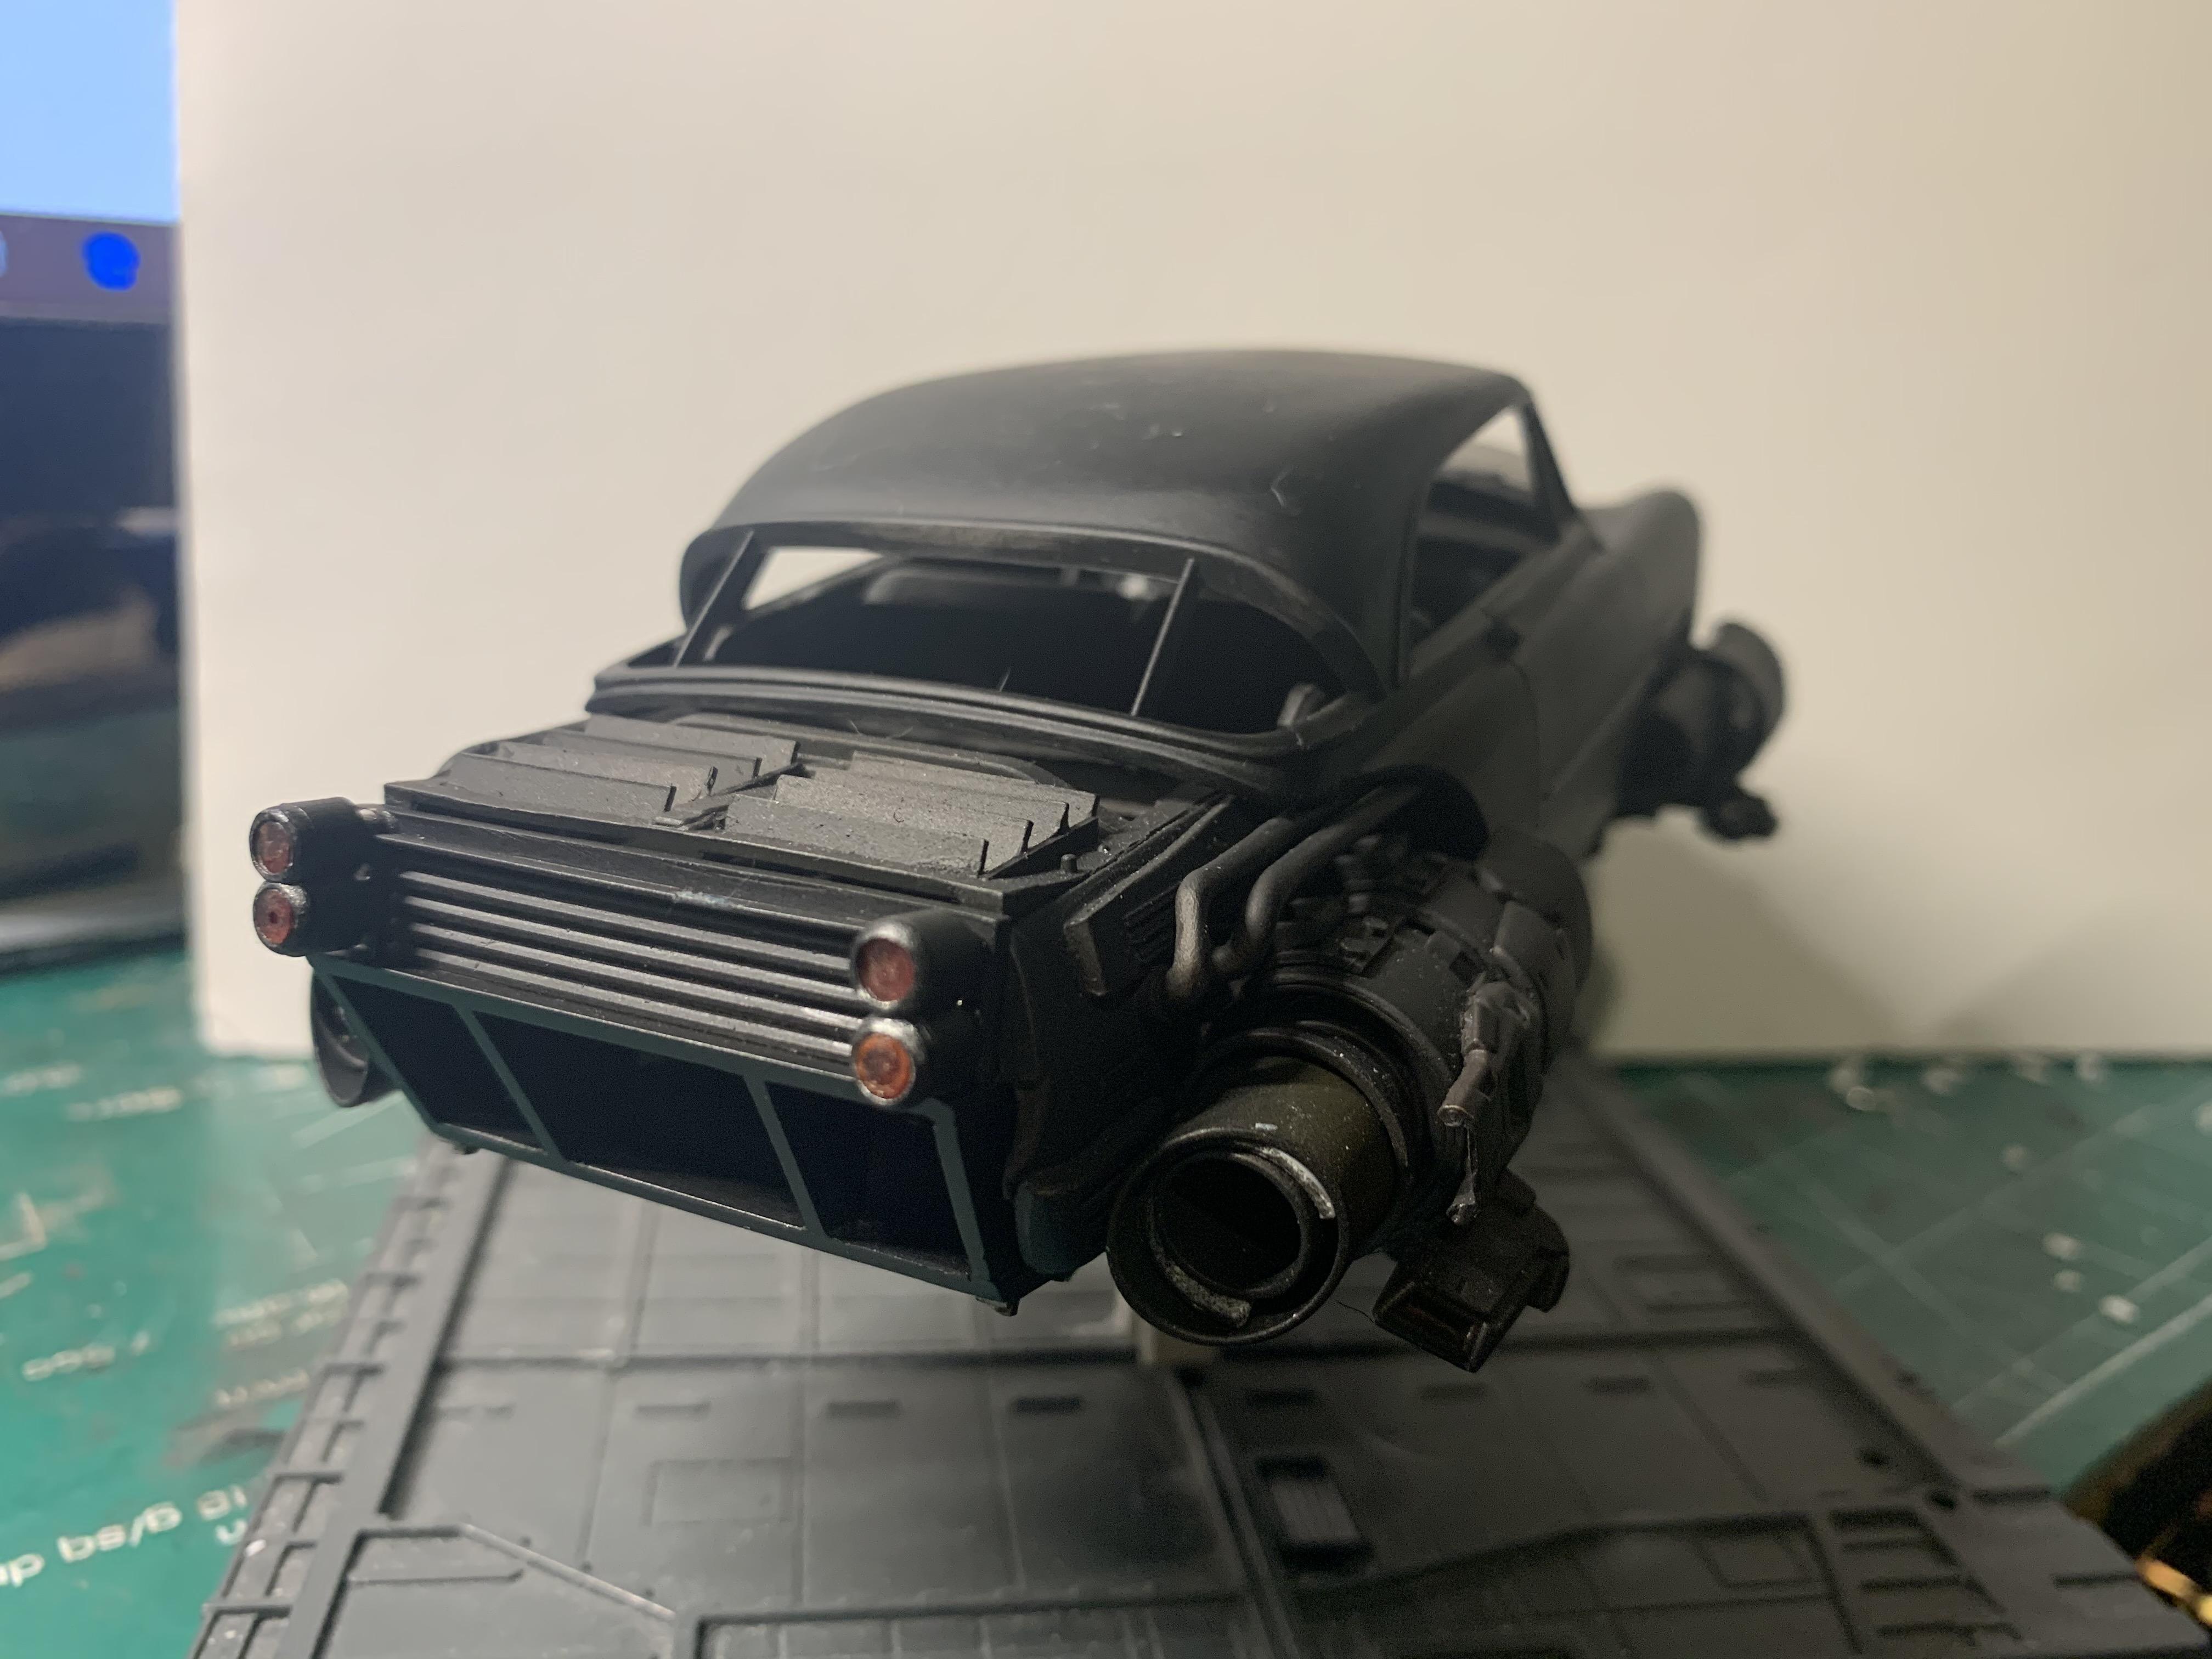
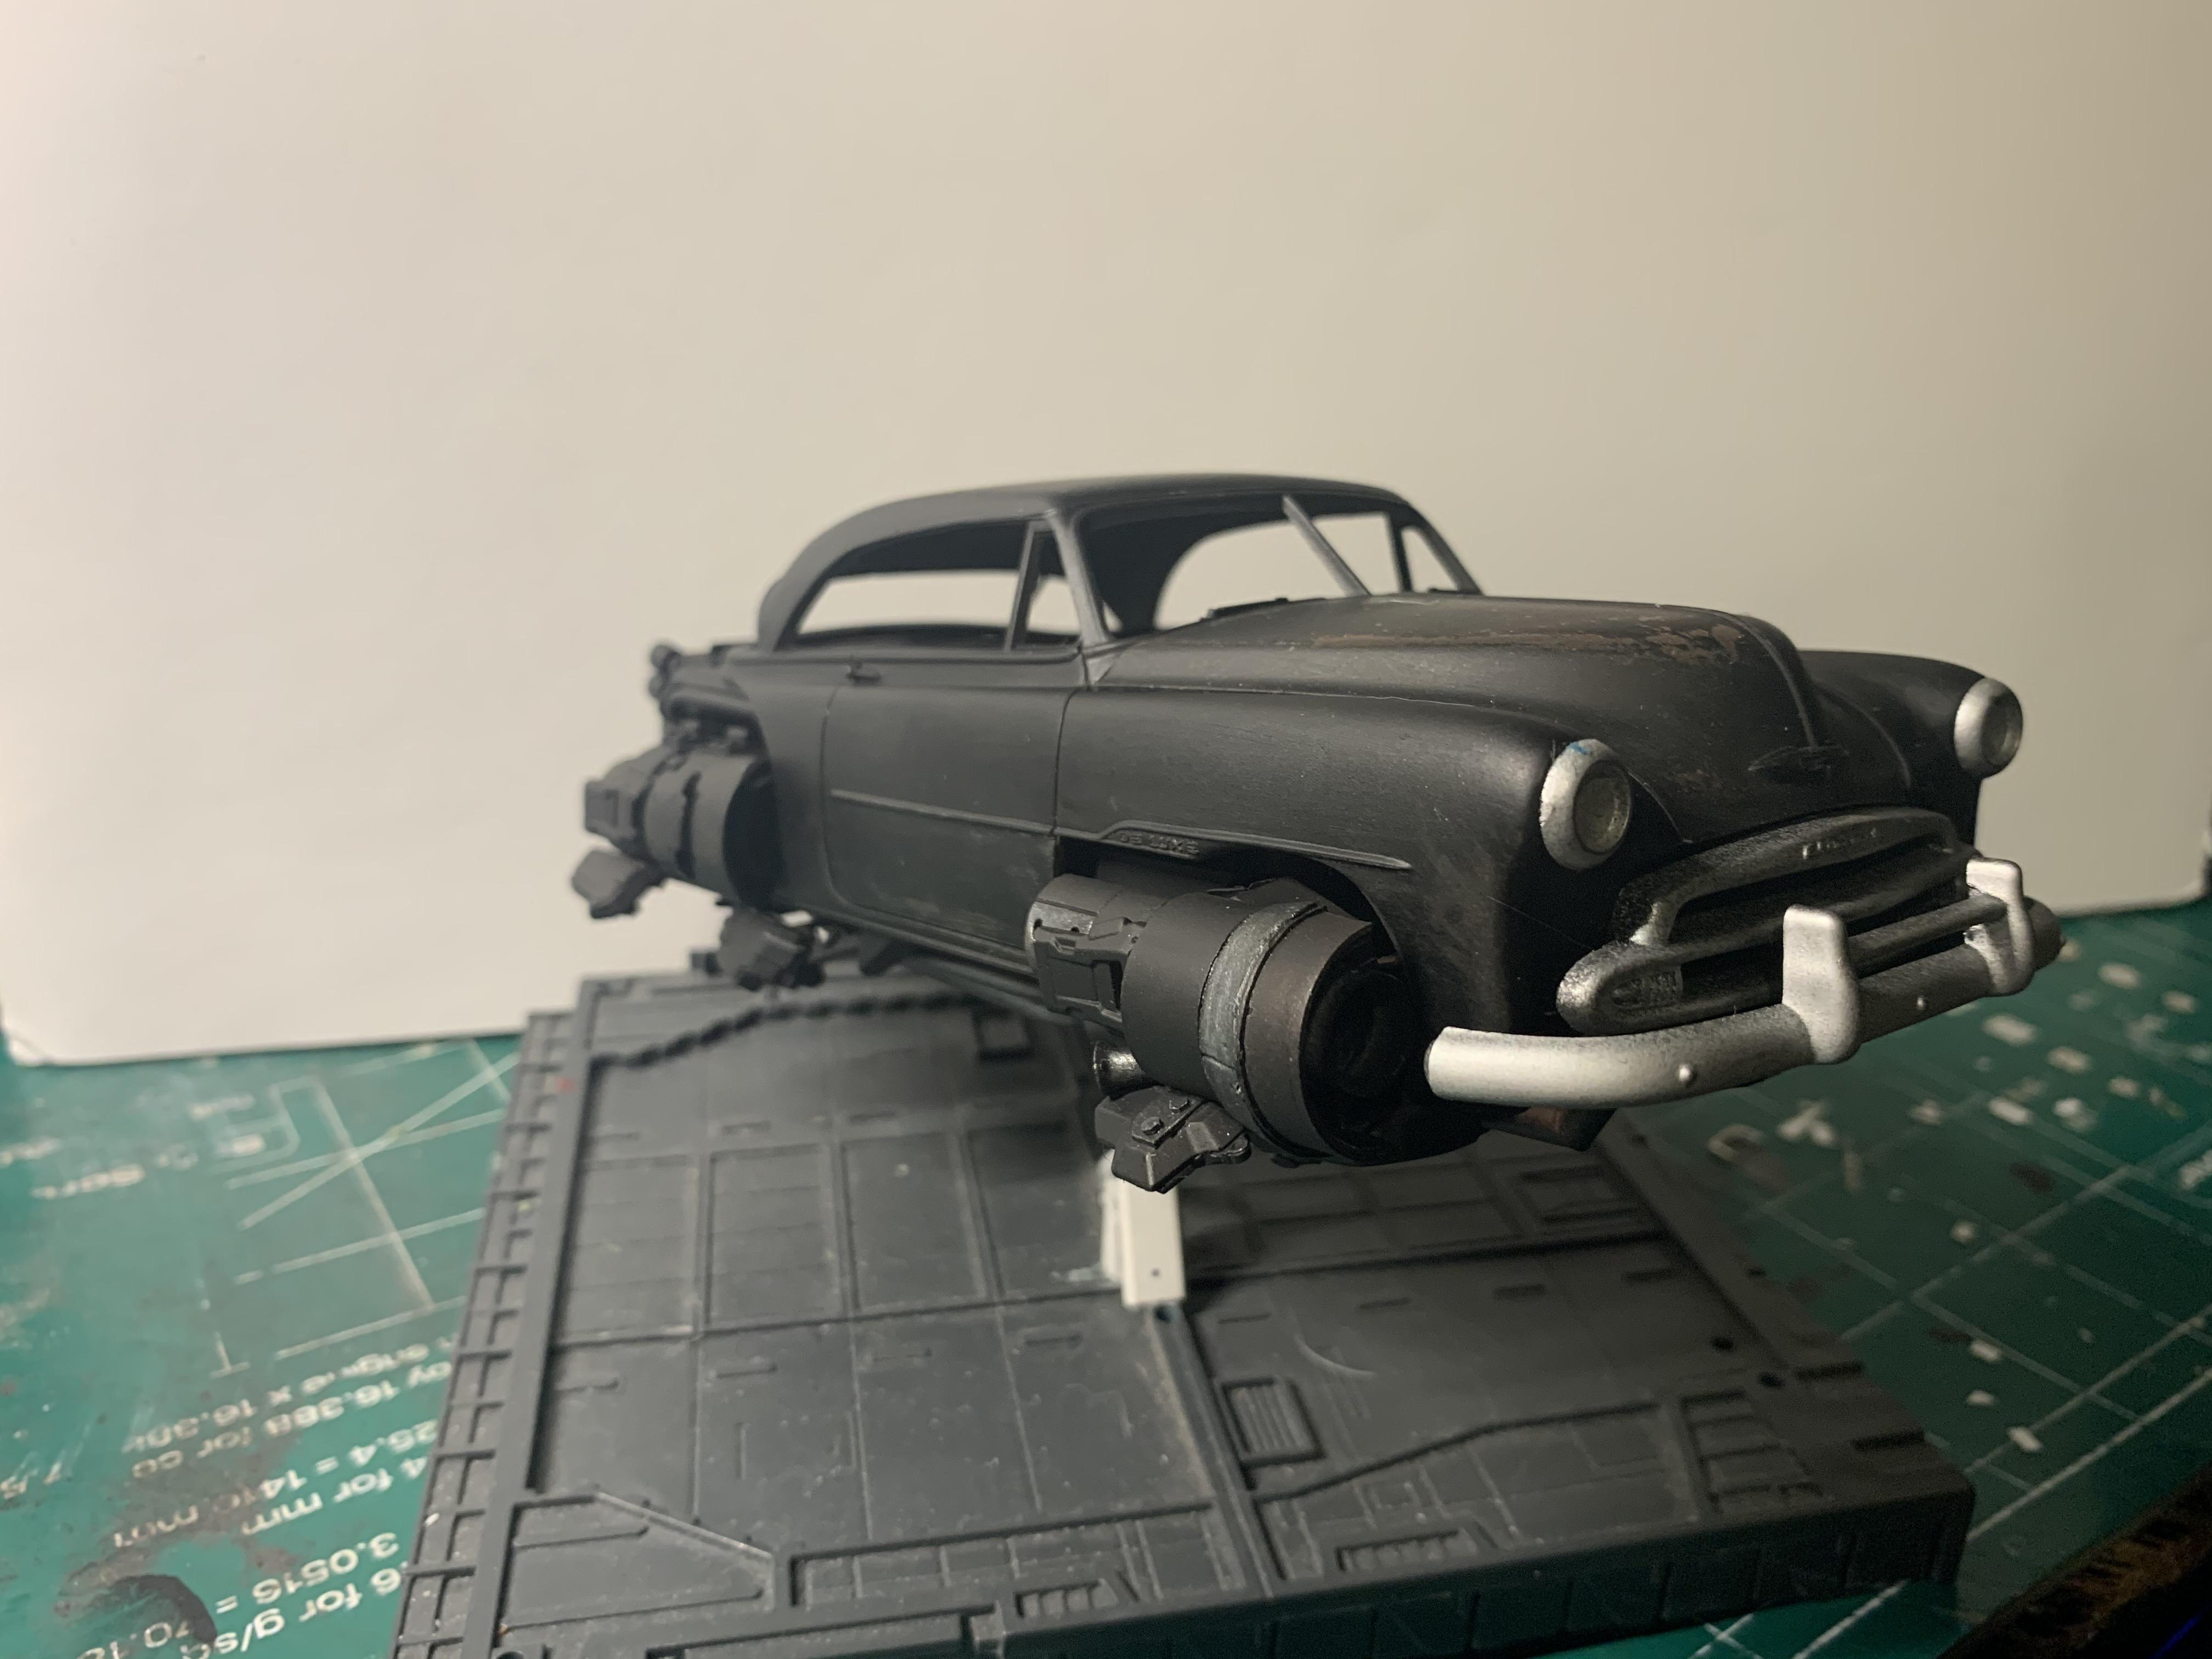
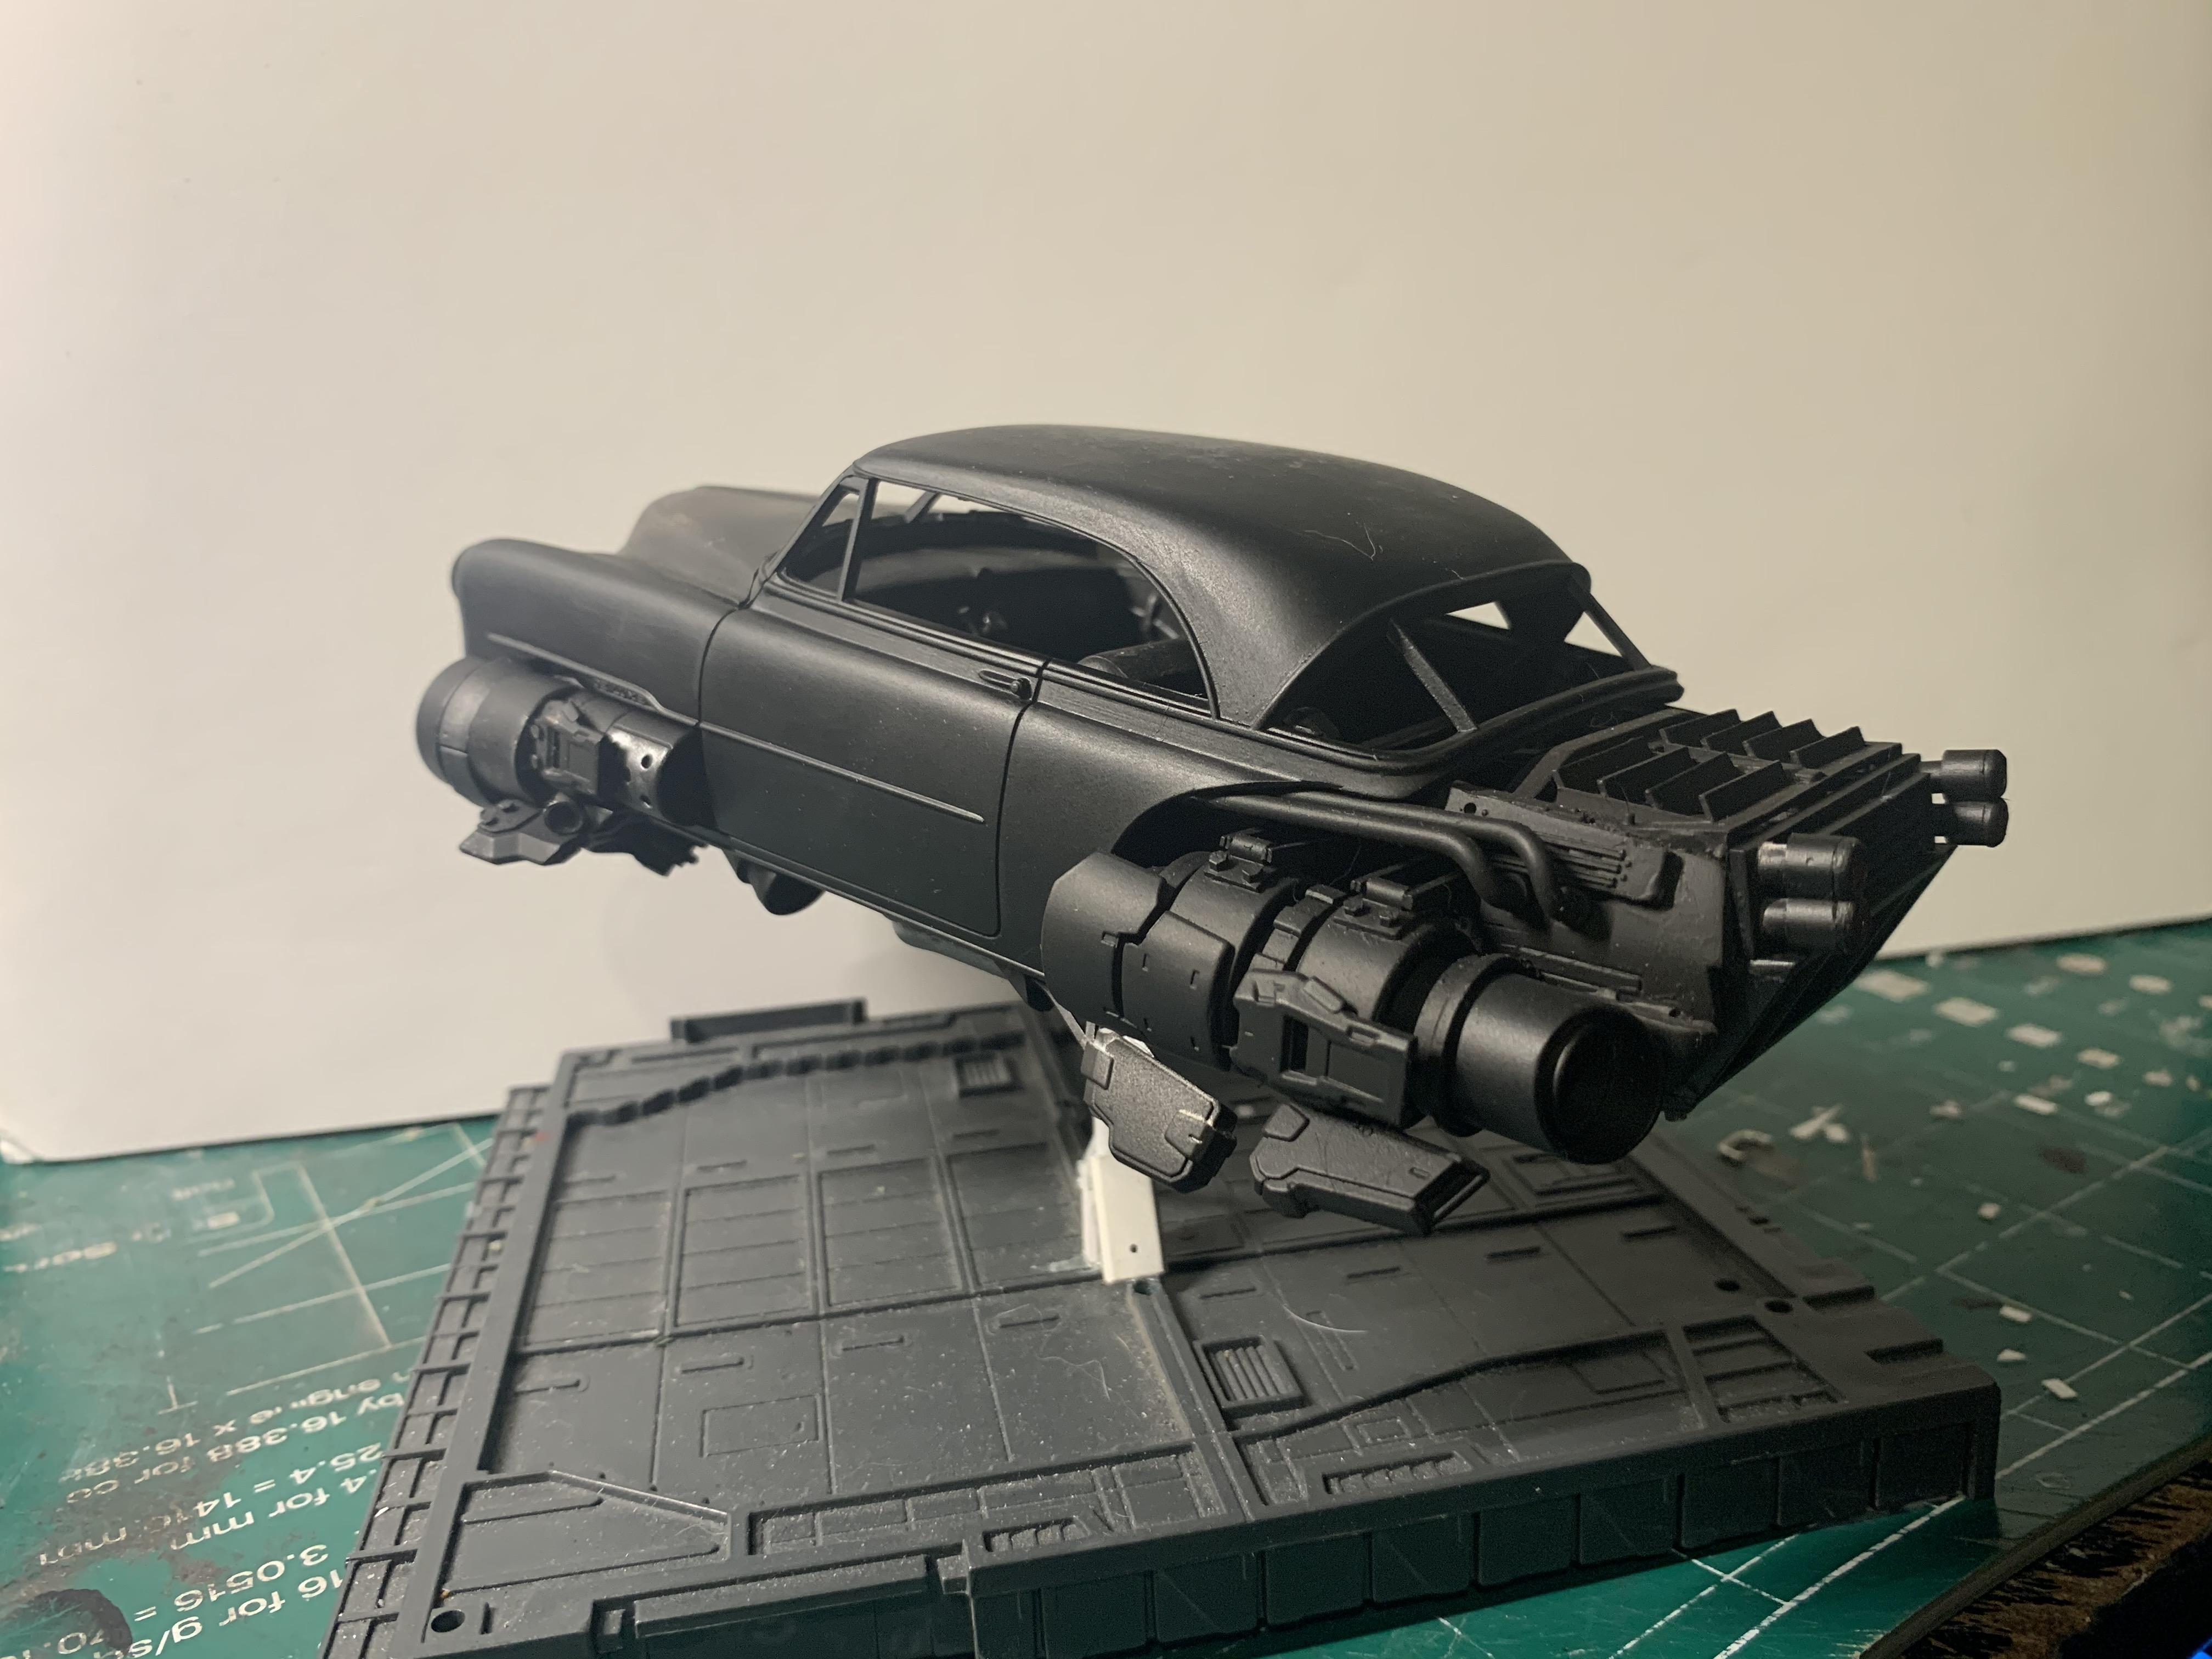
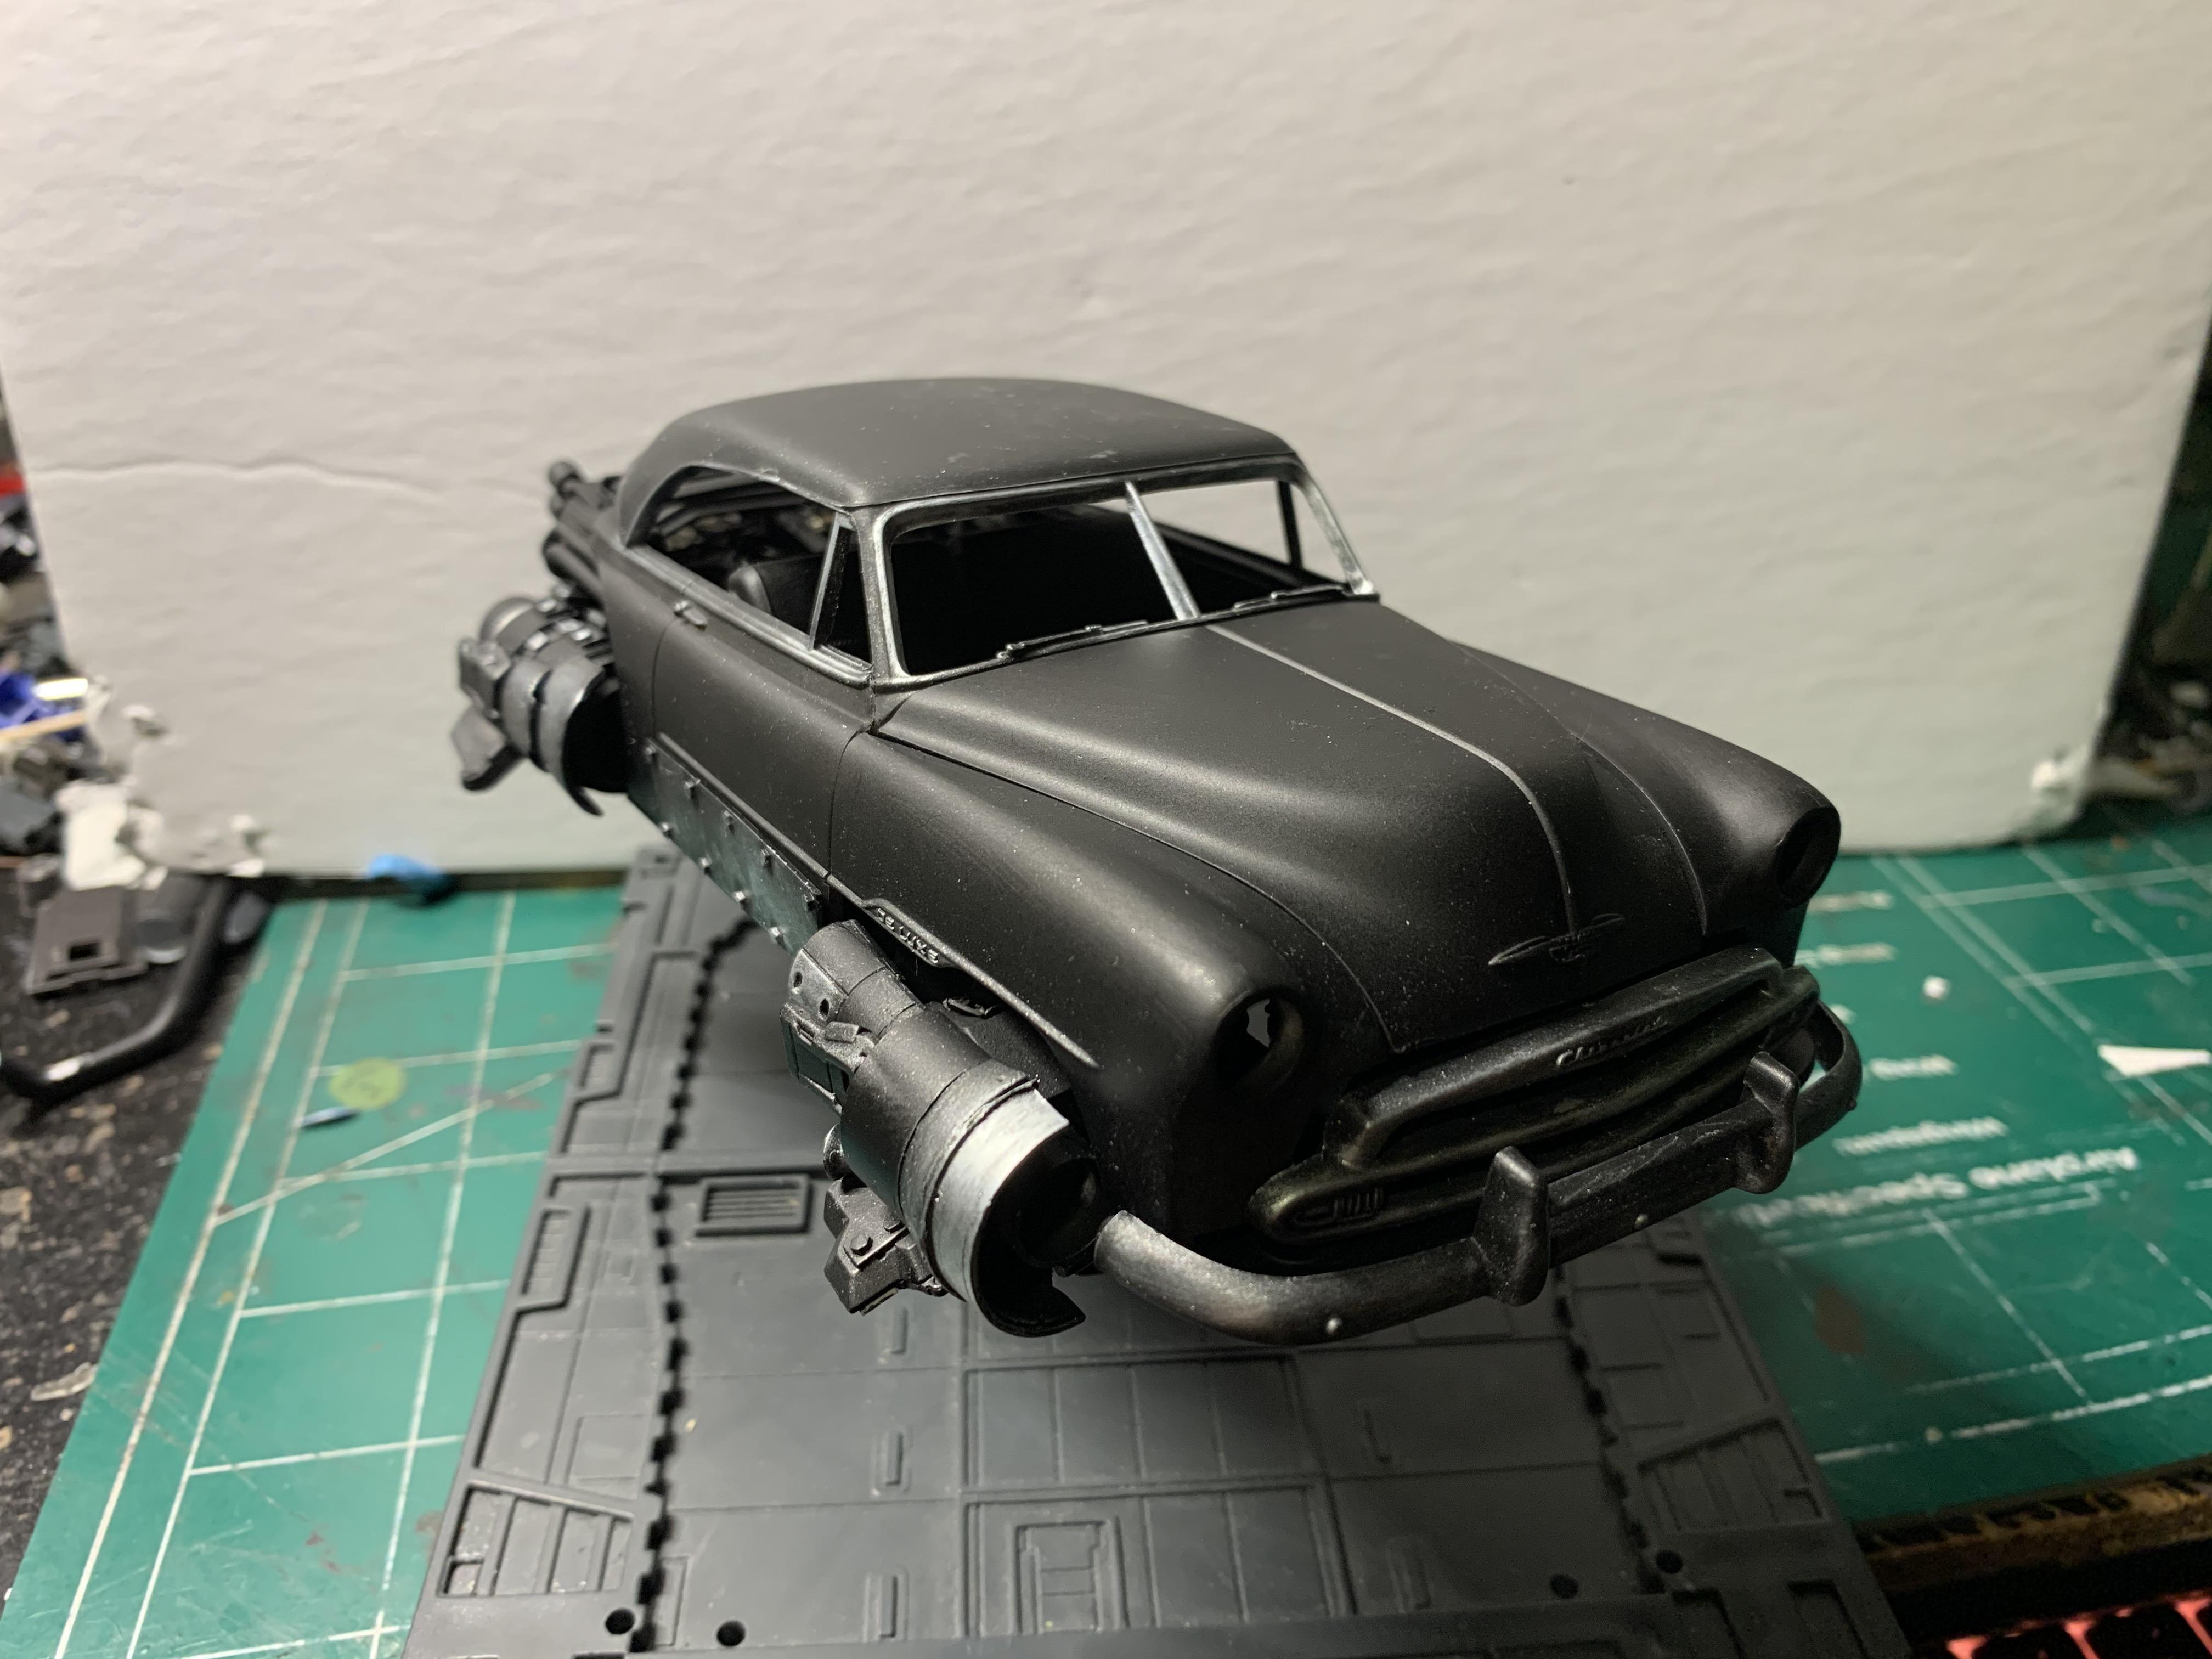
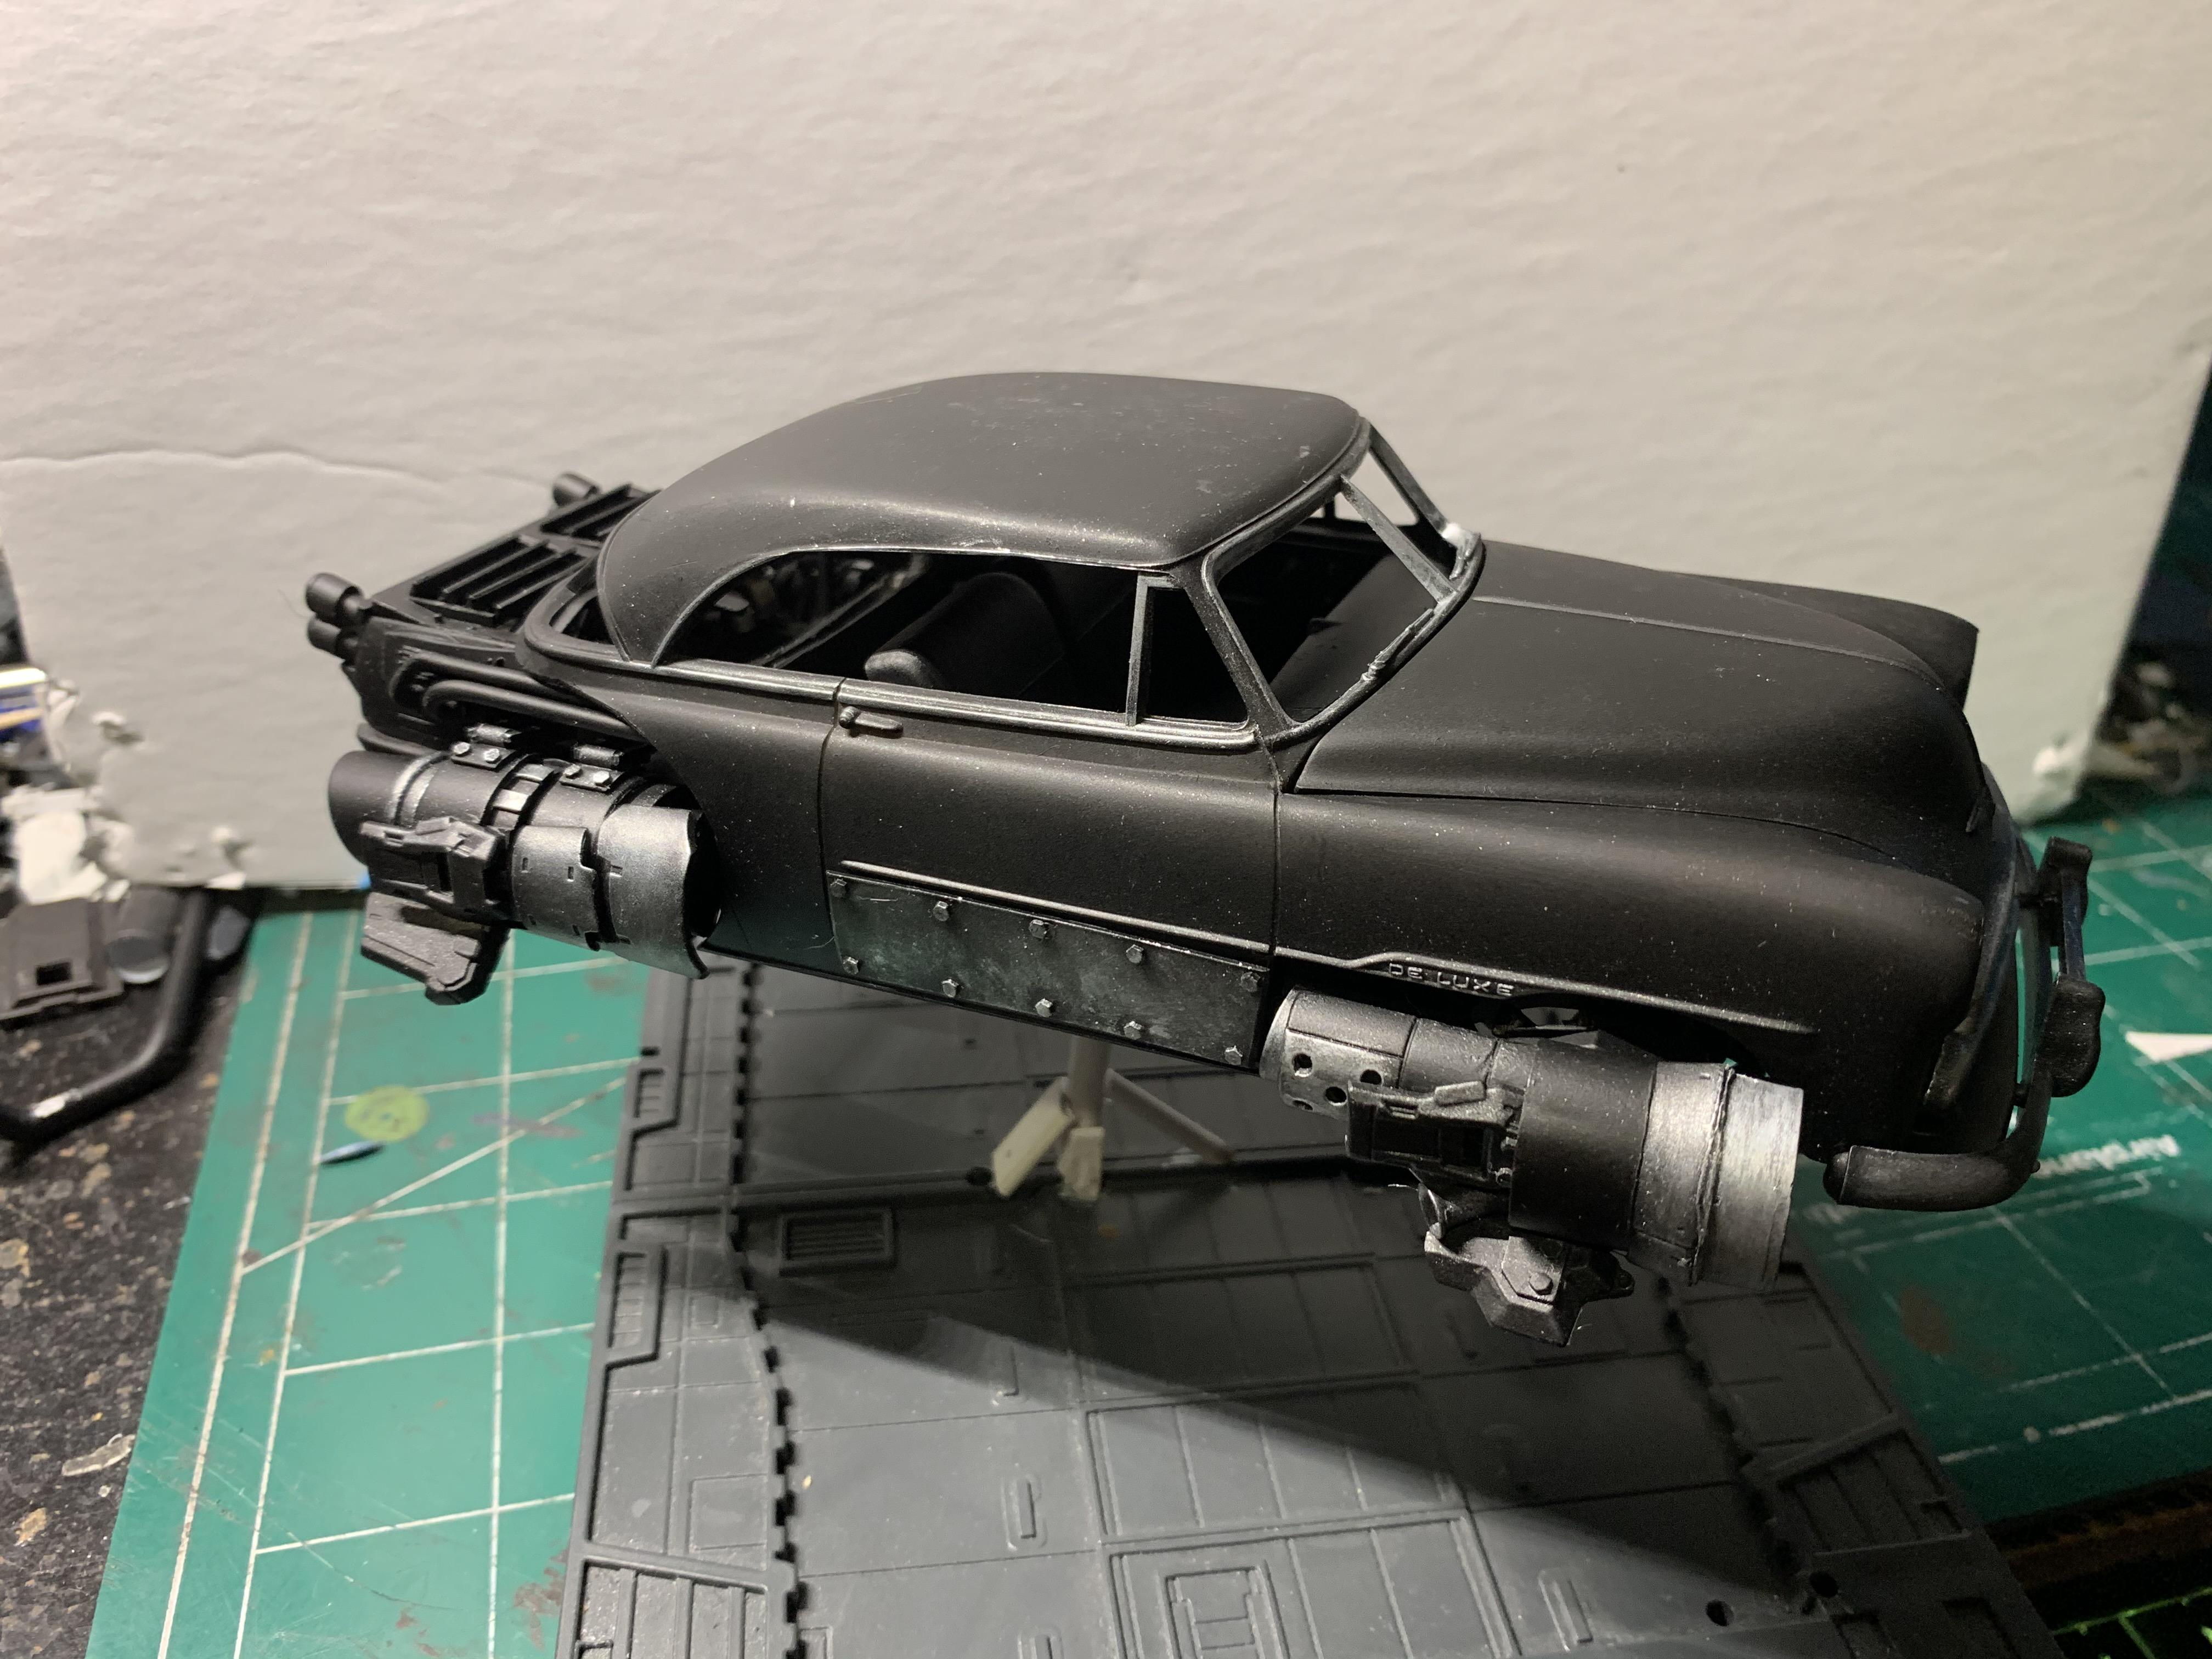
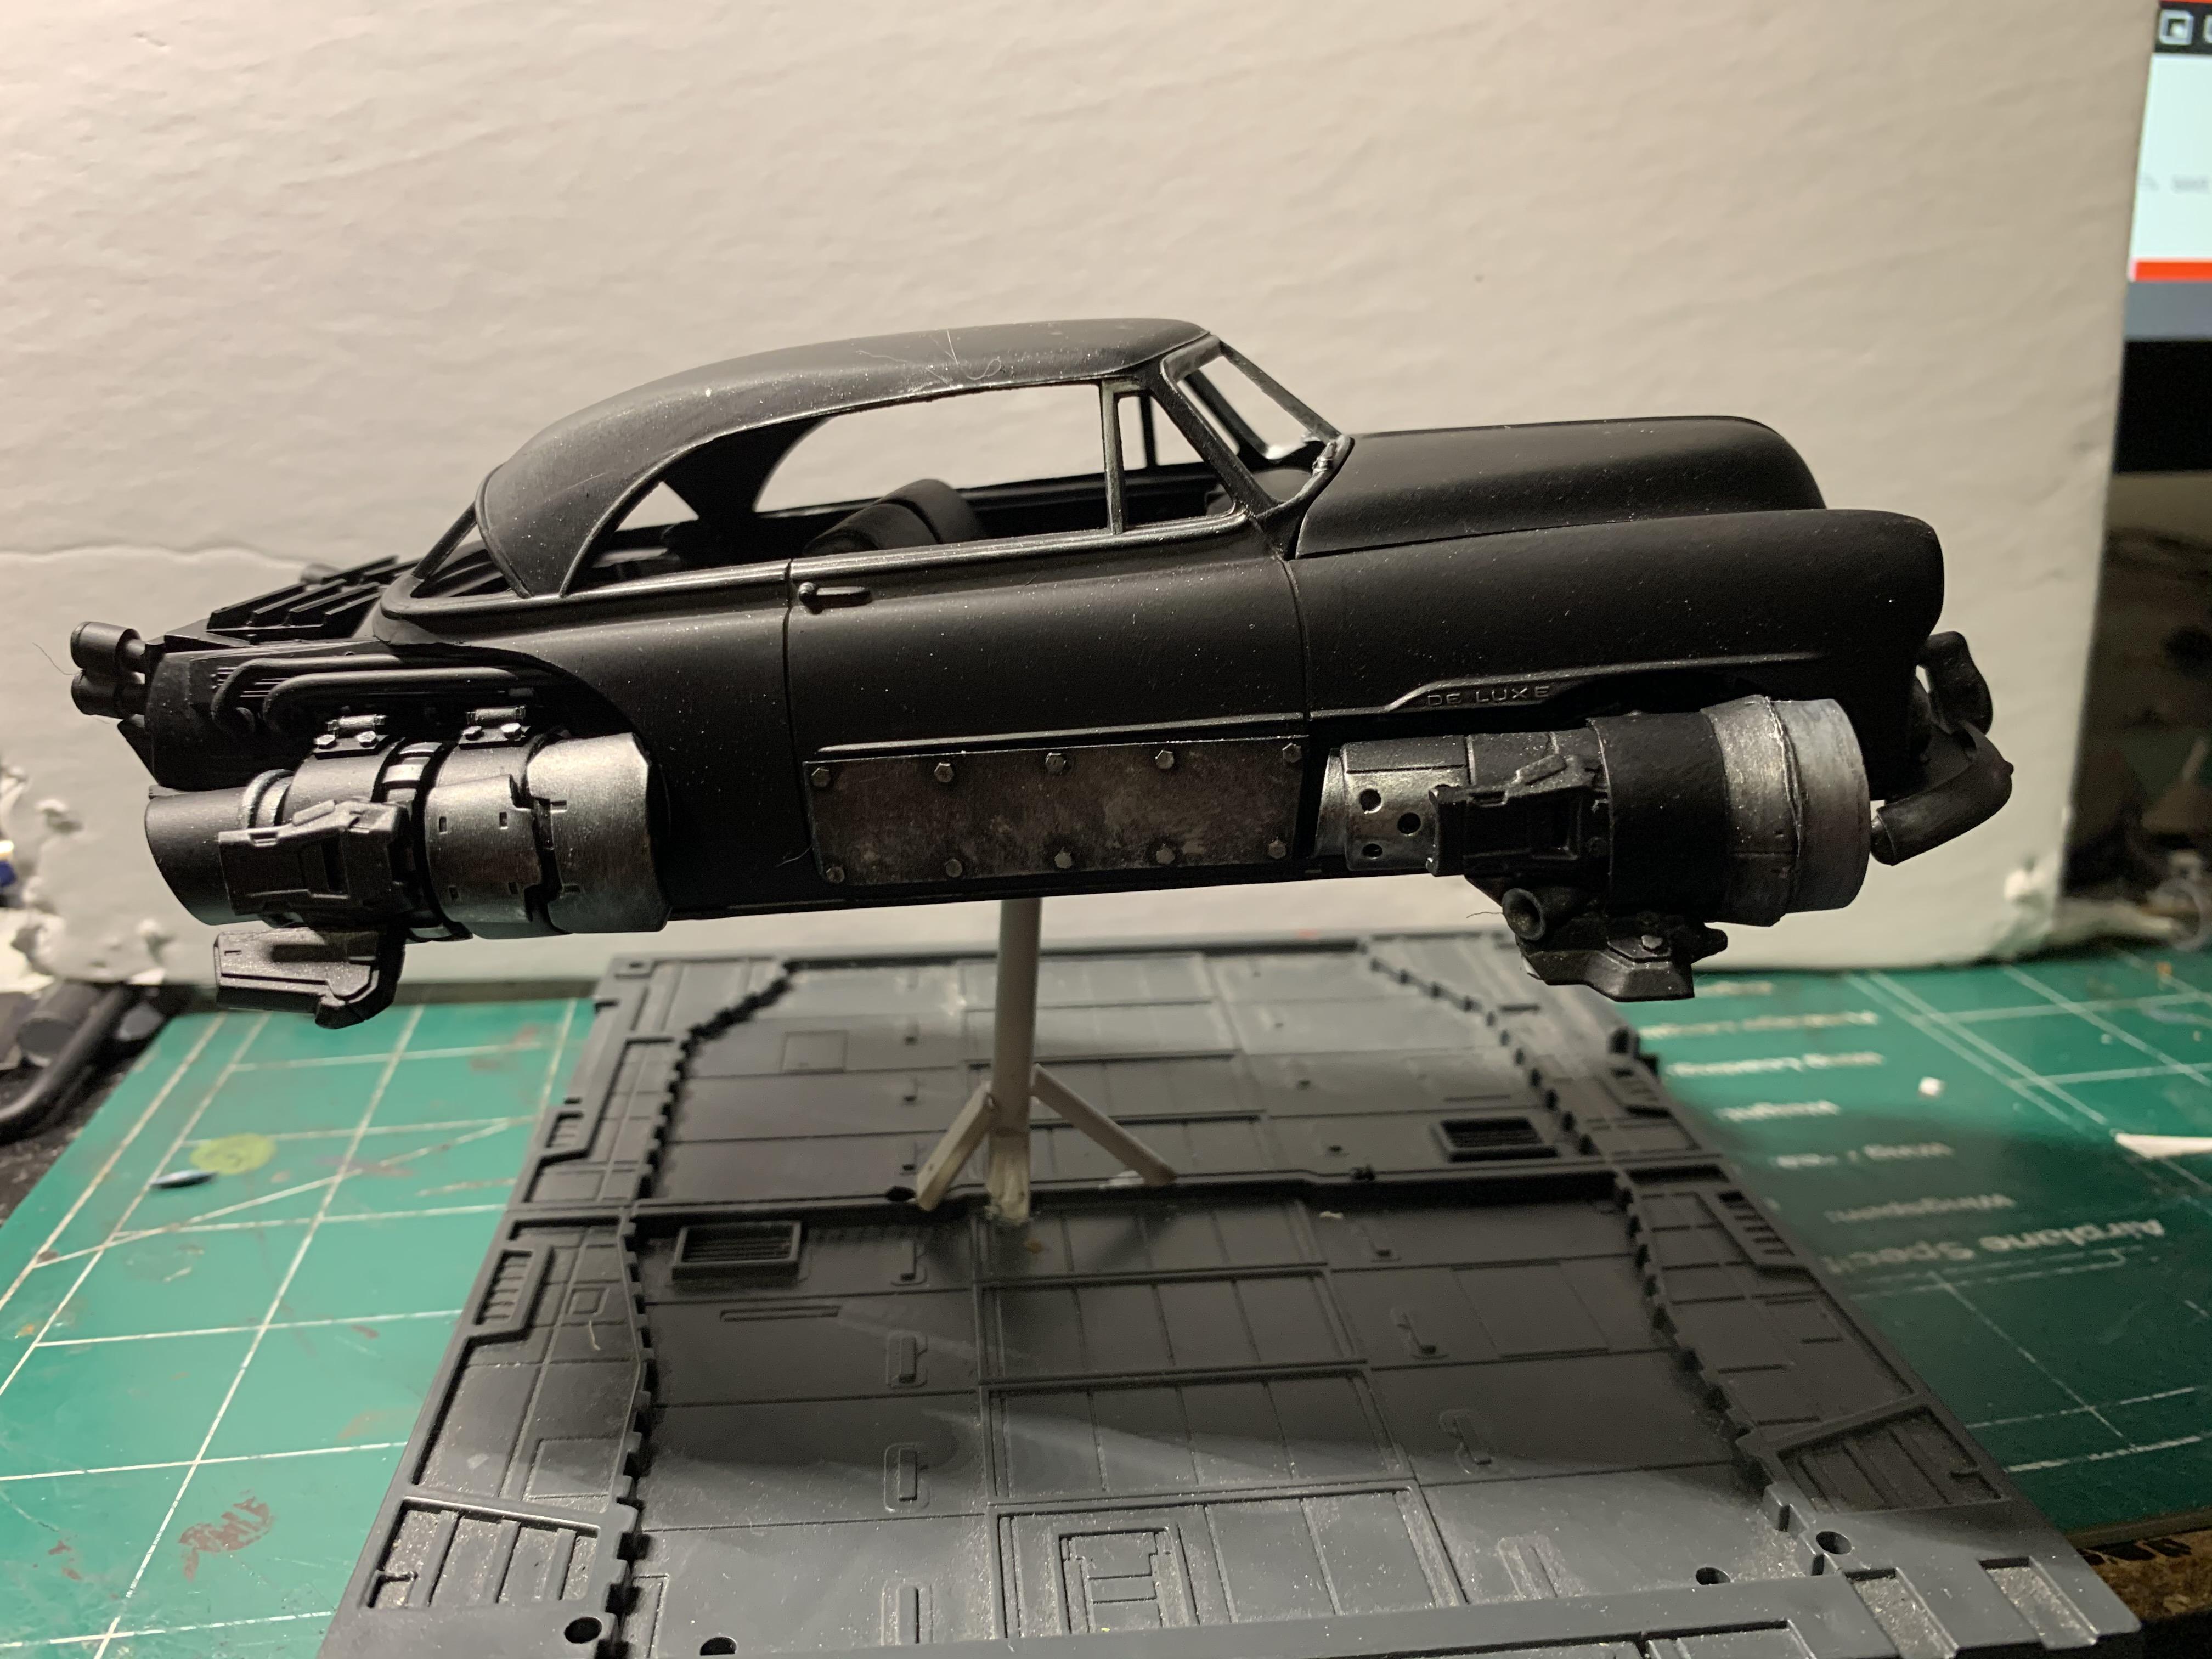
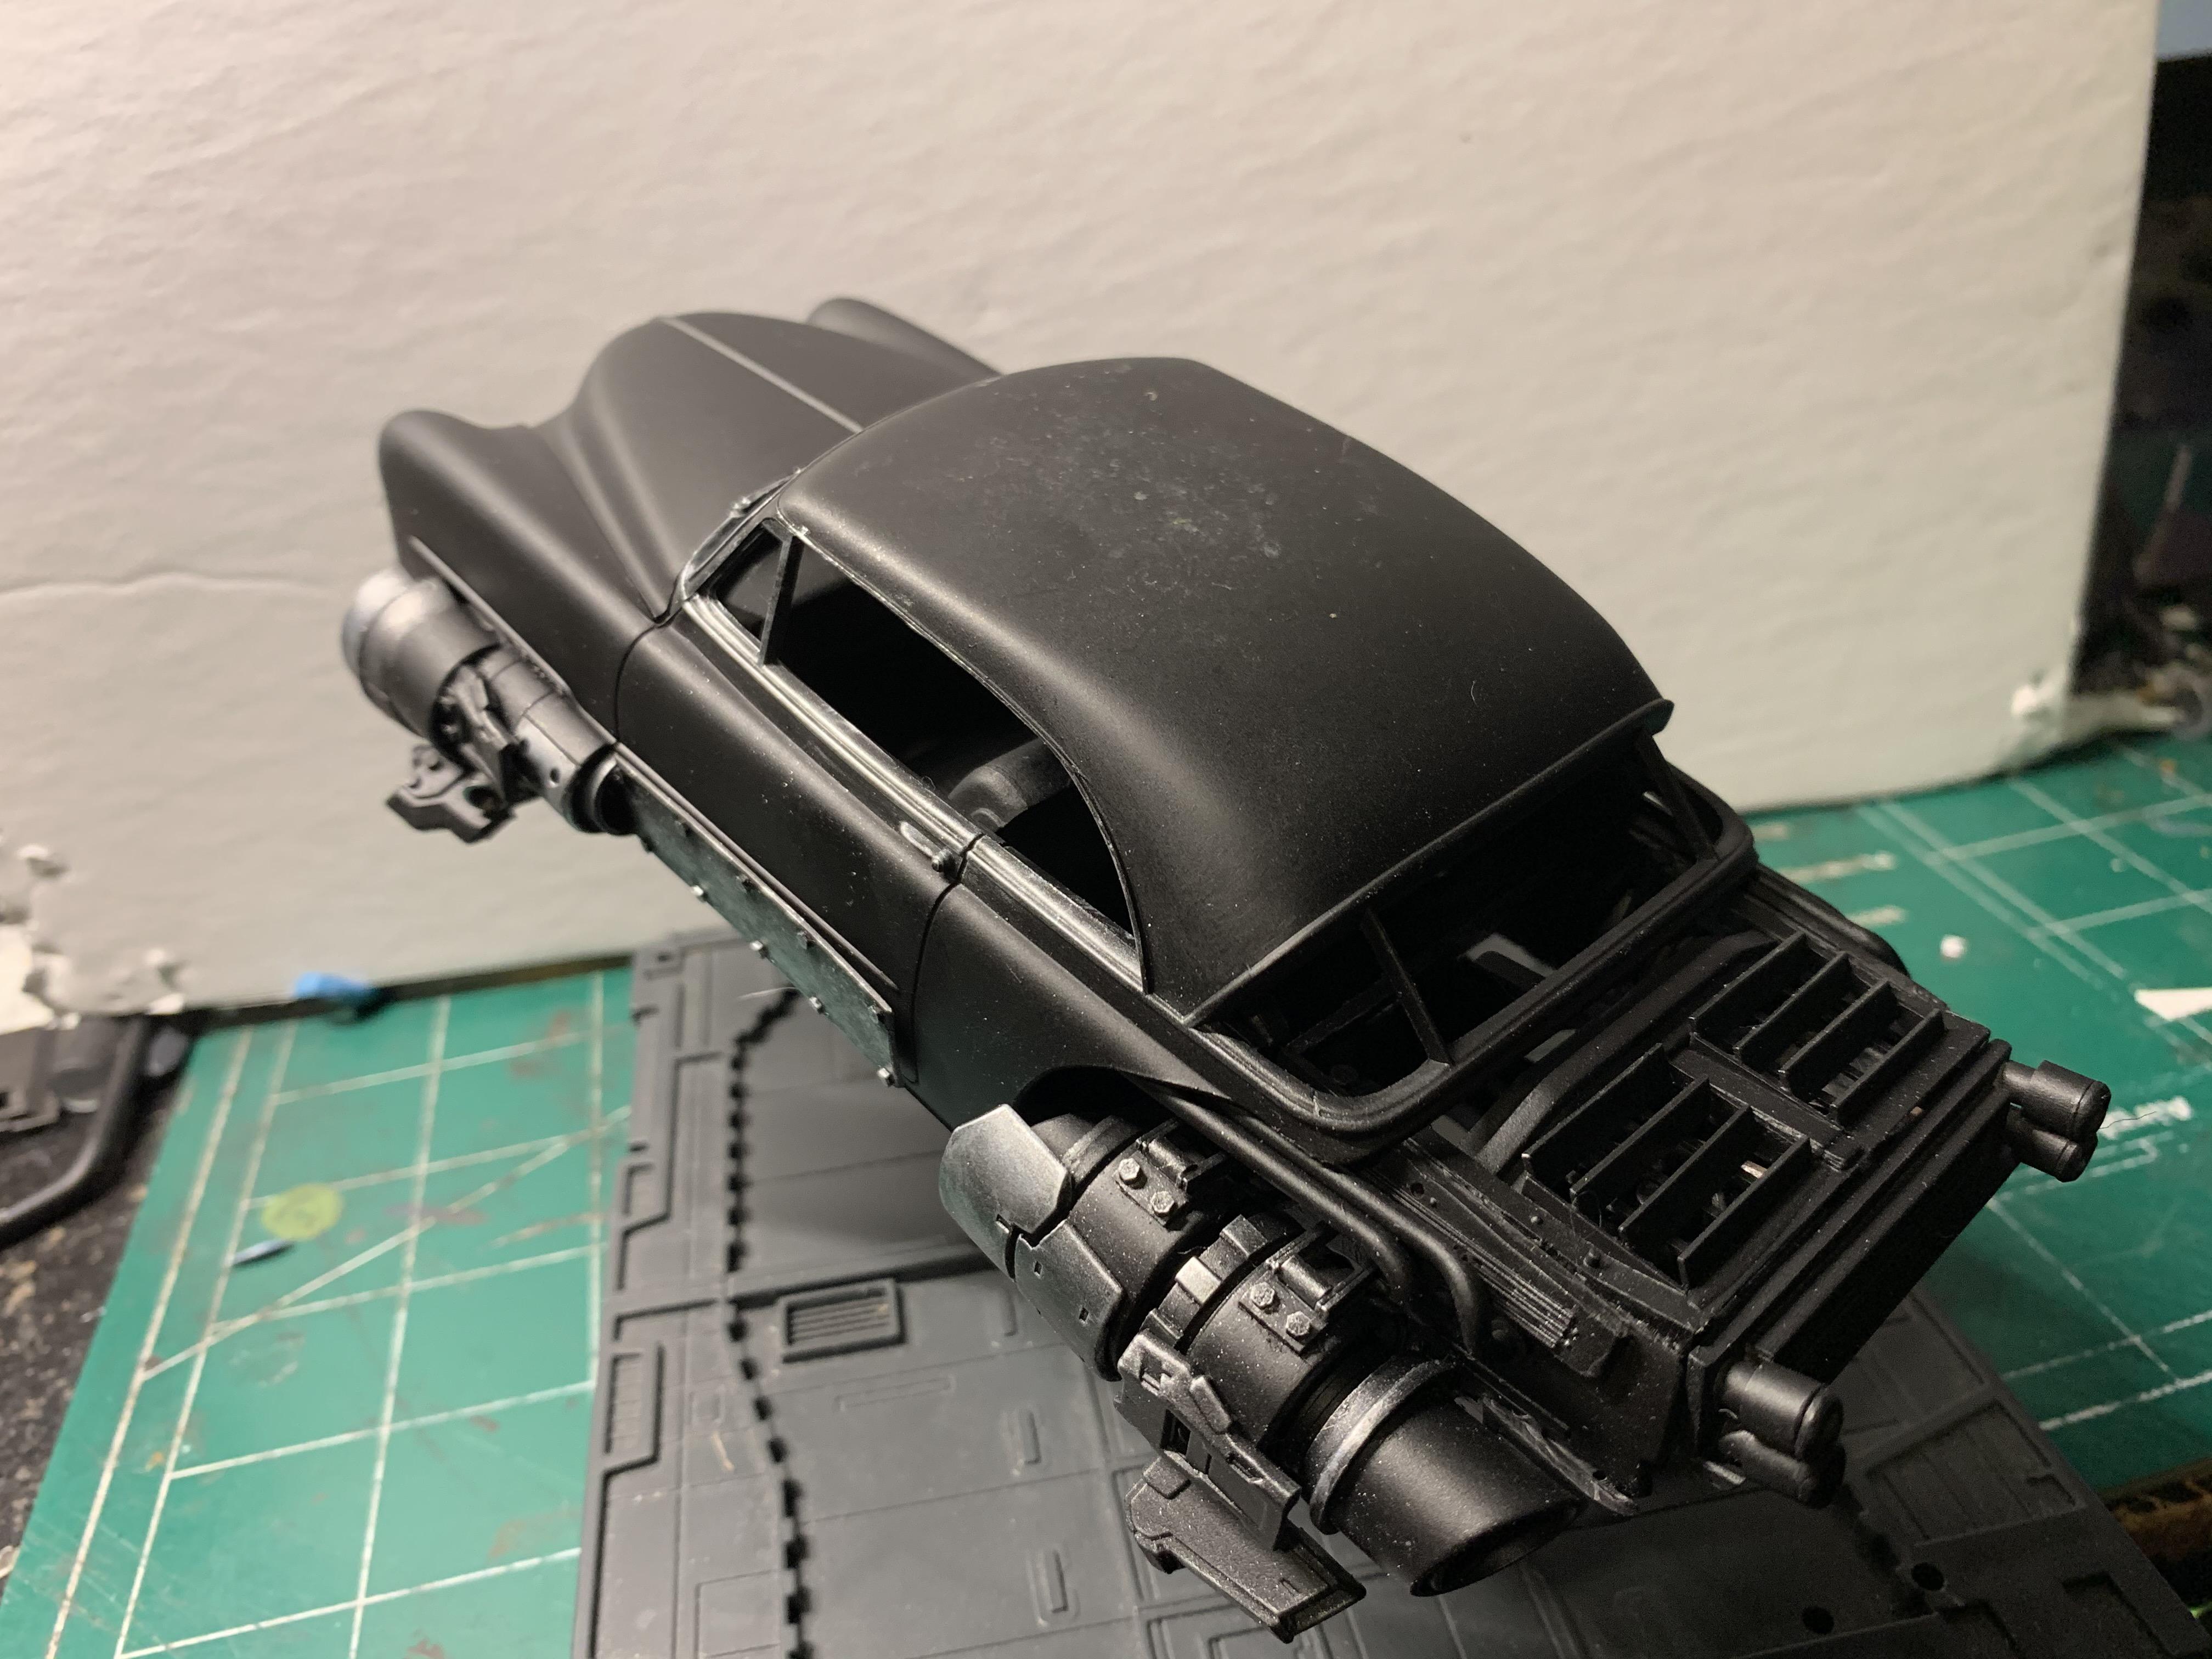
Hello everyone. Here's my 51 Chevy Bel Air jet car. My wife picked this kit up for me on clearance for $11.She knows my taste in jet cars. The side tail fins came from a 59 Chrysler Imperial curbside kit. I was looking for a cool way to mount the tail lights when I stumbled upon these. They give it a 57 Chevy feel. The body lines on this car made it easy for me to mount the front and rear turbines. I was able to cut large sections away by following the panel lines. I angled the lower door panels to give the front turbine exhaust a place to go. Unfortunately since the car is flat black and I added soot to the recessed area, you can't really see that it was modified. The recess wasn't very visible so I added fins near the turbine exhaust to help give it some depth. It was really difficult to find a color for this car. Ultimately it was a sinister looking car, so I decided to go with black. I really like how the chrome trim line on the center of the door looks. Since the power sources are at all 4 corners of the car, I'm always left with a big empty spot to fill under the hood. I just filled this one with random parts and hoses. Here's the build:
-
Thanks David! Yes, I'm glad that I did this modification. The trim line running down the middle of the doors gave me a perfect section for pulling this off. Looks much better than the metal plate I was going to use in the first photos.
-
My 51 Bel Air jet car is almost done. A couple more rounds of weathering are needed. I'd like to add a few streaks of rust and grime down the sides. I also will add soot to the lower door panels. I will probably add the final details this week. The door handles, side mirrors, antennae and glass. I was trying out different colors for the tail lights. I'll probably stick with red for the final.
-
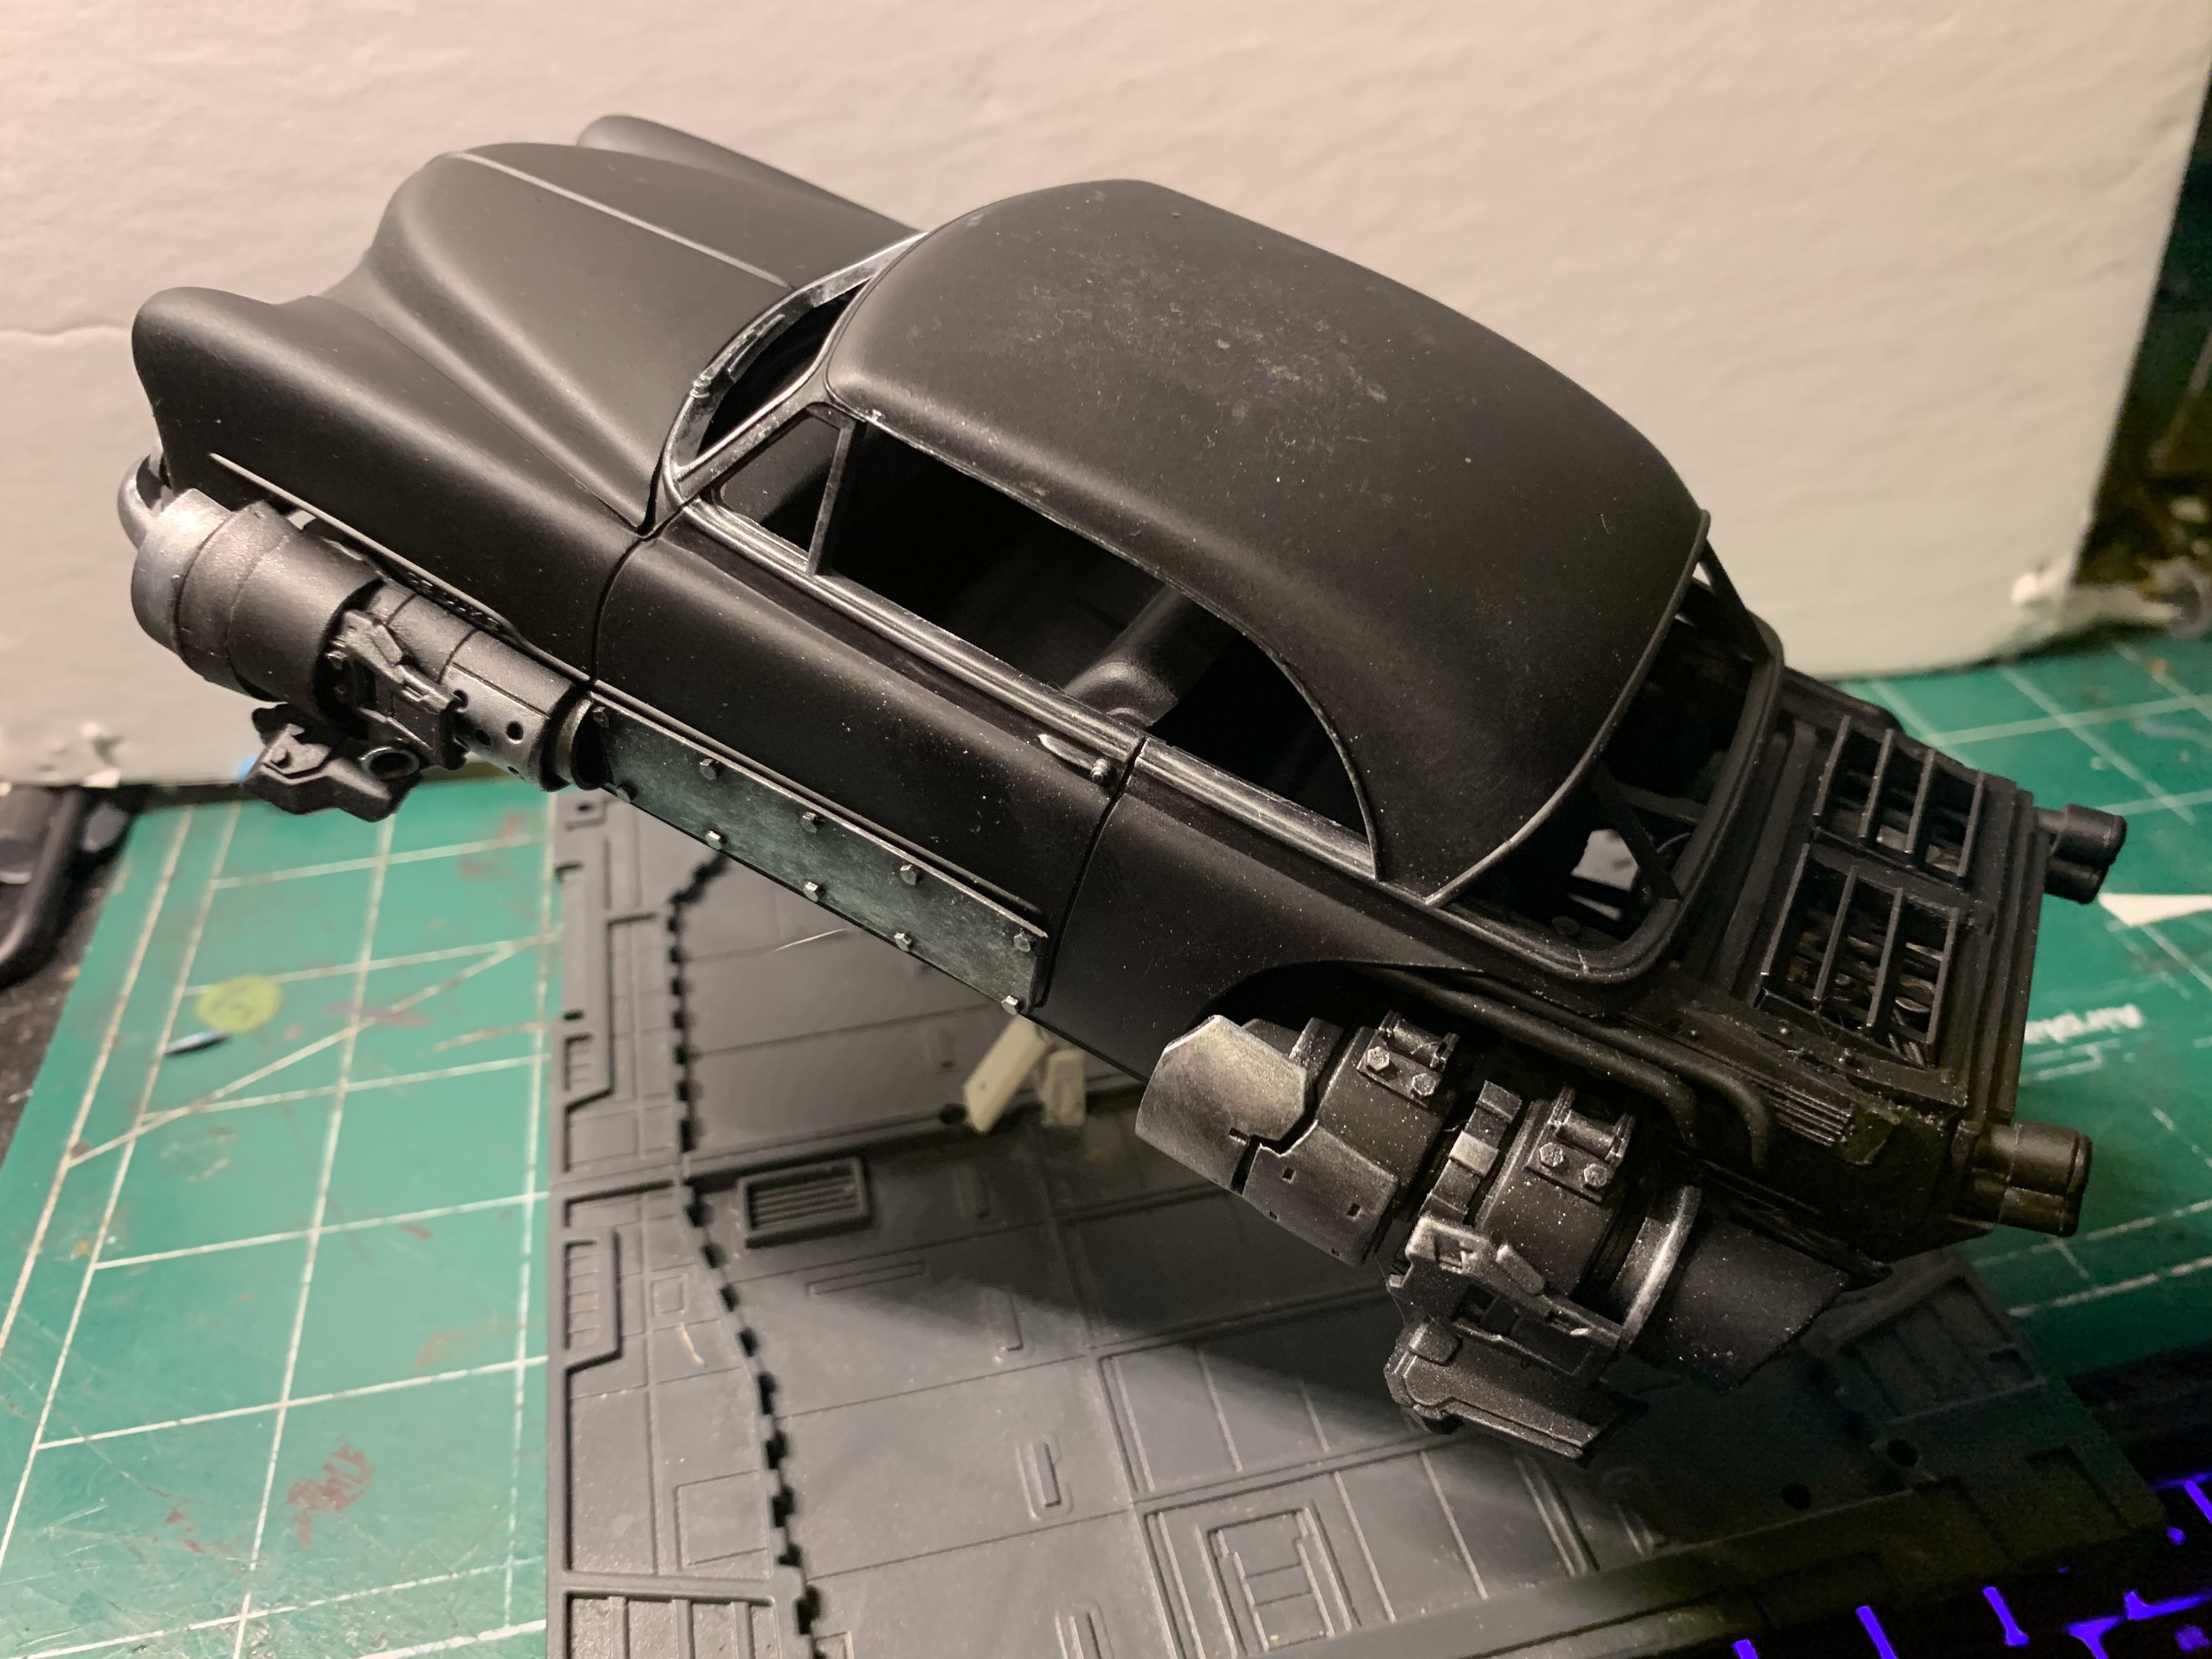
Thanks guys! Your comments are always welcome and appreciated. I made a few changes. I'm pleased with the results so far. I removed the tail lights and added flaps with linkage. Placed the new tail lights on the end of the side fins. Looks much better. I added individual fins to the grill. The other two gizmos are some kind of flight control from the undercarriage. If you refer to the earlier pictures, I had heat plating bolted to the bottom half of the doors. I figured this area would need some protection. The plates were too large and appeared to be an afterthought. I decided to cut a relief that followed the same lines as the front fender reliefs. I attached the one end and left a 3/16" gap at the hinged side of the door. I cut 4 pieces of styrene at a very sharp angle to fill the voids. I'm really happy with this addition. Gives it a more finished look. Just a cool shot from above. Thanks again! Dax Here you can see
-
41 Chevy Pickup Hovercraft
Daxman replied to Daxman's topic in Model Trucks: Pickups, Vans, SUVs, Light Commercial
Thanks Mike! You've been following me a long time friend. I appreciate it! The Kansas City scale model show is in June I believe. This kit has been 95% done since November. I've known that I have a few spots left to weather and get the final details done before the show. Gotta say, I do love how it looks with the bed removed. I like your idea. I'm going to seriously think about this. It would give me an excuse to build the hover chopper that I've been wanting to make for years now.
-
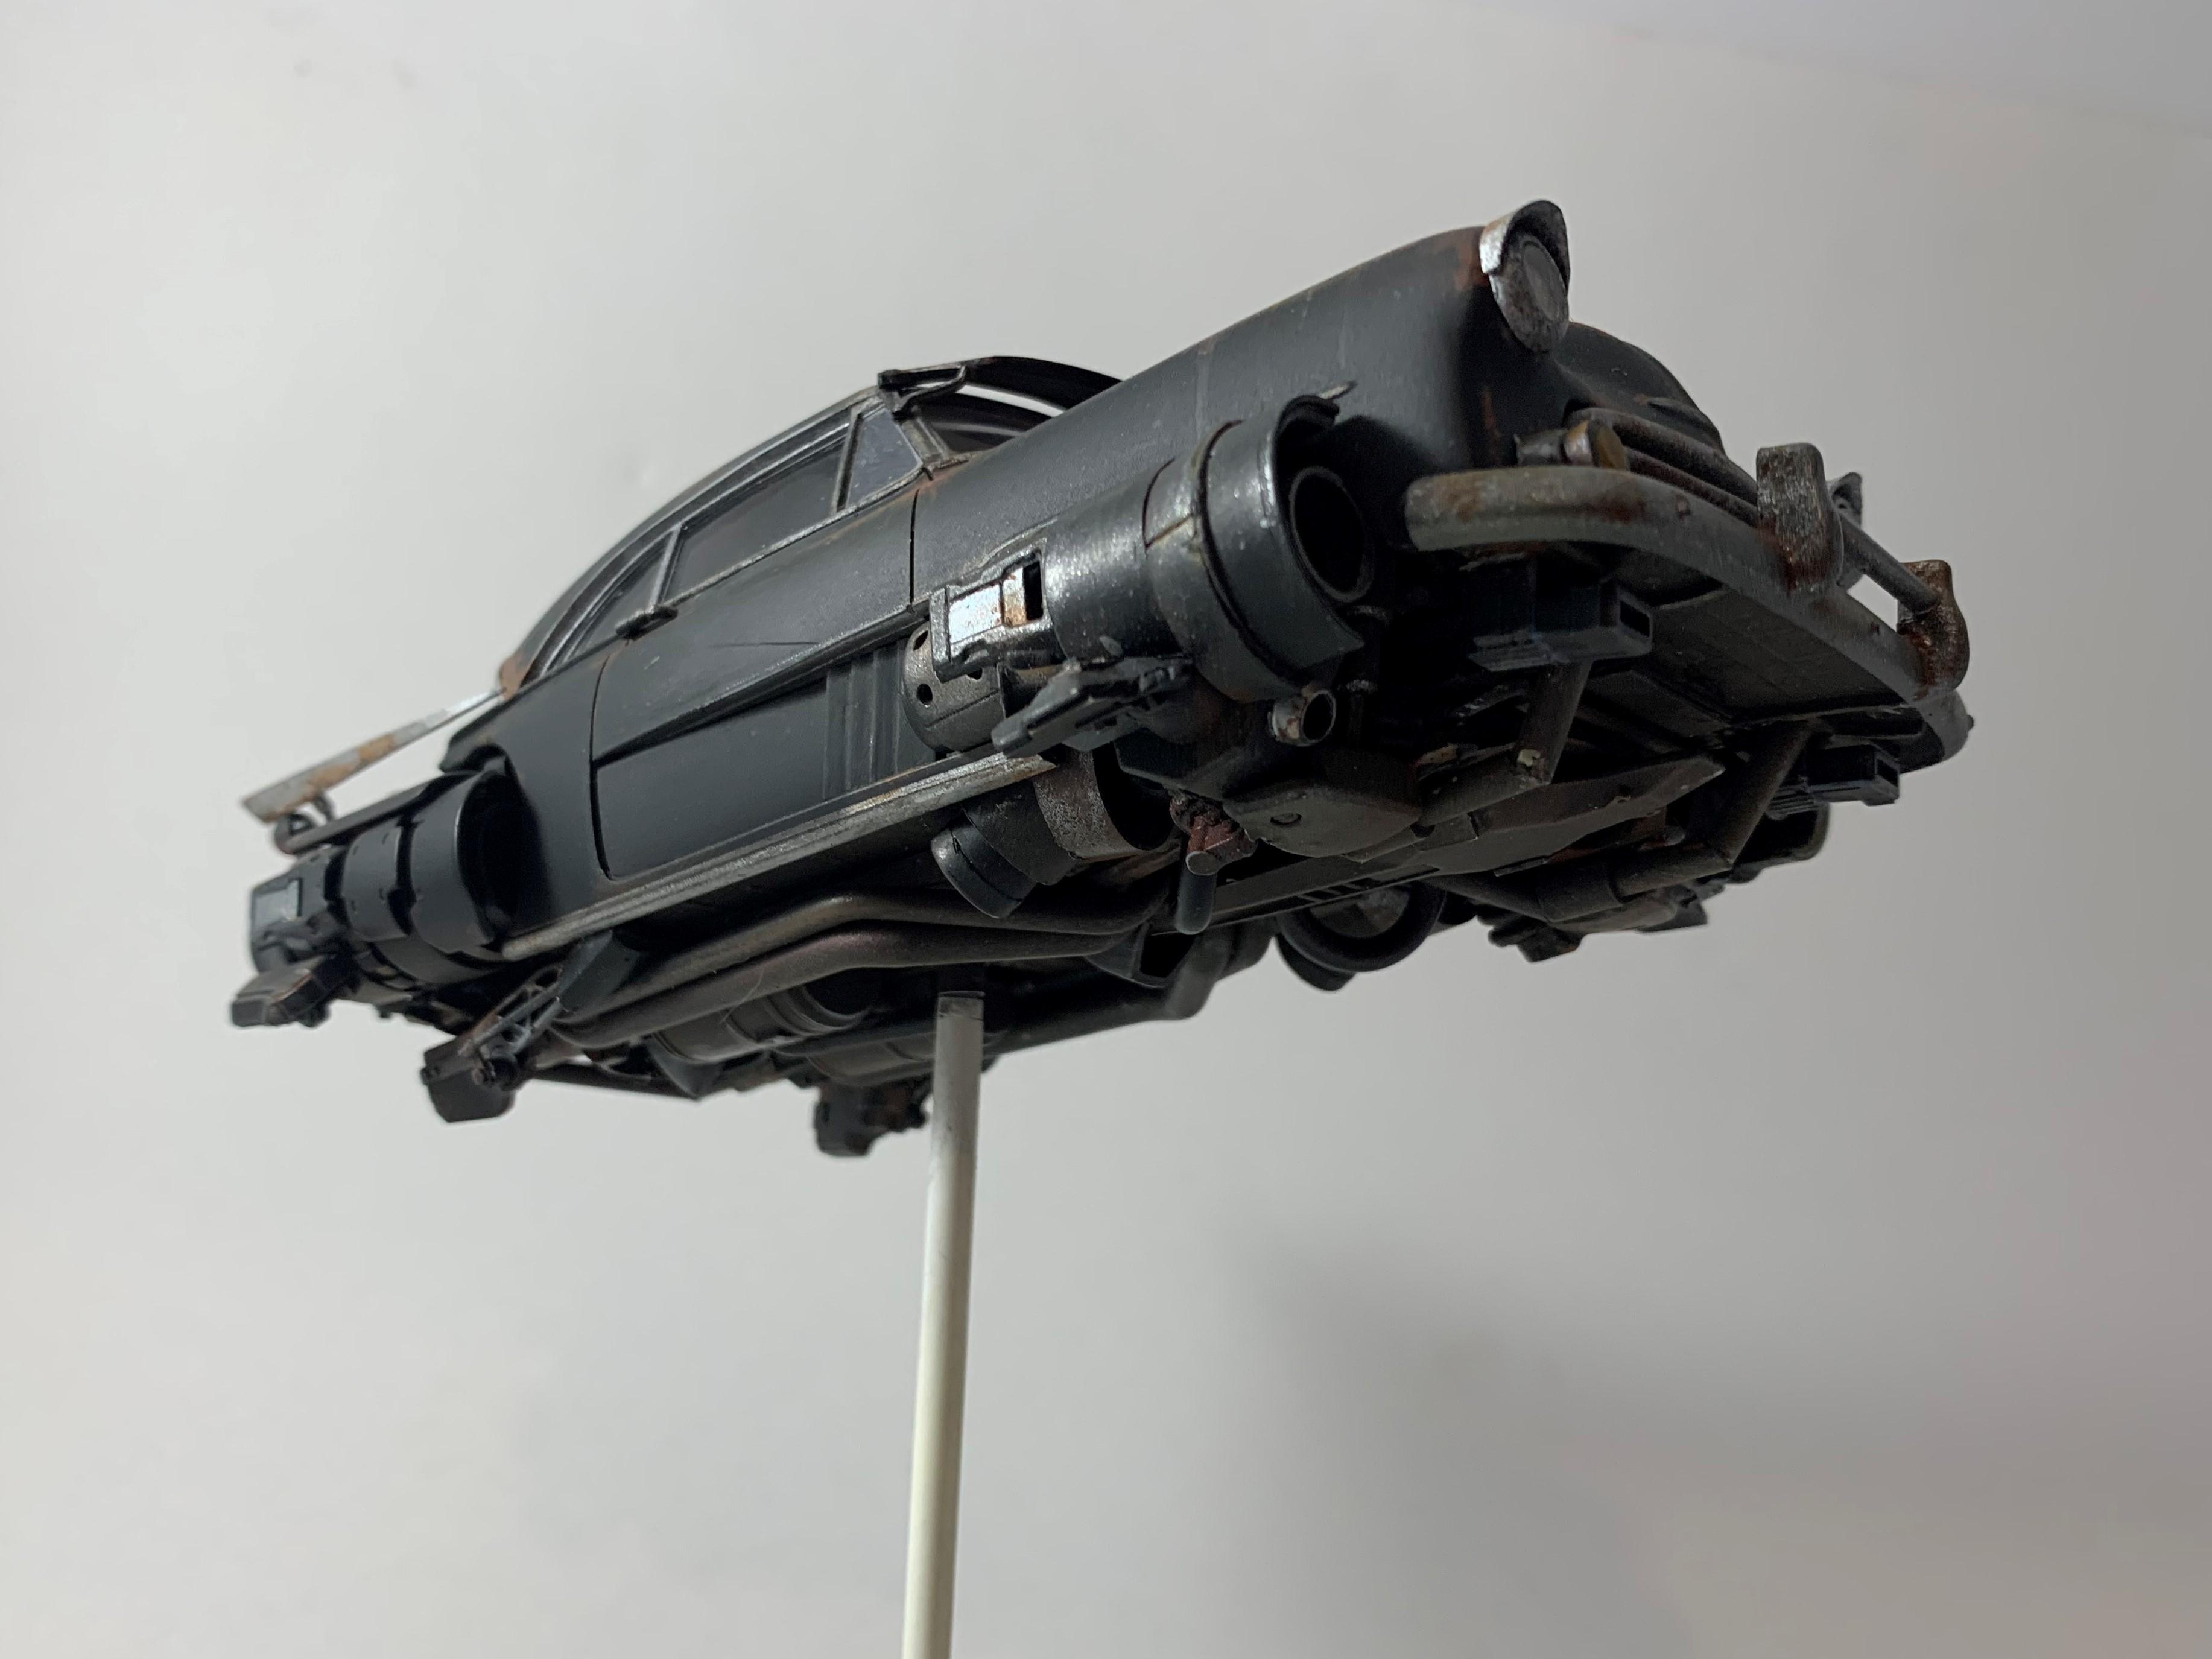
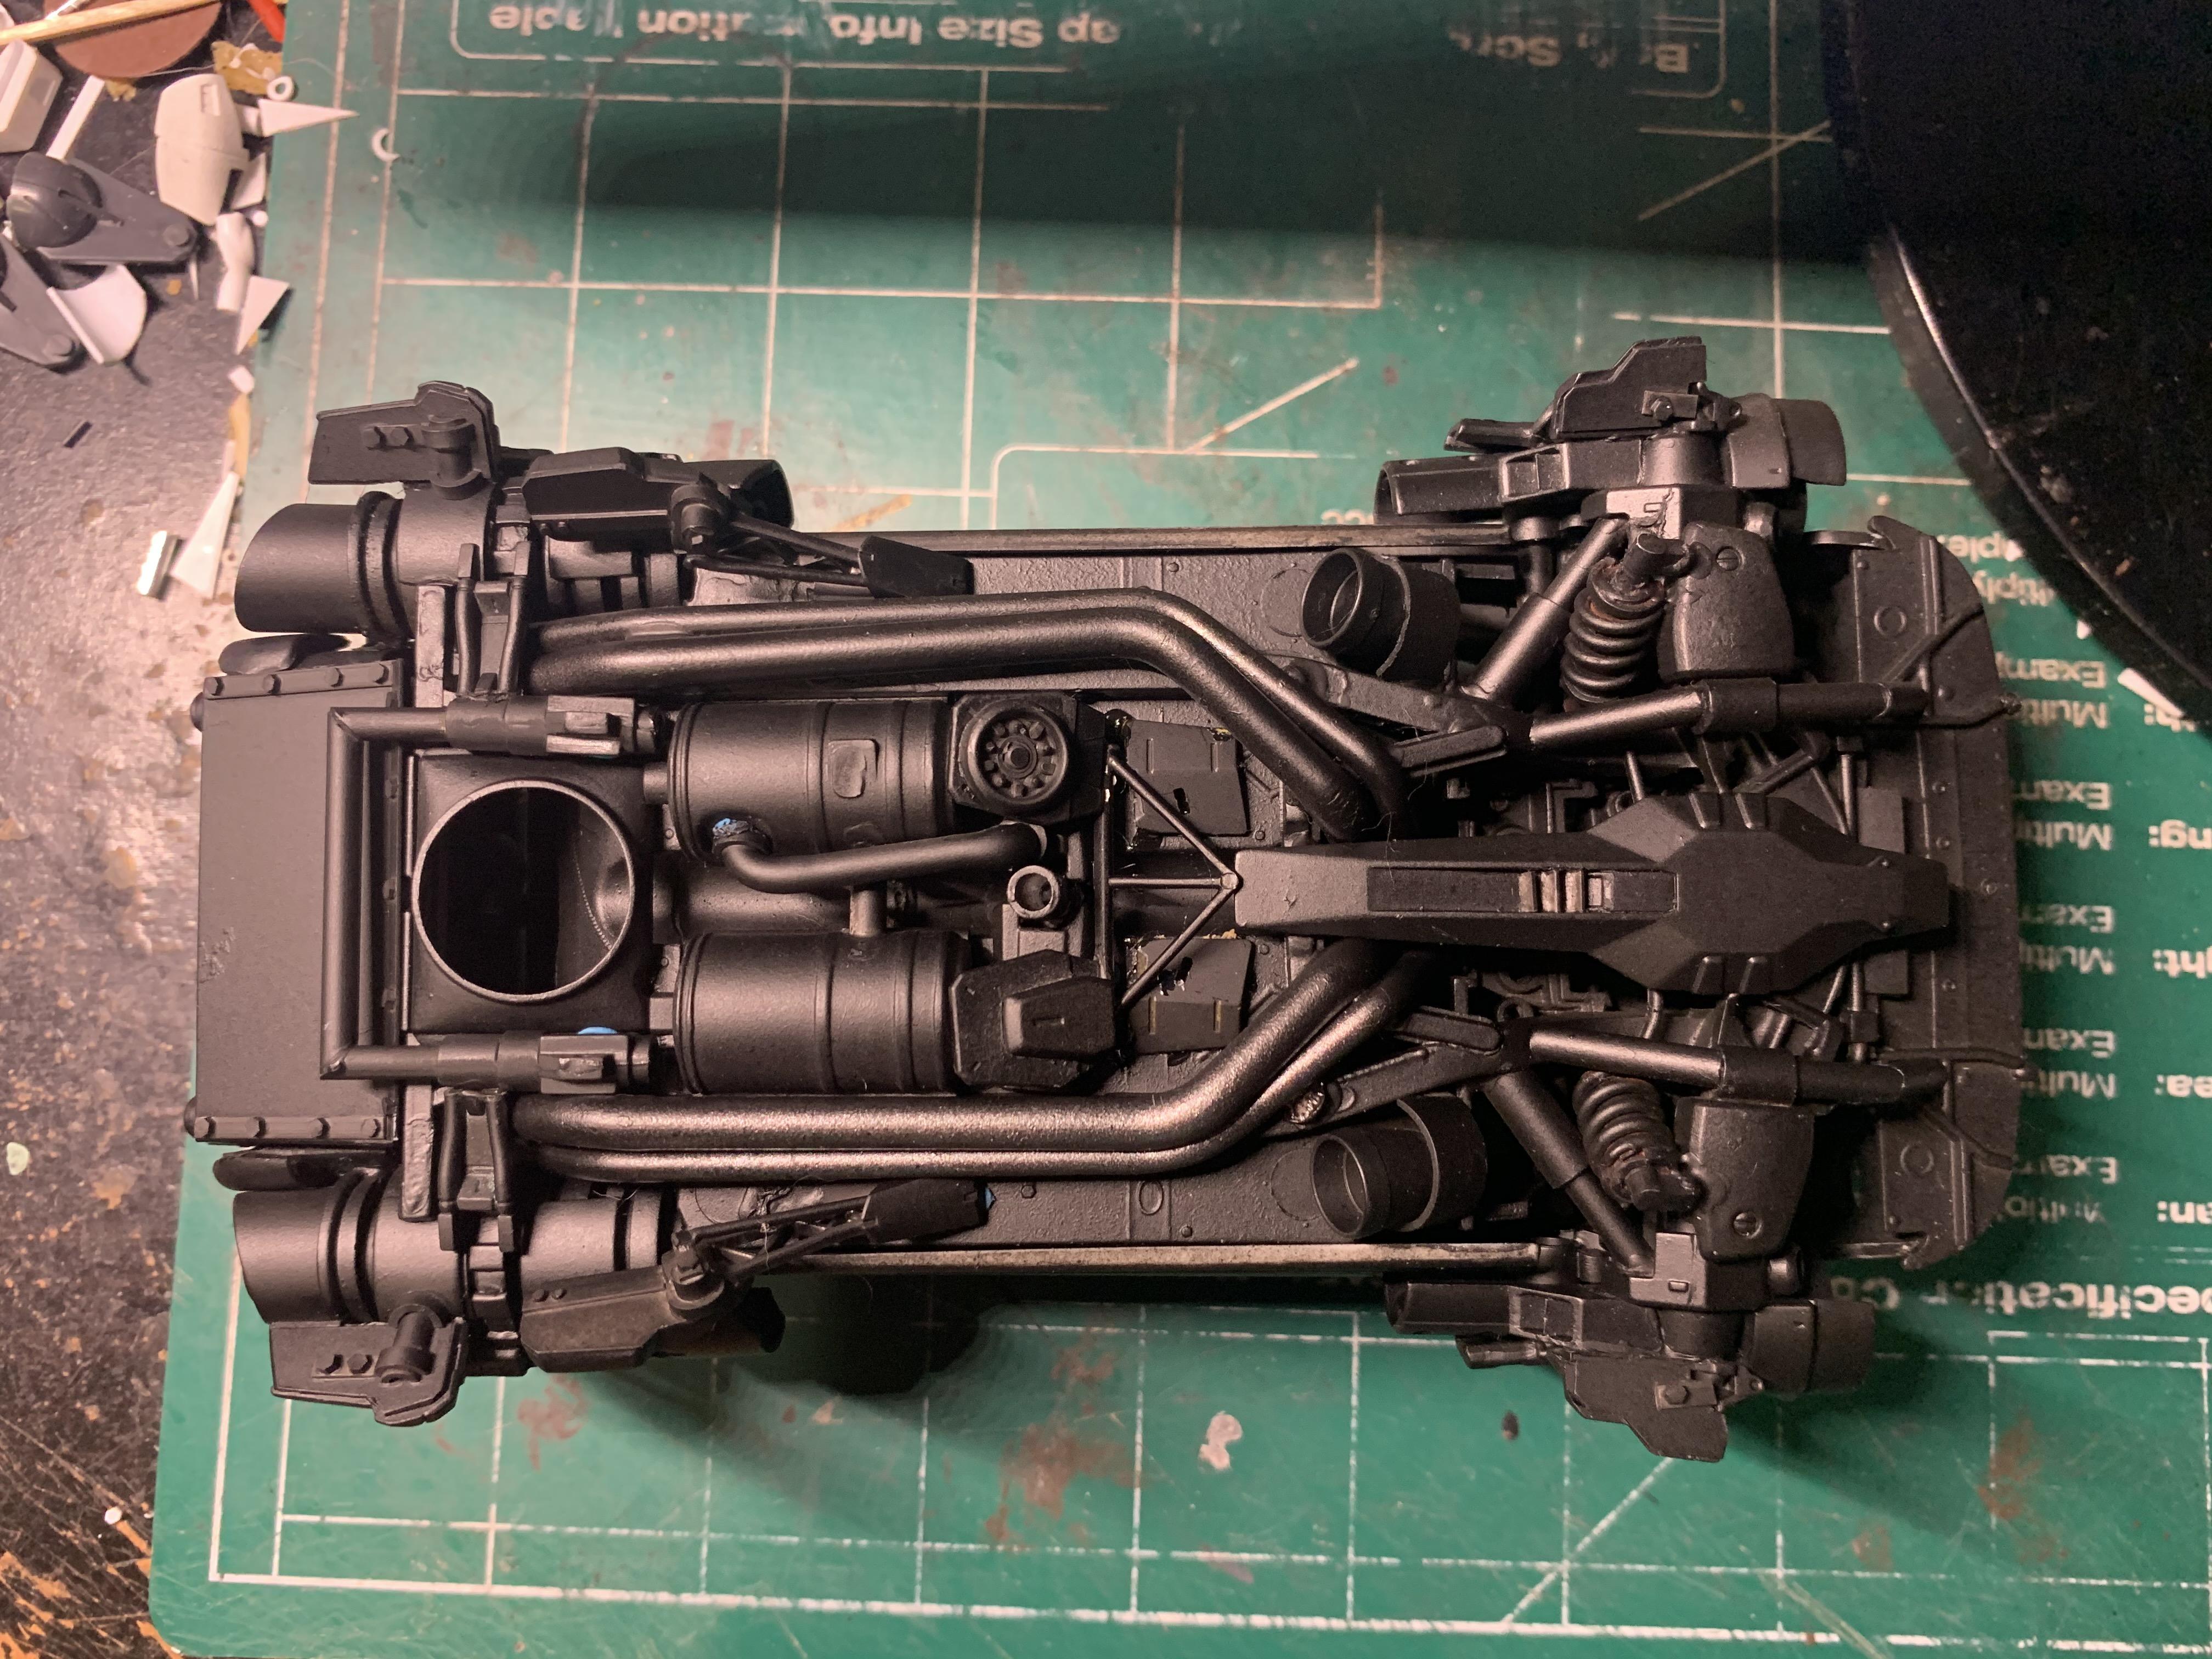
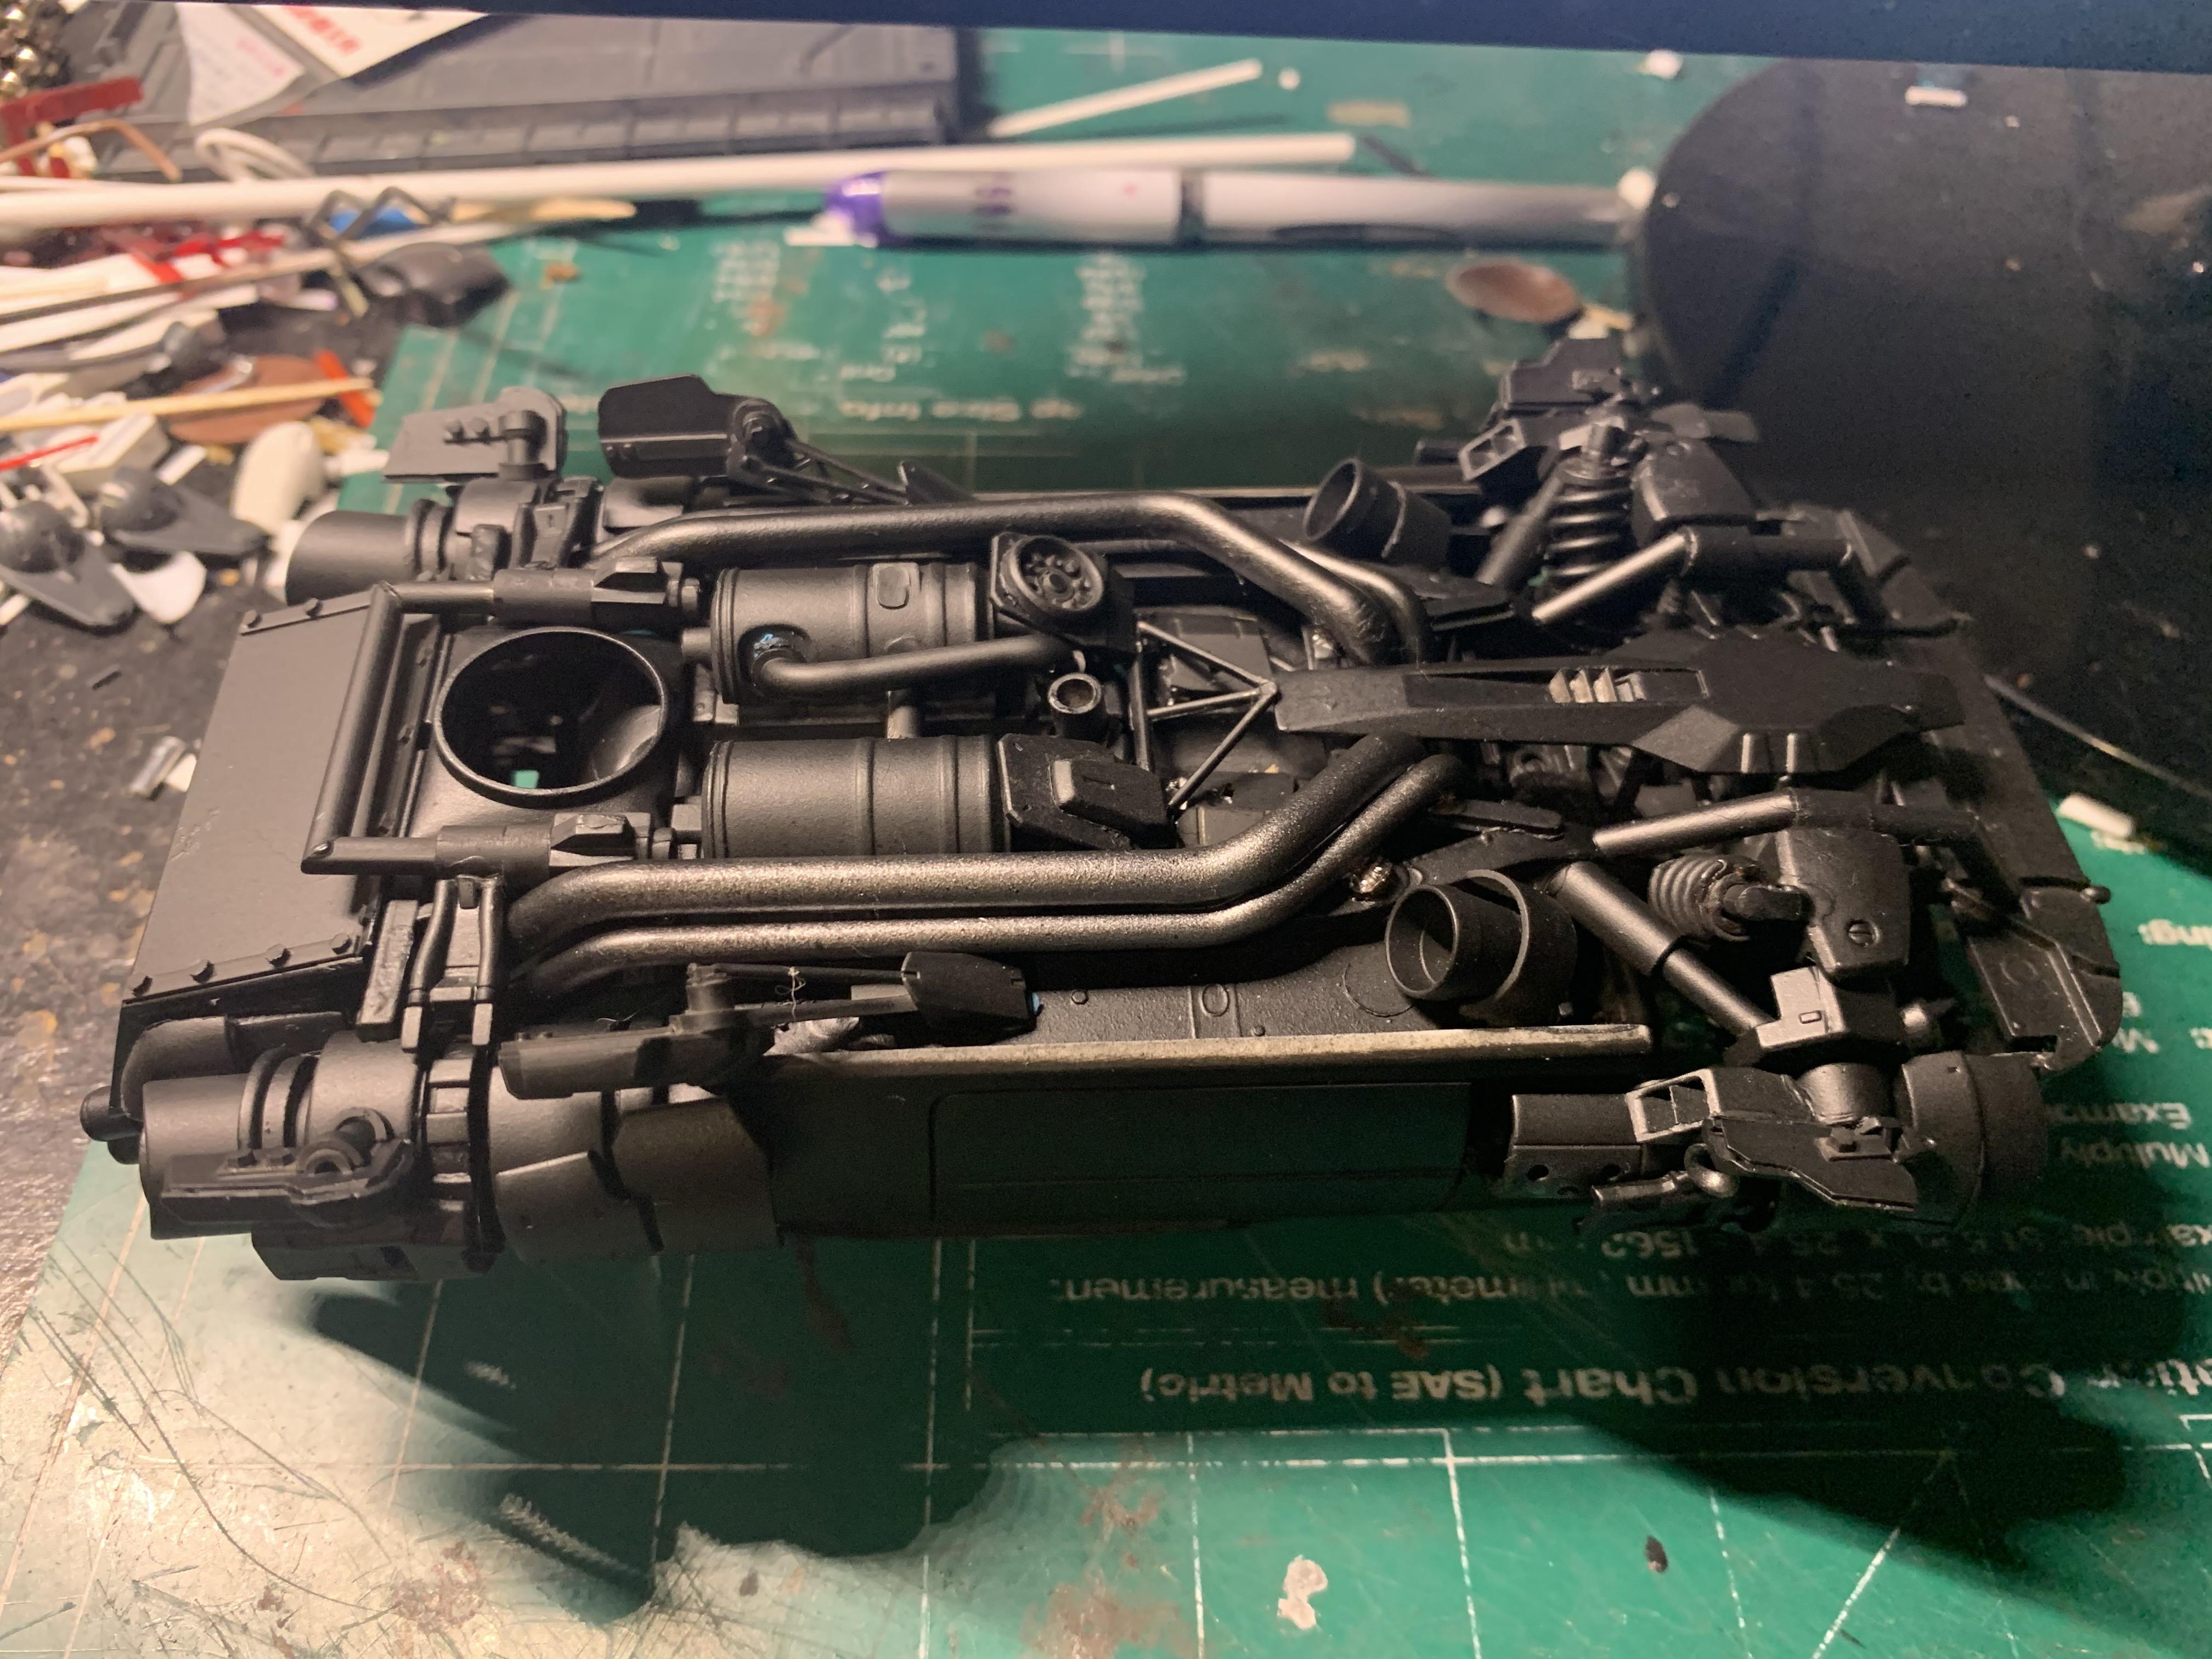
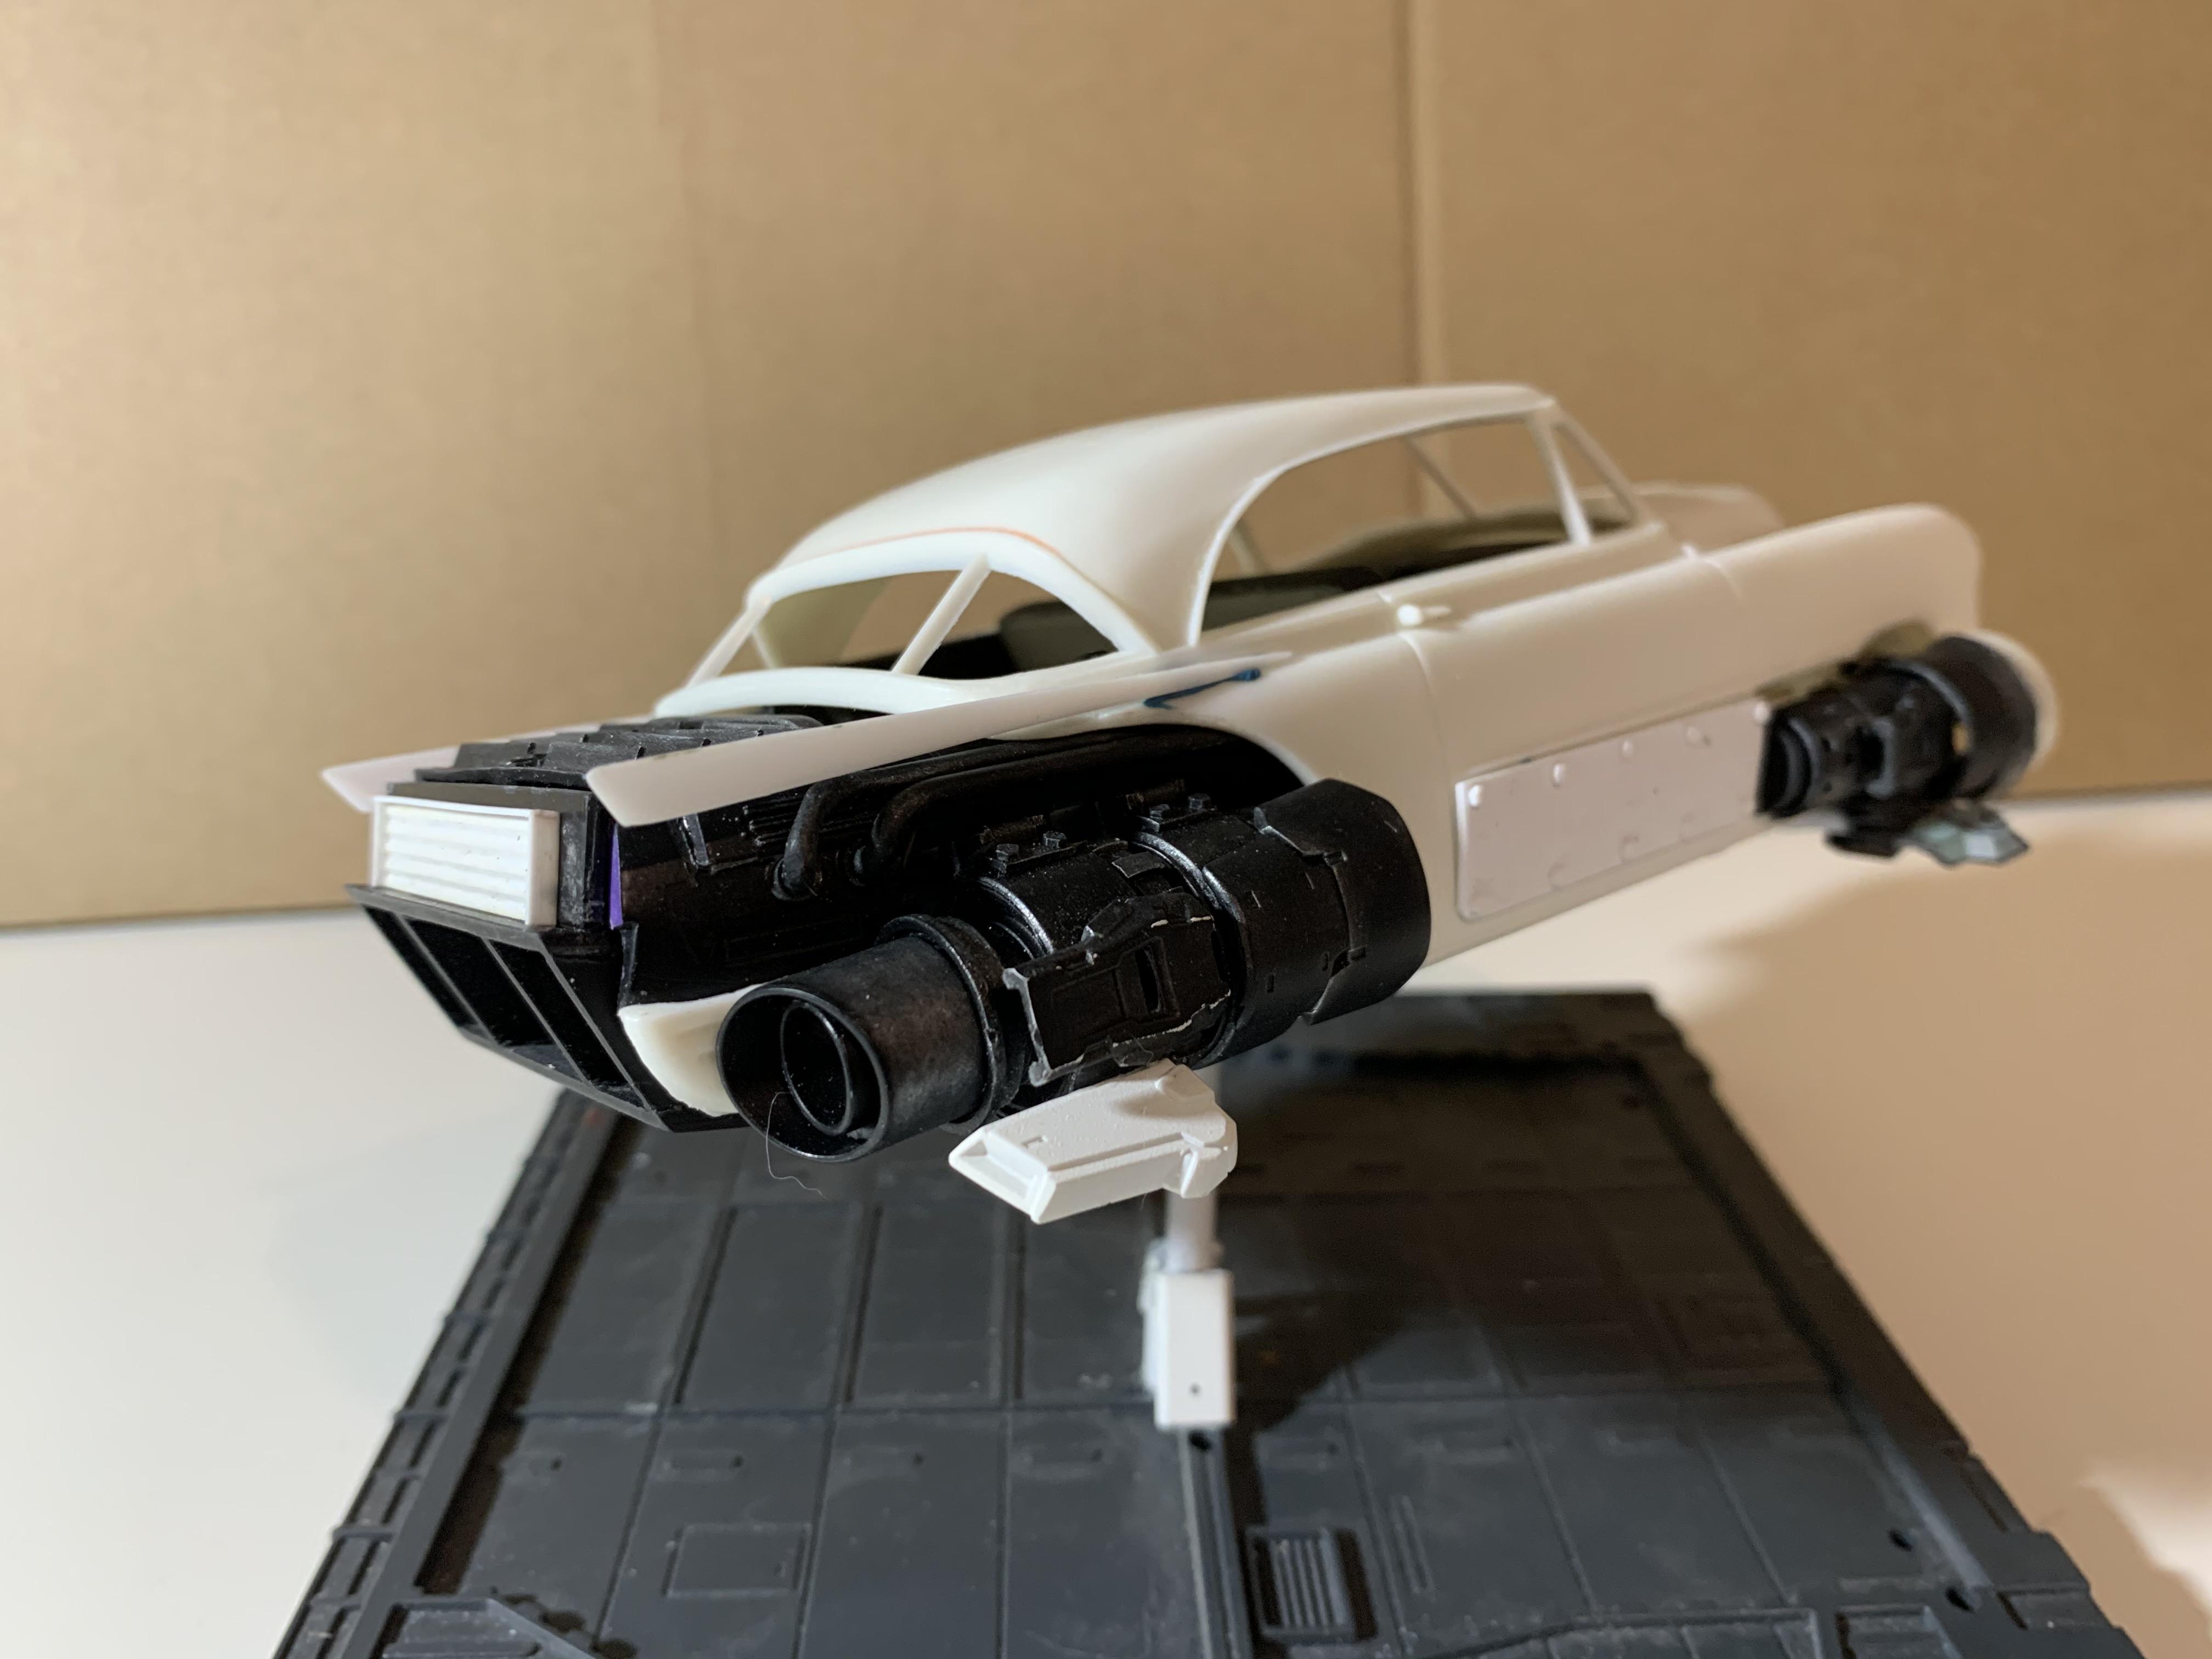
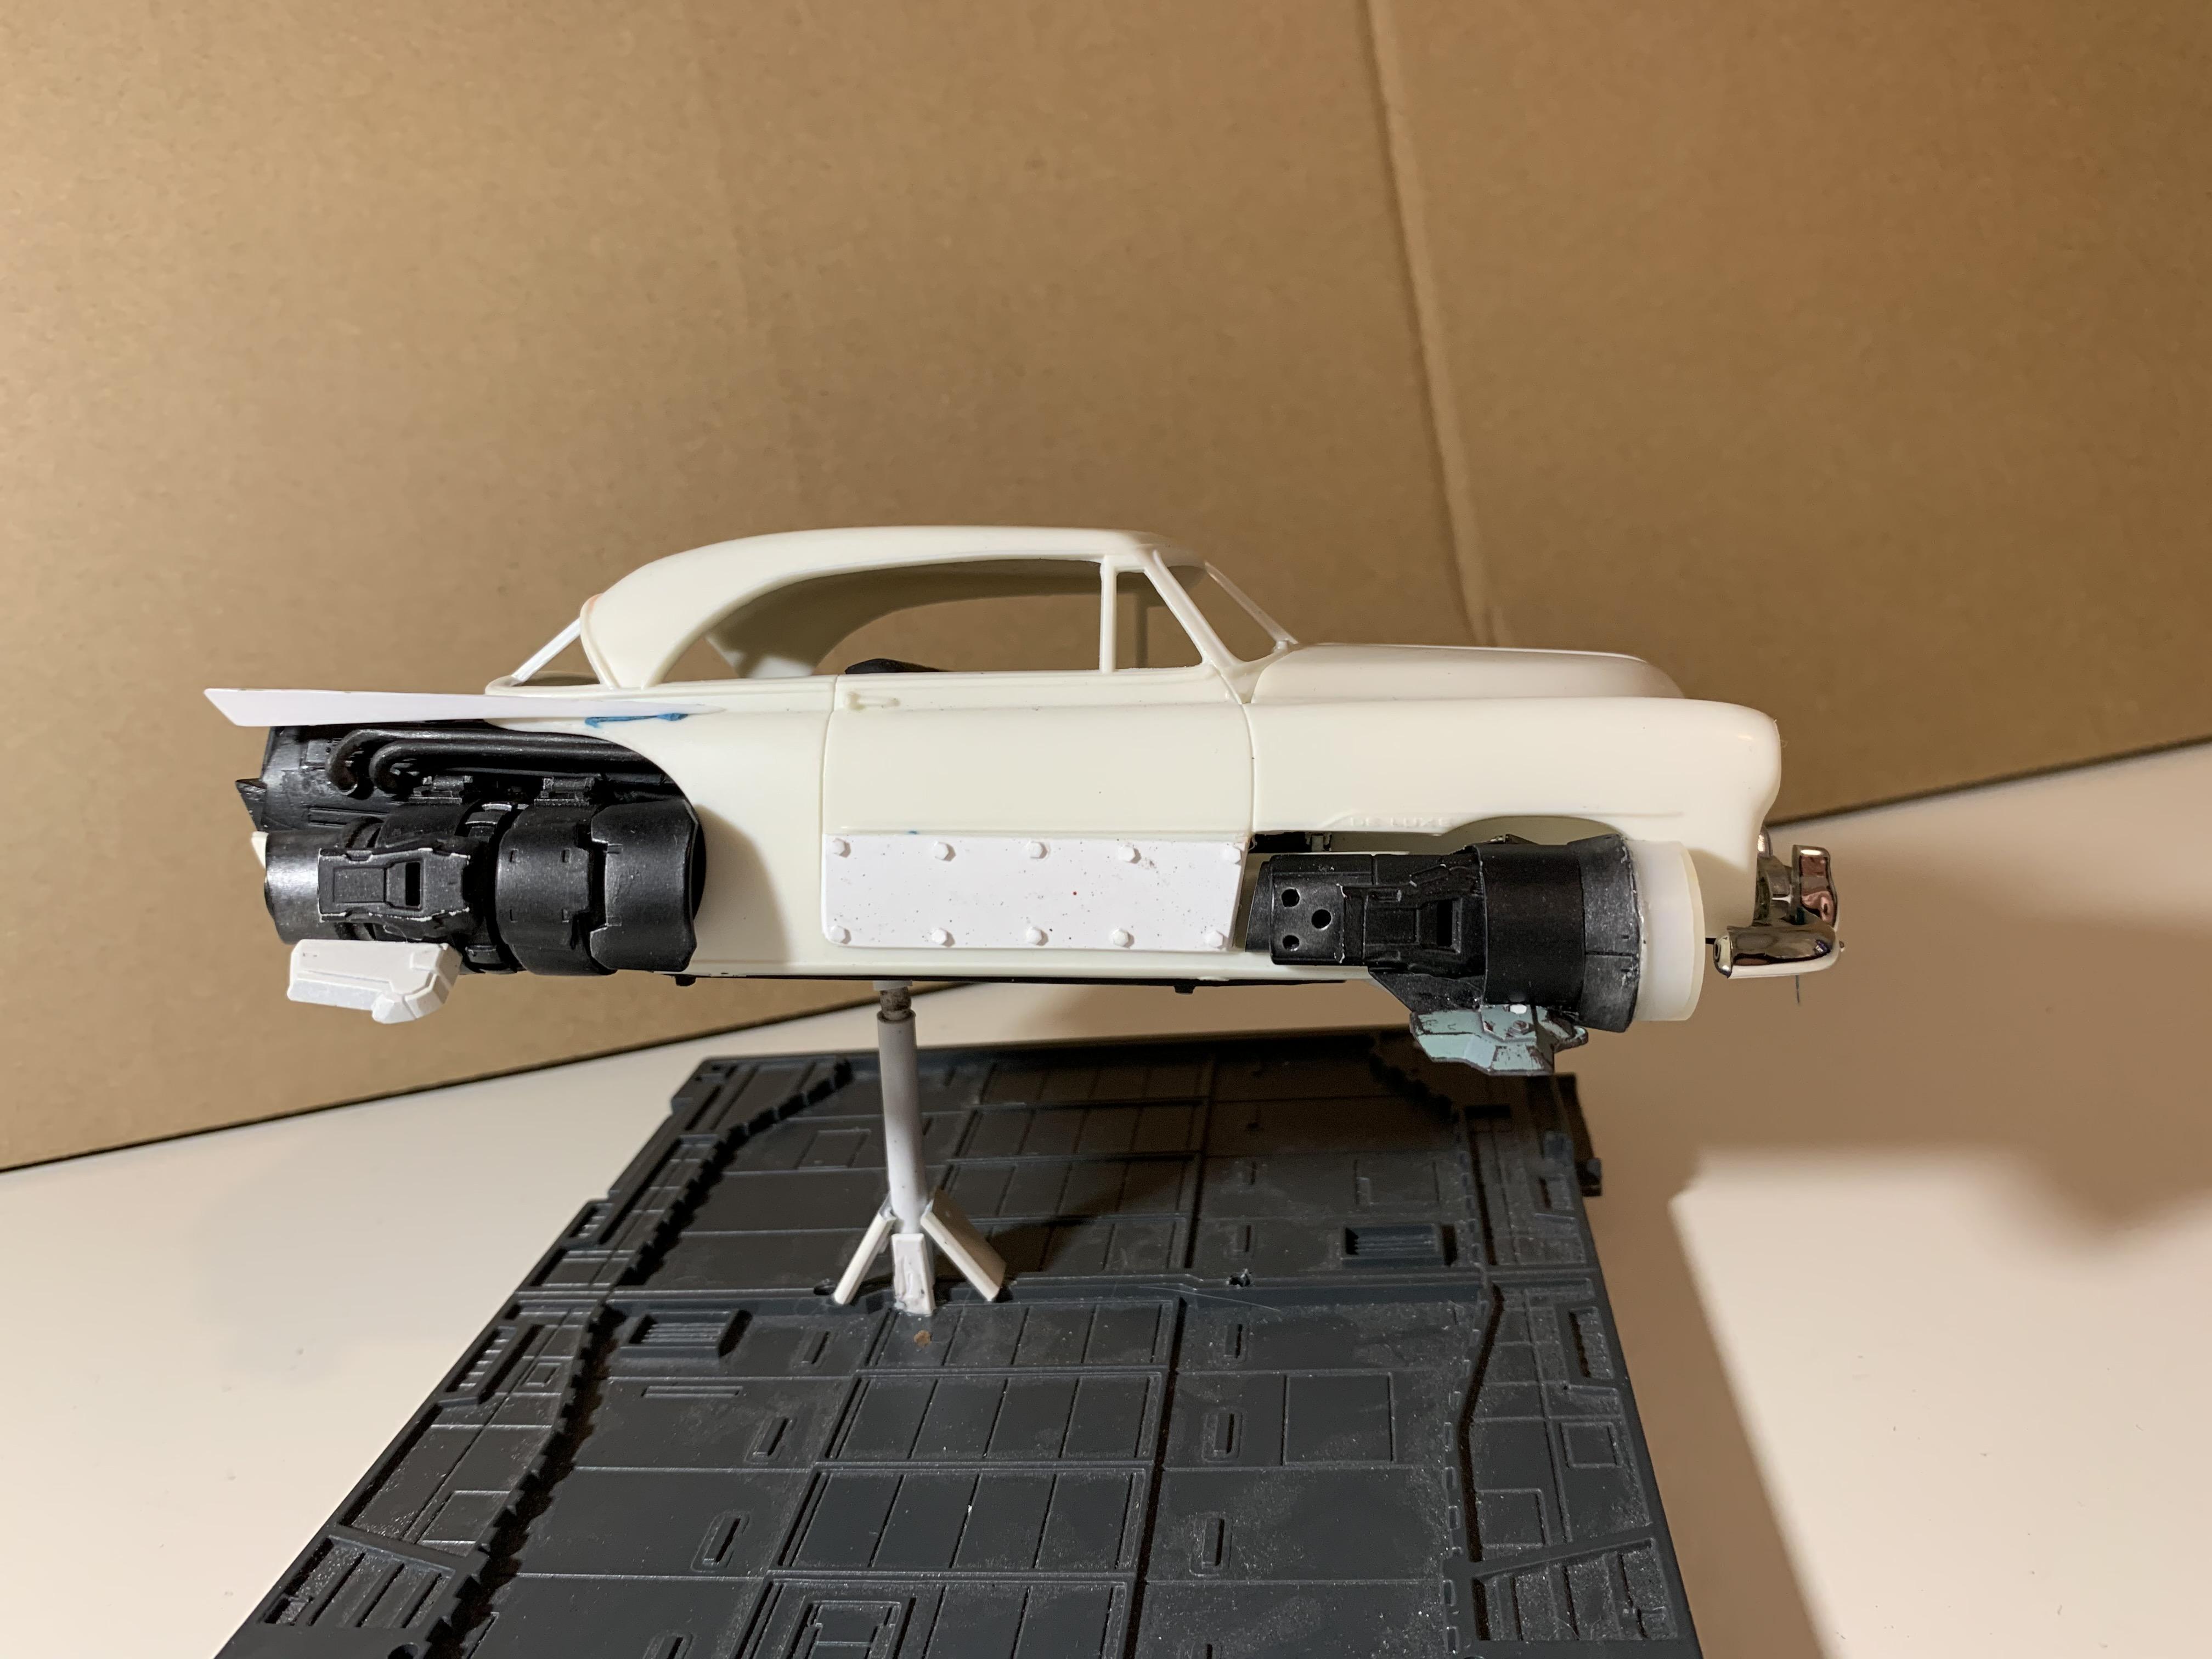
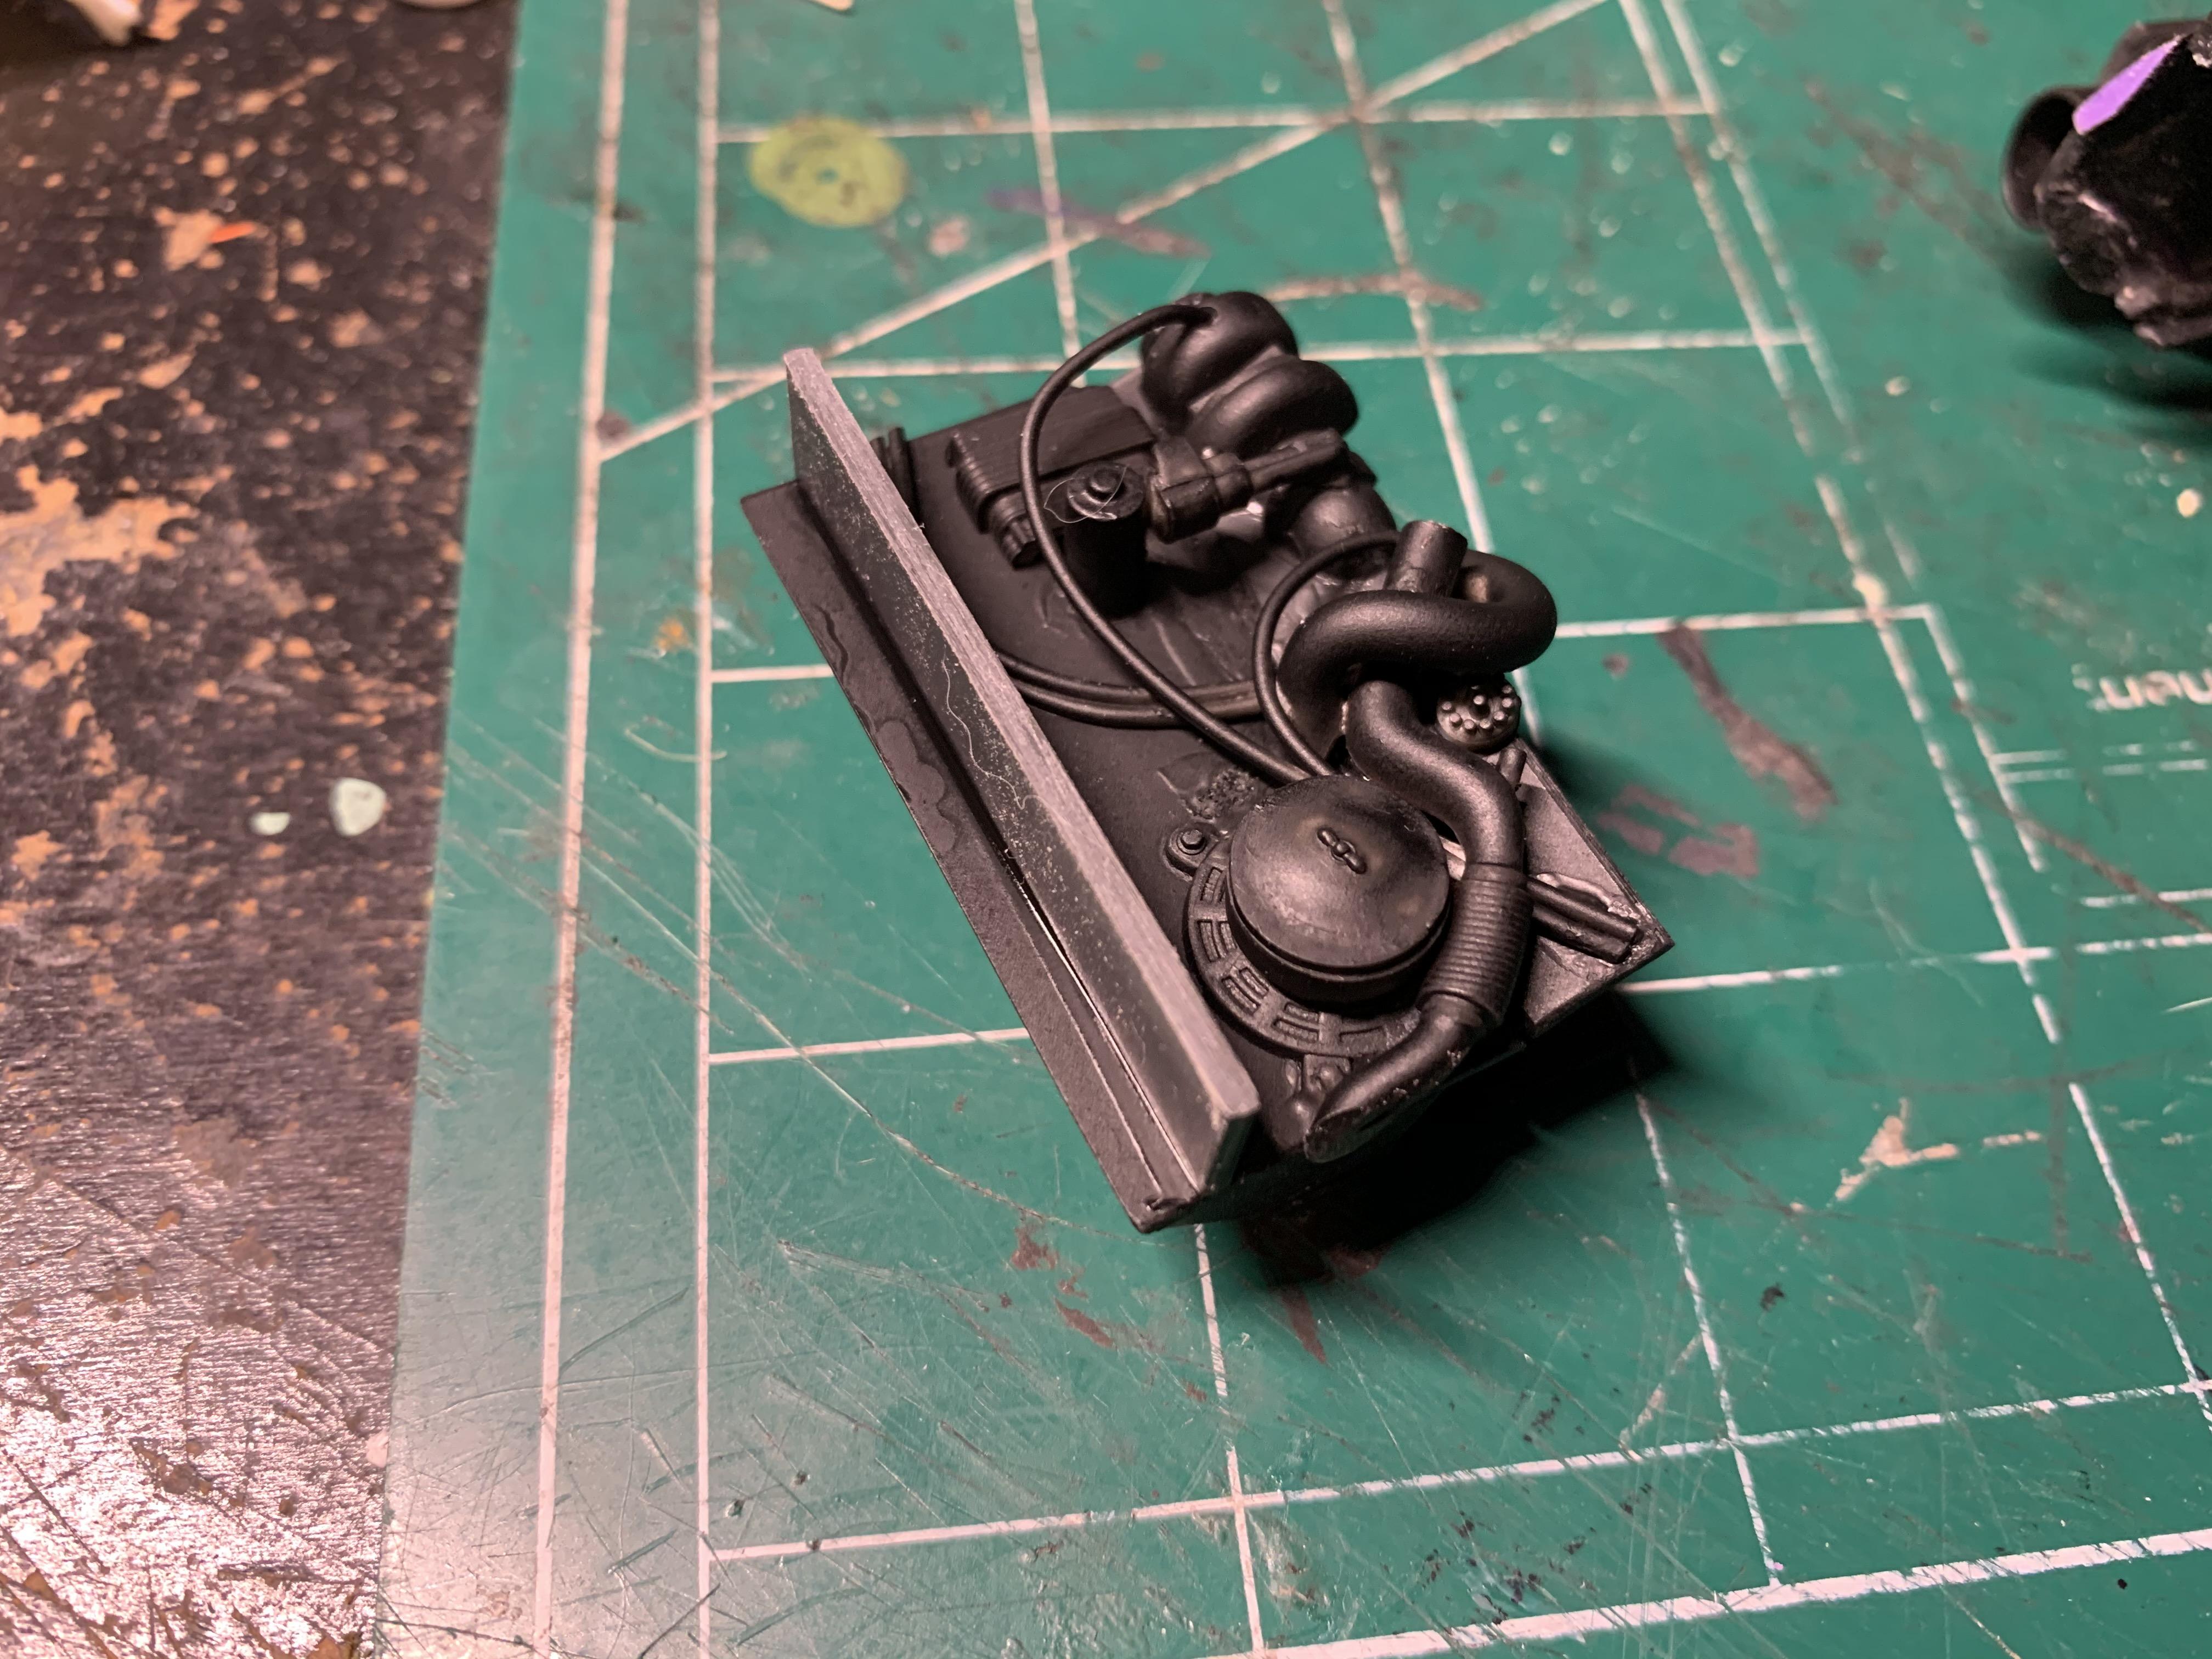
My son had quite a few Gundam kits that he wasn't interested in building. He donated them along with the grey plastic bases that I use to show the cars in flight. In total he gave me 6 complete kits and a few half built models as well. I use anything that looks like it fits the ascetic of the car. Many times I modify the Gundam part to fit the model as well. I did a fast count and came up with around 30 Gundam parts on the undercarriage alone. Looks better with a coat of black. Hovercar 101 - it can always use more hoses and pipes. Working on the undercarriage of these hover cars is one of my favorite parts of the build. You can get really creative. Unfortunately it tends to get overlooked when the kit is complete. I should start displaying the cars like this. I added new winglets? to the bottom. I may move the location slightly. I need to do something to the grill. I feel that it needs to be more of a focal point. I may cut out the center horizontal bar for a more open look. Not sure yet. I really like the tail lights, just think something more 50's is needed. I'll probably end up changing these out. If you've seen my other builds, you'll know that I change a lot changes from start to finish. I'm going to start the body color paint this week. I may not go with the police vehicle theme. I really need to think this one through. I'll keep posting pics. Thanks for the support from everyone!!
-
Thank you Dave. I went to the local hobby shop today looking for that 57 Del Rio today. I had seen it there every single time I went into that store. Of course, now that I want to buy it, there were none on the shelf. I'll probably order it online. I was thinking about how cool that station wagon would look as a jet car. It might be a future project!
-
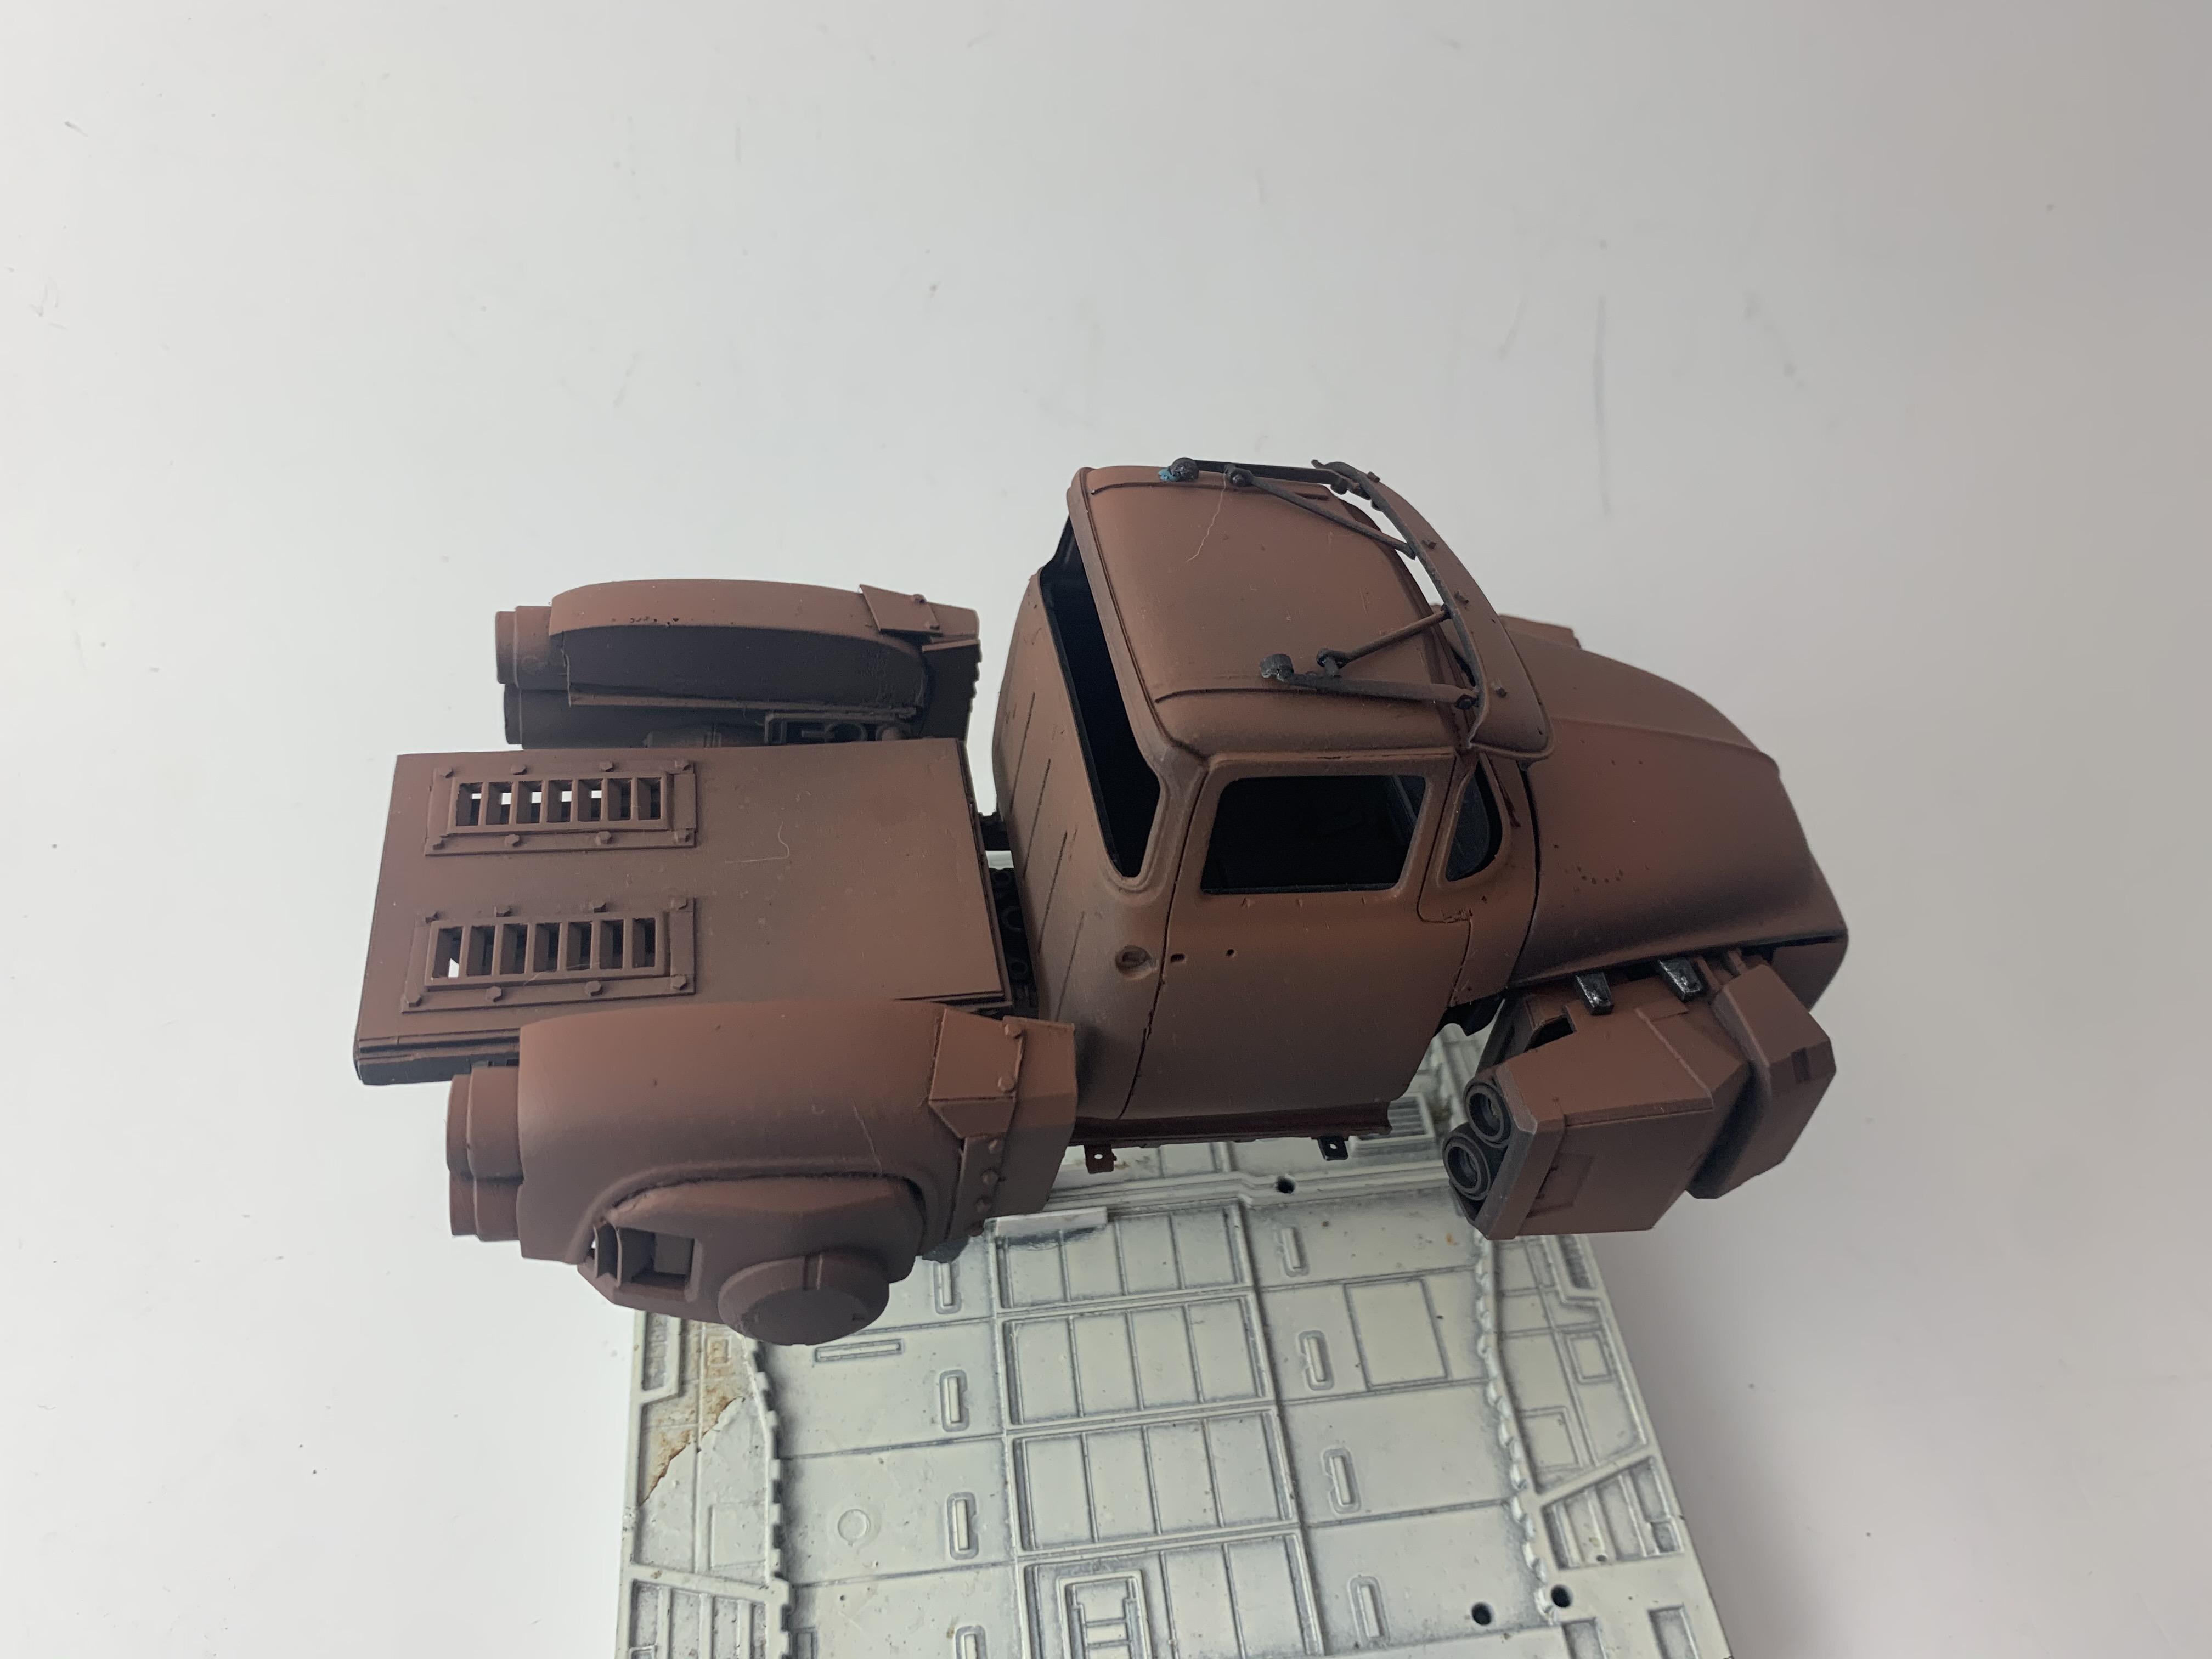
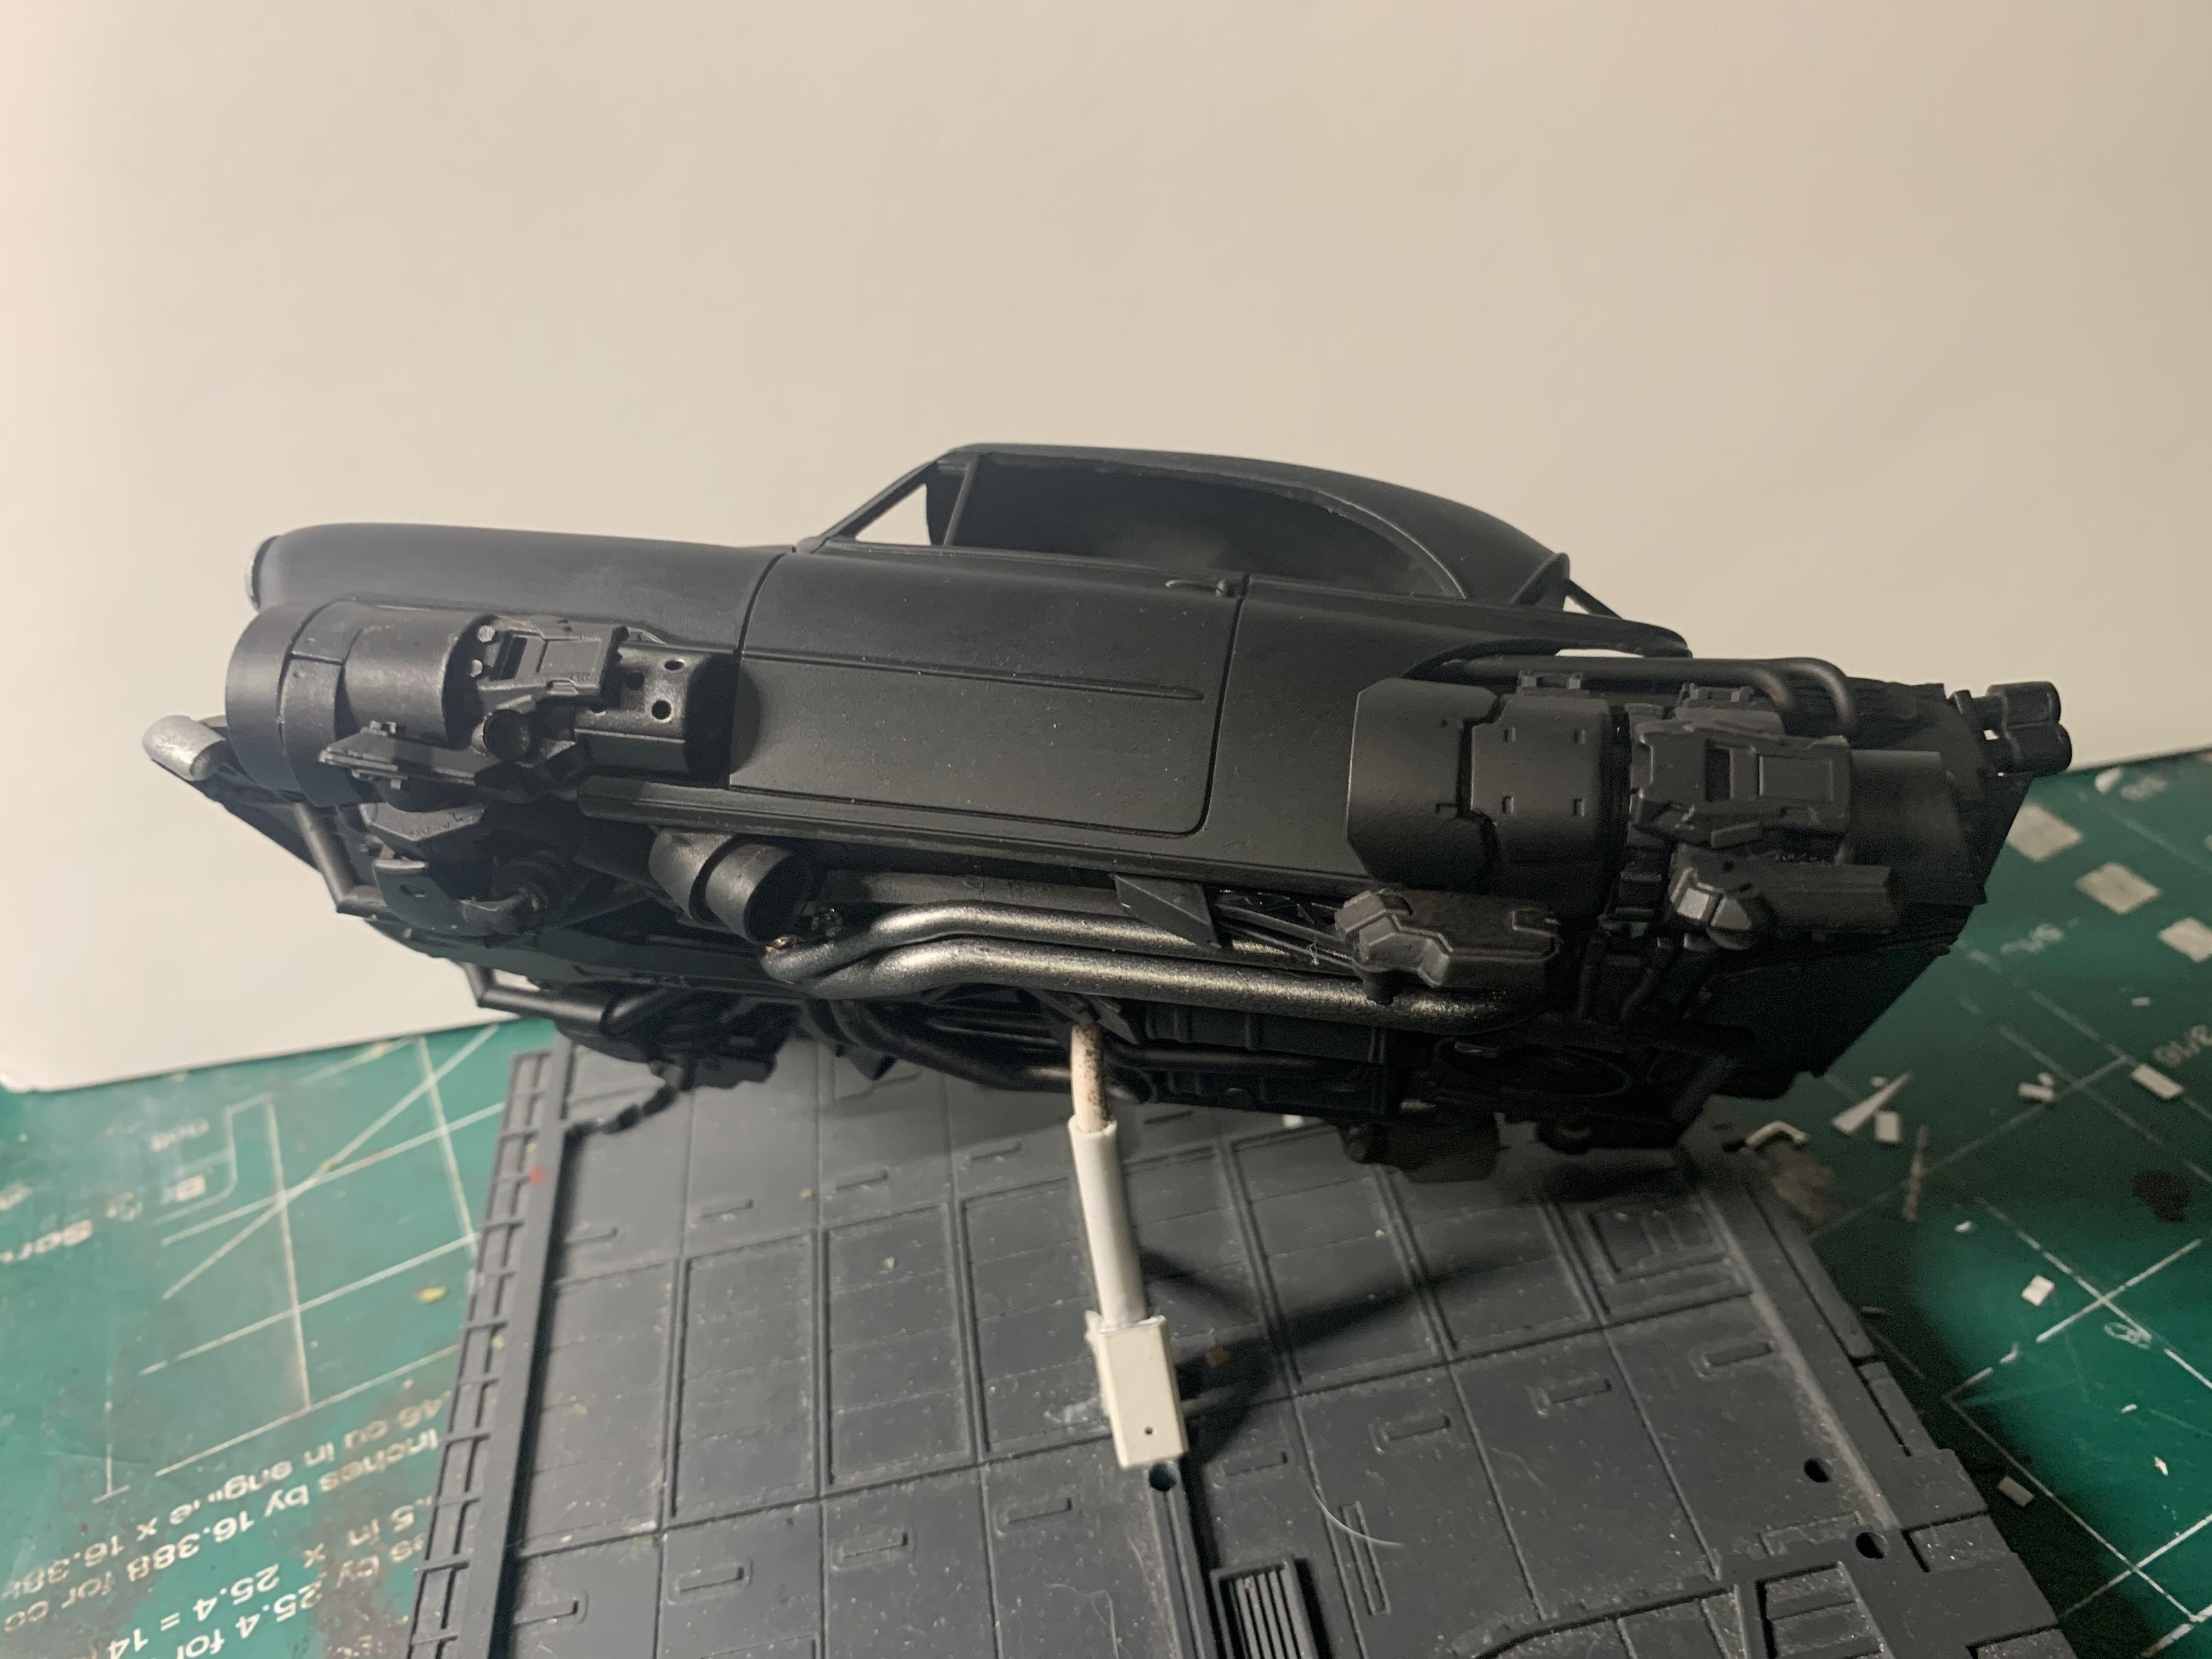
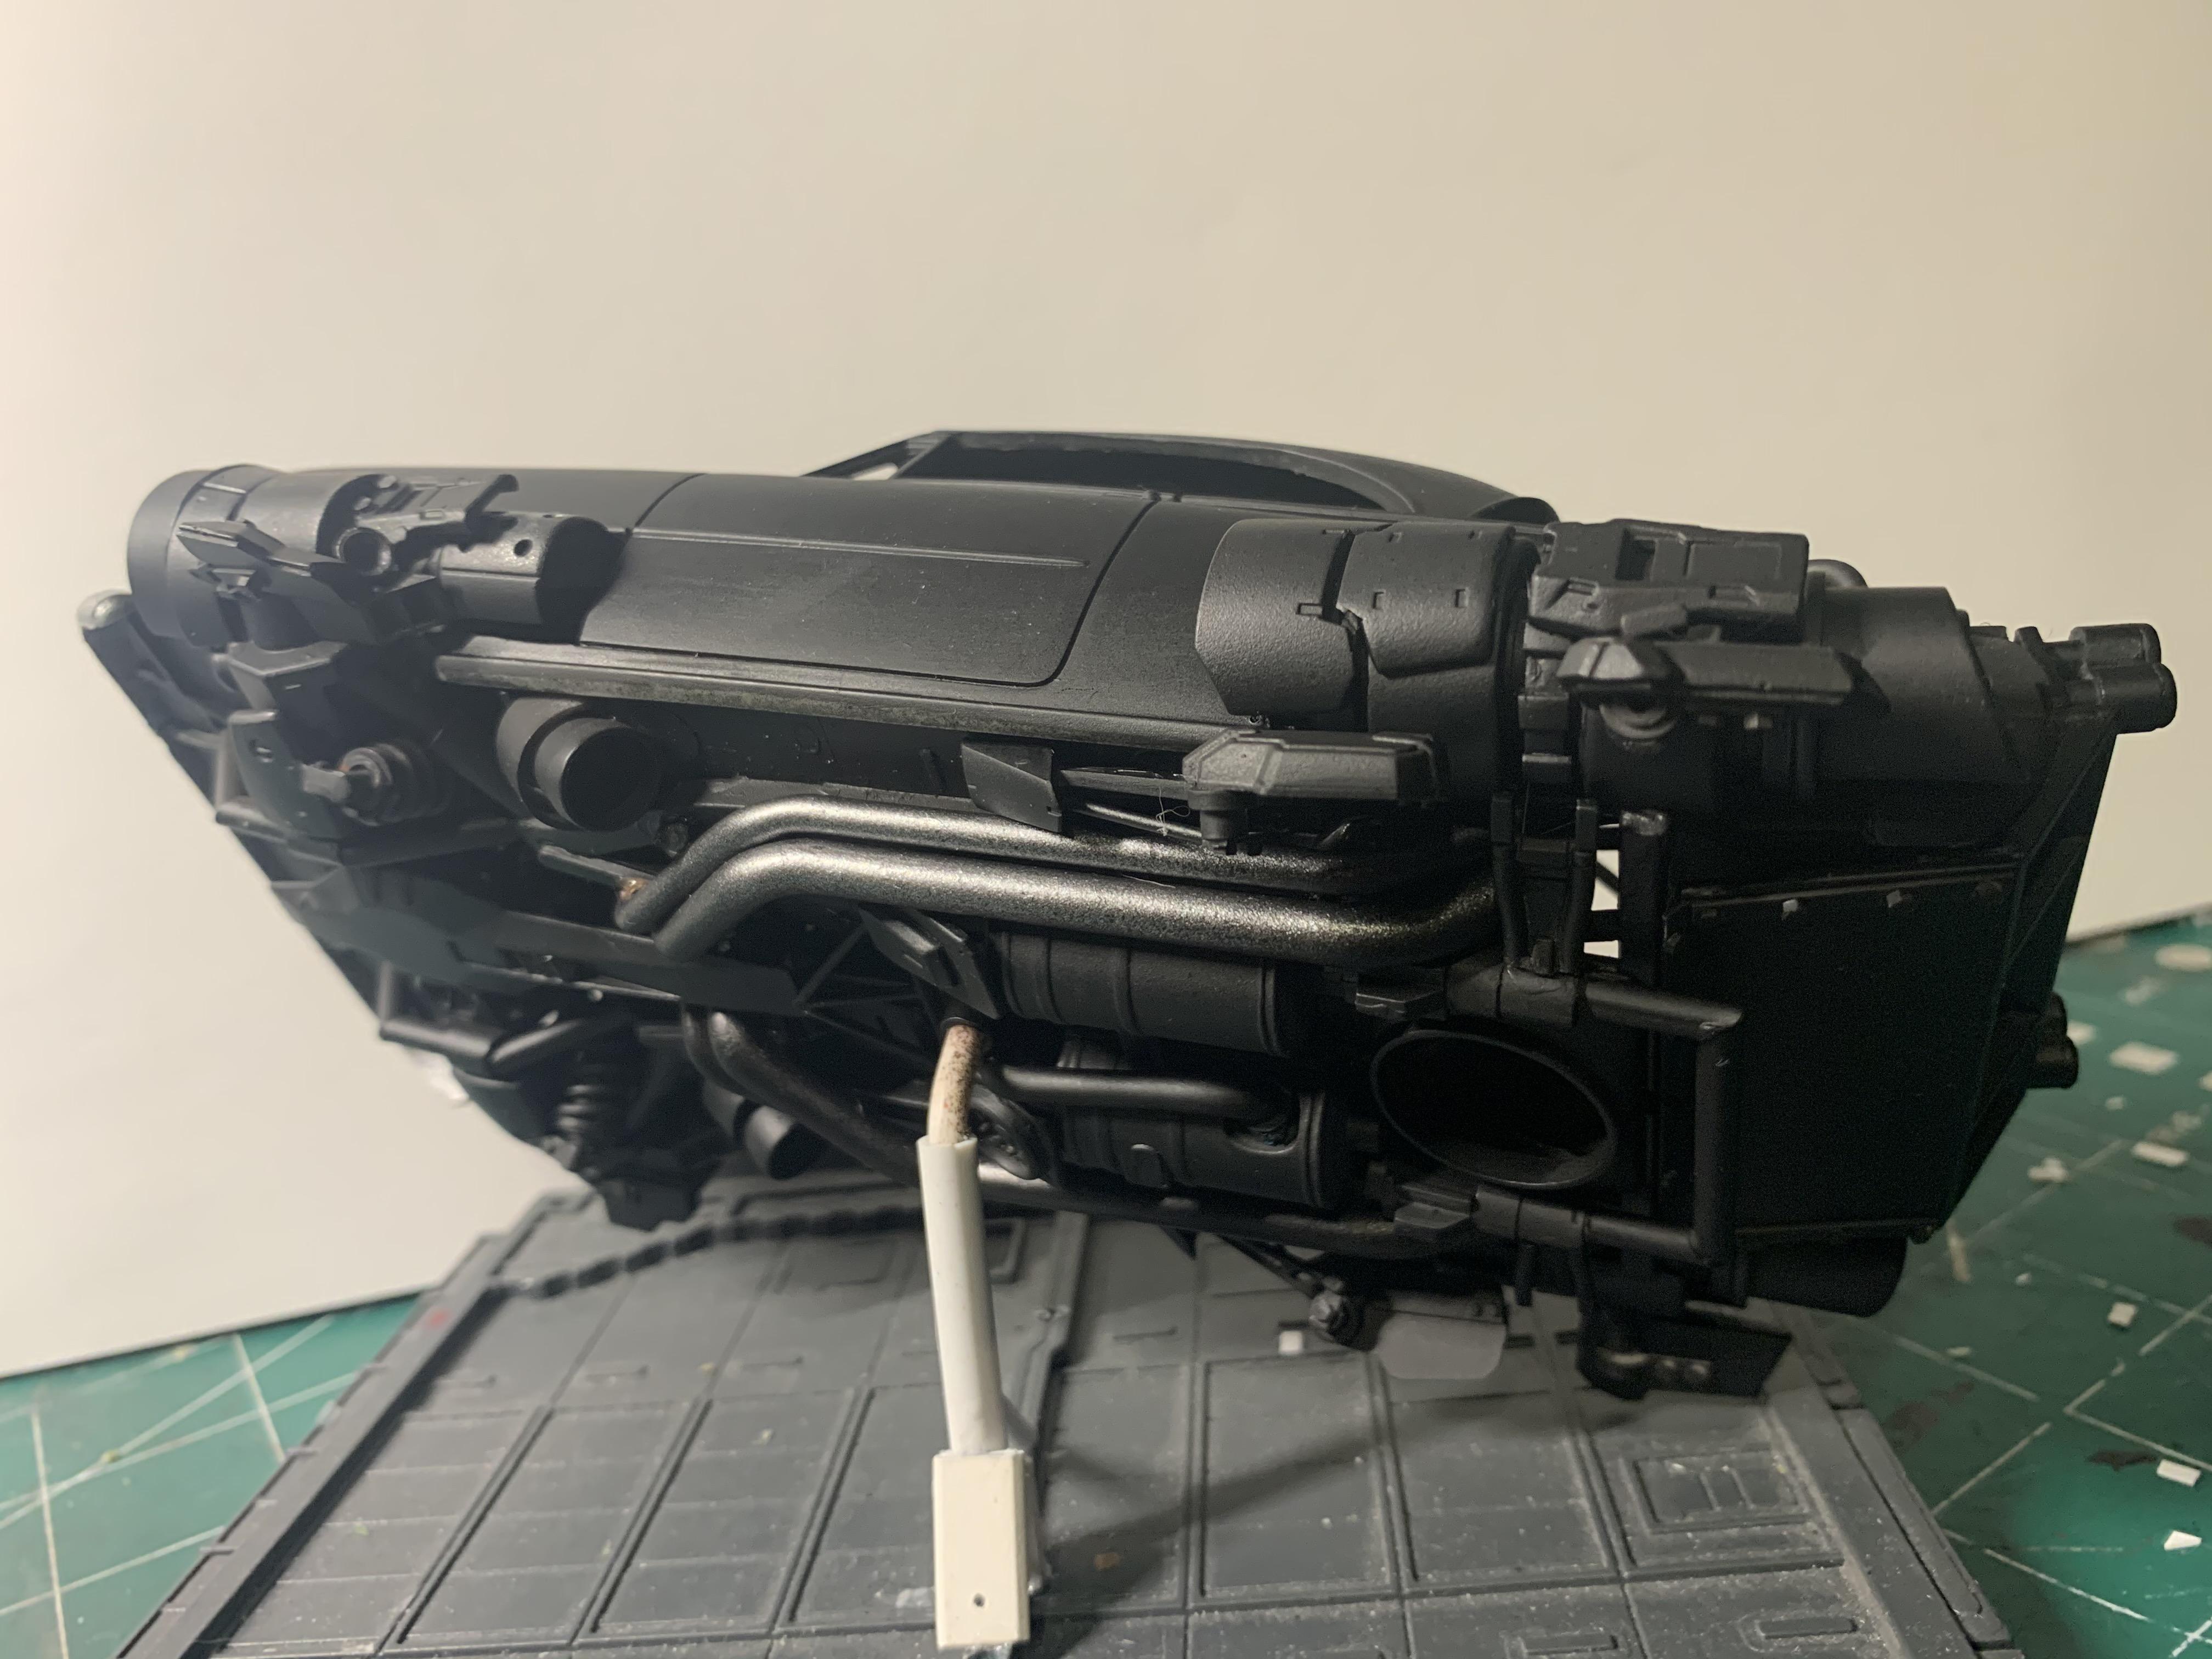
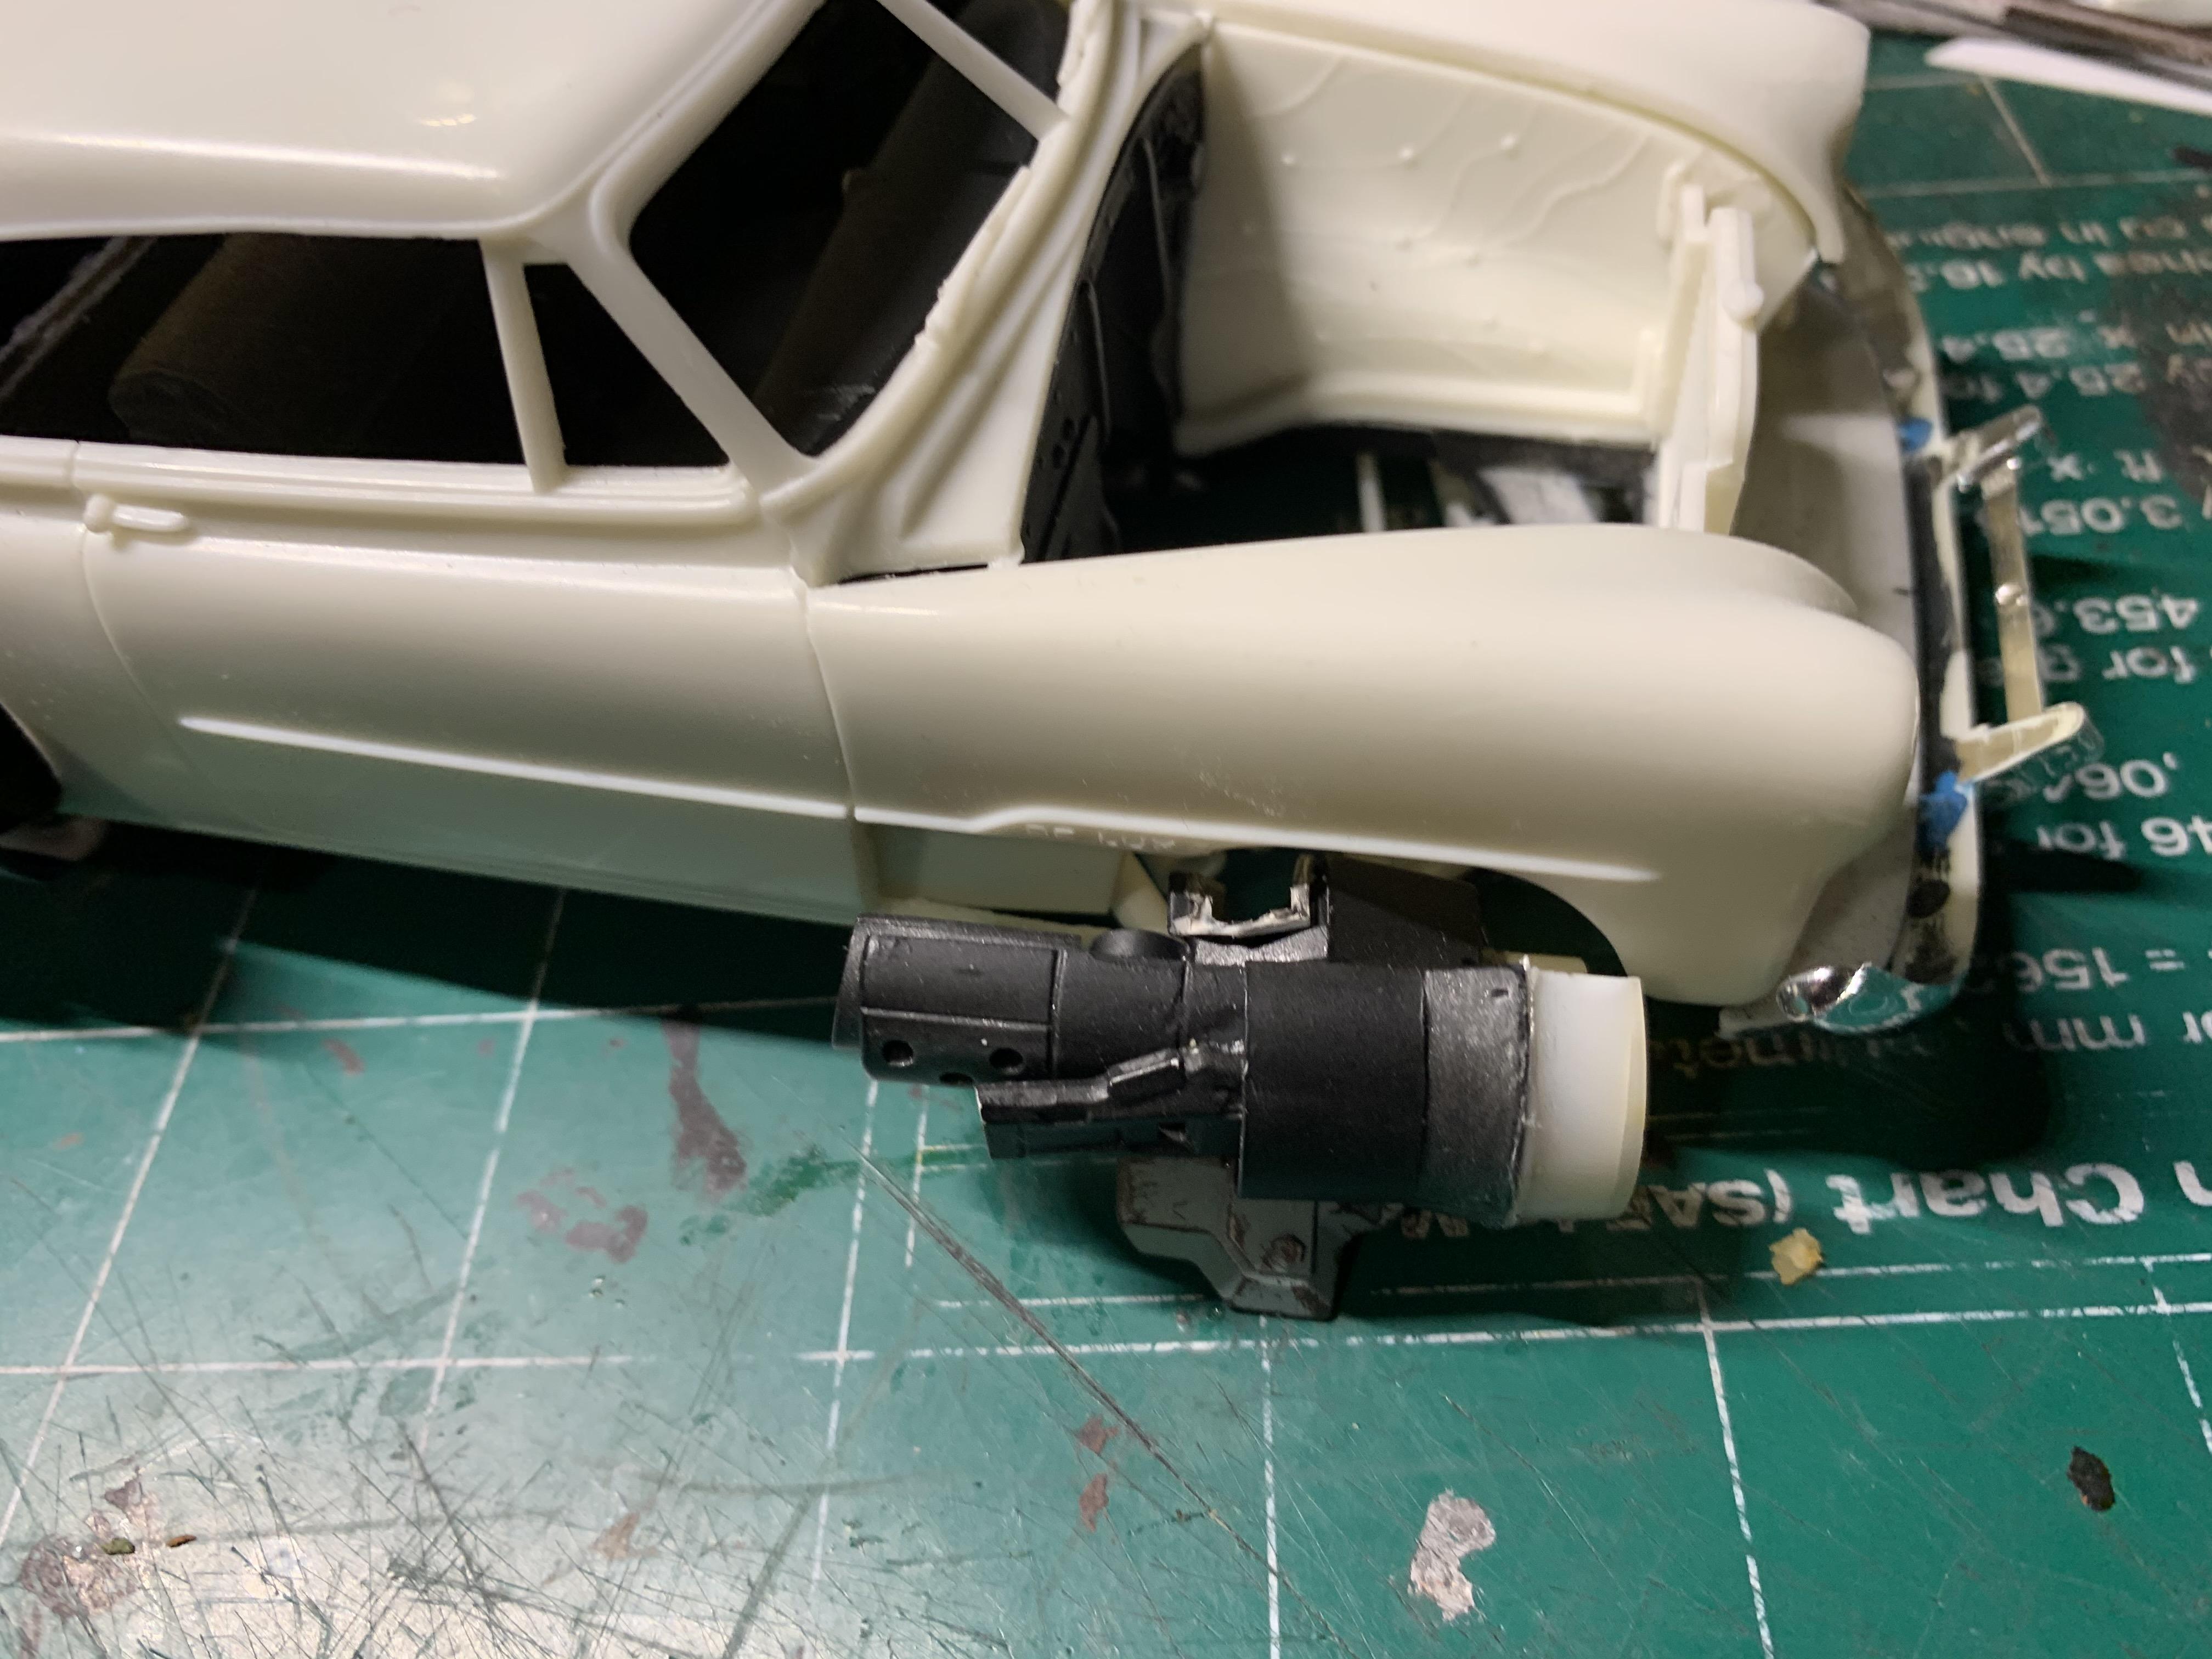
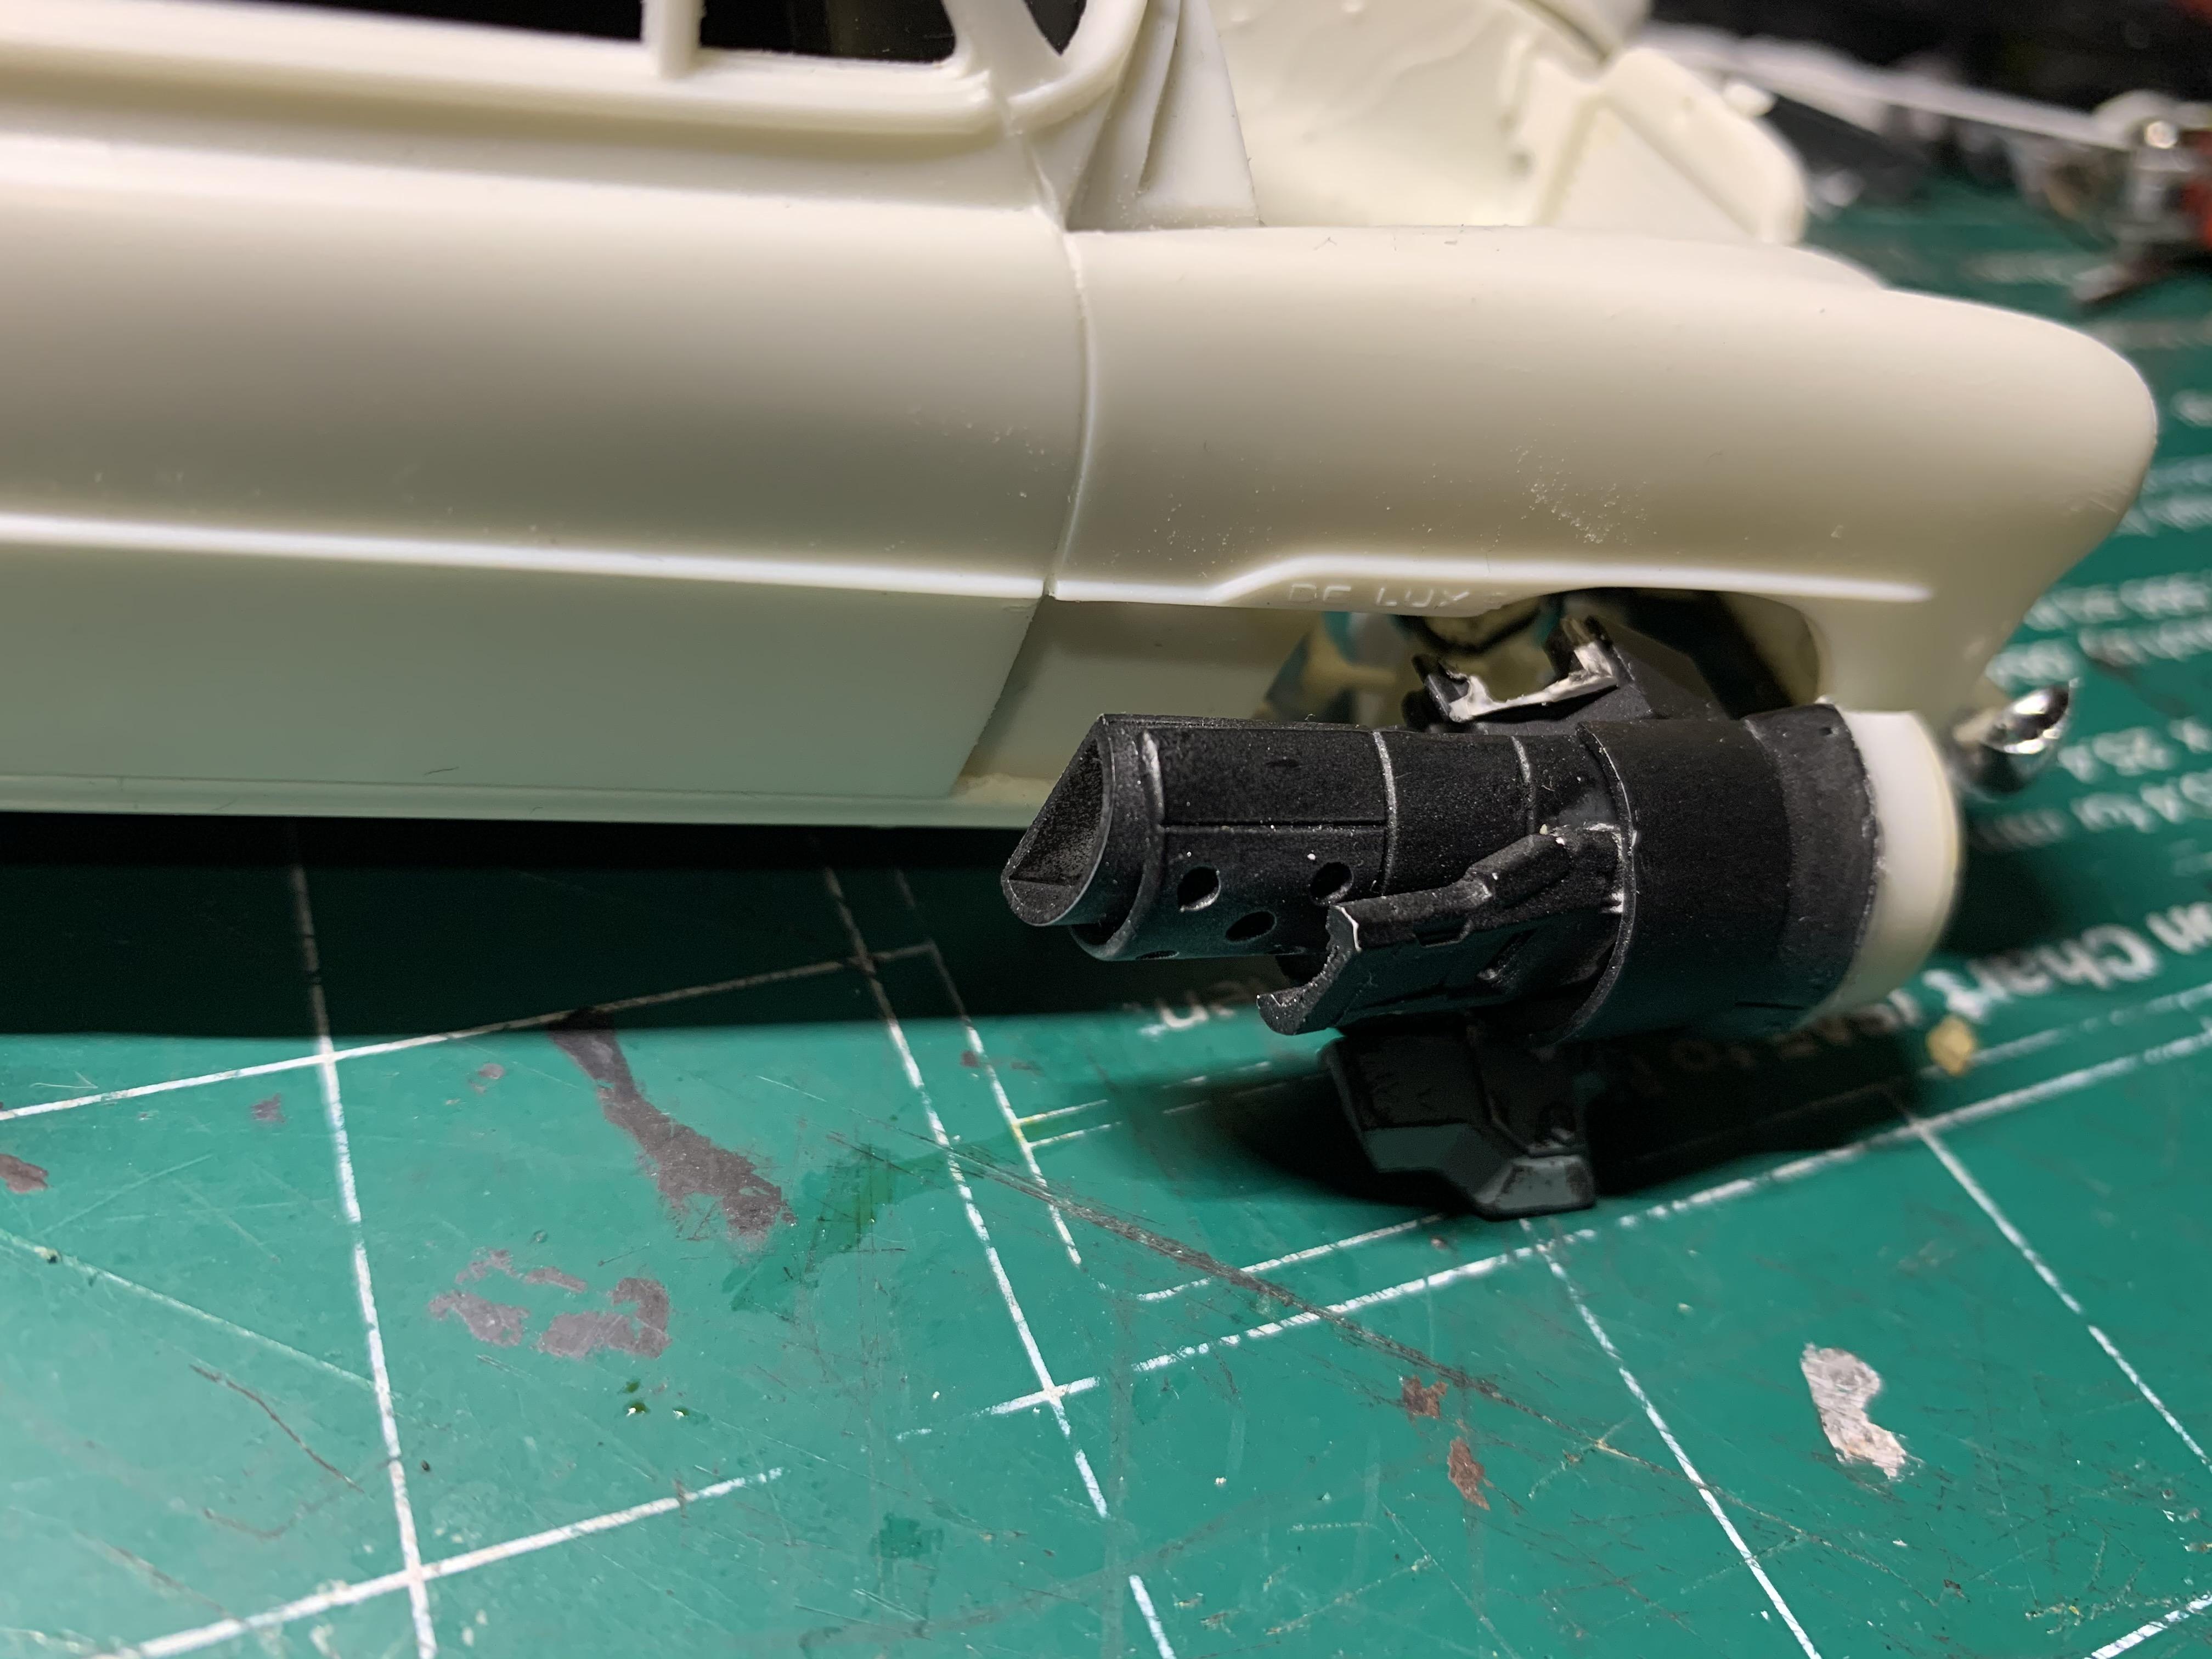
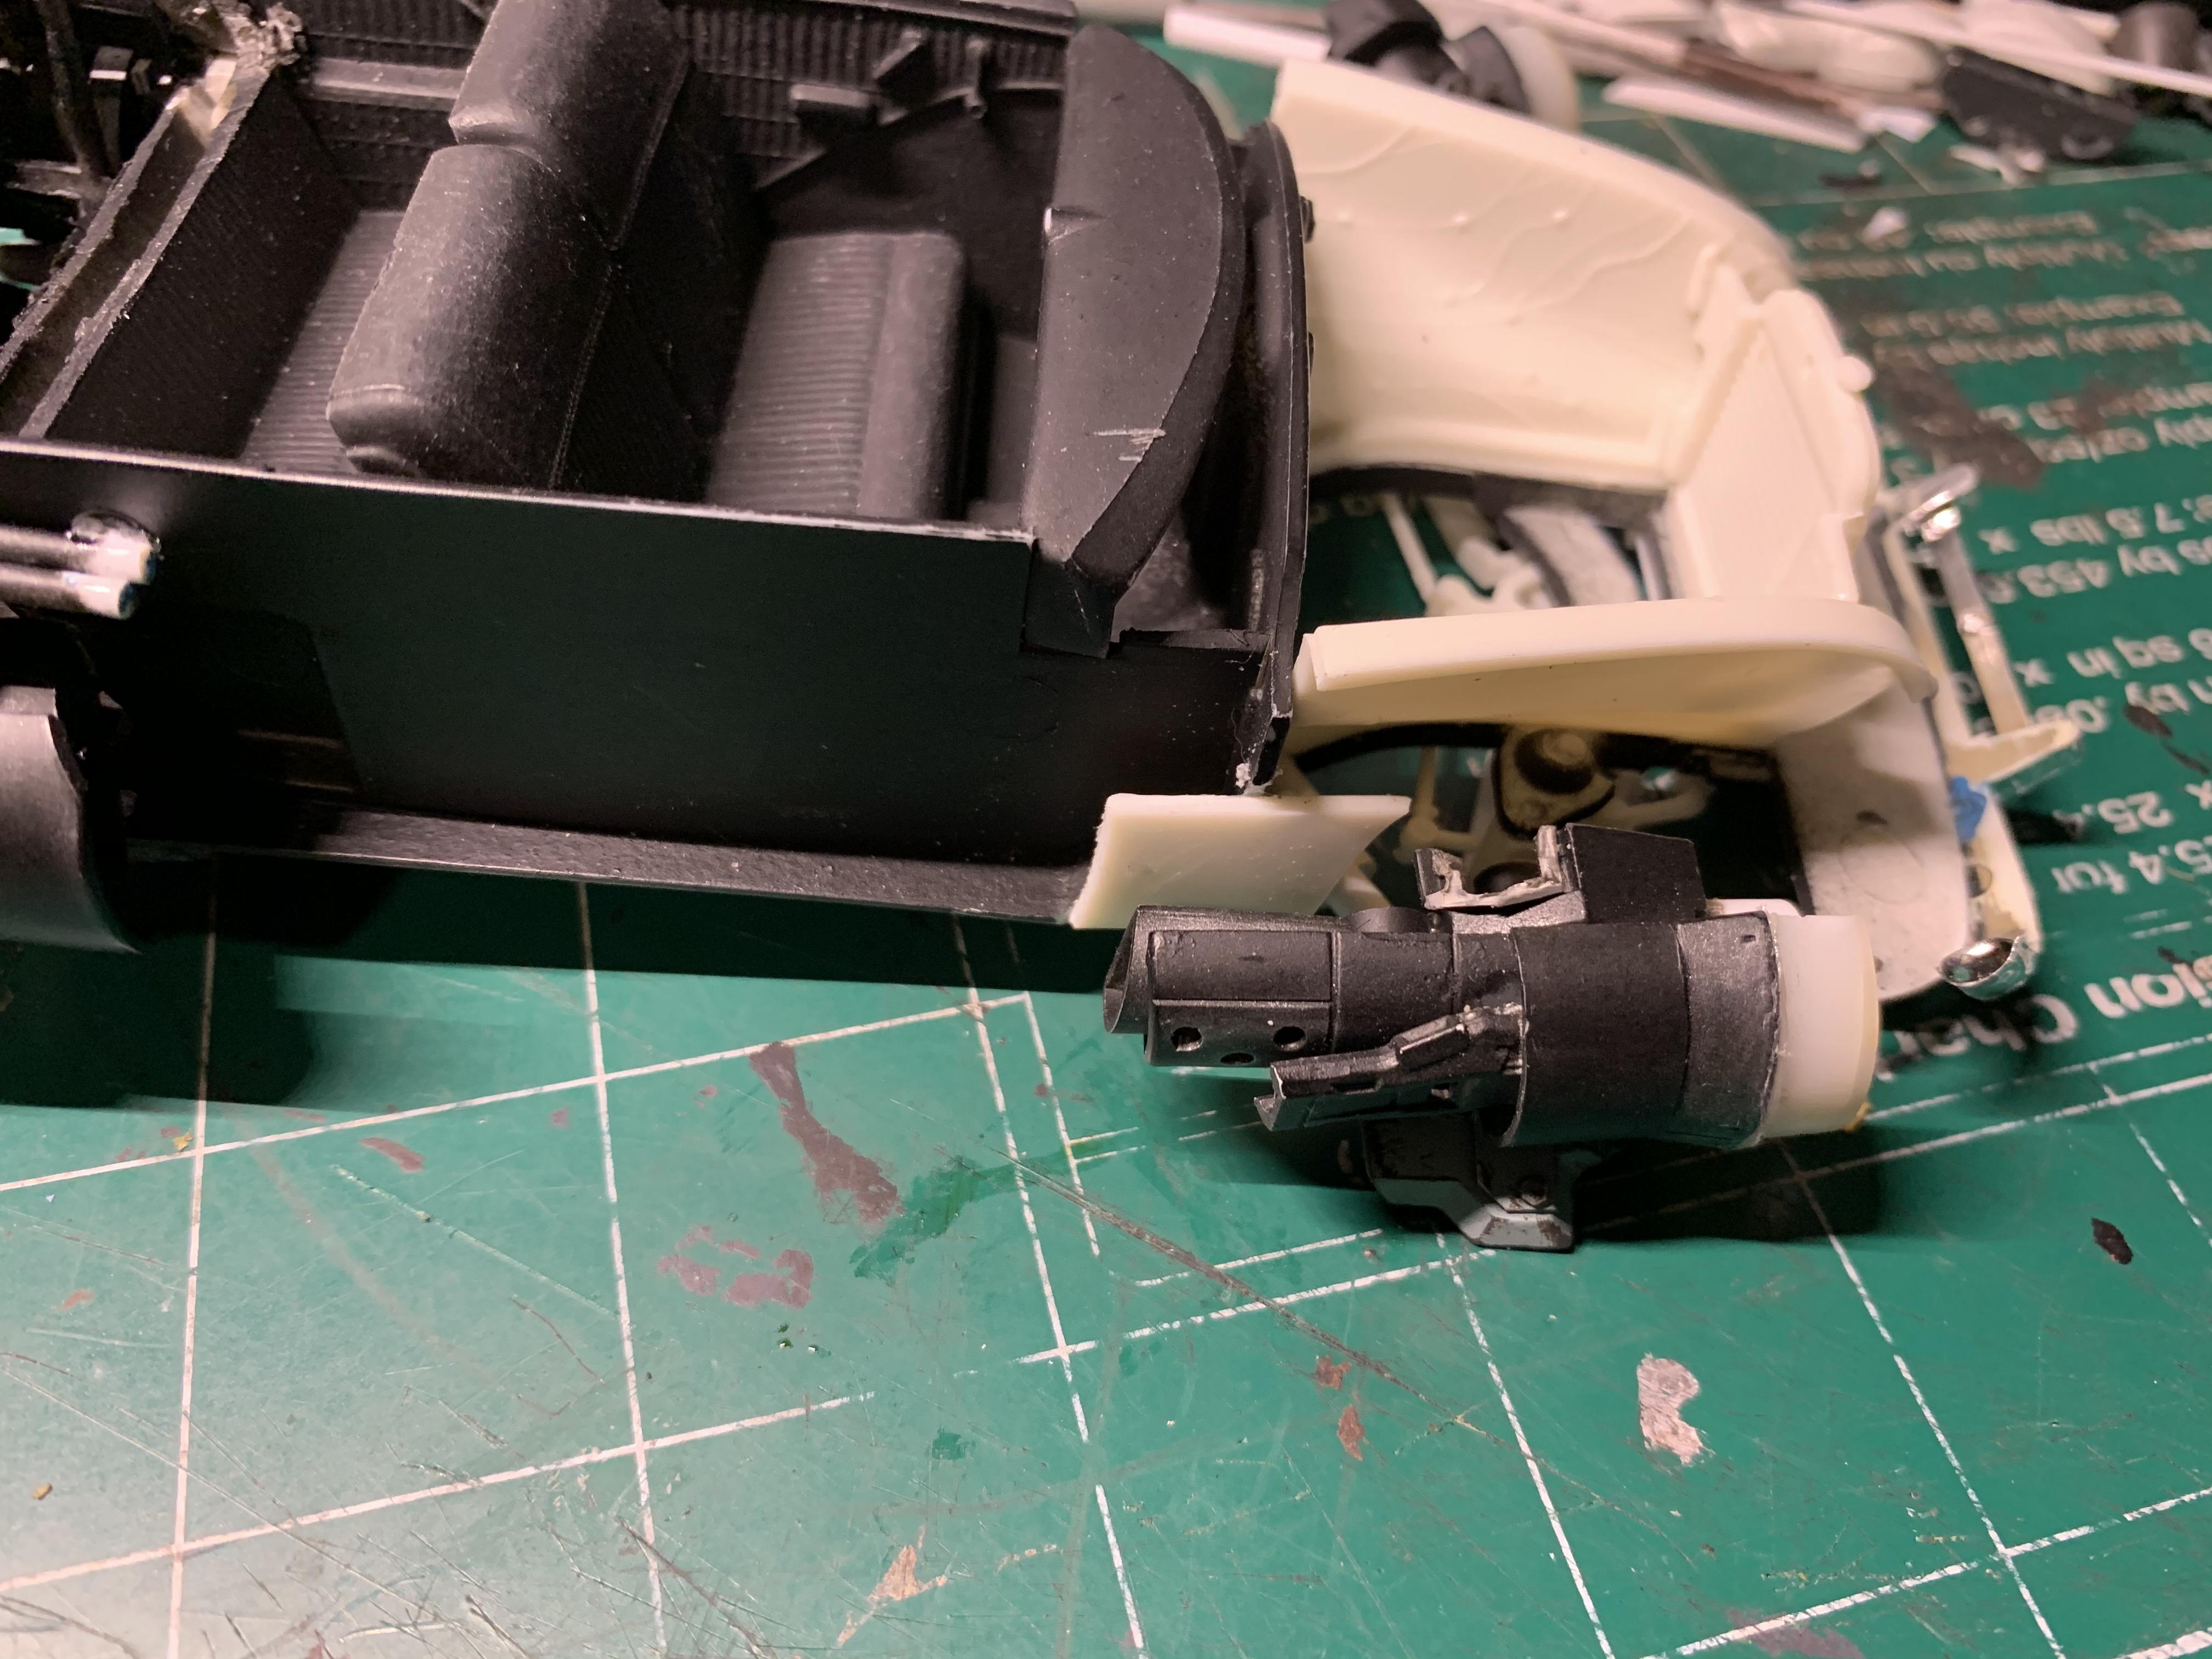
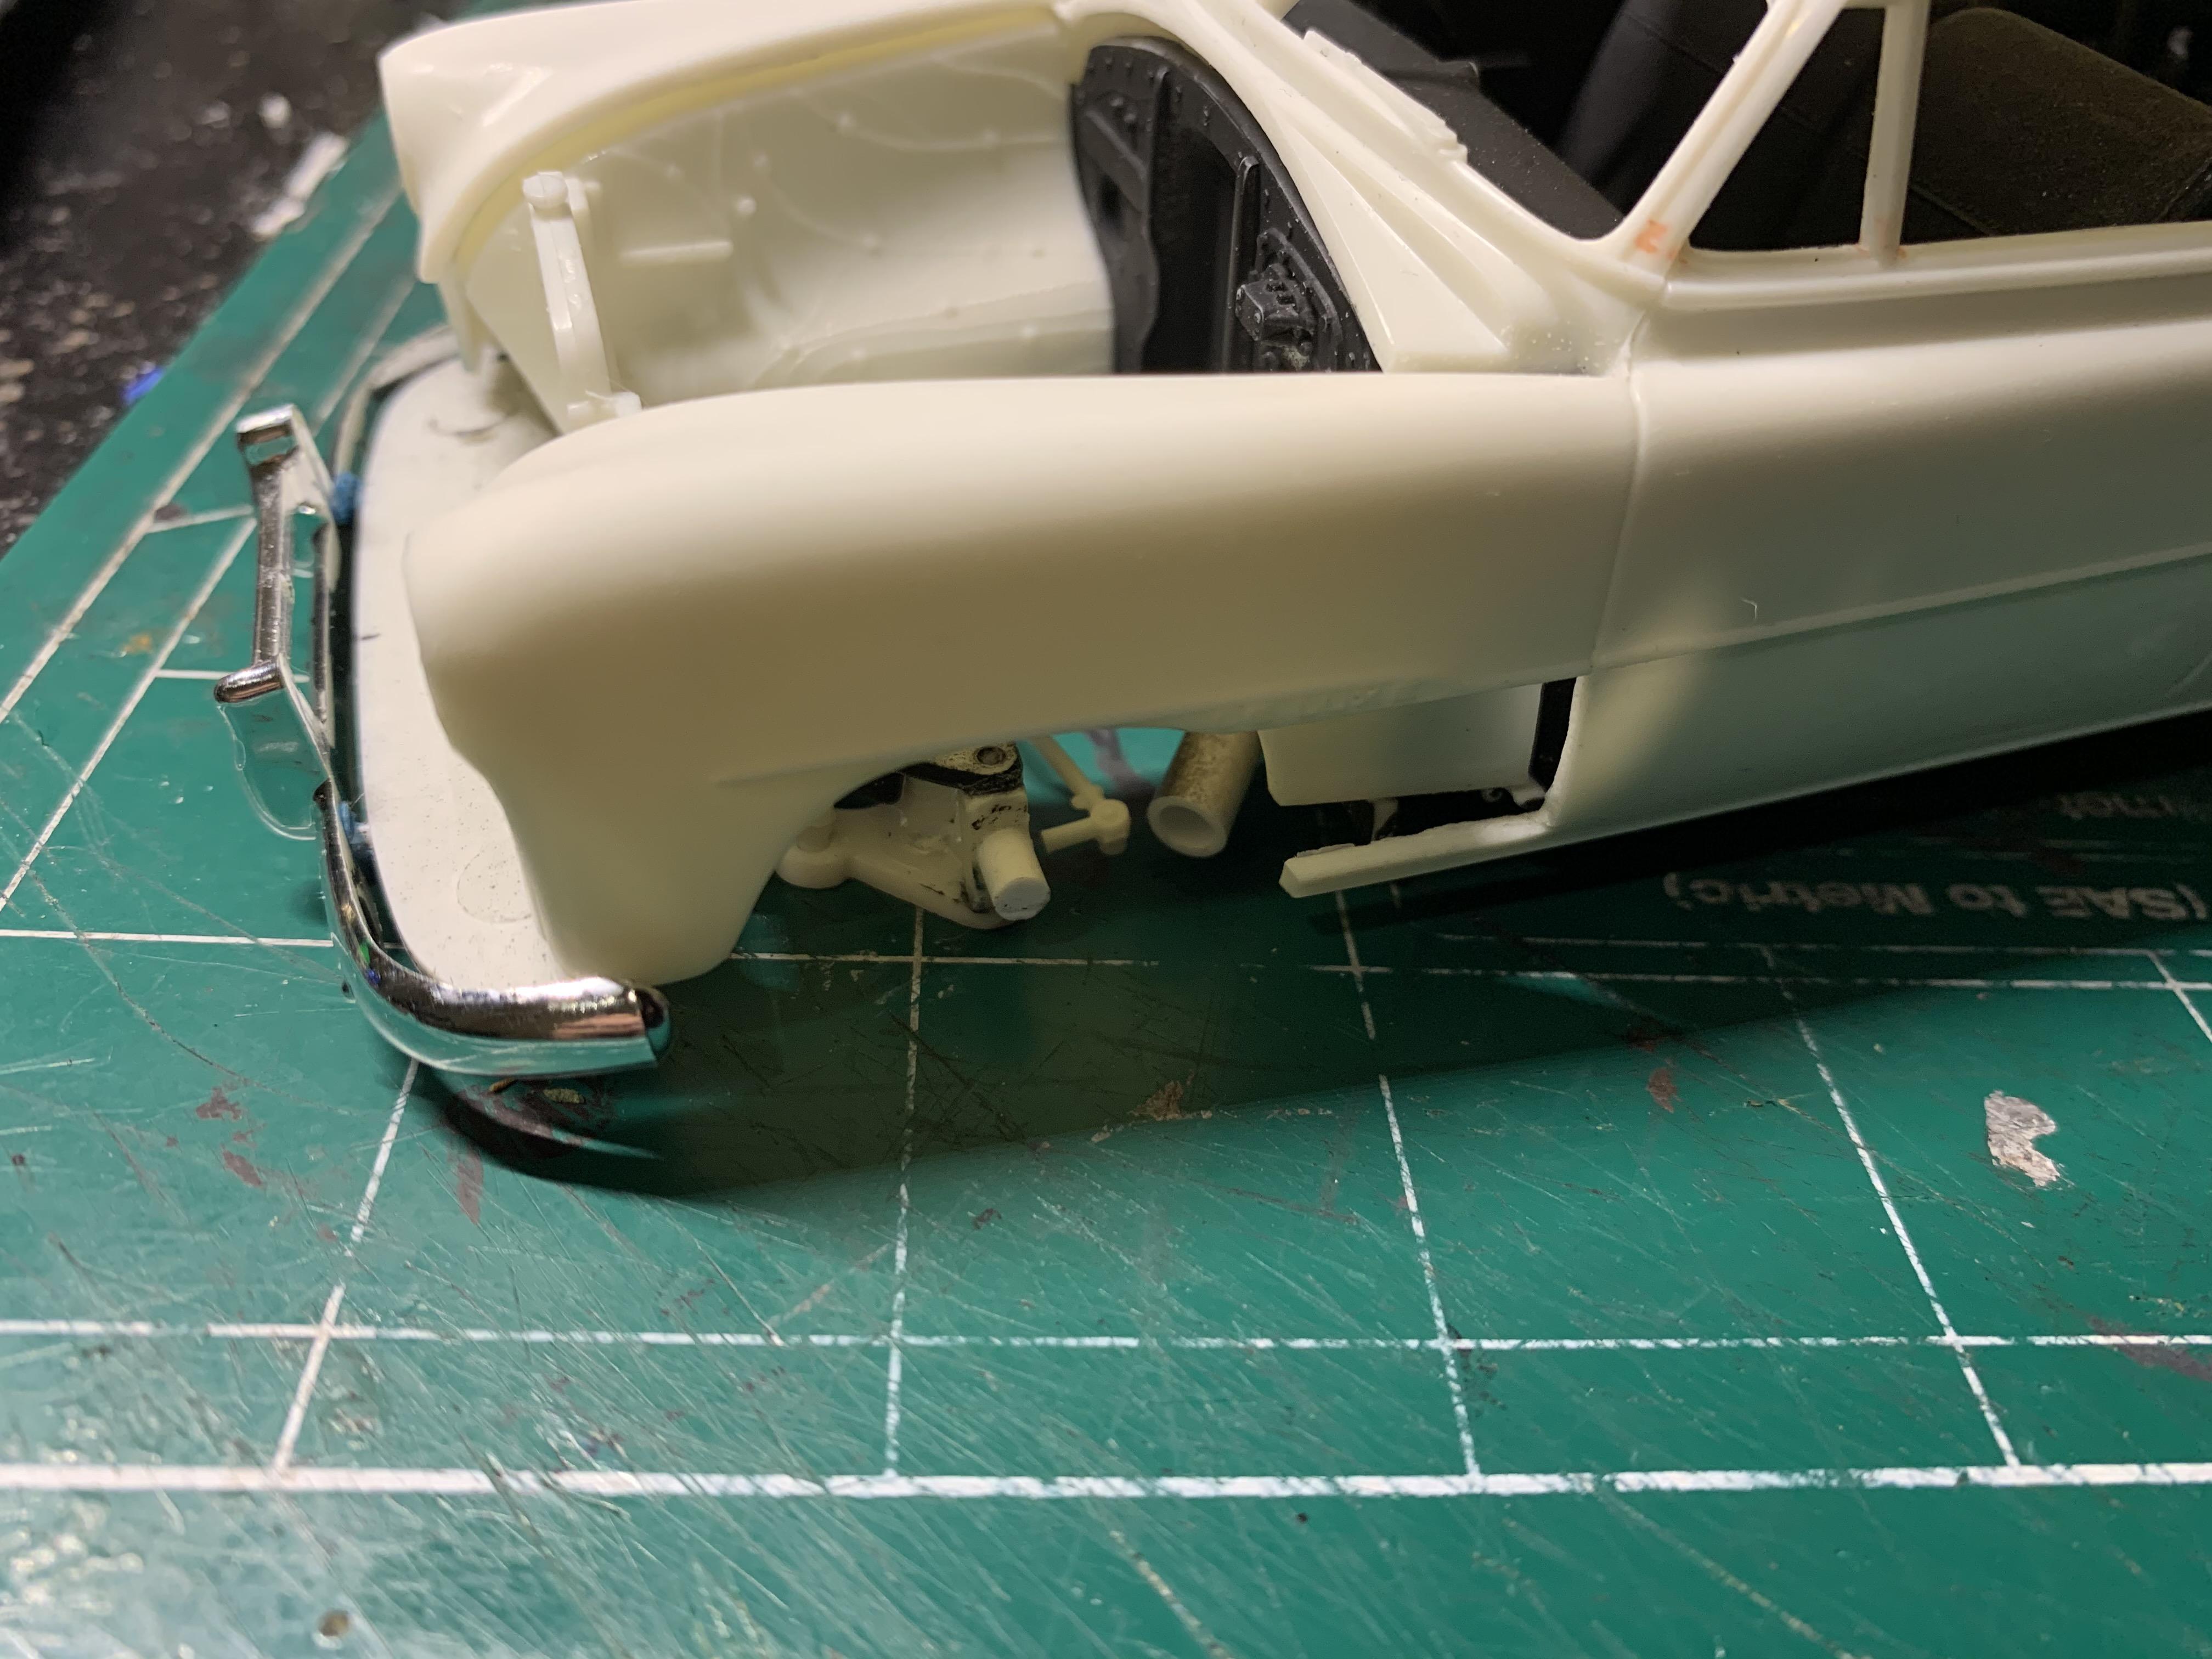
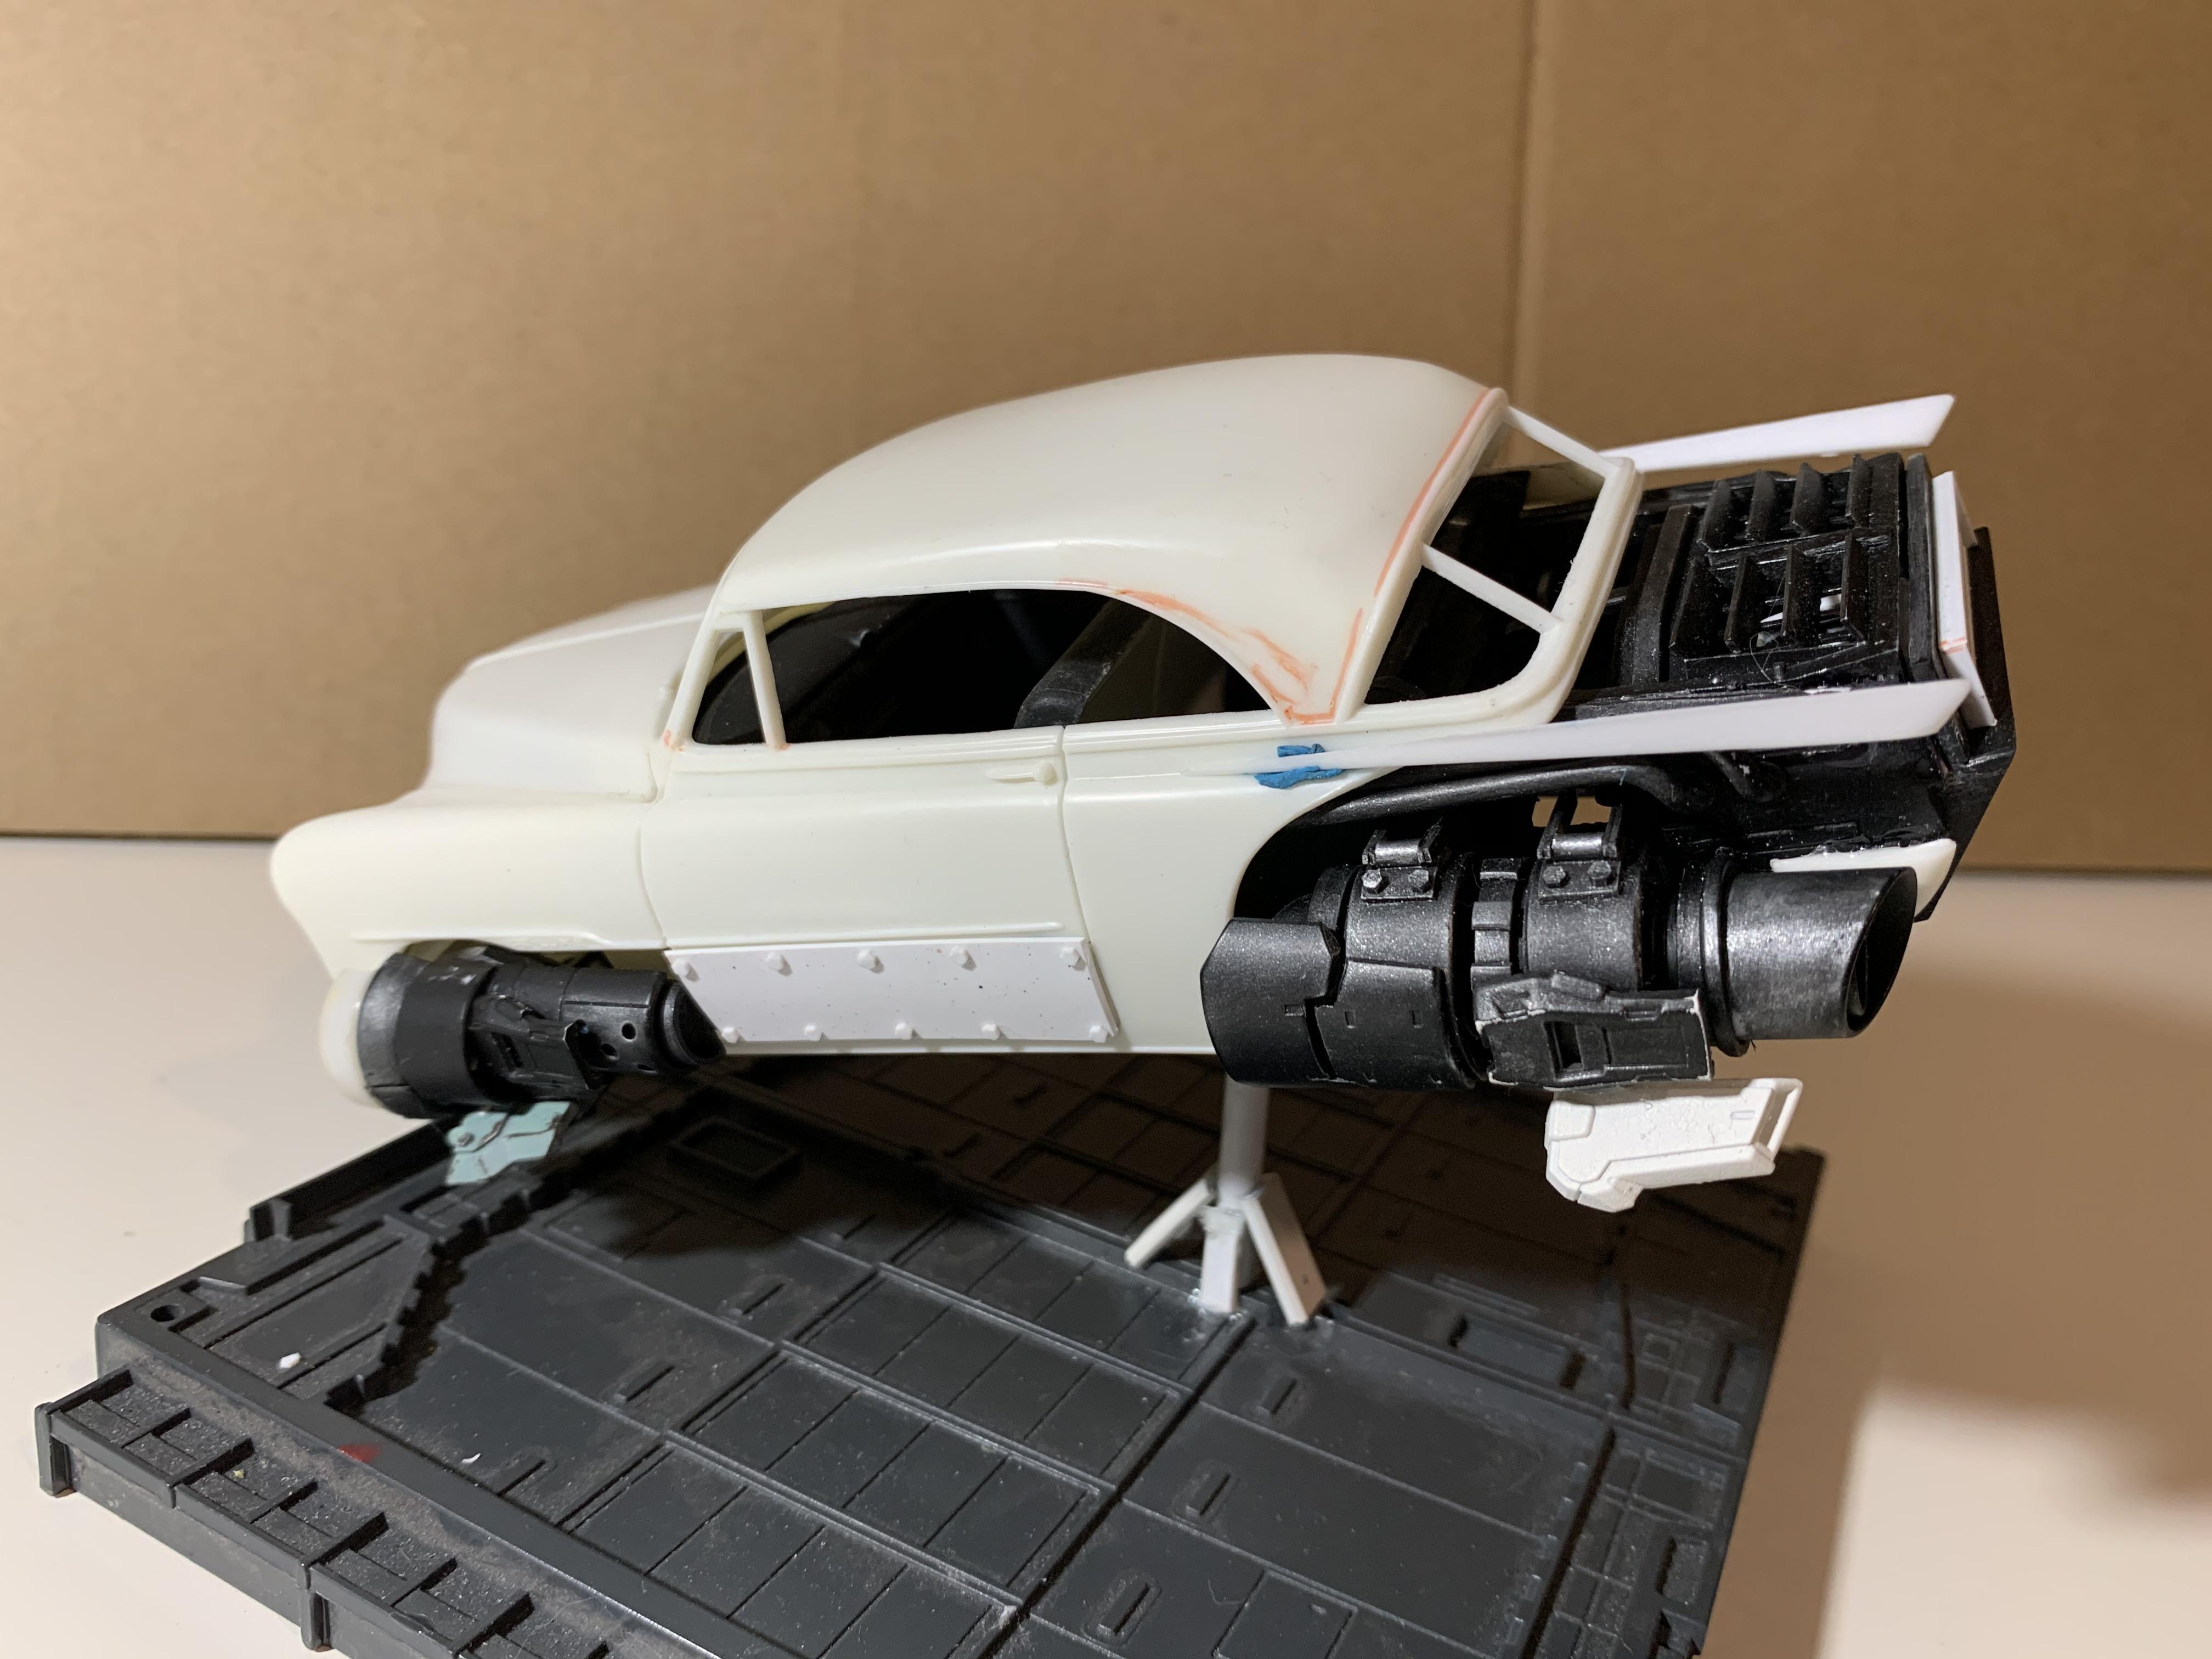
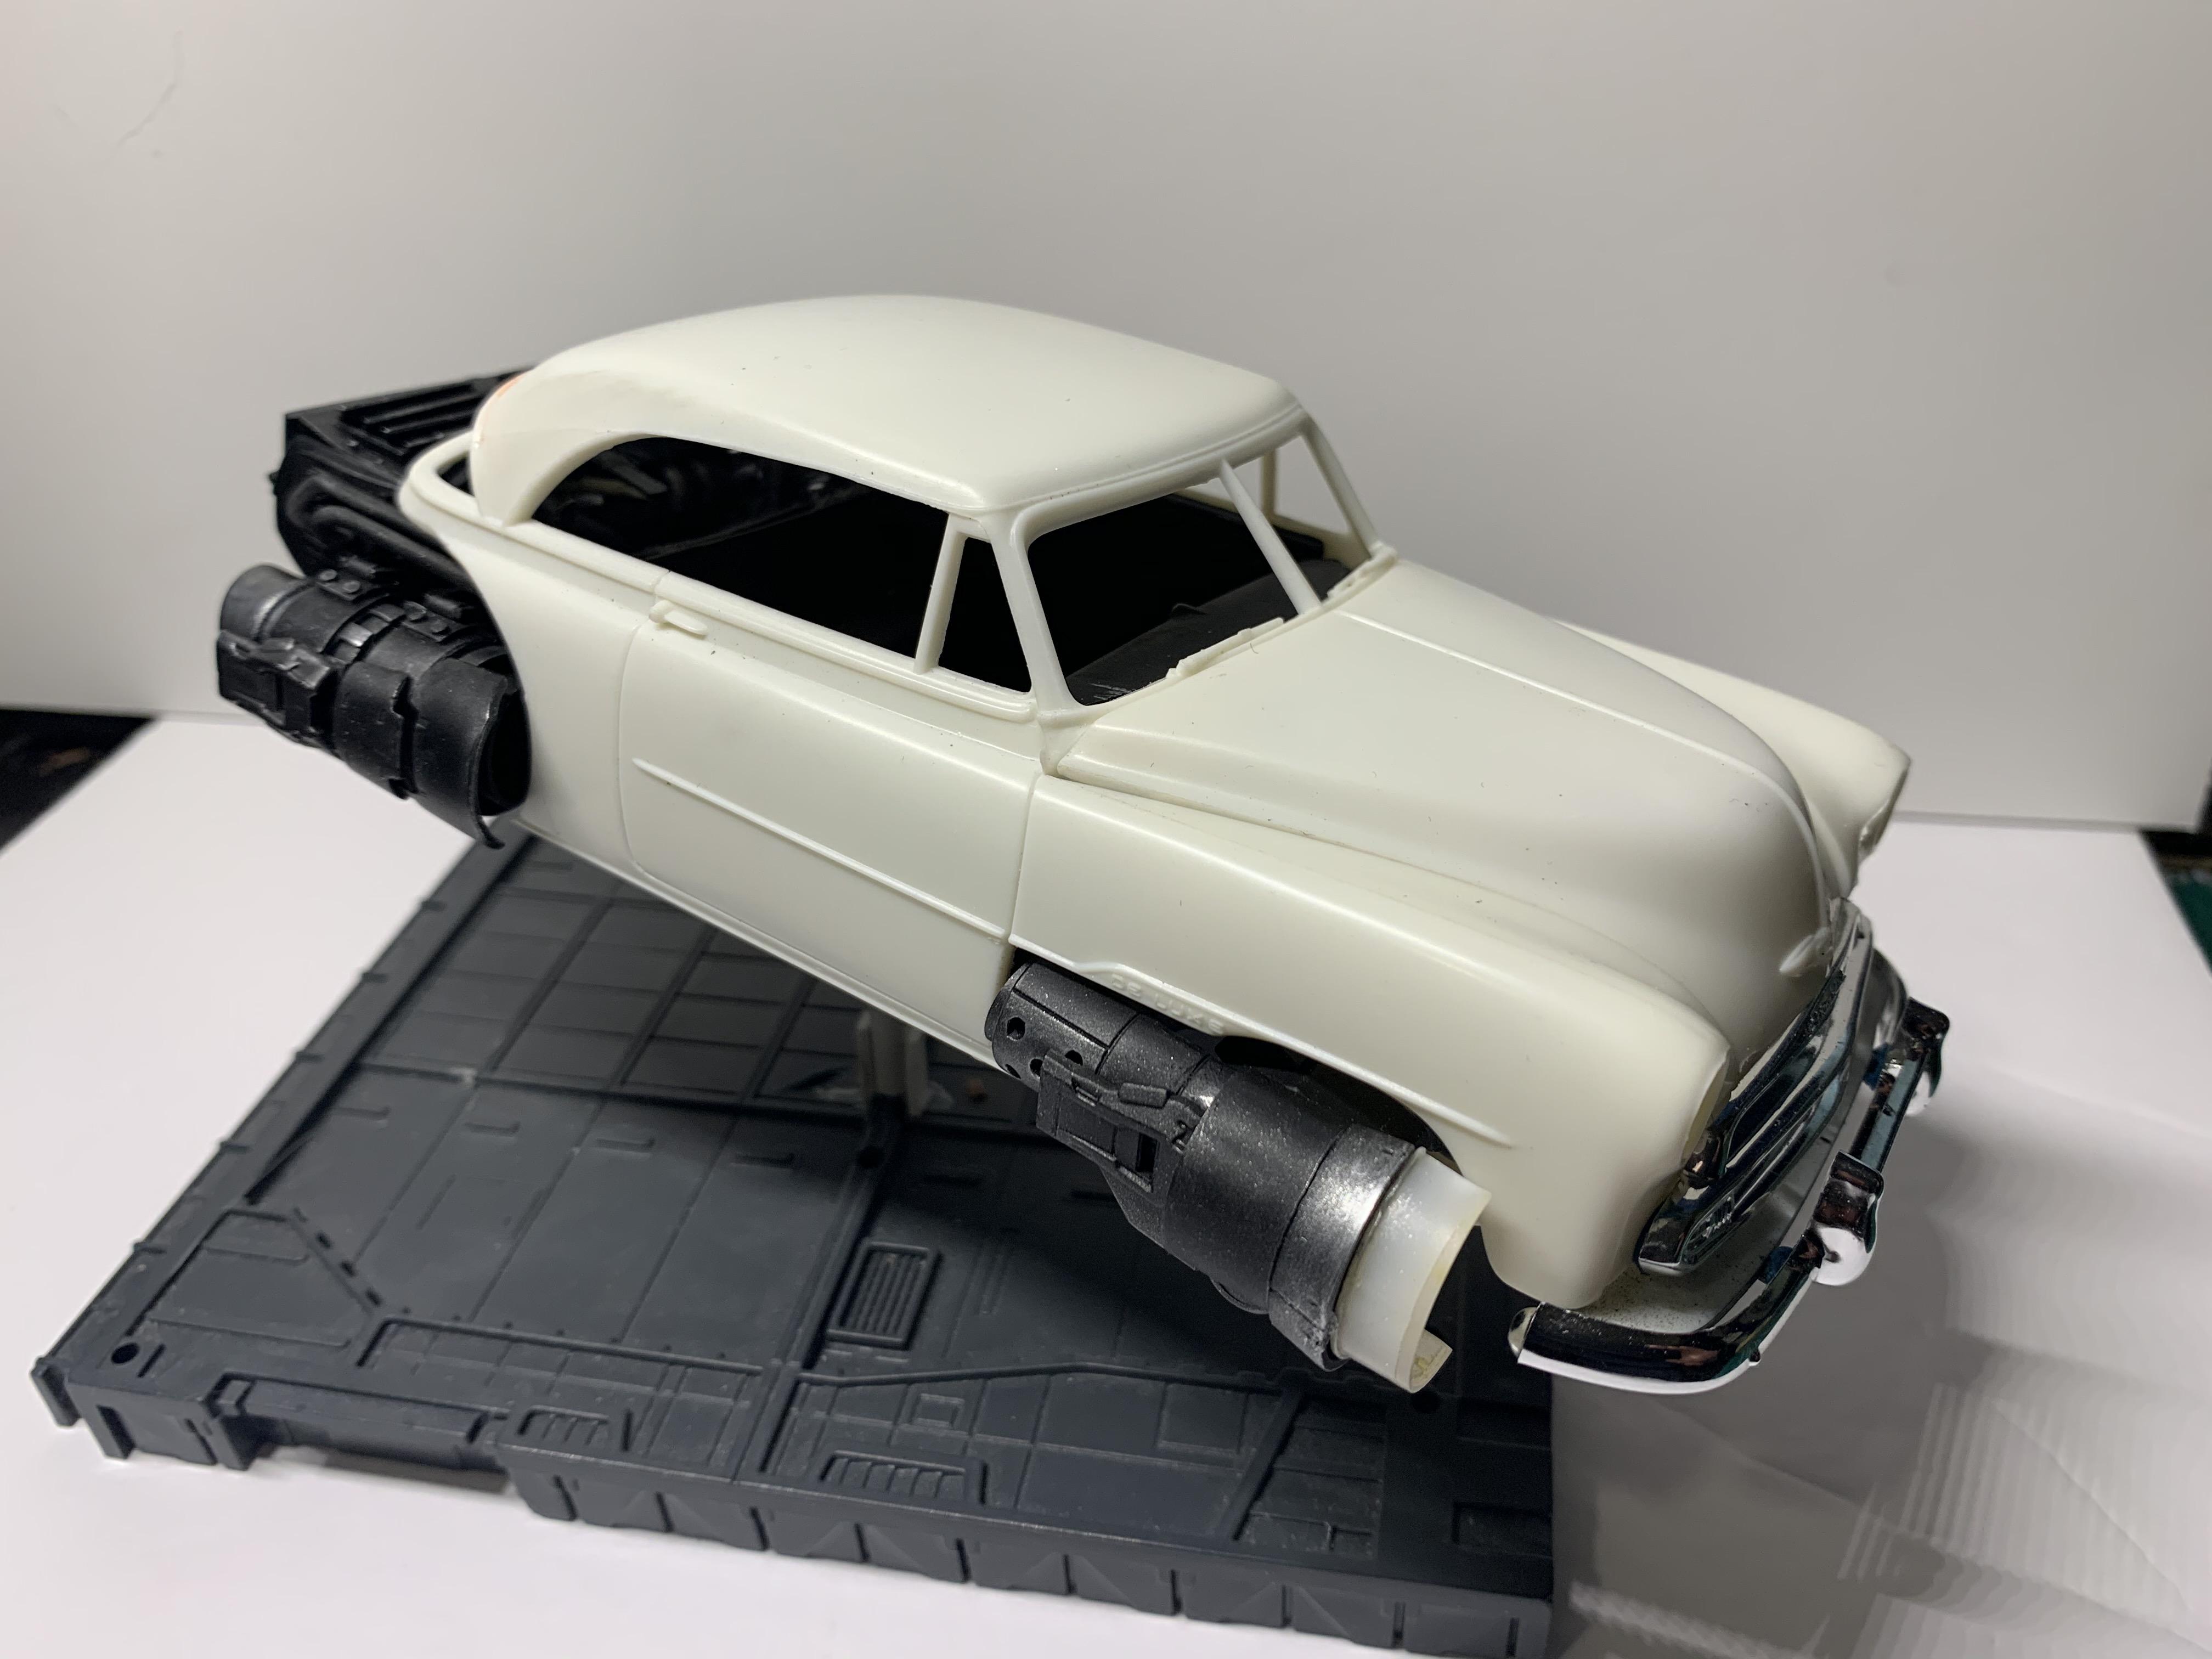
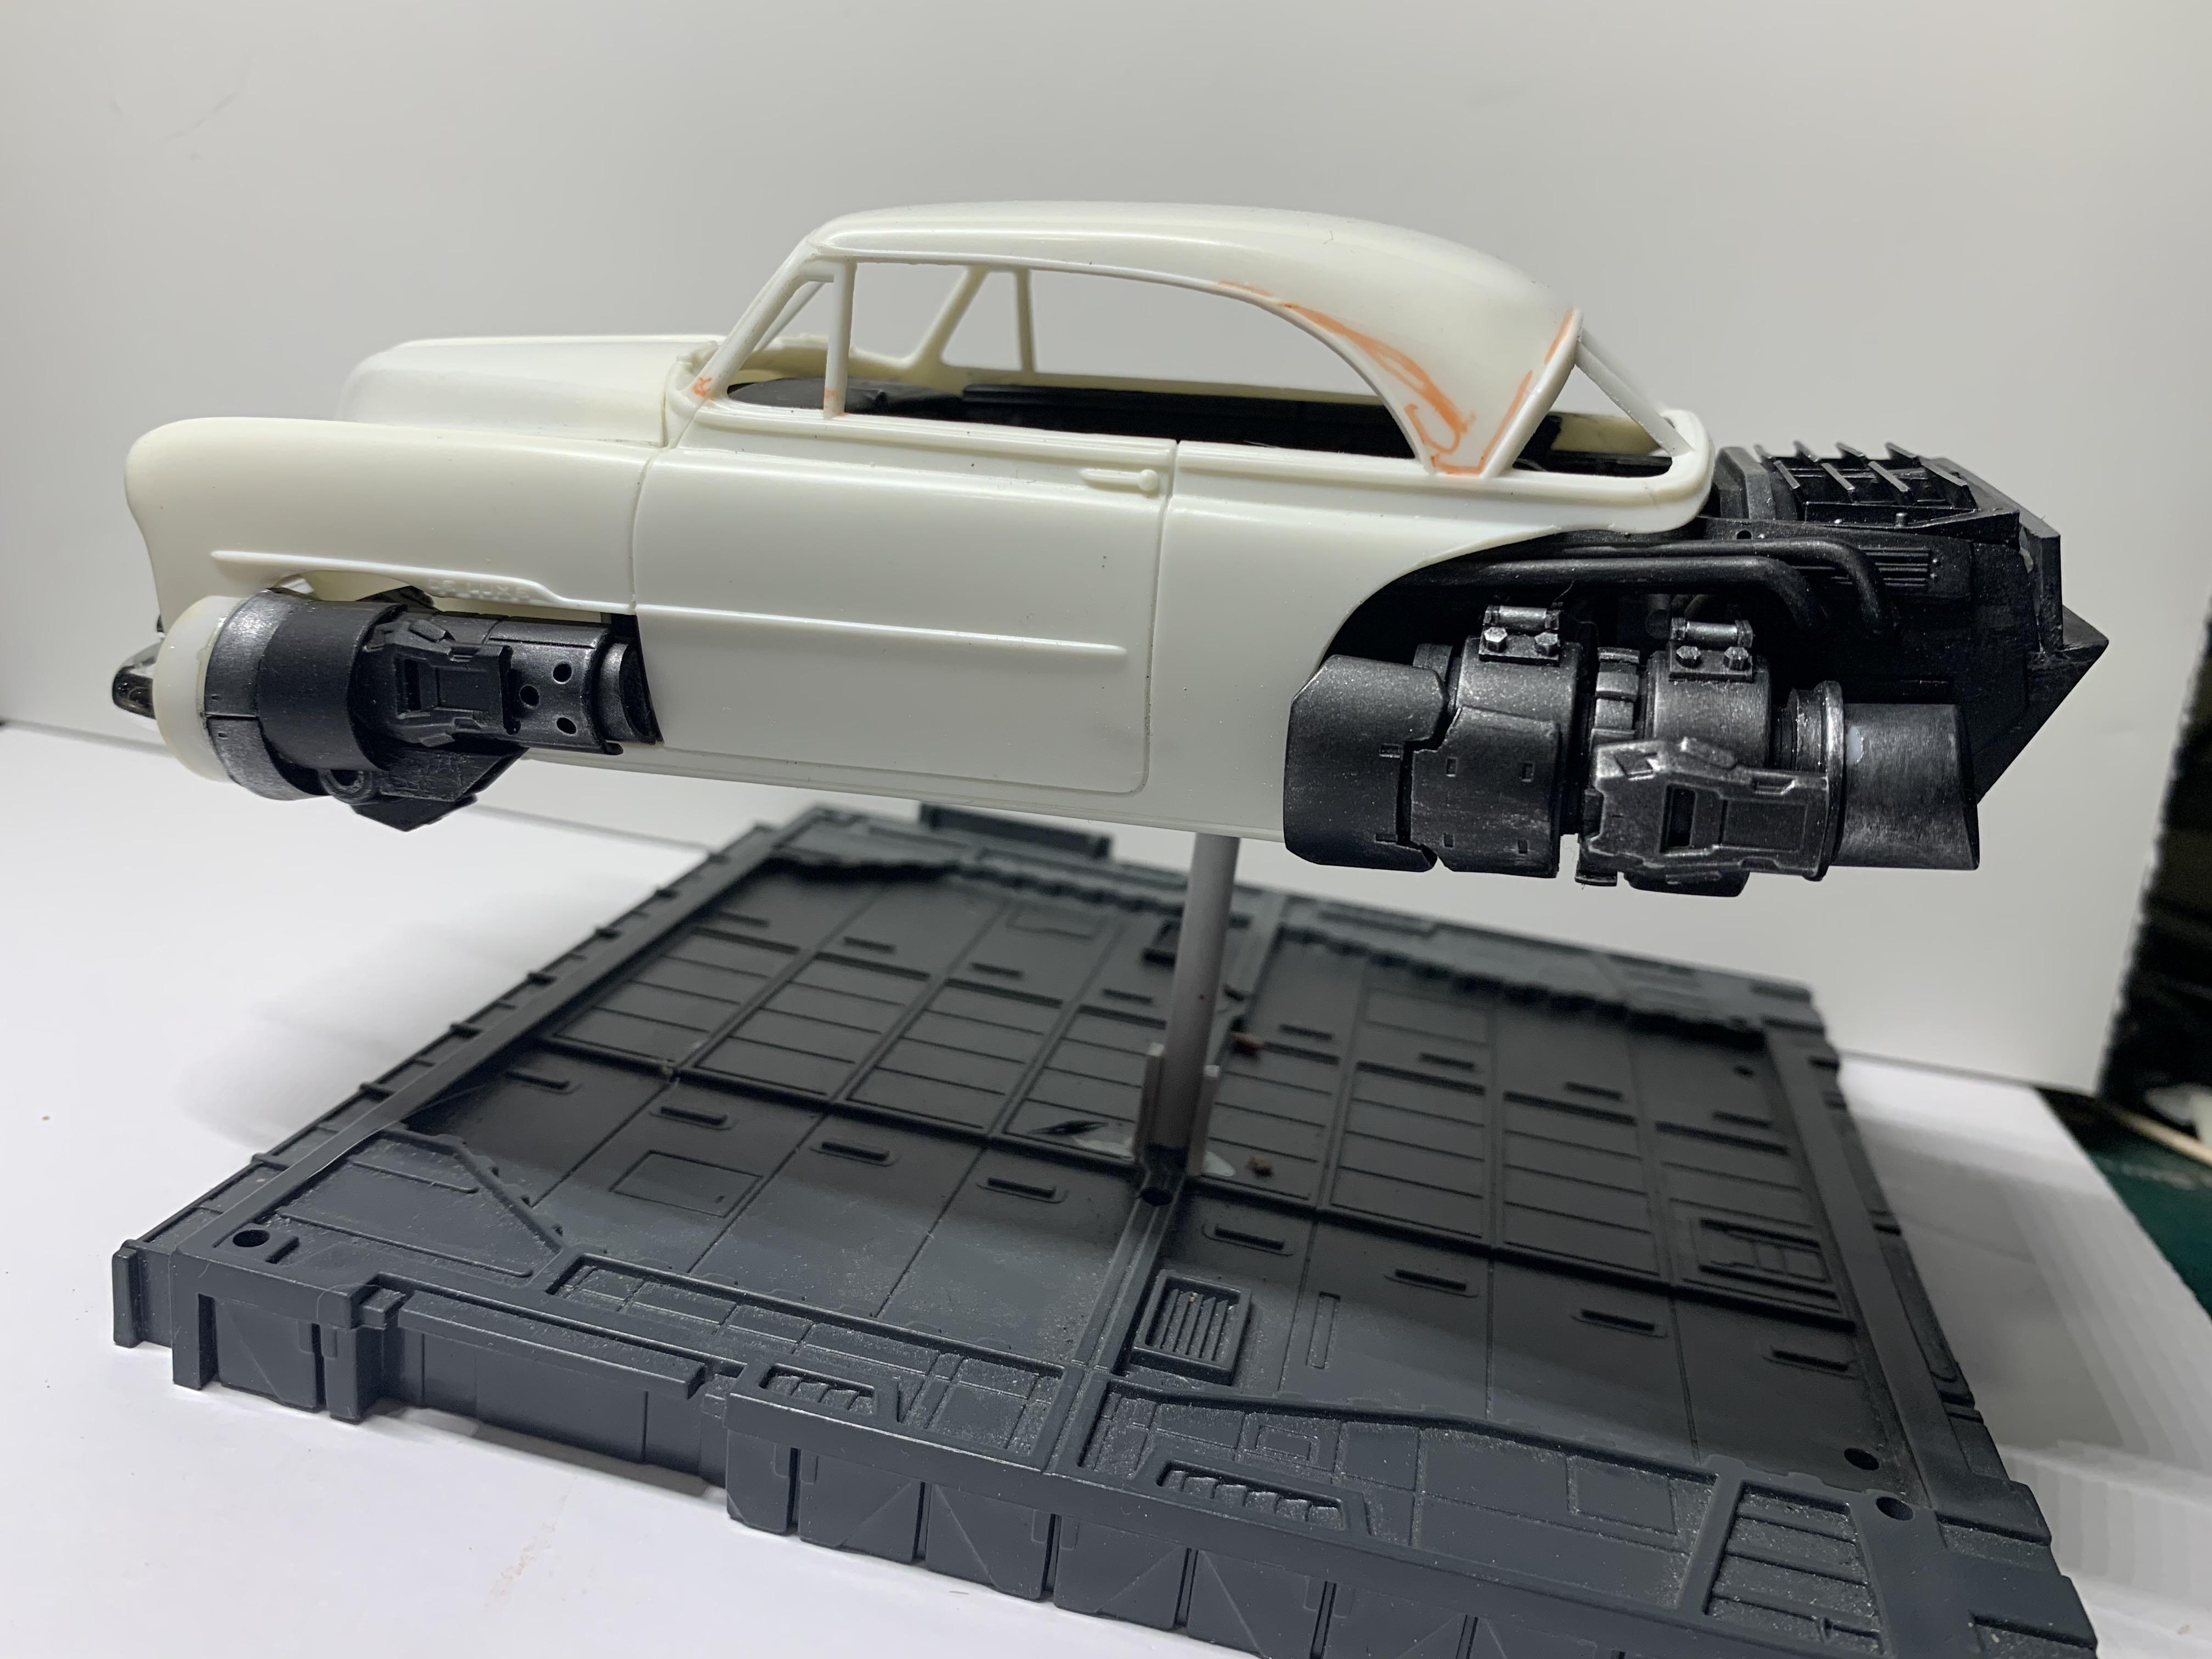
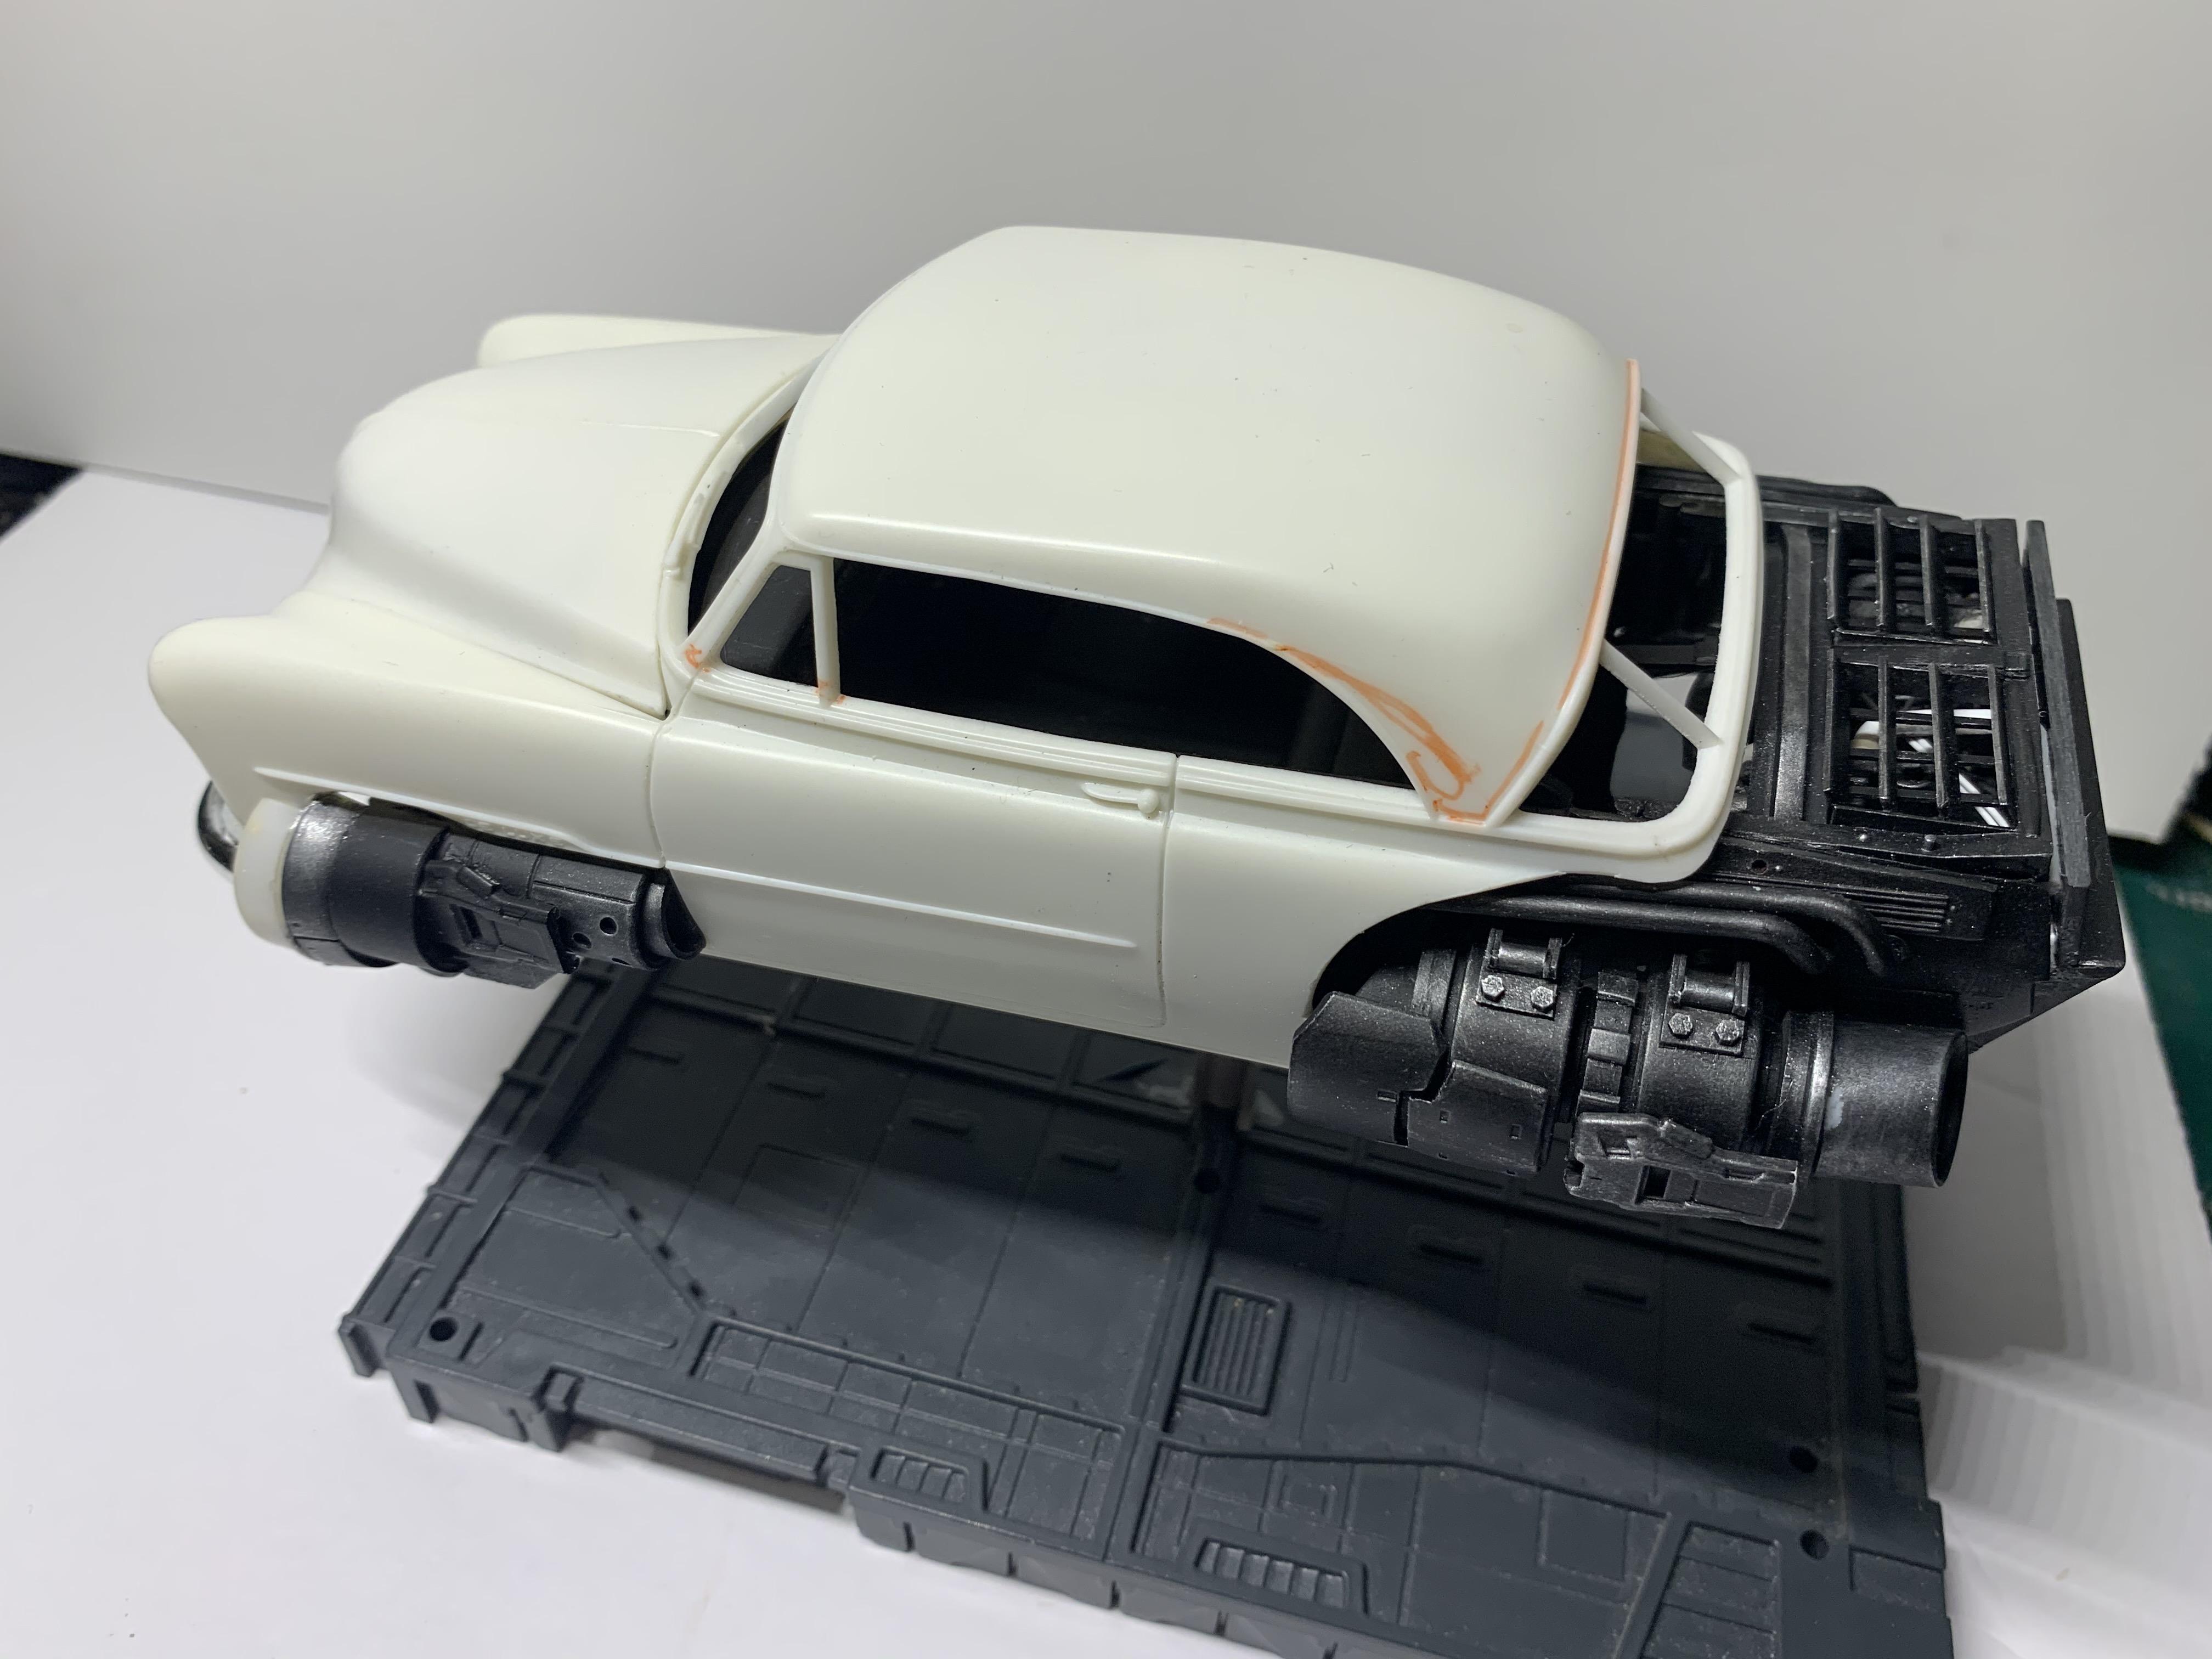
I am pretty sure that I'm going to make this into a police vehicle. Next time I'm at the local hobby shop, I'm going to see if I can find a 50-60's police cruiser that I can kitbash. I figured that since it's a 2 door, it would be a pursuit car. It will be weathered, but not as rusted and faded as my other jet cars. I cut a relief for the front turbines to tuck into. I'll need to fill the gap with styrene. I removed part of the backseat because I was going to mount the rear turbines in a slightly different location. Things changed and now I need to find a way to rebuild the backseat, or find something that'll cover my mistake. Front turbines fit into the relief. These photos the turbine is not attached in it's final position. . Gundam parts, large diameter styrene tube, and wheel rims make up the turbines. Then I found these really cool tail-fins. I love the tail-fins. Makes it look more like a pursuit vehicle......at least that's what I tell myself. Heat shields on the doors. I'm thinking that I'll make the roof and the doors white. The turbines will be dark steel and black. I like how the side trim remains above the front turbine. I'm so impatient that I had to rub some AK Interactive True Metal on the steel parts, just to see how they'd look. Thanks for looking! Dax
-
1964 GMC
Daxman replied to bill lanfear's topic in Model Trucks: Pickups, Vans, SUVs, Light Commercial
Top notch. I love it! -
56 foose ford
Daxman replied to Brudda's topic in Model Trucks: Pickups, Vans, SUVs, Light Commercial
I'm blown away by that color. Very nice paint job. I like the matching headlights as well. -
AMT 50 Chevy patina truck
Daxman replied to Jantrix's topic in Model Trucks: Pickups, Vans, SUVs, Light Commercial
Well done Rob. Good job on the weathering. That truck is a beast. -
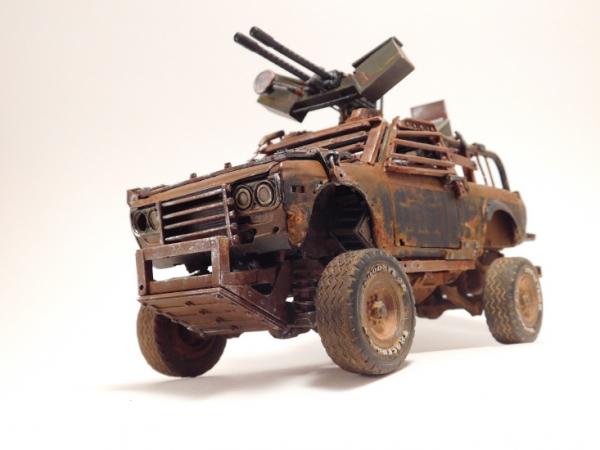
Thanks David! The Karma Bug has come along nice! Keep the side intakes, I love them. As a wasteland vehicle, are you adding any weaponry? My son gave me approximately 10 of these bases. He purchased them online from a Chinese retailer a few years ago. It's basically an interlocking set of tiles, used to pose Gundam models. They've come in handy! Thanks!!!
-
41 Chevy Pickup Hovercraft
Daxman replied to Daxman's topic in Model Trucks: Pickups, Vans, SUVs, Light Commercial
Thanks Steve! I've tried the salt or hairspray techniques before, but the results are a little too random for me. I think both look great on weathered cars, but I prefer have a little more control over it. I do all the body modifications first then spray with a dark rust colored primer. I prefer darker rust so that I can later lighten up the areas that would see the most sun. After the primer is dry, I use Vallejo Latex airbrush paints to create highlights. Spraying lighter colors of rust towards the top of the vehicle. I usually use 3-4 different shades of brown/rust. Ending with a very light coat of orange rust to simulate sun damage. Latex paints are great since they dry so fast! After the latex paint dries, spray with a few coats of Dullcoat. I put it on pretty thick because I'll be sanding off the next few layers of paint. I let this completely dry. If it's not dry it'll gum up when it's sanded. It's tough for me to wait since I use Latex 90% of the time. Then paint the vehicle with your color. I use Vallejo Air latex for this as well. A few thin coats. Thicker coats on the sides and bottom since I'll be sanding the top of the car. I sand the areas that get the most human contact and the spots that see the most sun. Using different grit sandpaper can give different end results. Fine grit gives a nice fade from body color to rust. Rough grit gives it a more scratched, chipped paint look. After I'm happy with the amount of body color removed, I'll go back with a light wash of light rust colors on the exposed areas. Here's a link to the build. The paint in the 1st photos was an experiment. Disregard the first few. Later in the post I repaint it like I described above. You'll see where the sanding starts out light...then a few pics later you'll see that I sanded a lot more of the red off. -
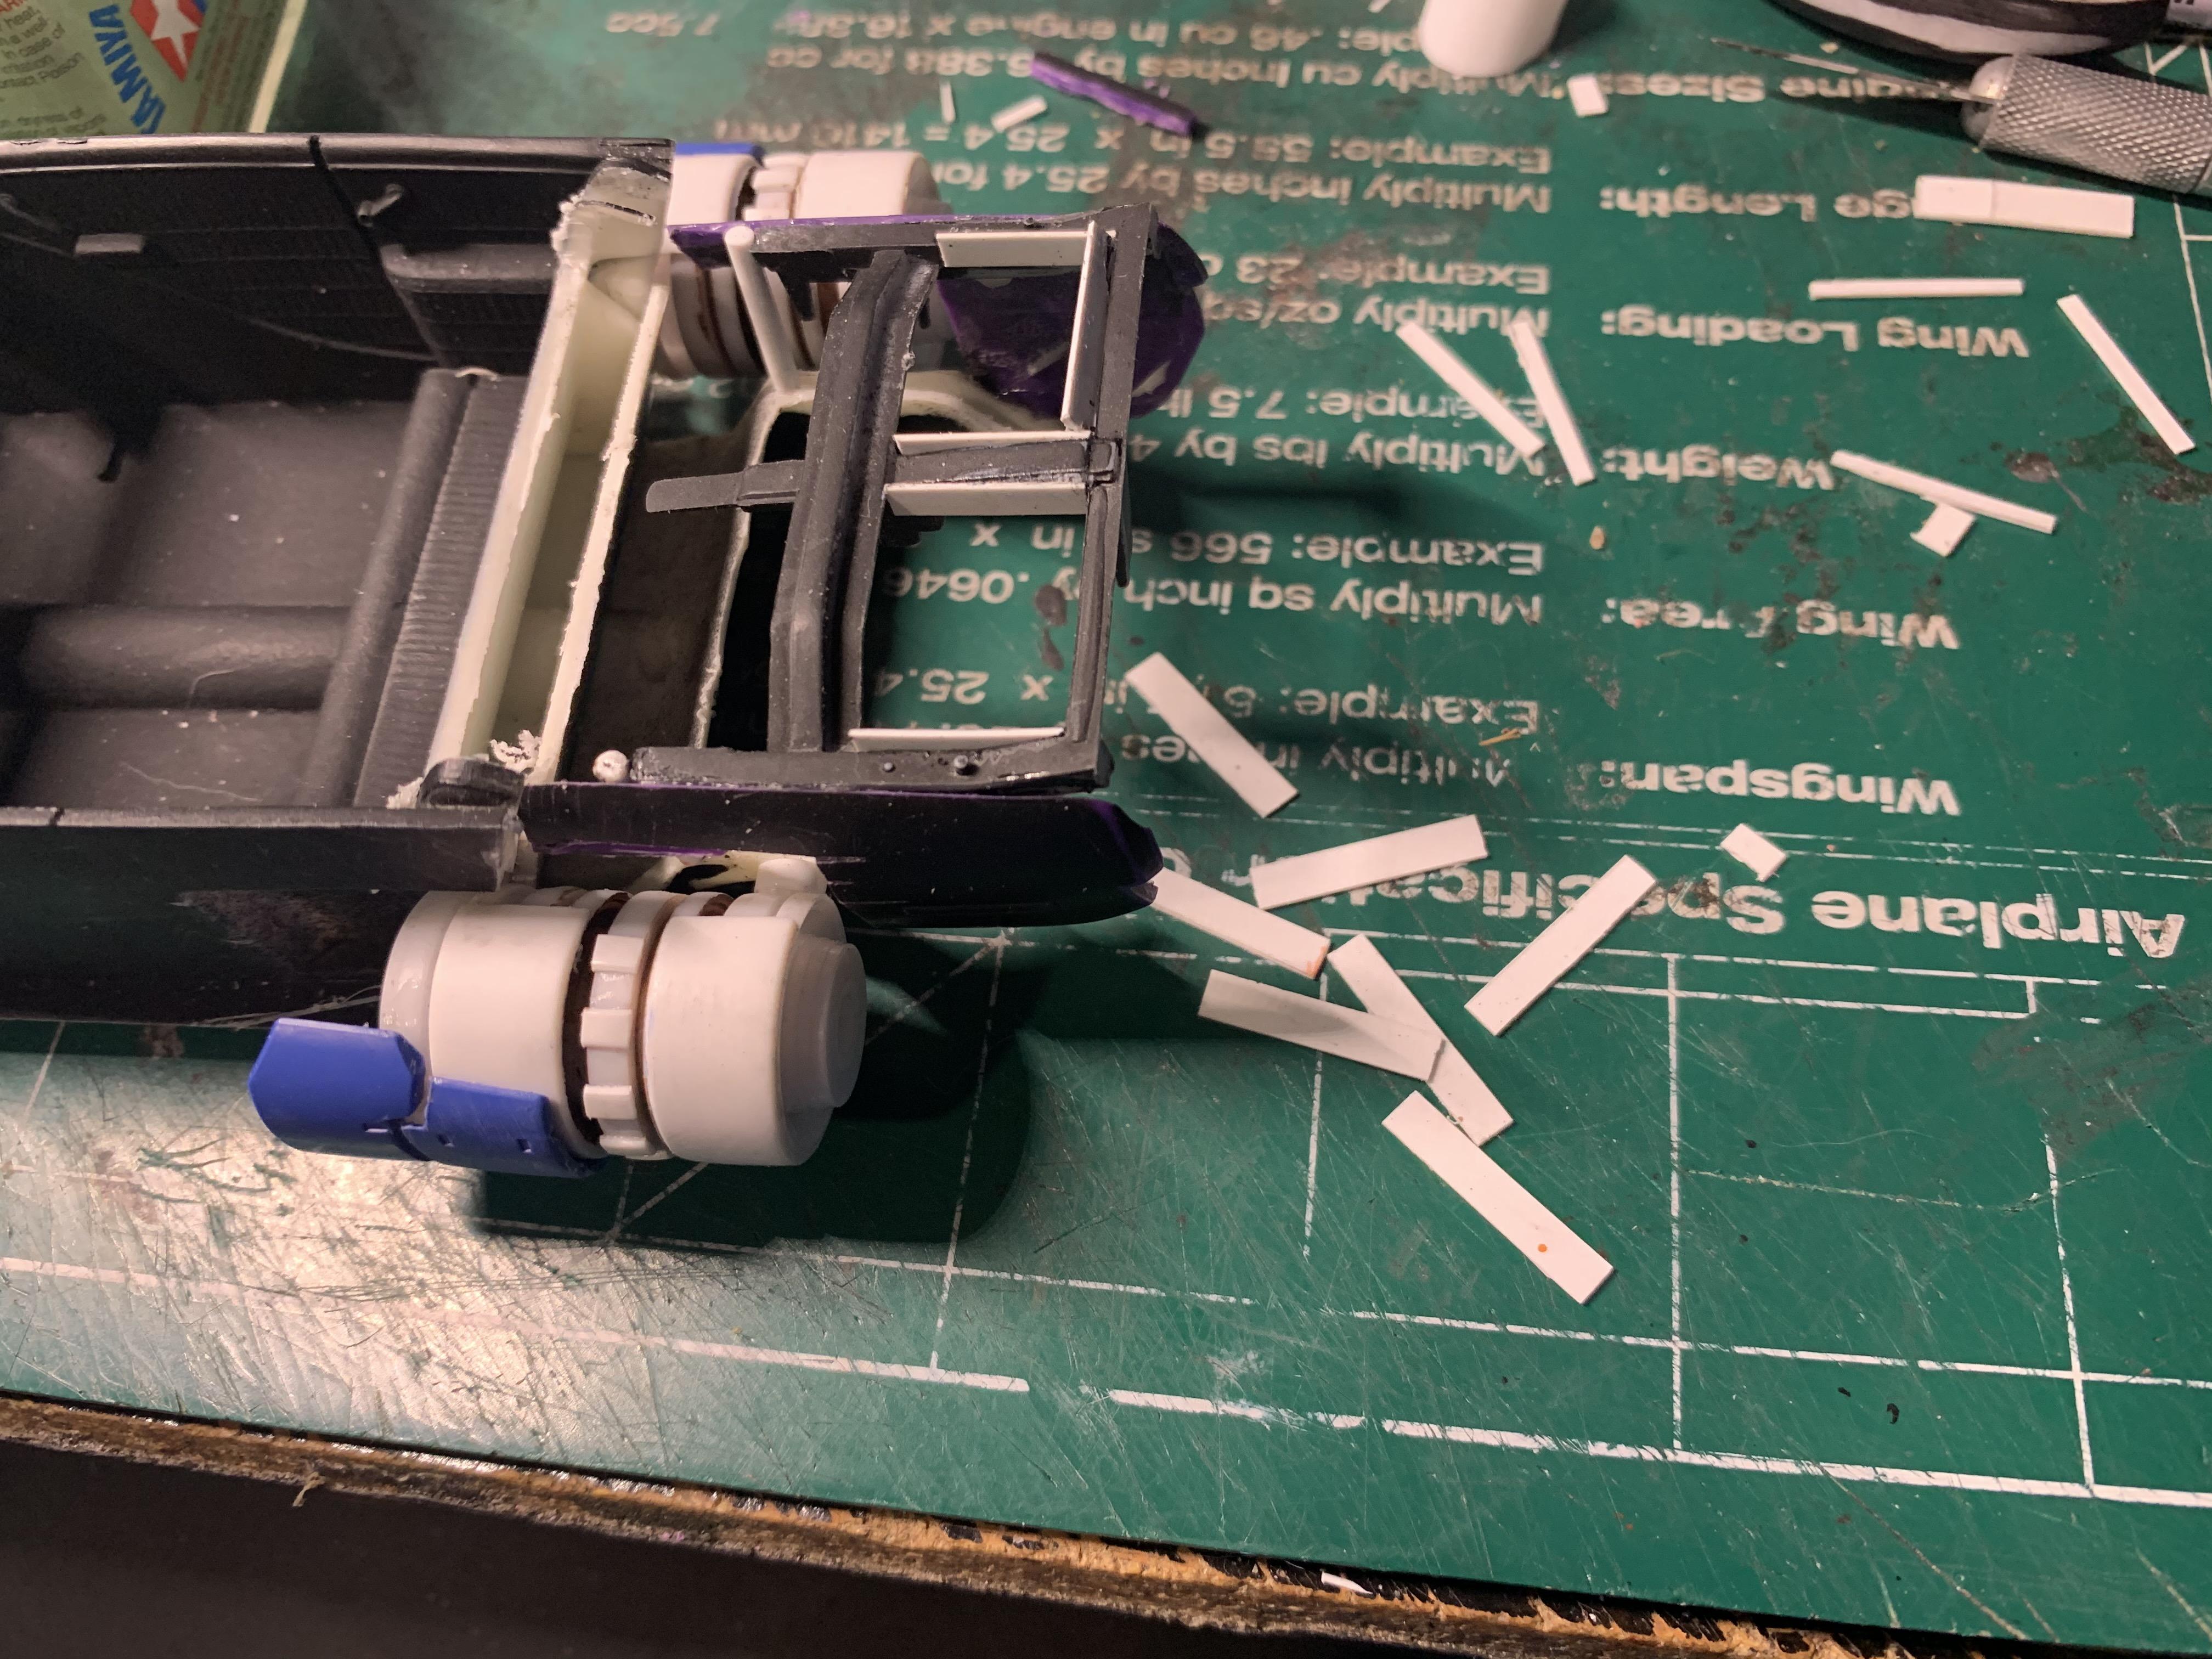
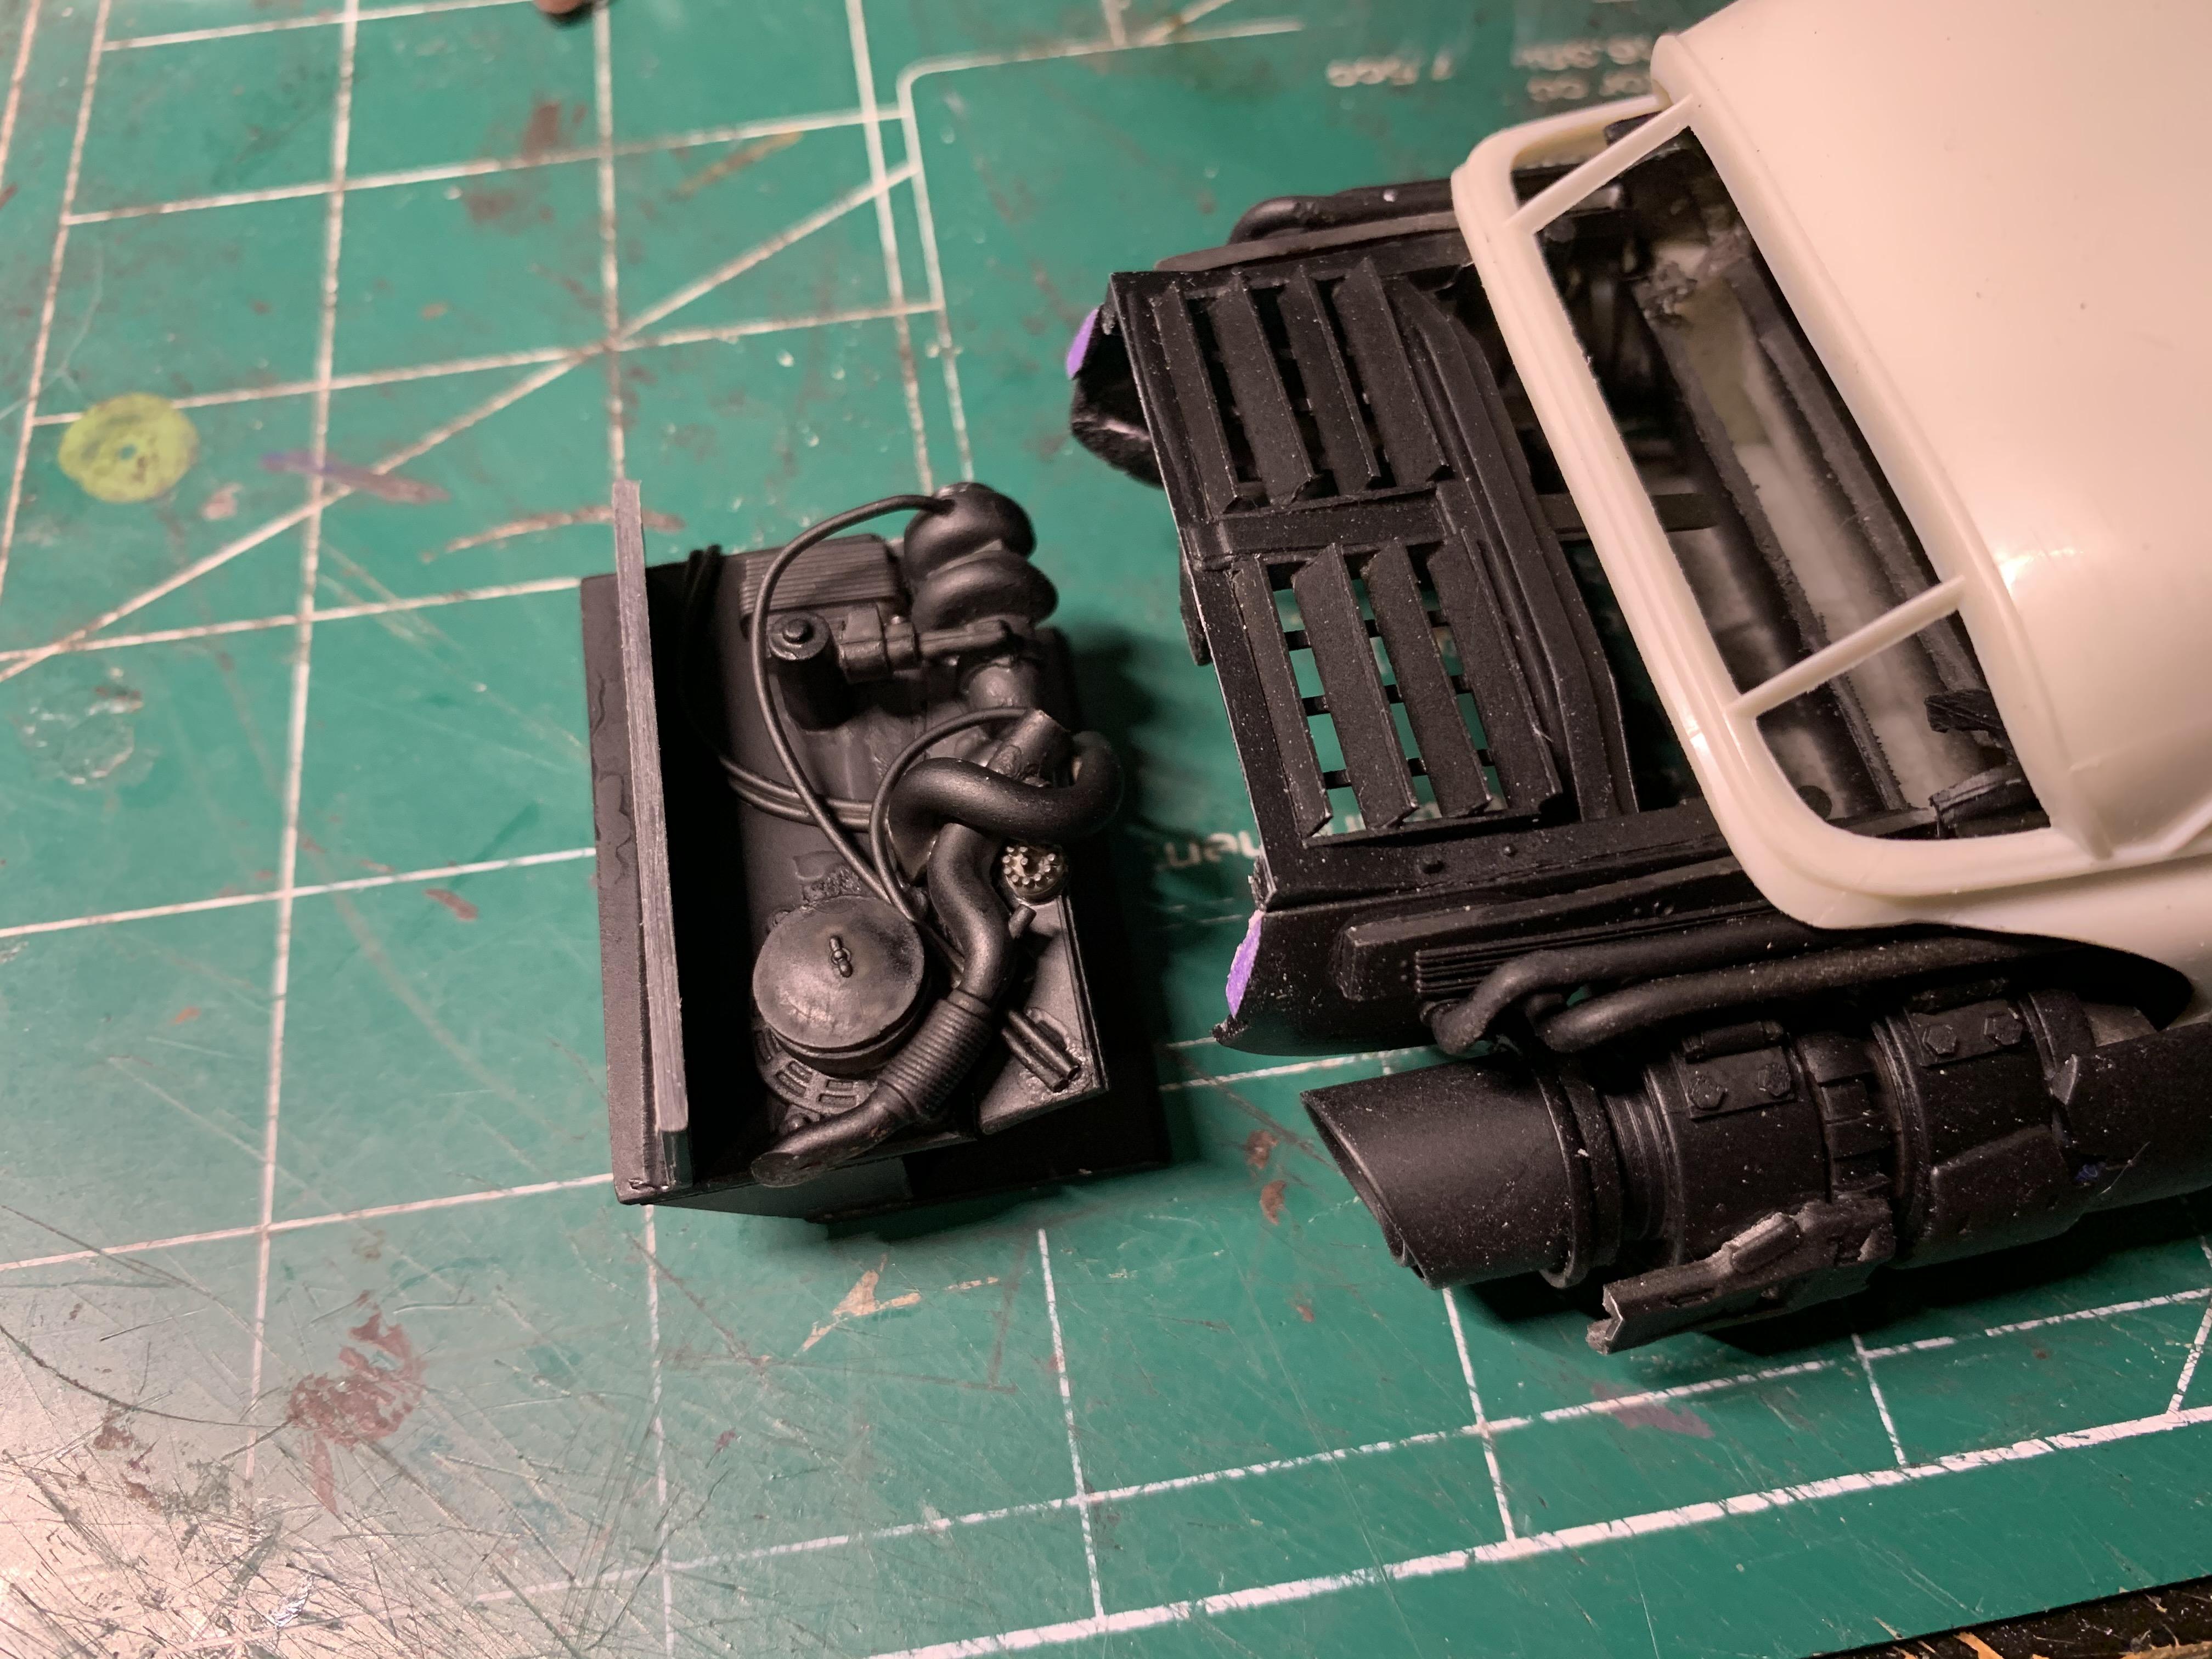
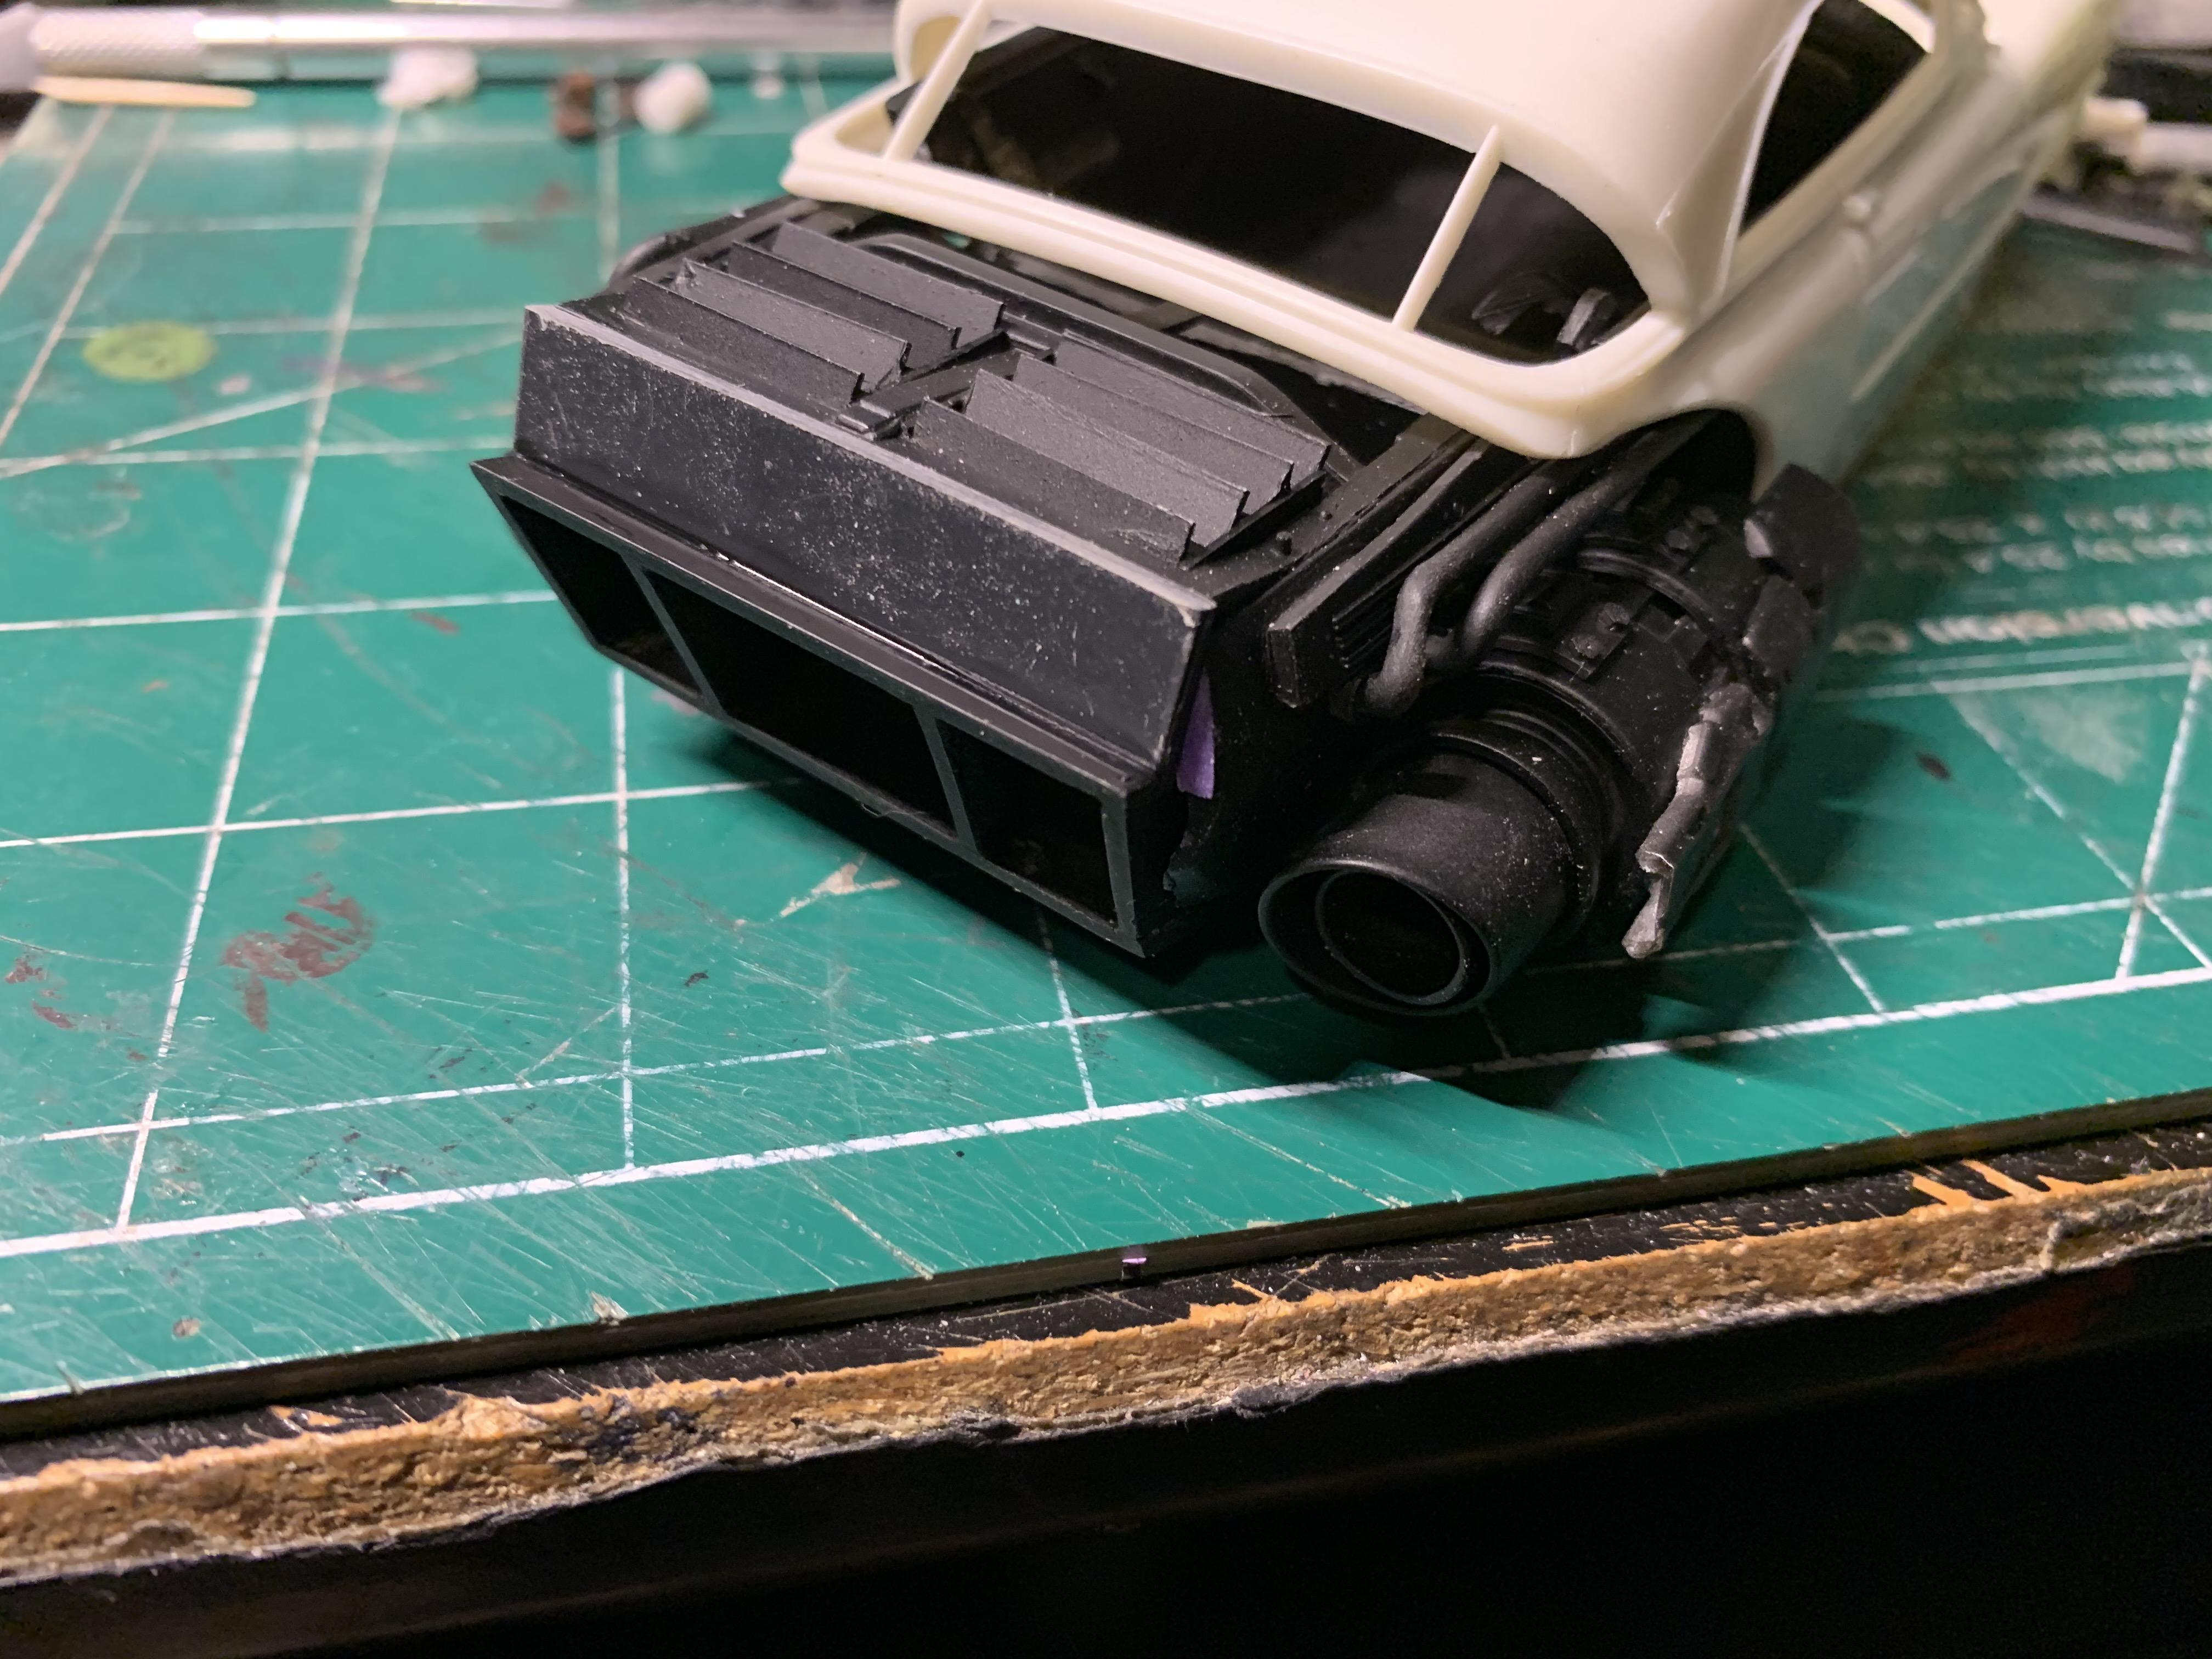
I finished my last Jet car back in October last year. It's one of my favorite that I've built. Really proud of that one. I'll be taking it to the KC model show this year. I took a break from models for the holidays. A few weeks ago my wife called me from Hobby Lobby and asked if I wanted a 51 Chevy kit that she found on clearance. I couldn't turn down the offer. Here's where I'm at. I'll be leaving the rear mechanical parts exposed on this one. The turbines were made from wheel rims, large styrene tube, and Gundam parts. Lots of Gundam parts. It would make an interesting police car. Been thinking about it, but I'm not there yet. The main thing holding me back from a police car is the fact that it's a 2 door. The purple plastic is the rear of a 71 Hemi Cuda. I only used the quarter panels. I used the frame and cross member of another kit to build the top. I cut strips of styrene to make the intake vents. I wanted to see mechanical parts under the intakes, so I created a false compartment above the exhaust. Threw in a few interesting parts. For the most part everything under the vents will be hidden, but if you look closely, you'll be able to see. There's a VW exhaust in there. A turbo from a semi. I'll keep posting photos as I go. Thanks for looking!
-
41 Chevy Pickup Hovercraft
Daxman replied to Daxman's topic in Model Trucks: Pickups, Vans, SUVs, Light Commercial
Thanks Matt! I thoroughly enjoy building these as well as the weathering process. I feel that I'm telling a story as I'm putting these vehicles together. The rust and grime help to tell the story as well. Thanks for taking the time to comment!! -
41 Chevy Pickup Hovercraft
Daxman replied to Daxman's topic in Model Trucks: Pickups, Vans, SUVs, Light Commercial
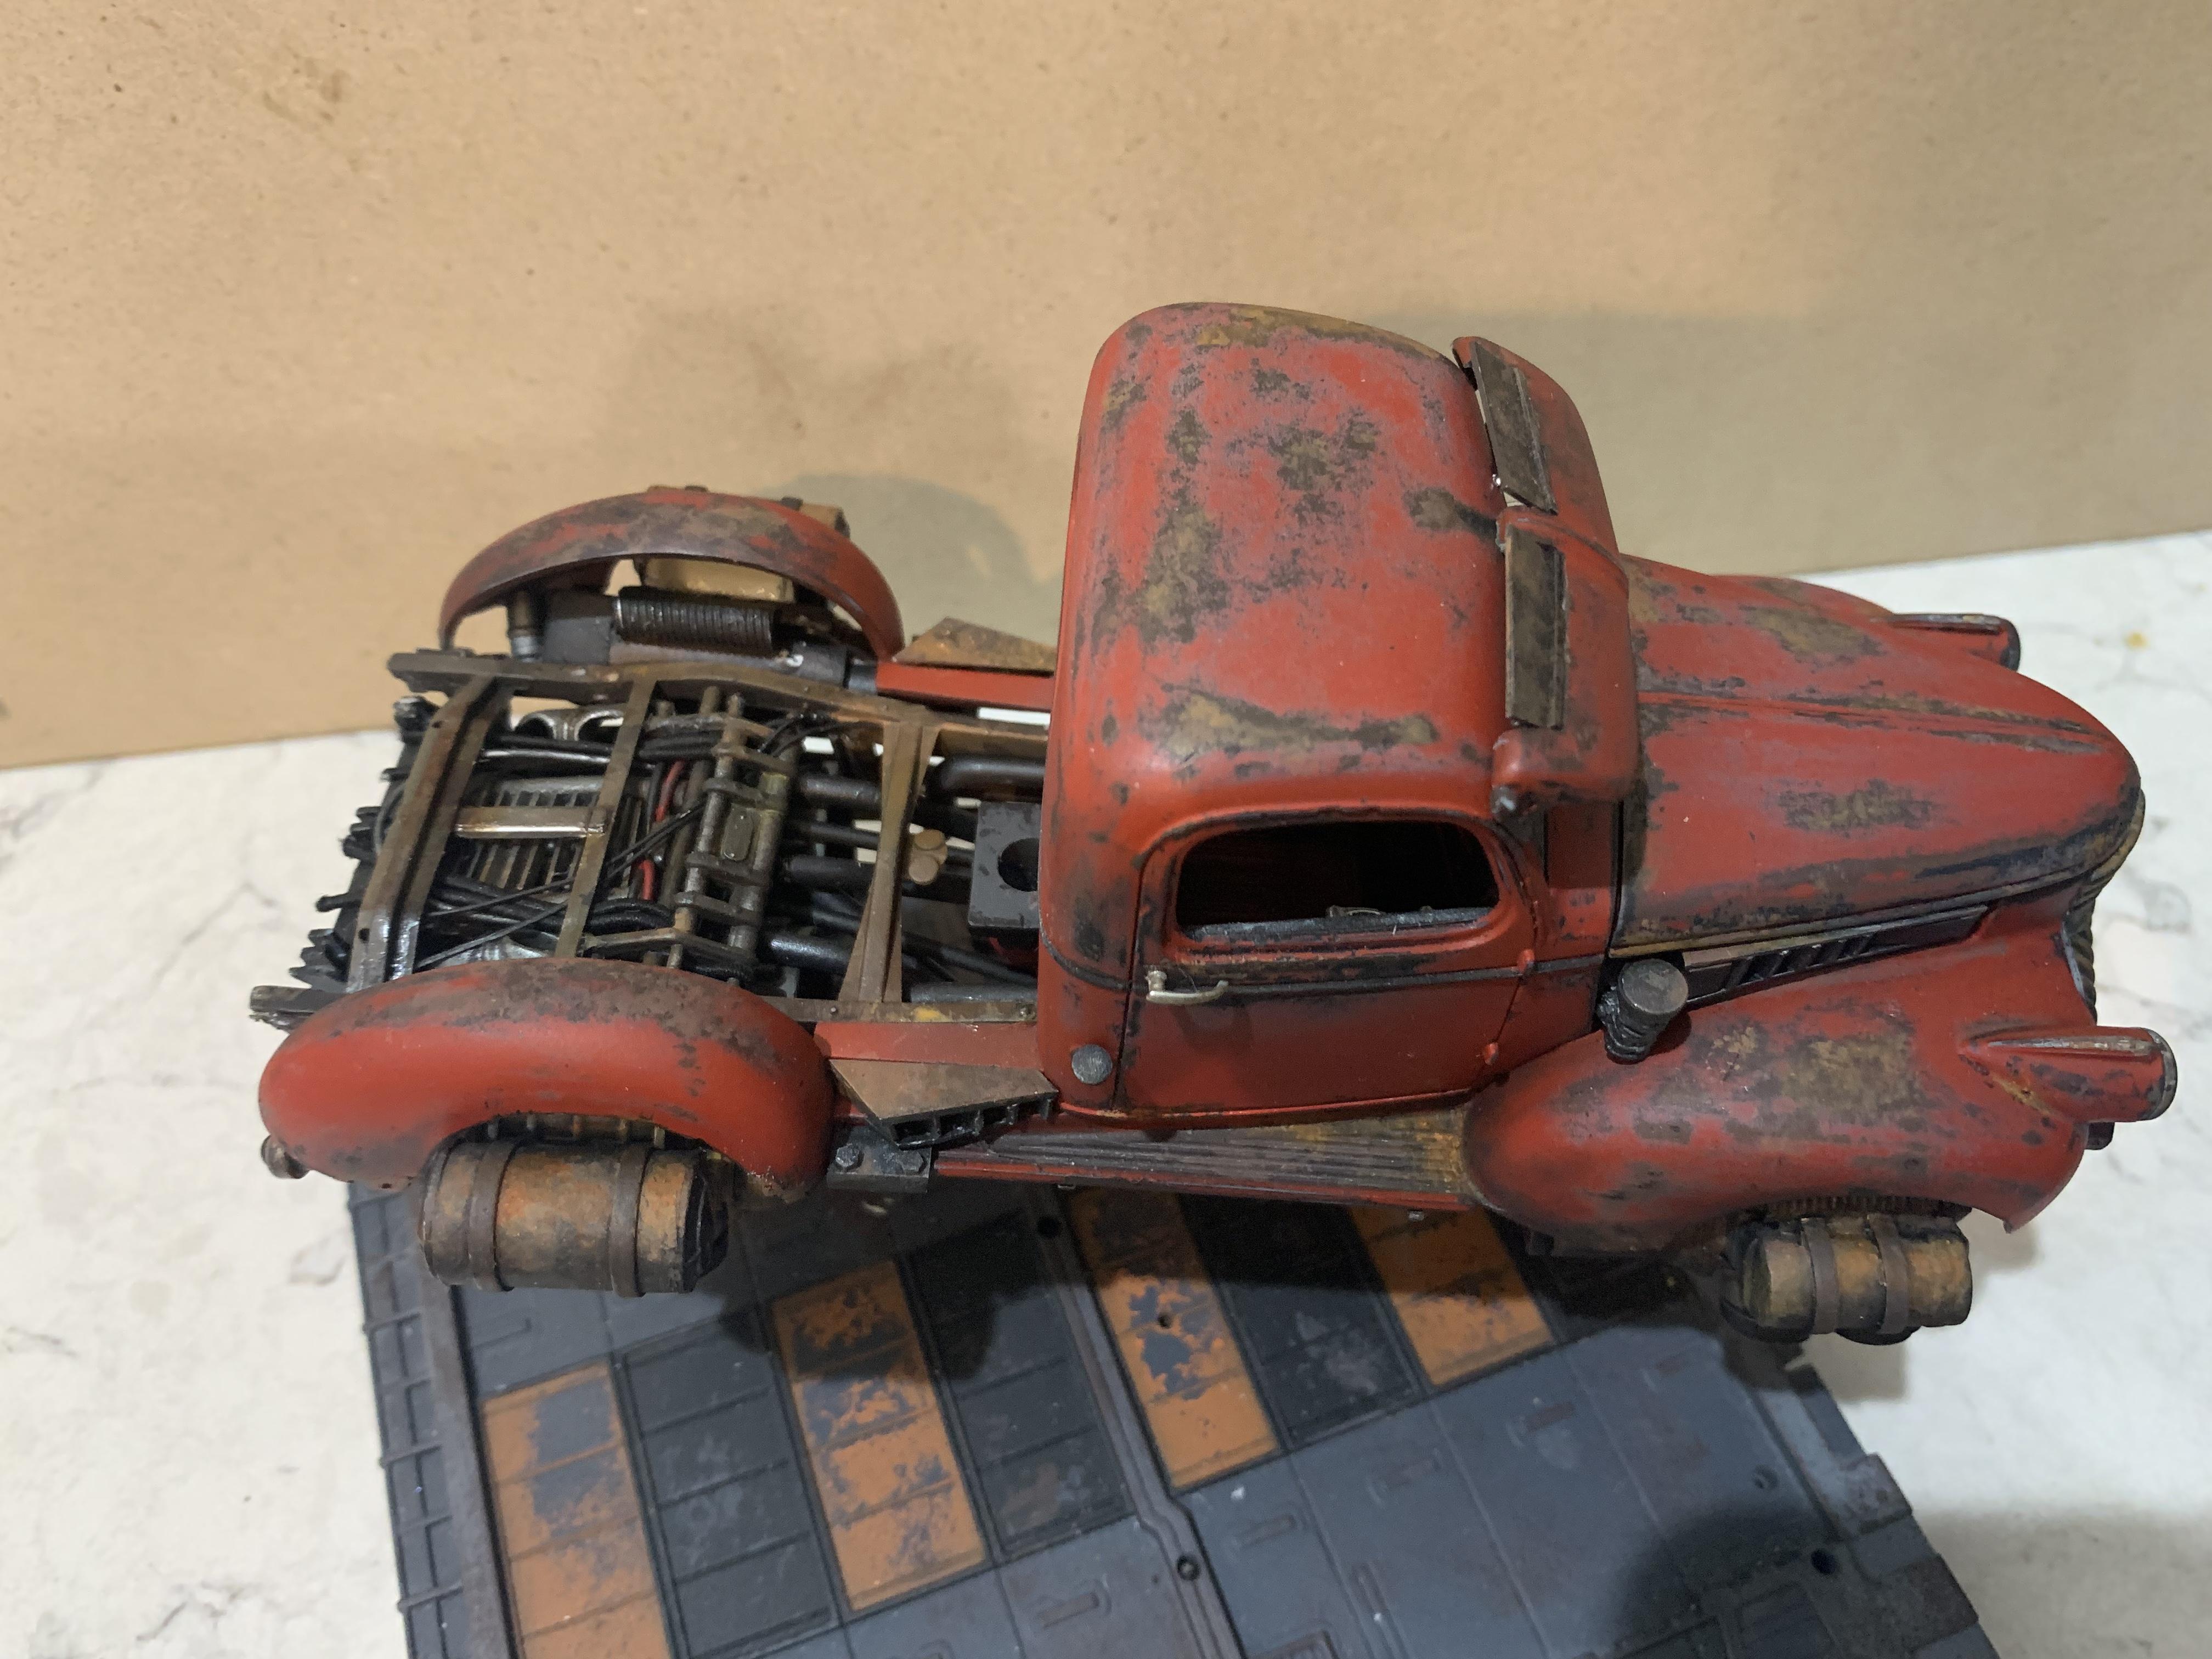
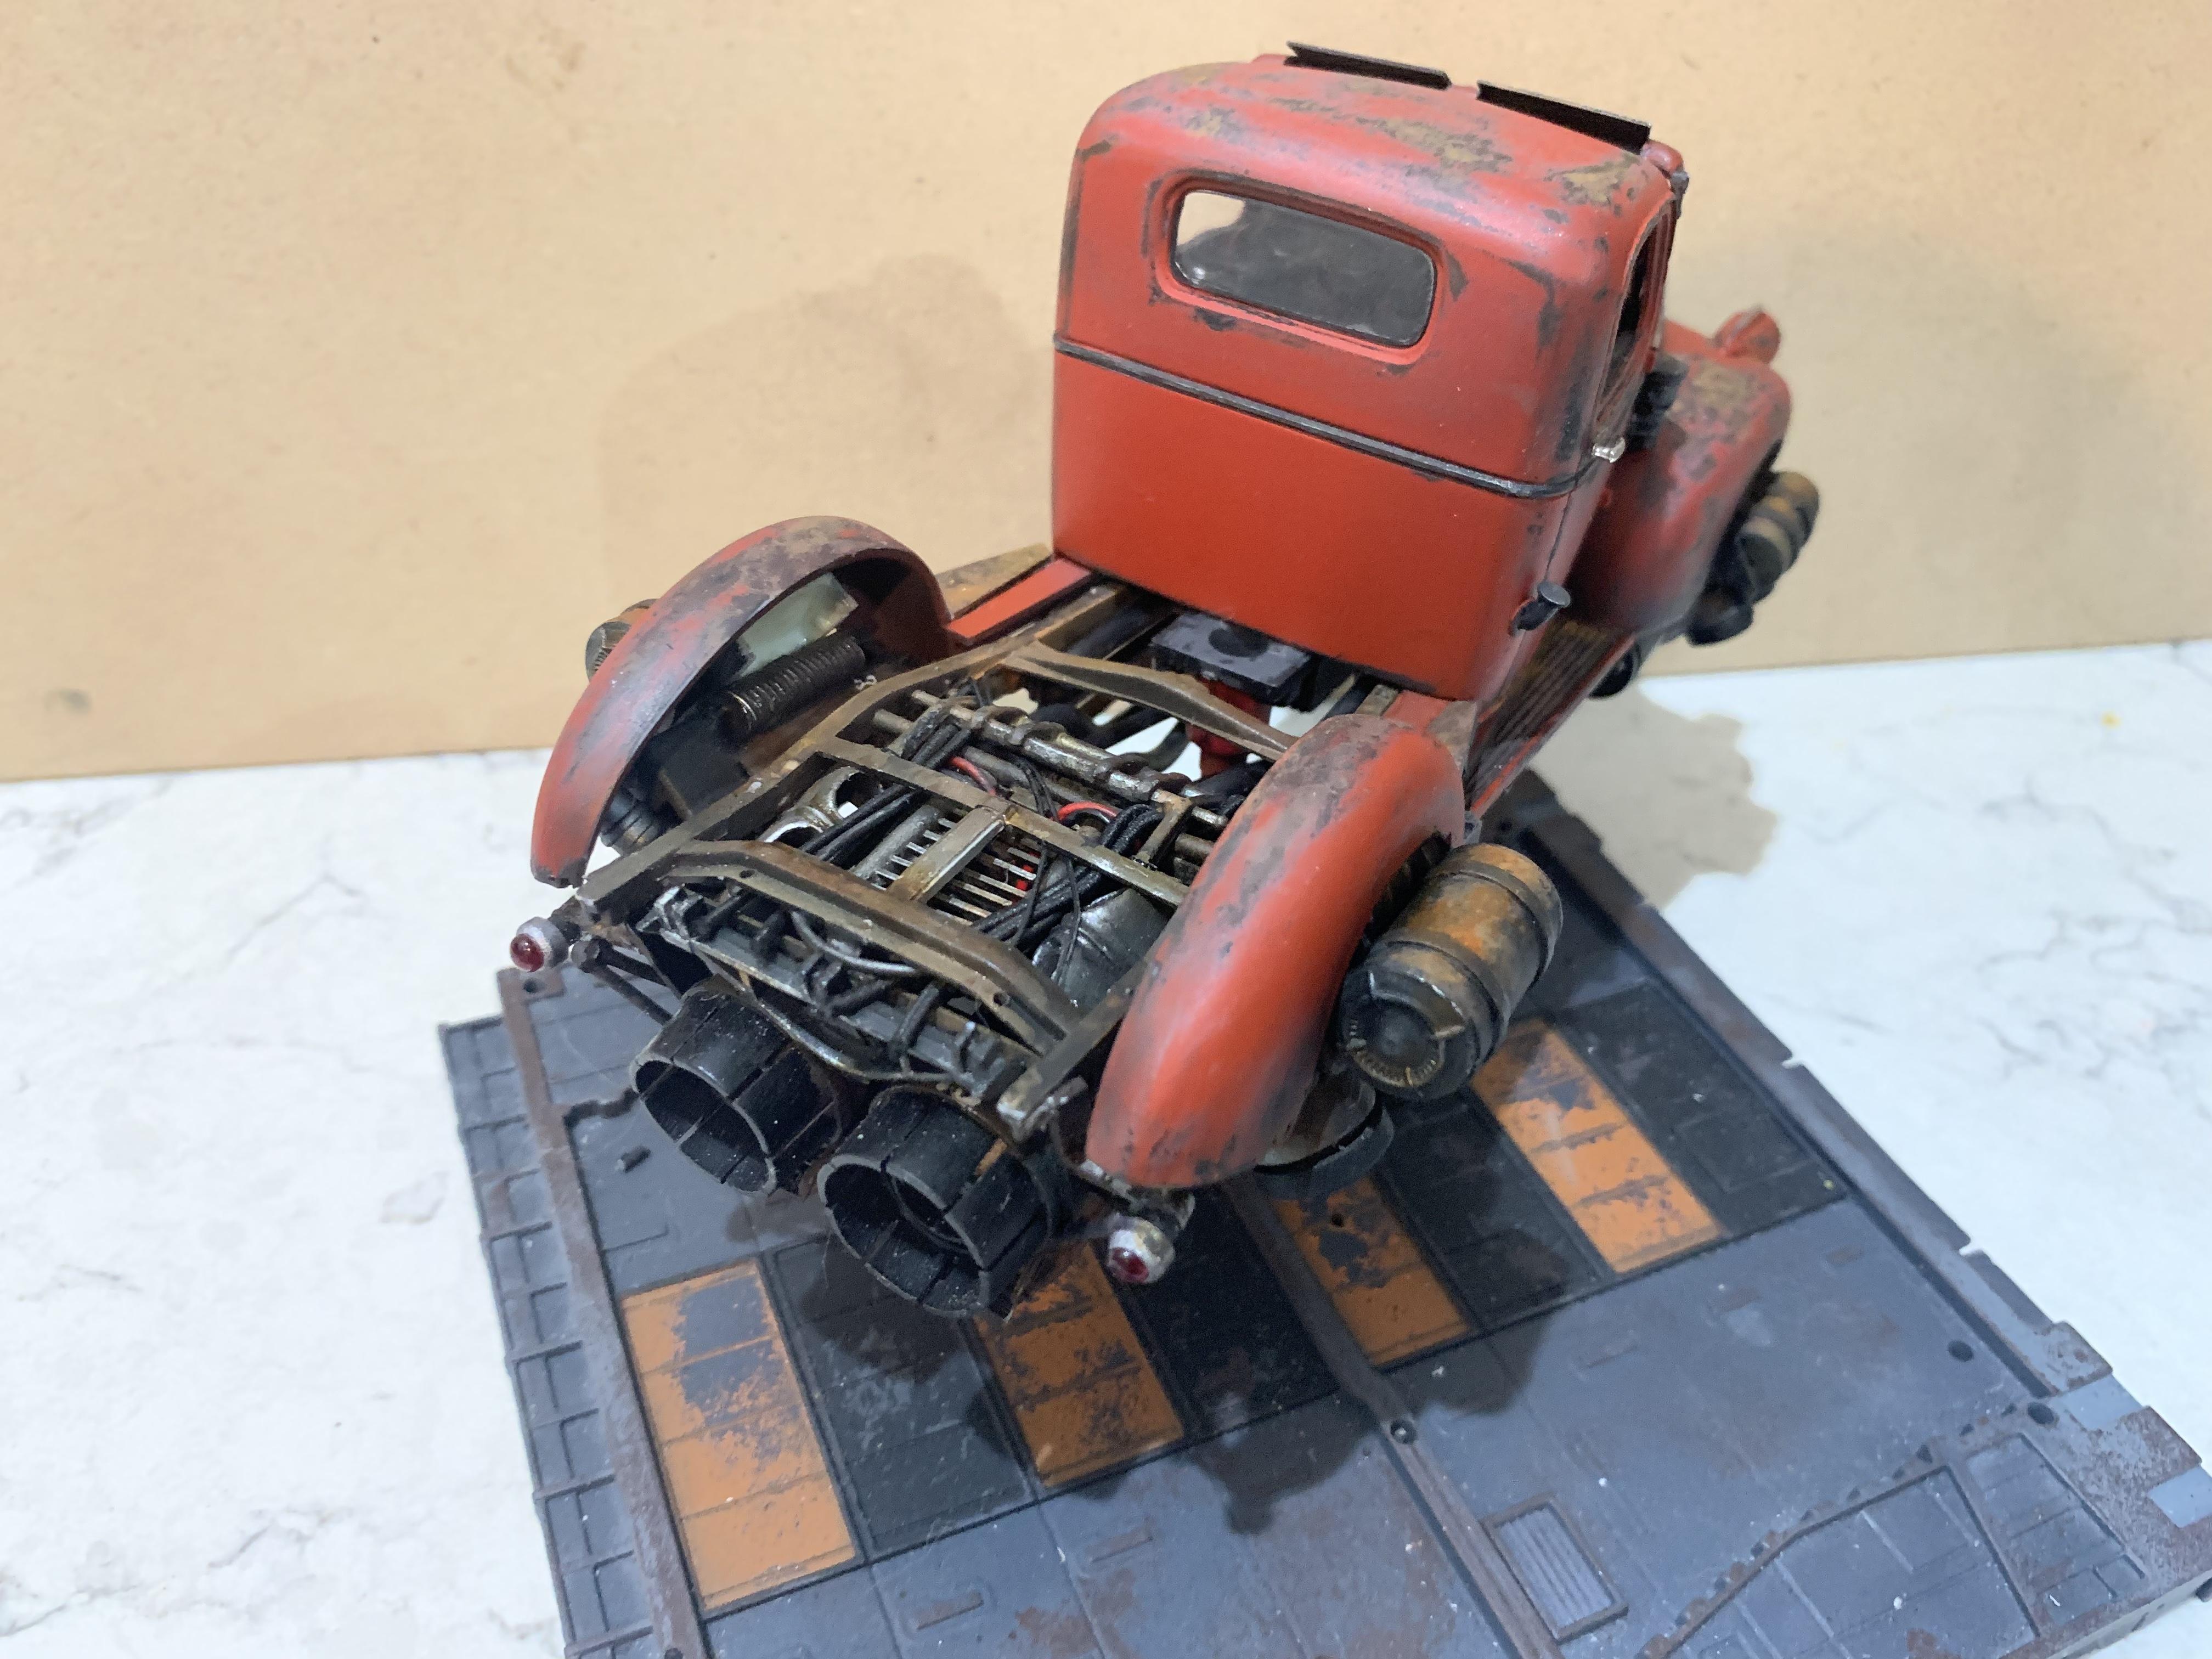
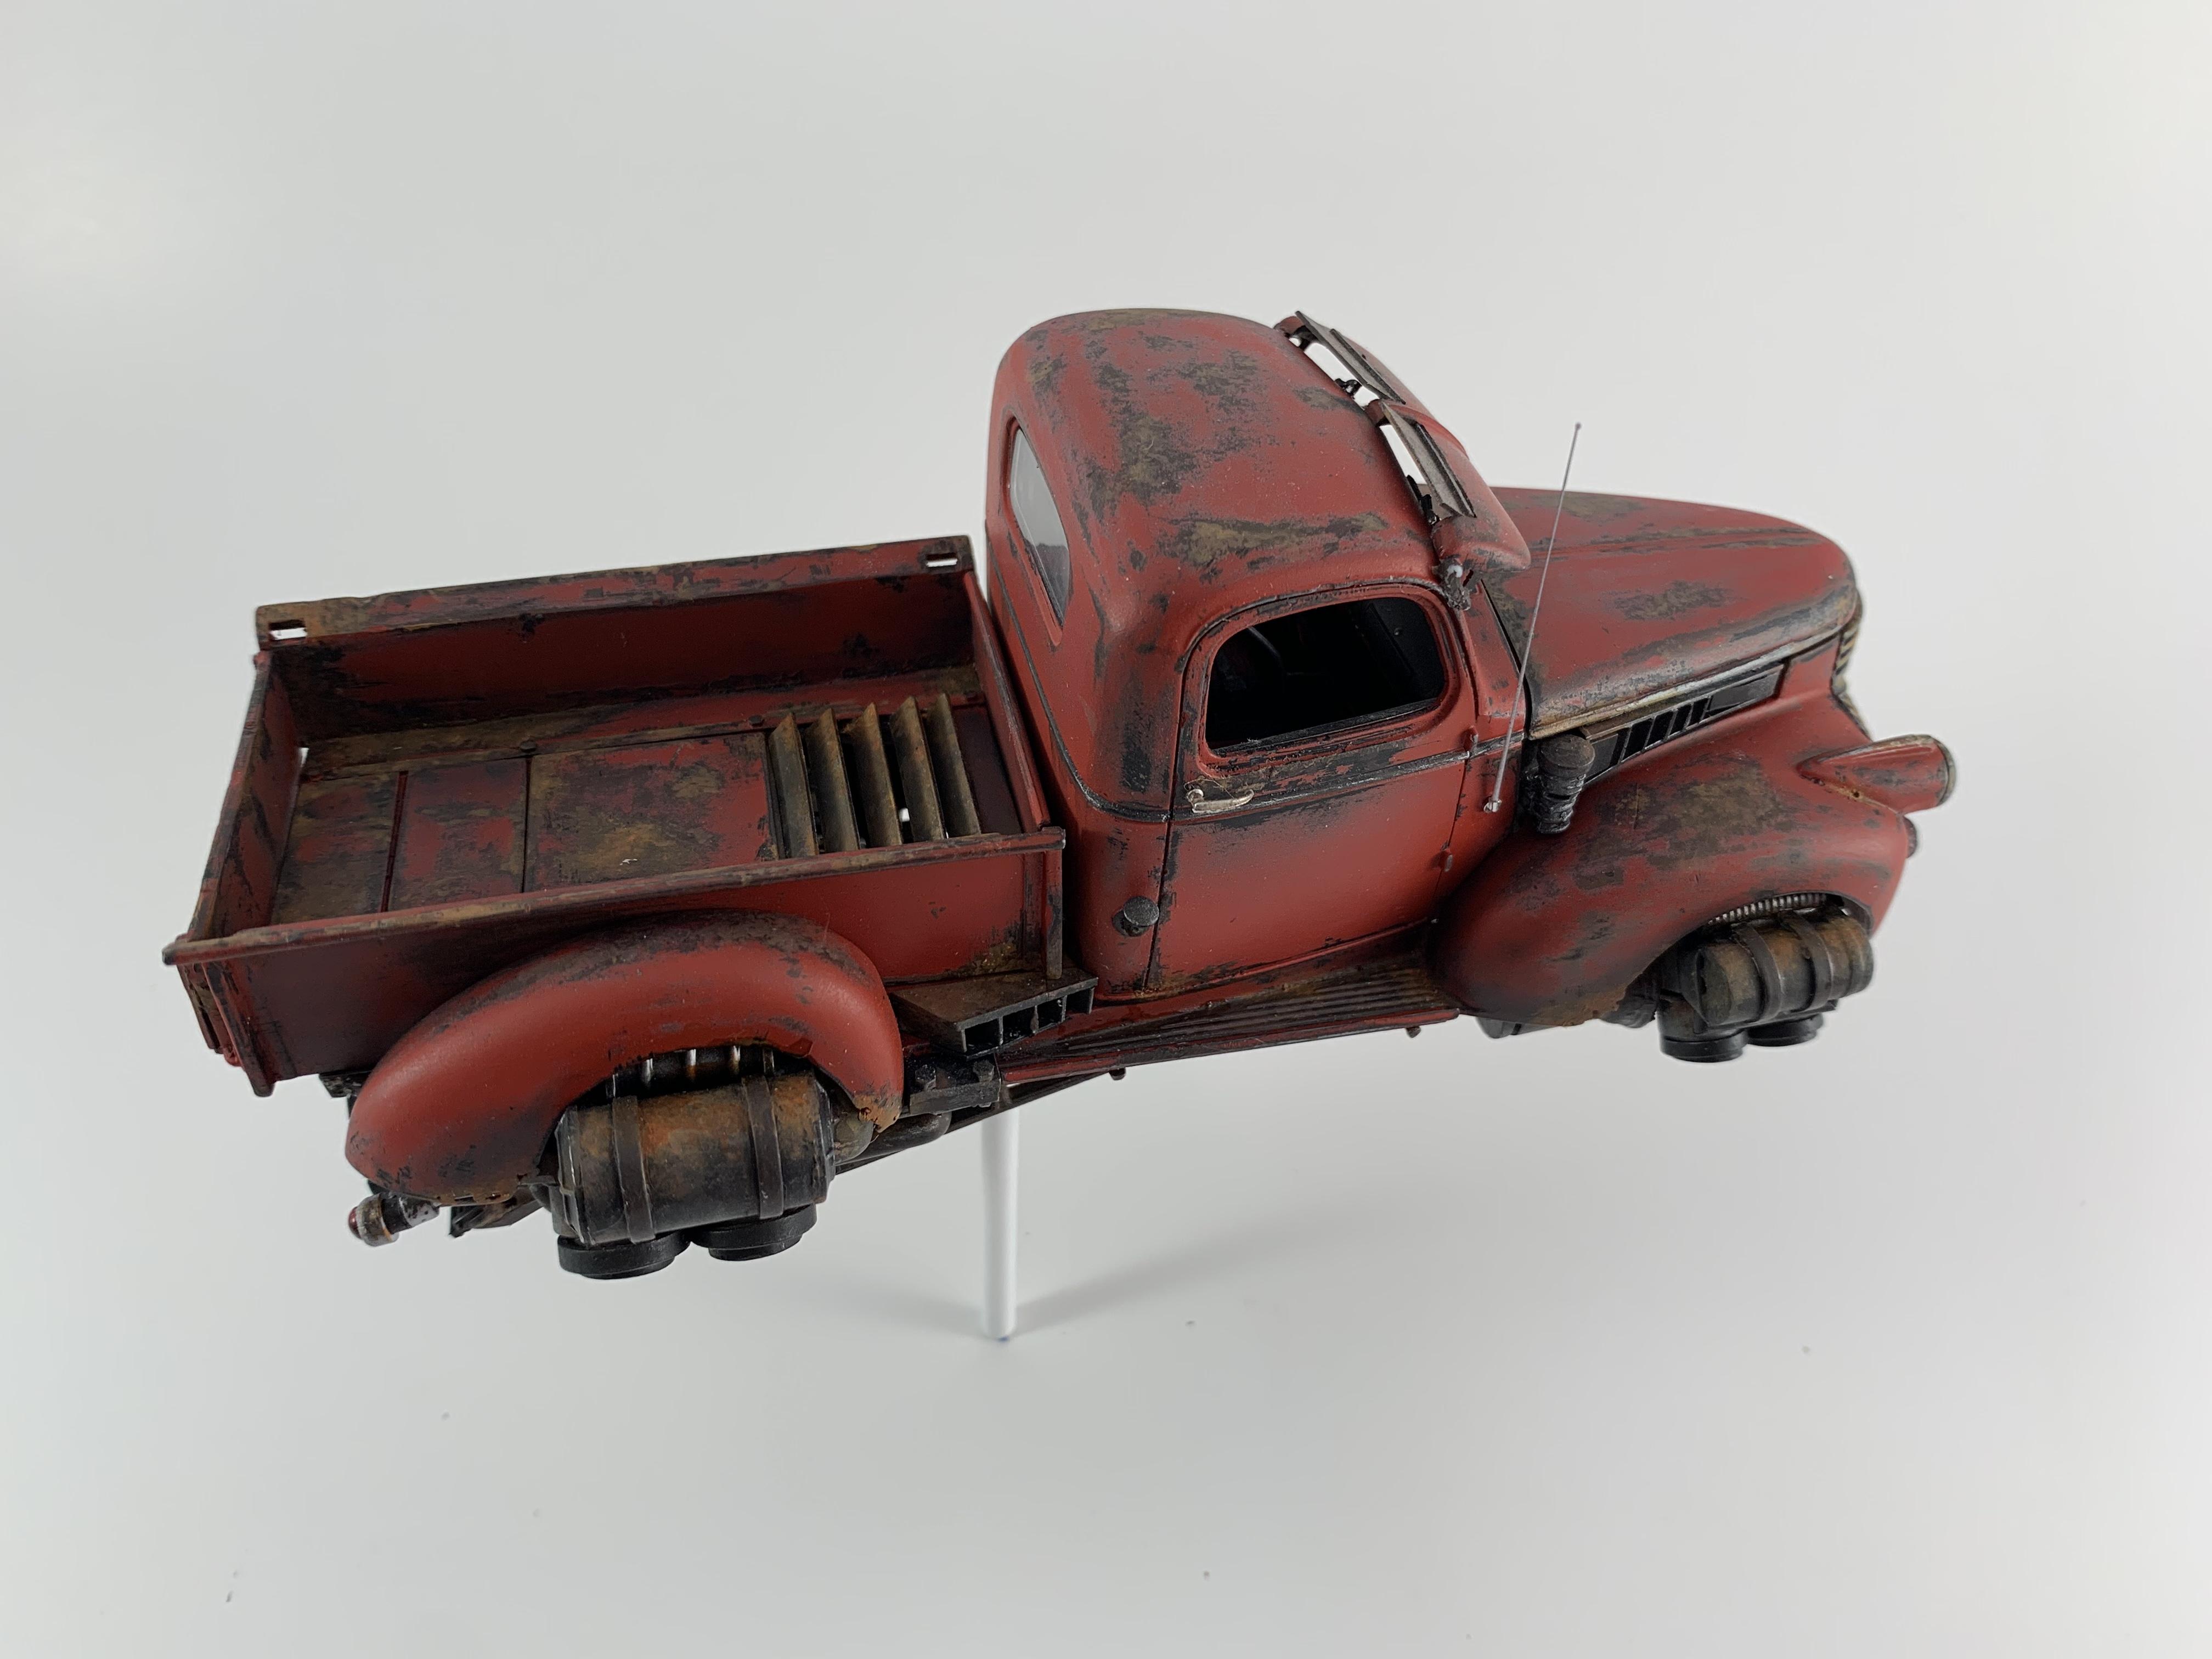
Thank you all, I appreciate the kind words! I'm going to try to put all 6 of my hovercars in one post soon. They've been on the shelf too long and collected some dust. I need to clean them up and shoot some new photos. Here's a few more of the truck. This view shows a little more of the undercarriage. I haven't glued the truck bed on. I like the look of it without as well. This was a very nice build. I enjoyed the entire experience.
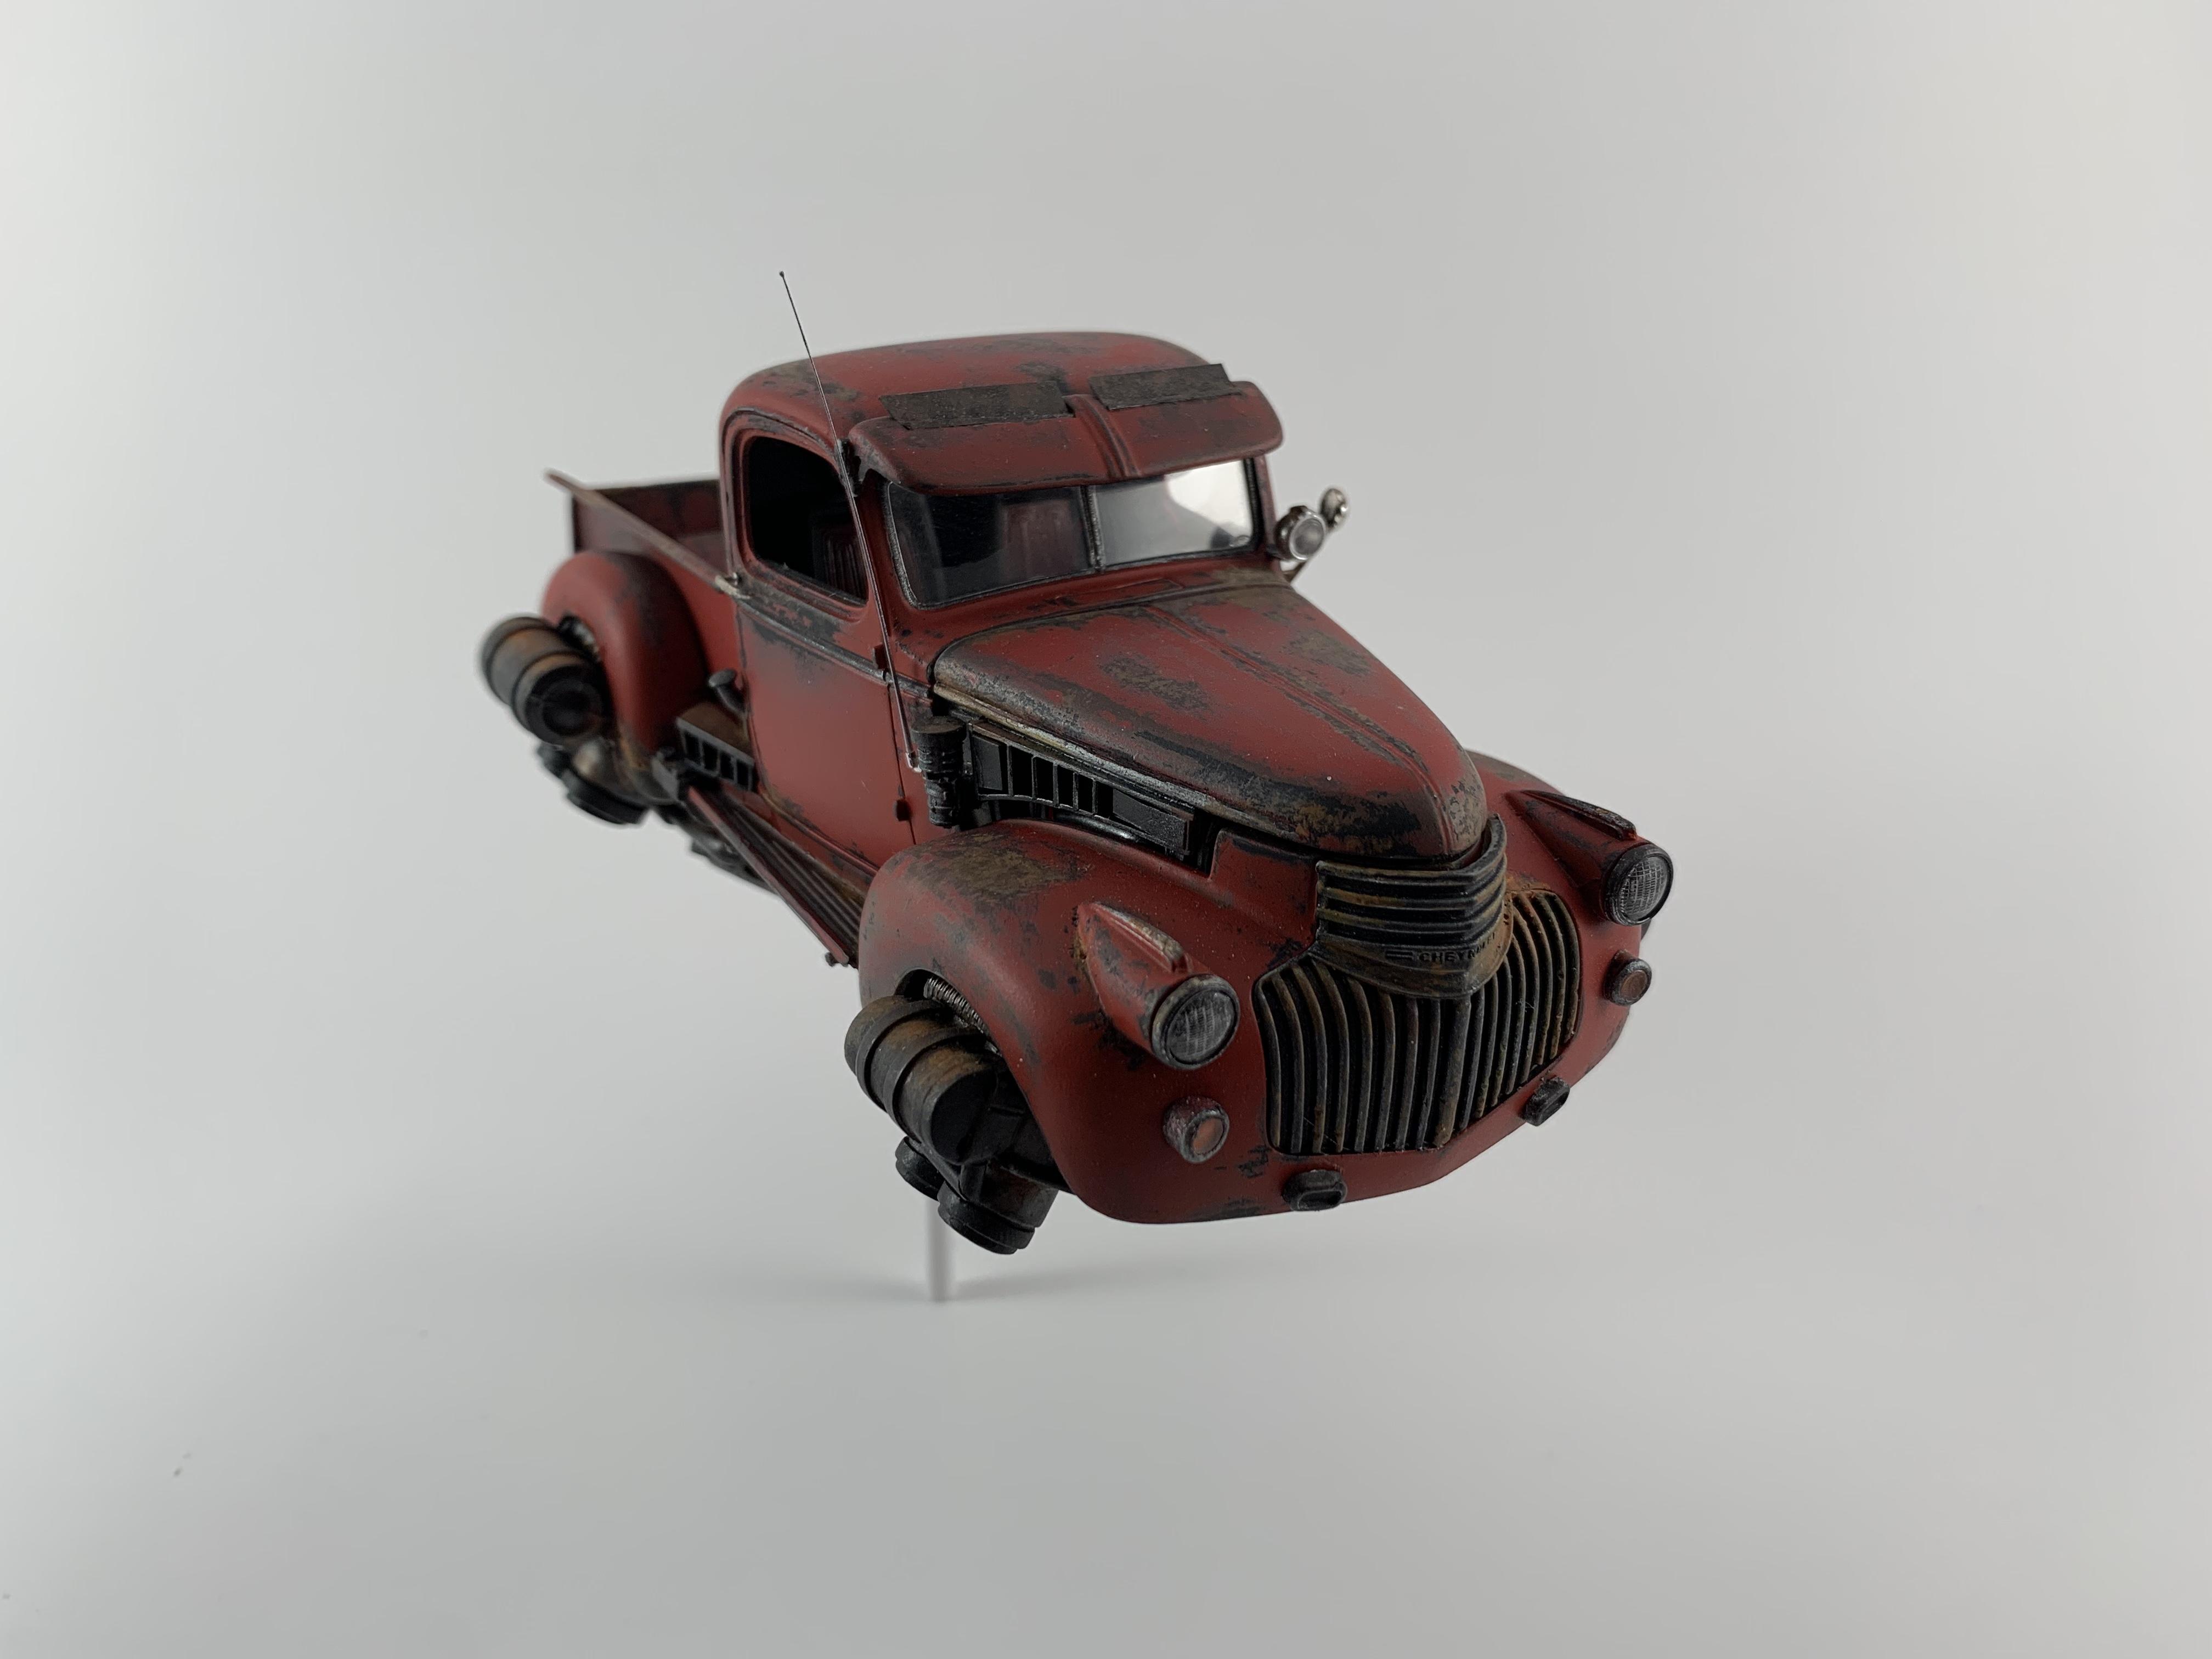
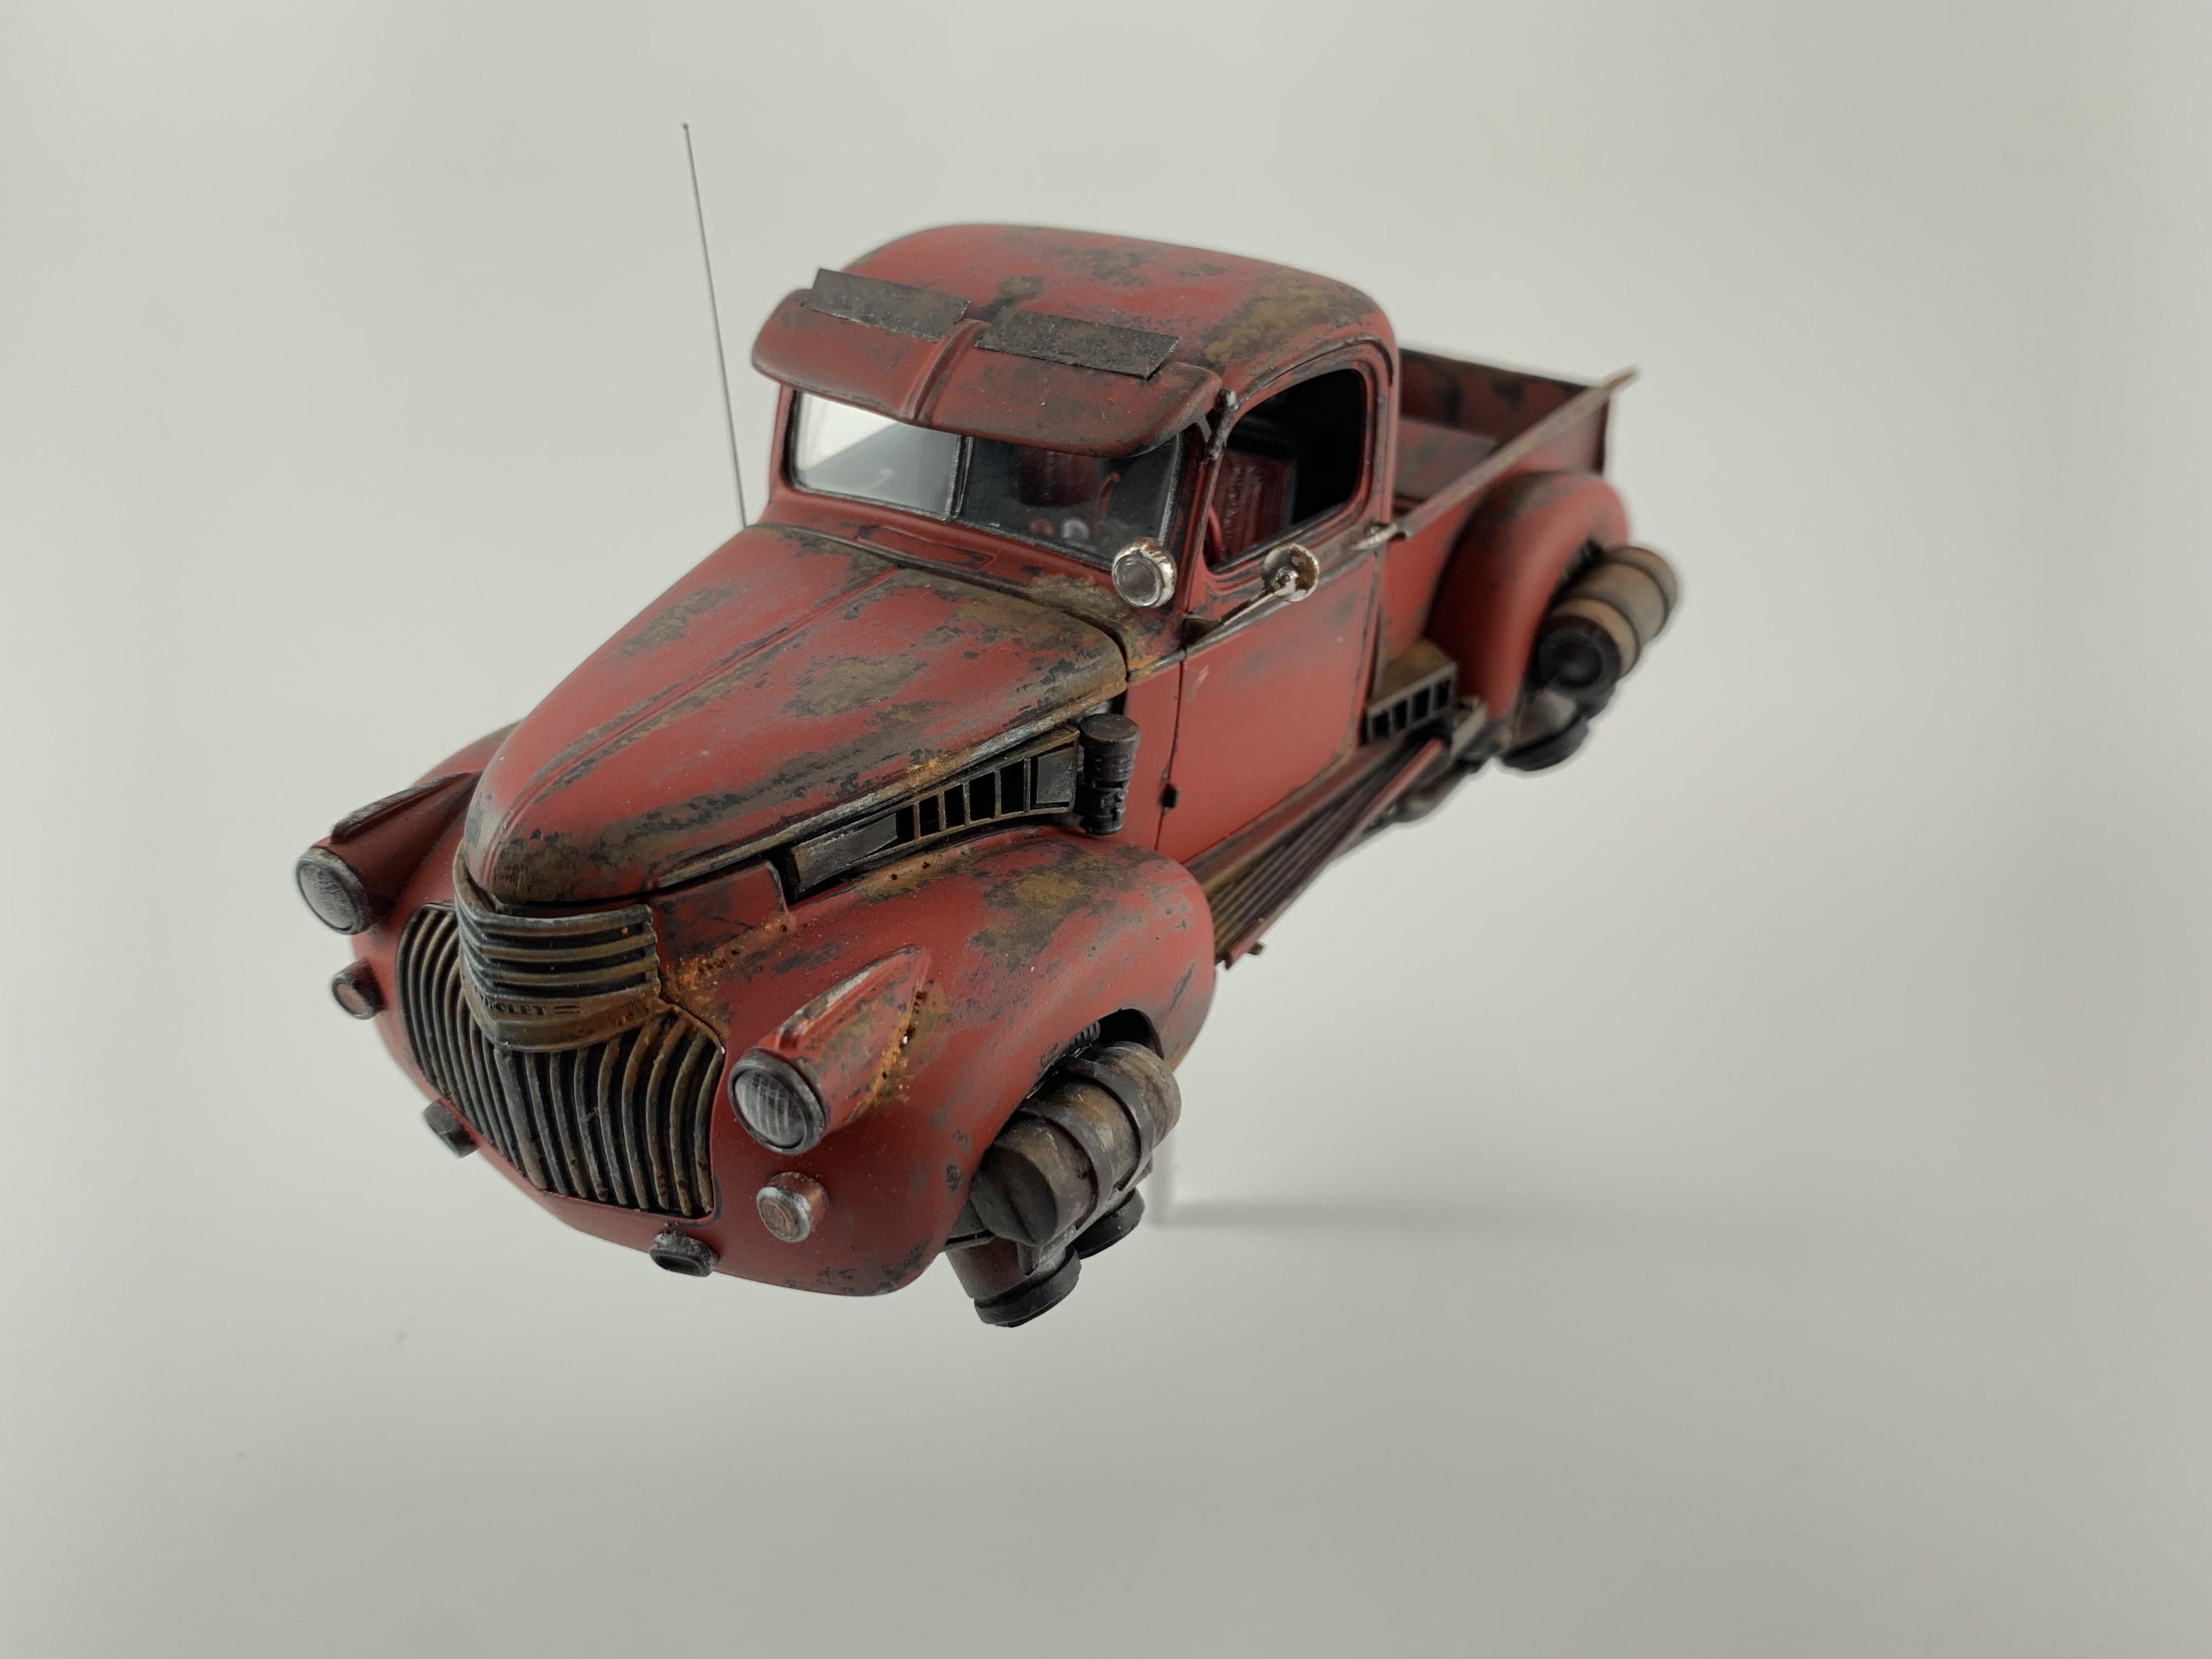
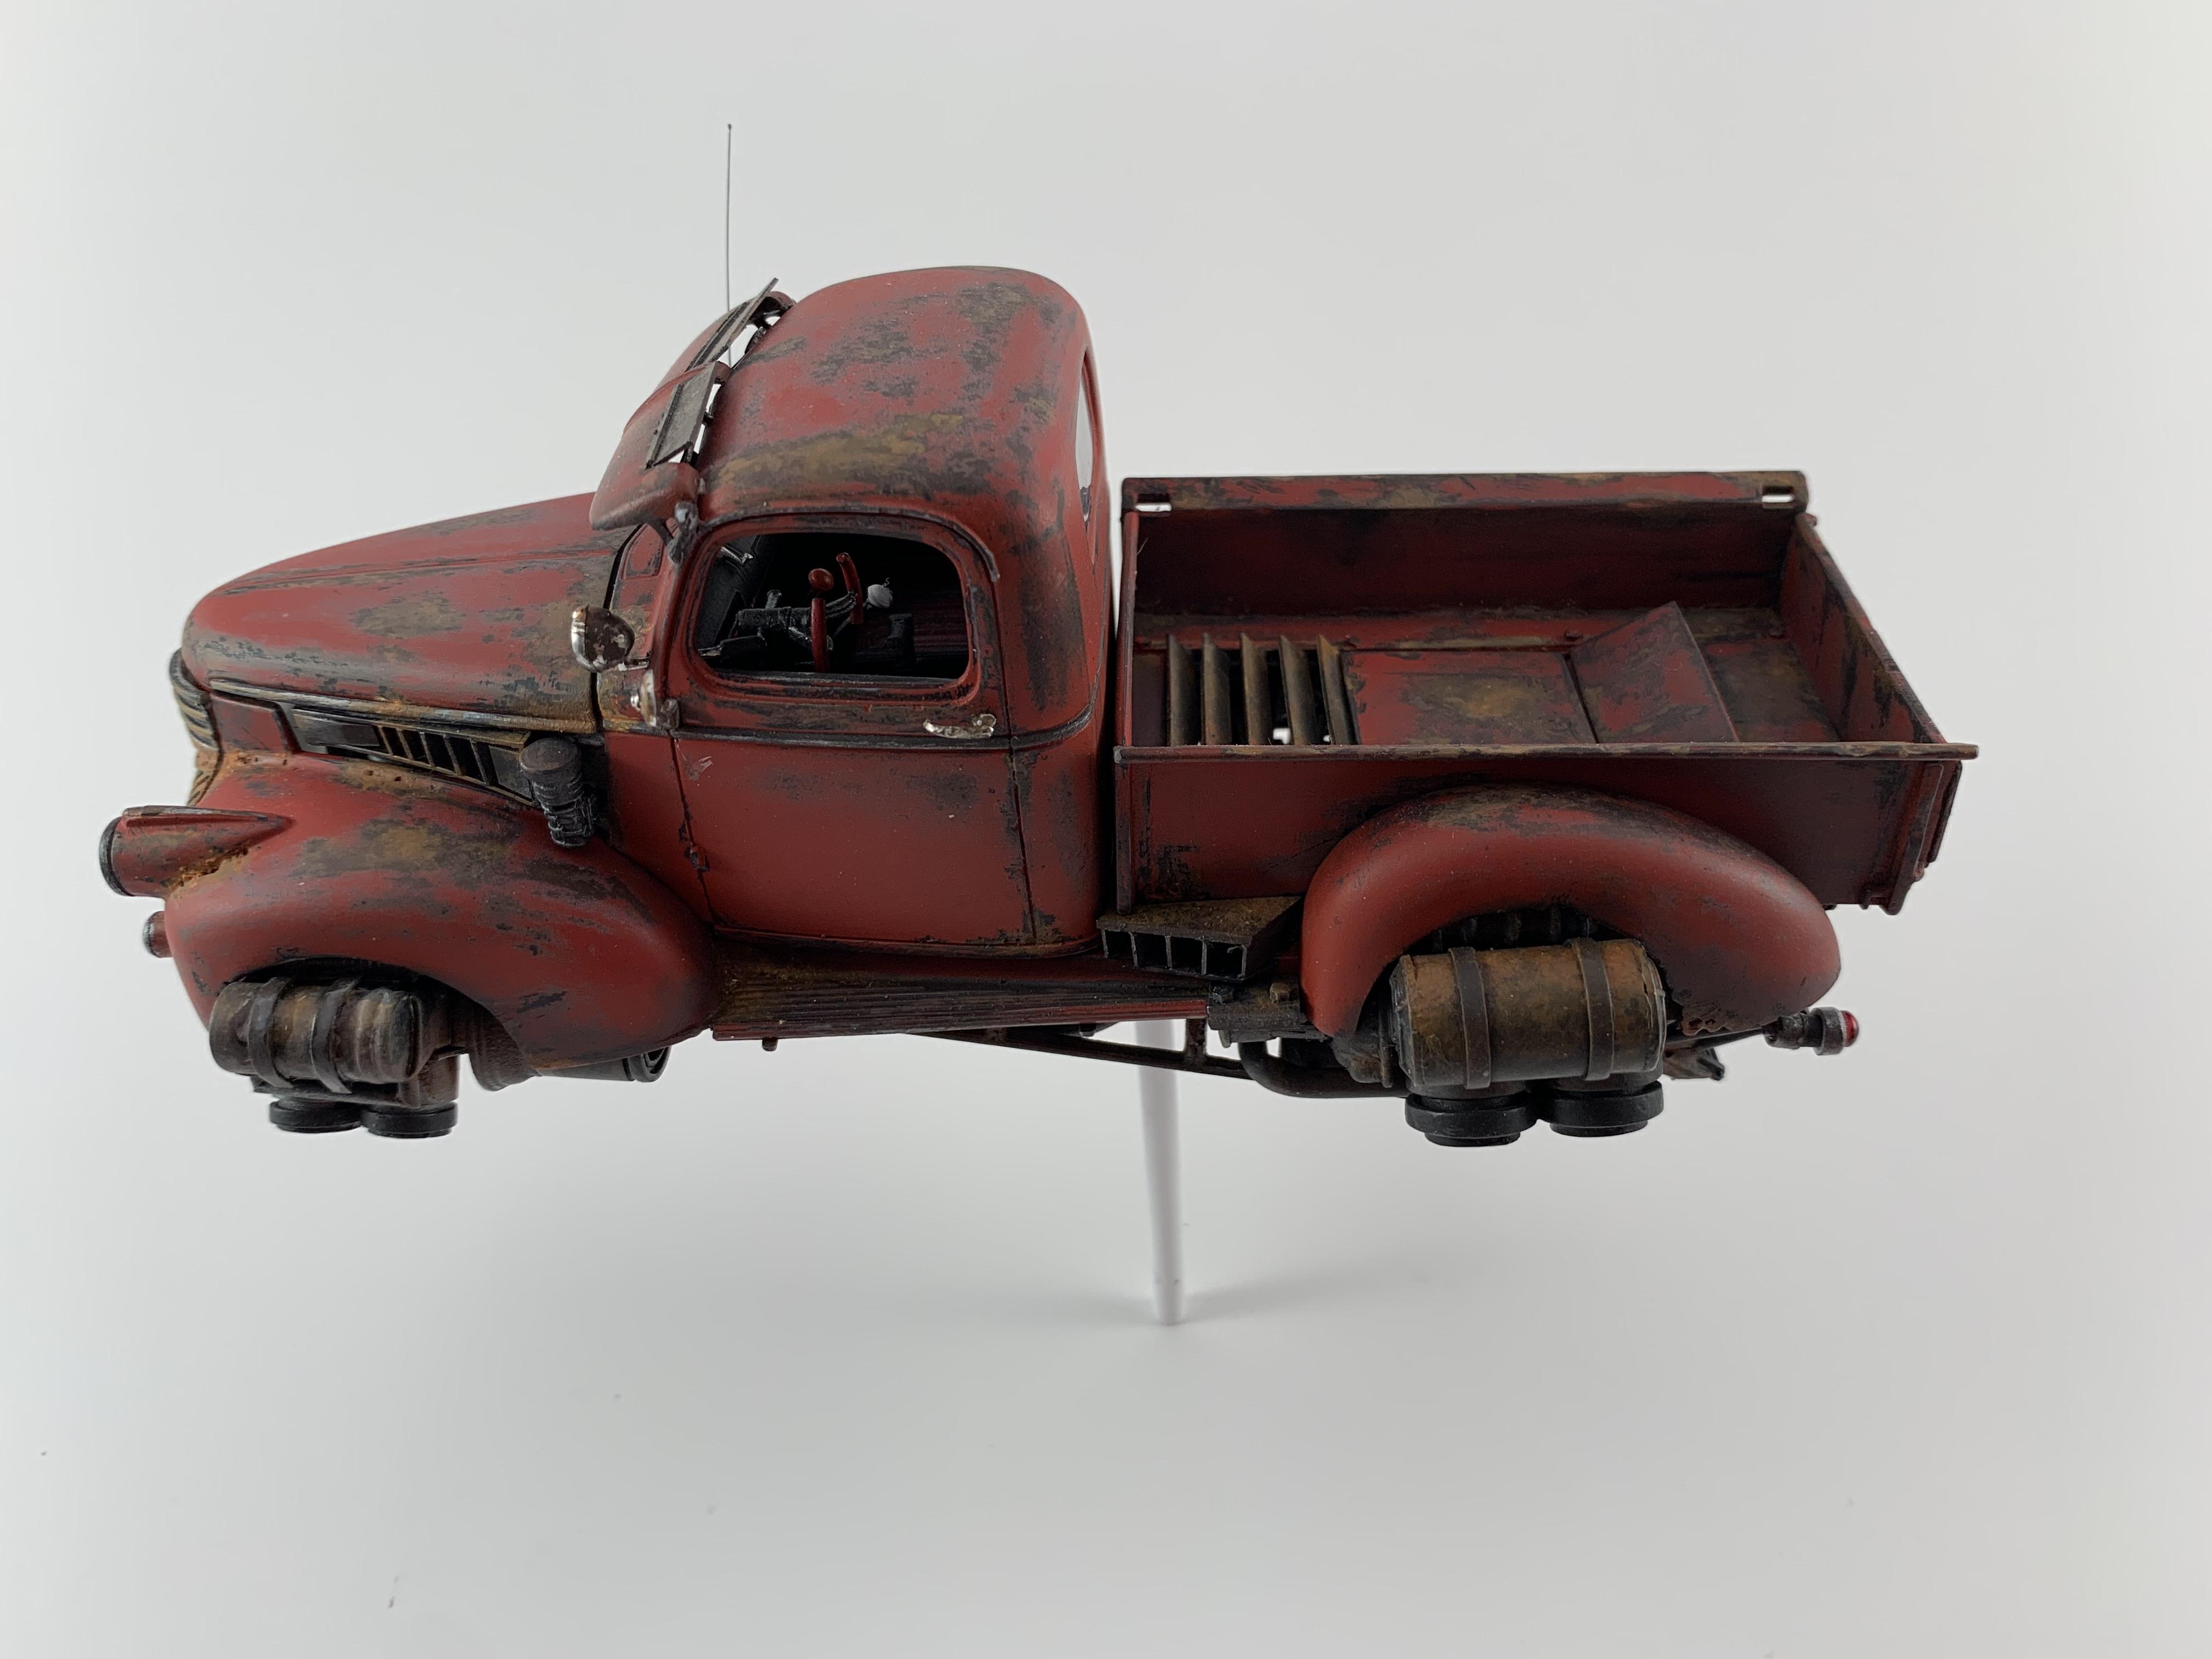
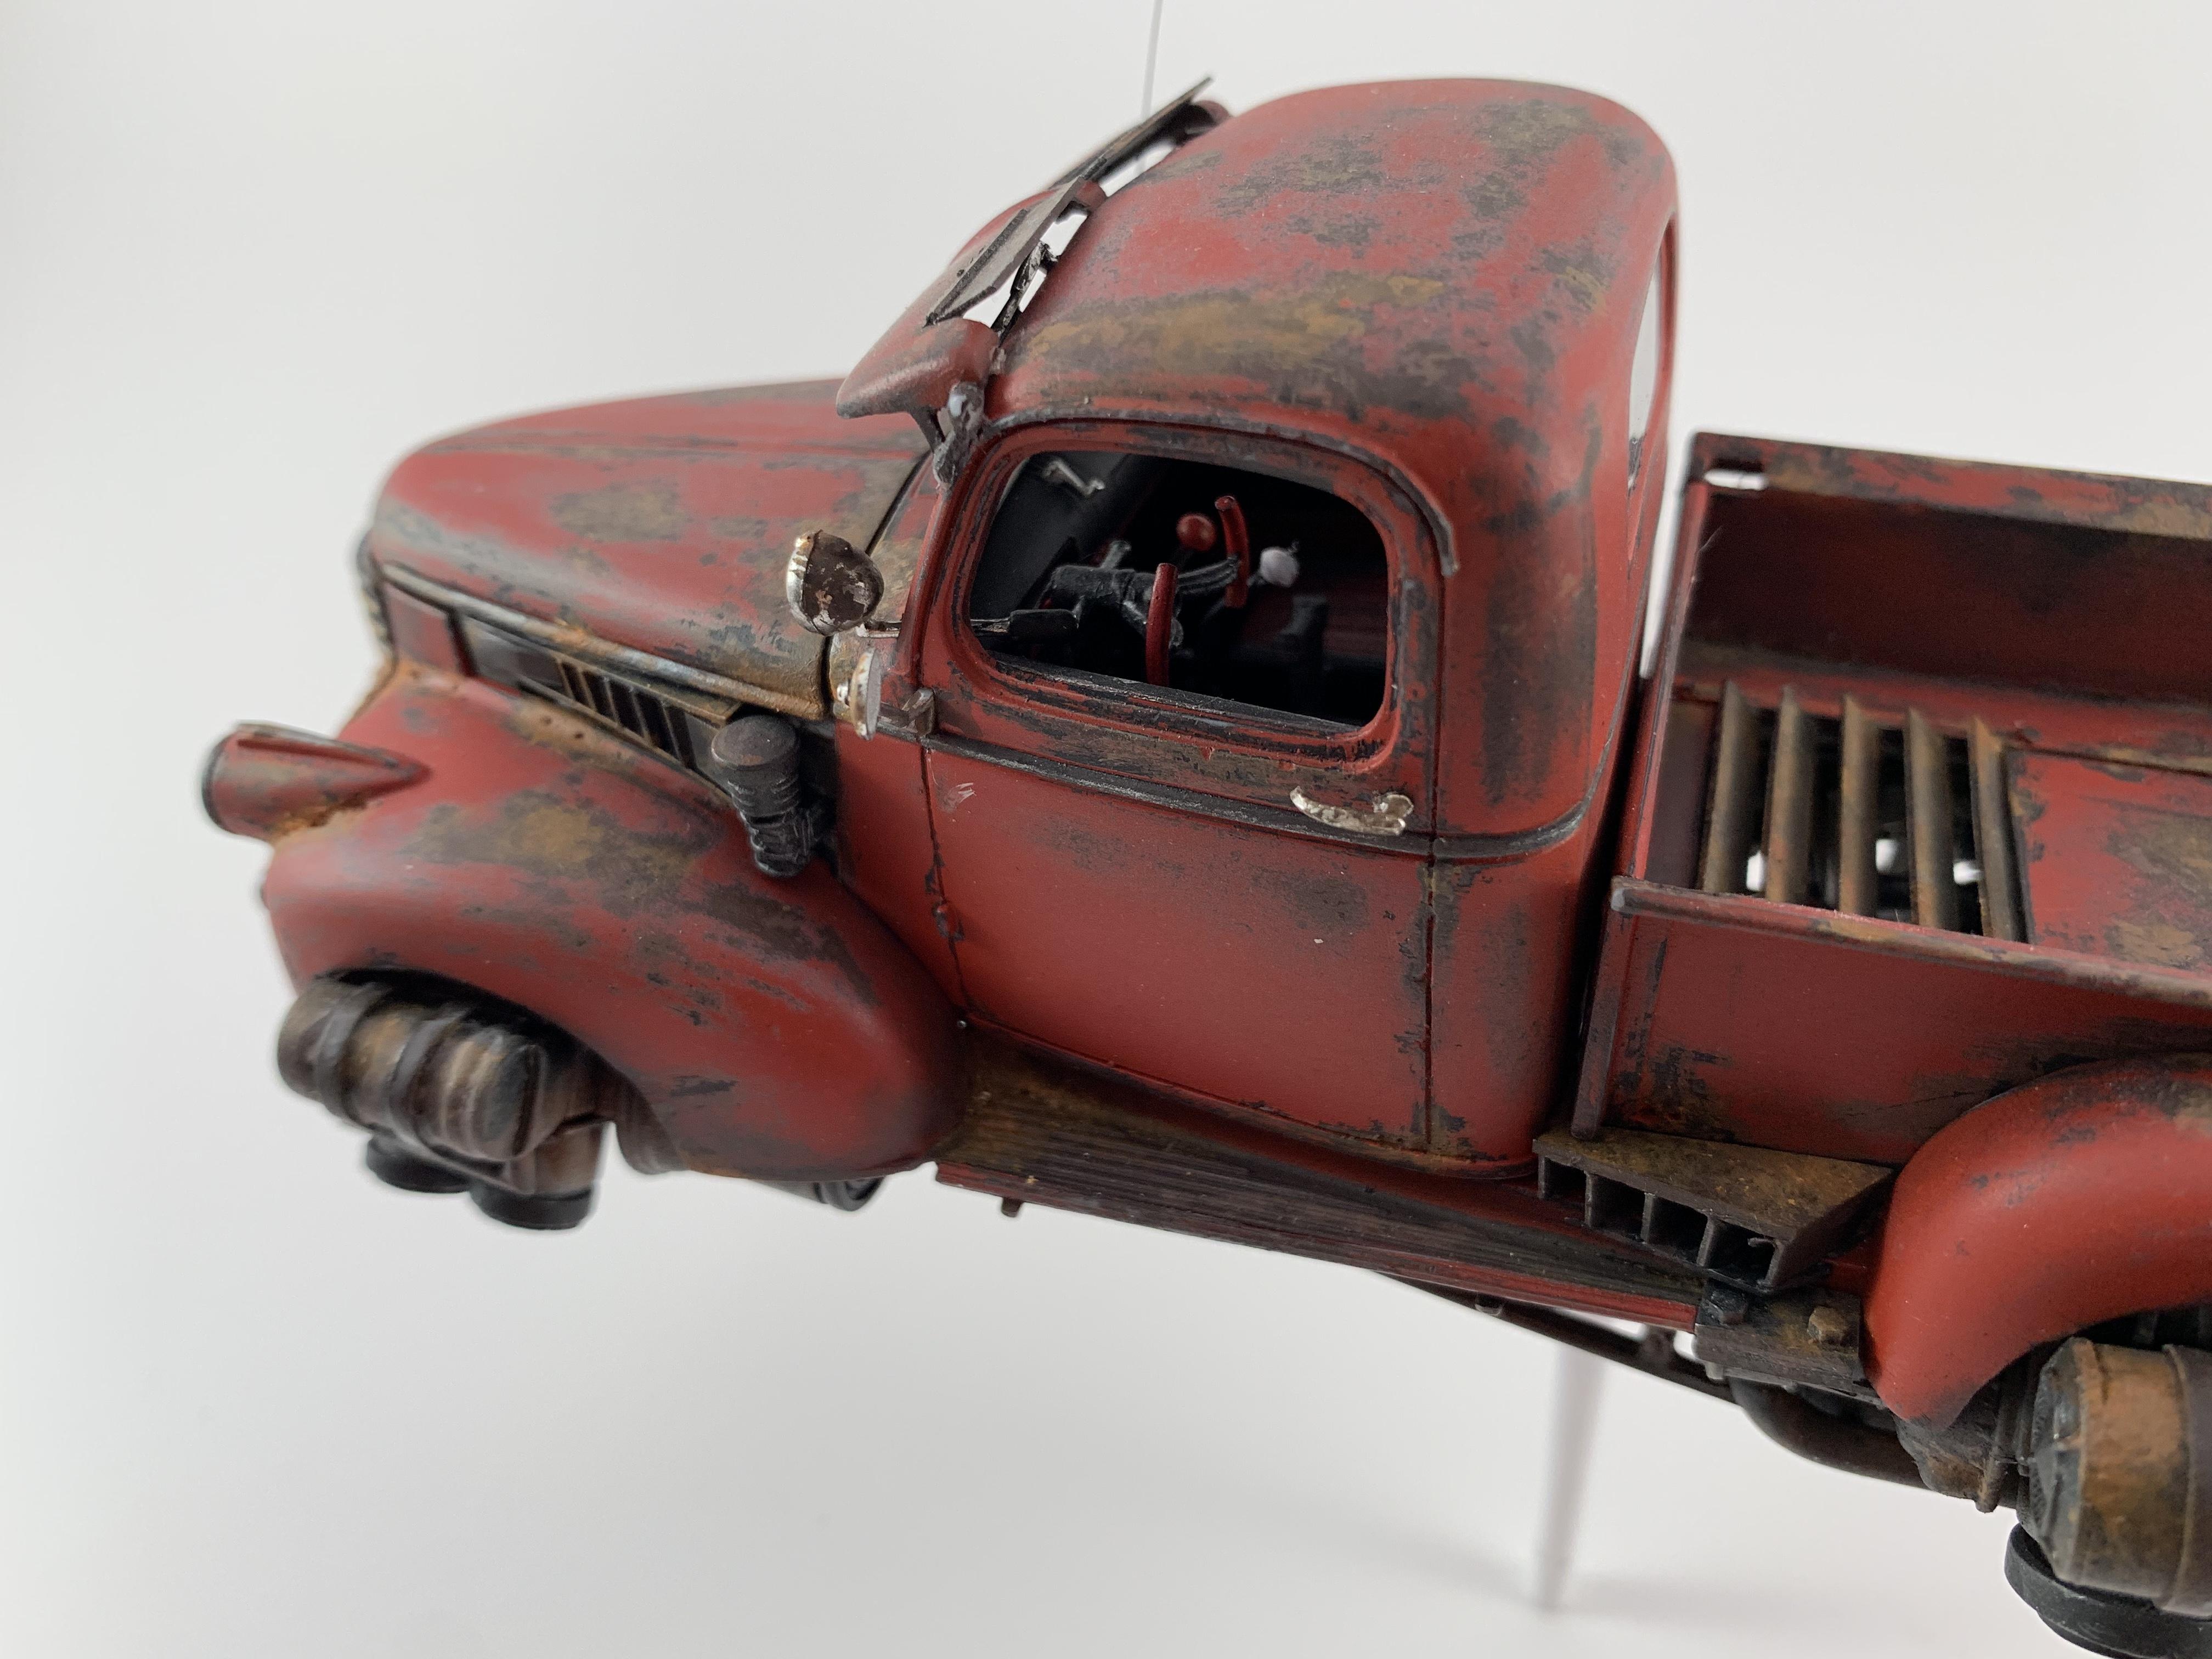
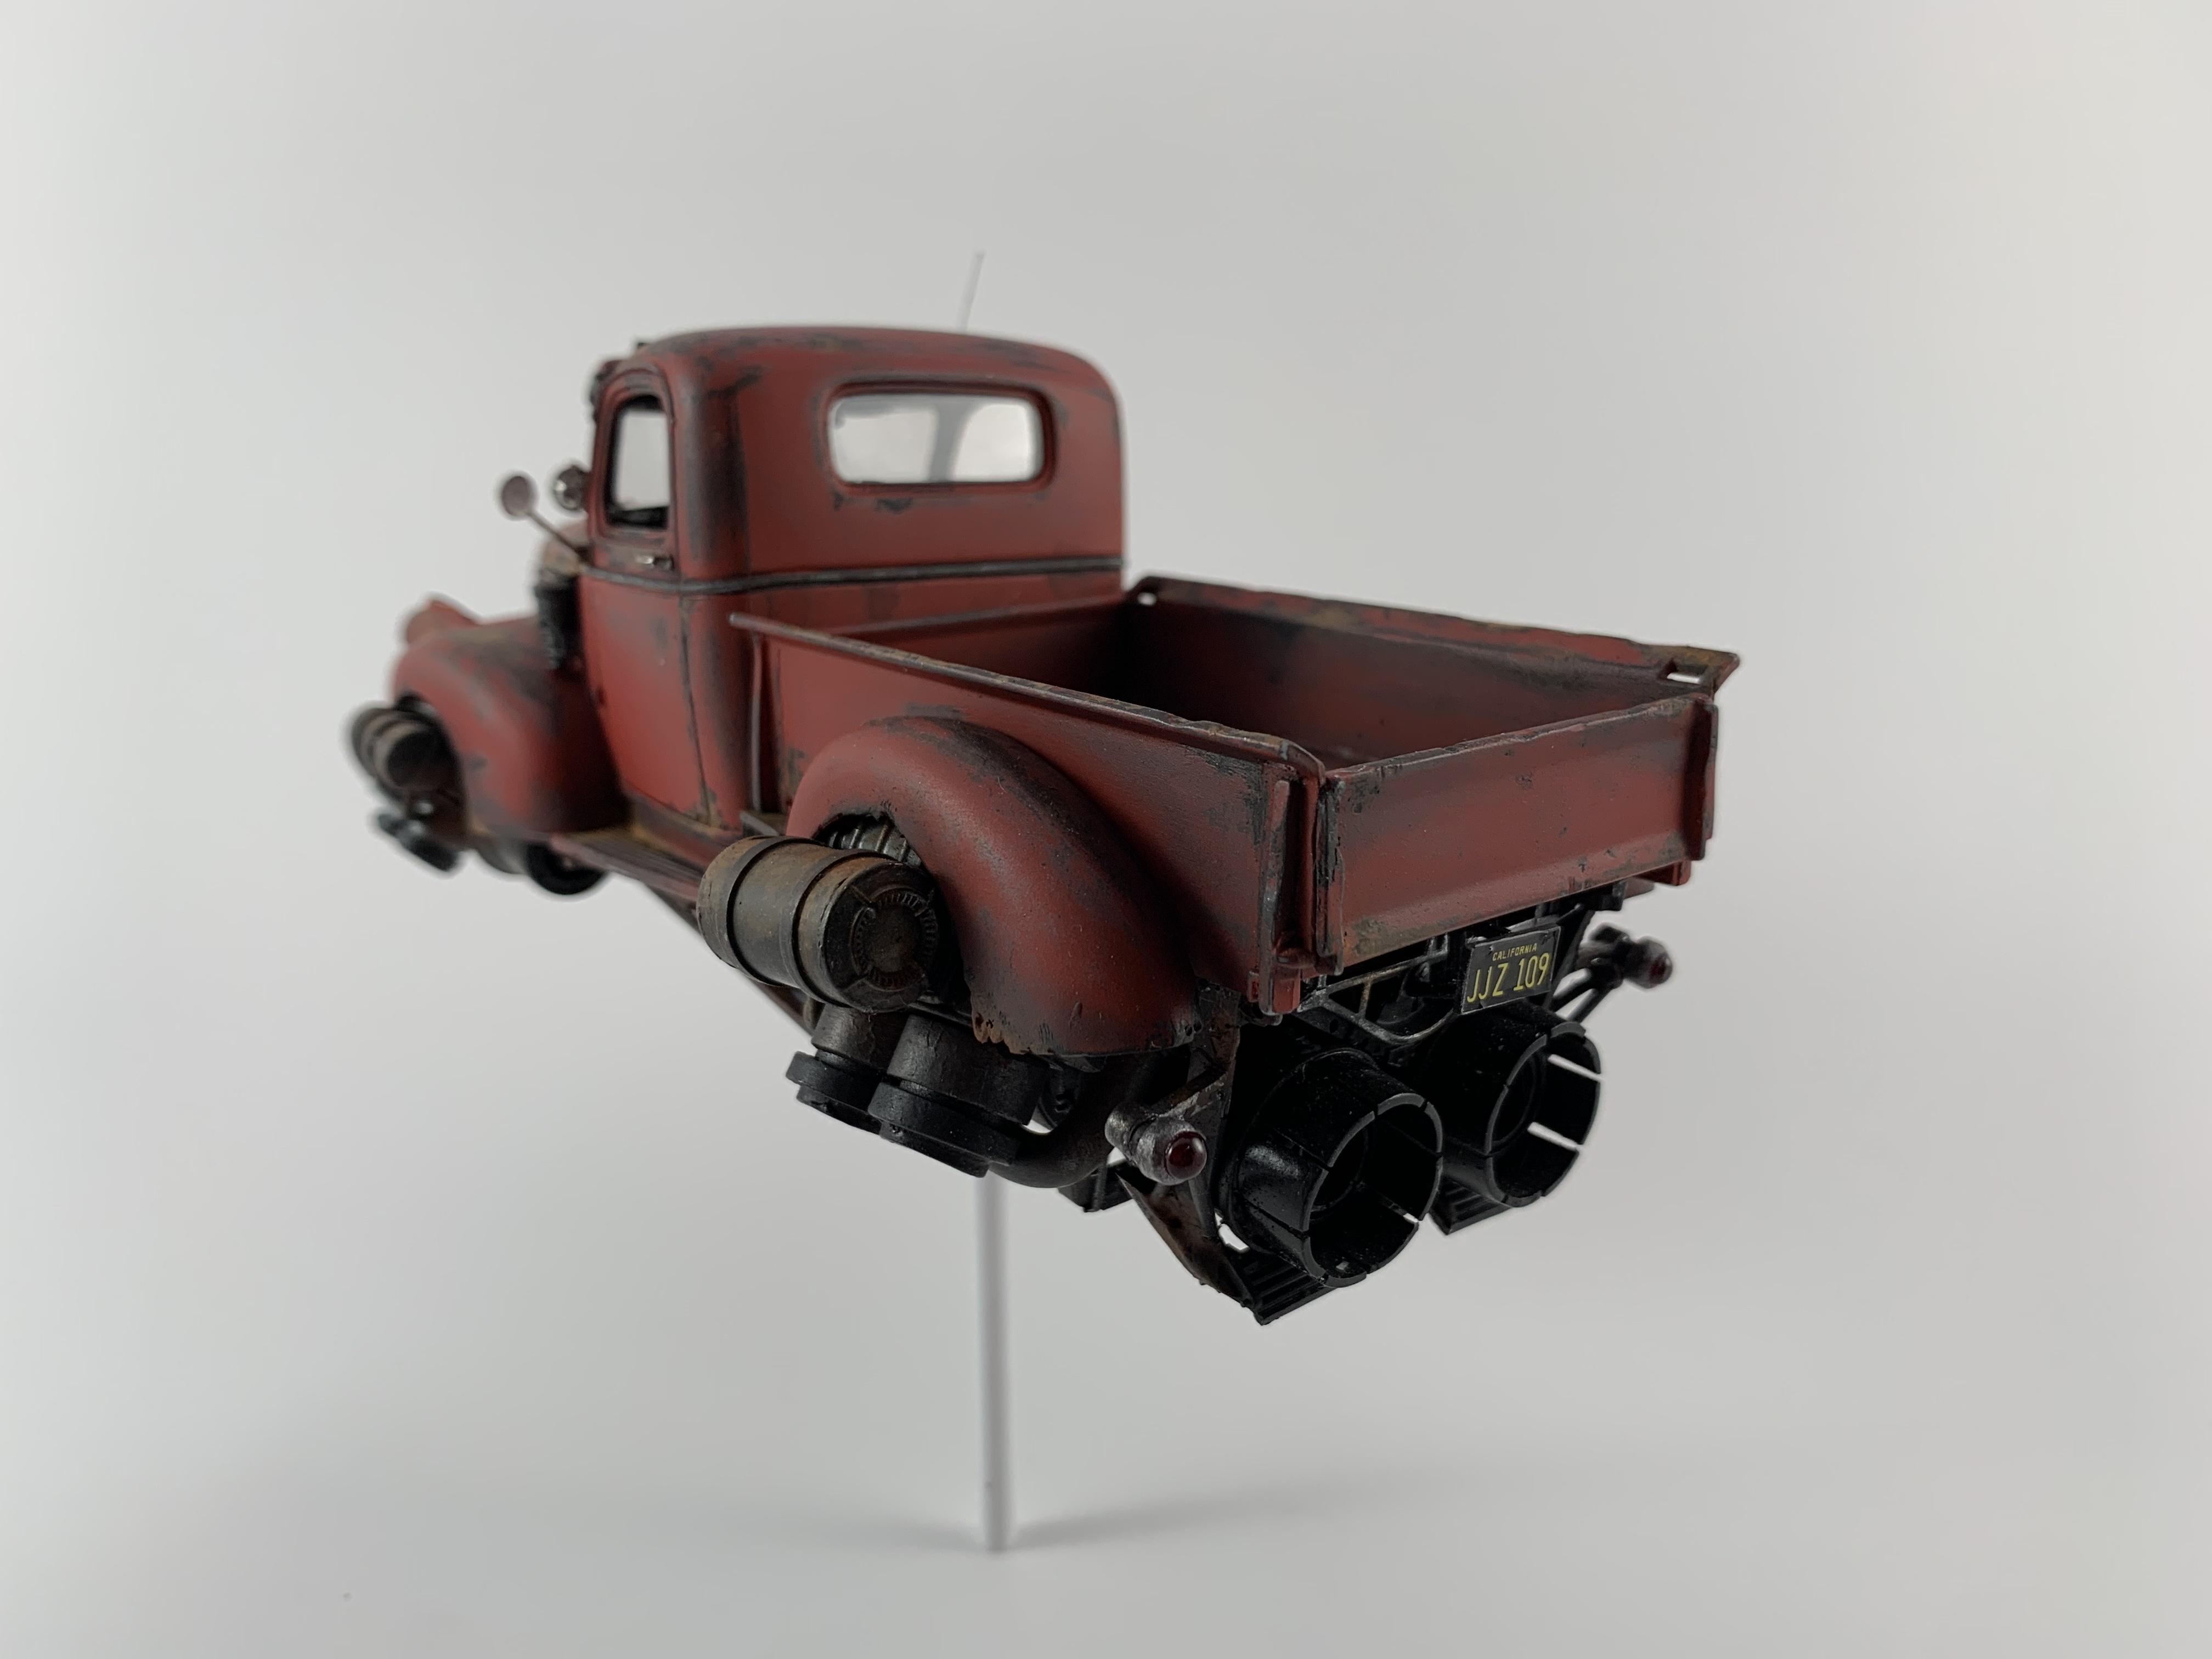
-
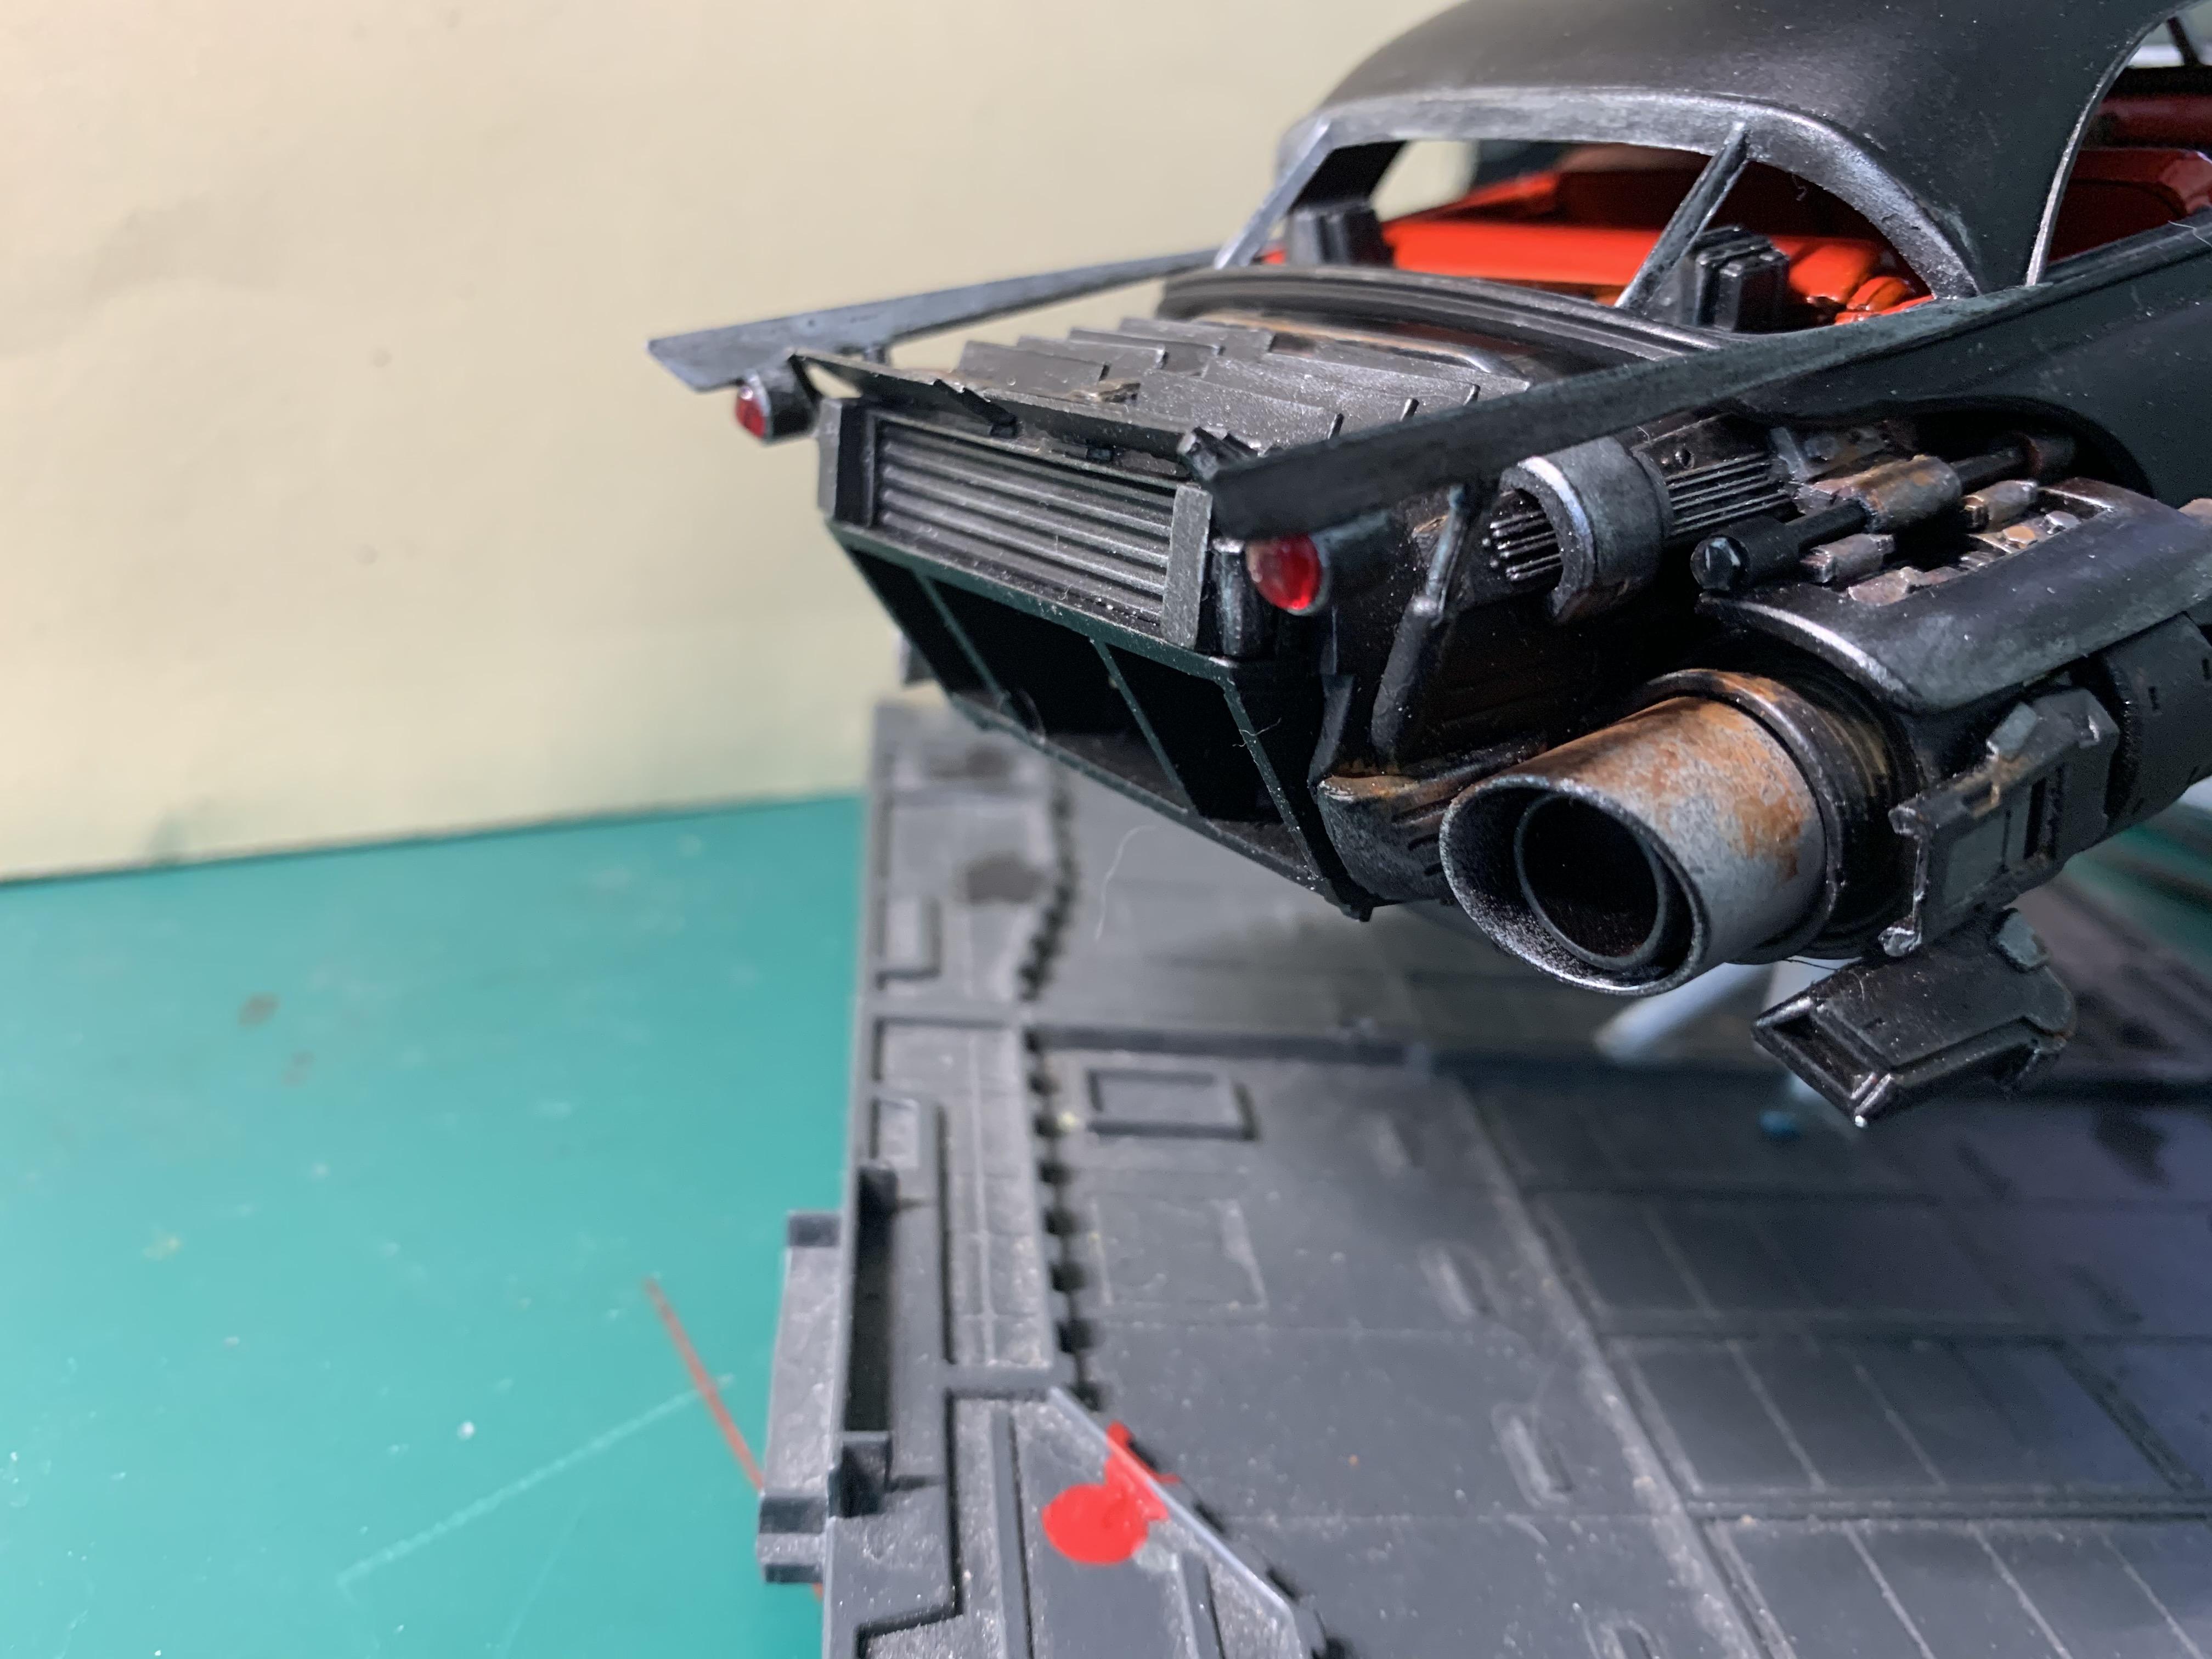
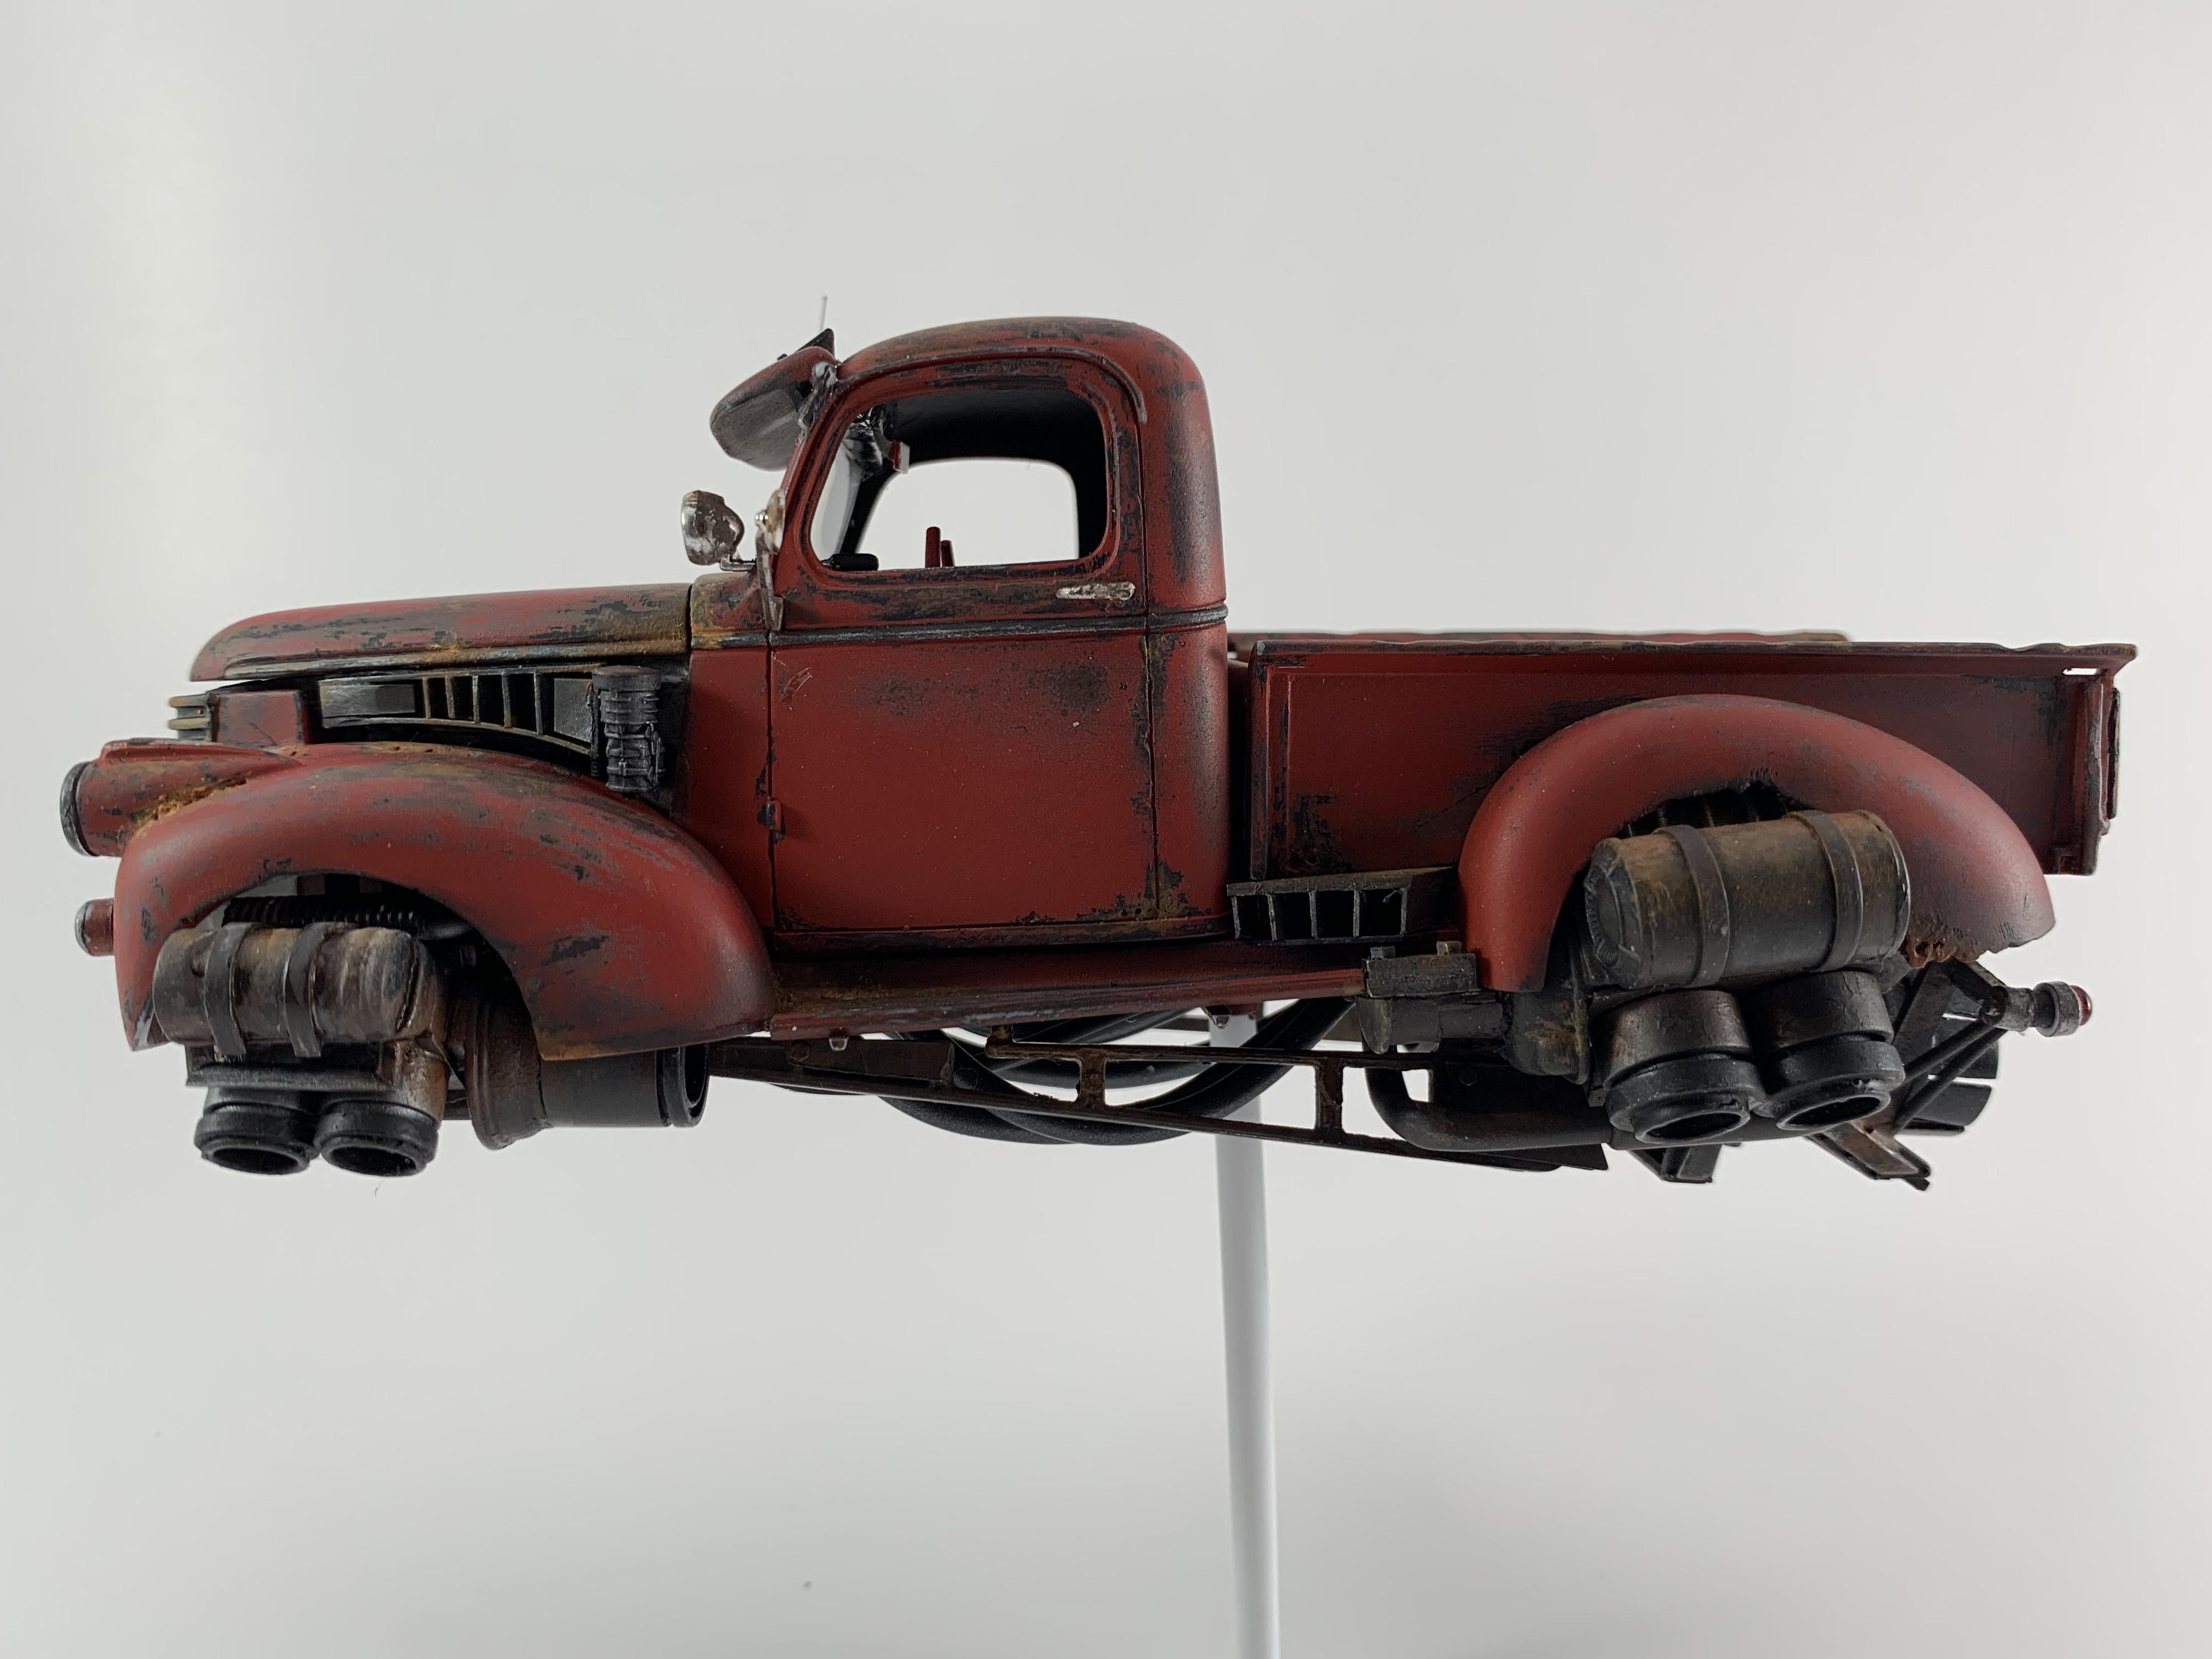
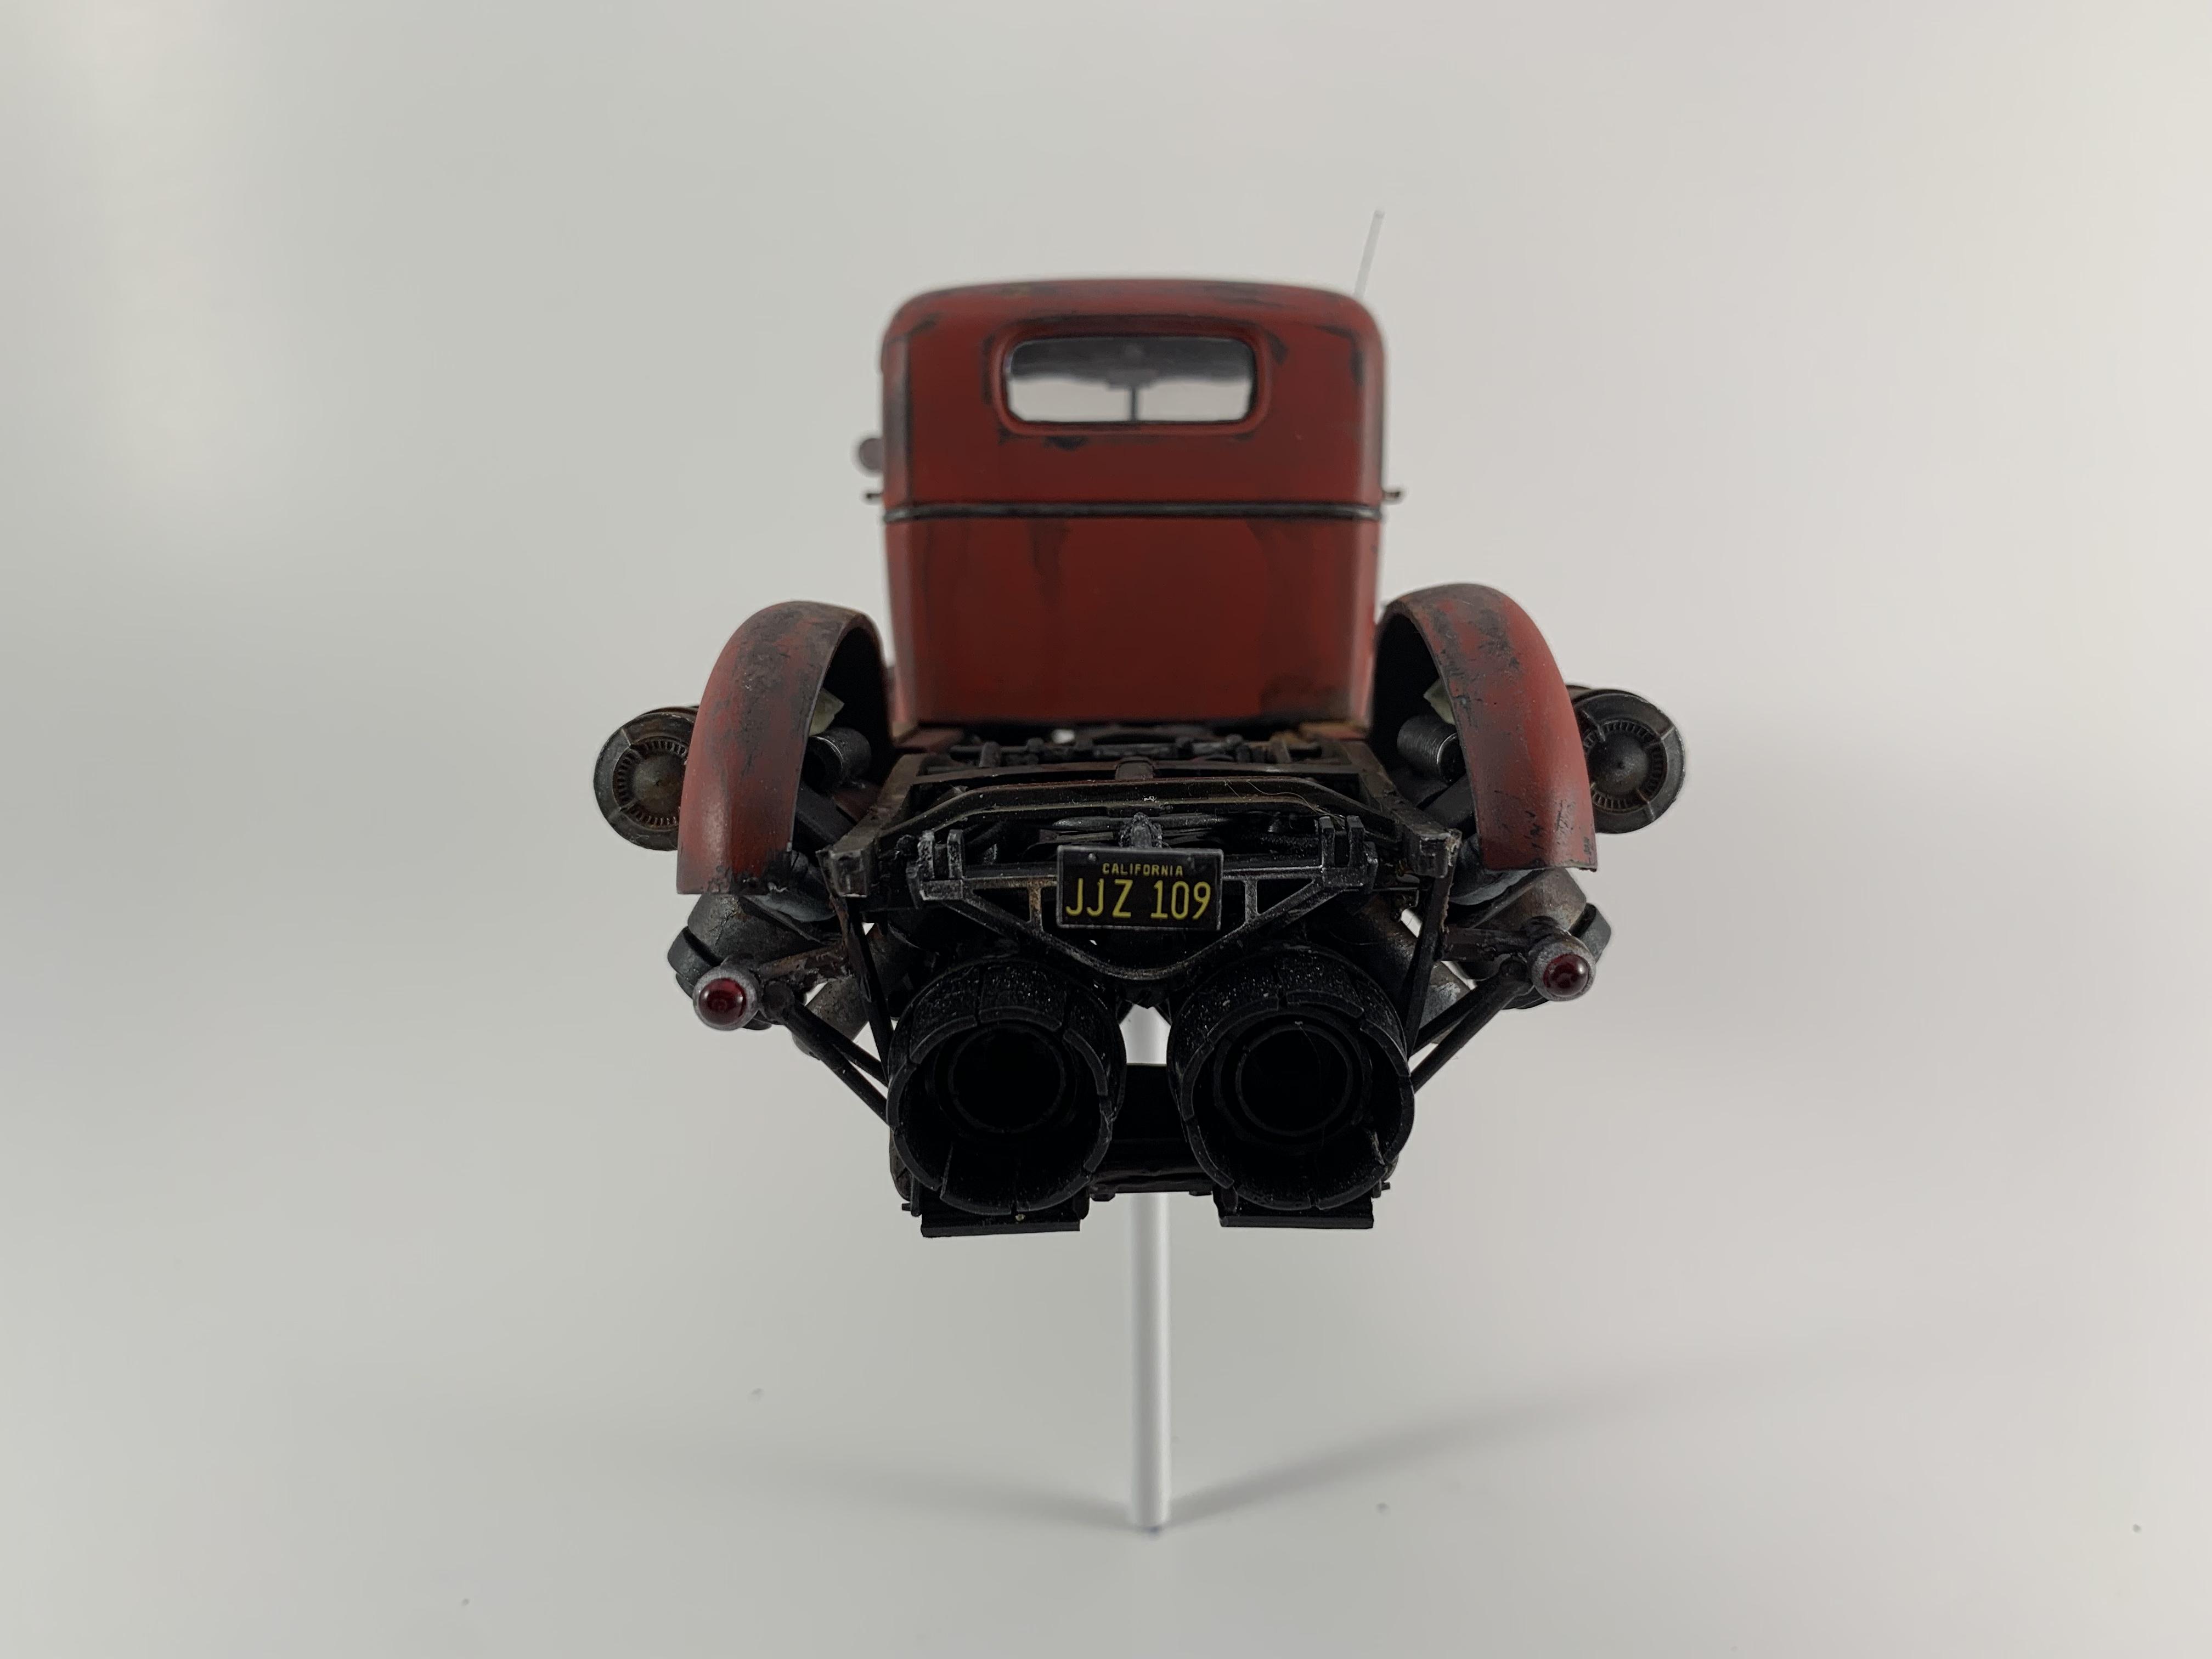
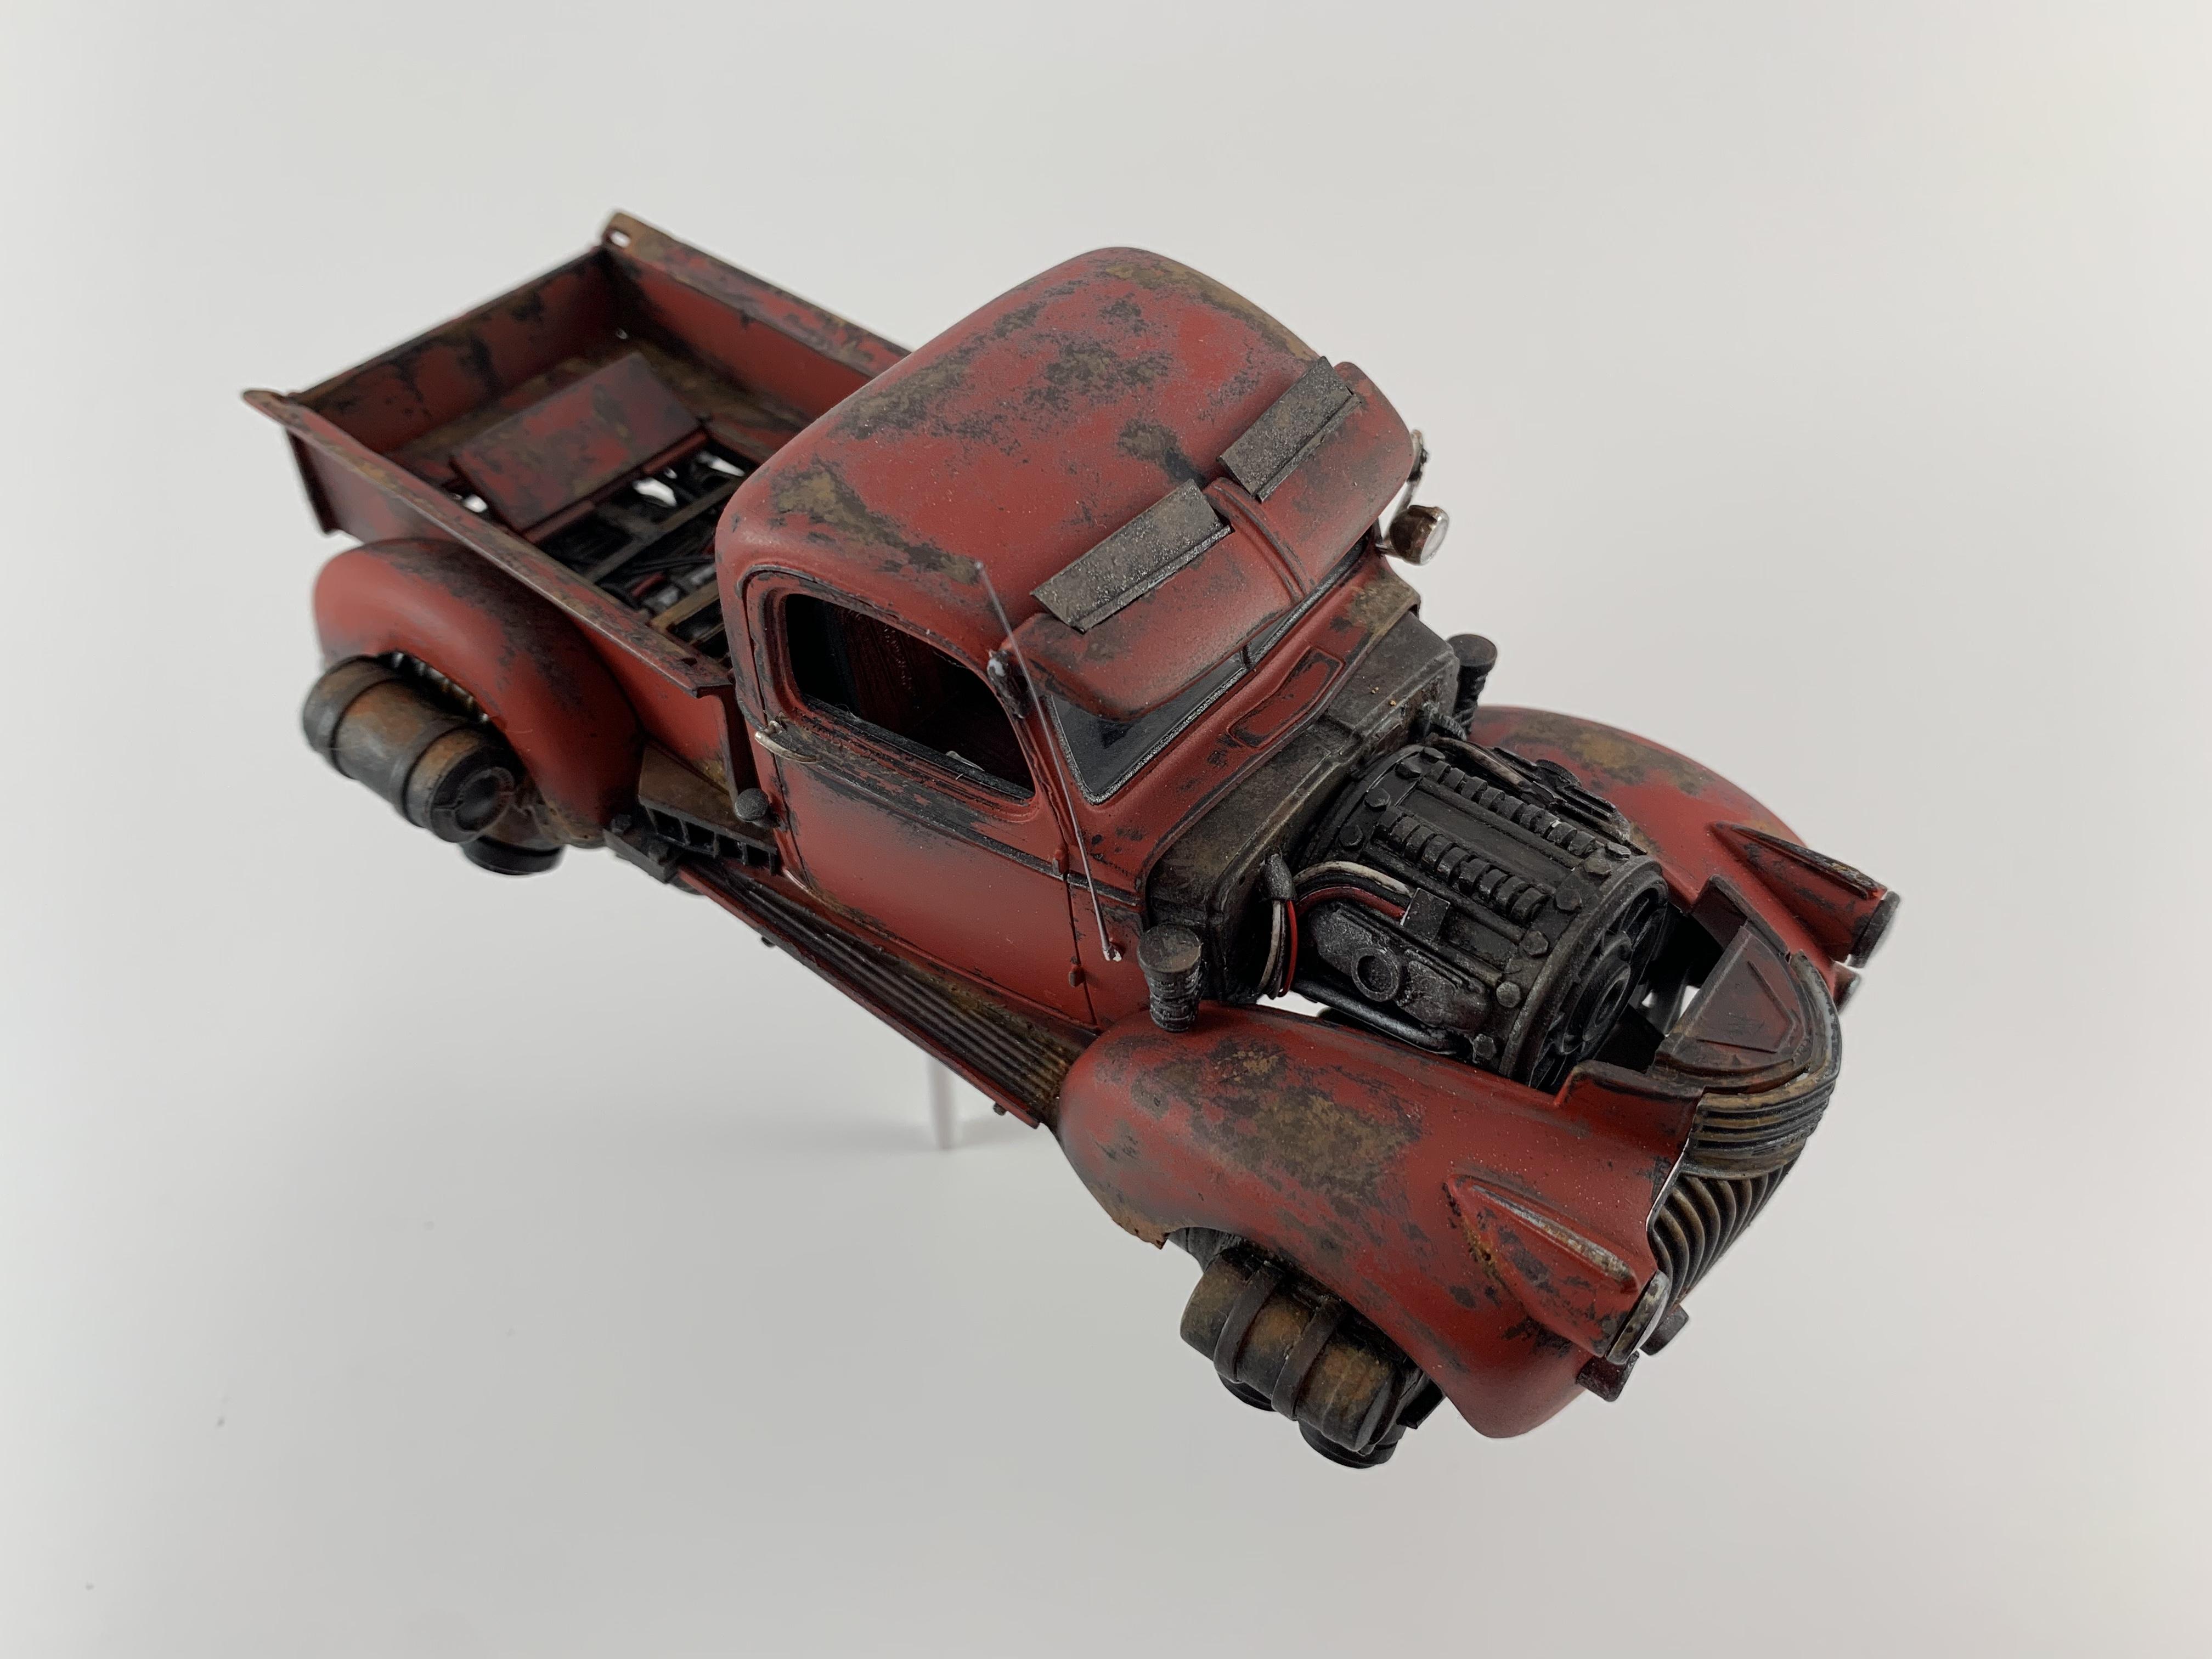
It's a great feeling when you finish a model that you really enjoyed working on. This is a 41 Chevy pickup 1/25 kit from Revell. I made a few modifications.... I have been making these hover themed cars for a few years now. This pickup truck is number 6 of my fleet. I really enjoy the DieselPunk, retro style. Lots of heavy steel, grime and mechanical gadgets that appear to serve a purpose. I typically use older cars with large protruding fenders. This way I can add lots of hardware under the wheel wells. The truck has two large turbines that are attached to the frame, under the bed. These would be for forward propulsion. The turbines at the corners of the truck would be for take-off, landing and turning. Since the two large turbines under the truck would need plenty of air, I made the large intake vents in the truck bed. One intake on each the side of the truck bed as well. I love the grill of this truck. It has a very menacing feel. The turn signals were made from styrene tube. I melted some clear amber sprue for the lenses. I had a second identical kit, that I borrowed a few other pieces from. The kit comes with 1 windshield wiper that goes on the driver's side roof. I used the wiper from the second kit on the passenger side. This unfortunately made it so that I had to mount the visor at a much higher angle. I really wasn't happy with it sitting up high on the roof, so I cut two reliefs for the wiper blades to go under. Now the visor sits at a proper, cool looking height, and it got some neat little air flaps. I wanted something interesting under the hood. I made this generator looking thing and it fit the look of the truck. I kept adding bits to it until I ran out of room. I mentioned big turbines. This is where the monster began. I made these twin turbines for a 71 Hemi Cuda that I was going to make into a hover car. I tried them under this truck and I instantly switched full time to this model. The interior was good fun. I made a floor center console and added 2 long manual shifters. One red handled and one white. I added a few more flight controls and a throttle lever to the right of the driver's seat. The steering wheel resembles a flight yoke. I made a access plate that could be removed to work on the large turbines.The second plate is hinged and lifts for cooling. Most of the wires and hoses are styrene rod. Thanks for looking!!!
-
65´Chevy El Camino 1/25 AMT
Daxman replied to Fairfax's topic in Model Trucks: Pickups, Vans, SUVs, Light Commercial
Amazing work, I love it!!