DR JAY
-
Posts
288 -
Joined
-
Last visited
Content Type
Profiles
Forums
Events
Gallery
Everything posted by DR JAY
-
I need a set of GOOD QUALITY decals for this project that has stalled for want of decals. I won't go into why, after 2 orders from separate companies, I have nothing I can use that's worthy of the time and effort put into this build already. Any suggestions? This build was intended to be a tribute to not only Junior, but more importantly to one of my best friends that I used to race with and who recently passed away. I can't have this one stalled in a box on the shelf forever...Thanks for looking! Stay Healthy!

-

1960 Pontiac Laurentian & Scratch Built Travel Trailer
DR JAY replied to DR JAY's topic in Model Cars
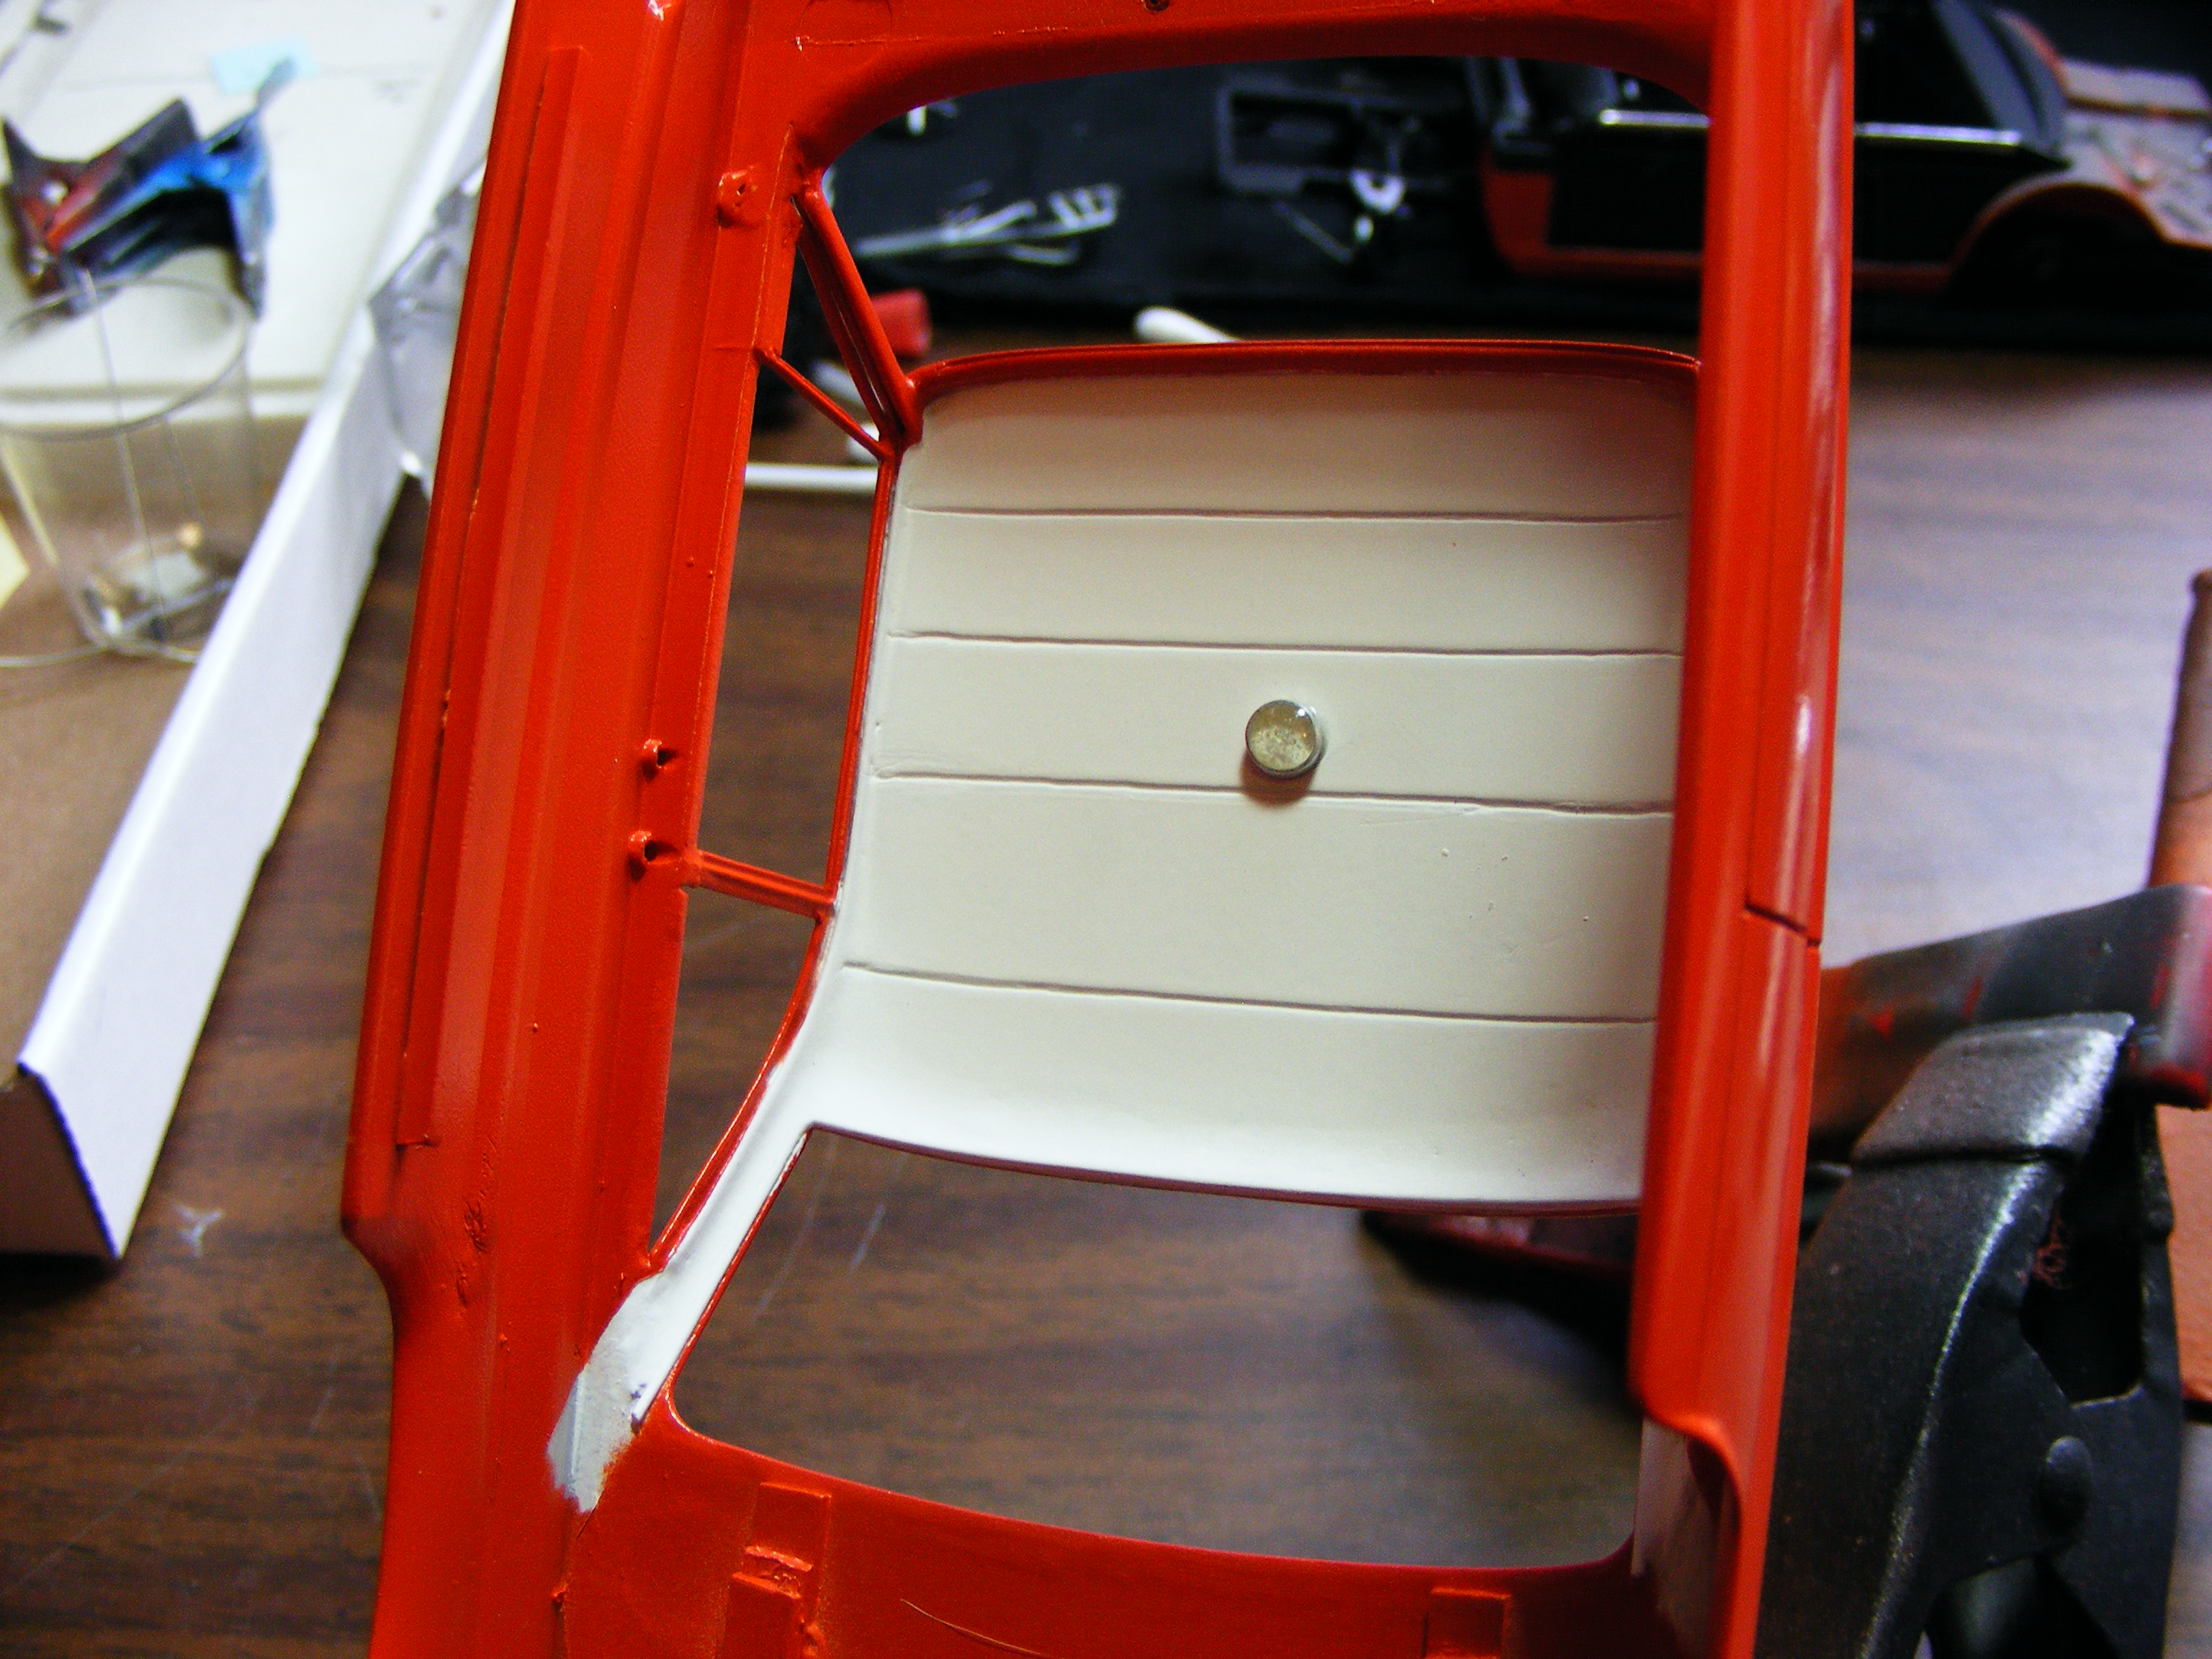
Thank You To make the job simpler and to avoid glass fitting trouble I scribed the Chevy body around the trim at the top of the doors followed around the trim at the base of the windshield and back window so that it just dropped into the hole in the Pontiac body; from which I removed the roof using the same method. The whole point was to ditch the Bonneville roof and glass entirely because it just wasn't right at all. The Chevy glass would have fit anyway because I make headliners and channels for the trimmed and polished glass to snap into...usually with no adhesive required. -
1960 Pontiac Laurentian & Scratch Built Travel Trailer
DR JAY replied to DR JAY's topic in Model Cars
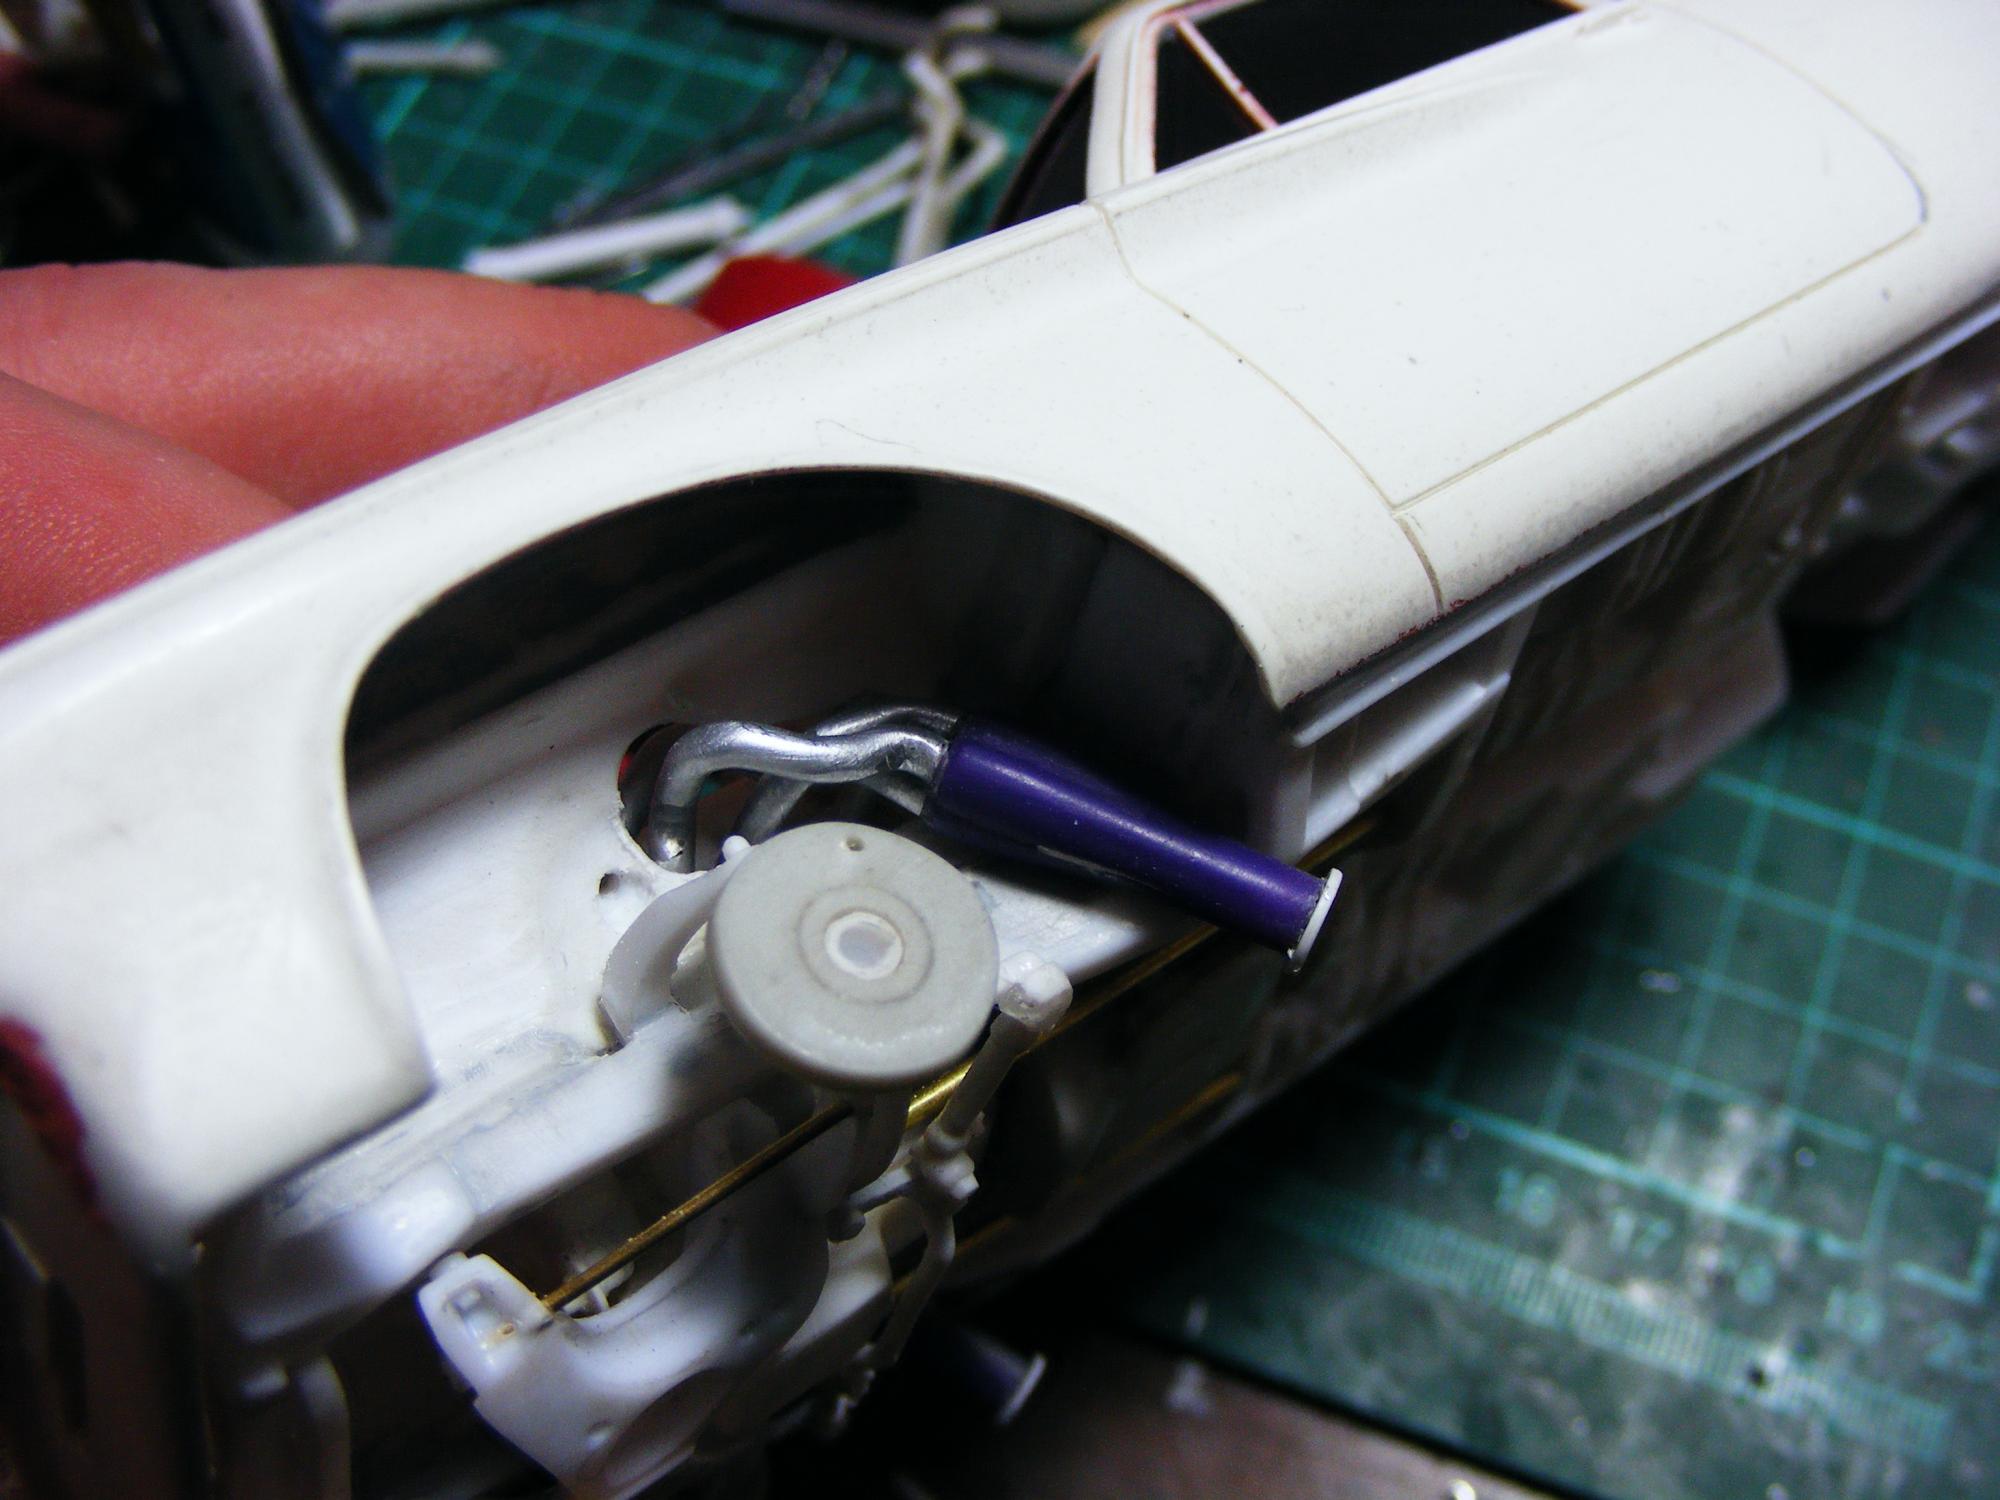
I twisted wire together, leaving strands to correspond with appropriate accessories, and then painted the harness tamiya rubber and appropriate colored wires. As For the trailer: It's scratch built from styrene except for wheels, tires, tail lights. tongue jack, furnace vent and roof vent. The louvered vents on the sides are foil copies and the propane tank is made from pen caps and aluminum sheet. Thank You for the compliments! I appreciate them a lot. The trailer was actually an accessory after thought that turned out fairly decent for the short time it took to design and build. -
1960 Pontiac Laurentian & Scratch Built Travel Trailer
DR JAY replied to DR JAY's topic in Model Cars
...The Trumpeter Bonneville with a Revell 59 Impala roof. I kept the Bonneveille interior just because it looked good and it saved me a lot of work ...My Hobby shop guy made me some miscellaneous decals for future projects before he closed his doors and these were among them -
...Just completed last week and I'm testing out Google Photos...
-
My re-registration went OK but my disapointment at the entire history being lost is, at this time, immeasurable.
-
Thank You! The side glass is Evergreen clear sheet.
-
Jake King Thunderbolt , wheels source ?
DR JAY replied to gtx6970's topic in WIP: Drag Racing Models
I'm working on the AMT 65 Riviera right now and that kit comes with Ansen-looking 5 slots that would easily pass for the rear wheels on the Thunderbolt--although I don't think the offset would be right. The front wheels on the Thunderbolt look like the slots are smaller than the rears, so you would have to find a matching set with smaller slots. The offset on the T-Bolt fronts looks like a match for the Riv wheels I'd offer you mine but I have already stripped the chrome, removed the receivers for the wire axles and sanded the rim flanges from 2 for widening.
-
Thanks VERY much for the compliments! I appreciate the feedback...nice to know others appreciate your efforts.
-
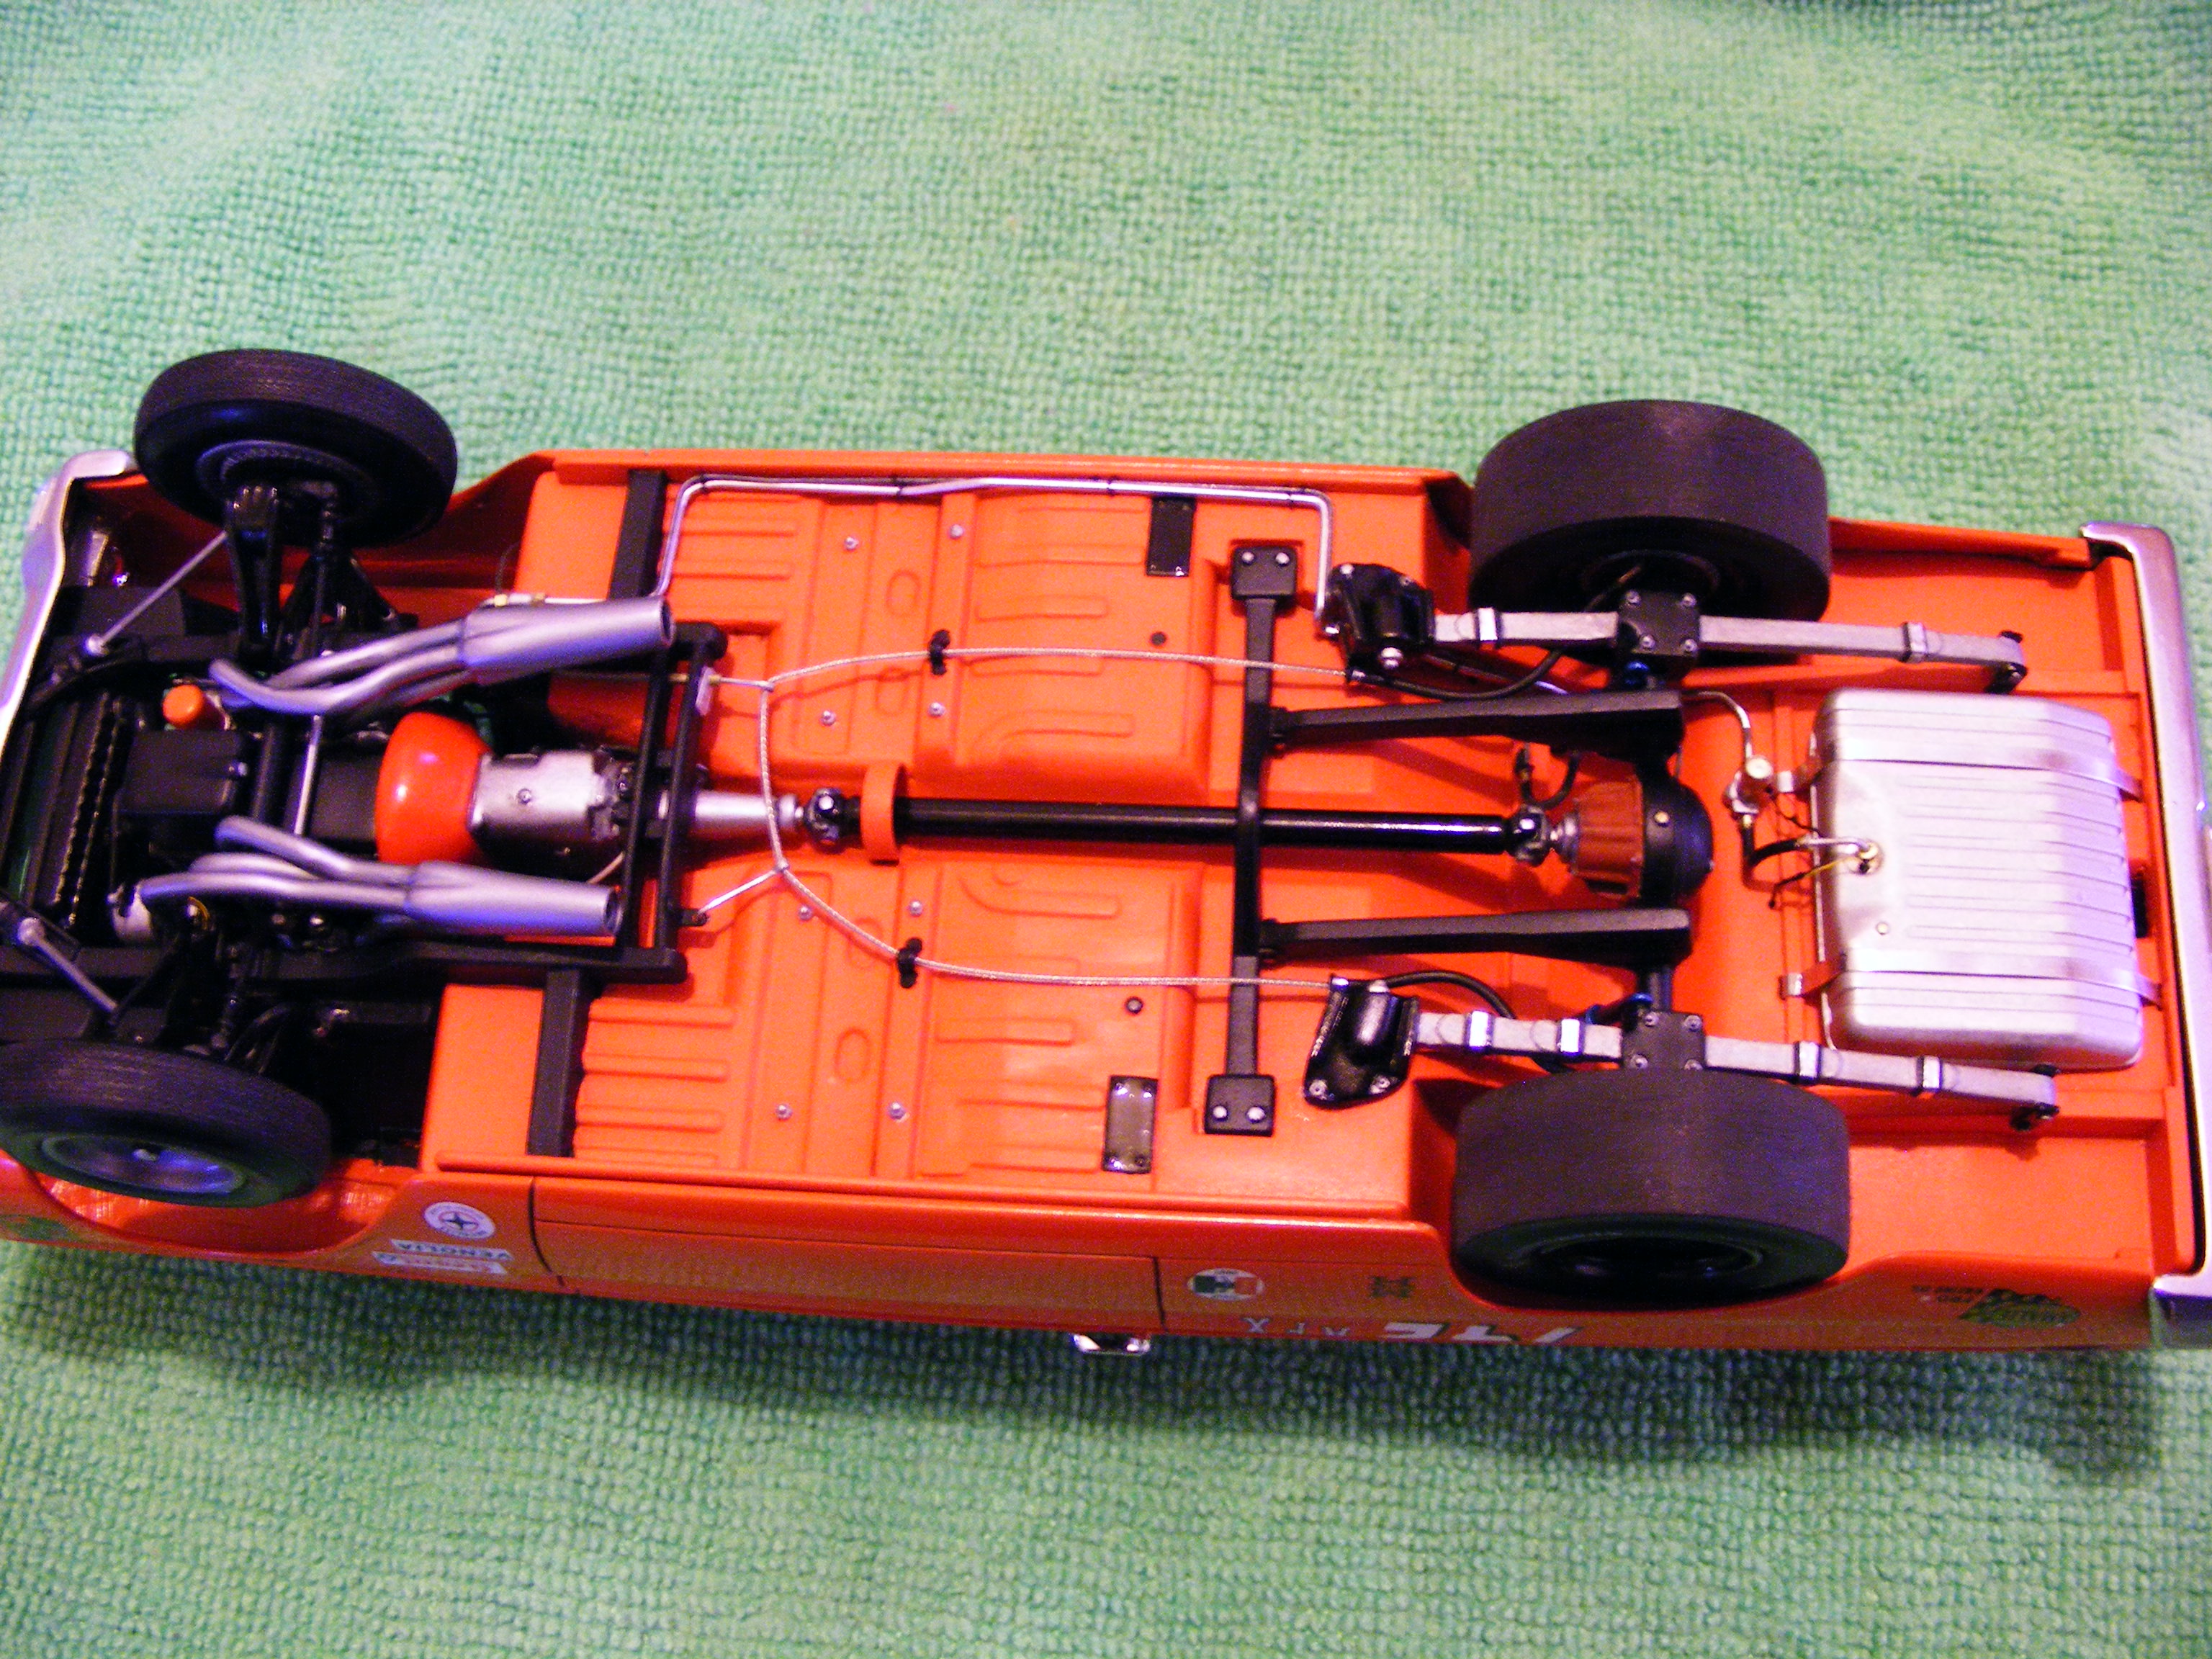
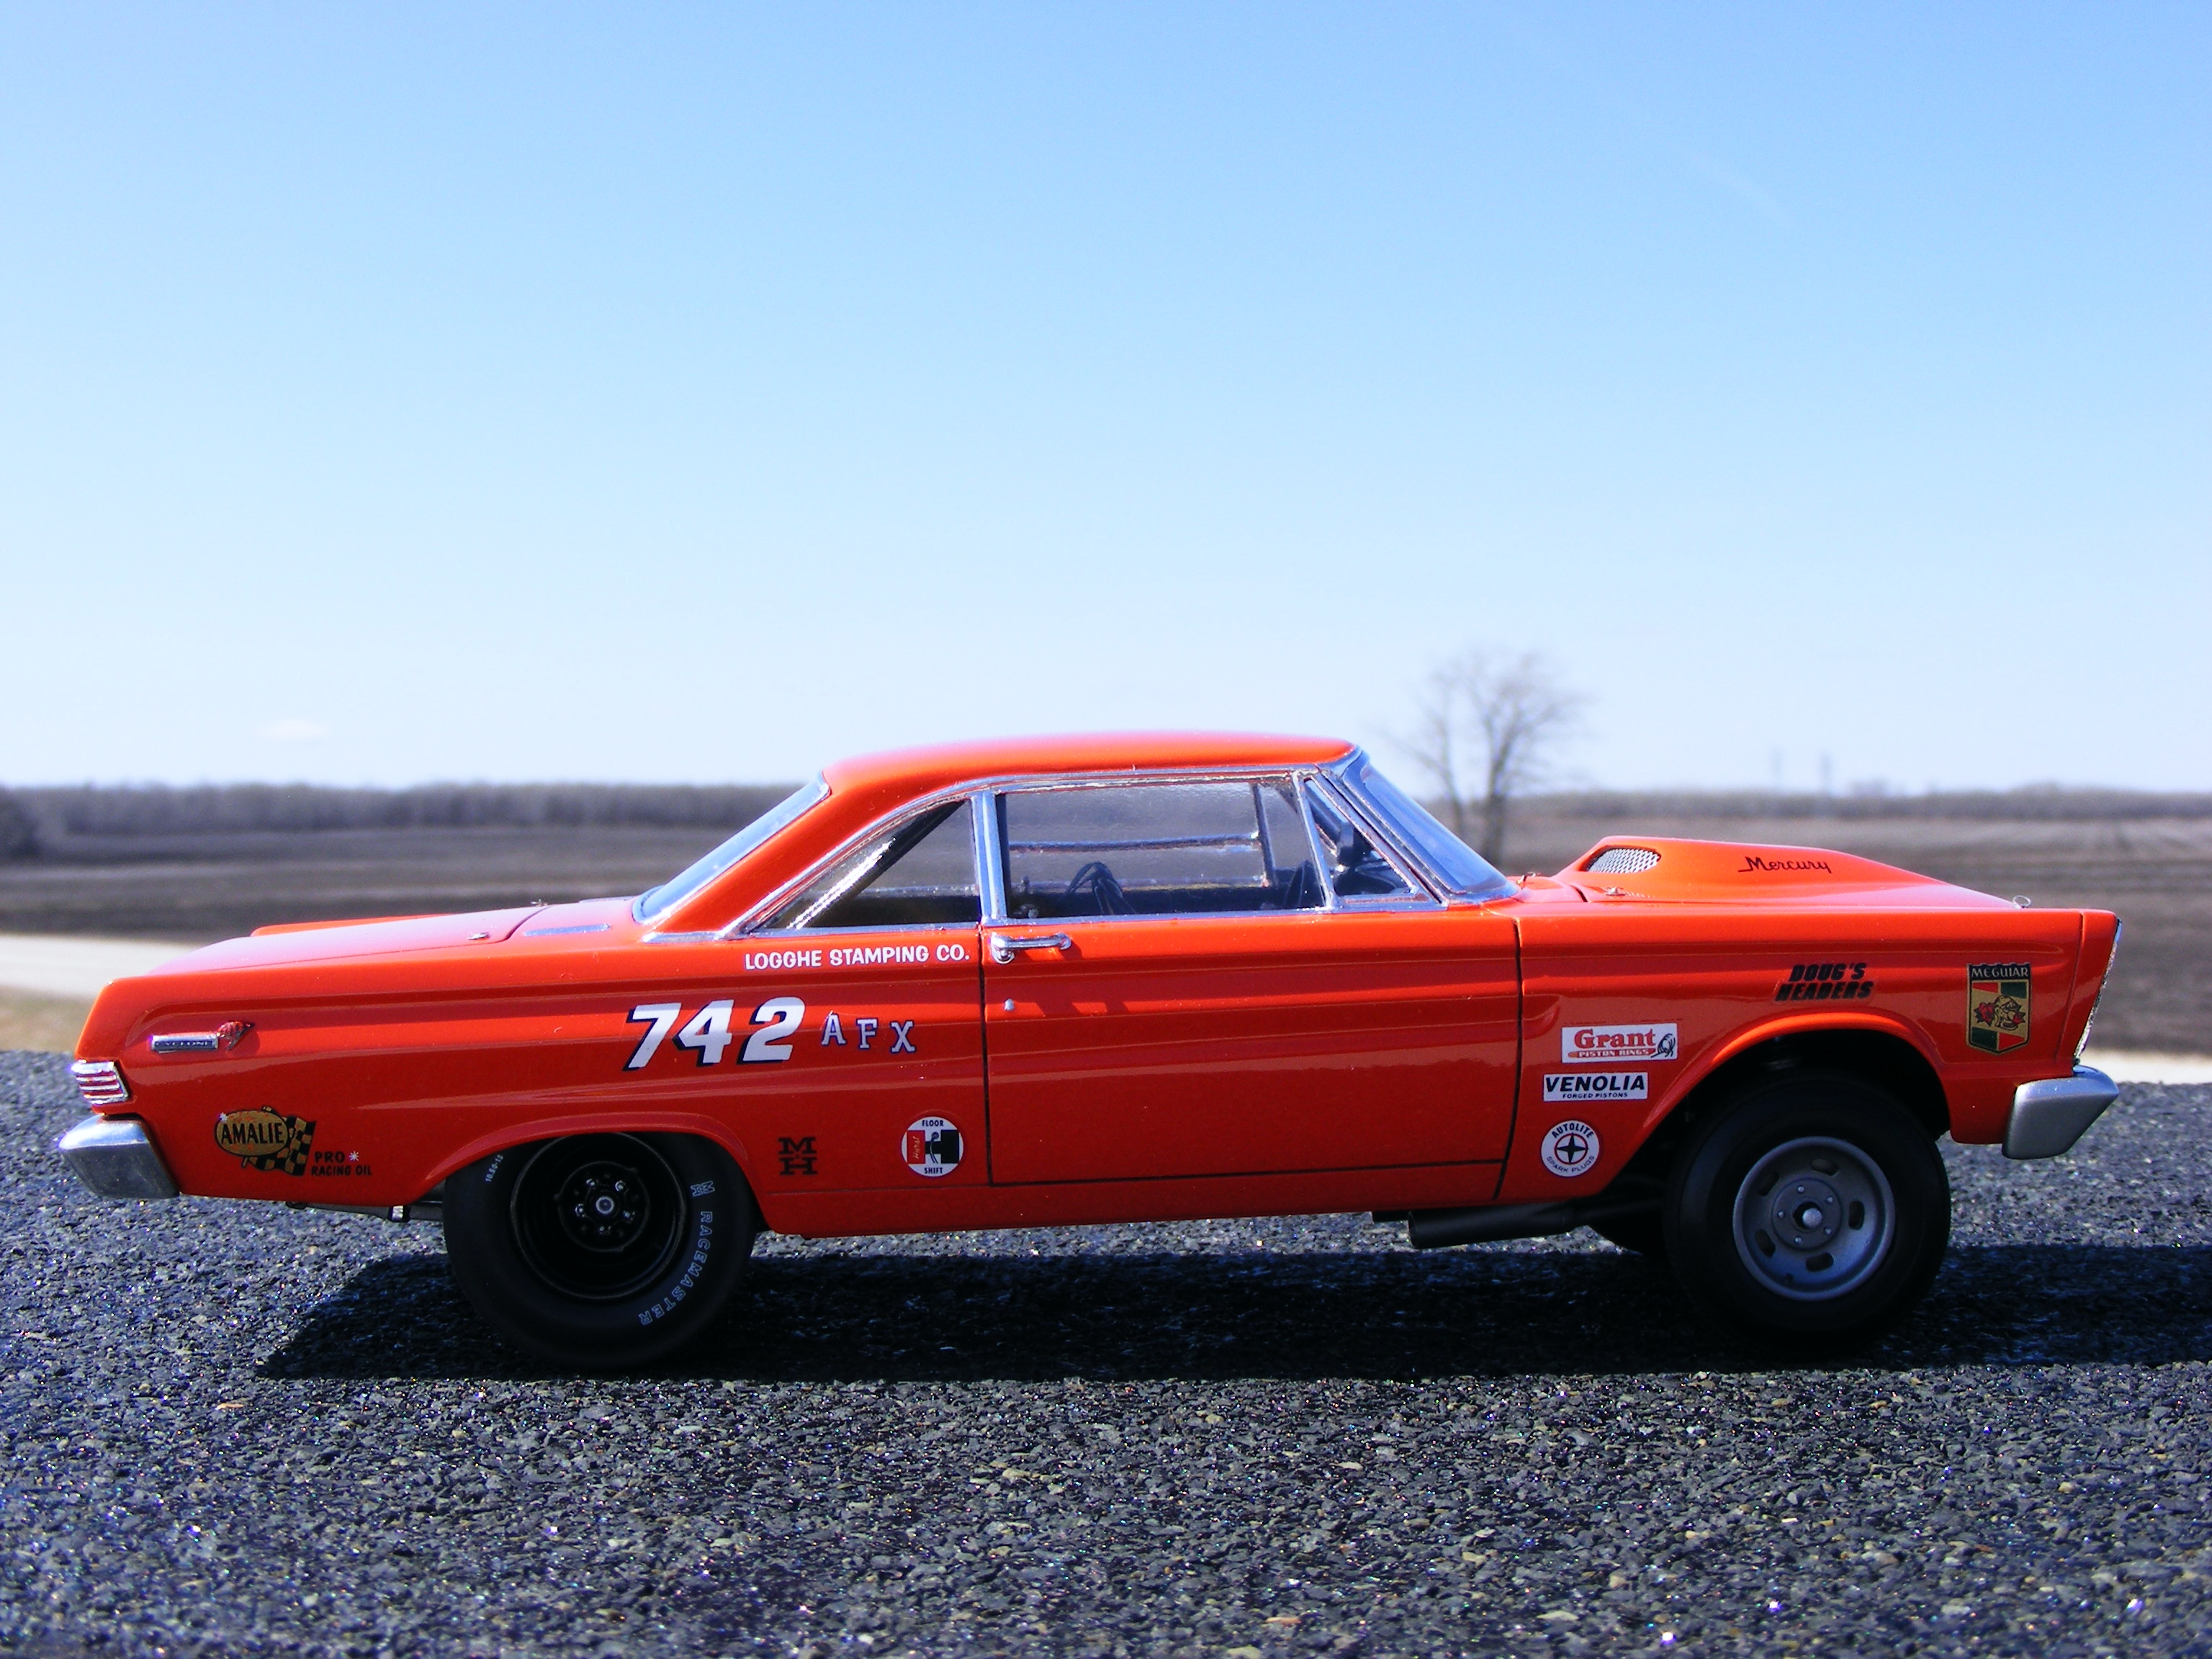
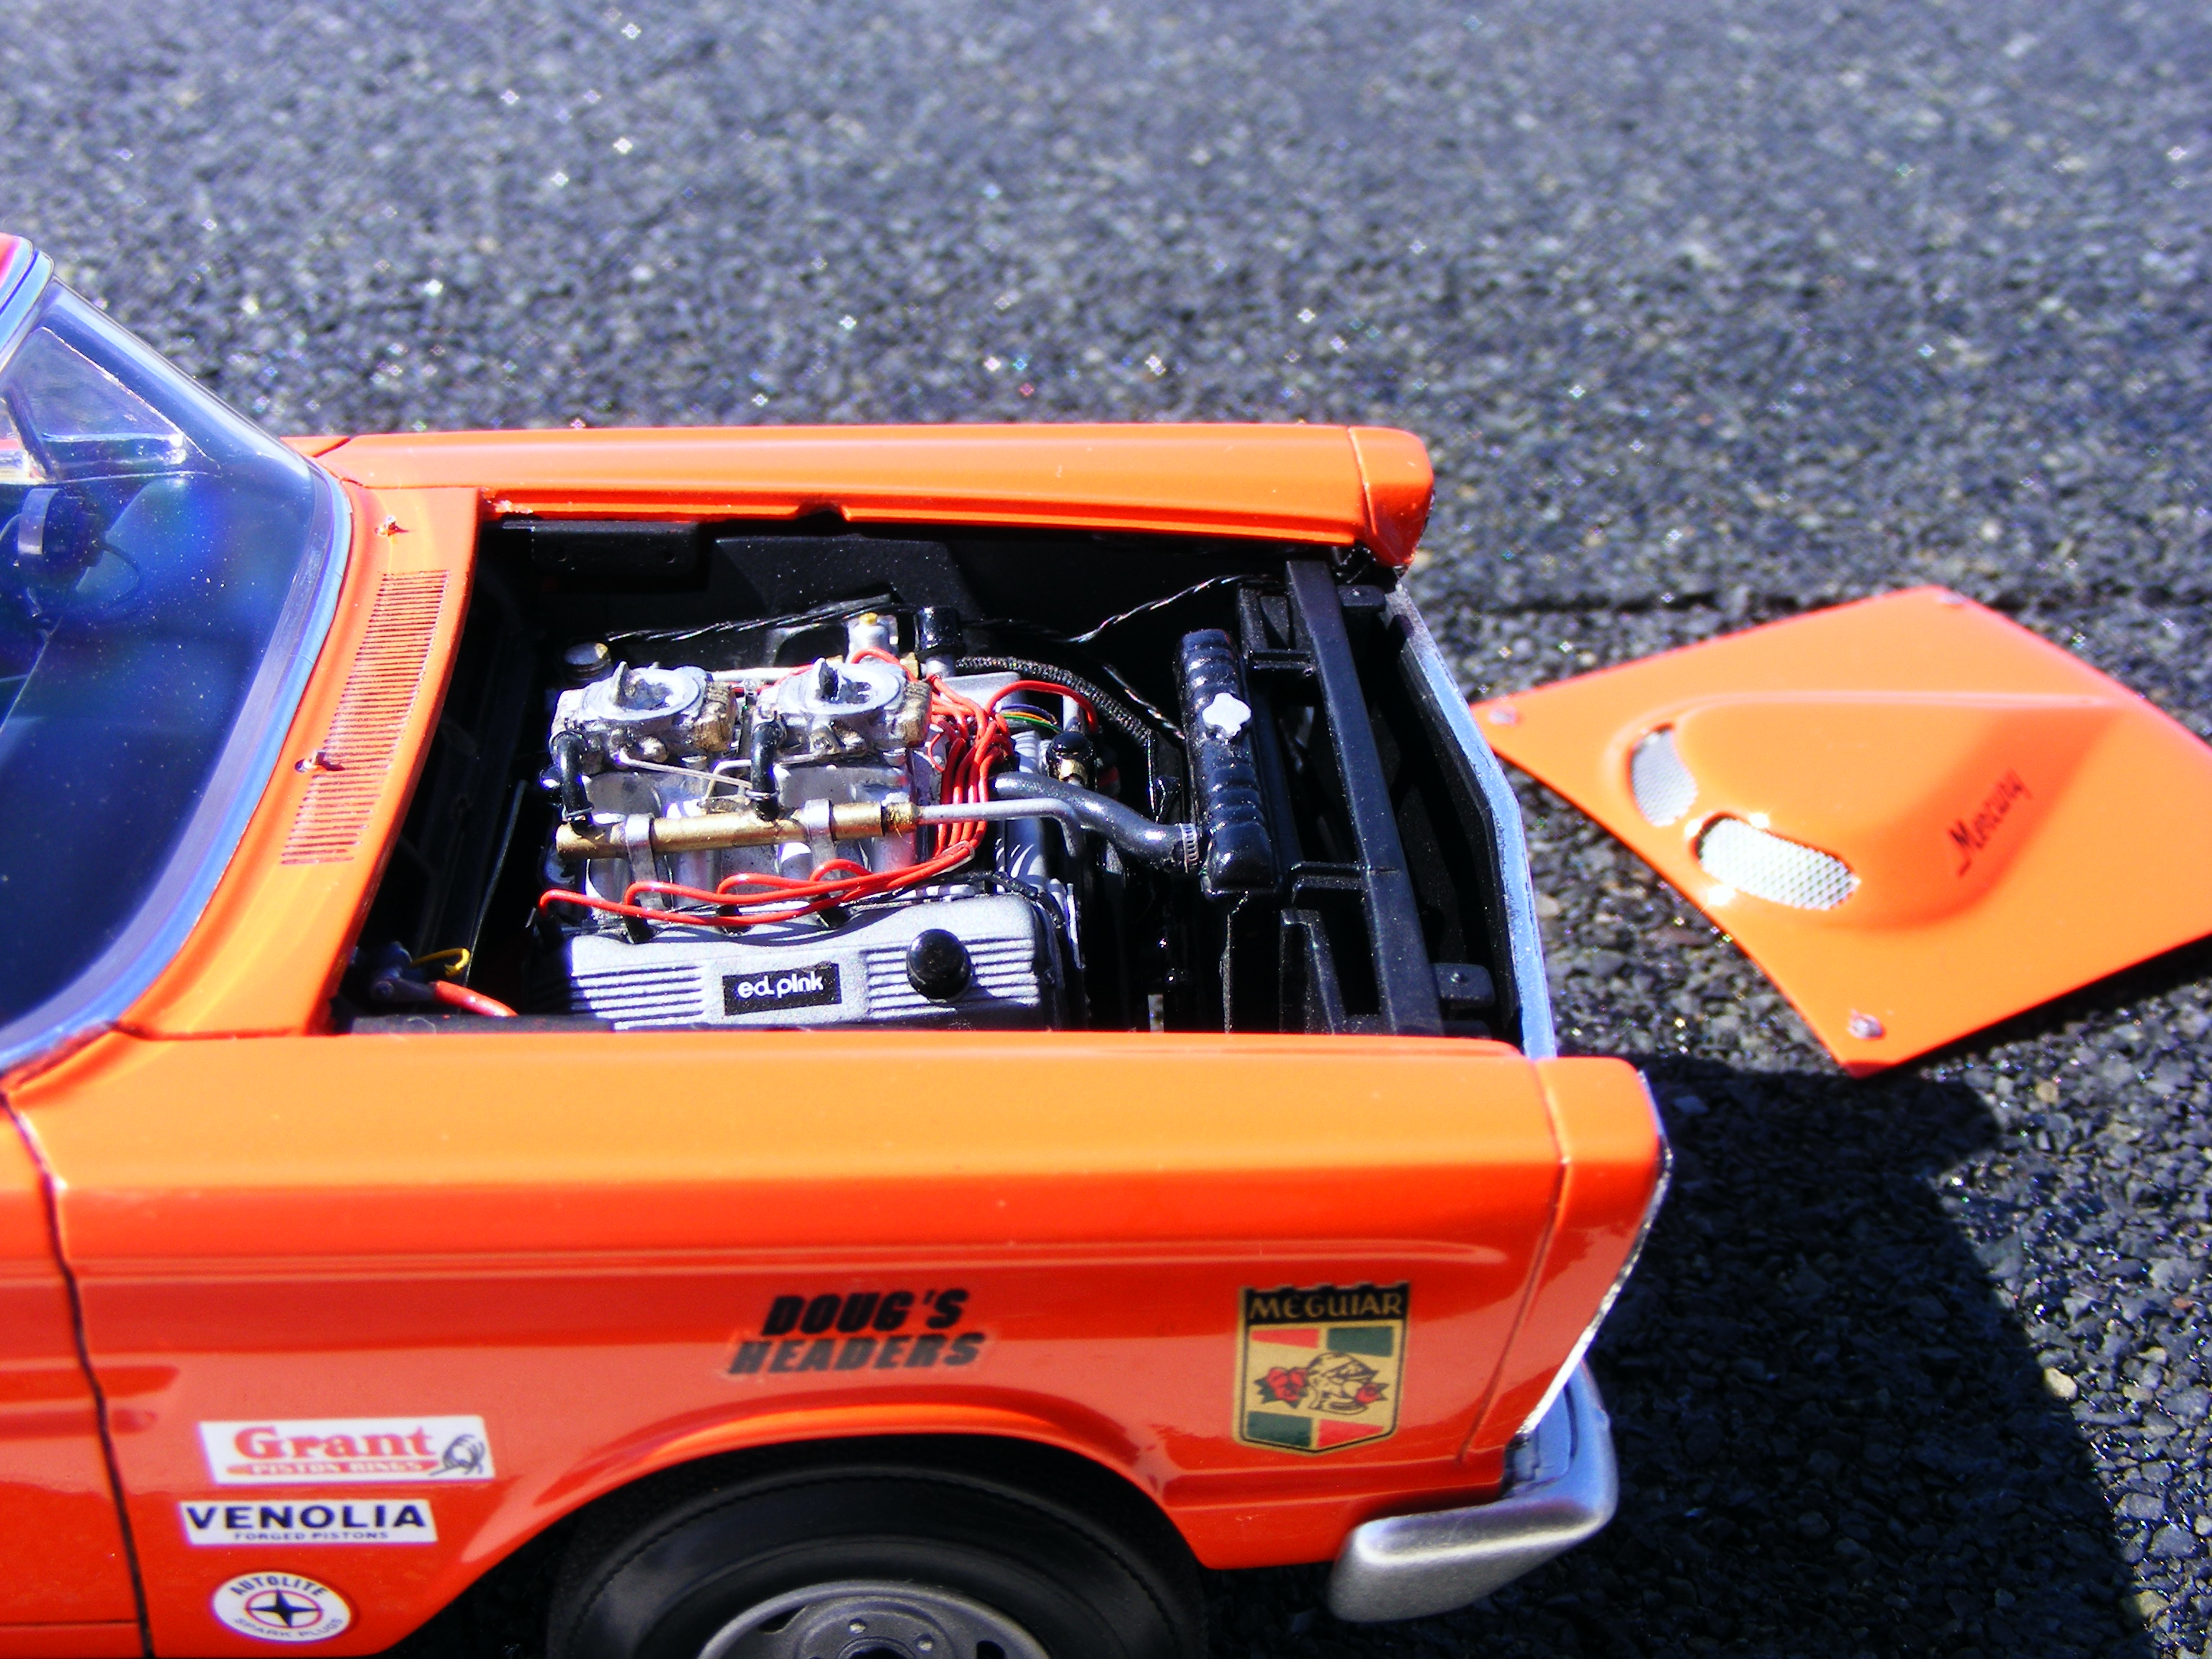
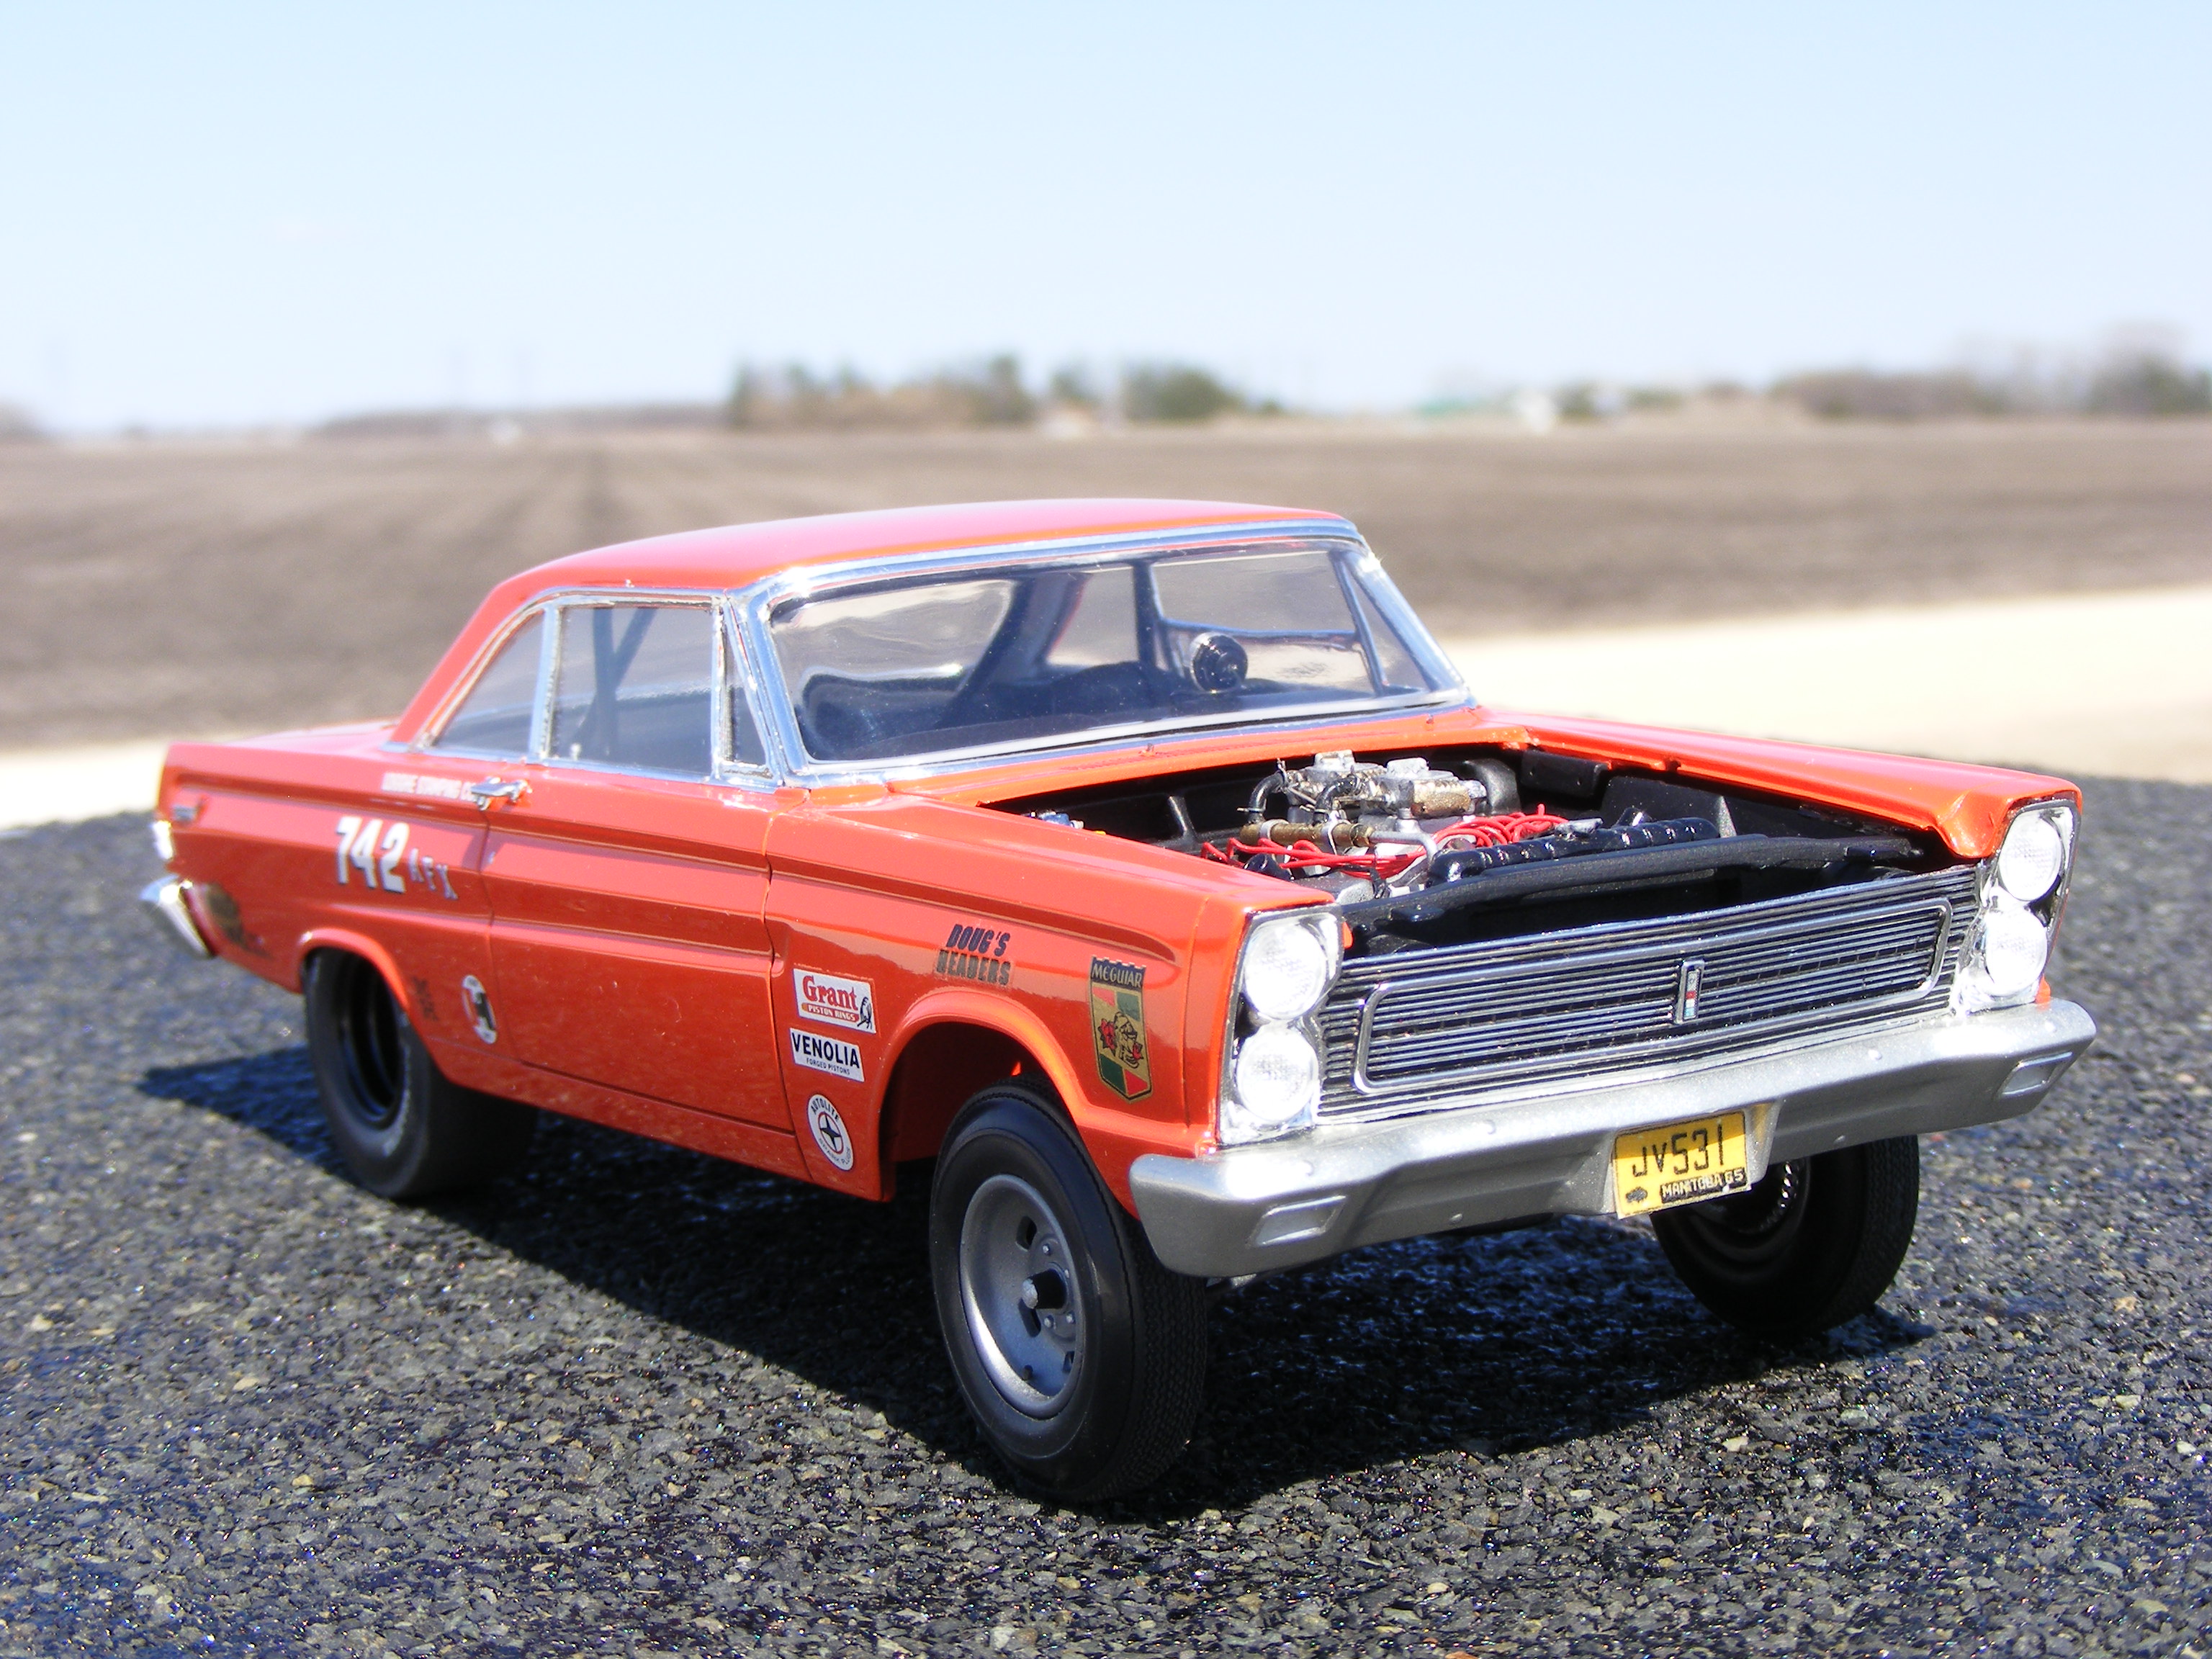
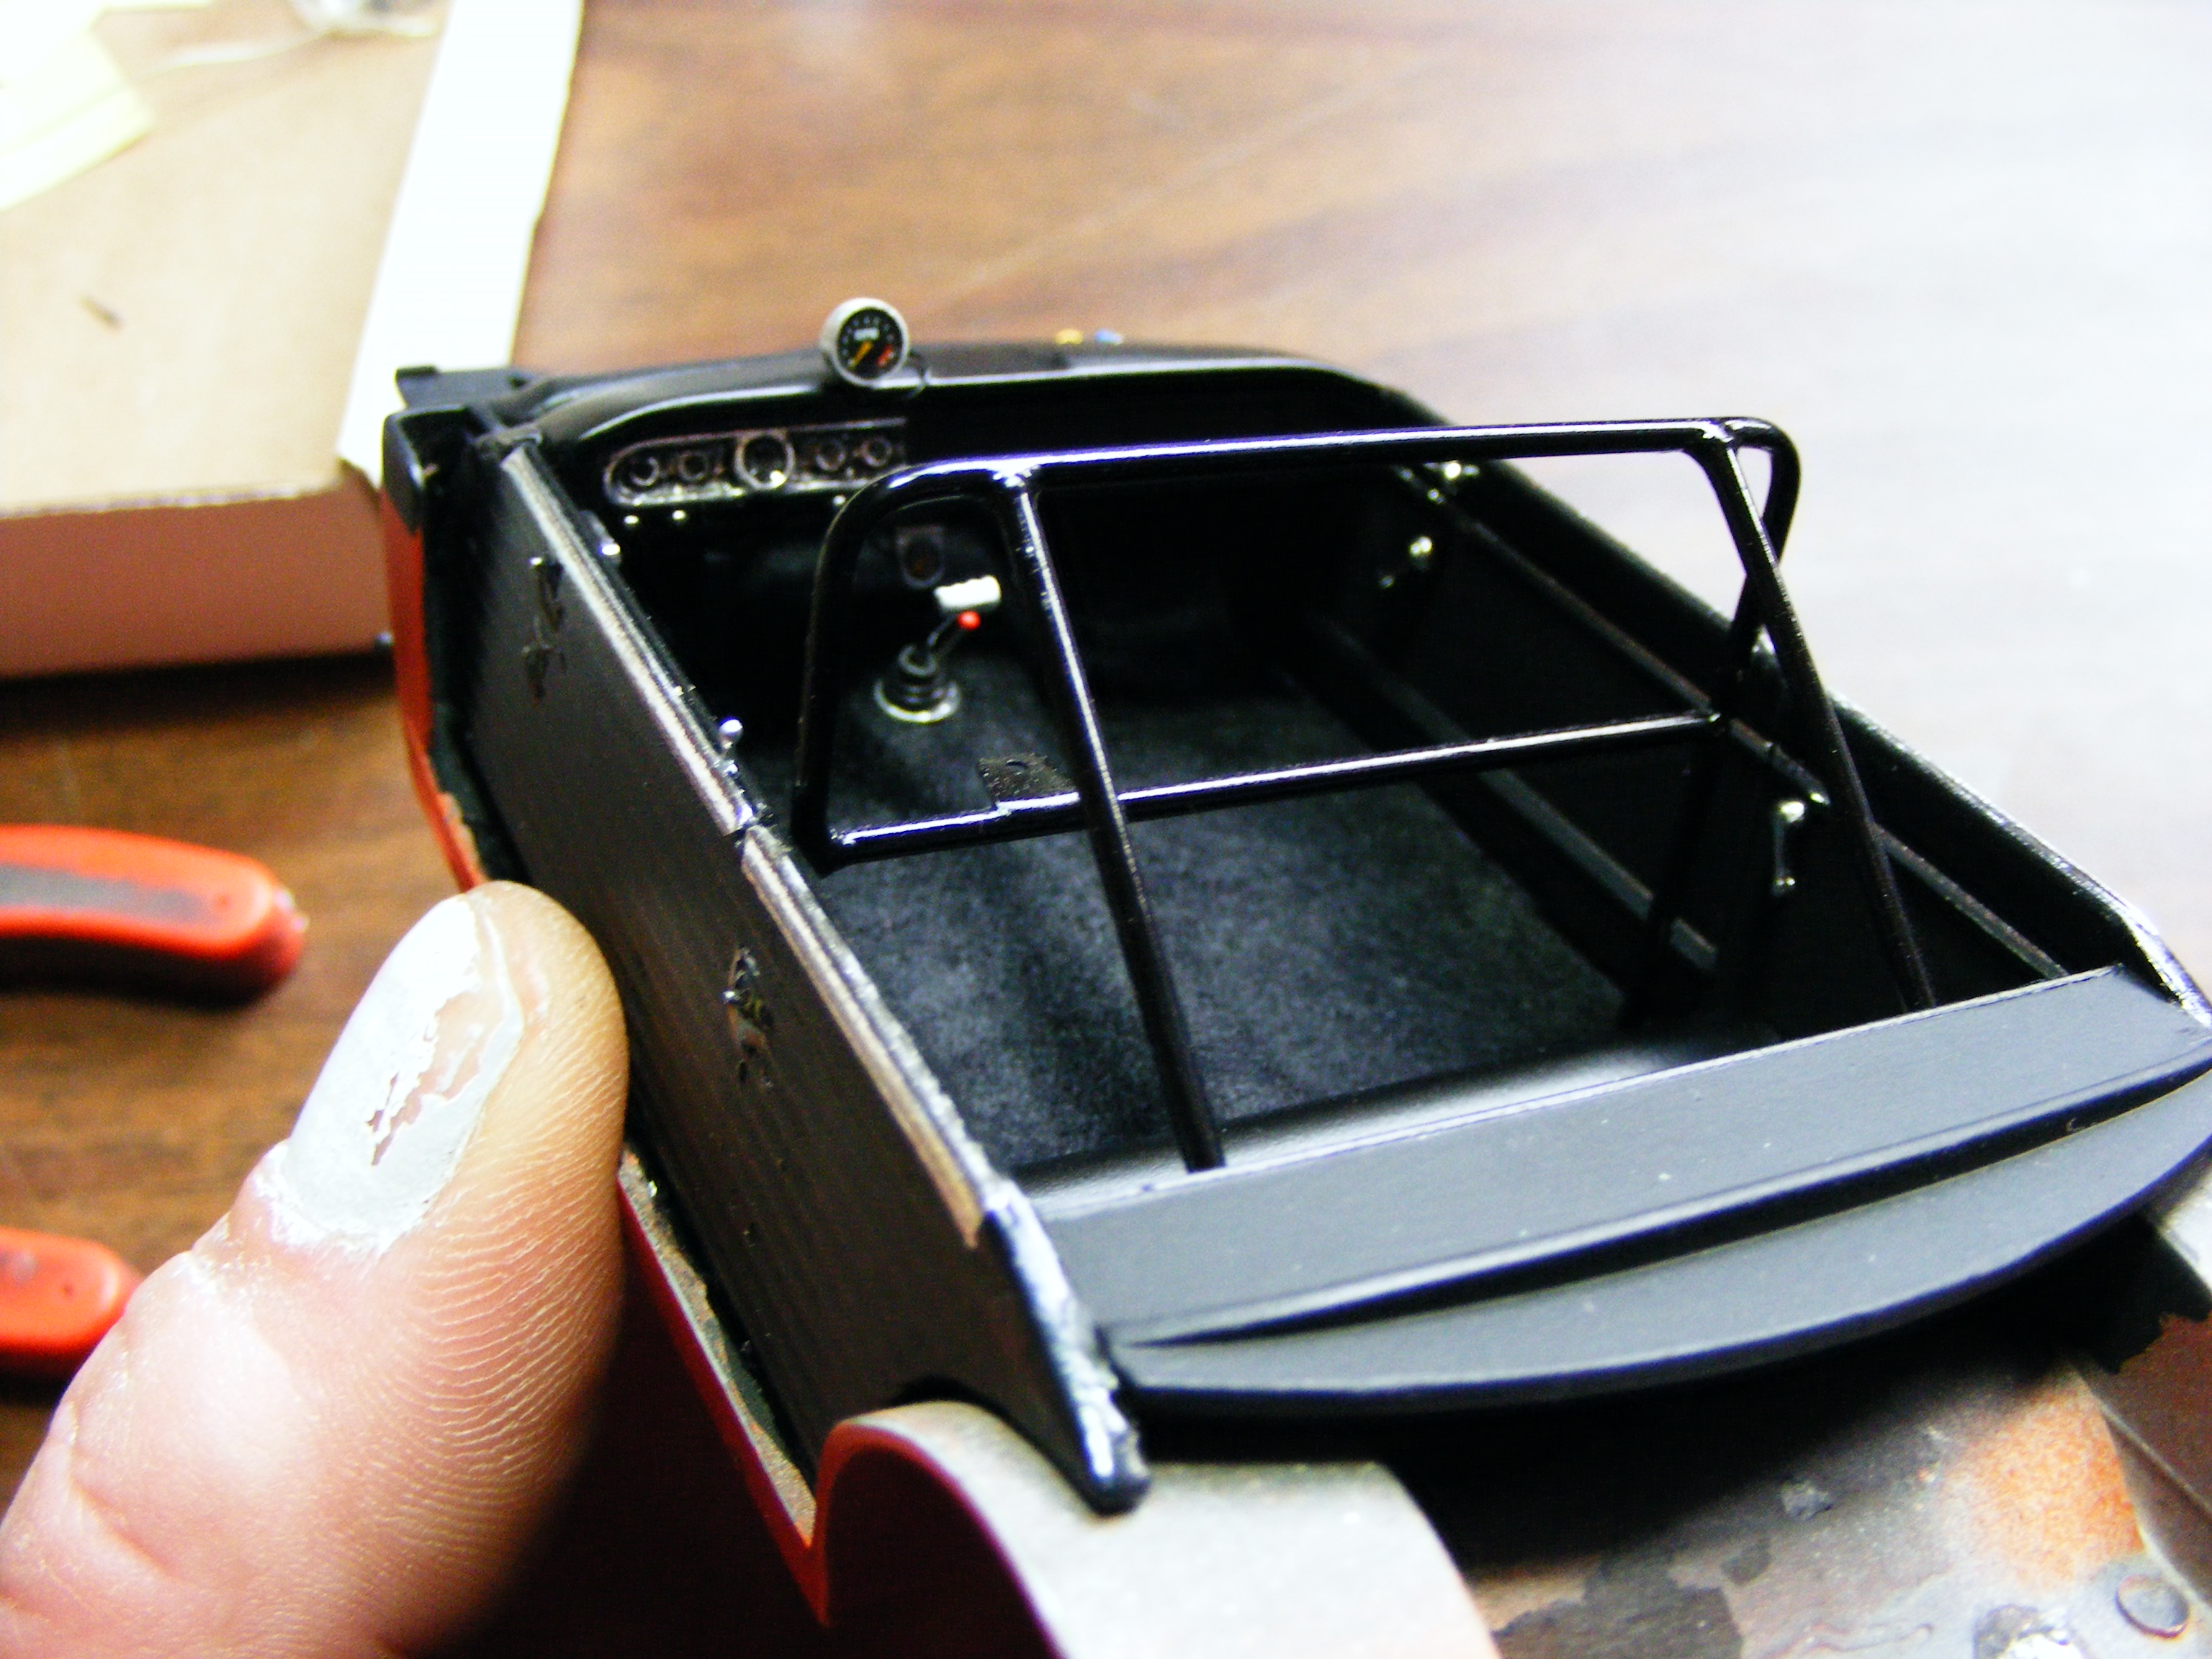
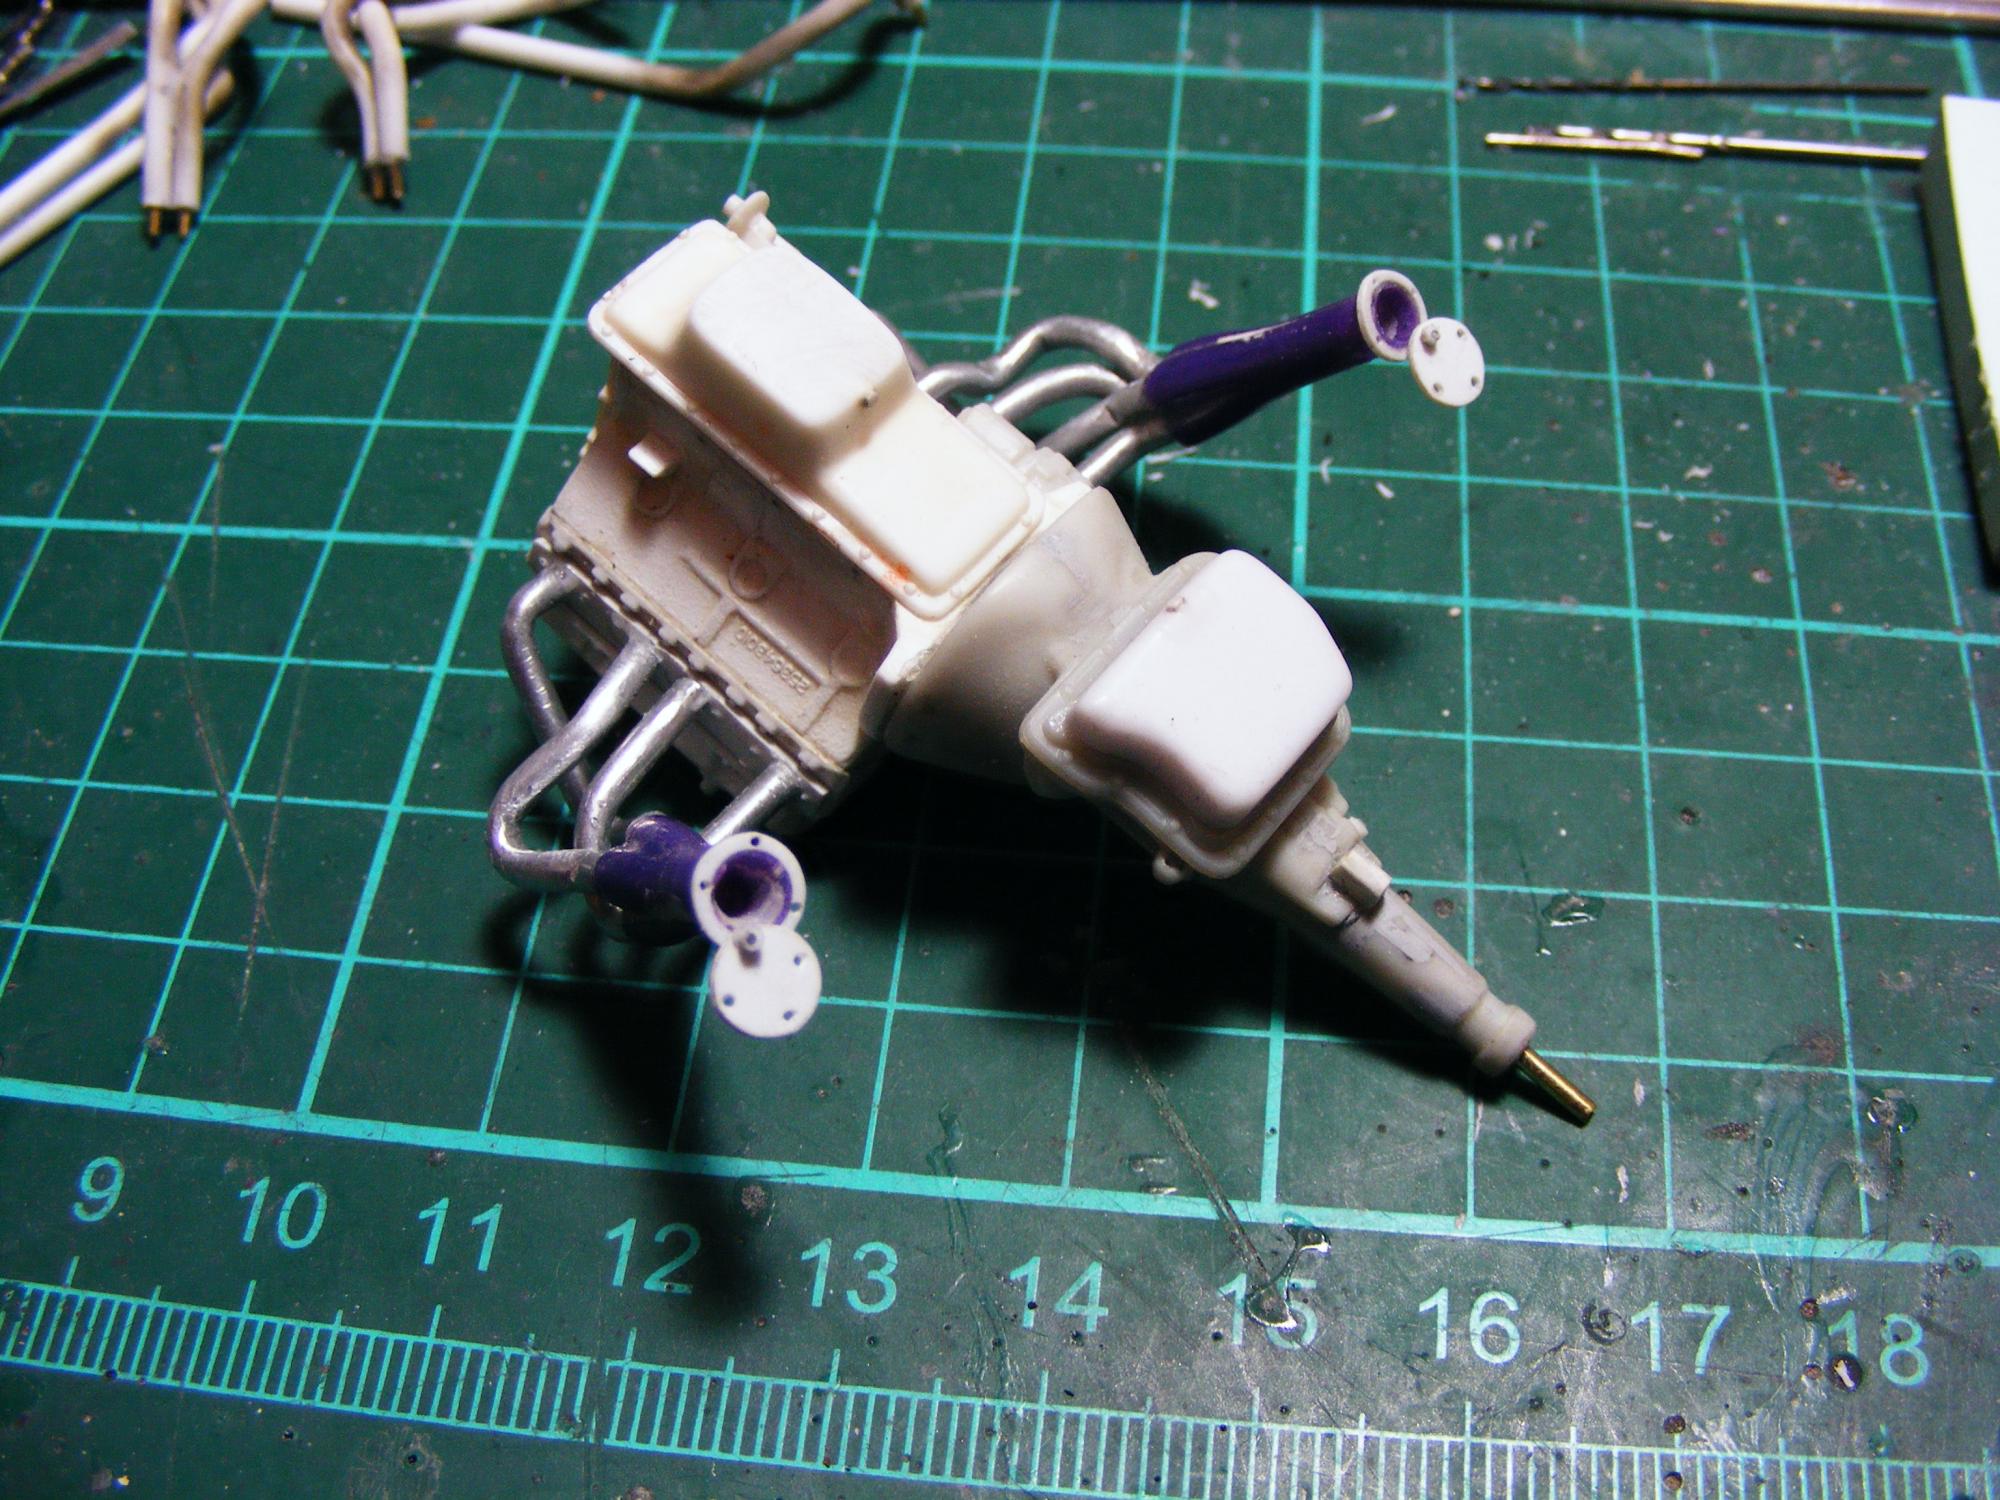
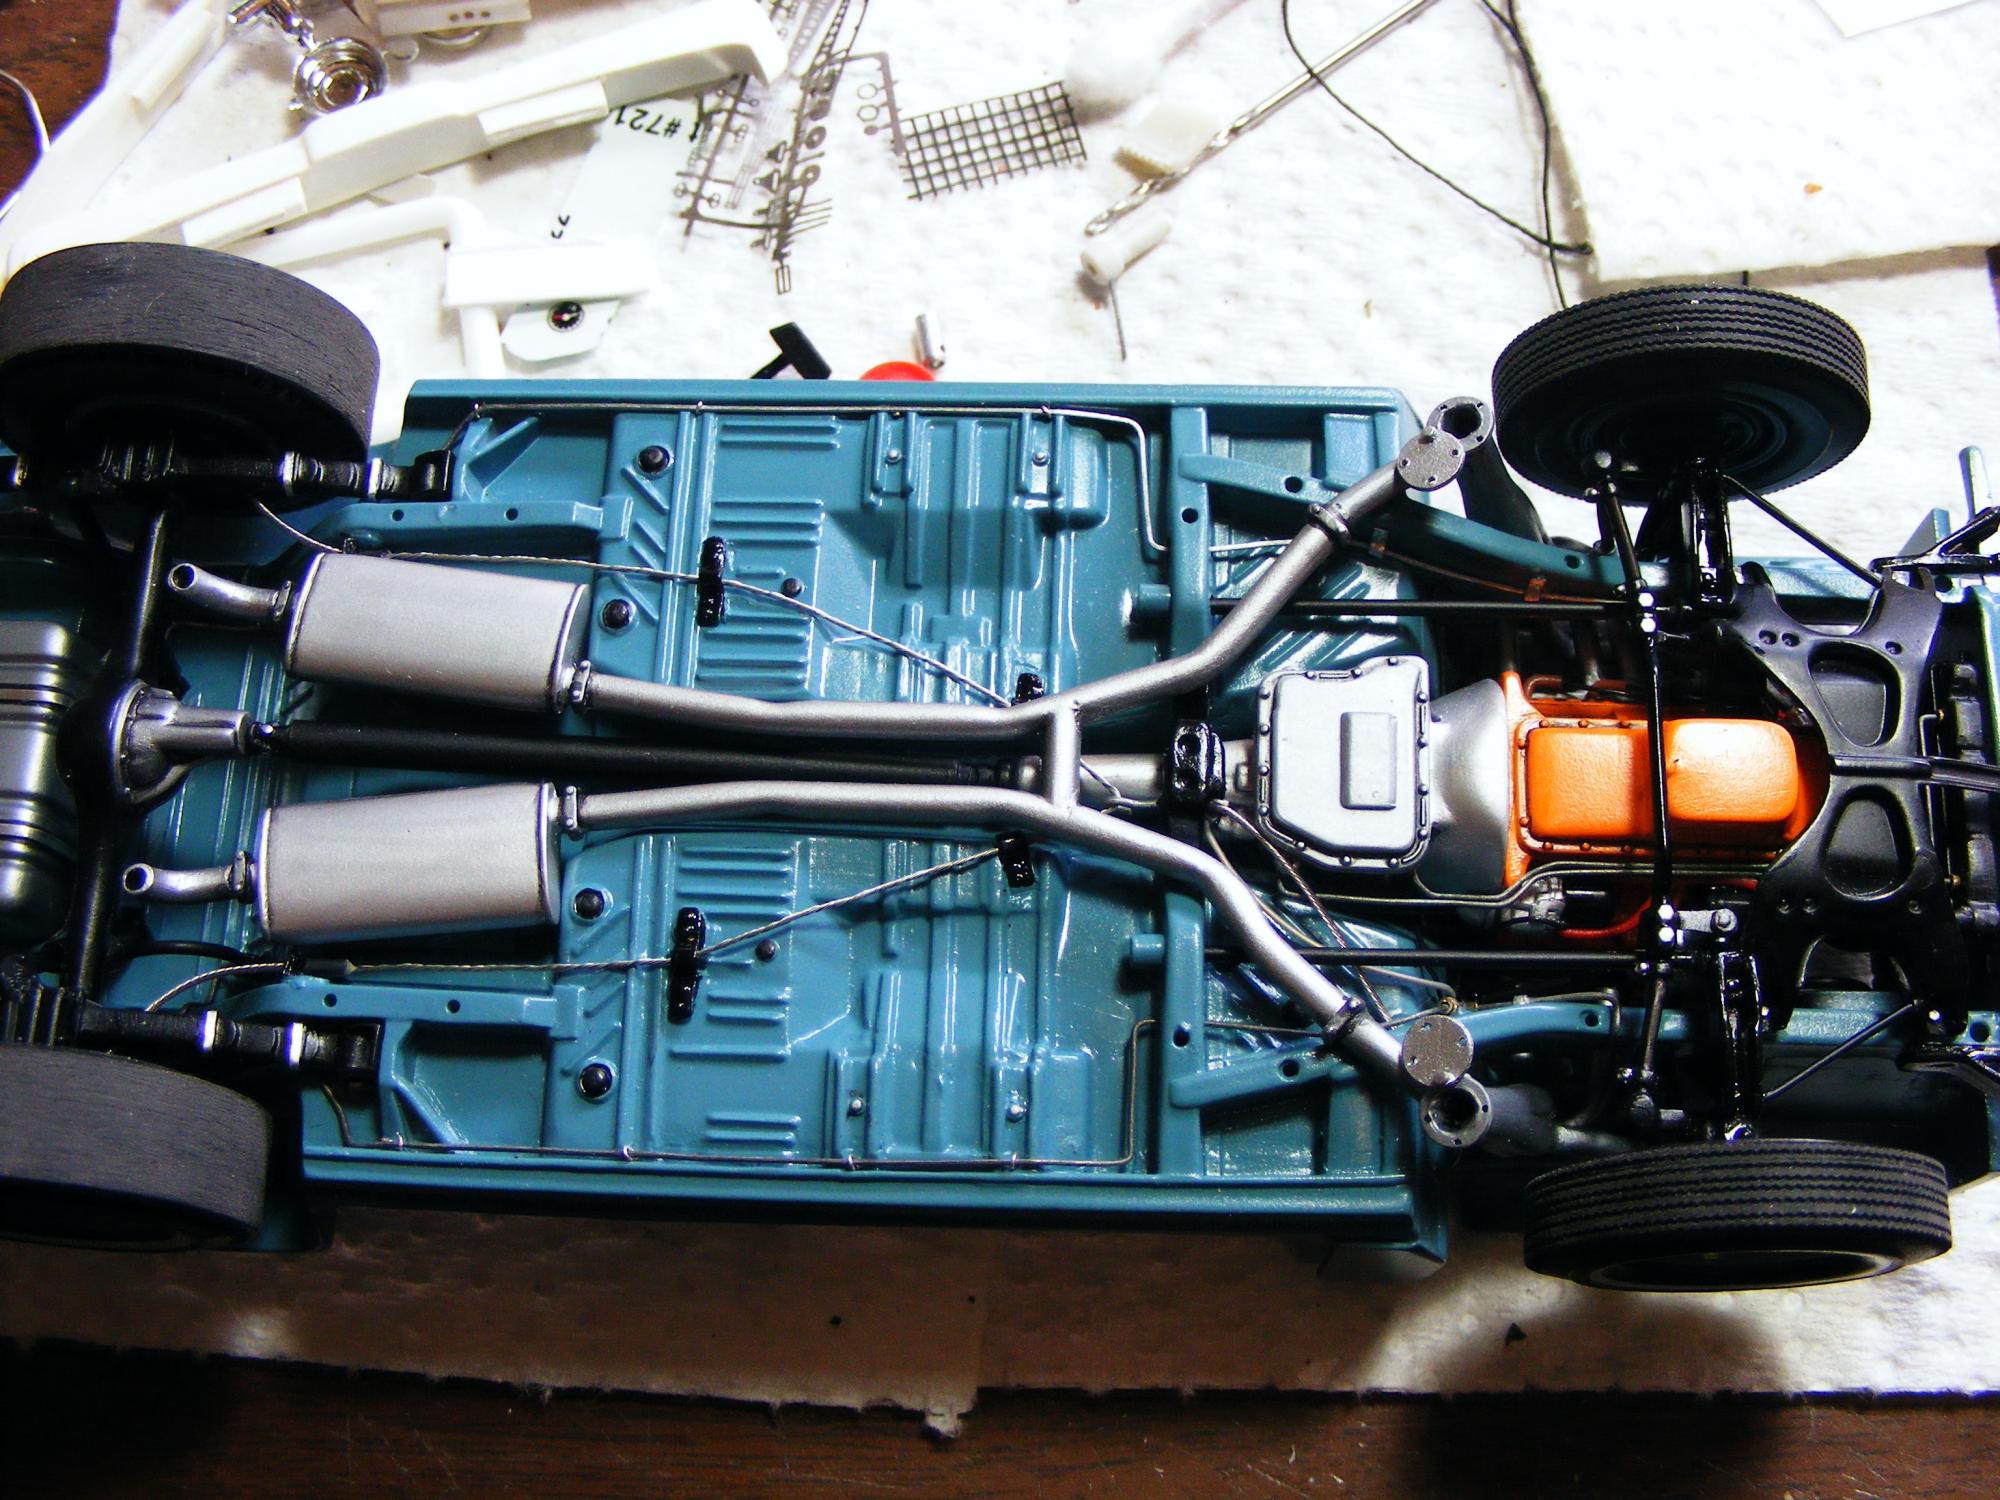
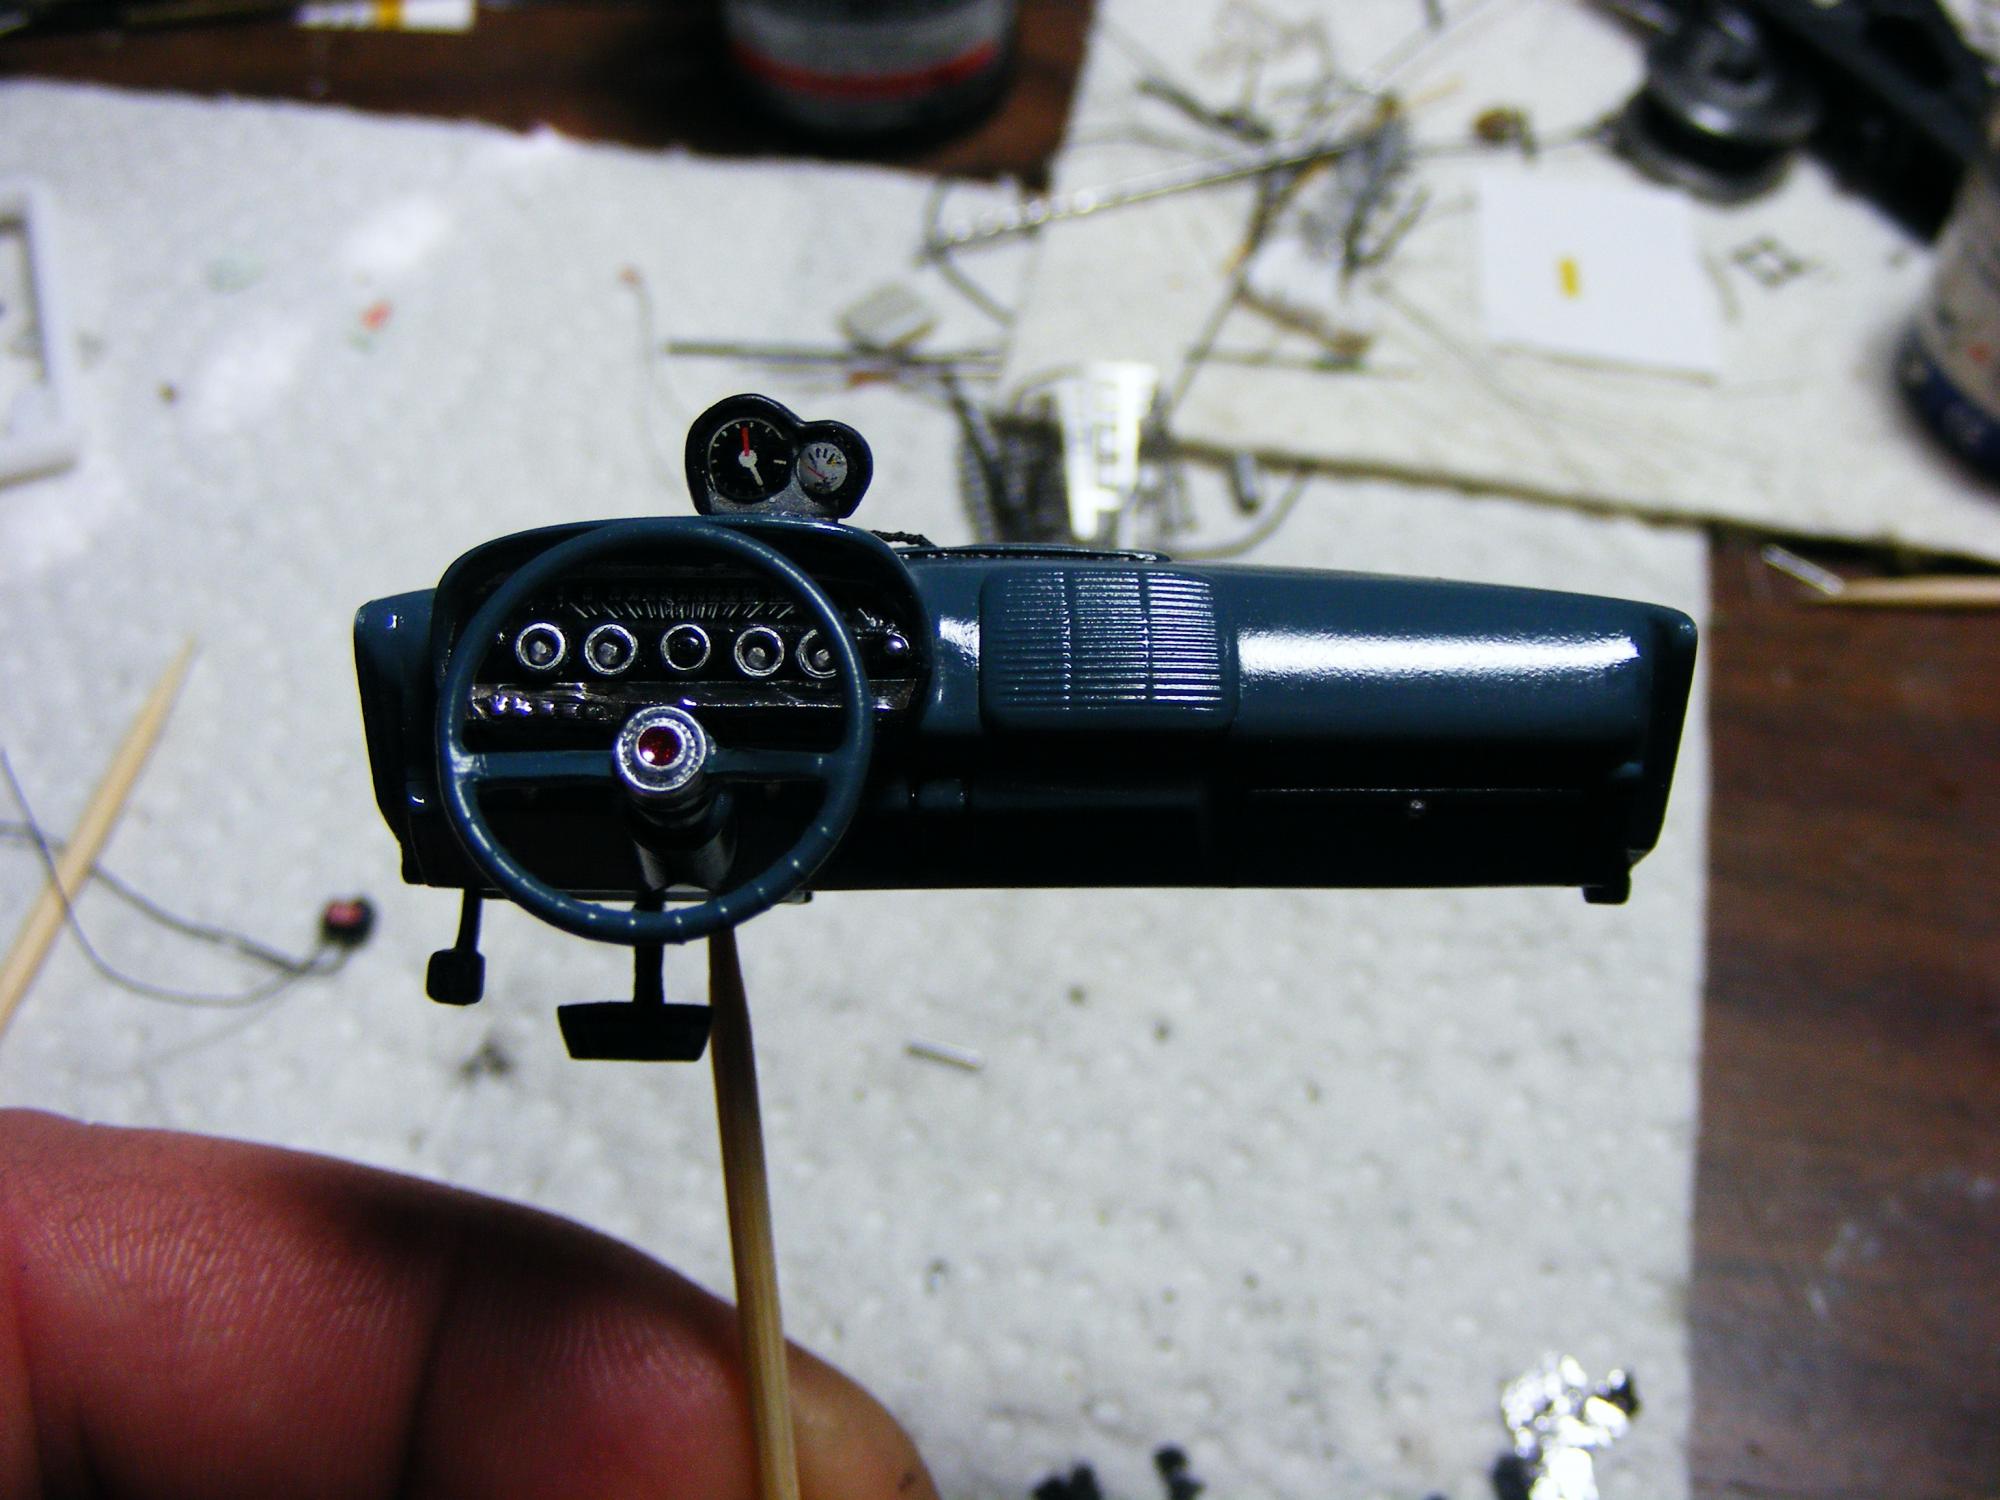
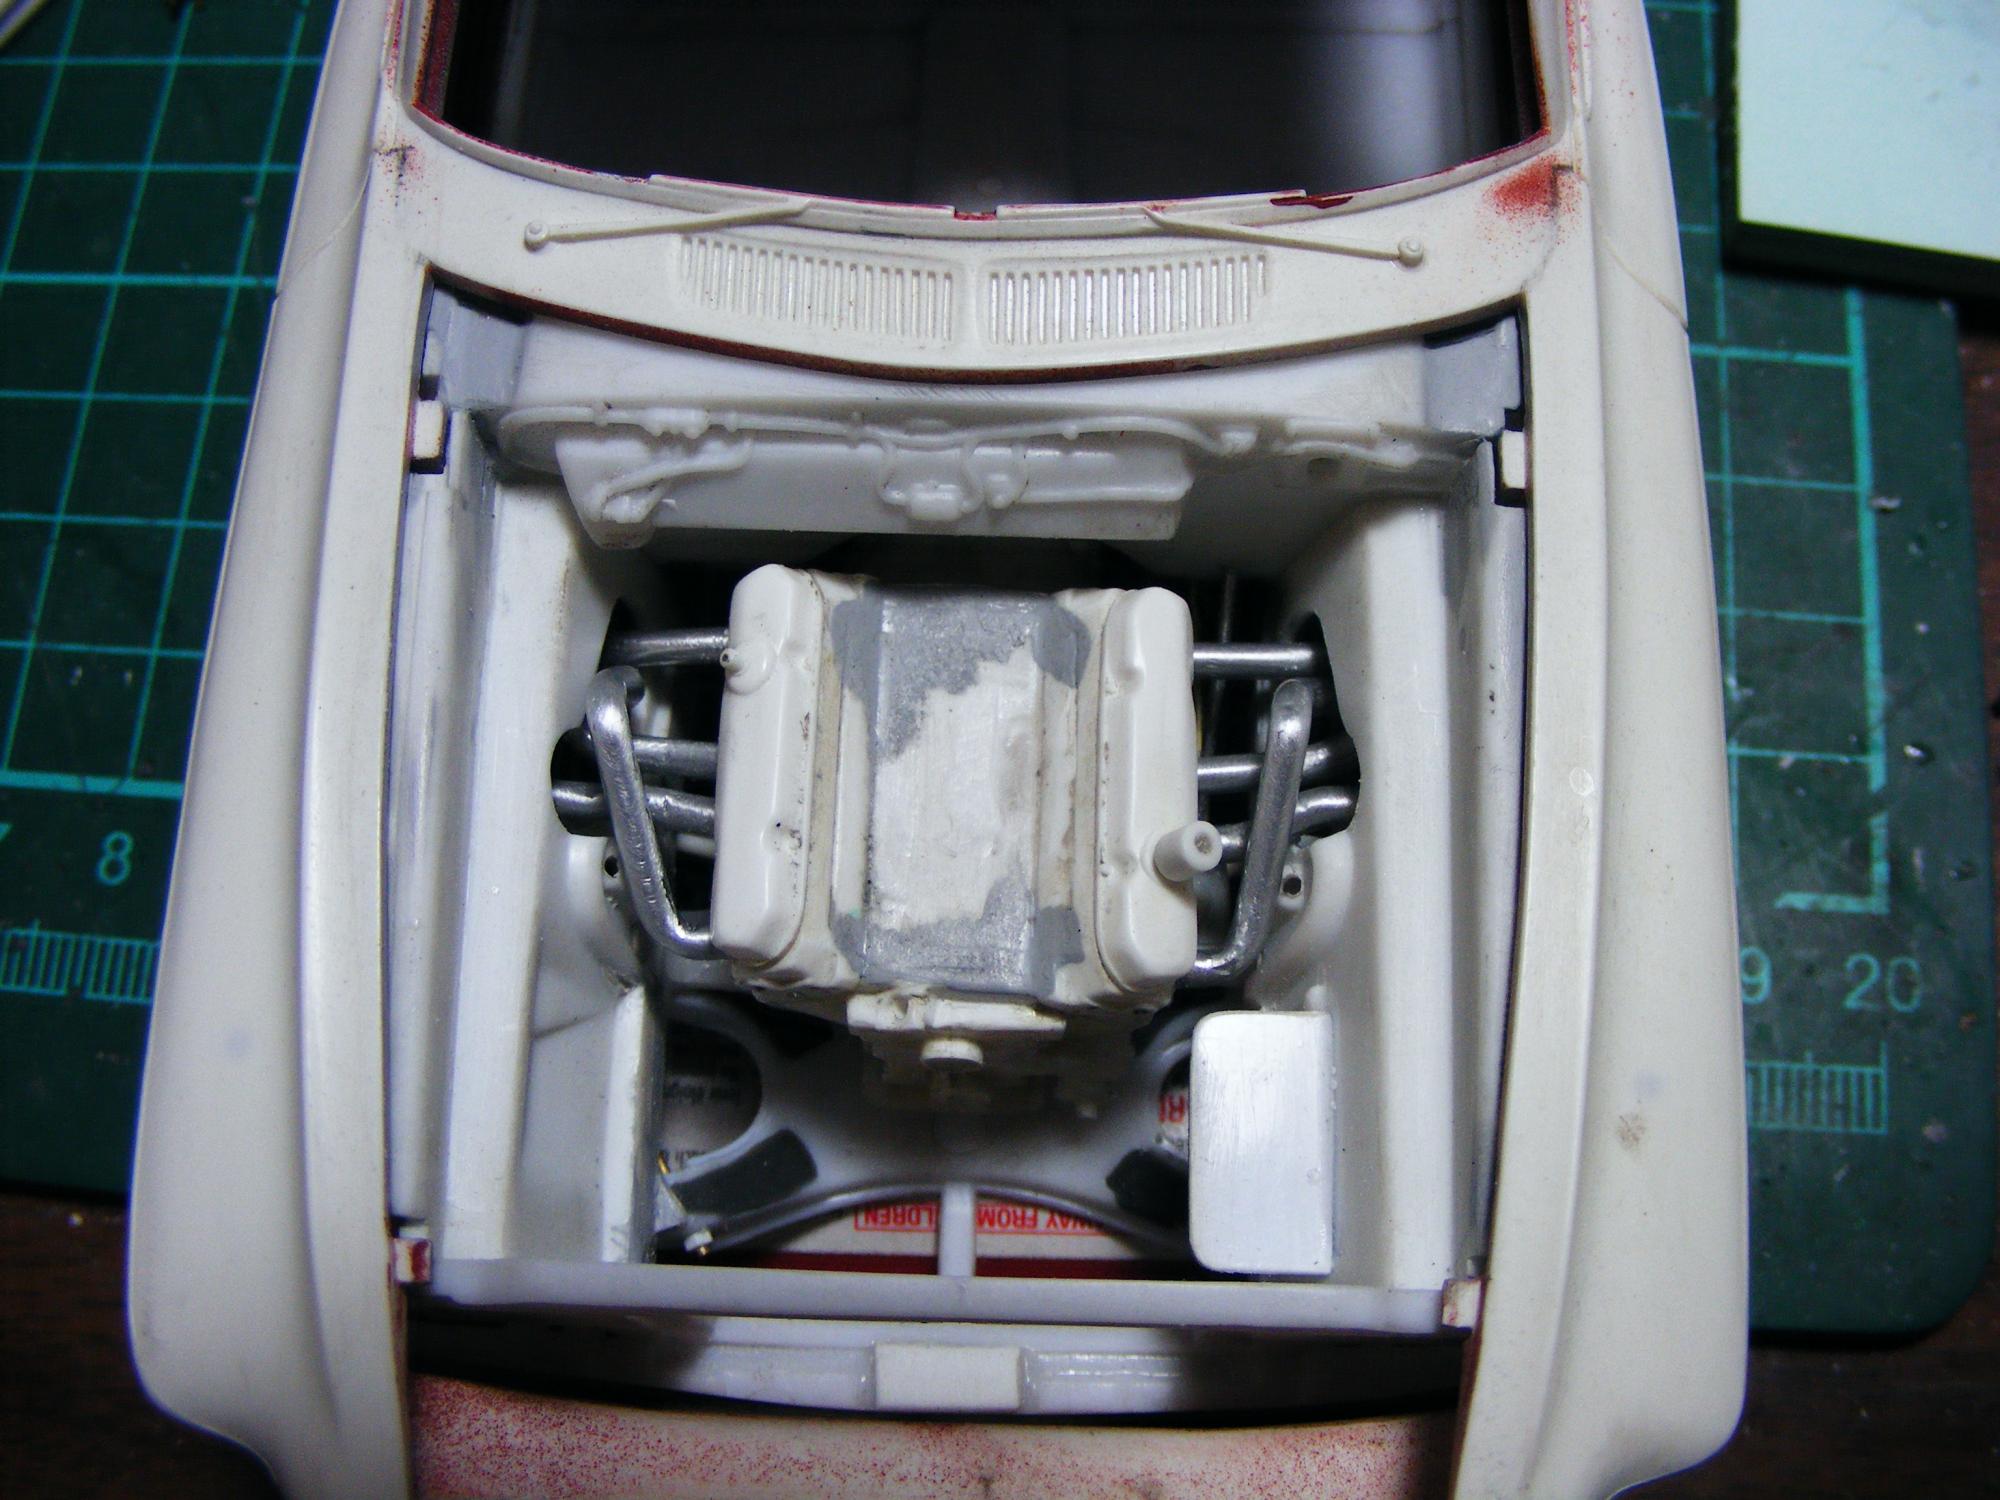
I used the body; bumpers; dash and fuel tank from the Moebius kit. The chassis is from the Revell Thunderbolt--as incorrect as it may be, it meant far less work for me. The SOHC was put together using the Parts Bins and the basic 427 short block and 4 speed from the T-Bolt kit. I made the headers from styrene rod. The interior stuff is mostly scratch built--like the tach; shifter, reverse lock out lever and boot; the roll bar and seat frames as well as the tub/door panels, which I detailed with scribing and the door handles and window cranks from the Moebius panels. I added some side glass and frames as well as headliner detail with the dome light. The Hood scoop is from the T Bolt,; I have always preferred the Ford scoop to the Mercury twin scoop hood.
-
Two more iconic cars we need kitted
DR JAY replied to Greg Myers's topic in General Automotive Talk (Trucks and Cars)
I agree that a 55-57 Buick, Olds or Pontiac need to be represented (I have a soft spot for 55 Oldsmobiles thanks to my Dad), but being a Canadian I would also stand in line for a Bricklin kit. -
Tool for bending copper/brass tubes/rods
DR JAY replied to aurfalien's topic in Model Building Questions and Answers
I bent up these fender well headers from K&S aluminum tubing by hand...I straightened some paper clips and inserted them inside the tubing 1st to prevent kinks
-
How long do ya'll take
DR JAY replied to Chris Evans's topic in General Automotive Talk (Trucks and Cars)
Agreed--Since it's my hobby and for relaxation and enjoyment, I don't keep track of time and--to a lesser extent--cost. -
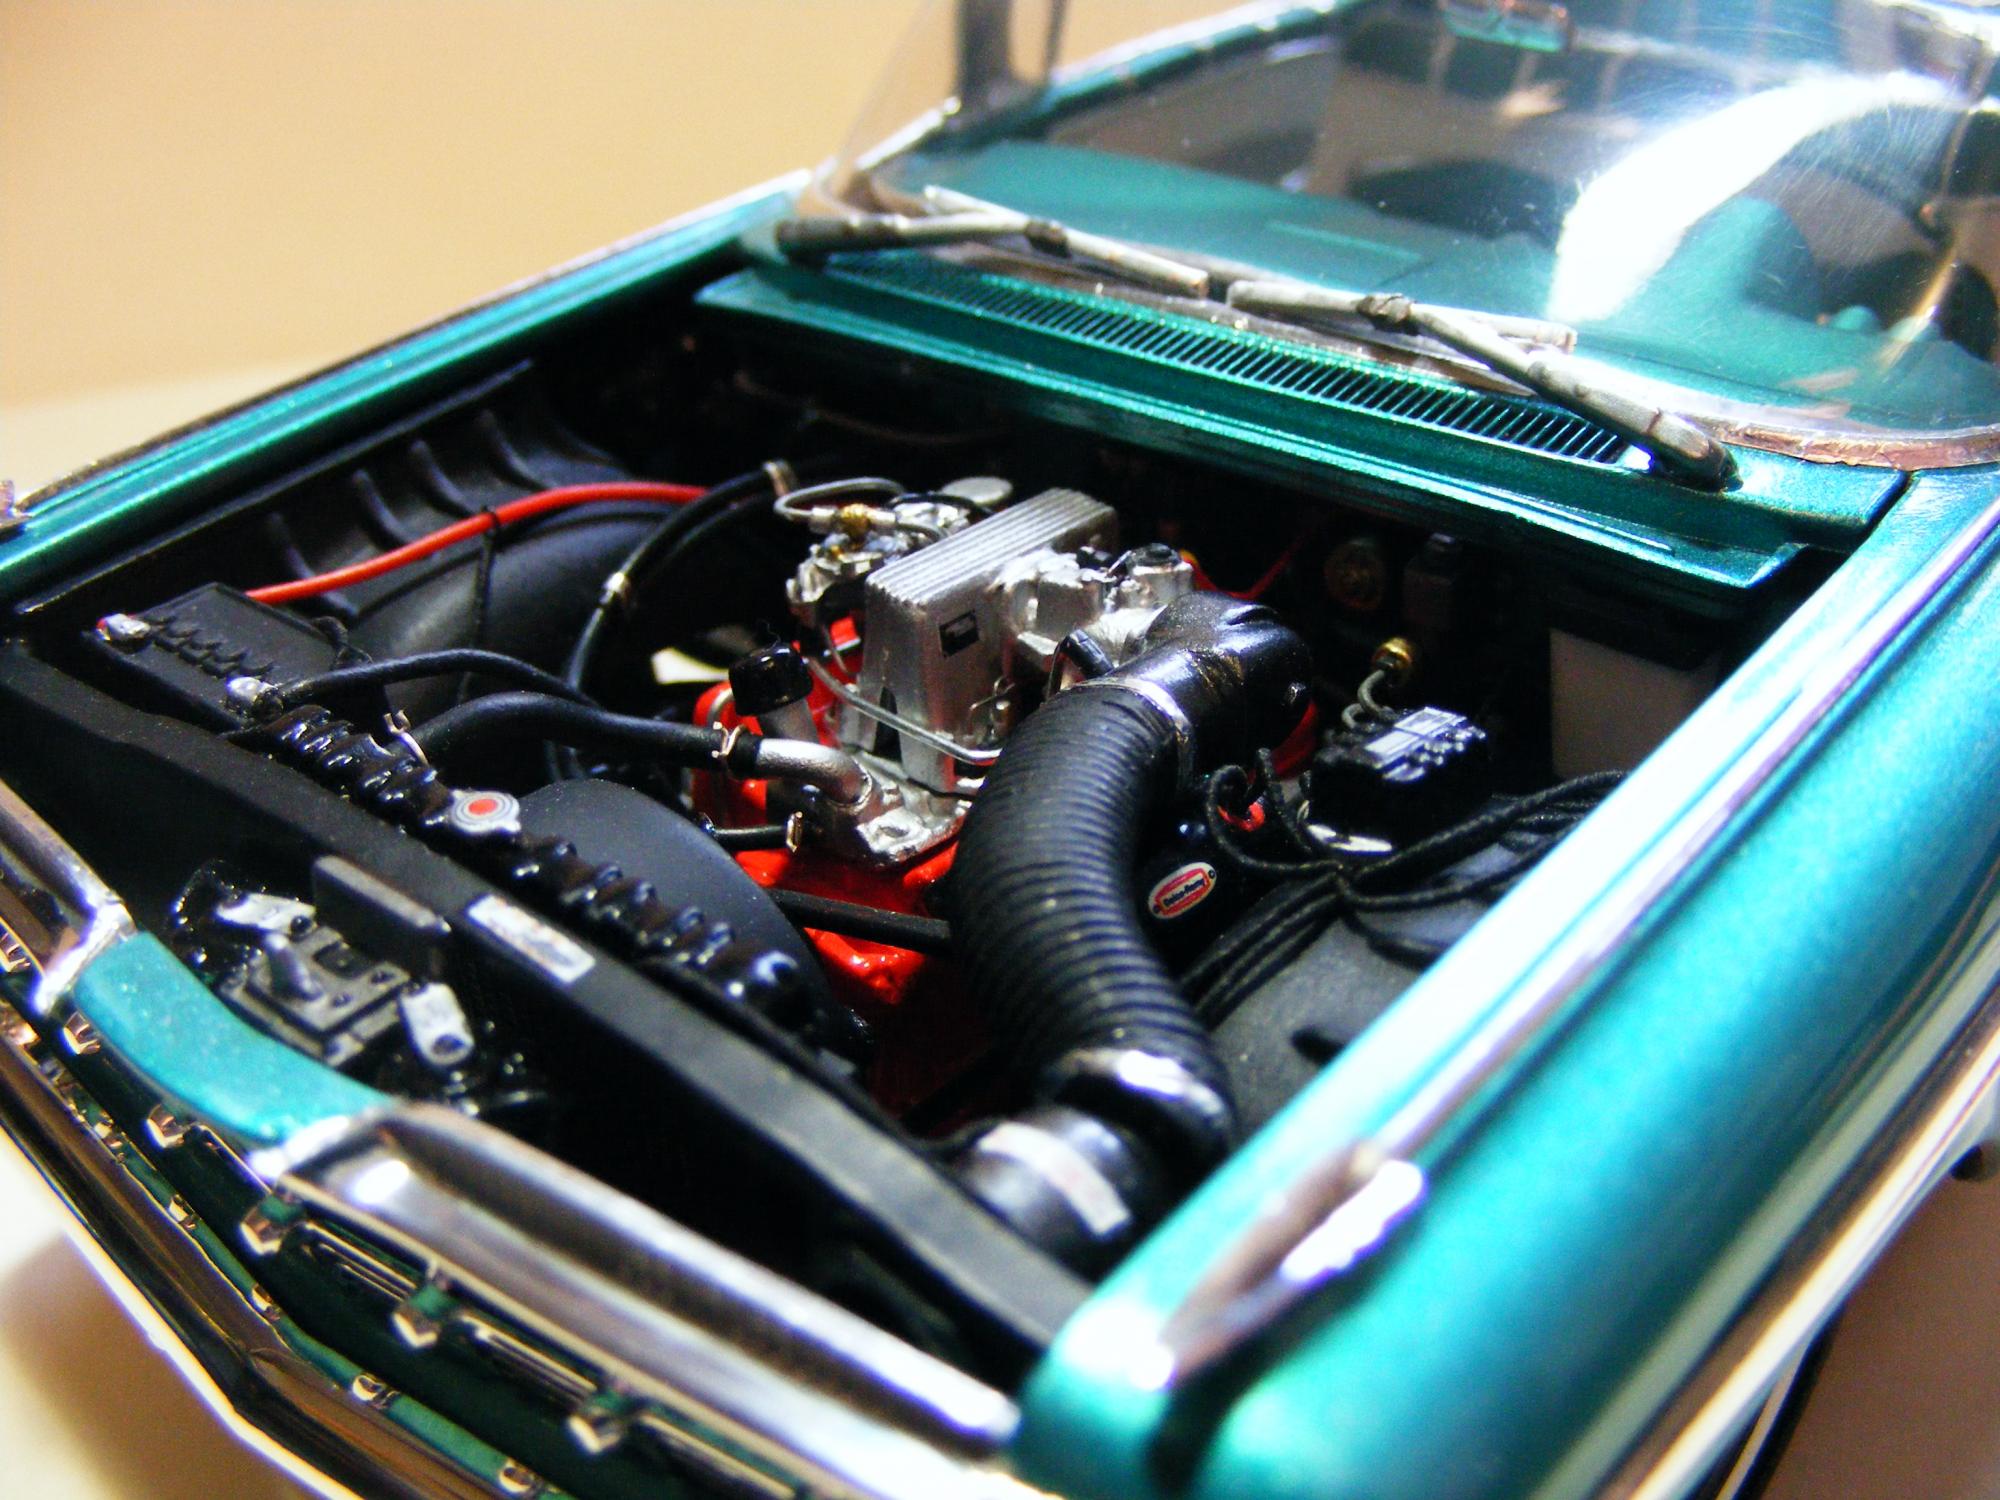
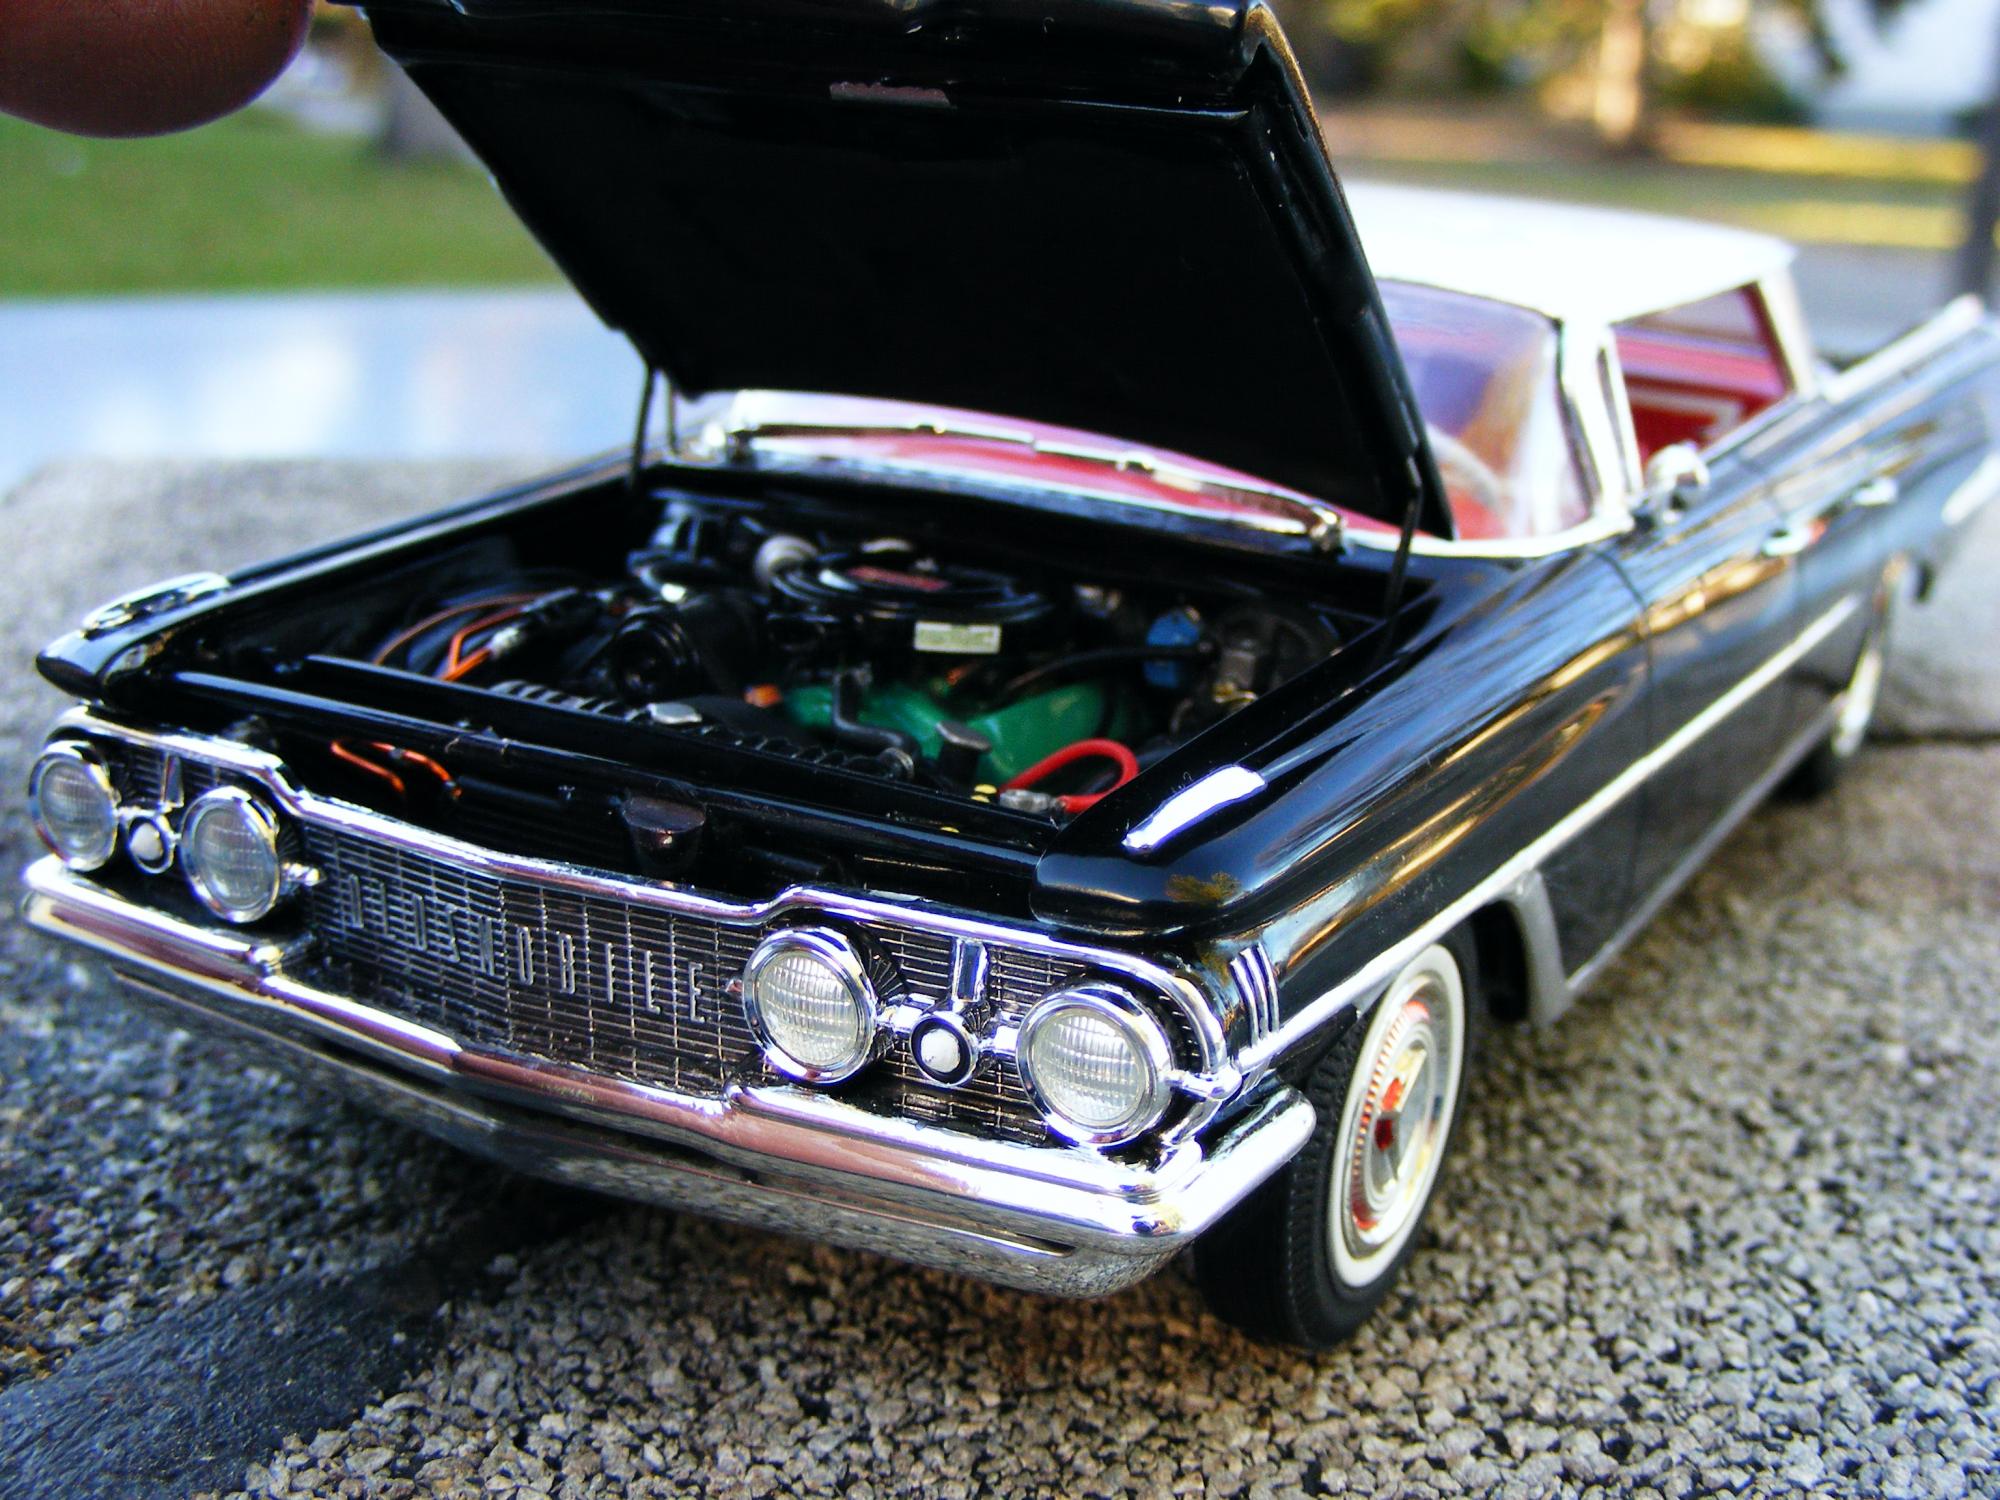
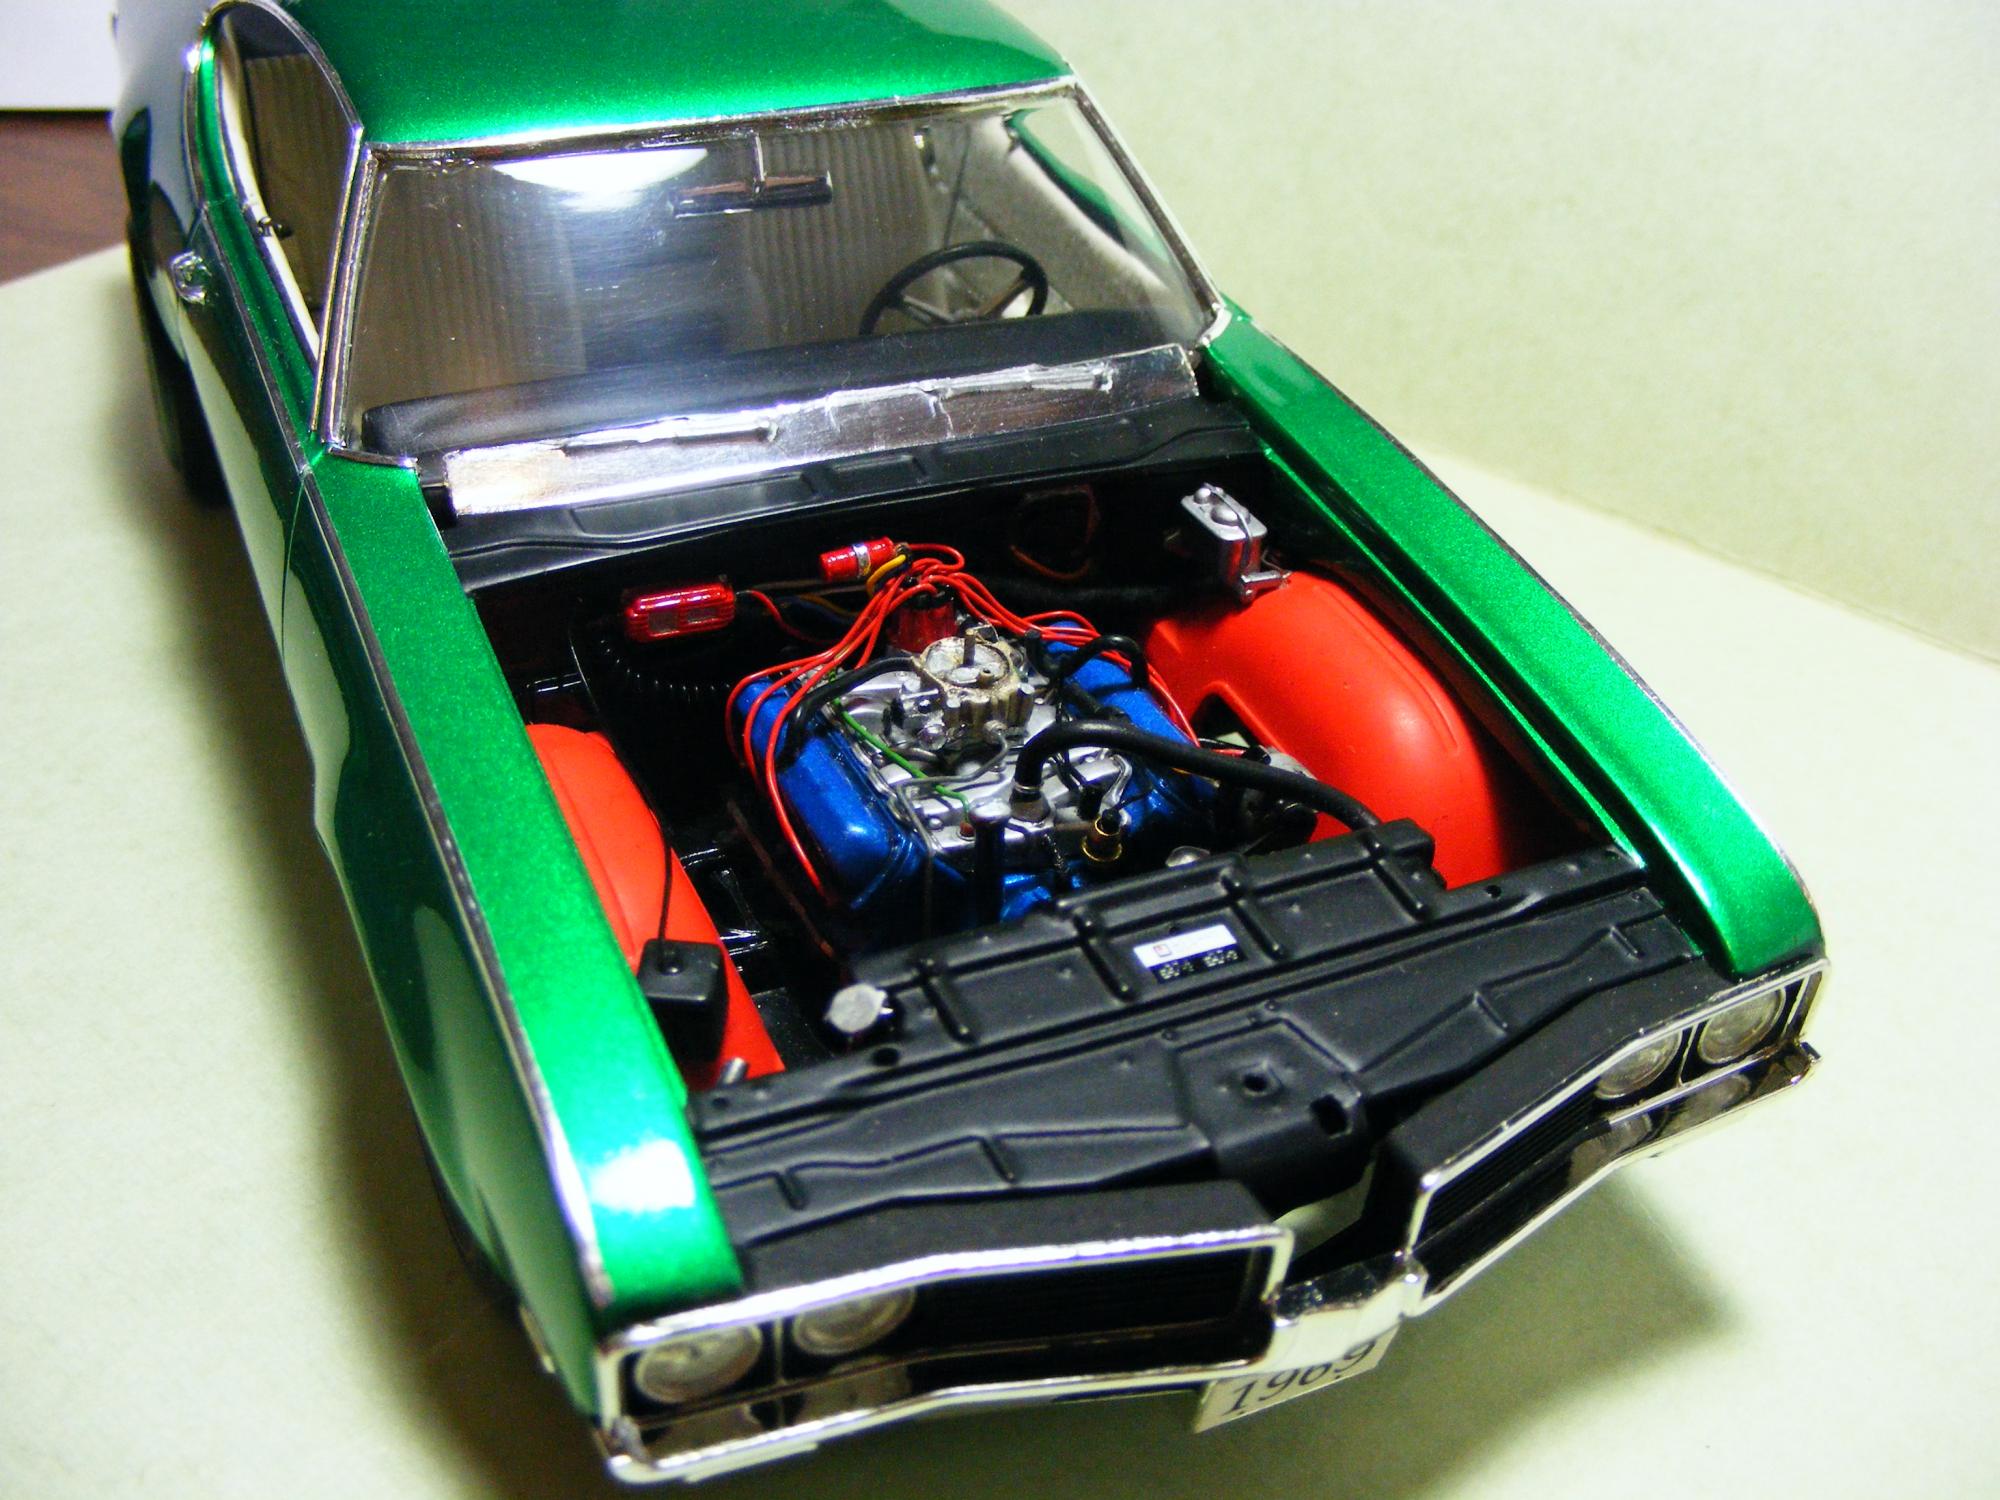
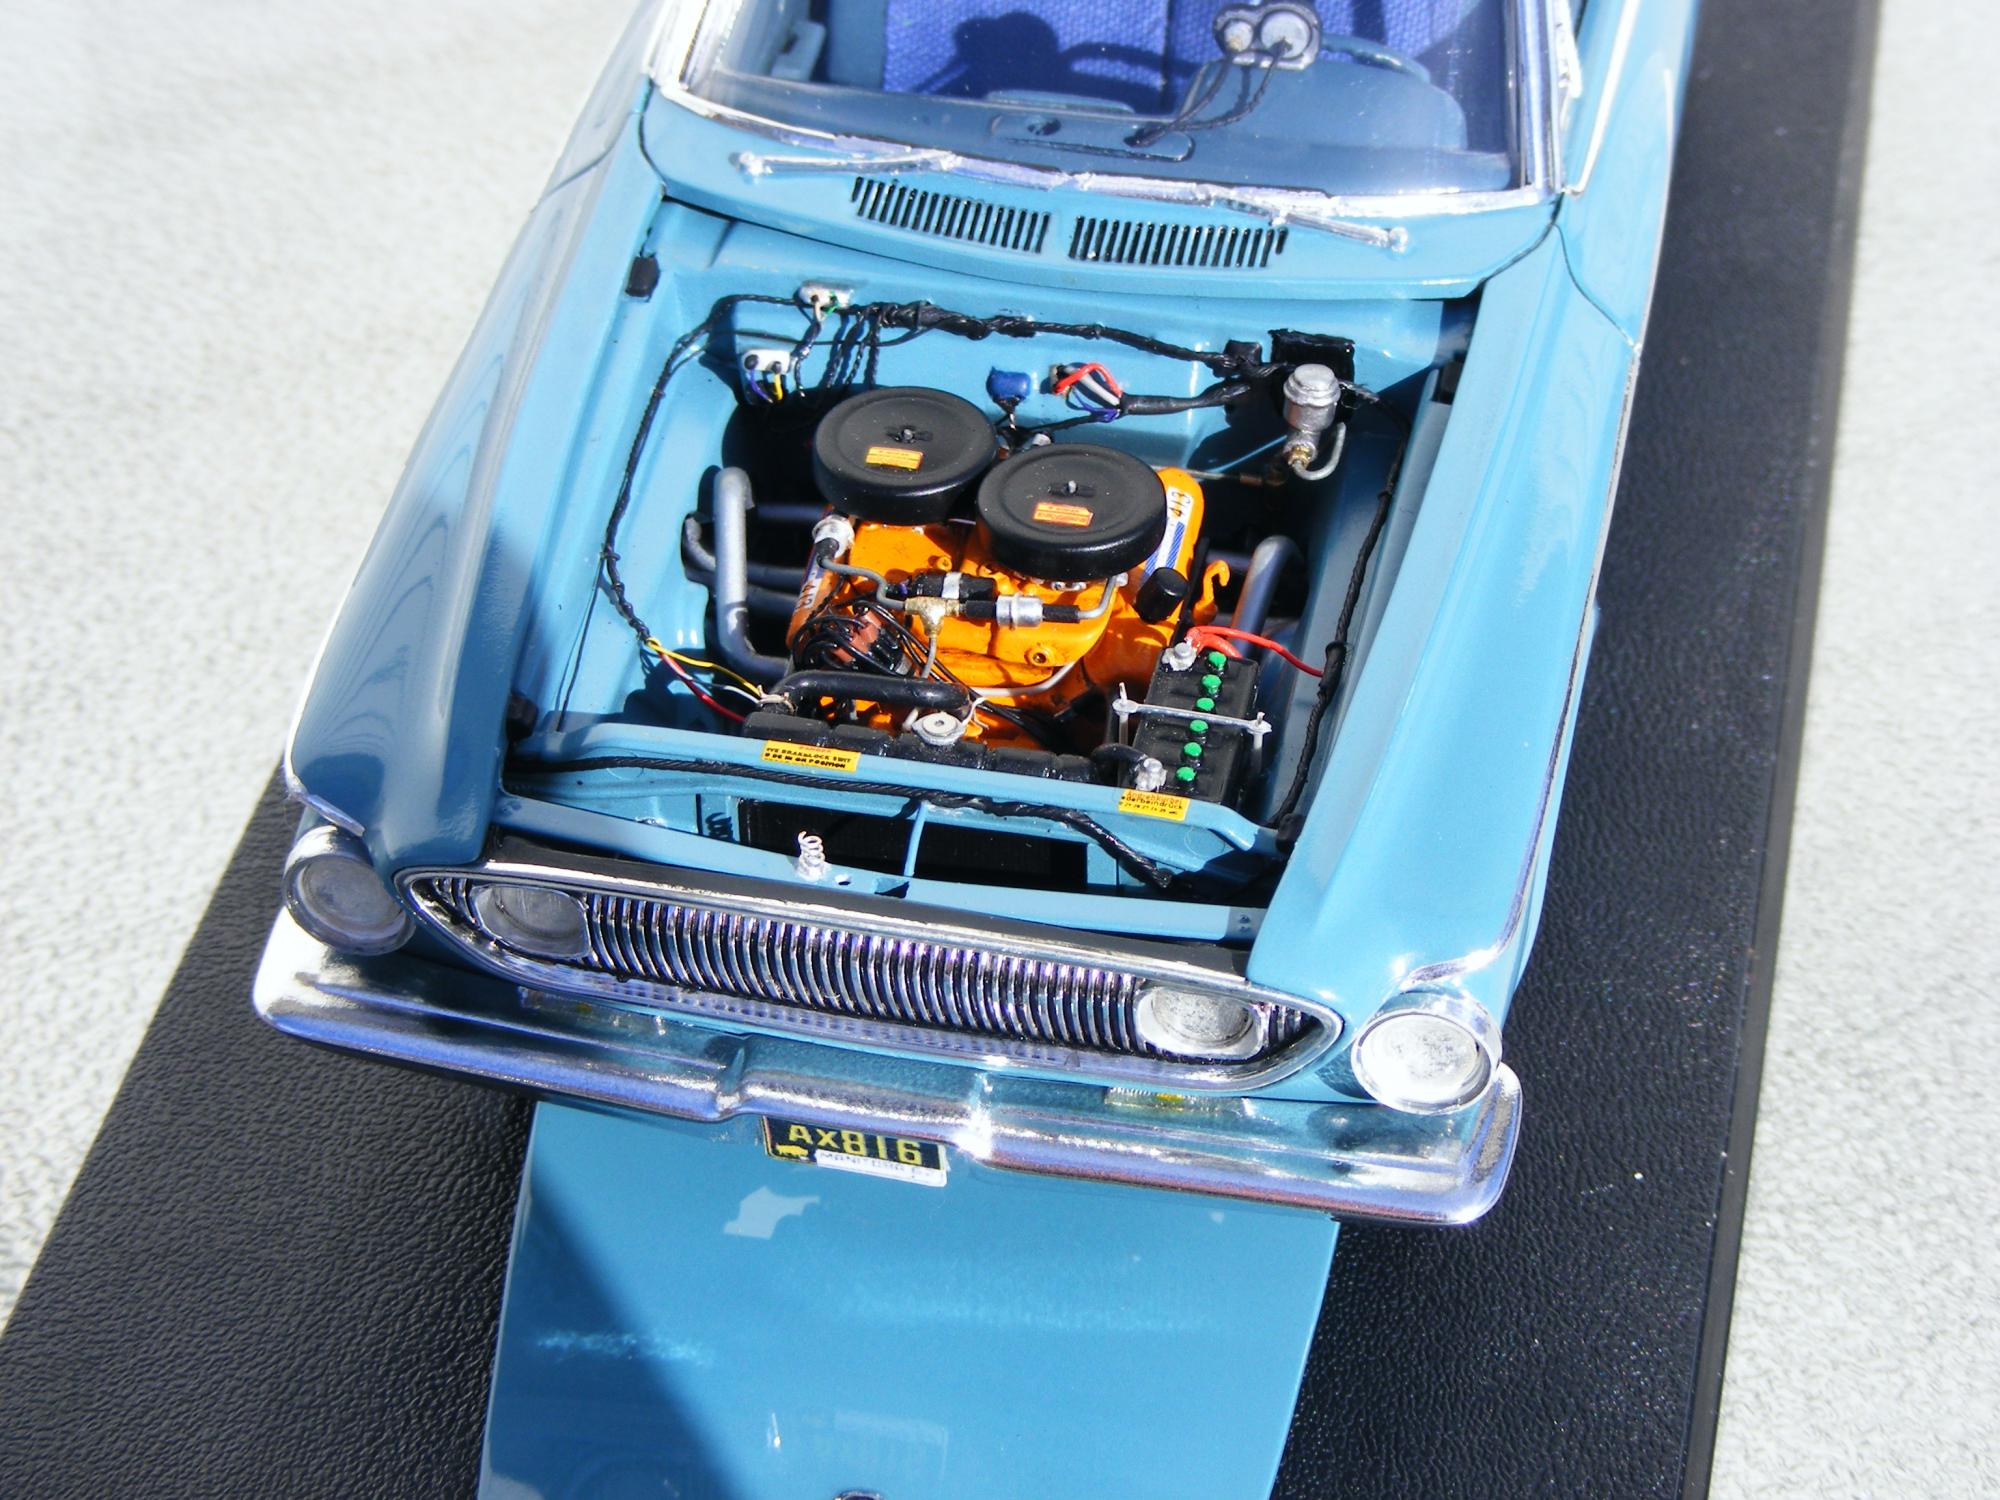
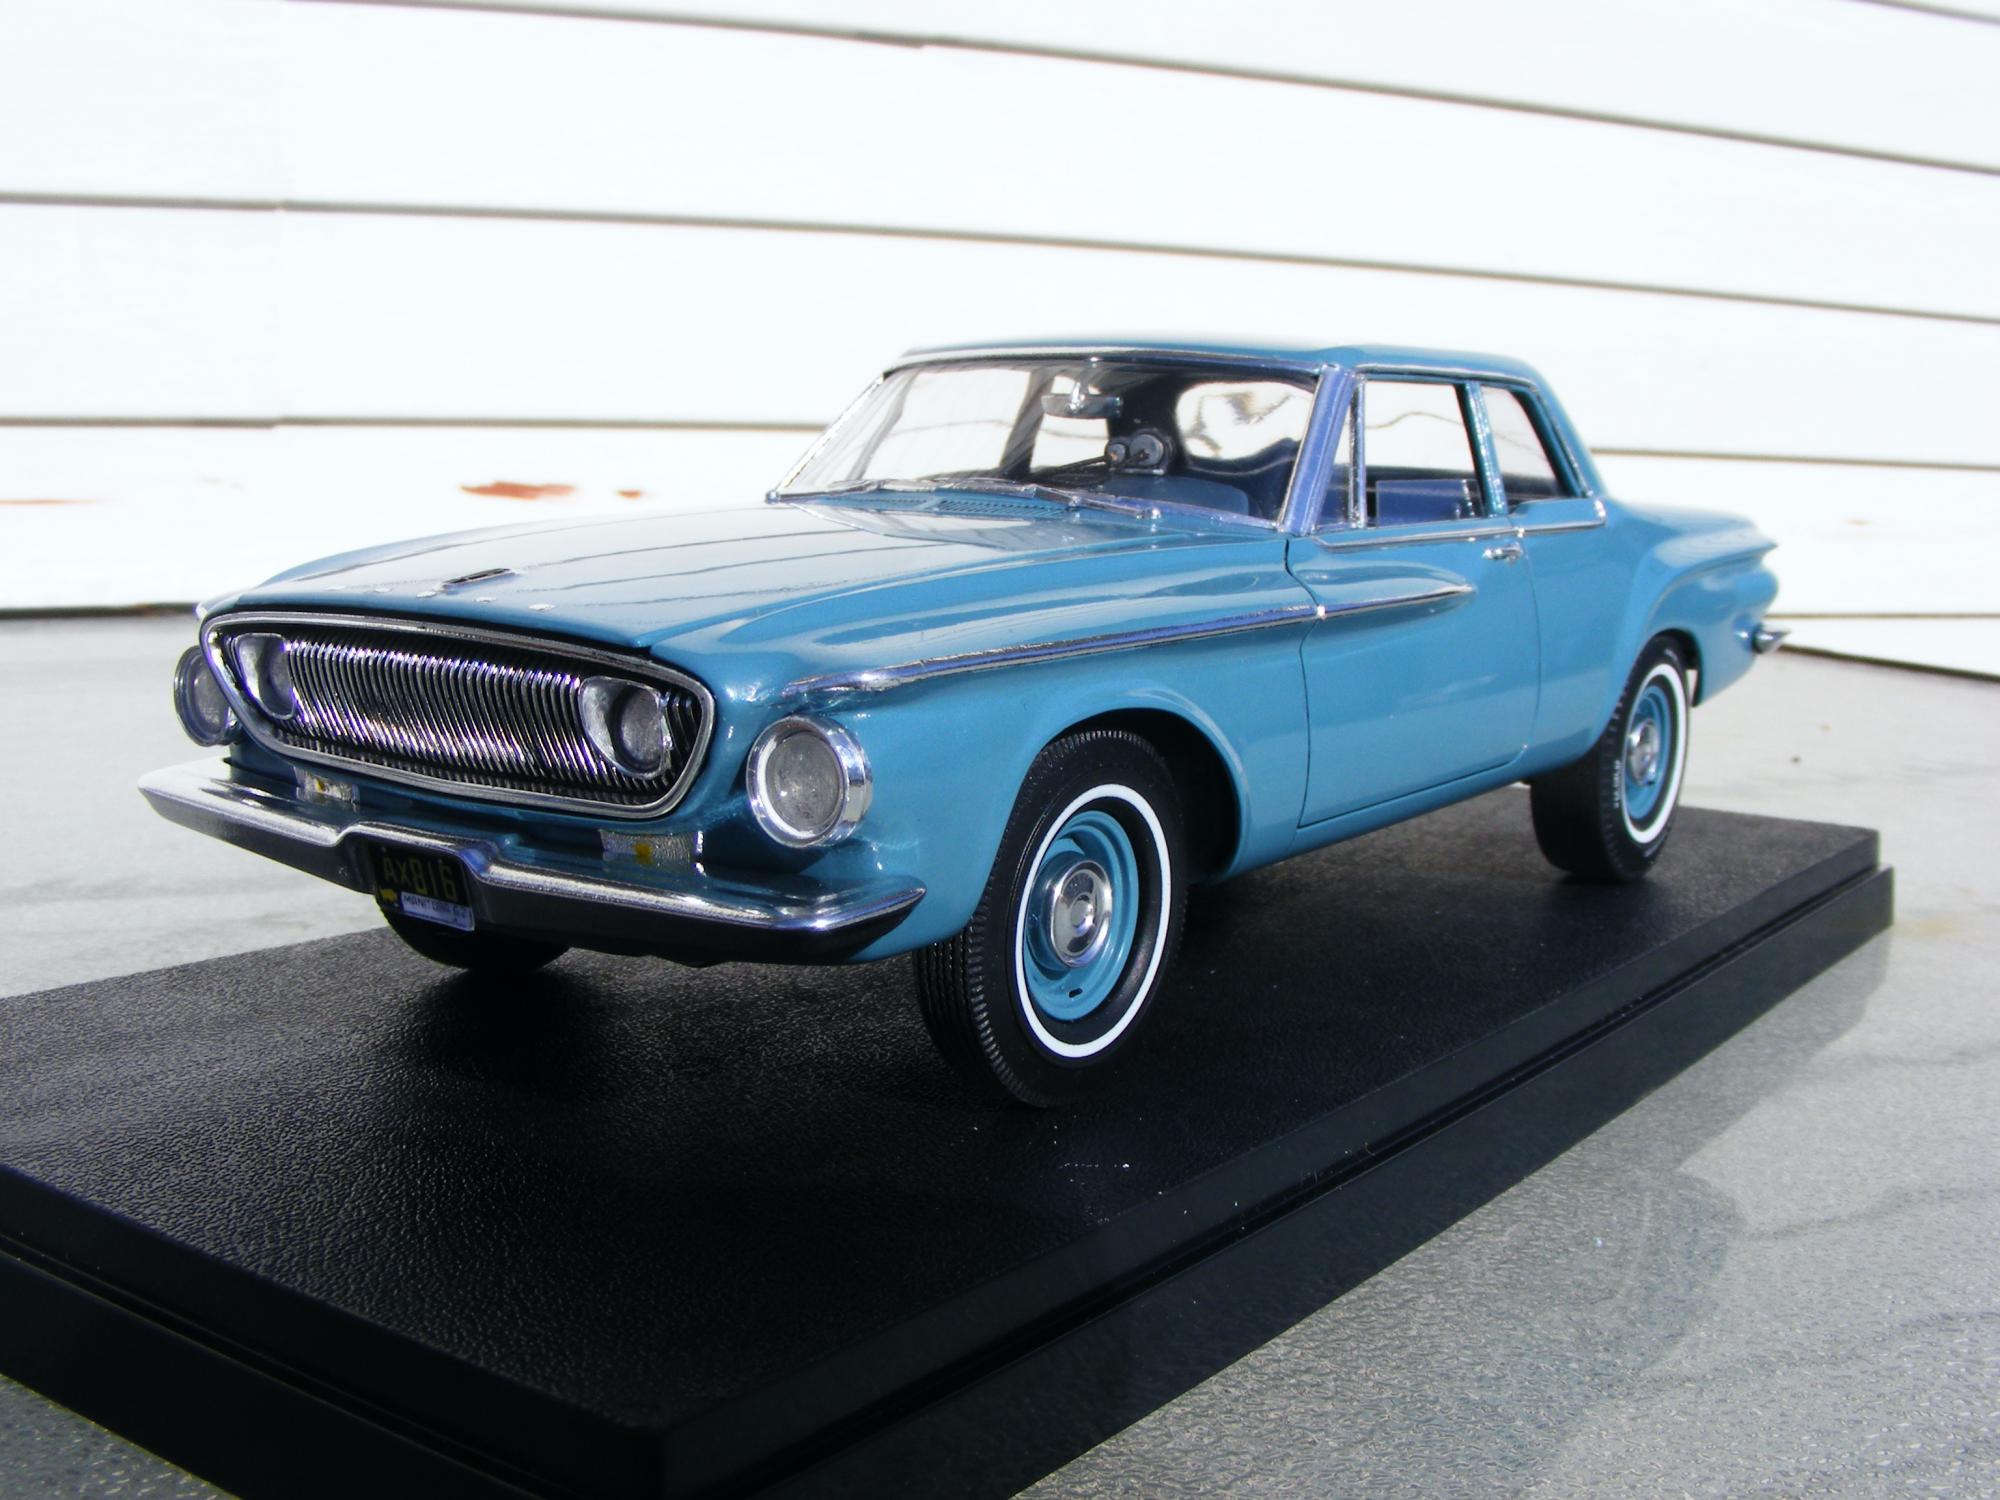
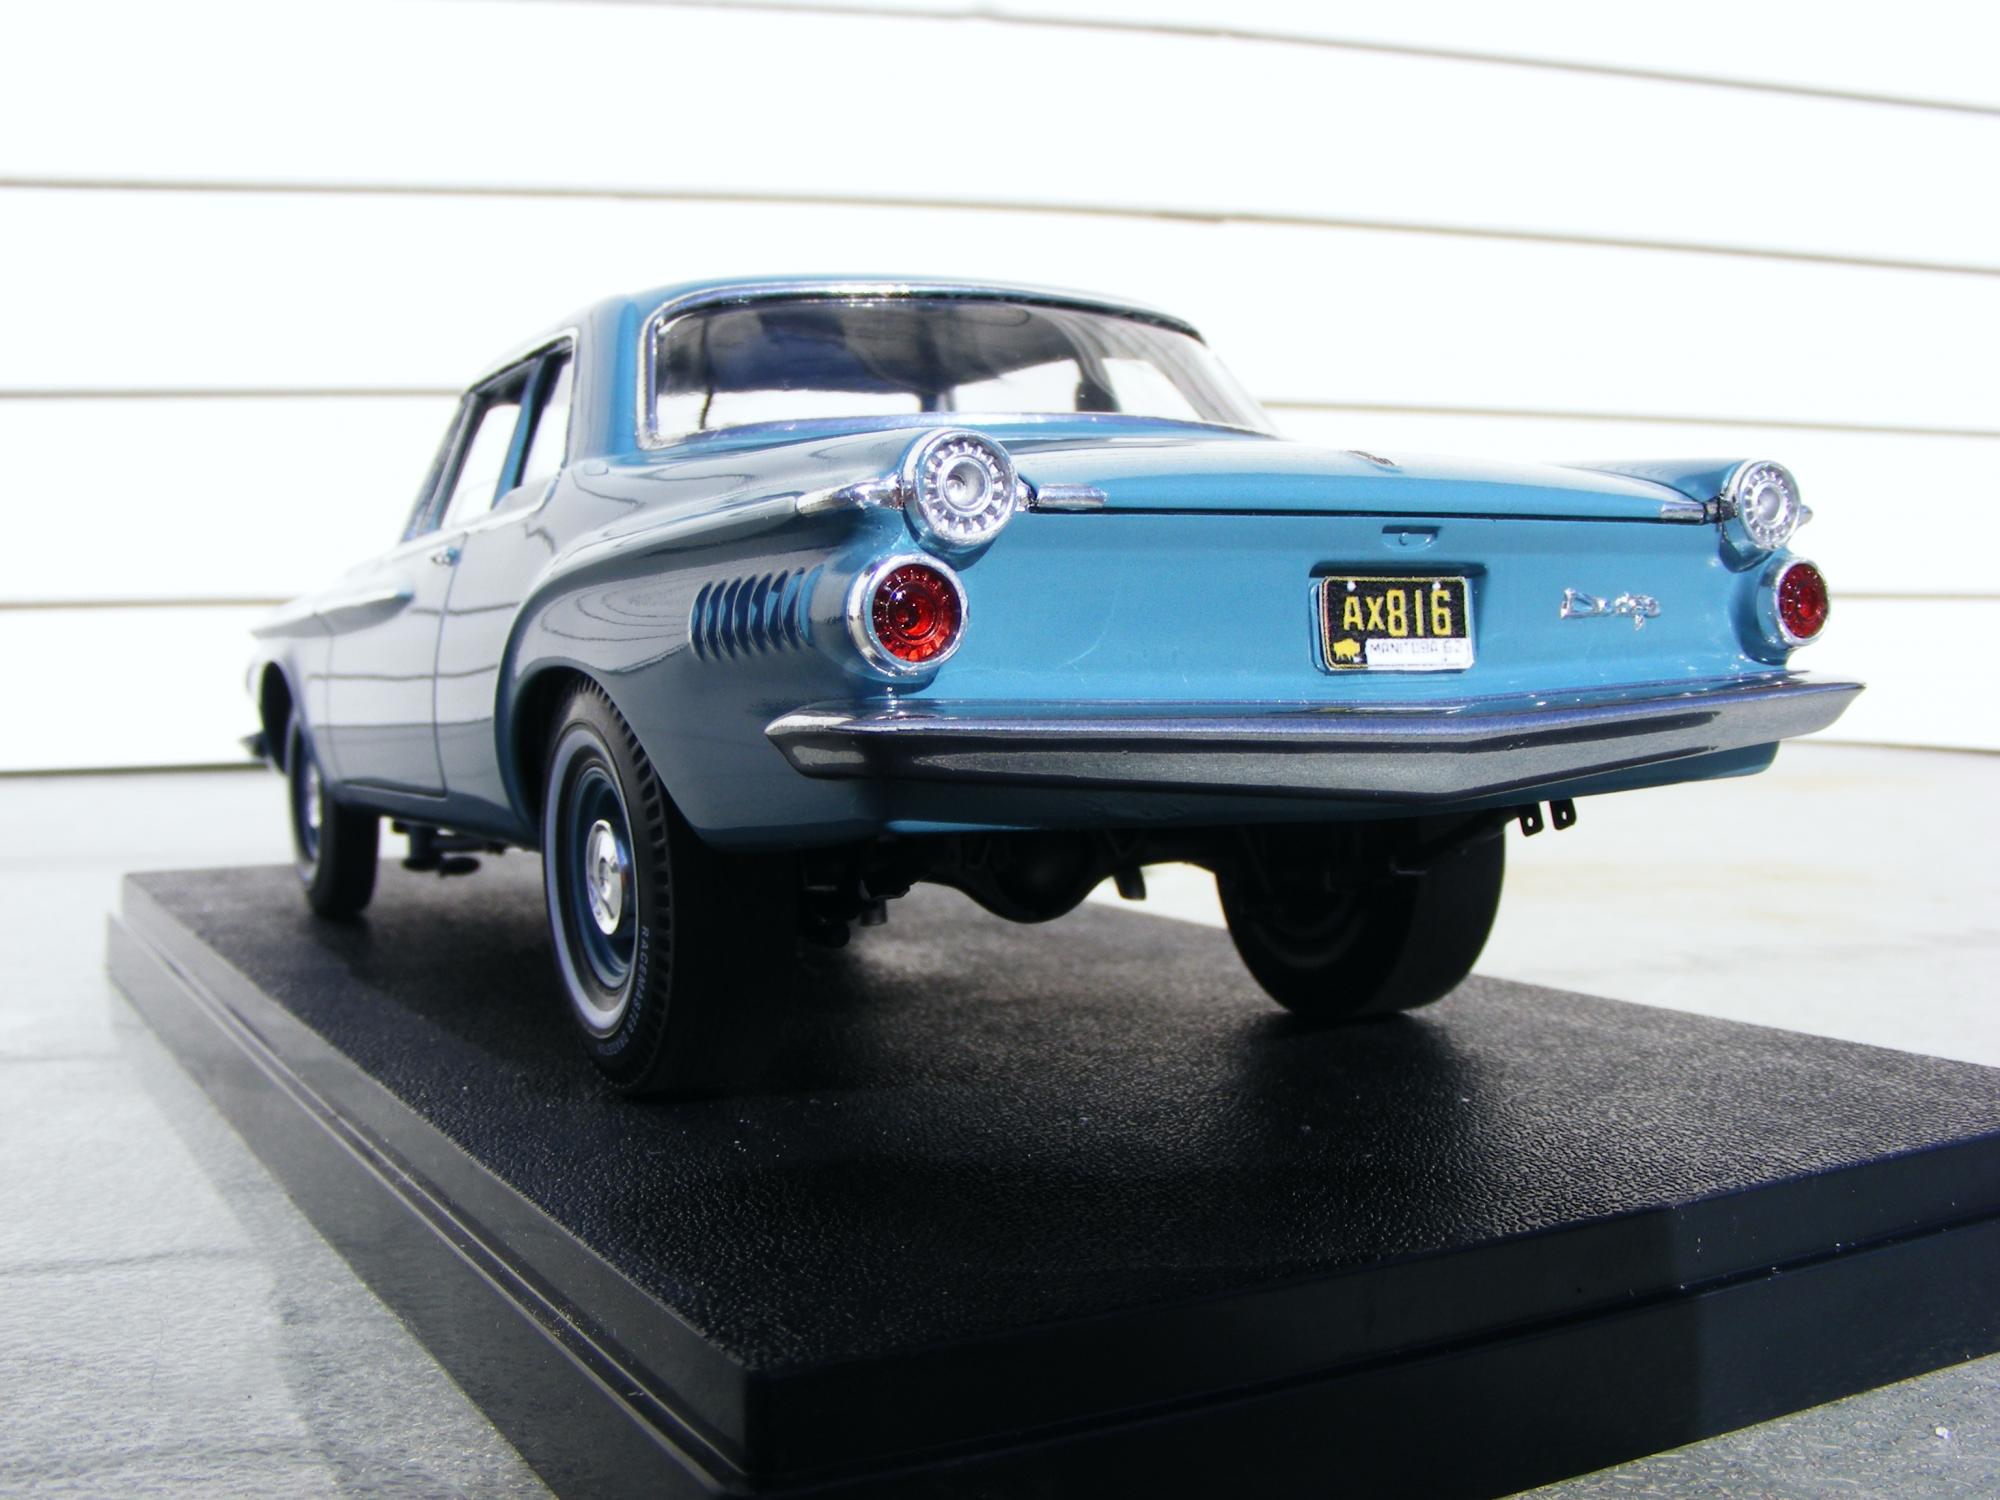
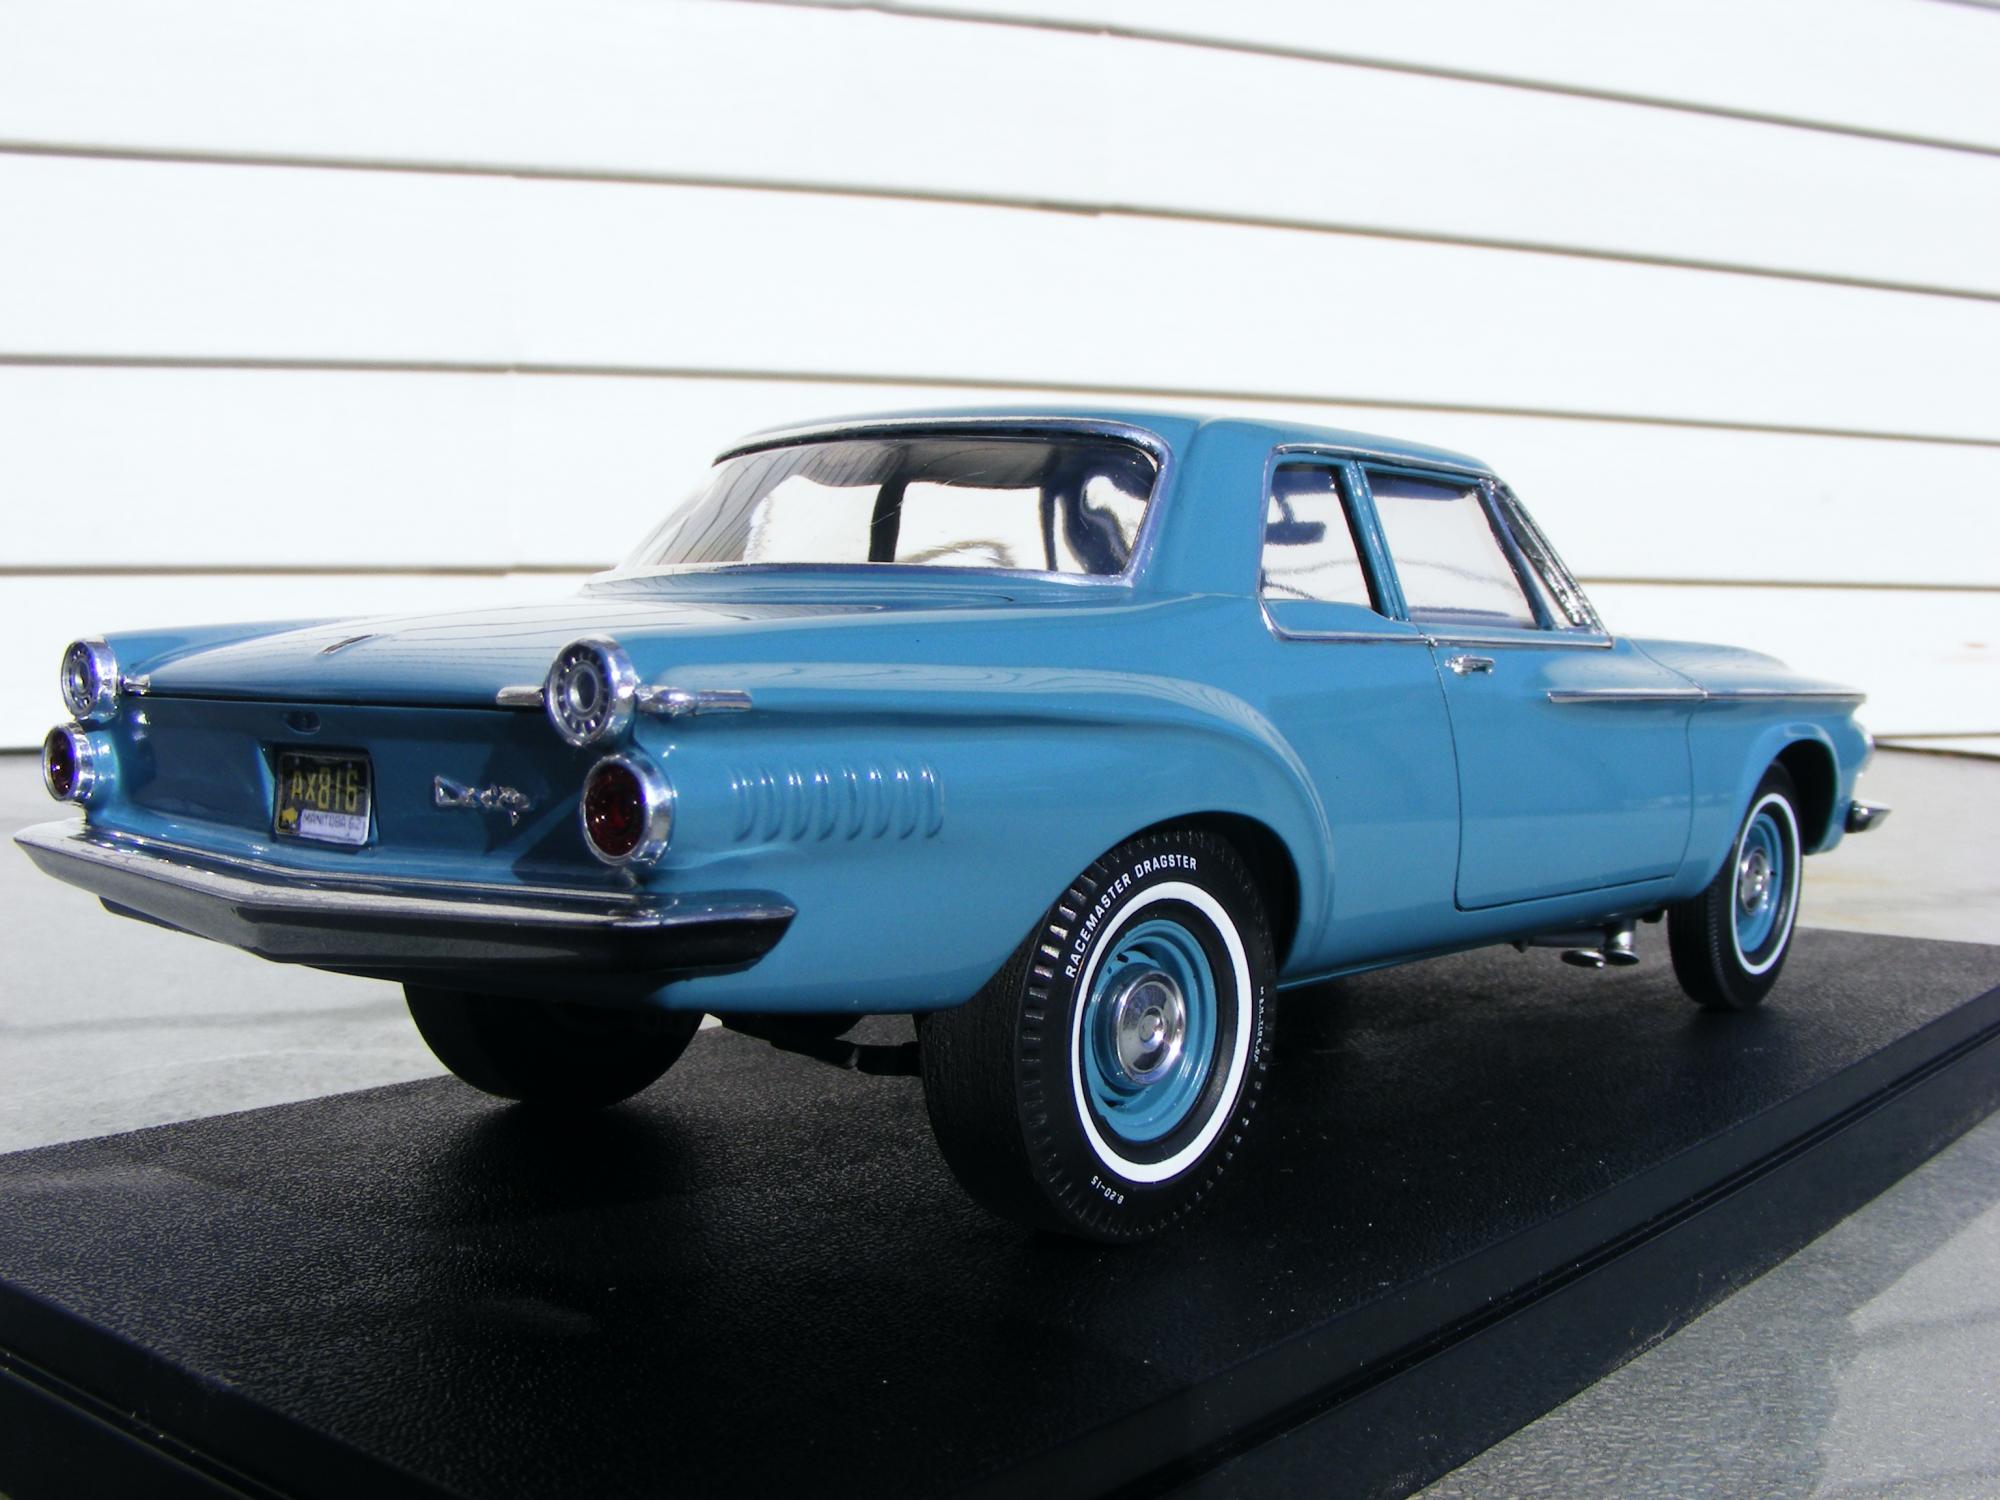
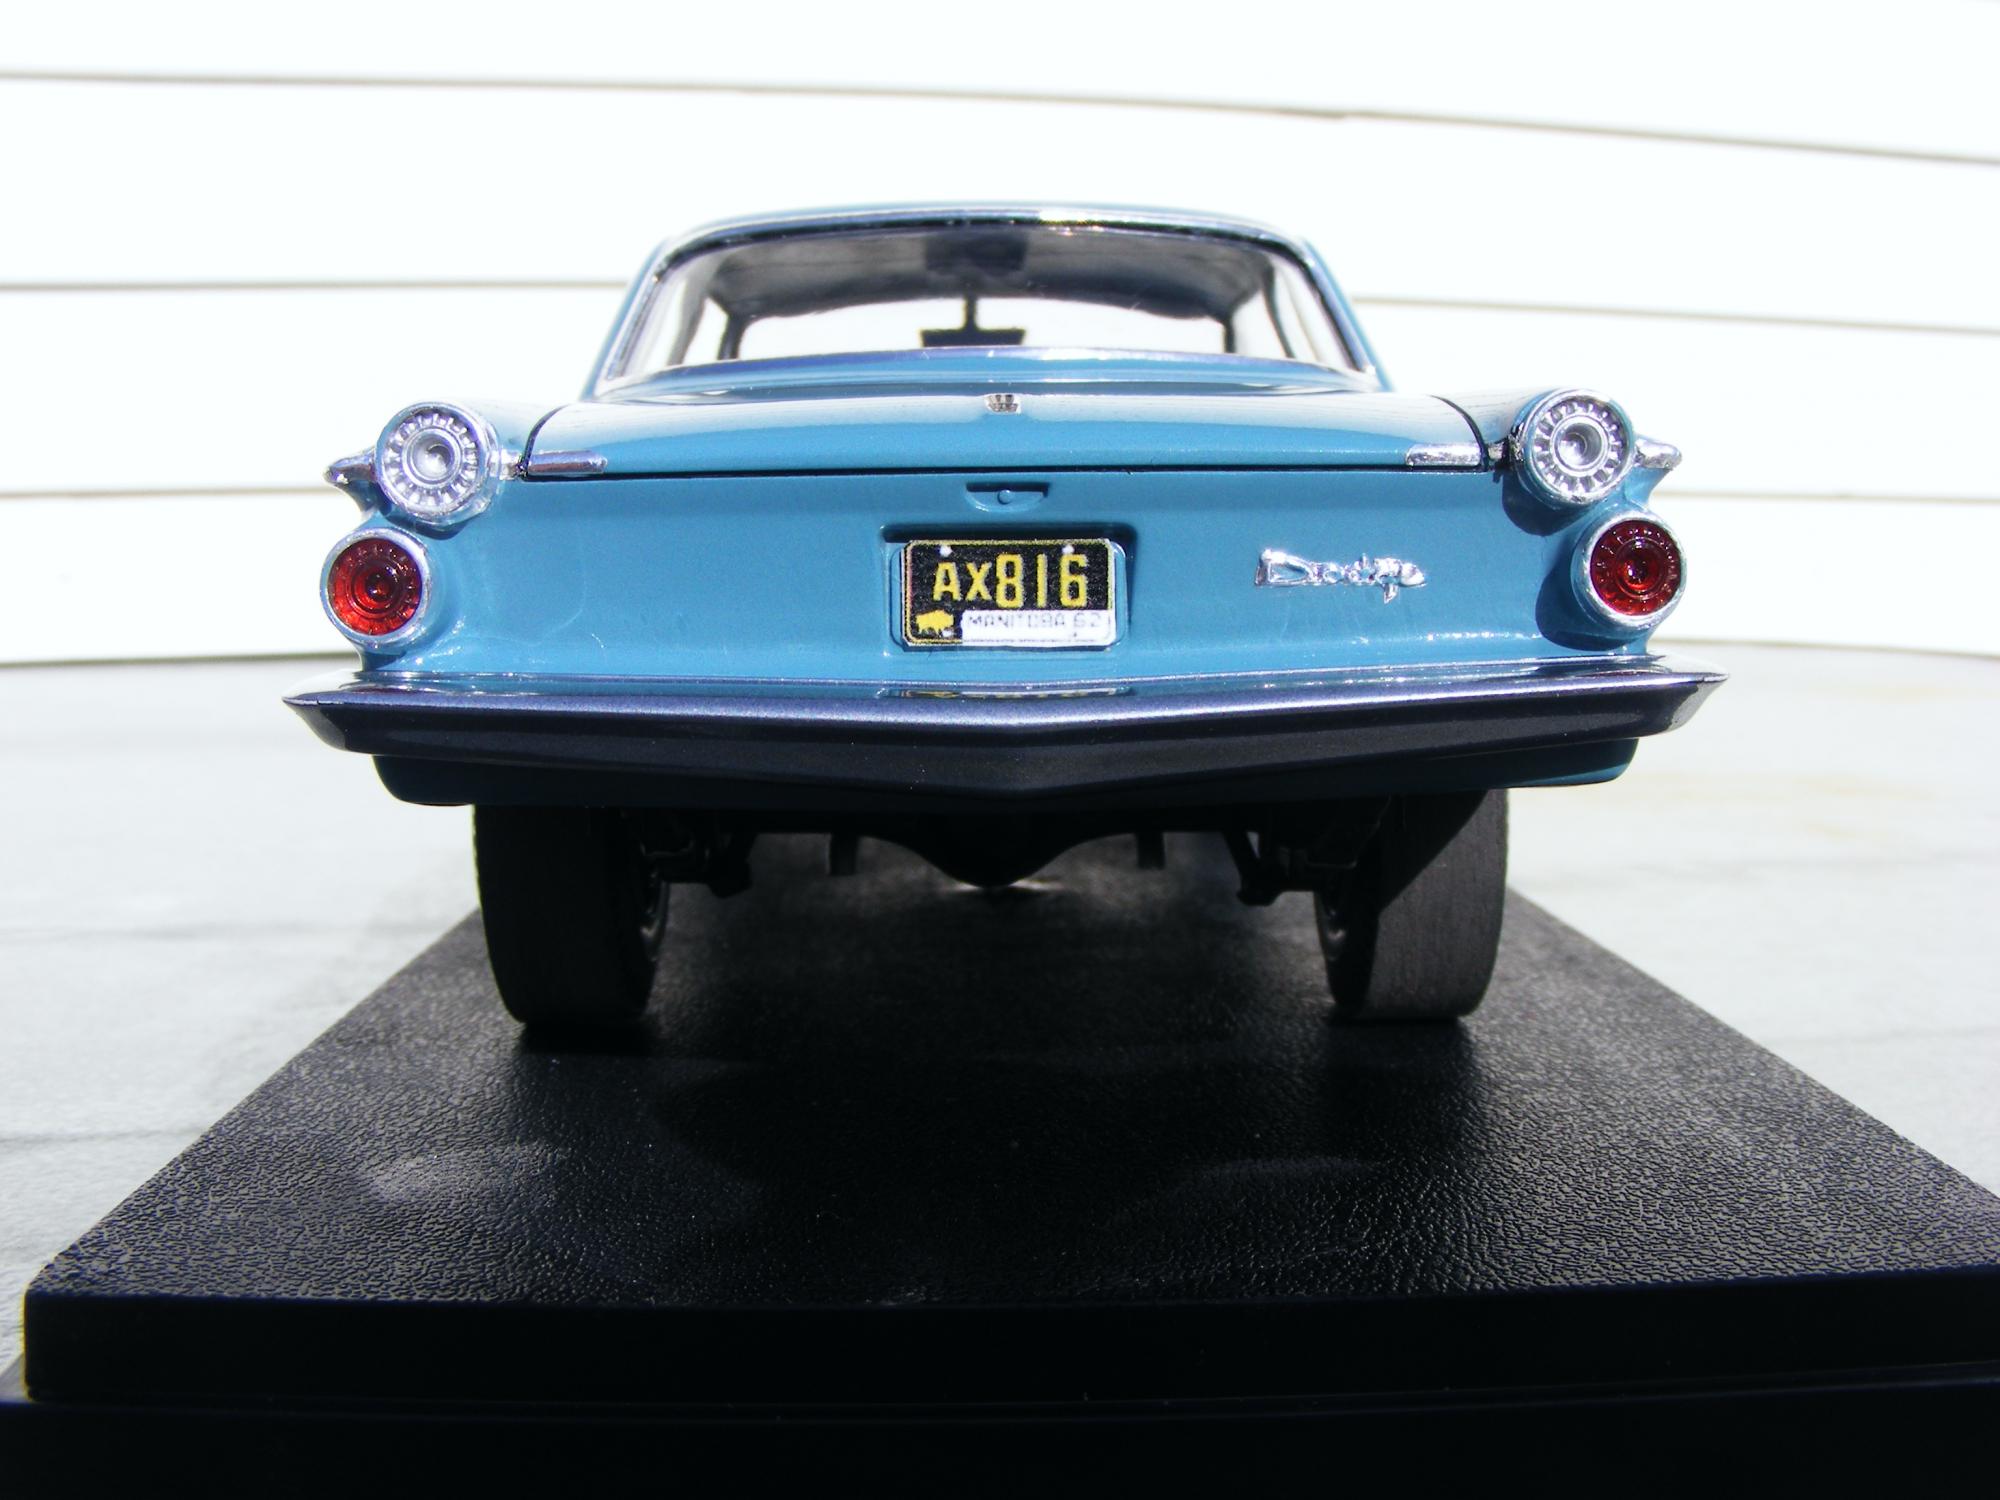
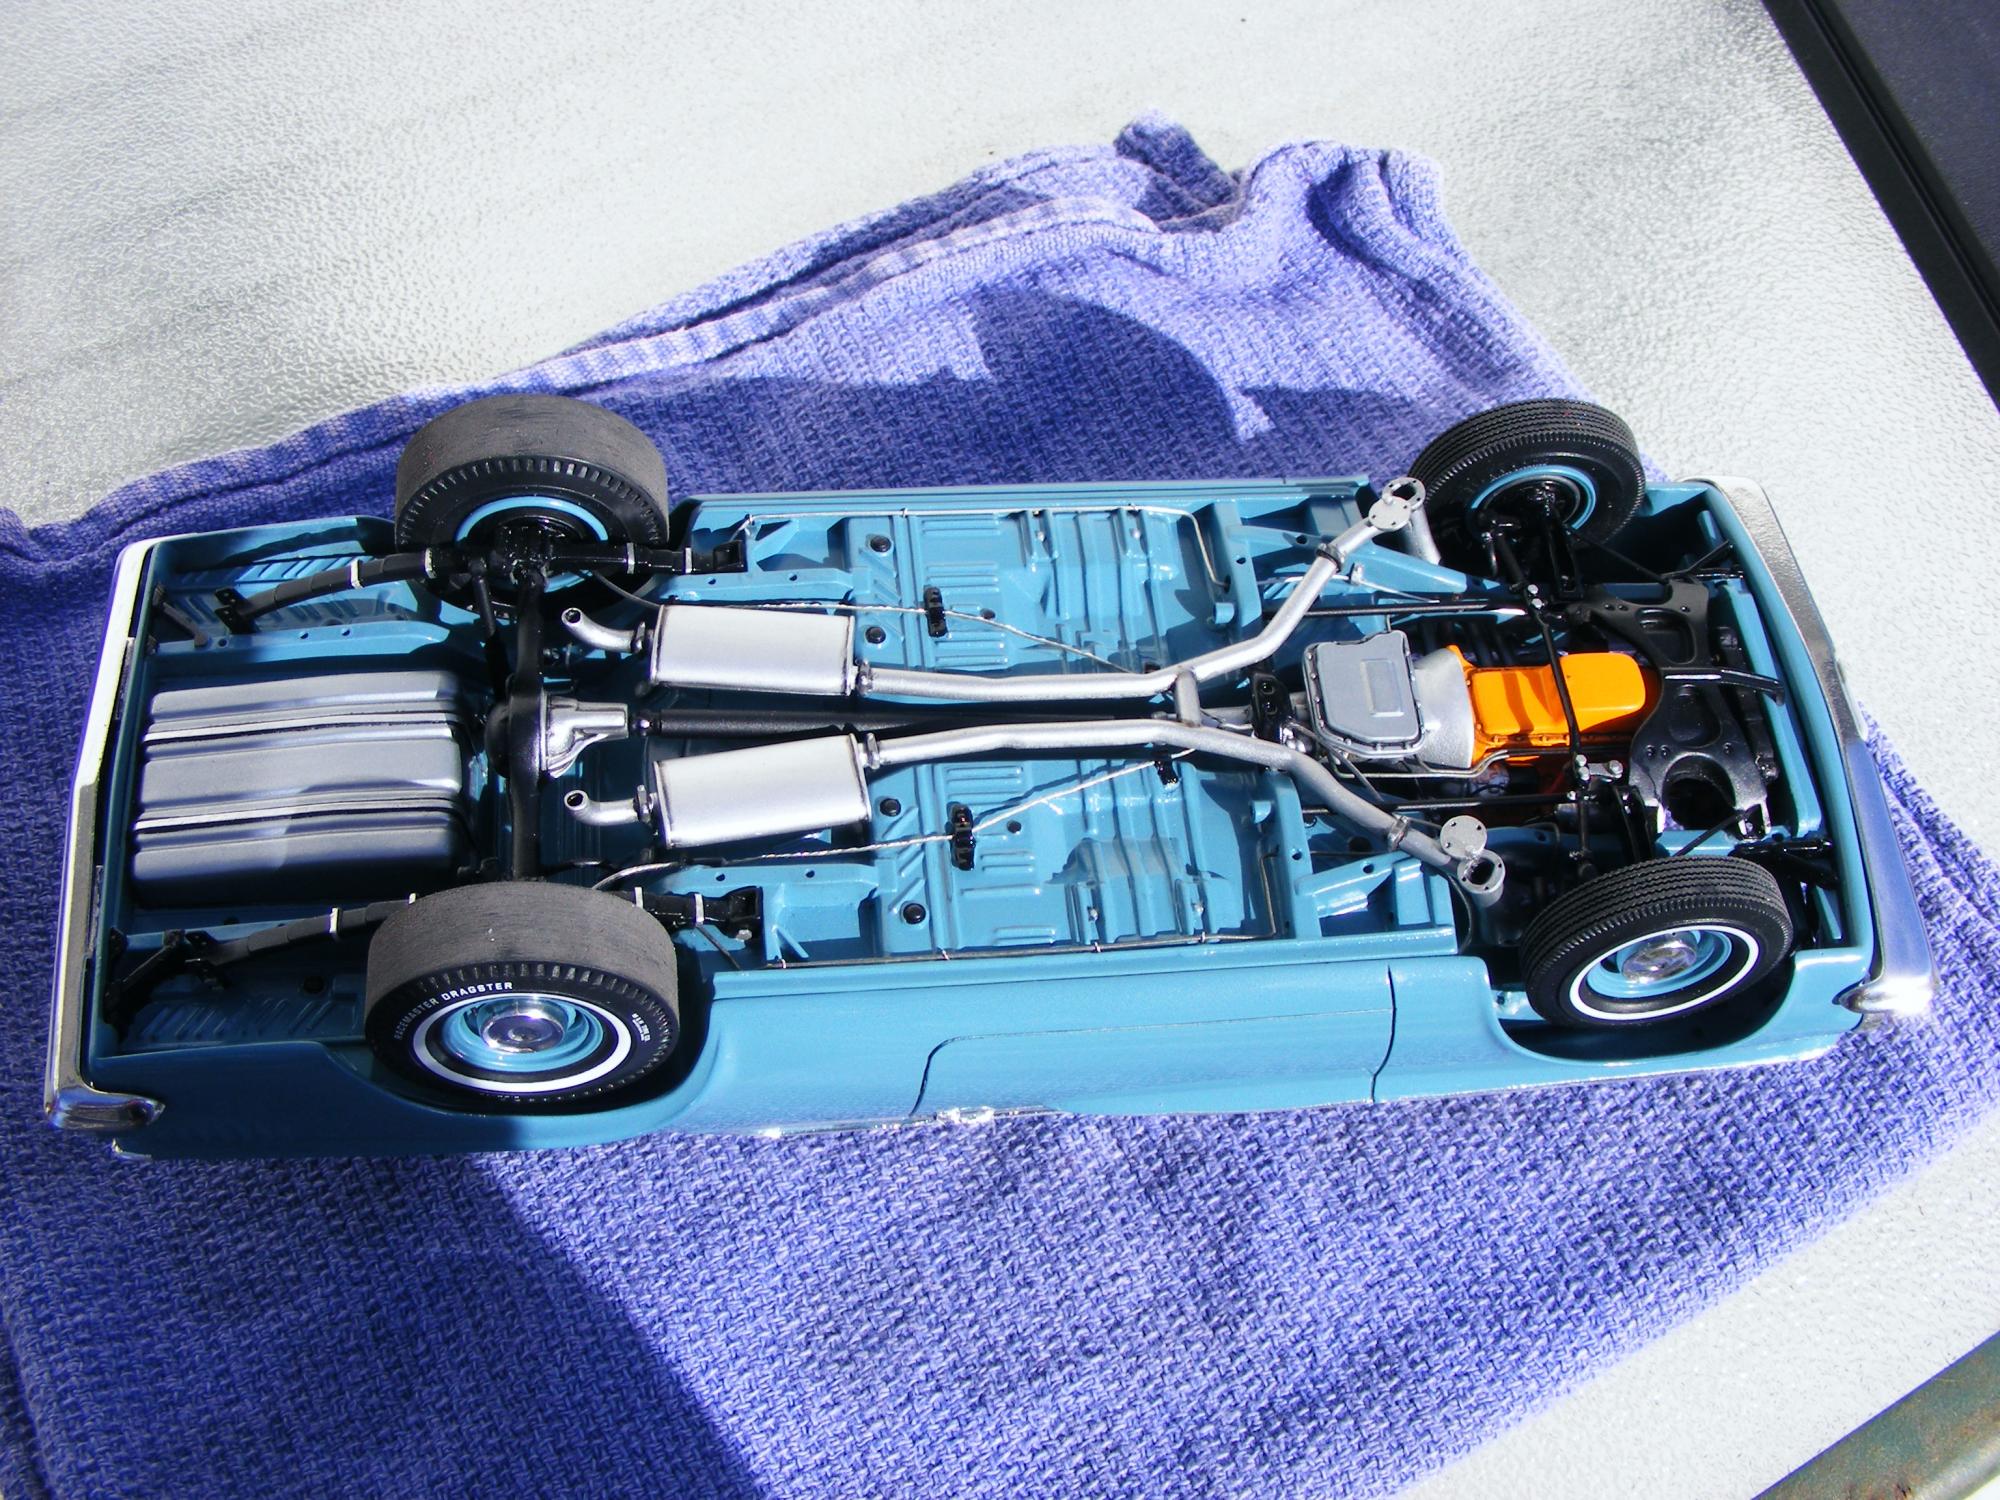
Great engine bays! Here's a couple of mine: A fuelly 283 in a Revell 59 Impala; A 394 Rocket in a Modelhaus 59 Oldsmobile; a 400 in an AMT 69 442 and the 413 Max Wedge in the Johan 62 Dart I recently posted Under Glass
-
Great job on the conversion!
-
Plum crazy purple with what interior color
DR JAY replied to Riley Customs's topic in WIP: Model Cars
My 71 Demon 340 was an original purple car with white seats, door panels and headliner with a black dash pad and package tray. Even after the paint had faded--as PCP always did if you parked the car in the sun for anything longer than 10 minutes--the interior still looked great... I don't build for contests and prefer to paint colours that appeal to me or fit the project...BUT--if I WAS building for a contest, I would chose the lighter interior so that interior details can be easily seen. The black interior--while more "Down To Business" and spartan in appearance--tends to hide a lot of detail once the body is glued in place. I spent MANY hours modifying a dash only to find that my hard work was lost in the shadows and the only way it could be seen was to look at the pre assembly pictures I took. That said, colour choice is a personal preference and whatever YOU like is the right choice in the end -
Outstanding!
-
Thanks very much for all of the kind compliments--I really appreciate the input! Hopefully the Johan 62 Plymouth turns out as well
-
I walked past this kit in the LHS today...now I'm thinking that I should have picked one up. Next time. Great job on it, though. The Recall Wheels pretty much decided for me...
-
I tried to document this project On The Workbench as I went. I just finished it the other day--with the exception of the door and trunk locks. I realize that the 62 Dart was NOT dodge's finest hour in the design studio, but I have always loved the way that the 413 Max Wedge was wrapped in such a homely package that year...if a station wagon would have been available in 1/25, I would have built that instead and chosen an even more bland colour. Thanks for looking..
-
I still have some small details to add...like the door and trunk locks. I'm otherwise calling this one finished. More pics will be Under Glass. Thanks for all the compliments--this build took 2 months to the day and was the fastest I have ever done a project like this.
-
...Back in my younger days, I used to wrench on dirt stock cars and we had no pipe bender--we filled the pipe with sand so it wouldn't kink and used one of the many trees behind the shop as a fulcrum. (We never built cages that way, just bent up pipes for repair purposes) Kinda the same deal here with the aluminum tubing i used, except I slid paper clips into the tubes before bending and used the bit of paper clip sticking from the pipes as pins to hold the header flanges in place and attach the headers to the cyl heads. The collectors were spare parts and the flanges were just styrene. Both sides took an evening. The toughest part was bending them up in such a way so they would fit the holes in the fender wells and line up with the heads when the engine was dropped in around them--just like a 1:1. I usually use solder, but didn't have enough to do both sides. Thanks for the compliments everyone. Kinda proud of this one...
-
Thanks very much for the compliments! I appreciate the input...
-
There. Caught up.... Which brings the project to the current state.
-
.JPG.560f3265e7bfcdf65e1e78871a2f6124.JPG)
.JPG.990d550e15a69b97f822a35d667fcbd8.JPG)
.JPG.a9312acf21836be686ca08f7bedb1540.JPG)