customline
-
Posts
3,791 -
Joined
-
Last visited
Content Type
Profiles
Forums
Events
Gallery
Everything posted by customline
-
I'll say ditto to all the above. The pictures show that black paint reflecting perfectly the surrounding objects. Just amazing, Mike, how did you go about getting that black paint job so beautiful? What paint did you use?
-
Looks great under there, James. A nice Show & Go gasser straight from the pages of Car Craft.
-
That big FE is a tight fit, Jeff. You may need to make some room. I had to.
-
Wrinkle city. You may have put that second coat on too wet. It's happened to me but with a clear top coat, trying to get a nice wet look. Laid it on too heavy. Probably why I don't like to use a clear coat. You have plenty to do while that body soaks. Get busy!
-
I'm with you on that! And just about every rattle can you find has their name on it. What happened?
-
About those wheels, James - I expect better from Moebius. Some of the newer Revell kits are supplying weird wheels too. I applaud your color choice! Everything looks great, James.
-
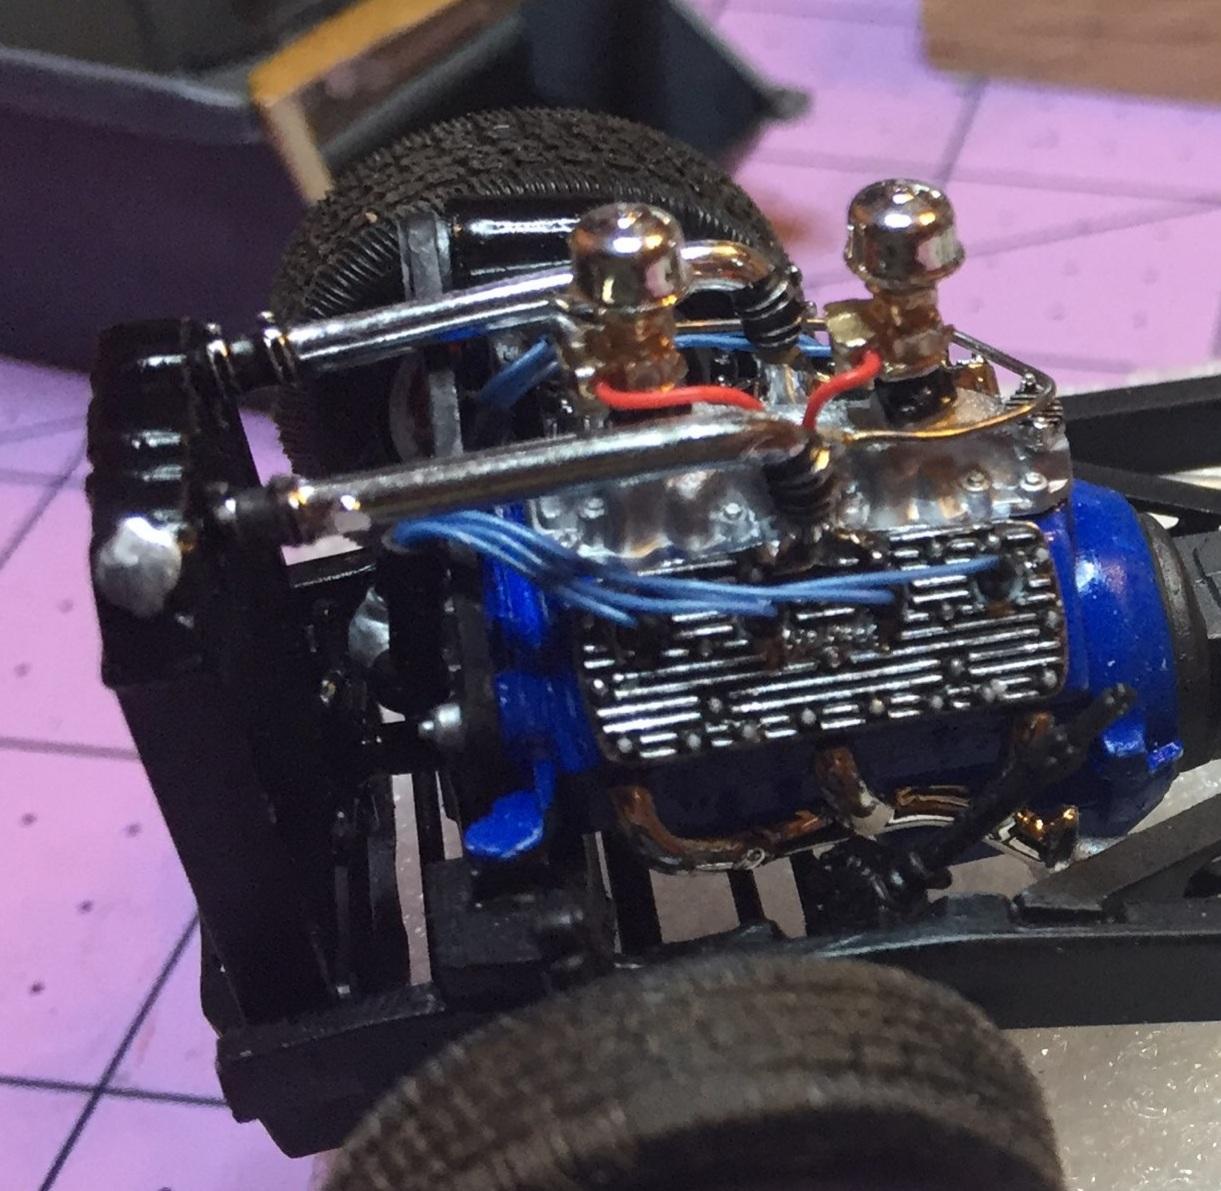
Engine looks fine, James. I think it's OK to use wires that look a little too thick on a race car engine, especially one with all that chrome sitting on top and those outrageous headers. I save my thin black wires for stock engine builds and use blue, orange, or yellow, thicker wires for race type builds. I have a lot of wire I can't use for spark plug wiring because the AWG number only indicates wire size, not the overall thickness. It's tiresome. Are you planning on adding fuel lines and linkage? Linkage makes me crazy; I avoid it.
-
I might go with black( I can't get a good black paint job either) if I was going to flame it ( my flames don't come out too great either) . I feel you, James. Anything with a chrome straight axle pushing the nose into the stratosphere needs a drag strip paint job. I'm kinda leaning toward some shade of orange but that's just a fettish with me. Yellow or maybe a metal flake bright blue. That black one in your picture is nice but it could be so much more. Got Boyd's? I've got my '56 300B sitting in paint job limbo with it's black paint job that didn't turn out so hot. I must get it it straight. This car needs to be black. It's a huge Chrysler Sherman tank and it belongs to a mortician or a pro golfer. Not a 27 year old with an adrenaline addiction. That guy runs in A/G every week and is trying to attract a sponsor. Anyway, just my thoughts, friend.

-
From what I've seen of Moebius, this will be a really nice build regardless of the color you choose. Let's see what's in the box, James ?
-
I remember some years ago in the old SA forum I saw a tip for a return spring using the element from a tail light bulb. I still have a couple of those bulbs in my junk box. Never did do it.?
-
By-pass hose? Return spring? Heater hoses? I don't know what you have never done ?
-

1964 Pontiac Bonneville Convertible.
customline replied to StevenGuthmiller's topic in WIP: Model Cars
I just stumbled across this thread now..... it is obvious to me that Steven is a Master Craftsman. The level of detail is astounding. This is Ph D level model building. -
I wouldn't want to change out the plugs, Steve. Maybe from underneath ?. Headers look good. Any street exhaust coming?
-
So difficult for me to get a great black paint job like this one. I'm envious. I also covet this kit, too. Gonna have to pay the price when I find one, I guess. Beautiful model, That Guy!
-
Well, you haven't let it stop you. Losing a little blood once in a while is good for you. I know it's going to happen so I just prepare for it. ?
-
I think we should all agree this is a pretty darn amazing newbie build. The use of an unusual engine shows out-of-the-box thinking. All of it does. No limits, rat-rod thinking for this one. Congratulations, Mr. Ericsson. You have our attention! Tip: I keep a box of band-aids on my work bench. Enough said. ?
-
Just adjust the torsion bars down a little ☺️. Seriously, this thing is super cool. Love the color and great work on the white interior, the only color if you like to drive with the top down (why would you not?). The Magnum 500s are difficult to make look as good as yours. The tail pipe thing ? I've done that on a few builds (intentionally and unintentionally). Amazing how much those things will take without breaking. I'm following!
-
Steve, I don't think that headers, because the configuration will vary with the application, are worth the time and material with maybe certain exceptions. One would be open street rod types where all pipes are on a single plane (like for Ford flatheads) and possibly cast-type factory manifolds that you find on some high performance applications. Your solder headers are quick and easy to build and the ones I see here look good and it's easy to make adjustments to get them to fit the way you want.
-
This looks like it's going to be a great one; already is, so far. That resin body looks really good. I wonder if it will fit on the '53 Ford frame. ?
-
Oh, good one! Glad I haven't hooked it up yet. And yeah, I can hear the sound of a flathead in my mind too. Music ?. The first engine sound I heard when coming home from the maternity hospital.
-
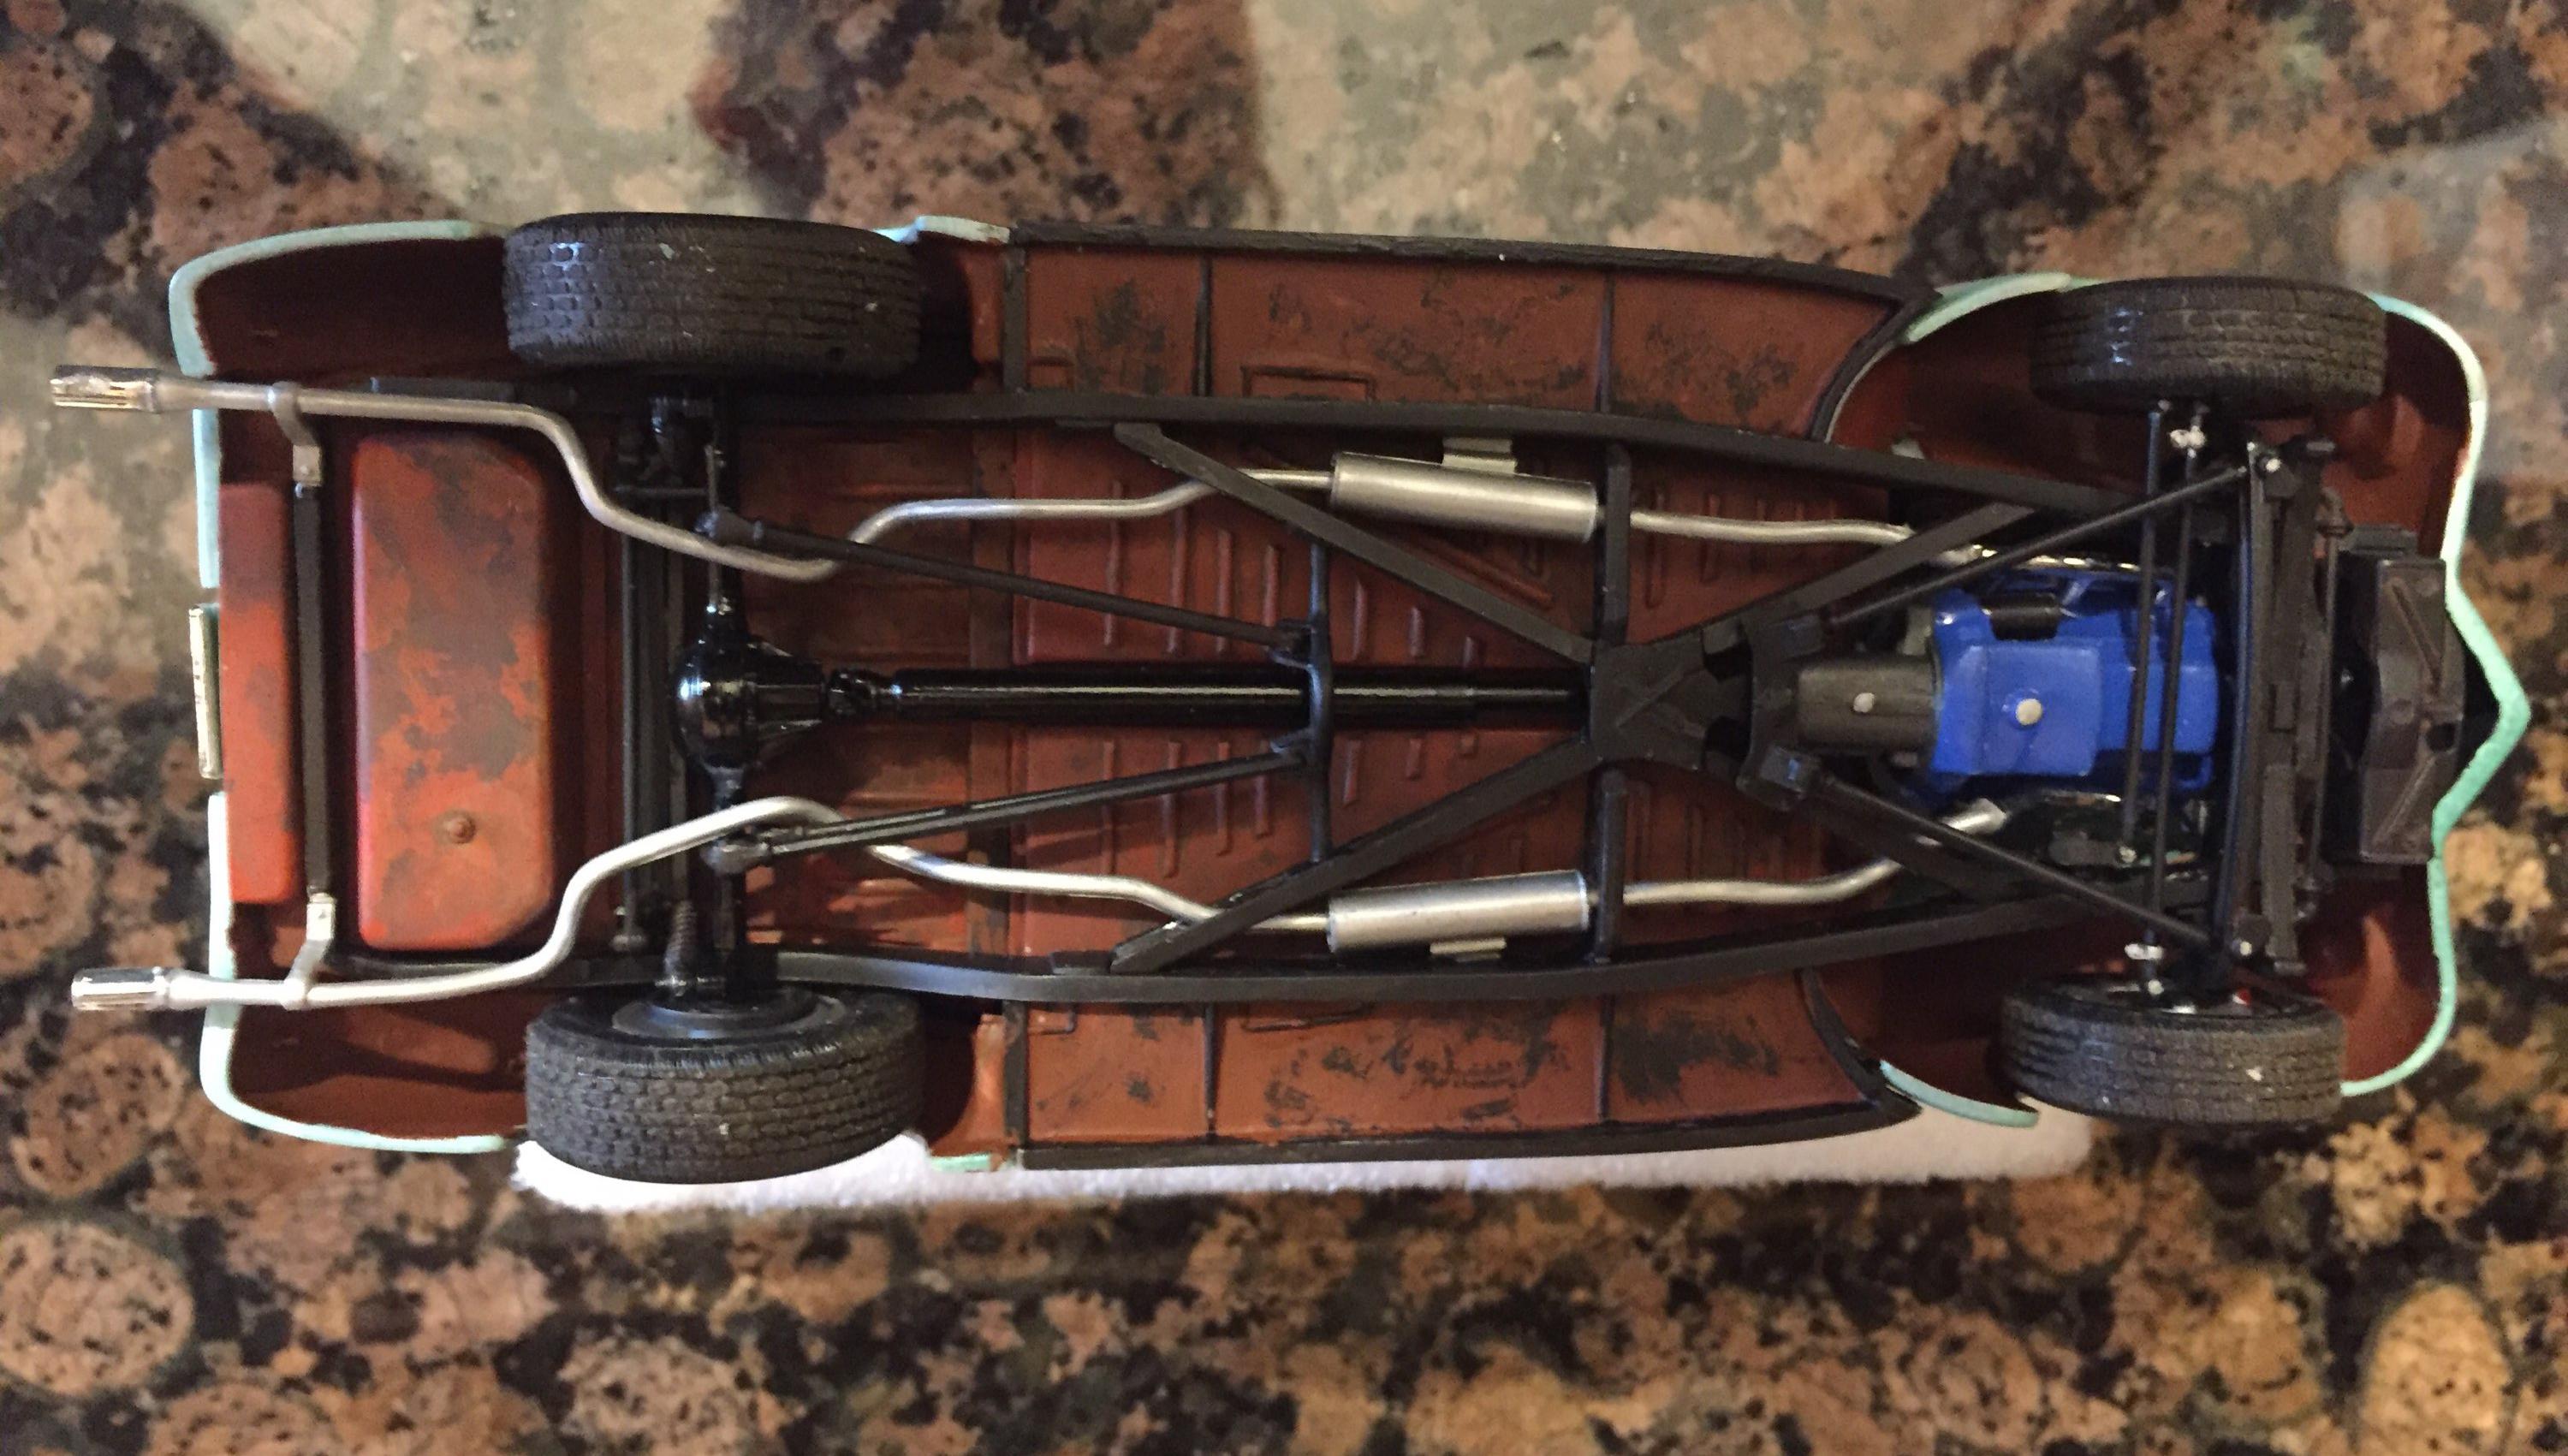
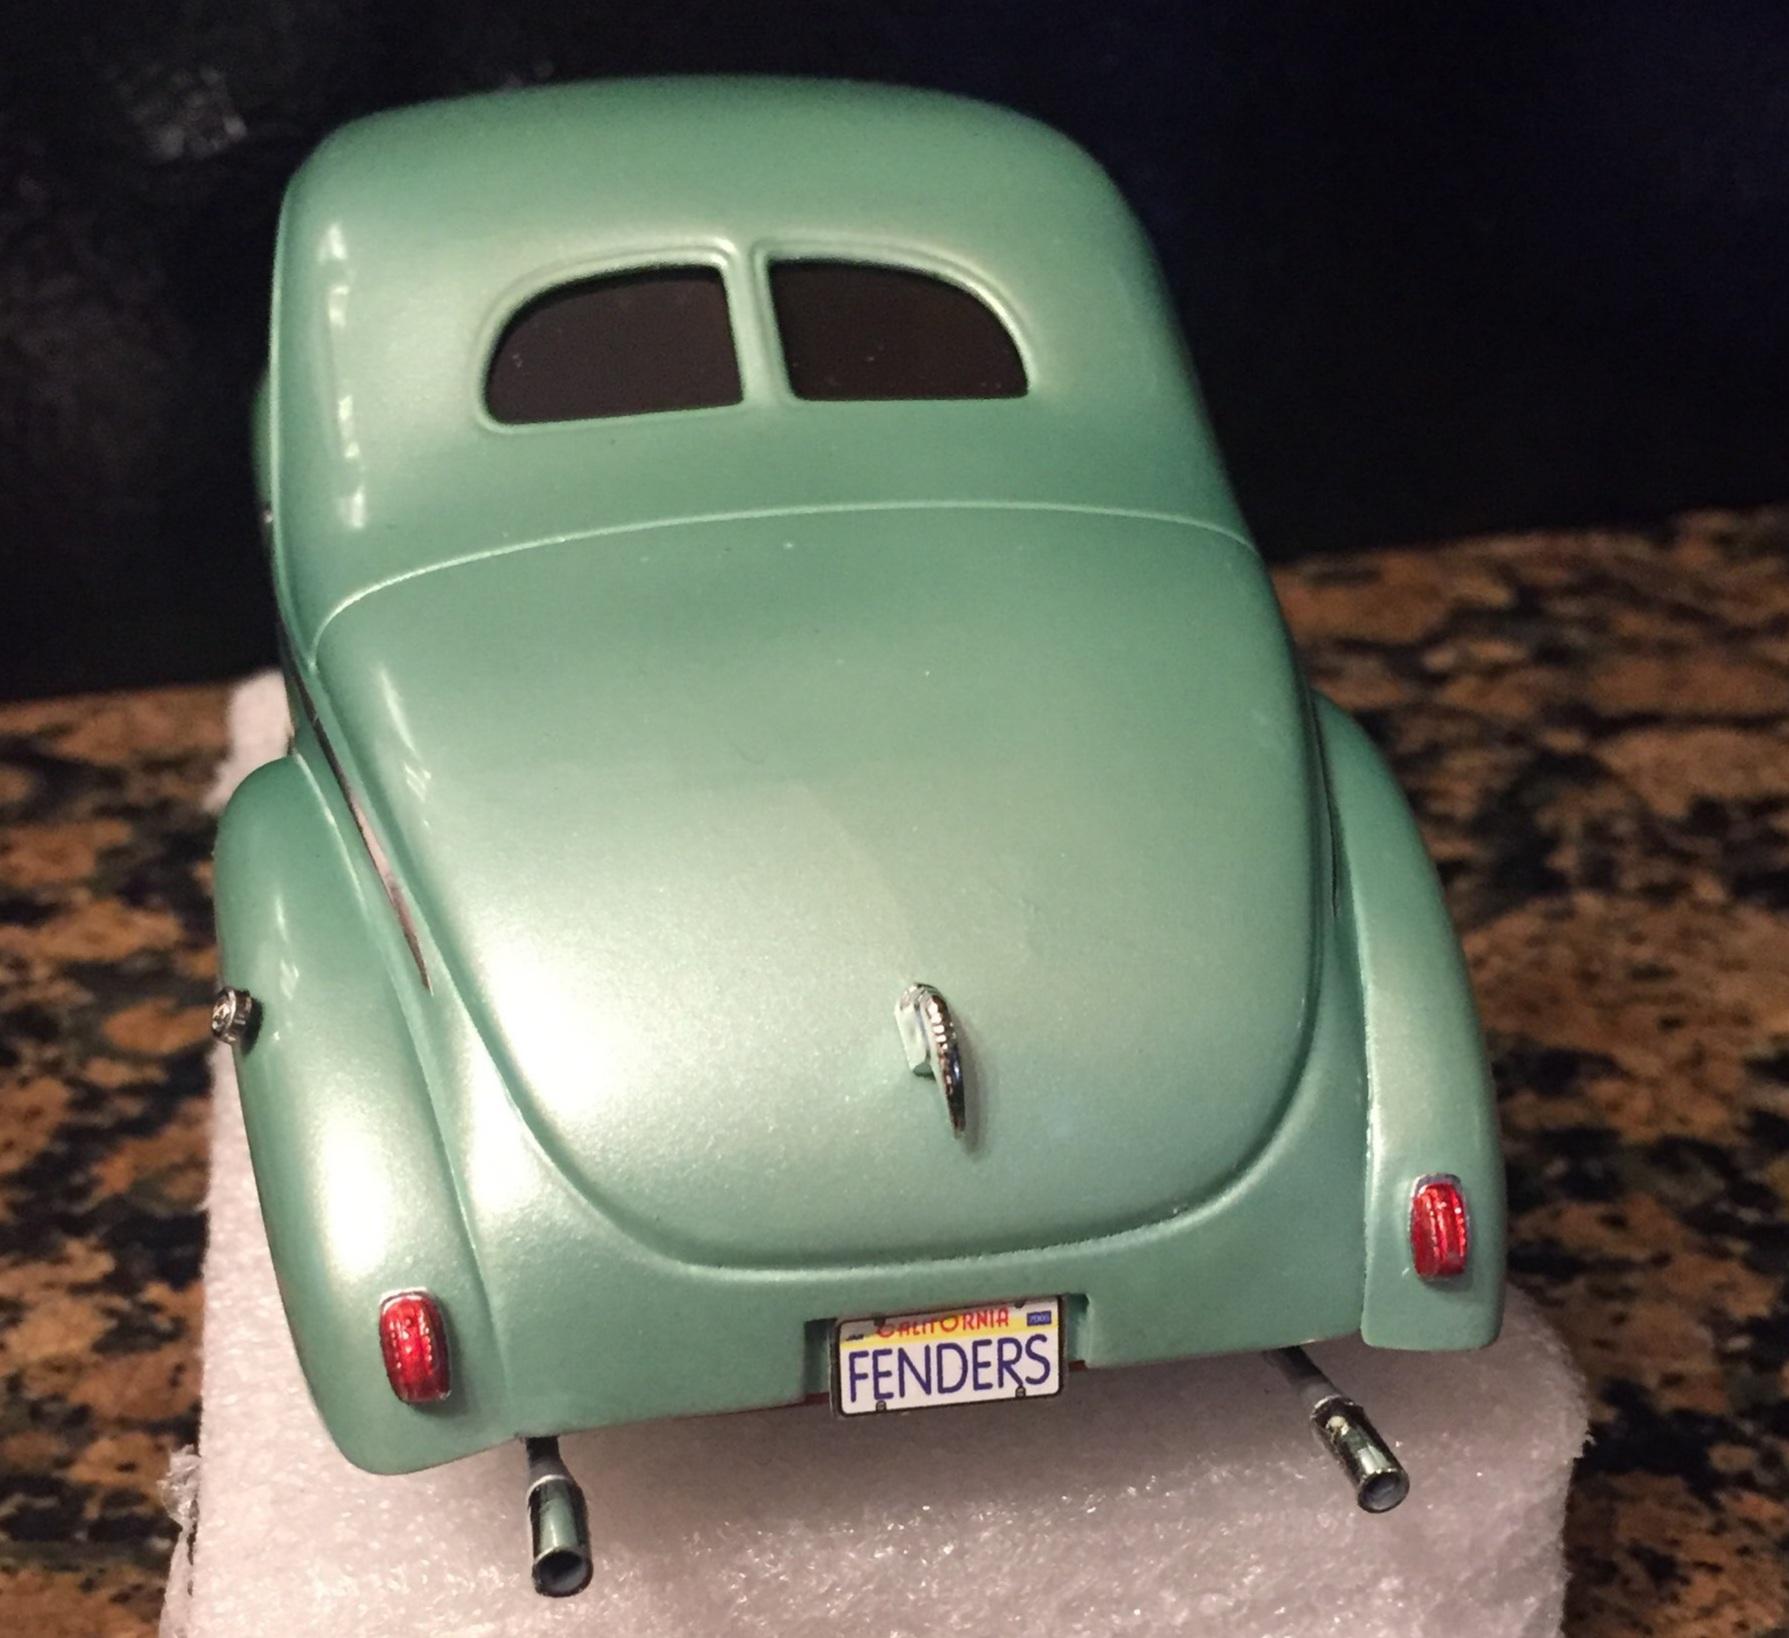
A little movement on this one but it's not quite finished. I never know what to do here because I must be consistent with my "narrative" and the car I am imagining is a street driven custom with lots of rod run mileage since it's completion (a hot rod is never really finished). So the underside is consistent with that. The engine has been replaced with a nice flathead because the FE that some lame-brain stuffed into this car finally developed a wrist-pin knock and this flathead, which was waiting for a completely different project, was longing for home. I decided to light up the rear with tail lights from the '41 Plymouth as an homage to my old coupe. The exhaust system is kit stock and very poorly routed but who am I to argue with the experts? If you don't analyze it too much you won't care. You can't fault me for following the instructions ?. There are a number of small details left to be dealt with after body to frame attachment is made such as shortening the tail pipes ?. But this is it for a while; I have company coming soon and won't be able to work on this stuff. Till then, don't forget to tighten those paint caps. ?MO
-
Yup. There are at least 3 that I saw that look like the above. I think I'll take the x-19 path. It does tone down the "chrome" to look a little more real.
-
I just looked at Cragar 390 street pro...this might be it...the center thingie looks right (without the knock-off spinner)
-
I think they look a lot like Halibrand Sprints, which have a polished finish. I'm sure I've seen some like this that had a grayish spoke but with polished edges. I have the x-19 and you are right about less is more( I tell her that all the time ☺️)
-
I feel a need to detail the wheels that this kit provided. I can't identify them. Does anyone know the mfgr. of the 1:1 wheels represented by these kit wheels?