customline
-
Posts
3,791 -
Joined
-
Last visited
Content Type
Profiles
Forums
Events
Gallery
Everything posted by customline
-
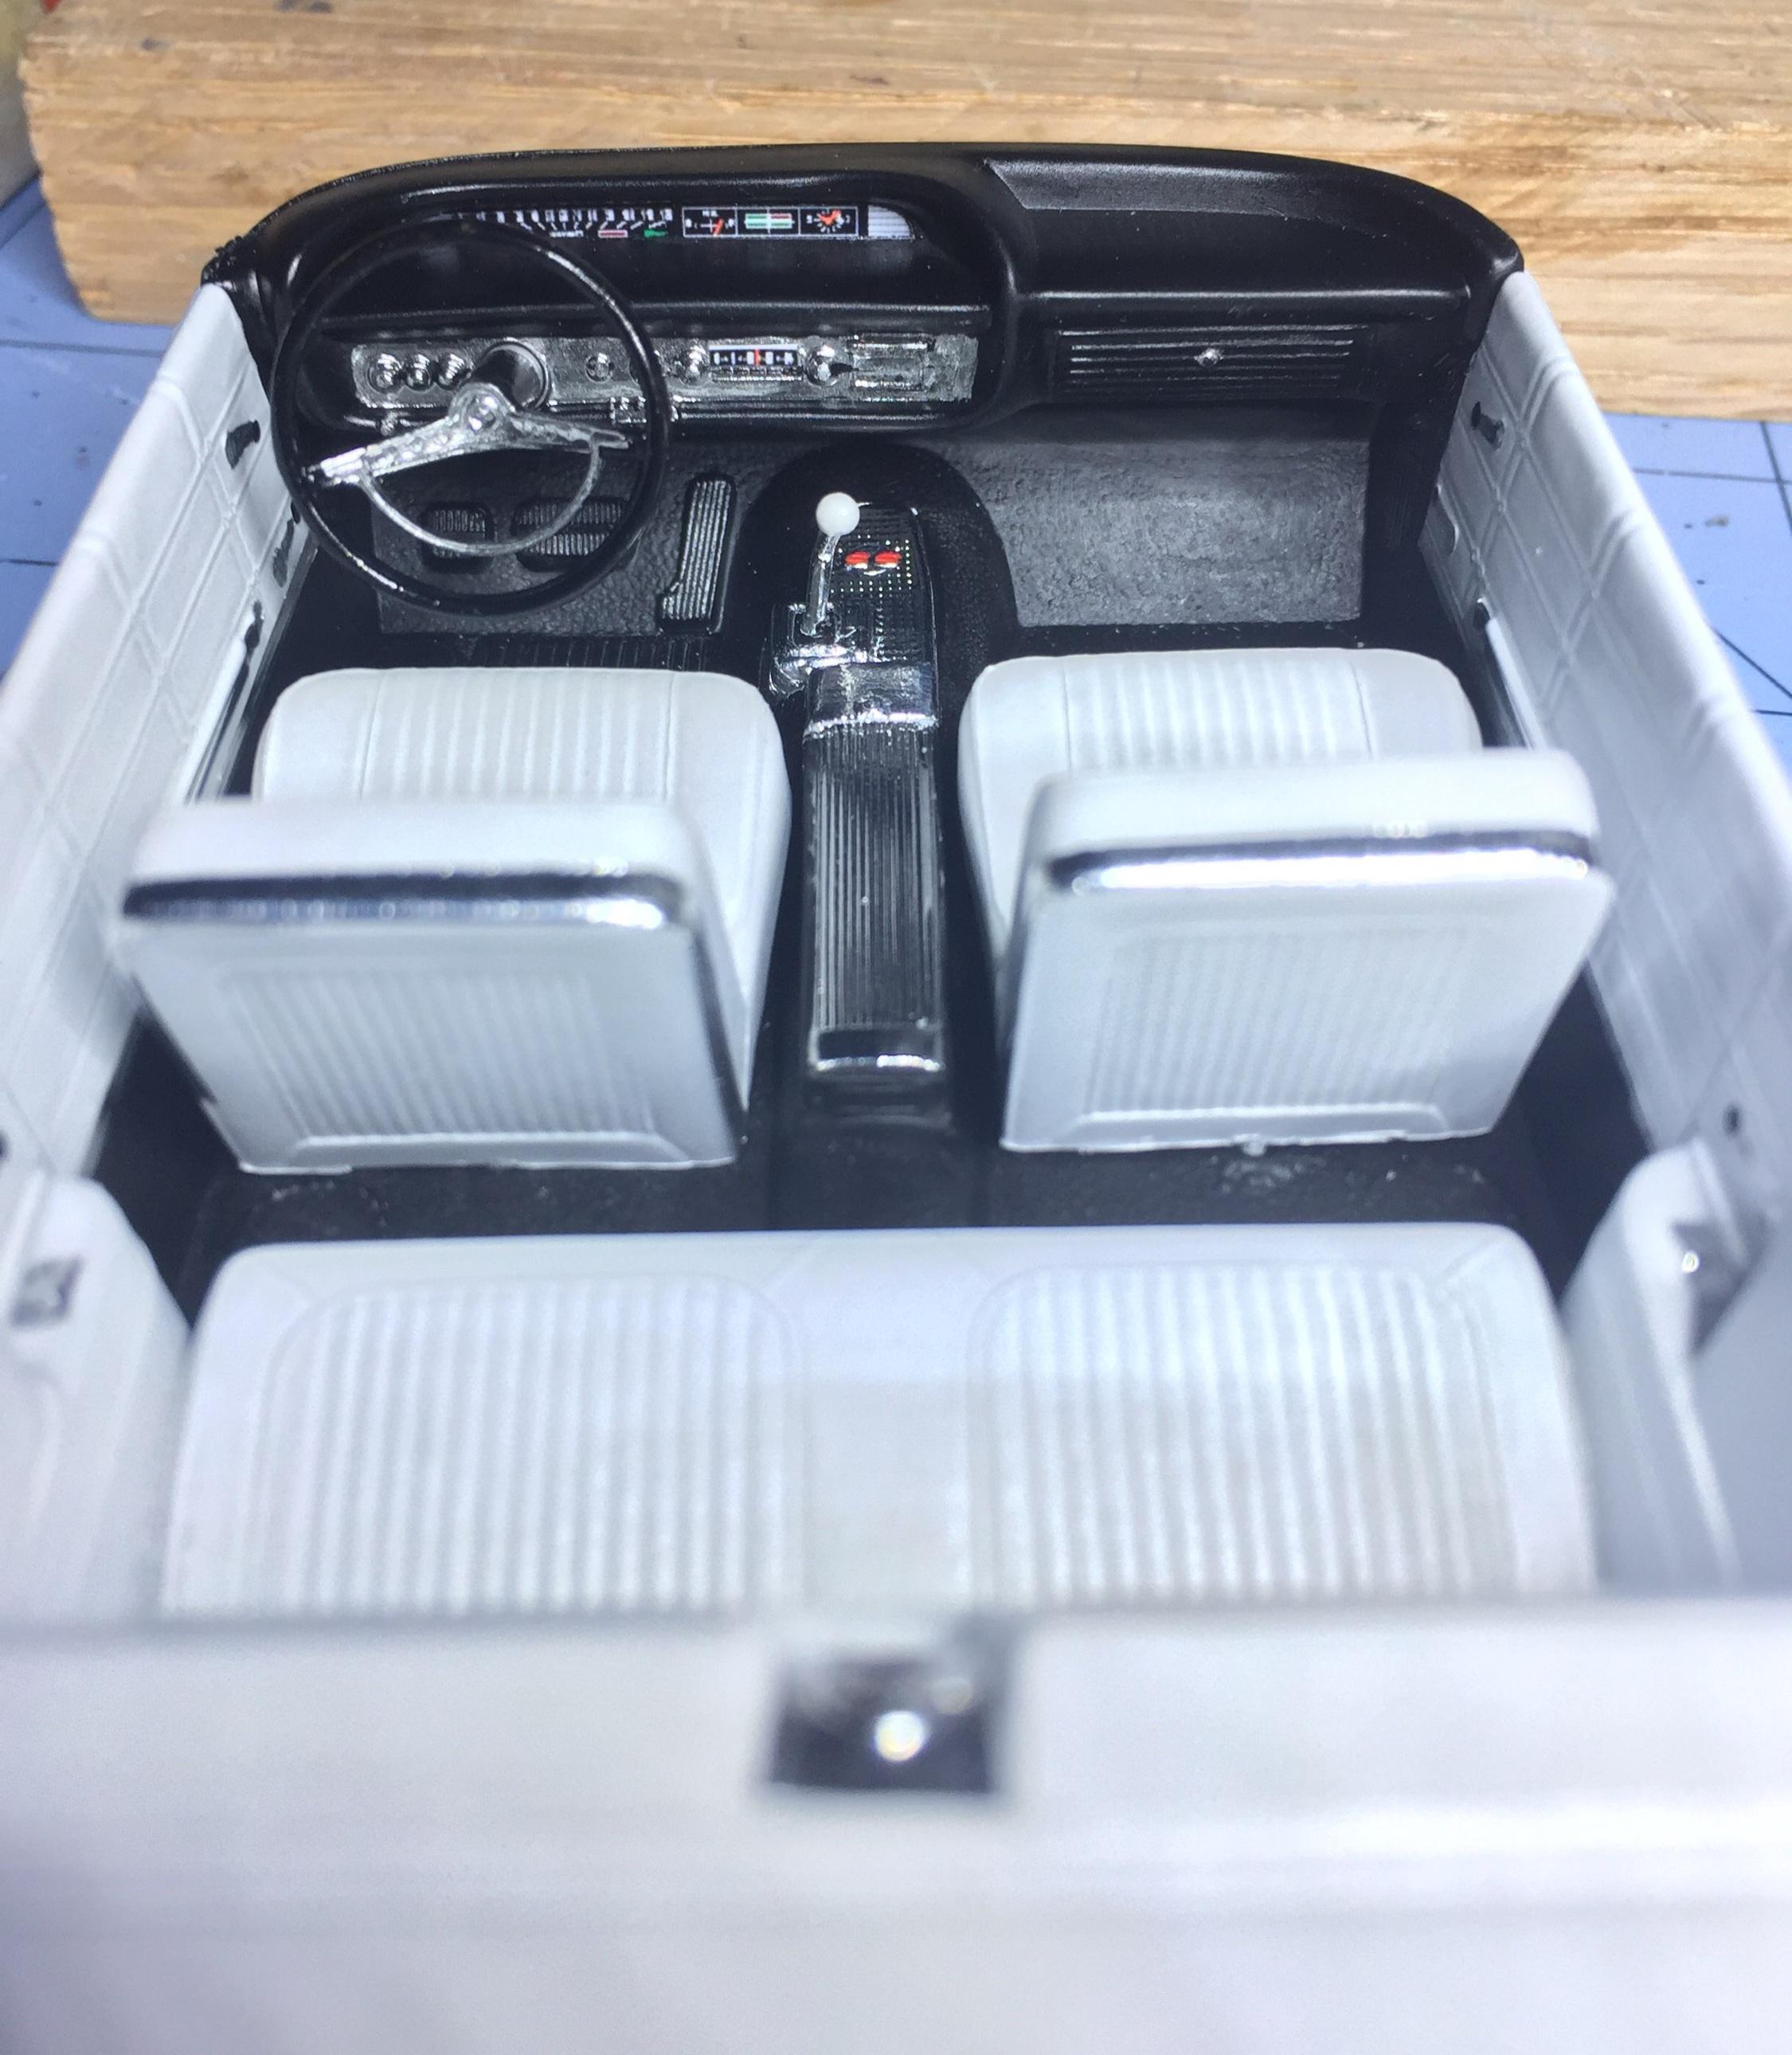
Thanks, Steve. I gotta say that B.M.P. instrument panel is extremely sharp and clear. I only use them when i need to but they make a tremendous difference and, on this particular dash, it's the star of the show. Love 'em!
-
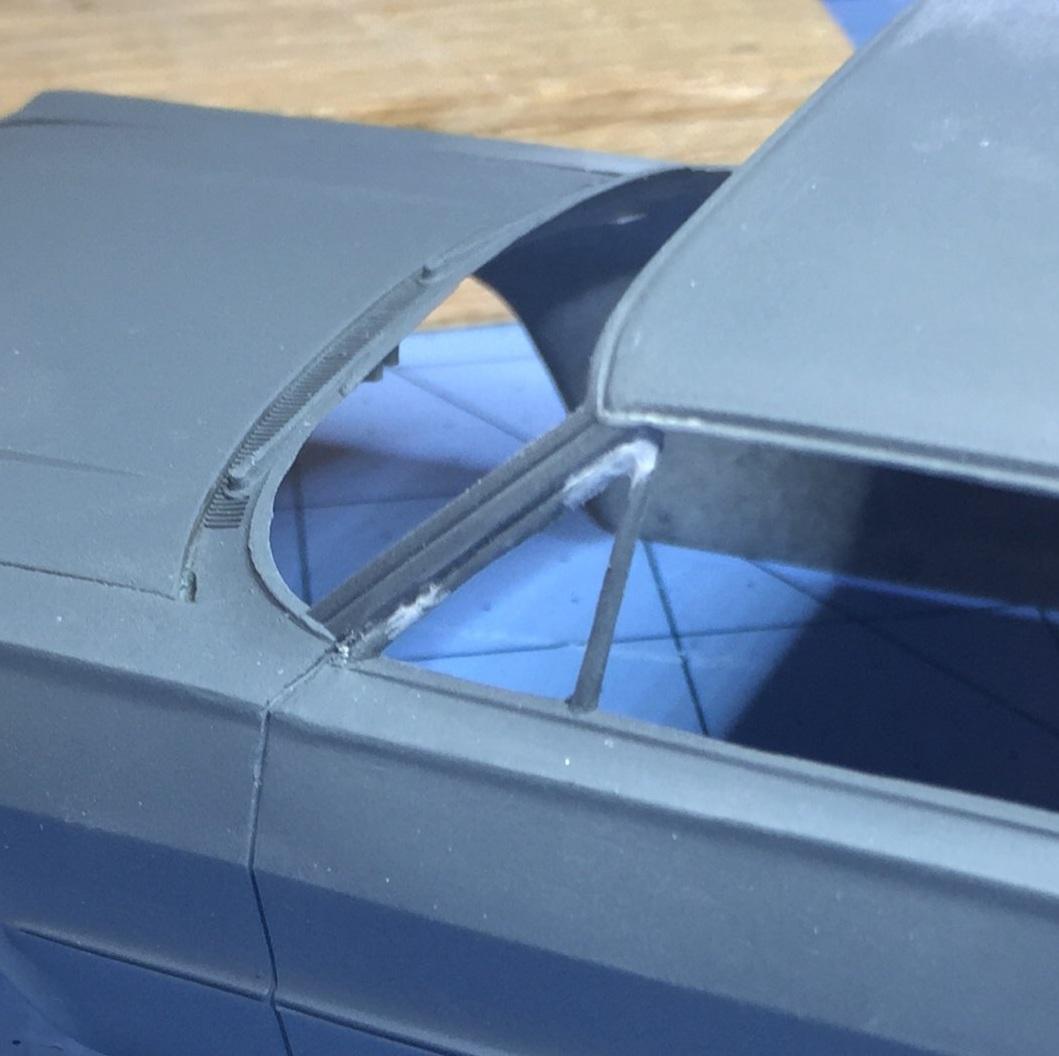
Oh yeah, the kit I'm working with is an older one with lots of flash in the worst places like the A pillars and the rear deck trim. I don't mind a few sink holes, but you need good smooth trim if you want the foil to look good. I hope to see more decal sheets including the instrument panels, but I really think Michael Hansen's photo reduced panels (Best Model Products) are the cat's pajamas. I think they look better than the decals. The white on the A pillars is filler, trying to smooth out the horrible mess left behind by the flash and subsequent restoration of the lines. The left post is so bad that I may need to cut it out and try to replace it with strip styrene( I hope not ?). Very tedious.

-
Yup. Chrome Reversed rims. Everybody had 'em! Nice detailing, Jim. You nailed it!
-
Thanks, Sam, I just wanted to point out one of the many deficiencies of this particular kit.
-
I am here to help! (Well, you asked for it ?) an all chromed rear axle housing, even back in the day, is a fairly expensive proposition. Unless we will be entering this roadster to compete for the AMBR, the axle housing should probably be painted with a nice neat aluminum quick-change attached. Just my opinion ?
-
I'm waiting for the instrument cluster printout from Best Model Products to complete the interior but I just want to point out something I noticed after it was too late to do anything about it. (It was an "oh well..." moment.) The tub is made for a convertible. Just sayin'. ? But it's not too late to cut off the roof! just kidding ?
-
I just looked at the "Advanced Custom", Eric.....FREAKING INGENIOUS! THATS how you do it! Very inspired. Paint is off the hook!
-
Now that makes sense! they just had it on the wrong end.
-

Dehydrating in my Ninja?
customline replied to customline's topic in Model Building Questions and Answers
Thank you gentlemen, I appreciate the response and I assure you I will not dry paint in the Foodie unless the old woman is out for the day ?. -
I wonder if anyone ever built the radical custom version. ?. The rear treatment is the most bizarre idea I've ever seen. It makes no sense at all. Who would do that? Yours looks pretty darn good, Mike. Red works really well on this body style. Since I have committed to building this as a very mild street custom, I will explore the "bullet lens" angle. I think it's my best chance for success.
-
Right?
-
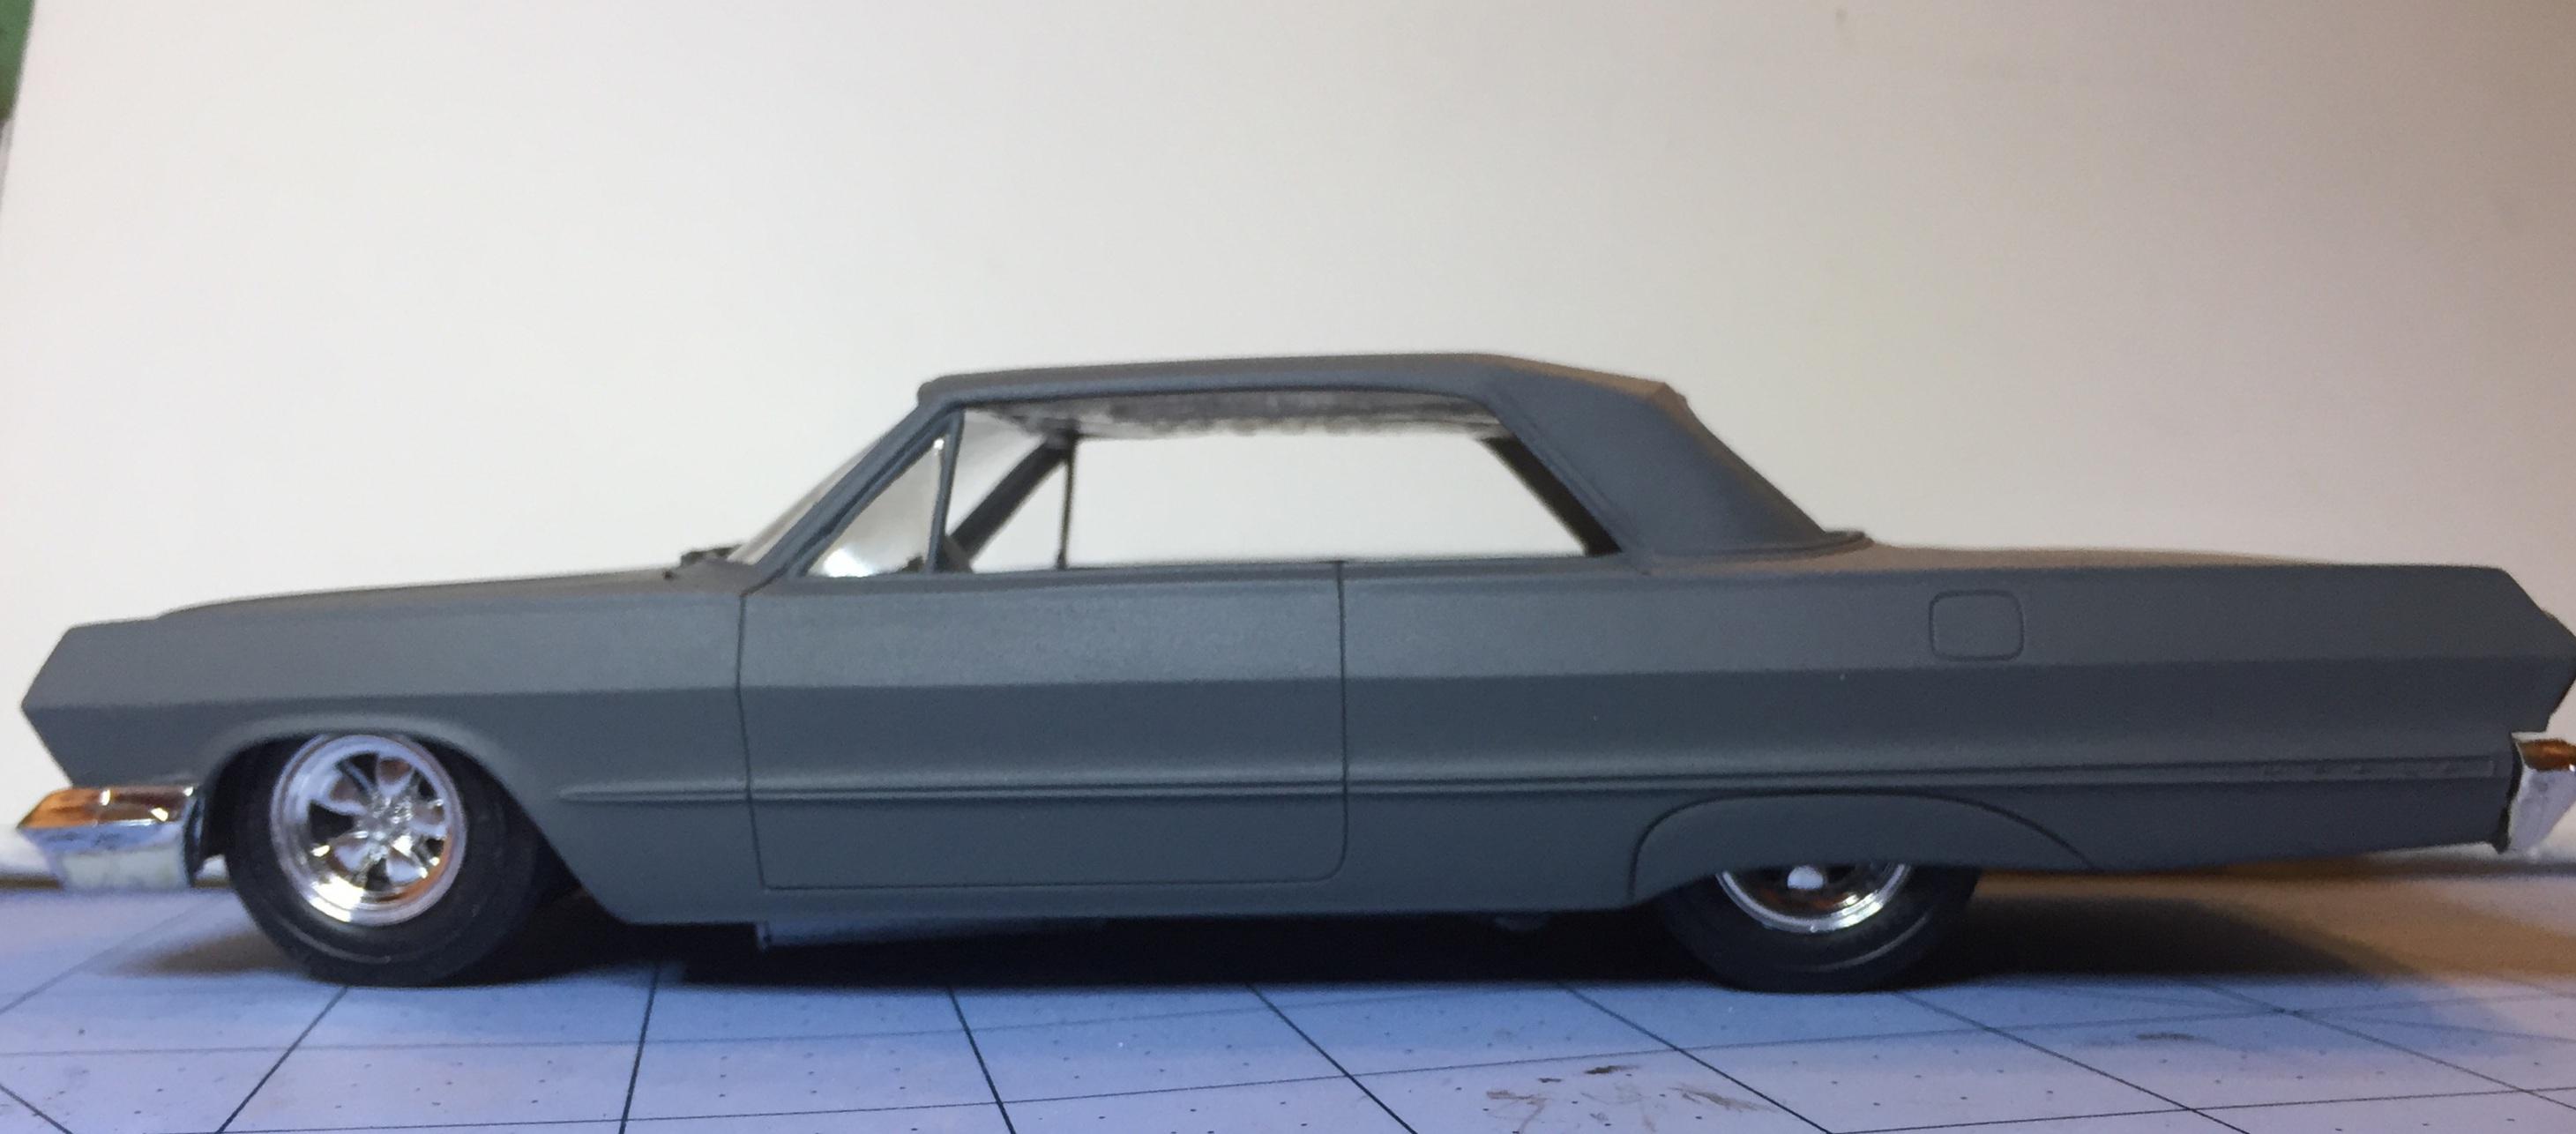
Primed and ready for body work. Mainly sink-holes and other blemishes. Thanks for looking.
-
Well, OK...the engine is not great. It won't look bad in a barn find or a beat-up truck.
-
Yup. I think you're right, Tony. Some of us will have the talent to pull it off. My hand painting prowess is a little above average and it's a choice I will need to make soon.
-
Dehydrating in my Ninja?
customline replied to customline's topic in Model Building Questions and Answers
And while you're waiting for the paint to dry you open another kit and start snipping parts, shaving flash and fitting things together. Then you get the body in primer and 3 days go by and it's still not dry so you take that crappy '63 Impala kit down and ....hey, there's no firewall!.....thanks for your input, David. -
Dehydrating in my Ninja?
customline replied to customline's topic in Model Building Questions and Answers
Good idea, Mr. Rodent, I will stick an oven thermometer in my Foodie. Thank you! -
Dehydrating in my Ninja?
customline replied to customline's topic in Model Building Questions and Answers
I love the smell of lacquer thinner in the morning. It's got that...that....lacquer smell. ? -
Dehydrating in my Ninja?
customline replied to customline's topic in Model Building Questions and Answers
Don't laugh at him Steven! -
Dehydrating in my Ninja?
customline replied to customline's topic in Model Building Questions and Answers
Thanks, Dave, good info here! -
Dehydrating in my Ninja?
customline replied to customline's topic in Model Building Questions and Answers
Exactly the sort of Intel I was looking for, thank you ! ? -
Dehydrating in my Ninja?
customline replied to customline's topic in Model Building Questions and Answers
Thanks for your reply, Bill. OK, I guess I should have asked the question in the context of drying paint. I should be specific. I have the instruction booklet and it tells me I can run the dehydrate function at a range of 105-195f. I know absolutely nothing about out-gassing paint with a food dehydrator and wondered if anyone has used a Foodie (which is an incredibly useful appliance) to cure paint and for how long and at what temperature. ?♂️ Seems to me it would be a good way for me to speed up the drying time of paint that is slow to dry, which I keep running into these days. ? -
My Ninja Foodie has a "Dehydrate" setting. The lowest temperature setting for dehydration is 105F. Has anyone tried this? If so, how did you set it and what were the results?
-
1964 Pontiac Bonneville Convertible.
customline replied to StevenGuthmiller's topic in WIP: Model Cars
Man, that relay and wiring looks fantastic. Great detailing, Steve. -
This is pretty cool. The post-shoebox Ford body is a big favorite of mine. The Y-block is a great choice for this and this one looks great. I have 2 of these kits waiting for me to get some inspiration and now I believe I have some. Nice work on the trim channels, looks good smoothed out.
-
I appreciate every word, Steve, your ideas are well received.