customline
-
Posts
3,791 -
Joined
-
Last visited
Content Type
Profiles
Forums
Events
Gallery
Everything posted by customline
-
That was the idea, David. Gonna open up a little here, Dave.....this Ford design is equal, in my mind, to the styling of the '64, (full line..all of 'em....).....and the '56 Crown Vic. The '40 coupe is magical. The smooth curves of the coupe's roof is reminiscent of a Beagles head. It looks like a damned puppy to me. There! I said it!....sorry....it's an icon, David. OK, ☺️ thanks, David!
-
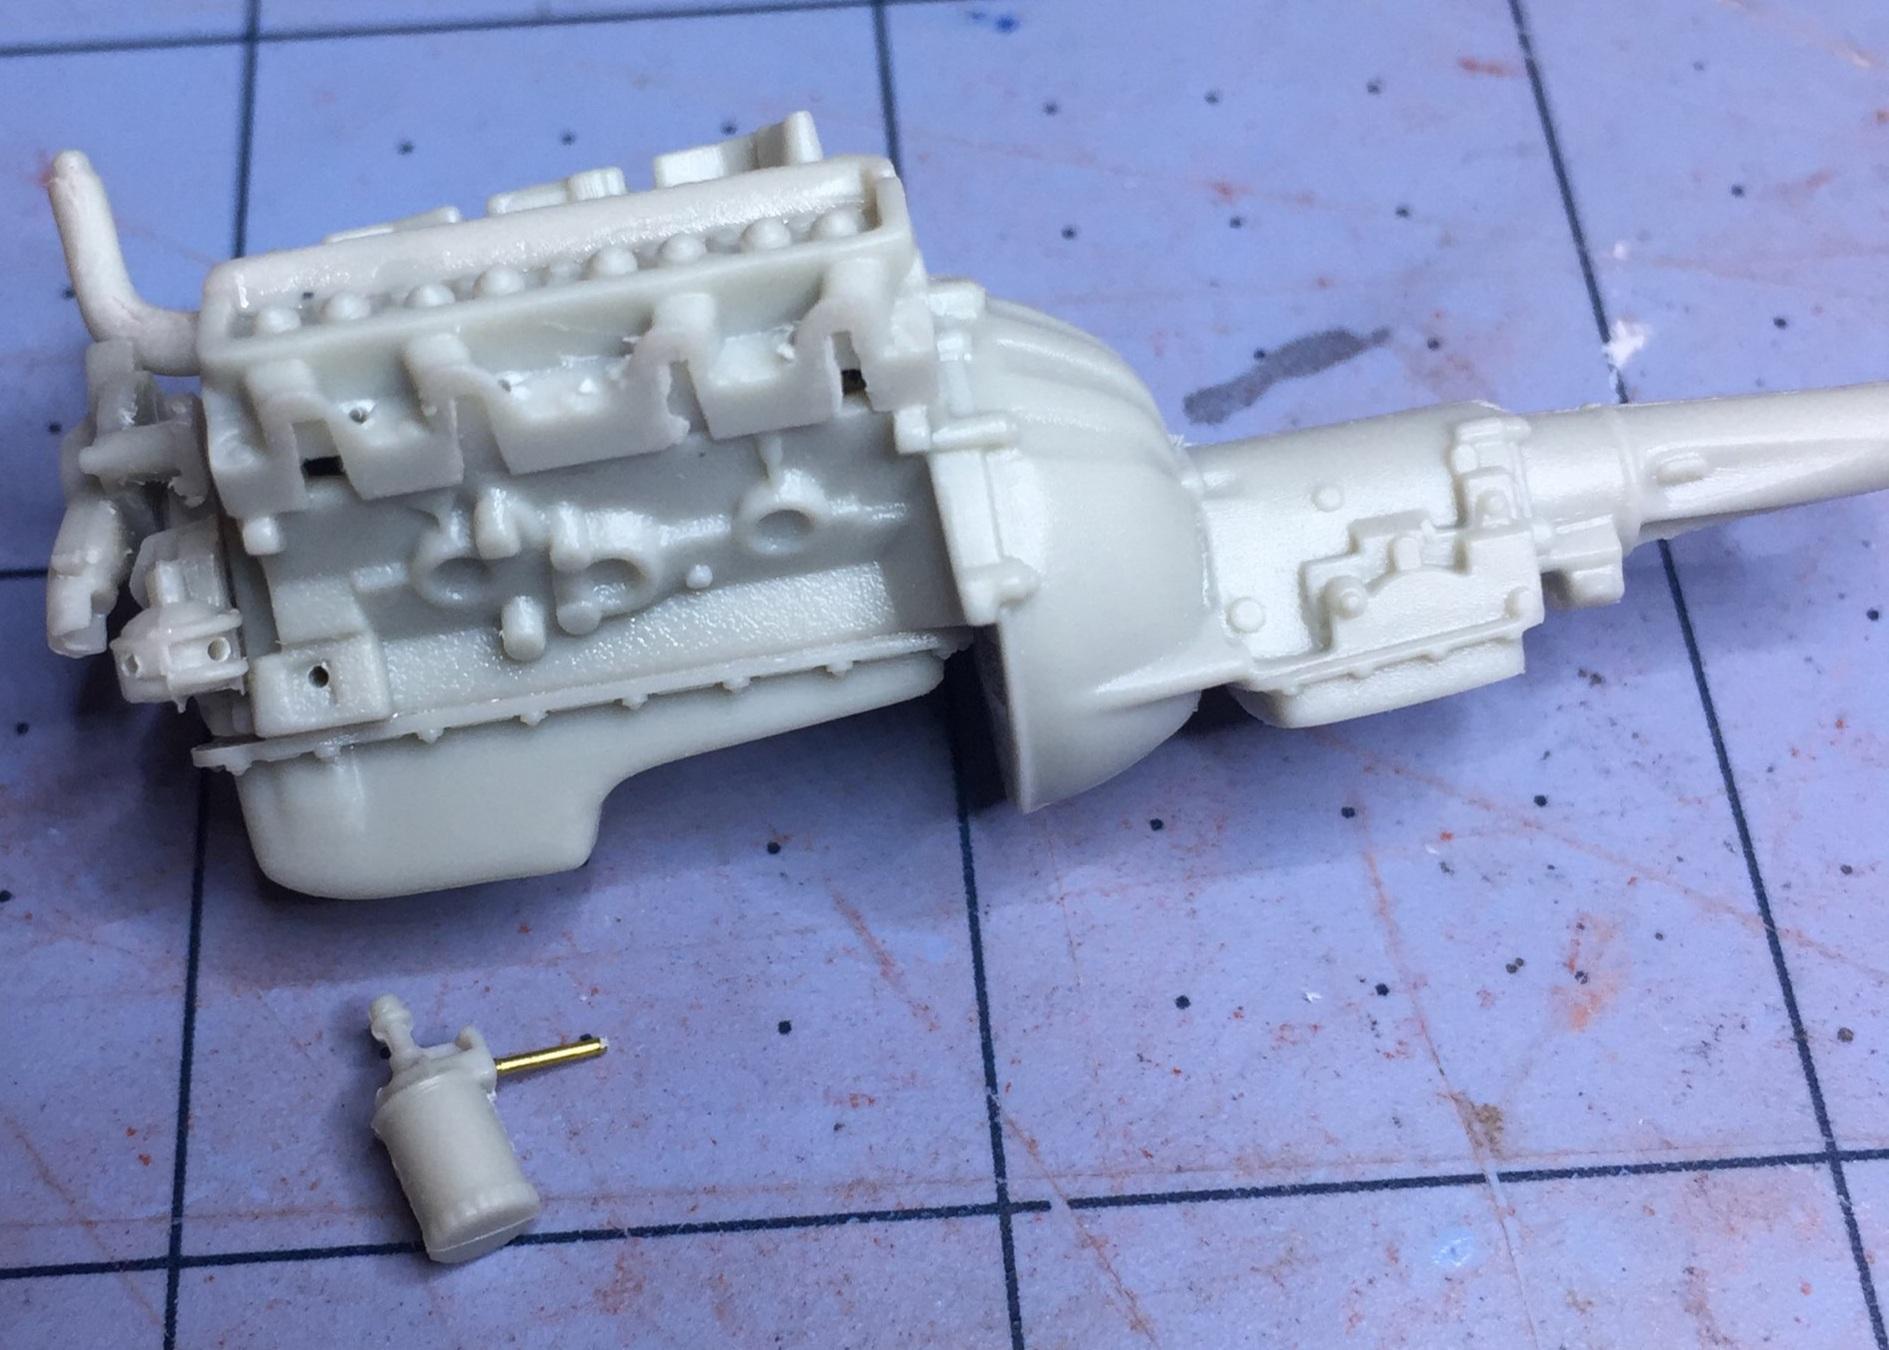
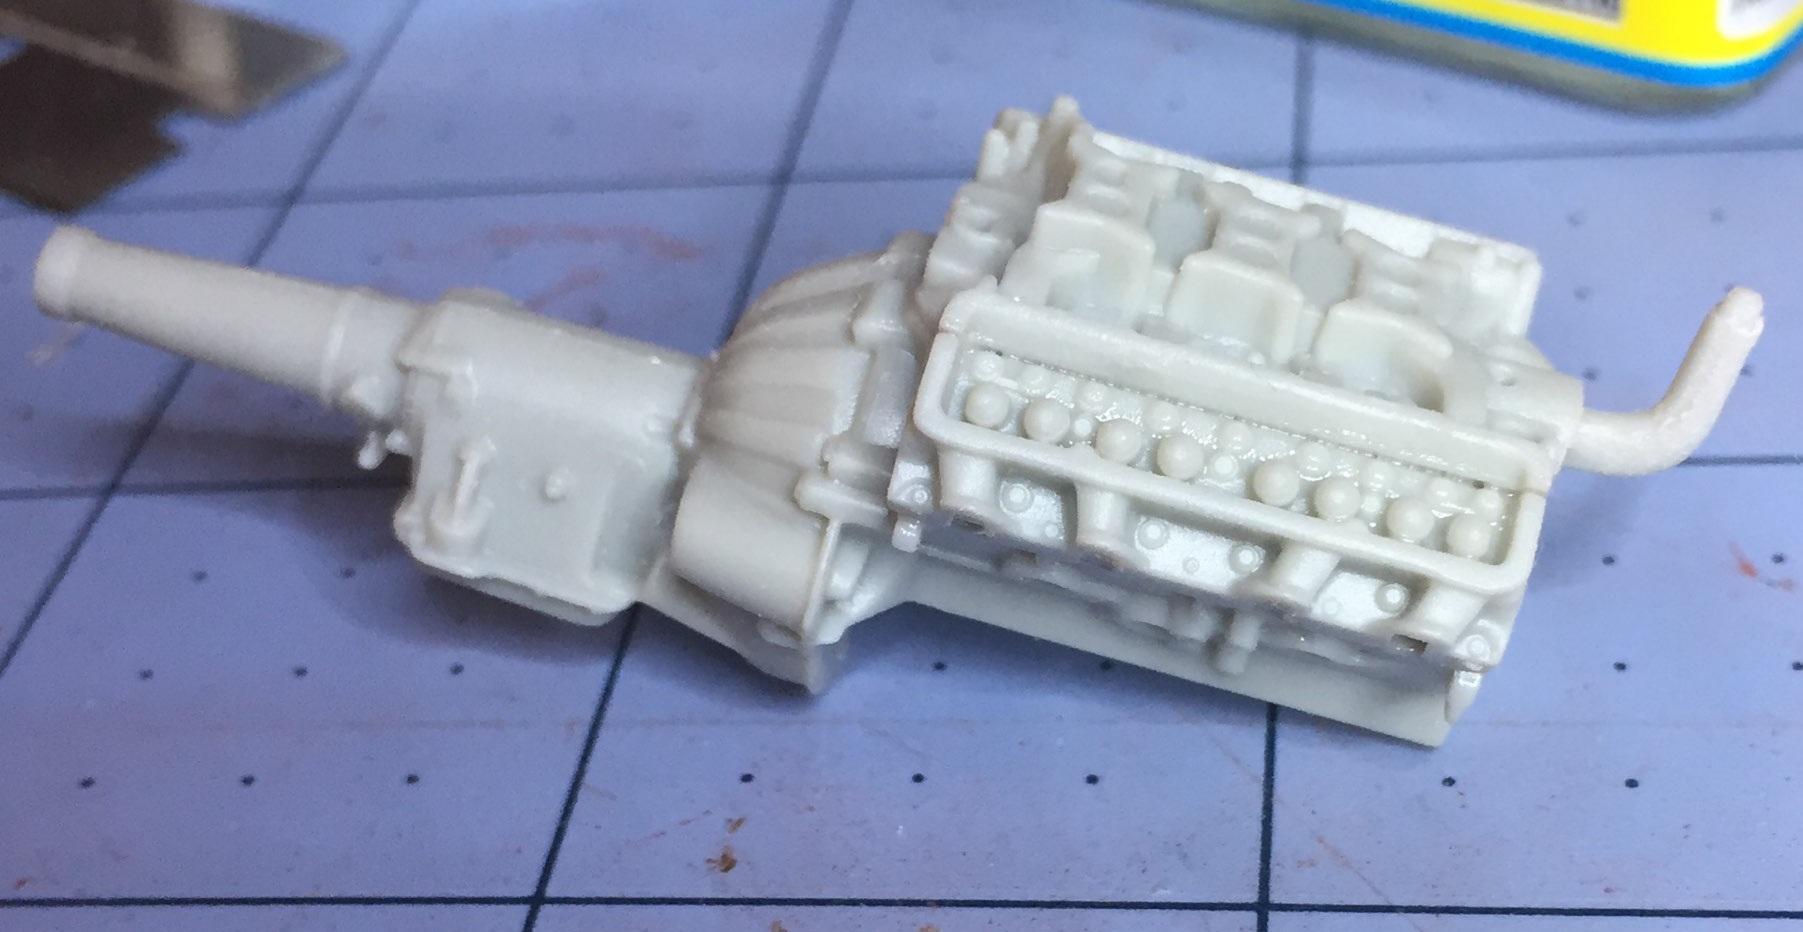
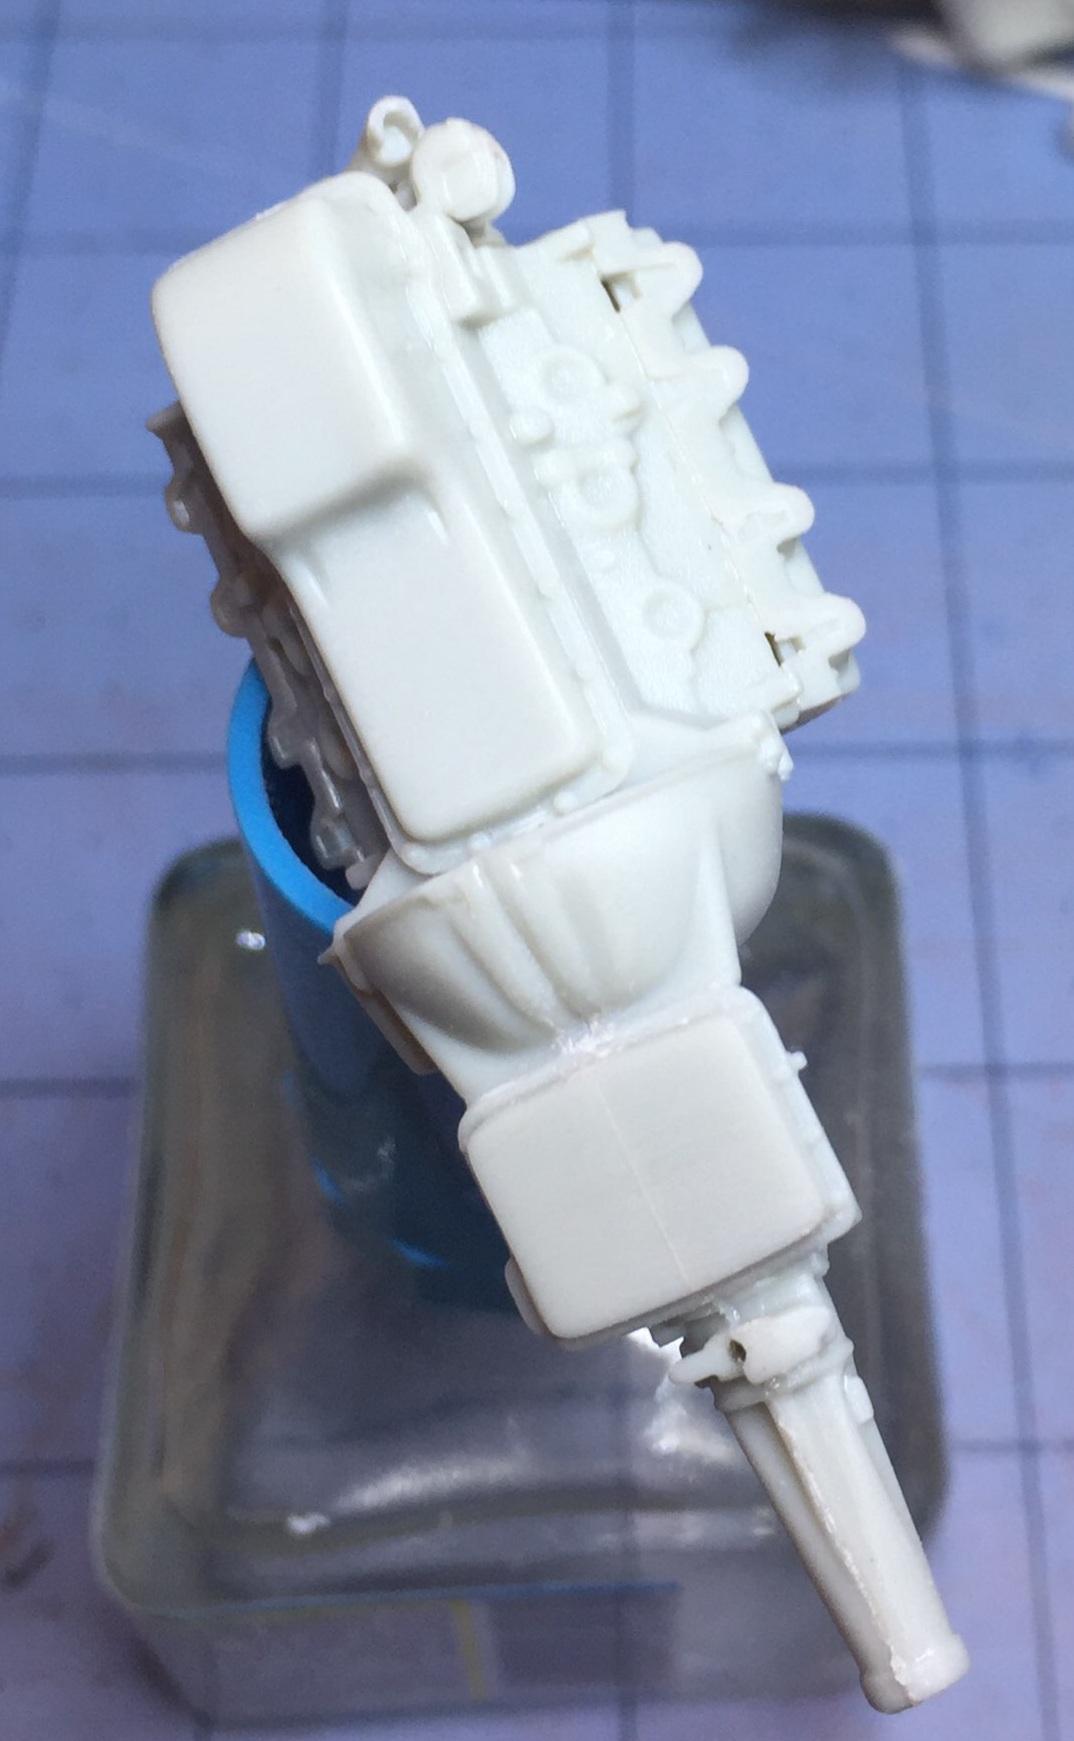
Yeah. I don't know what happened there ?. I painted the engine black so don't bother to talk me out of it ?.
-
Oh I dunno, Steve....it looks like a hair-puller to me but maybe I can work something out. Most of it looks like fun, though. It's a whole lot better than the old screw-bottoms I've been dealing with lately. Fun is where you find it ?.
-
I guess I need to type something here. ? .....OK, I screwed it up. ?
-
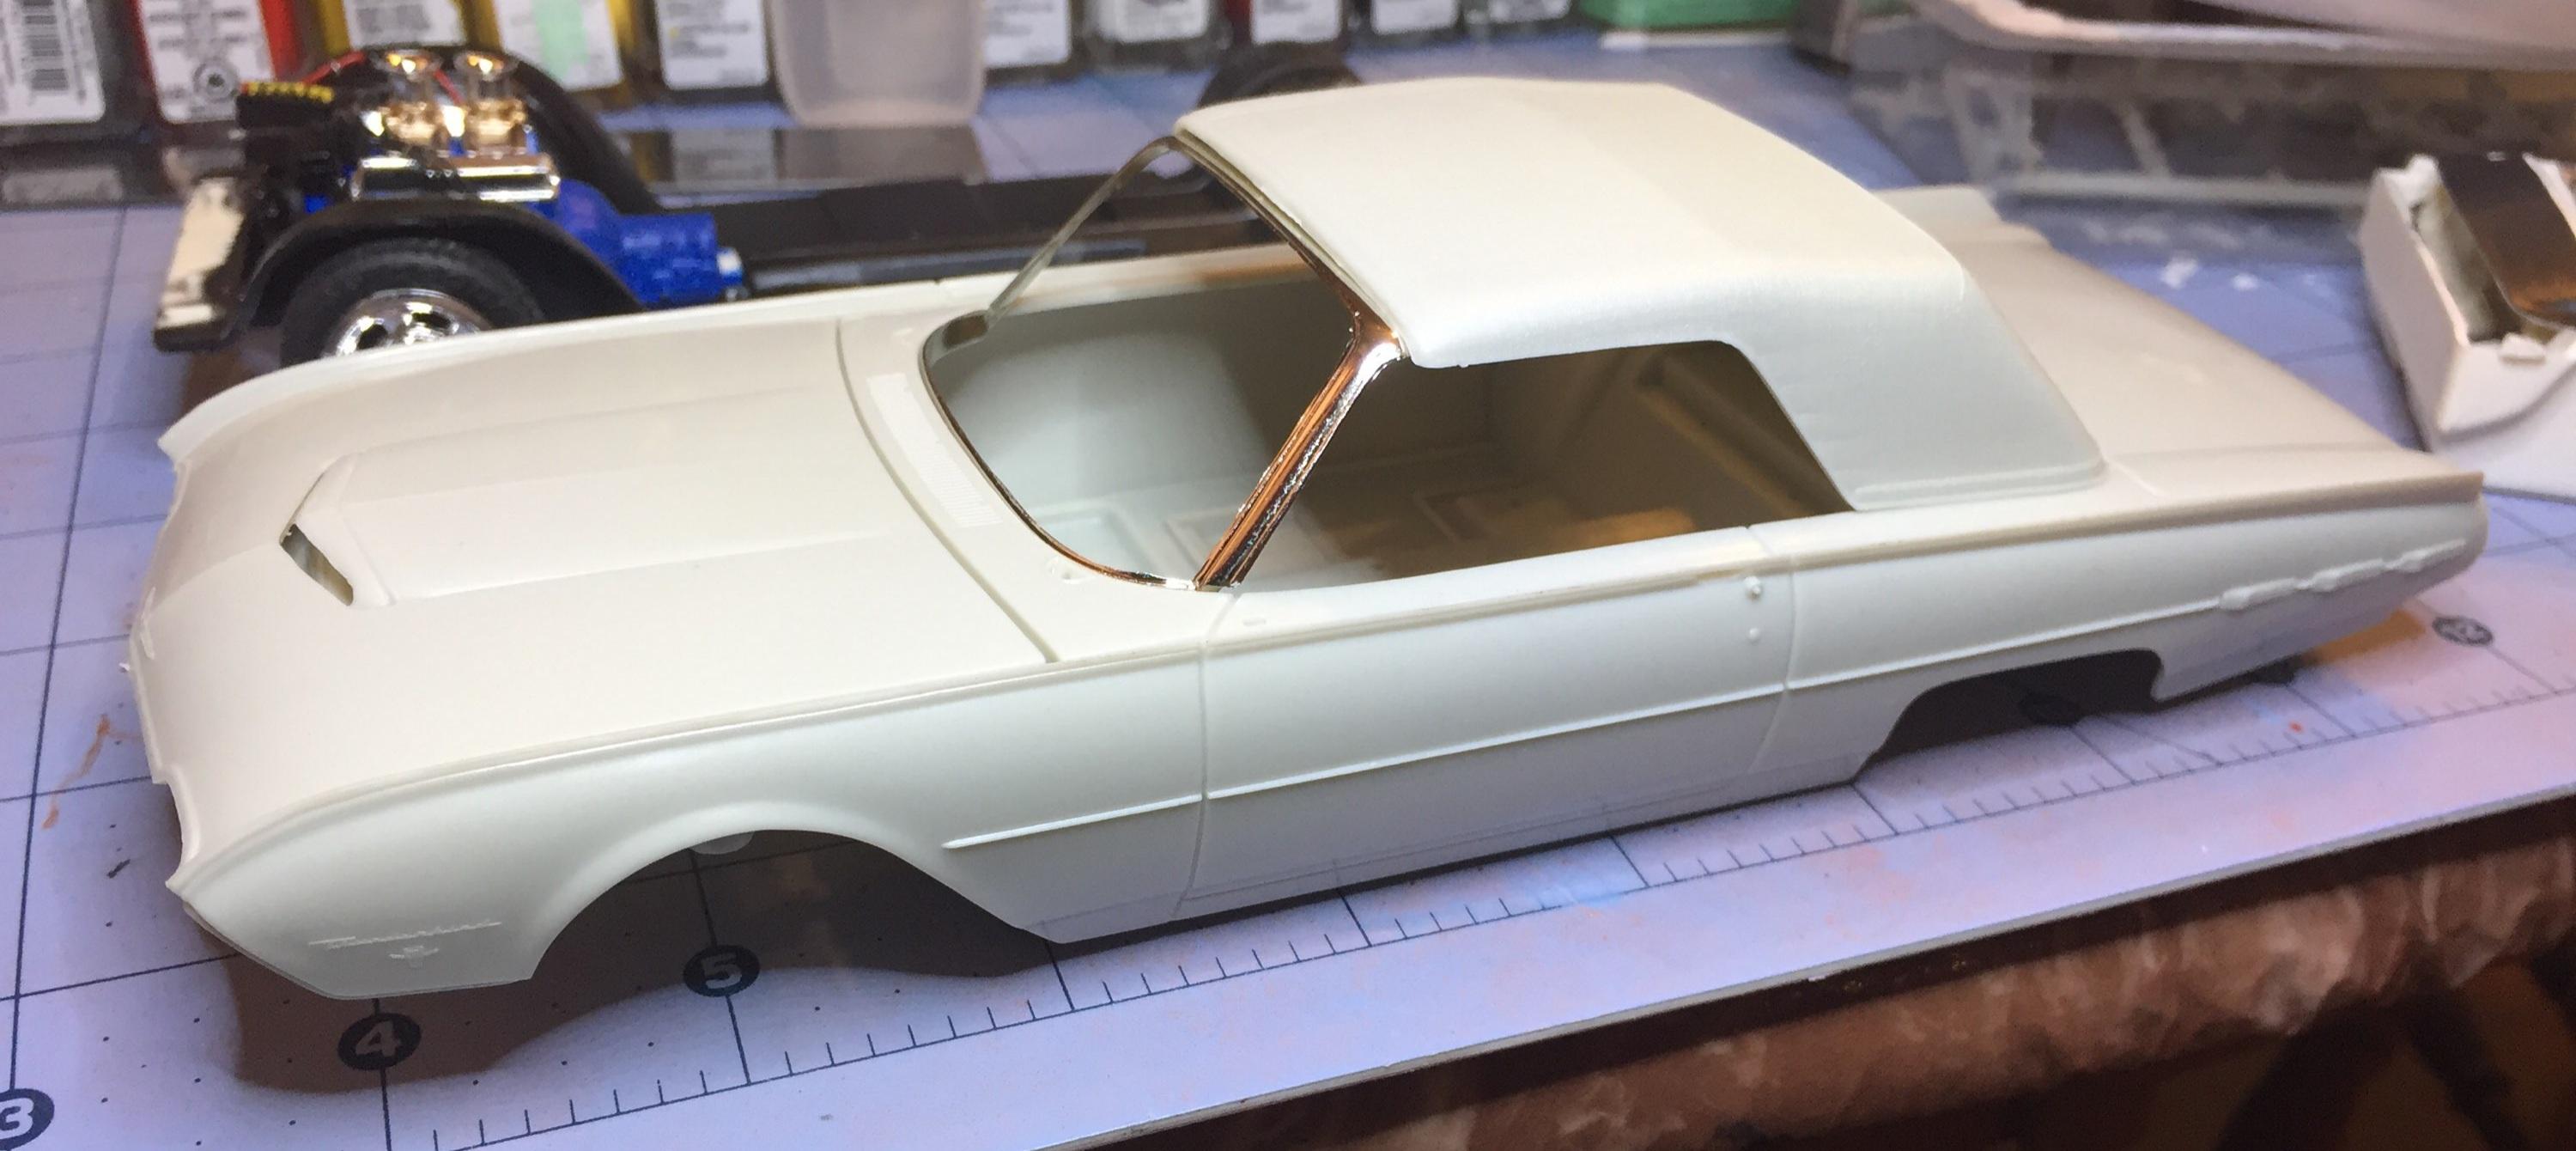
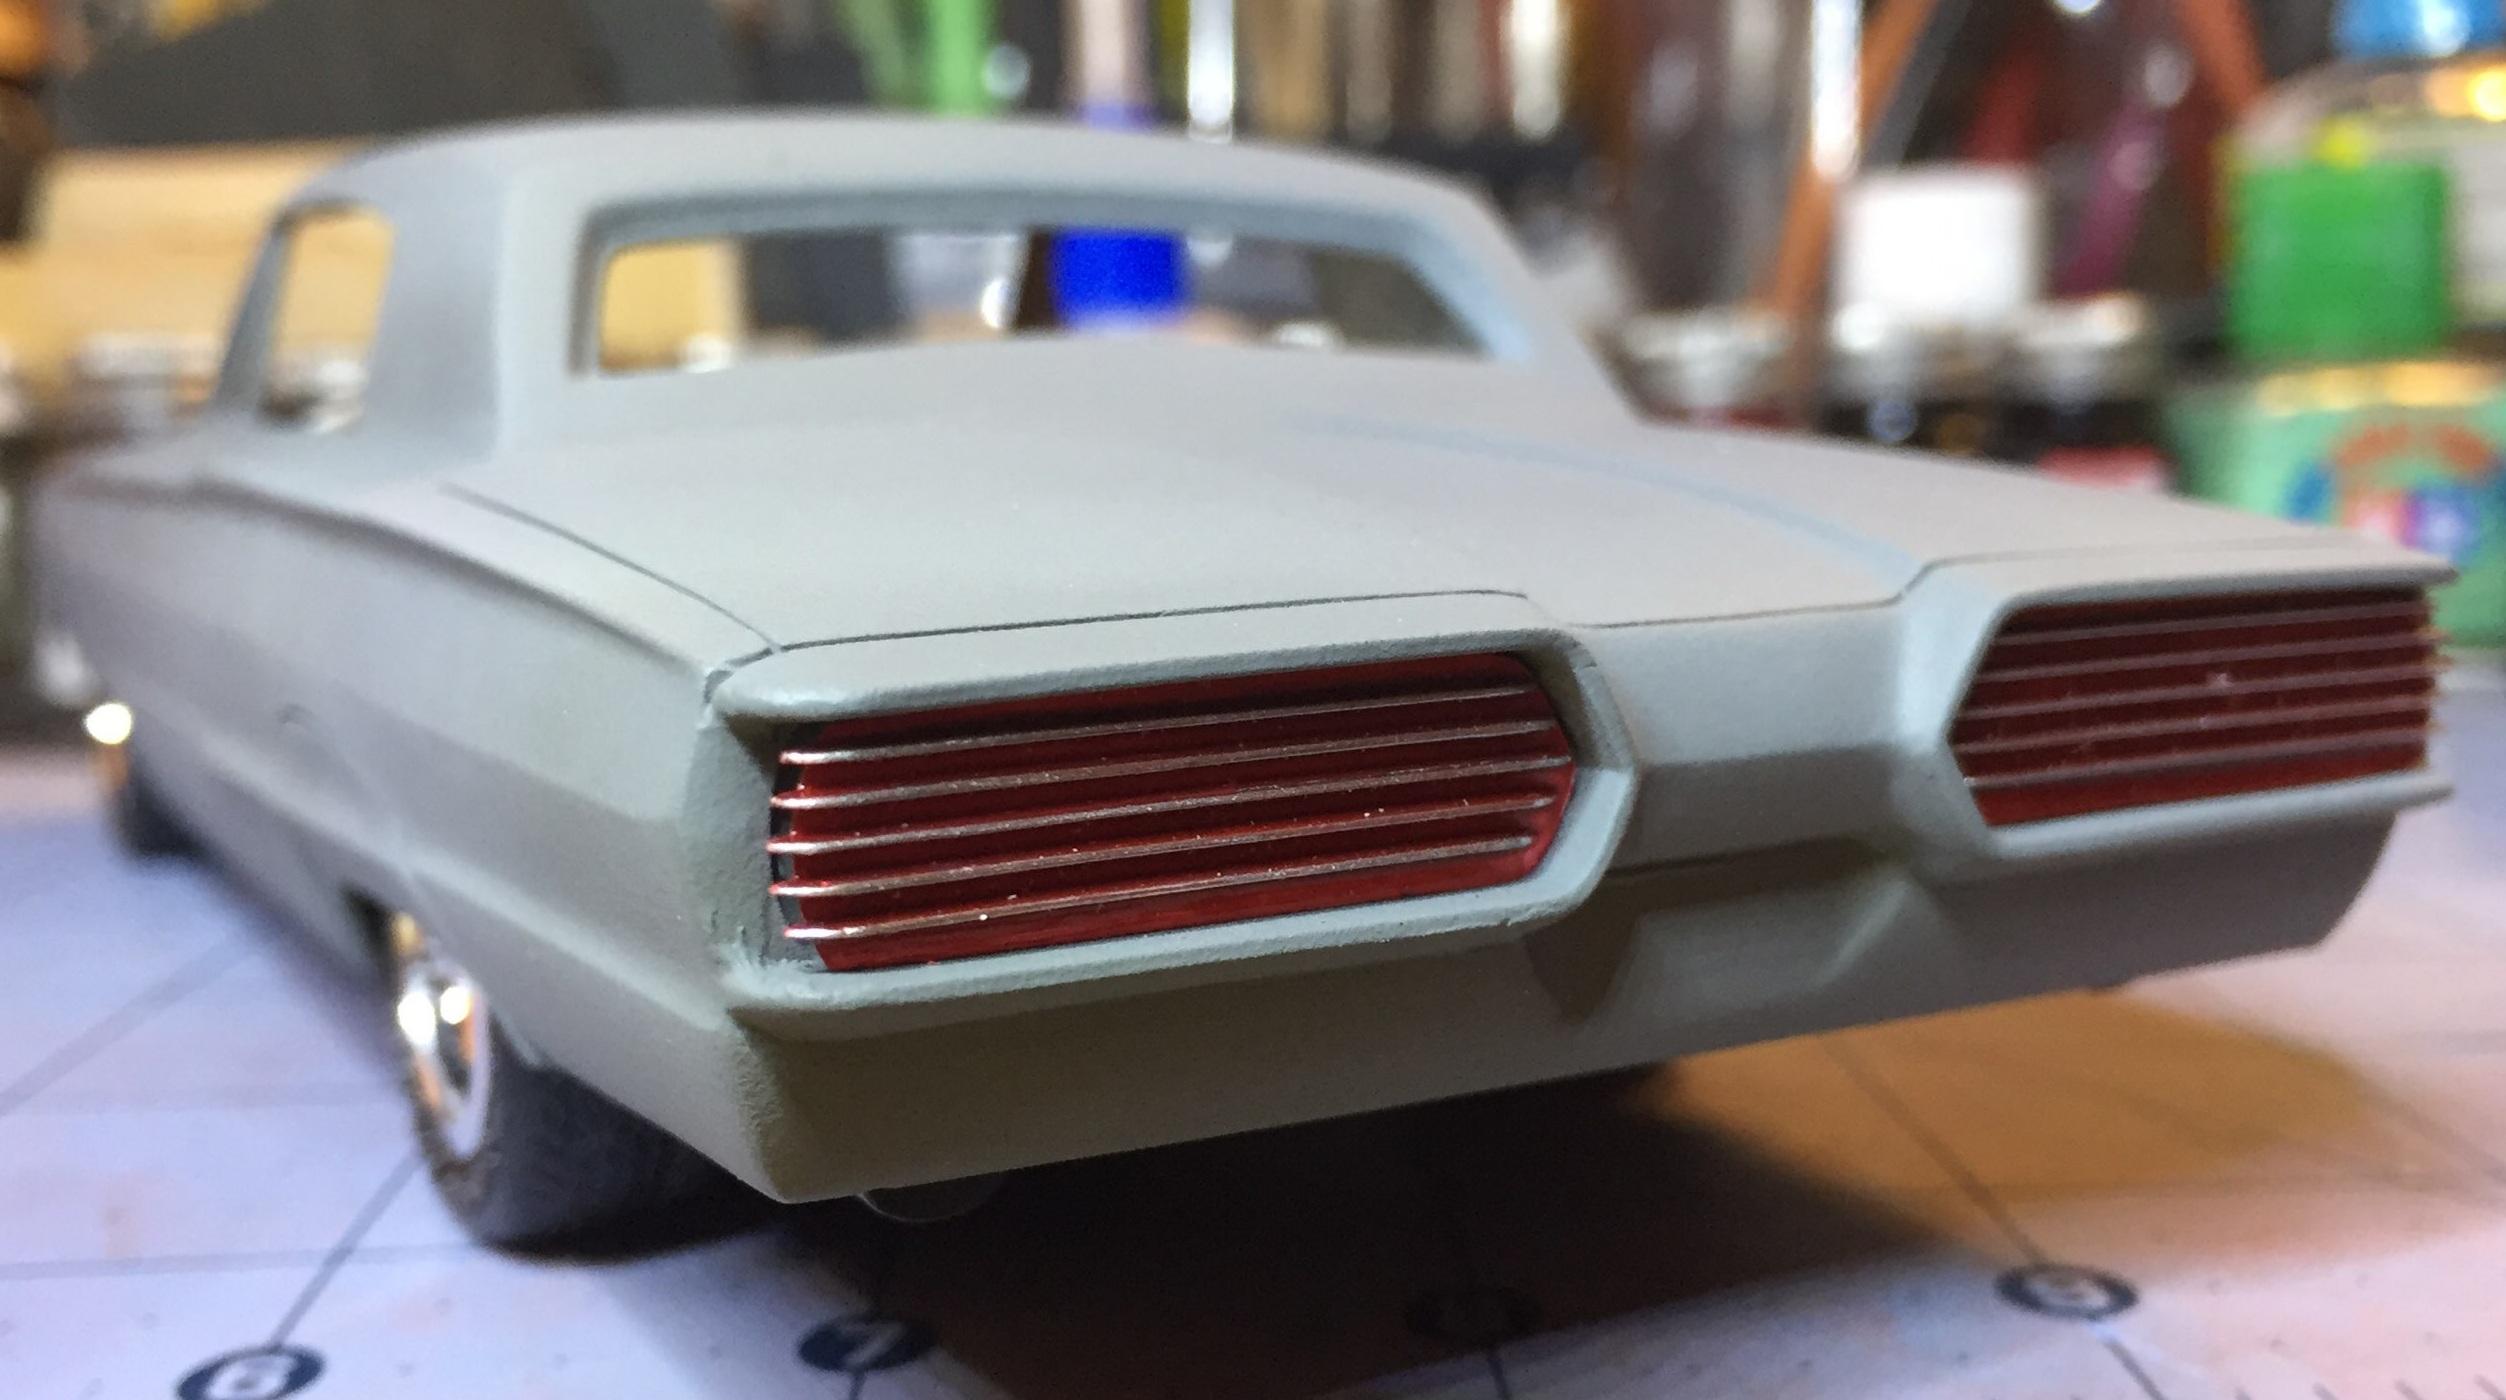
The thing I see that could be troublesome is the chrome trim that runs along the top ridge. My foiling skills are good enough to do most jobs but this one will test me. This kit is not a level 2, In my humble opinion, due to the skills required to make an authentic replica. Look at the cool stuff below. The windshield fit is perfect! And the way the chassis locks into the body at the rear? You gotta love that! And hanging pedals? You don't get that on most kits ?. And they gave us a swing-away steering wheel to make real if we so desire.

-
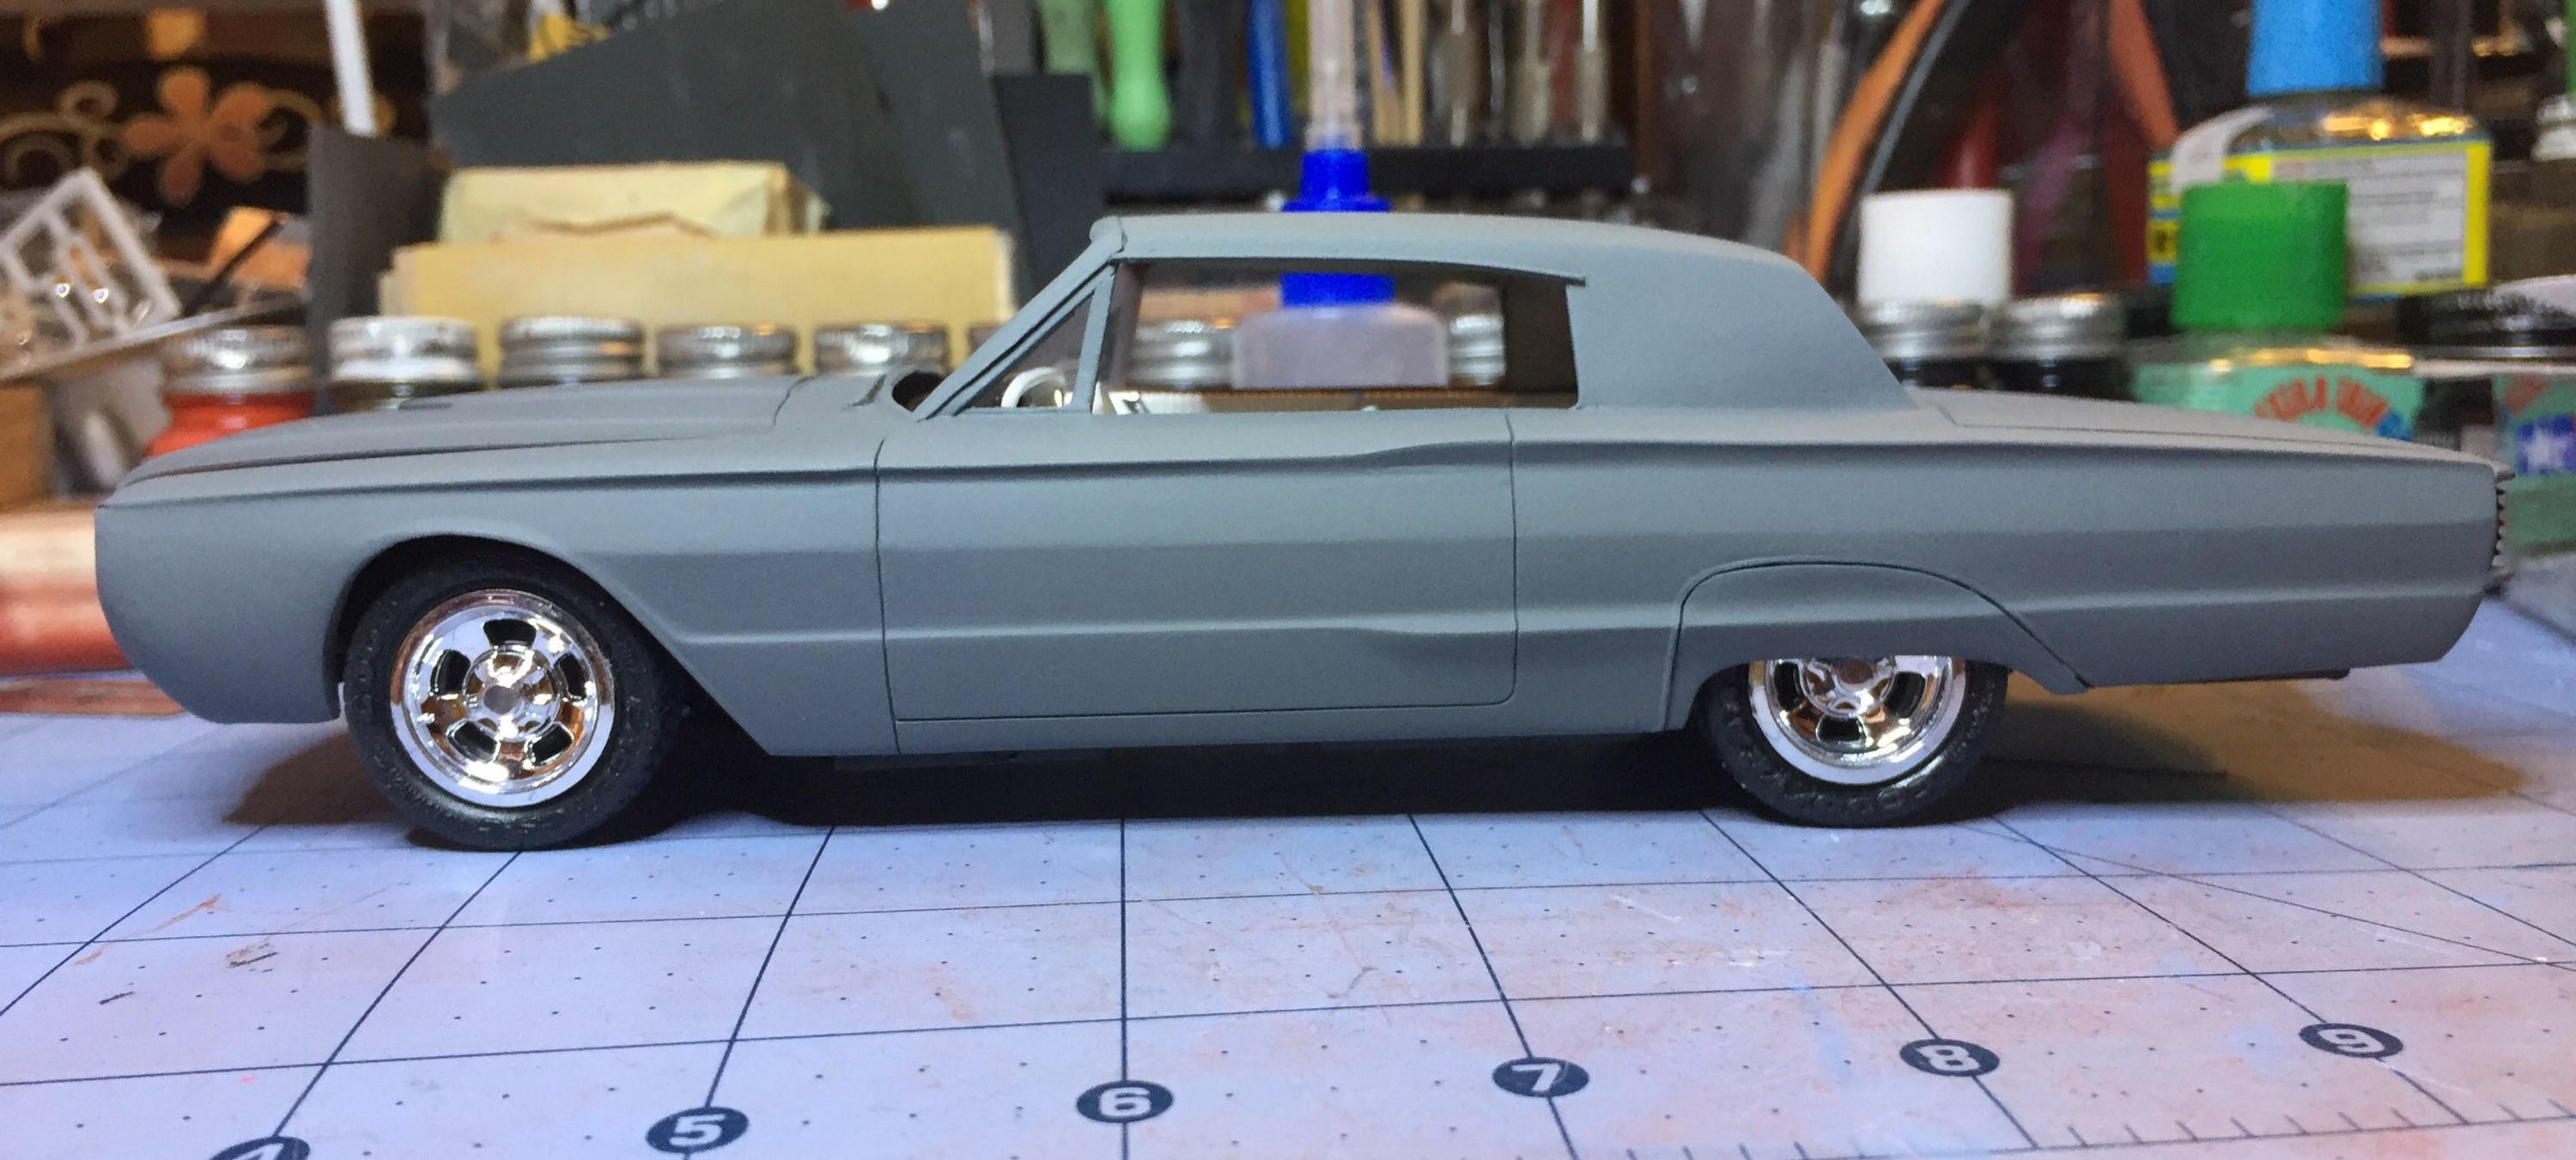
Steve, your 'Bird looks fantastic in red w/ white roof- this car begs for that. Do you think this kit rises to the level of the Moebius Chryslers? It is at the very least as good as some of the Revell Special Editions. I am highly motivated to make this one special. I cannot find anything on the body that needs correction. No parting lines, no nuthin'! It's perfect. There is, however, an issue that, for me, could be a bit of a challenge. The scripts and emblems are very low relief, making it quite difficult to "finish" them properly. Maybe someone can help me out with their input on this. I will usually remove them in order to have an easy job of micro-polishing out the paint job but I don't want to build a custom this time.
-
Good point, Dave. Stop making sense! ? I hate to paint this engine black but that's what my research turned up. Maybe someone will give me a reason to use another color....gold, maybe? I think blue looks good, huh?
-
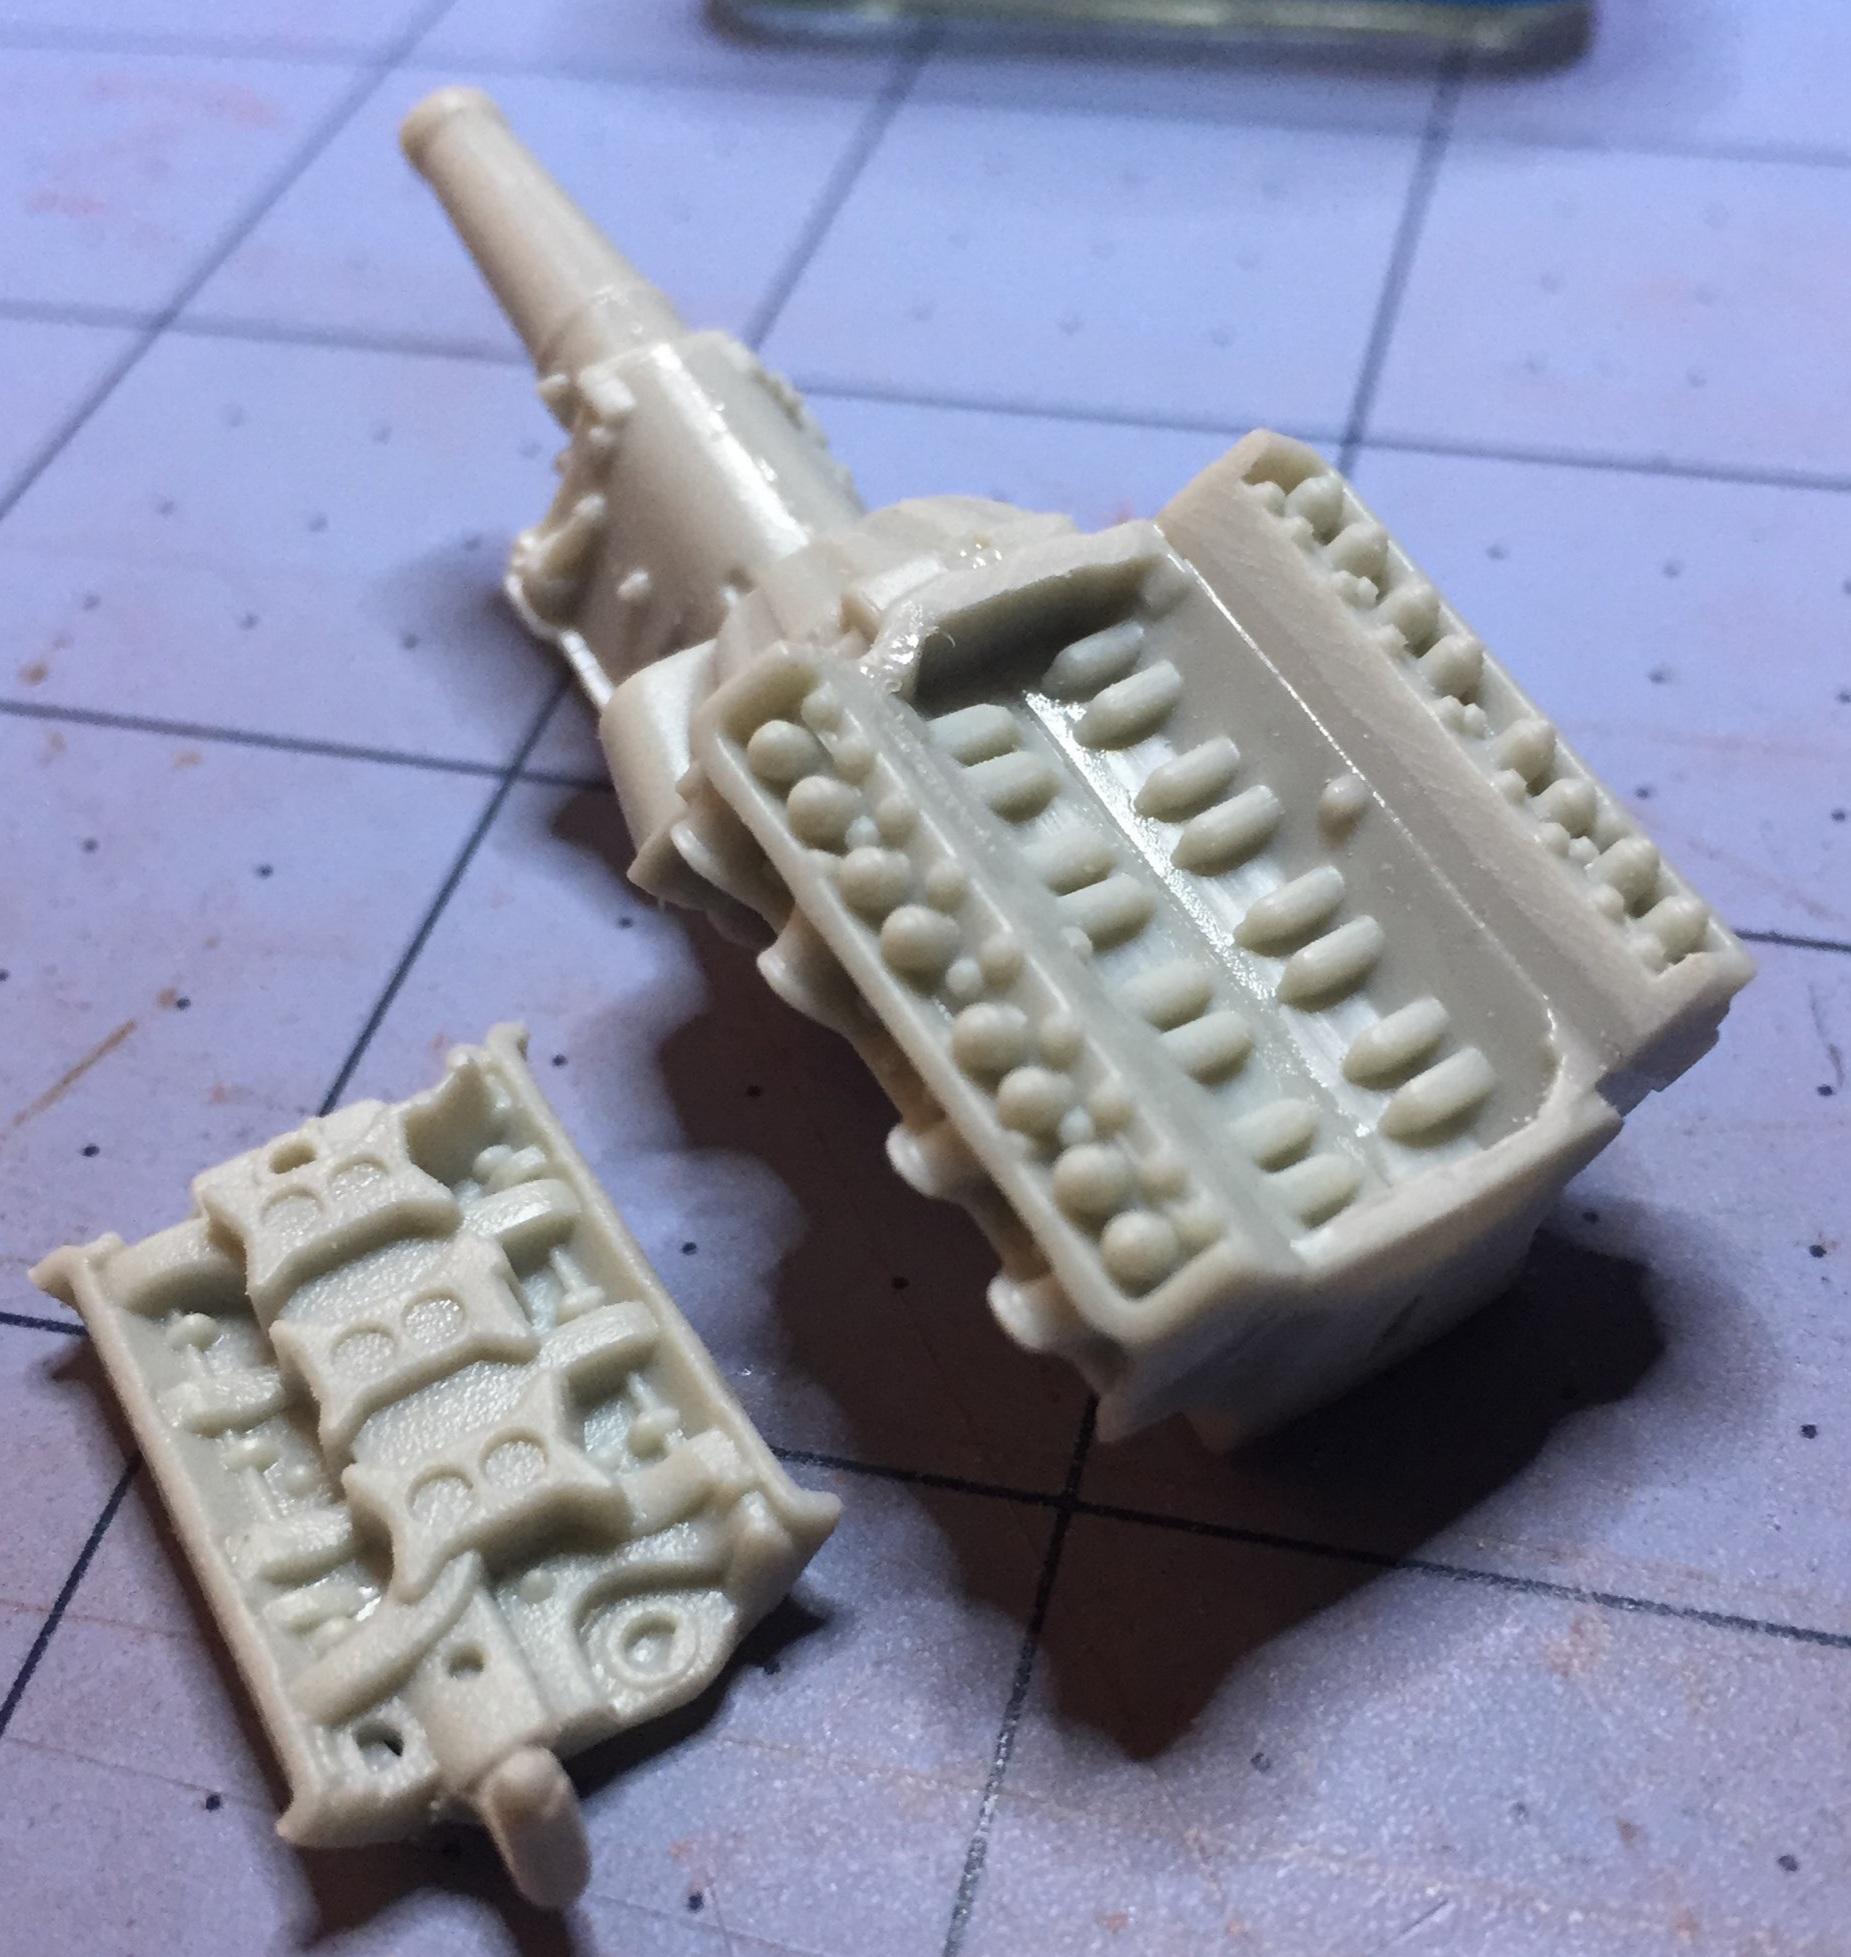
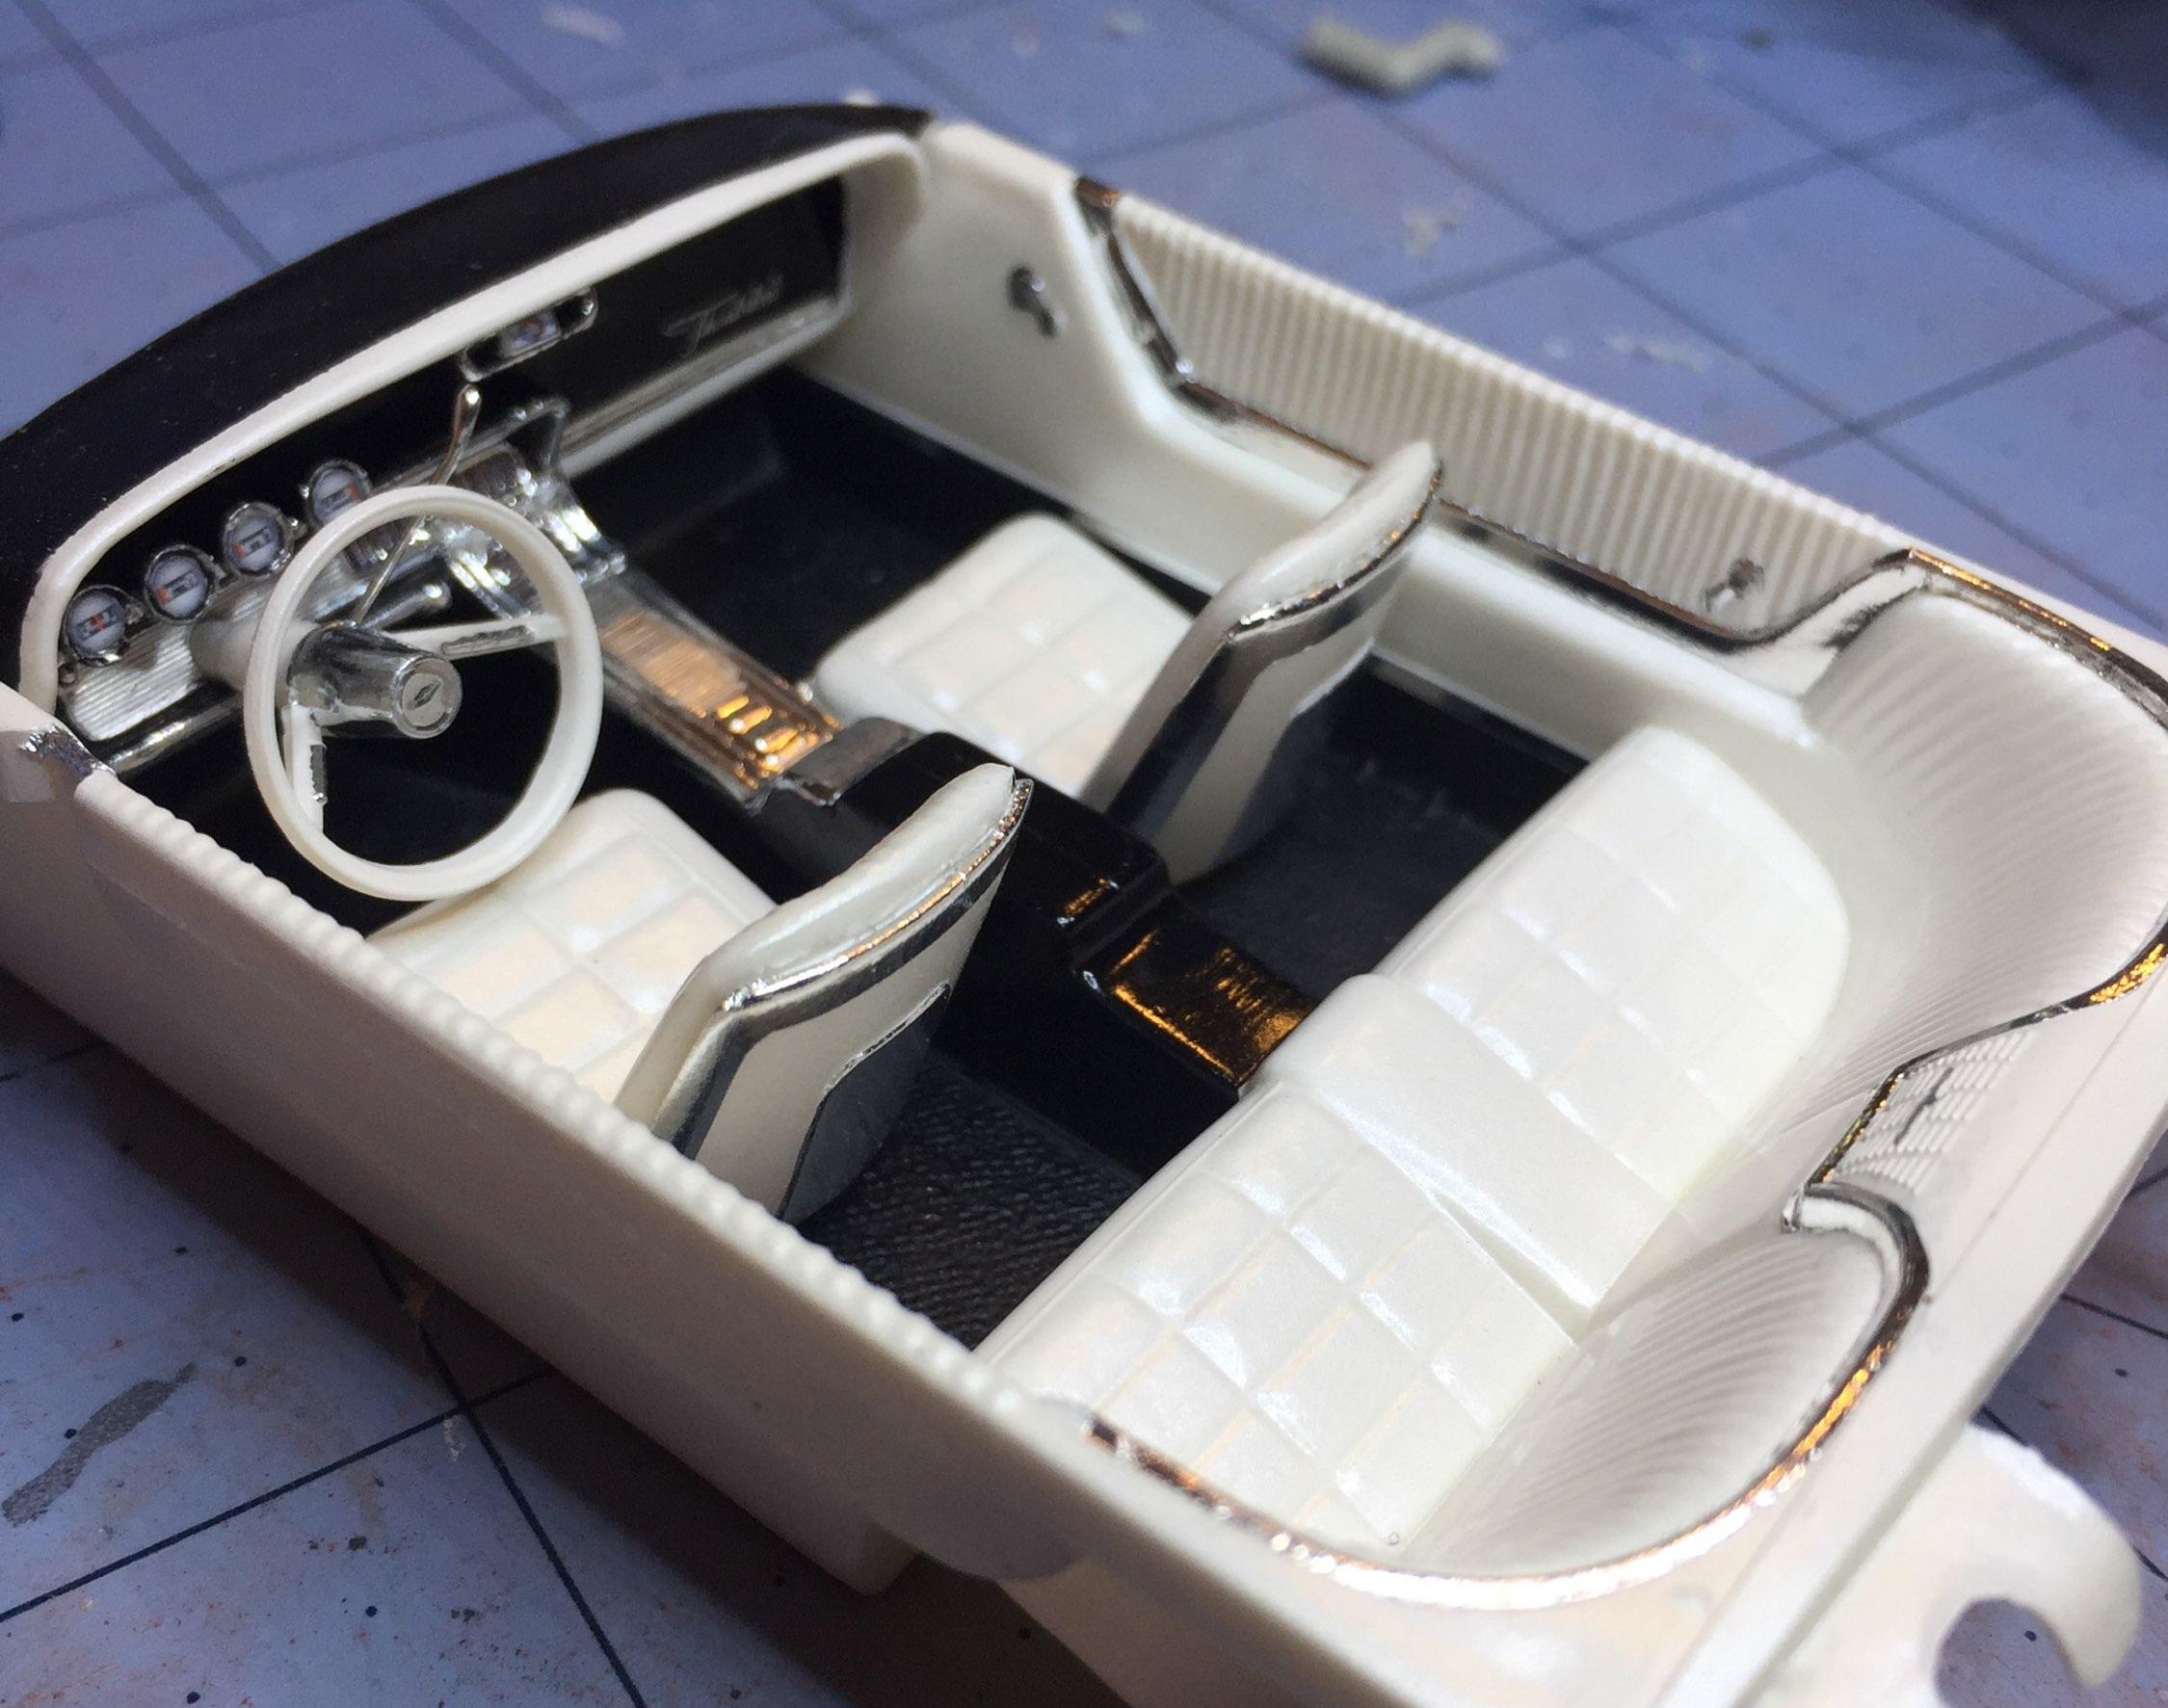
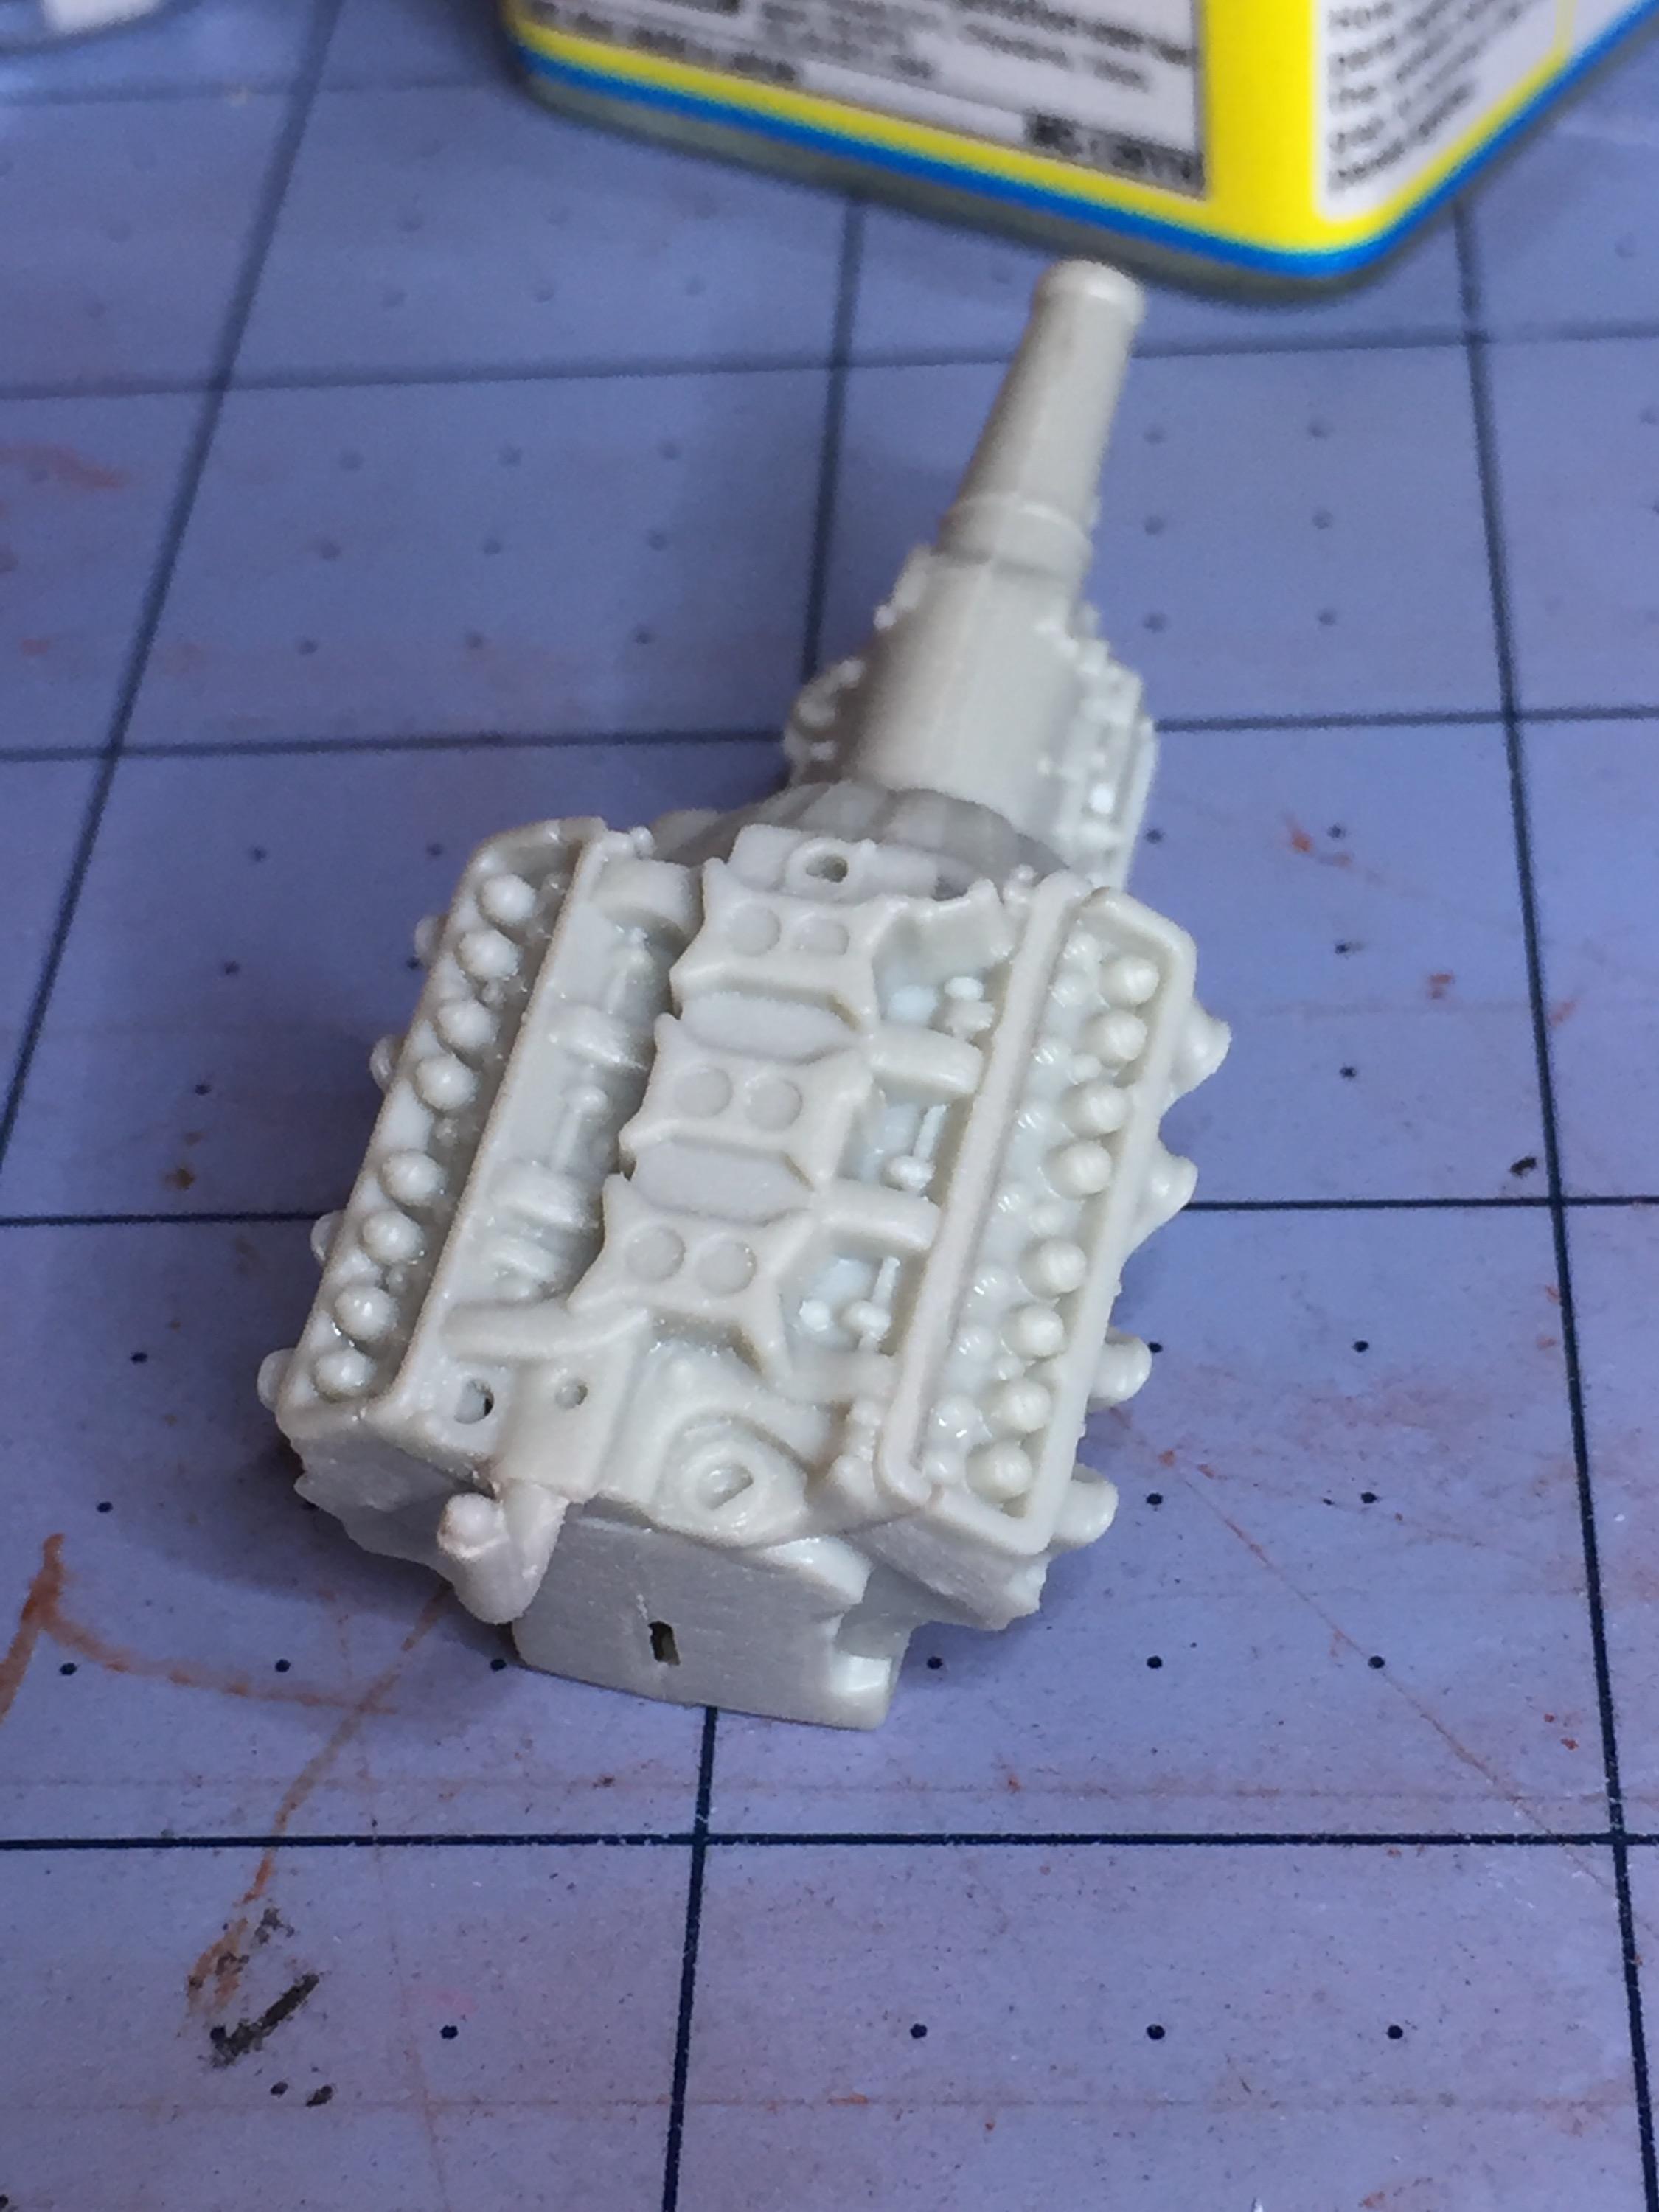
I read the reviews on the Hobbylinc site and I just had to get one. So I found this one on Ebay for a decent price and it arrived Saturday. I couldn't get away from it. The perfect body, the fully detailed 390, the sharply rendered wire wheels, white wall inserts, separate interior sides with details in high relief. Steering box, air conditioning system, power steering, heater hoses, posable wheels....friends, it's a great kit. The chrome windshield frame is precision fit to the cowl from the bottom.....I had to start this thing like NOW! The big FE is equipped with three deuces and the detail of the block and heads is on par with the Moebius 300B hemi. Almost. The distributor is on the small side but big enough to drill the center out for wires....it had a vacuum advance on it but I broke it off while drilling ?. I have assembled it enough for paint that I will apply later today. I feel like I should strip the chrome off the rocker covers and paint them silver for authenticity but hey, I love chrome. I don't need to decide on that yet. The plan is to keep it stock and I have already been cautioned about the dash being too wide but anything else I should know will be appreciated, and yes, I have seen the blue one with the Starliner roof. Comments, criticism, BS, etc...welcome, as always ?.
-
That dash was not fun and I tried to make it look somewhat like it's supposed to. I did discover something useful, though. I used BMF "black chrome" on the flat area where the glove box resides and as I am rubbing it down I noticed the black coating is rubbing off on the "Thunderbird"......cool huh? You can speed it up with an alcohol dampened swab. Think of the possibilities ?. Thanks for checking in, Rusty.
-
I appreciate the heads-up on that, TJ. There's justification for checking constantly on how things fit. I ran into a fit problem on this one involving the engine position interfering with body to chassis fit. It's all good. You just can't let your guard down.
-
I did not know that, TJ, thank you very much! That's the sort of thing that raises my BP. Yes, excellent works here. The ERTL influenced kits remind me of Moebius kits. Another one I have in my stash is the '58 Belvedere. Real nice. So..... what's the work-around for the '62 dash?
-
I couldn't help myself. Started another one..... Heh heh ☺️.....
-
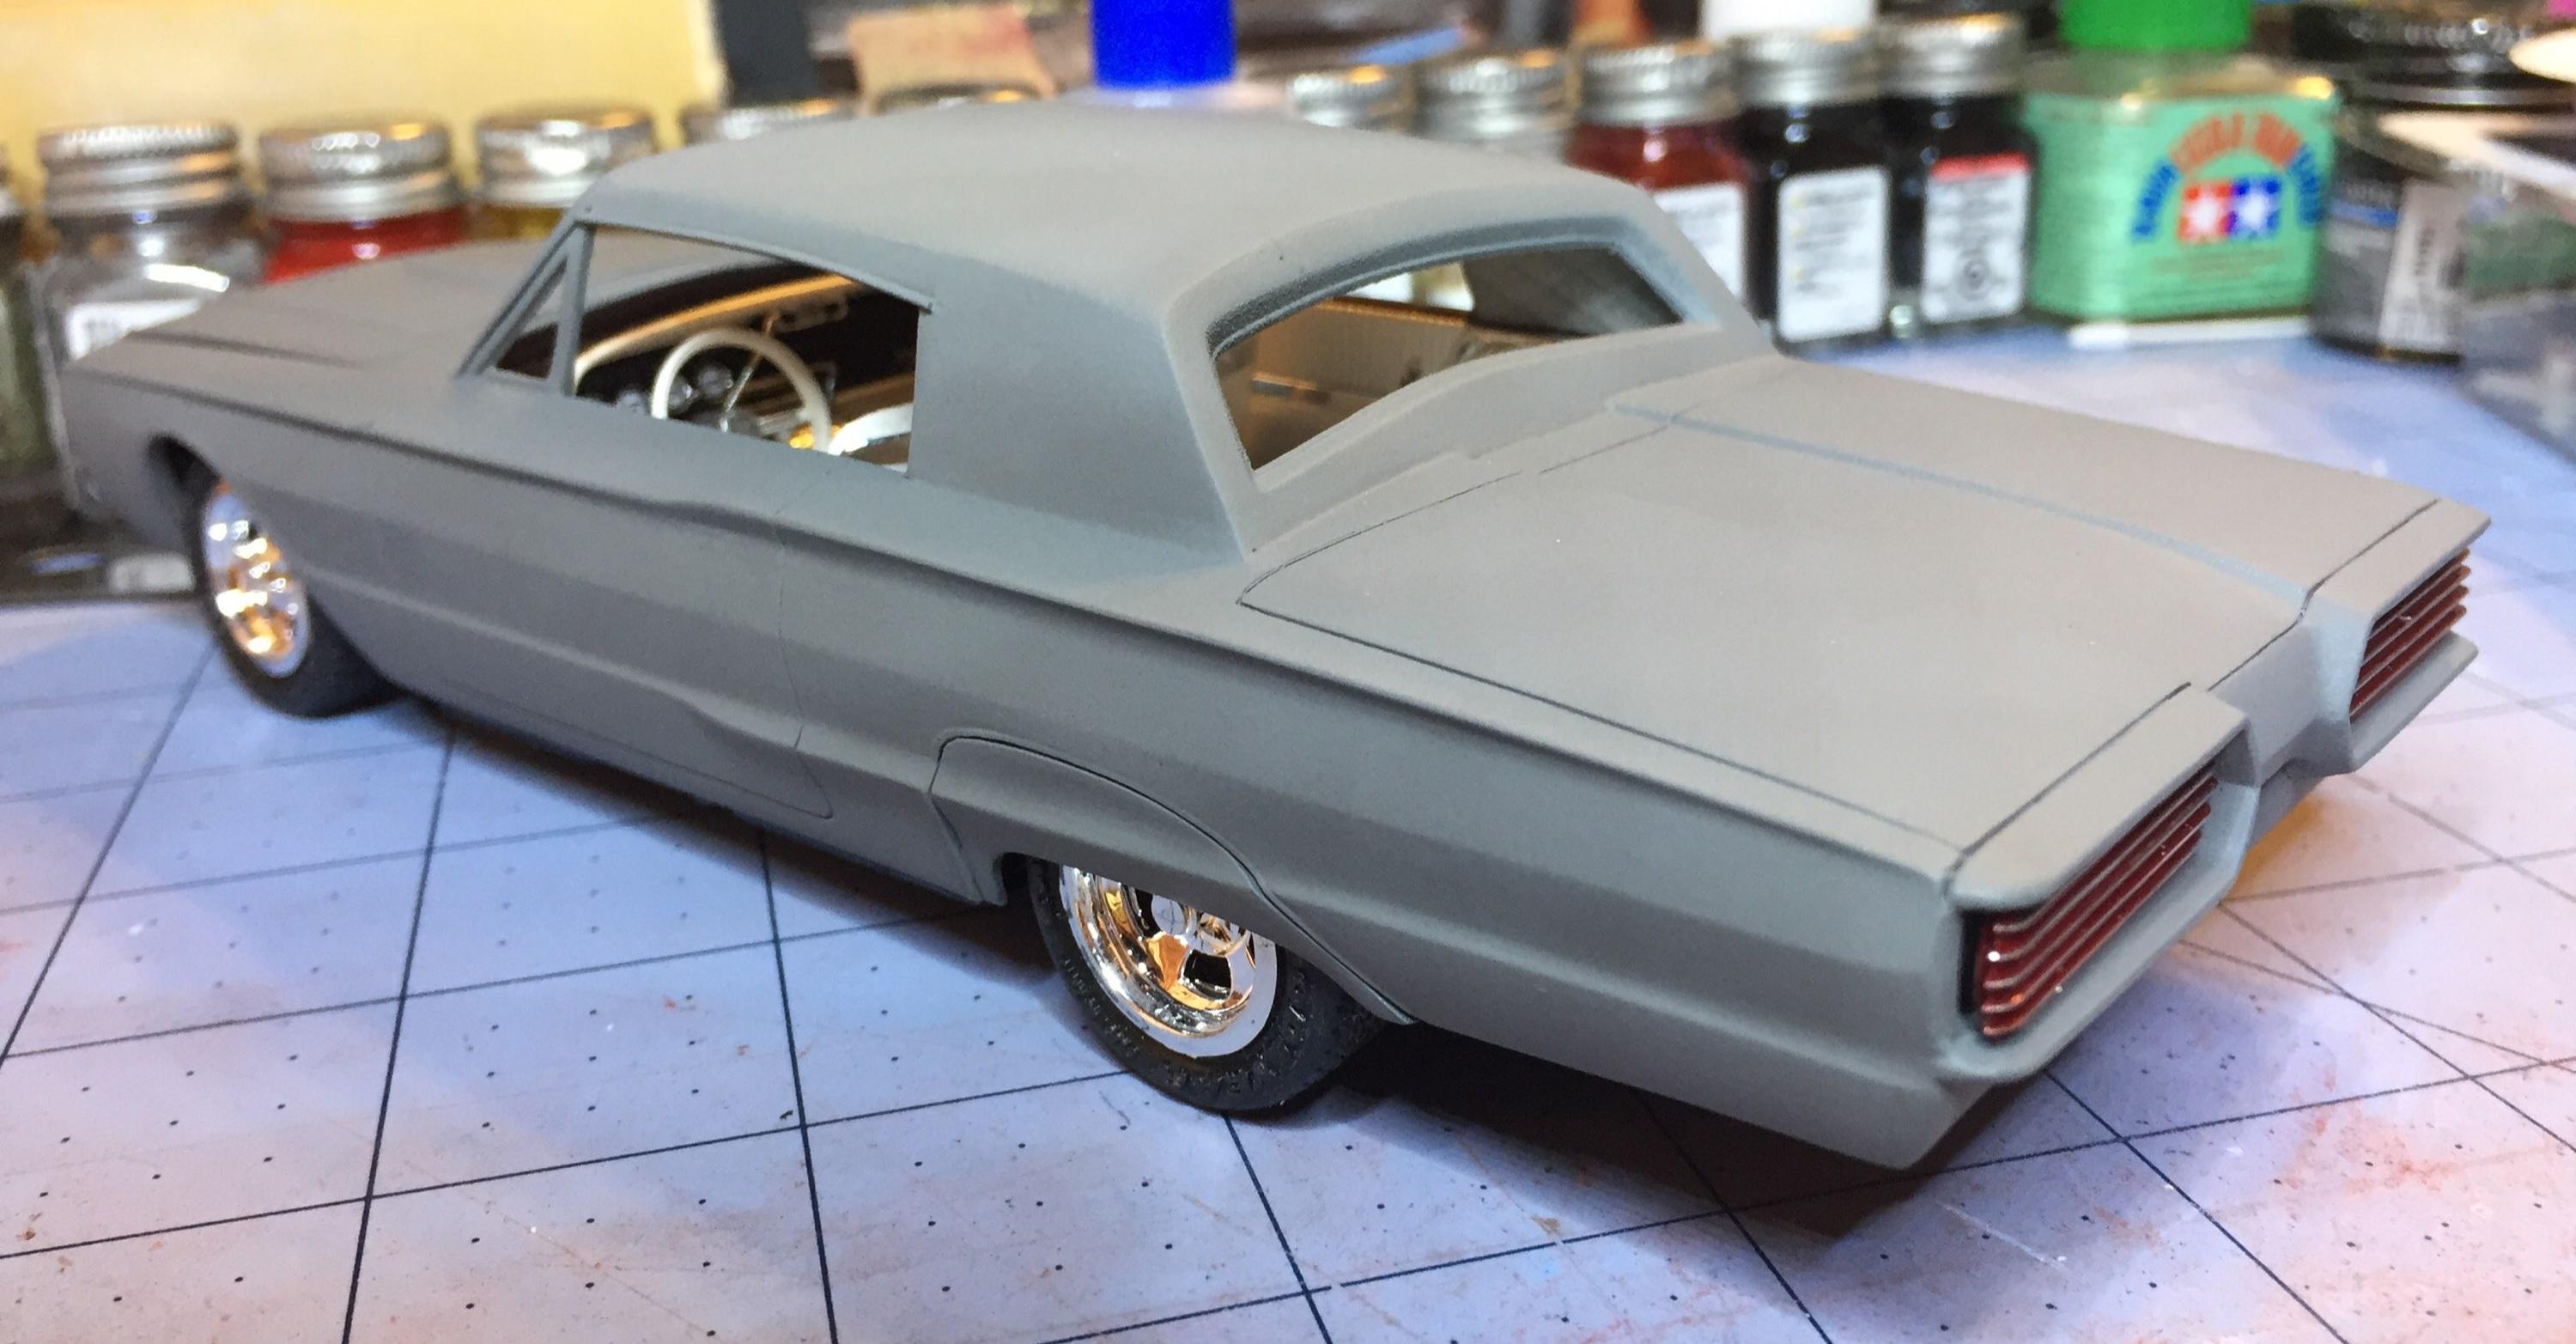
Last primer coat to wet-sand then some fine white Tamiya ?. Finished the interior. I'm thinking some shade of purple or orange pearl for the kustom body work. ?. I dunno. Help me out. Oh...I guess I got the T-Bird bug up my A55. I scored a '62 kit on ebay last week. ? What a nice kit! I keep finding those /ERTL kits in the light gray styrene to be great kits. The 'Bird body is perfect! ? not even a trace of a parting line. Tiny bit of flash on all those engine parts ?, but lots of sharp details throughout. Couldn't wait to start it.....well...just the engine ?.
-
I still have a lot to use up but for those regular colors I am turning g to the "Ace Hardware Premium" brand for engines and chassis' and the like. Glad you like it, Dave.
-
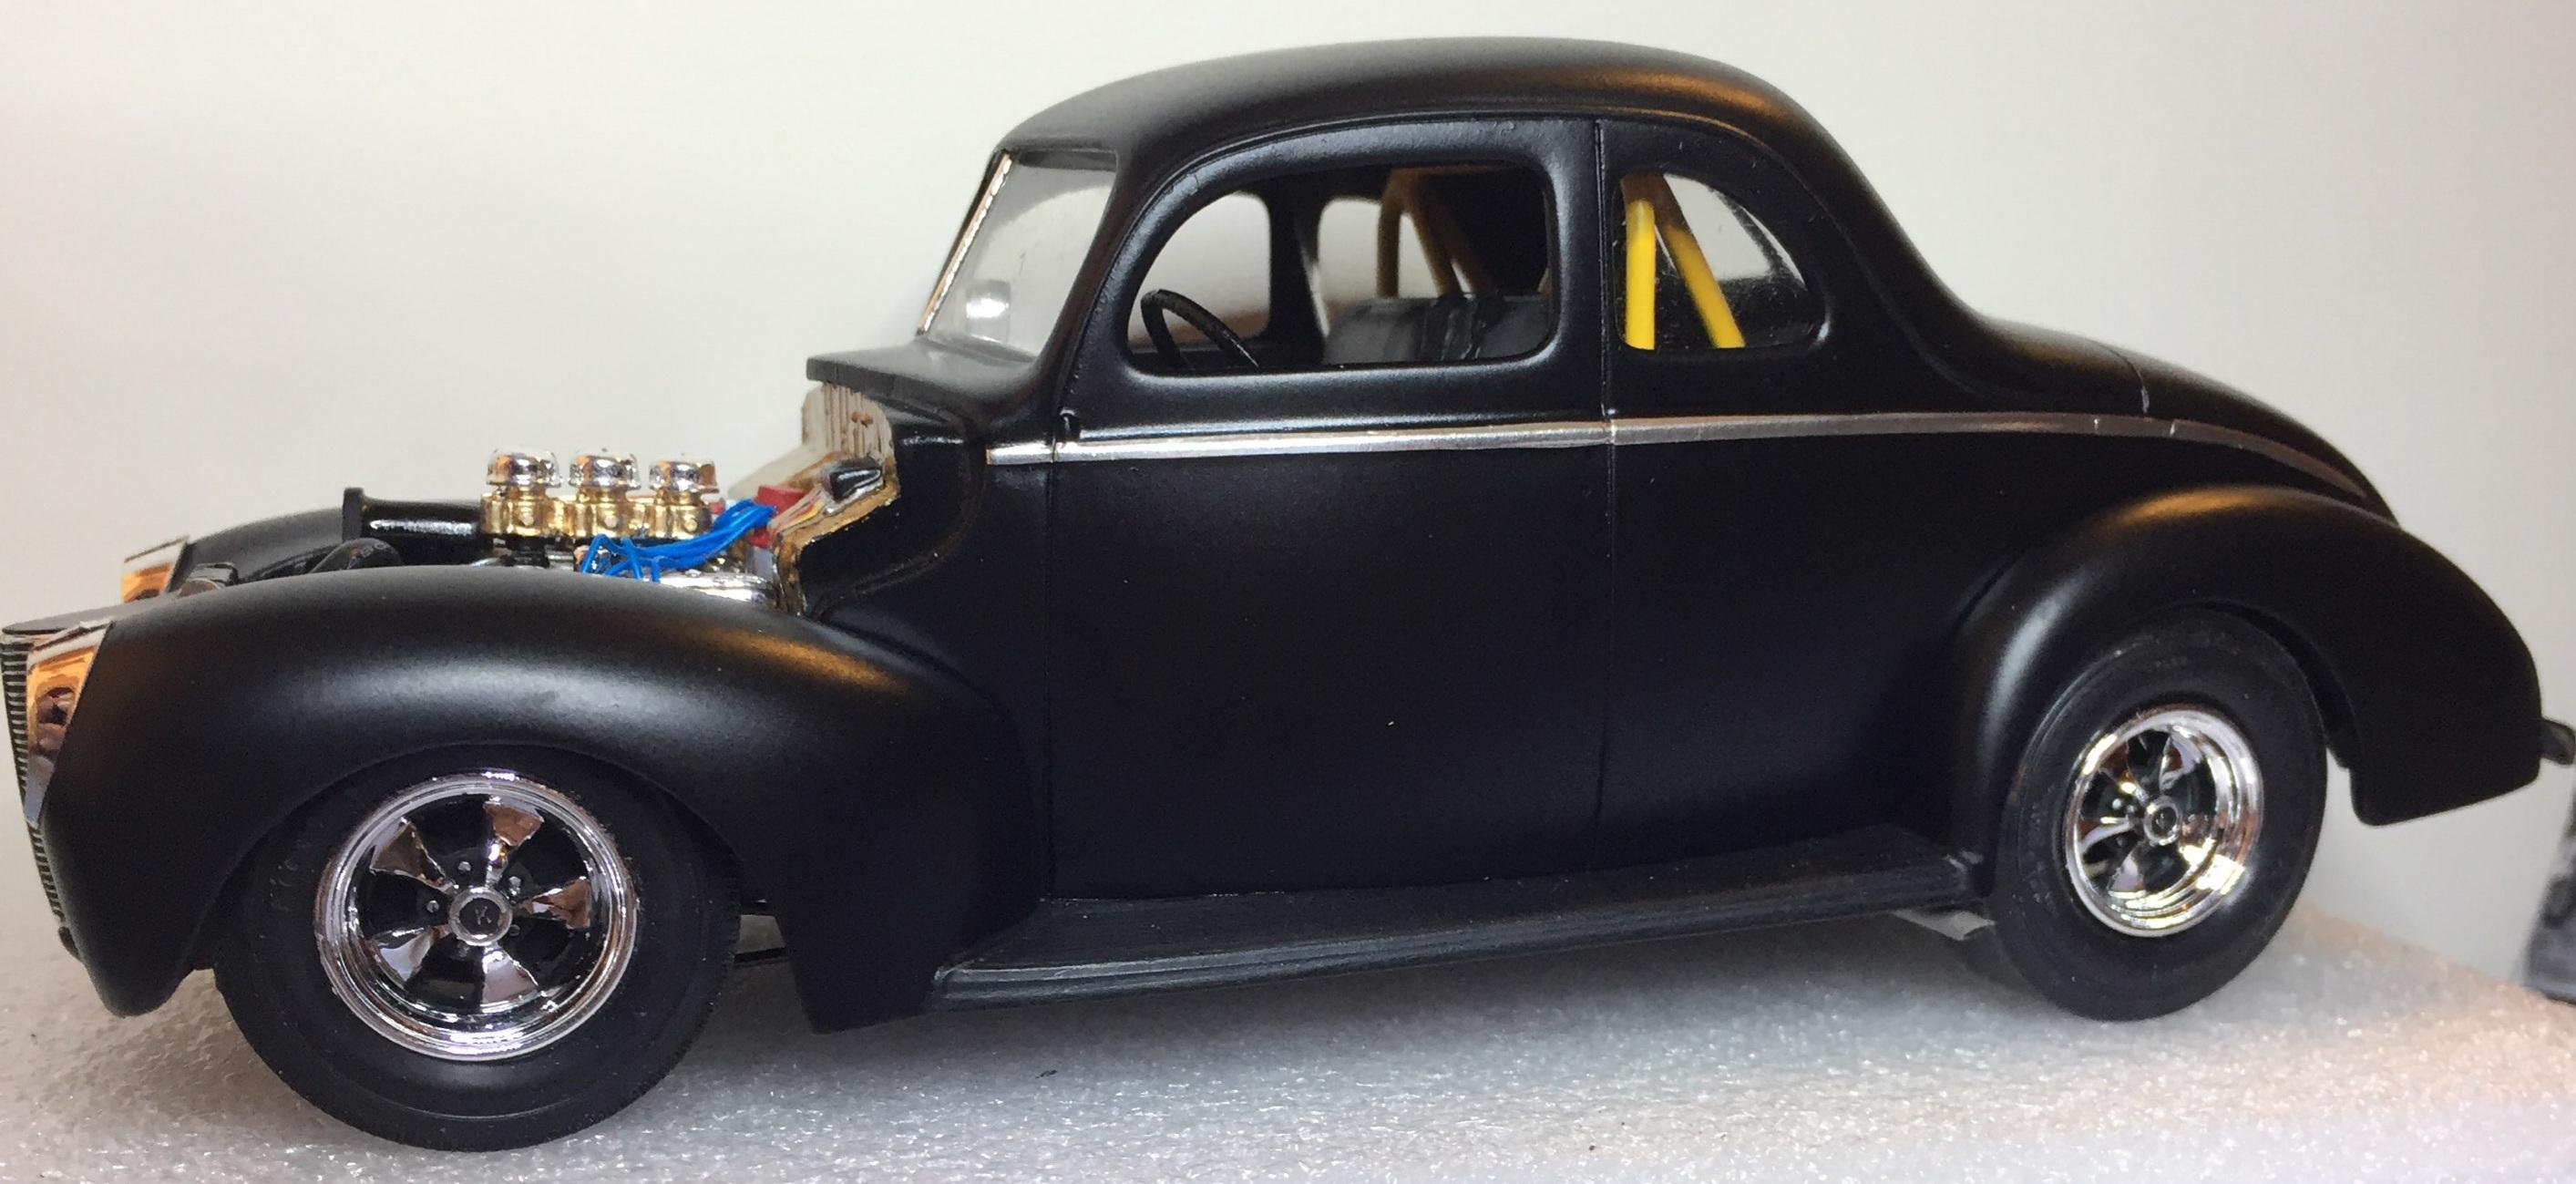
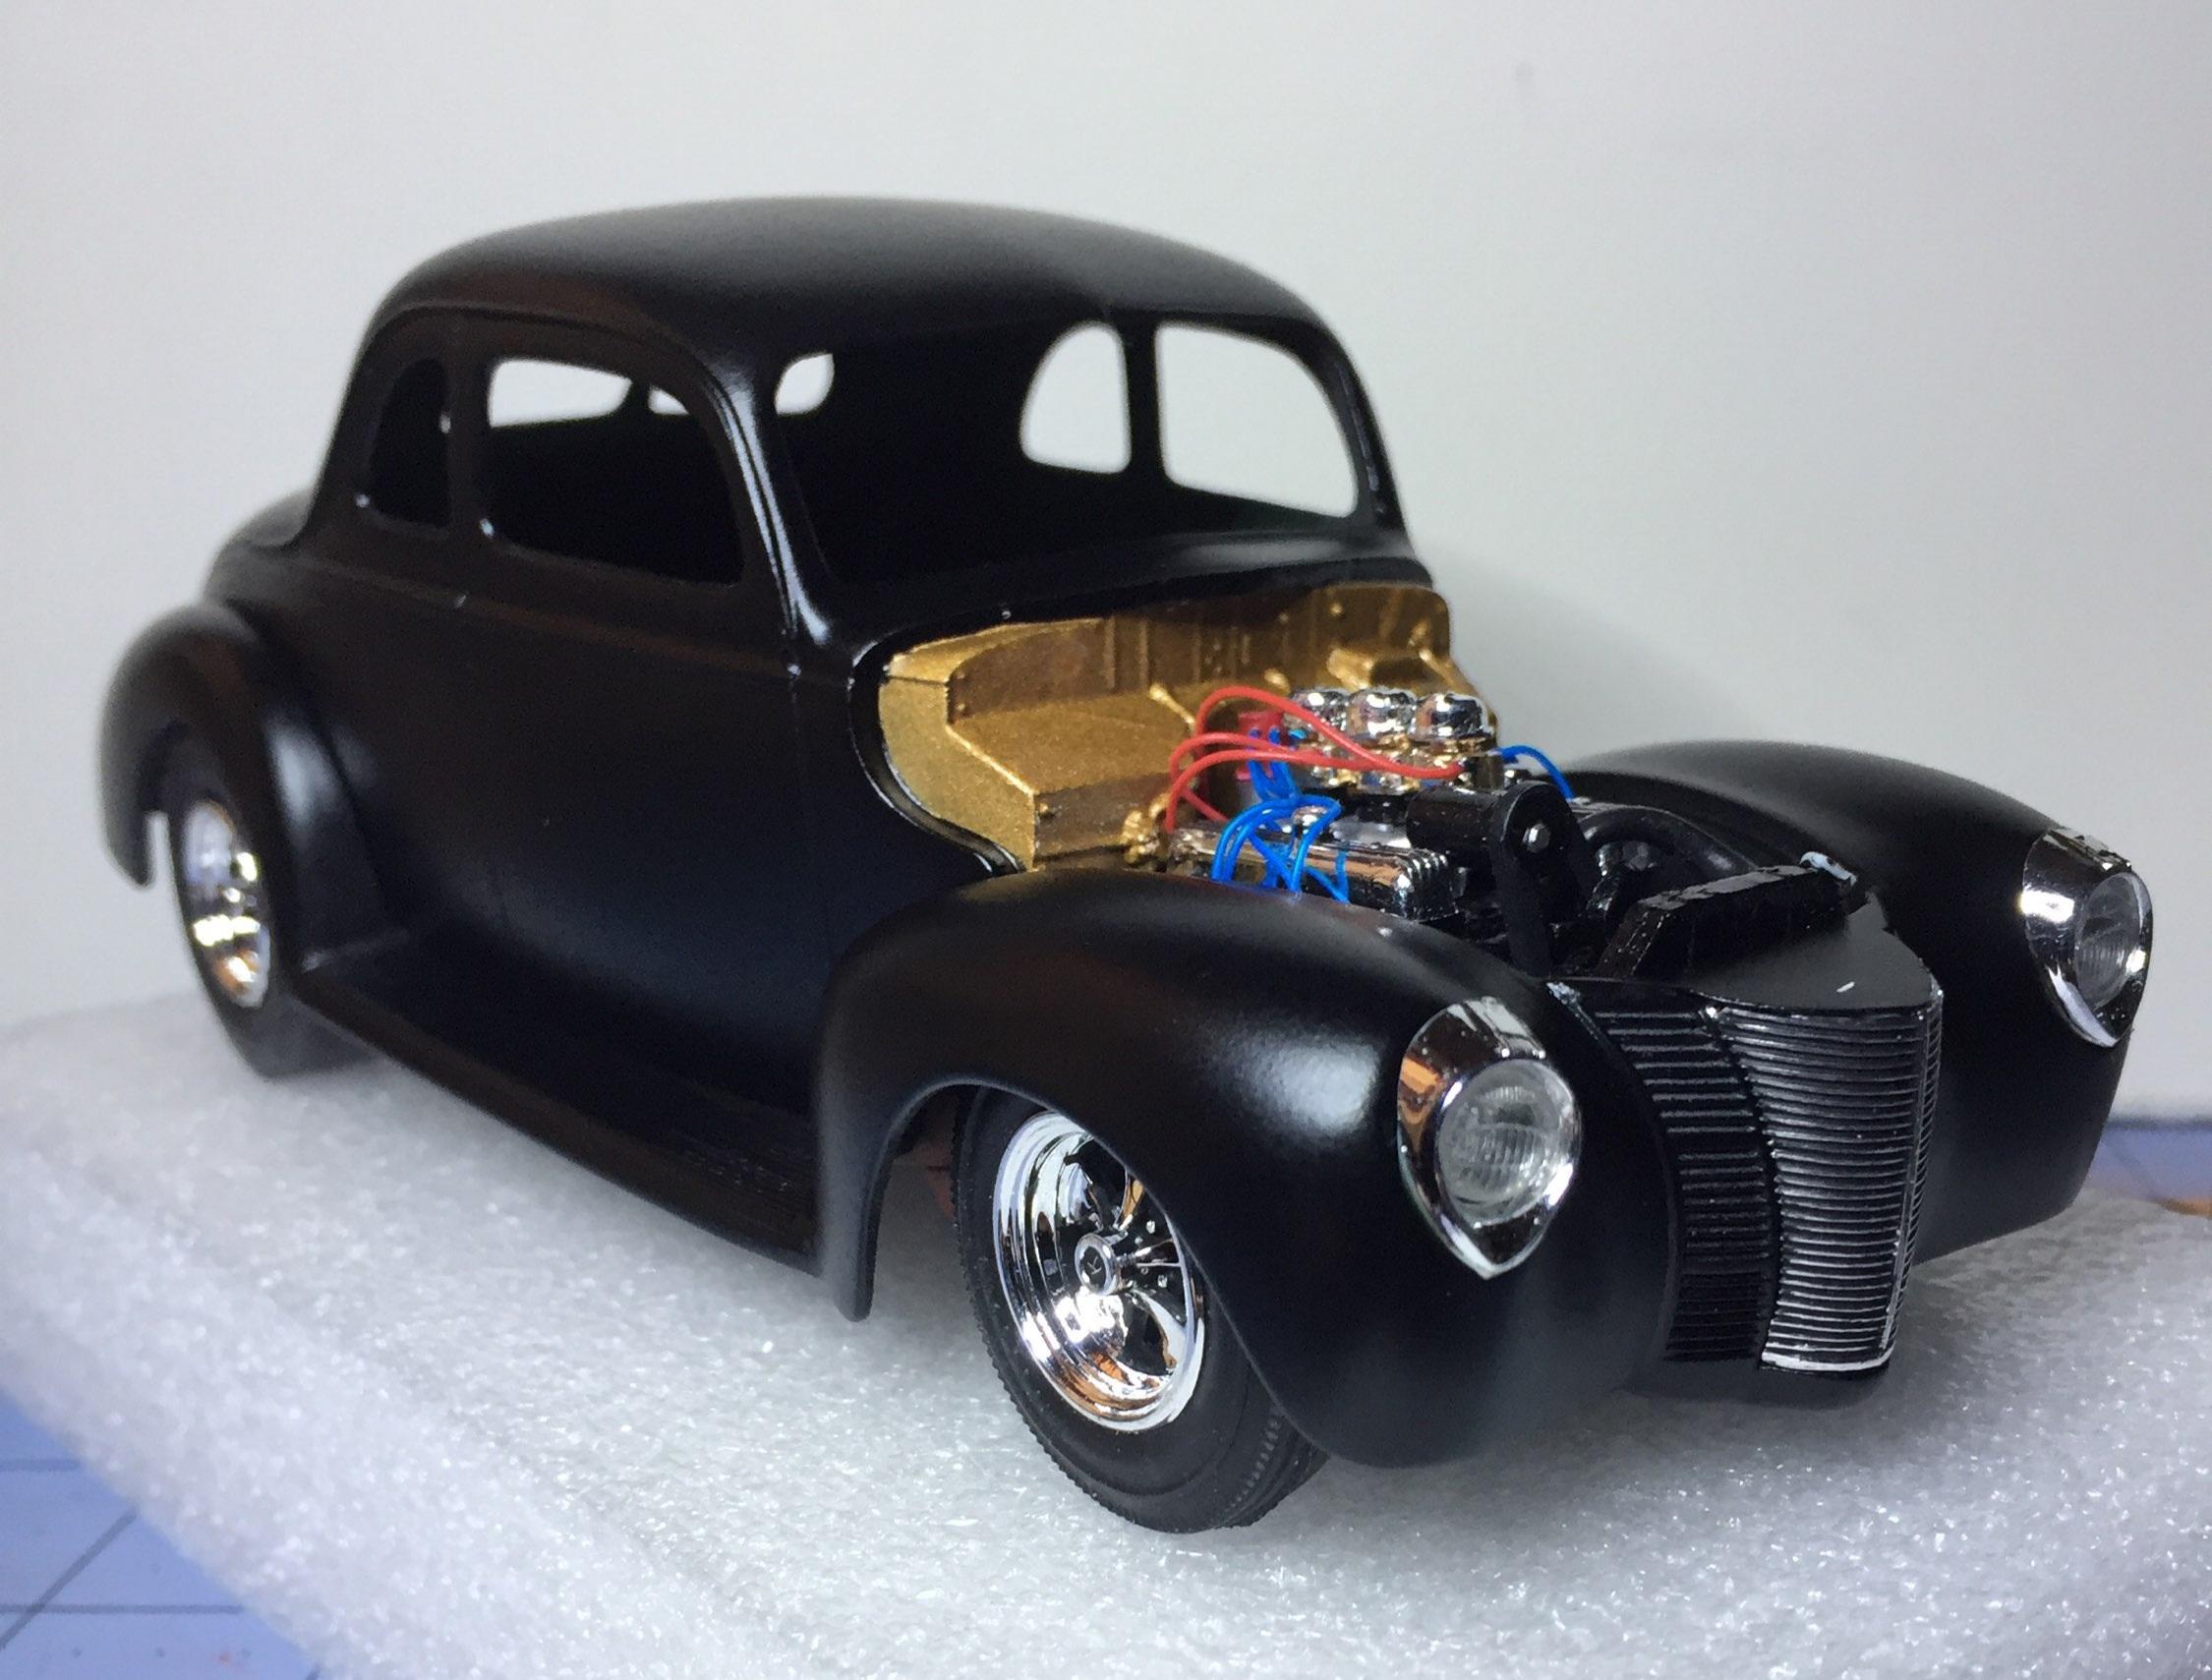
Thanks,Dave, I'm all about the sixties ?. I used Krylon satin black.
-
All glued up in one piece now. Gotta score a pair of door handles (I shaved off the molded ones) or make them. Need to try something with carb linkage but no promises ?. Here's what she looks like now. Thanks for checking in.
-

1964 Pontiac Bonneville Convertible.
customline replied to StevenGuthmiller's topic in WIP: Model Cars
Wow Steven, your time was well spent! Real nice handles/cranks. It's worth it for this one; this ragtop Poncho is to die for. I love everything about it. Keep it coming! -
Try "wholly $h!t" next time ? or just "holy ?!"
-
What will you do with the roof? ?
-
You may be correct, Bob. Poor execution. Paint is not my thing.
-
Thanks all! ?
-
Well, Sam, I hope you have as much fun with yours ?
-
Yeah, yeah....I know. It needs more paint on it to even it out, though. Color sand and more blue. No sweat.
-
Betcha thought you'd seen the last of this one....? first coat will be wet-sanded when I feel ? like it..........but here's where we're going.
-
You missed the part about the "inclusions" ?. it's death for a candy paint job. Fatal. No-can- fix. Never should have done it. Big waste of pricey paint. I had one shot and I freaking blew it. I need a beer to cry in. Thanks for looking! Nice color, huh? ?