customline
-
Posts
3,791 -
Joined
-
Last visited
Content Type
Profiles
Forums
Events
Gallery
Everything posted by customline
-
YAY! ? Now let's get the foil on it, John. We're waiting ?
-
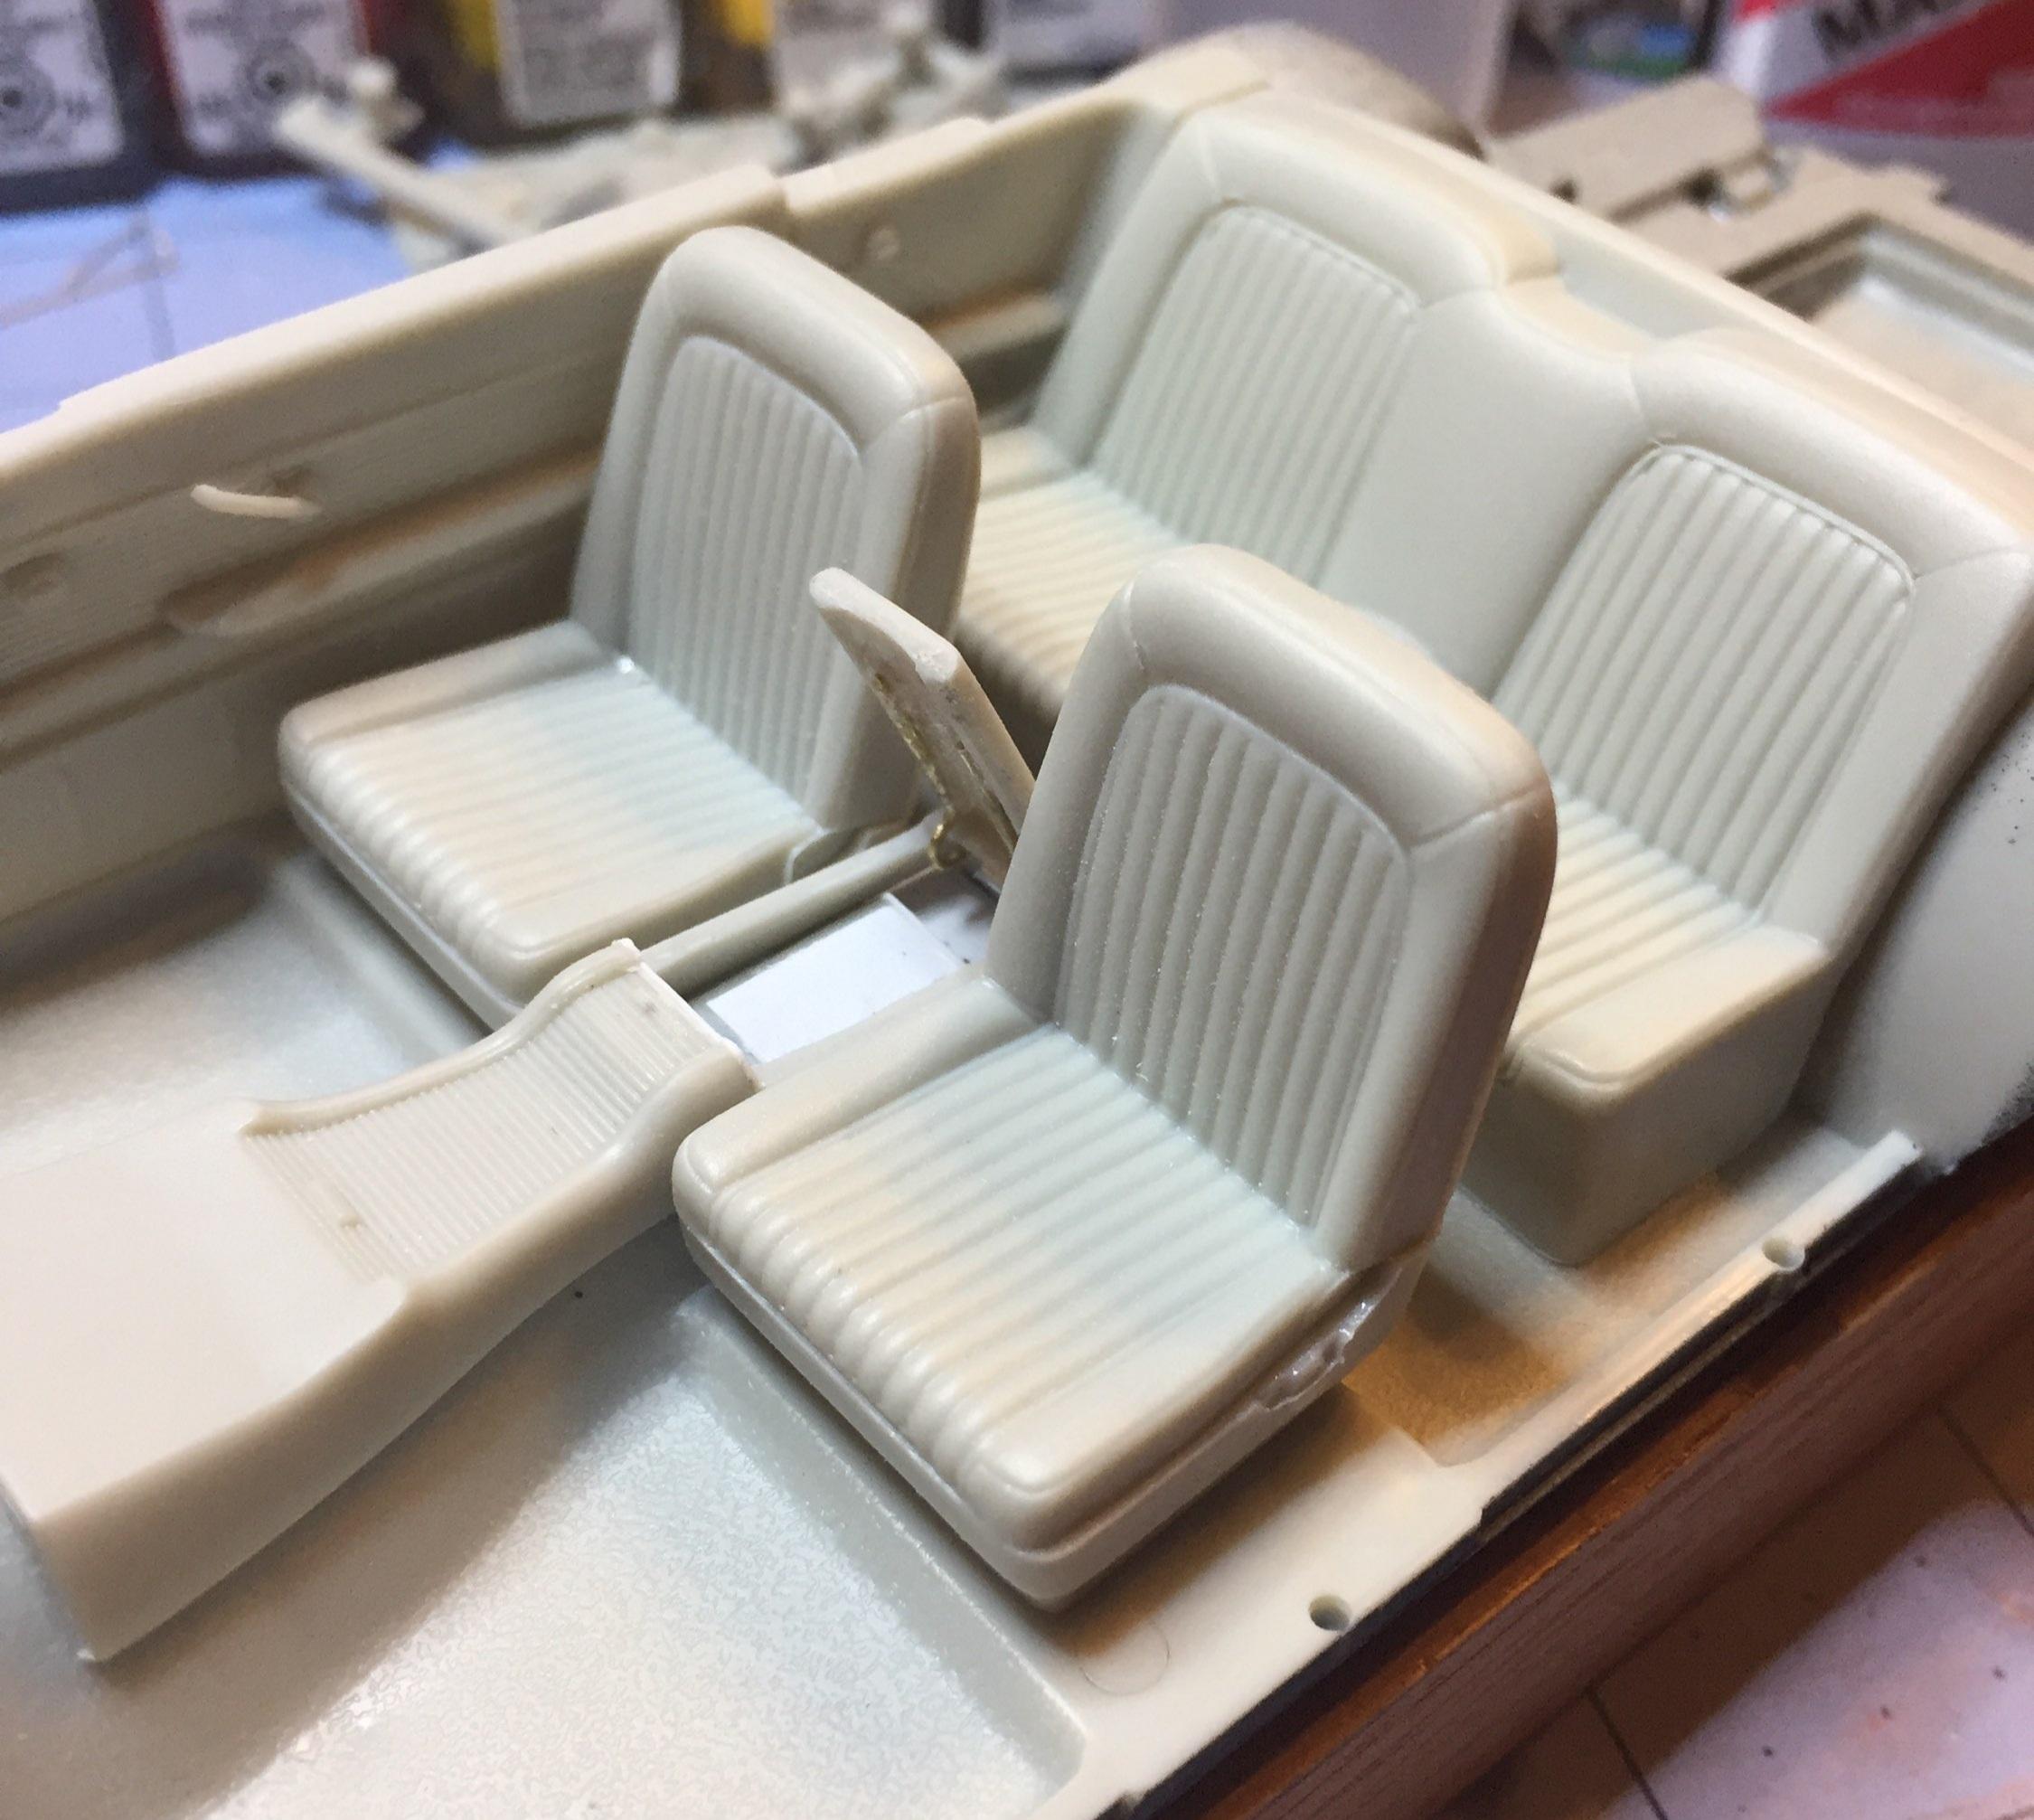
Yup. I use clear gloss for lenses nowadays, Dave. I found a big bottle of it hiding in plain sight. In time it may yellow but it will be someone else's problem. I have not joined the millions of model car builders that use Future. I can't find it at a reasonable price. I wanted to try it but the stuff is very expensive and I would never use enough of it to make it worthwhile. I rarely use a clear coat on car bodies and the clear lacquer is great for lenses. I also use the "Gold" CA for glass and lenses. No fogging. For a convex guage glass I think a drop of thick CA might work or maybe 5 minute epoxy or maybe Bondic? (I should test before doing any of these; the ink on the guage face might dissolve ?). Thanks for your interest Dave, I do appreciate it. Hey. Check this one...interesting interior colors.

-
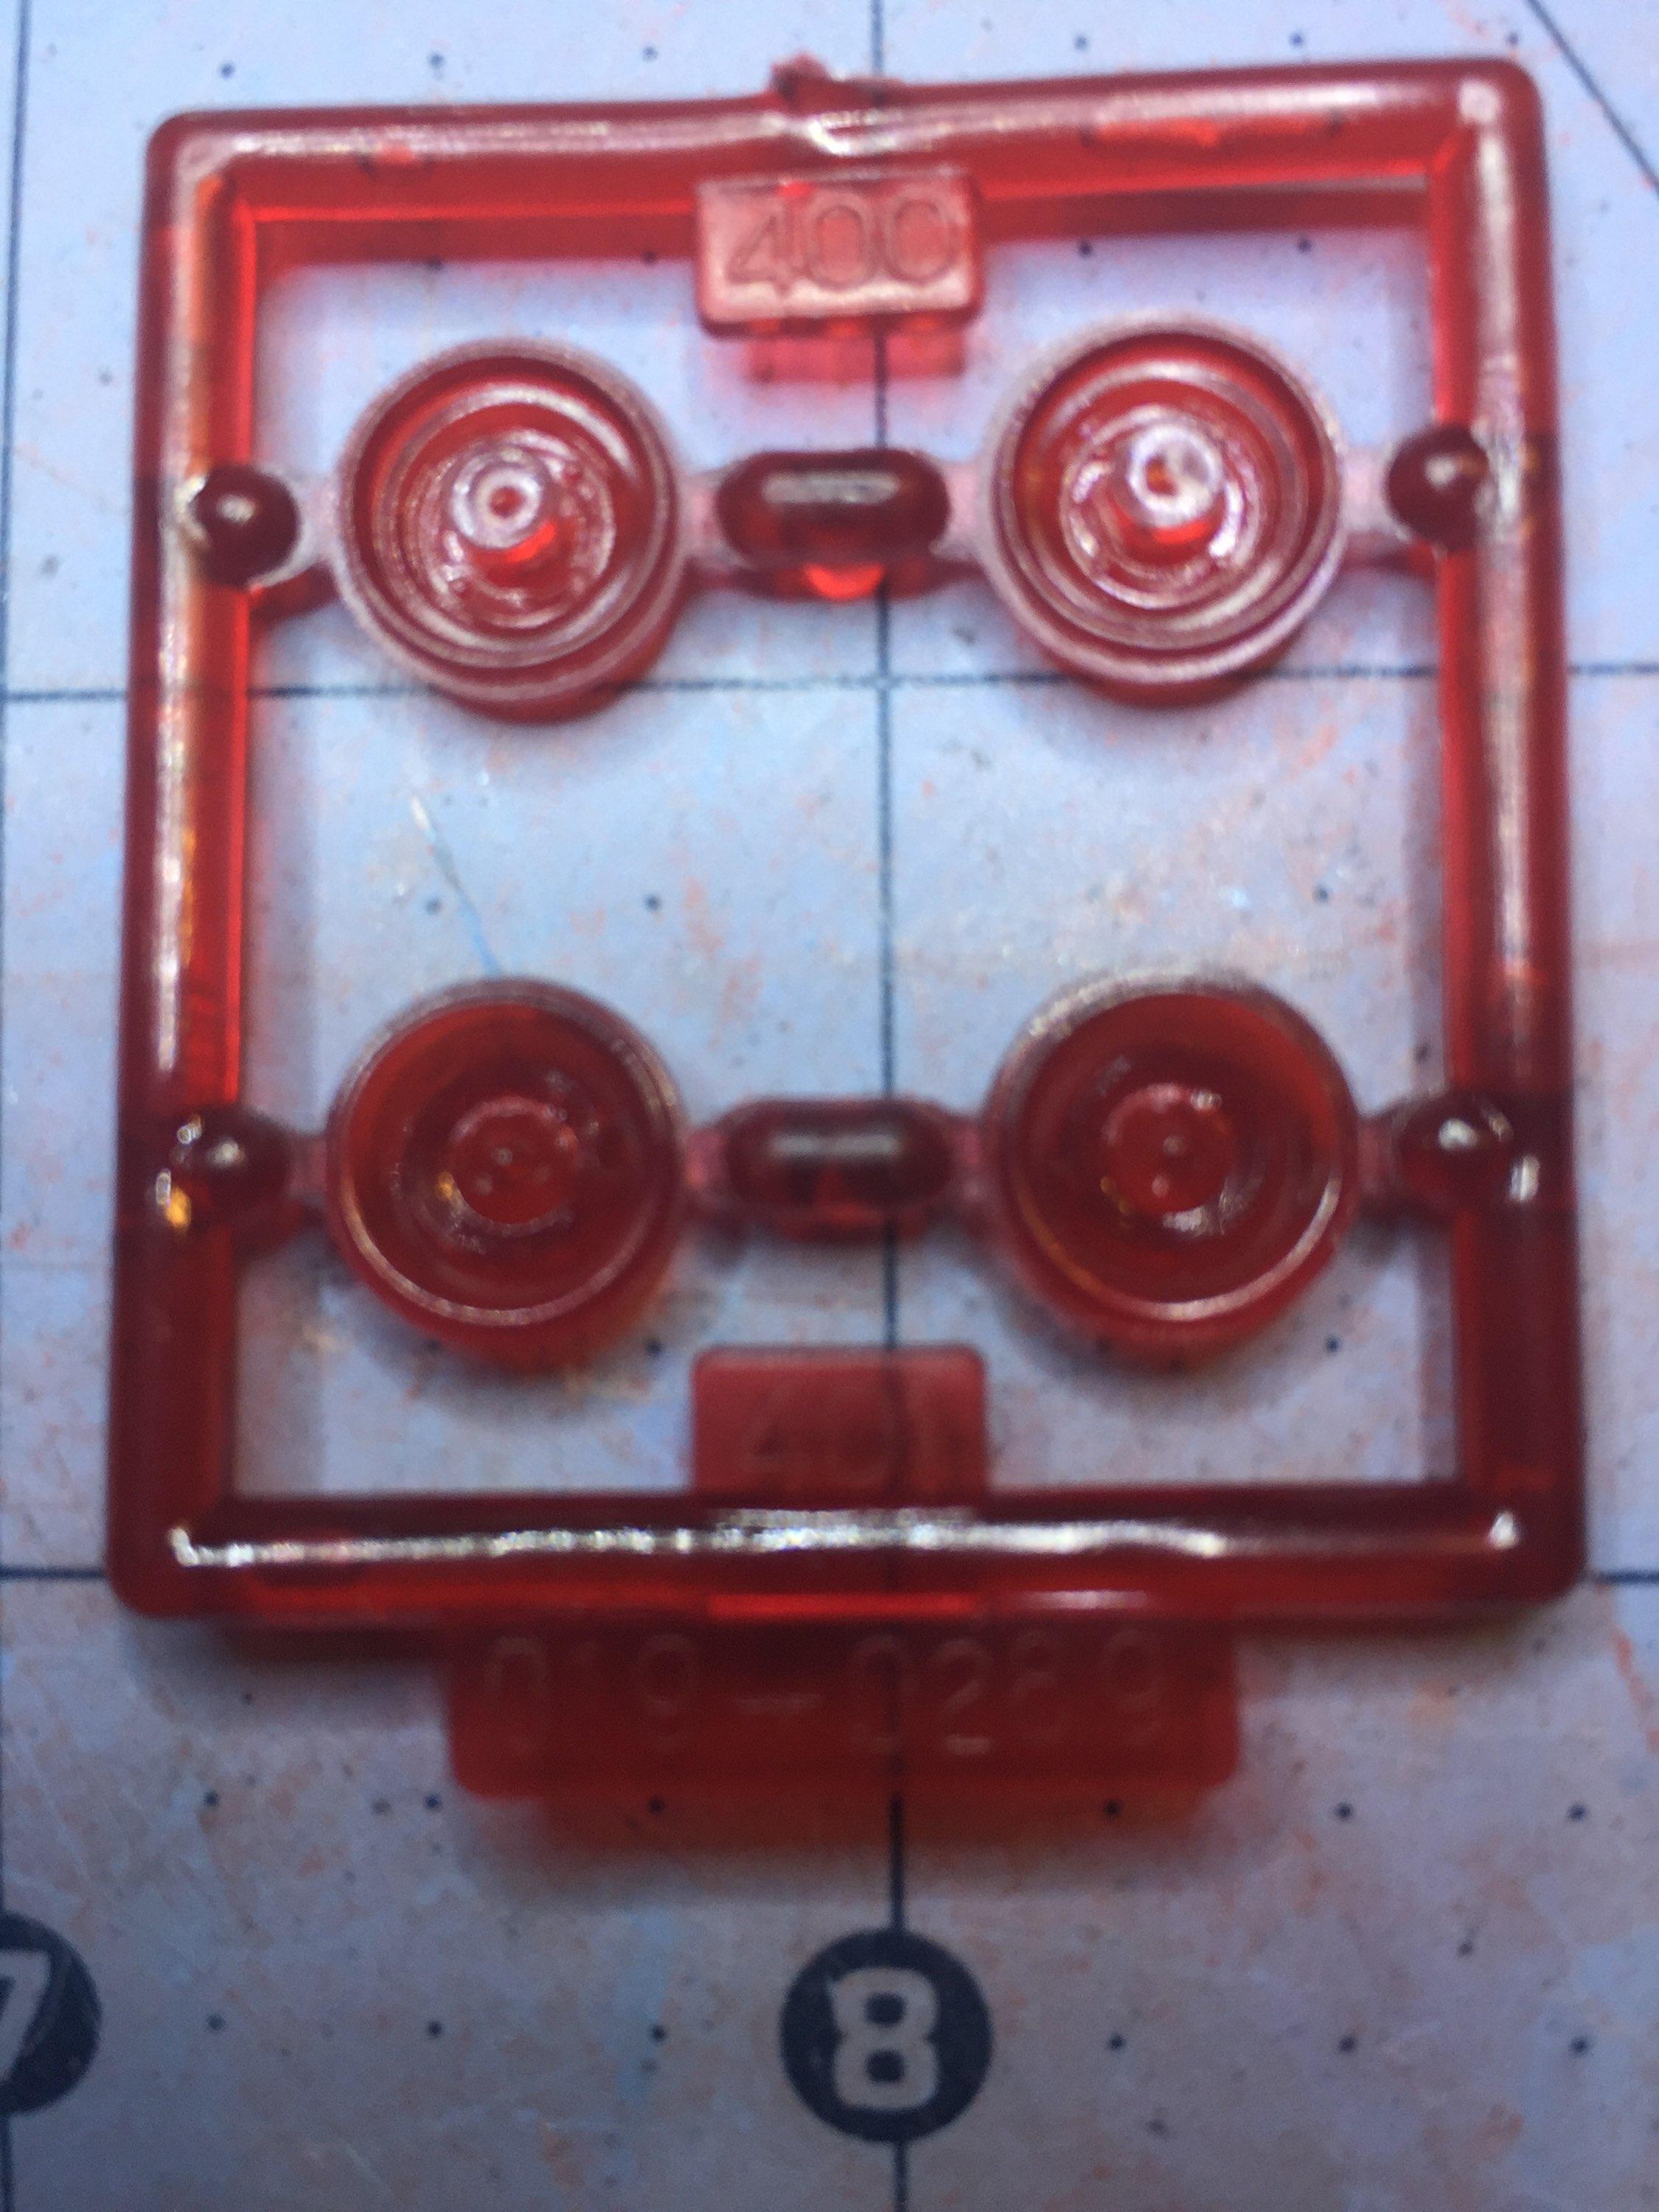
I have the kit #099-30081 according to the instruction sheet and the box says 30081-1HD. The date I find In both places is 2002. My point is "why didn't they tell the builder which tail light lenses were the correct ones for the stock version." ? ANYWAY.....if you have this version, you are aware of the "issue". If you buy a kit in the used market you may get this one and you will be aware of the issue. If anyone reading this has the latest version of this kit, please let us know if they corrected the instructions. Inquiring minds want to know. ?
-
Here's my girl with a big smile for ya! (See below). OK, the tail lights: I cannot imagine any way to do this. Period. They are just too small. The outer ring is do-able but that's it. Am I wrong? And I get a laugh ( not a real one ☺️) from the instruction sheet which is here for your entertainment. So typical. Remember, this is a "stock only" kit. No custom parts. Well, except for those bullet-shaped lenses. Thanks for stopping by ! ?
-
Awesome job, Katsu! I especially dig the body color brake drums. I hope you don't mind if I "borrow" that idea ?. If you could see the rear wheels, would those drums be the darker shade of blue?
-
I like the way this is going, John. Two-toning looks terrific on these mid-fifties cars. Don't hurry it. Fight the urge....let that paint dry! ?
-

1964 Pontiac Bonneville Convertible.
customline replied to StevenGuthmiller's topic in WIP: Model Cars
Those inspectors marks show up on 1:1 restorations and I wonder how they survived a total restoration process ?. Some details are very difficult to add at the scale most of us work in but this is so easy to do. At 1:25 scale, yours are the only ones I've seen. It's a great way to not just add detail but it adds, in the case of your builds, realism that causes one to wonder if it's a 1:25 or a 1:1 being viewed. It caught my eye and I wanted to make others, who may not have noticed, aware of it. Maybe it helps others up their game a bit; not the factory marks necessarily but that kind of thinking while building a scale model. It adds to the fun and, for me, that's what counts. You must have had tons of fun building this Pontiac. Hey Steve...I didn't really think you knew the name of #27 ? -
Roger, this thing is awesome. You can paint, sir! You should be very proud of this gorgeous gasser. CONGRATS! When I have items like those headlight pods or mirrors and handles that must be attached post paint, I will pre-drill the body before paint and use .020 brass wire to "pin" them on afterward (just run the bit through the holes to clean out the paint.) That way you get a good positive attachment using only the tiniest bit of CA. If I can drill it, I pin it. Mirrors and handles can be tricky but if the item is big enough to drill with a #75 bit, you're in business. (You can go smaller if you have those small bits but I can't keep those below #75 - I just break them ?.) I will also do this with rear spoilers too. Try it!
-
Cool. Going there now!
-
1964 Pontiac Bonneville Convertible.
customline replied to StevenGuthmiller's topic in WIP: Model Cars
That's a trendsetter, Steve. Pretty soon everybody will be cashing in on that one. Myself included so....thank you! ? -
1964 Pontiac Bonneville Convertible.
customline replied to StevenGuthmiller's topic in WIP: Model Cars
I'd like to look into the employment records of the Pontiac plant and find out who inspector 27 was...... thats detail, folks! Steve? Who was 27? ? -
I am especially fond of that shade of gray. Very classy. You just may get your wish, Jeremy. I wonder how satin eggplant would look....?
-
I'm just hamming, Steve, for the entertainment value. This $h1t happens to everybody. I am serious about a paint change though. The 3 options I'm wrestling with: satin black, gloss orange, gloss red, and dark gray primer. Oh....wait....
-
? .....right?
-
-
.....OK, so I thought I could just wet-sand this thing with 2000 and then empty the can on it and I would have a nice candy blue paint job, inclusions notwithstanding. But I'm sorry, no....the sanding revealed how my rattlecan technique is a total failure and I should be farming out my paint jobs. ?. Also, to add insult to injury, my bodywork sucks too. ?. I think the kit may be cursed. Anyway, the sanding revealed numerous low spots and sinkholes that I didn't catch in the primer phase. NEVER SKIP BLOCK-SANDING. So I'm back to square one. I am abandoning any thoughts of a cool candy blue paint job in favor of something that was suggested by one of our colleagues a few pages back.
-
I'm following, John. I have one of these I've been saving. I remember building this one as a kid. It was painted blue if my memory serves me. The magnets are a good idea. The '57, in Fairlane trim, is a very handsome set of wheels. I'm kinda sorry I never owned one but where I lived, they rusted out very quickly and you couldn't find one that wasn't "perforated."
-
The first Thunderbird. This body is a natural for sectioning. Shortening is genius. I'm following, for sure. Is there a plan to remove those tail light fairings? The wedge cut left them not parallel with the trim.
-
There's no way to do that at 1:25th scale. My only purpose would be to emulate the look of depth by recessing the faces and maybe a drop of CA on top of the faces. It could work ?
-
I'm glad you brought this to me, LM. I had no idea. I just looked at my dash -what about drilling the guage faces out and attaching a piece of sheet on the back side and using photo reduced guage faces from Best? In fact, I'm going to order some right now! Thanks for the tip!
-
First, I really like this kit for a gasser build. It's a natural (AMT thought so.) The black paint job makes me very envious. Absolutely beautiful. The rest of it is super nice too. I would keep the decal count low so as not to cover up too much of that paint job. ?. I'm following now, can't wait to see it completed!
-
I especially like the "realness" of the weathered/repaired/neglected finishes. Very insightful in concept and execution. Brilliant! I love that steering wheel, James. It's very '60s.
-
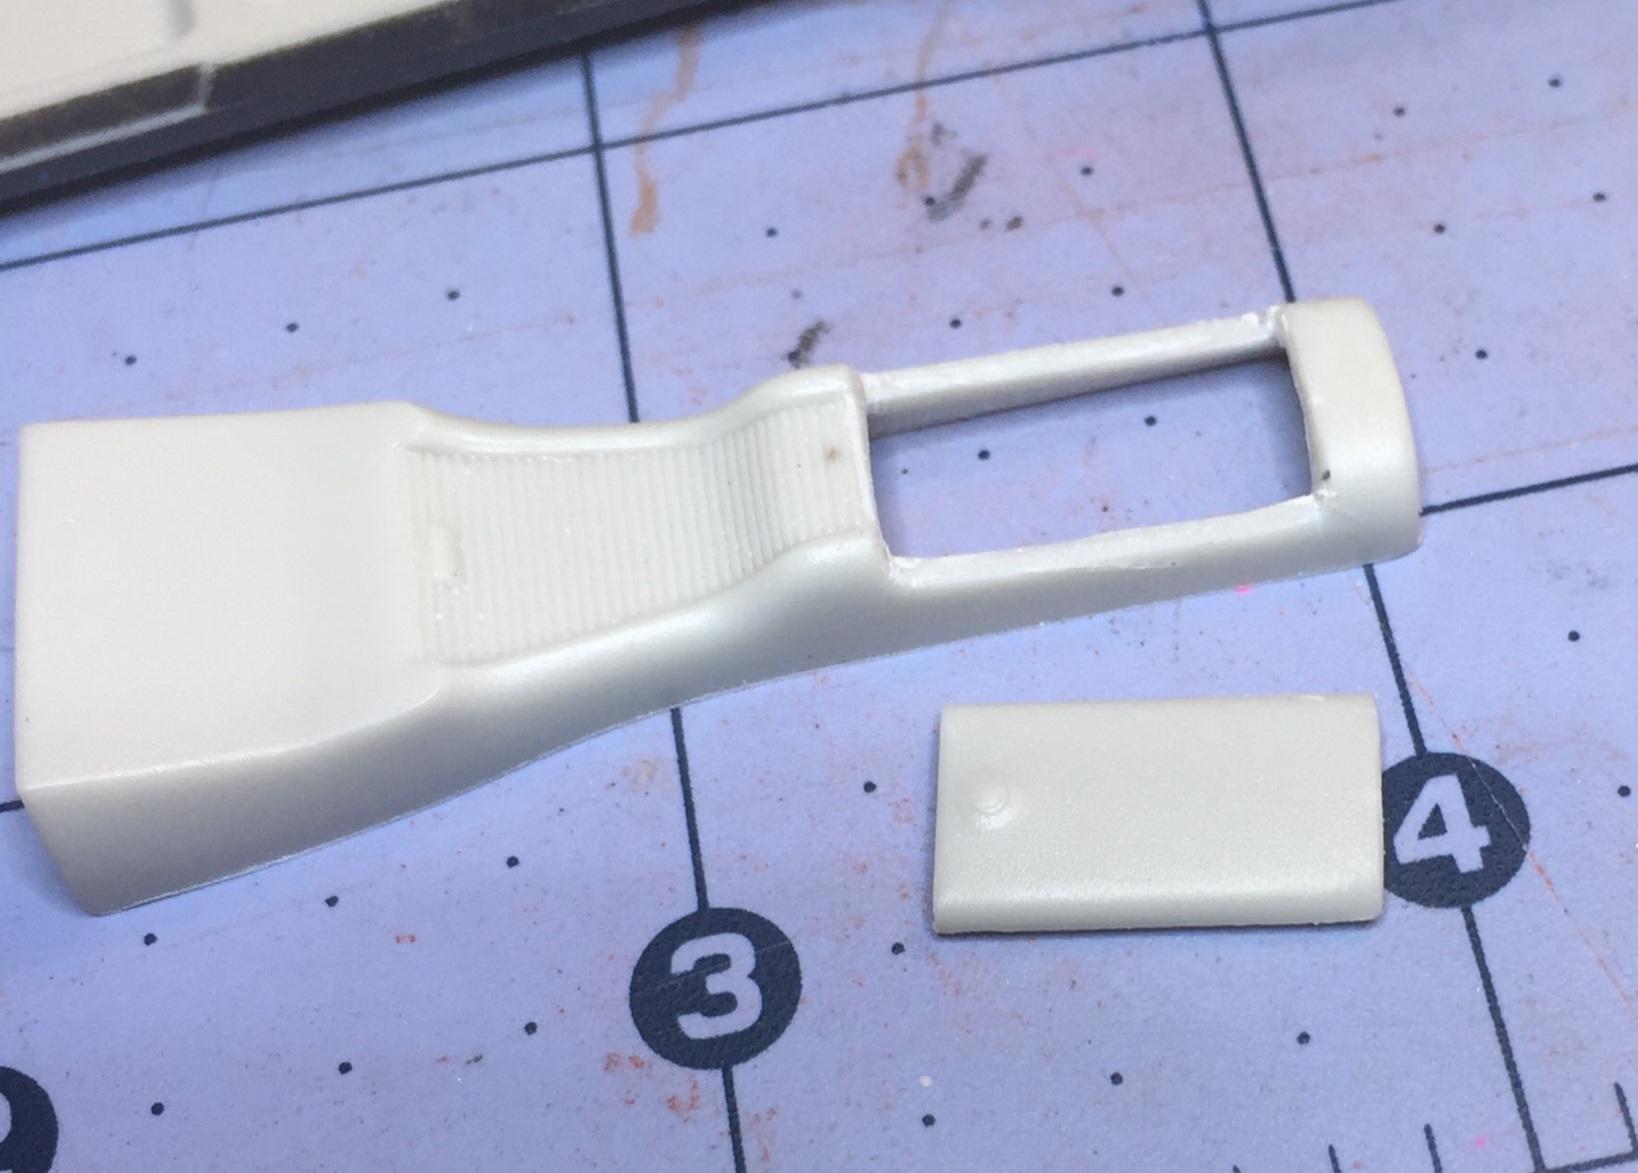
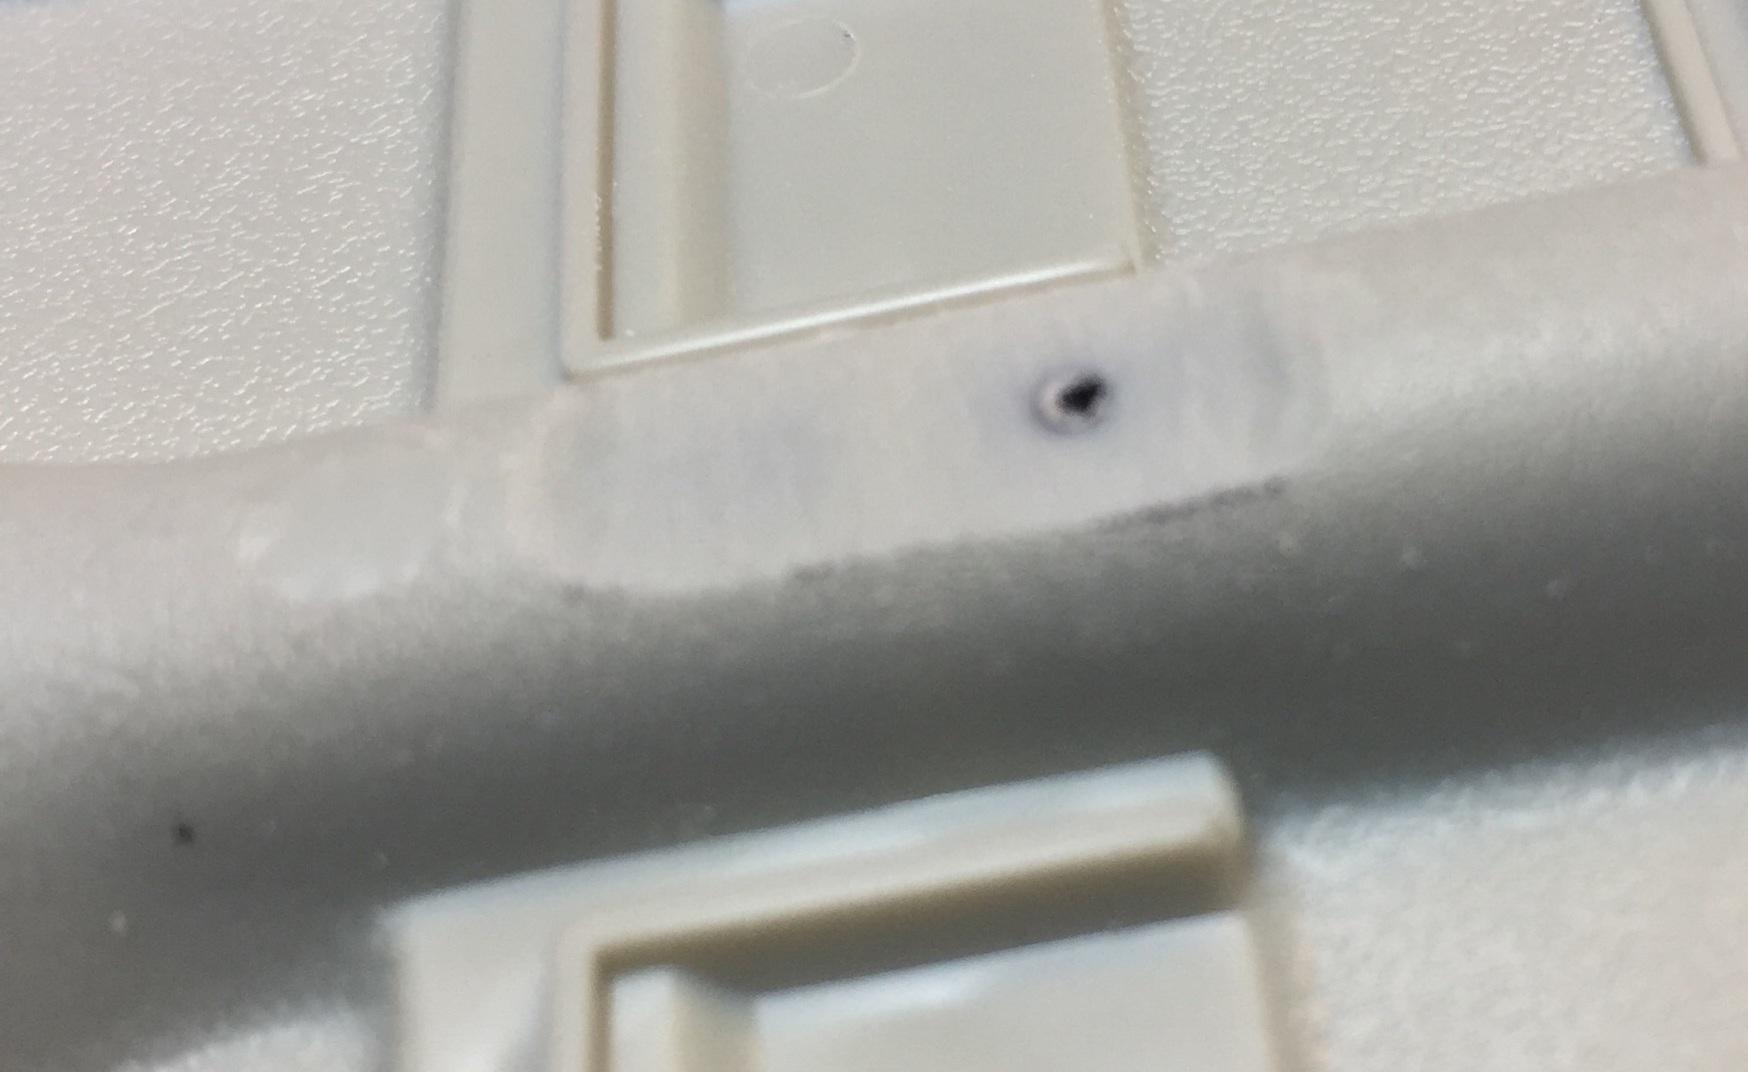
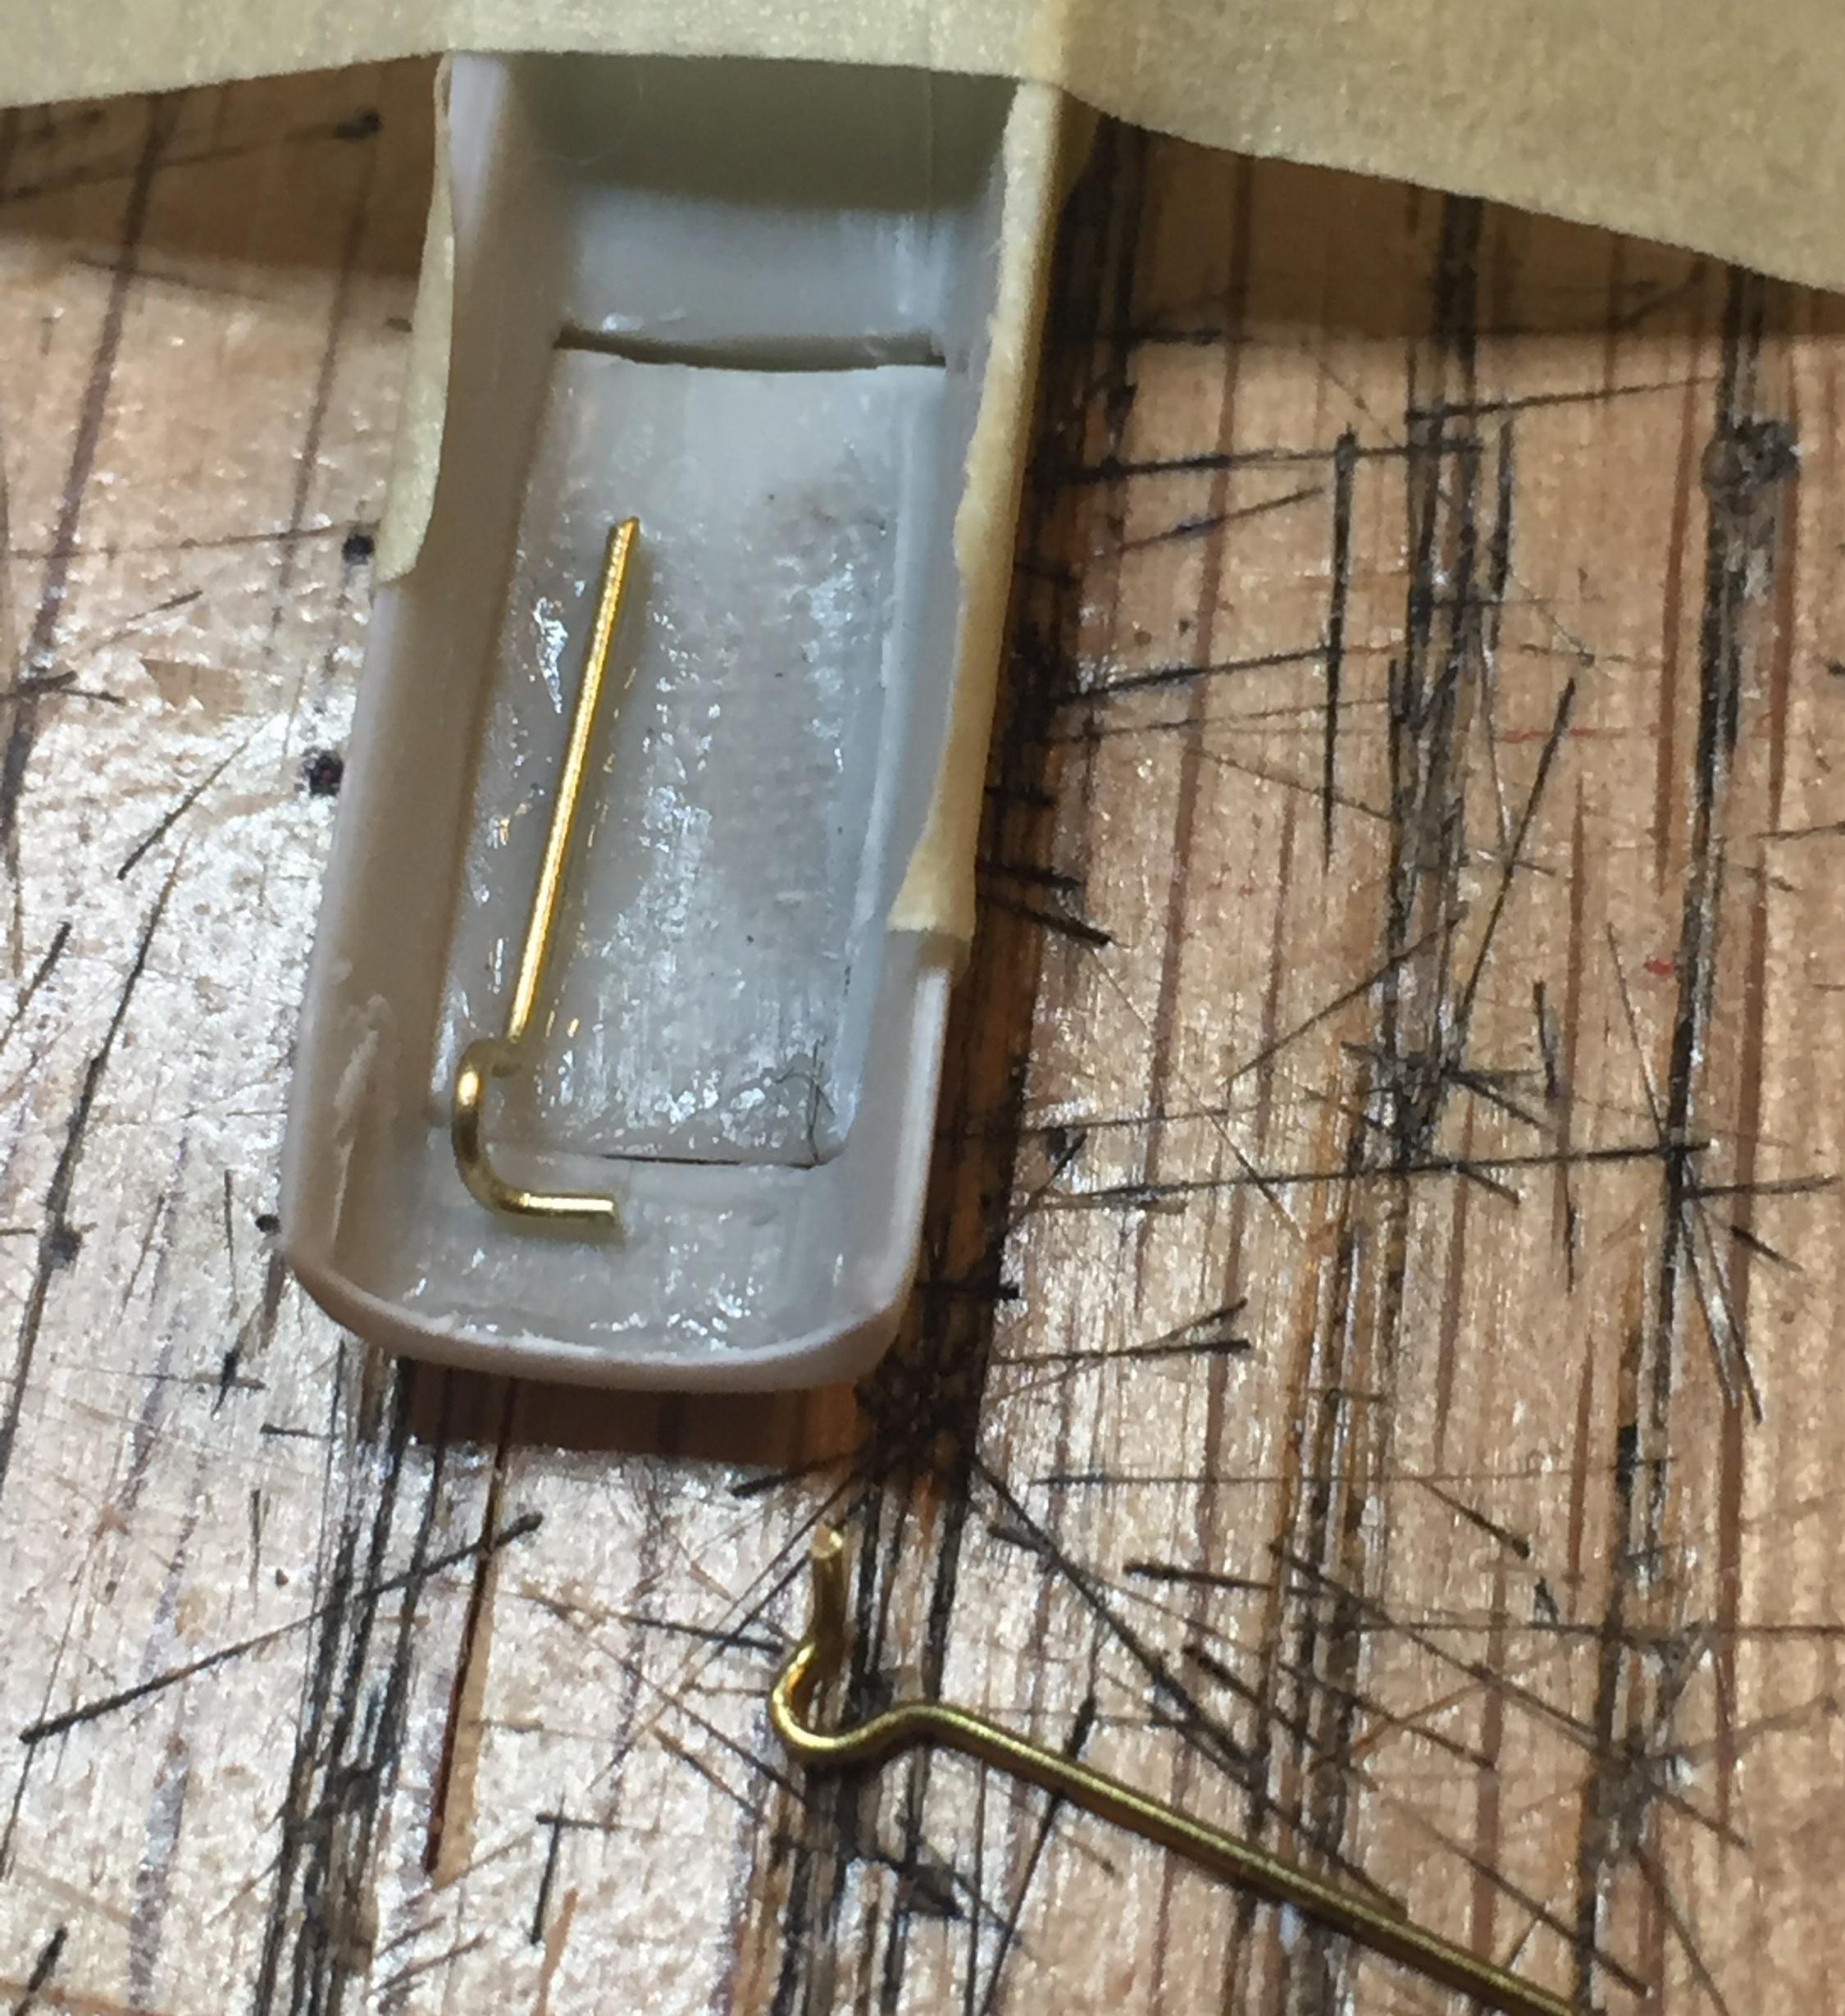
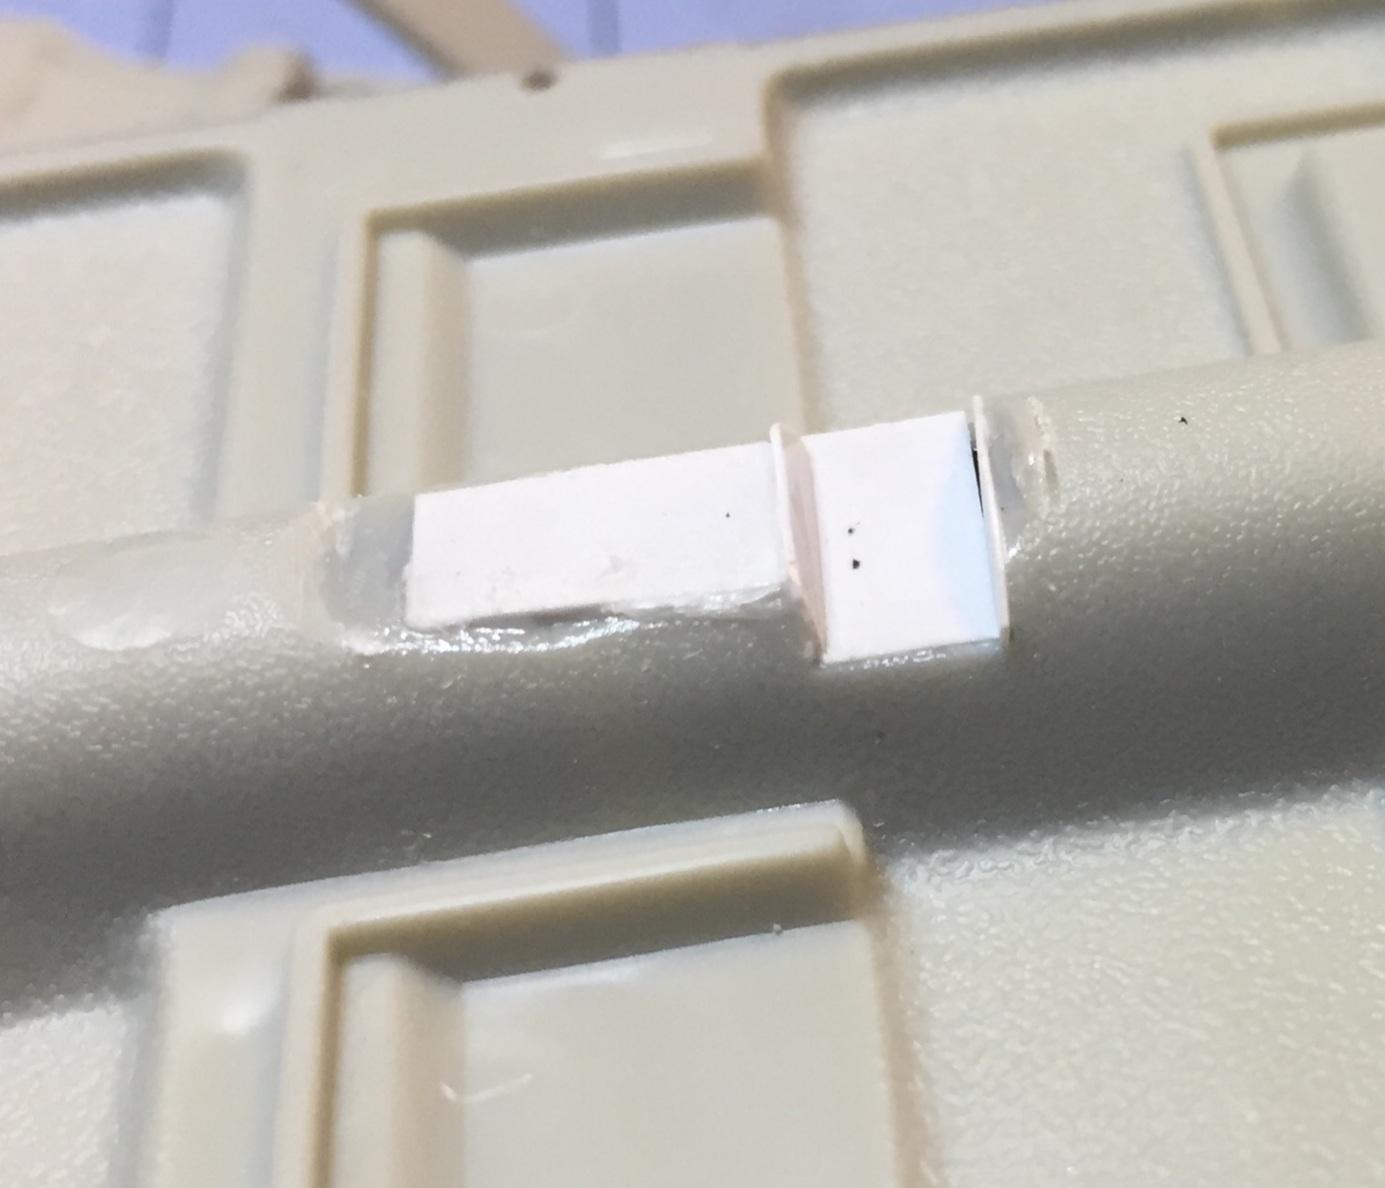
It's getting kinda tricky playing with stuff that small. I went through a whole length of brass wire to get there ?. 3 or 4 hinge attempts, one time using fabric, one time using that thick foil from my Trelegy packs. Coulda saved a lot of time if I just resigned myself to cutting the trans tunnel from the beginning. It's been a strange day. Thanks, Steve. ?
-
More crazy time ?....It looked easy. I figured I could do it. It ain't pretty but I got it. Tried some different things and this is where it ended up. Enjoy!
-
I can't forgive myself for passing up this kit when I found it at Michael's on clearance. It was a choice between this one and the AMT '70 Impala, both on clearance. I had already built the Merc once so I opted for the Chevy in the big flat box. Big mistake. ? That was the last time I have ever seen this kit on any store shelf. I still scout Ebay for one but it seems like a waste of time.


.jpg.d31d4e8f88887f25c0a57de8fbf7b66c.jpg)