customline
-
Posts
3,791 -
Joined
-
Last visited
Content Type
Profiles
Forums
Events
Gallery
Everything posted by customline
-
Thank you kindly, sir, I shall, and, so far, yes.
-
Those door cards look terrific, Moz. I reeeeeealy like the arm rest/door pull thing...another idea for me to steal ?
-
Happy to help. ?
-
Tan goes well with dark blue and a light gray might work also. Maybe a light blue. White is always an option.
-
Len, which variety of BMF did you use? The "Ultra Bright Chrome" or the "New Improved Chrome"? I think I used the "Aluminum" on the Edsel (by mistake; things are a bit mixed up here ?) and it buffs up looking like stainless, which is actually better for most trim anyway. I think if you use the "matte aluminum" and buff it, you will probably like it. Testor's enamel, unless it is hardened in the bottle, should be OK on the second coat.
-
Great chop, Greg! Great idea on the full "liner" too. Lots good stuff here. I'm in ?.
-
I think there's something wrong with that dark brown paint, Len. What is it? You might try a softer brush, though. The foil looks great, especially against the red.
-

‘55 El Camino
customline replied to NOBLNG's topic in WIP: Model Trucks: Pickups, Vans, SUVs, Light Commercial
Oh....yeah. they said to say hello. -
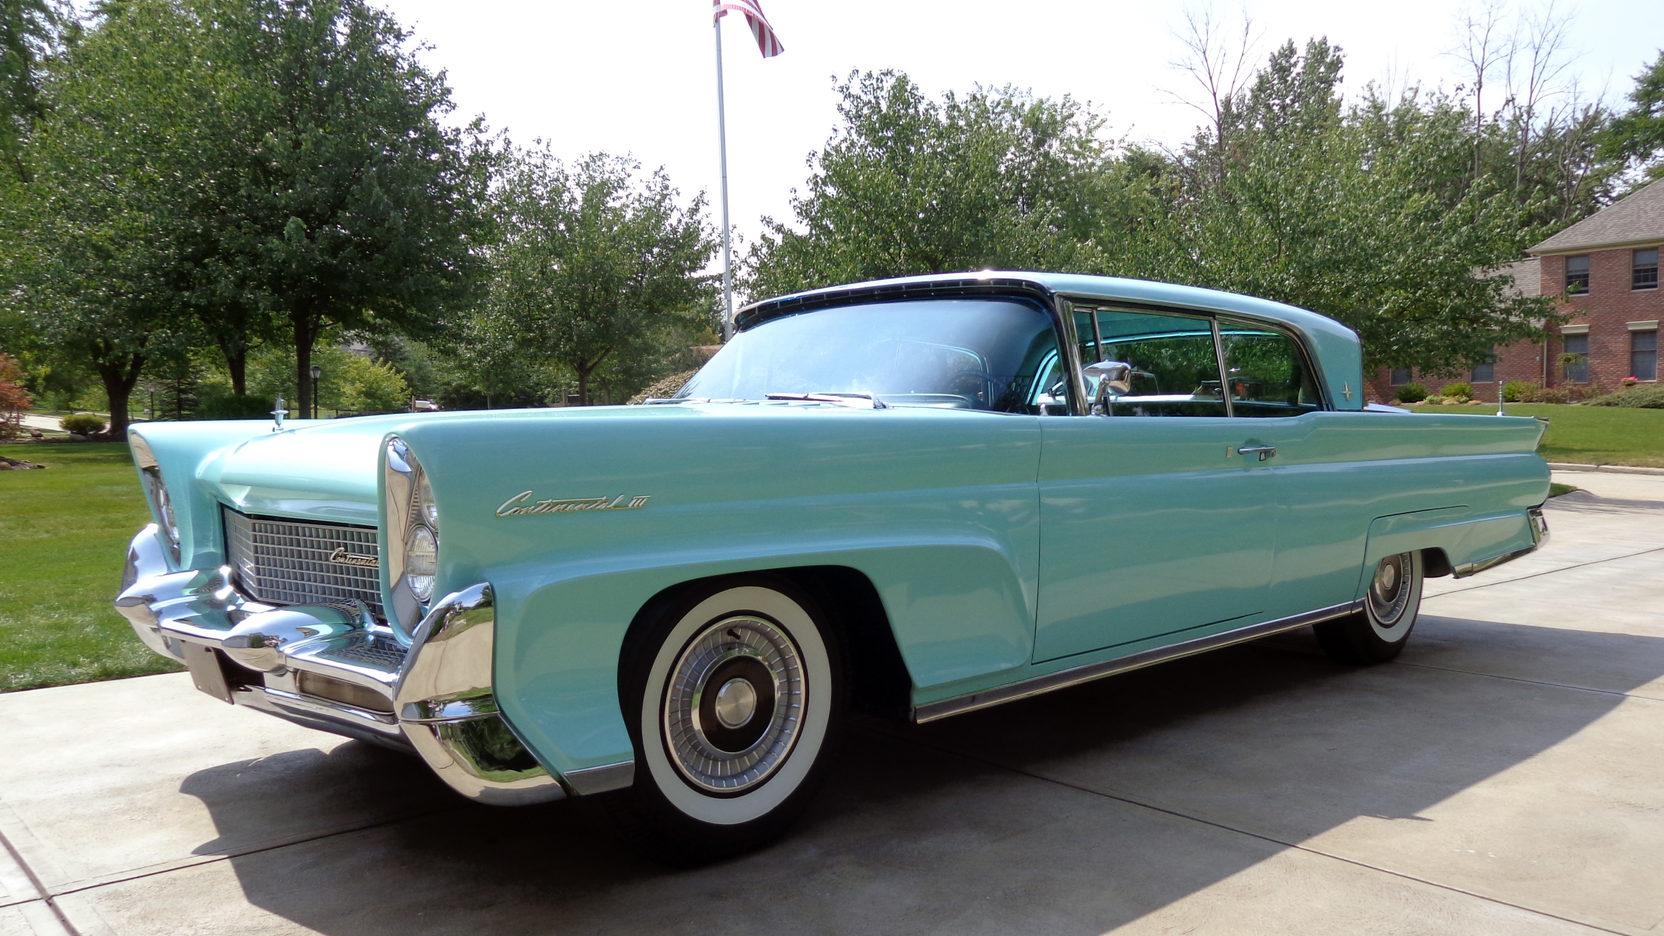
Monogram's 1955 Lincoln Futura Concept Car: WIP
customline replied to David G.'s topic in WIP: Model Cars
She does look happy. -
Monogram's 1955 Lincoln Futura Concept Car: WIP
customline replied to David G.'s topic in WIP: Model Cars
Well, okay then. ? ...but she looks drunk. -
Gee, Moz, this is the first time that I have heard anyone complain about the light white primer (maybe I missed it?). What did you experience with it? I know it's pretty thin and that can be a problem with some paint types, or applying the color too "wet" (I suspect). What headaches did you endure besides the color pulling away from edges?
-
Bob, those Blue Max wires make that old rocket motor pop. Interesting choice on chassis & suspension finish. Black can hide detail and this kit is fairly well detailed. Good idea!
-
Monogram's 1955 Lincoln Futura Concept Car: WIP
customline replied to David G.'s topic in WIP: Model Cars
We need a back-story for the occupants now, Dave. Are they married? Dating? Just friends or is she his secretary and they are, let's say, taking long lunches together? ? Edit: http://www.joesherlock.com/Futura.html <-some interesting info here...be sure to read the fine print at the bottom of the page. ? -
Monogram's 1955 Lincoln Futura Concept Car: WIP
customline replied to David G.'s topic in WIP: Model Cars
It's unfortunate those wild styling ideas simmer down on the way to production:
-
Monogram's 1955 Lincoln Futura Concept Car: WIP
customline replied to David G.'s topic in WIP: Model Cars
Yes indeed! She's a beauty, Dave. Congrats! -
1957 Ford Del Rio "Shooting Brake" Ranch Wagon
customline replied to LennyB's topic in WIP: Model Cars
Nipples??.... -
1957 Ford Del Rio "Shooting Brake" Ranch Wagon
customline replied to LennyB's topic in WIP: Model Cars
Nice work on the scoop, Len. When you're done with this one, have a look at this. ??
-
I'm serious ? <- my new favorite emoji ?
-
Let's get some primer on that hood, Bil. It would make it easier to visualize it
-
I refer to the instructions for advice ?. The instructions are simply a guide and not necessarily the best way to do anything, as we all know, but, when presented with a dilemma, the instructions can sometimes be helpful. The big "road-map" type of instructions can be and have been used for furniture protection but the one in question is not adequate for that role.
-
Happy paintday! Looks good! Have fun BMFing! Ooooo...that sounds dirty...?
-
Most of it did, Greg, but there are a few very small things that may only be a problem for me. I mentioned the radiator situation. The rear body panel probably needed to be attached during final assembly; I wanted it in place for paint. I had calculated the chassis install would be difficult and it was. That was my choice. Sometimes the instructions don't work. Ìt was an enjoyable kit with nice detail. IMHO, this is a good kit for an OOB build. It doesn't need any additional detailing, only painting what's there.
-
Yes! Great idea! ?
-
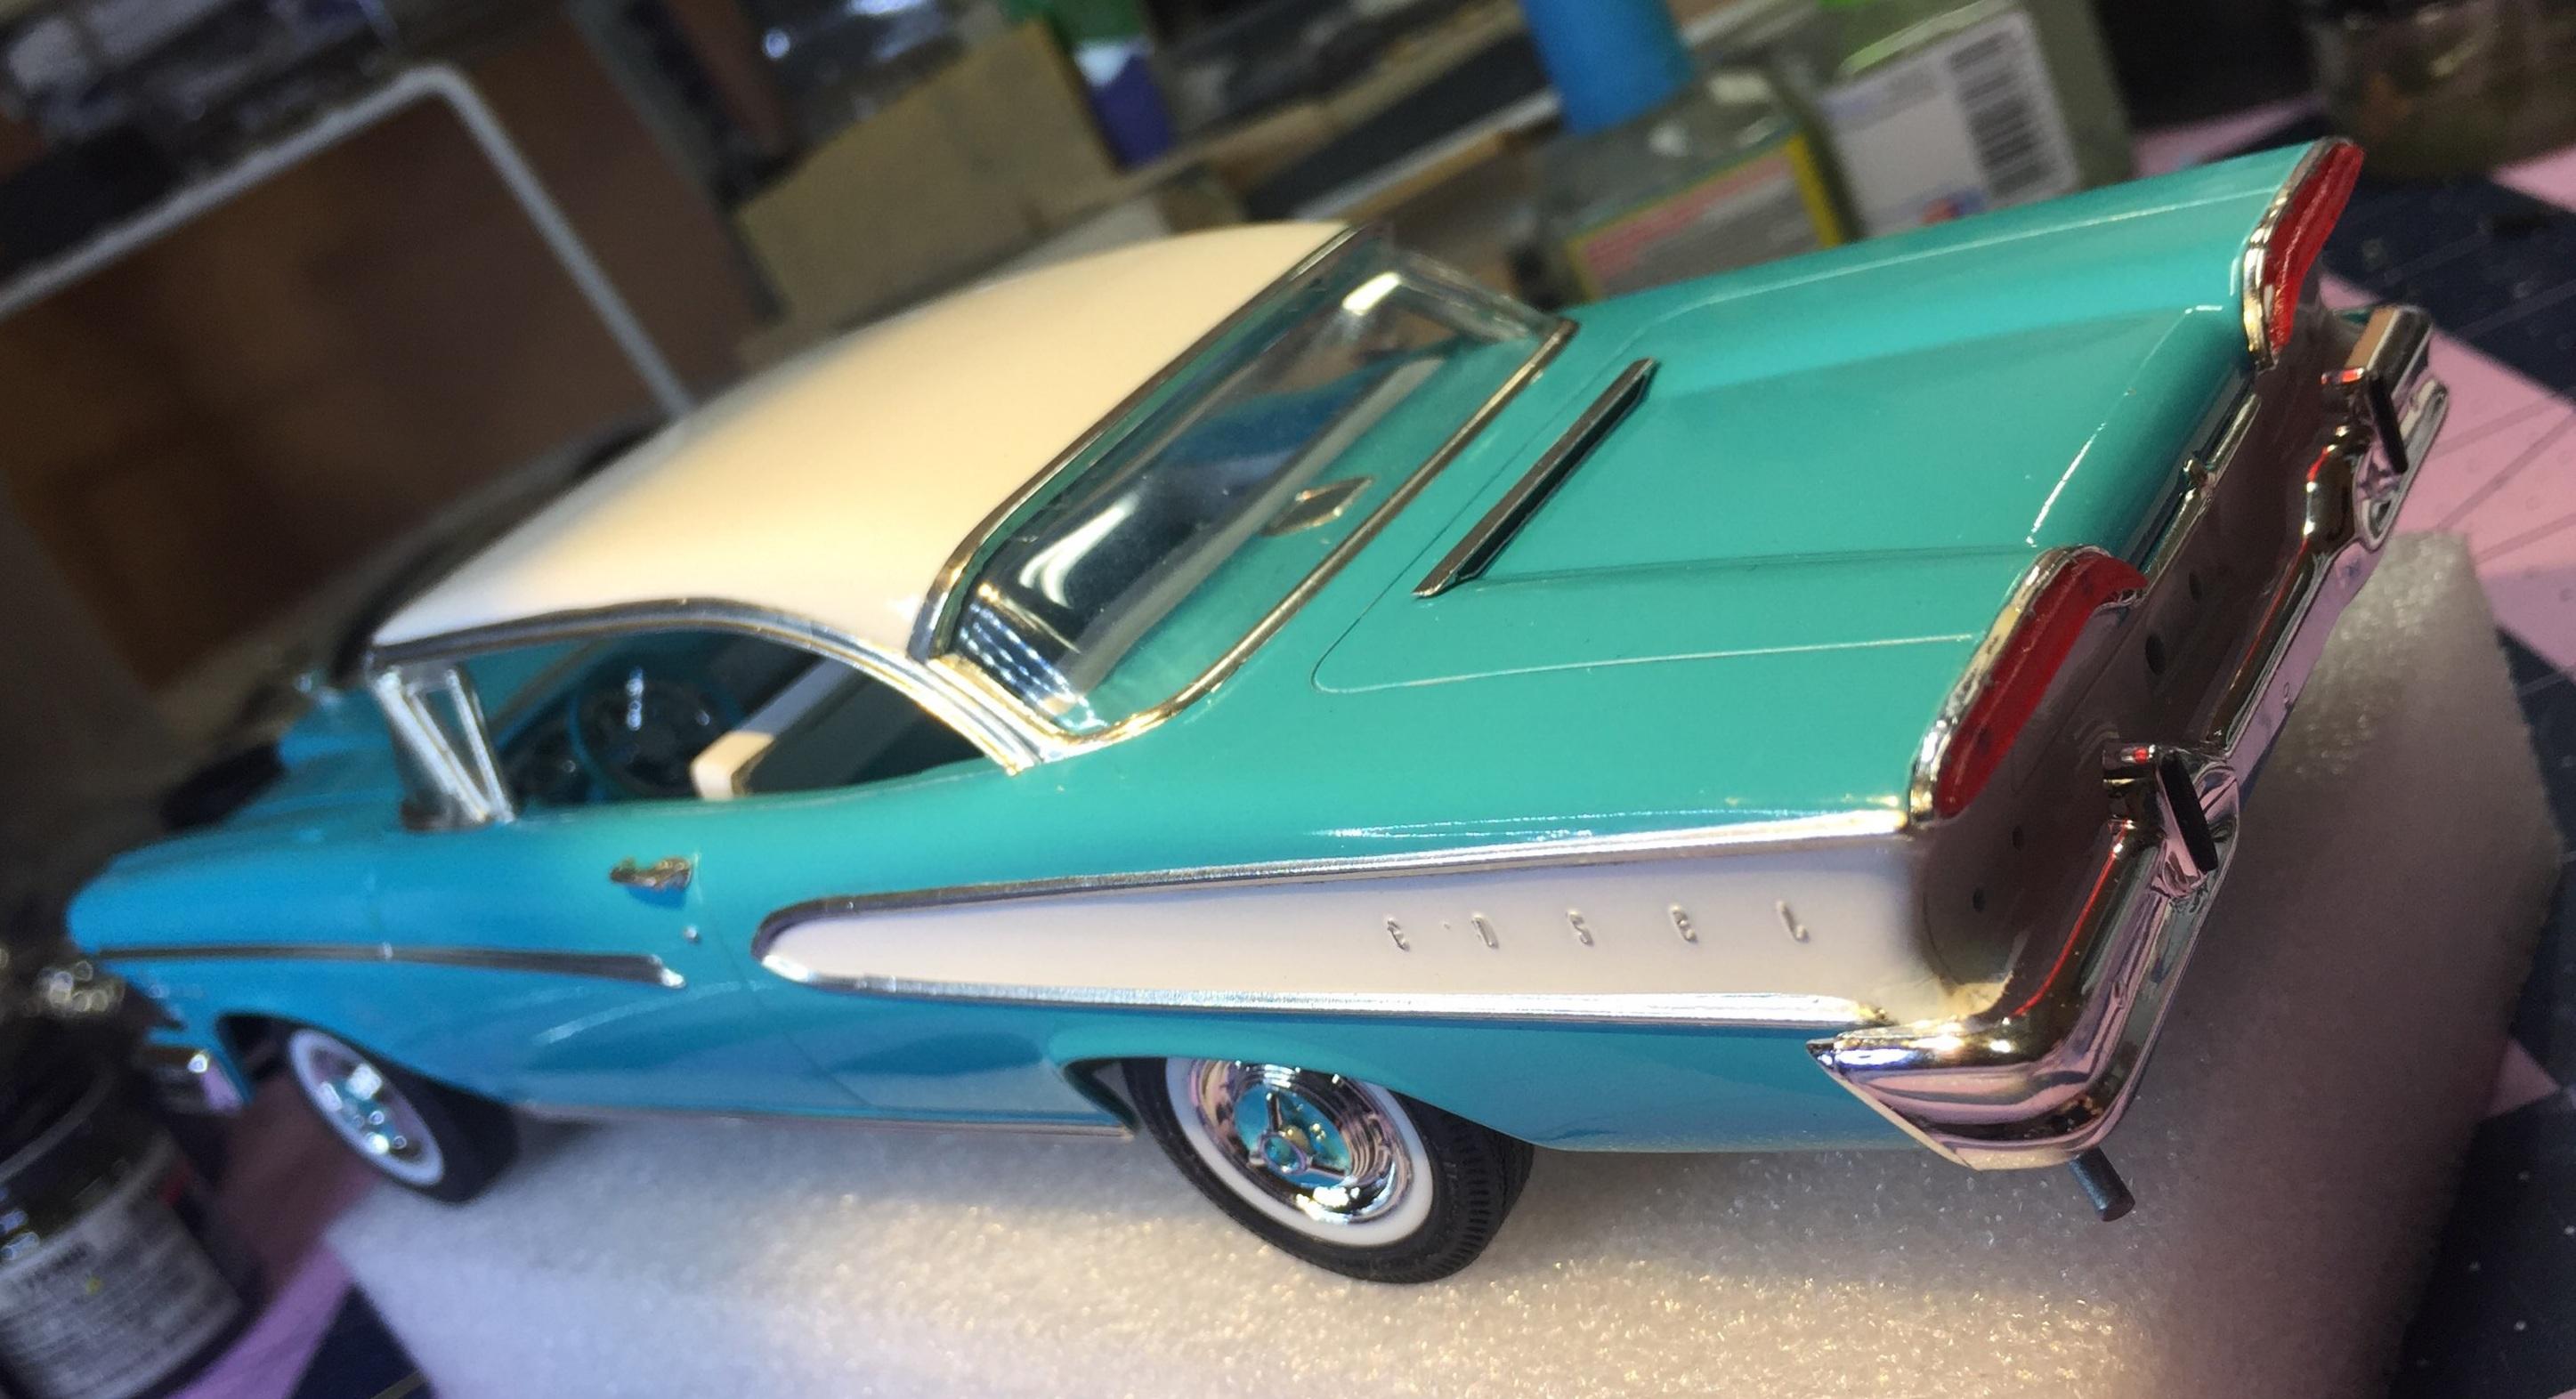
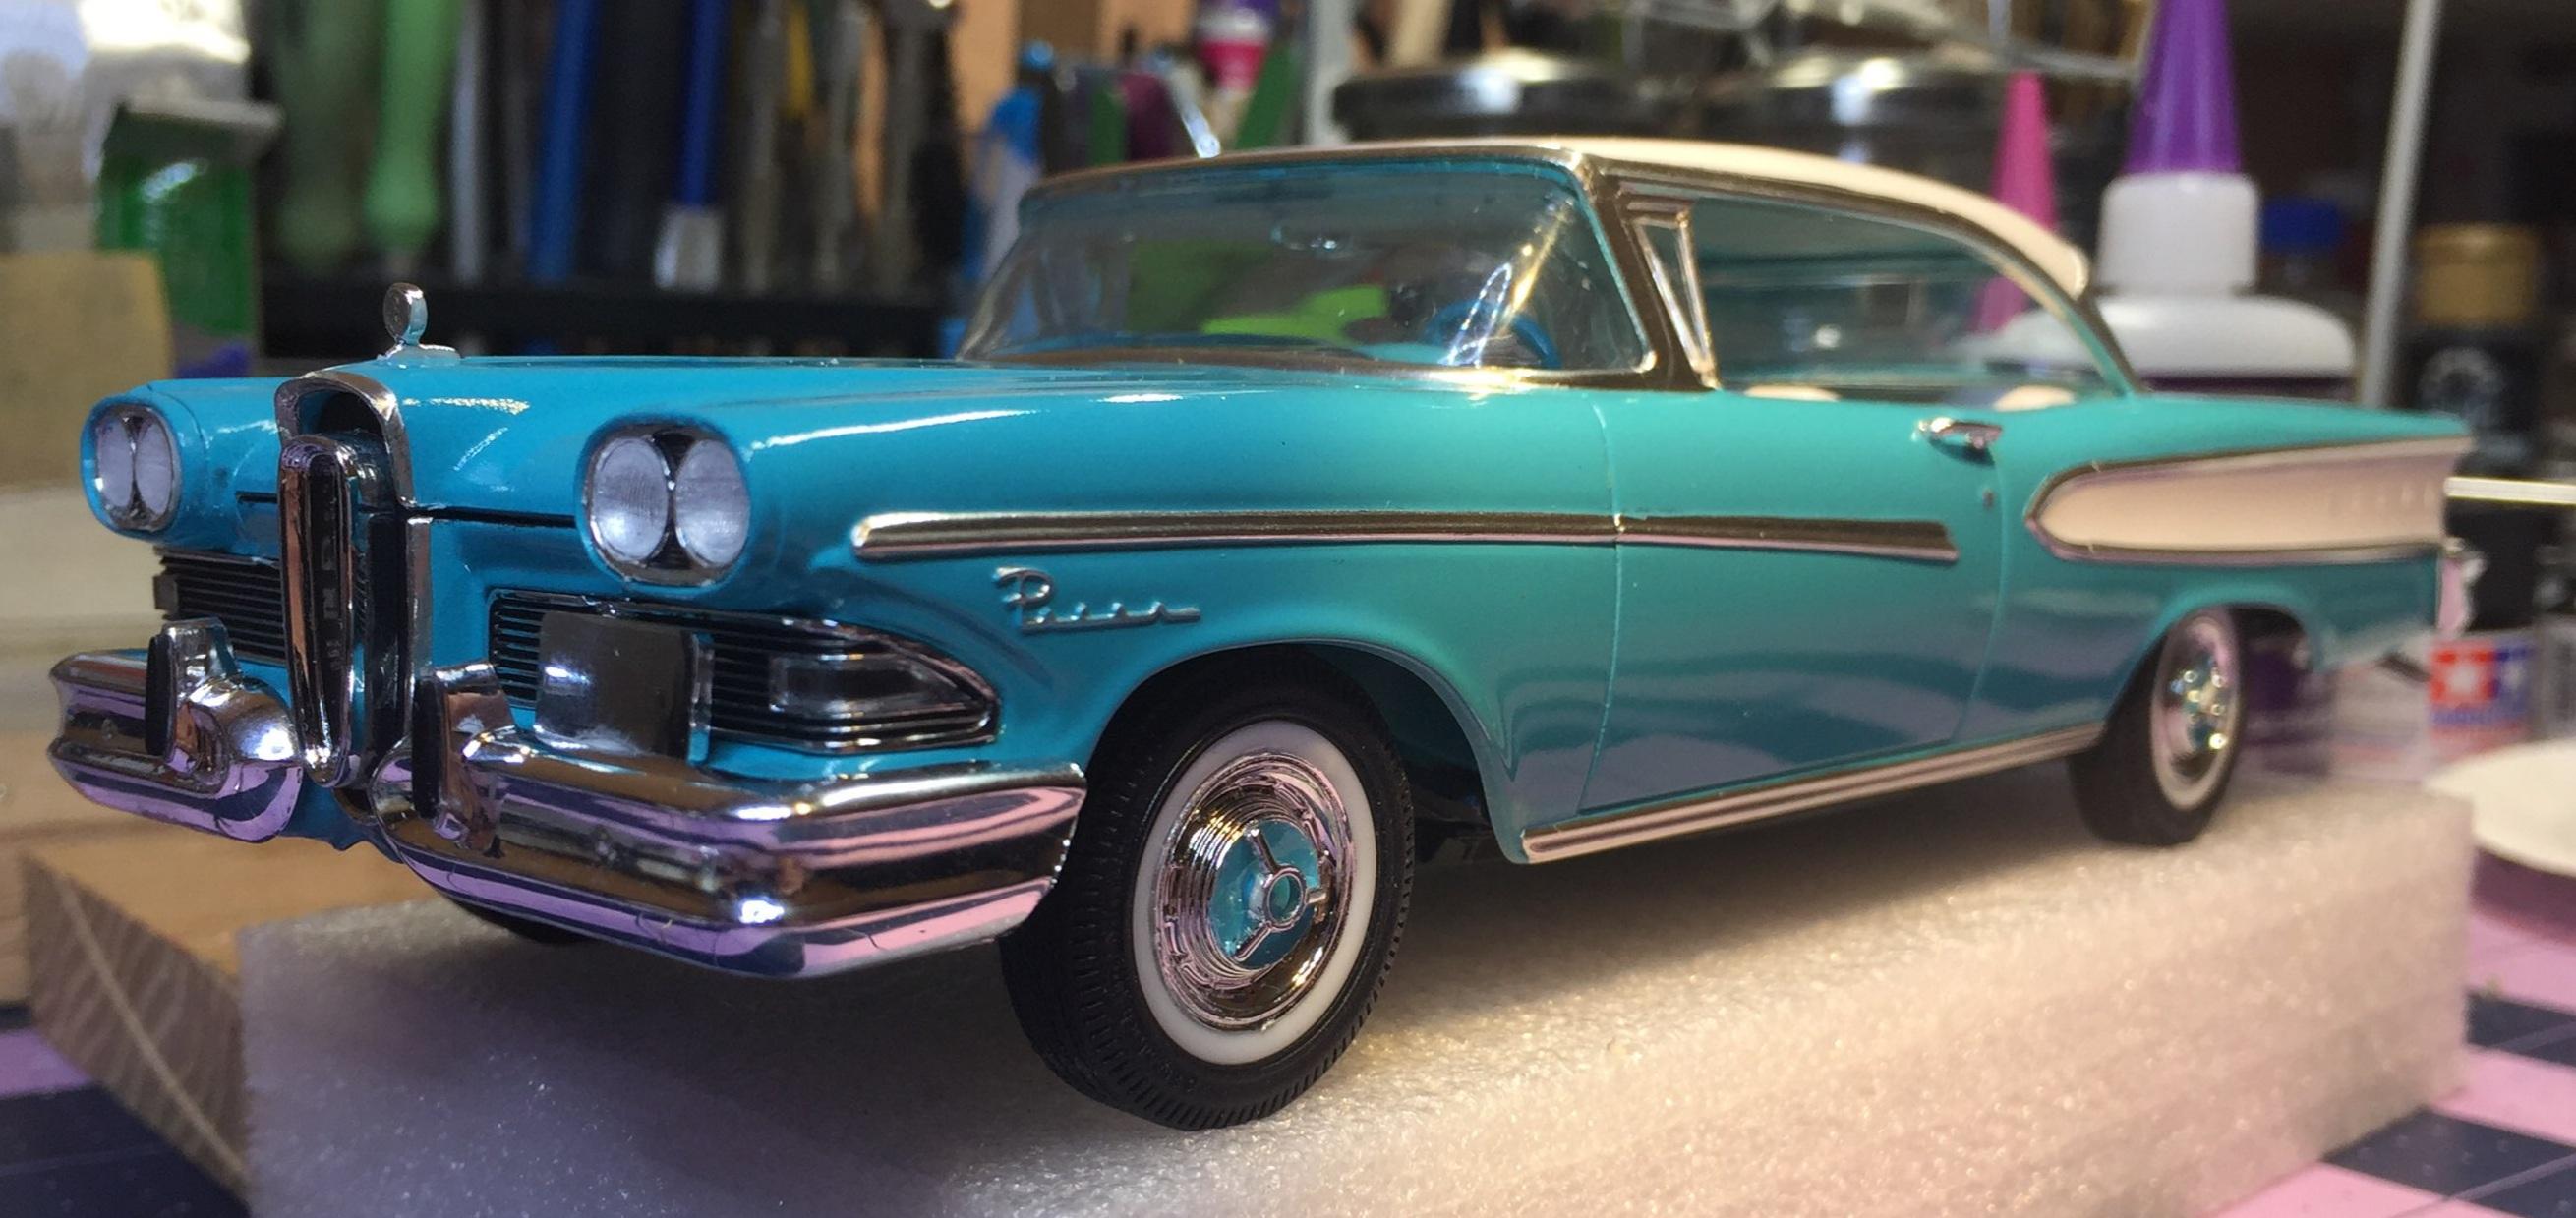
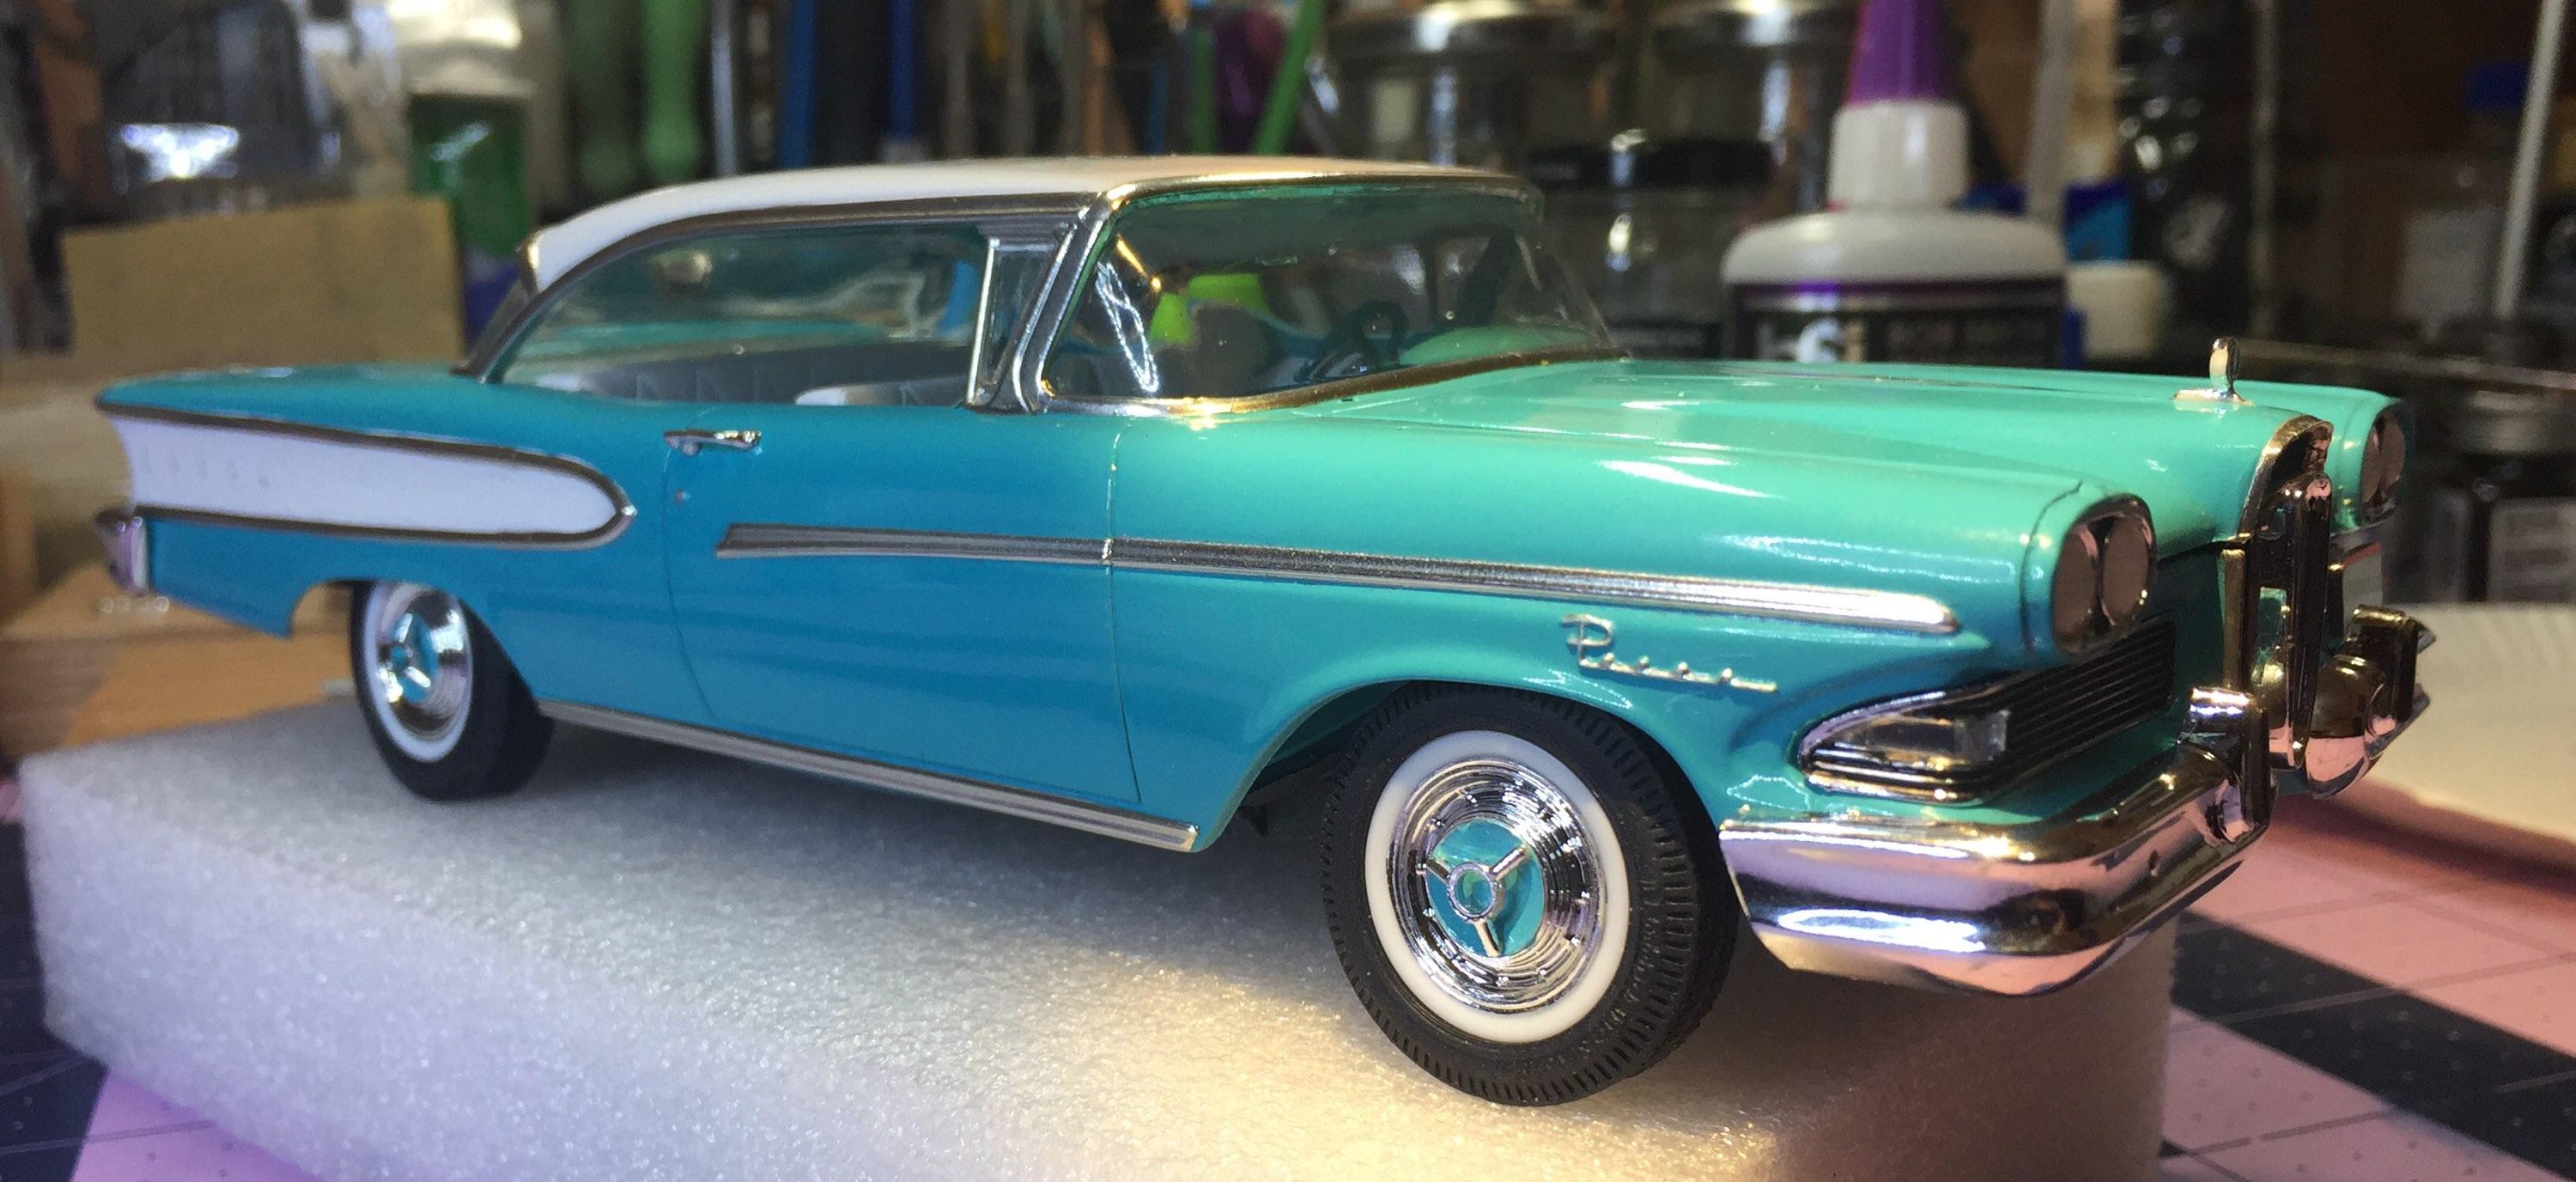
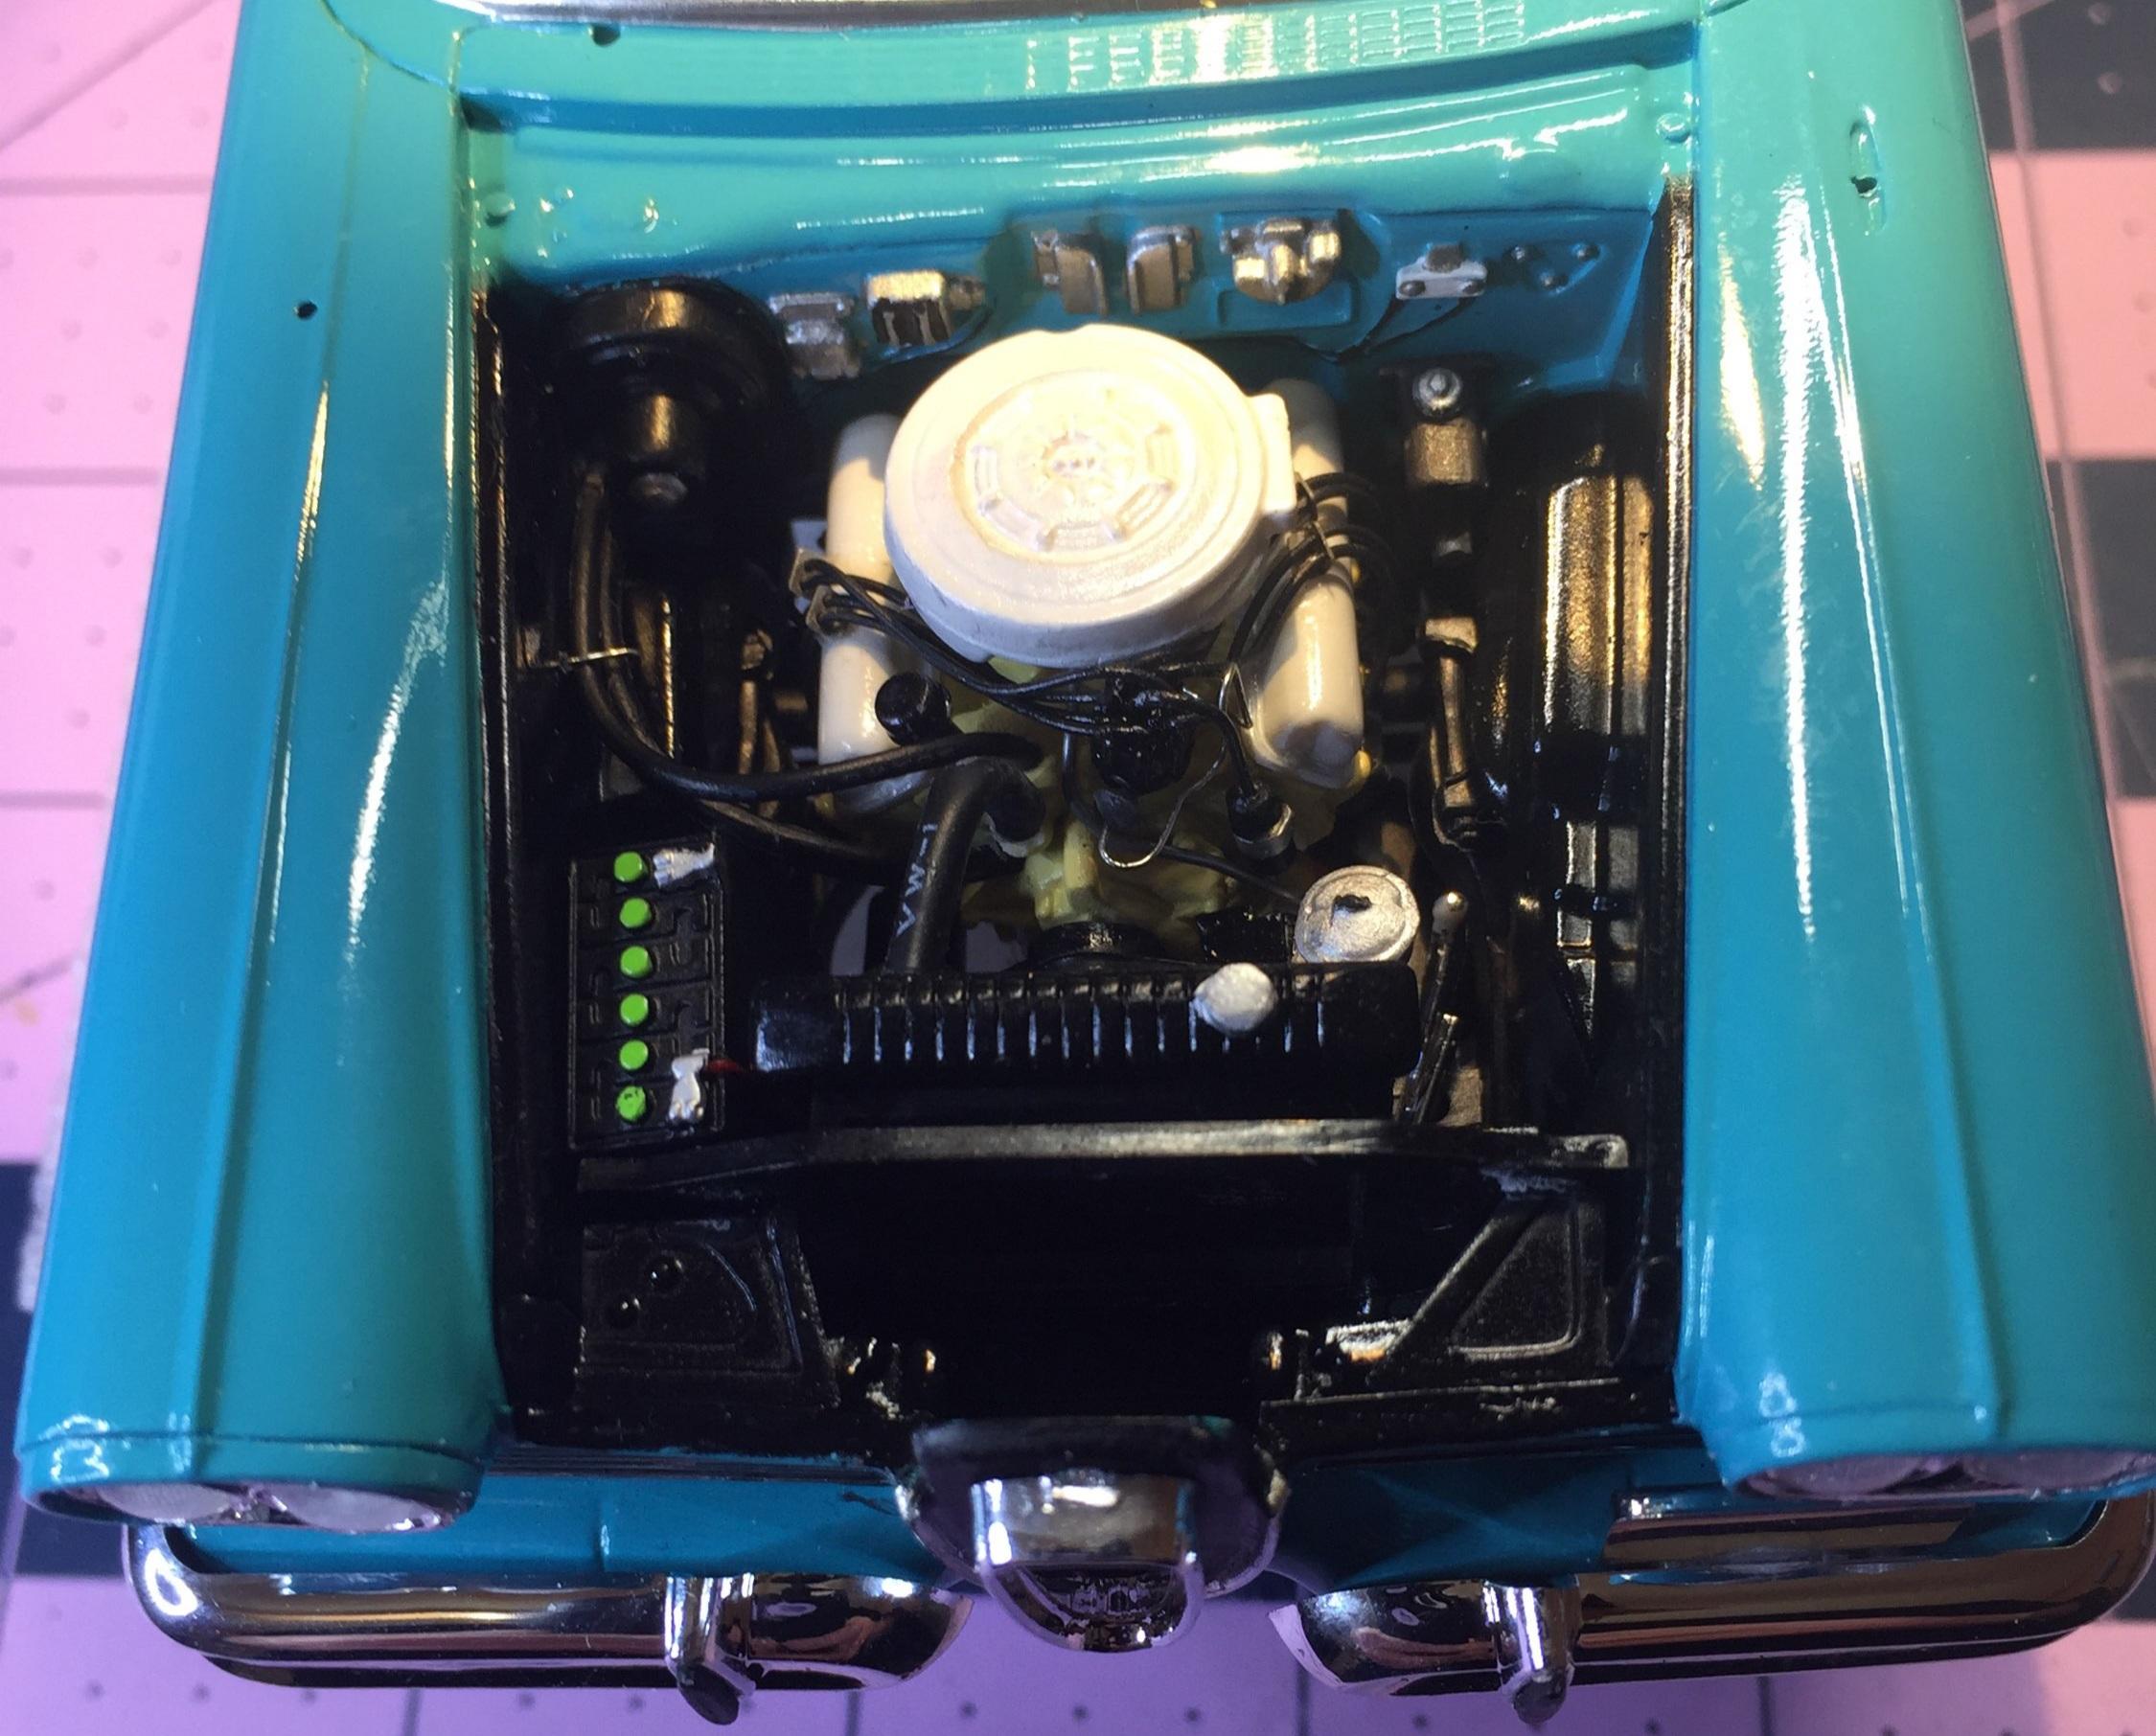
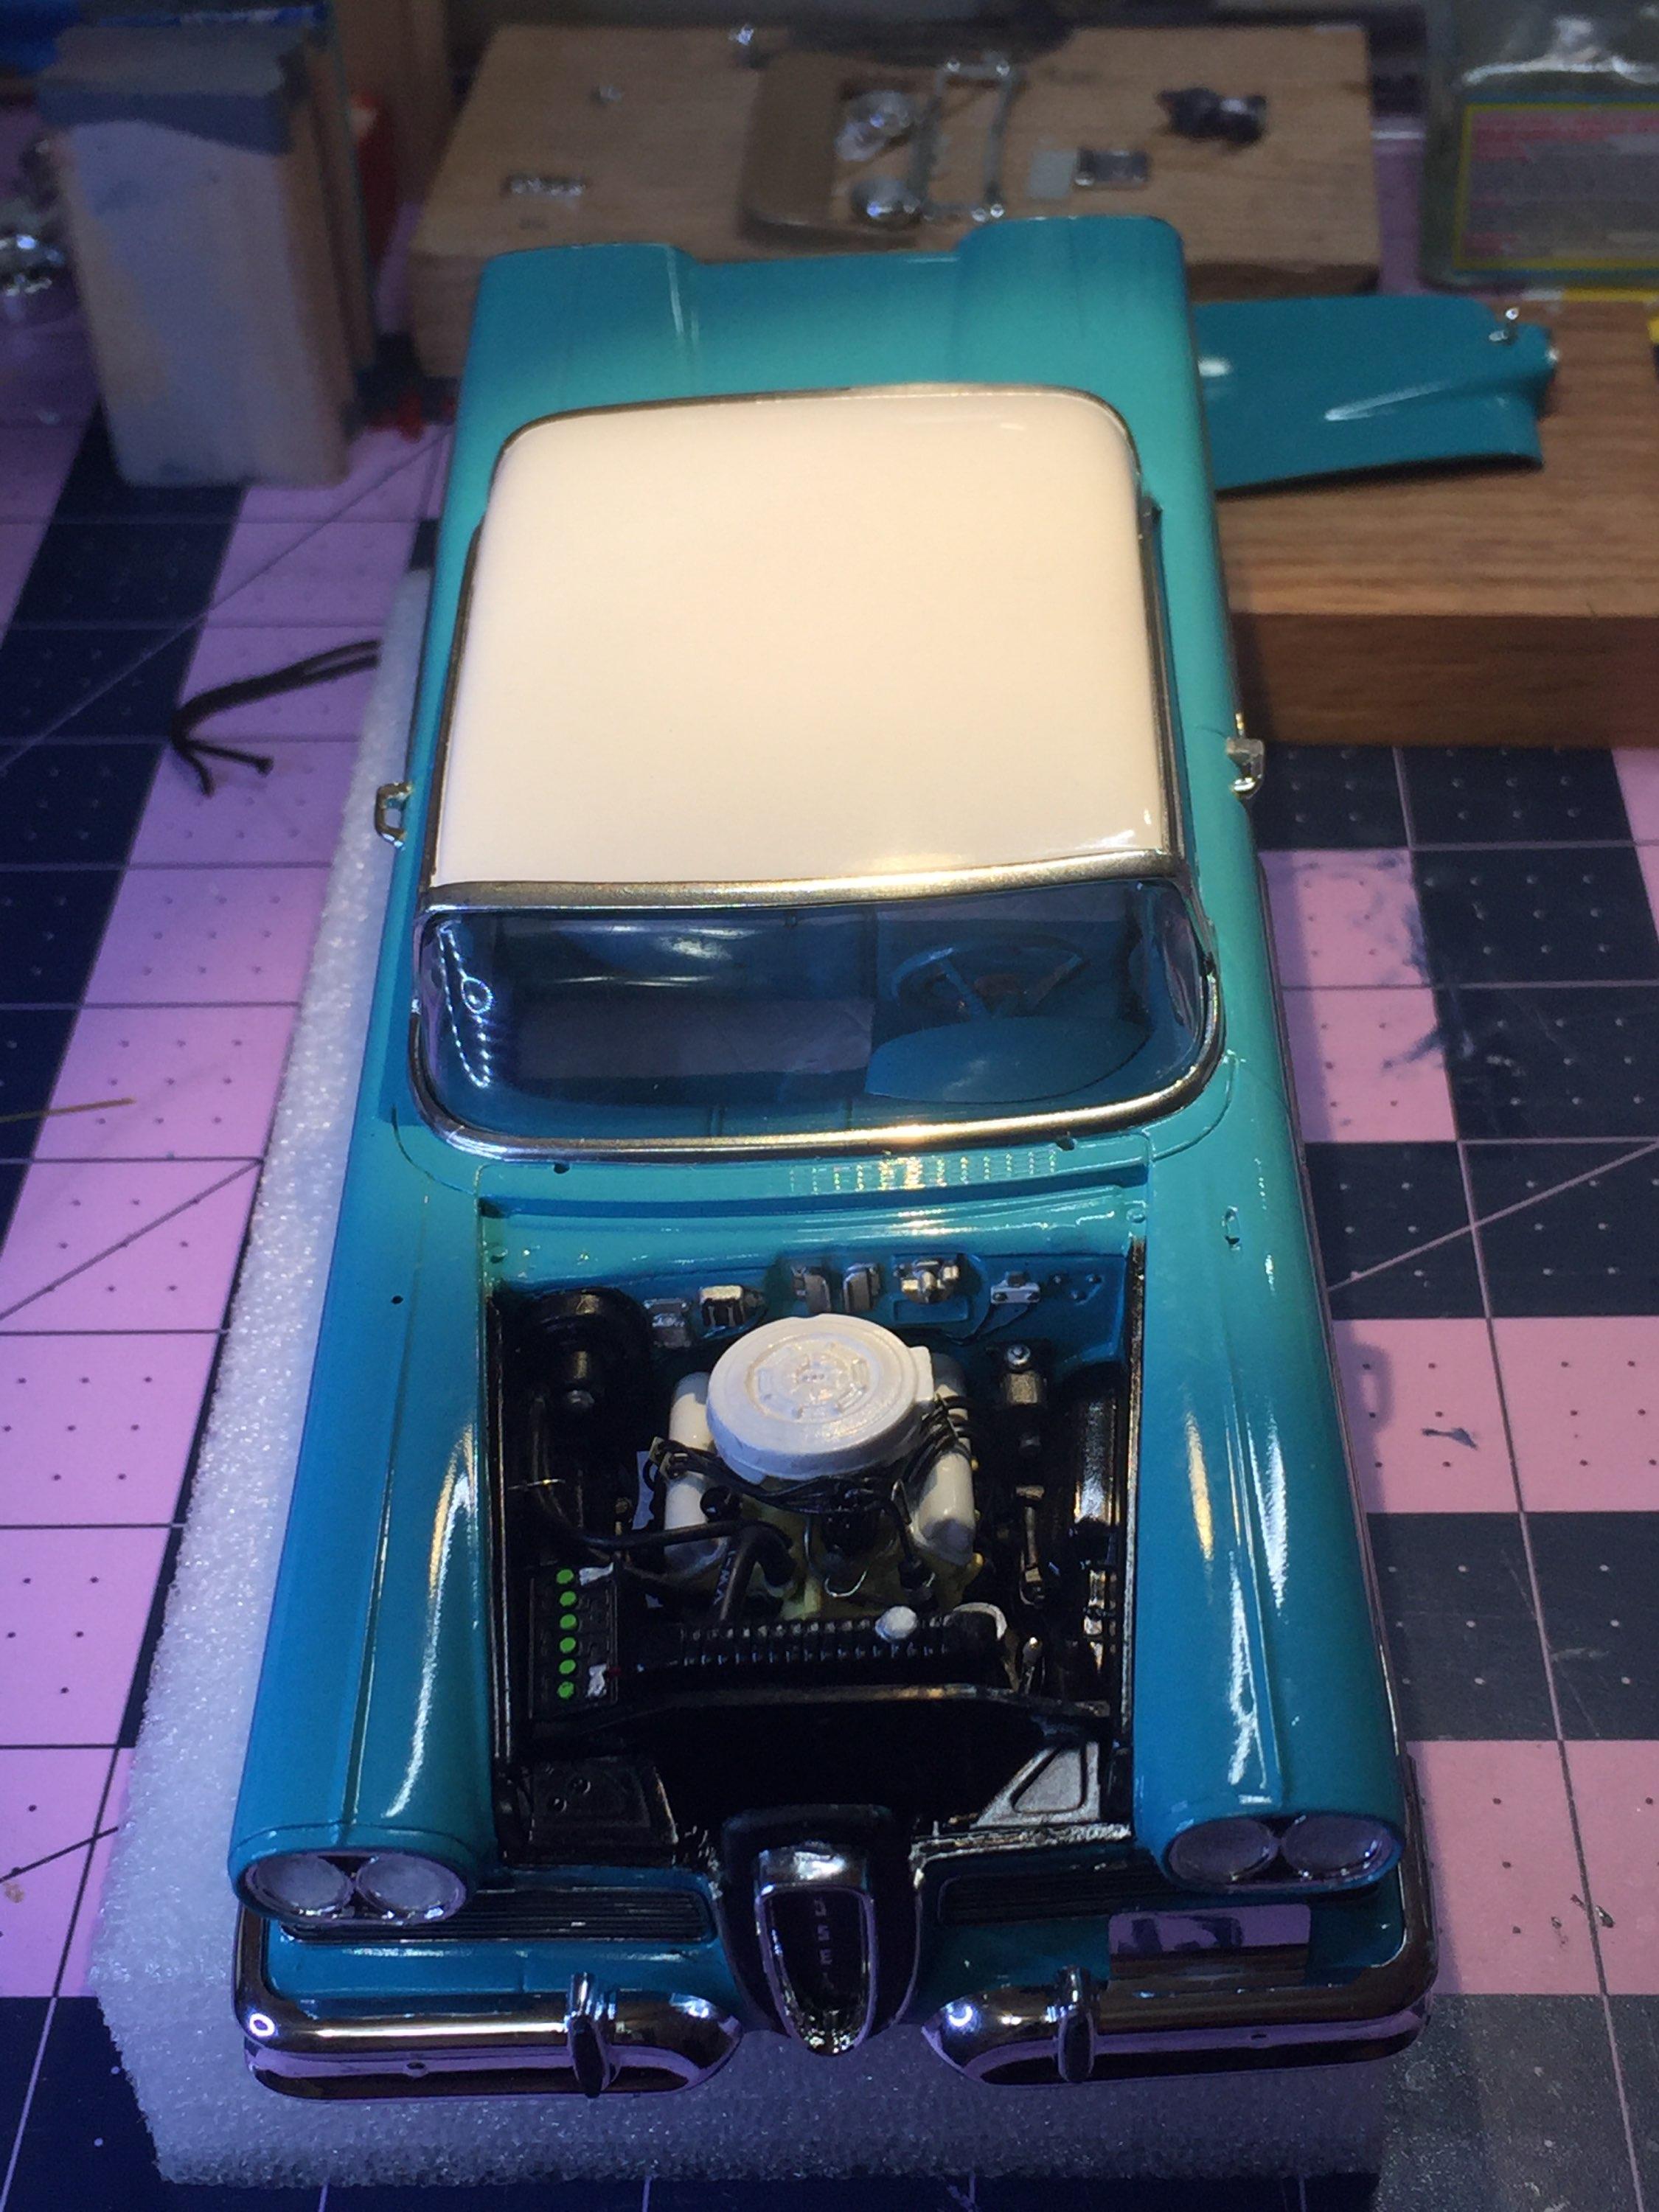
What's next is anything that needs paint until the weather becomes prohibitive. There's a '65 Impala ragtop that's been waiting for, I think, two years and a 300C that needs a second coat (never should have painted that one black.) Then there's a half-dozen that need batteries and radiator hoses. A few of them need final assembly. Loose ends everywhere ?. I dunno, Bil. The bench needs a good clean-up and re-organizing. Right now, though, I have a few images for your viewing pleasure ? it was time to put the Edsel together so with great difficulty I was able to get the body on the chassis. The instructions show the radiator assembly installation in a very ambiguous manner. I discovered that the radiator assembly must be inserted from the top after joining the body to the chassis. The bottom hose ? It gets in the way, of course. The top hose is a piece of wire insulation. There was a problem with the kit piece. The heater hoses were a bit tricky too. I had to replace one of them with wire also. All in a day's work. This kit is pretty good about details so I didn't bother with a few things like battery cables and just painted the ones that were molded in. Thanks for looking and don't hesitate to make your feelings known. There's still little stuff like back-up lights but this one is soon headed for the "shelf of mediocrity "
-
The kit had no interior? ?