Der Bugmeister
-
Posts
60 -
Joined
-
Last visited
Content Type
Profiles
Forums
Events
Gallery
Everything posted by Der Bugmeister
-

71 Olds 442 W30 (replica of my brother in law’s car)
Der Bugmeister replied to Steve H's topic in WIP: Model Cars
Absolutely stunning work, Steve! Looks good enough to jump in and start driving... -
The colour looks great, nice work so far! In the Oldsmobile world, those Magnum wheels would be SS1 (Super Sport 1) wheels. Correct for the car and definitely a sportier look ?
-
71 Olds 442 W30 (replica of my brother in law’s car)
Der Bugmeister replied to Steve H's topic in WIP: Model Cars
The more, the merrier ? I've been on the forum for years but haven't built anything since 2014ish...and I really need to change that. I ordered this kit from BC Shaver and after I picked up the one they ordered in for me, they called and said they had the one I ordered in the store now. Hmmm...ok, went down and bought the second one. I have a '71 Cutlass that I'll base one of them off, and an old Testers/Johan 1970 Cutlass to build like my '70. I restored the '57 Beetle in my avatar back in the 90's and may redo it at some point but for now I'm up to my armpits in the Cutlass. Your chassis is looking sharp. Did you consider adding the green band around the rear axle? That was a factory marking. -
71 Olds 442 W30 (replica of my brother in law’s car)
Der Bugmeister replied to Steve H's topic in WIP: Model Cars
Yep, I'm up in Duncan and doing a frame off restoration on a 1970 Cutlass right now. I'm enjoying seeing your photos of both the real deal and the great detail work you're doing on the kit. Details like the alternator bracket and master cylinder bale are outstanding! -
71 Olds 442 W30 (replica of my brother in law’s car)
Der Bugmeister replied to Steve H's topic in WIP: Model Cars
Beautiful work, I'm loving the detail you're putting into that engine! The 1:1 looks like a highly detailed restoration, I'm going to have to keep my eyes open for it this summer assuming he gets out in it once in a while! I've got two of these kits on the shelf waiting for me to find the time but I'm getting too up close and personal with the frame and underbody of my '70 Cutlass ? Looking forward to seeing more of your work on this build. -
Is this too many models
Der Bugmeister replied to gray07's topic in General Automotive Talk (Trucks and Cars)
My wife says I have too many models and too many 1:1 cars. I disagree. I don't have enough room, is the problem. -
70 Olds 442 W30 finished in the under glass section
Der Bugmeister replied to mangodart's topic in WIP: Model Cars
I think there's a '72 CS Convertible kit, essentially the same as a '71 except the grills and tail light dividers. -
70 Olds 442 W30 finished in the under glass section
Der Bugmeister replied to mangodart's topic in WIP: Model Cars
Correct. Front bumpers have round signal lights and the rear bumpers have horizontal tail lights. There's a conversion kit available that I need to locate and buy. The grills and gravel guard are also different for the 71, but I'm not sure if that's in the conversion. -
70 Olds 442 W30 finished in the under glass section
Der Bugmeister replied to mangodart's topic in WIP: Model Cars
Coming along very nicely! I've got the Testors release of this kit with similar plans to use parts from a '69 HO kit. Mine will replicate how I envision my '71 Cutlass S will look in a few years. -
1950 Oldsmobile Club Un-Couped (Revell)
Der Bugmeister replied to Der Bugmeister's topic in WIP: Model Cars
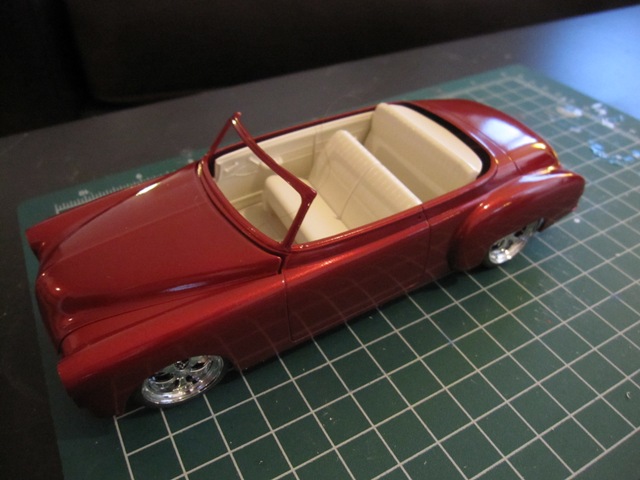
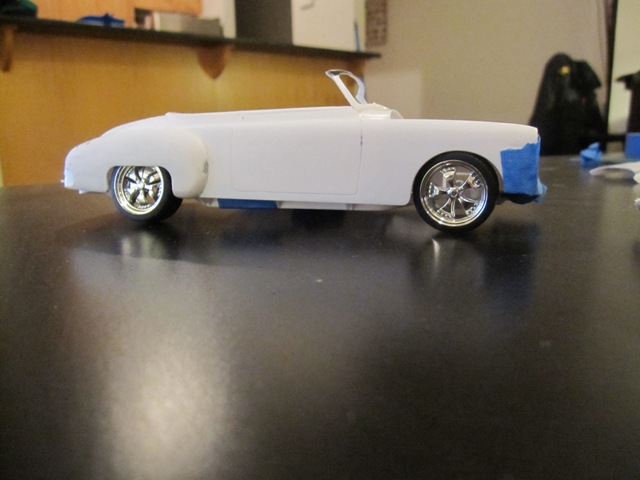
Painted and cleared, just a mockup here so don't let the wheel position throw you off. Debating whether to leave the seats their current colour or add some accent panels to them.
-
Moving along on the '50 Olds...
-
Fantastic work on those engines!
-
Great work! Love the detail.
-
1950 Oldsmobile Club Un-Couped (Revell)
Der Bugmeister replied to Der Bugmeister's topic in WIP: Model Cars
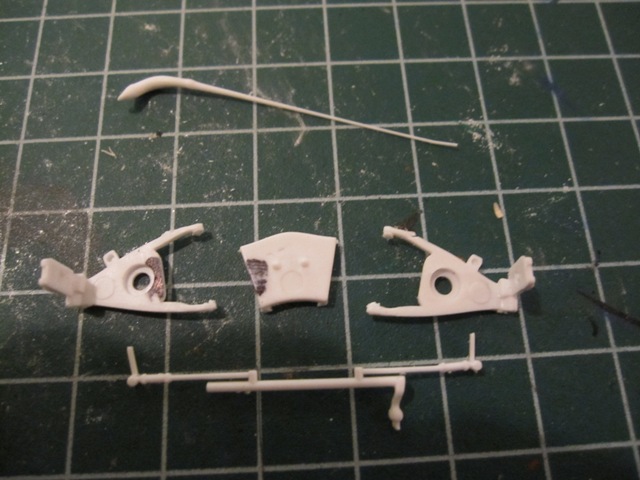
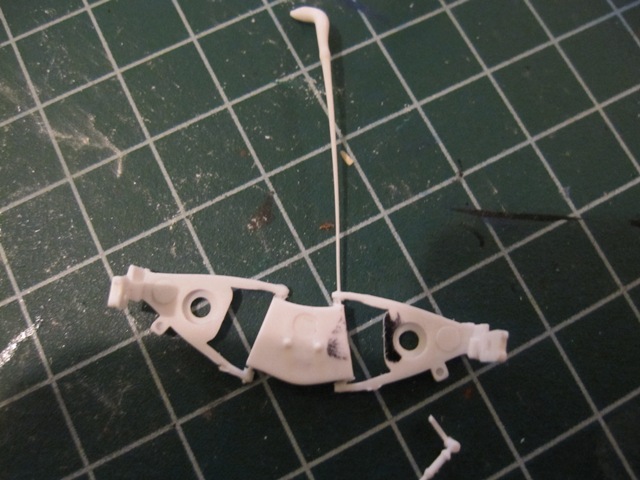
Unfortunately gluhead's photos seem to have disappeared into fotki space, but from his description it sounds like he probably did something like this (maybe more): Drilled the A arms for pinning with stretched strue, cut them loose then pinned them up. They won't move when I'm done the installation, but this will get me the stance I'm after. Probably old hat for many, but first time for me trying a lot of these techniques. So far, so good! Thanks for the tip on the AMT kit, horsepower. I don't have access to it unfortunately, but was planning on trying my hand at fabbing the open roof/cover. Most everything else should close up alright.
-
1950 Oldsmobile Club Un-Couped (Revell)
Der Bugmeister replied to Der Bugmeister's topic in WIP: Model Cars
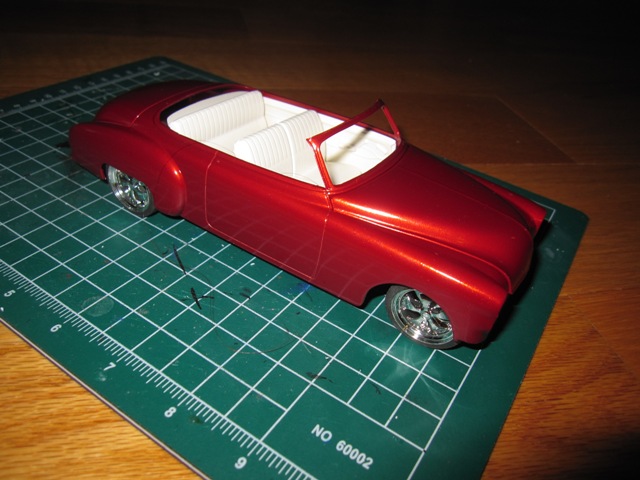
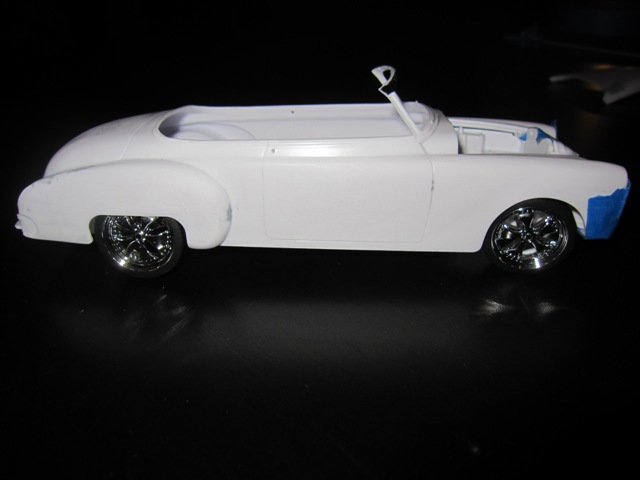
Thanks Pappy Found the rims for it, now to make things fit and resemble something that might work in 1:1. I don't think I'll be able to get it sitting as low as originally planned, but that's alright. Also picked up a Revell Pontiac 421 V8 in the hopes I can make that work in there.
-
What do you use when mocking up a bunch of parts to hold them all together? Apart from masking tape, anybody use a particular type of glue? And how to disassemble/remove the glue?
-
1950 Oldsmobile Club Un-Couped (Revell)
Der Bugmeister replied to Der Bugmeister's topic in WIP: Model Cars
Thanks for the link...unfortunately most of the images don't load for me for some reason :-( Narrative sounds like a heckuva build though. -
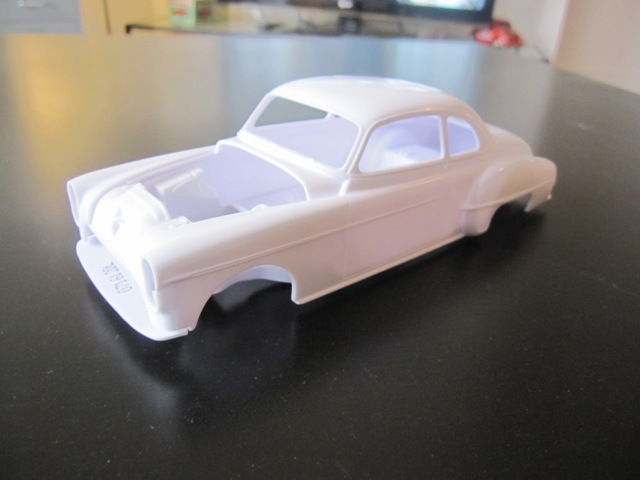
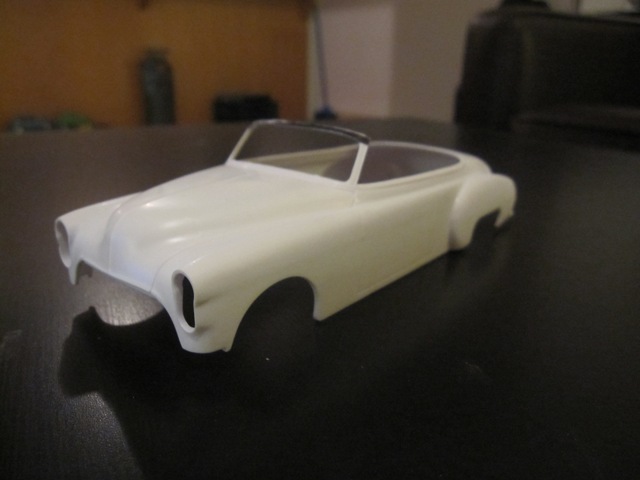
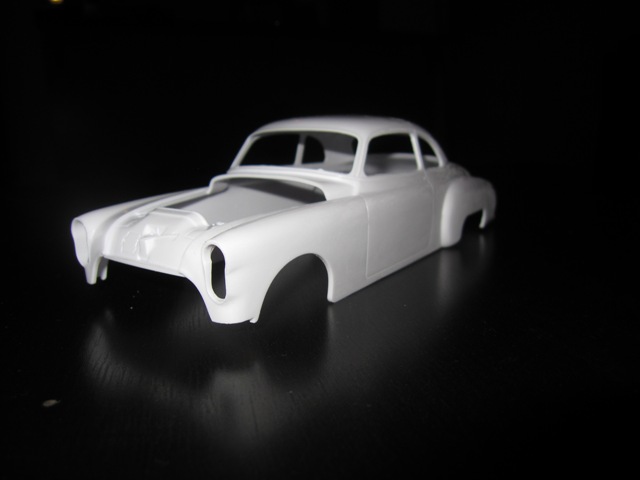
Kit is the Revell '50 Olds Club Coupe 2 in 1. Not my normal choice in builds, but this is a group build so kind of stuck with it. Decided to get a bit adventurous (for me at least), aiming for a smoothed convertible dropped to the weeds in this one. Spent today getting inspiration (found it), shaving the body trim... and losing the roof. Next up is to find the wheels then figure out how to drop the suspension and fit them in there.
-
Great job, strikingly clean and detailed for such a short time frame. I'm with the guys who couldn't pull of a build like that in 5 weeks, nevermind 5 hours...although I may have to try it one day just for the heck of it. Thanks for sharing!
-
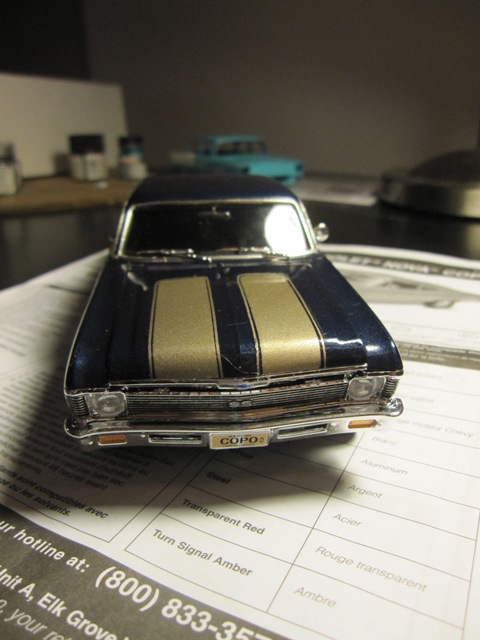
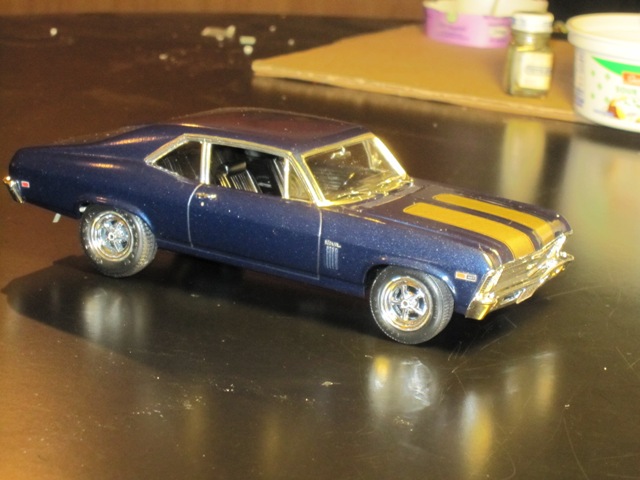
Thanks guys. No idea what the rims are from, I picked them up in a baggy at a recent show. The stripes are painted...quite a learning process doing them. They look better in the photos than under strong lighting and I probably should have stripped the hood and started them over after a couple of the issues I had, but I decided finishing a build was more important.
-
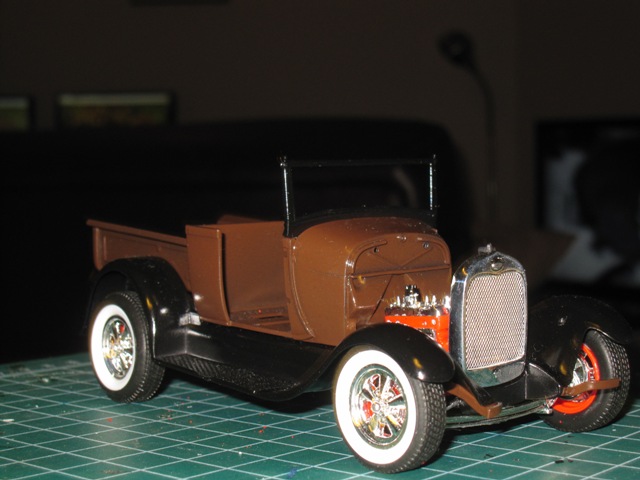
Took me long enough, but I finally finished another one. This was a nice kit to put together, clean molding and the parts fit well. Some minor modifications...found some rims and slightly larger tires, plug wires, lowered the front end a little. Now I can get back to the stalled builds before hitting something new.
-
69 VW Bug ... 66 to 69 Bug 8/24/17 Fotki update
Der Bugmeister replied to Foxer's topic in WIP: Model Cars
Nice work, a lot of differences between those two years! If it's not too late, you might want to look at the front bumper bracket openings - from '68 onwards, they bolted to the outside of the body and ran through the fenders as opposed to the apron. A couple other changes are that by '67 the voltage regulator had moved to a position under the back seat vice mounted to the generator, and the dashboard had lost the horizontal chrome strips. Great looking upgrades. Keep Buggin'! -
I've been reading a lot of threads here and elsewhere discussing homemade spray booth solutions. A common comment in the vast majority of these threads is the warning that using the wrong kind of fan is dangerous due to explosive hazard. Ok, I get that there IS a hazard. But then, there's hazard in most everything we do. So my question is, has anybody personally experienced an explosion/flashback scenario while using something like a bathroom fan in a home made spray booth? Or is there reliable documentary evidence of this happening? By the way, it's not my intentional to be confrontational in asking this question. I have seen the risk expressed many times, but I don't recall anyone relating personal anecdotes substantiating the concerns so I start wondering if it is a myth repeated so often as to be assumed true or is based on substantive personal experience. Thanks
-
What's the story behind your user name/avatar?
Der Bugmeister replied to JollySipper's topic in The Off-Topic Lounge
I've been using "Der Bugmeister" since the mid-90s and my first forays into the great wide web. It refers to my 1:1 passion (I have 4 original Beetles in the current stable). Avatar is a photo of my '57. -
Slowly but surely...this is pretty close to the final stance. I found some mesh that looked how I wanted for the grill. At this rate, should be done about March!