Search the Community
Showing results for tags 'Revell'.
-
 78’ GMC Big Game Country Pick up, will keep you guys posted after it is done.
-
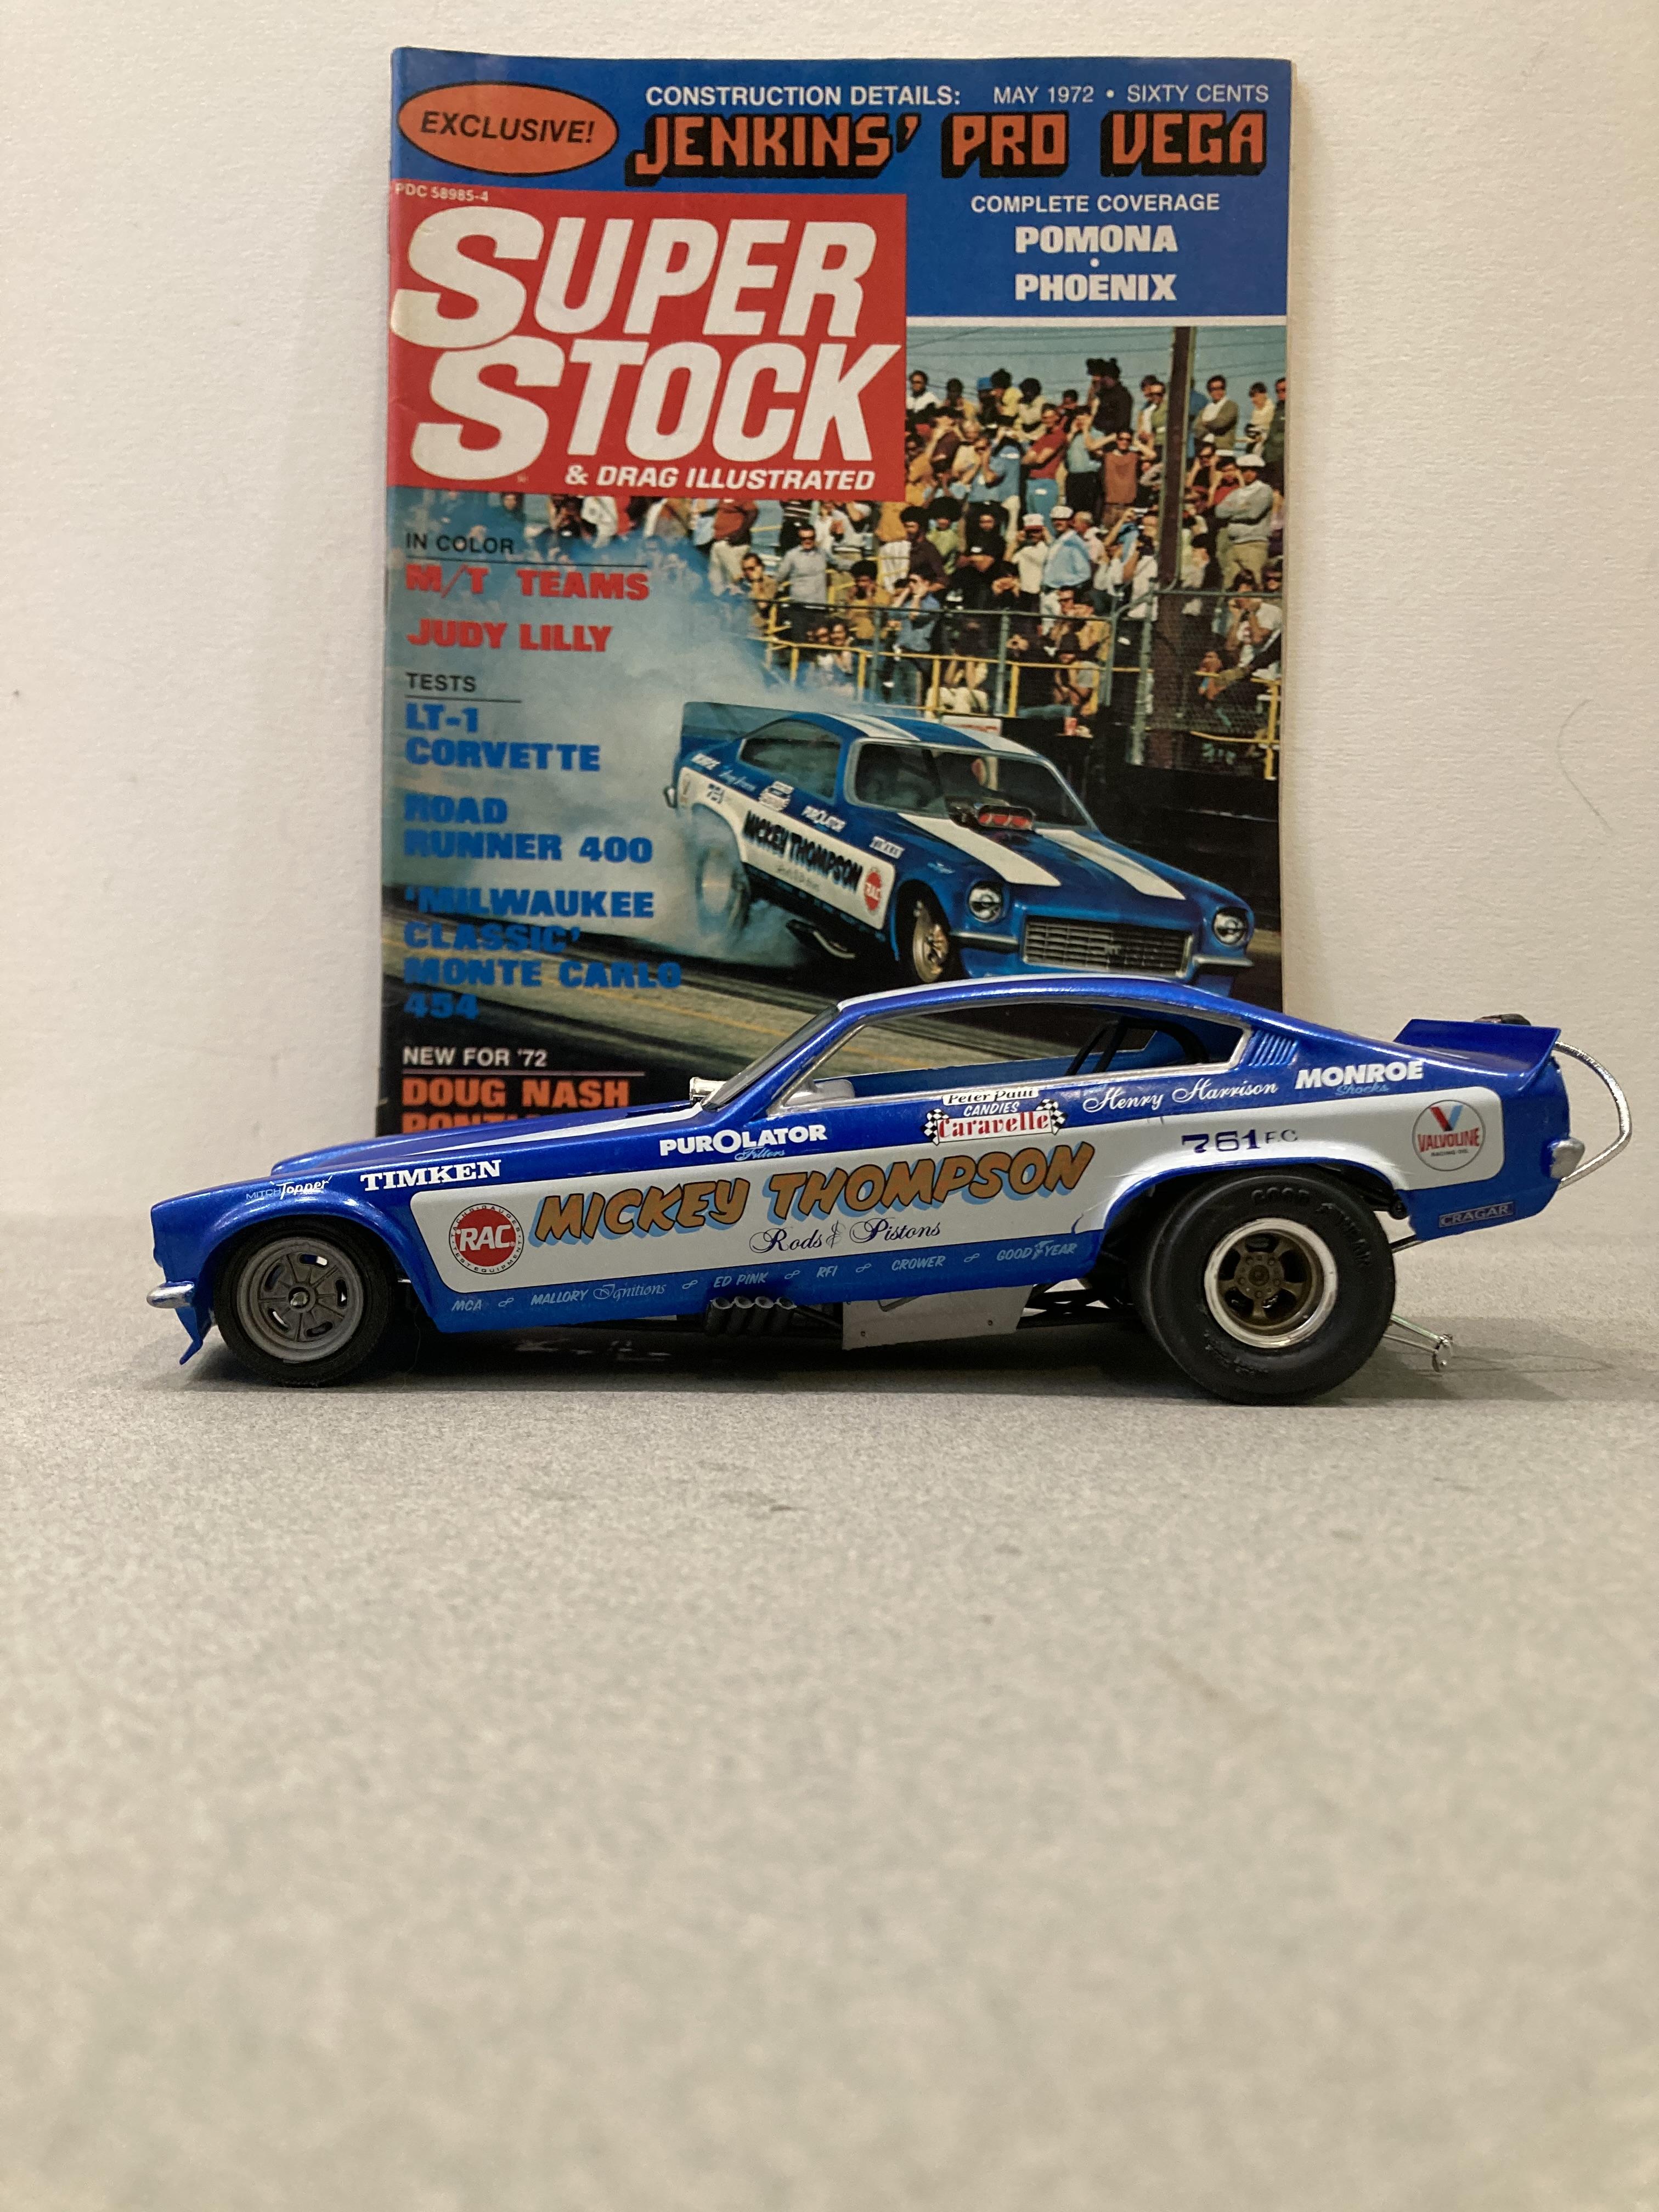
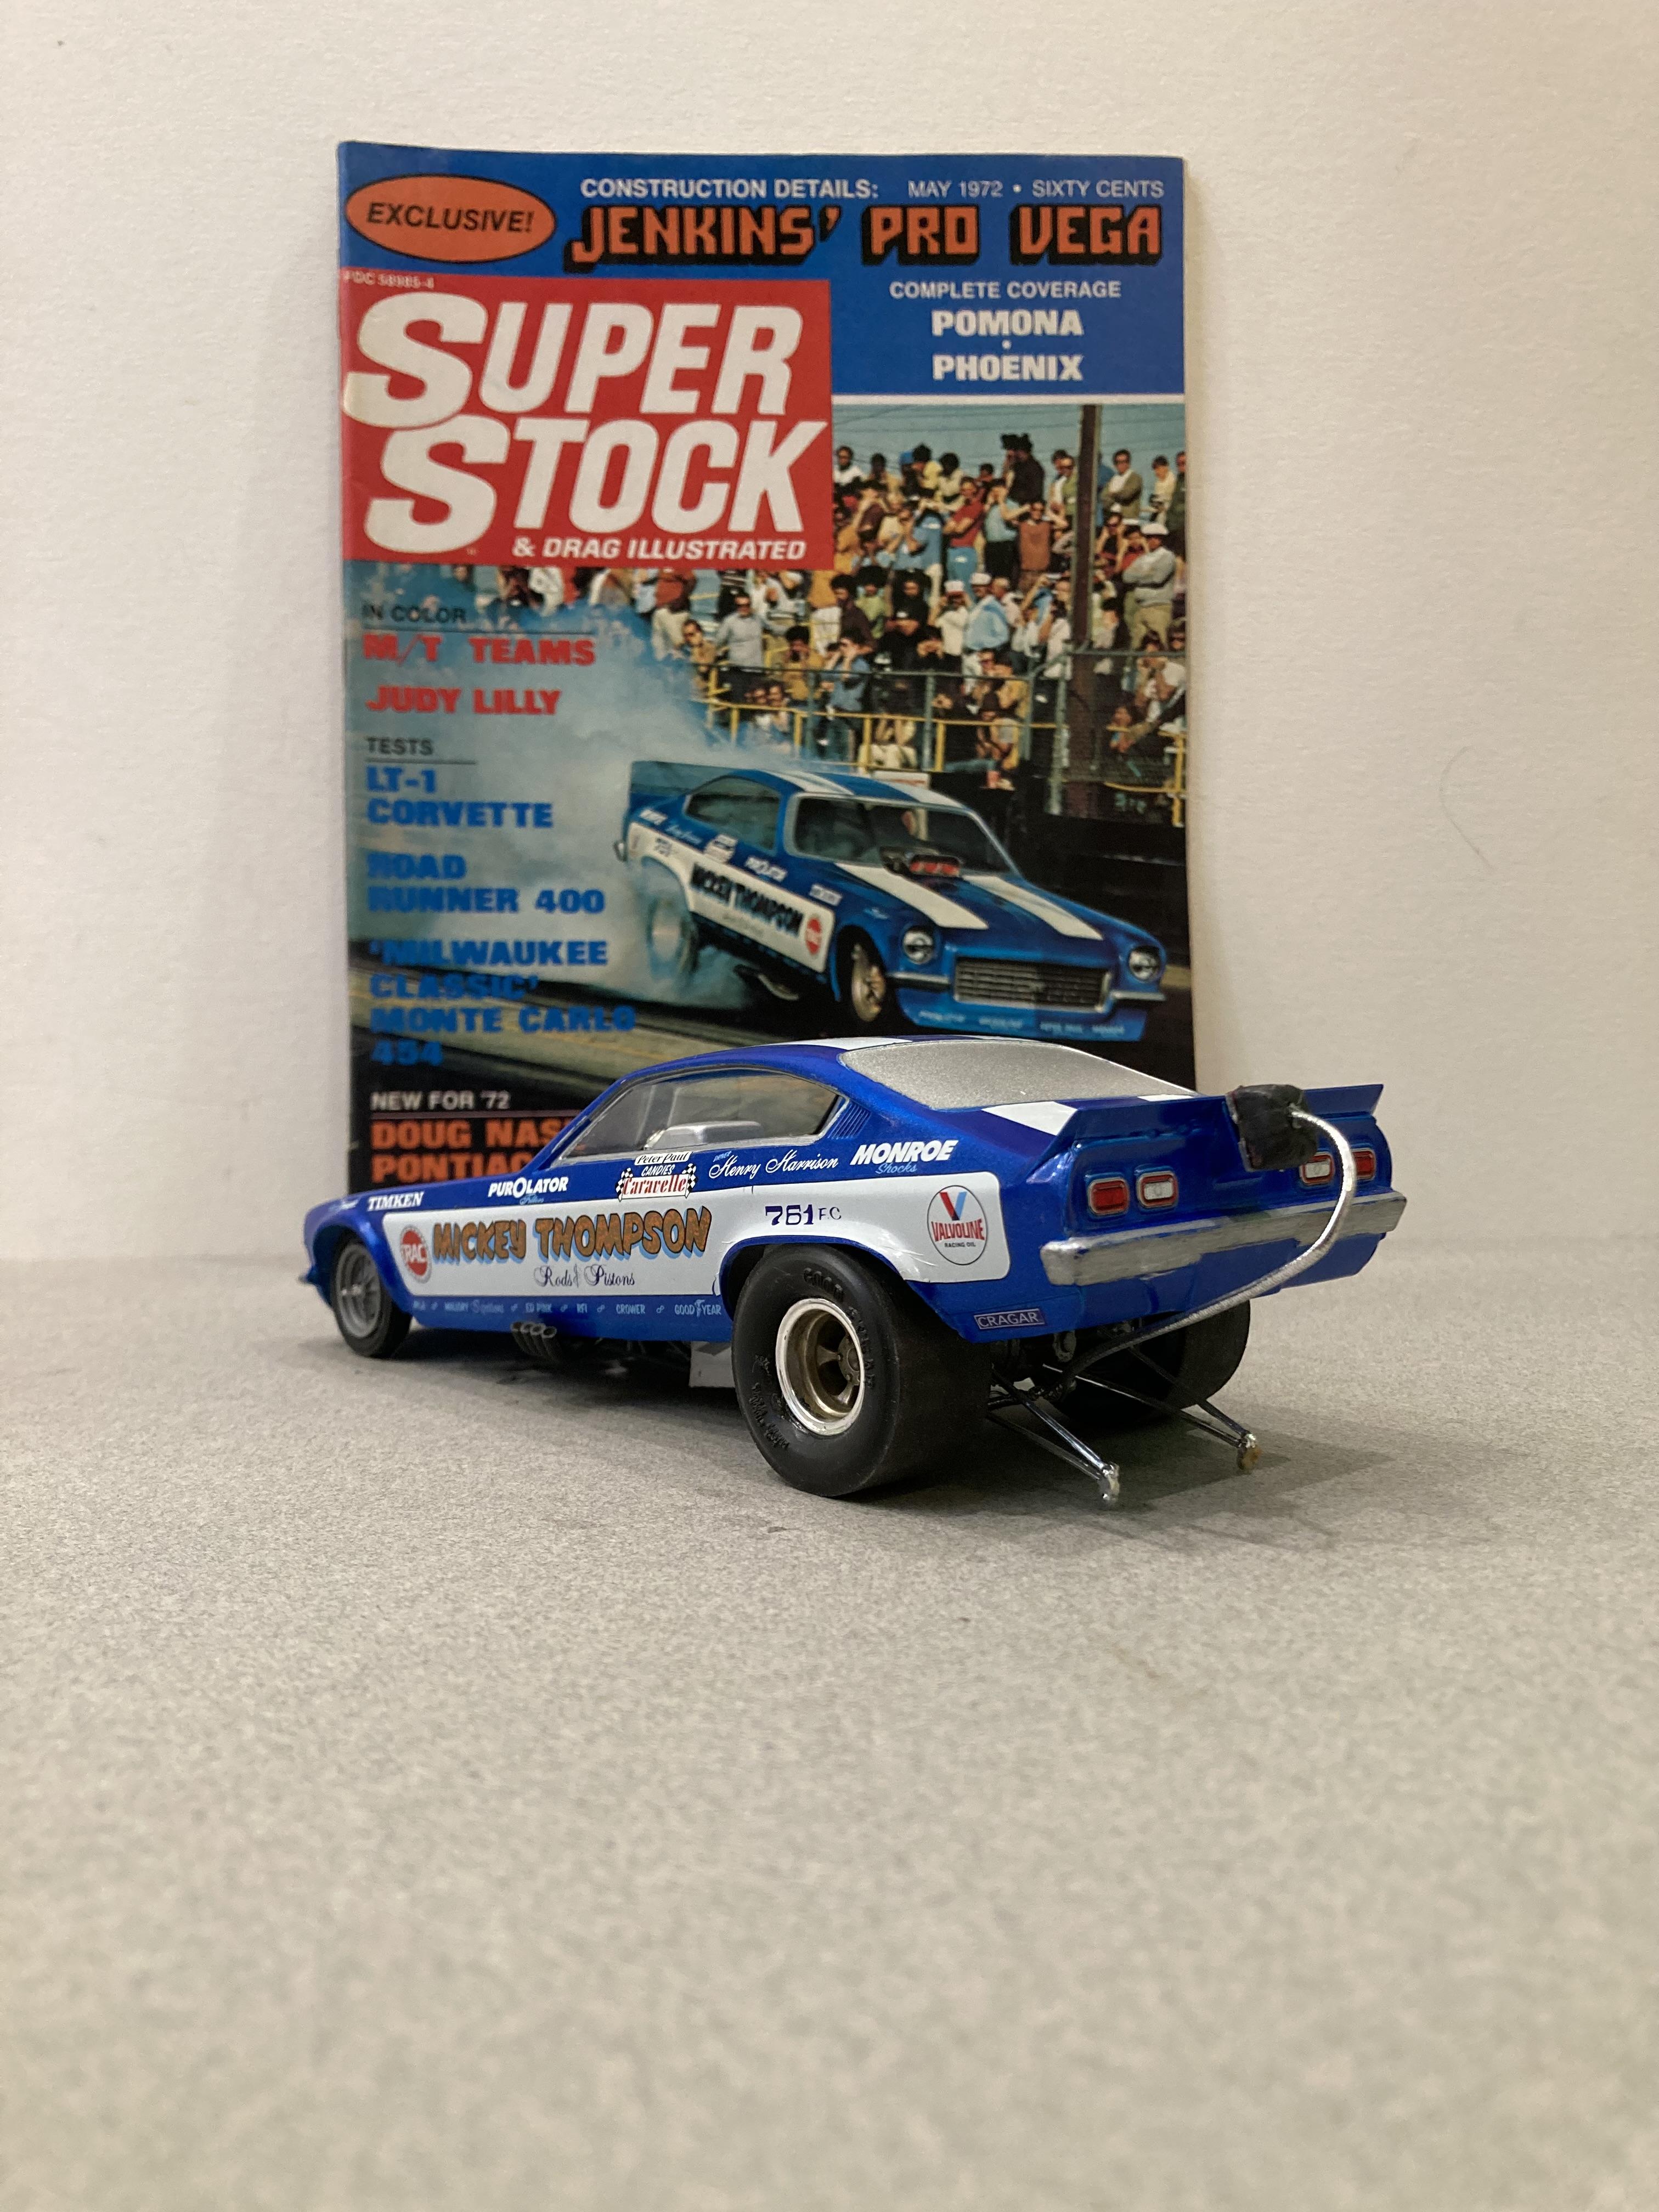
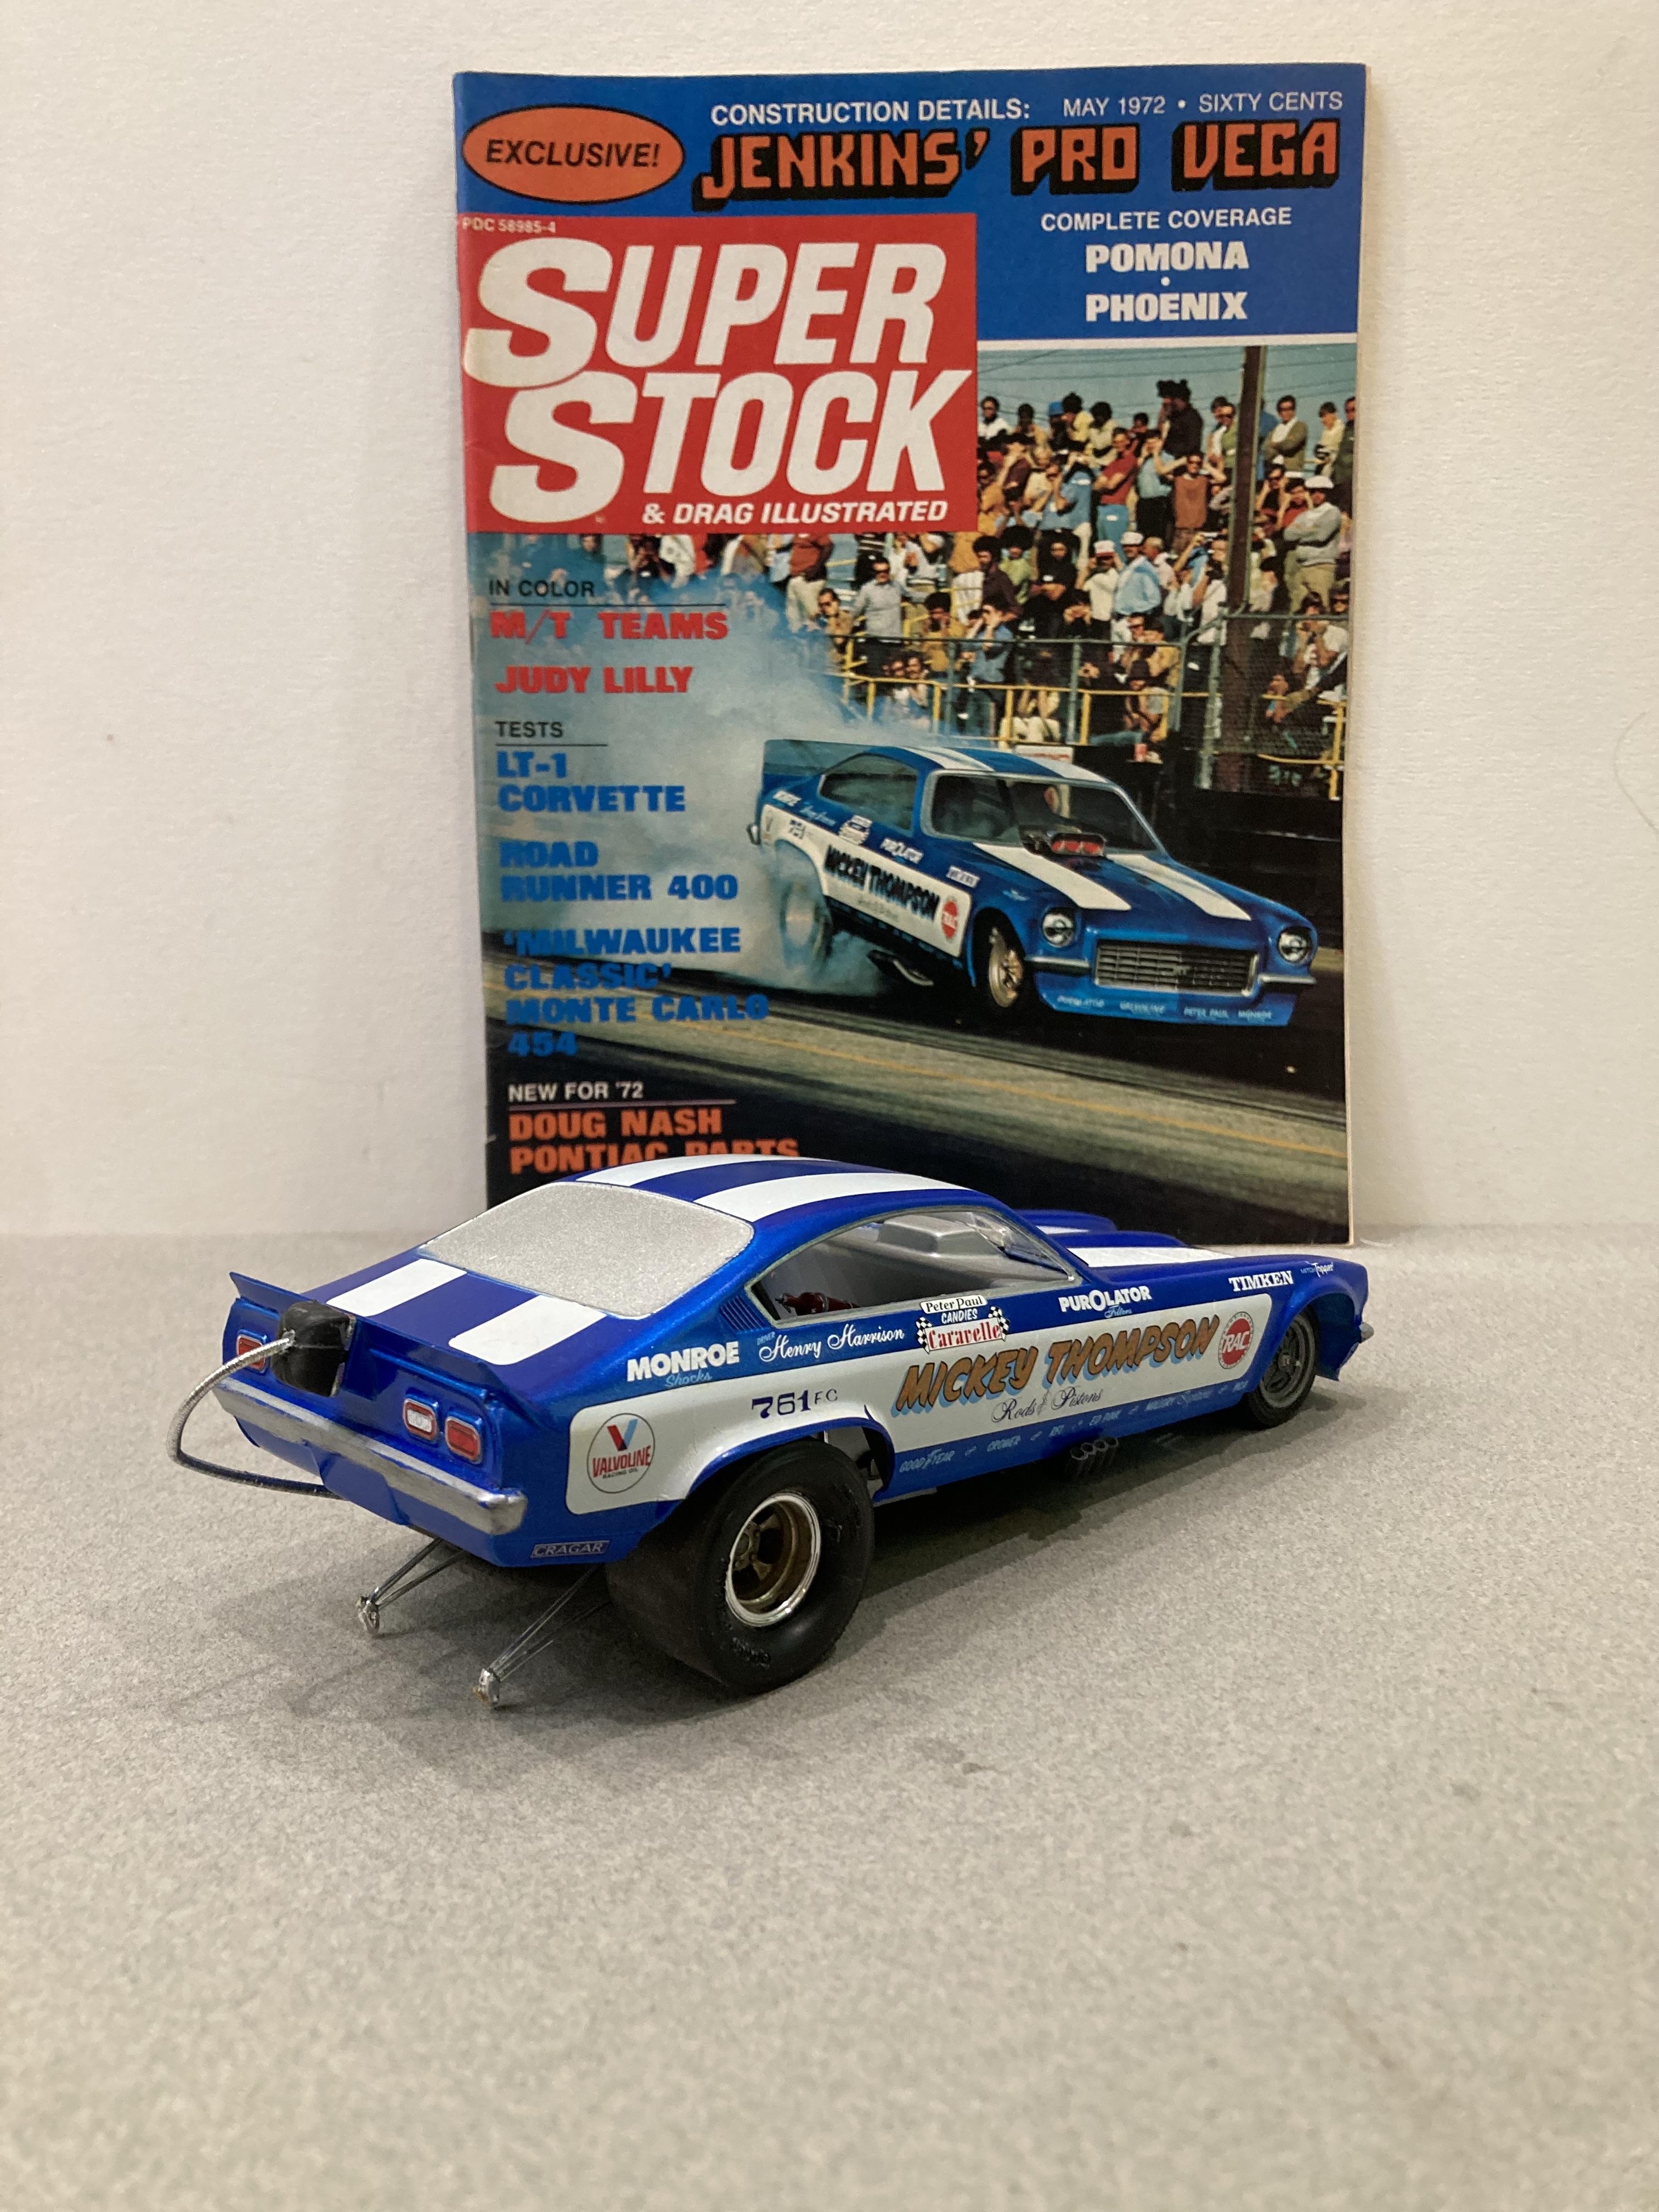
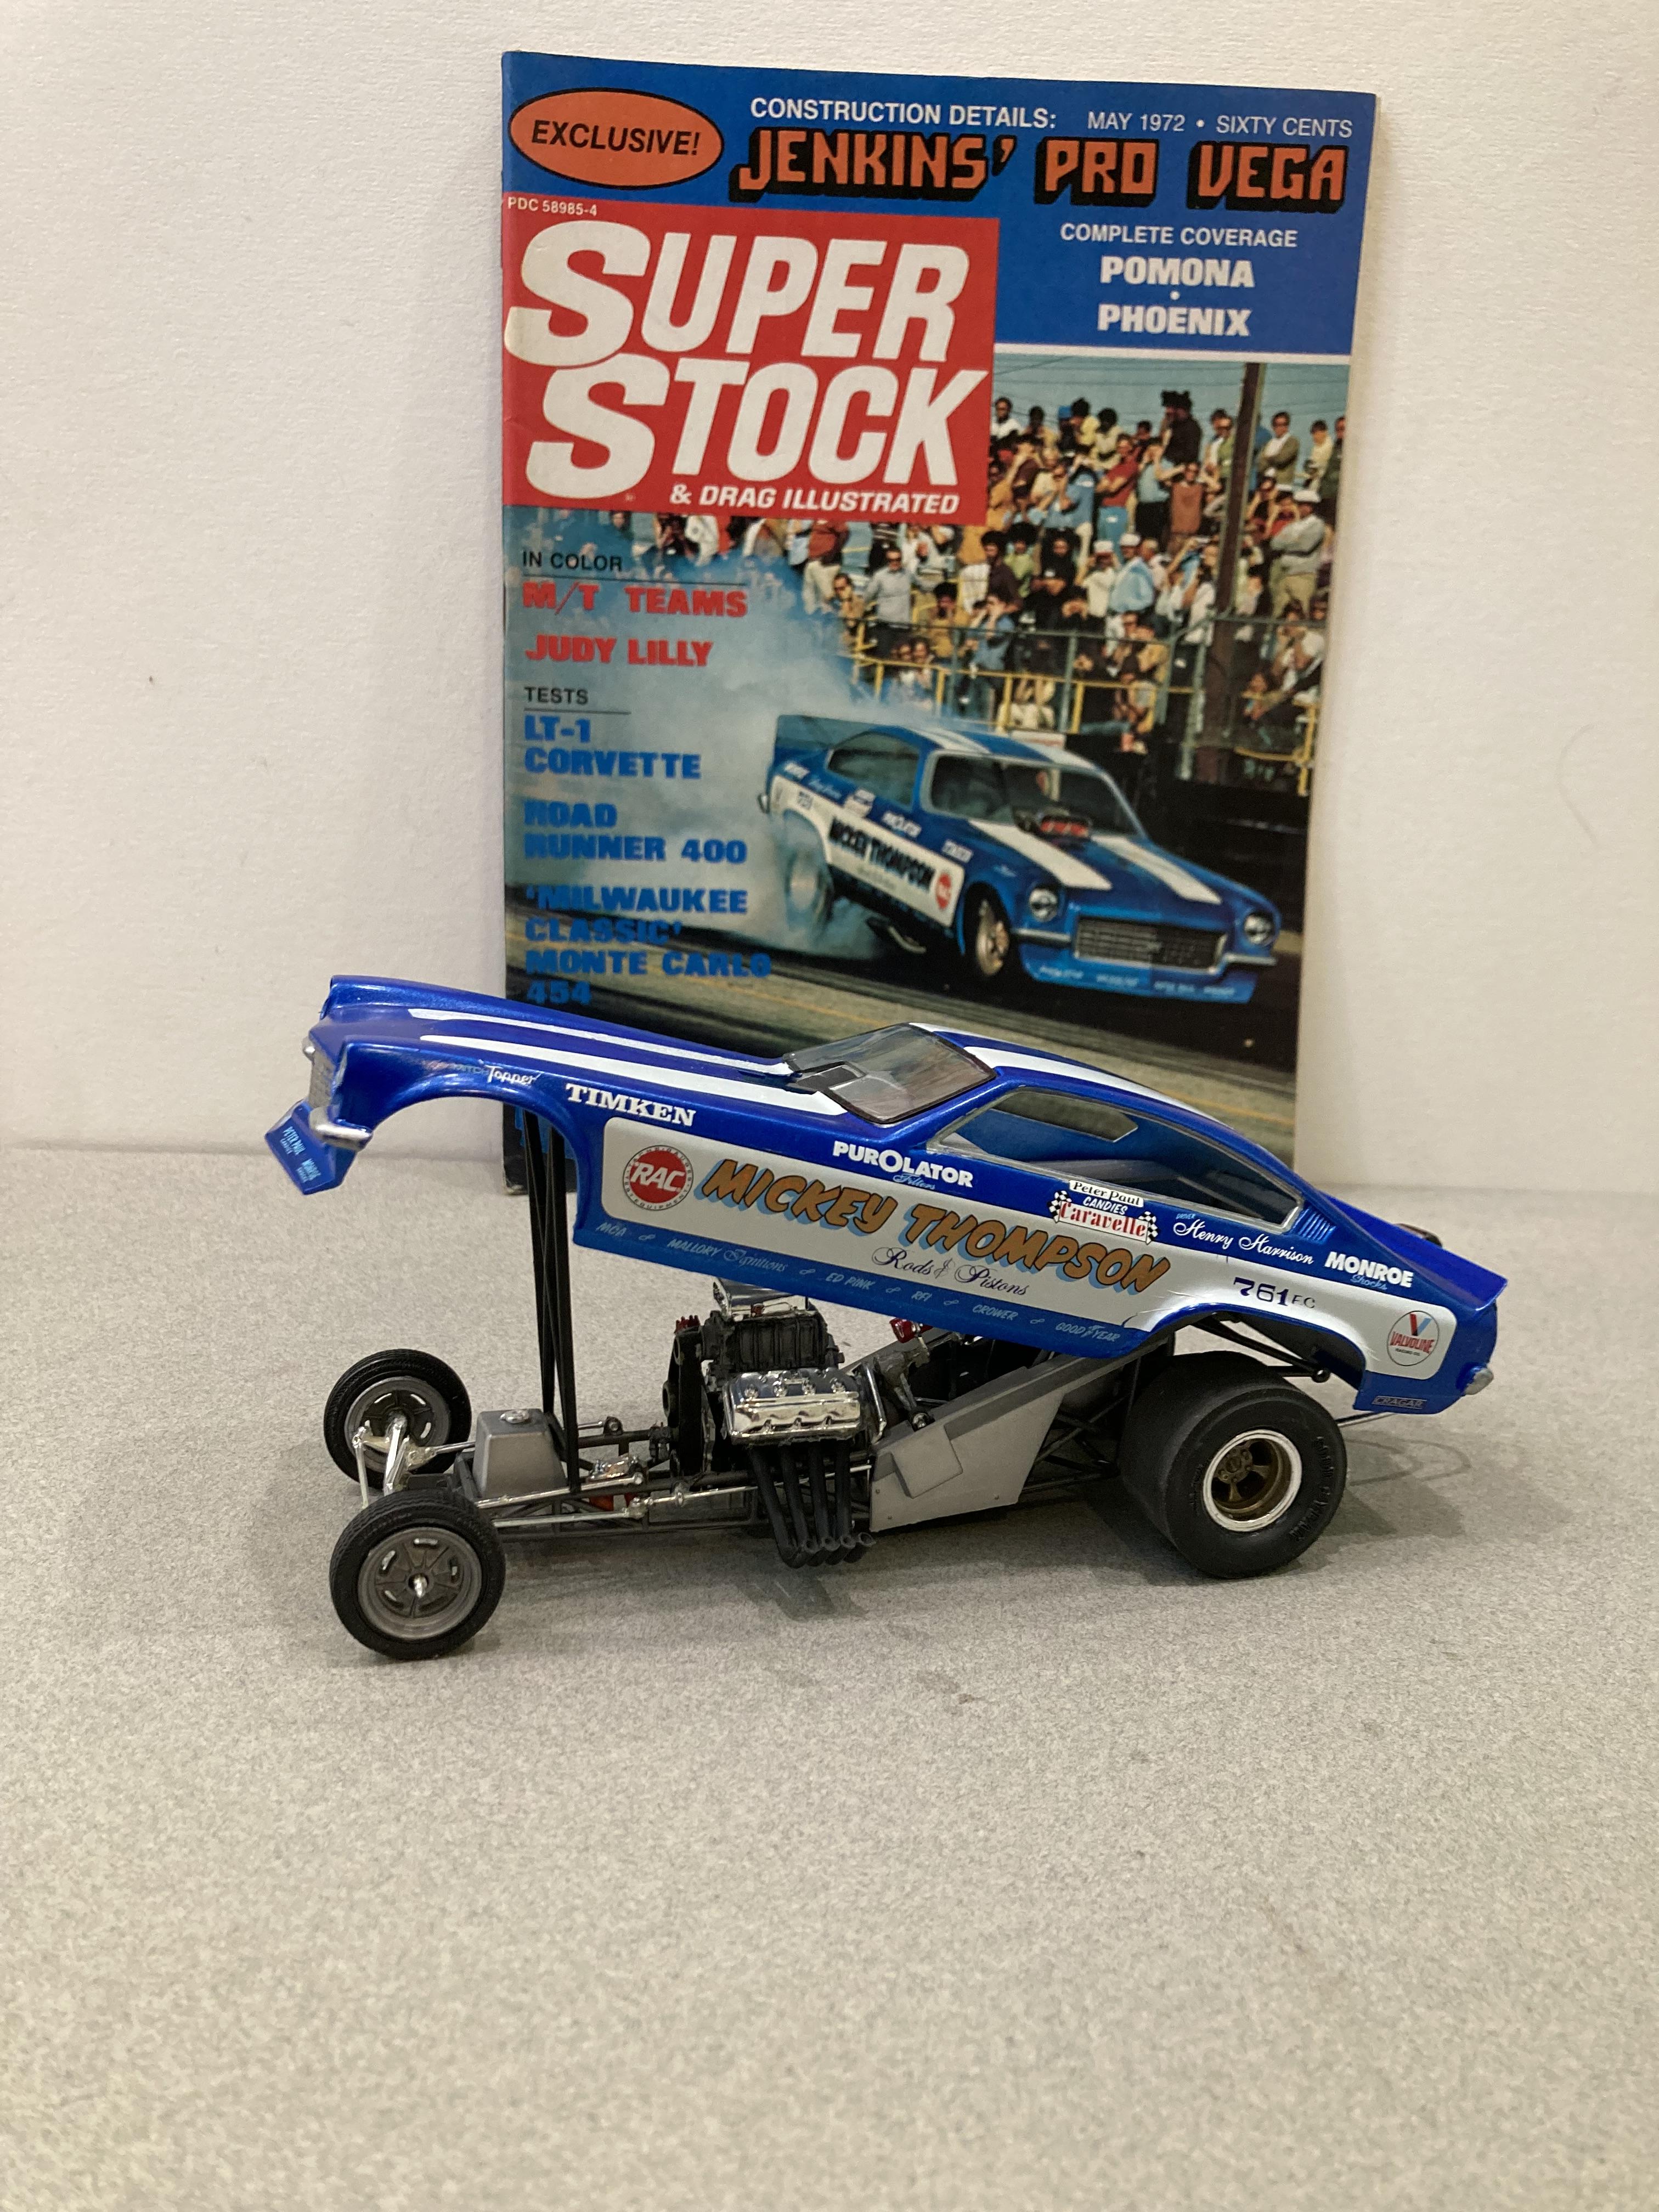
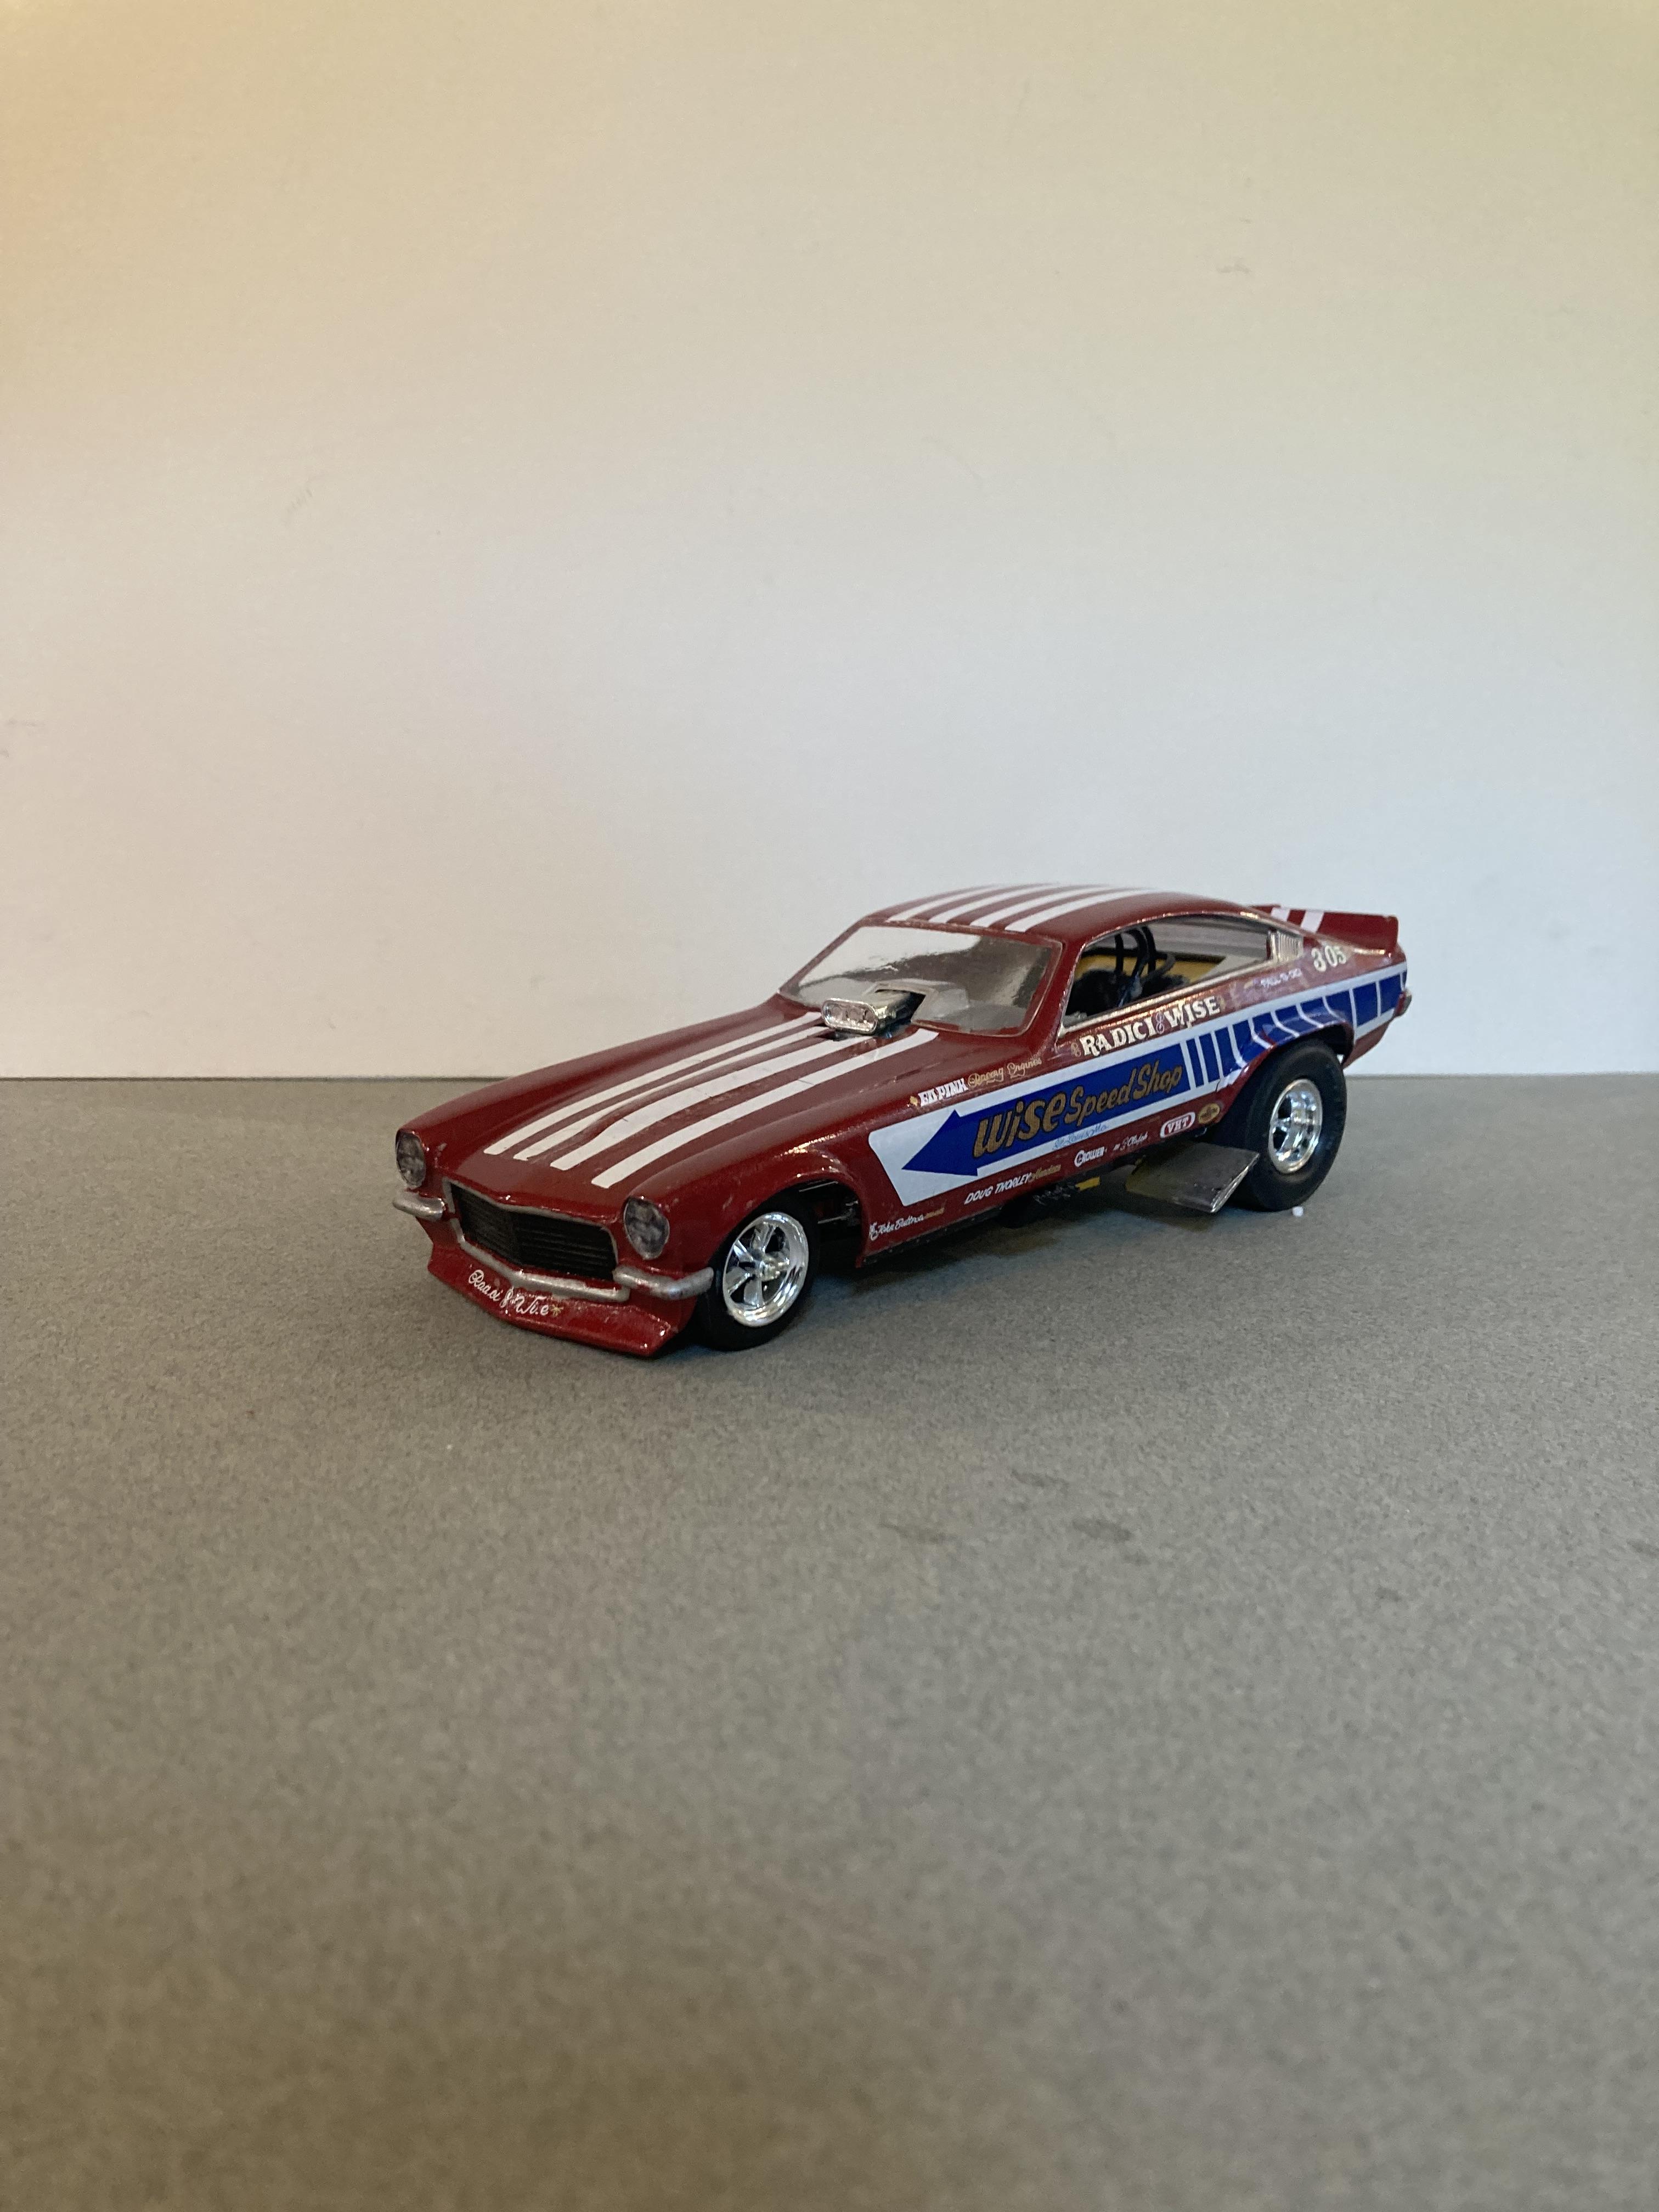
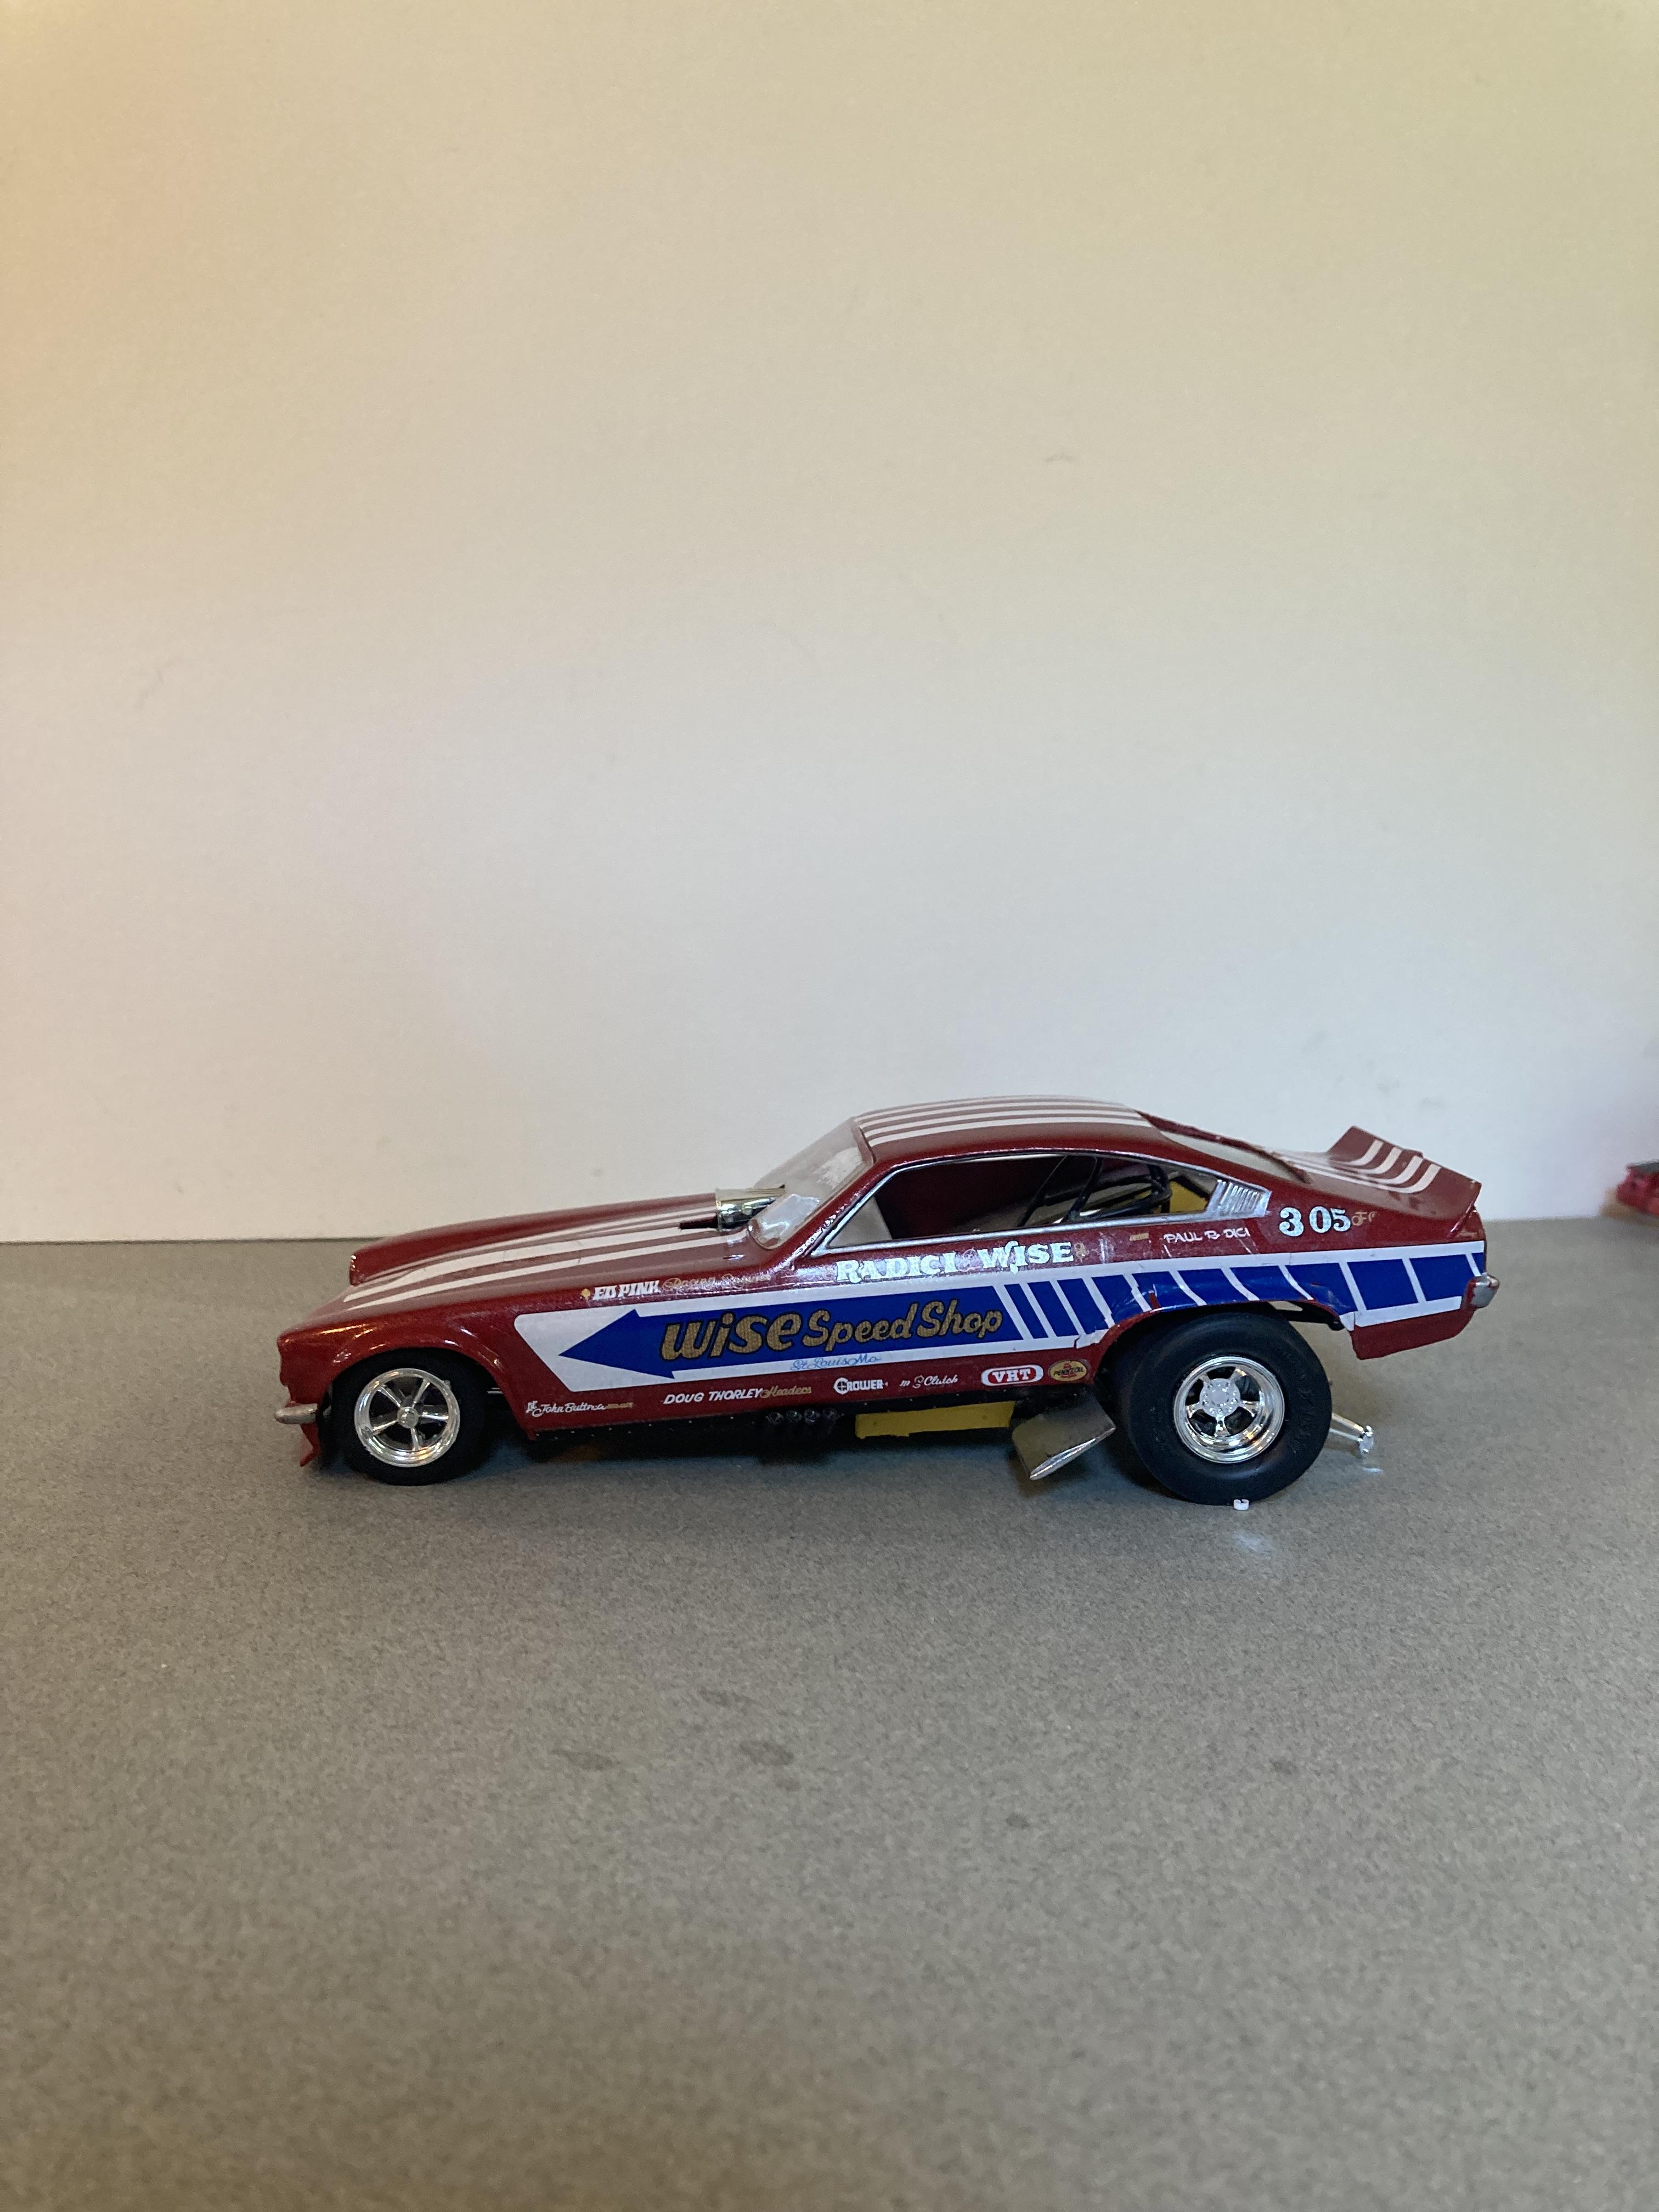
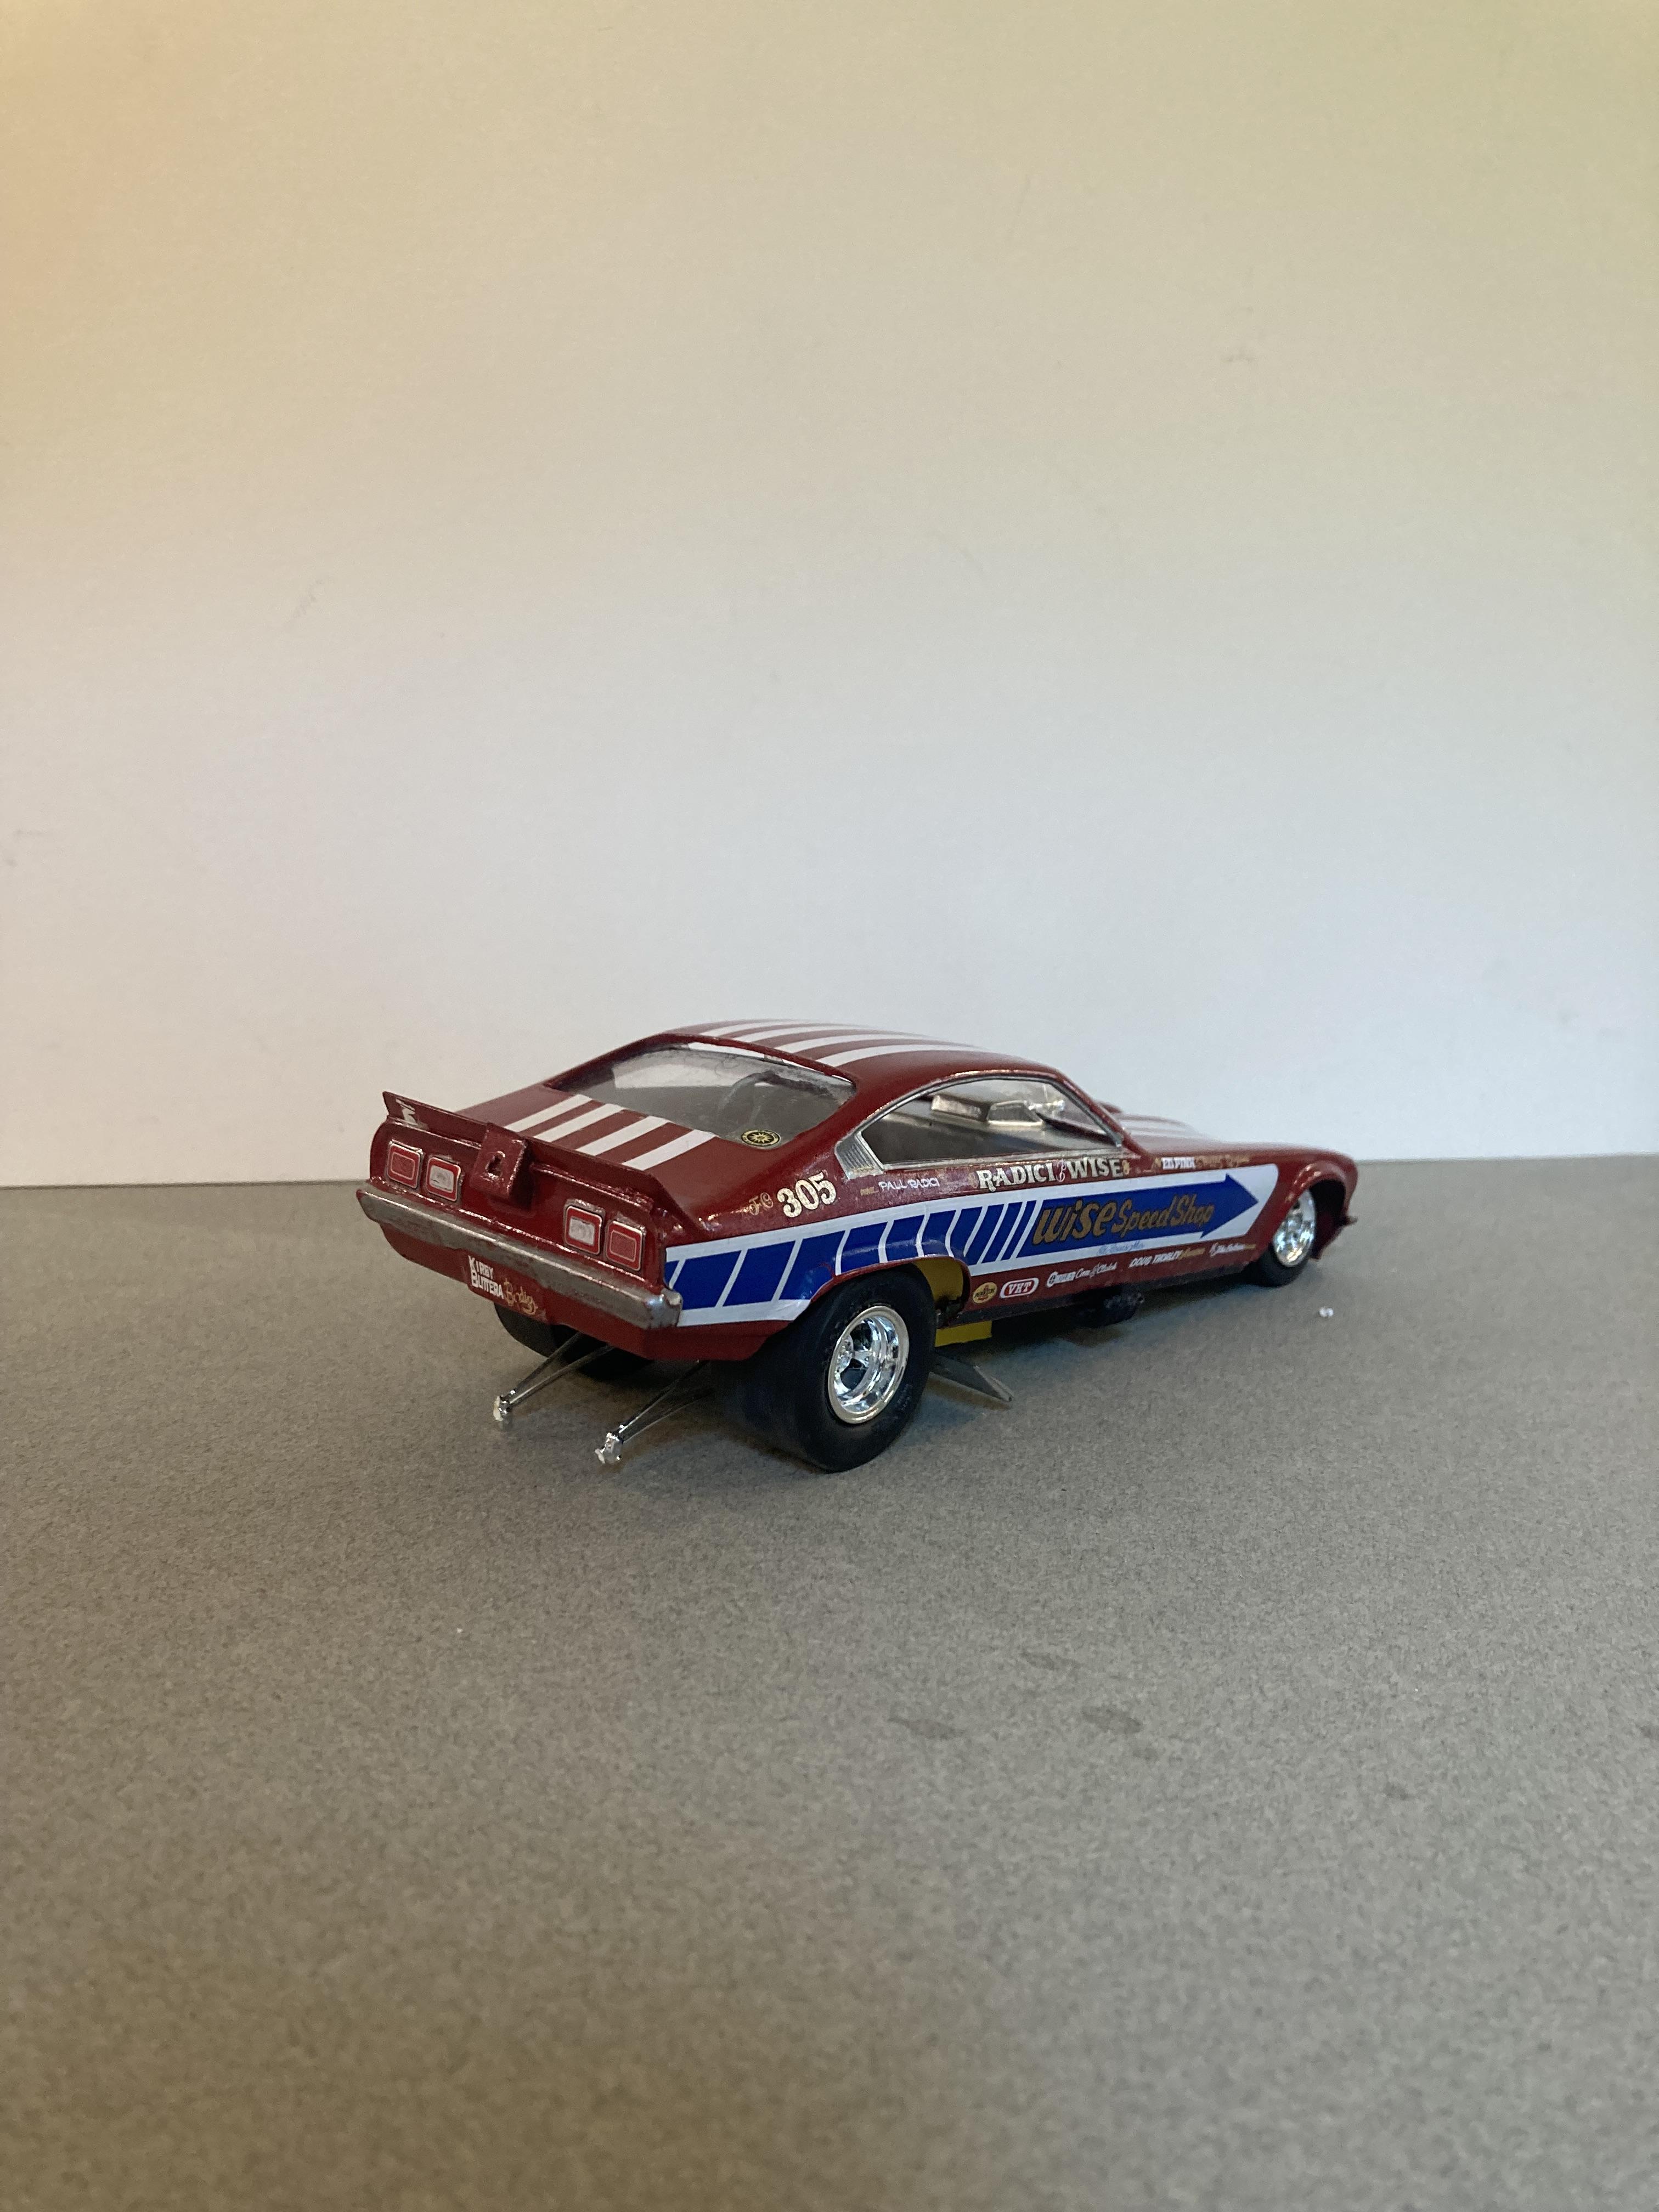
 I built this one some time ago using the revell jungle Jim kit. I swapped out the wheels with the front ones from polar lights and the back wheels from the mpc funny car. The mpc slicks really change the stance of this kit I think for the better. I painted it with testors true blue pearl and used slixx decals. This is one of the best funny car kits of all time, and there is a ton of amazing aftermarket decals available for it. I recommend the latest 2010ish version as it was updated to a one piece chassis and one piece rubber slicks. Until next time thanks for looking. Thanks mike
-
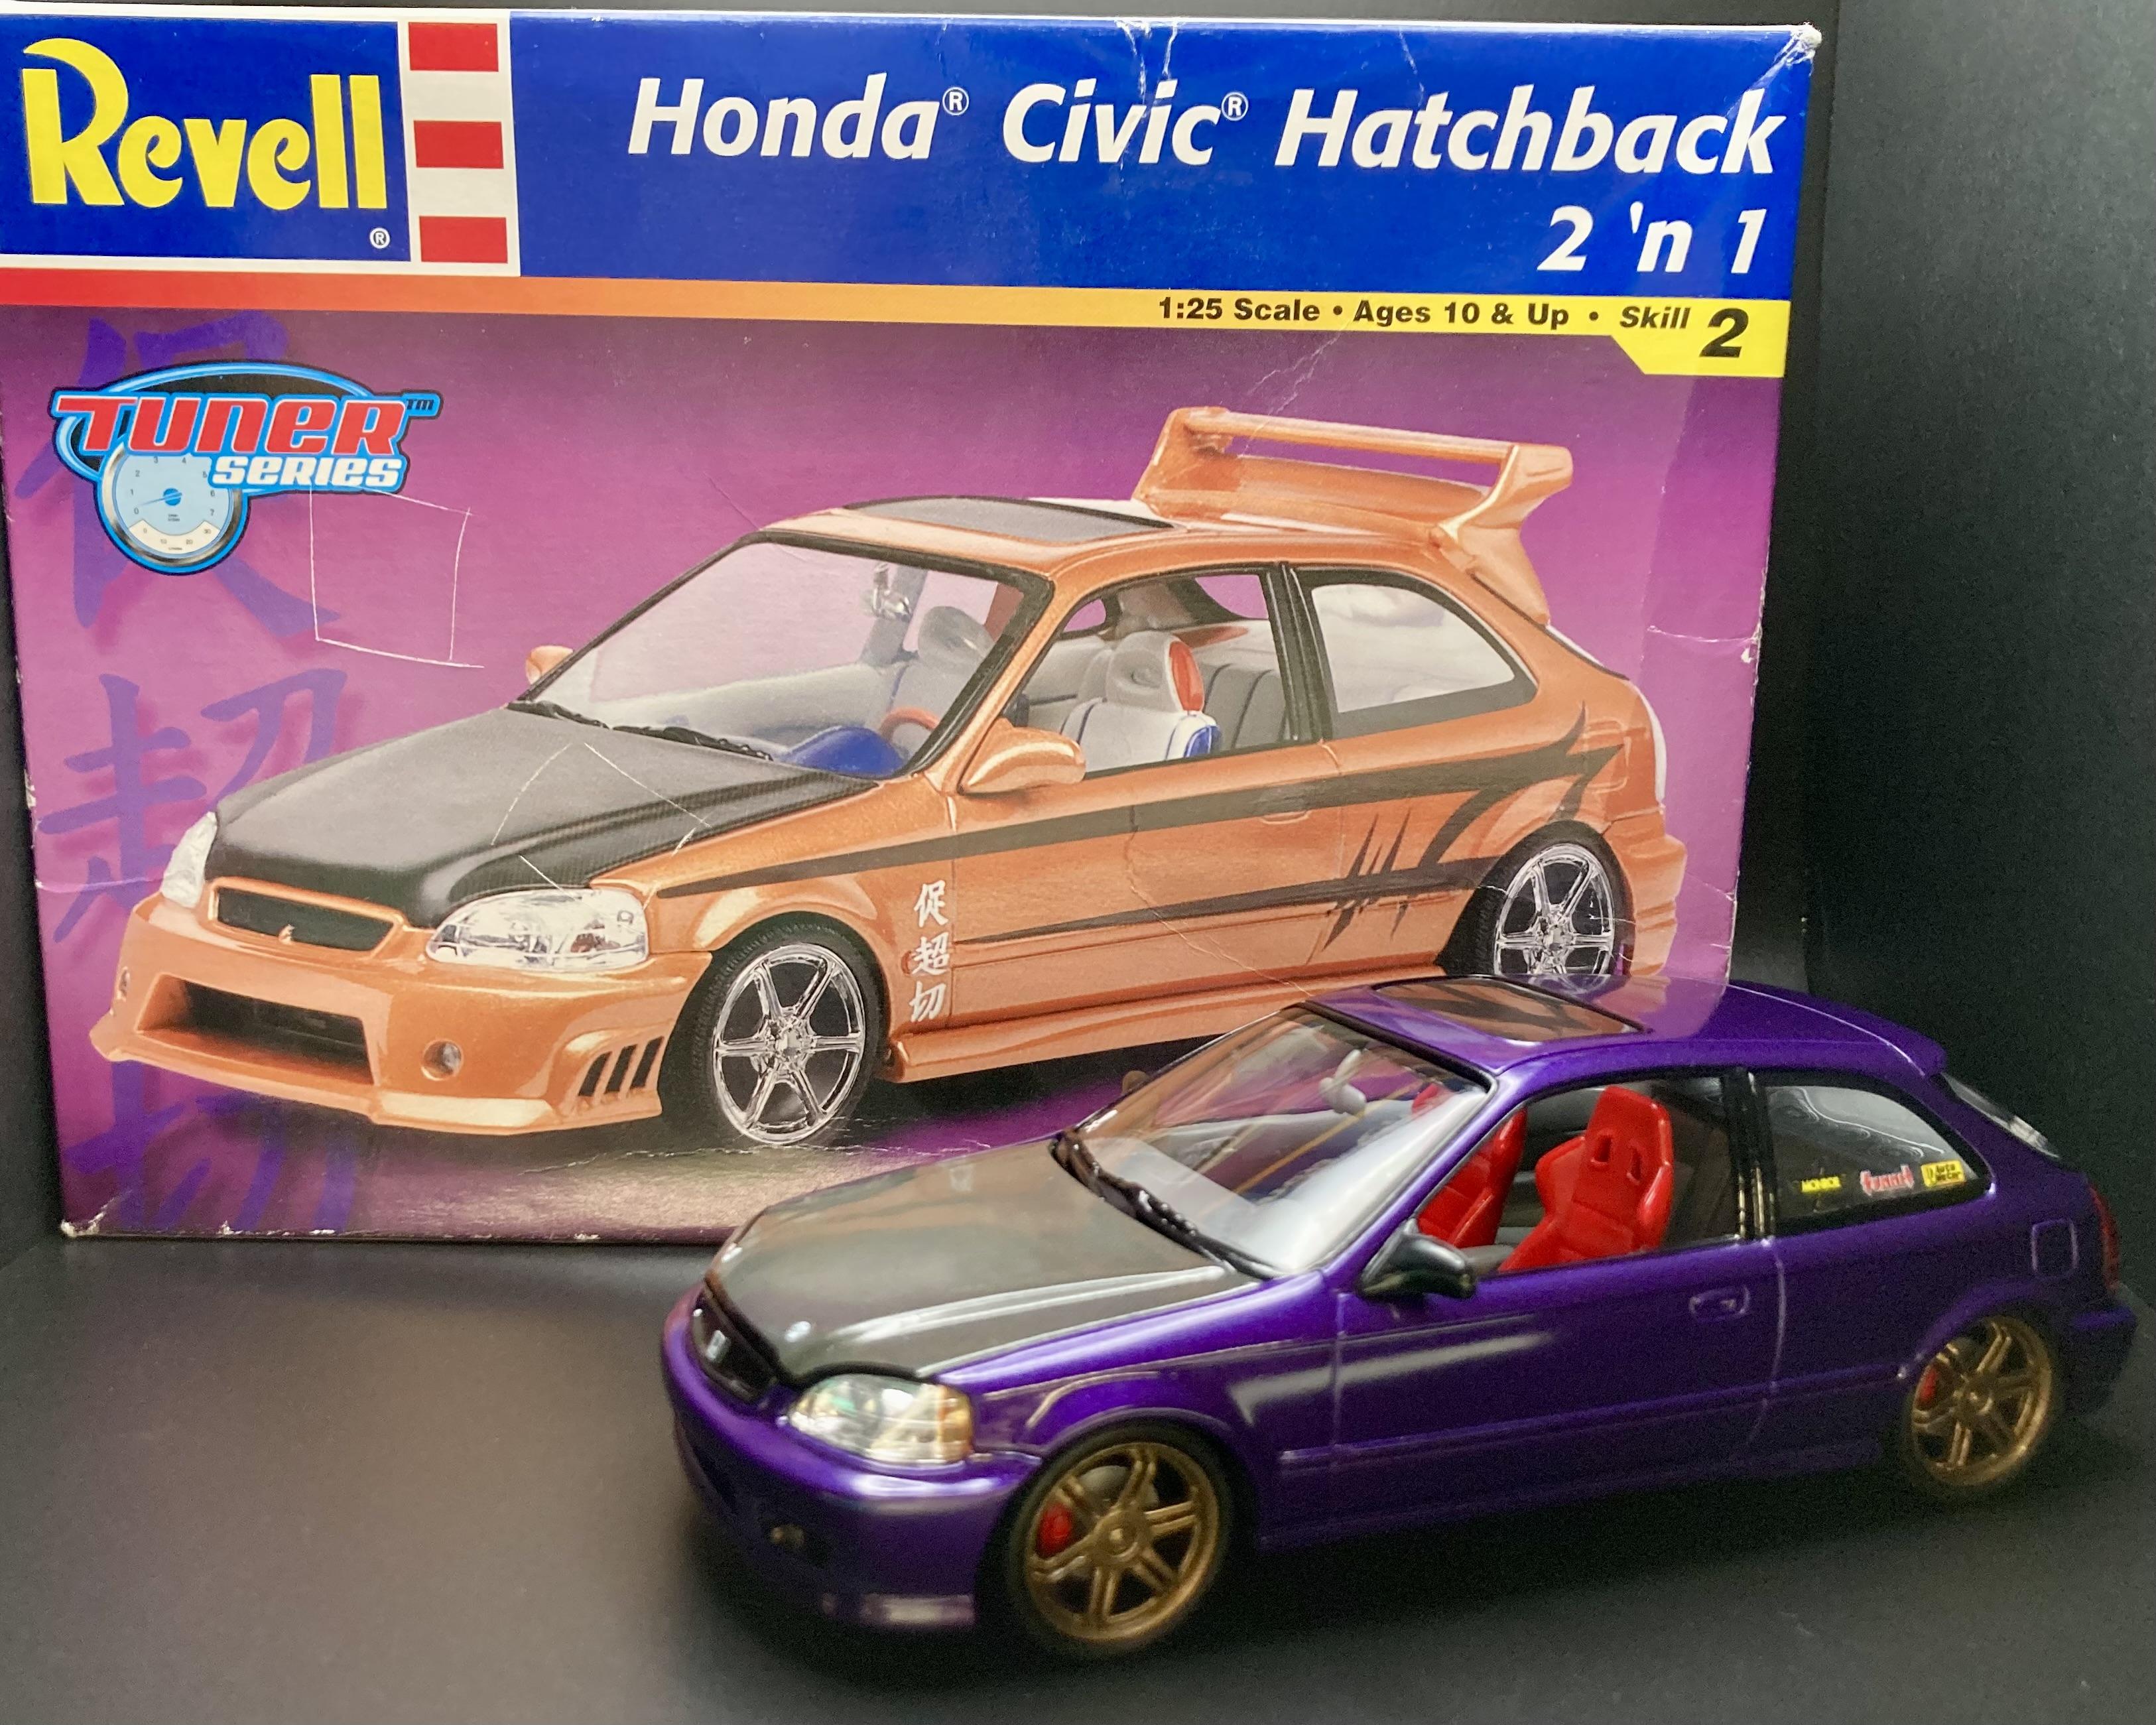
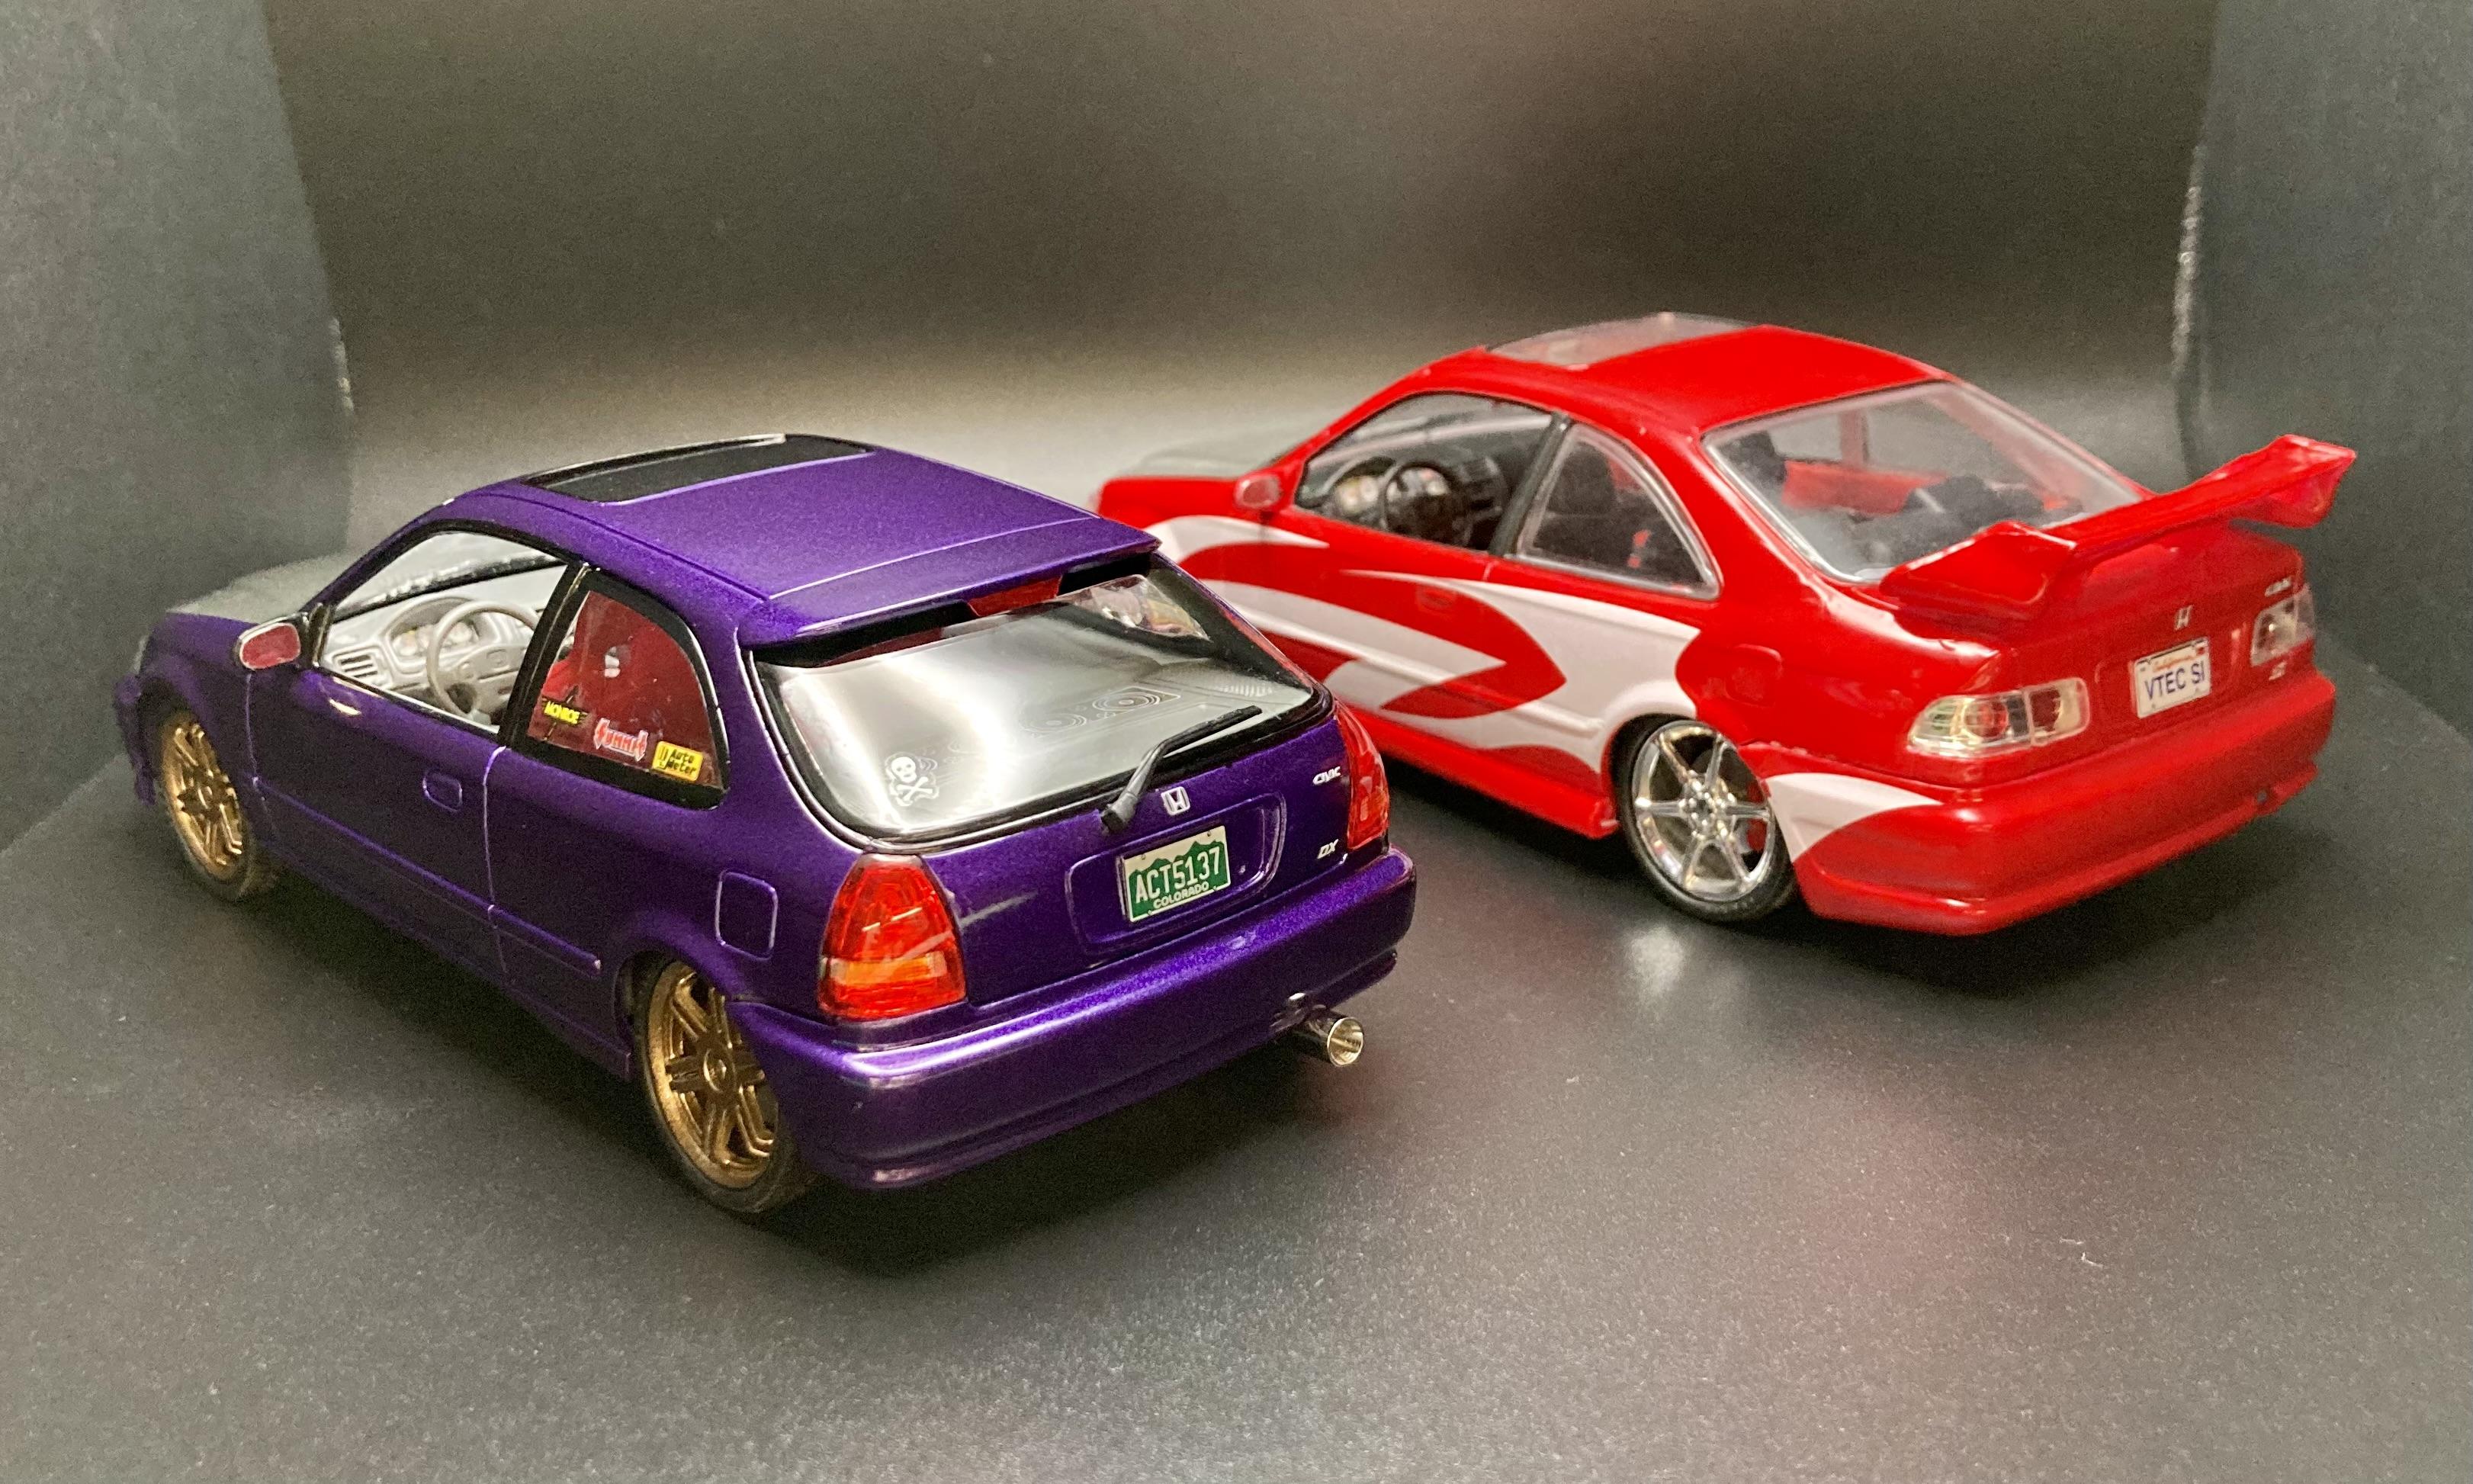
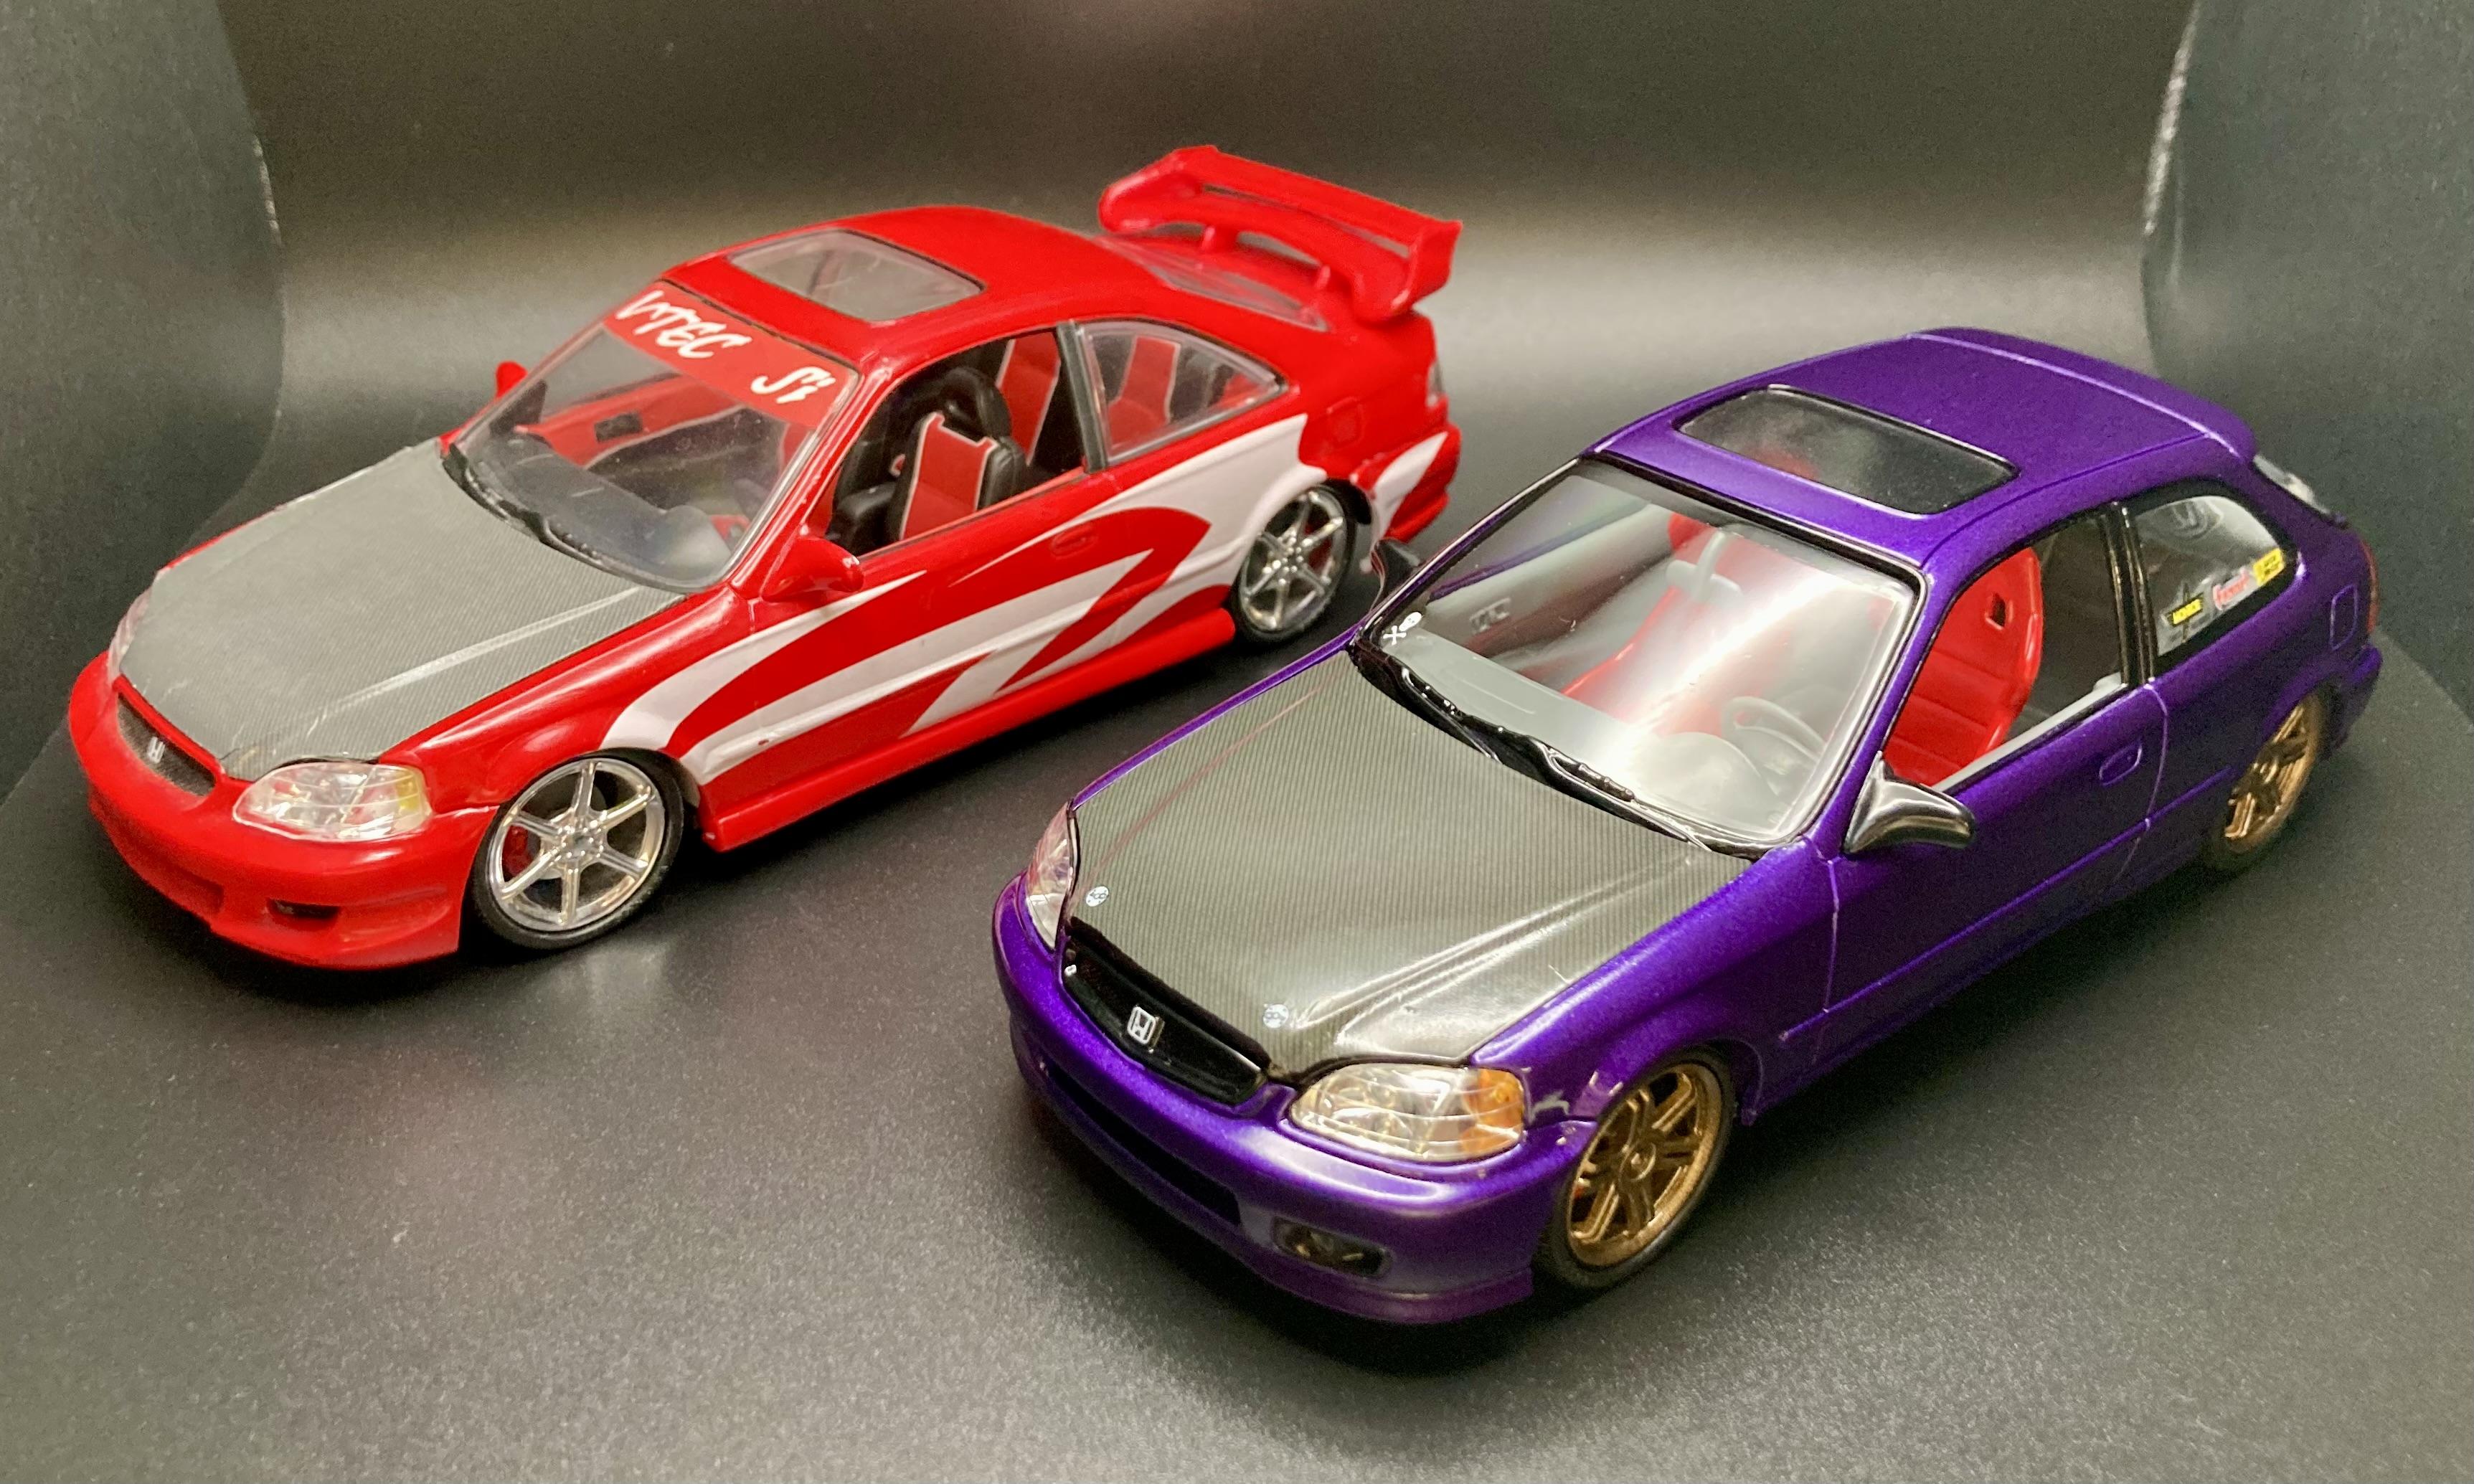
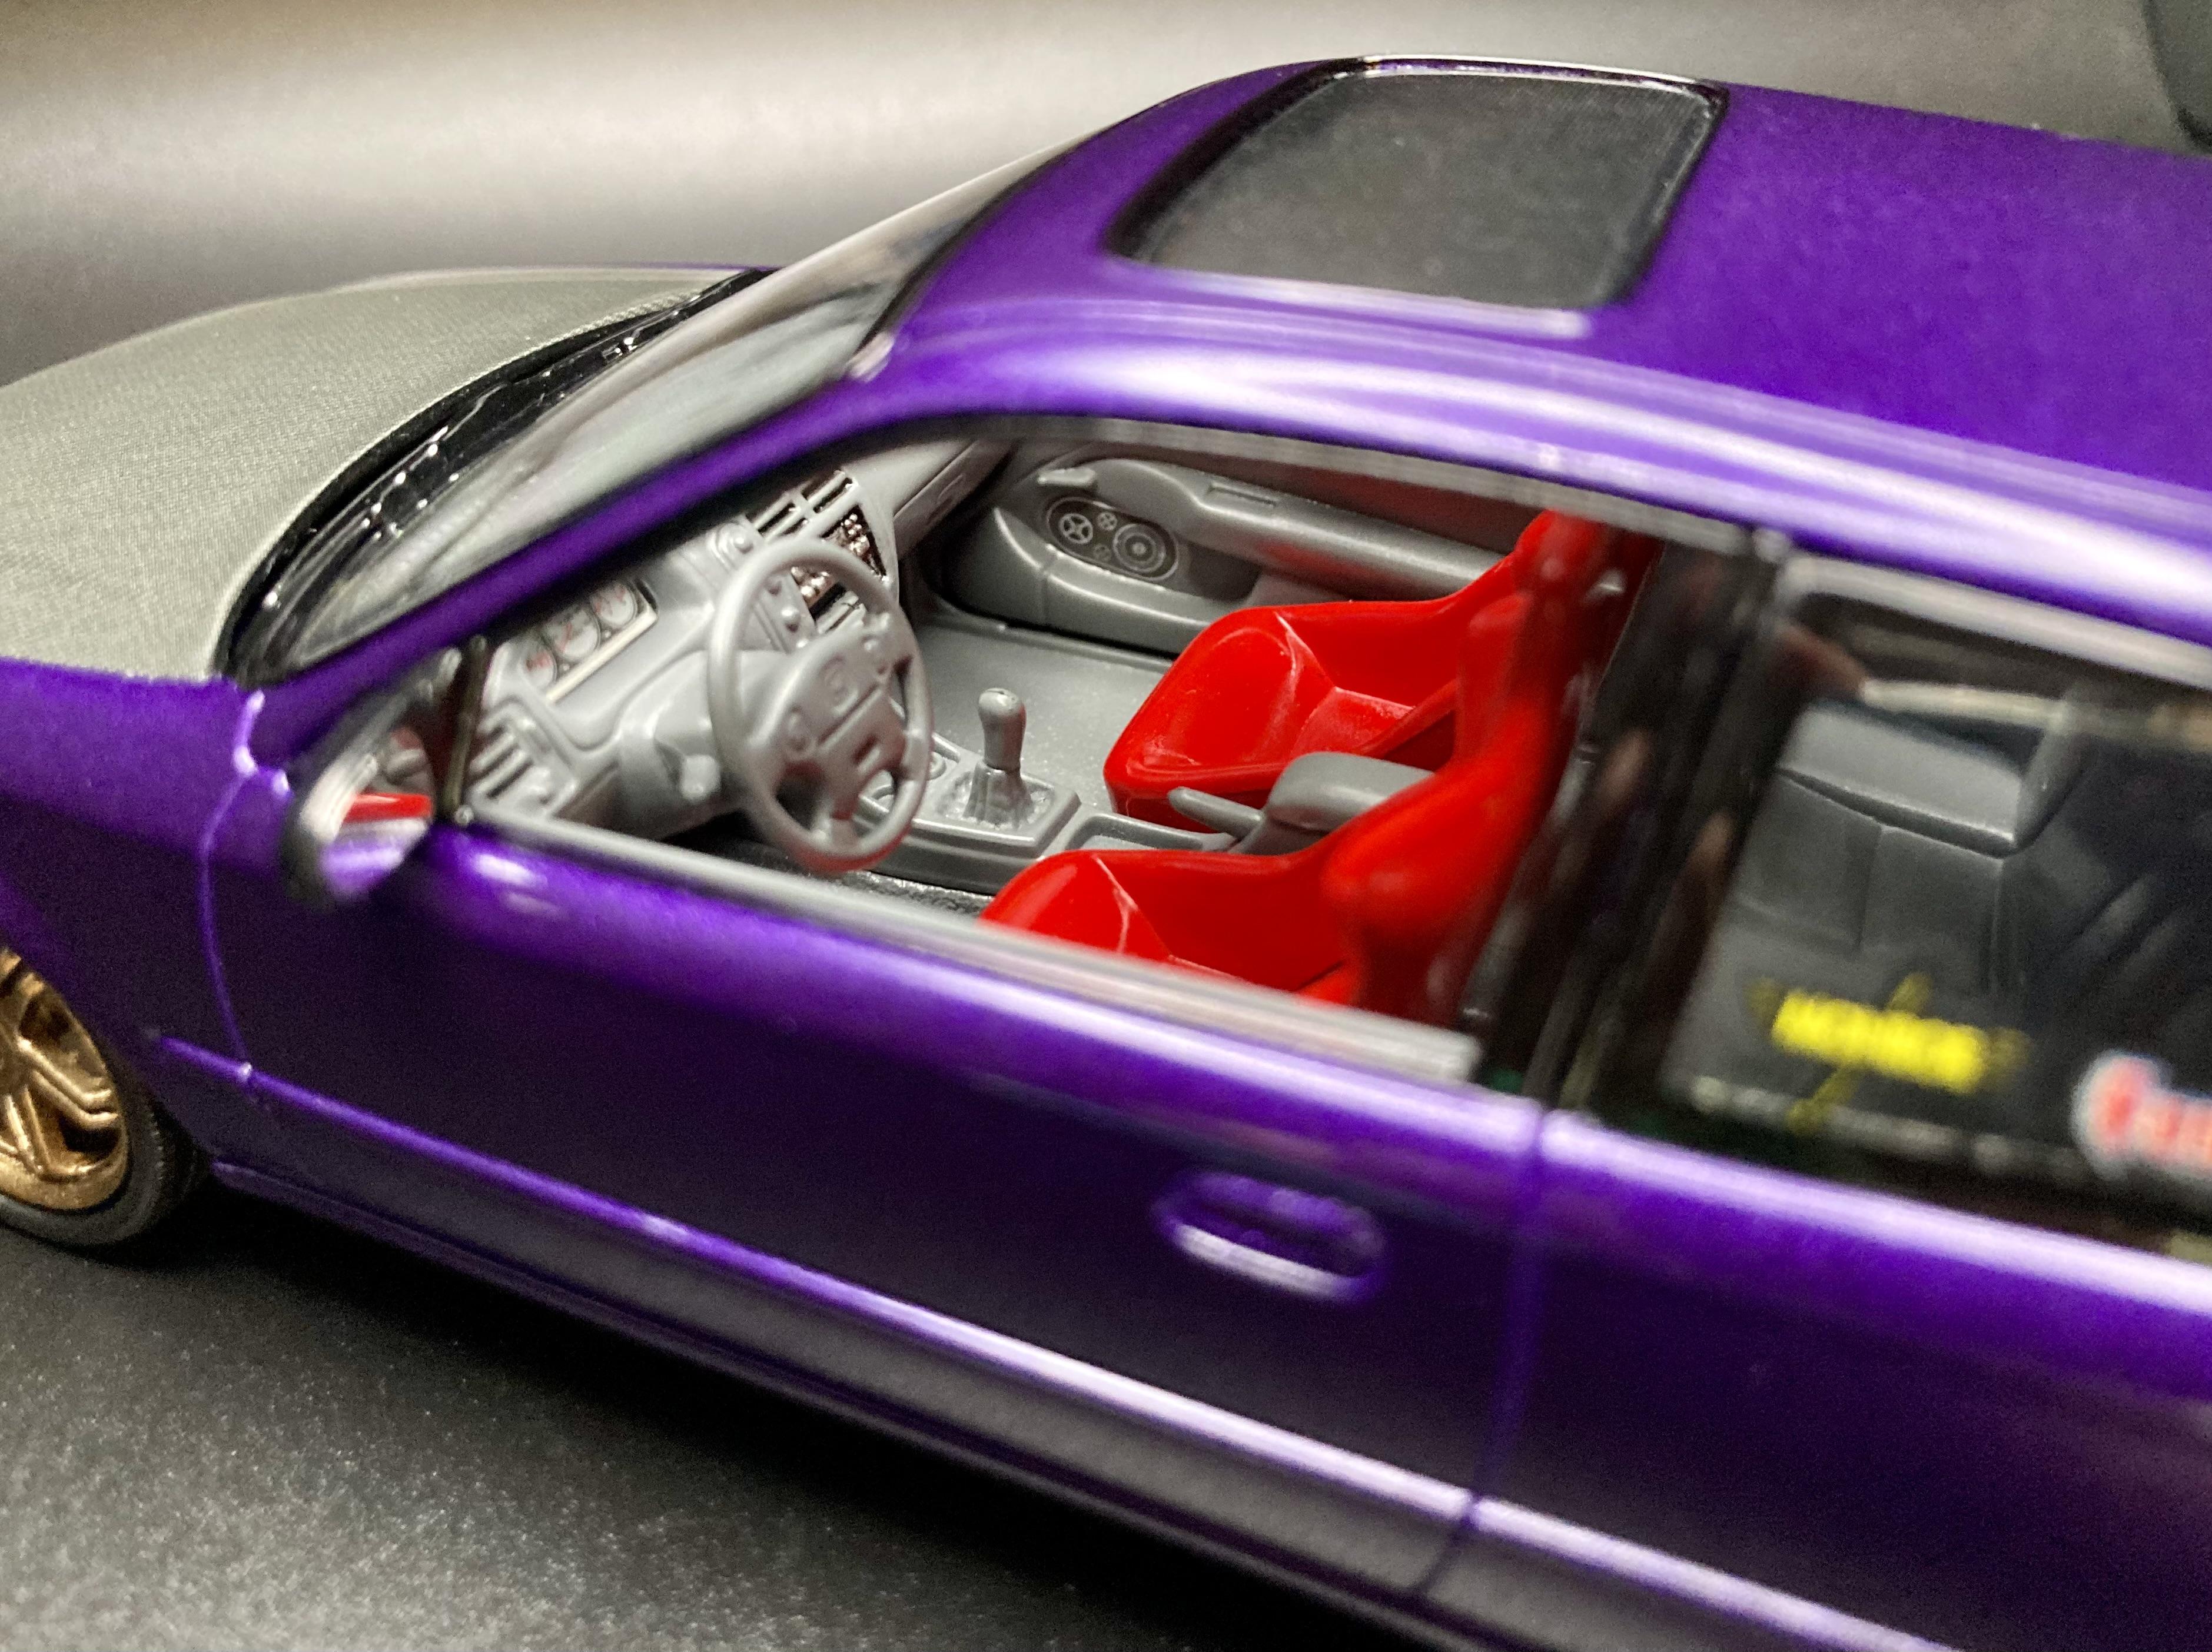
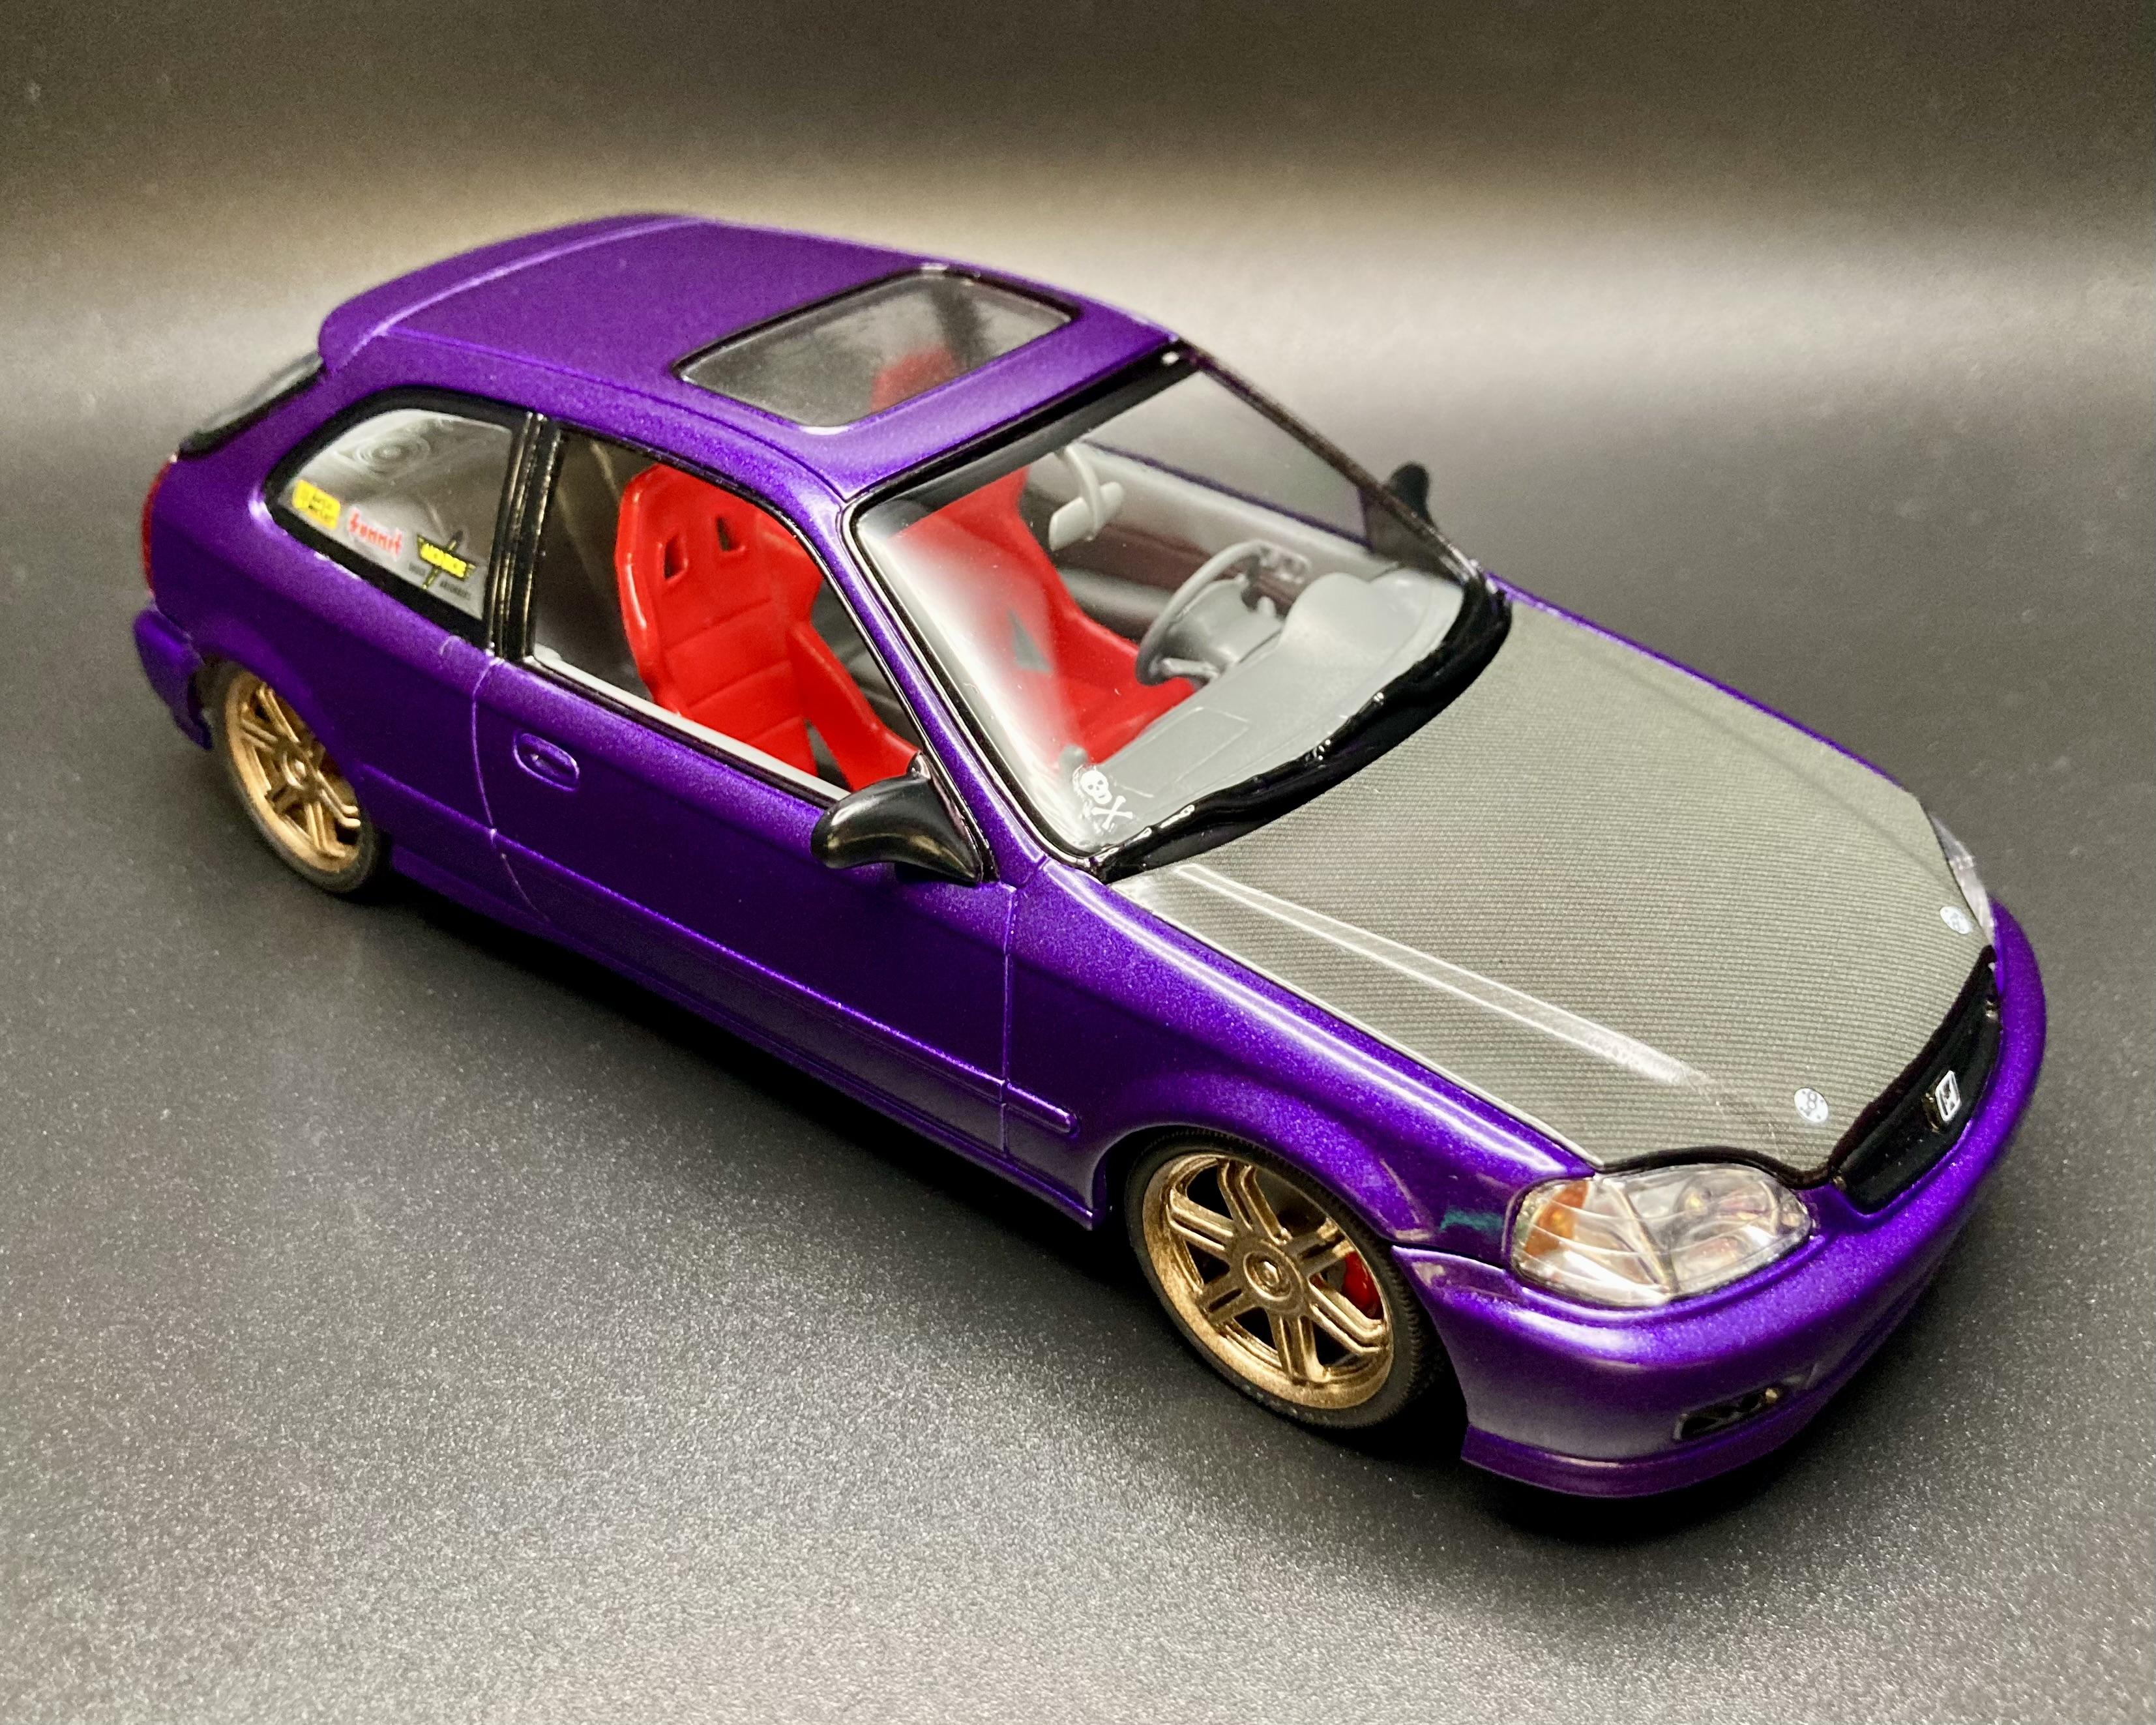
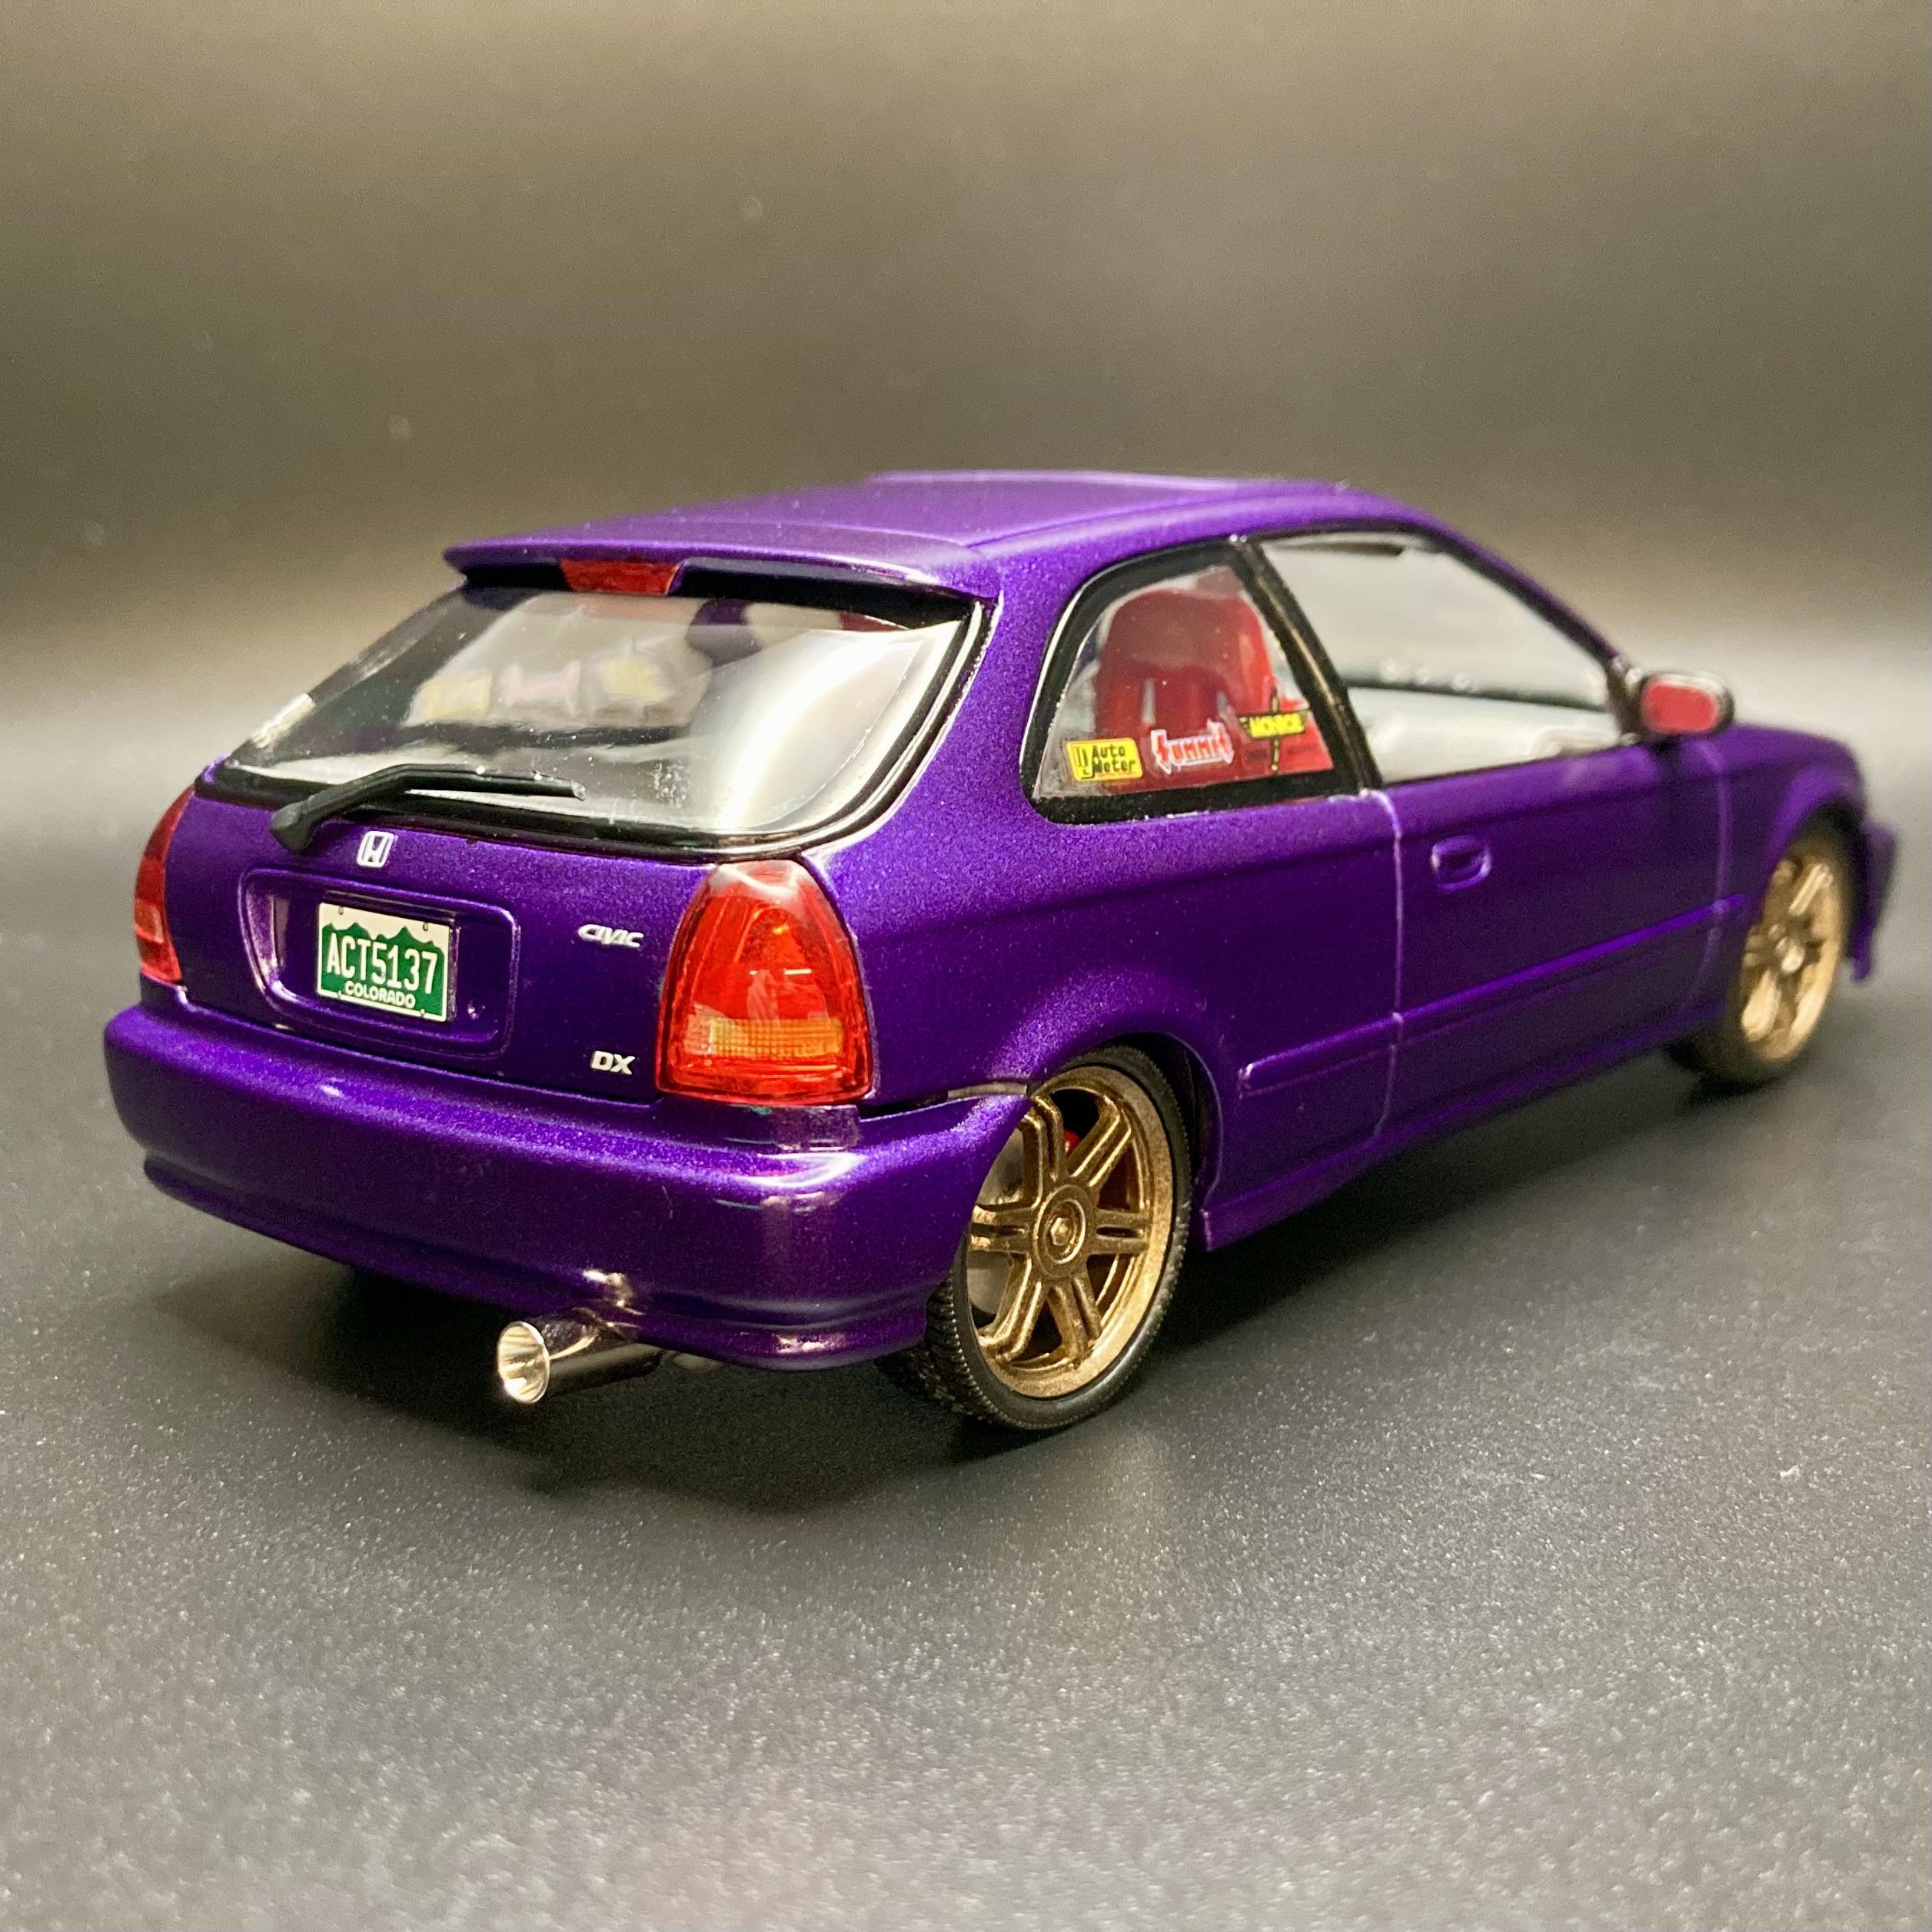
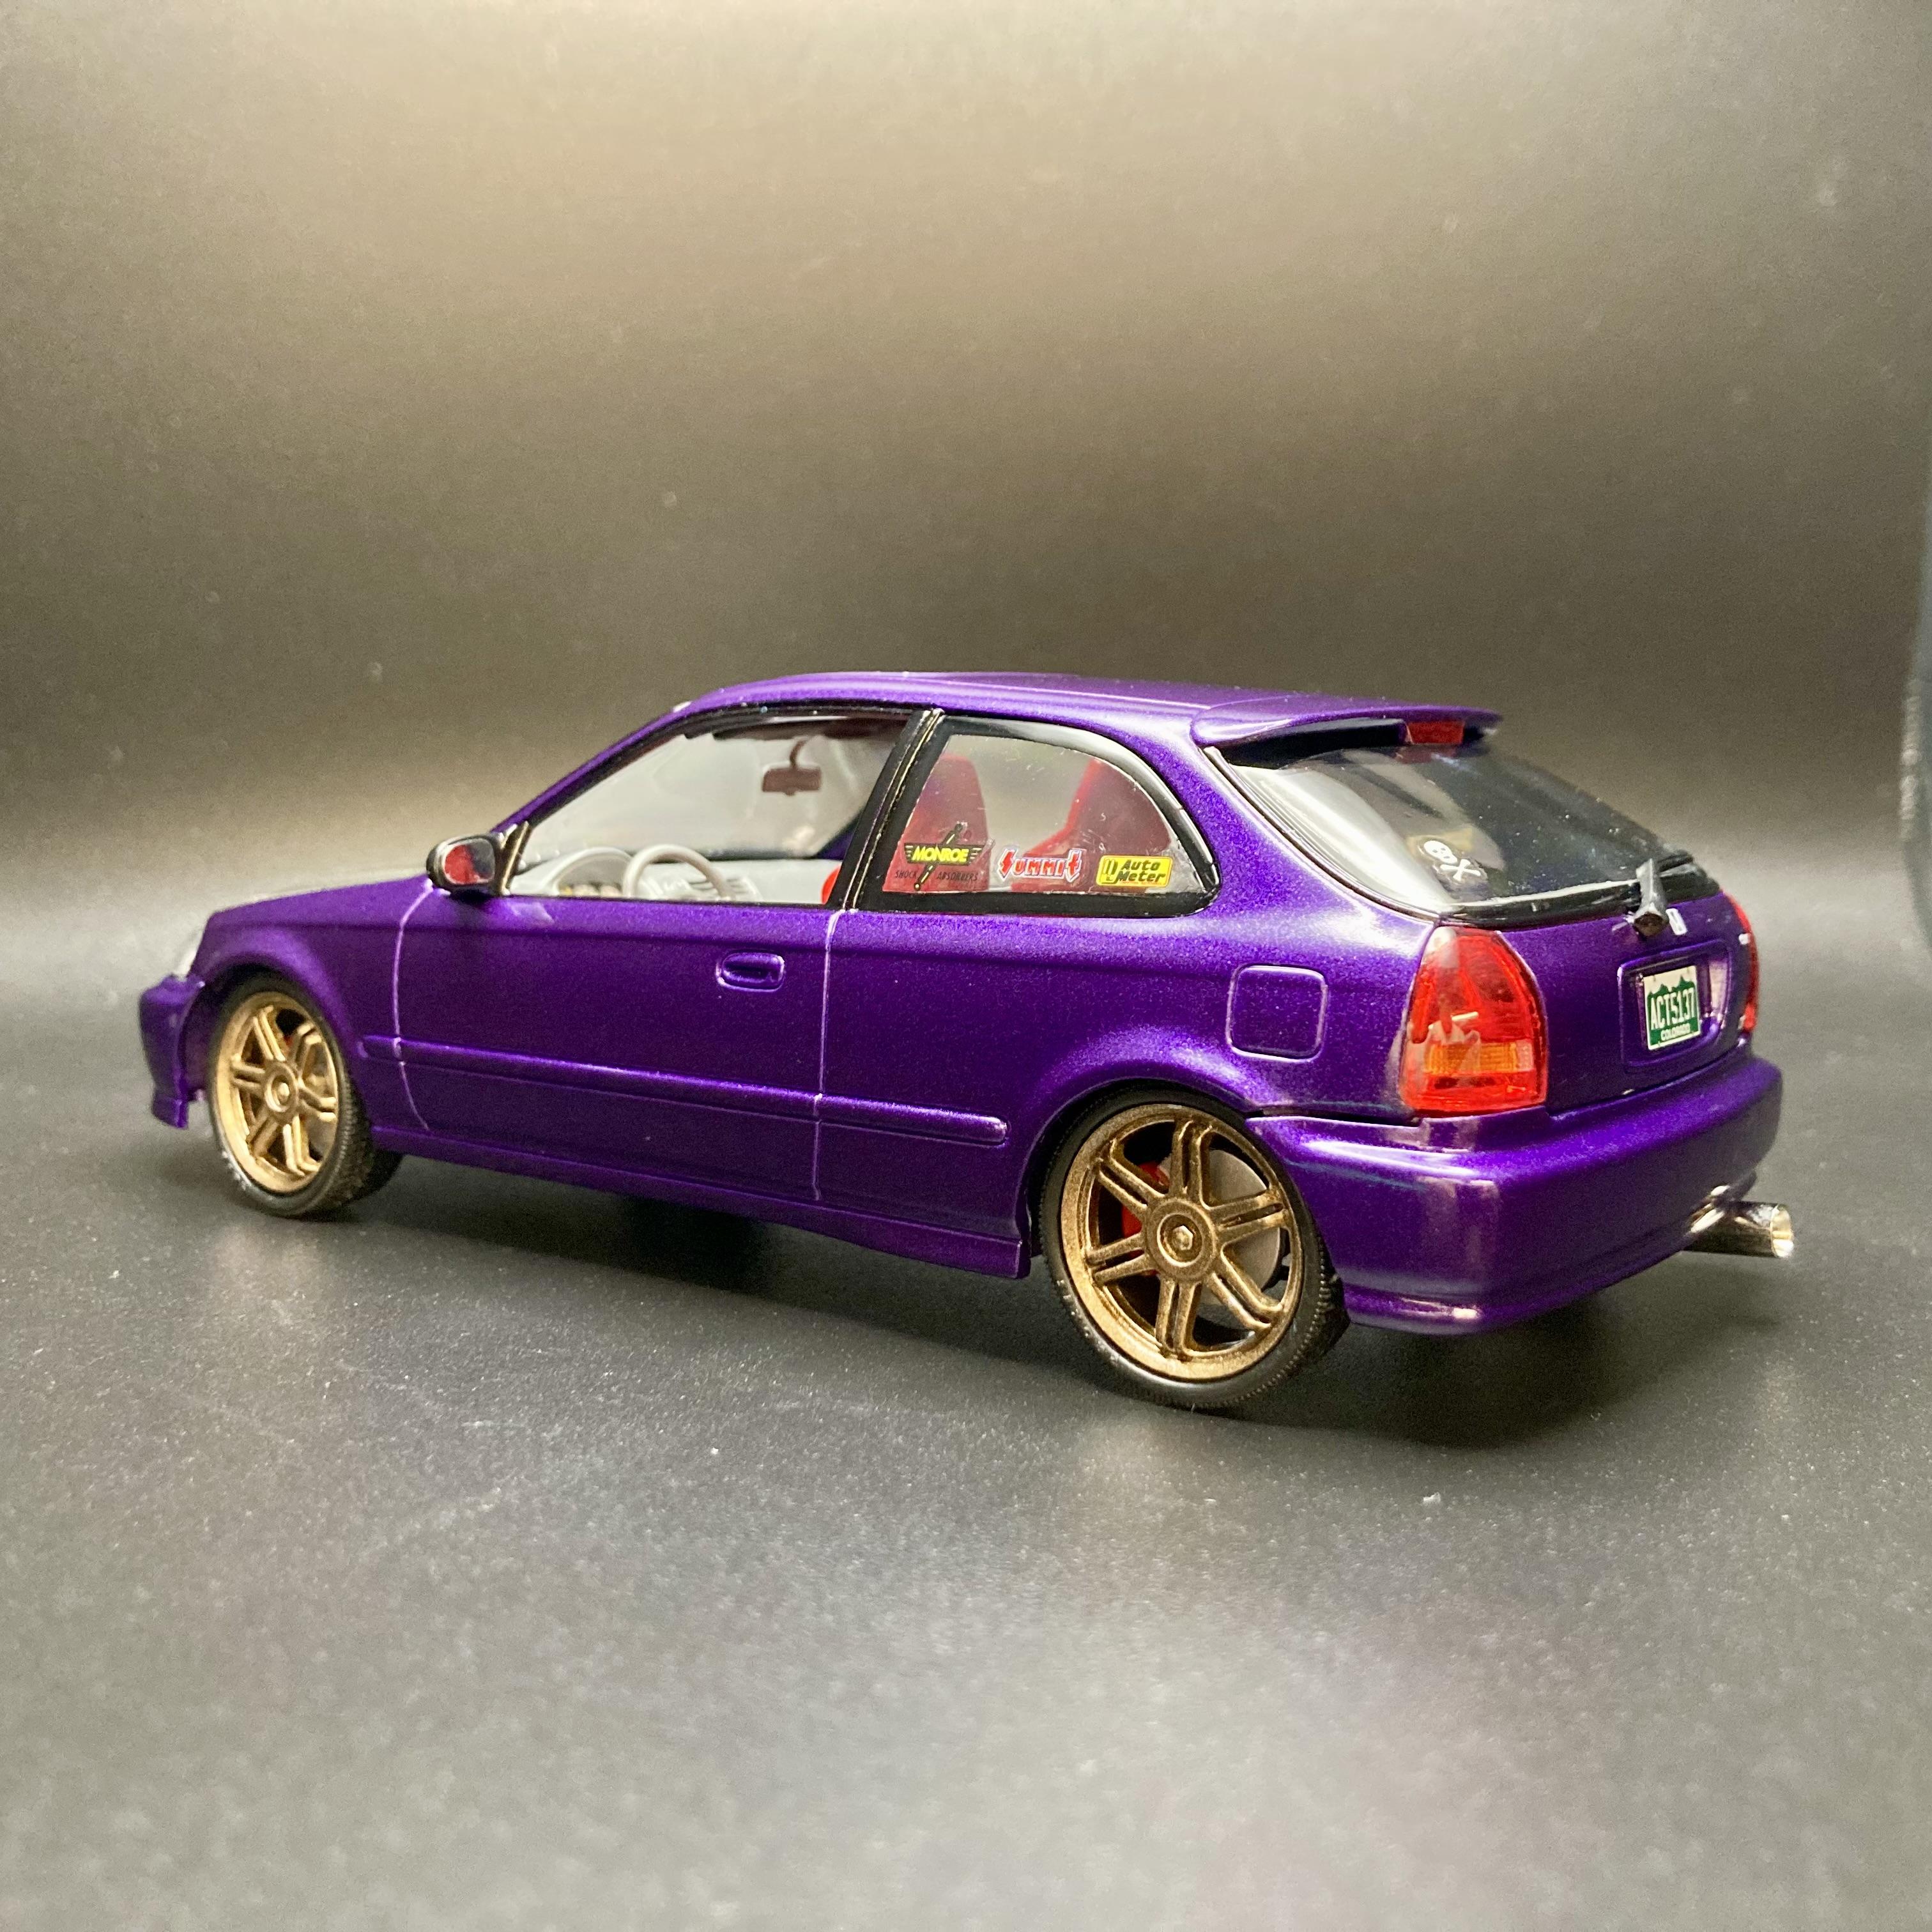
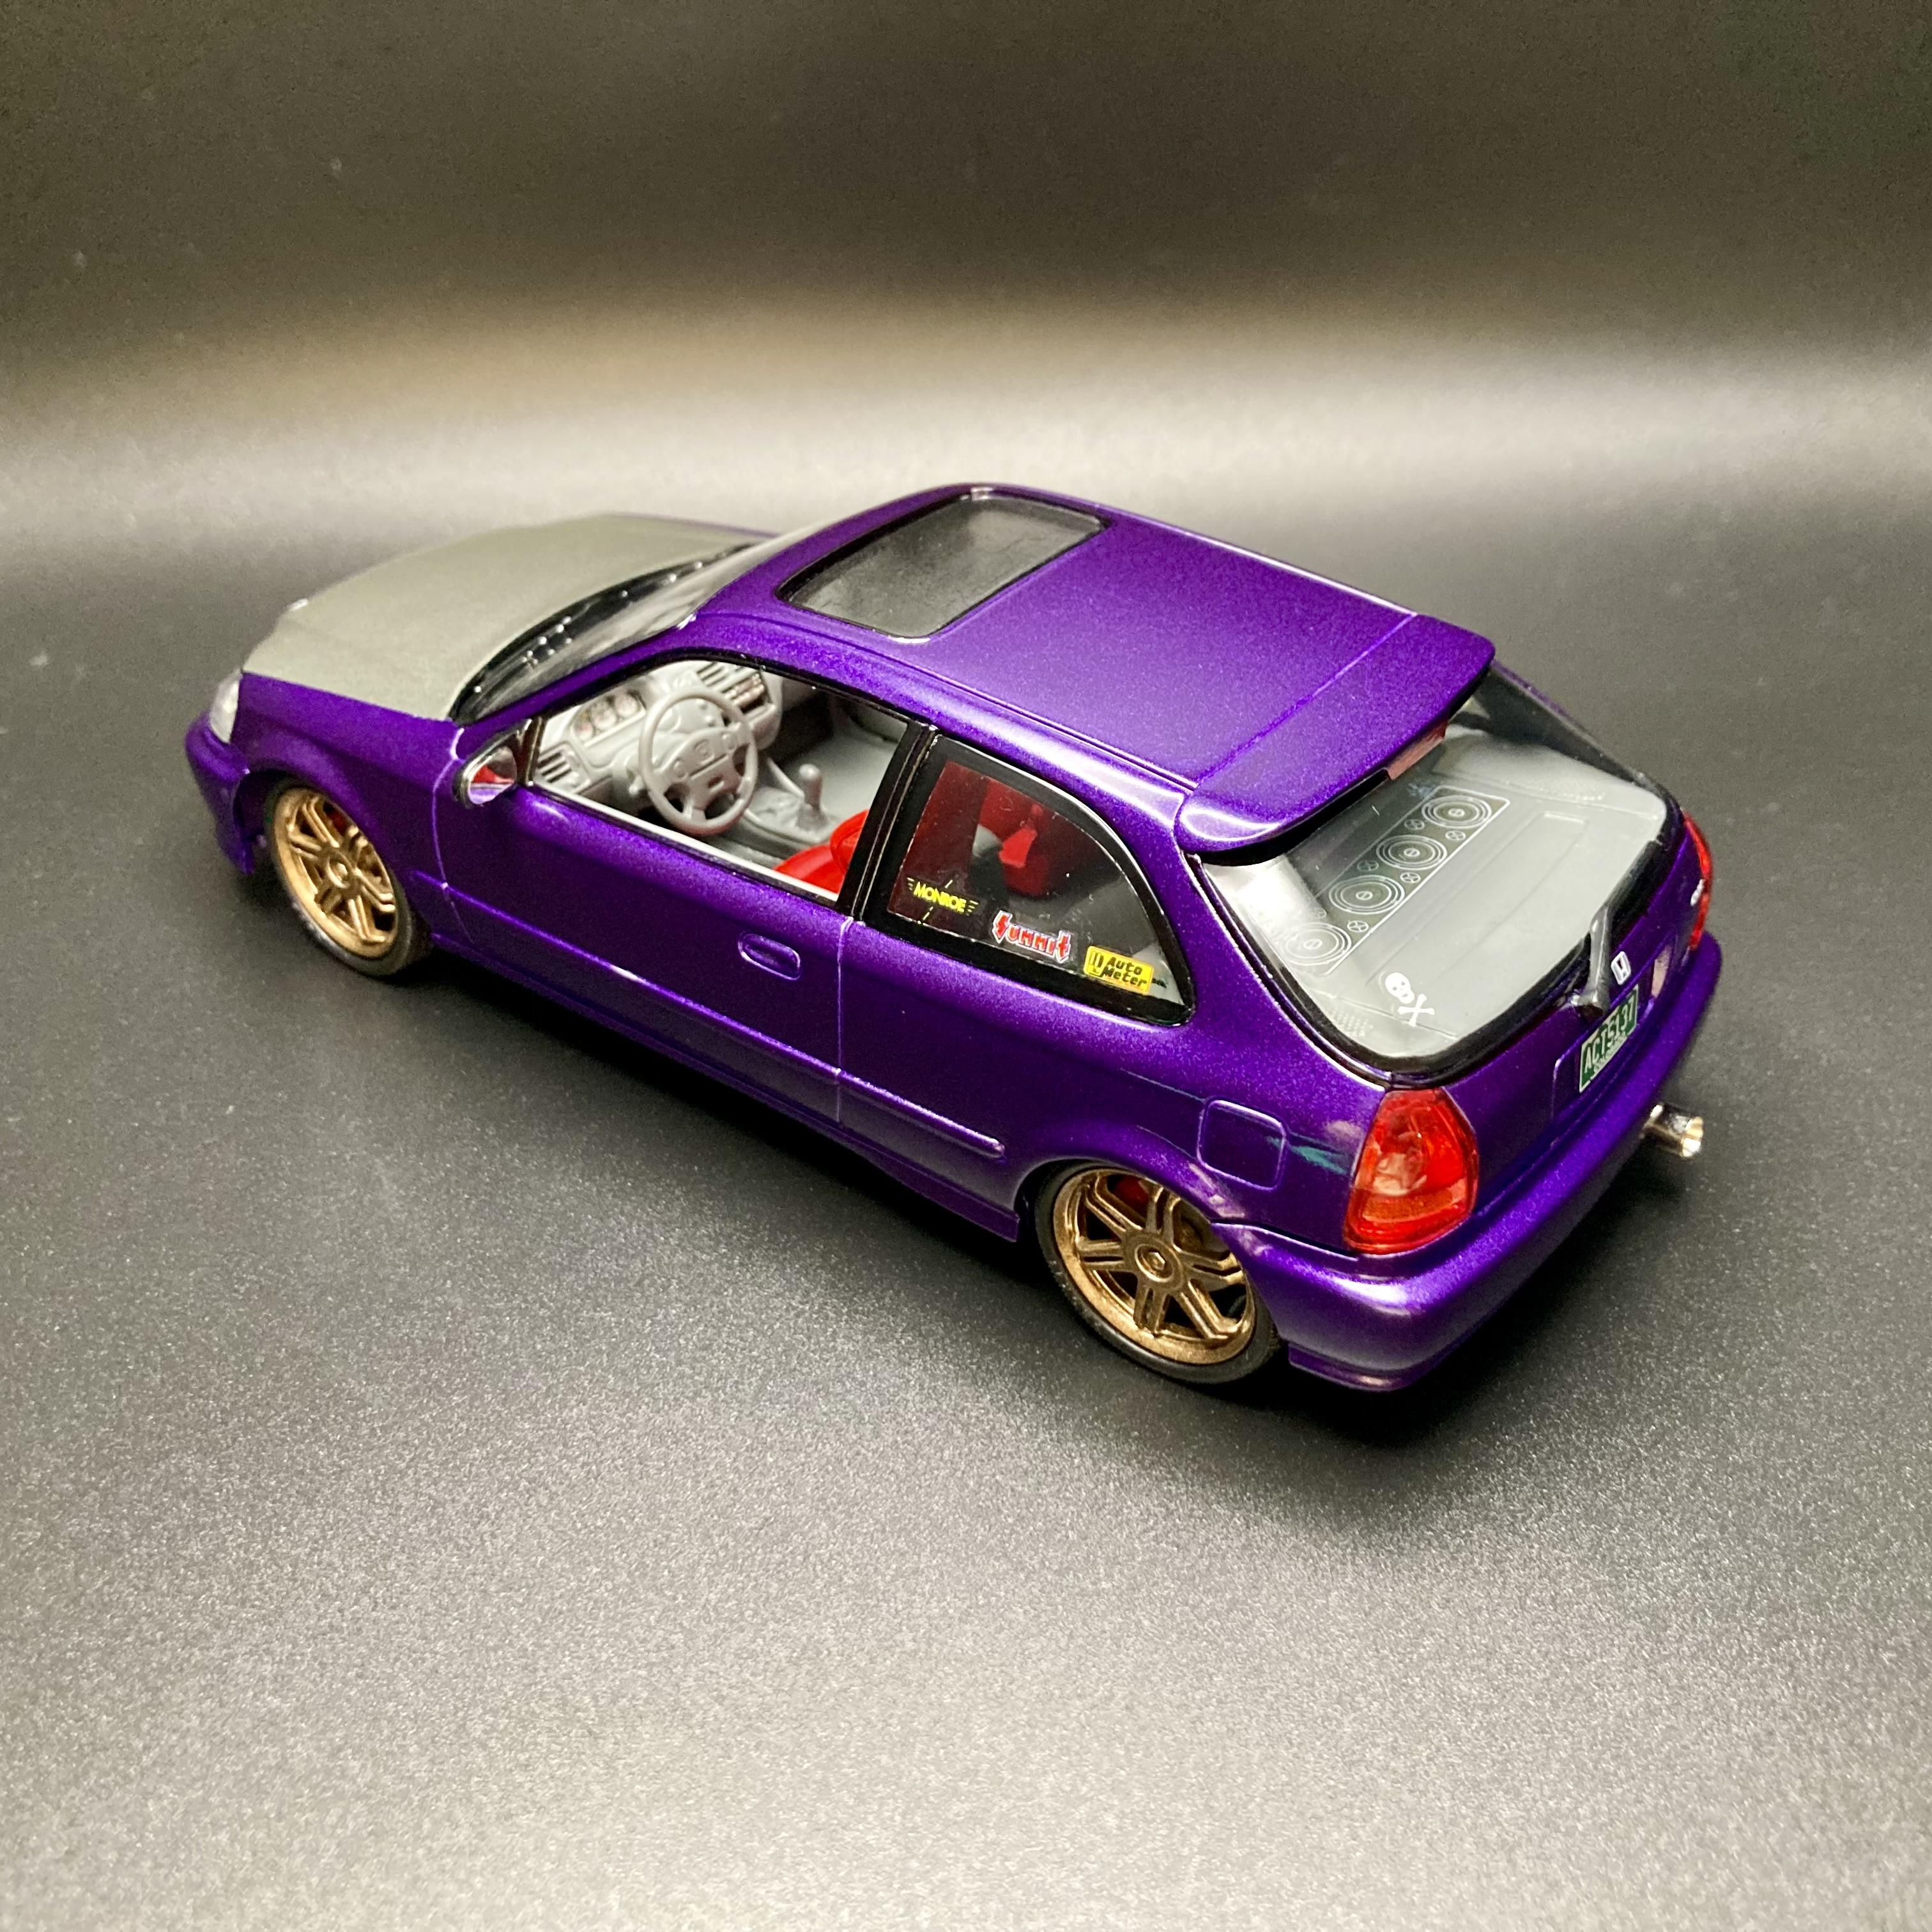
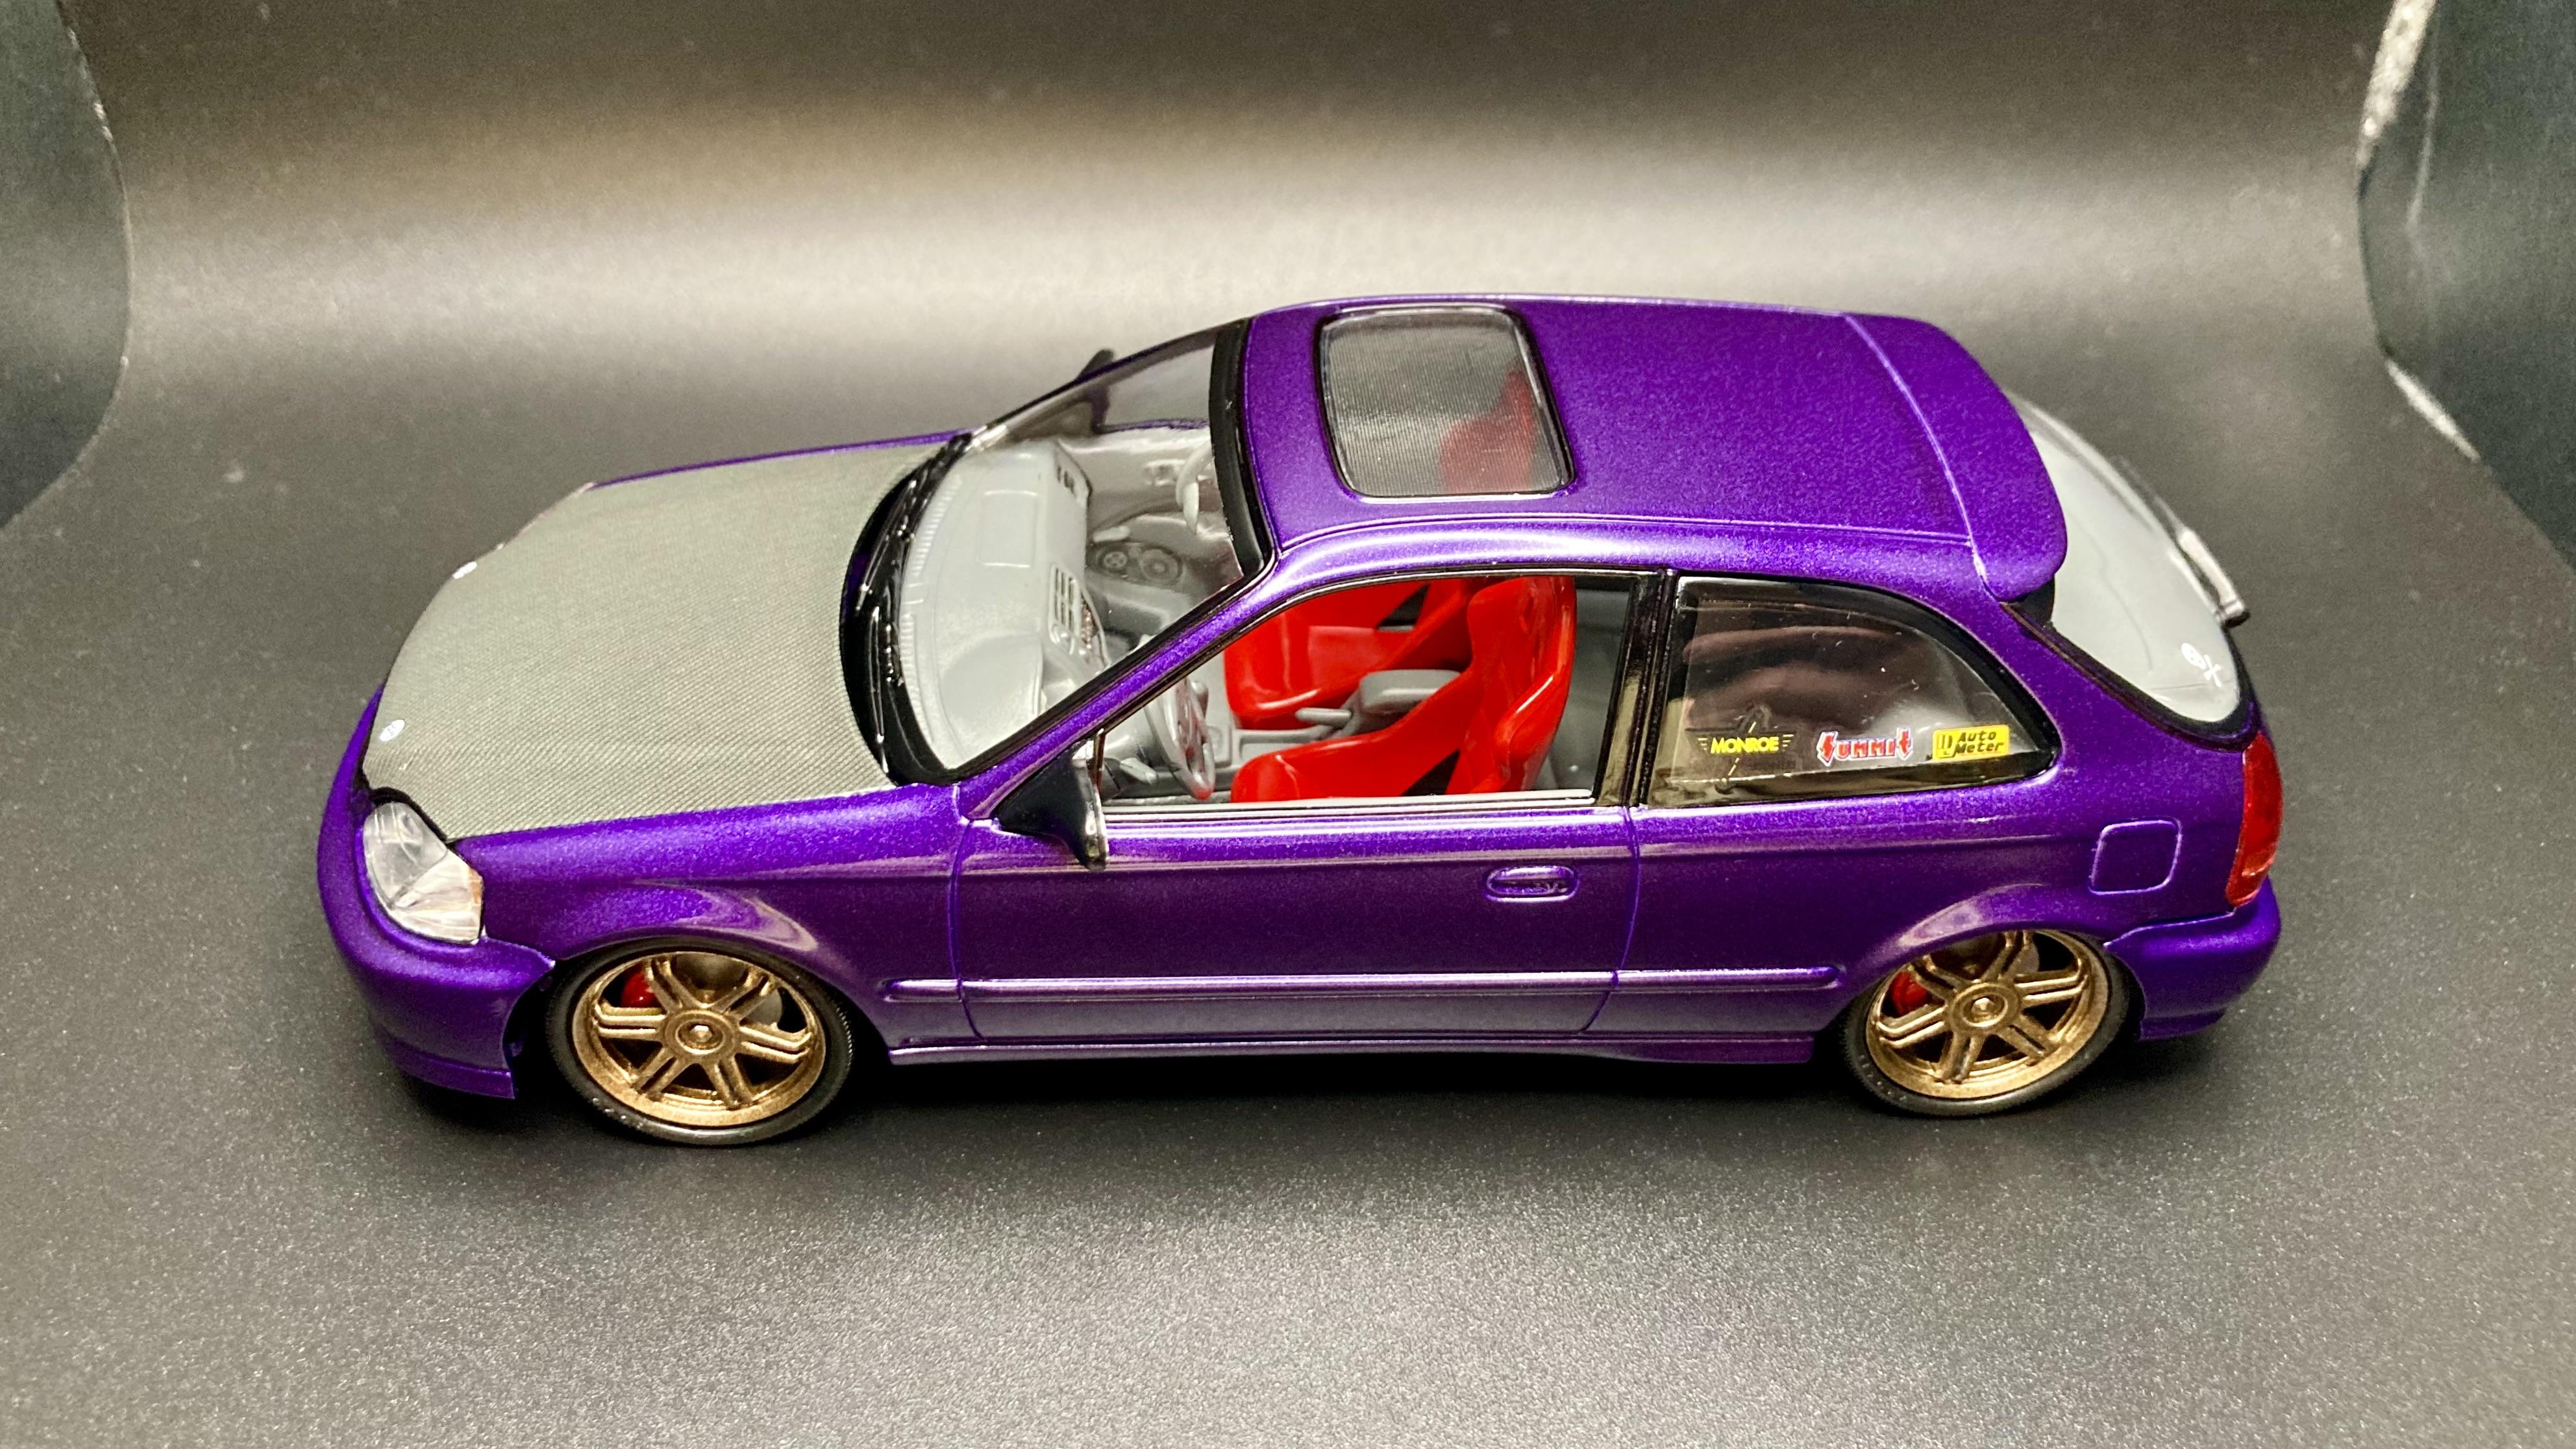
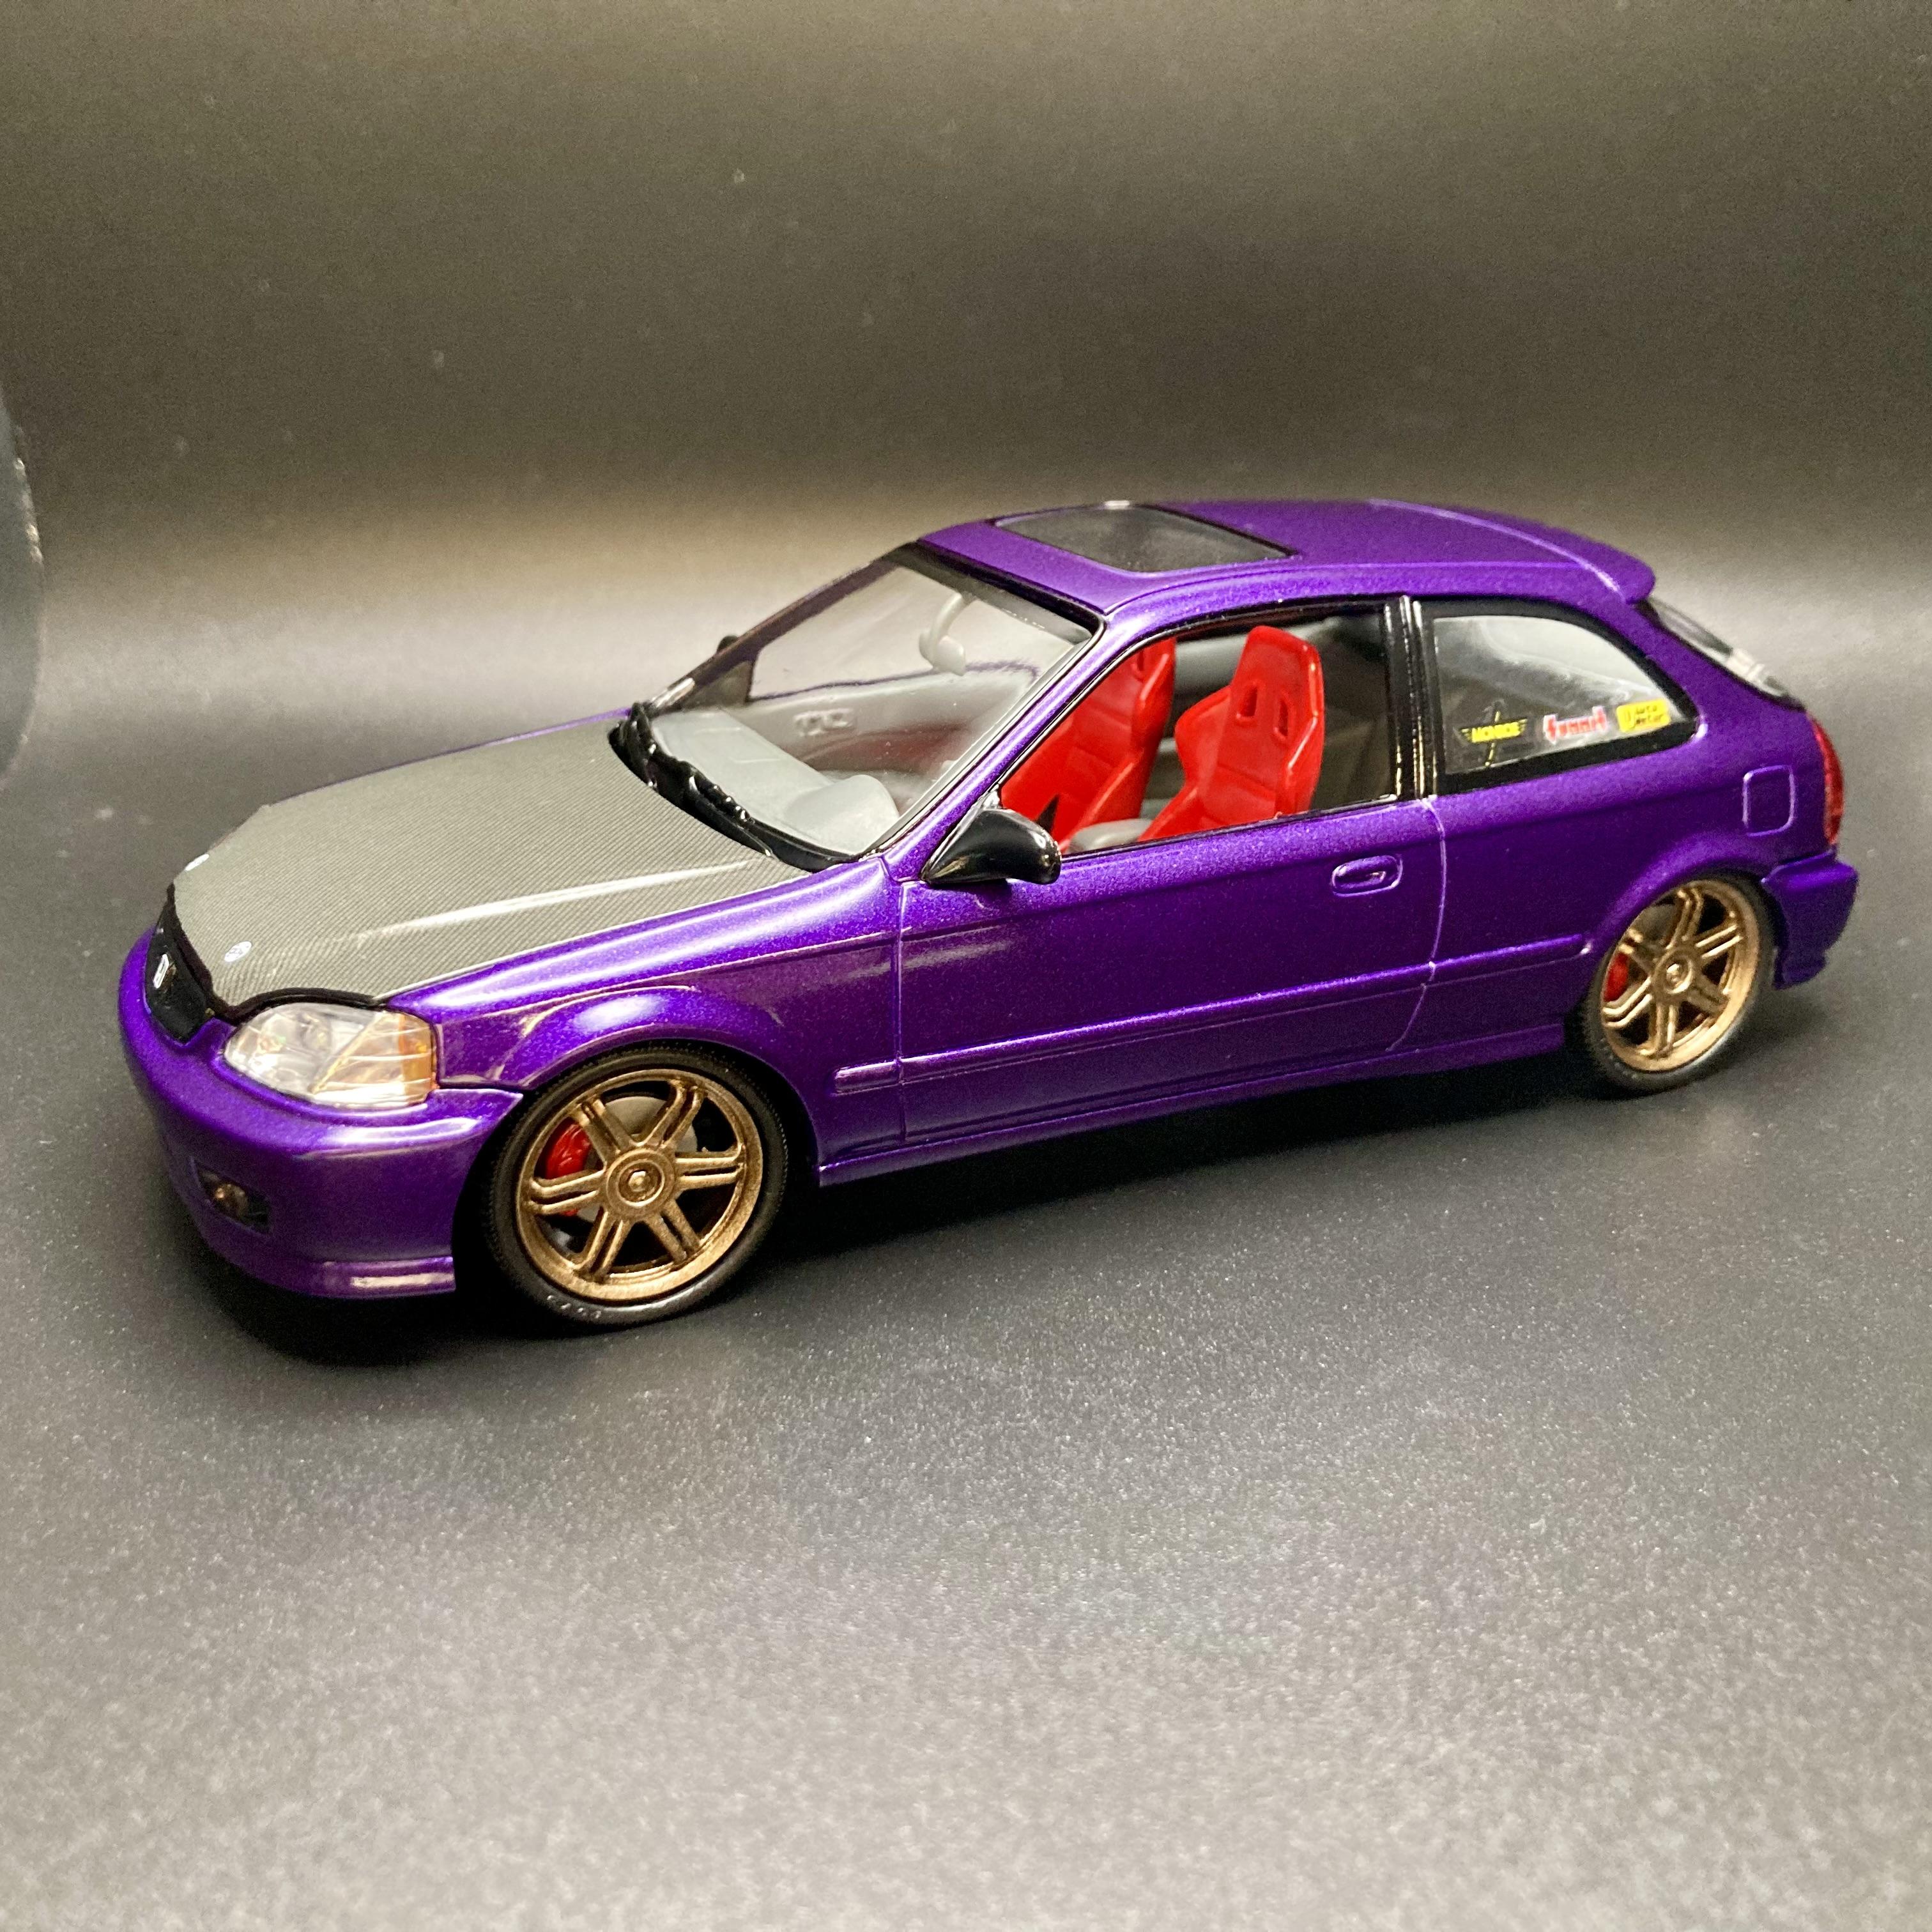
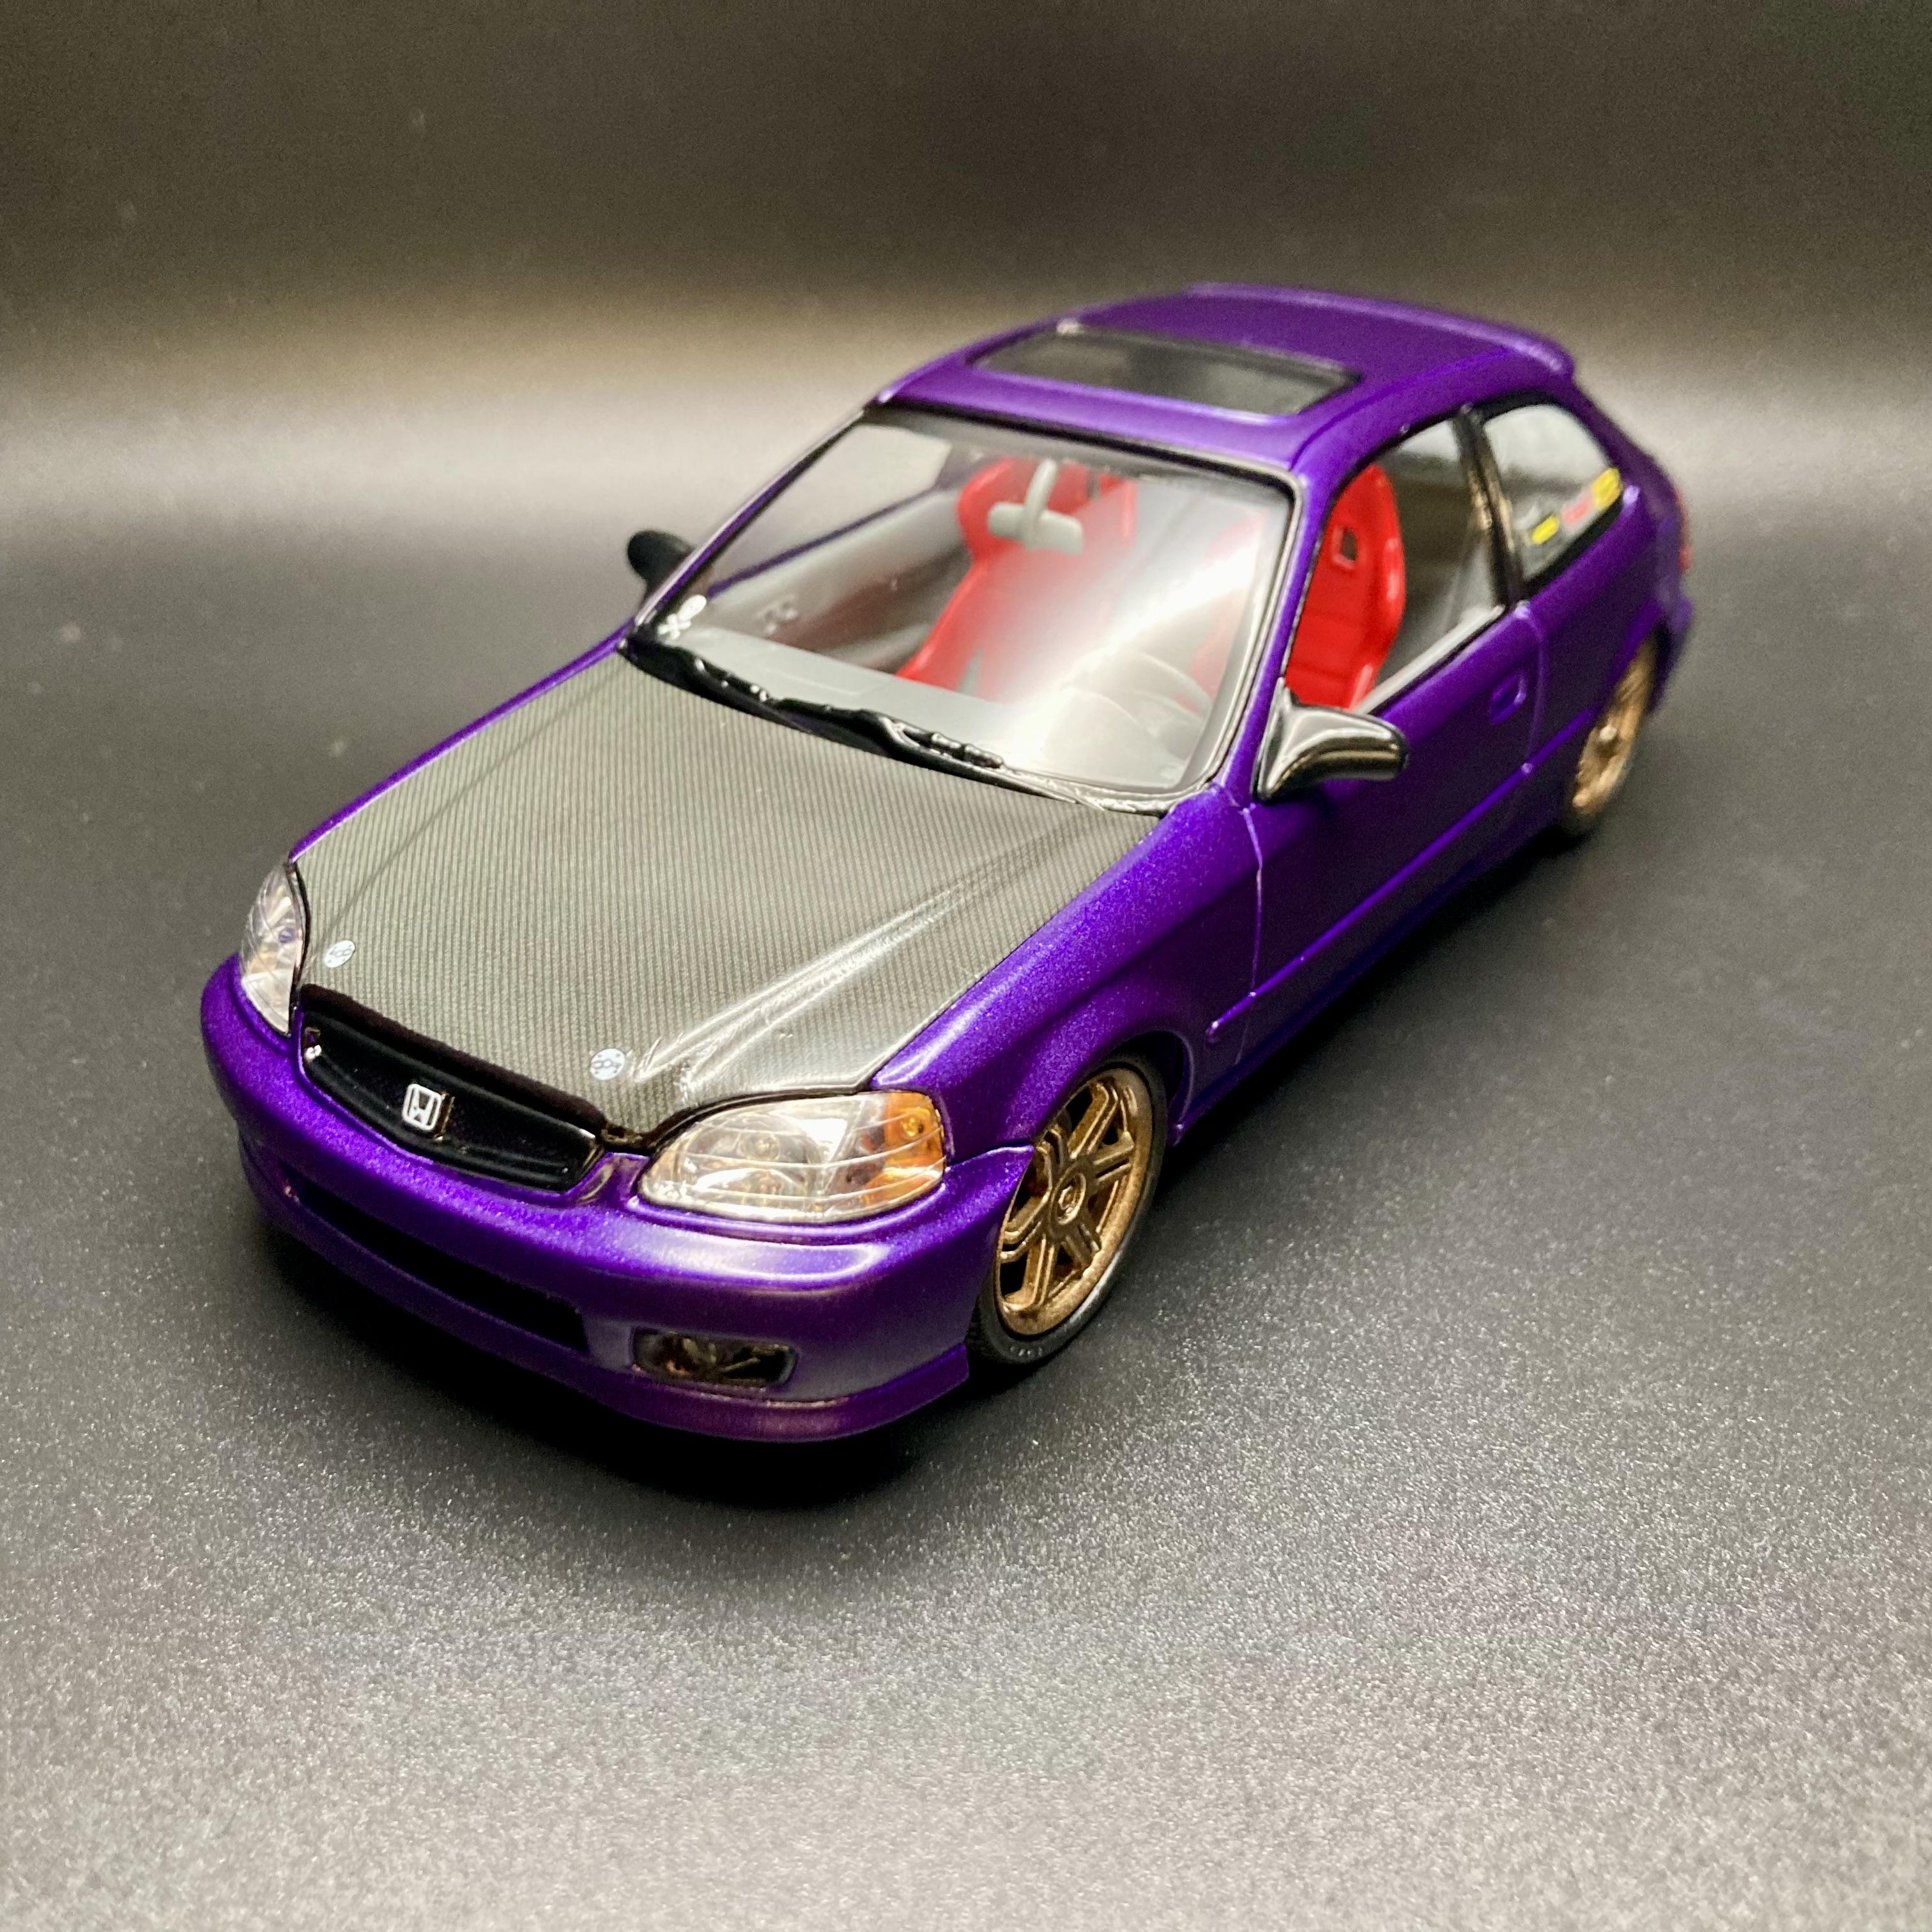
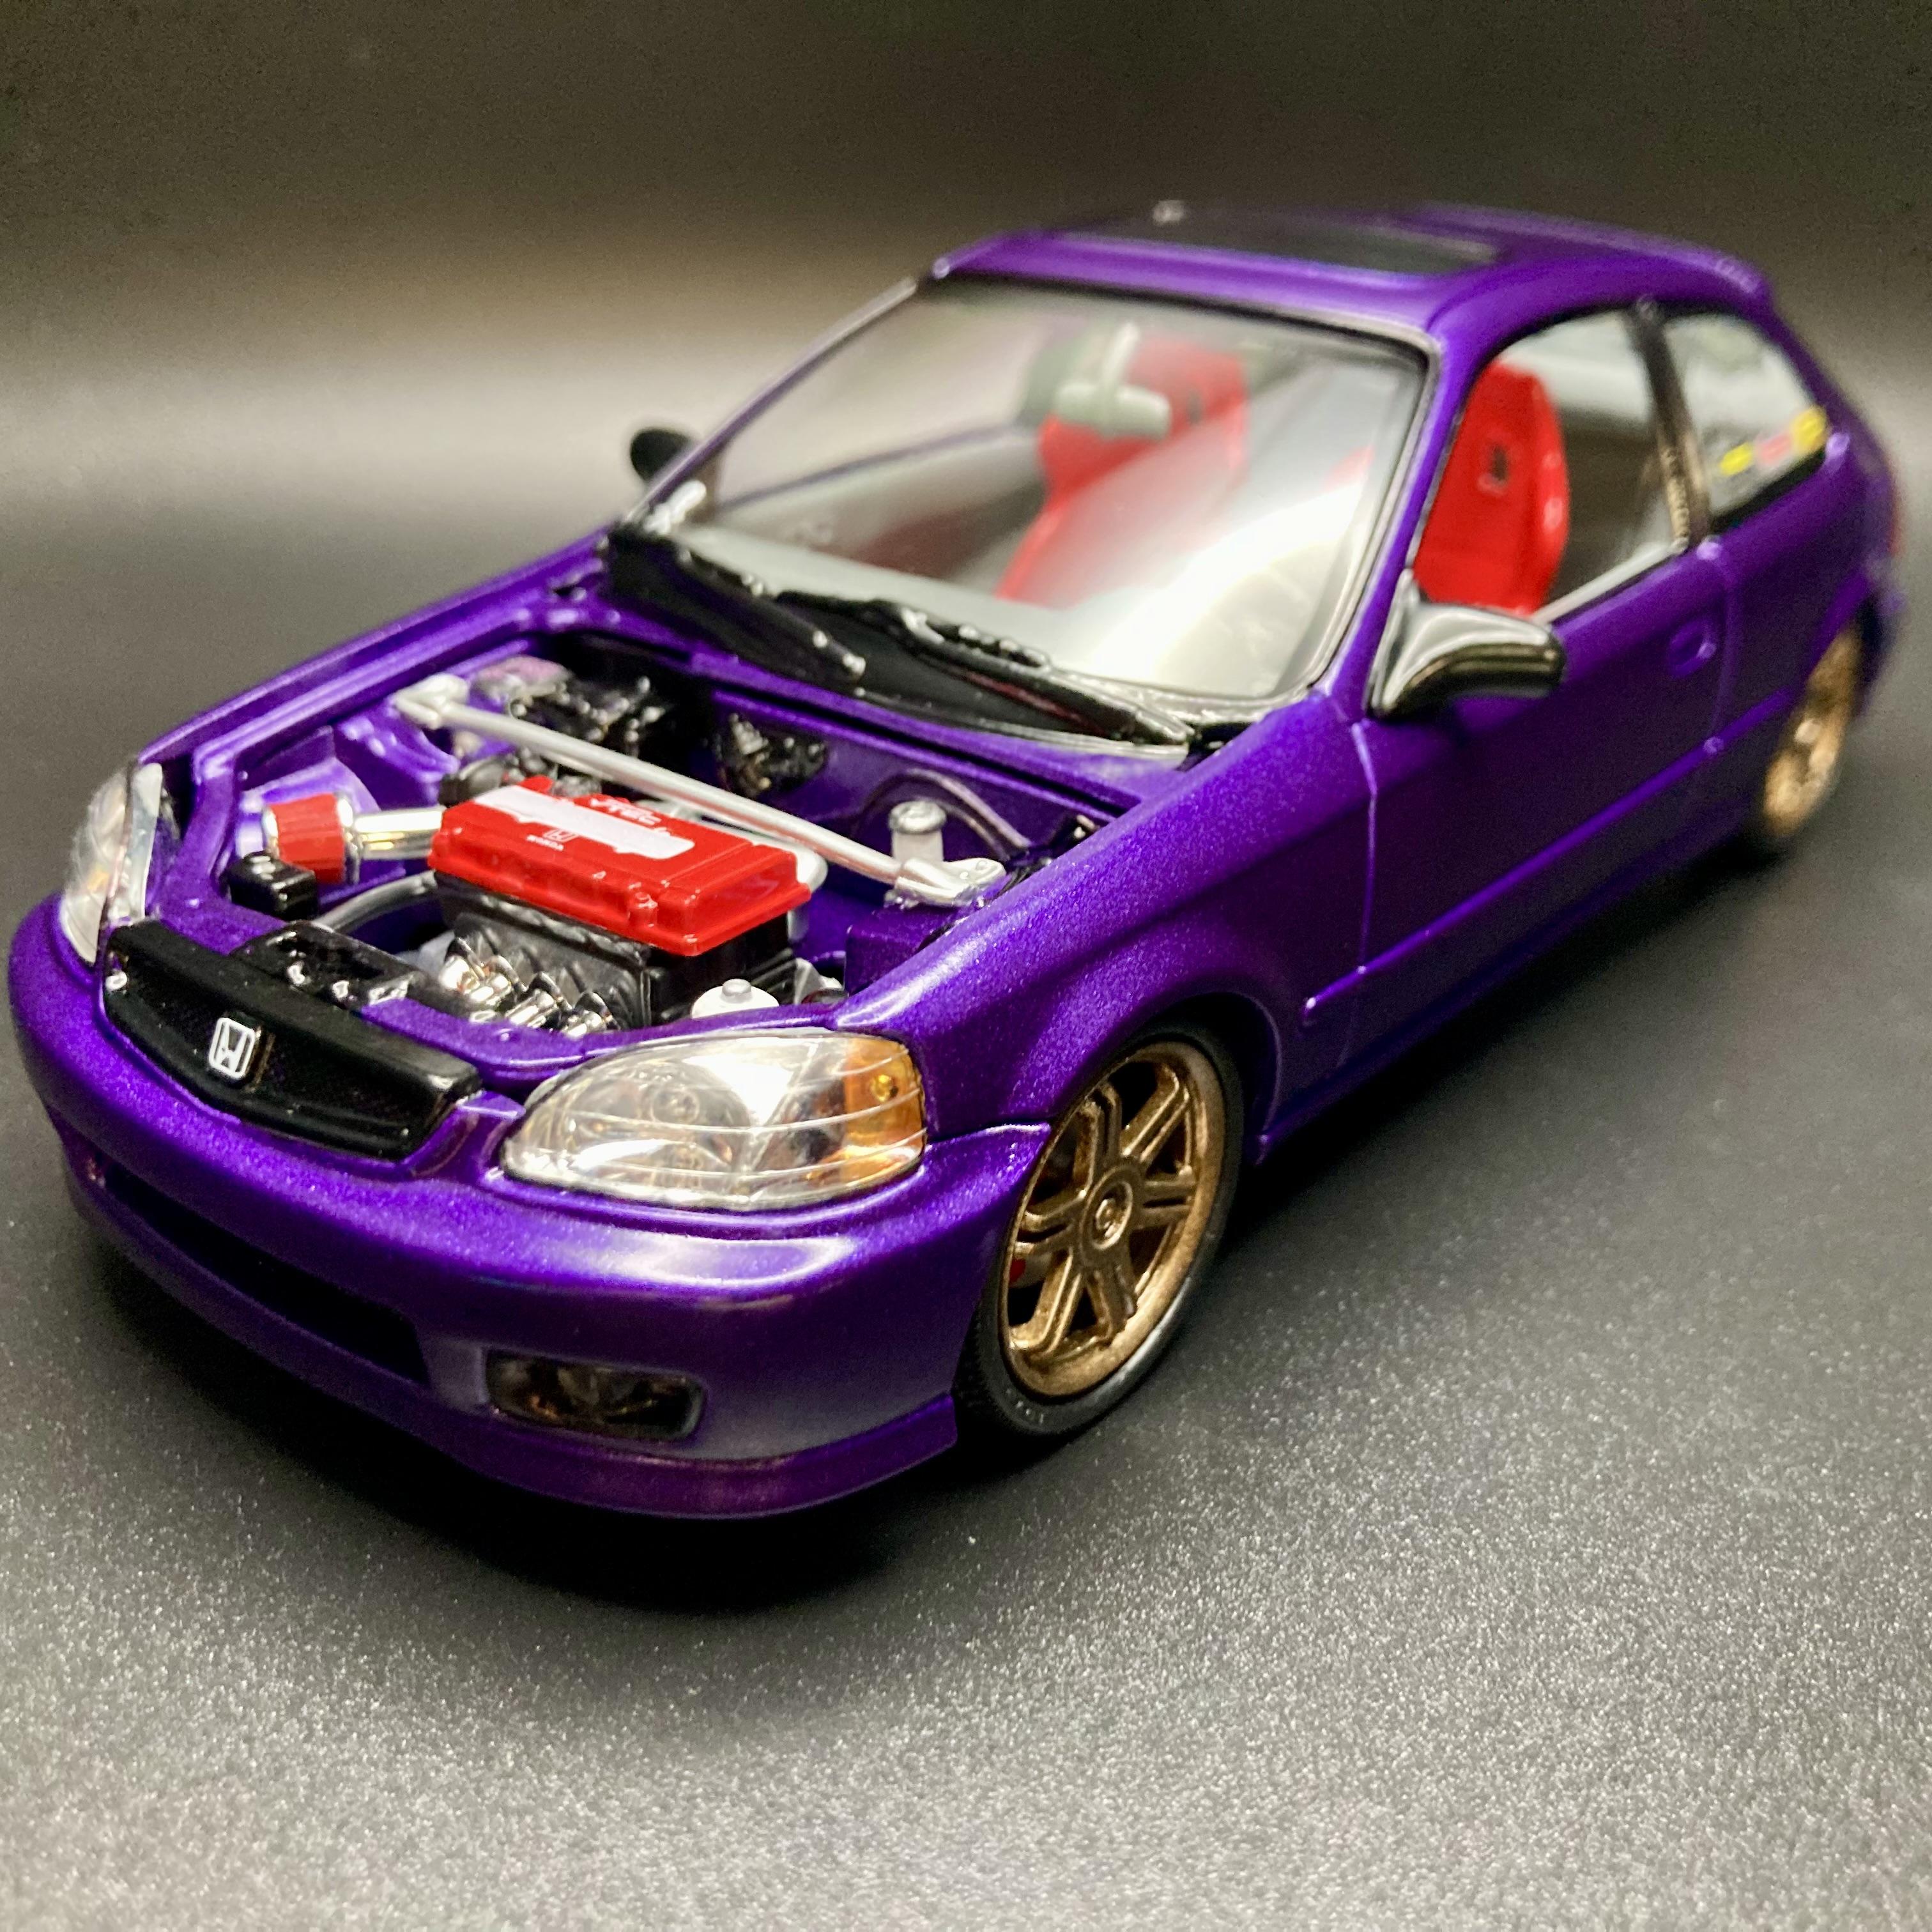
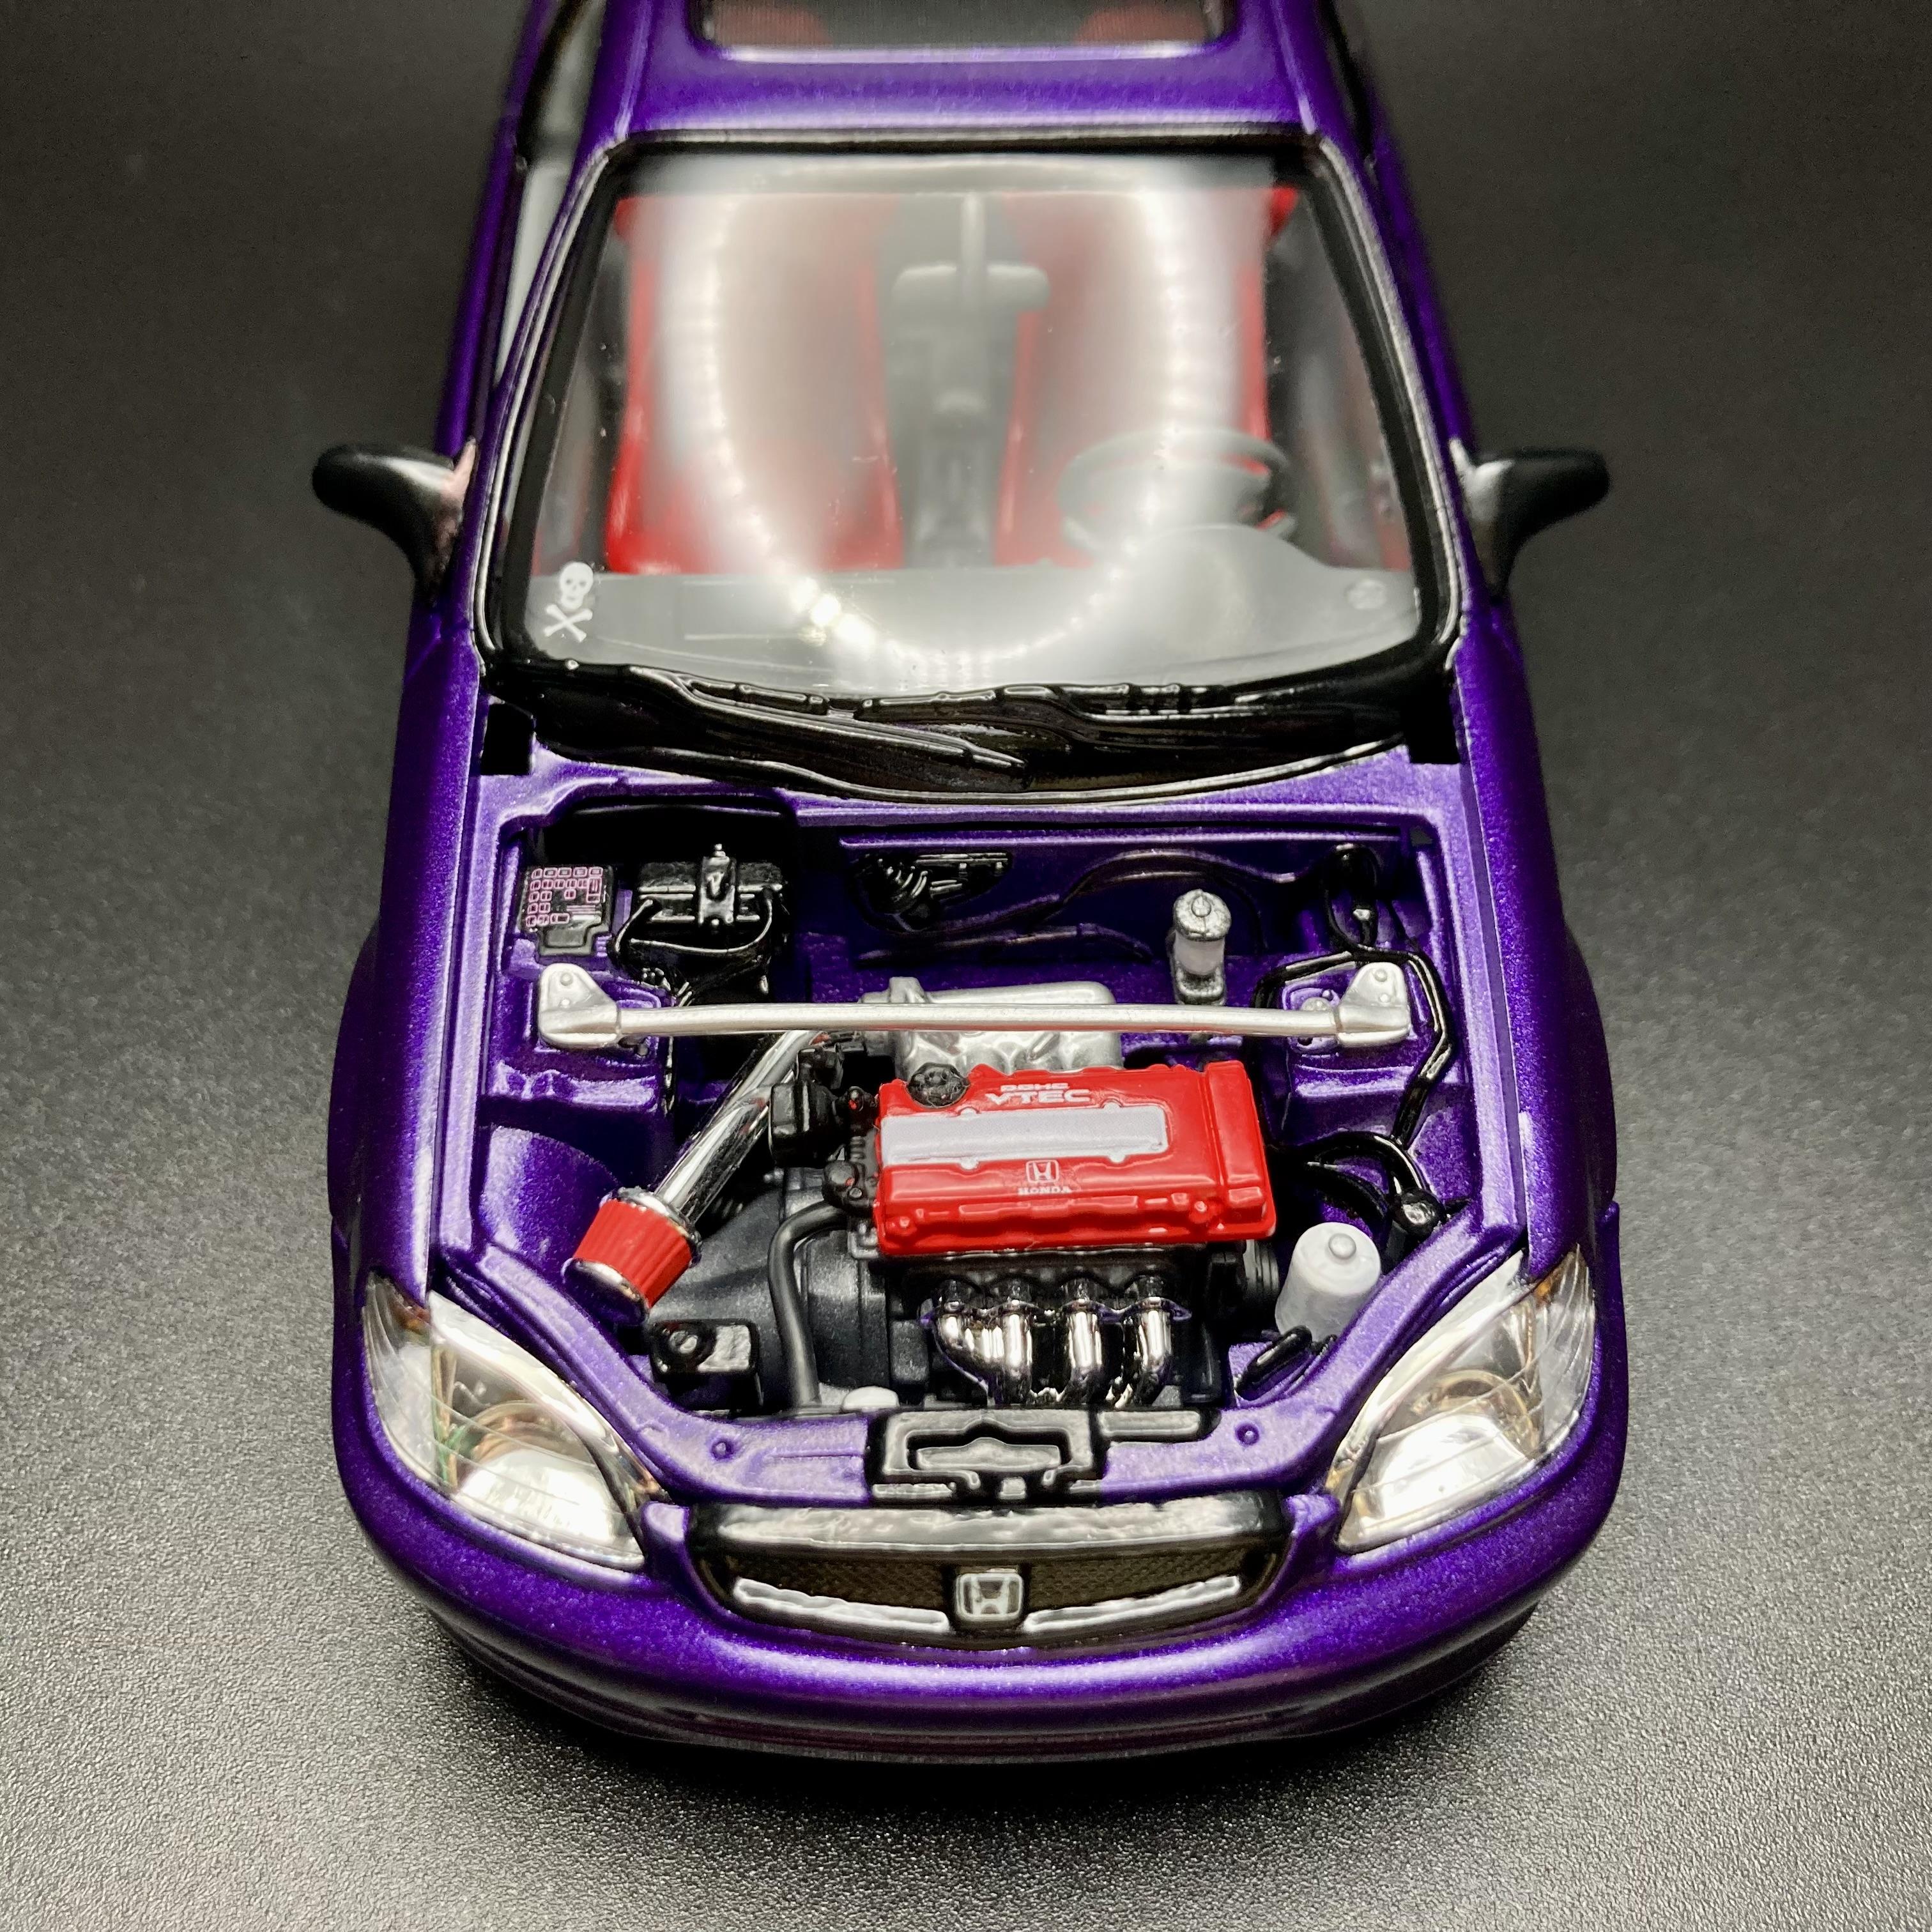
Here’s my Revell Honda Civic EK Hatchback! These Tuner Series kits are a ton of fun with lots of custom options. I built the Integra and Civic coupe as a kid when these kits were new, so this was definitely a nostalgia trip for me! I recently bought the entire series from eBay now that I have adult money; my allowance back then did not stretch far. 😂 I built this one with a more modern JDM/tuner look than the fun-but-gaudy 2000s style the kit represents. I painted it in Testors Extreme Lacquer Purplicious to vaguely match the best Honda color ever, Dark Amethyst Pearl. Interior is in Krylon gray. The racing seats came from the SVT Focus from the same series, in Rustoleum Gloss Apple Red. These Tuner Series kits build up very nicely. Revell seriously needs to reissue the entire series, I would buy several of each. That red Civic coupe is the very one I built when I was 12, in full early-2000s-tuner regalia. I brush painted that one in Testors Acrylic; body graphics were kit decals applied long before I knew Tamiya Mark Fit existed. It’s one of my better childhood builds of the surviving few, but the camera is definitely hiding a ton of blemishes. It’s fun to see how much my skills (and taste) have improved!
- 10 replies
-
- 11
-

-
This is the excellent revell kit built box stock in testors white enamel with Fred caddy decals. This is a great building kit with lots of aftermarket decal options.
-
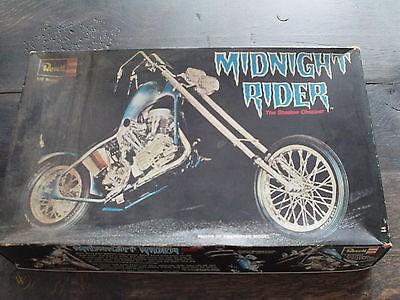
 Hello all, I'm in need of 1971 REVELL H-1229-380 Evil Iron Knight Rider Chopper Trike 1/8 Model Kit instructions I purchased a not completed one of these and instructions are missing! hoping one of the members here can please scan and post please? or point me in right direction on where to get instructions. thank you in advance!
 -
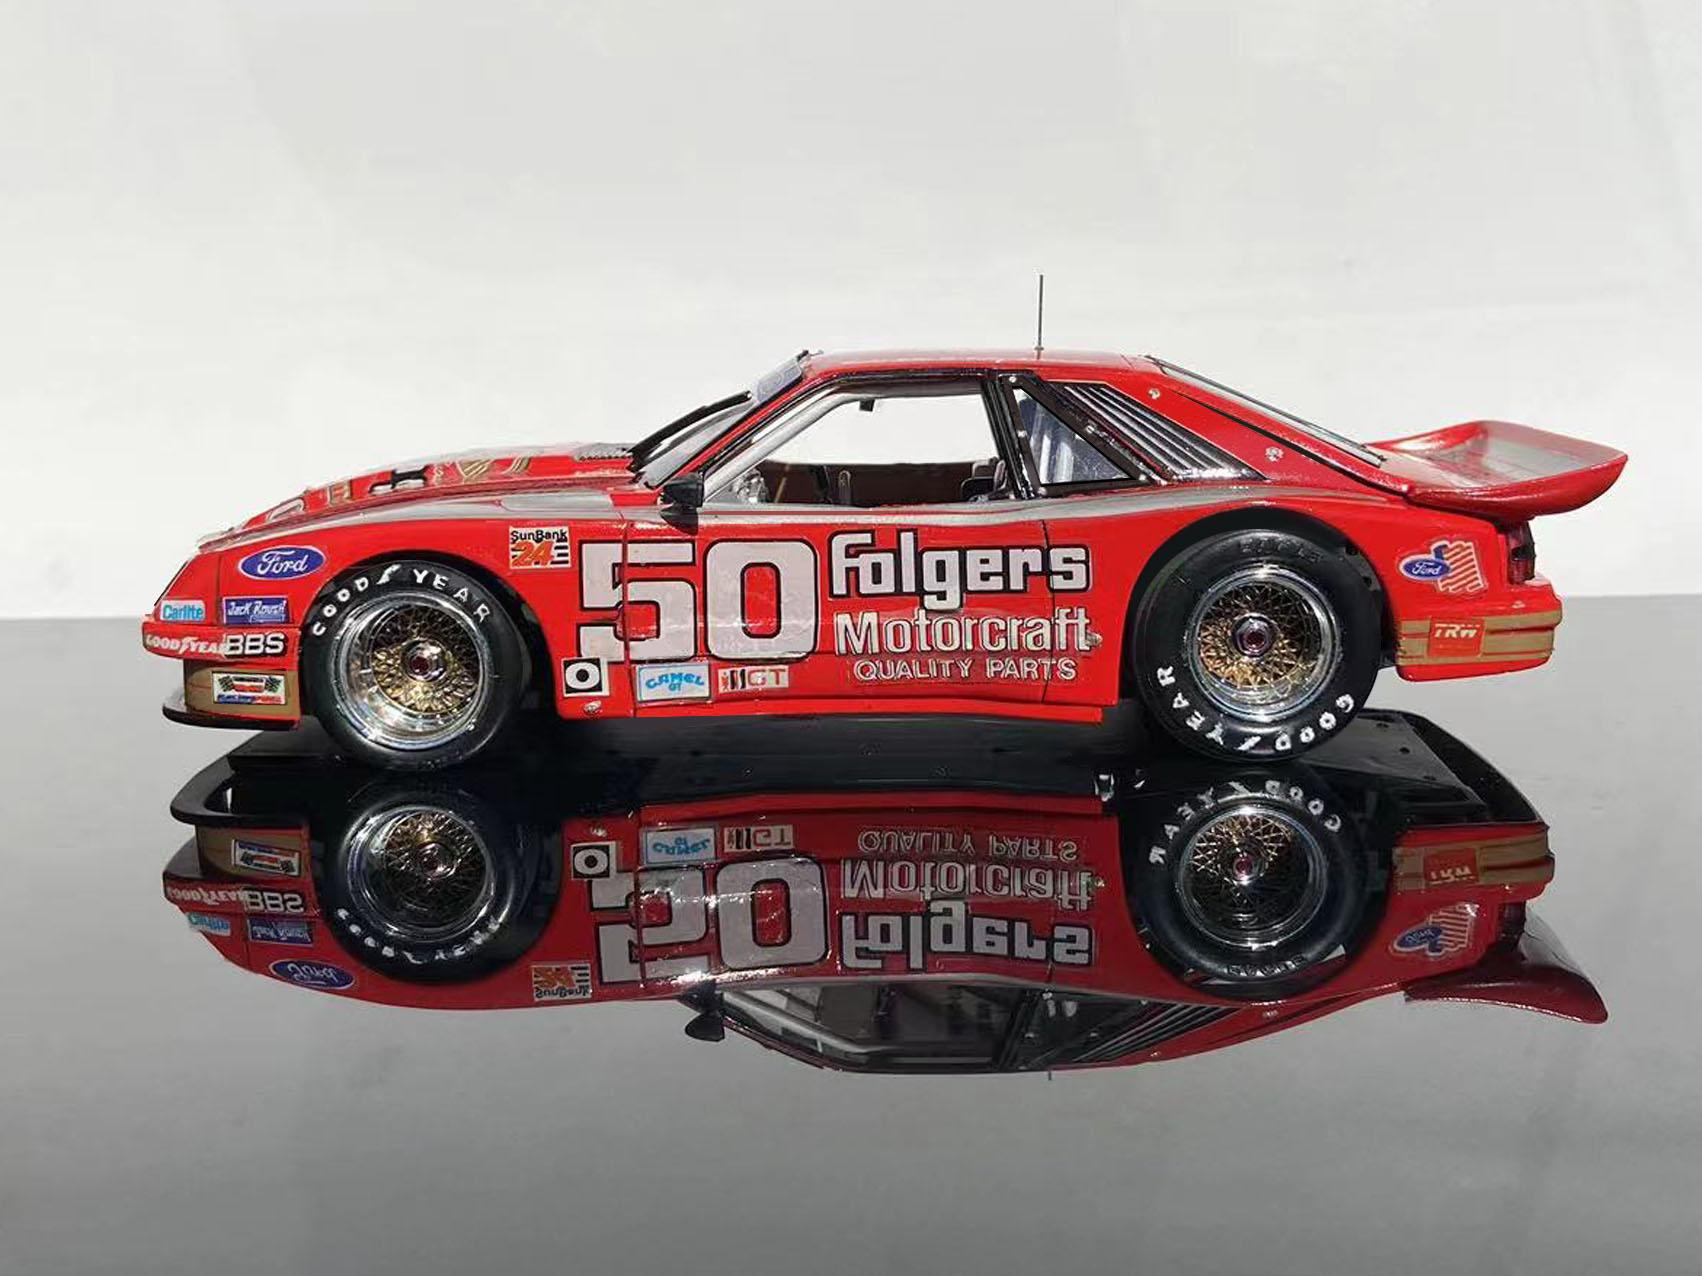
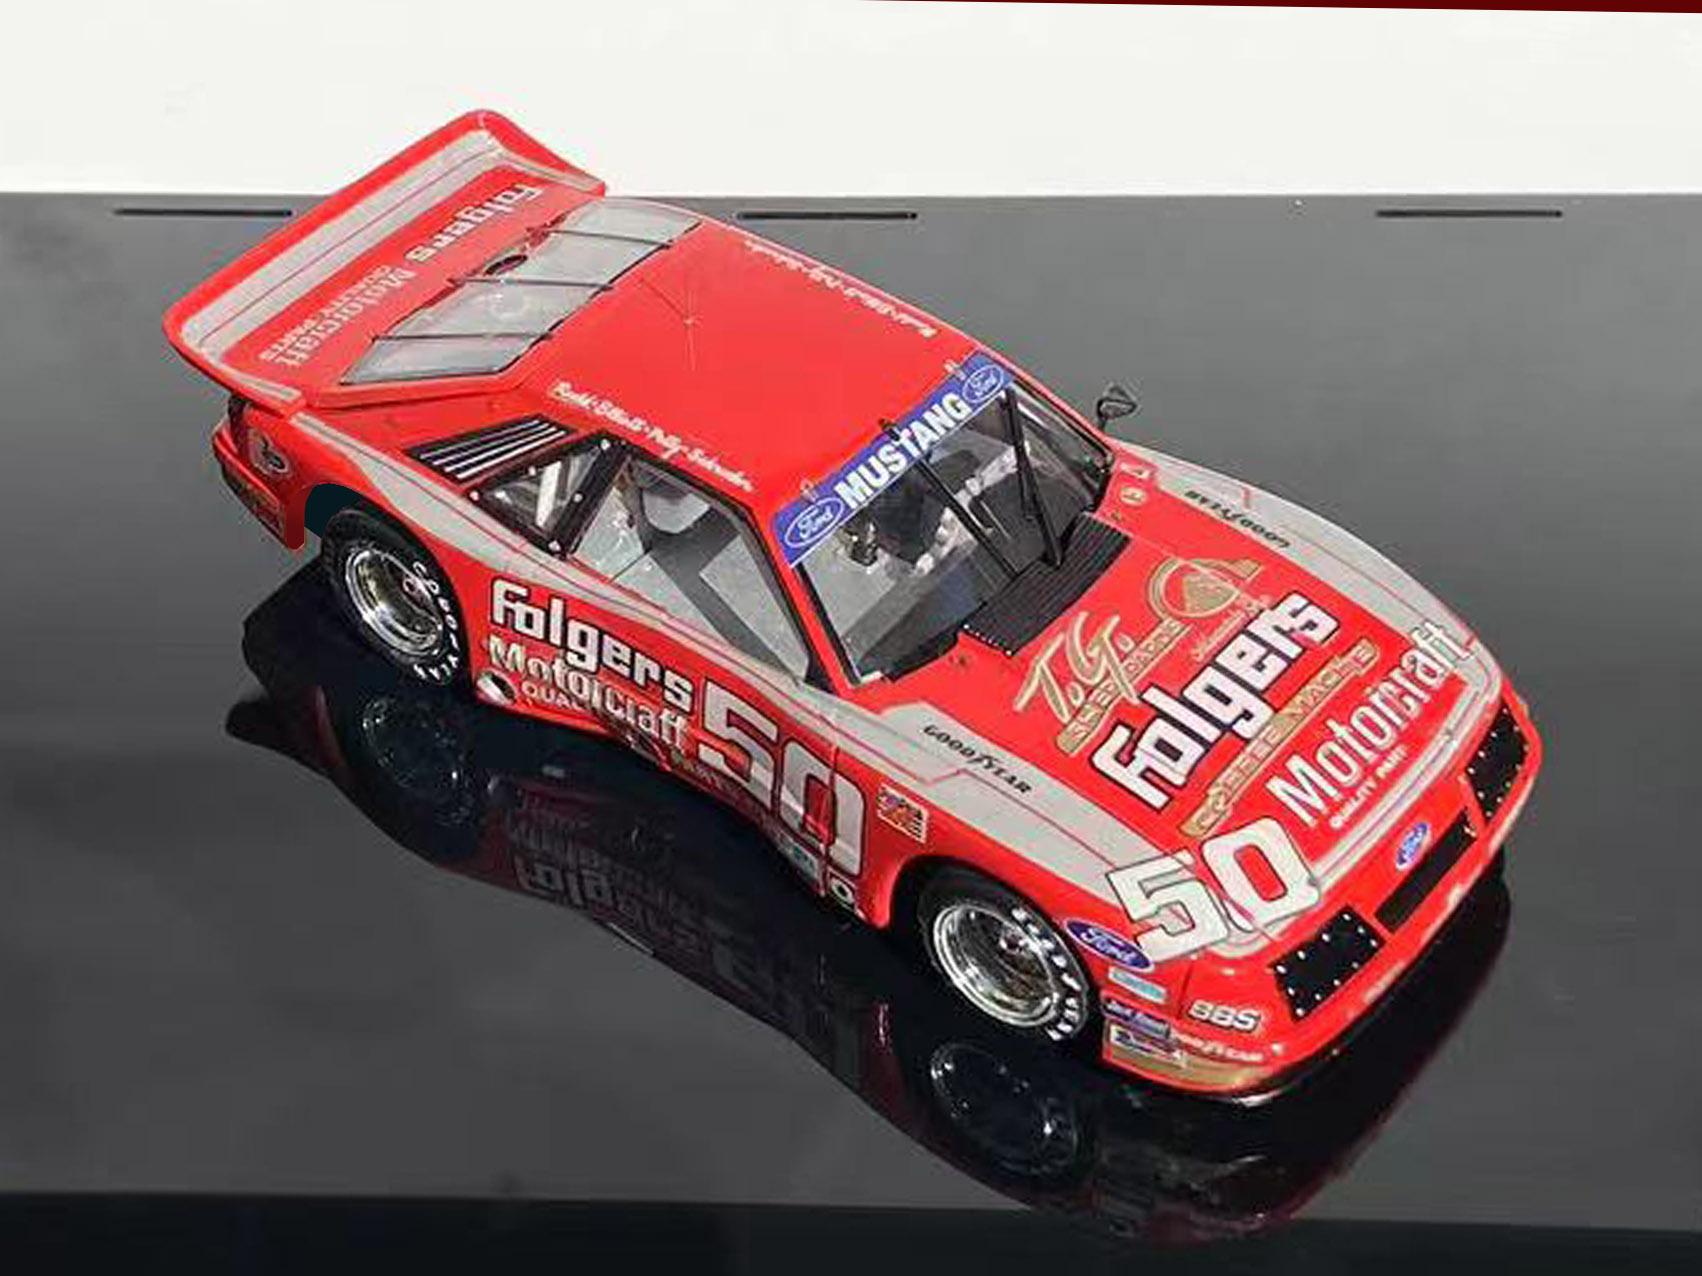
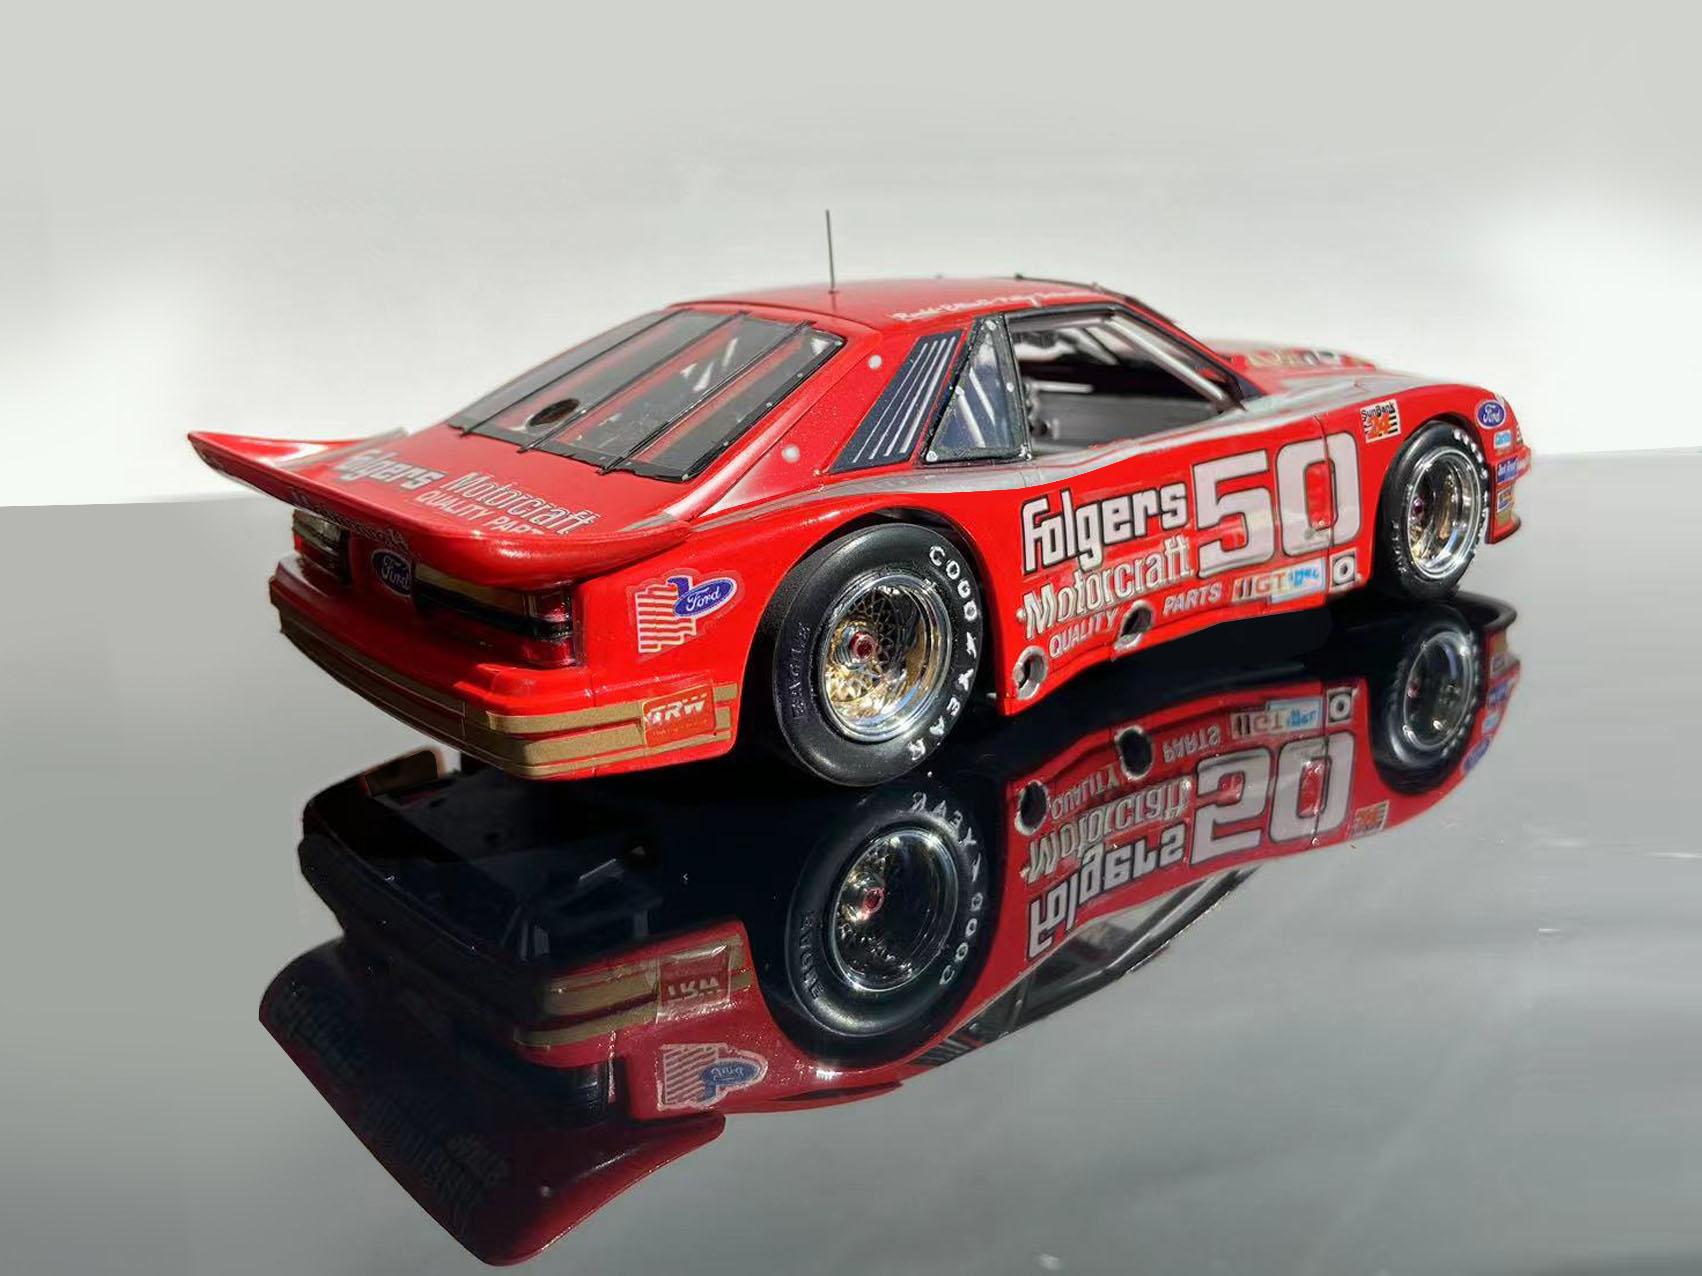
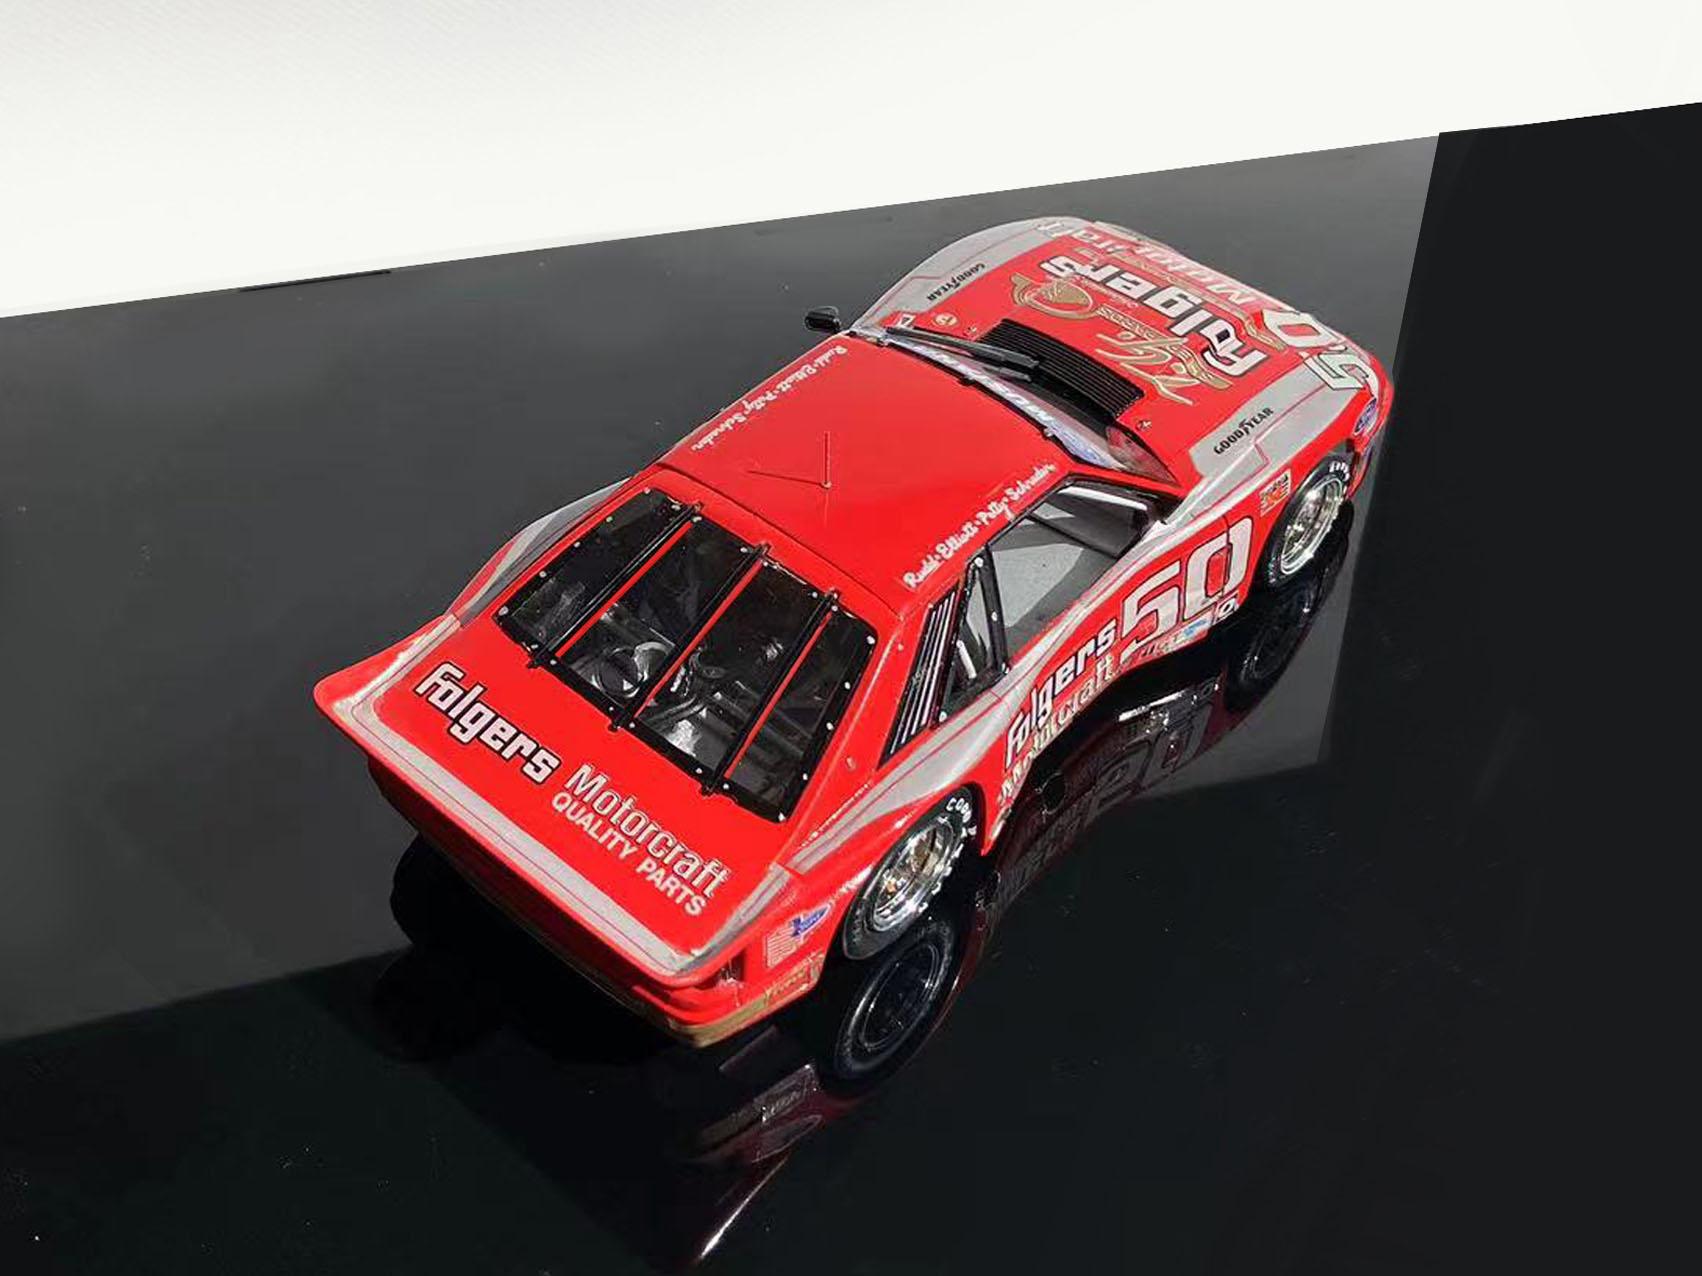
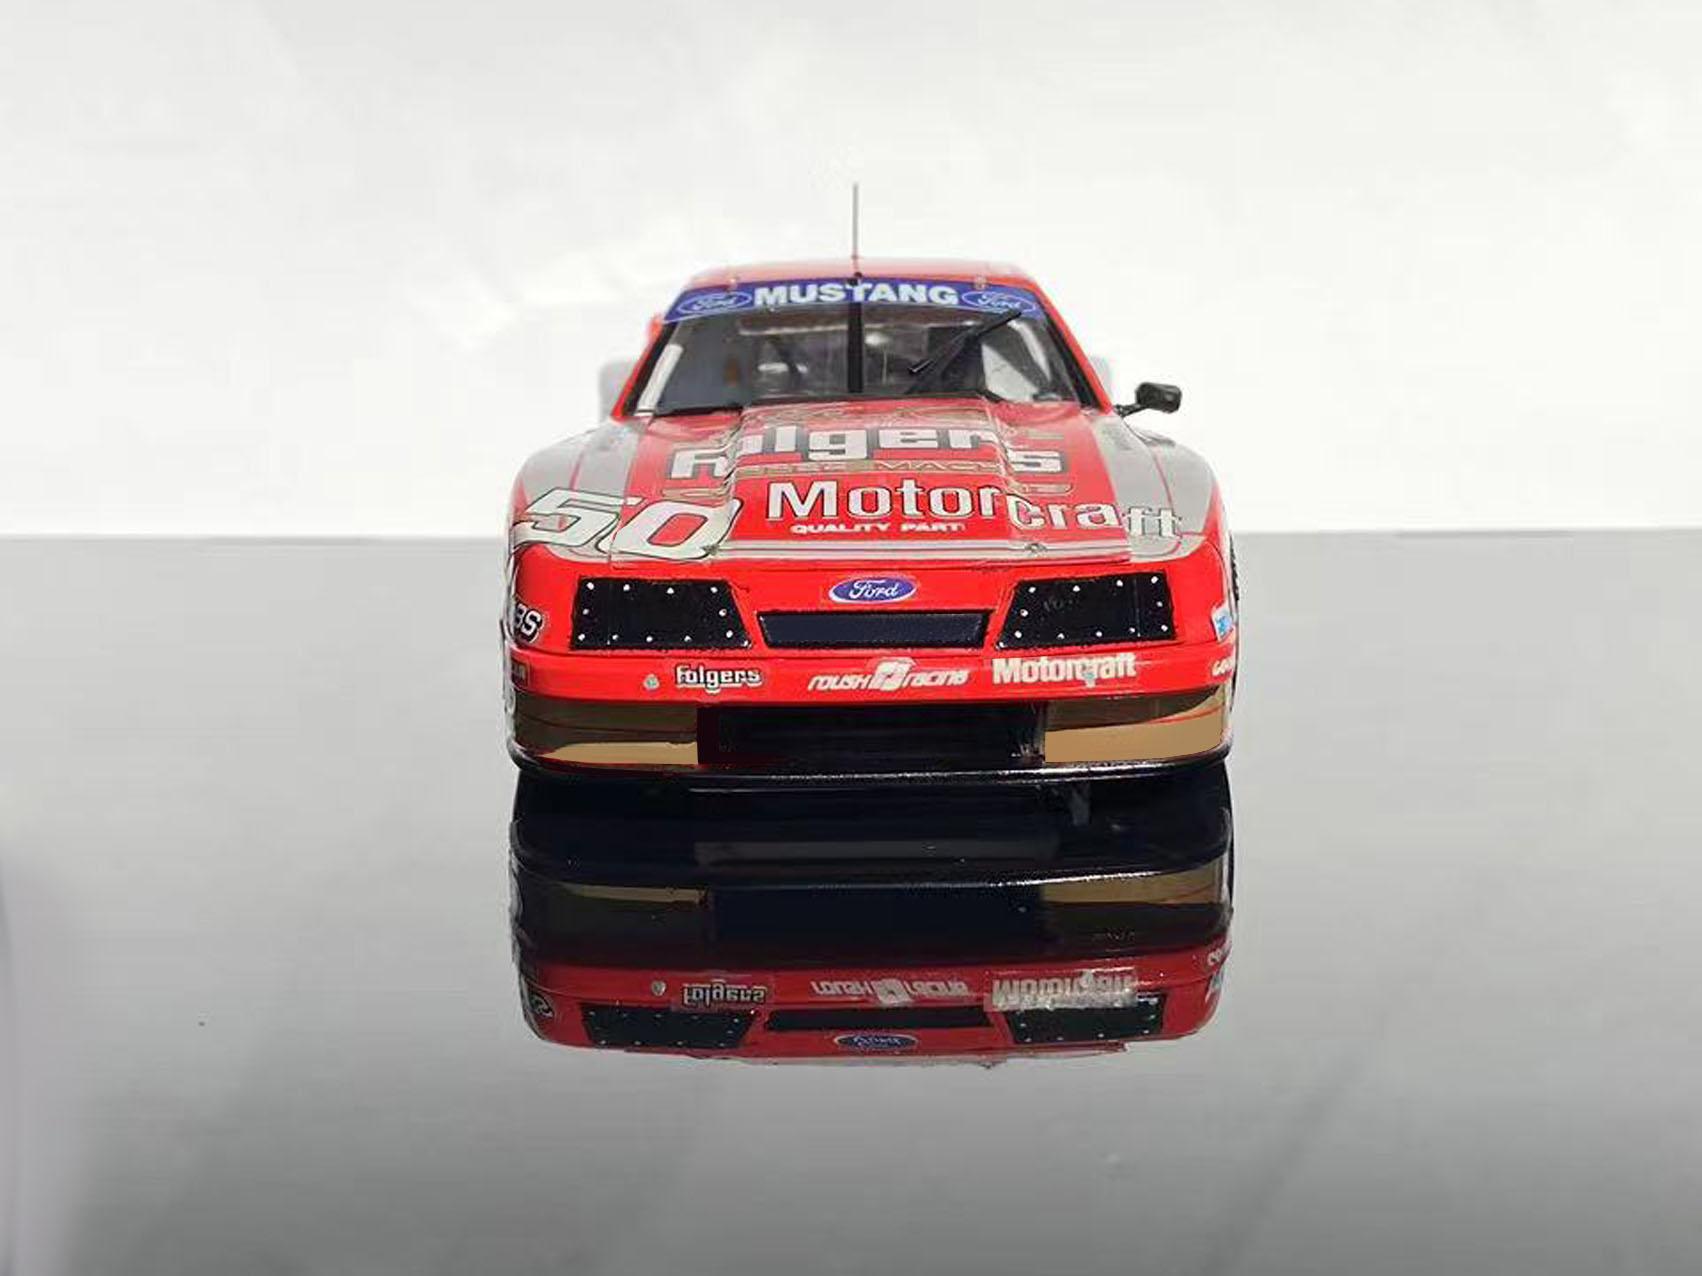
My first completed build of 2024 is Revell's 1985 IMSA Mustang ...Built from the box applying the original, nearly 40 year old decals! Expecting the worst, I was fortunate that Tamiya Decal Set and a lot of lip biting had worked. I used Tamiya and Mr Hobby paints and primers throughout the build. Two coats of Mr Hobby Super Clear applied from a rattle can finished off the body. I also added a thin gauge wire to represent a roof antenna. After the build I came across some reference photos and noticed that the real car had a NASCAR style window net. I think I'll apply one in the future. Enjoy the photos.
- 20 replies
-
- 11
-
-
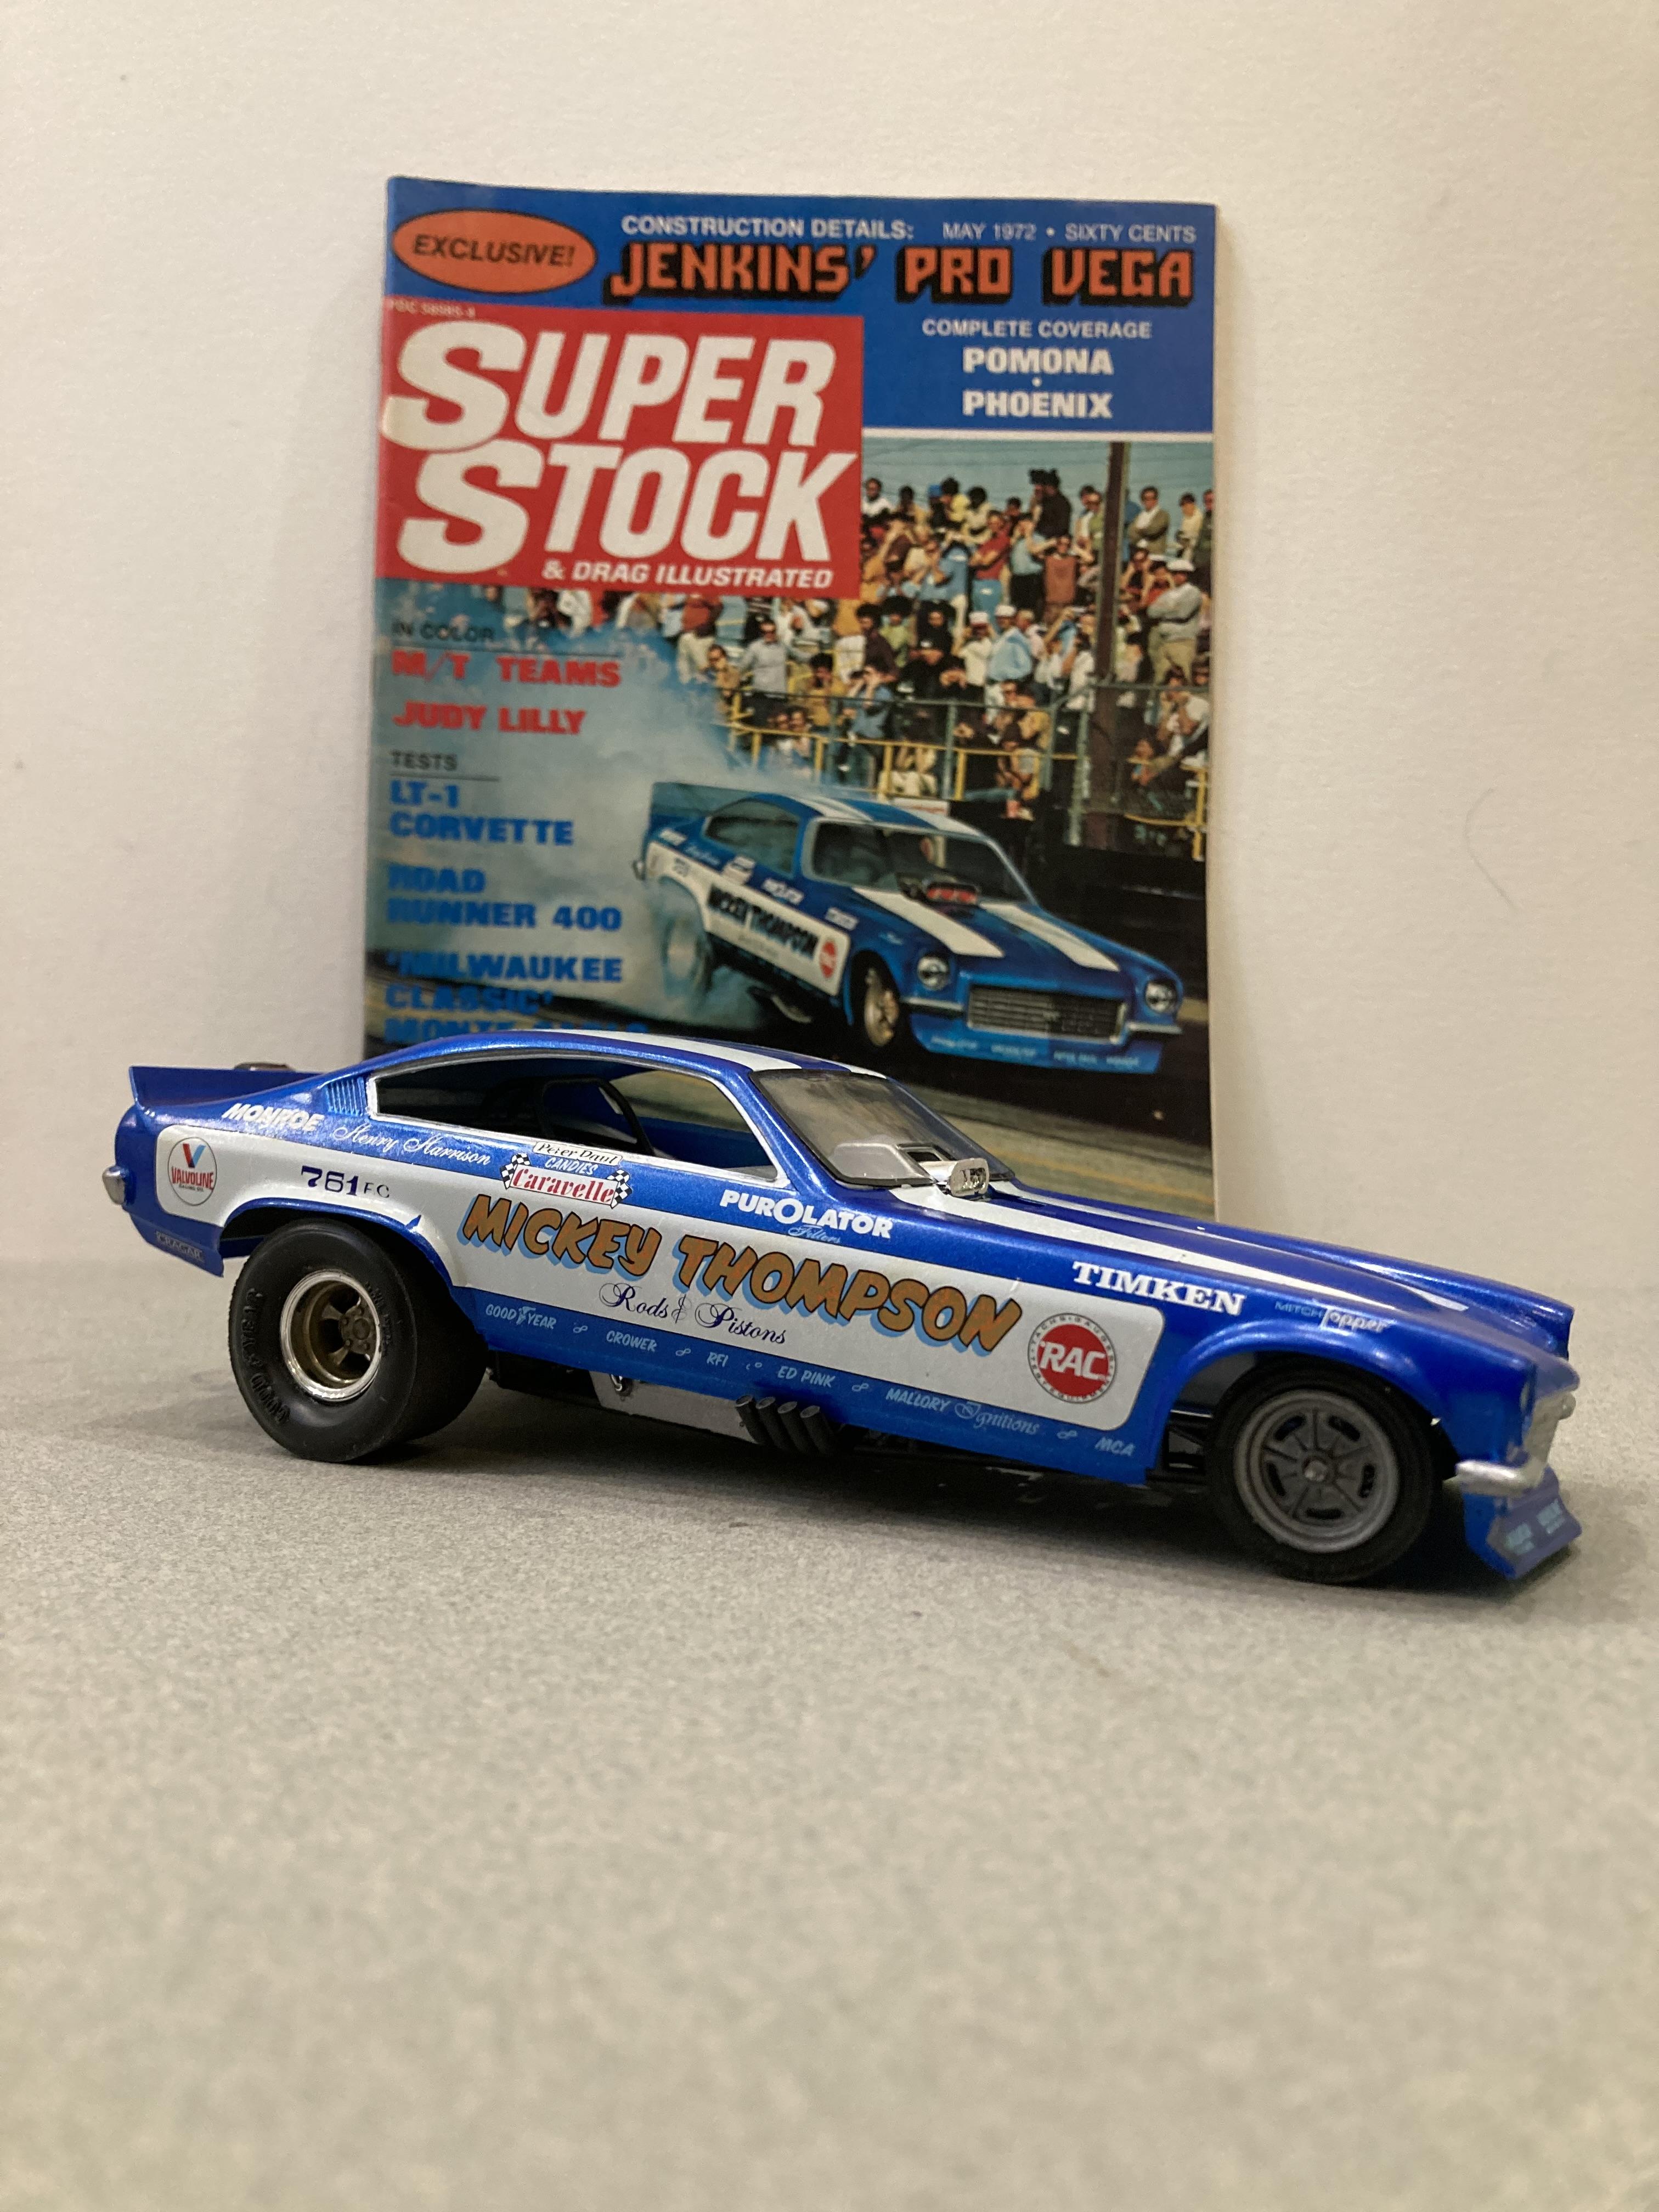
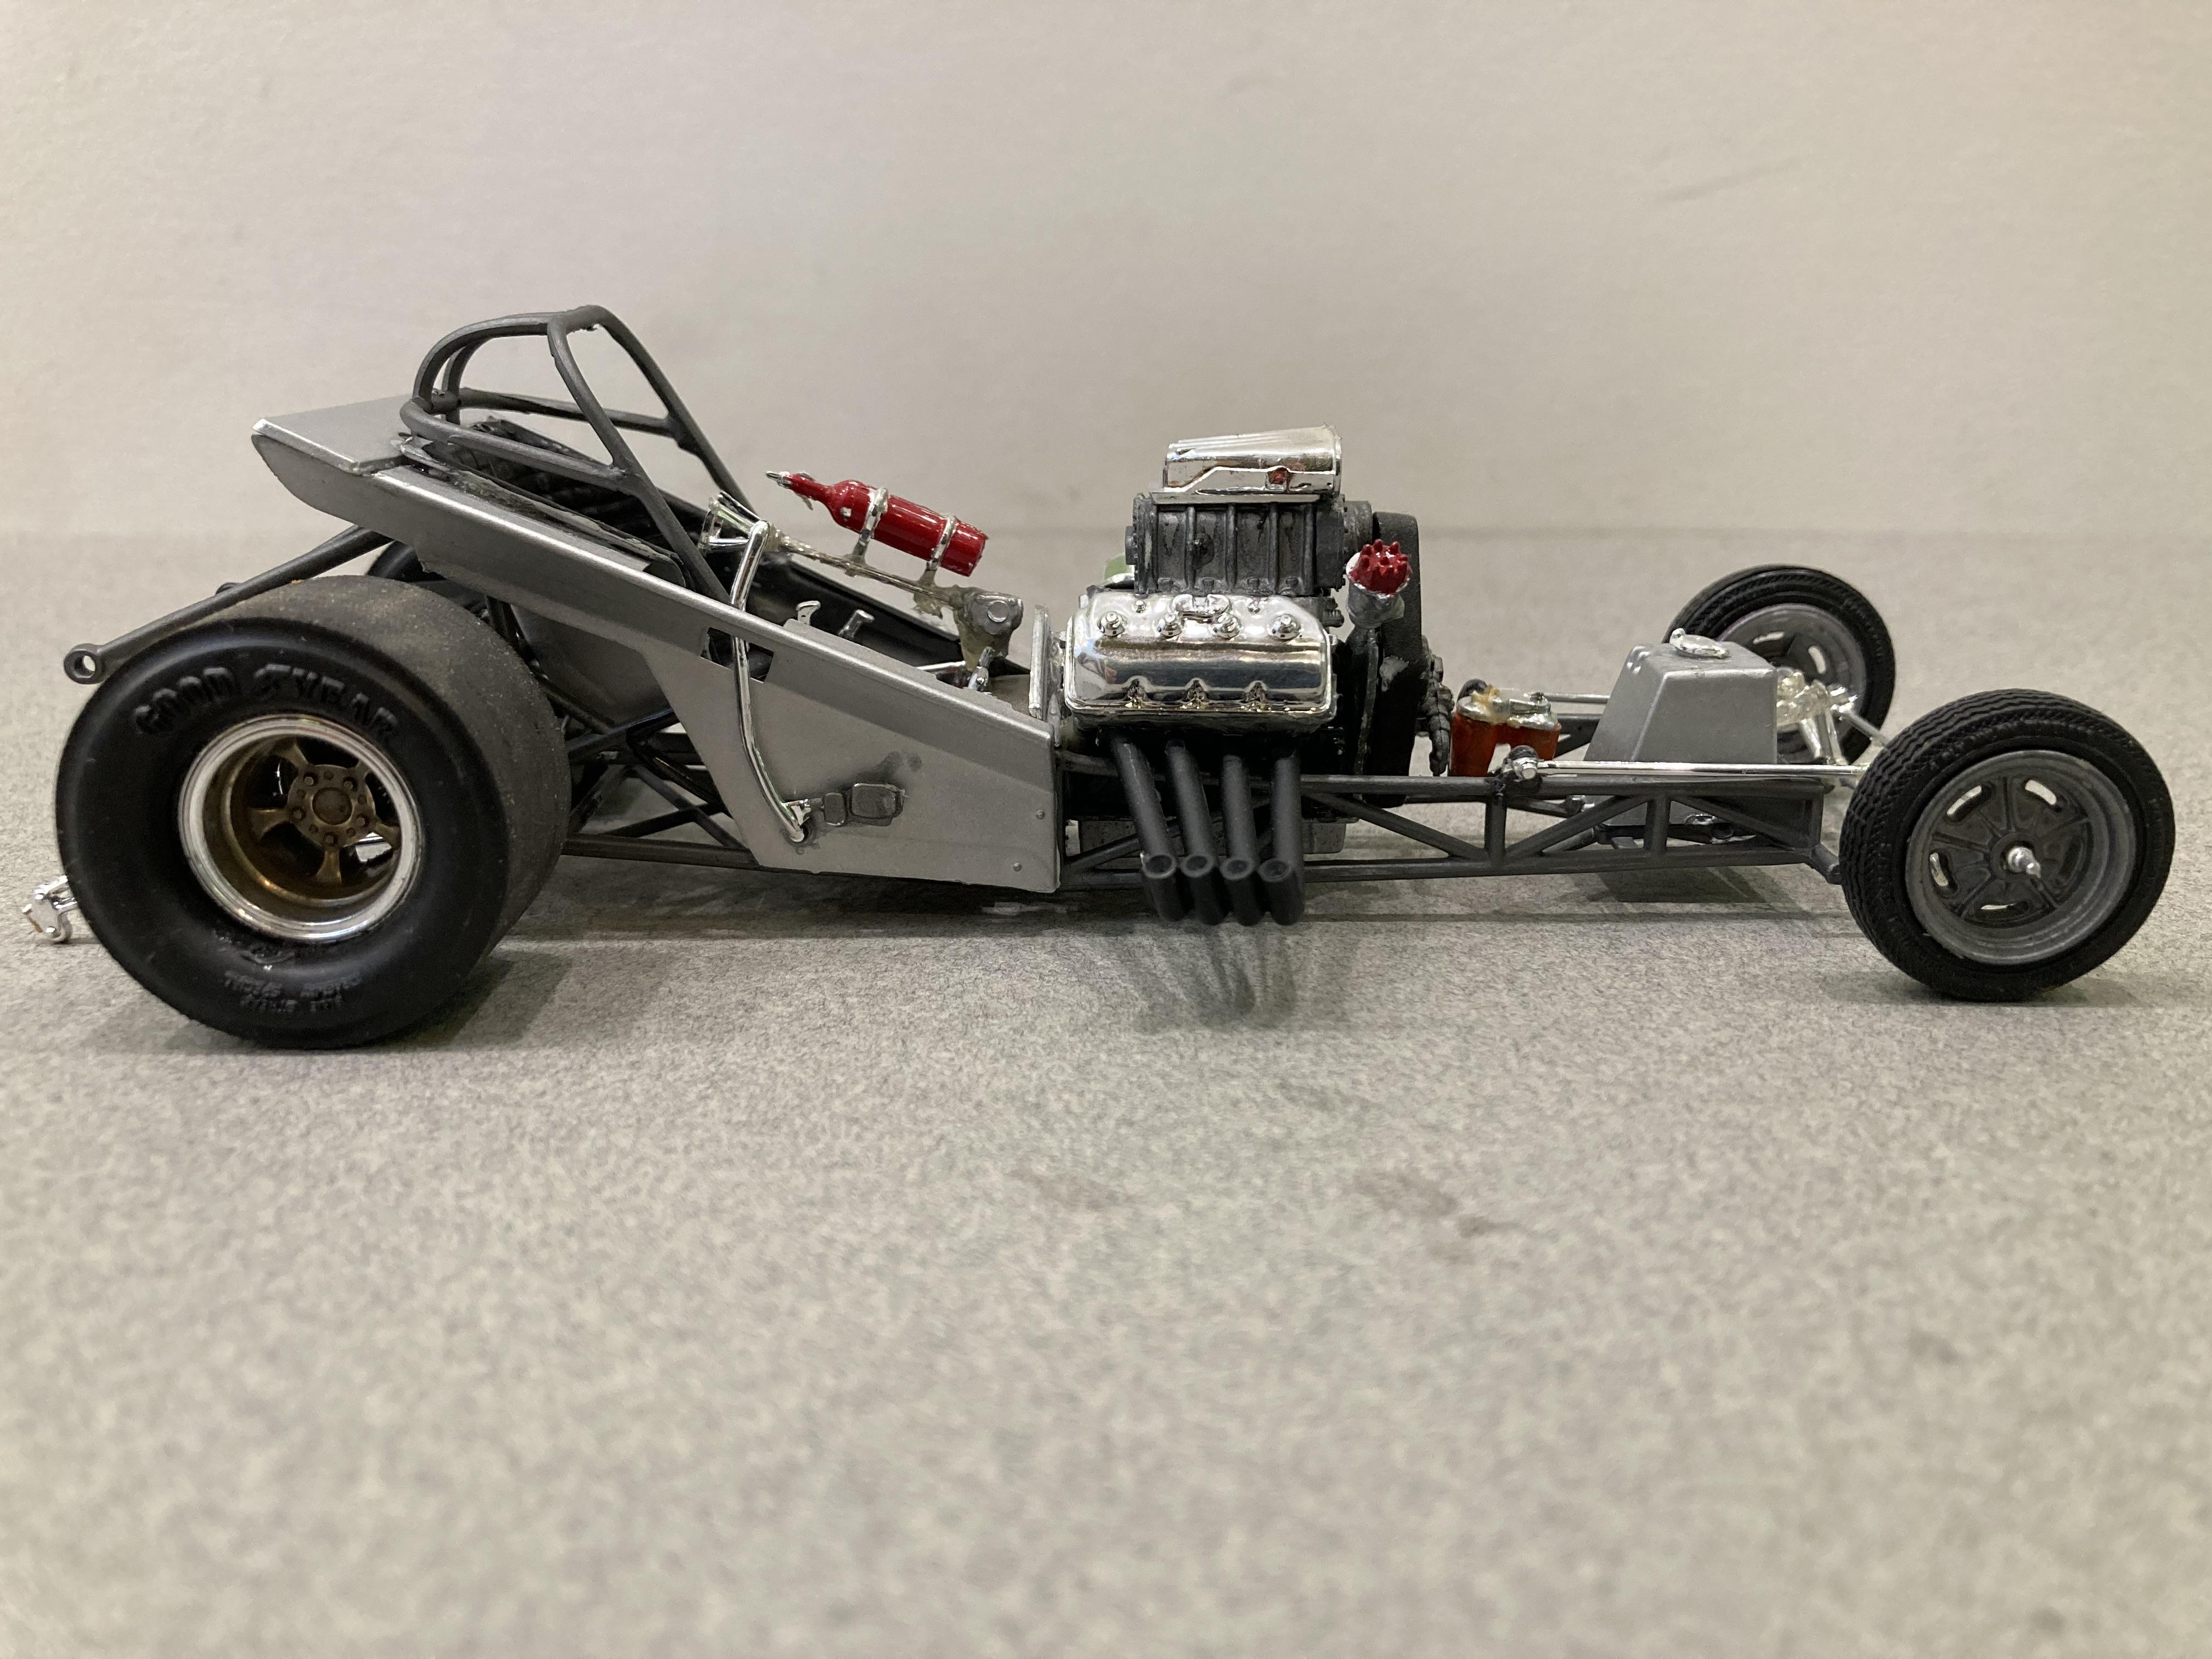
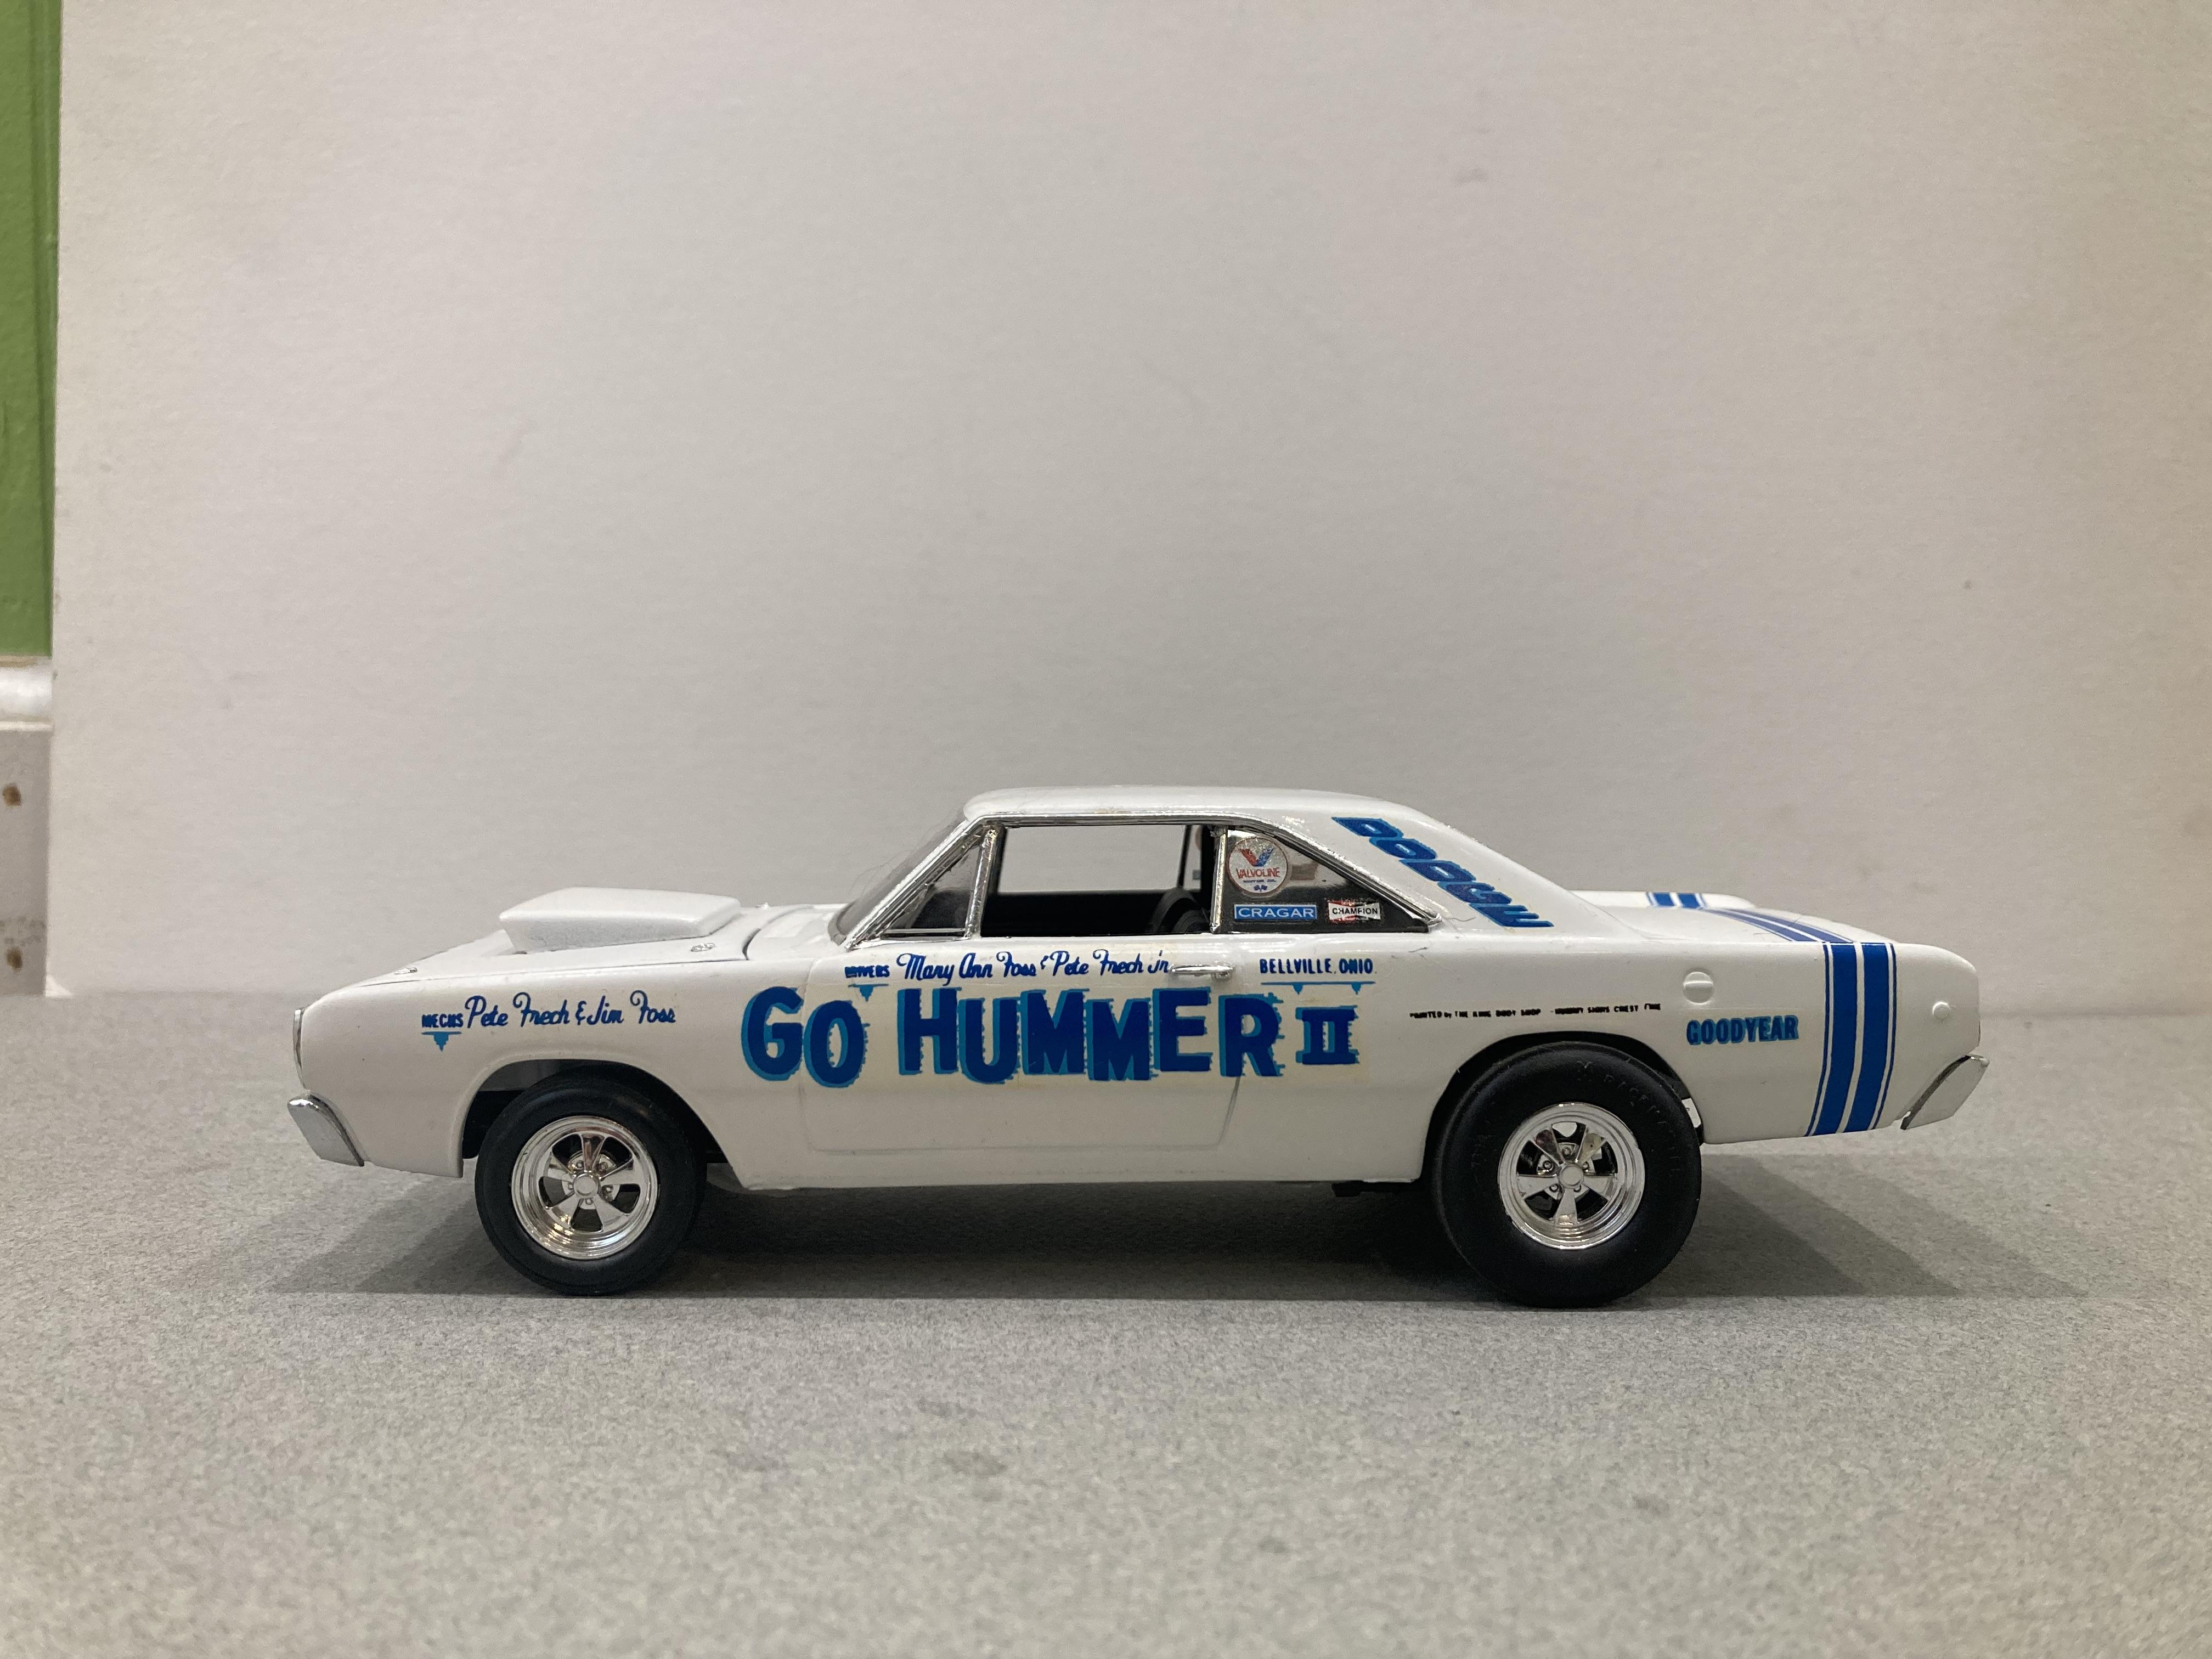
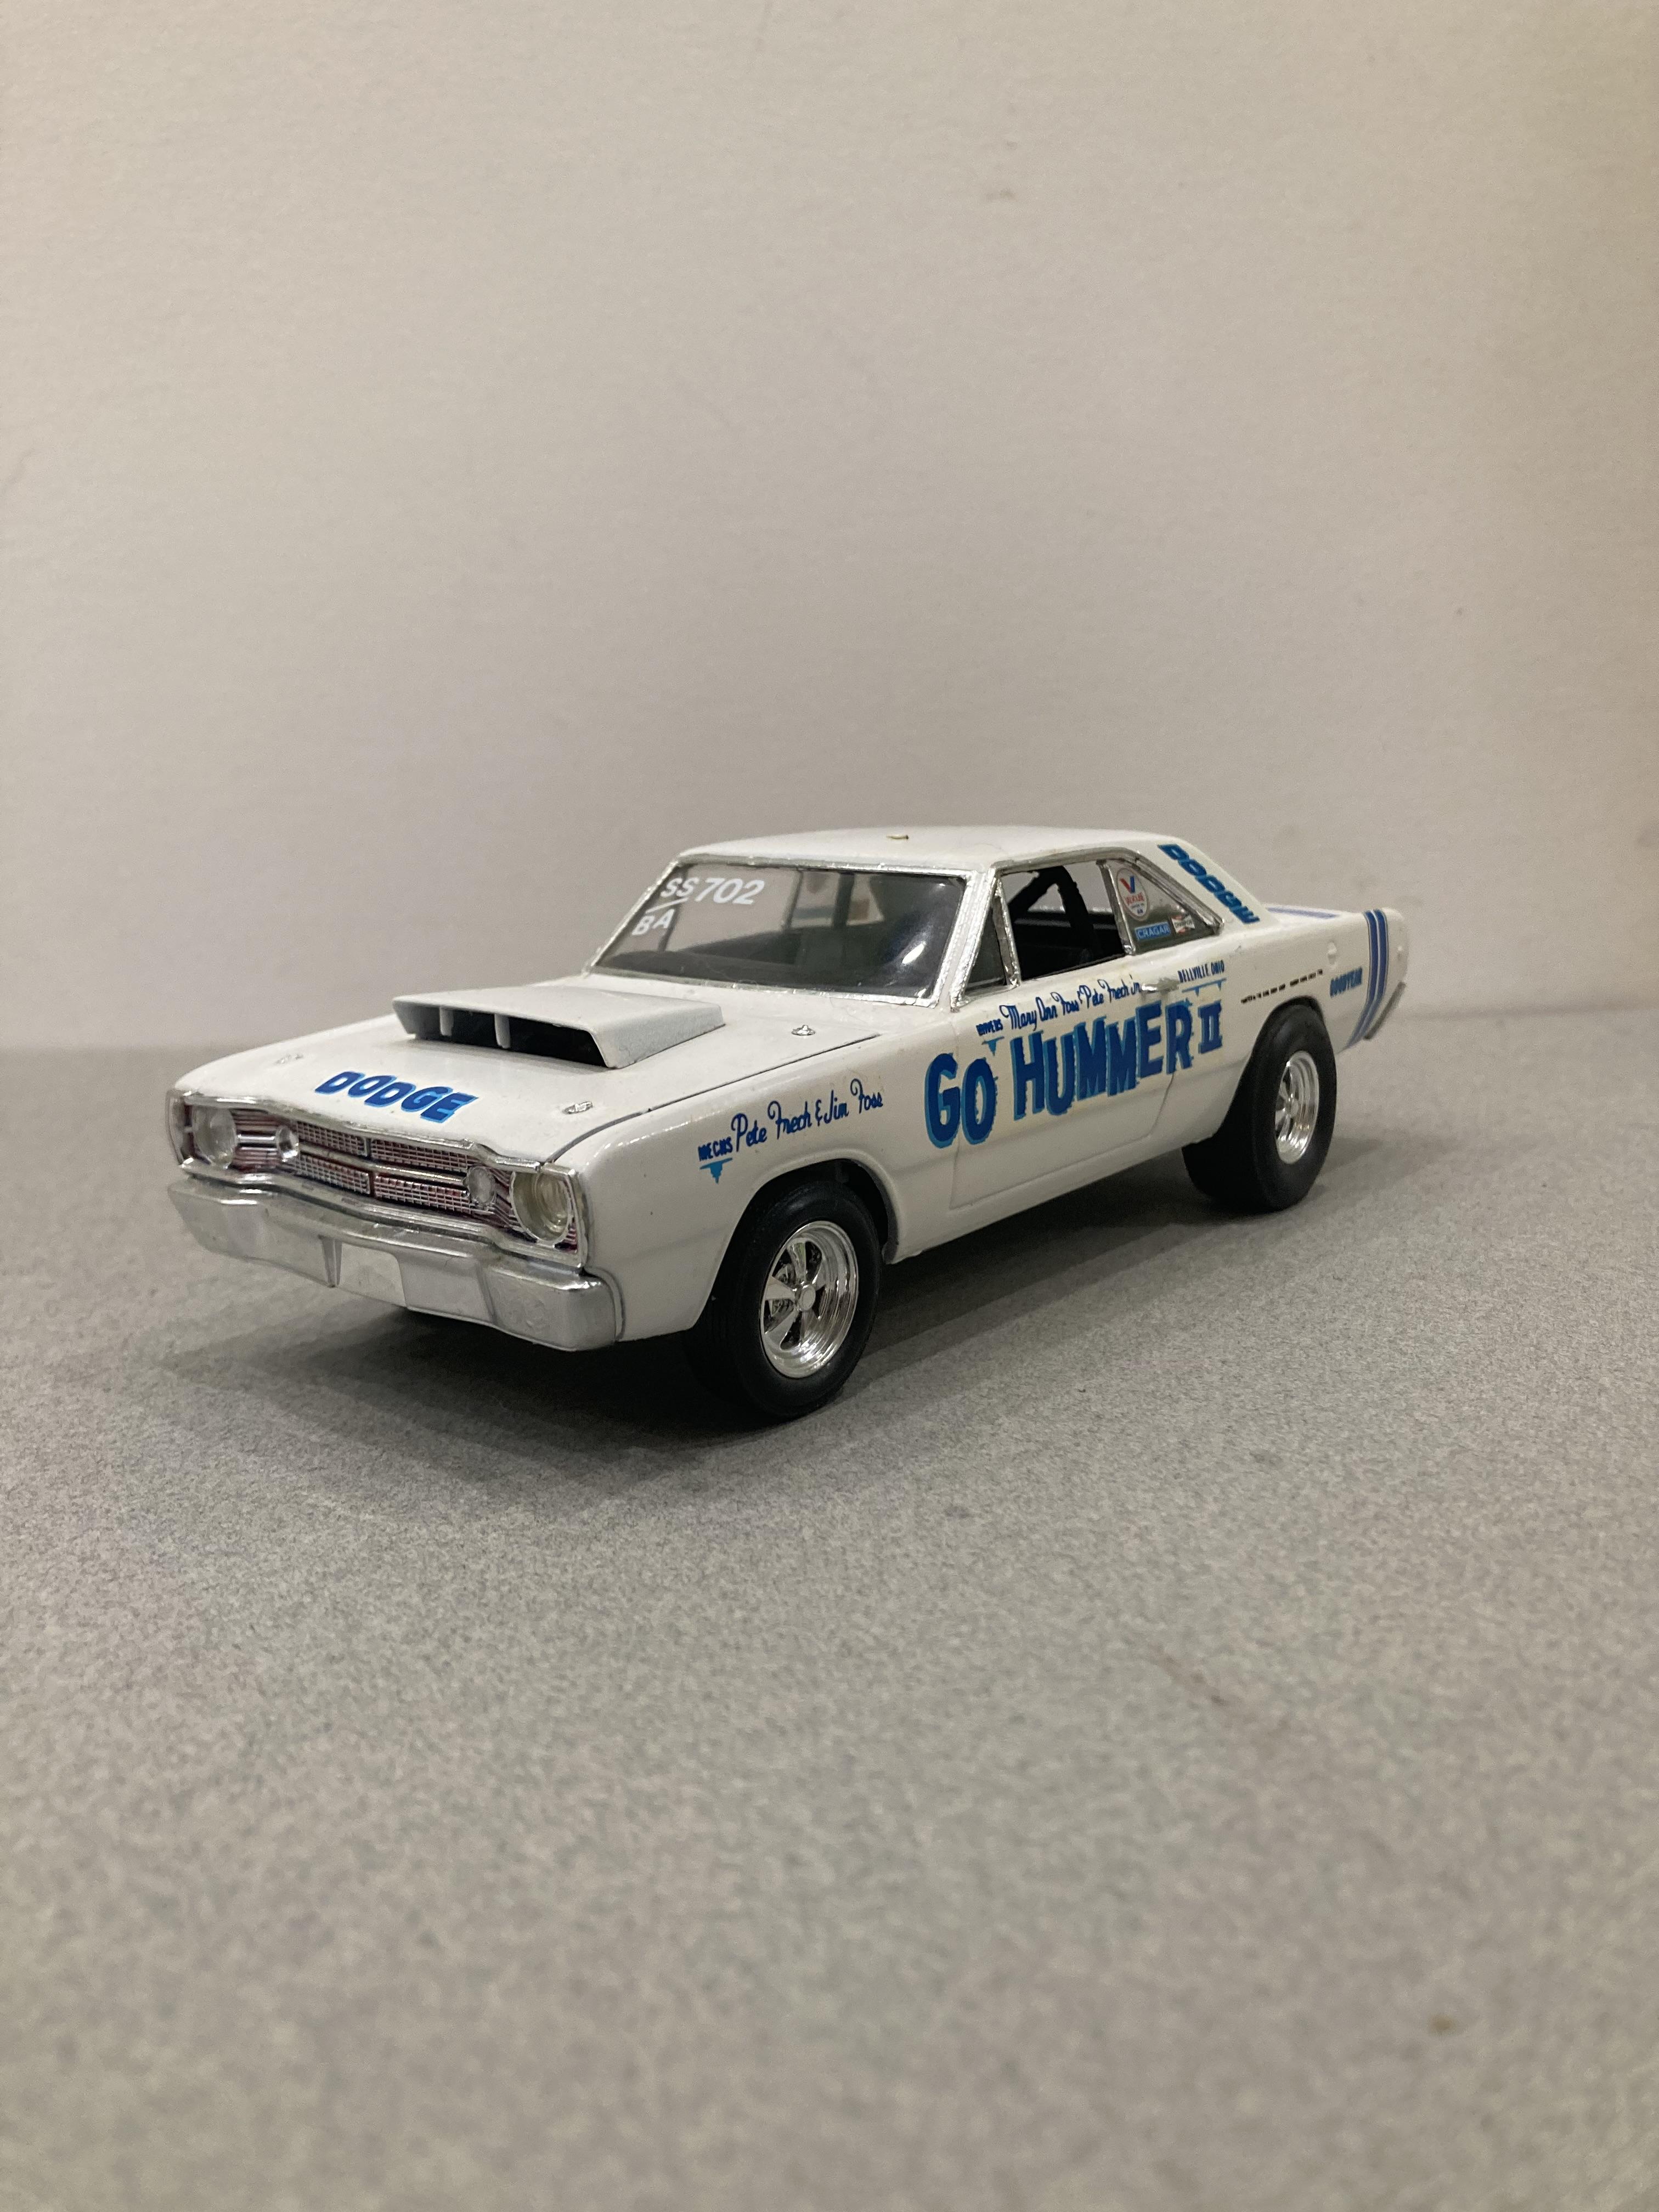
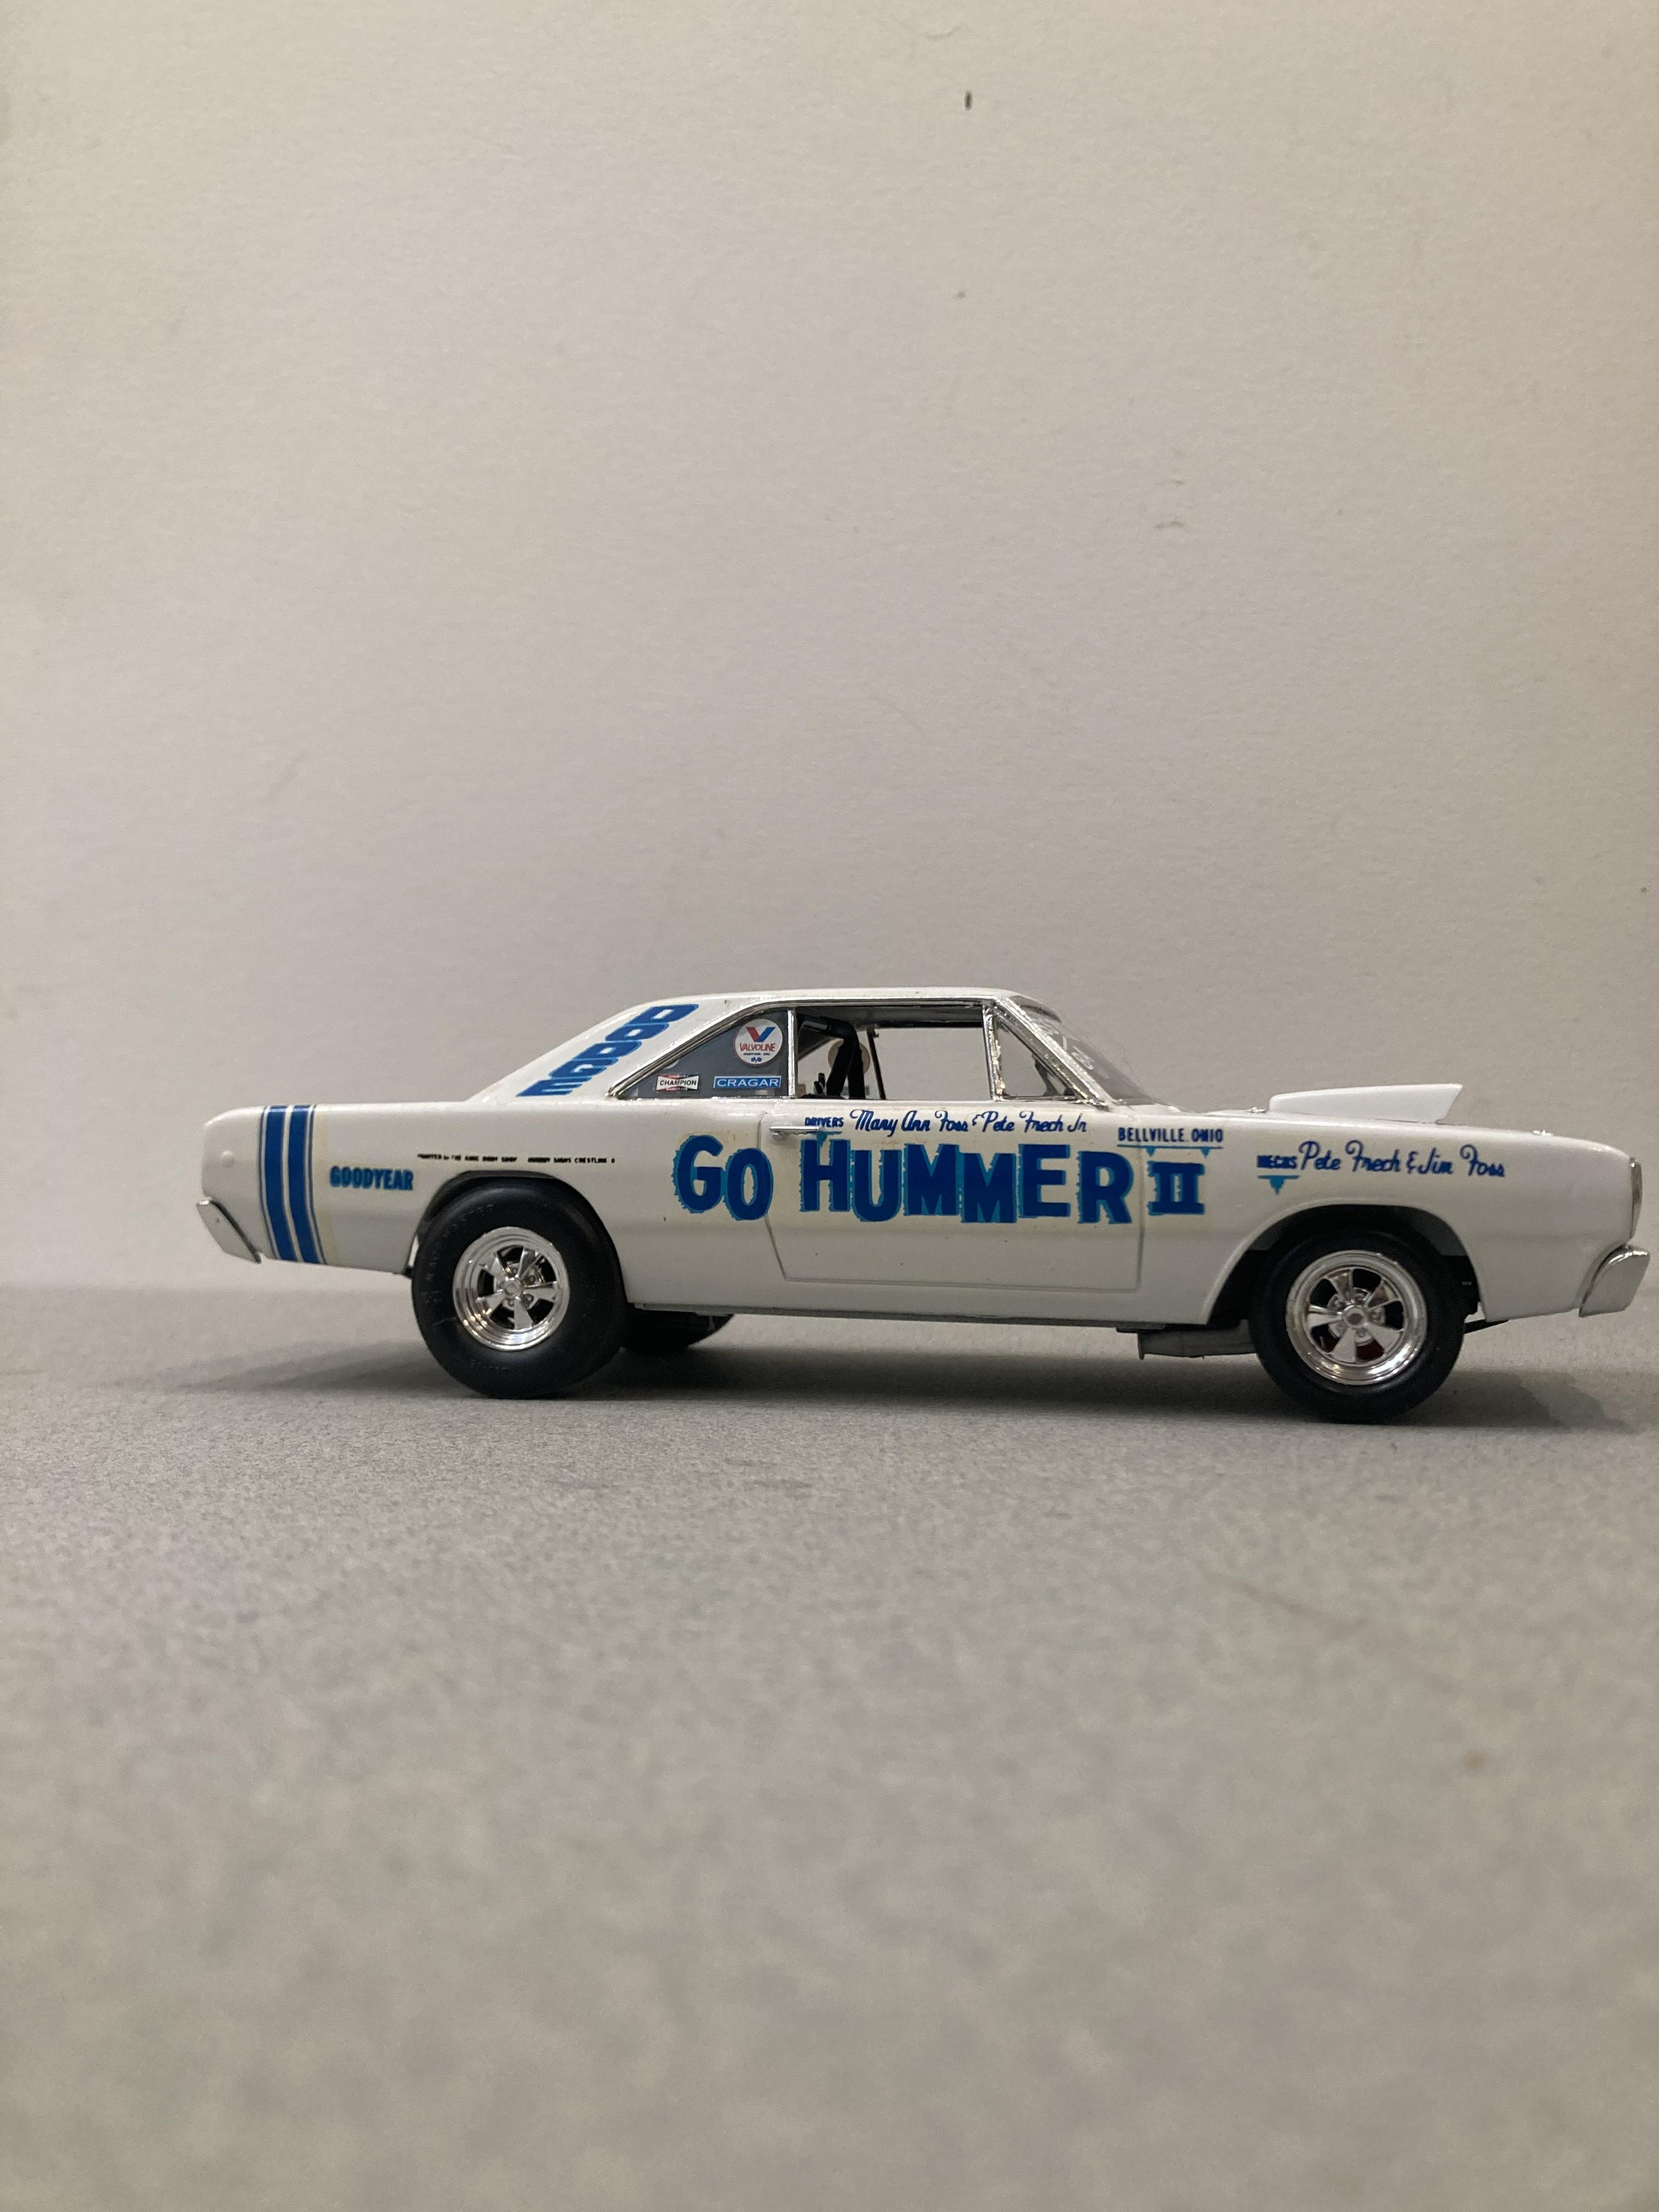
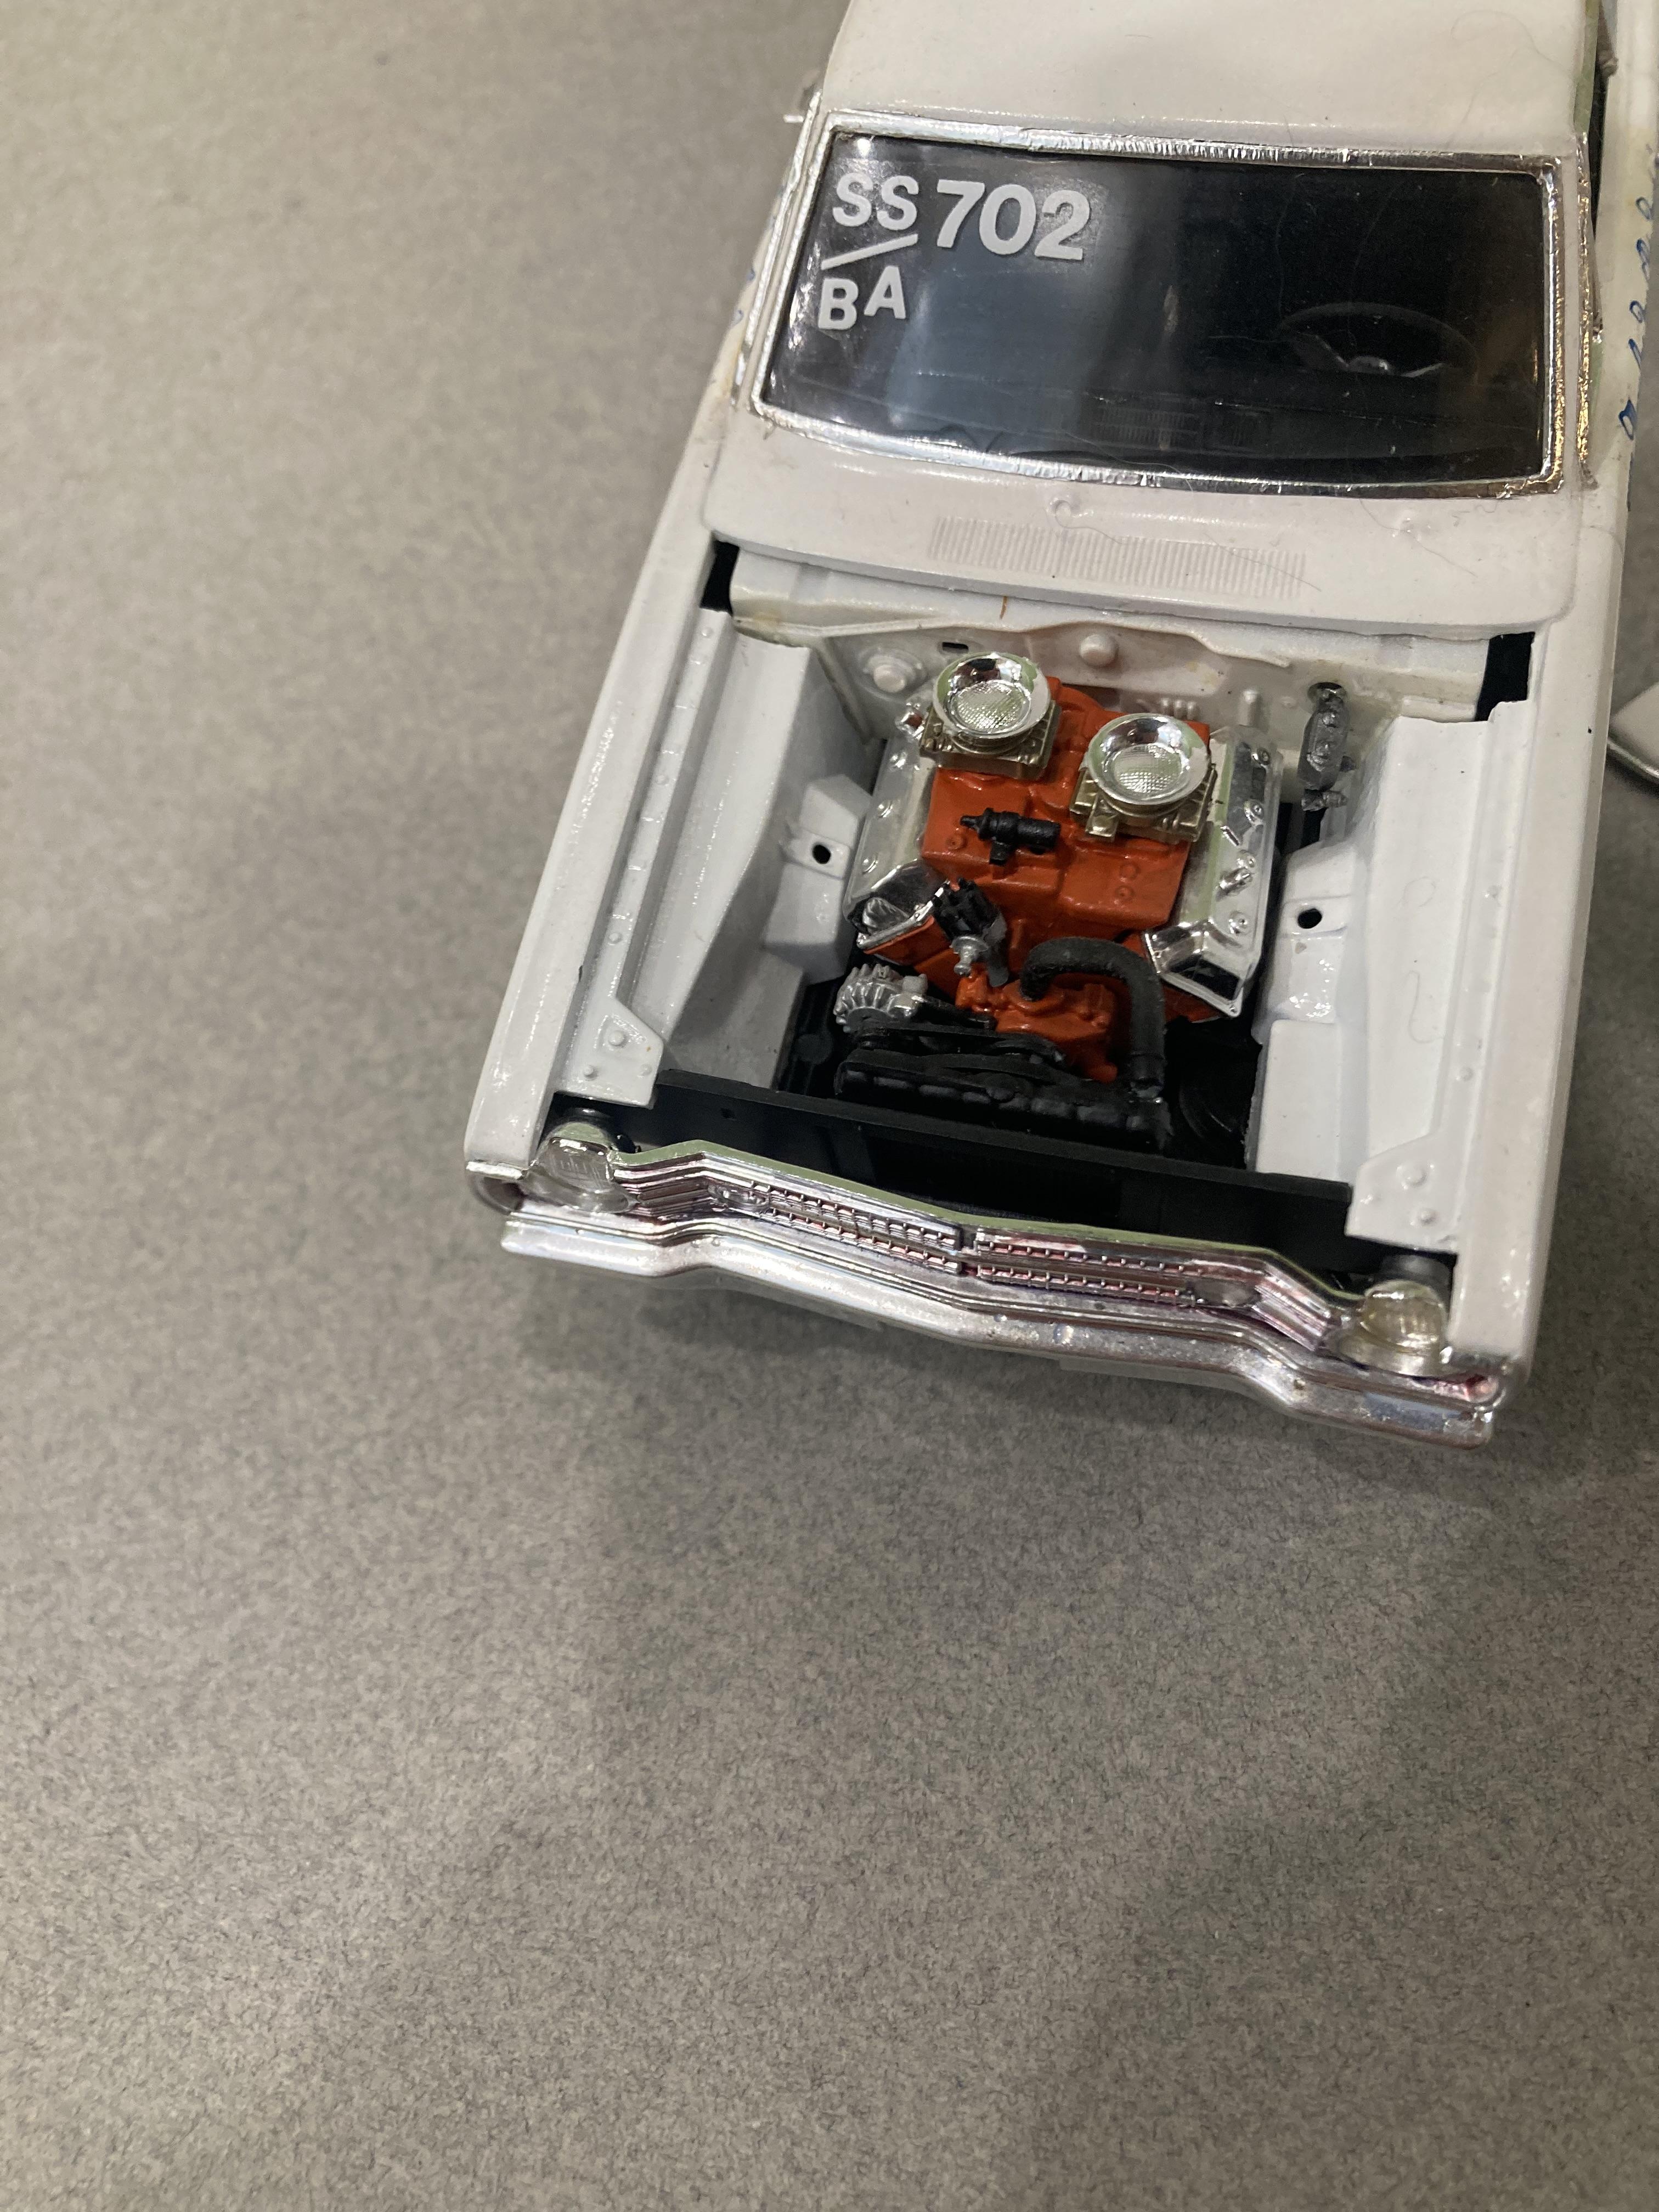
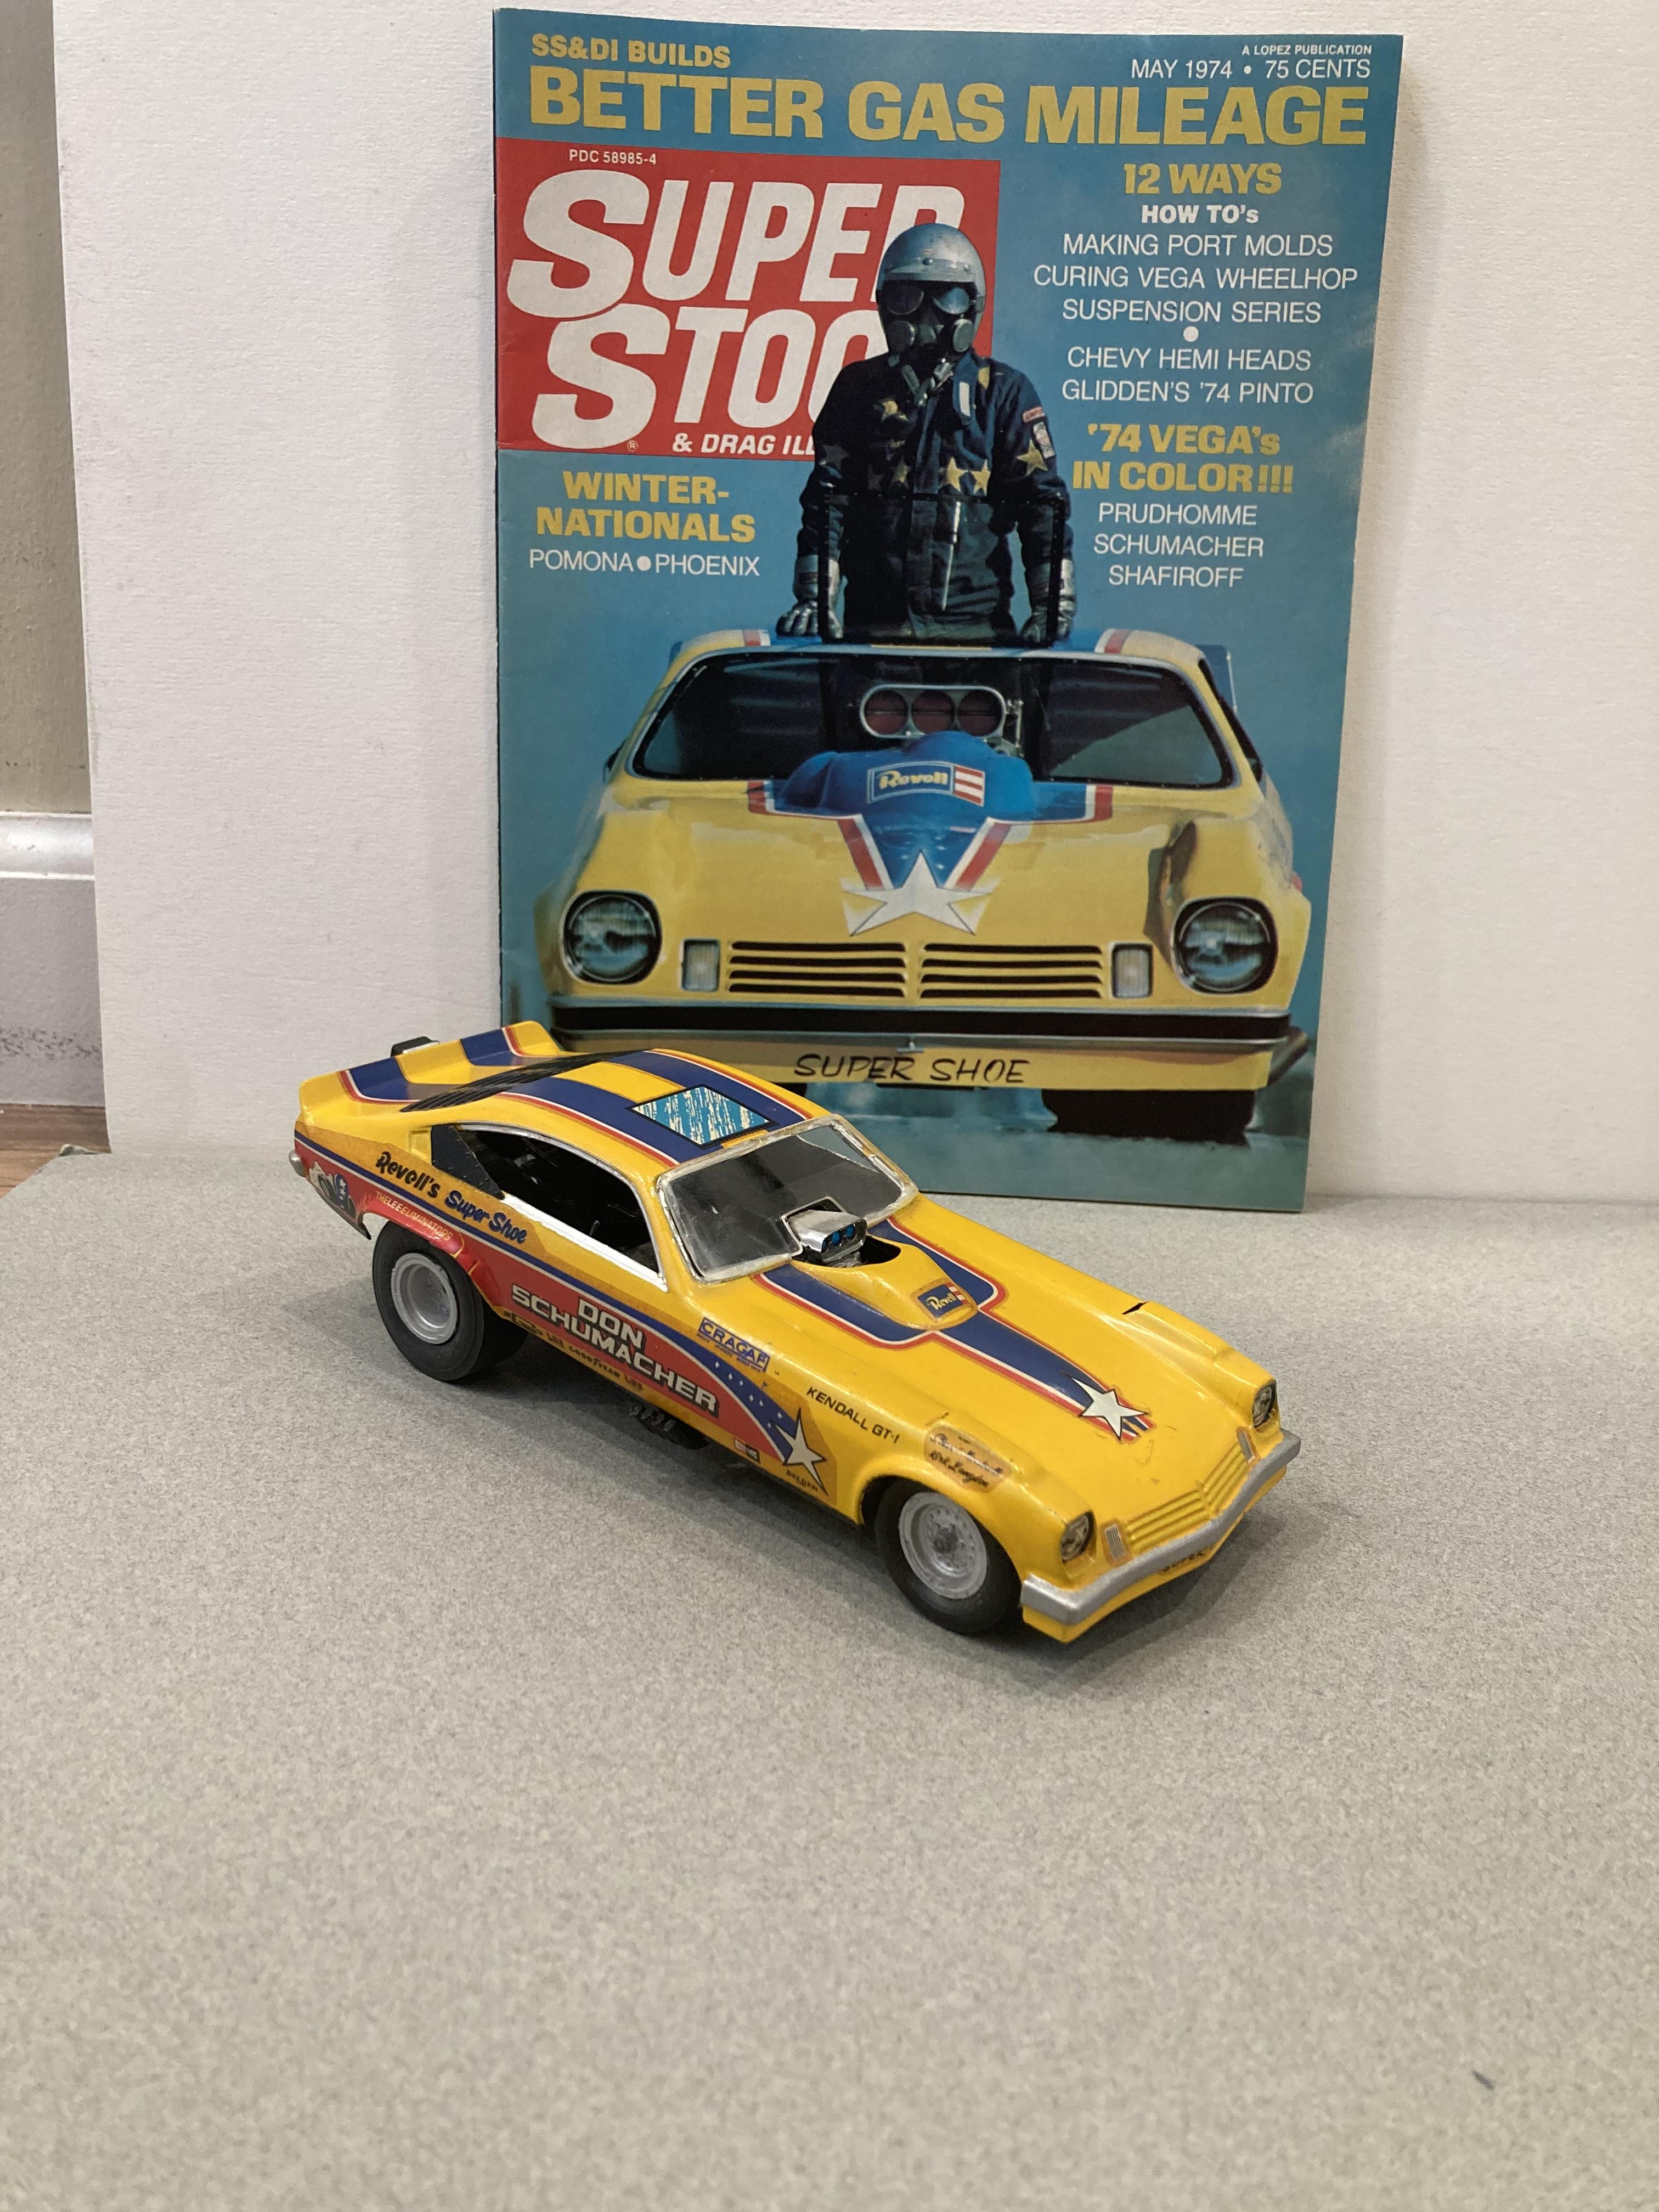
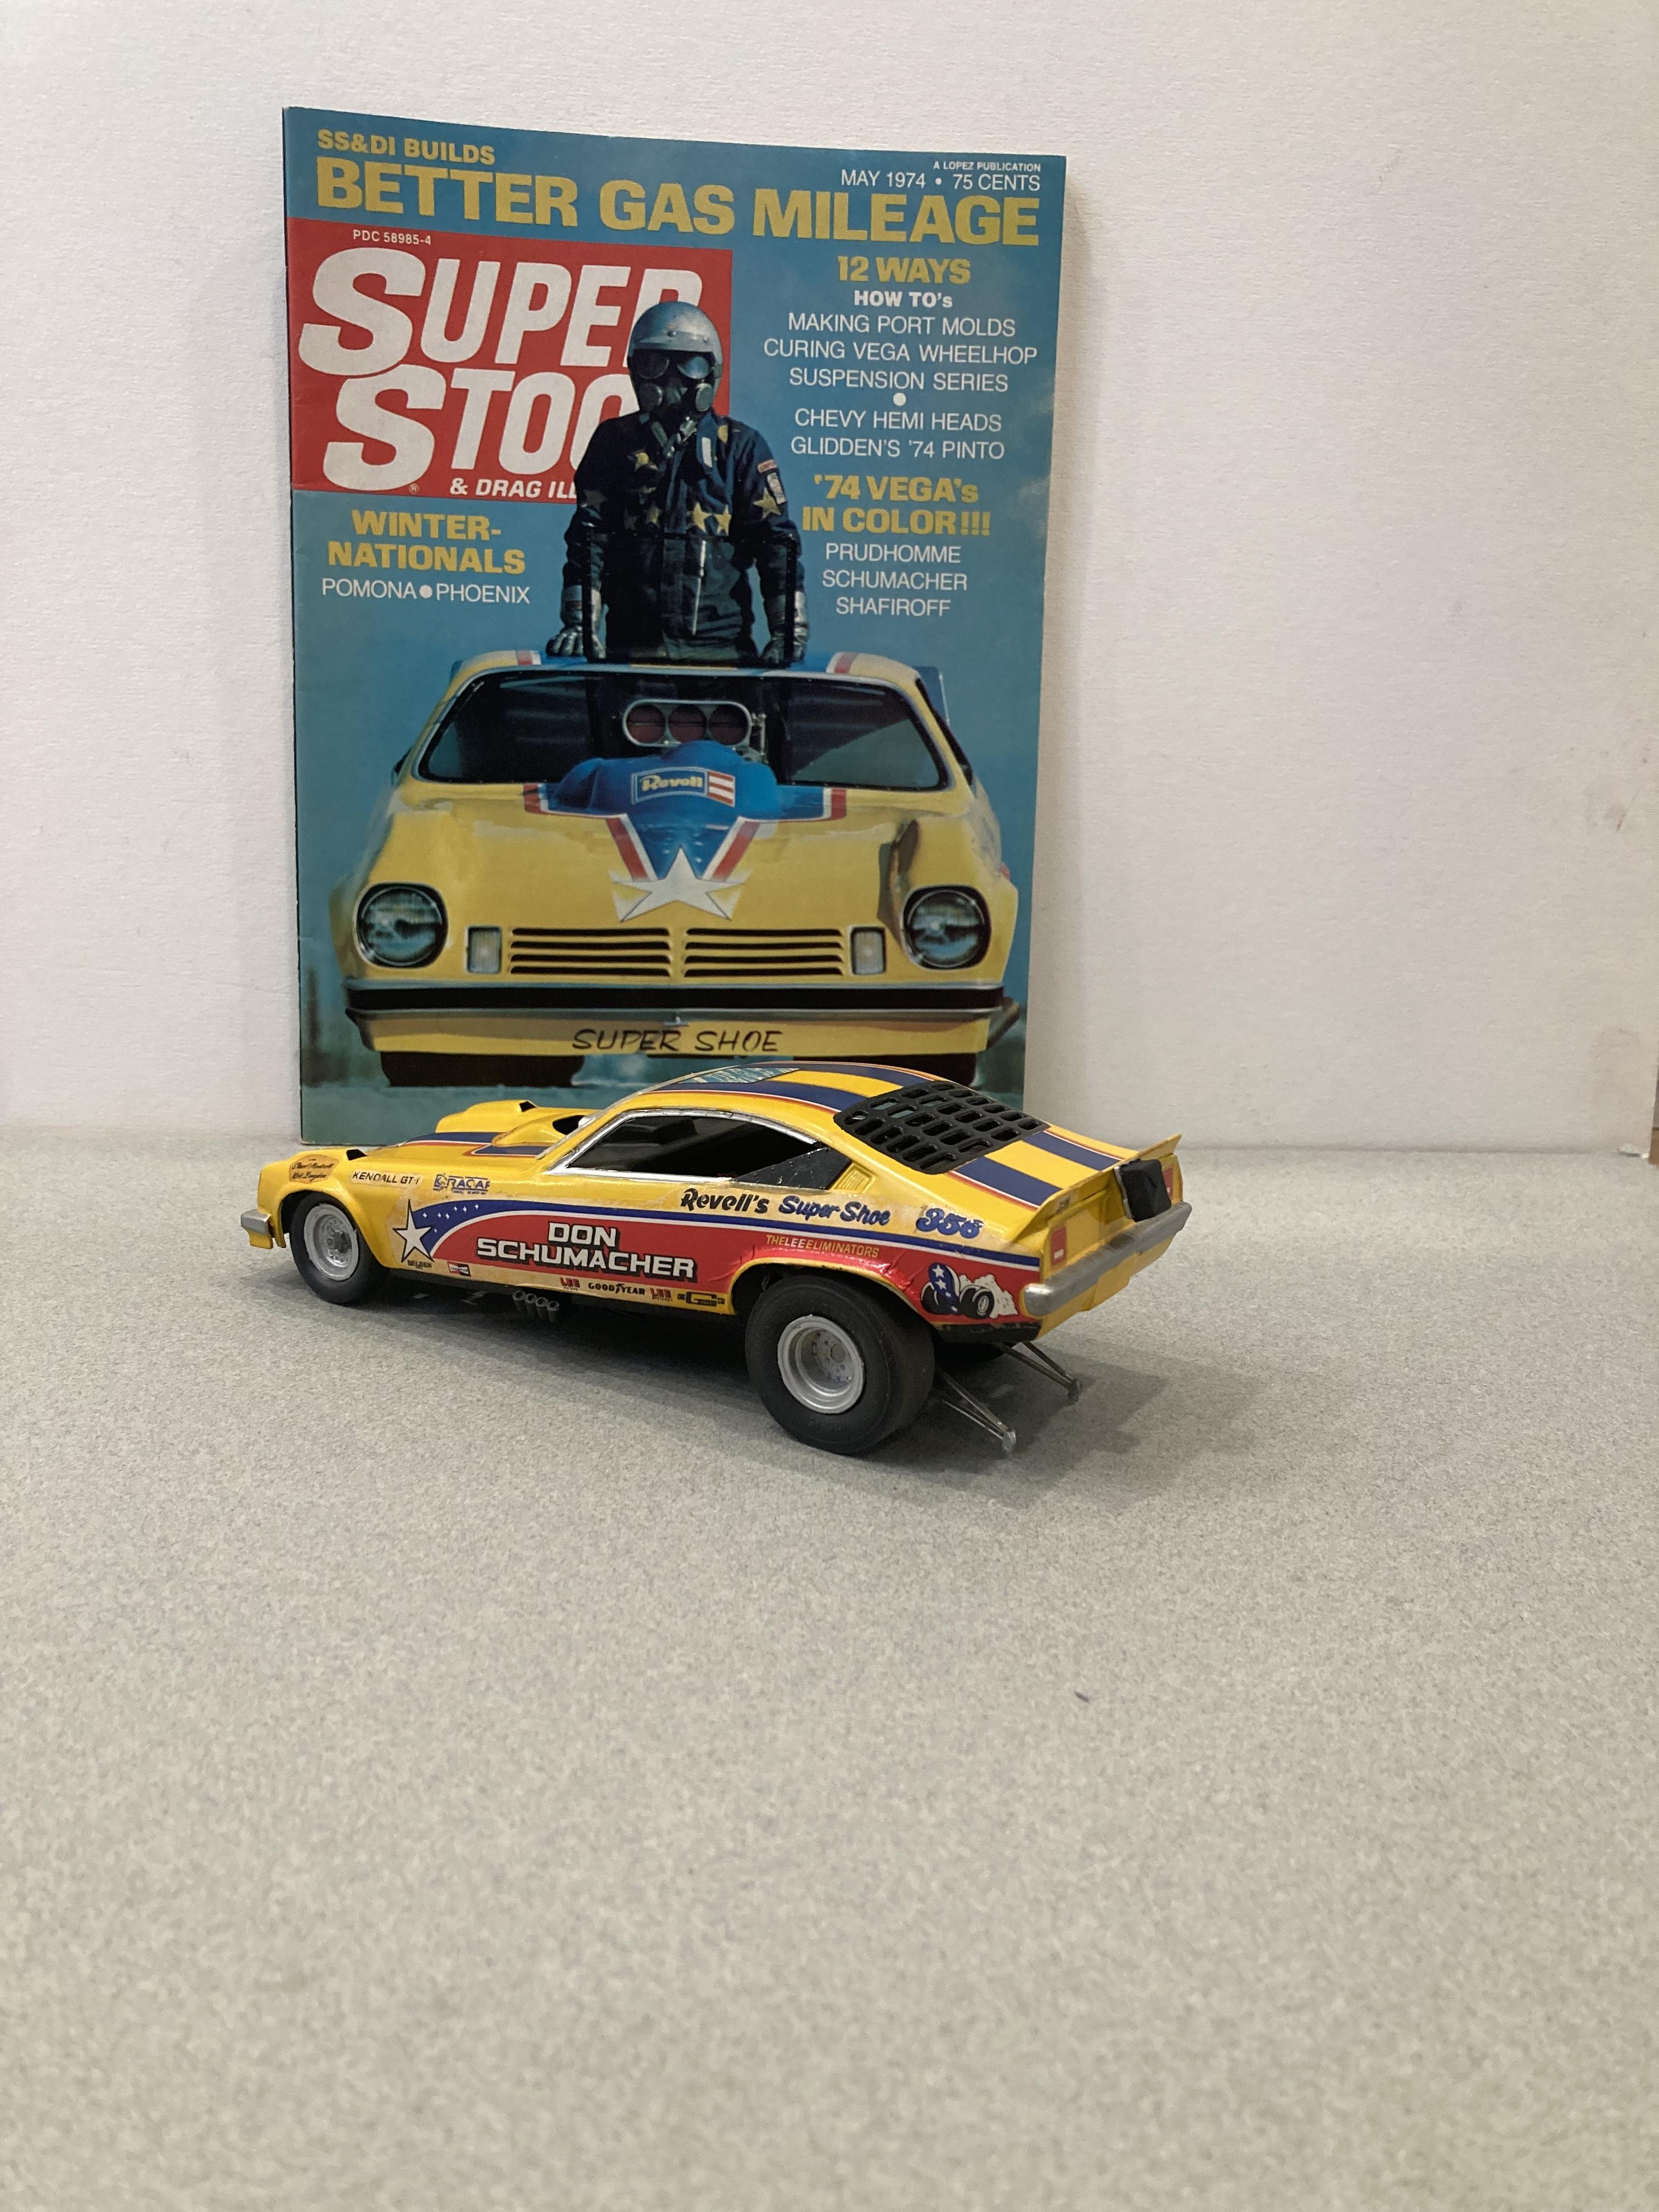
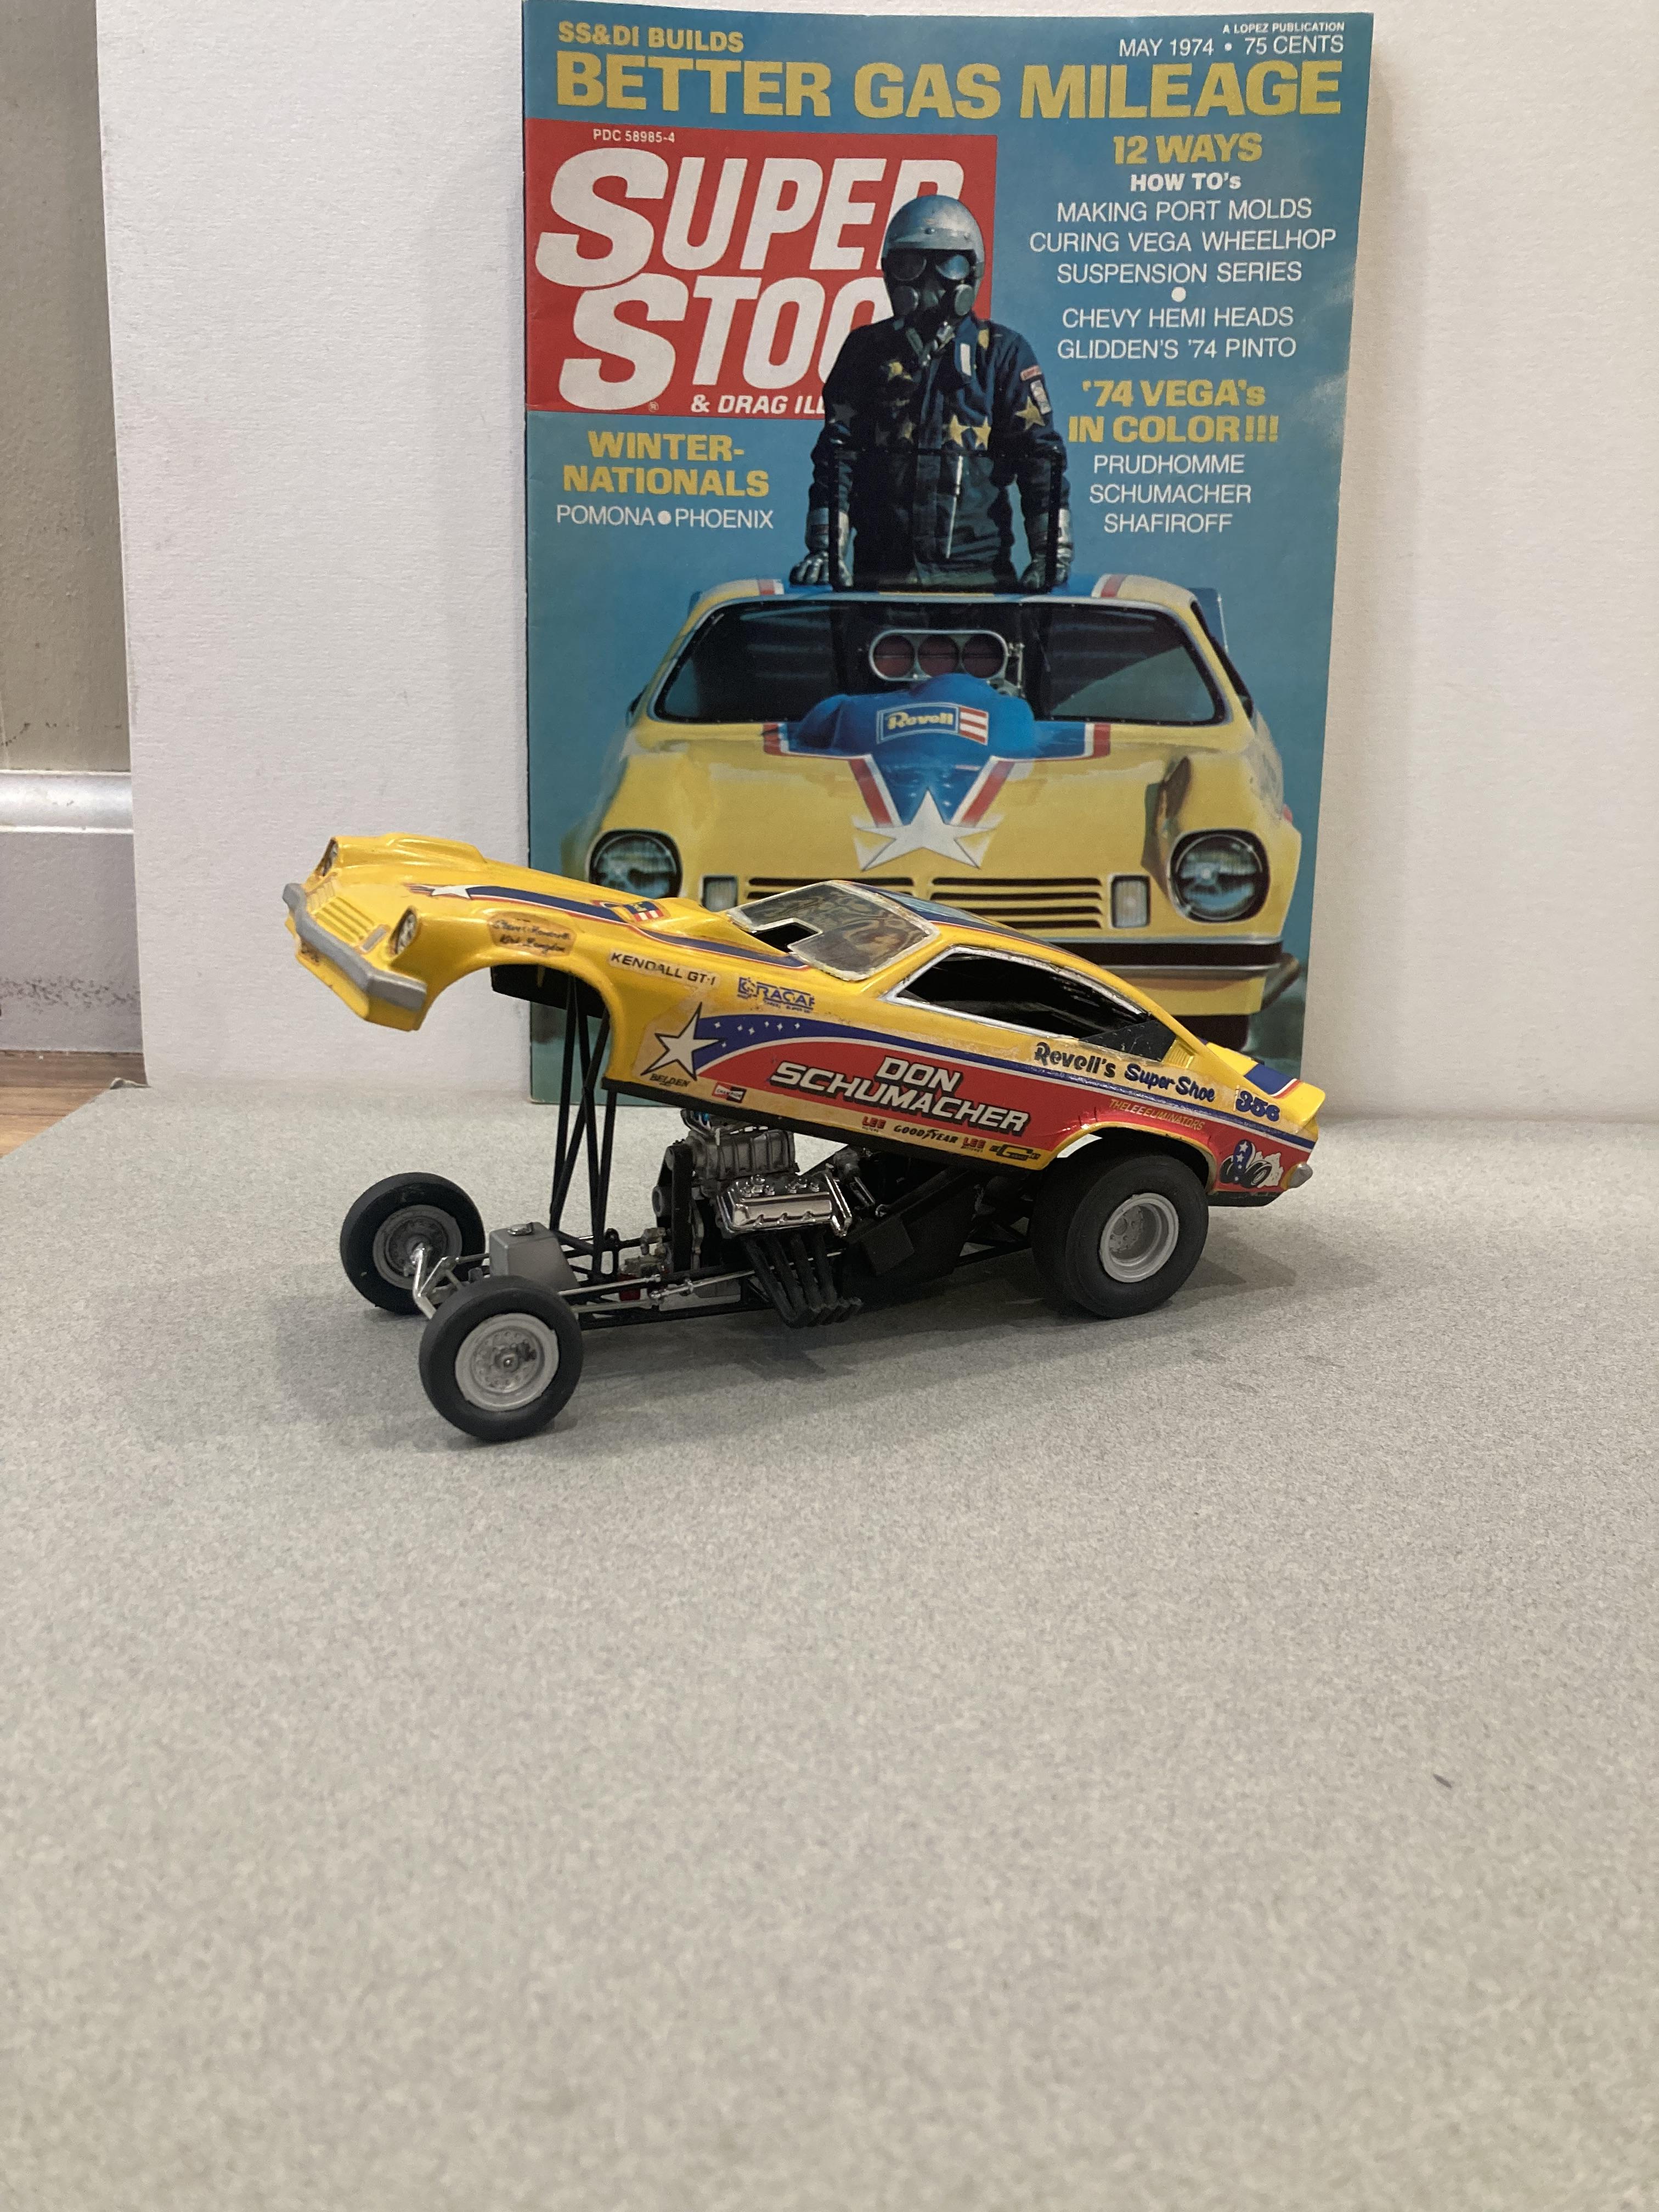
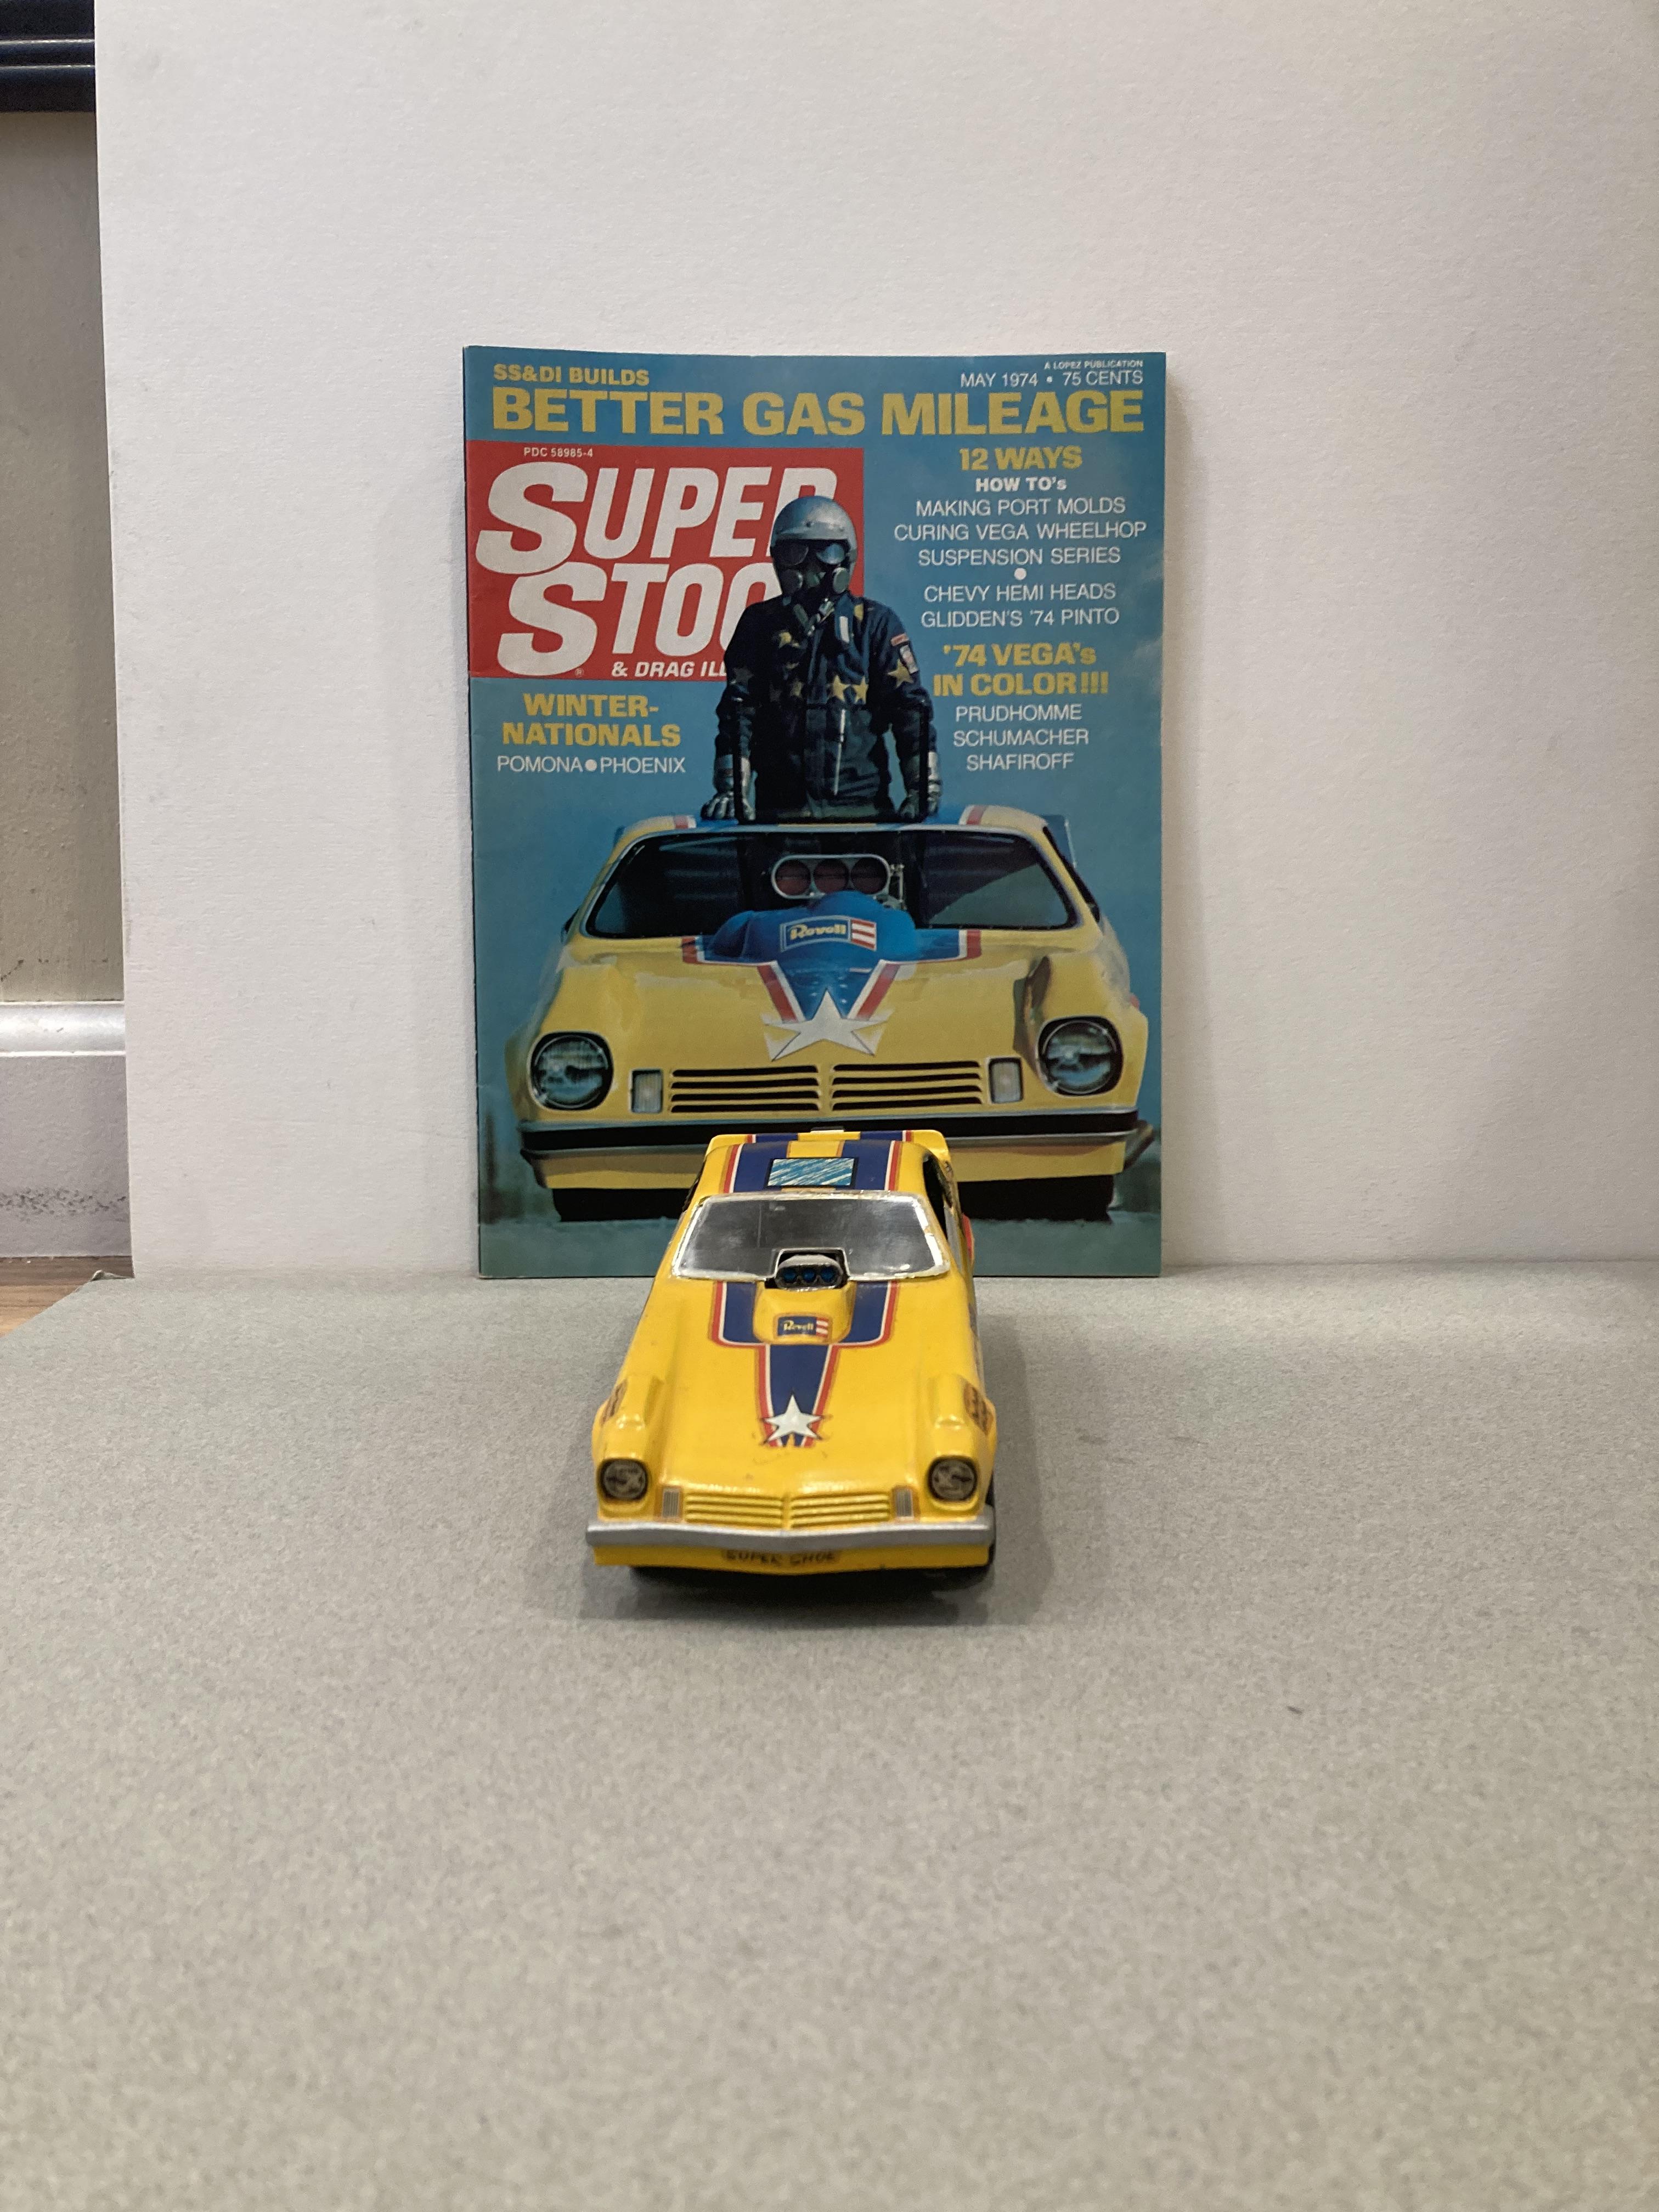
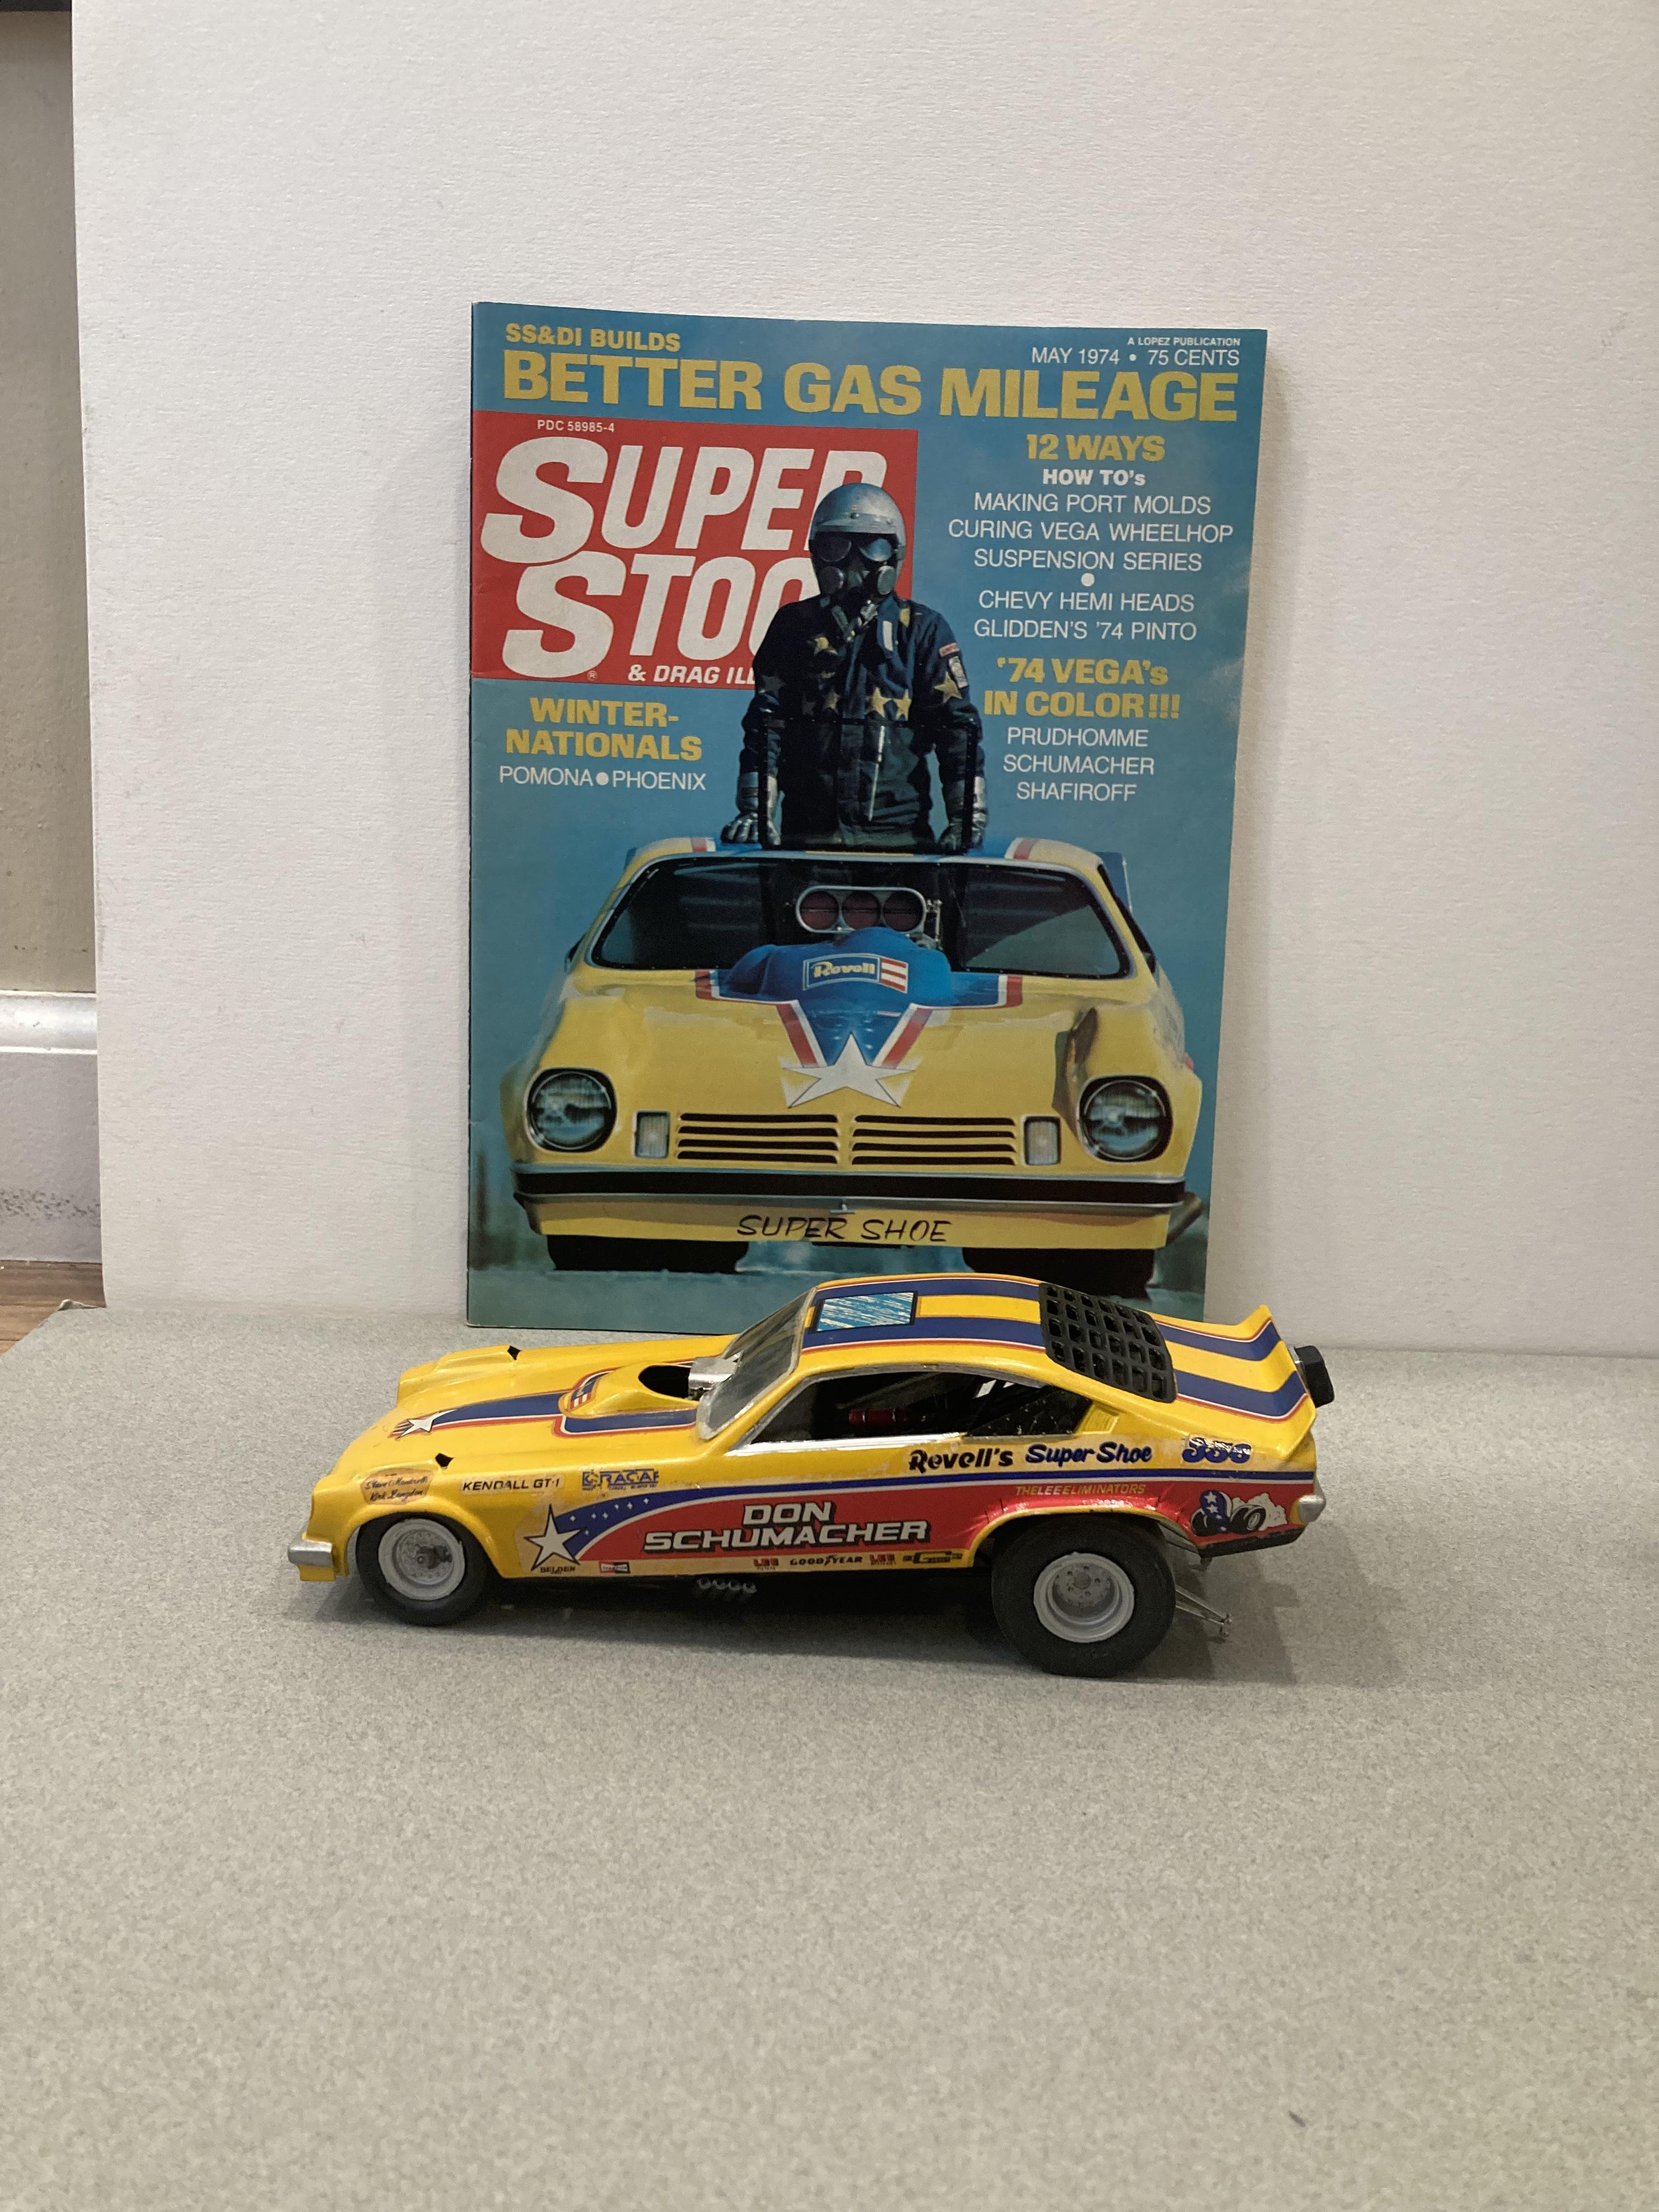
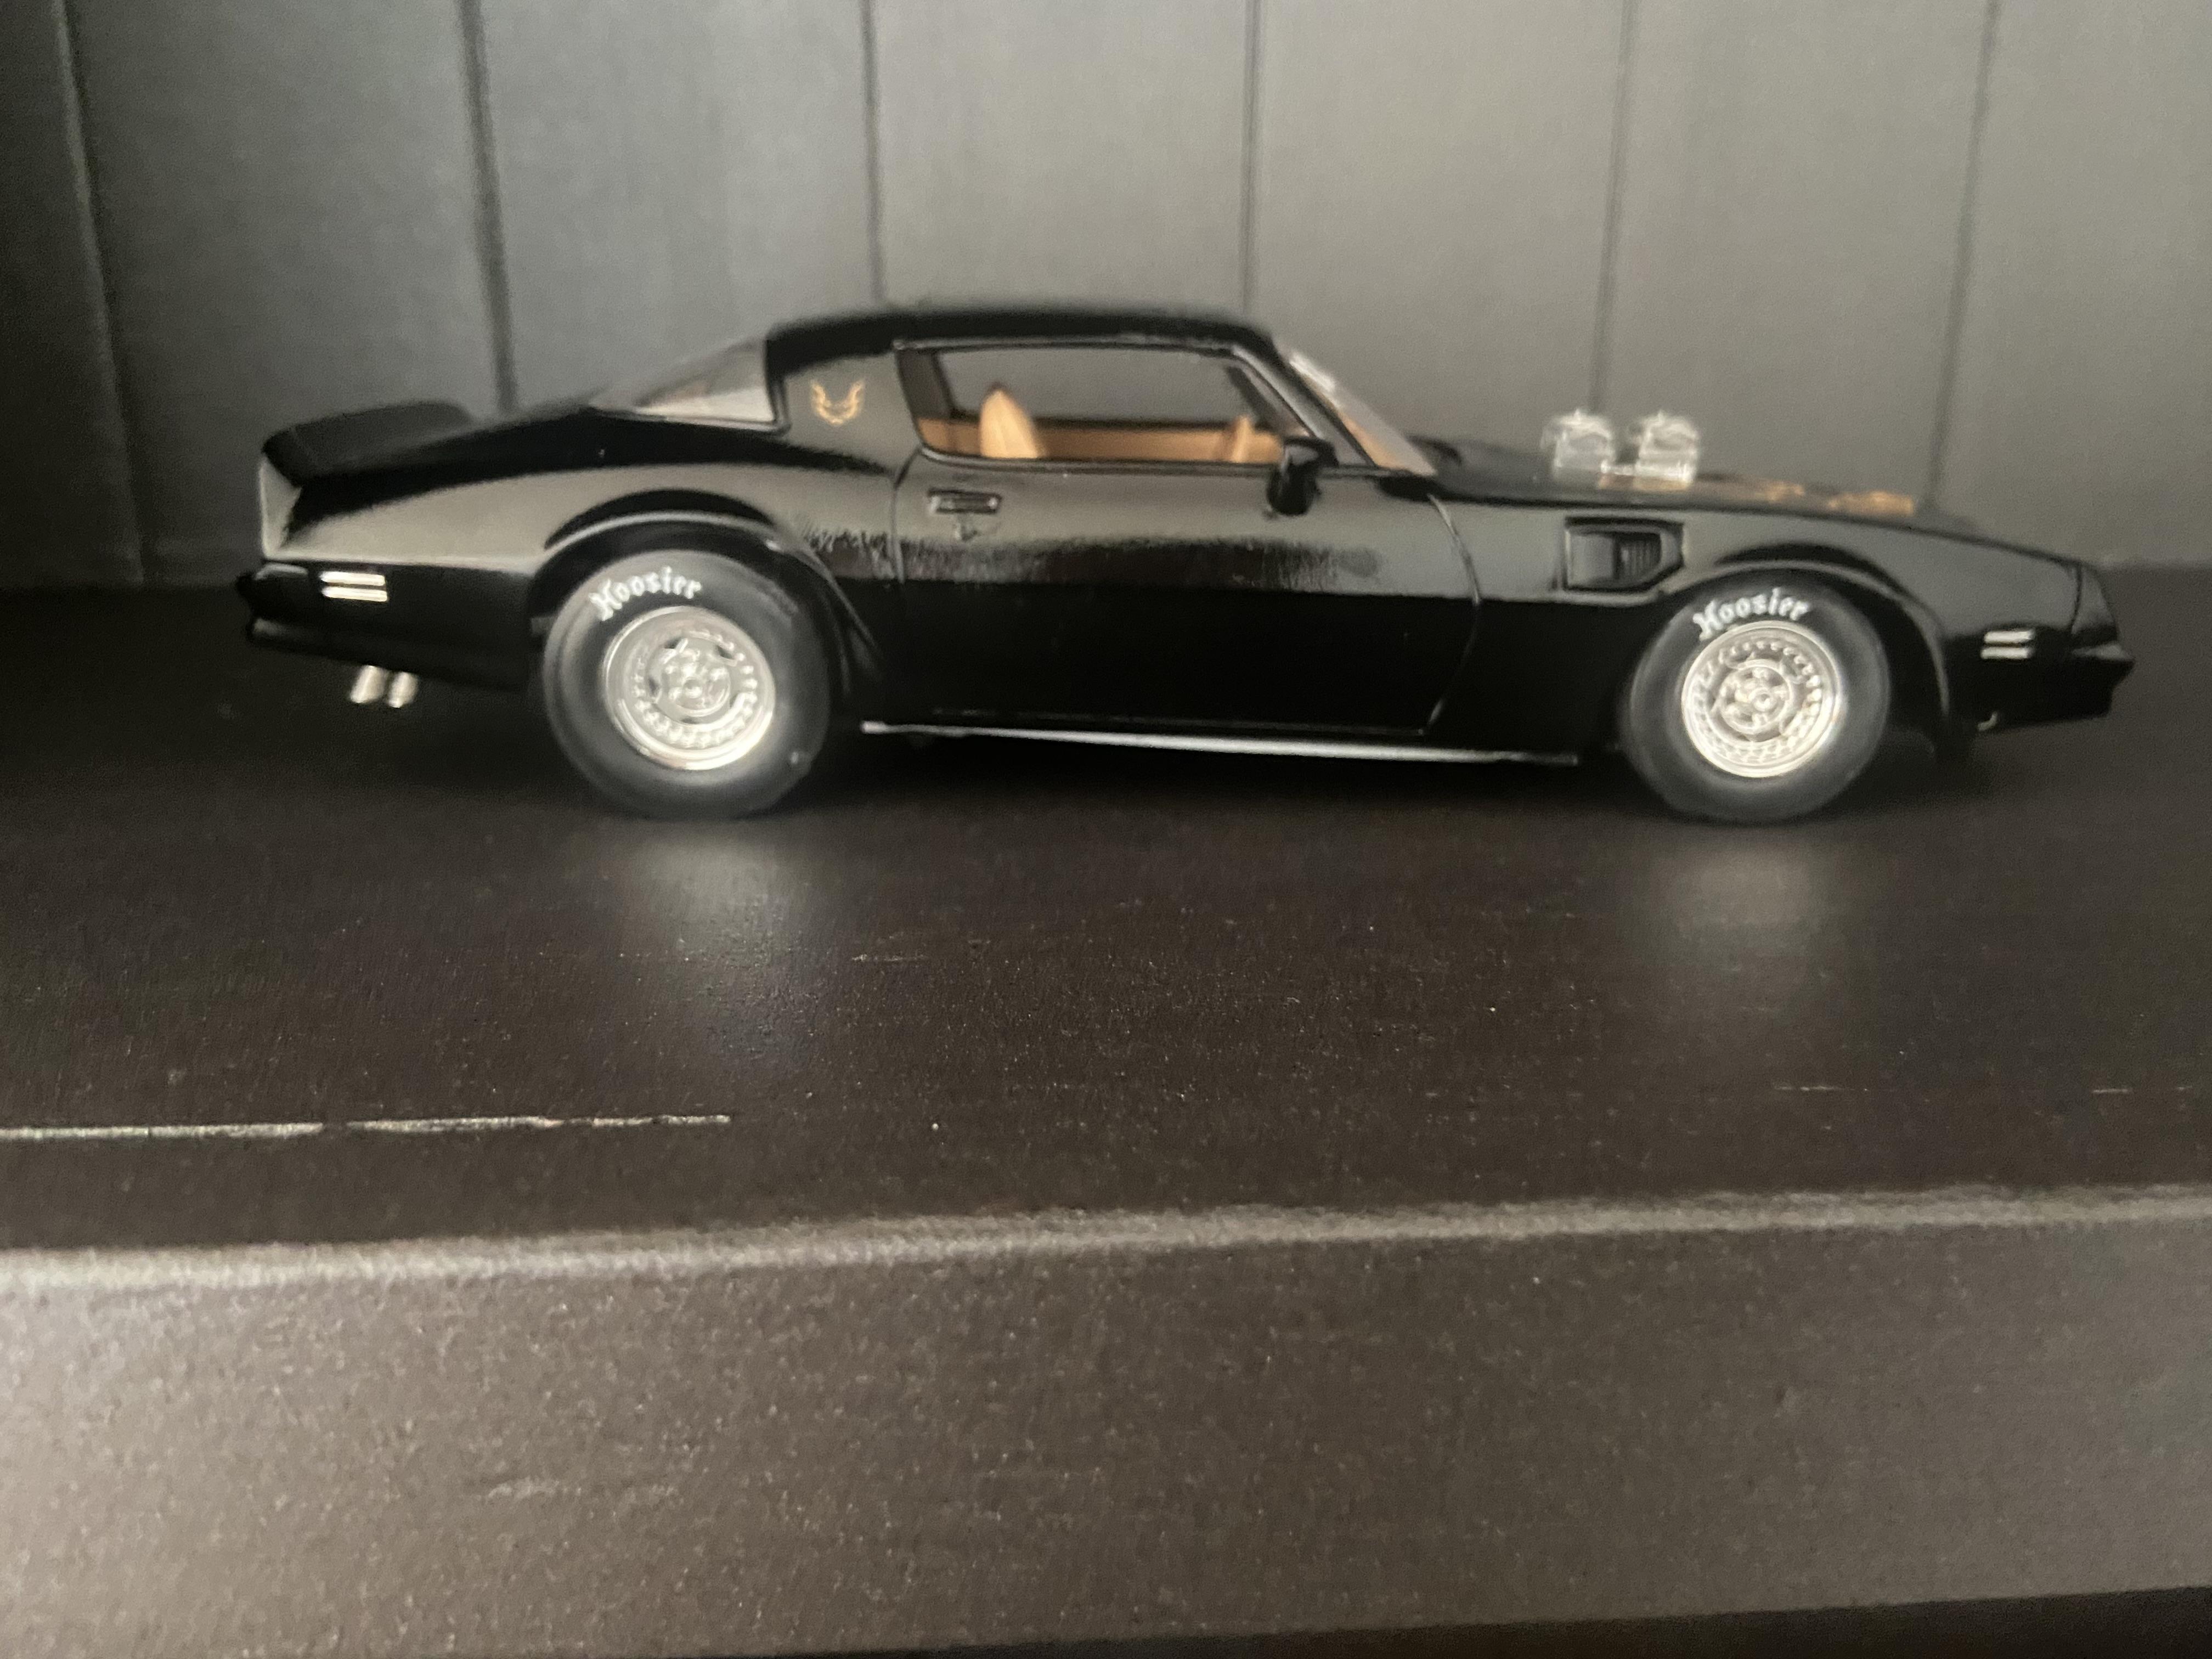
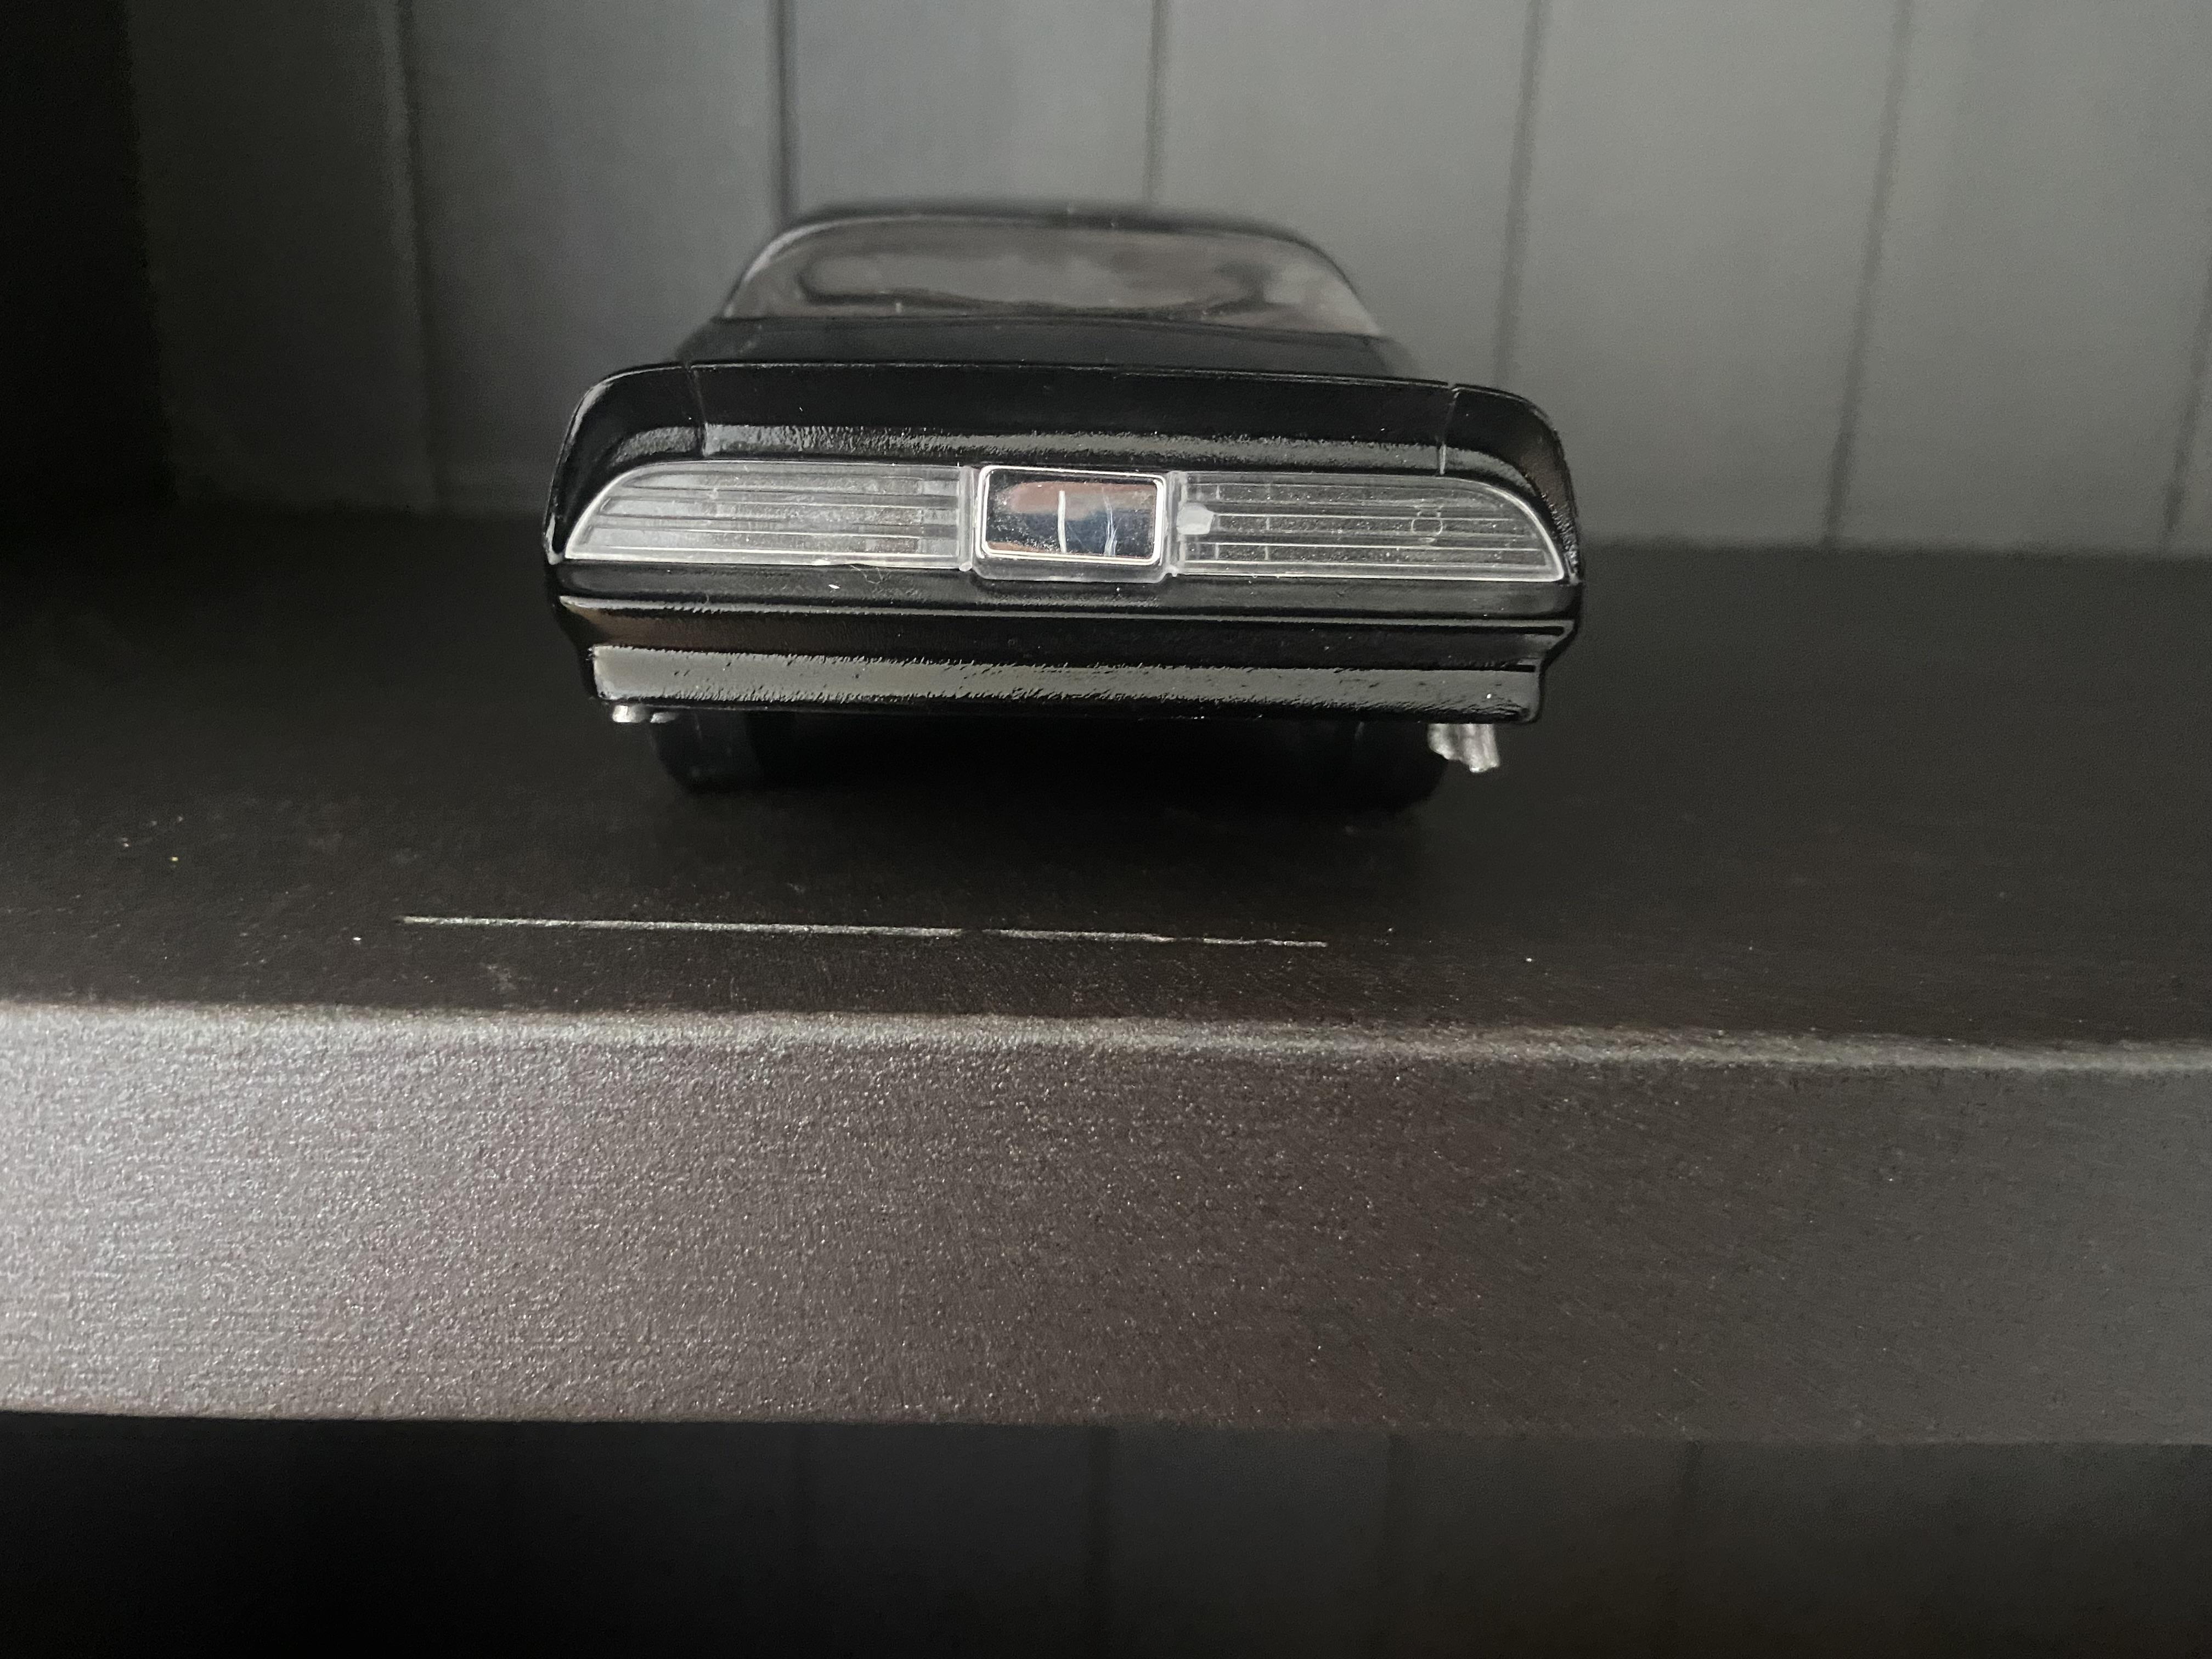
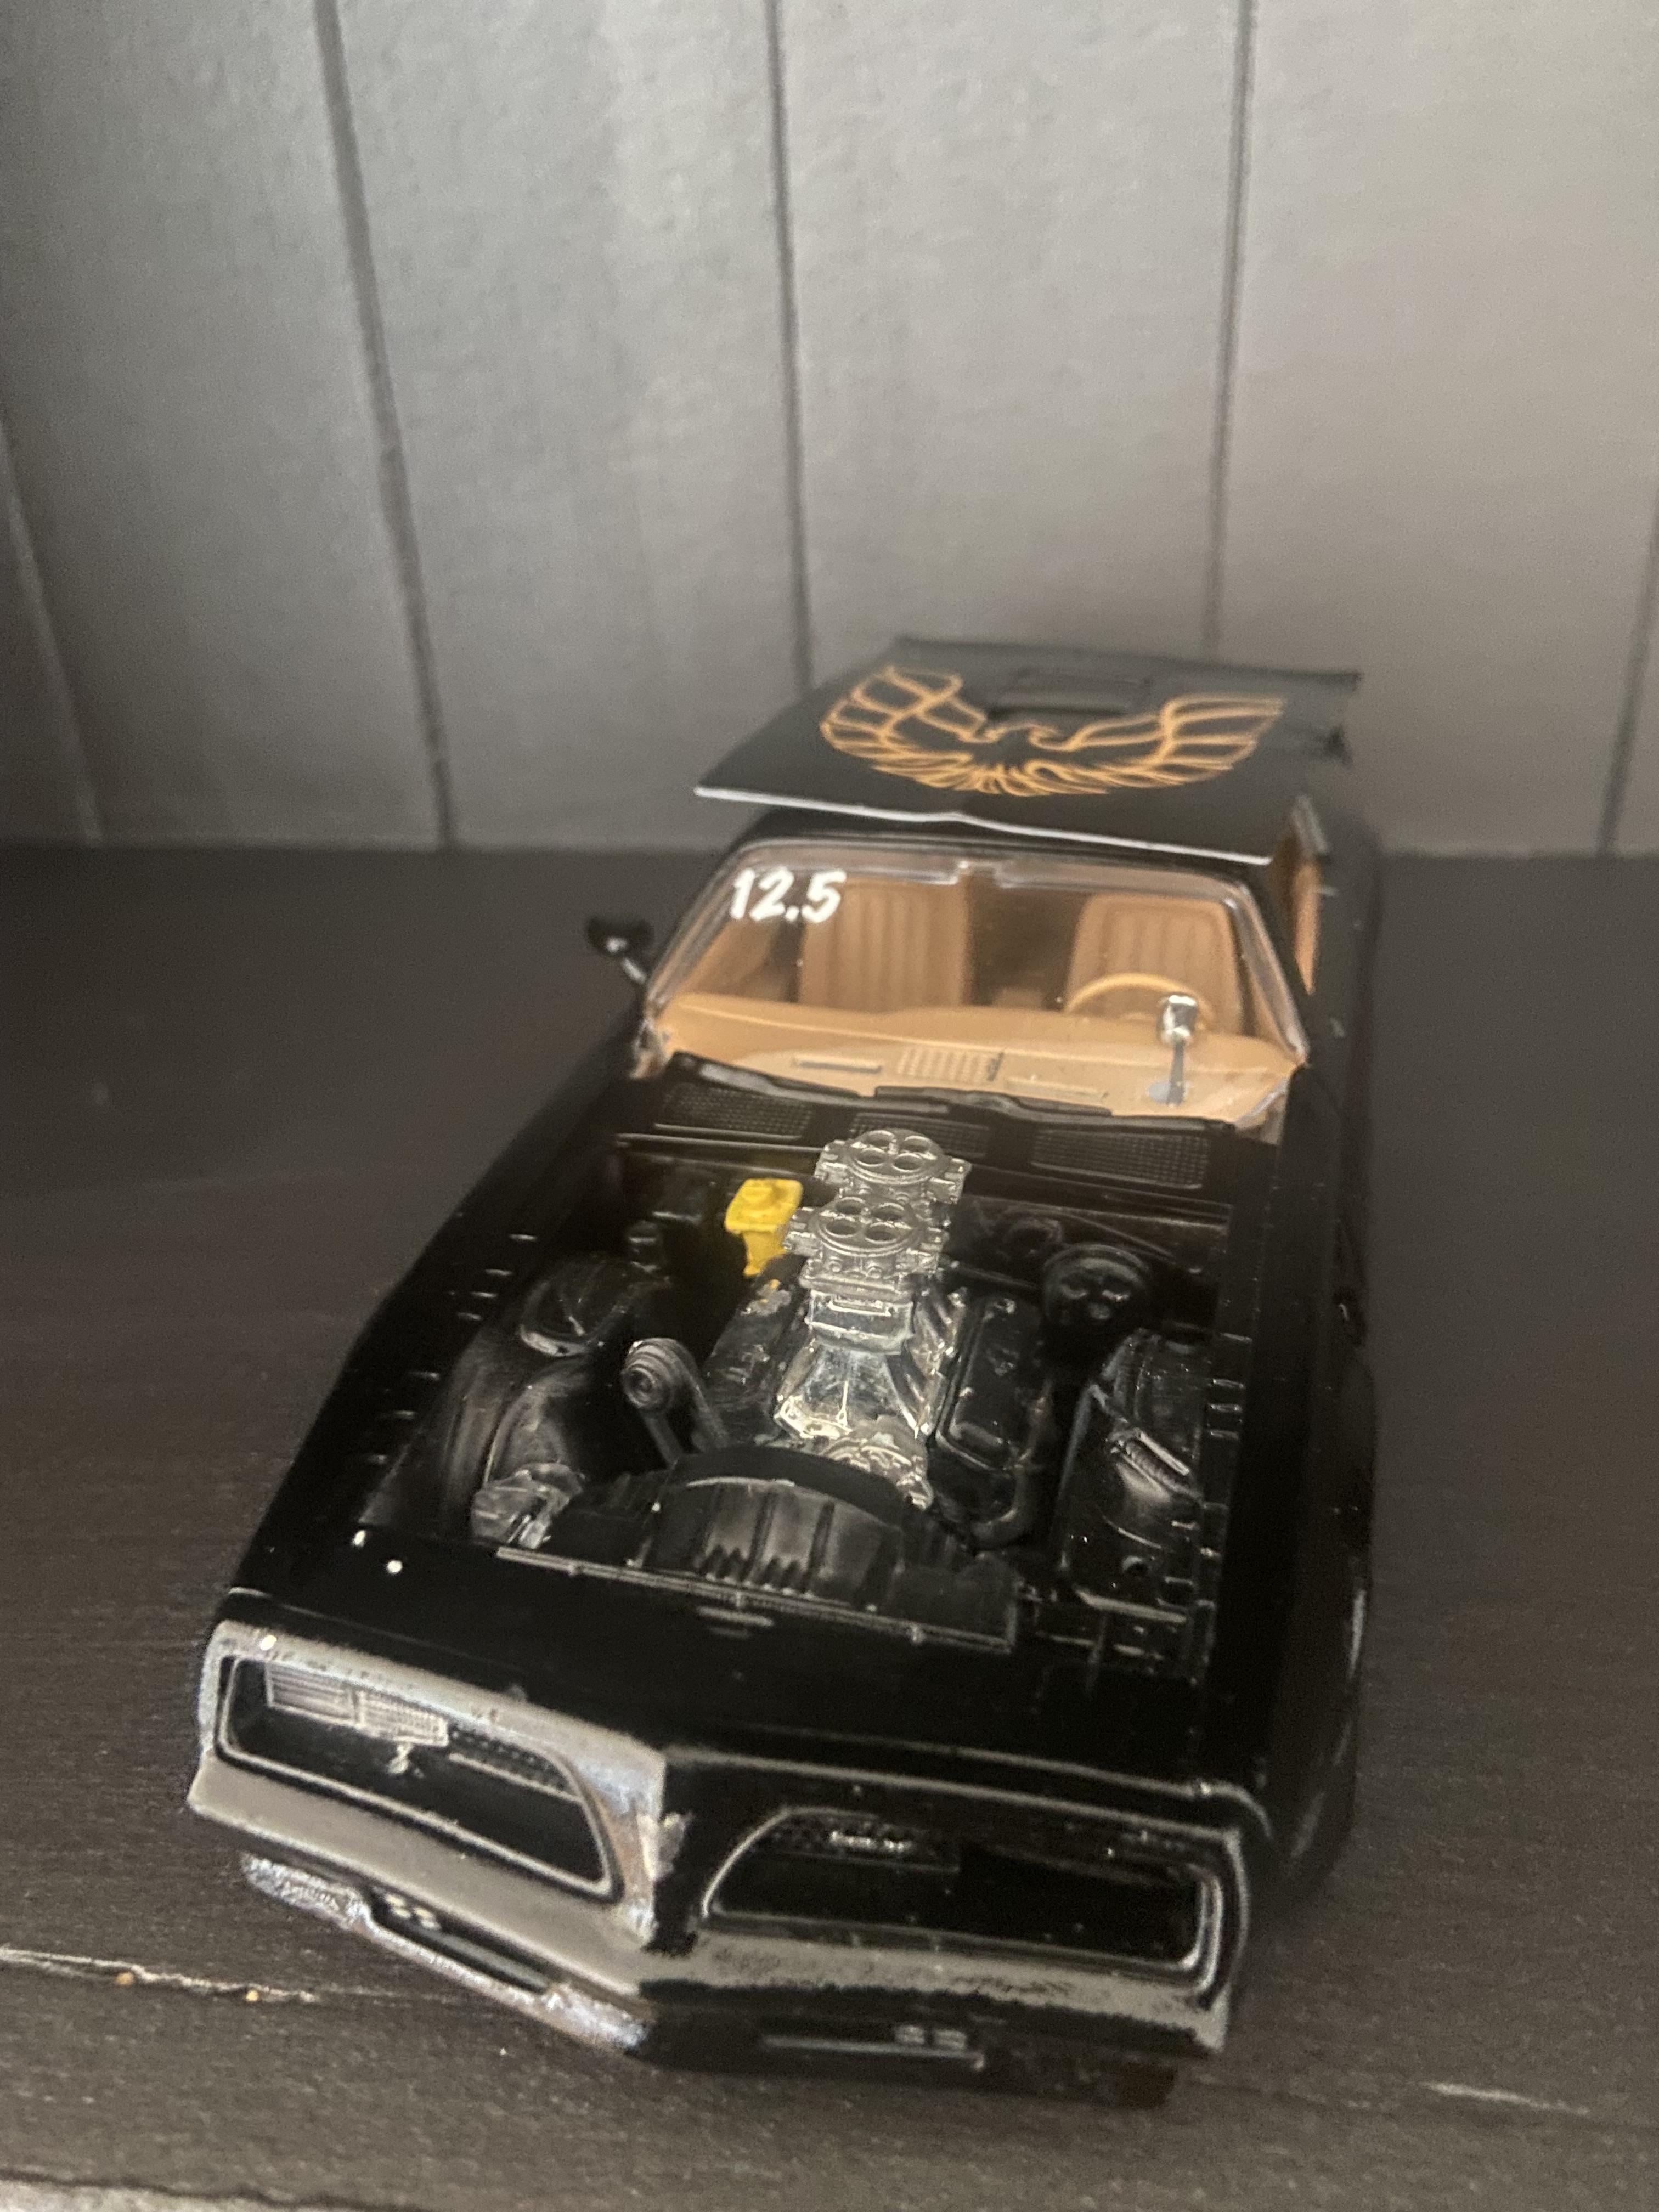
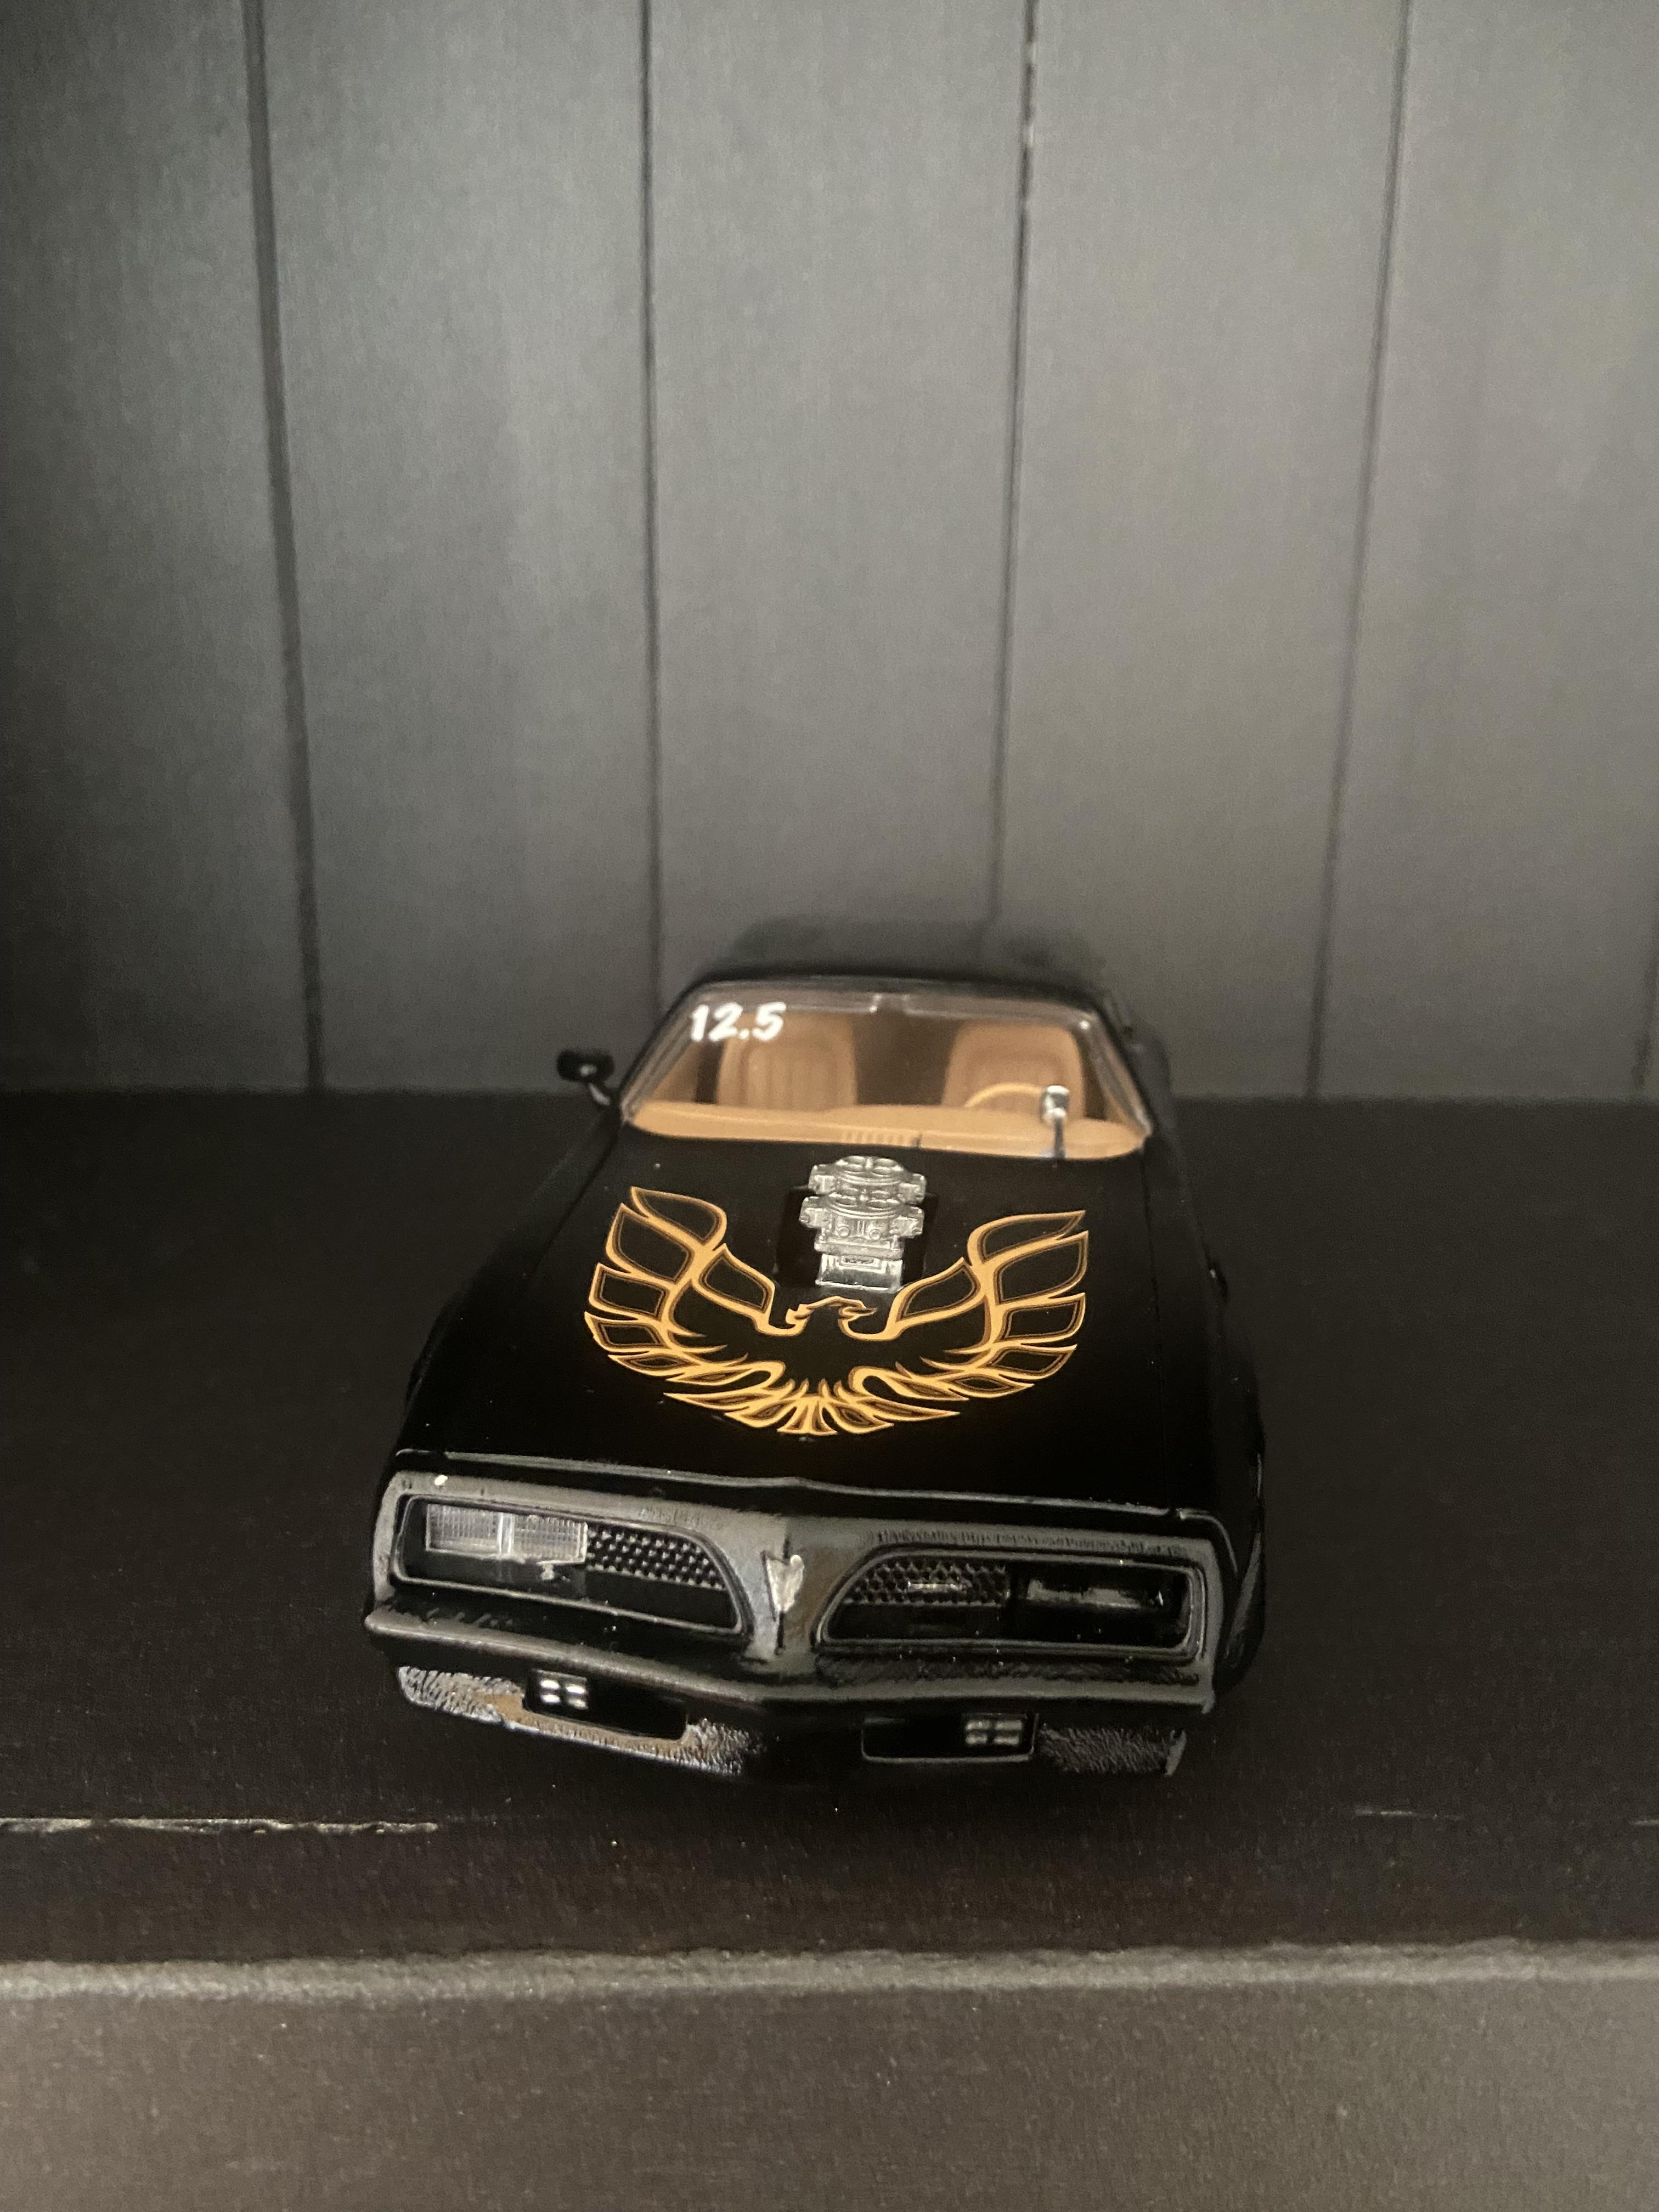
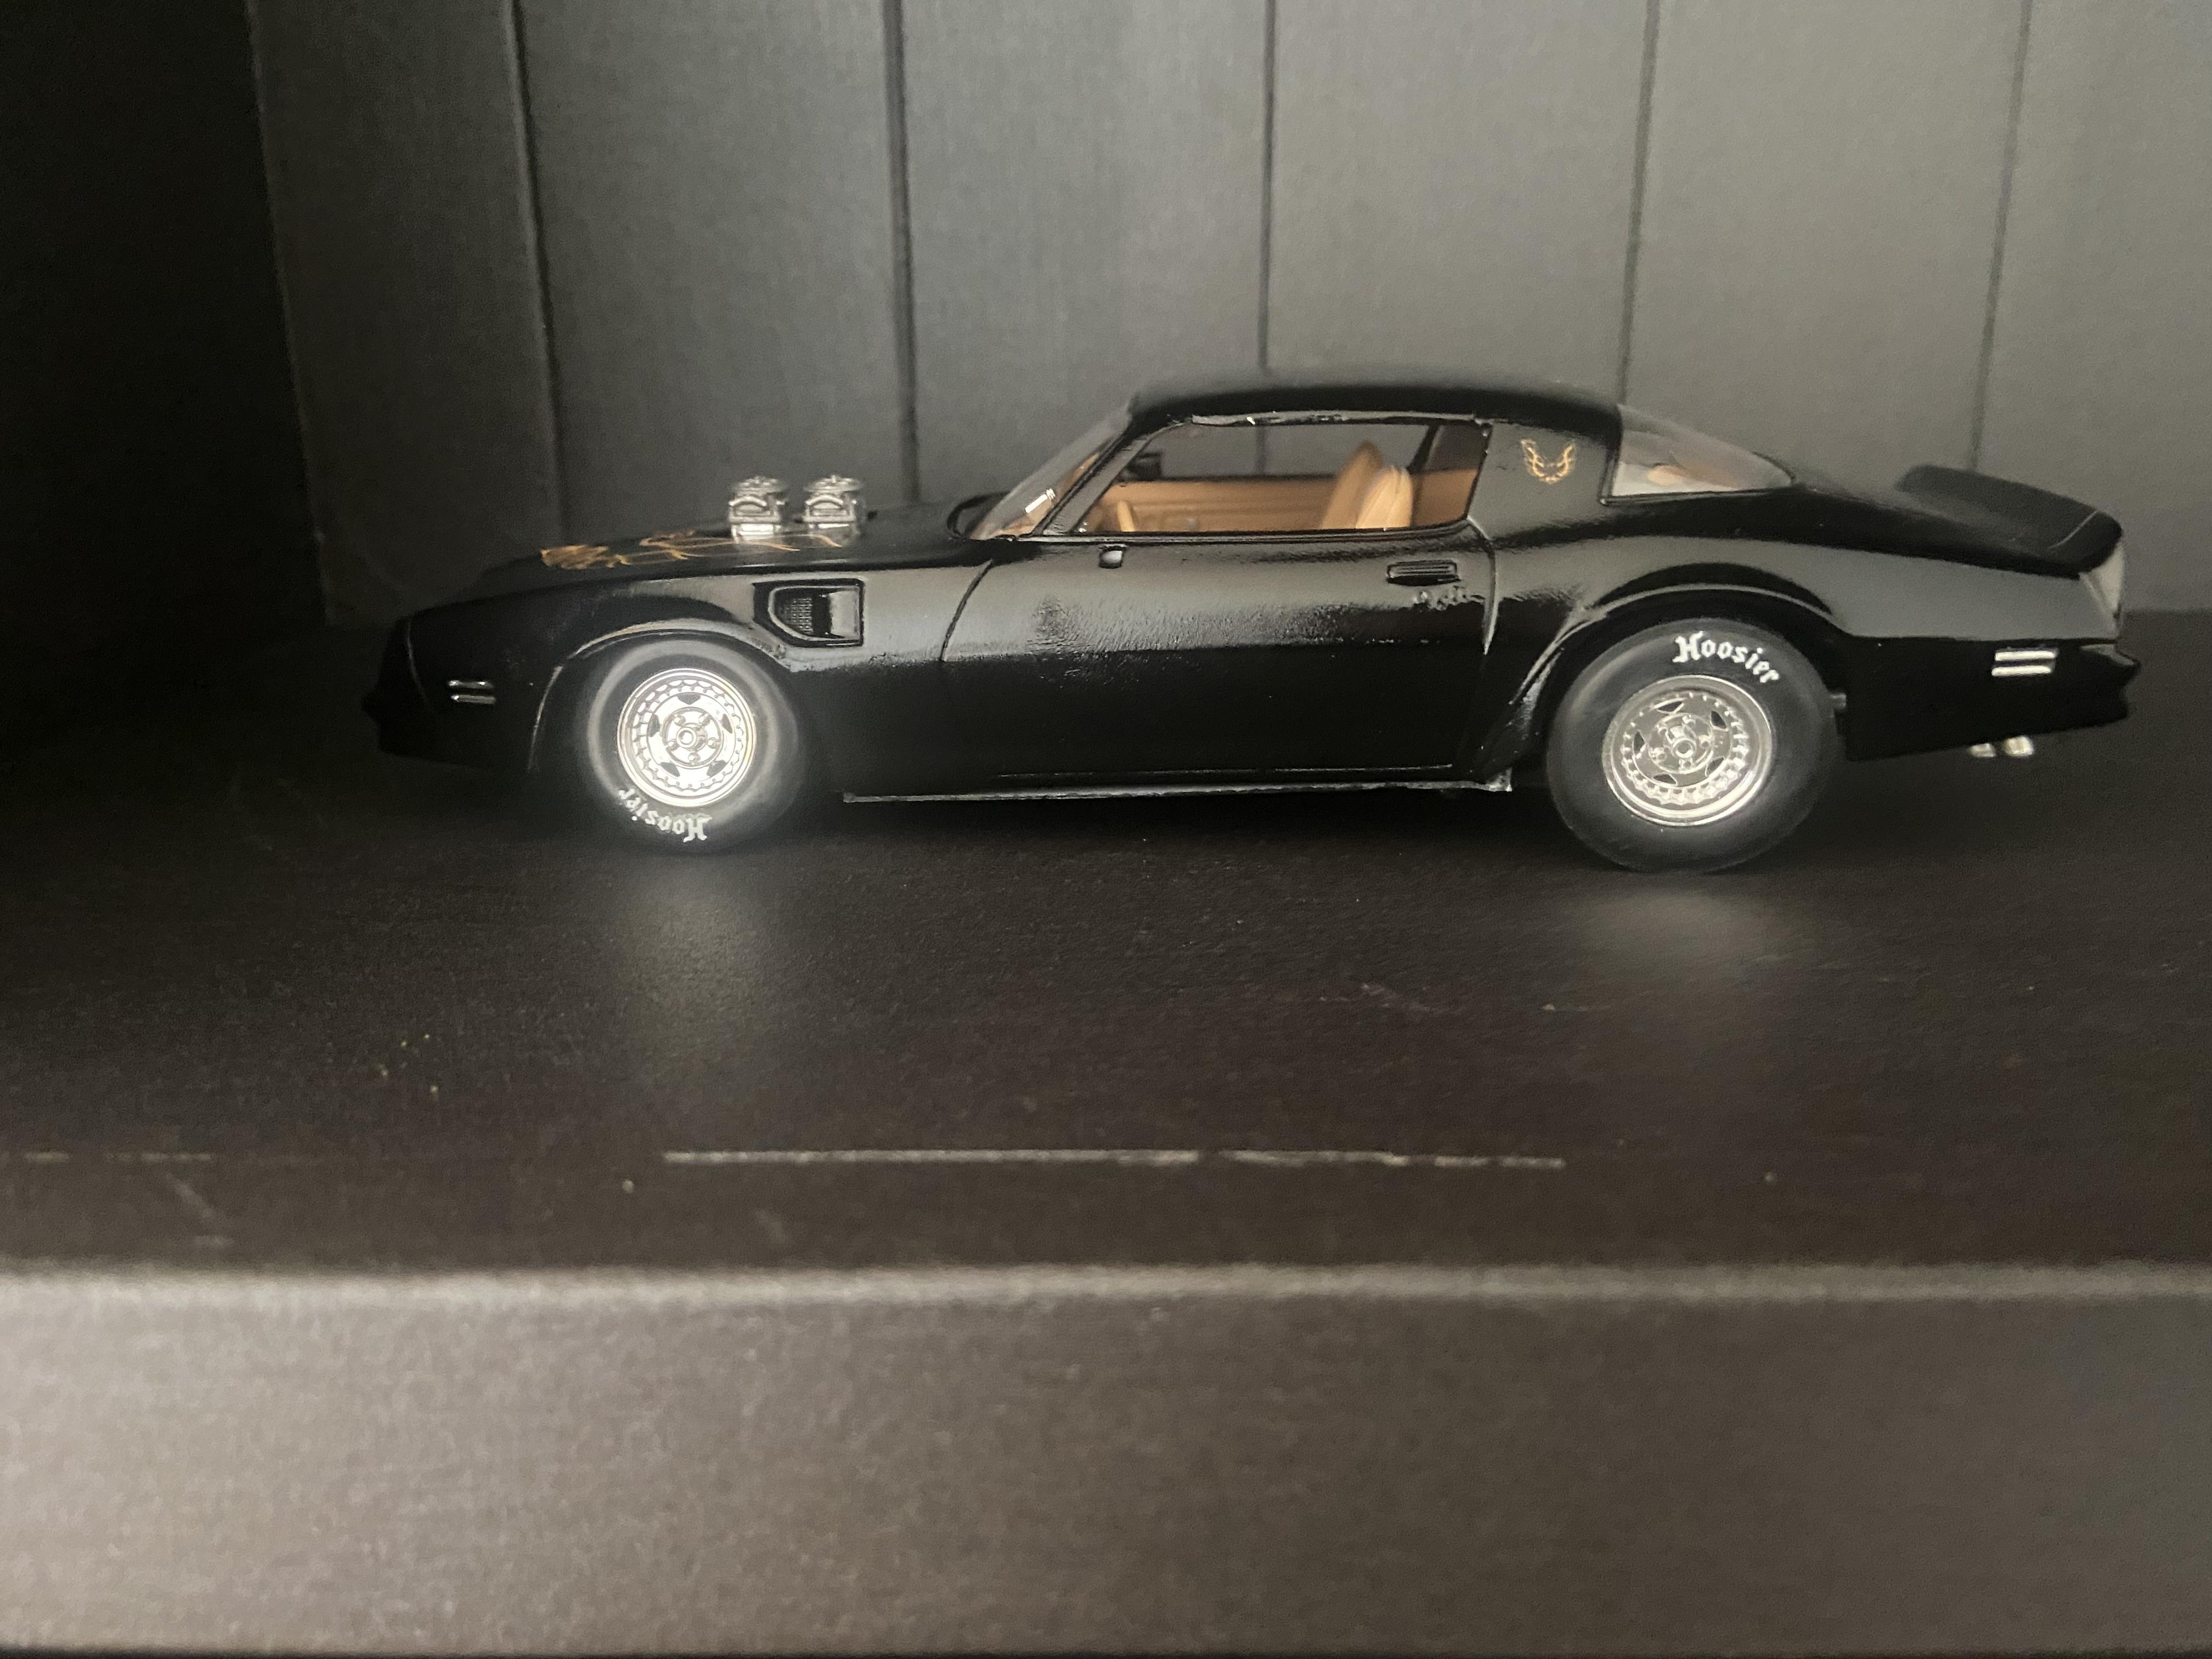
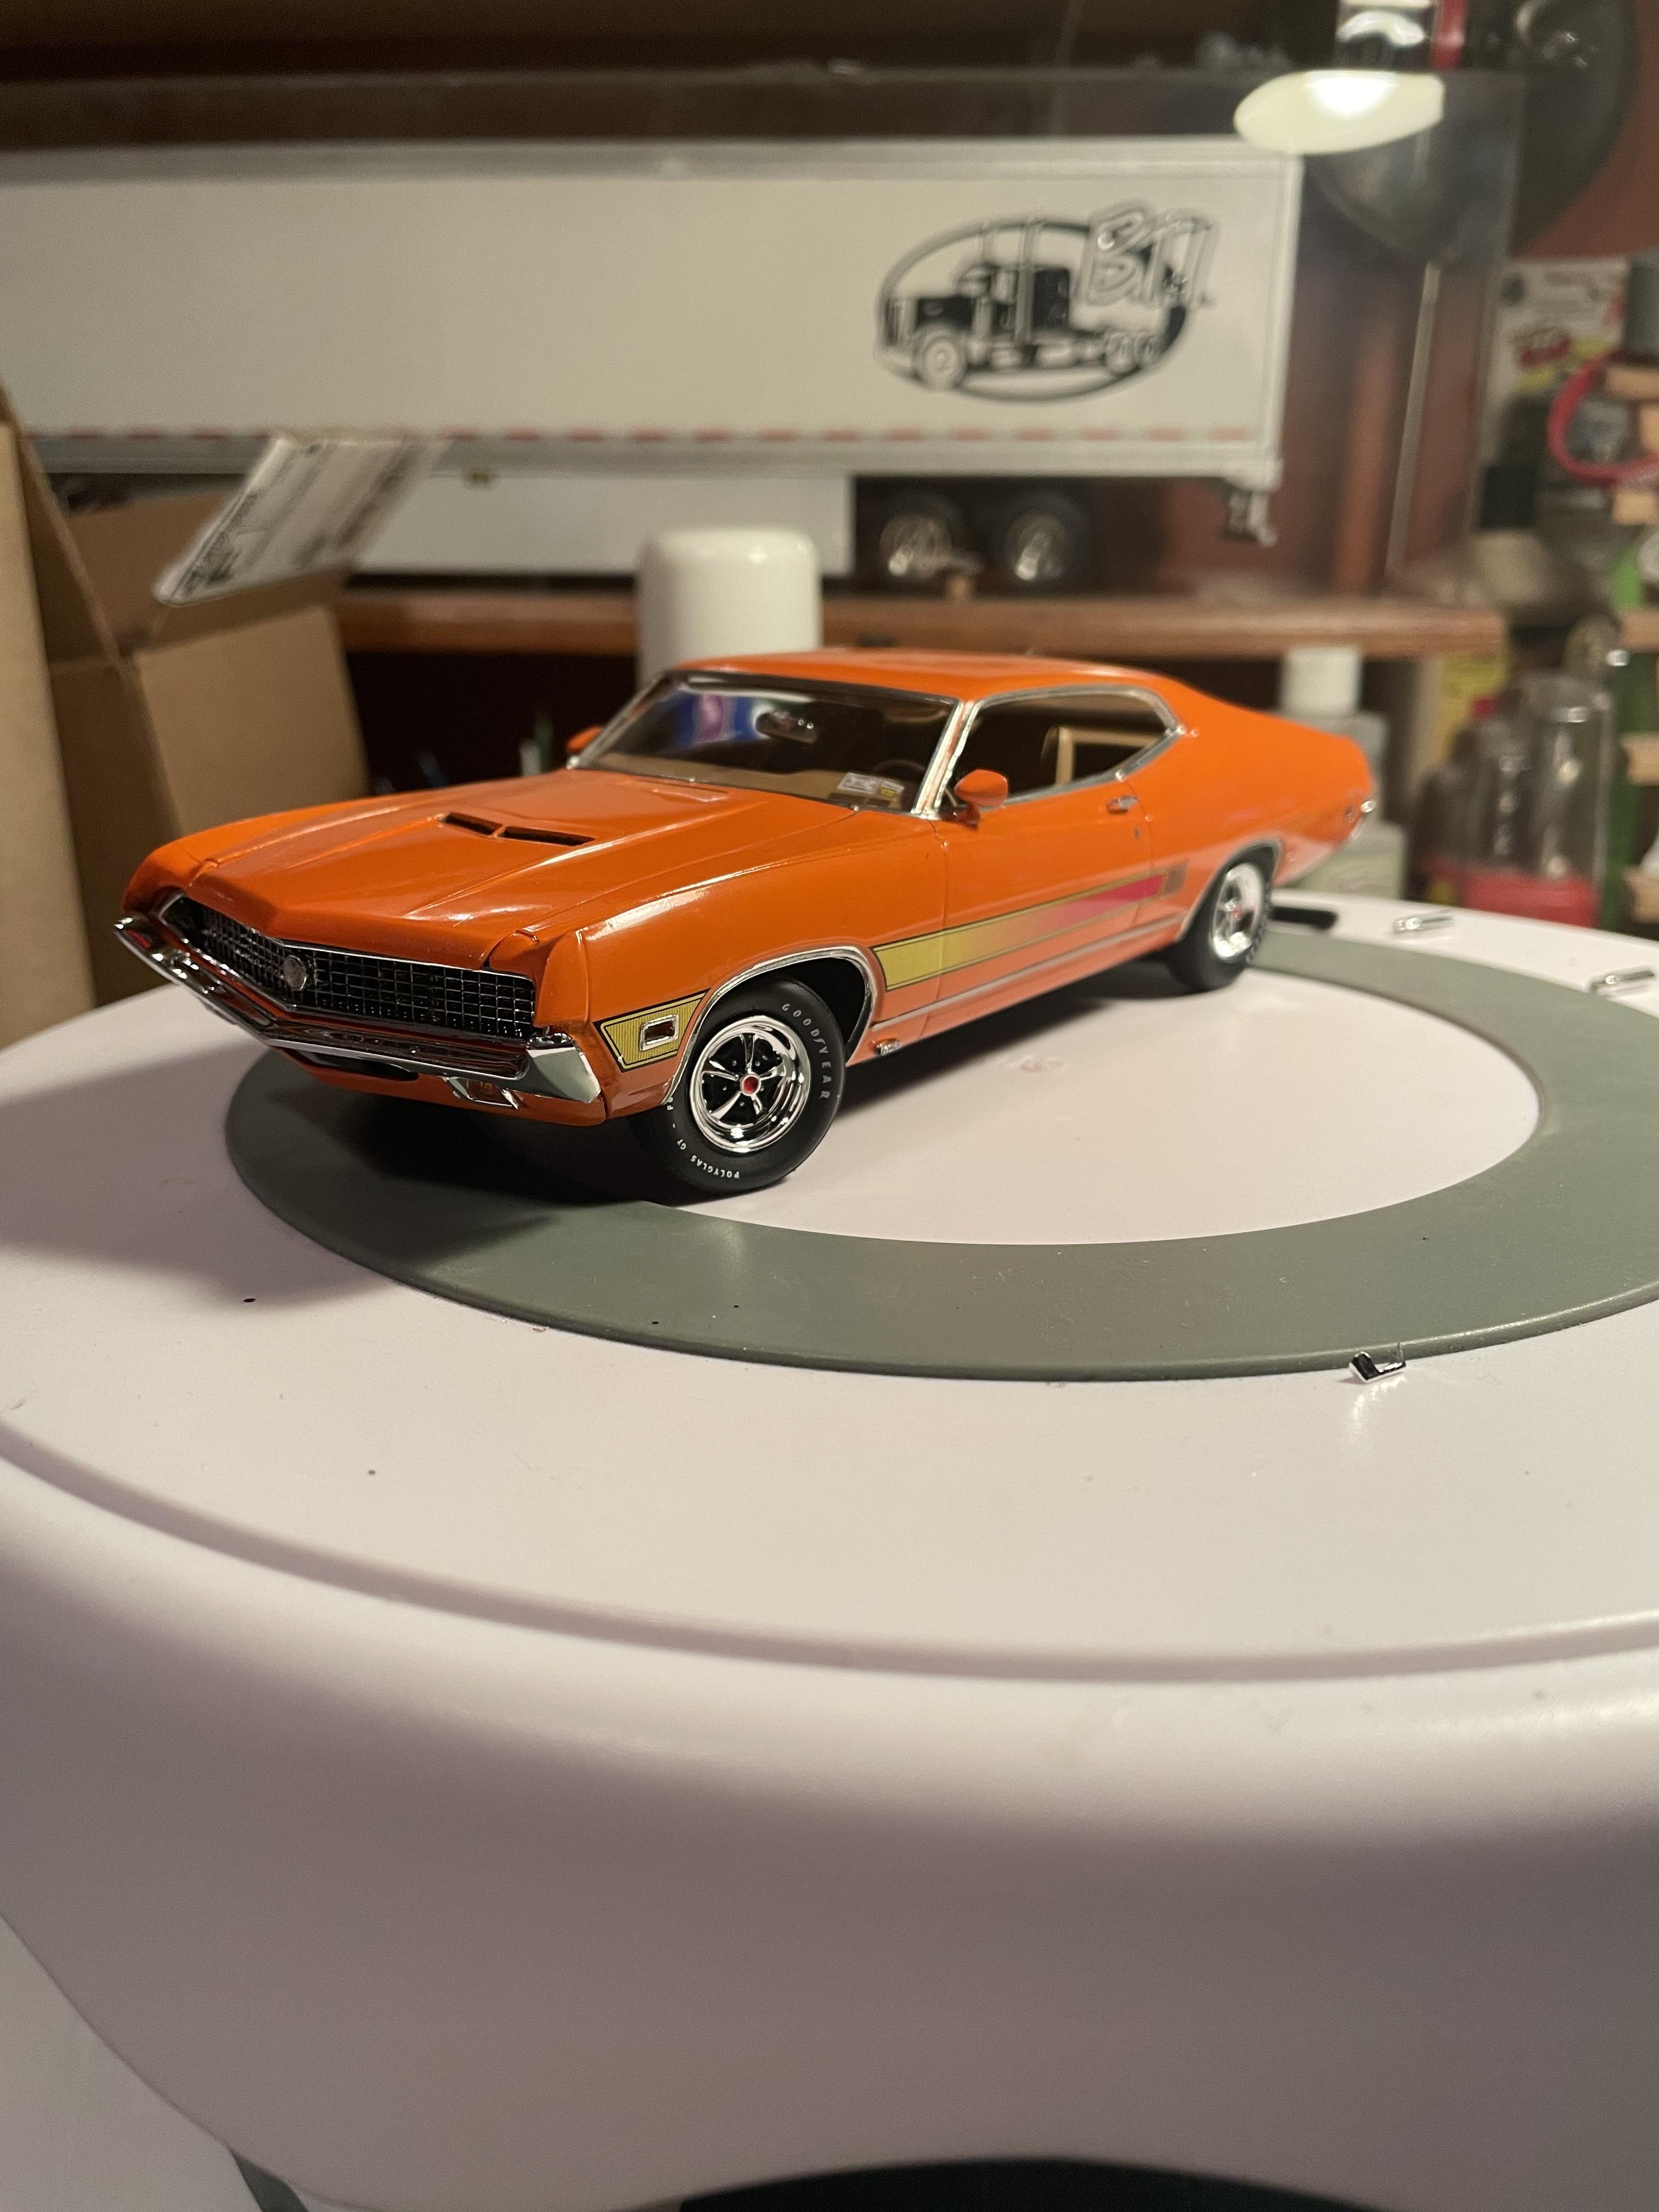
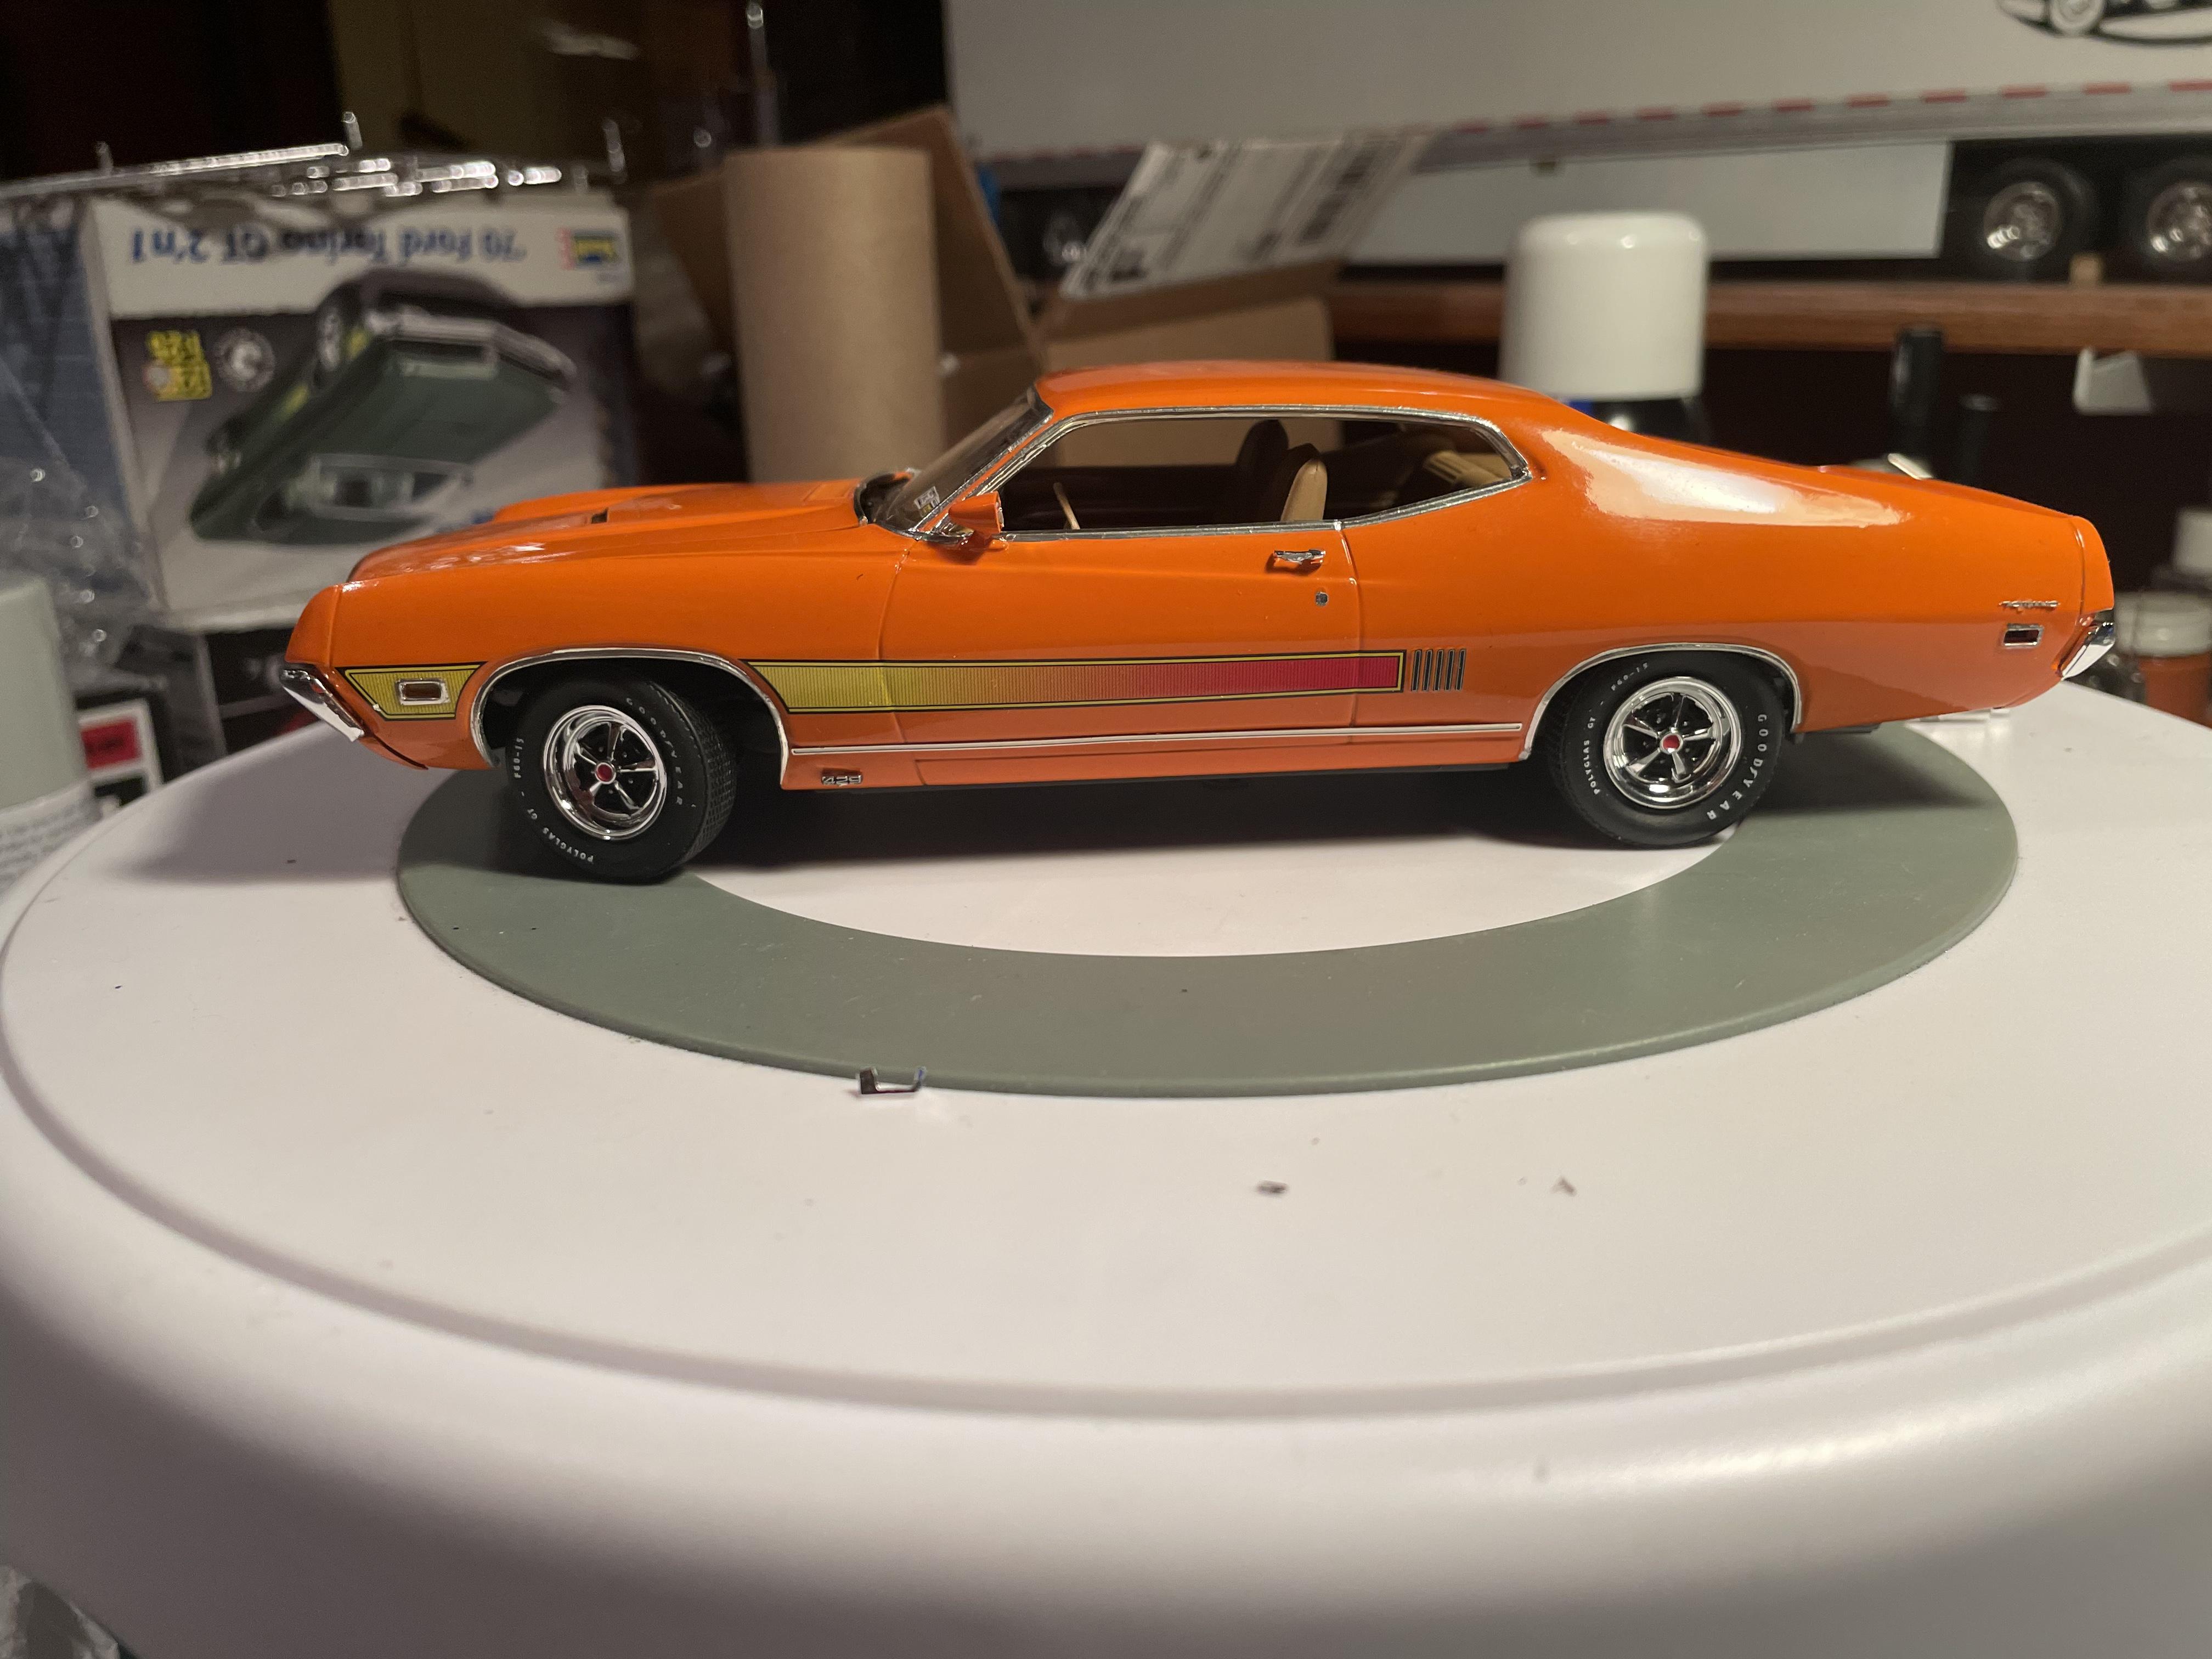
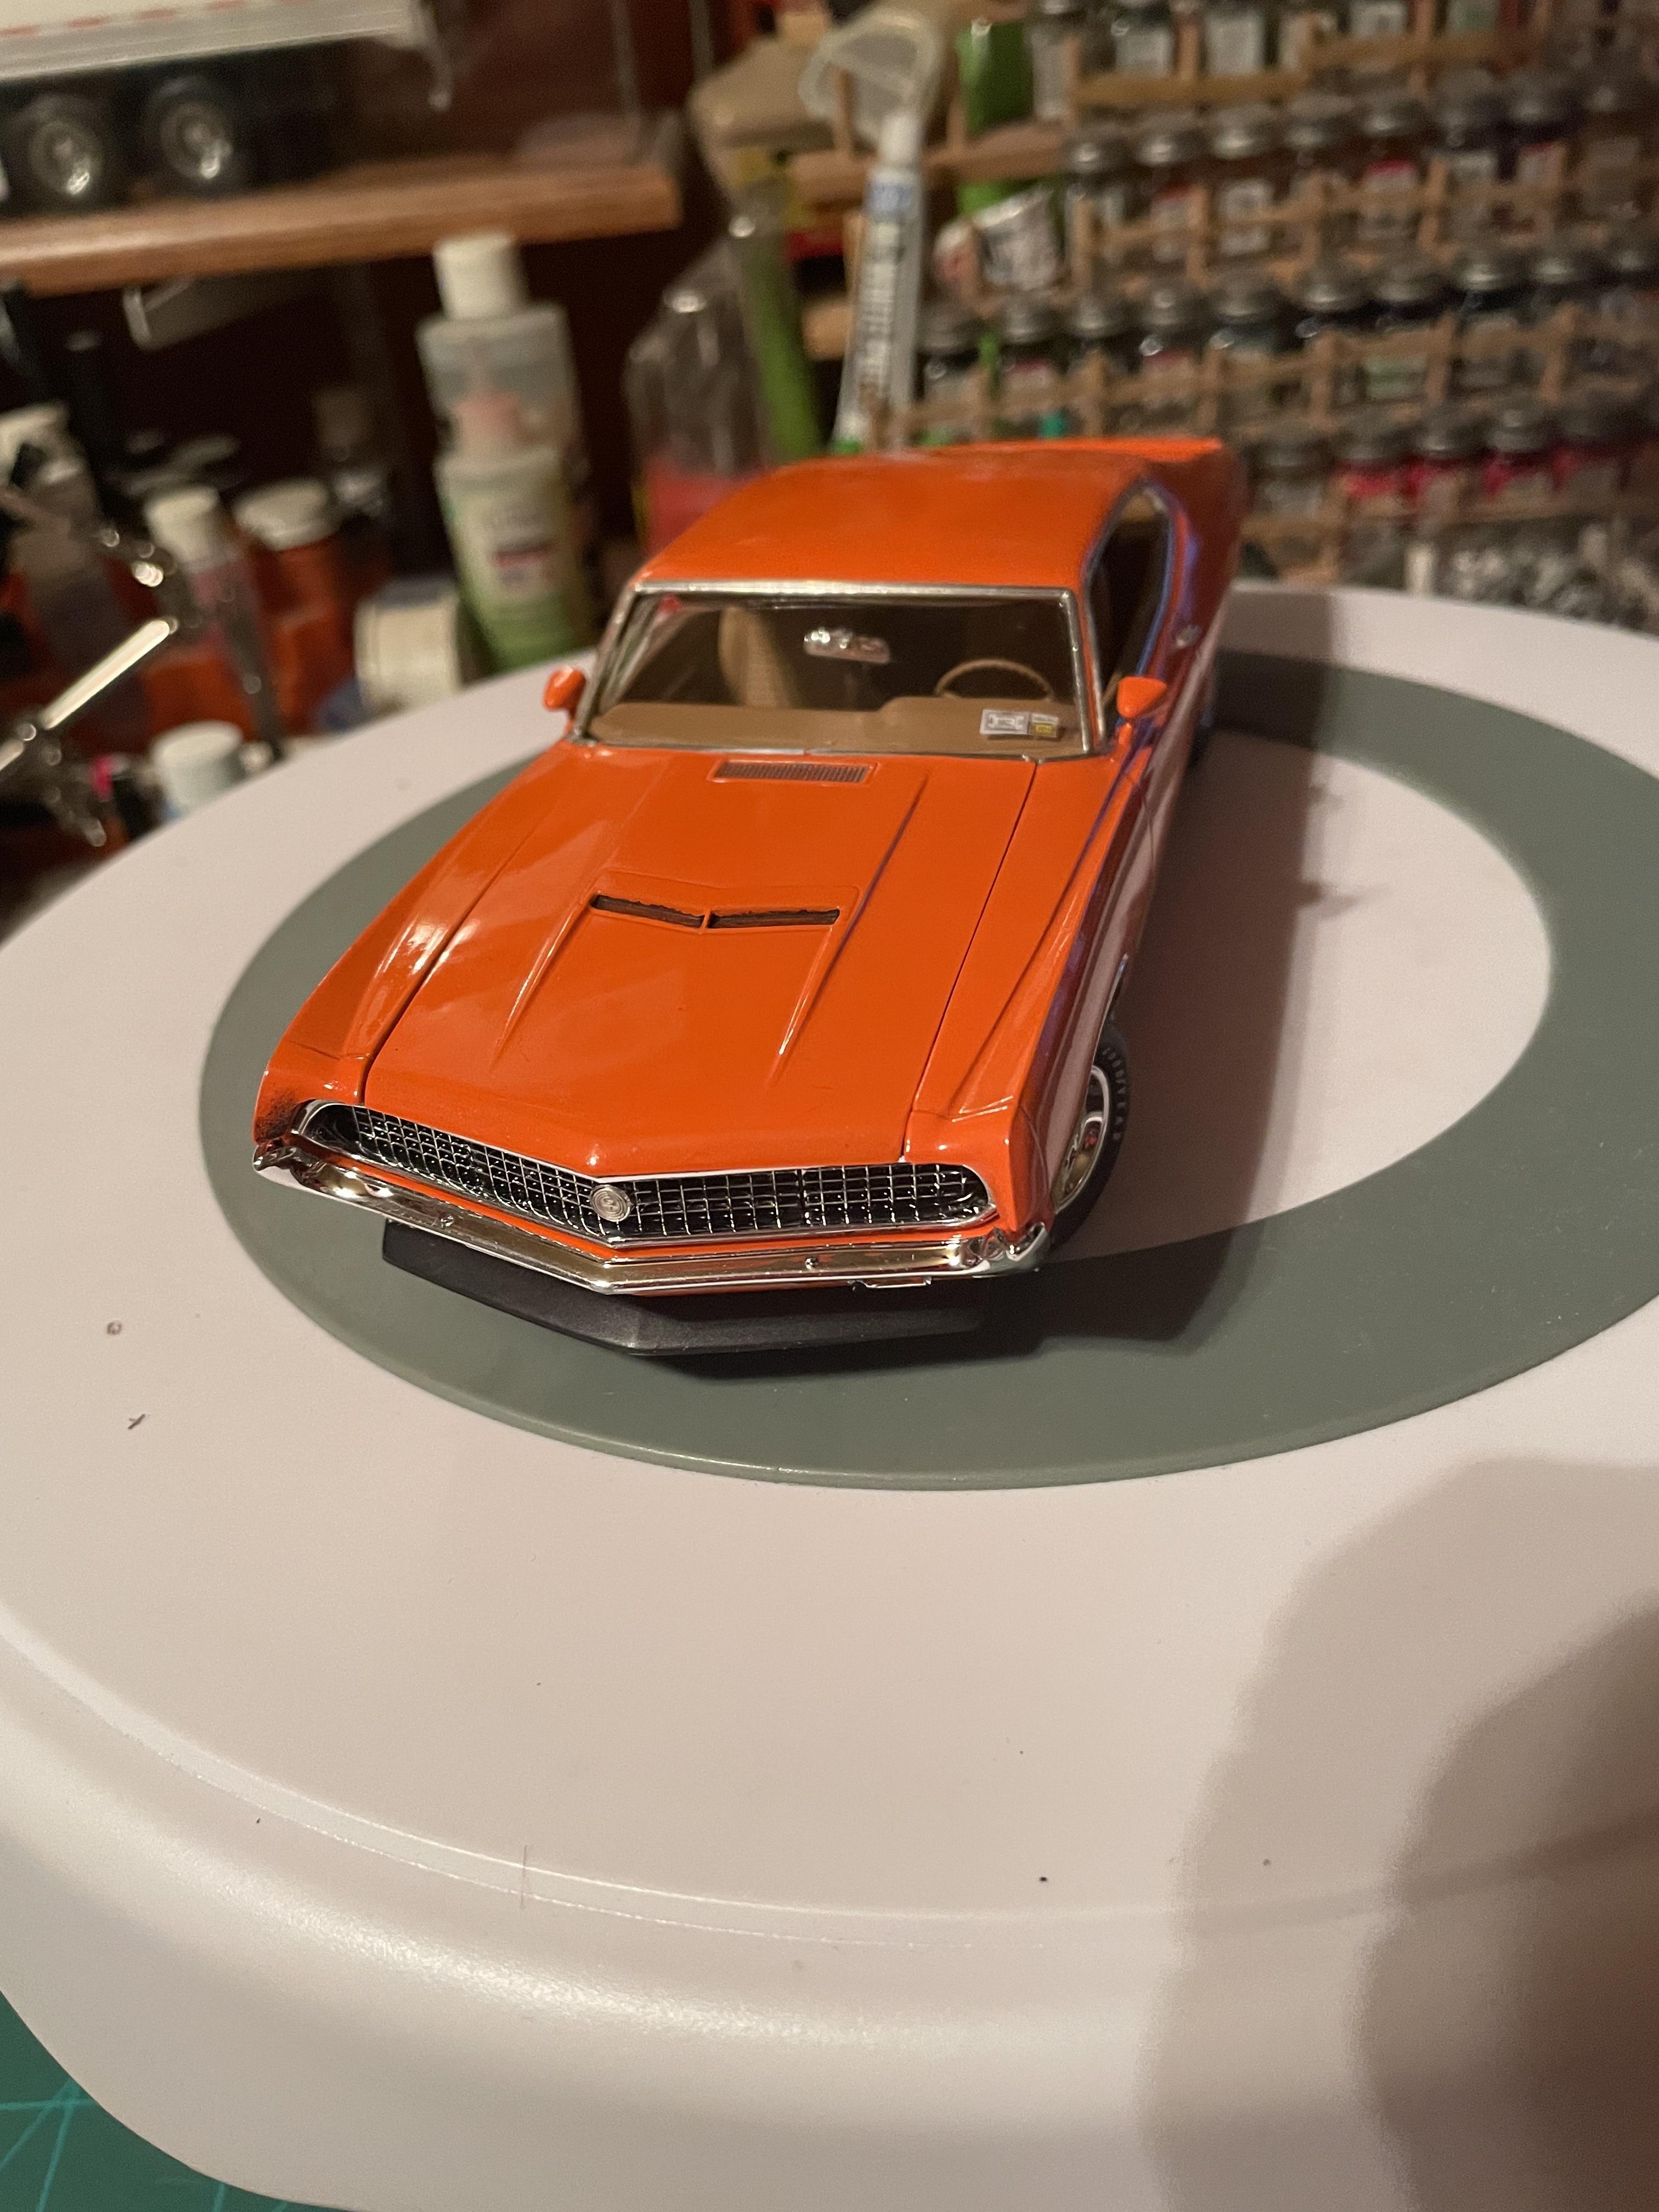
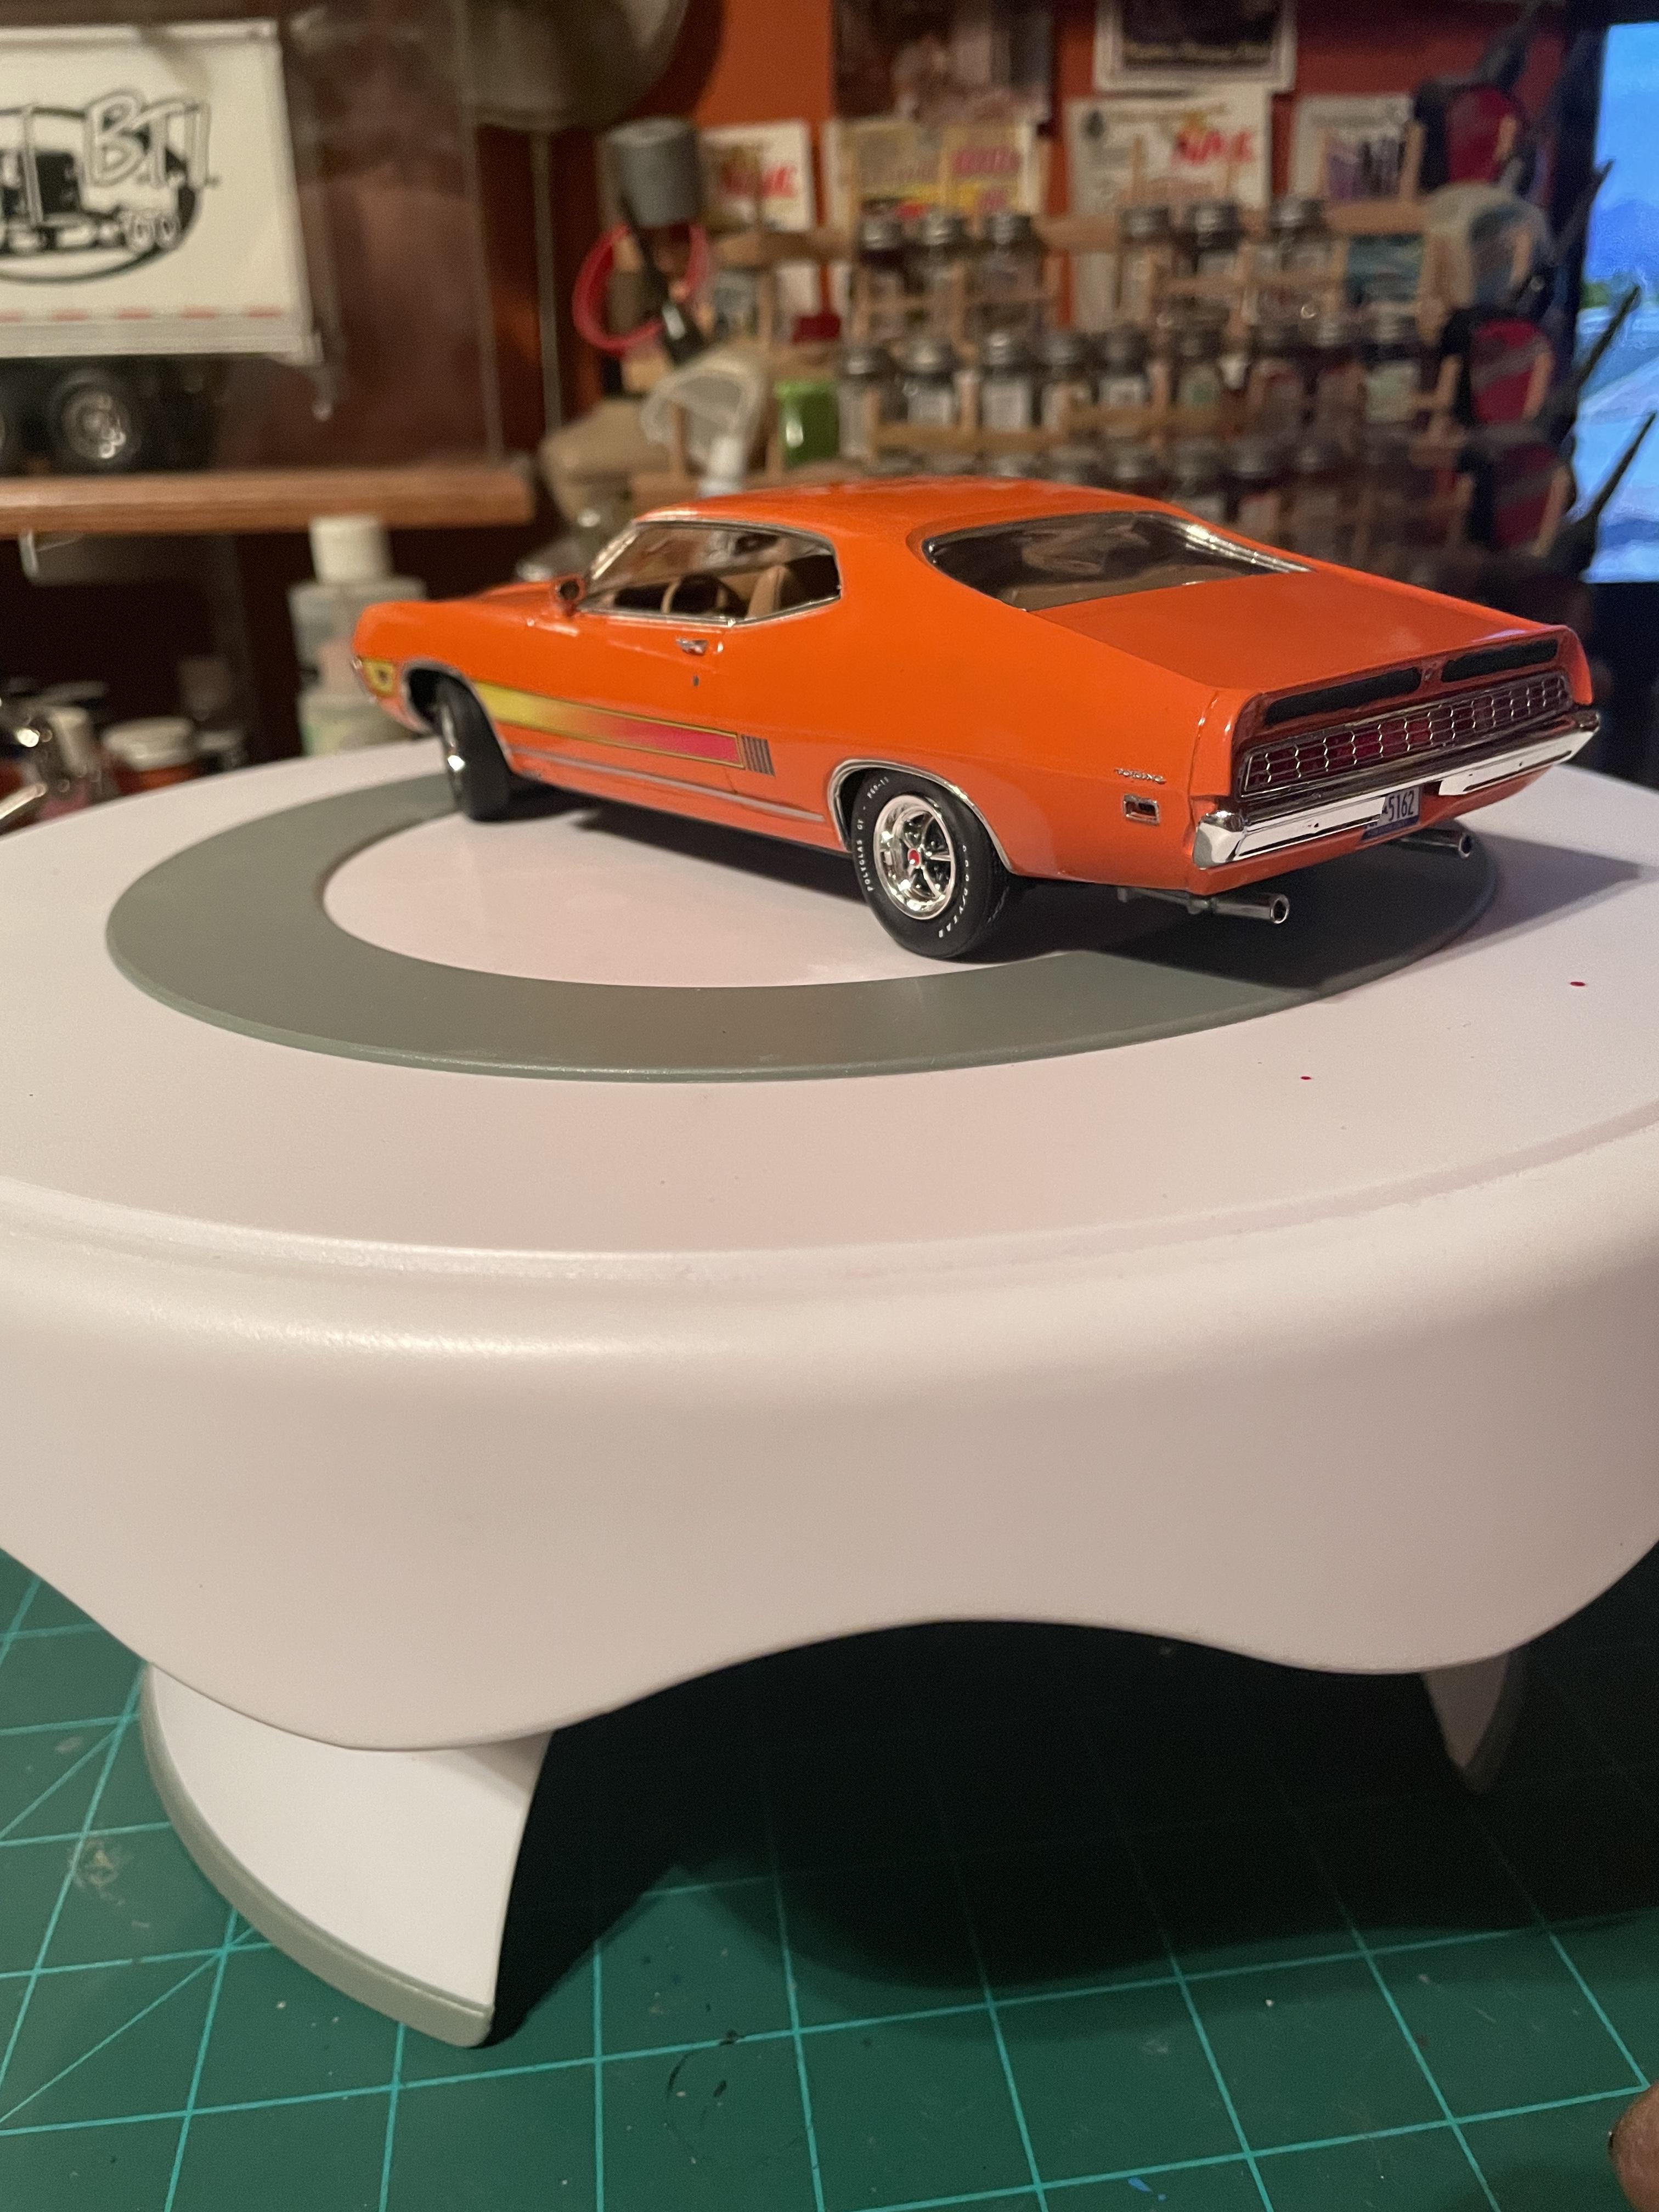
This was built from the old revell kit the early 90’s reissue. It’s box stock . The paint color is an old testors boyed’s color a pearl yellow ( or it might have been called pearl sunflower ) . These mid 70’s era revell funny car kits are some of the best ever made at least in my opinion. Until next time thanks for looking 👀, Mike
-
Well here it is. Not my best paint job or body work but I’m glad to have it off my bench. The carbs are a 3d printed set I got from eBay and wheels and tunnel ram are parts box items. Anyway enjoy.
- 5 replies
-
- 5
-
-
- revell
- 77 trans am
- (and 1 more)
-
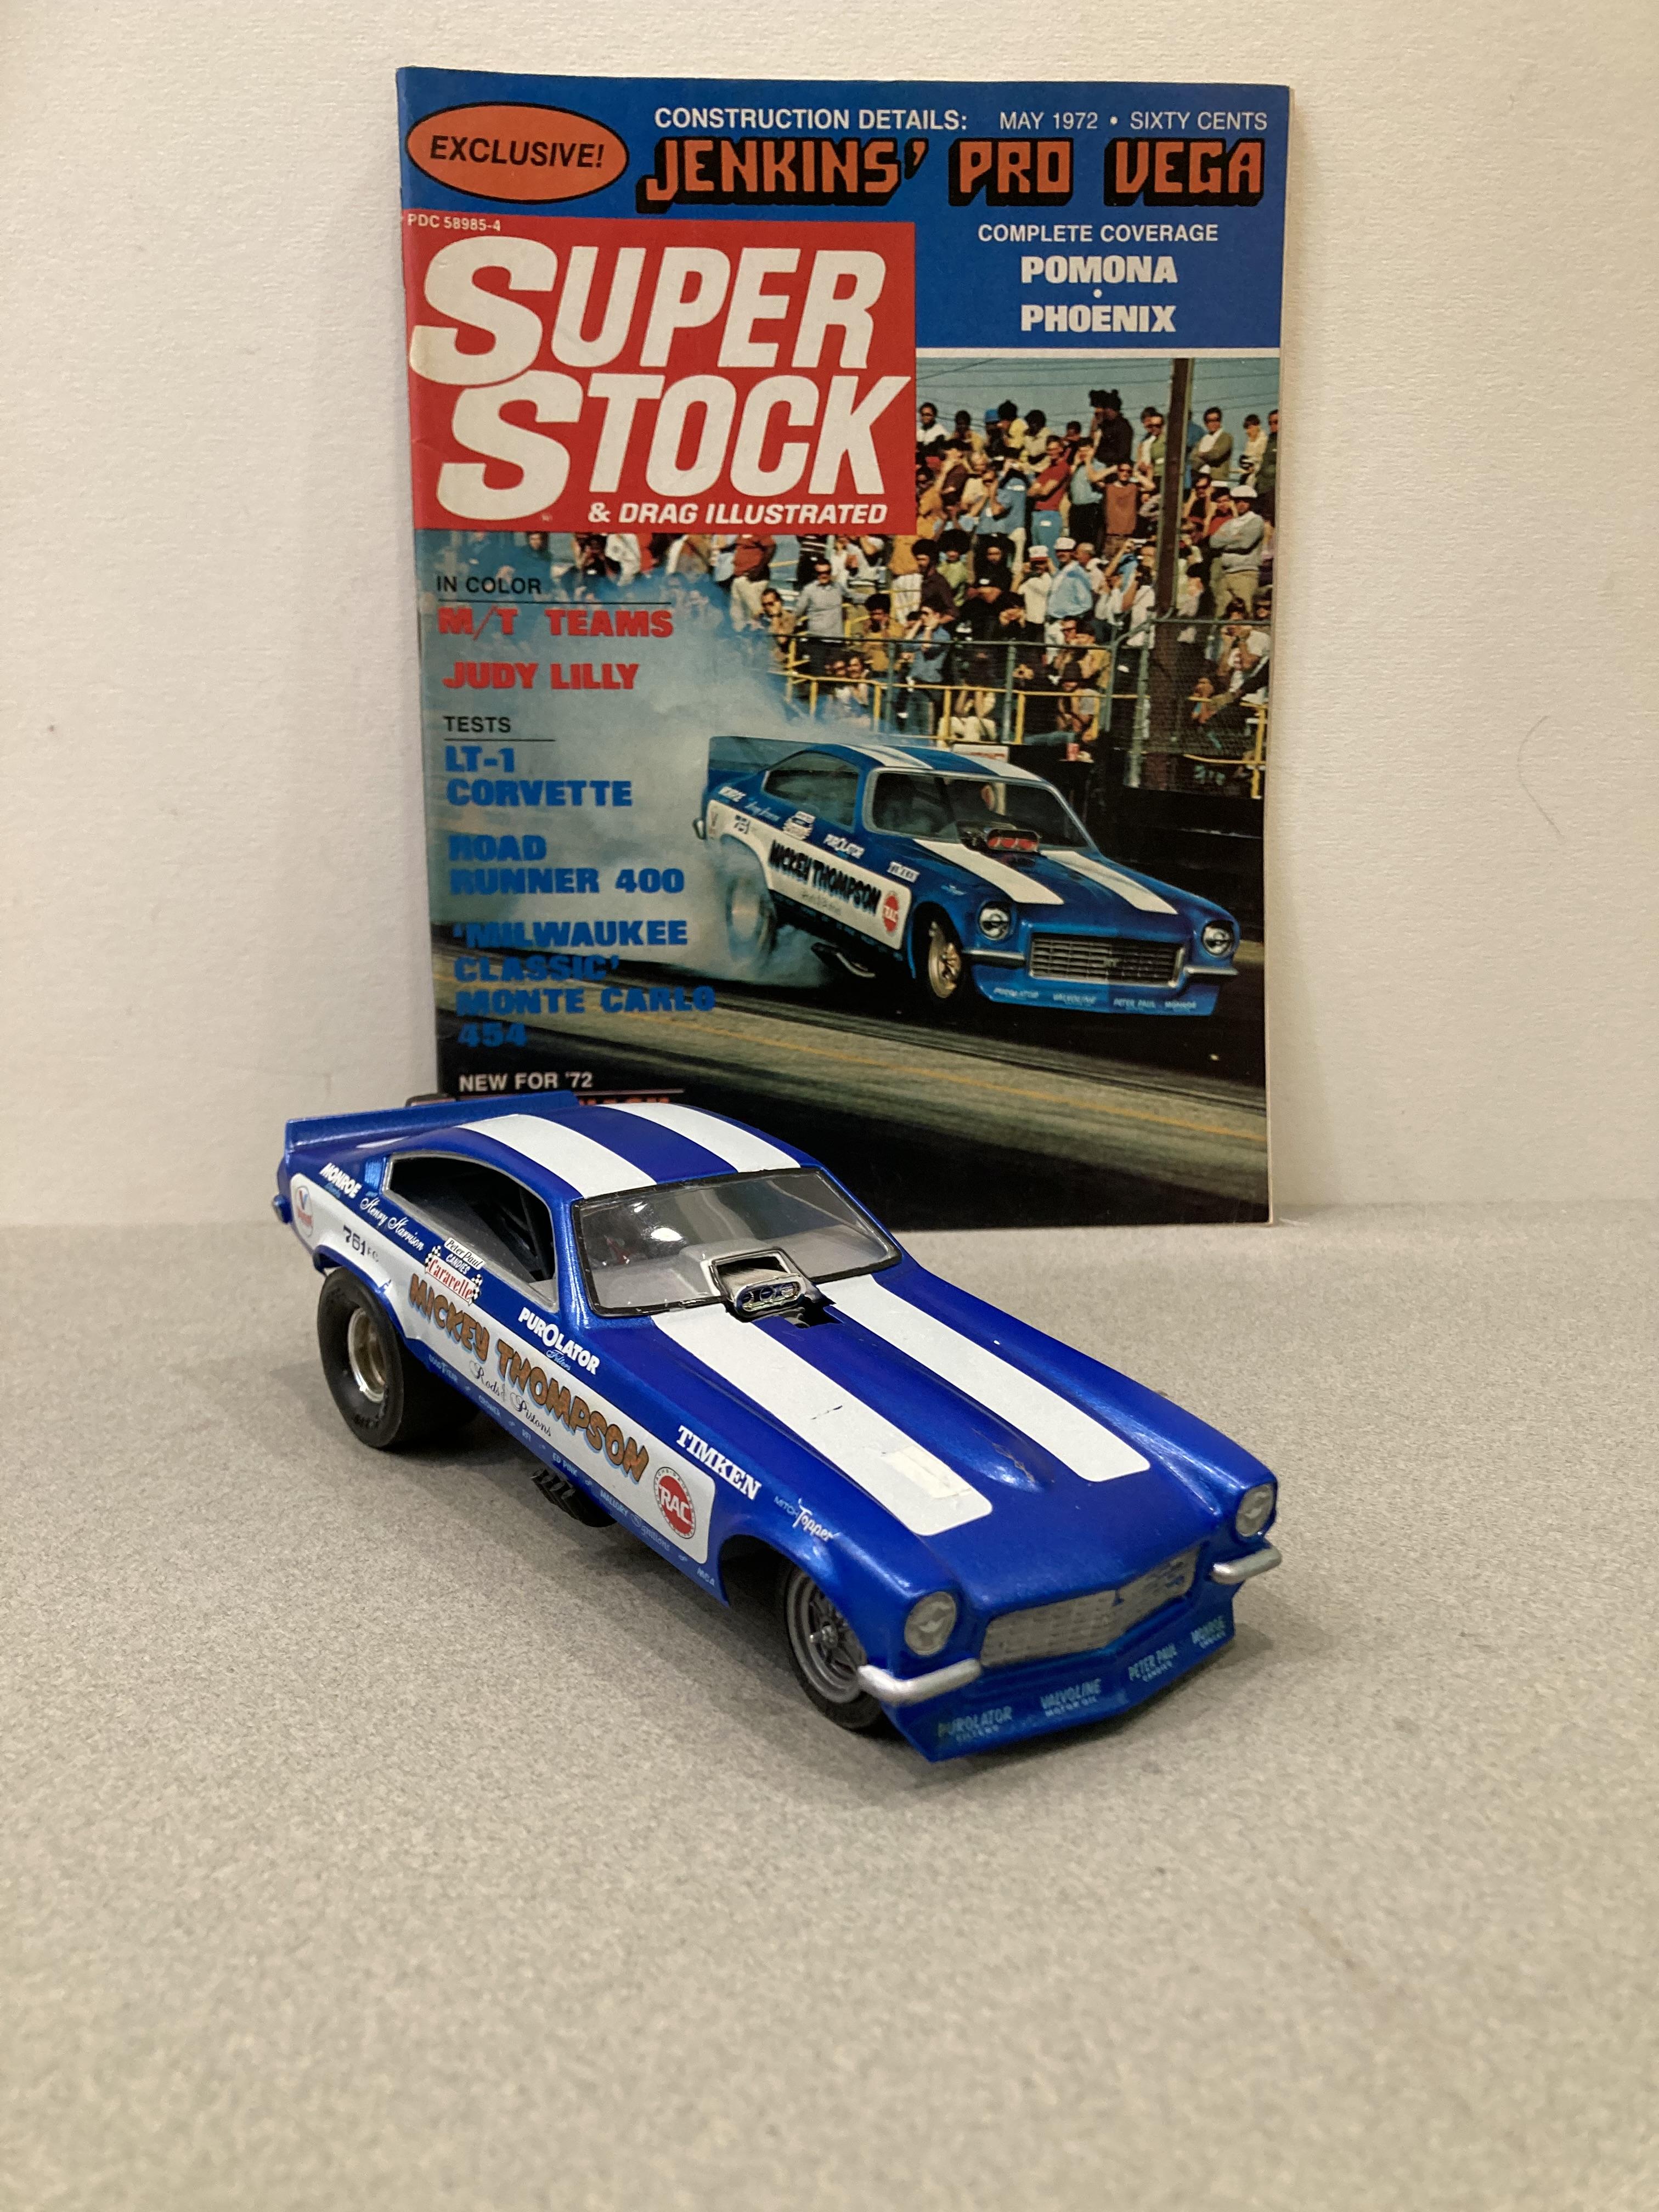
I started out with the revell jungle Jim kit . With the rear wheel wings that were left over parts from the mpc blue max funny car. The paint color is testors lacquer with clear. The decals came by the way of the talented chuck boener . I swapped out the kit’s wheels , and the interior hat with some spares from a polar lights funny car. As always thanks for looking 👀, Mike
-
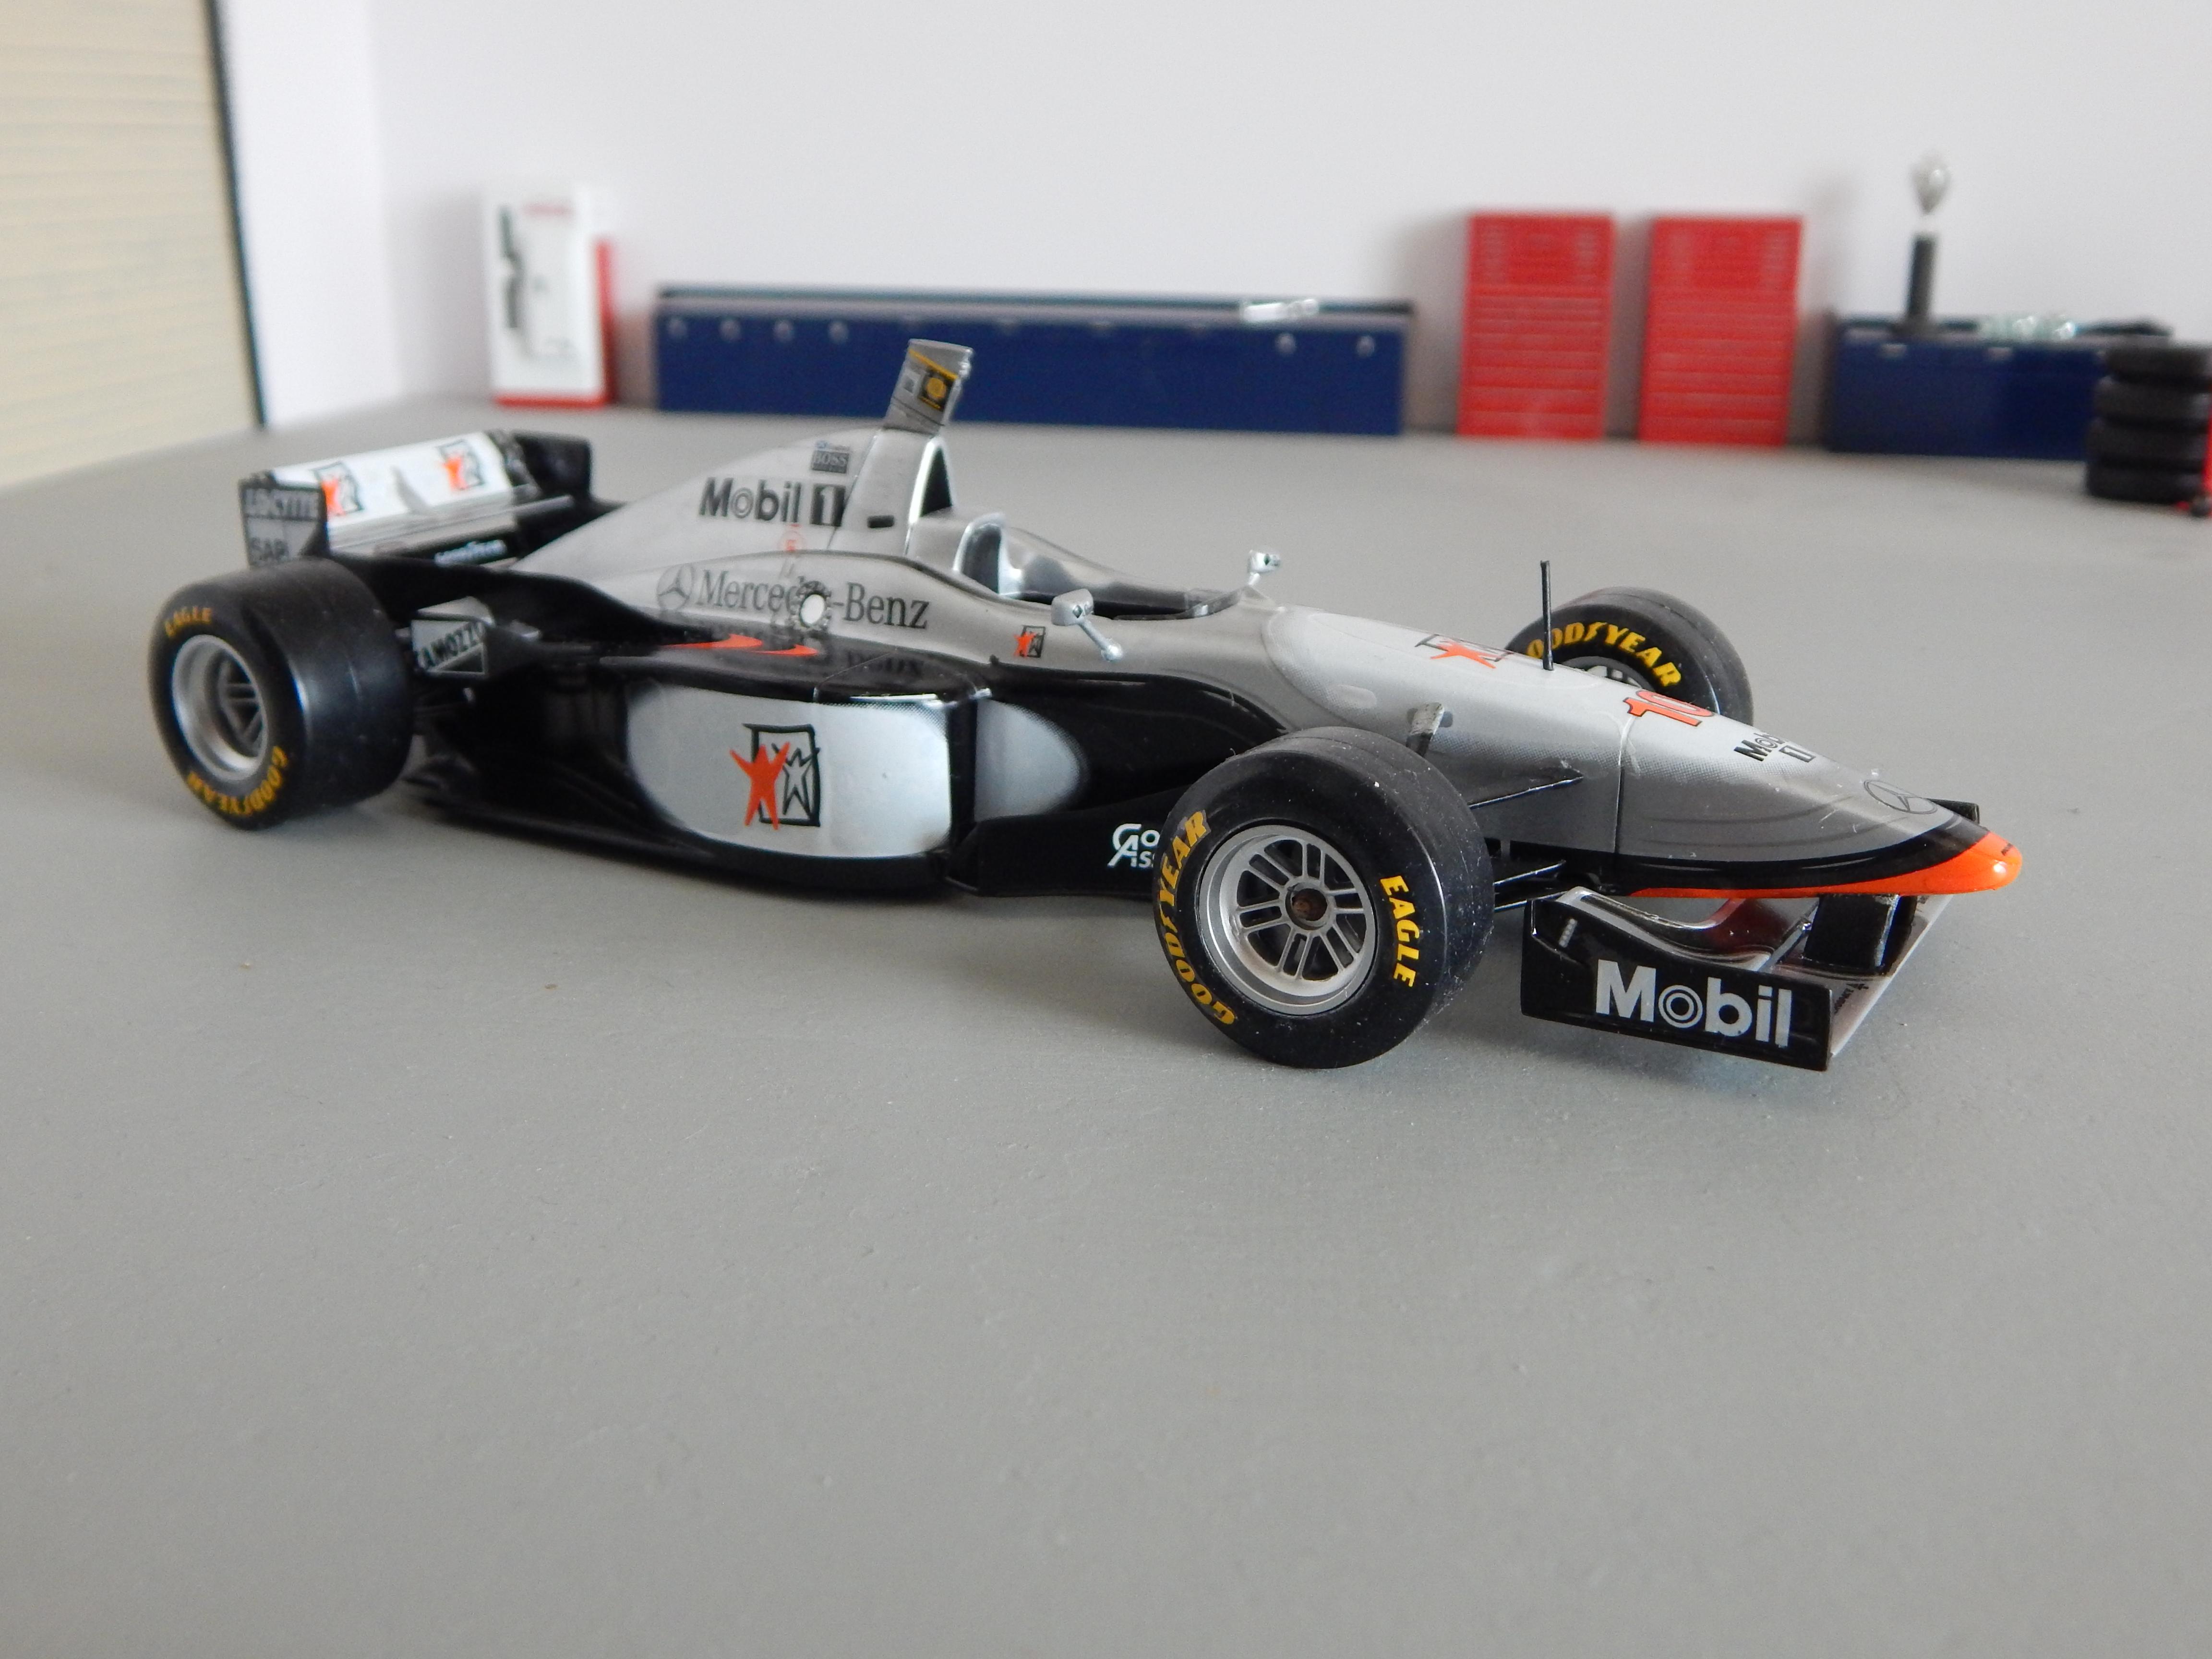
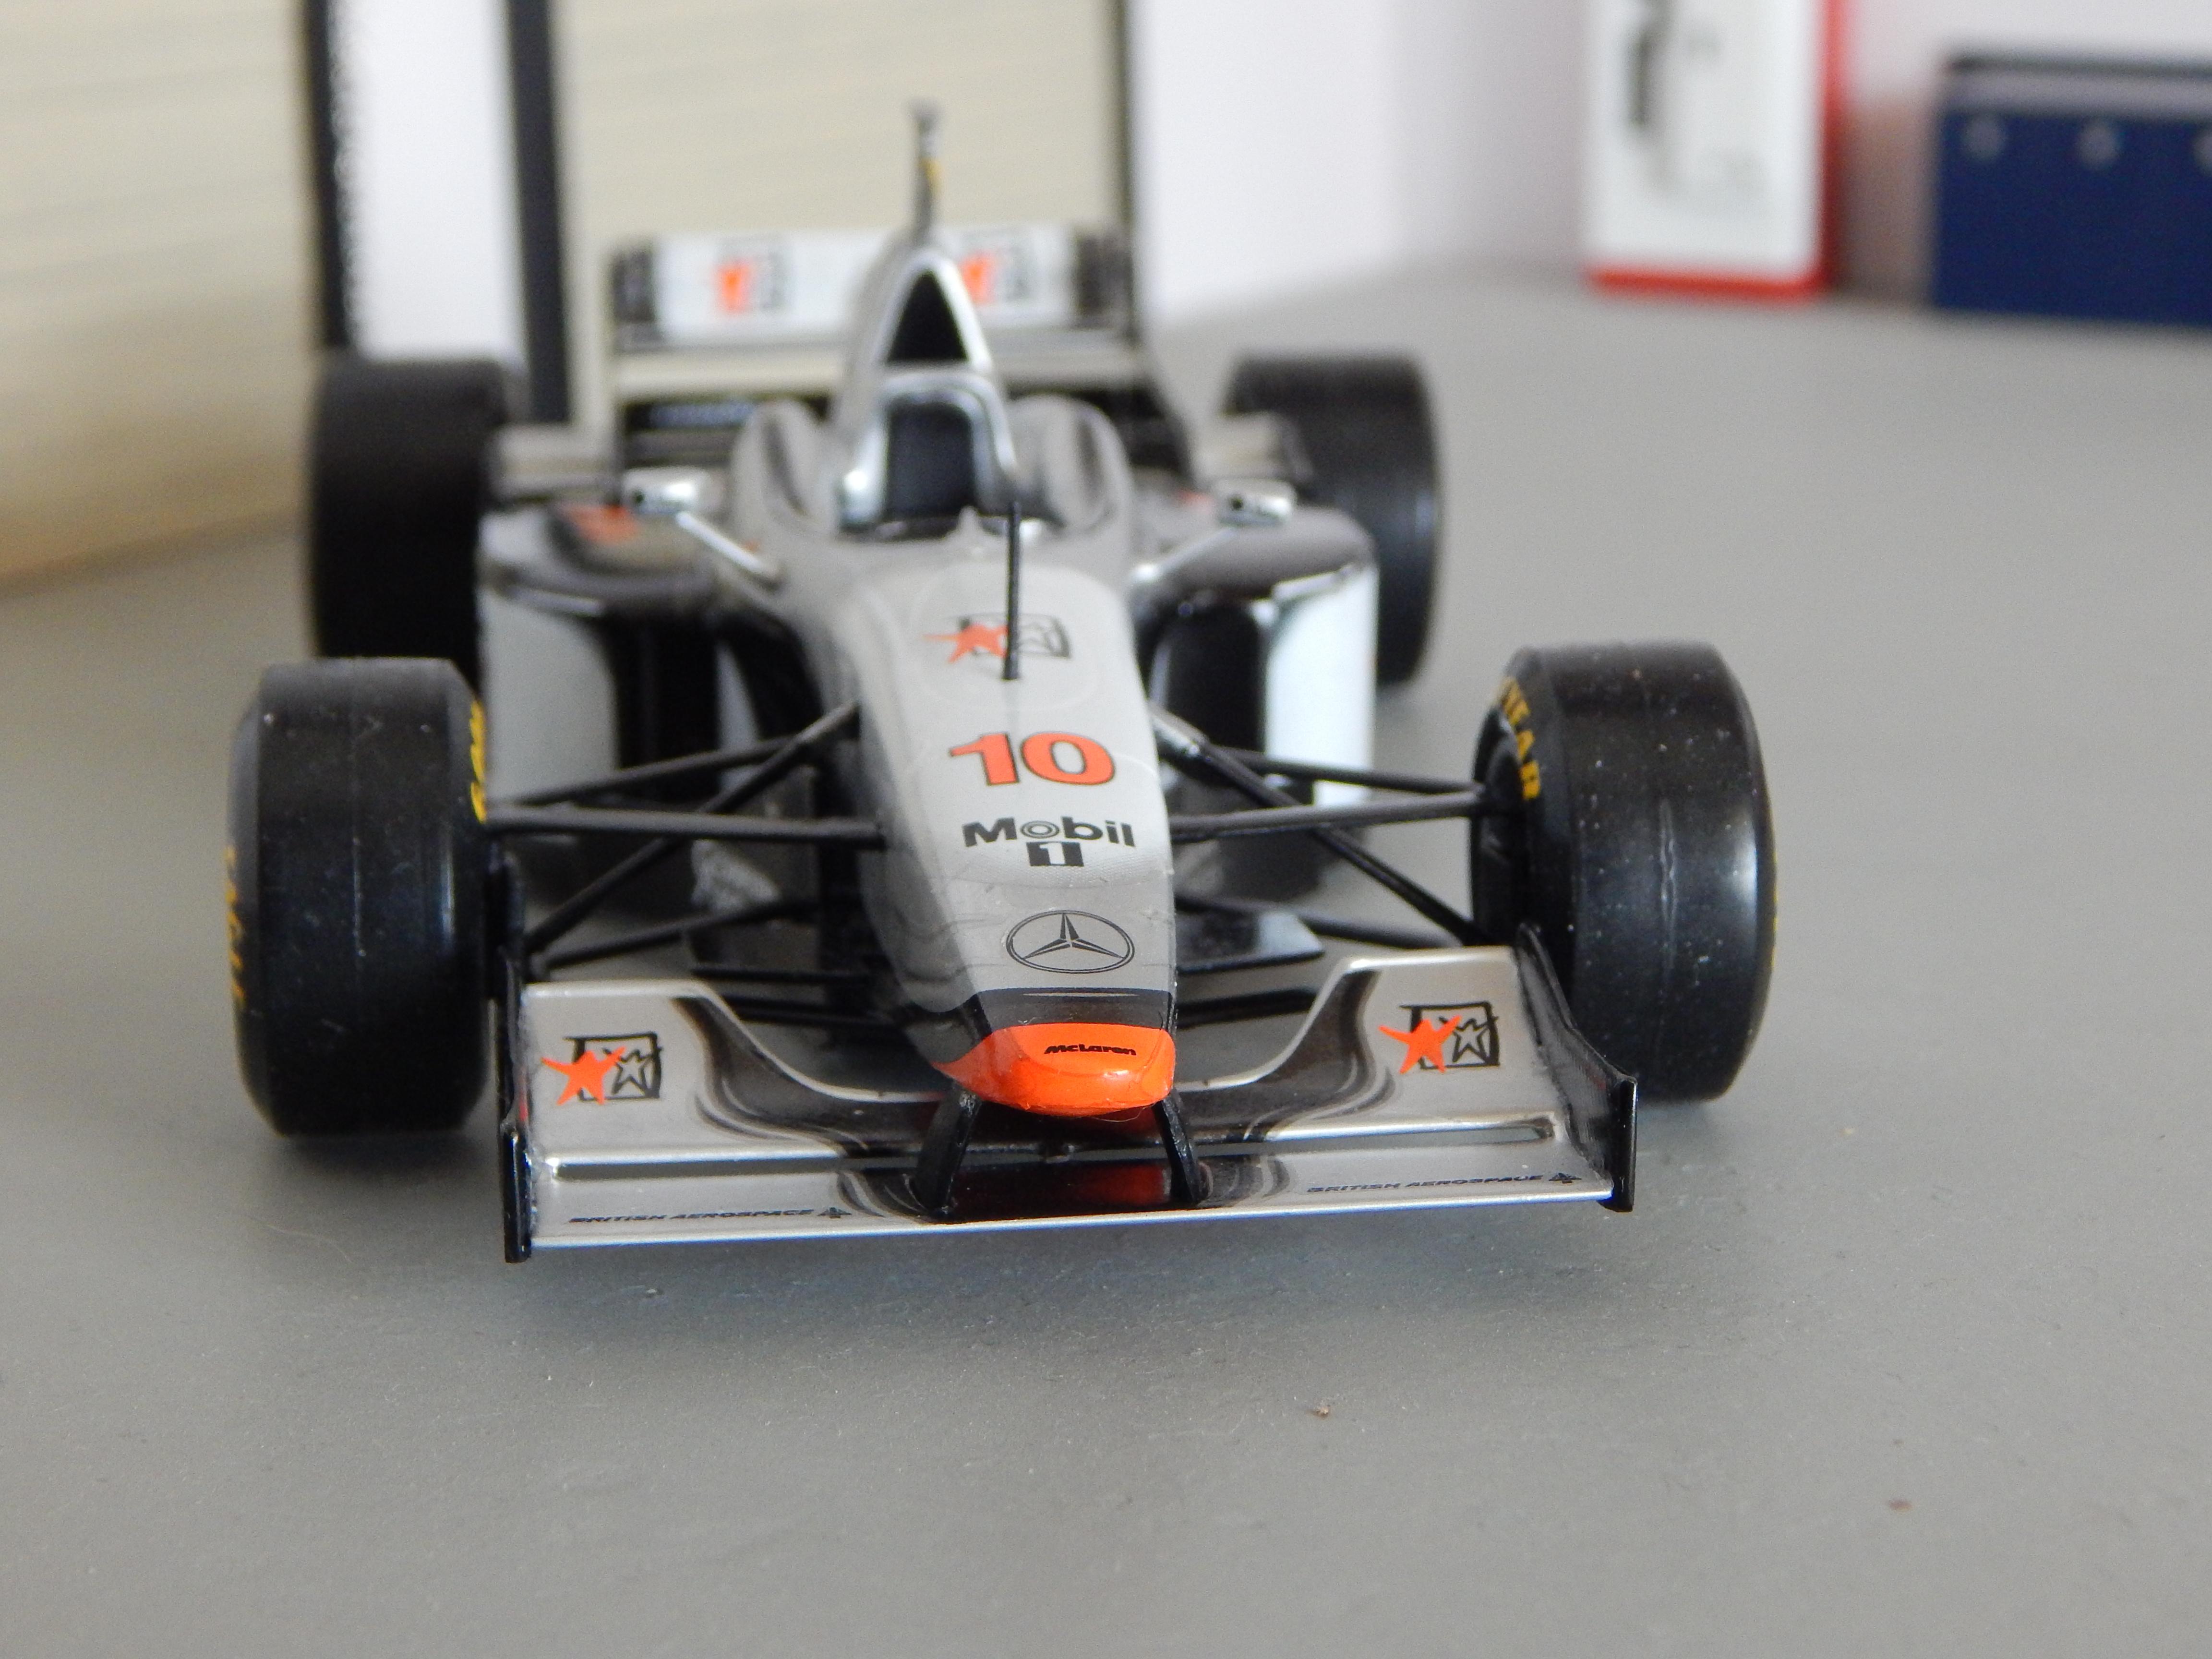
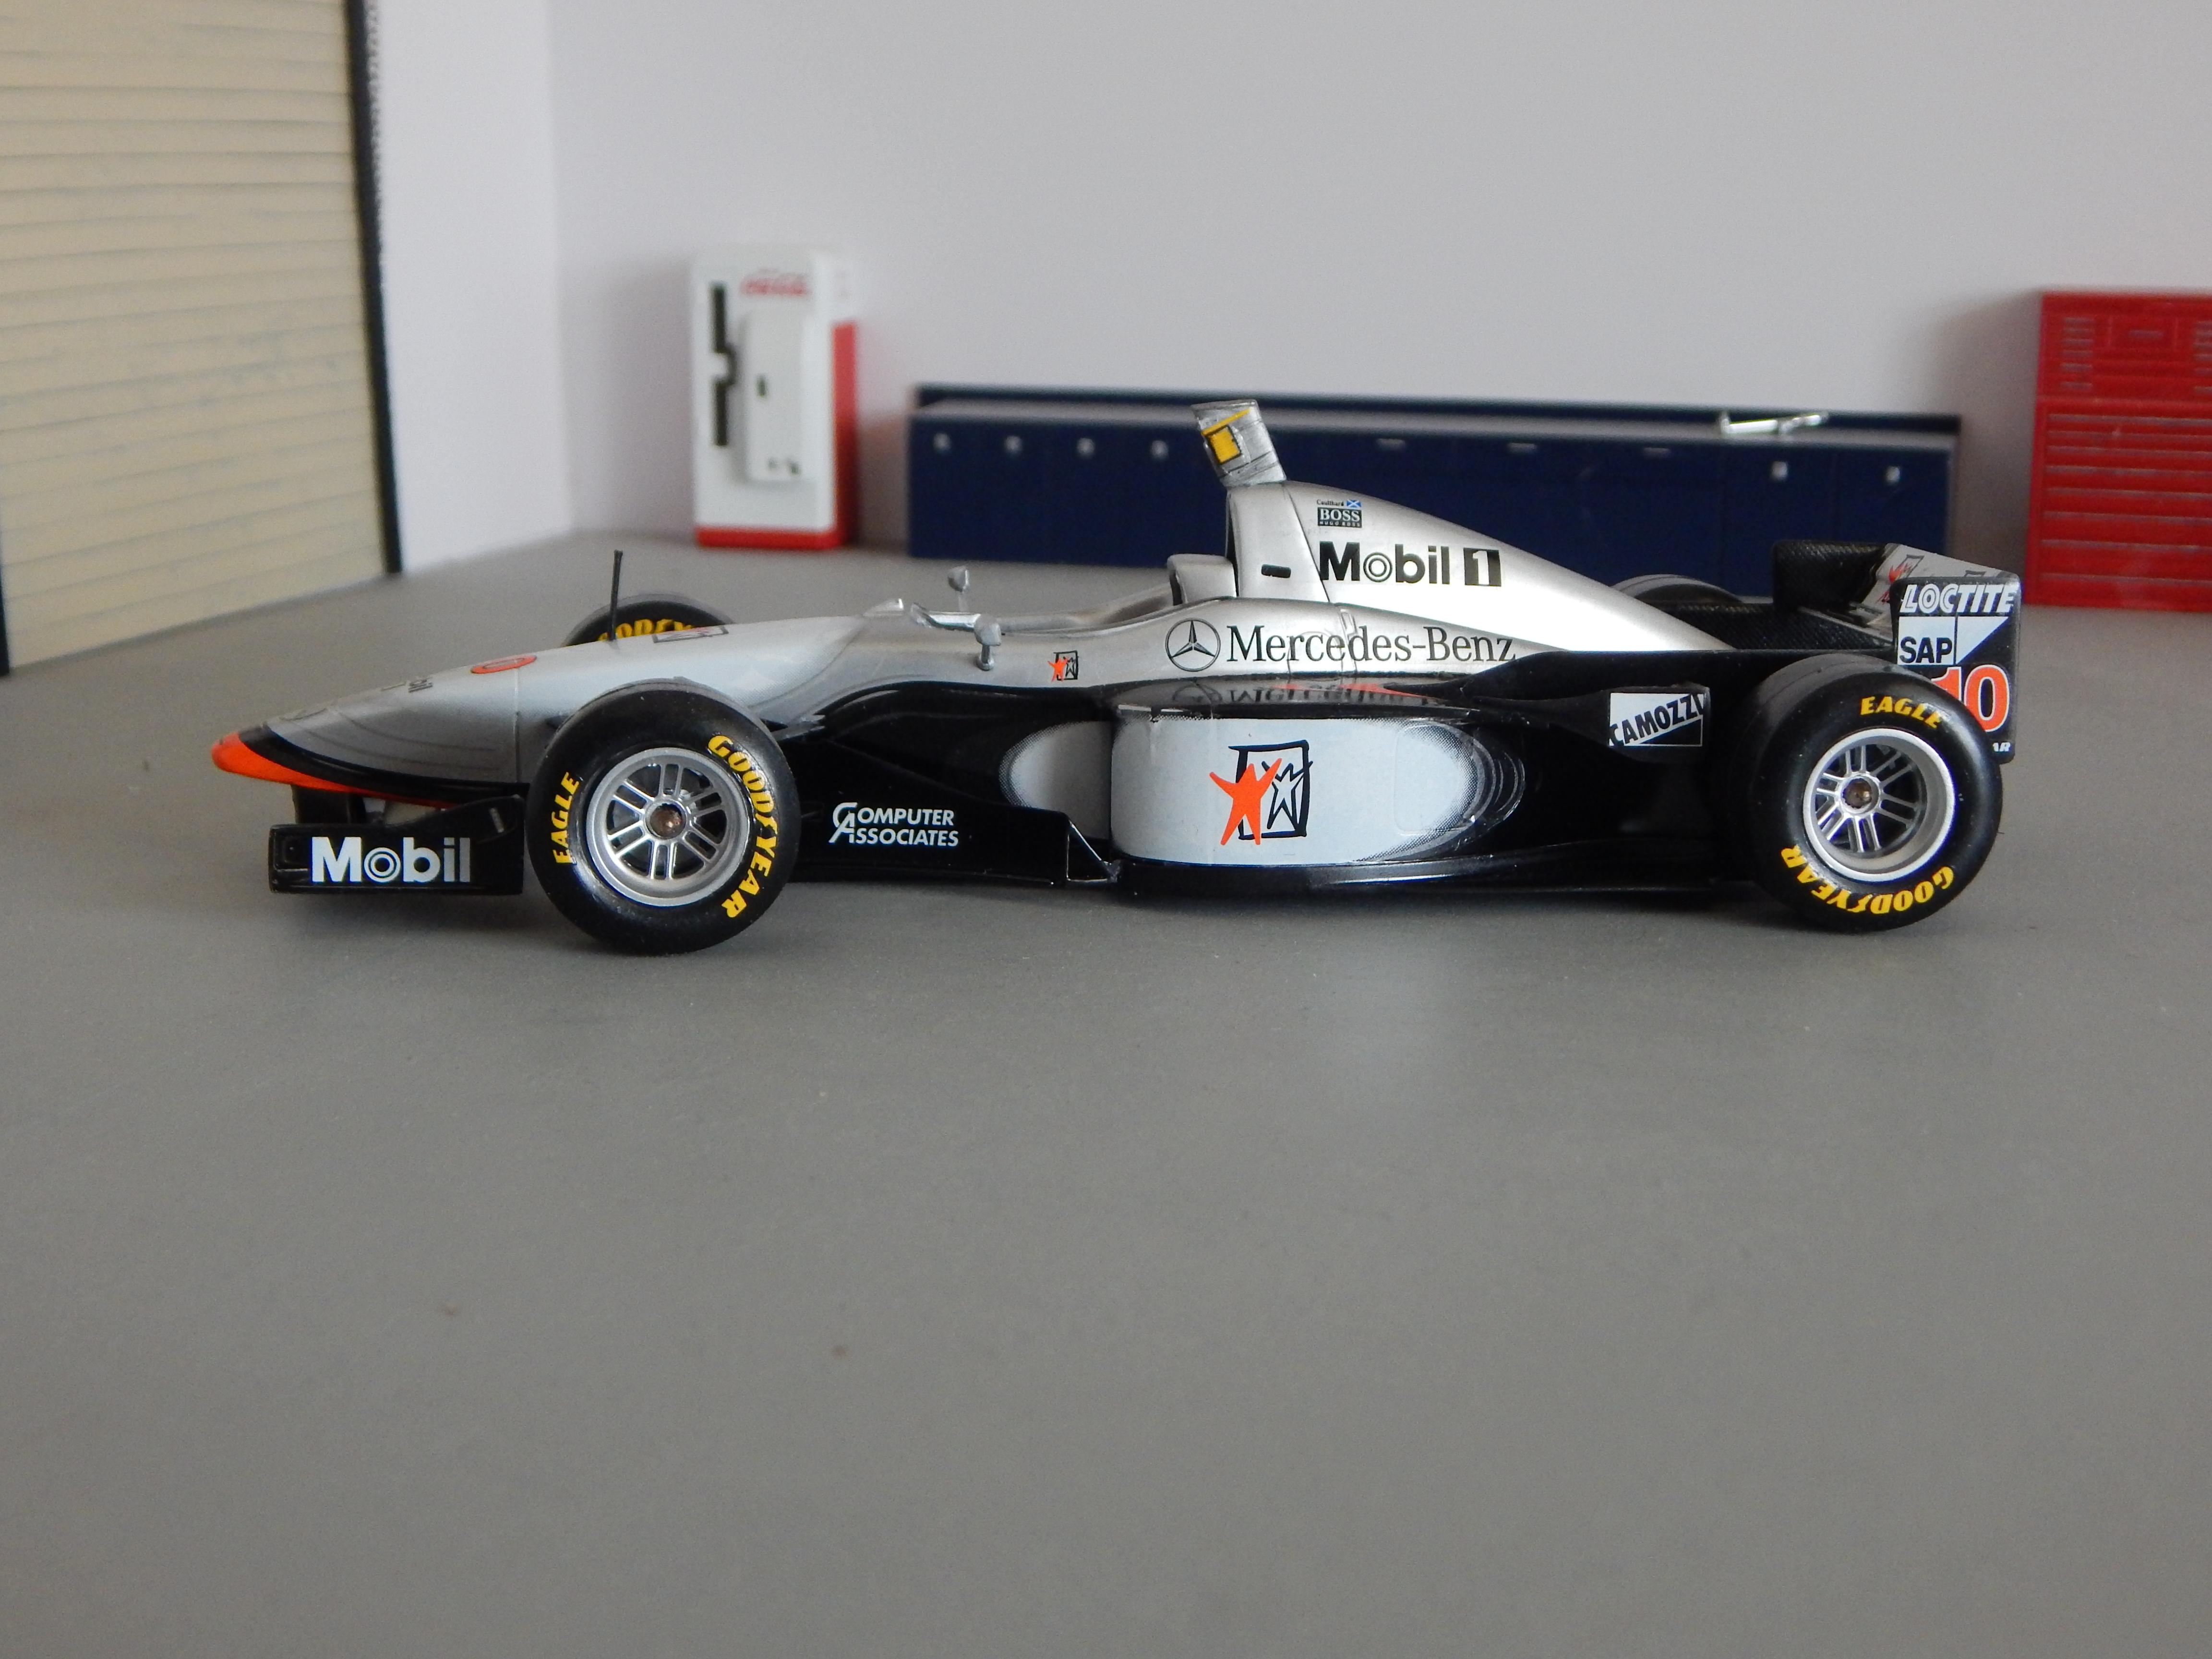
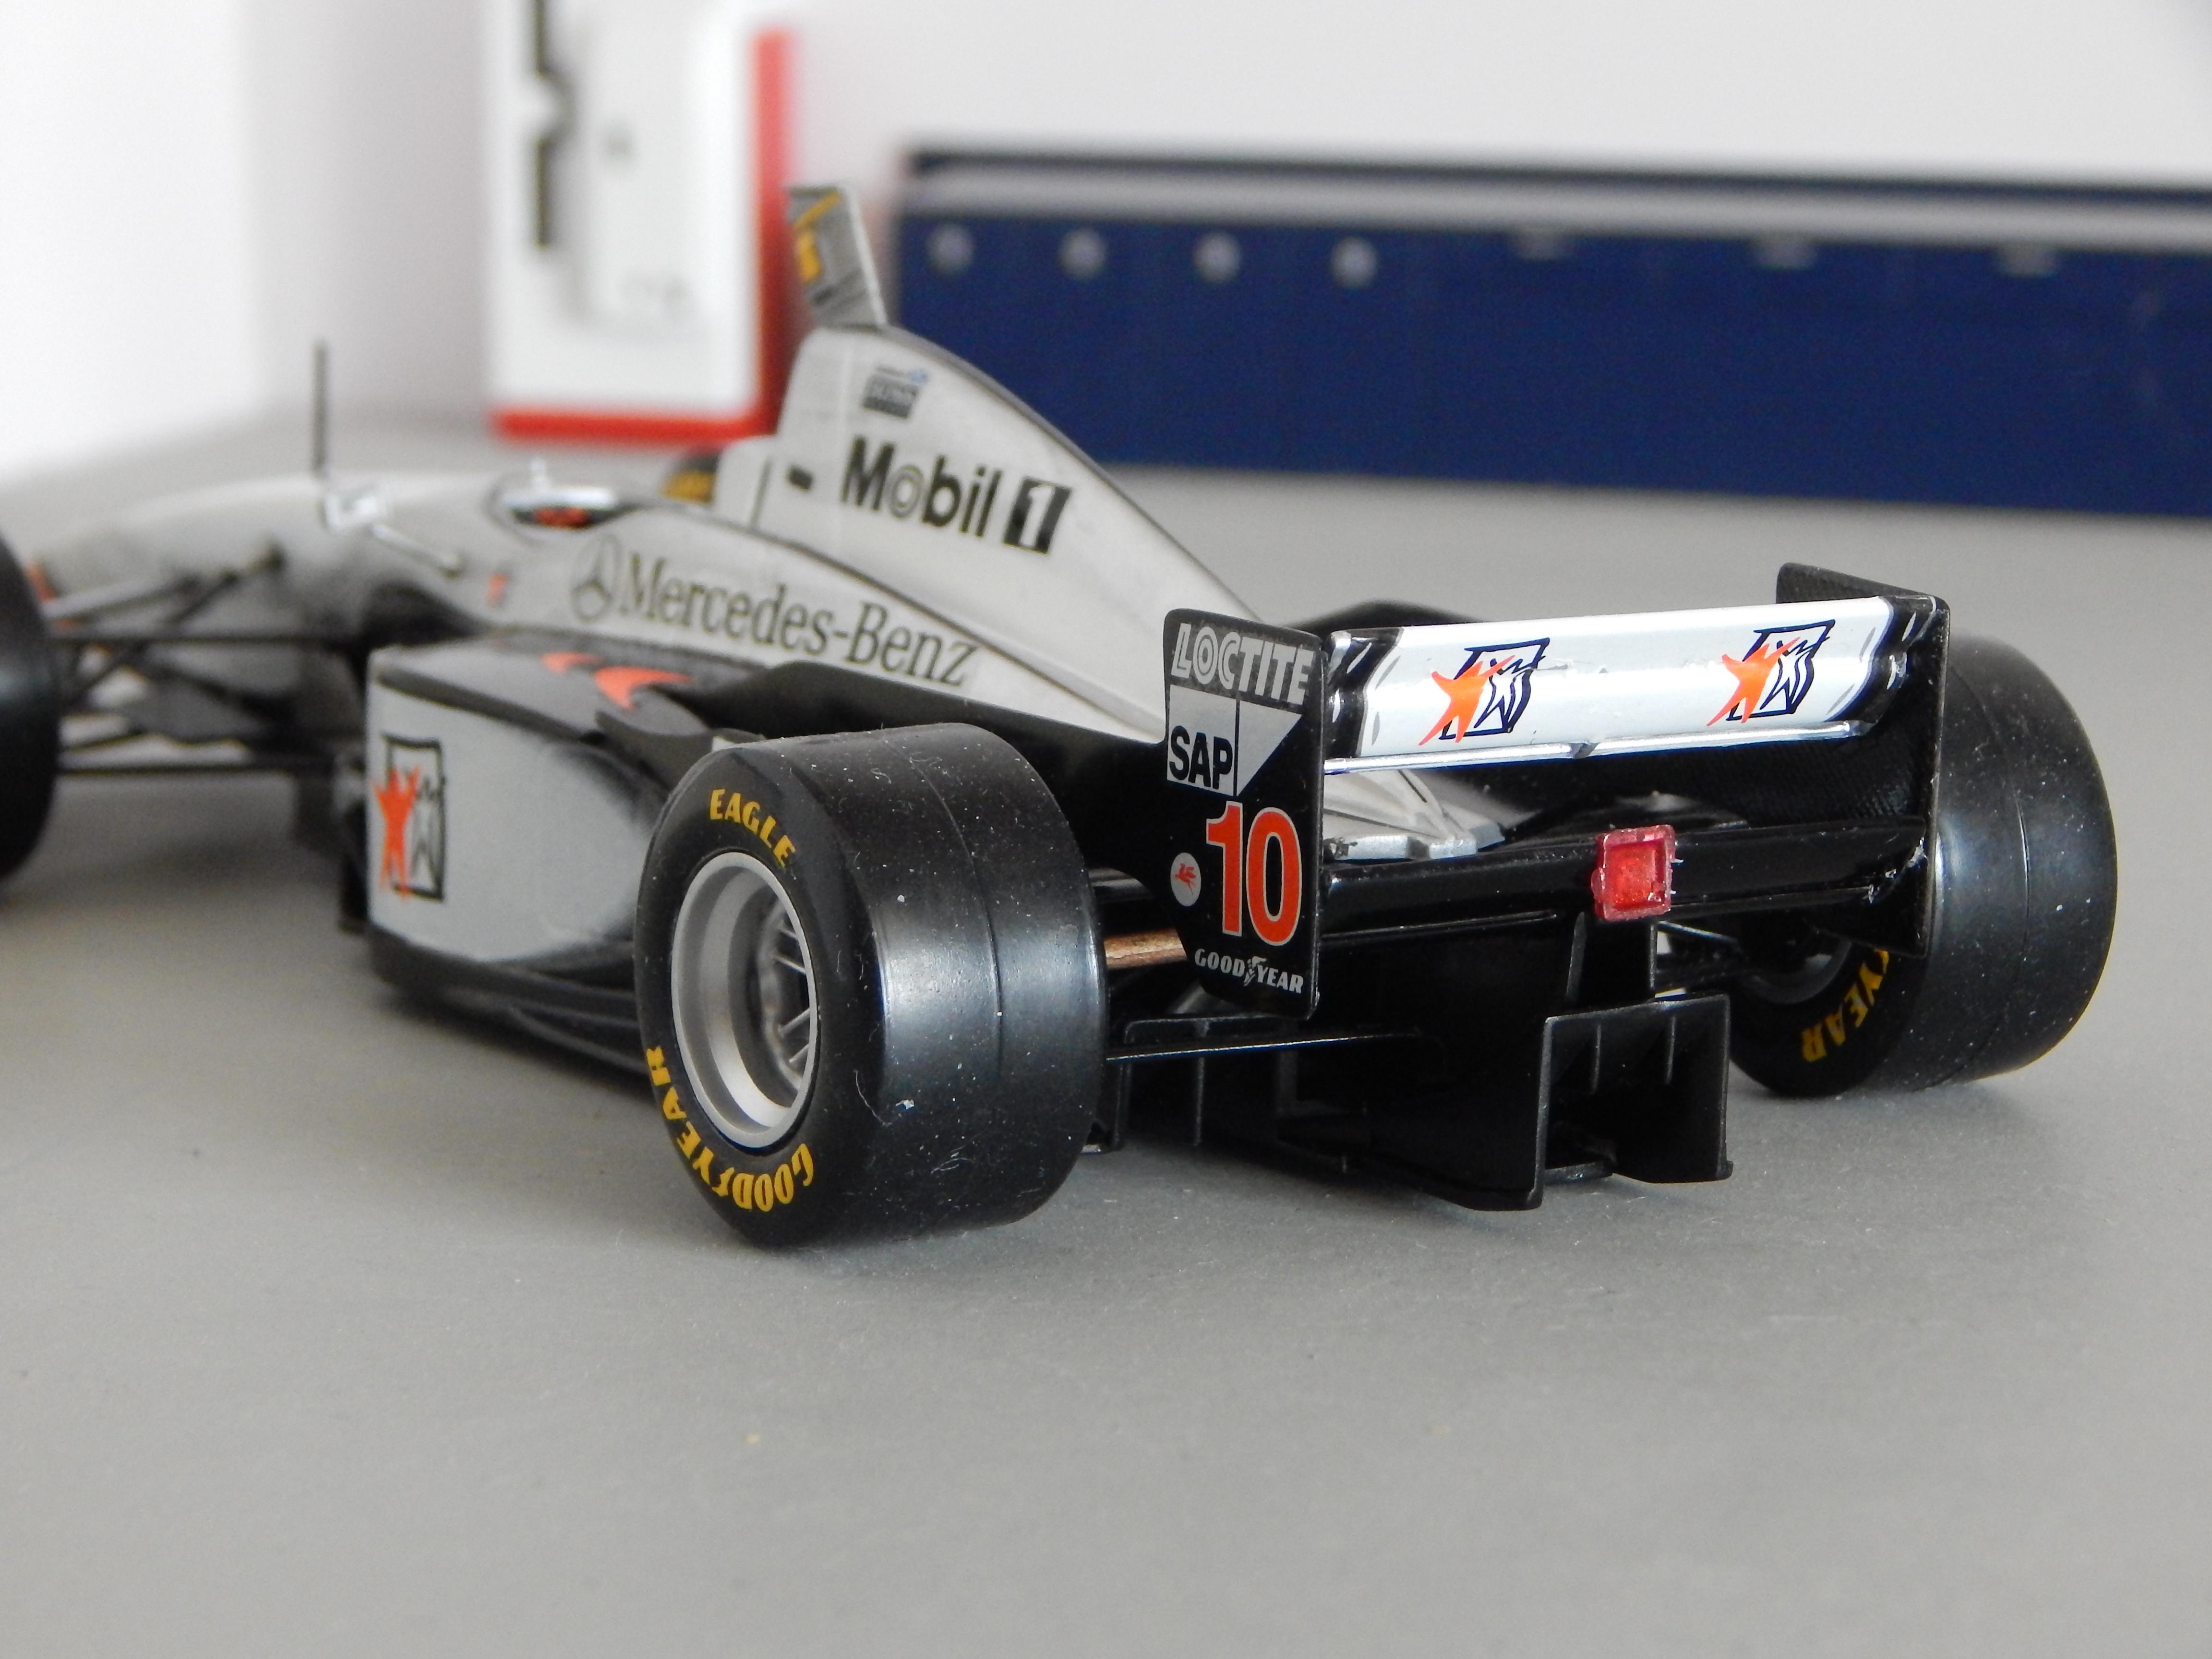
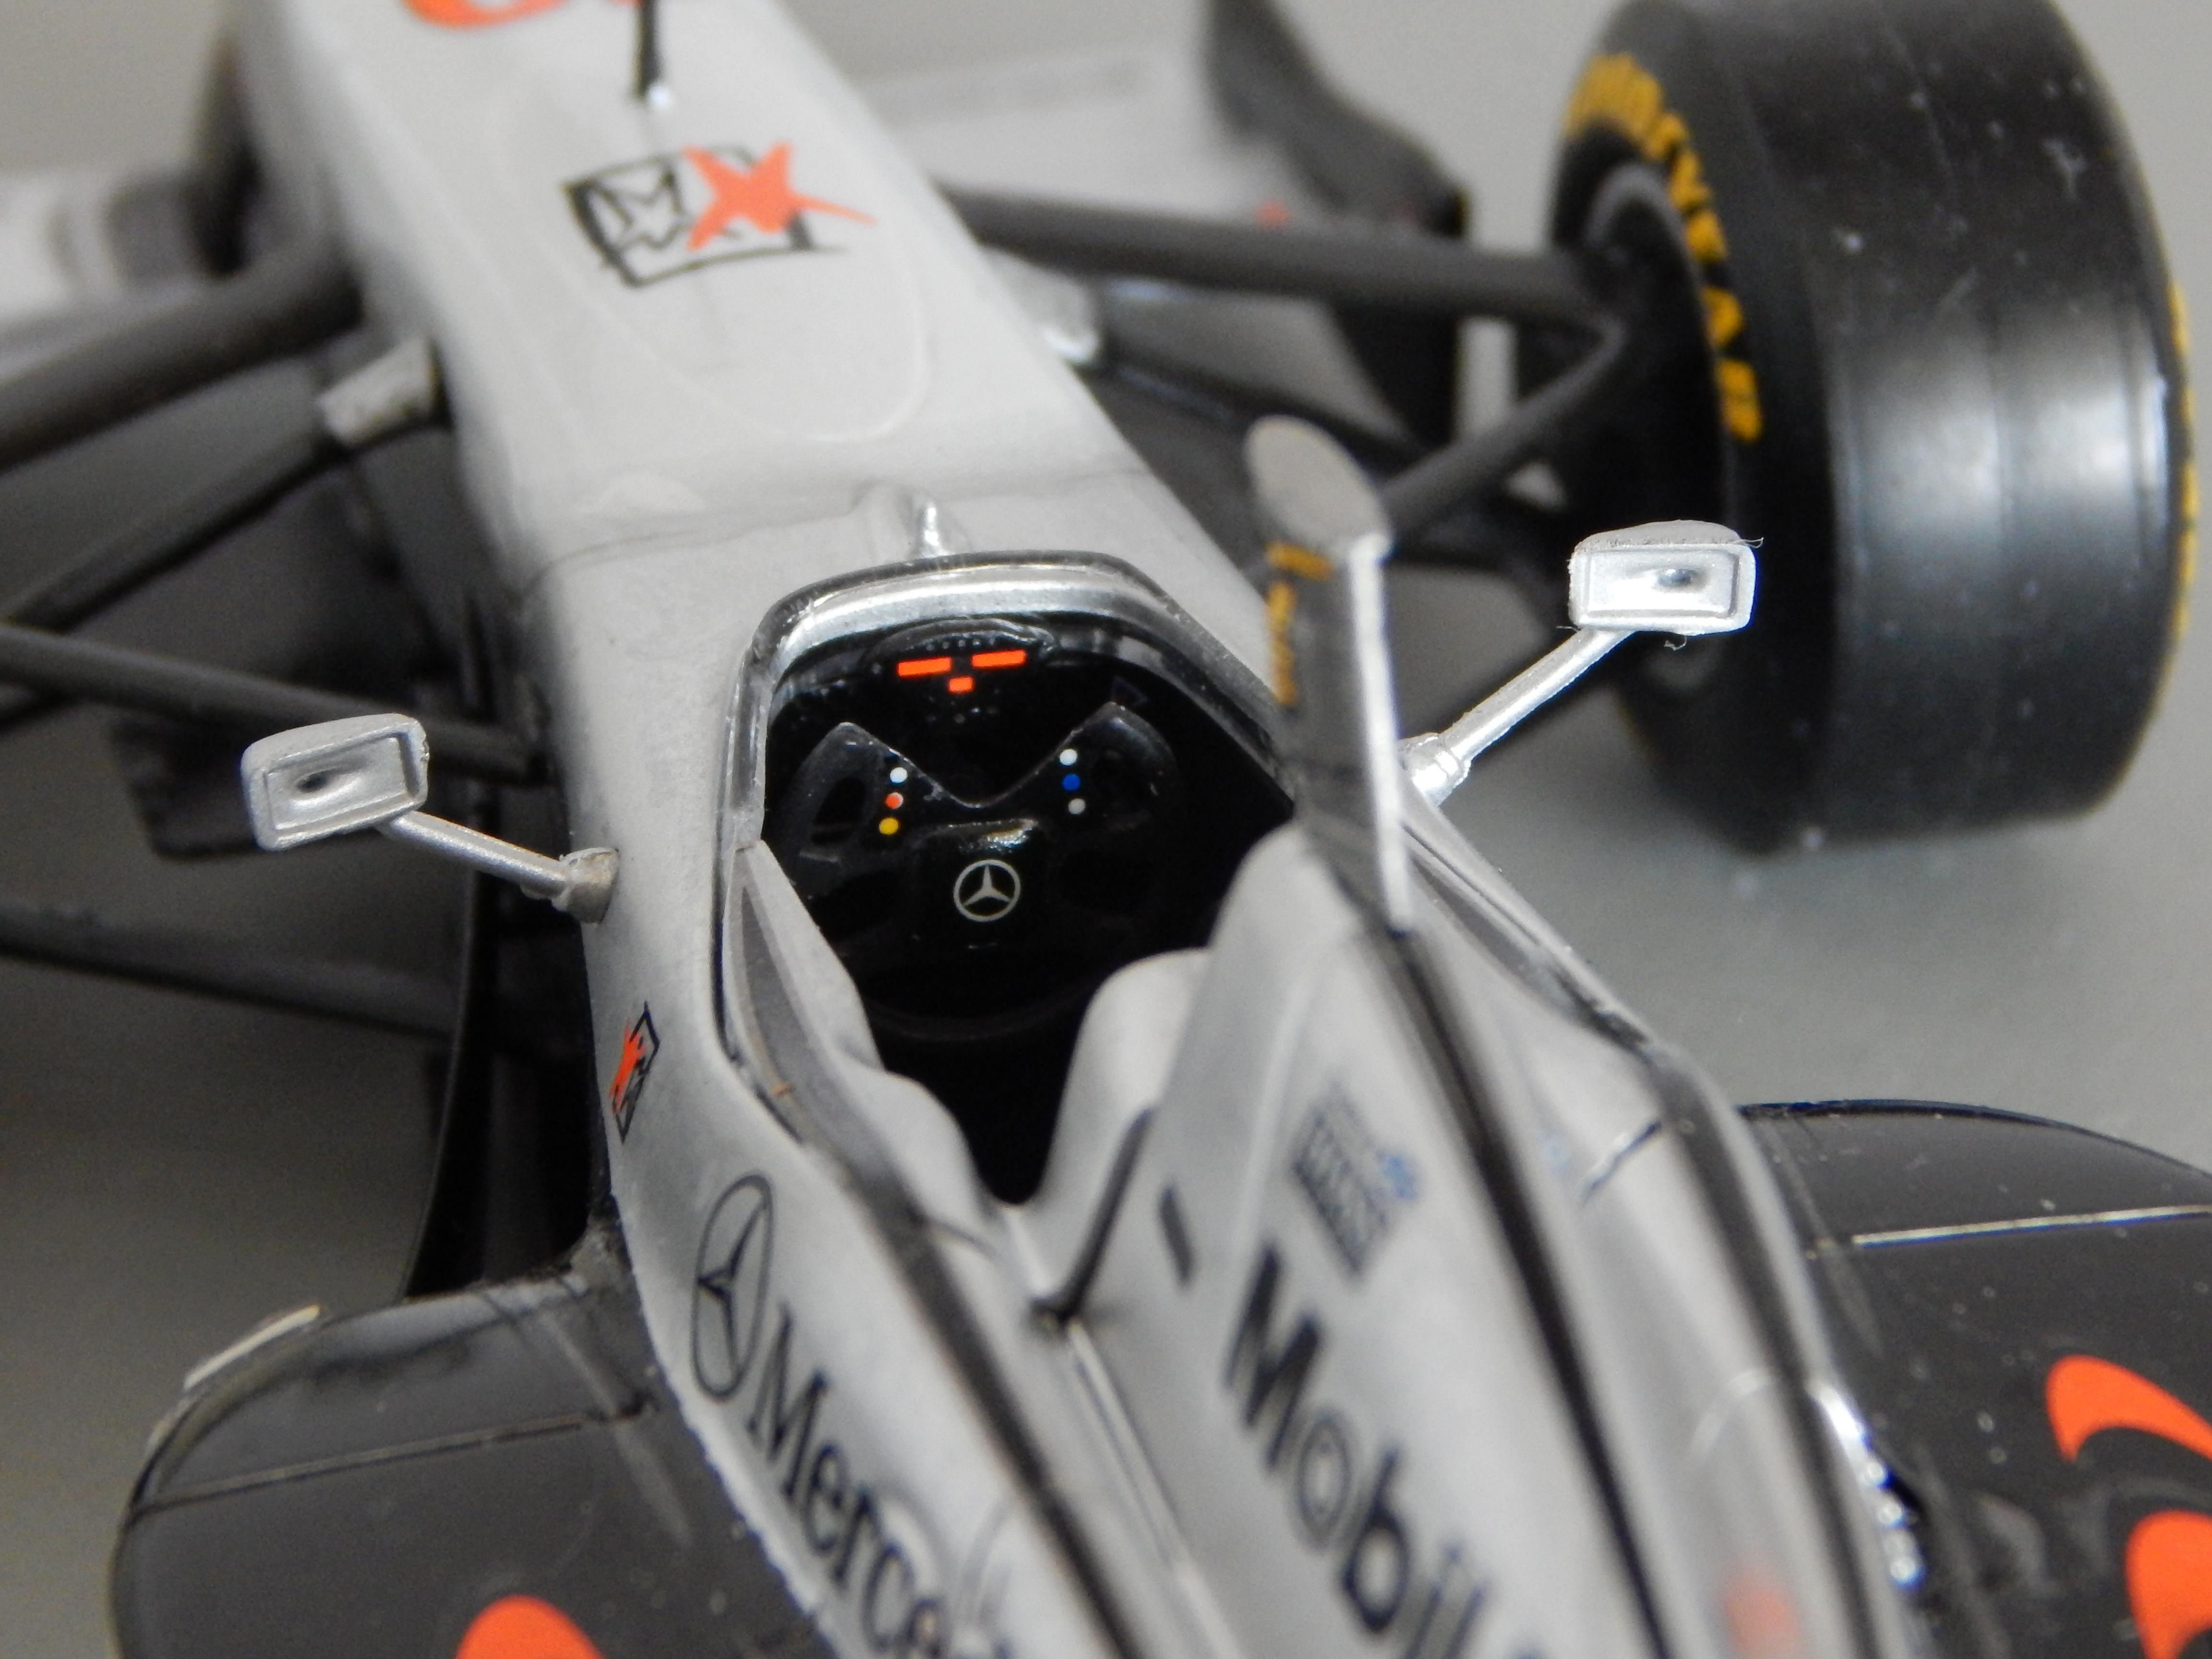
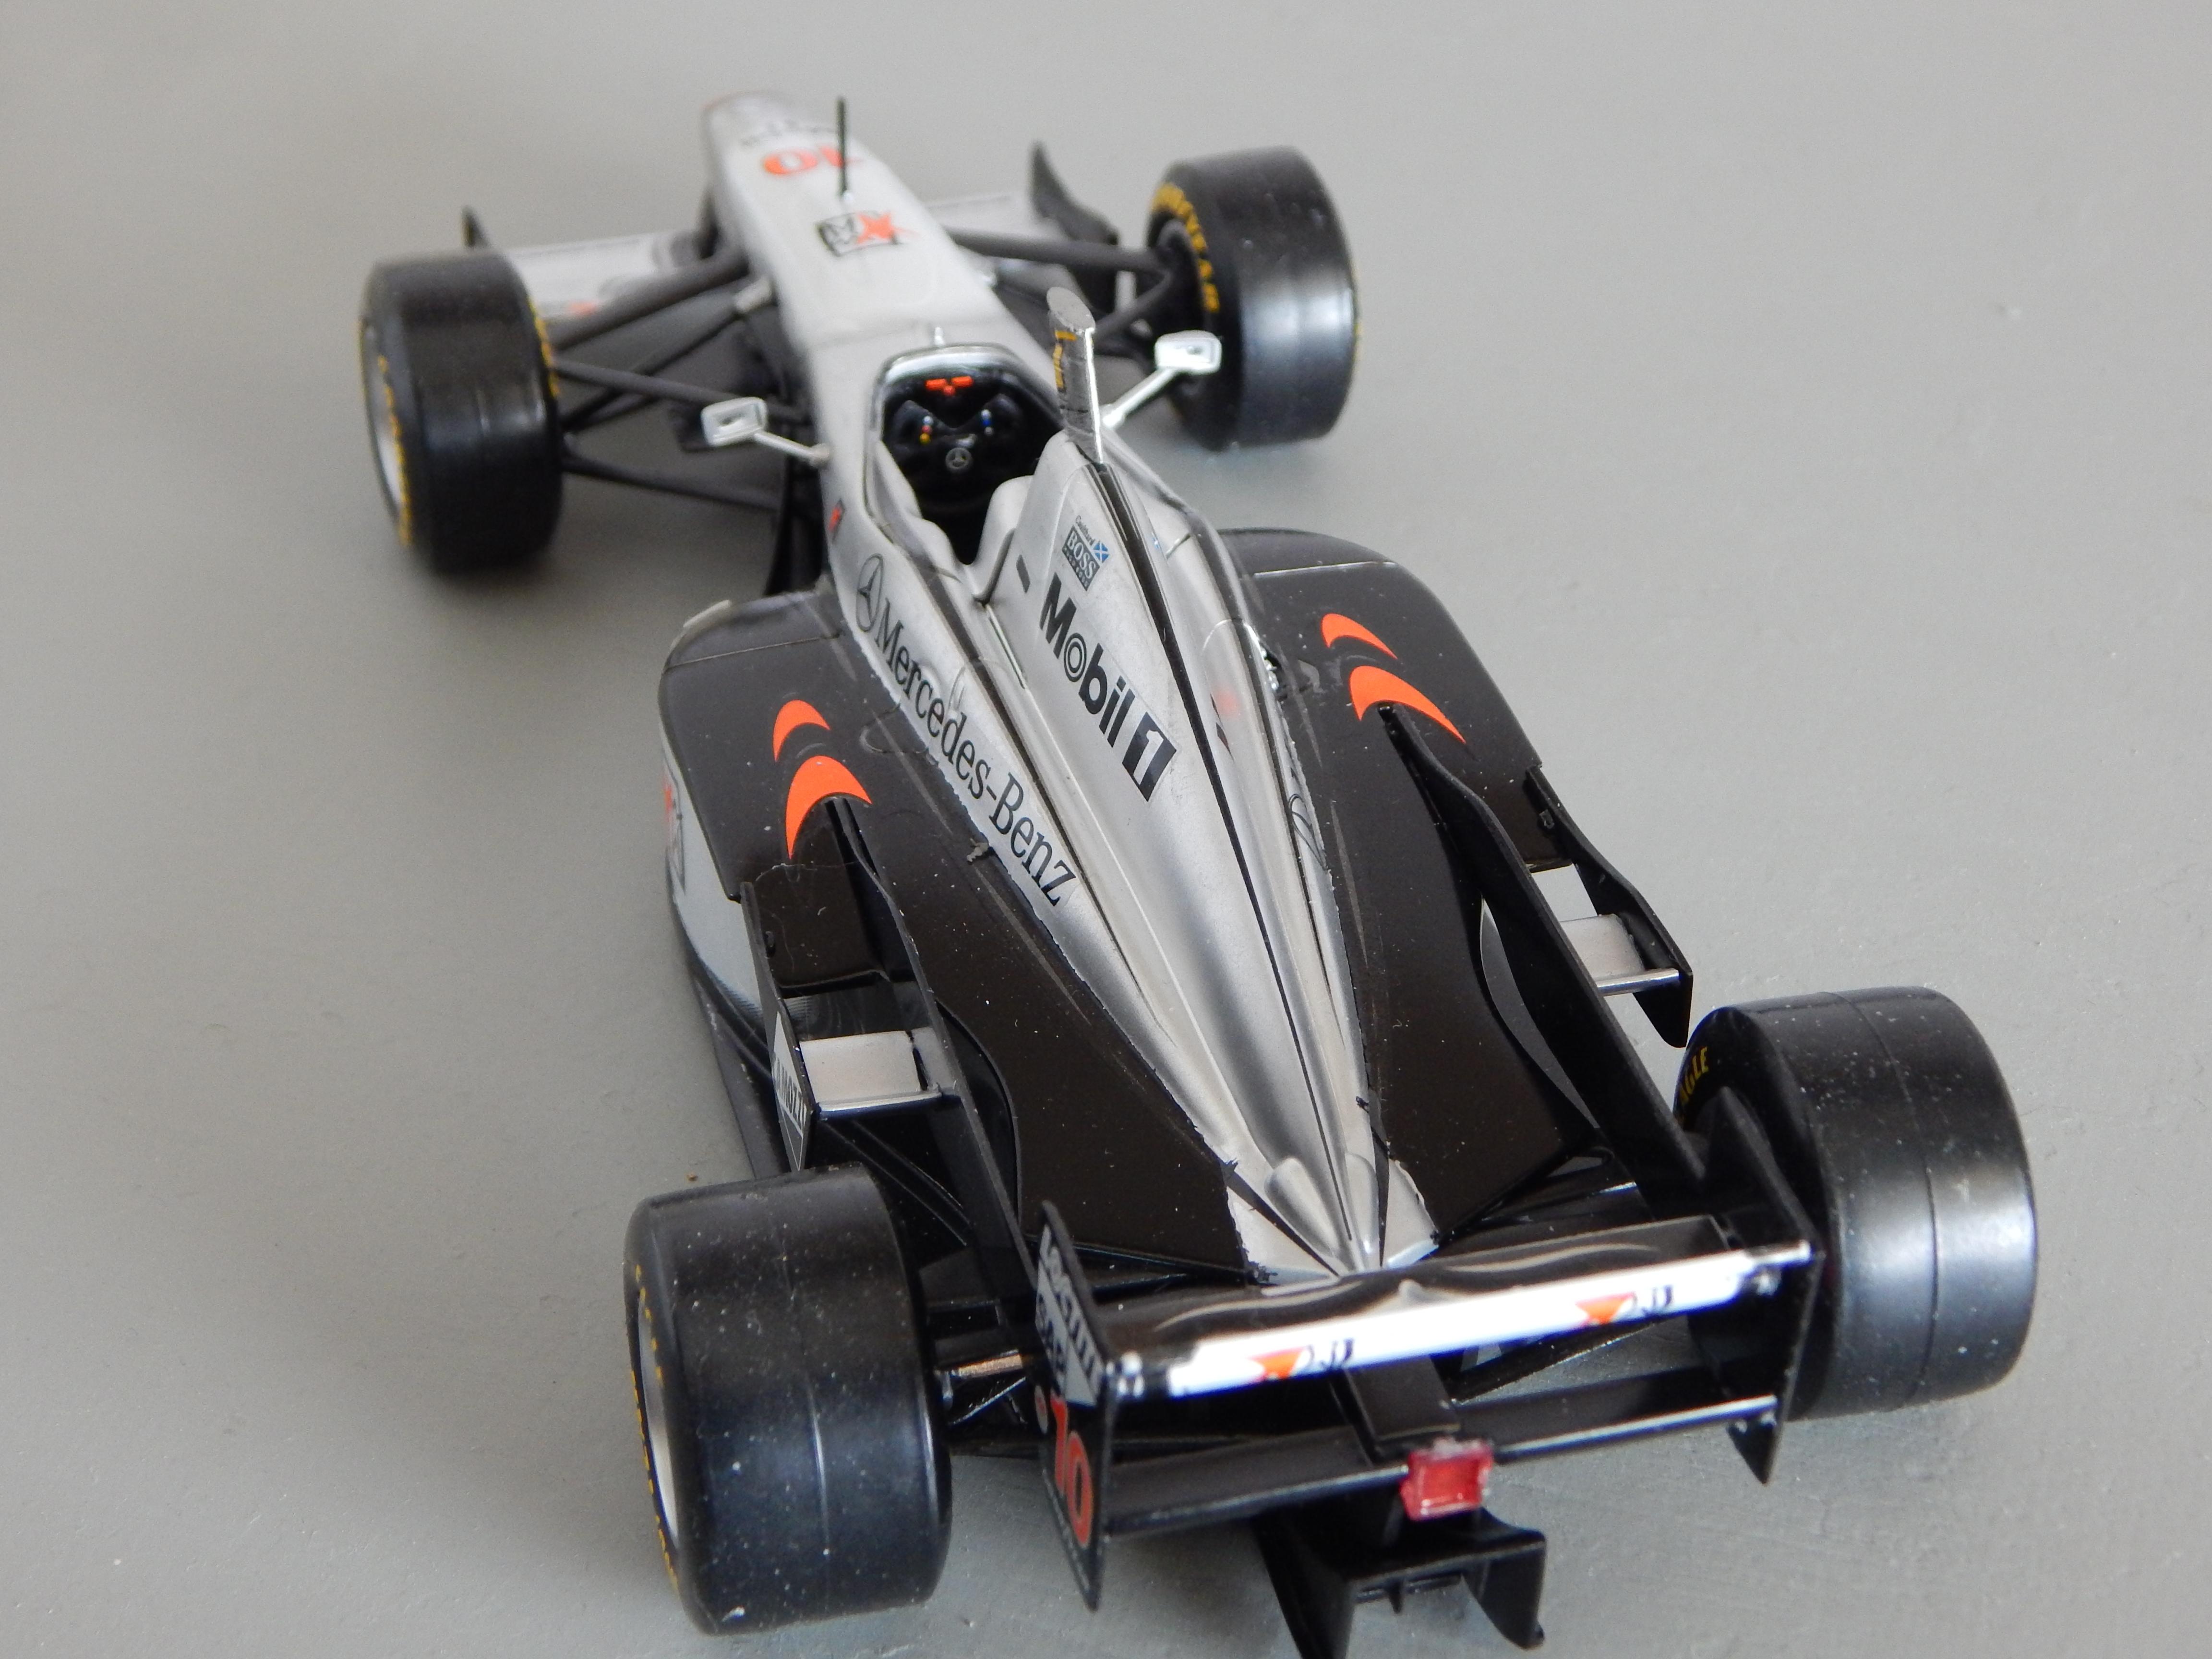
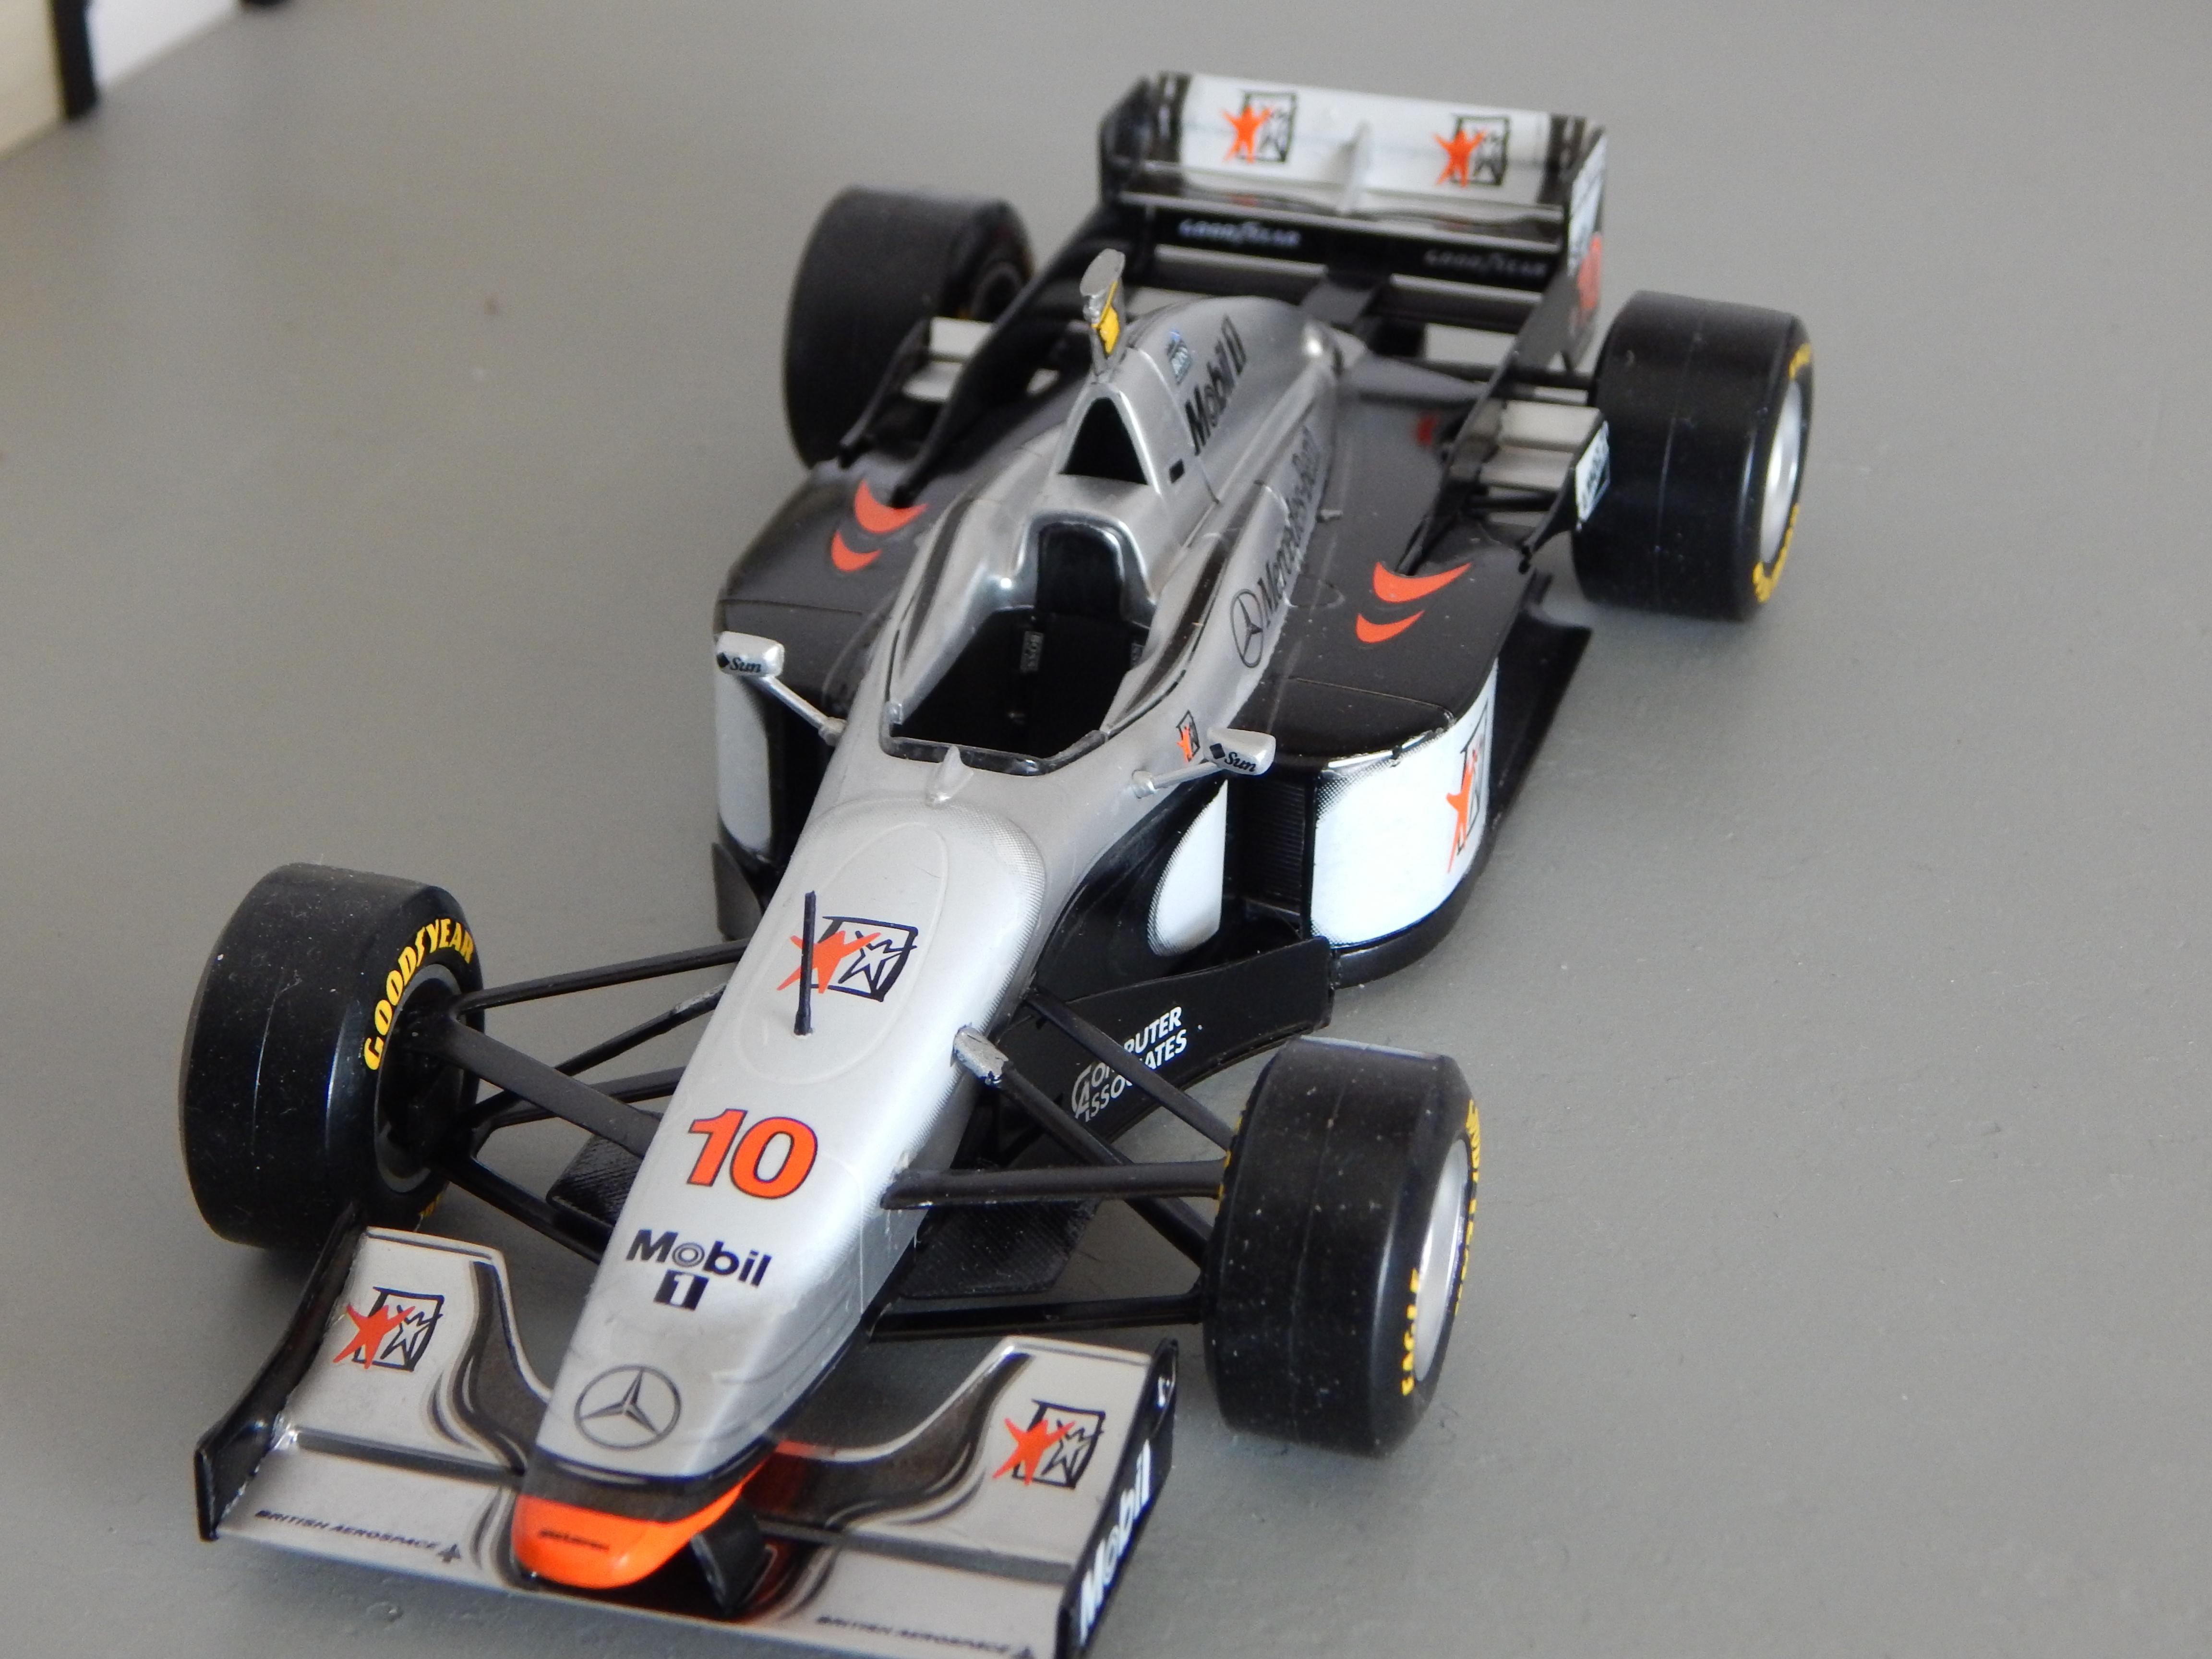
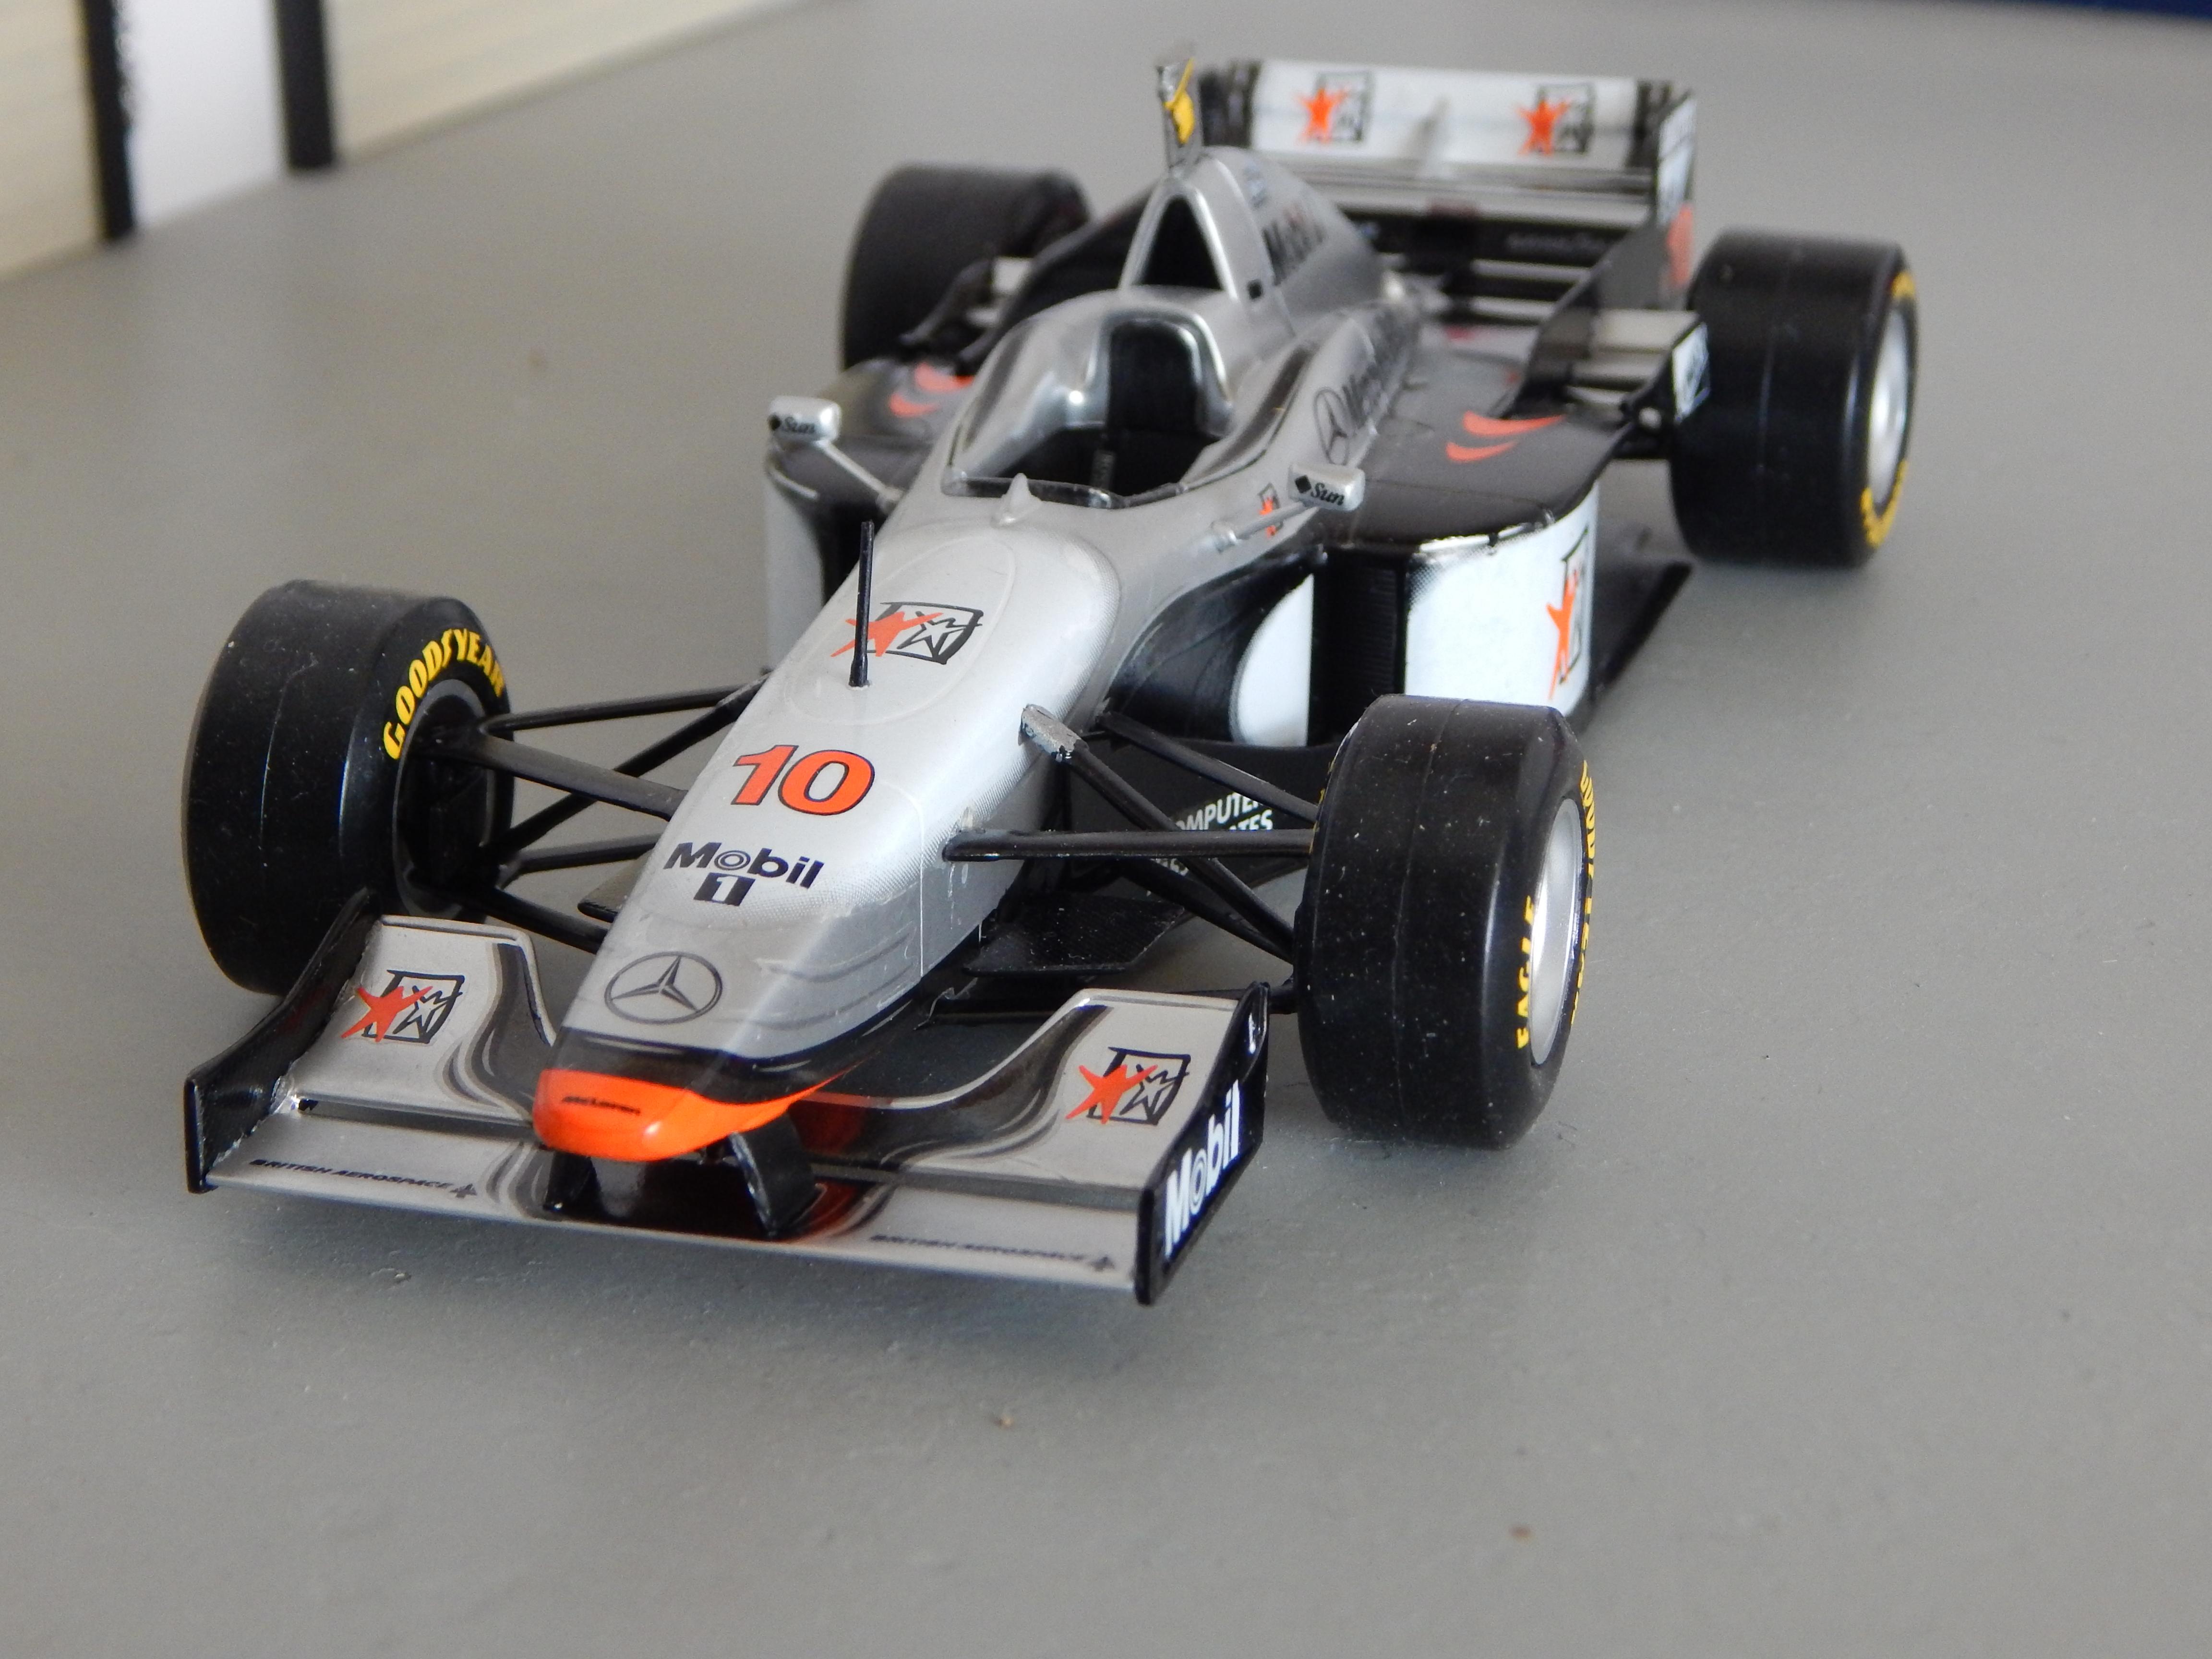
My latest completion. These Revell 1/24 kits are kind of finicky, small attachment points for the wings being the toughest part, but I really like doing the decals. Lots of setting solution and some hair dryer heat got them snugged down well. This is the car driven by David Coulthard, his teammate was the #9 of Mika Hakkinen. Coulthard won the first race of the season in Australia and I think Hakkinen won in Spain that year also. Comments welcome, thanks for looking.
-
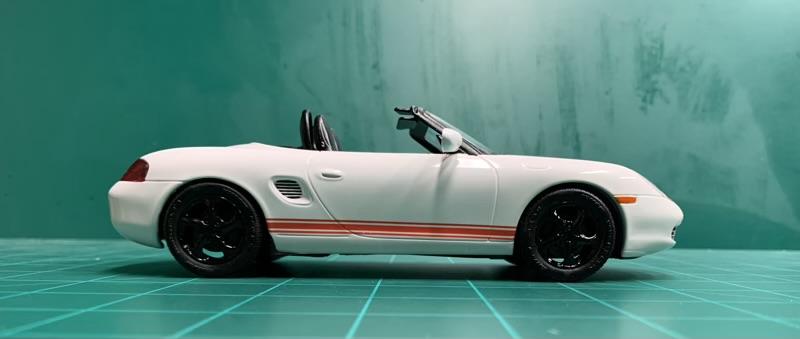
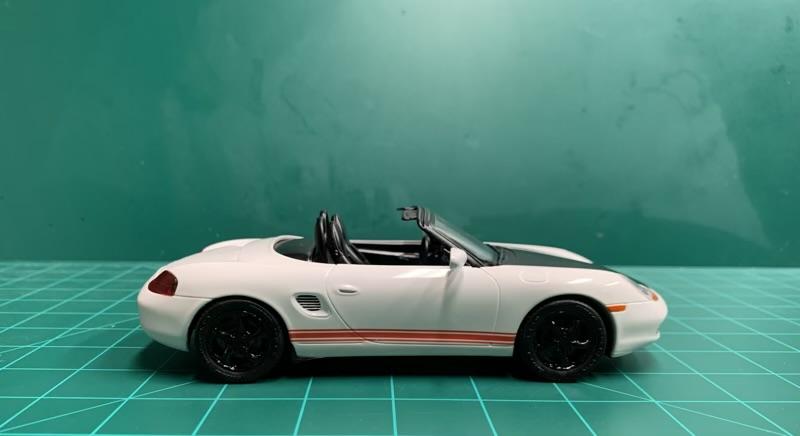
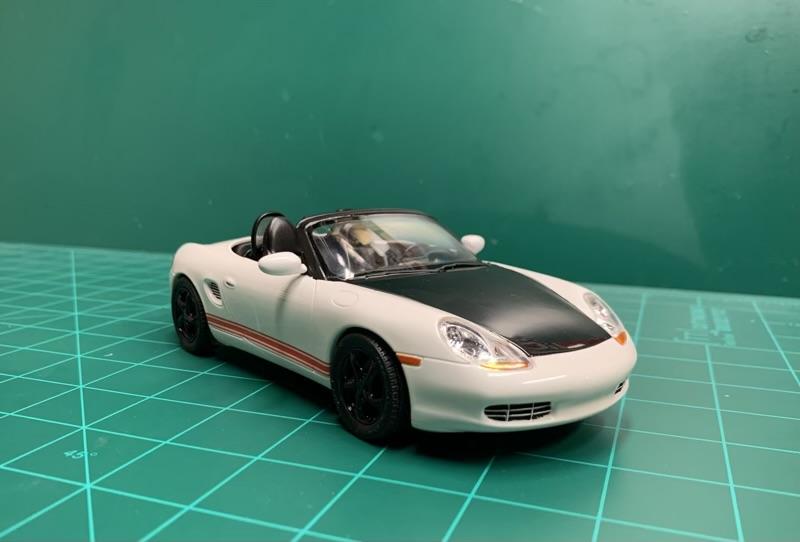
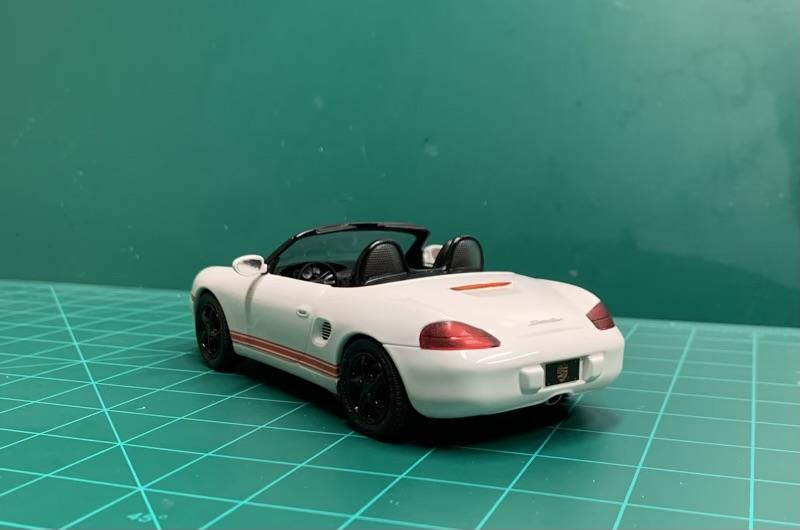
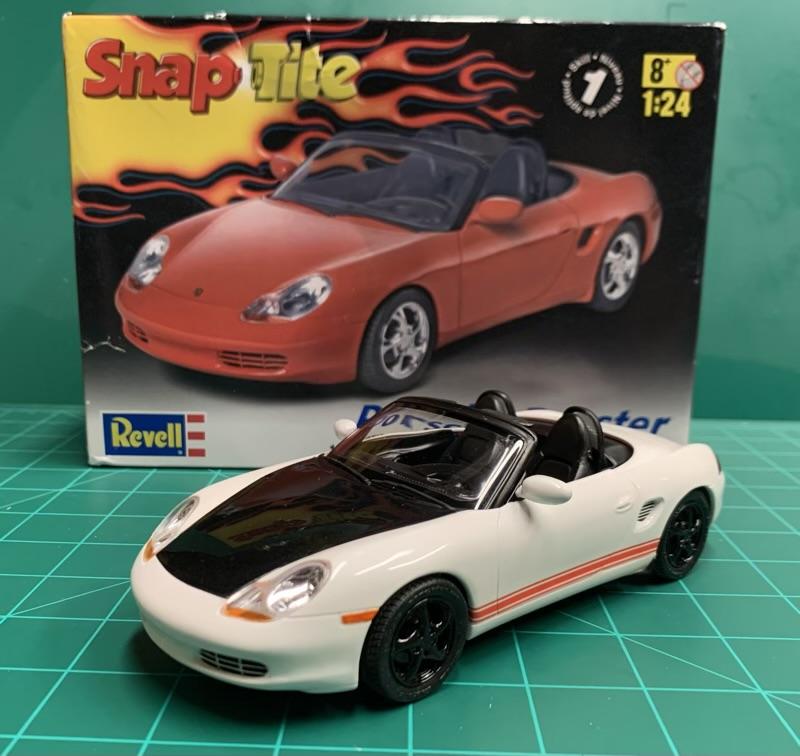
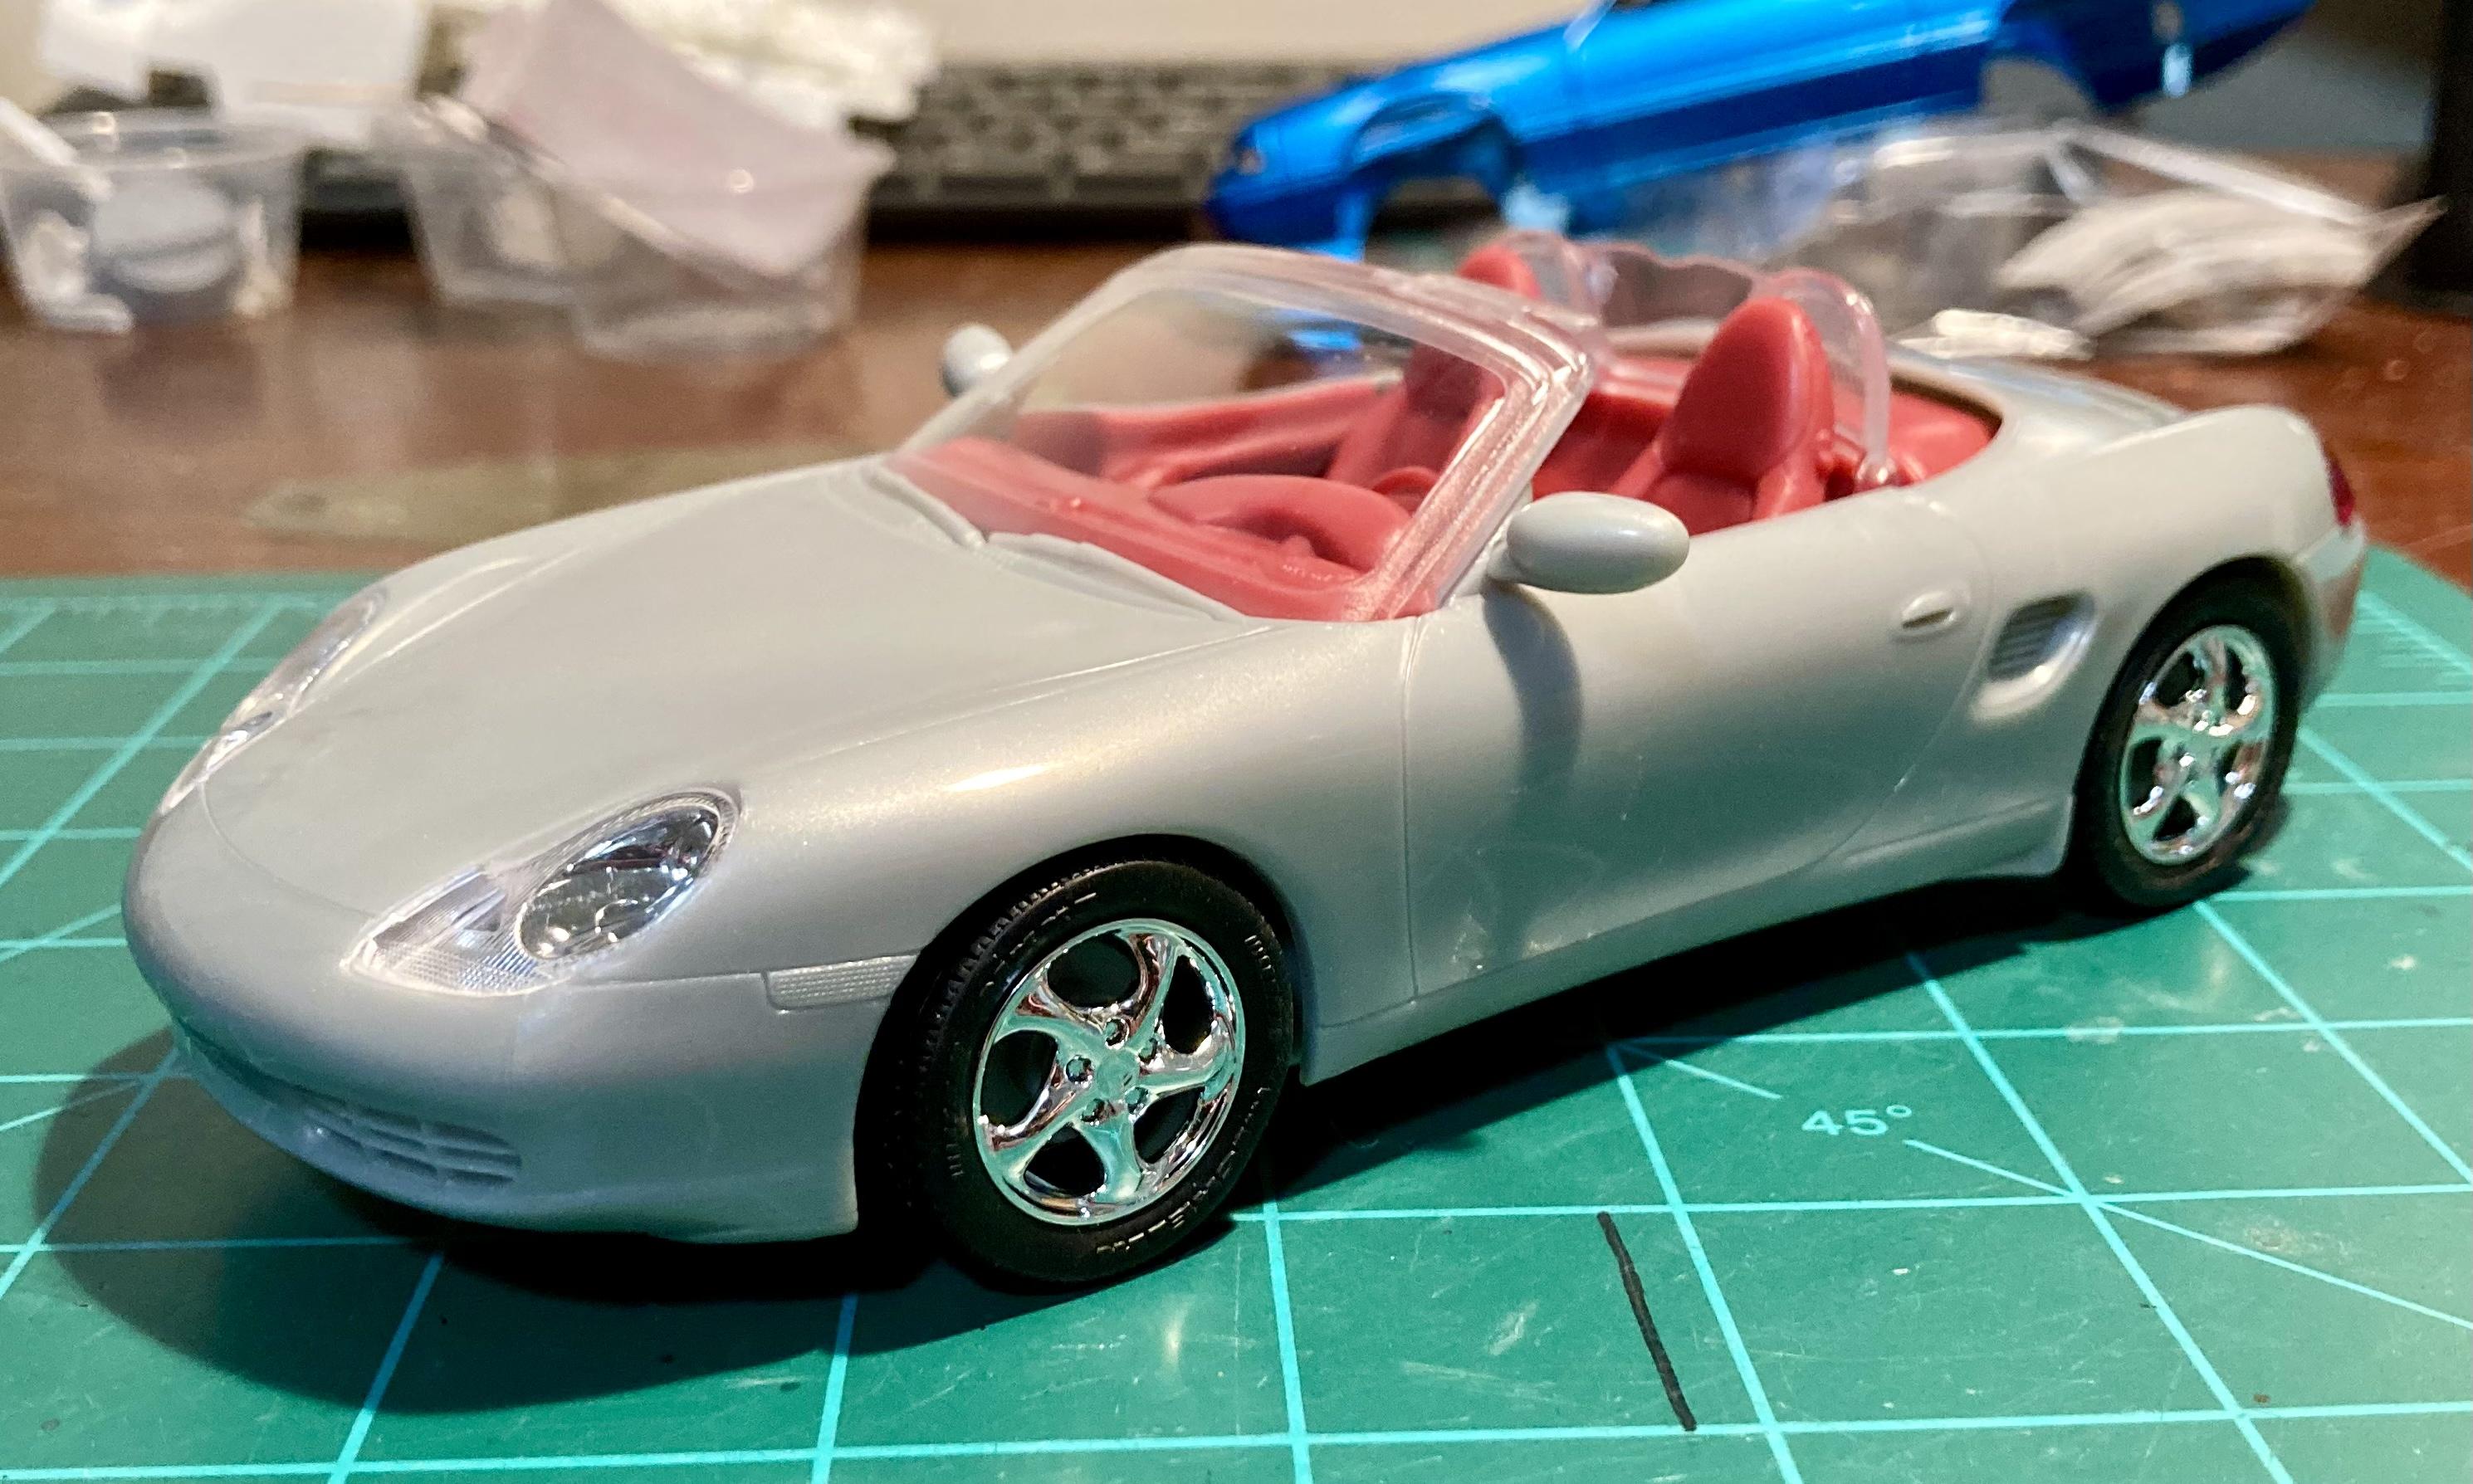
Just finished this one. My first completed build since 2022! This is the Revell Porsche Boxster Snap Tite kit from 2015. It was a gift from my wife and daughter several years ago. I built this as a test bed to try out a few different products and techniques. As such, there are a few “firsts” for me on this project. For starters, the paint. This was shot with Tamiya TS-26 Pure White, Testors Extreme lacquer blazing black, and cleared with Rustolium clear lacquer. I’d never used the Tamiya rattle cans before, and wow! Great stuff! The undercarriage was lightly weathered (another first for me) with Tamiya panel line accent, and Mr. Weathering Color. The kit was built straight out of the box, with the only addition being the stripe decals, taken from the AMT Mercury Comet kit. I hope you enjoy! As always, questions, comments, and constructive criticism are welcome. Thanks for looking.👍
-
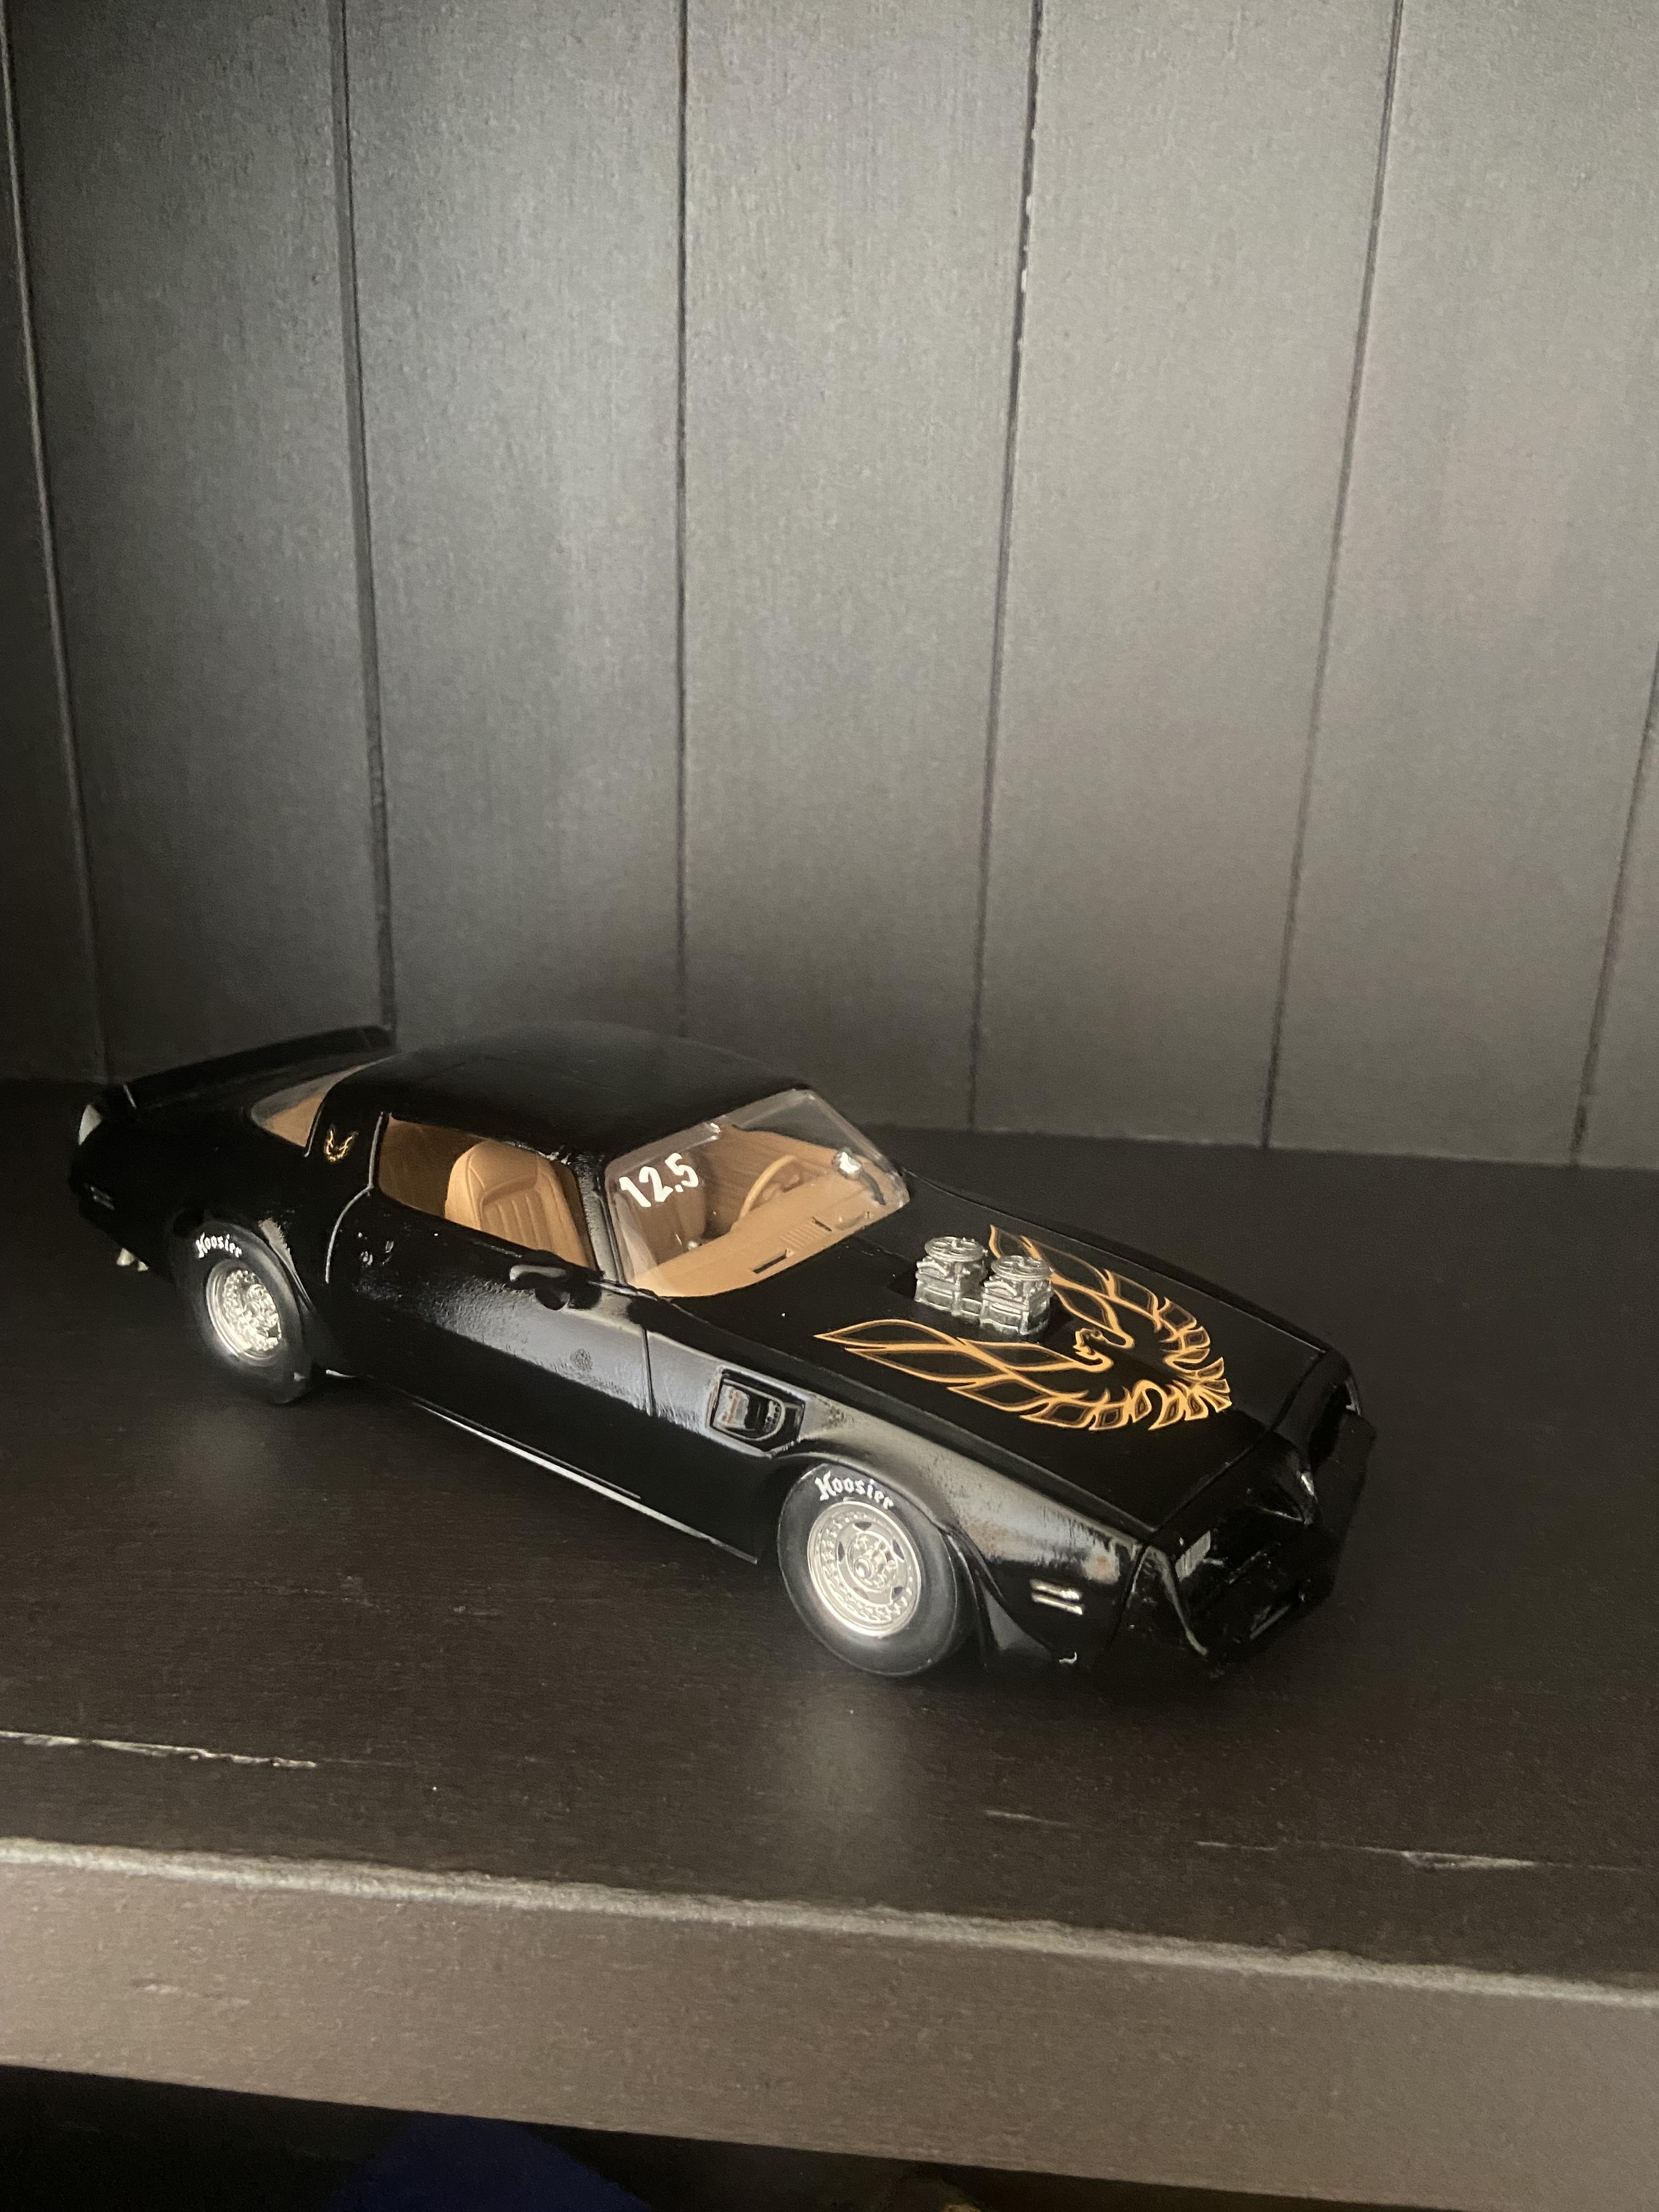
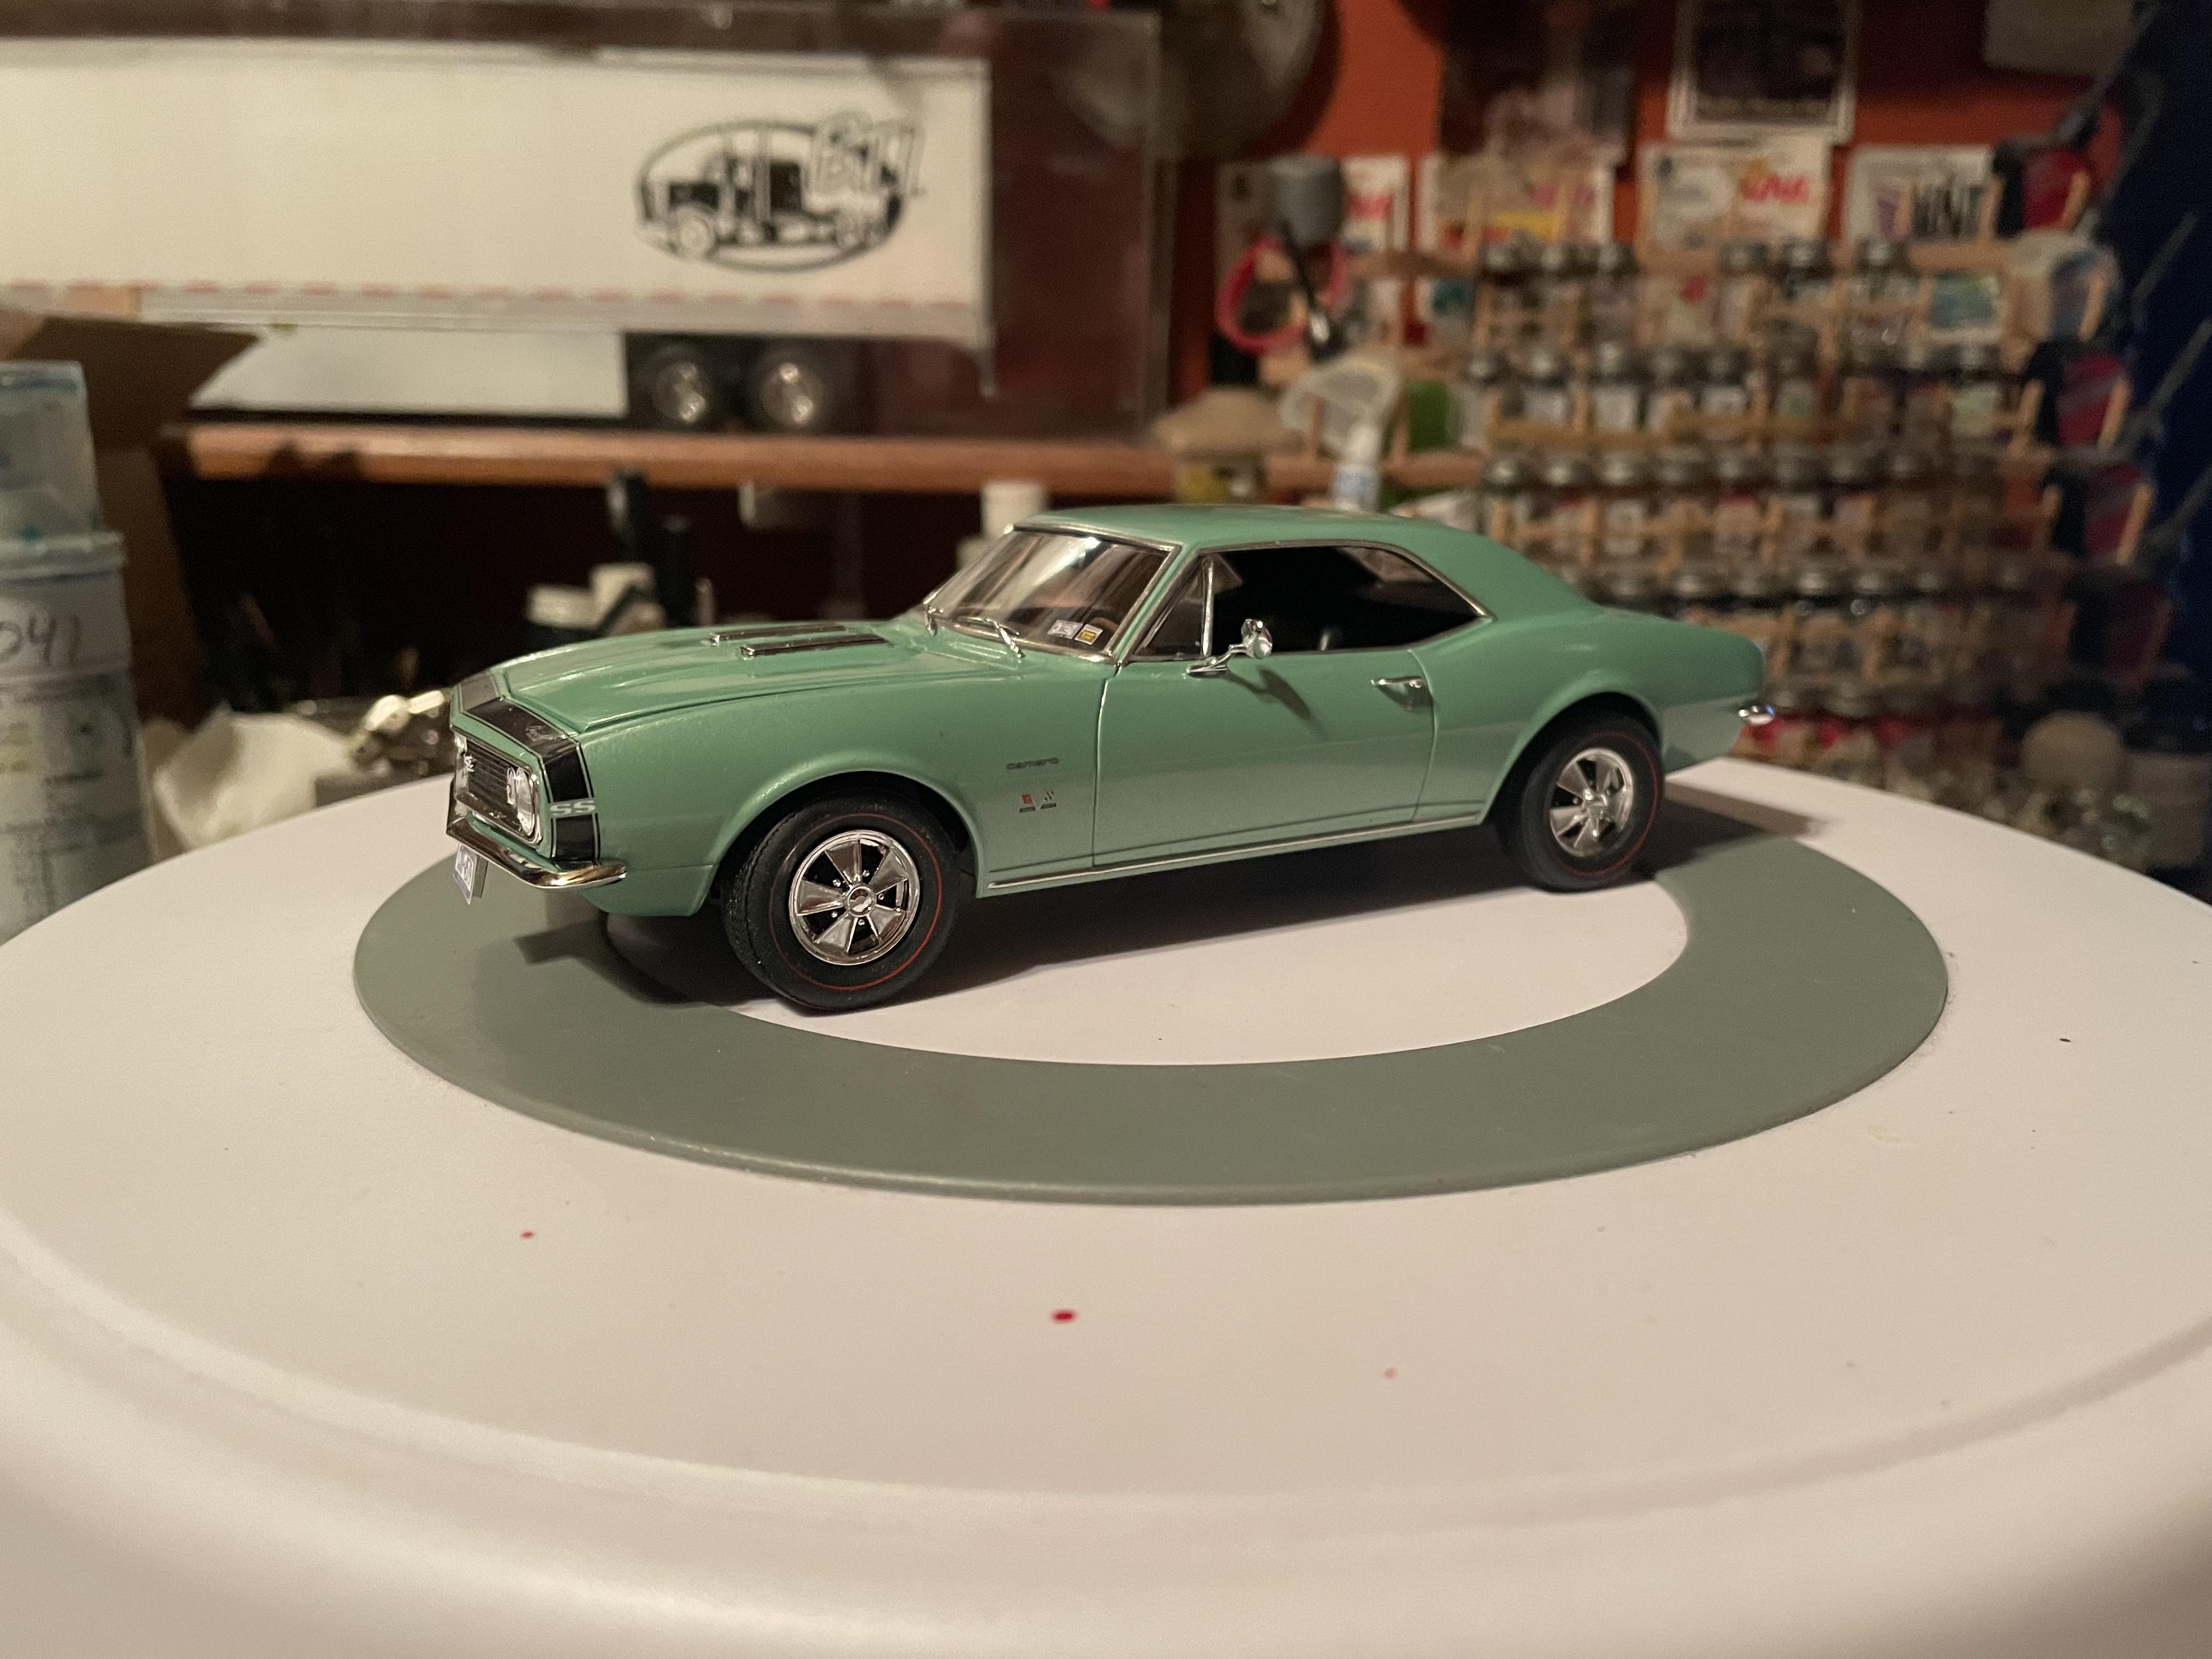
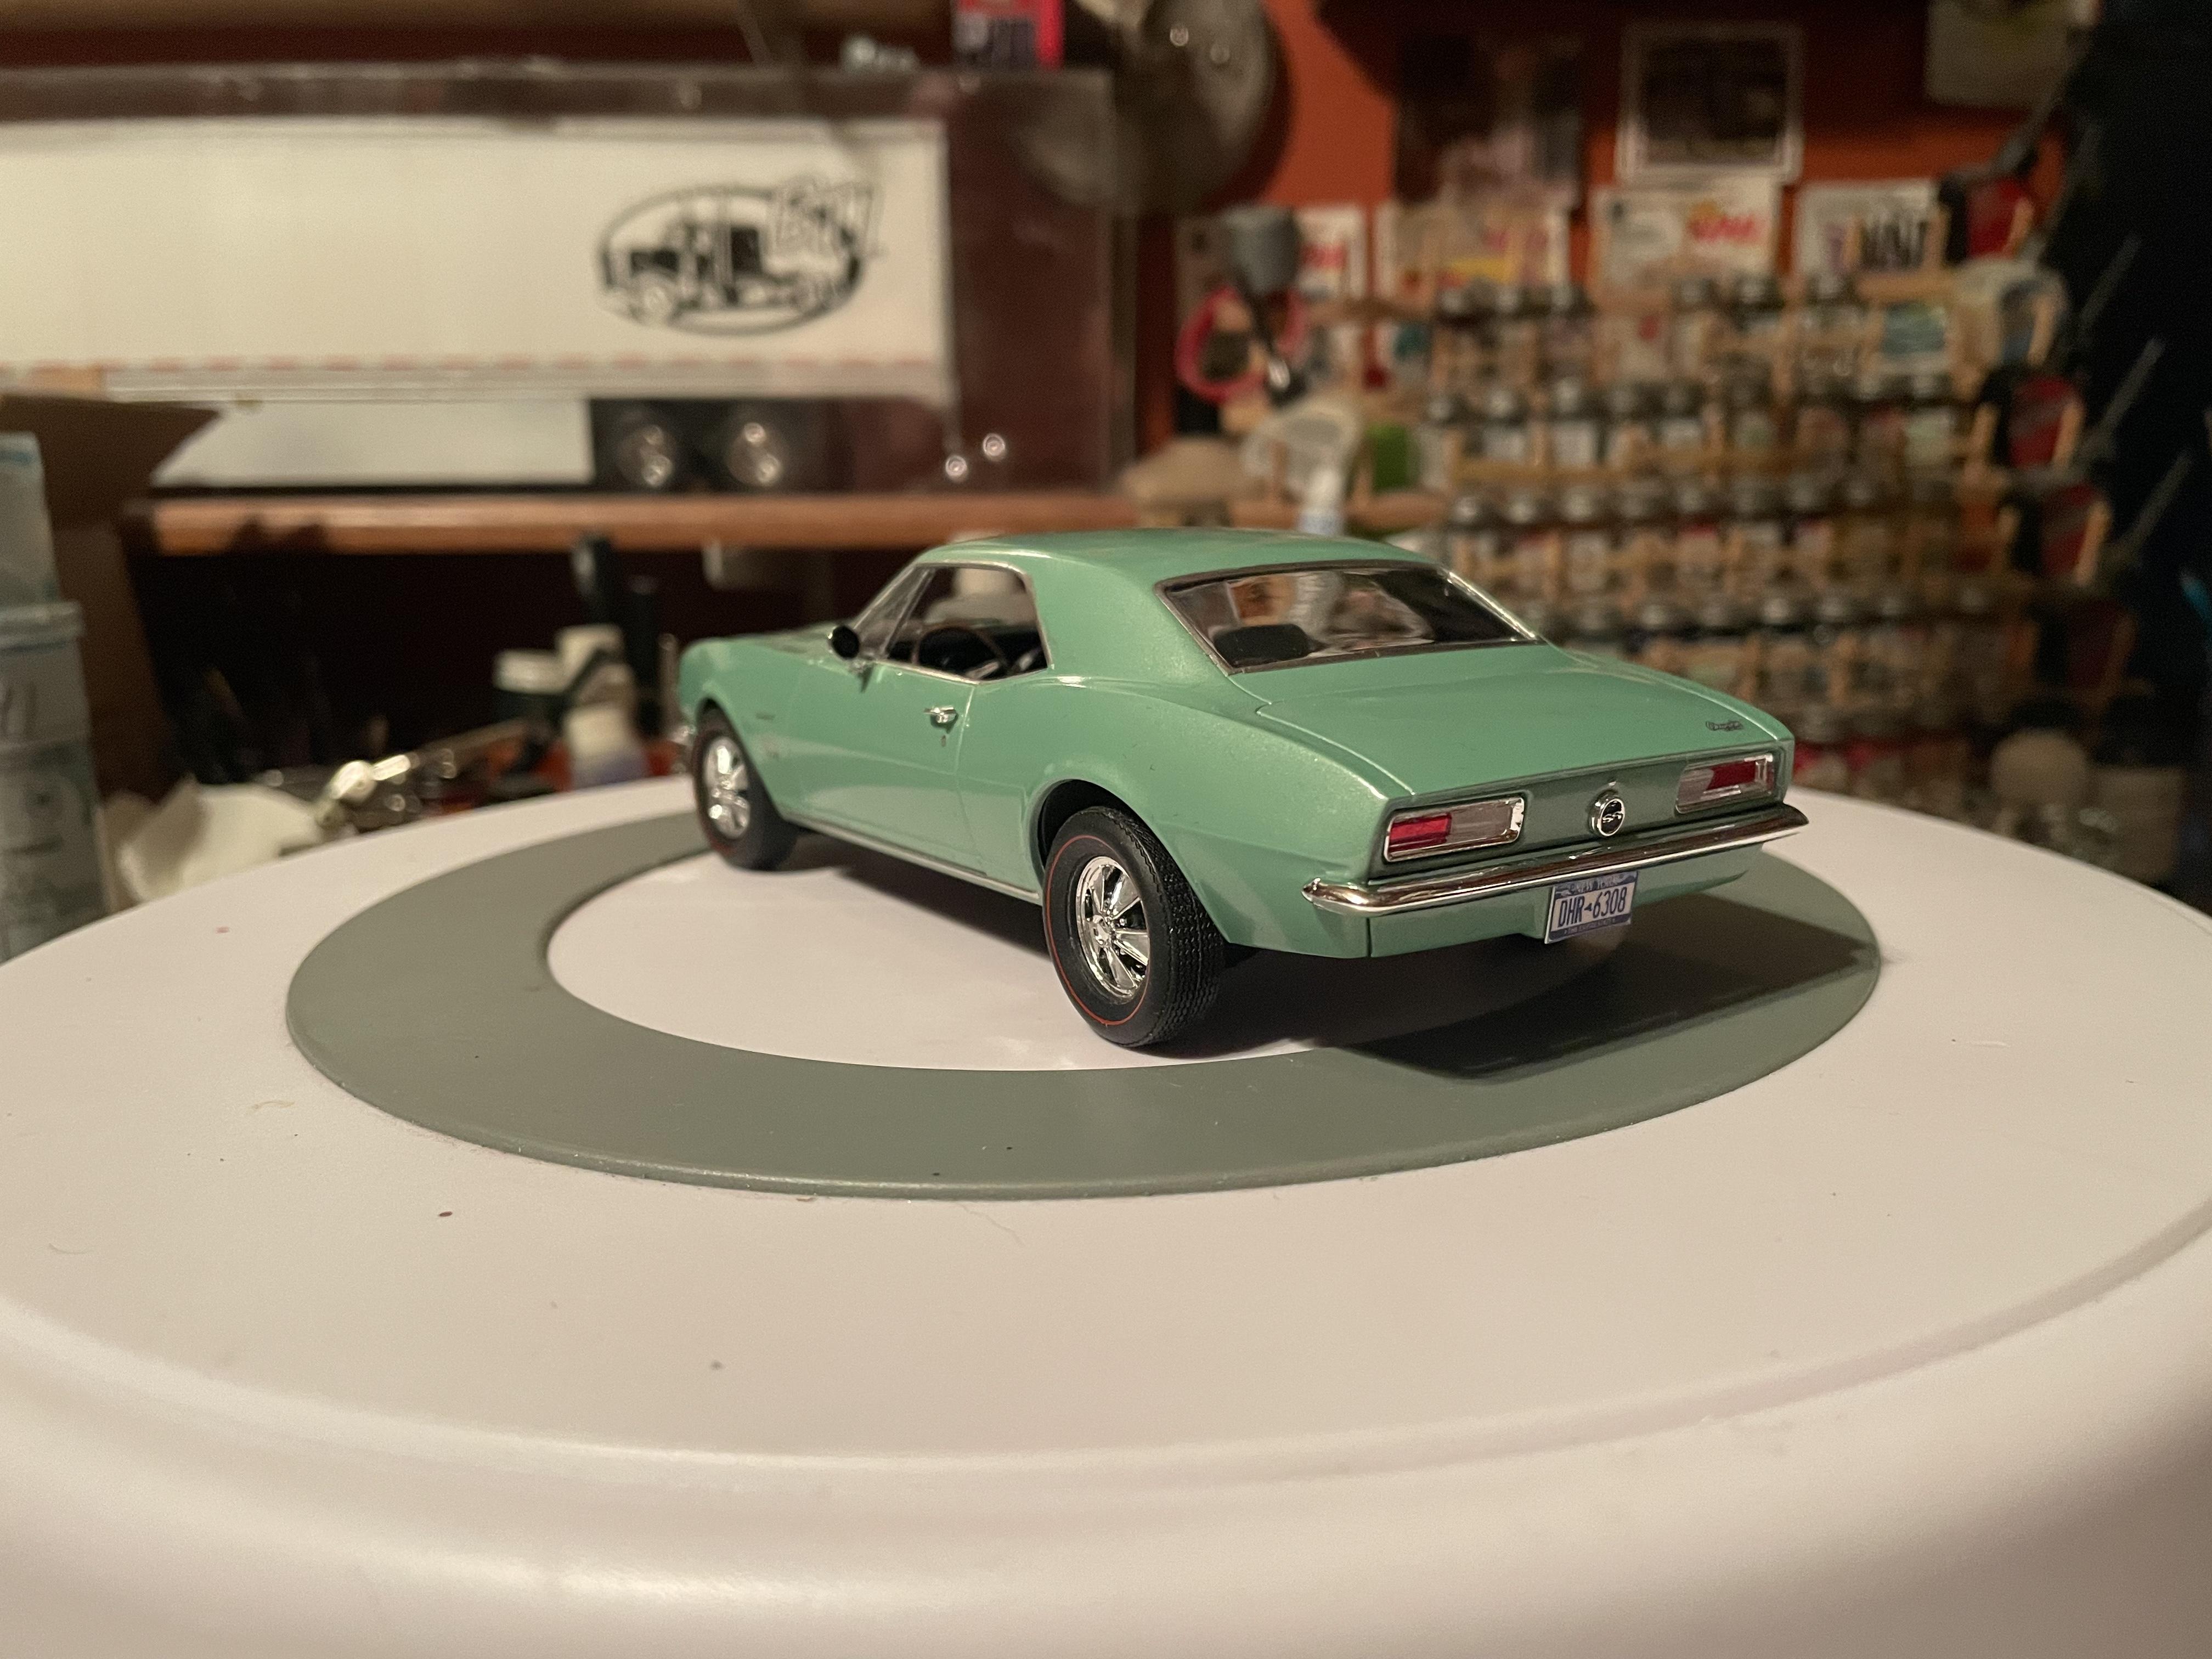
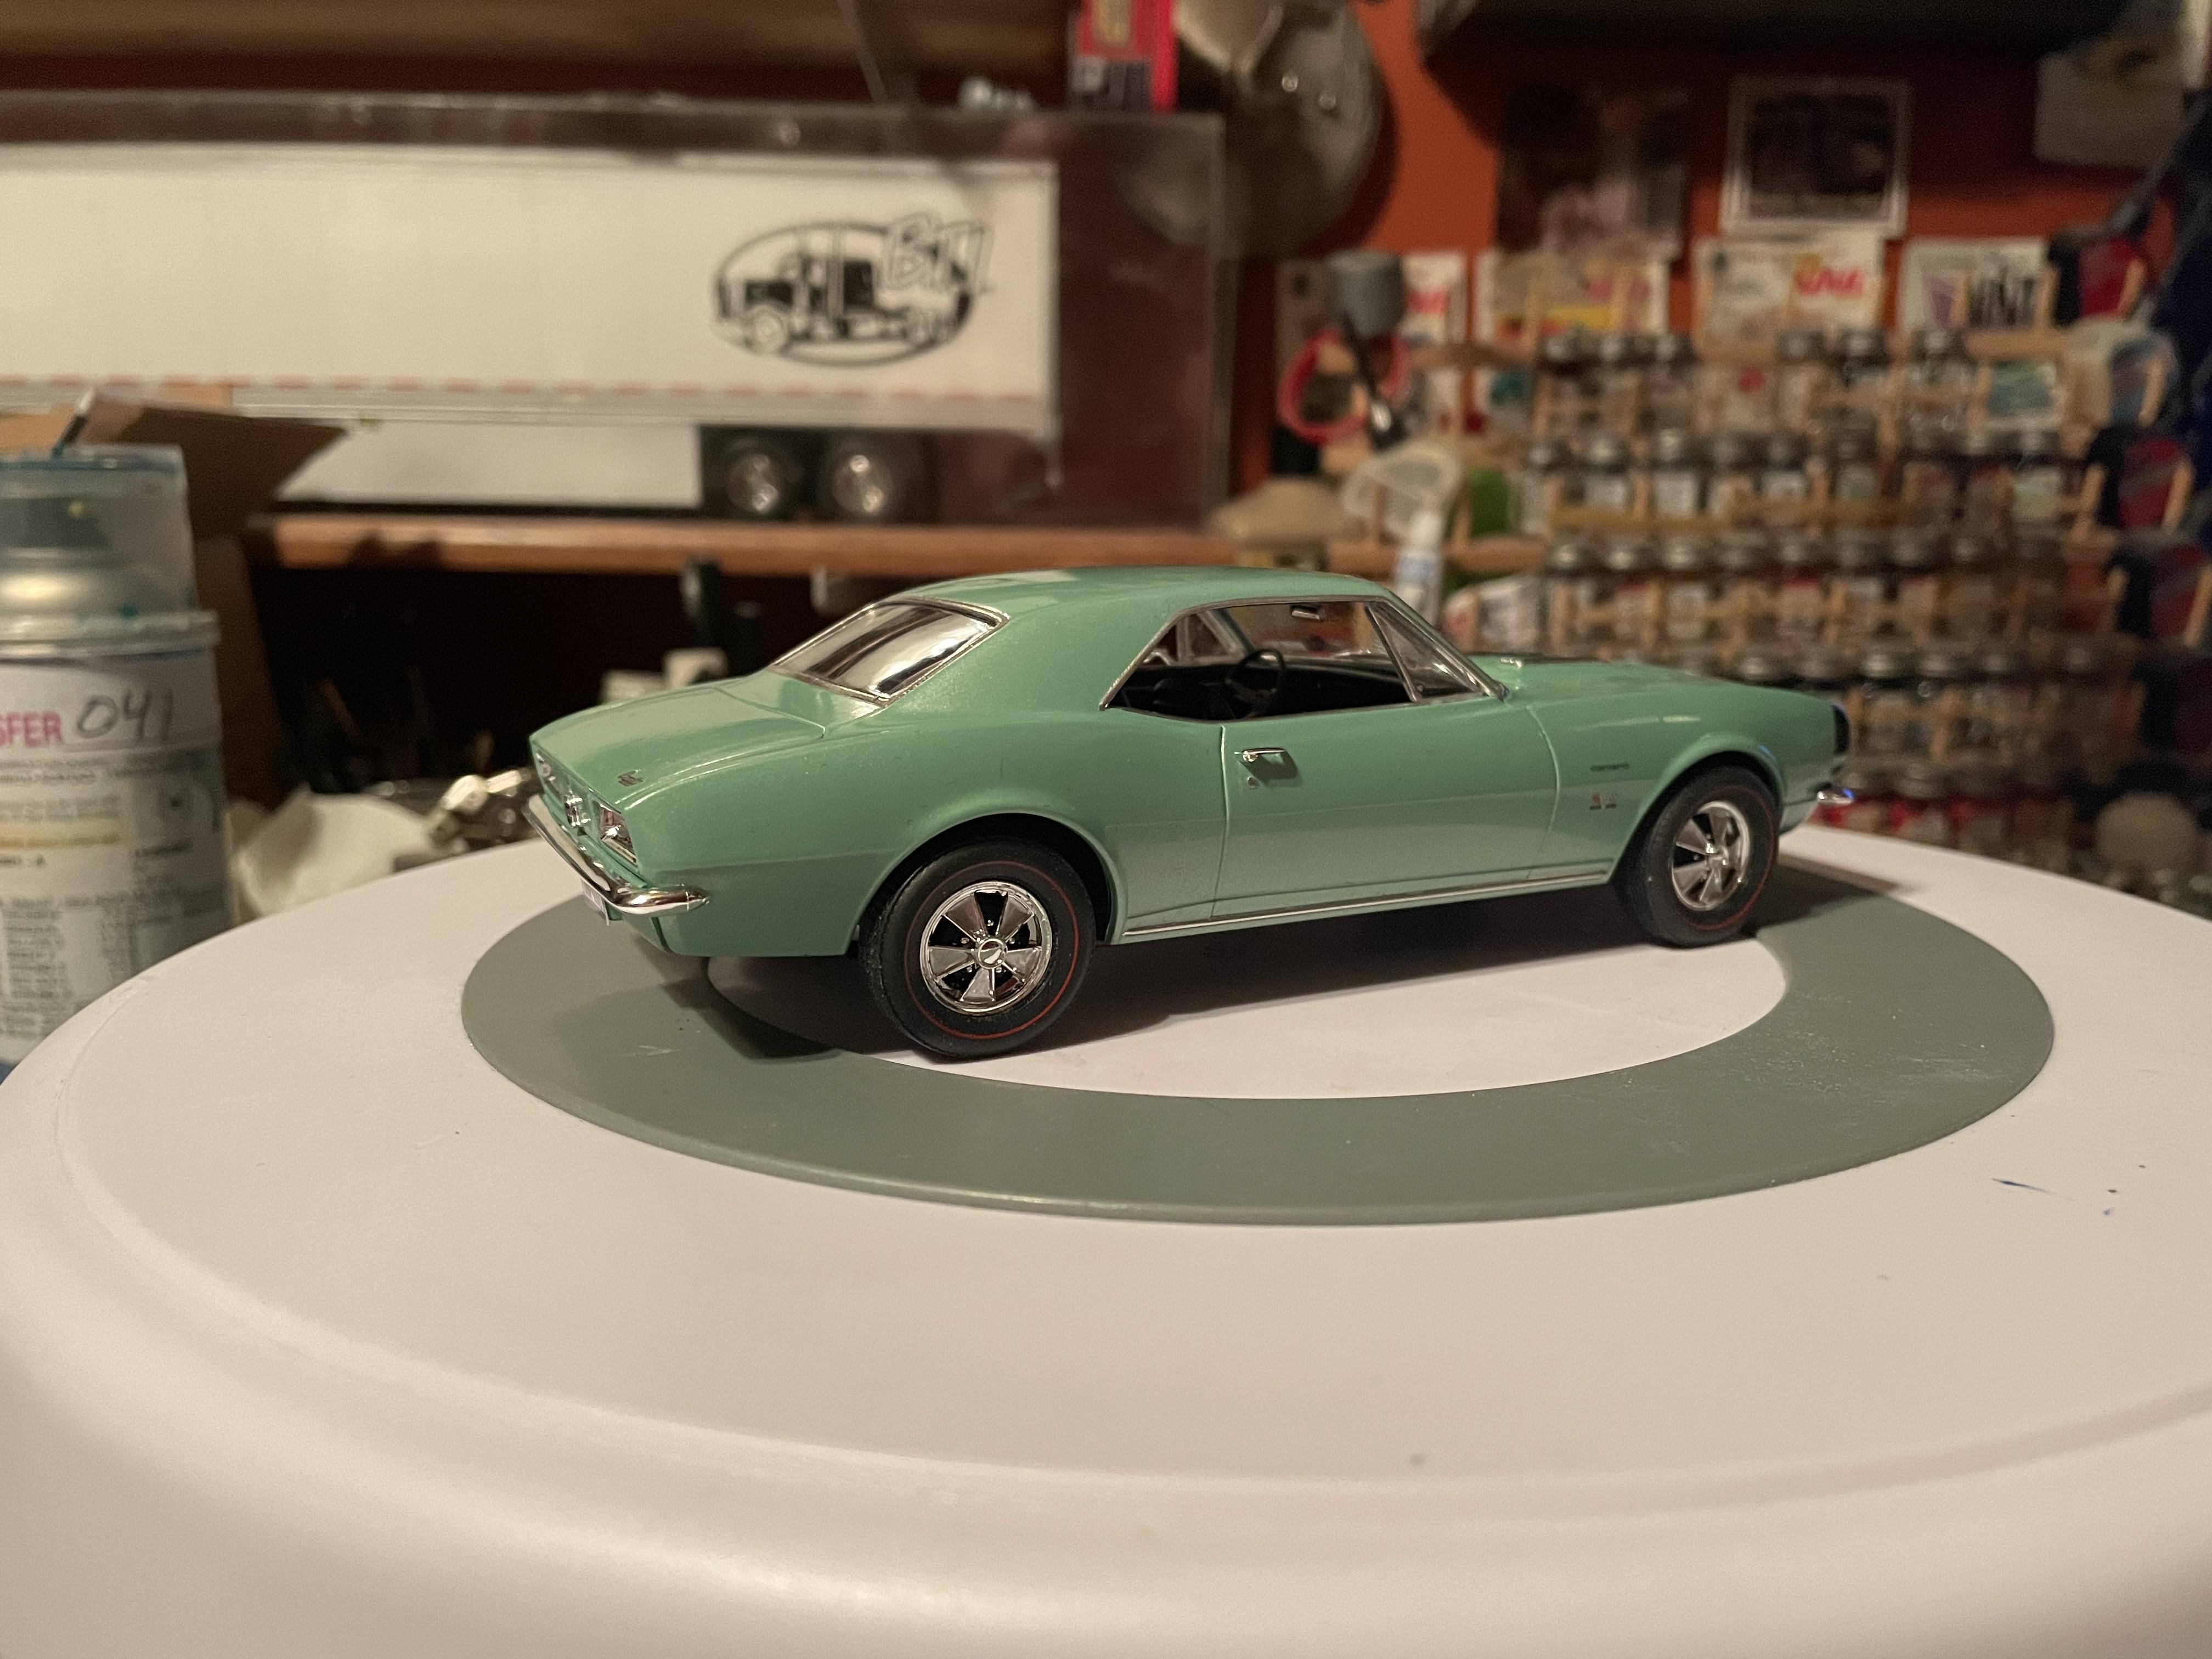
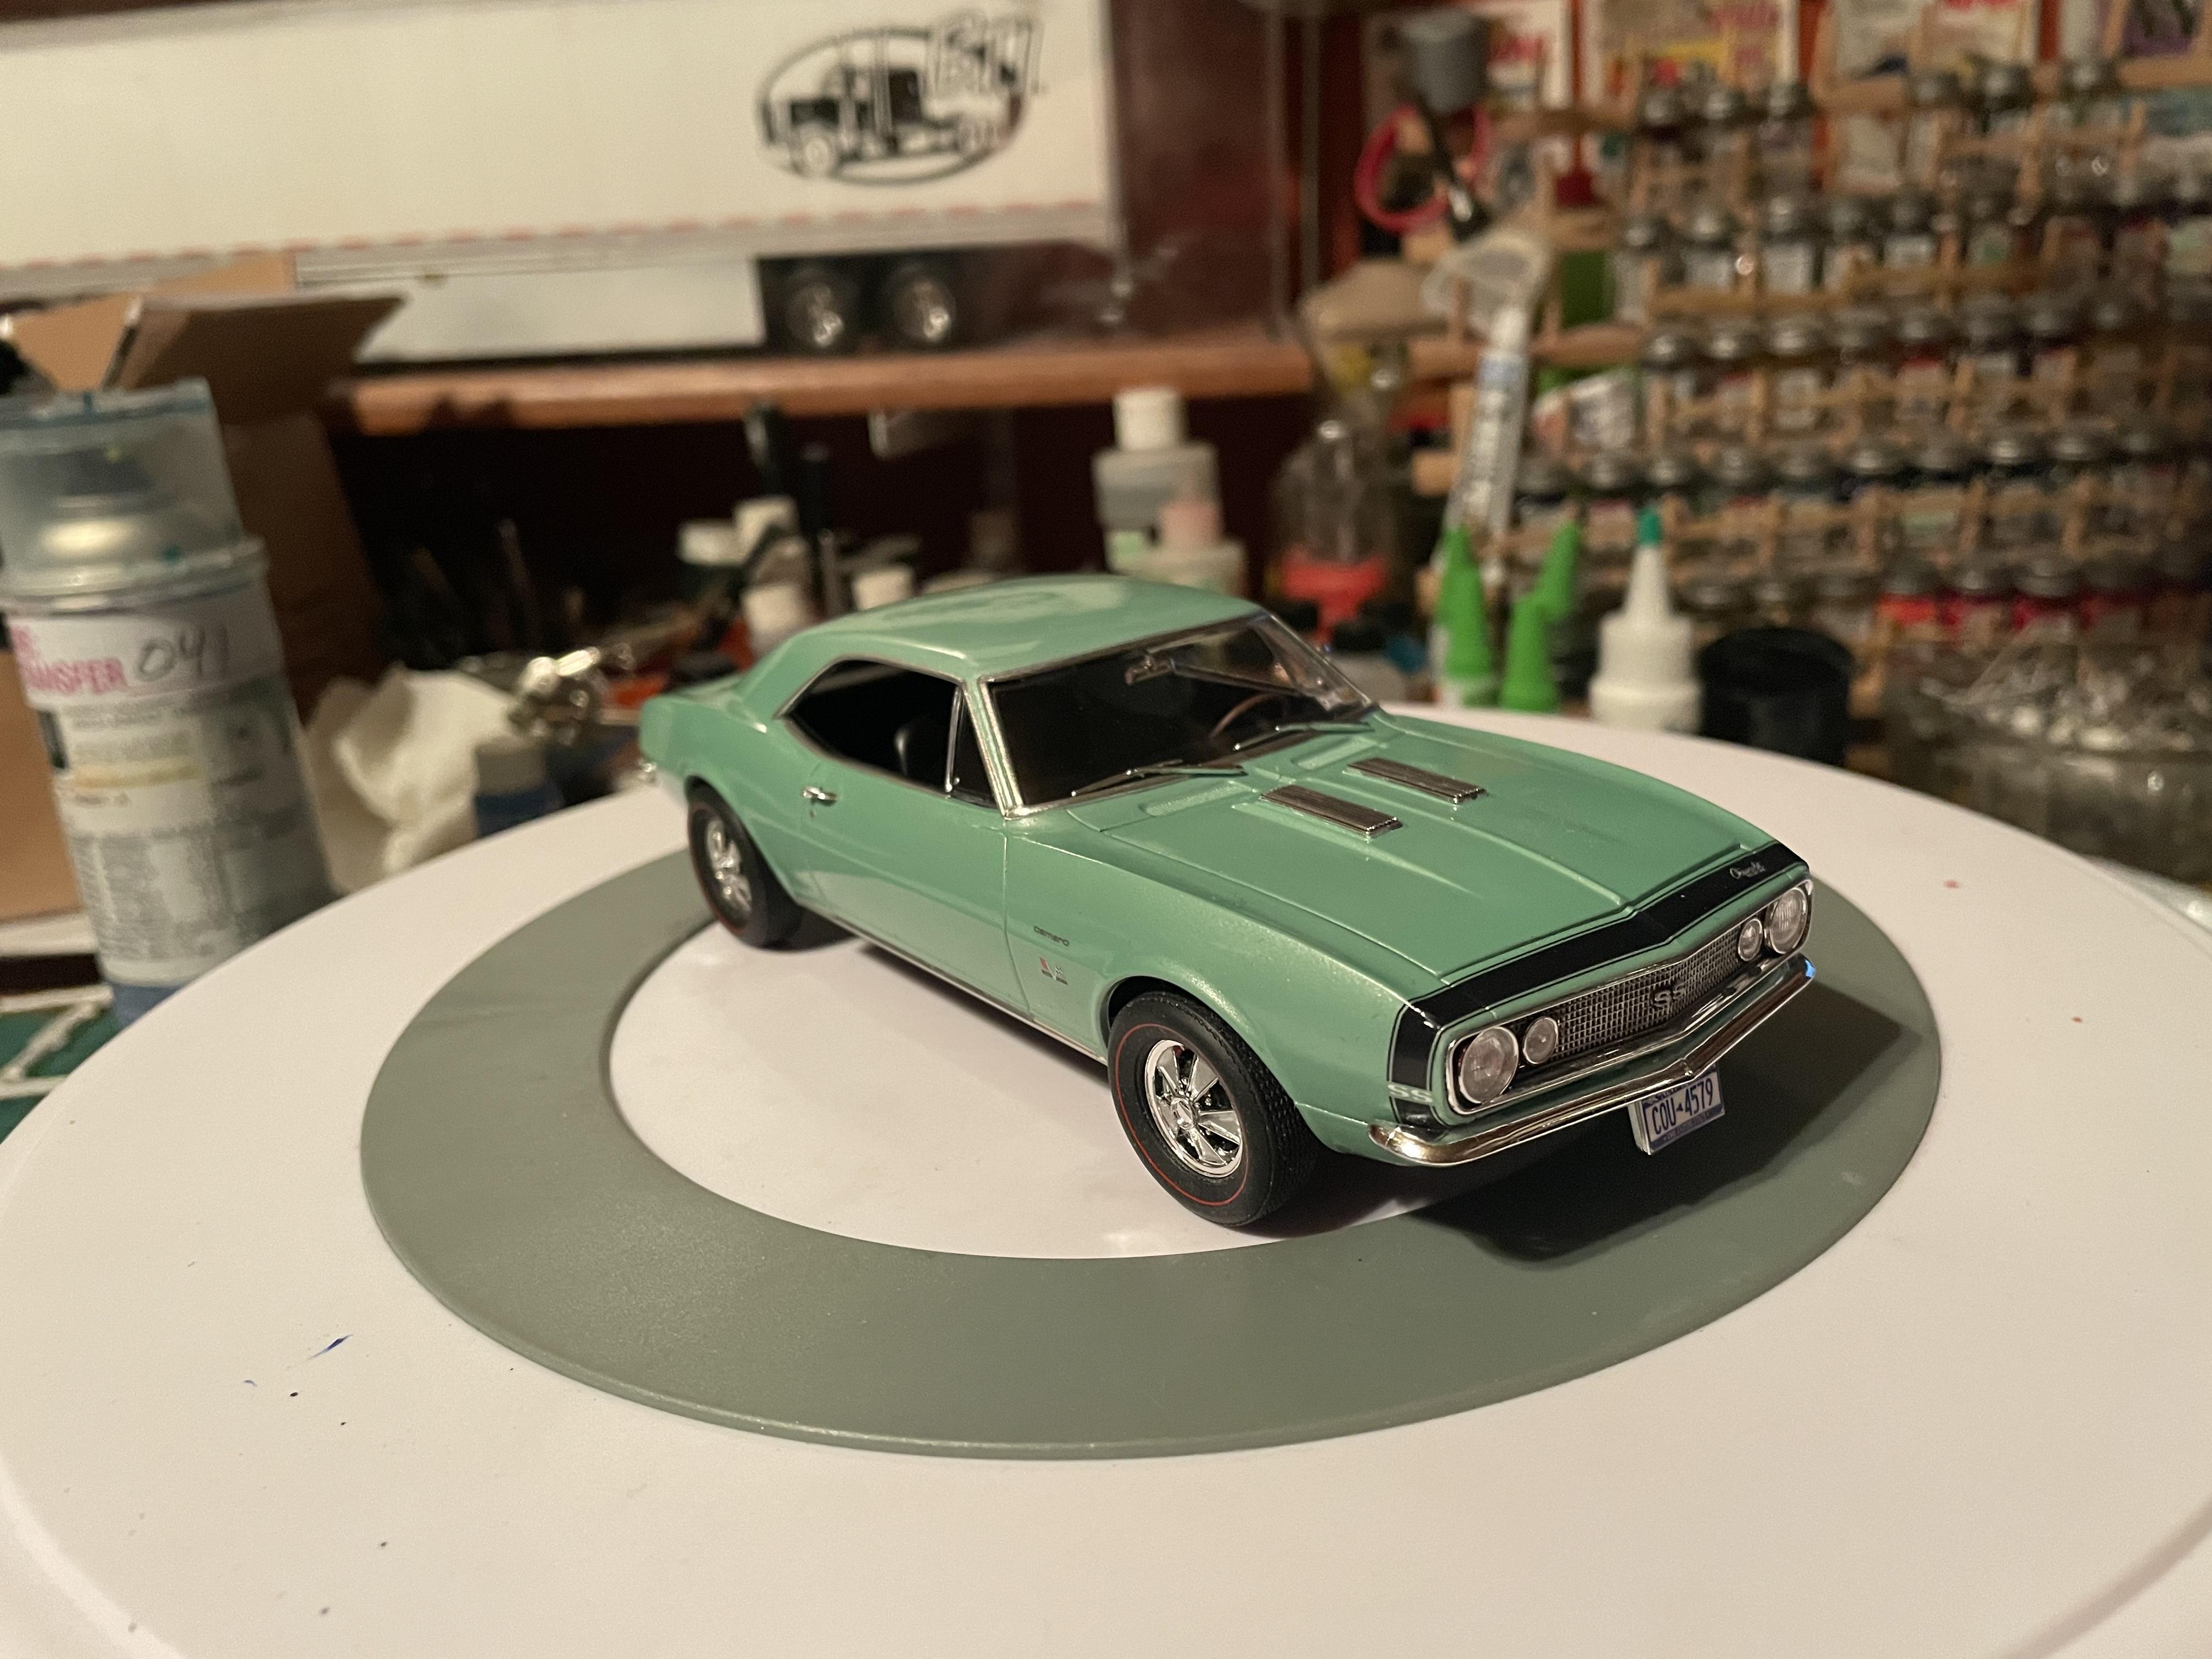
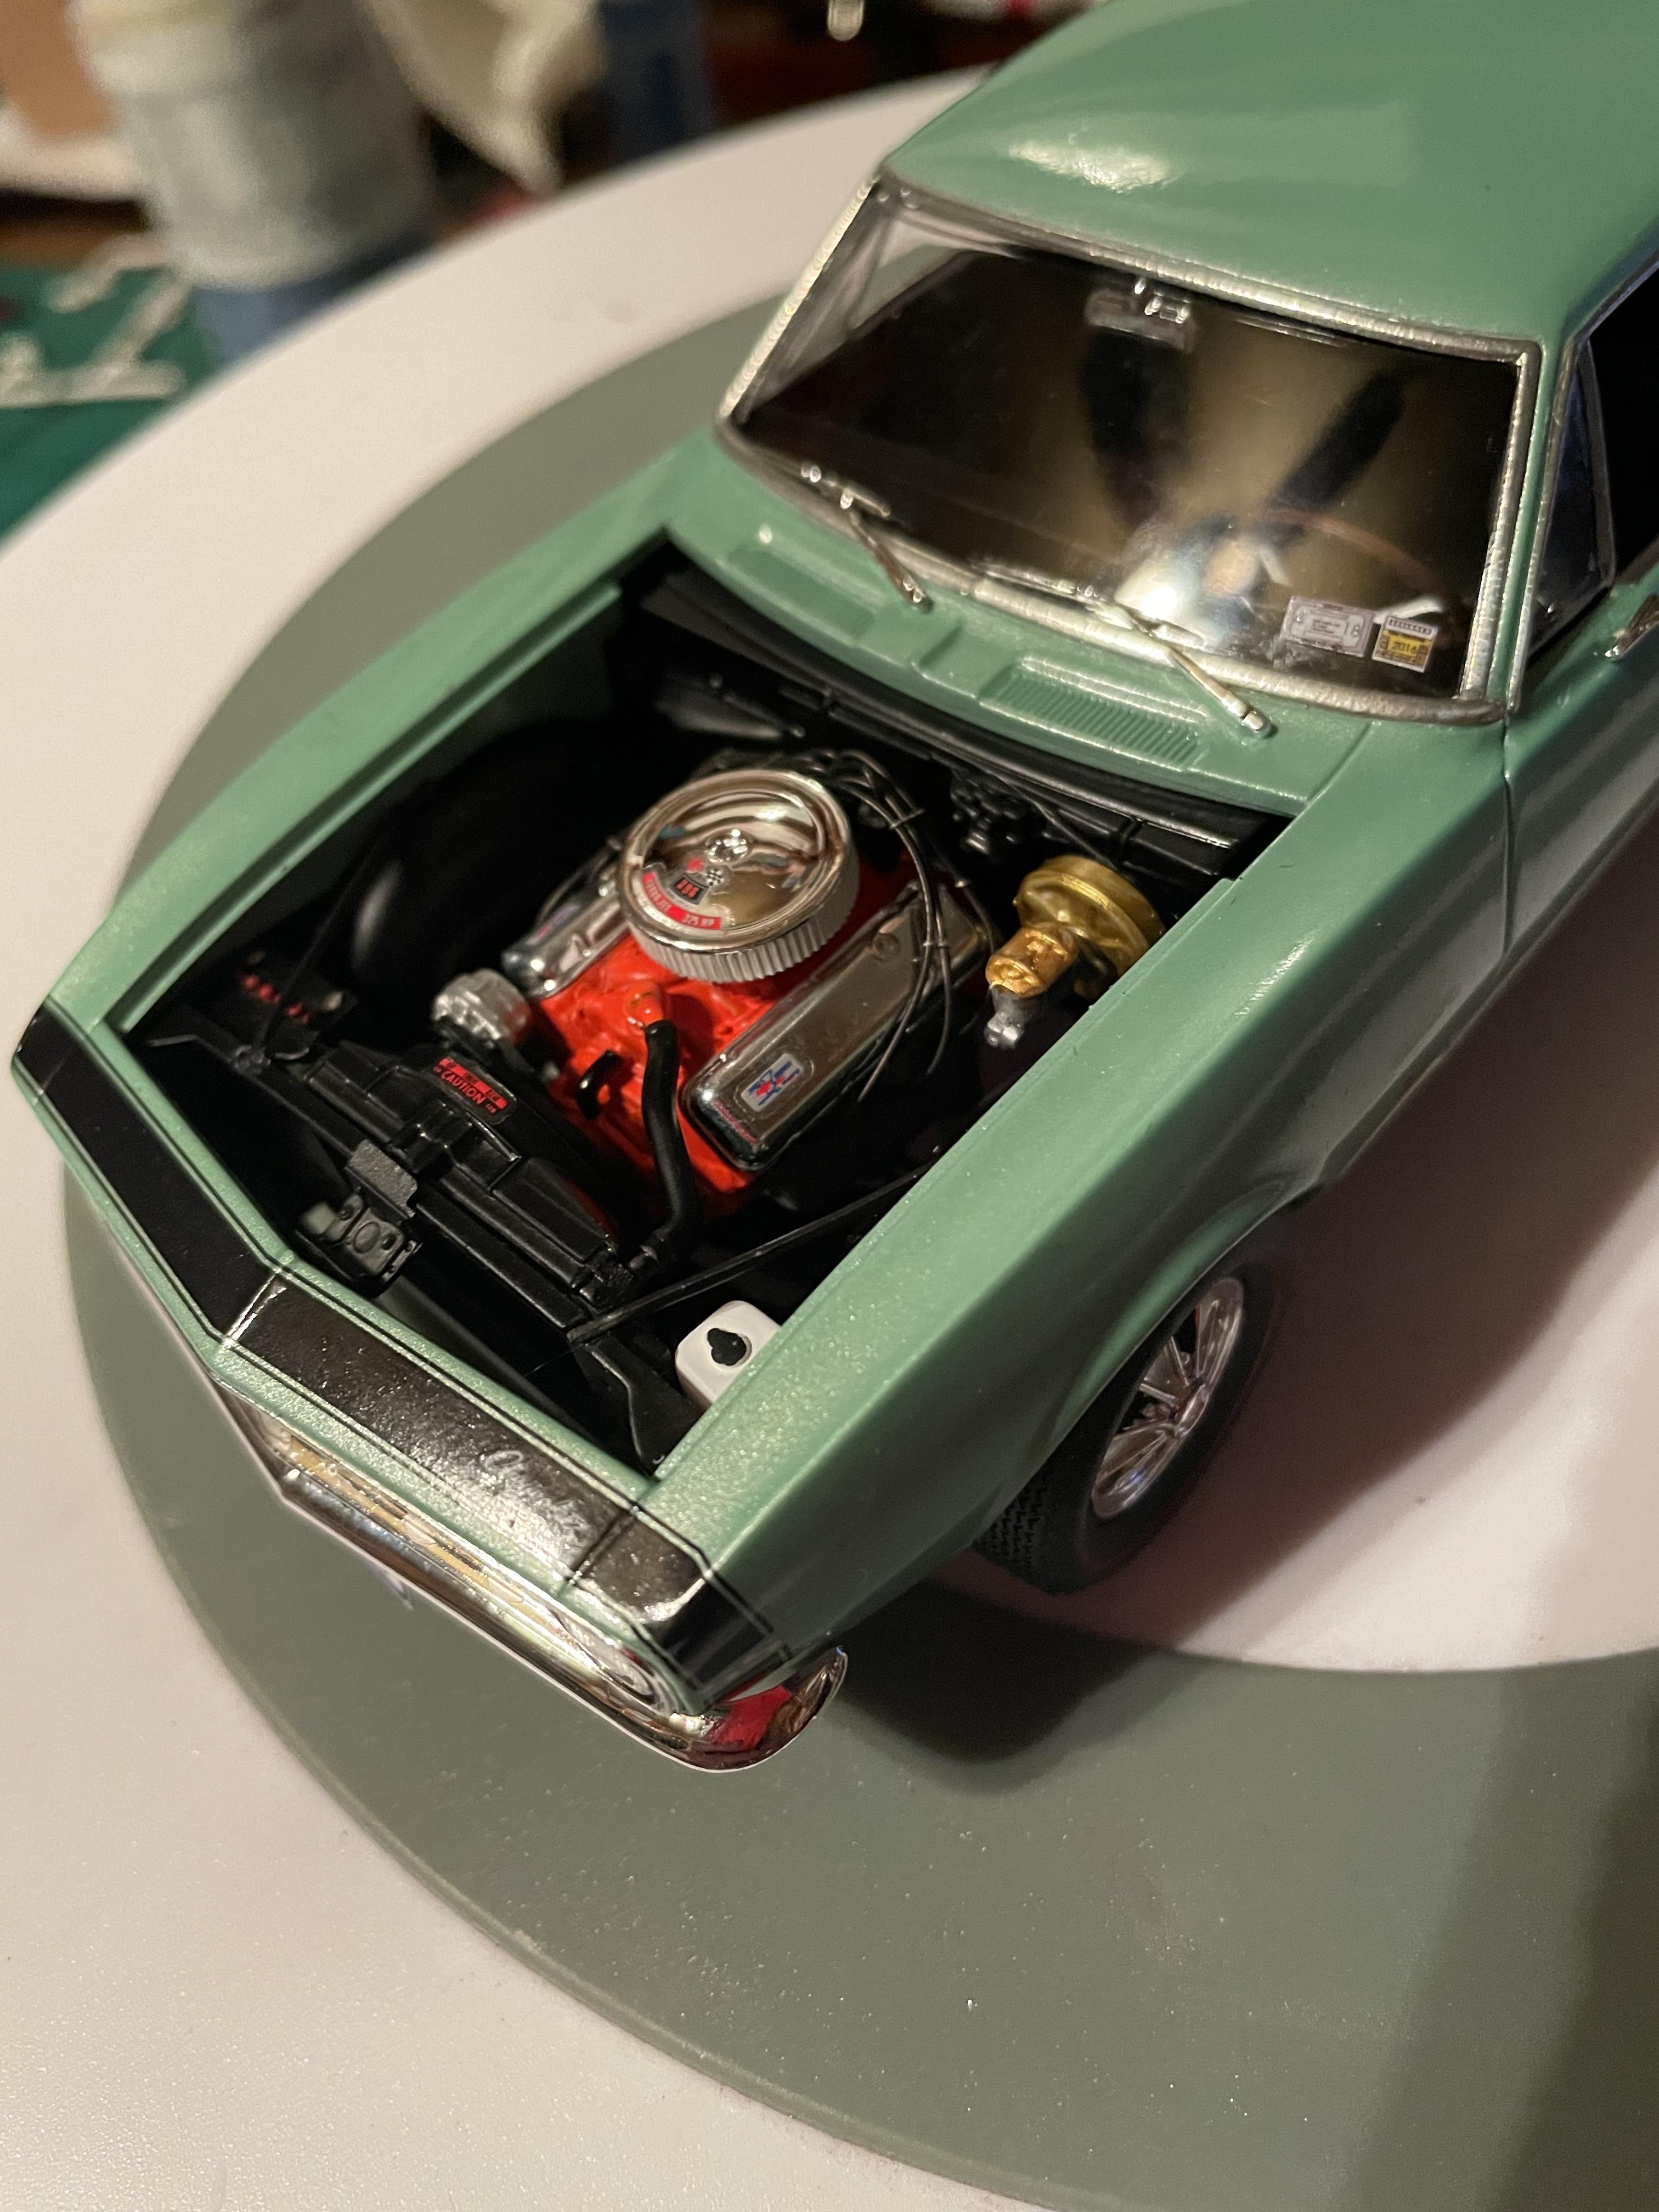
Finished this one Christmas morning. Used tamiya pearl green, wheels are from the Lindberg 66 chevelle kit ( these hubcaps were actually an option on 67-69 Camaros ) and amt parts pack red line tires. Nice kit, builds up well. As always, thanks for looking.
-
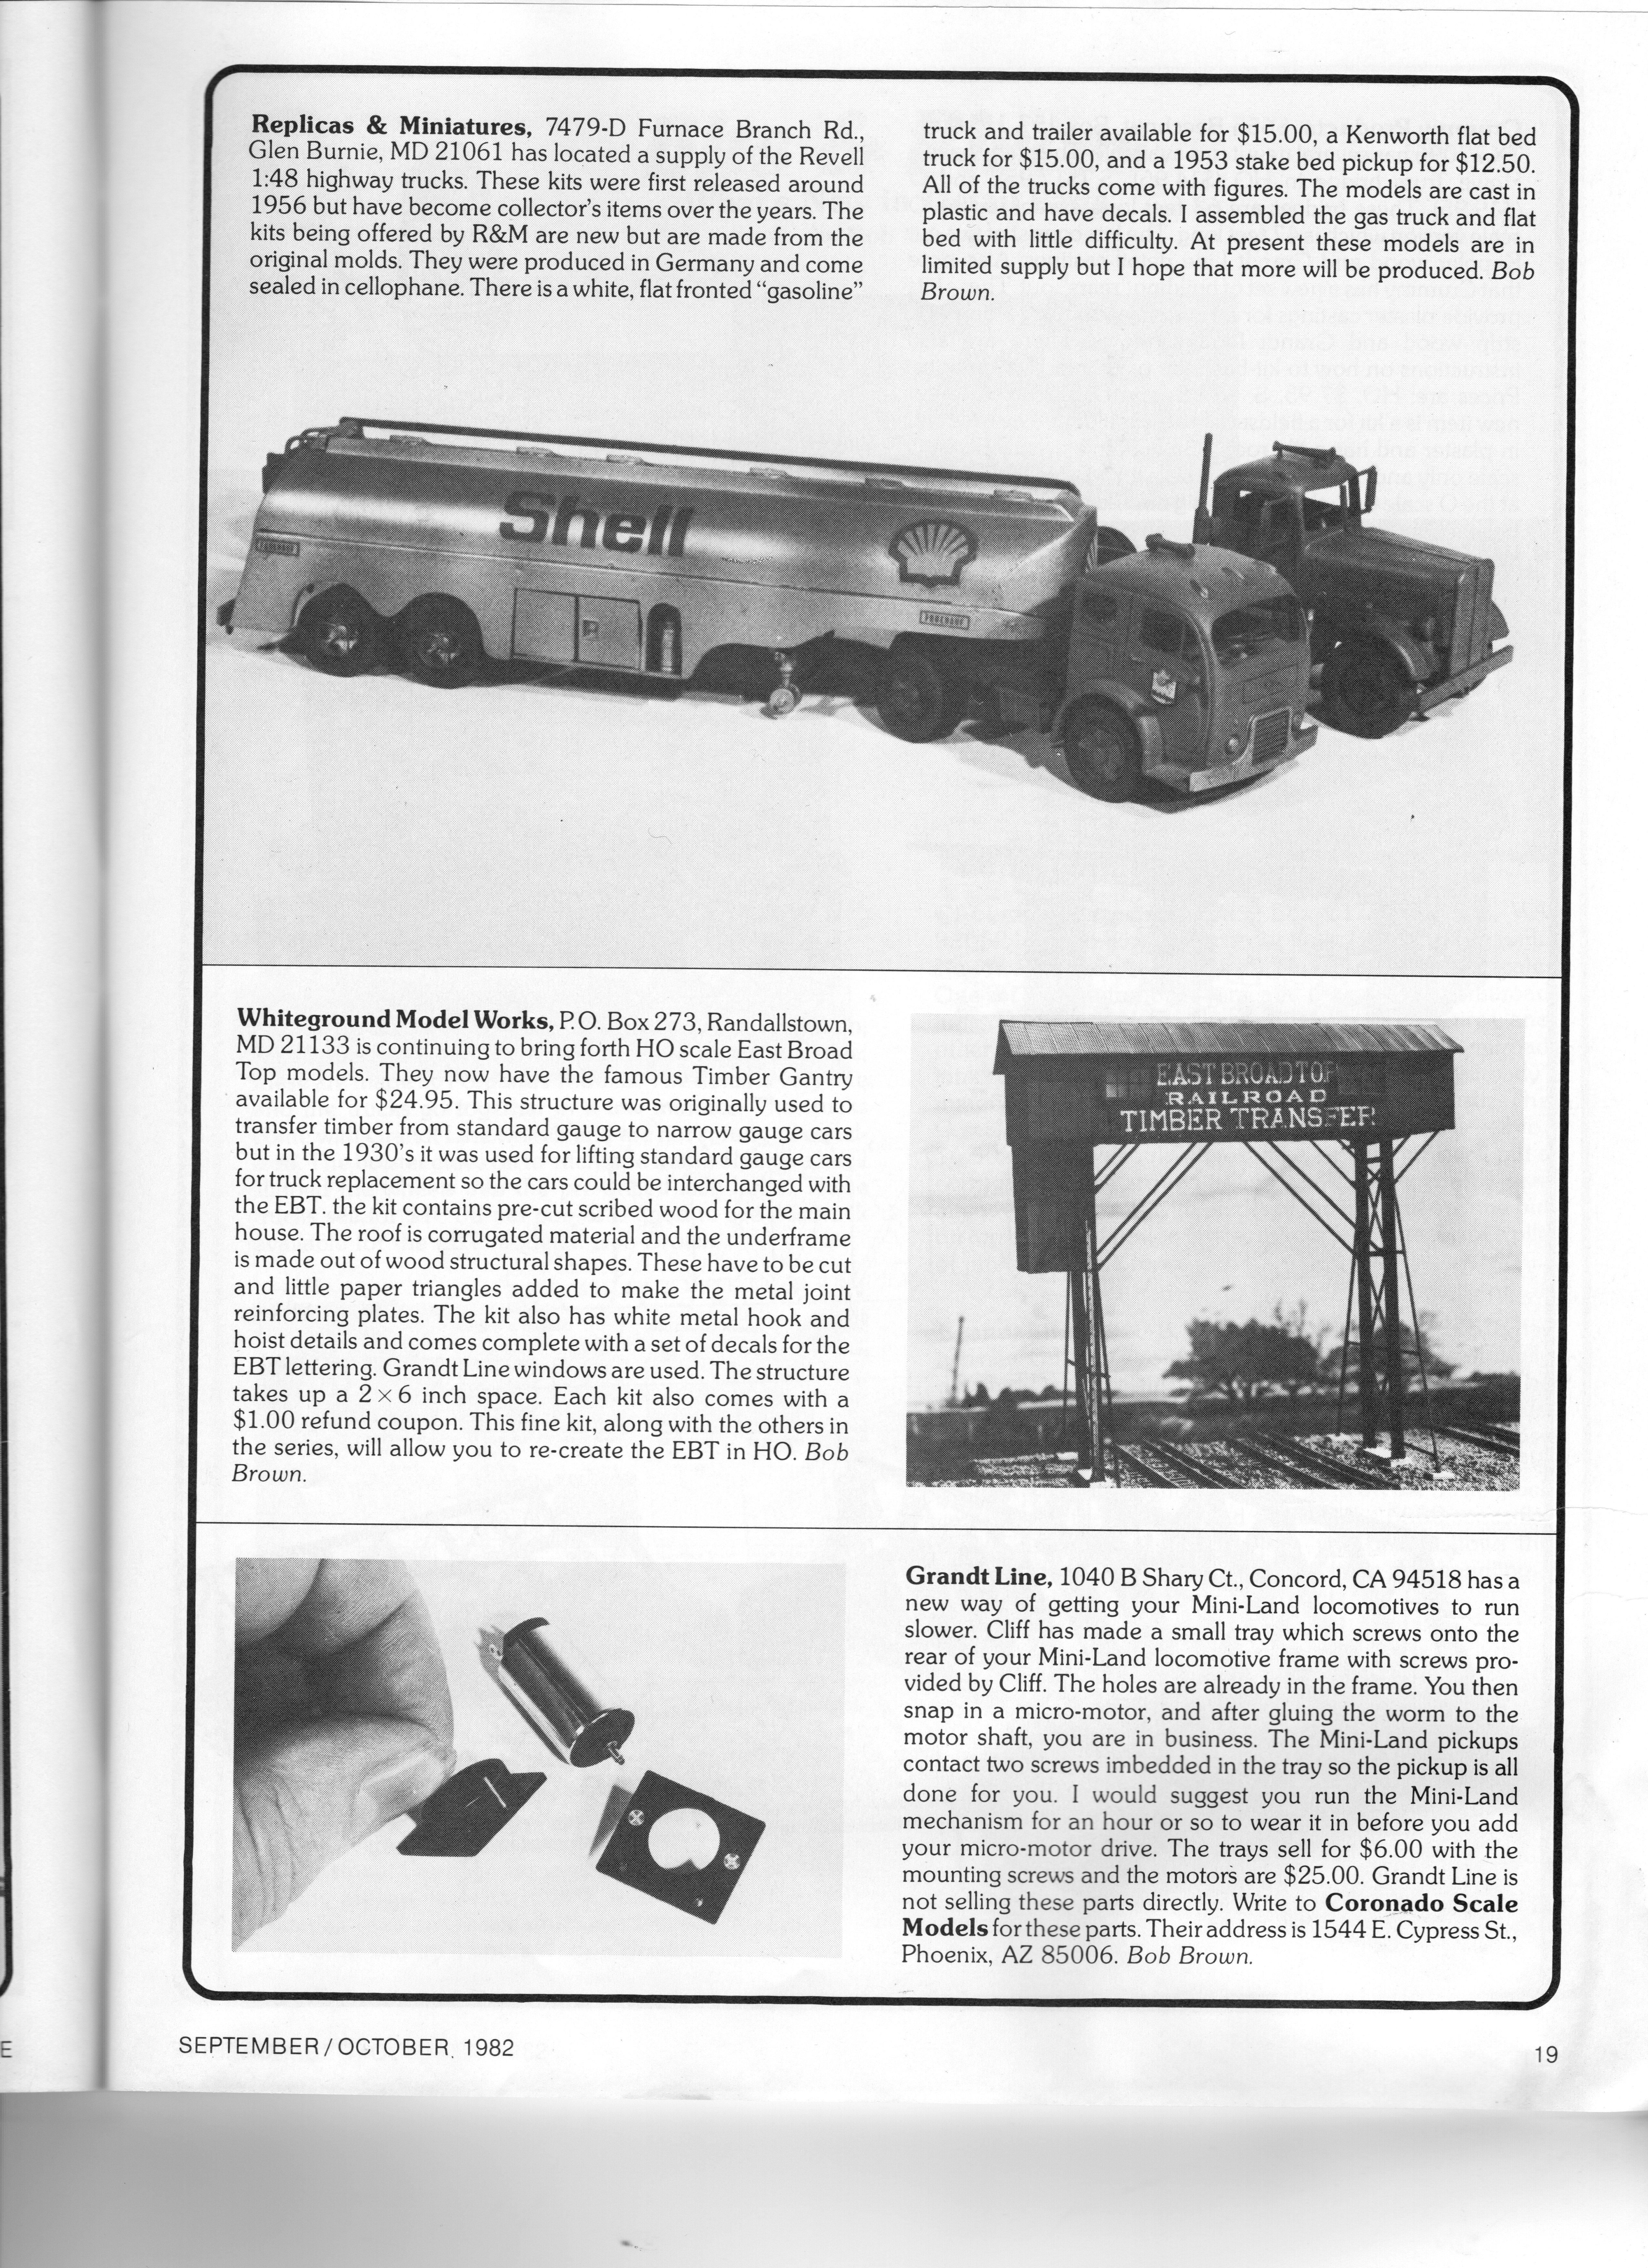
 Going through a stack of old issues of the fantastic Narrow Gauge and Short Line Gazette, I came upon this review.
-
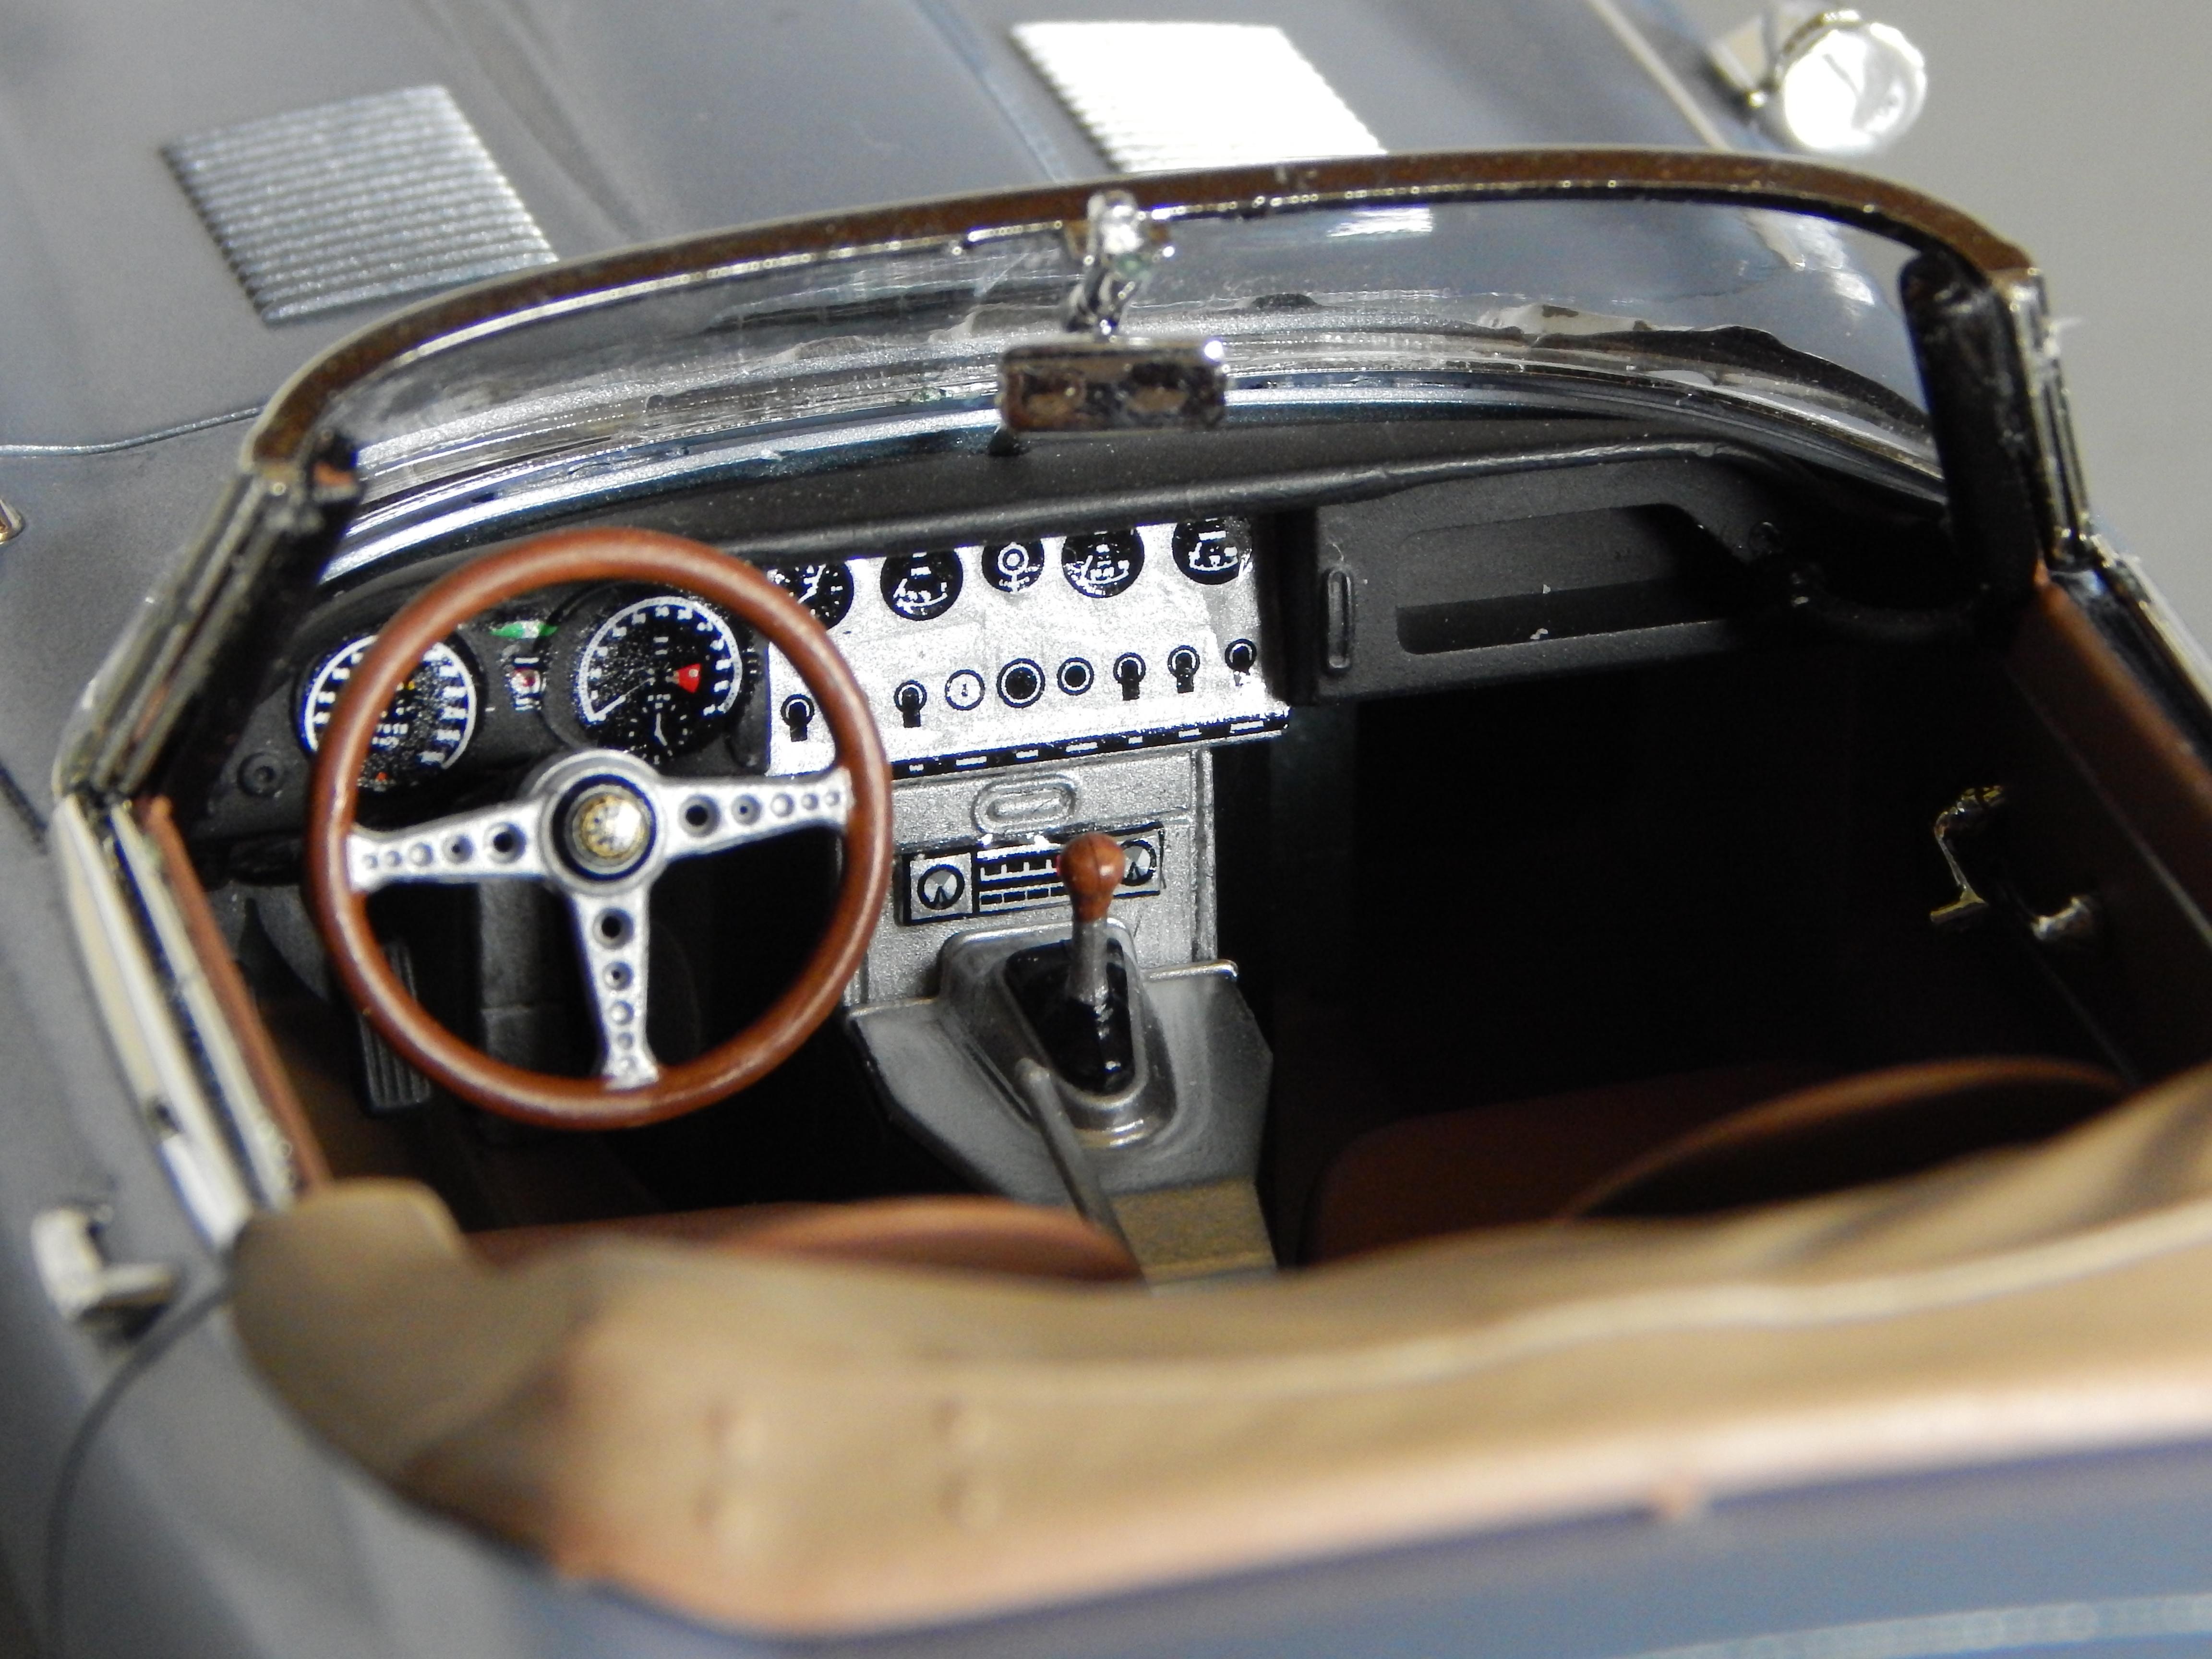
Its rumored that Enzo Ferrari called it "the most beautiful car ever built" upon its introduction in 1961. I always liked the lines of the roadster better than the coupe, the roofline on the coupe looks 'off' to me for some reason. Maybe because I've recently completed a couple of Heller kits I especially enjoyed this kit, the engineering and parts count were outstanding. Mold lines were faint and easy to clean up and the parts attachments, especially the chrome parts, were designed to be well hidden on the finished car. Everything fit without massaging. It included an extensive decal sheet with all the underhood and interior markings you could want. I didn't use them all, some were extremely tiny. This kit, and I imagine the sister coupe, easily rival Tamiya for accuracy and ease of construction IMHO. Comments always welcome and thanks for looking.
-
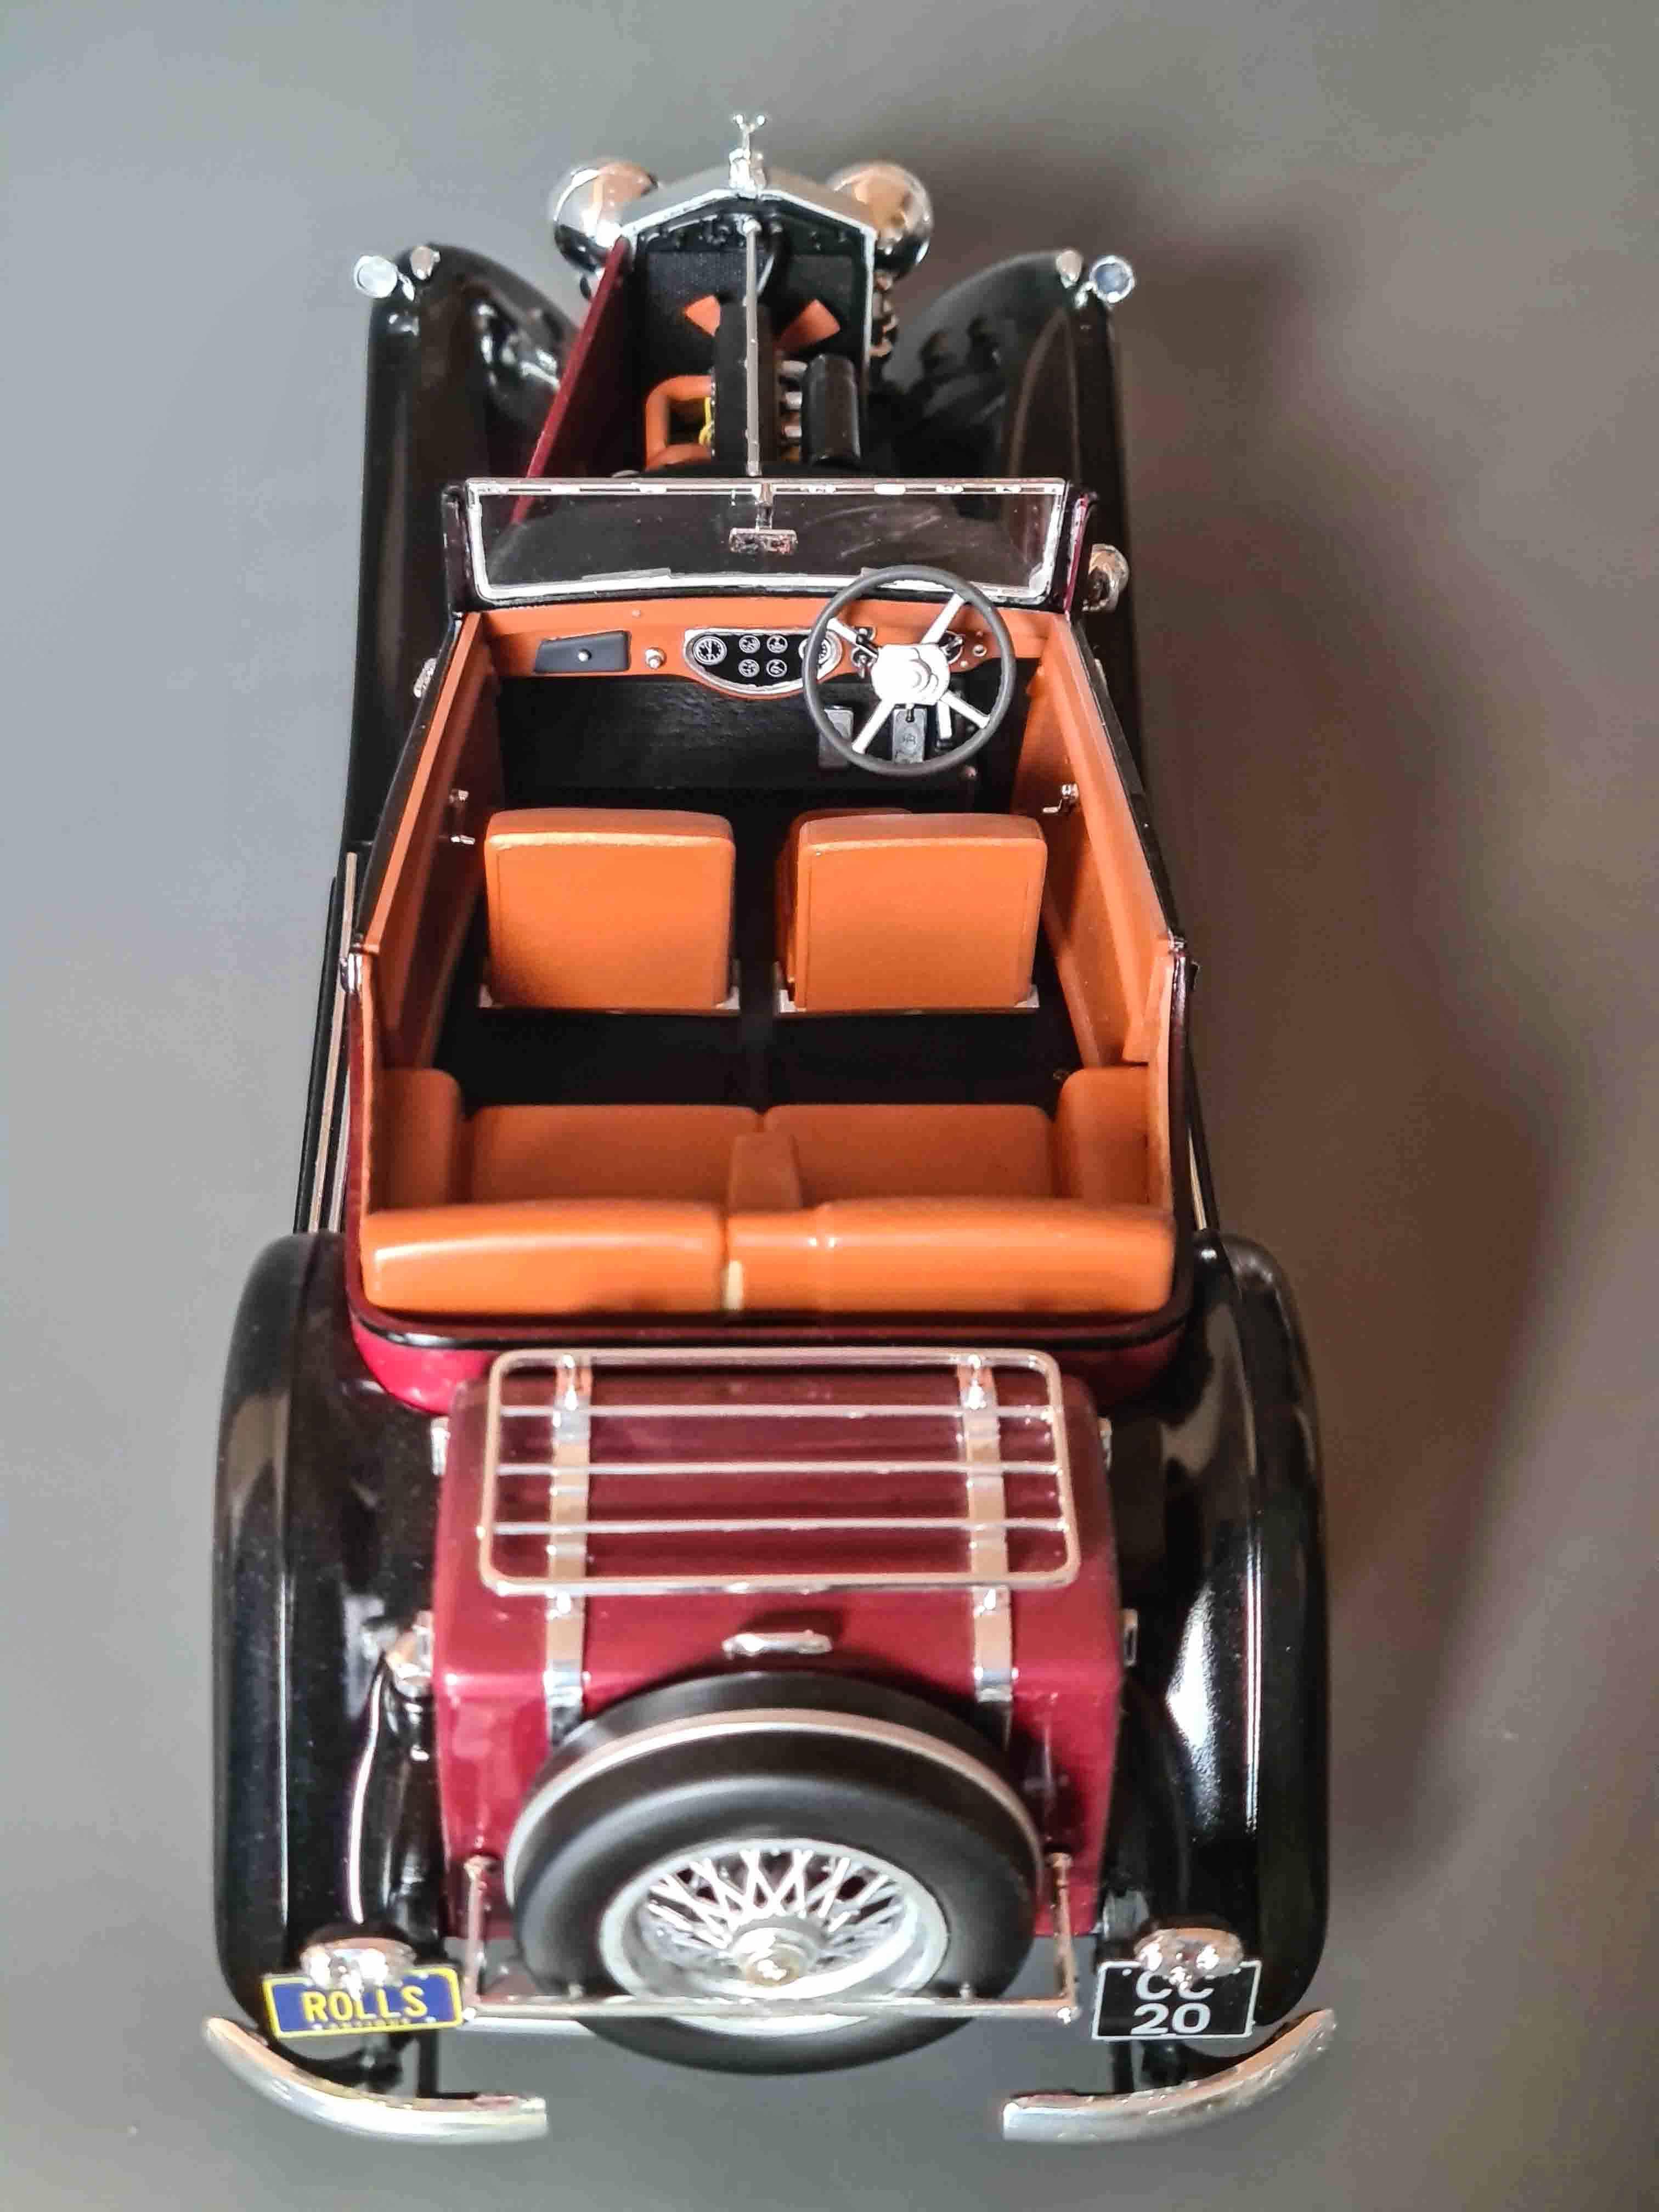
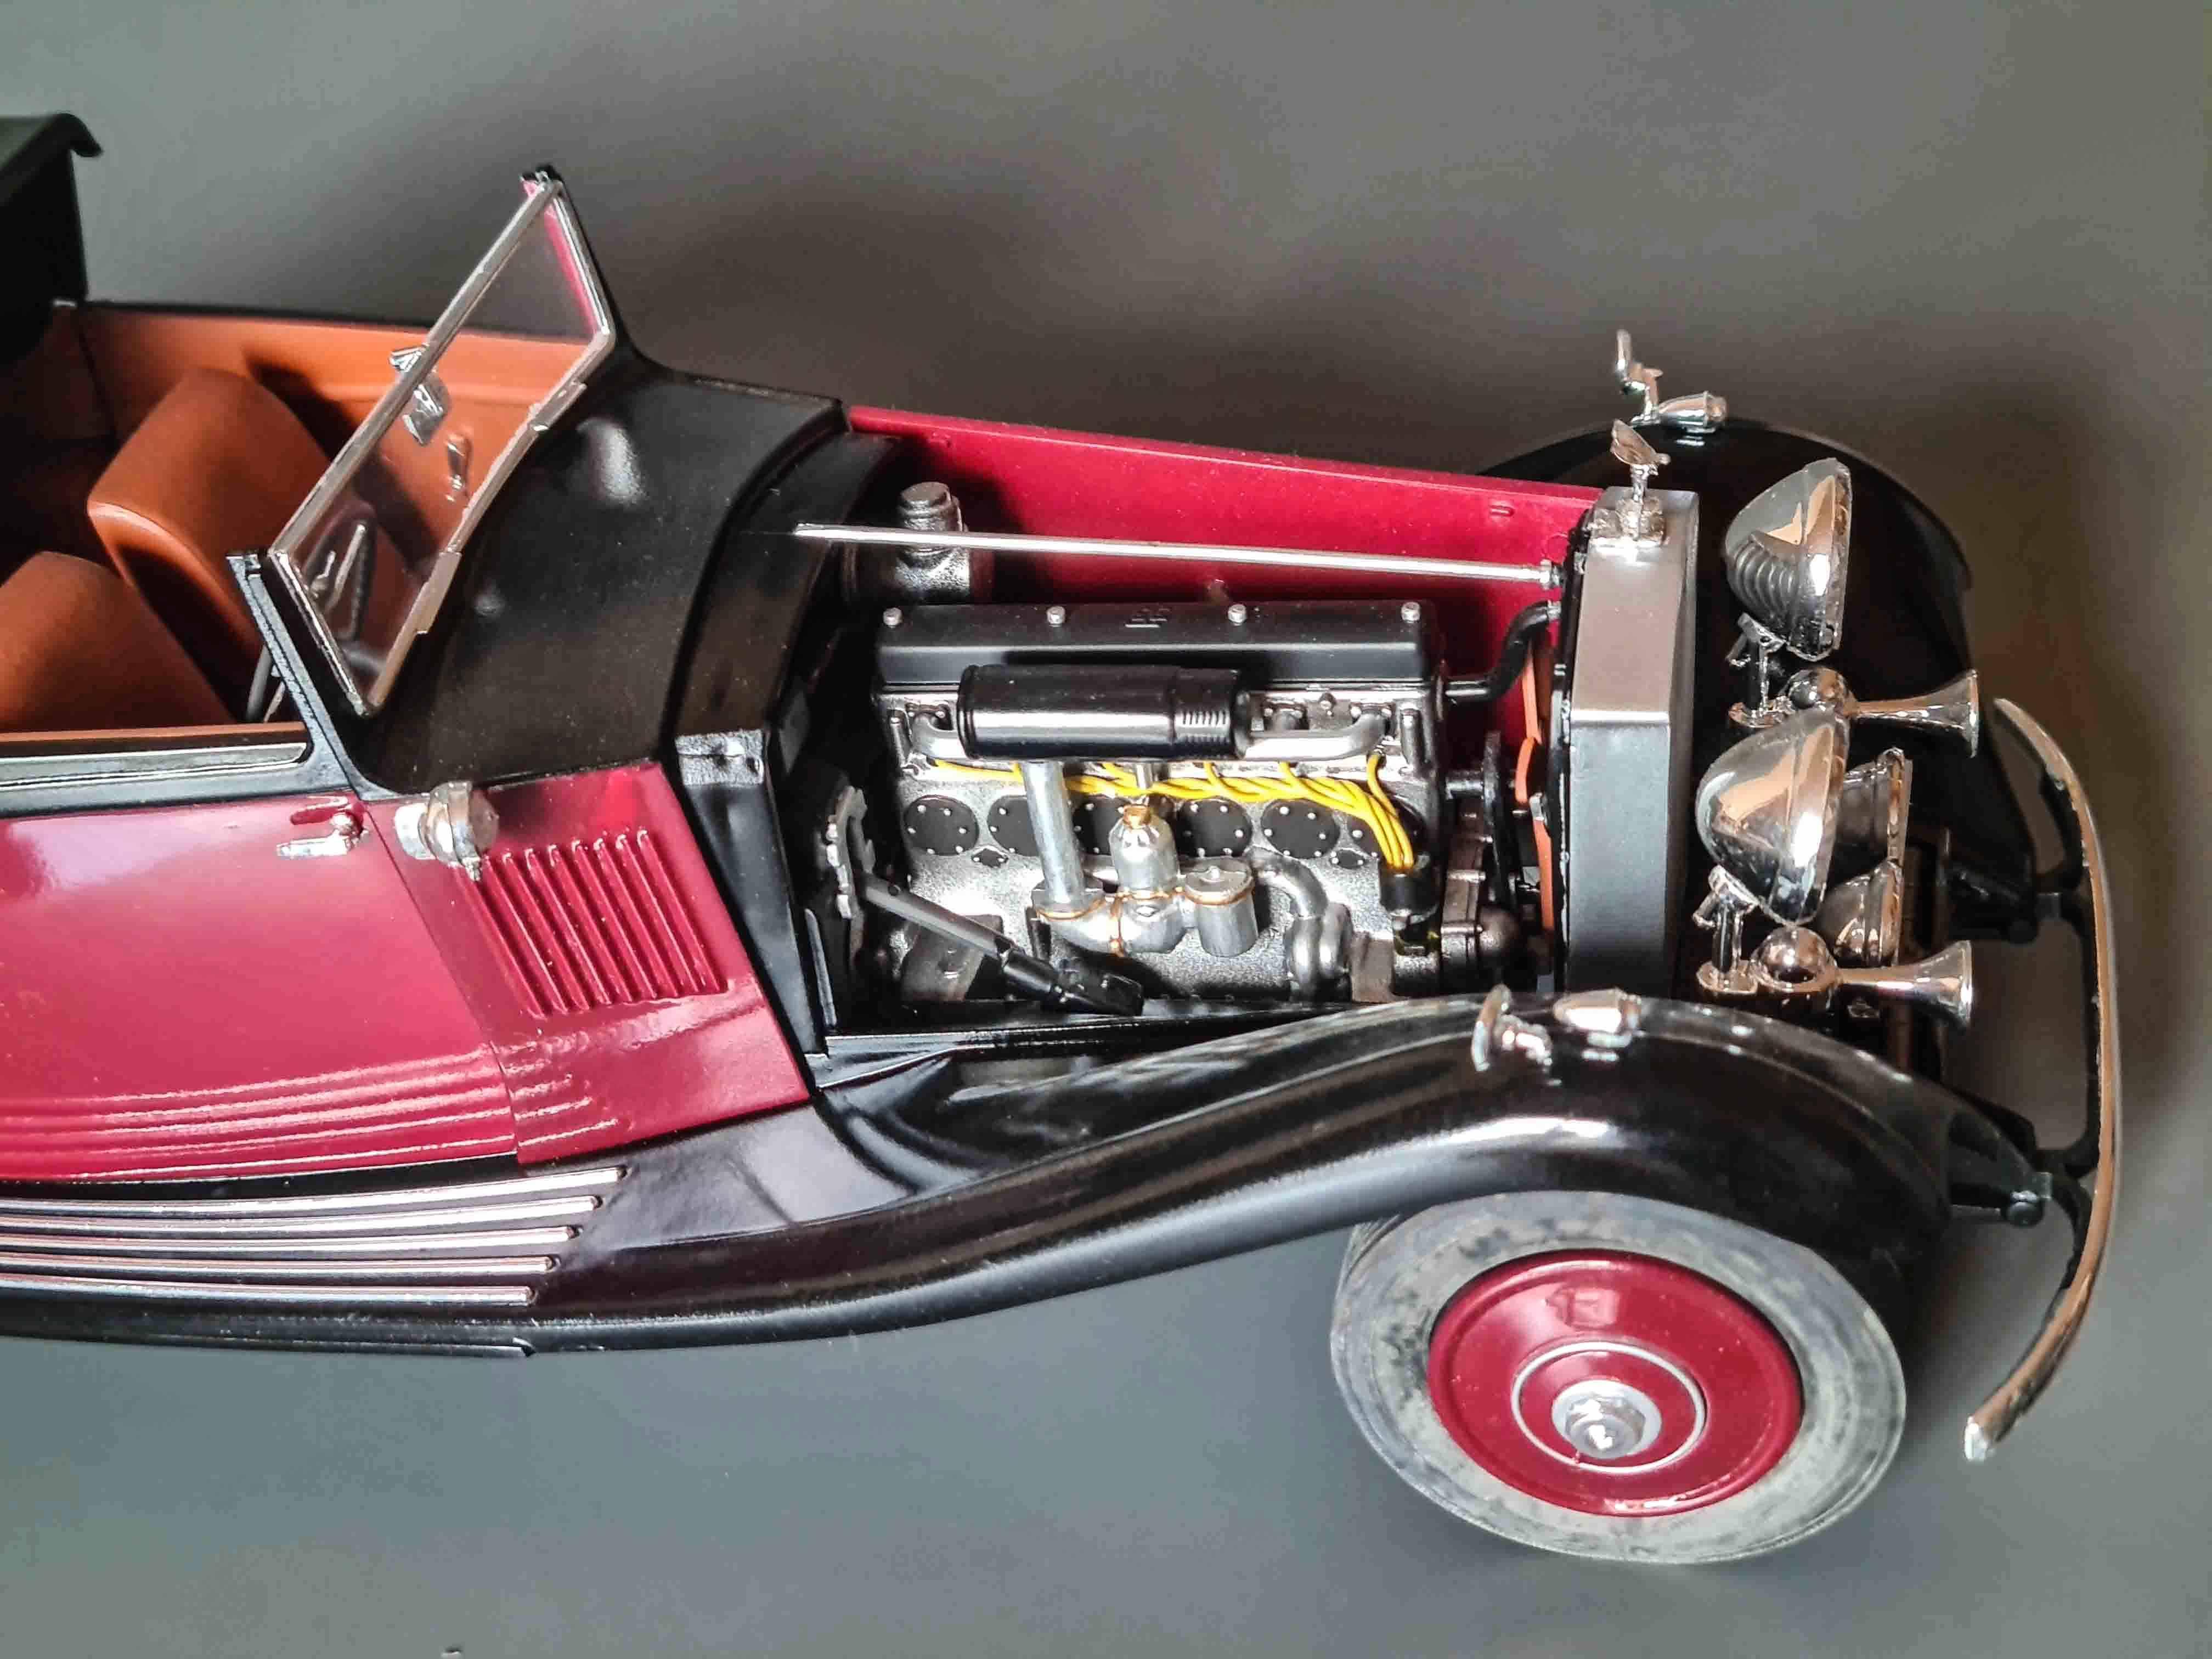
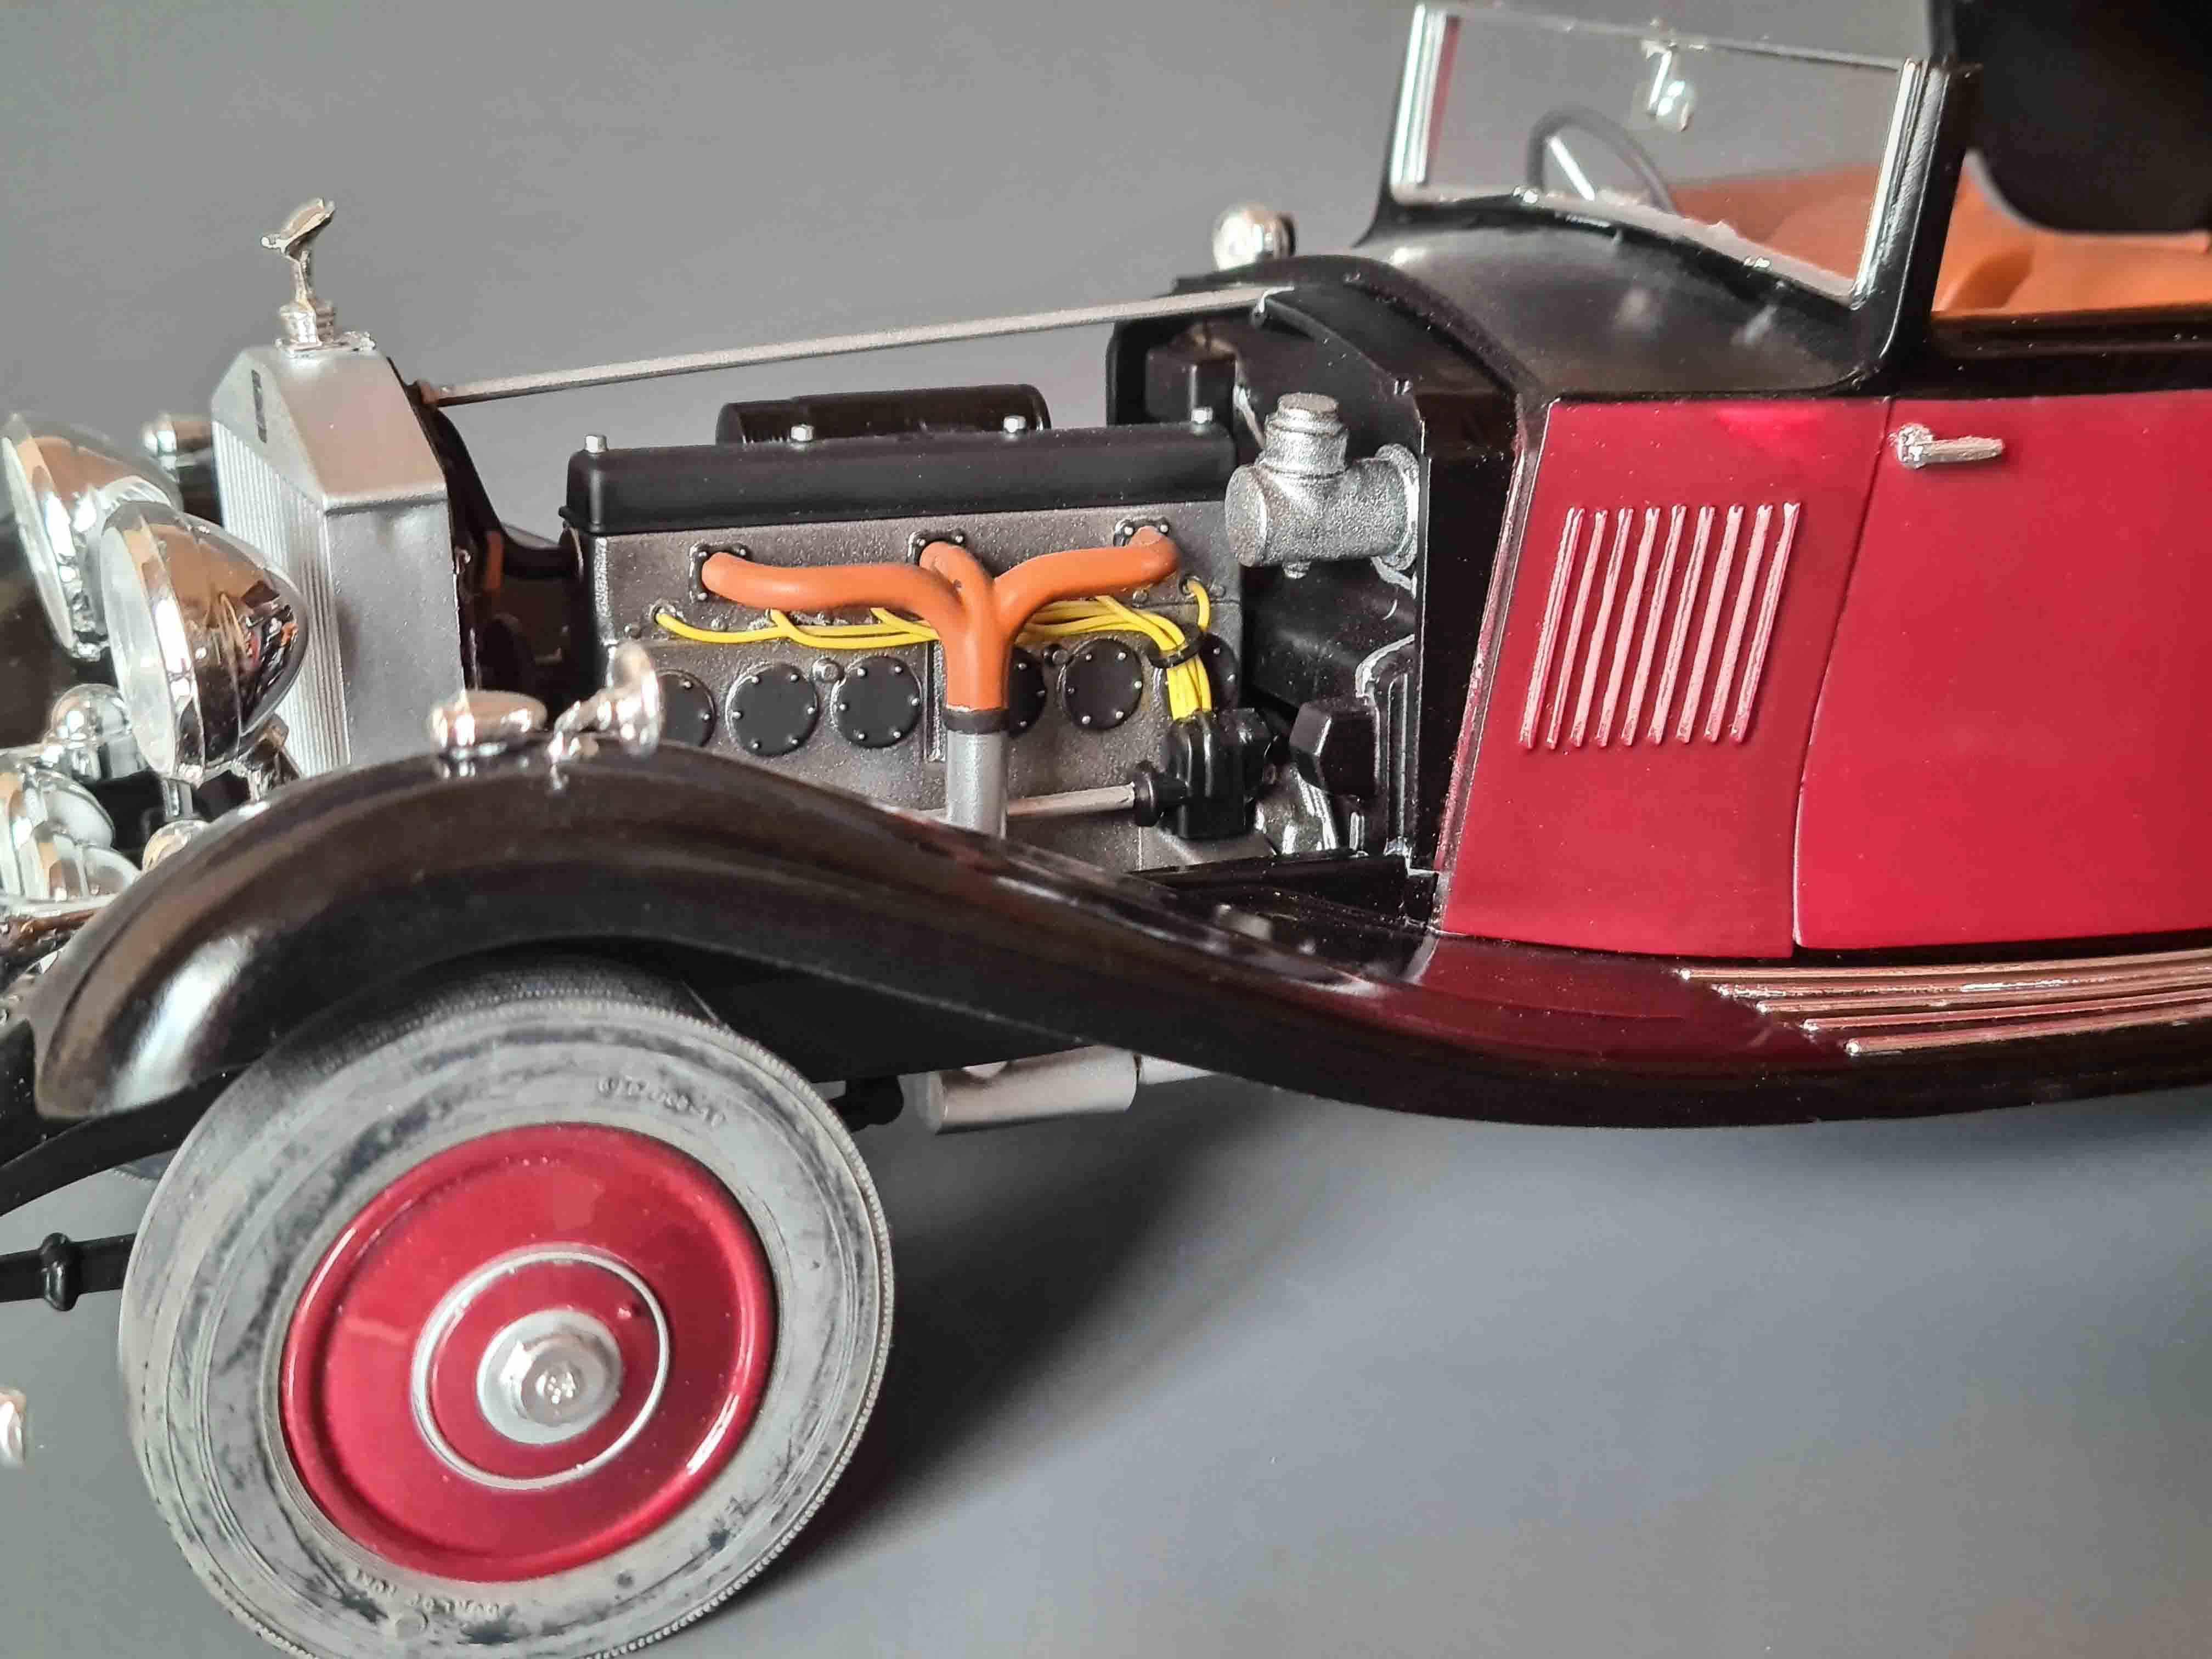
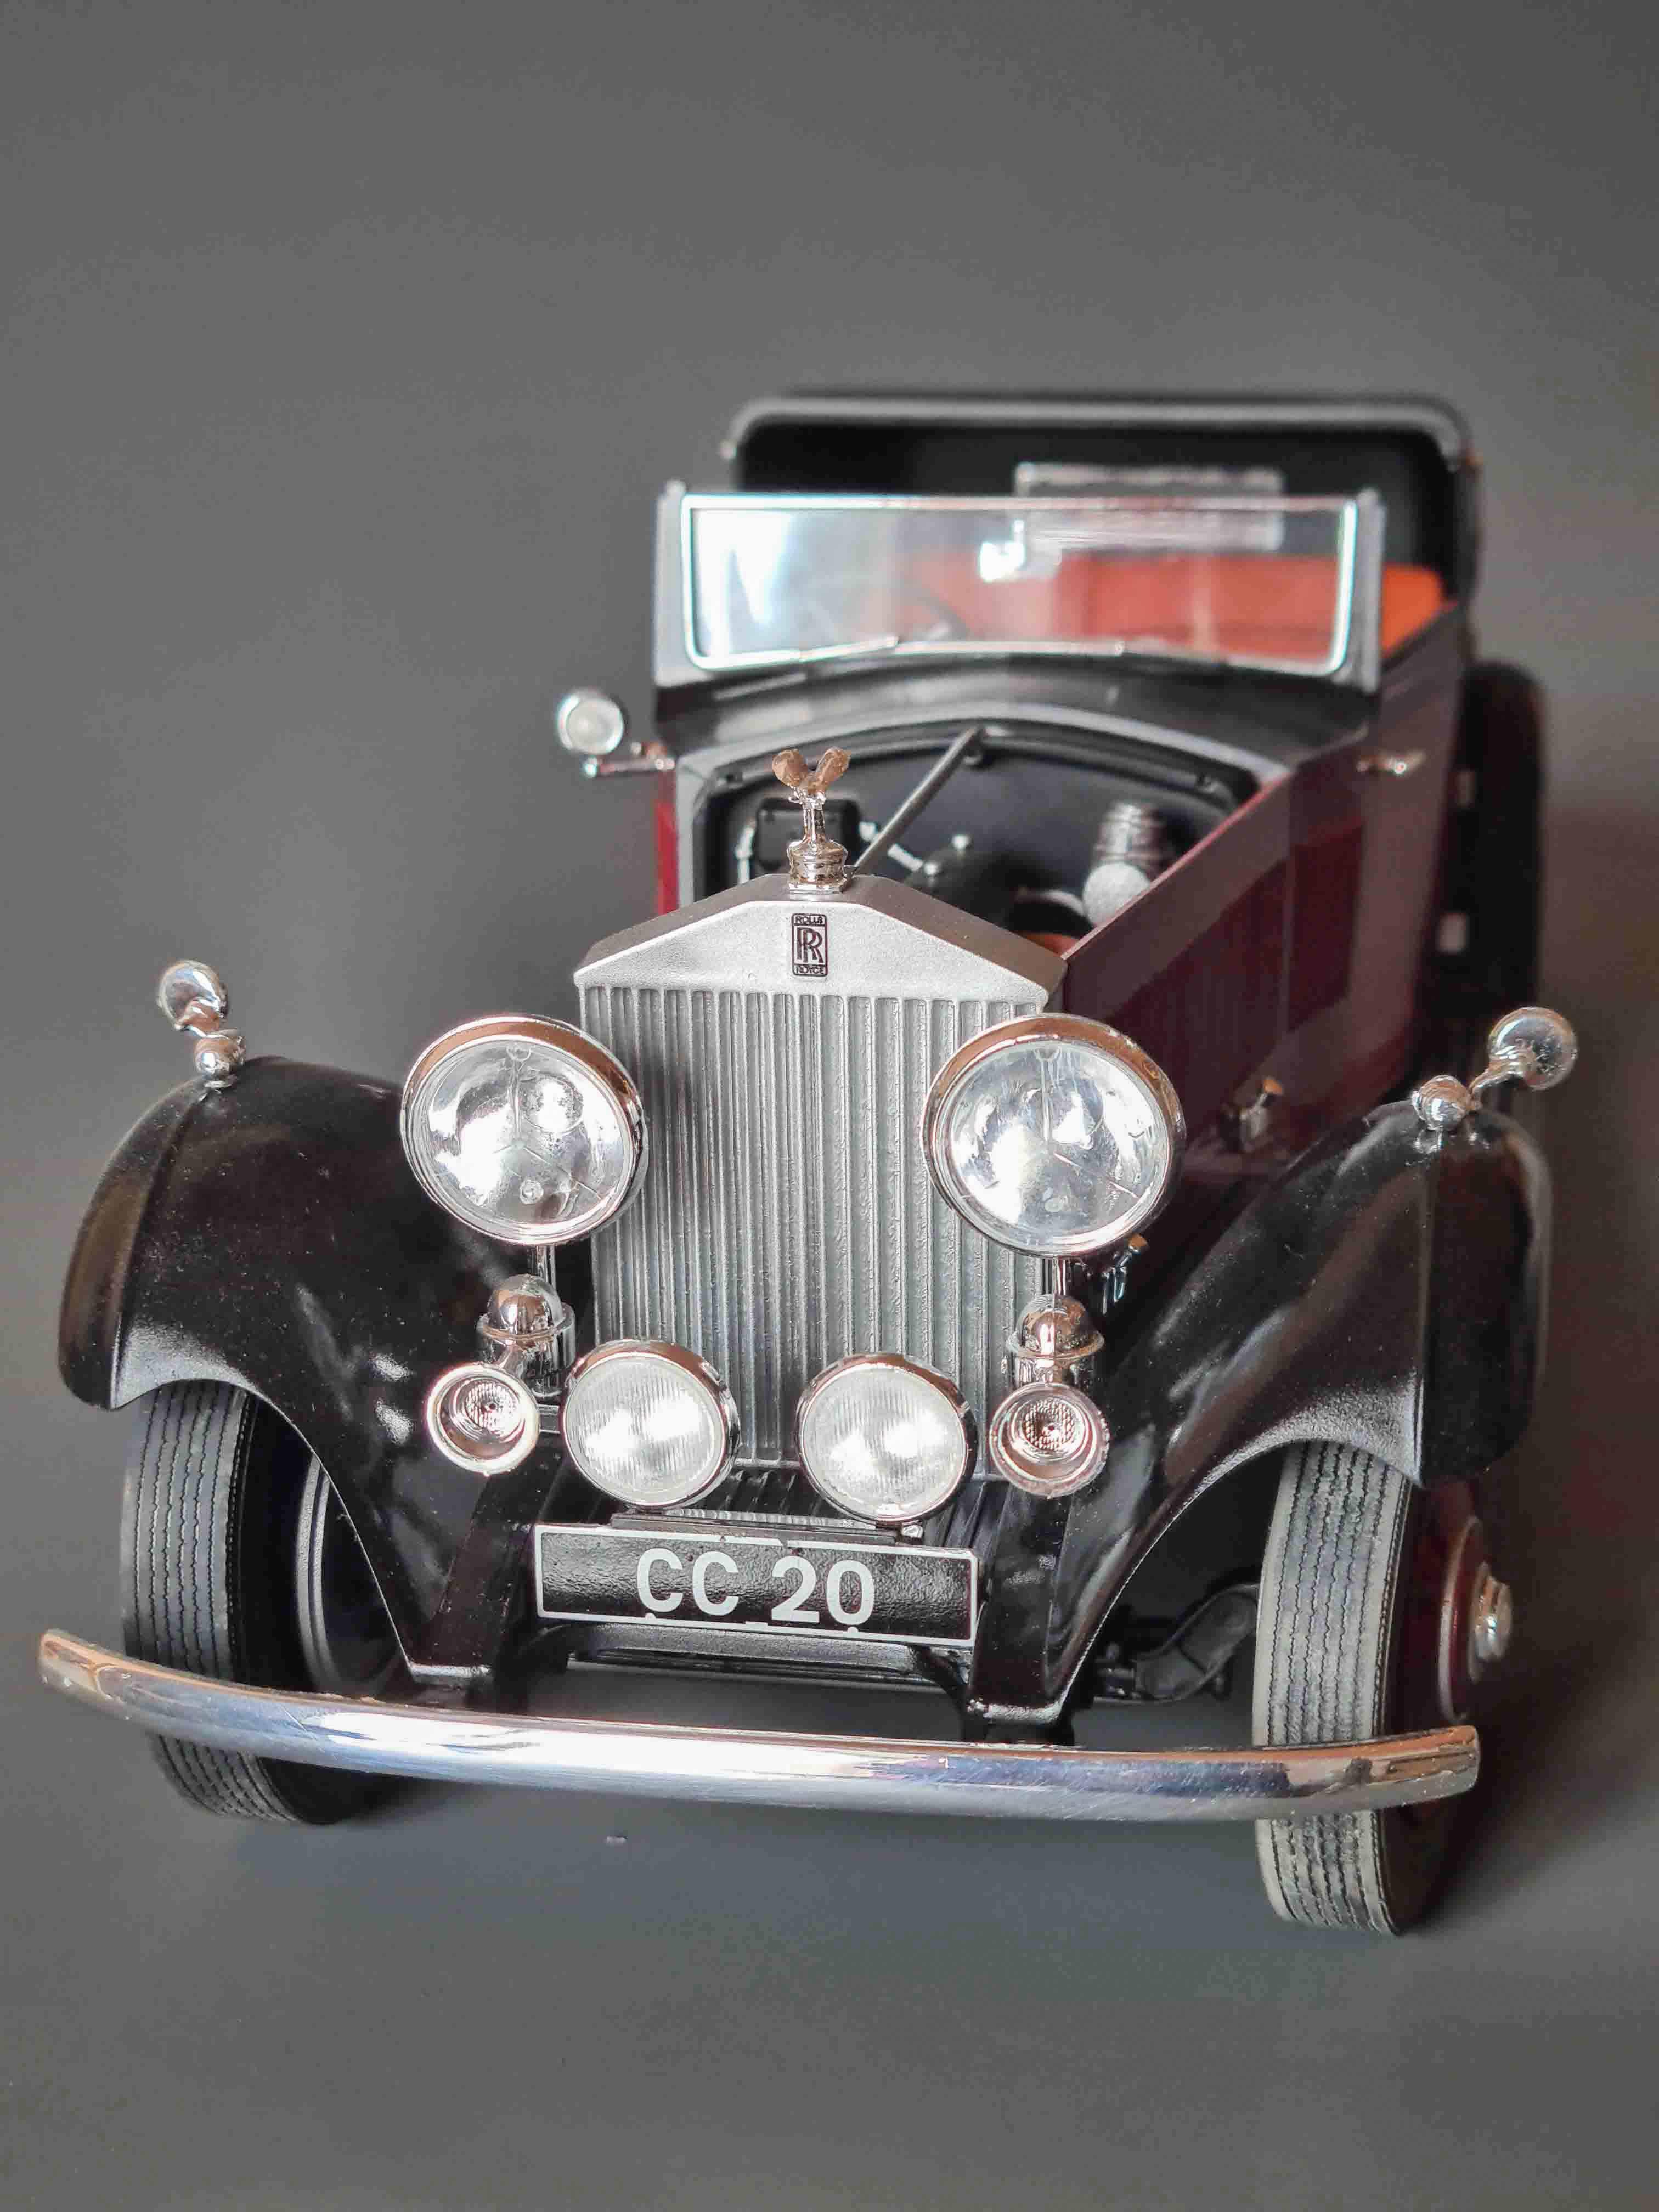
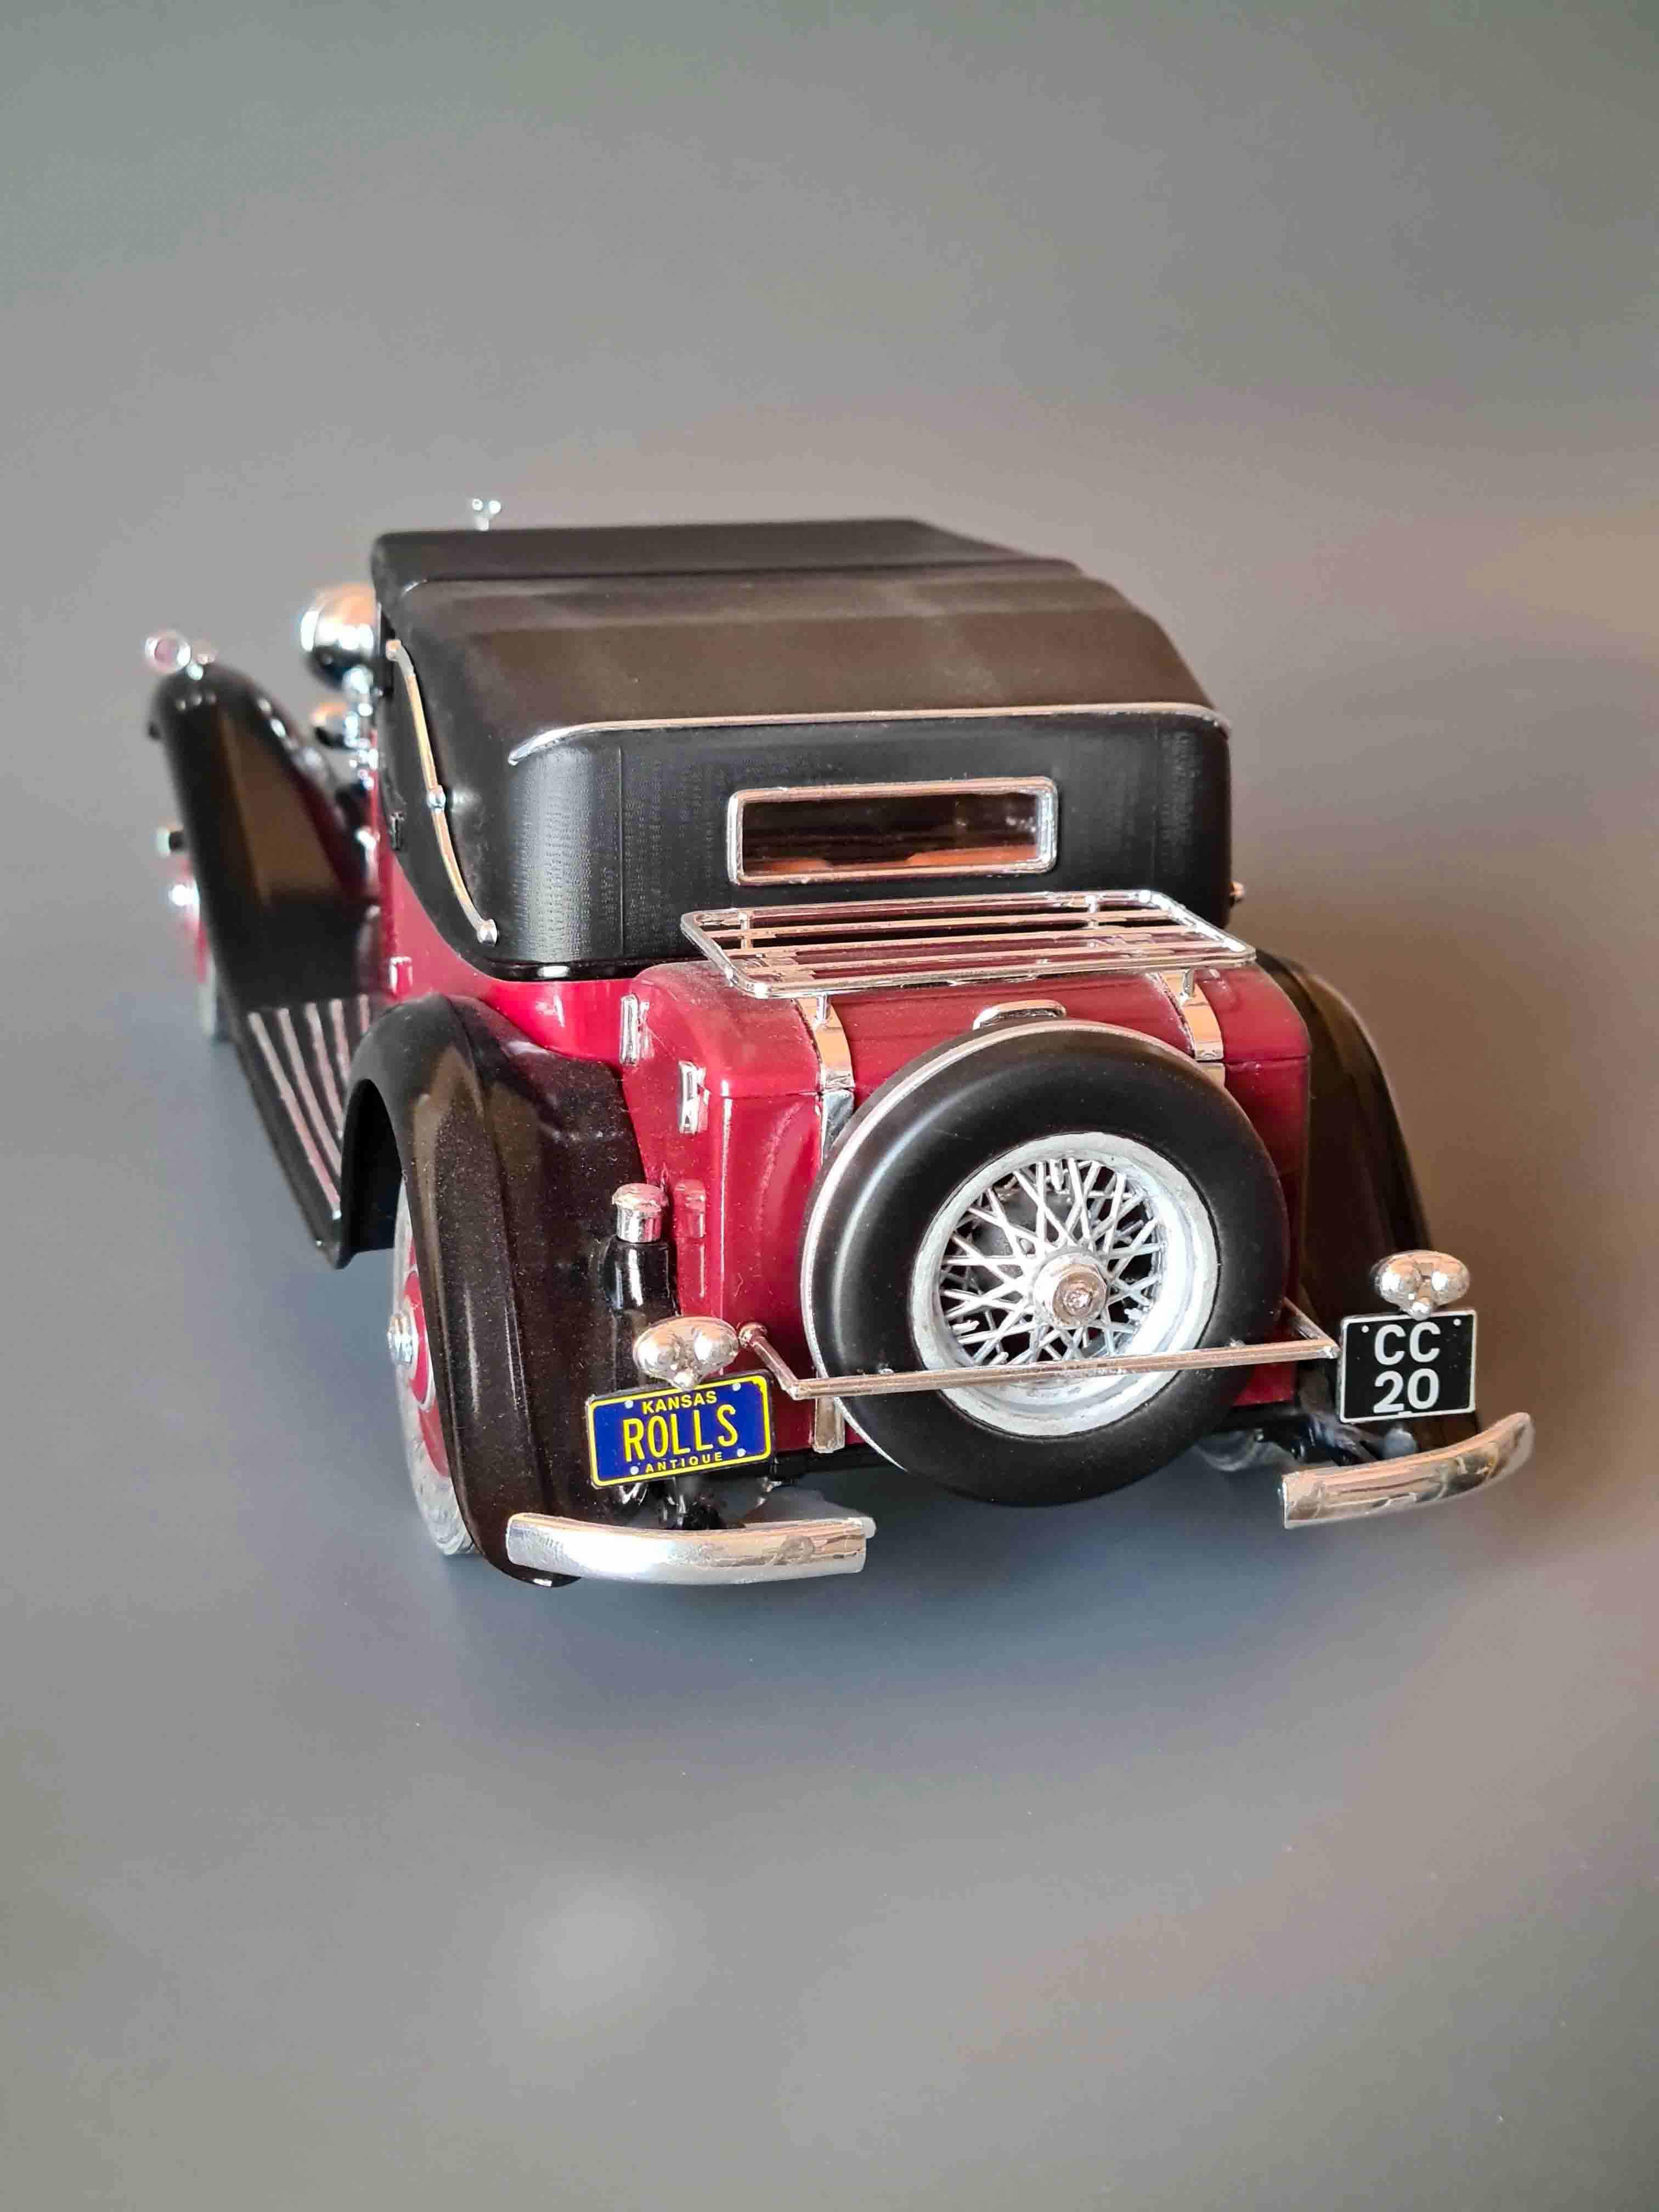
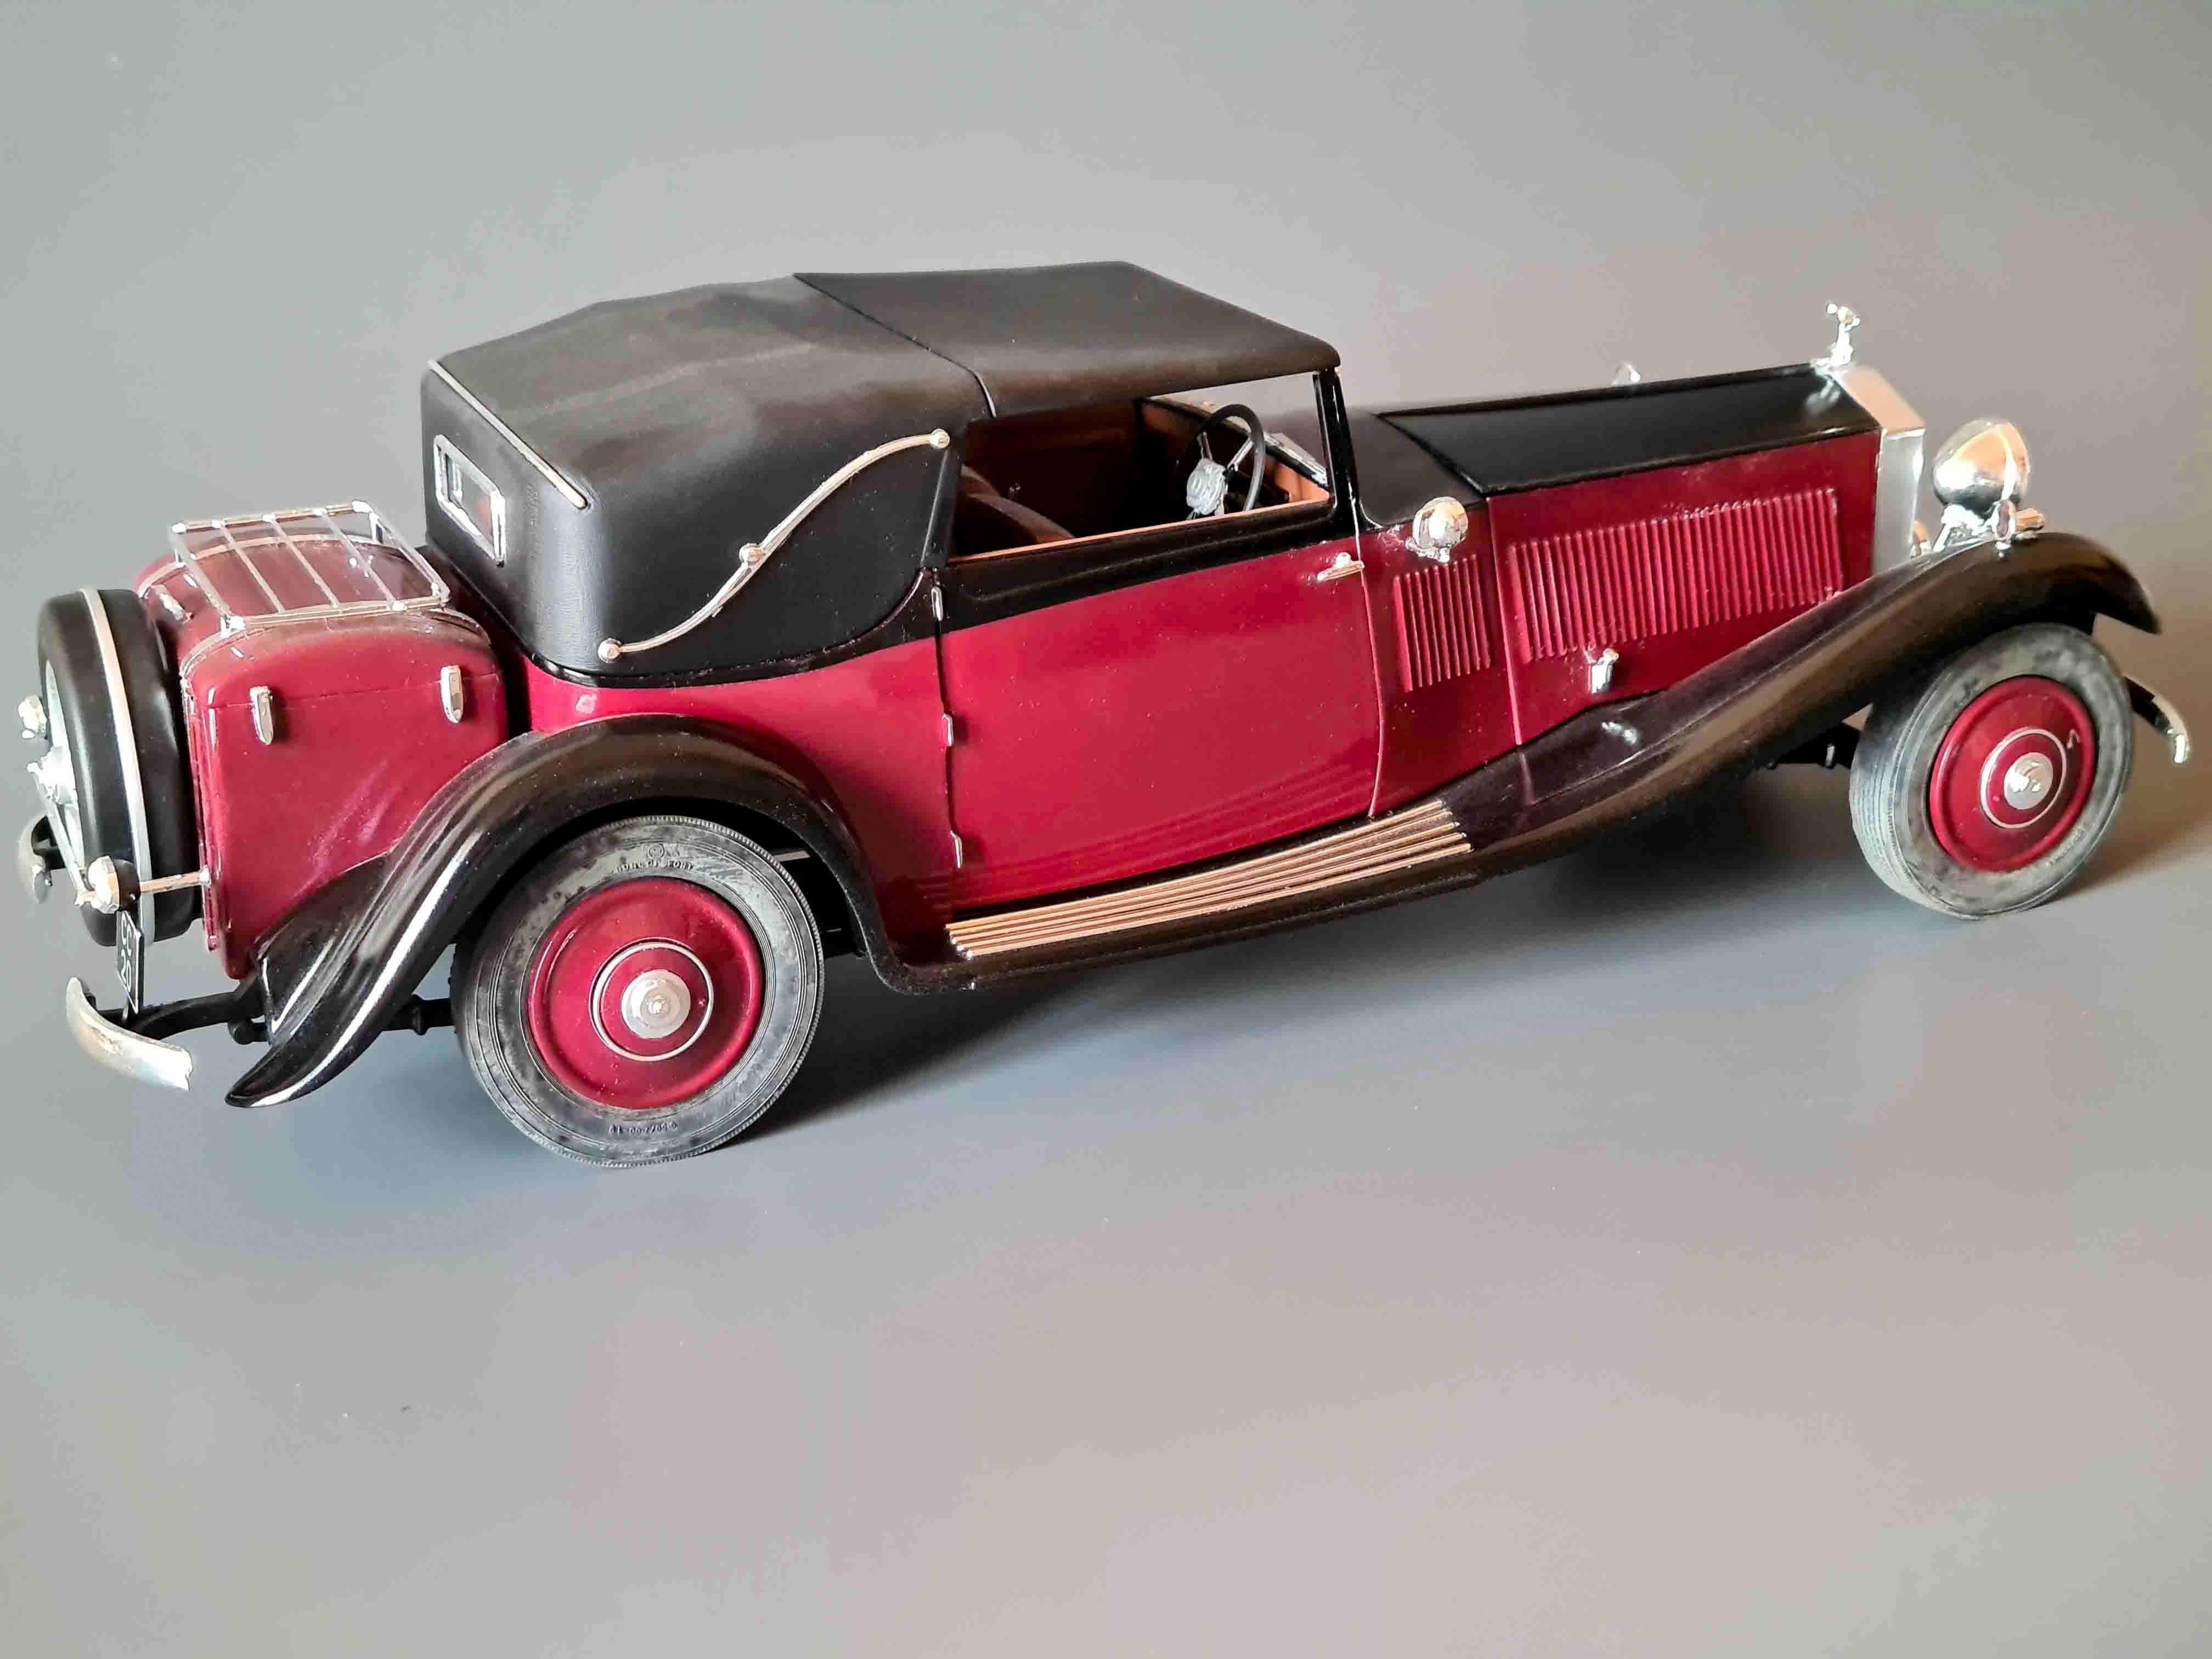
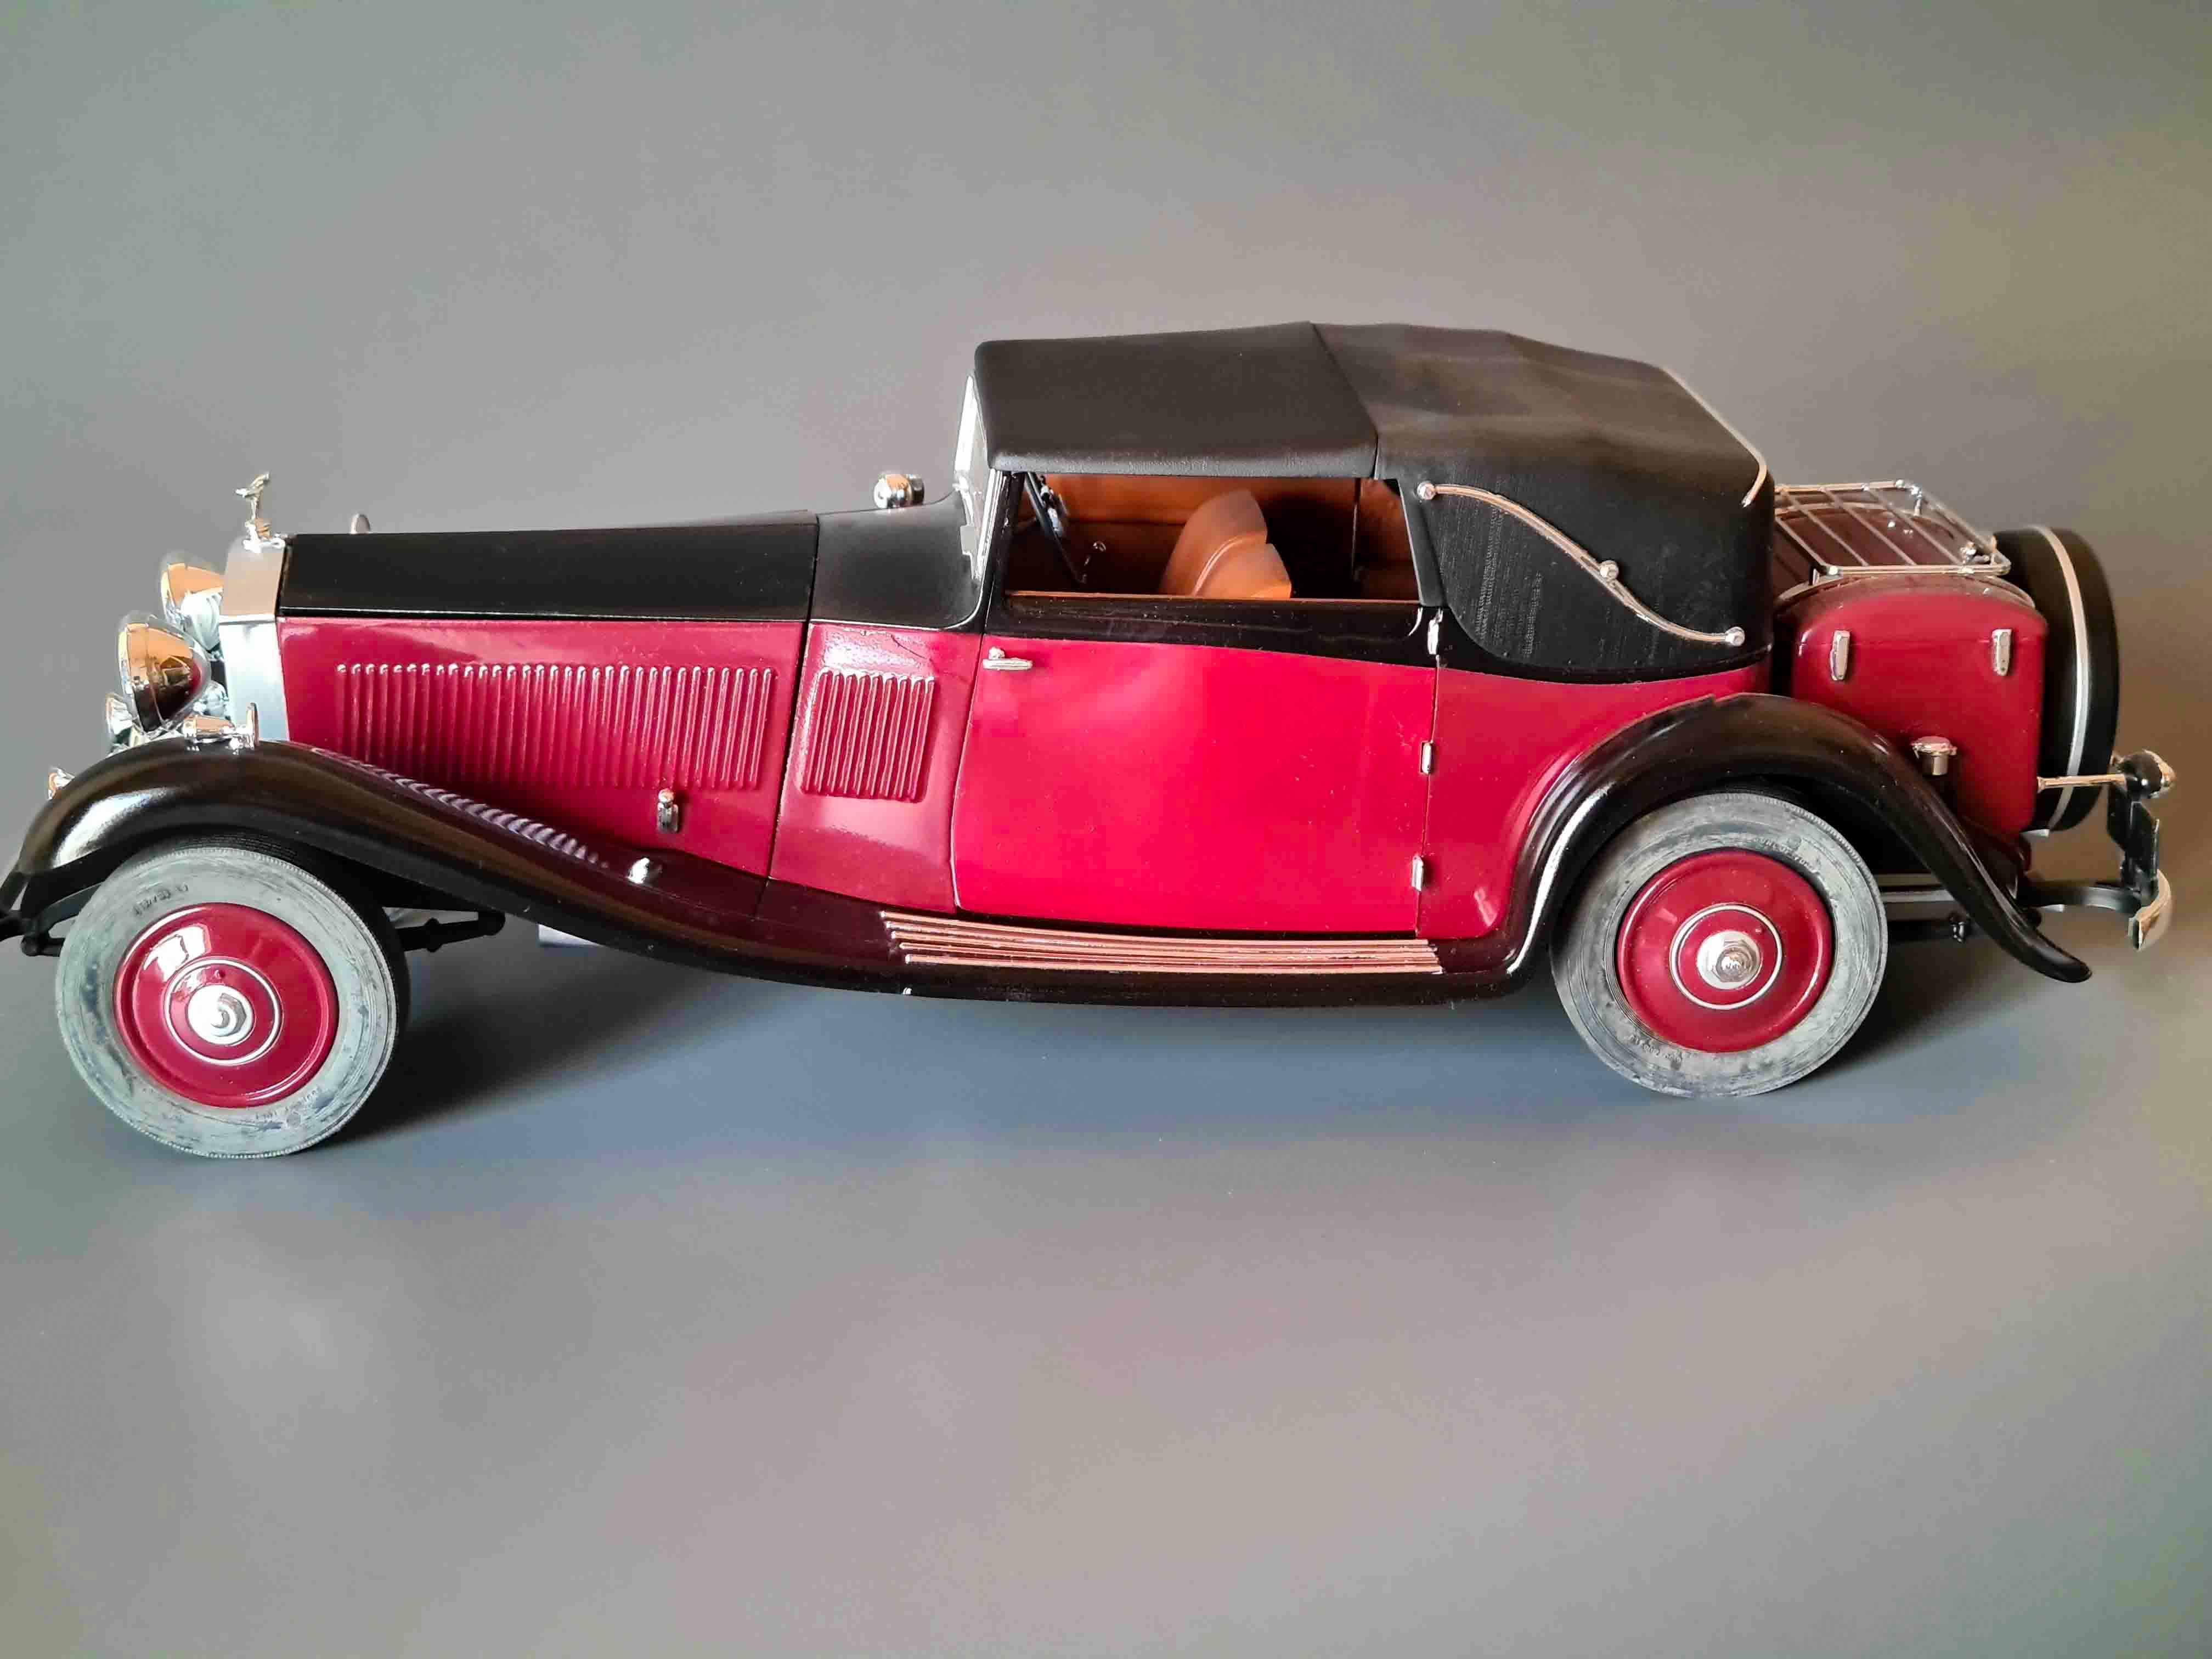
One of my first built model cars
- 11 replies
-
- 4
-
-
- rolls-royce
- 1/16 scale
- (and 1 more)
-
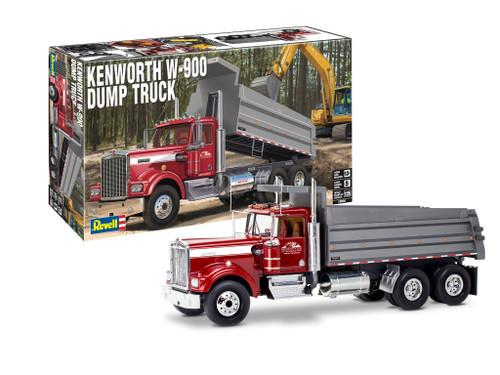
This just caught my eye… https://www.megahobby.com/products/kenworth-w900-dump-truck-1-25-revell.html
-
First stage of painting on BM Camaro is done. I shot the auto-touch up white yesterday and the MCW rally green today. Plans call for installing the decals then clearing it with some Tamiya TS-13. Thanks for looking all comments welcomed.
-
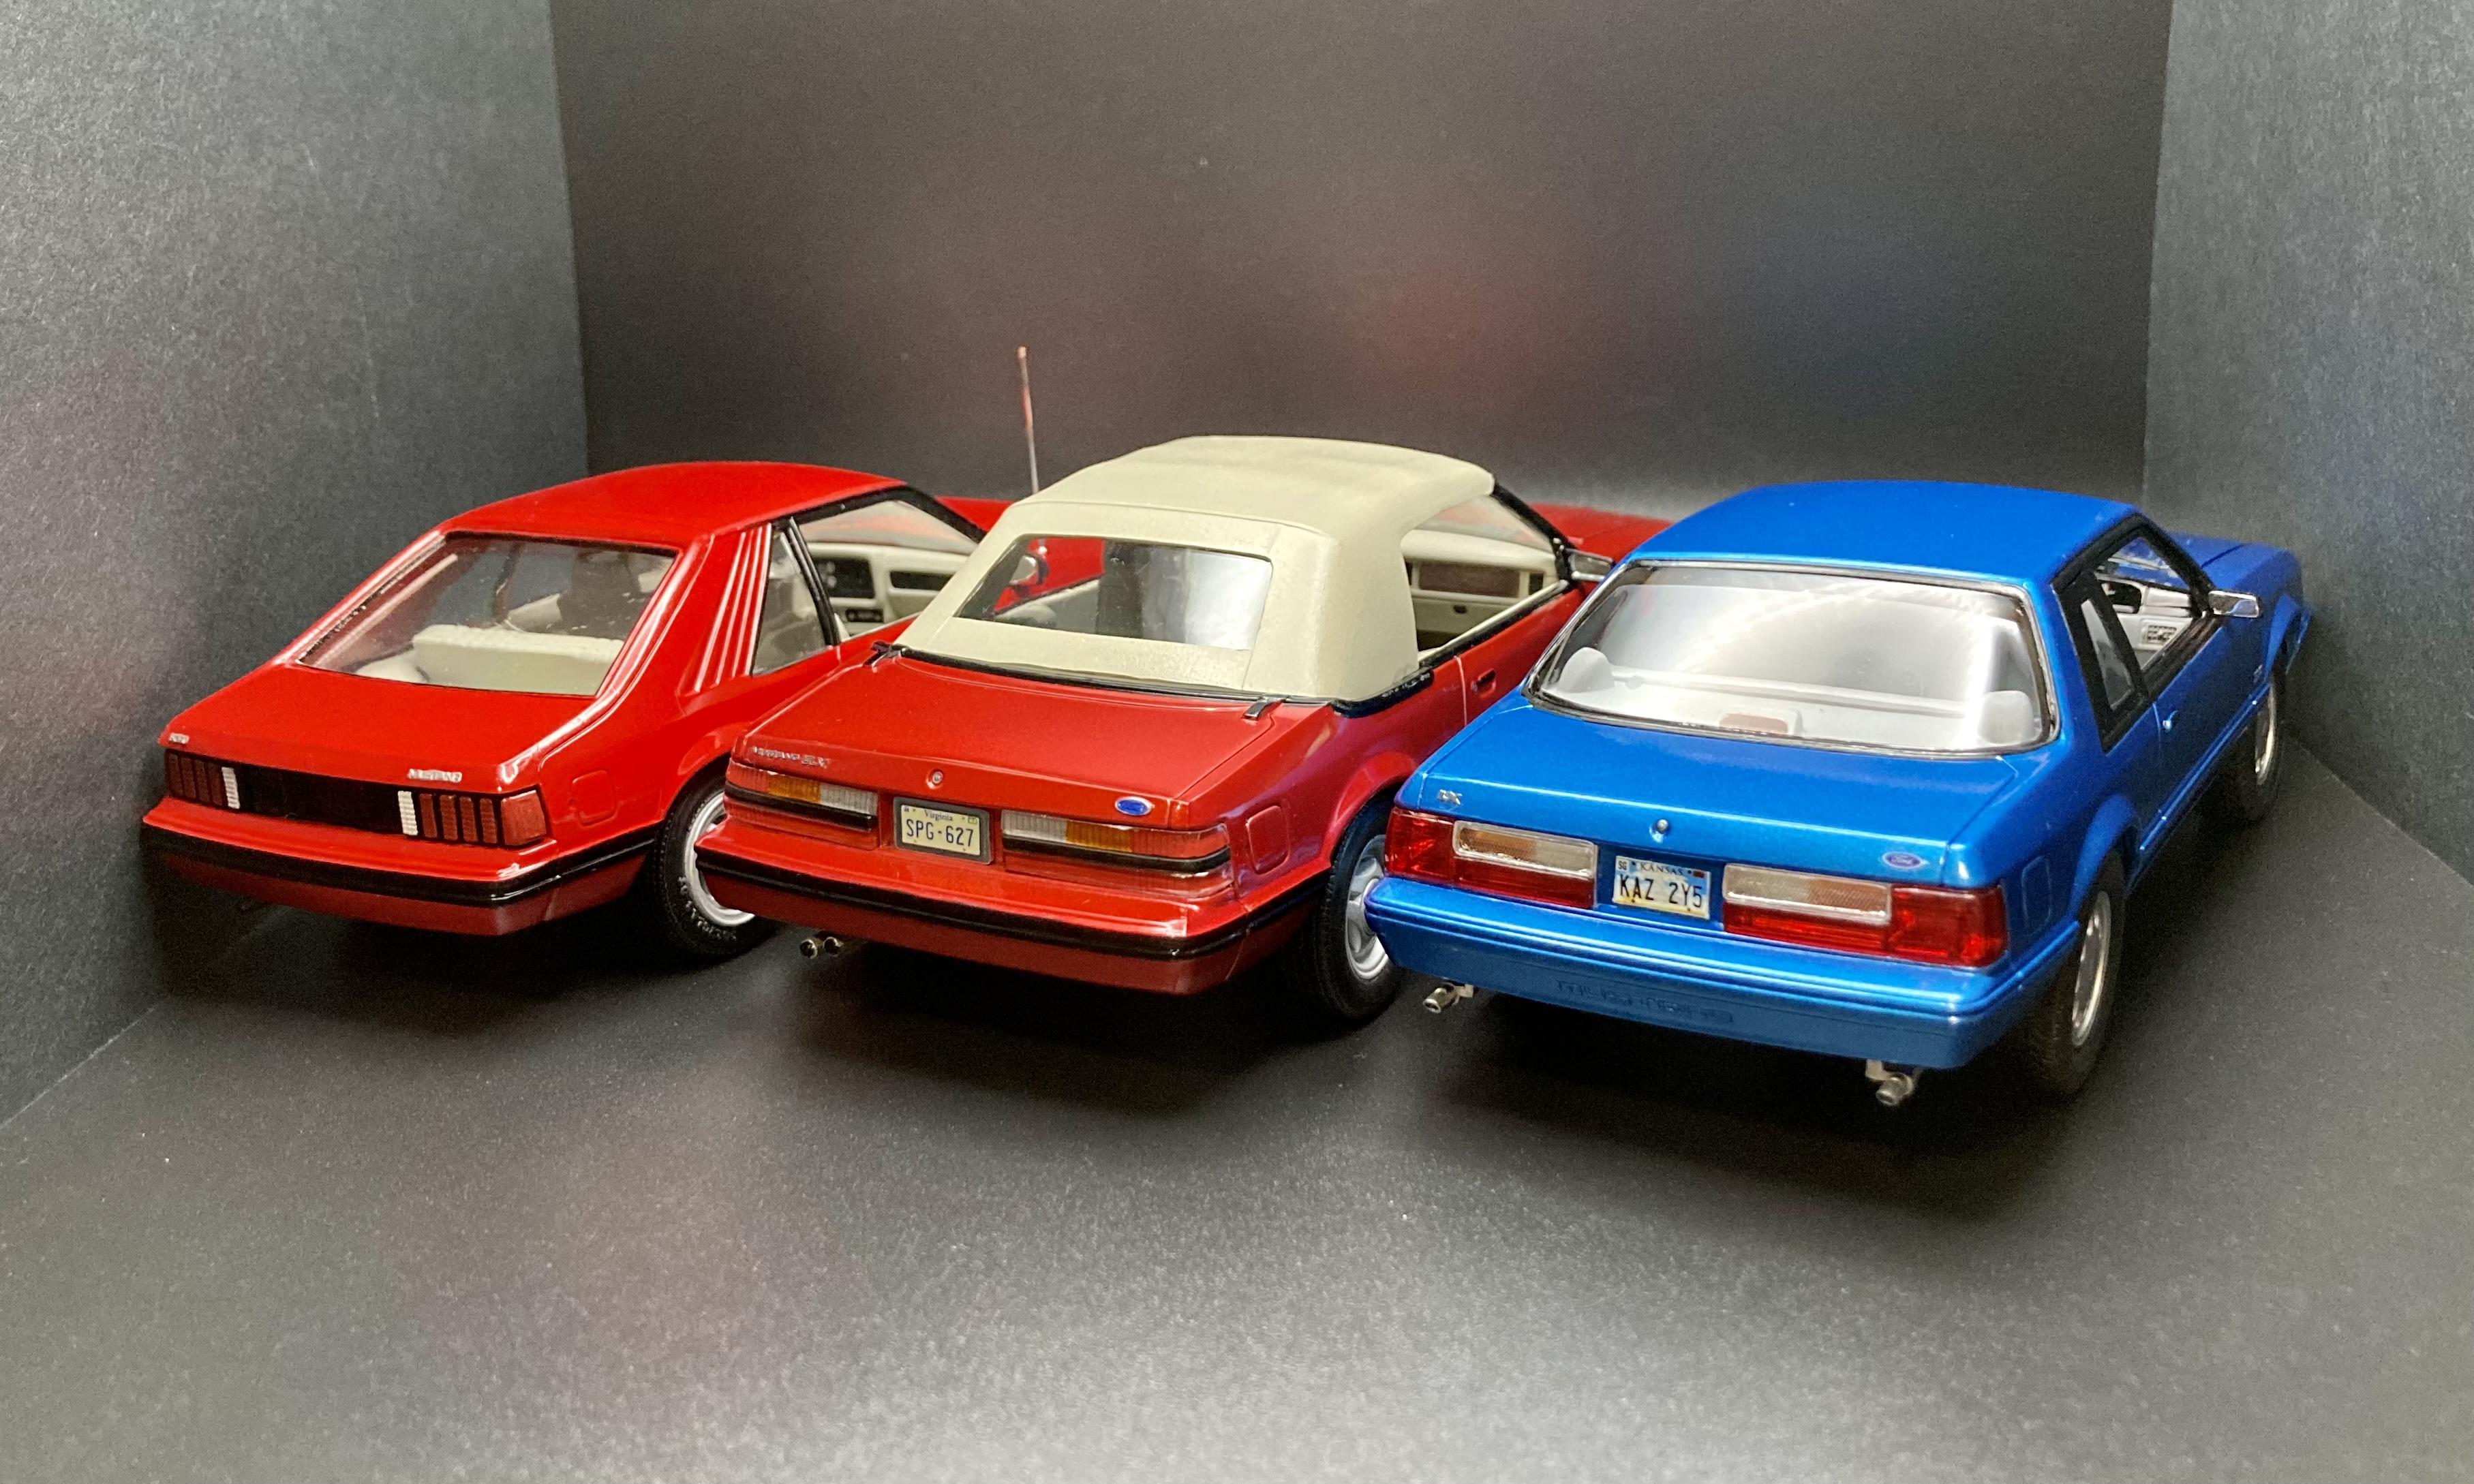
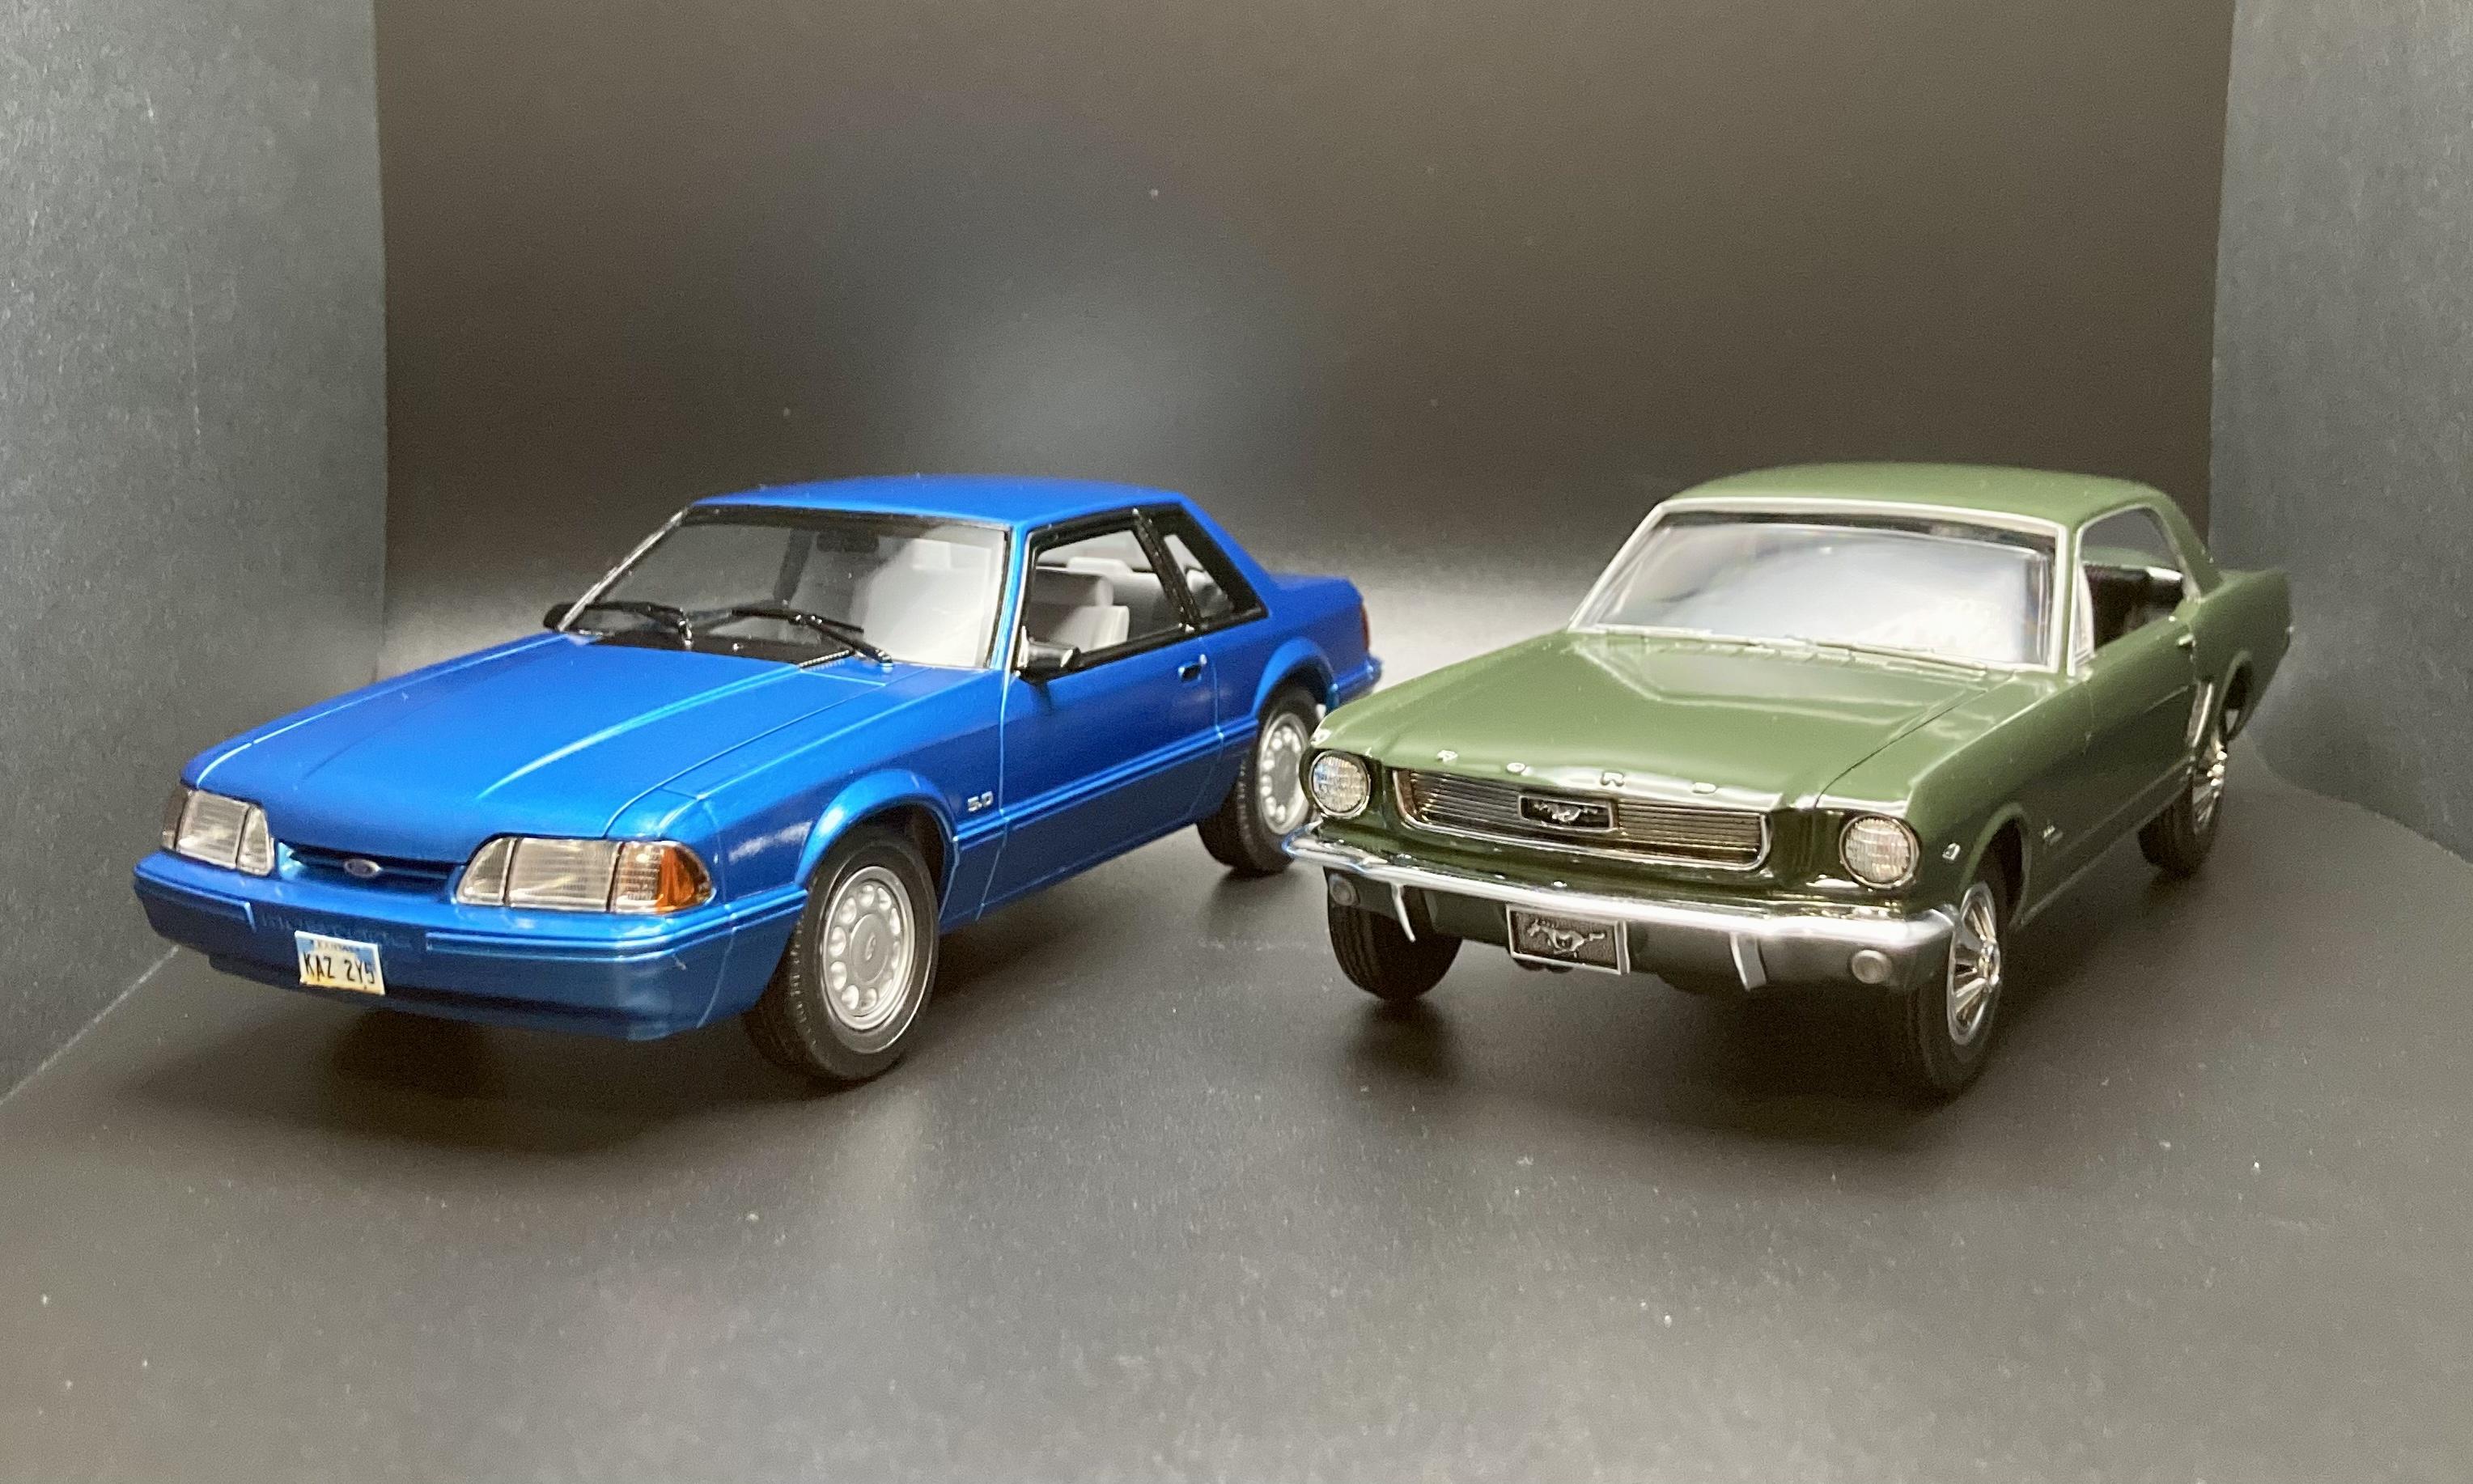
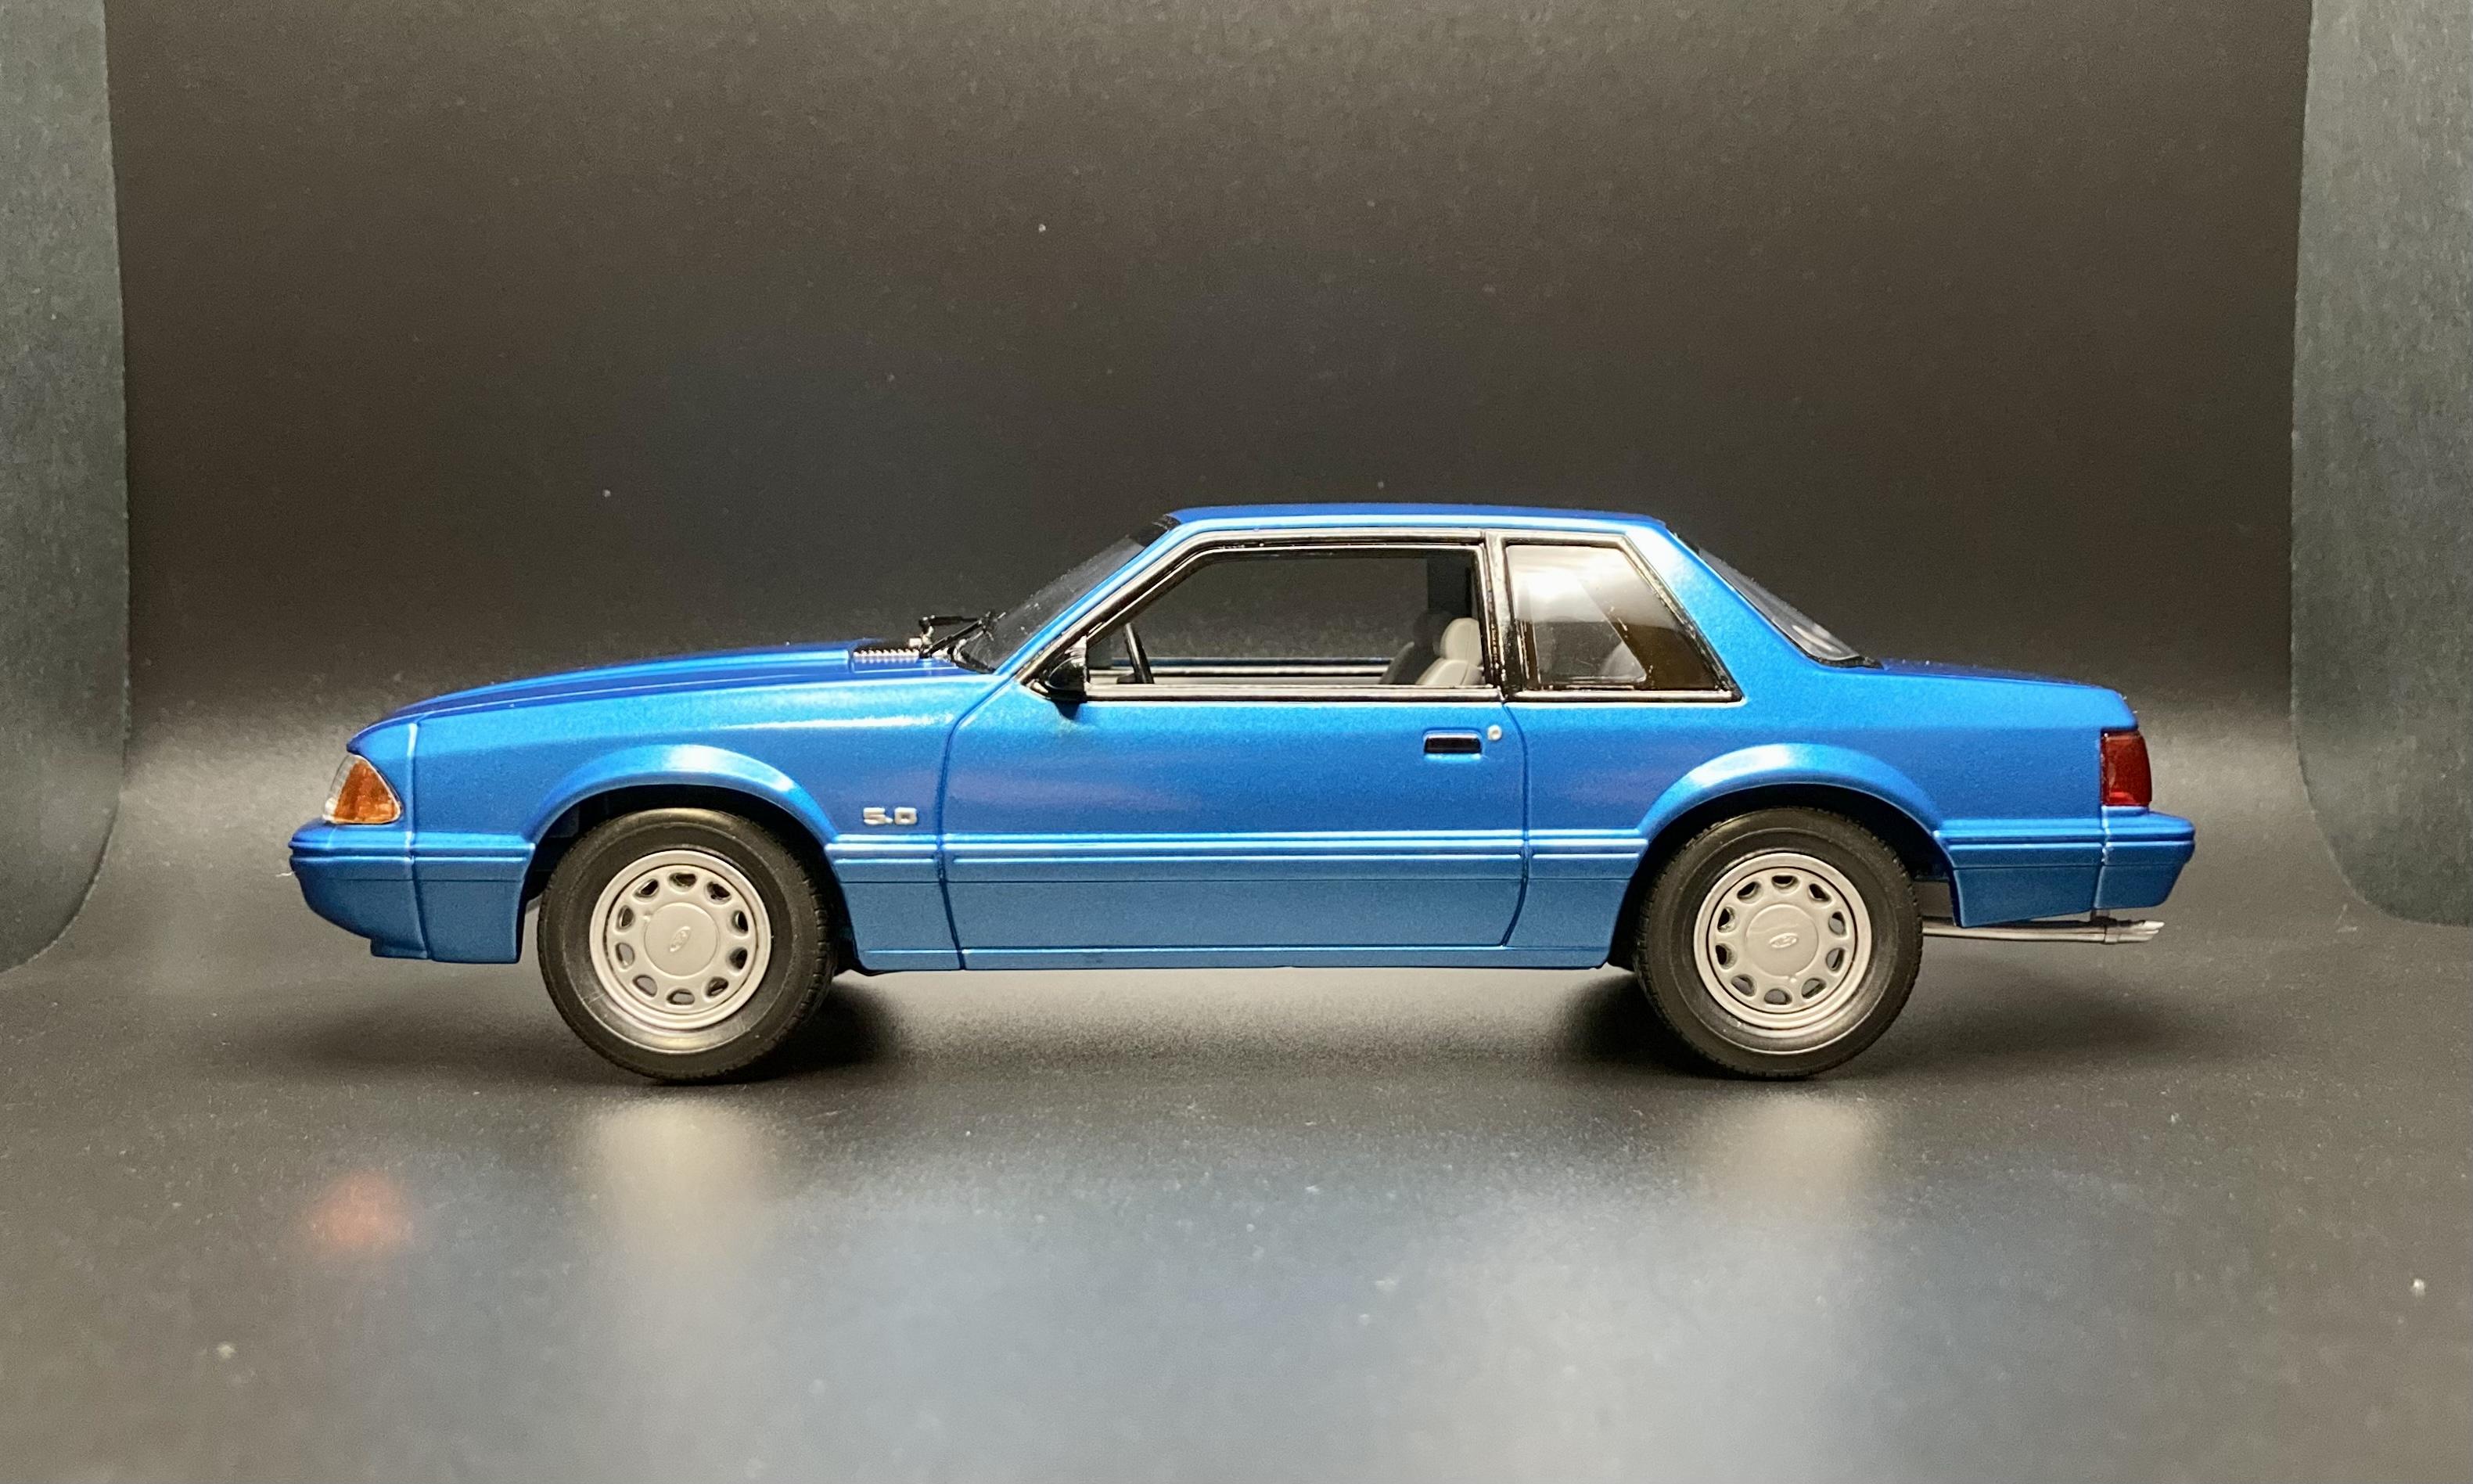
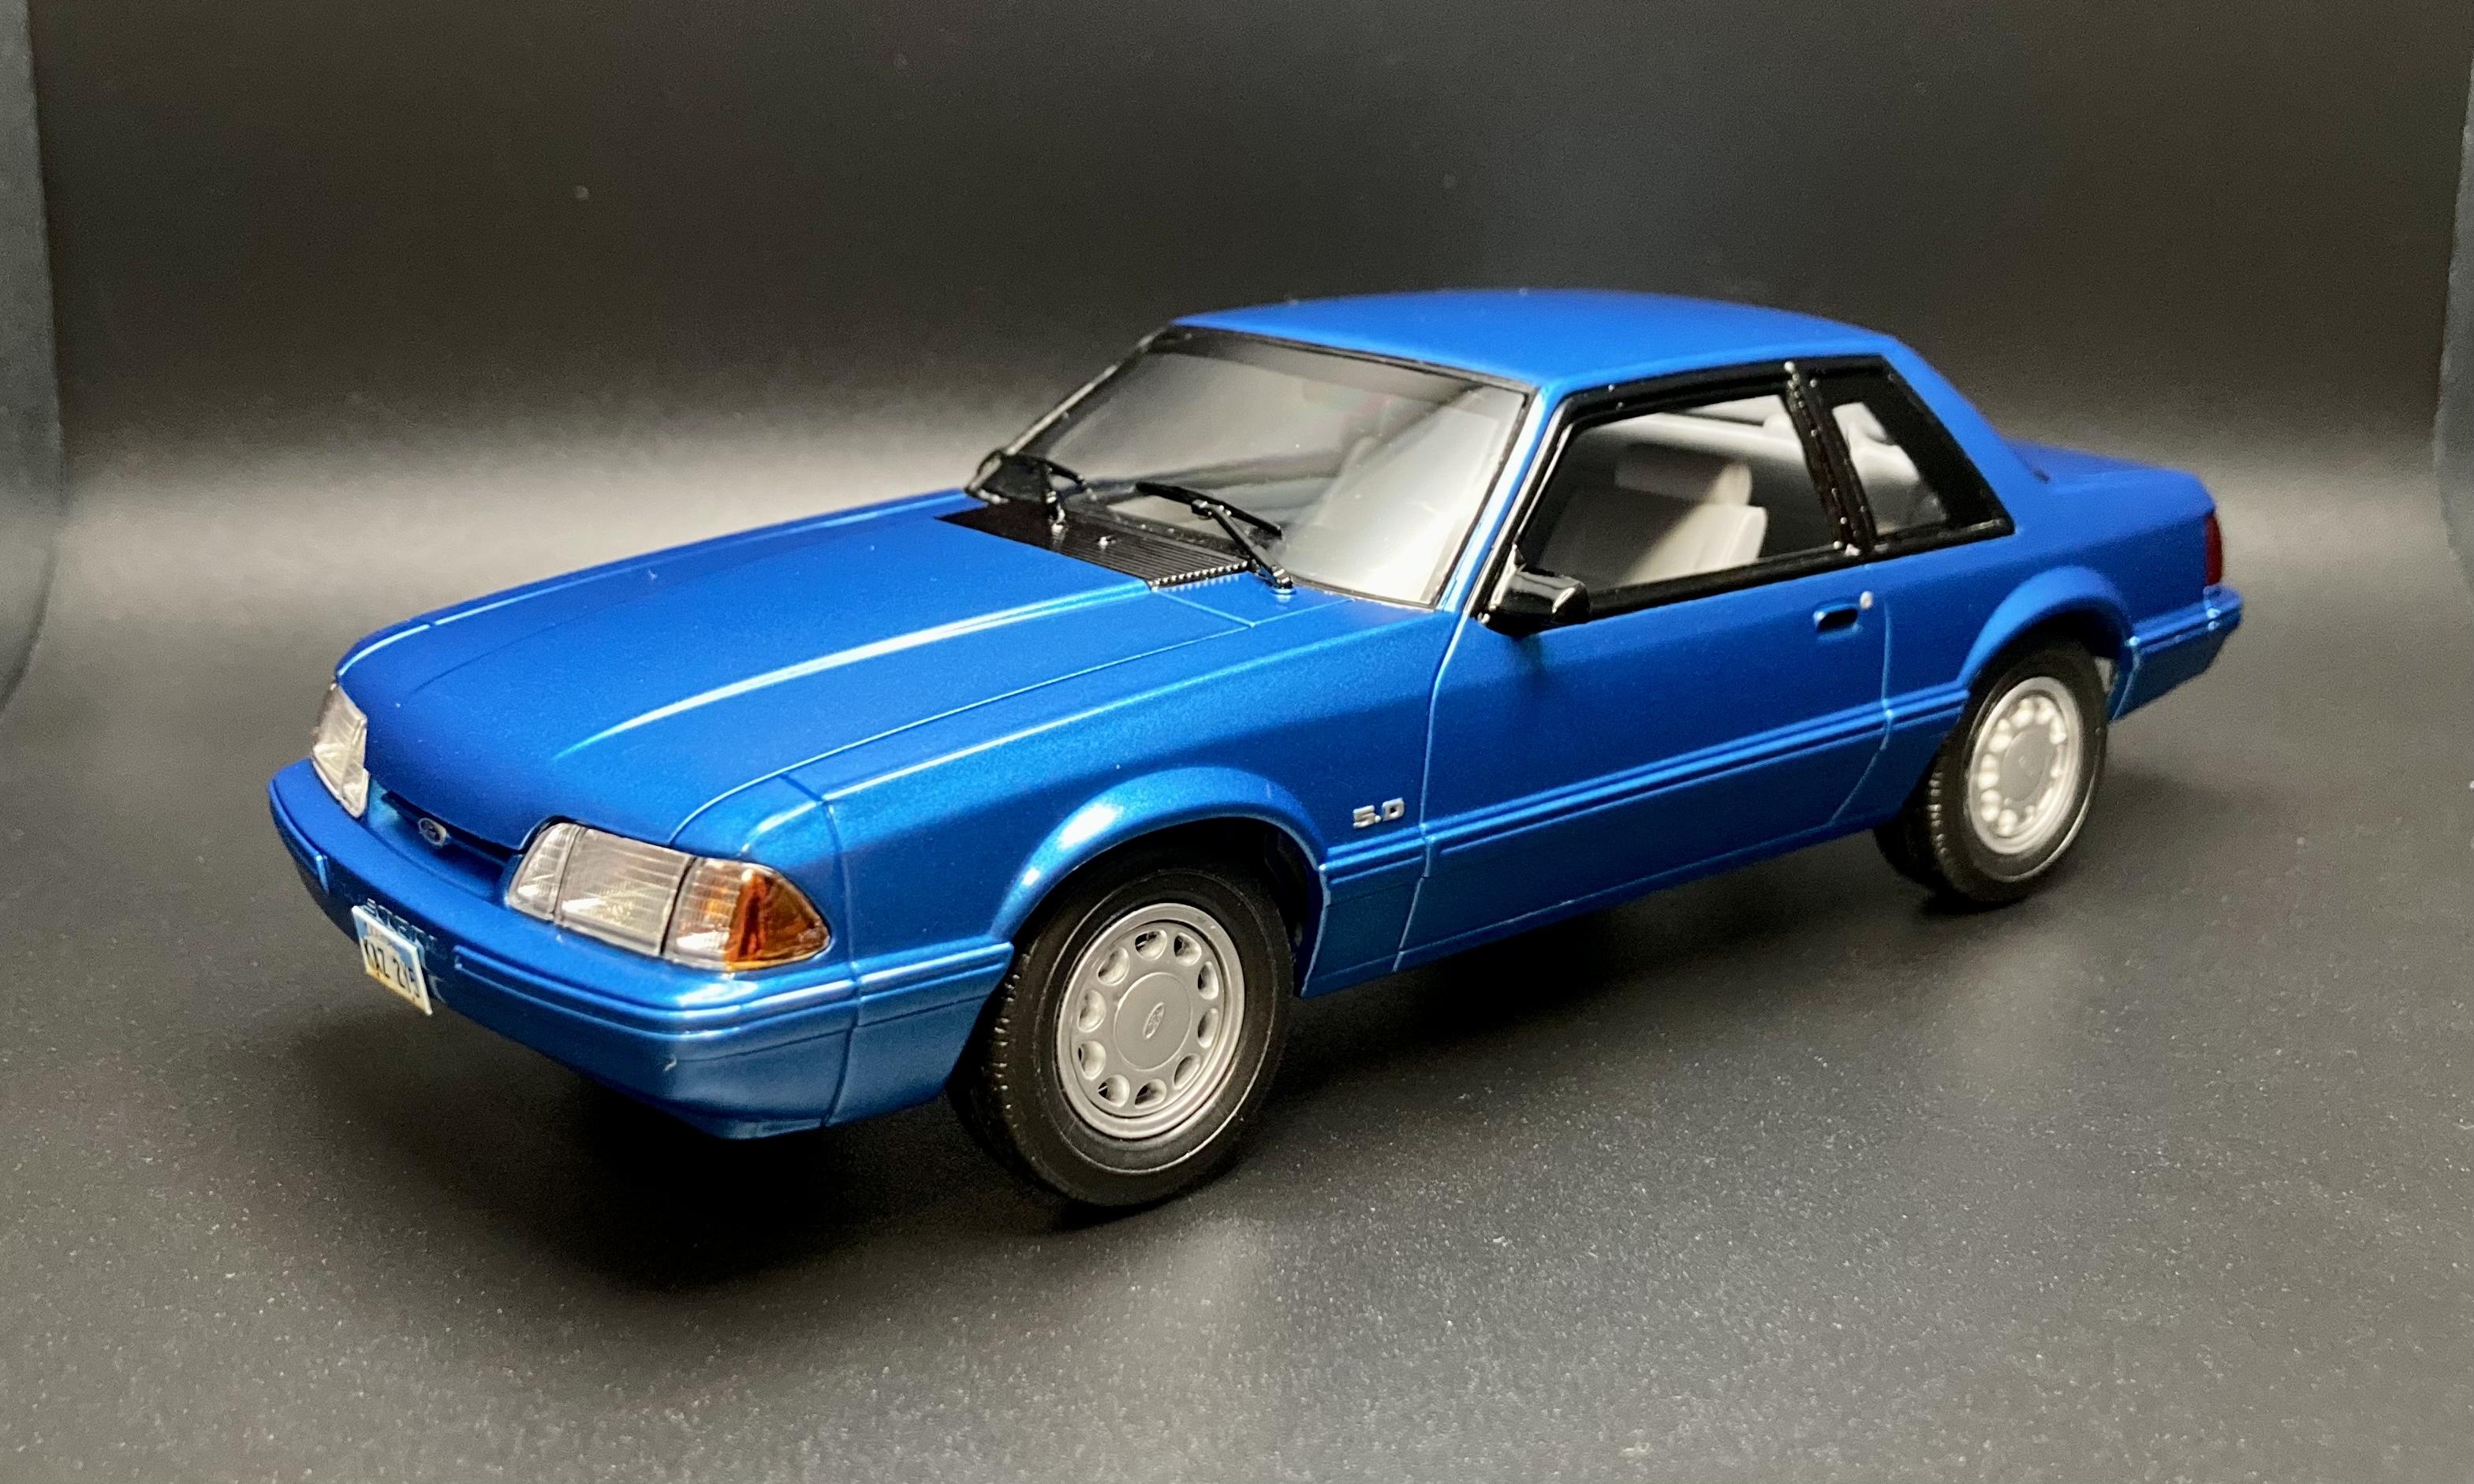
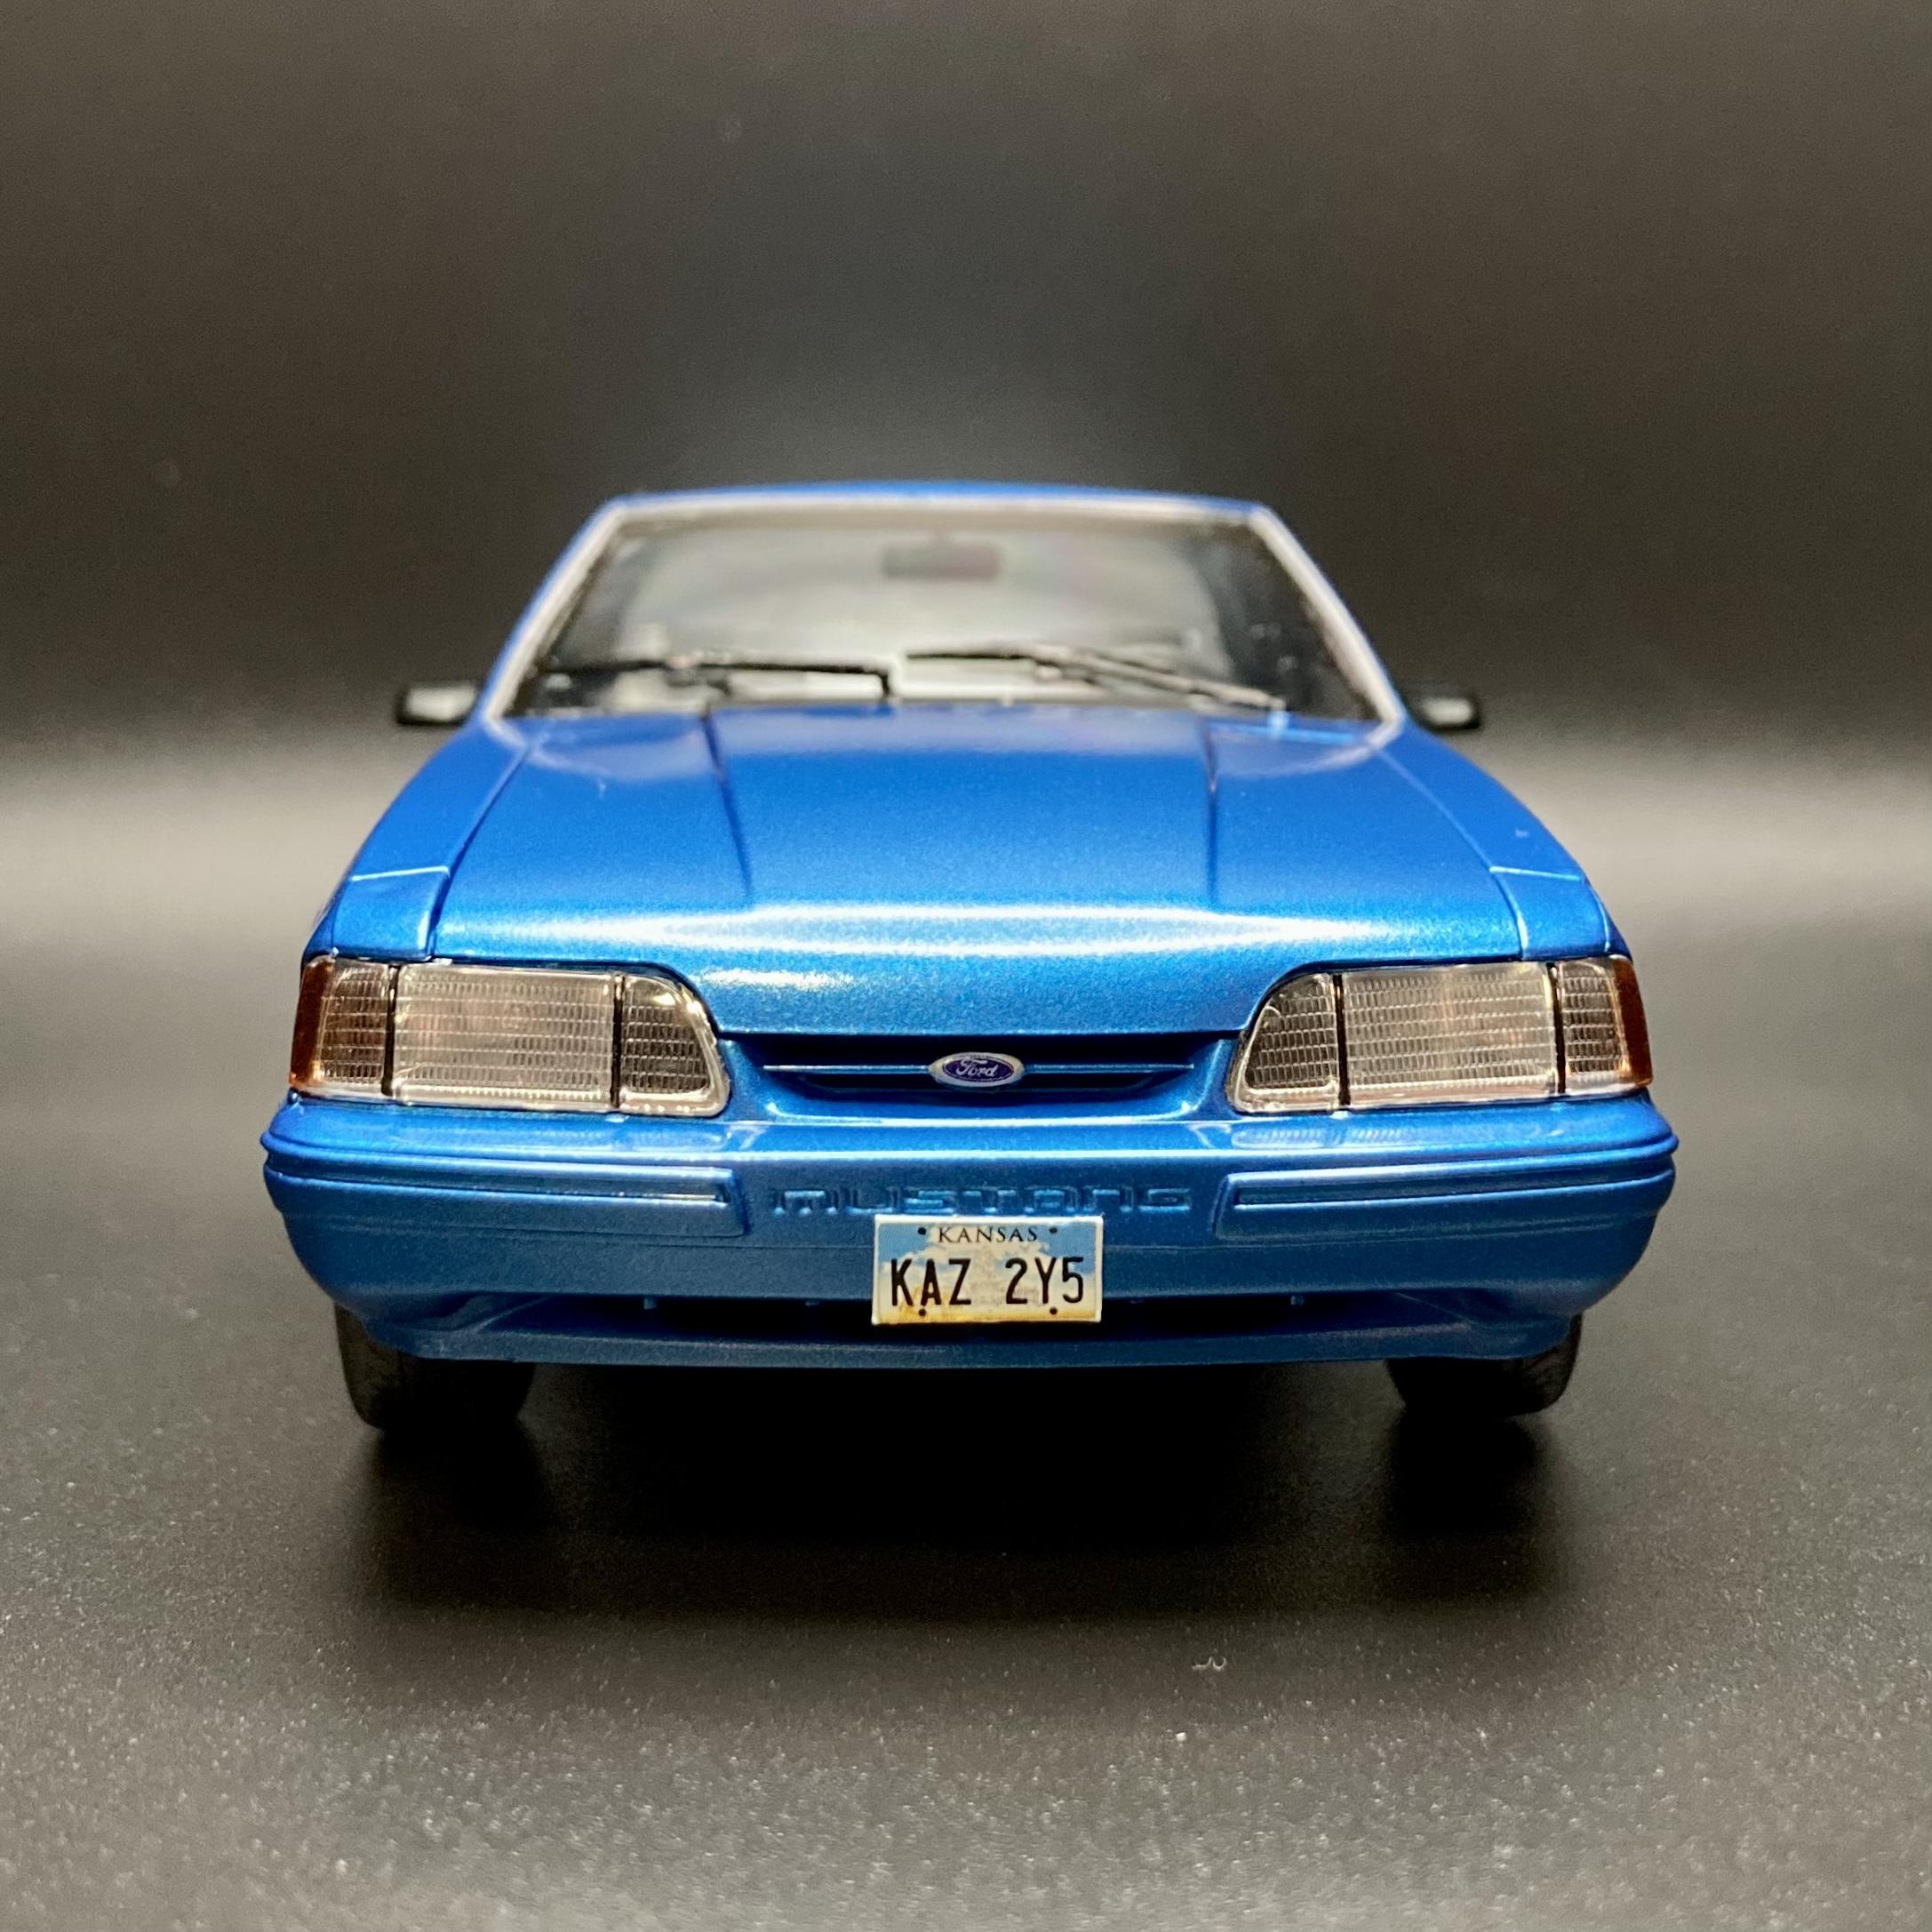
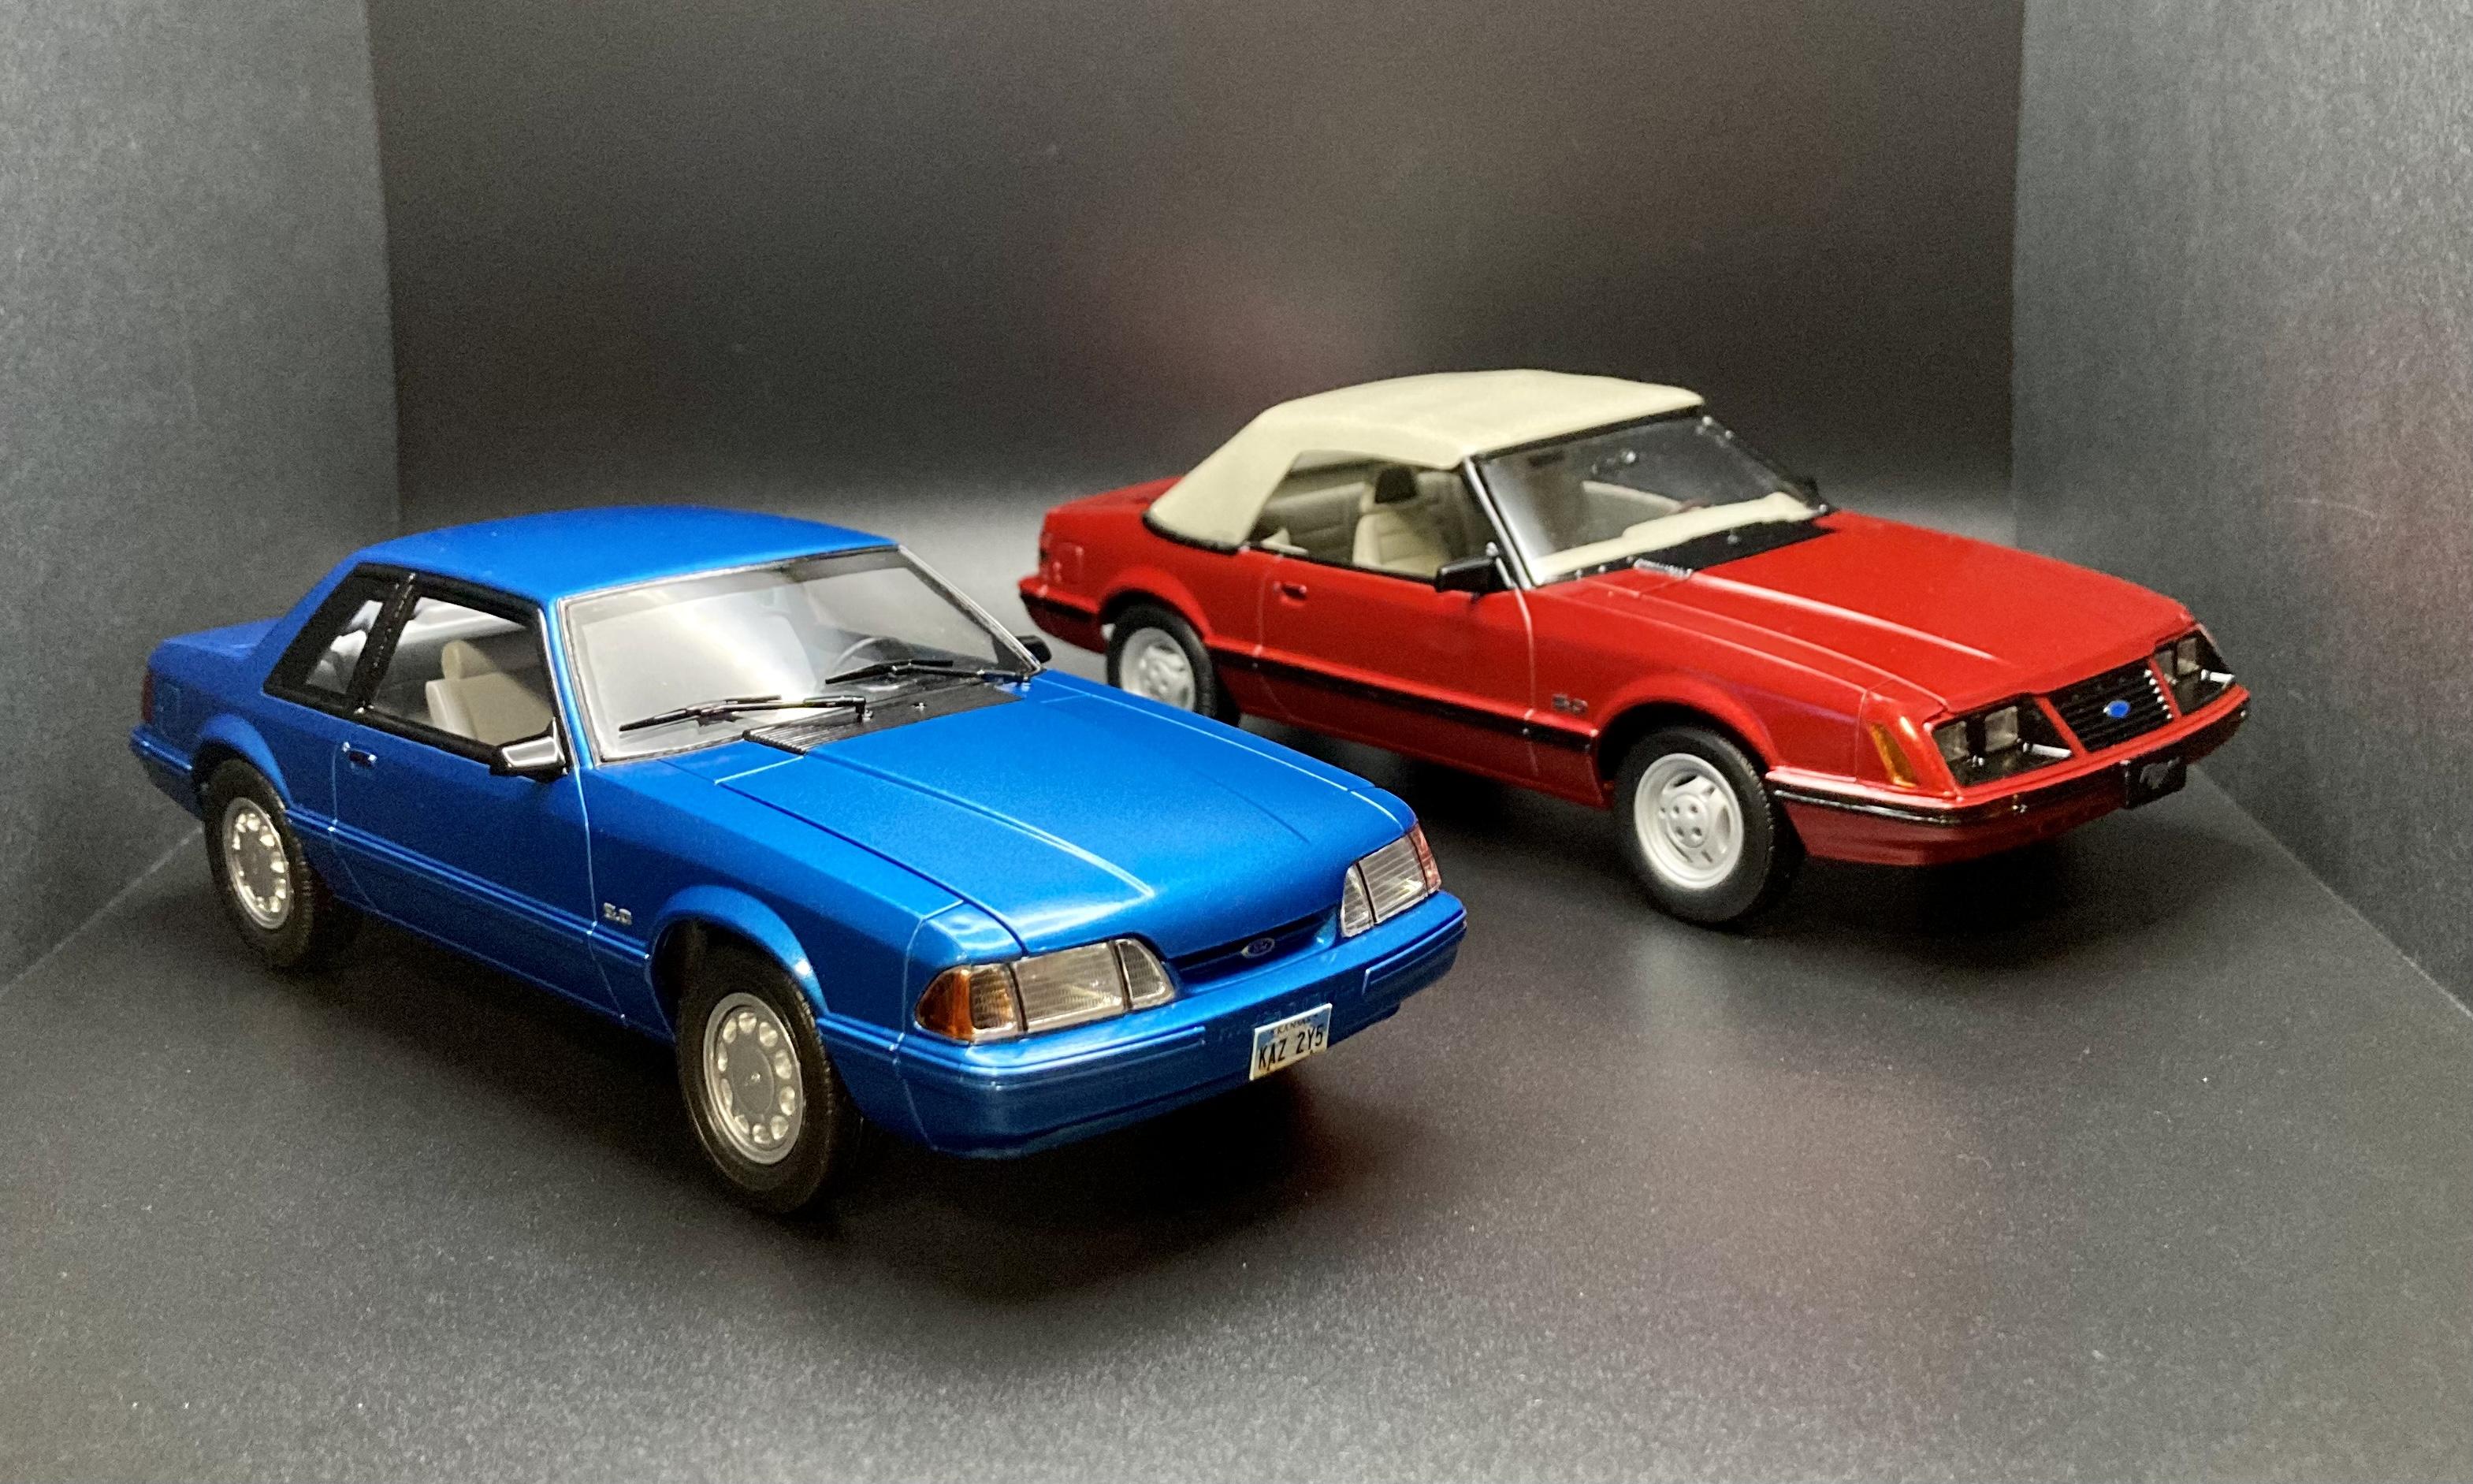
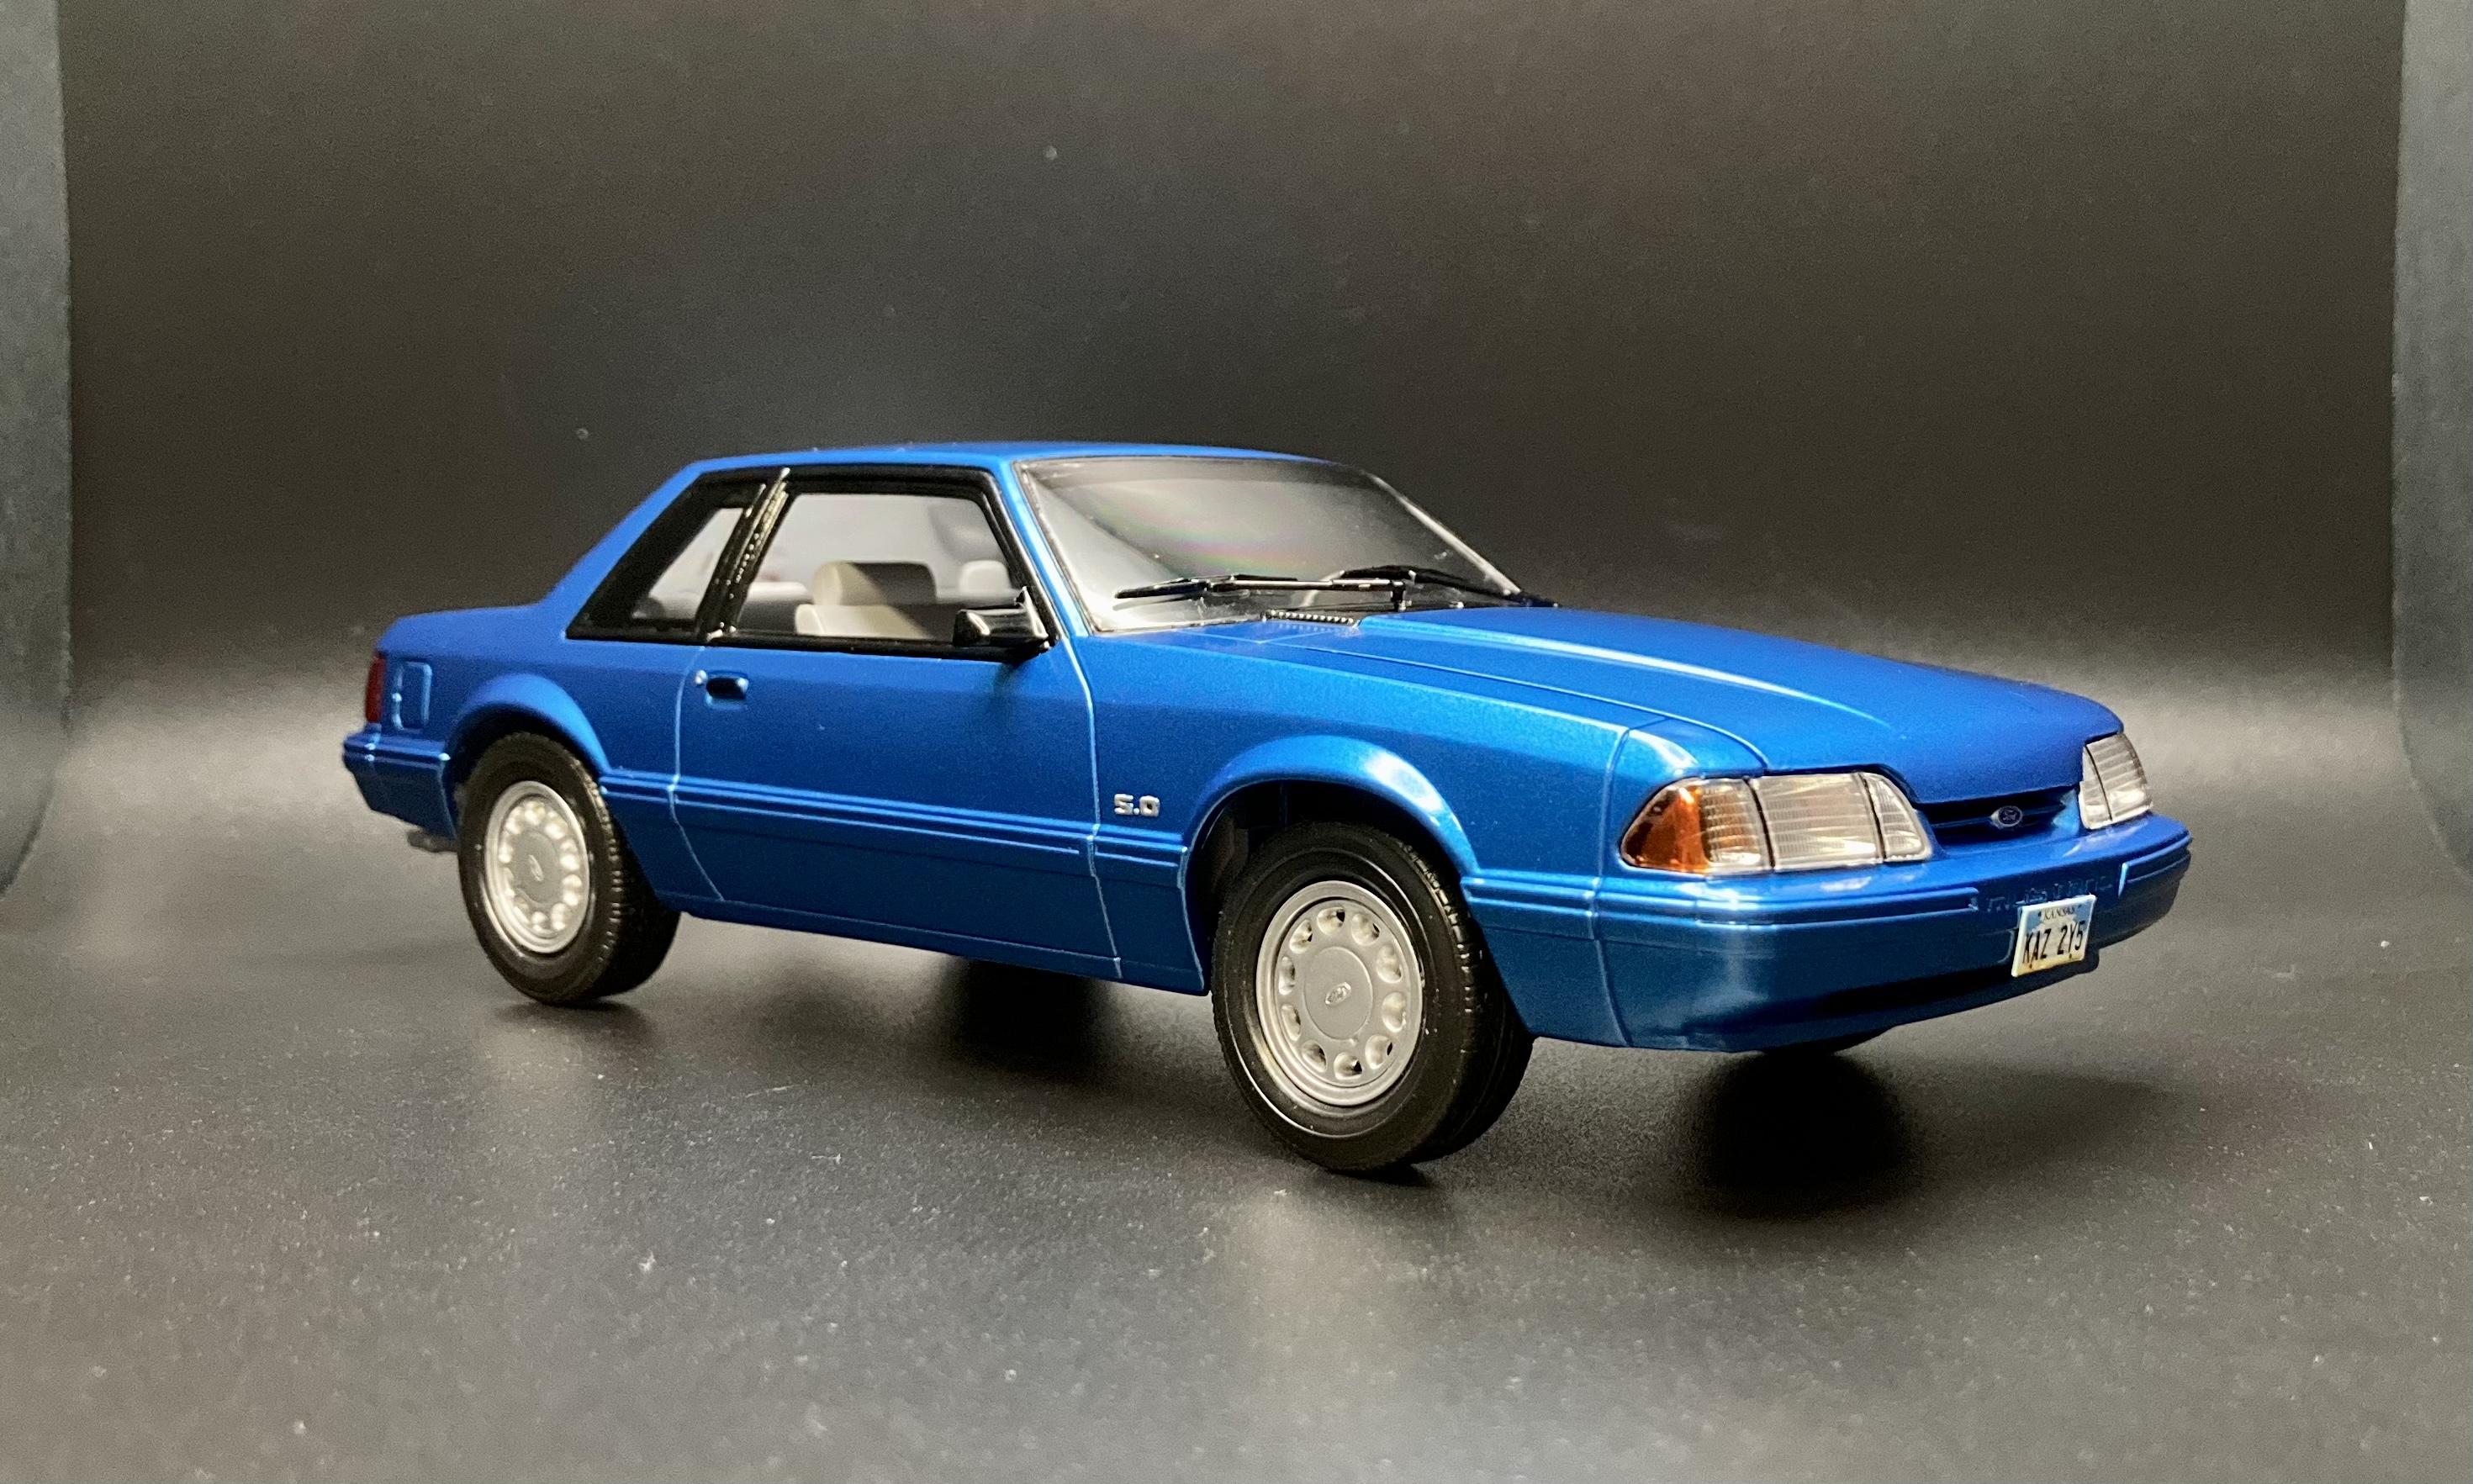
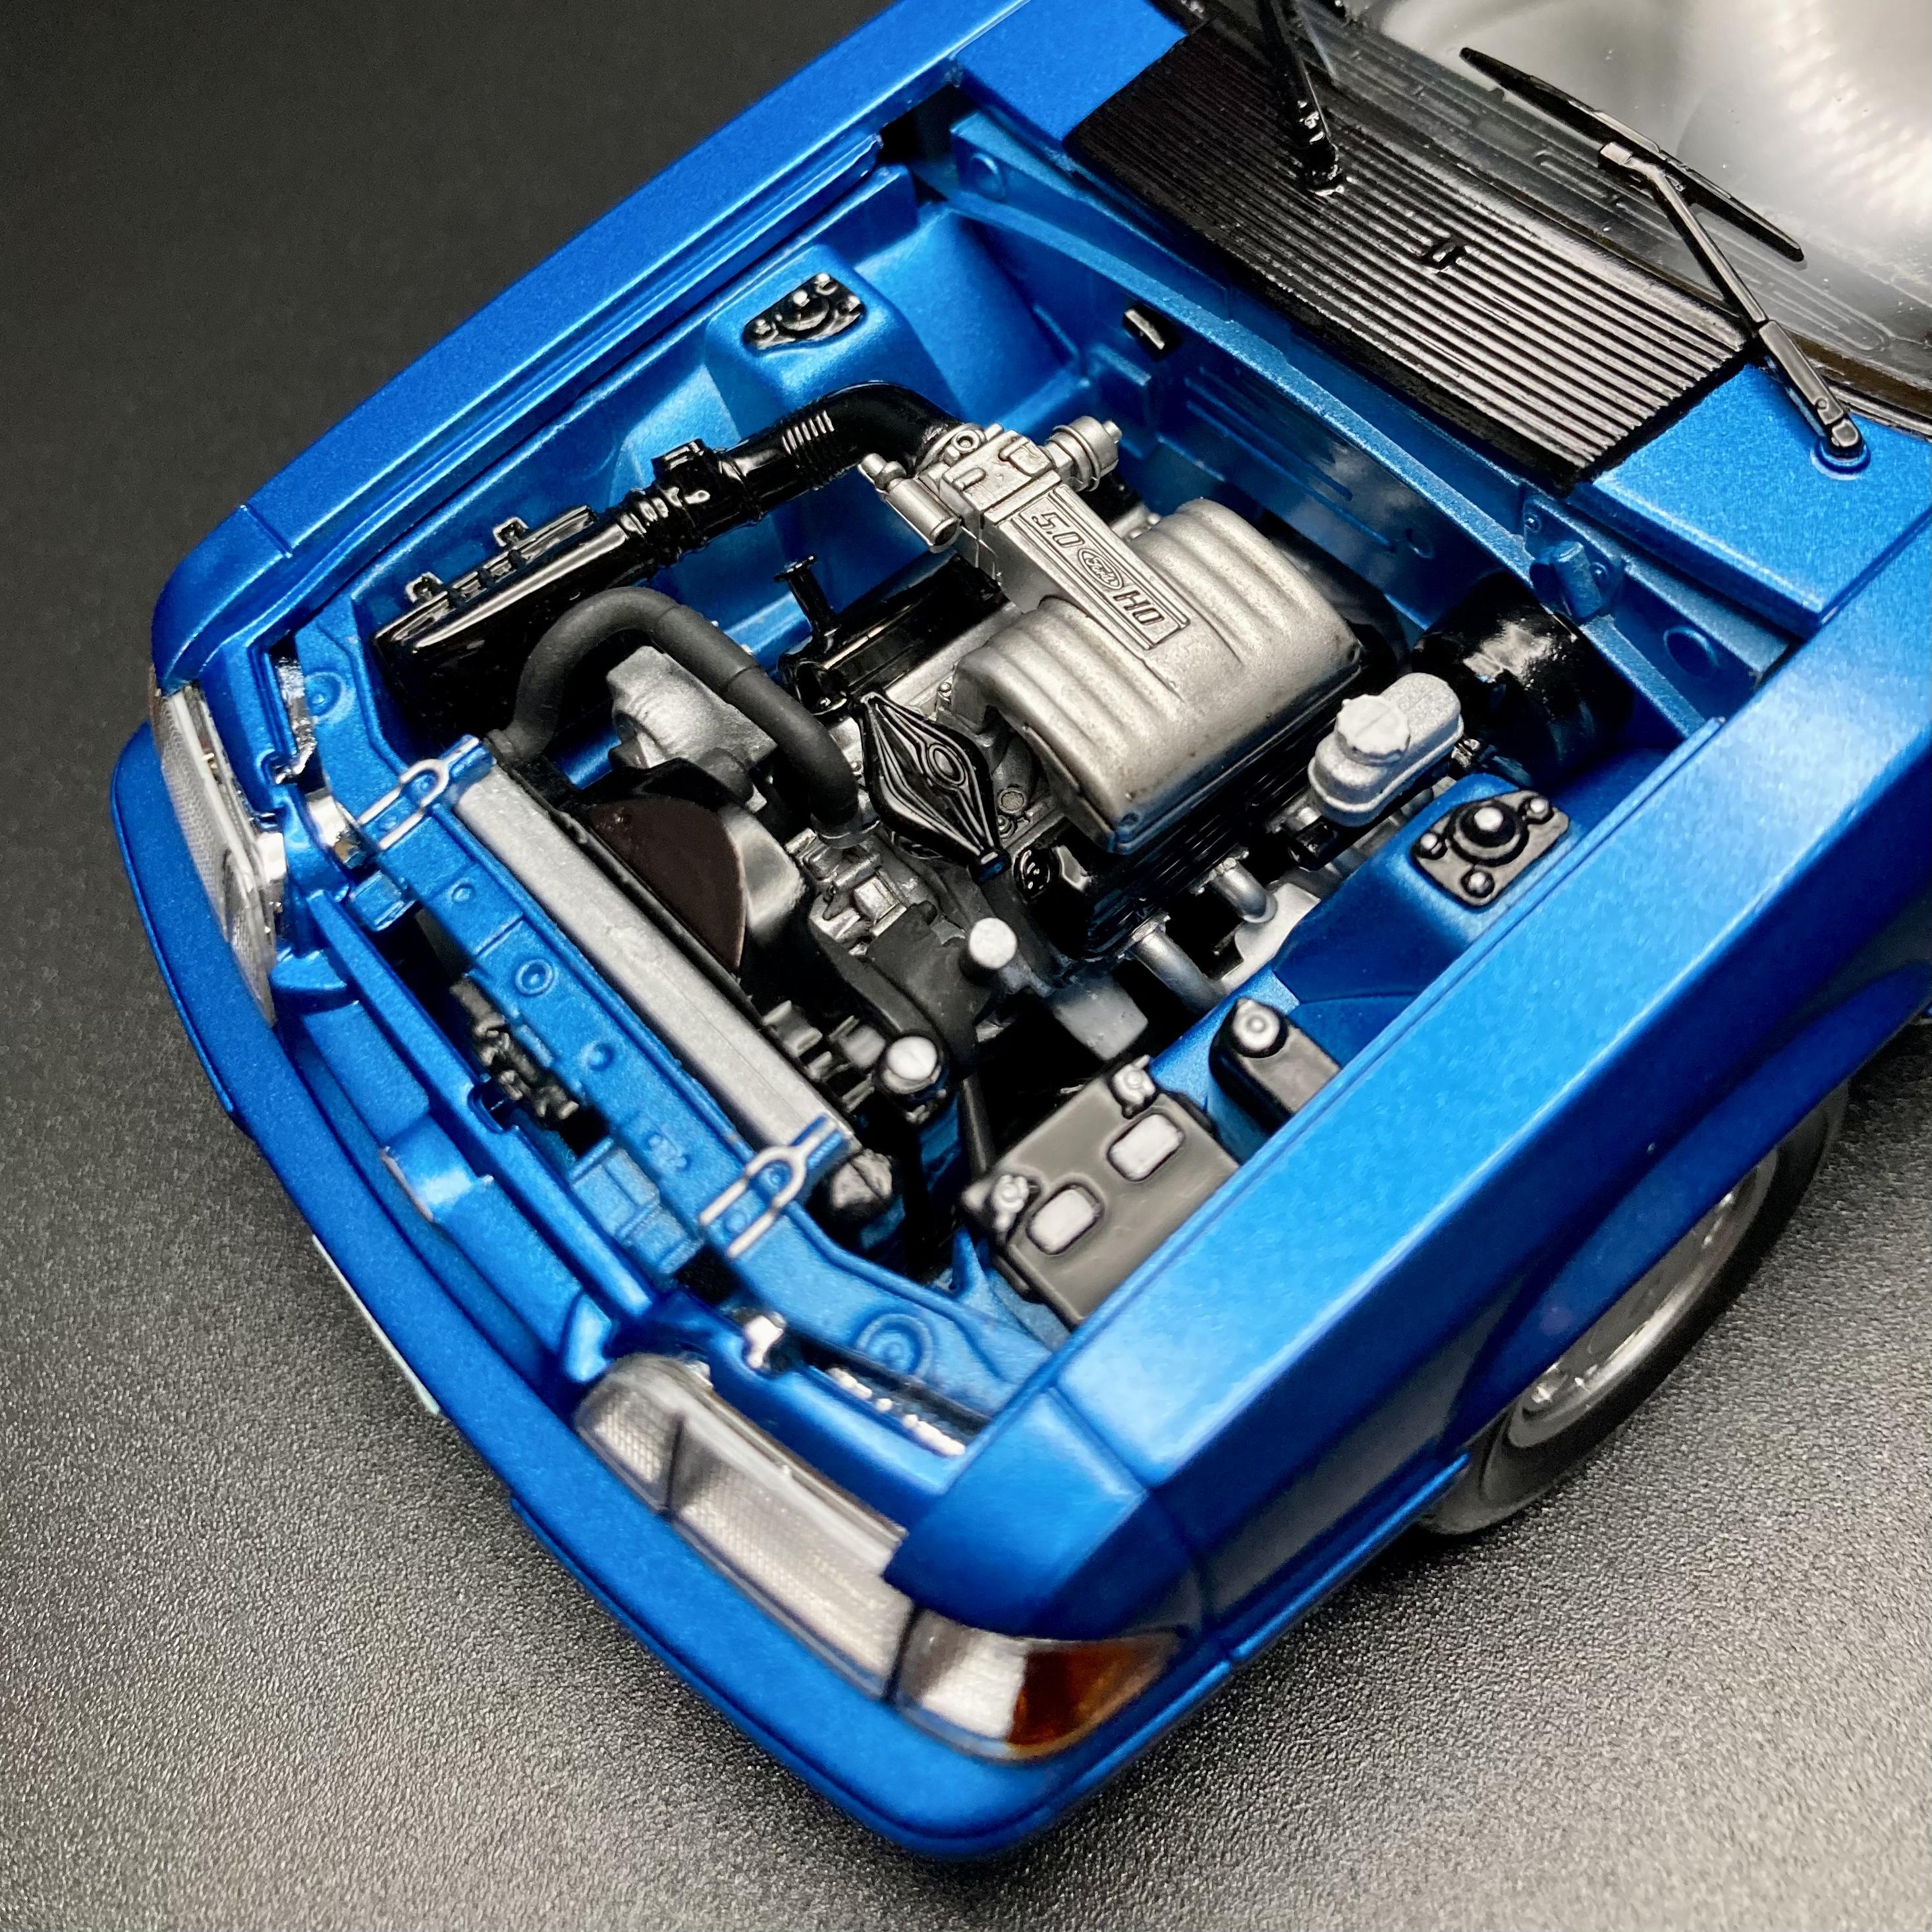
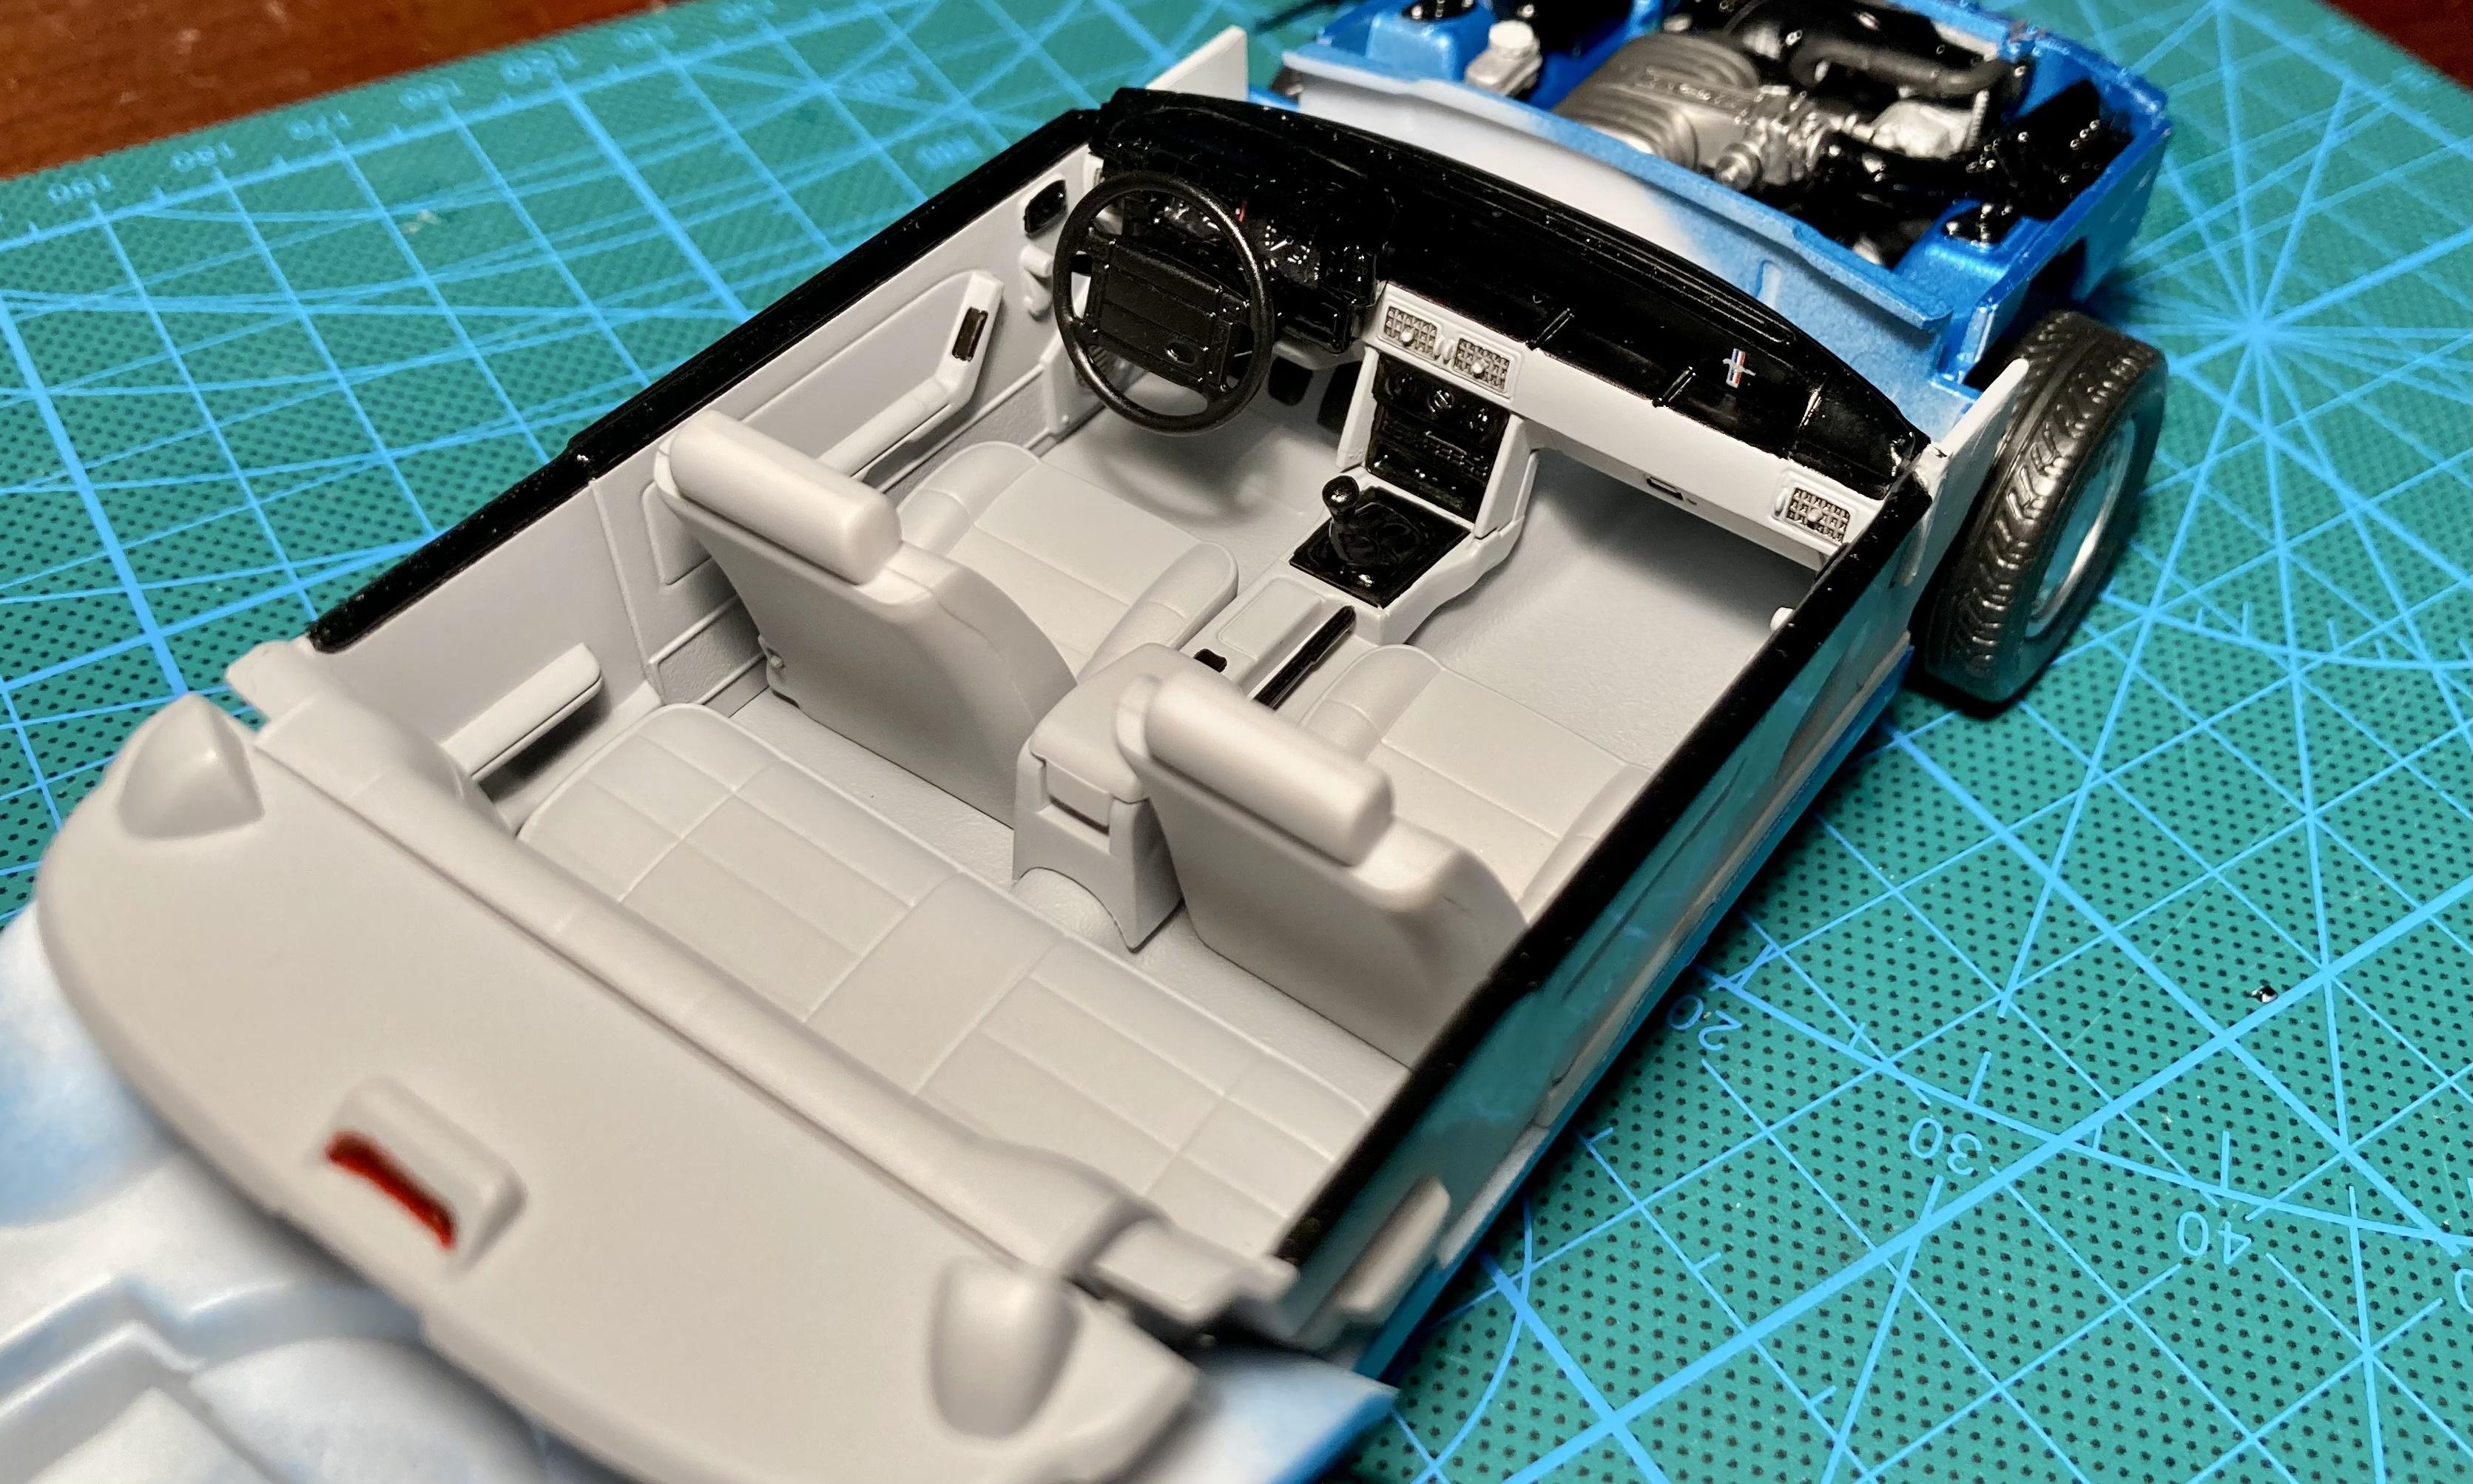
Here’s my box stock build of the infamous Revell 5.0 LX notch! A LOT of digital ink has been spilled on this forum about the roof proportions- but I haven’t seen many on here actually built as a factory stock car (mostly drag and police cars). To my eye, it looks fine until you see it next to a picture of a 1:1 😂. Using the current release Drag Racer kit, I wanted to build mine as a ‘92-‘93 model year with the body-color belt strip. I was shooting for my favorite Fox color of Ultra Blue, done here in Tamiya TS54 “Light Metallic Blue”. A 92-93 should have the Pony 5-spoke wheels, but I actually really like the 10-holes this kit comes with. I do have a Monogram ‘92 convertible that I might swap wheels with later. Roof proportions aside, this kit is very well done with excellent fit and detailing. I especially love how the window glass sets in from the outside of the car. The drag car release instructions only show how to build it as a drag car but the factory parts are included and they’re easy to figure out.
-
Hey! I'm looking for vintage Revell Chopper kit. Complete or just a box is also enough. Thanks ? (Image borrowed from internet) -Olli
-
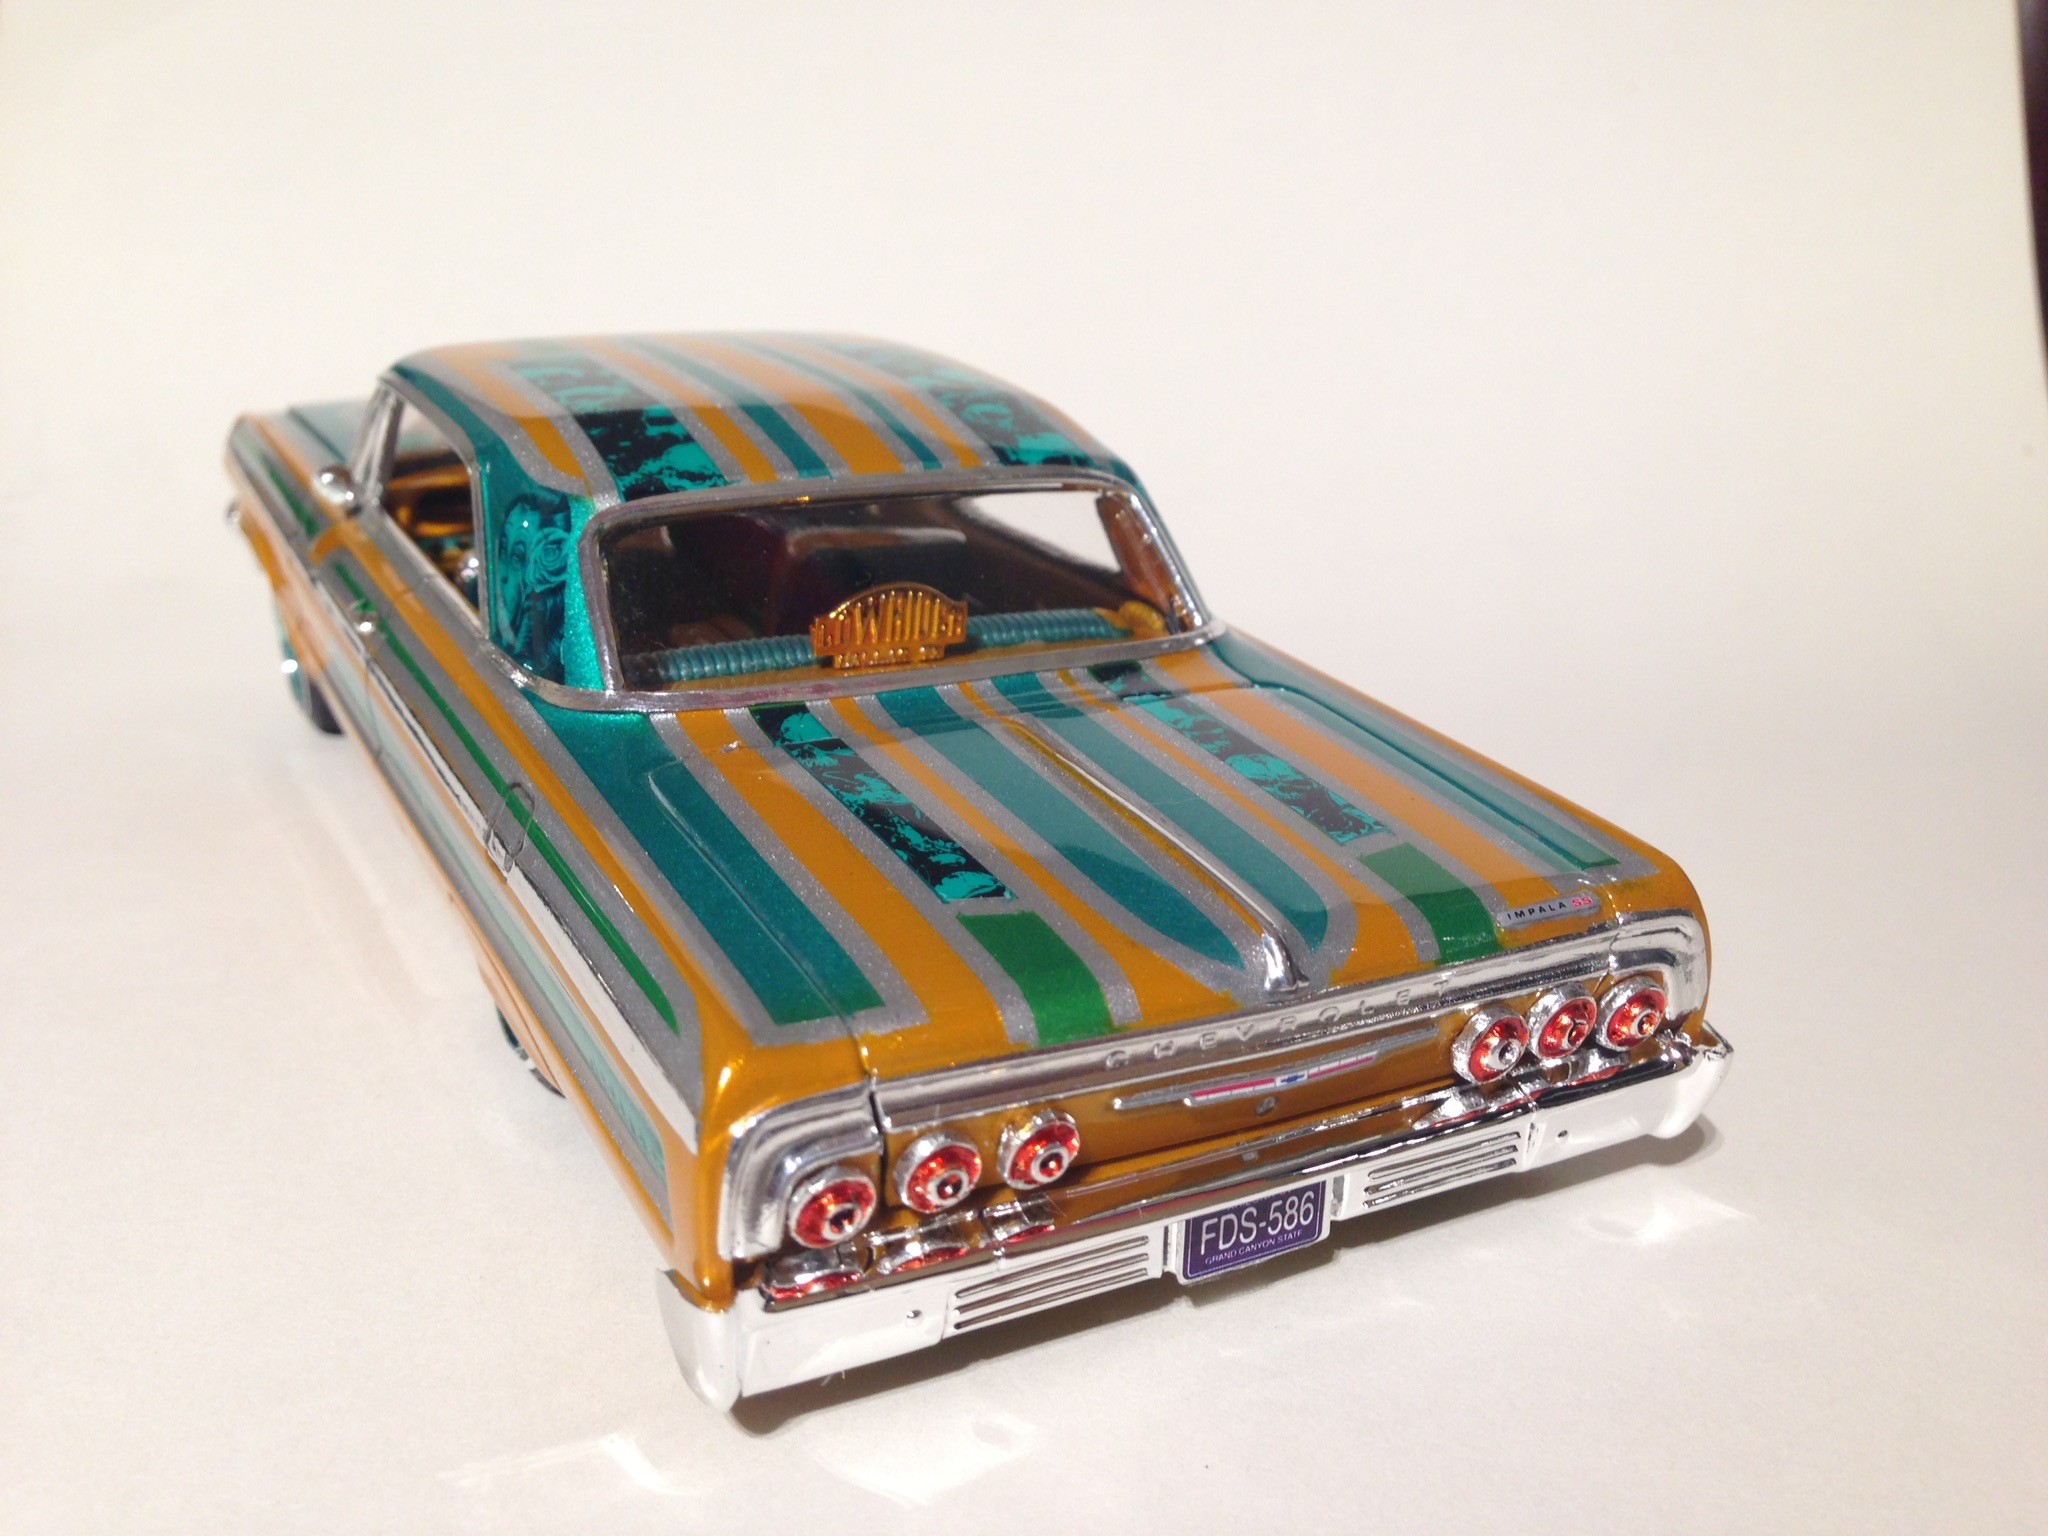
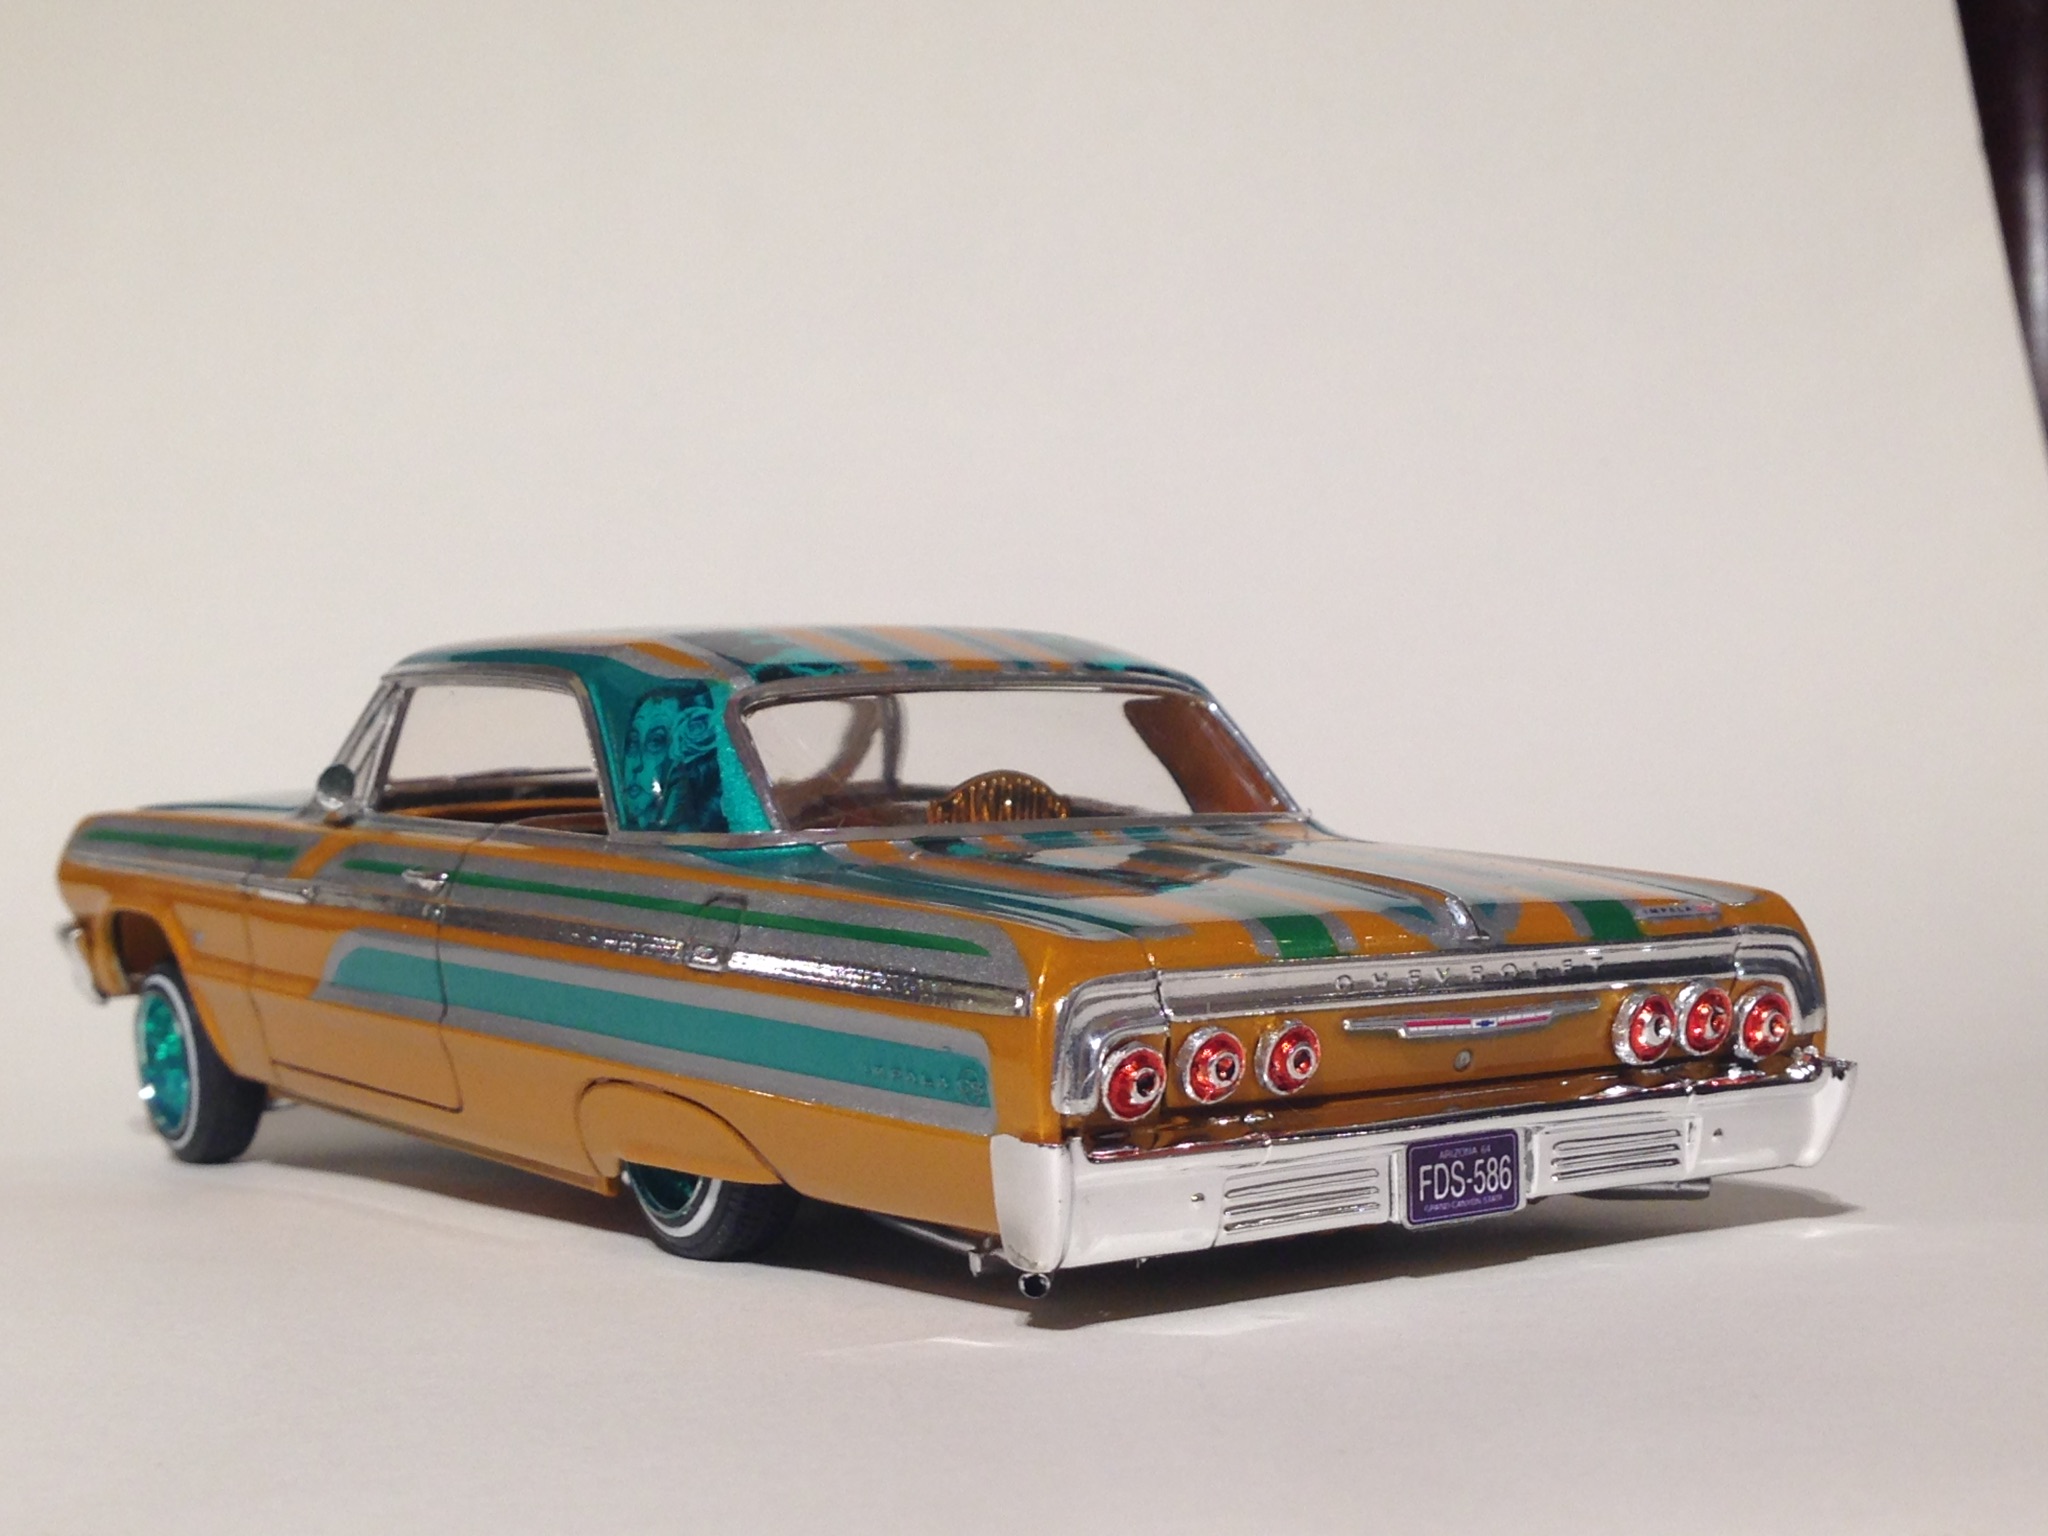
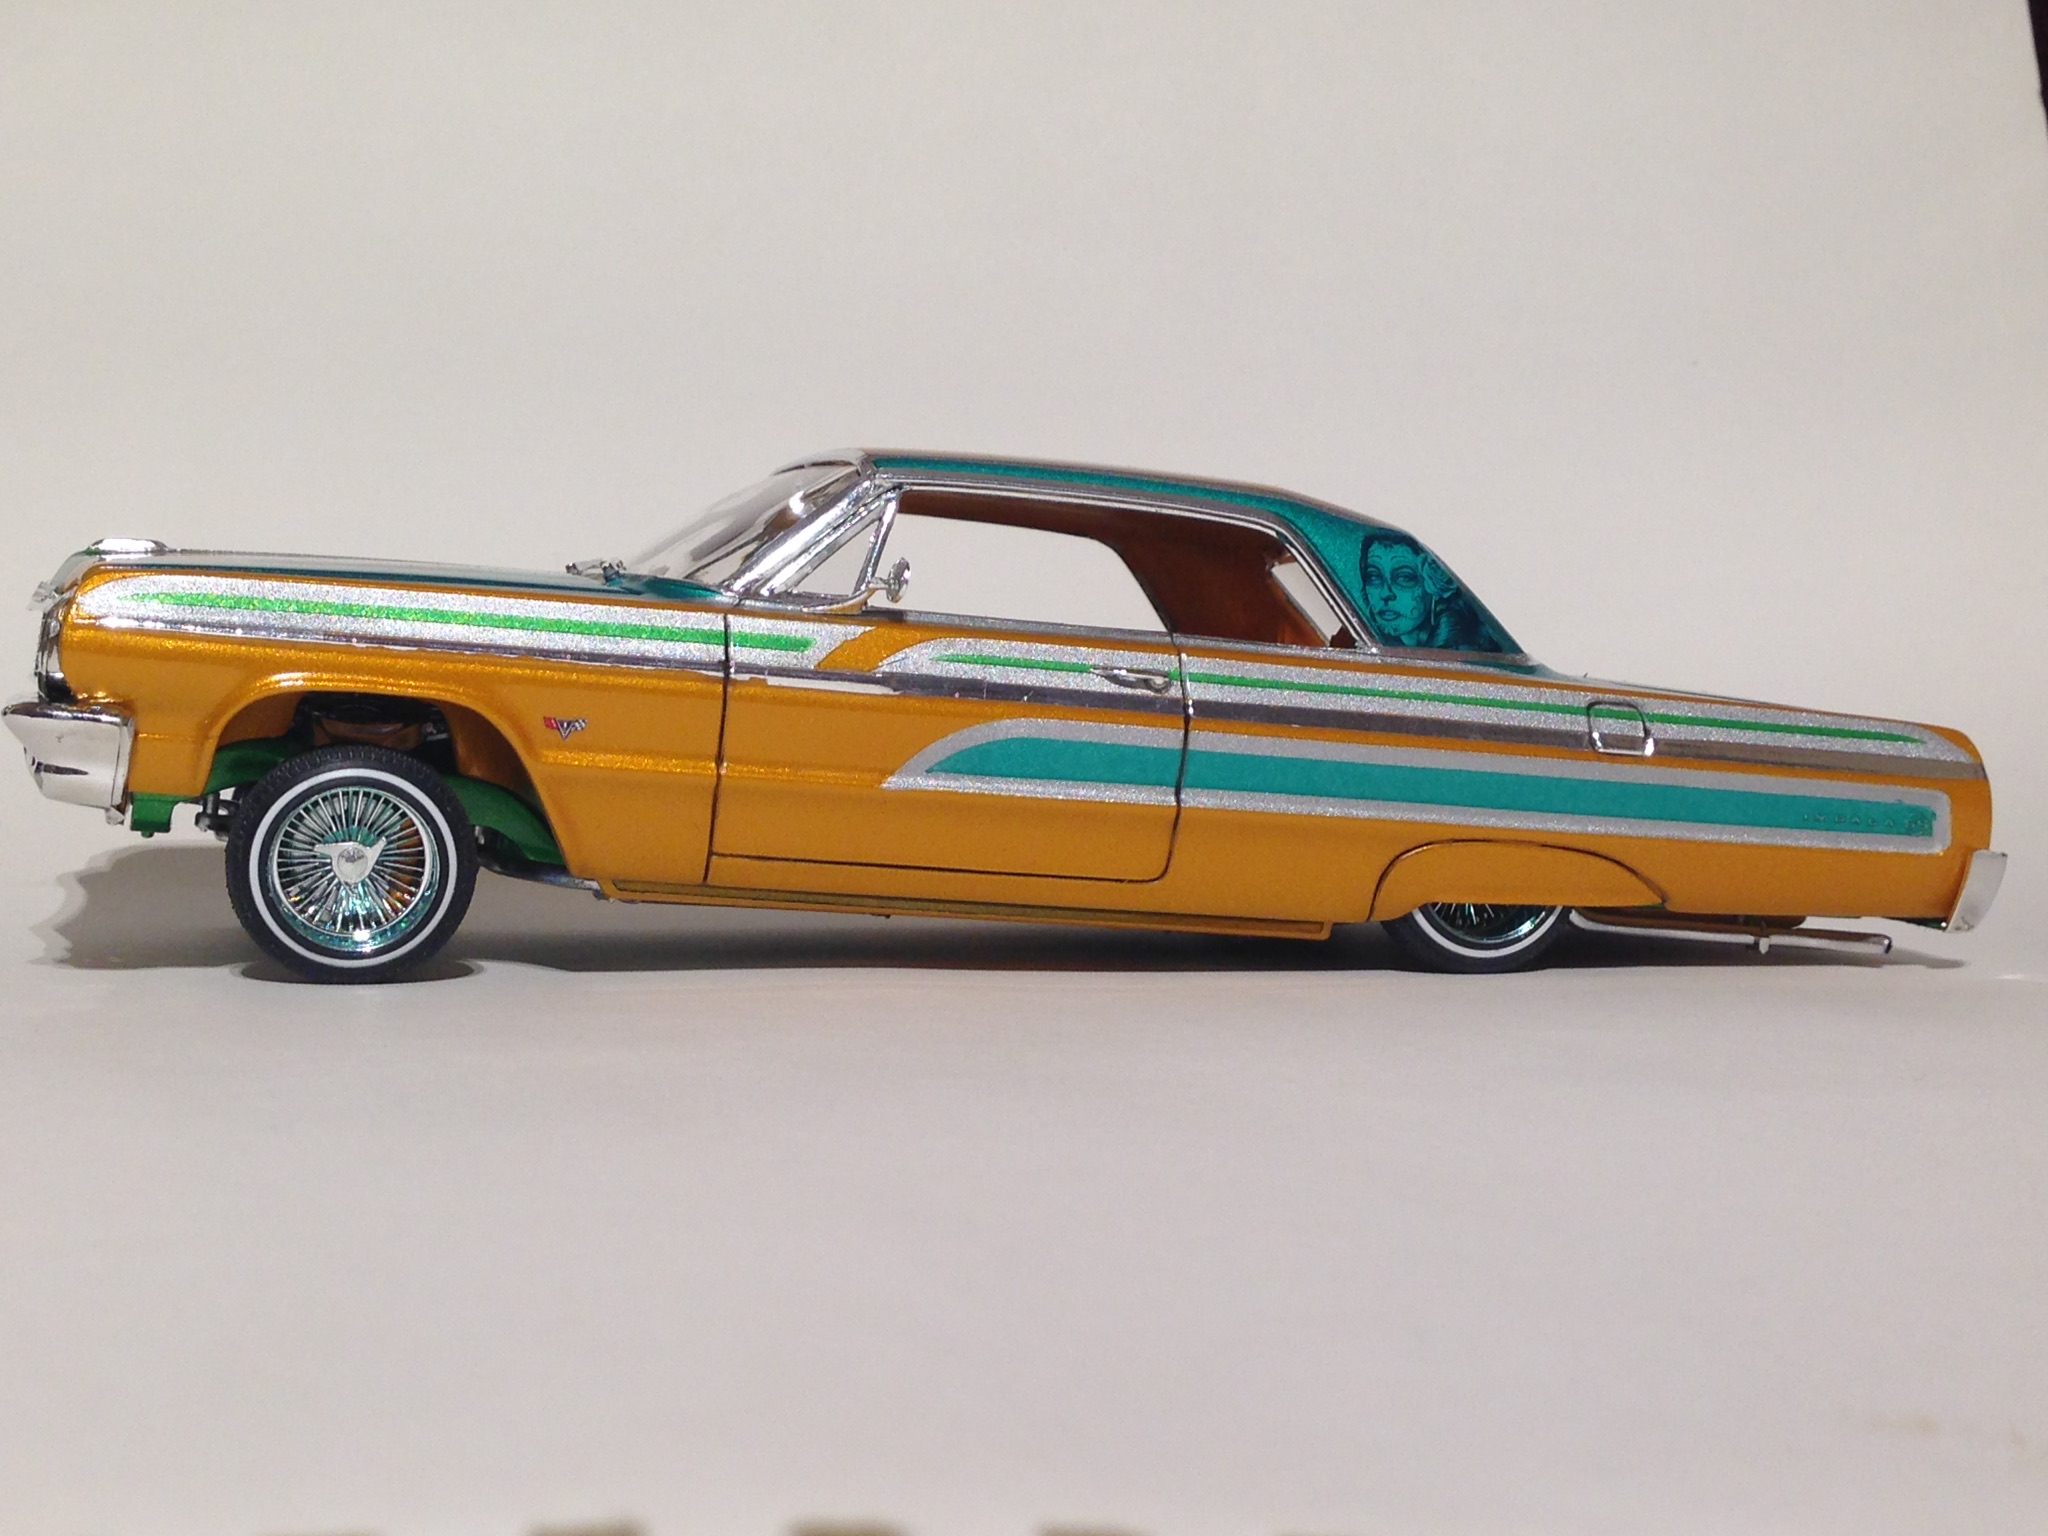
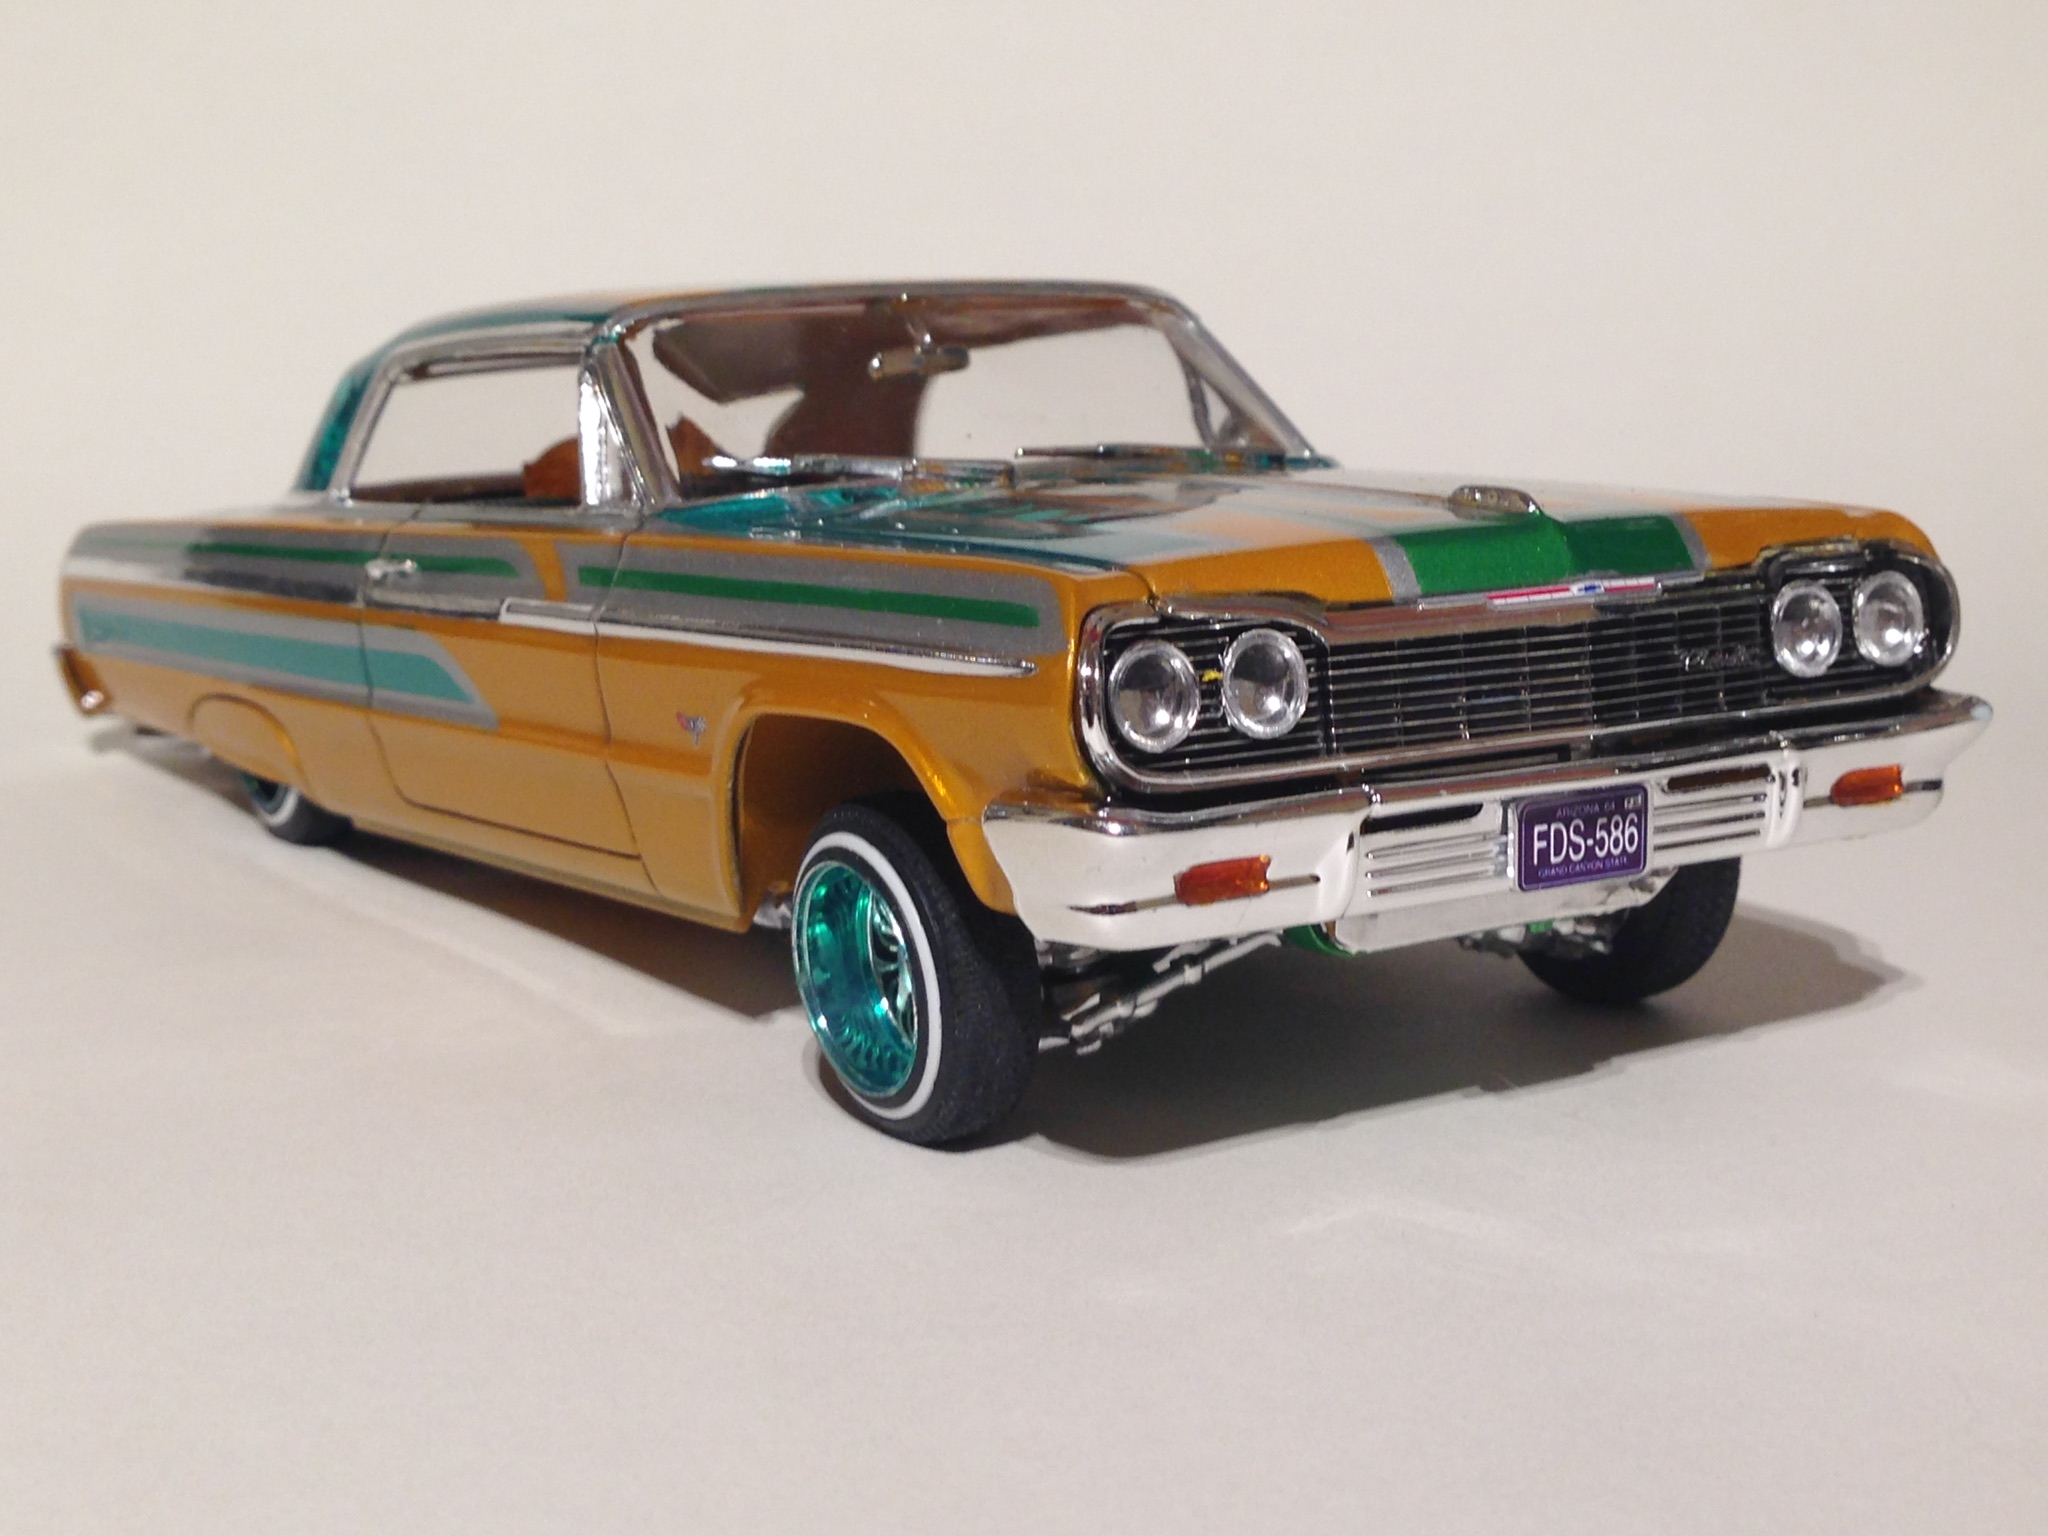
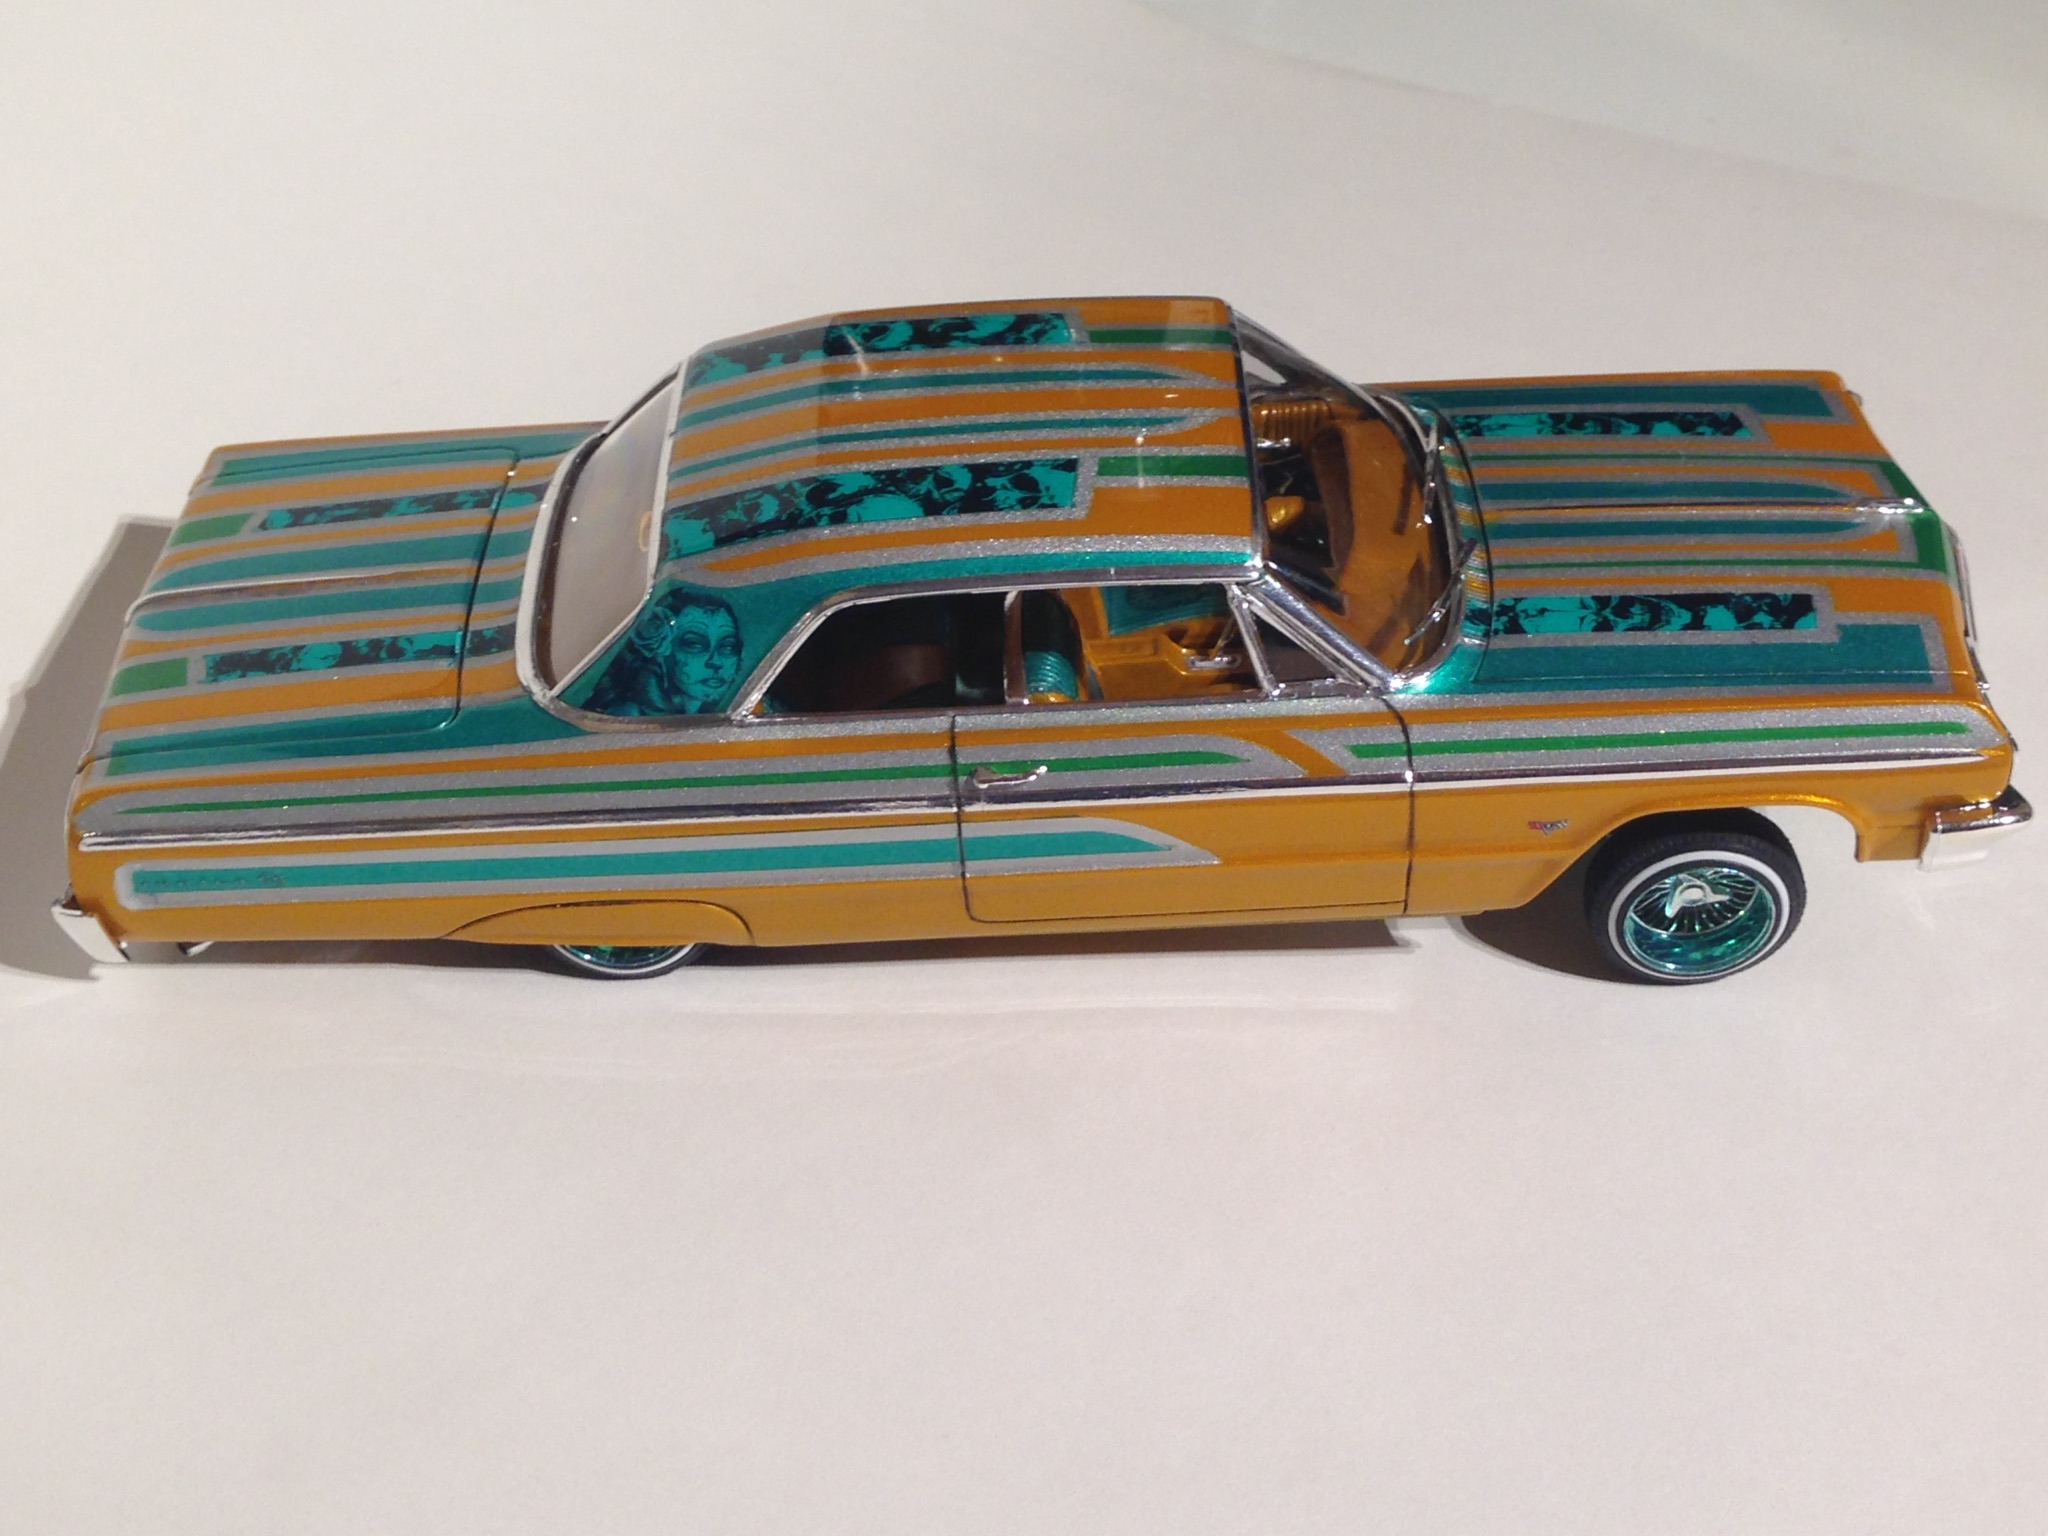
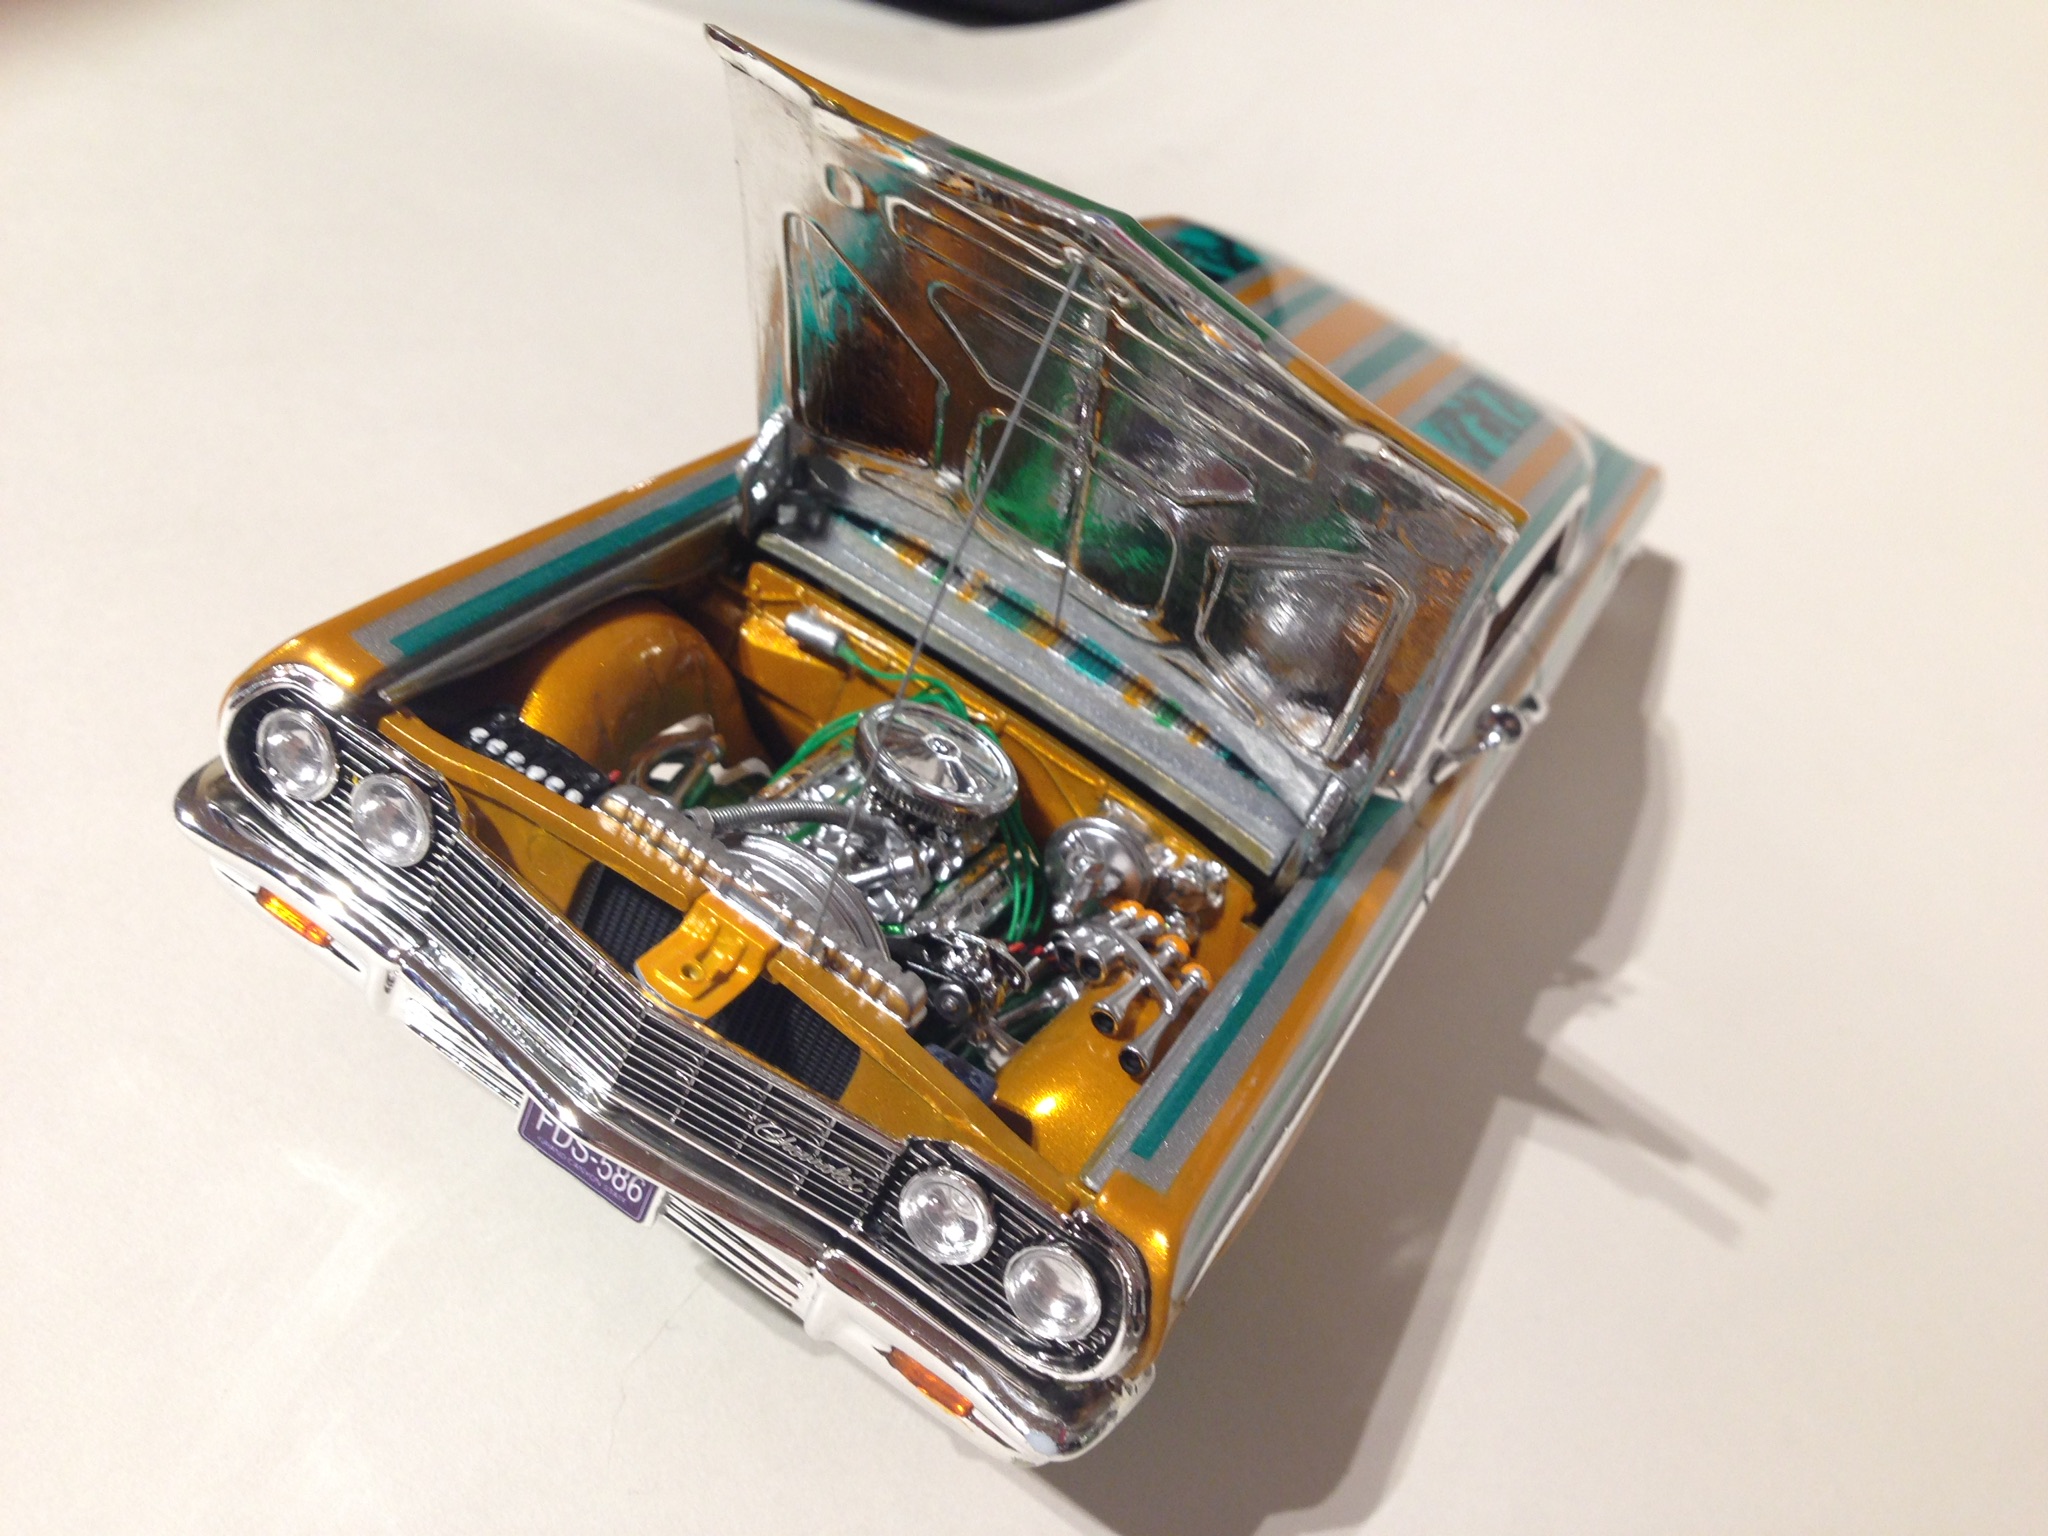
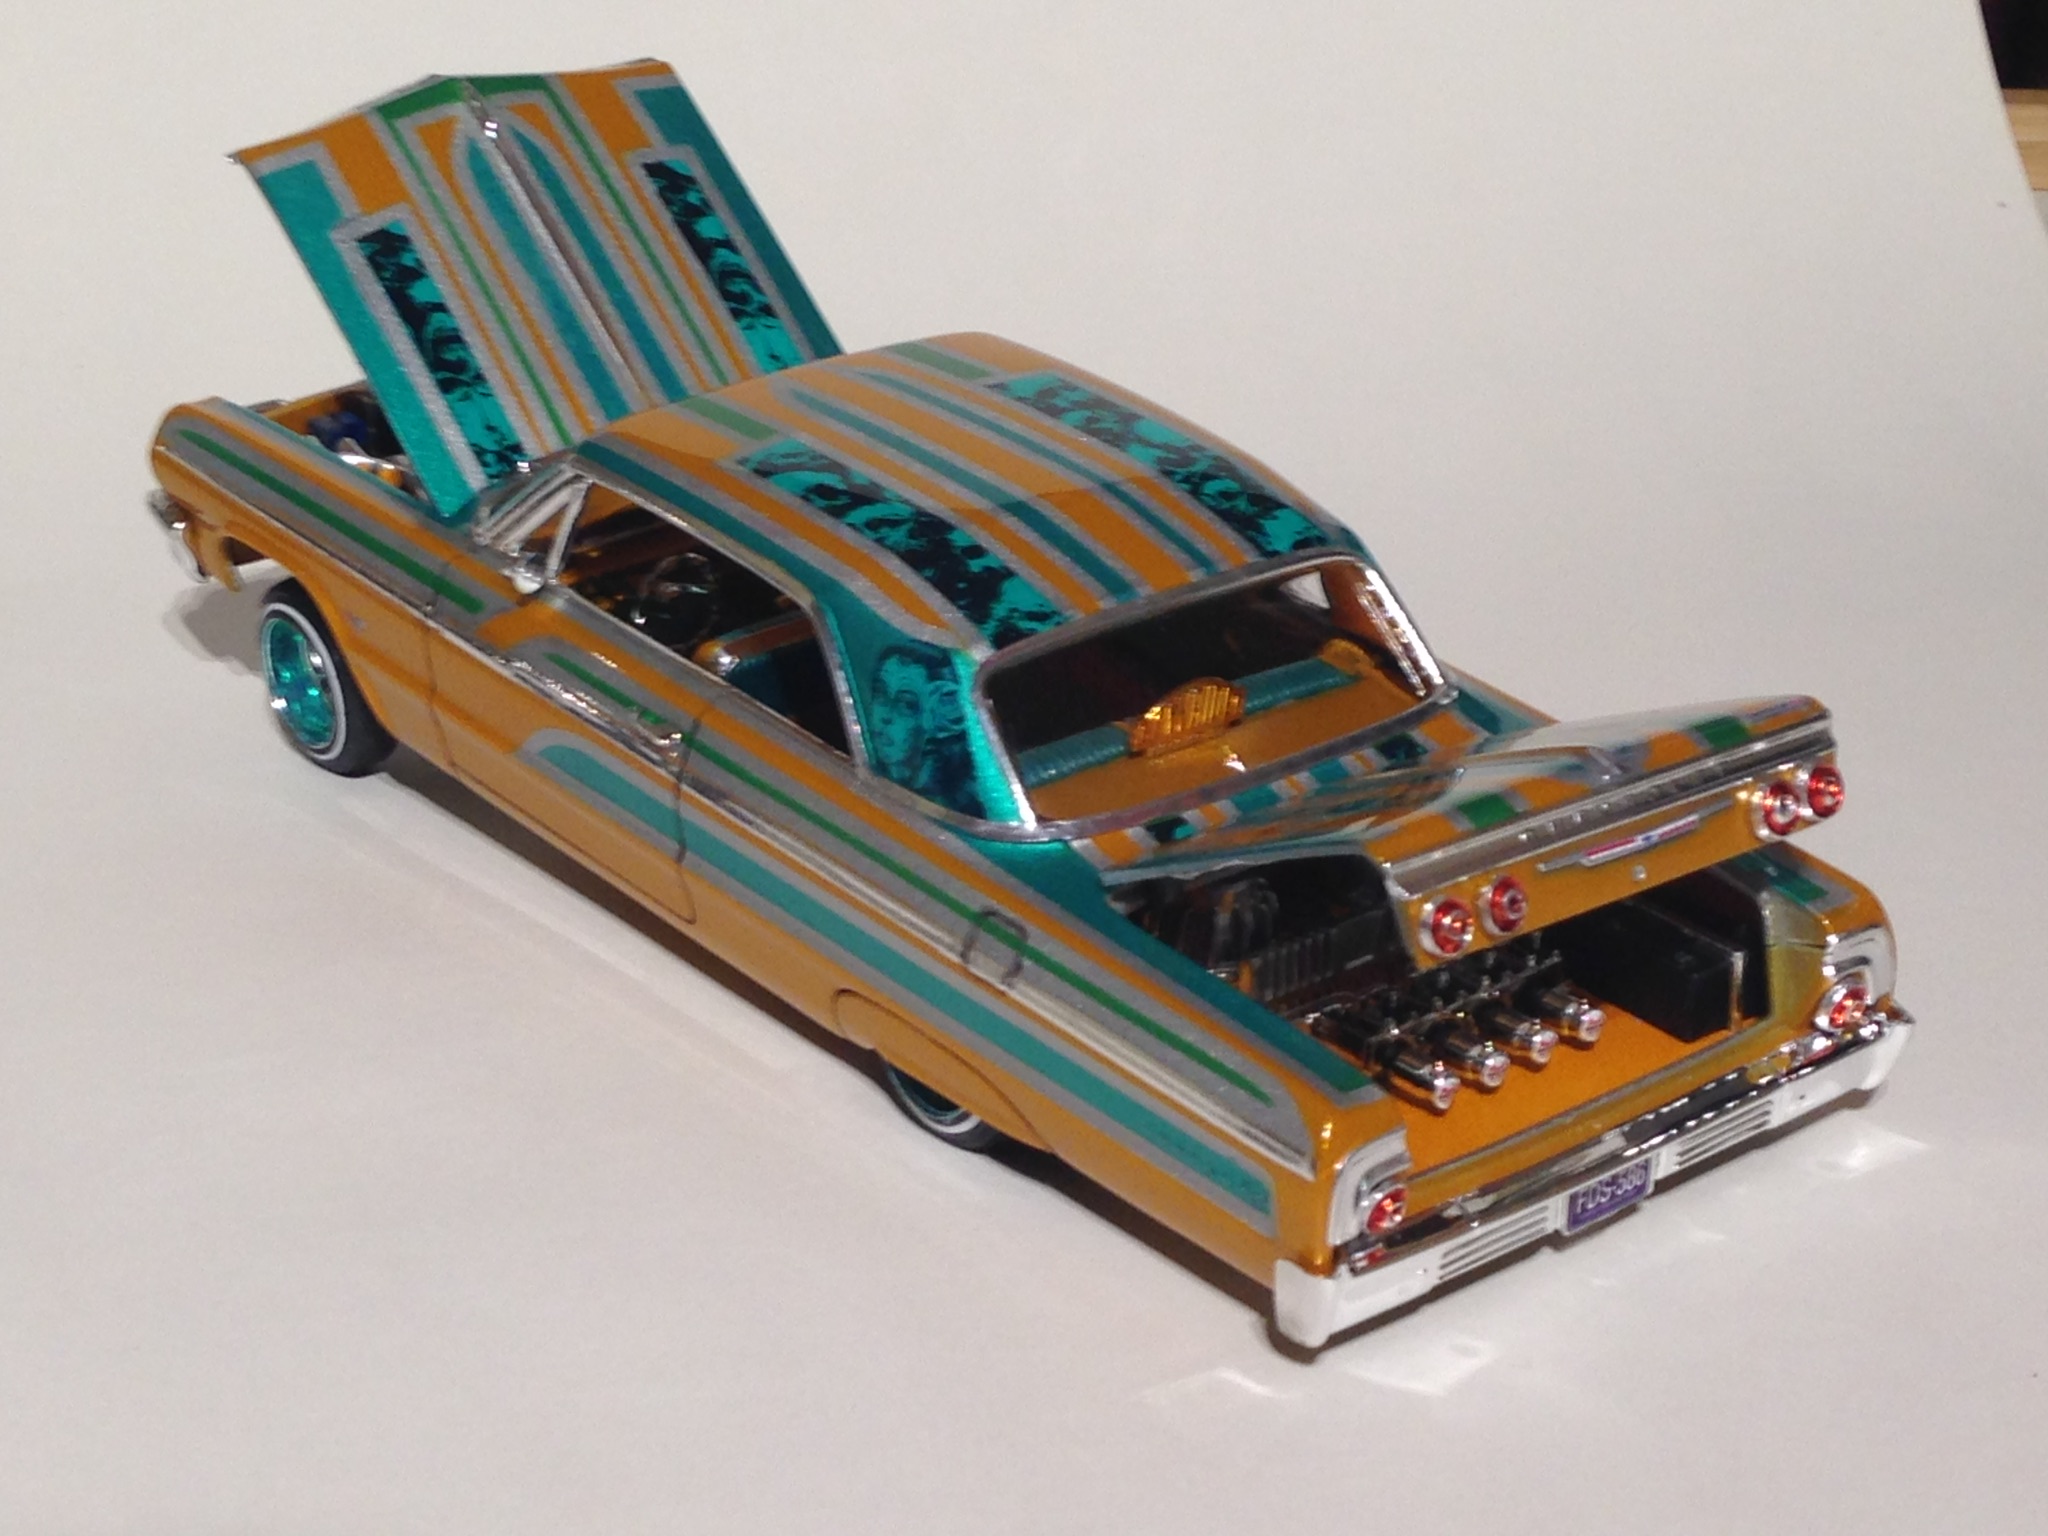
I finally got it done! I'm blown away by the detail the Lowrider guys put into their cars. Some of them are more like jewellery, than cars. I hope to get better at building lowriders and get my paint more precise. I love the chrome and the wild colours and I want to build more of these. I only added a few bits n bobs; Subwoofers, Pegasus Daytons, resin rotors and calipers. But most of the time was spent masking, painting and waiting for it all to dry between the many coats of clear (15, I think). Then a lot of wet sanding and polishing. Paint was from rattle cans, which prompted me to order an airbrush. I realised how much paint I've been wasting, when I looked at my bit of cardboard I use to protect my lawn from the paint.! I think I spent about £50 on paint for this ? Thanks for looking, all comments and criticisms welcome
-
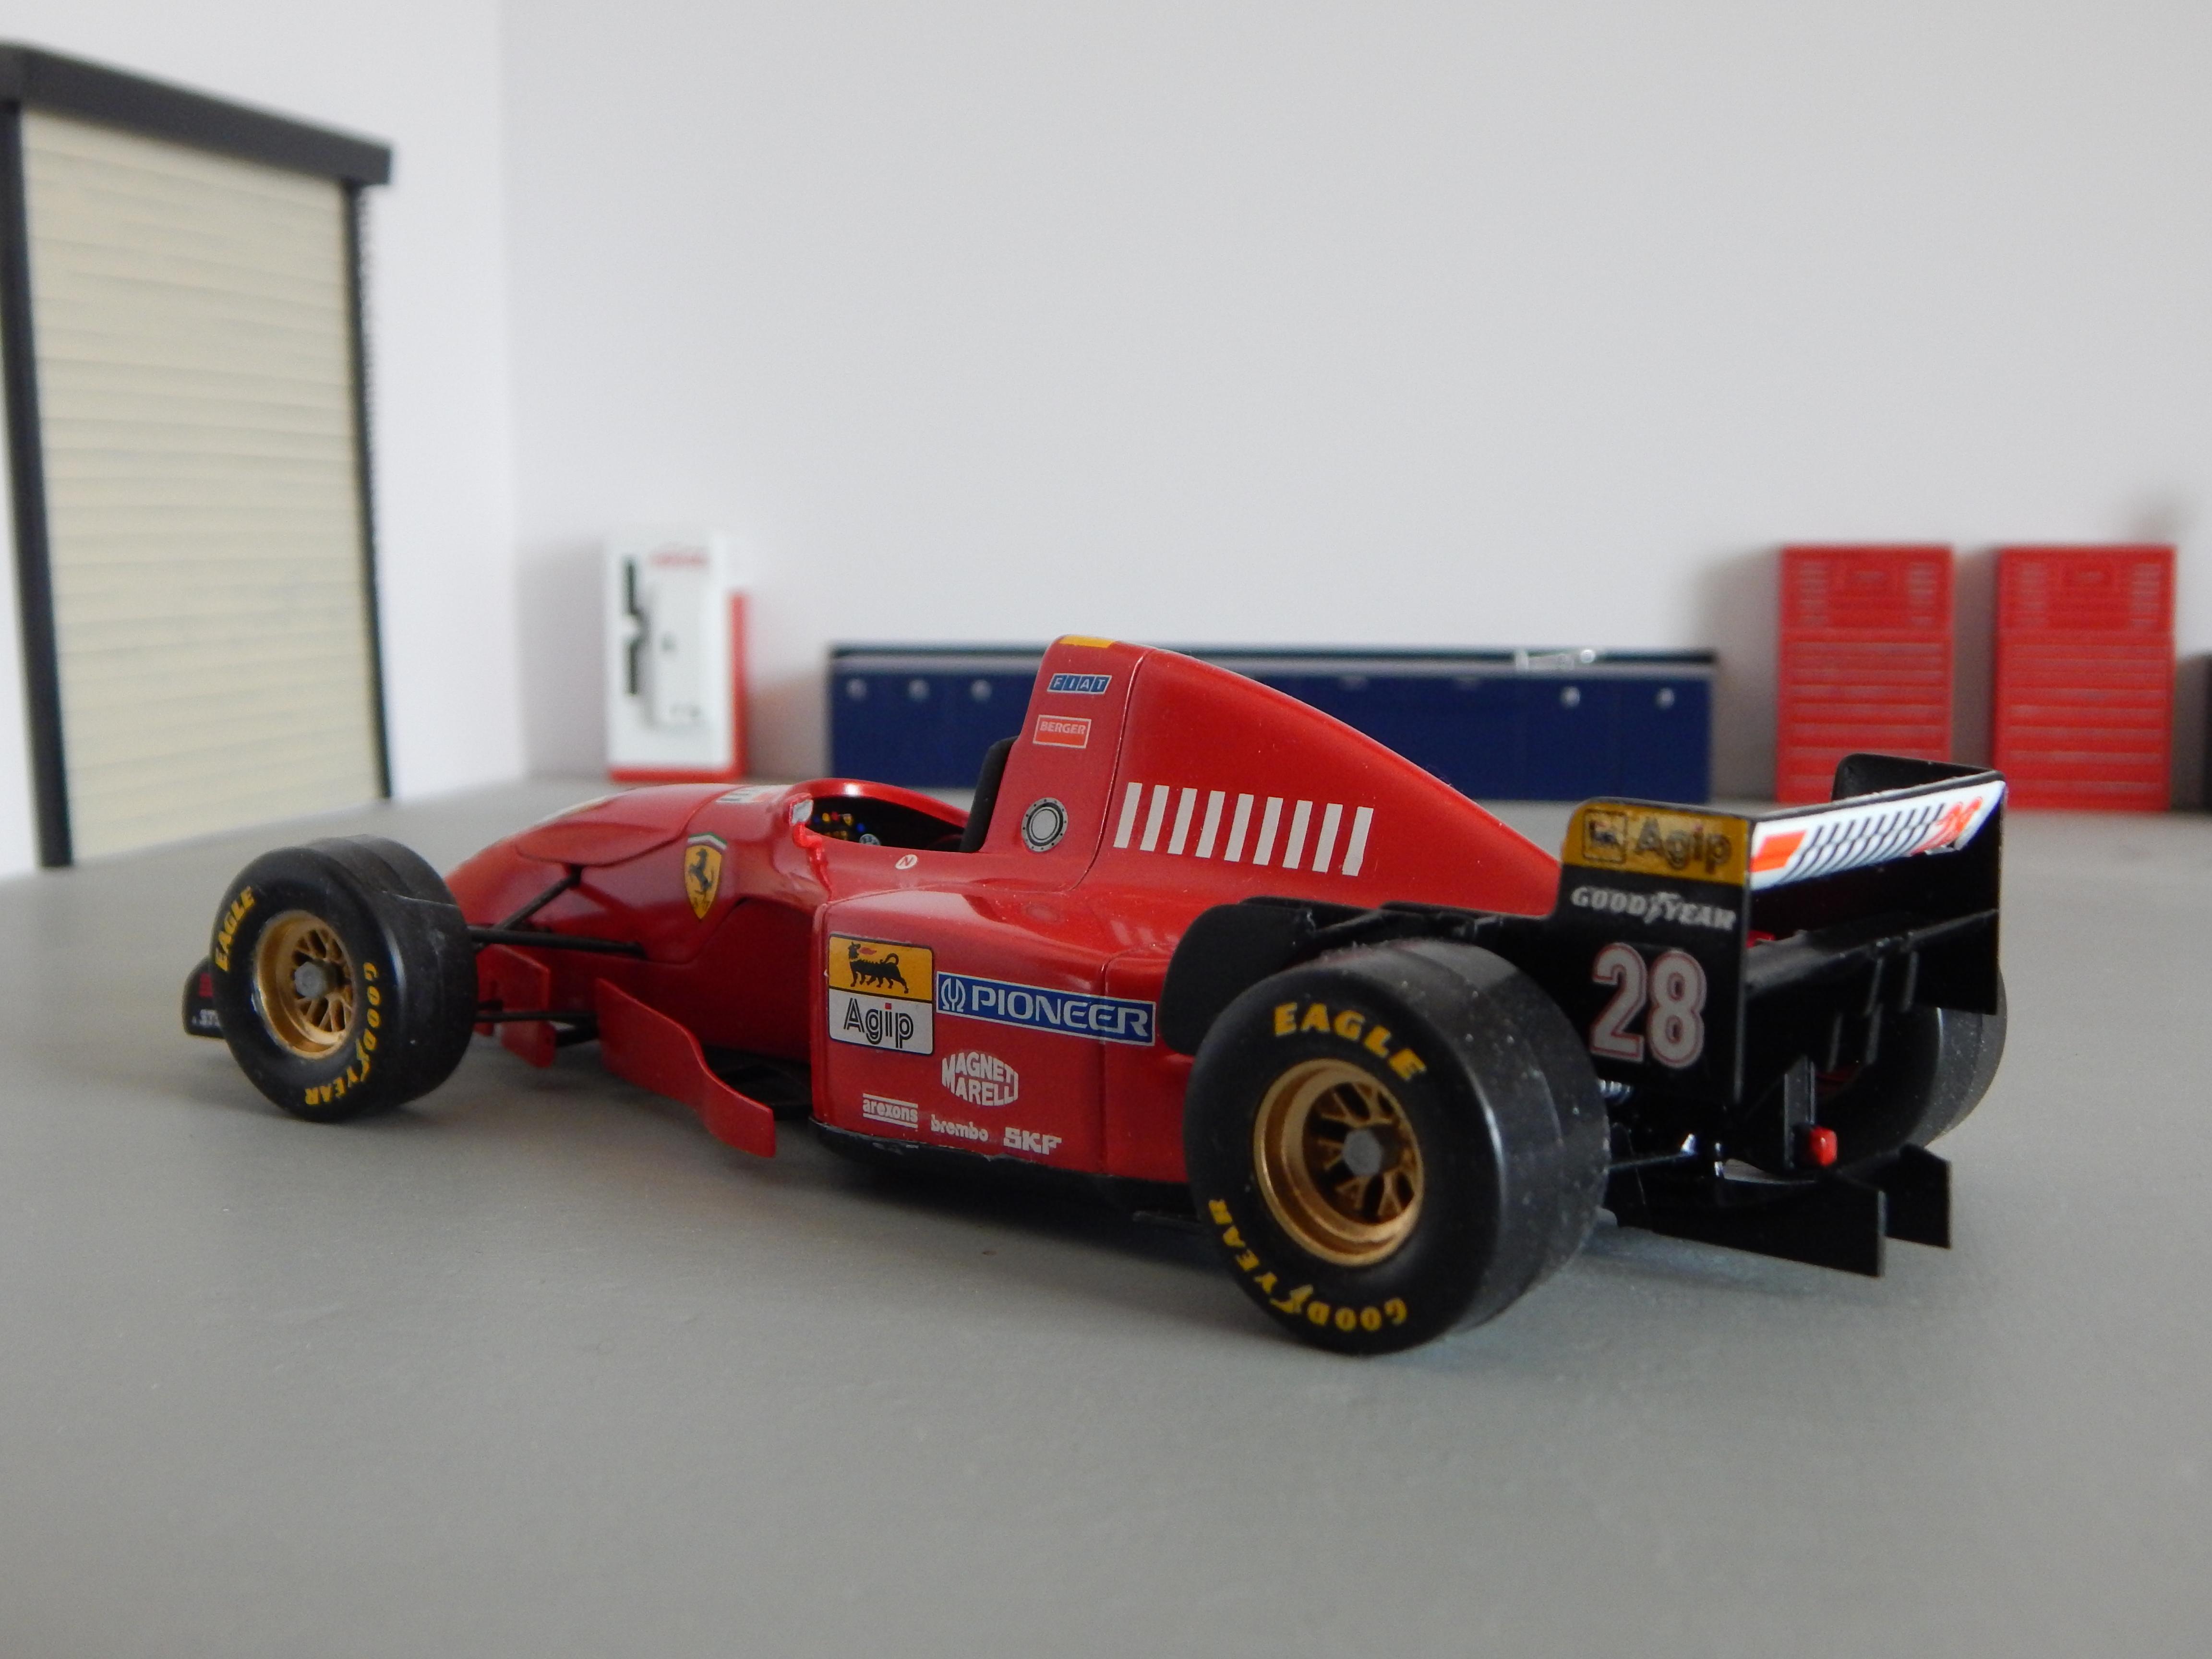
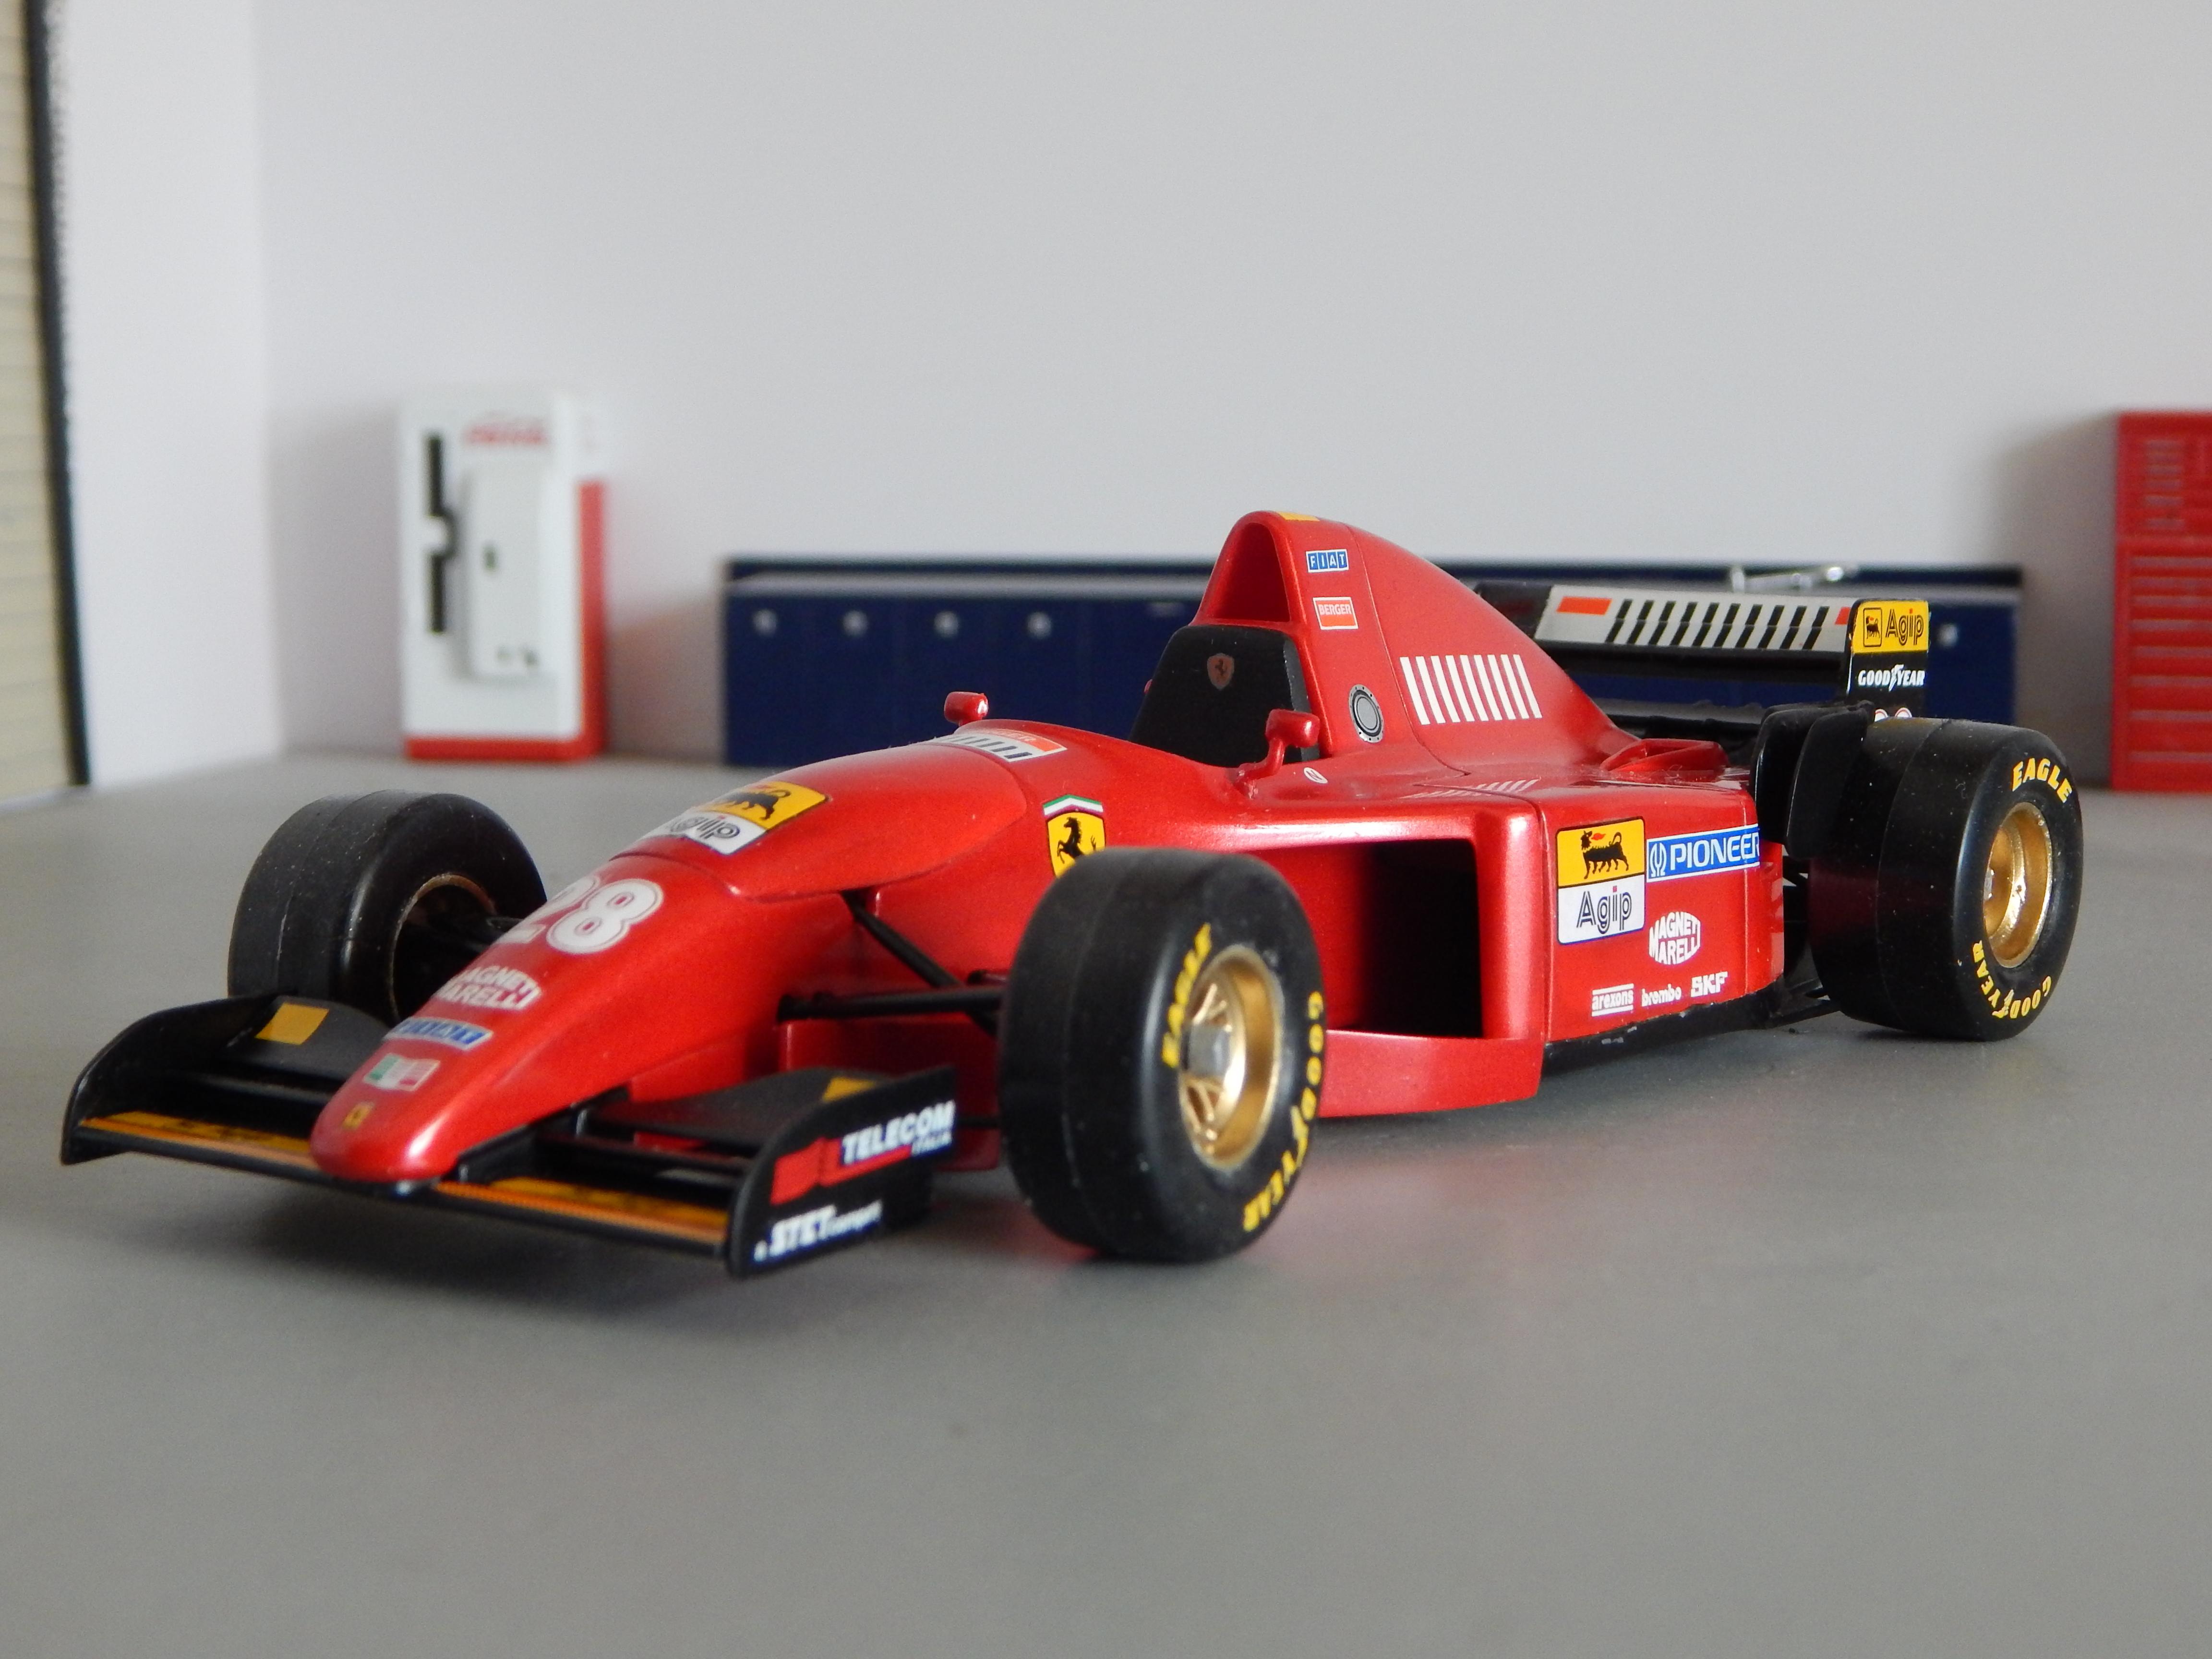
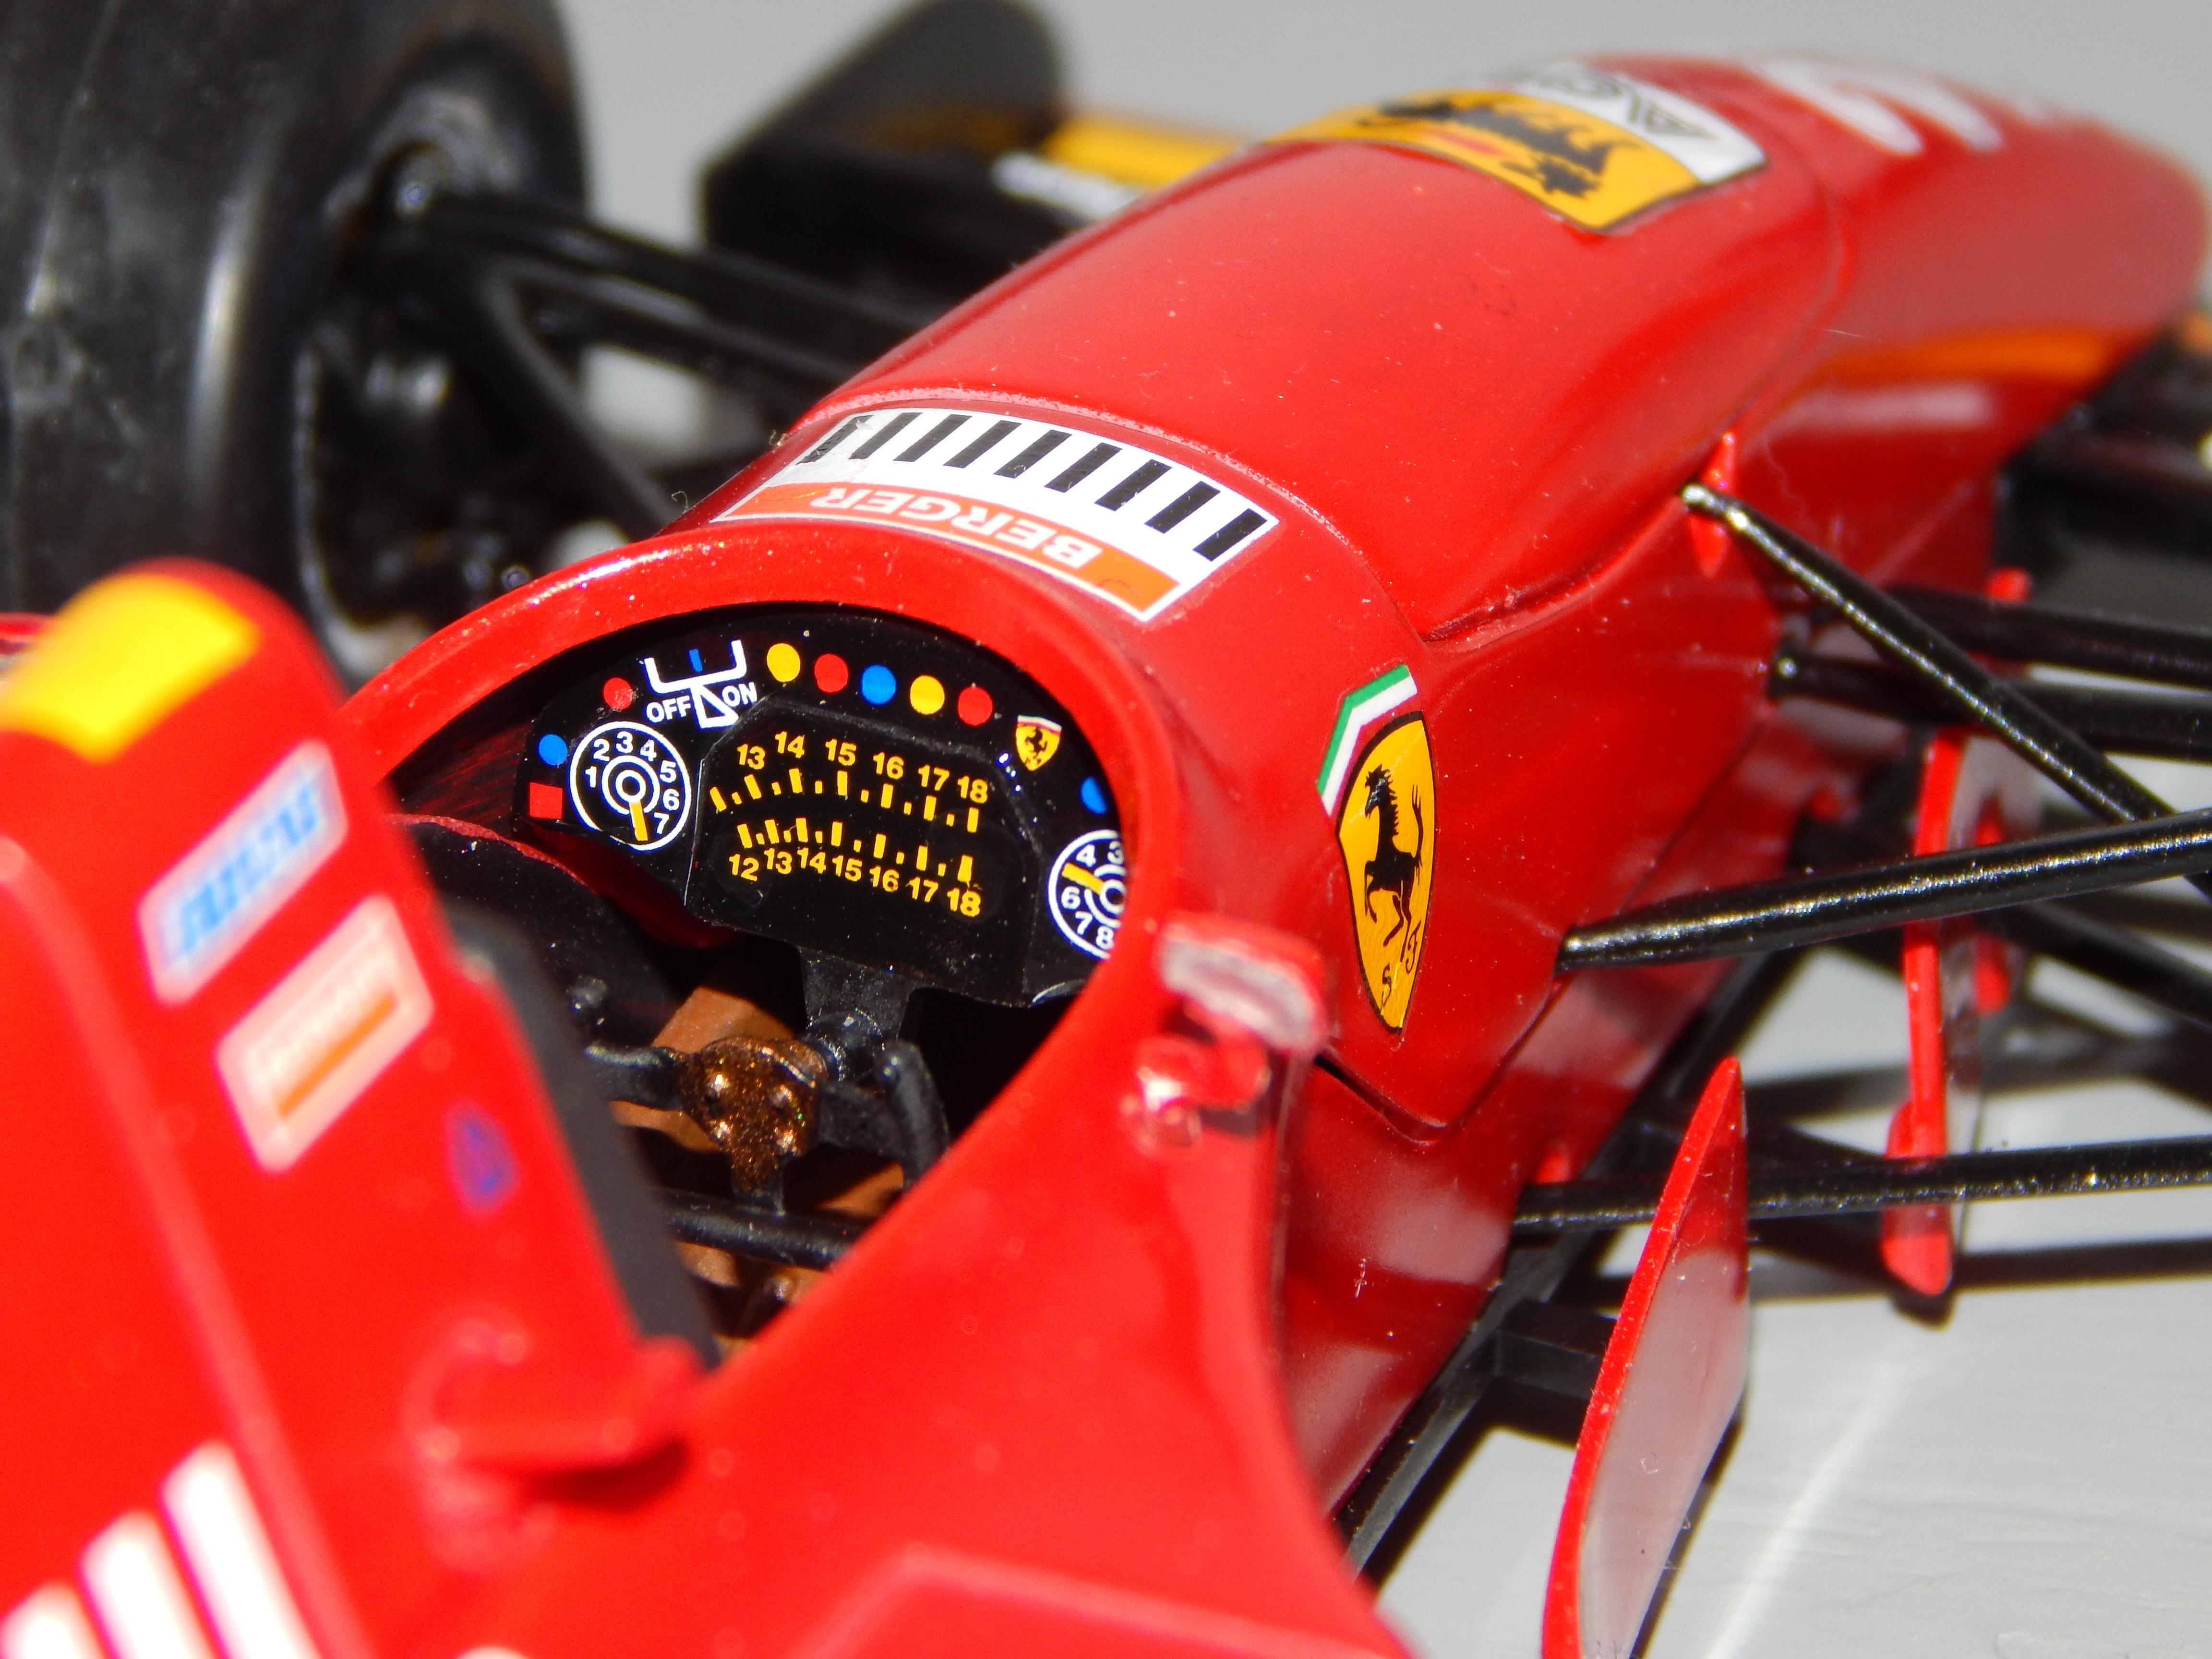
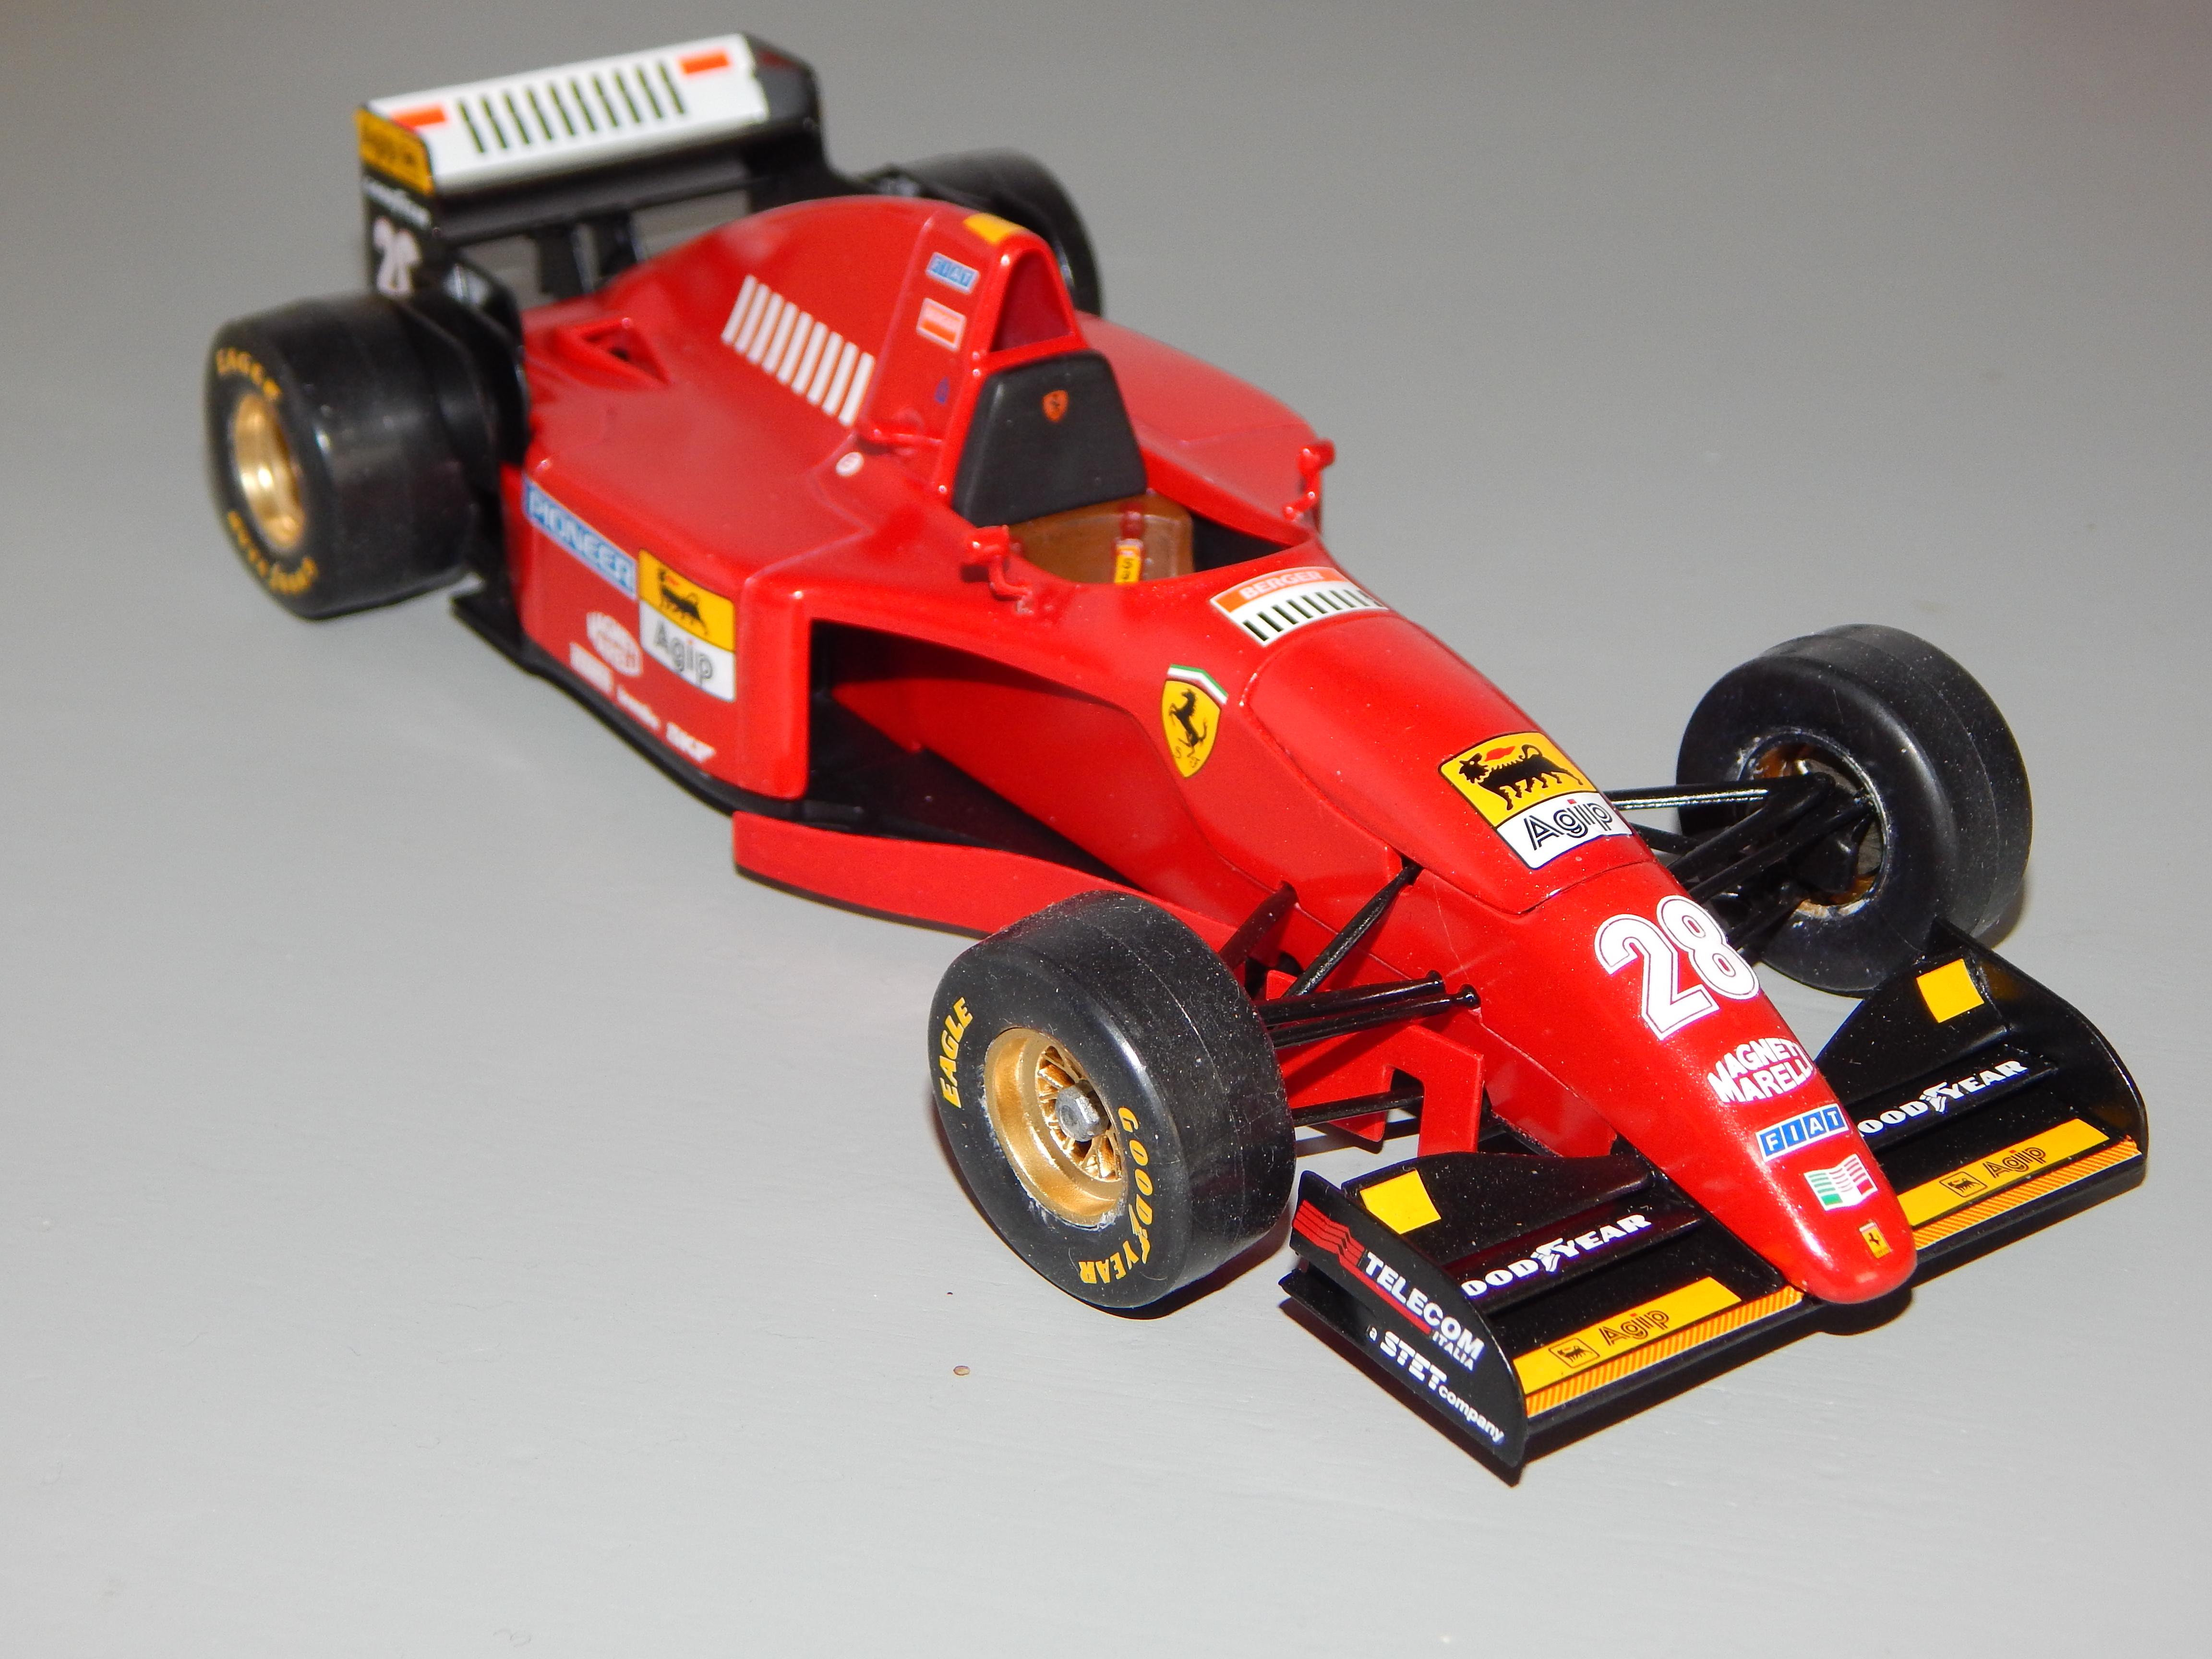
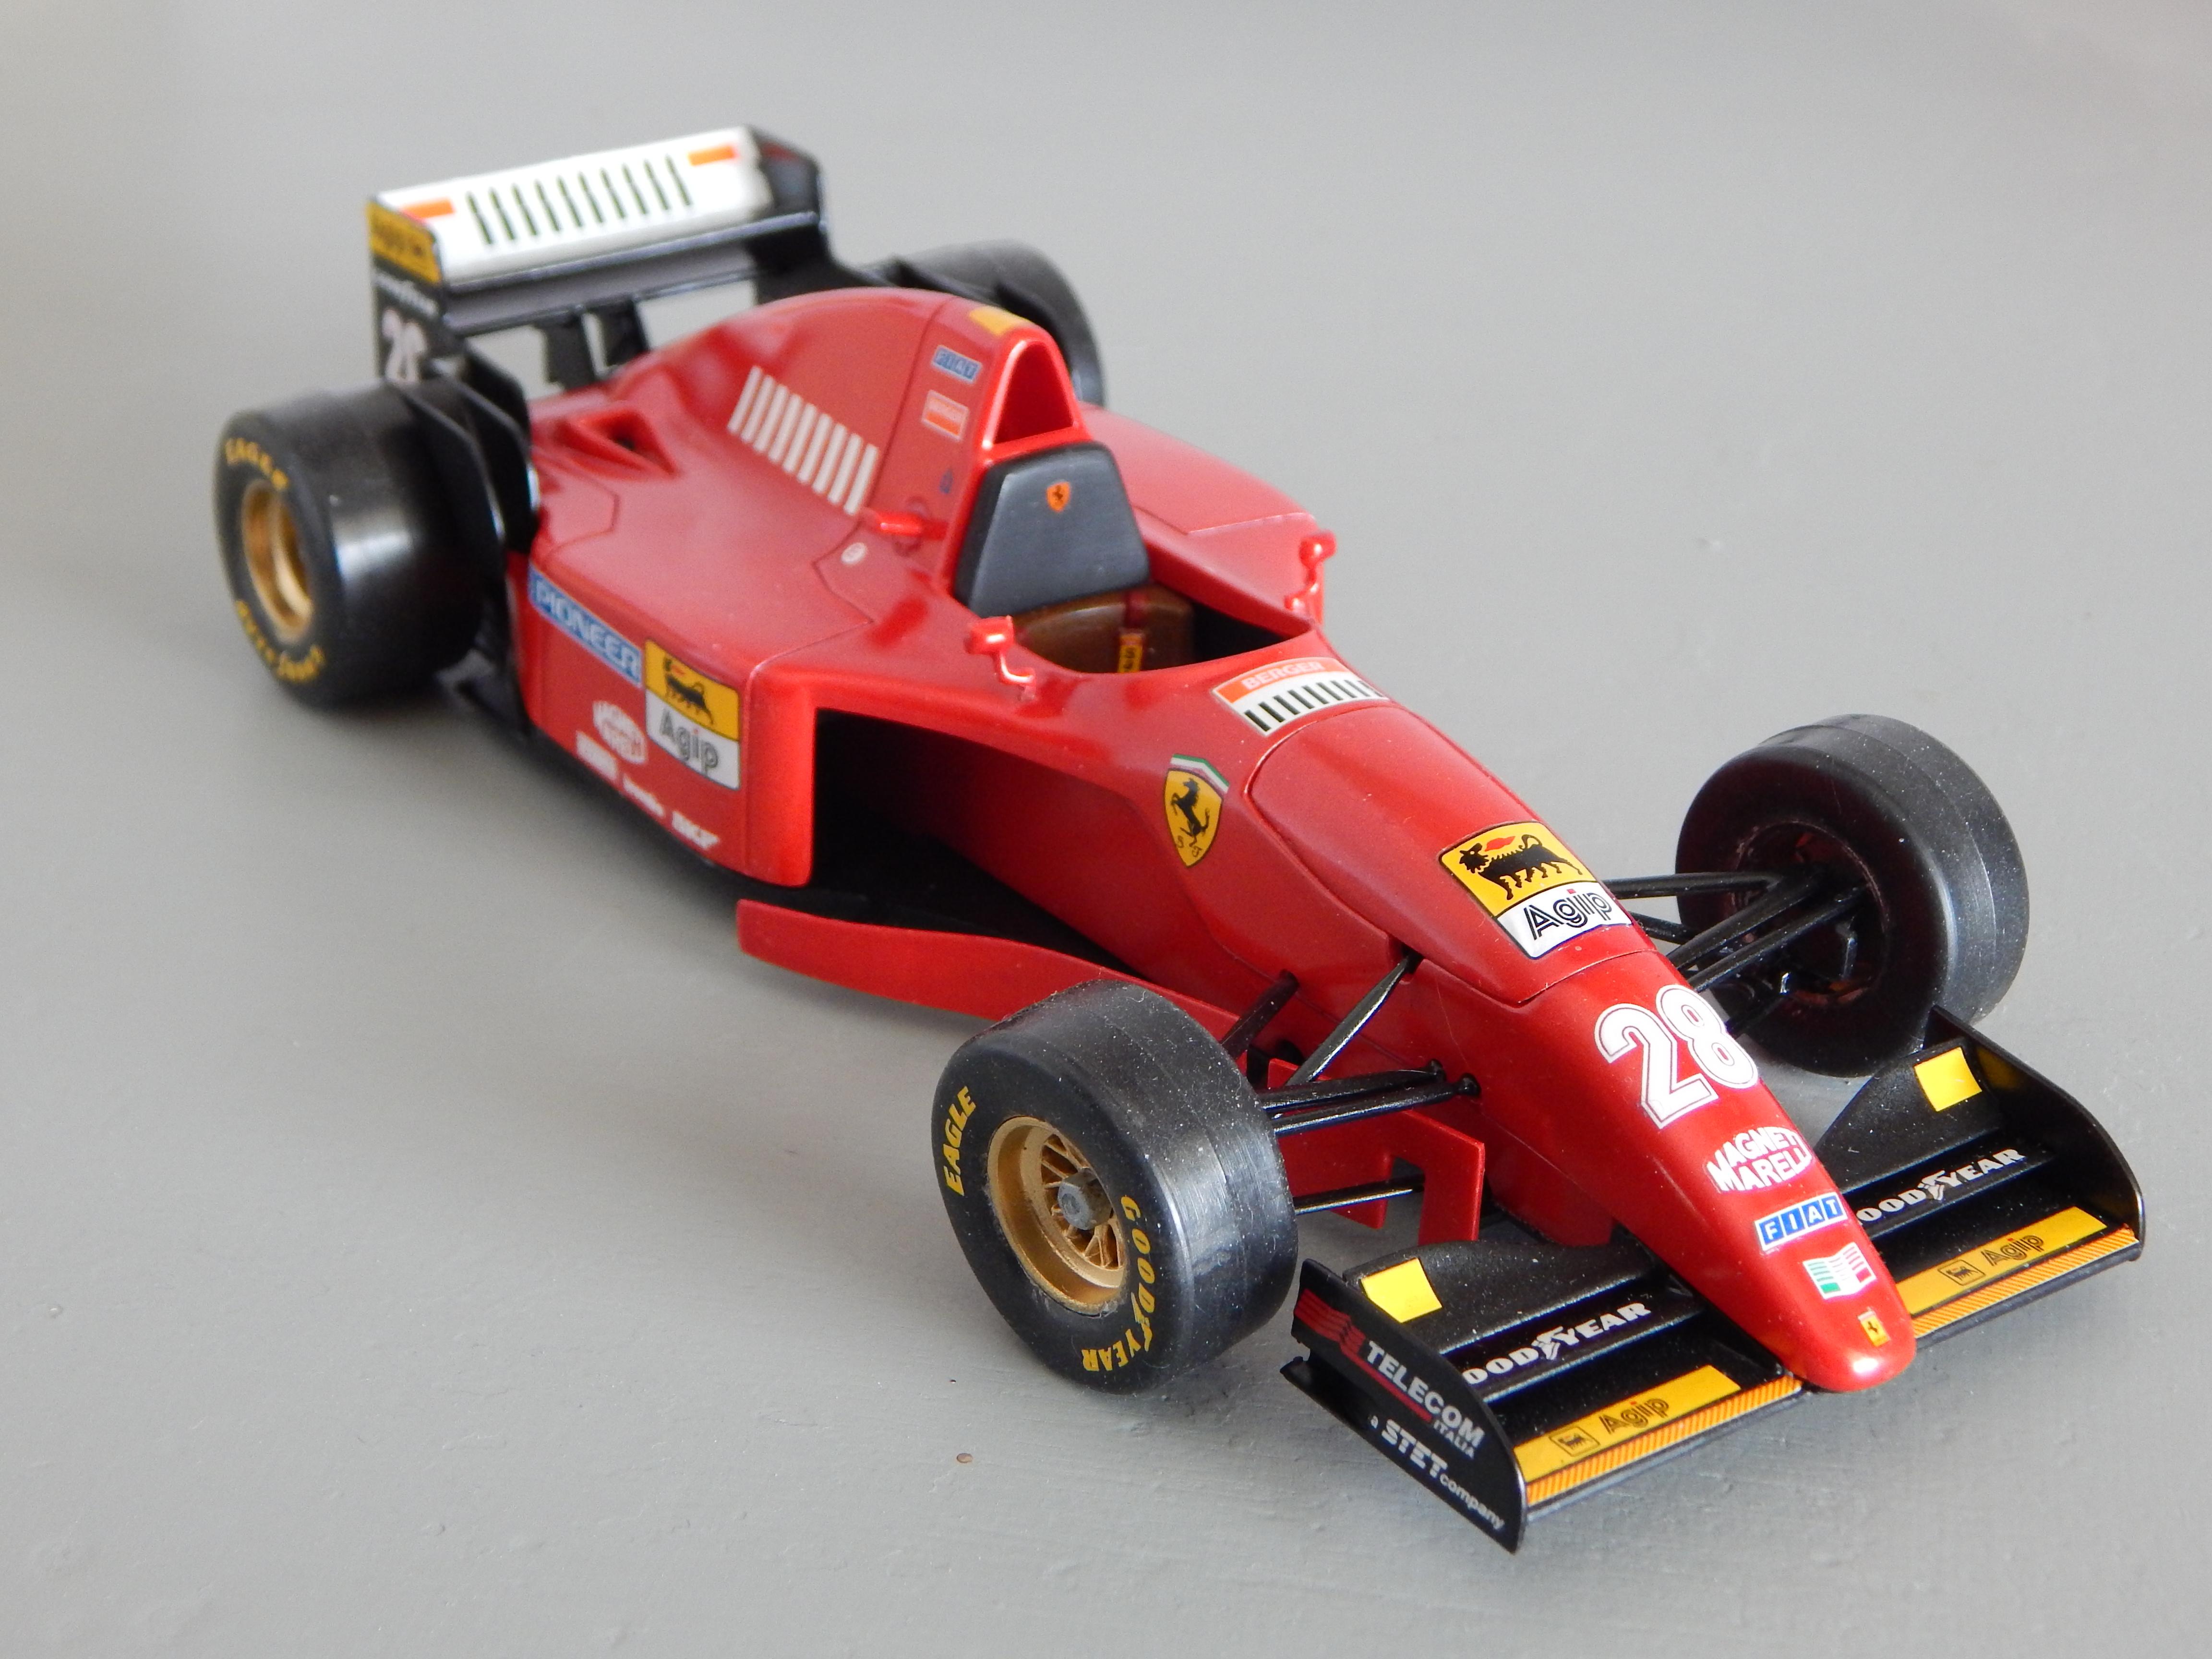
From Wikipedia: The Ferrari 412 T2 was the car with which Ferrari competed in the 1995 Formula One World Championship. Designed by John Barnard and Gustav Brunner at Shalford in the United Kingdom, the car was launched at Maranello on the 6th February, 1995. Driven by Jean Alesi and Gerhard Berger, this depicts Berger's car. Nice little kit, it does have an engine which will never be seen after gluing the body together. The only issue I have is with the tires, they are the soft, sticky plastic that attracts every mote of dirt within 6ft and will probably eventually eat the wheels. I put a couple of coats of primer and paint to hopefully forestall that, time will tell. Comments welcome, thanks for looking.
-
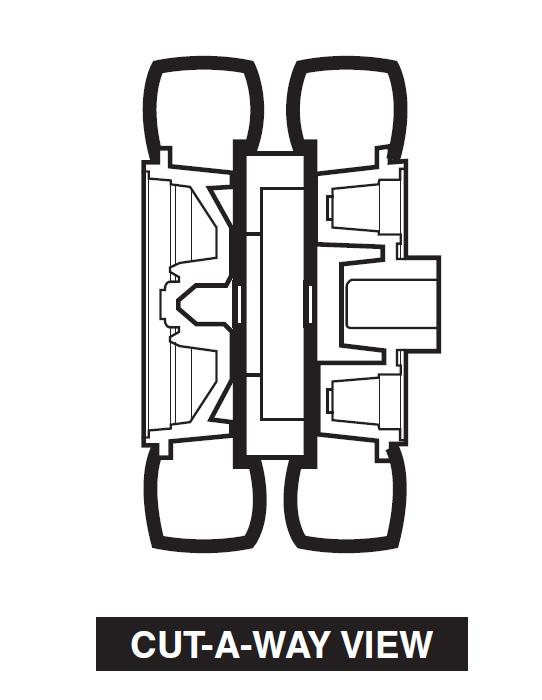
 I see now and then people who hasn't followed or even read the instructions on how to mount the tires on the rear wheels on the Revell Peterbilt 359 and Kenworth W900 Aerodyne snap kits. If you do it wrong it looks horrible and if you do it right it looks a lot better...not perfect as these wheels are way too shallow to be realistic...but it is what it is. Here is how you are supposed to do it, the wheel rim goes inside the tire so the outermost lip on the rim is inside the tire, so the rims are not only pushed through the tire like on most of the kits, if you do the outermost lip on the rim shows and it shouldn't. Here is a blown up picture from the instructions on how to do it. And here is how it should look if you have done it right. And if it looks like this you have done it wrong. The right way looks a lot better, doesn't it. Easy as pie. The pictures are not mine except for the blown up instruction picture, the others are borrowed from a couple of threads on this forum.
-
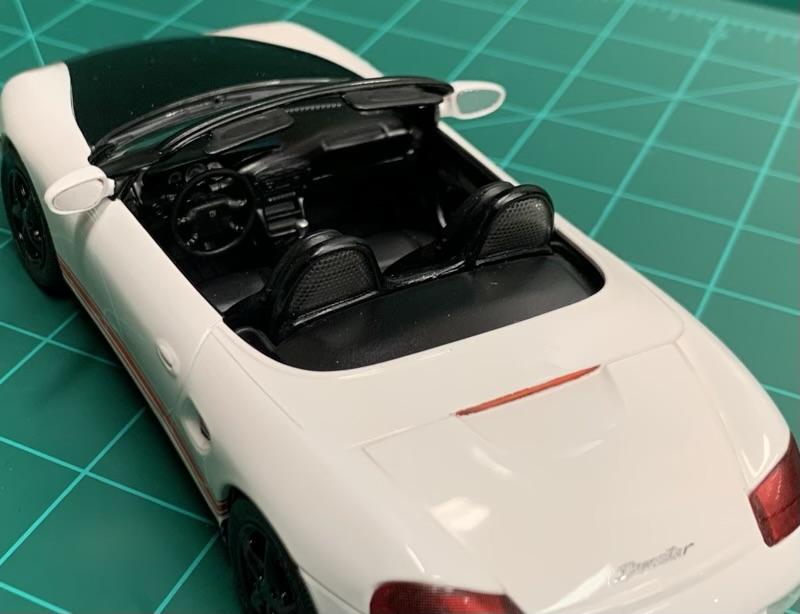
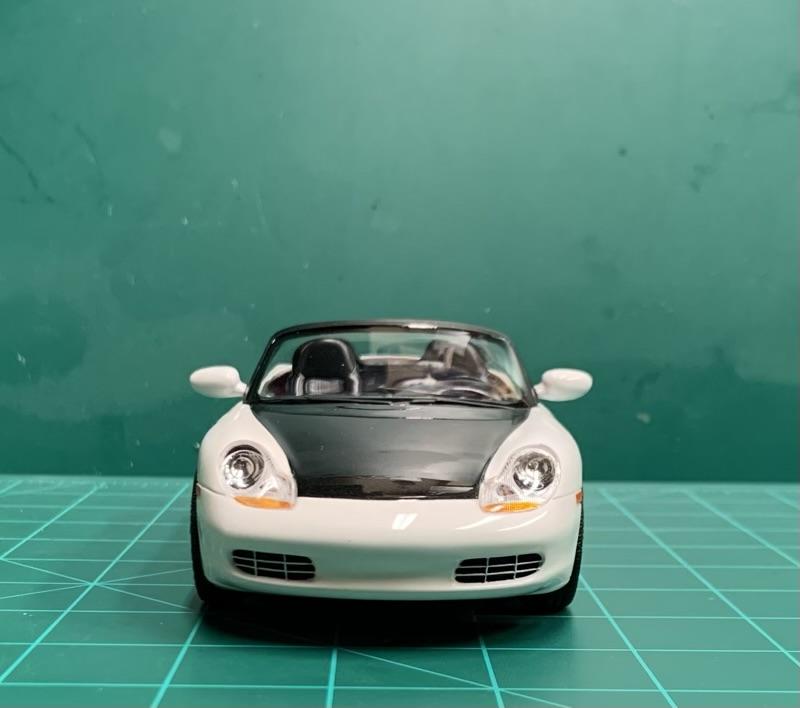
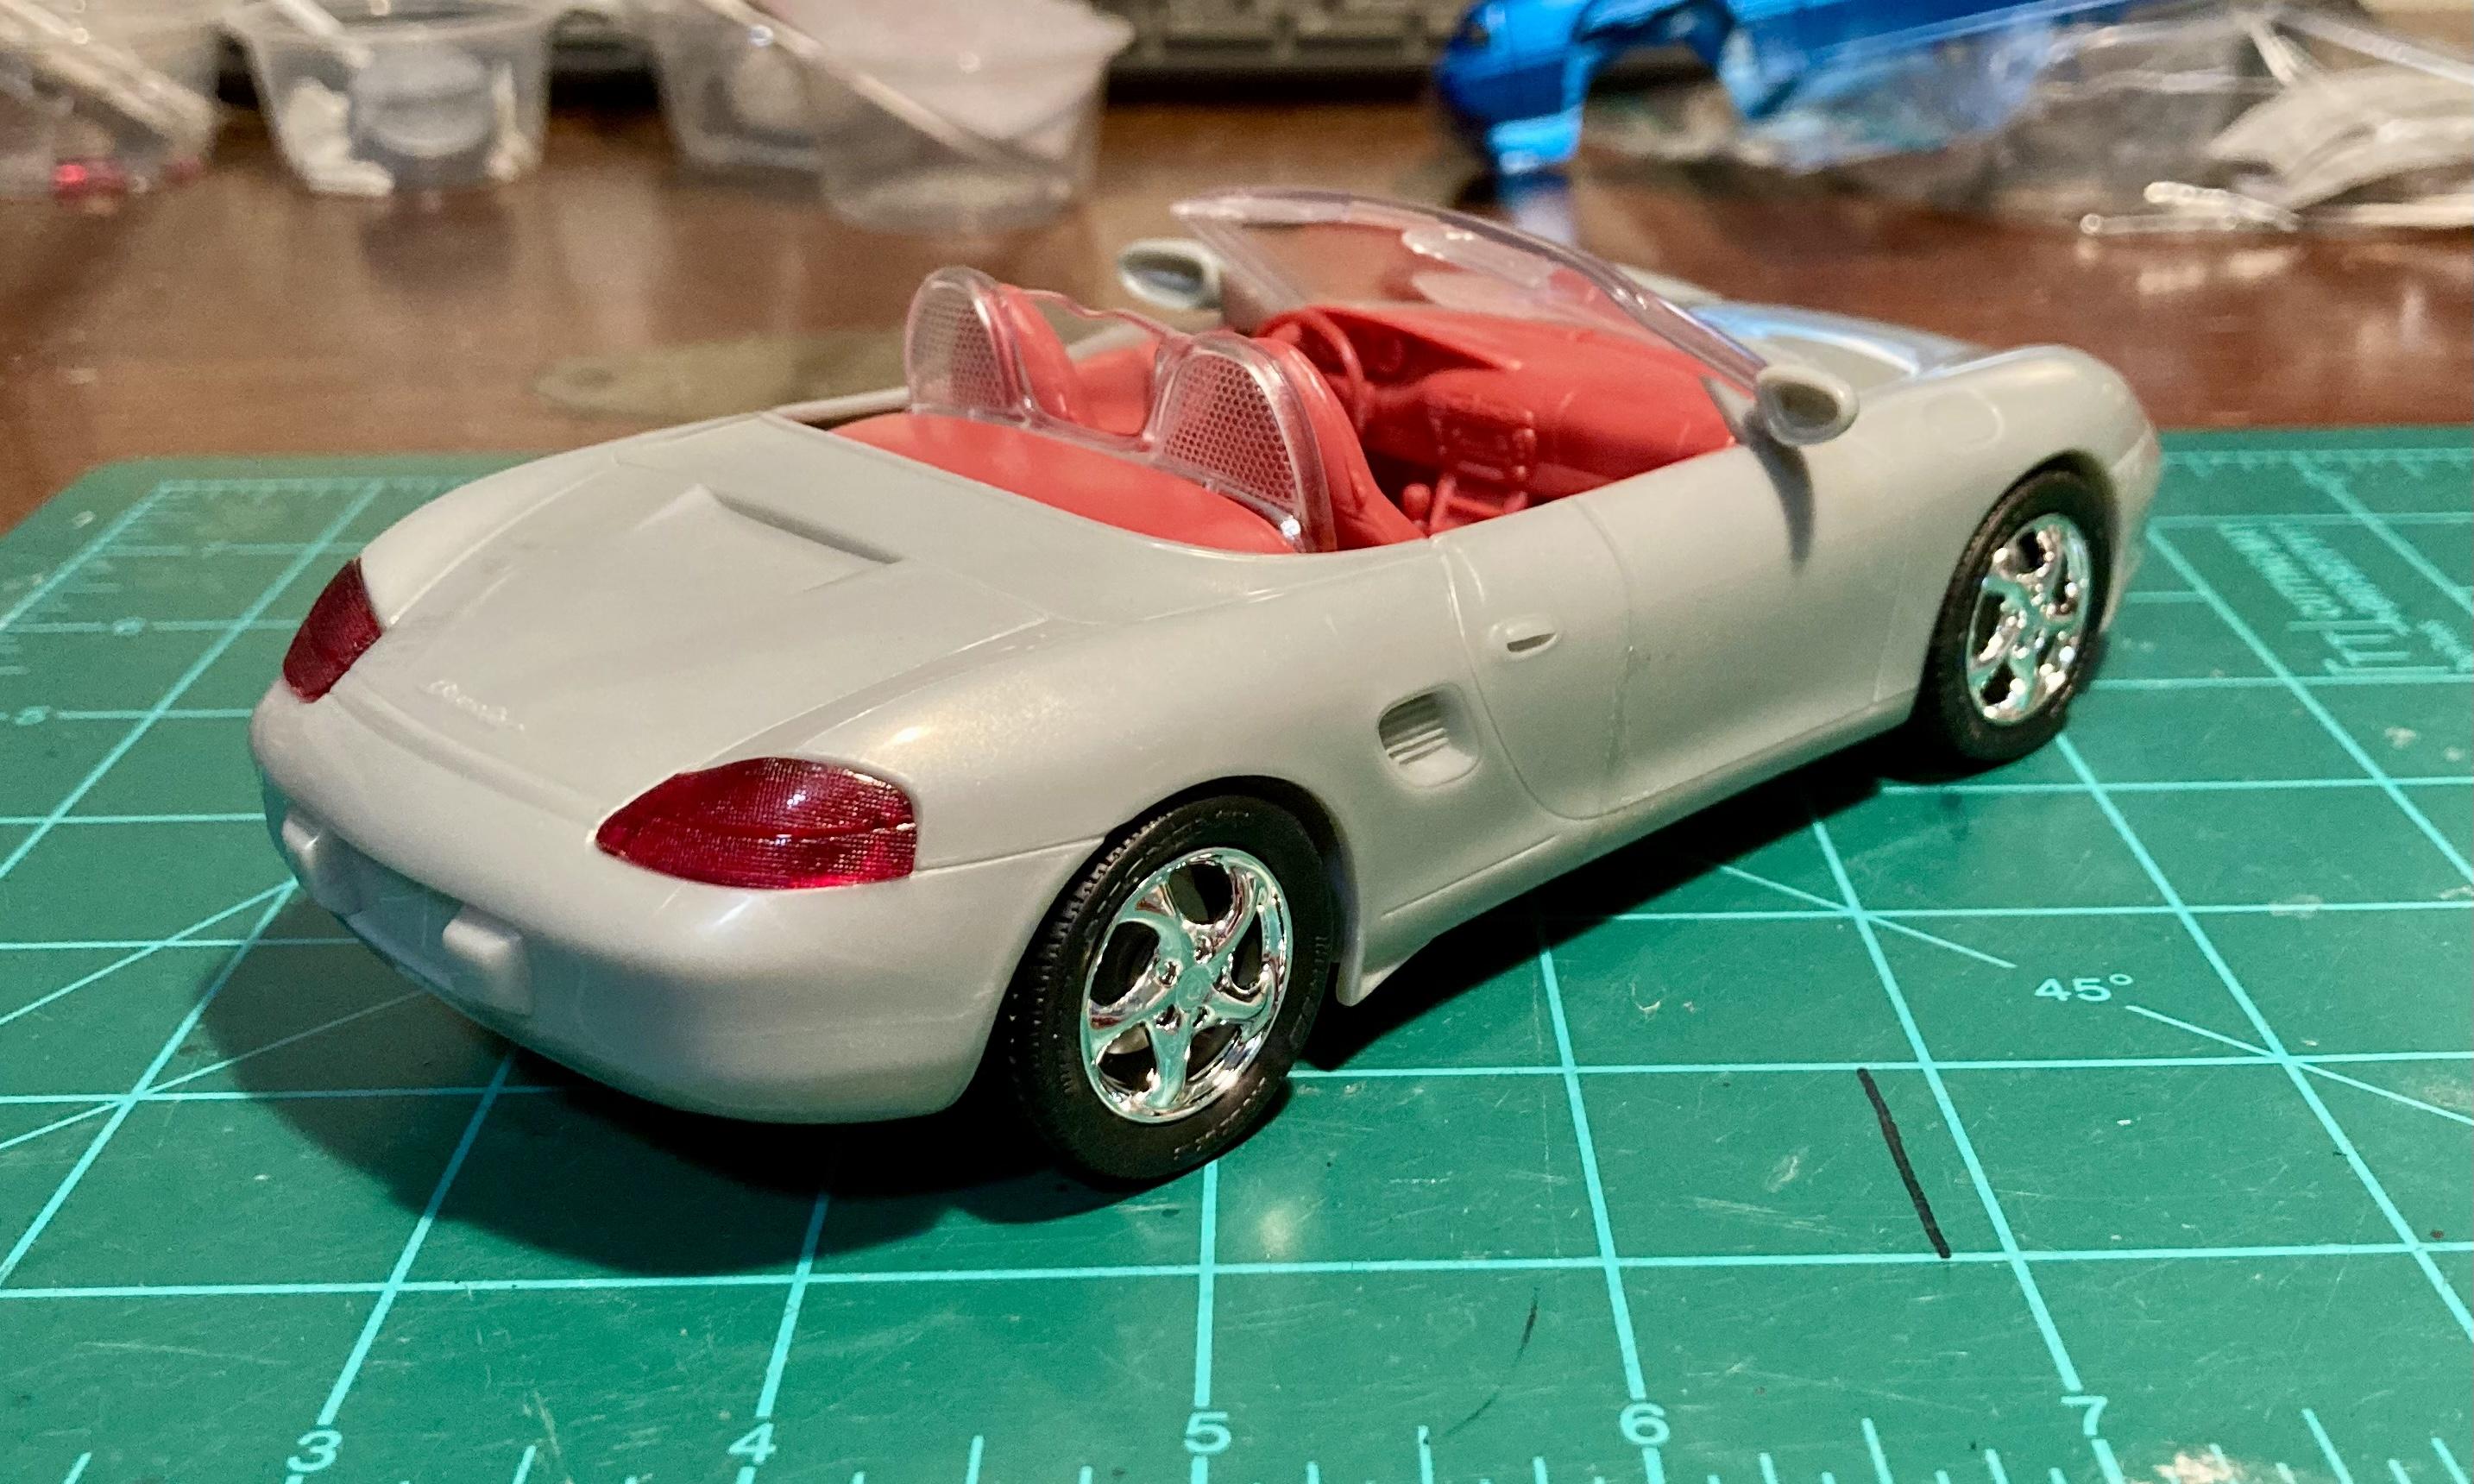
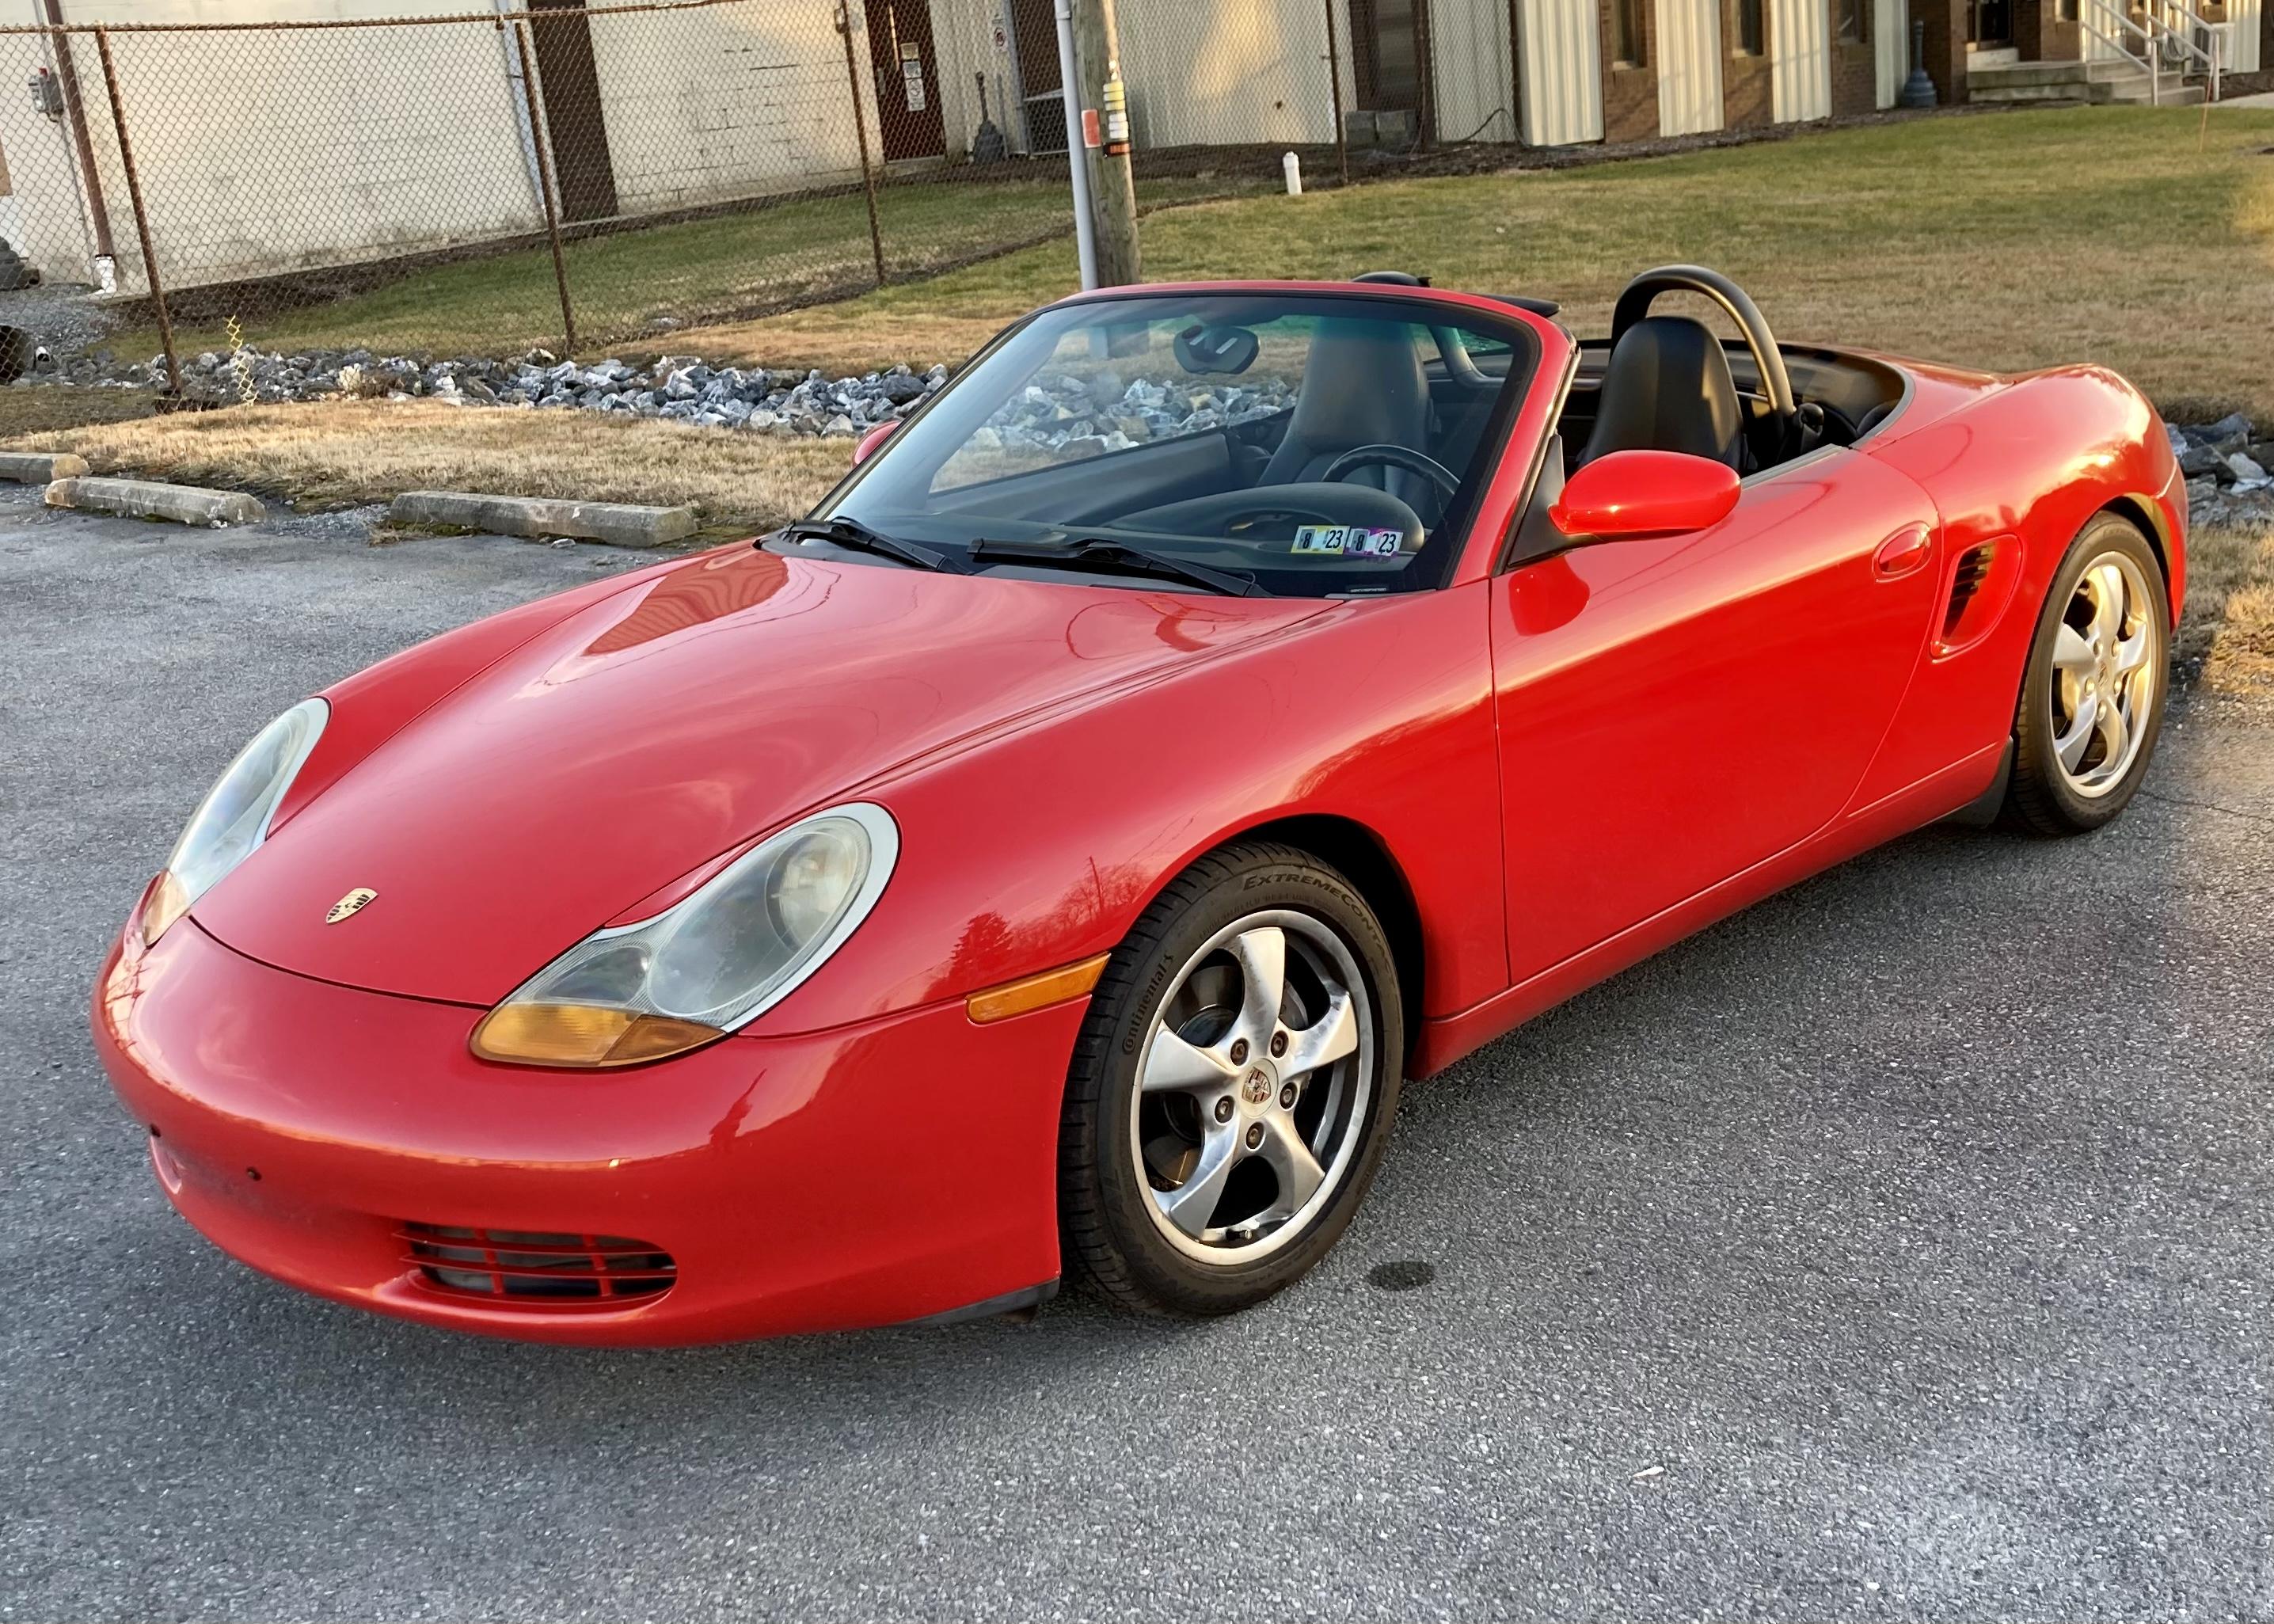
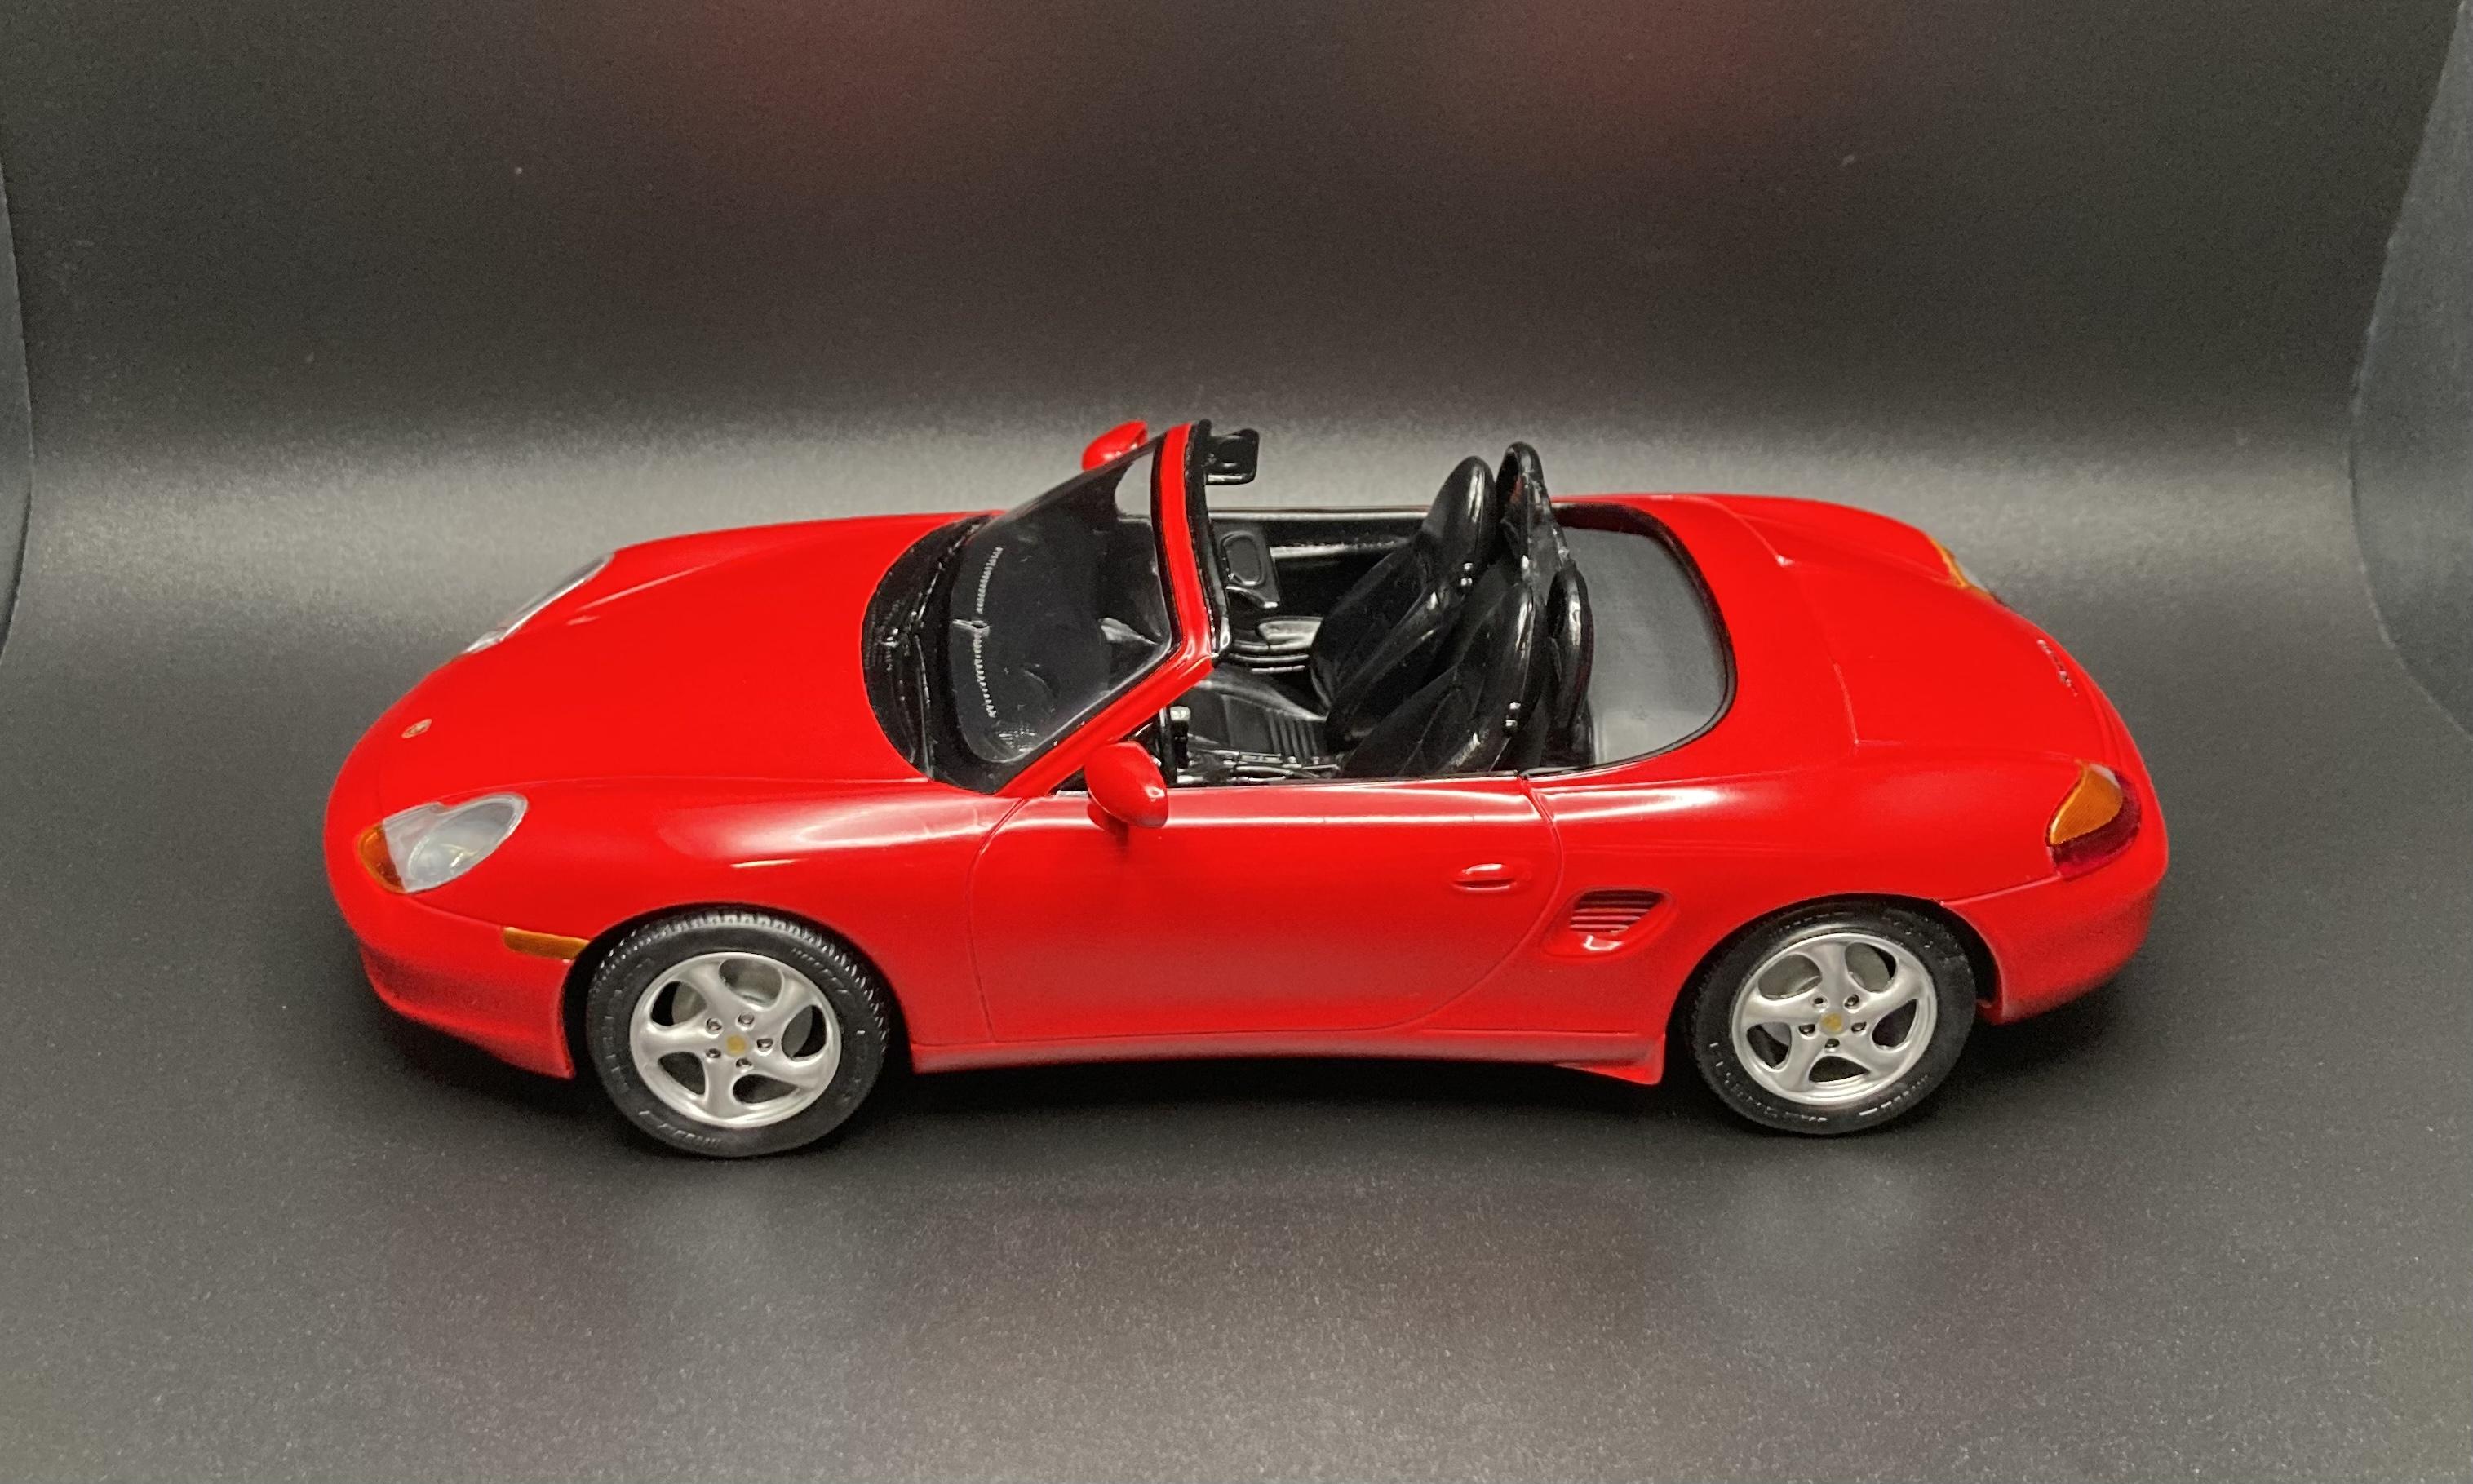
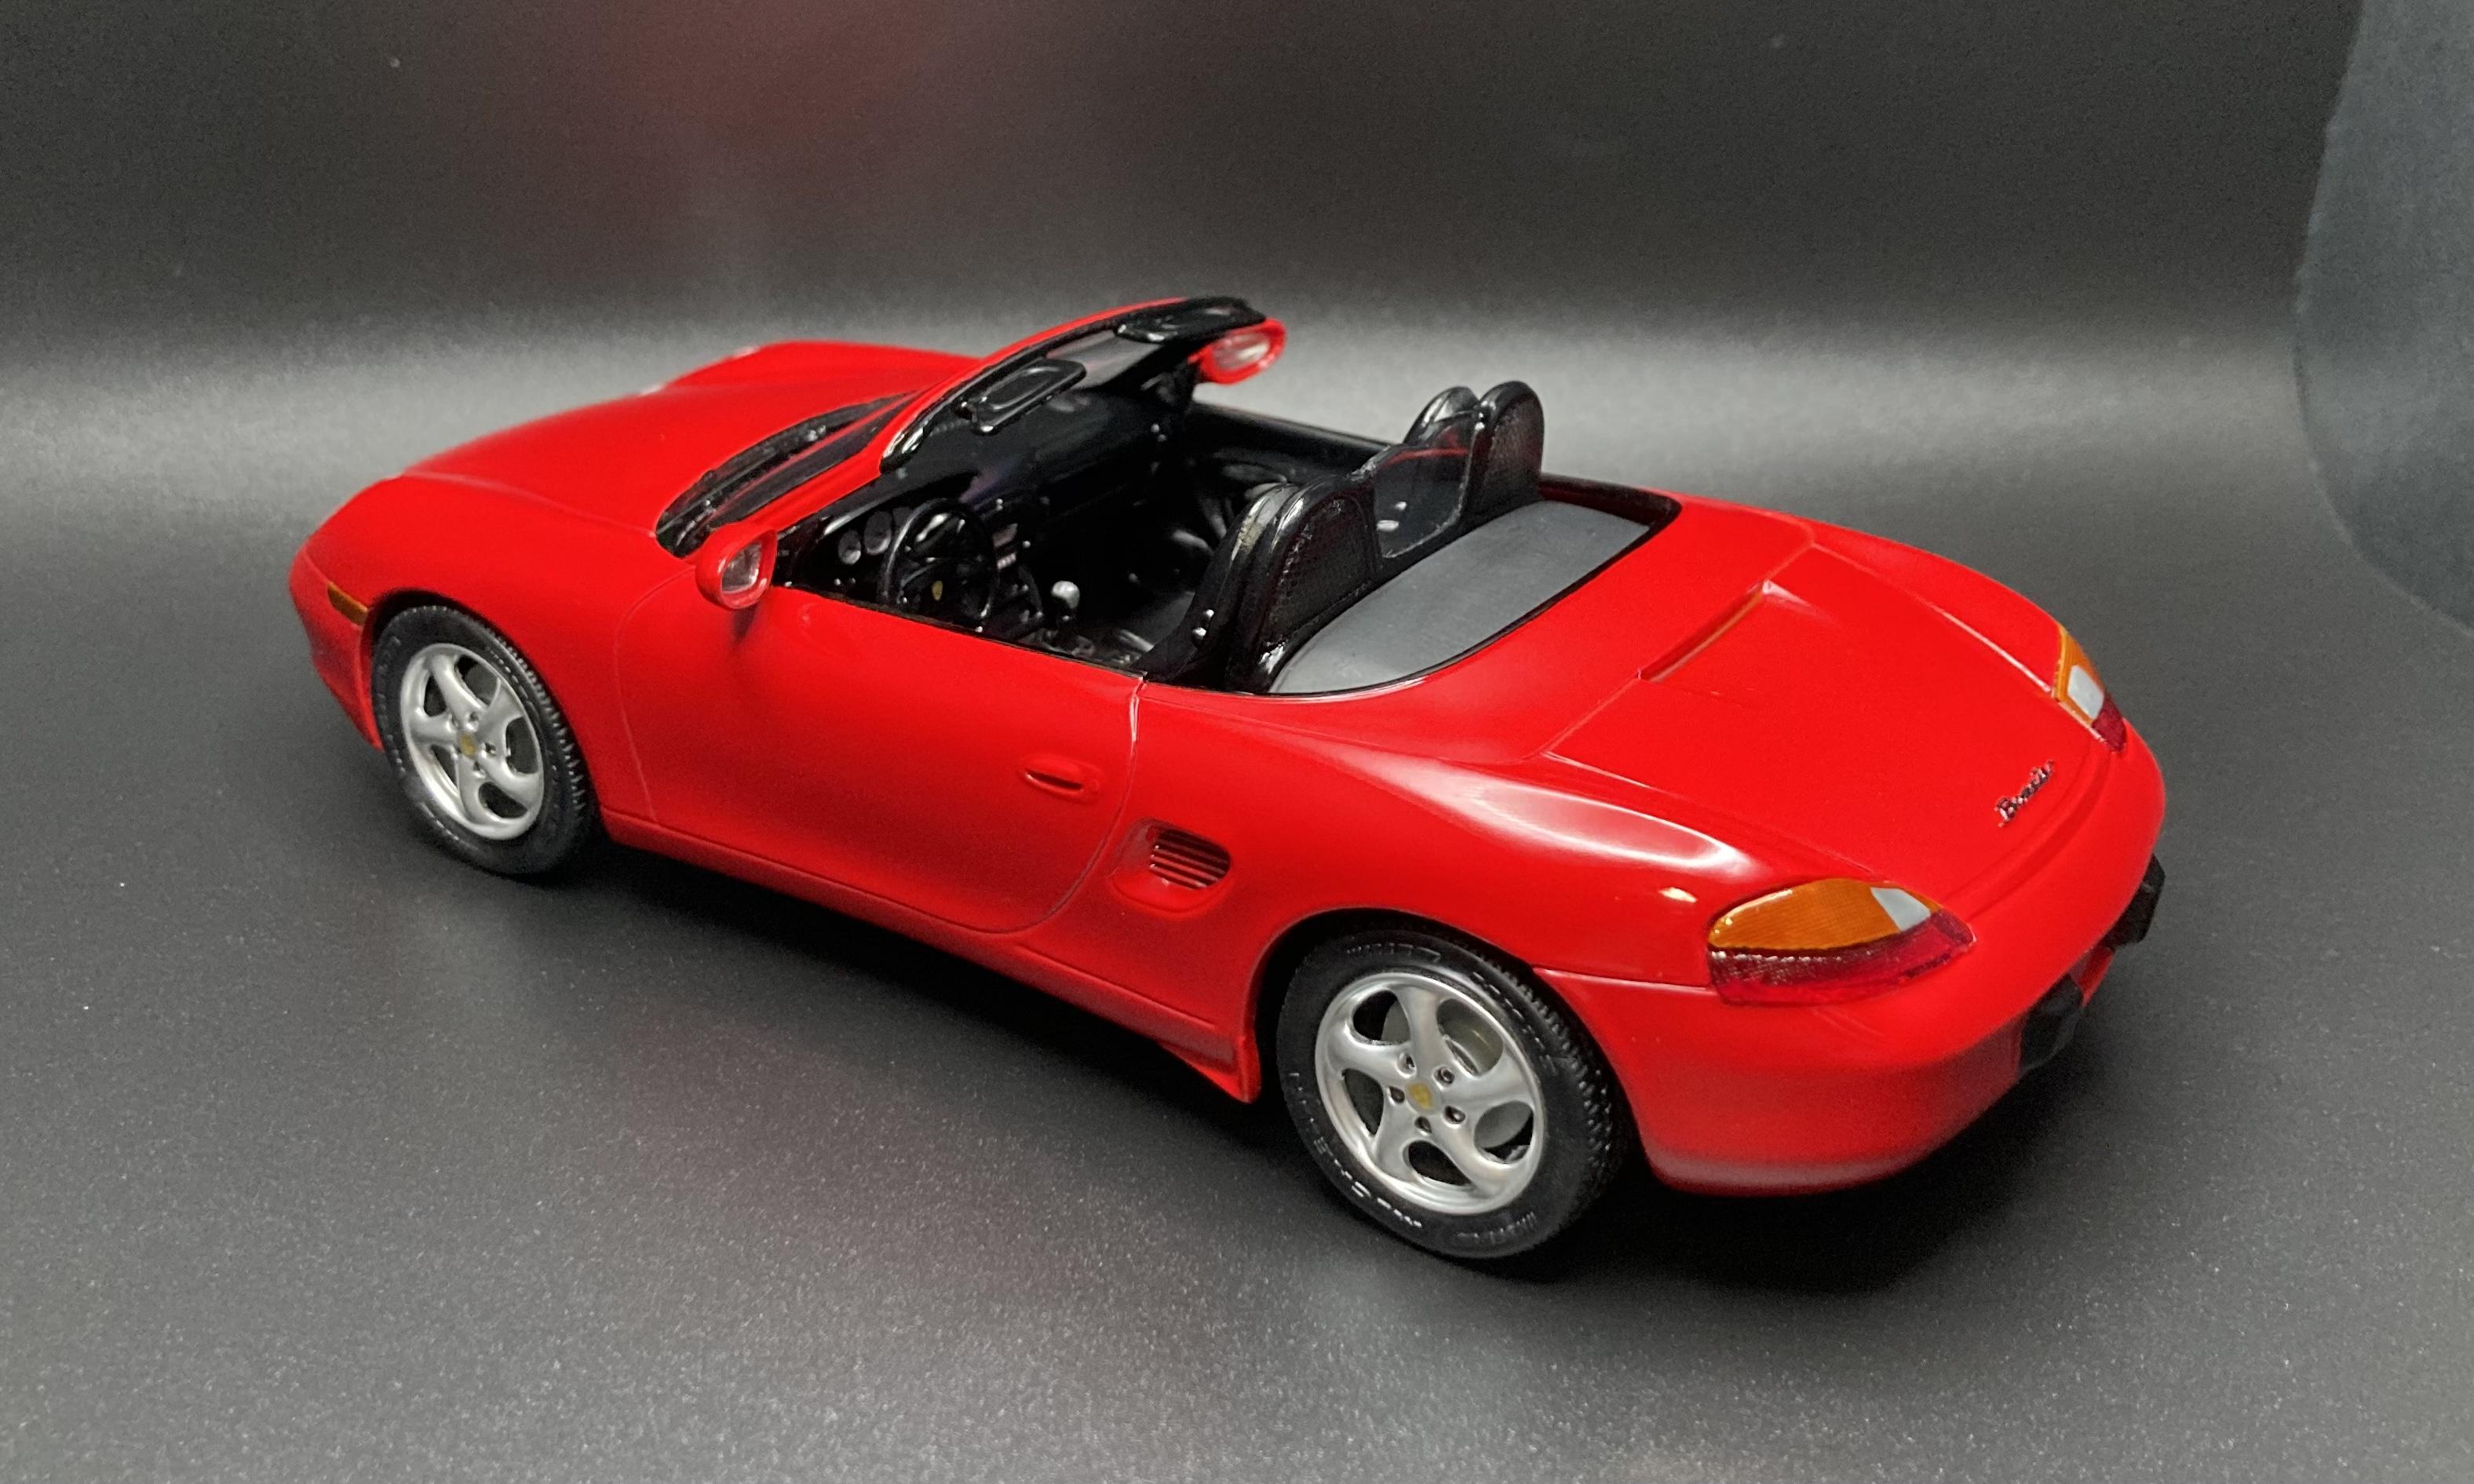
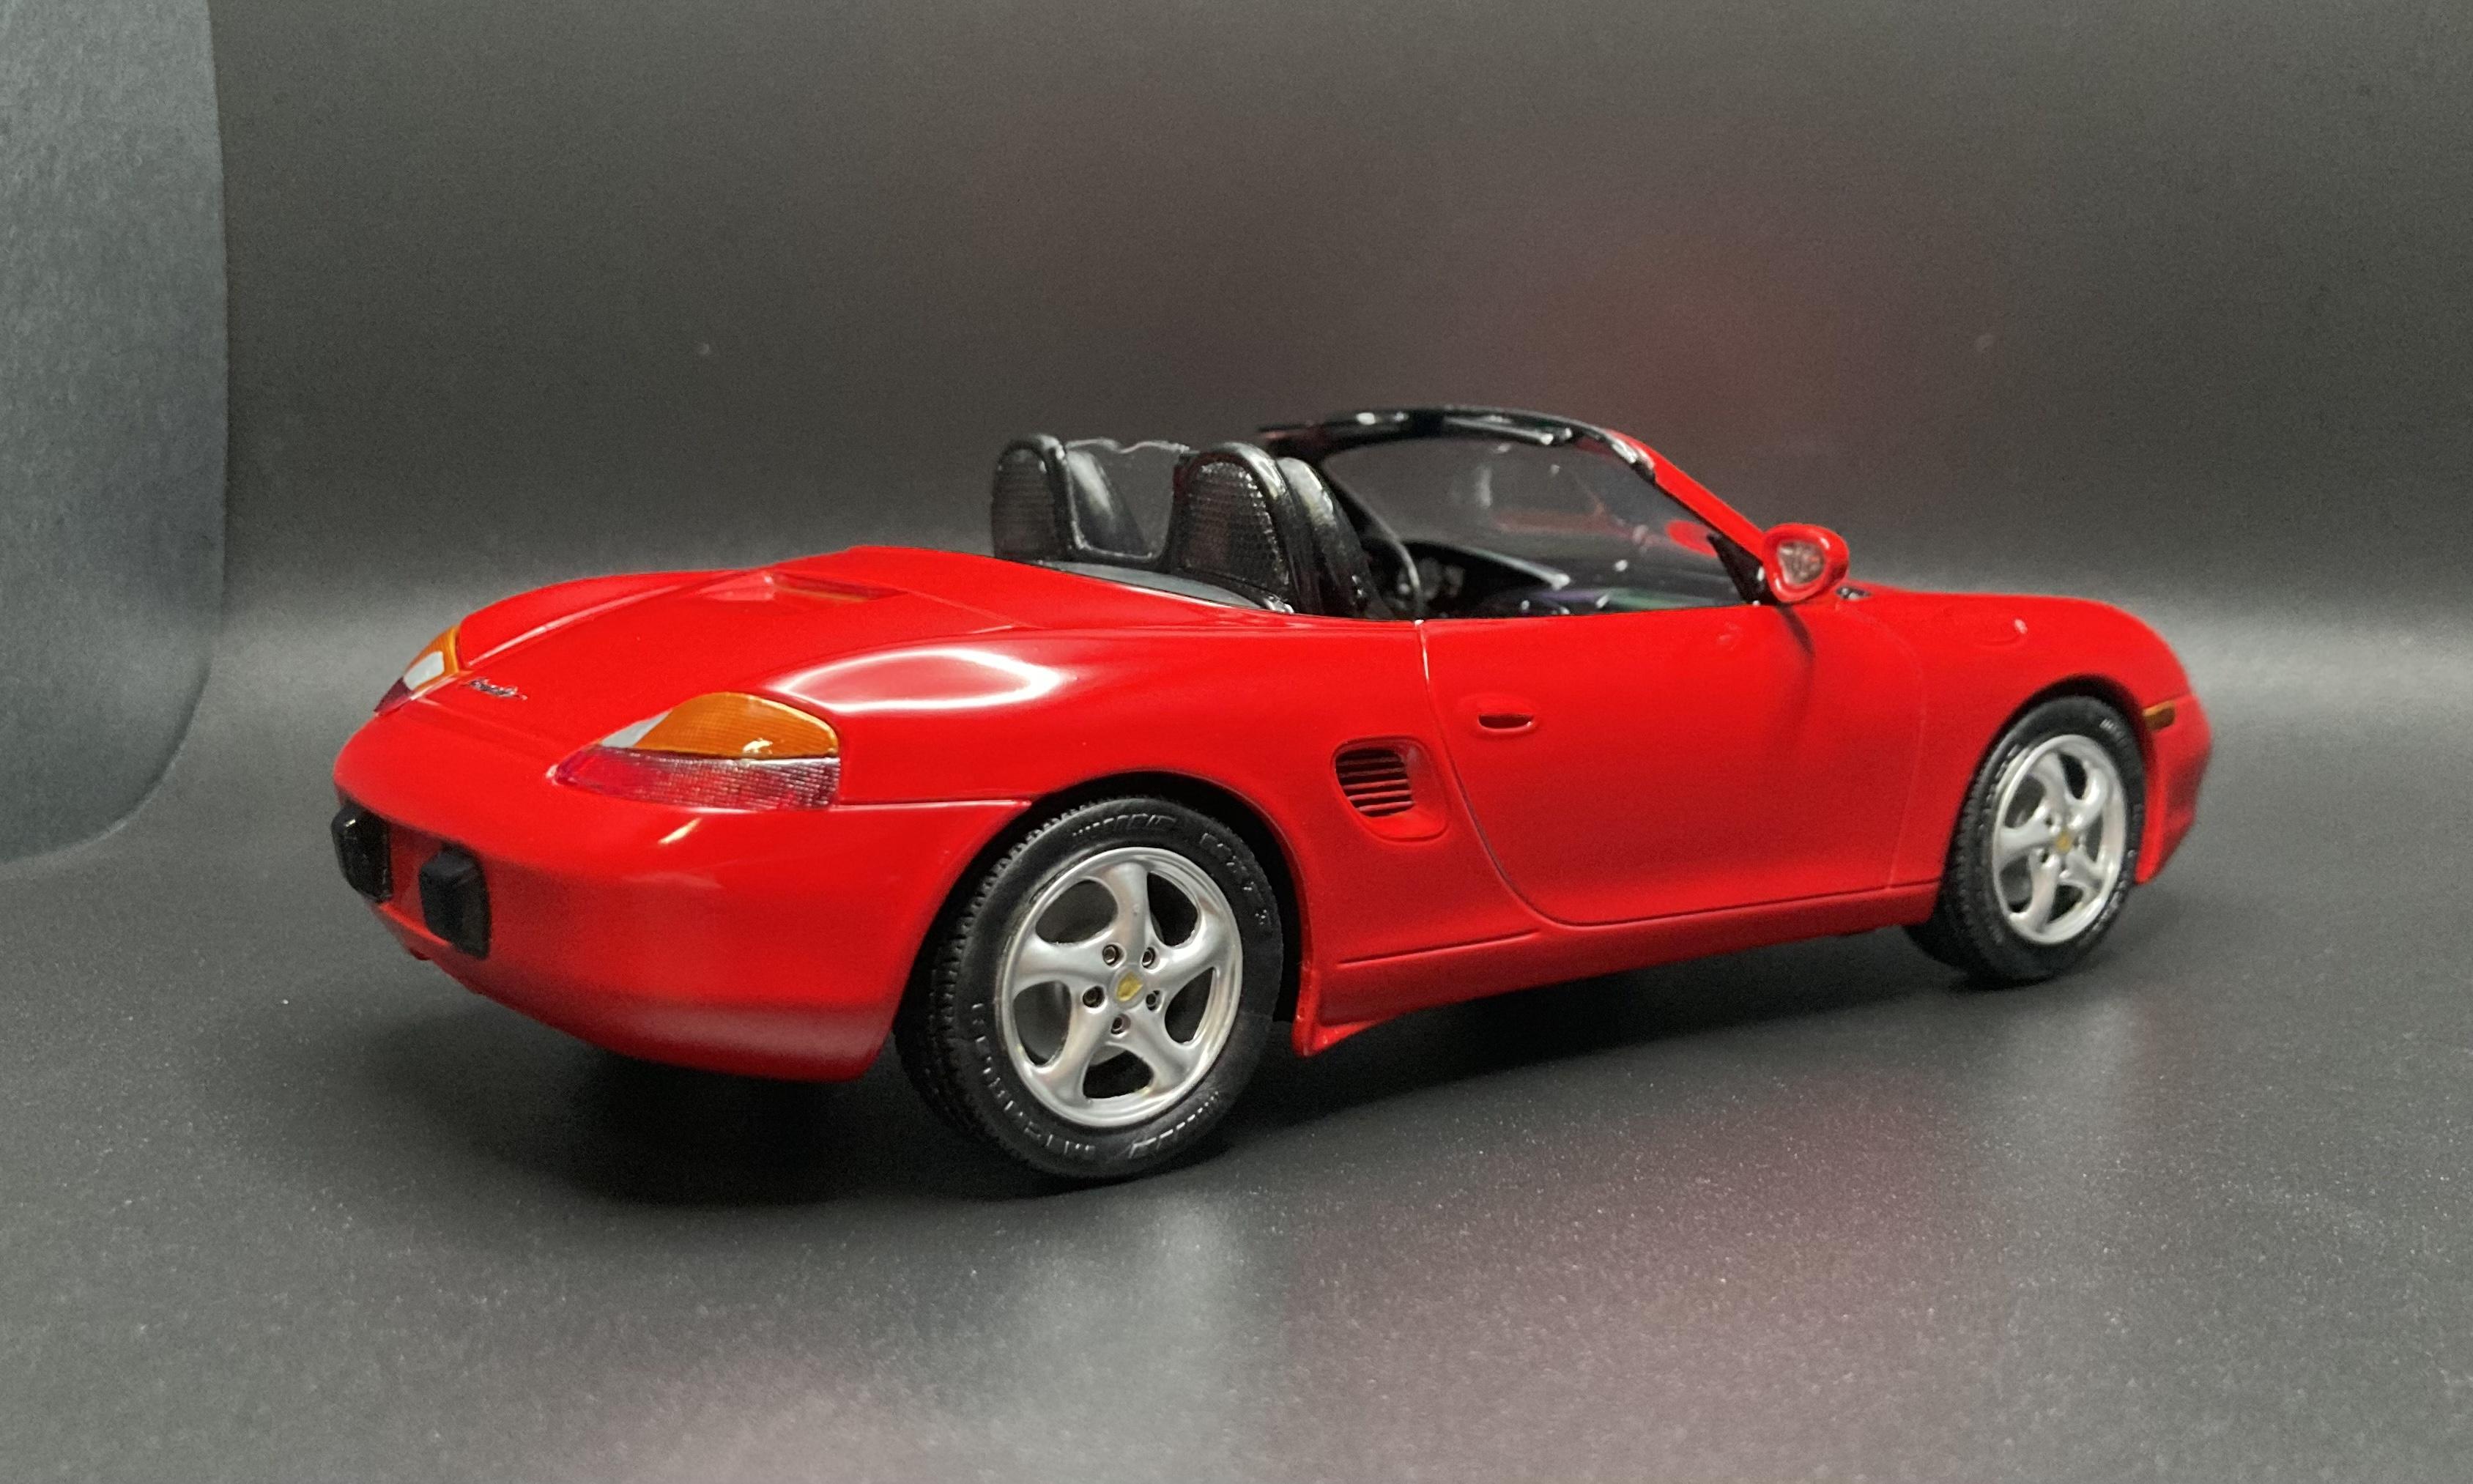
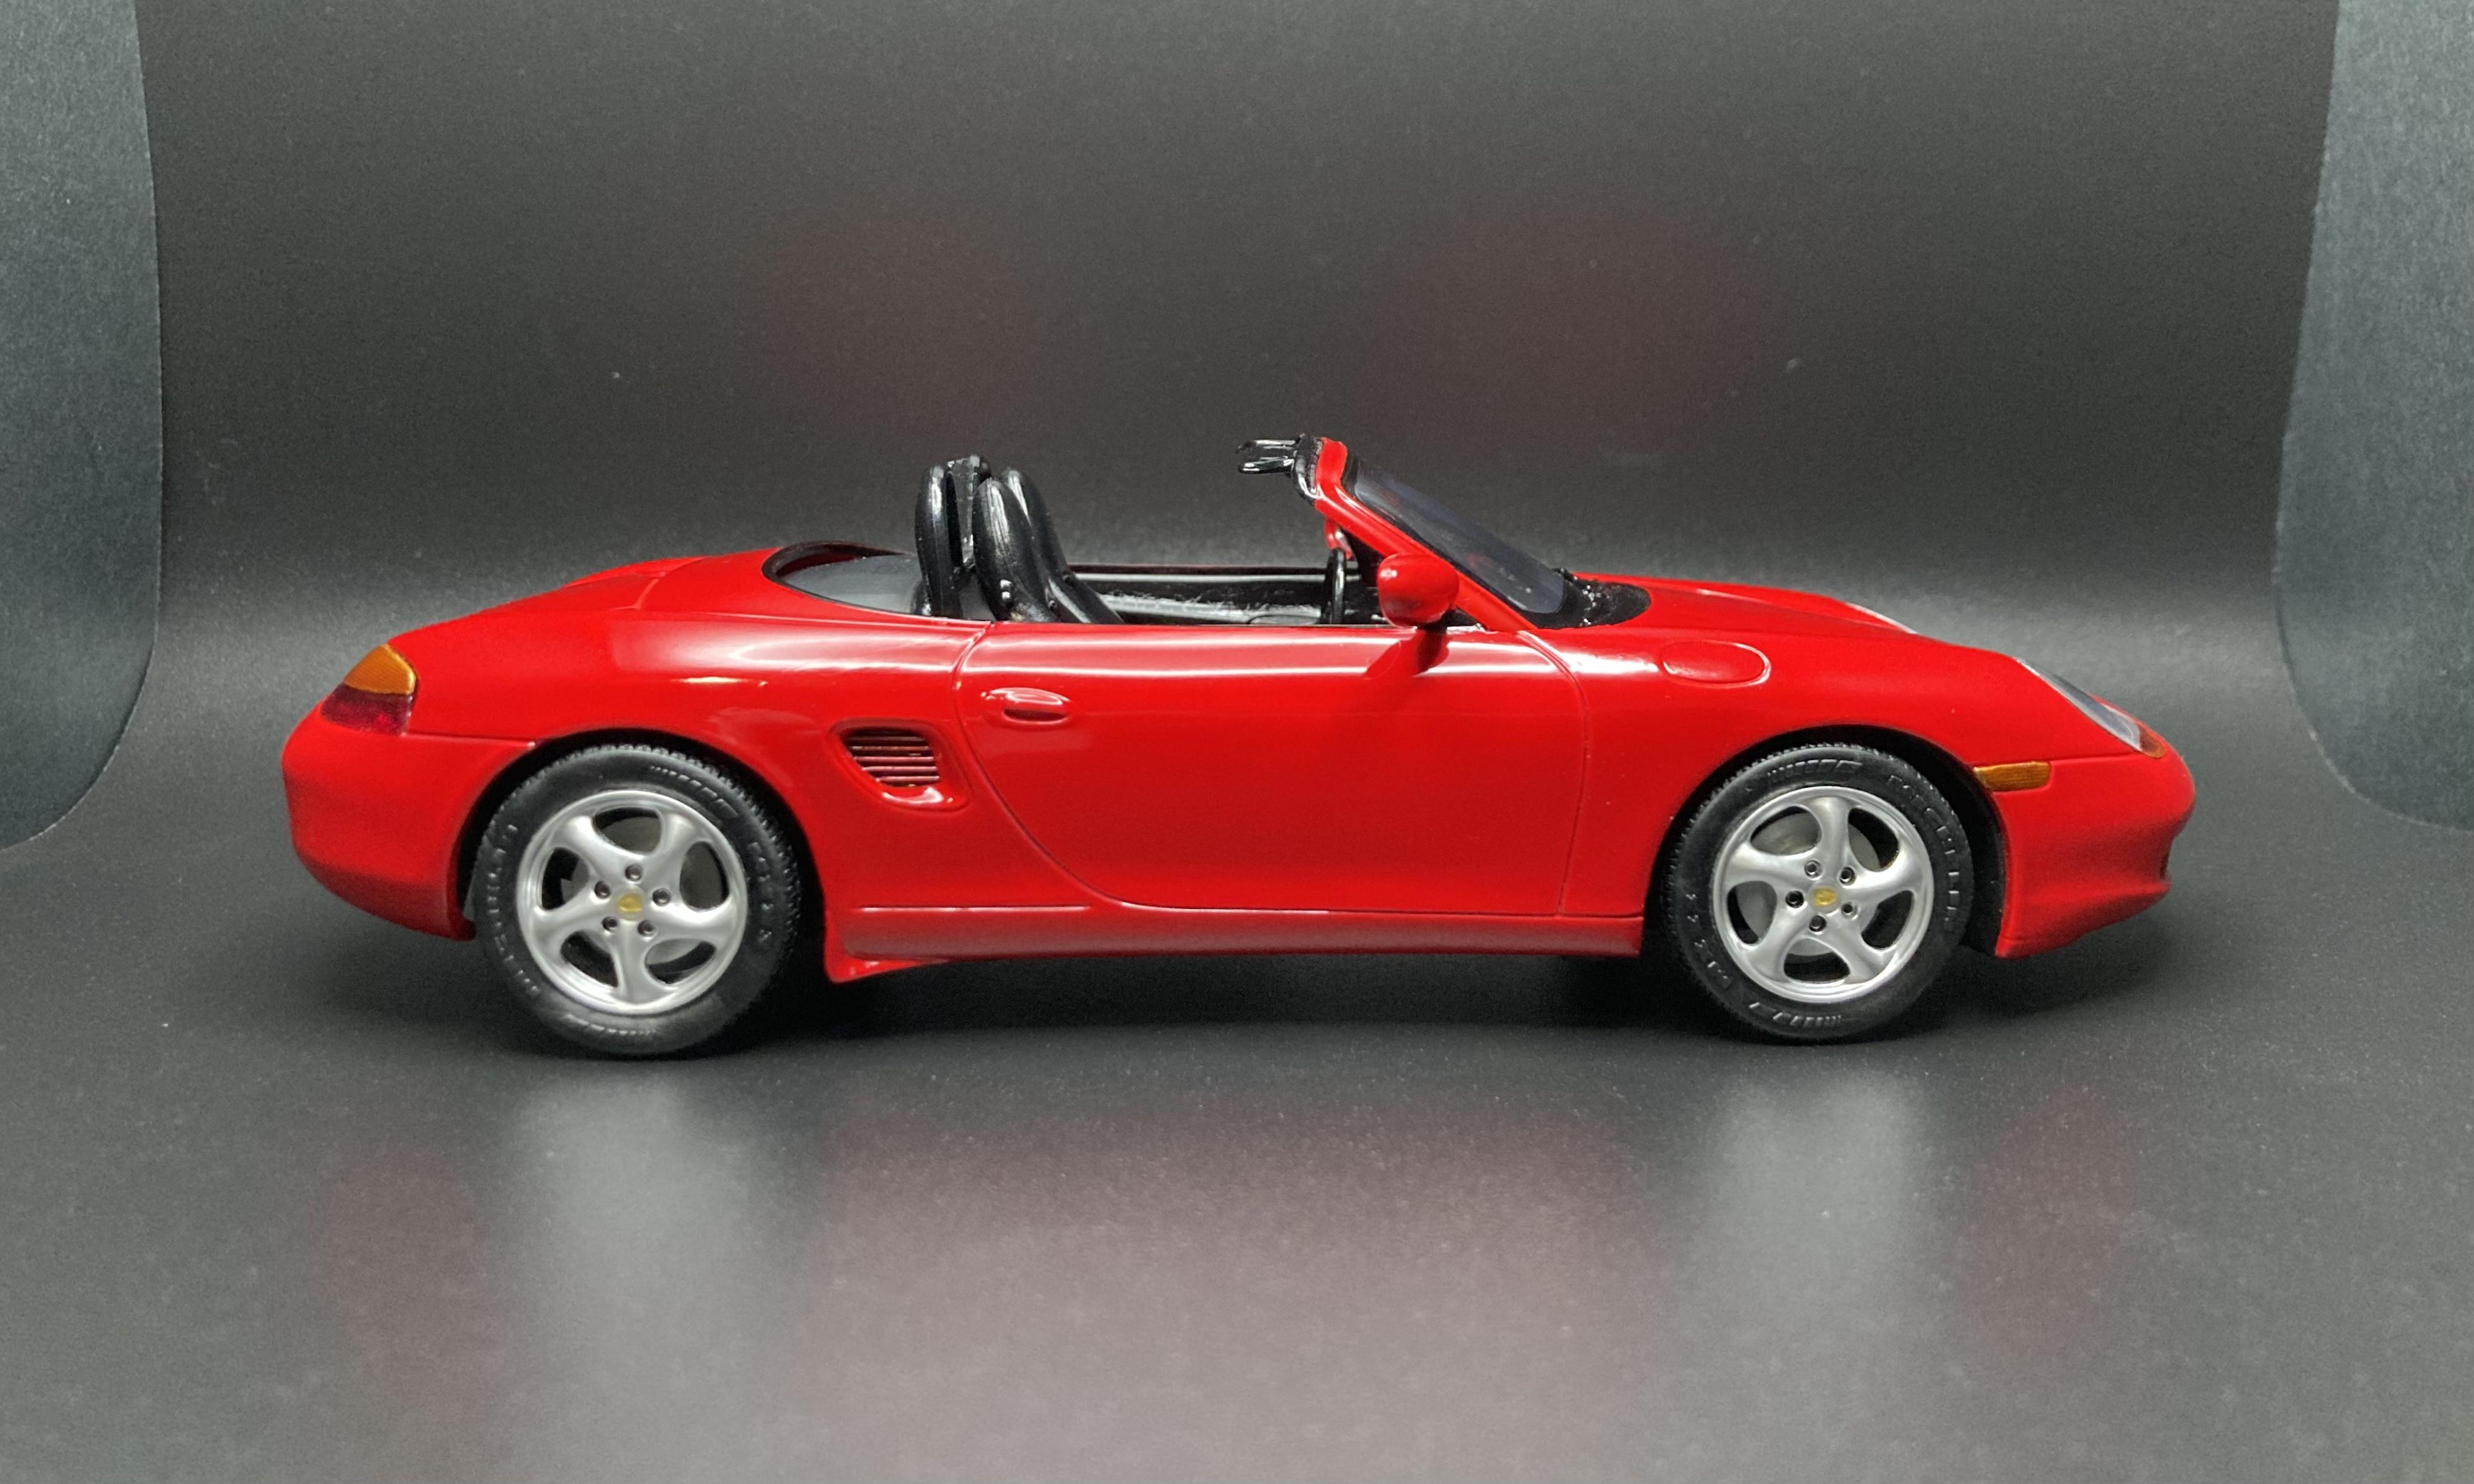
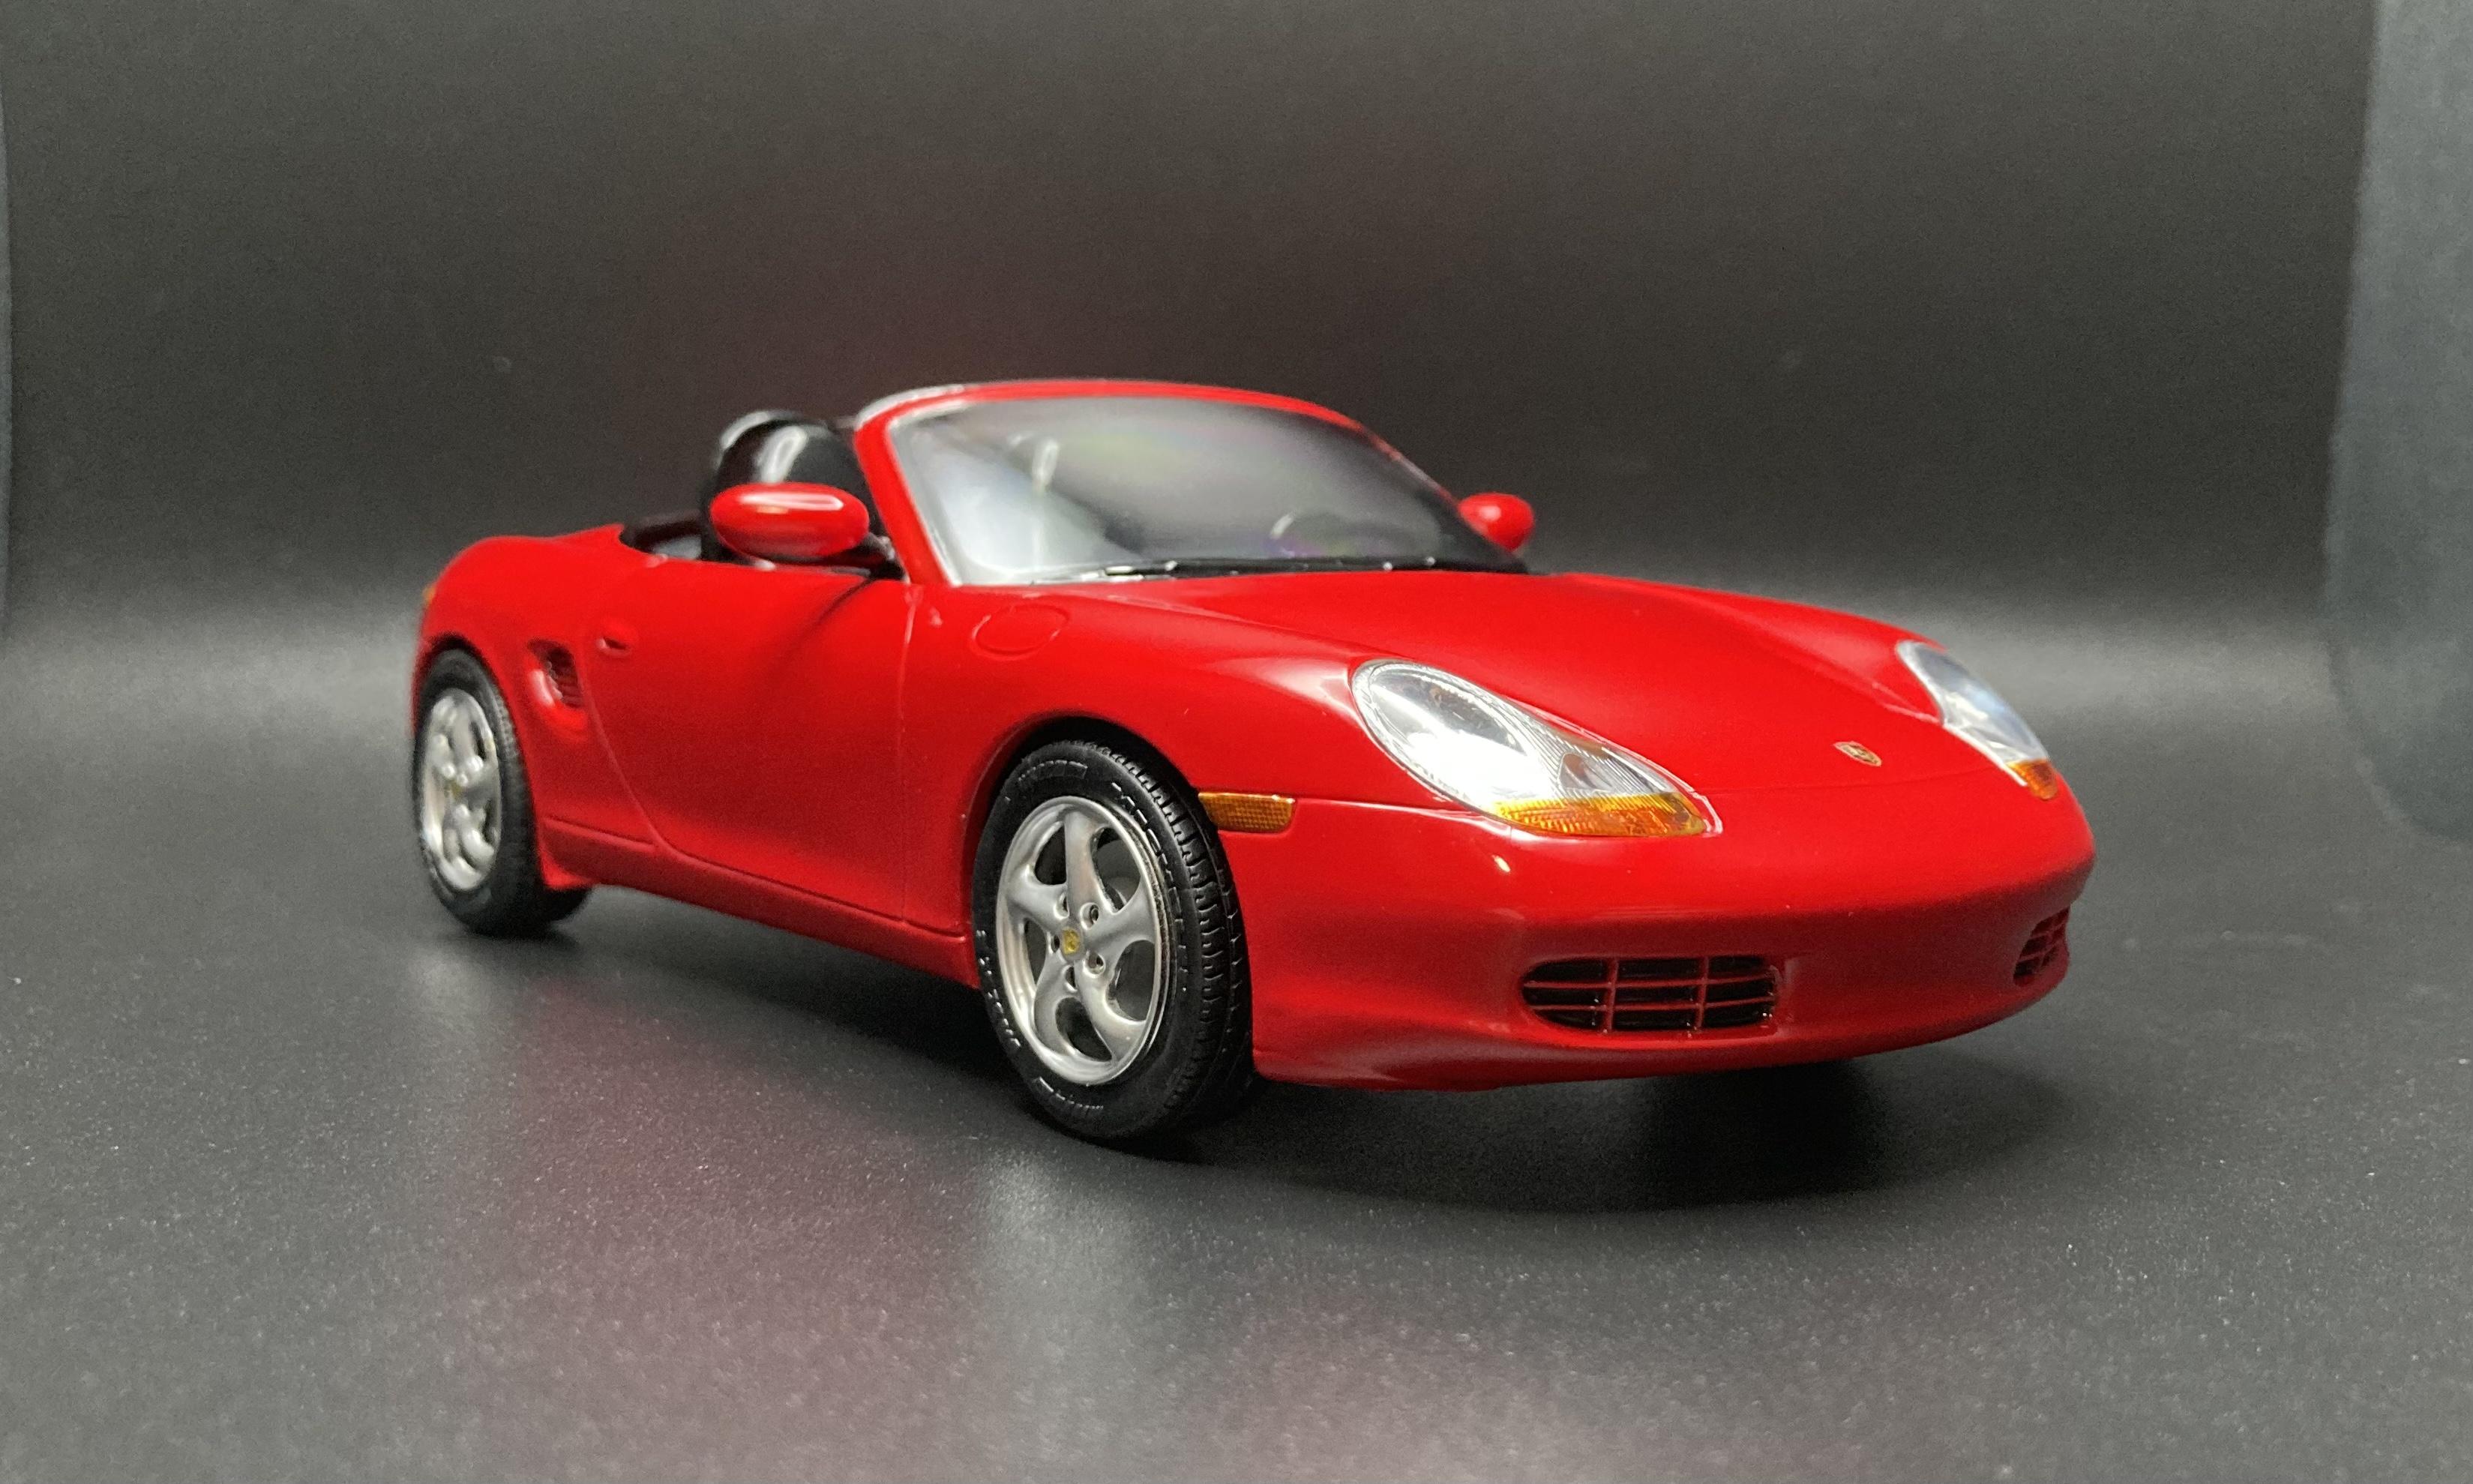
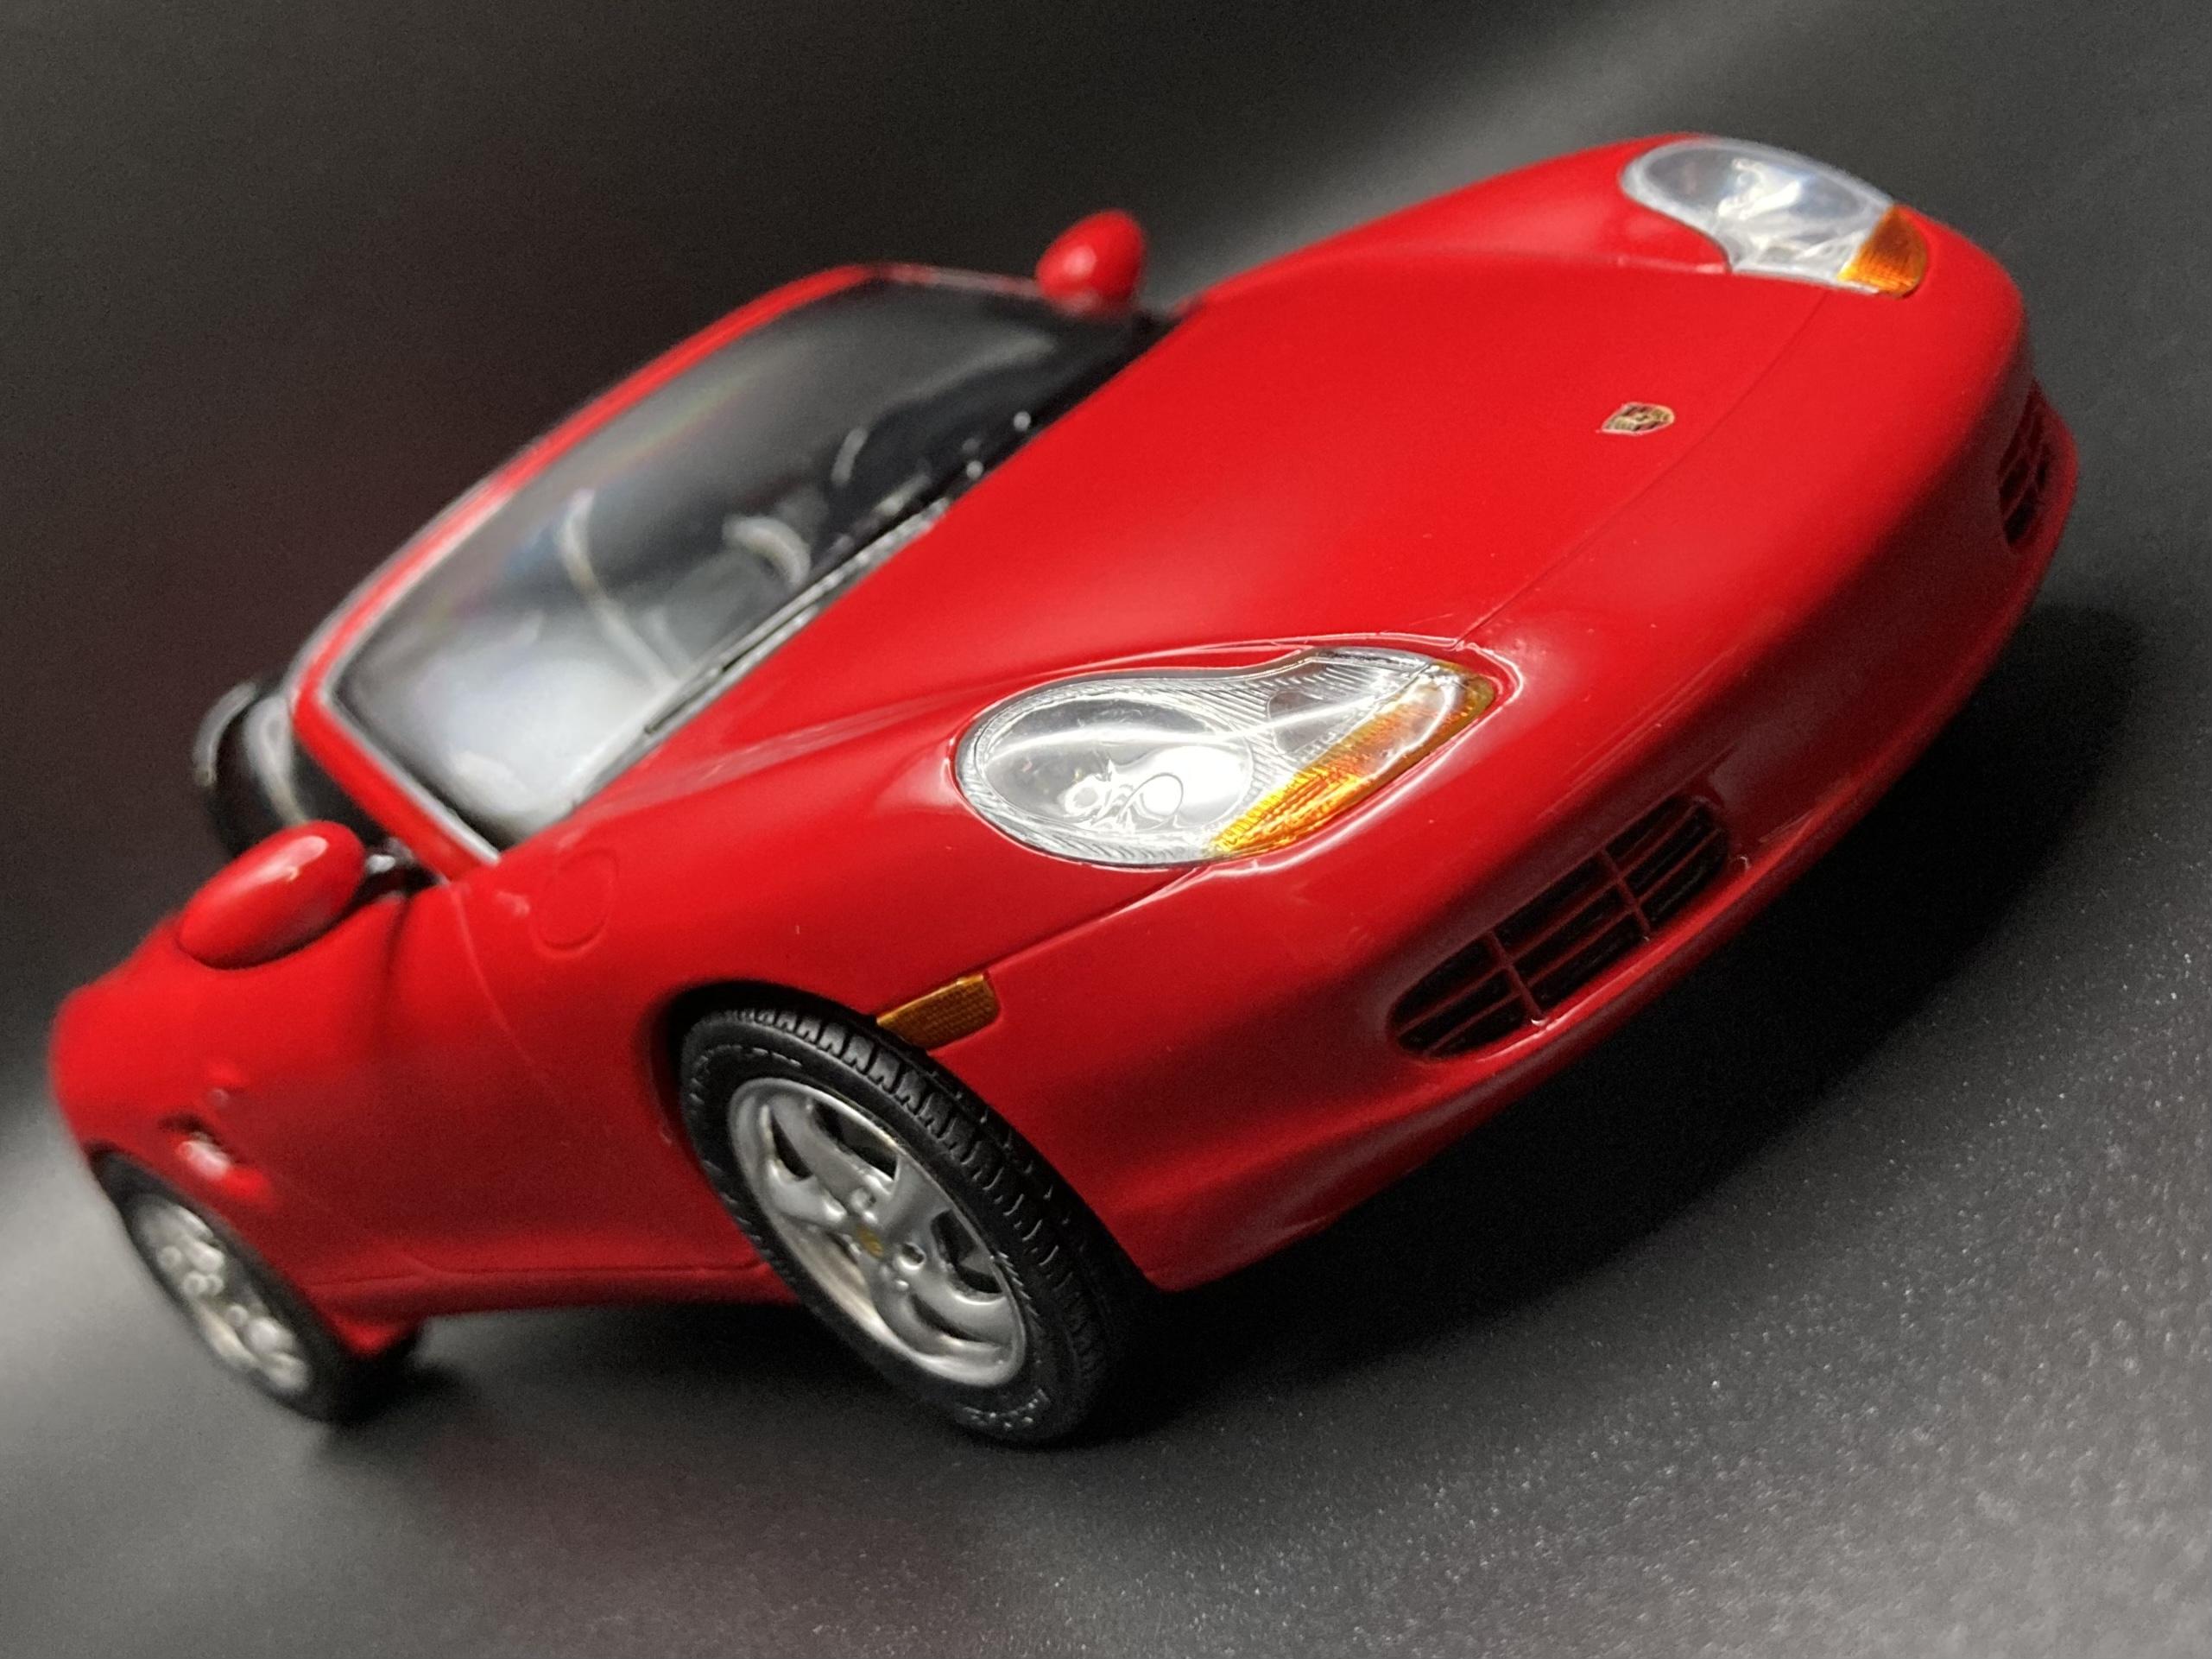
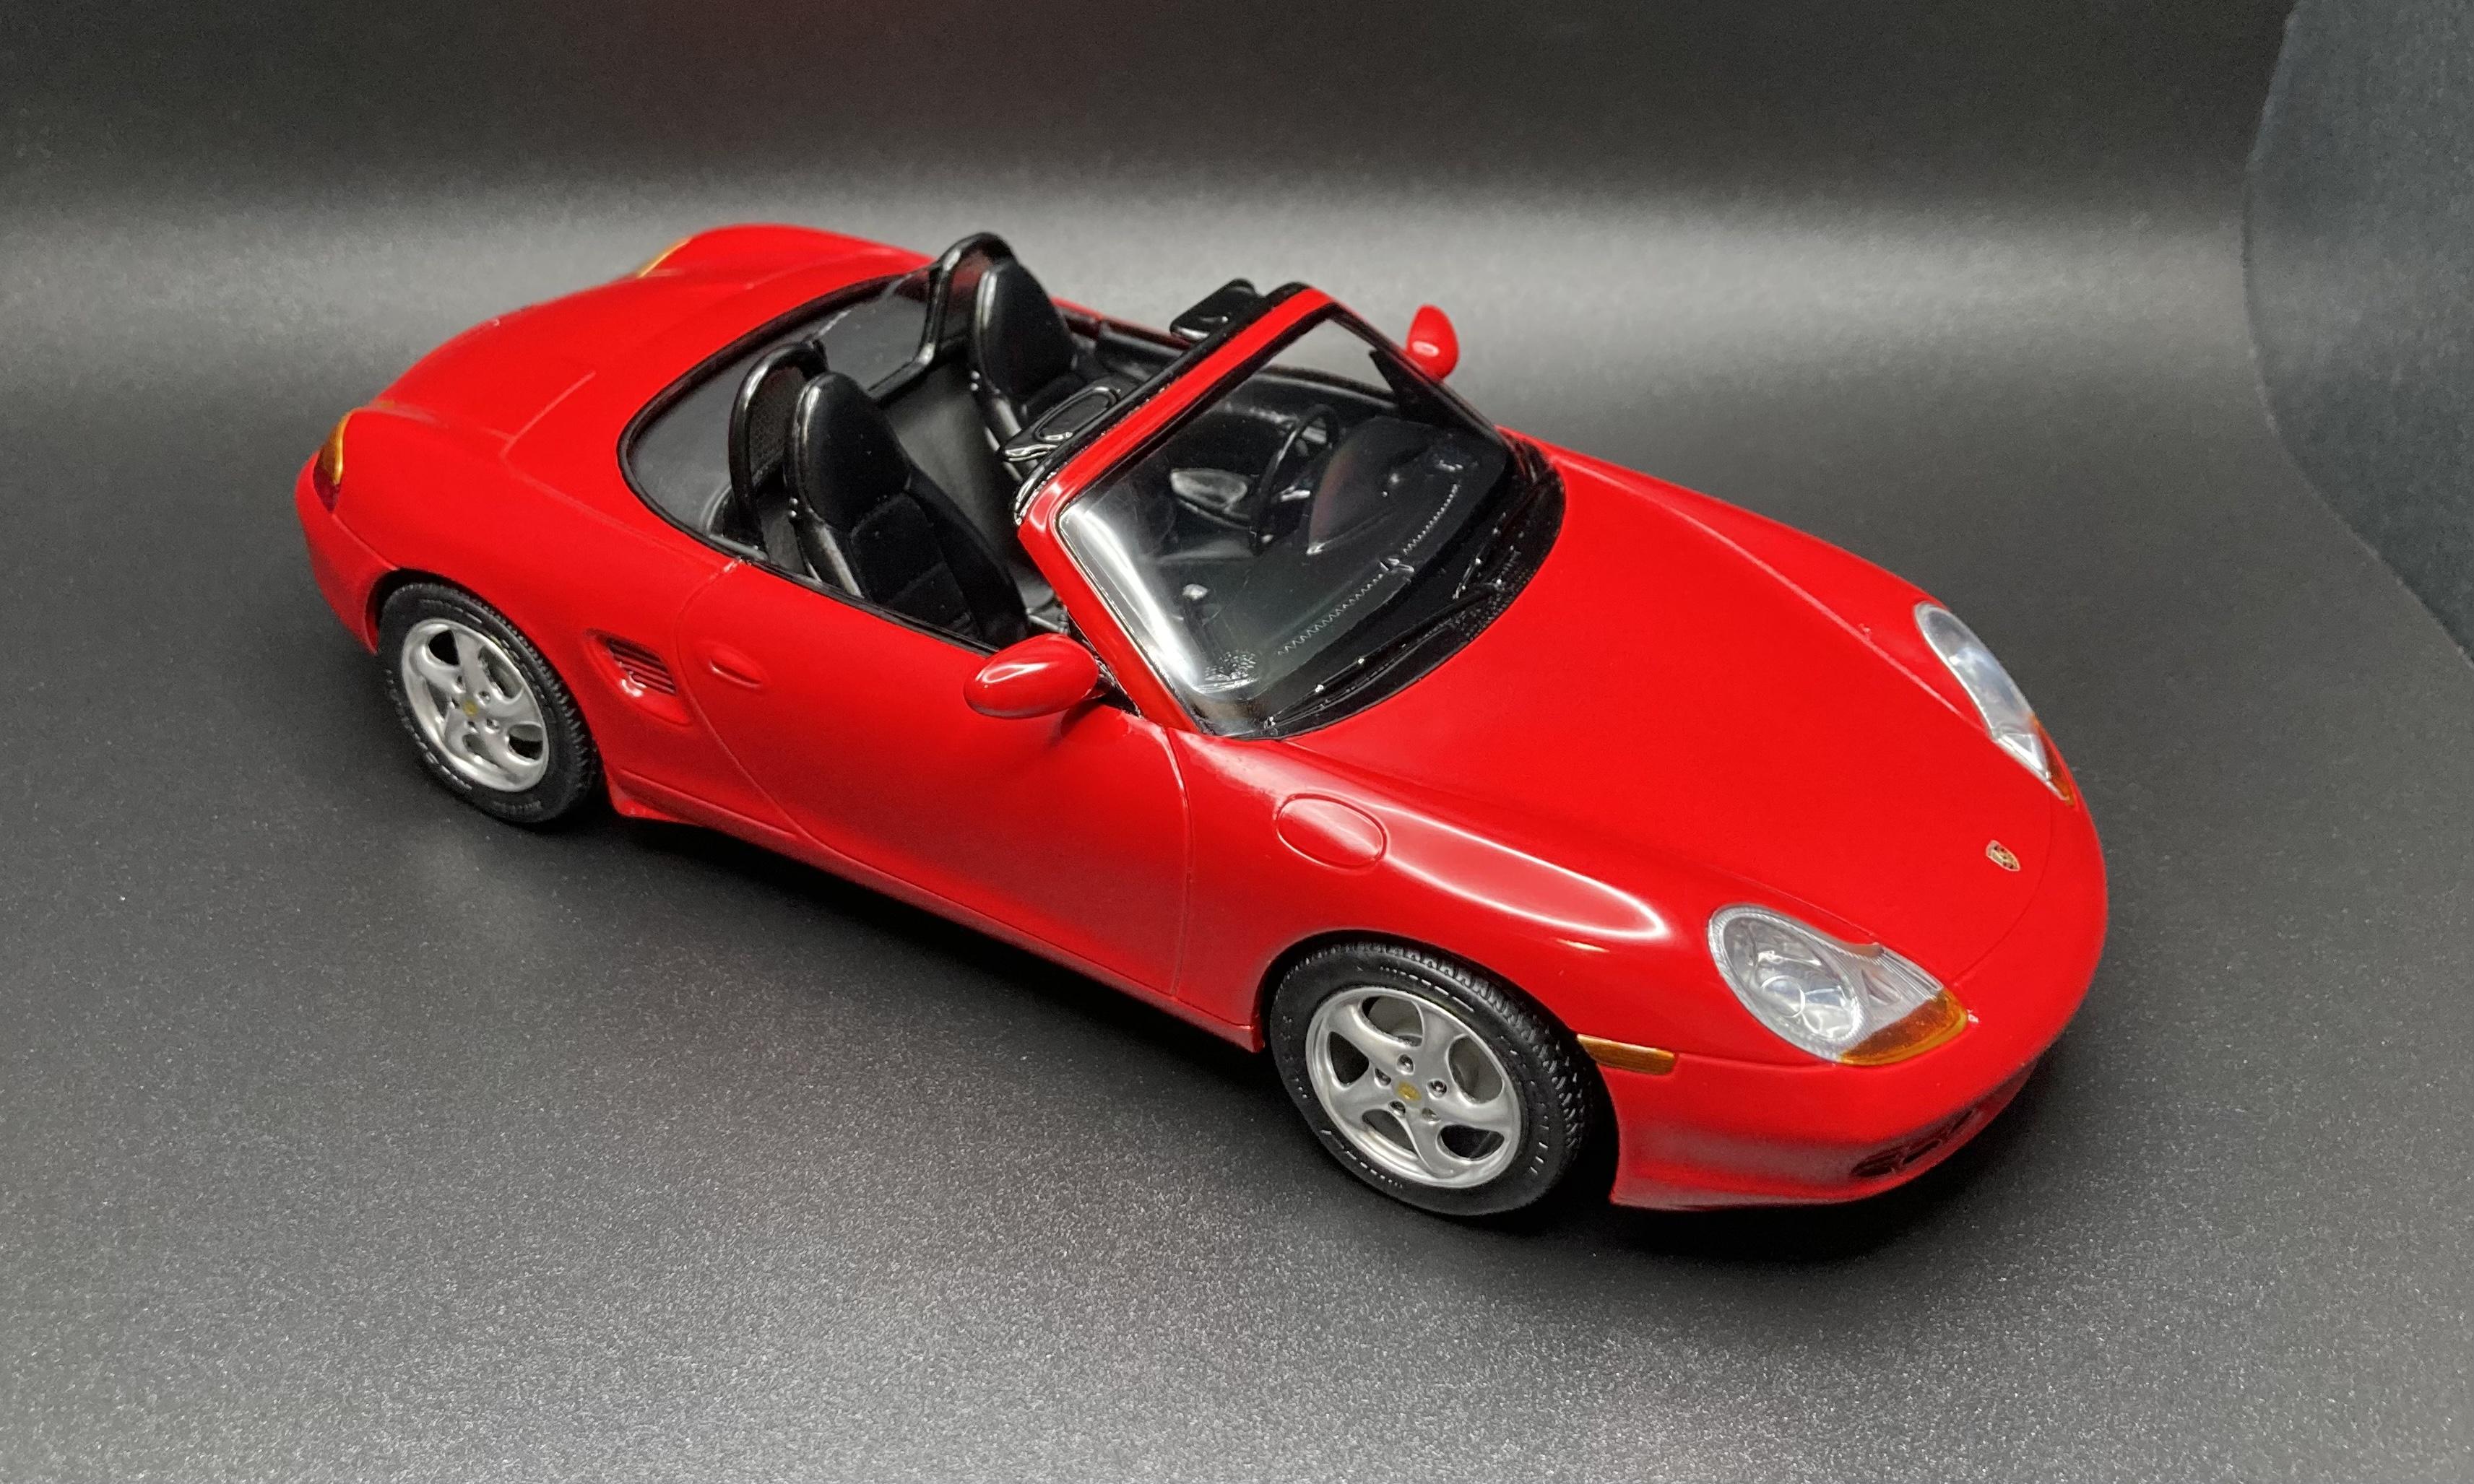
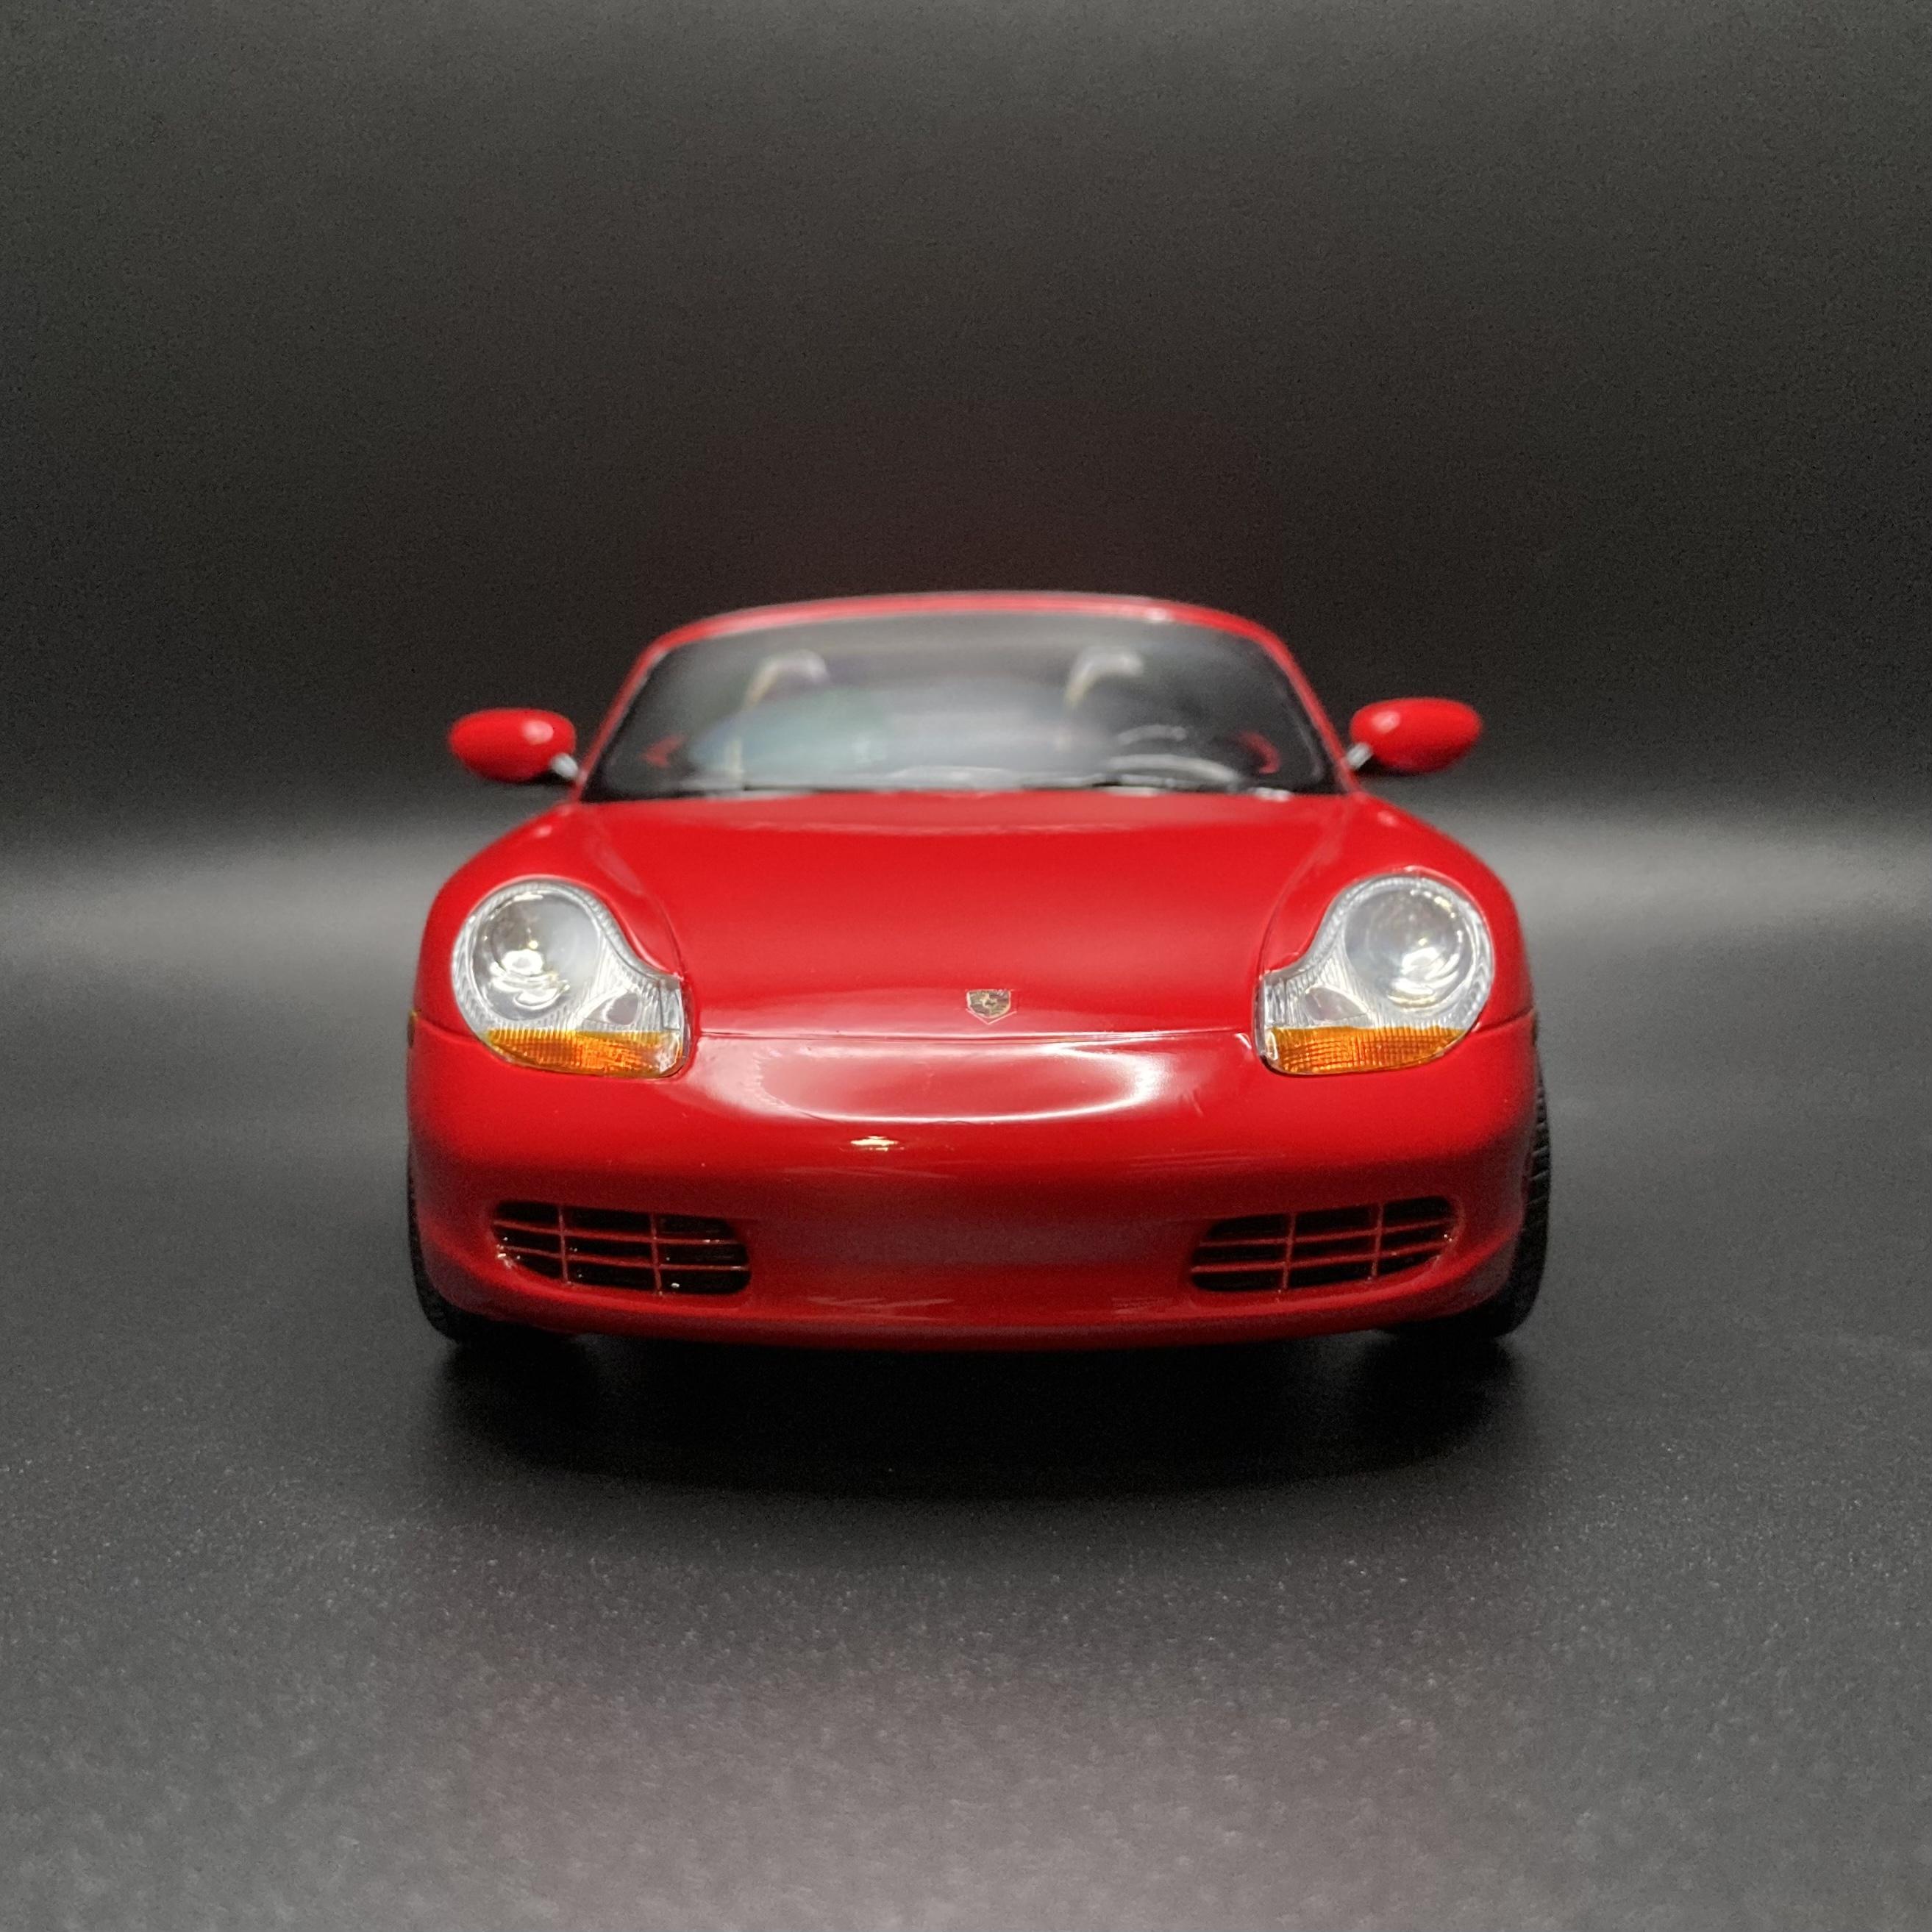
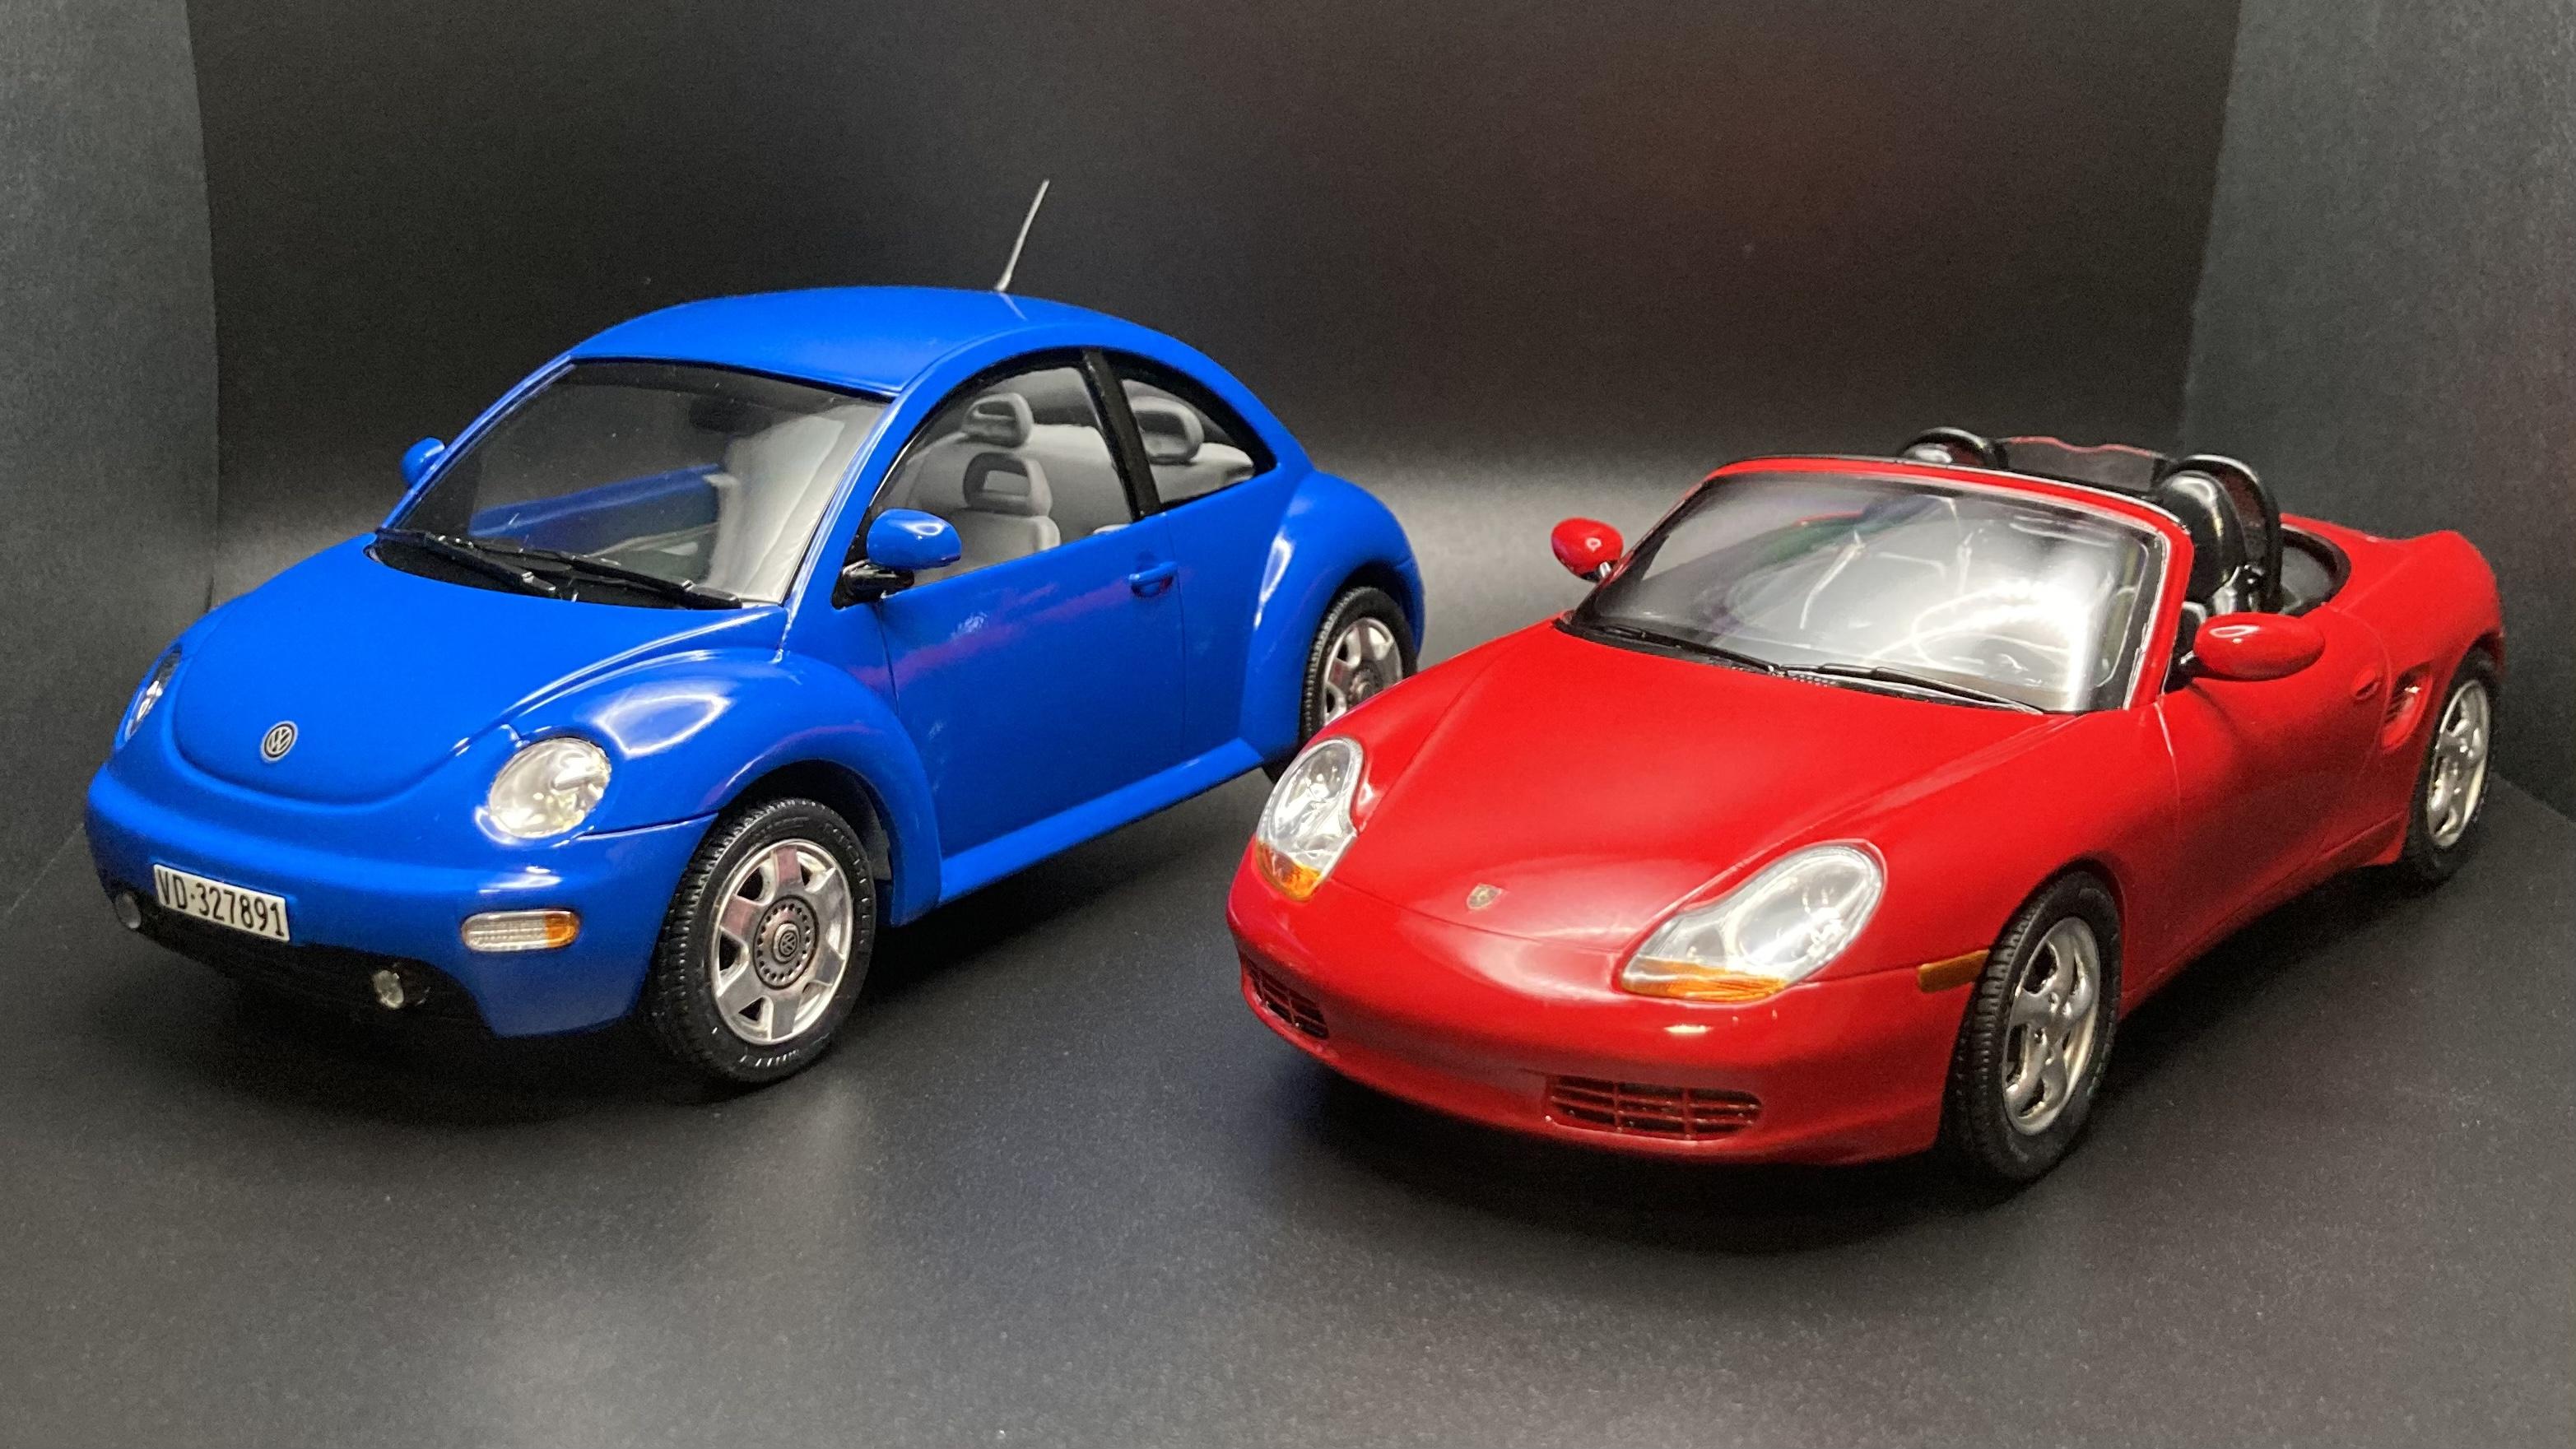
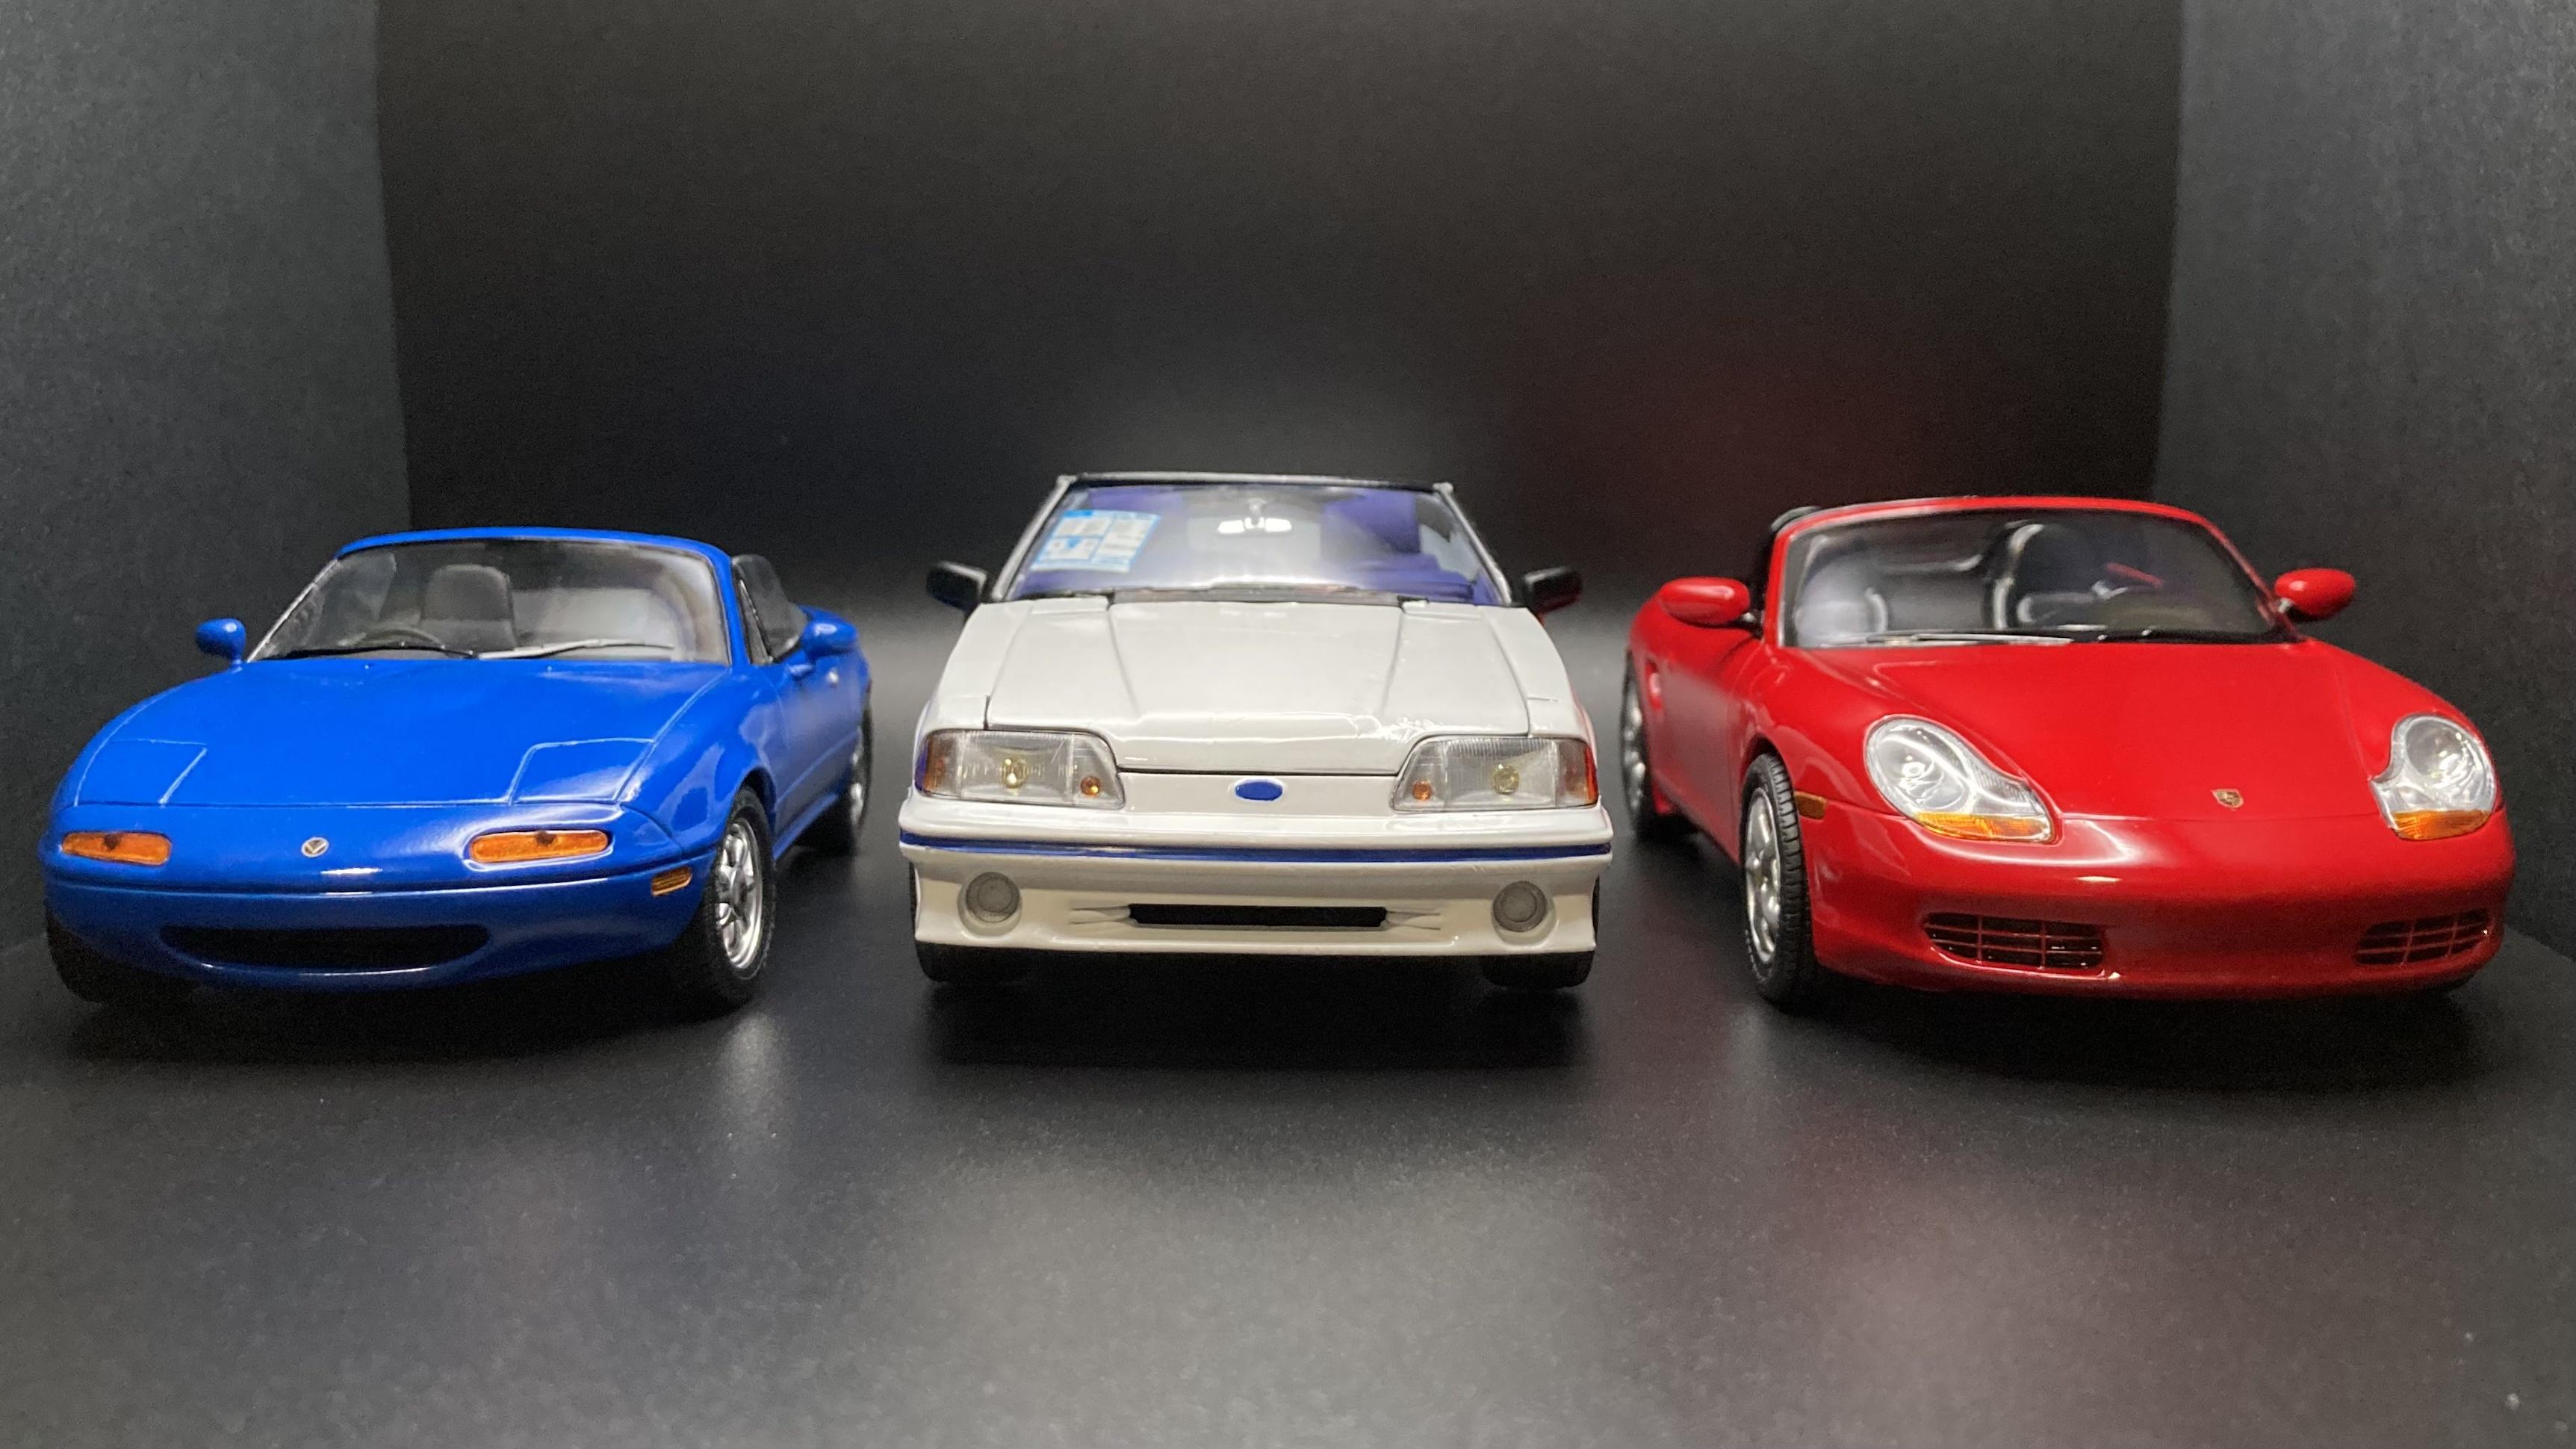
I recently bought one of my (many) childhood dream cars: a 2002 Porsche Boxster 2.7 manual. They say to never meet your heroes, but in this case it’s as amazing to drive as I’d hoped! Naturally, I had to build a model to match my real car. I started with the original issue Revell/Monogram SnapTite kit. For fun, I built it unpainted to see how it would look if I’d built it as a kid in the late ‘90s. It definitely looks like a toy and not realistic at all. It’s a very basic snap kit but the fit up is excellent and I think they captured the shape and proportions of the real car nicely. I painted the body Tamiya TS-8 Italian Red over their pink primer, which looks pretty close to classic Guards Red to me. The kit’s Turbo-Look wheels are different than my later car’s wheels but they’re close enough so I left them as is. It’s amazing how some paint and simple detail work can really set off a basic snap kit. Hood crest decal came from eBay. Kit only comes with a terrible set of stickers. Two late ‘90s Revell snap based kits of German subjects. Both come alive with a little detail work! The Boxster joins my builds of my former 1:1 fun cars. I wish I could have kept them all, but the sale of each one funds the next!
-
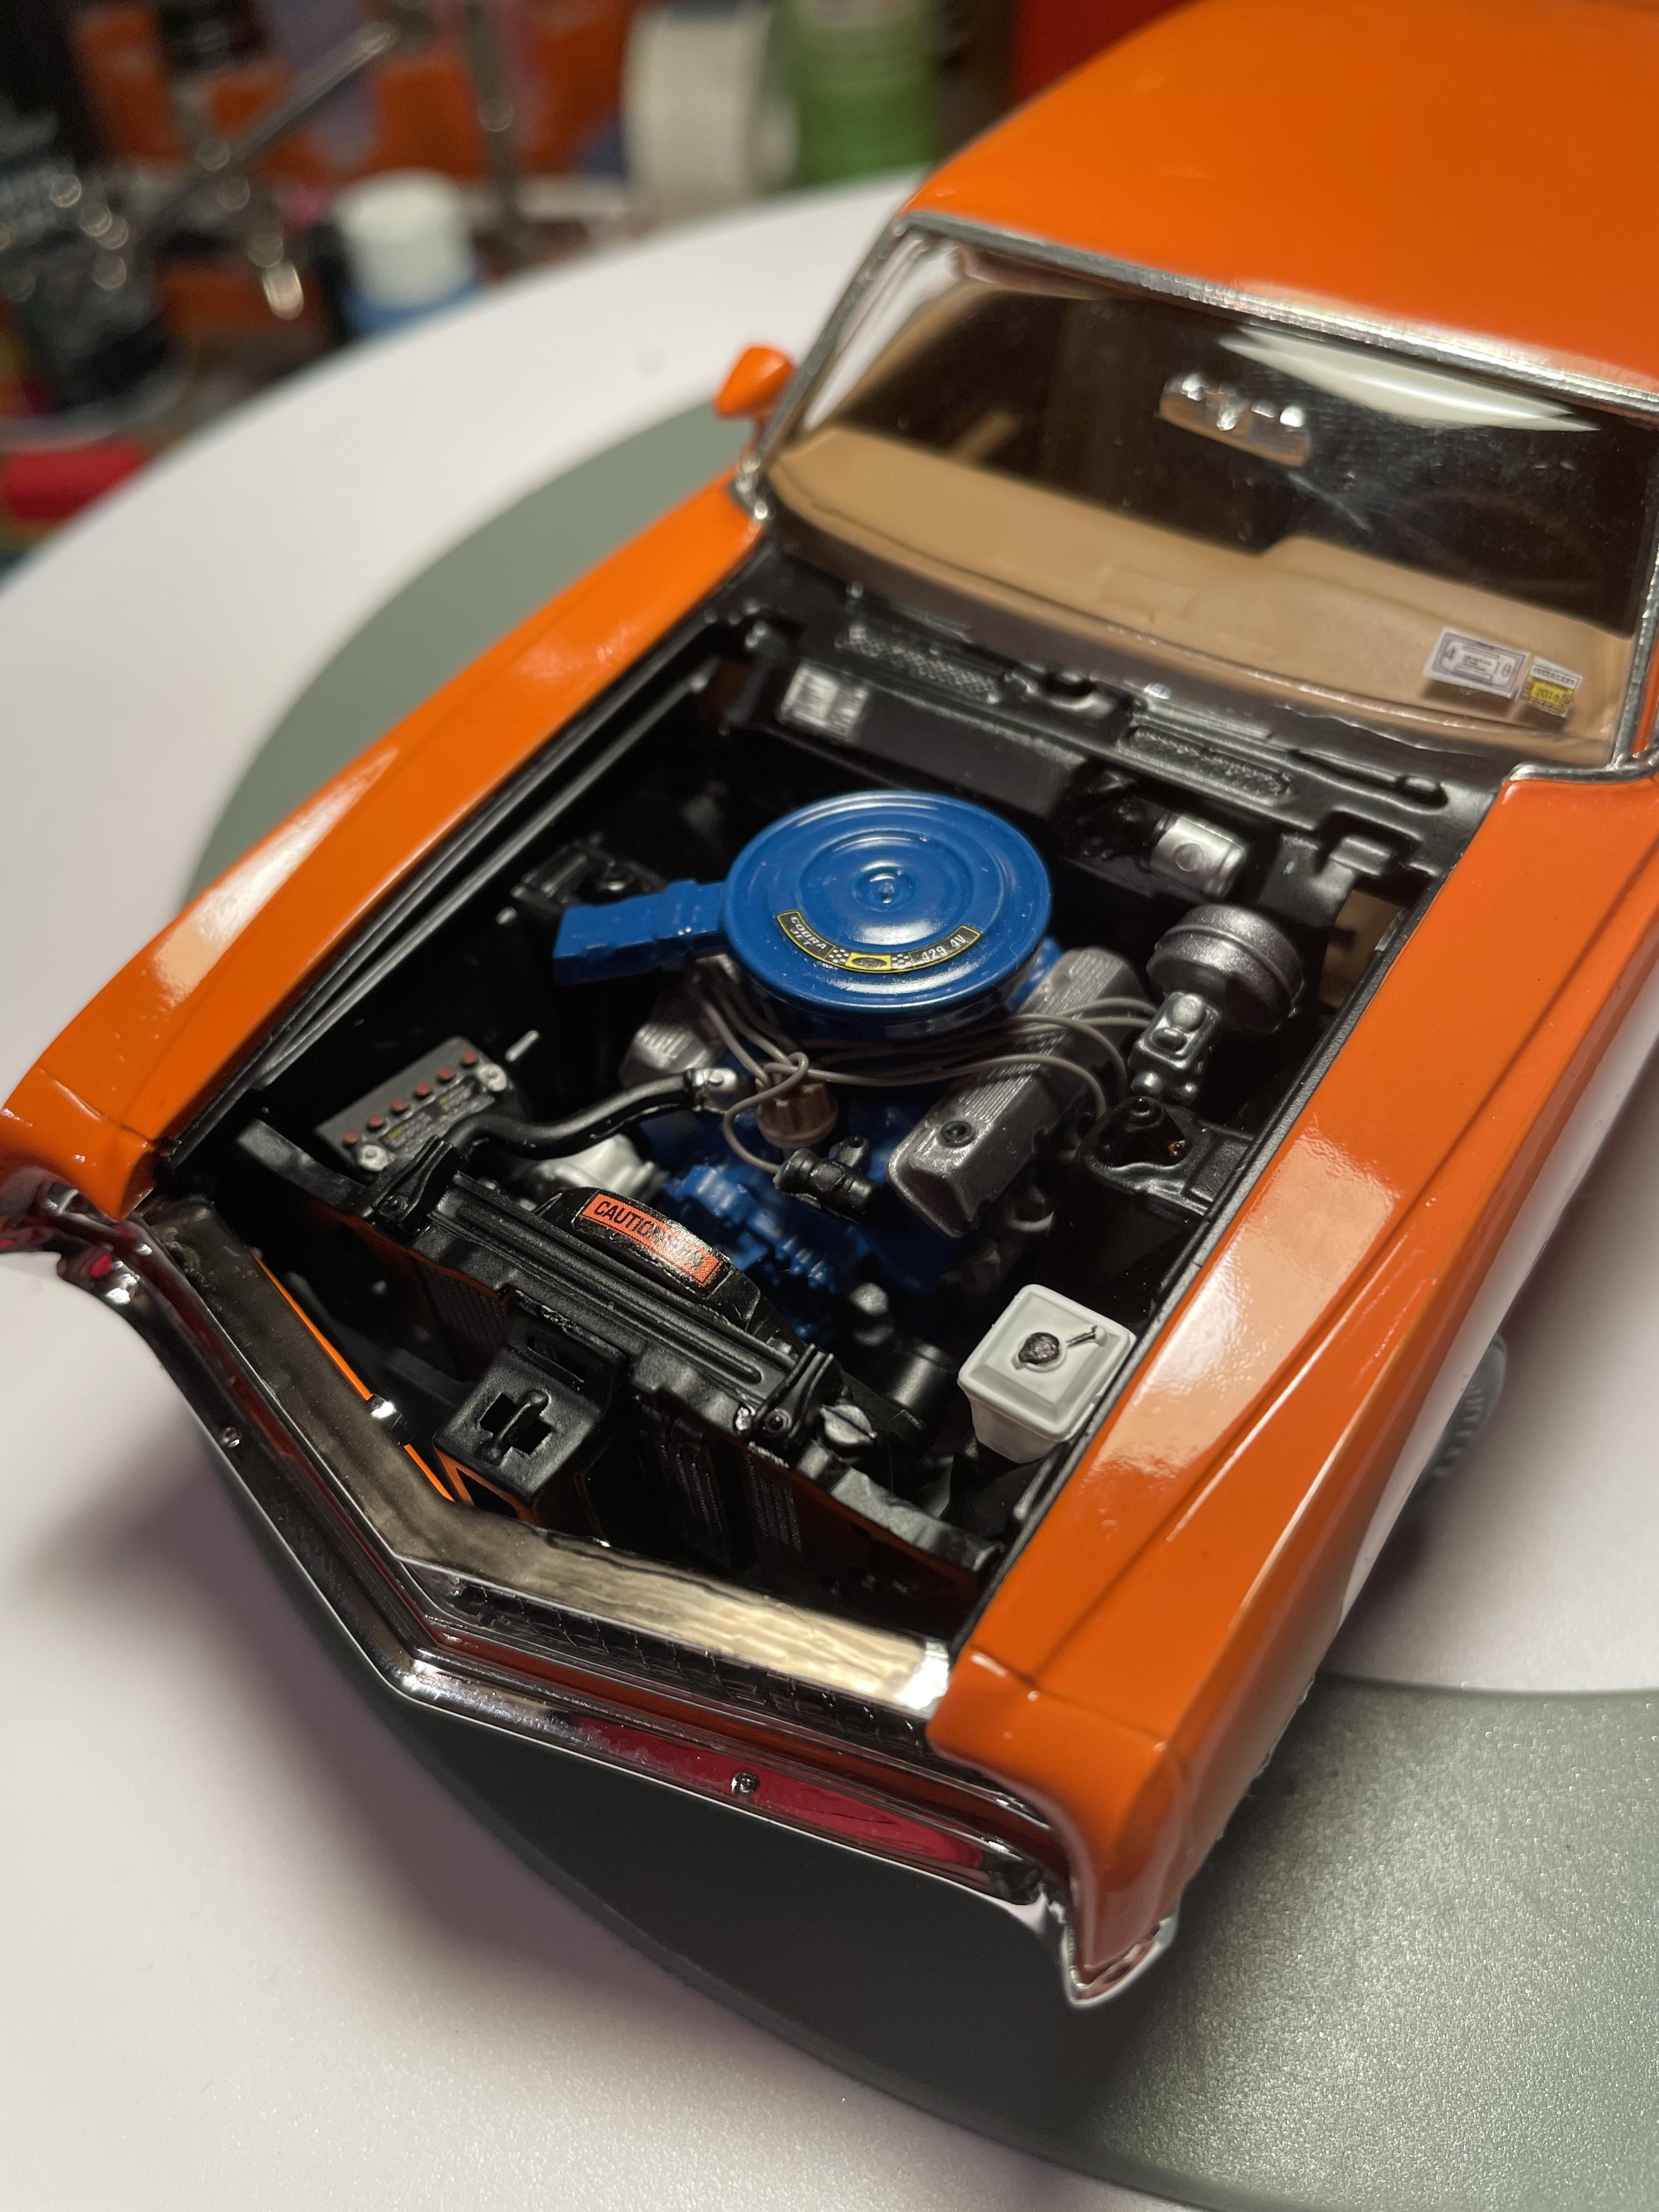
 Re: kit 4463. I like how Revell assumes everyone knows what the engine, and the carbs are, and I don't know what I'm doing or know anything about Fords. Building version B with the 3 carb setup. If I knew the carb brand and model #, I can search for pictures. If you have done the carb linkage, fuel line, please post pictures. I assume there is a system where there is a cable from the gas pedal to the engine, then there are linkage rods and photo-etch parts to drive me crazy with. Regarding the fuel pump, the kit has a non-stock looking fuel tank, I know my Chevy pickup has the fuel line going through a big hole, so is there an electric pump in there? Or is there a mechanical pump on the engine? All I really want to do is fab a clear glass bowl filter for the firewall, but need to be realistic about what is at each end. I also should know what the engine is, I know hot rodders put Chevy SB in, should be accurate on the firing order for the spark plug wires. Might as well ask about the transmission too. Looks like an automatic, only two pedals. Dare I ask about linkage from the shifter to the transmission?
 -
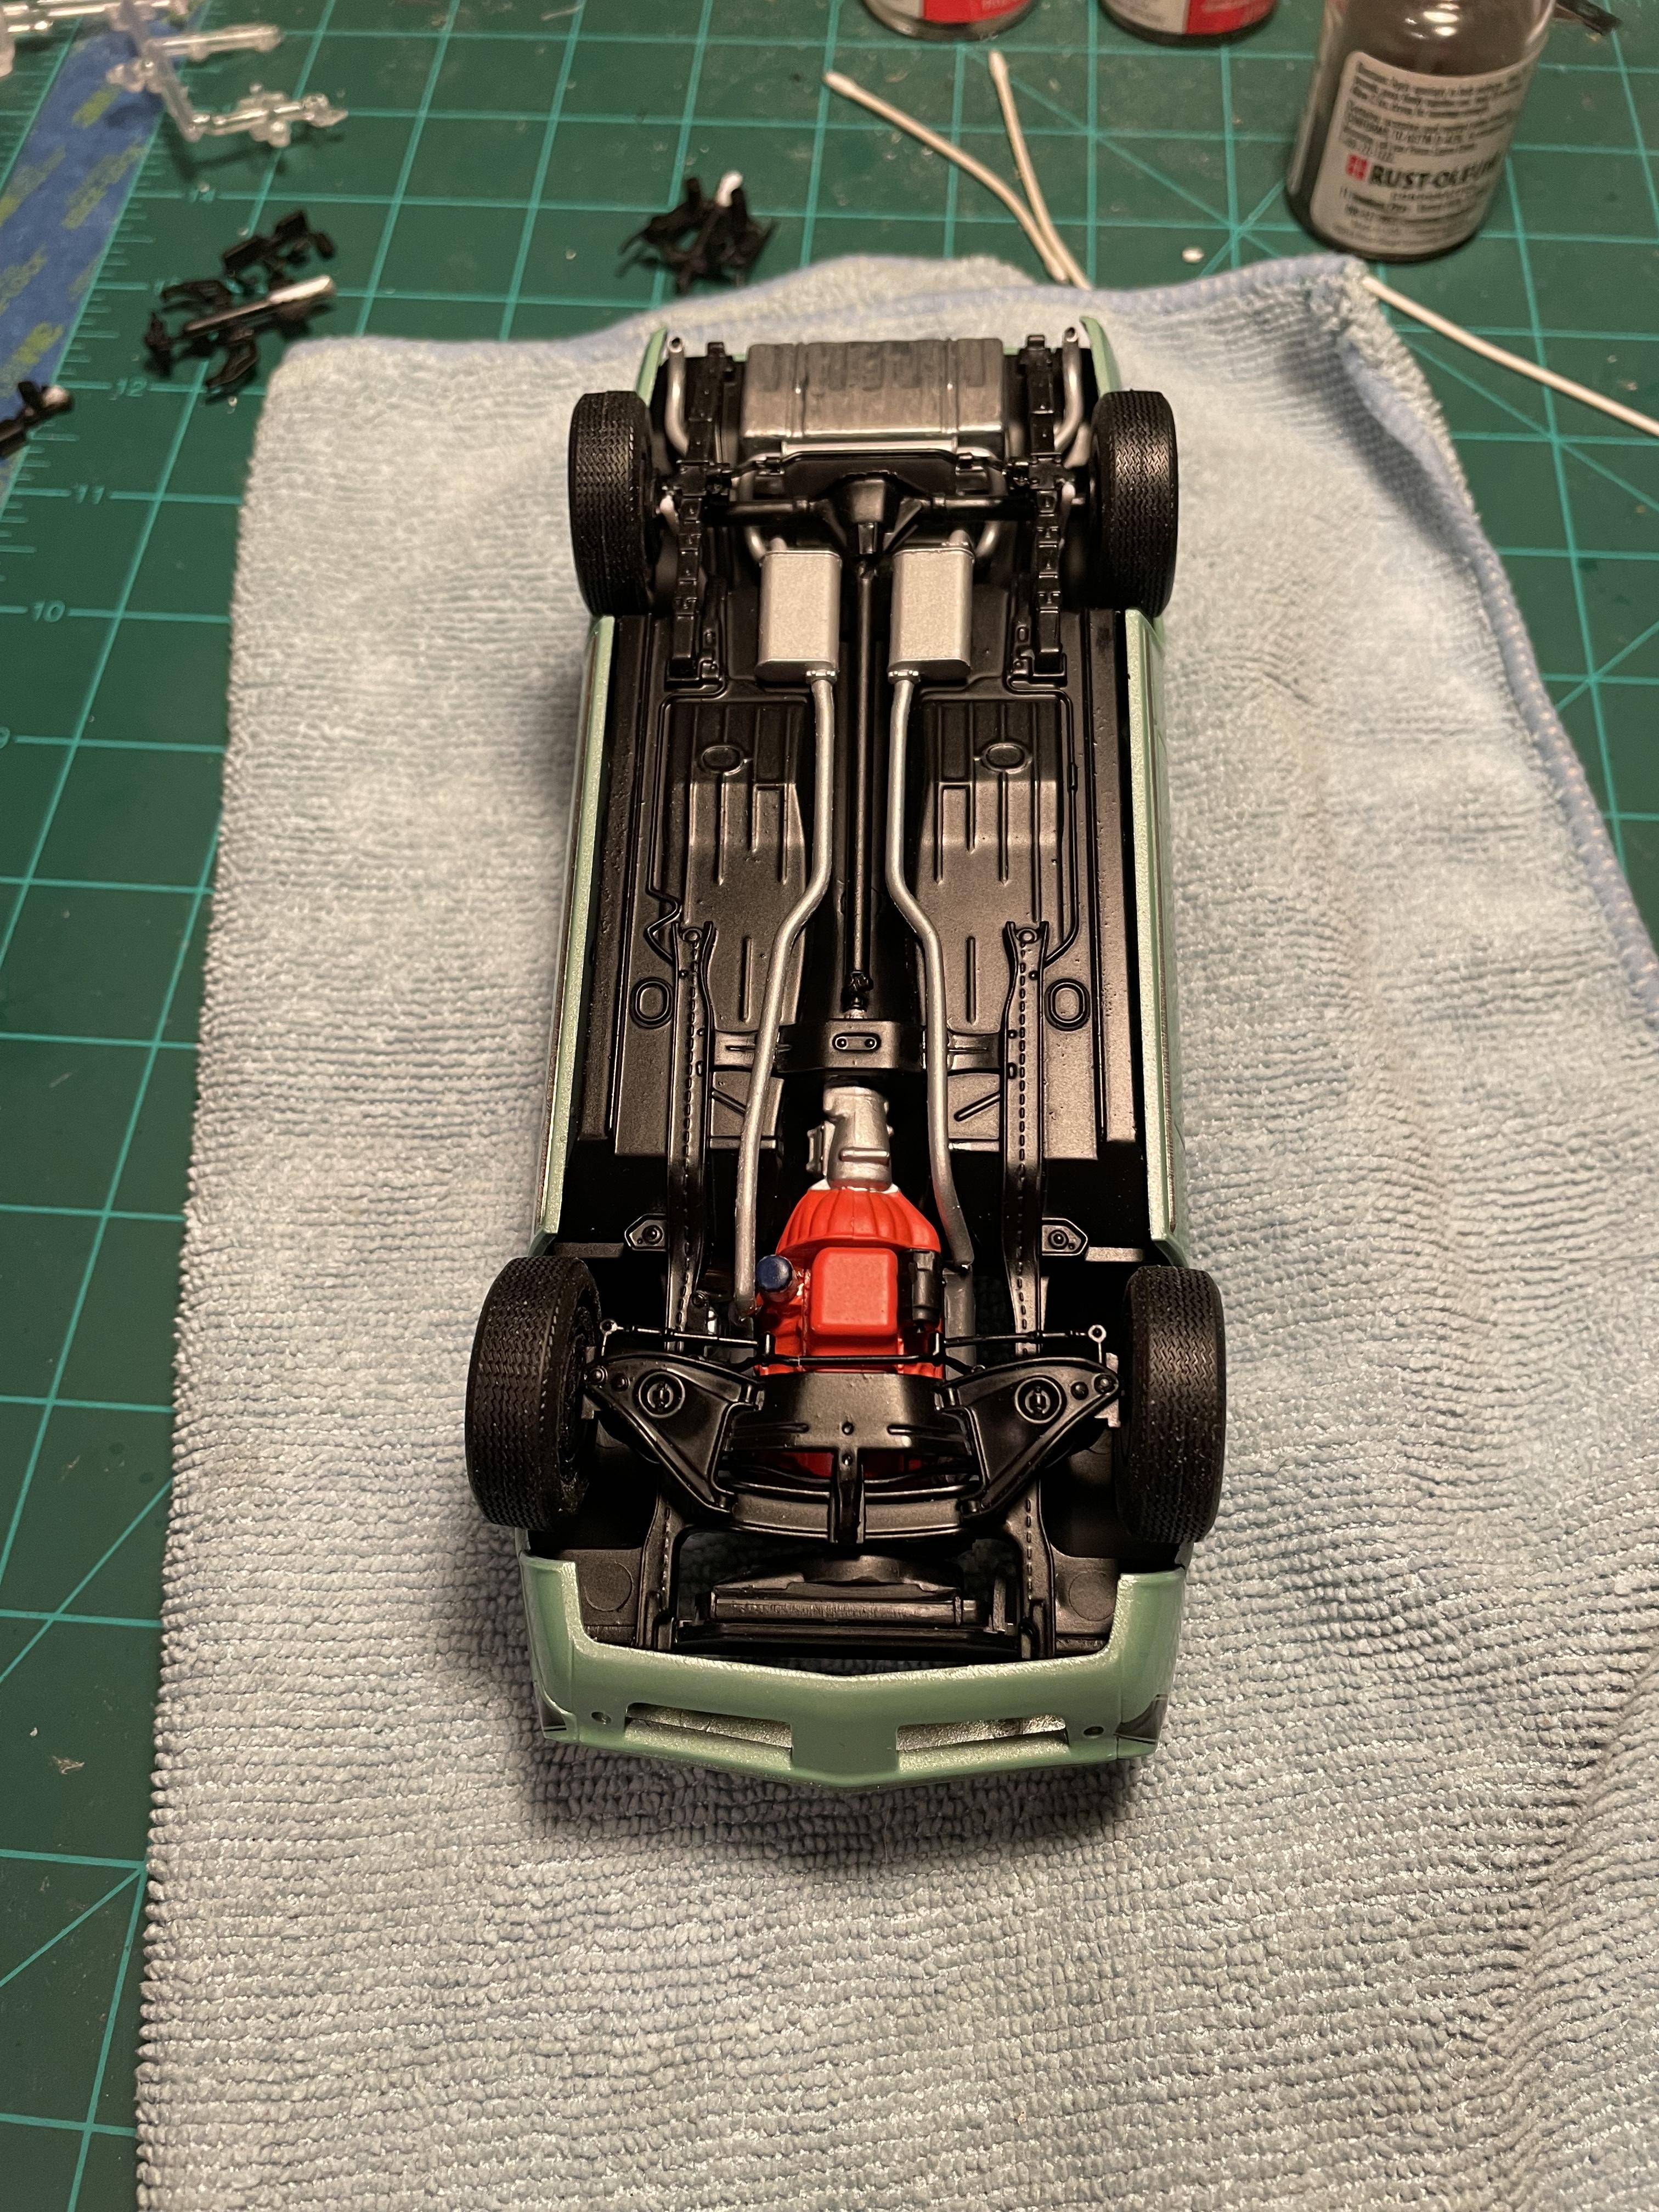
Another recent completion, didn’t turn out as well as I would have liked, but it looks good on the shelf. Thanks for looking.