HNTR
-
Posts
256 -
Joined
-
Last visited
Content Type
Profiles
Forums
Events
Gallery
Everything posted by HNTR
-
5/6/18 updates 2013 T/A with Dual Turbo and Alien Intake W.I.P.
HNTR replied to HNTR's topic in WIP: Drag Racing Models
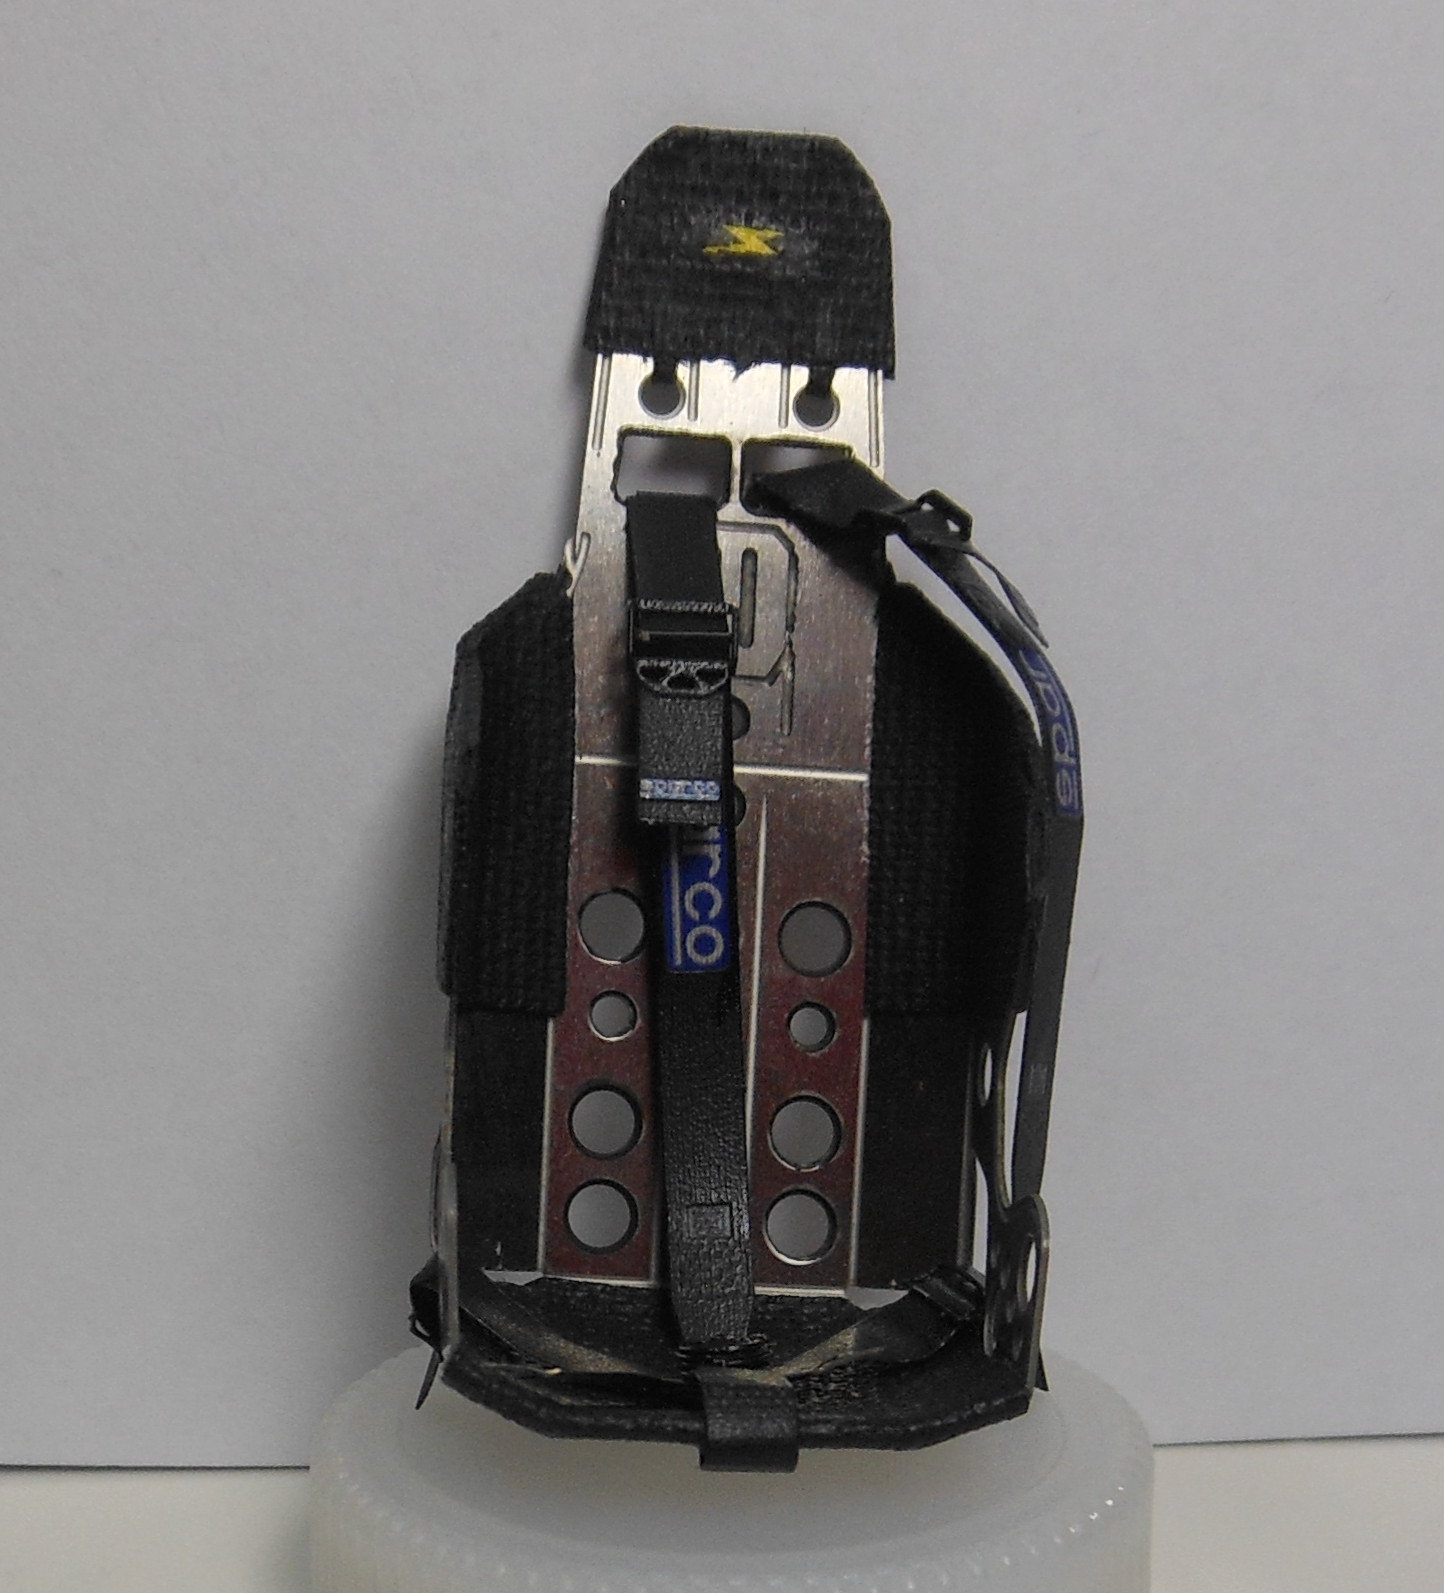
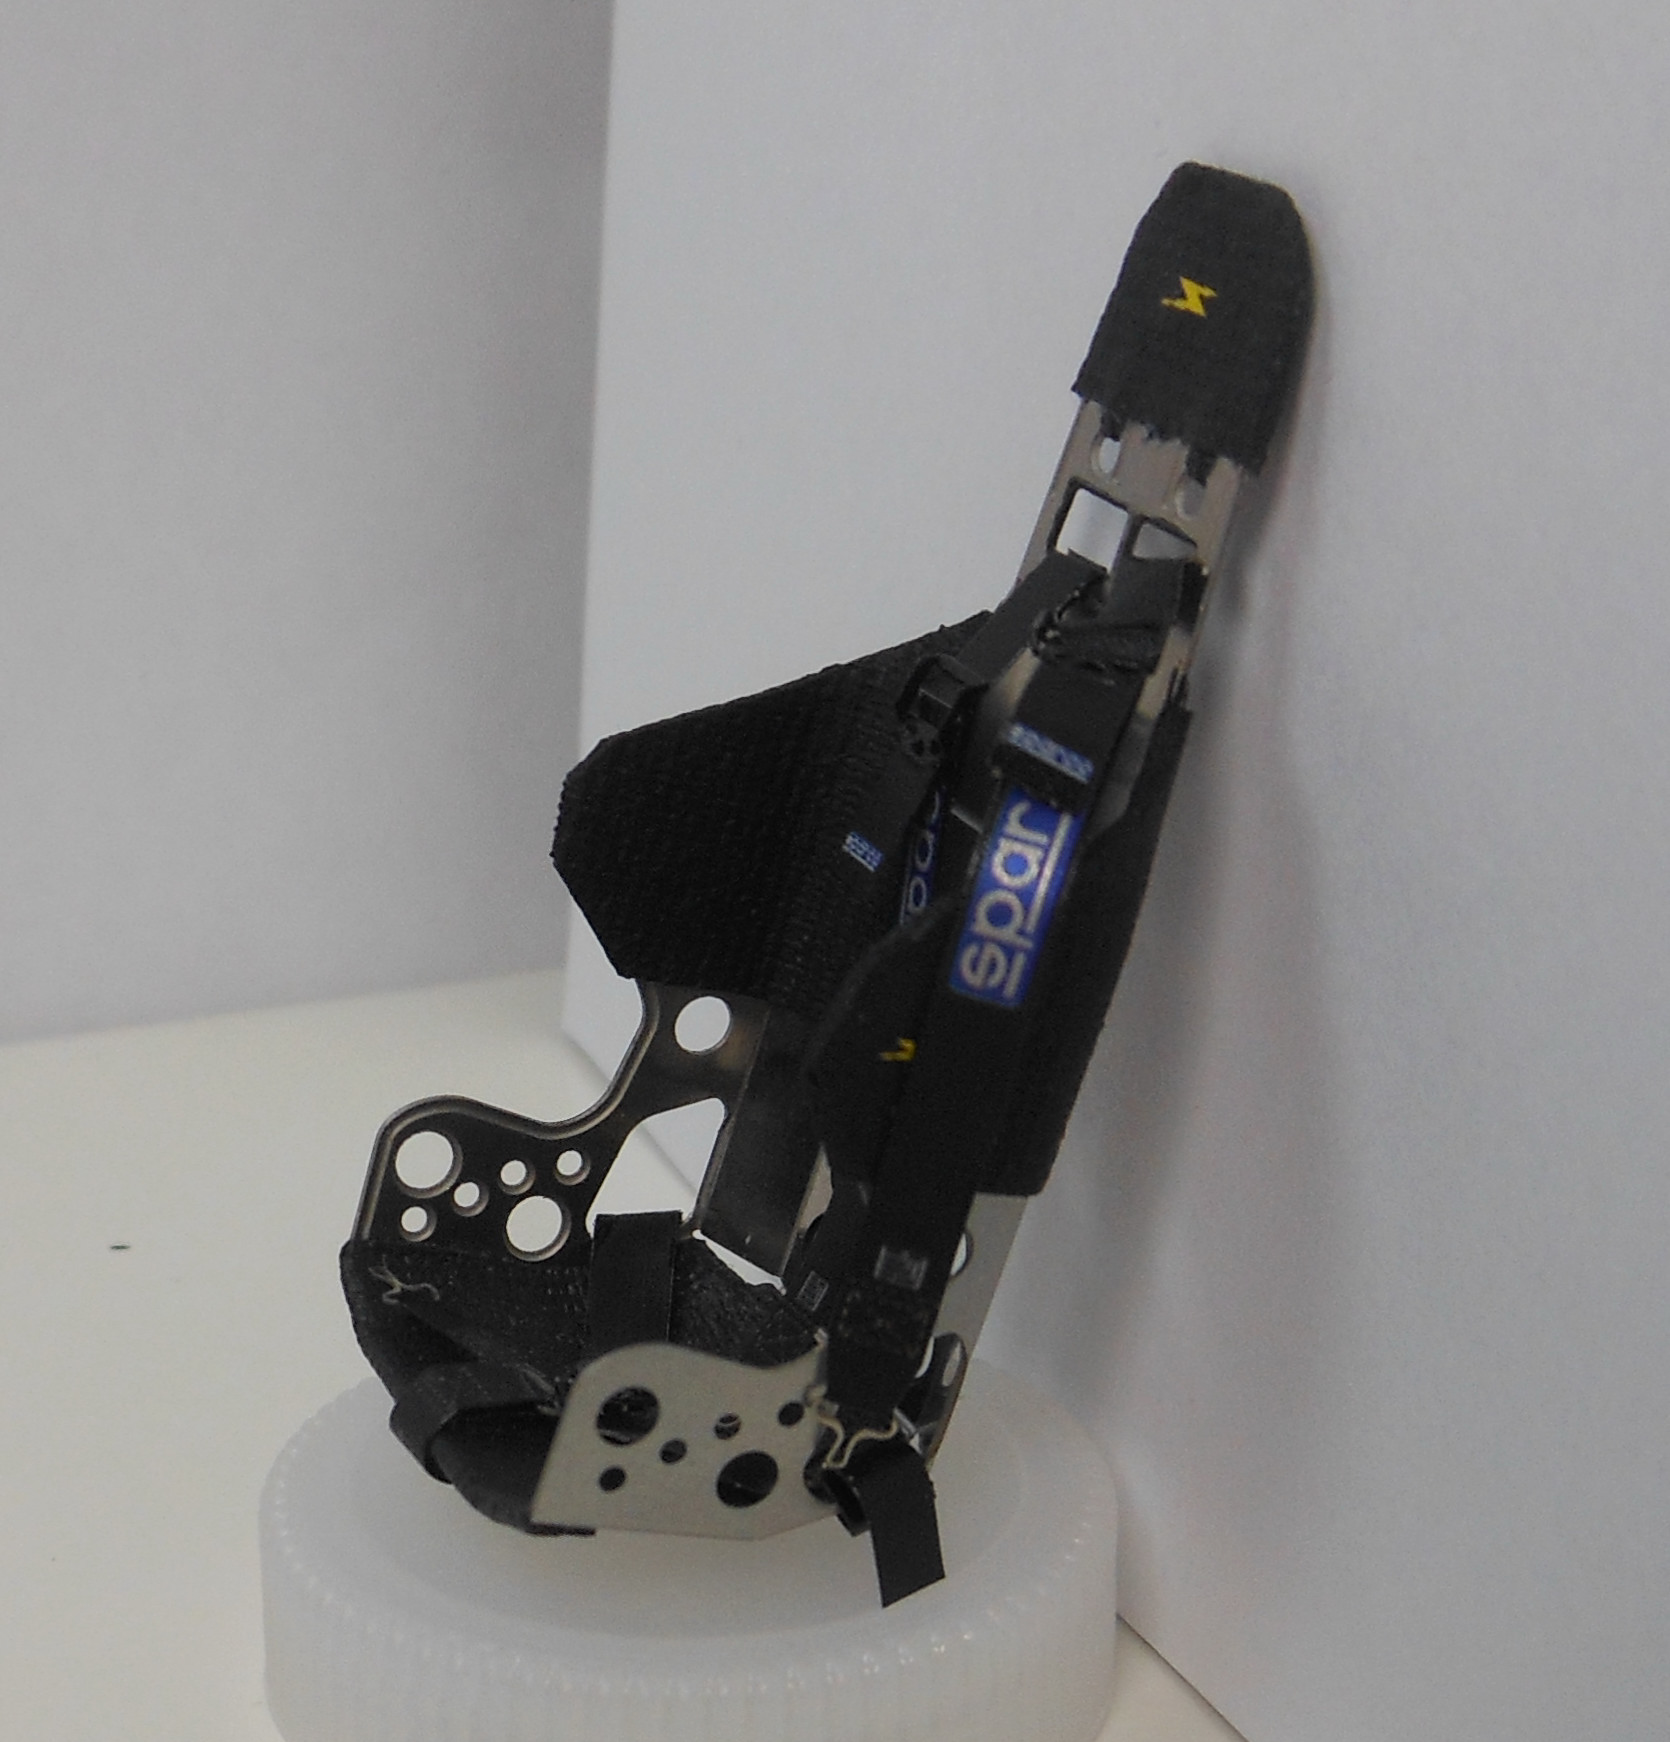
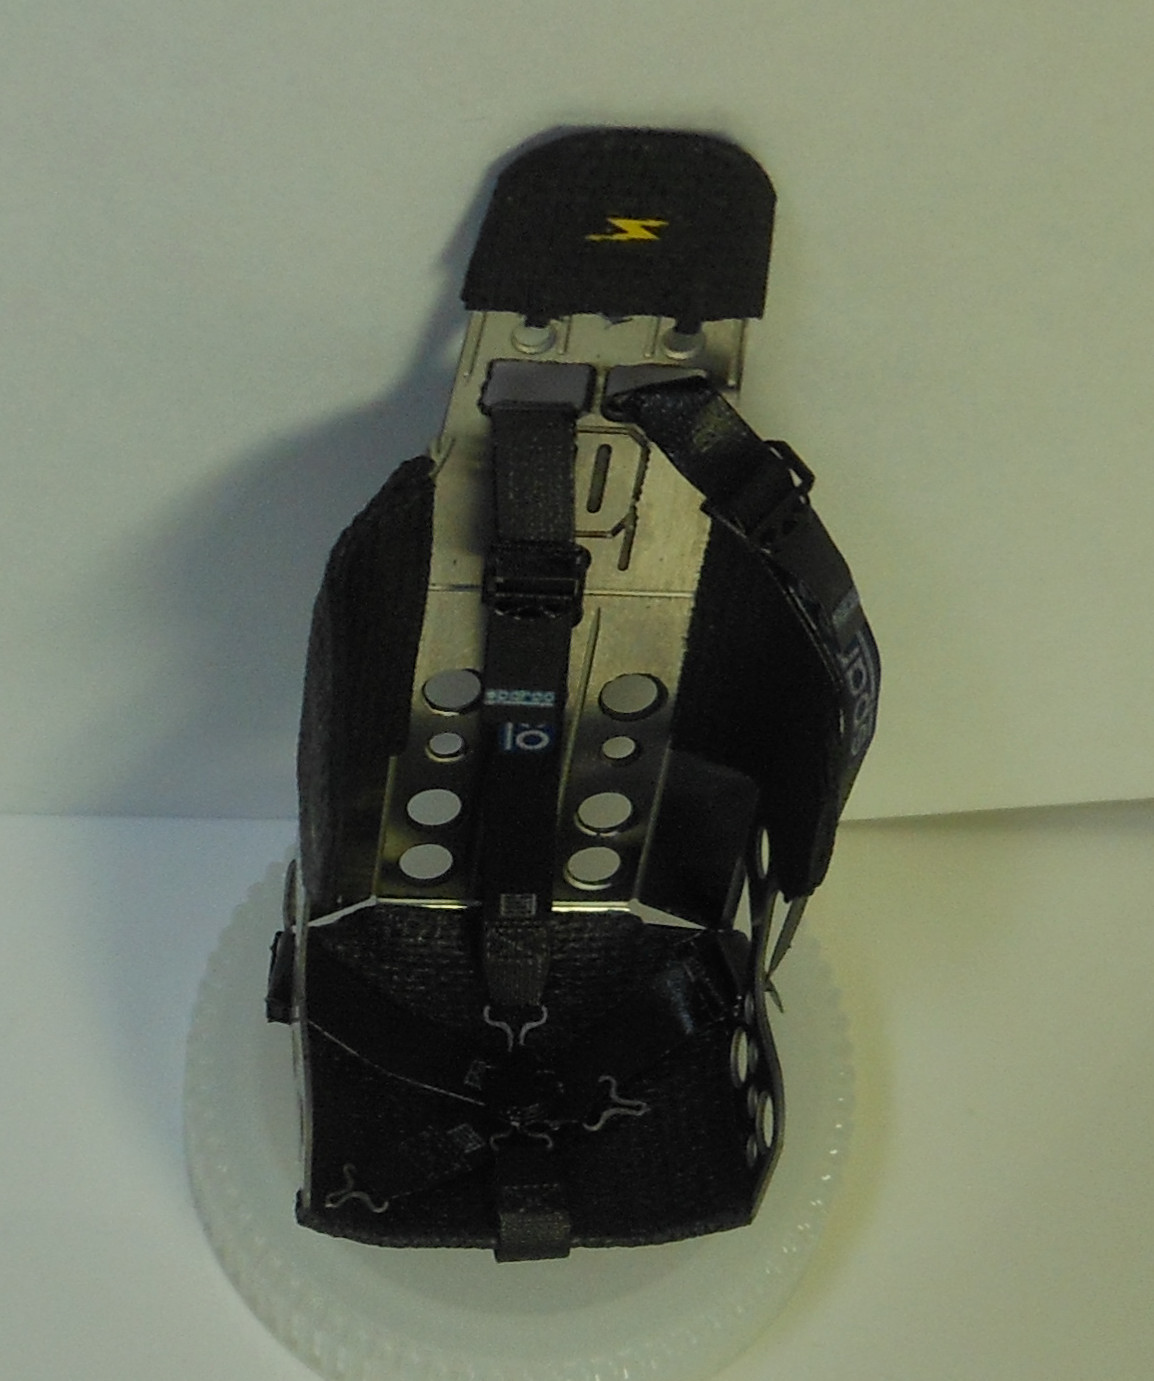
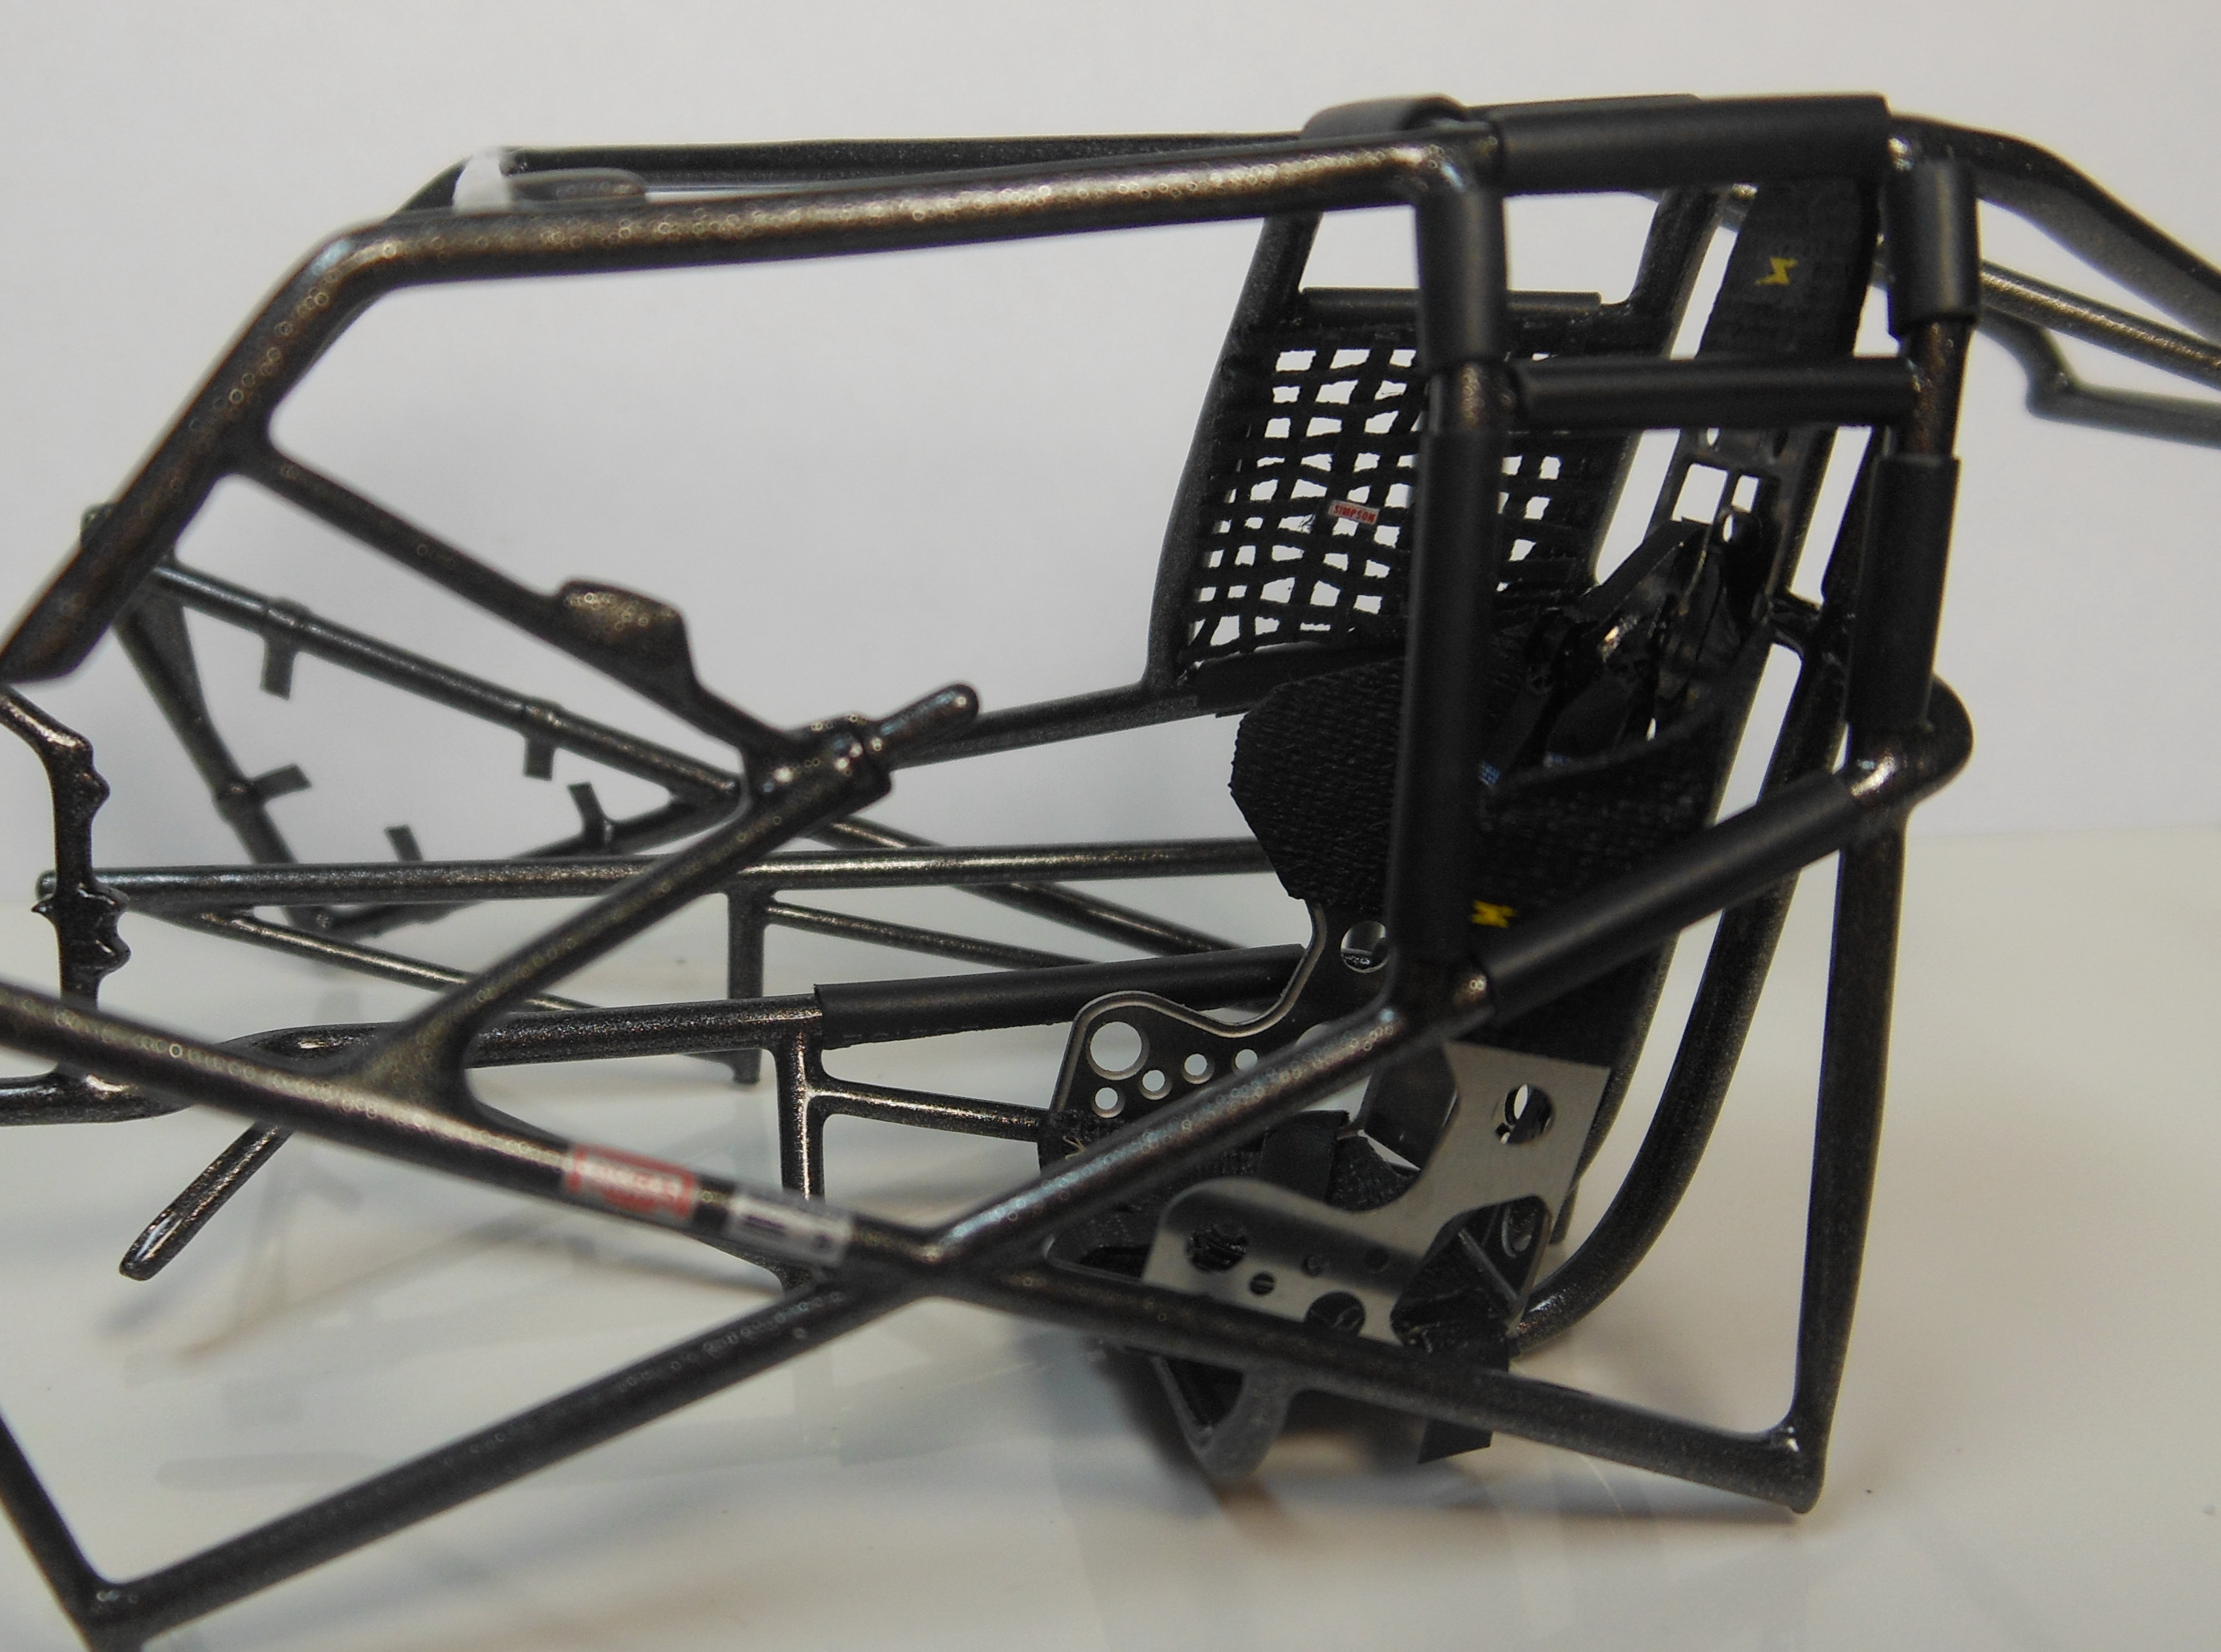
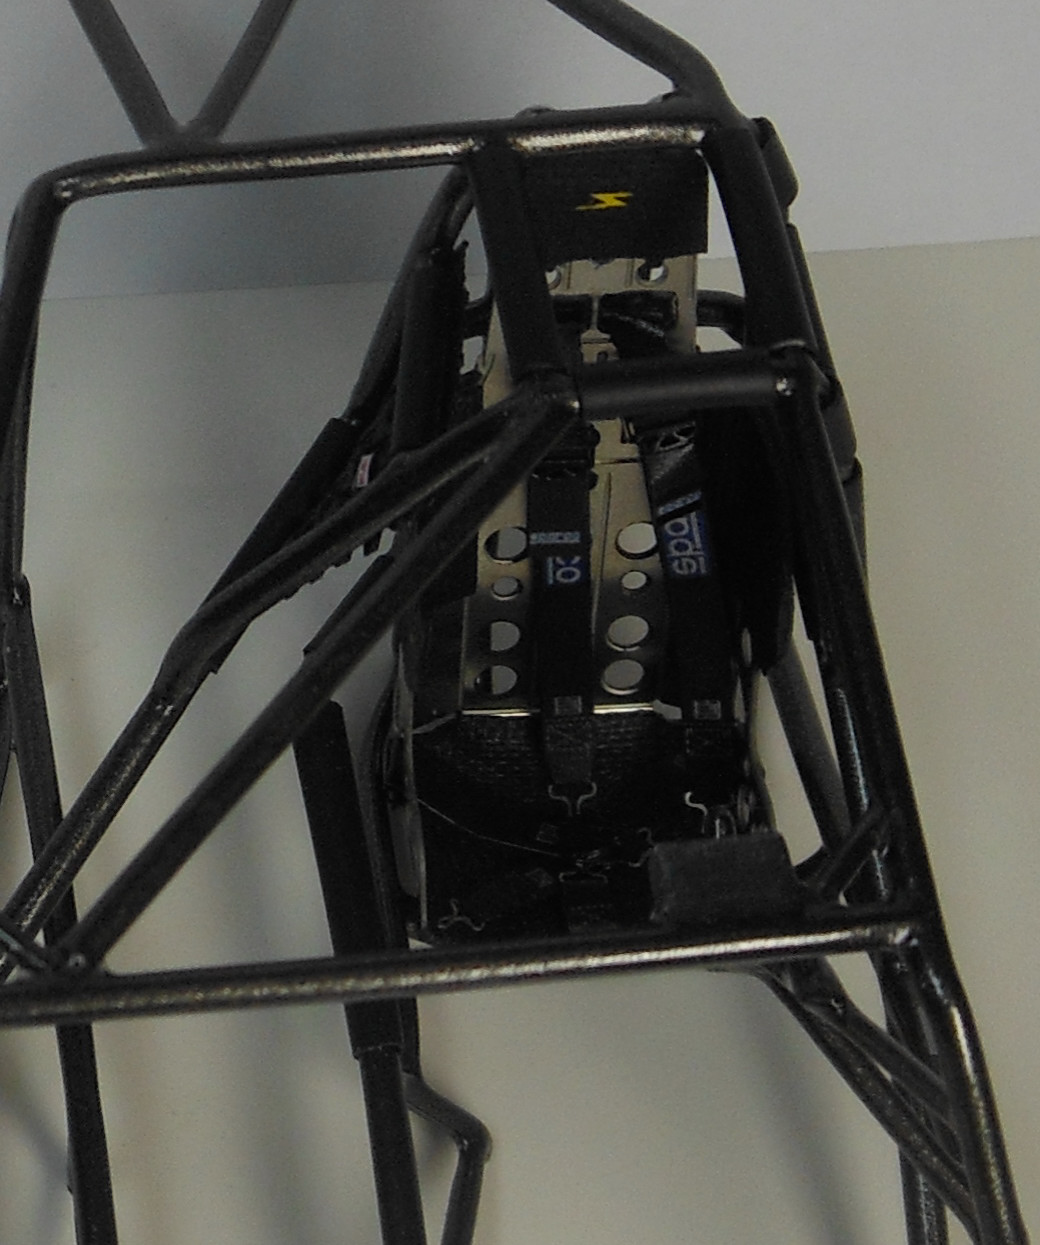
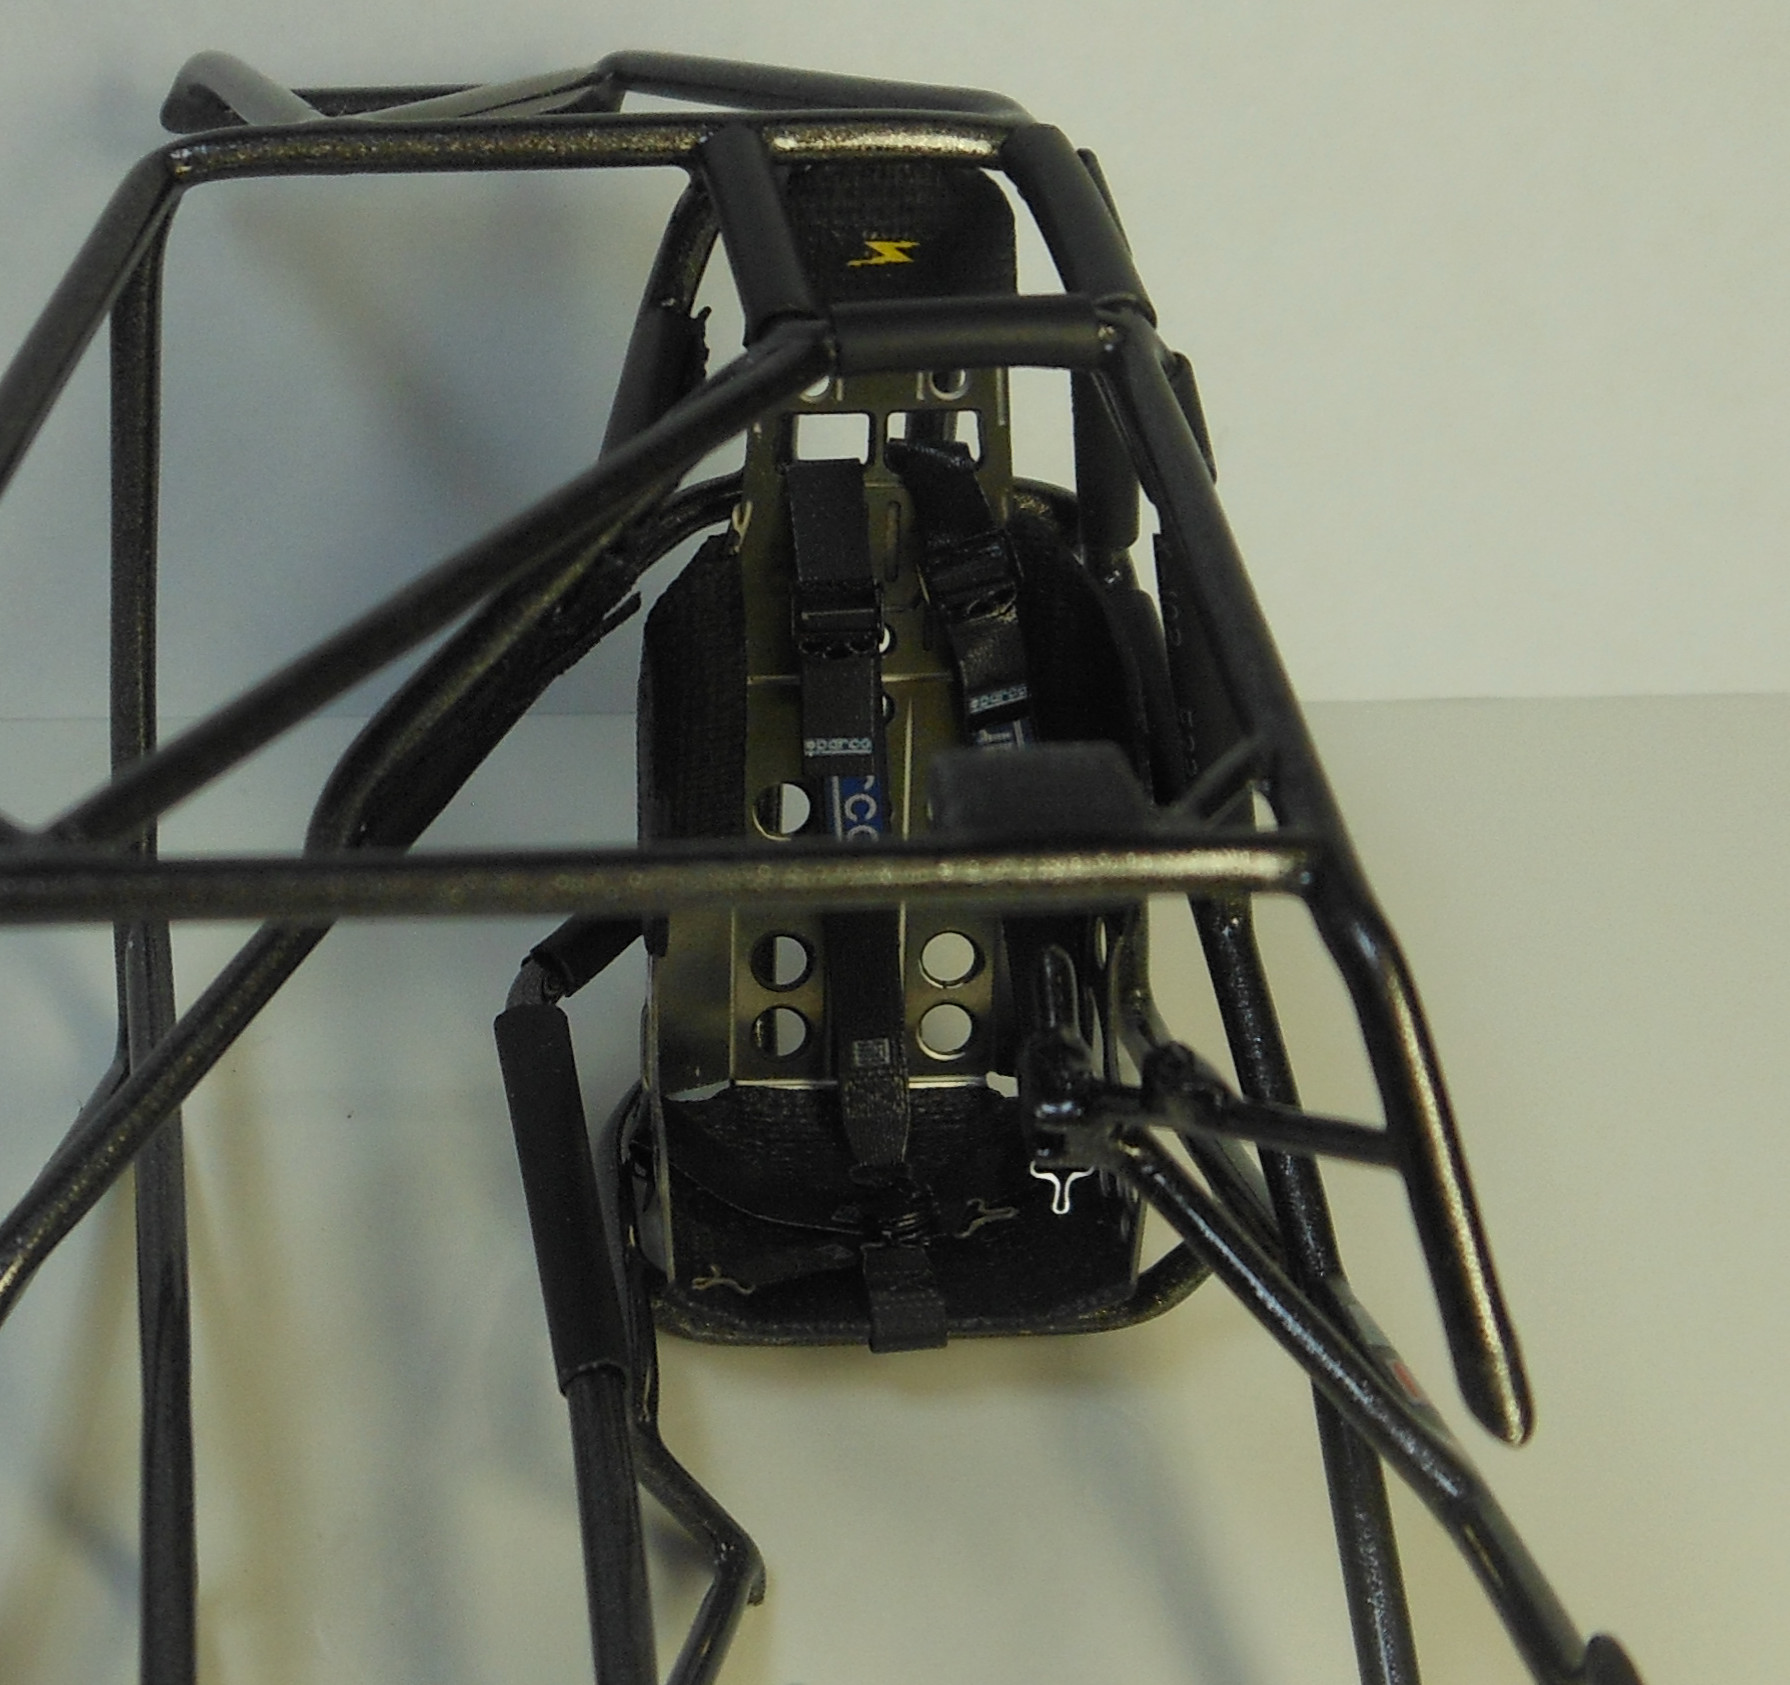
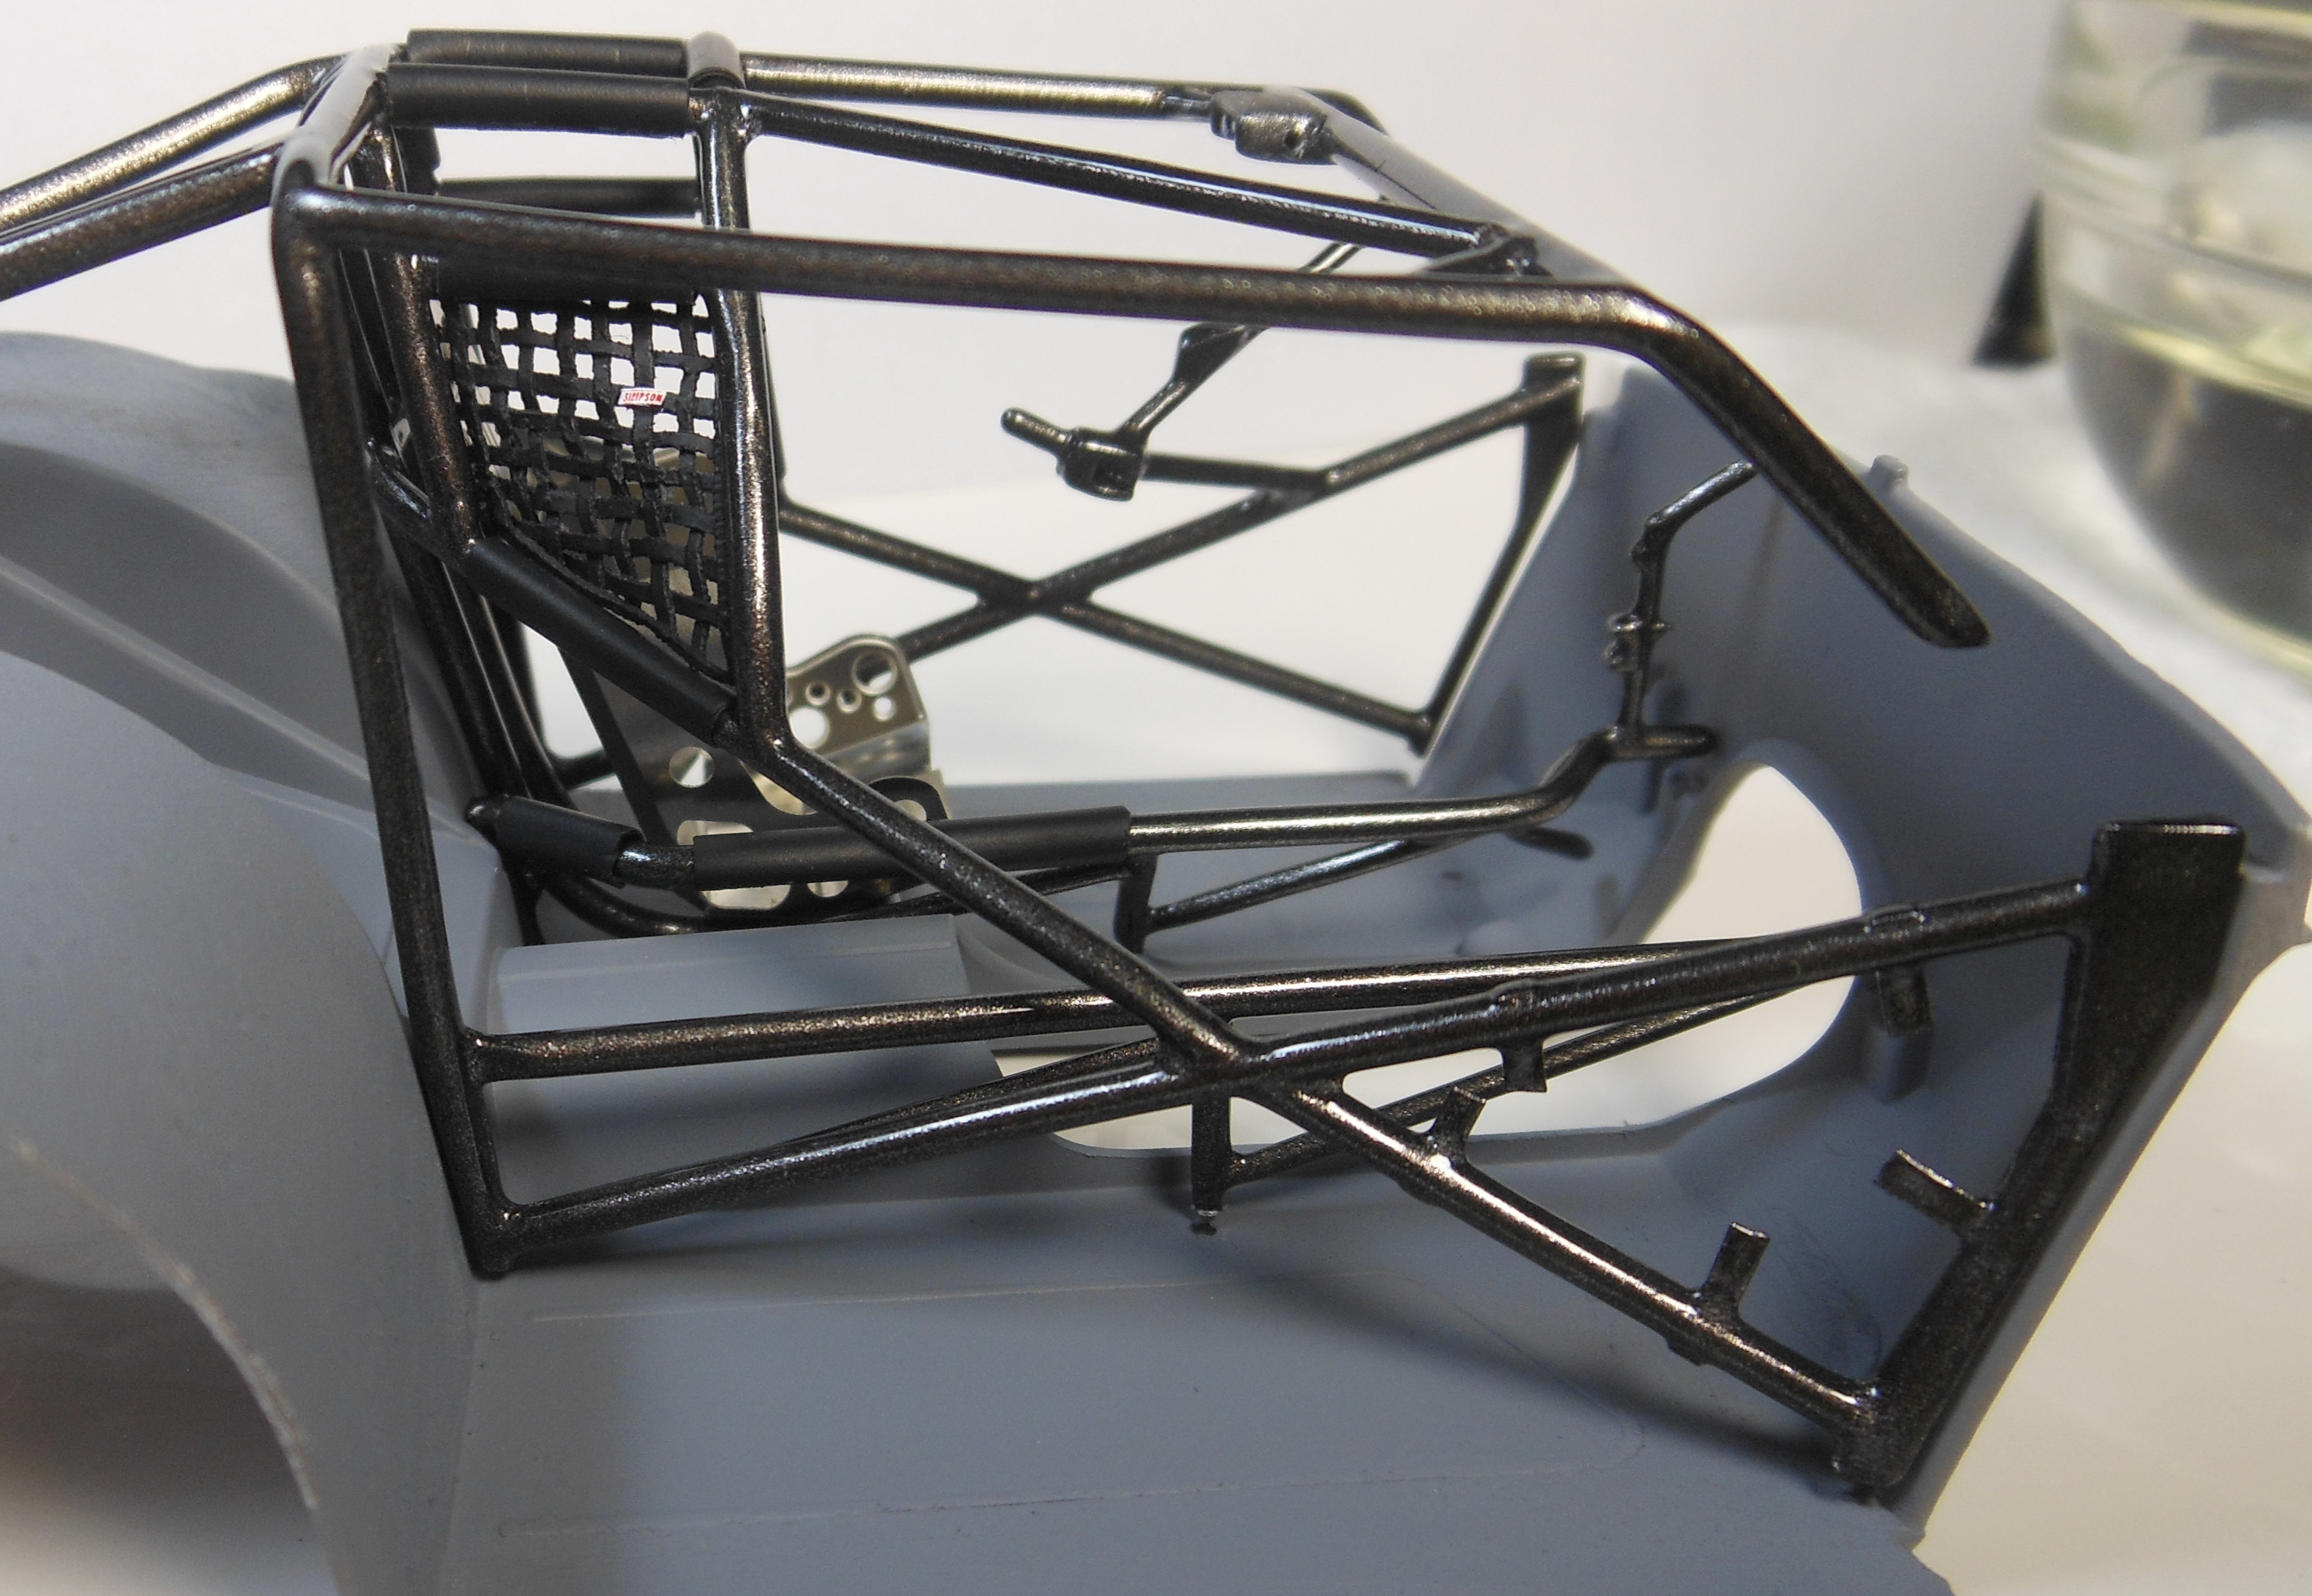
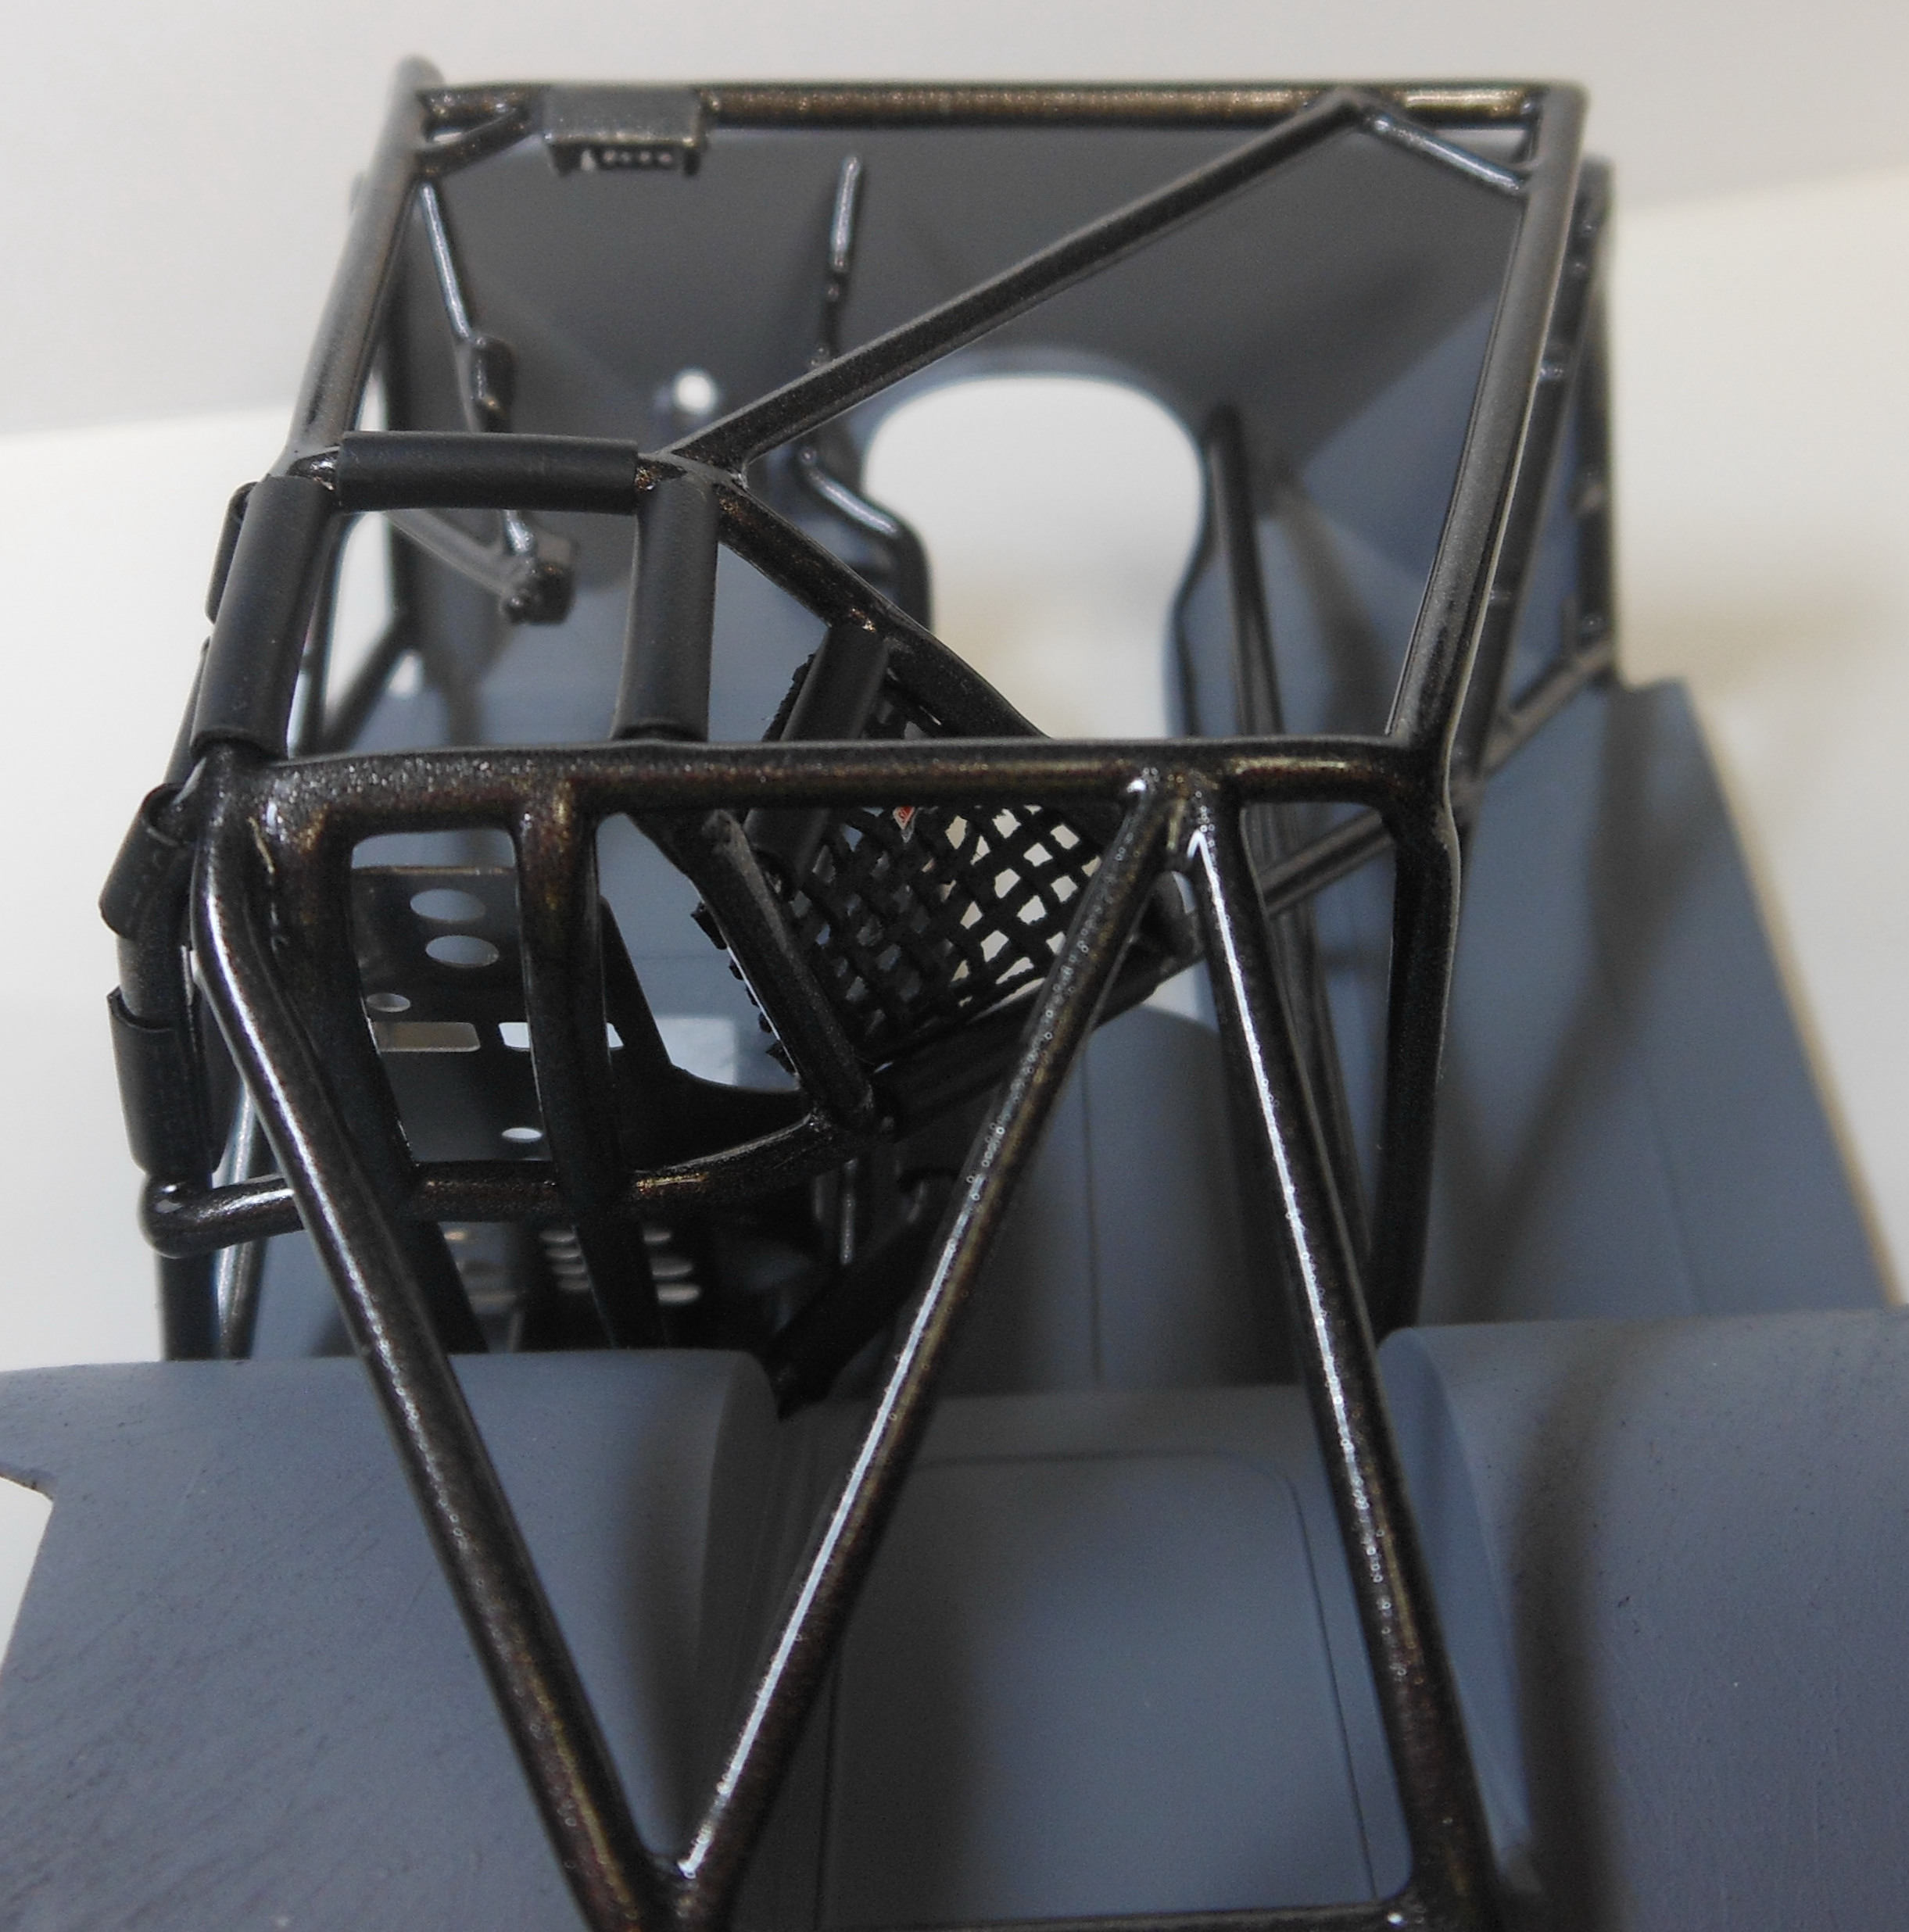
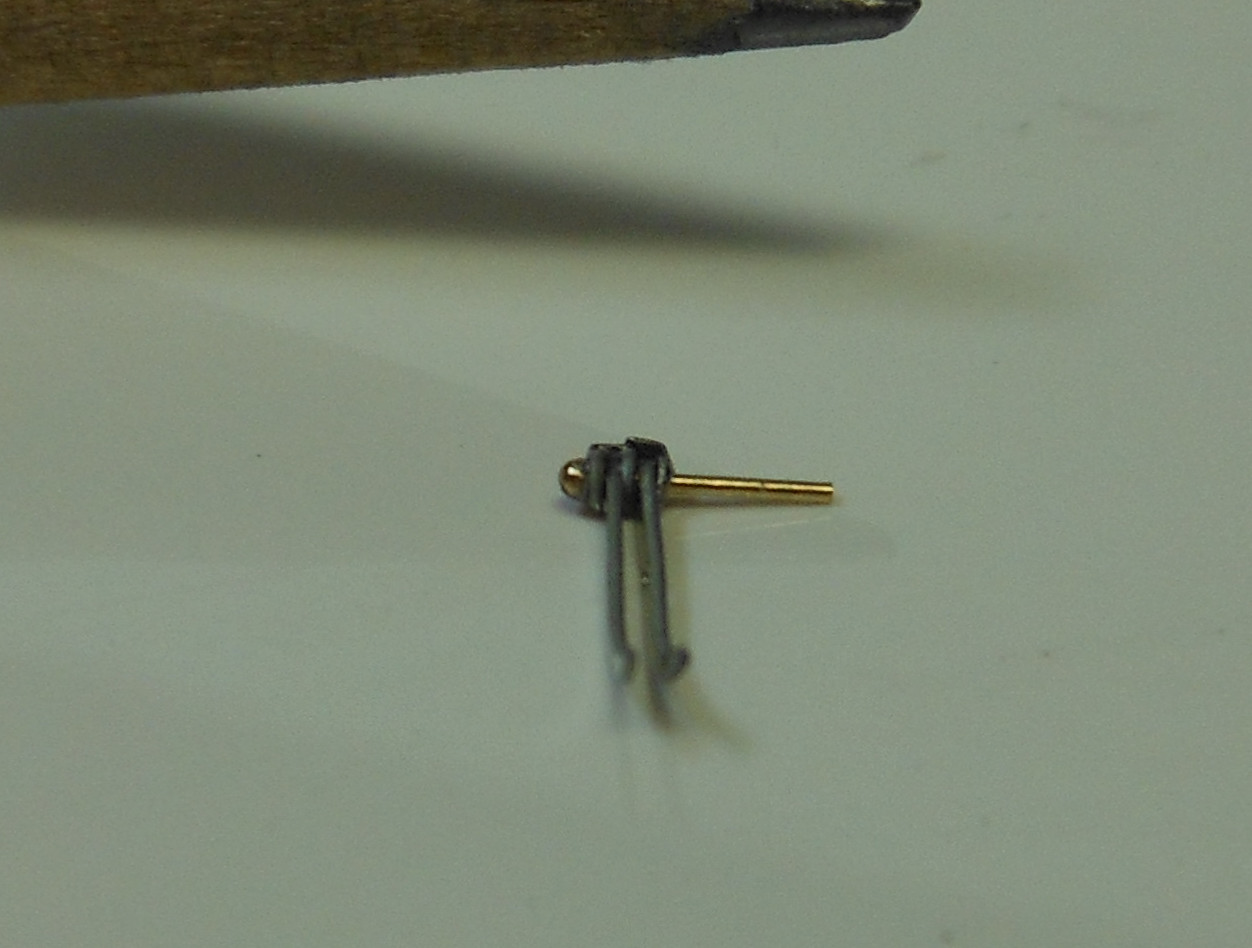
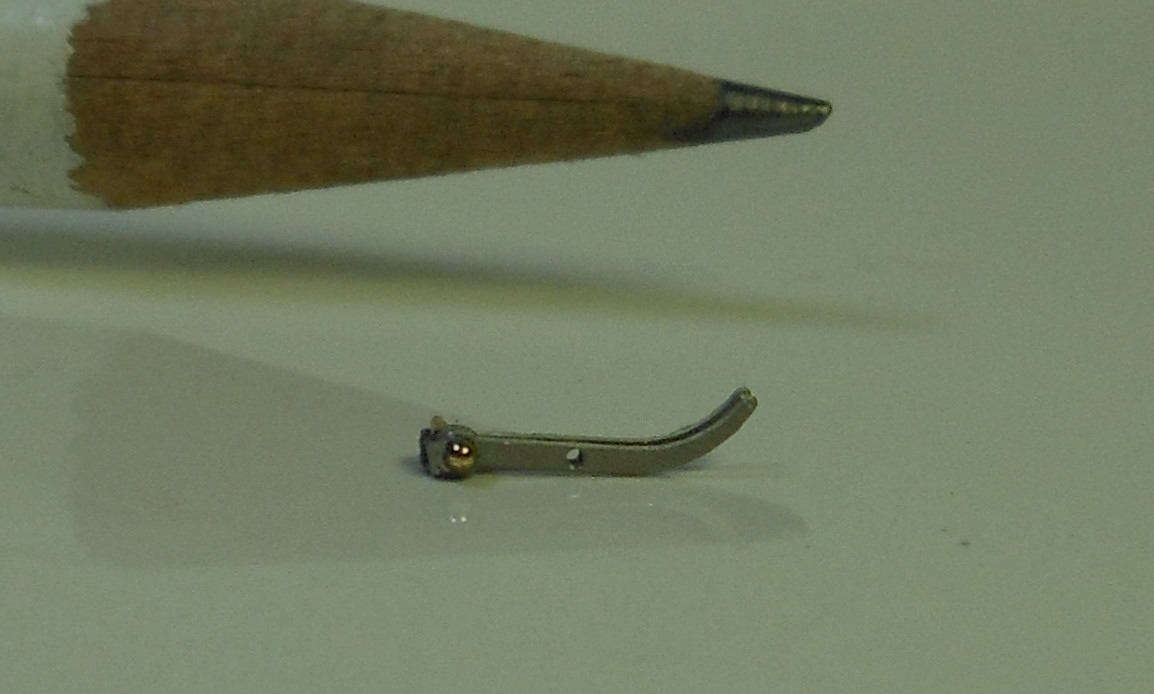
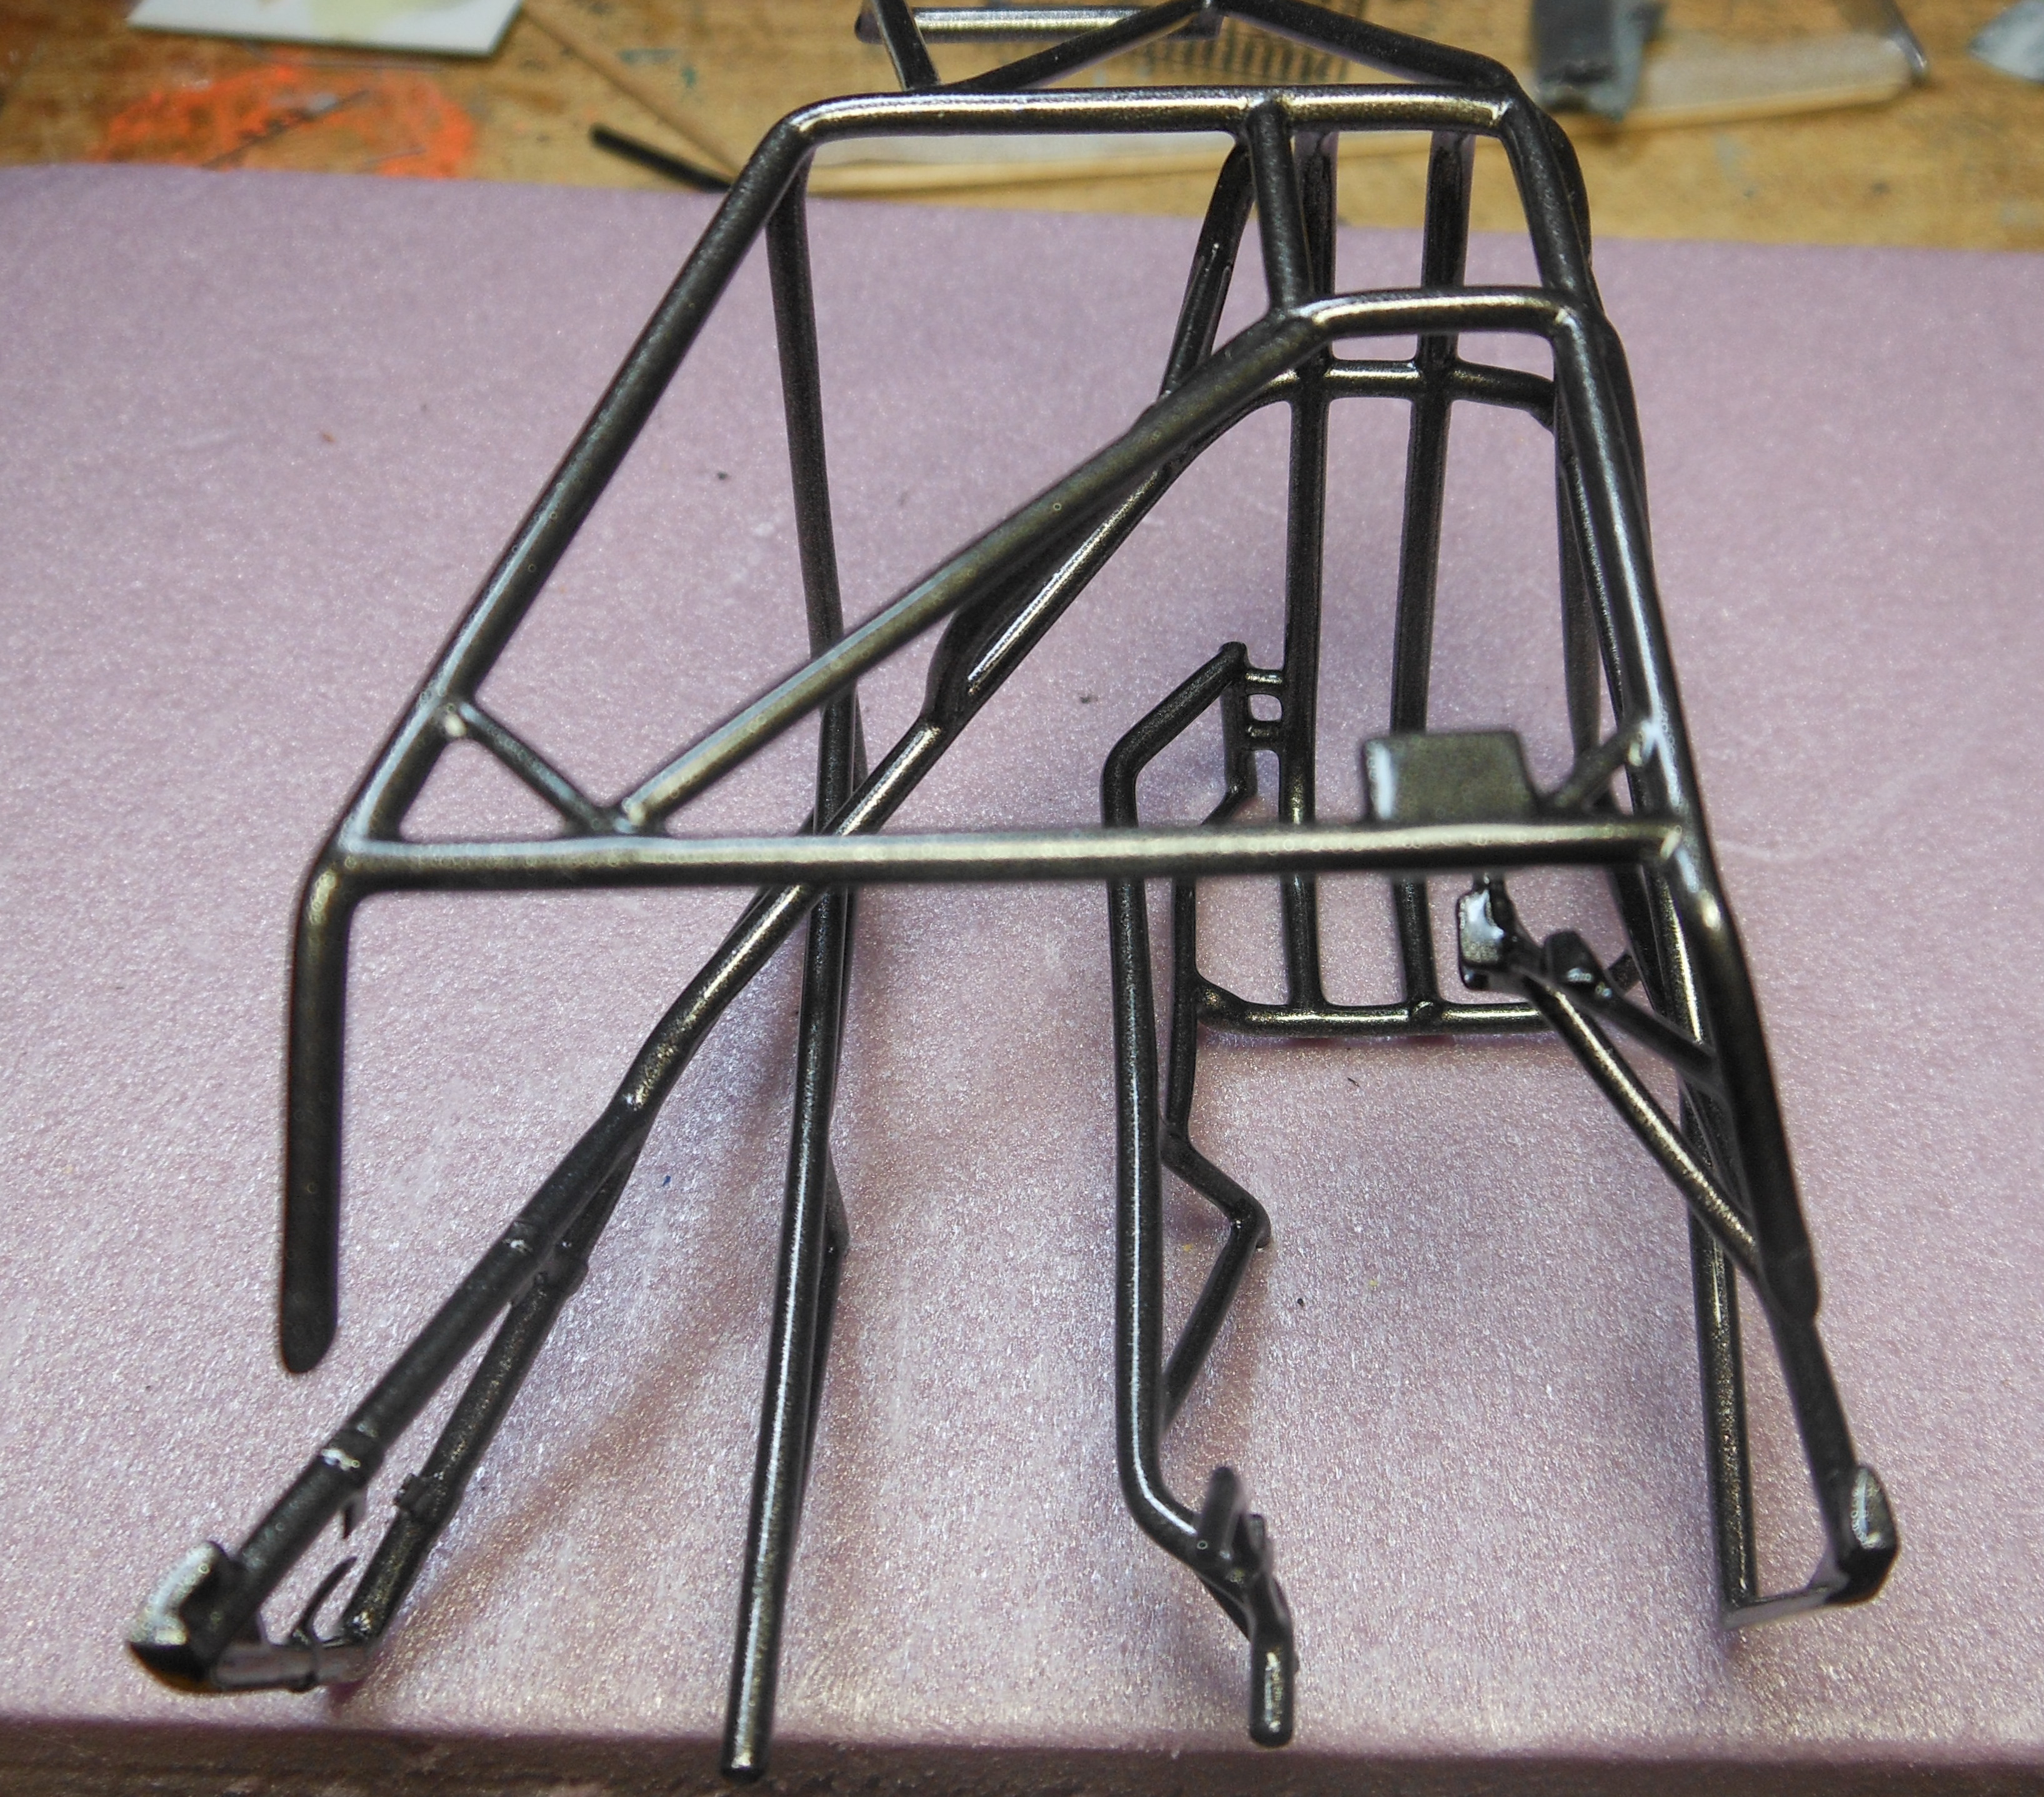
The seat is from dirt modeler, welds are Archer fine scale decals, and this is 1/25 scale. Just finished the seat, check it out.
-
5/6/18 updates 2013 T/A with Dual Turbo and Alien Intake W.I.P.
HNTR replied to HNTR's topic in WIP: Drag Racing Models
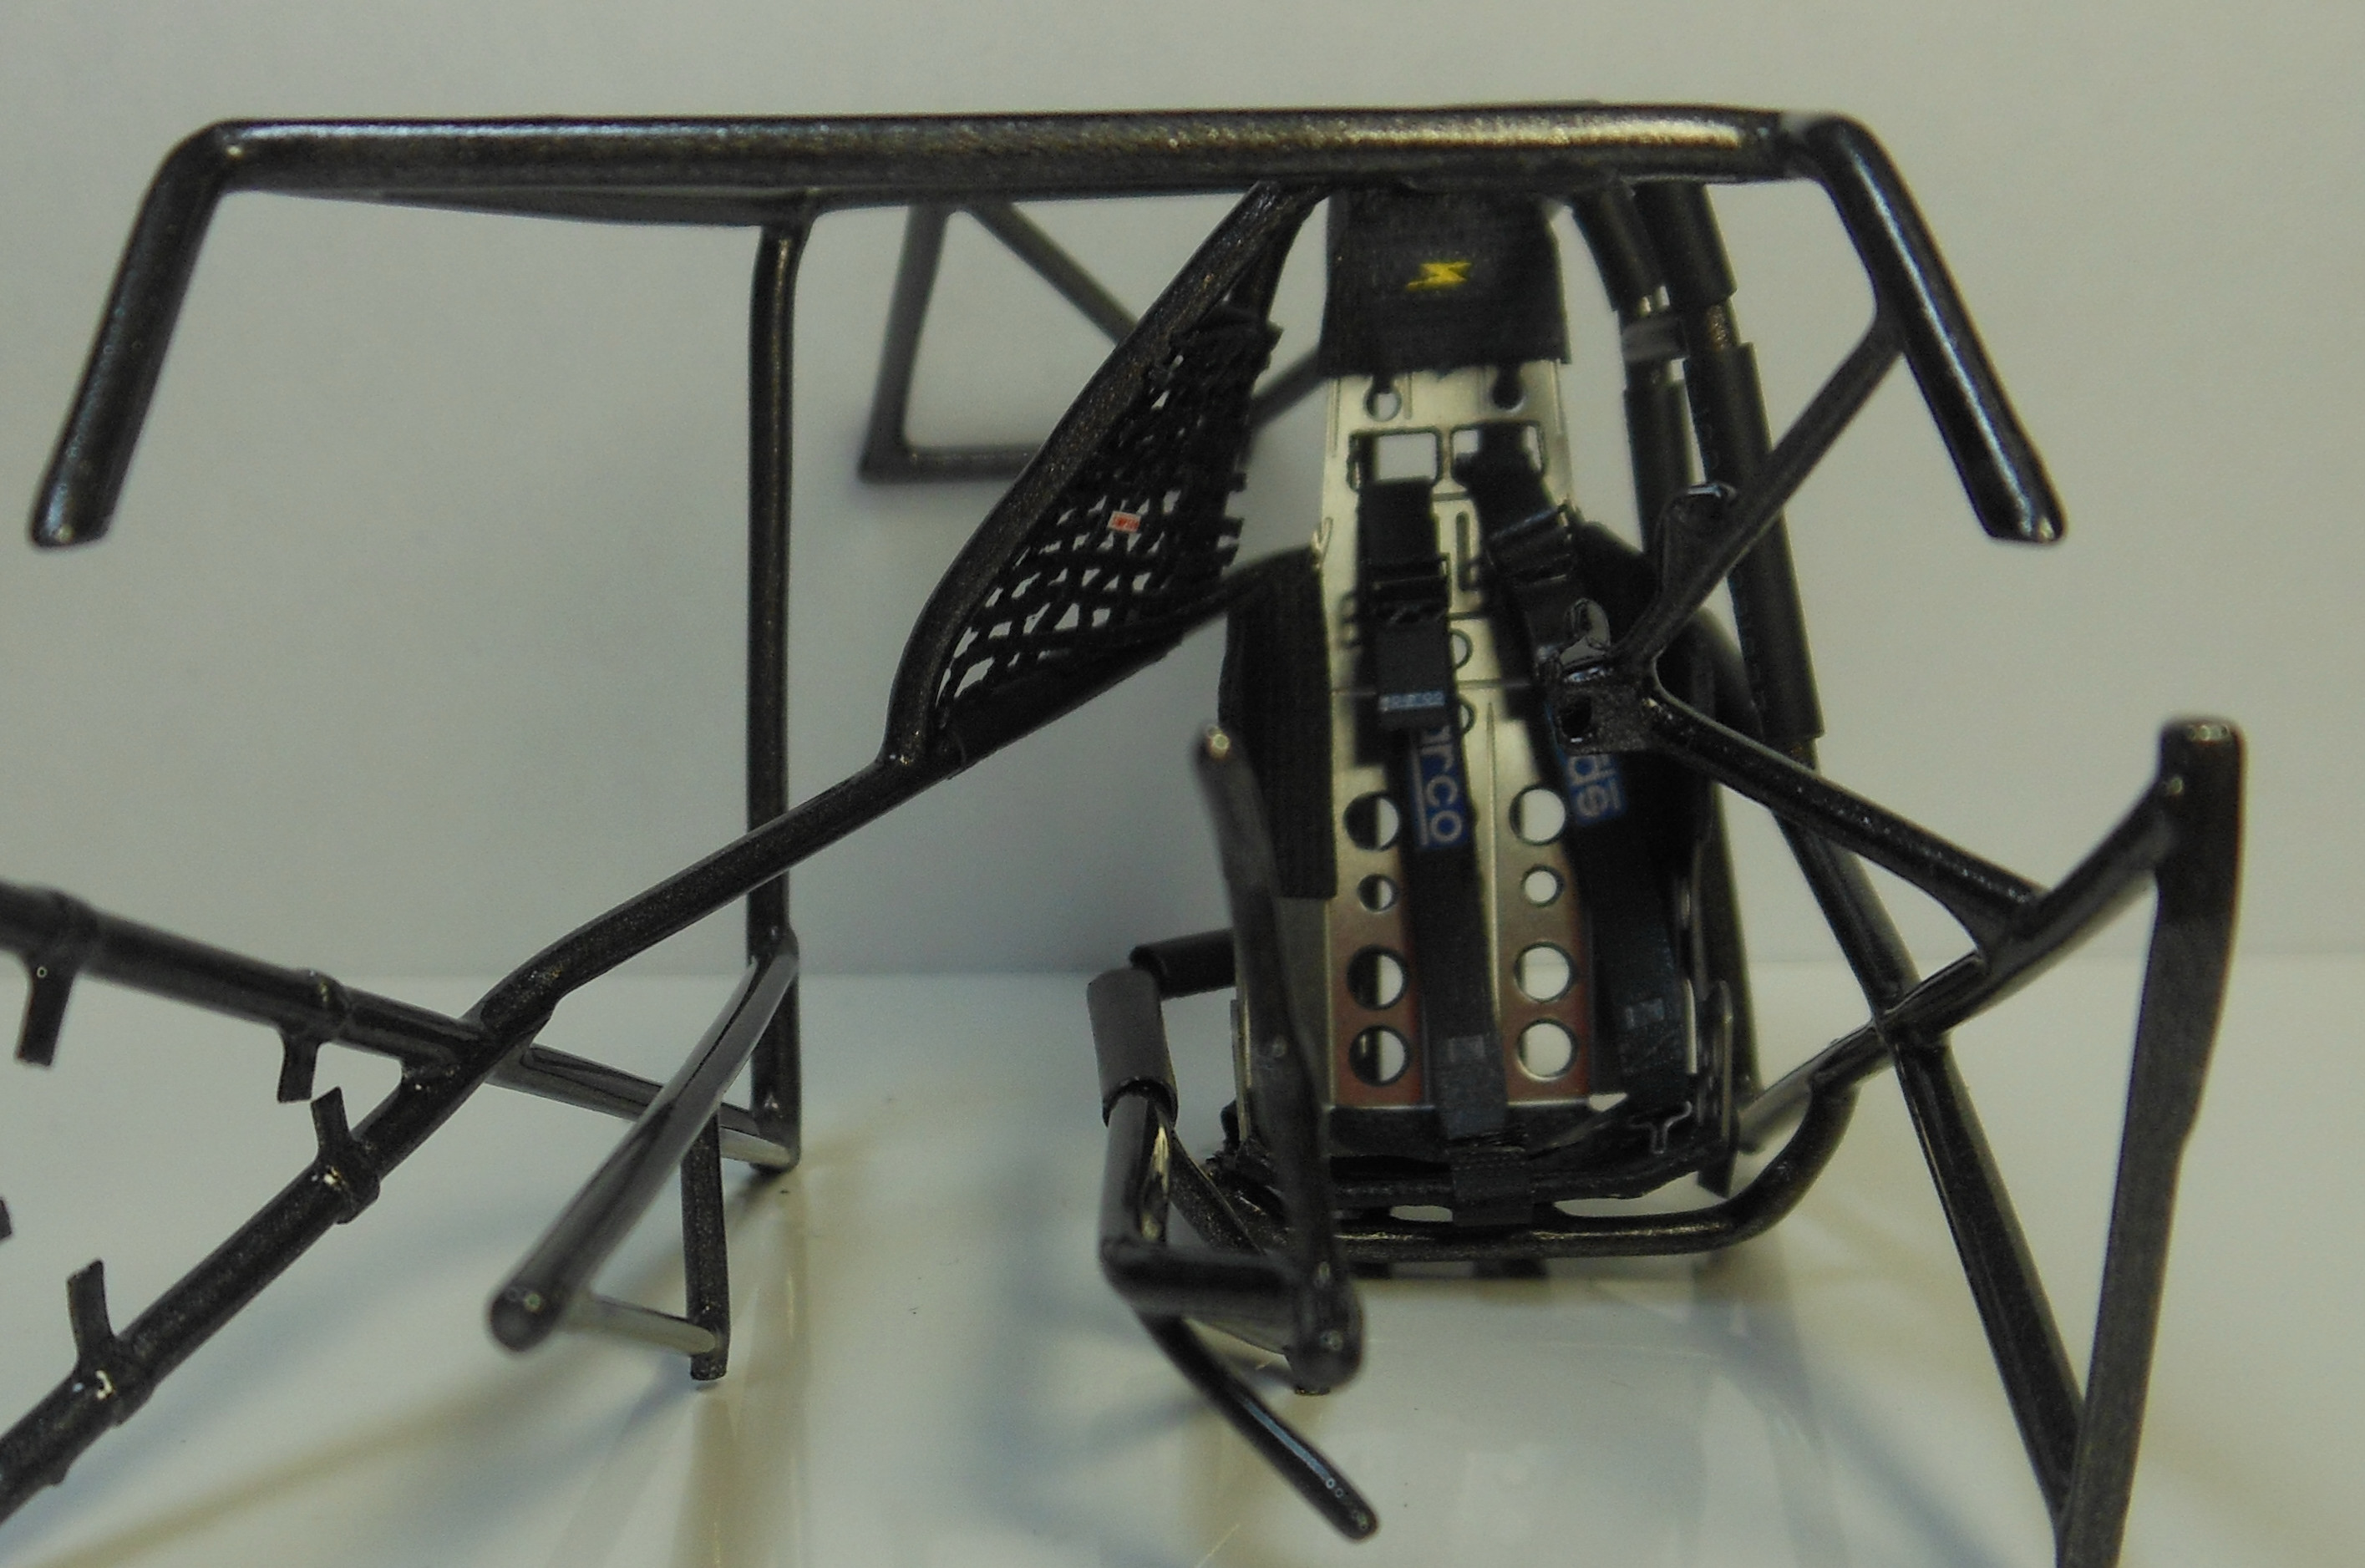
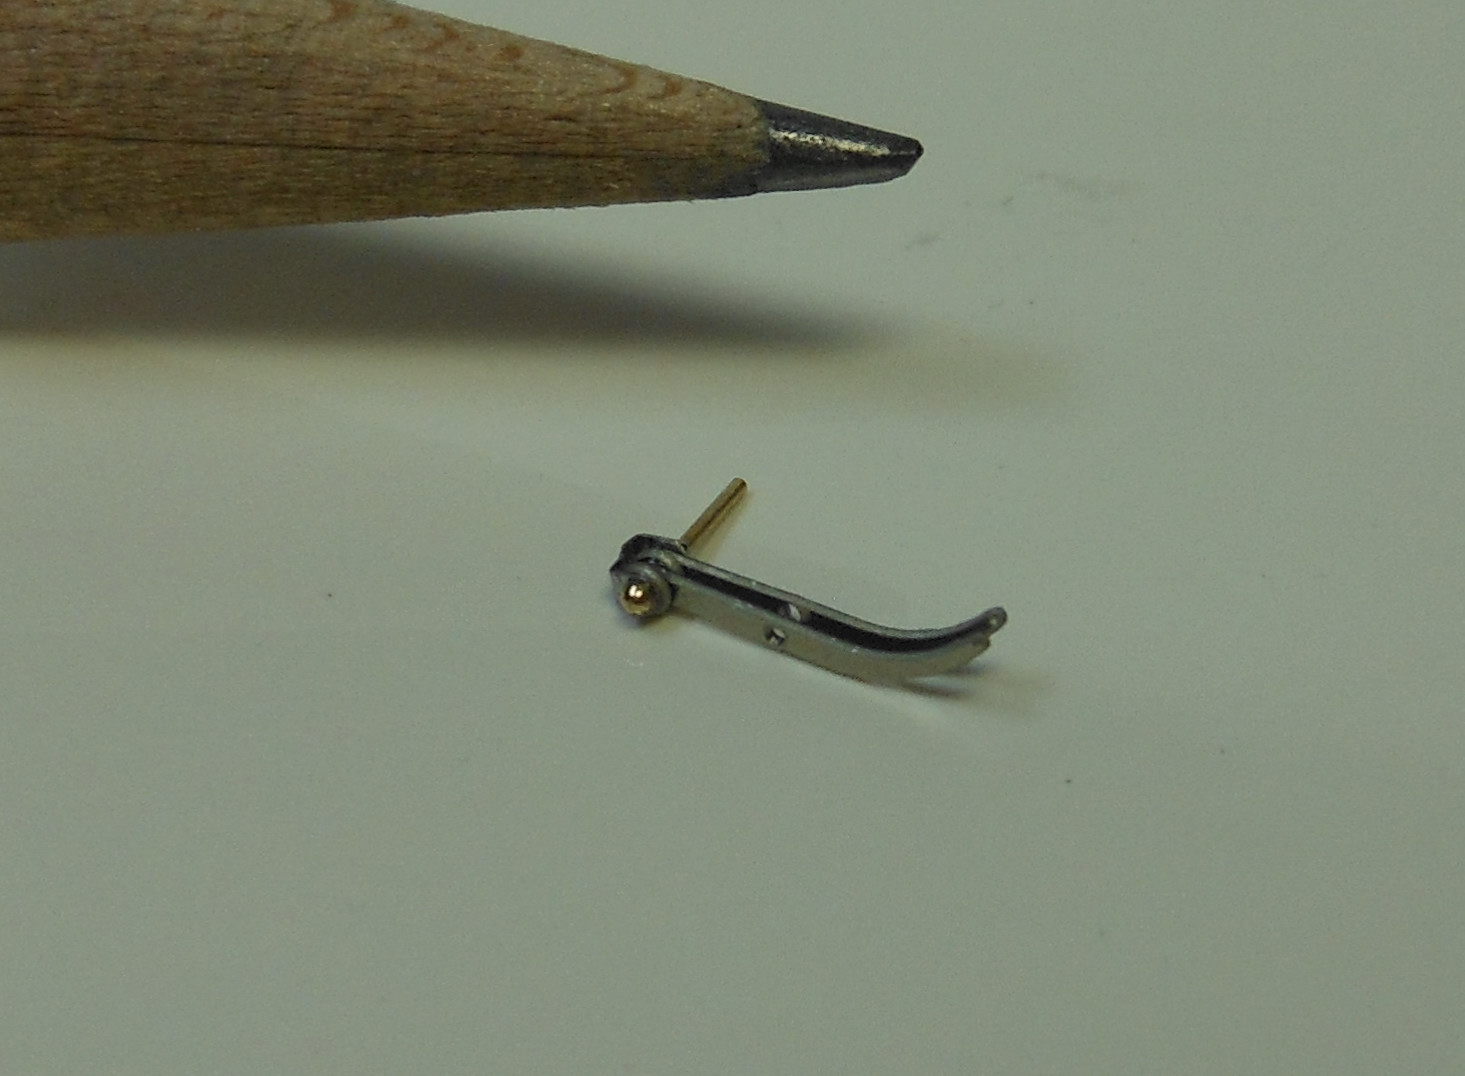
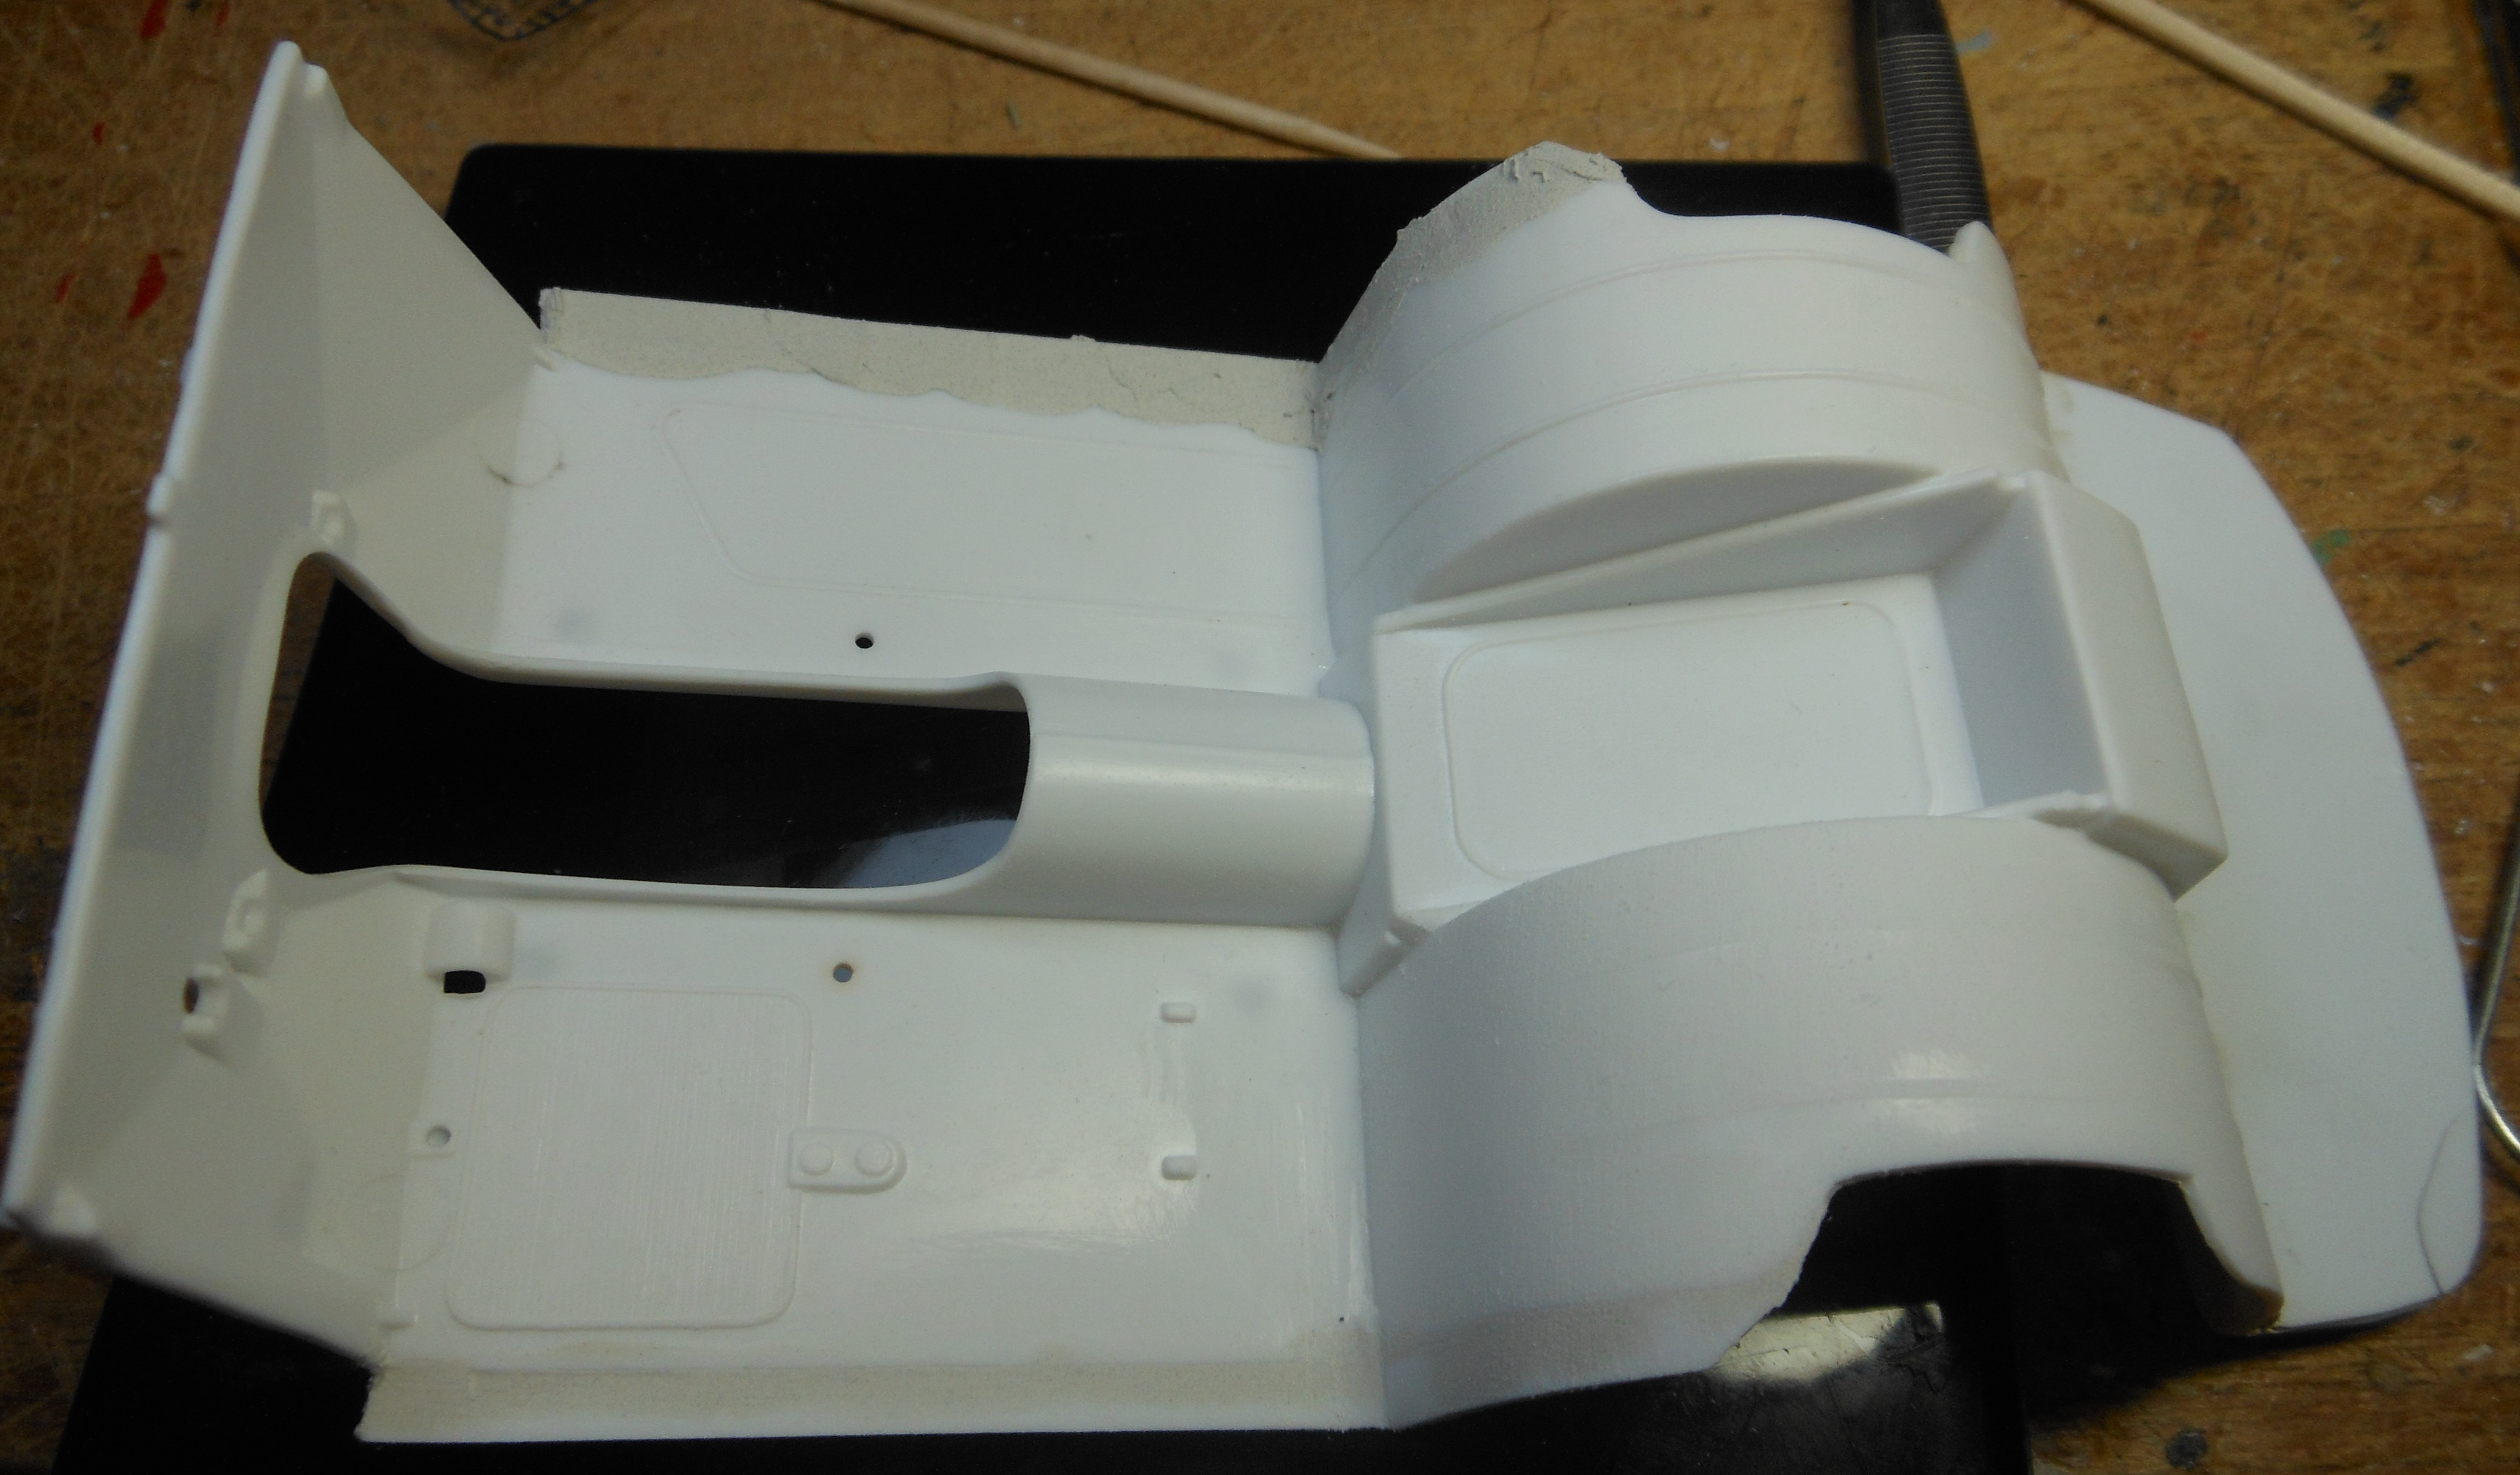
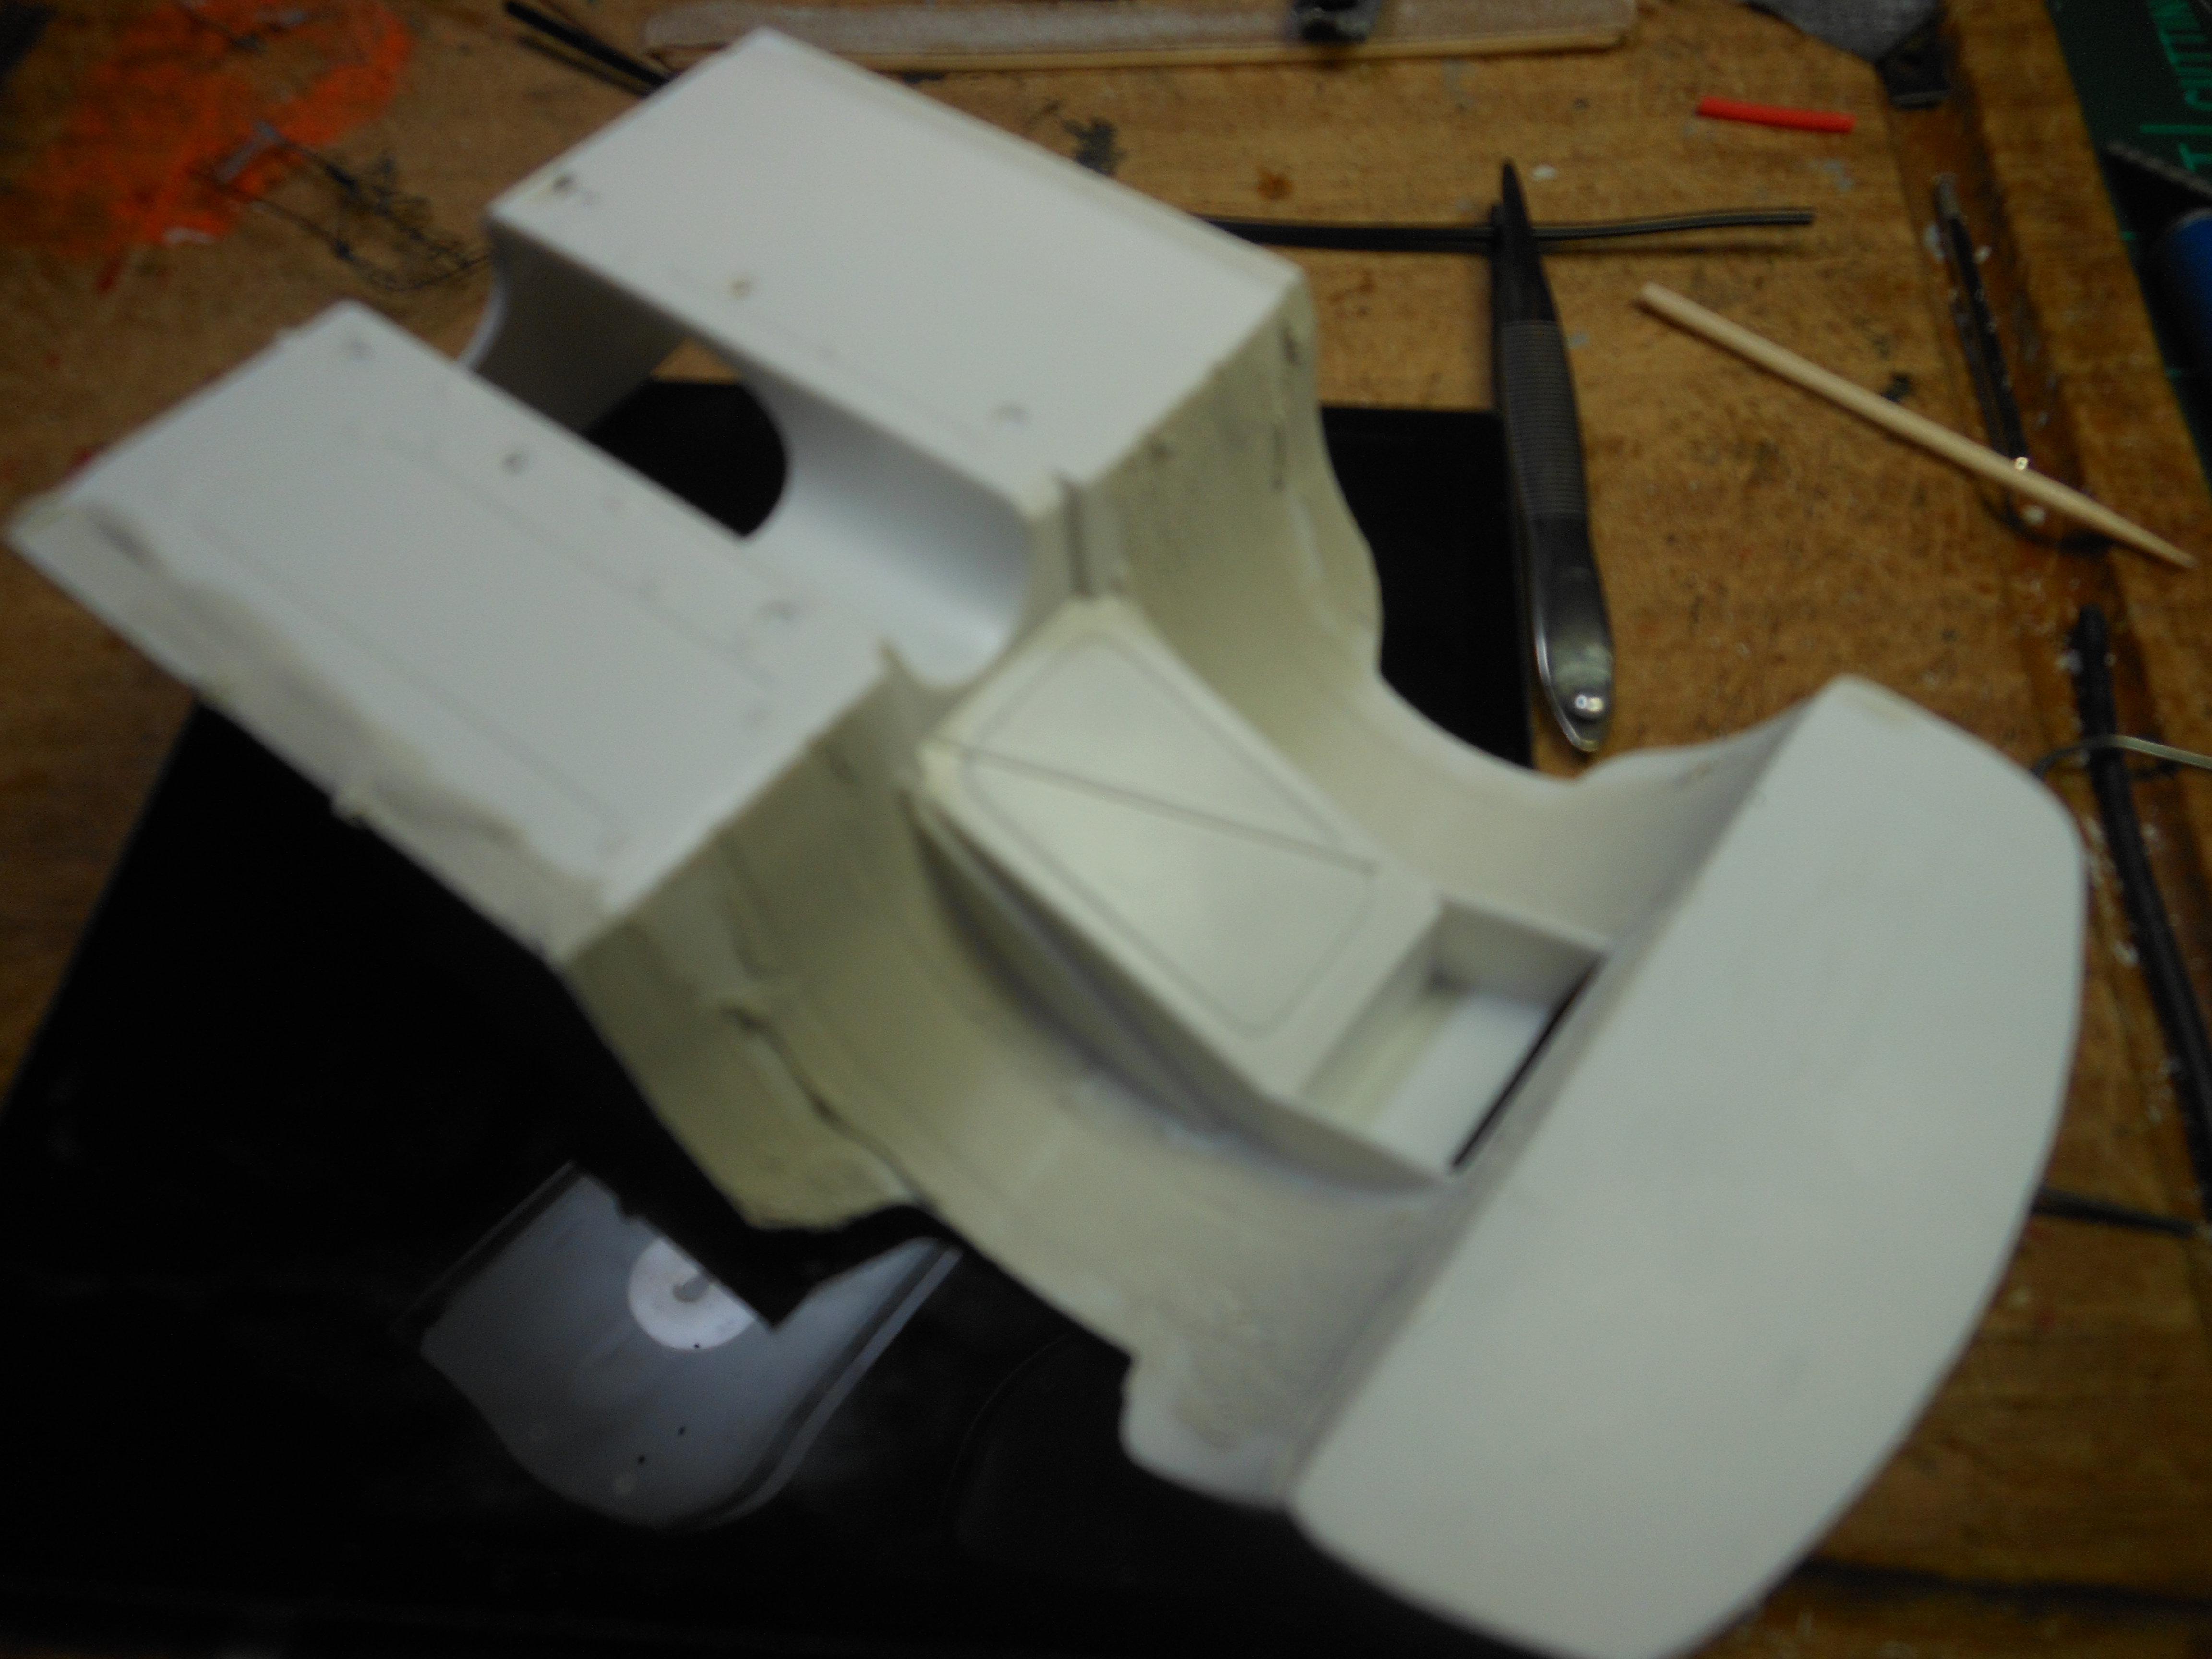
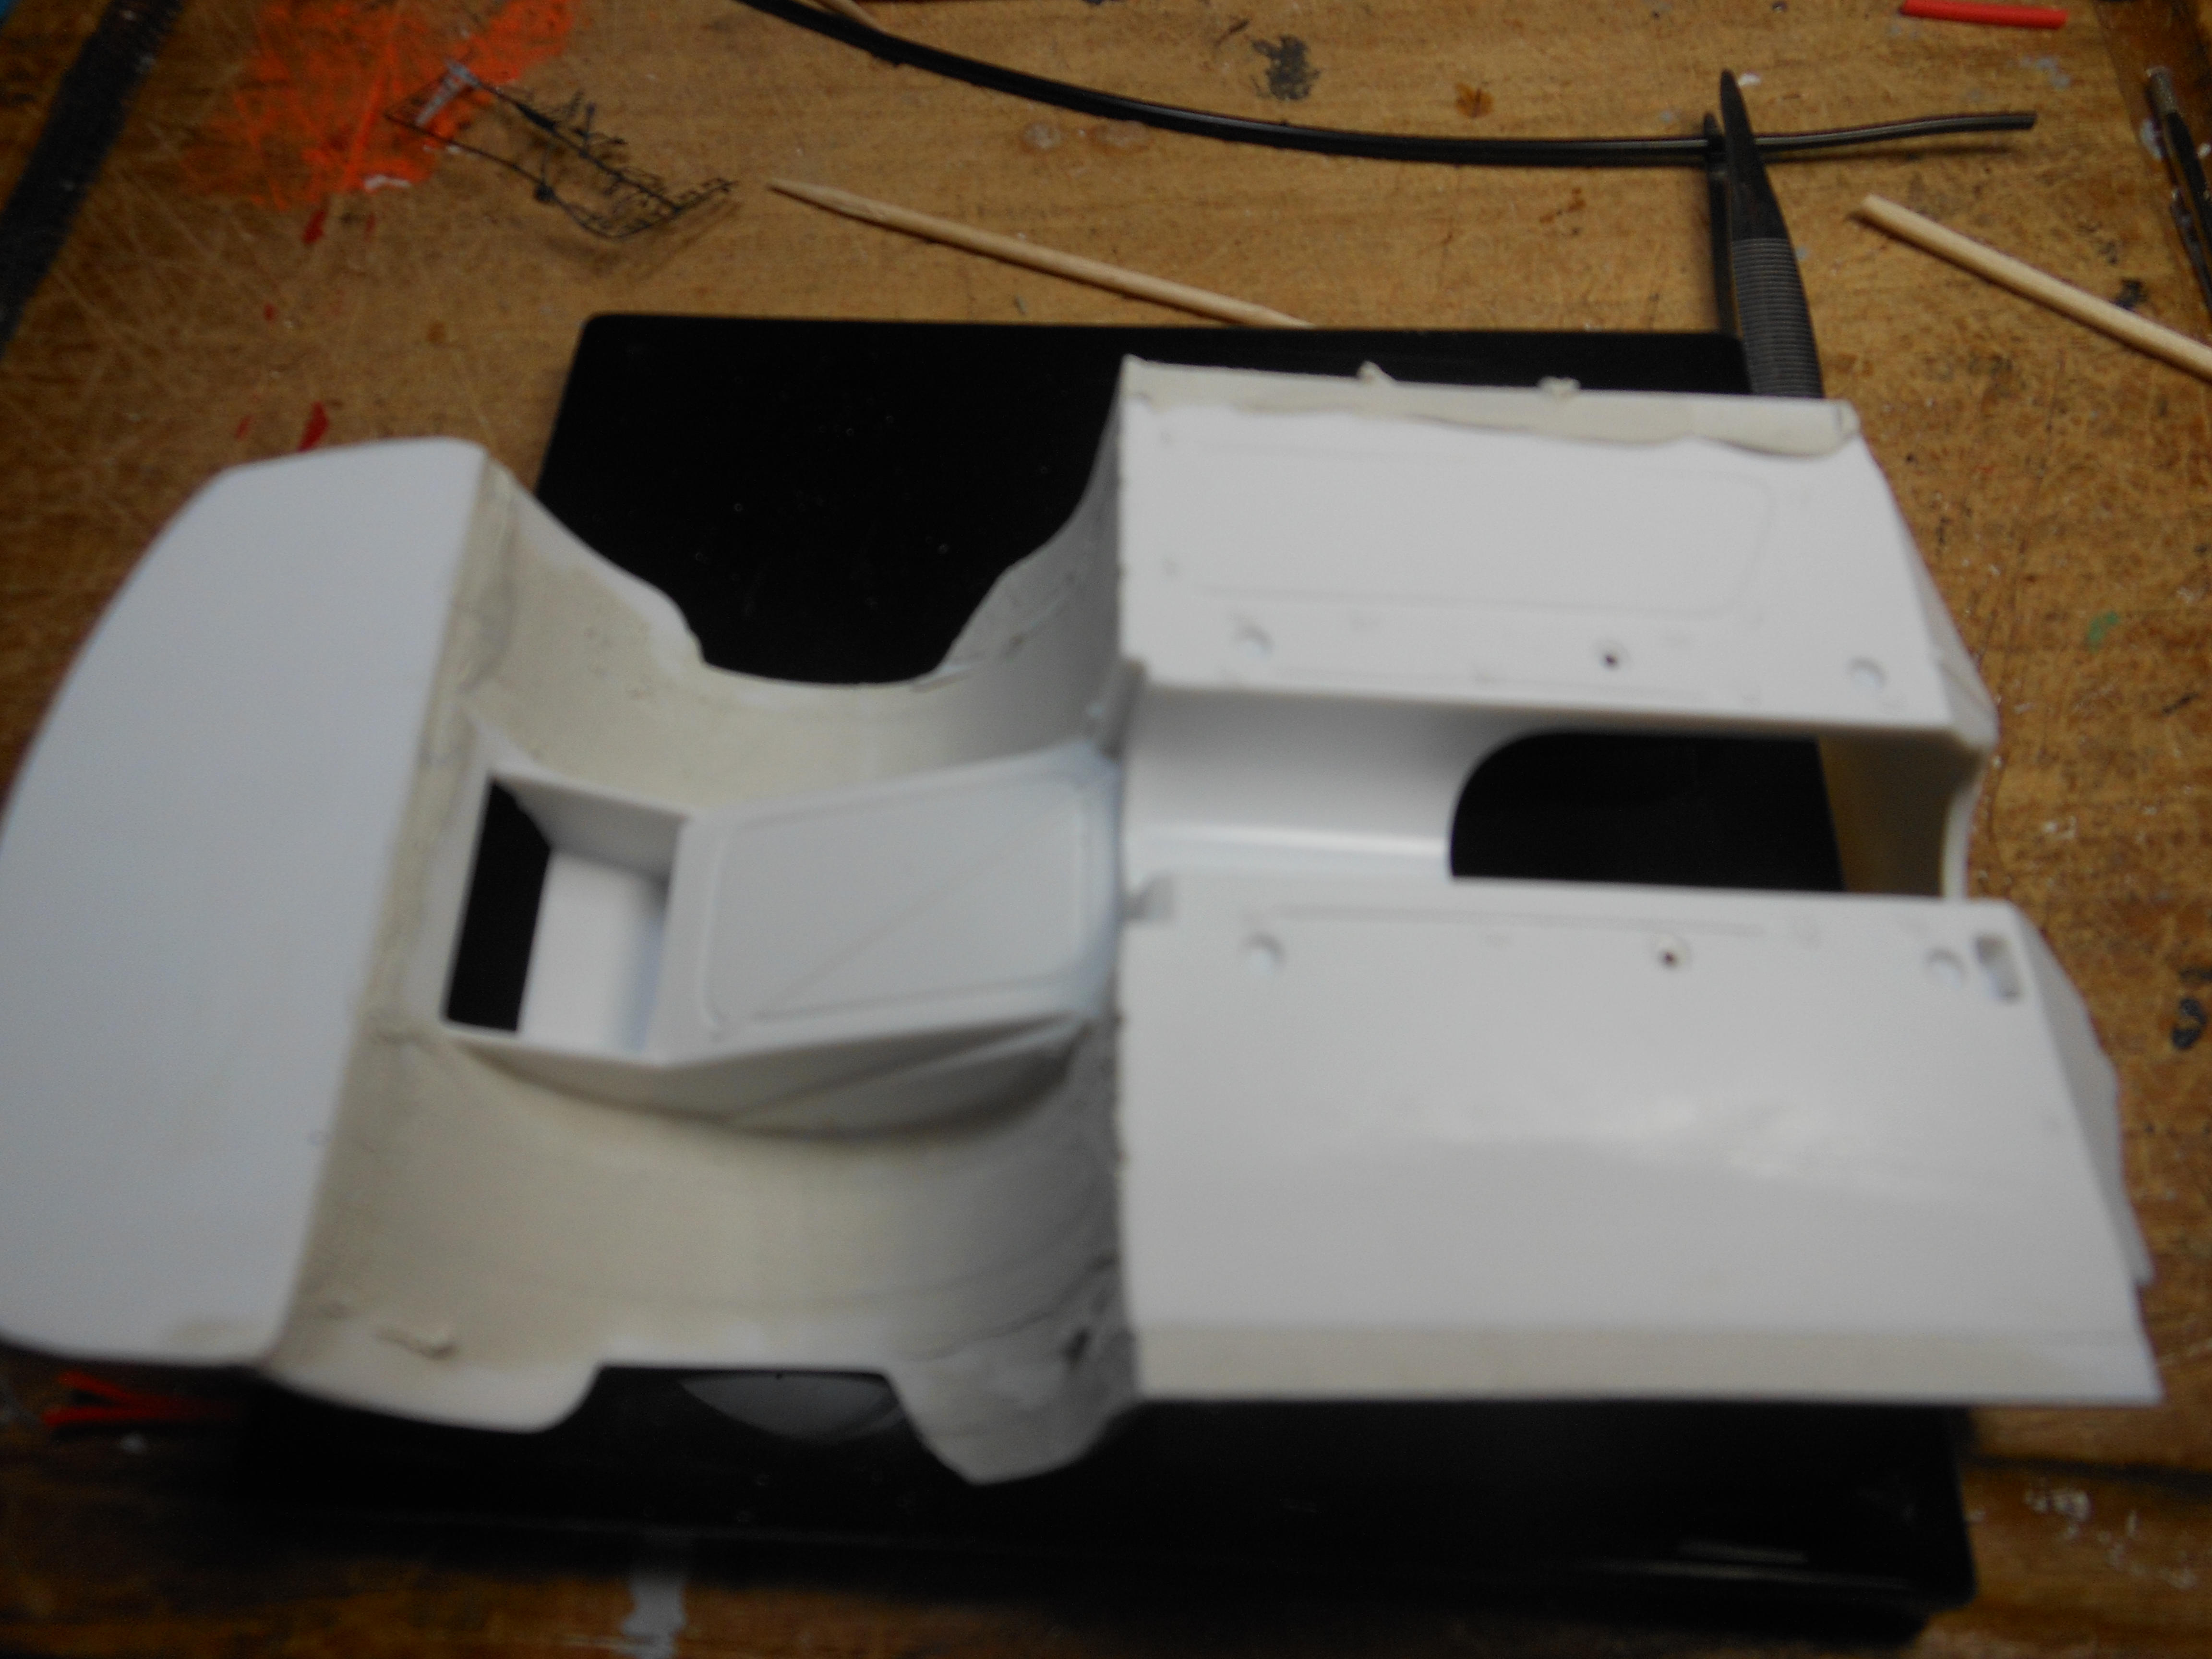
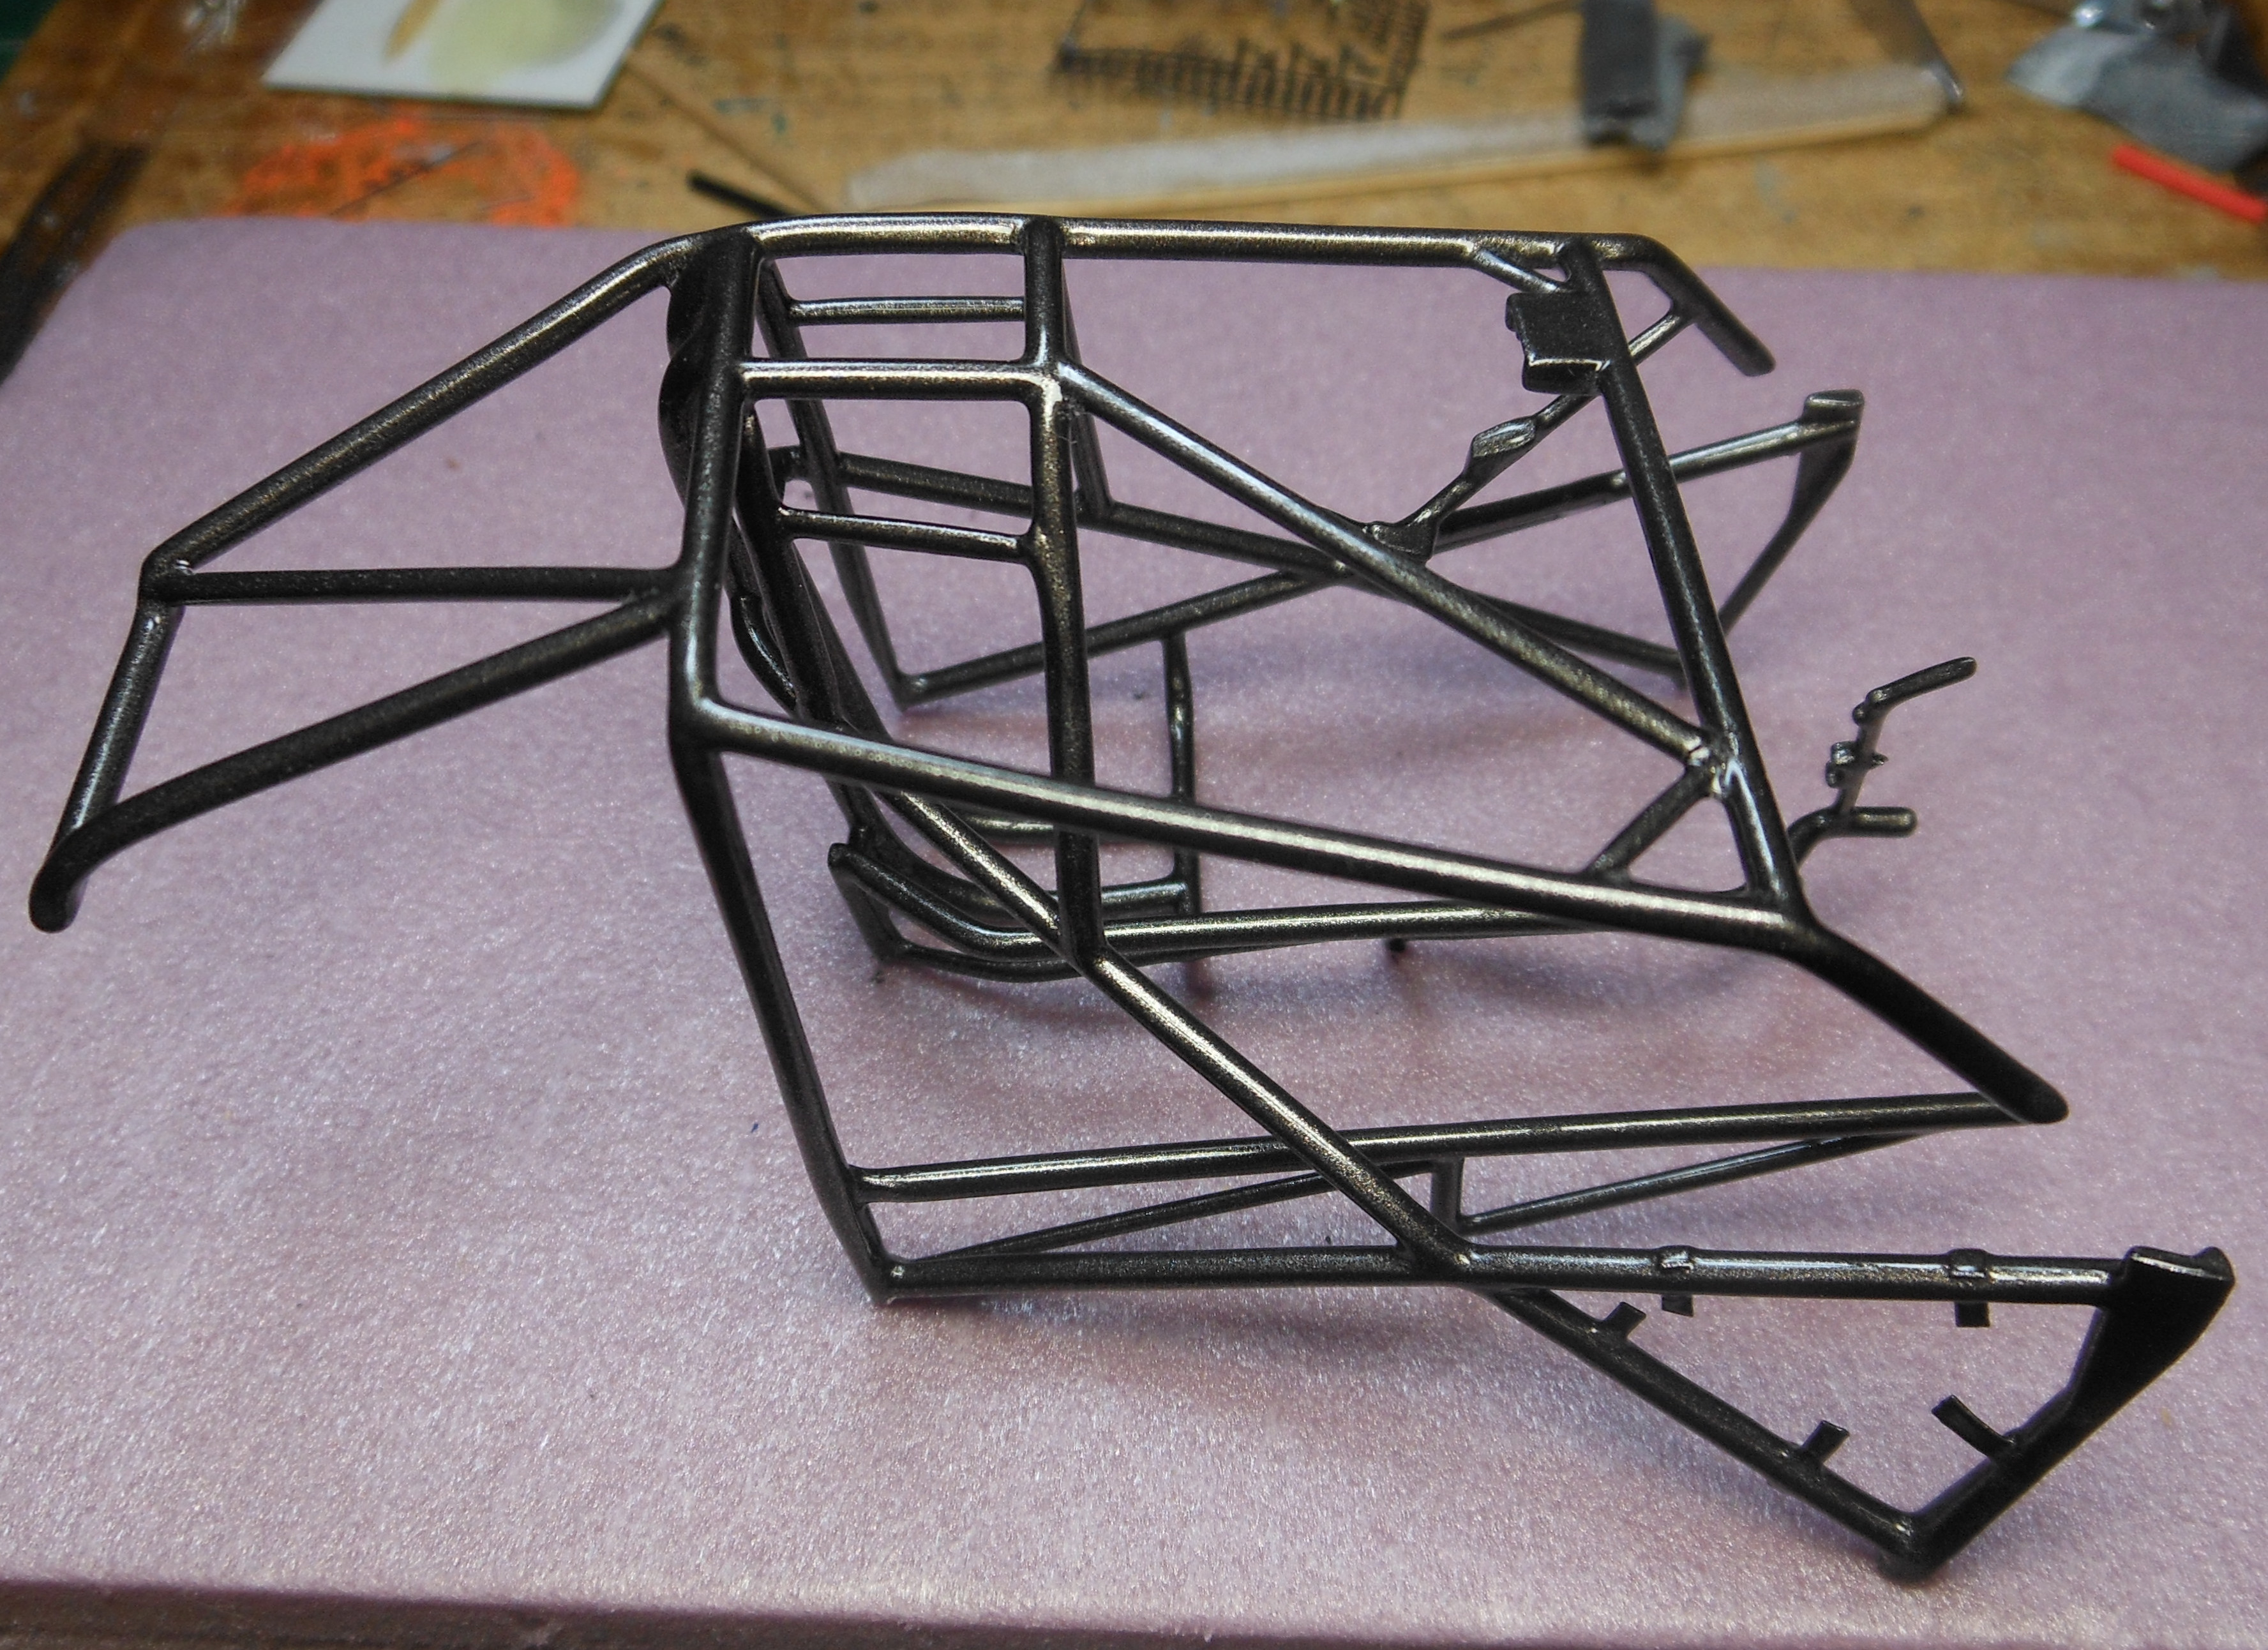
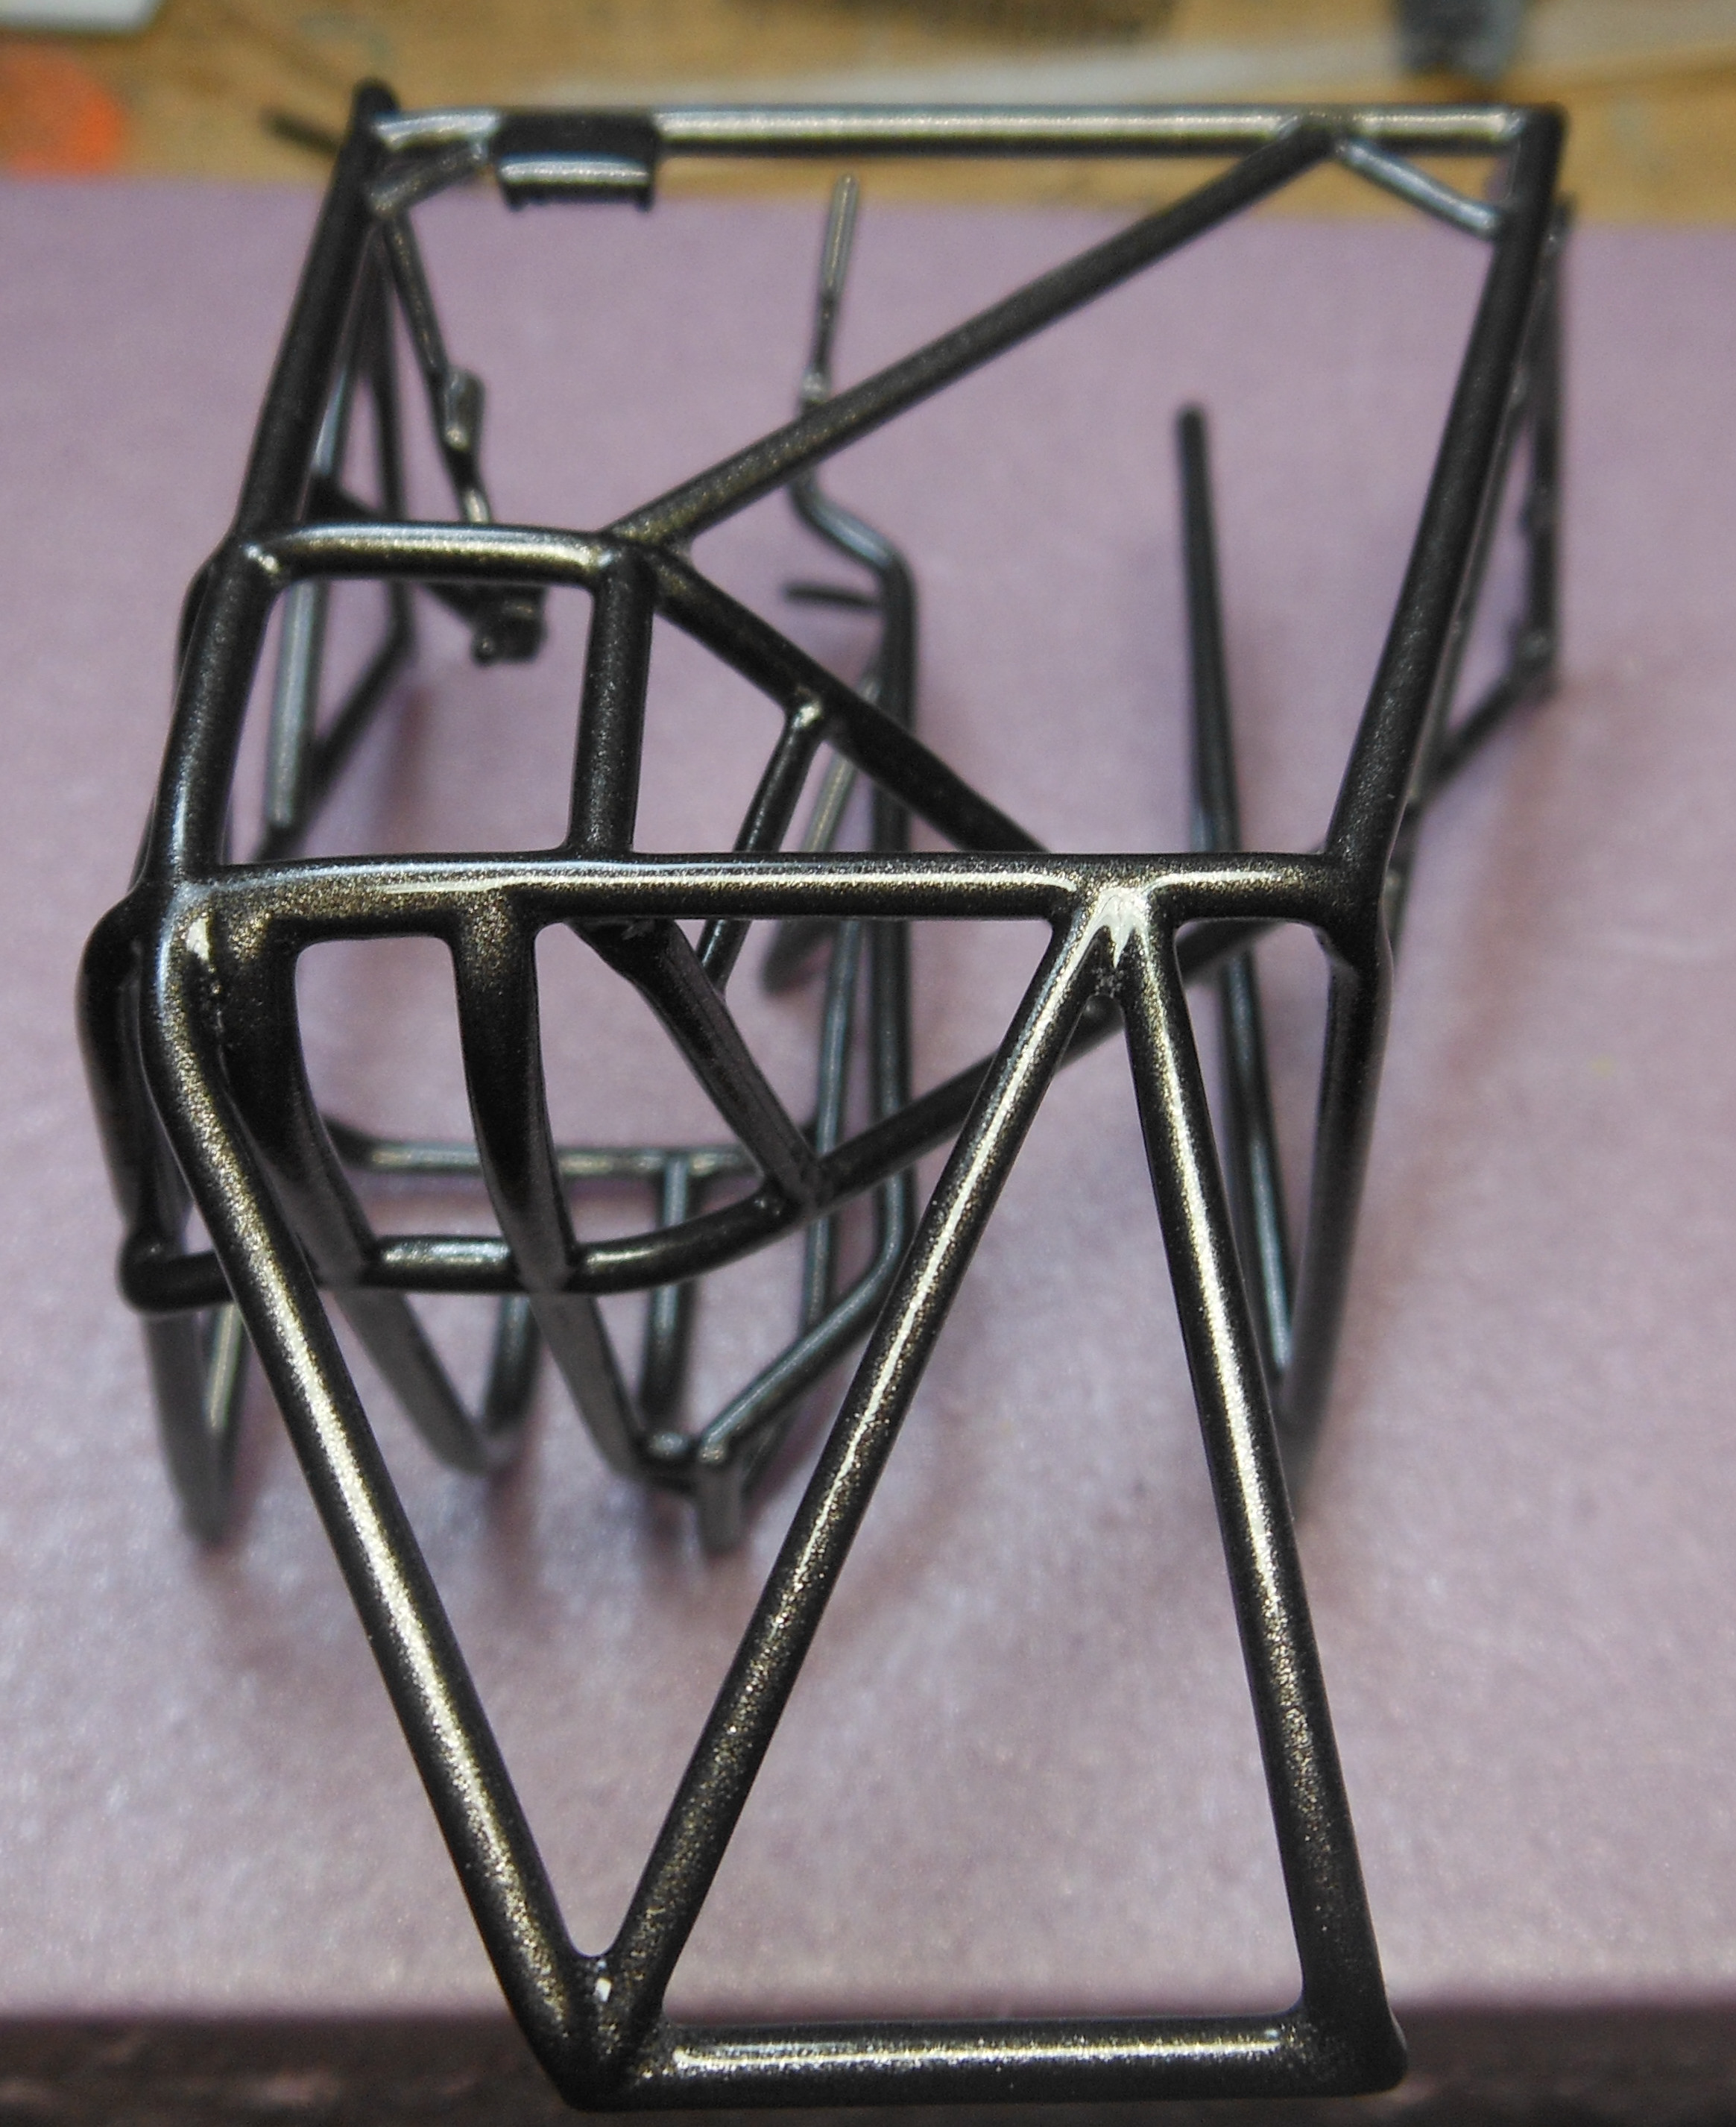
Here is some work I did past couple days. It takes so long to do stuff and seems like you barely get anything accomplished. Made a net(pro mods are using them on this side this year and will make one for door side), padding, double chute handle, started seat, and some paint and decals. The tub is still be filled and sanded. Here are some mock-ups also.
-
Great trade with 68shortfleet!!! This man knows how to deal with people and some sweet kits!! Thanks again.
-
5/6/18 updates 2013 T/A with Dual Turbo and Alien Intake W.I.P.
HNTR replied to HNTR's topic in WIP: Drag Racing Models
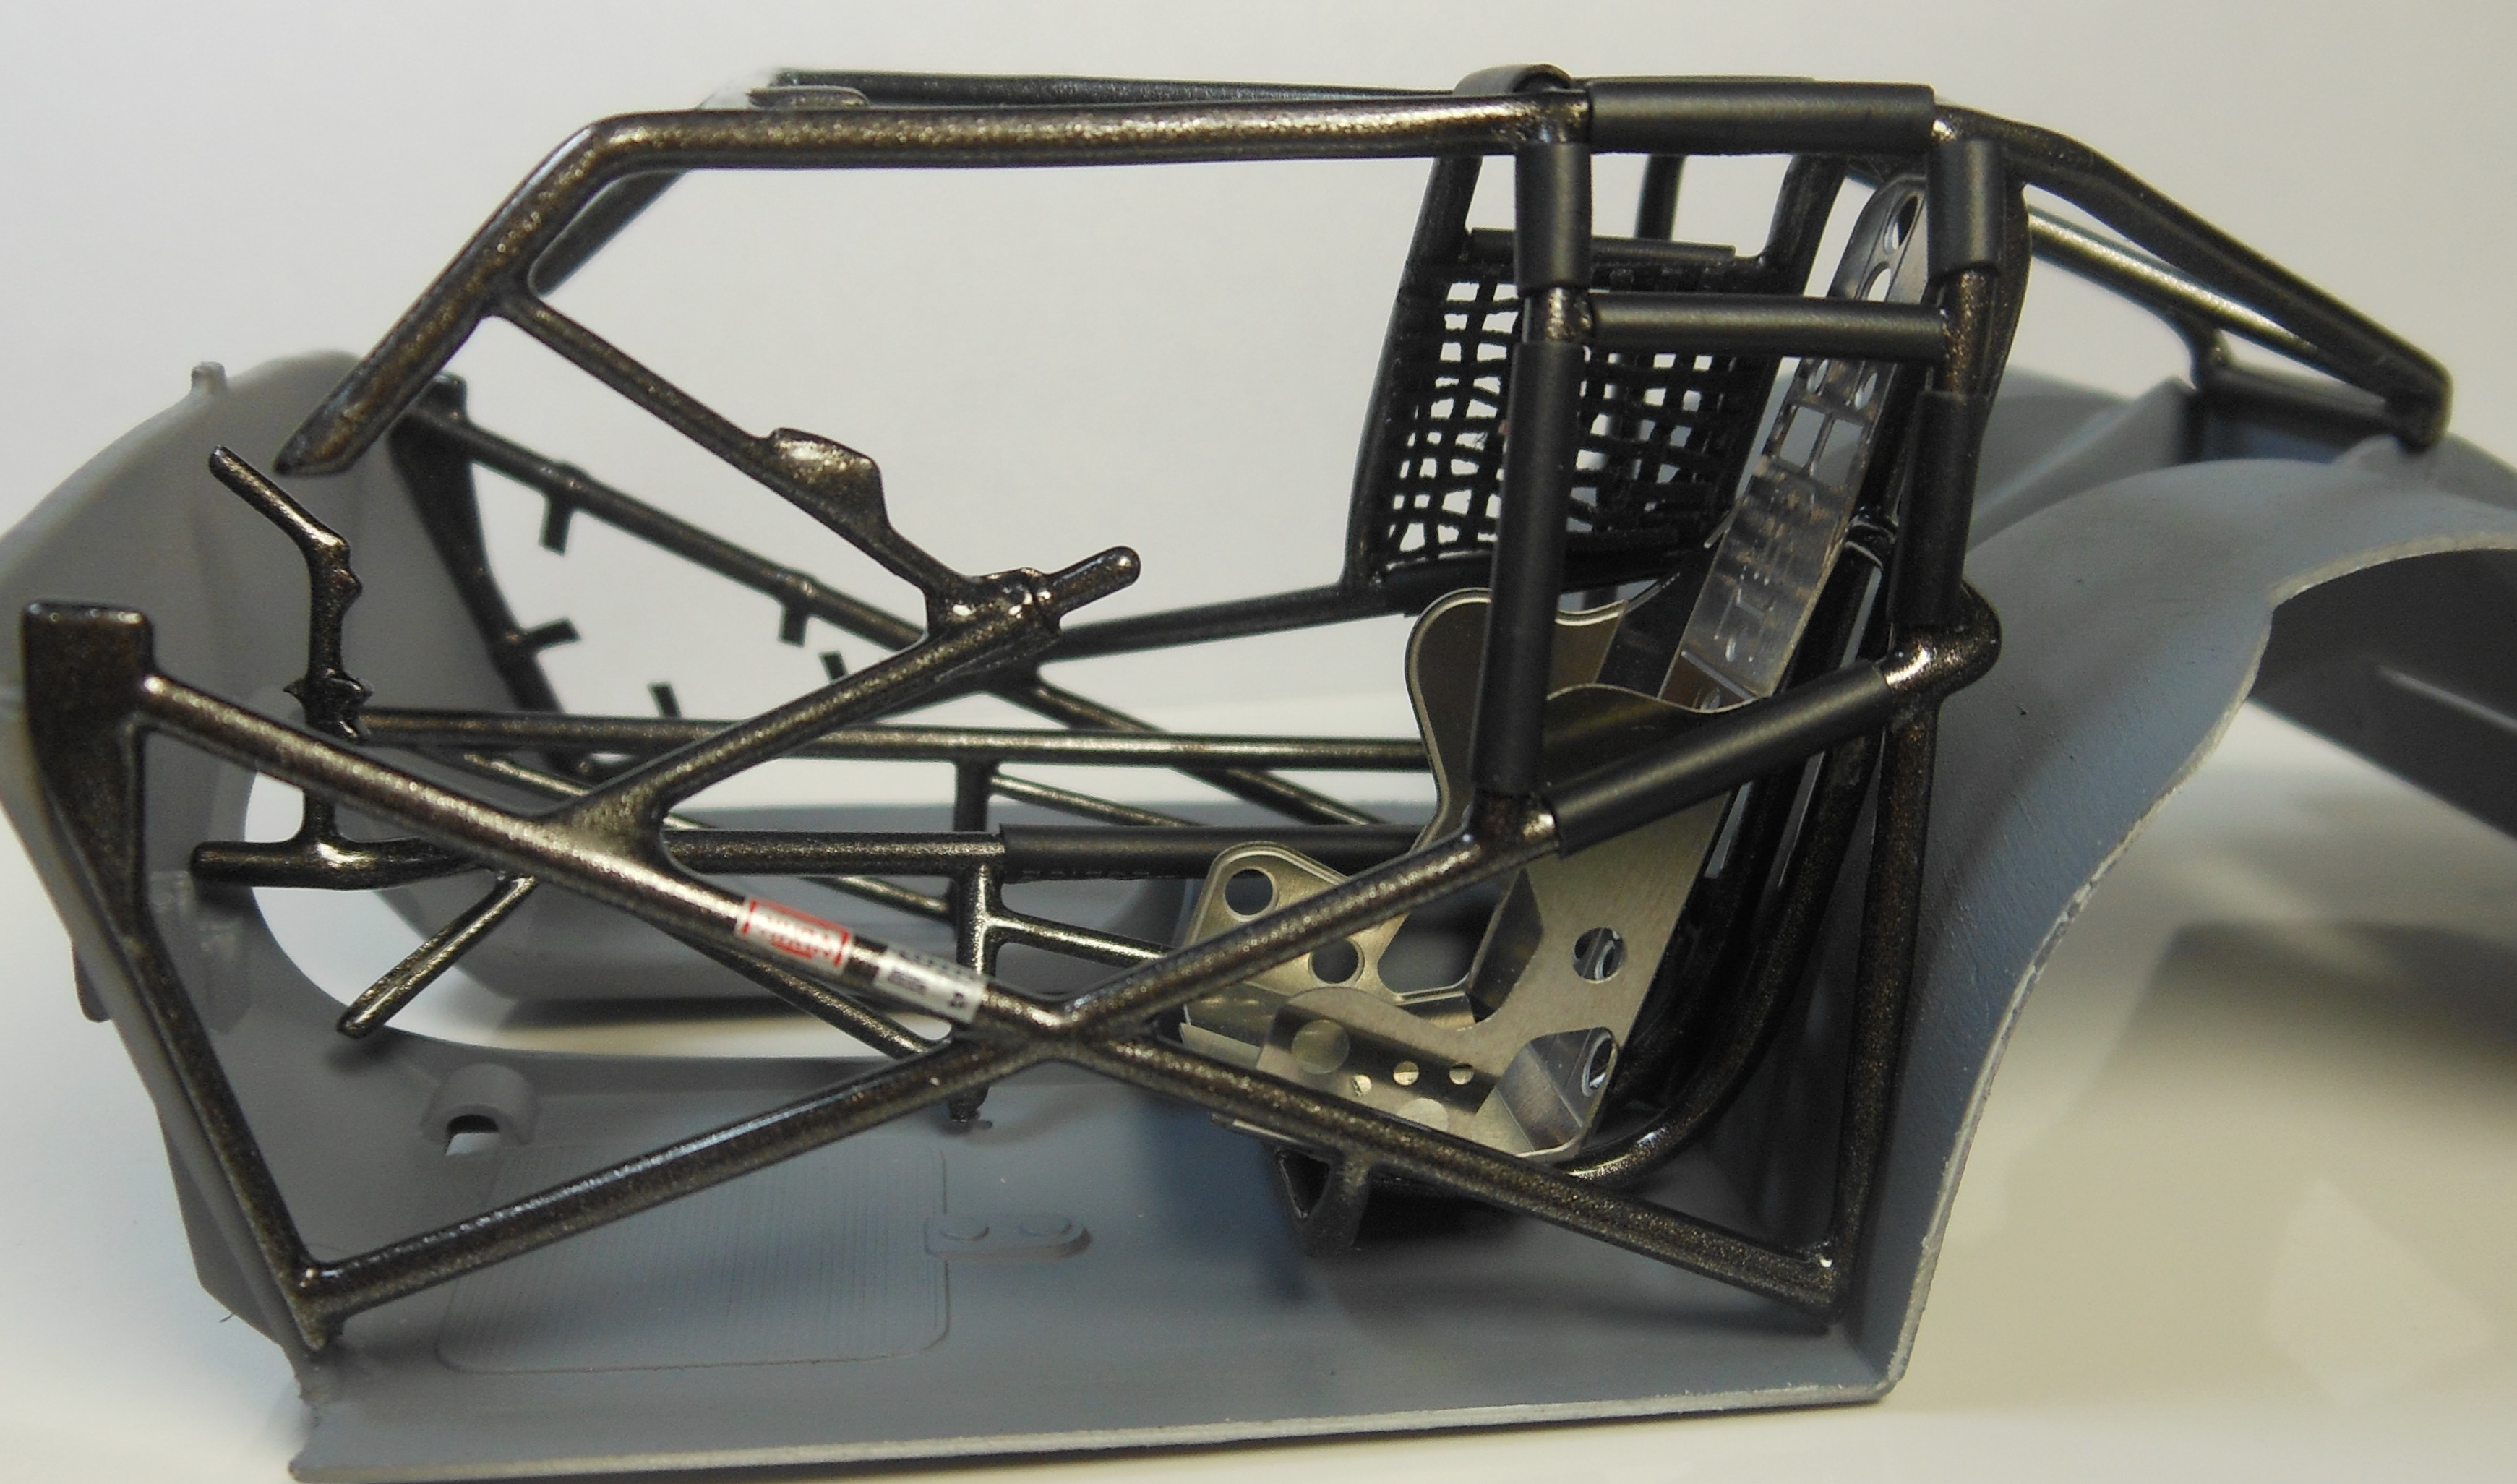
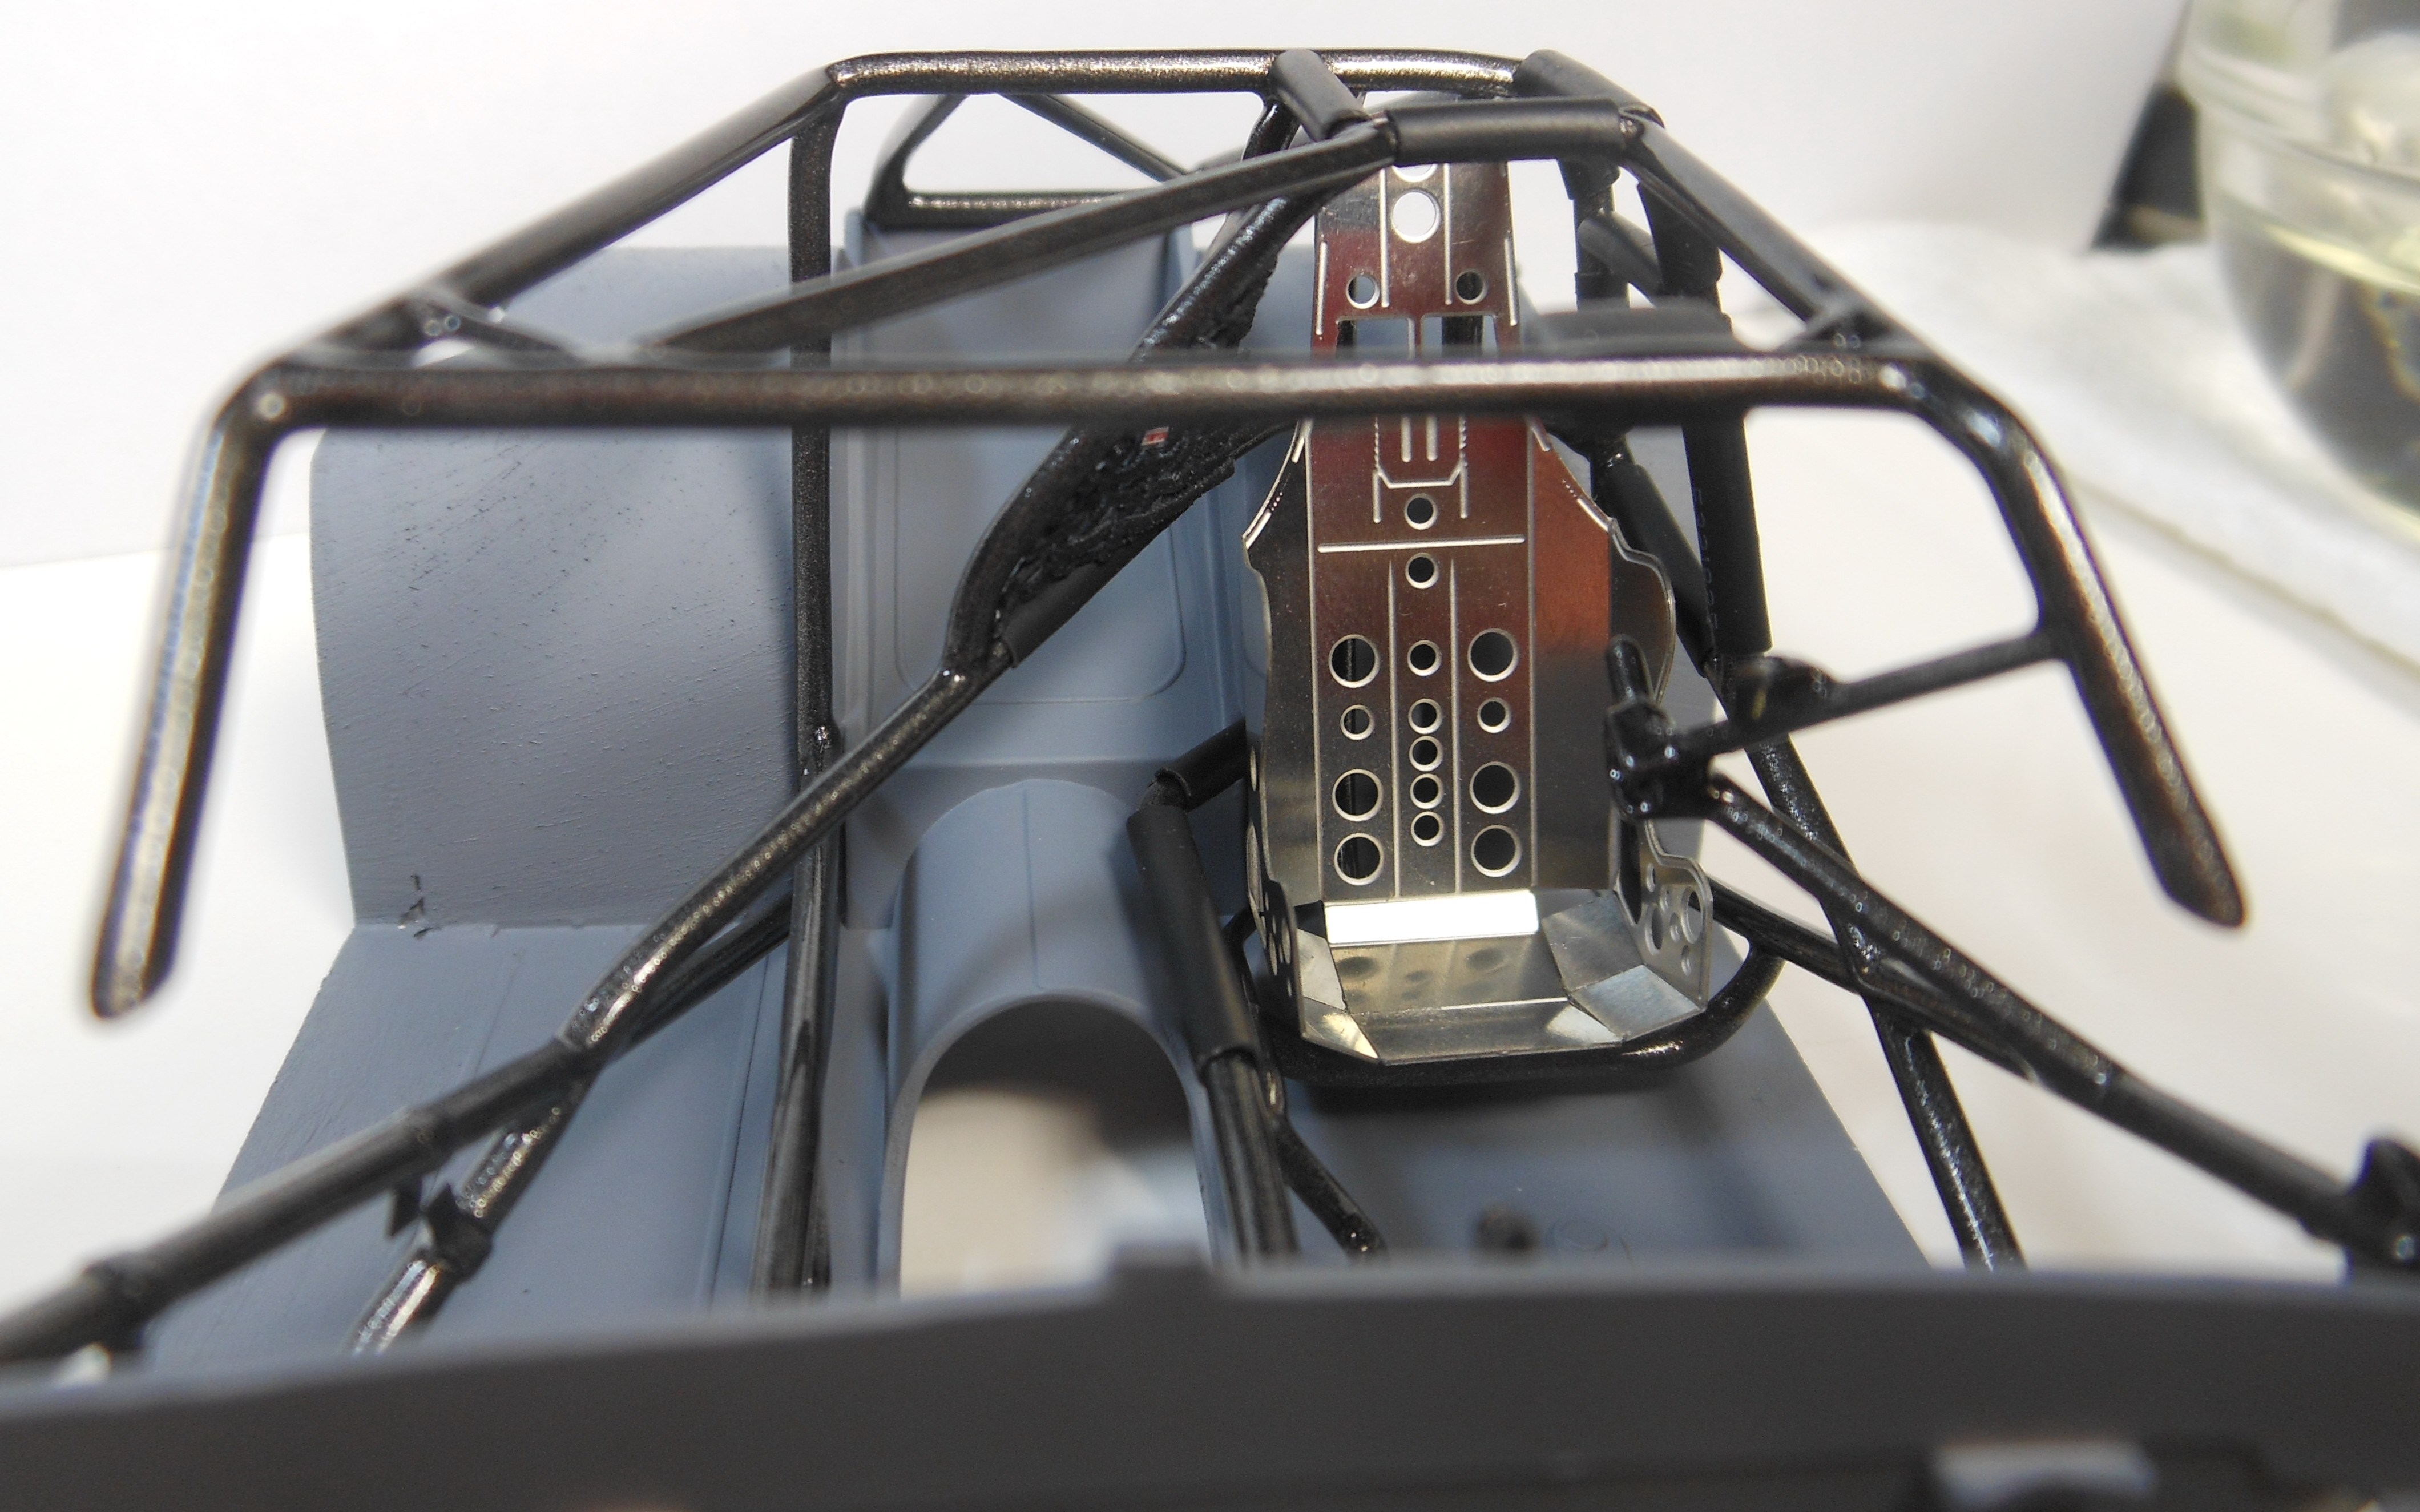
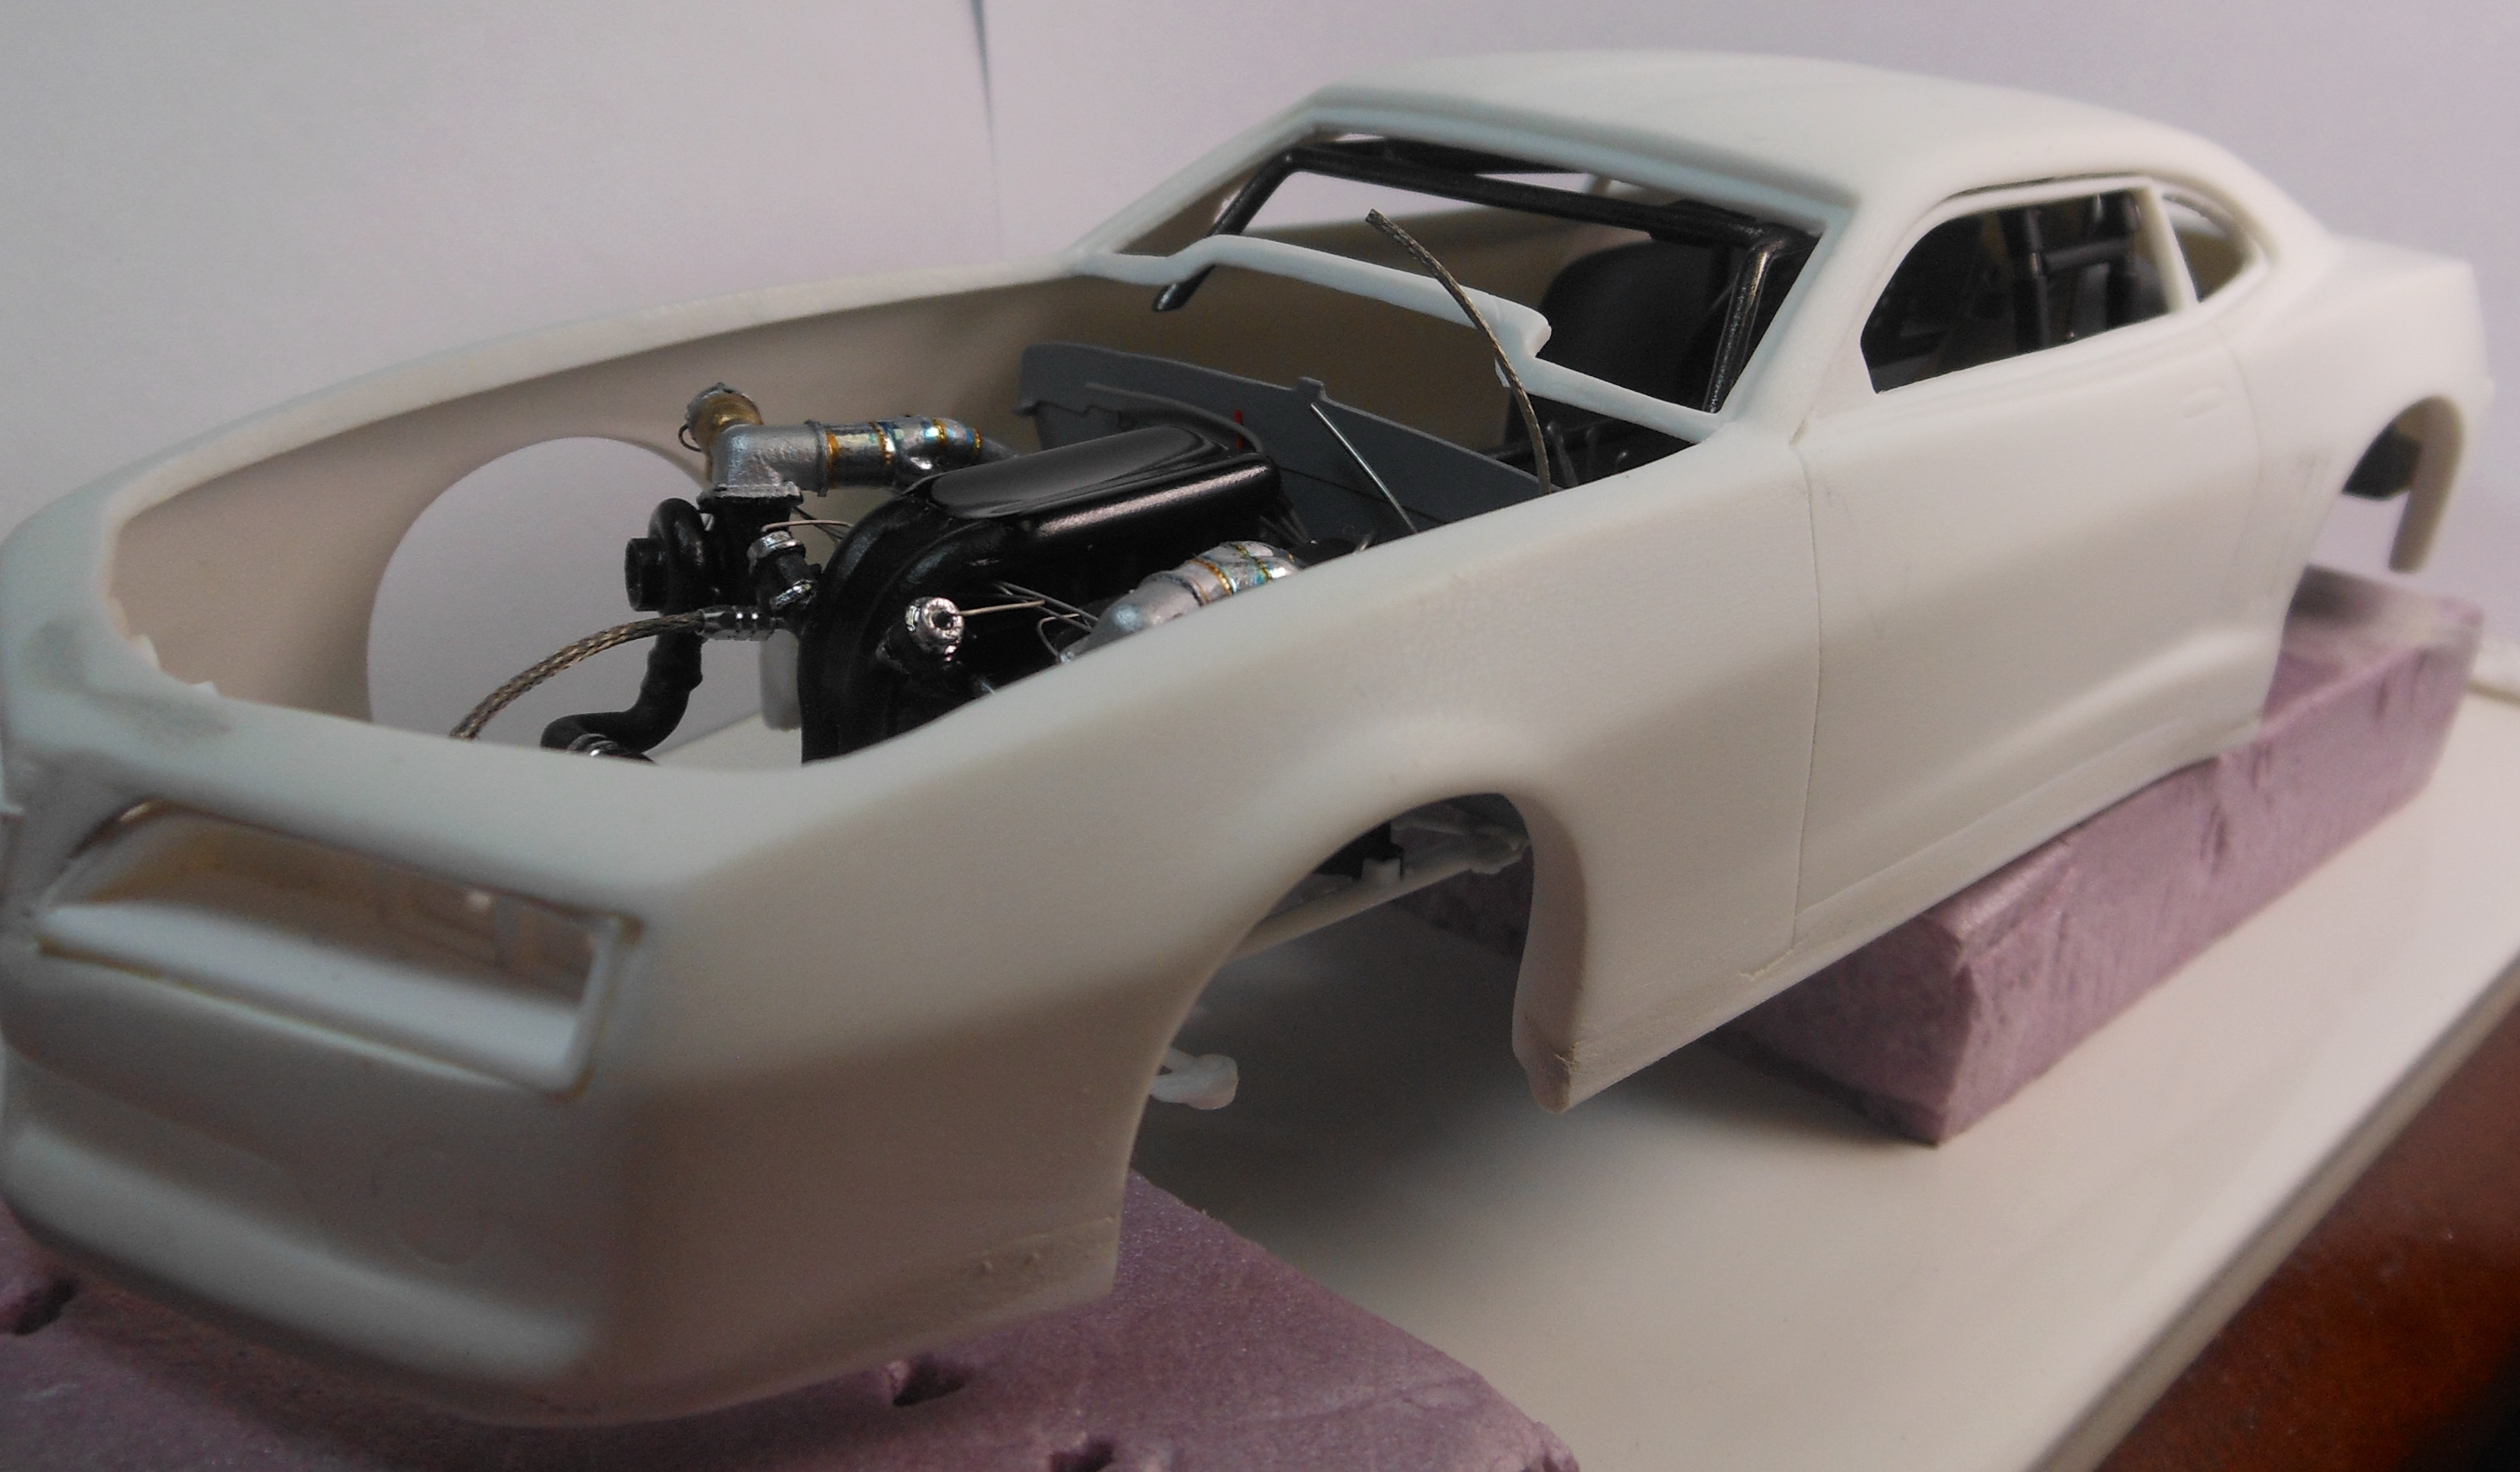
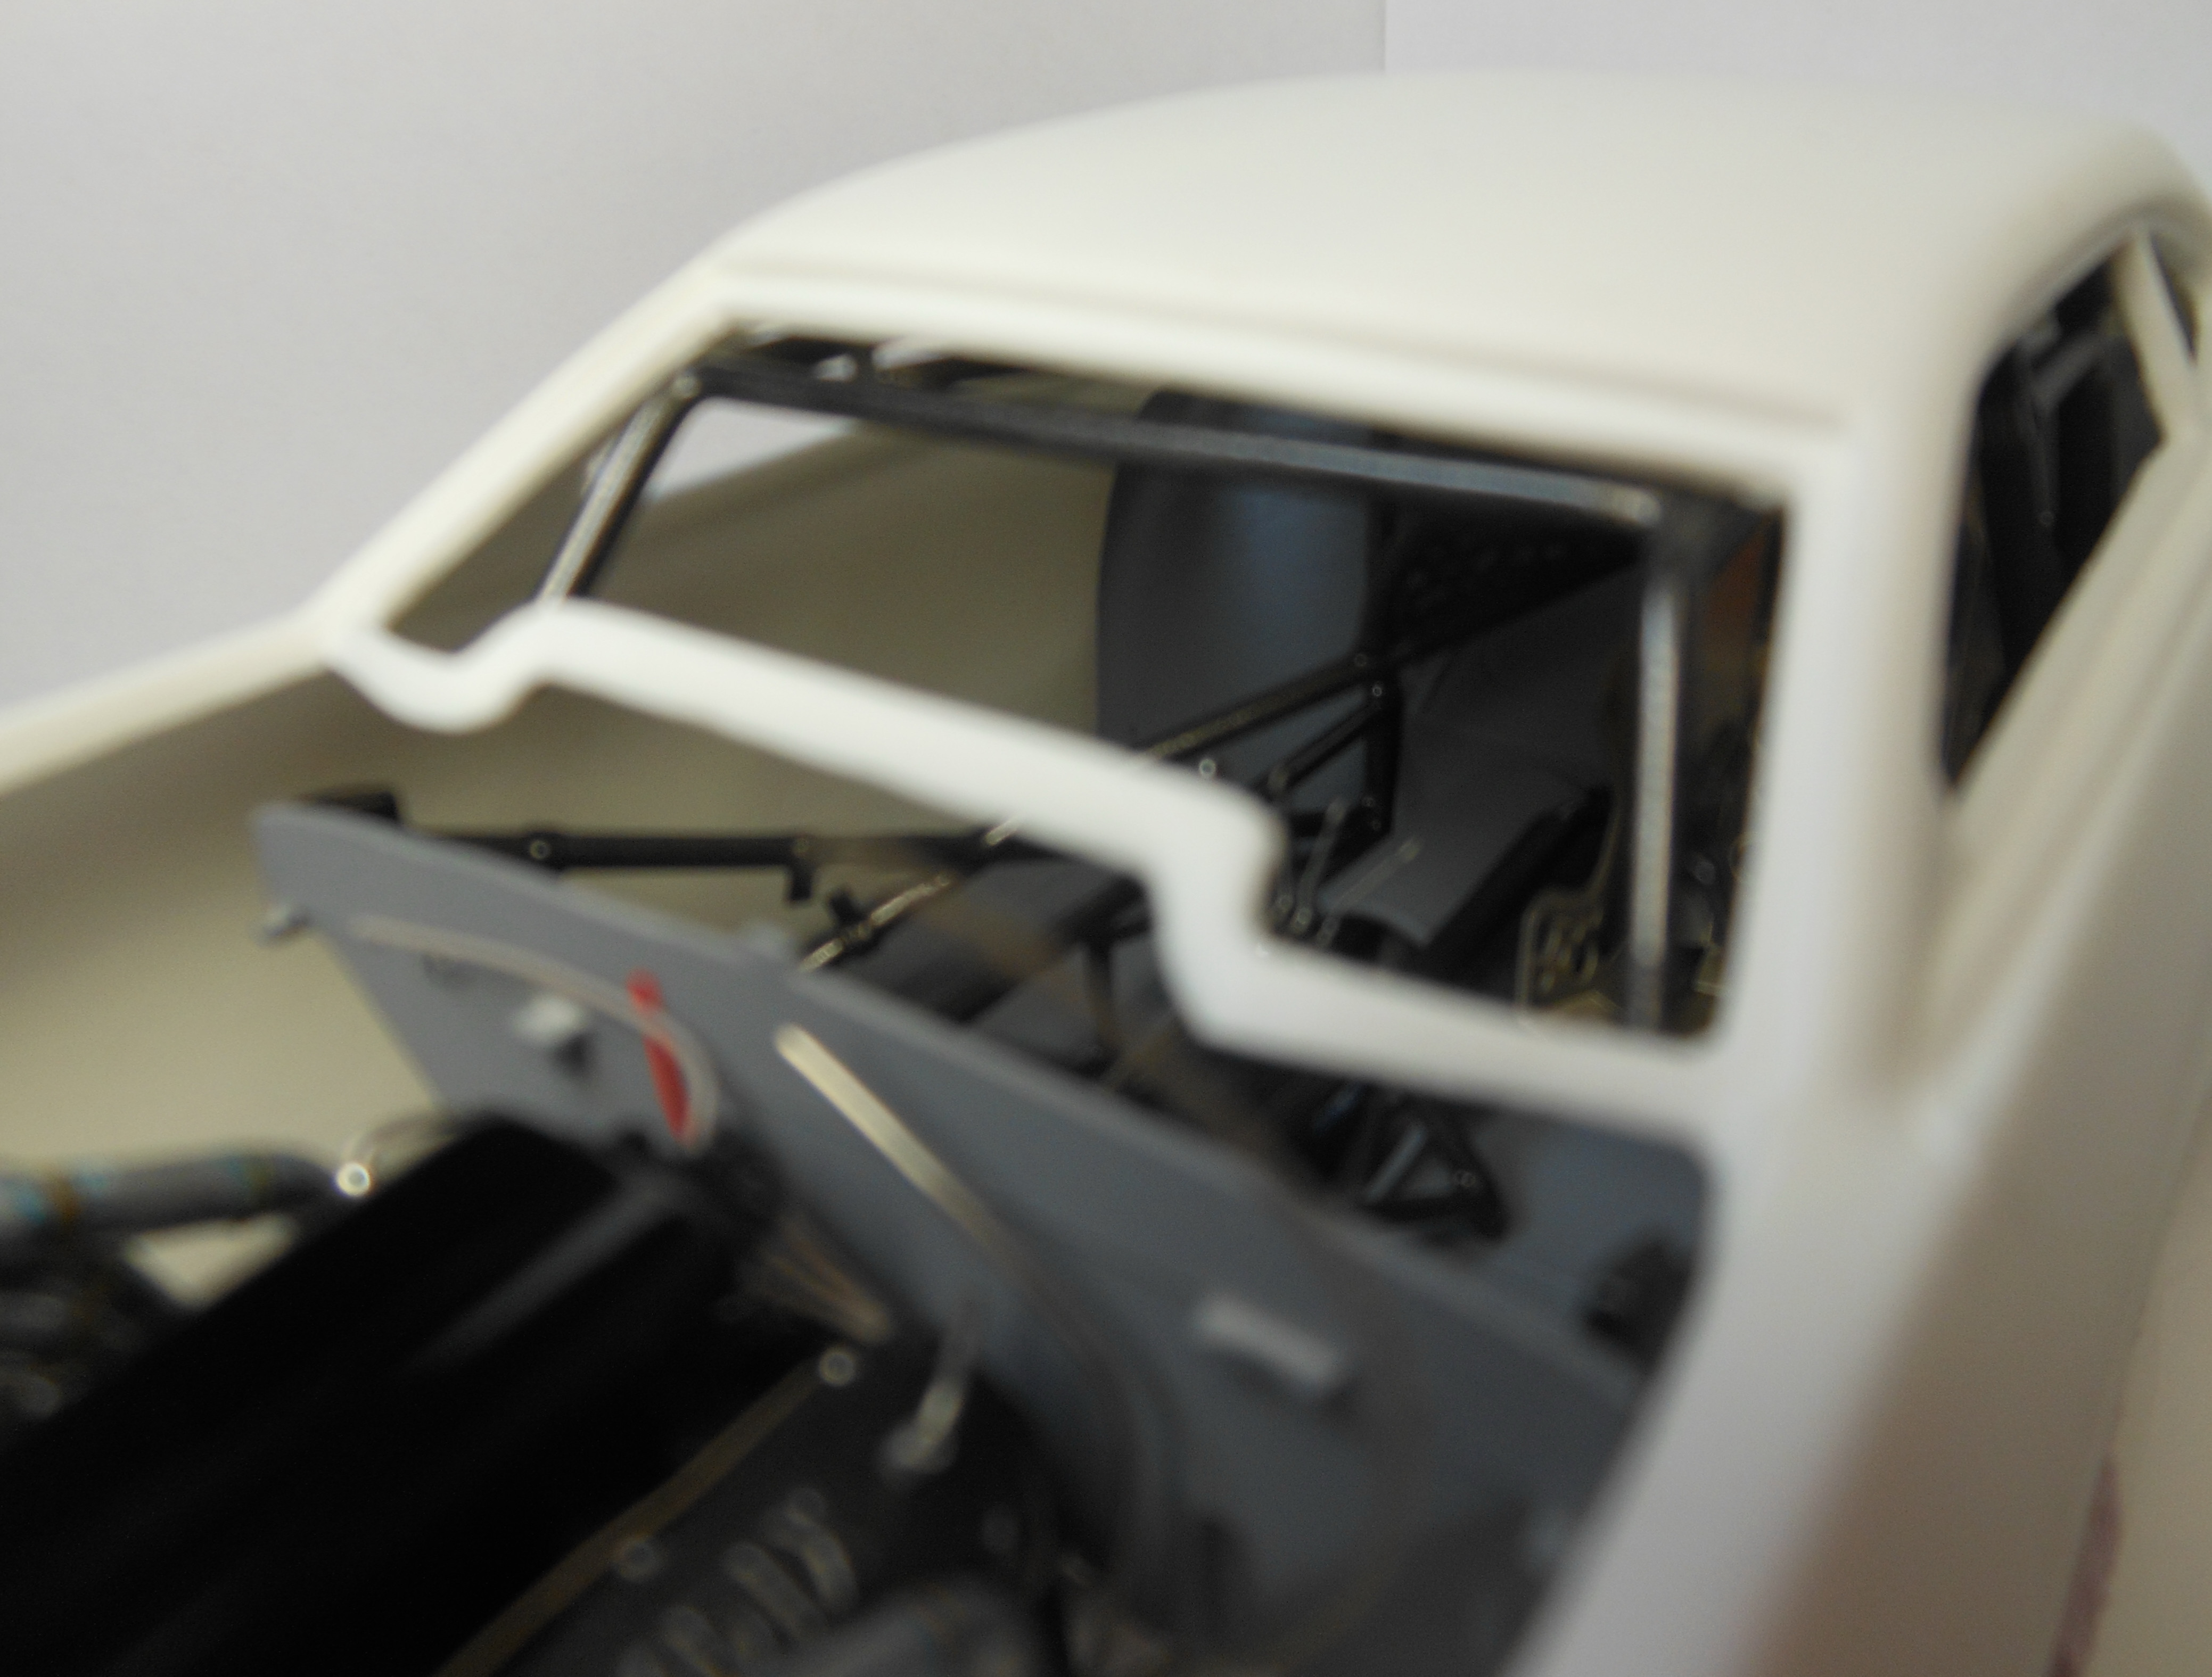
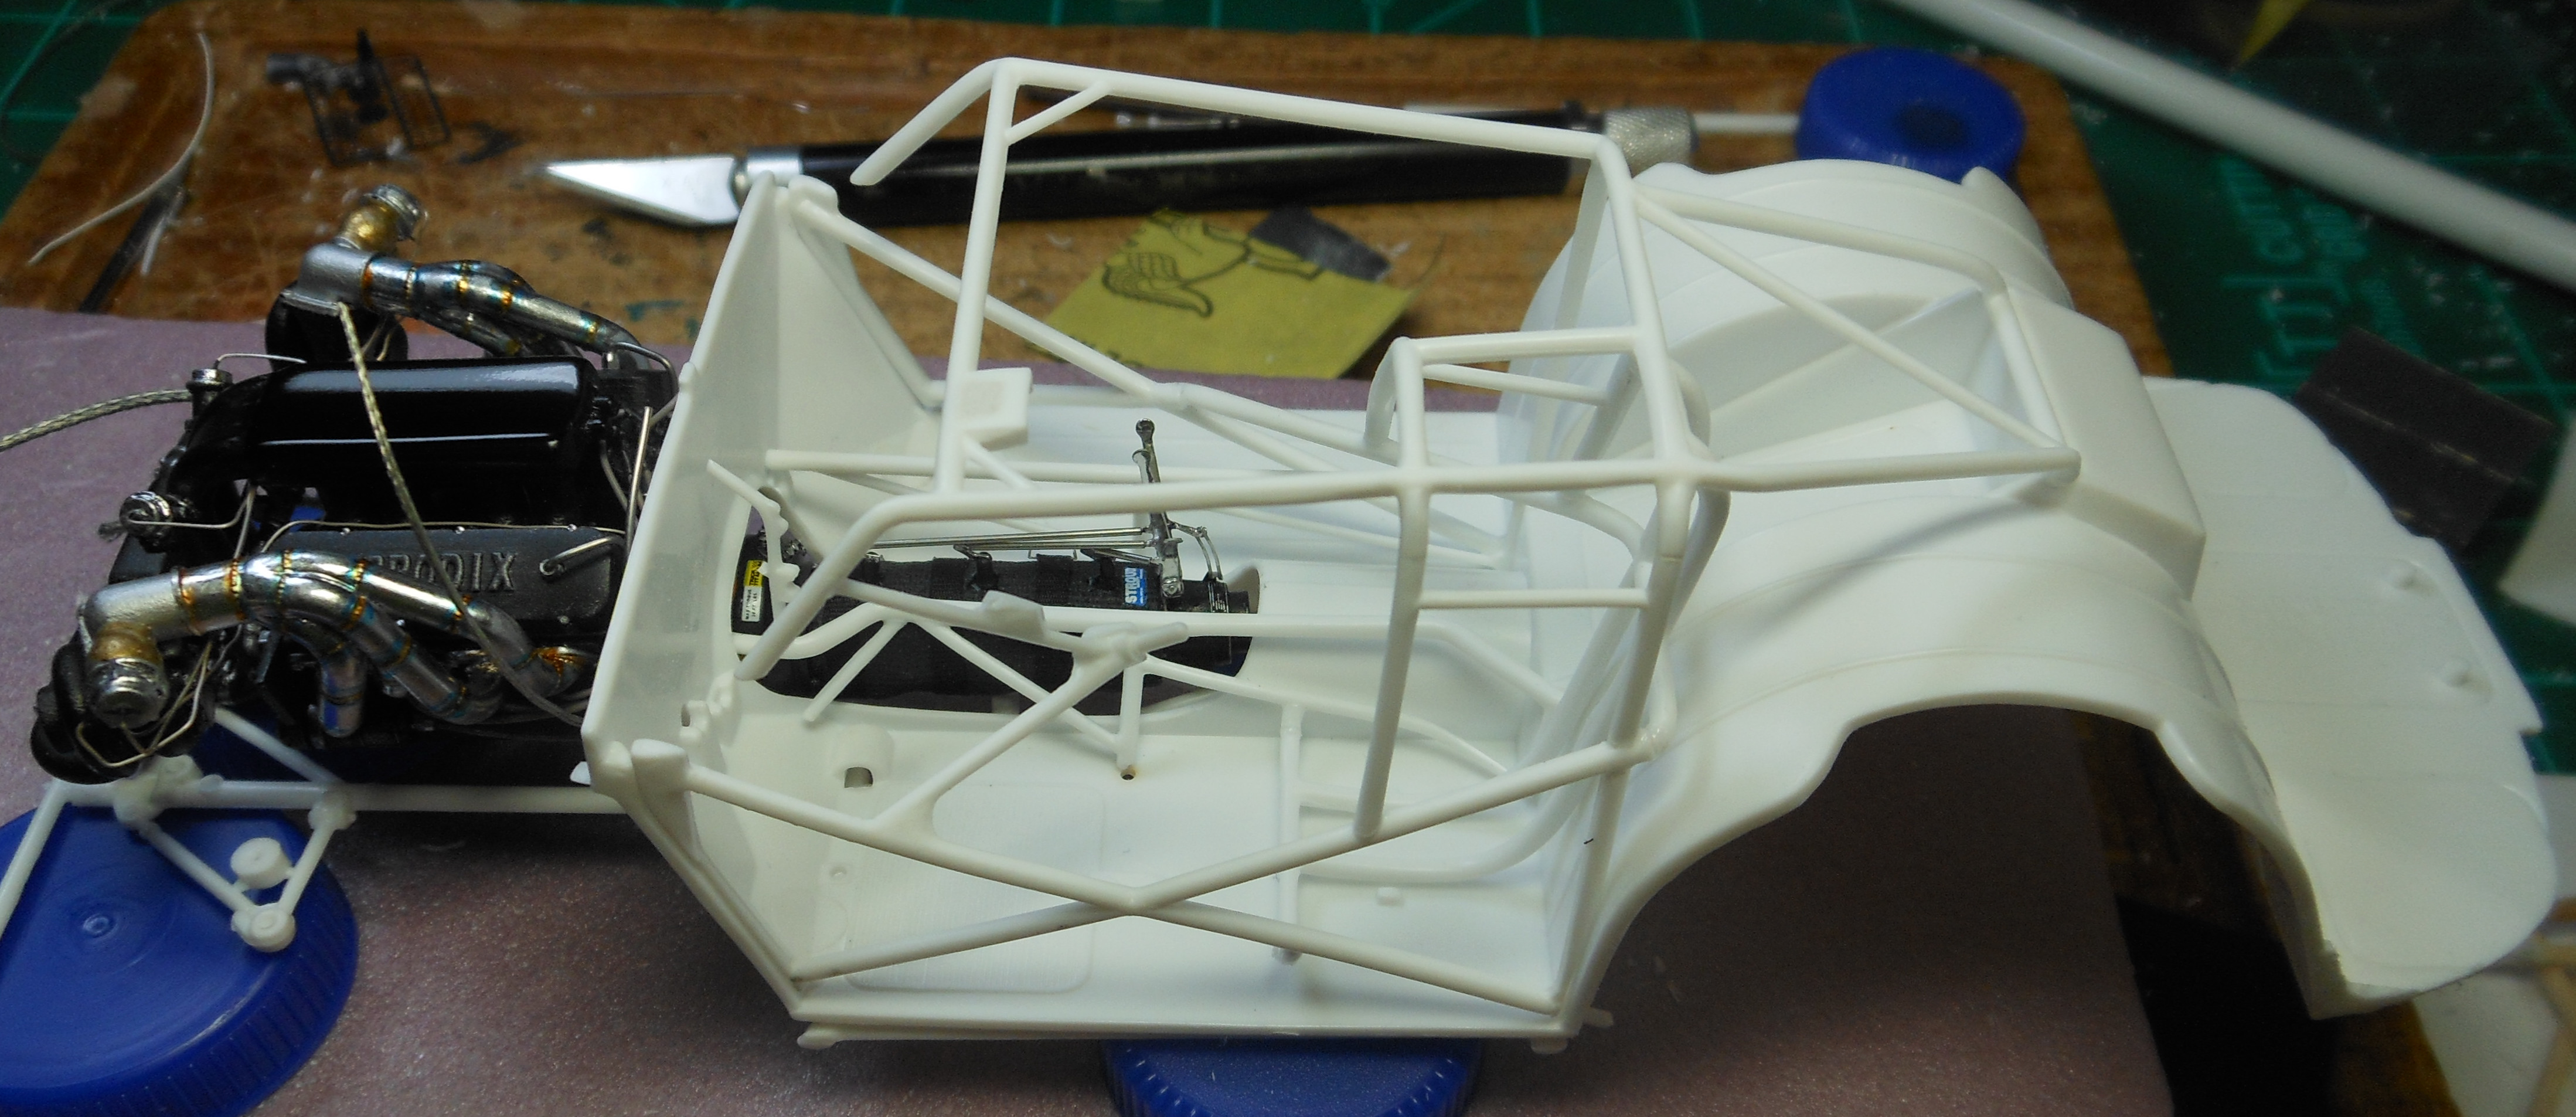
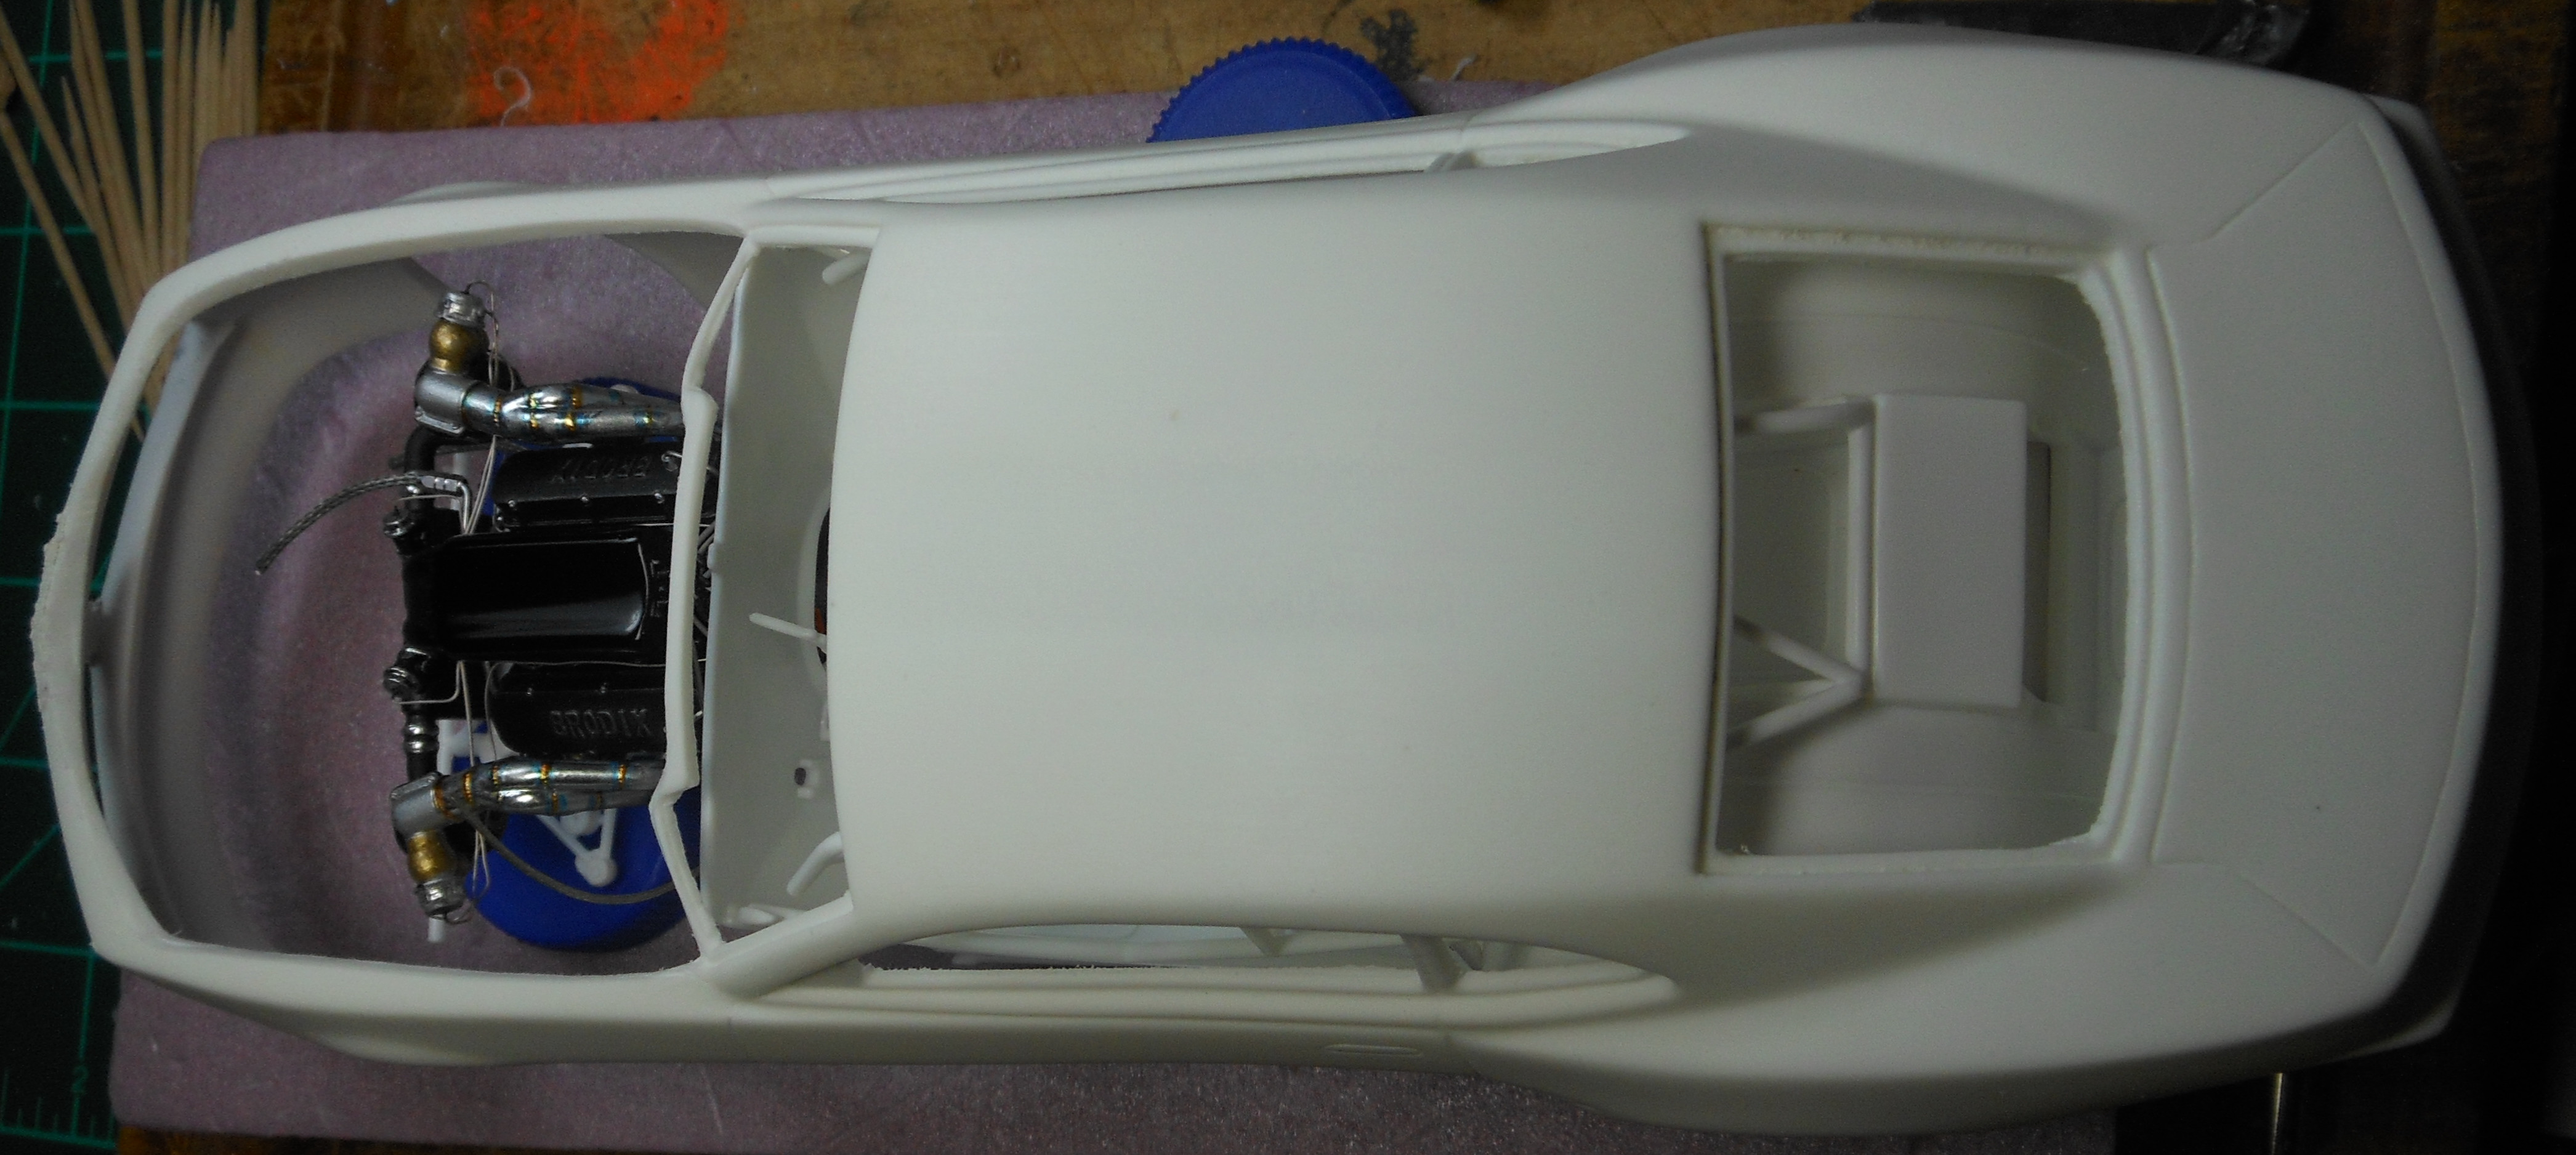
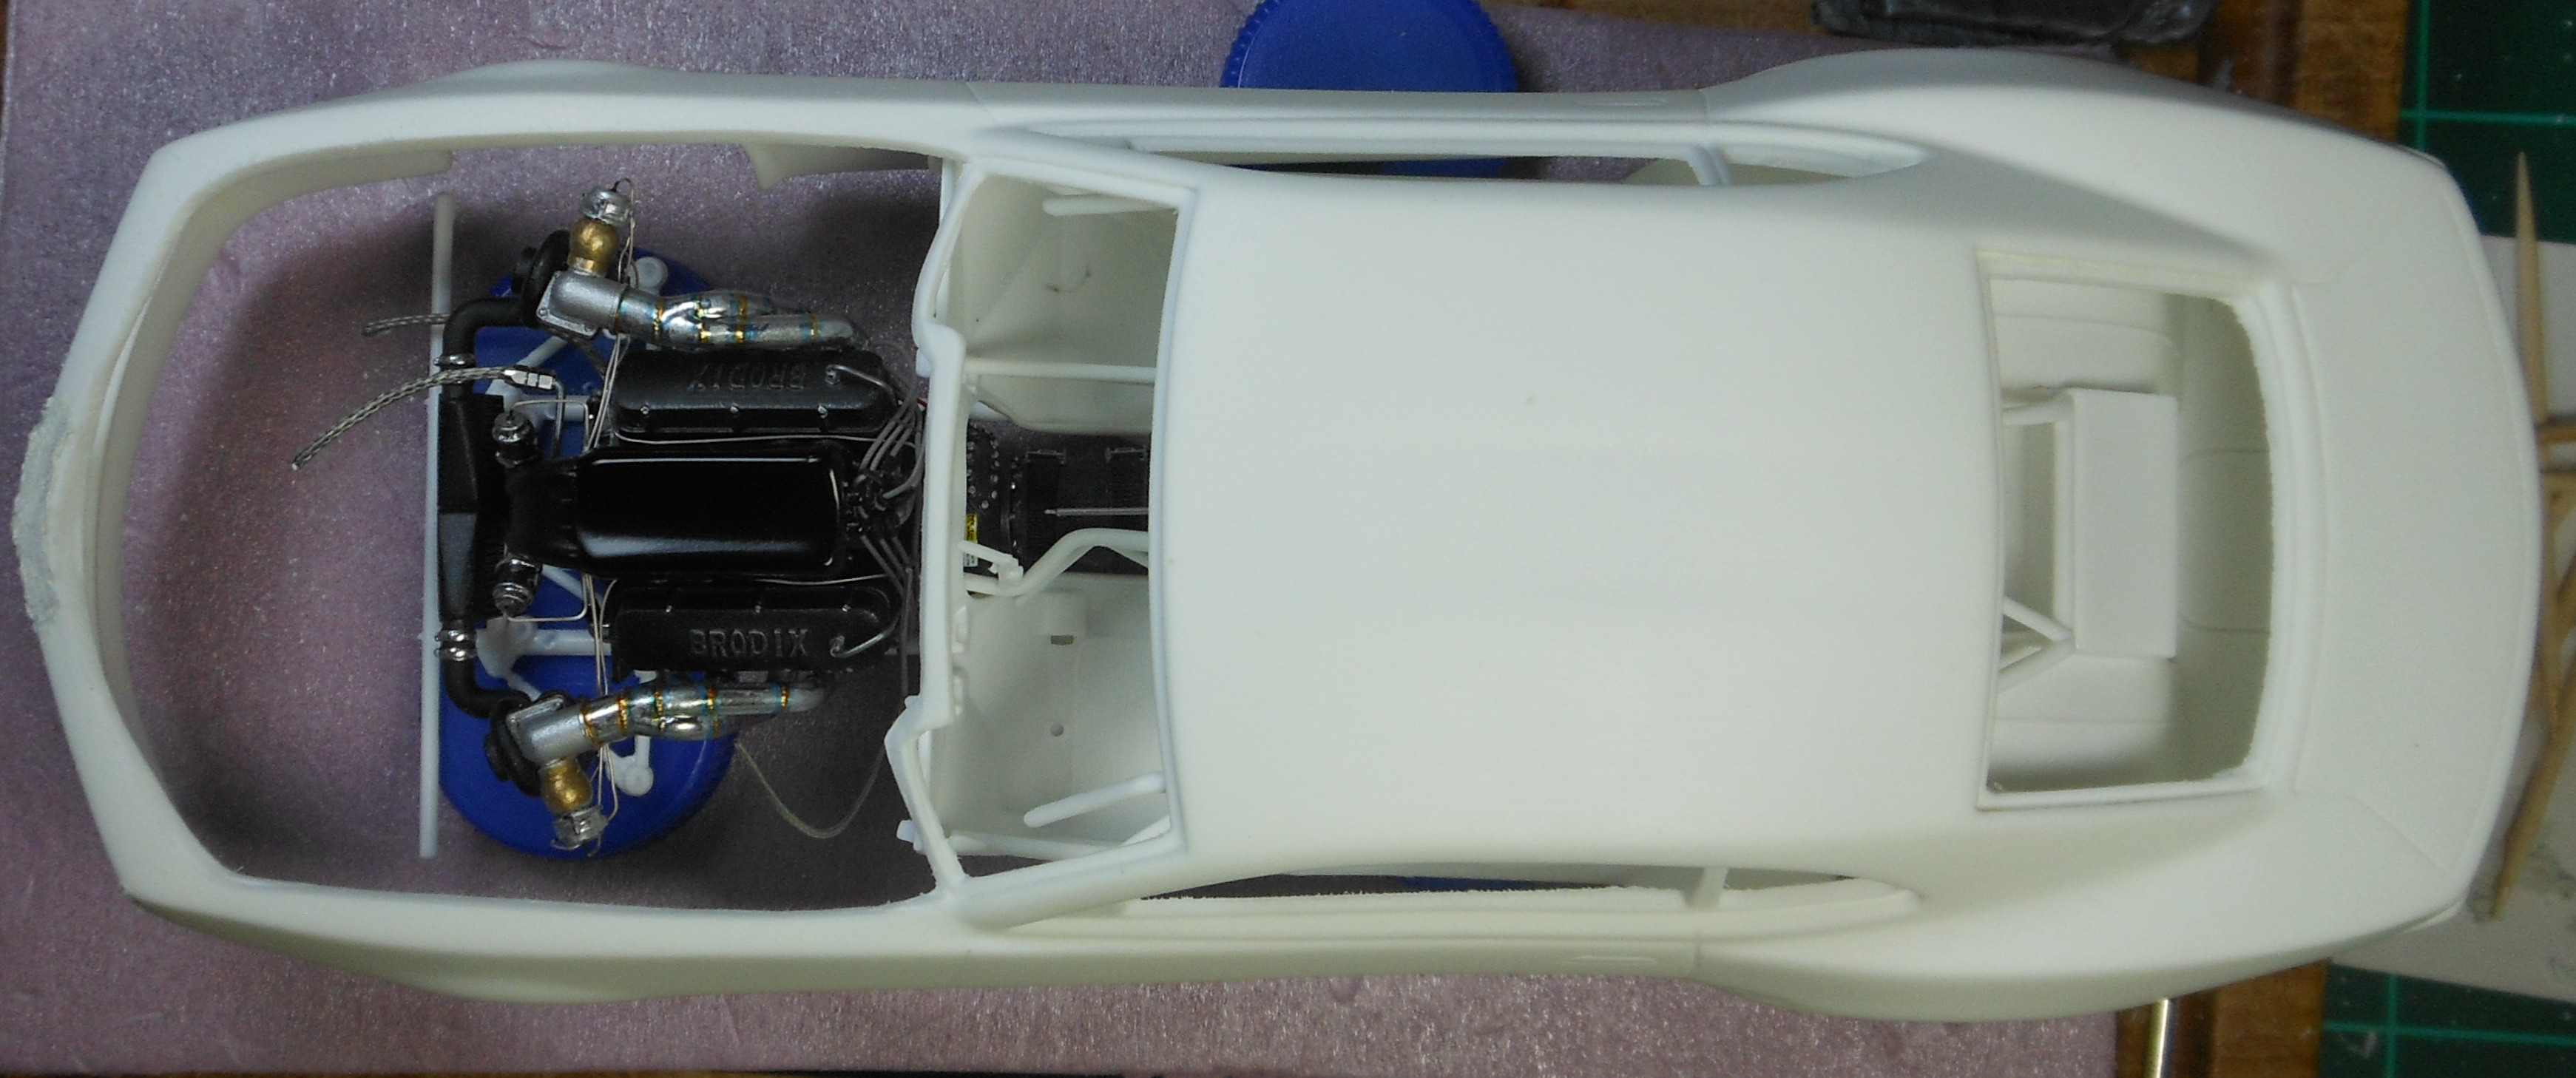
Widened the tub, made body a little longer, and finished the cage.
-
5/6/18 updates 2013 T/A with Dual Turbo and Alien Intake W.I.P.
HNTR replied to HNTR's topic in WIP: Drag Racing Models
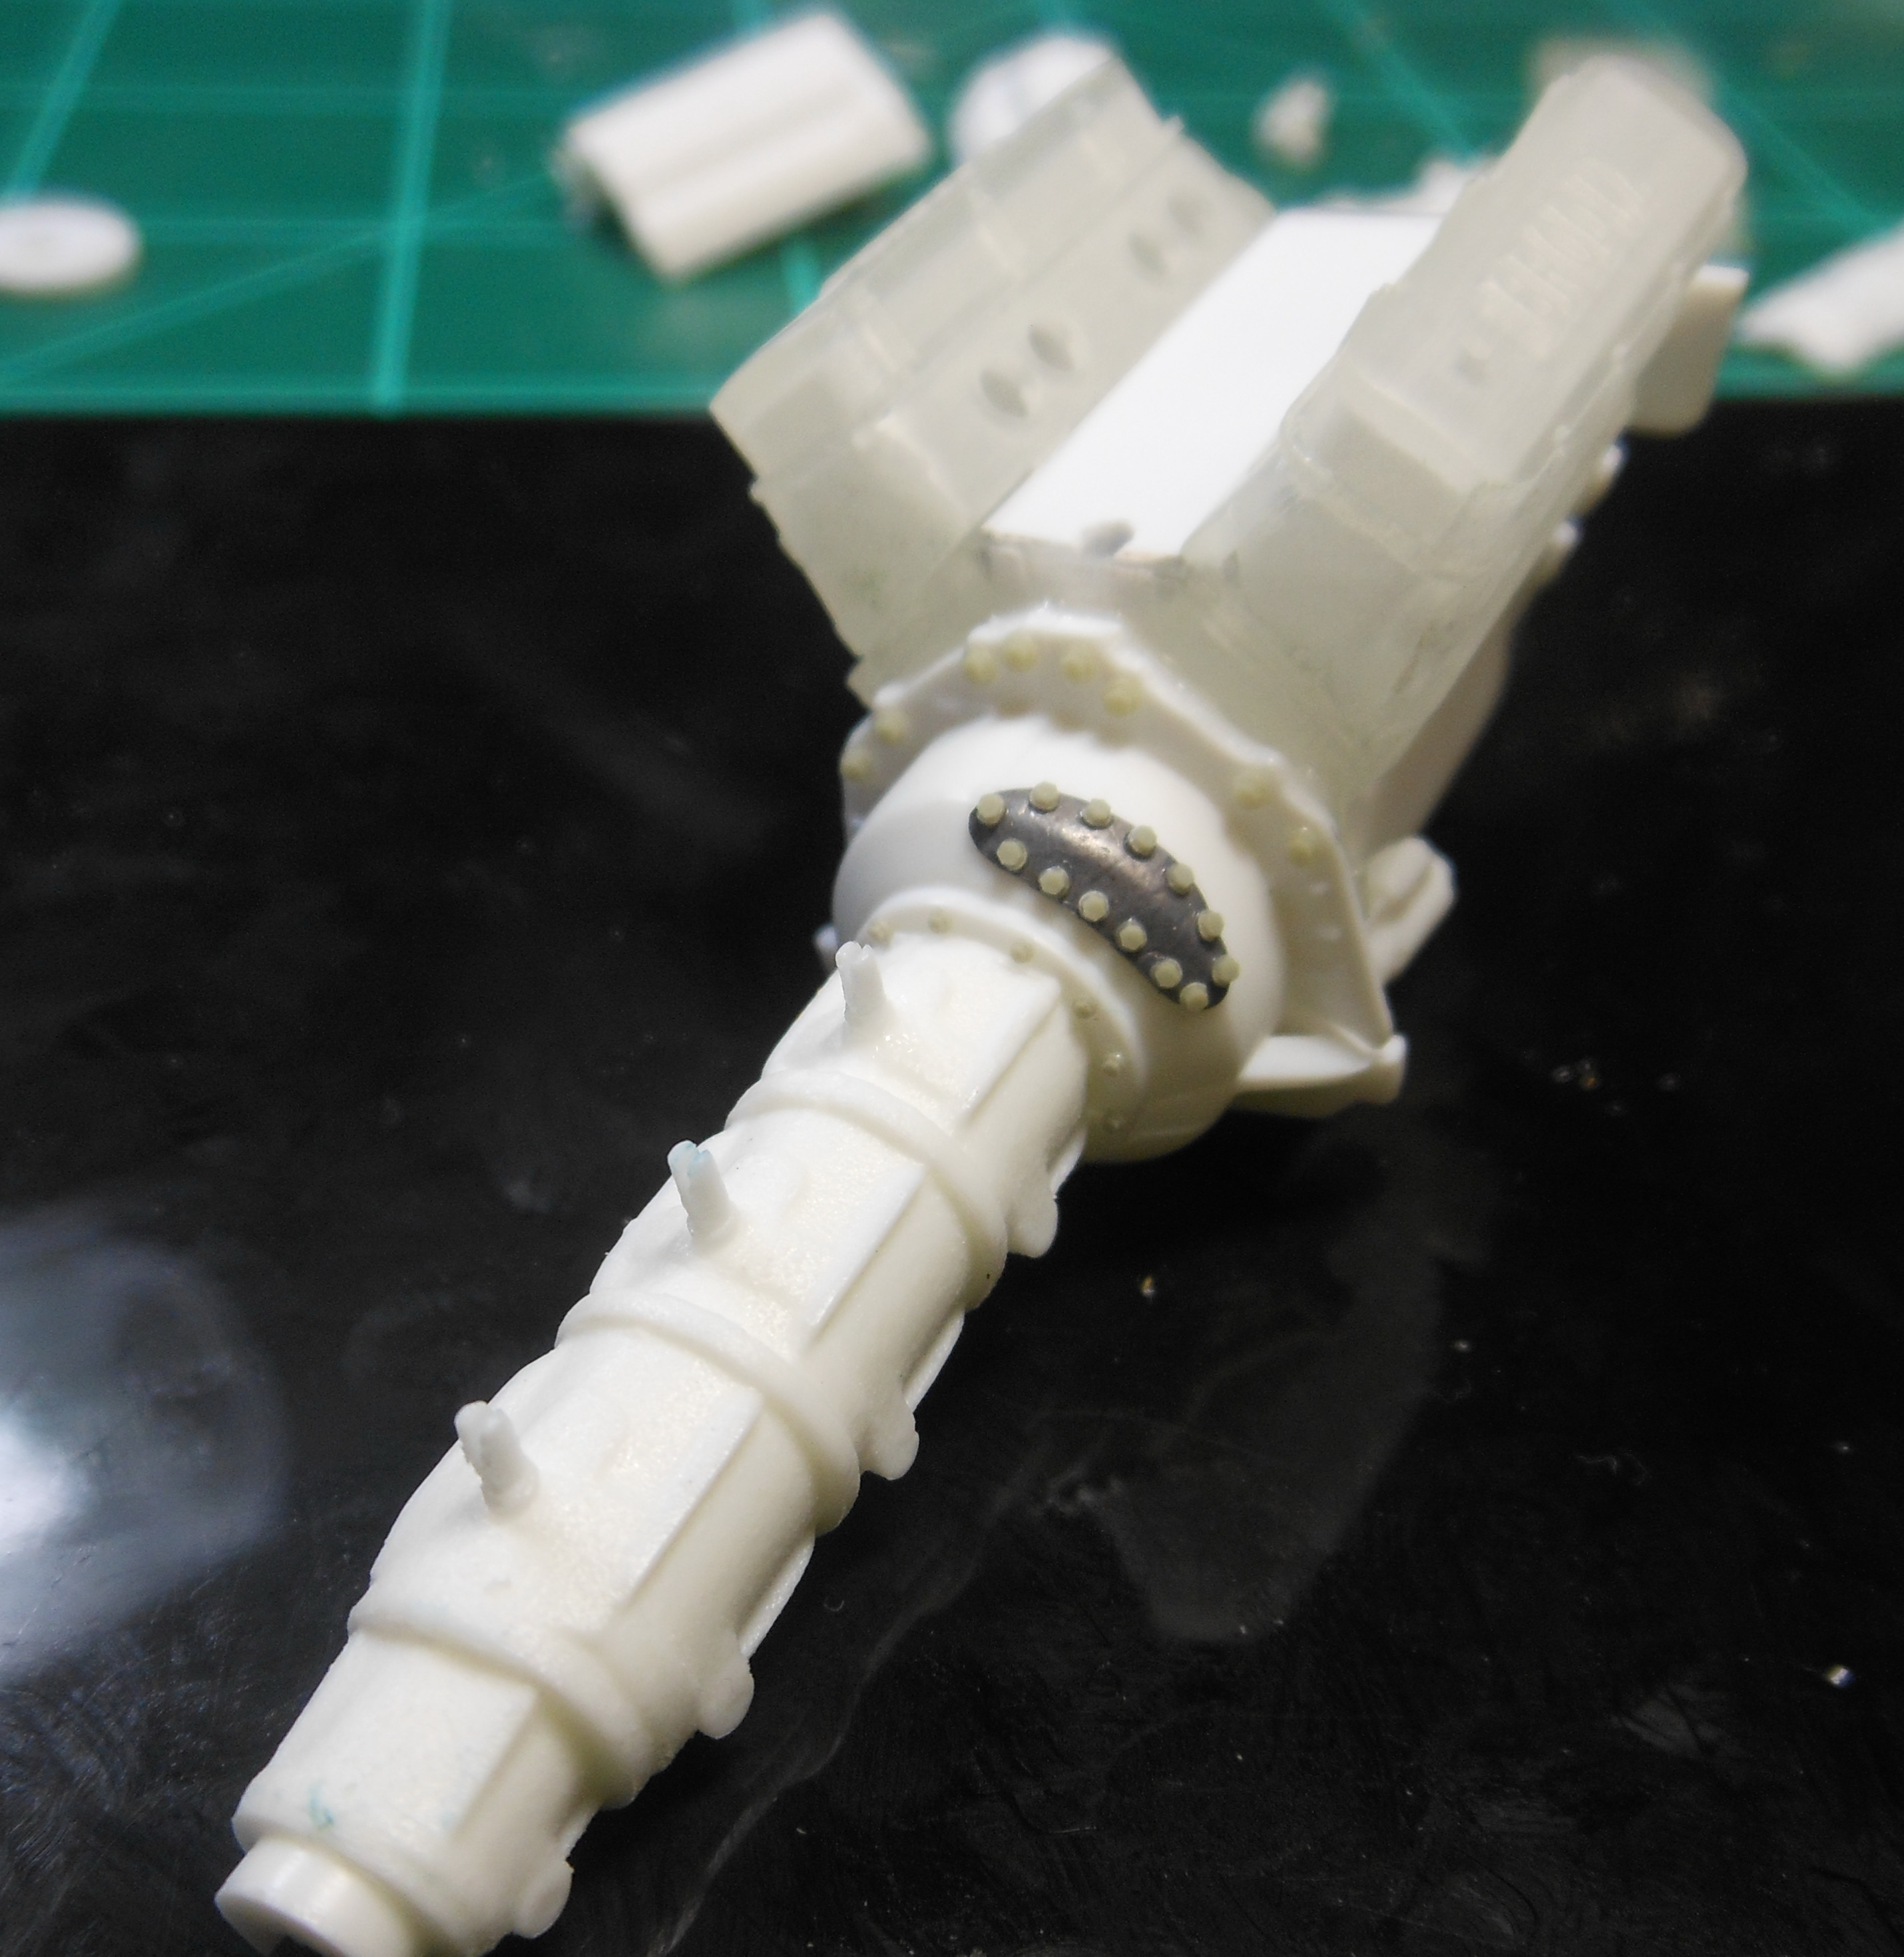
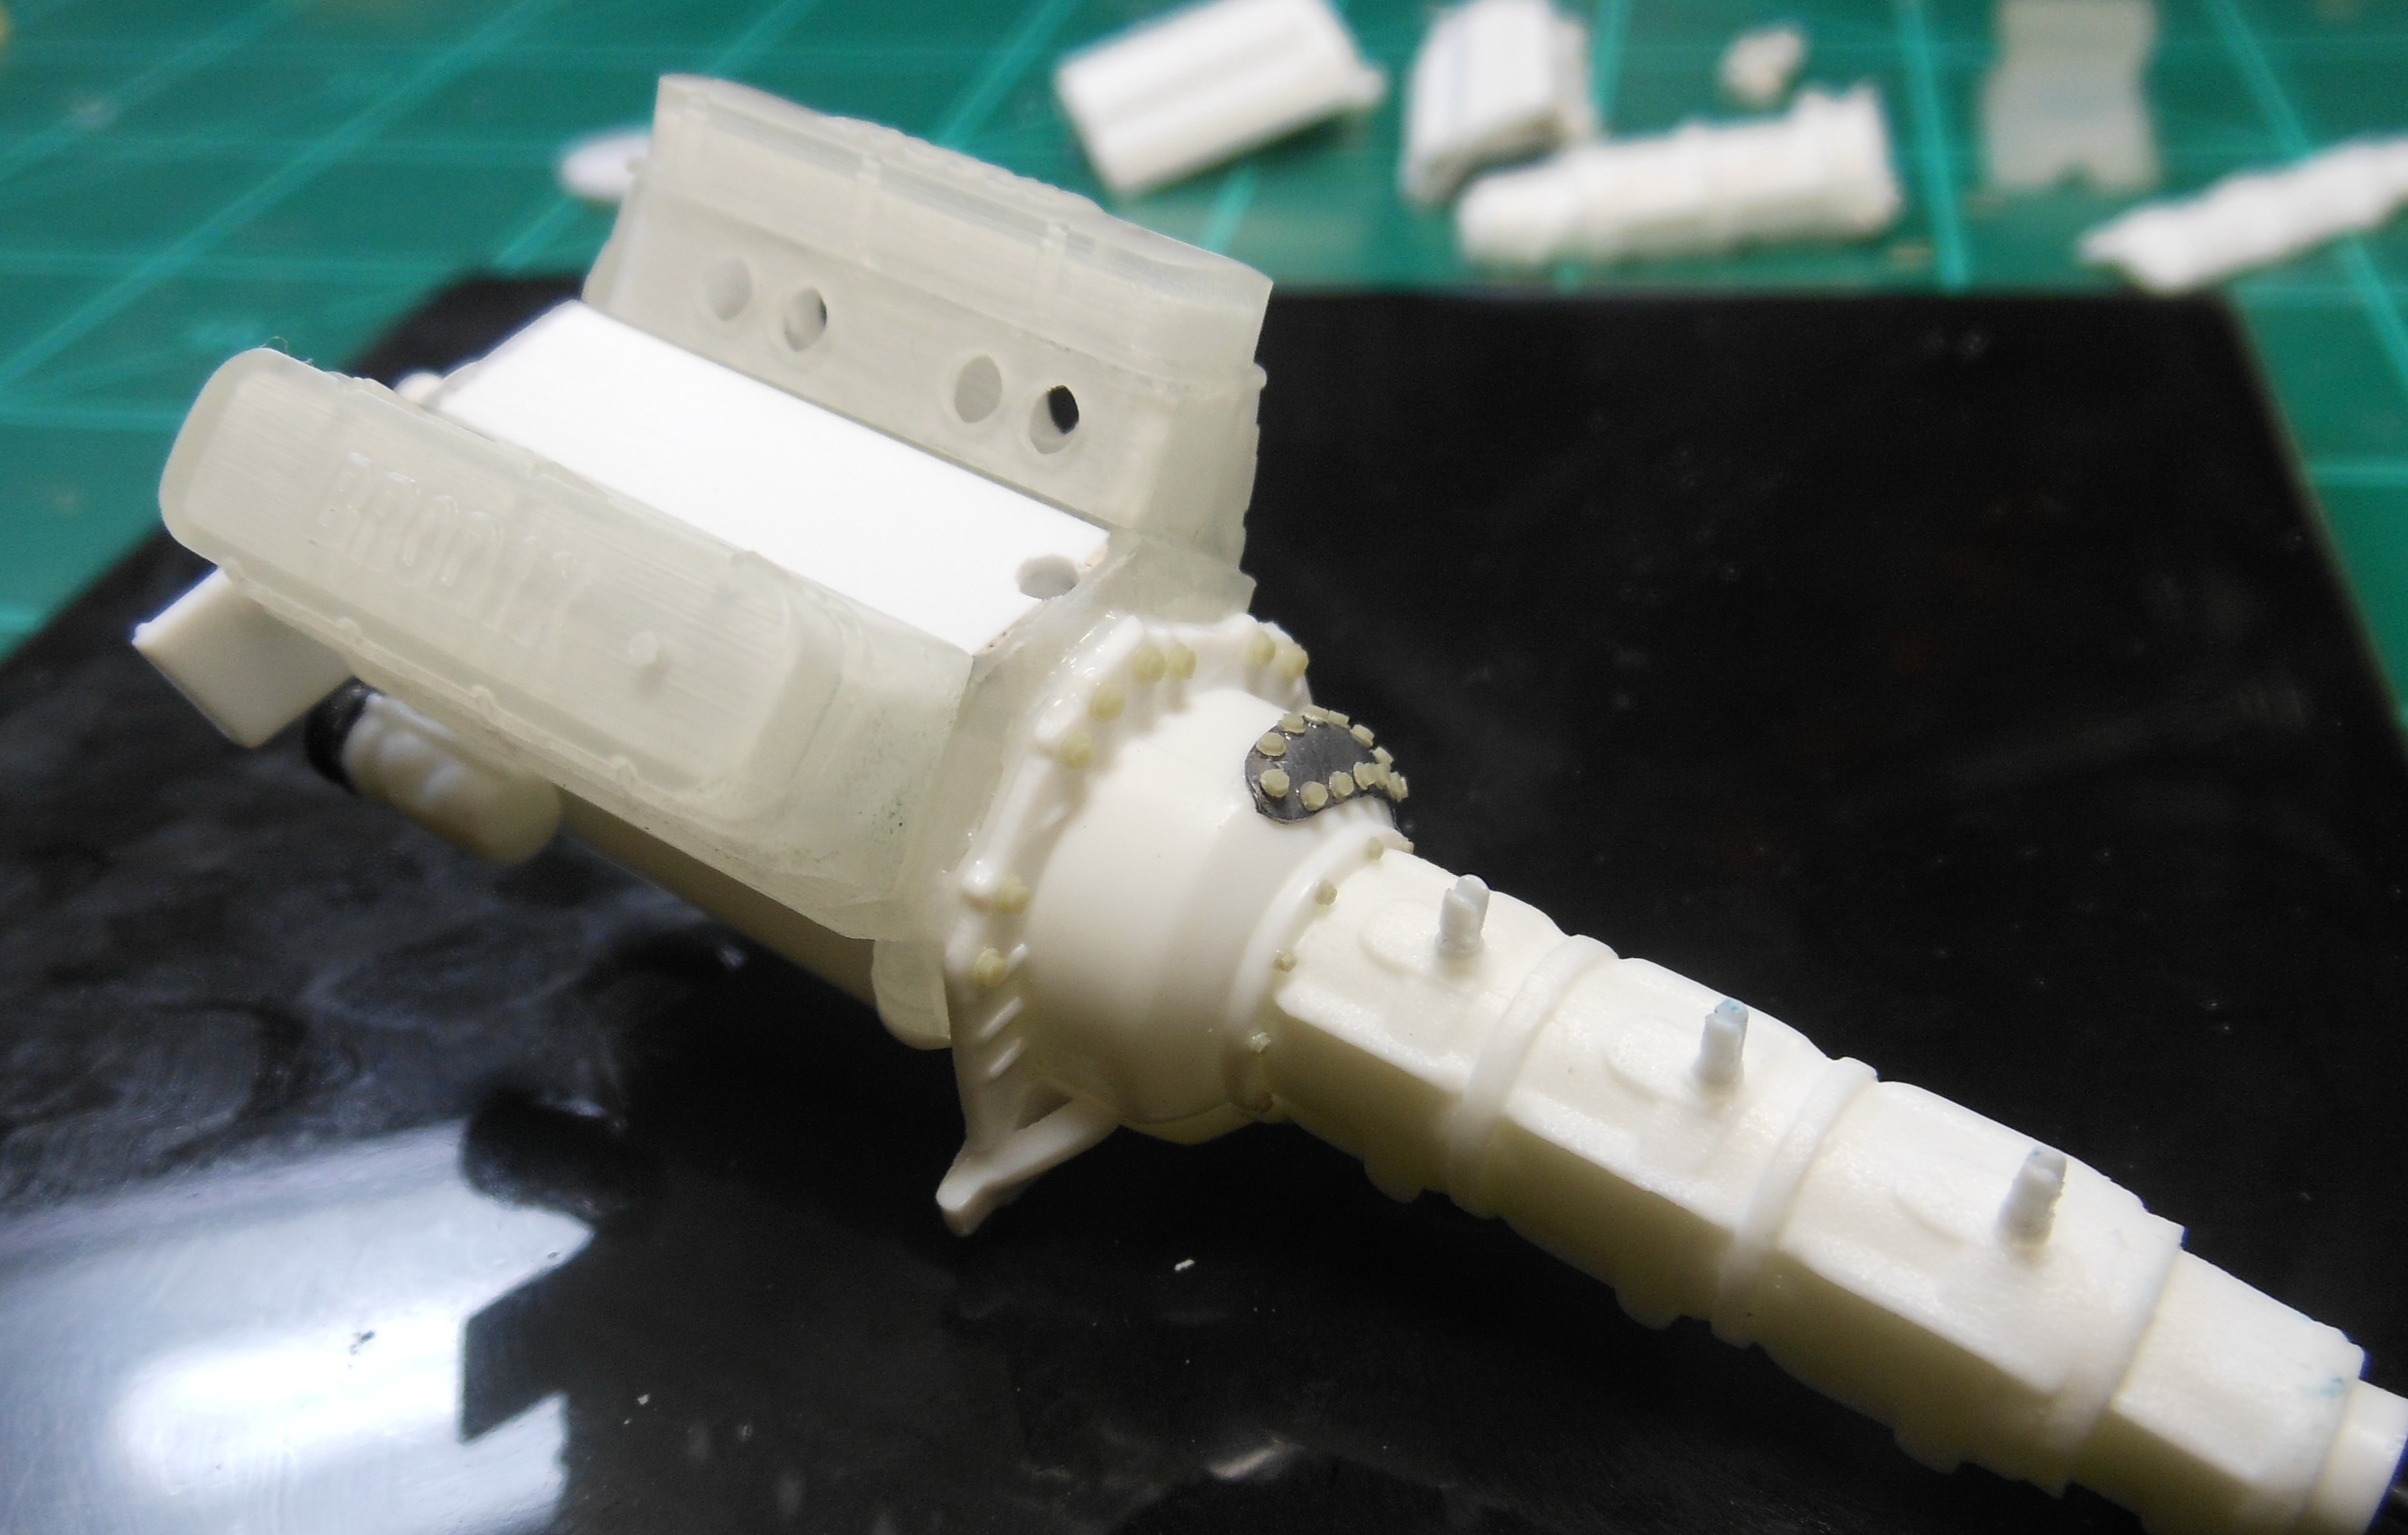
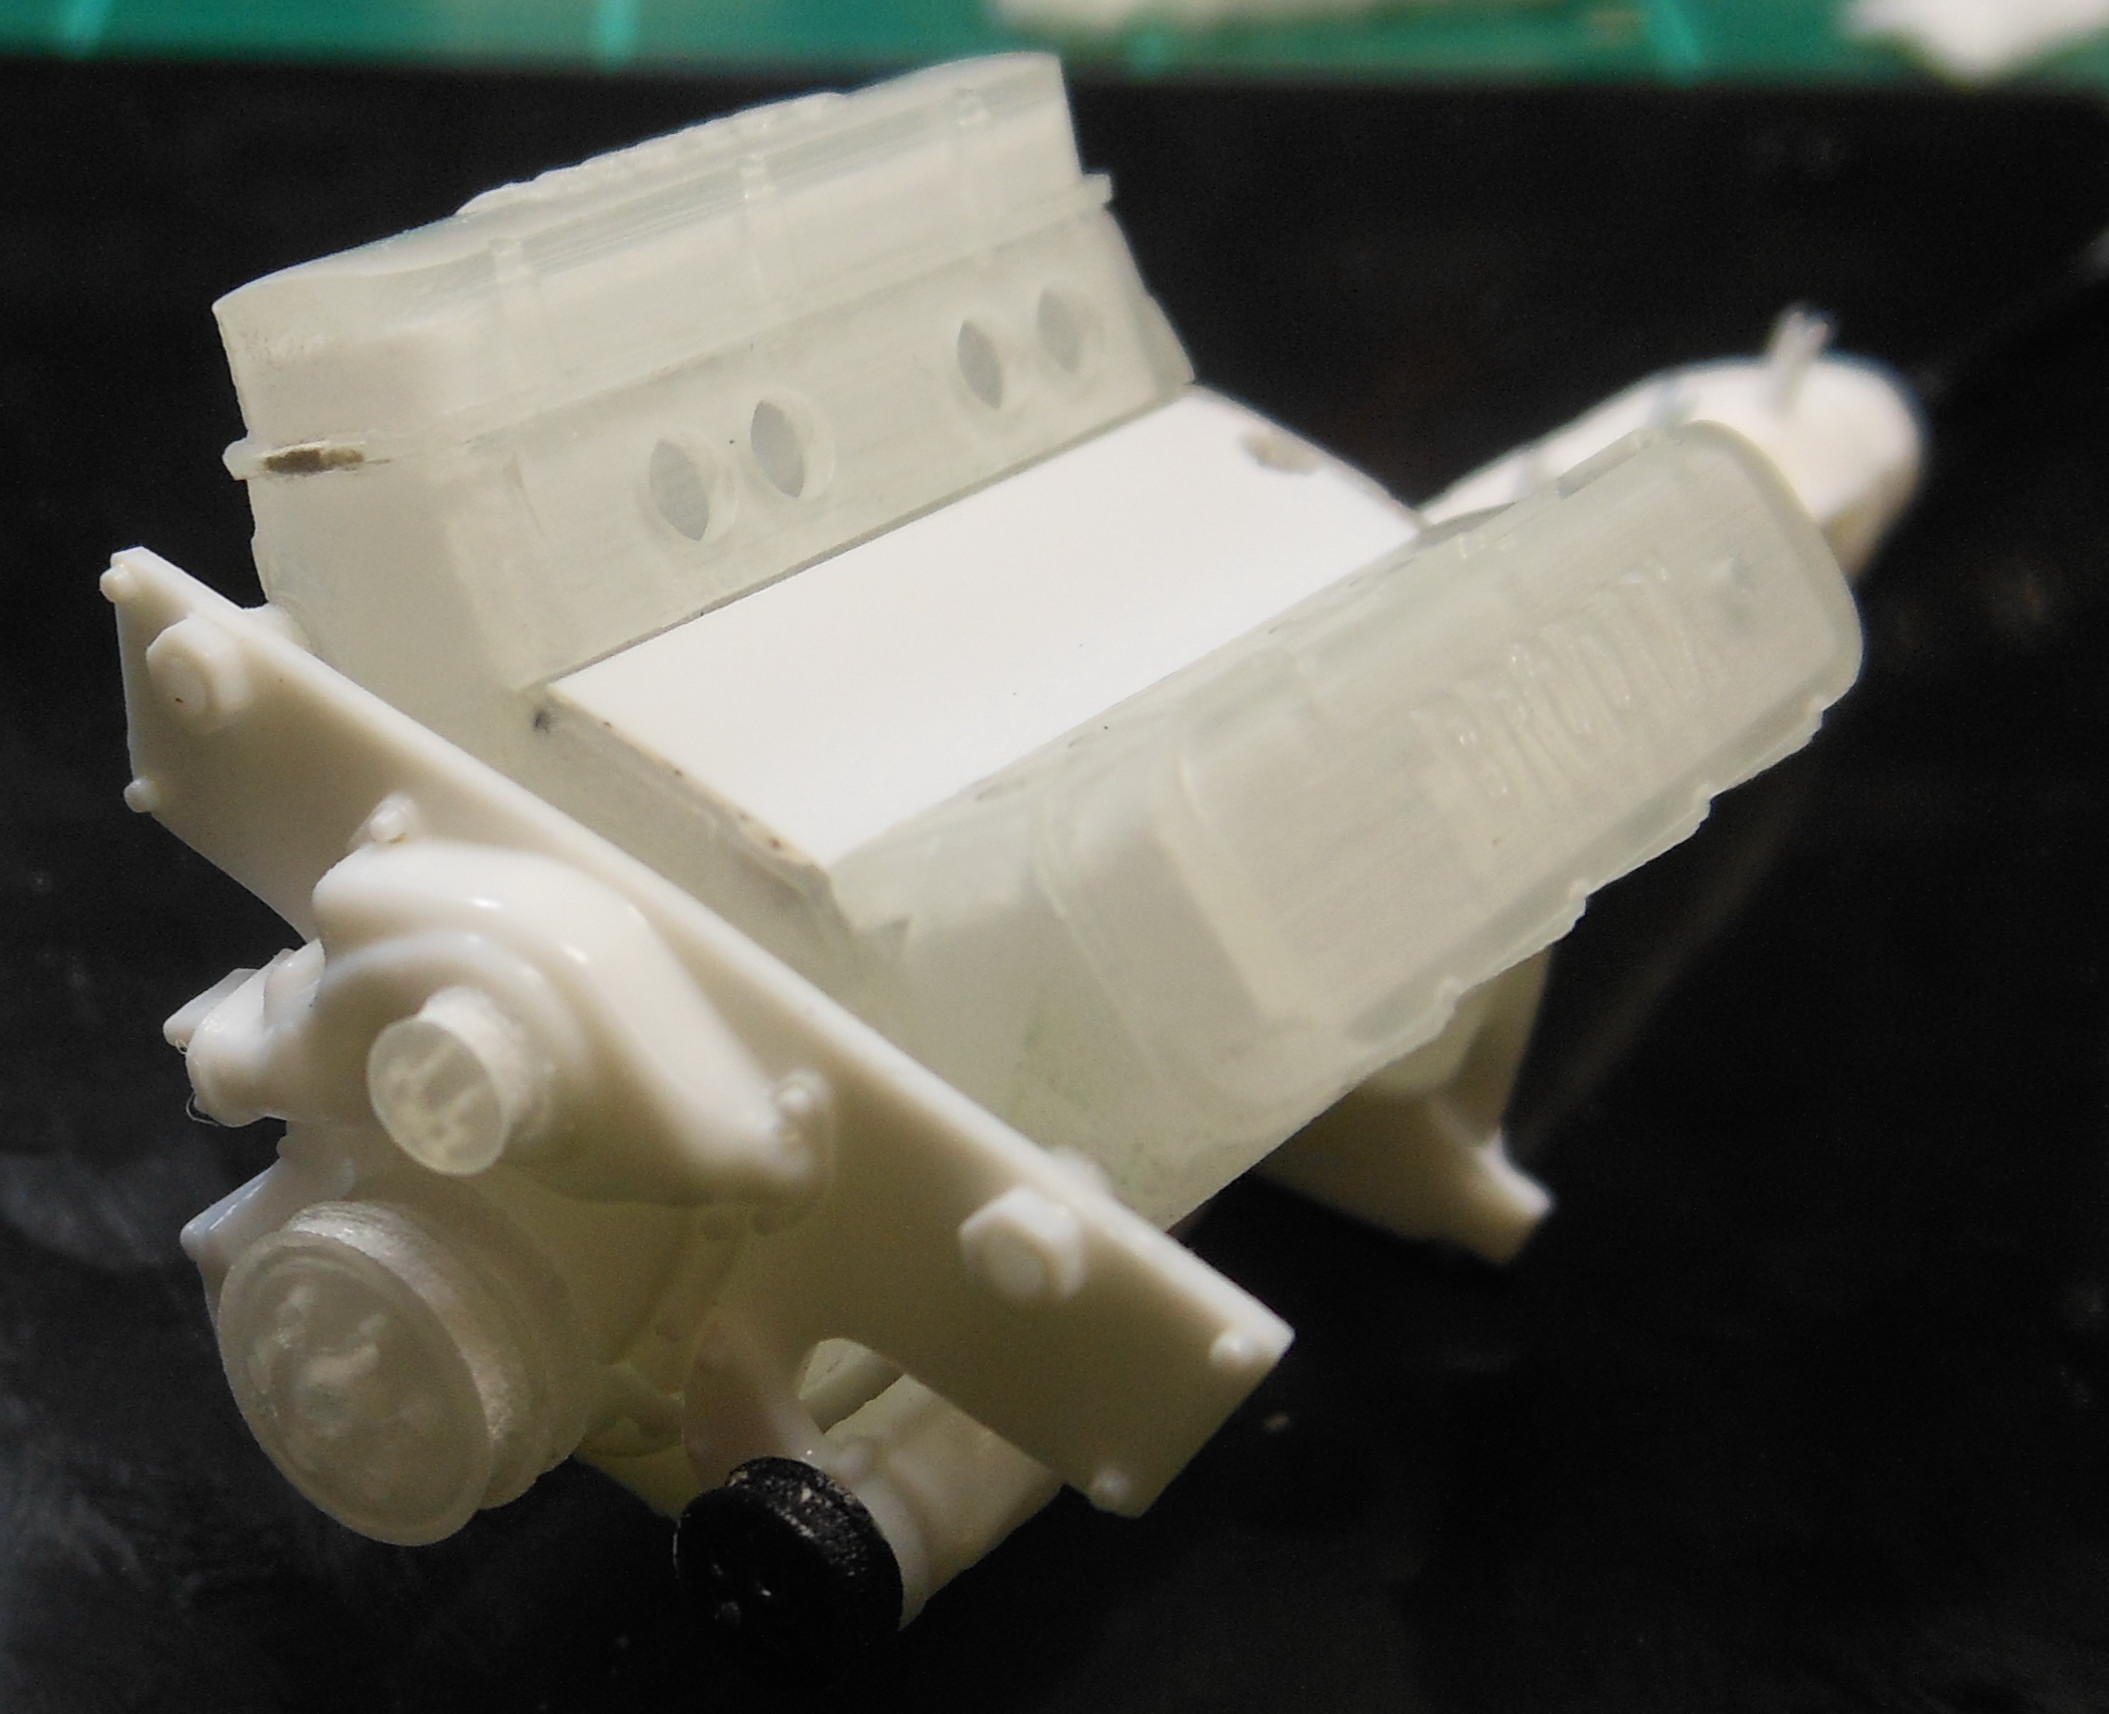
Thanks again everyone. The 3D parts are from 3D Specialties. -
5/6/18 updates 2013 T/A with Dual Turbo and Alien Intake W.I.P.
HNTR replied to HNTR's topic in WIP: Drag Racing Models
Thanks guys. I plan on trying to detail this whole thing and hope that it comes out somewhat decent. -
I was hoping to find something that is more plug and play, lol. Eyes aren't what they used to be.
-
Checked it out and the 1/24 and 1/25 don't come with the fittings.
-
5/6/18 updates 2013 T/A with Dual Turbo and Alien Intake W.I.P.
HNTR replied to HNTR's topic in WIP: Drag Racing Models
Thank you sir. -
He does have alot of stuff but, could only find "T" fittings.
-
That is what I am looking for!! What scale are those? I could not find those on TDR at Shapeways.
-
5/6/18 updates 2013 T/A with Dual Turbo and Alien Intake W.I.P.
HNTR replied to HNTR's topic in WIP: Drag Racing Models
Thanks guys -
5/6/18 updates 2013 T/A with Dual Turbo and Alien Intake W.I.P.
HNTR replied to HNTR's topic in WIP: Drag Racing Models
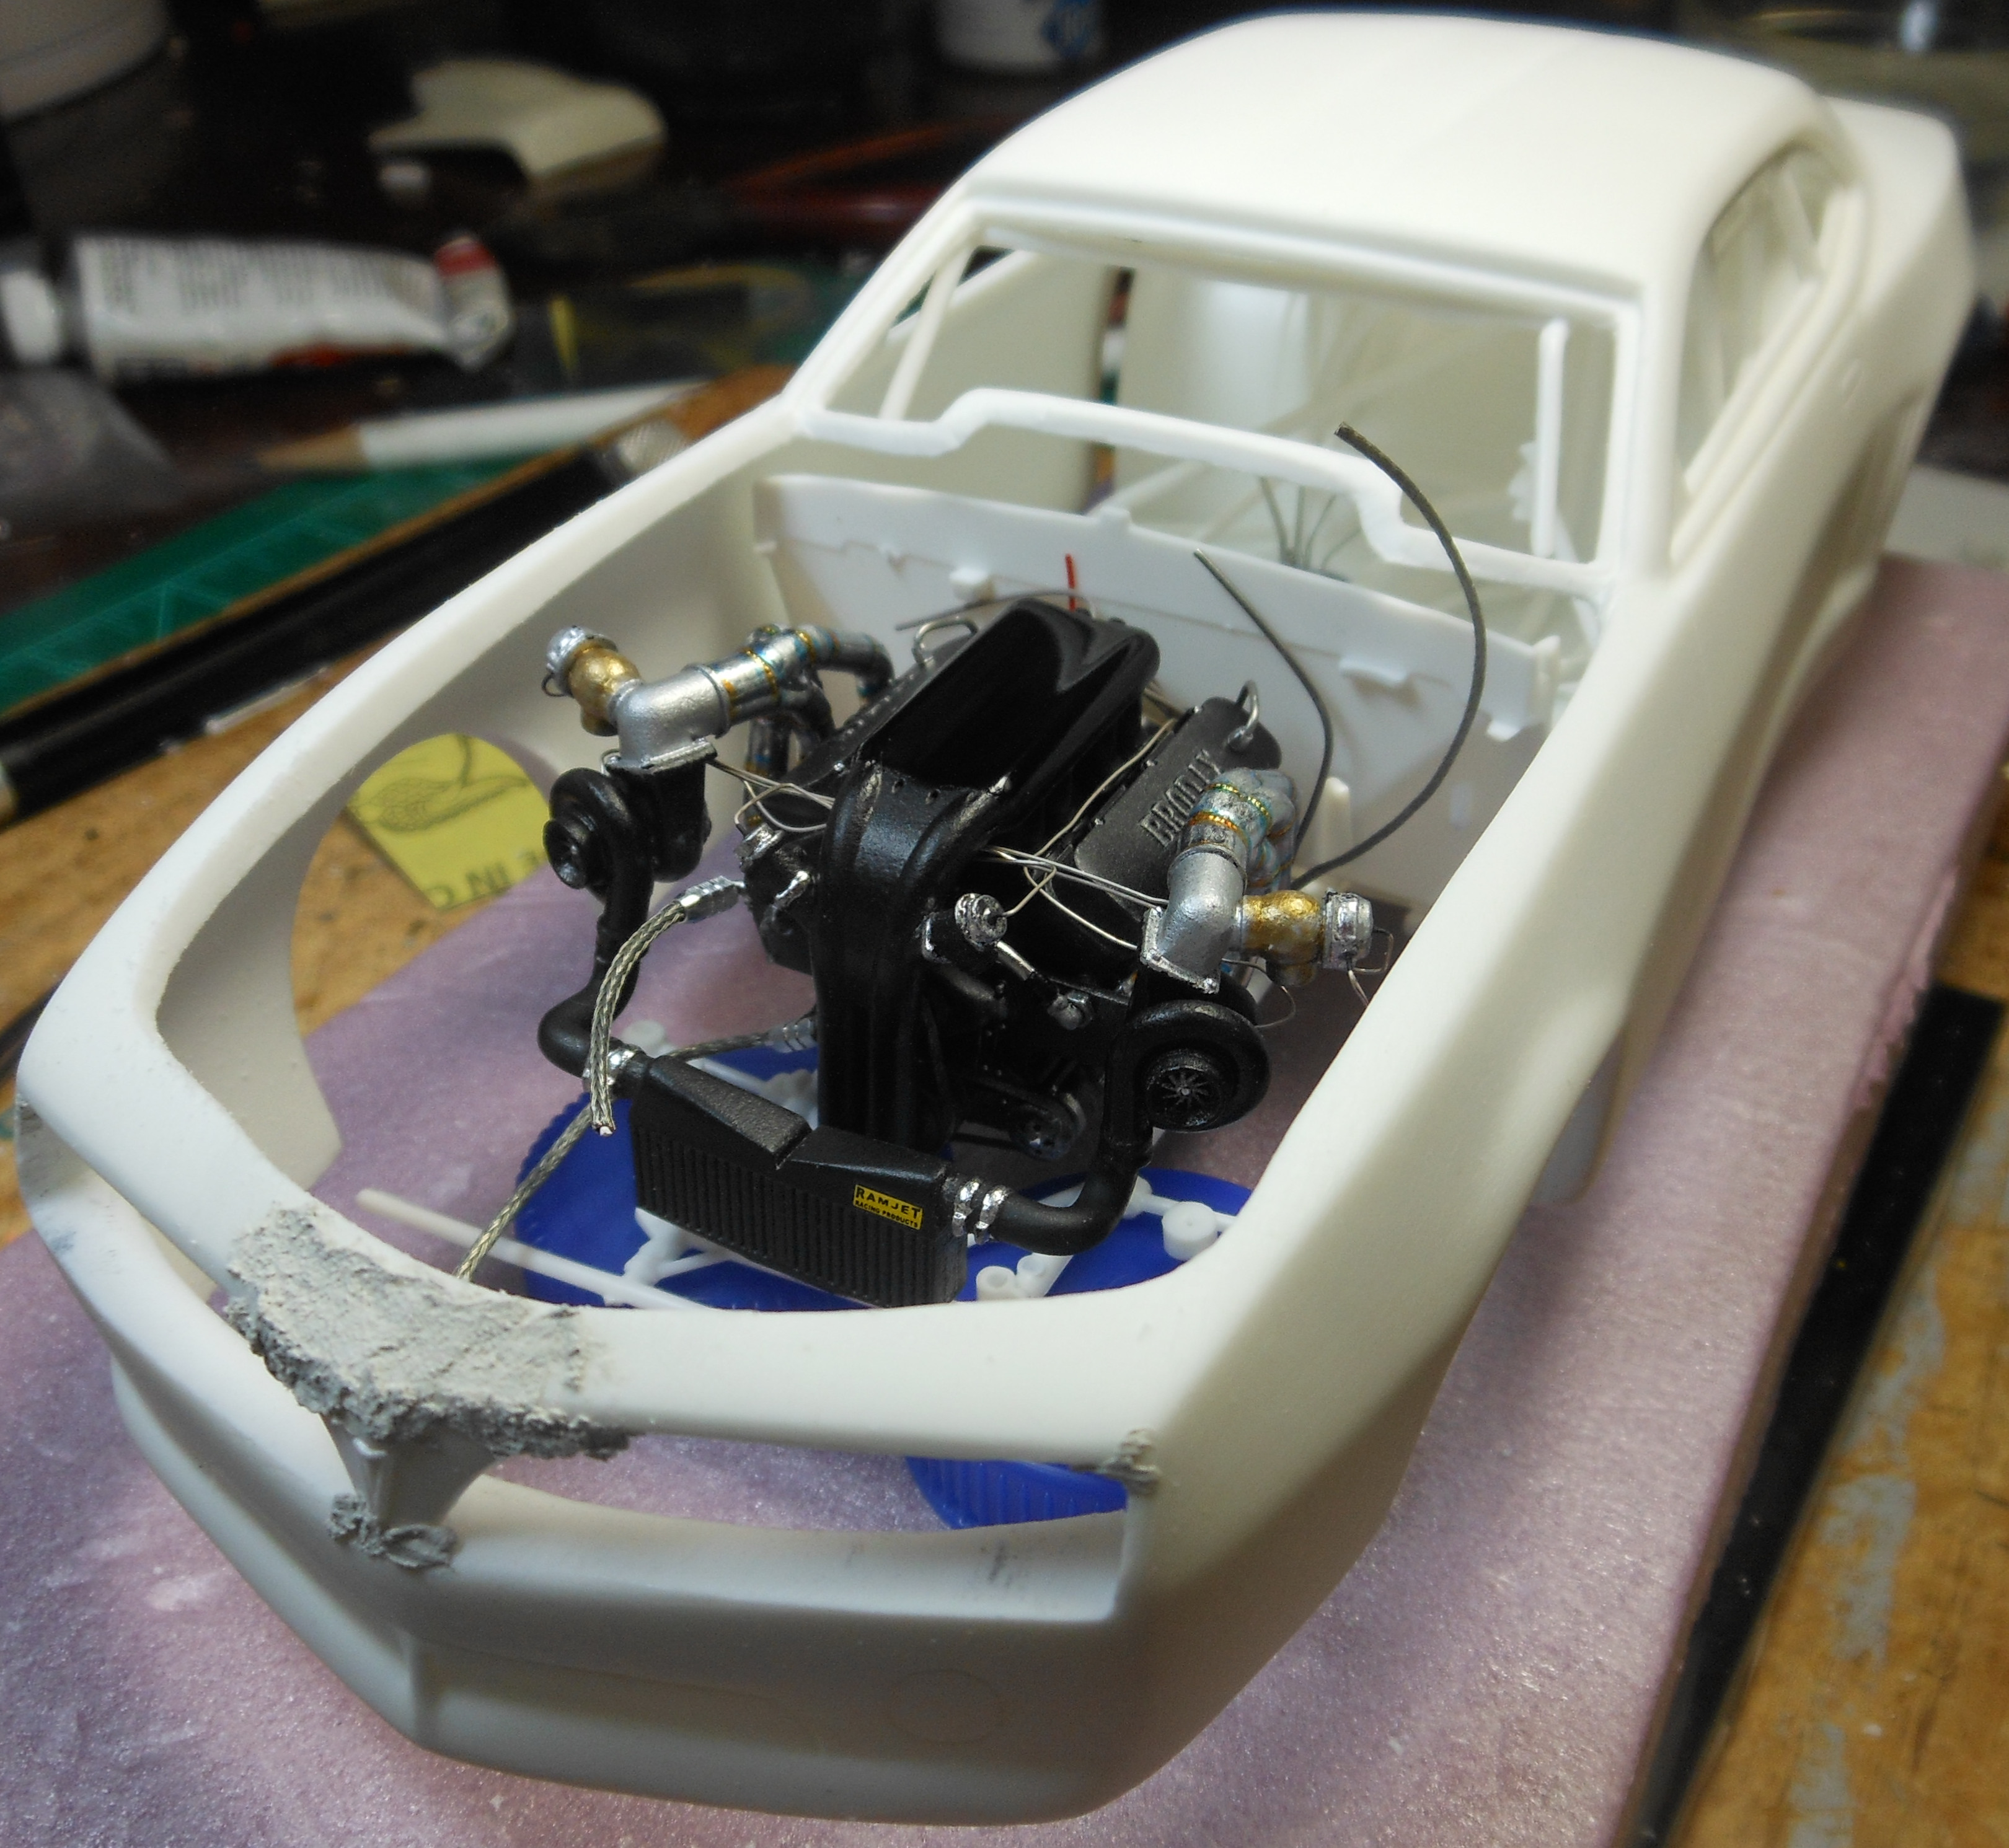
Here it is mocked in body.
-
5/6/18 updates 2013 T/A with Dual Turbo and Alien Intake W.I.P.
HNTR replied to HNTR's topic in WIP: Drag Racing Models
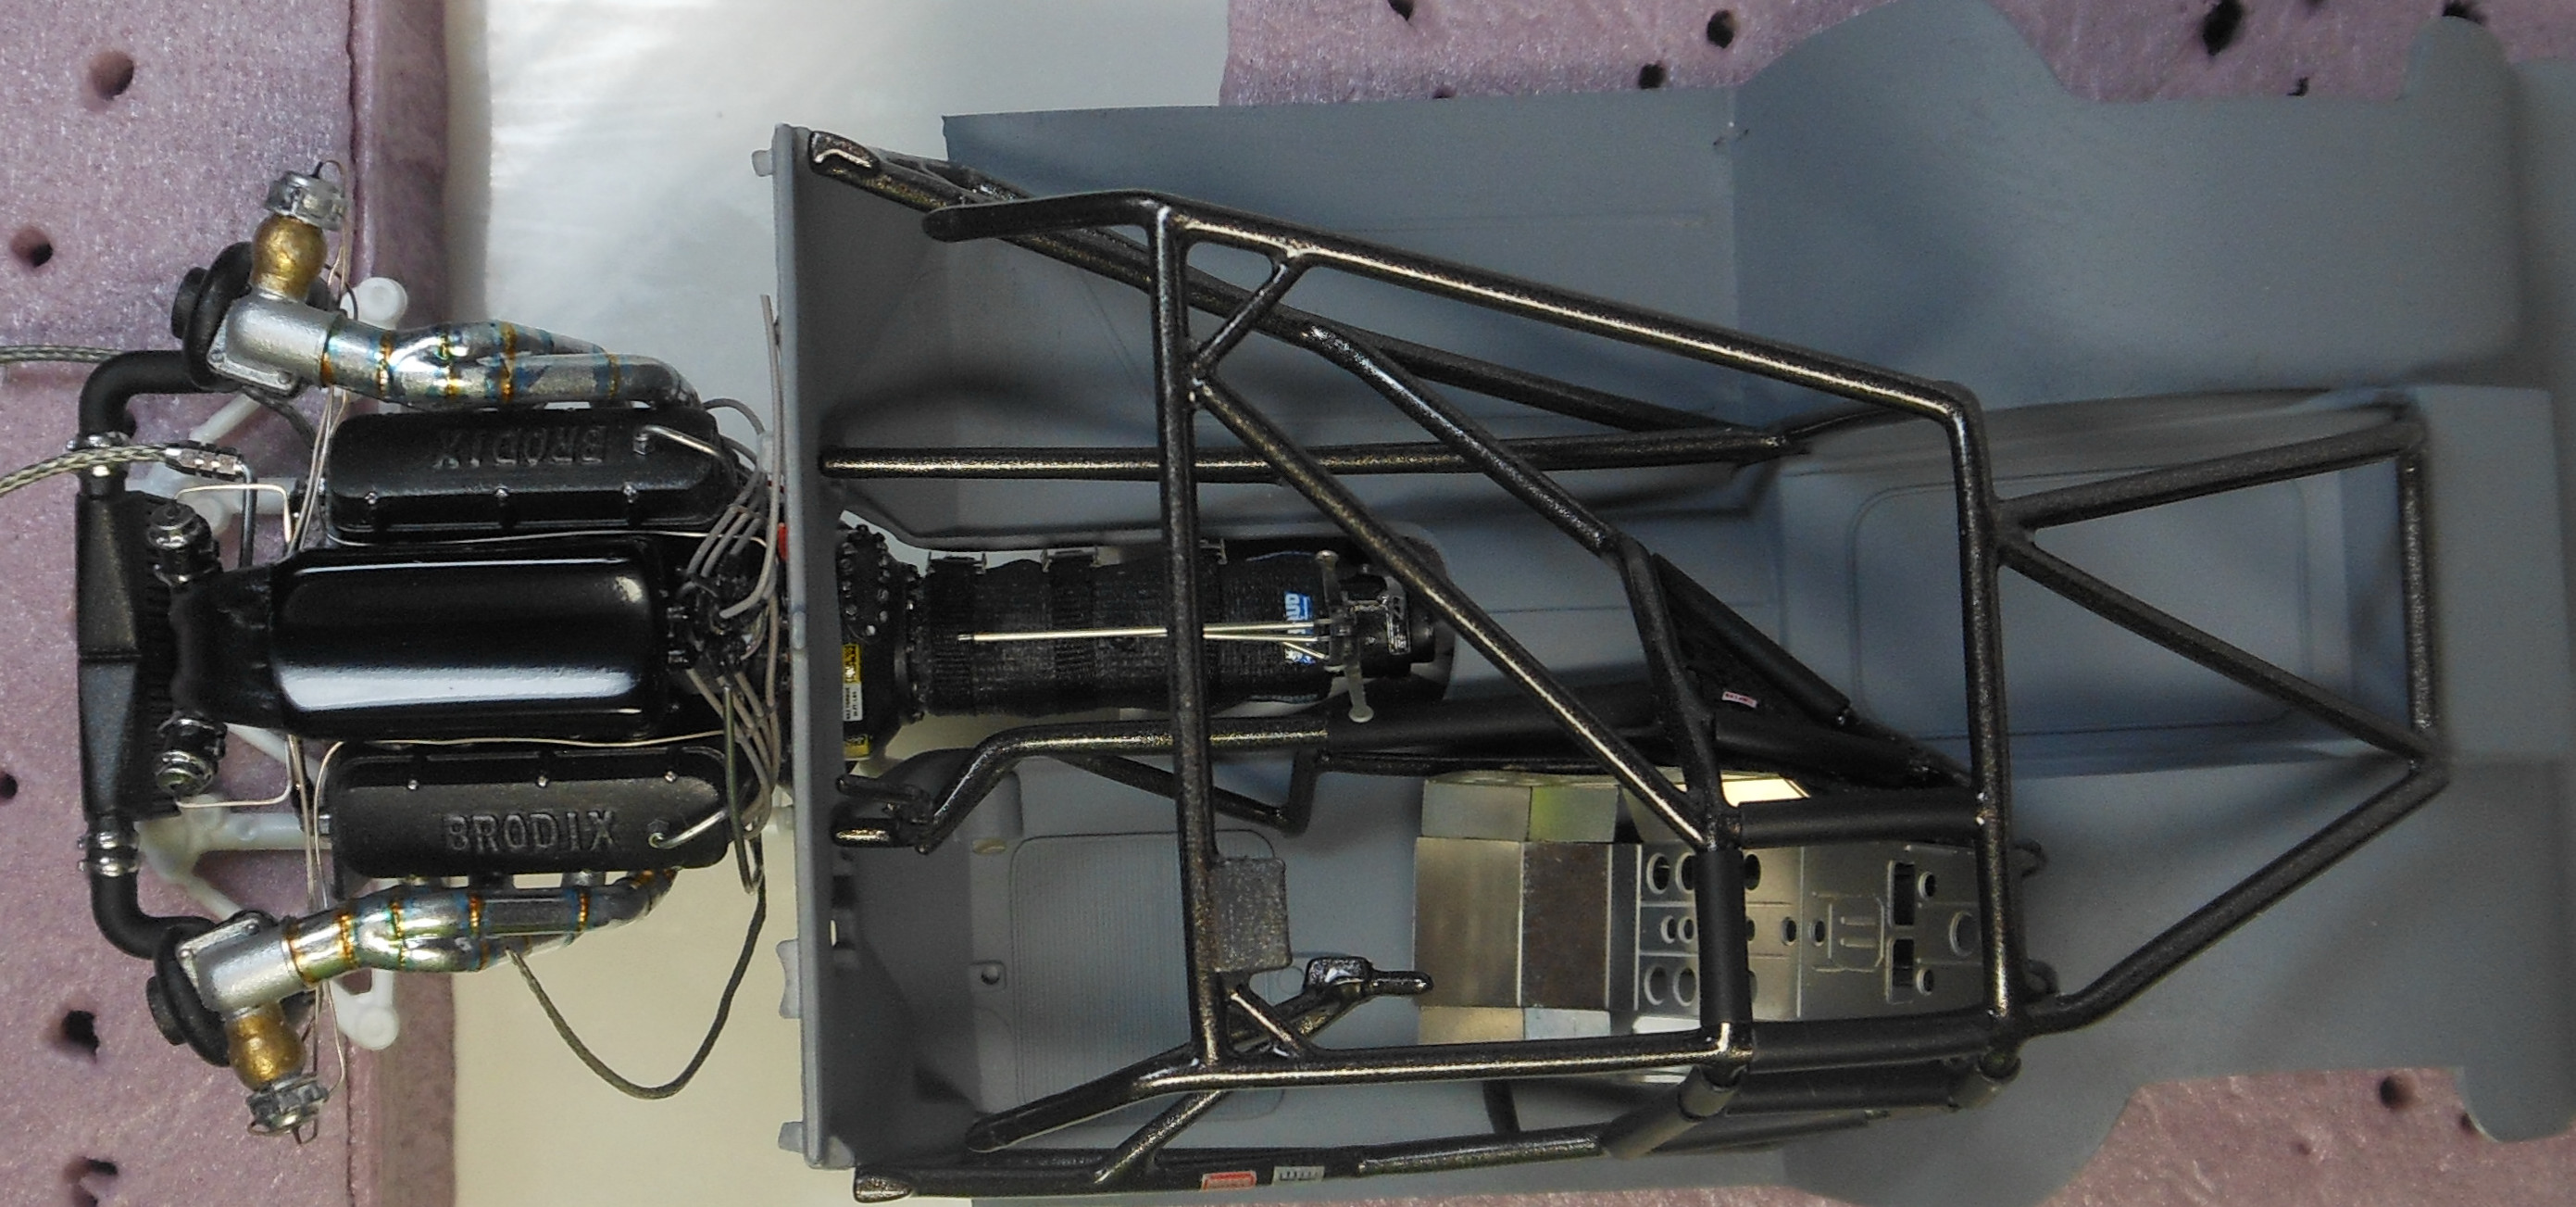
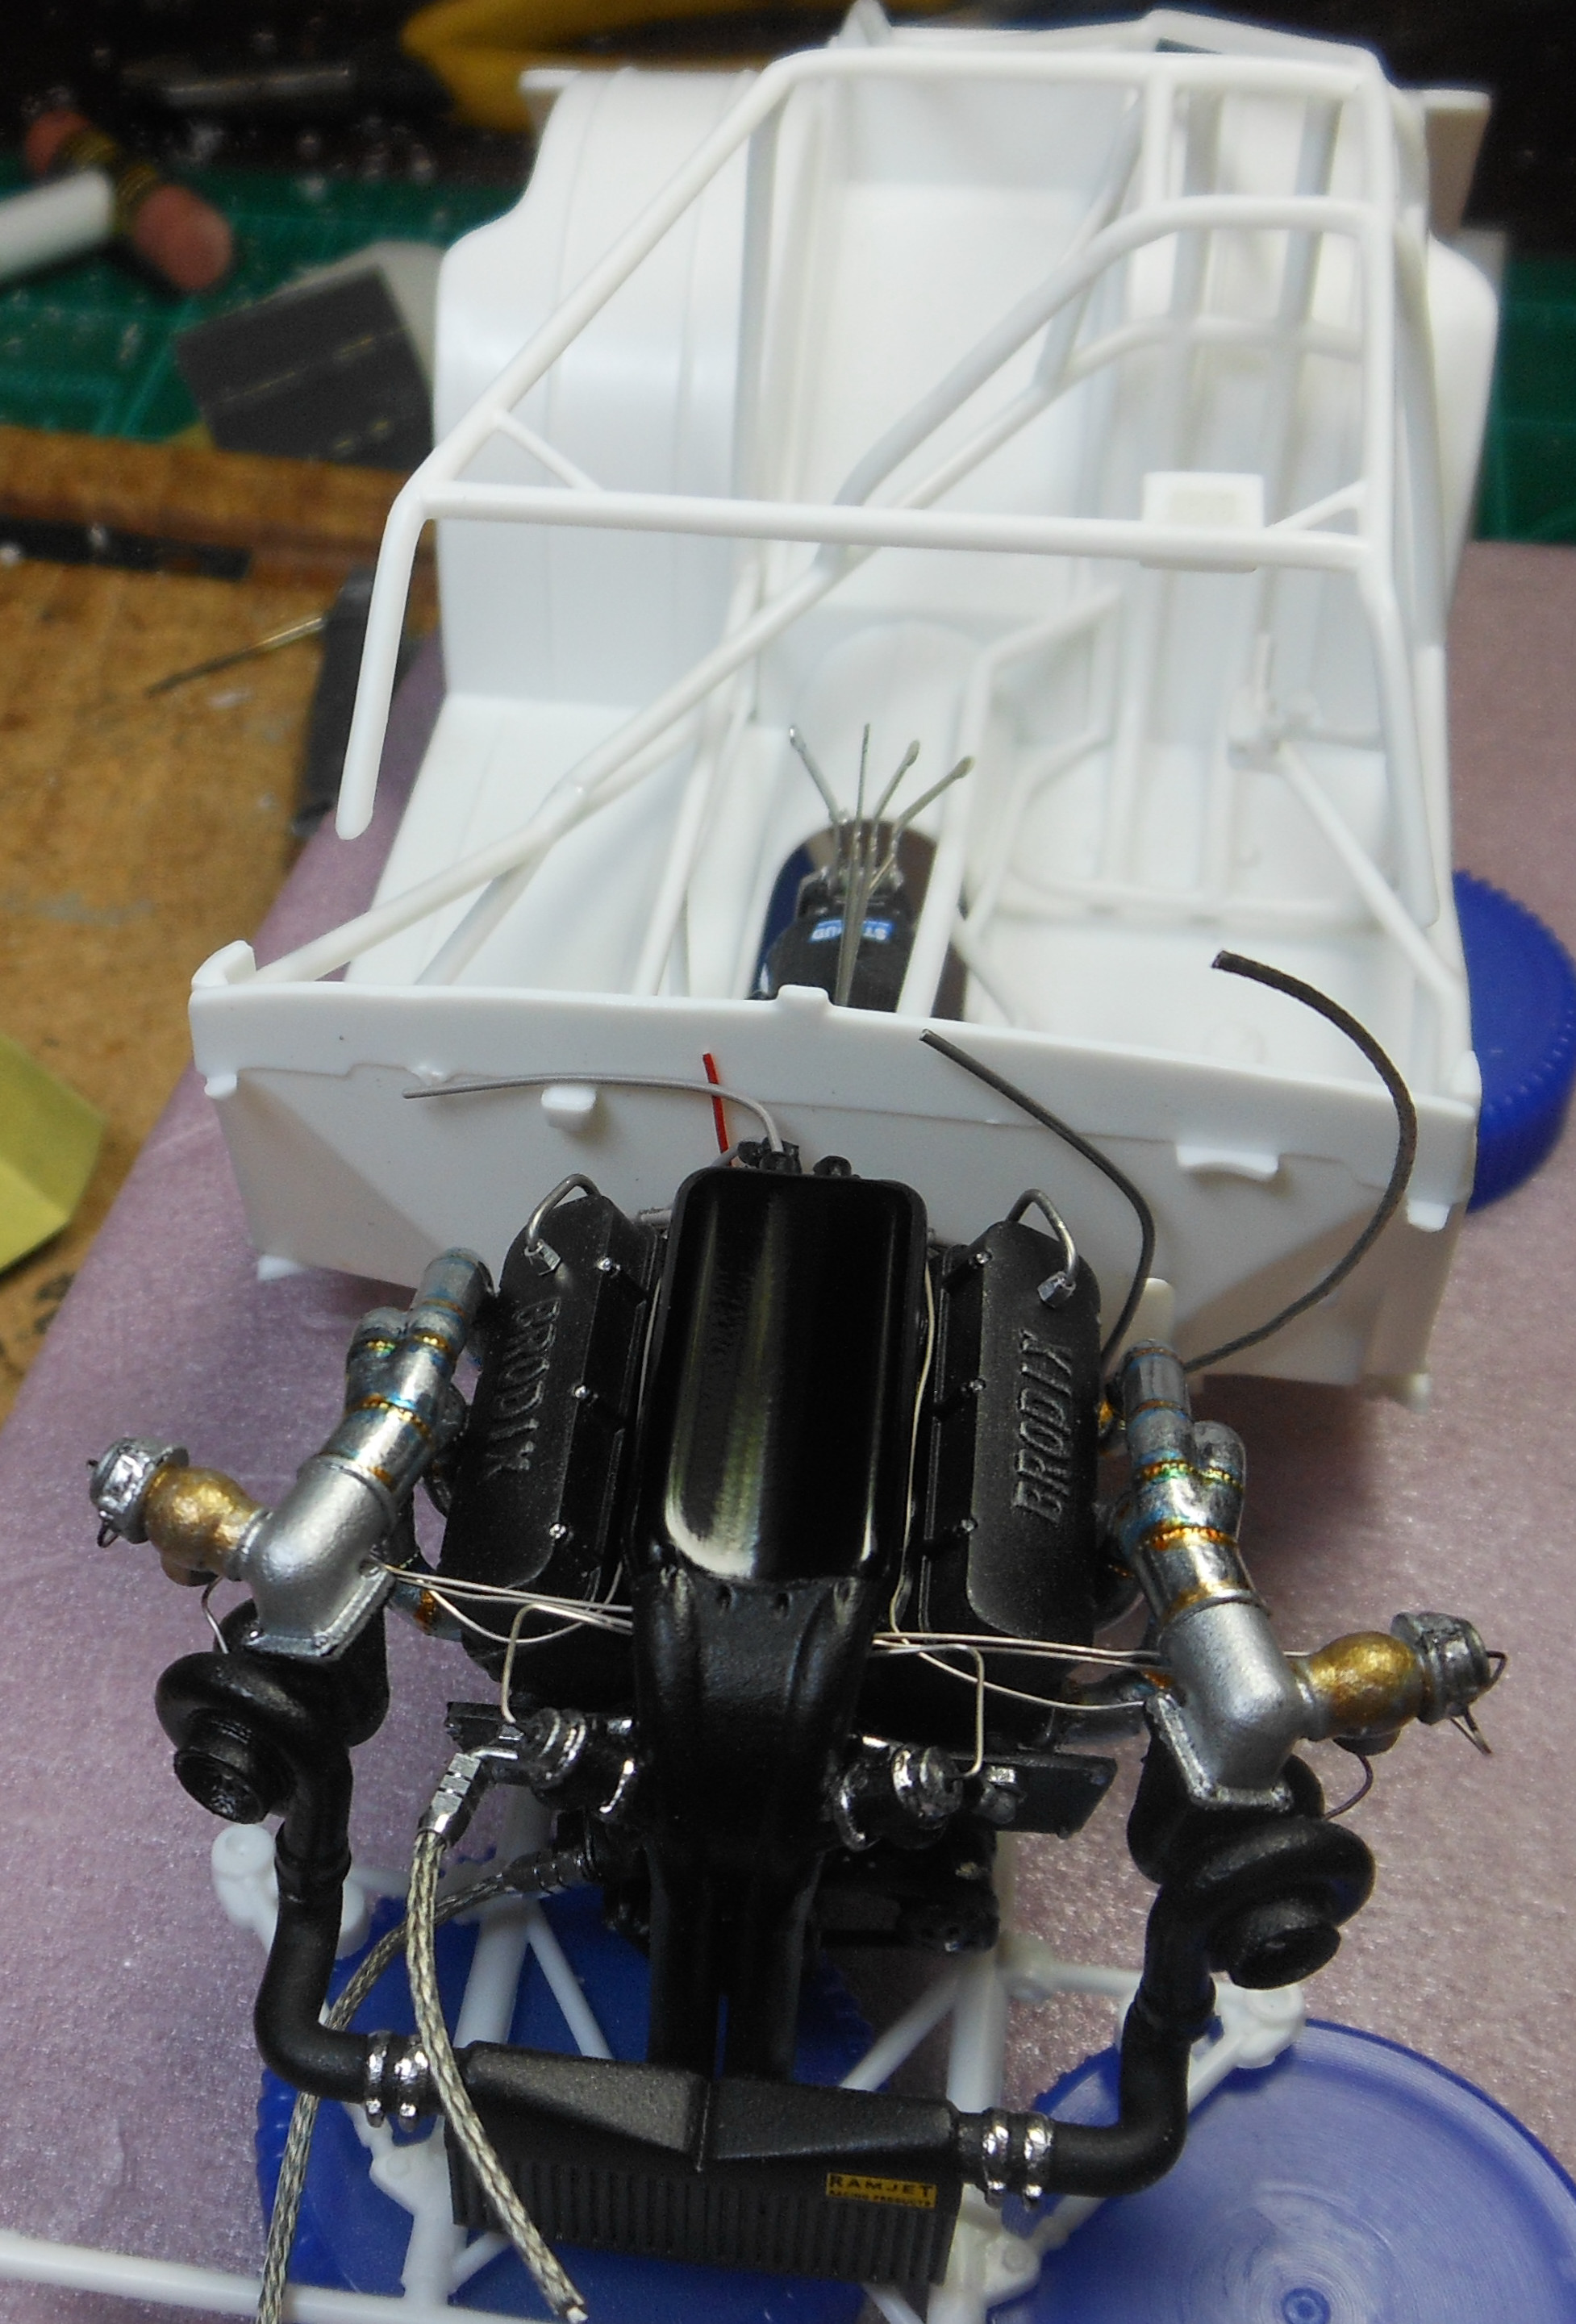
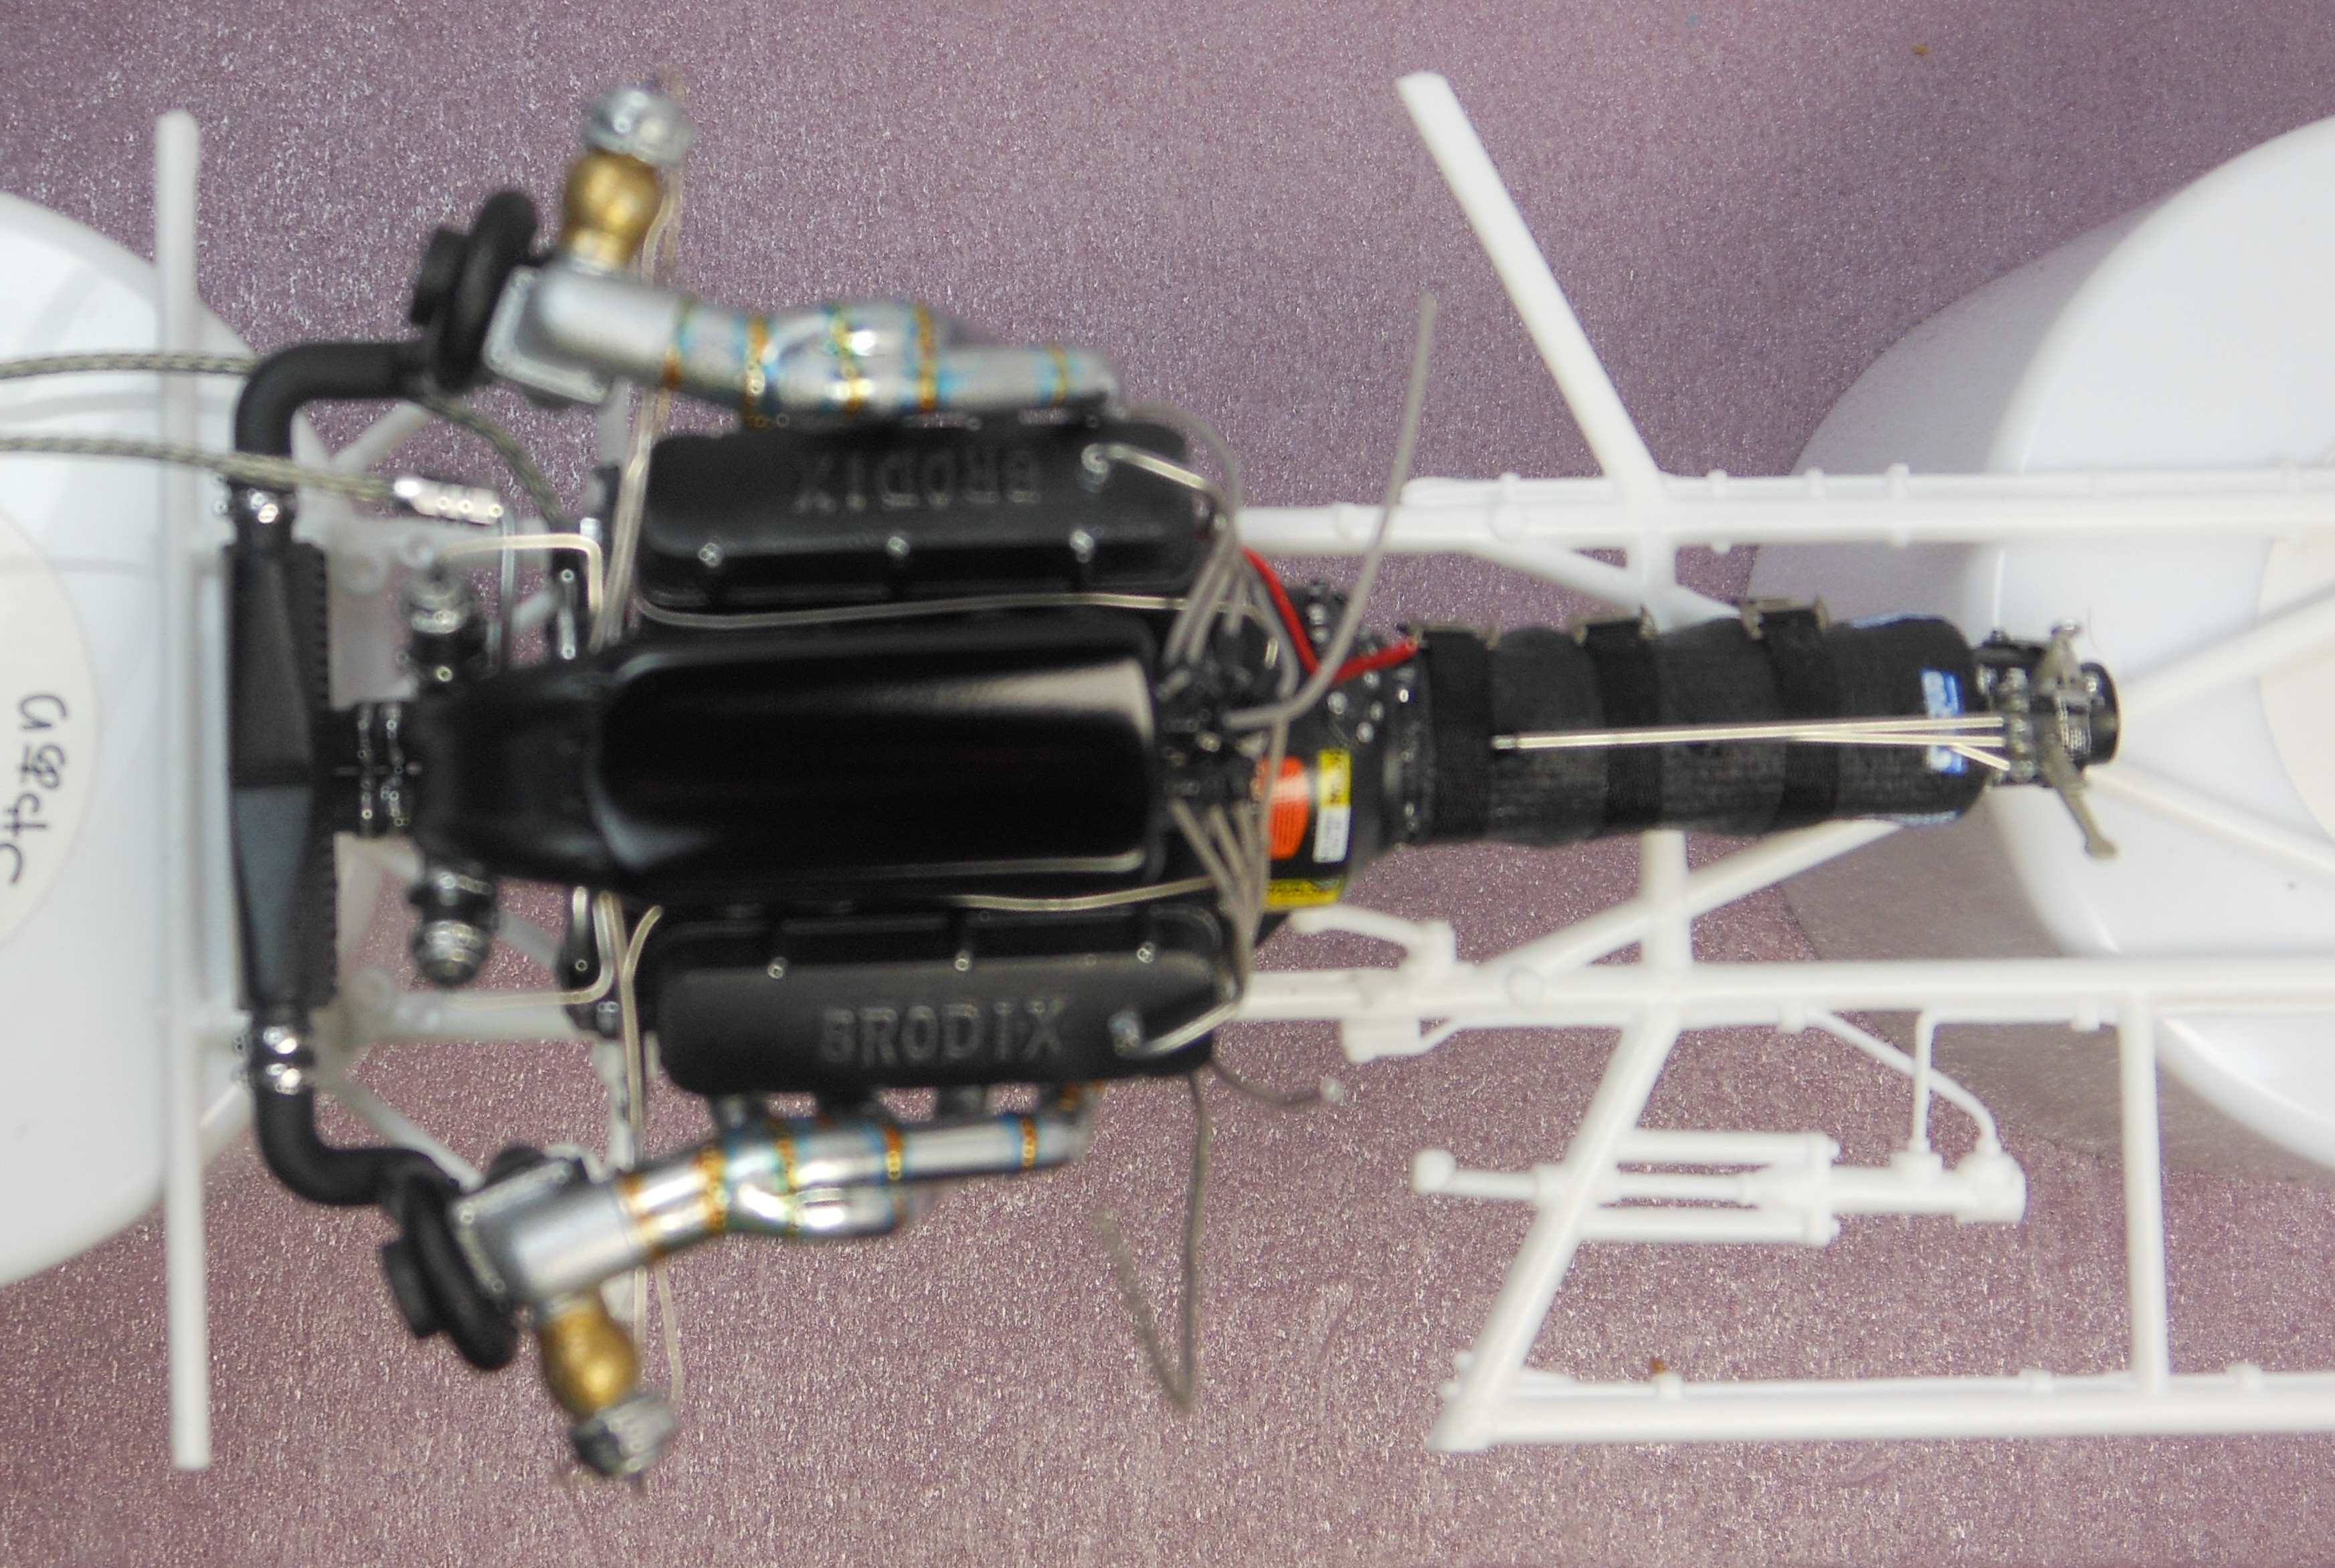
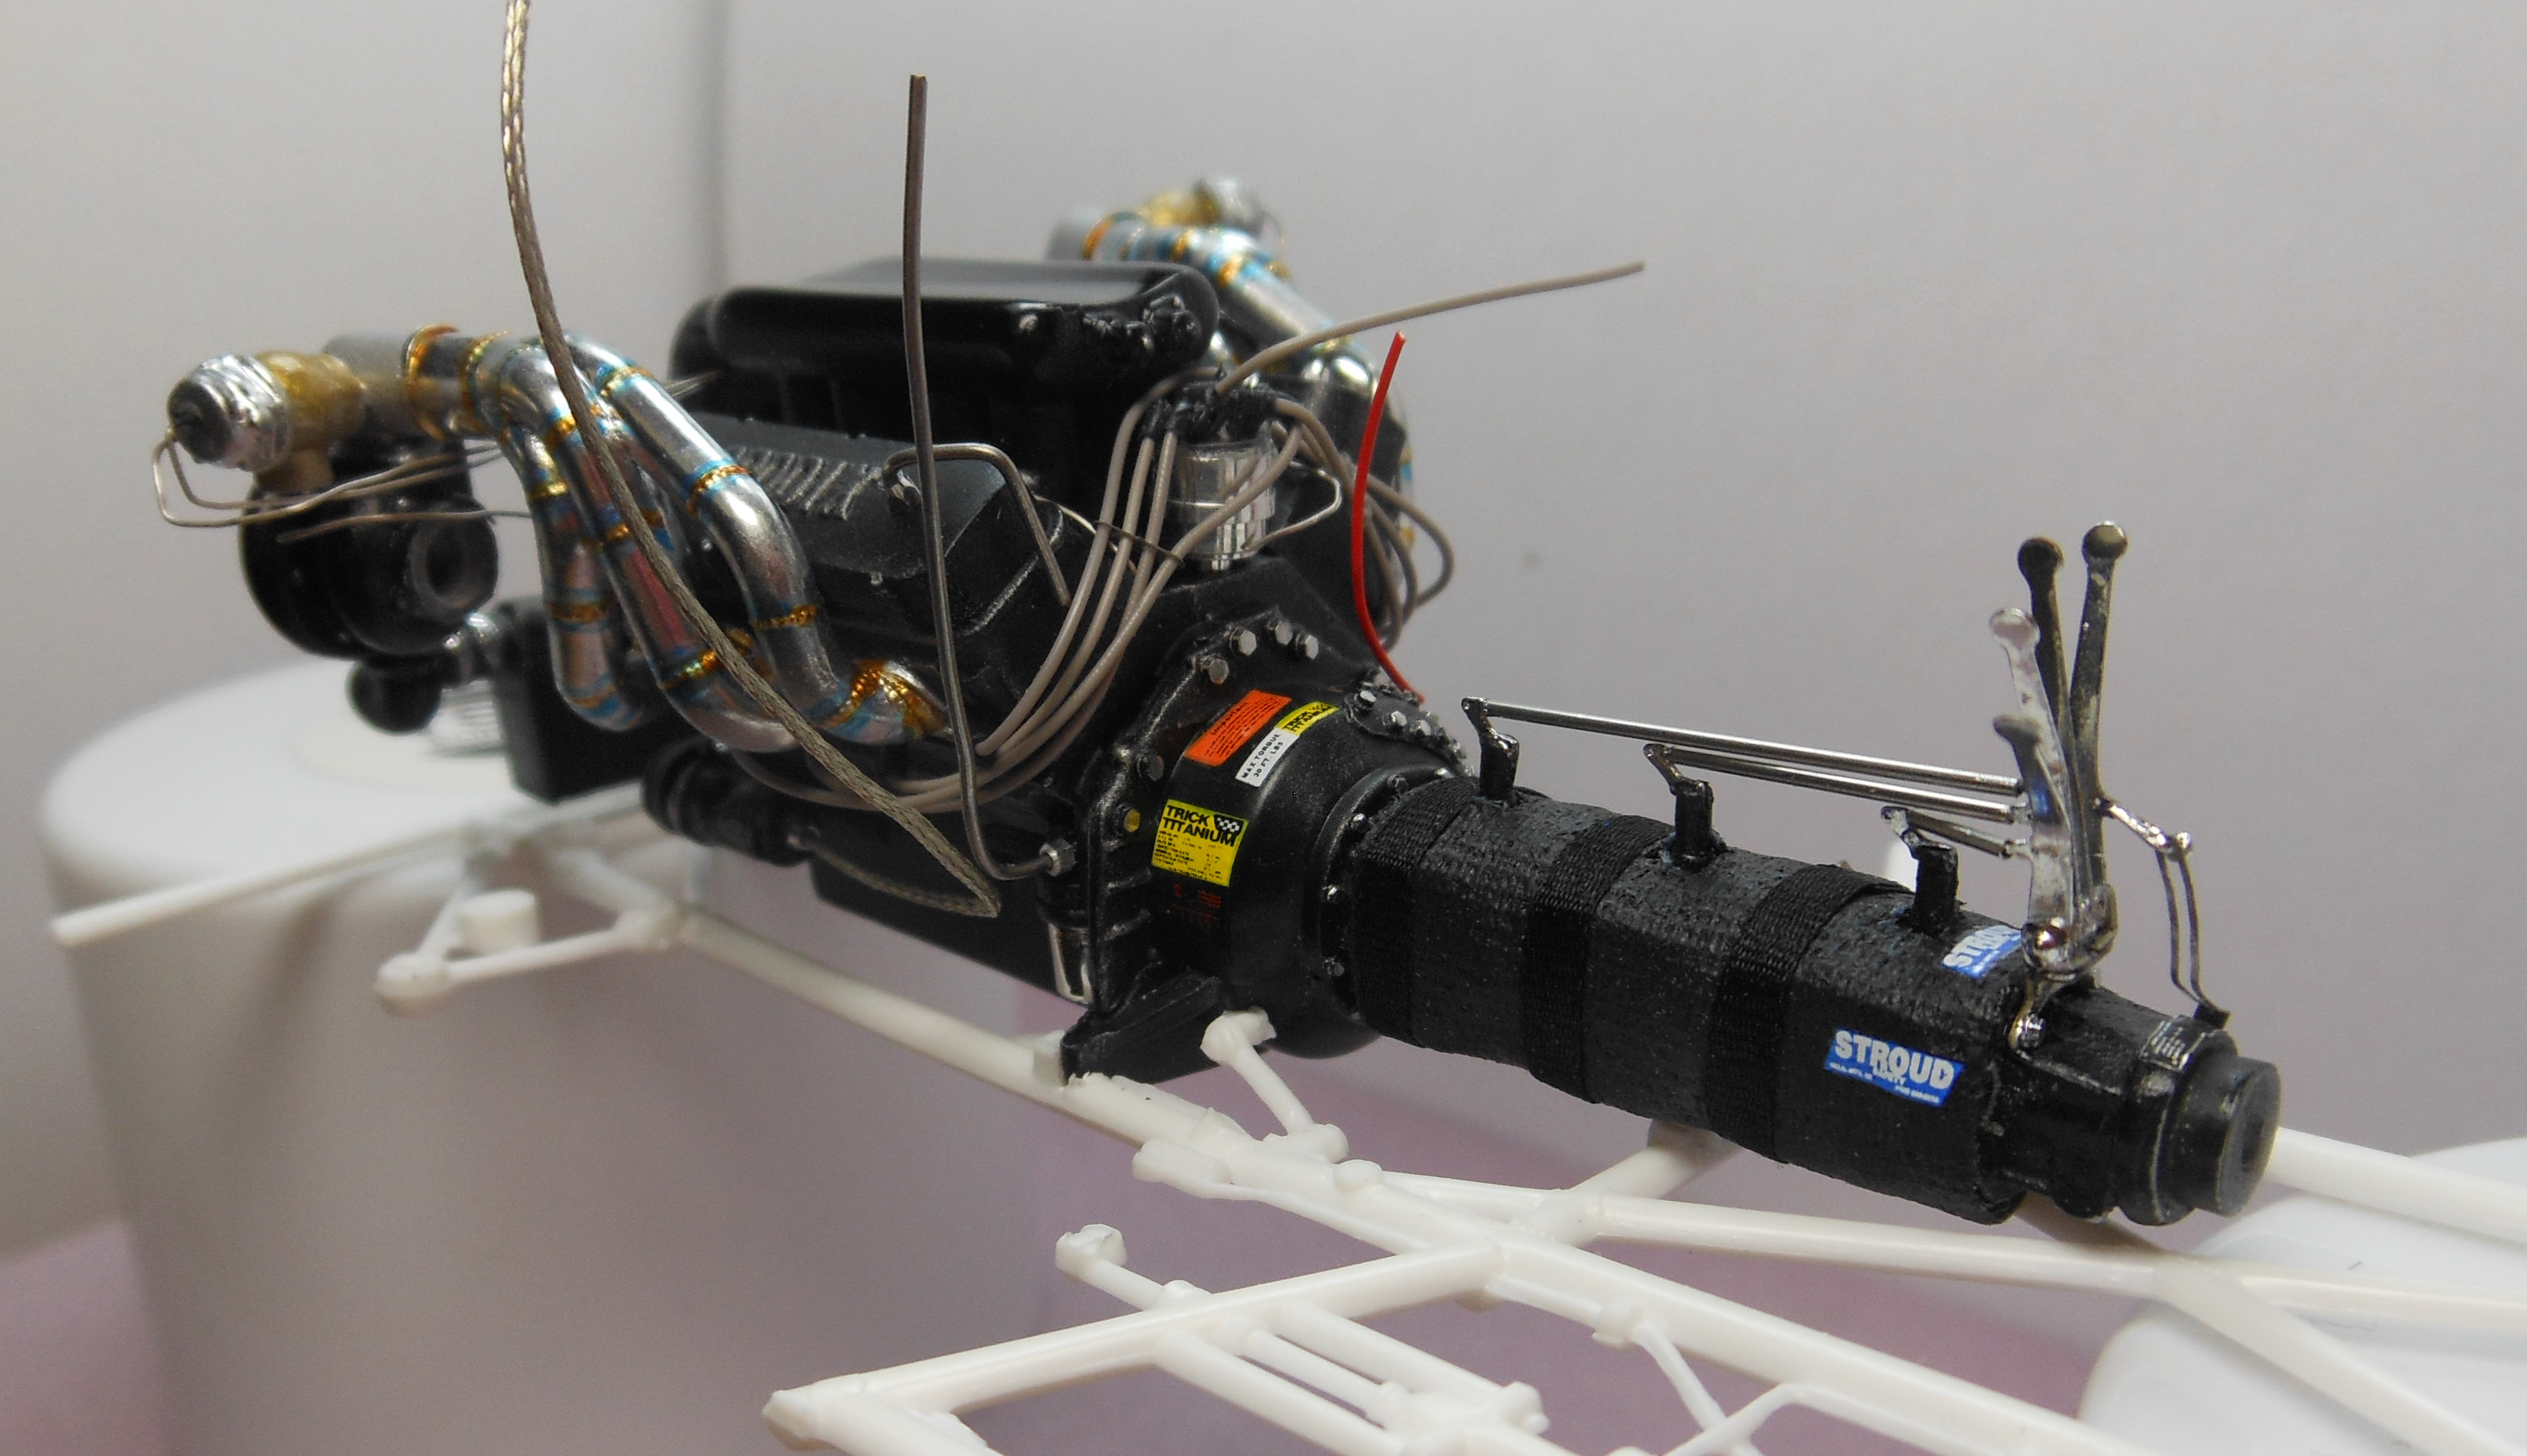
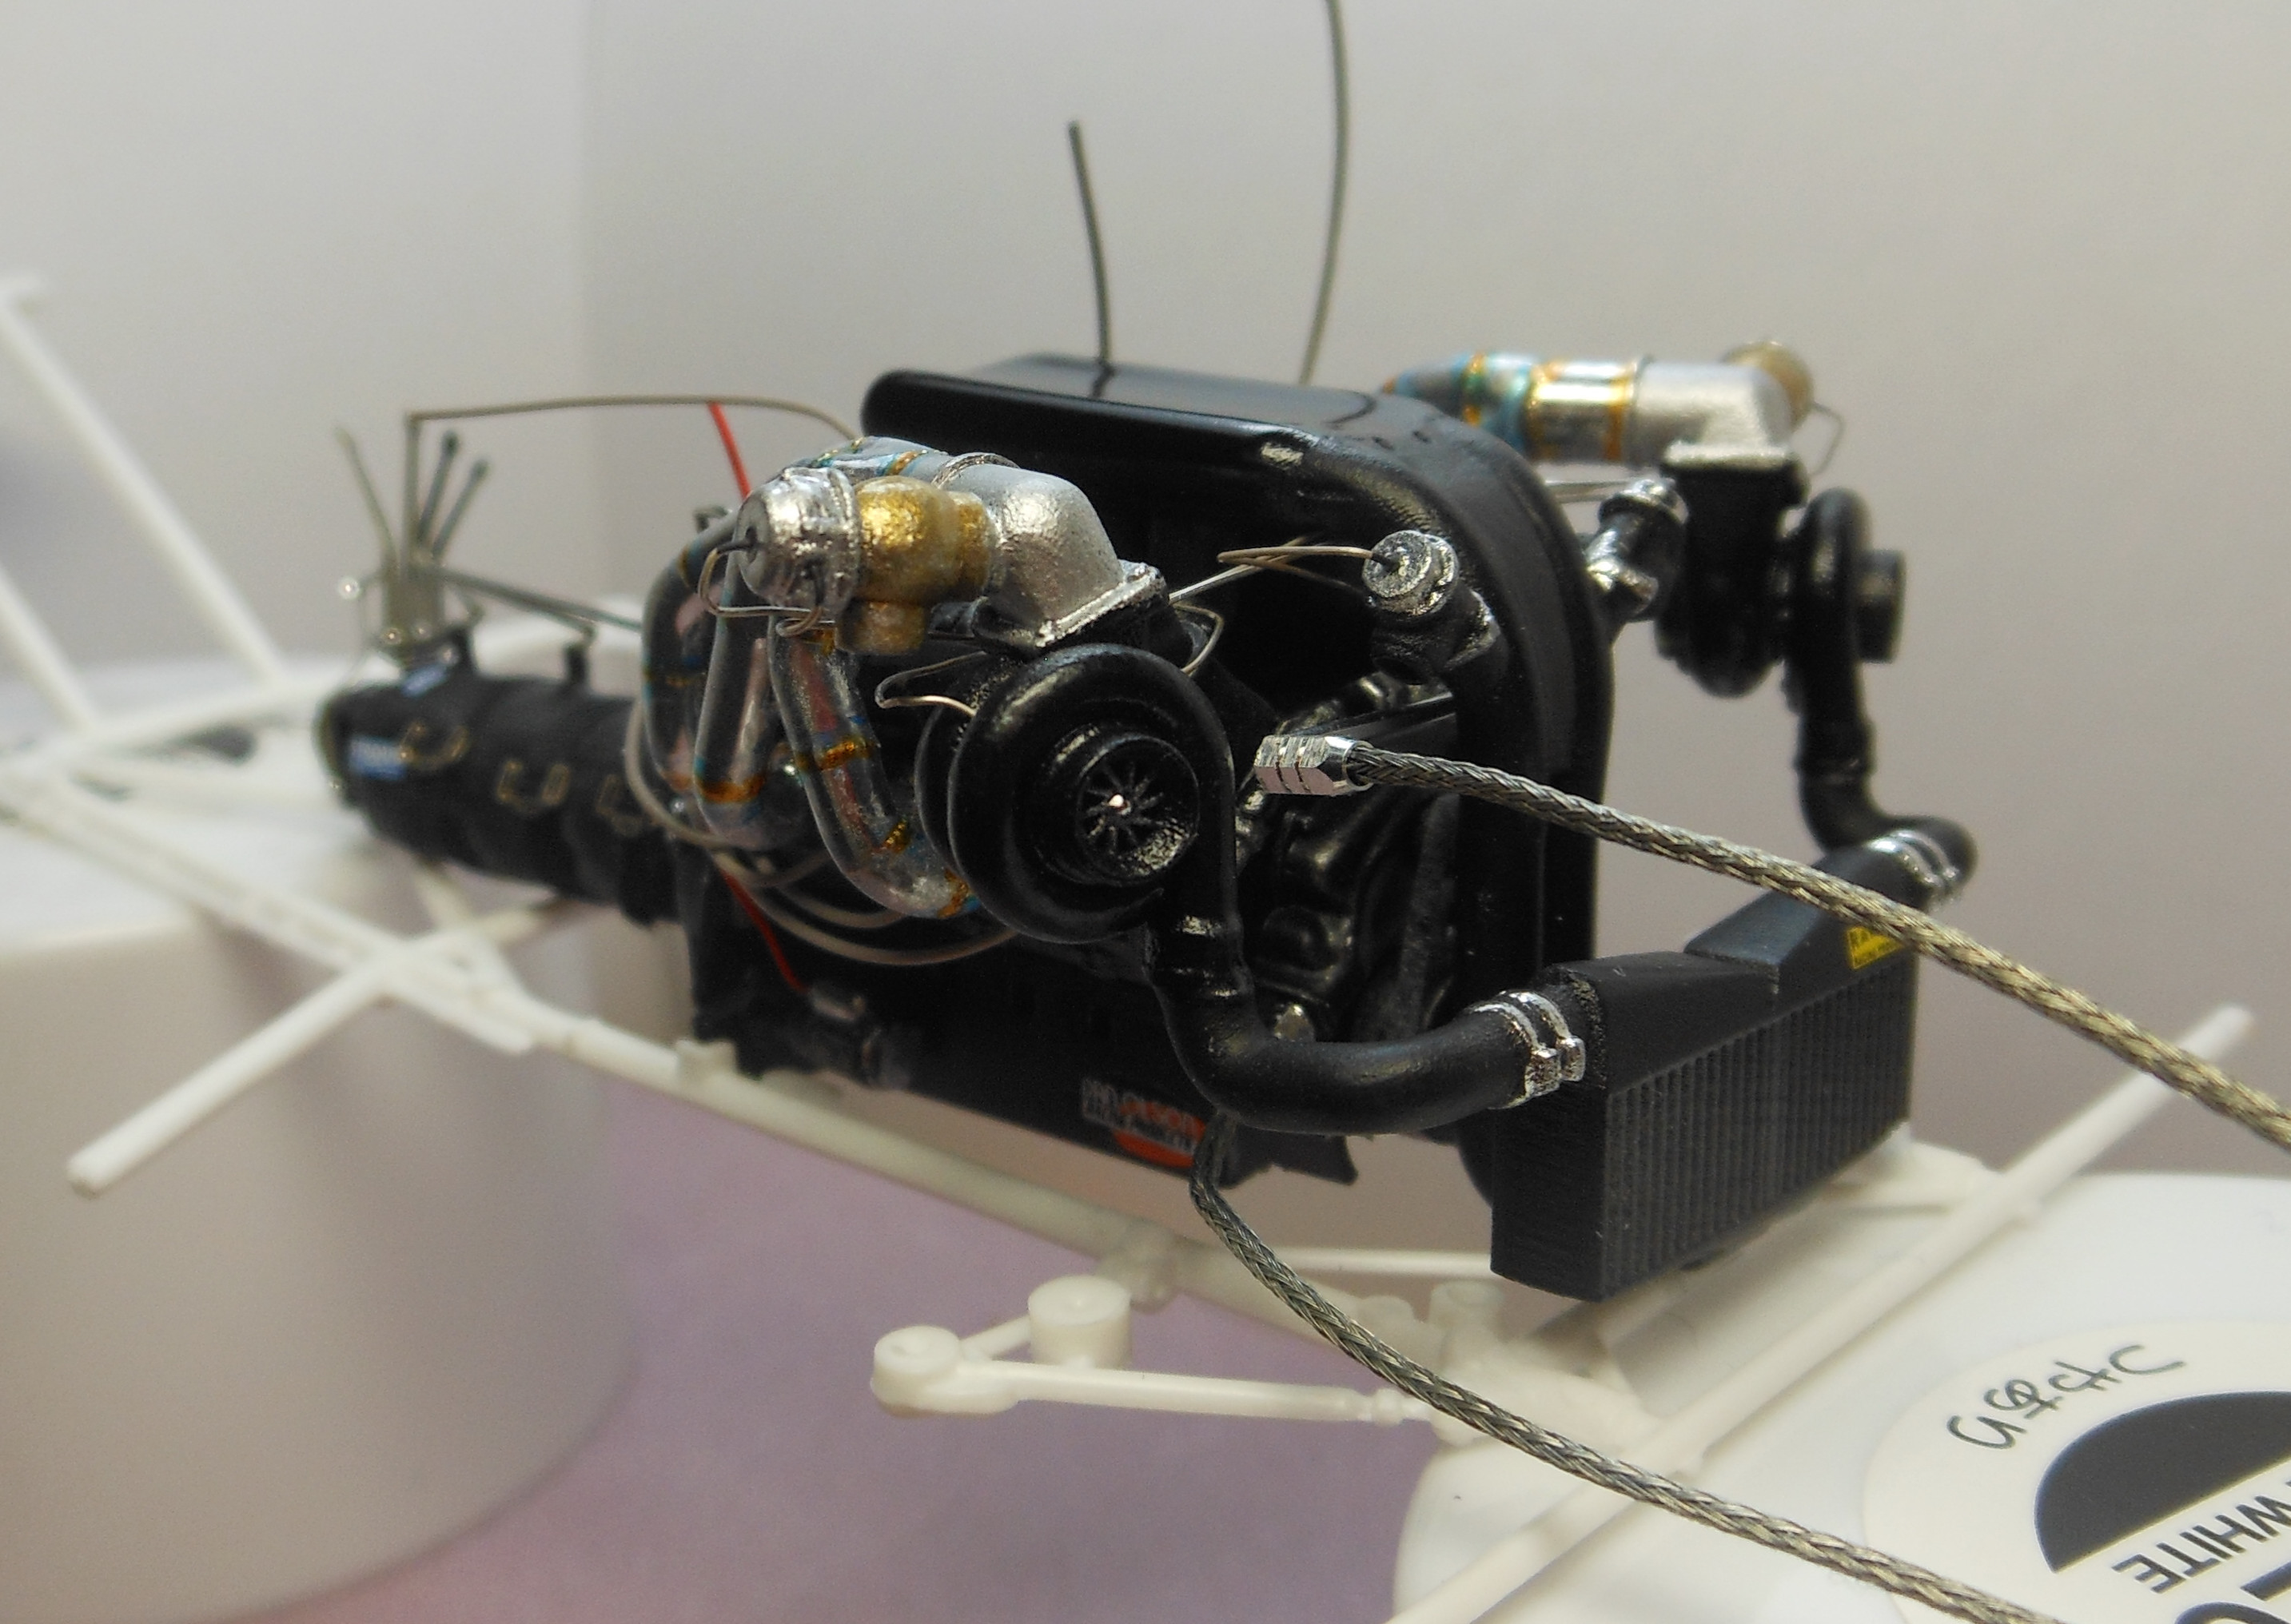
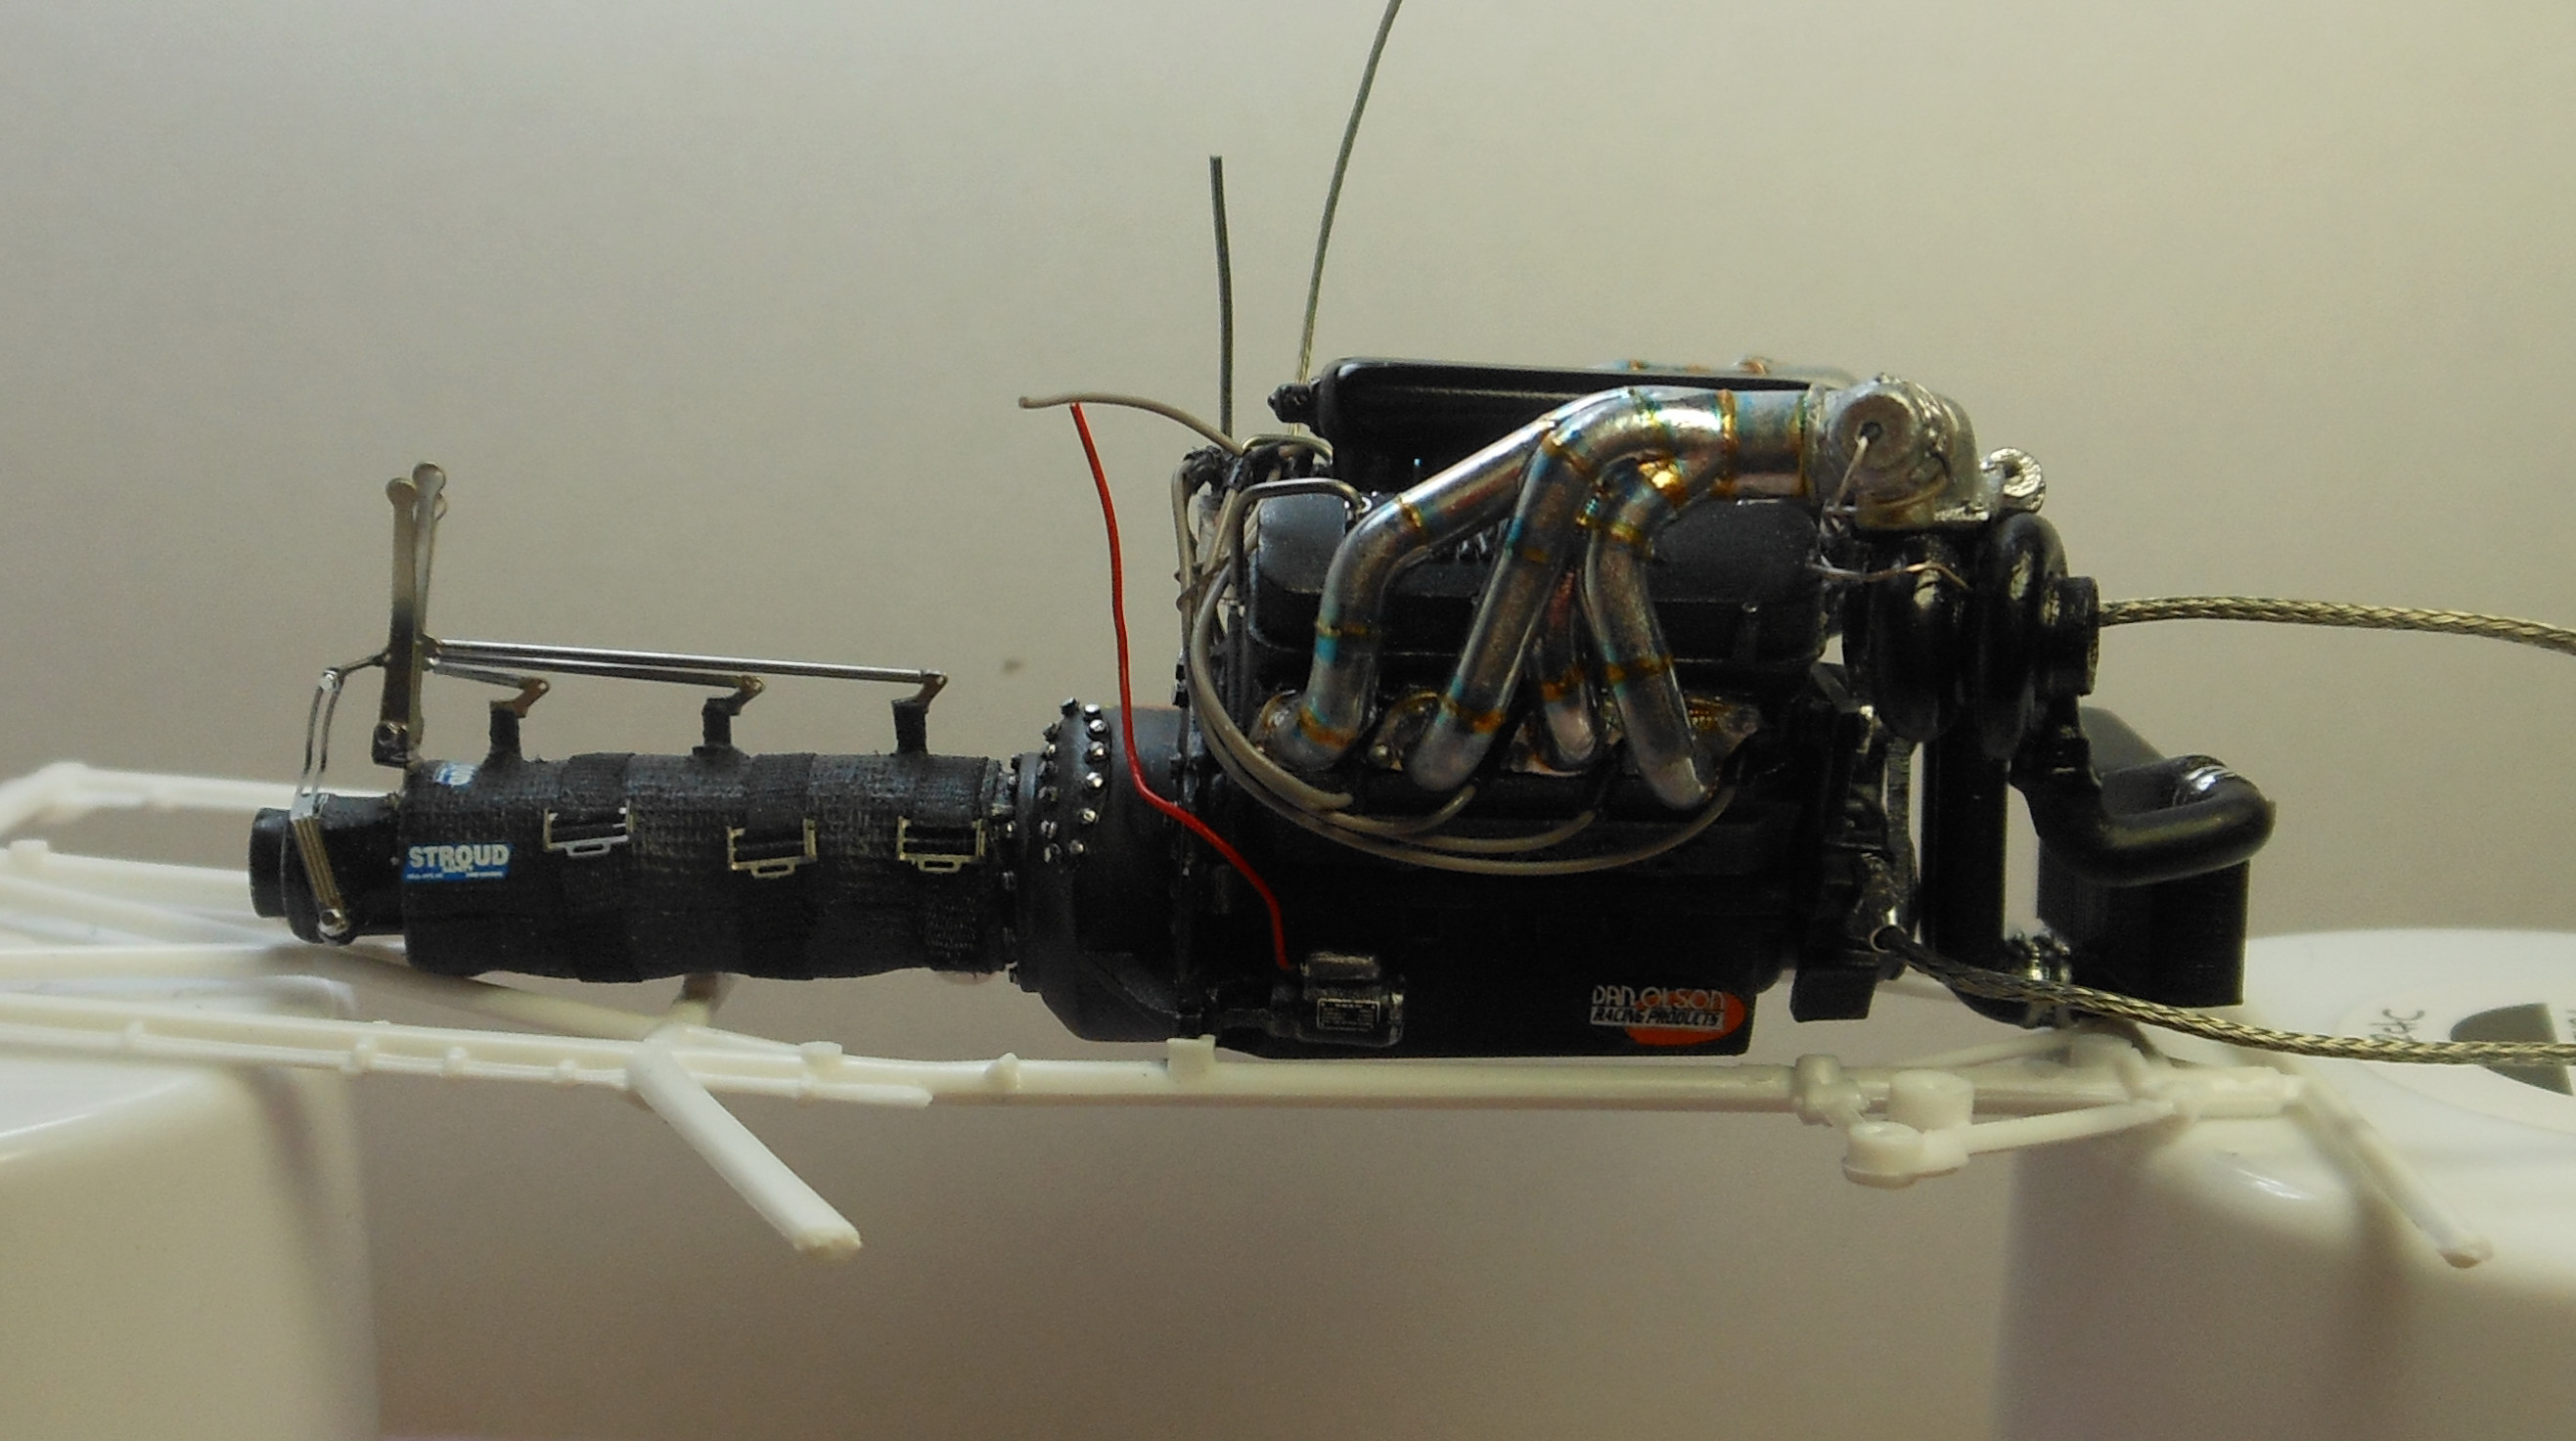
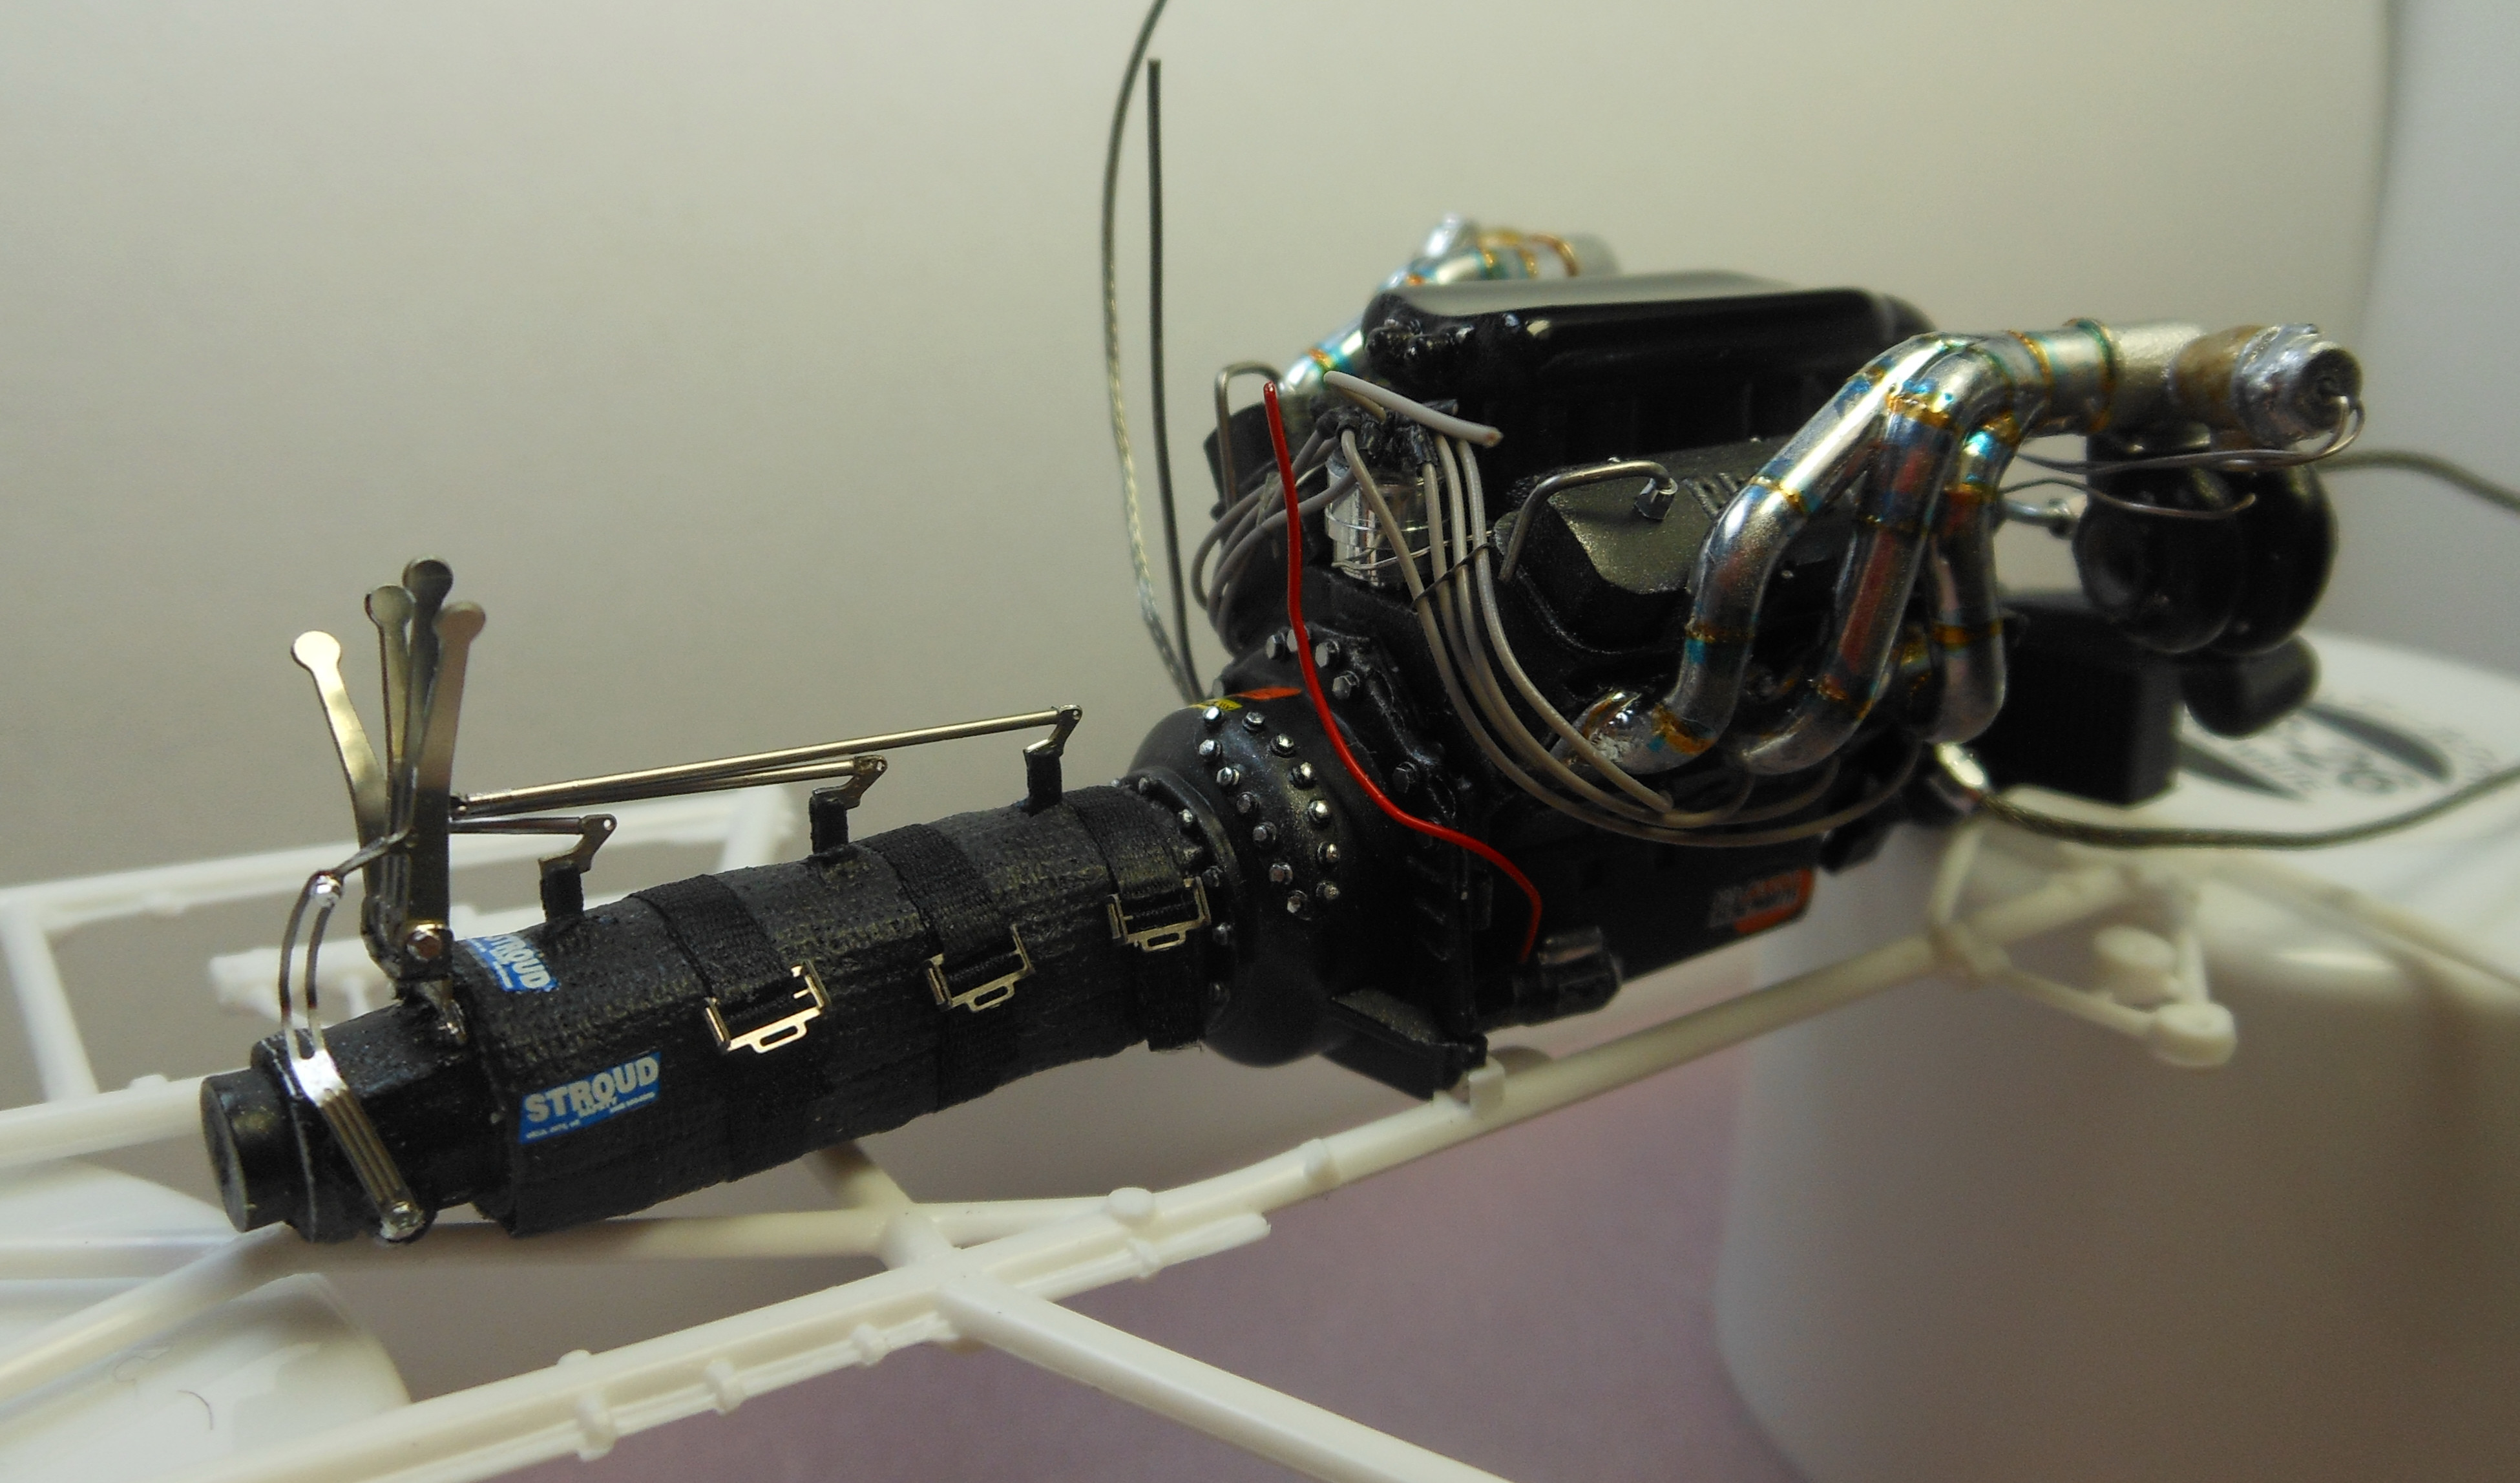
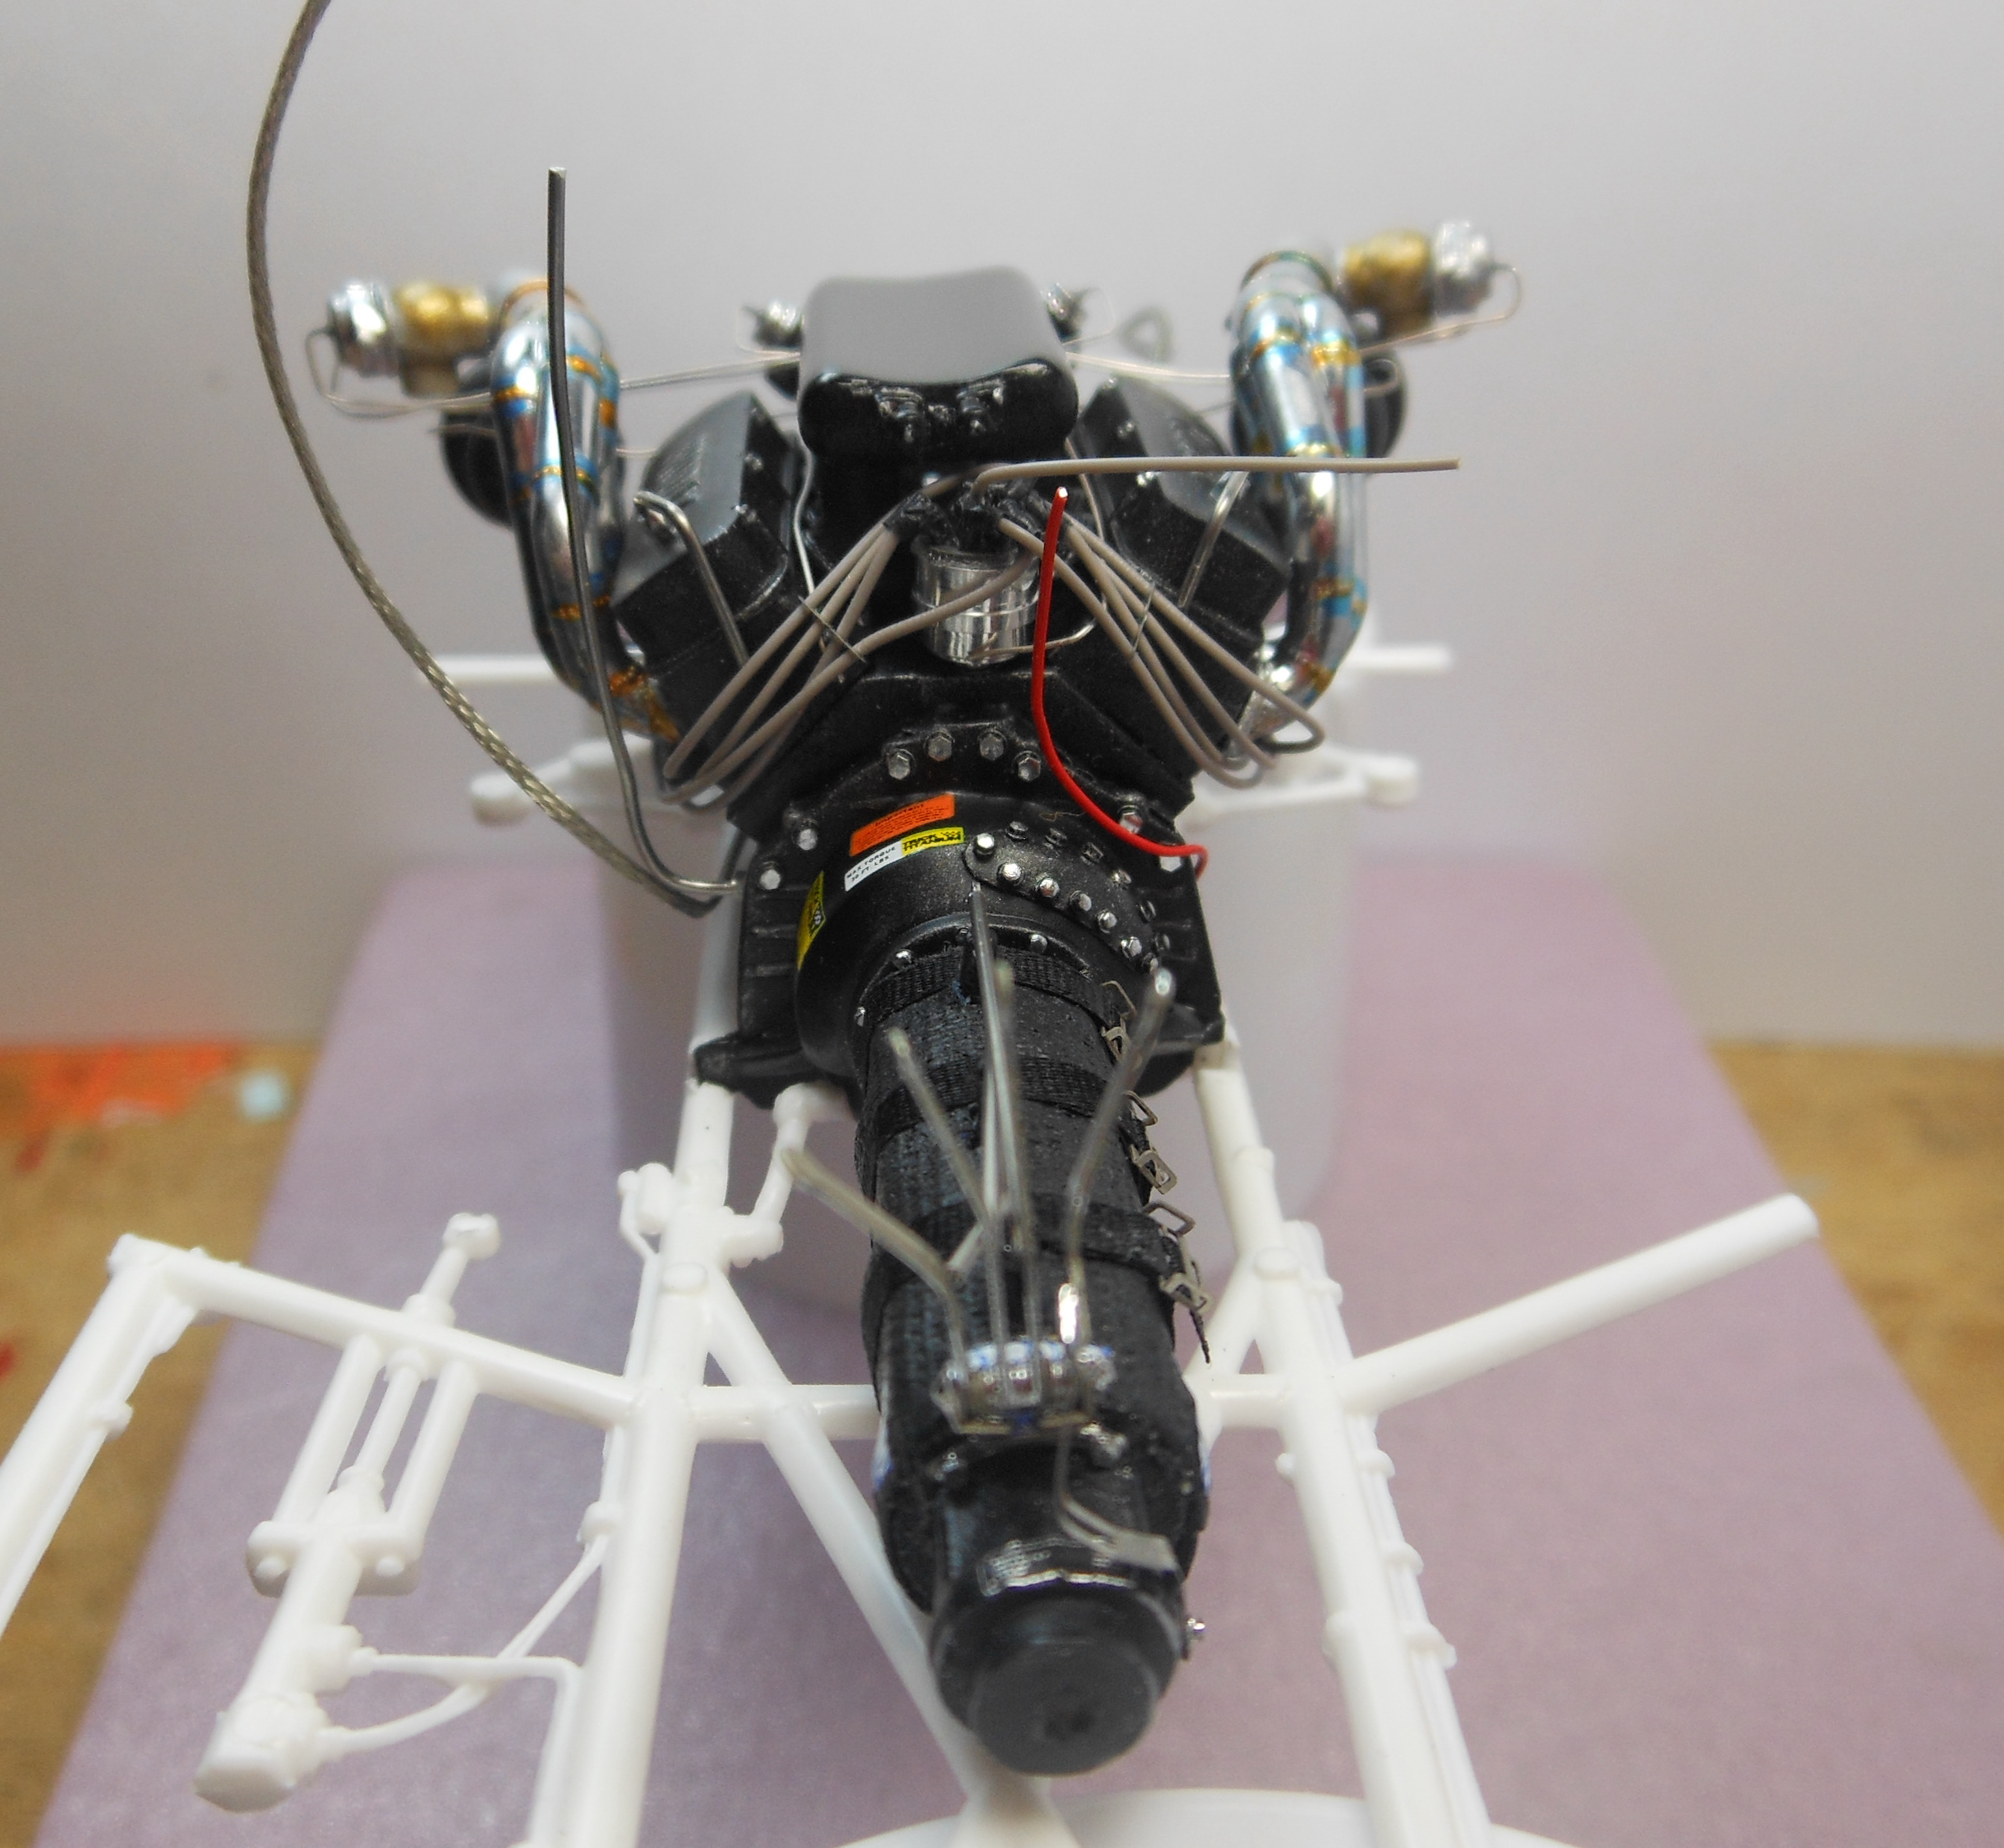
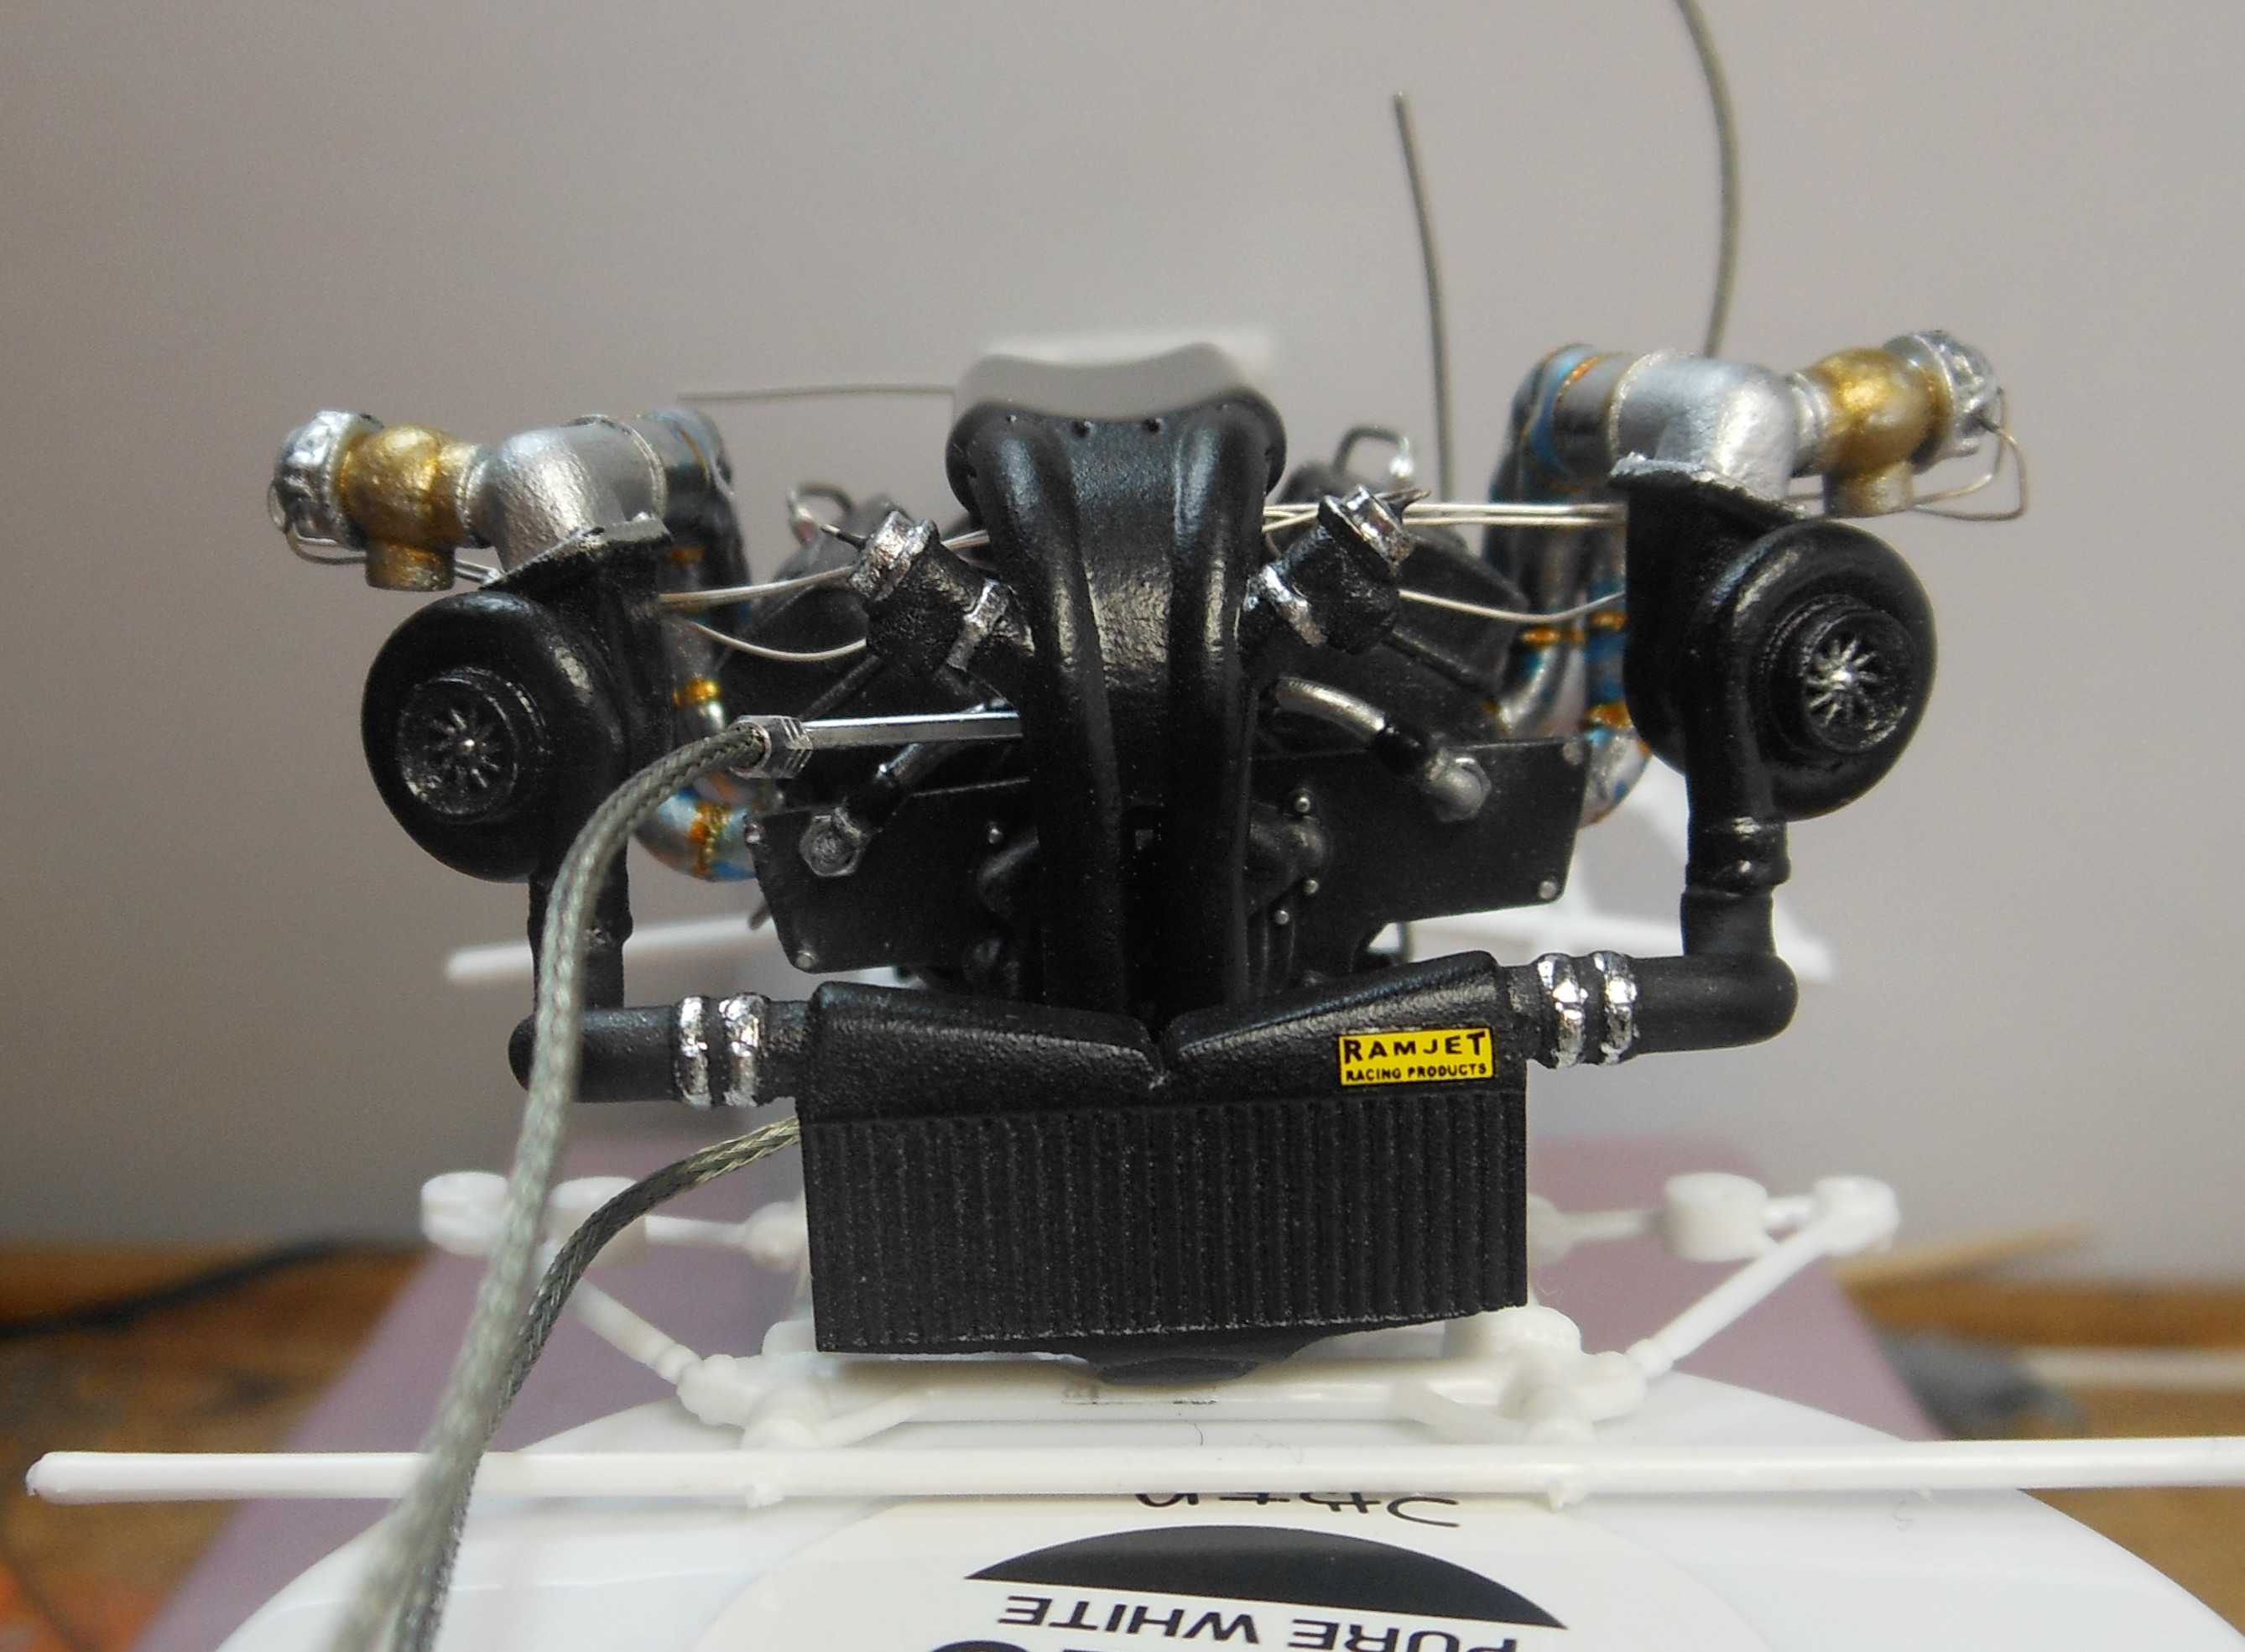
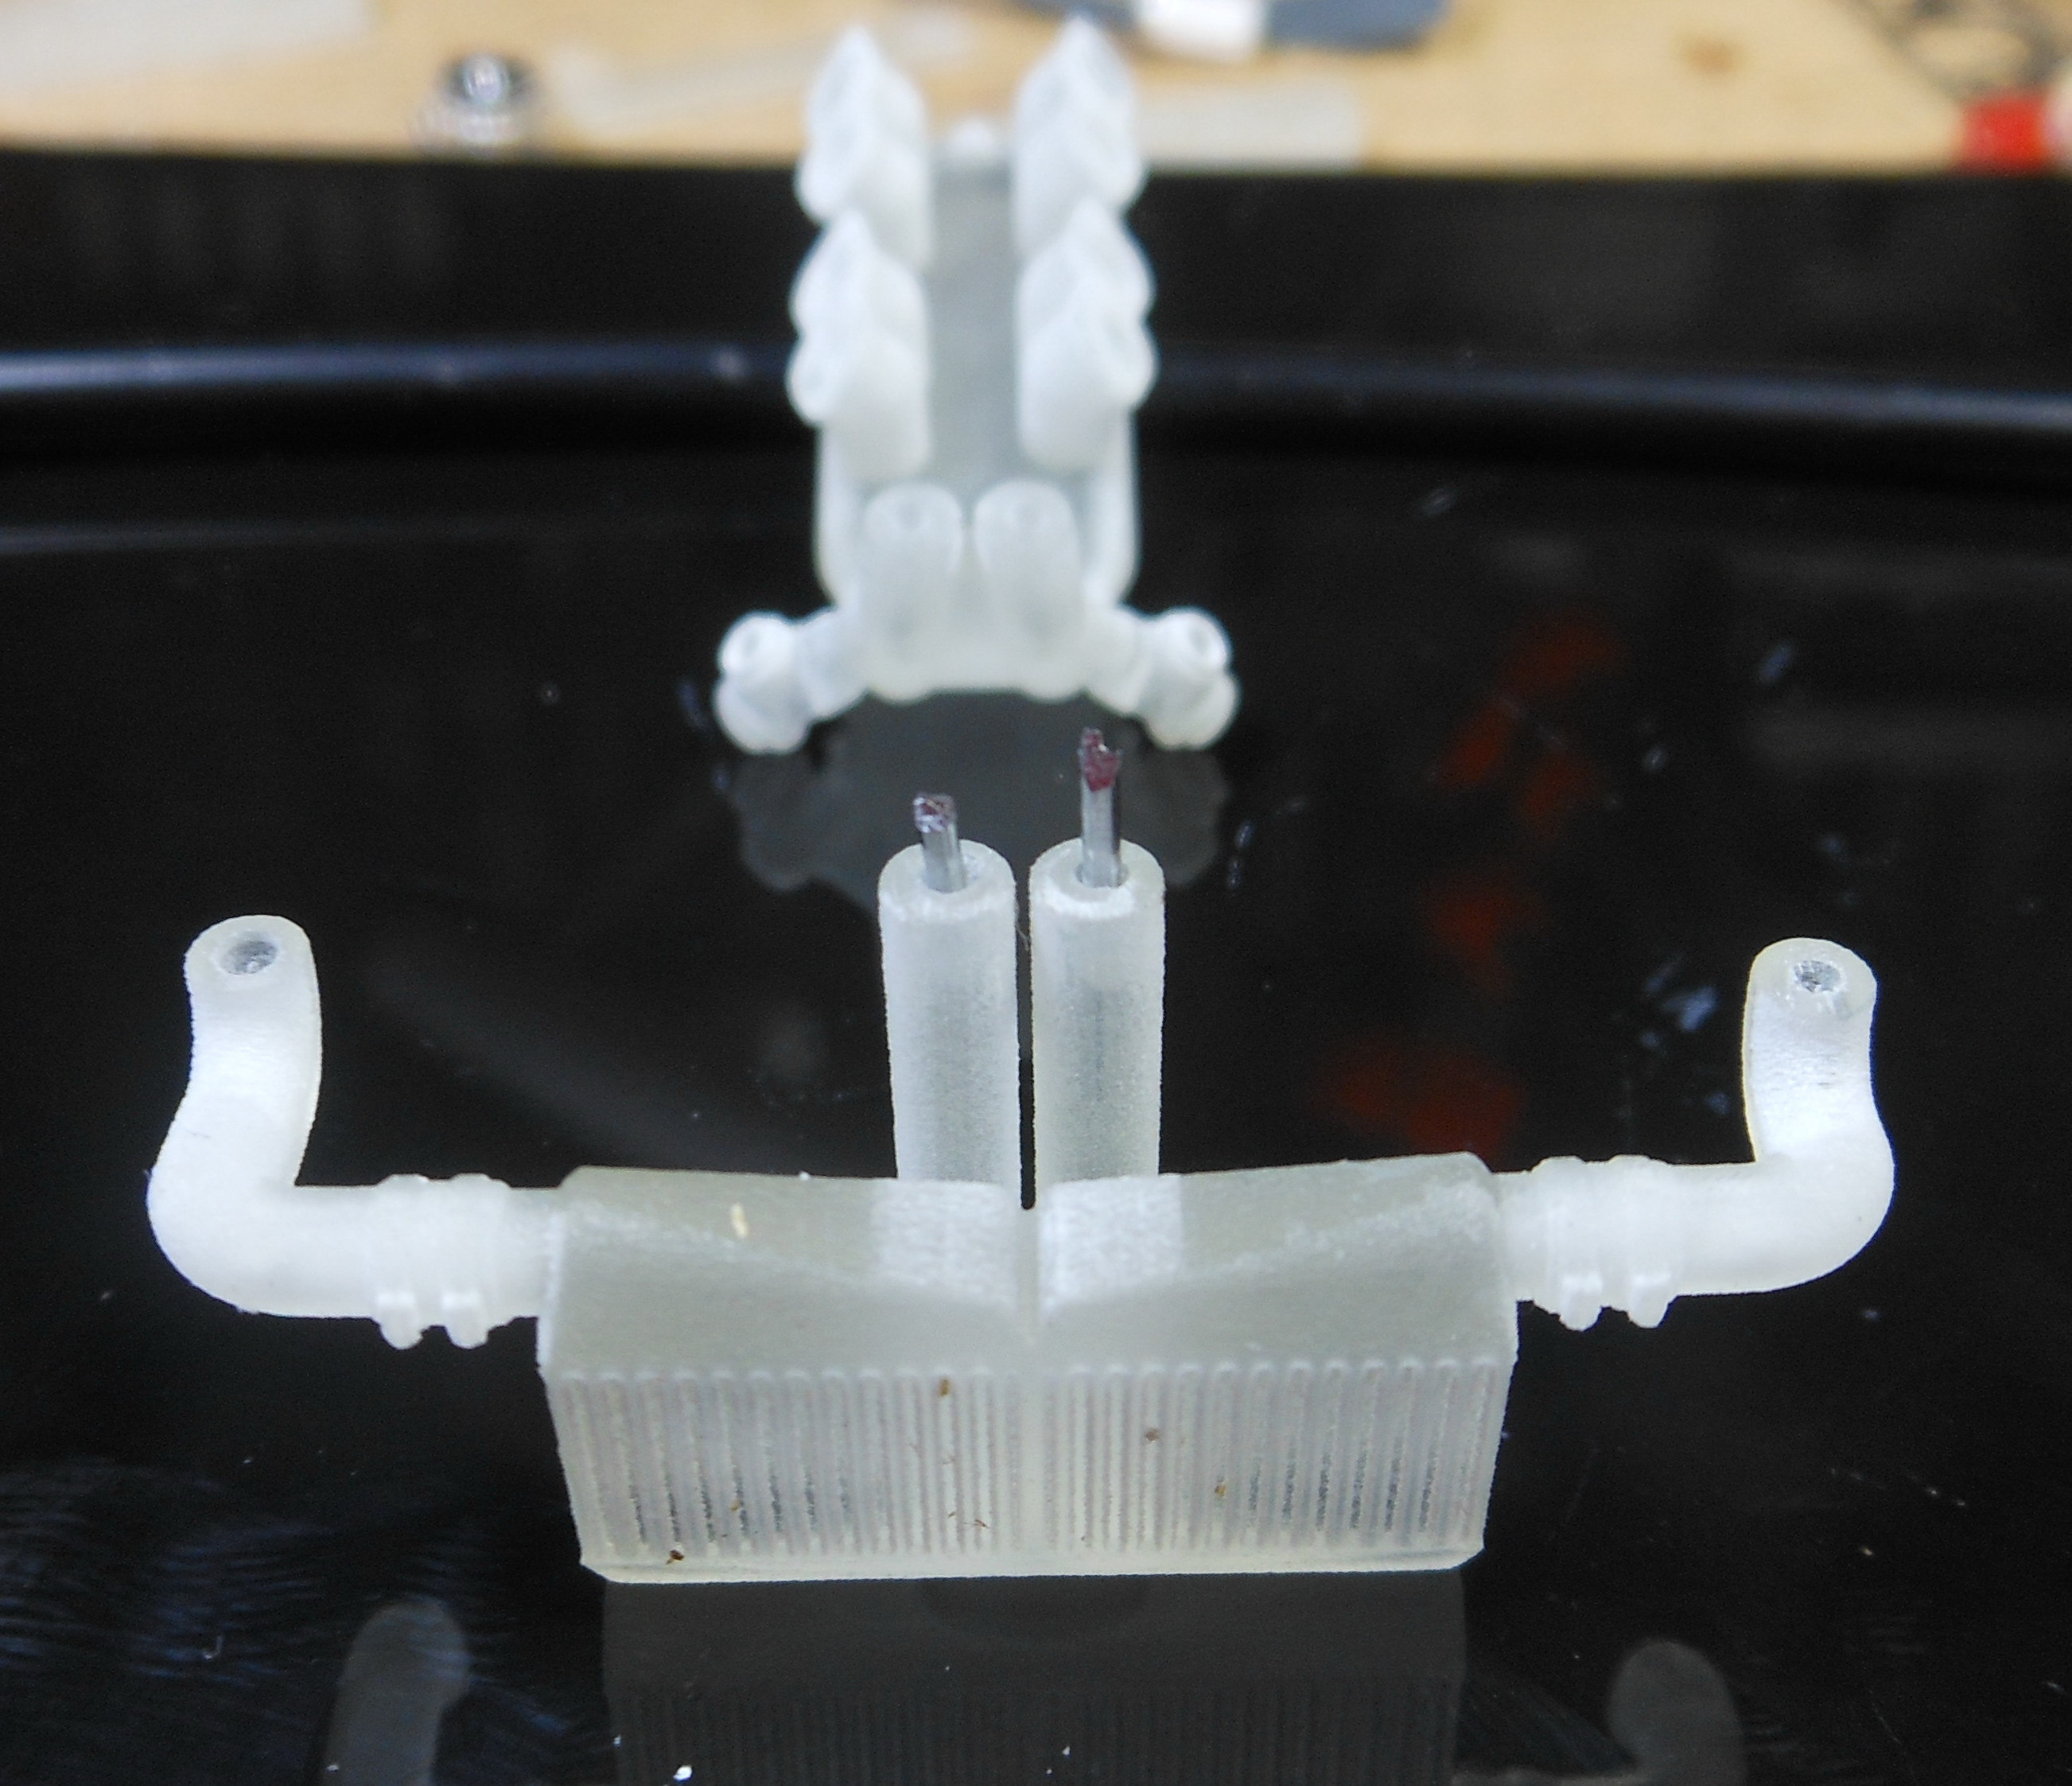
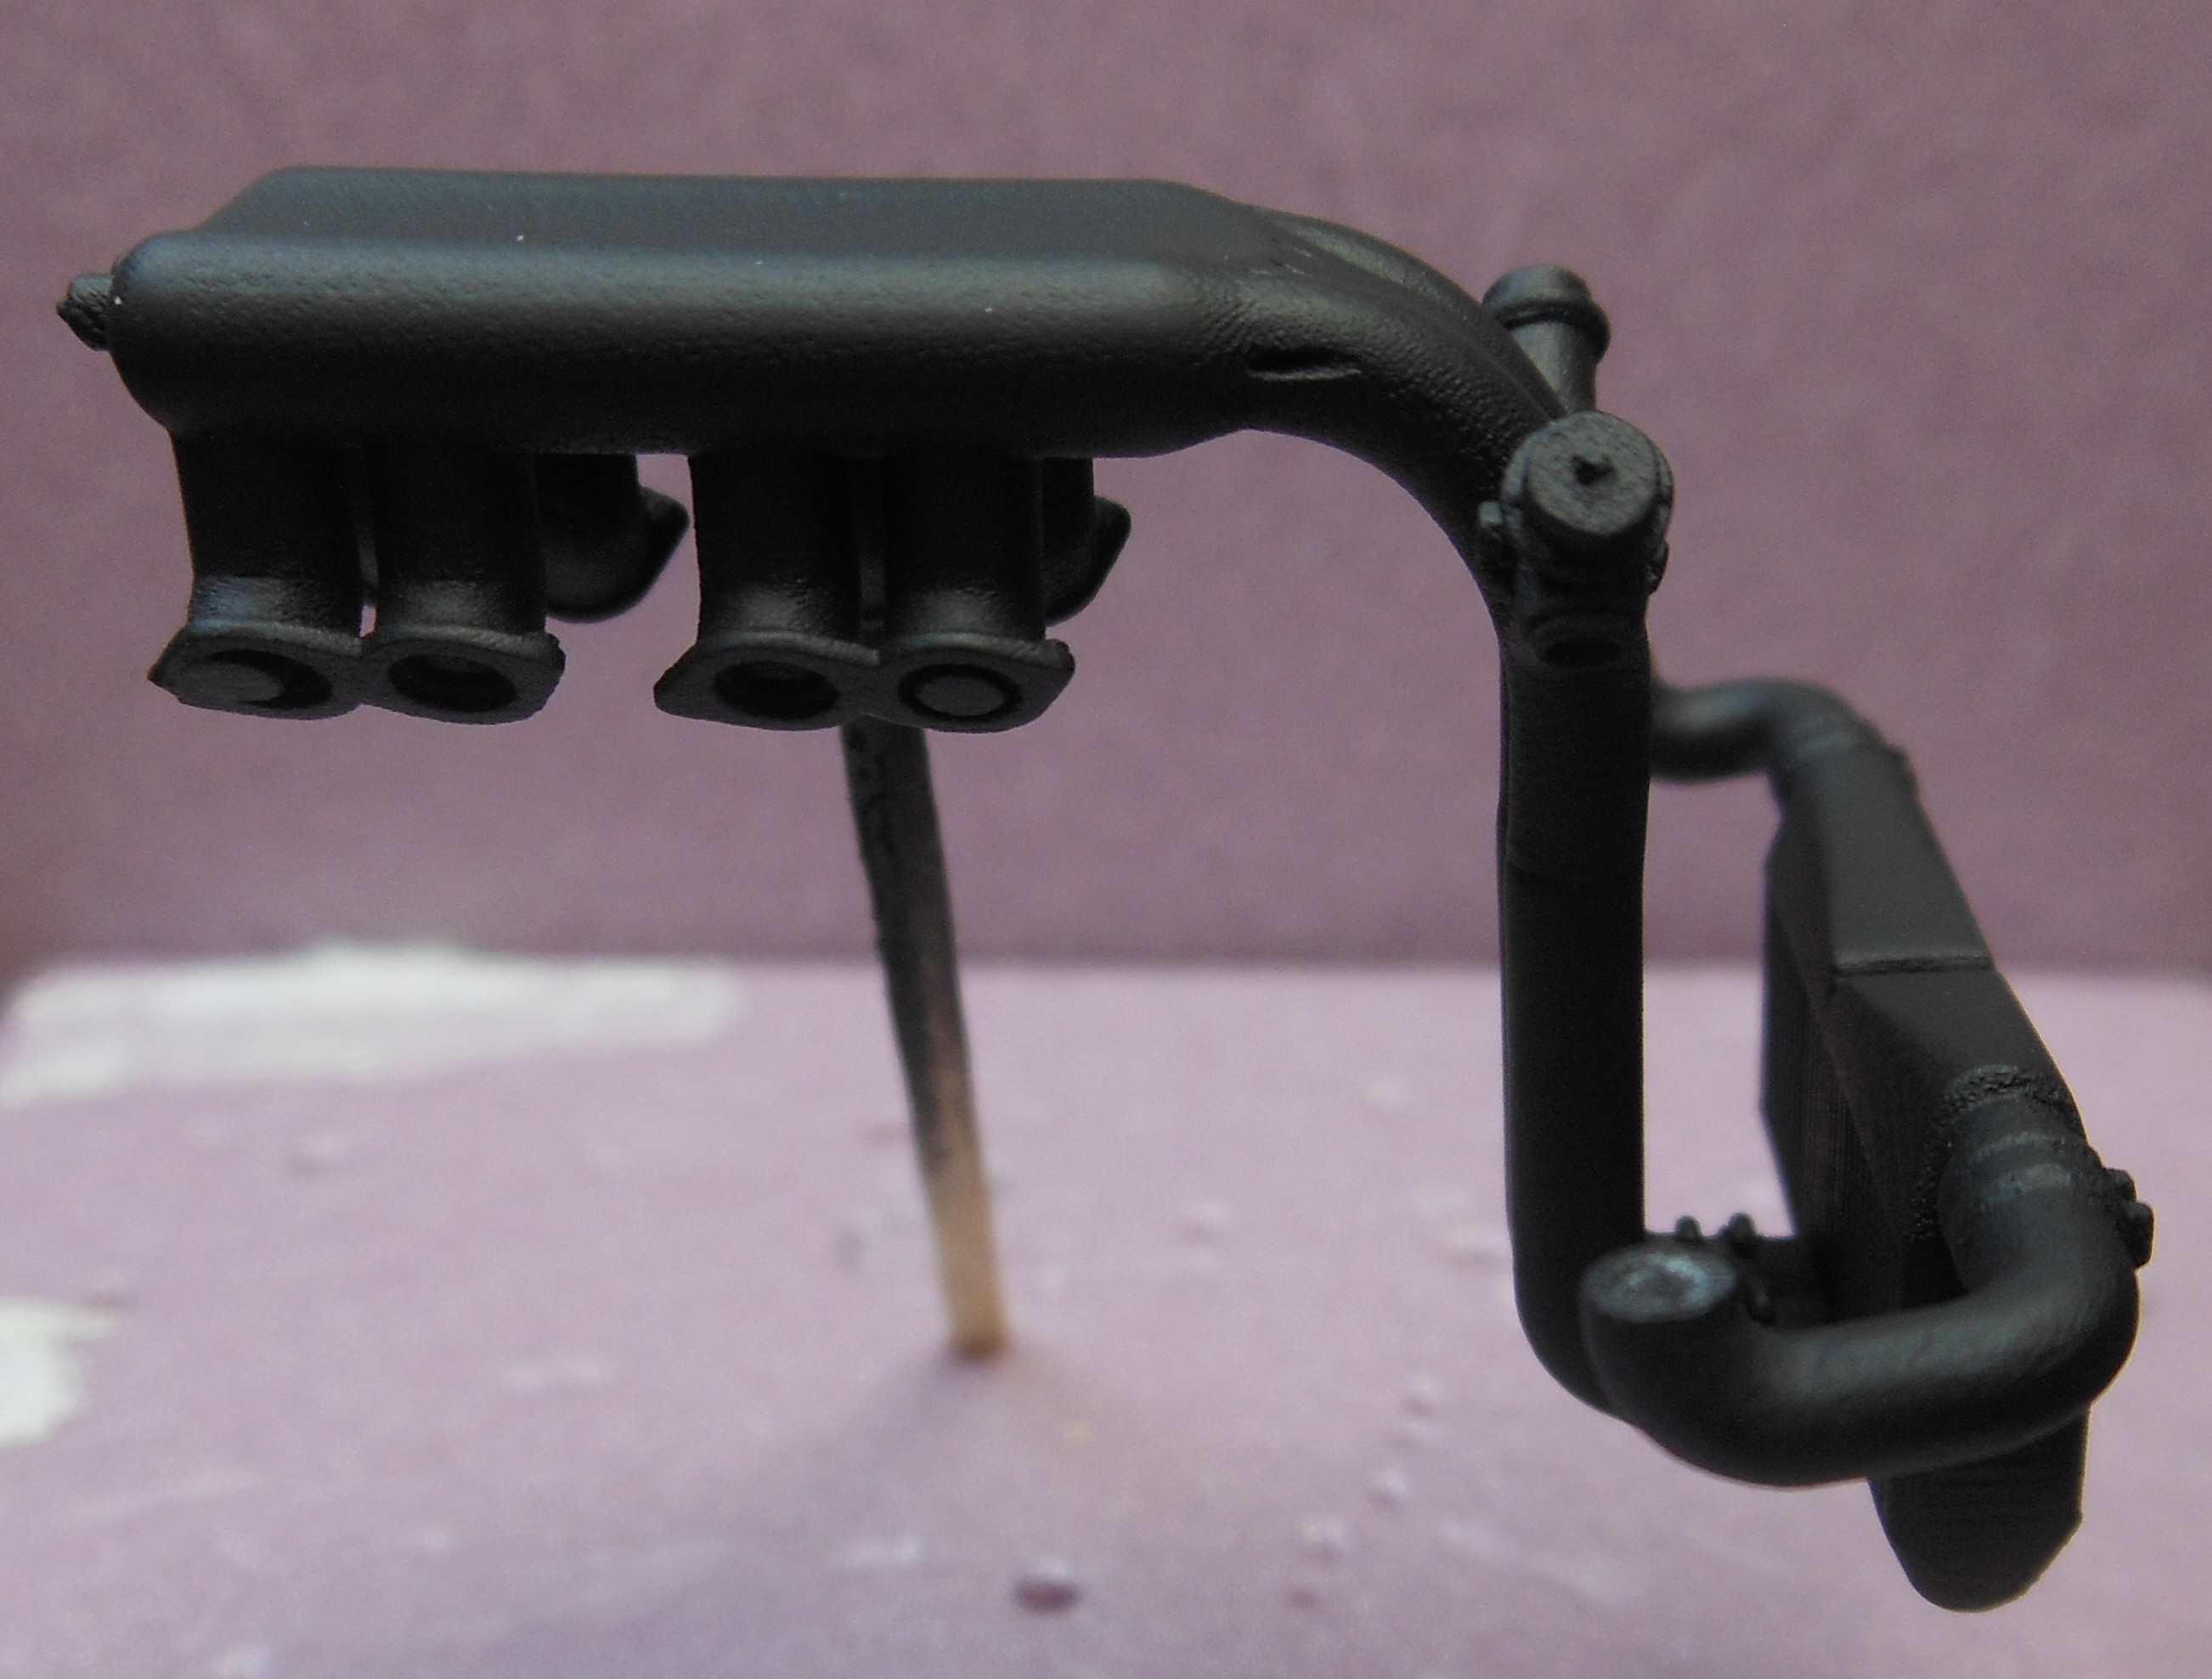
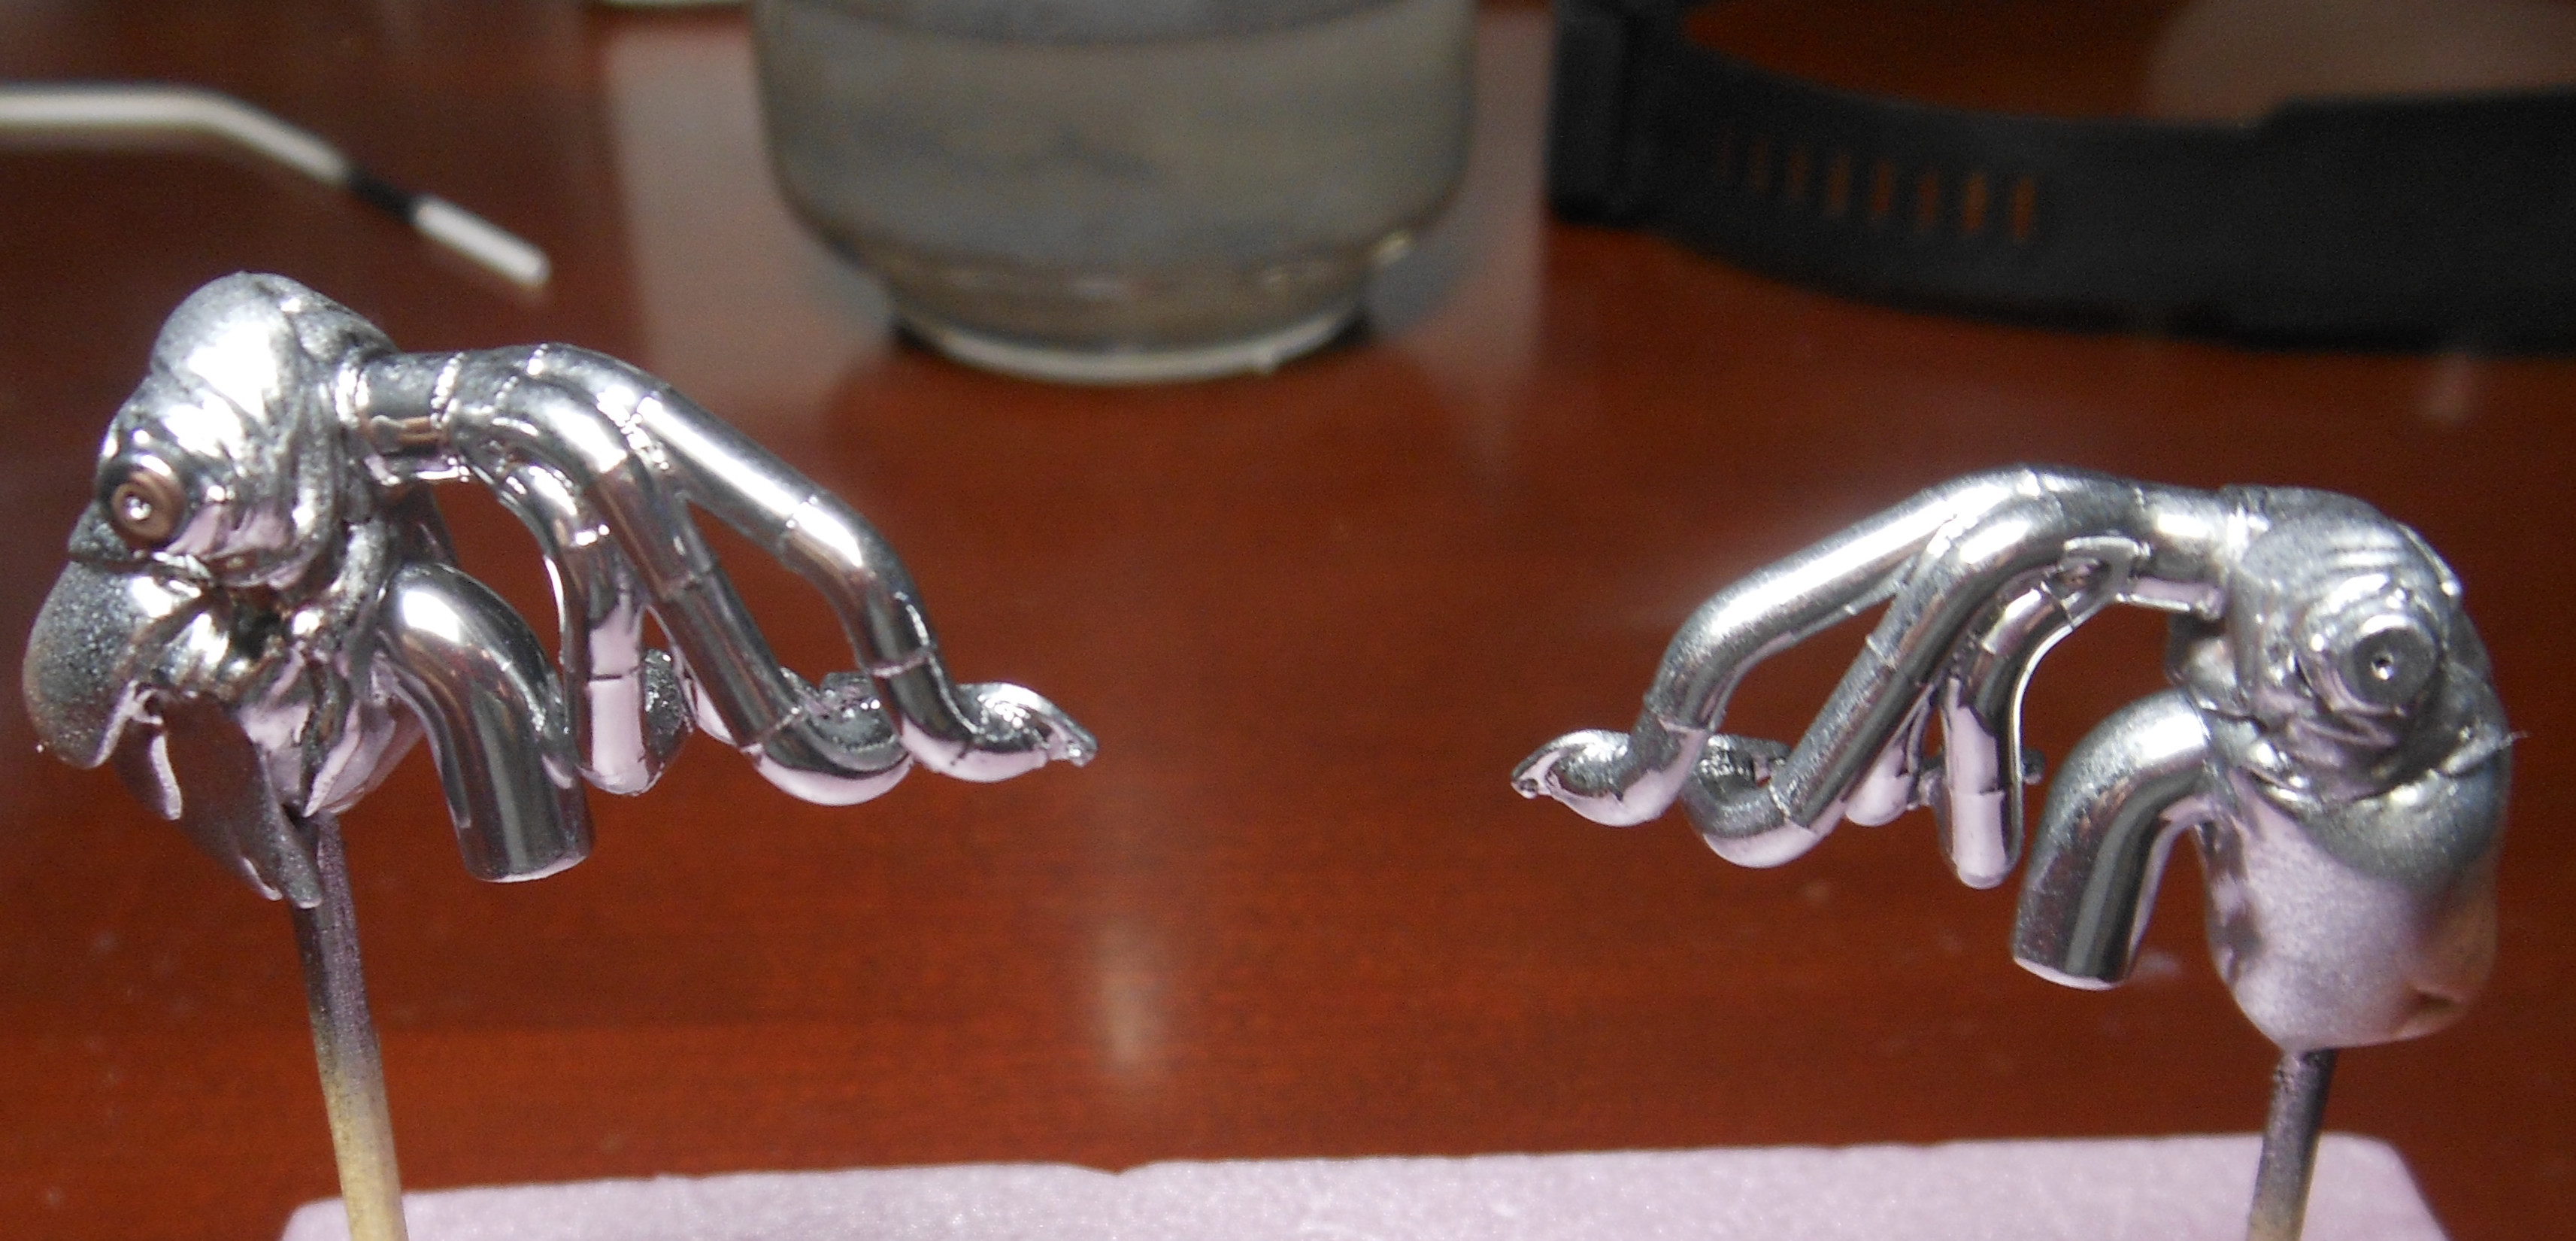
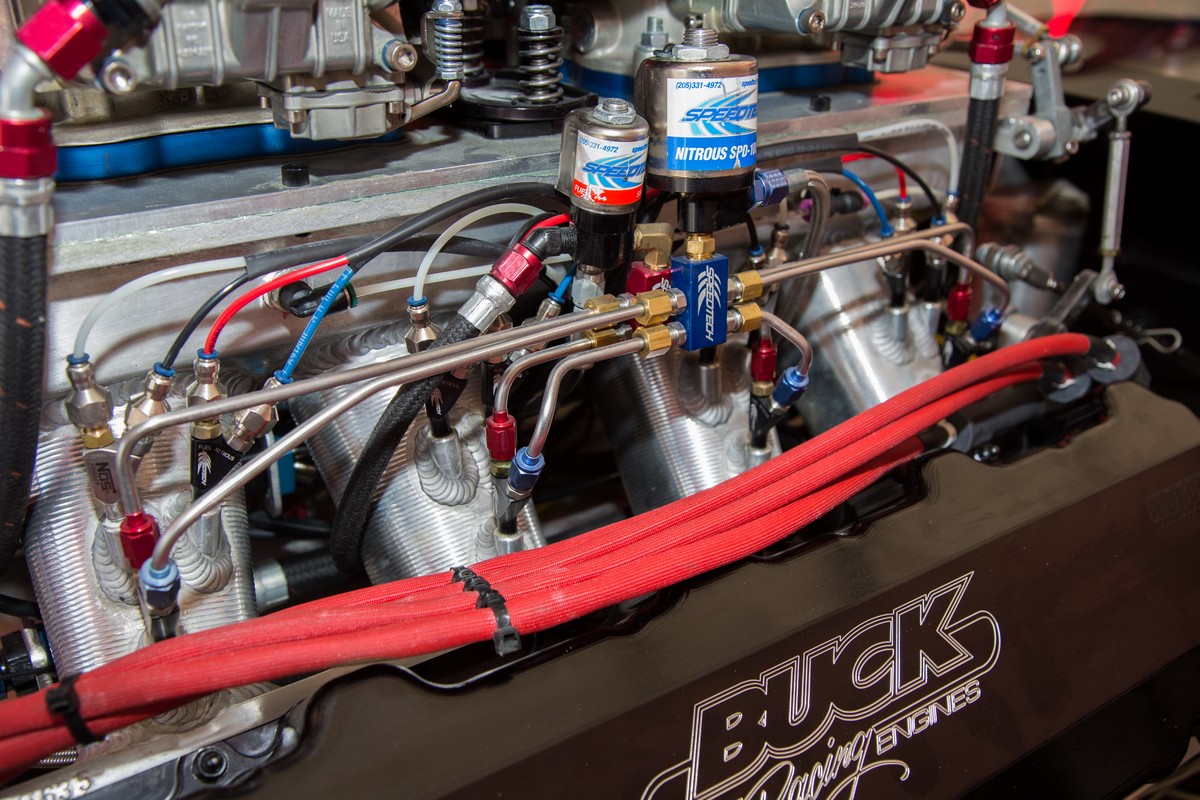
Motor complete.
-
5/6/18 updates 2013 T/A with Dual Turbo and Alien Intake W.I.P.
HNTR replied to HNTR's topic in WIP: Drag Racing Models
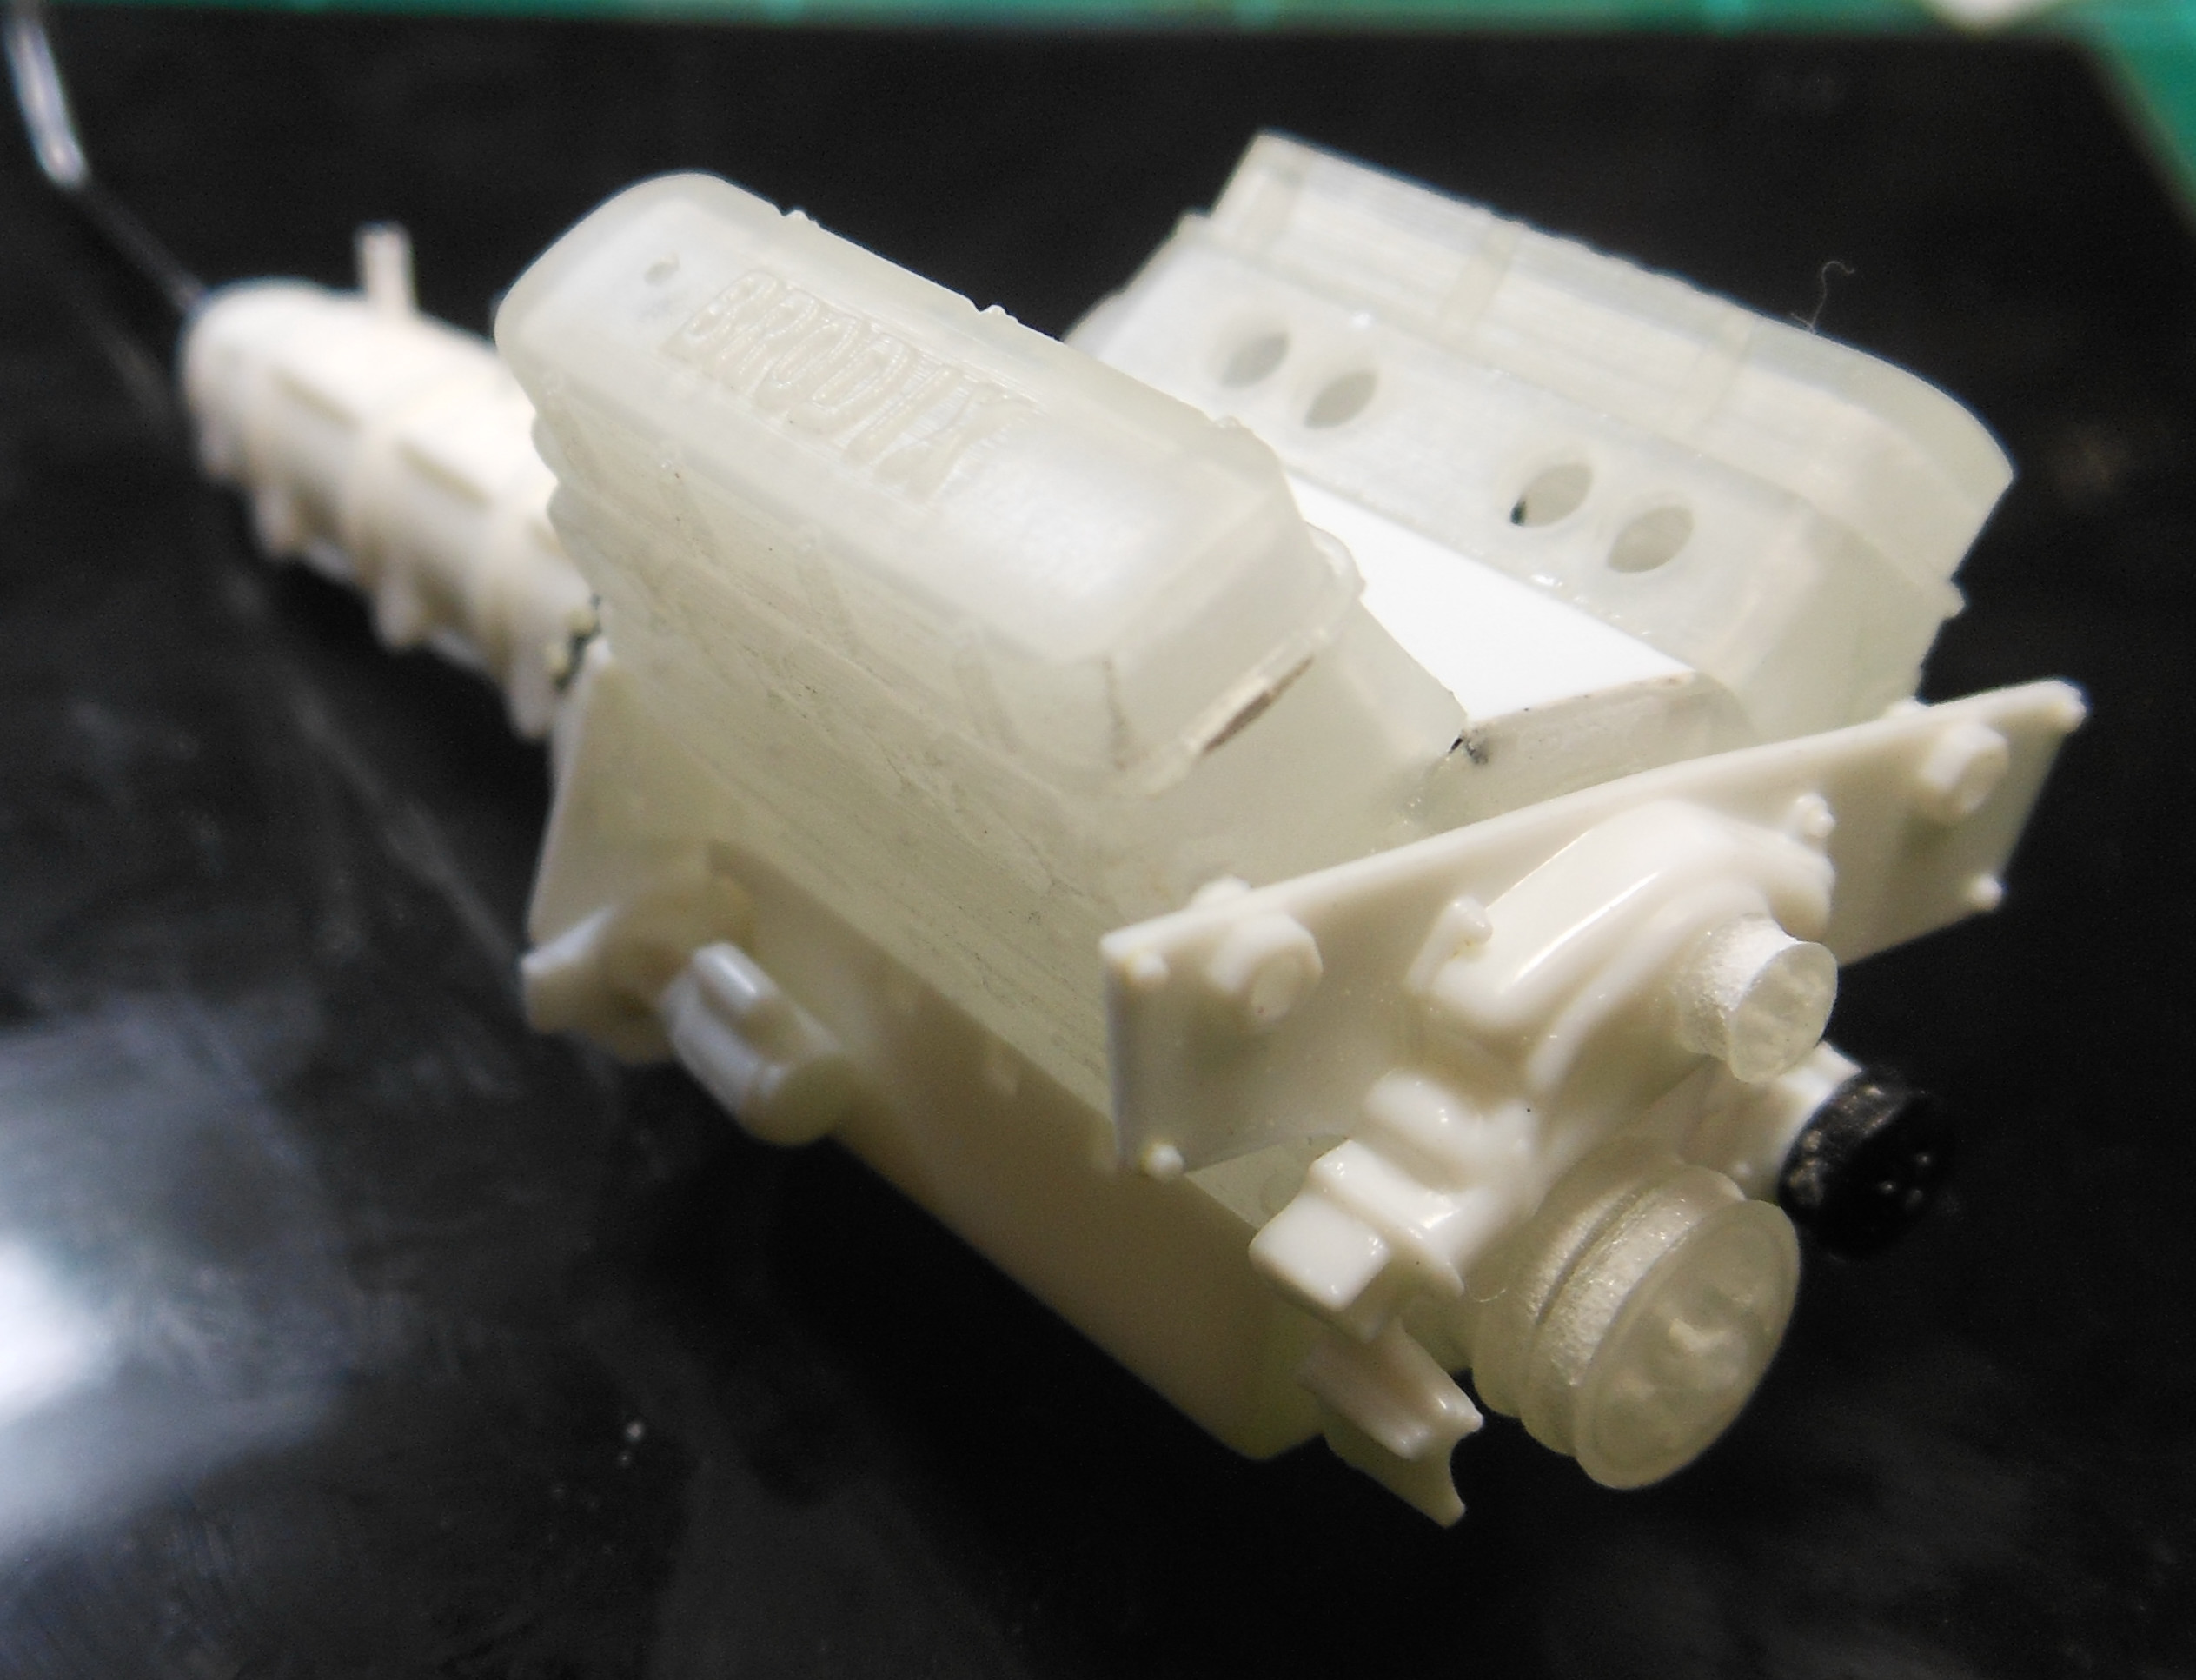
Motor wip
-
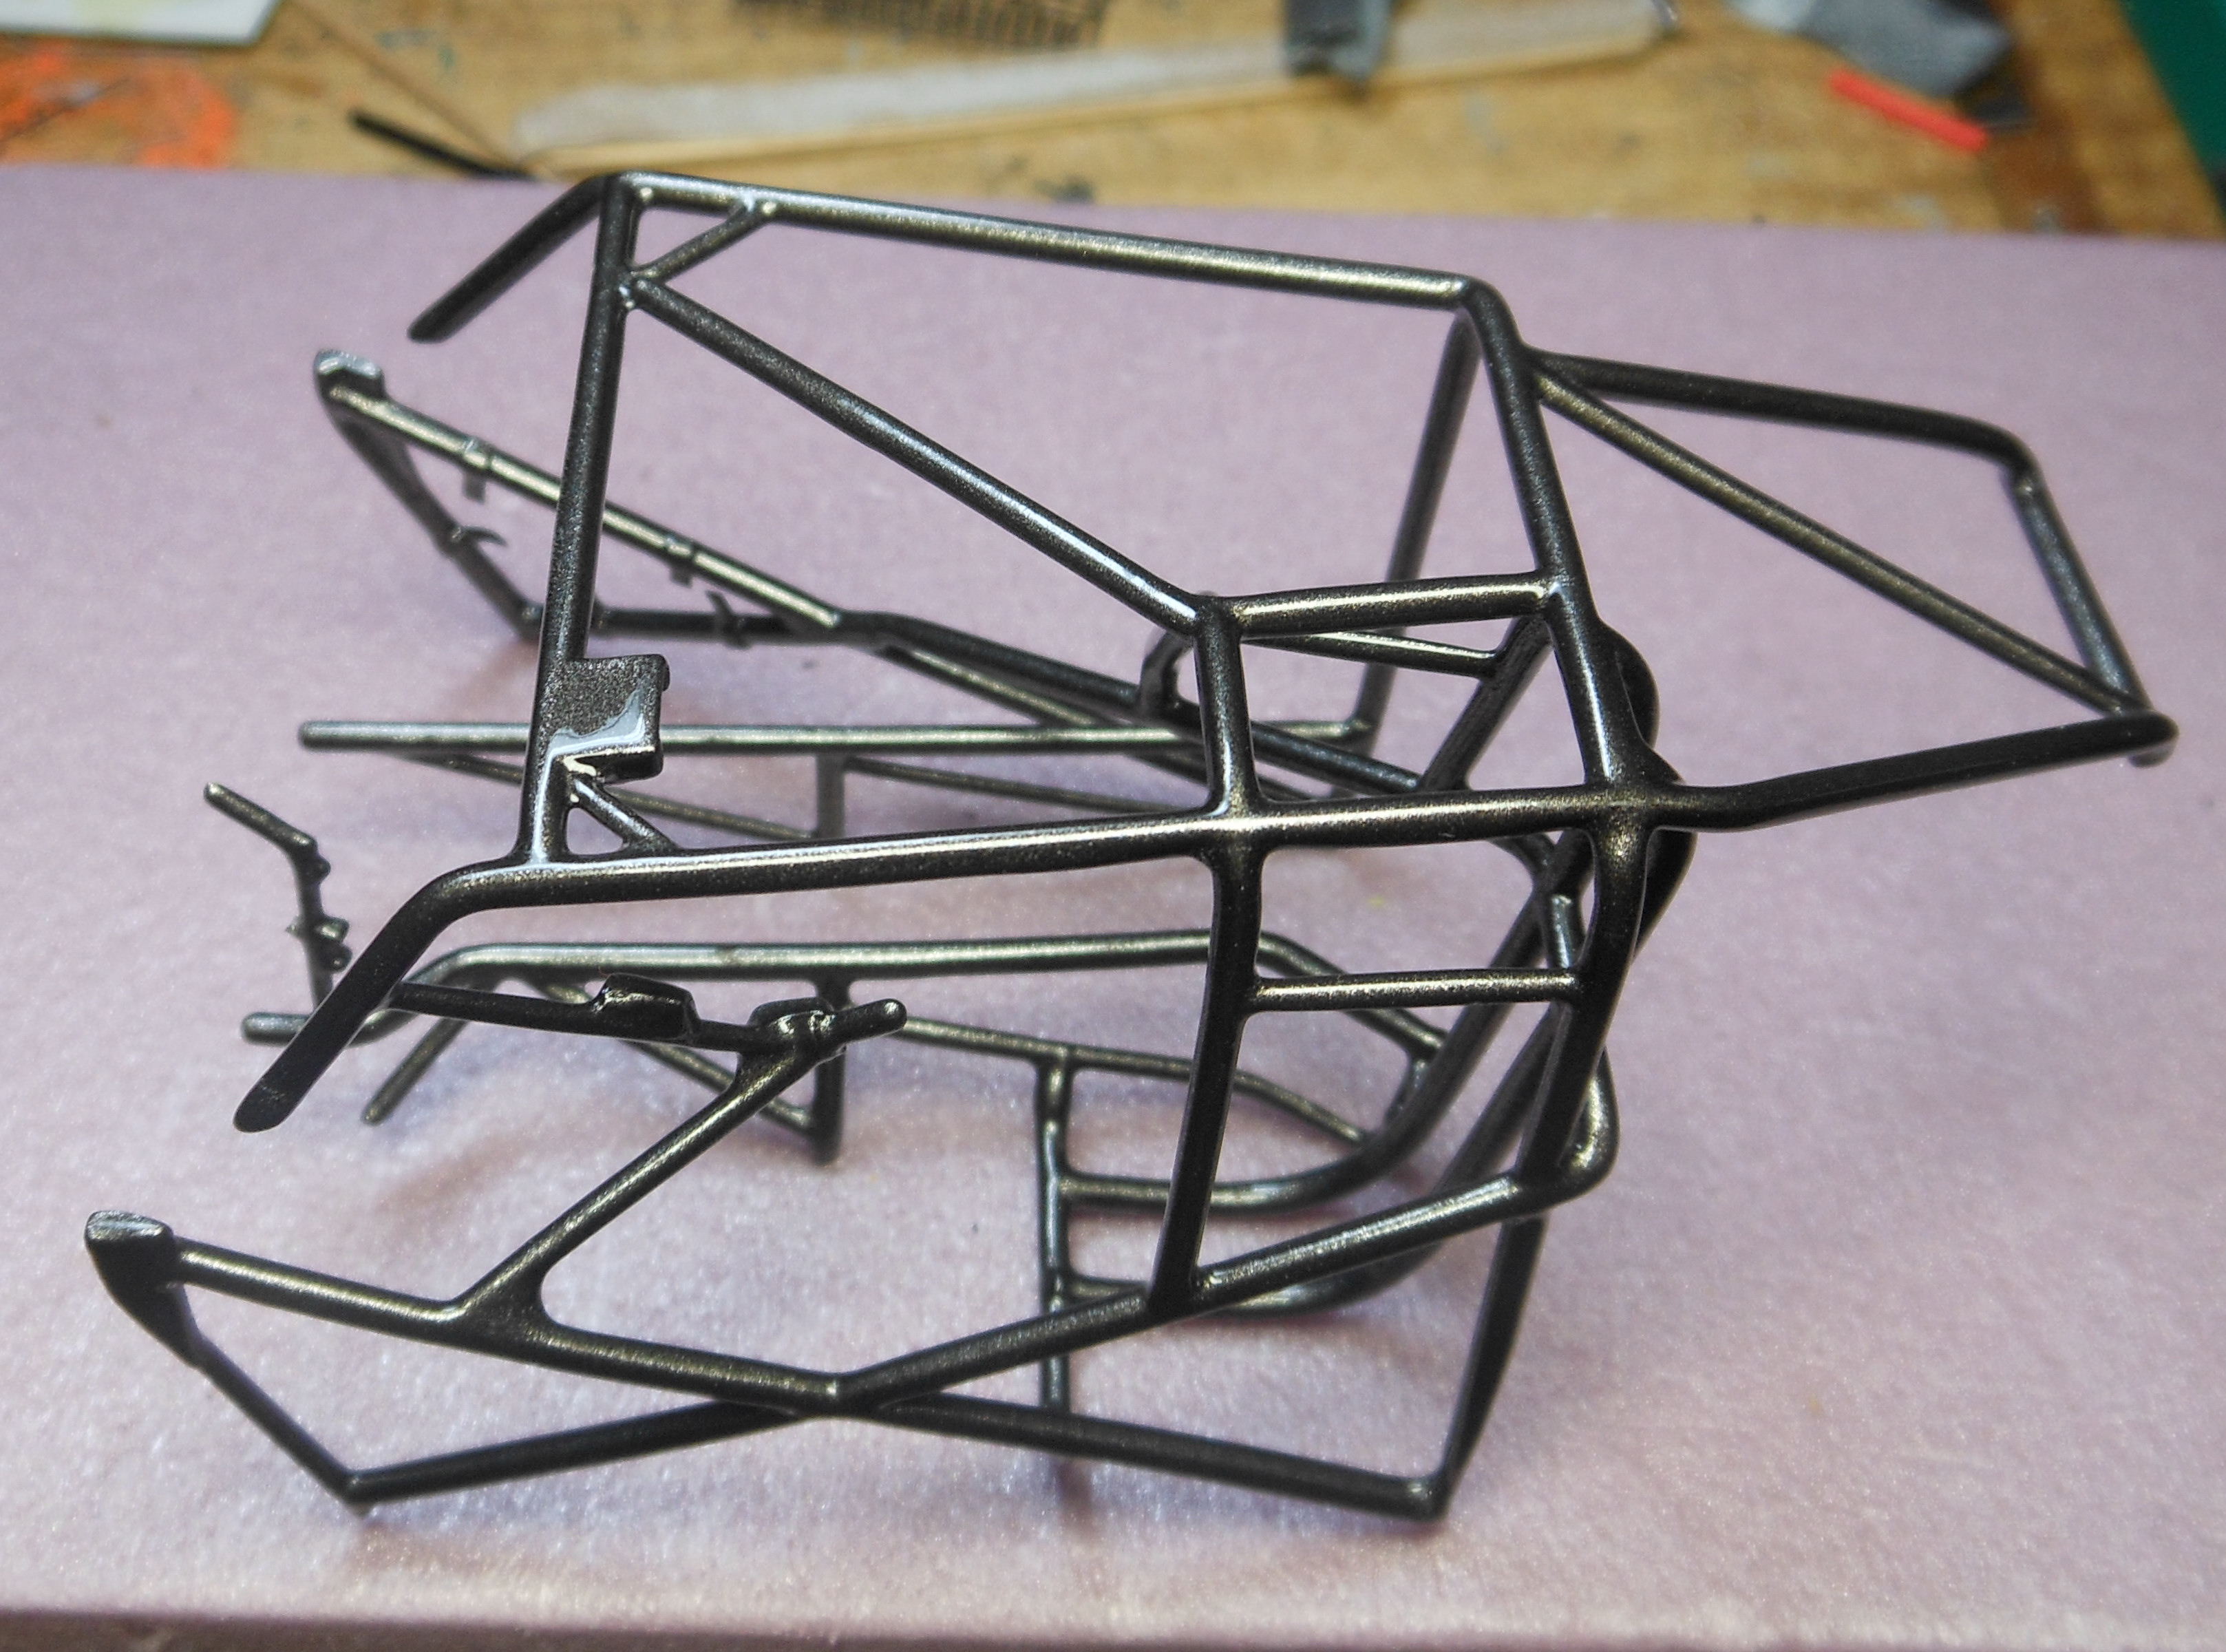
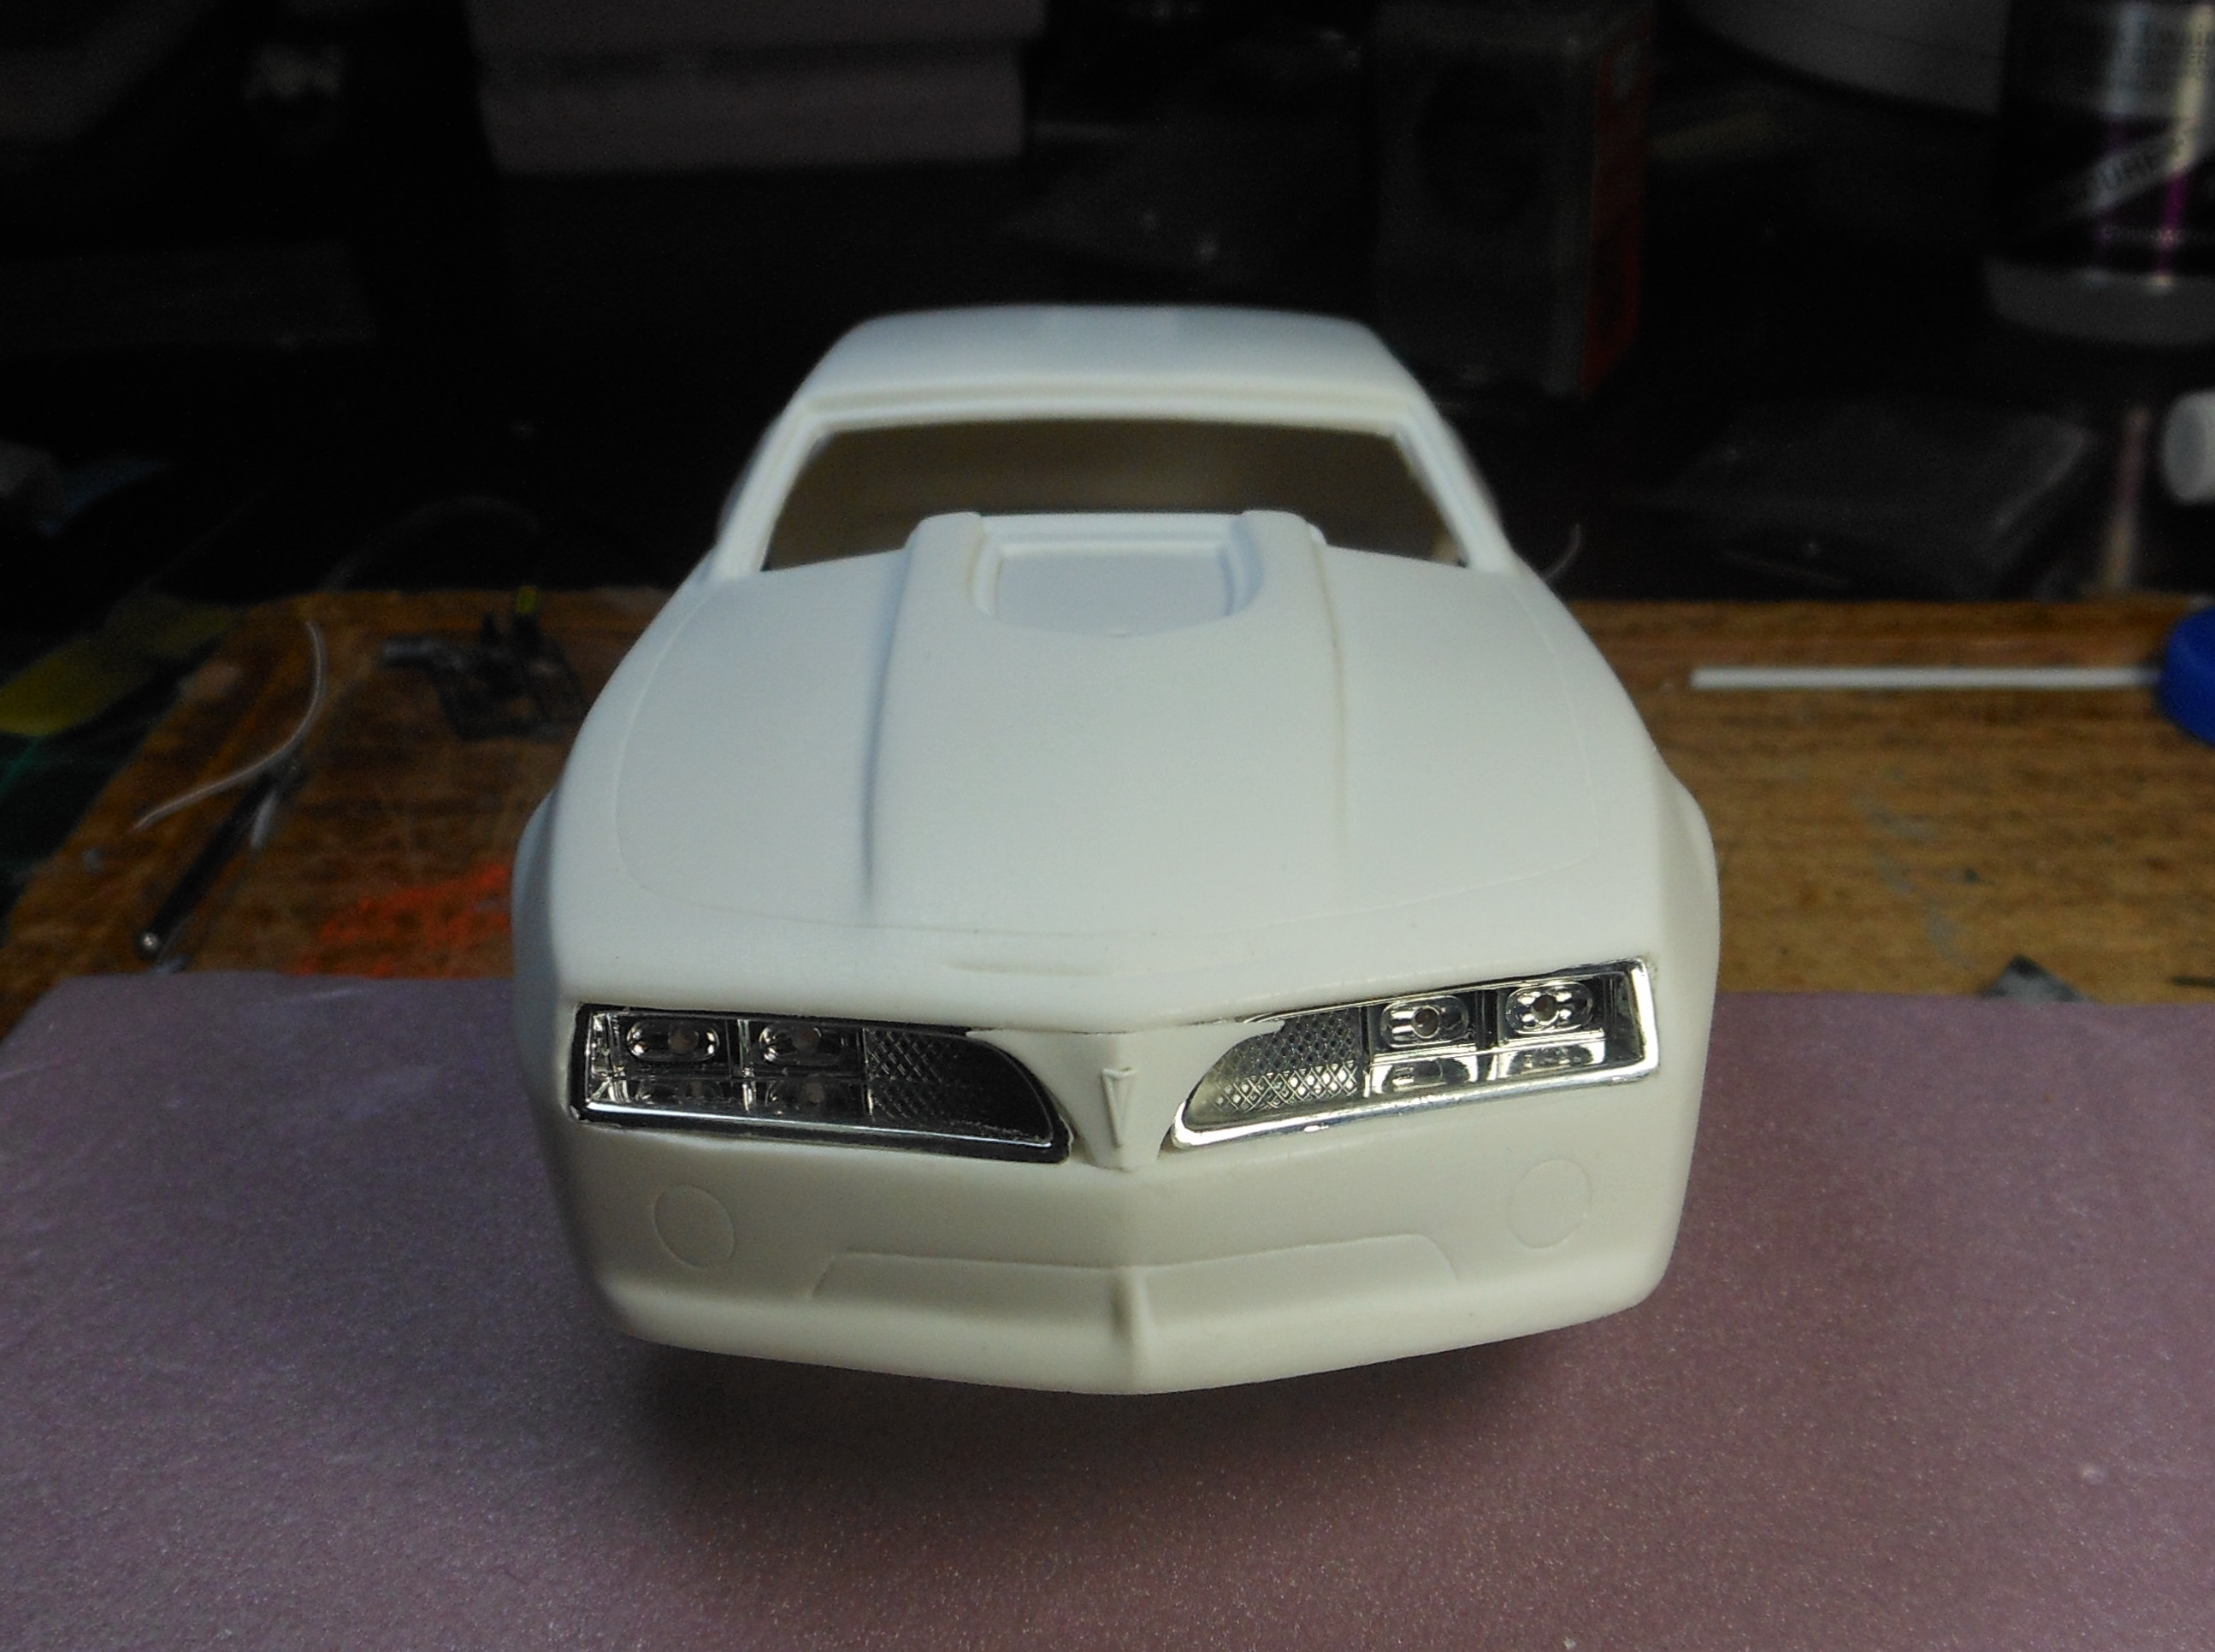
Decided to share my WIP build. Changing the Camaro to a T/A and built this motor from 3D, kit parts, and scratch built items. If you like it, leave a reply. If you don't, let me know.
-
What do you guys use for 1/25 "Y" fittings for nitrous on the intakes??
-
Are those smooth or need sanding? Looks cool either way!! Keep us posted.
-
I forgot to say. My mom had one and promised it to me when I got my license but got screwed and my sister got it. White one too!!
-
I know what you are saying about the front end, but I really liked it this way. This is a custom build car and I am trying to put a twist on every part and piece. Those front wheel spoilers are not supposed to be curved out like they are either, but I love it. Thats why I also shaved the handles and smoothed the fender lights, or reflectors.Have you ever watched "Bitchin rides" where they put the fuel cap behind the tail light, lol?? I absolutely love the feedback and keep it coming, just think more custom. I have alot more surprises in store for this one. I really do appreciate your feedback and thanks for the compliments also.
-
Thanks gentlemen. This is not going to be the final color, stay tuned.
-
FINALLY A BASE COAT OF INCA GOLD, THIS IS NOT THE FINAL COLOR!!!
-
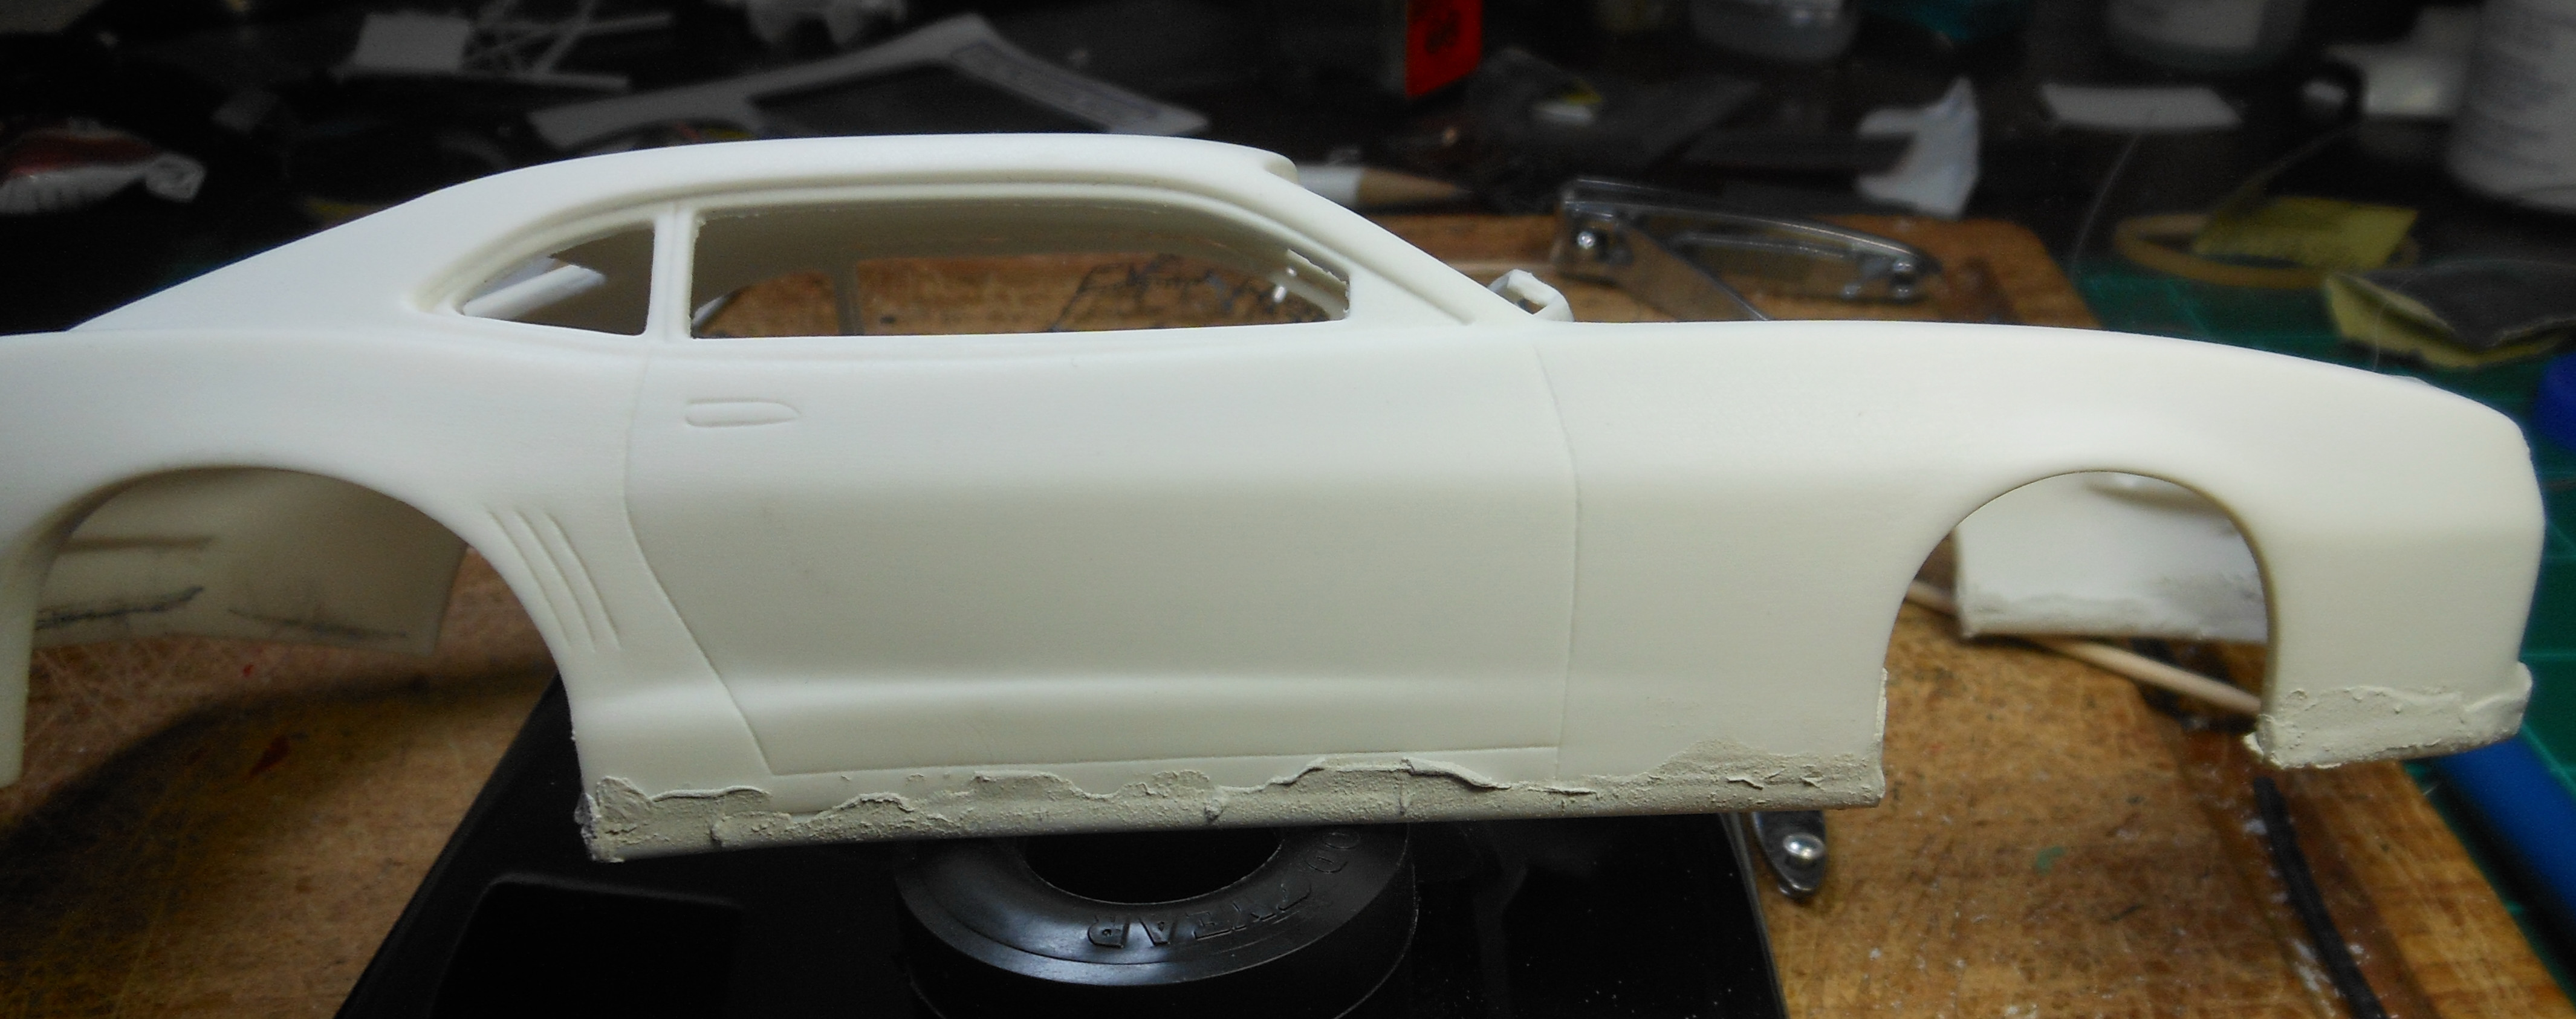
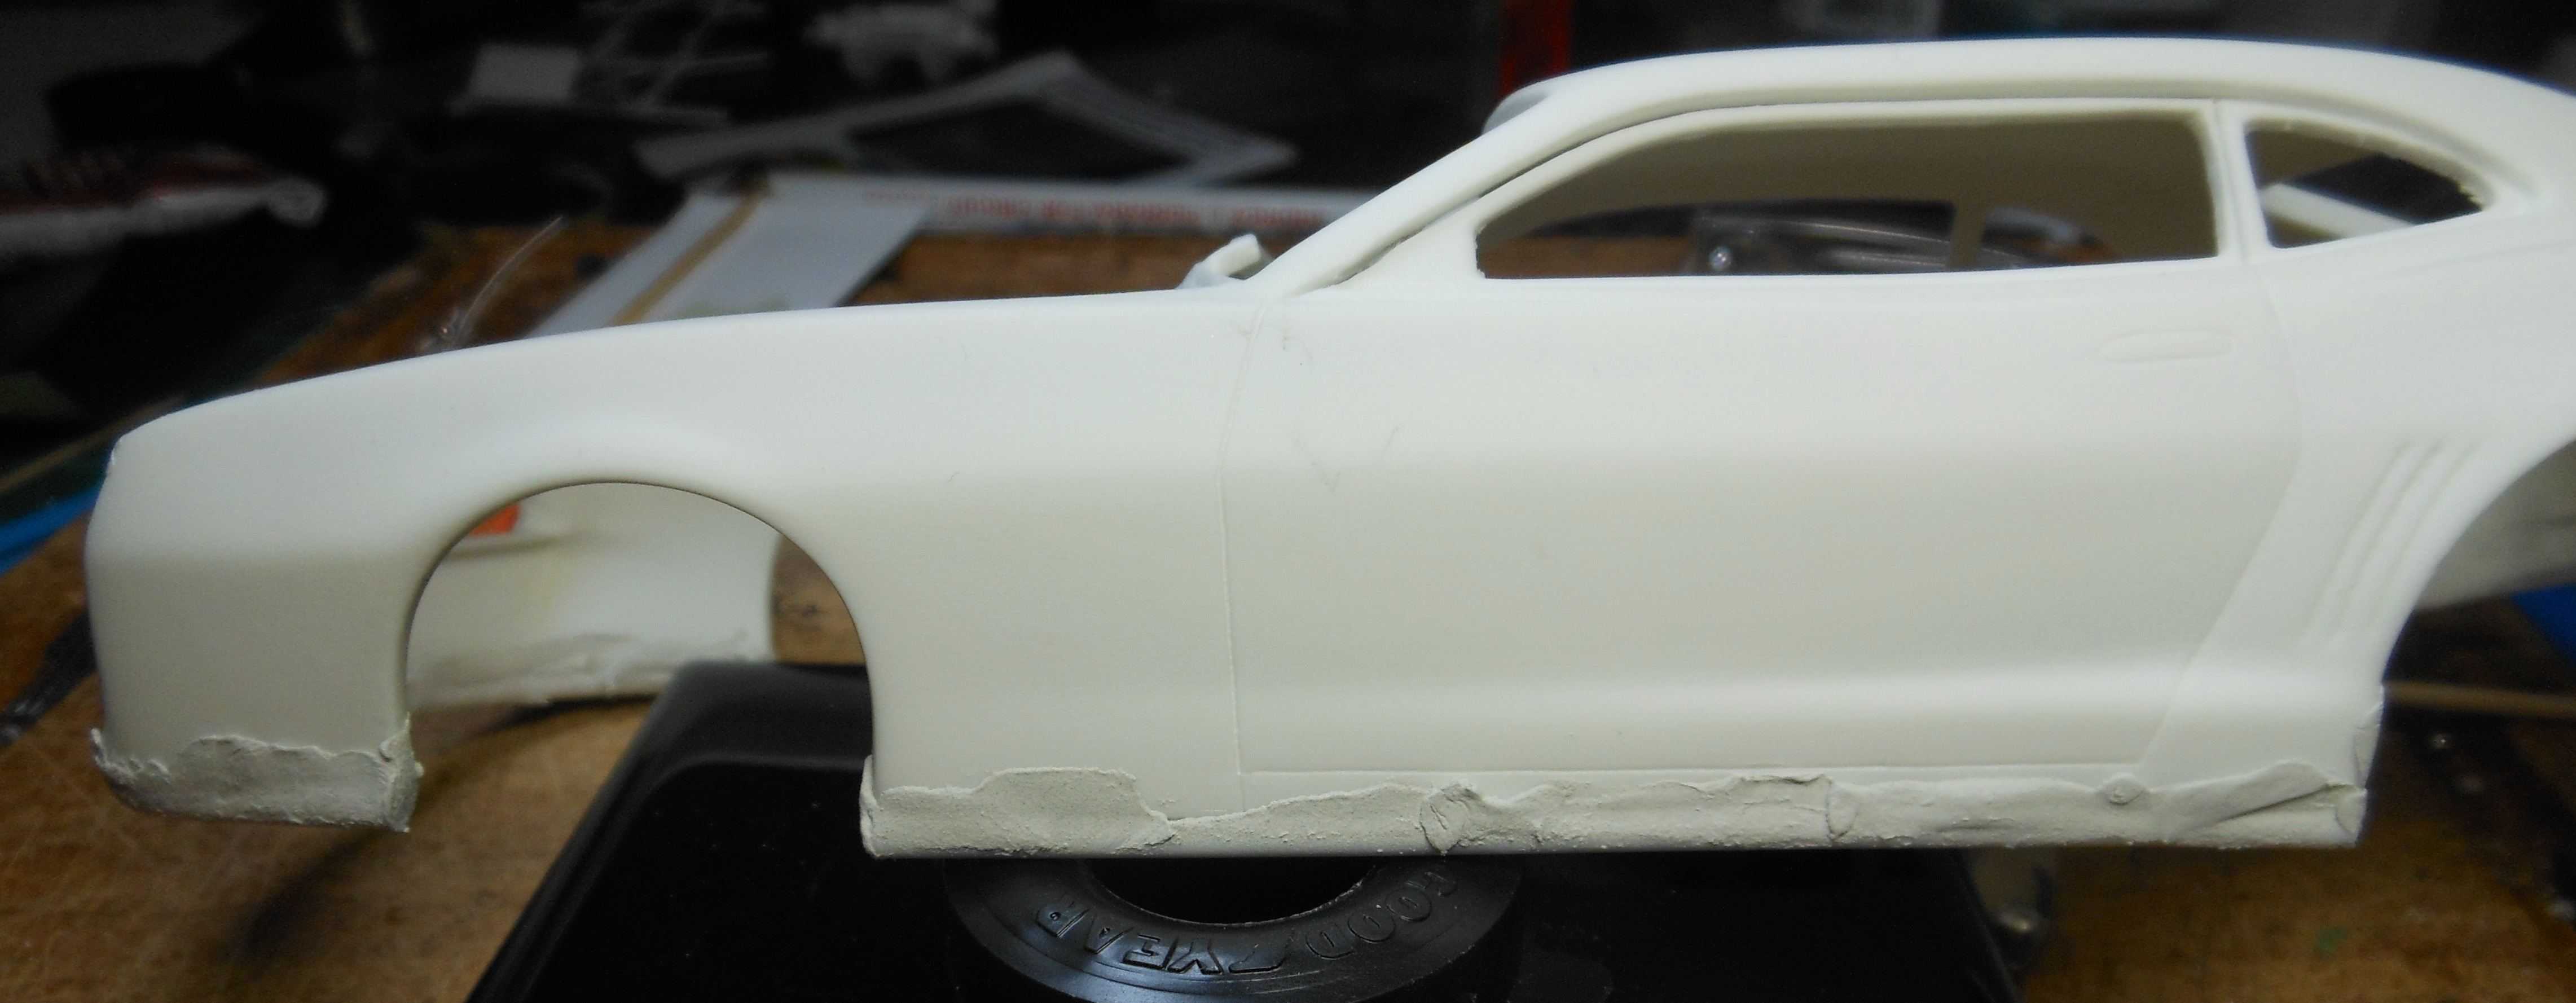
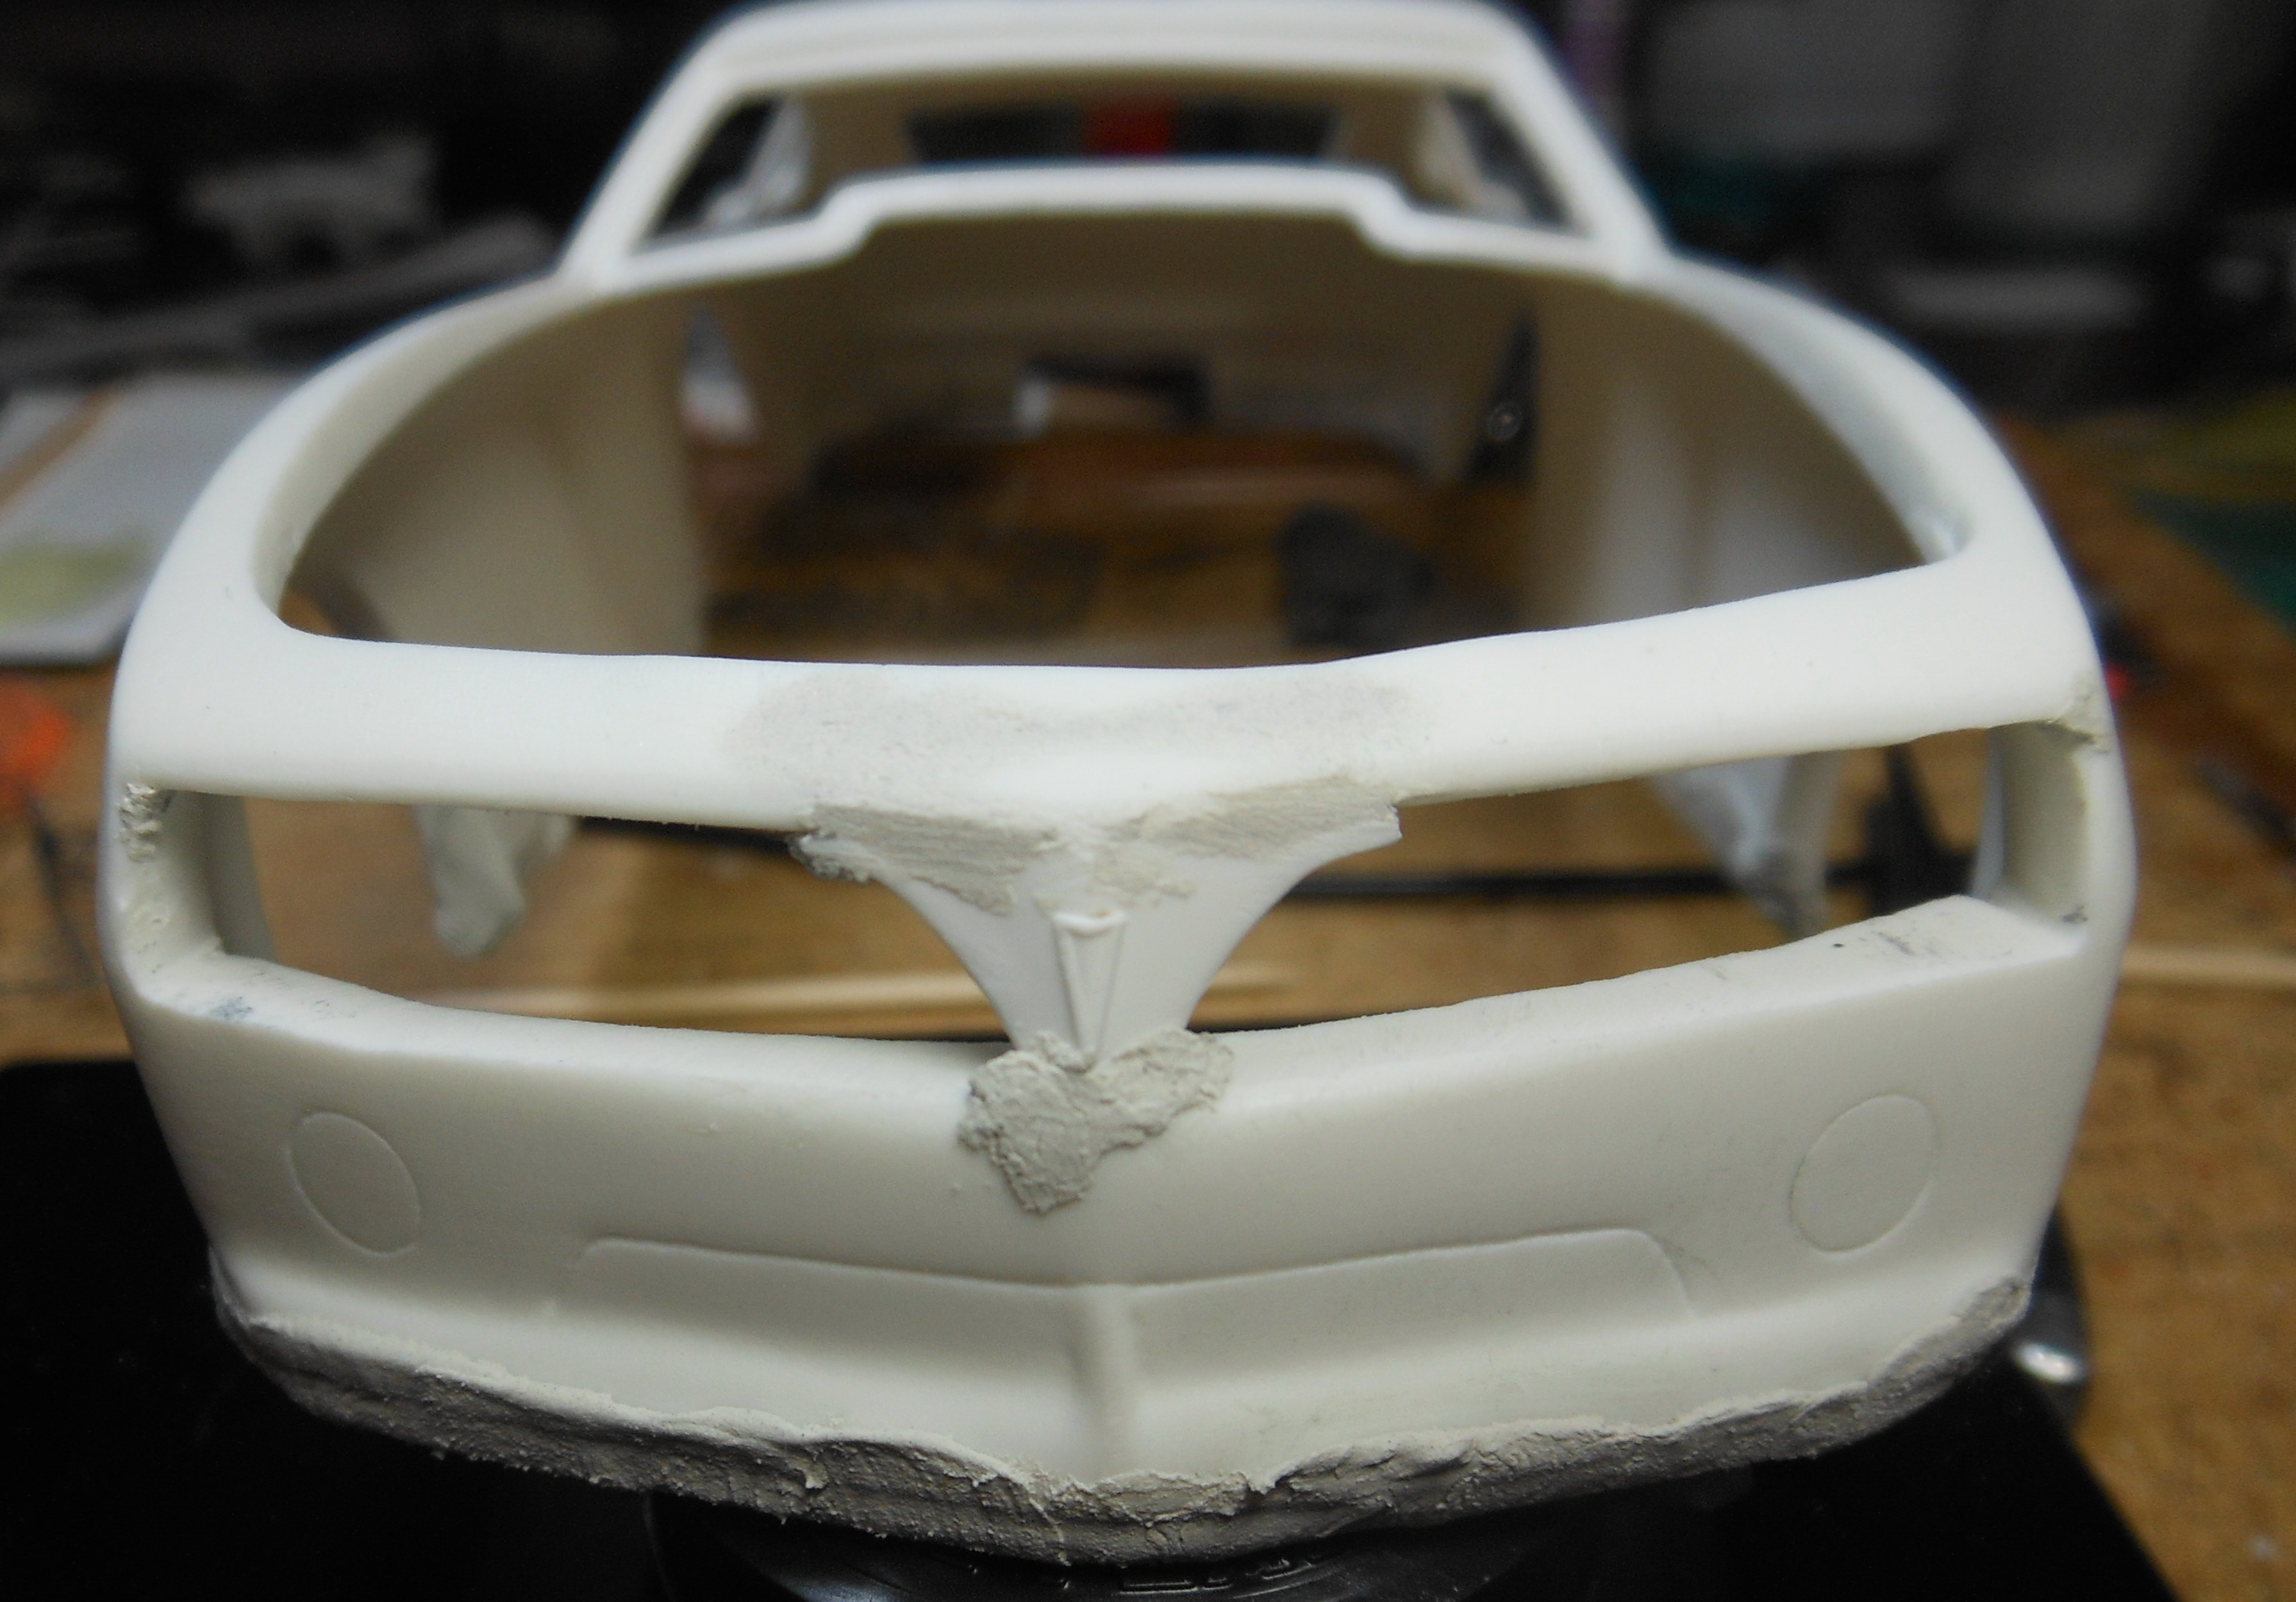
PRIMER AND FILLING...
-
BODY WORK...
-
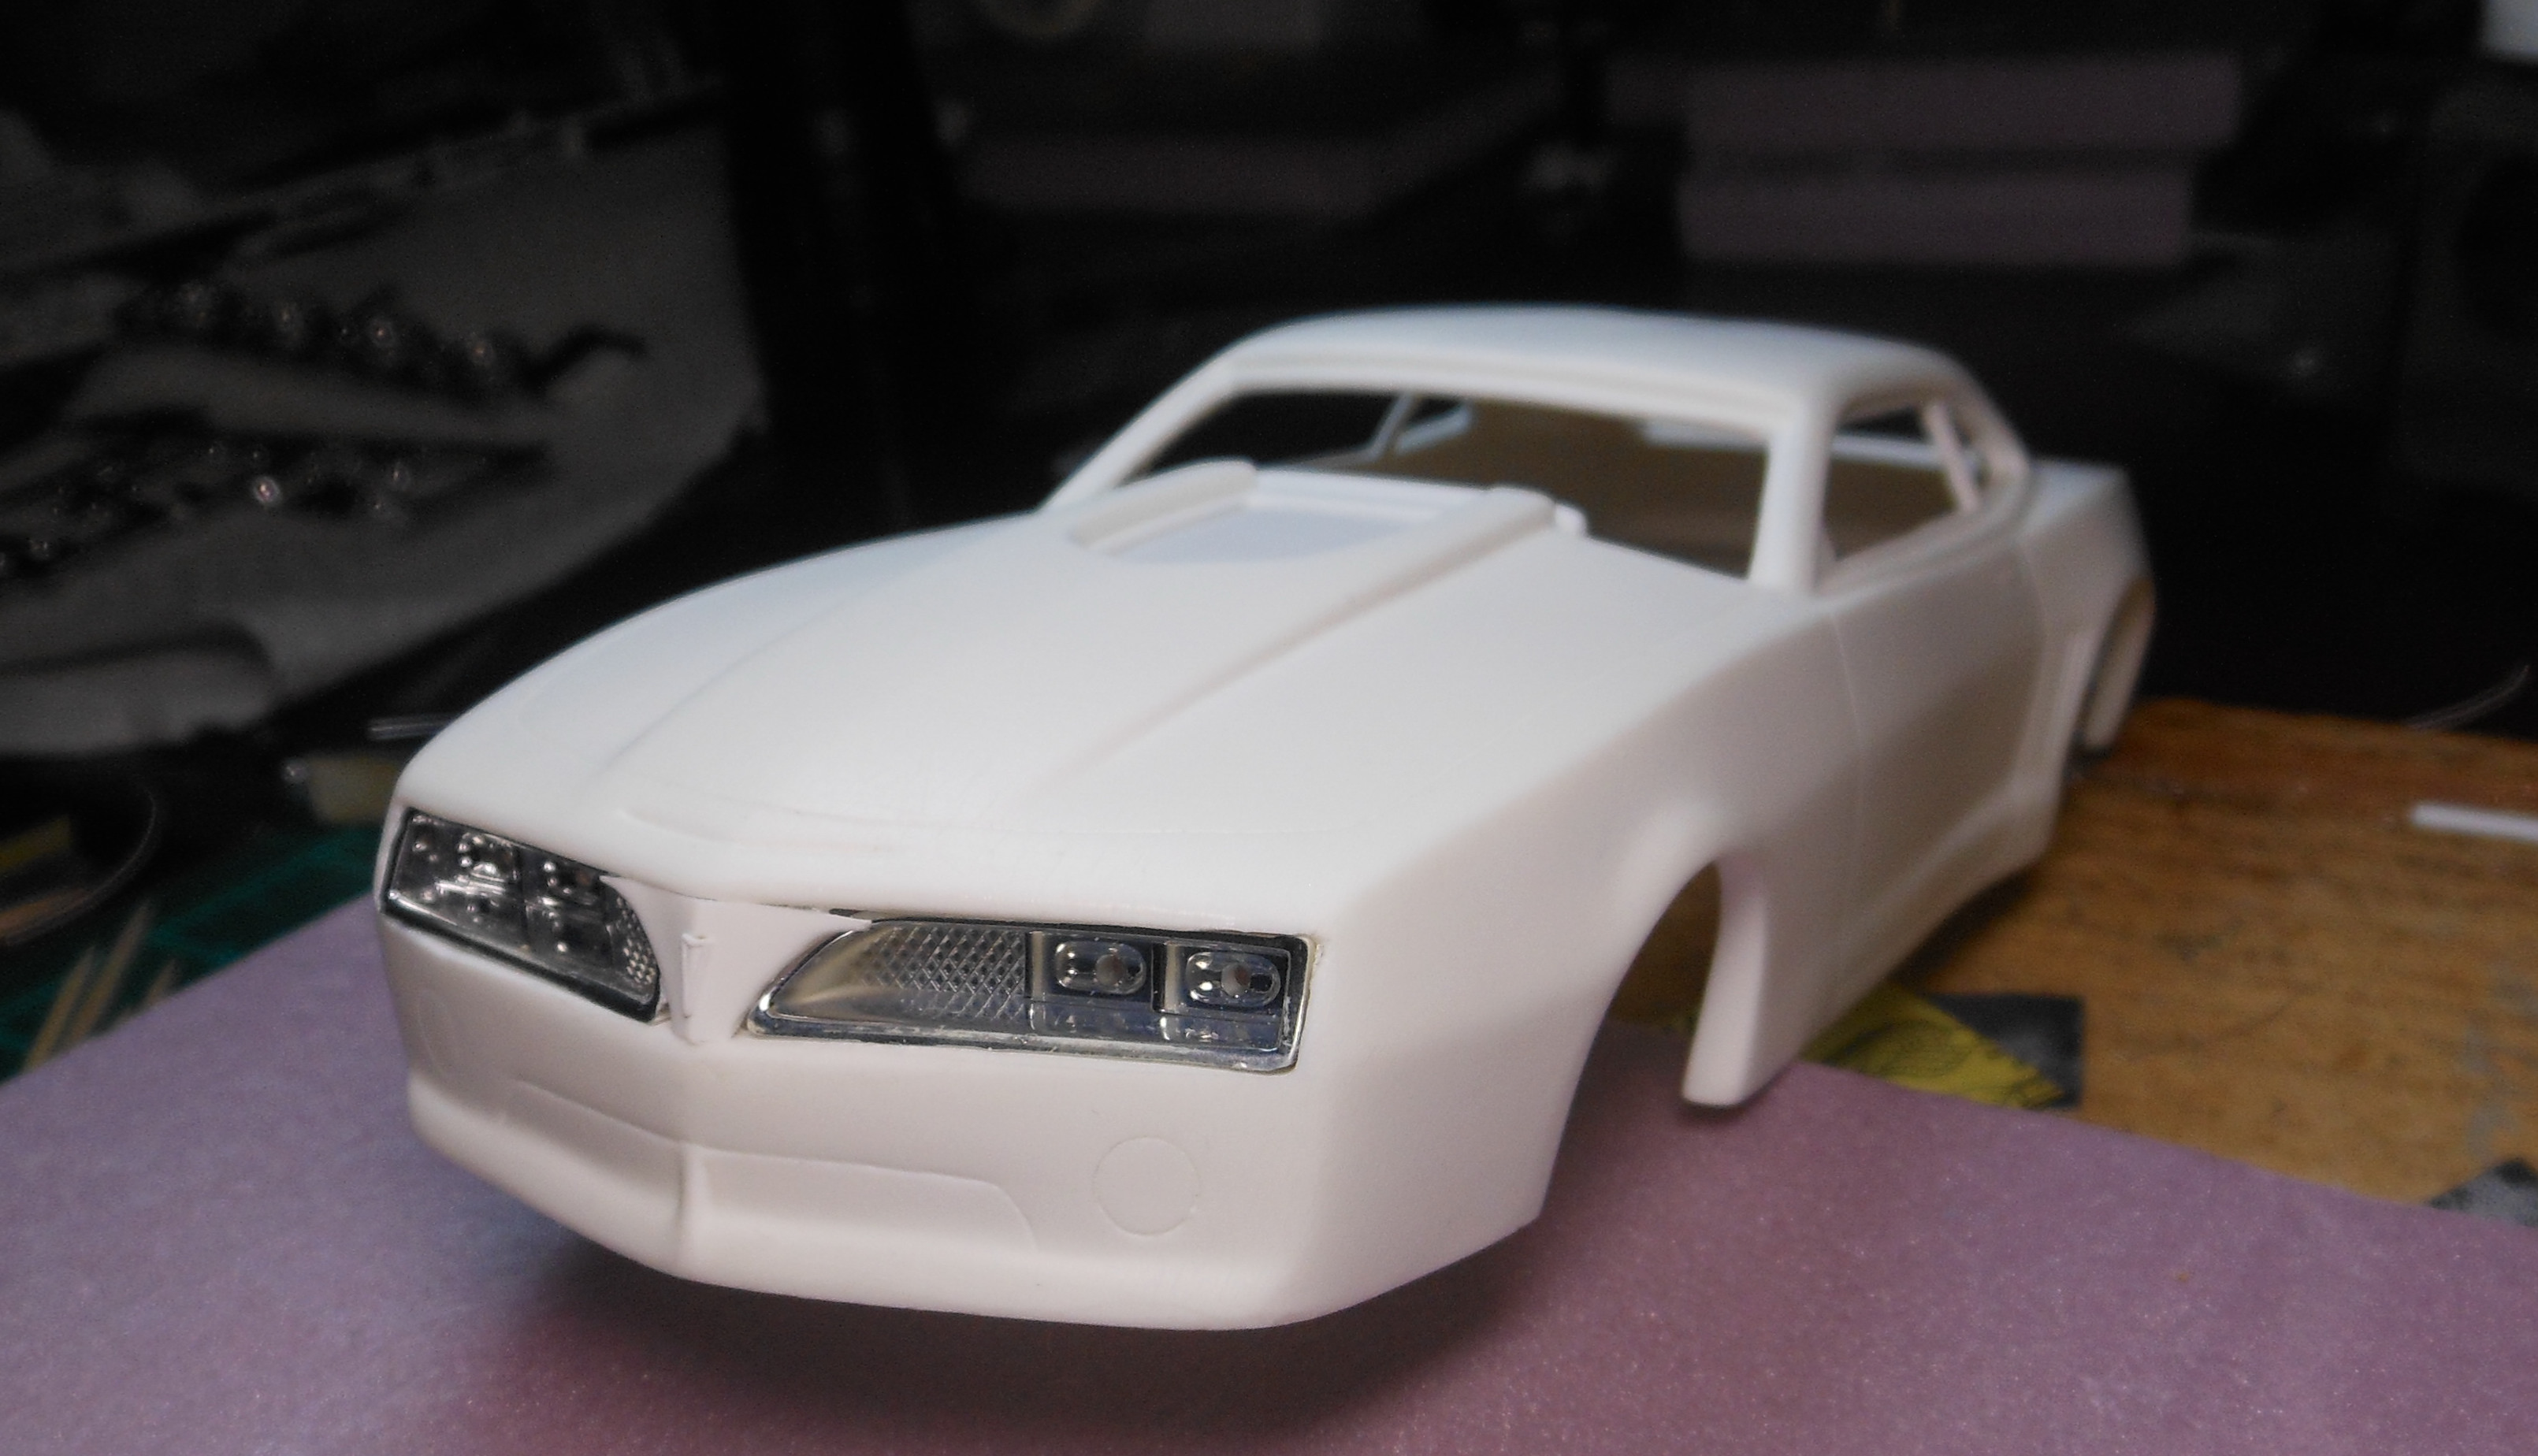
A while back I bought a built 1973 Firebird from Ebay. I have been looking for one for a long time and could not find any that were in my price range so I decided to do a rebuild of this one. Obviously it was built a LONG time ago. I stripped paint with oven cleaner and started fixing the body. I decided I wanted all the spoilers on it so I used the ones in the newly released '79 T/A kit. I always liked this car because of the lack of a front bumper (STYLE) and while doing the body work I decided to get rid of the rear bumper also. So I gave it a roll pan. I had to sand out alot of glue on the body, especially on the hood intakes. It seemed like I would never finish the sanding process. I found myself sanding too much in some areas and had to fill those along with getting rid of the bumps and swirl marks. Primed and sanded and primed and sanded and primed and sanded!!!! FINALLY got some paint on this beast!!!!! I put some Inca Gold on it for and underlying base color. This is NOT the final color but just another step. I would like to have this and my '74T/A completed before the fall Detroit Area Modelers Show because it is a 50th Anniversary for Camaro and T/A's theme.I hope you all enjoy, thanks for letting me be a part of the group!! ORIGINAL KIT