Christopher J
-
Posts
217 -
Joined
-
Last visited
Content Type
Profiles
Forums
Events
Gallery
Everything posted by Christopher J
-
 Definitely going to be following this. I love a detailed model. The work you've started looks great.
 -
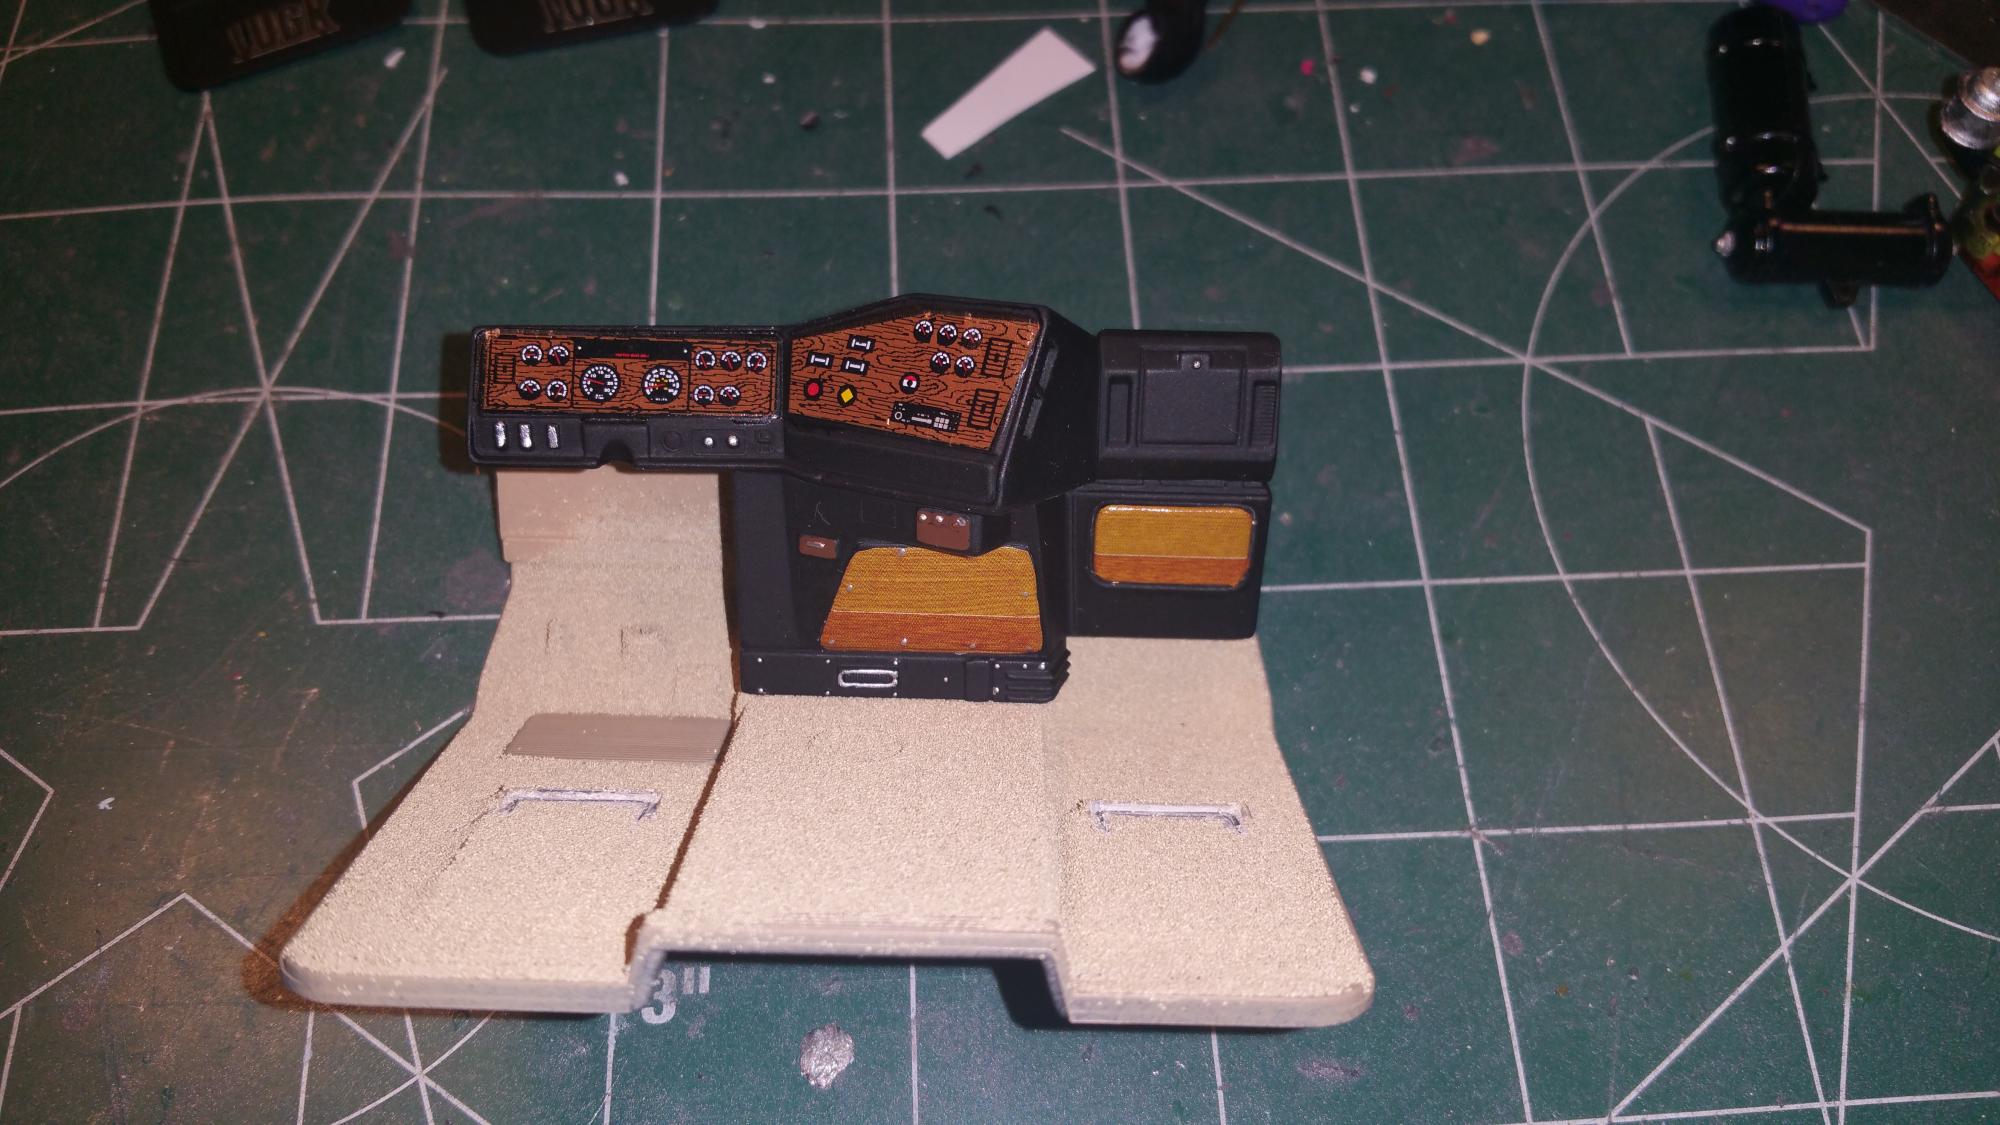
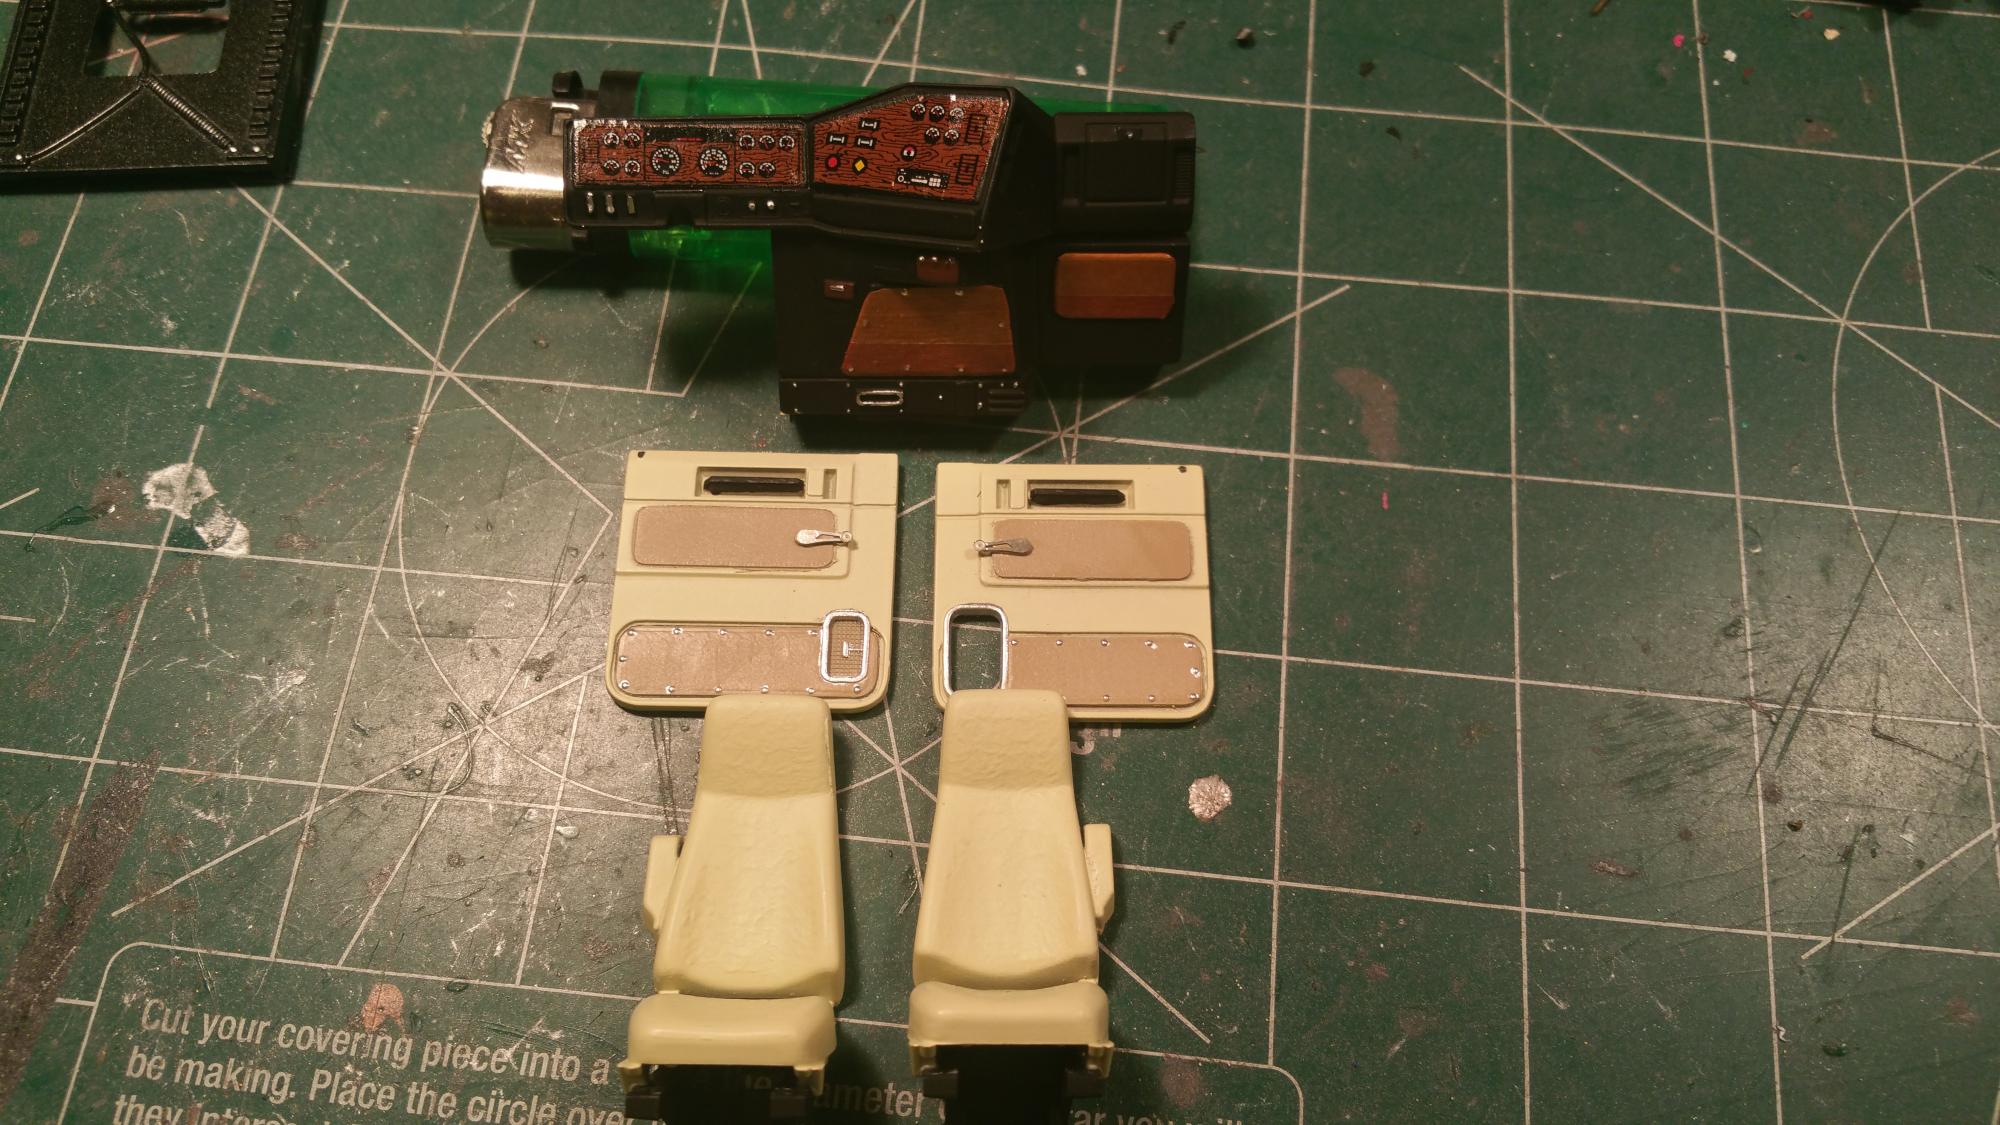
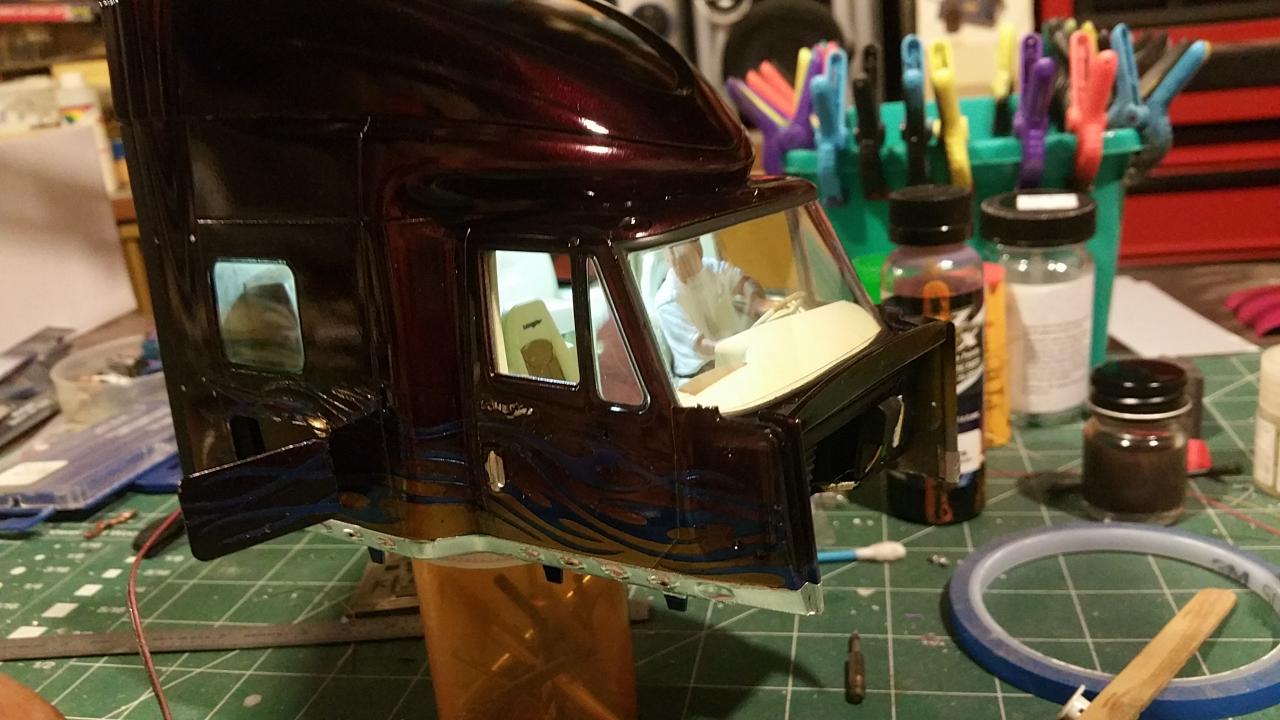
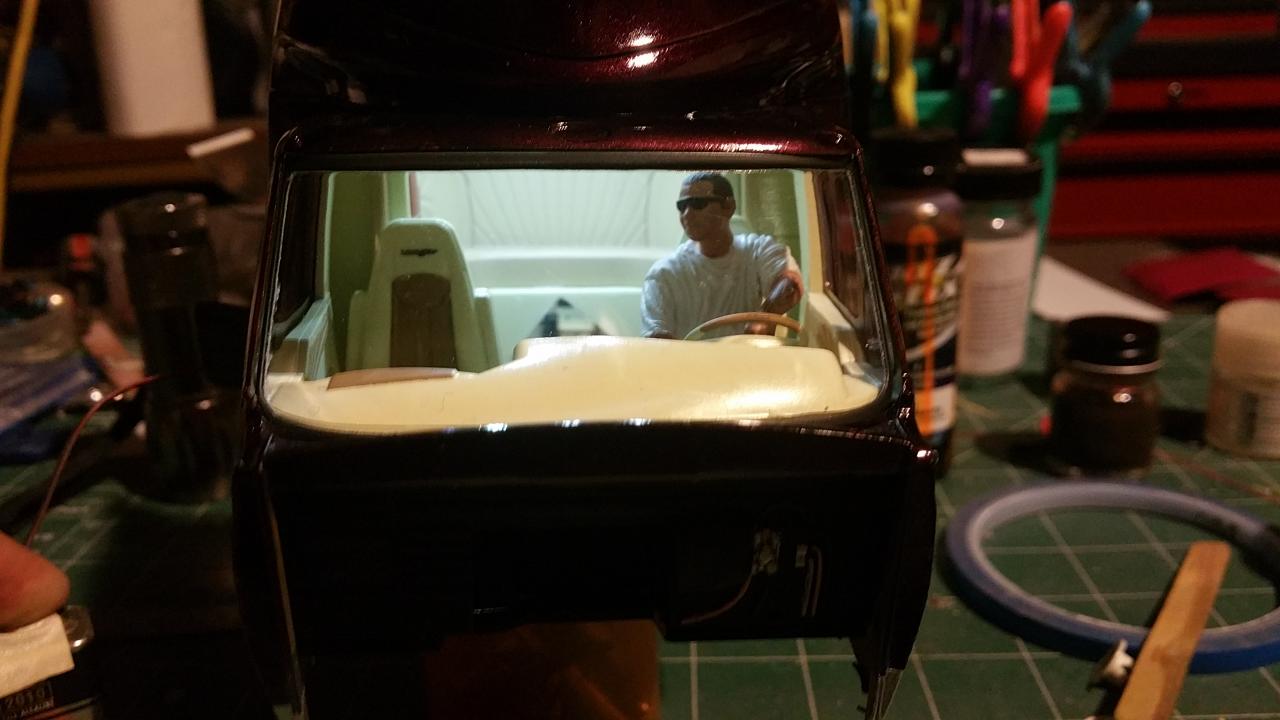
Got a little more done. Cab interior pieces are painted and trimmed. I shaved down the wipers and used some photo etch ones. The headliner and floor are textured/carpeted using embossing powder. I made templates of the lower panels and the floorboard decal from my Line Star. The decals were then followed with Walthers decal solution.

-
A fellow builder is going to send me a couple of tires so it looks I may be in the clear. Otherwise I would change them all out to have it look semi correct. Worked on the bunk a bit last night and started painting some interior parts for the cab as well as sanding down/filling the glue joints on the hood and primer on the exterior. Right now I'm trying to figure out if I want to relocate the stacks to the rear of the sleeper or leave them on the sides. Also gave the battery box and tanks the Easy Off treatment to remove the chrome. Will try and get pics this evening of progress.
-
Thanks to all for the replies. May try and get some work done on the body this evening.
-
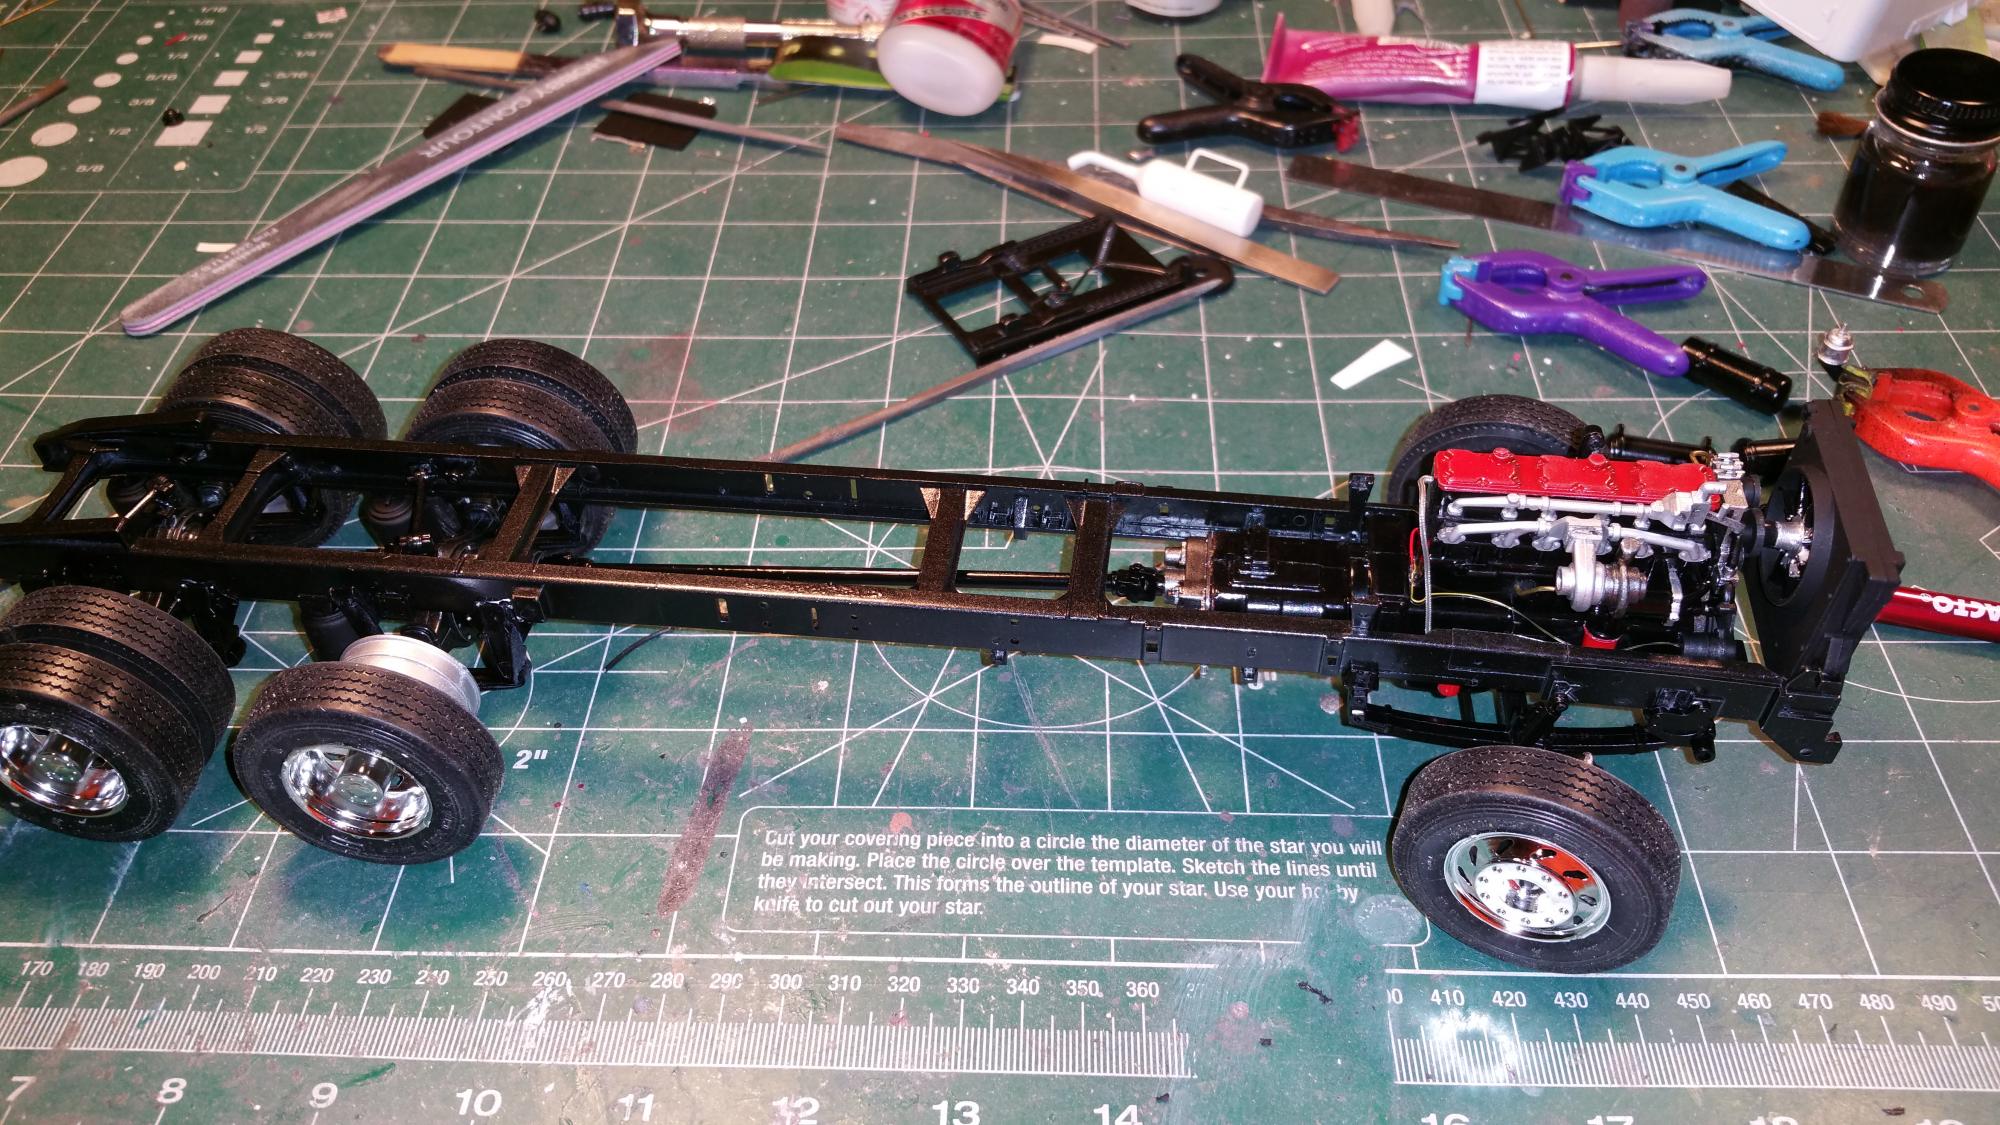
Got her up on her own 9 feet....should be 10, but alas a tire is missing from the kit. The steering in the kit is awesome in that not only is it functional but all the steering system to the gear box is functional. The chassis is a metalic/gunmetal color and the suspension components are black....Har do see the difference from the photo. Working on finding body colors that will help the chassis color show better. Currently working on the interior pieces and will don't he cab next until I get a chance to go and buy a set of Moebius wheel and tires to make up for the missing piece.
-
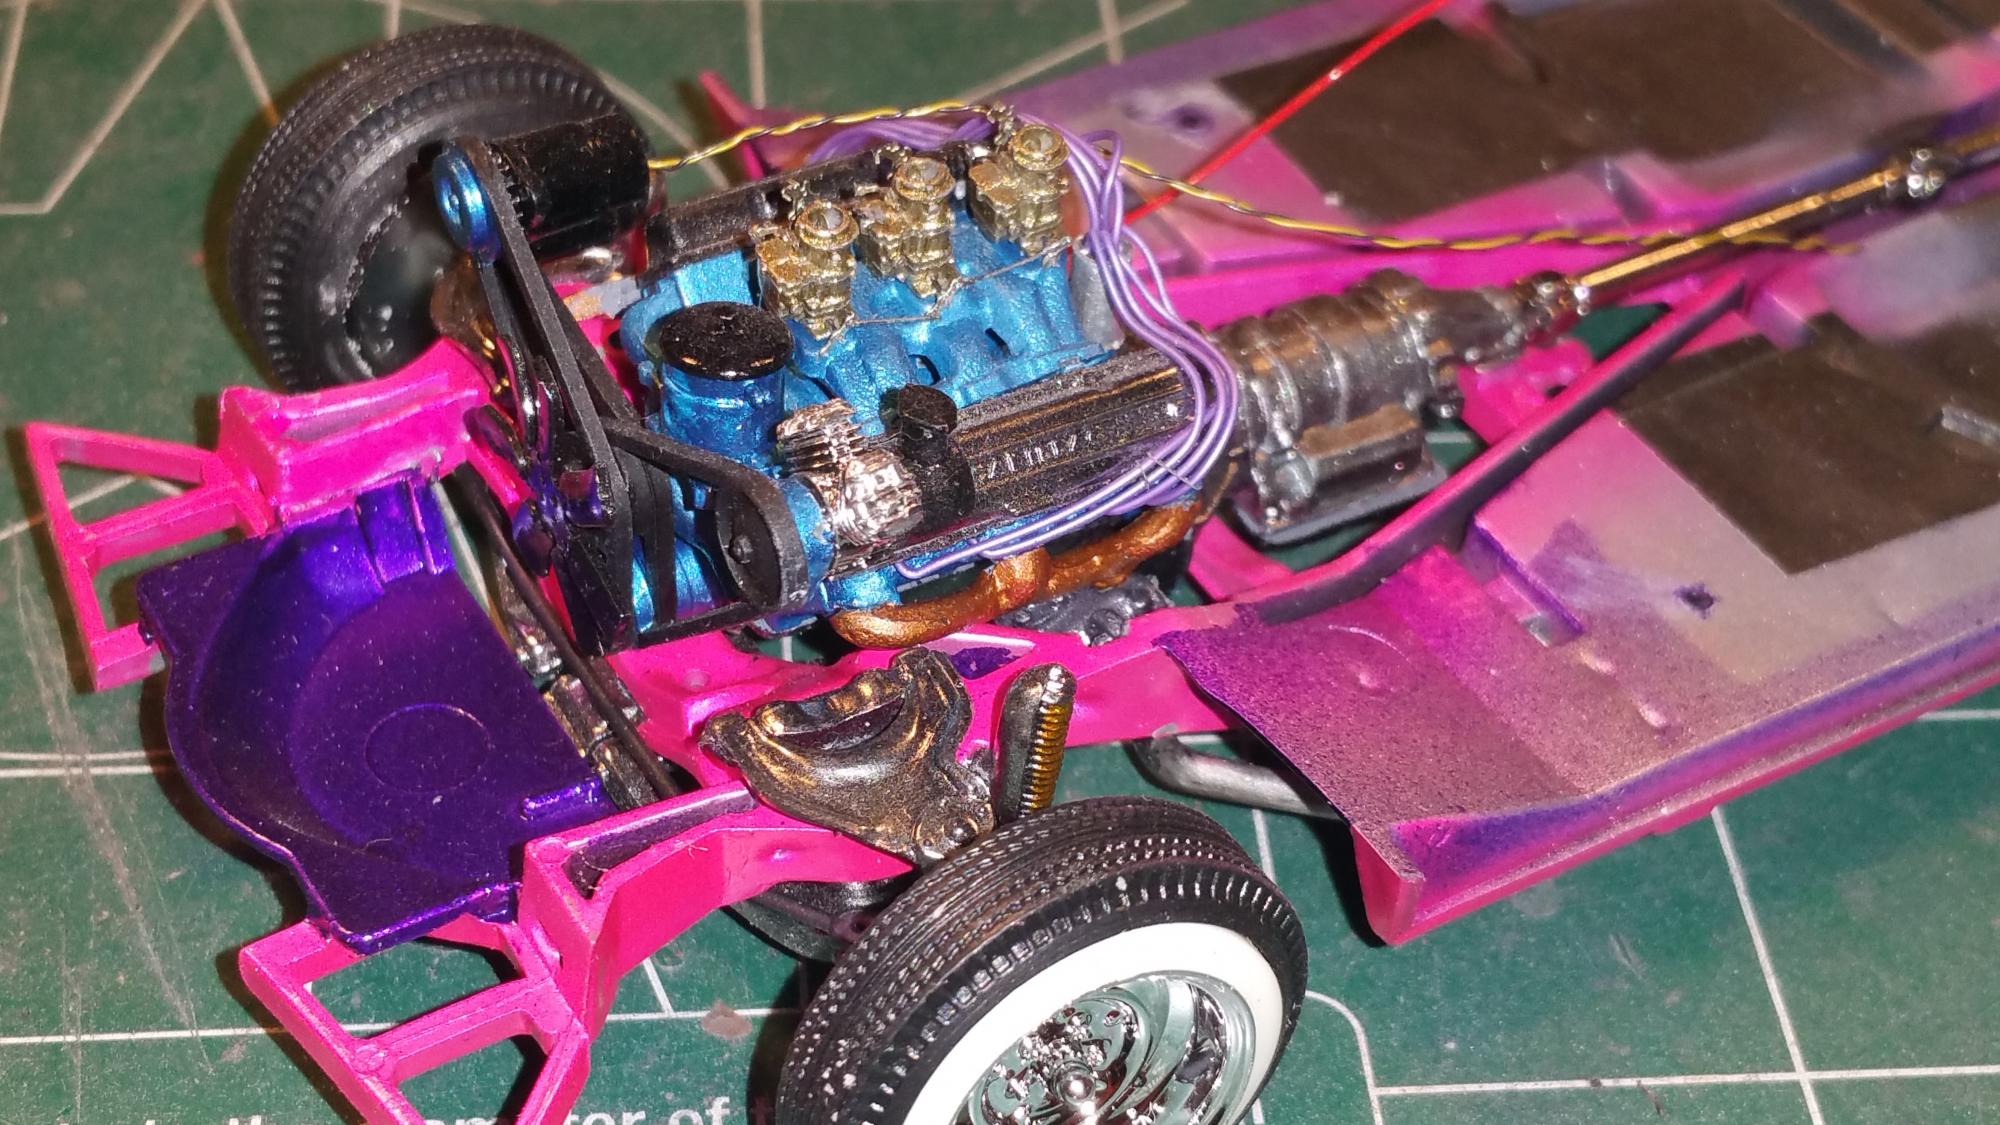
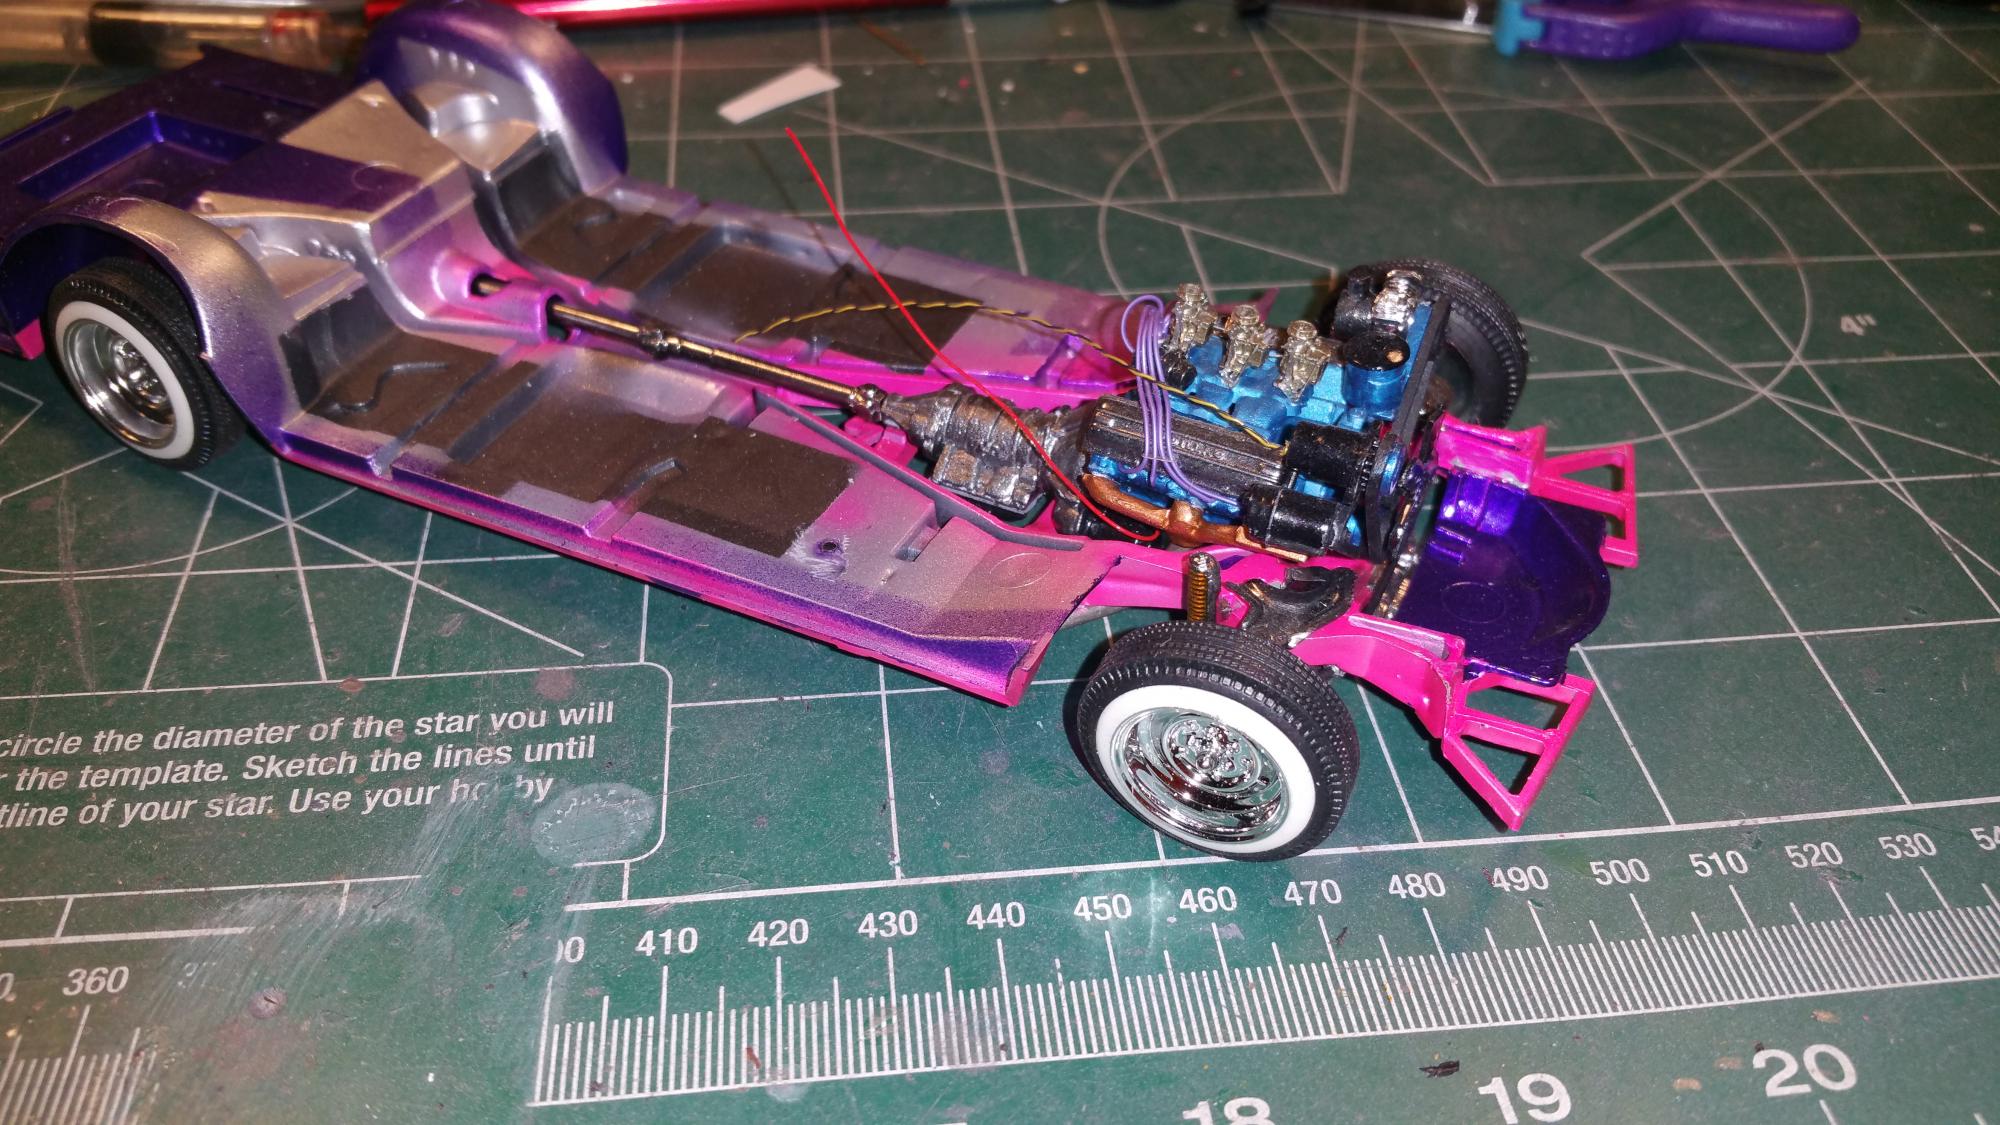
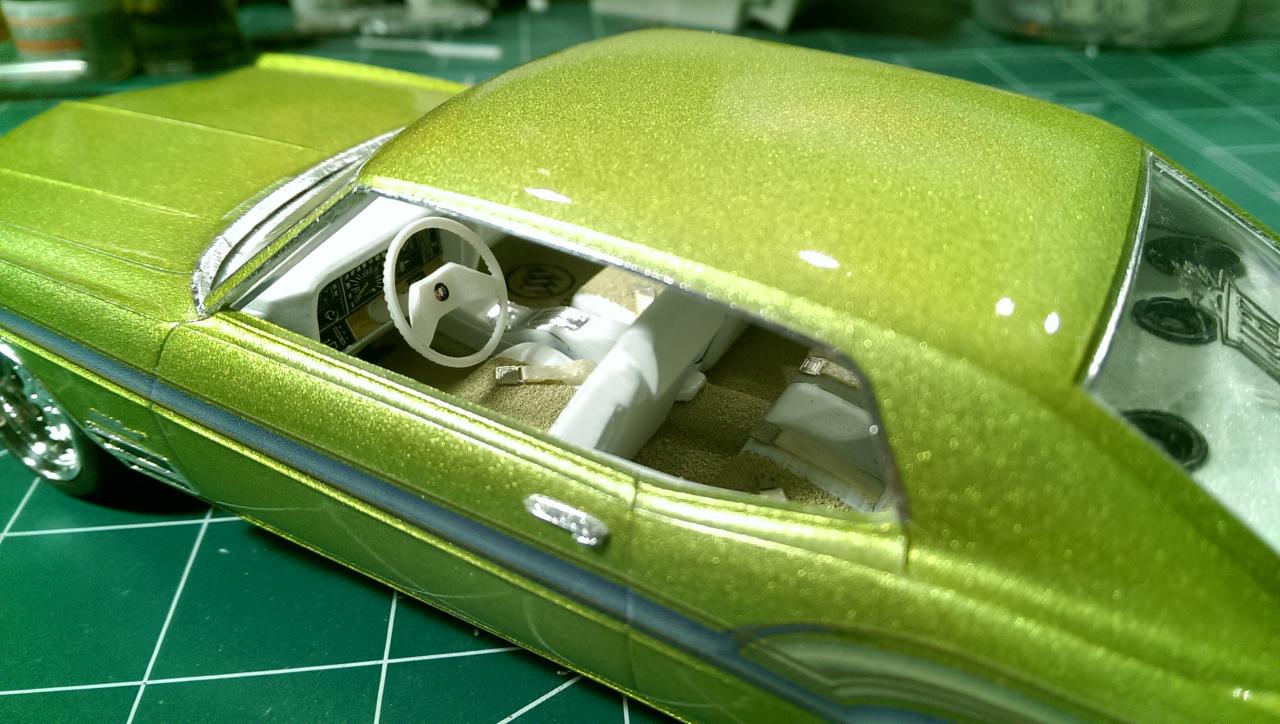
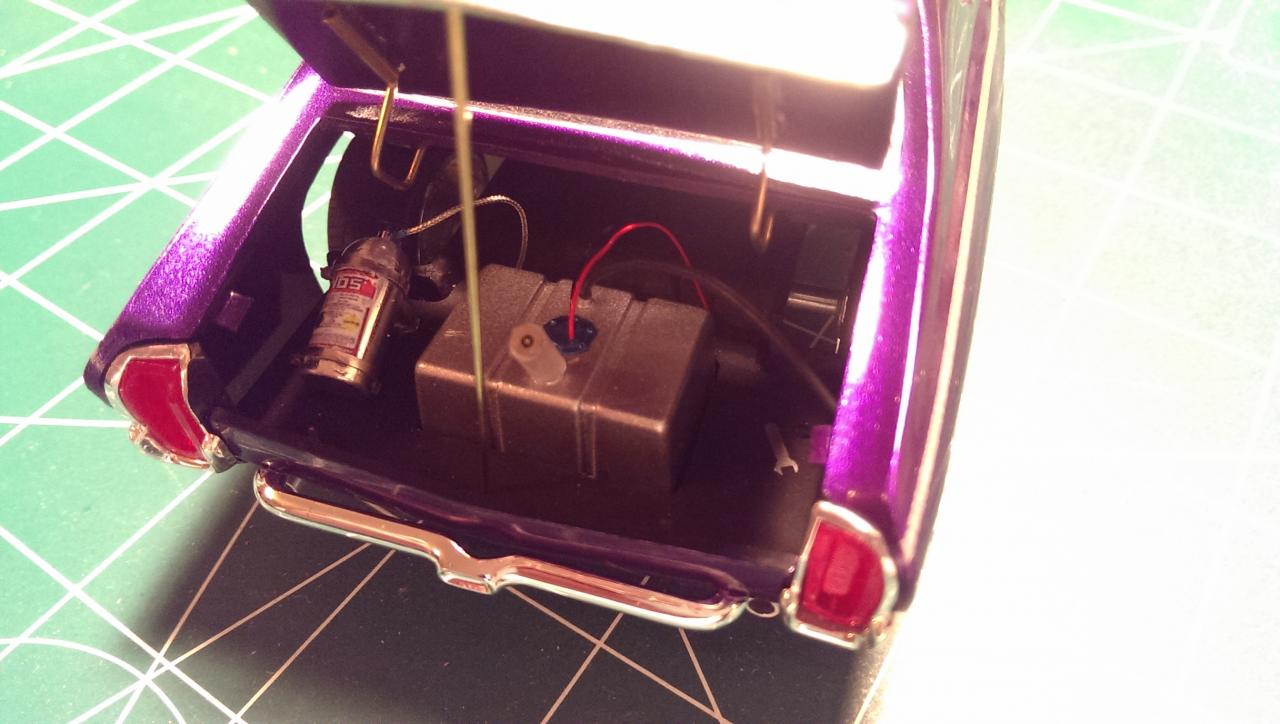
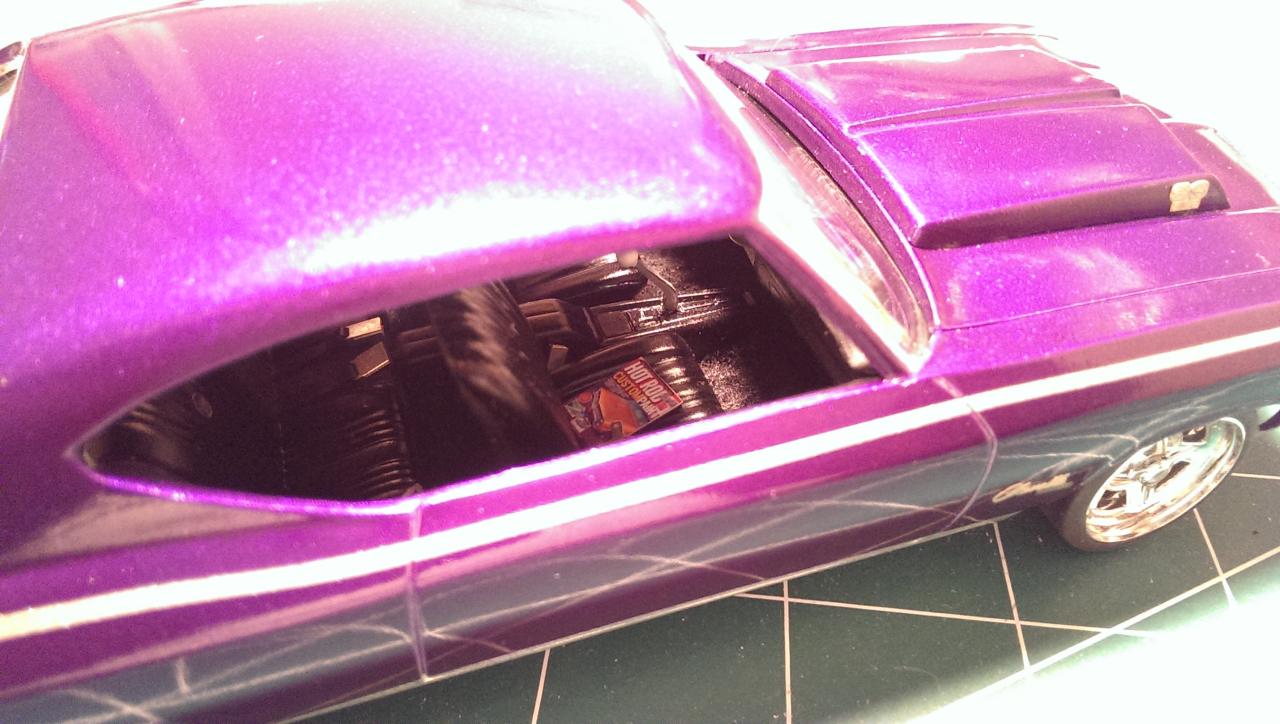
After some of my contest builds I wanted to do something different so figured I'd build something for the wife. She came into my model dungeon and picked out a kit, and the colors. The details were left to me....so as usual I'm going for broke :-) I opened the trunk and the doors, which will open suicide. The interior will be white and purple, white convertible top. The stock carbs were switched out for a resin set from MCG. Little bit of plumbing and wiring and here's where it's at so far.
-
20' EU Container trailer 1:24
Christopher J replied to truckmodell's topic in WIP: Model Trucks: Big Rigs and Heavy Equipment
Having pulled containers and remembering a lot of the components on the chassis I have to say this is absolutely stunning work and craftsmanship. You have great modeling skills, keep up the fabulous work. Looking forward to the continued progress. -
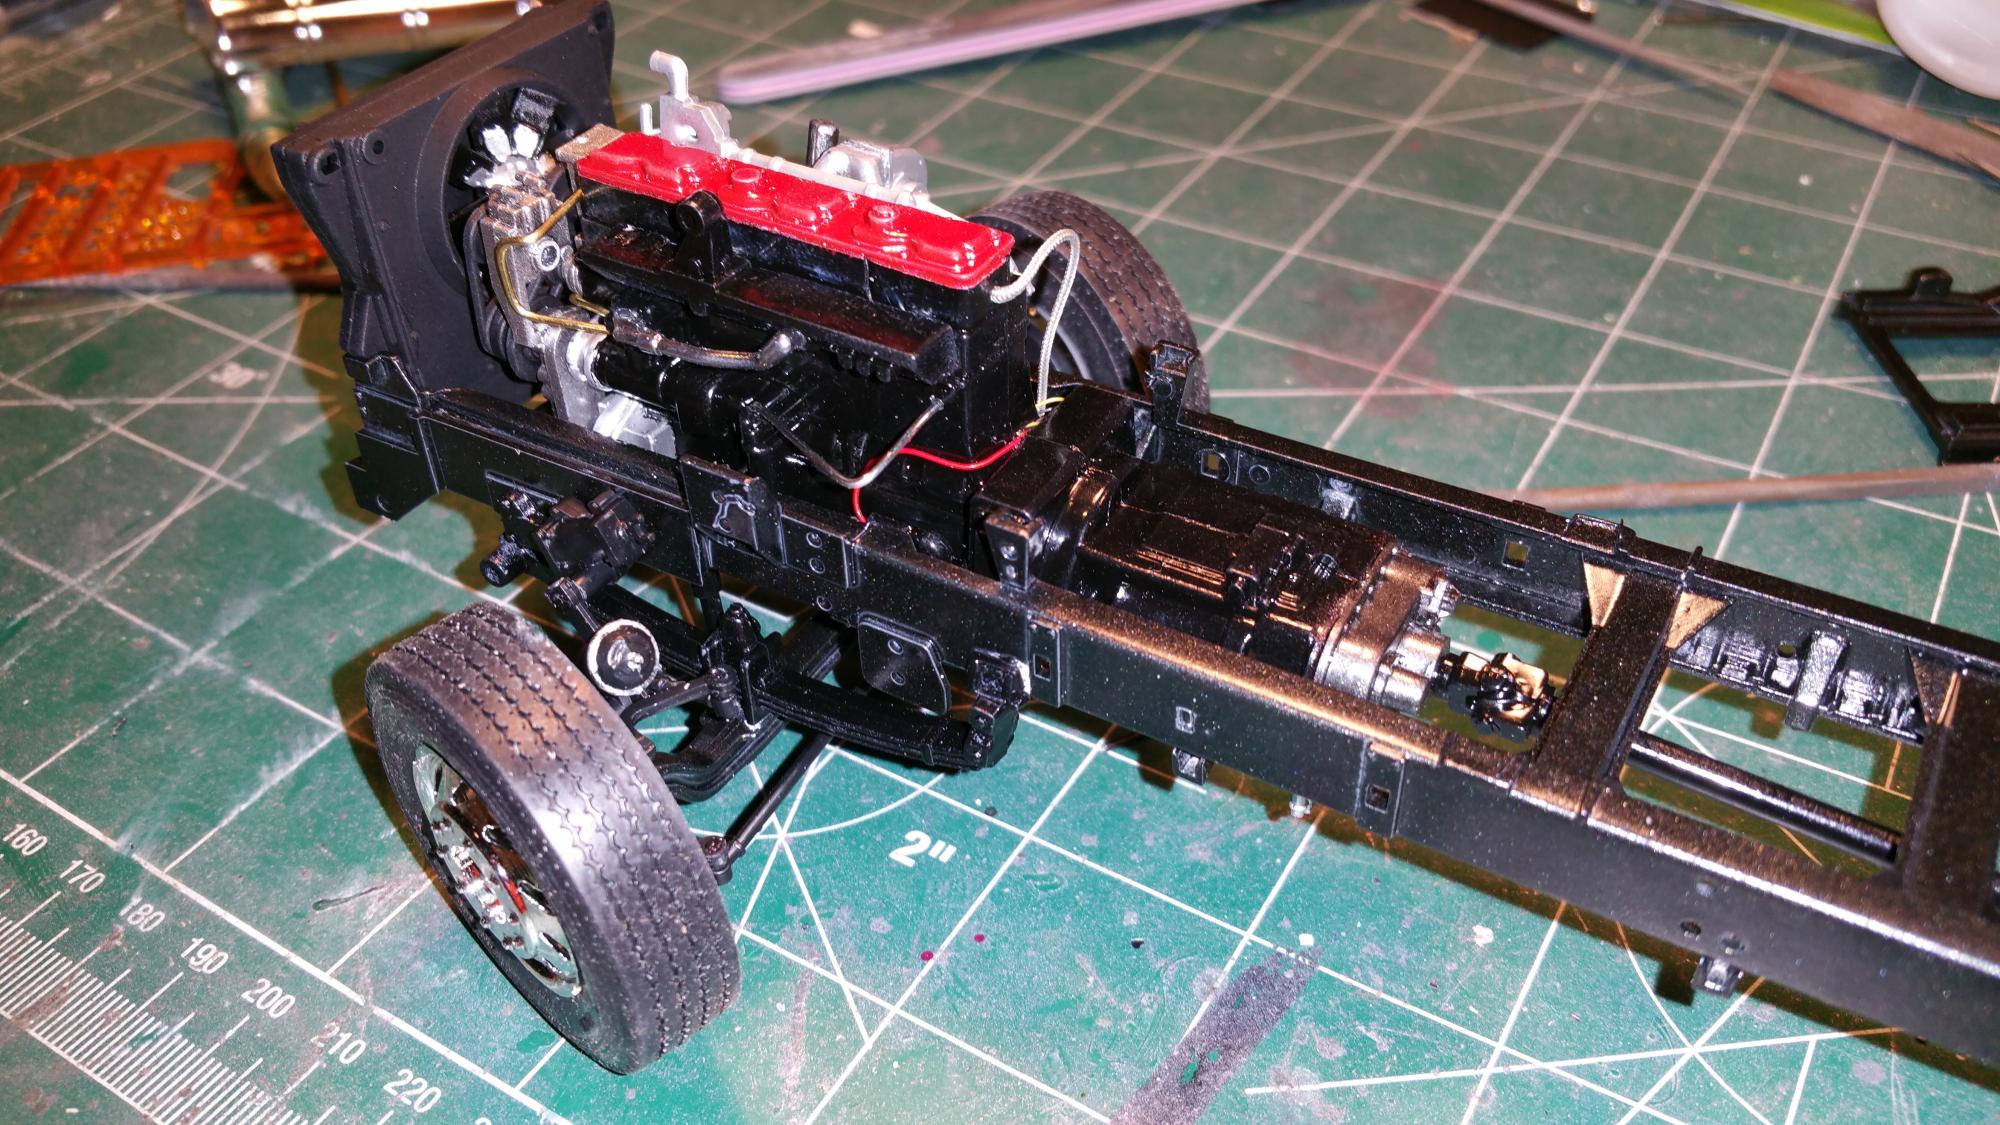
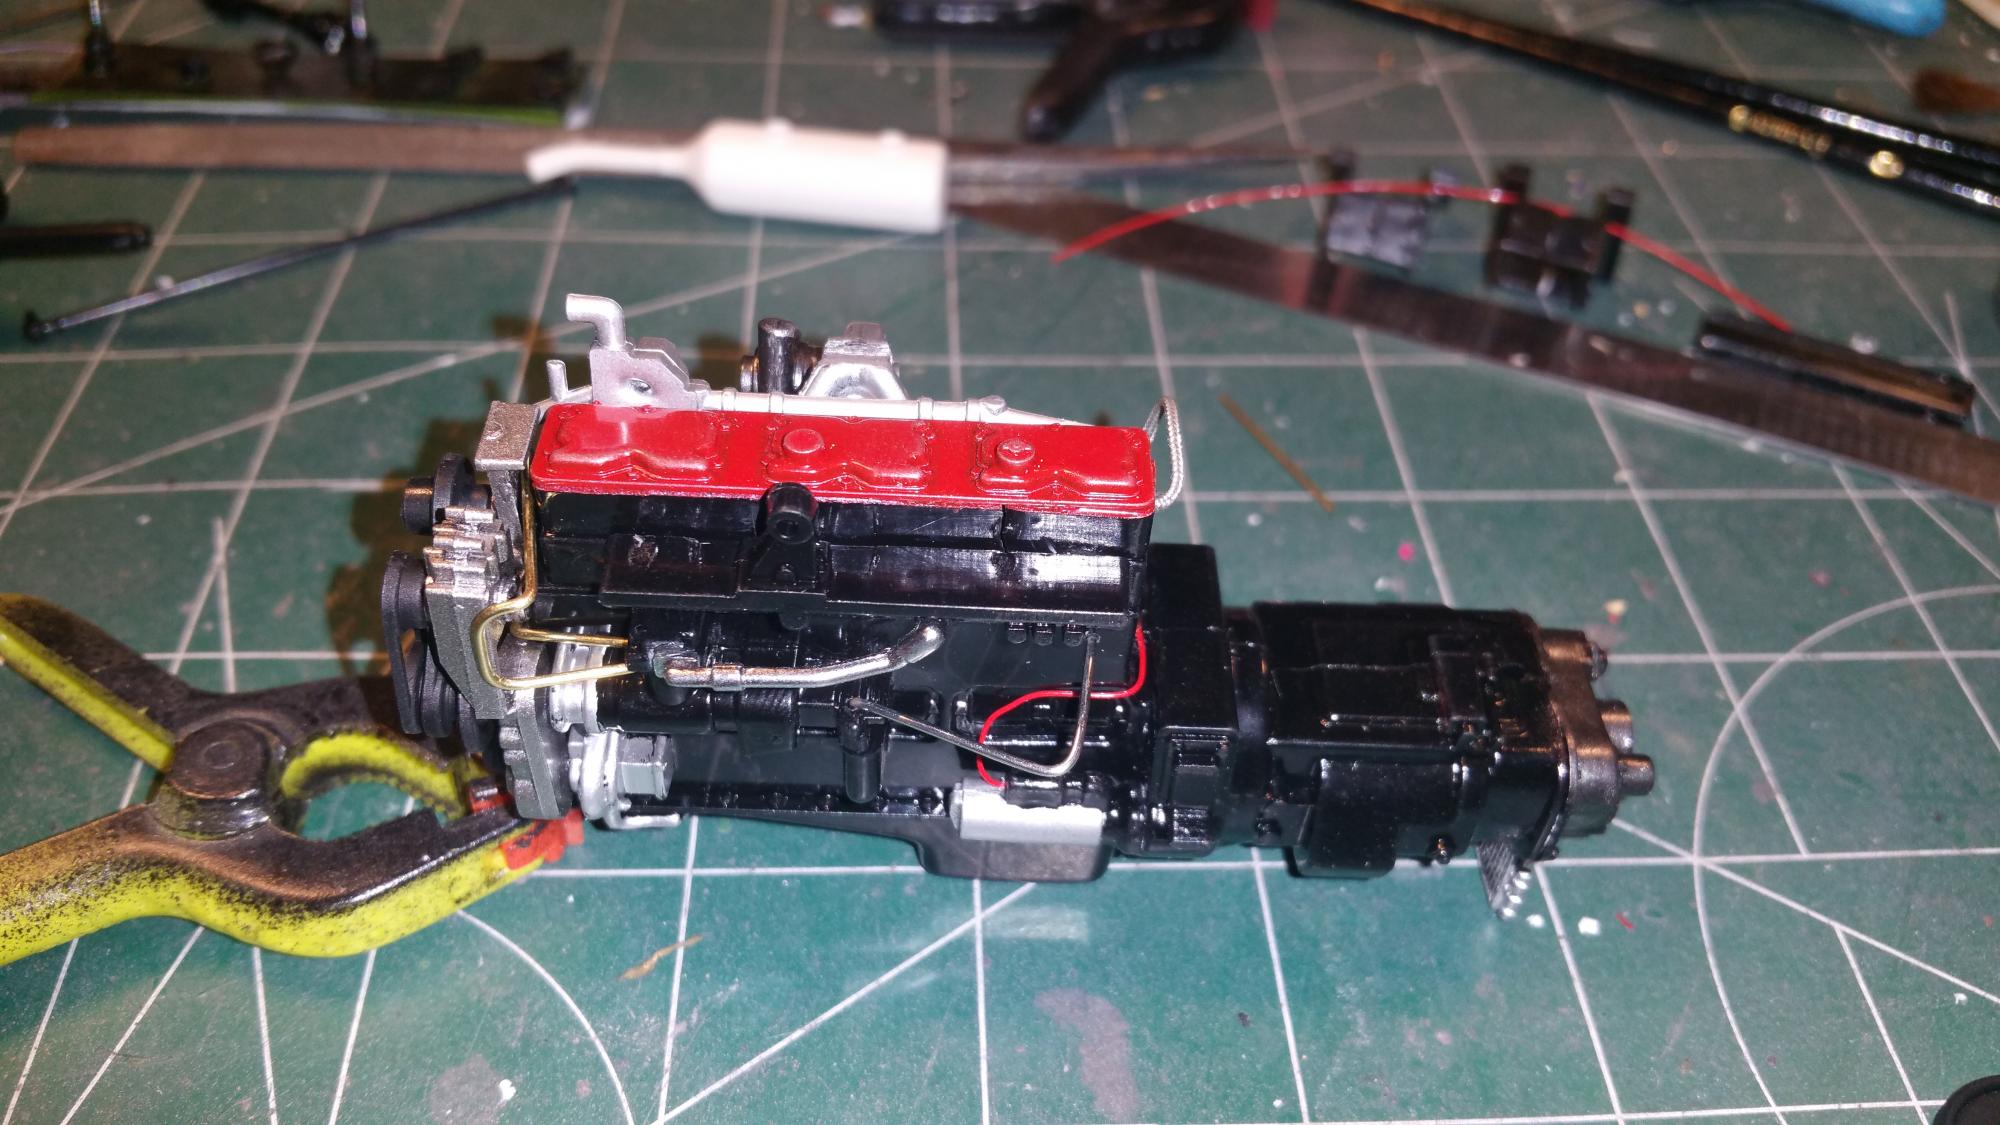
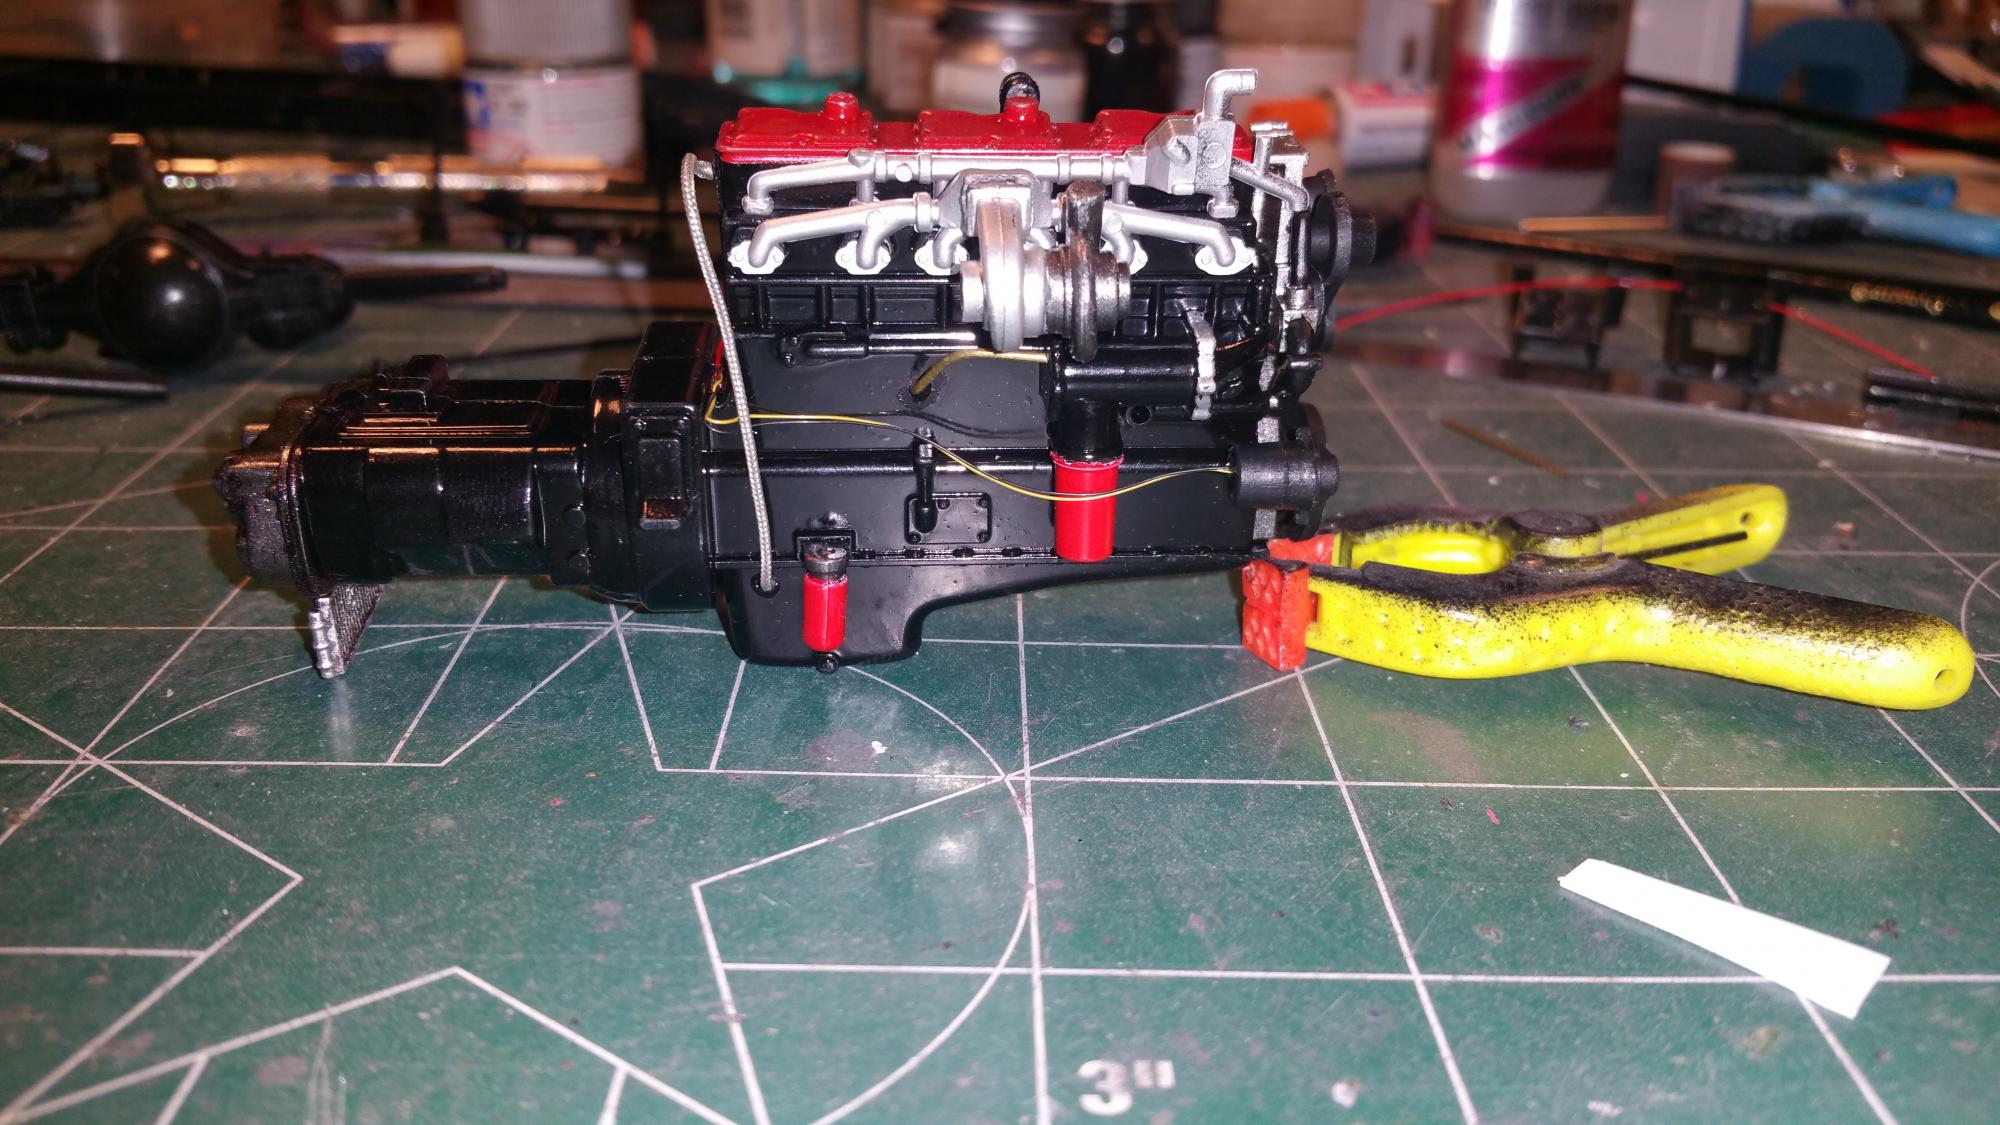
I got lucky and found an Itelari Freightliner FLD 120 at the last model show. Picked it up for $20. I've been building for a while but fairly new to the commercial side of modeling. After finishing my Lone Star the truck bug bit me so I decided to start this one. After some research on Freightliners of that year it seemed the kit motor mostly resembled a Cummins N14 so that's what I went with. When it comes to car builds I plumb and wire them as much as I can to look real (within reason). That said I want to dress up this engine as best I could for a first try. It's not 100% accurate to the one that was in one of my trucks or pics from the web, but it's better than nothing. Considering one engine half was warped, cracked and bent I'm happy with how it came out.
-
Absolutely fantastic! Very nice work. I love the scratch built frame.
-
Thanks to all for the replies and taking time to look.
-
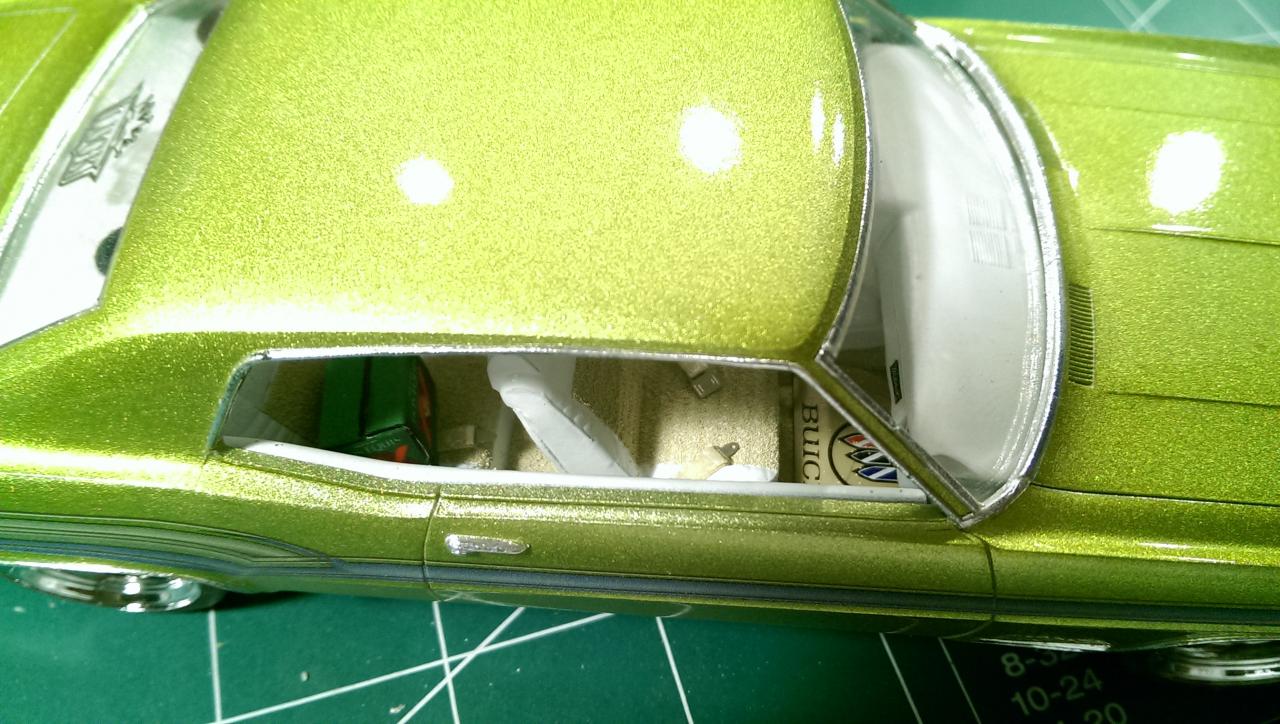
Here are the rest of the shots I have. The floor mats I made using styrene sheet. The kit came with a good amount of decals and there was plenty of Buick ones to pick from. The carpet is embossing powder.
-
Stretched Revel W-900
Christopher J replied to fantacmet's topic in WIP: Model Trucks: Big Rigs and Heavy Equipment
I'd like to know too!! Other than Dacron or Emron what did you use that no strippers are working? -
Stretched Lonestar
Christopher J replied to Christopher J's topic in WIP: Model Trucks: Big Rigs and Heavy Equipment
Well ain't that a b!+ch!! Thank you very much for the heads up on that! I'll have to see what I can come up with as I'm out of the colors I used. -
I've been a Mustang guy since childhood but never cared for the Mustang II. I have to say though if they'd made them like you did yours I may have had to owned one of that body style. Very nice kick a$$ build!! Love it.
-
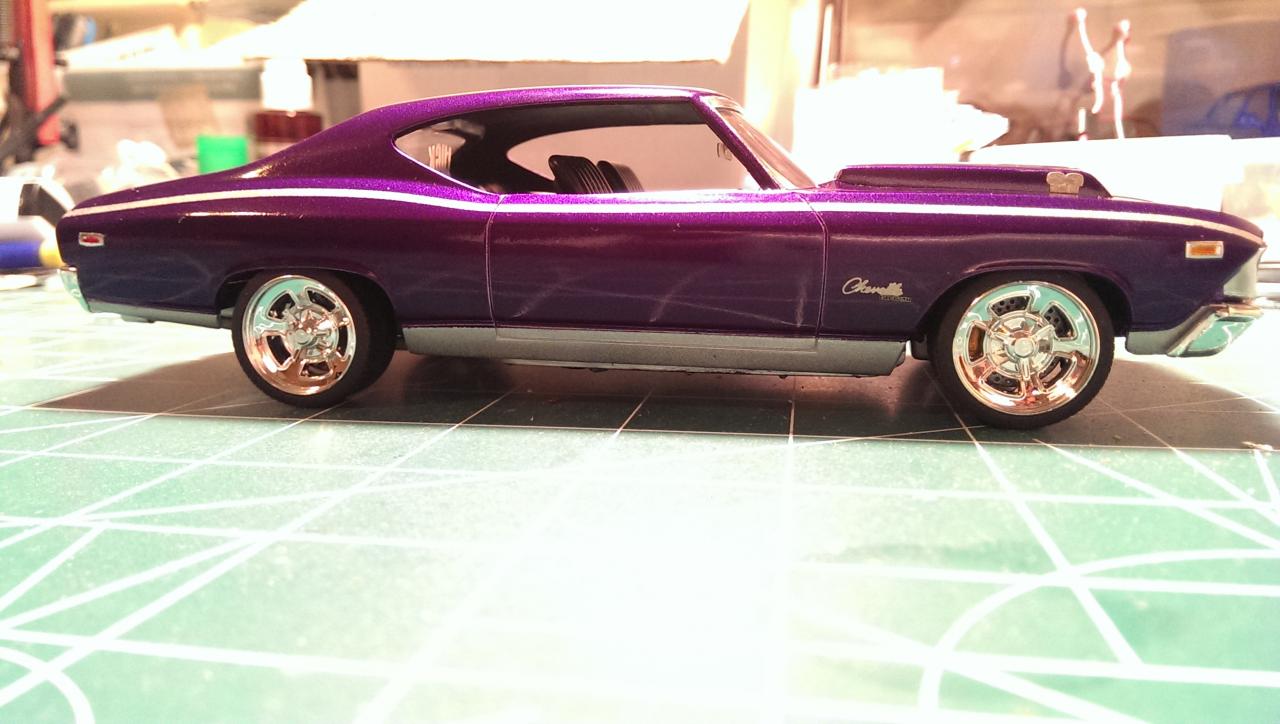
My new wife was admiring some of my previous builds and I asked her if she'd like me to build a car for her. She went through my stash of kits and picked out a Chevelle. She chose the colors and I went from there. Had a problem with bleed through she took ownership before I could touch it up.:-)
-
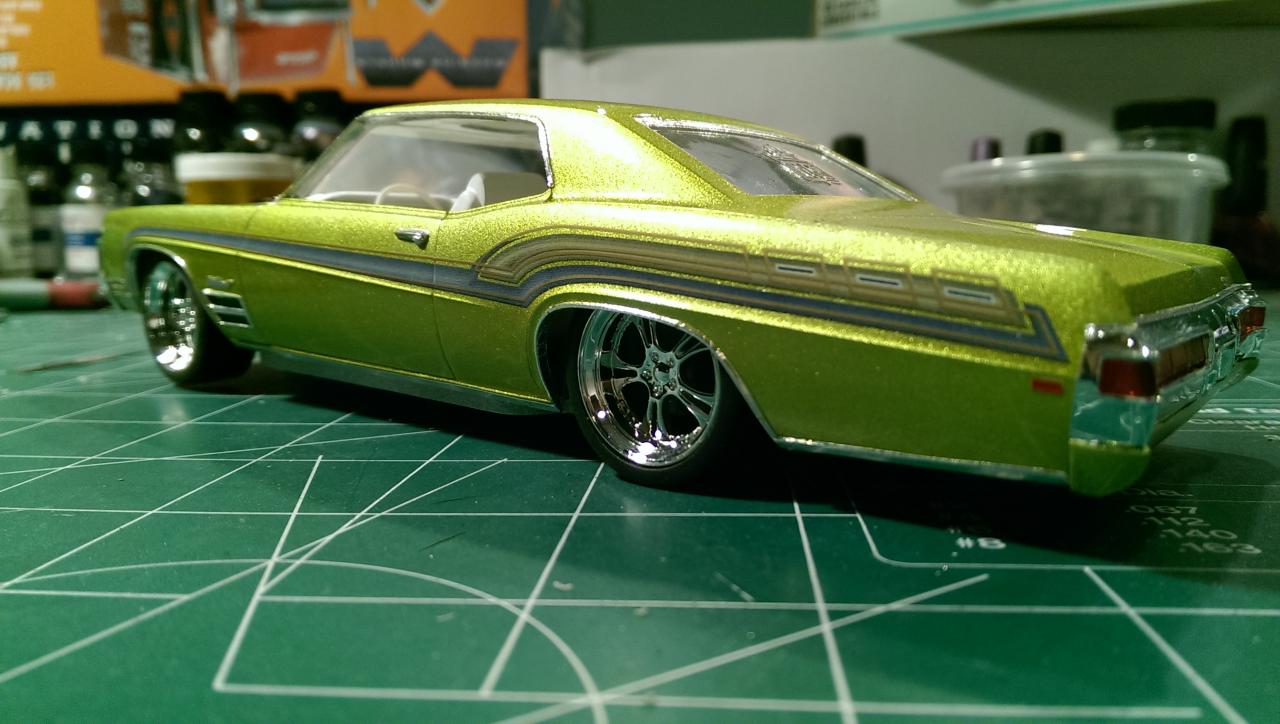
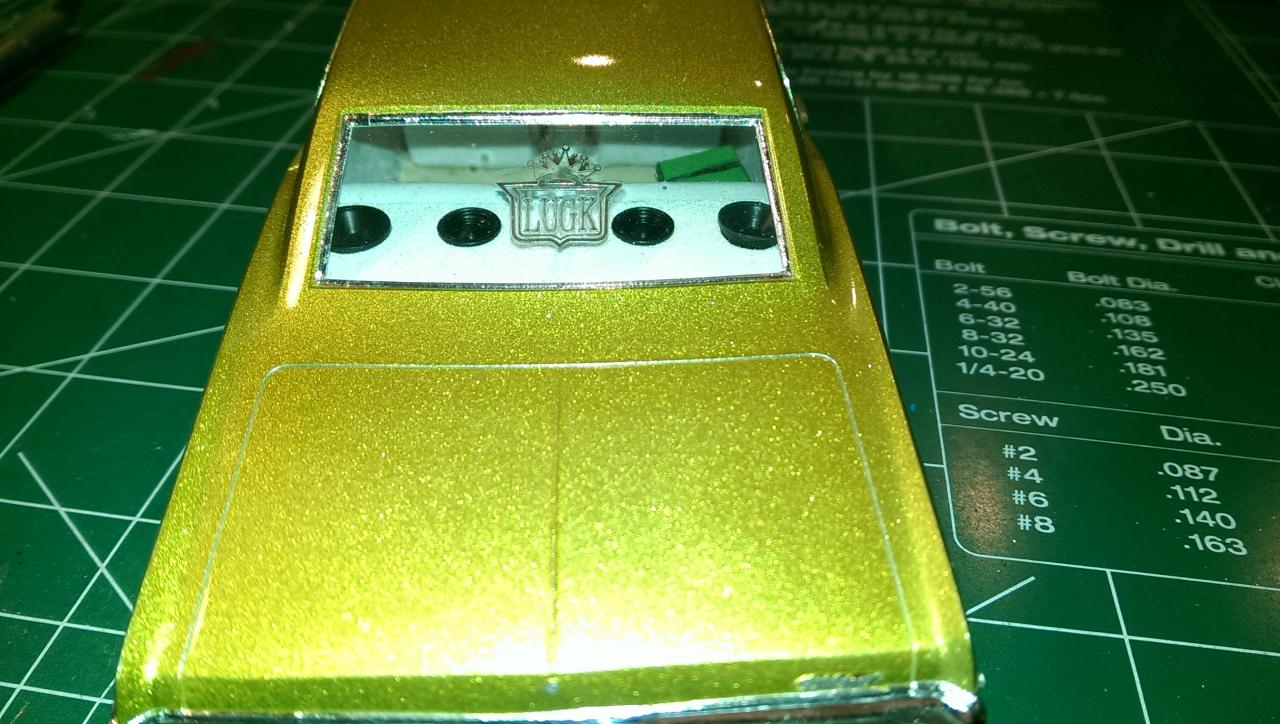
Buick Wildcat I did a while back, can't remember if I posted pictures of it. Was working on it about the time of my divorce. Trying to get back into the swing of things and back to my passion of building. My clubs logo placed on the rear glass using clearcoat. Color is Alclad Candy Yellow over Model master Diamond Dust. Pegasus 20 inch wheels.
-
Stretched Lonestar
Christopher J replied to Christopher J's topic in WIP: Model Trucks: Big Rigs and Heavy Equipment
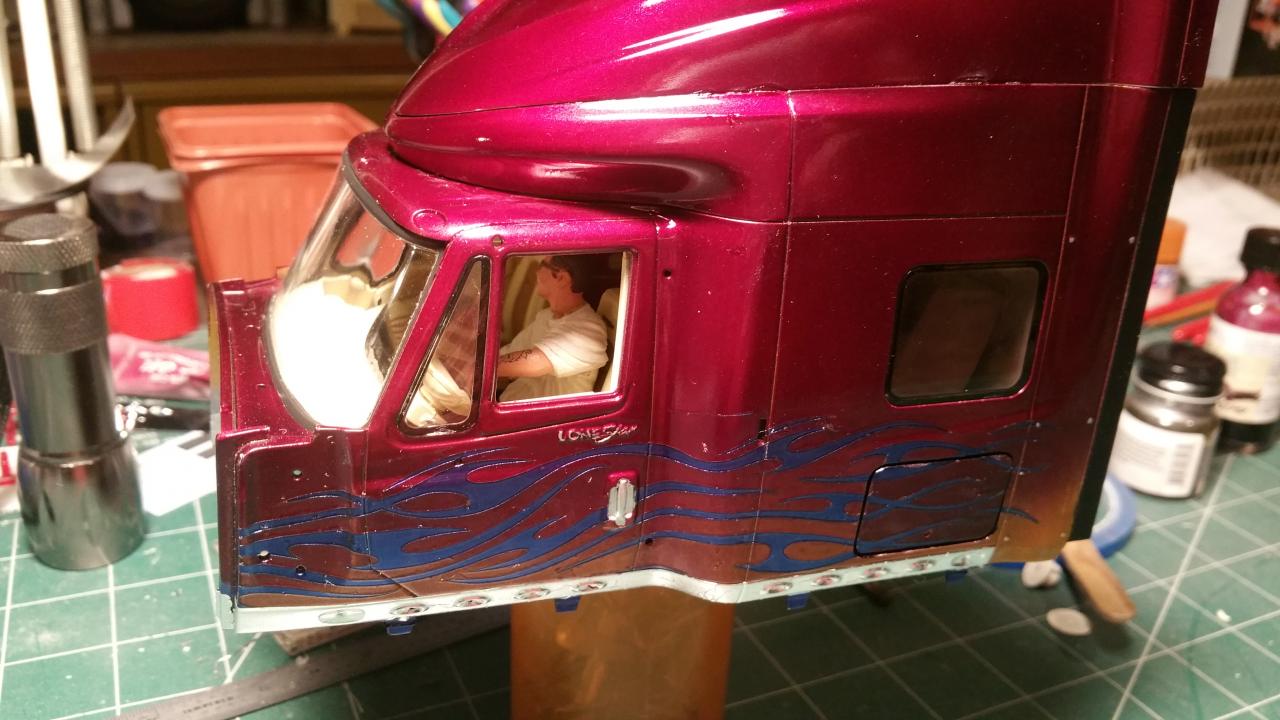
Interior is glued in finally and the light is functional. Did some touch up on the exterior as well. On to the other lights....
-
White Freightliner
Christopher J replied to The Modeling Hermit's topic in Model Trucks: Big Rigs and Heavy Equipment
Having worked as a mover/owner operator for a few years I have to say I loved the read. Had me laughing something crazy :-) Nice looking truck, like the colors. -
Stretched Revel W-900
Christopher J replied to fantacmet's topic in WIP: Model Trucks: Big Rigs and Heavy Equipment
Citristrip should work. I fly scale RC helicopters and some of the builders and pilots I've flown with swear by it when having to strip a body for repaint. Nice stretch, I have always liked tractors with long frames. -
Frame painting
Christopher J replied to Christopher J's topic in General Automotive Talk (Trucks and Cars)
Thanks for all the great replies and help. Taking a bit of each of these ideas and I should be successful on my next paint job coming up. -
I've been looking at some of the various builds here by a number of you builders...beautiful stuff to say the least. When it comes to cars I feel like I'm on point in most cases but trucks I'm still a rookie to. One of the things I've noticed is a number of you all build up your chassis/frames with the suspensions and afterwards you paint them. Being an OTR driver I know truck frames and most components on them are painted the same color, what I'm curious about is how to guys get good coverag with your paint without being too heavy or light in some crevices and such, especially those using rattle cans.
-
Will definitely be looking for some of that Krylon.
-
VERY VERY nice build so far. I have a couple of these AMT trailers. One I built for my oldest, the other I've scavenged parts from as well. Did you use BMF for the stainless or metalizers paints? The parts look great. Will your rear door function as a the lift as well?
-
Stretched Lonestar
Christopher J replied to Christopher J's topic in WIP: Model Trucks: Big Rigs and Heavy Equipment
Thanks for all the kind remarks and replies. I've really learned a lot from looking at many of your builds. Hoping as I build a few ore trucks I'll be able to detail them like I do my cars. Did a little more this evening. The overhead interior sleeper light is wired. The battery will be under the bunk, which is why I opened the doors. Got them fitted and hinged. The hood is not wanting to line up correctly so gonna need to do some tinkering....more pics soon. -
Stretched Lonestar
Christopher J replied to Christopher J's topic in WIP: Model Trucks: Big Rigs and Heavy Equipment
When I did the math it was just shy of a 5ft stretch.