-
Posts
489 -
Joined
-
Last visited
Content Type
Profiles
Forums
Events
Gallery
Everything posted by smellyfatdude
-
Today was finally a decent day for painting outside, and there's no way I was going to waste it. I spent about two hours masking the interior, and about ten minutes painting it. All in all, it was time well spent. It'll need a wee bit of touching up, plus the flocking and detailing added, but at least the paint's on it. Also got the bumpers done. Half an hour after spraying them with Tamiya clear, I shot three coats of Alclad on them. They're not perfect, but they're definitely better than what I started with.
-

1962 Ford Sunliner Update, 8/1, Adding Some Color
smellyfatdude replied to StevenGuthmiller's topic in WIP: Model Cars
I'm envious! I already have a ' 62 in my collection, that I built last year. But seeing that fresh plastic sitting there makes me want to do another. I shall be watching this one! -
You must have been saving it, so you could make it look stunning!
-
Thanks, and Dyno that's how it sits with the axles in the standard position. I think you're just seeing fluffy towel effect, Neither of the trash cans are level (or clean!), but you can see it's pretty much dead on stock position. I could lower it, but it's not going to be crusing east L.A., and there's too many darned potholes around here to be dropping it down any, Today sucks for painting, warm and no wind but it's way too humid, thanks to the recent thundershowers. So I'll maybe clean the red paint off these tires, and use the blue craft paint I bought to fix them up. Maybe tomorrow, I can get some interior work done.
-
Thanks again, everyone. The wheels/tires will be stock, but with the newer parts from the re-issue. Got the bumpers cleaned up, and sprayed with Duplicolor black primer. When we get a day that the wind's not howling, I'll throw on a few coats of Tamiya clear, then shoot some Alclad on them.
-
Thanks, Don. I like 'em too, that's why I keep building 'em! Here's the kit bumpers, devoid of chrome. It's funny how some good, strong oven cleaner turns that ancient plating in to an orange mush. I'm going to clean these up, remove the flash and seams as well as the molded in year, and re-do them with Alclad. I wonder how many kids tried butting them on upside down, since they say "1961" either way. And here's the dash and boot painted. The Pacific Blue over white is just ever so slightly lighter than the Coral Blue on the body. Right on, that's the optical delusion I was hoping for. Much tedious masking lies ahead on the interior, but I have a feeling once it's done it'll have been worth the effort. Can smelly say, "Wow, I really picked great colors this time!"? Yes, smelly can!
-
That's okay, Steve. That's to be expected, and is perfectly fine to me. Critiques and opinions are the whole reason behind sharing our "little toy cars". When it's something like detailing, where it looks right to one person and out of place to another, it's not as though any comments to the negative are the same as someone saying, "That's not right" or "that's not correct for that model". That might not be how they would build it, but I think it's understood that the work we post and share has to look right to us, since it's our shelf that it's going to reside on. I enjoy hearing anyone's opinion, simply 'cause I wouldn't know a lot of the stuff I know about this hobby, if it weren't for people sharing theirs. You can't see much here, but the tub and dash have been sprayed with Krylon satin white. When it's dry in a bit, I'm going to shoot the Pacific Blue on the dash. I just hope that's what it is. It could be the leftover Tropical Turquoise, that was also missing the label. Gee, I love surprises!
-
Byron, I've often wondered the same thing. It's odd how a person can look at reference photos of something they build, and see such a marked difference between models of the same vehicle. On some 1:1 cars the panel lines are barely visible, on others they are quite prominent. The hardtop above looks like kind of a beater, that probably needs the doors aligned. But the ragtop looks pretty cherry, and one can see the panel lines distinctly. I guess it's a matter of preference, and I find that most of the time it's not what people notice and focus on. Most likely, a little less scribing beforehand would make them appear a bit lighter.
-
Thanks, fellas. I forgot I had to foil the trim for the top well. So I took care of that this a.m., and used some more black wash to create a line seperating the windshield frame from the door. Looks a little more natural, I think.
-
Thank you, Curt. I've got the chassis prettied up, as well. Just have to add some aluminum bmf to the mufflers. The can sans label is some leftover Boyd's Pacific Blue. Feels like just enough to do the interior, so I'll do it up with that and white.
-
Here's the body, black wash added where needed, and the foil all done. I brushed the rear quarter trim with Tamiya flat clear, to get the right aluminum effect.
-
Thanks again, folks. For those who are not a fan of the trash can, here you go. My Machine on a shingle.
-
I'd be impressed even if all you'd posted was the finished build. After seeing what you started with, I'm in awe! That's a totally sharp Javelin!
-
If you come across a used asphalt shingle, send it my way. I could paint some lines on it, to make it look like a stretch of road.
-
What a gorgeous Chrysler!
-
Now that I've finished (luv that word!) my ' 70 Rebel, this will be next. Got this painted and cleared last week, and depending on what source you look at the Tamiya TS-41 Coral Blue might be fairly close to Ford's Aquamarine of that year. The chassis has all that nifty promo style engraving about the car's features, and just like the ' 62 Galaxie I did last year, I'm going to leave it right there. I'll do the frame rails with semi-gloss black. The chrome is a lot fresher in the ' 61 hardtop re-issue that I'll be robbing some parts from, but I might just go ahead and strip the kit bumpers, clean up the seams and re-do them with Alclad. I foiled the script on the trunk, prior to laying the paint on, then cleaned it off with some thinner. This will be Galaxie # 4 in my collection.
-
Thanks for the comments, everyone. I've been lucky enough to build three of the vintage Jo-han AMC kits, and this particular one is probably the least accurate. But, it was still a fun build. I just need a Jo-han ' 70 Javelin kit now, and then I'll have all the ones I've ever drooled over. But then, I probably wouldn't pass up the chance to snag one of the Ambassador ragtops. Here's a pic of my AMC "unholy trinity".
-
A few more.
-
From an unbuilt Jo-han kit I acquired this past winter. The paint is Testor's One Coat Graphite Dust, over a base of Krylon satin white, and cleared with Tamiya TS-13. The front of the engine is from the AMT ' 75 Gremlin re-issue. I ordered the decals from Keith Marks, just so I could add the "Machine" logos.
-

When I Was Young & Dumb: Building the Unbuildable '56 Chevy!
smellyfatdude replied to John Goschke's topic in Model Cars
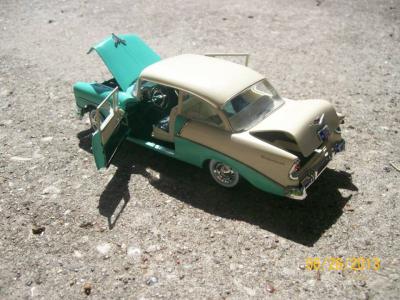
I bought one of those kits from ebay several years ago. I too discovered the "nightmare". More flash on that thing than anything I'd ever seen. So, I sent it to a friend. He made it in to this. -
Good question, Bob. I Googled the name and also saw that they were still around. It would certainly be interesting to know!
- 39,121 replies
-
- johan
- glue bombs
-
(and 1 more)
Tagged with:
-
In my quest to try and build a Galaxie from each year between 1959 to 1970, I snagged yet another kit from epay for a pretty decent price. The steering wheel is melted from tire burn, but that's the only real flaw. Haven't picked a color yet, and the autocolor library site is "under maintenance" right now. And I got these yesterday. I already have a Hemi Cuda kit, but I absolutely can't decide between two different color schemes, so I'll have to do one each way. The ' 65 Galaxie is going to be a replica of an actual car that a former co-worker of mine owned. He passed away several years ago, but his son has kept in touch and has been kind enough to send me some pictures.
- 39,121 replies
-
- johan
- glue bombs
-
(and 1 more)
Tagged with:
-

Revell 2013 Mustang Boss 302 - School Bus Yellow - Update - Gaps Fixed
smellyfatdude replied to RandyB.'s topic in Model Cars
You're a brave man, Randy! I try not to even look at my finished models, for fear of messing something up. But obviously, it paid off. The whole car looks stellar!

