purepmd
-
Posts
430 -
Joined
-
Last visited
Content Type
Profiles
Forums
Events
Gallery
Everything posted by purepmd
-
 Like Nitro said, these little work horses are all over the place, with Nebraska Department of Roads markings out here. Great work so far.
 -
Got the makings of a very cool custom. So far so very good.
-
1981 Kenworth K100
purepmd replied to KJ790's topic in WIP: Model Trucks: Big Rigs and Heavy Equipment
Beautiful work, as always, KJ. Love your KWs. -
579 & Refer Trailer
purepmd replied to kilrathy10's topic in Model Trucks: Big Rigs and Heavy Equipment
Really liking the interior, NICE work, JT! -
Just adding the monthly check in. I want to thank all for the kind words of encouragement and interest. They are greatly appreciated. I have made some progress, The White drop rail frame, with the correct cross members, and corrected front springs is together. This weekend, the cab floor / doghouse is being constructed. Took one of the Revell snap 3406 engines and built an aftercooler, removed the molded in starter, and made belt pulleys for individual belts. Hope to have pictures soon. Happy modeling.
-
Nice work, Tom! Love that green! I, too, like repurposing decals. Great results with yours.
-
Road Boss 2 Integral, photos 03/08/17
purepmd replied to purepmd's topic in WIP: Model Trucks: Big Rigs and Heavy Equipment
Sorry about the picture not loading, here is attempt 2. I was looking at Tamiya black and titanium silver, and red outline.
-
Road Boss 2 Integral, photos 03/08/17
purepmd replied to purepmd's topic in WIP: Model Trucks: Big Rigs and Heavy Equipment
Rick, go for it! There are some great reference photos on any image search, and there is valuable info at Whiteroadcommander.de, the form of many brochure scans. If you have a KFS resin kit, it makes it so much easier. I found, at the website, the BBC measurements for all three hood lengths. The long hood version I am doing, is 152 inches. That calculates to 160 millimeters in 1/24th scale. The cab itself, has a 88 inches, front to back, and 15 mm narrower. The sides of my hood measure 72 millimeters, and the trailing edge is about 3 to 4 millimeters away from the cab front /firewall. Add 2 mm to the front and if I remember, 14 or 15 mm to the rear of the wedge, added to the AMT Road Boss hood. Add 6 mm to the side, above the fenders. The longest sections of the AMT hood, will need to be shortened a little over 8 mm. This is the paint job mine is going to get. Oh, FYI, Detail Master has a photo etched, rectangular grille mesh that is super close to the grille on the RB, and RB2. Good luck, keep us posted! -
Another Kenworth K100
purepmd replied to KJ790's topic in WIP: Model Trucks: Big Rigs and Heavy Equipment
Well done, KJ. Another awesome tribute to the golden age of trucking. I think you could build a hundred of these and each would be unique and spectacularly done. Keep it up. -
Conforti Mack DM821SX 03/11/17 update
purepmd replied to Tesla's topic in WIP: Model Trucks: Big Rigs and Heavy Equipment
Dennis, that is certainly one jaw dropping Bulldog! Beautiful job! -
JT, that is amazing work! Insanely cool! Leaves me shaking my head, speechless! Can only imagine what the full treatment entails.
-
Definitely, what JT said.
-
Really liking the color combination, period perfect for a truck that age.
-
TAT 2017: 1987 Freightliner FLC
purepmd replied to steel_tiger1's topic in WIP: Model Trucks: Big Rigs and Heavy Equipment
That is some nice work, Tiger. Slow good work will always beat fast shoddy work. Like that old saying goes, "Haste makes waste". That is what I really like about military builders: details, details, details... Well done, looking forward to more. -
Road Boss 2 Integral, photos 03/08/17
purepmd replied to purepmd's topic in WIP: Model Trucks: Big Rigs and Heavy Equipment
-
Road Boss 2 Integral, photos 03/08/17
purepmd replied to purepmd's topic in WIP: Model Trucks: Big Rigs and Heavy Equipment
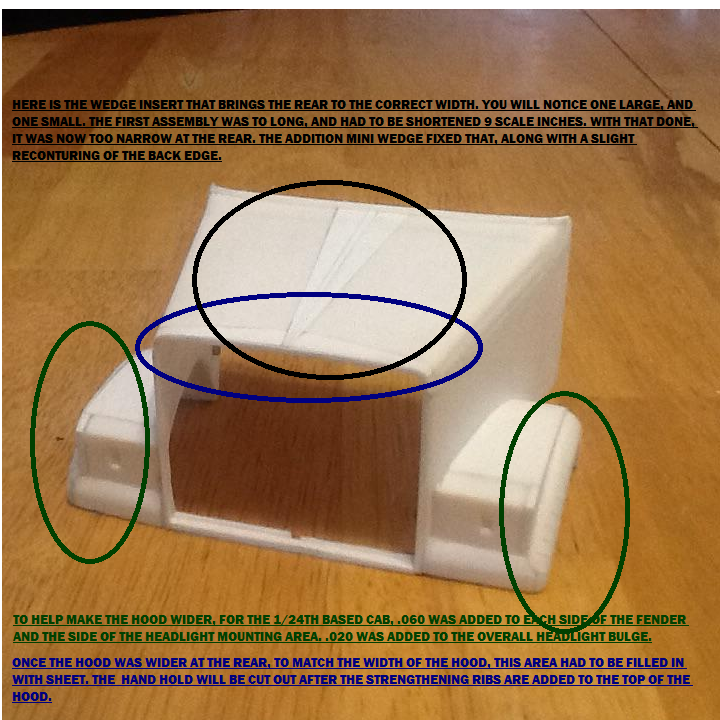
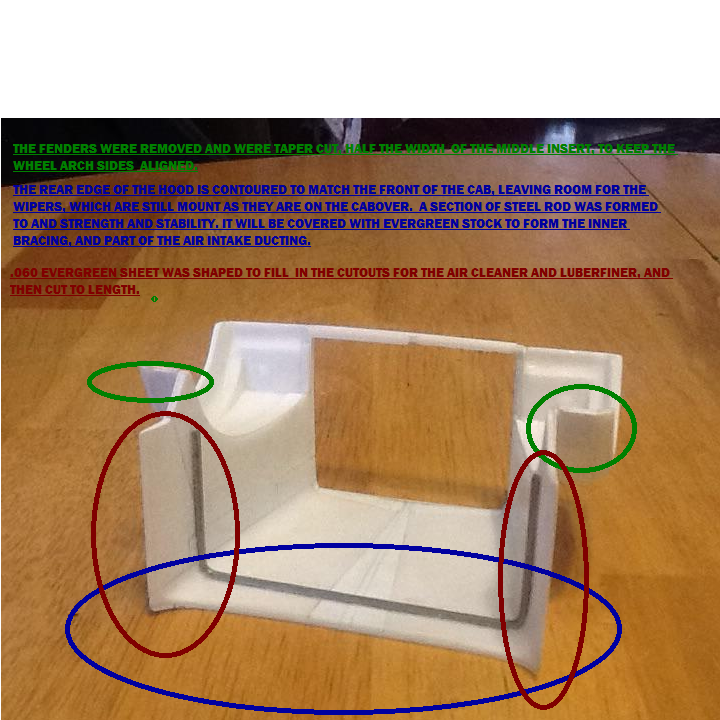
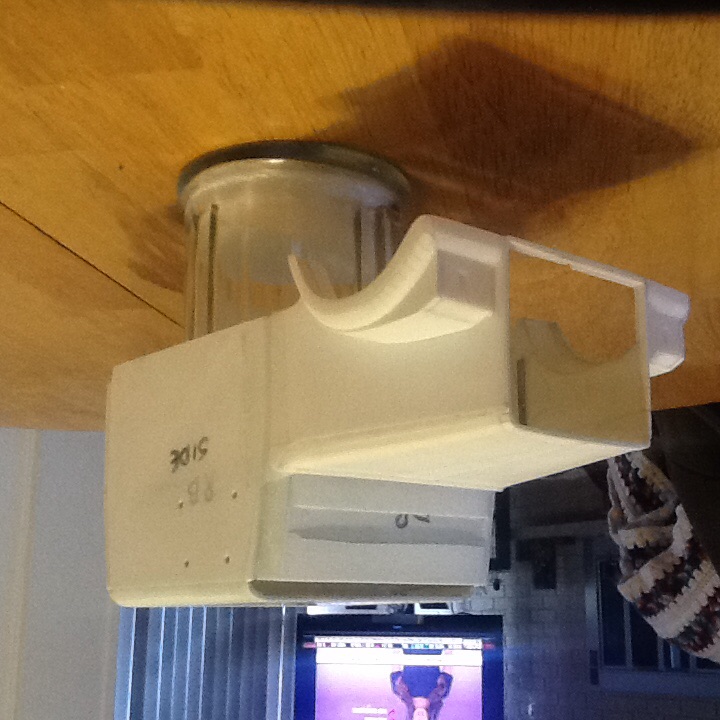
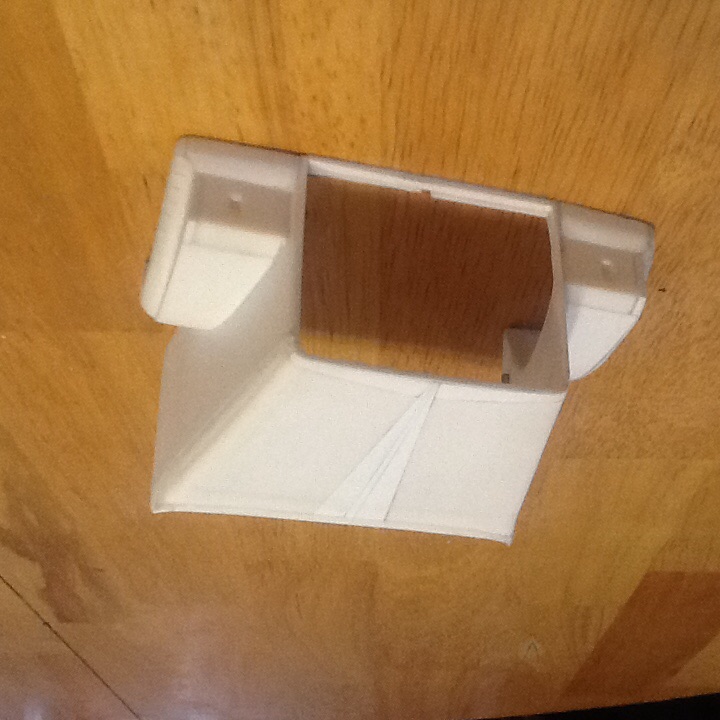
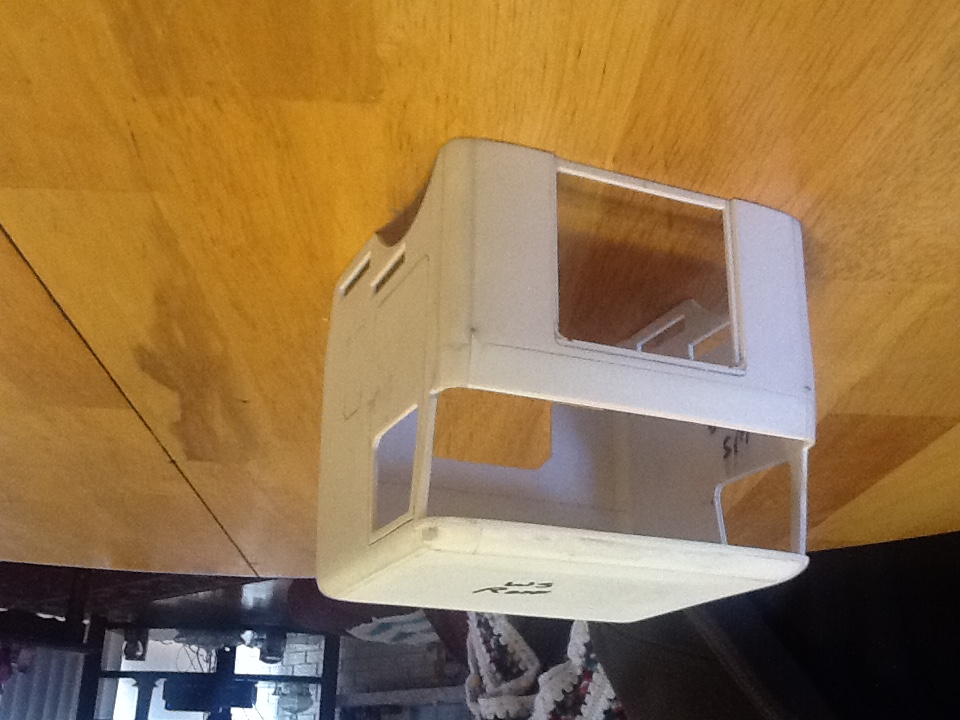
Great idea Vinnie, as you wish. The cabs are really simple in principle: just slabs of .060 sheet, with the front and rear angles cut. I sandwiched 6 sheets together, for 3 cabs, when forming the sides. All 3 should, in theory, be the same. Evergreen tube, various diameters, is split, length-wise, into 4 sections, to make the quarter round cab corners. A corner jig, and miniature carpenter's square, help keep panels aligned during the sand, fit, sand, fit, sand, and so on assembly. Here are some pictures, with notations, about the, more involved hood construction.
-
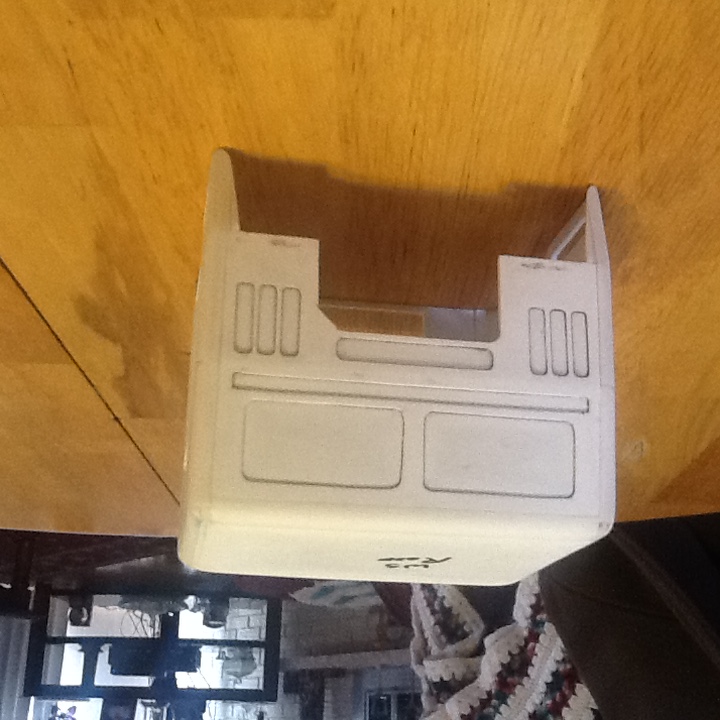
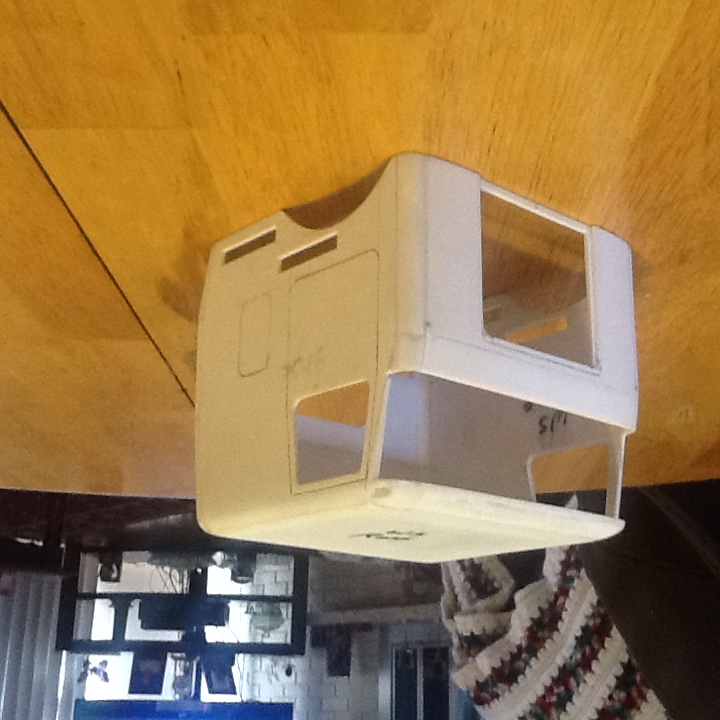
As a time and effort saver, I started multiple White High Cab scratch builds. I started with the same basic side panels, albeit a little shorter, as the Western Star cabover, and narrowed front and rear panels, and got the basic cab she'll set up in order to start cutting up a AMT Road Boss hood. It had to be widened, shortened a bit, made taller, and set the rear curvature to matche the front of the cab. I added .060 to each fender, on the overall width as well as to the width of the head light area to accommodate the quad rectangular head lights. Still have a lot of work before primer, and will post some more pics then.
-
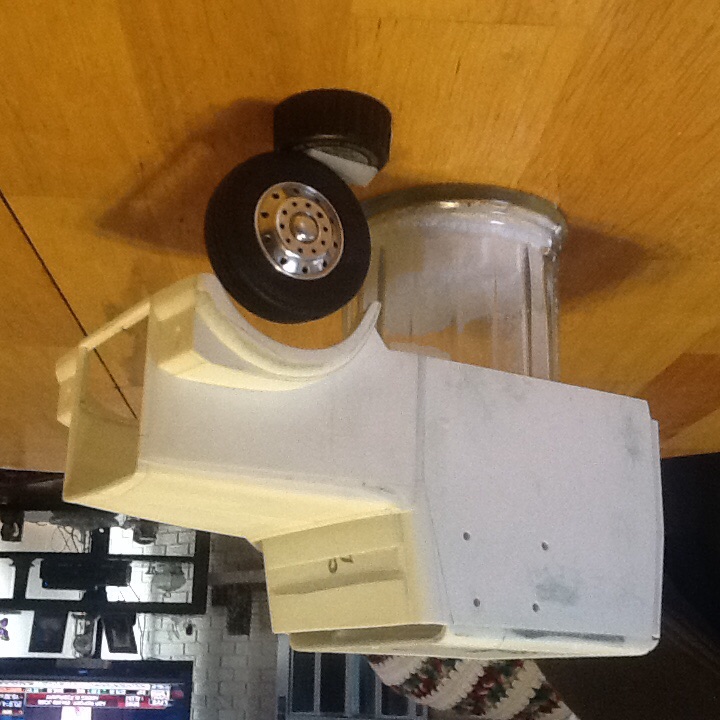
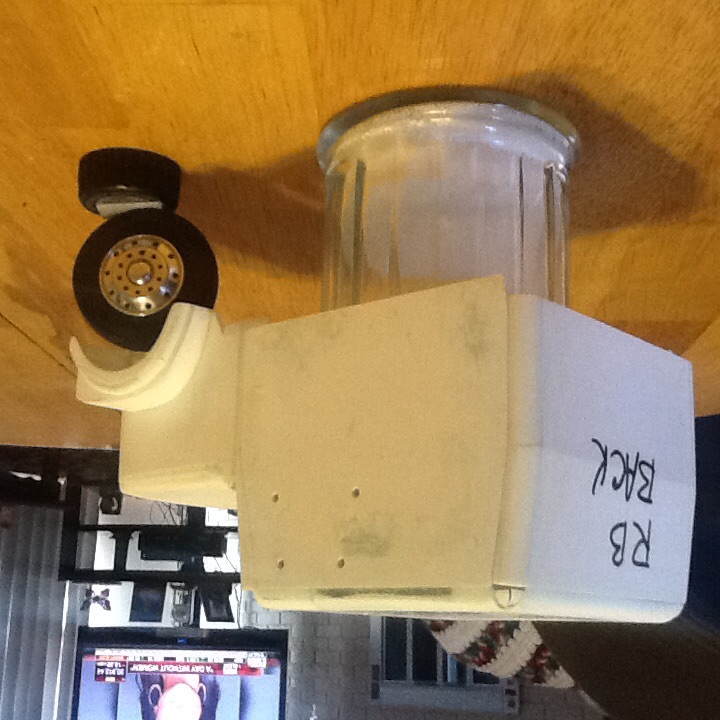
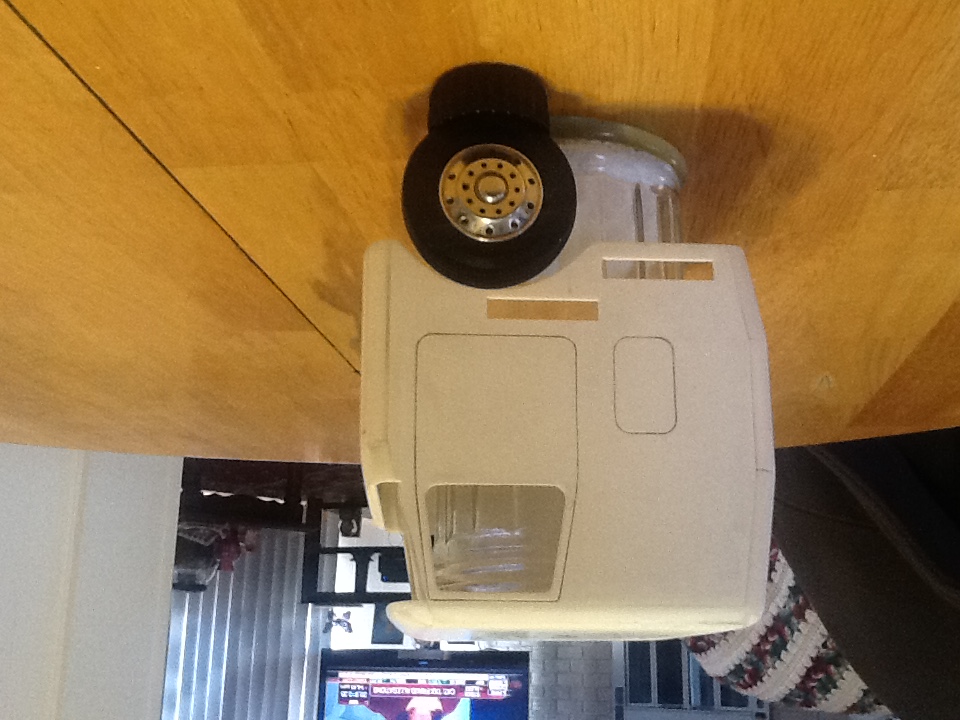
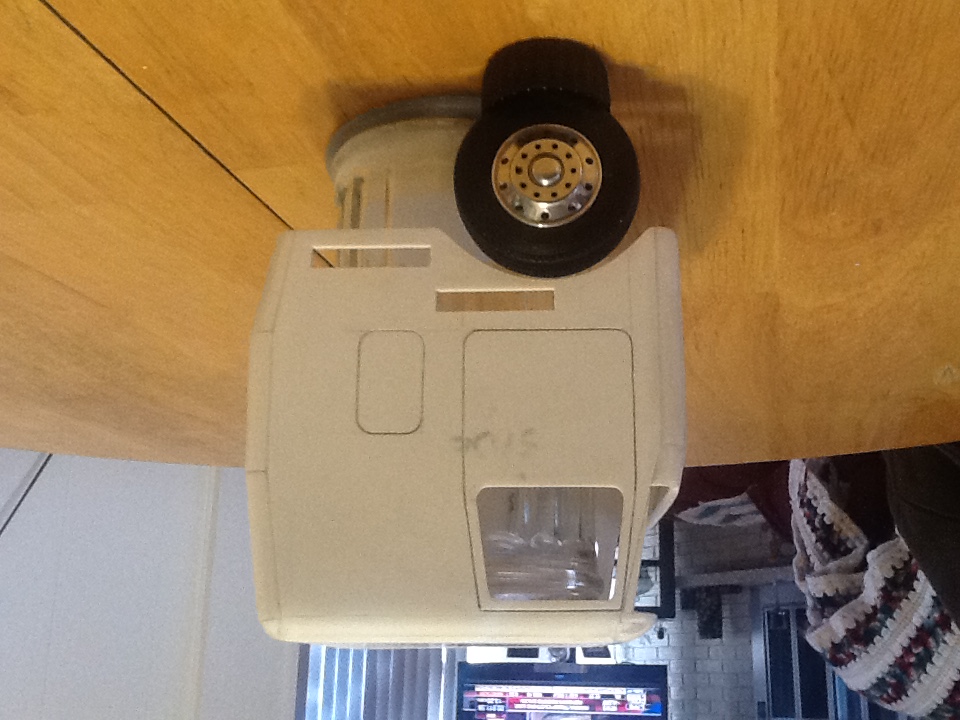
Finally got some pictures to post. Have the first Western Star cab roughed in. Haven't even done the first overall sanding. Still need to add the grab handle recesses, sleeper vents, door handle recesses, etc... Added a little graphite to the initial door seems for the contrast in the pics. Also will post the Road Boss 2 Integral pics in a new thread about that build.
-
1951 Corbitt Tall boy
purepmd replied to codie27's topic in WIP: Model Trucks: Big Rigs and Heavy Equipment
Now that is Just AWESOME scratch building. The engine is fantastic. Well worth the time invested! -
Kenworth Bullnose 1953 1/25 Strato-models
purepmd replied to Pavel A.'s topic in Model Trucks: Big Rigs and Heavy Equipment
Pavel, another work of art. Beautiful job! This model holds more interest, for me, than the real truck! Outstanding work! -
Would anyone want to see 70 Charger pics?
purepmd replied to mod3l Lover's topic in Car Kit News & Reviews
Having owned a '70, i would really like to see a corrected kit. If the bug ever bites hard enough, I just have to have one, based on the F&F car, I will figure out how to fix the tail lights. Doesn't look that hard, (famous last words). -
Very nice conversion.
-
Another knockout. JT. In it's own right, as cool as the first. Just a quick aside about the Italeri chassis. I have got mine all cut up, the sleeper, cab, hood, and bumper separated, and the 377 frame looks very close. Once you cut out the screw stanchions, from under the hood, it can be hinged pretty easily. A firewall can be fabbed with a little sheet stock, and TA-DA. You really did start a sales boom for New Ray with these.
-
New Ray Pete 579 Rework
purepmd replied to kilrathy10's topic in Model Trucks: Big Rigs and Heavy Equipment
"Detoyed" is right! Major difference! So glad i got one. I would have let this opportunity go by, if it were not for this model. Awesome eye for potential you have there. -
1/24 scale kenworth w900
purepmd replied to Chaser's topic in Model Trucks: Big Rigs and Heavy Equipment
now that is one slick custom! Great color combination, super clean assembly, and a whole lot of COOL mixed in. Very well done!