Bob Ellis
-
Posts
2,656 -
Joined
-
Last visited
Content Type
Profiles
Forums
Events
Gallery
Everything posted by Bob Ellis
-
Building a stock body 1984 Pontiac Grand Prix From NASCAR
Bob Ellis replied to Bob Ellis's topic in WIP: Model Cars
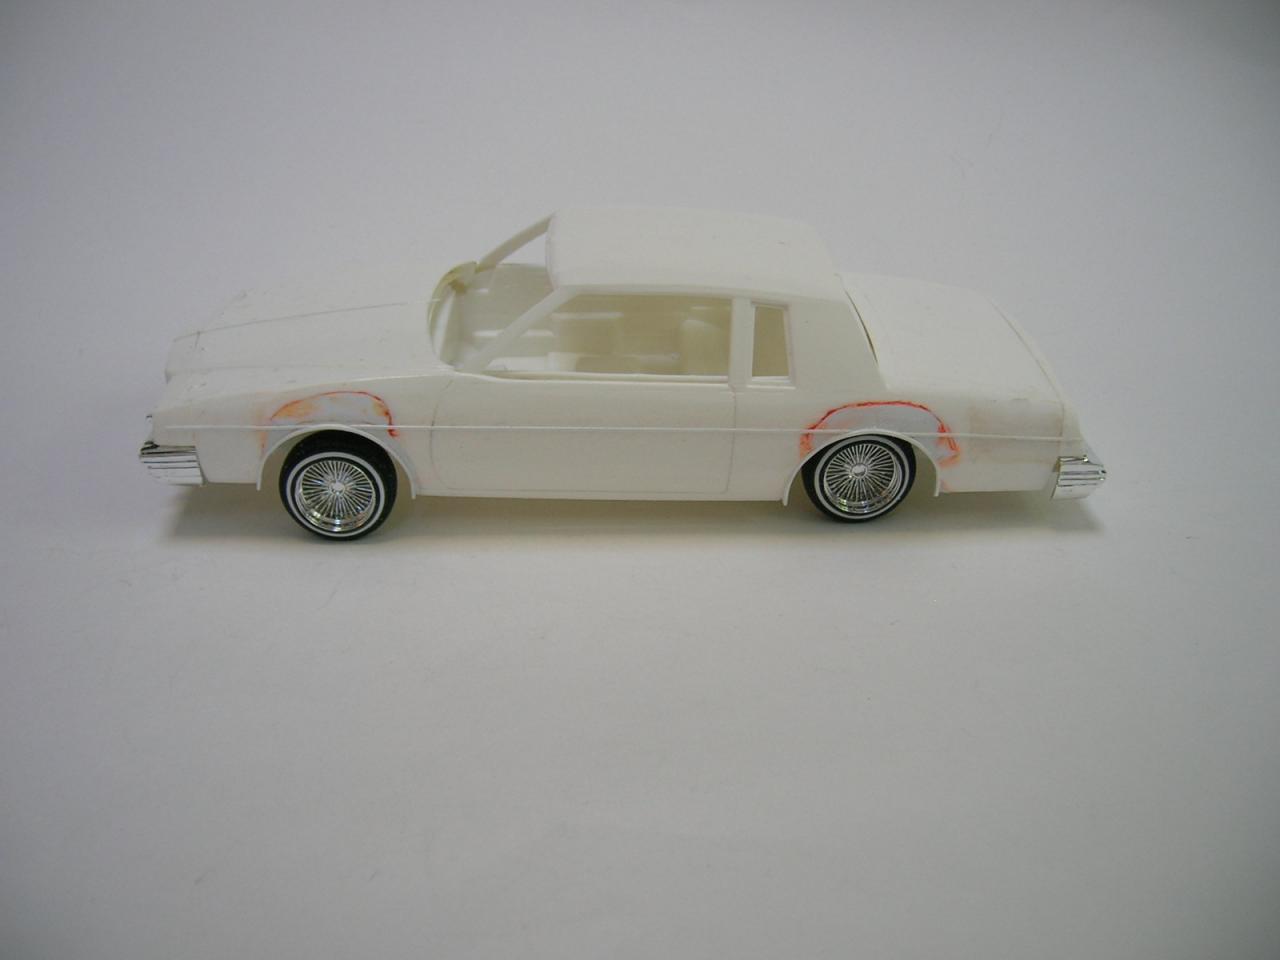
This is the first attempt to the side chrome. You can fix mistakes using an Xacto to chisel it off if it doesn't go well.
-
Building a stock body 1984 Pontiac Grand Prix From NASCAR
Bob Ellis replied to Bob Ellis's topic in WIP: Model Cars
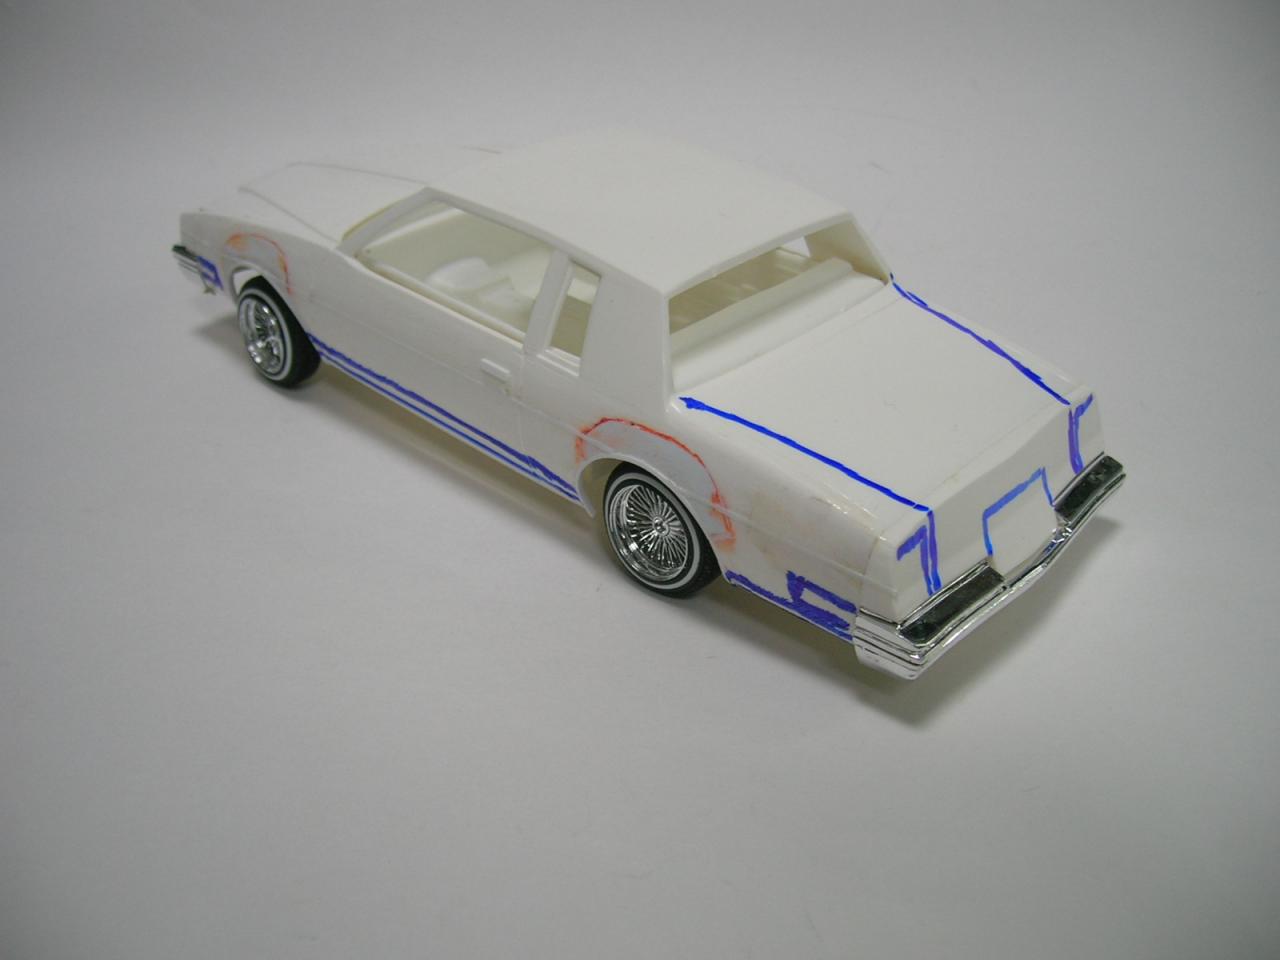
I like to plan details with a magic marker based on photos. I rough it in. Evergreen is used for body shape and chrome.
-
Building a stock body 1984 Pontiac Grand Prix From NASCAR
Bob Ellis replied to Bob Ellis's topic in WIP: Model Cars
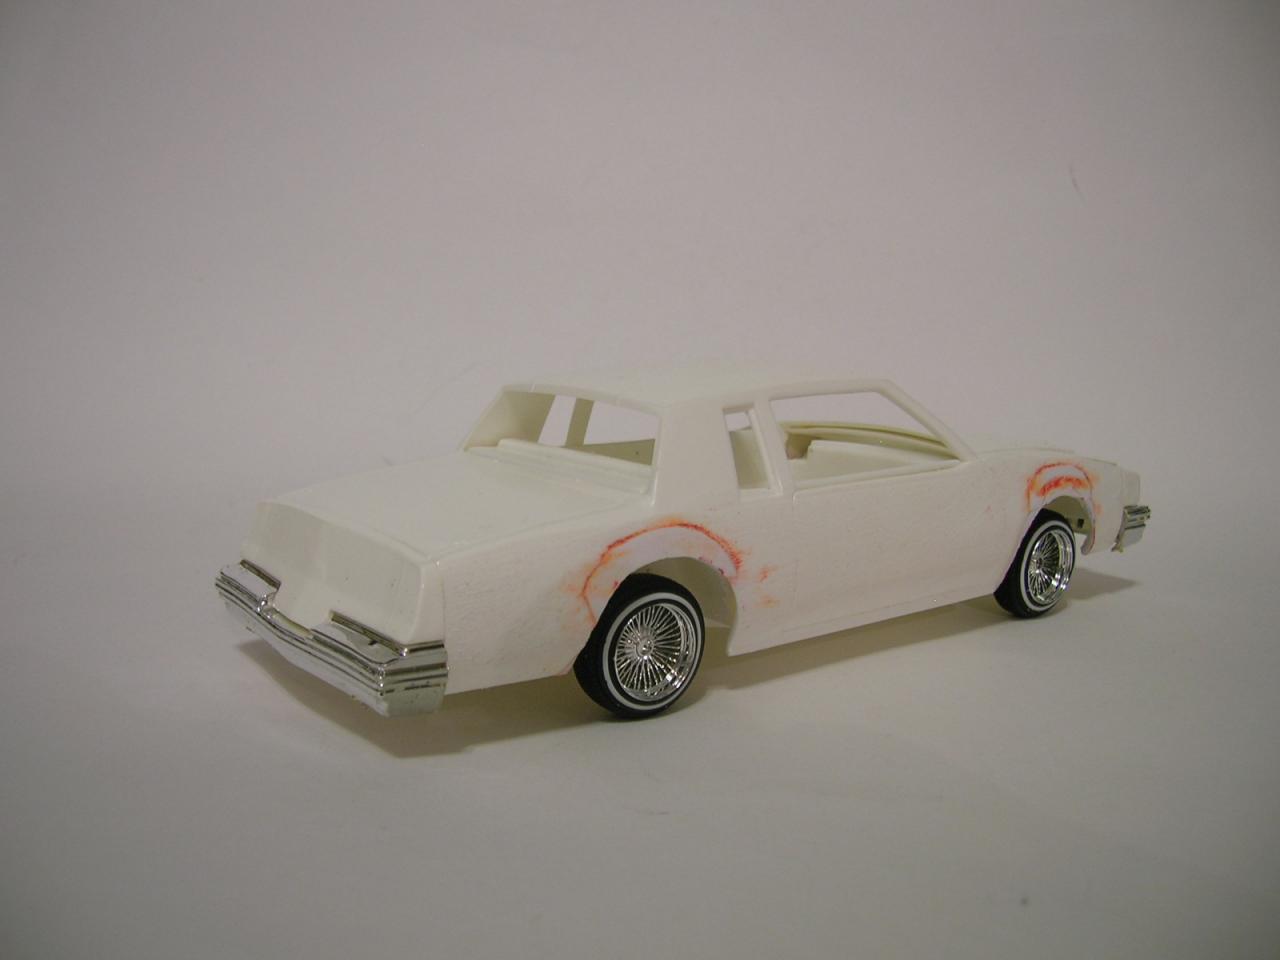
It looks sort of done here, but it is far from done. Now it has the look of a stock Grand Prix.
-
Building a stock body 1984 Pontiac Grand Prix From NASCAR
Bob Ellis replied to Bob Ellis's topic in WIP: Model Cars
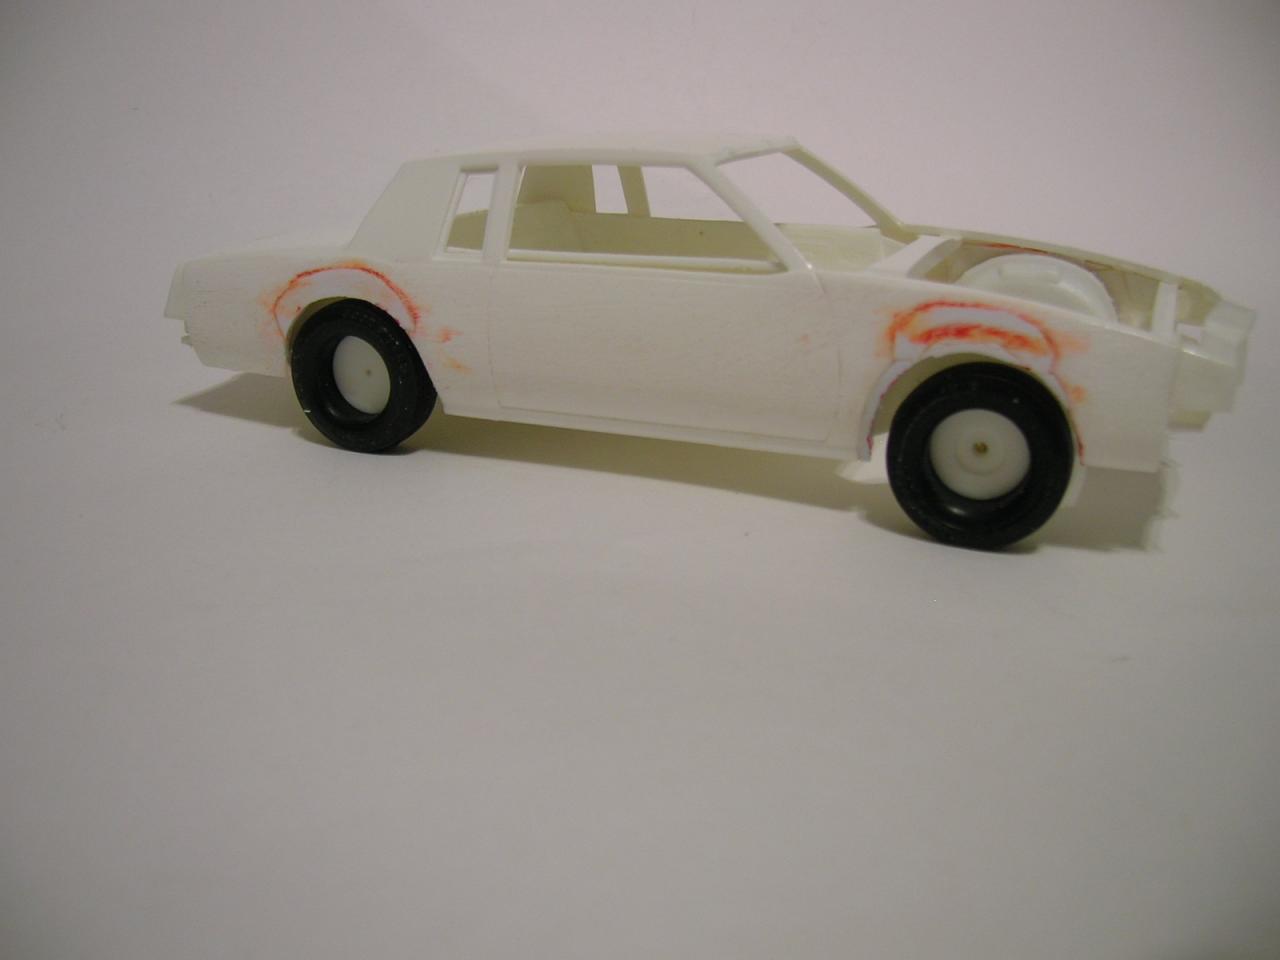
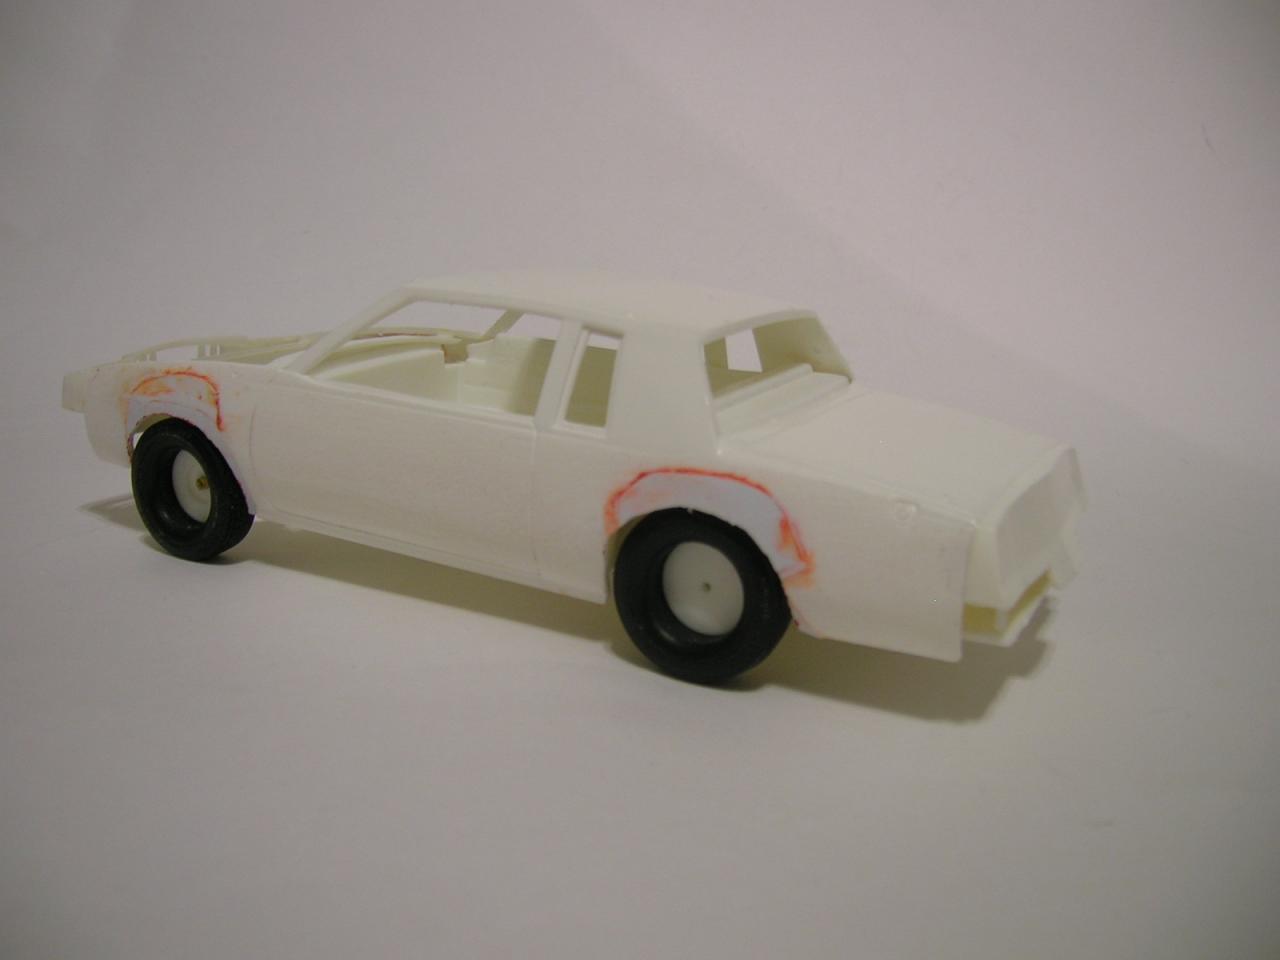
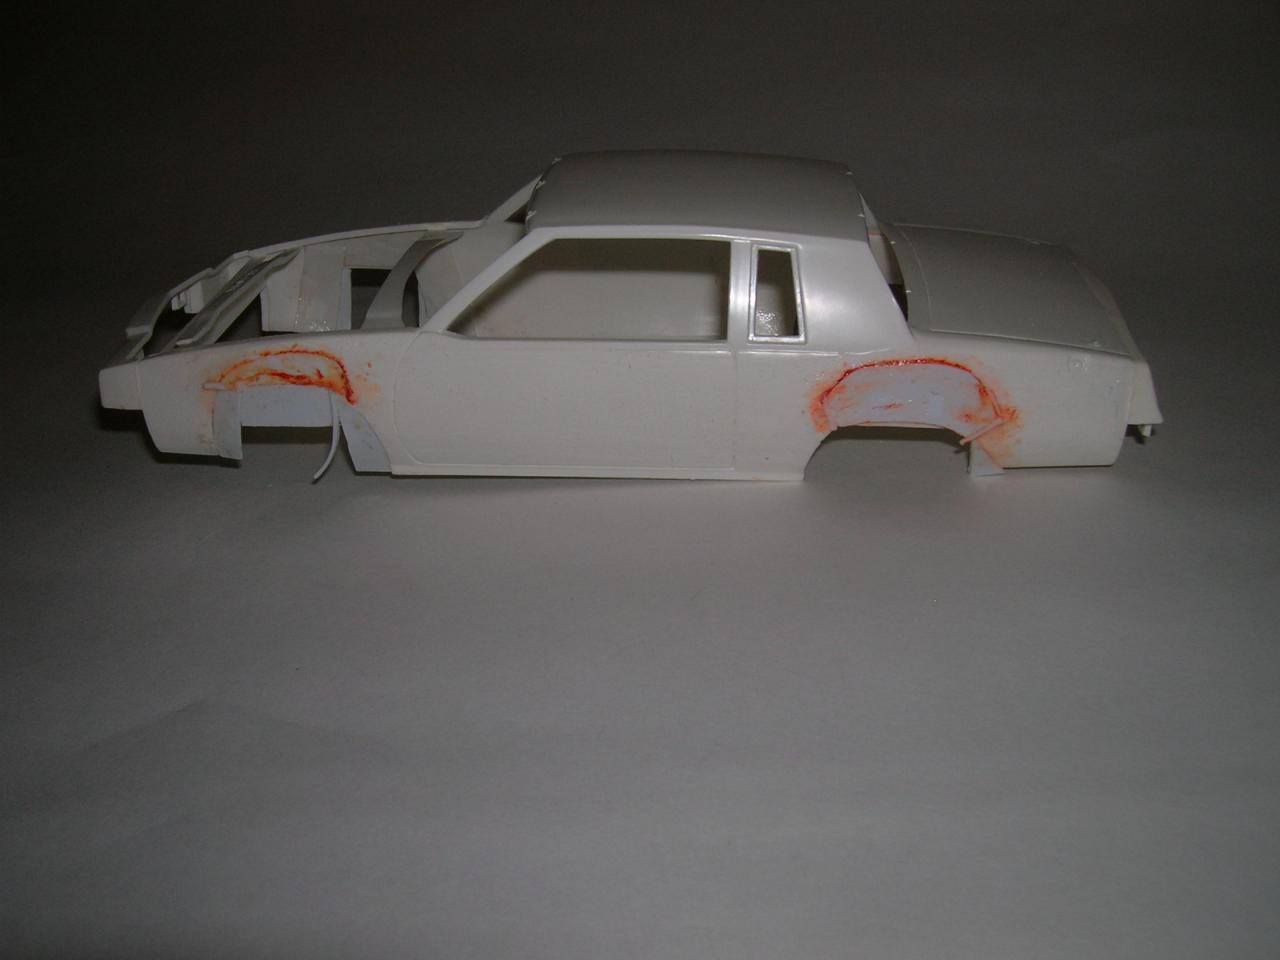
Grand Prix wheel wheels are round. I marked the circle with a wheel and a magic marker on the patched material. To get a perfect round circle. I wrapped 60 grit paper around a 1/25 tire. Rotating the tire and 60 grit eventually gave a decent circular shape. At this point, you can see the '80 Monte Carlo frame with wheels fits very nicely into the NASCAR body.
-
Building a stock body 1984 Pontiac Grand Prix From NASCAR
Bob Ellis replied to Bob Ellis's topic in WIP: Model Cars
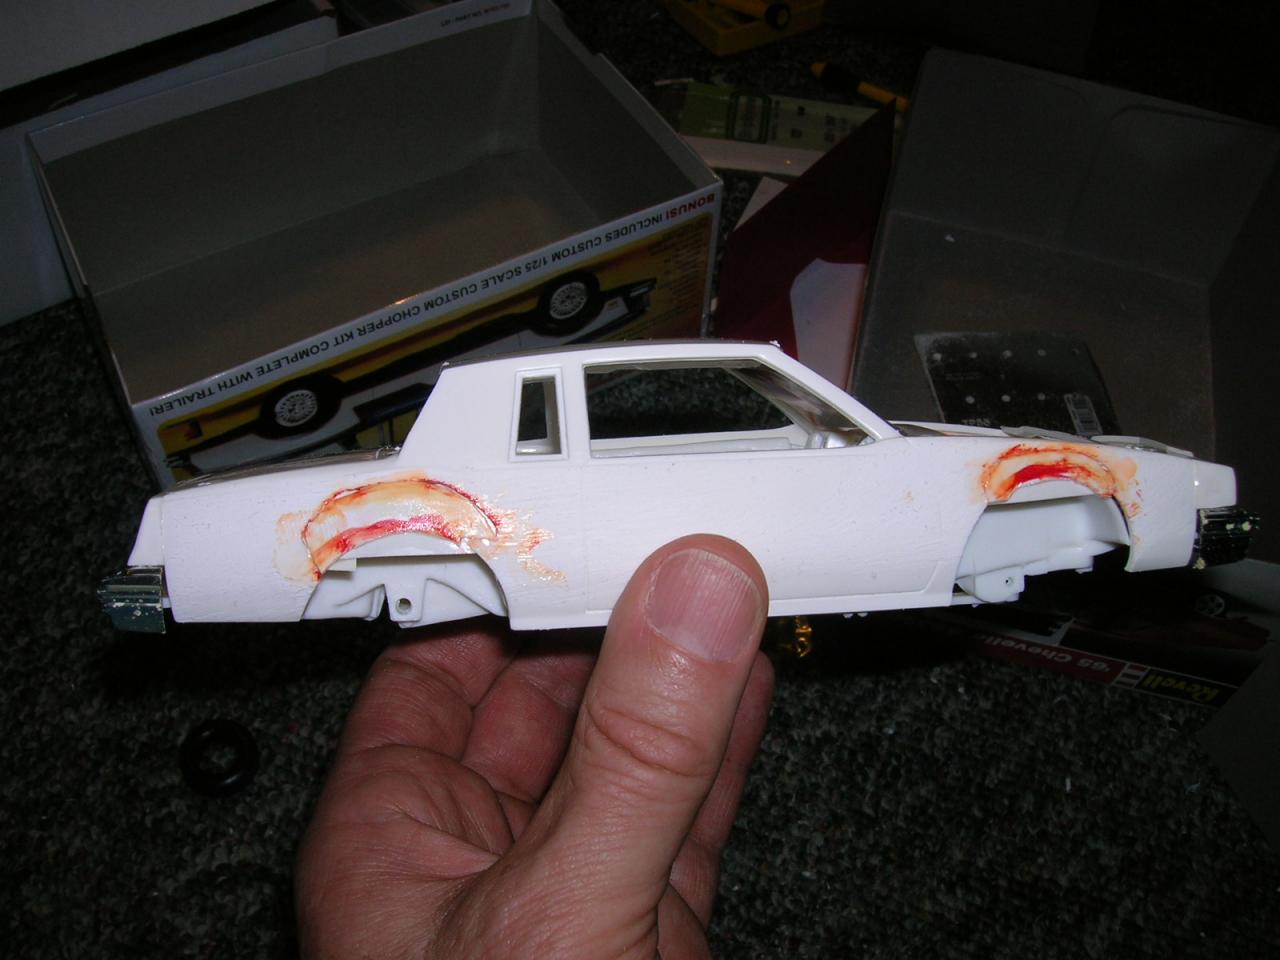
I don't like to fill with putty early in the job. I stuff holes using solvent welded plastic.
-
Building a stock body 1984 Pontiac Grand Prix From NASCAR
Bob Ellis replied to Bob Ellis's topic in WIP: Model Cars
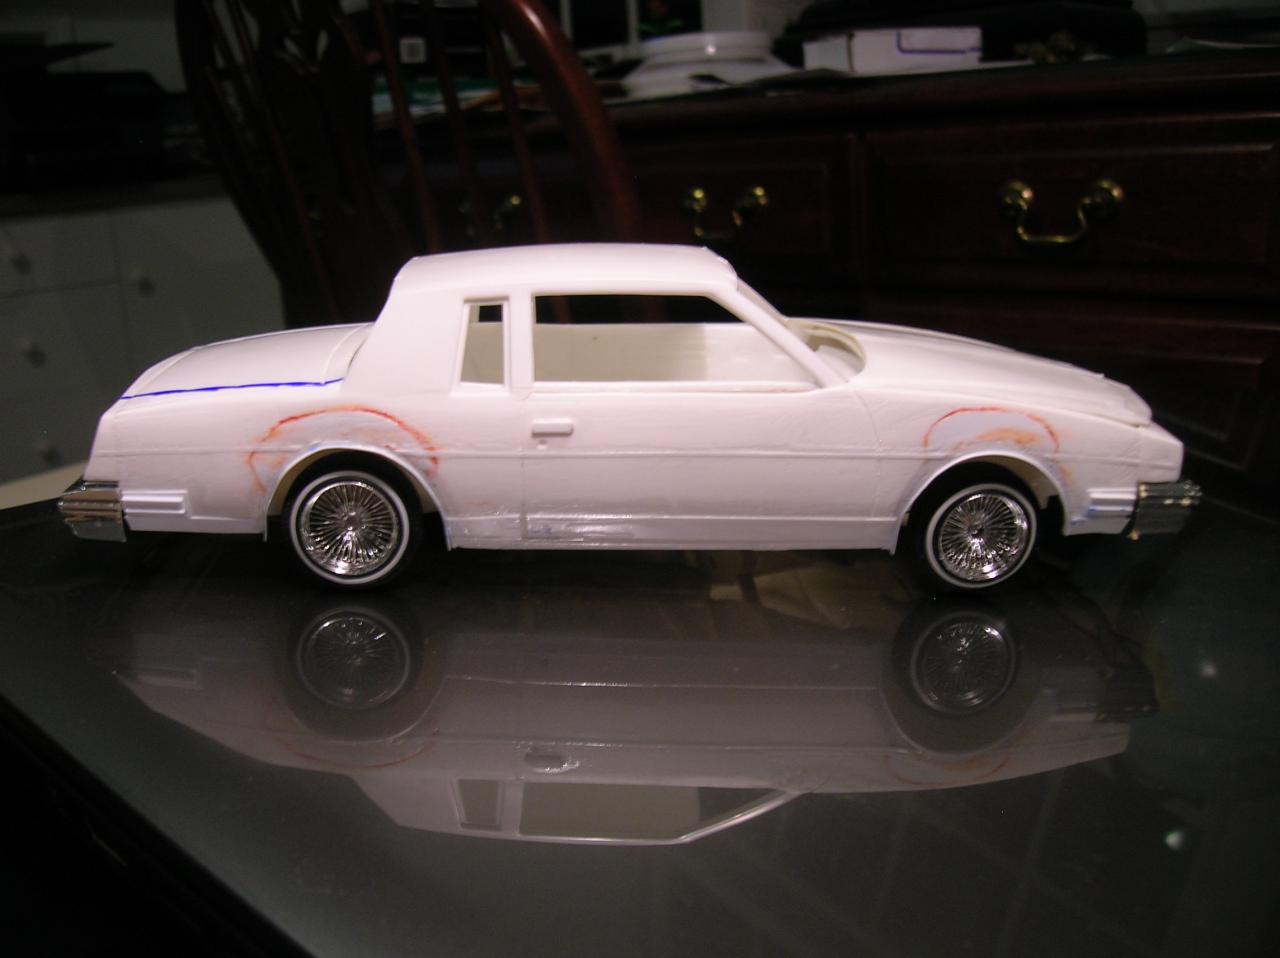
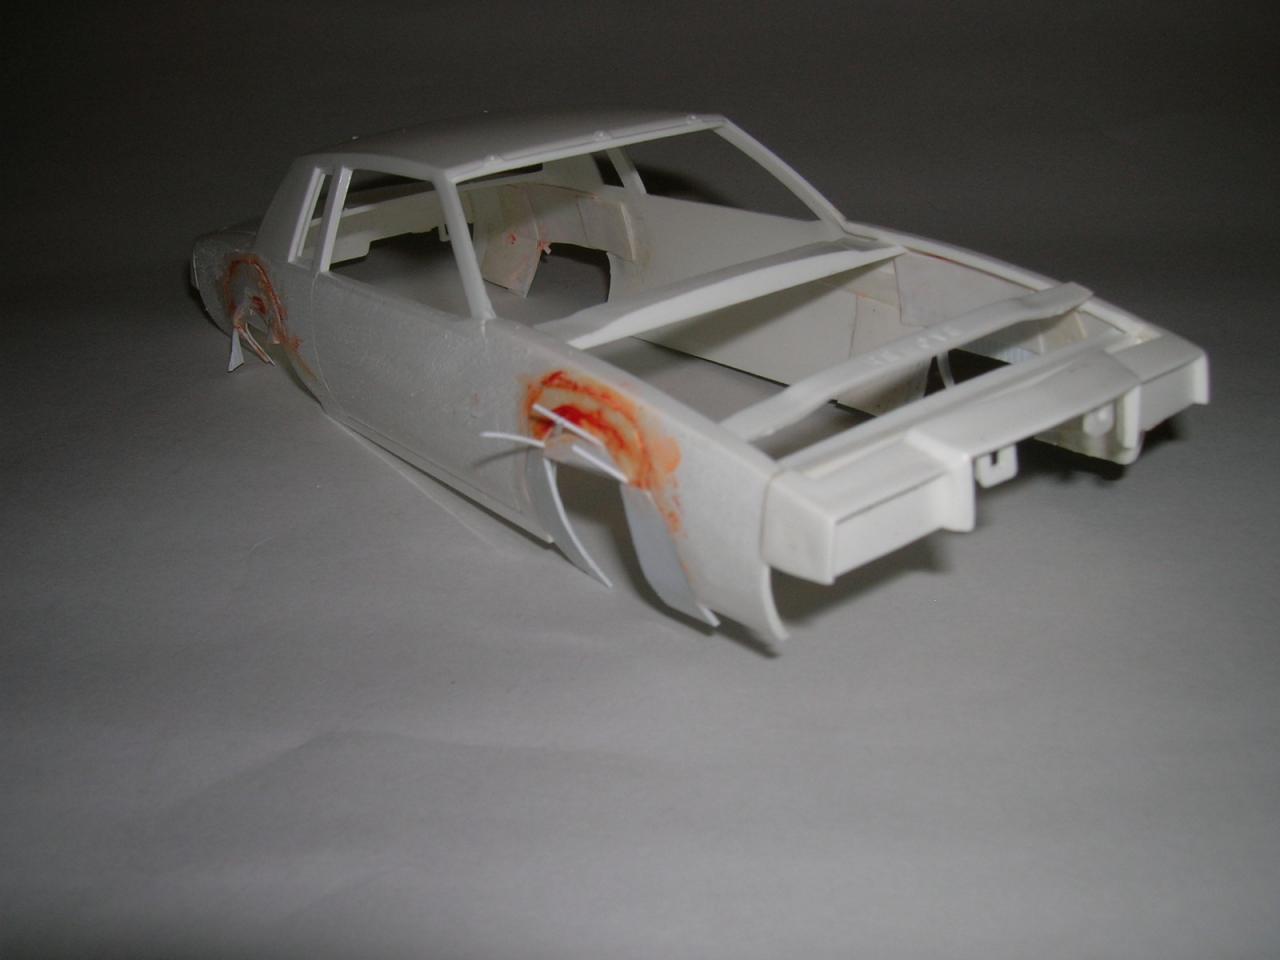
I ground off the huge NASCAR wheel openings with 60 grit mounted on a flat plate. Once the wheel bump is ground off flat to the side, you find that there is very little plastic material remaining in critical areas. A lot of patching is necessary with Evergreen Styrene. At least 2-3 layers inside to keep the body intact. Everywhere you see red magic marker is new patch material.
-
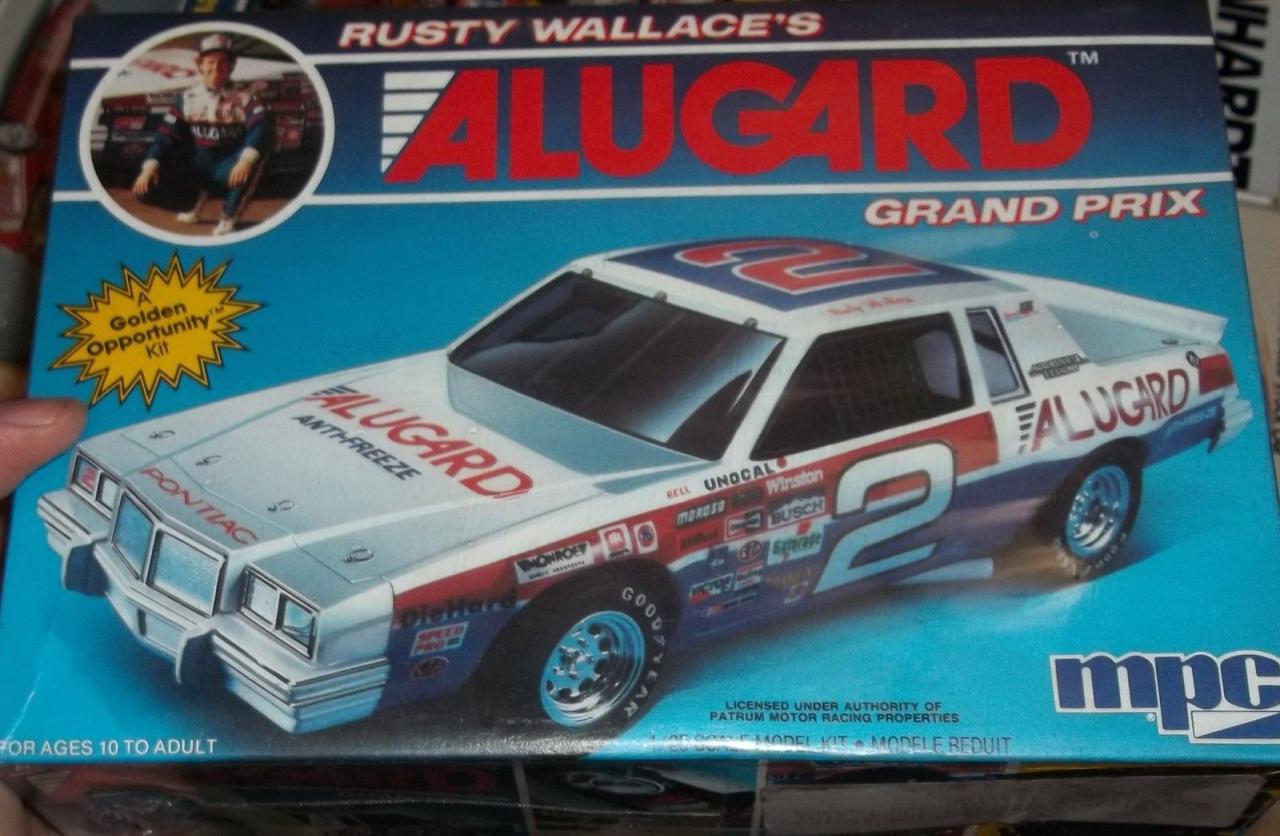
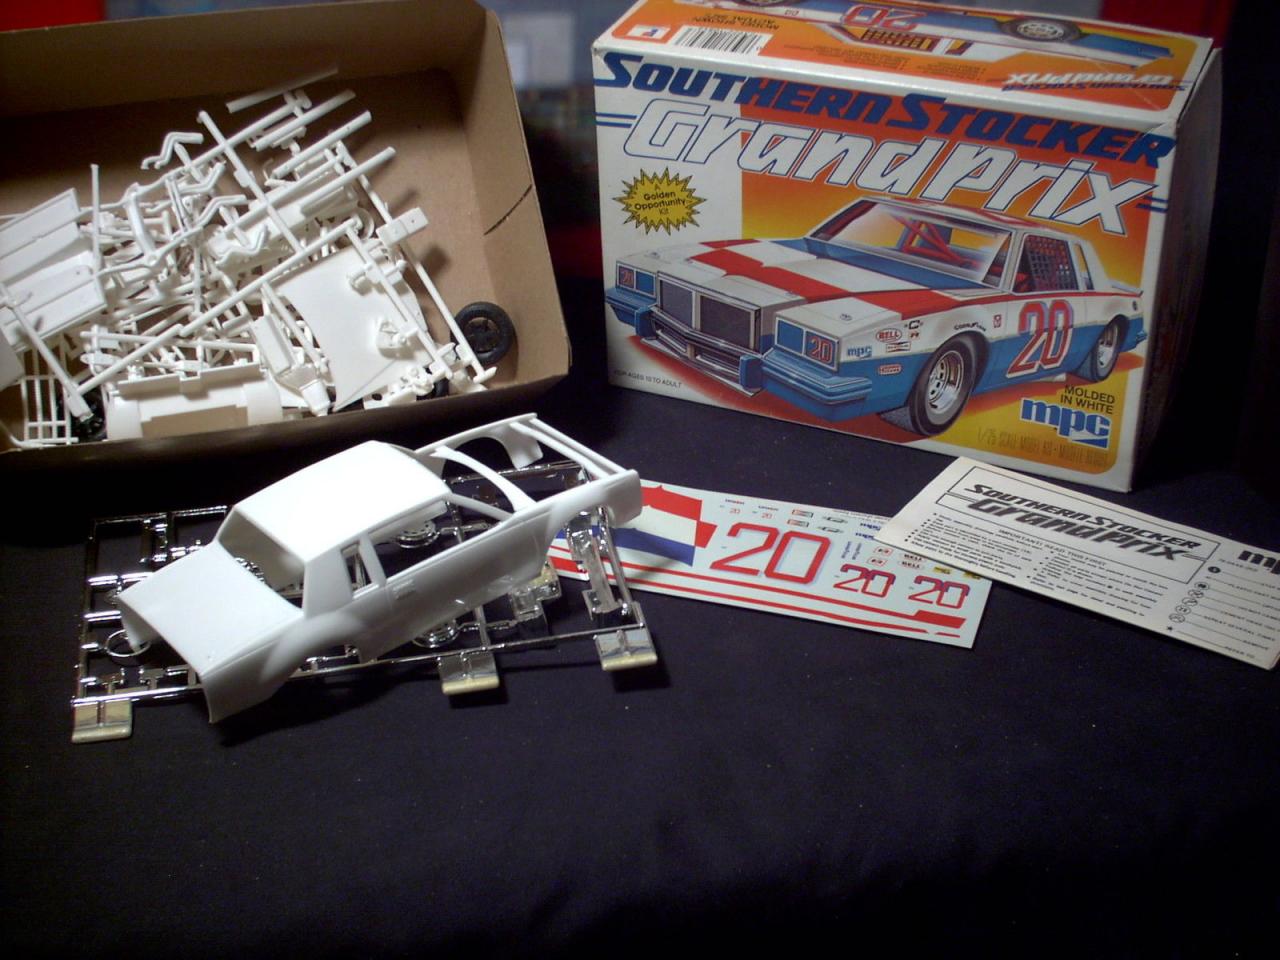
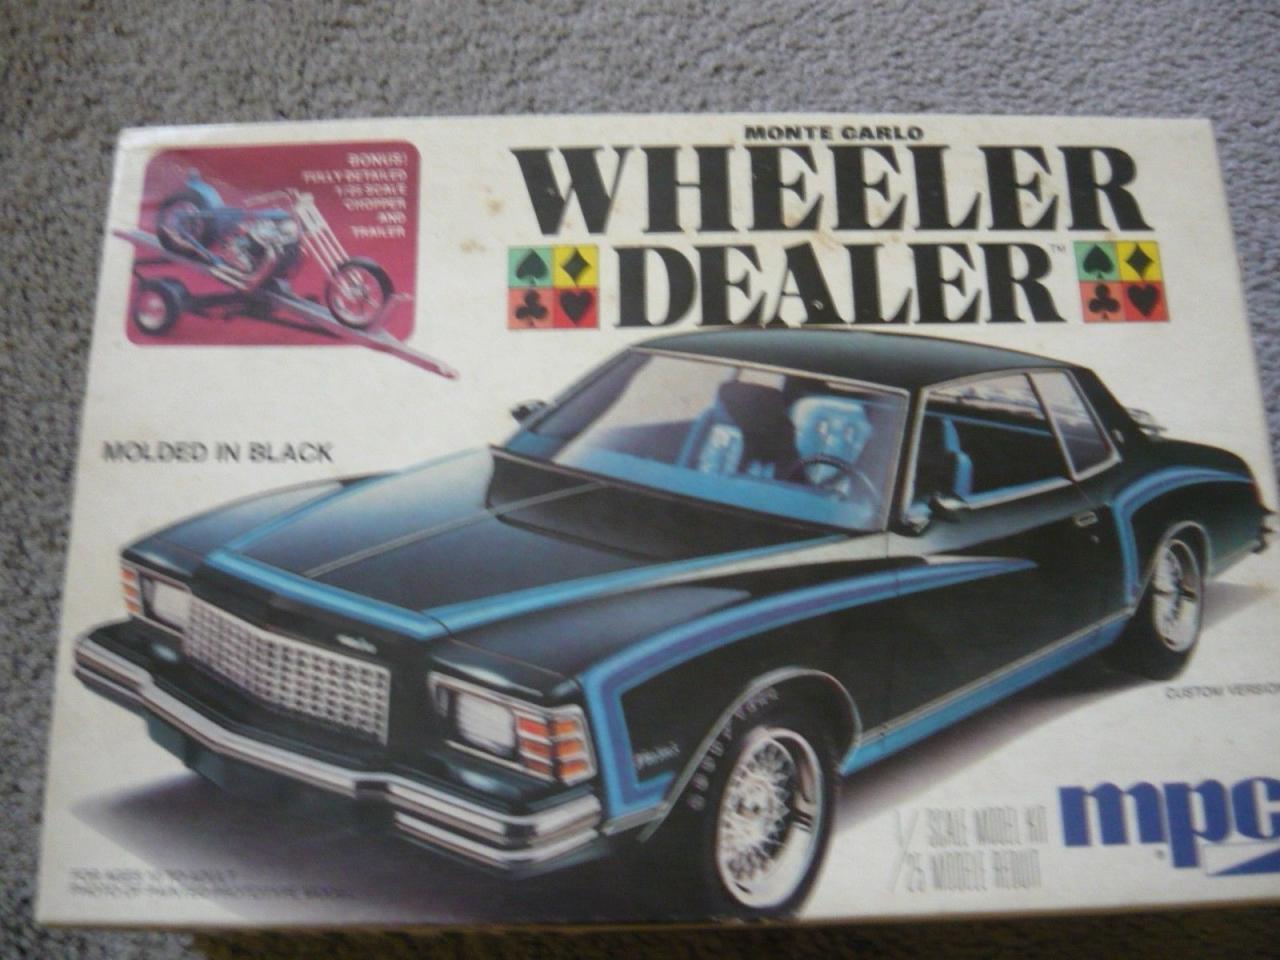
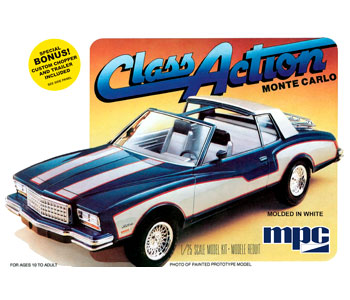
I used to own a 1984 Pontiac Grand Prix. The only kit available are NASCAR varieties of this 1981-1987 Pontiac G body car. Several people have done this conversion; many times using the 1/24 Monogram Monte Carlo as a basis. I decided to stay with 1/25. The MPC Grand Prix NASCAR kits had nice bumpers. The also had huge wheel opening bumps. This is a big job to eradicate. The MPC '80 Class Action Monte Carlo provided the glass, interior tub, chassis and 305 Chevy V8 engine I needed. With very little filing, it all fits I originally omitted the photo of the best available MPC Monte Carlo kit. I got one at a local store relatively inexpensive. It was re-issued by Round2 in 2008.
-
Lets See Your Replicas of Yours/Your Families Cars
Bob Ellis replied to Platerpants's topic in Model Cars
My first two cars, a 1972 Gran Torino bought in 1975 and then a 1976 Cobra that was bought in 1979. I got a photo of my friends looking at my Cobra and another parked somewhere in West Virginia. -
1) Modelhaus has the best resin casting, but it is not cheap, and it is only 2 door fastback. About $80-90. Bodies are about 1/2 price. 2) MCW is pretty good, and the Biscayne is an MPC modified to fit recent ERTL AMT '67 Impala kit. Alcad or you send the bumpers for chroming. Price is $40 and pretty fast service. 3) R&R made both hardtop and convertible resin. The frame was junk and the body sometime had a few pinholes to fill. Chrome bumper included. Solid red tail lights? Mine '68 R&R convertible had a '69 dash. Not uncommon to get mixed parts in these kits. As Forrest Gump would say " Life is like a box of R&R resin, you never know what you gonna get" 4) If you buy the front and rear Modelhaus '68 Impala bumpers, it is possible to make your own '68 Impala. For some reason, the newer ERTL/AMT '67 SS427 Impala body is a different width than the MPC '68 front bumper. I think the body is too wide and you must pull in the front. Some significant reconfiguration required to the ERTL body. But, it is possible. 5) If you can find an original AMt '67 Impala or the AMT '68 Impala (non stock), you won't have to fix the width of the body to use the '68 front bumper from Modelhaus. The custom '68 AMT Impala has a funky solid rear roof. That means you might build a convertible, or cut a rear window, or something else creative. It's a $50 proposition, no matter which way you go.
-
Looks cleaner shaved. Gold is a good color choice.
-
Revell Sox & Martin Pro Stock Cuda
Bob Ellis replied to kitswapper's topic in Car Kit News & Reviews
What killed the Sox and Martin team was the advance of automatic transmissions. Ronny Sox could manually shift faster than any human being alive, but by 1973, he couldn't out do an automatic. -
New project, resurrecting a '60 Ford Wagon Glue-Bomb.
Bob Ellis replied to Ron Hamilton's topic in WIP: Model Cars
Are some of those Hubley wagons done in styrene, acetate or both? -
It's predecessor, the '64 Chevelle wagon which was modified in 1965, had a beautiful 6 cylinder engine. Too bad Round2 can't find it.
-
Remember that kit came out in 1964-1965 before computer aided design. Complicated kits back them had some fit issues compared to the 4 screw chassis type that always fit together.
-
When I Was Young & Dumb: Building the Unbuildable '56 Chevy!
Bob Ellis replied to John Goschke's topic in Model Cars
I built the Revell '55 Chevy with no problems at 14 years old. But I have to admit the '56 didn't build as well. Didn't seem to fit, so I chucked it. You build is amazing. -
If you look at the chrome and other parts sprue, you will notice all the reissued 67 70 and 72 GTOs used common parts. It appears, from some of the parts I bought have mixed or last version parts.
-
92 Crown Victoria - 8-29-17 wheels, interior and antenna
Bob Ellis replied to Foxer's topic in WIP: Model Cars
Wow, that is nice. Didn't know the conversion was so involved. -
That Revell '67 Chevelle is a great kit. I built one 20 years ago. I never tried the AMT version. Is it the same as the Revell?
-
The hobby shops in the USA are dying like flies too. Have fun with the GTX
-
Very nice work
-
A young Tim Boyd!?
Bob Ellis replied to unclescott58's topic in General Automotive Talk (Trucks and Cars)
Nearly as interesting, it is my understanding (Gregg/Harry, correct me if I'm wrong) that Robert Schleicher, who authored numerous articles in Car Model and Model Car Science, is a major domo in Golden Bell Press and publisher of Model Cars magazine. Tim, you are correct about Robert Scleicher, or Bob as he he liked to be called. I met him once a year, for many years at the Amherst Railway Society Springfield, MA train show. I used to make model train kits and decals. First time I met him, about 1989, it was about model trains. We got to talking and I said " Your name sounds familiar. I thought I saw it on an old Car Model magazine article". He said he had wriiten all those articles. He was a pretty modest guy. He said "the models probably looked better in the pictures than they really were". In any case, he was a good guy and I am glad that I got a chance to meet him.. -
Nice work
-
I like the 2+2 convertible
-
It's great. Model from the glory days of ERTL.
-
71 Charger RT " Daytona Style" - MADE IN BRAZIL
Bob Ellis replied to uelder valongo's topic in Model Cars
Nice work.