howsthat1959
-
Posts
75 -
Joined
-
Last visited
Content Type
Profiles
Forums
Events
Gallery
Everything posted by howsthat1959
-
Revell 2022 Corvette Stingray C8 Z5
howsthat1959 replied to Luc Janssens's topic in Car Kit News & Reviews
Should also mention that the coupe rear deck opens up like a normal hatch. Convertible top cover opens from the front to accept the top. The deck is in 2 pieces. -
Revell 2022 Corvette Stingray C8 Z5
howsthat1959 replied to Luc Janssens's topic in Car Kit News & Reviews
The convertible doesn't have the glass window in the engine hatch. It's solid because the top retracts on top of the engine. This kit has exterior details of the drop top but a glass rear window... -
To size the decals to scale, I add the picture to Microsoft Word document and size the image using the photo editing feature. I also fiddle with the brightness and color sometimes to make sure the image looks right.
-
"No spray" decal paper
howsthat1959 replied to Sidney Schwartz's topic in Tips, Tricks, and Tutorials
For cloth interior seat inserts and such, i design the image in one of many drawing programs, or download a patter and then scale it using Microsoft Word. I print on normal weight copy paper and use Amy's quick drying craft glue to attach the cloth. I've attached a picture of 76 Cadillacs with the absurd green plaid cloth inserts available back then as an example. I done this on dozens of cars requiring complete cloth seat patterns.
-
Different Types of Truck Air Brakes
howsthat1959 replied to howsthat1959's topic in Model Building Questions and Answers
Thanks for all the info. Now I know more about this braking system than I ever thought possible. -
Different Types of Truck Air Brakes
howsthat1959 replied to howsthat1959's topic in Model Building Questions and Answers
Wow. Thanks for all the information, pix, vid and pdf. Great! -
Different Types of Truck Air Brakes
howsthat1959 replied to howsthat1959's topic in Model Building Questions and Answers
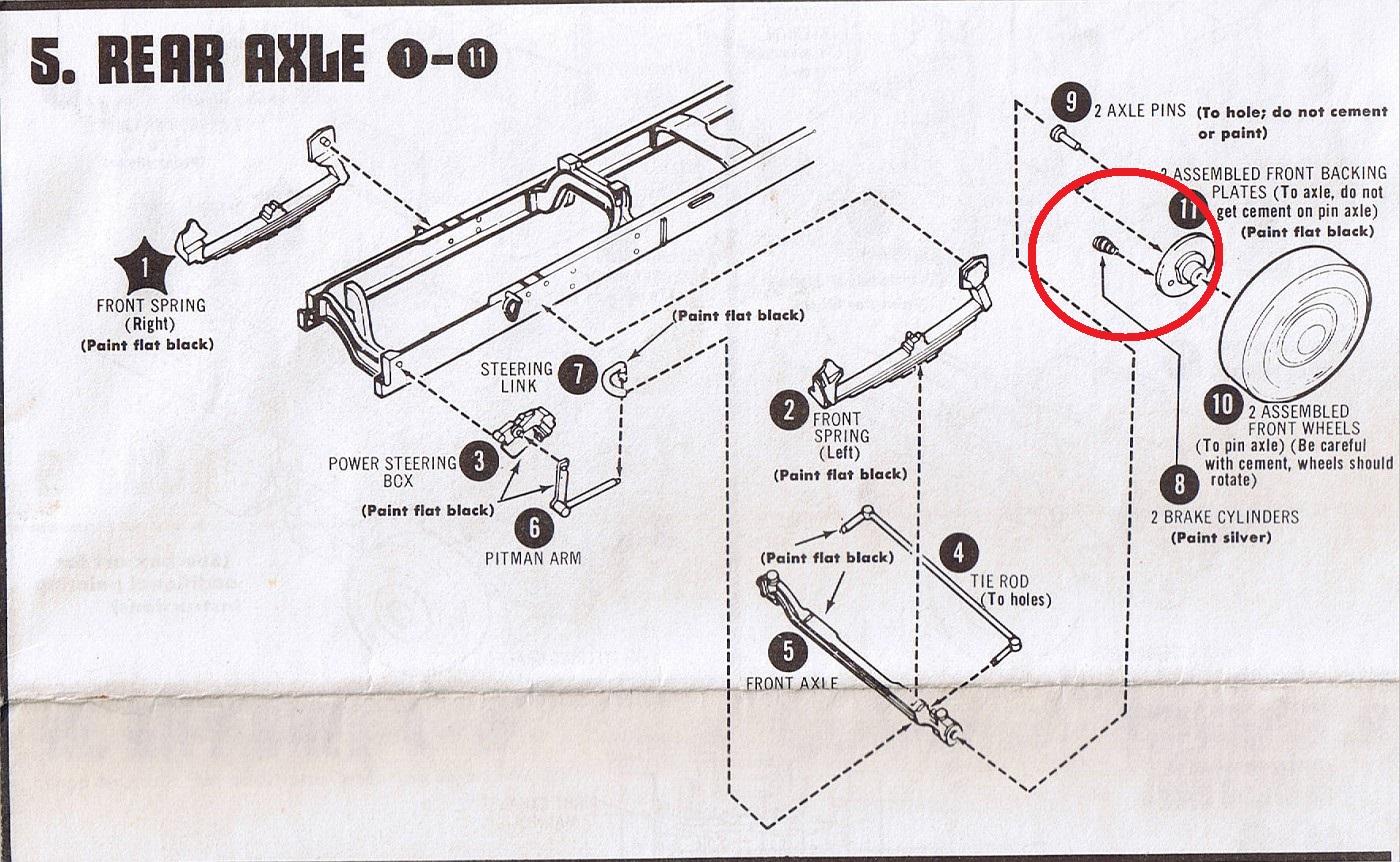
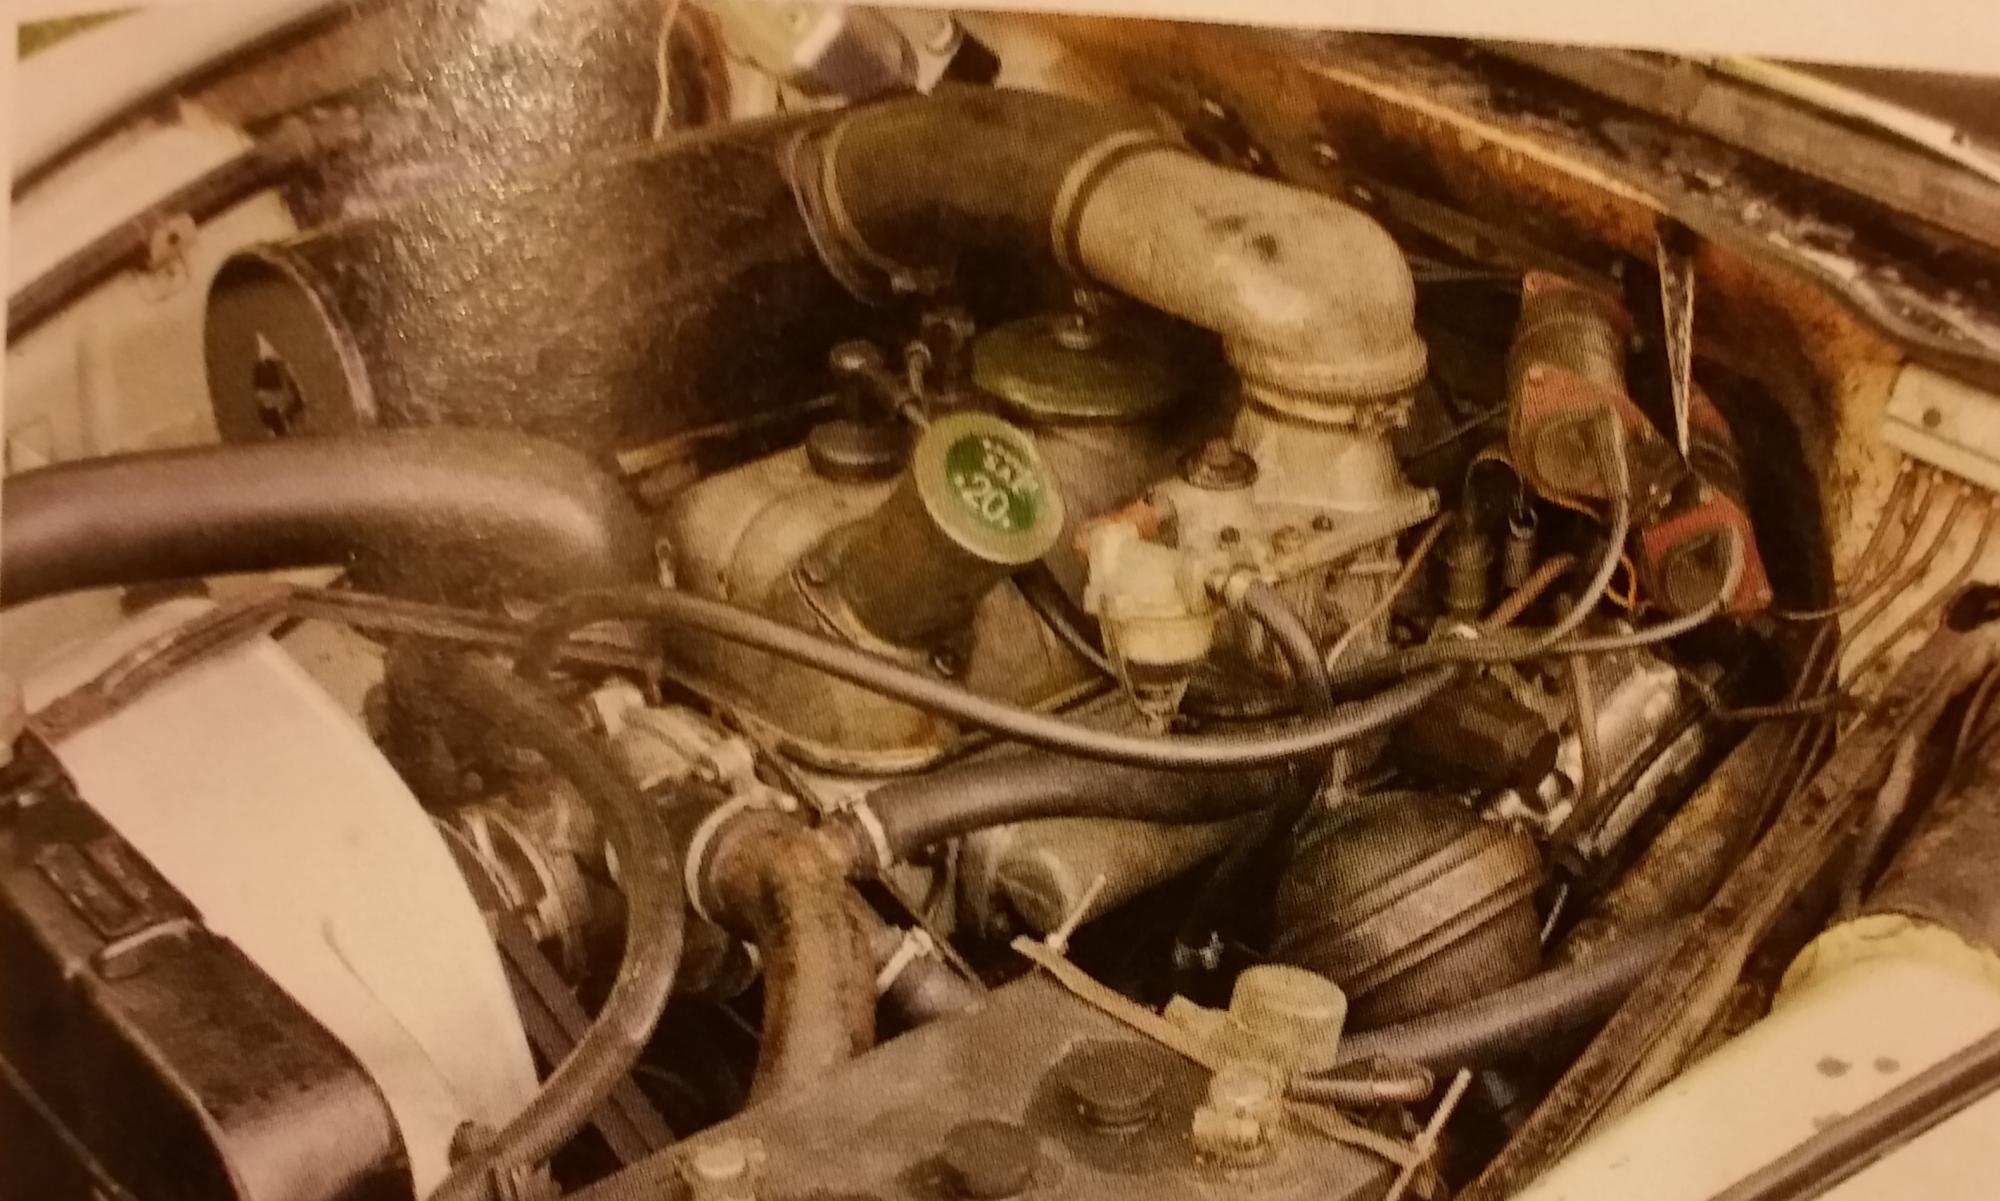
I'm referring to the item circled in red in the picture. Thanks
-
Most truck air brakes have the actuators mounted to the axles and rods that enter the brake drum to apply the brakes. Some AMT kits (including the current new refuse truck with C-900 Ford) have little cylinders mounted perpendicular to the backing plate. I have had no luck finding any information on these things. I'd like to know how the air lines are plumbed to them and how they work as well. If you can point me in the right direction, I'd appreciate it. Thanks
-
I'm currently building a 59 Sedan deVille 4 door flat top resin conversion. The glass does sits on top of the chrome as you say. Built the Eldo years ago and don't recall a fit issue so that's how it must fit.
-
Its a reissue of the original Revell kit. While nice, it is not quite accurate in size and proportions of the real car. It is also a multi-piece body and no engine. But it does build into a great looking model.
-
AMT PP-29 turbine Big rig Engine
howsthat1959 replied to Mr mopar's topic in Truck Kit News & Reviews
Uh Oh. I better sell my GMC Astro Kit before this engine comes out... -
I found the fit of the windshield to be horrible (especially for a new tool). It was impossible to install without scratching up the painted rubber windshield gasket.
-
Modelhaus Tires
howsthat1959 replied to Maindrian Pace's topic in Car Aftermarket / Resin / 3D Printed
It's not clear from the web site but are the prices for the number shown (2 or 4) or per tire? Doesn't seem to be anyway to ask. -
As molded, the suspension on the truck is slanted such that the front end rides lower than the rear. Would this be the case for an empty mixer (rear would ride lower when full) or is this another case of Ertl's fine model design skills? Thanks.
-
JoHan '72 Toronado; School Me
howsthat1959 replied to Dodge Driver's topic in Car Kit News & Reviews
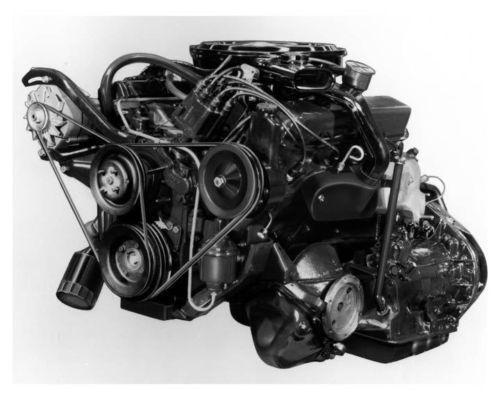
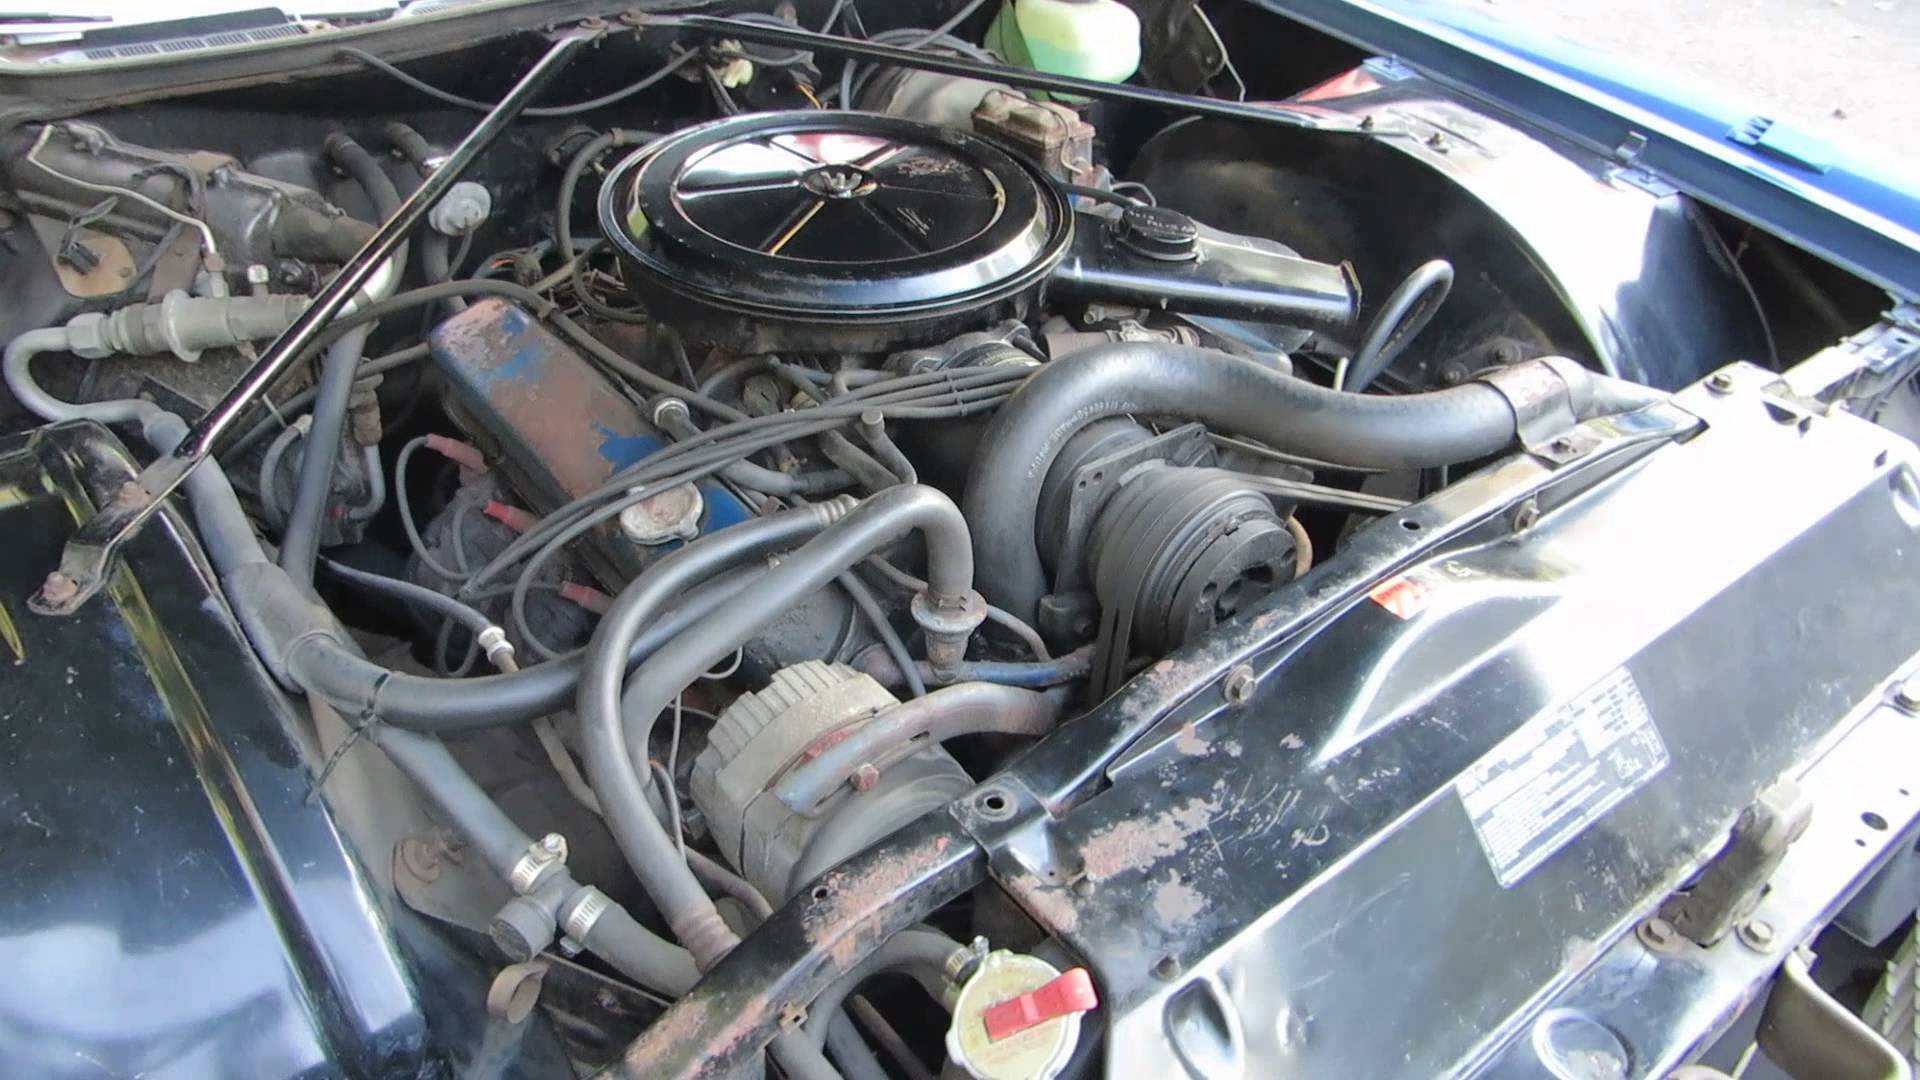
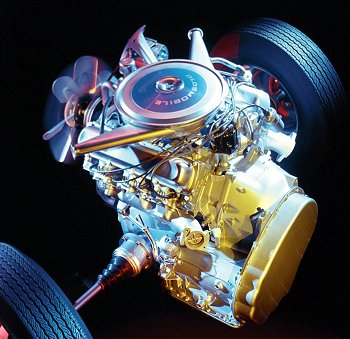
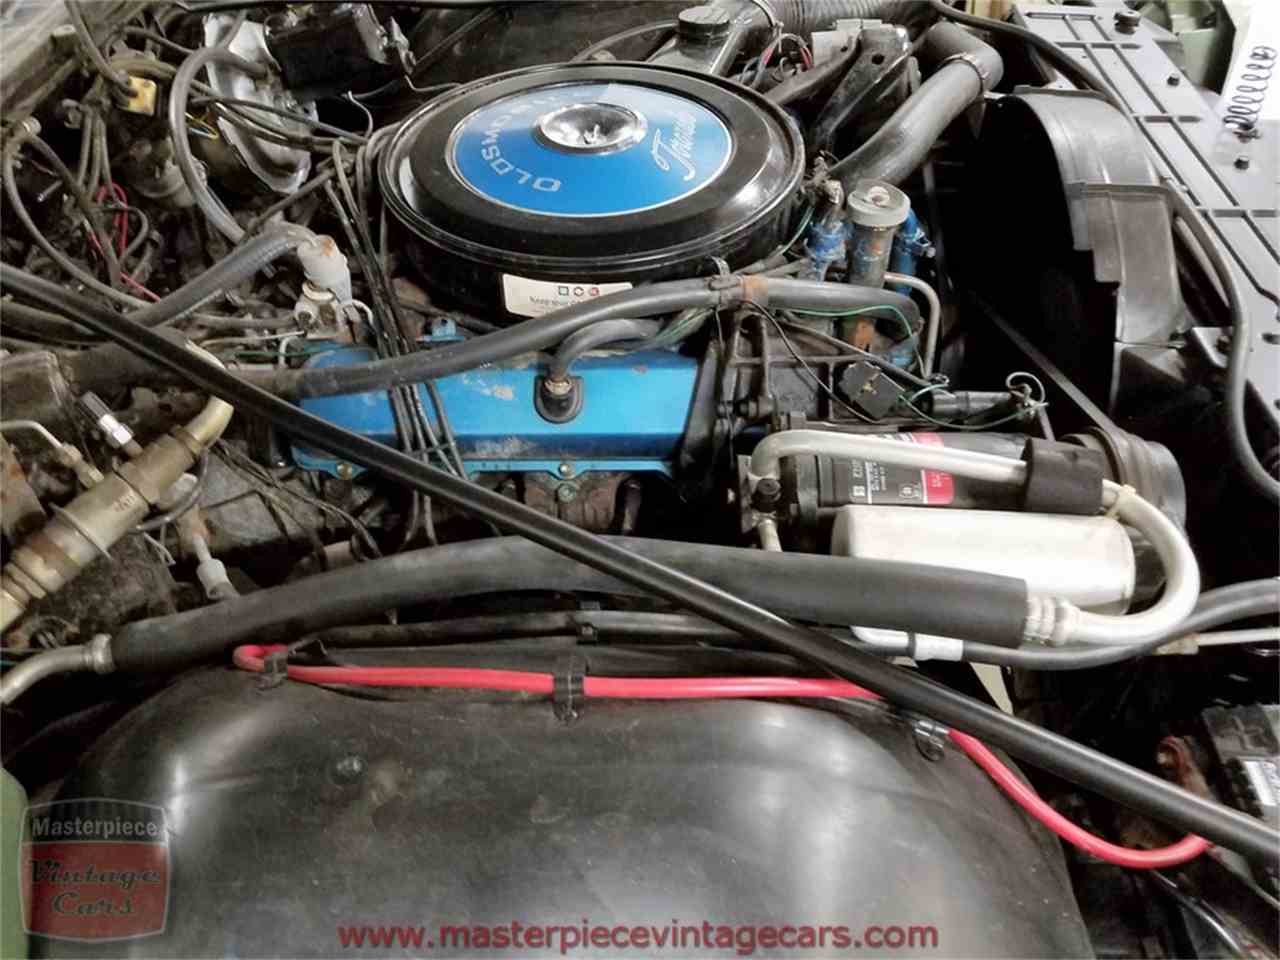
If you google 1971 oldsmobile toronado engine you will find many pictures. -
JoHan '72 Toronado; School Me
howsthat1959 replied to Dodge Driver's topic in Car Kit News & Reviews
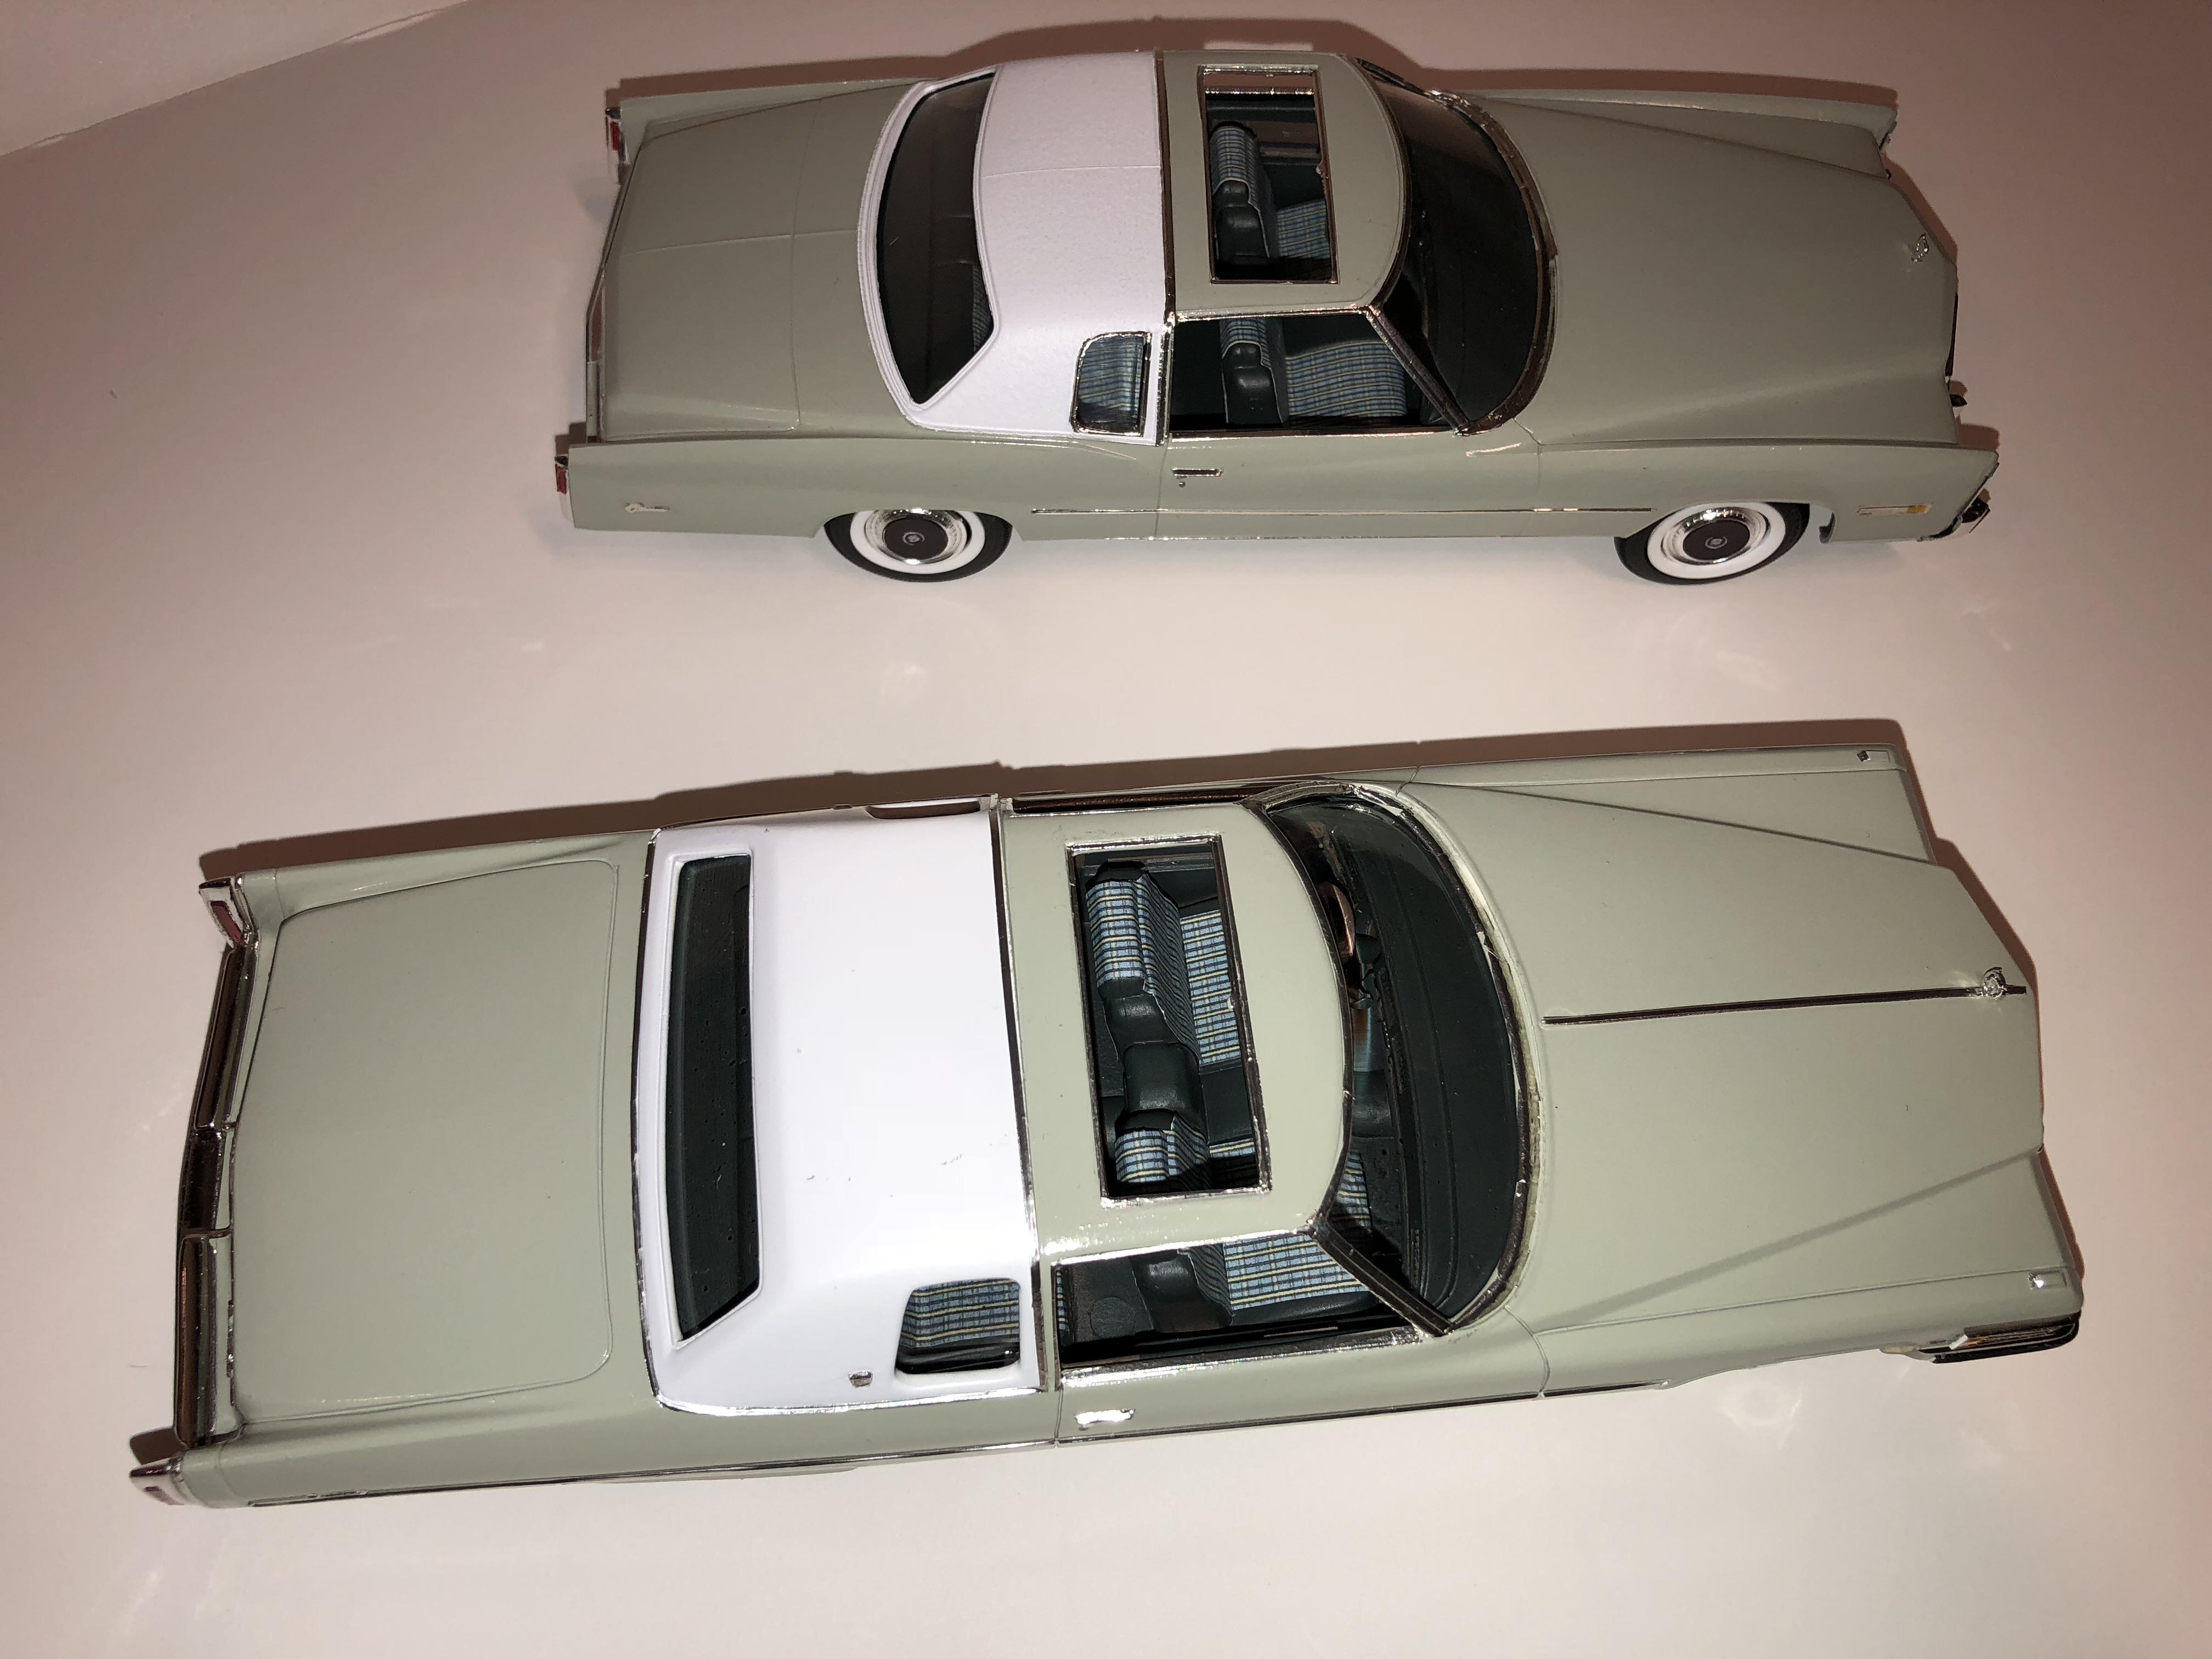
The Eldorado and Toronado engines are completely different. The most obvious thing is the location of the distributor: In the front on the Cad, in the rear on the Olds. The Johan Eldorado kits have the Toronado engine from the Olds kits. Guess the were lazy. Pix attached.
-
Thanks for the info. Here's a link to the kit details: http://blog.modeljunkyard.com/2012/09/01/kit-review-1959-ford-fairlane-skyliner-by-revell-in-125-scale/
-
Can you tell which release the kit is you are building. I have a number of these and none came with white wall inserts for the tires, Thanks
-
Corvette Raw Fiberglass Floor Pans
howsthat1959 replied to jjsipes's topic in Model Building Questions and Answers
I couldn't tell you exactly what I used except it was a mix of mil tans until it looked right to my eye. I'm mainly responding to thank you for going the way it looked like from the factory (instead of black that most models [and many 1:1 cars] seem to get painted with.) -
AMT 1960 Ford Thunderbird Convertible
howsthat1959 replied to Ron Hamilton's topic in WIP: Model Cars
The package tray filler on these cars needs to much bigger than the model has. The interior needs to be trimmed as seen in the attached pix so the filler panel can be the proper size.
-
help with venting airbrush set up
howsthat1959 replied to Byron5150's topic in Model Building Questions and Answers
Late to this discussion but the windows in our basement utility room (where the booth is) have crank up and out casement windows. I took a 3/16 thick piece of Plexiglas, cut a hole in it to accommodate a dryer vent and installed it in front of the window so there still was natural light coming in. The windows can still be closed. -
I was incorrect about the tool storage. After looking further, it appears that the early single central locking nut wheels could not facilitate holding the prop rod as the later five bolt wheels did. The later wheels have a hole in the center for the prop stand rod (which is also used to remove and install the wheel covers).
-
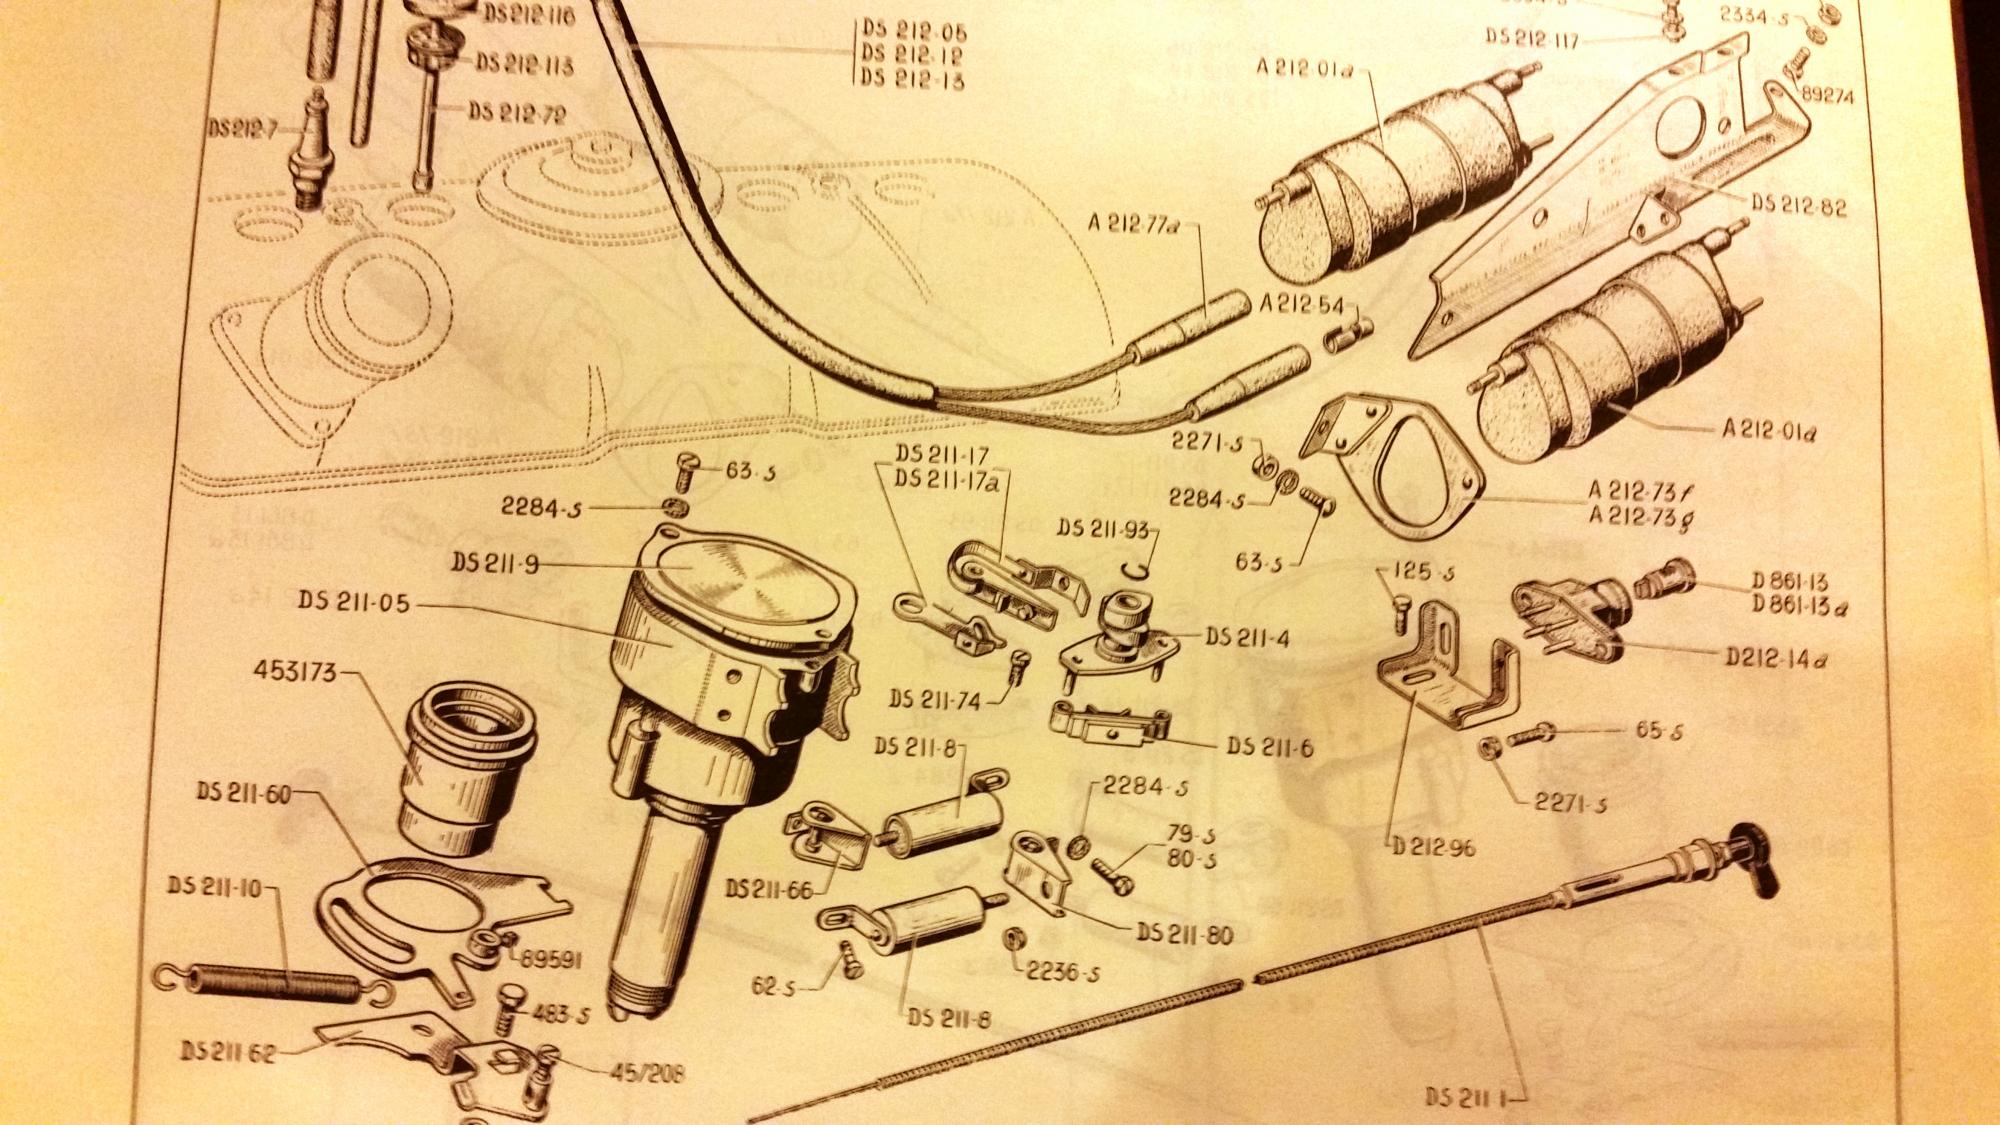
I'm afraid I may have left out some info about the ignition system. The external intake manifold engine has the points breaker under the manifold where the disttibutor would be. Two wires run from it to two coils. Each coil fires twice...one for the timed spark and a wasted one on an exhaust stroke of a different cylinder.
-
Whats In the Box Citroen DS19 Kit Review
howsthat1959 replied to martinfan5's topic in Car Kit News & Reviews
I'm afraid I may have left out some info about the ignition system. The external intake manifold engine has the points breaker under the manifold where the disttibutor would be. Two wires run from it to two coils. Each coil fires twice...one for the timed spark and a wasted one on an exhaust stroke of a different cylinder. -
My DS is a European model and as far as I know, the prop was usually carried in the spare. It sits on a peg tool that is used to set the height of the prop when in use. In all the cars I'v eve looked at (and that's hundreds) the spare is arrange as such, with the three stap thing holding it all in place.