Alan
-
Posts
874 -
Joined
-
Last visited
Content Type
Profiles
Forums
Events
Gallery
Everything posted by Alan
-
'70 Dart Swinger Big Block Scratchbuilt 1/25 Scale
Alan replied to AmericanMuscleFan's topic in WIP: Drag Racing Models
Killer build!! One thing wrong, you have the drive shaft loop at the wrong end, or just add another one just rearward of the front yoke next time .... Alan -
Thanks
-
You SHOULD write a book!!! It would be a hit within this community that's for sure !
-
Tim, Can you post some progress pics of the corrections as well as the hood. I have this kit as well and when the time comes to build it I want to do it justice. Thanks Alan
-
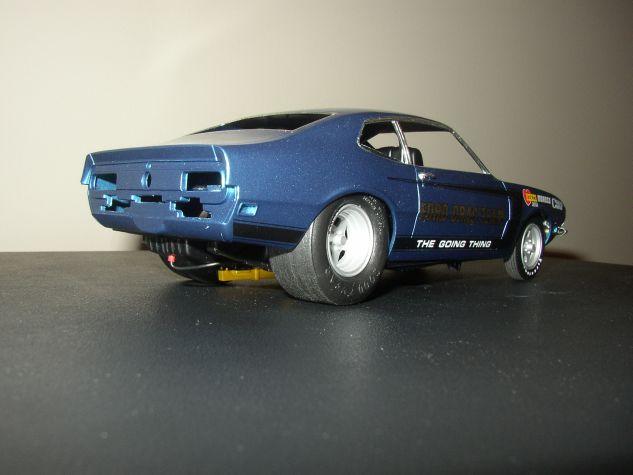
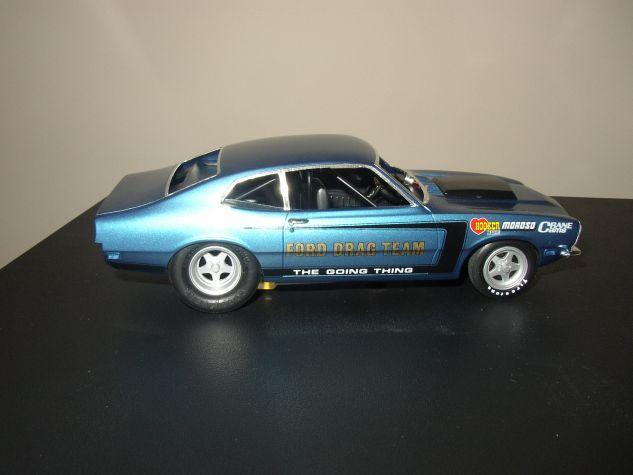
1970 Don Nicholson Ford Maverick Pro Stock
Alan replied to Guy Beaudette's topic in WIP: Drag Racing Models
Ha, Just saw this AFTER I posted in the SM Cuda thread ........ K, put up some progress shots -
Guy, you should post some progress pics of this so everyone can see things like your trunk "cam" that holds it open or the carb builds. Every part it seems is a kit all on it's own. As a follow up, how about your Dyno Maverick and some progress shots of those killer headers just to mention one of the multitude of scratch built items on your life like works of automotive art. Glad to see you are sharing what you do with us. Please keep posting my friend, large file pics so all can see the details in your craftsmanship!!! Alan
-
Not to mention Guy has scratch built many items as he always does. Eg. the headers and intake are a couple scratch built items on this one. The body is the MPC 70 Cuda. He is one of THE best builders that is for sure. Alan
-
Looking for dragonsnake decals
Alan replied to GoodbuildNY's topic in Car Aftermarket / Resin / 3D Printed
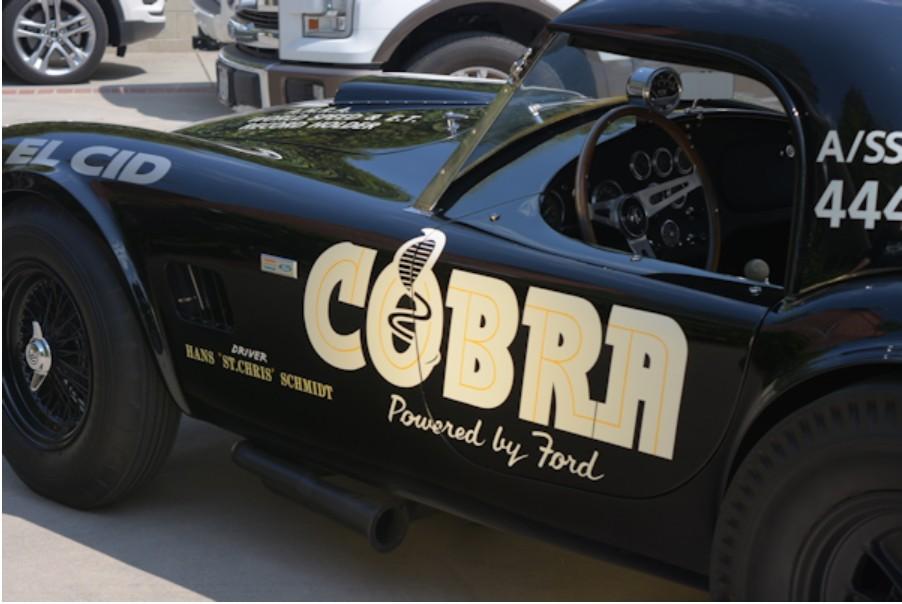
I see something that needs correcting on one of my decals ..... Alan -
Looking for dragonsnake decals
Alan replied to GoodbuildNY's topic in Car Aftermarket / Resin / 3D Printed
Here is one of the pics used when doing these decals, so that "A" was not an oversight
-
Looking for dragonsnake decals
Alan replied to GoodbuildNY's topic in Car Aftermarket / Resin / 3D Printed
Hi JC, I would be happy to replace the decals if you are not happy with them. I see I do need to correct the "A" as you pointed out. If anyone needs corrected replacements let me know via the website email and I will send you revised ones. Sorry about that but I do miss things from time to time. The reason I include the layover is for crisper color that is all. Alps printed decals do not reproduce the greatest color, you can lay the one Alps printed decal alone, or you have the option of taking the time to add the crisper Inkjet printed layover. I stand behind my decals and if the customer is not happy with anything to do regarding the decals I will issue a full refund or replacements. Just let me know. Alan whoopiekatdecals.com -
Dave, I am really liking your builds and building style. You capture the look and feel ..... Nice work, keep the photos coming. Maybe add some chassis shots ... Alan
-
I forgot how to edits ones posts when there is no edit tab ..... I want to remove images Can anyone remind me, Thanks
-
I used the kit chassis, removed the molded in leafs and replaced them with separate leafs and slapper bars moved inboard with new frame rails. The Mustang fuel tank would have to be narrowed if using that chassis. Alan
-
That ebay seller is Wendell Sowers (AFXnScale), who ripped off many including myself at one point. He used to be good, never a problem then it went south. And yes that is a Perry's Resin recast ...... Alan
-
VERY nice! Thanks for posting the pics ..... Where are the rear tires from, look like the MPC ones with no sidewall detail Alan
-
Nice ! Any more pics of the SS Chev?
-
To get that "crispness" you have to draw everything from scratch. You can then make them as small or large as you like without pixilation. Many aftermarket decals are just scans of an image hence the poor quality. Alan
-
I would be interested as well Alan
-
Scan of Fred Cady 70 Olds 442 decal needed Please
Alan replied to Alan's topic in General Automotive Talk (Trucks and Cars)
Thanks Jack -
If anyone has, and could scan the Fred Cady 70 Olds 442 decal sheet and supply an exact length measurement of the side stripes, that would be appreciated. Thank you for the help Alan
-
Vince, Please contact me about the wheels you offer Thanks Alan
-
The Old Master, 1966, 1:25 brass model
Alan replied to Mike Williams's topic in WIP: Drag Racing Models
KILLER replica Mike!!!!!!!!! Alan -
Very nice job on those!
-
Oh, and the wheelie bars on the Mustang?
-
Thanks! Those both capture the look very well .... were are the wheels on those from? Alan