dougwintz
-
Posts
347 -
Joined
-
Last visited
Content Type
Profiles
Forums
Events
Gallery
Everything posted by dougwintz
-
Unimog
dougwintz replied to dougwintz's topic in WIP: Model Trucks: Pickups, Vans, SUVs, Light Commercial
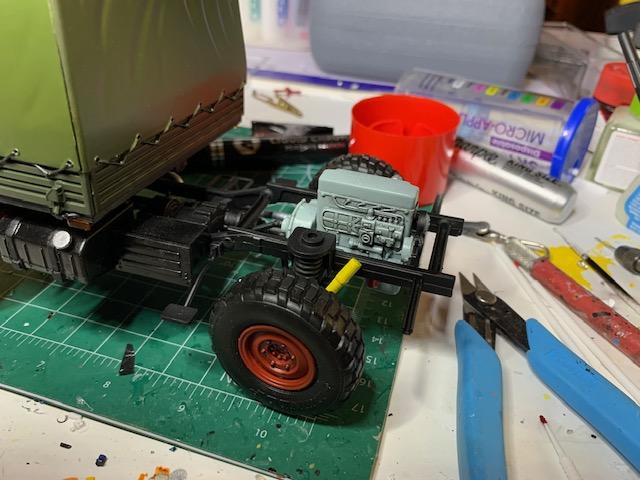
And more test fittings....
-
Unimog
dougwintz replied to dougwintz's topic in WIP: Model Trucks: Pickups, Vans, SUVs, Light Commercial
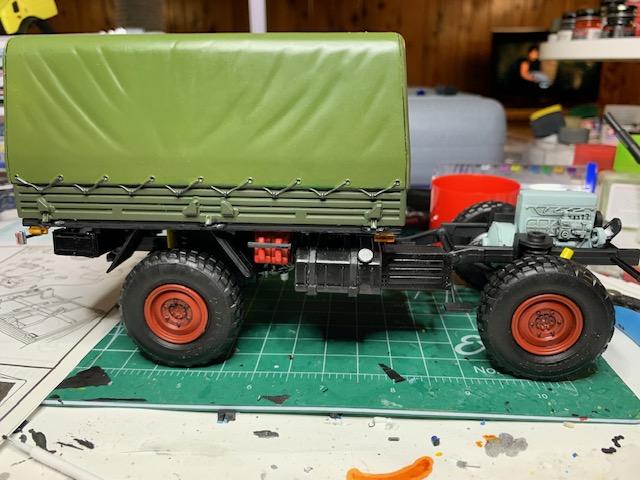
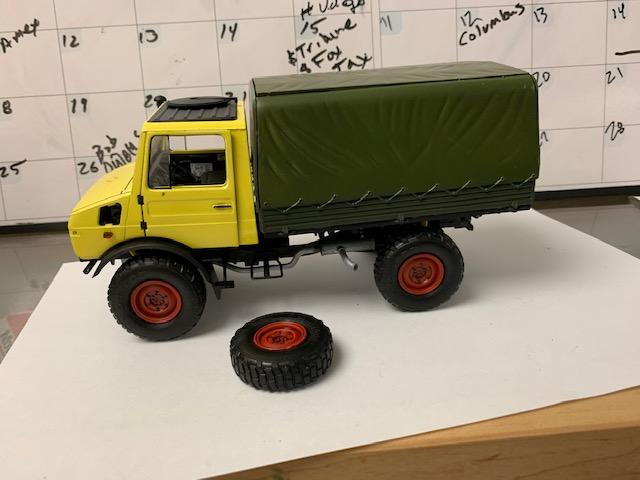
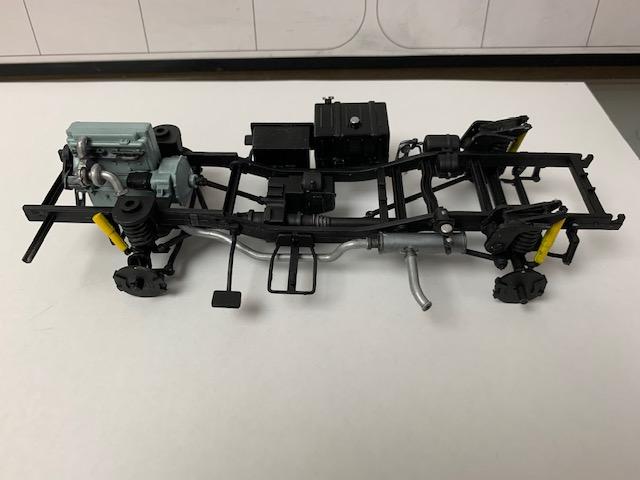
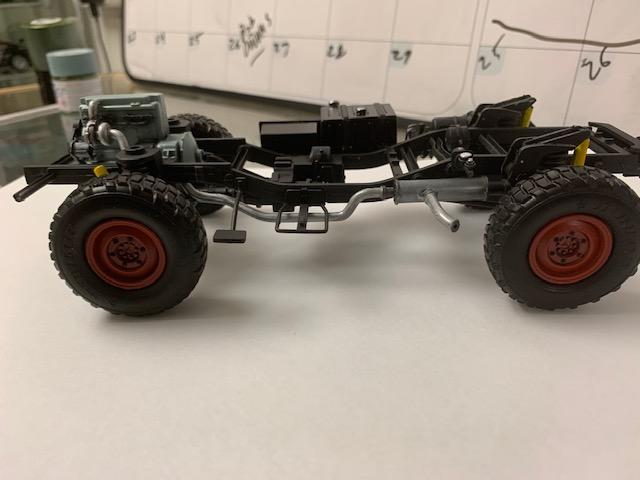
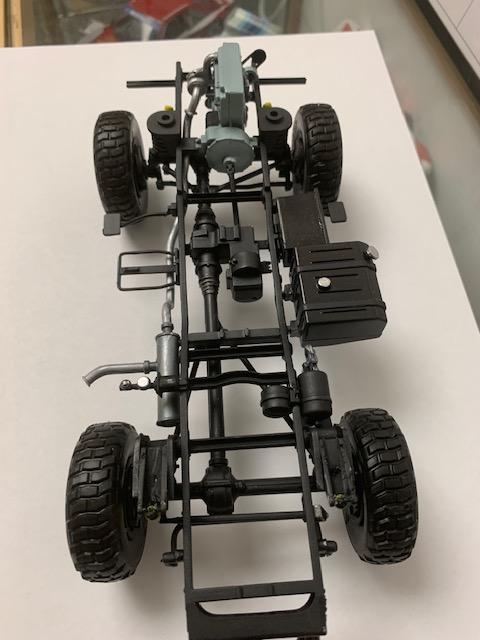
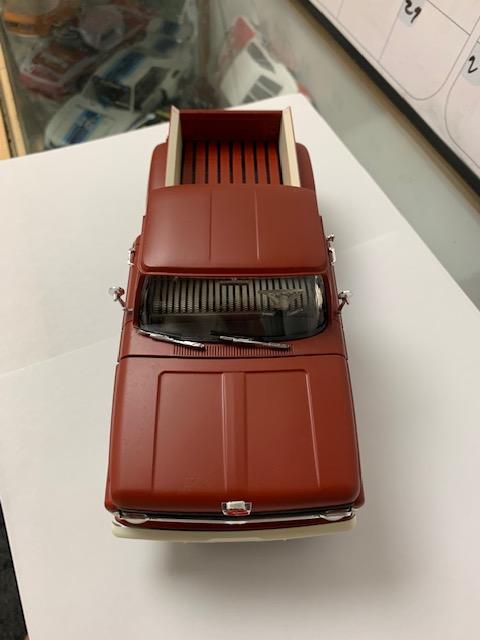
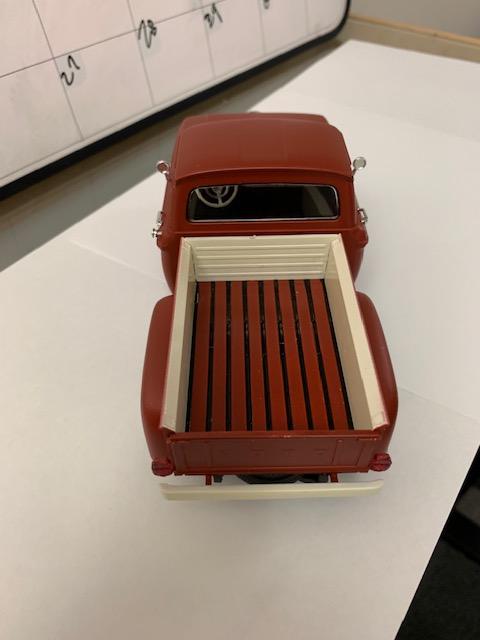
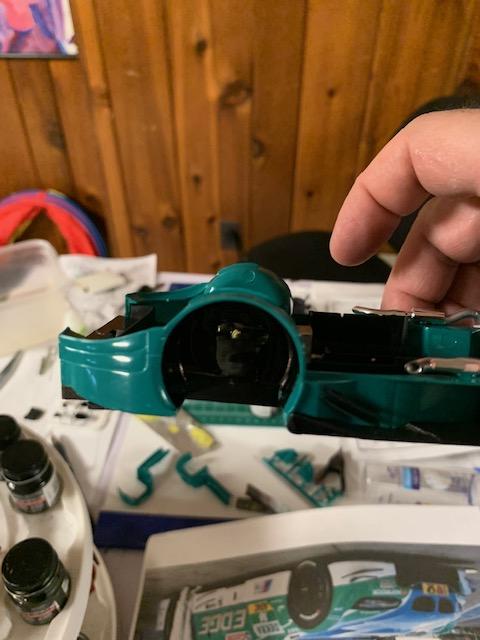
Couple more photos of WIP. The 1:1 truck was the look I was trying to go after. The underside of the bed is comprised of about 15 parts! I have to attach the lights there next. But I'm amazed at the level of detail in the kit. I did a test fit of the cab and bed to see what it might look like. Not glued and the top is not attached yet - but it seems to be coming along nicely.
-
Unimog
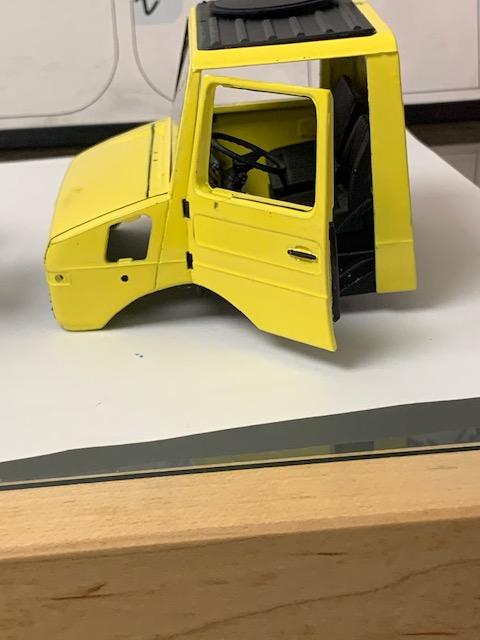
dougwintz replied to dougwintz's topic in WIP: Model Trucks: Pickups, Vans, SUVs, Light Commercial
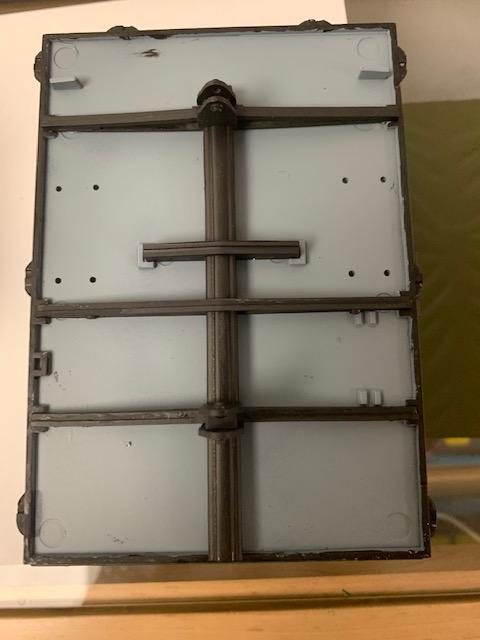
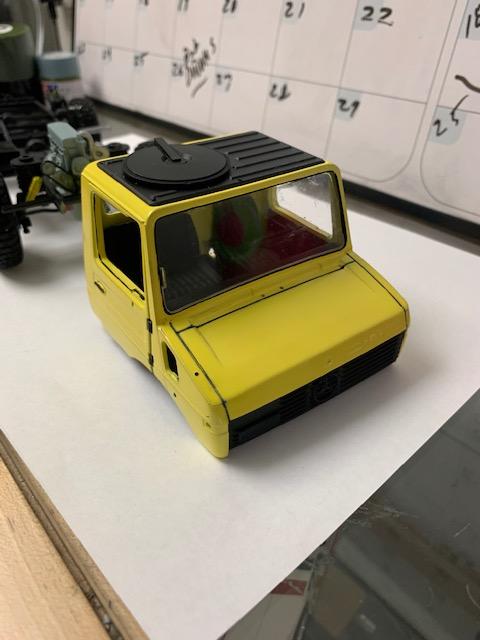
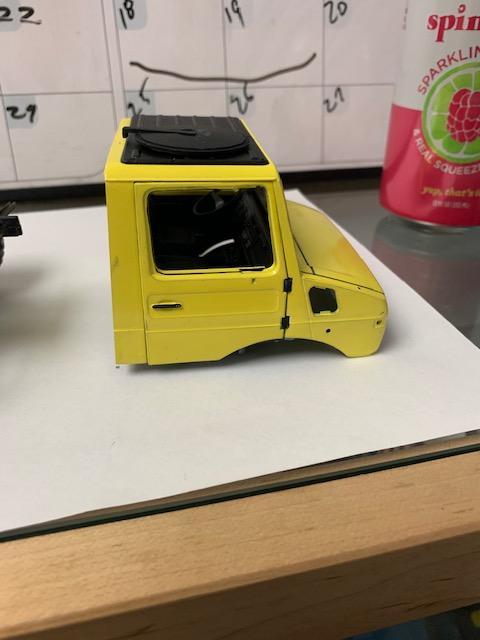
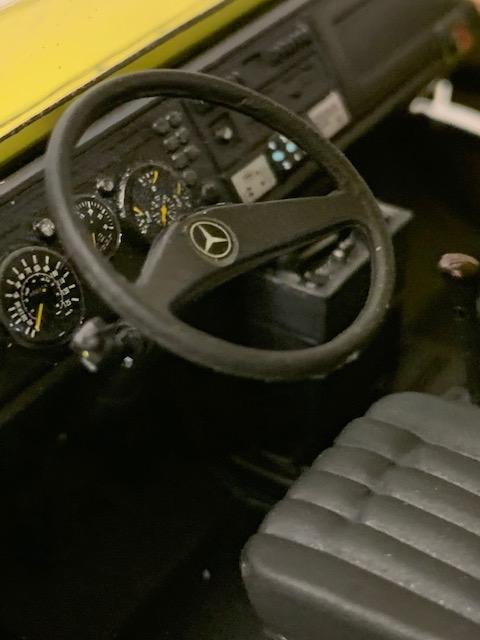
Hi. Here are some photos of the cab in progress
-
Unimog
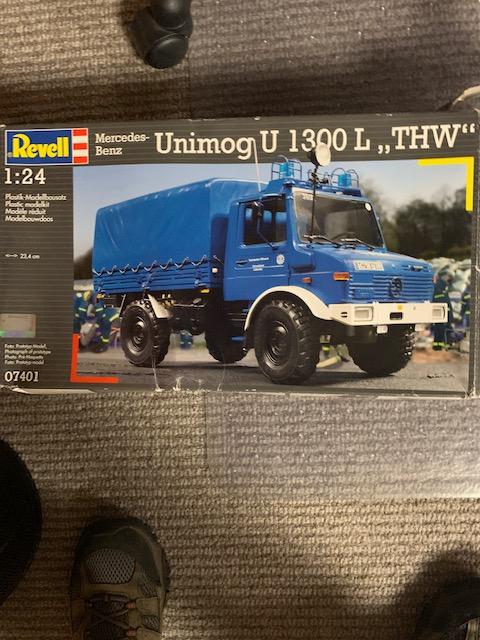
dougwintz replied to dougwintz's topic in WIP: Model Trucks: Pickups, Vans, SUVs, Light Commercial
Hi. The Dakar kit is the one I wanted, but I couldn't find it. I have this one
-
Unimog
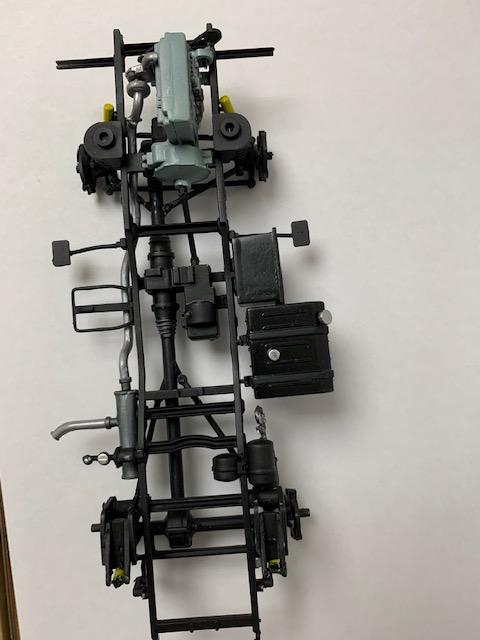
dougwintz replied to dougwintz's topic in WIP: Model Trucks: Pickups, Vans, SUVs, Light Commercial
-
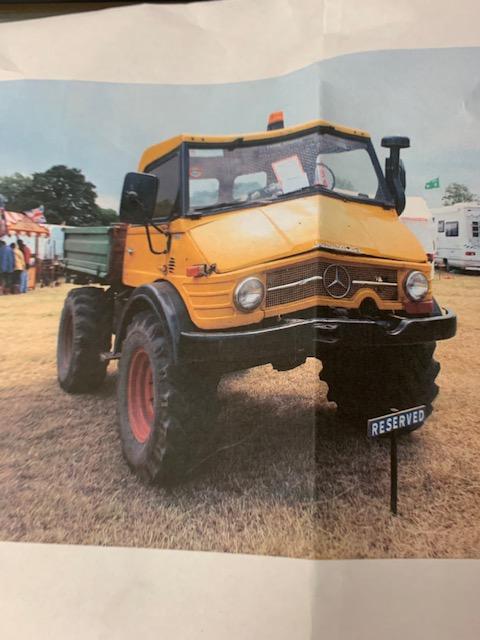
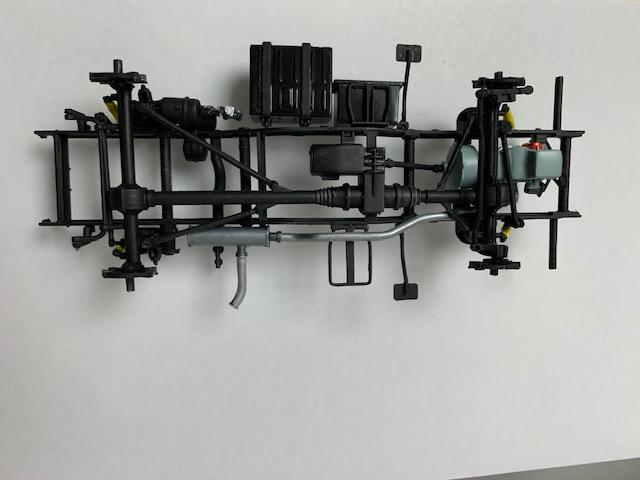
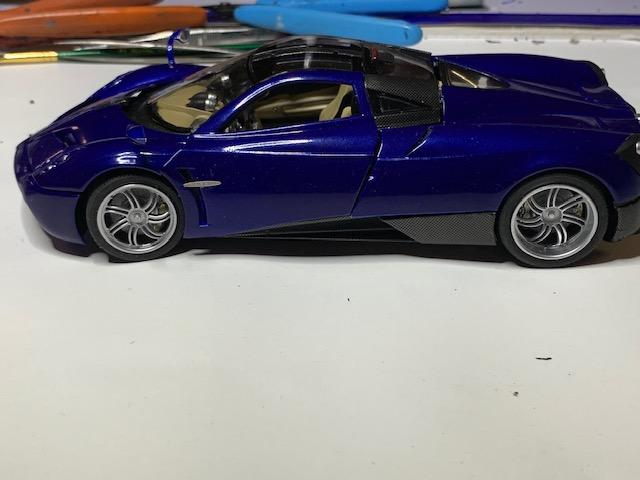
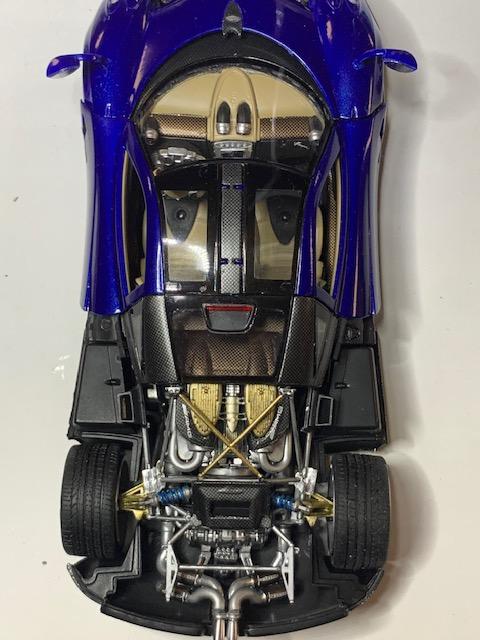
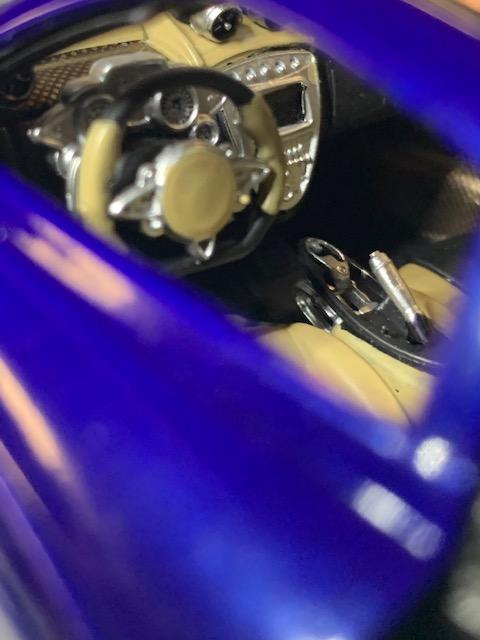
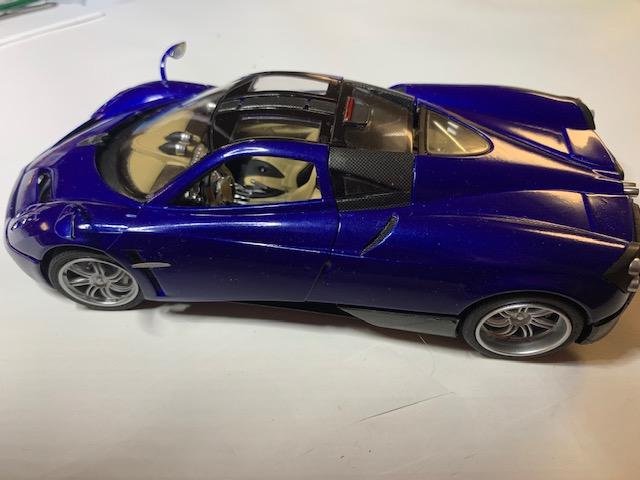
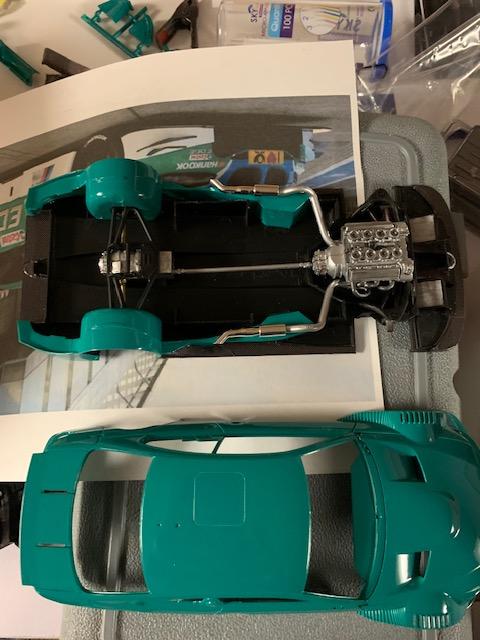
Usually I build cars - if its a truck usually just something like a Flareside or like that. Having just finished a Pagani, I wanted to move on to something easier. So I picked this Unimog - but was surprised by how detailed the chassis is. Here's my start.
-
56 Ford FD100 Pick Up
dougwintz replied to Daxman's topic in WIP: Model Trucks: Pickups, Vans, SUVs, Light Commercial
Wow. Very creative and imaginative. There's a little Mad Max meeting Blade Runner in there. Fun to watch. -
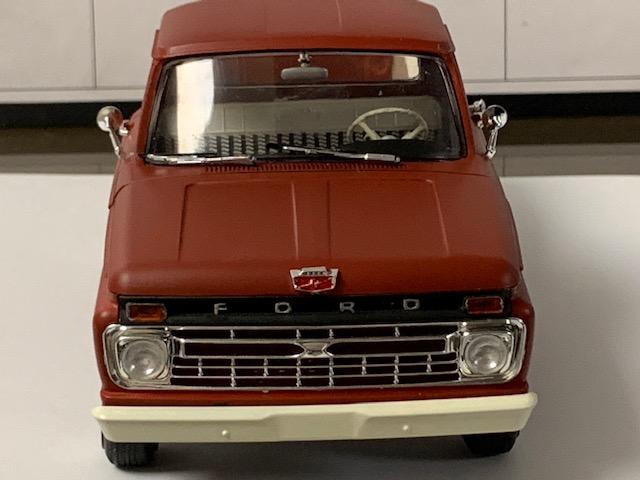
1966 Ford F100 Fleetside
dougwintz replied to dougwintz's topic in Model Trucks: Pickups, Vans, SUVs, Light Commercial
Modelcarcrazy - you are right!. Brain cramp on my part! -
From the Moebius kit. Tamiya dull red - liked color and the flat finish
-
Posted these in Under Glass too. As I said "Mother of Pearl" this was difficult!
-
MOTHER OF PEARL! $#@ this was difficult. I kept trying to figure out why the parts didn't fit - its because they don't fit. Or at least I think they want you to build it with all the body parts hinged and open. So, yeah, lots of whittling to try and close some of the gaps between the body panels. I have a couple of detailing things to finish off but man, I've got to give it a rest. Makes me want to do a snap kit next!!
-
Dan....I just saw yours - man, putting me to shame.
-
Trying to get a sense for how this will all hang together
-
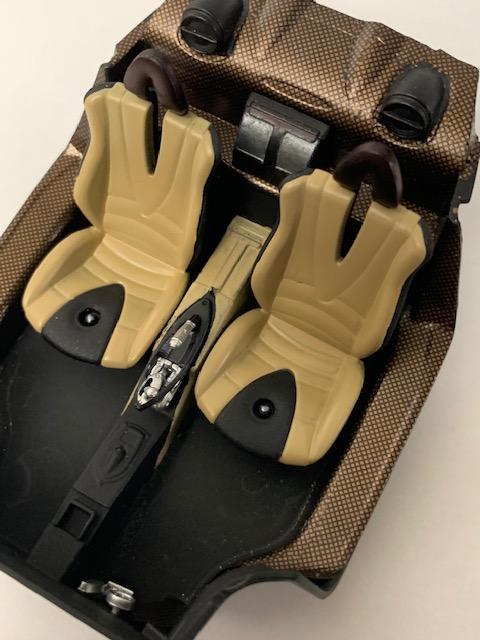
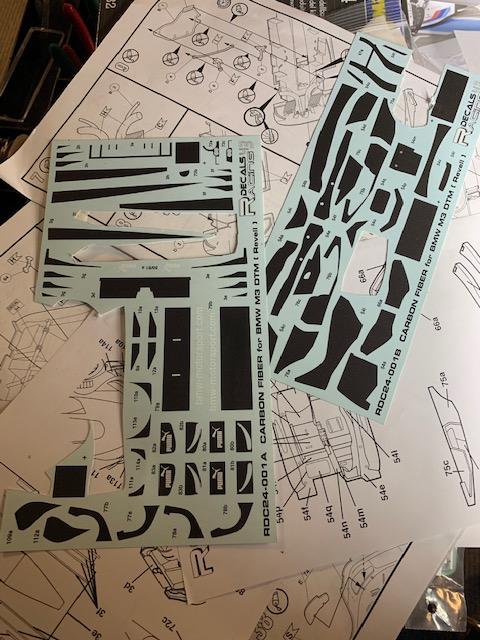
Hey Sonny. The carbon fiber is from Scale Motorsport. With a little help from decal solvent, it adheres very well.
-
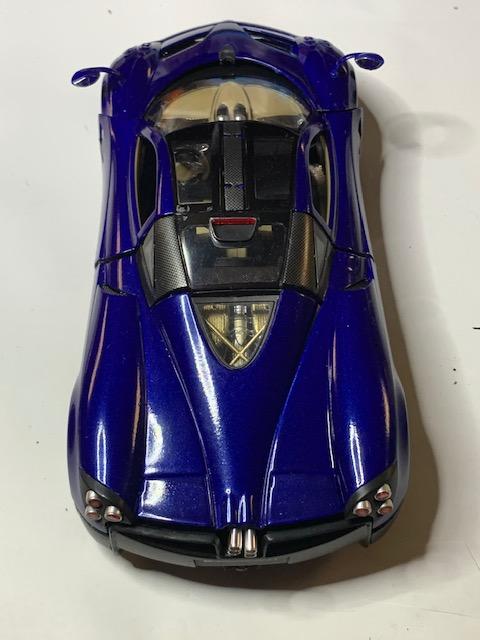
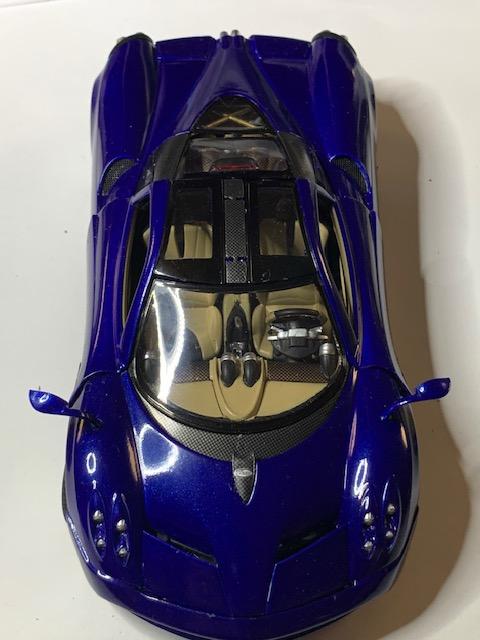
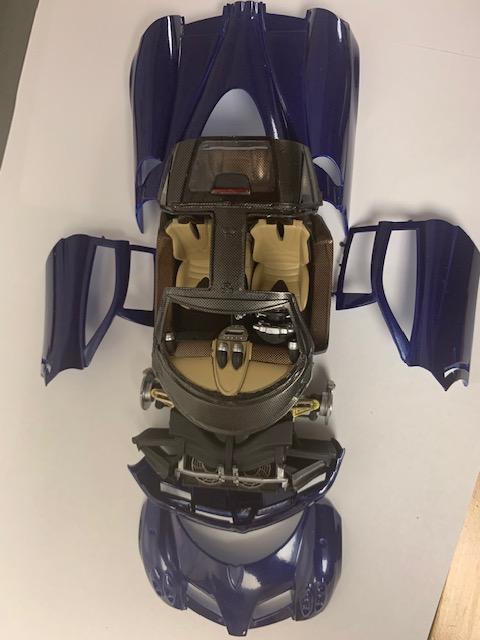
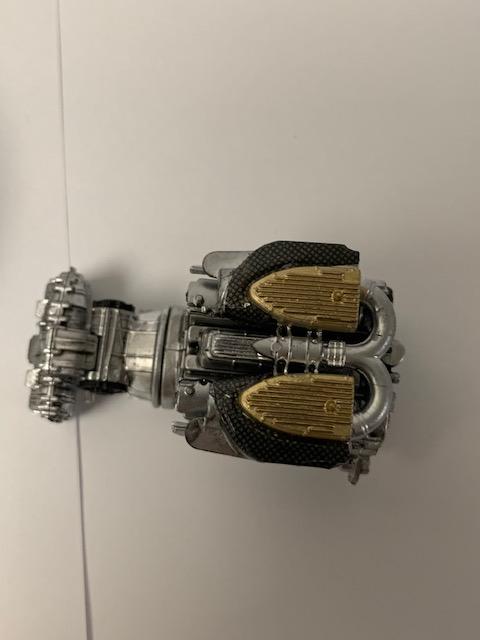
Hi. Gradually making my way through this build by Aoshima. Got carried away with the carbon fiber so it's taking a while. But fun, challenging kit.
-
This is a kit I've looked high and low for and it is very expensive. You did a great job on it - one of my favorite cars. I've built a couple of the Hasegawa's with aftermarket engines. You level of detail and realism is just great.
-
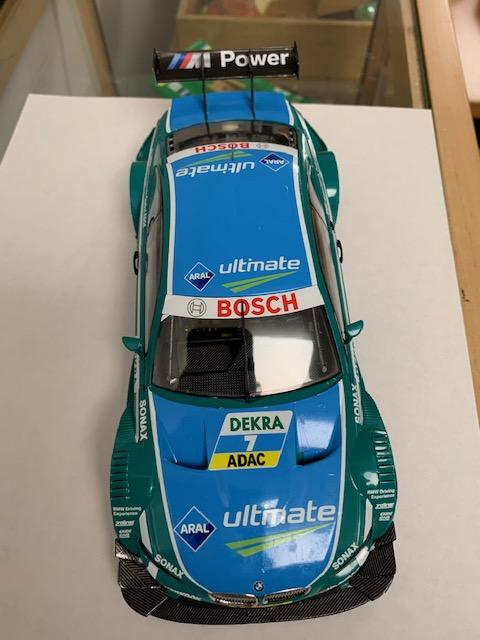
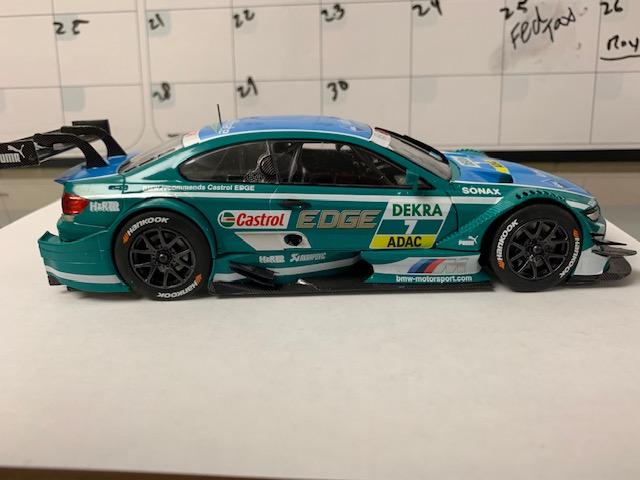
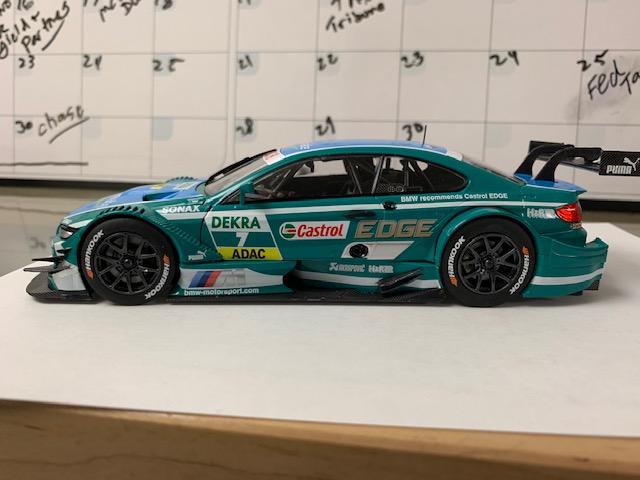
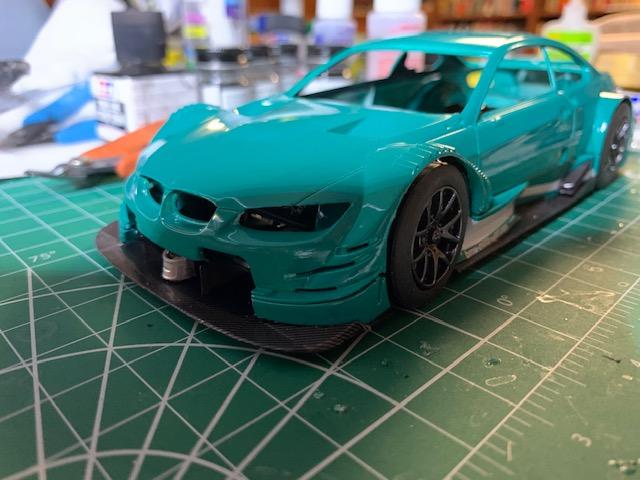
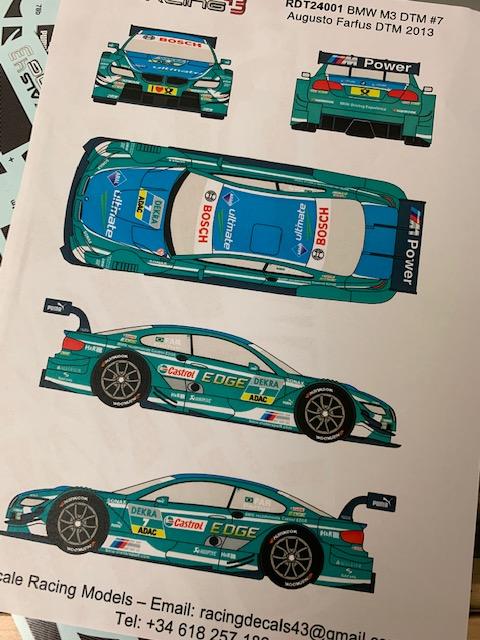
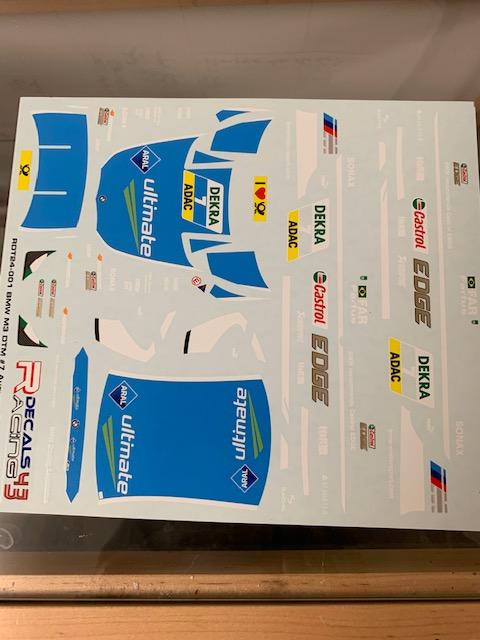
Hi. Here's my completed BMW. You can see the build progress in WIP.. This seemed like a walk in the park at first, but some fitment problems between the chassis, tub and body required a lot of fiddling. And it's one of those kits where the engine pushes up against the hood. So not as easy as I thought. The decals are from Racing 43 - really like the livery on this one.
-
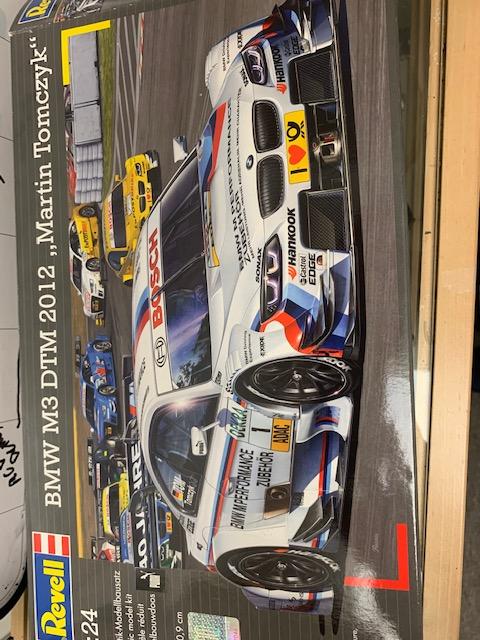
BMW DTM M3 2012/3
dougwintz replied to dougwintz's topic in WIP: Other Racing: Road Racing, Land Speed Racers
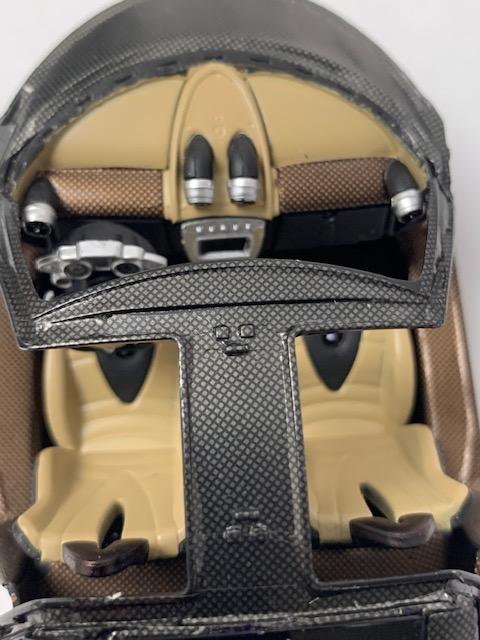
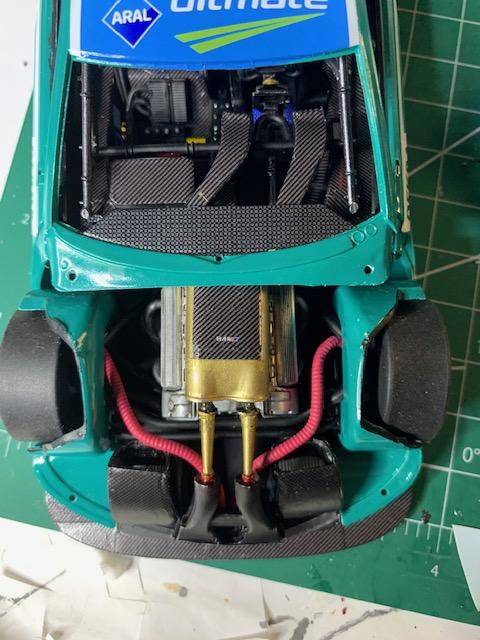
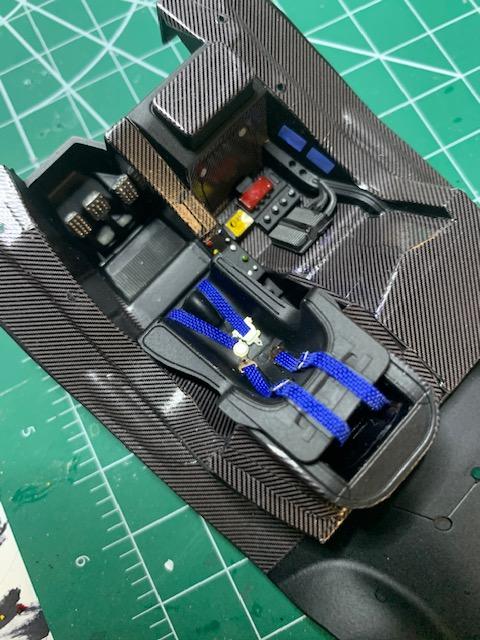
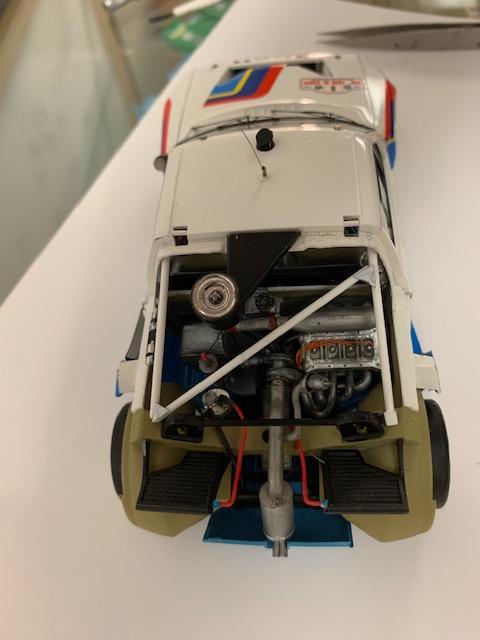
Interior is coming along
-
BMW DTM M3 2012/3
dougwintz replied to dougwintz's topic in WIP: Other Racing: Road Racing, Land Speed Racers
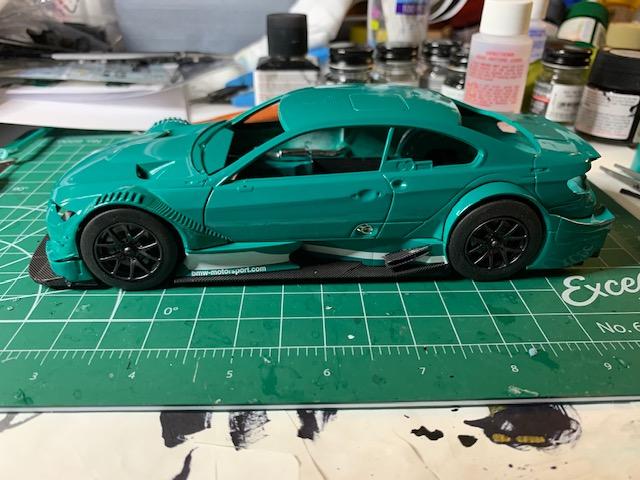
More work in progress. Body parts fitting together nicely.
-
BMW DTM M3 2012/3
dougwintz replied to dougwintz's topic in WIP: Other Racing: Road Racing, Land Speed Racers
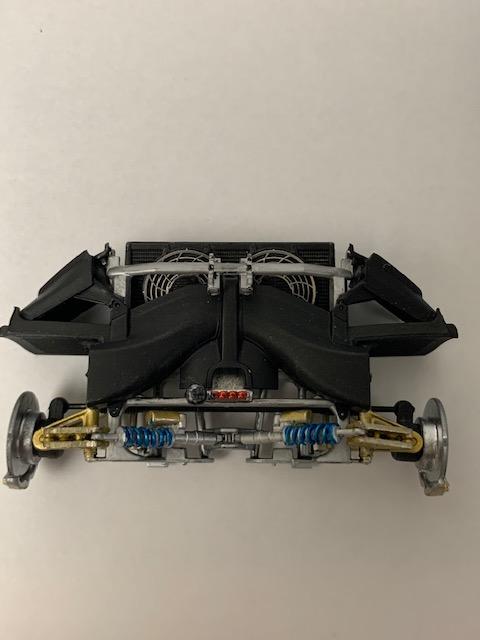
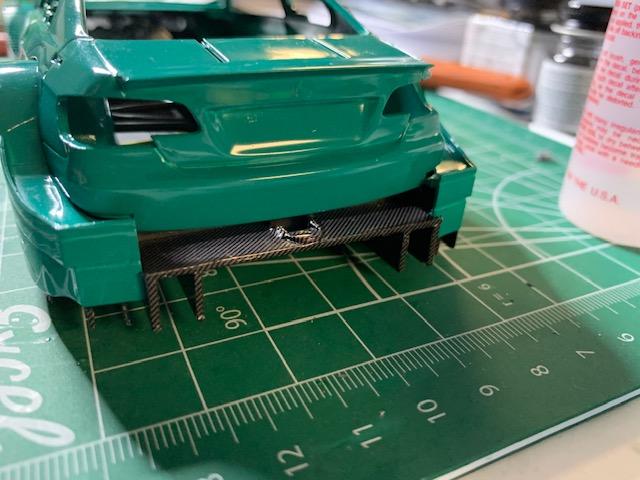
Working my way through this. I'm using carbon fiber decals from Racing 43. Just about done with the chassis and cockpit. BTW, this kit is VERY well engineered. Considering all the separate pieces that make up the body, they fit real well together. I have been test fitting as I go.
-
BMW DTM M3 2012/3
dougwintz replied to dougwintz's topic in WIP: Other Racing: Road Racing, Land Speed Racers
Wow. Excellent. Thanks for that. I can probably incorporate that reference into the build. Appreciate it. -
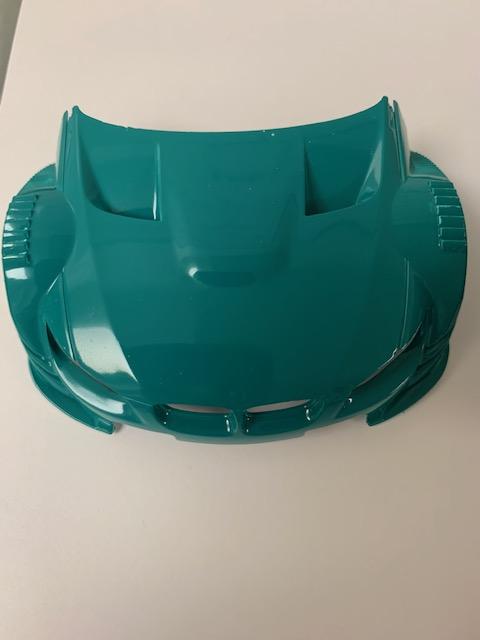
Hi. I'm building this BMW M3 DTM and using some aftermarket bits to reflect the Agusto Farfus car and livery. The paint is Tamiya Cobalt Green which, after primer, went on so easily. Really a pleasure to work with. Here is my question to this group. I can find exterior shots of the DTM BMW i'm building, but I can't find ANY references for the engine and engine bay. Anyone have any ideas on that? Thanks and I'll post more pictures as I get further into it.
-
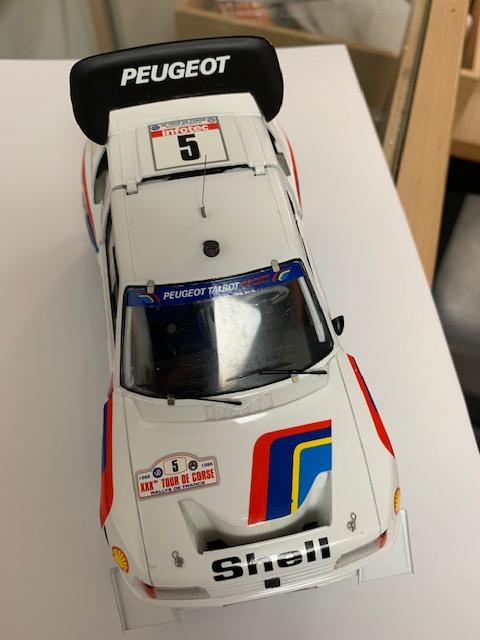
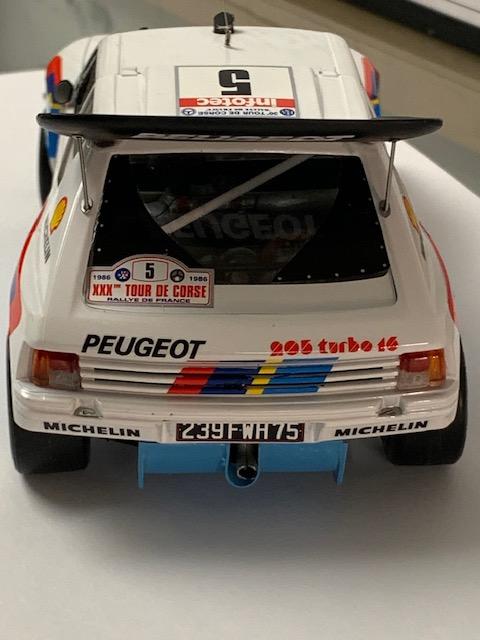
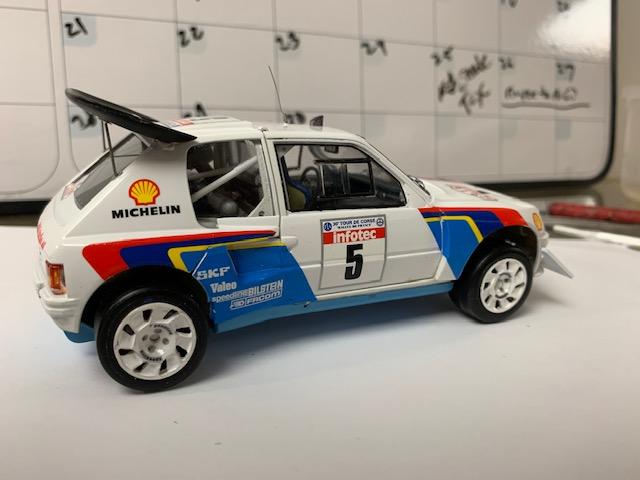
Thanks for the comments, guys. I think it's very cool that you have actually been to some of the events these cars ran in. I feel like I'm just catching up to that piece of racing history. I am building a bunch of Lancias (1/24 scale), Alpines, Evos and now Peugeots. It's fitting because the 1;1 cars I enjoyed owning and driving the most were the Evo and R32.
-
This was a big reclamation project. I think I built this 15 - 20 years ago, and the clear coat on it had yellowed. Looked ugly. So I striped it, took it apart, applied some aftermarket bits and put it back together again. Took f o r e v e r. I have another I 'm going to build as a Pike's Peak version, but think I'll try something easier next.
-
Thanks. I agree on the Tamiya paints. How is it they can go on so smoothly, while the other products require significant work? I'm going to try the Tamiya finishing products you mentioned. Thanks for the tip!