HJK
-
Posts
144 -
Joined
-
Last visited
Content Type
Profiles
Forums
Events
Gallery
Everything posted by HJK
-
Hi Daniel, Thanks for this detailing hint. I've never heard the expression 'freeze plugs'. Can you please tell me what they are for and why are called like that? Thanks, Juergen.
-
Charles, Thanks very much for your explanation of the canvas roof. What flaws do you mean? I can't see any. No, honestly, you know where they are but I can't spot any. I really admire your building capabilities. Thanks again, Juergen
-
Hi Charles, wow, this truck looks fantastic again. But to be honest, I didn't expect something else from ya . Can you please tell us a bit about the materials you used for the roof canvas and the leather straps and how you made and painted the parts? Thanks, Juergen
-
Zvezda Star Destroyer
HJK replied to Madhatter's topic in WIP: All The Rest: Motorcycles, Aviation, Military, Sci-Fi, Figures
Hi again Simon, long time-no see, hope you're still ok, virus-related I mean. And I also hope that you're still motivated to fumble with the tiny parts on your SD. What about the electronics and the fiber routing? Did you find a satisfying solution for the stand in order to display your SD in a proper way? All the best , stay focused, Juergen -
Mark, thanks very much for your detailed explanation. Take care, Juergen
-
Zvezda Star Destroyer
HJK replied to Madhatter's topic in WIP: All The Rest: Motorcycles, Aviation, Military, Sci-Fi, Figures
Jeez Simon, you definitely deserve to be happy with the outcome. For me personally it creates a tension nearly unbearable to wait for the finished SD. I'm really looking forward to it. Please stay focused. Juergen -
Zvezda Star Destroyer
HJK replied to Madhatter's topic in WIP: All The Rest: Motorcycles, Aviation, Military, Sci-Fi, Figures
Hi Simon, Good to see you back at the bench. Your idea to give us a size reference is great. It helps all the more to grasp how tiny the parts are you are putting together. I personally also like the warm white of the lights. It's not that glaring like the bluish ones. They also remind me of the Alien movies. In the not so well illuminated areas of the ship there always was the danger of the beast lurking around the corner. Anyway, keep up your gorgeous work. Take care and stay negative mate. Juergen -
Hi Mark, I'm immensely impressed by the realistic weathering. It looks spot on. May I ask how you did the chipped away paint on the garage door? Thanks, Juergen
-
Mack Trident
HJK replied to Hessel Hemstra's topic in WIP: Model Trucks: Big Rigs and Heavy Equipment
Hi Hessel, I really like the massive trucks from down under. The reddish dust on the frame and the running gear looks realistic. It's just my taste but the cab, sleeper and front bumper seems to be a bit too clean, don't you think? Take care, Juergen -
Thanks very much, Håkan. This helps a lot, Juergen
-
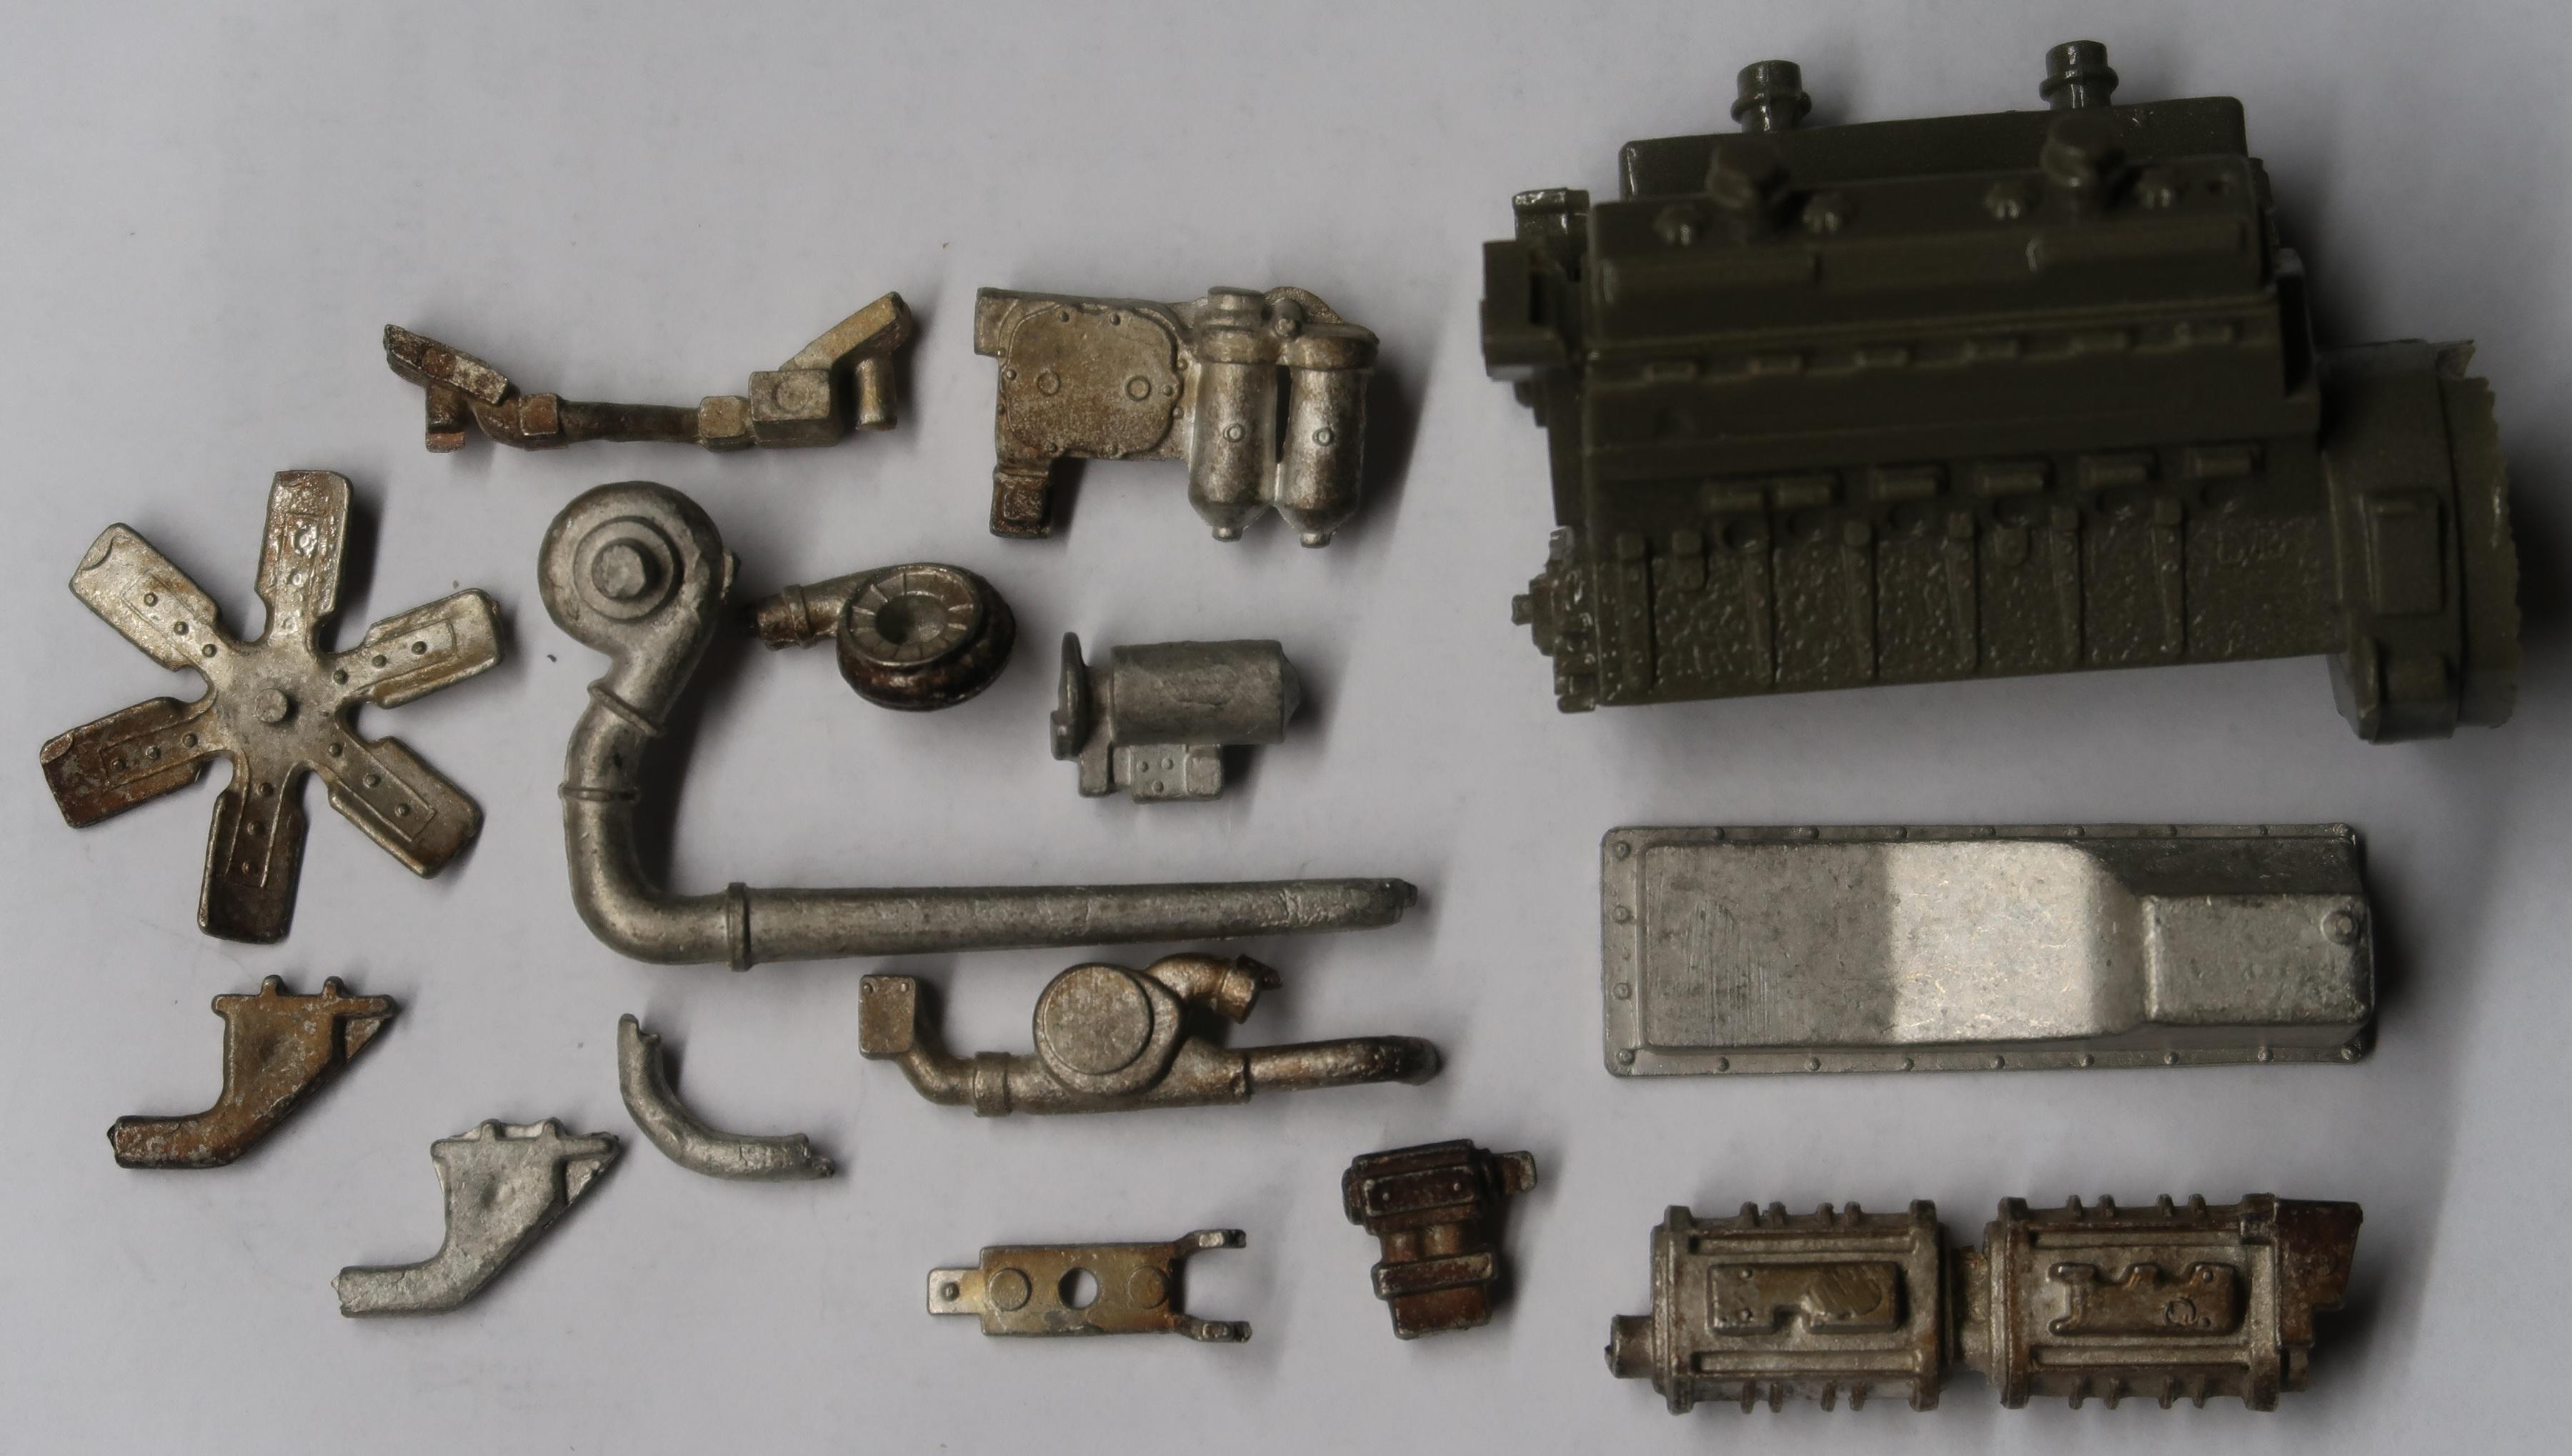
Thank you, Håkan. Do you know by any chance what are the extrusions on top of the covers? Do you have a construction sheet for the engine? Thanks a lot, Juergen
-
I bought this engine in a package a couple of years back. There's no label on the bag so I'm not sure whether it's a yellow big 12v or a Detroit 12V71.Does anyone know and can help? Thanks, Juergen

-
1968 Dodge D800 Dump
HJK replied to DRIPTROIT 71's topic in WIP: Model Trucks: Big Rigs and Heavy Equipment
And again the heavily tormented and dented side walls of the dump box. Thank you for that, Juergen -
Reo Gold Comet
HJK replied to Chariots of Fire's topic in WIP: Model Trucks: Big Rigs and Heavy Equipment
Charles, thank you so much for the explanation on the window gaskets. Tom Decker is right. Your way to explain is excellent and very good to understand. Although I'm not sure whether I'm enough a craftsman to perform the gaskets this way but I nevertheless will certainly try that on a next project. In the end I can't think of a better way to do it, so again thanks very much again. Juergen -
Reo Gold Comet
HJK replied to Chariots of Fire's topic in WIP: Model Trucks: Big Rigs and Heavy Equipment
Hello Charles, what else can I do than joining the chorus of praise of all the other forum members. And you absolutely deserve that. I can't remember any built model I followed here in the forum that wasn't a stunning piece of art. Do I feel a tiny little sting of jealousy? Hmm,......yes! But it's just wonderful to follow your WIPs and see the finished builds. And I learned a lot from you. But there are still some questions. For example, how did you do the rubber beads around the window openings of the body above the compartments? Thanks very much, Juergen -
B.R.B.O. 2021 Ford T8000 Dump
HJK replied to DRIPTROIT 71's topic in Model Trucks: Big Rigs and Heavy Equipment
Thanks for your answer, Brian. And thank you for sharing your method of bending the aluminum sheeting. If I got it right you installed a kind of double bottom in the dump box, that's a splendid idea. It really did the job of realism. Juergen -
B.R.B.O. 2021 Ford T8000 Dump
HJK replied to DRIPTROIT 71's topic in Model Trucks: Big Rigs and Heavy Equipment
Brian, Compared to the difficulties you had with the cab in the beginning this truck turned out absolutely fantastic. Also the weathering is spot on. May I ask what you did that inside the dump box the outside webbing can be seen where the 'sand' rubbed off the paint? That looks especially convincing. Juergen -
Monogram 1926 Mack
HJK replied to Straightliner59's topic in WIP: Model Trucks: Big Rigs and Heavy Equipment
Hi Daniel, OK, I see. I also have one of the Monogram kits. It's the Texaco Tank Truck. This one doesn't come with these levers. That's the reason I asked the question. Another thing is also puzzling me. On one of the pictures at the beginning of your thread one can see six rivet heads nearly in the middle of the frame rails. There is nothing in between the rails, no cross member or similar parts, so I'm asking myself what are they for? Do you have any idea what they are for? Is there a special reason for them? Are they needed for the Log Hauler Kit and they just use the same frame for all the kits? BTW, I thought about your solution of routing the ignition cables. That's a very clever method, thanks again for sharing your idea. Juergen -
Monogram 1926 Mack
HJK replied to Straightliner59's topic in WIP: Model Trucks: Big Rigs and Heavy Equipment
Daniel, Thank you very much for your detailed explanation, I really appreciate it. And honestly, from step to step the Mack looks better and better. Your weathering skills are amazing. And the proposals from Charles will certainly add to the look. Please tell me what are the small levers under front of the seat for? They don't seem to come from the kit, do they? I'm really excited to see this thing finished. Juergen -
Monogram 1926 Mack
HJK replied to Straightliner59's topic in WIP: Model Trucks: Big Rigs and Heavy Equipment
Hi Daniel, the weathering looks really, really gorgeous. Can you please tell me how you routed the ignition cables through the pipe to the spark plugs? Thank you. -
Jouko, The BMW looks great and like a real one. The reality is not only the more than gorgeous spokes, it's also the bluish color of the exhaust pipes. Everyone who owned such a BMW knows that. That is a very nice detail. And again, the green looks absolutely great. Take care, Juergen
-
Zvezda Star Destroyer
HJK replied to Madhatter's topic in WIP: All The Rest: Motorcycles, Aviation, Military, Sci-Fi, Figures
Simon, You're right. My suggestion would be best from only one orientation, so forget about it. It seems I have to think things to the end before suggesting them. In the end you probably can't completely hide the whole stand and to honest that's not a disaster. I'm really curious what idea you will come up with. I'll keep my fingers crossed that all comes out to your satisfaction. Take care, Juergen -
Hi Jouko, Your work is absolutely fabulous. Especially the spokes you made are gorgeous. And I like the green you chose. In my view it's a lot better than the blue on the box. There is just one little thing you might want to change. The stand should be mounted a 180° turned so that the tips of the bent pipes will point to the rear. Just have a look to the picture on the box or the lead picture of the real green one. Or is there a special reason for mounting it the other way? Keep up your gorgeous work. I'm excited to see that finished. Take care, Juergen
-
Zvezda Star Destroyer
HJK replied to Madhatter's topic in WIP: All The Rest: Motorcycles, Aviation, Military, Sci-Fi, Figures
Hi Simon, Yes, you're right. The combination of a length of more than 600 mm and a weight of about 4 kilograms on a 1/4" tube is more than likely to wobble when moving and turning the stand to have a look at it. And even using a pipe bender you sometimes can't avoid the crinkling without filling the tube with sand, especially if you want it to be a curve with a small diameter. So all in all it's presumably better to use the steel strip. OK, what about using a styrene plate fixed to the front of the base plate of the stand? It will cover the stand and you can put on a picture of the black space with lots of stars on it. Only the horizontal strip protrudes the styrene plate and you can hide all the other parts of the stand. Does all this make any sense to you or is it complete nonsense? Maybe I'm thinking in a completely different direction? If that's the case just tell me to keep my mouth shut, I hope you know what I mean, don't you? Anyway, keep up your gorgeous work. Take care, Juergen -
Zvezda Star Destroyer
HJK replied to Madhatter's topic in WIP: All The Rest: Motorcycles, Aviation, Military, Sci-Fi, Figures
Hi Simon, It's a bit difficult for me to judge what's possible for you to produce a mount for the SD. As I don't know firstly the dimensions of the power pins or the plug and secondly the weight and the overall size of the SD it might be the case that I recommend or propose something completely stupid. I second your thought that the tube with a curve would look better especially when it's painted flat black. The outcome depends a bit on the material of the tube, the diameter of the tube and the radius you want to use for the curve. In order to avoid the crushes or wrinkles at the curve you can fill the tube with fine sand (e.g. the sand you use in bird cages) and bend it around something solid which has the diameter you want to achieve. As I understand it you will have a horizontal part of the tube that connects to the SD and a vertical or slightly tilted part of the tube that will be mounted to the base plate, right? So then again the possible length of the horizontal part of the tube depends of the weight of the SD in order to avoid the pitching of the ship. You can also bend the tube to a bigger curve so that the tube comes back to the front nearly under the SD. So if you place the base plate under the SD you can prevent the whole thing from tipping over. The further back you place the base plate the heavier the plate must be. I hope you can understand my thoughts. In case it's still too foggy just say so and I will make a little sketch to support my words. Hope it helps a bit. Take care, Juergen