

Straightliner59
-
Posts
4,722 -
Joined
-
Last visited
Content Type
Profiles
Forums
Events
Gallery
Posts posted by Straightliner59
-
-
Excellent work, Ken. There's something about these older kits, built well, that I find kind of moving. As mentioned, earlier, because they're inspirational, there's some nostalgia, to them, and they're just downright cool!
-
29 minutes ago, Bainford said:
Plus, of course, it's just plain rude to walk out of a hobby shop without buying something.
And if it's not rude, it is certainly unnatural.True enough!😅
-
14 hours ago, Ace-Garageguy said:
EDIT: It's the only adhesive besides my expensive aircraft epoxy-based products that does a decent job sticking together aluminum and brass parts, but it's imperative to thoroughly sand any surface oxidation off of metals prior to bonding...and I don't mean a quick swipe with sandpaper. I mean thoroughly.
What would your thoughts be, pertaining to, maybe leaving the plastic coating on unexposed, gluing surfaces of the aluminum flashing I use. I've been sanding it off--and, that's necessary for finish work, but, could that coating be an ally, when it comes to adhering the sheet?
-
16 hours ago, ColonelKrypton said:
Brass is strong, perhaps too strong for some tasks, easy to work, can be soldered.
It is not easy to break old habits and break away from old comfortable ways of doing something. I will make it a point of using more plastic tiny bits - nothing ventured, nothing gained and perhaps I will find a new comfortable place with a more hybrid approach.
I think it's a lot of fun, to try new techniques. That's why I first attempted a scratchbuilt brass dragster chassis, and why I learned to work sheet aluminum into compound curves. I've thrown a ton of stuff away, that didn't work out. I have a little bin that's marked as a tip of the hat to Burt Munro: Offerings to the gods of scale. My not-so-successful attempts go there, now!😁
I guess I don't have any excuse not to attempt to mill a set of spindles, now that I think about it! Hmmm...
-
 2
2
-
-
16 hours ago, NOBLNG said:
What do you use for glue when building tiny parts that require the strength to withstand some mild abuse, like steering components?
Thanks, Greg.
To add, a little to what Bill said--once the spindles are mounted to the axle, they have the added support of the axle, itself. That virtually eliminates any chance of the "tabs" flexing, and weakening the joints. Our models aren't typically in high-stress environments--except during transport.🙂 I also flow a bit of CA over the joints, once the solvent's cured a while. It's worked out, pretty well!
-
1
-
-

3-D printing would be the only way to get that taper, as well.
-
13 hours ago, Randy D said:
Daniel, Such a treat to see your dragster in person and get to talk to you.
I enjoyed that, as well! It was a privilege to see and hold this Maserati. Your bodywork was a joy to see! You can certainly be proud of that!
-
45 minutes ago, slusher said:
Could I just use the glazing compound so I don’t have to deal with a hardener?
The best thing about using a two-part catalyzed putty, is that there's virtually no shrinkage. That's preferable, especially in larger areas, like custom bodywork. For general filling of sink marks, etc., most standard fillers will work just fine!
-
1
-
 1
1
-
-
2 hours ago, CabDriver said:
I was in Hobby Lobby, trying not to buy any kits but I never built this kit and I always wanted to, so…
Plus some copper and aluminum rod, to feed my lathe
If I don't find what I went to the hobby shop for, specifically, I always buy some building materials. Especially when I see the K&S Special Shapes rack. I snag up the 1/32" and 3/64" brass tubing, anytime I see it! Last time I was there, they had K&S square aluminum tube in 3/32" and 1/8", neither of which I'd seen, before. Anyhoo...you can never go wrong investing in materials (or tools!).😃
-
I little weathering from the track would be wonderful. The repairs, and the new color look great!
-
1
-
-
I love them. I think you did a great job, capturing the motion and energy! Nice work!
-
16 hours ago, ColonelKrypton said:
I will have to look more closely at the train bits and pieces. Train stores around here ( Canada in general ) are not as well stocked of such detailing parts as they once were.
Here in the Denver area, there used to be what was probably the greatest model railroad store in the country--Caboose Hobbies. My friend, Don and I spent hours, in that place looking at different castings and machined parts. He started using the handrail stanchions, and told me about them. I have used them, since. There is no telling how much money I spent, in that place on materials and supplies, alone! Alas, while the name still exists (I think), it's not really even a shadow of its former greatness.
I agree--whatever works, I'll use it! If I don't have it, thankfully, I mostly have the ability to make it with round stock, and PCB bits in the lathe. I always have my eyes open for building materials, no matter the source. I've made steering axles from brass and plastic, both--it depends on what the rest of the project requires. If I'm going for quick and easy, I'll generally use plastic. My Nostalgia Top Fuel dragster has brass components, up front. The attached are a Monogram Model A Coupe, I'm working on--well, was--and will be again, at some point.

-
2
-
-
4 hours ago, Ian McLaren said:
Thank you very much Mike! Having seen the kind of work you turn out your words mean a lot! The next car is more up you alley, full brass 1978 Swindahl chassis, funny car, it's also a (been thinking about this one for years kind of deal) project and is going to be my most ambitious.
model yet
That will truly be a joy, to watch!
-
Very nice, Dennis! Dig the Minnesota plate, too!
-
1
-
-
4 hours ago, customline said:
This is fascinating. Who made this kit? What scale?
MPC, 1/25th.
-
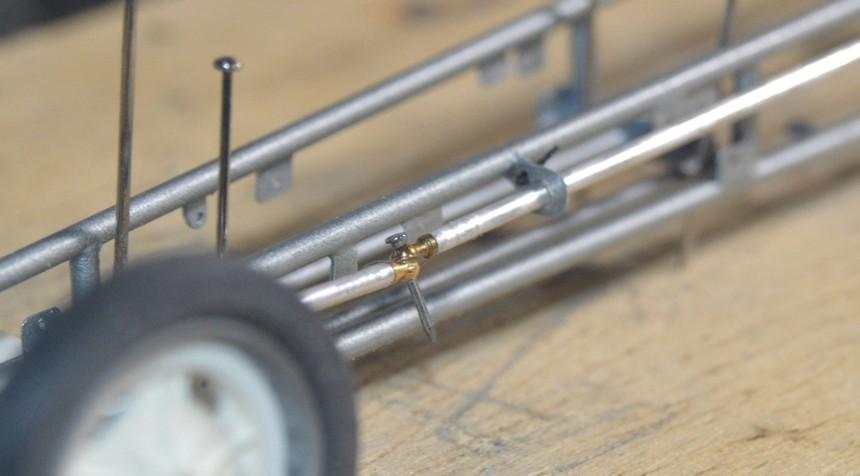
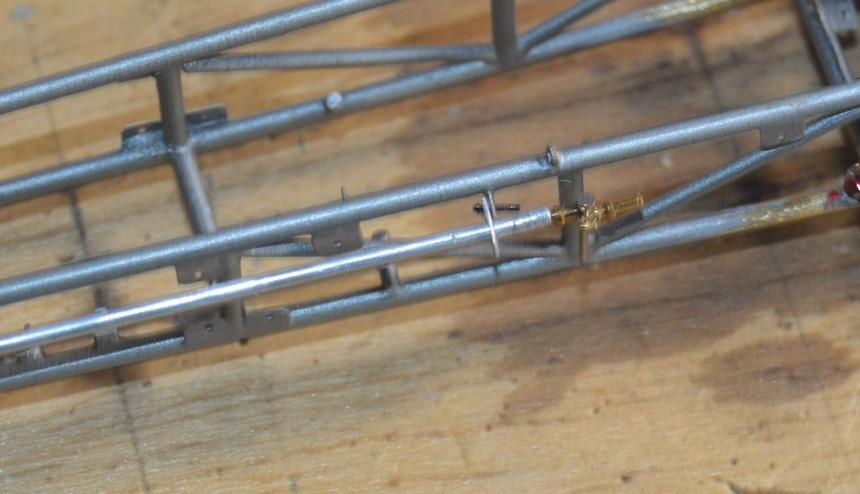
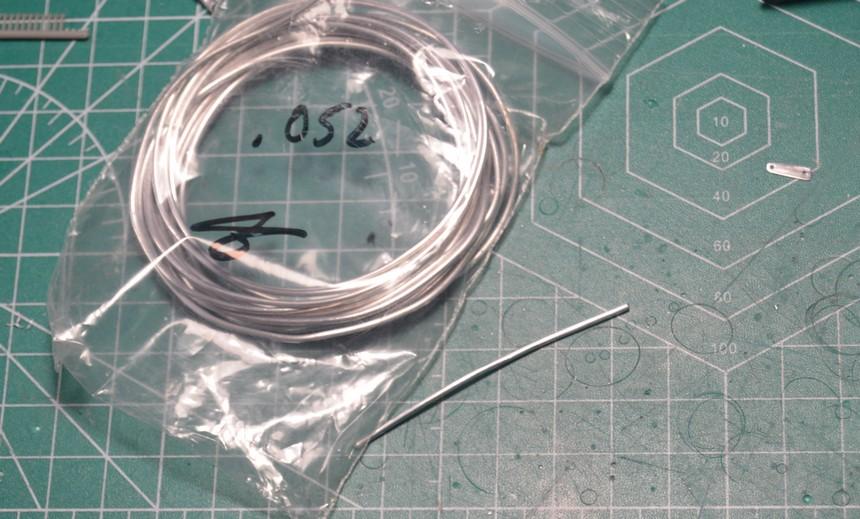
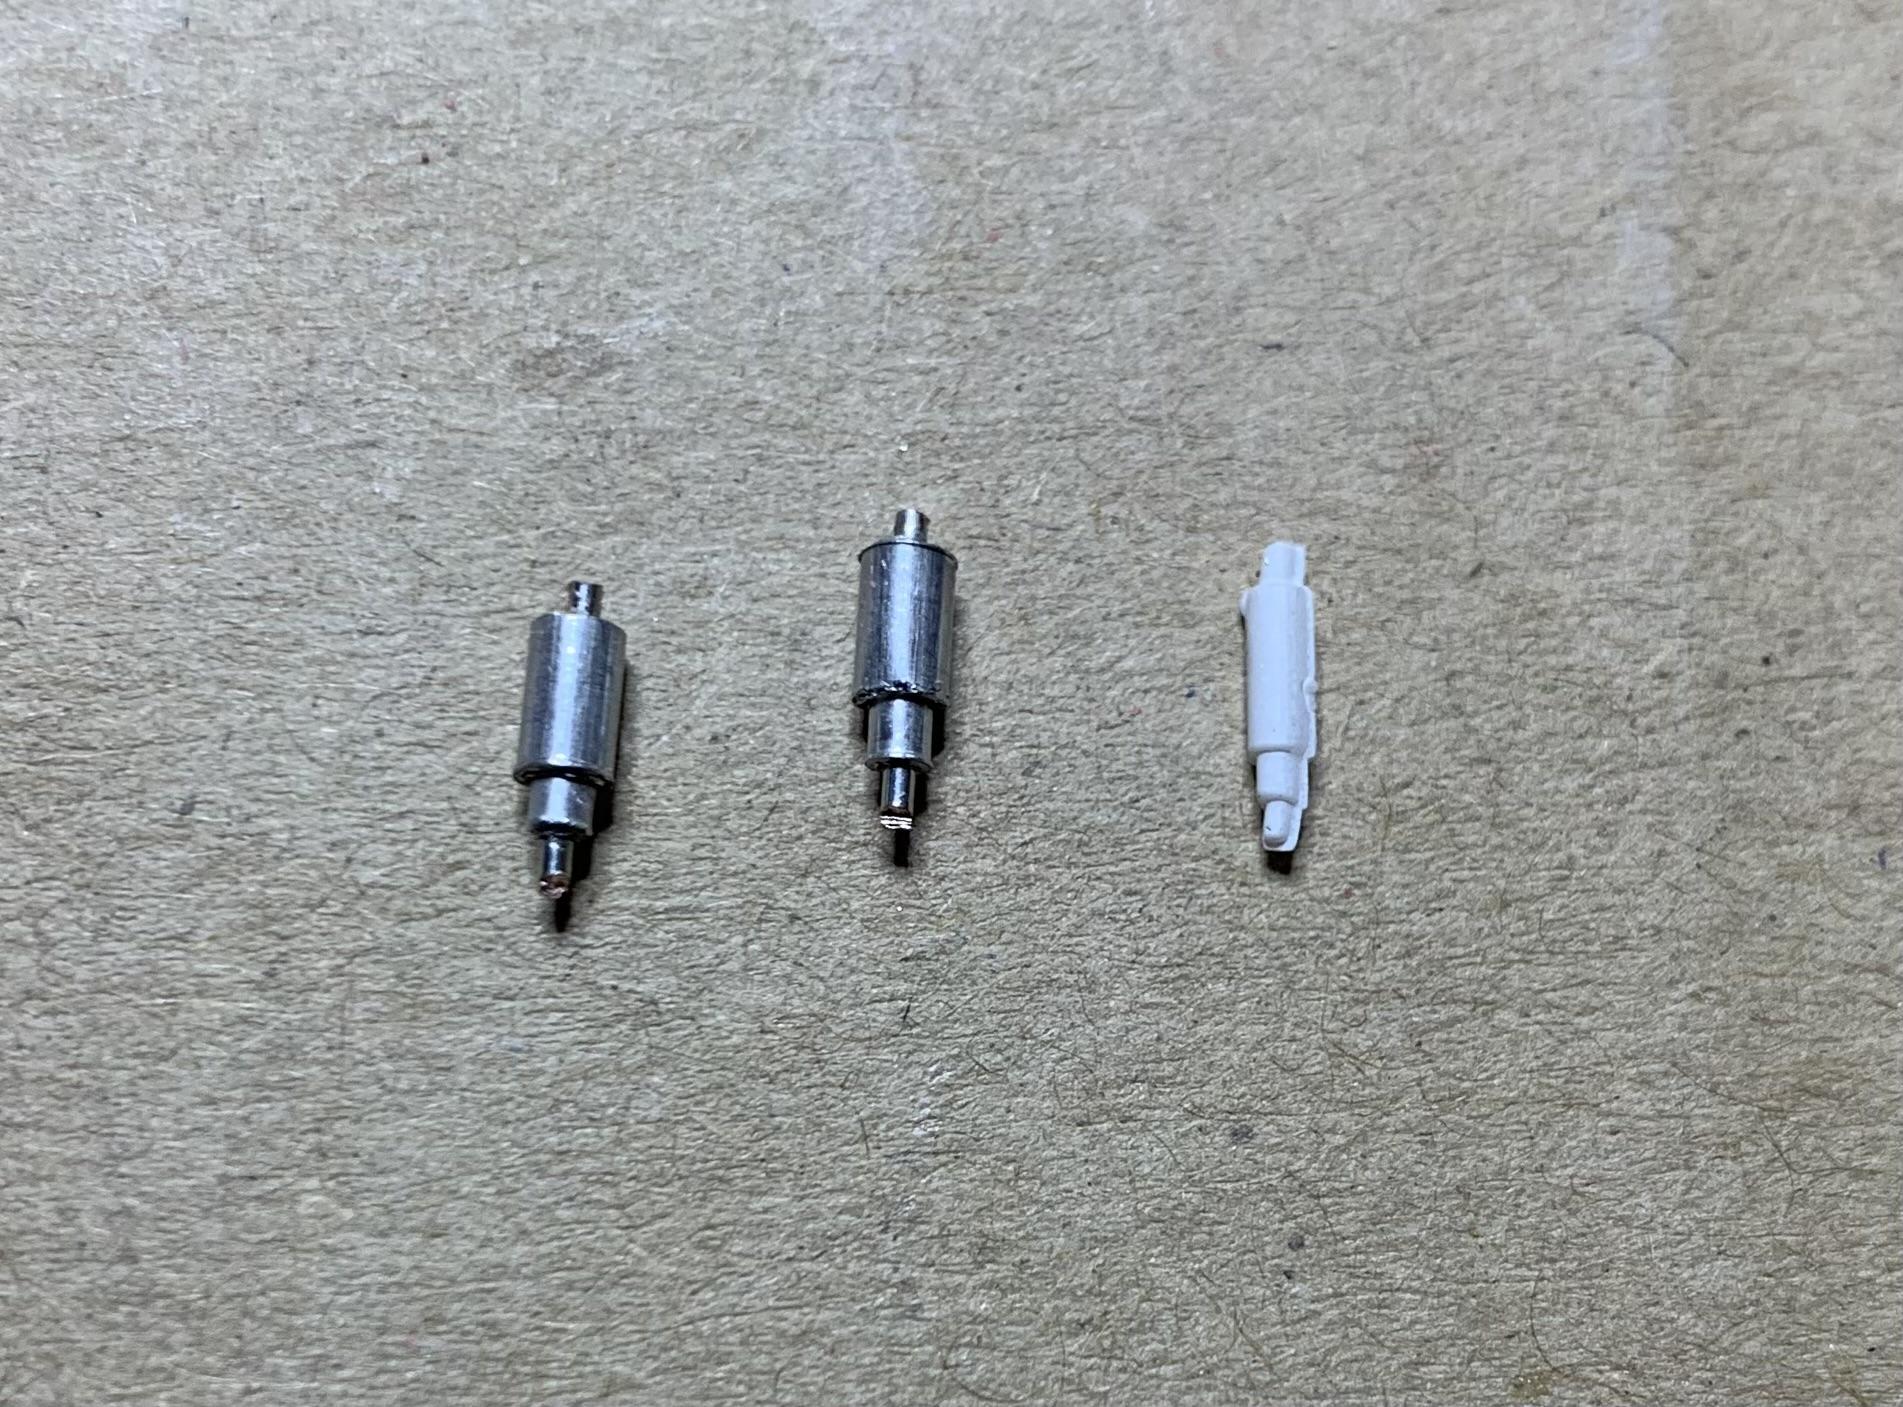
For tie rod ends and heim joints, I almost exclusively use HO scale handrail stanchions. When I built the steering for my Nostalgia Top Fuel dragster, I milled them, for the first time. That can easily be accomplished with a file, as well. I use 3/64" brass tube for the tie rods. For the longer shafts/rods on the NTF car, I used .040" aluminum armature wire that I bored on the lathe, to accept the stanchions.
-
2
-
1
-
-
I would add that, if accuracy is important, to you, study the subject you're doing. Vinyl stripes won't be as shiny as the paint, on a real car. On race cars, all the little contingency decals are applied after everything is painted, so they shouldn't get clear-coated. That said, often, earlier period race cars had some of their contingency markings actually painted on, as were car names, local sponsor names/logos, driver names, etc. Research is paramount! And, it's fun! You just have to be careful not to fall down any rabbit holes (which are also fun!).🙂
-
1
-
-
On 2/12/2024 at 10:04 AM, Ace-Garageguy said:
PS: I once found a brand new cylinder assembly for a Pratt & Whitney R-2800 on the shelf at a resale/salvage shop just down the street from one of the Lockheed/ NAS/ AFB gates.
")
That sounds like a nice piece of decor!
-
1
-
-
I've been playing around, with this thing. Was supposed to be quick and easy. Apparently, I have to work on that.😃
-
6
-
-
This is really coming along, beautifully, Terry. The stance is perfect! It could not look more like a Stocker!
-
On 2/18/2024 at 4:19 PM, dino246gt said:
Mobius kit front shocks, hmmmm.....
It only took about 3 minutes to make aluminum copies, that seem to look much better.
I'm using mostly the Mobius kit.
This is very cool, Dennis! I wish I had your knack for bodywork. Now, these shocks--this illustrates the biggest reason I scratchbuild so much stuff. It's often easier than cleaning up molded kit pieces, it's a helluva lot more interesting and fun than cleaning up those mold lines, and, they always look way better than the kit parts! Beautiful work, sir, as always!
-
1
-
-
48 minutes ago, Bainford said:
Life is better when it is spent with enablers.
Unquestionably!
-
 2
2
-
-
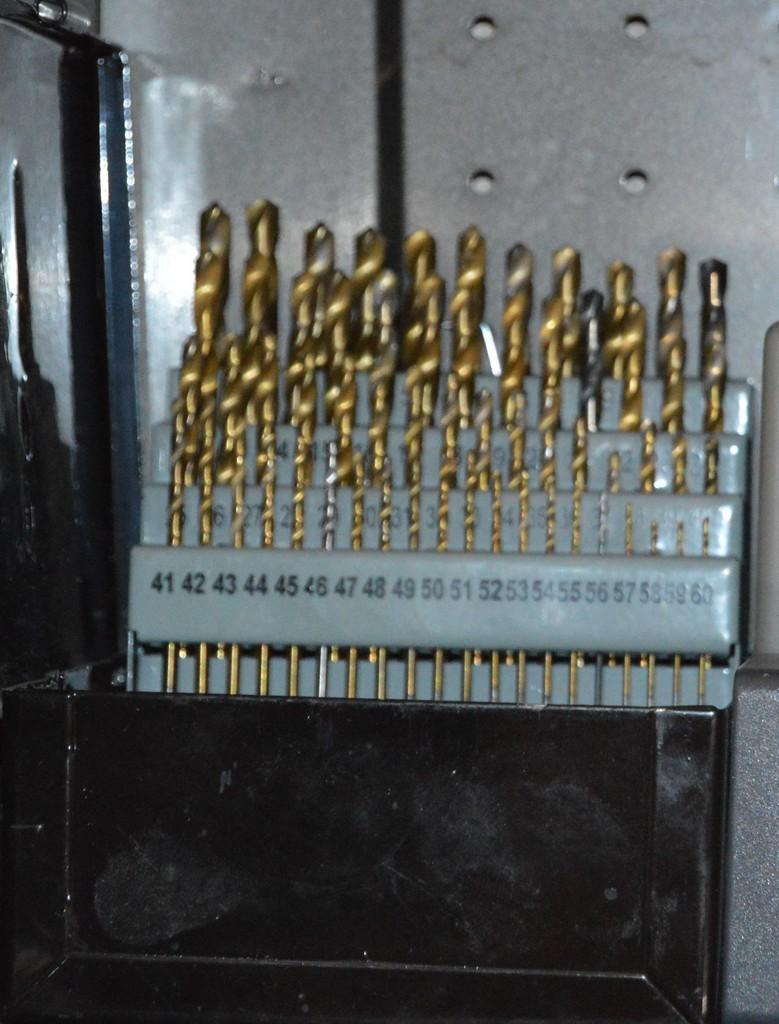
I have bought a lot of drills, over the last few years. A time, or two, I have worried that I might have a problem. This thread has made me realize that I am only beginning to get a handle on the problem!😁 I would like to thank each and every one of you for your support, in this matter...
-
3
-
-
4 minutes ago, tim boyd said:
Thanks Daniel...this is the info I was looking for. But I also found your explanation of how you did the body panel joins to be very instructive and clever. Thanks for taking the time to explain that and the paint approach!
Cheers...TIM
Always happy to share! We aren't guarding any State Secrets, or anything!🙂


TUTORIAL: Steerable I-Beam (and tubular) Front Axles, part one
in Tips, Tricks, and Tutorials
Posted
Those spindles are beautiful, Graham! Excellent innovation in building your jewelers' lathe, as well. I have a set of gravers for my lathe. I never thought of using wood blocks, as tool rests. I'll be giving that a go, for sure. Thanks for sharing!