StevenGuthmiller
-
Posts
15,086 -
Joined
-
Last visited
Content Type
Profiles
Forums
Events
Gallery
Everything posted by StevenGuthmiller
-
 Exactly. Steve
 -
I think you mean "drivel". Dribble is what old guys do on their shirt. Steve
-
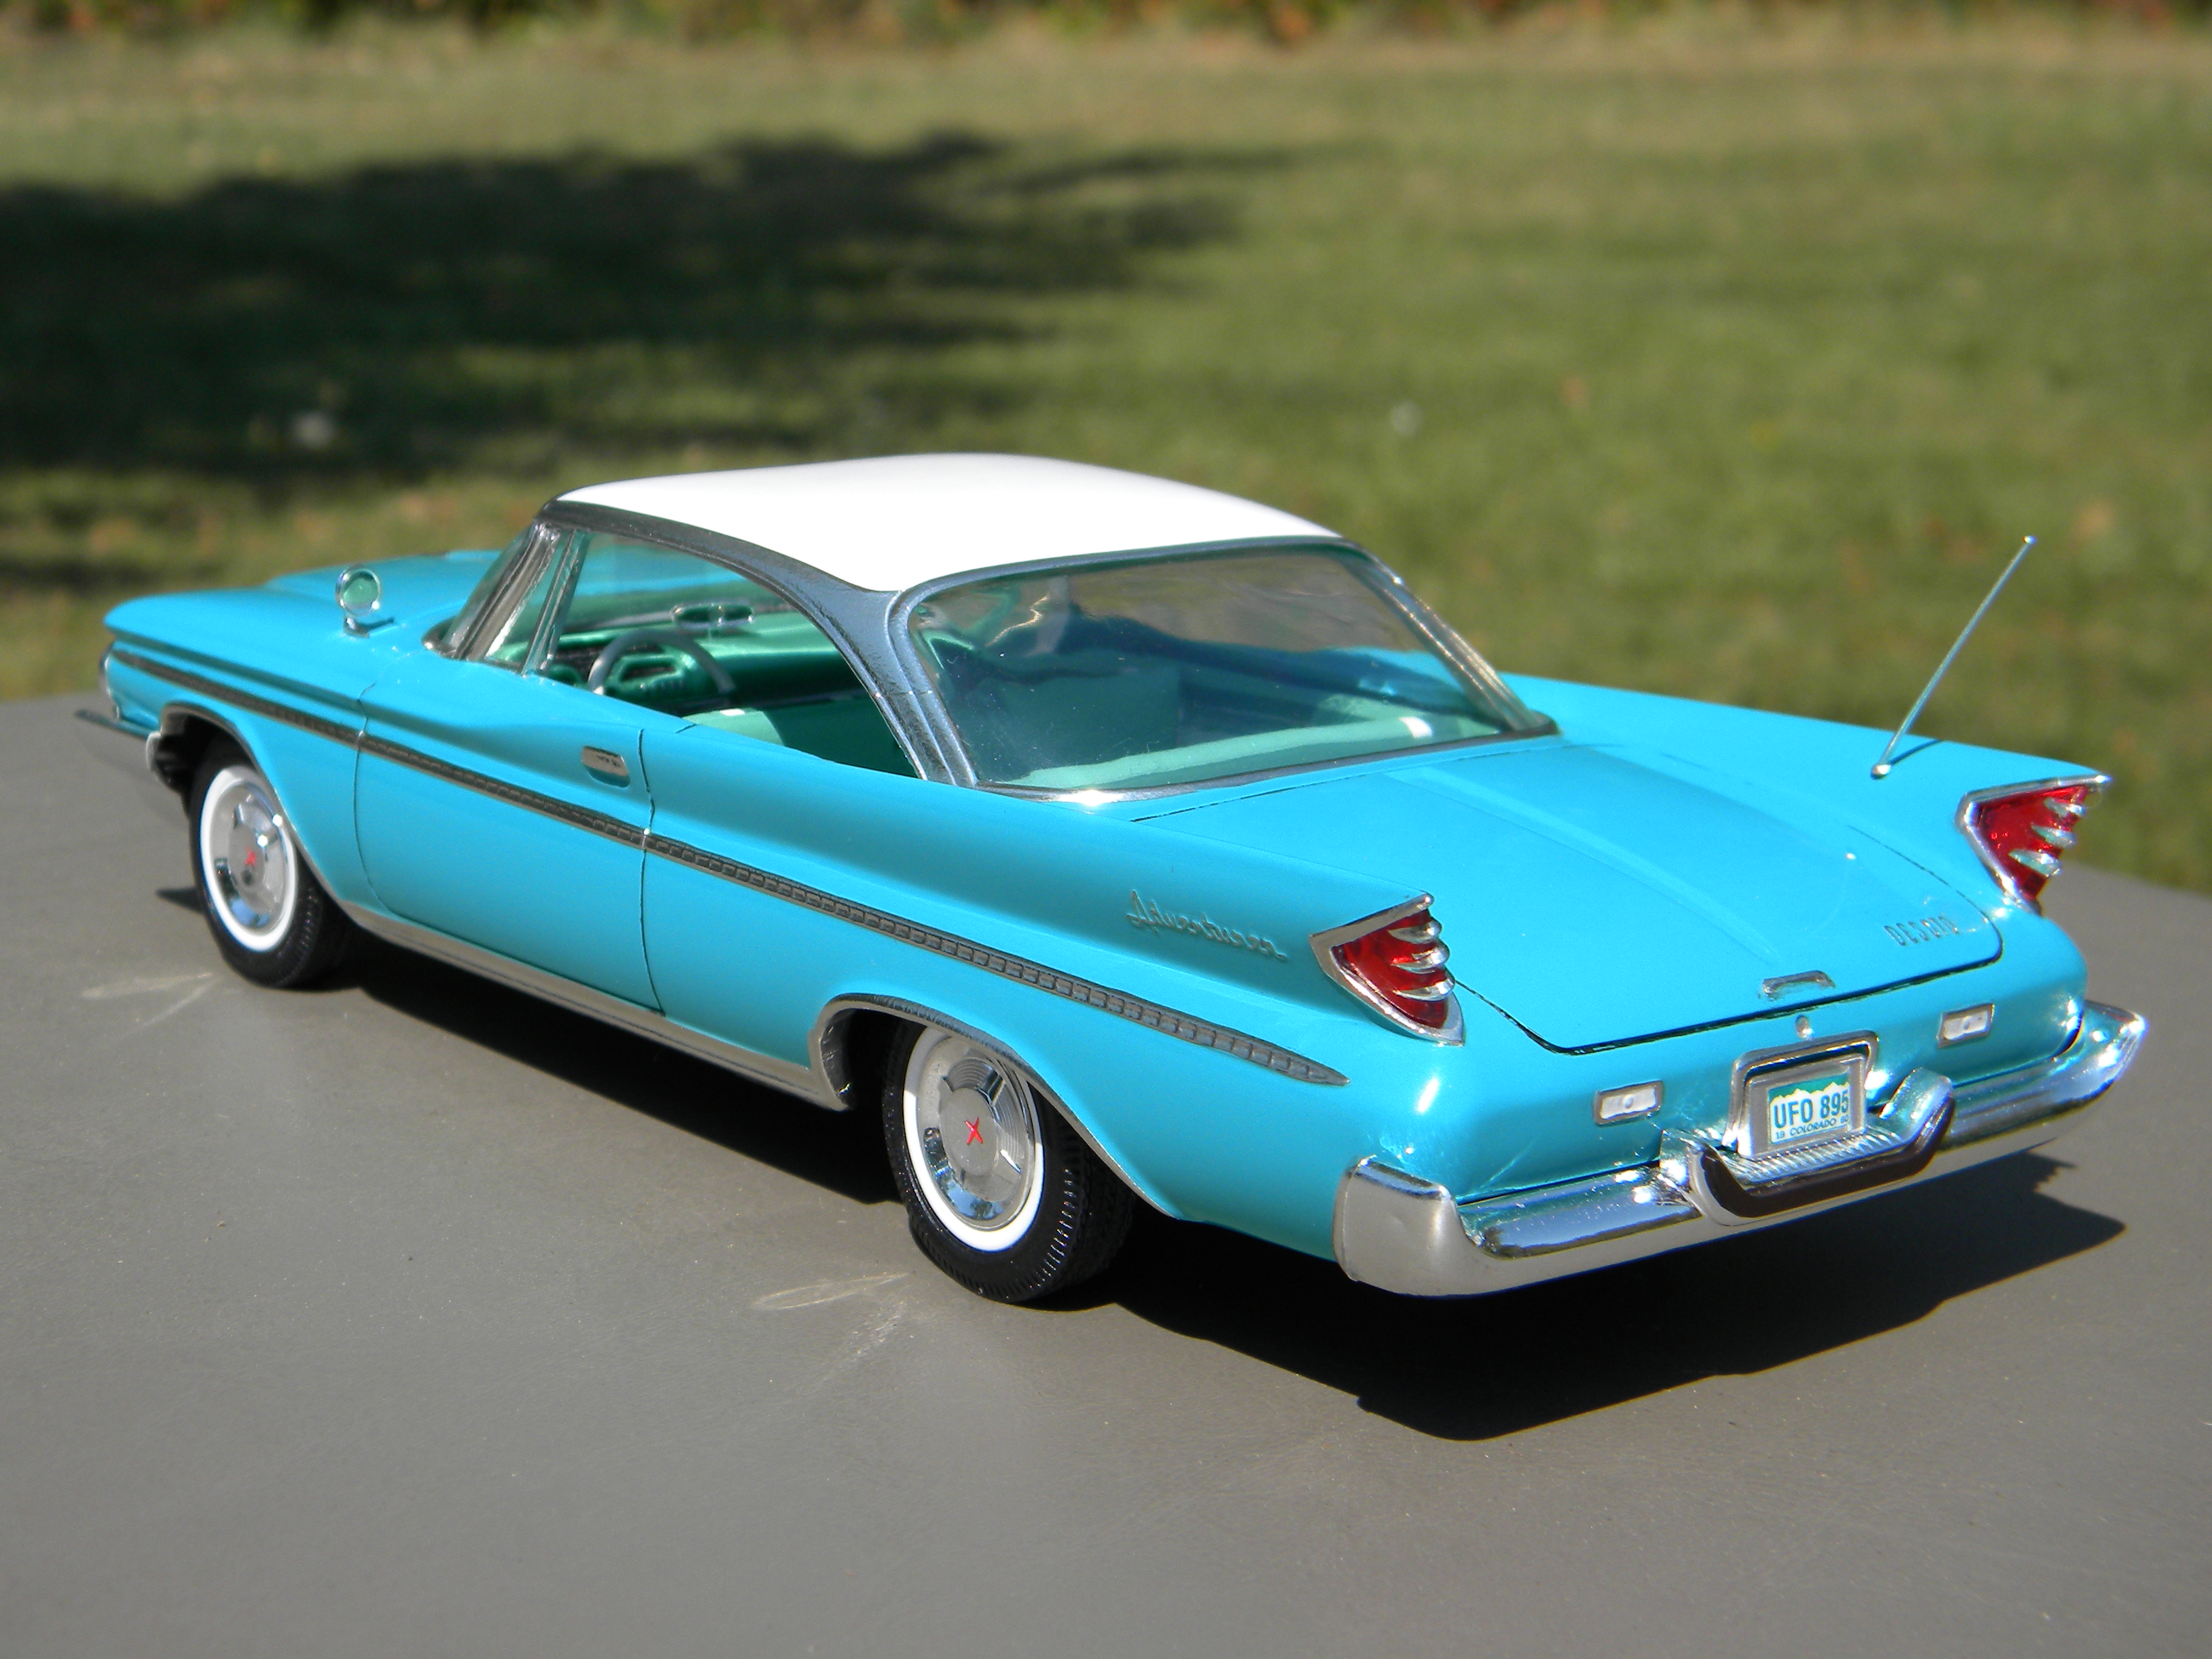
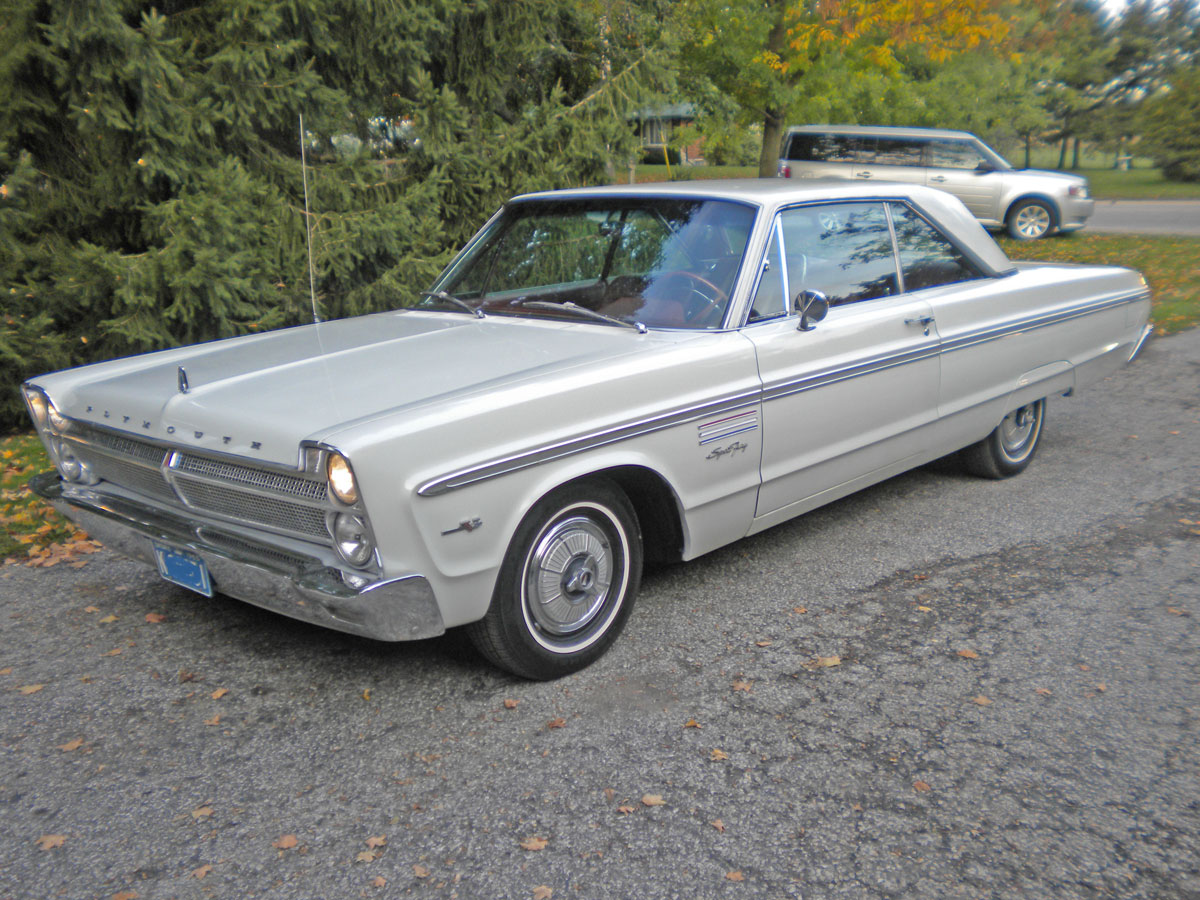
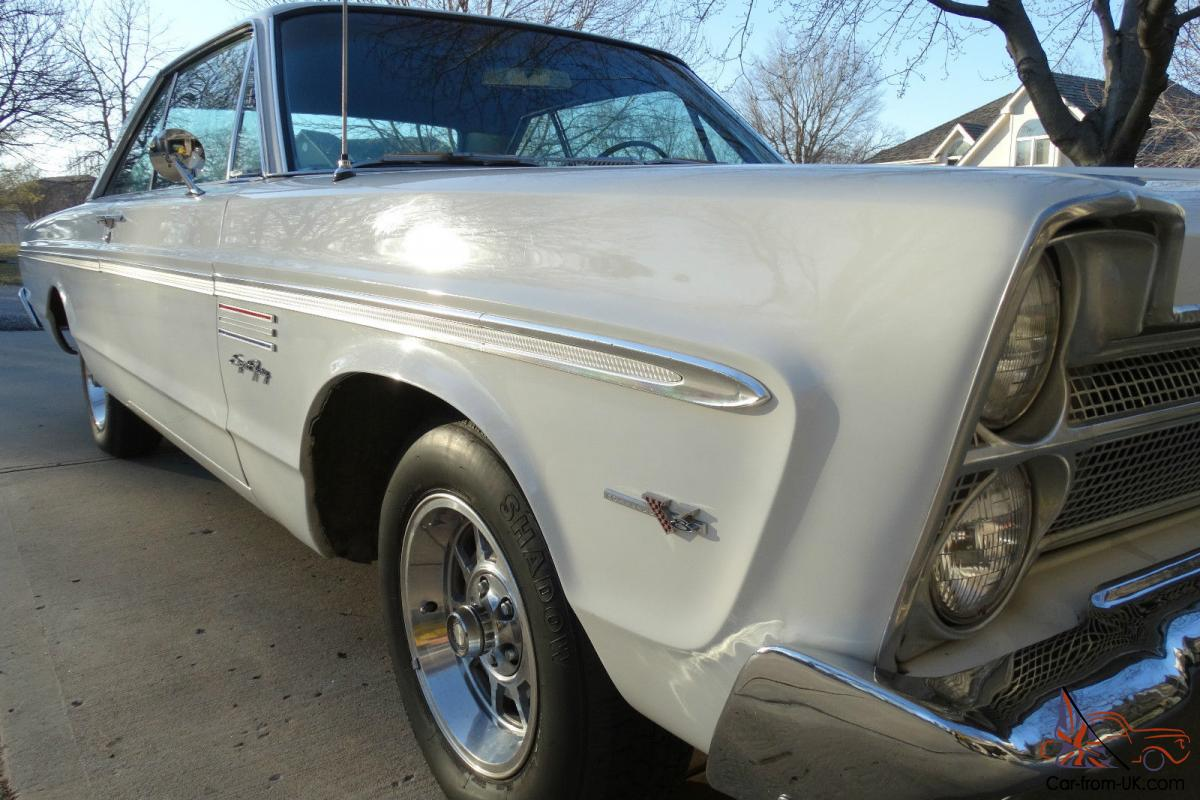
'65 Fury. Back on the Bench.
StevenGuthmiller replied to StevenGuthmiller's topic in WIP: Model Cars
Finished up the interior today. The chassis is done and the body is finished except for a few minor details, so I guess I have exhausted my excuses for not starting on the engine! Steve -
I will concede that point. It really is none of our business. I just thought that being as Paul would have us guess what that cost would be, that it might shed some light on his argument for auctioning his items rather than trying to set a price for them. I will just end my part of this discussion by saying that I really find the whole idea of people shunning ebay because they don't want to participate in a "bidding war" a completely bogus argument. As I stated before, the only way to become engaged in a bidding war is to allow yourself to. If someone feels that Paul should offer these at a set price, they obviously have some sort of price in mind. When these models come up for auction on ebay, it would be a pretty simple task to place a single bid for the maximum amount that you believe that the item is worth to you and walk away. One of two things will happen. Either the "premium price" that some have stated that they are willing to pay will be sufficient in order to win one, or it will not. It's for this reason that I'm beginning to feel that some people's aversion to ebay has absolutely nothing to do with "bidding wars" and more to do with their distaste for ebay in general. Nothing wrong with that either, but let's just call a spade a spade. Steve
-
Pontiac Engine Turquoise Blue?
StevenGuthmiller replied to crowe-t's topic in General Automotive Talk (Trucks and Cars)
Hmmm. Might be a little too bright? Steve
-
I believe that you may be missing the point. The reason that masters have come up is because you need to understand that as Paul stated in his post, his contribution to this model is in the development stage only. He does not cast his own kits and needs to contract that part out to a second party. That party will demand a fee for casting. You have to remember that the cost of a Modelhaus kit at roughly $100.00 or so, is all mold making and casting costs with a little extra for profit. There is no compensation for the time and effort involved in creating a master because Modelhaus did not have to create masters. The large bulk of their kits and parts were direct copies of vintage kit parts. All that was required was to make molds and begin casting. I assume that you realize that in order for Paul to make some modicum of profit on this project, he needs to recoup those casting costs and make up for the cost and time of creating the master itself. So what would be a fair "buy it now" price? If a Modelhaus kit sold for say $120.00, that's your base......at a minimum. Add on top of that the largest portion of a project like this, the development, and you will add a substantial amount to that number. That plus the fact that these will be produced in a very limited run making it that much more difficult to recoup the costs. Modelhaus sold thousands of parts over years of operation. You have to take into account the scale of the operation. It's a little like comparing the corner grocery store to Walmart. So what would you pay as a "buy it now" price....... $200.00?.....$250.00? I think it would shed a great deal of light on the subject if Paul could divulge what his cost per unit will be to offer these to us. Steve
-
The seats had the engraving. I did them the way I described with basically a black wash over white. Steve
-
Pontiac Engine Turquoise Blue?
StevenGuthmiller replied to crowe-t's topic in General Automotive Talk (Trucks and Cars)
Actually, this was a custom mix made with Testors flat enamels and clear coated. But it is pretty close to Duplicolor "Chrysler Turquoise" engine enamel. It might be a bit darker than it should be, and possibly leaning a bit too far to the turquoise side, but fairly close. Steve -
Steve
-
Scratch building an airvent?
StevenGuthmiller replied to Yahshu's topic in Model Building Questions and Answers
There you go. A valve cover would also work. It appears though guys that Phil doesn't have a parts box to pilfer, so can anyone think of a finely finned plastic material that can say, be found in the household? Let's put on our thinking caps. Steve -
I doubt that you will have any issues doing it this way. Issues usually arise when paints that are too hot are sprayed over paints that are not designed to handle it. Tamiya primer is designed to be used under lacquer paint. Testors Aztec acrylics are basically colored water. There should be no problem going over a primer that can withstand lacquer. Steve
-
Pontiac Engine Turquoise Blue?
StevenGuthmiller replied to crowe-t's topic in General Automotive Talk (Trucks and Cars)
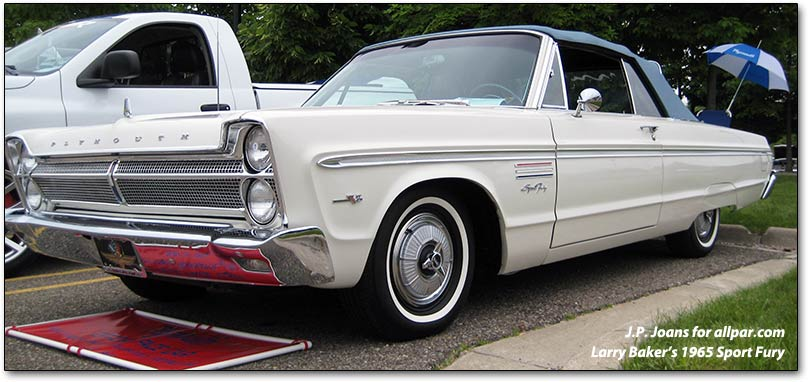
Sometimes I question how accurate these charts are. I own a 1969 Pontiac Grand Prix that as far as I know had never had the engine removed when I bought it. The correct color SHOULD have been the metallic light blue as referenced by the chart above. But it was not that color when I purchased it and when it was overhauled a few years ago, I had it painted the same color that it had been. It was a light "turquoise" blue. Basically the same color as the '63 Bonneville engine that I built a while back. Steve -
Yes. It also had a lemon scent and came in a blue tube. You can still buy it. Although I don't know why you would want to. Steve
-
Nice work Randy! It's good to see one of these built in stock configuration on occasion just to remind everyone what a '49 Ford SHOULD look like. Beautiful as is! No customization required. Steve
-
Scale Motorsport decals
StevenGuthmiller replied to RichCostello's topic in Model Building Questions and Answers
Very possible. Could have been mis-packaged. Steve -
I wouldn't want to even venture to guess Paul, but I'll bet it's a lot more than most people here think. People seem to want to continue to bring up Modelhaus as a fair comparison to what you do, but I don't believe there is a comparison to be made. My understanding is that Don did not produce masters, but only made molds and cast parts. Masters for unique models, such as yours, were produced by others and then cast by Modelhaus. I assume that the maker of the master was compensated in some fashion for each unit sold. I'm certain that you could enlighten us on that fact because if I recall correctly, you provided some of those masters. Besides that, Modelhaus was an all out business producing thousands of parts. My assumption is that yours is much more a niche "labor of love" where you work on a project due to your interest in the subject and then offer a limited number of units to the public. Please carry on good sir. Your work is an inspiration. And don't let anyone tell you what you should do with the sweat of your labor. If I had an interest in a '77/'78 T-Bird, I would be actively pursuing one as we speak, no matter the manner in which you offer them. Steve
-
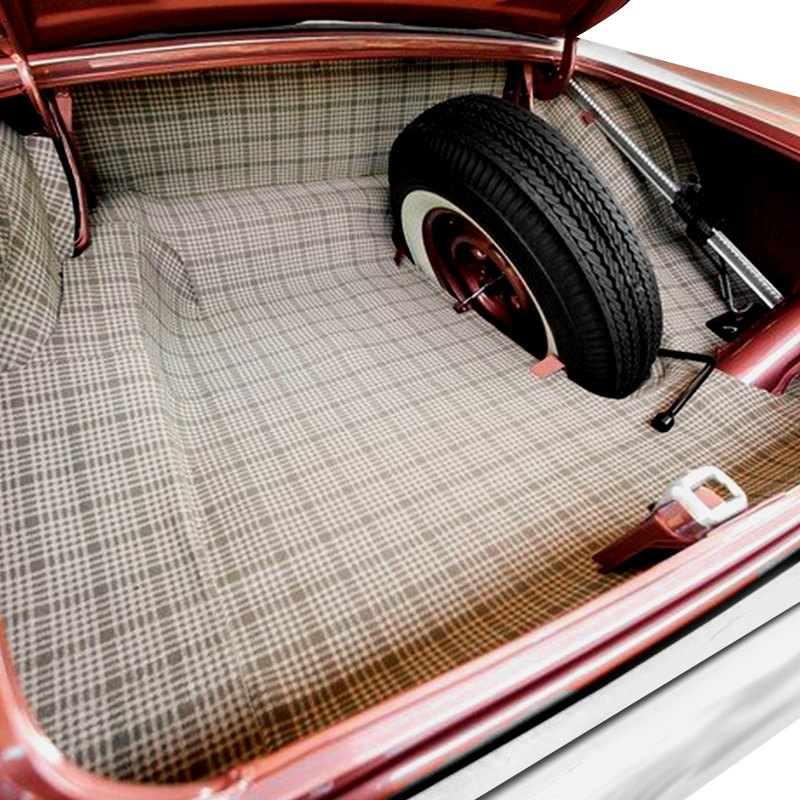
Scale Motorsport decals
StevenGuthmiller replied to RichCostello's topic in Model Building Questions and Answers
Some photos might help. I know that Scale Motorsports did some plaid pattern trunk liner decals. If those are the ones that you have, they are probably printed on white paper to look like a vintage trunk liner. They did some clear plaid upholstery decals as well. I used them on a '63 Ford pickup build and even though I chose to use them over white, they were printed on clear paper. Steve
-
Scratch building an airvent?
StevenGuthmiller replied to Yahshu's topic in Model Building Questions and Answers
You could try looking for a grill from another kit that has evenly spaced "slats" about the right size as pictured. From there just make a "frame" to place it in and the button in the middle. Once you have a master you can cast as many as you need. Steve -
'65 Fury. Back on the Bench.
StevenGuthmiller replied to StevenGuthmiller's topic in WIP: Model Cars
Useful information Mike. I guess that I really don't need to worry too much about 100% accuracy. The Johan kit was never accurate anyway. The body is a Fury III, while the interior depicts a Sport Fury, so I guess anything goes. There's really no way to replicate the engine turned detail anyway, so I guess the steel gray is as good as anything. Steve -
'65 Fury. Back on the Bench.
StevenGuthmiller replied to StevenGuthmiller's topic in WIP: Model Cars
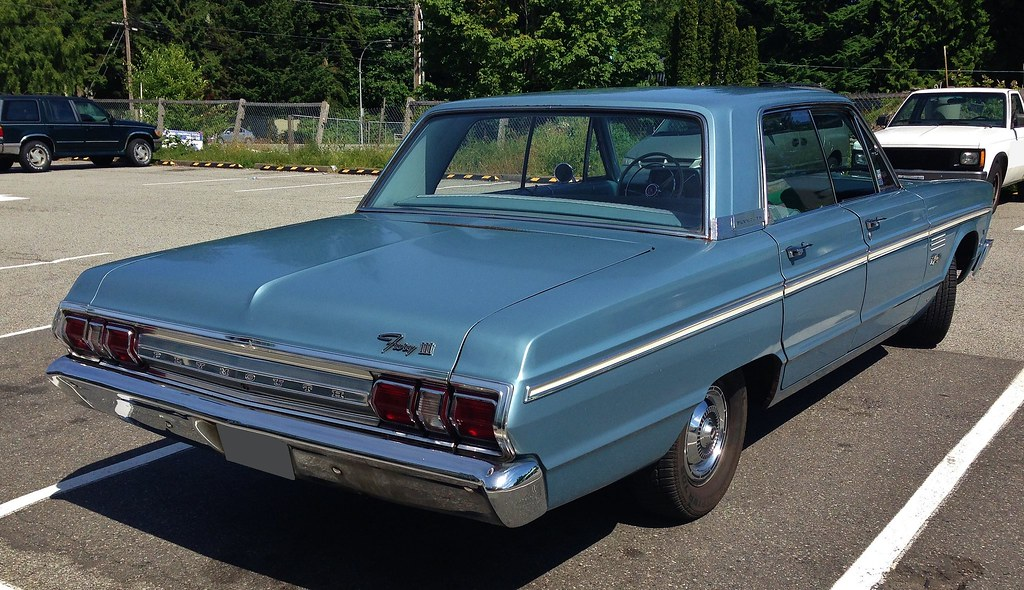
I'm not 100% certain what is completely correct Wayne, and I don't want to be contradictory, but in my research I actually saw a lot more pictures of '65 Furys where they were a silver or gray color rather than black. That was actually my reasoning for wanting to do them gray. Steve It appears that some actually had turned aluminum panels between the moldings. Actually, I have seen a lot of variation in these moldings. Everything from the aluminum, black and gray, to other colors such as blue or white. Not sure if these are all factory installed or not.
-
Any idea how to "tint" windows
StevenGuthmiller replied to JerseeJerry55's topic in Model Building Questions and Answers
I spray it right from the can with good results. I find it works best if you have a good clean nozzle and you warm the can in hot tap water for a few minutes before spraying. Steve -
'65 Fury. Back on the Bench.
StevenGuthmiller replied to StevenGuthmiller's topic in WIP: Model Cars
Would you prefer chocolate chip, or peanut butter. Yeah, I just wasn't happy with how the black was working out, and I originally was going to do it in a dark gray anyway, so when I decided to do it over, I decided to paint it with a metallic steel color instead. Steve -
This is my only point. If you can pick out individual metallic particles in a photograph, they're too large. I will add that I'm not immune from this phenomena either. Sometimes even MCW and Scale Finishes have particles that are a little too large. It happens. Steve
-
Any idea how to "tint" windows
StevenGuthmiller replied to JerseeJerry55's topic in Model Building Questions and Answers
Make sure the glass is clean and apply it to the inside of the glass in very light coats, (to my eye, one light coat is good enough). If you aren't happy with the results and need to try it over, it cleans off easily with an alcohol wipe. Steve -
Any idea how to "tint" windows
StevenGuthmiller replied to JerseeJerry55's topic in Model Building Questions and Answers
If you're looking for a "smoke" or black tint, Testors #2949 "Transparent Black Window Tint" works great! One of the few Testors spray paints that I really like. But be certain to get the #2949 lacquer. There is an enamel tint, but it doesn't work worth a BLAH_BLAH_BLAH_BLAH. I recently purchased a set of these transfers to try on my next project for the tint band. I'm hoping that they work well. It will save a lot of farting around with paint. Steve