StevenGuthmiller
-
Posts
15,071 -
Joined
-
Last visited
Content Type
Profiles
Forums
Events
Gallery
Everything posted by StevenGuthmiller
-

What camera to use.
StevenGuthmiller replied to NerdmanB's topic in Model Building Questions and Answers
I get way better photo quality with my I-Phone SE than I ever did with my Nikon 35mm digital camera. Steve
-
Certainly! I would go that route if I could find one. Unfortunately, there aren’t a lot of them laying around. There was a body for sale on eBay recently, but it appeared to have already had the scripts sanded off. Steve
-
I didn’t expect it. That’s actually okay with me. Saves me from buying another magazine. ? Thanks for checking! I appreciate it!! Steve
-
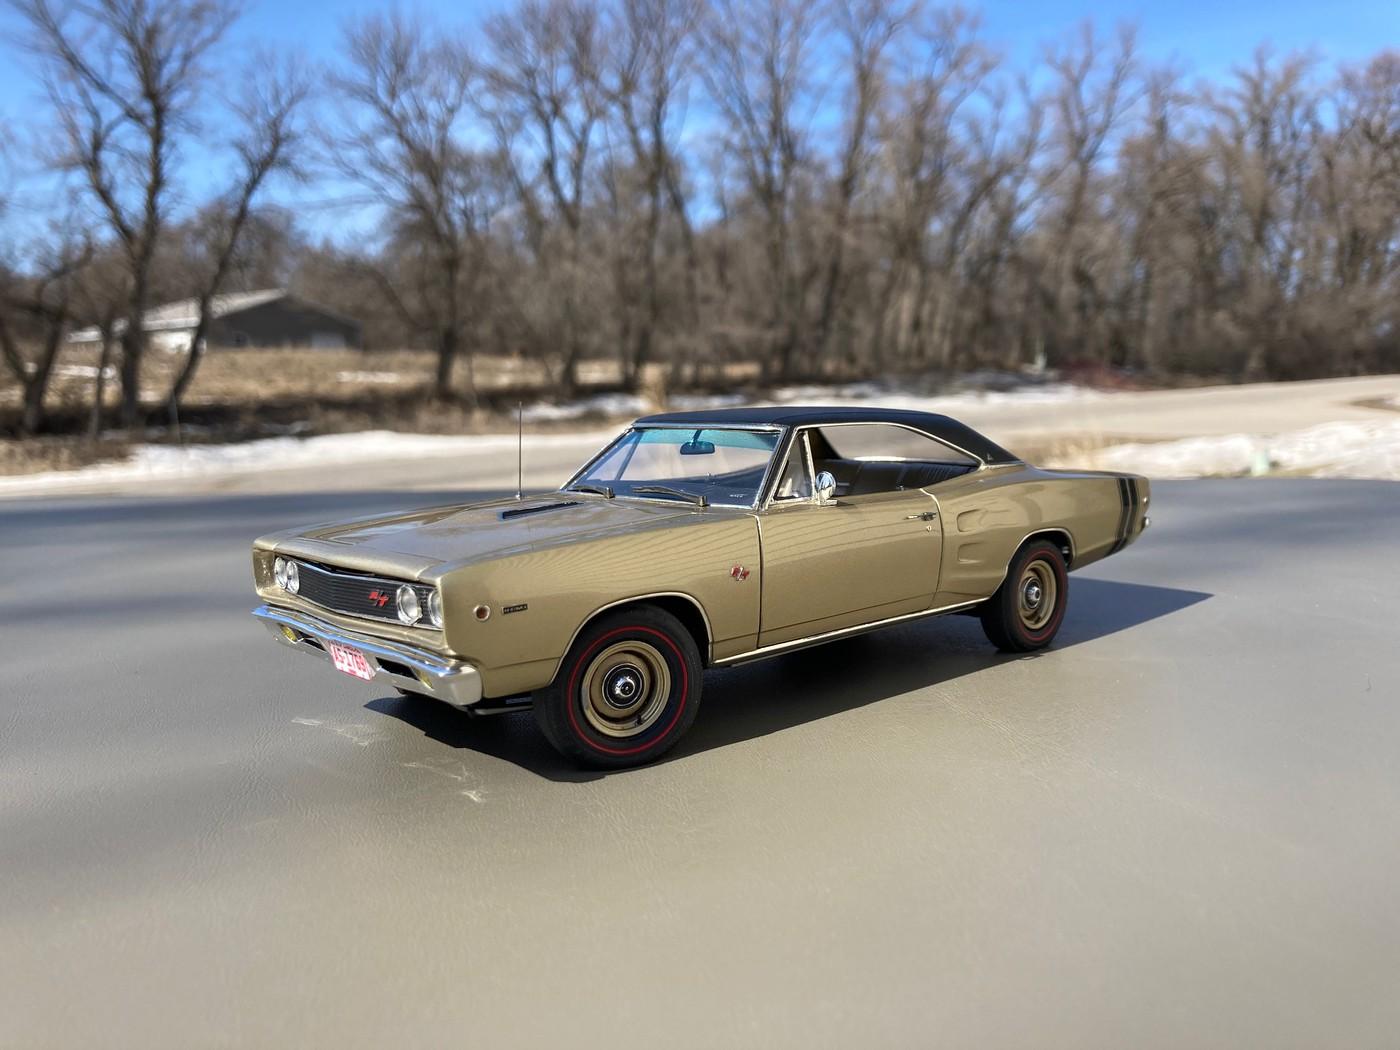
Thank you Dan! That surprises me a little as that model was in the NNL coverage from the 2021 magazine. Oh well. Not complaining! I wonder if the Coronet made the 2023 NordicCon pages? Steve
-
Well, this is my first attempt at this technique, and of course, I had to pick a tough one for the first shot at it. Believe me, I really had no intention of ever having to try this, but it was born out of necessity. I've been getting increasingly excited about getting started on replicating my 1:1 1969 Pontiac Grand Prix, and I'm finally beginning to feel confident that my skills are approaching the required expertise that will be needed to build this model to the technical degree that I have wanted to. However, there are some hurdles that I had to find solutions to right out of the gate. The first issue at hand was the long, pronounced sink mark present in the trunk lid of my kit's body directly above the GRAND PRIX script, making it nearly impossible to fill while keeping the script intact. After a preliminary check to see if I could possibly find some PE letters that would pass as replacements, which was unfruitful for the most part, I decided that I would have to try the foil casting technique. I followed basic suggestions from other members of the forum, and preliminary results appear to be passable. The letters are very small and quite difficult to work with, but you're dealt the hand that you're dealt. Installing these tiny letters will be a challenge unto itself, but it appears that I'm on the right track. Of course I will feel safest replicating these letters at least a couple of times to insure that I have spares in case of loss or damage. I will also need to replicate the letter "J" from the lower front quarter panel before eliminating the "SJ" from that location. Steve
-
Small PE Block Letters
StevenGuthmiller replied to StevenGuthmiller's topic in Model Building Questions and Answers
That was my assumption. probably cost prohibitive for a one off. Steve -
Fabulous!! Thank you Trevor! I suppose I'd better get one. Steve
-
Does anyone have a copy of this magazine, and if so, can you tell me if my '68 Coronet R/T made the "NNL North" section that year? I'd be interested to know, and I suppose that I should get a copy if so.......Just for posterity. Edit: Could have alternately been in the "NordicCon" section as well. Steve
-
I believe you're correct. At least I've never seen a '65 molded in any other color. The '66 was molded in white. Steve
-
Thanks for the interest in this model from eight years ago fellas. I appreciate the kind comments. Here are a few more recent outdoor photos of the same model. Steve
-
Thank you for your interest Amelie! To be completely honest, I bought this kit off of eBay a good number of years ago, and built it in probably 2015 or 2016, so I don't remember the particulars of the purchase, other than to say that it's likely that I spent less than $100.00 at that time when they could still be found relatively cheaply. My guess is that you would likely spend at least twice that amount today for a clean example. This kit was a one time release from MPC, produced in 1965 only as far as I know, so it has become quite rare and collectable. You can still find them on occasion today, but at a premium price. Steve
-
What Did You Have for Dinner?
StevenGuthmiller replied to StevenGuthmiller's topic in The Off-Topic Lounge
I love a good salad! As long as it has plenty of bacon, cheese, croutons and dressing! ? Steve -
What Did You Have for Dinner?
StevenGuthmiller replied to StevenGuthmiller's topic in The Off-Topic Lounge
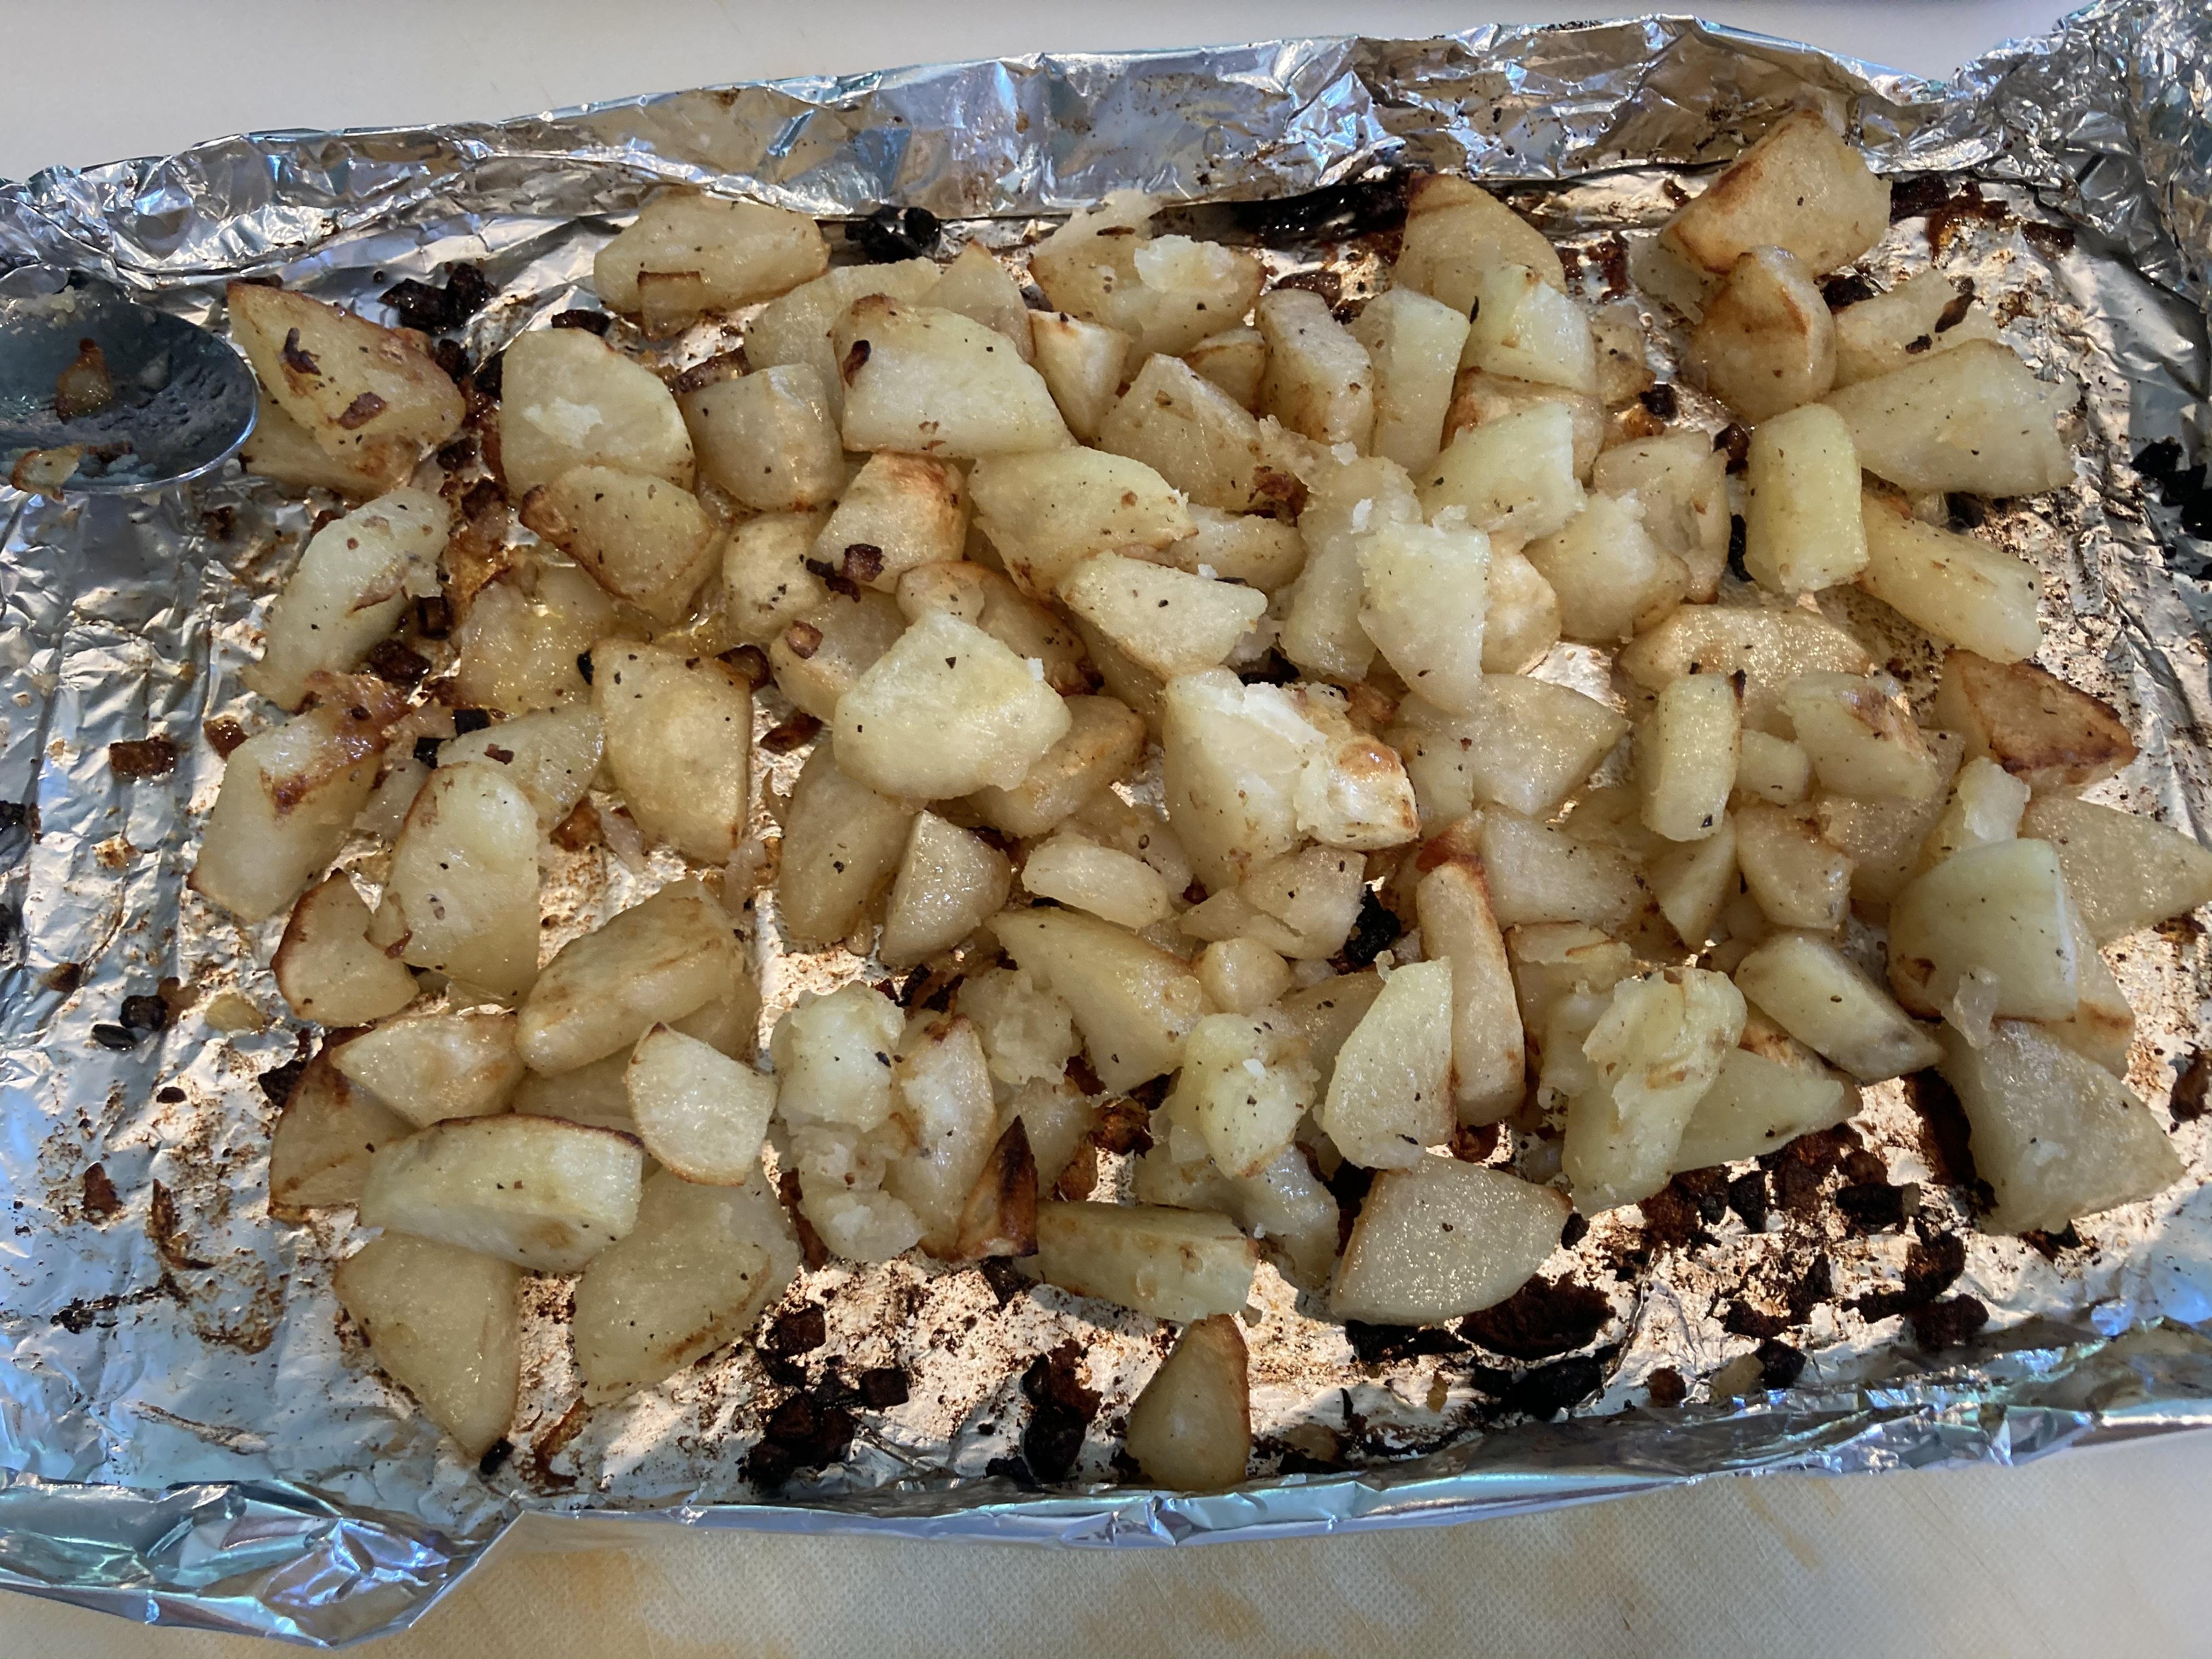
A simple grilled dinner on a hot day. Sirloin kebabs with Greek seasoning, and potatoes with onions and butter. Steve
-
Small PE Block Letters
StevenGuthmiller replied to StevenGuthmiller's topic in Model Building Questions and Answers
I don't have the equipment, nor the know how to follow that route. Steve -
Small PE Block Letters
StevenGuthmiller replied to StevenGuthmiller's topic in Model Building Questions and Answers
That's always been an avenue to pursue, but I wanted to see what my alternatives were before I committed to that. PE scripts would of course be a less involved option. Steve -
Question/New Topic for us Oldtimers
StevenGuthmiller replied to TransAmMike's topic in The Off-Topic Lounge
I suppose I’m just a child at 61, but I’ve still been building for almost 55 years! Does that earn me any brownie points? ? As long as the eyes and nerves hold out, the plan is to keep on keepin’ on. ? Steve -
Small PE Block Letters
StevenGuthmiller replied to StevenGuthmiller's topic in Model Building Questions and Answers
I wouldn’t need them at all if it were not for a couple of factors. First, the scripts on the trunk lid are present and in fine condition, but unfortunately there is a rather pronounced sink mark running through the middle of them the entire width of the trunk lid that will require repairs, which will ultimately obliterate the scripts. On the front quarters, I can leave the GRAND PRIX scripts, but as the car is to be converted from a model SJ into a model J, some changes will be required in at least that portion of the scripts. Steve -
Small PE Block Letters
StevenGuthmiller replied to StevenGuthmiller's topic in Model Building Questions and Answers
Does anyone 3-D print anything that small is the question. Steve -
Small PE Block Letters
StevenGuthmiller replied to StevenGuthmiller's topic in Model Building Questions and Answers
Those look fairly close. Steve -
Small PE Block Letters
StevenGuthmiller replied to StevenGuthmiller's topic in Model Building Questions and Answers
Sorry. should have been 1mm. Steve -
I agree that it appears to depend on the type or model of wheel. I opted for a dark metallic gray for the Torque Thrusts that I used on my '65 Fury. Just seemed to me to add a little more character over primer gray. Steve
-
Does anybody know if, or where, I can find some photo etched block letters? I need something roughly 1mm x 1mm to reproduce the "GRAND PRIX" lettering on the trunk lid and lower front quarters for a '69 GP. Thanks folks! Steve
-
Best all time guitar riffs/solos
StevenGuthmiller replied to NYLIBUD's topic in The Off-Topic Lounge
Of course they don't get any more iconic than these. I can name that tune in three notes!! Steve -
Best all time guitar riffs/solos
StevenGuthmiller replied to NYLIBUD's topic in The Off-Topic Lounge
My favorite! Steve -
Best all time guitar riffs/solos
StevenGuthmiller replied to NYLIBUD's topic in The Off-Topic Lounge
Love that song!!! Steve