ferrari87
-
Posts
235 -
Joined
-
Last visited
Content Type
Profiles
Forums
Events
Gallery
Everything posted by ferrari87
-
Do you sit the model outside or bring it in after painting to cure?
-
It depends. Did you keep your paint outside? Did you warm the paint can up in hot water? I didnt have issues painting my R33 last weekend, but i warmed the paint and had a somewhat room temp. garage. From what I understand, the paint running could be a case of 1. Painting too closely 2. Painting too slowly. I havent used a spray can for a wet coat yet but with my airbrush i'm maybe 12 inches away from the model and I move very quickly side to side, evenly applying and overlapping. I also move the model around quickly, building up the paint around the entire model. The paint should look wet, just to the point where it wants to run. At that point, lay off and move around the model.
-
Not at all, i keep my garage heated during the winter during painting but i'm looking at purchasing a paint booth from TCP global and taking the man cave and converting it into a hobby room. Just have to ensure the fumes get efficiently removed from the room....or else the wife will have a fit...
-
I'm about an hour north of you. I'm thrilled we're getting normal temps back this weekend.
-
Thanks for the tip! I've got my R-33 as a test bed so she'll recieve the bulk of the abuse when it comes to trying my hand at cars. I remember my first AFV, a Dragon Model Panzer IV Ausf G....it looked terrible next to my later tanks.
-
The detail set is from Hobby Design. It has the PE to make the brake rotors from something like 6 different pieces. That will be a challenge in itself! The grill as well looks like a bugger to assemble. Anyway, I'm going to start the build log shortly, I hope to hear your advice there as the build progresses!
-
They really do! Looks outstanding!
-
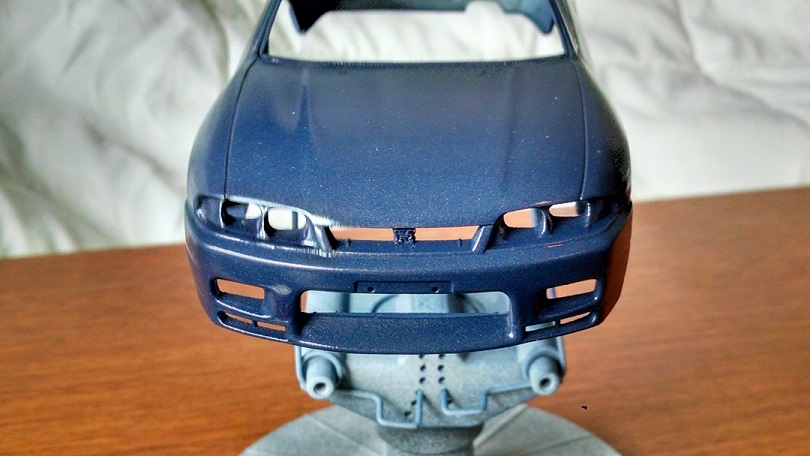
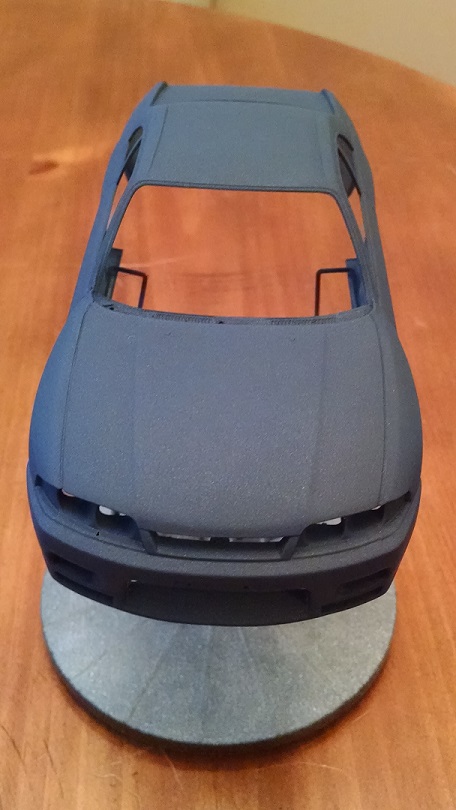
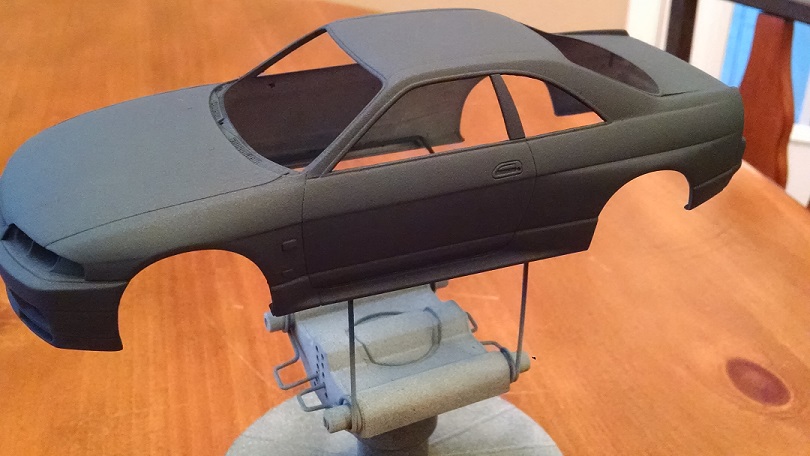
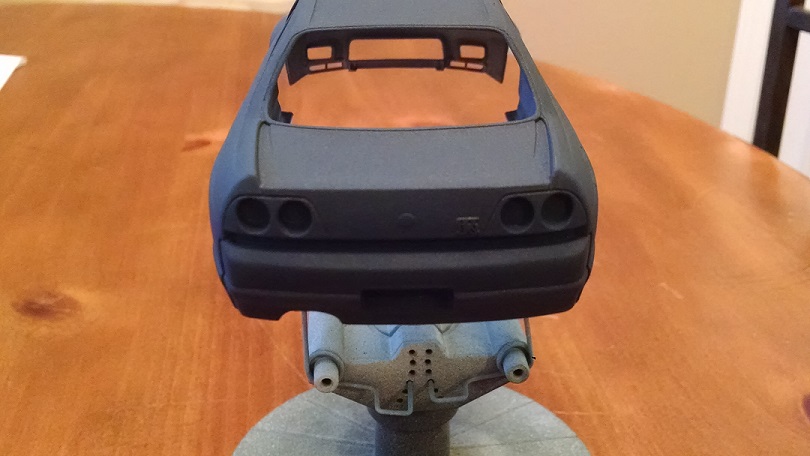
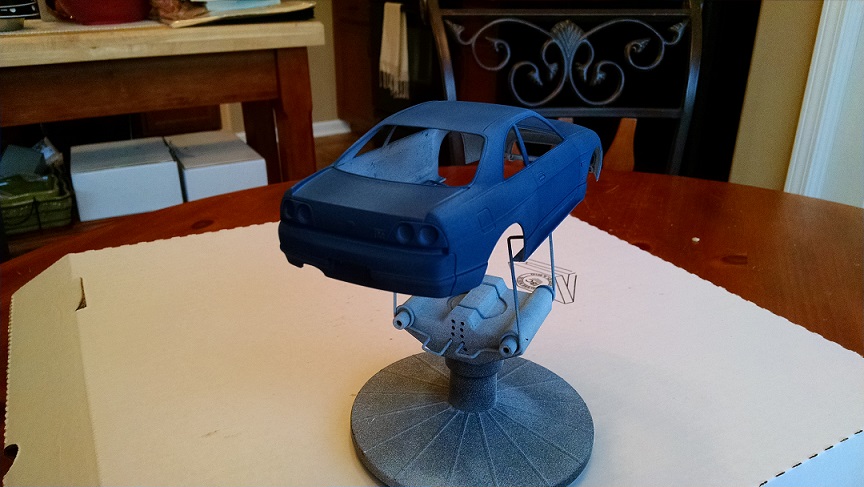
Ok gents, I finished up the basecoat and the susepension. All that's left is to go back and spray the front lip flat black (I should have taped that off to begin with, but no biggie) and paint the window trim. if you look in the sunlight, the subtle metallic flakes come out from the Chrome Silver. some orange peel that will need to be polished out, I have the Novus system coming in within the next day or two. And the ride height....I did my best at aligning everything perfectly. So now my Skyline squats perfectly! All that's left is the interior painting and flocking, the window trim, decals, and the head/tail lights. Oh, and polish and wax.

-
Not to side track too much, but we just got a dusting here in TN, north of Nashville. Hopefully it doesn't stick around too long but I have a feeling you are right, it's going to be a long winter. Back on track, sorry to hear about your paint. I hope you fix it just fine and it turns out amazing!
-
Steve, I'm glad to have found them. I used to be part of a very tight group when I did armor and having the support and criticsm of experienced hobbyists. Look for my R-33, DBS, and future Formula One builds!
-
CJ, I'm really excited to start the DBS. I have a detail PE set from Hobby Easy, I believe its from Studio 27. Anyway, it looks to be a challenge so patience will be required. I'm wrapping up my R-33 build this week so look for that in Under Glass. I didnt realize that Tamiya sold the kit with Aber PE until I had bought the detail kit from Hobby Easy but after some comparison, they are quite similar. The brakes can be done in pure PE or the stock brakes can have PE added, the front grille is PE and the metal transfers for the badges and such are there so the seperate kit looks good. I hope to see any input and criticism you guys have, no worries man- criticsm makes me a better modeler.
-
Steve that looks awesome! But....snow!
-
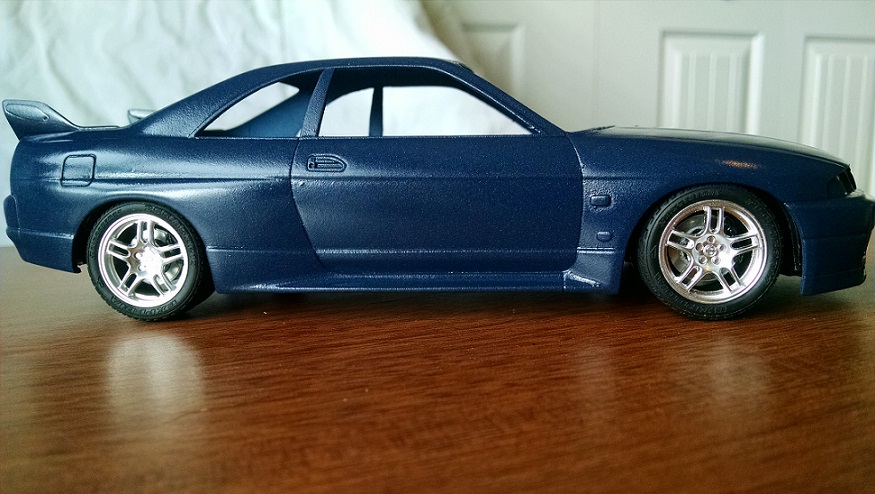
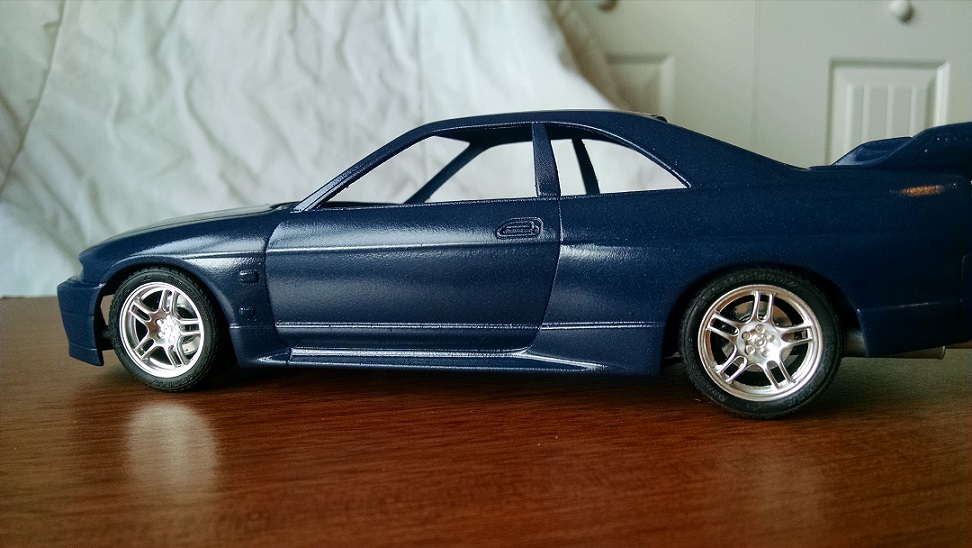
final wet coat has been sprayed and cleared. Pictures will follow tomorrow. The suspension is done, tires are on and the ride height is perfect. Now it's on to the interior.
-
http://www.automotiveforums.com/vbulletin/showthread.php?t=215864 There's a plethora of how-to's there. Specifically, how to modify wheels from male to female and female to male. Might help in your search.
-
Thanks Steve. Youtube has been a big help as well. I'm just trying to avoid orange peel and the crazing you guys mentioned. I greatly appreciate you guys helping me out, I know from the AFV side of life, beginner questions seem to come over and over again and we never liked the guy who signed up and then posted something that could have been easily searched for on the internet. Thanks for helping me organize the painting process. I look forward to displaying a fantastic finish on my DBS that should arrive Monday morning.
-
CJ, you have made my day. Thank you sir. I think I've just spent so much time reading threads and googling, that I've come across many different techniques like you mentioned that I've got them all mixed up in my head. That right there helps me straighten out a lot! Particularly how decals fit into the picture.
-
I really appreciate the help gentlemen! Coming to cars has been a completely new experience. I never had to model a nice paint job prior to this as tanks were always banged up anyway, so a bad paint job was actually a good thing. I found myself getting good and a bad paint job...I hope that wasn't just me actually being bad at applying paint, but there's a certain technique to making a tank look like the paint was applied in the field like the Germans were forced to do with their camo schemes later in the war. Anyway, so with the lacquer/enamel/acrylic issue settled (I'll probably go with using Tamiya Sprays from now on and decant them), so let's use an example, I'm working on a car, I've laid down primer- Tamiya Fine Surface Primer White. Then I've done two mist coats of red, lets say its Tamiya TS-86. I've wetsanded any imperfections between the primer and the two mist coats. Next I lay down two wet coats. 1. How long do I wait between wet coats with a lacquer paint? 2. Why wetsand? Is it only for imperfections in the paint, like lint or dust? Let's say I have to wetsand a two small imperfections out, lets say its a small run and a few dust pieces. What's the best way to take out the paint run and dust? a wetsand of 3400/3600? So assuming we've fixed these issues, what's the next step? a lacquer clear coat? Or do I just go to Novus 1 and 2? Do I clear after polish/wax? And for those builds that have decals, do you polish/wax then place decals? I need a step by step guide... I genuinely appreciate the help and guidance, I'm hoping the switch from armor to cars goes well!
-
Thought of one more, after applying the first clear coat, how long do I wait to apply the second clear coat?
-
 I've got a few ideas over the winter: Aston Martin DBS Kimi Raikkonen's Ferrari F60 A very detailed Nissan Skyline R-34 GTR VSPEC II Toyota Supra Mazda RX-7 Fernando Alonso's Ferrari F138
 -
Hey guys, I'm in need of some advice. My predominant modelling background is WWII armor. There after painting the tank of our choice, it was decals and then a coat of flat clear. My questions are as follows: In terms of painting, I lay down the base coat of my choice, I predominantly use enamels- so when using an enamel, let's say Model Master Gloss Red, is it required to use a clear coat? Do I want to use a clear coat before placing any decals, then use something like Future Floor polish to seal the decals? Can I use a lacquer clear (for instance, Model Master Ultra Gloss Lacquer Clear) over enamels? If so, how soon -or late- after should I apply this over enamels? Lastly, when using a paint that will or unexpectedly dries flat, will using a gloss clear coat bring me the shiny result I am looking for? Thank you for your time and i greatly appreciate the help!
-
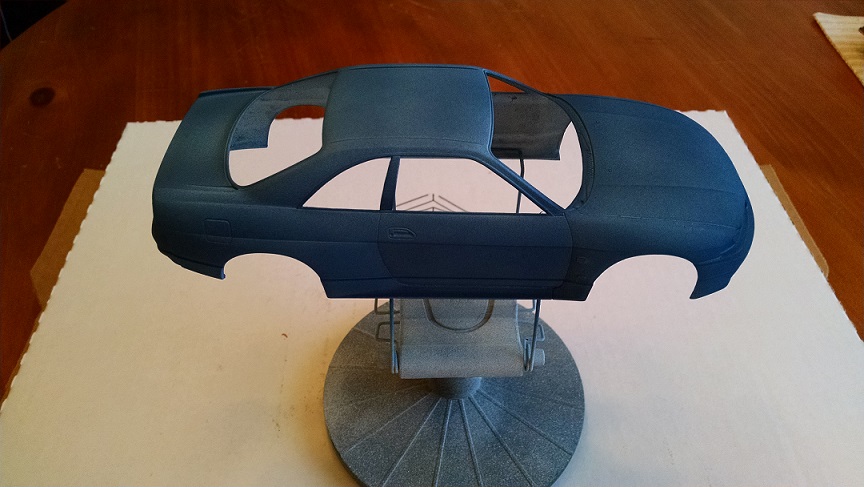
Laid down the last mist coat and then followed up with the first wet coat today: The paint's much more flat than I had thought. I guess I will have to lay down a gloss coat after the second wet coat tomorrow. The paint looks awesome when wet and that's the look I was going for but it has dried to a complete flat finish. I also made minor progress on the front suspension. Once the paint dries I have to attached the PE rotor faces to the kit rotors, then put everything together and start on the interior. The instruction sheet calls for a very gray interior and i'm still going back and forth on following the instructions or doing a flat black/dark gray interior. I'm also going to do a charcoal grey flocking for the carpet and rear deck.
-
There will NEVER be enough LaFerrari's. EVER.
-
Looks great so far! That shine on the paint....gorgeous.
-
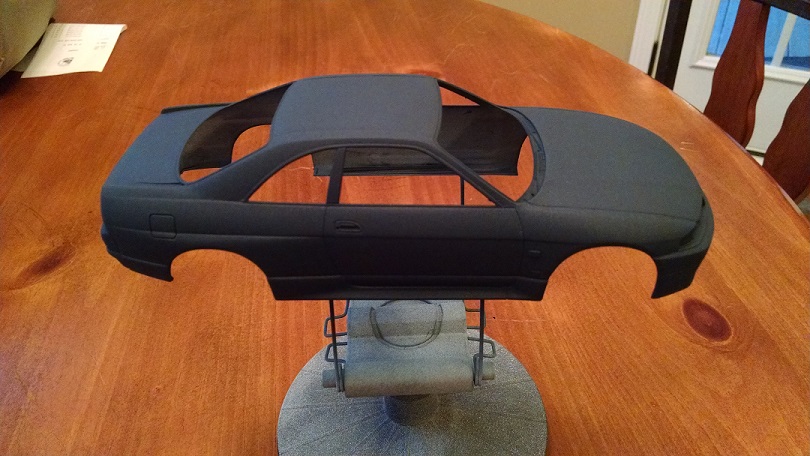
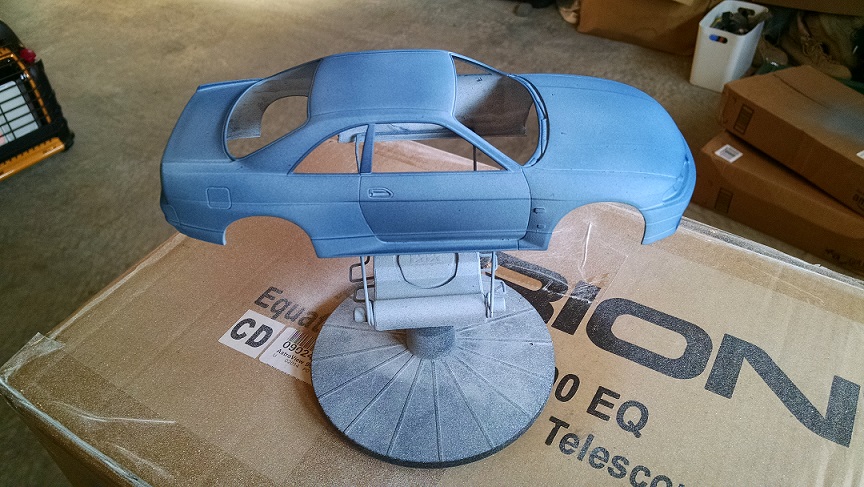
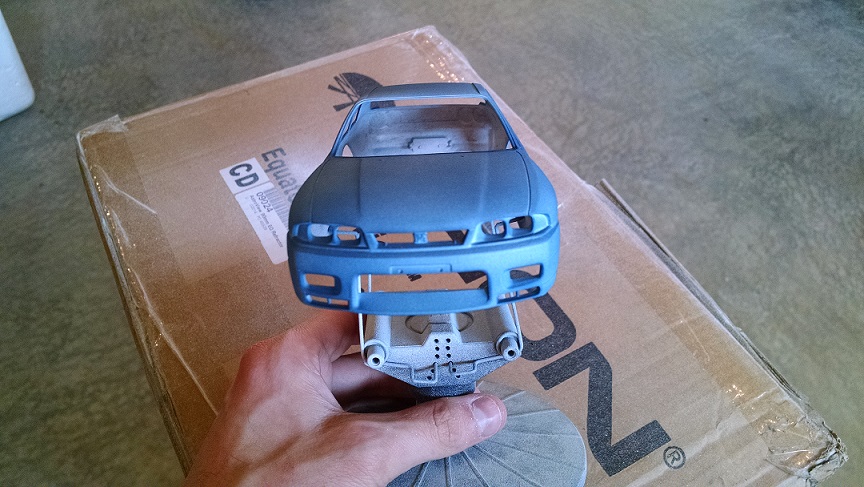
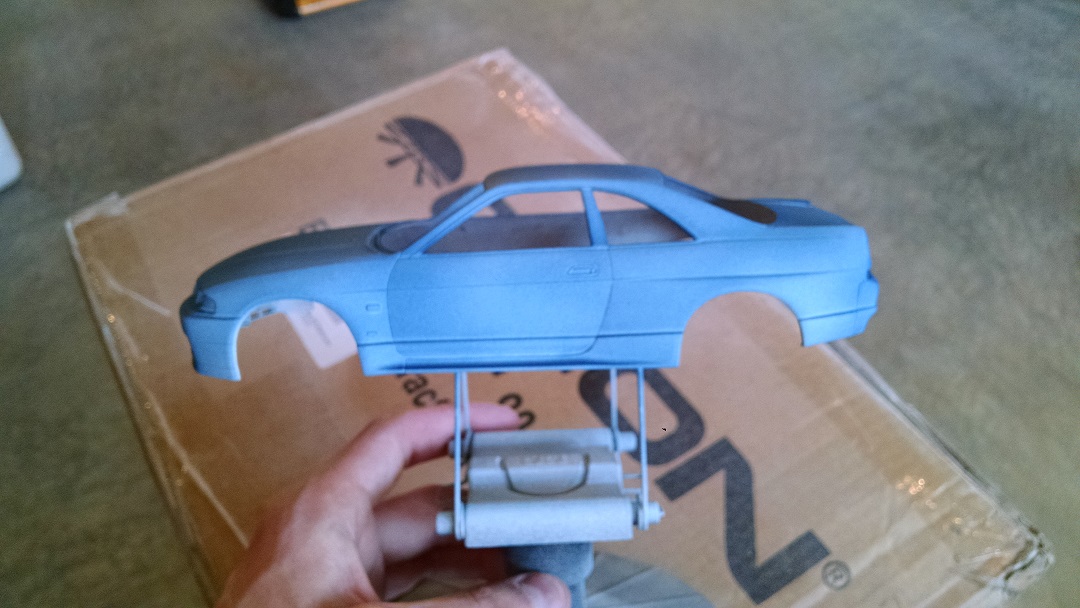
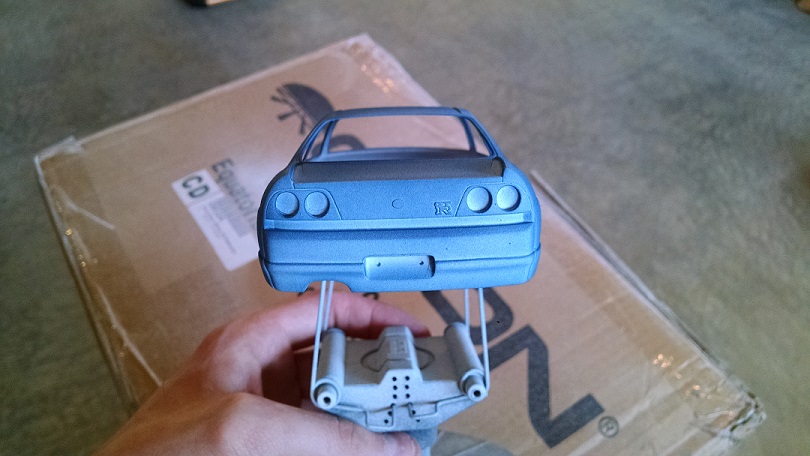
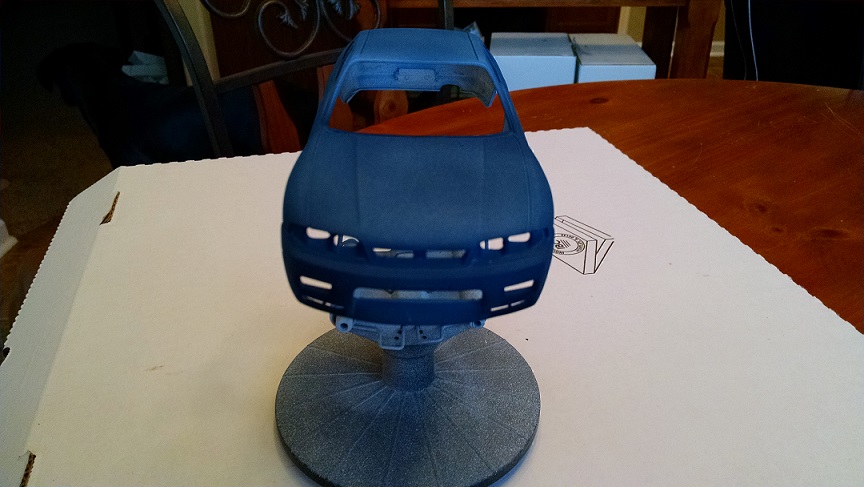
]I finished the second steering knuckle modification. Now all there is left on the underside is to paint the front suspension. Thanks to the 30 weather that rolled in, I've spent most of the day shopping for a heat source for the garage. With that taken care of, I also took some time to give the body two mist coats, although i believe the second mist coat was a little much for a "mist" coat.. First coat: and then the second coat: I modified the color a bit for the body and deepened the blue. I can't wait to see the wet coats turn out.
-
gorgeous. That blue is awesome.