restoman
-
Posts
1,129 -
Joined
-
Last visited
Content Type
Profiles
Forums
Events
Gallery
Everything posted by restoman
-
This will be largely box stock with a few added details like plug wires, rad hose, etc. I seriously debated swapping in a better chassis, along with the proper rear end, proper intake and air breather, etc., but the misshapen door & hood scallops and the work to make them look better meant just too much work when there are much better Charger kits out there. I am going to pull the air cleaner and wrap it in foil, though... So, it got sprayed with nail polish and automotive clear. I added some redlines and a set of recall wheels, and it will carry a black 500 tailstripe. Comments always welcome.

-
I find these to be great for storage, too. Glue bombs, rebuilders, tires, etc. Stackable and dirt cheap. I even use them for smaller builds in the display cabinet.
-
Nice work!
-
I use some larger versions of these for smaller things like carbs, mirrors, door handles, engine accessories, etc. I just label them with masking tape and a magic marker. The thing I like about them, mainly, is that I can set the whole tray on the bench and sort through it, instead of going drawer by drawer. I have four of them, all the same size, so stacking them is easy. Sorry for the crappy pic...
-
I've done the same... and now have all the zip lock bags labeled and sorted into those upright plastic-drawer systems. 4 of them. But now, I can find what I'm looking for without dumping everything out on the bench. I save pretty much all the left-over parts.
-
How big is your... stash?
restoman replied to Pierre Rivard's topic in Model Building Questions and Answers
A few years ago, I sold off a bunch of kits that just no longer appealed to me (of course, now I want them back), and ended up with roughly 100 on the shelf. I intend to keep myself around that number, or lower. Build a couple, buy a couple... Glue-bombs or re-builders, though... I can't stop seeking them out. -
How big is your... stash?
restoman replied to Pierre Rivard's topic in Model Building Questions and Answers
Yup. Half the fun, to me, is thinking about what could be done with each kit: build it to resemble a car from my memory, customize it, hot rod it, stock build, etc... and then digging into the parts bins to see if whatever I've come up with could be done. I've changed direction several times on kits that I likely will never get to, but it's still highly enjoyable to me. I've got a thumb drive loaded with pics and articles of potential what-ifs. -
Nice work!
-
Replicas & Miniatures of Maryland. Norm has some really neat resin items, and is super to deal with.
-
Thanks for the compliments! I have a thread in the work-in-progress section under the same title. It shows some roof development.
-
Yes, indeed! Very nice.
-
Very very nice! I don't know if I'll ever get to building mine, but I hope it turns out somewhere close to the level of work you've done here.
-
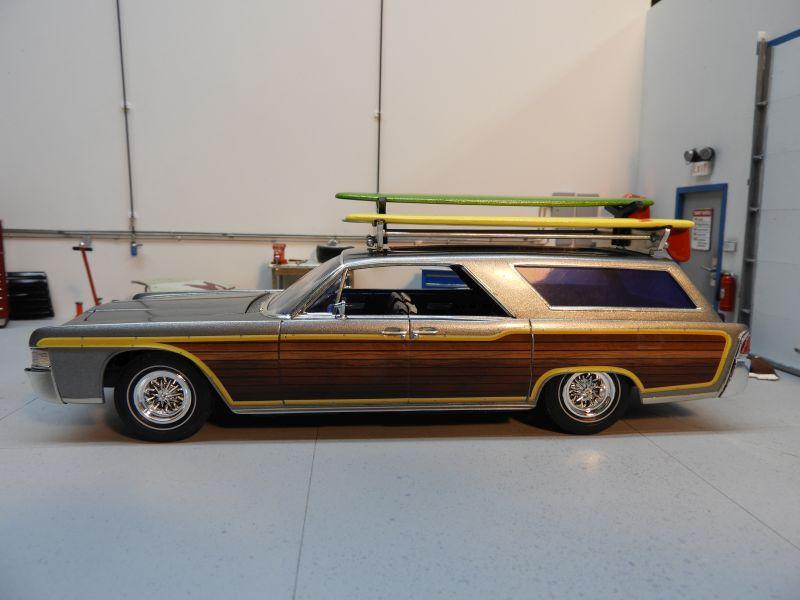
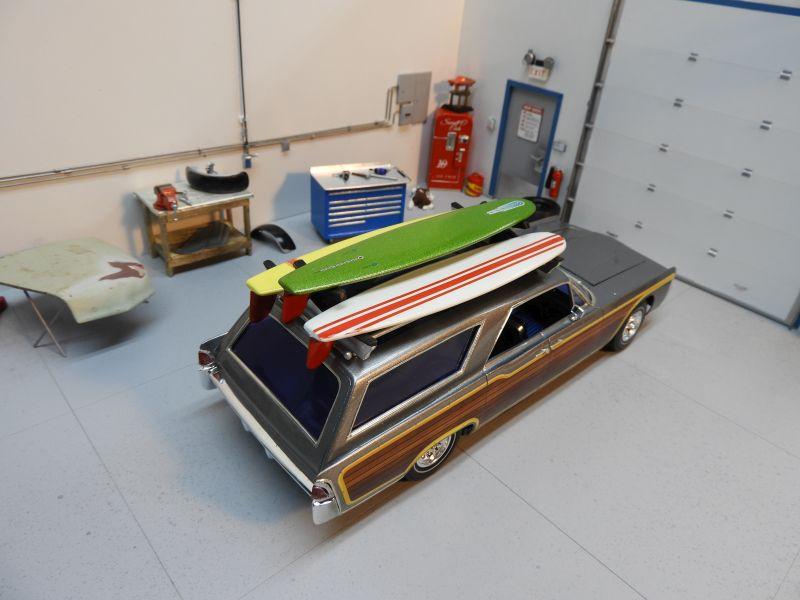
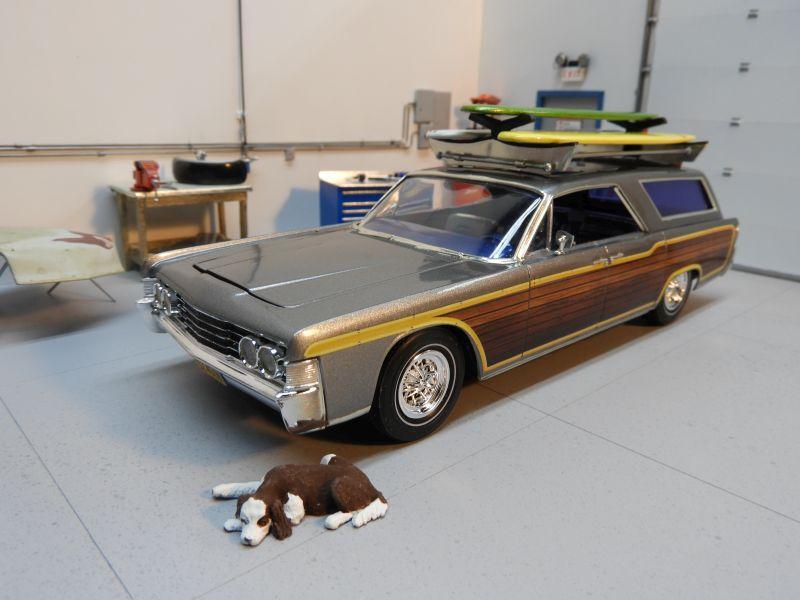
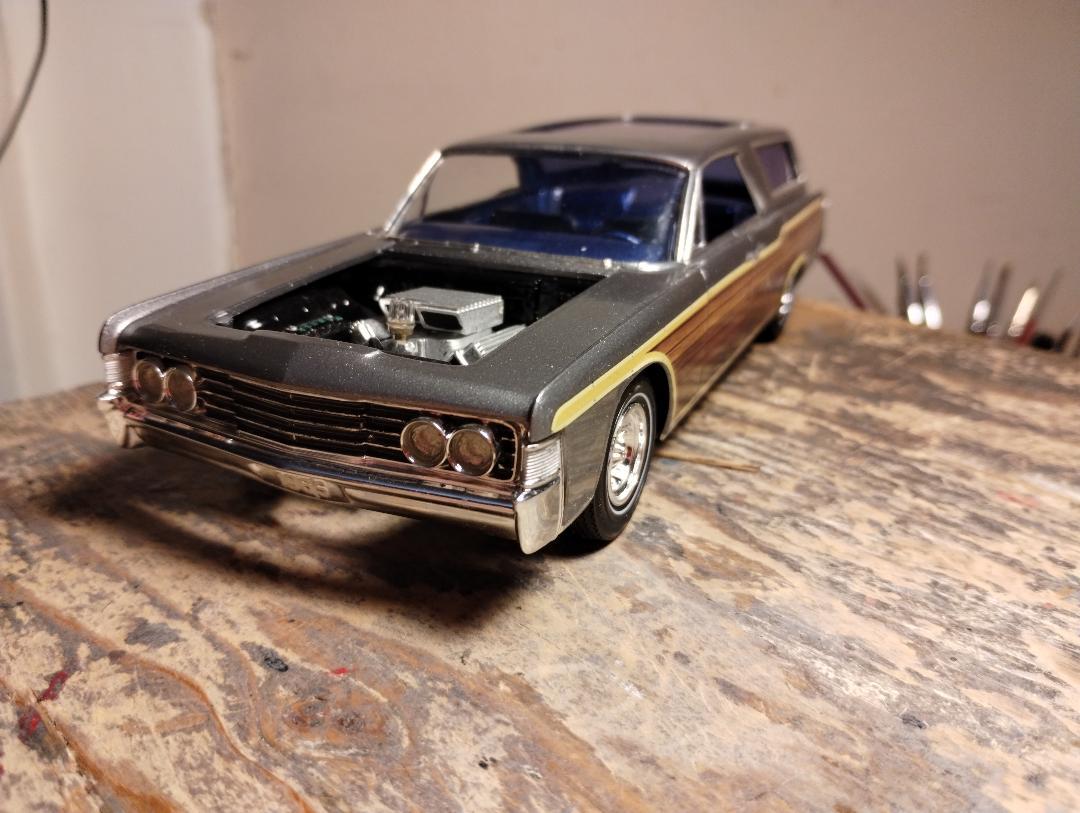
Ken McCloskey was born and raised in a surfing culture. From the time he was old enough to walk, he was in the water and then on a board. Throughout his teen years, his home town of Malibu was a surf mecca. When Ken hit his twenties, he did what every kid does: get a job, start a family, but a house, etc. But he never lost his love for the waves. When the call of self-employment hit, he answered. For three years, he didn't even see the water, cooped up as he was in the office. When his business hit paydirt, the hours got longer. By his late thirties,he found the hours too long and since he was making some good scratch, he stepped out of the shop and started to enjoy life a little again. He still loved the curls, and now his kids were showing interest in it, too. So Ken did what he had seen everyone else doing back in the 50s, and got himself a wagon to hit the beach with. But, not just any wagon... not for Ken. He had the money, and an innate abhorence to be like everyone else. So Ken strolled into his Lincoln Mercury dealer, plunked down the $$$ for a brand new Continental, and had it delivered to Myron's Auto Body & Bait Shop in LA. What he got back was everything he wanted. A full one-off custom surf wagon, complete with room for three boards, a wife and three kids. And the dog, of course. Custom mixed grey metallic paint, blue leather interior, wood grain (wouldn't be a surf wagon without wood, would it?!), a full sky light, tinted glass, aluminum wheels, some hop-up goodies on the big V-8, and the ability to cruise to the surf in the utmost of class. An Endless Summer. It took a long time to finally get this done, but it was fun. The decals were fun. No, not really. Getting the kit's wagon roof to look realistic was a challenge, but I think I pulled it off. The surf stuff is from R & M of M, the tinted glass is an old food storage container lid. Comments always welcome!
-
Thank you! The Springers are from Replicas and Miniatures, painted to resemble our dogs.
-
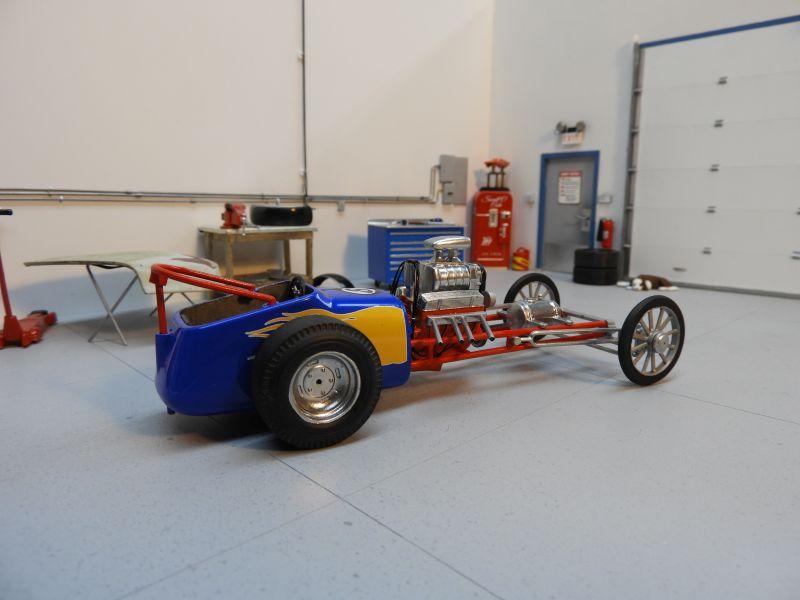
An Atlanis re-issue from way back. A pretty basic kit, but fun nontheless. I opened up the blower scoop a little and added some plug wires, as well as blending the body seam, but those are the only mods. The first build to get shot in my new diorama. Comments always welcome.
-
I've got the door tracks in place, but not the upper ones yet. I want to make them removable for when the thing isn't being used. I'm not going to do a door spring, just a cover for it.
-
I thought about building a Toro leaf blower to lean in the corner... that's how my shop stayed... uh... clean. ?
-
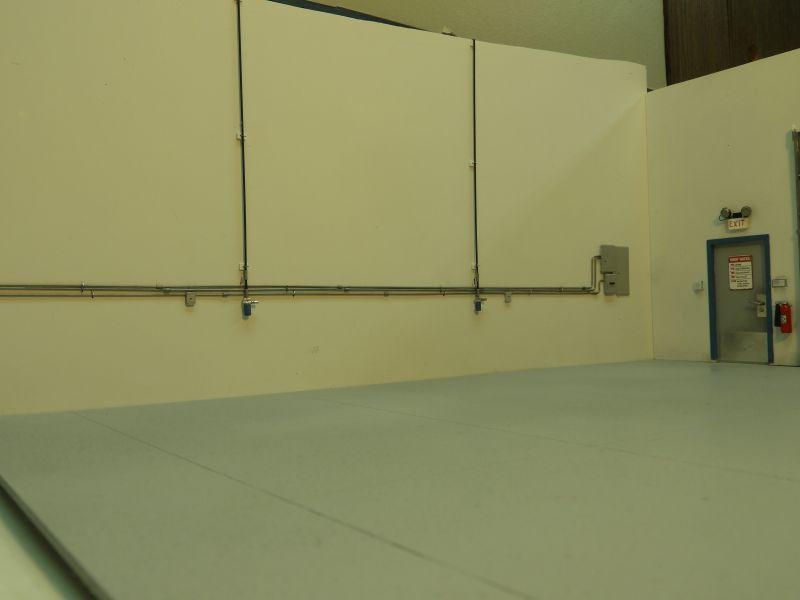
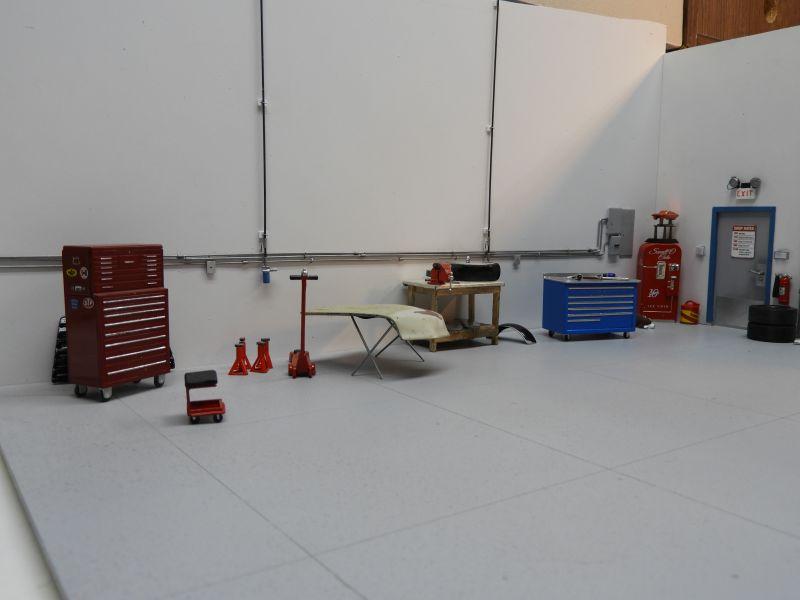
I started this mainly as a photo prop, something a little jazzier than plain white poster board. I used some 1/8" acrylic sign board that I picked up along with some auction stuff for the floor and walls. Built in sections so it can come apart when not in use, I decided to build a generic shop and just swap out the dio detail pieces so it can be whatever type of shop I want at the time: race shop, body shop, mechanic shop, etc. I'll weather it as I go along Comments always welcome.
-
Beware HOT resin parts attacking styrene parts
restoman replied to Scott Colmer's topic in Tips, Tricks, and Tutorials
I live in relatively-humid South Western Ontario, and I've been lucky to get through a batch of Smooth On over the course of a summer without the very-last pieces being a luck-of-the-draw for softness or failure to fully cure. I did find if I kept the bottles in a Zip-Lock bag with silica desicant packets that it did kind of/sort of help the final few pieces... I've never trusted un-used resin more than 1 year. $.02 -
No further than the last post. Been finishing up a few other kits that have been sitting too long. And then, I got started on a diorama photo prop... This one should be back on the bench sometime in January.
-
Been awhile...
-
What did you see on the road today?
restoman replied to Harry P.'s topic in General Automotive Talk (Trucks and Cars)
1973 or newer, judging by the body contours. My brother-in-law in Airdrie has a similar version sitting in his yard since the mid-90s. I'm amazed at how nice a shape it's still in. -
I believe it was your build of the kit that got me started down this rabbit hole! Thanks!
-
The hood and side panels fit nicely...
-
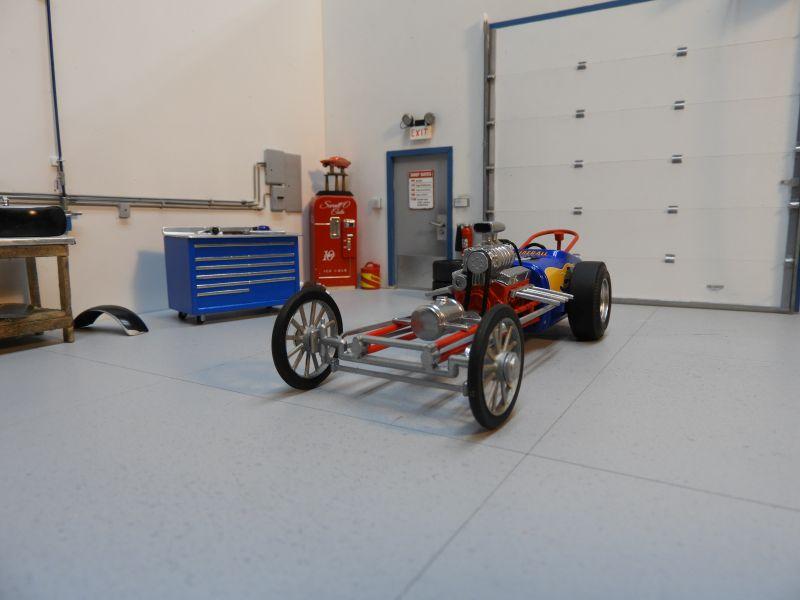
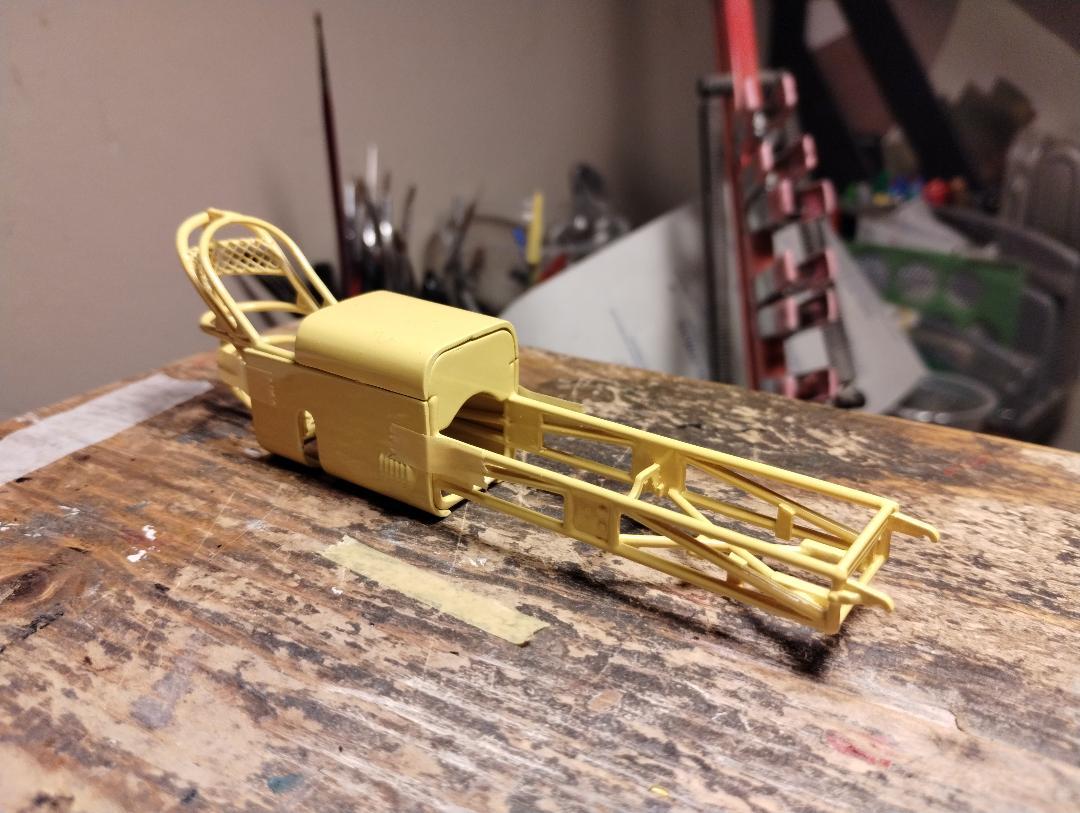
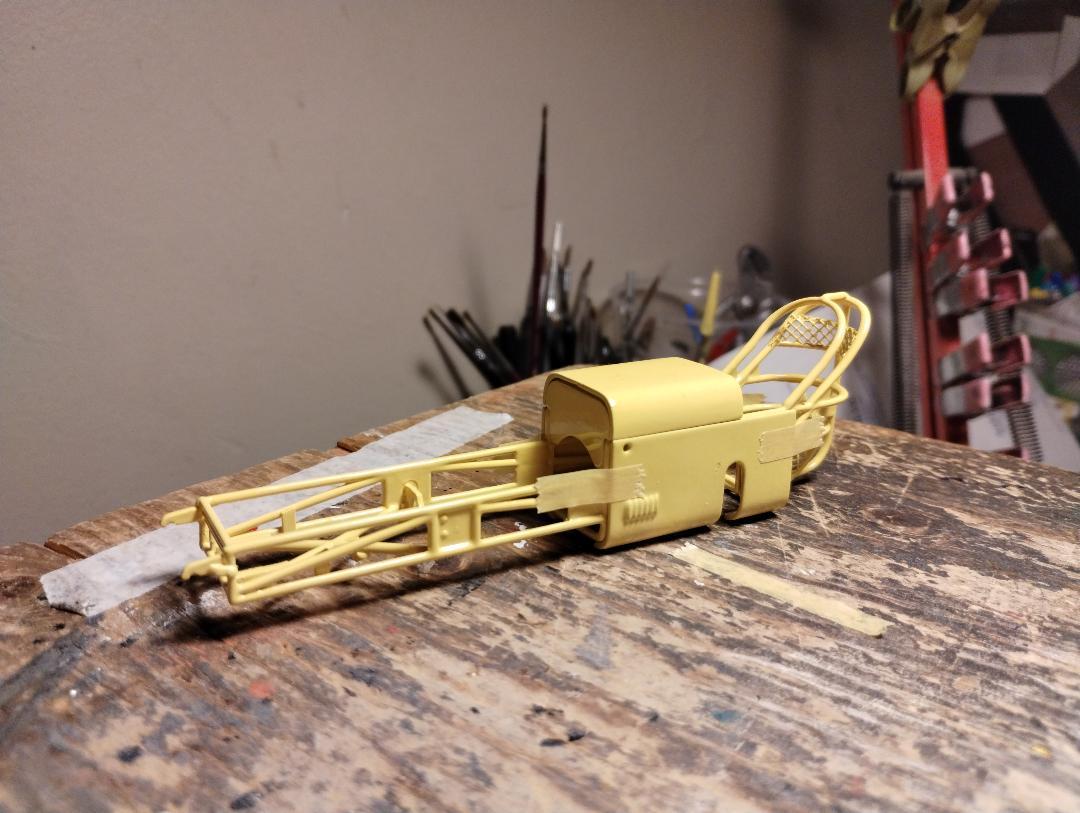
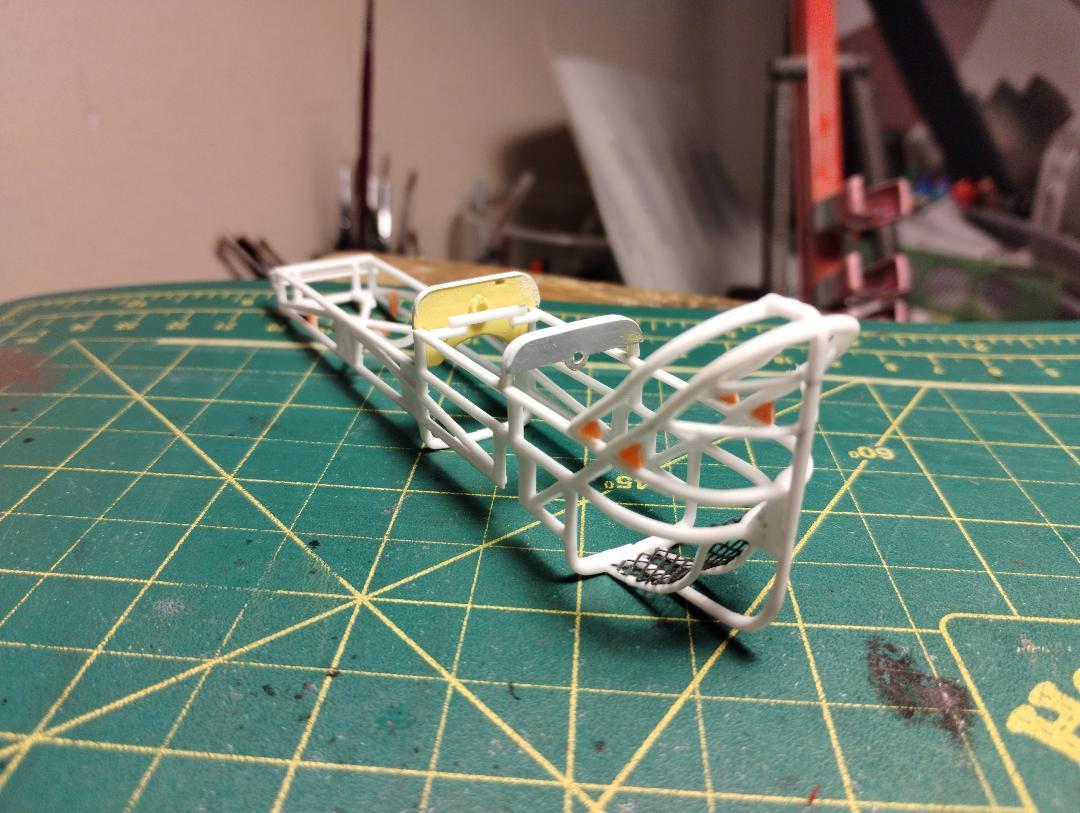
Before the paint... I used my Dremel to remove the extra material at the rear roll cage, and spliced in a piece of styrene to replace the upright bar. The cross pieces for the firewall and dash mount are styrene rods bent over a candle. I moved the firewall bar back a bit so I could get the firewall to fit flush, like the original dragster, and moved the dash bar forward so that the dash fits under the hood panel. I'll do the firewall in some polished BMF when assembly time comes. I added a mount for the steering box behind the firewall. The gusset pieces are small wedges of bread clip styrene. It looked to be the right thickness, and the contrasting colour made it easier to see and file for a good fit. The screen under the seat and behind the driver's head rest is just nylon window sreen set at an angle. Liquid cement holds it well. I modified the front torsion bars for a better look for the front suspension. They're a bit high in their placement, but it'll work.