Impalow
-
Posts
1,065 -
Joined
-
Last visited
Content Type
Profiles
Forums
Events
Gallery
Everything posted by Impalow
-
 Thanks Bruce!! I appreciate the kinda words! I cant tell you how good it feels to get this bike ramp knocked out... nothing better than finishing up something you had been back of mind brainstorming since 2018.. 🤣 I think this wraps up the "heavy" fabrication, now its just some minor things... cargo boxes, air tanks... then its on to final cleanup, paint and details!
-
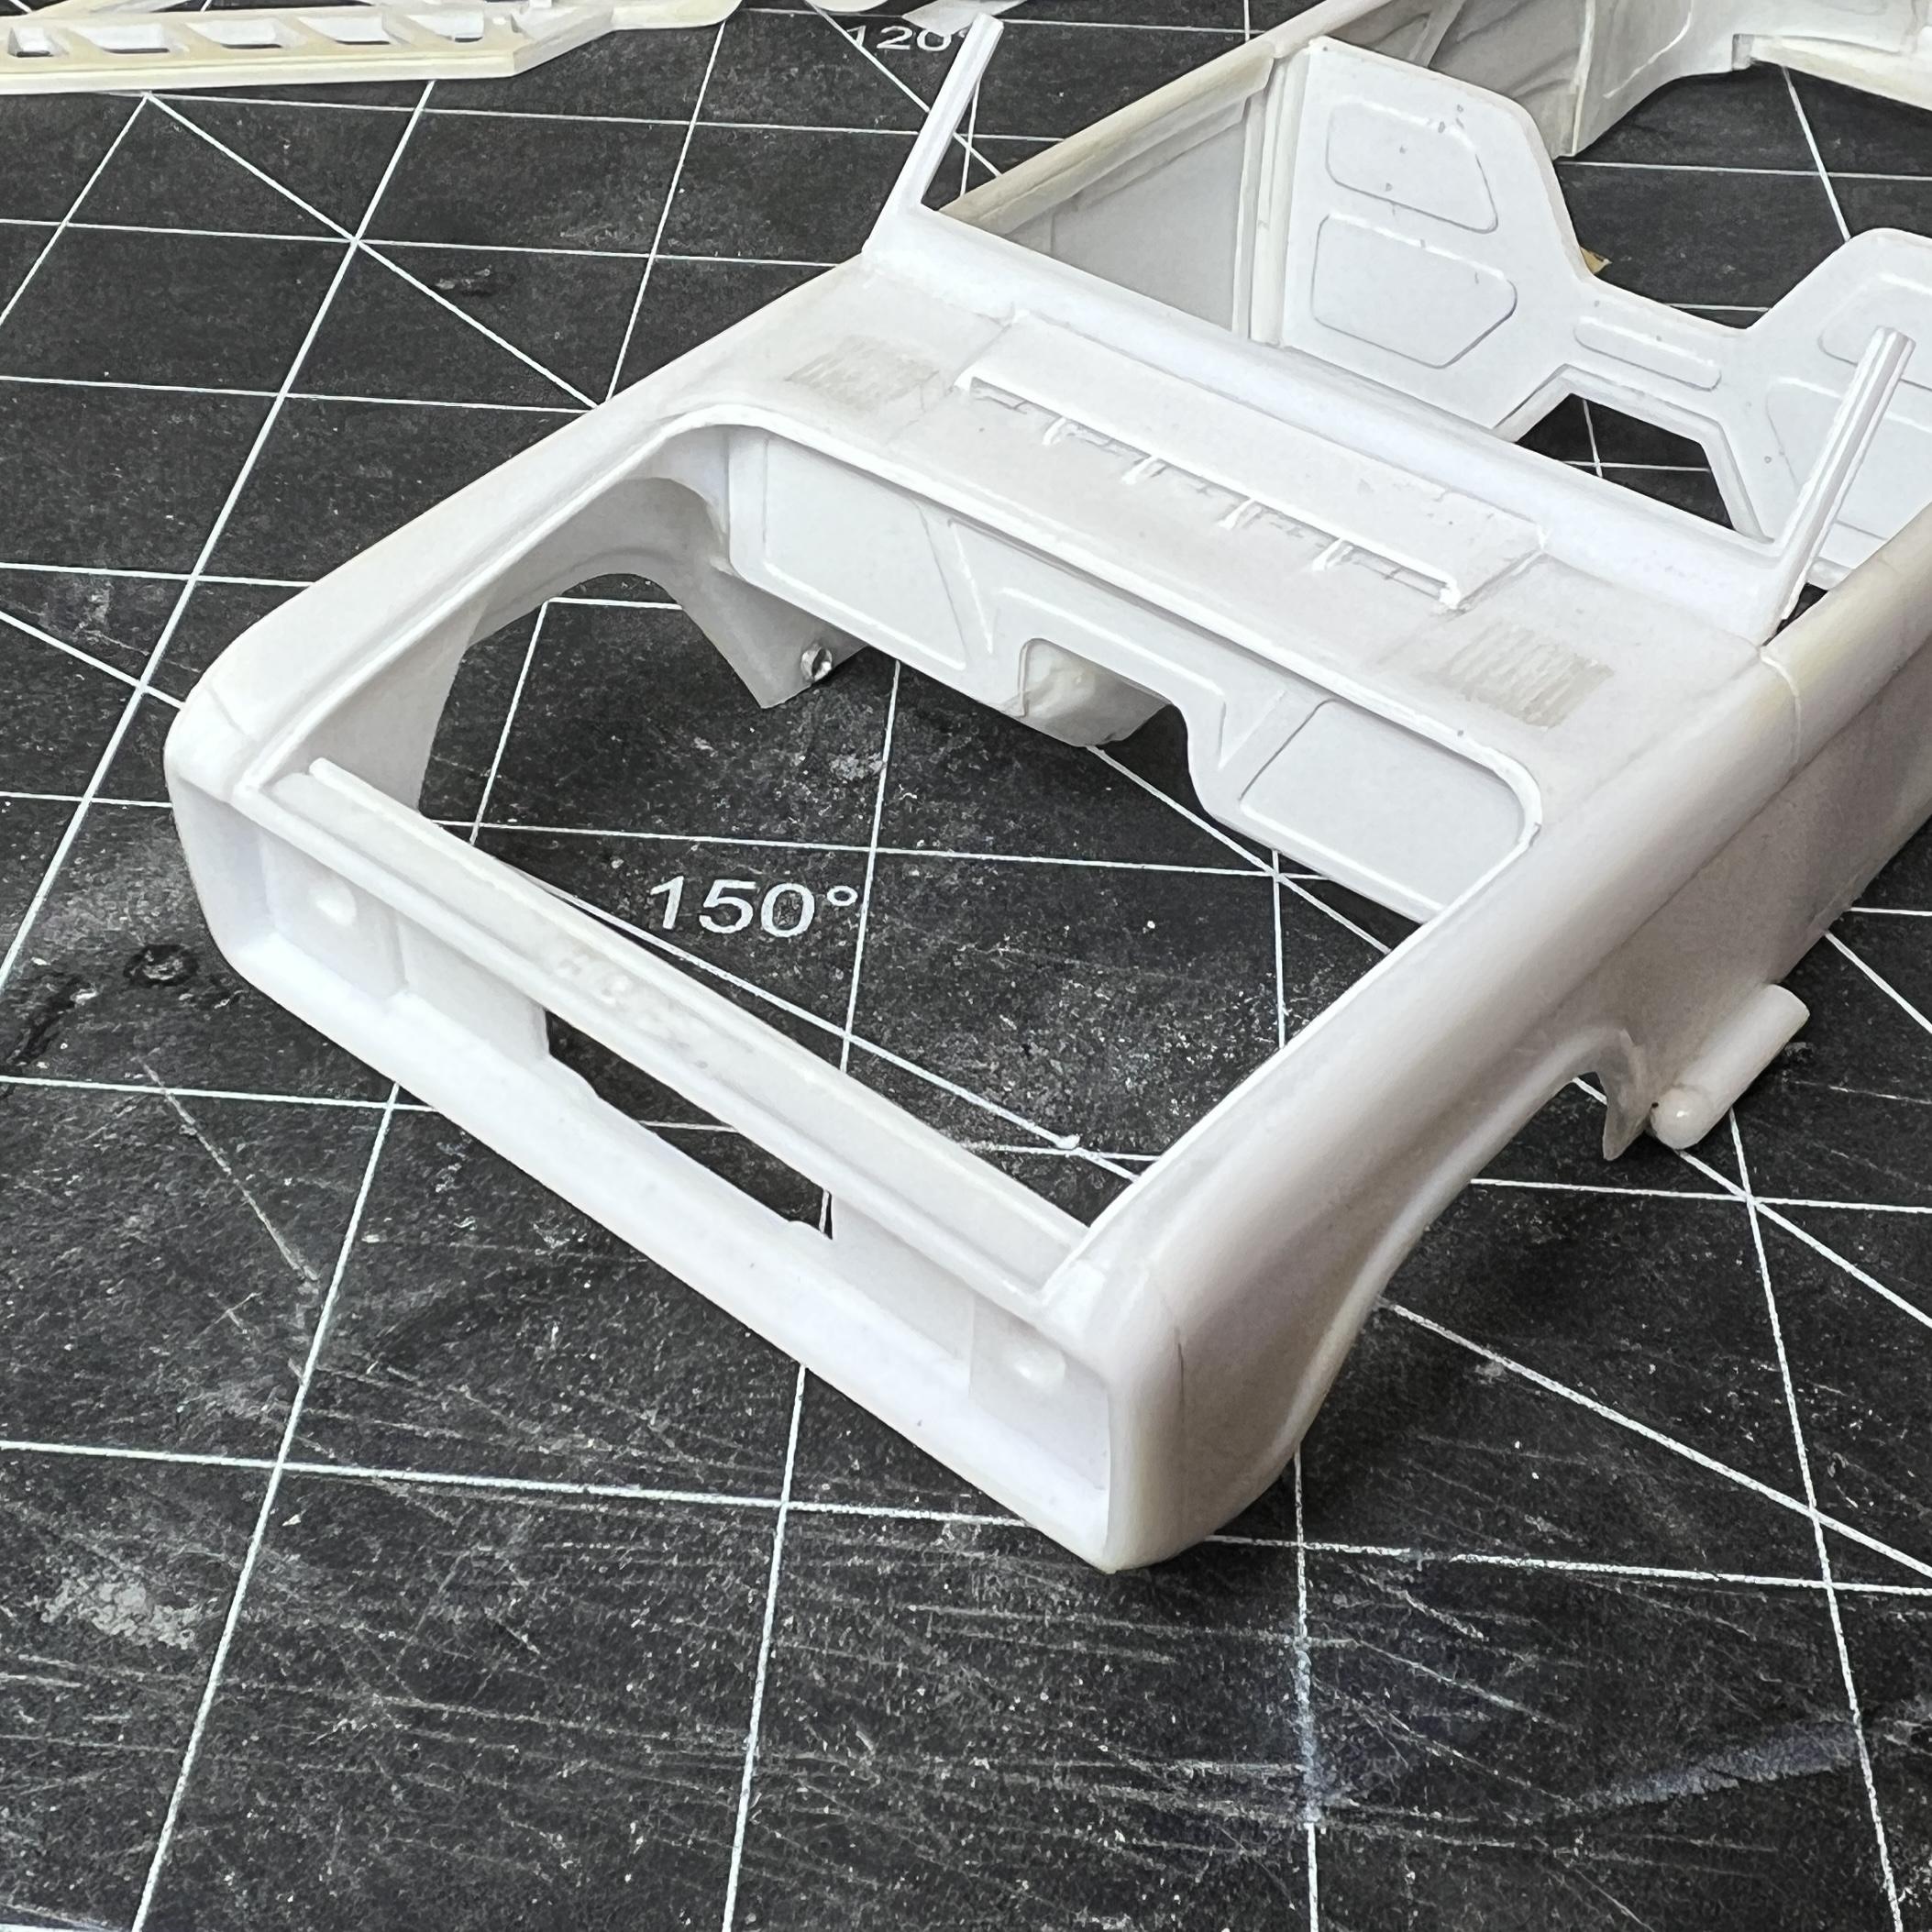
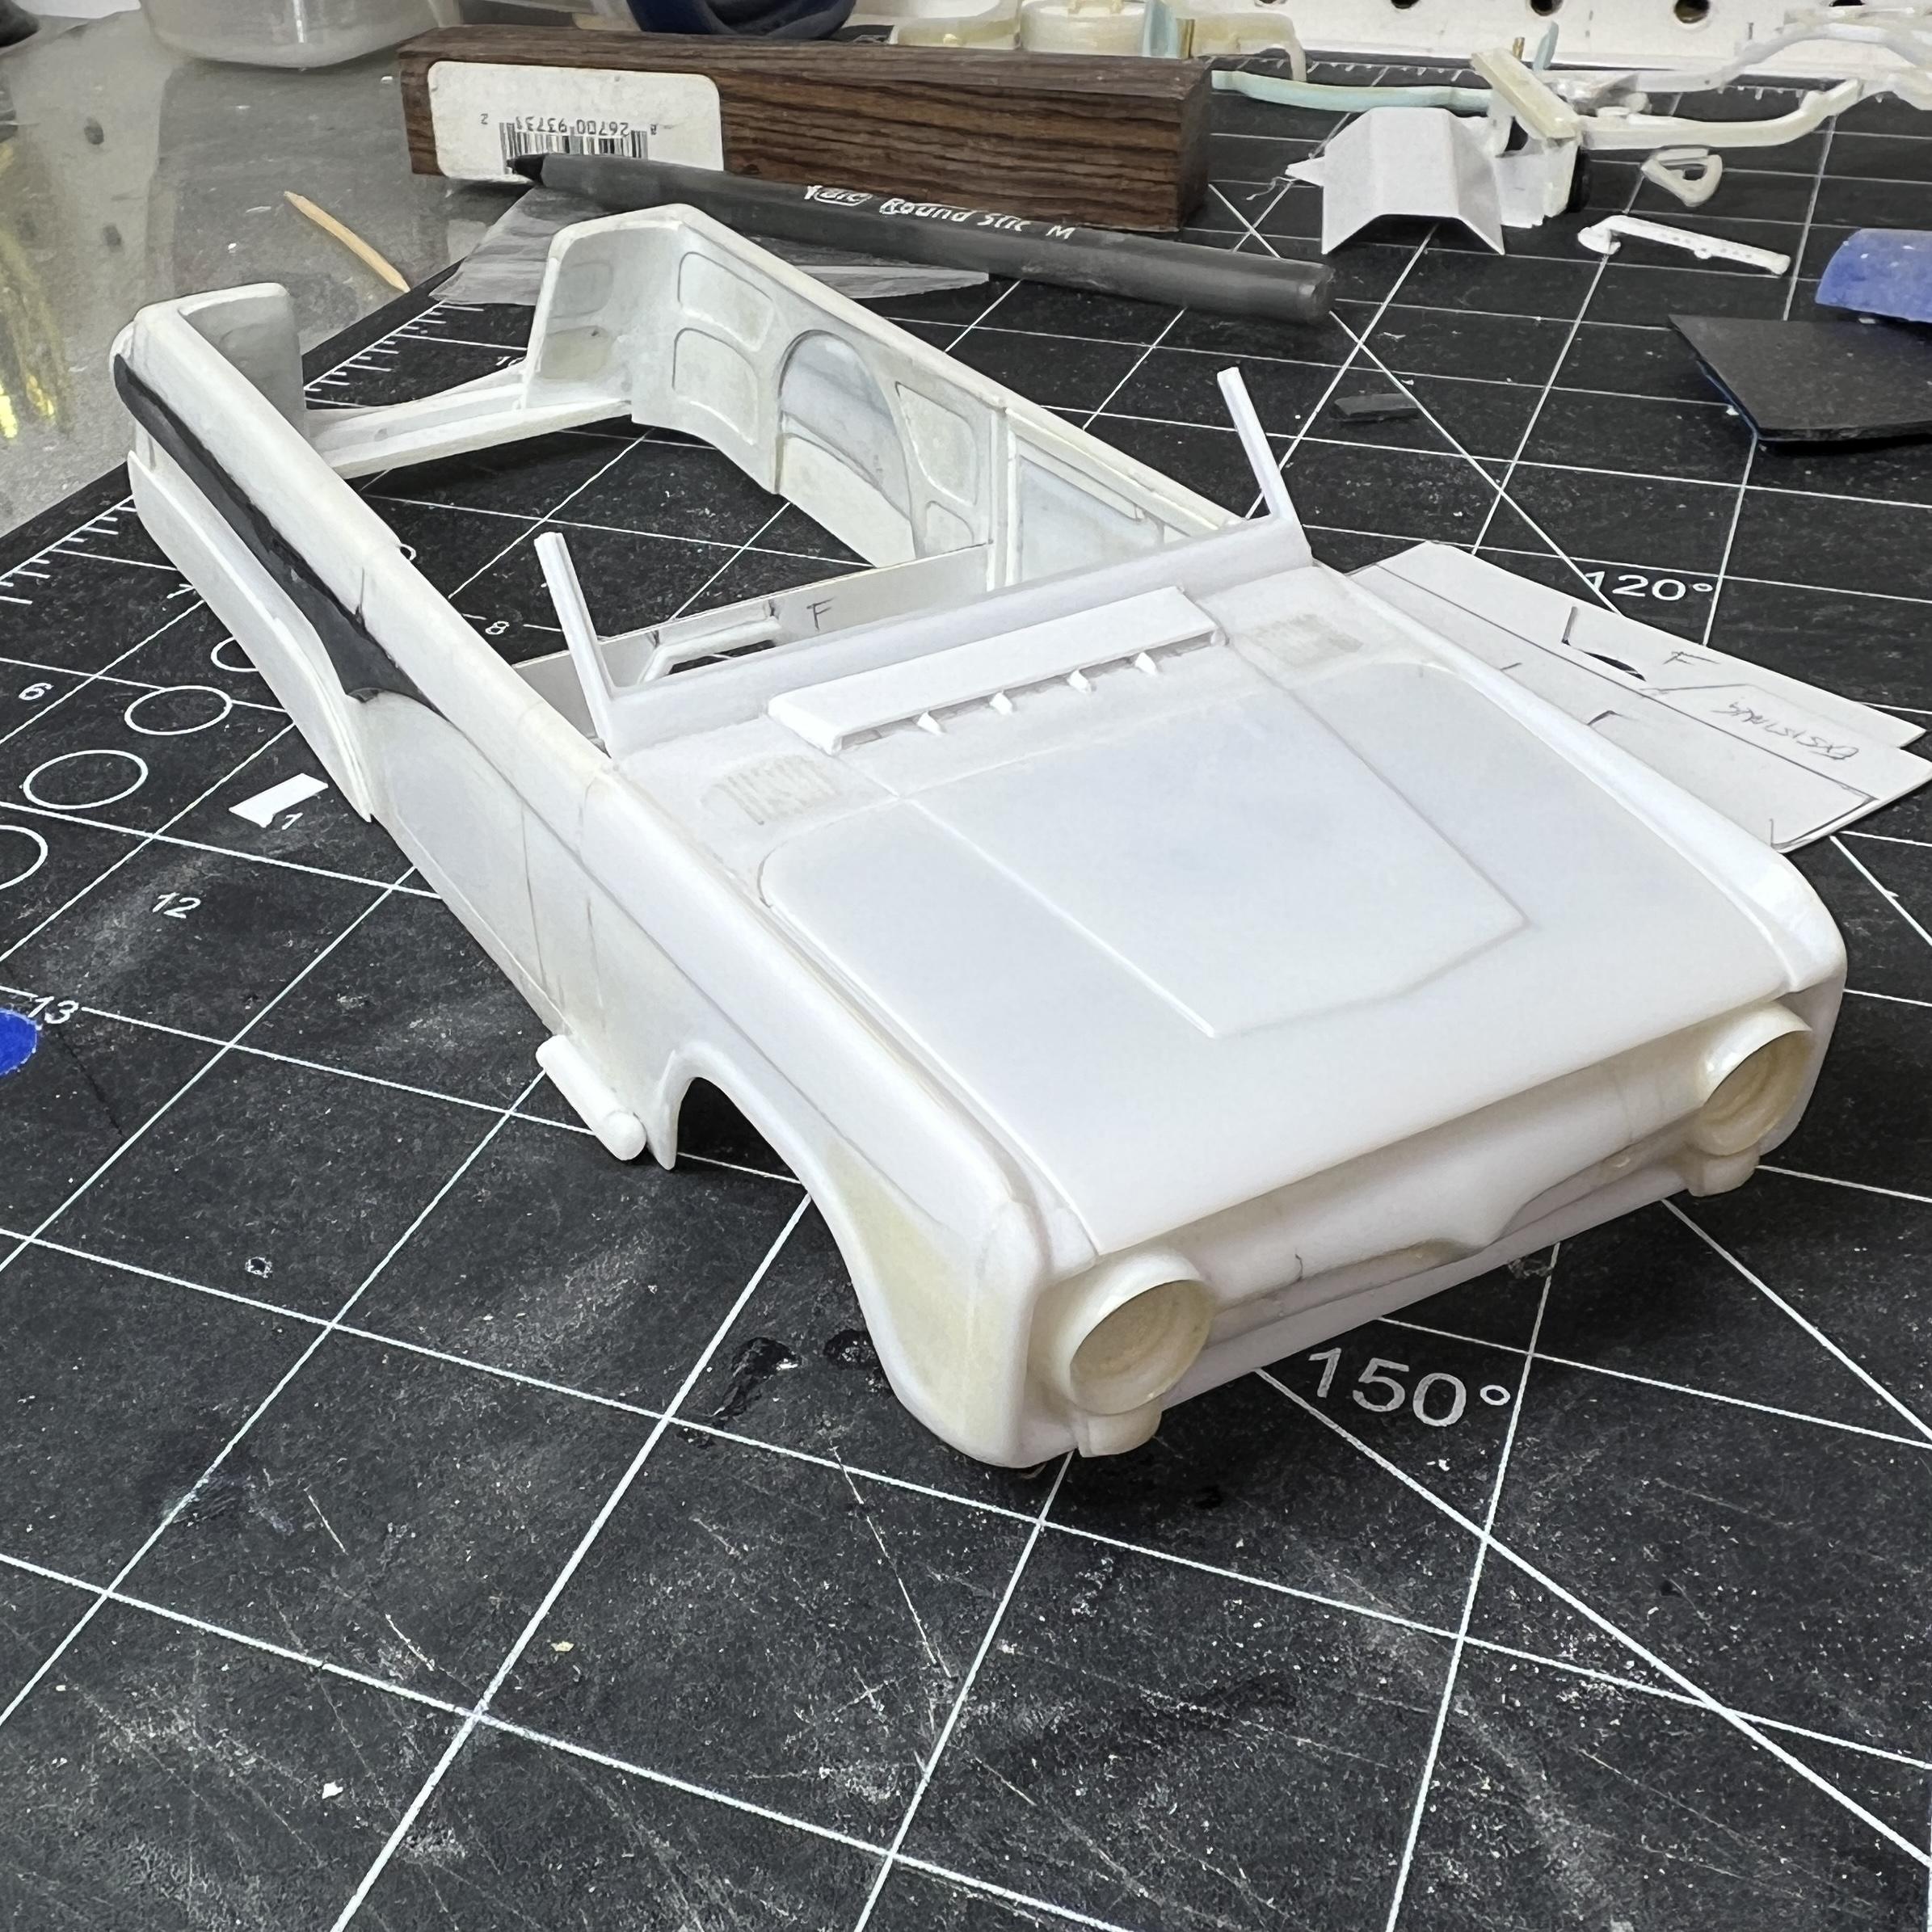
A little more progress... primed, hinged , lots of little detail added... some more filler and cleanup to do, hoping to display on the "in progress" table this Saturday in Columbus Ohio for the Buckeye Classic!
-
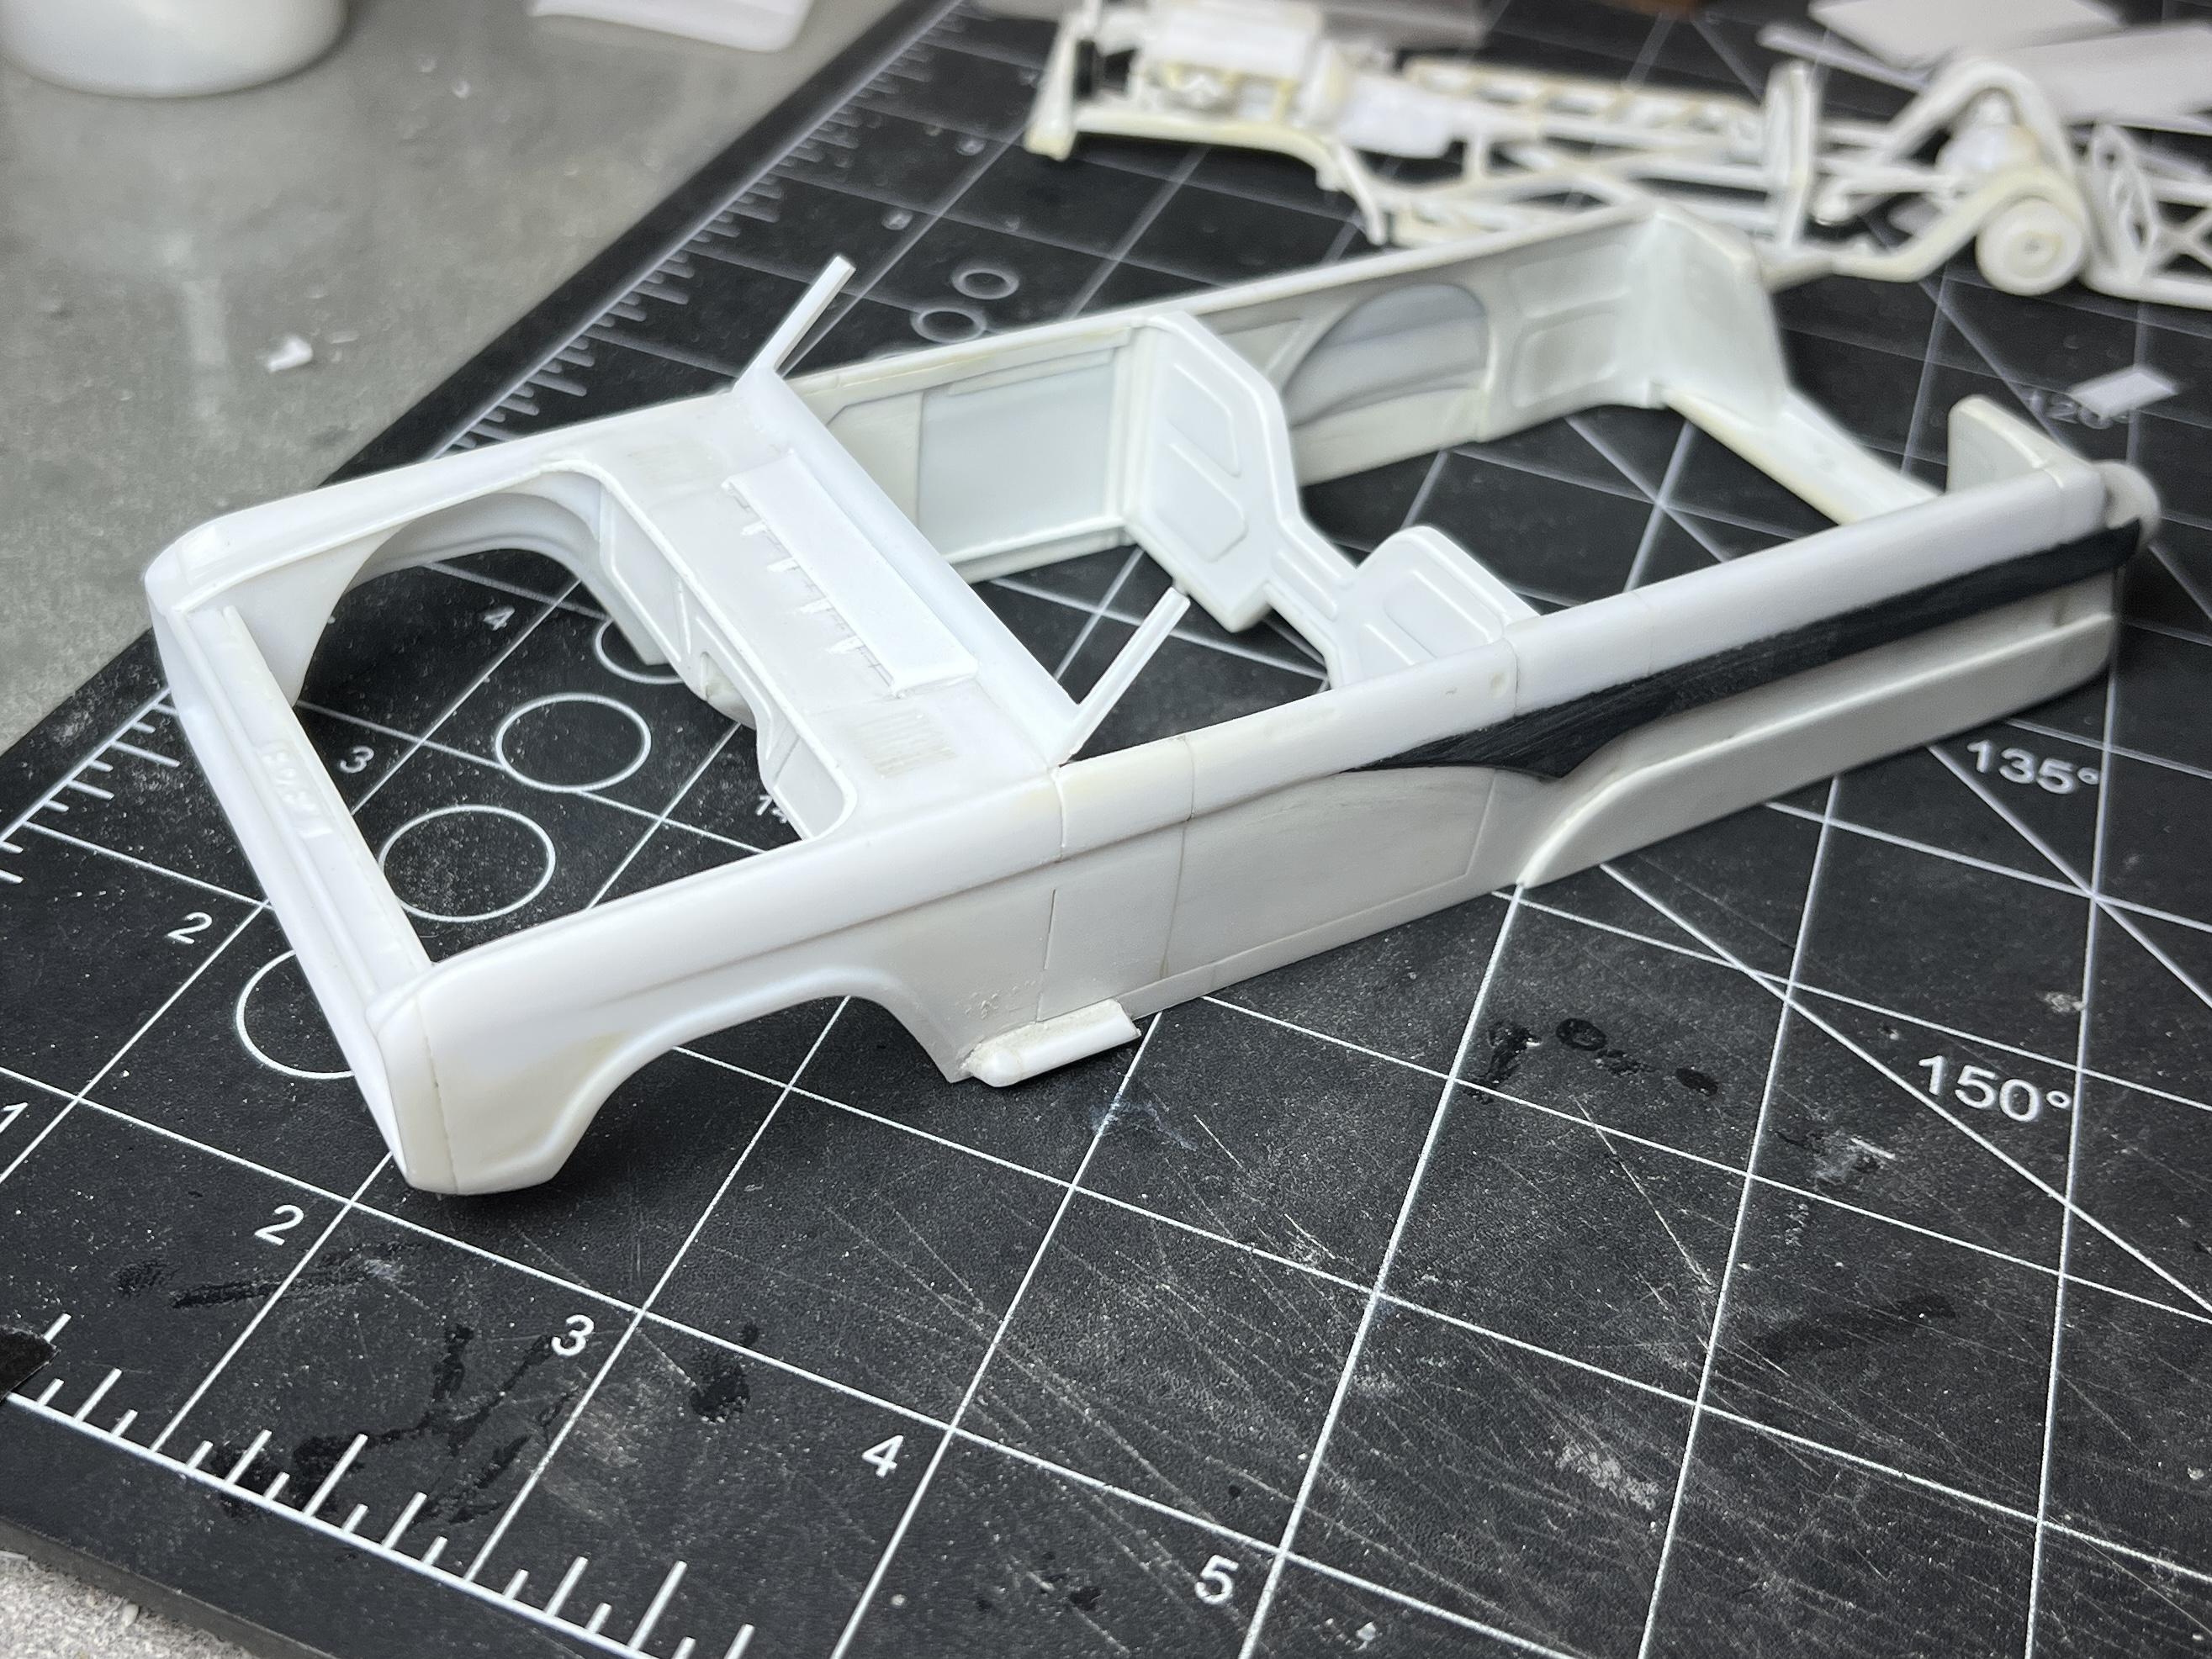
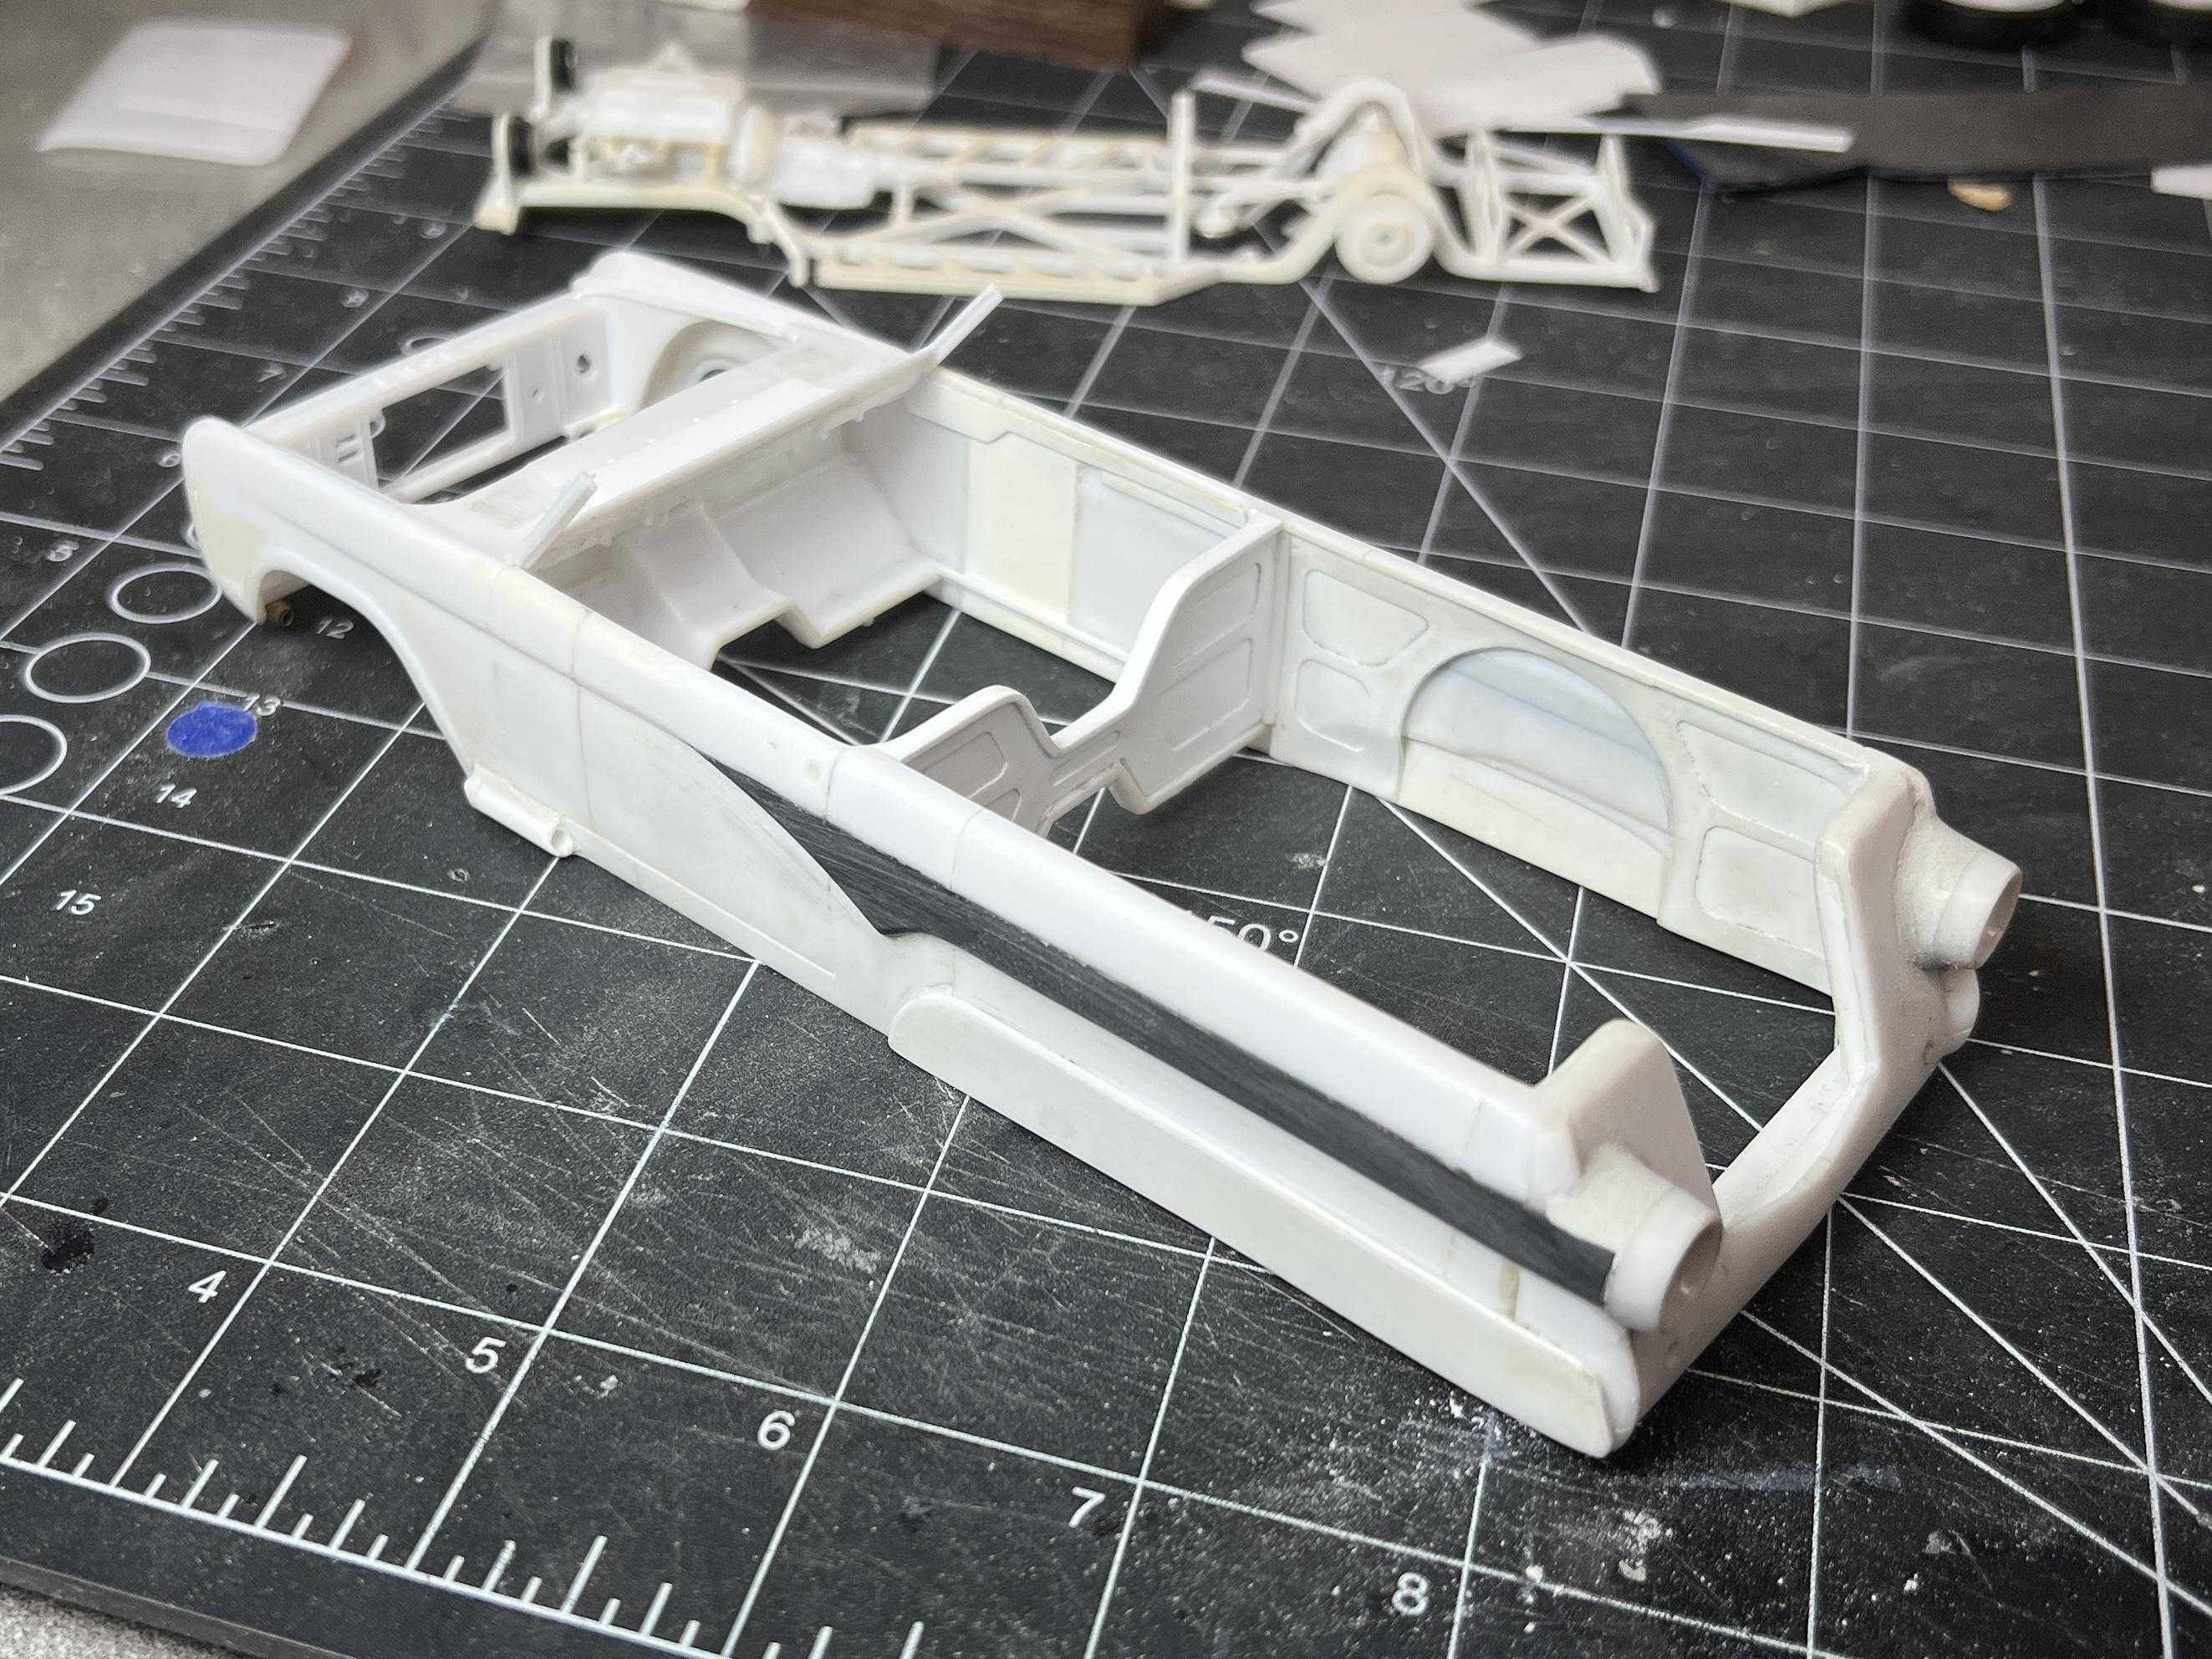
Progress! Hood reworked/shortened, scratchbuilt cowl vent, frenched side pipes, firewall detail added, bulkhead constructed, and epoxy putty applied and smoothed… I think I just need to work on a reversed hood hinge and scribe some door lines and its time for some primer!
-
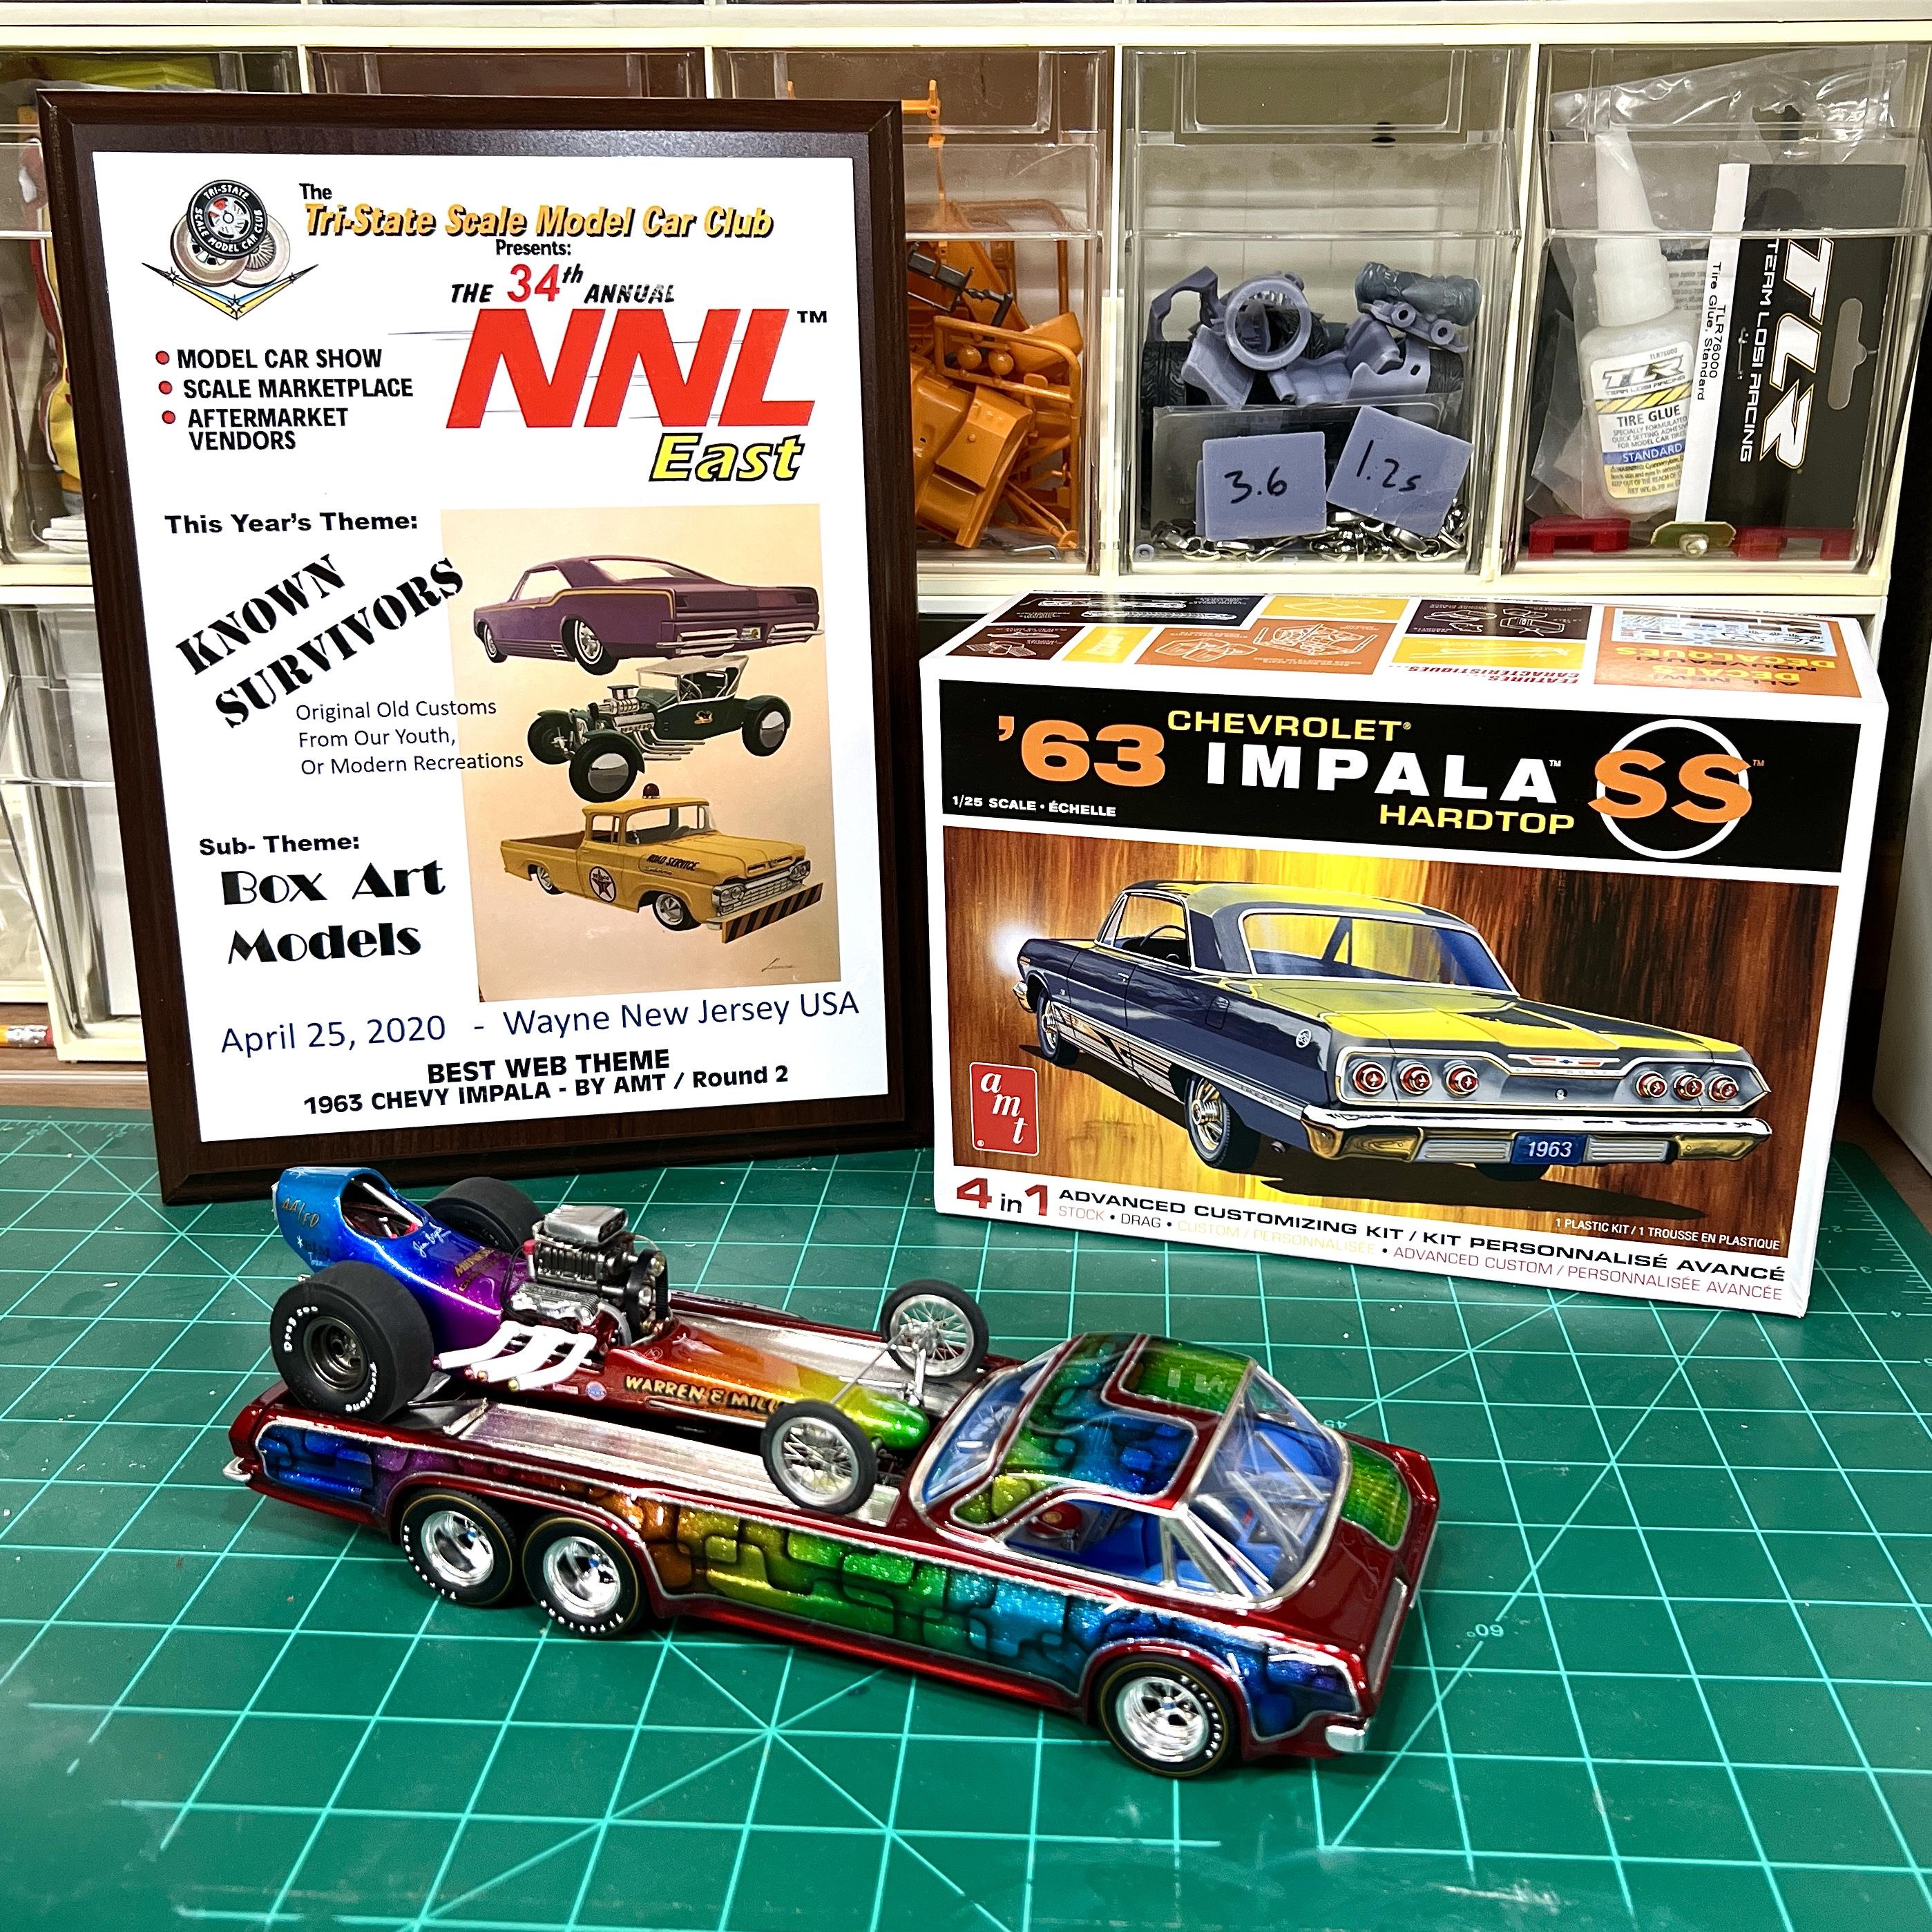
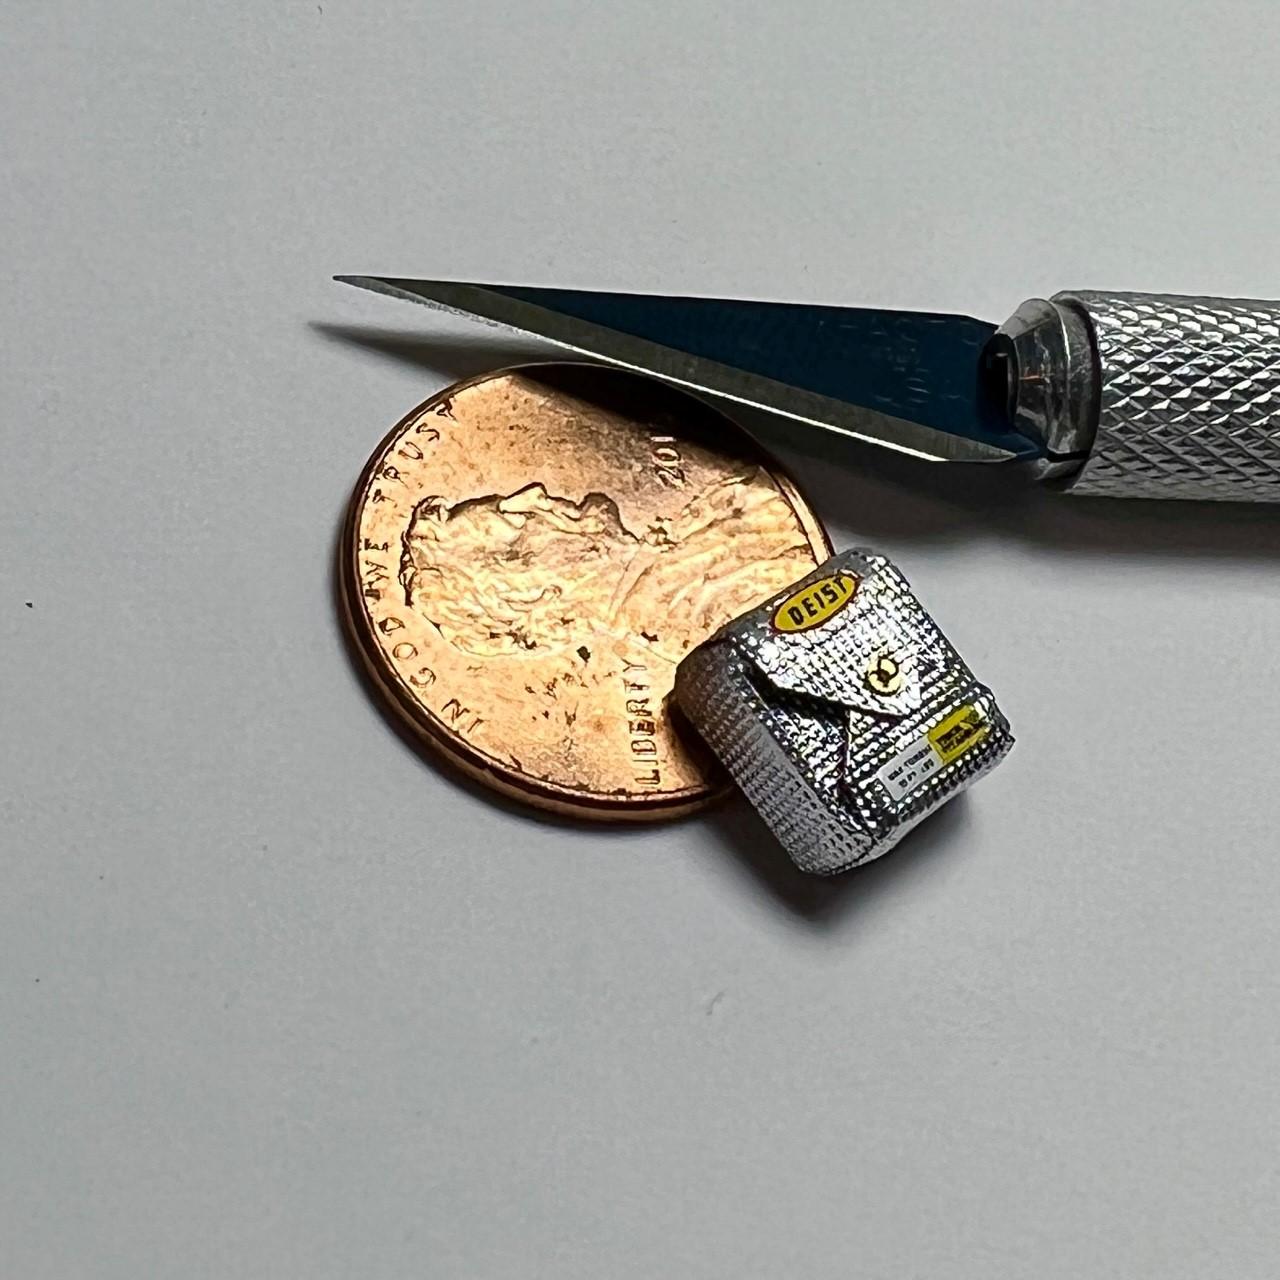
Remember this thing? to be honest I completely forgot about it.. However I booked my room for NNL East, and I want to take something... I went into my workshop to take inventory and look for a model I can have completed by April and this one jumped out at me. So here we go! NNL East of Bust! There were a few things that I was stumped on back in 2018 that caused this to get set on the WIP shelf of doom, so first things first lets get those out of the way. taillights bike ramp hood So first up were the taillights, I grabbed some parts box bezels and then altered the body line with some thick styrene. I'm going to use some epoxy putty to mold all this together. This helps make those cruiser skirts look less foreign and gives me a nice flat surface to do some 1956 ford inspired copper trim!
-
Hey Tony! We don't really have categories because this is more of an non-competitive NNL style event, we do give out a handful of trophies like Best of show, best youth and a couple other "best of's" that change from year to year.
-
until
-
Yup that was me! look up "foil chocolate wrappers" on amazon, tons of options and different textures! (and a "lifetime" supply for cheap) https://www.amazon.com/dp/B0B9JRGMLH?_encoding=UTF8&psc=1&ref_=cm_sw_r_cp_ud_dp_5GN3D2MK7KE3BBJ9CDBV I used that one to make this parachute pack for my FED.
-
James is the man! Great modeler and all around good guy! Lucky to have him in our club.
-
I just finished up a 3 year project of trying to make those custom parts look "decent" Still need to take under glass photos, but here is the project log if you want to go for a wild ride.
-
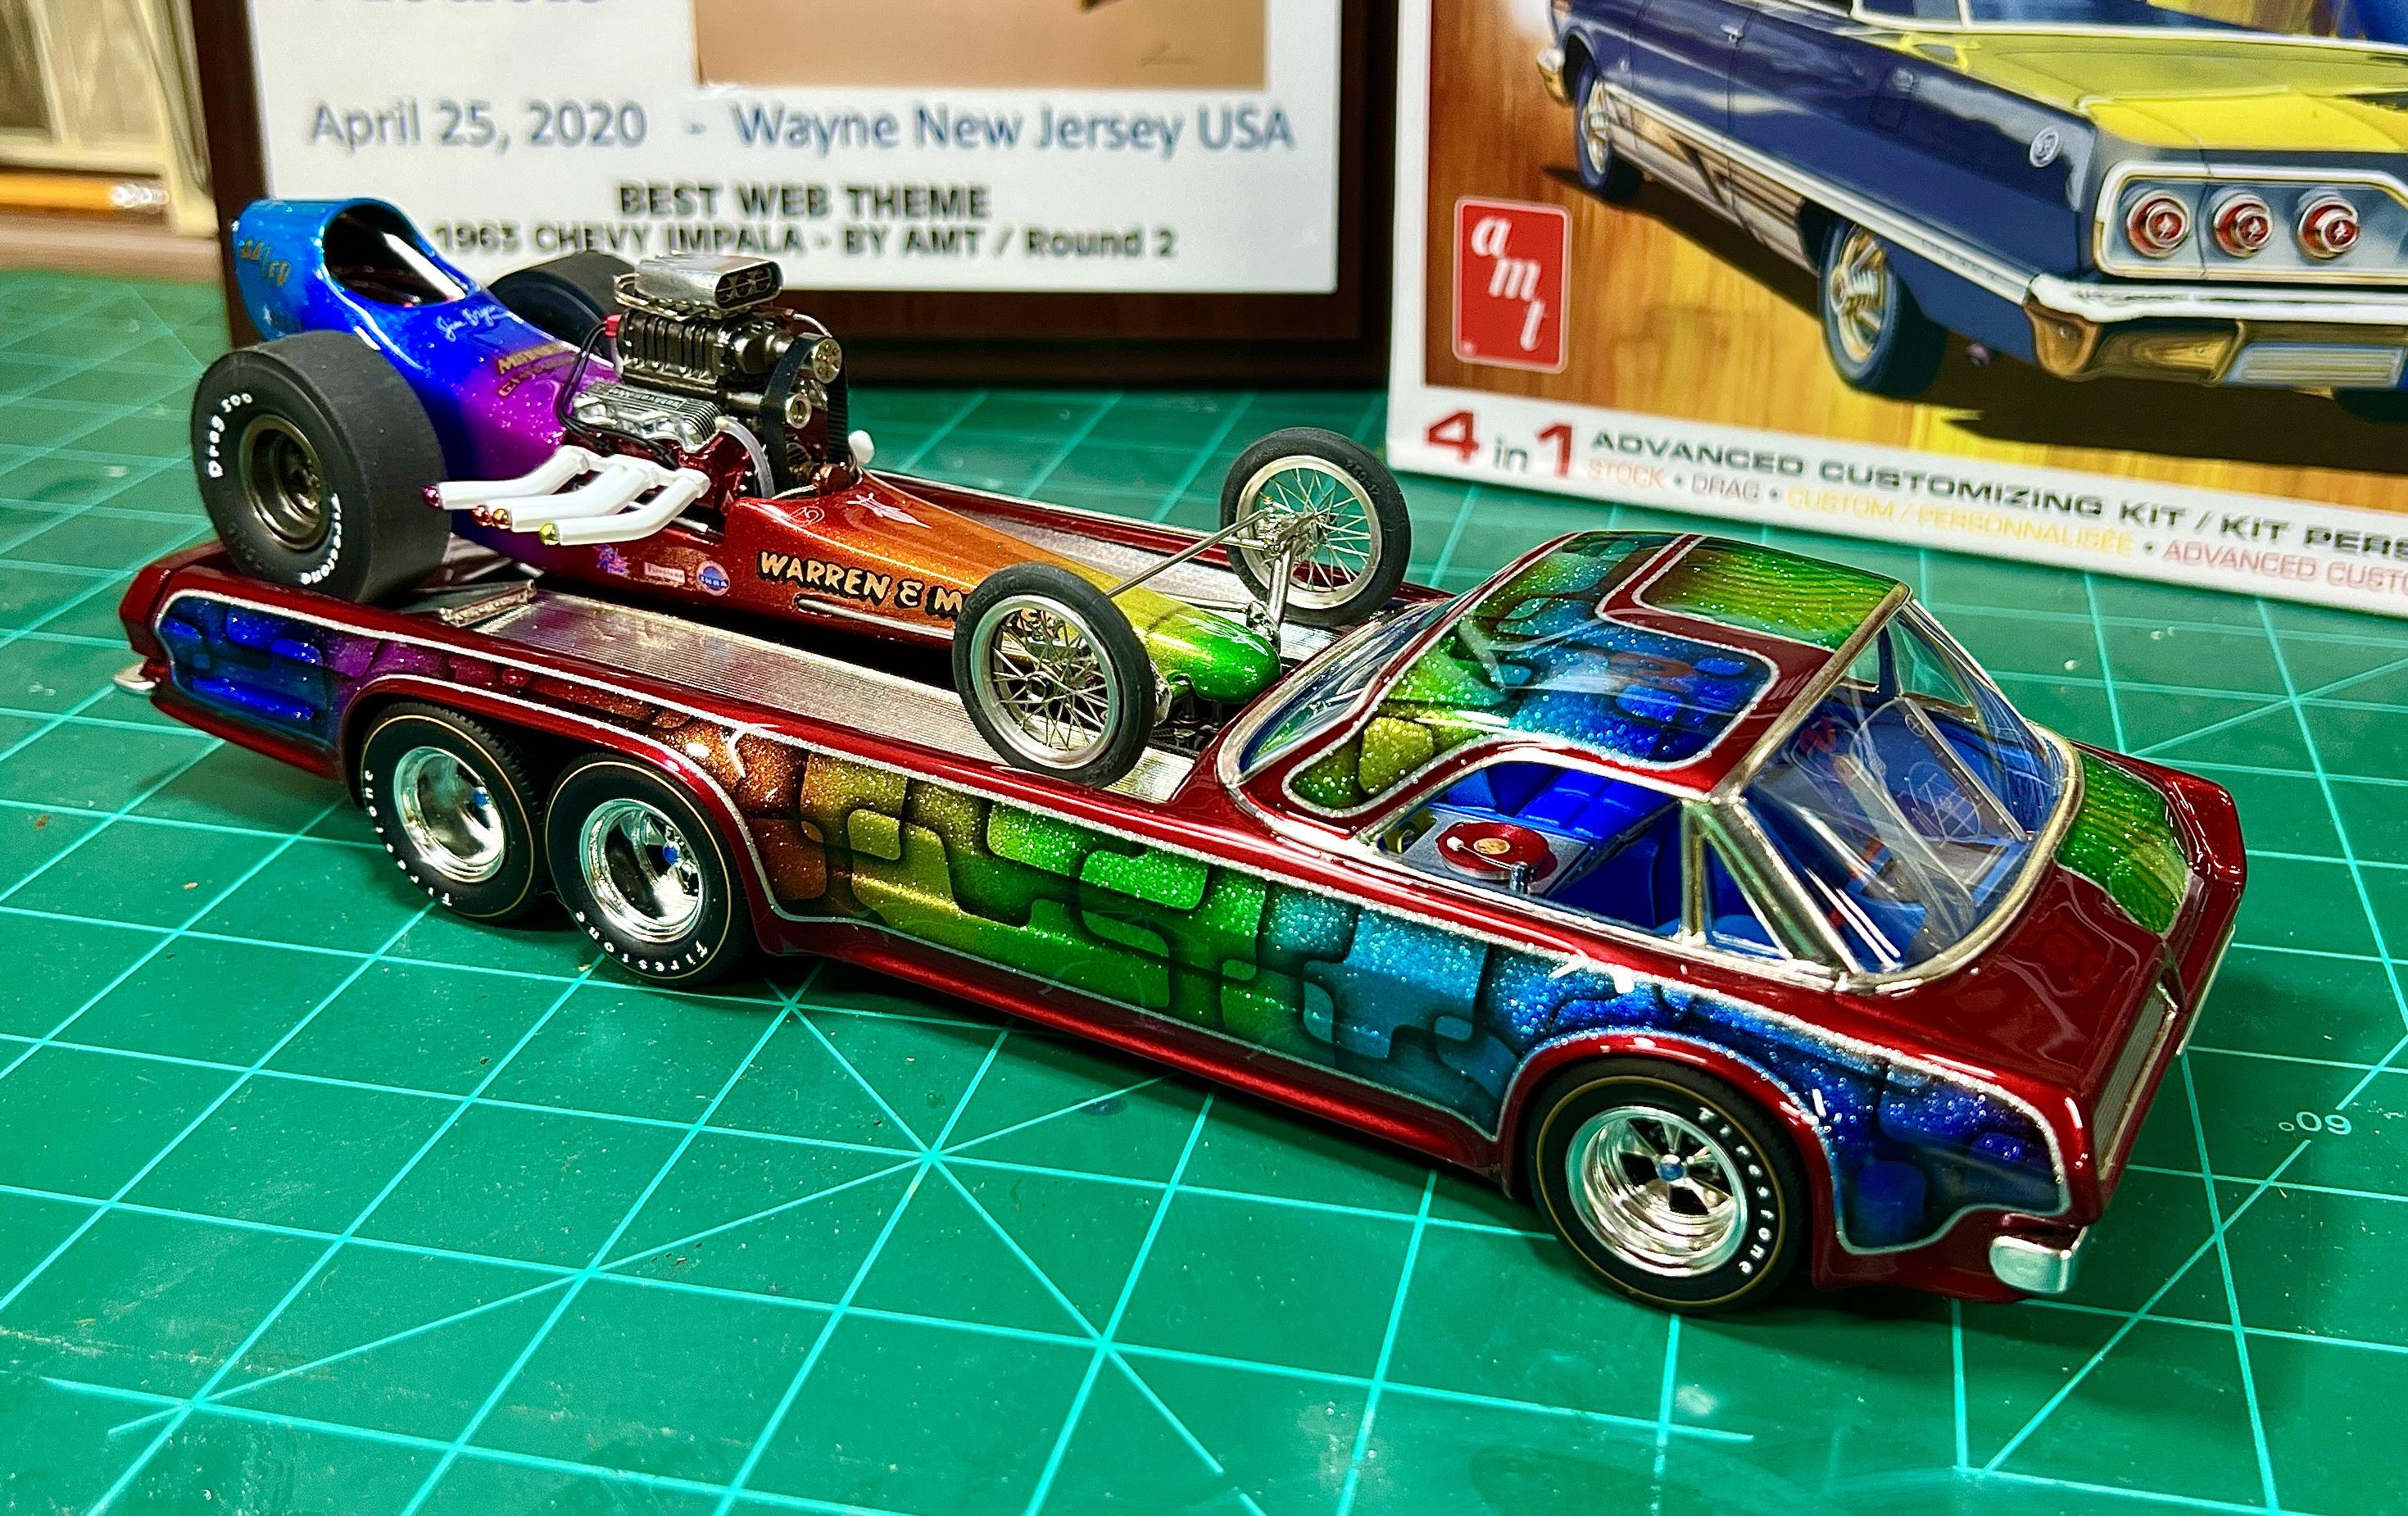
Mission Accomplished! Underglass post still to come!
-
Thank you guys!! So I lied, these details came out too good not to share... but now it is officially done! I can not wait to unveil the pair at NNL East Saturday! Its been far-far too long..
-
Thanks Michael! The Offy covers were sourced from from the kit below! They are on a separate little tree with a nice set of 5 spoke mags, and sadly its not included in the drag releases of the same kit. Thank you! That was a challenge, but really turned out well... it was more luck than skill on that one.
-
Thanks everyone for following along this crazy train! I still have a few little minor details to do, but I'm going to call this one done! Ill do a nice under glass photo shoot after east!
- 372 replies
-
- 10
-

-
More progress! NNL East or Bust!!!
-
Awesome stuff! I cant imagine even trying to do that fade with spray cans! Kudos for some awesome work!
-
Yeah! I still need to do a release cable and the little "remove before flight" tag! Decals done!!! Hopefully I get to shoot some clear on my lunch break tomorrow!
-
Thanks guys!!! Got some time this weekend to add some decals! A few more little ones to add and time for more urethane clear... Then I wanted to try and make my own shiny silver parachute pack... I know people have used cigarette wrappers but I don't smoke, so I had to get creative. I found these cool textured foil chocolate wrappers on Amazon, and they seemed to work nice. https://a.co/d/jjXbedQ you get a lifetime supply under 6.00 shipped. I just made a little square and covered it...It was a bit tricky to work with because it is very thin, however I didn't have any issues with tearing. I also think it would work fantastic for more modern heatshield material... lots of uses and 100 4" x 4" sheets will last me quite awhile. ?
-
Awesome stuff! Glad to see you are getting some bench time!
-
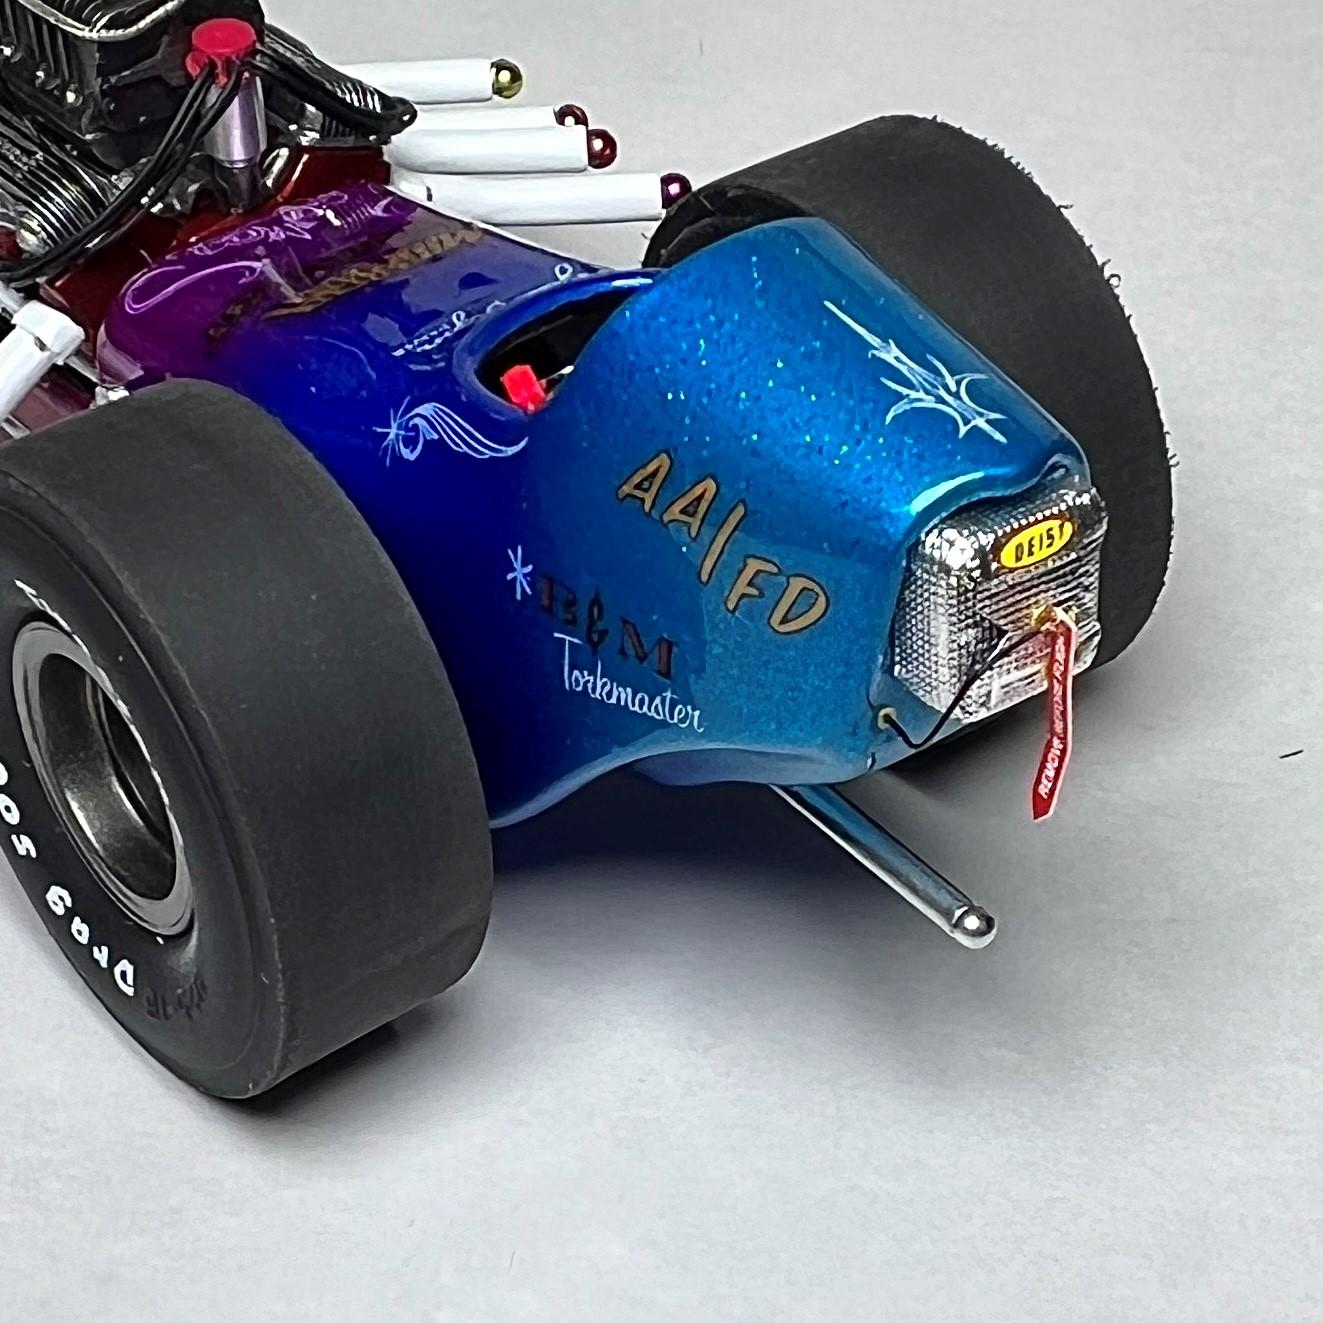
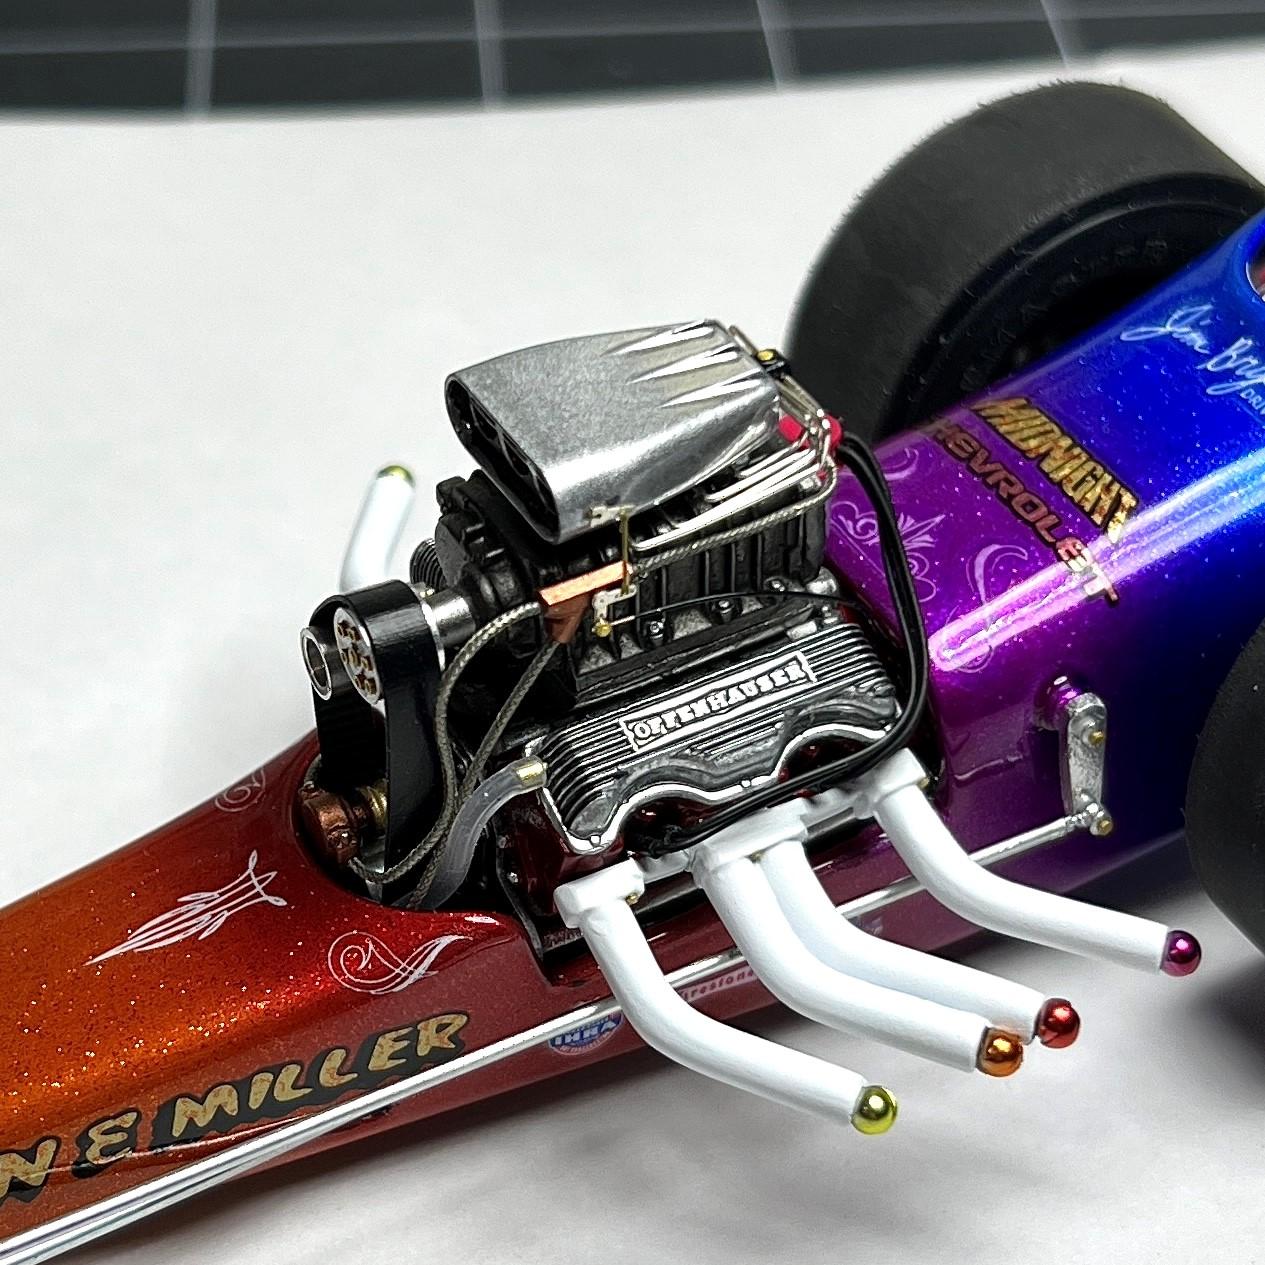
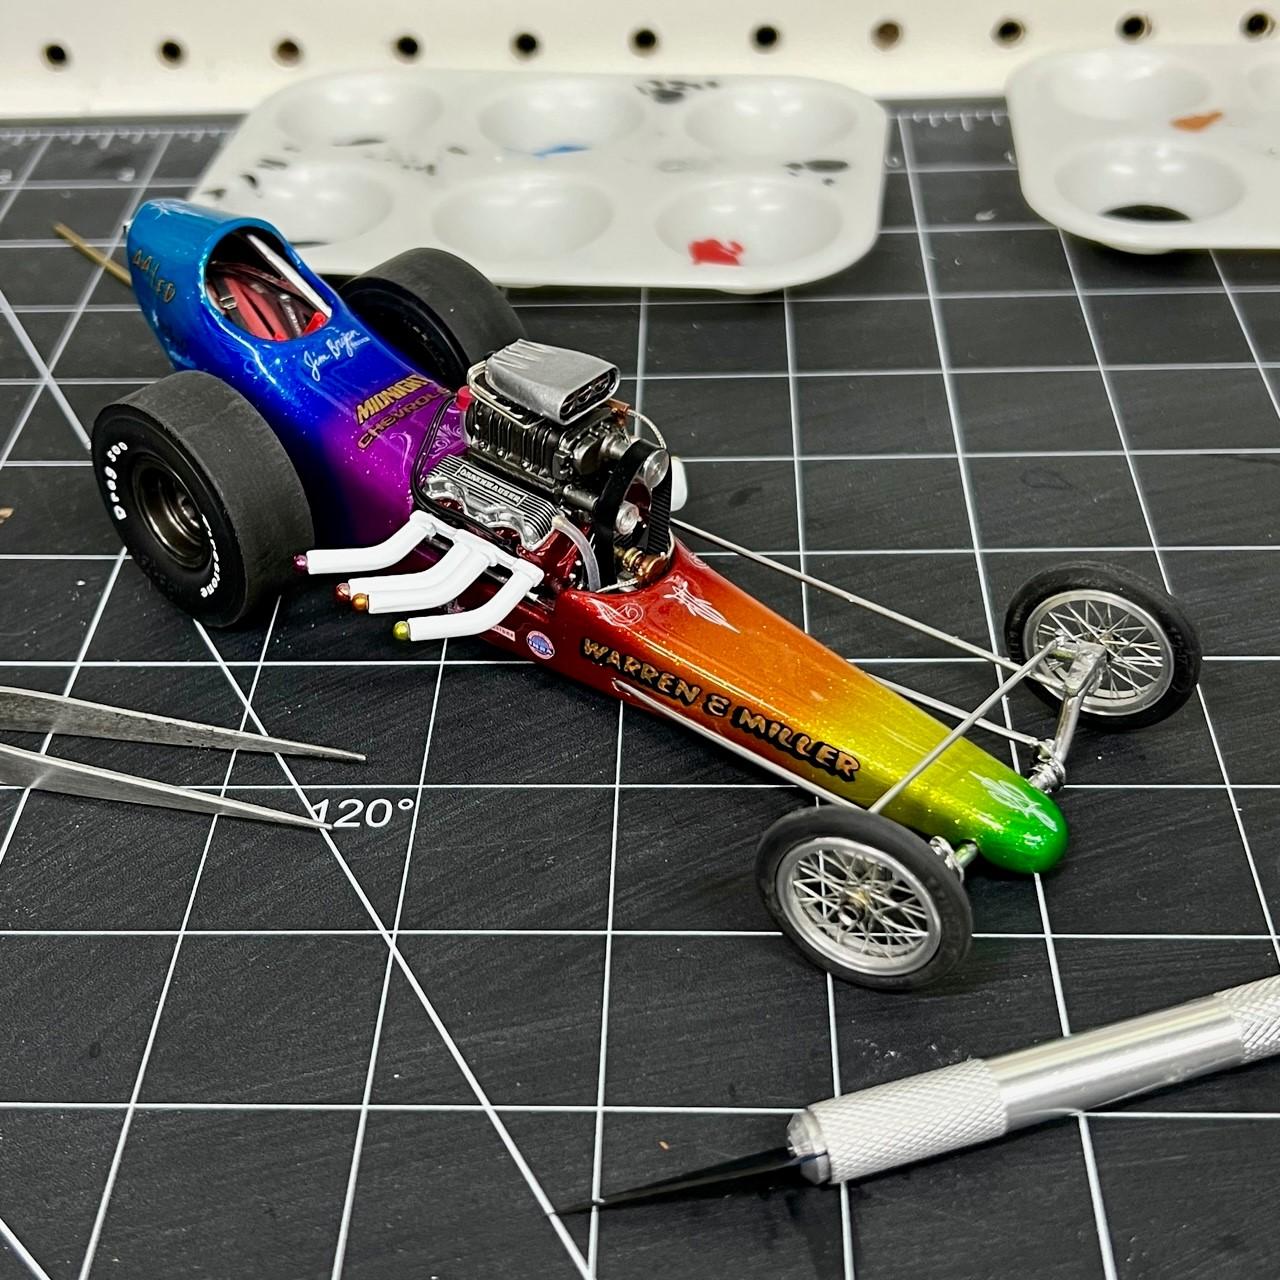
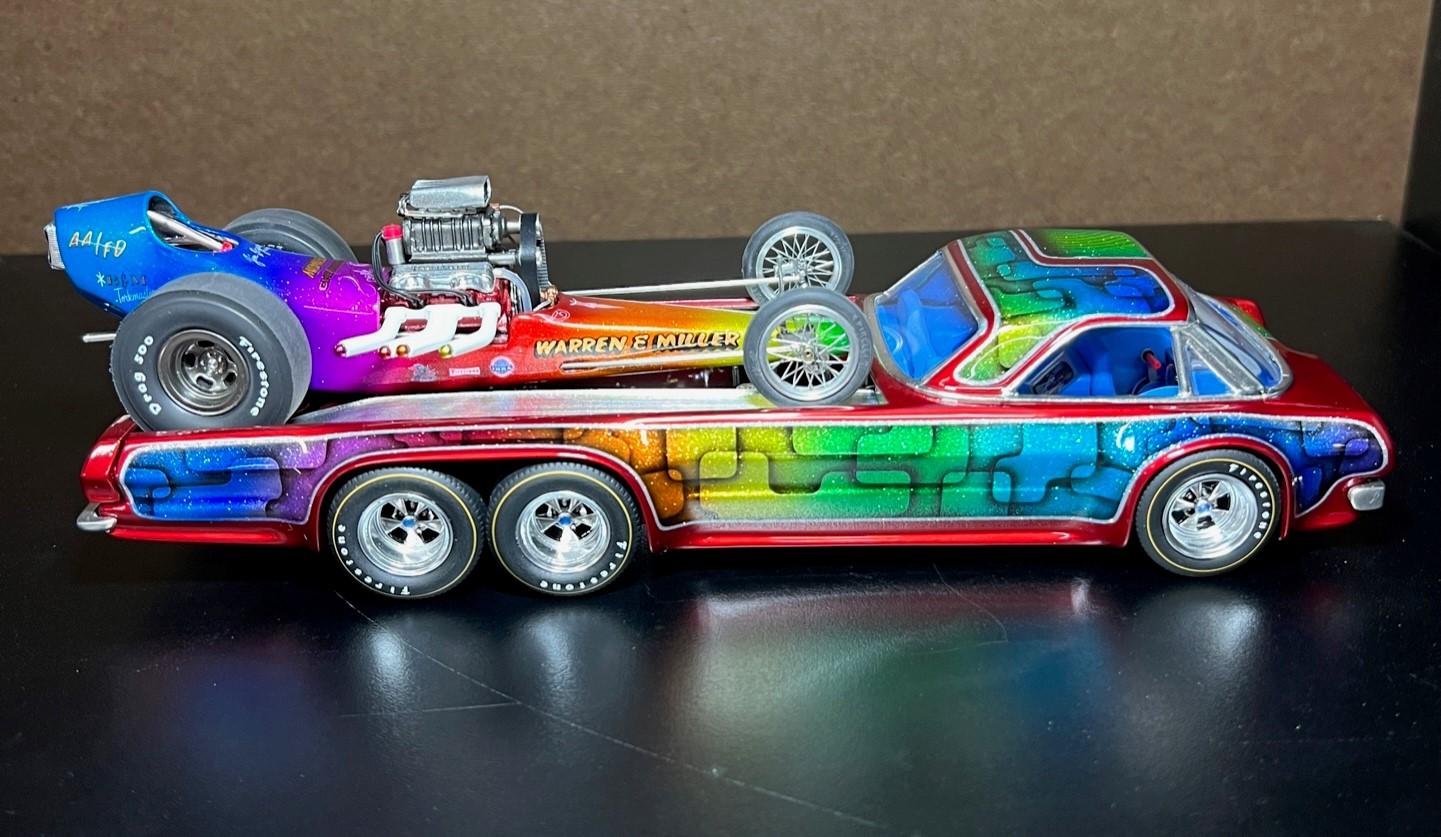
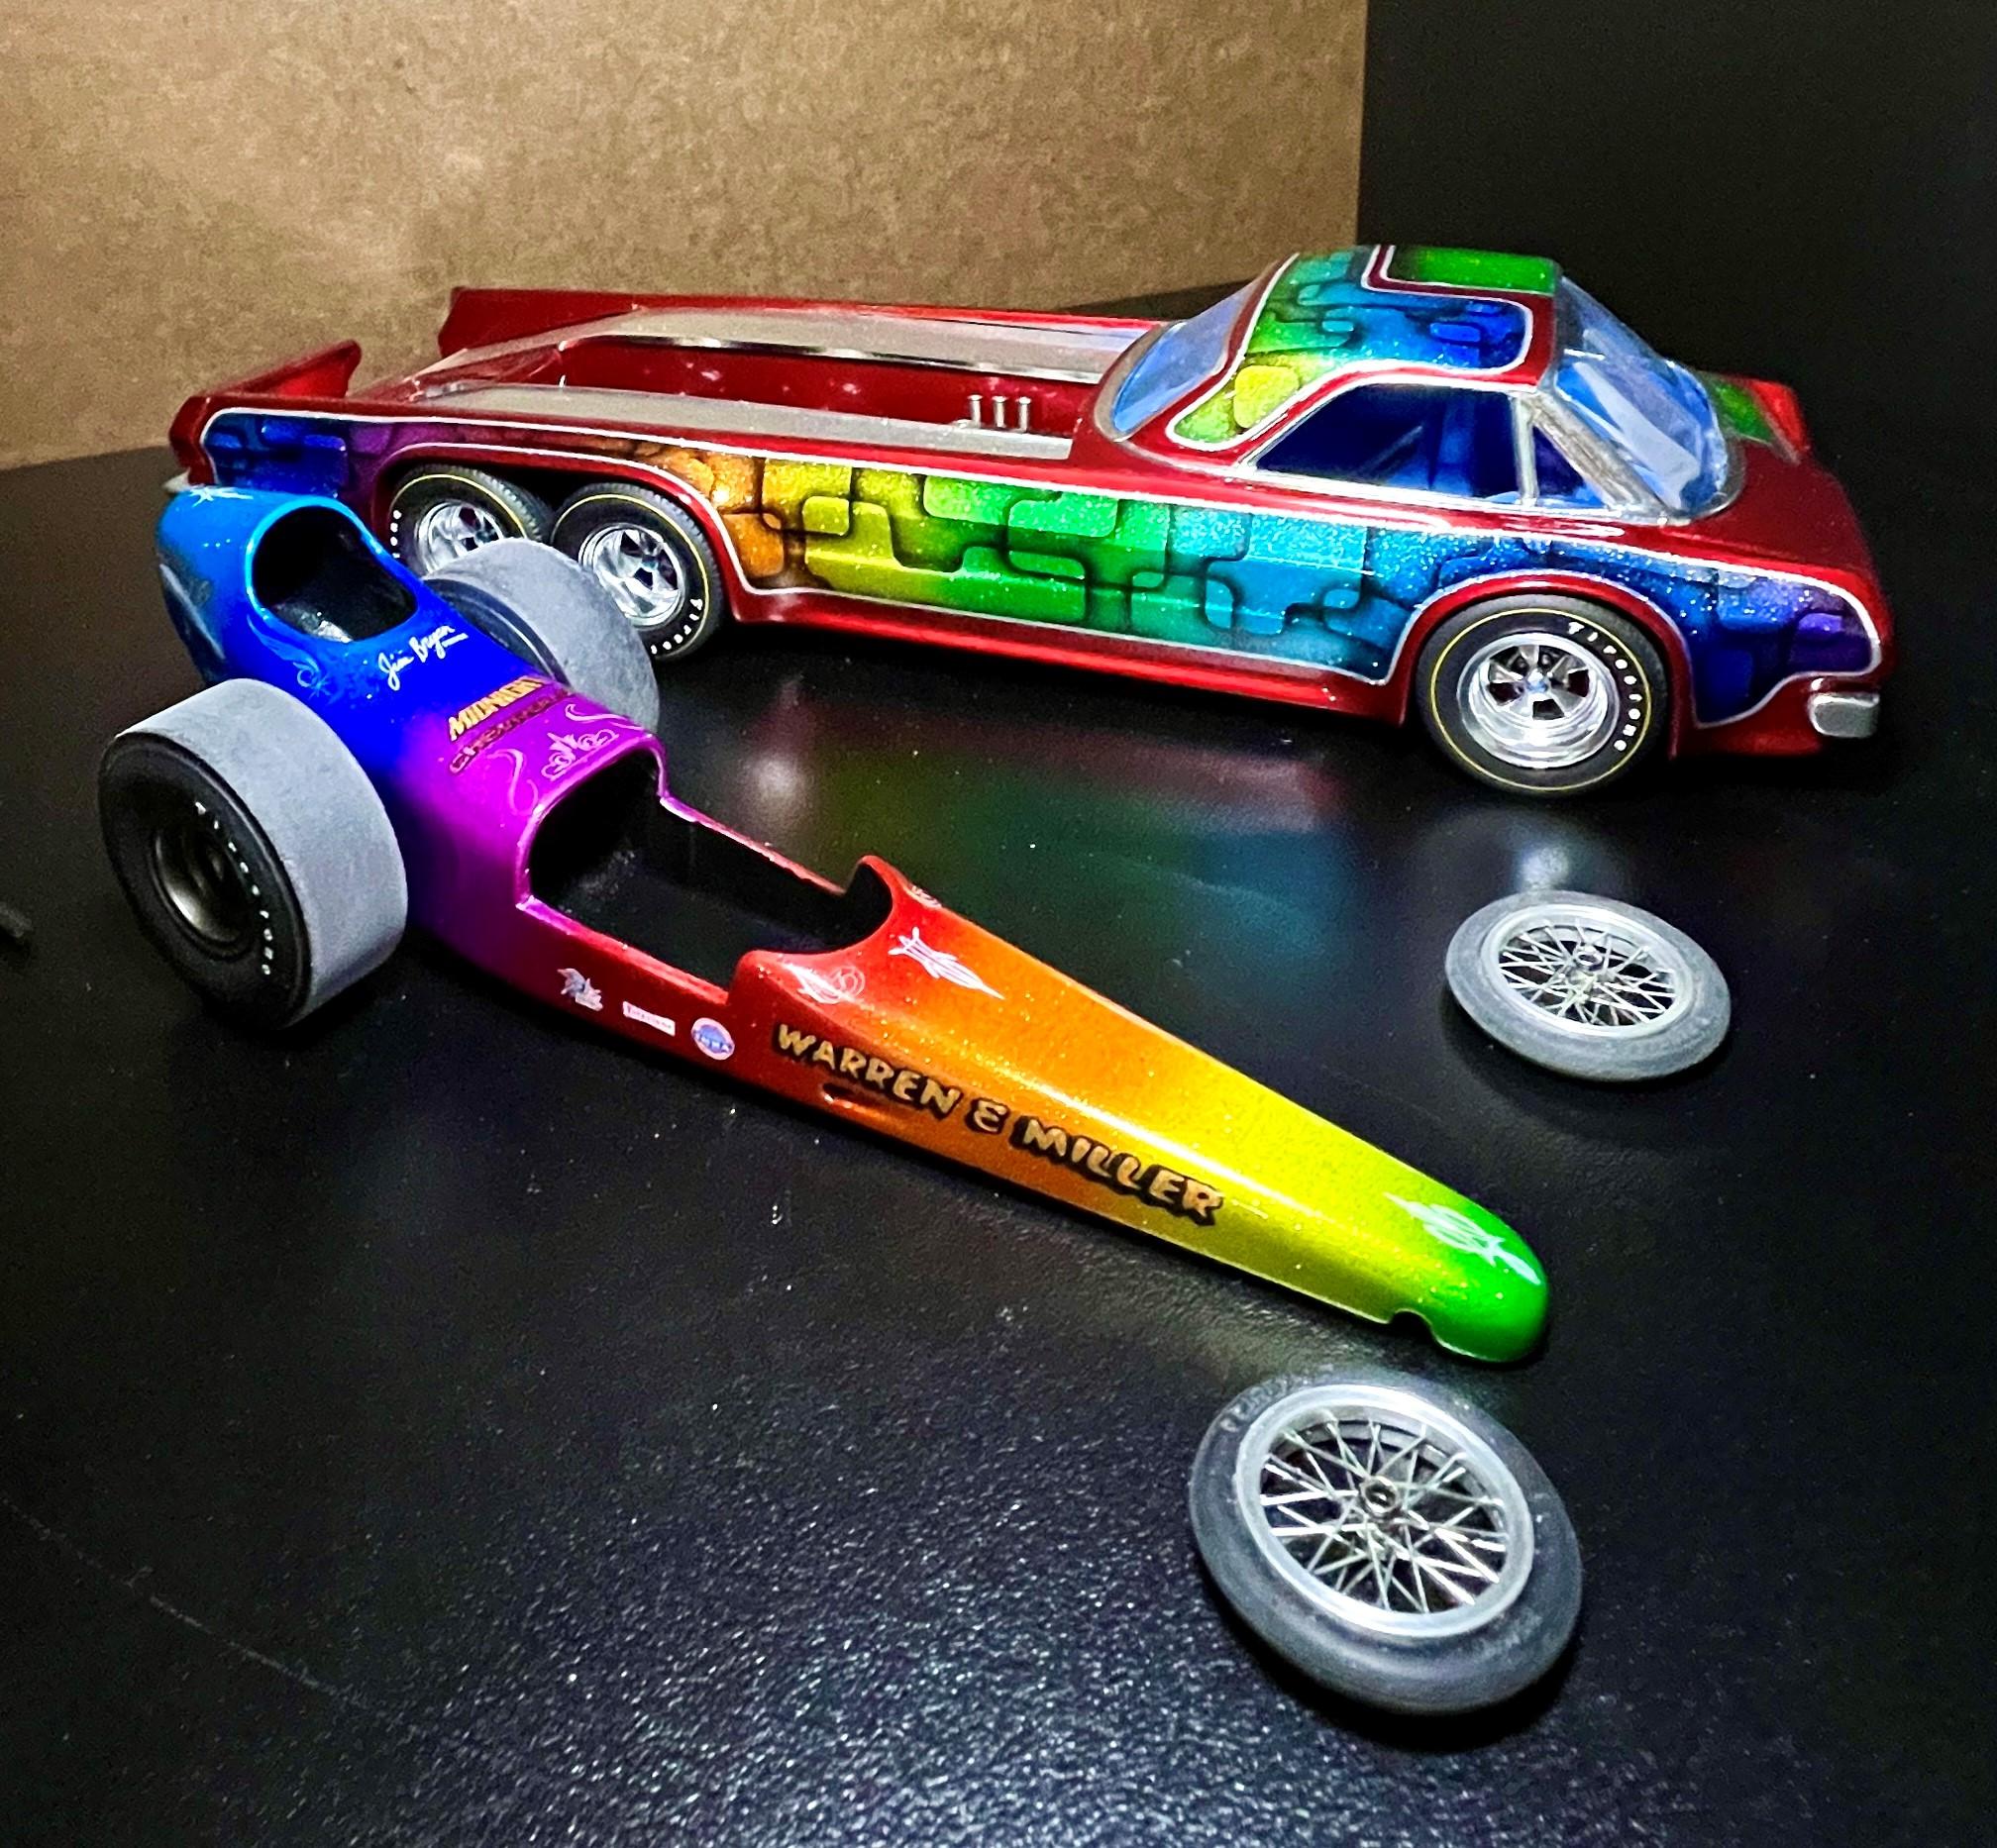
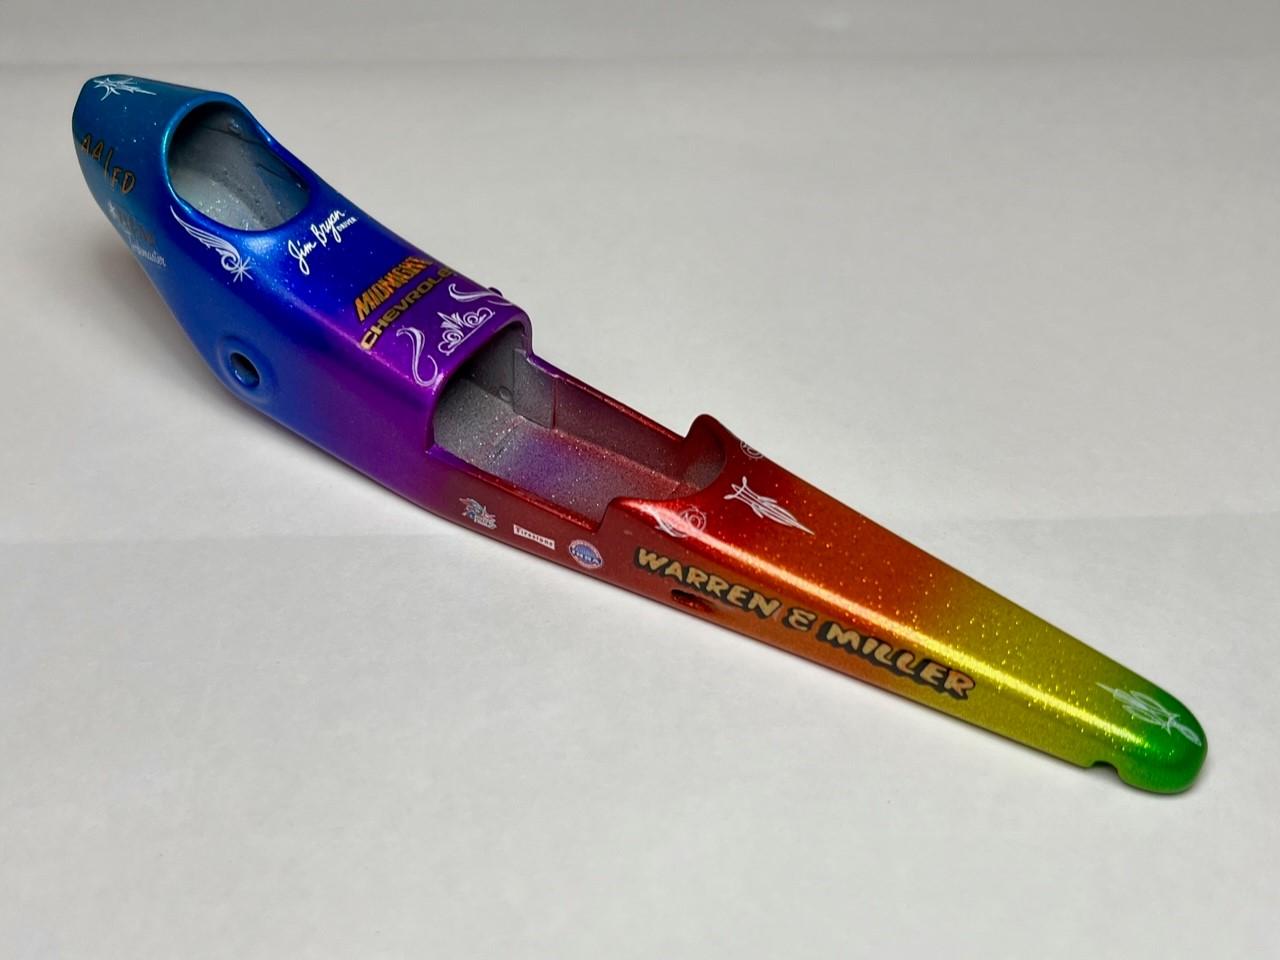
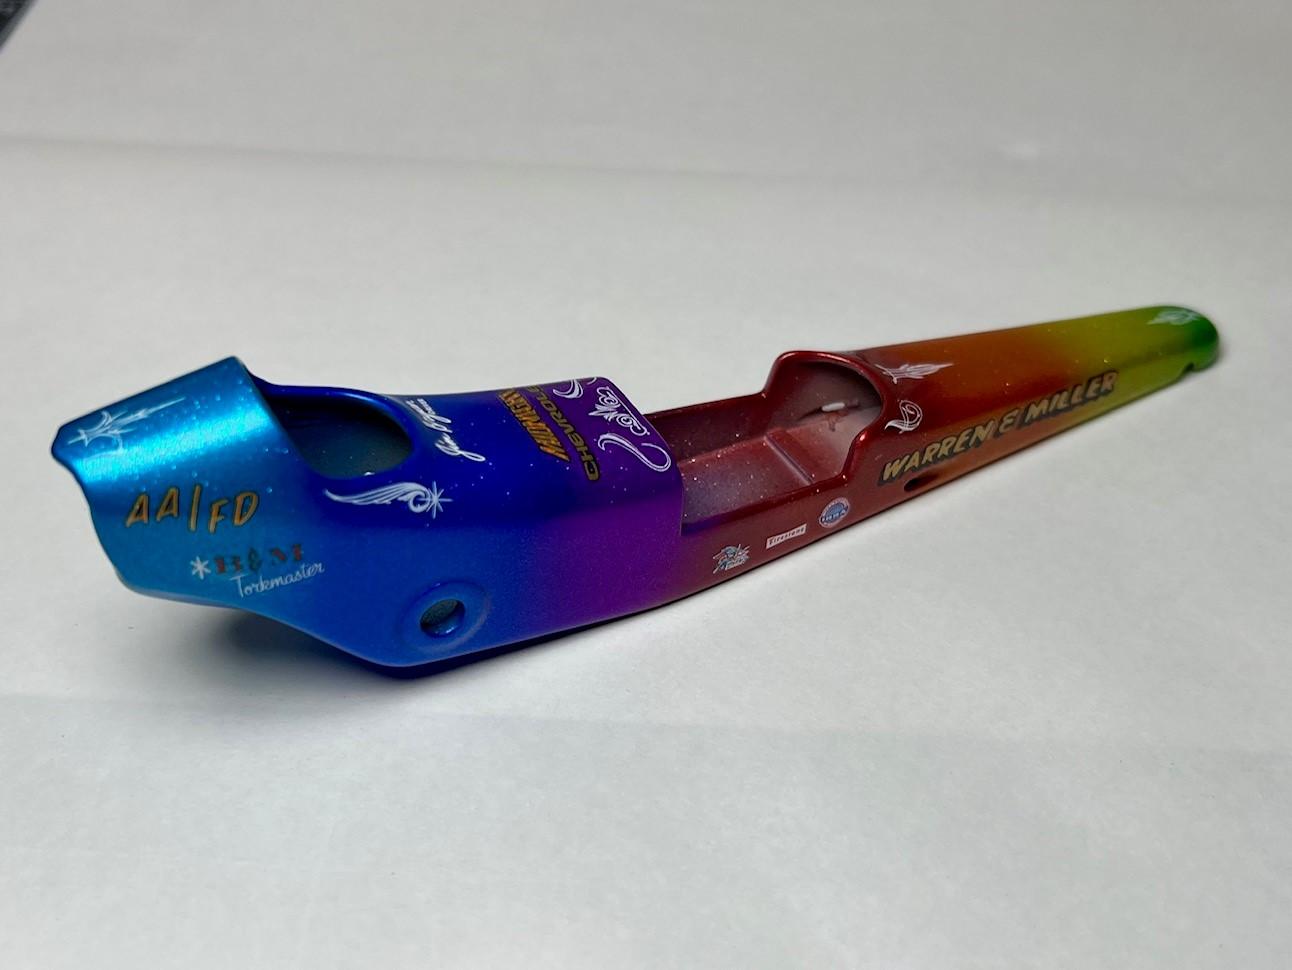
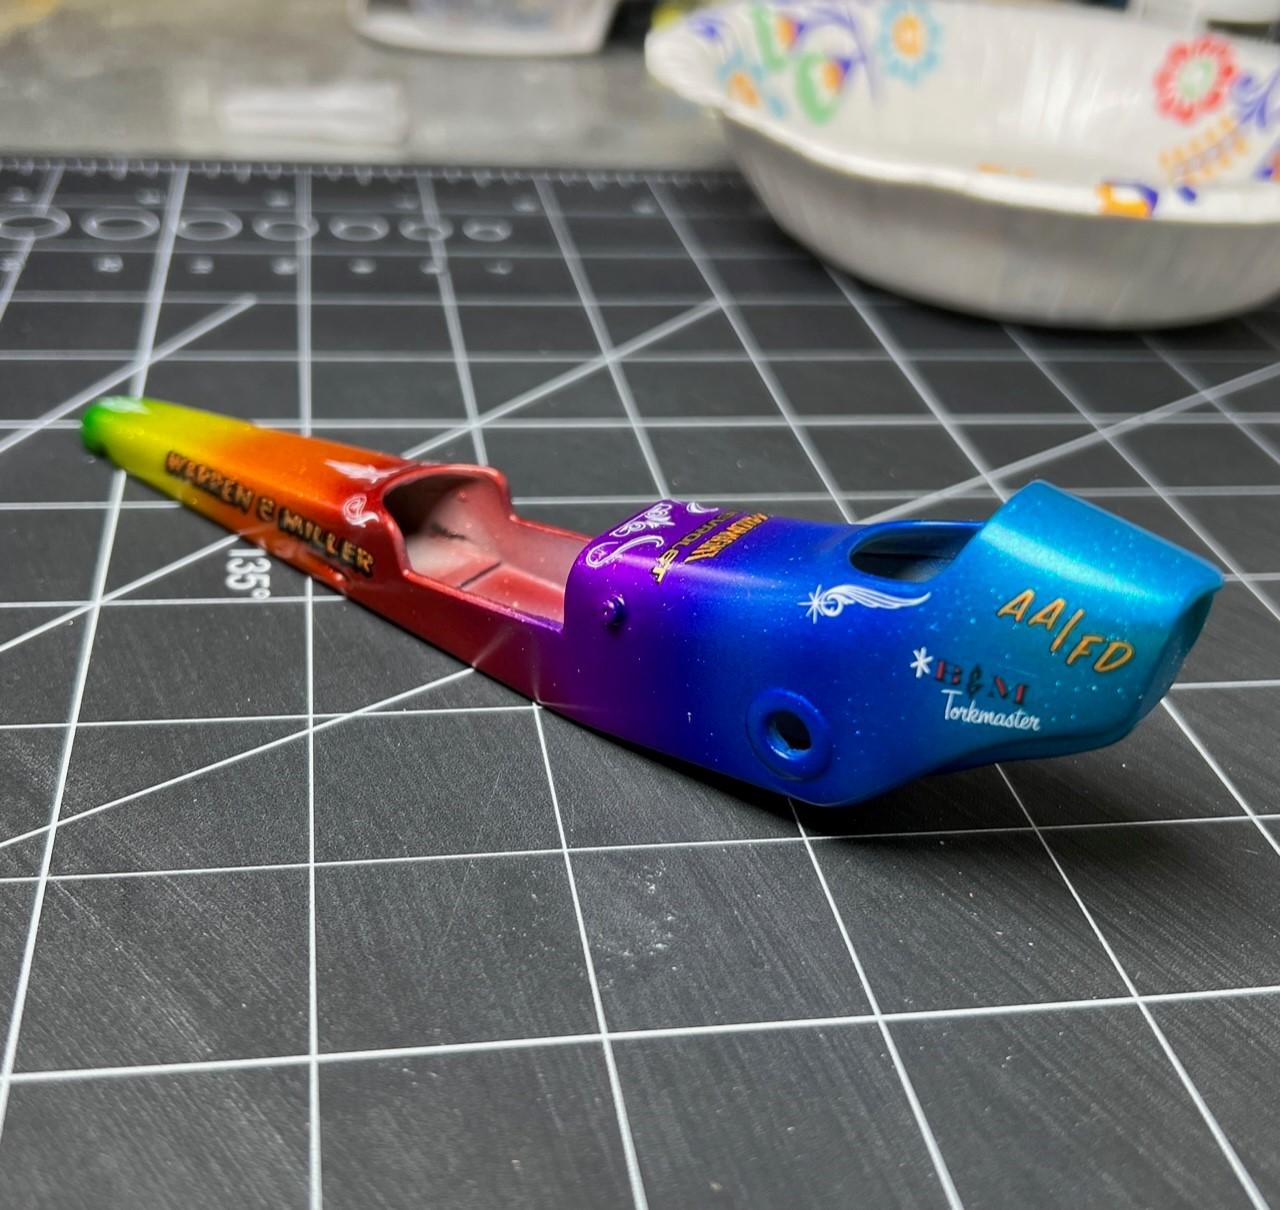
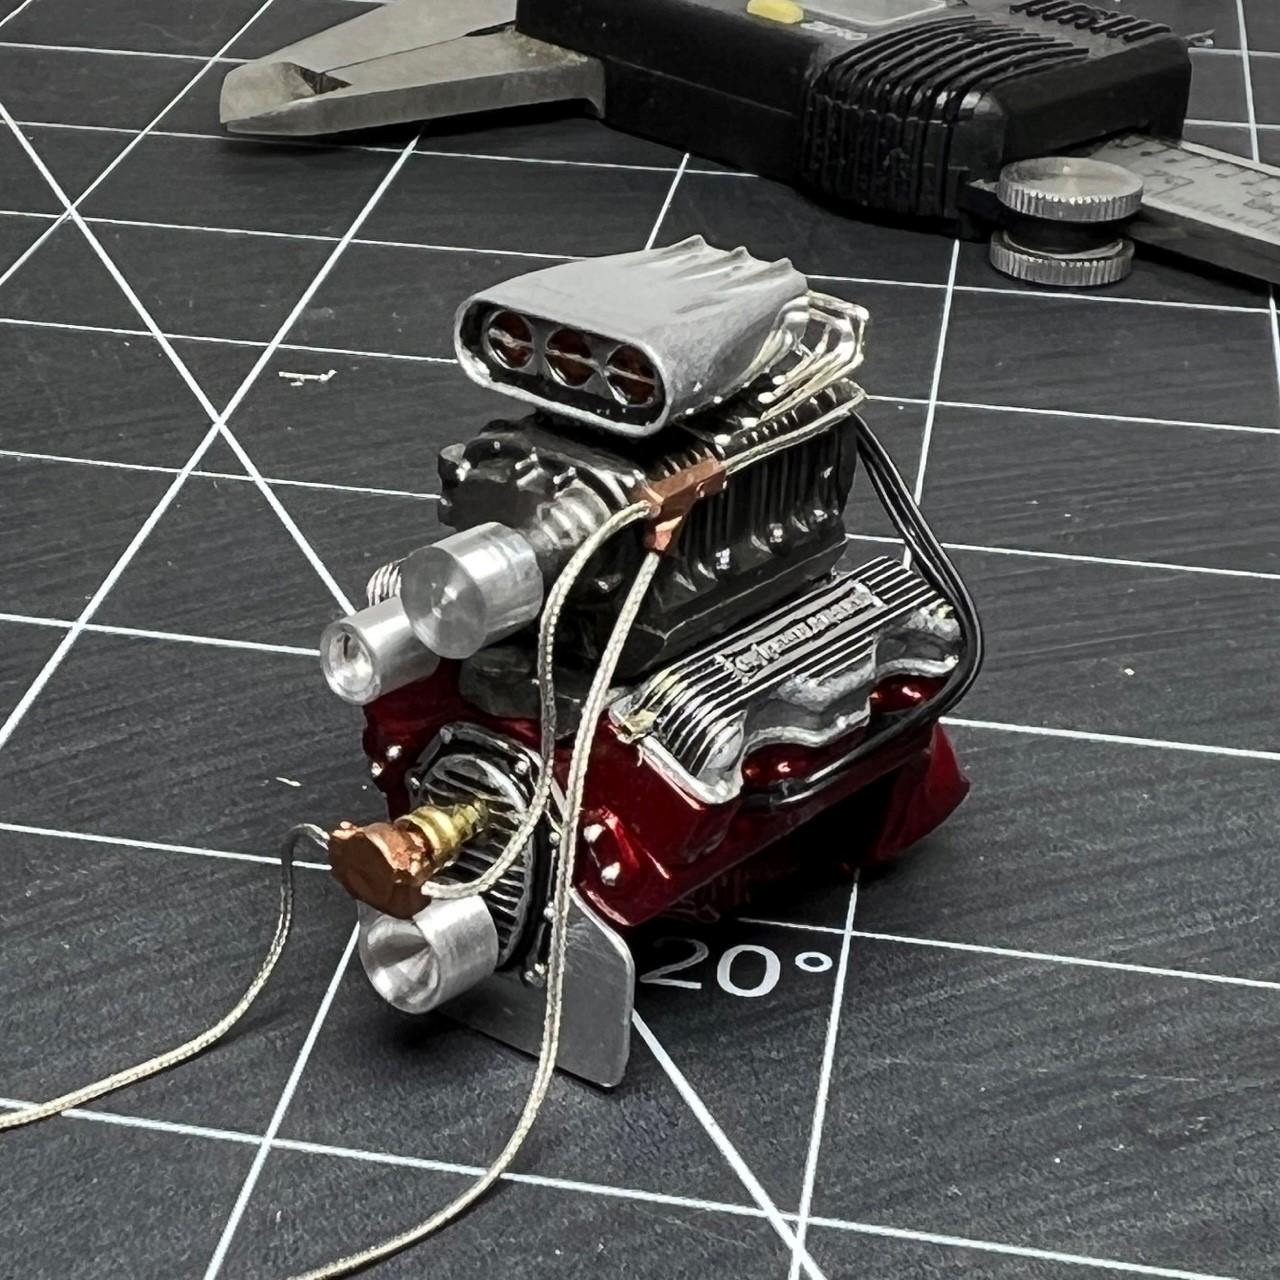
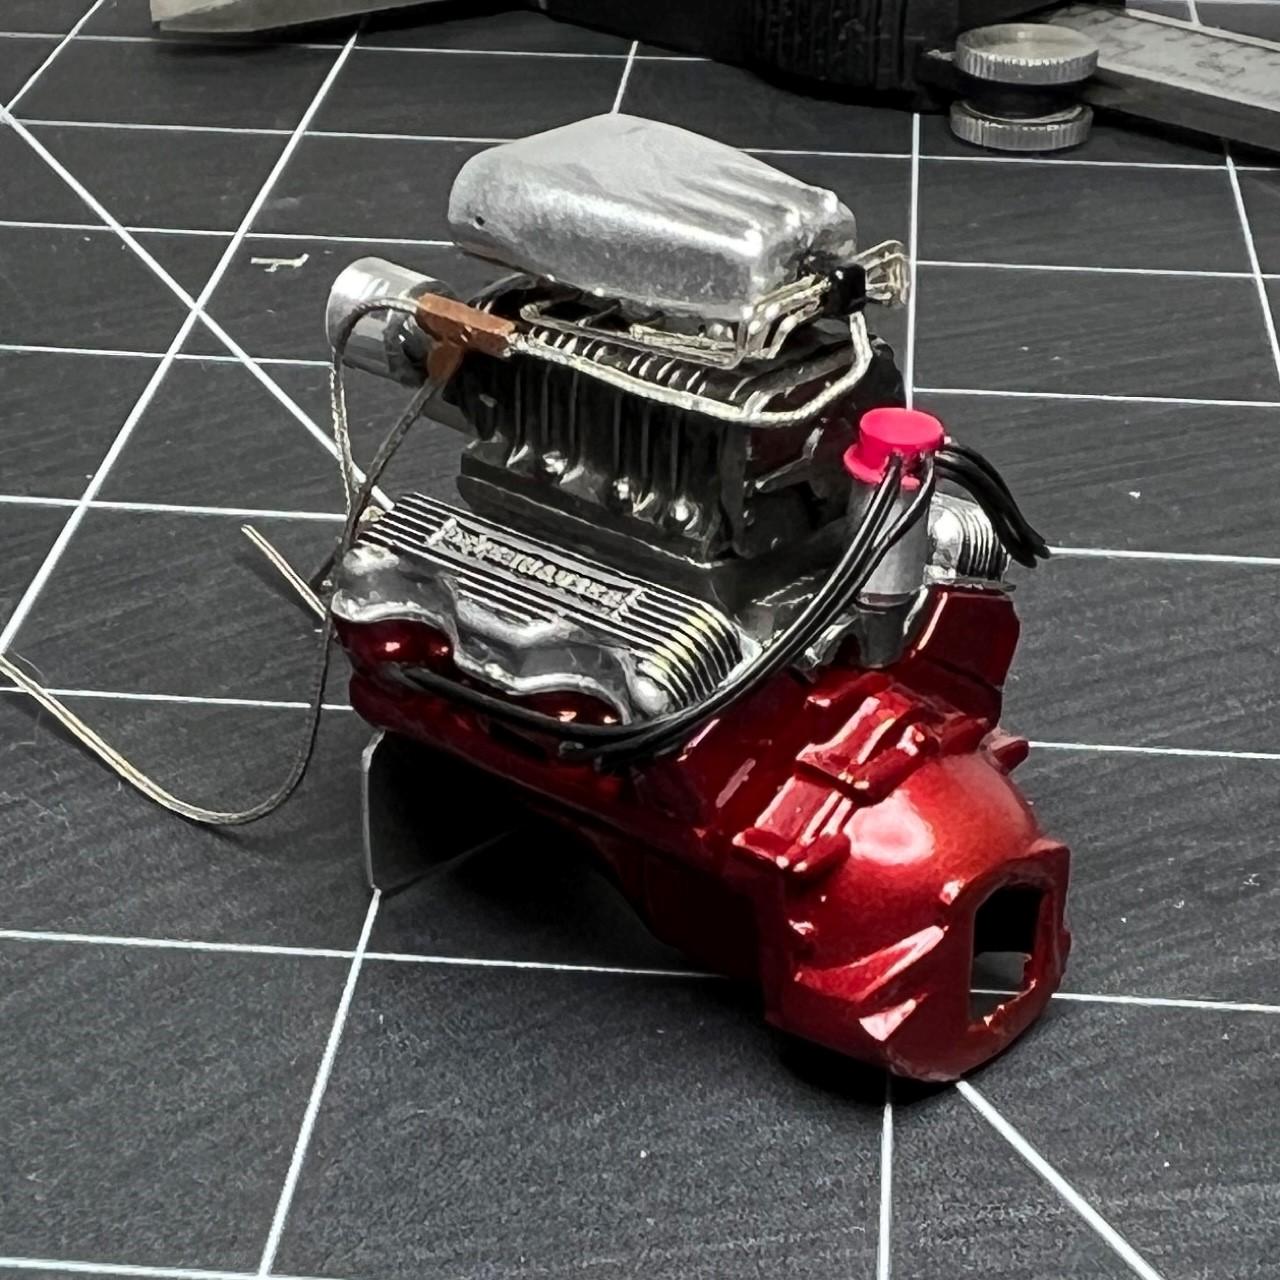
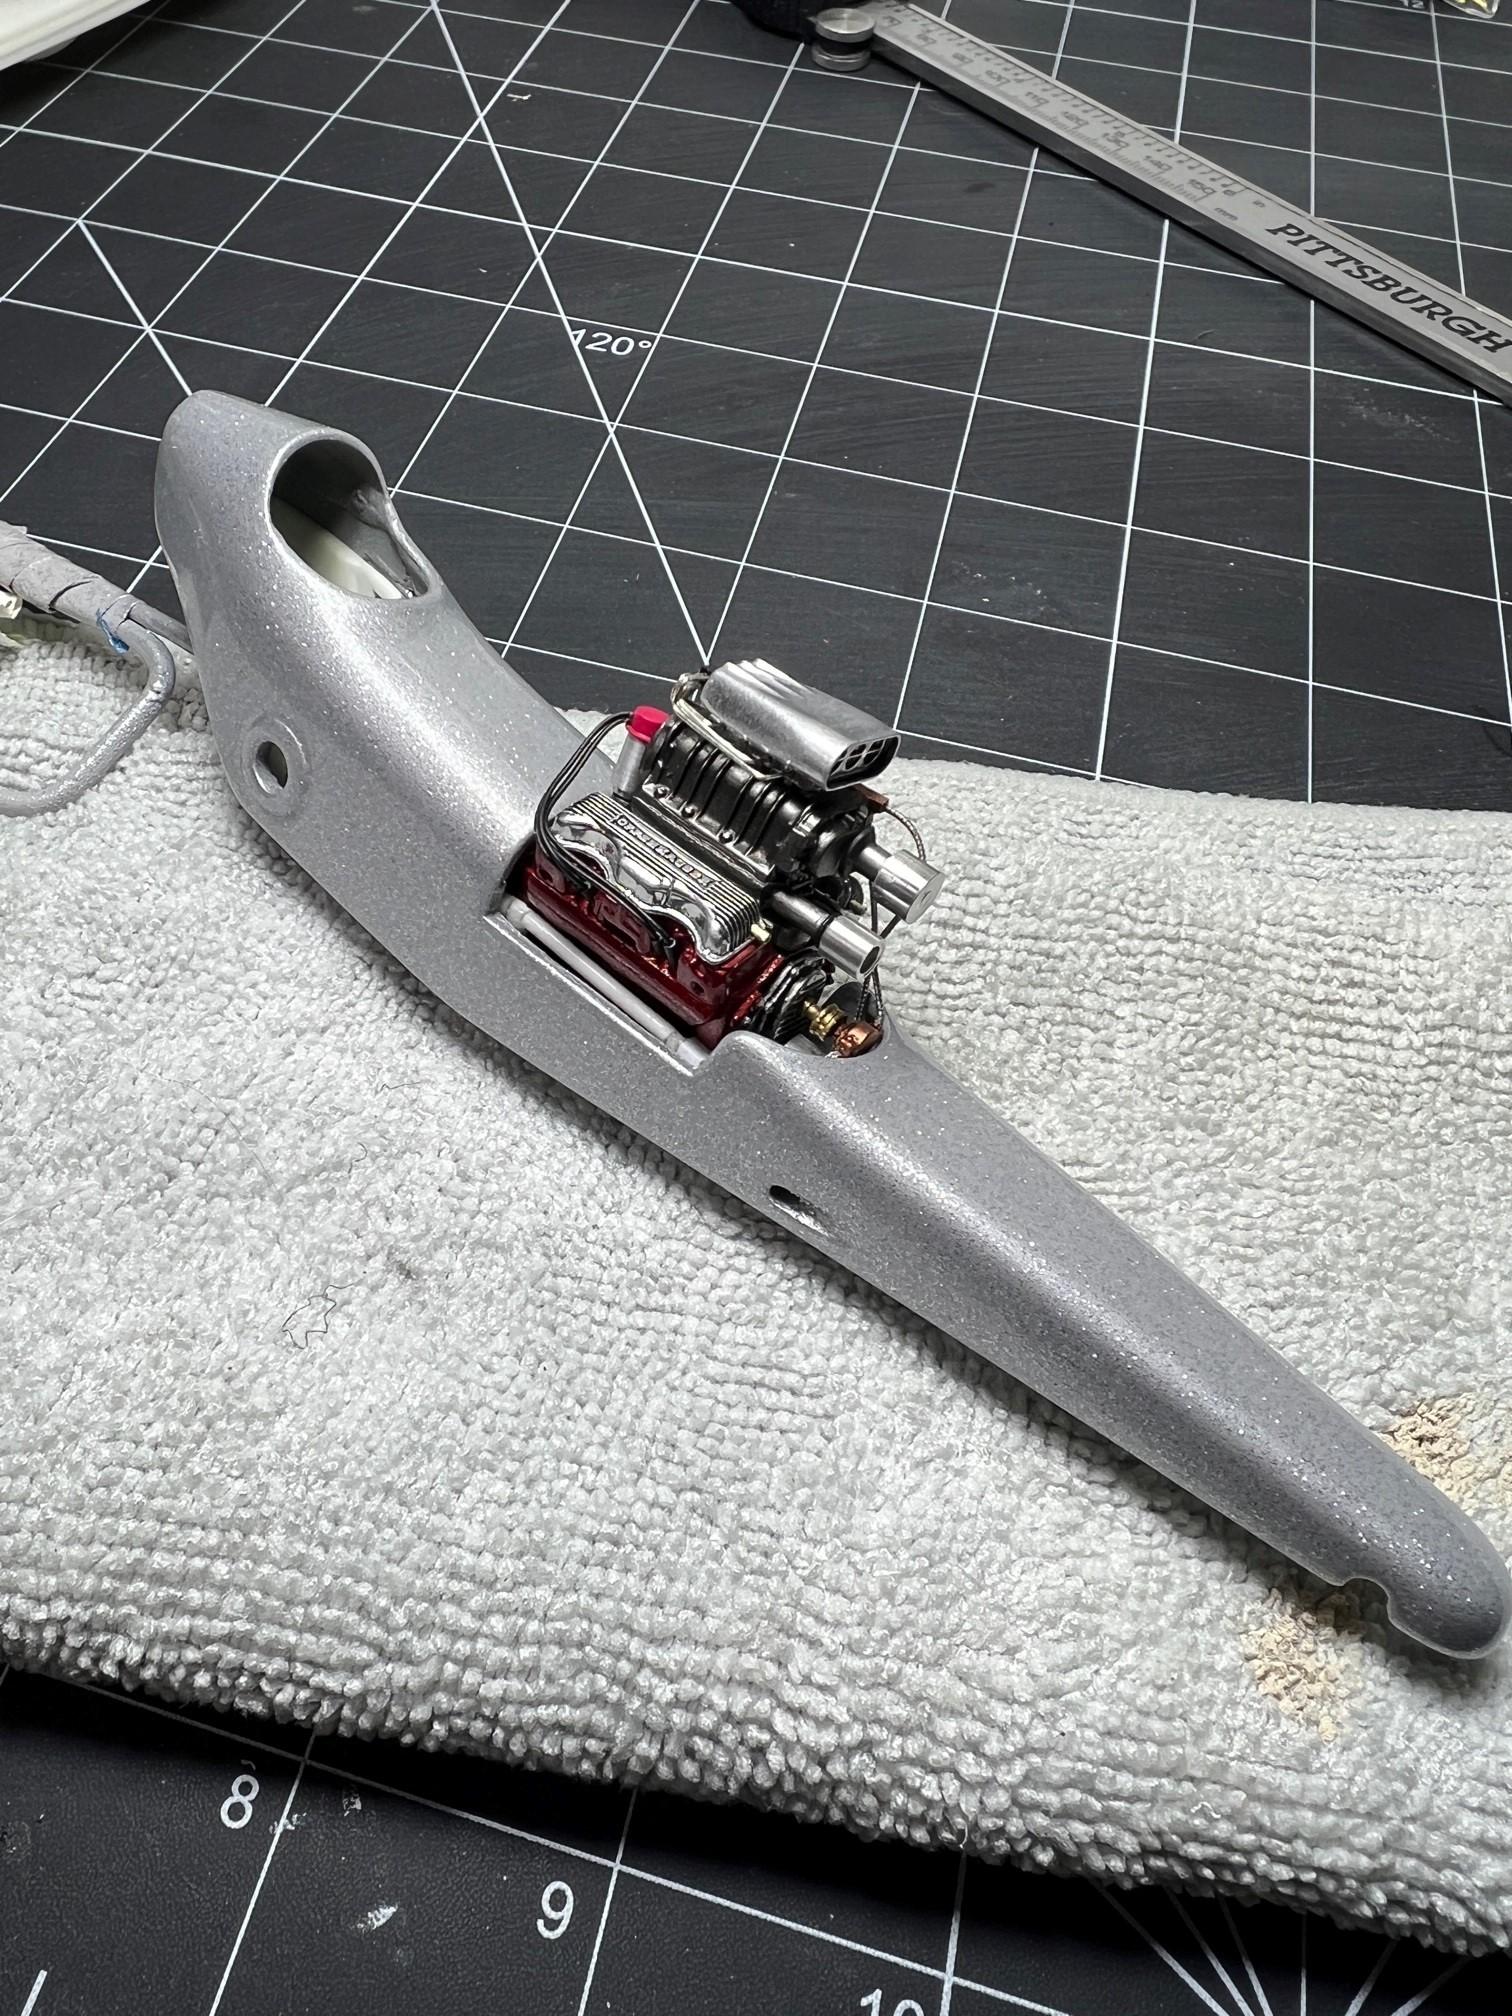
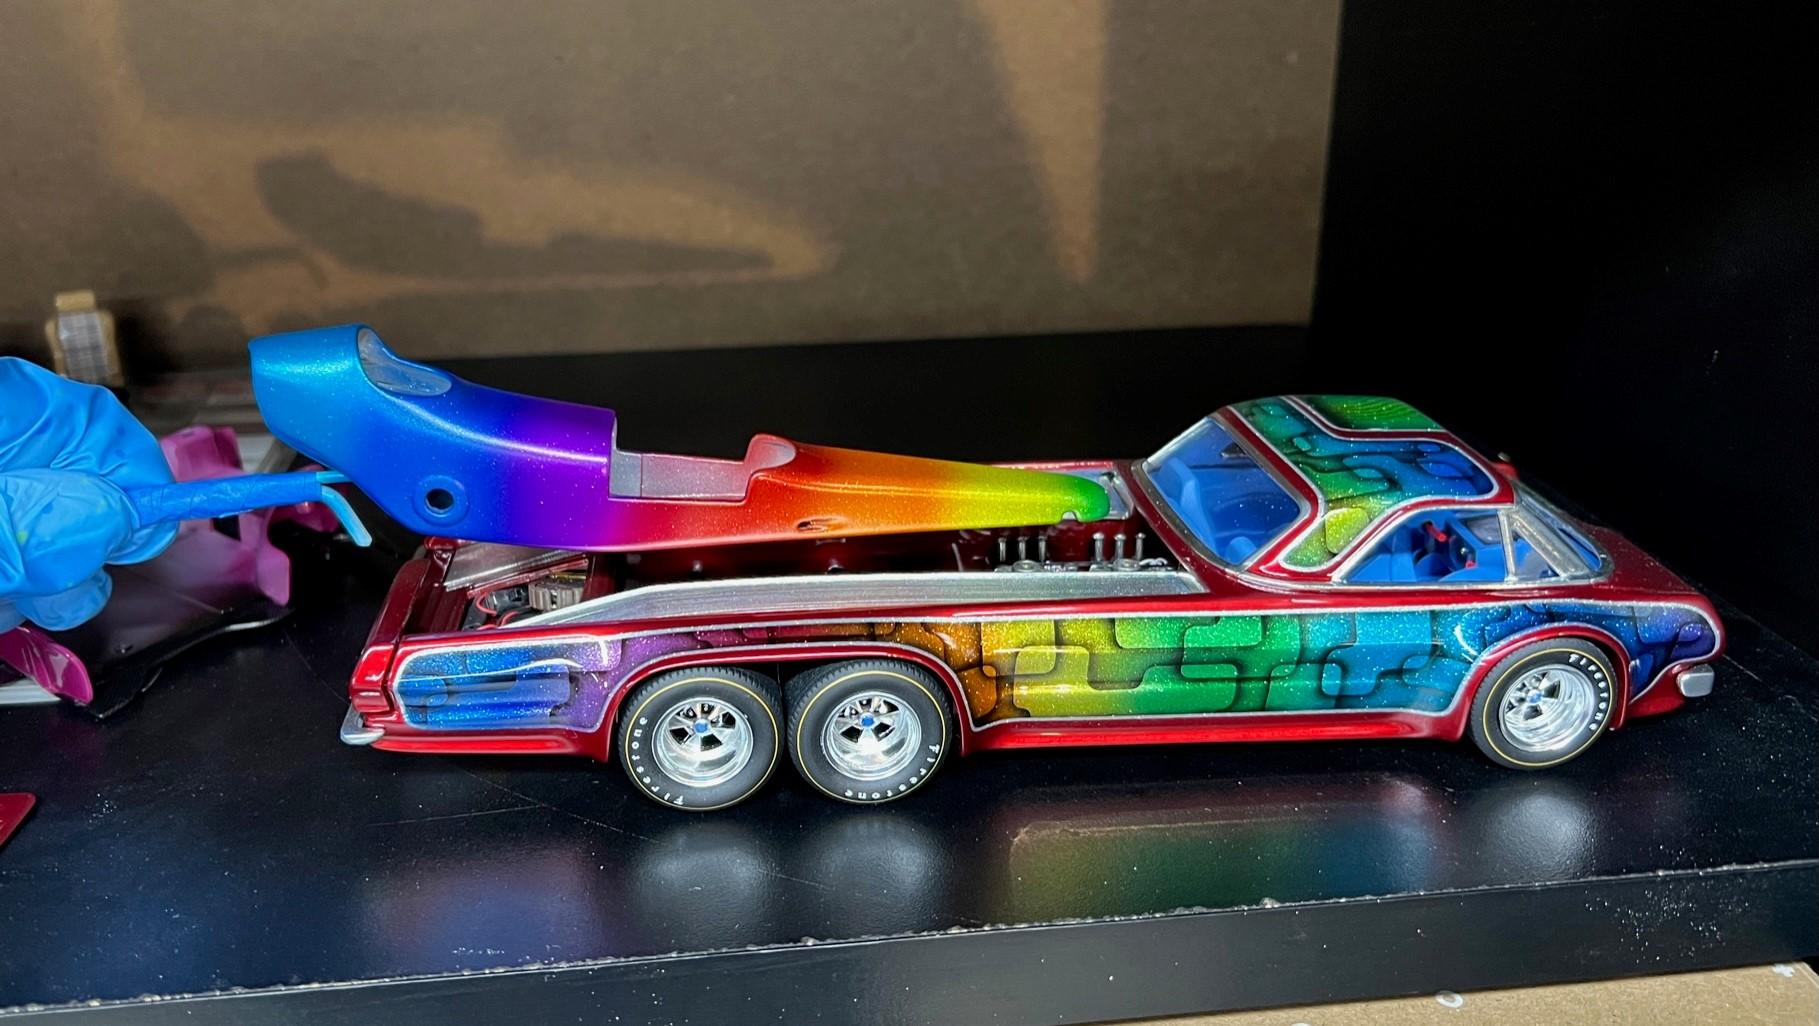
So trying to make a push to get this complete for NNL east... 3 years late but whatever.. ? I got the W-Block built and detailed.. still some final touches to add, but I'll do that after its final installation into the dragster. The fuel lines on the injection were extra fun... I finished up the body work on the body, primed and used the same metalflake combo on it as the hauler... then a bunch of urethane clear to smooth it all out. Last night I was able to get it sanded down with 2000grit and spray the rainbow kandys on it... the Splash Paints Kandys go on so nice, and the color builds easy so its a pretty controlled process... The plan was to have it match the colors on the hauler and I think I pulled that off pretty decent. I did bugger up the overlap in the back between the blue and violet, but its mostly covered by a tire and should be fine. Ready for one more round of clear, and then final assembly!
-
until
-
Thanks guys!! Its fun to be back on it! Thanks Chris! I used epoxy to secure the spokes to the rims and it did create a bit of an issue with thickness when joining.. I plan on painting these with molotow so I feel like the gap should somewhat disappear... but it is there. I thought about using a saw to create and little notches/pockets in the aluminum for the spokes, but that seemed like a lot of work. I think the best option would be to 3D print the rim halves and put little notches in for the wires on the backsides... That would serve as a guide to keep the spokes more uniform, and also help the halves fit together better. Ill probably give that a go for a future project!
-
Some more progress! Starting to get “that” look!!
-
3D printers - is it worth it?
Impalow replied to customline's topic in Model Building Questions and Answers
I personally struggle with this some myself, as someone who has "moderately decent" skills in both realms of the hobby. (3d modeling & printing/ traditional scratch-building) For my current vintage showrod projects I have purposely chosen to exclude any 3d printed stuff to keep the model true to the vintage... now this is something only I would notice. I still used cnc-cutting, photo-etch, LED lights... so in reality it doesn't even make sense, except to me in my head. Now simultaneously I have a more modern build on my bench, and I've modeled and 3d printed almost every part with the exception of the body and chassis. I do have a love/hate relationship with being able to make pretty much anything in my head, suddenly those kit seats that were 85% acceptable before are no longer acceptable when you can make exactly what you want and 3d print it... thus extending the projects completion for every little item like that. Much like what @CabDriver said above, The 3d process really excels when you have multiple items... model one firewall by hand? - no big deal. Scratch-build 8 coil packs or 4 wheels? just model it once and print a ton of them. I don't really have an answer, I am just here to say as someone who dabbles in both I am torn... -
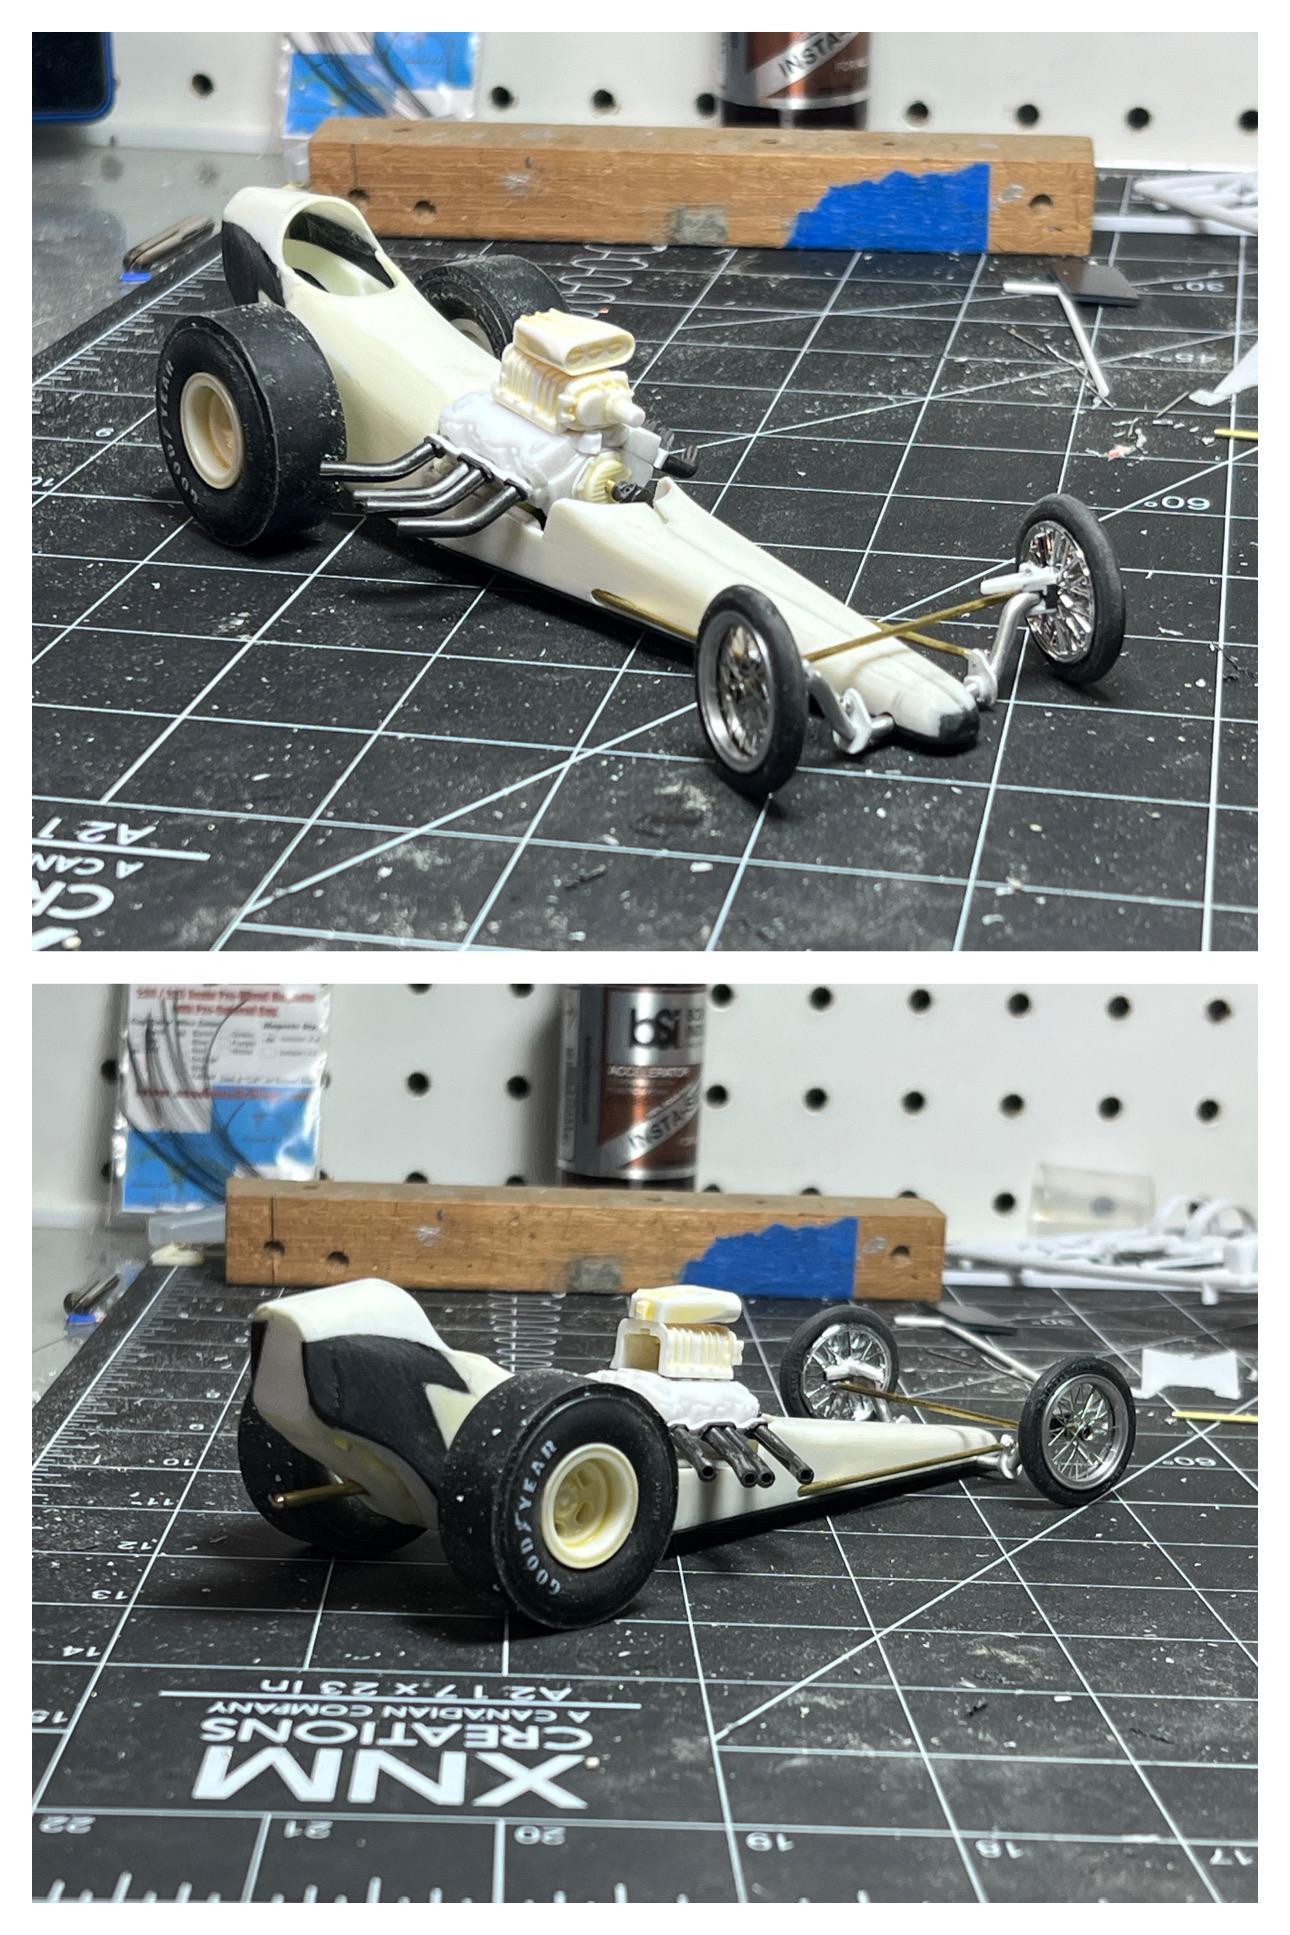
Thank you guys!!! Well, it looks like NNL East is a go! I booked our room.. now I need to finally finish this thing. I was actually going to do just that, until I saw this older tutorial on here and figured I had all the raw materials.. I should at least give it a go. http://www.modelcarsmag.com/forums/topic/150597-wire-wheel-lacing-tutorial-feds-simplified/ Surprisingly it was pretty "easy-ish"... I have only done the one so far, because I want to film the other as a "How-To" for my YouTube channel. I have also been fooling around getting the pose-able steering front axle built, located and the rest of the dragster body fabricated... Lots of experimenting with styrene shapes. I knocked out the headers and lowered the engine another 1/8" to make it look a bit more cohesive.... progress is happening!