
Impalow
-
Posts
1,065 -
Joined
-
Last visited
Content Type
Profiles
Forums
Events
Gallery
Everything posted by Impalow
-

1926 Model T Sedan - SomesortaRod - Finally Done.. Only 2months late!
Impalow replied to Impalow's topic in WIP: Model Cars
Wrapped up the dashboard last night.. Had to make some modifications, evidently when i mocked it up previously I had the seat much further back. Had to carefully cut about 1/8" off the back of the dash, to make it all fit and look natural.... eek Then I re-did the the gauge panel, cut out a new bezel and used some brass BMF on it, glued that on some printed gauge faces I drew up in illustrator.. I cut a new piece of .020 and covered it in BMF and glued the brass bezel and faces to it. Once that was in place I drilled out the center of the speedo for the needle, and added a piece of red armature wire to create the needle. Final step was to add the domed lenses, those are made from craft store 4mm and 7mm googly eyes, cut the googly part off and used the clear domes. Pretty happy with how it turned out... especially considering everything here was made from raw materials with the exception of the steering wheel. -
1926 Model T Sedan - SomesortaRod - Finally Done.. Only 2months late!
Impalow replied to Impalow's topic in WIP: Model Cars
Thank you all for the comments and compliments, I really appreciate every one. Honestly guys...I found doing this surprisingly less difficult than I was expecting. Full disclosure, I am one of those odd people that actually enjoy BMF work. The body lines were natural spots to break the BMF into more manageable pieces. When it was all said and done i really just had to "rip seam" two spots a side, the top of the cowl and where the body curves around the back. Thanks Tom, I just slapped it over the bare styrene and it seemed to work okay. I didn't want to introduce any new textures (paint/orange peel)...This body was old and quite smooth and shiny tho. Thanks John! I am actually not sure what show is next, thinking its not till early next year?. Are there any upcoming before the end of the year? I'm always down to get out of the basement on a weekend. Outstanding Allen! Im excited to see how other people use this tool... it opened a lot of doors for me. hahahahaa.... no awesome sauce was used in this build. -
Love it!... And those Vallejo washes..
-
1926 Model T Sedan - SomesortaRod - Finally Done.. Only 2months late!
Impalow replied to Impalow's topic in WIP: Model Cars
Thanks guys!! Here is a quick weekend update. Body fully covered with BMF... Inside and out. Then brushed with the 3m scotch Brite pad, and cleared. I found very thin wood veneer at the local craft store. I stained it with some min wax polyshades, then cut some strips to make the inner structure -
1926 Model T Sedan - SomesortaRod - Finally Done.. Only 2months late!
Impalow replied to Impalow's topic in WIP: Model Cars
Thank you all! Thank you pat! Yes it helps! I actually went back and read your underglass post on this model before I started. The ripping is a great way to avoid noticeable seams... Thank you so much for the help, and cultivating this idea. -
1926 Model T Sedan - SomesortaRod - Finally Done.. Only 2months late!
Impalow replied to Impalow's topic in WIP: Model Cars
Thank you Jim and JC. I used the gray "Scotchbrite" pad, just cut a small piece and sanded in tiny circles. -
1926 Model T Sedan - SomesortaRod - Finally Done.. Only 2months late!
Impalow replied to Impalow's topic in WIP: Model Cars
Thank you John! I am a huge fan of your work and its an honor to have you looking at this build. Every one of your build threads has inspired me in one way or another, for that I thank you. After a bit of a break... SEMA and then the Motor City NNL.. I got back to work on this thing last night. I finished up the engine/ frame assembly for the Detroit show, but i somehow didn't get any photos of that. I will update this with some photos later. I did get started on the BMF body finishing last night... tedious for sure, but so far I love how its going. The plan is to get the outside done, clear it... then do the inside and wood trim around the windows. Body ready for foil... Foiled cowl... Got everything under the belt line done last night. I couldnt help myself and "brushed" the cowl... This added texture hides the "foil" look and the seams. It was hard to get a good photo, but the look is right where i want it. and one more photo... cause i'm excited... haha -
NNL Motor City #11 -- Sunday, November 15th.
Impalow replied to PatRedmond's topic in Contests and Shows
Thanks Kevin... They are the AMT aftermarket ones... I like the shade of plating and the turned down bottoms. http://www.hobbylinc.com/amt-metal-injector-stacks-parts-pack-plastic-model-car-accessory-1:25-scale-pp7 -
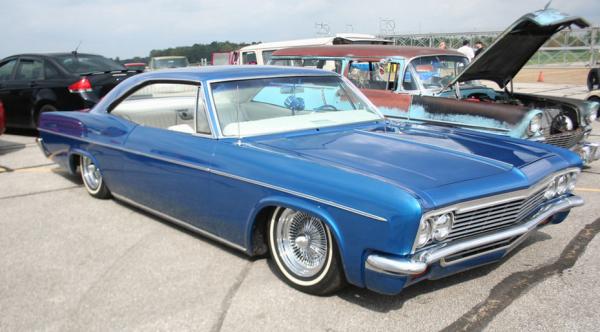
Bubbletop!
-
NNL Motor City #11 -- Sunday, November 15th.
Impalow replied to PatRedmond's topic in Contests and Shows
Amazing show yesterday! I was surprised and honored to have my gremlin receive the best paint award as well as the Don Borowicz Memorial award.... Truly humbling with all the amazing work on the tables. Thank you again Bob as well as the rest of the club for this honor. This show last year was the first model show I had attended in over 15 years, after attending my interest in the hobby was reignited. Its a great show, great atmosphere and great people. I would like to thank all of the club members for bringing this large event together. I am already excited for the April show. -
1926 Model T Sedan - SomesortaRod - Finally Done.. Only 2months late!
Impalow replied to Impalow's topic in WIP: Model Cars
Thanks guys... we are always our worst critics... good news is once the engine is in place, they aren't very visible at all... I never really noticed until those photos anyway. Thats a great idea... i have already picked up a couple damaged ones for other future projects... Ill keep my eyes open for something that could work... I can always upgrade those at a later date... My only concern is getting the diameters the same, because this frame was actually drawn around the specs of these wheels... but its worth a shot for sure! A last very little update before I head out to SEMA.... managed to get the steering done. I drilled out the RBMotion rod ends to fit the 1/32 brass tube... then drilled the inside of the tube to accept the .020 pins... cut the pins short enough i could insert one in each of the ends of the brass bushings. Sprayed the drag link with some Alclad polished aluminum... Once i got it all together... No more slop.. My plan is to add some photo-etched bolt heads to the pins during the final assembly. Pretty happy with this for my first try.. Okay.. I'm heading to Vegas to look at awesome cars for a week and hopefully come back inspired... -
1926 Model T Sedan - SomesortaRod - Finally Done.. Only 2months late!
Impalow replied to Impalow's topic in WIP: Model Cars
I did have some luck with the pose-able steering last night... The "pins" I used are too small, and caused some slop. Im going to work up some brass bushings to hopefully remove some of the slop. I drilled the backing plates down low and added some bent RB motion end links. Although its not 1:1 scale correct... i shouldn't have to worry about tiny plastic arms breaking every time I transport it. (you can see how the seams in the frame popped here.... its not bad at all in person, but this photo really brings it out... One of the problems starting to build a rat rod and ending up here, oh well, more notes for the next time) -
1926 Model T Sedan - SomesortaRod - Finally Done.. Only 2months late!
Impalow replied to Impalow's topic in WIP: Model Cars
hahaha.... It was nice meeting you too... I can guarantee the chassis will be complete in Detroit... but it depends on how the body foiling goes. I leave this Saturday for 8 days in Las Vegas for the SEMA show... if it wasn't for that i think i could have it done.... but if i had to choose between going to SEMA or getting this done... SEMA wins everytime, hands down.. I agree 100% on the wheels... but sadly at this point in the project I don't think switching them up is a great idea... I am looking for other sources for future projects like this I am planing... But that is definitely noted for the next one. -
1926 Model T Sedan - SomesortaRod - Finally Done.. Only 2months late!
Impalow replied to Impalow's topic in WIP: Model Cars
Sorry for the late response mark... No... but I will be in Detroit in a few weeks with it tho. Thanks Tim! Very small update, I haven't made a lot of bench time for myself lately... but i did manage to get the "skid plate" foiled. Did something a little different here, I sanded the BMF with the scotch brite and then cleared, then applied as usual... It worked pretty well, but the sanding did weaken the BMF and it was a bit more prone to tearing.. and then a mock-up, cause i haven't posted one in quite awhile. The to-do list is getting shorter.... Steering linkage, Rad hoses, and some small detail items and the chassis is done. My desire for pose-able steering is going to be a bit of a pain, but I hope worth it in the long run... I picked up some RBMotion rod ends with the hope to make it more durable for transit to shows. I'm hoping to get some time tonight to work on that. -
1926 Model T Sedan - SomesortaRod - Finally Done.. Only 2months late!
Impalow replied to Impalow's topic in WIP: Model Cars
Woah thats a great idea! im going to have to see what i have and give it a shot.. Thanks Rob! The cutter is amazingly useful. The cutter will only cut 2d objects out of sheets... you can create 3d objects by layering the 2d parts like i did on the dash... I do know how to 3d model and i have recently purchased a 3d printer, but the quality isn't quite where I want it yet... still trying to find its niche in my workshop. -
1926 Model T Sedan - SomesortaRod - Finally Done.. Only 2months late!
Impalow replied to Impalow's topic in WIP: Model Cars
Thanks guys!!! I finally got some good focused bench time last night... My plan all along was to cover the entire body, inside and out with baremetal foil... give it a light scuff with some scotchbrite and then a light coat of some clear to protect it.. The other night i tried the grille shell and failed miserably at getting covered and not having wrinkles folds.. it just didn't meet my expectations. So after a few days of thinking of other options, I decided to try it one more time before giving up.... last night i had success. Doing the entire body is going to be a chore.. but should be worth it. Here is a sample piece... left side is gloss clear, right side is matte.... decided to go gloss. Grille shell covered and assembled with the radiator. (sorry for the bad pic) Found a good wood flooring material at work, commercial veneer sample... looks much better than the stained bass wood i was planing. Then I decided to scratch build a glass bowl fuel filter.... 8 pieces on this tiny little guy. (Acrylic rod, a pin, some aluminum tube, a couple of punched styrene holes, and some brass tube for the connectors) almost too small to photograph with the old iPhone... sorry for the blurry pic Here it is installed, along with the grille/ rad... ran a copper fuel line... 28ga wire -
Agreed 100%... if you do go with a styrene glue, I personally recommend the tamiya extra thin that hobby lobby sells(also hobby shops).. Its inexpensive (even better with a 40% off coupon), easily available, super precise little brush applicator and it will give you nice clean joints on your unpainted raw styrene parts. http://www.hobbylobby.com/Crafts-%26-Hobbies/Model-Kits/Tools-%26-Adhesives/Extra-Thin-Cement/p/146566 But as Rob said... I've been using mostly the "Purple" bottle of CA glue that you can usually find at your local hobby shop. This glue will work on anything...but will frosty fog stuff (chrome and glass and painted) so you do need to be careful.. If you want to speed up the process even more, invest in a bottle of the CA kicker.. Glue with the CA, squirt the kicker onto the joint.. you can be sanding in minutes. Hope that helps a little.
-
1926 Model T Sedan - SomesortaRod - Finally Done.. Only 2months late!
Impalow replied to Impalow's topic in WIP: Model Cars
Thank you guys!!! Im really having fun with this one... i've pretty much given up on deadlines, It would be nice to have it done for Detroit next month but i doubt i will. I finished up the seat this past weekend... Repainted it with the alclad polished aluminum, made the inserts on the cutter, painted them with the leather tones, then added photoetched washers to simulate grommets. Computer drawing in Illustrator Cut and assembled upper cushion Upper and lower with grommets in background Painted.. no grommets Painted with grommets Seat tracks made on the cutter Assembled seat... pretty much 100% scratchbuilt -
1926 Model T Sedan - SomesortaRod - Finally Done.. Only 2months late!
Impalow replied to Impalow's topic in WIP: Model Cars
yeah it came out pretty close! I'm currently thinking just 2 different shades of leather with some shiny metal grommets, the flat earth with smaller hull red panels.. I'm worried bringing the LV pattern to the seat would make it too Beverly Hills, but keeping the tones should tie it in enough and not take away from the trunk.... The body plan is still BMF, but going to try a cleaner look... ill probably remove those welds, just keep a clean bare metal body. -
1926 Model T Sedan - SomesortaRod - Finally Done.. Only 2months late!
Impalow replied to Impalow's topic in WIP: Model Cars
Thank you all for the comments, compliments and words of encouragement. Brian, Al and Tom it was great meeting you and sharing our work, Toledo was an incredible and very motivating show... I'm already looking forward to next year. I wrapped up the tank assembly last night.... although i got in a "zone" and didn't take many in progress shots. As fun as this was, i am glad its over... lots of fiddly little parts... I decided to keep the "lid" permanently propped open, this seemed like a much better idea than trying get to it and prop it open all the time. I made the "hinges" out of some piano wire. Then i scratchbuilt the latches out of .005 sheet and some strips.. I used a hole punch to get the circles. Once they were made i covered them in gold BMF and glues them in place. Next came the straps, I cut strips of the .005 and pre-bent them to shape, fronts and rears leaving the loop end open on both. I found some old Detail Master "billet" air vents that would work as the buckles, so i threaded them into position and glued them.. Painted the entire assembly with Tamiya Flat Earth and followed up with the rust weathering powder and some wash, picked the buckles back out with some Alclad polished brass.. I threaded the front and rear straps into the wire hoops on the rack and frame, glued all the loop ends closed. Set the luggage/tank in place, and glued the front and rear straps together on top and the buckles. I reapplied some gray wash in the buckle area, which was still wet in the photos.. but i was excited to get photos. Like i said... glad that is over... haha... I think I'm going to create the leather inserts for the bomber seat next.. or maybe the wood floor... something larger. -
1926 Model T Sedan - SomesortaRod - Finally Done.. Only 2months late!
Impalow replied to Impalow's topic in WIP: Model Cars
Thanks guys!! The Toledo NNL was amazing and very inspiring... I was so inspired i made some excellent progress on the hidden fuel tank yesterday. Cut the split lid on the "trunk"... part of me just wanted to drill a hole and put a fill cap in the trunk... but, if i were doing this in real life.. i wouldn't do that... So I cut this flip-up lid that will use one of the hinges and latches of the trunk. Added some strap loops and bolt heads on the luggage rack Built the oval tank to go inside of the trunk, then drilled it for the fill cap from one of the Detail Master moon tanks. Now it was time for paint... I used some of the Vallego model color for the trim, then i printed the LV pattern out at 1200dpi on regular old paper. Put a few coat of enamel clear on the paper to seal and protect it. (first one very light to avoid running) Then i just cut the inserts to size and used thined white glue to attach them. After it was all done i touched it up and painted the inside with some Tamiya Hull Red. Painted the tank with AlClad Polished aluminum over Dupli-Color gloss black and clear... first time using this... absolutely love it. Chromed the luggage rack.... with Alclad chrome. and finally a mock-up.... still need to add the latches, handles and hinges. -
Good seeing you again John, this was the peoples choice winner...an absolute masterpiece.. Will do for sure!
-
Tim, thank you for the excellent photos and commentary! This was my first Toledo NNL and it was a bit of a whirlwind, the hours just flew by and was over way too soon. I missed meeting and talking with a few people I had only met on these interwebs. Truly an amazing event with great people. The work on the tables was top notch and very inspiring. the conversations were even more so. Already looking forward to next year.
-
1926 Model T Sedan - SomesortaRod - Finally Done.. Only 2months late!
Impalow replied to Impalow's topic in WIP: Model Cars
yep this will be there! As well as all my other works in progress... Thank you! Thank you Eric!! I was checking out your model t earlier.. Nice work! -
Looks great Tom!