lghtngyello03
-
Posts
1,246 -
Joined
-
Last visited
Content Type
Profiles
Forums
Events
Gallery
Everything posted by lghtngyello03
-

Tamiya Pennzoil Nissan Skyline R34
lghtngyello03 replied to lghtngyello03's topic in WIP: Model Cars
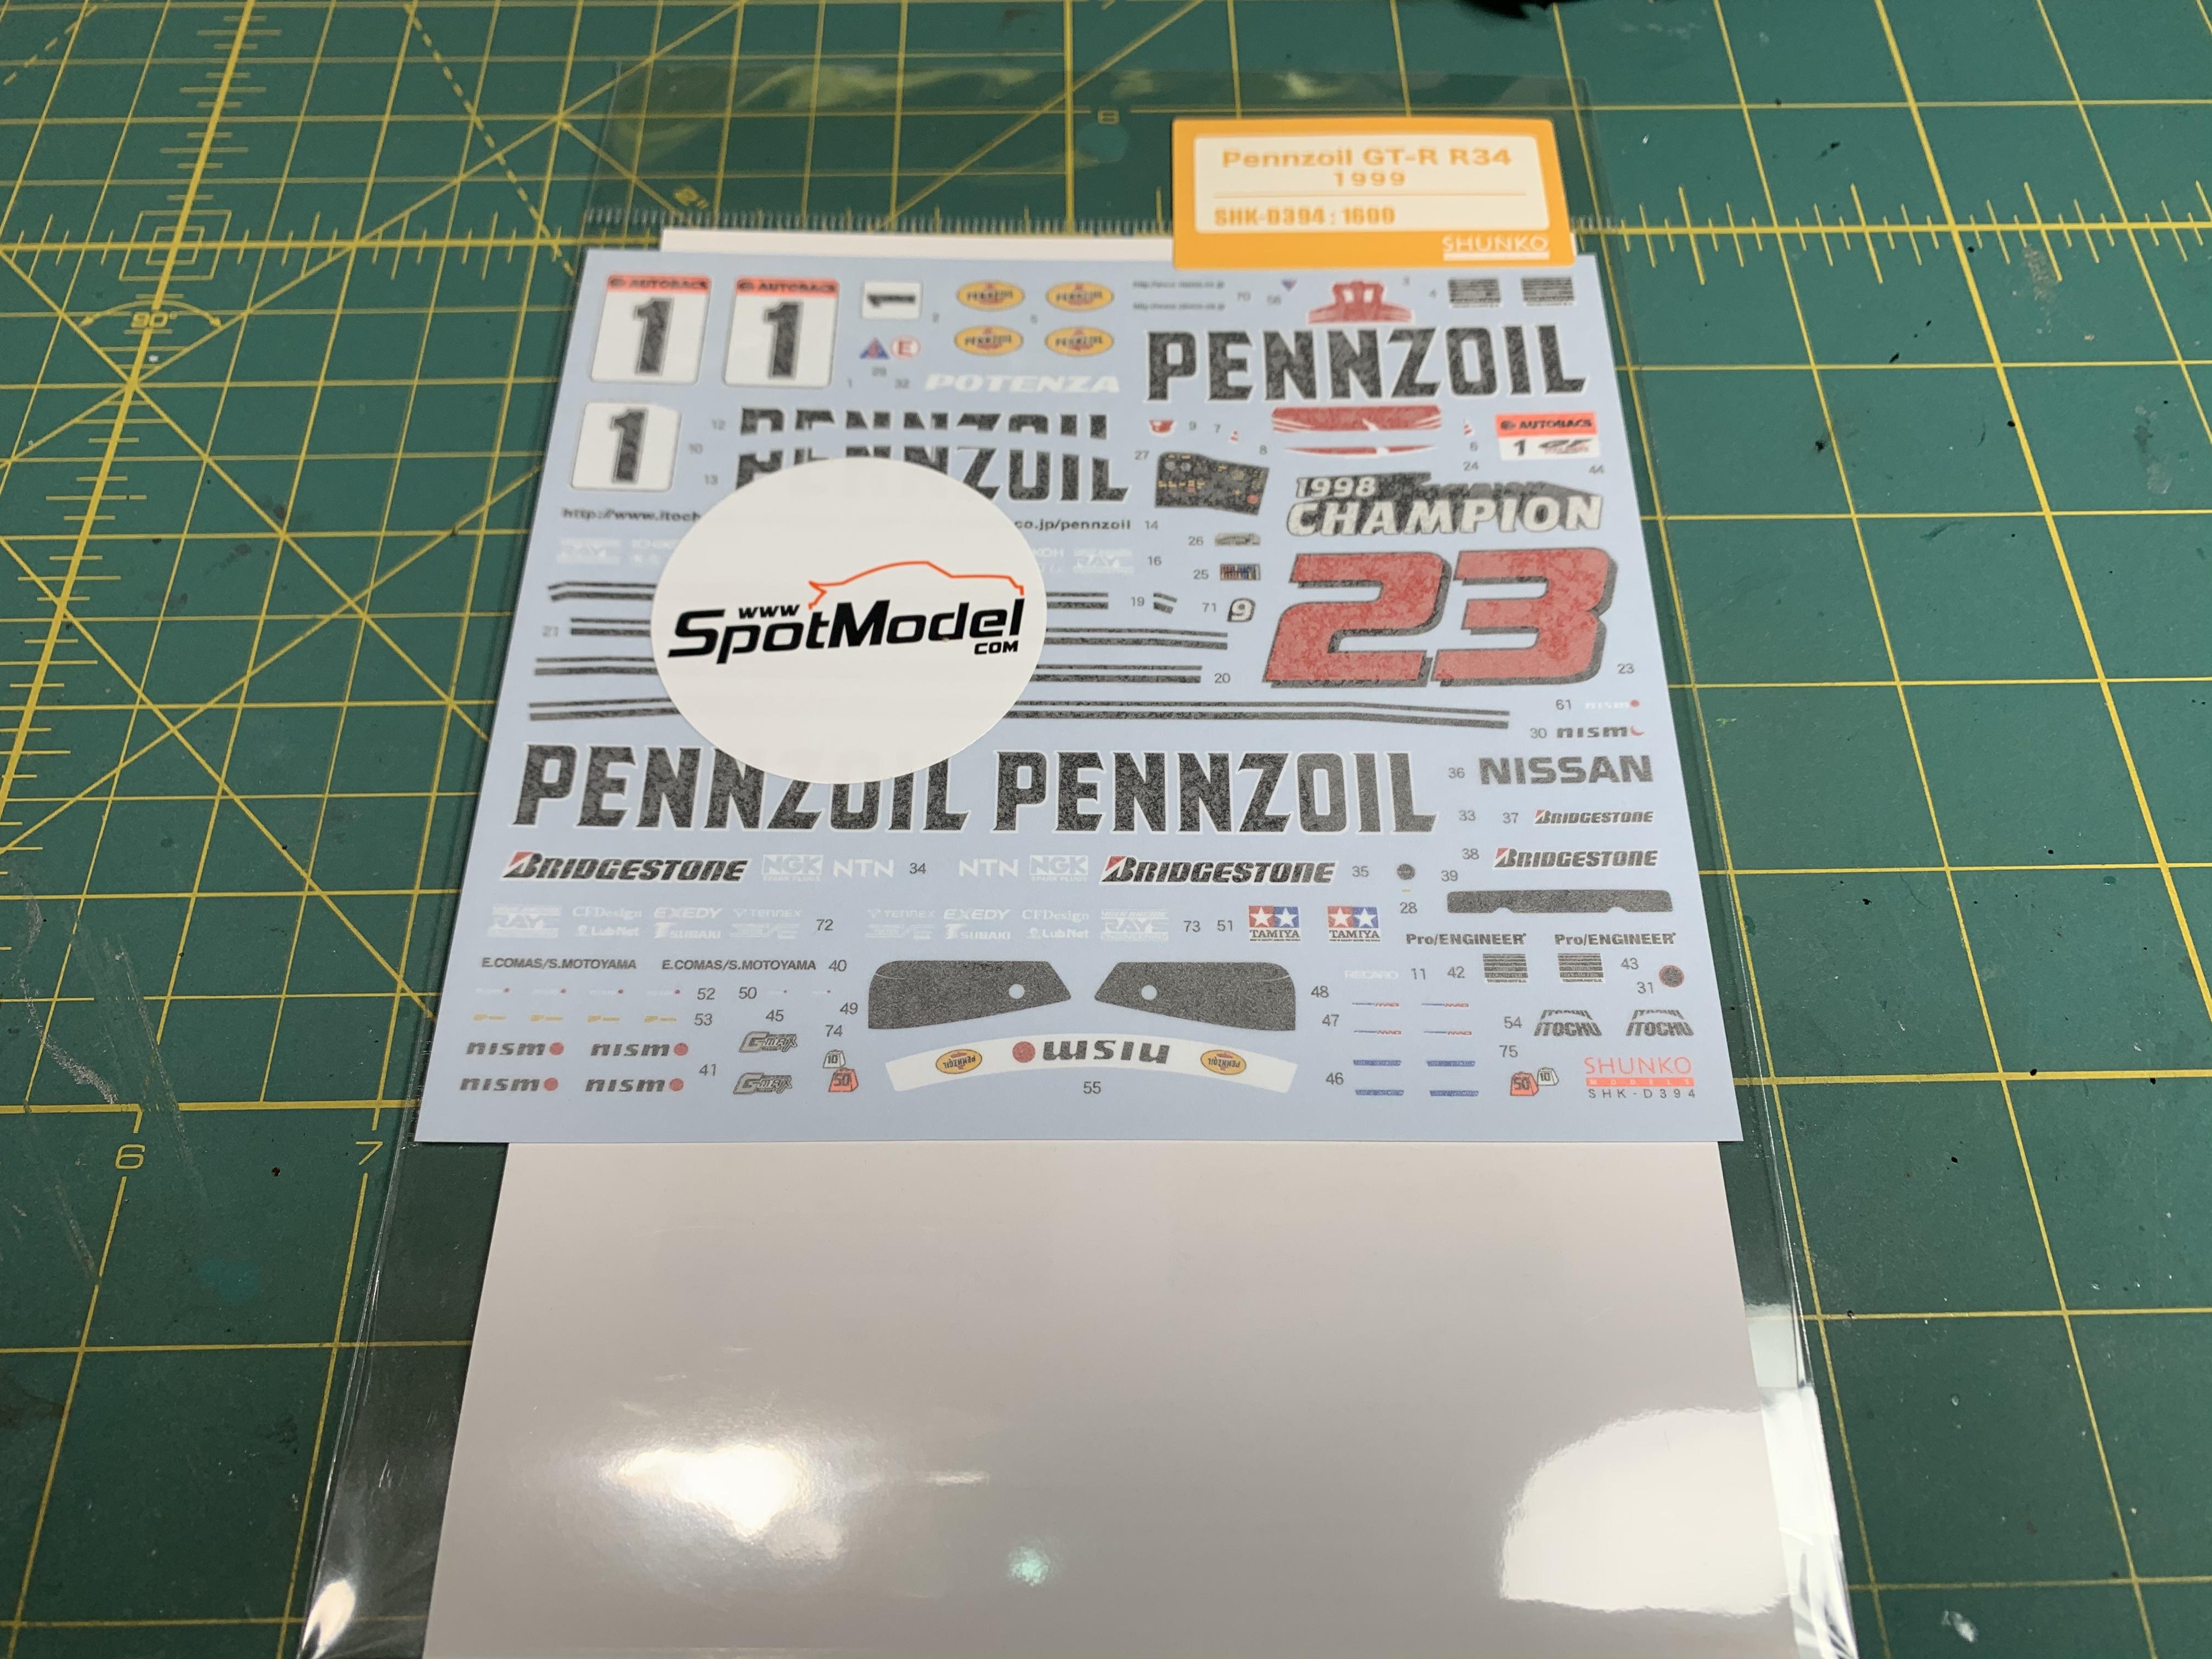
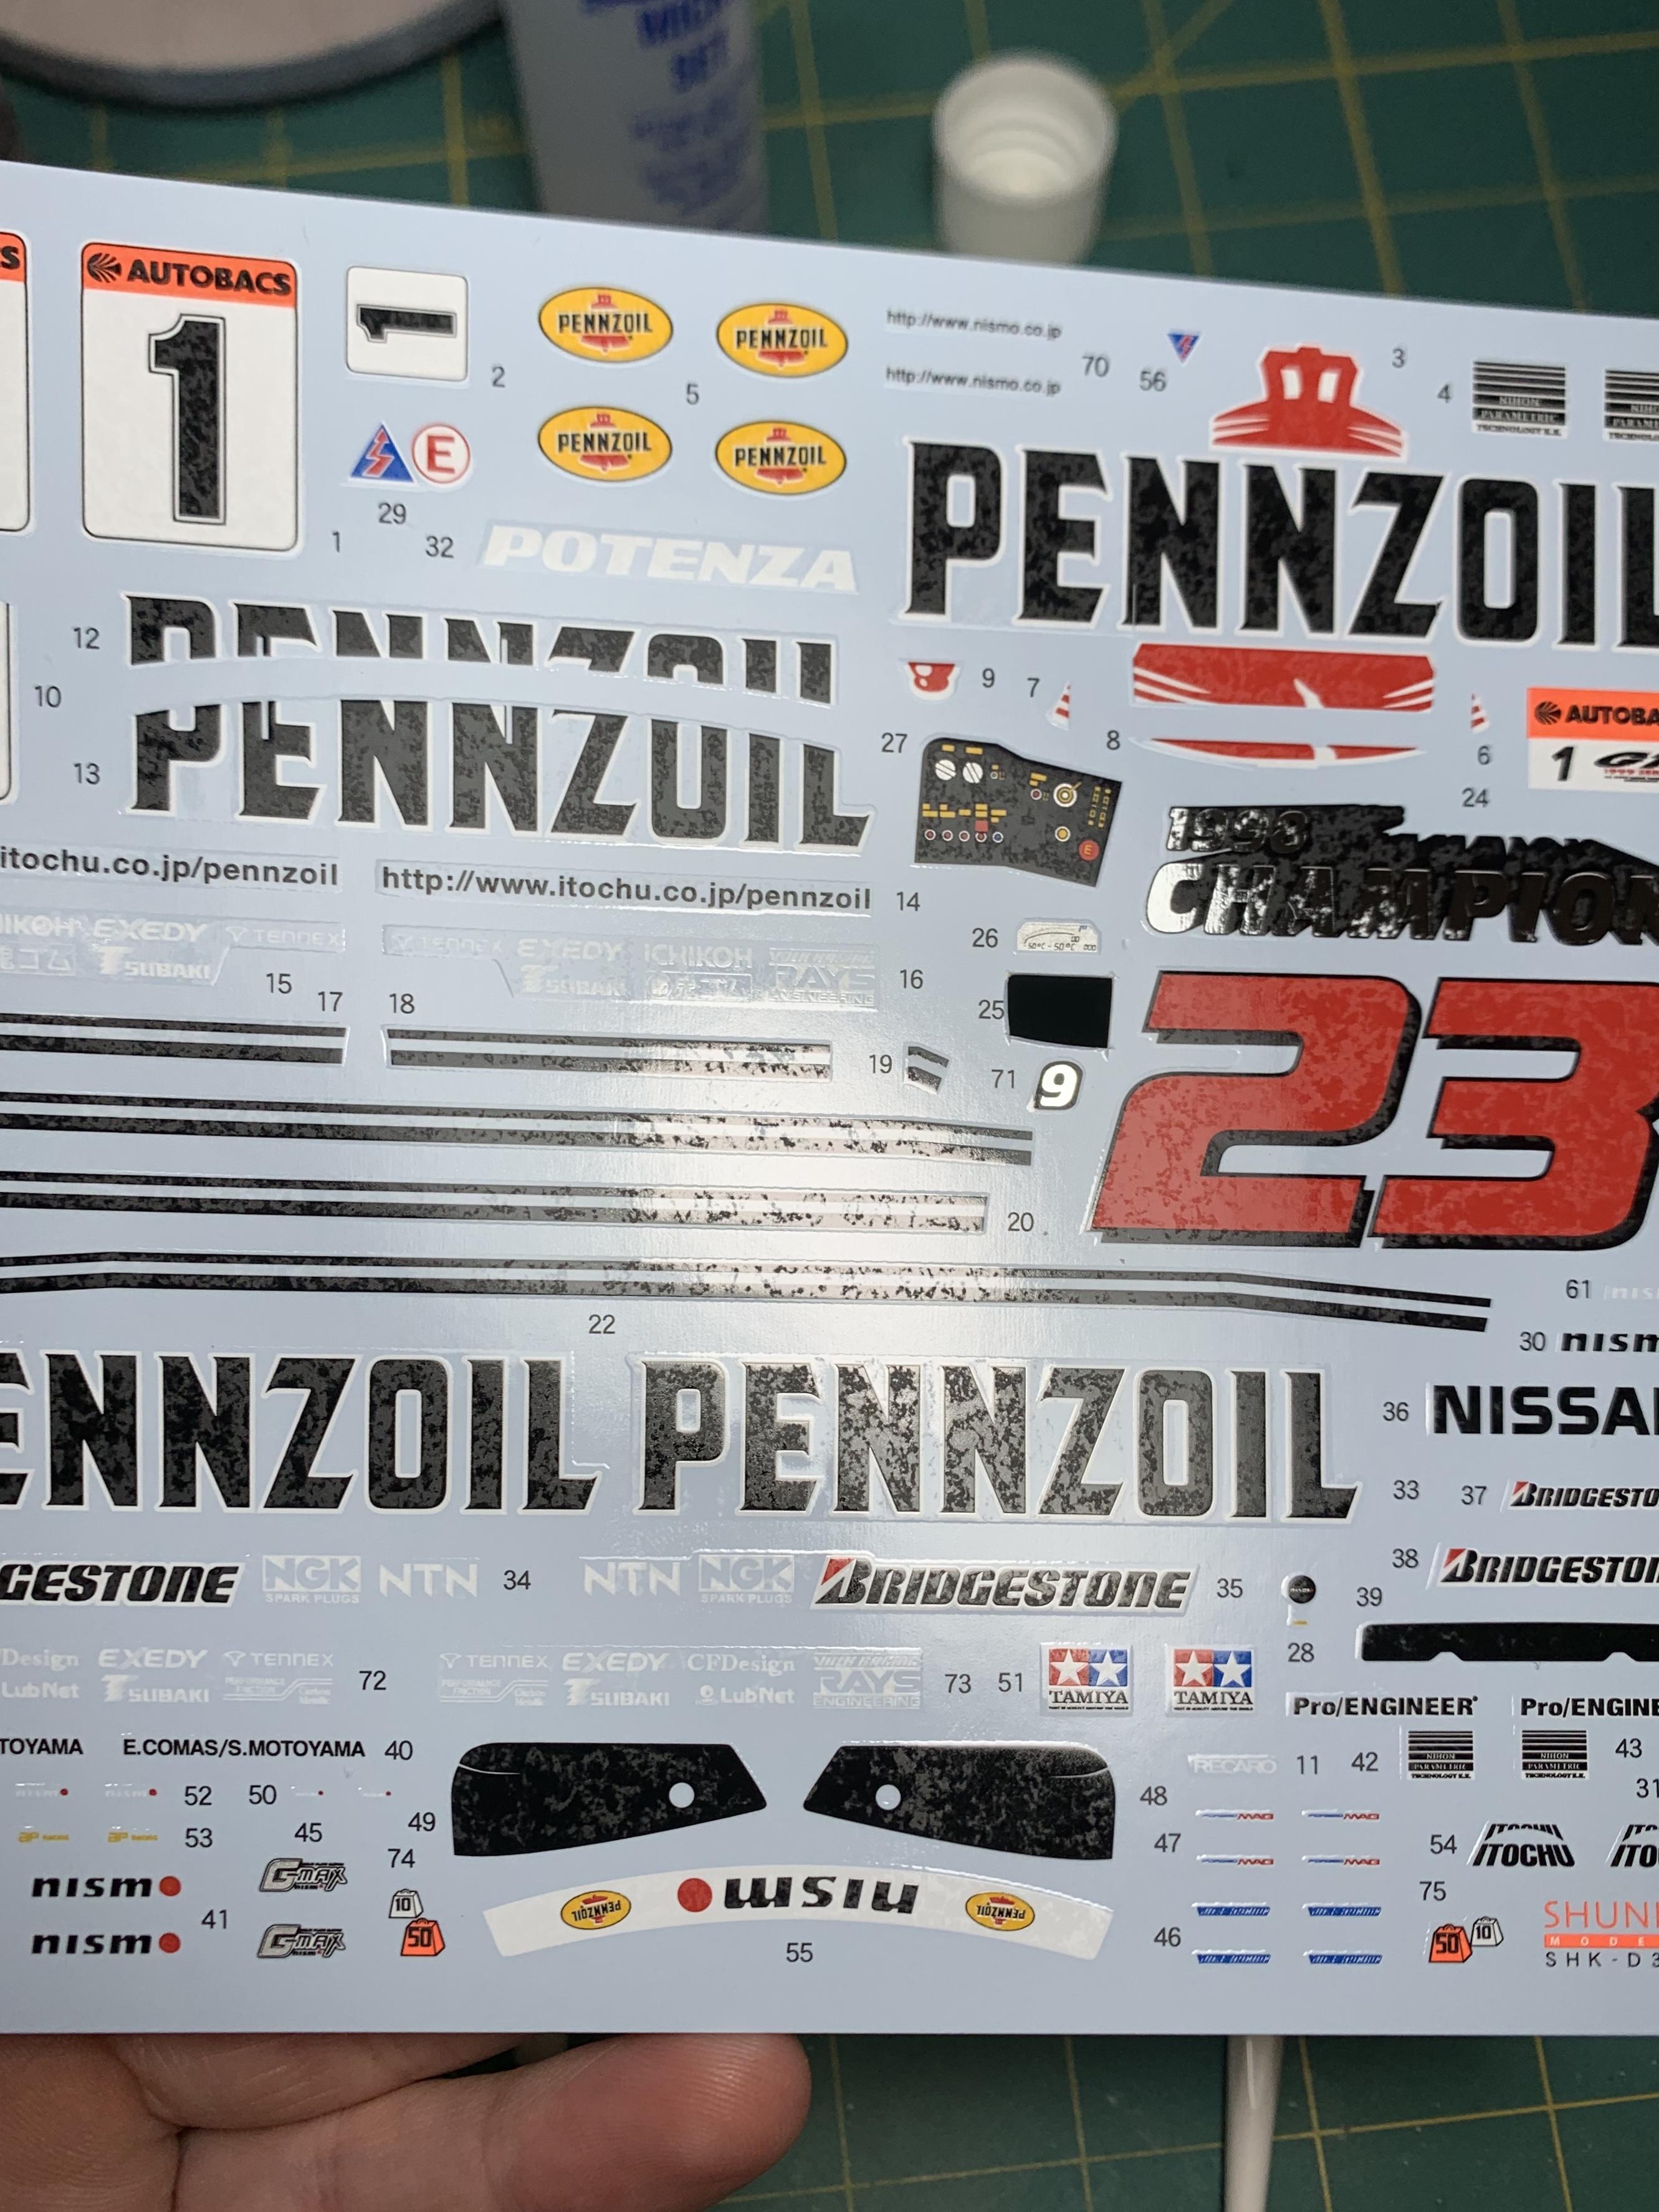
Thanks Michael! This is only my second build with decals such as this, and my first race car. It really has been a fun build so far...definitely makes me want to build more of the Japanese GT cars. Thanks Tom! The spots on the decals still make me nervous, even though I have cleared the center console and they go away....as well as I did get in touch with Shunko about these spots, and this was their response....sets my mind at ease now, lol. -------Dear Sir, As I informed you in e-mails titled "From Shunko Models (February 2019)" and "From Shunko Models (March 2019)", we changed softer printing. (or "soft-type".) In the former e-mail, I mentioned "The most serious problem is that because its surface is weak, the protection paper will damage it a little bit". In the past ten days, we have received inquiries that "something wrong with the surface of decals" from dealers inside and outside Japan. But all of the problem is the same as what I told in the e-mail. We would like to ask you again to provide thorough information about soft-type decals' character to customers before selling products. Considering this situation, today, we will put detailed explanation of soft-type decals on our web site. And, because it seems that many customers don't support soft-type decals, we decided that we will be back to former printing method (or "hard-type") form products which will be released in January 2020. We also decided that we will completely terminate shipping soft-type decals, with a grace period. The following is the content posted on the website. --------------------------------------------------------------------------------------------- Since we heard from some customers that the decals tear easily and are difficult to apply, we changed to a flexible decal (or "soft-type") in March 2019. However, since this soft type is made of a resin that cannot be restored after being deformed by external force, the rough surface of the protective paper remains as a mottled surface on the decal surface. On the other hand, there is no problem applying paint on the decal. When using soft-type decals, we recommend that you carefully blow clear paint or flat clear paint after the attached decals are completely dry. When it comes to the hard decals produced before February 2019 (or "hard-type"), you have to handle them with care after soaking them in lukewarm water, or they will tear. But the decals are hard and do not leave traces of the protective paper. Currently, our products have both hard and soft-type decals. You can identify the type from the label on the top right of the package. The hard type has a Japanese character, and the soft type does not have a Japanese character. (However, some products may have different small pieces.) We hope that you will consider and use the product after understanding the characteristics of each type. The soft-type decals are not supported by customers, so the printing method will be changed for this product in January 2020; thereafter, we will release the hard-type decals only. In addition, in order to eliminate situations in which both types are mixed, we will terminate the shipment of all soft-type decals on June 30, 2020. We will dispose of the remaining inventory of soft-type decals on July 1st. -
Tamiya Pennzoil Nissan Skyline R34
lghtngyello03 replied to lghtngyello03's topic in WIP: Model Cars
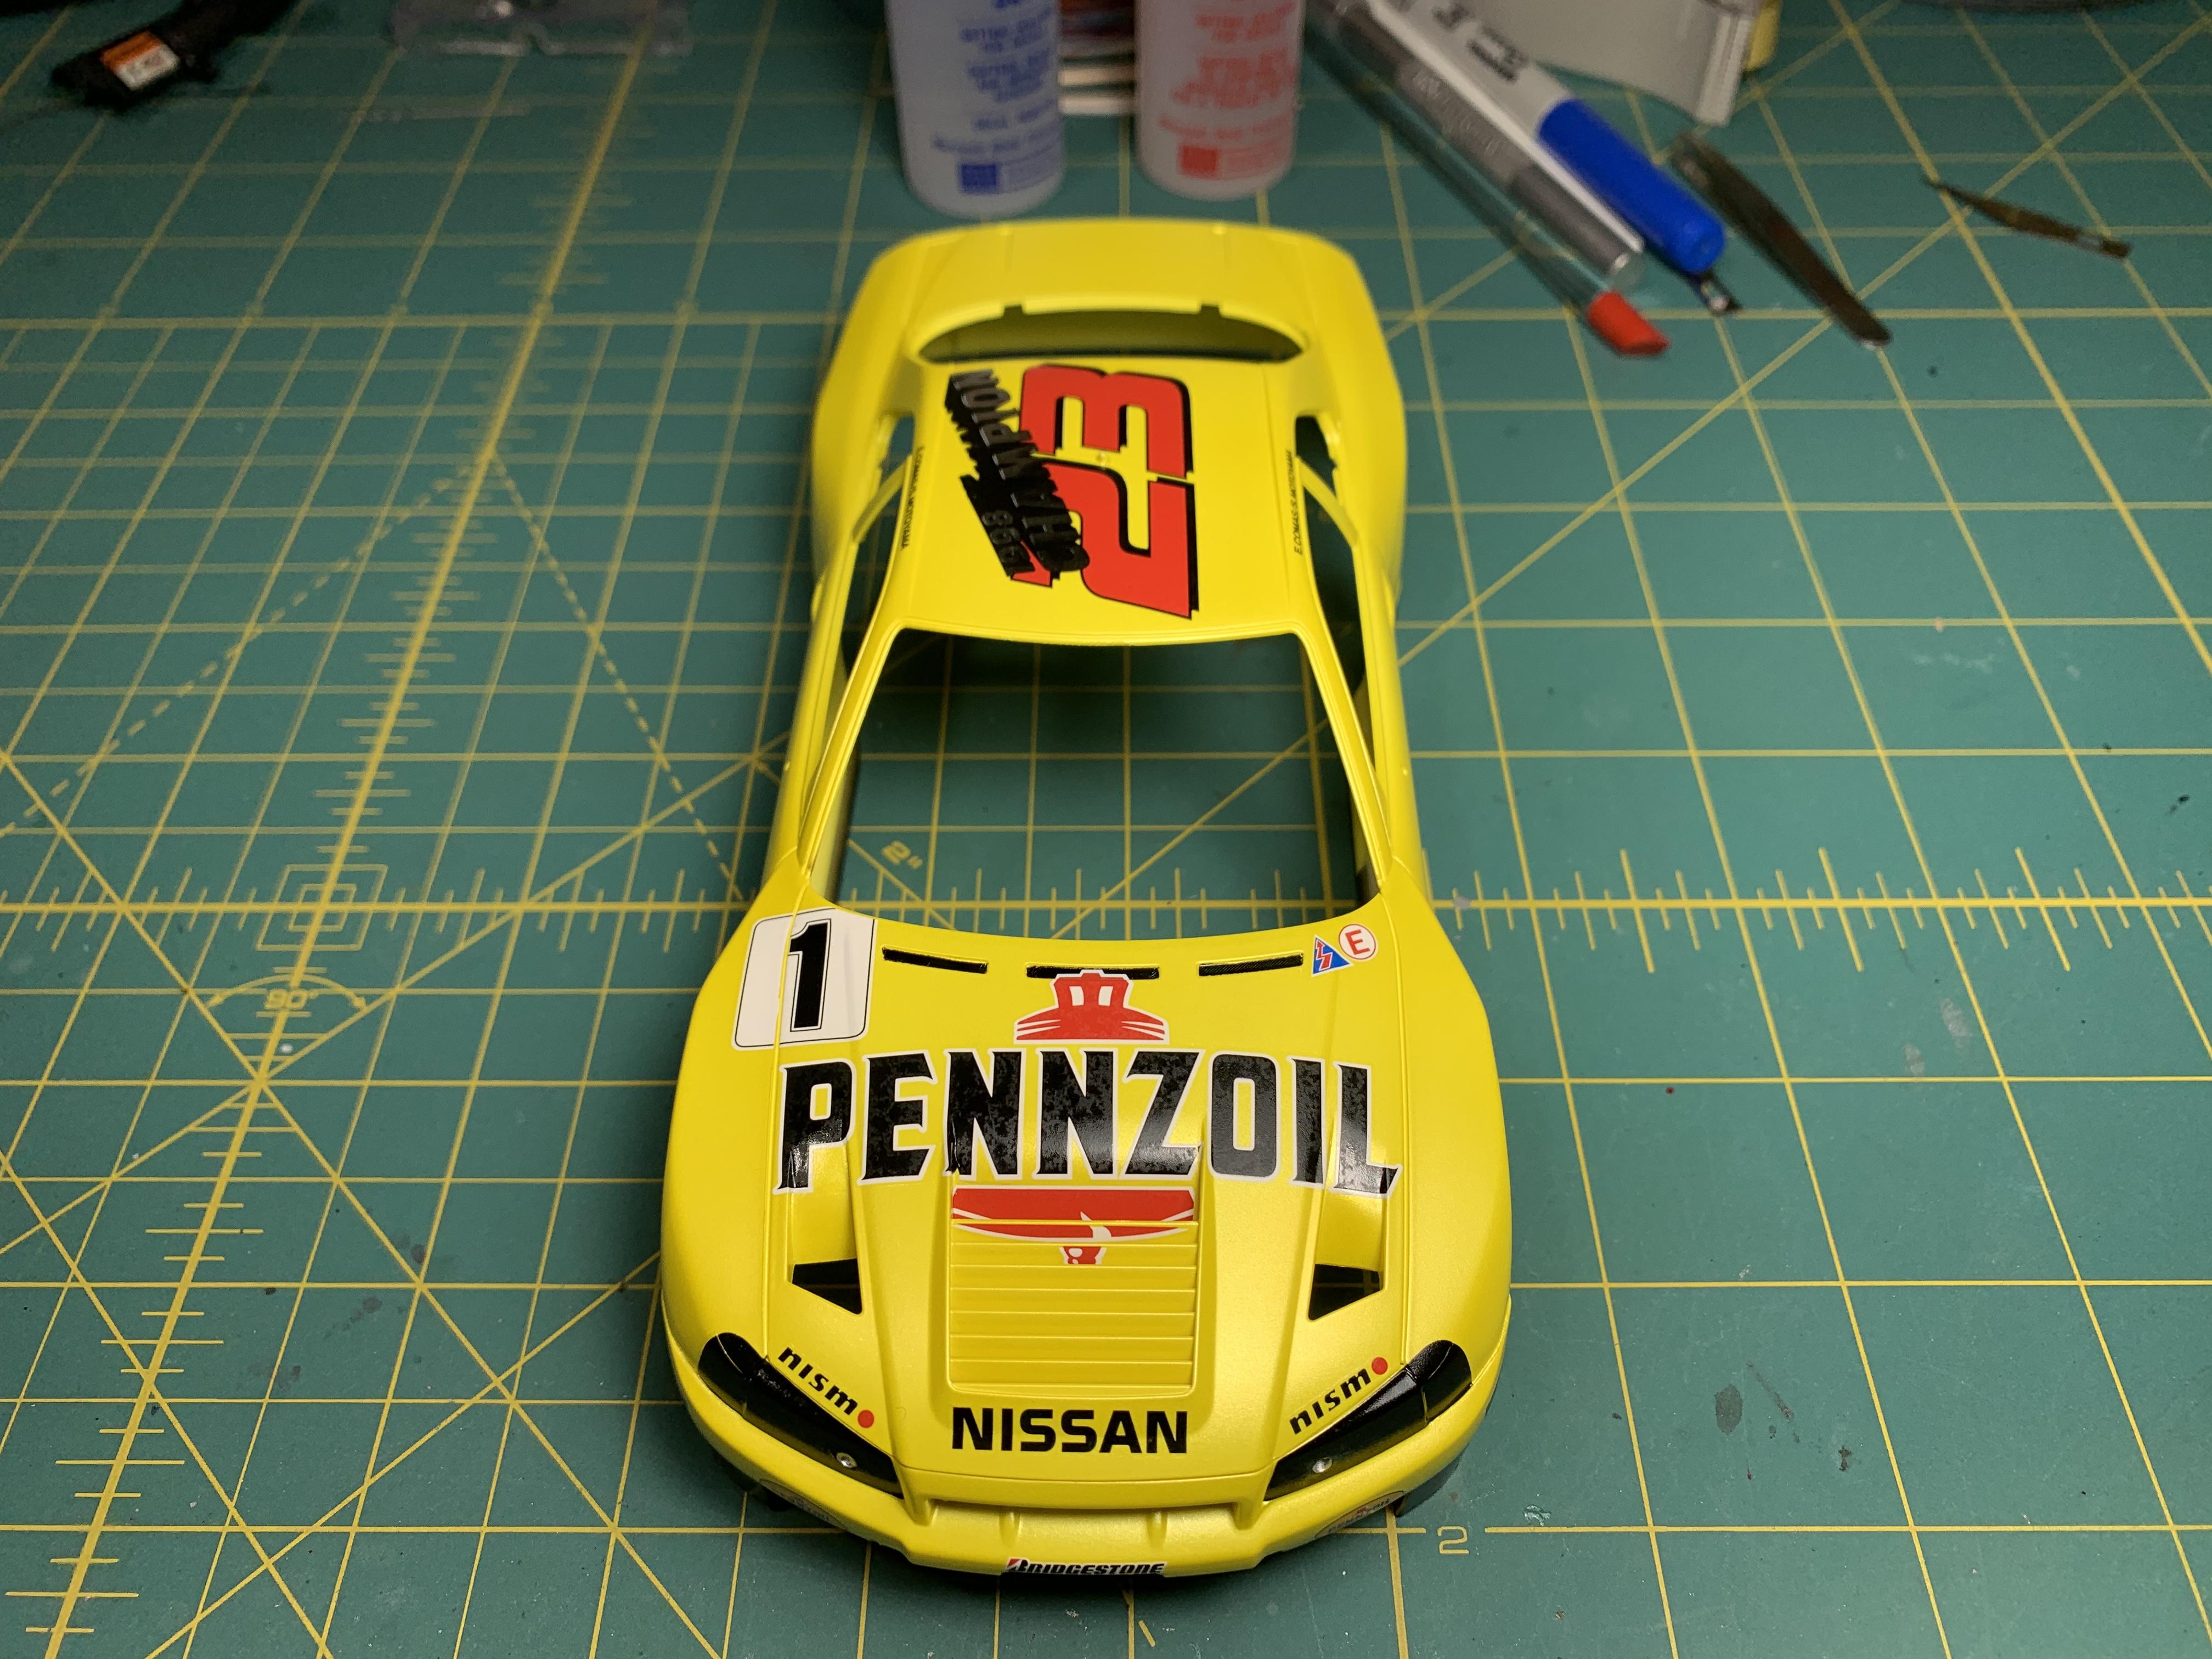
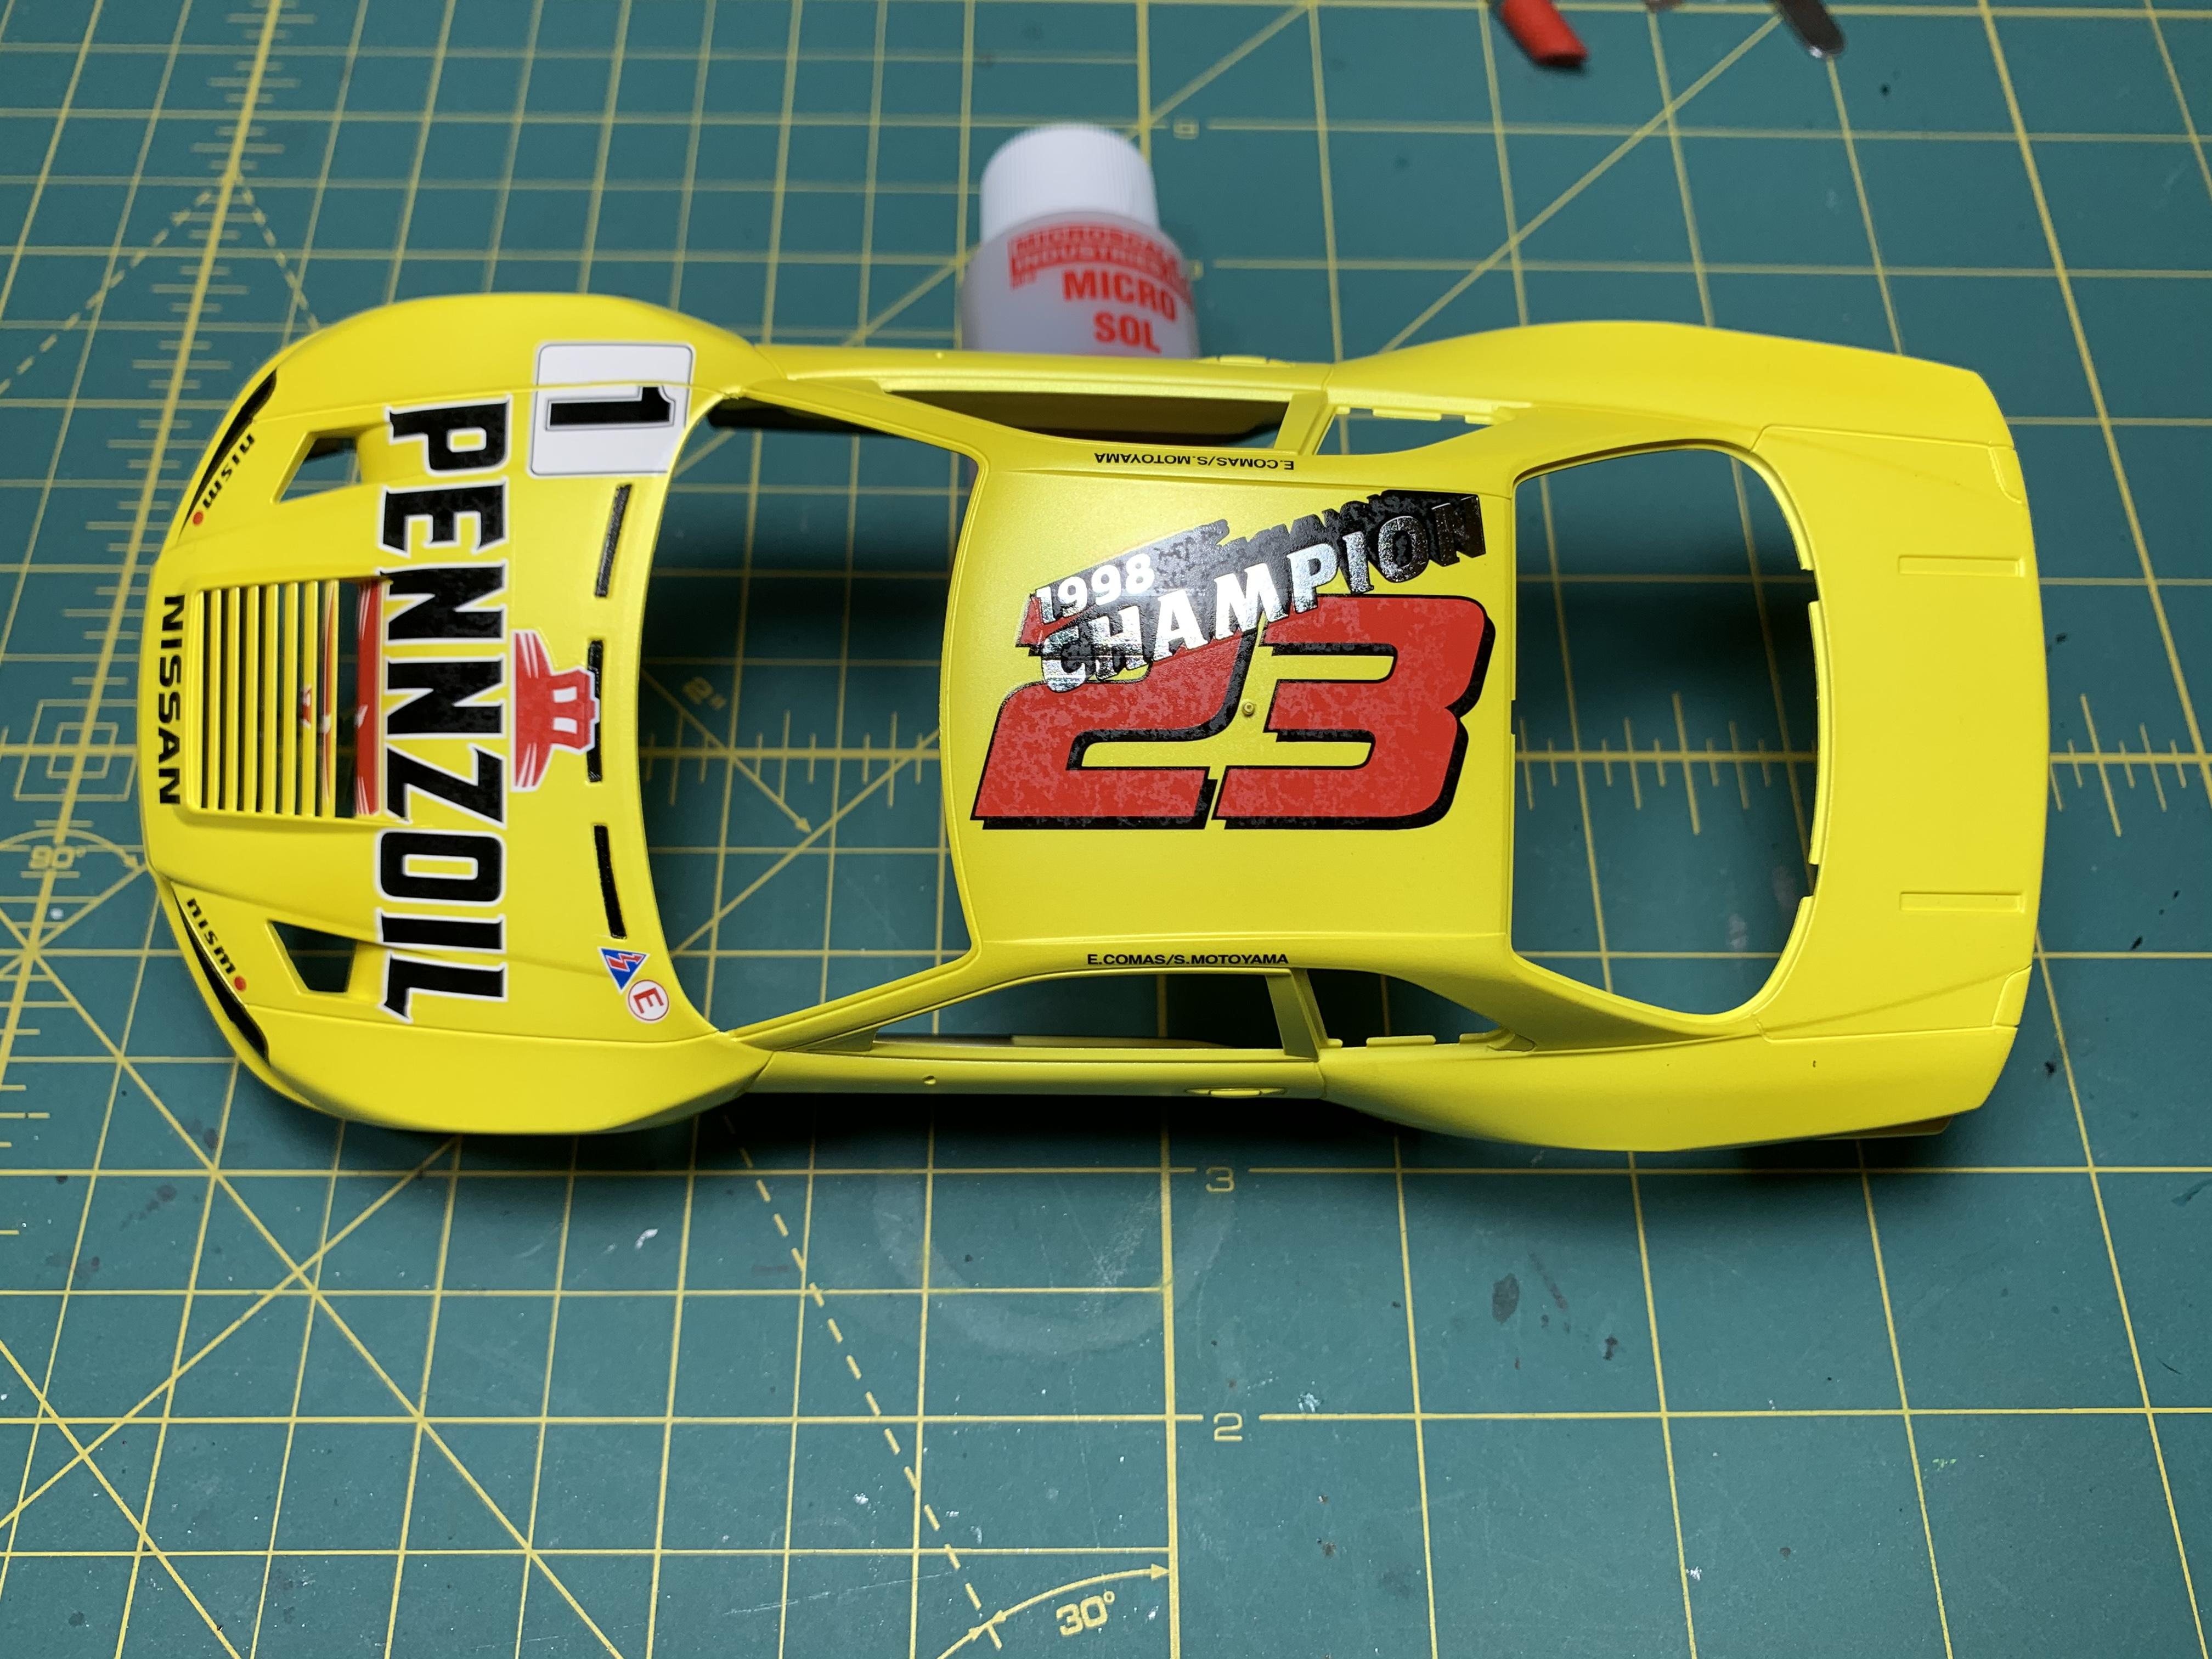
It’s been a while since I’ve had any time at the work bench due to some unexpected events. I did get a little time this evening to start the decal process, which is gonna be a long deal, lol. The fender wells have been the biggest pain in the butt and I have one left to do.
-
Super clean build! Love the detailing you did. What did you use for the texture on the valve covers, and what did you use for the hood spring and brake lines?
-
Tamiya Pennzoil Nissan Skyline R34
lghtngyello03 replied to lghtngyello03's topic in WIP: Model Cars
I didn’t see that when I tried to order on my cell phone yesterday, thanks. I’ll give it another shot. The delivery is only 5-7 days so I’ll wait it out. -
Tamiya Pennzoil Nissan Skyline R34
lghtngyello03 replied to lghtngyello03's topic in WIP: Model Cars
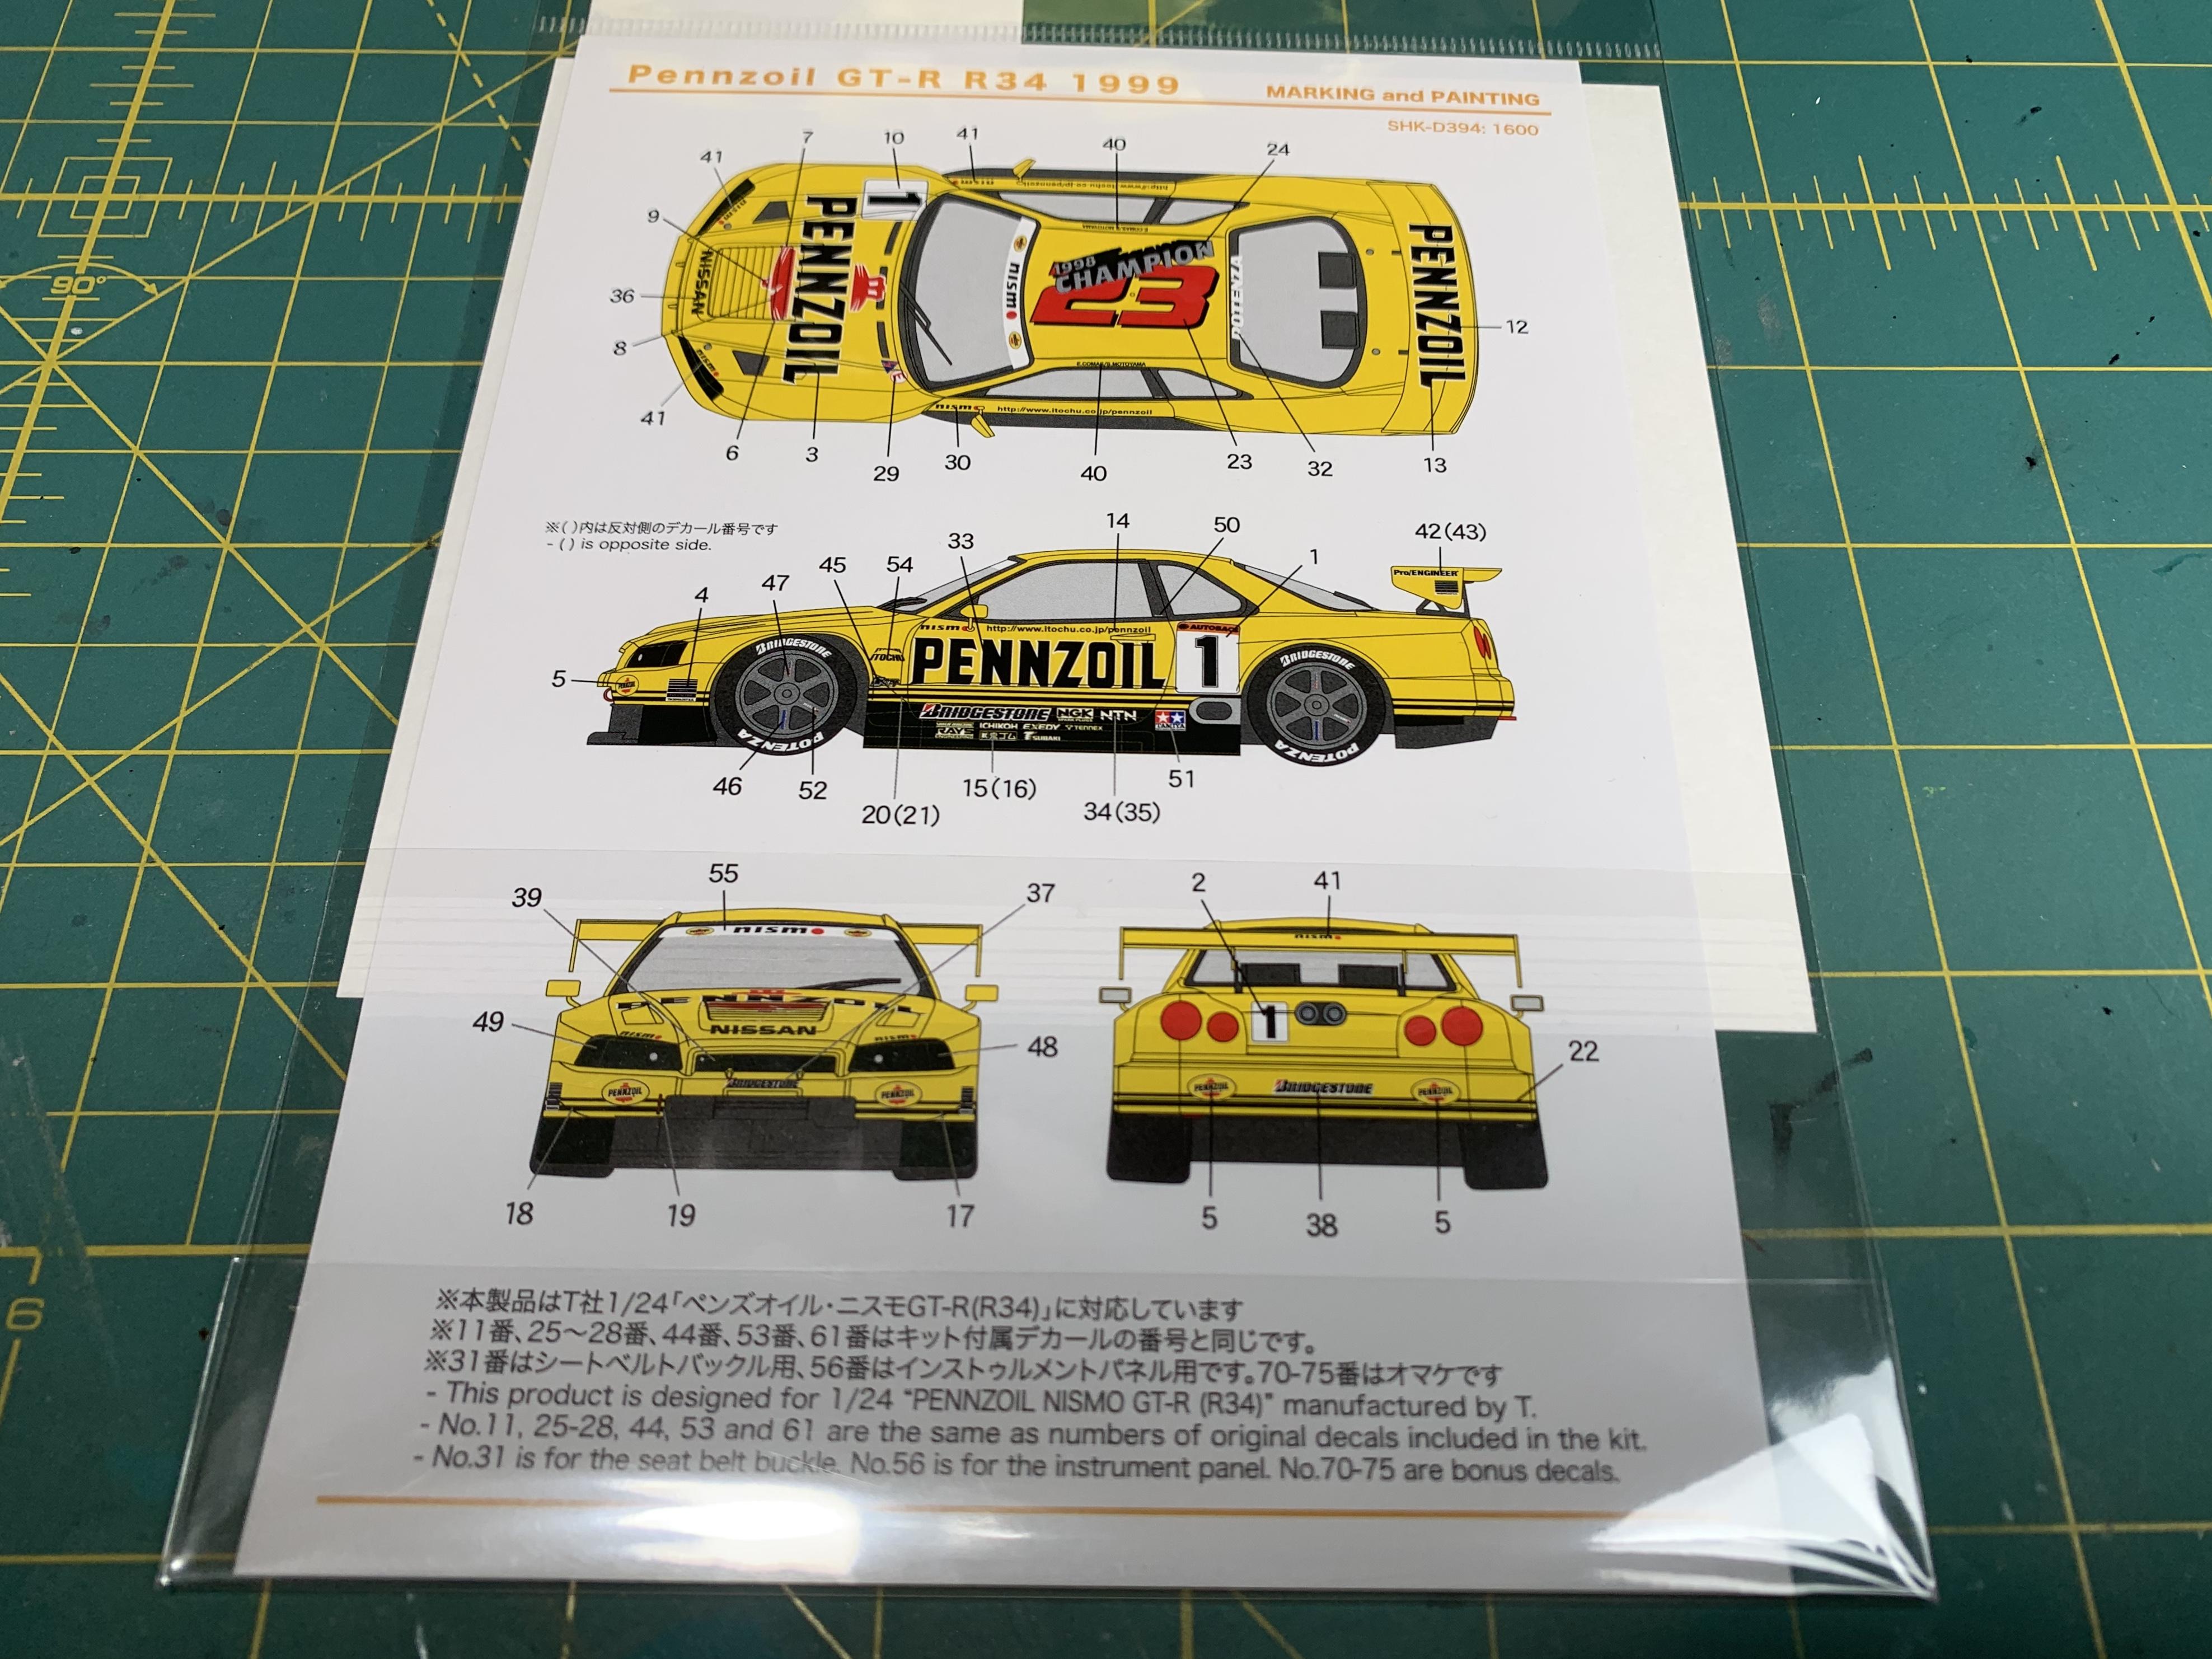
Well I got home today to find my decals in the mailbox. Great packaging and super pleased.....that is until I opened them. There appears to be a film on them. It seems as if maybe they went into the packaging immediately after printing while the ink was still wet. I figured I’ll try the instrument panel to see if these spots go away in water. Nope, they sure don’t . I’m pretty pissed about this. Spotmodel.com has no more in stock and hiroboy.com wants $45 to ship them to the States. Now I’m at a stall for something that’s their fault.
-
Tamiya Pennzoil Nissan Skyline R34
lghtngyello03 replied to lghtngyello03's topic in WIP: Model Cars
Thanks Dann! Hope it turns out great. I’ve got a lot of time in it so far. -
Tamiya Pennzoil Nissan Skyline R34
lghtngyello03 replied to lghtngyello03's topic in WIP: Model Cars
Thanks David! Hopefully the 2K clear will really make that pearl pop. It did well with just Tamiya TS13 on the spoon, so that 2k is definitely going to add some depth. -
Tamiya Pennzoil Nissan Skyline R34
lghtngyello03 replied to lghtngyello03's topic in WIP: Model Cars
Thanks again Michael! Can't wait for the decals to get here, but it may be Thanksgiving or so before they show up since they're coming from Spain. So I'm going to focus now on trying to get the chassis ready. Lots of small details still left to do on interior and suspension. -
Tamiya Pennzoil Nissan Skyline R34
lghtngyello03 replied to lghtngyello03's topic in WIP: Model Cars
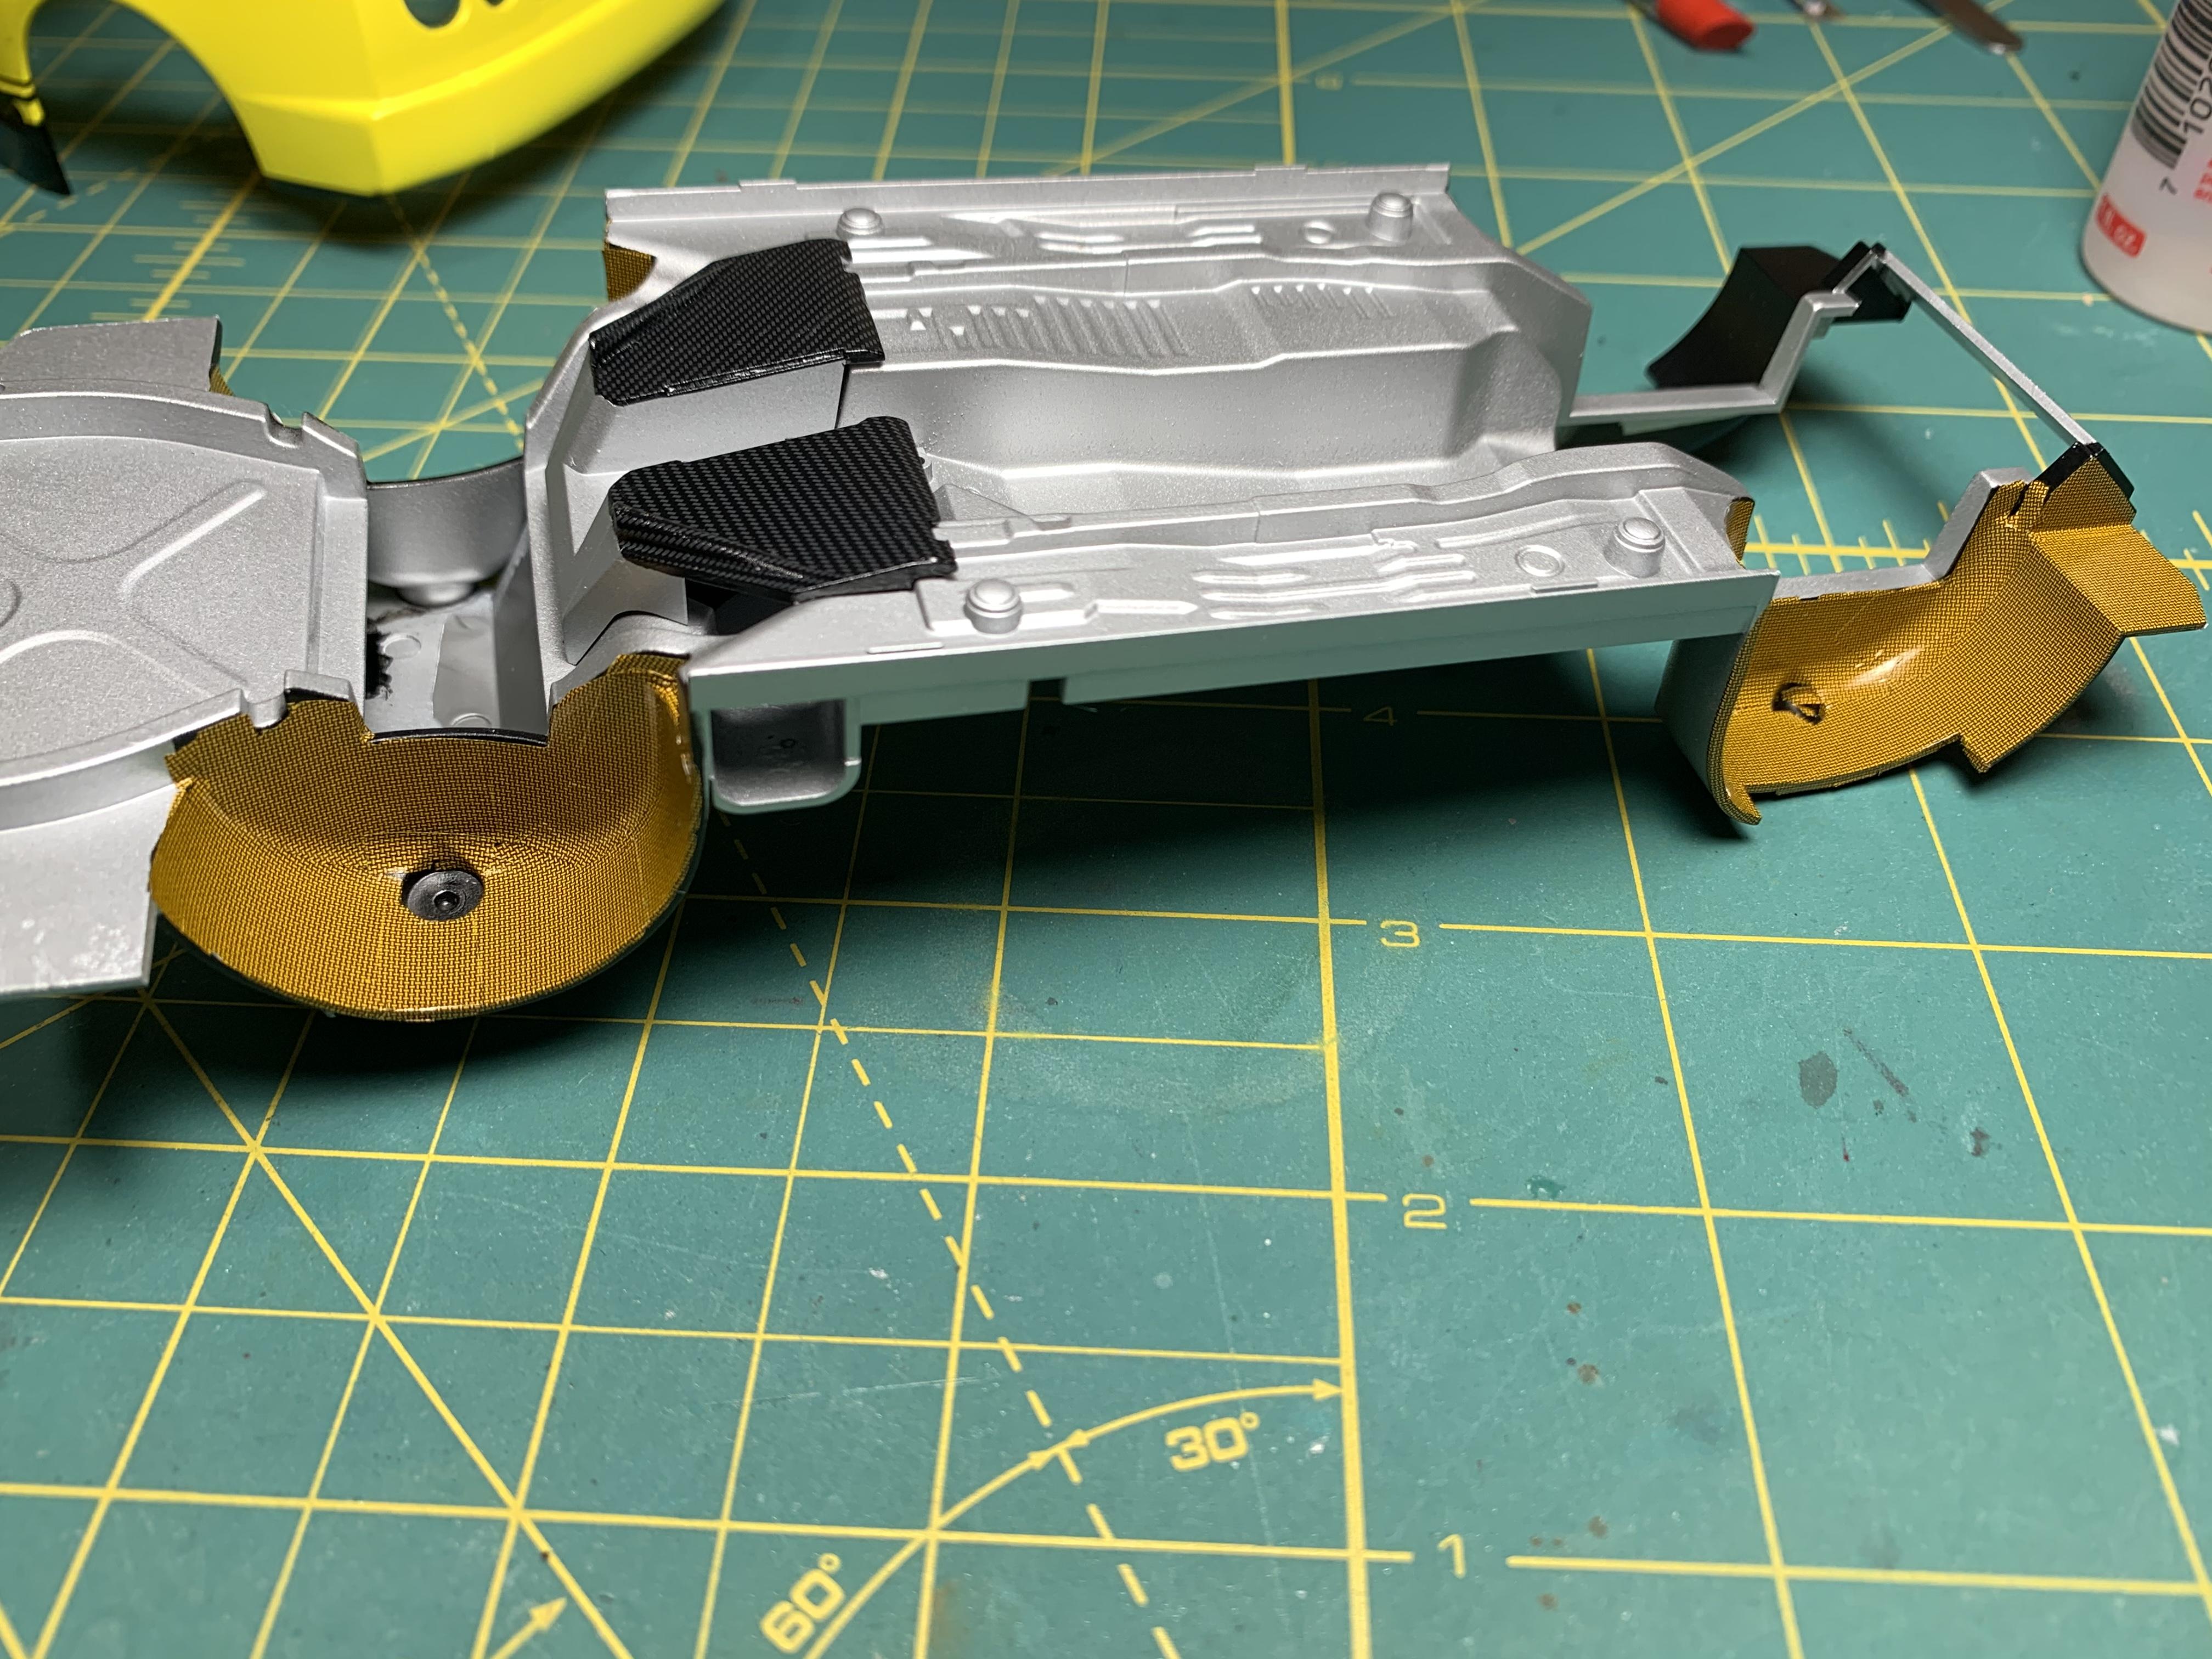
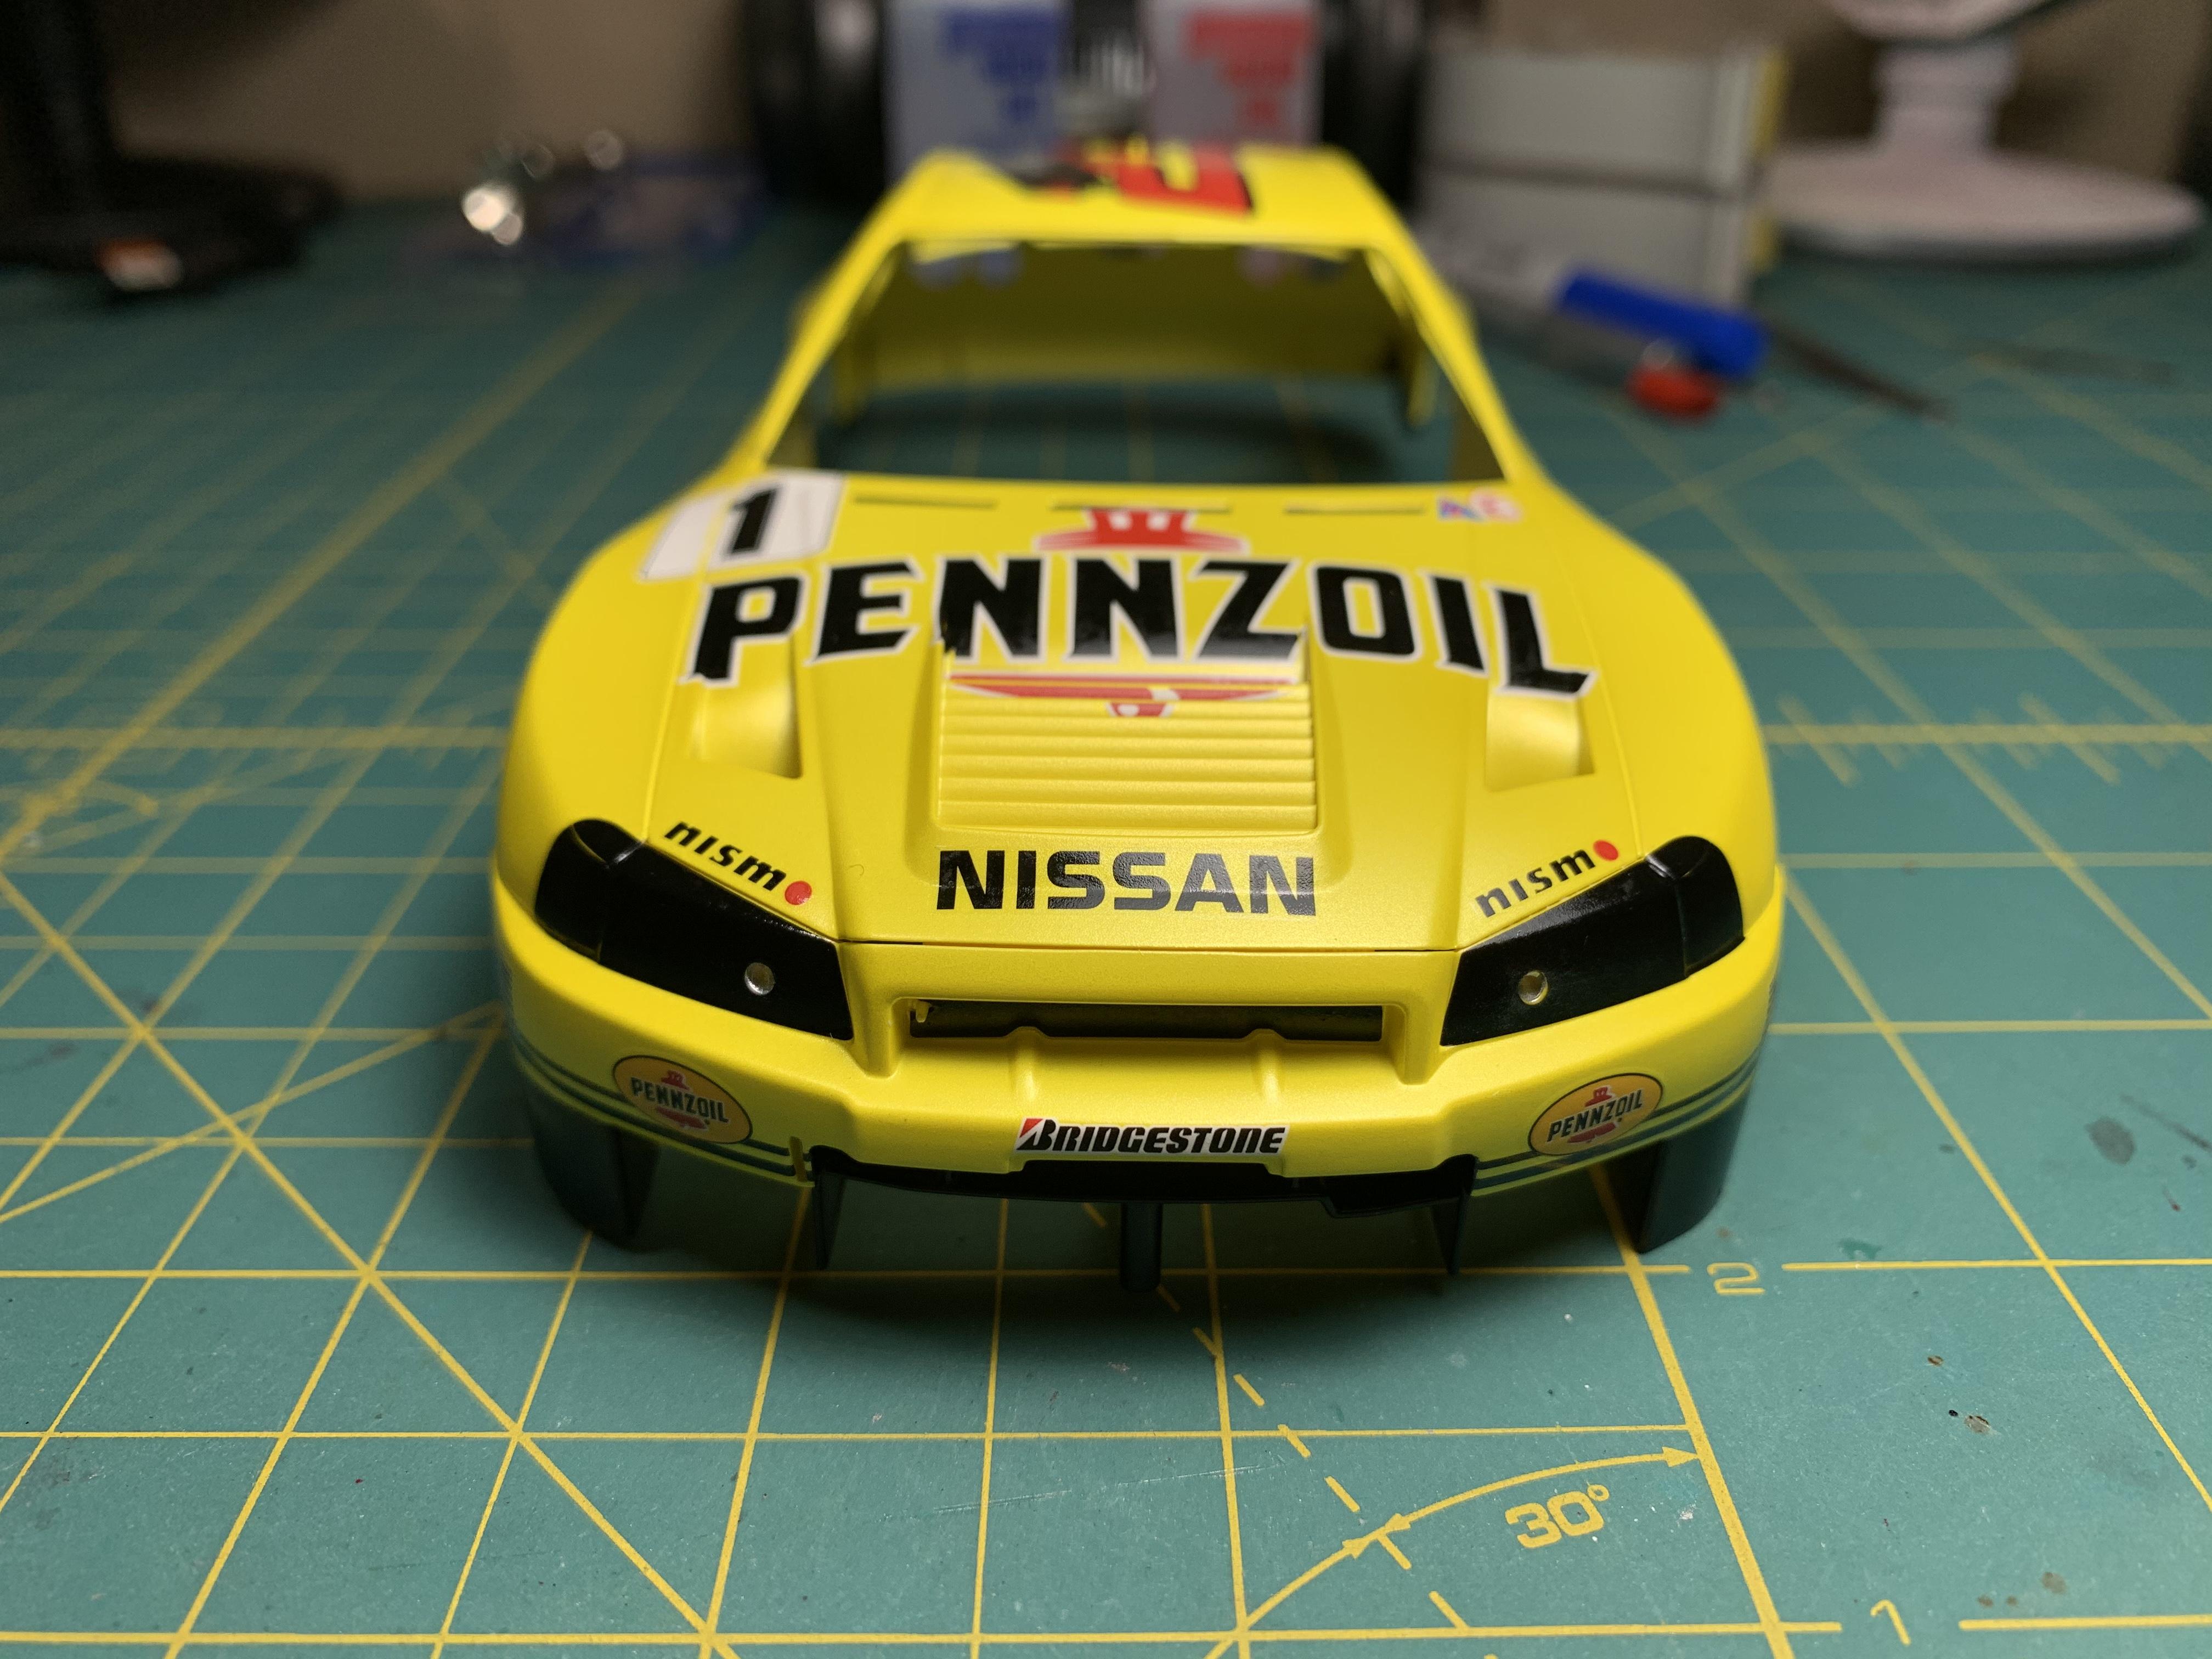
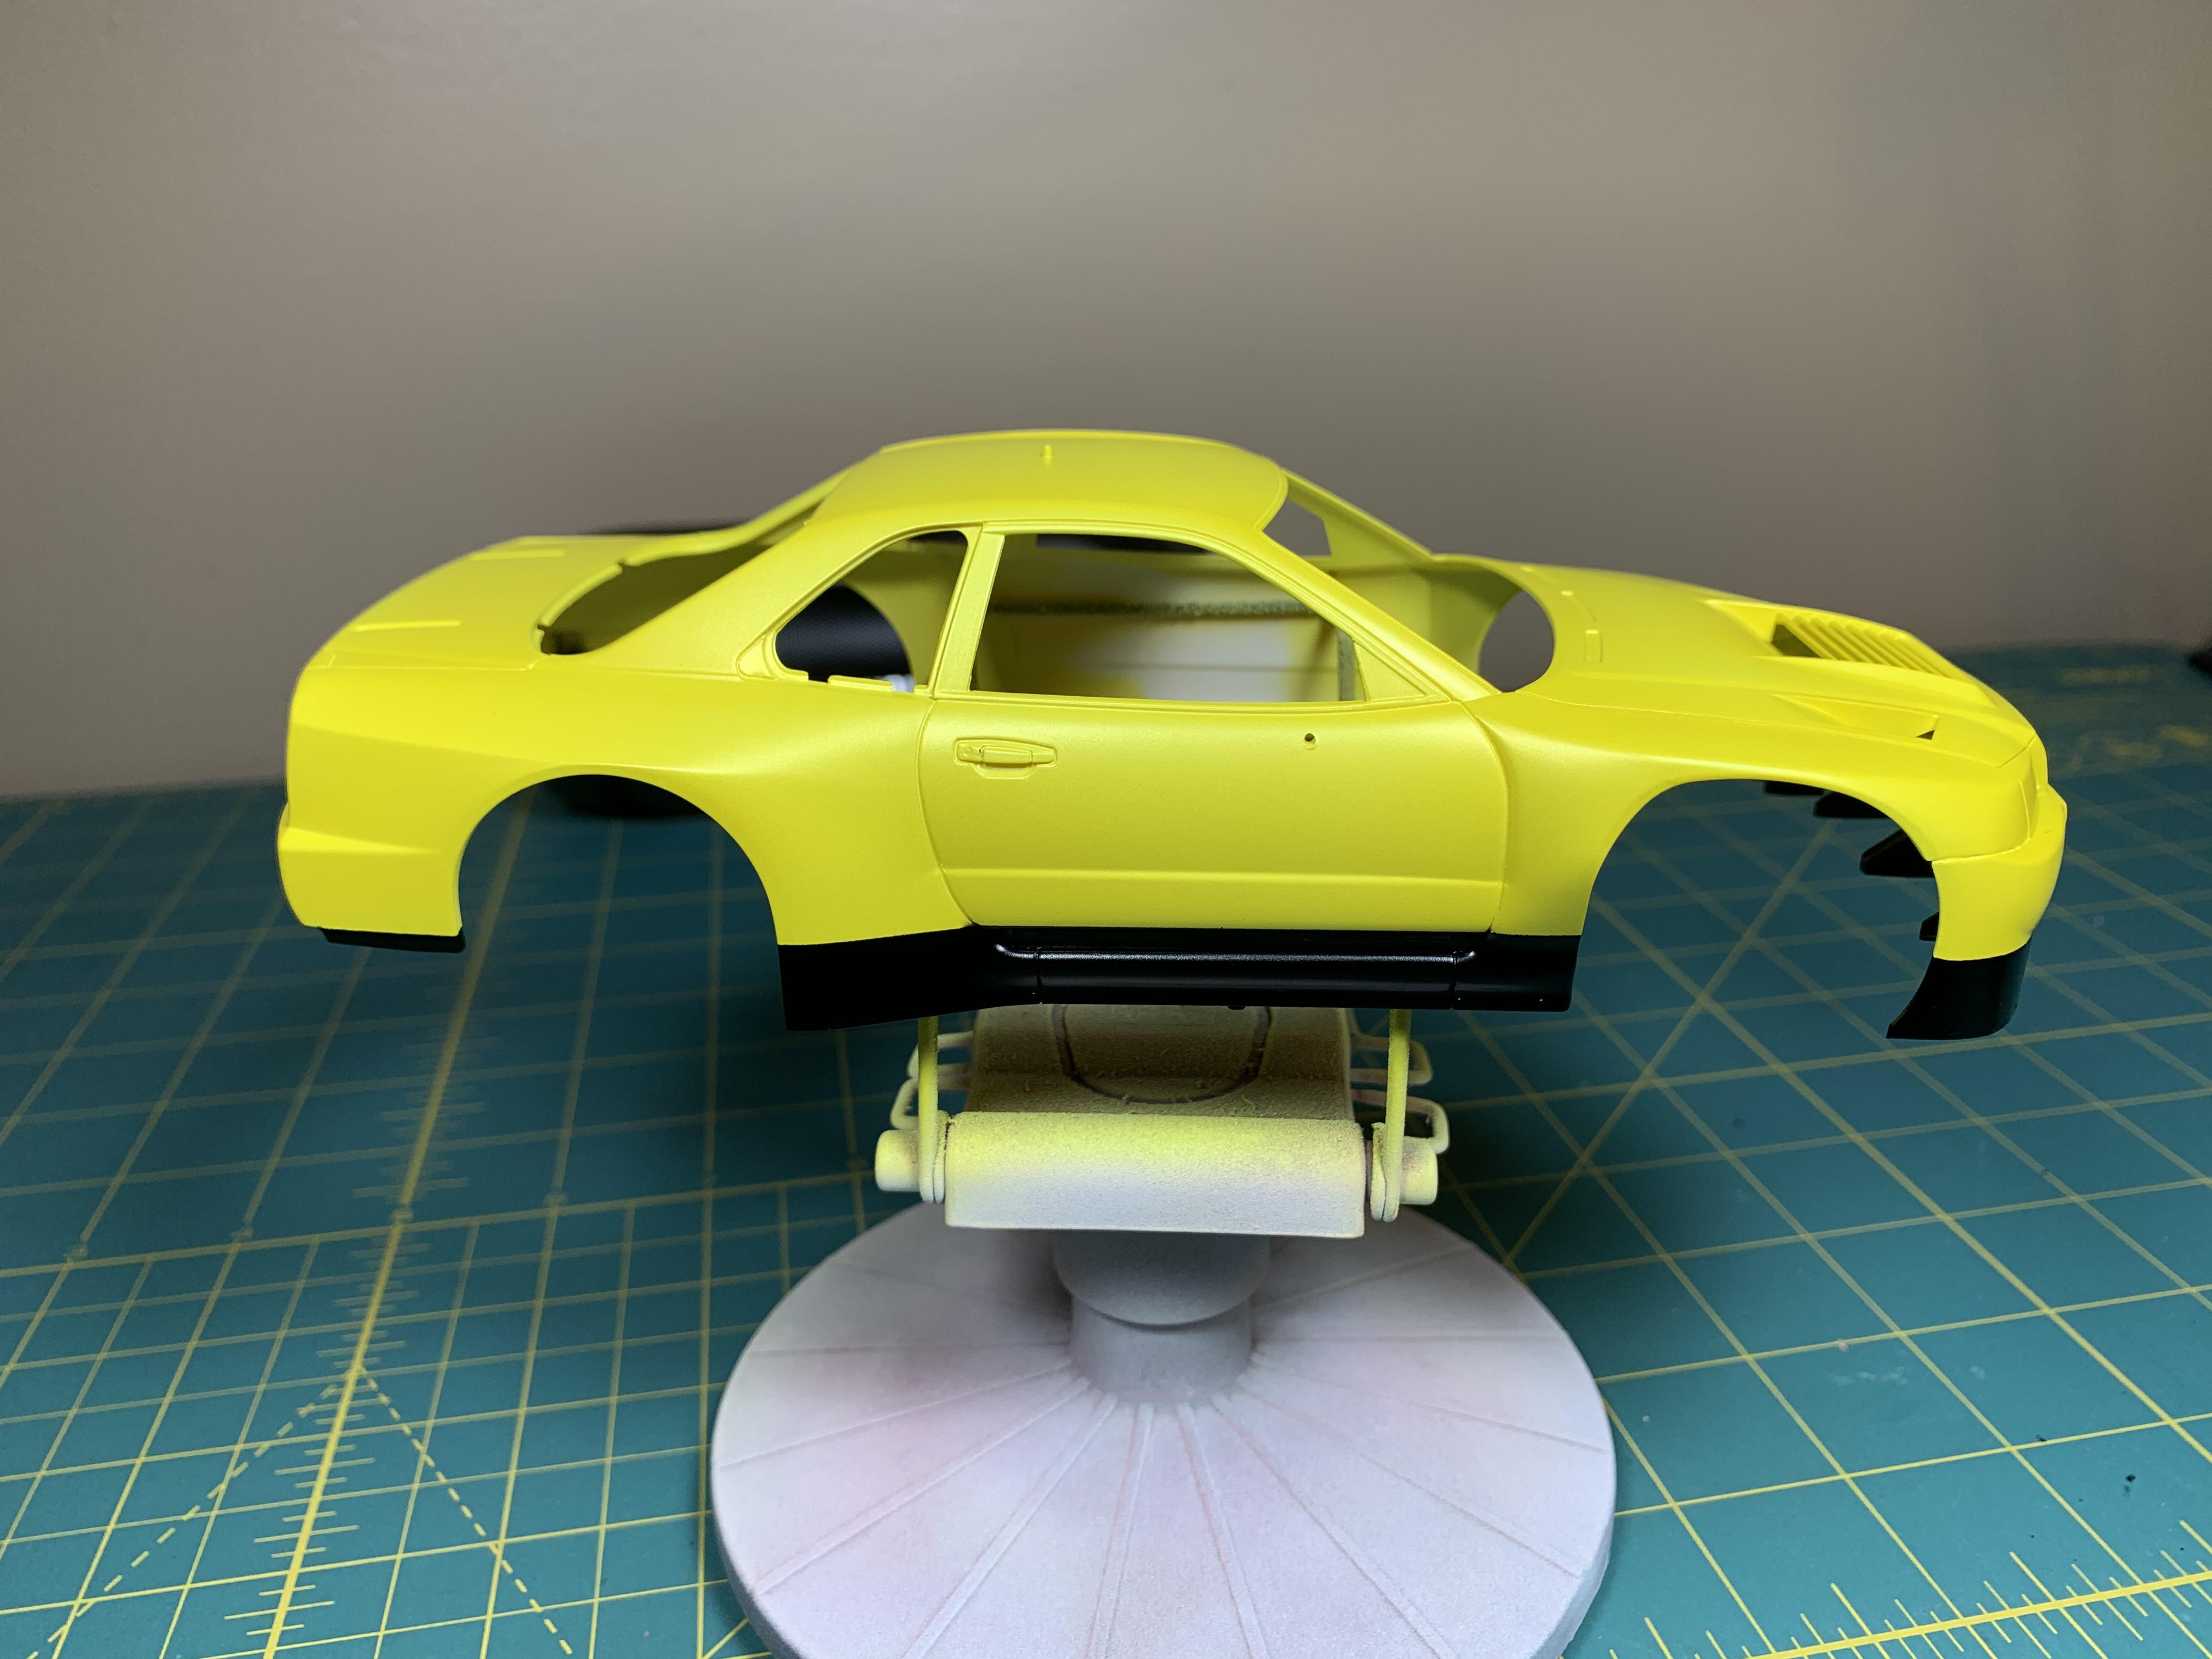
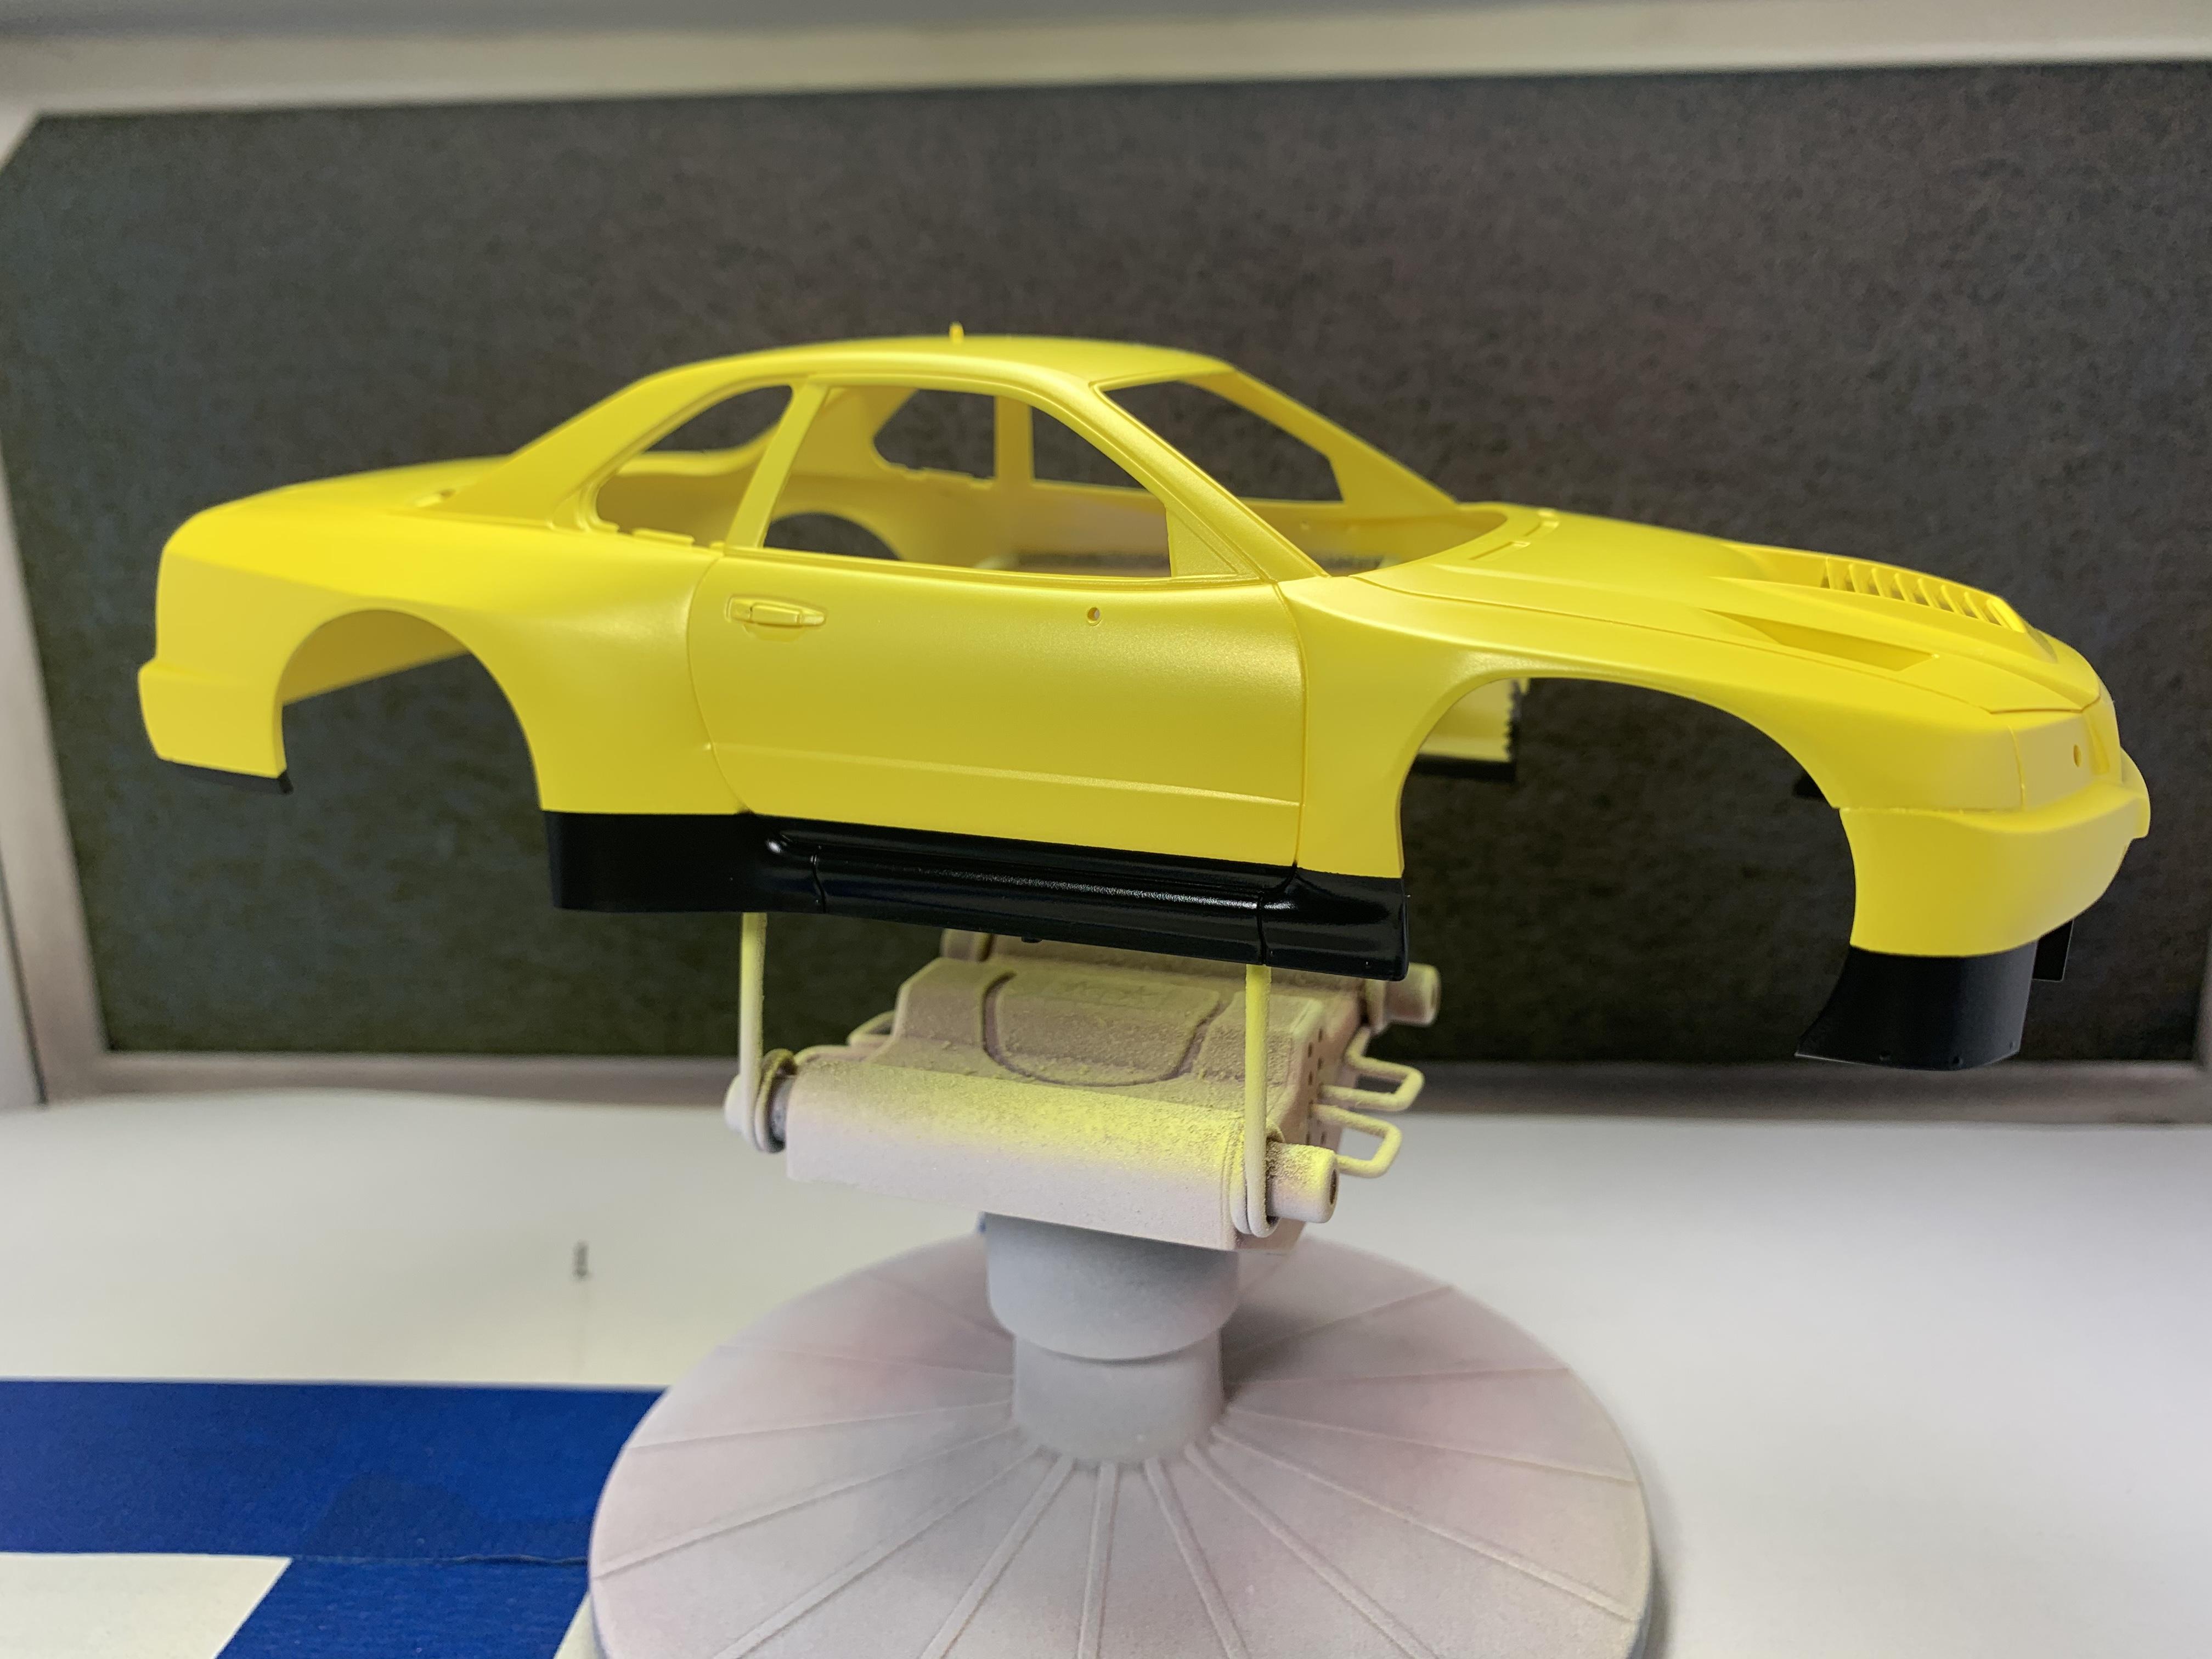
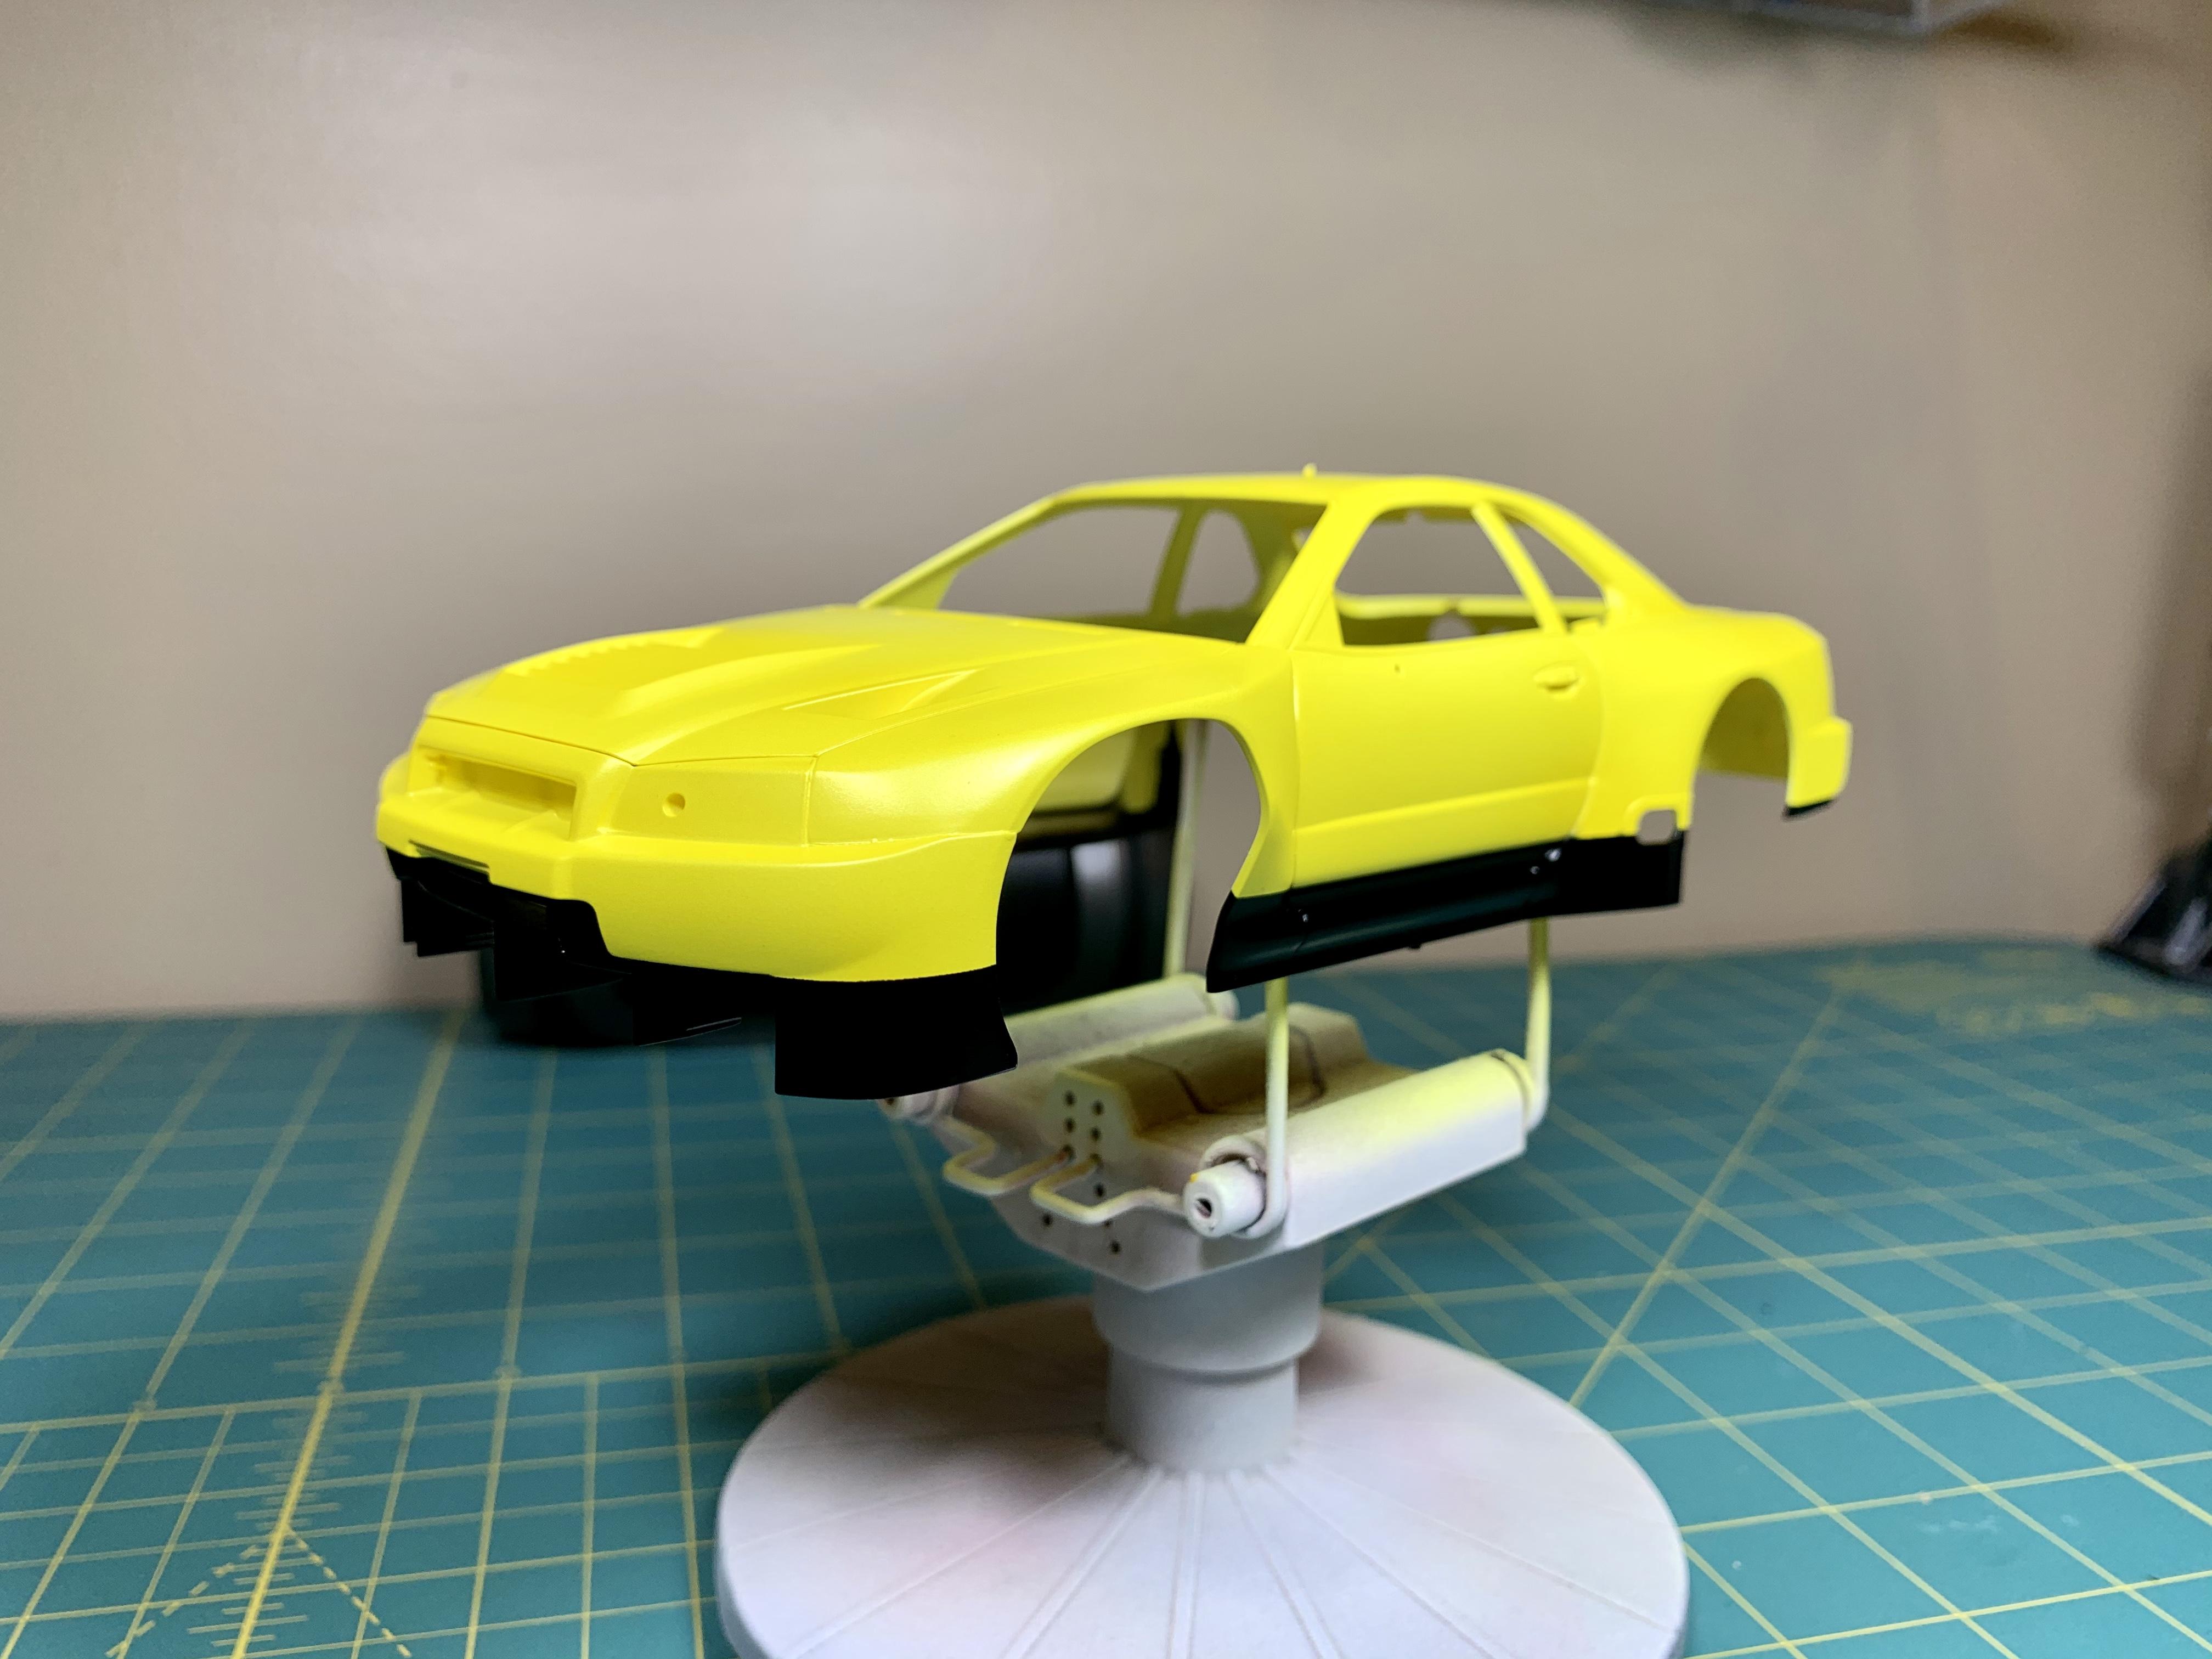
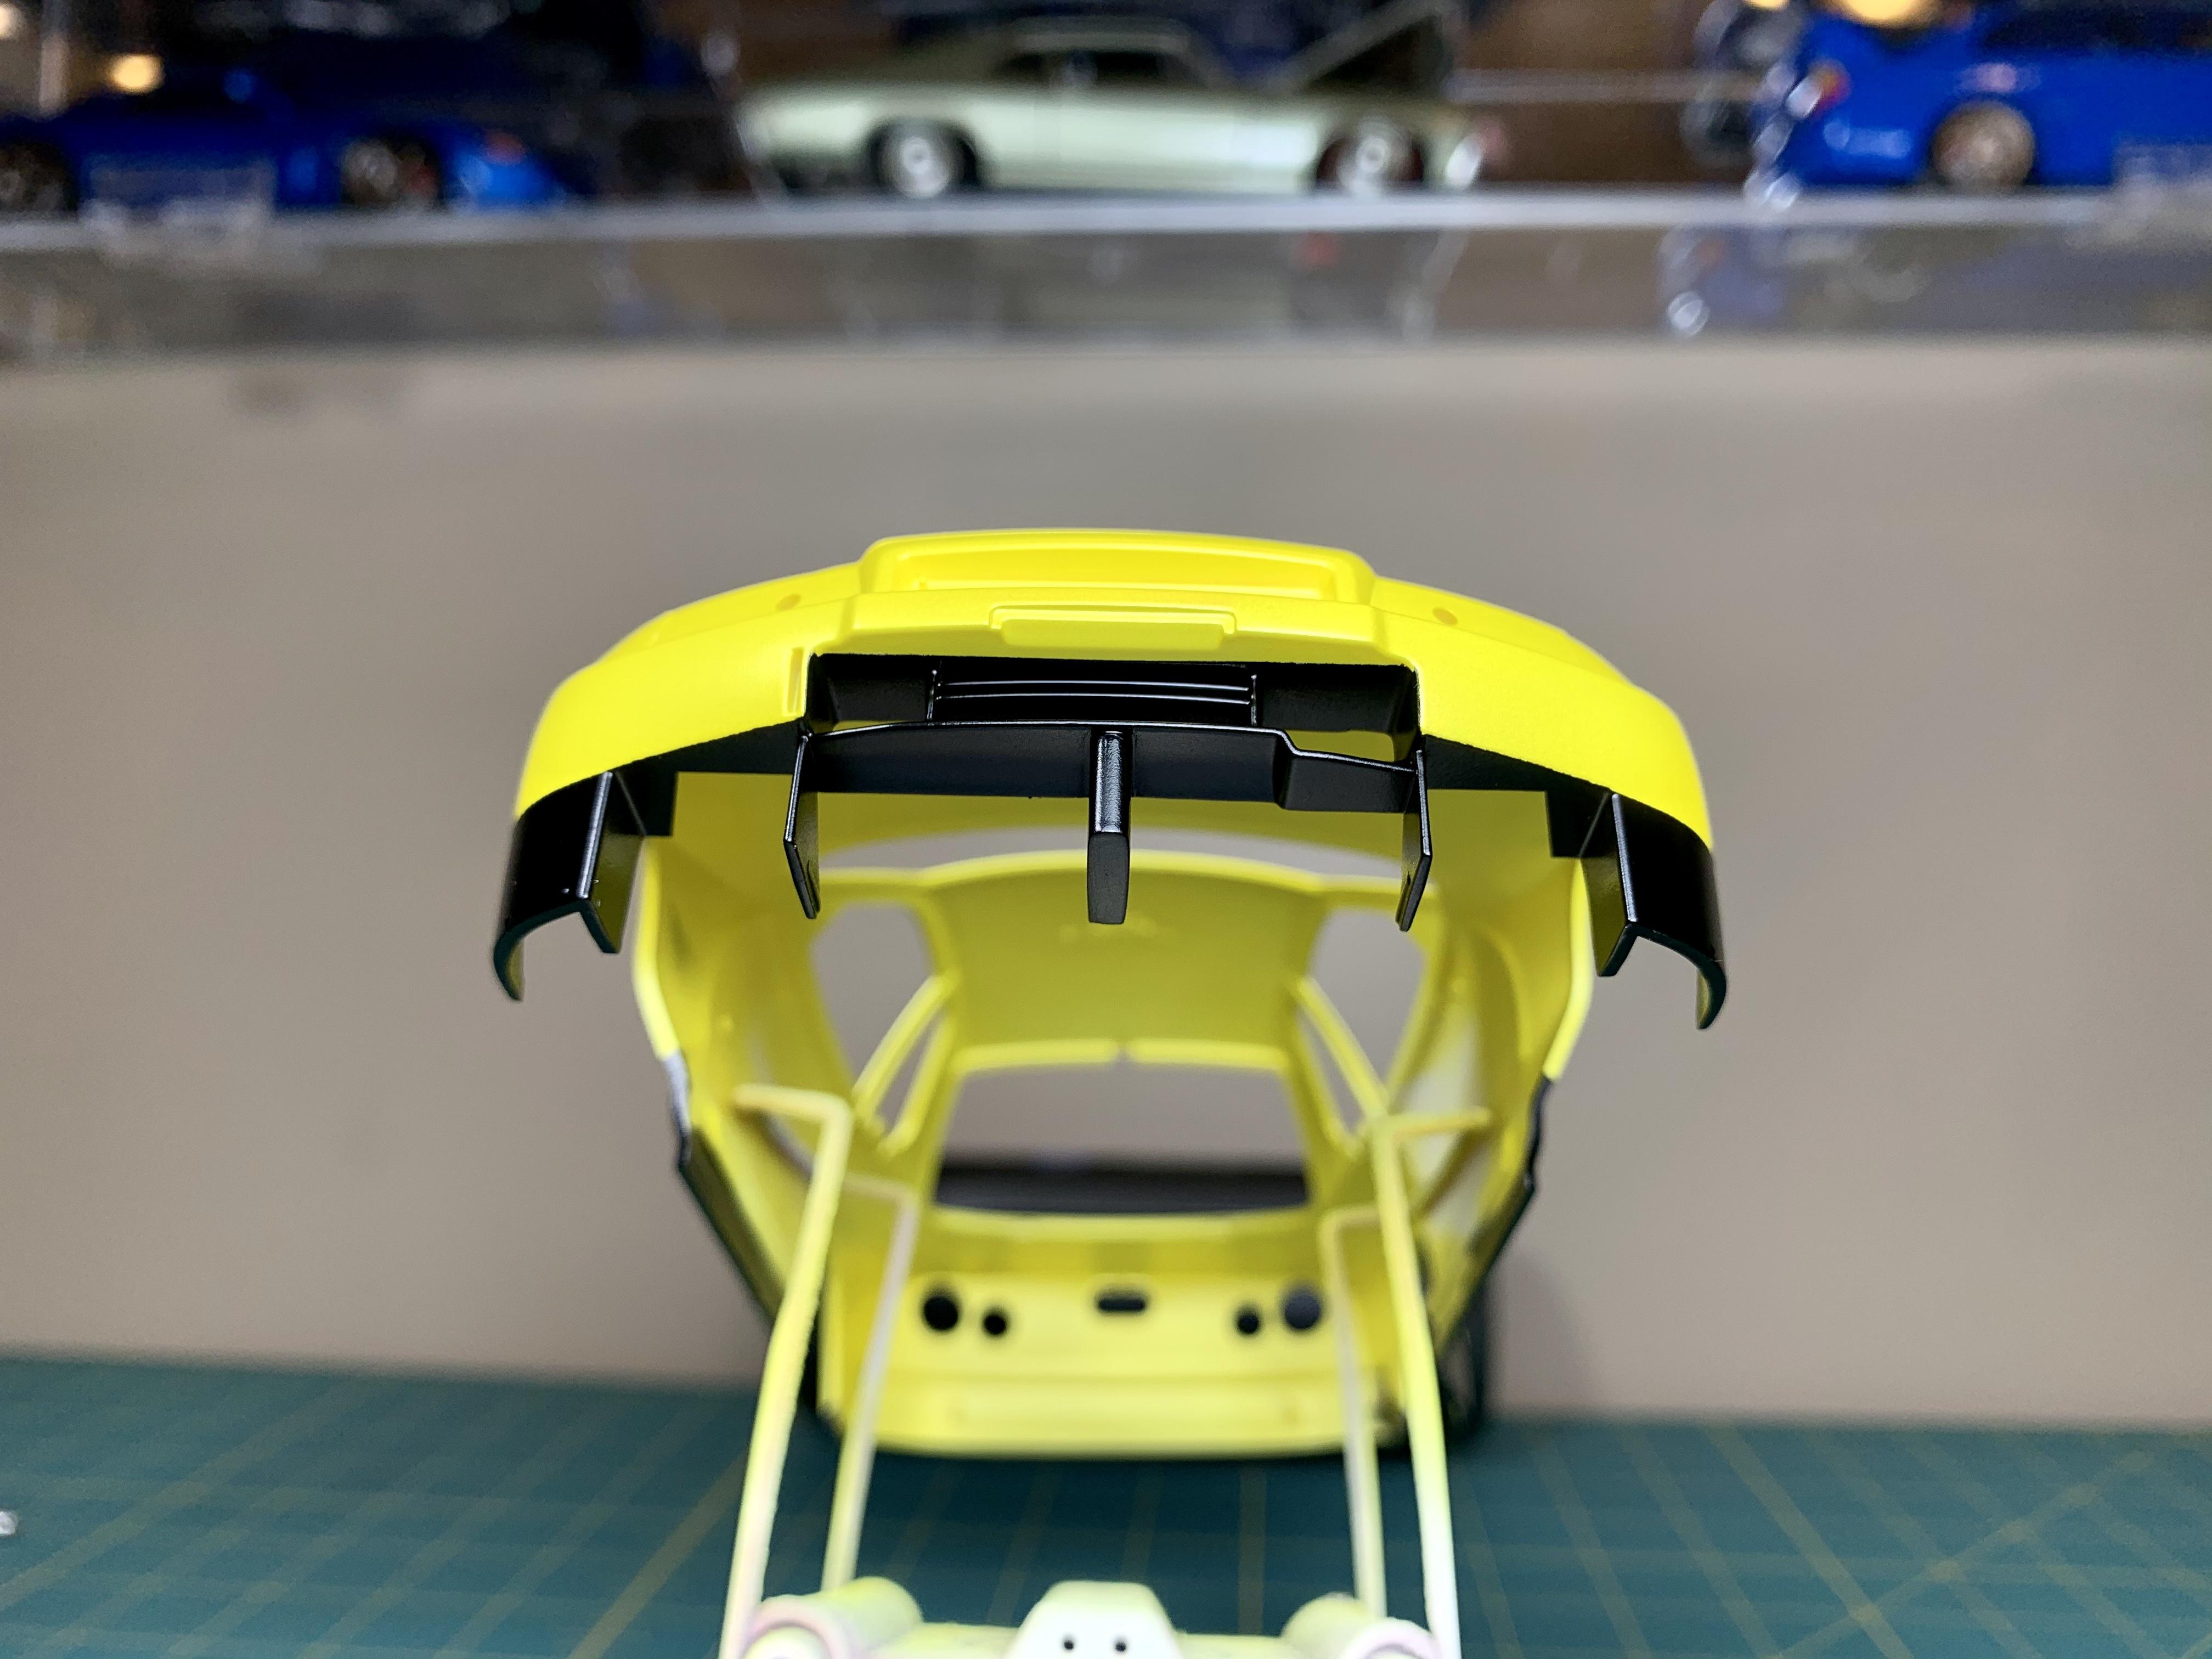
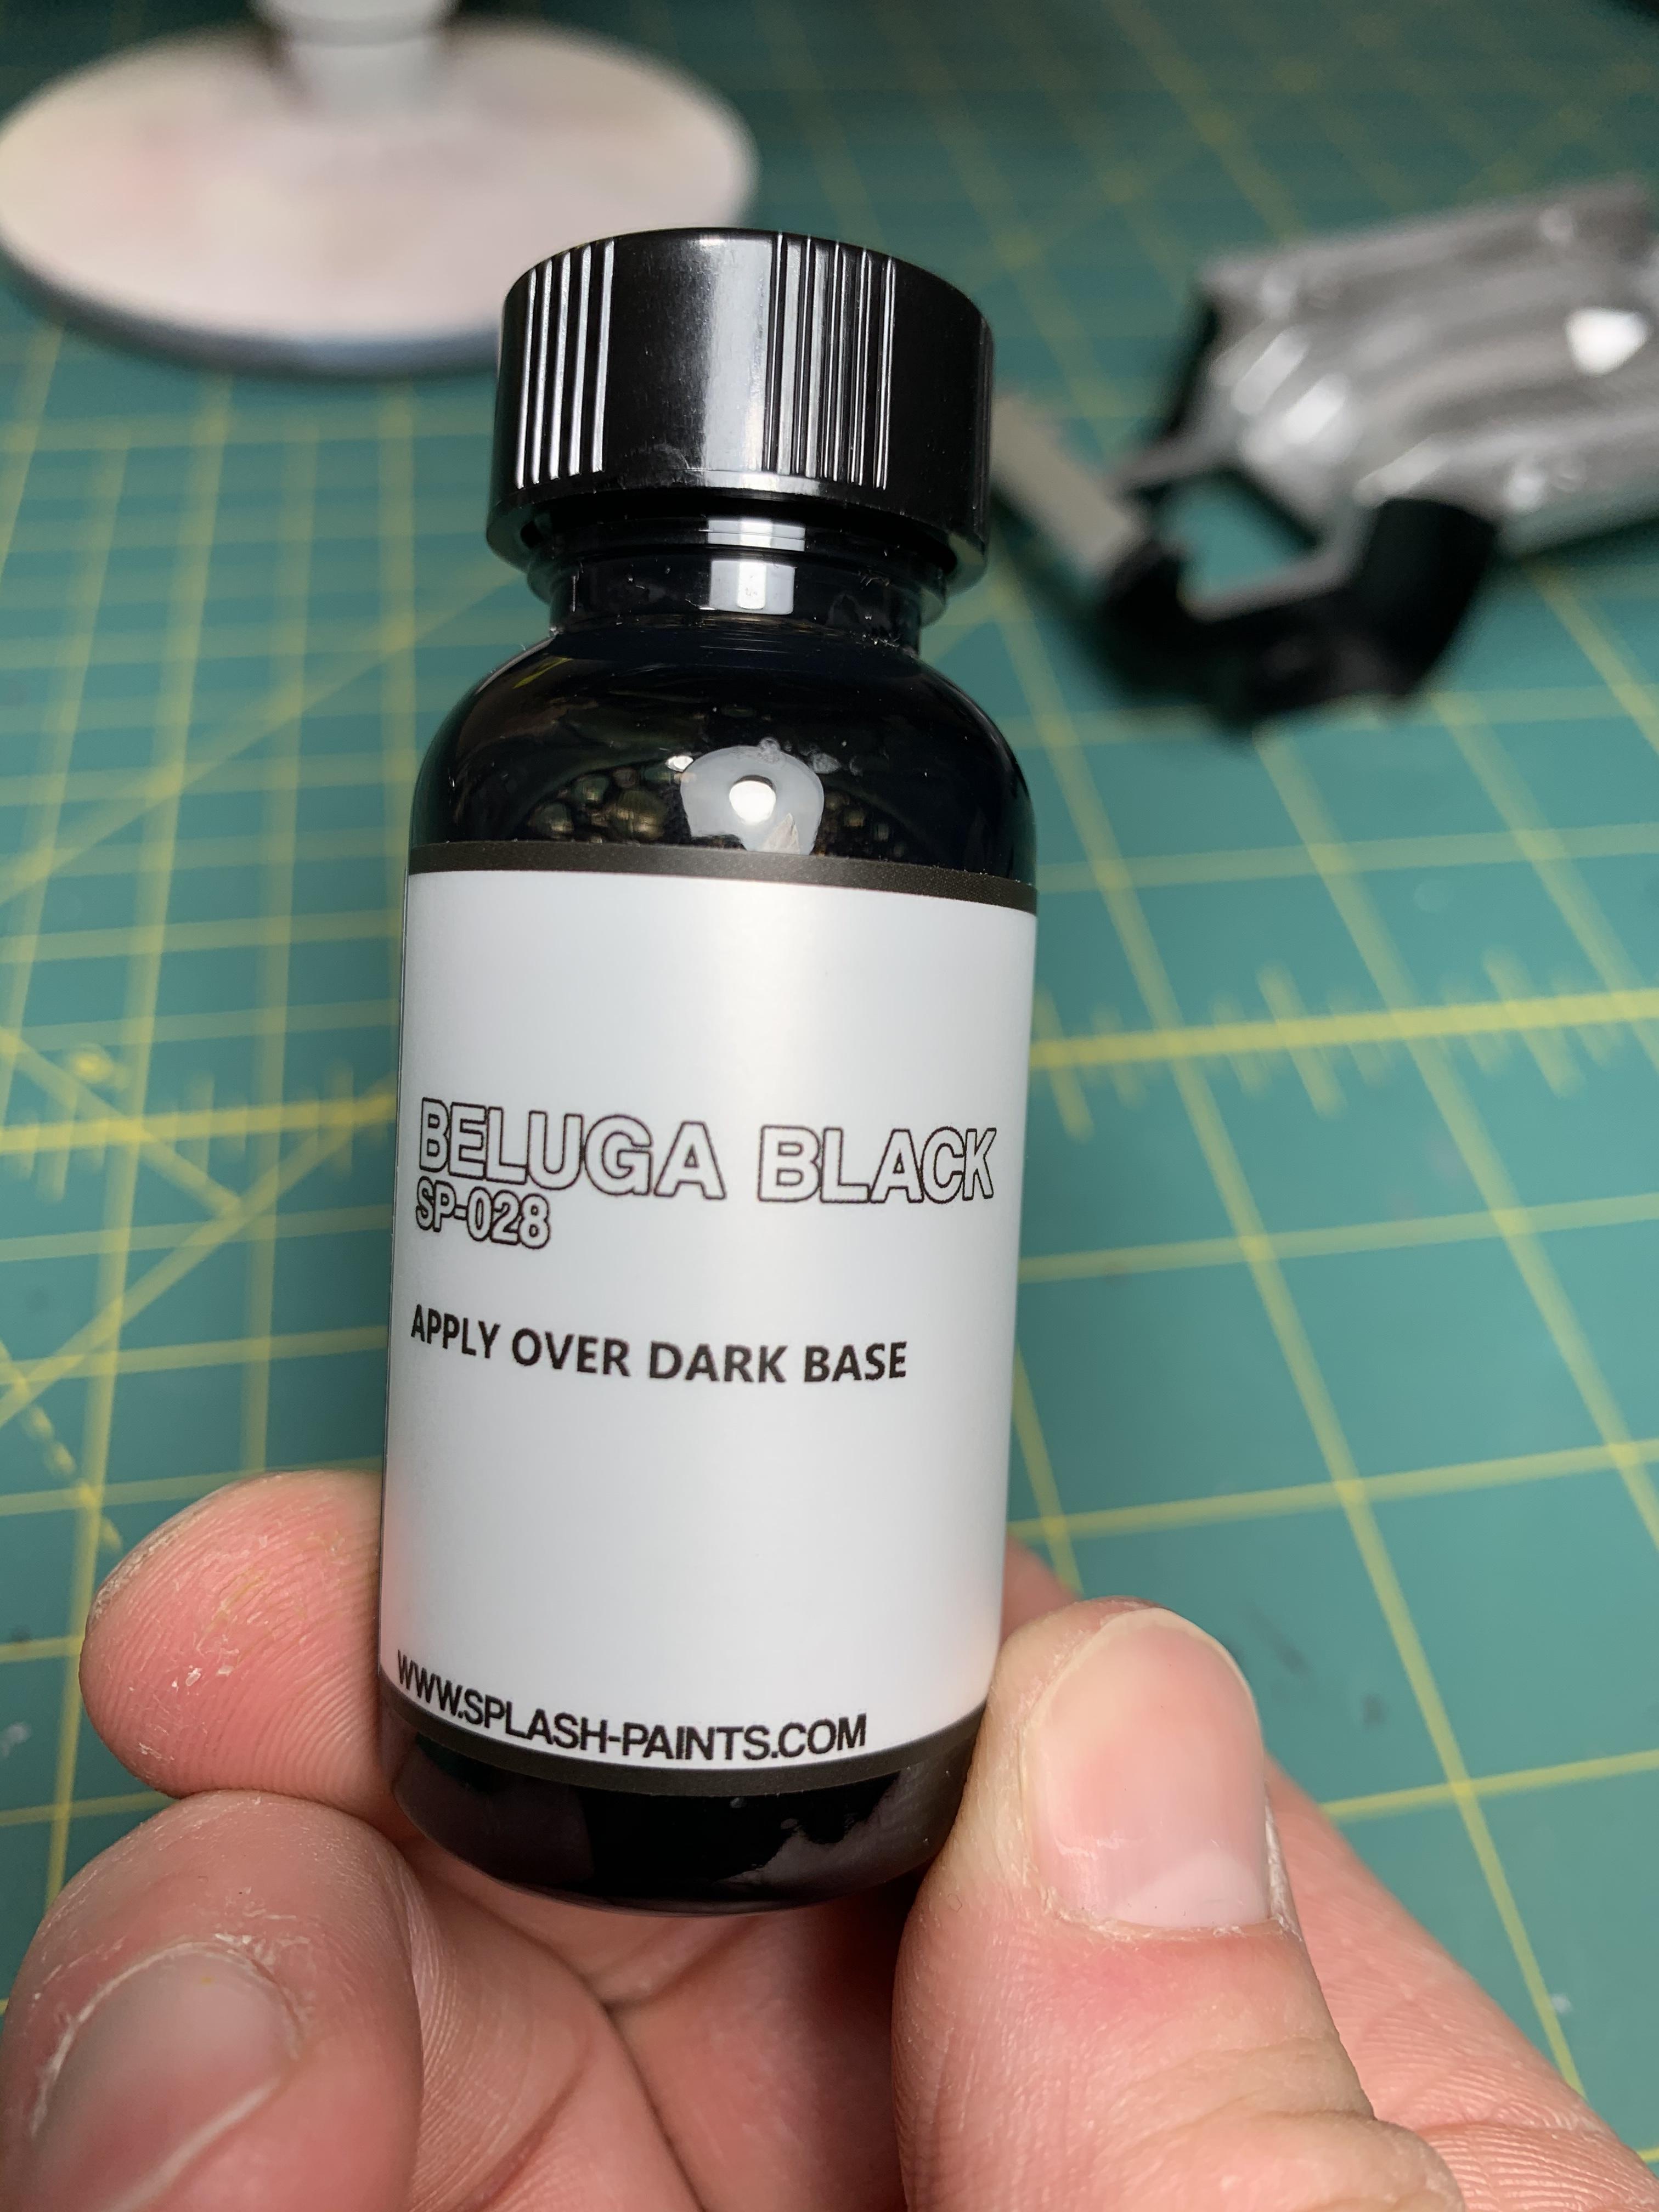
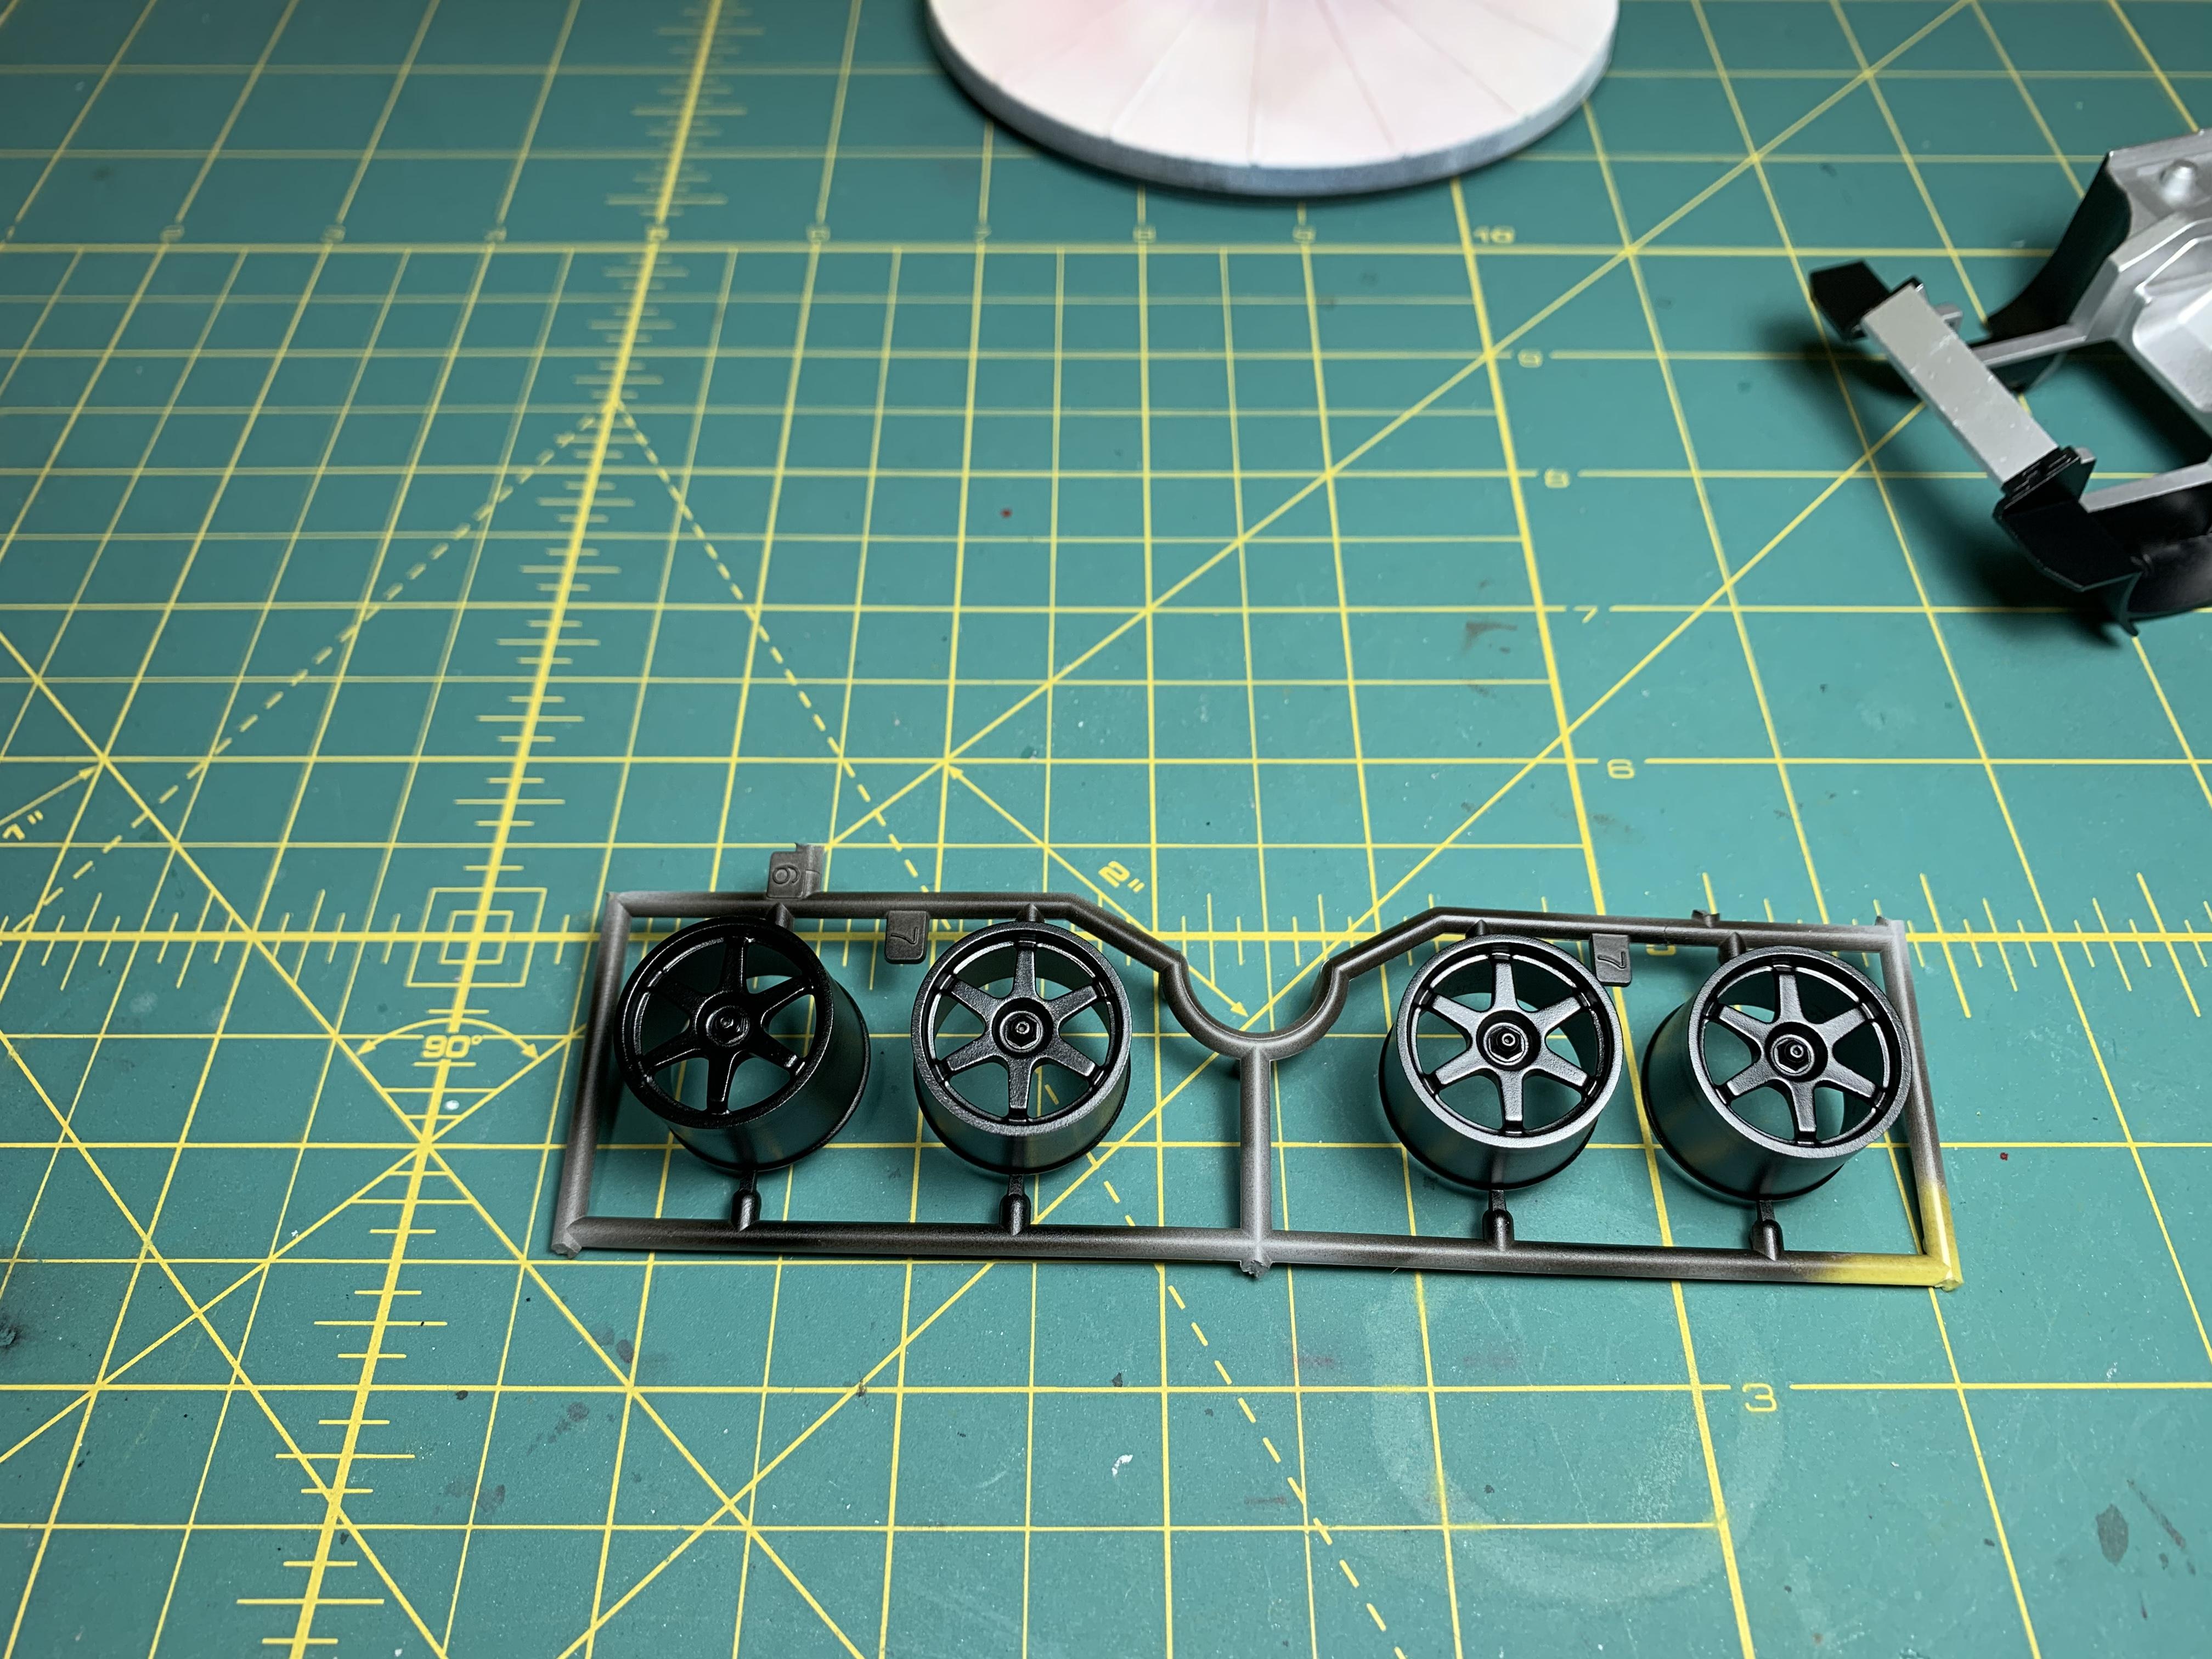
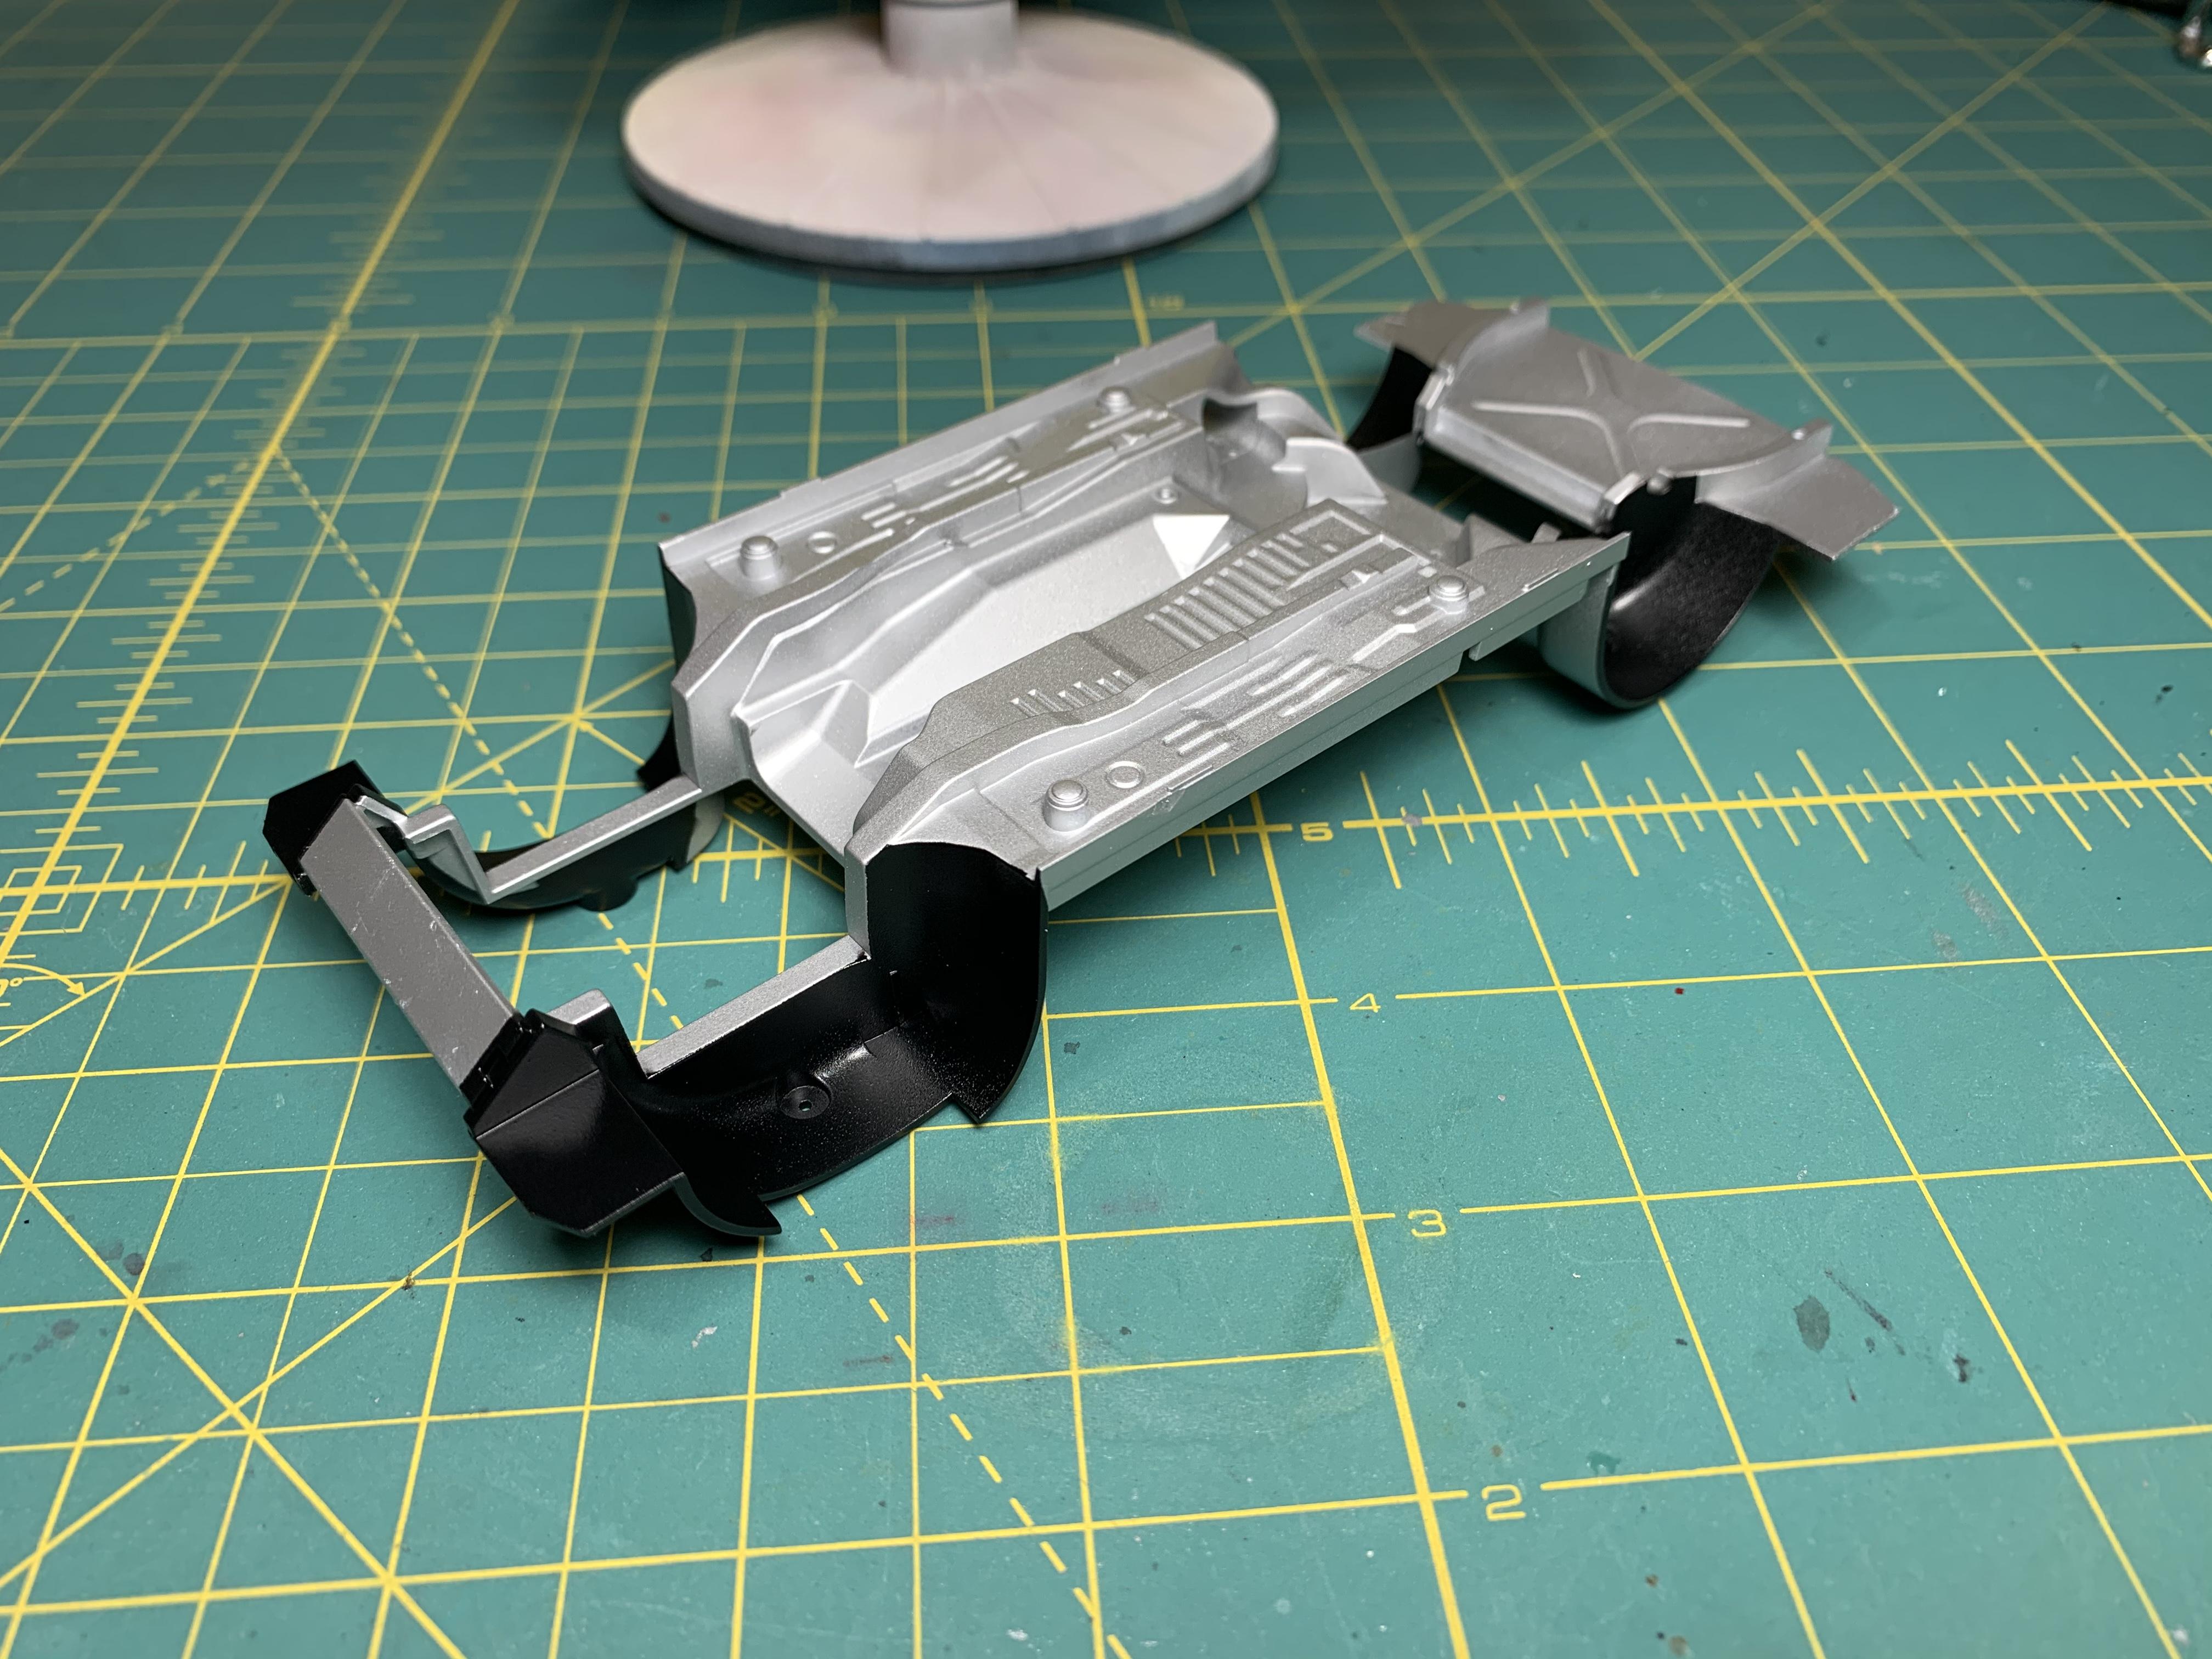
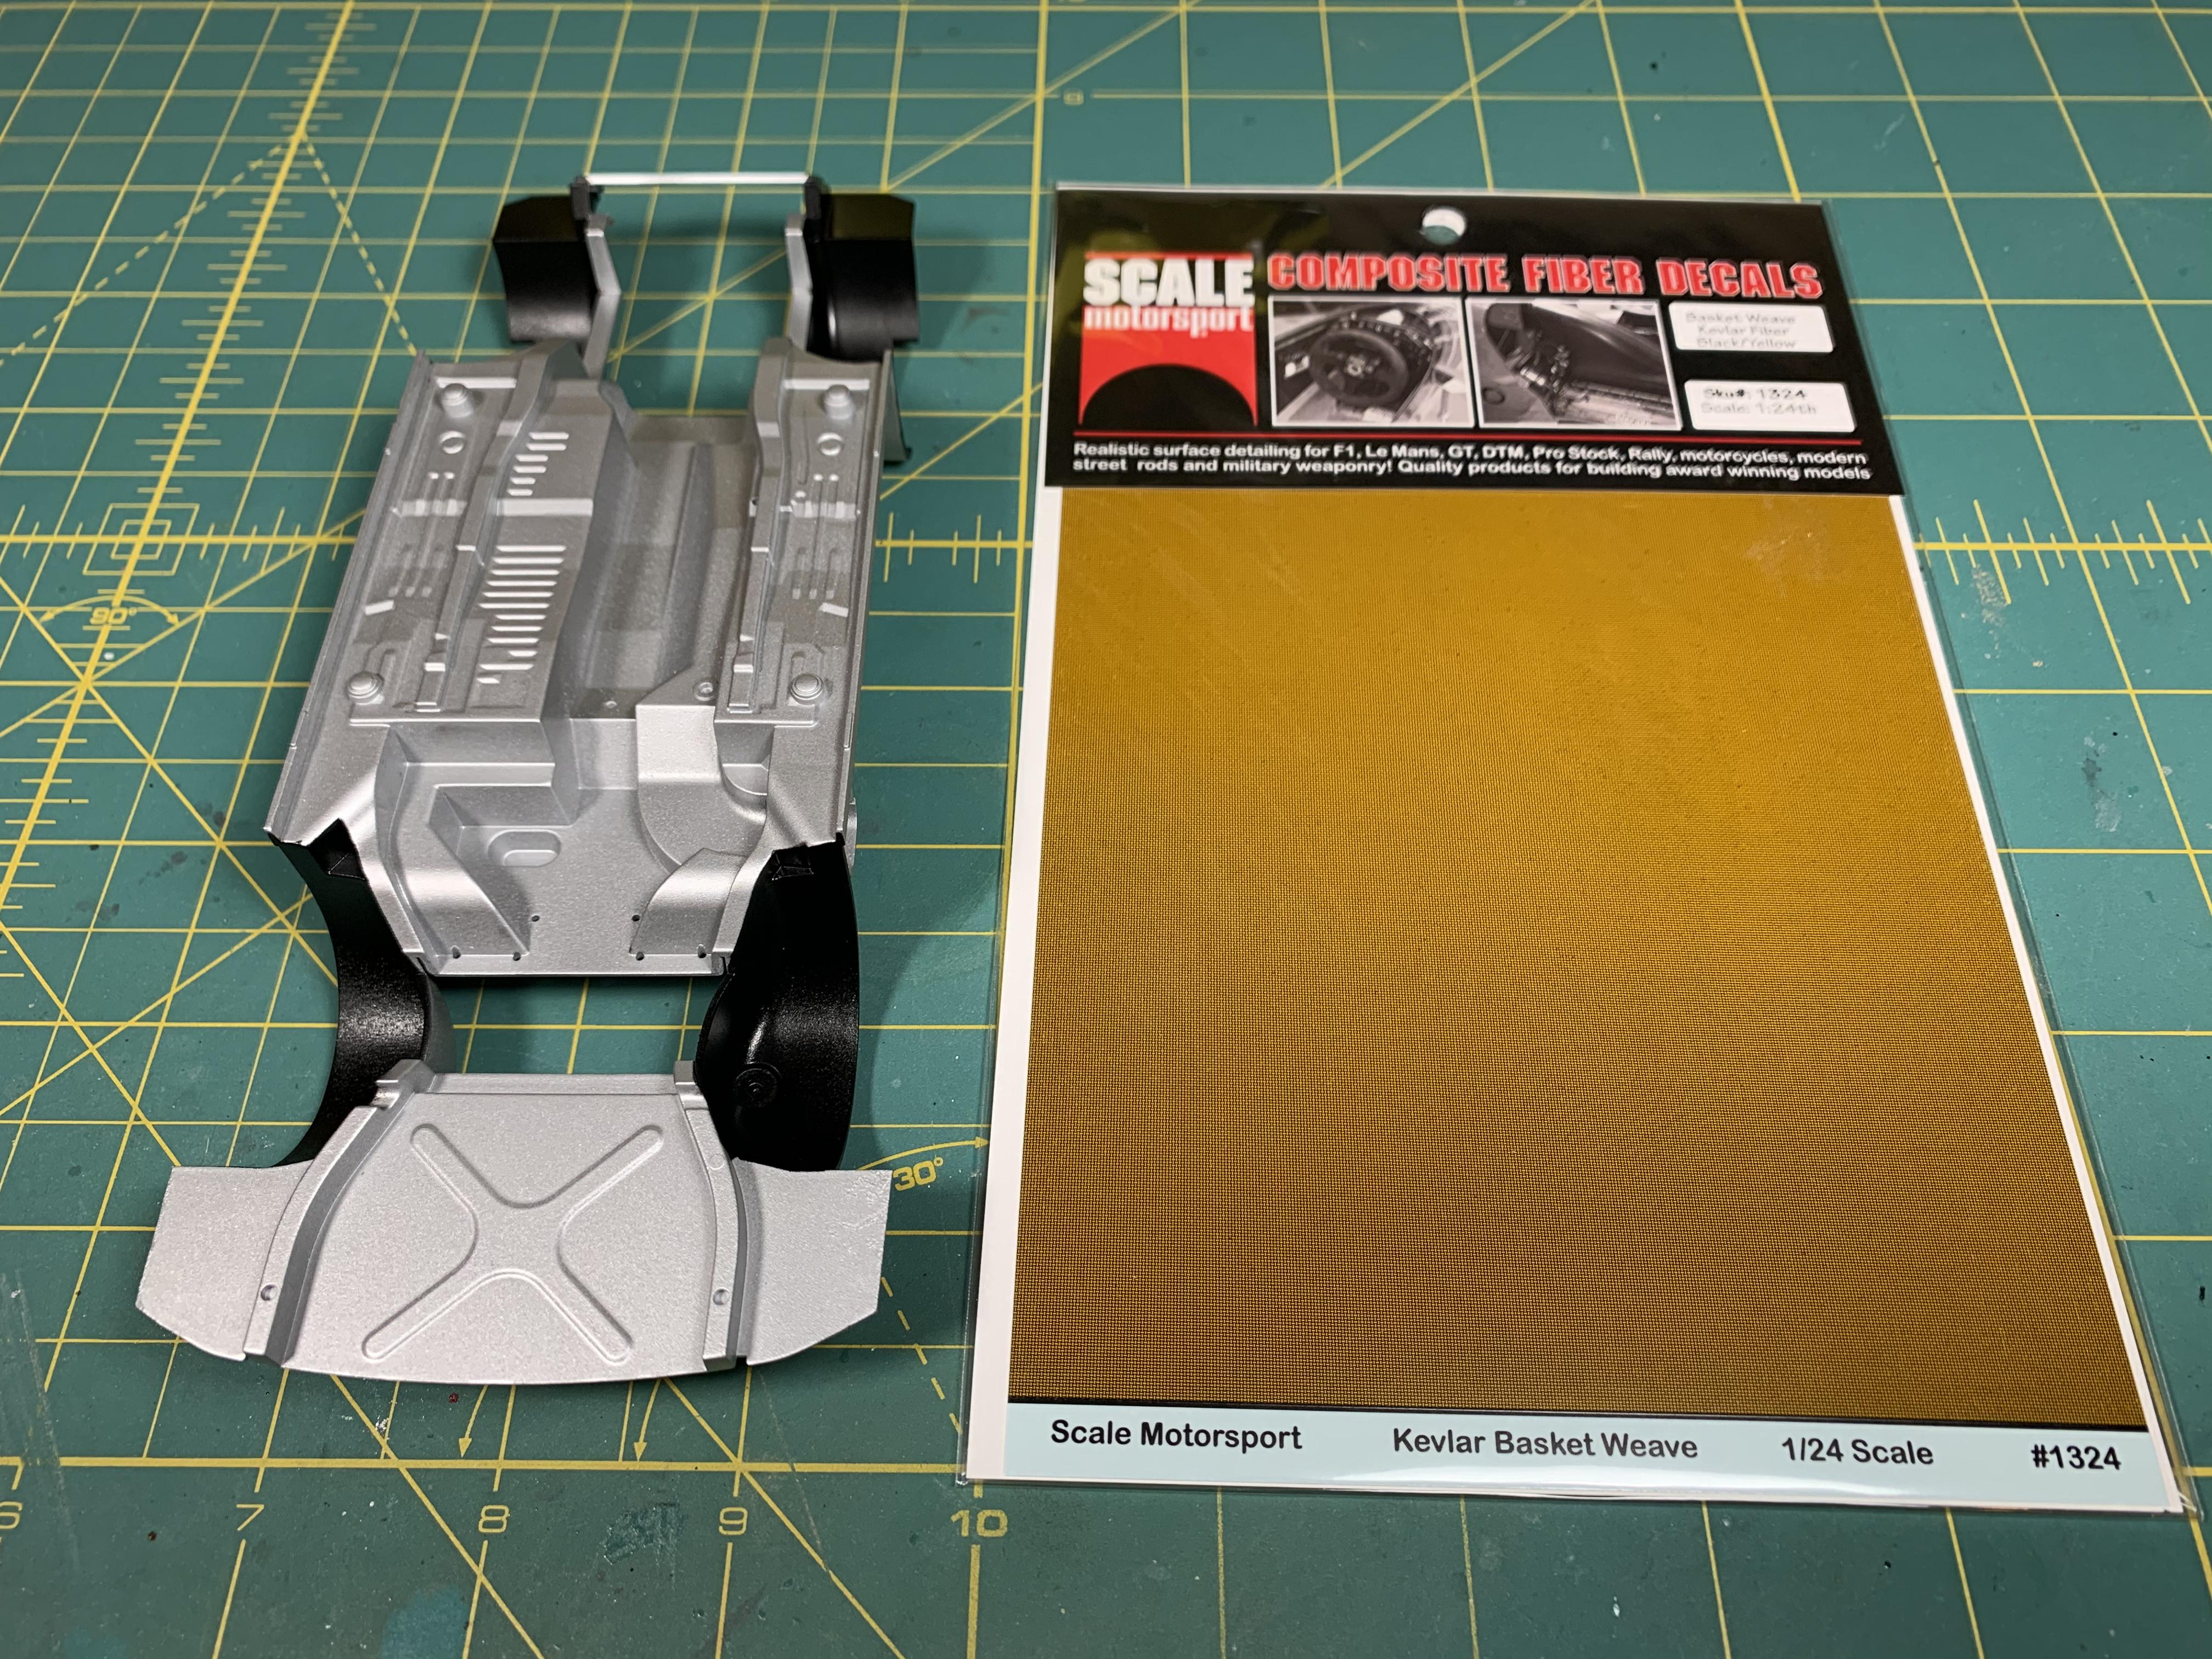
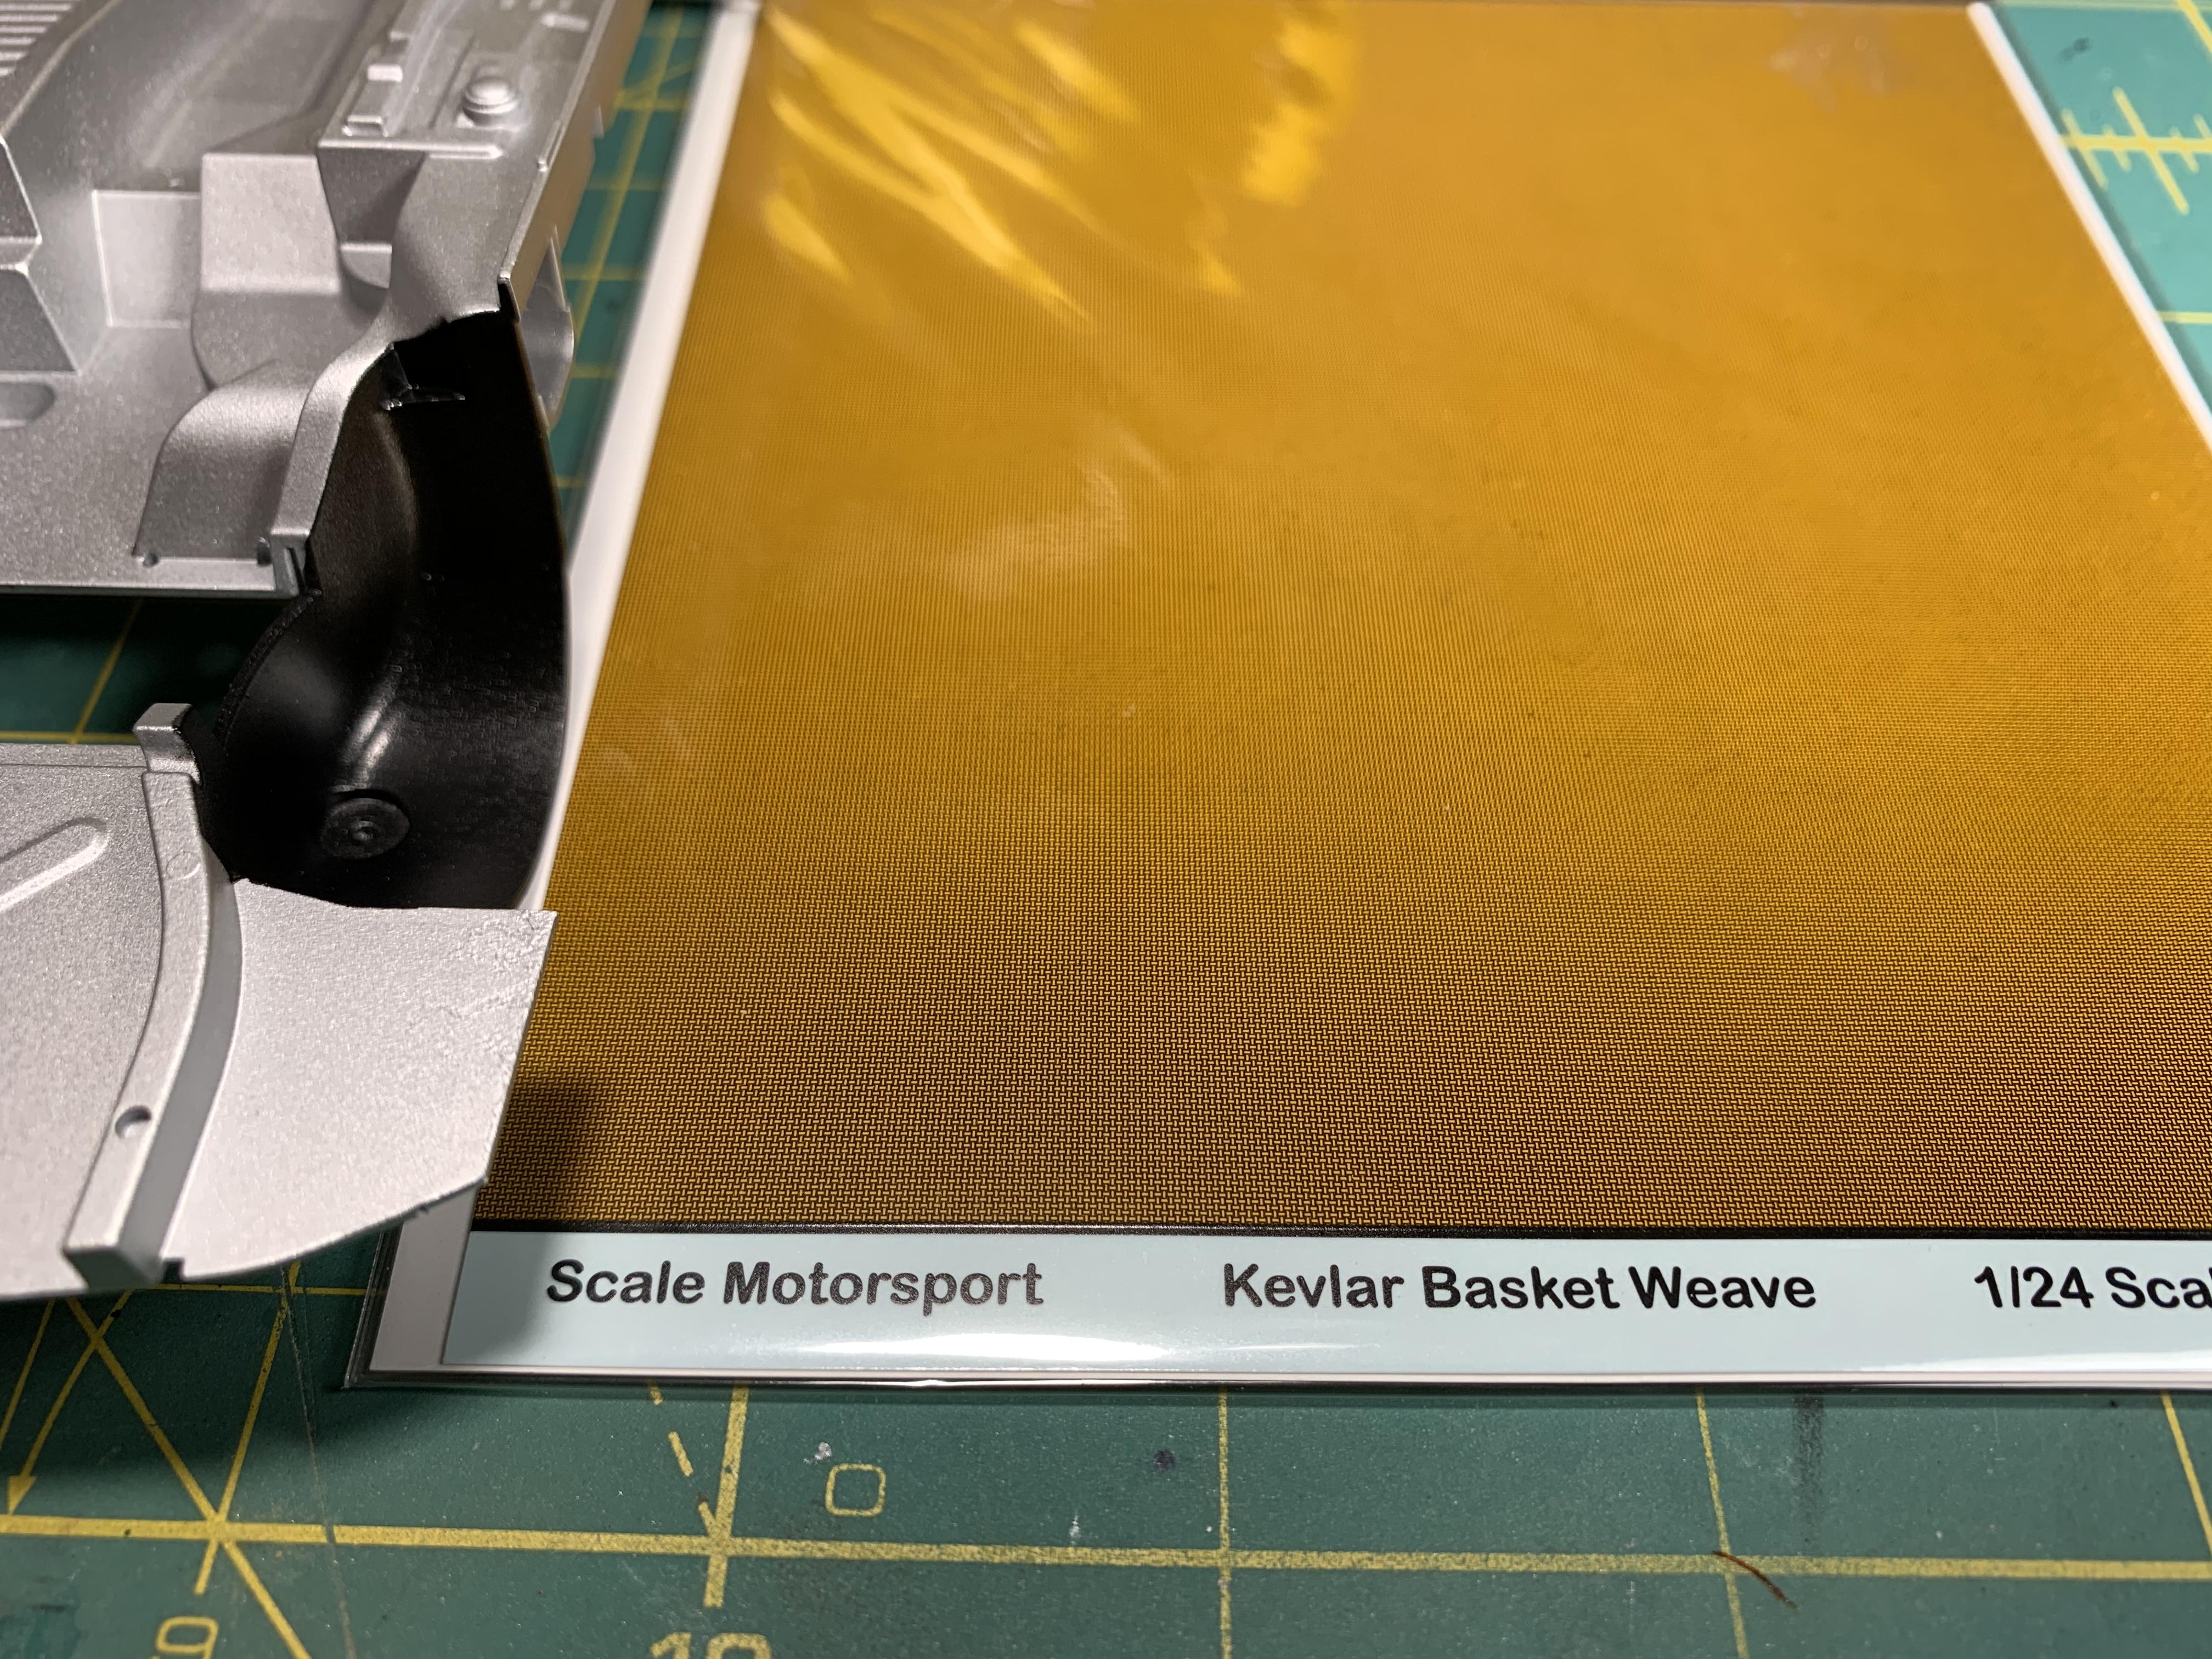
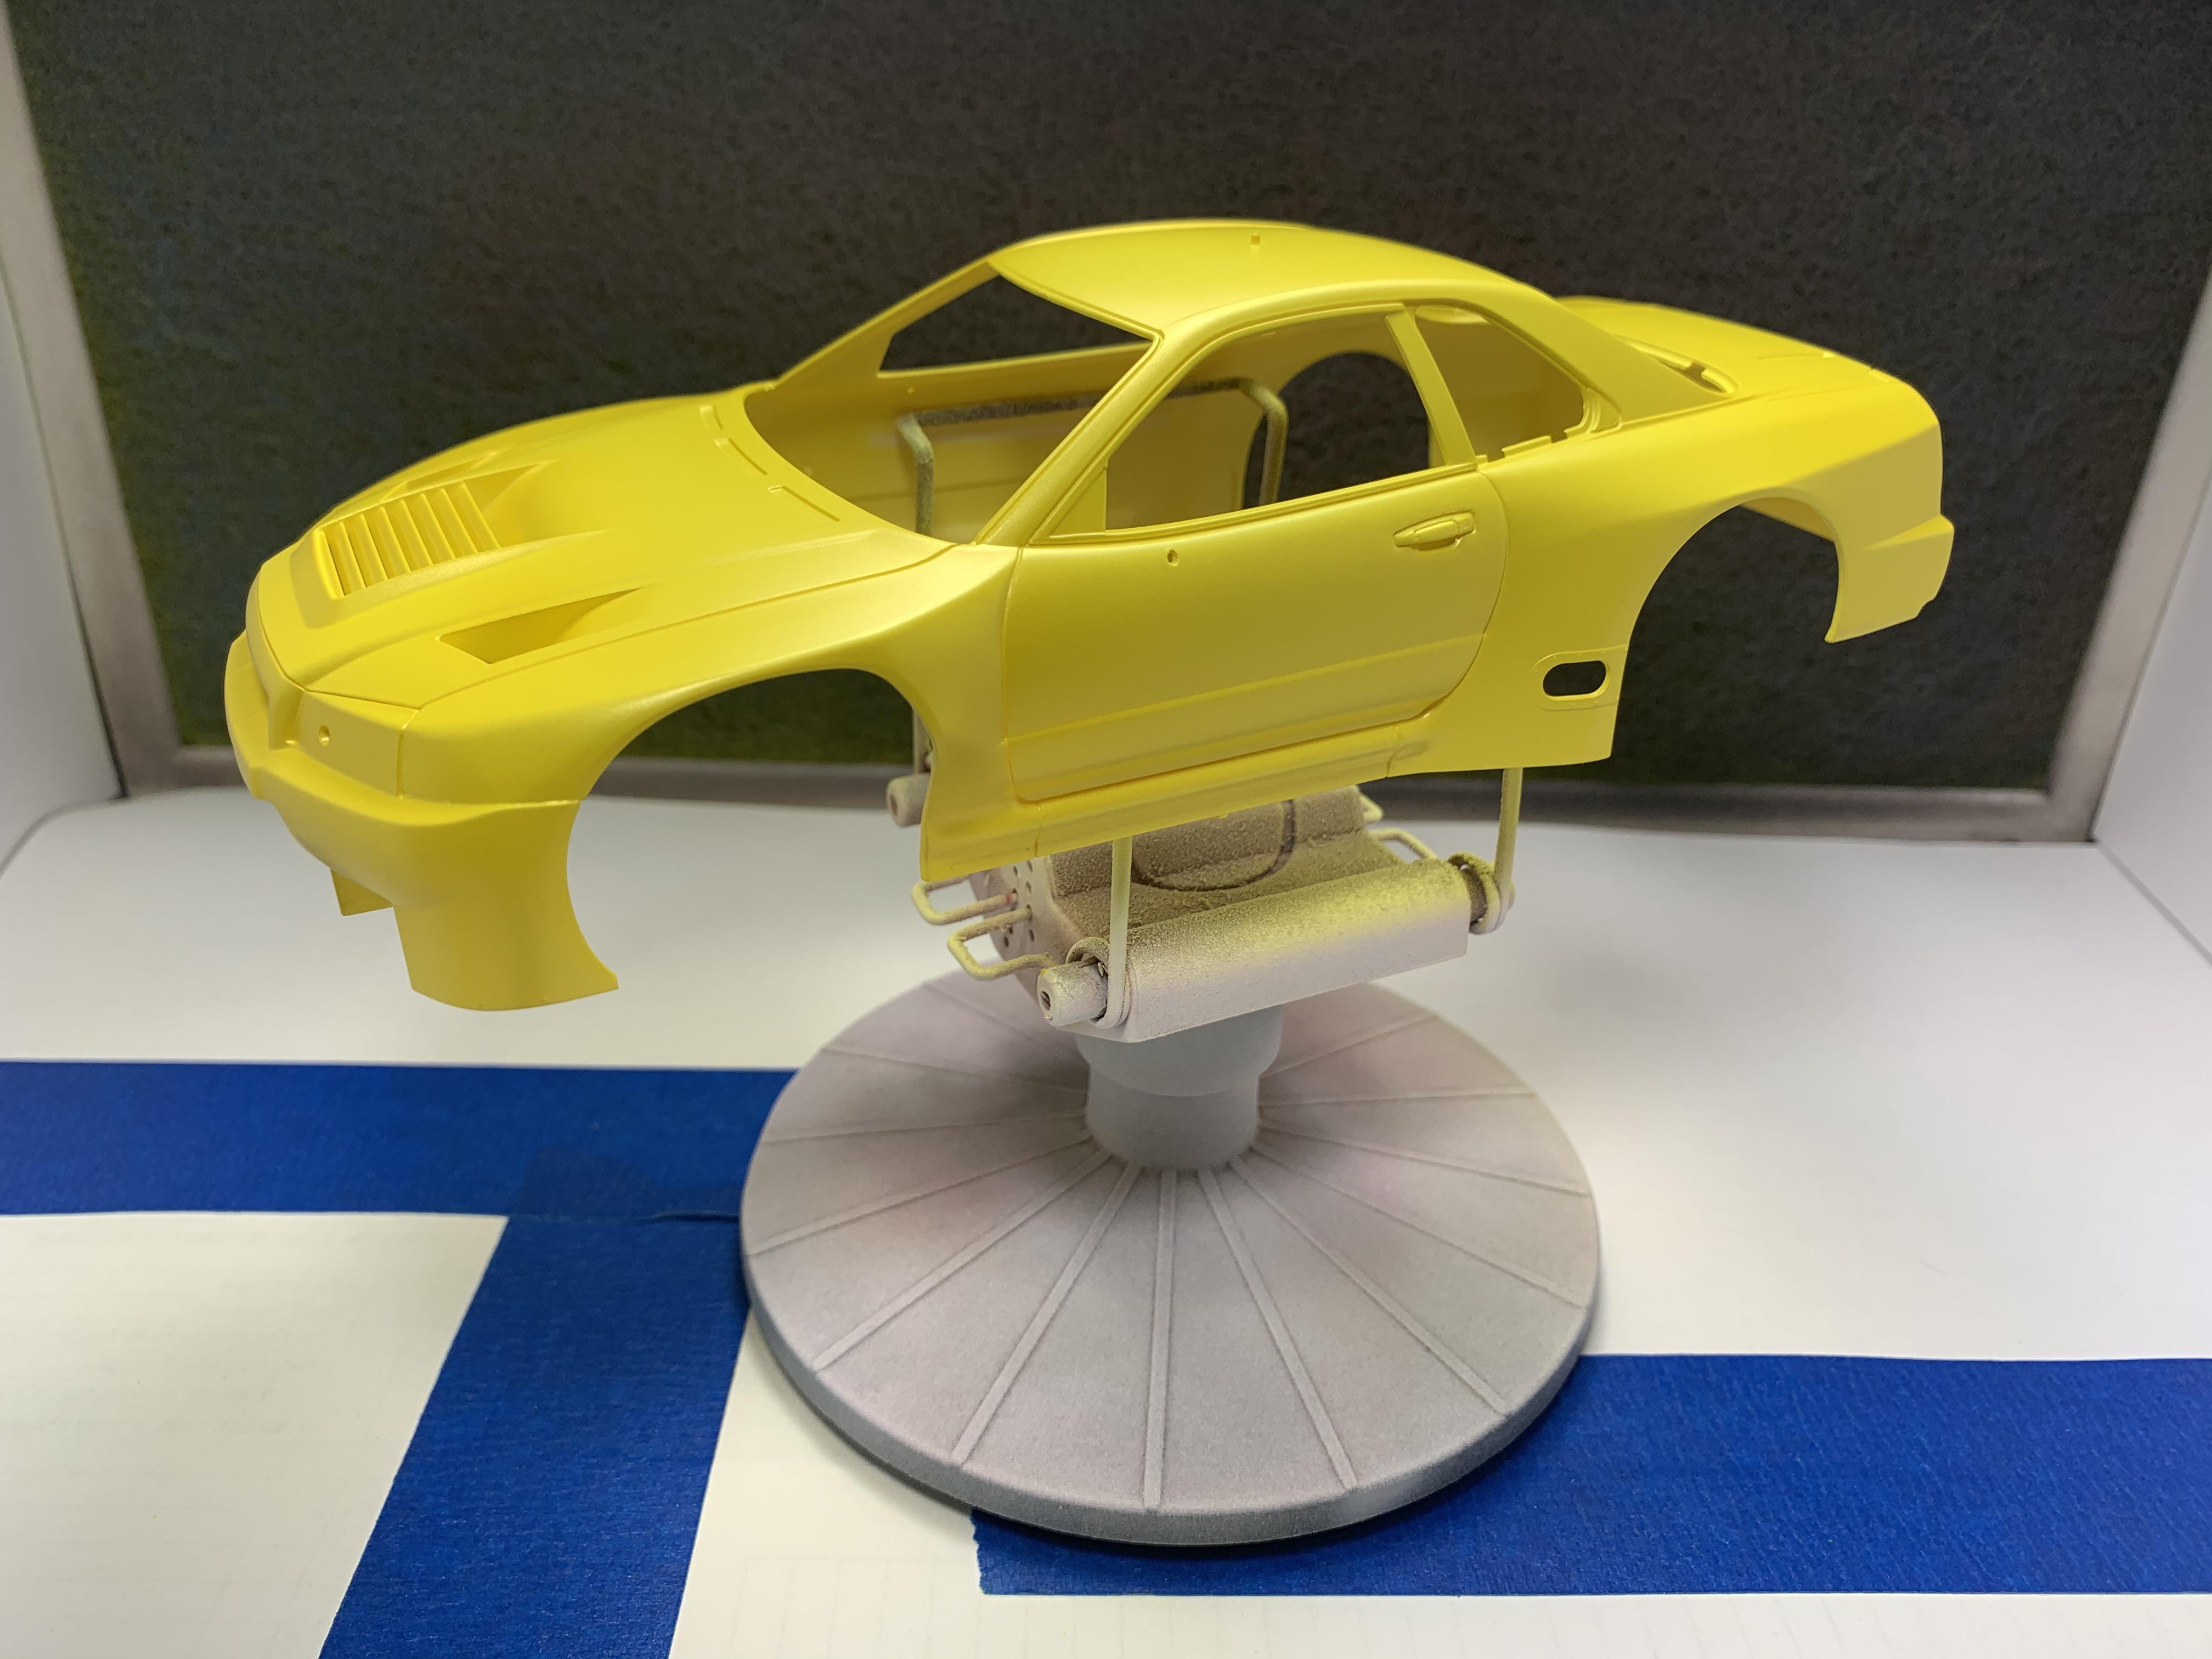
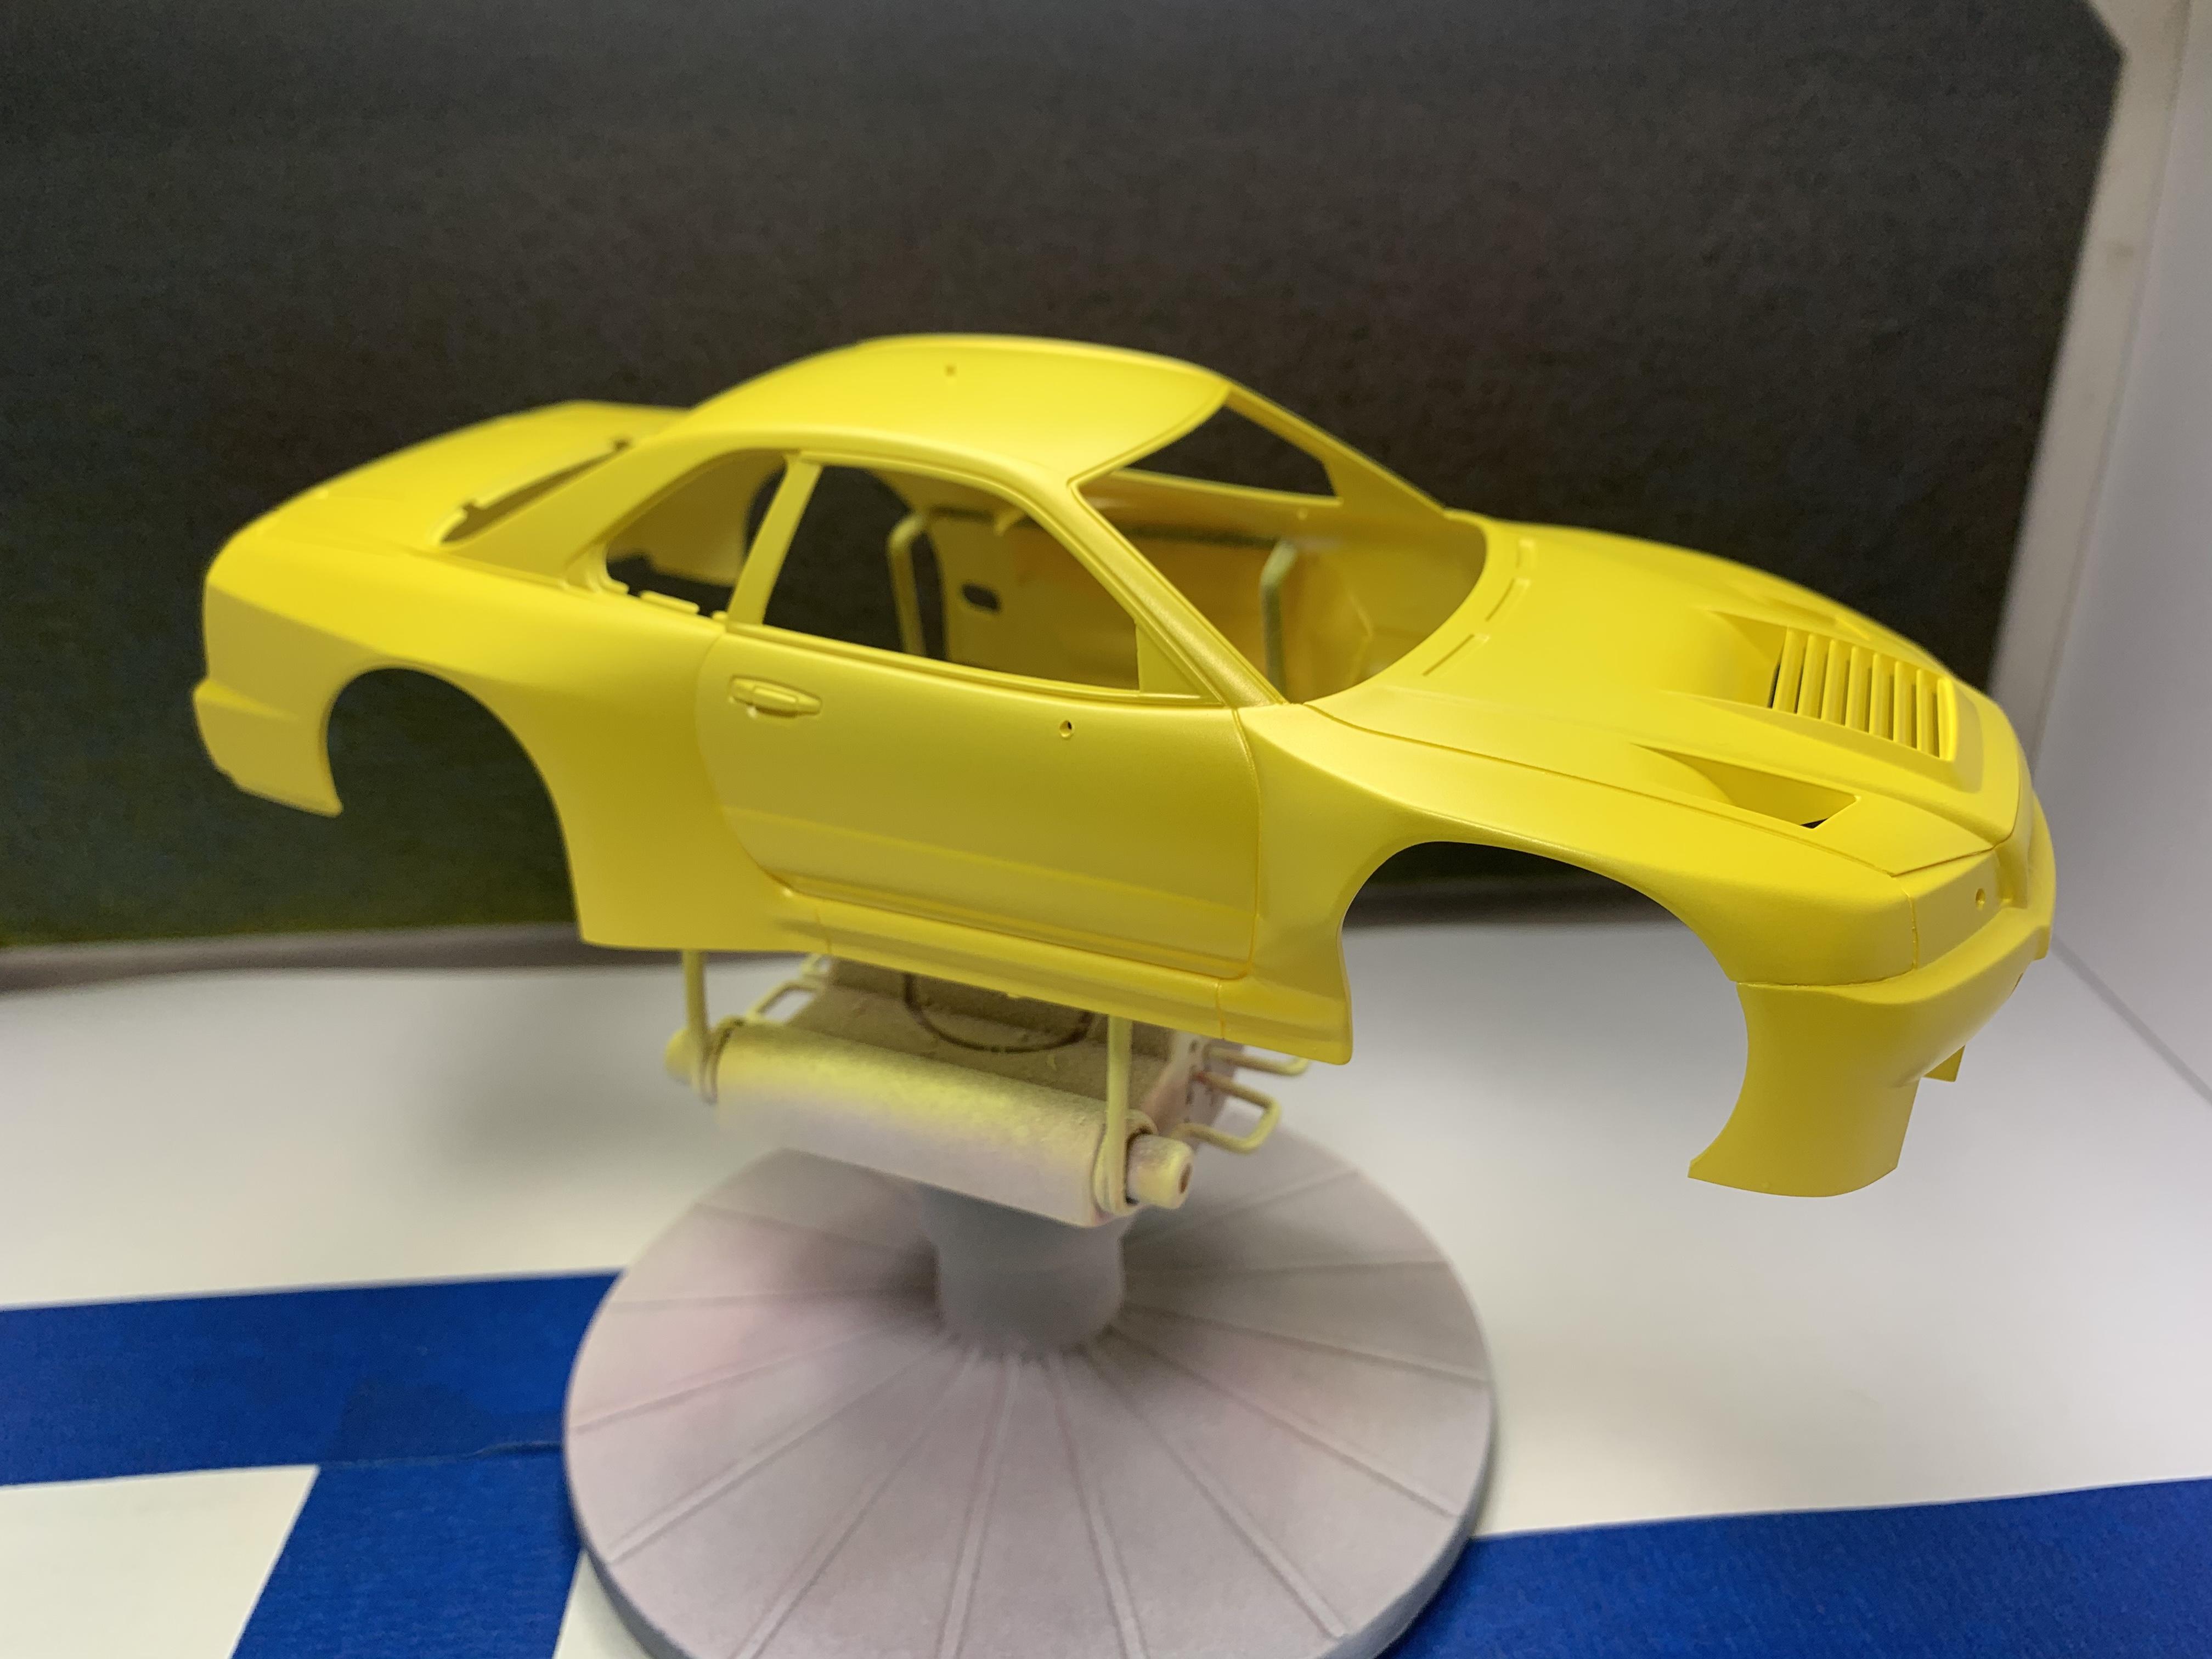
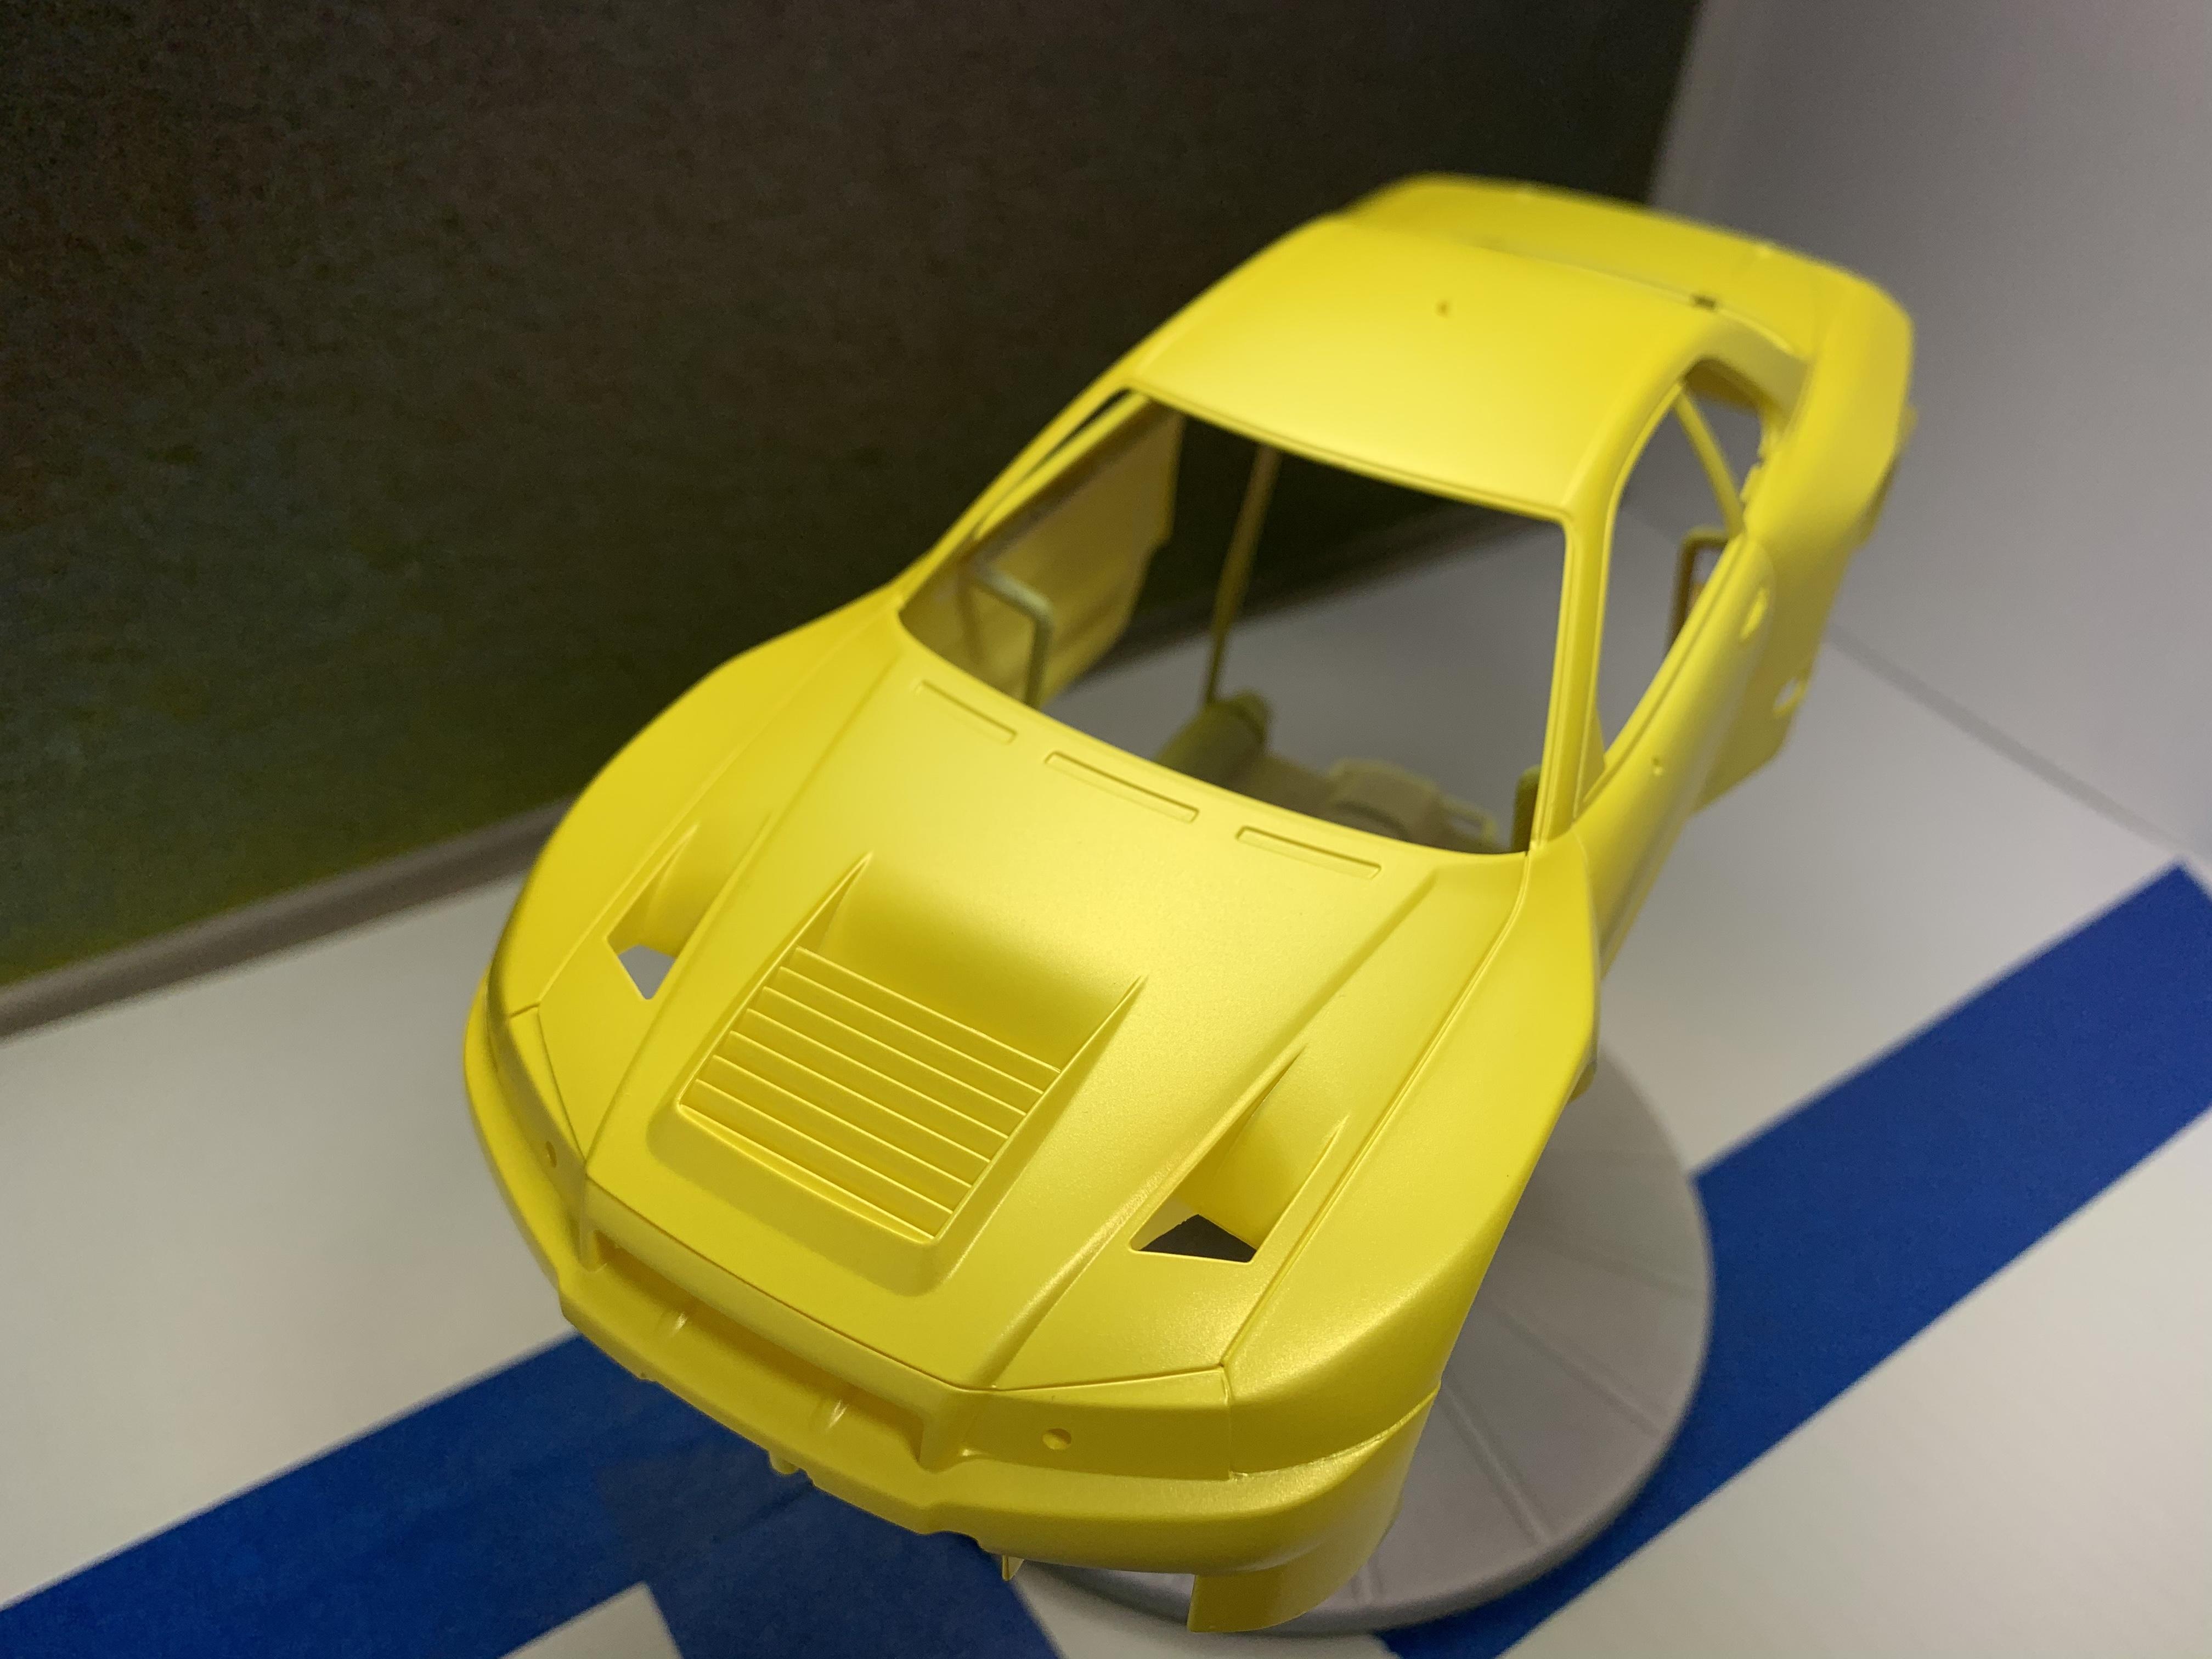
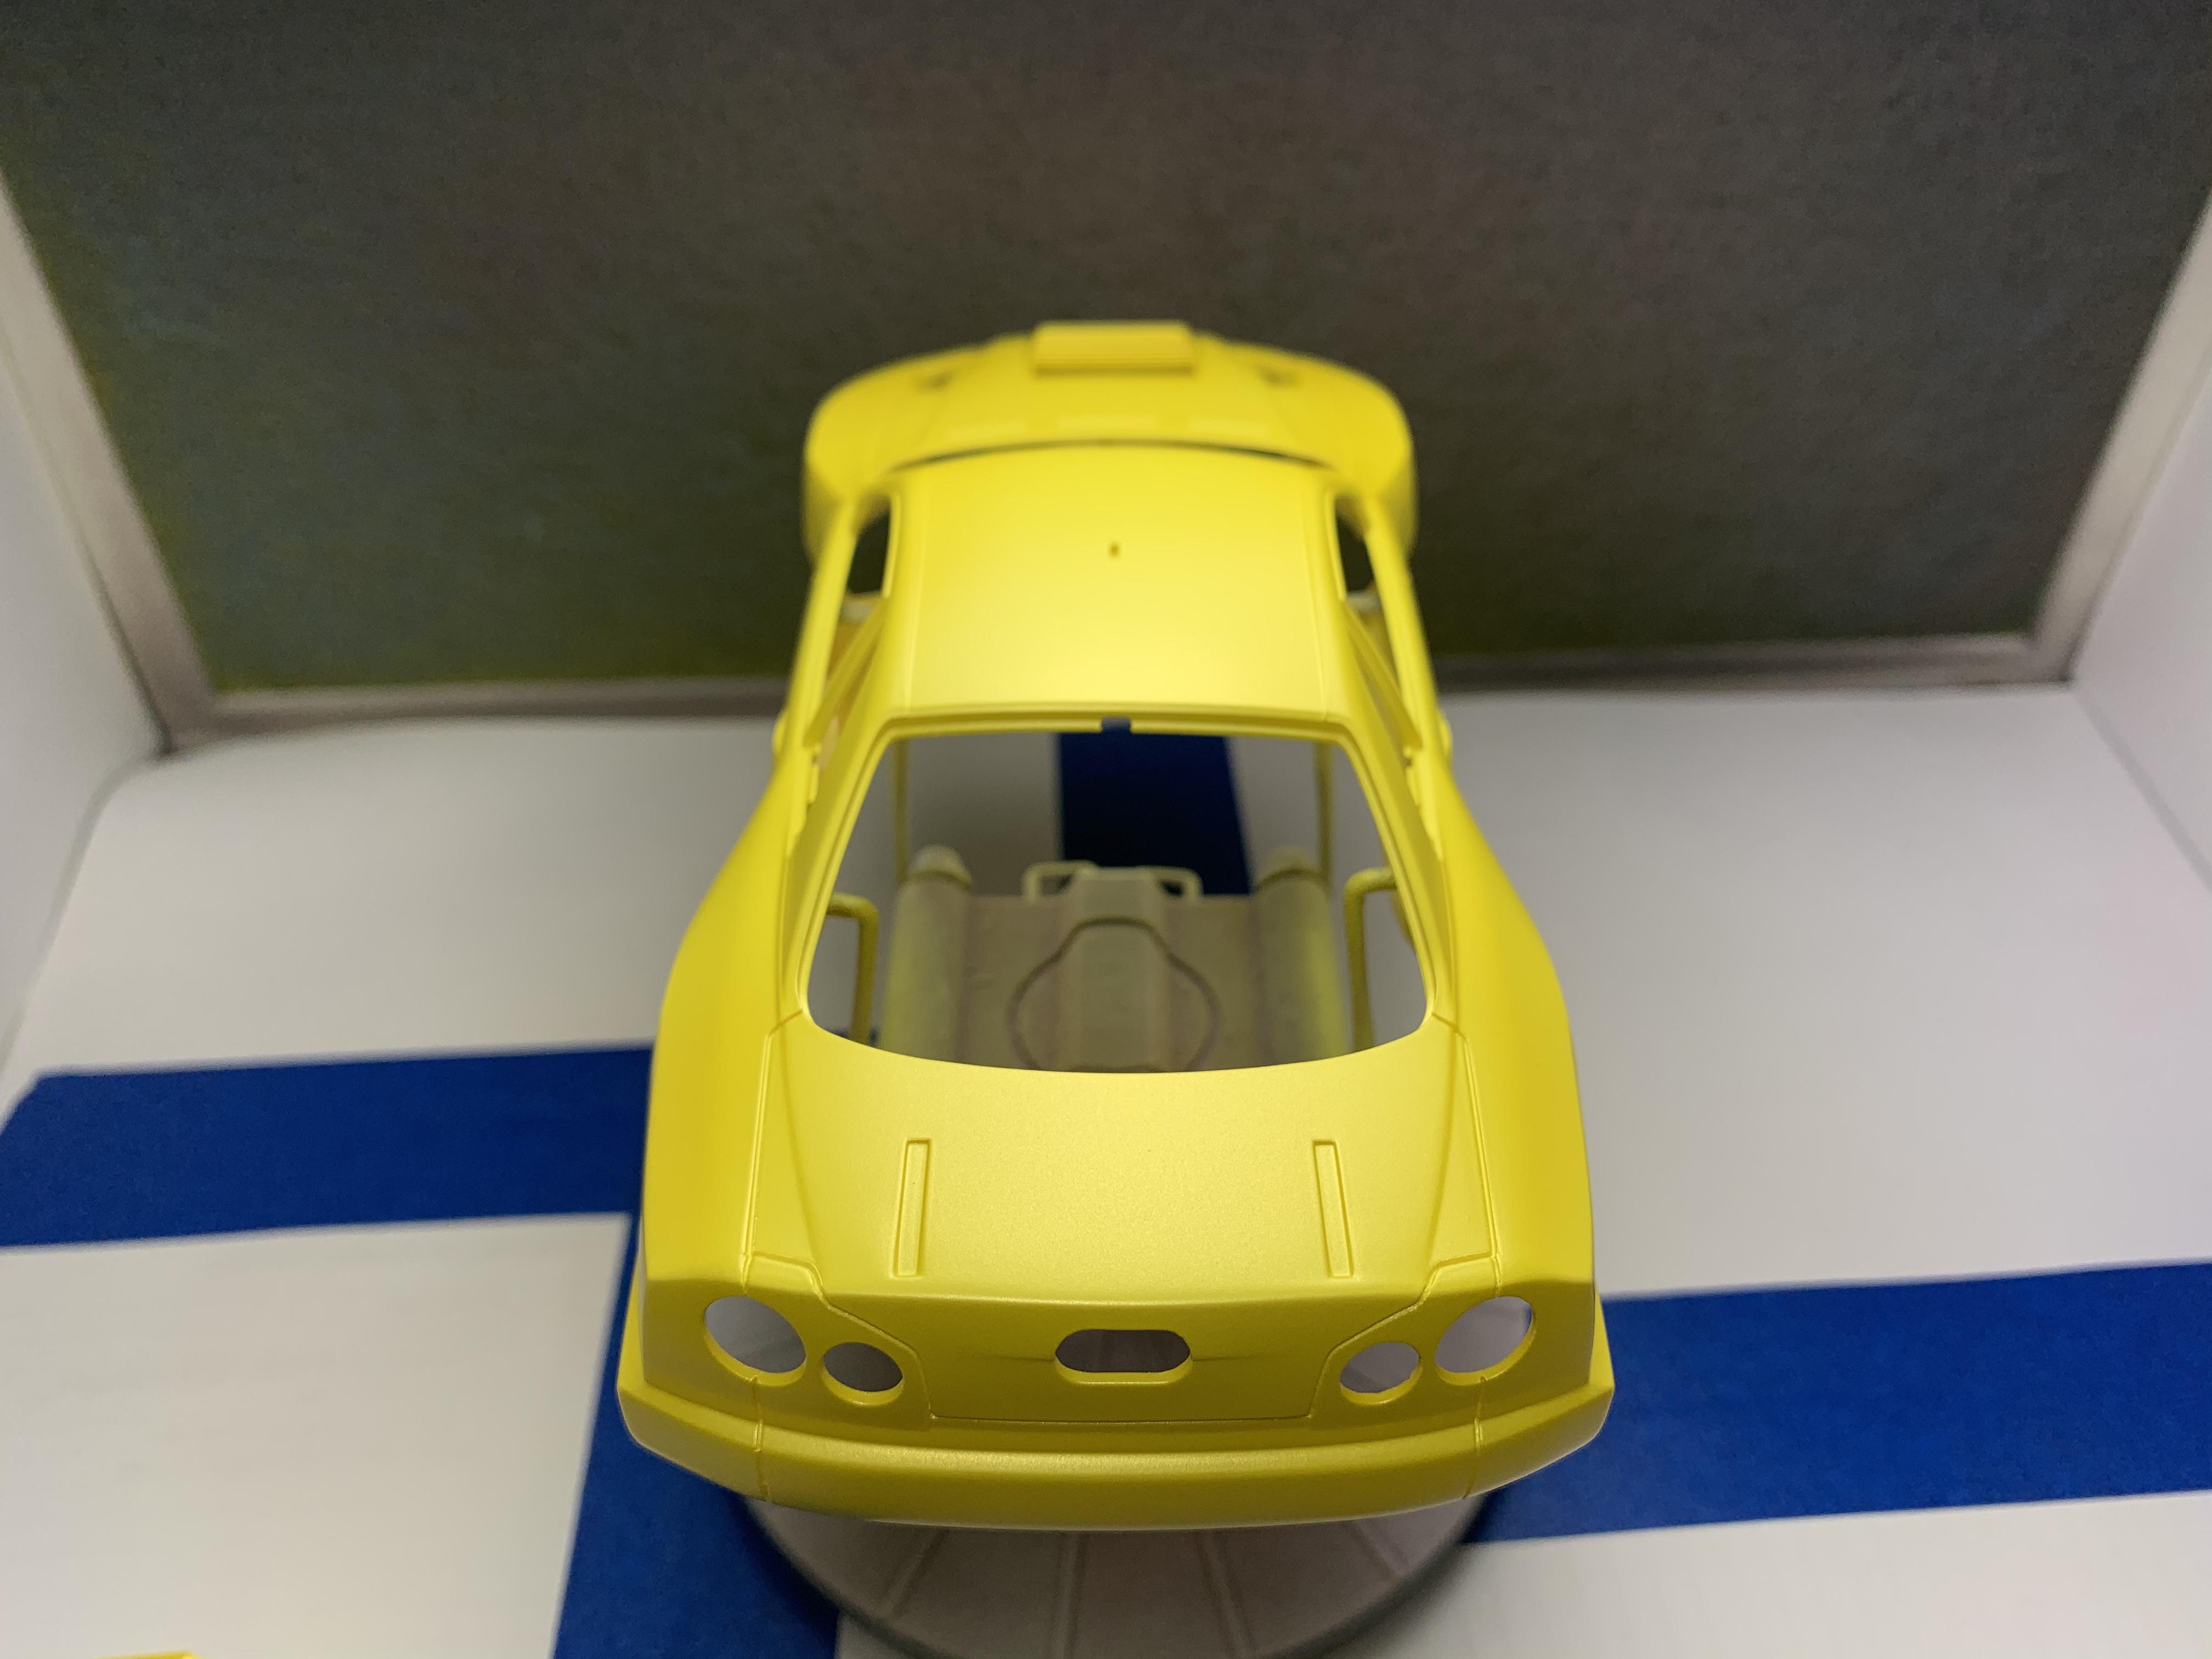
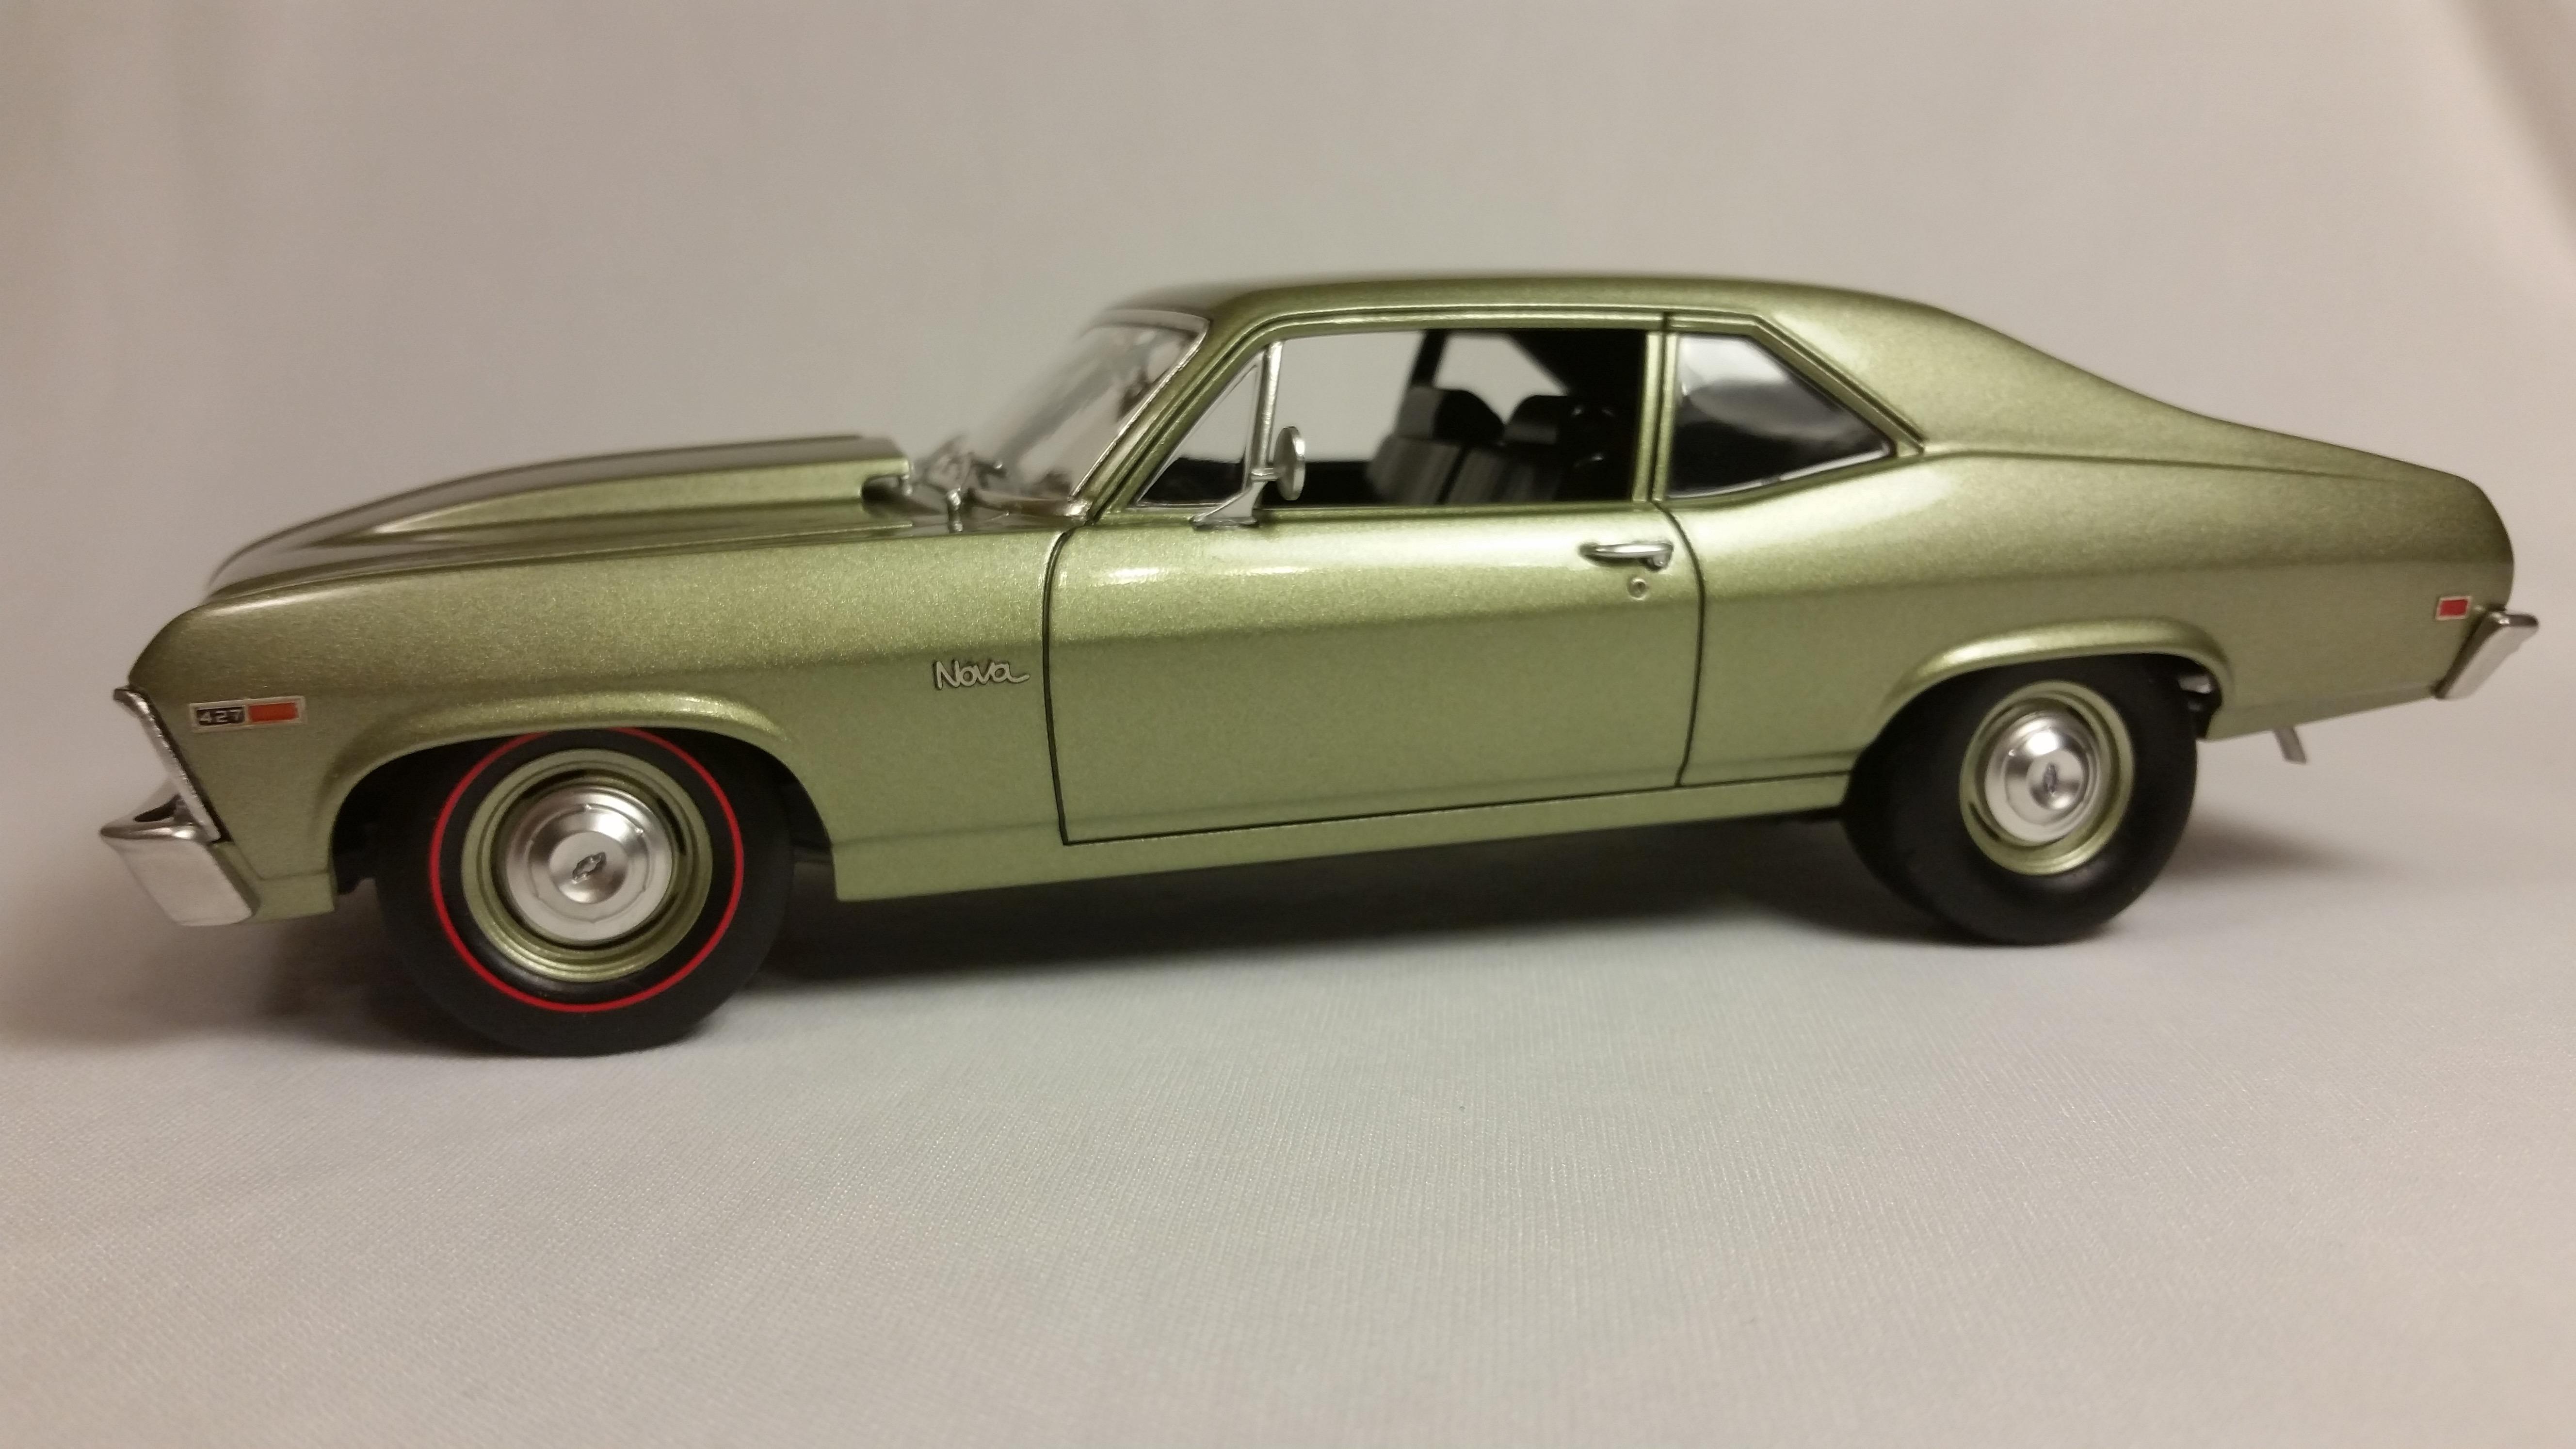
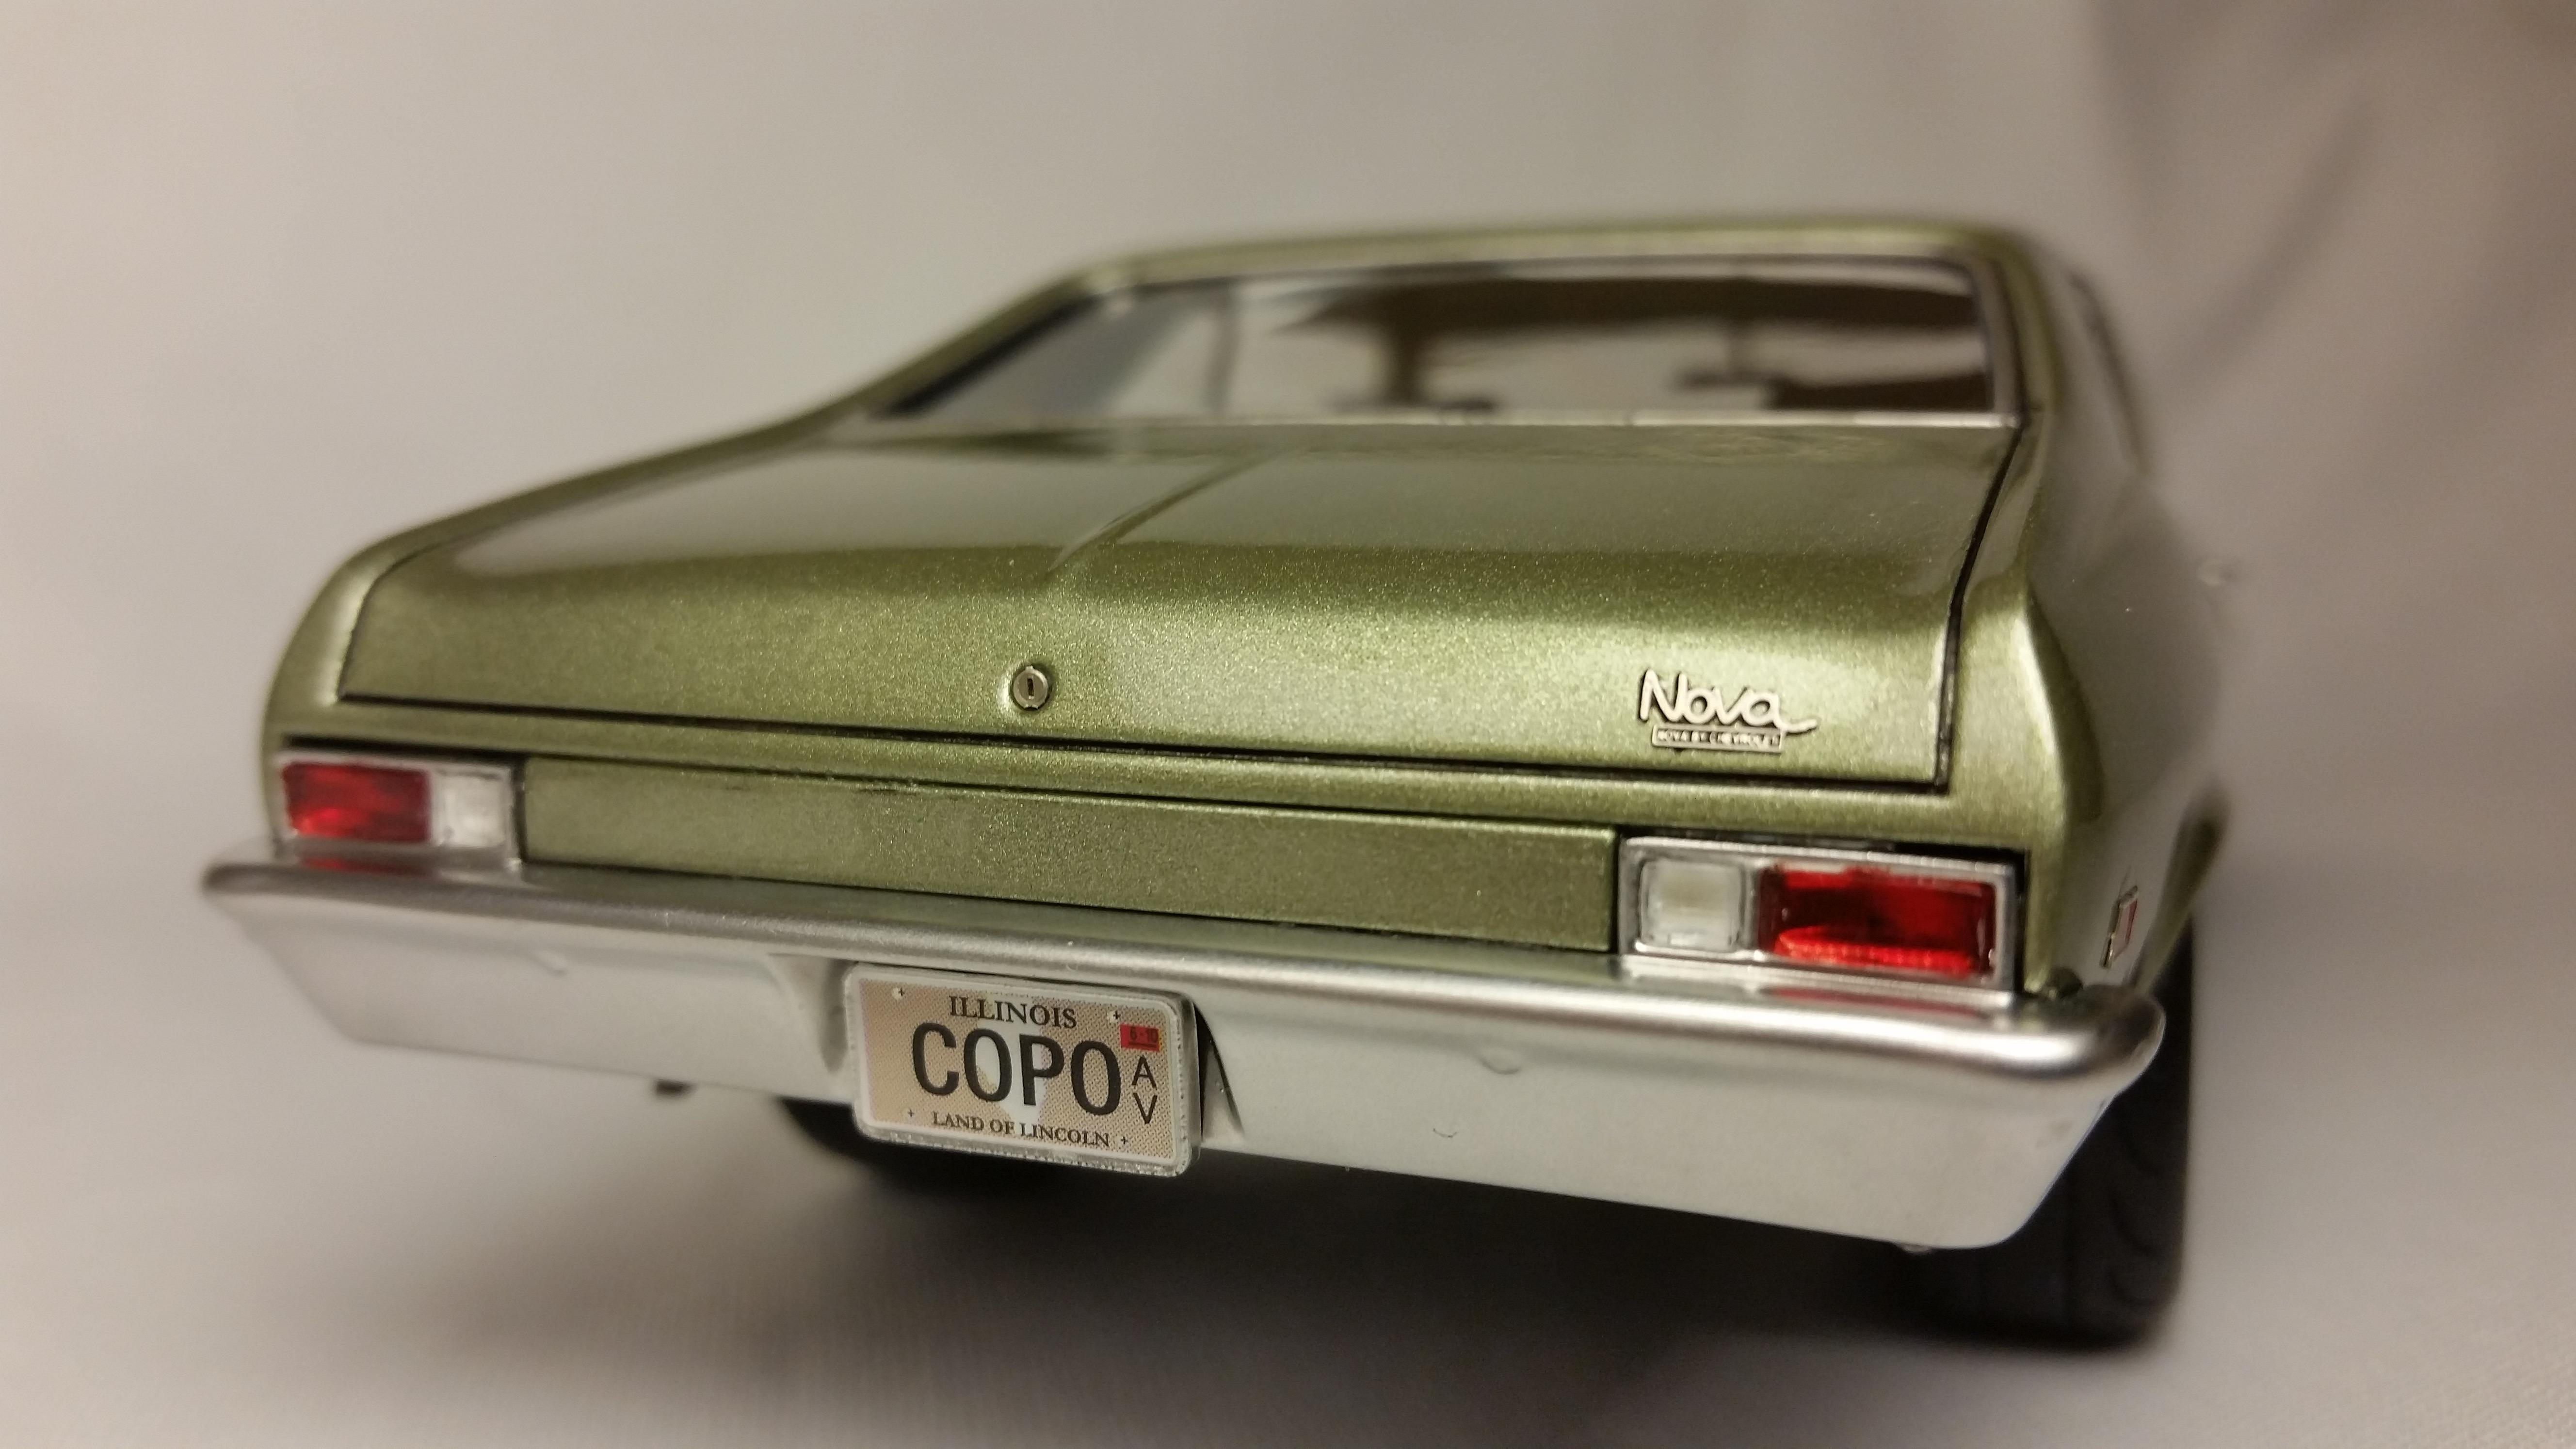
Today was a rainy day so I was able to stay inside and get some work done after getting home from work. After lots of taping, I sprayed the bottom half of the body In Splash Paints Beluga Black lacquer. Very satisfied with the results. Tamiya tape never lets me down on good crisp lines as well. I also got all the small body parts that are black, as well as the wheels sprayed in this same Splash Paints color. After the body I sprayed the wheel wells in some Tamiya Semi Gloss Black to prepare them for the Carbon Kevlar decals as on the 1:1 as seen in the pics if you look closely. I also included 2 different pics of the body in different lighting to show the different effects that light has on this paint.
-
Tamiya Pennzoil Nissan Skyline R34
lghtngyello03 replied to lghtngyello03's topic in WIP: Model Cars
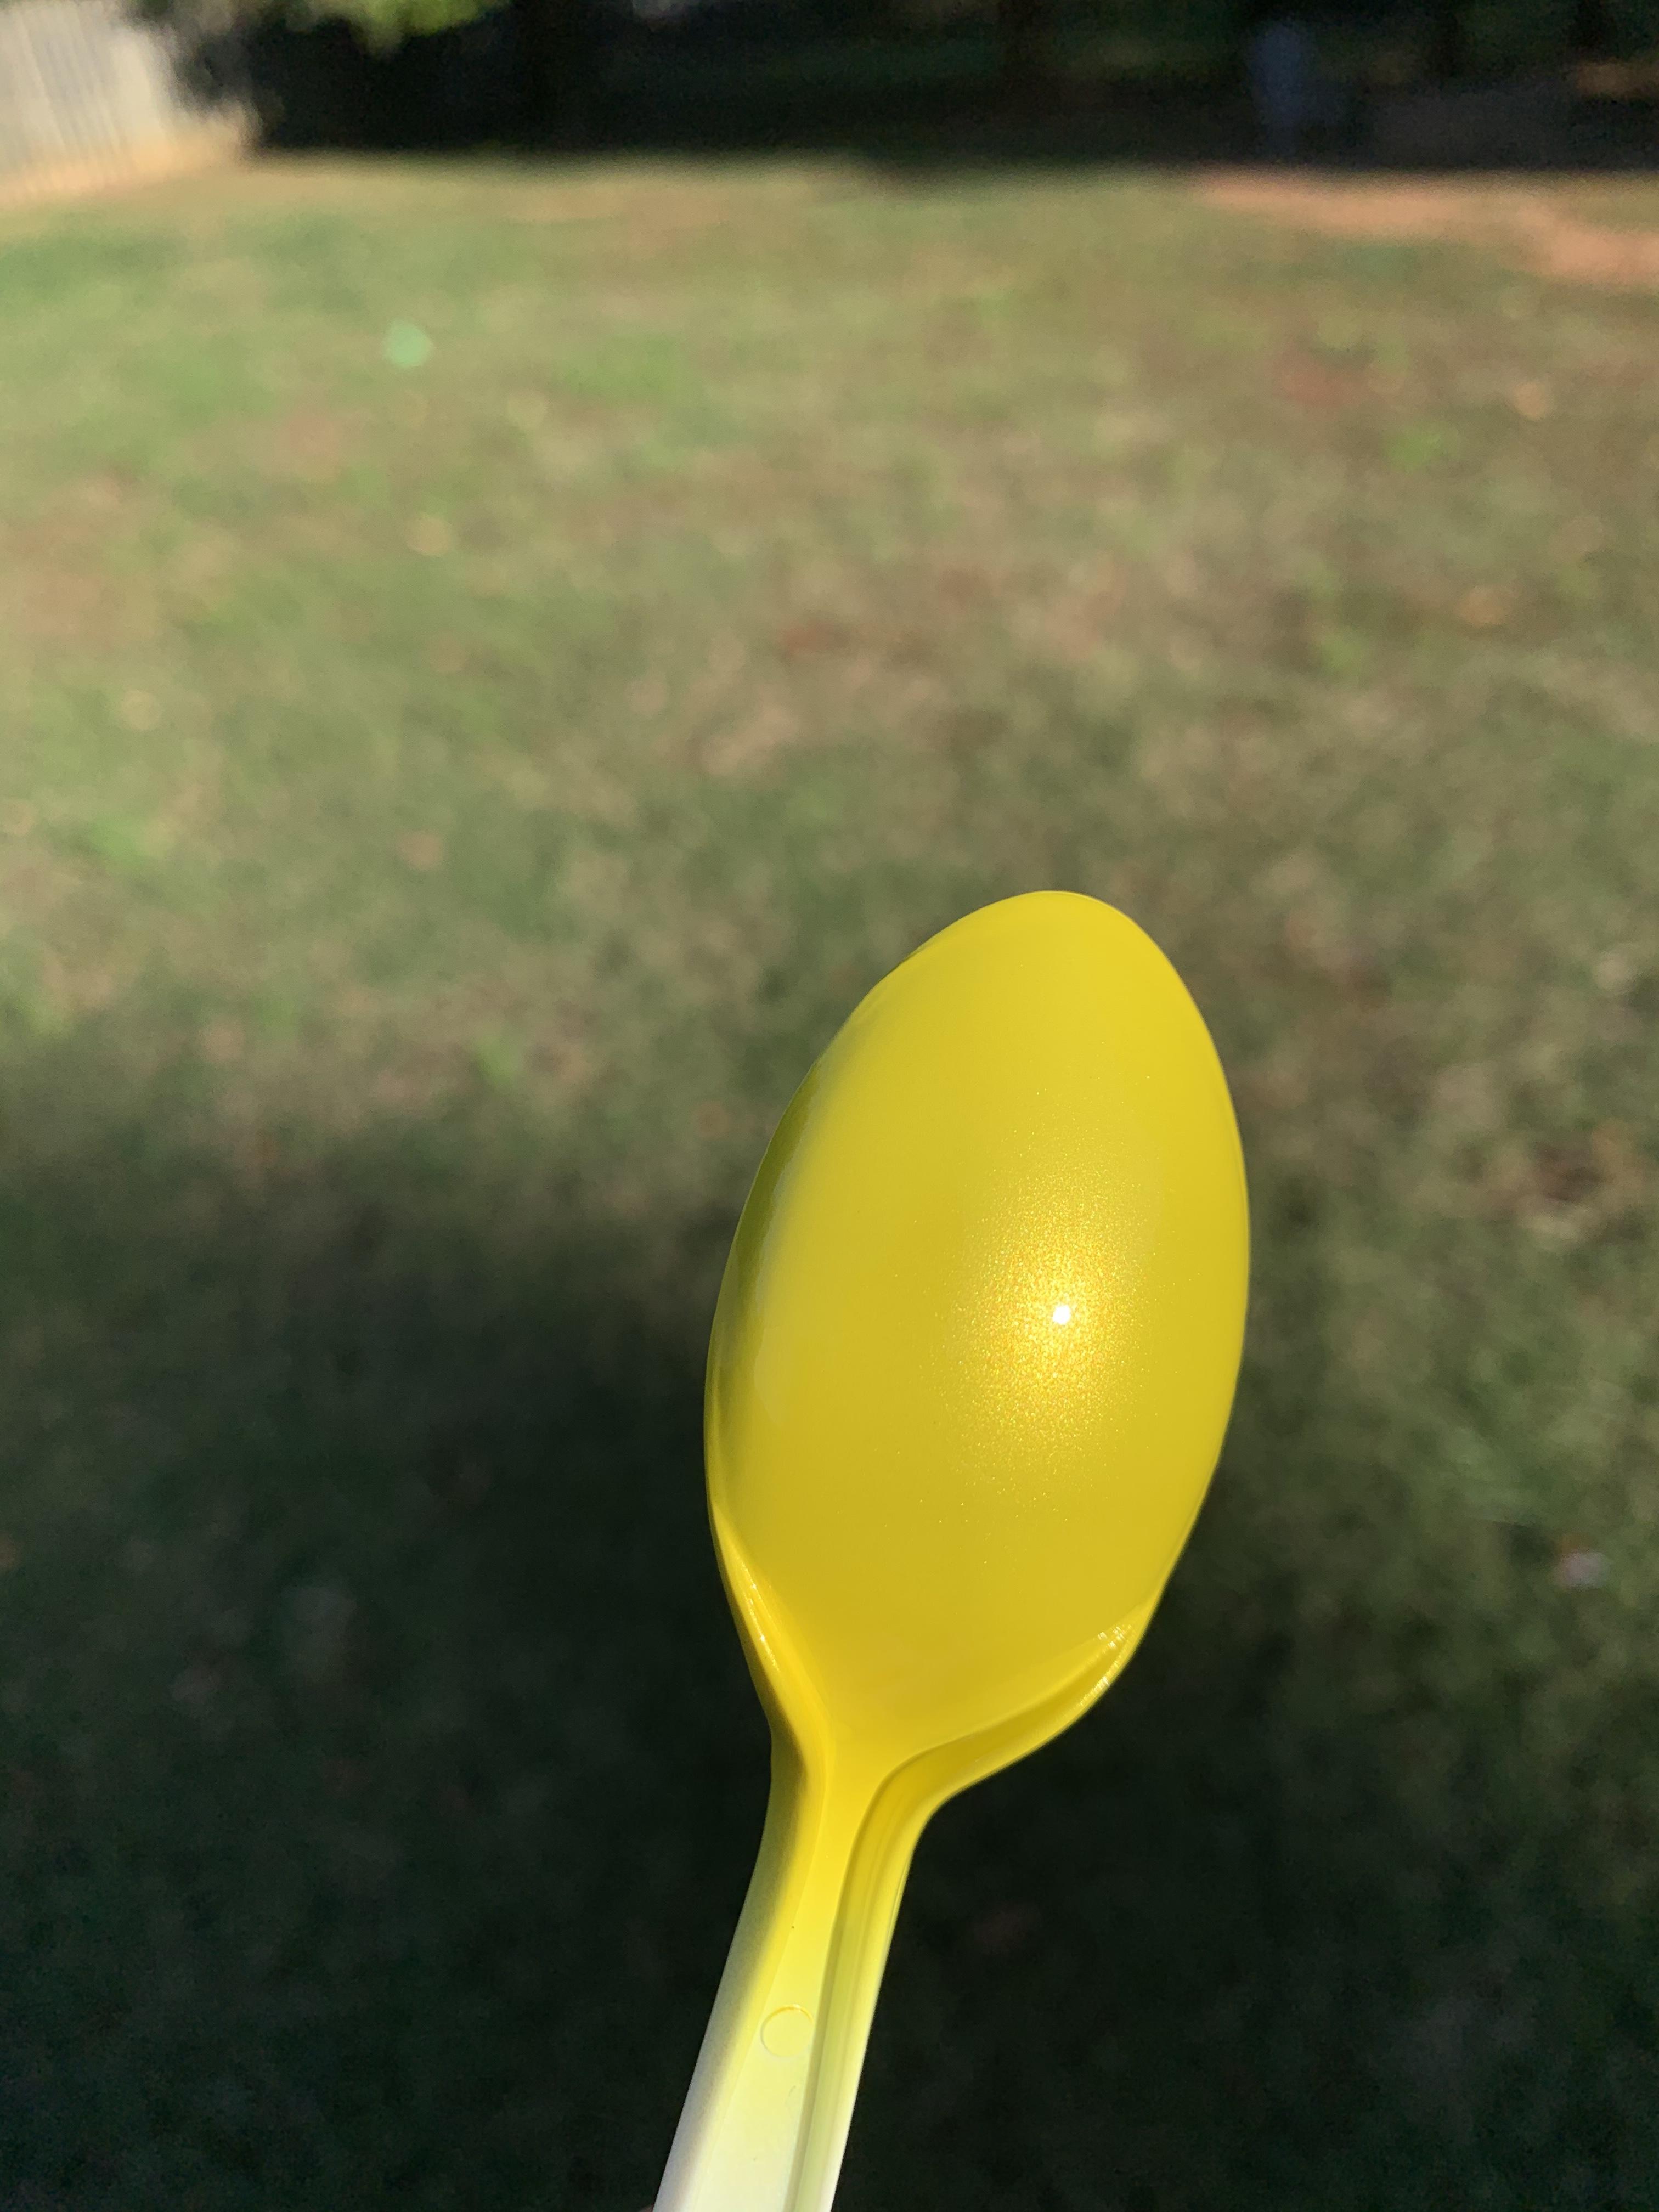
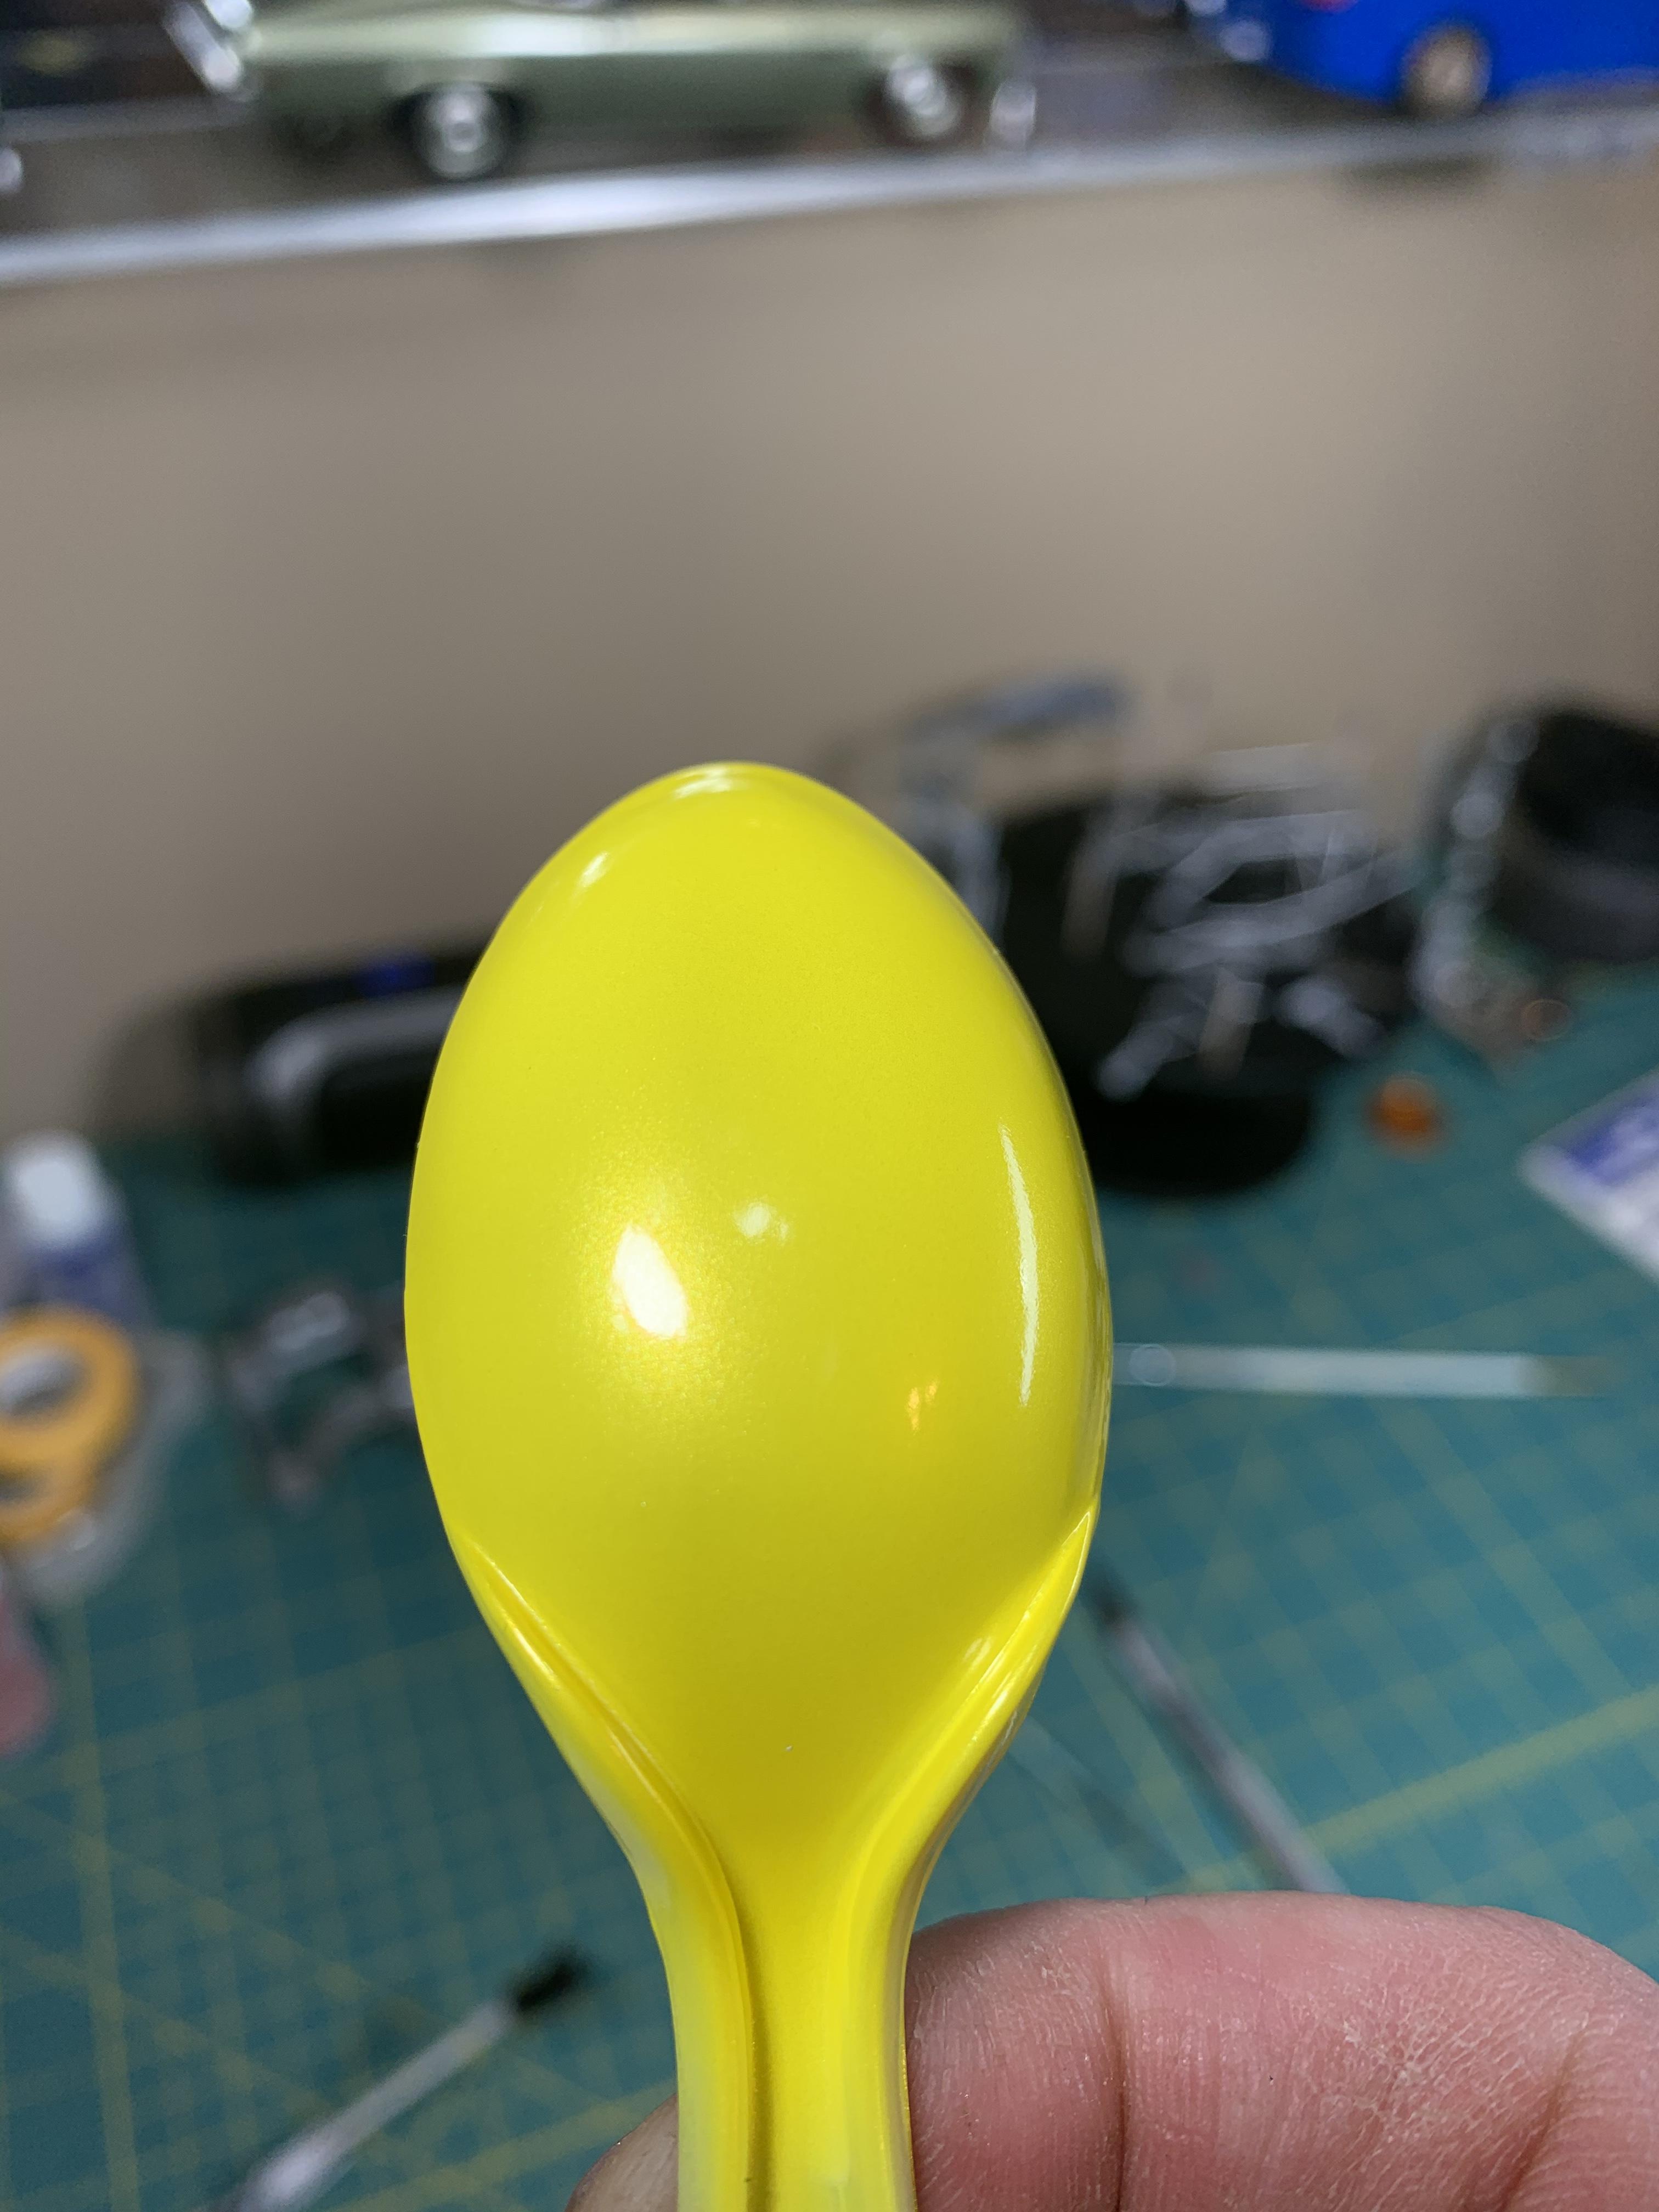
That was the first thought when I sprayed the spoon the other day. Without the clear, it has no depth at all, and I was really disappointed until I shot some Tamiya TS13 clear over it. The body looks like it has no color shift at all without clear, unless you move it in the light, and the camera can't catch it at all. But once some 2k clear is laid over it, it is gonna pop for sure. The pic below is only Tamiya TS13 clear, and it isn't as clear as the full sized photo either. Different lighting really plays a roll in this color for sure.
-
Tamiya Pennzoil Nissan Skyline R34
lghtngyello03 replied to lghtngyello03's topic in WIP: Model Cars
Well I managed to work up the courage to spray the color on the body tonight. Super pleased with the way this turned out and I can’t wait to get the black part sprayed and the decals on to put the 2k clear on. That should really make that pearl pop! It took 14 super light coats to get this color the way I wanted it. I hate that the light and camera won’t show the pearl in this paint because it’s amazing in person
-
Man this is a cool kit. Excited to see your end results, should be killer like everything you usually do!
-
Tamiya Pennzoil Nissan Skyline R34
lghtngyello03 replied to lghtngyello03's topic in WIP: Model Cars
Thank you David! It has definitely taken a lot of time, but it hasn't really been super difficult. The end result is worth it. -
Tamiya Pennzoil Nissan Skyline R34
lghtngyello03 replied to lghtngyello03's topic in WIP: Model Cars
Thank you Michael. I hope so as well. This is a rare kit and I don't want to screw it up with mishaps such as too hot of a paint reaction. -
Tamiya Pennzoil Nissan Skyline R34
lghtngyello03 replied to lghtngyello03's topic in WIP: Model Cars
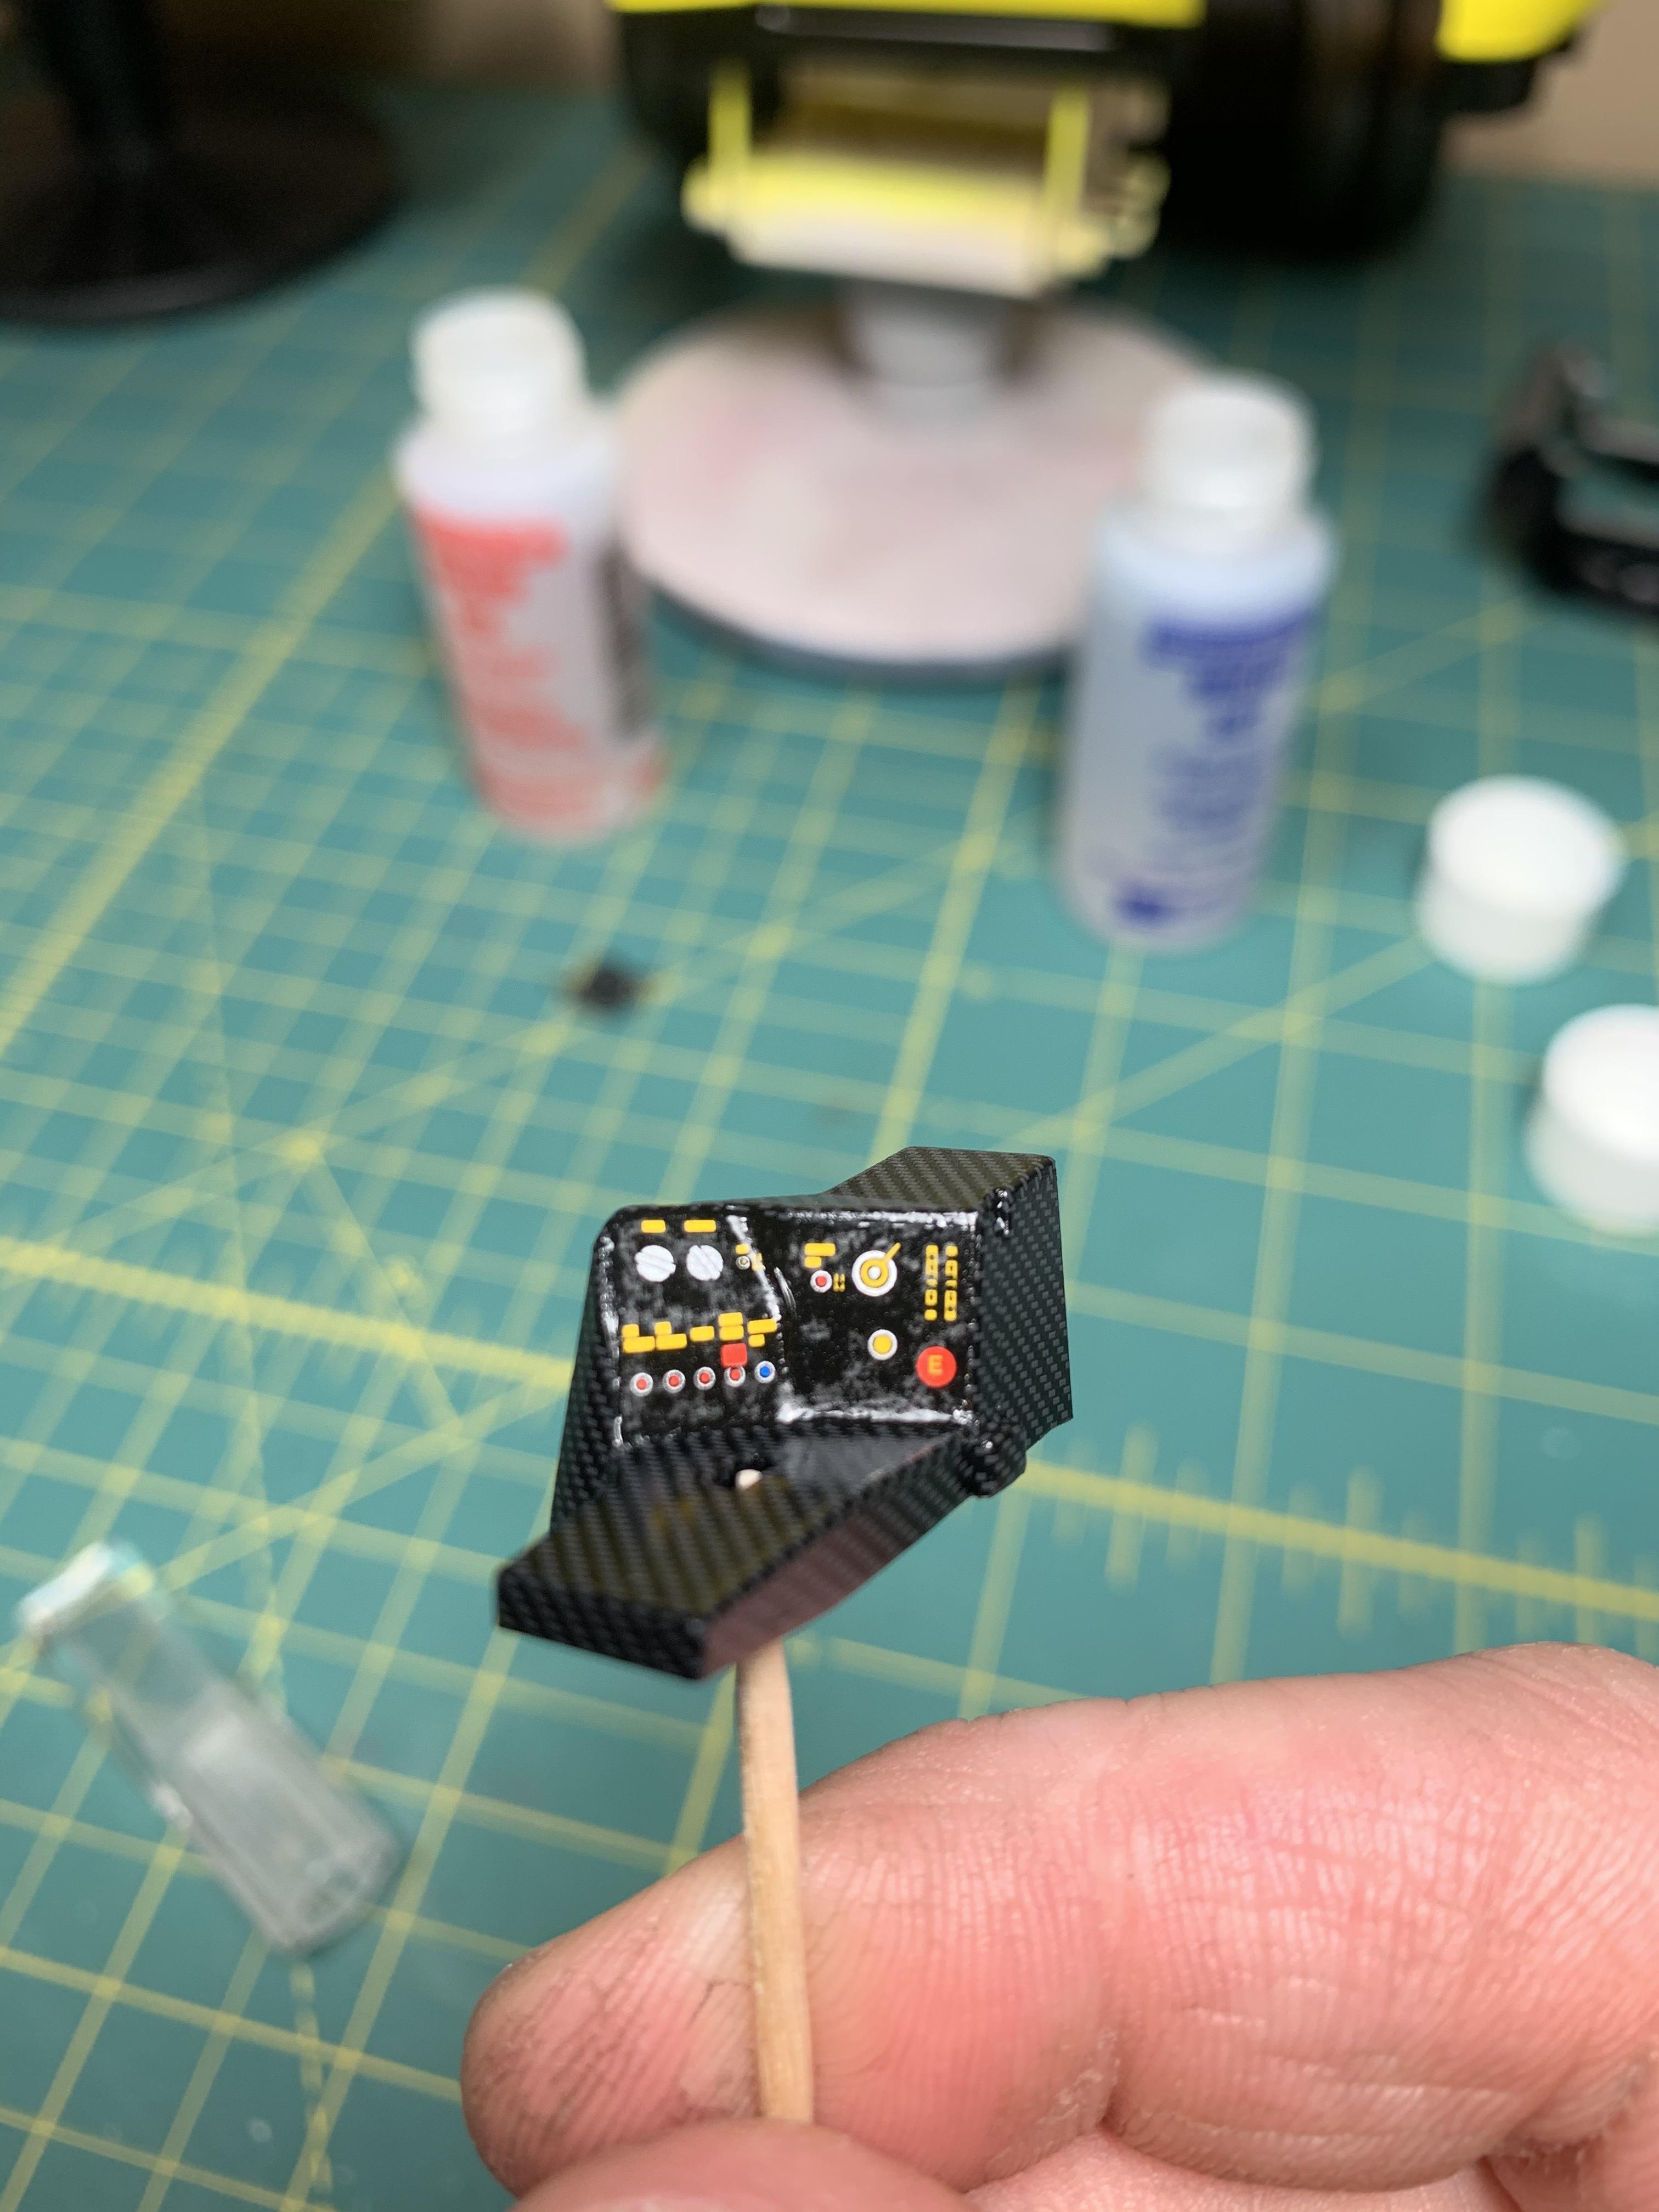
I didn’t get too much done this evening l, but I did get the instrument cluster carbon decals on and buttons detailed. I will have to wait on my Shunko decals to do the gauge cluster though. I also sprayed some Zero Paints on a test spoon. I used the exact same primer I used before which was Tamiya White Primer. This is the same stuff I used before with horrible luck that crazed my TME Evo build, which resulted in a complete strip and repaint with Tamiya spray. I am super pleased with these results, but I’m still horrified to put it on the fully prepped body. Hopefully it will not have a bad reaction to the primer. Maybe this color wasn’t mixed as hot as the Evo Red? Anywho, I included some pics of the color in the sun and inside to see how much pearl is in this paint and it’s beautiful.
-
Tamiya Pennzoil Nissan Skyline R34
lghtngyello03 replied to lghtngyello03's topic in WIP: Model Cars
Thanks Tom, Hoping I can get some more stuff done this evening. -
Tamiya Pennzoil Nissan Skyline R34
lghtngyello03 replied to lghtngyello03's topic in WIP: Model Cars
Thanks man!!! -
Tamiya Pennzoil Nissan Skyline R34
lghtngyello03 replied to lghtngyello03's topic in WIP: Model Cars
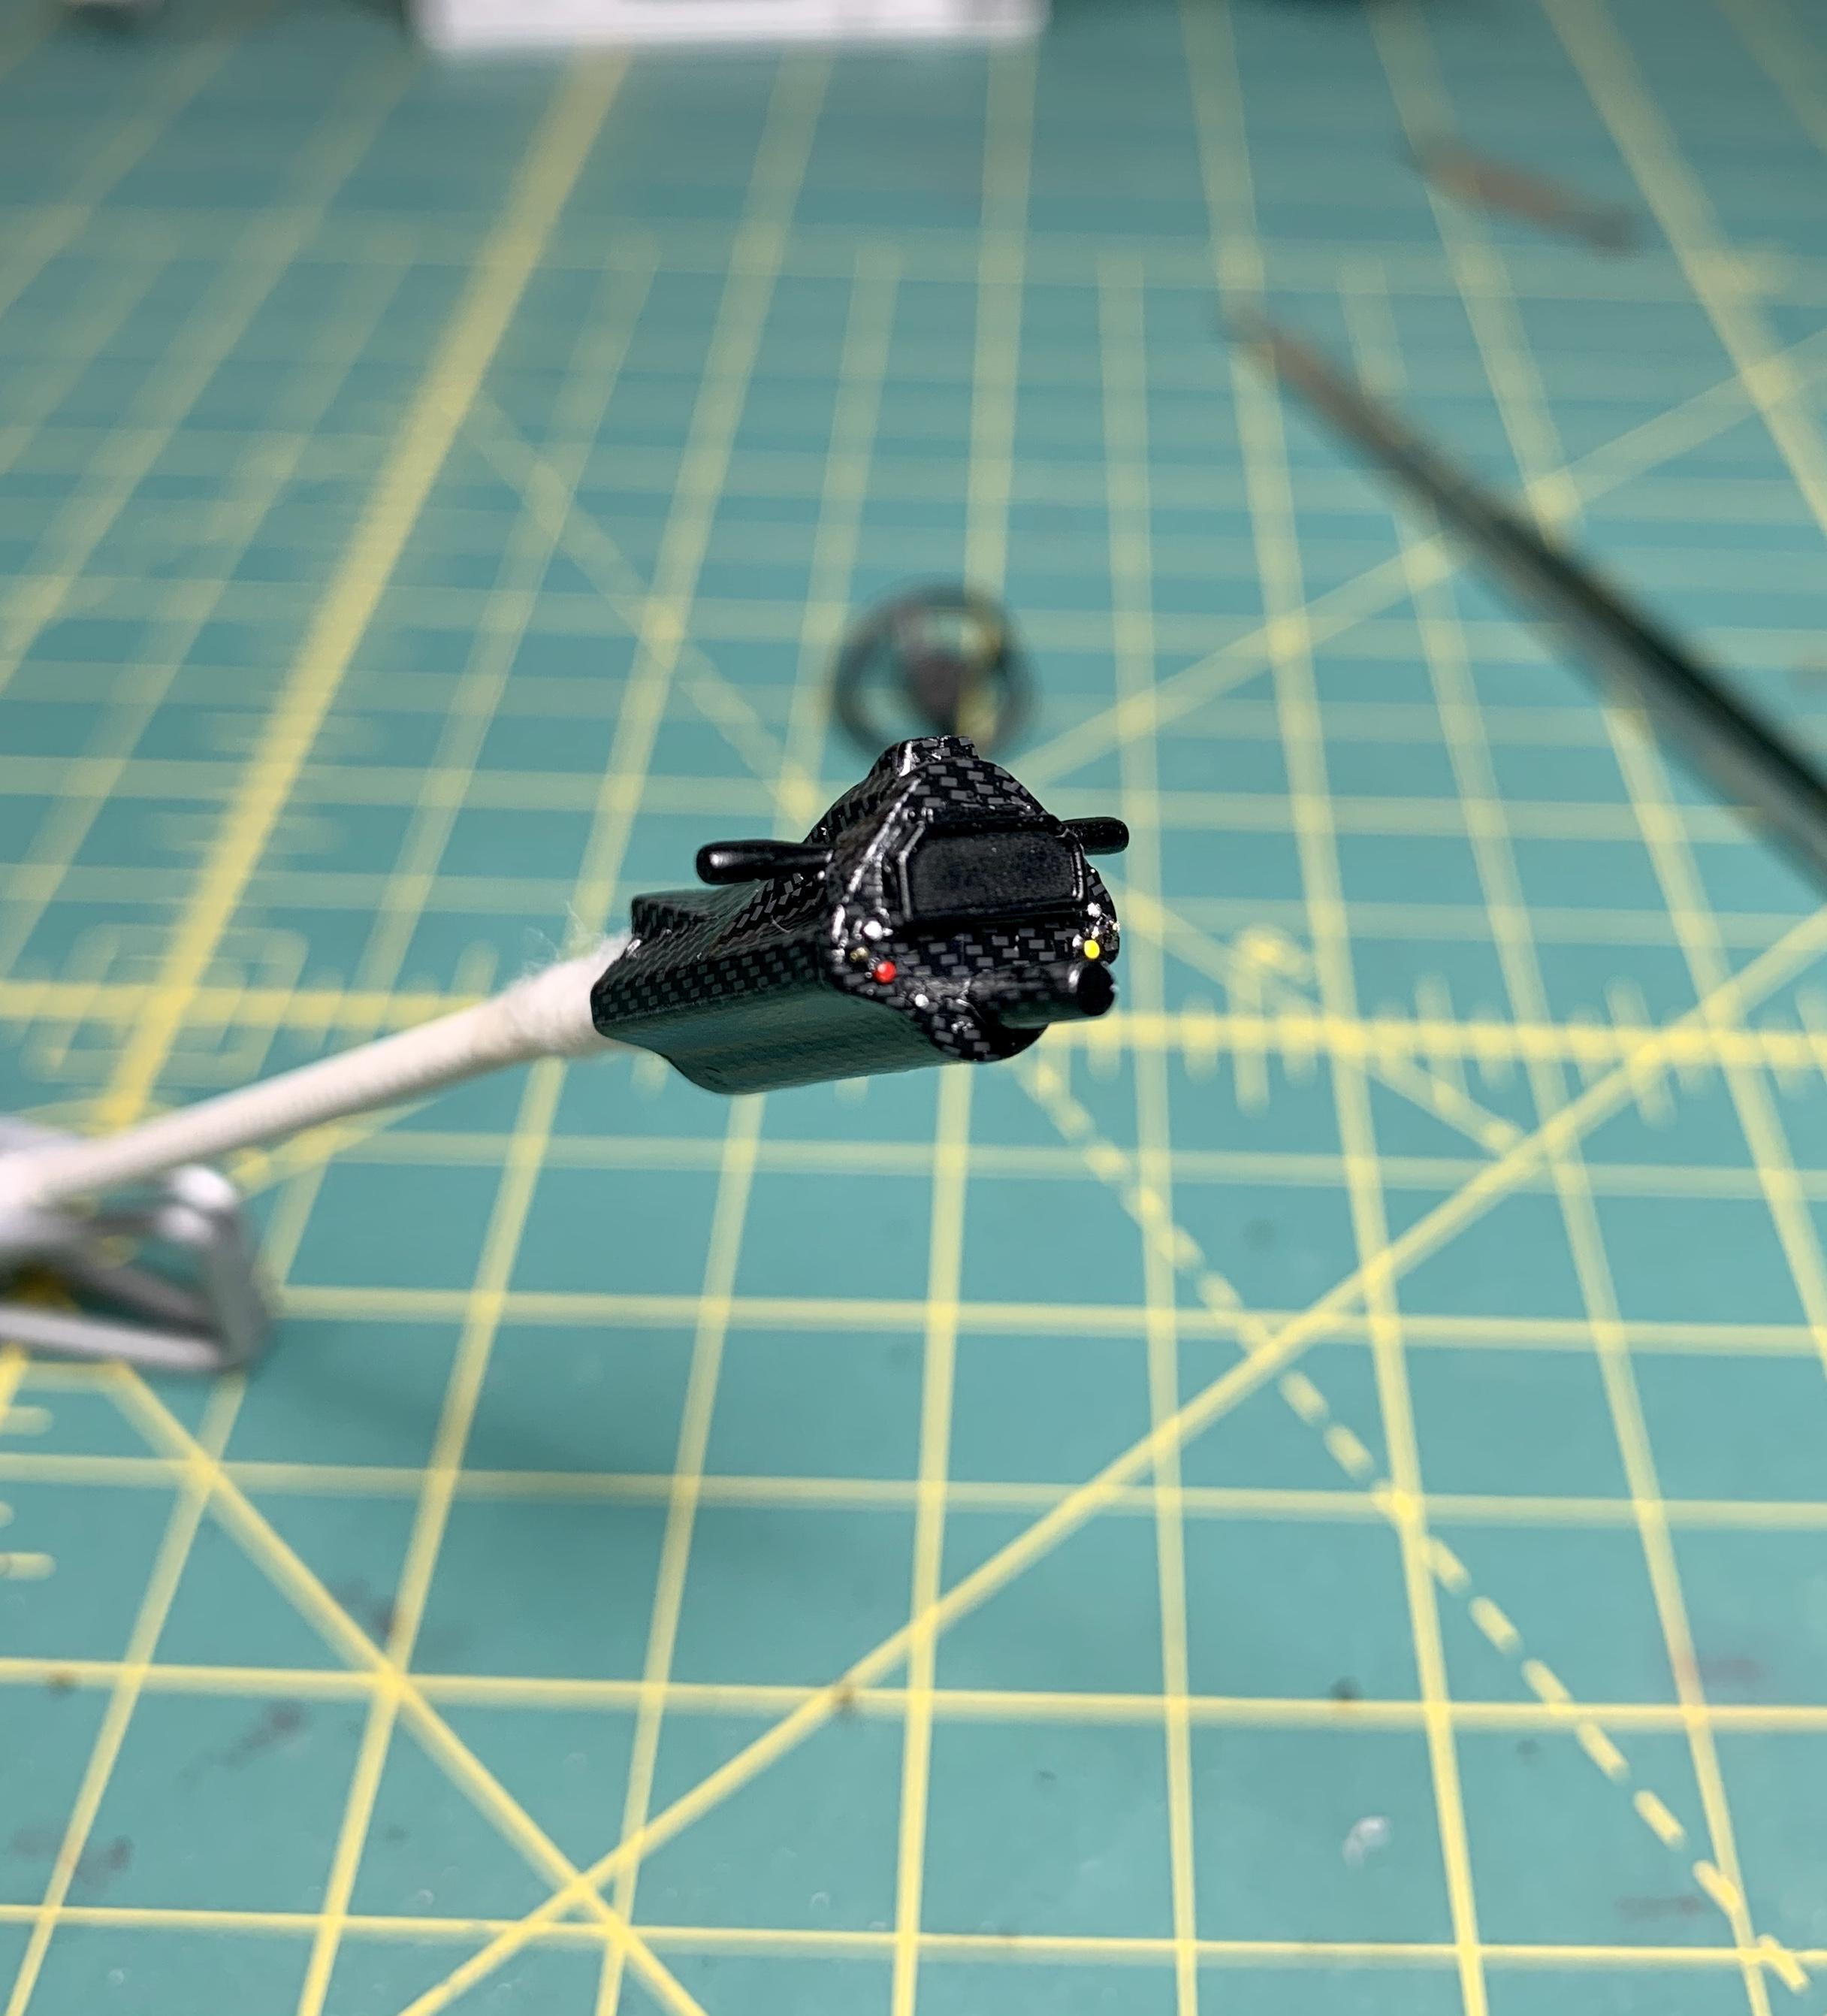
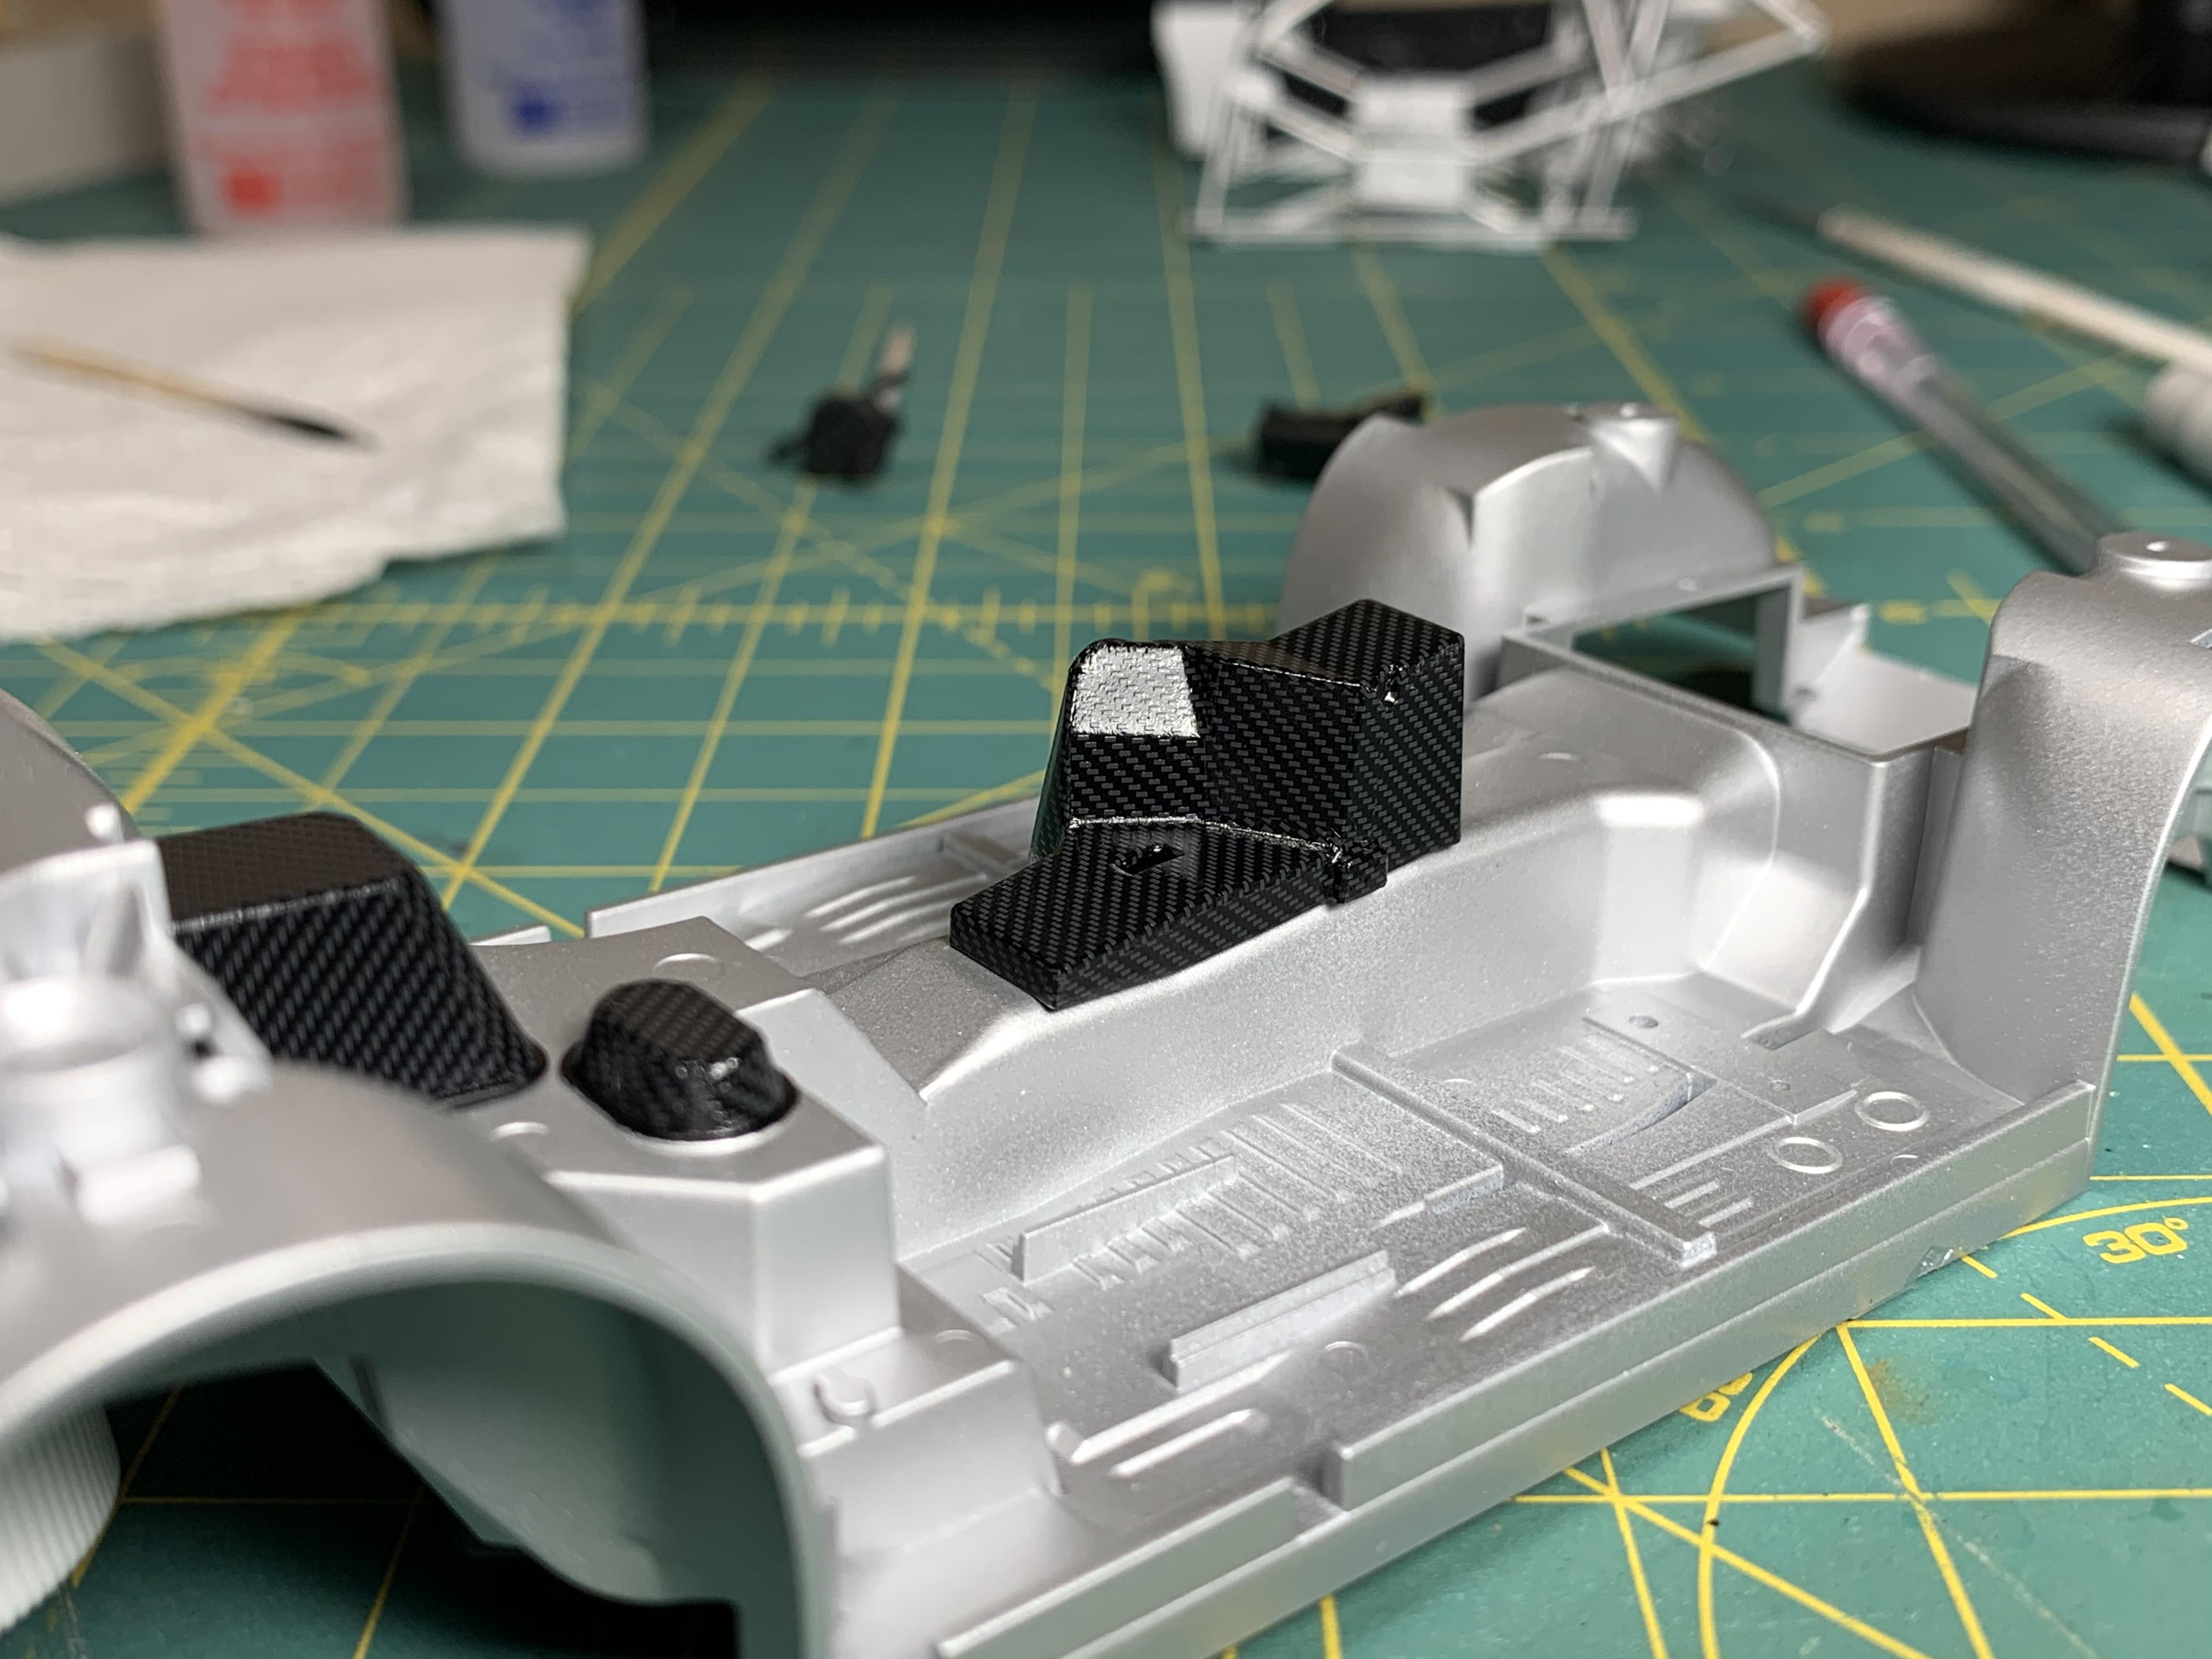
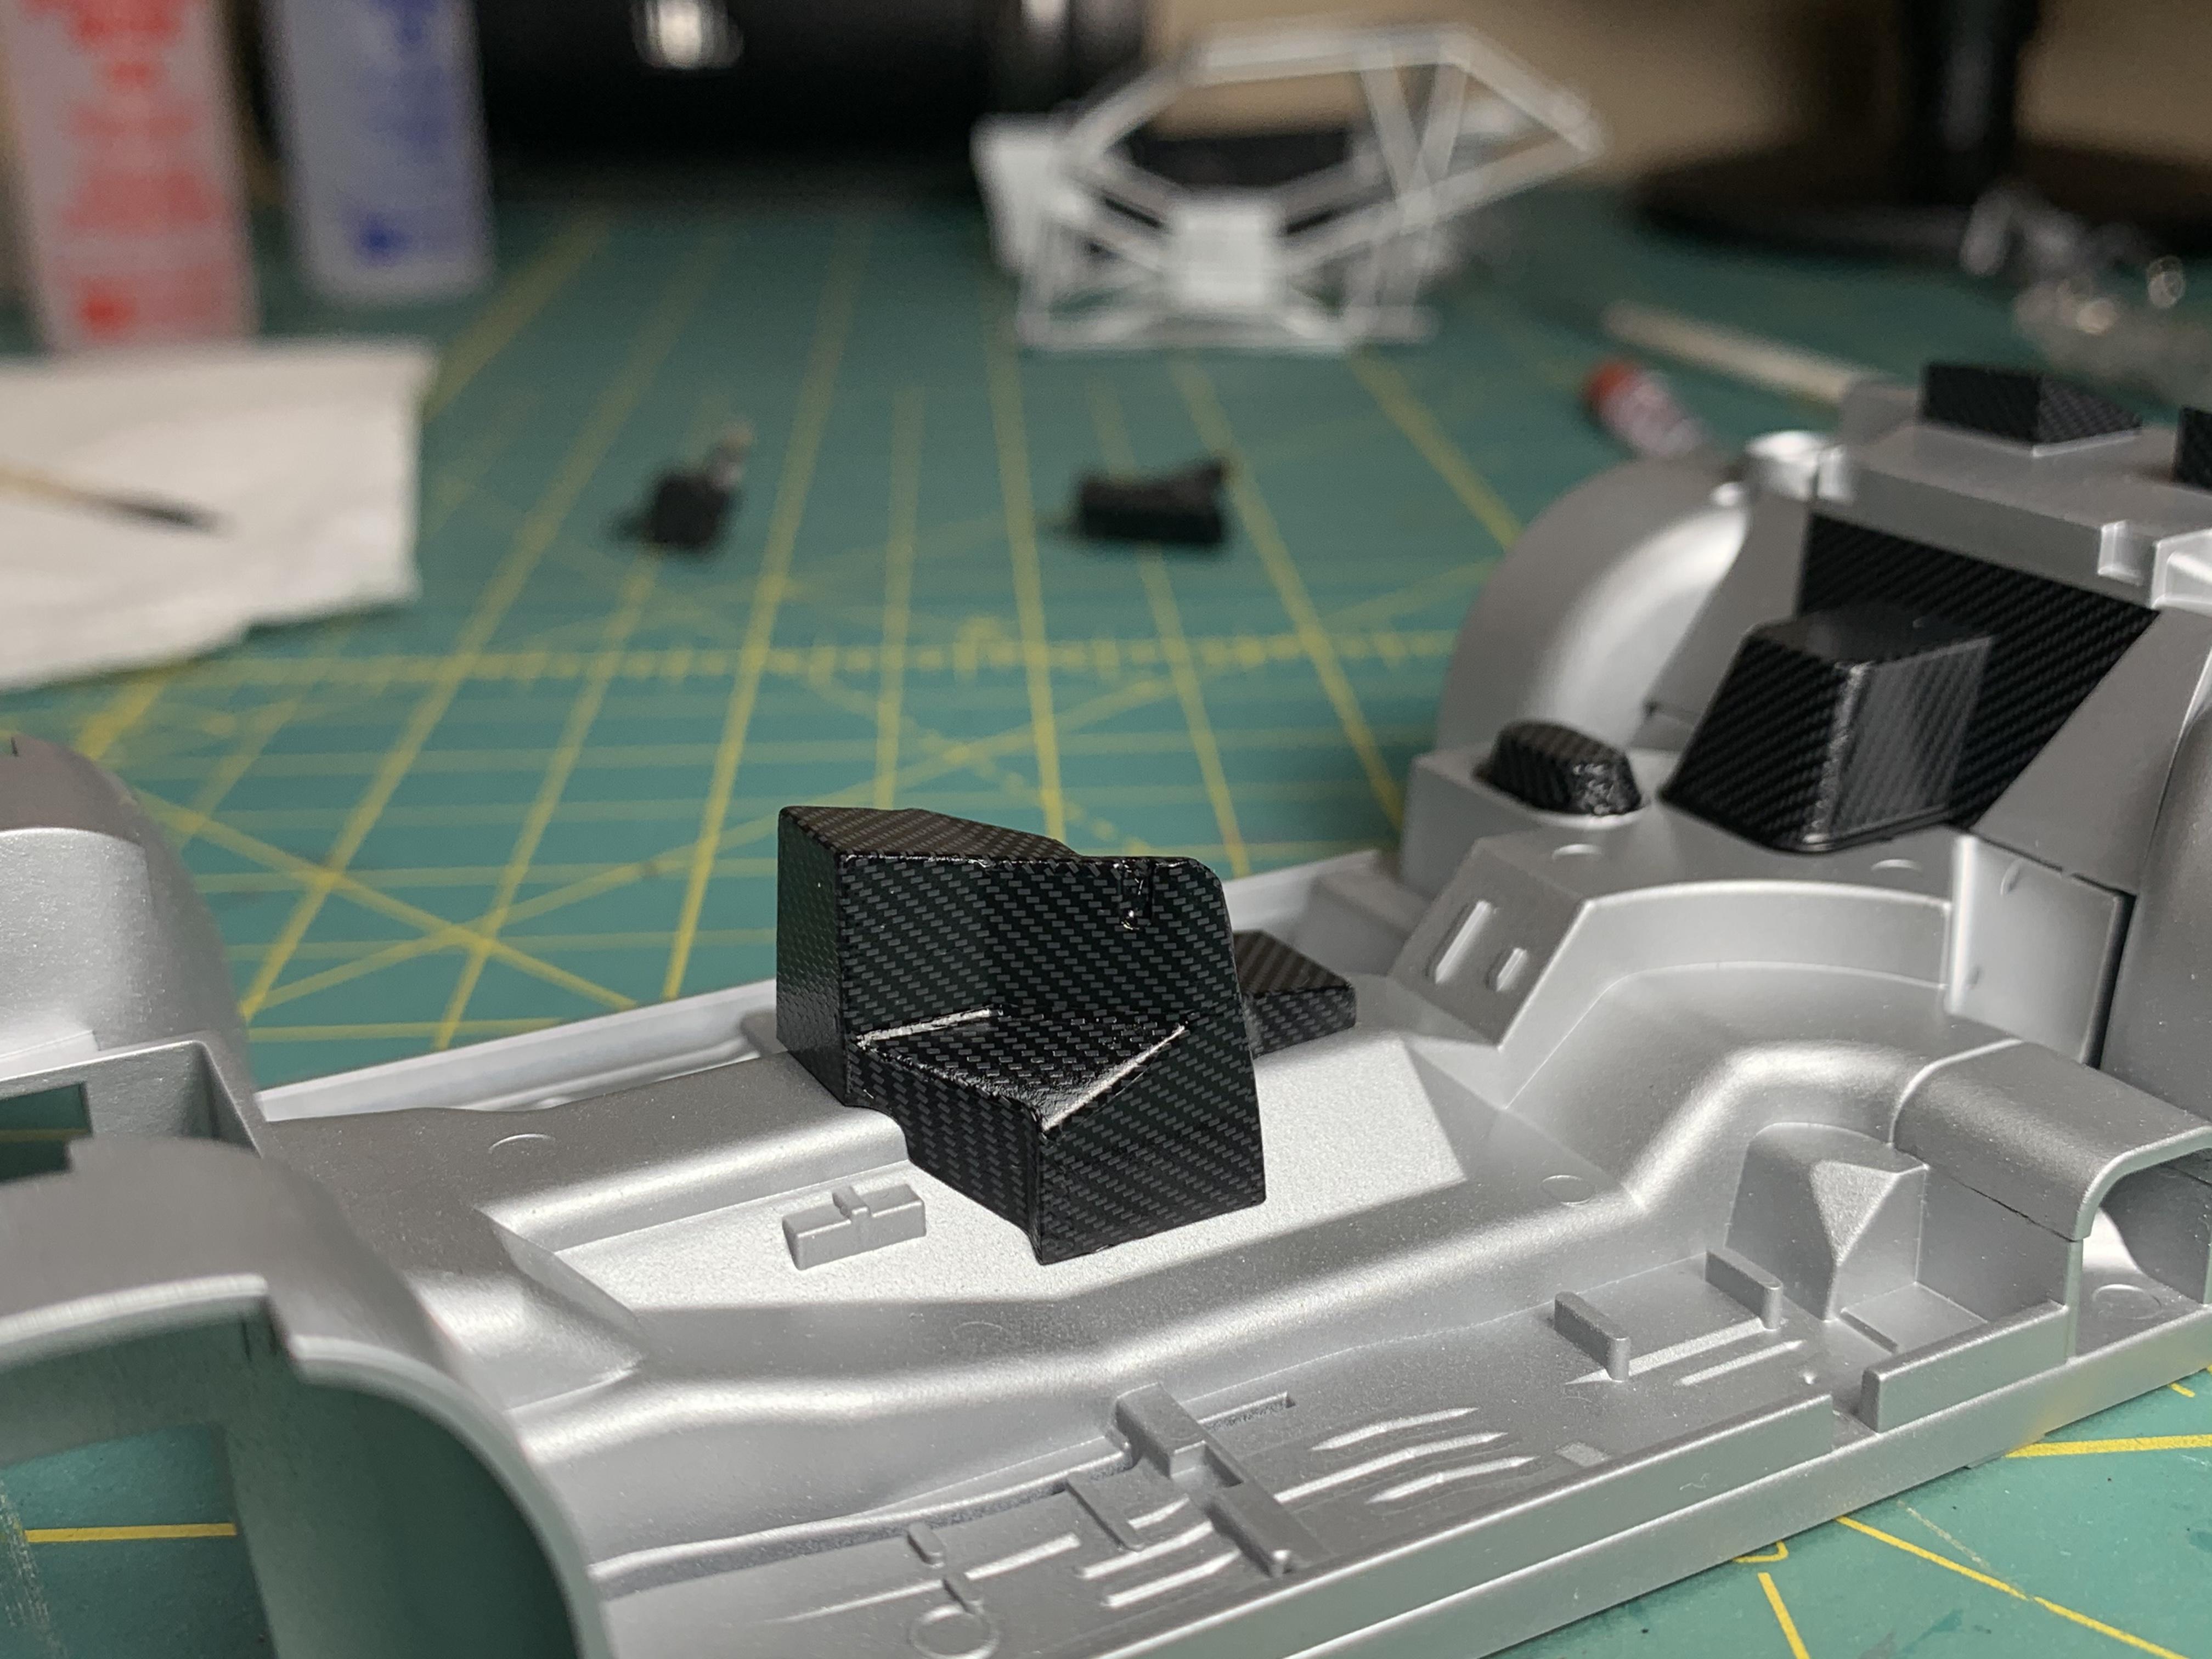
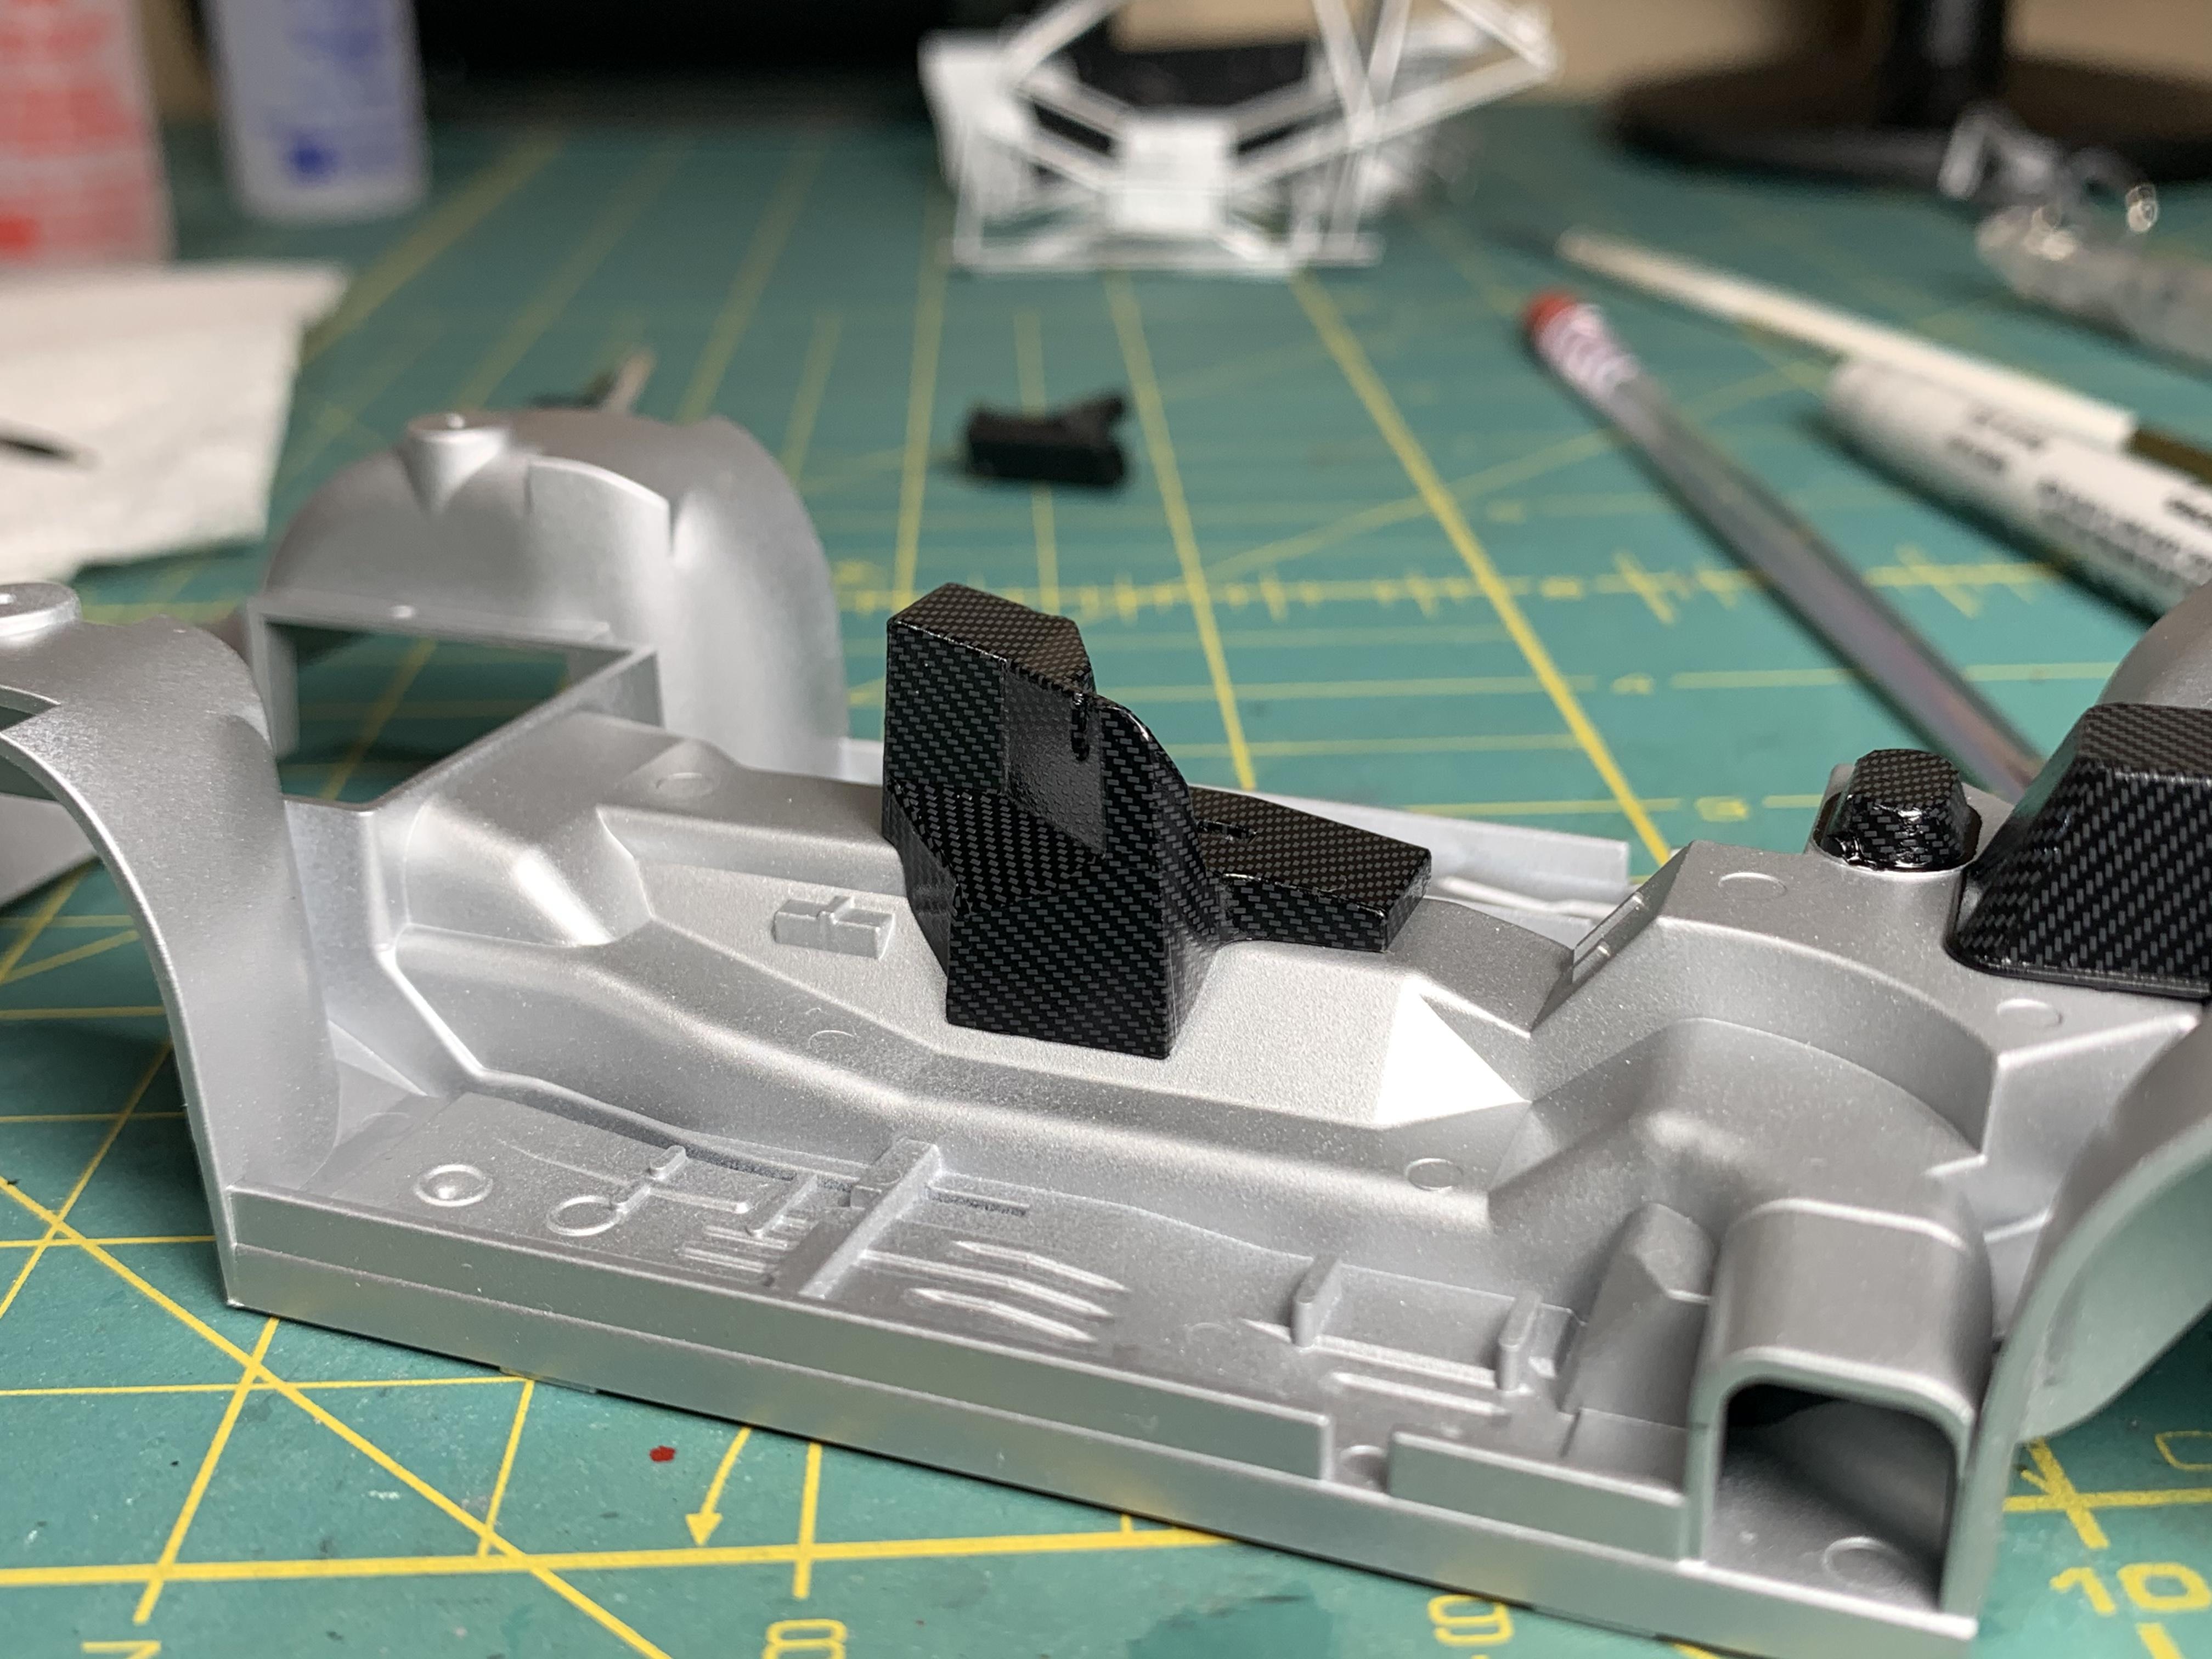
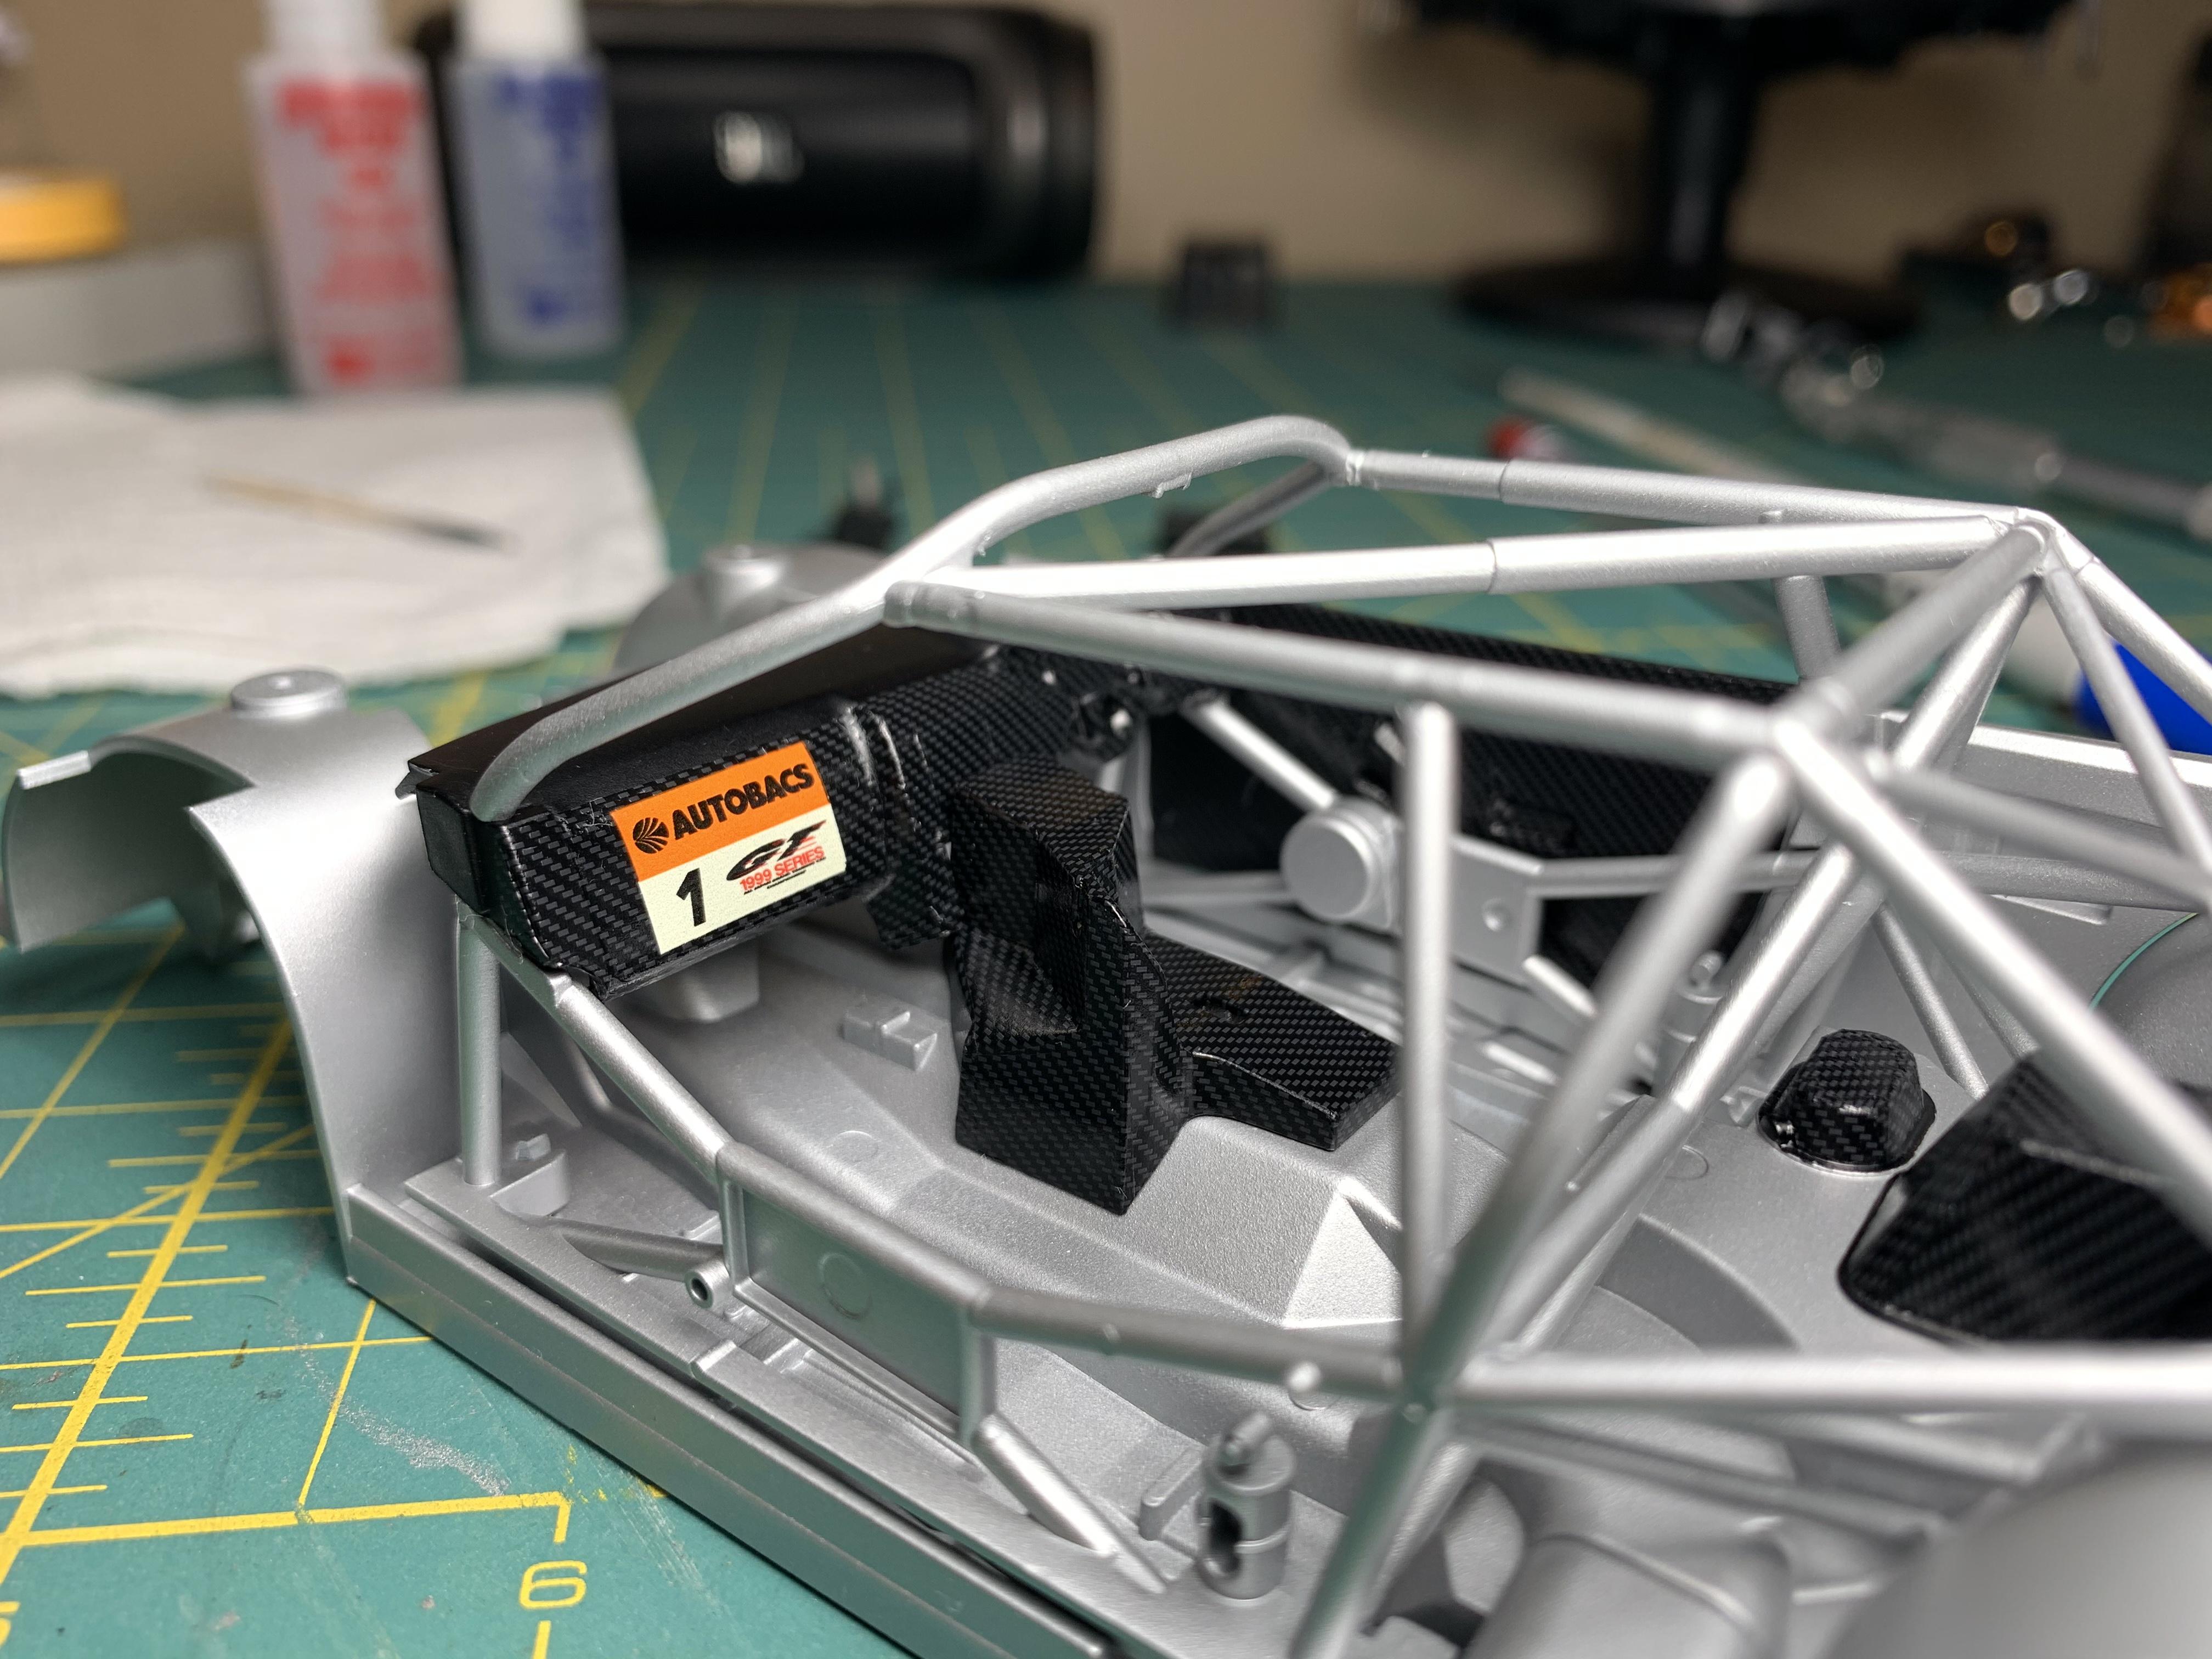
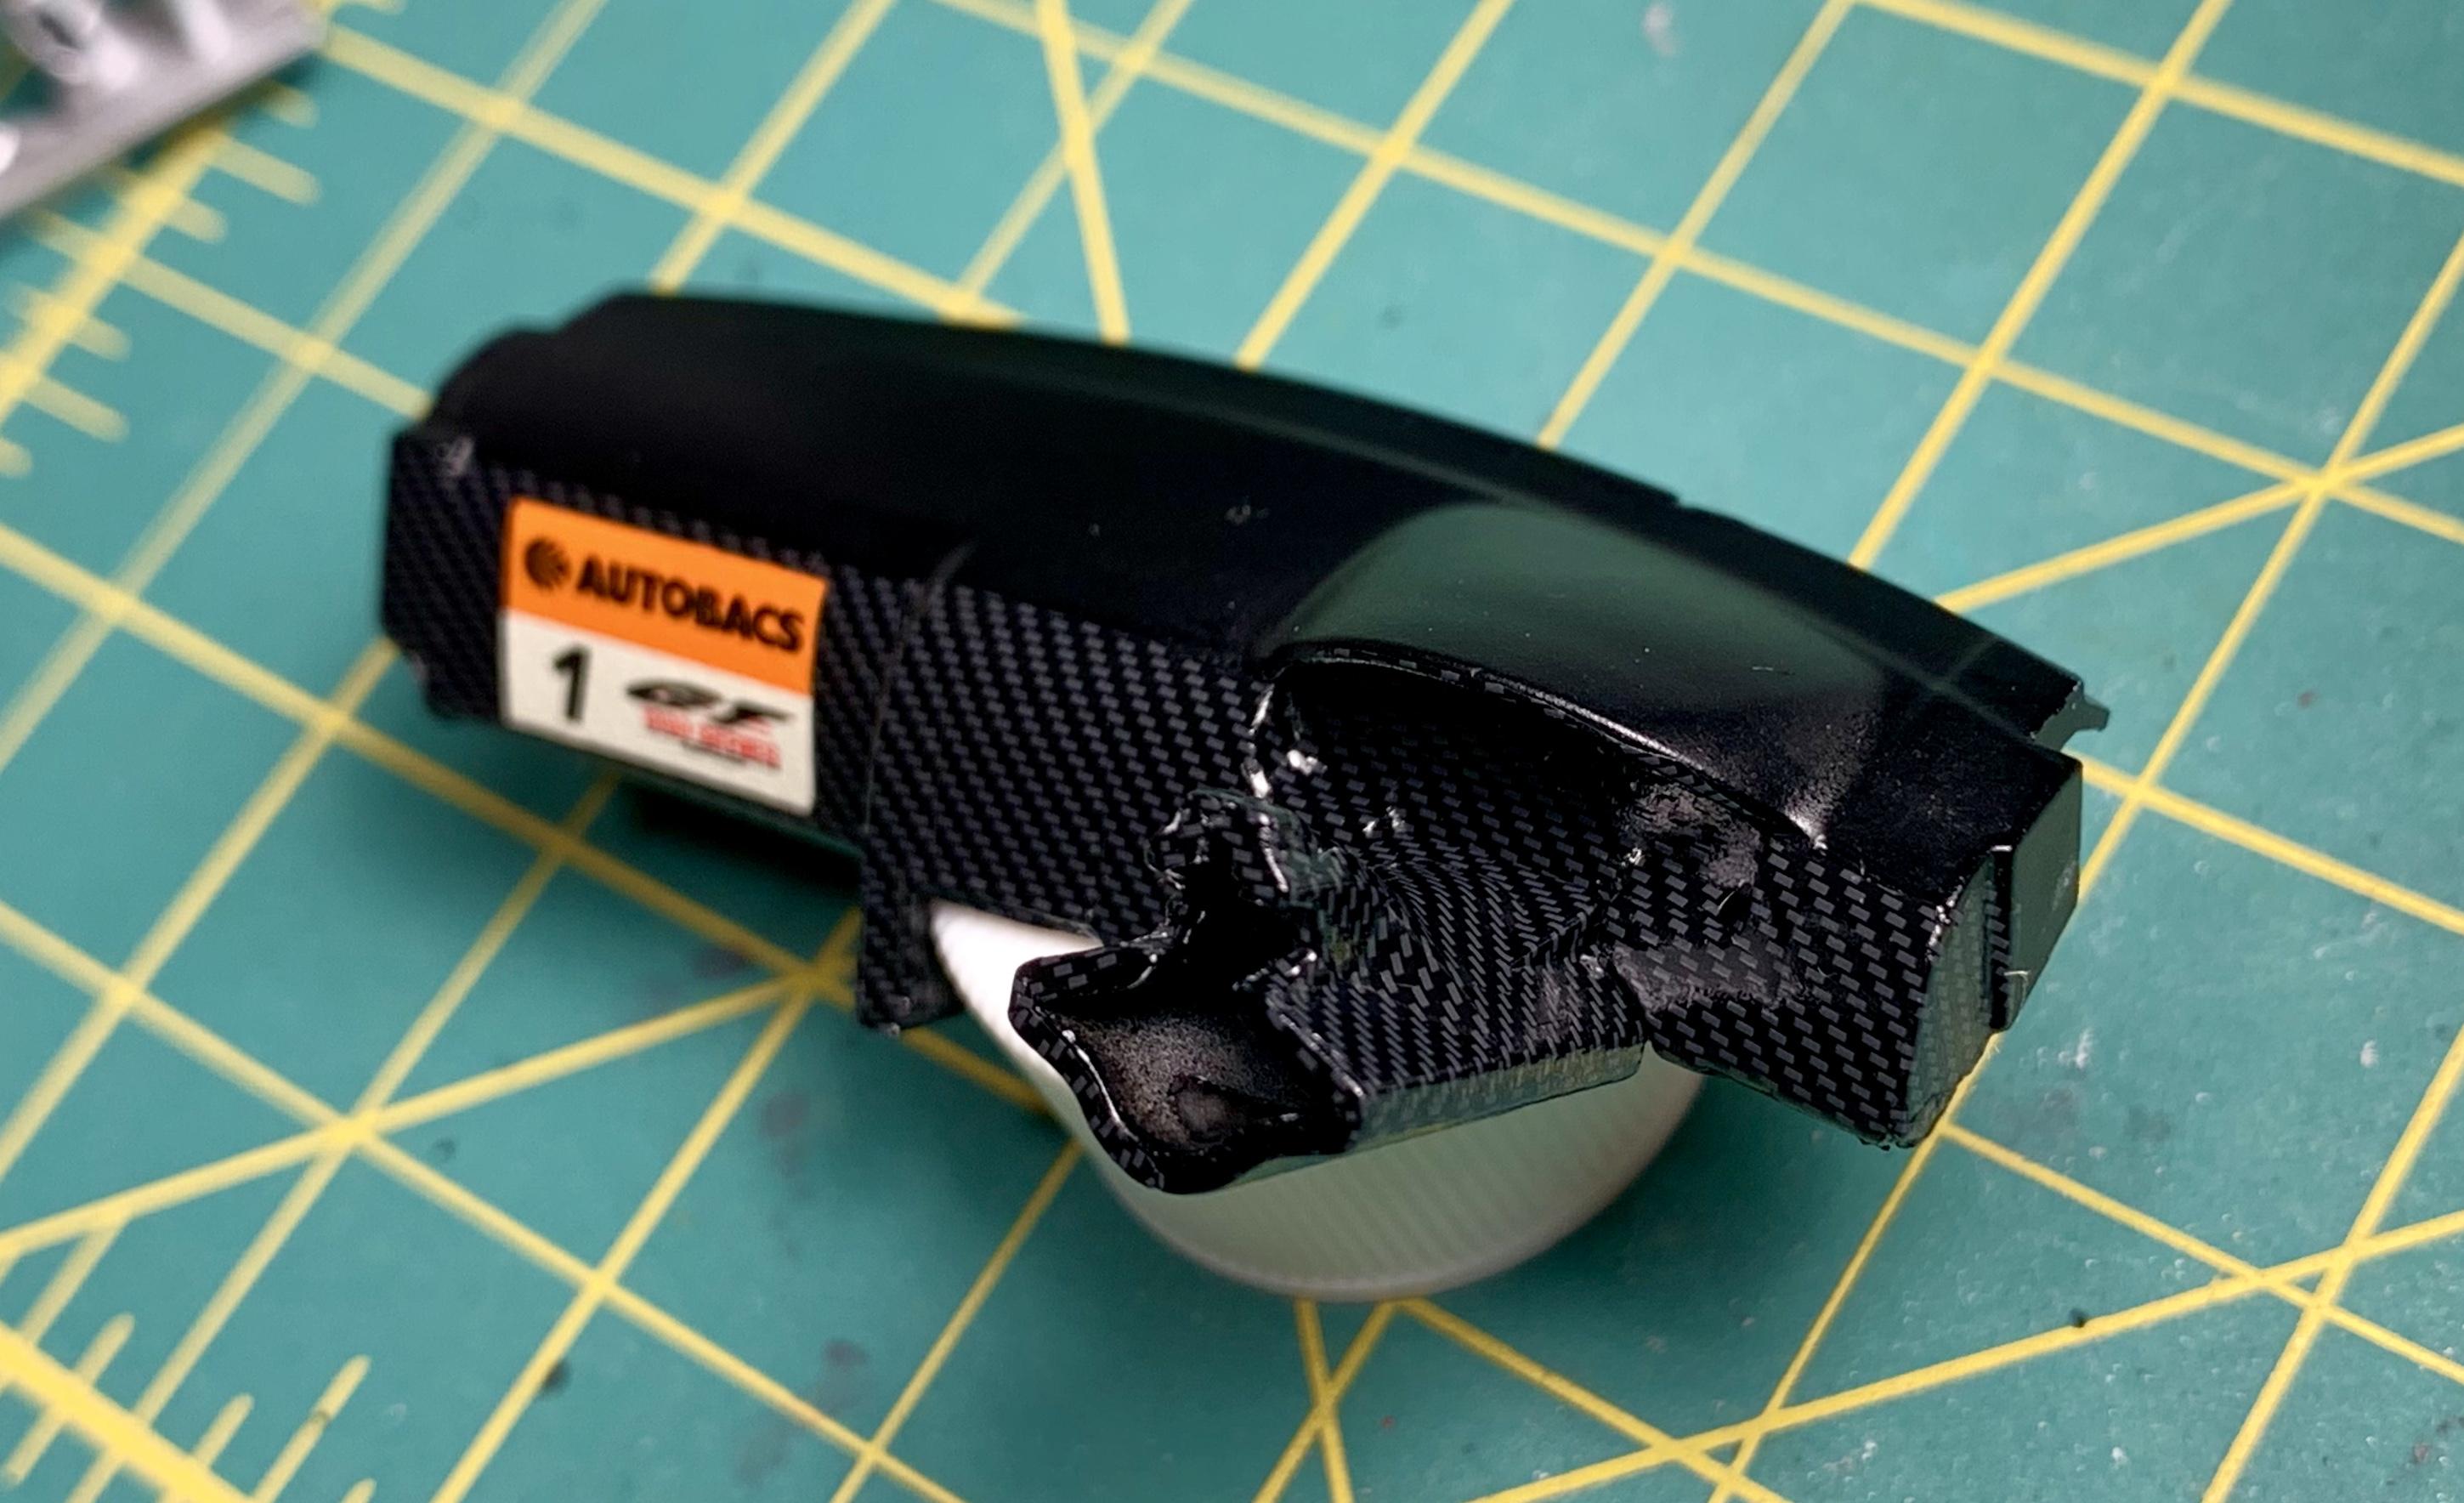
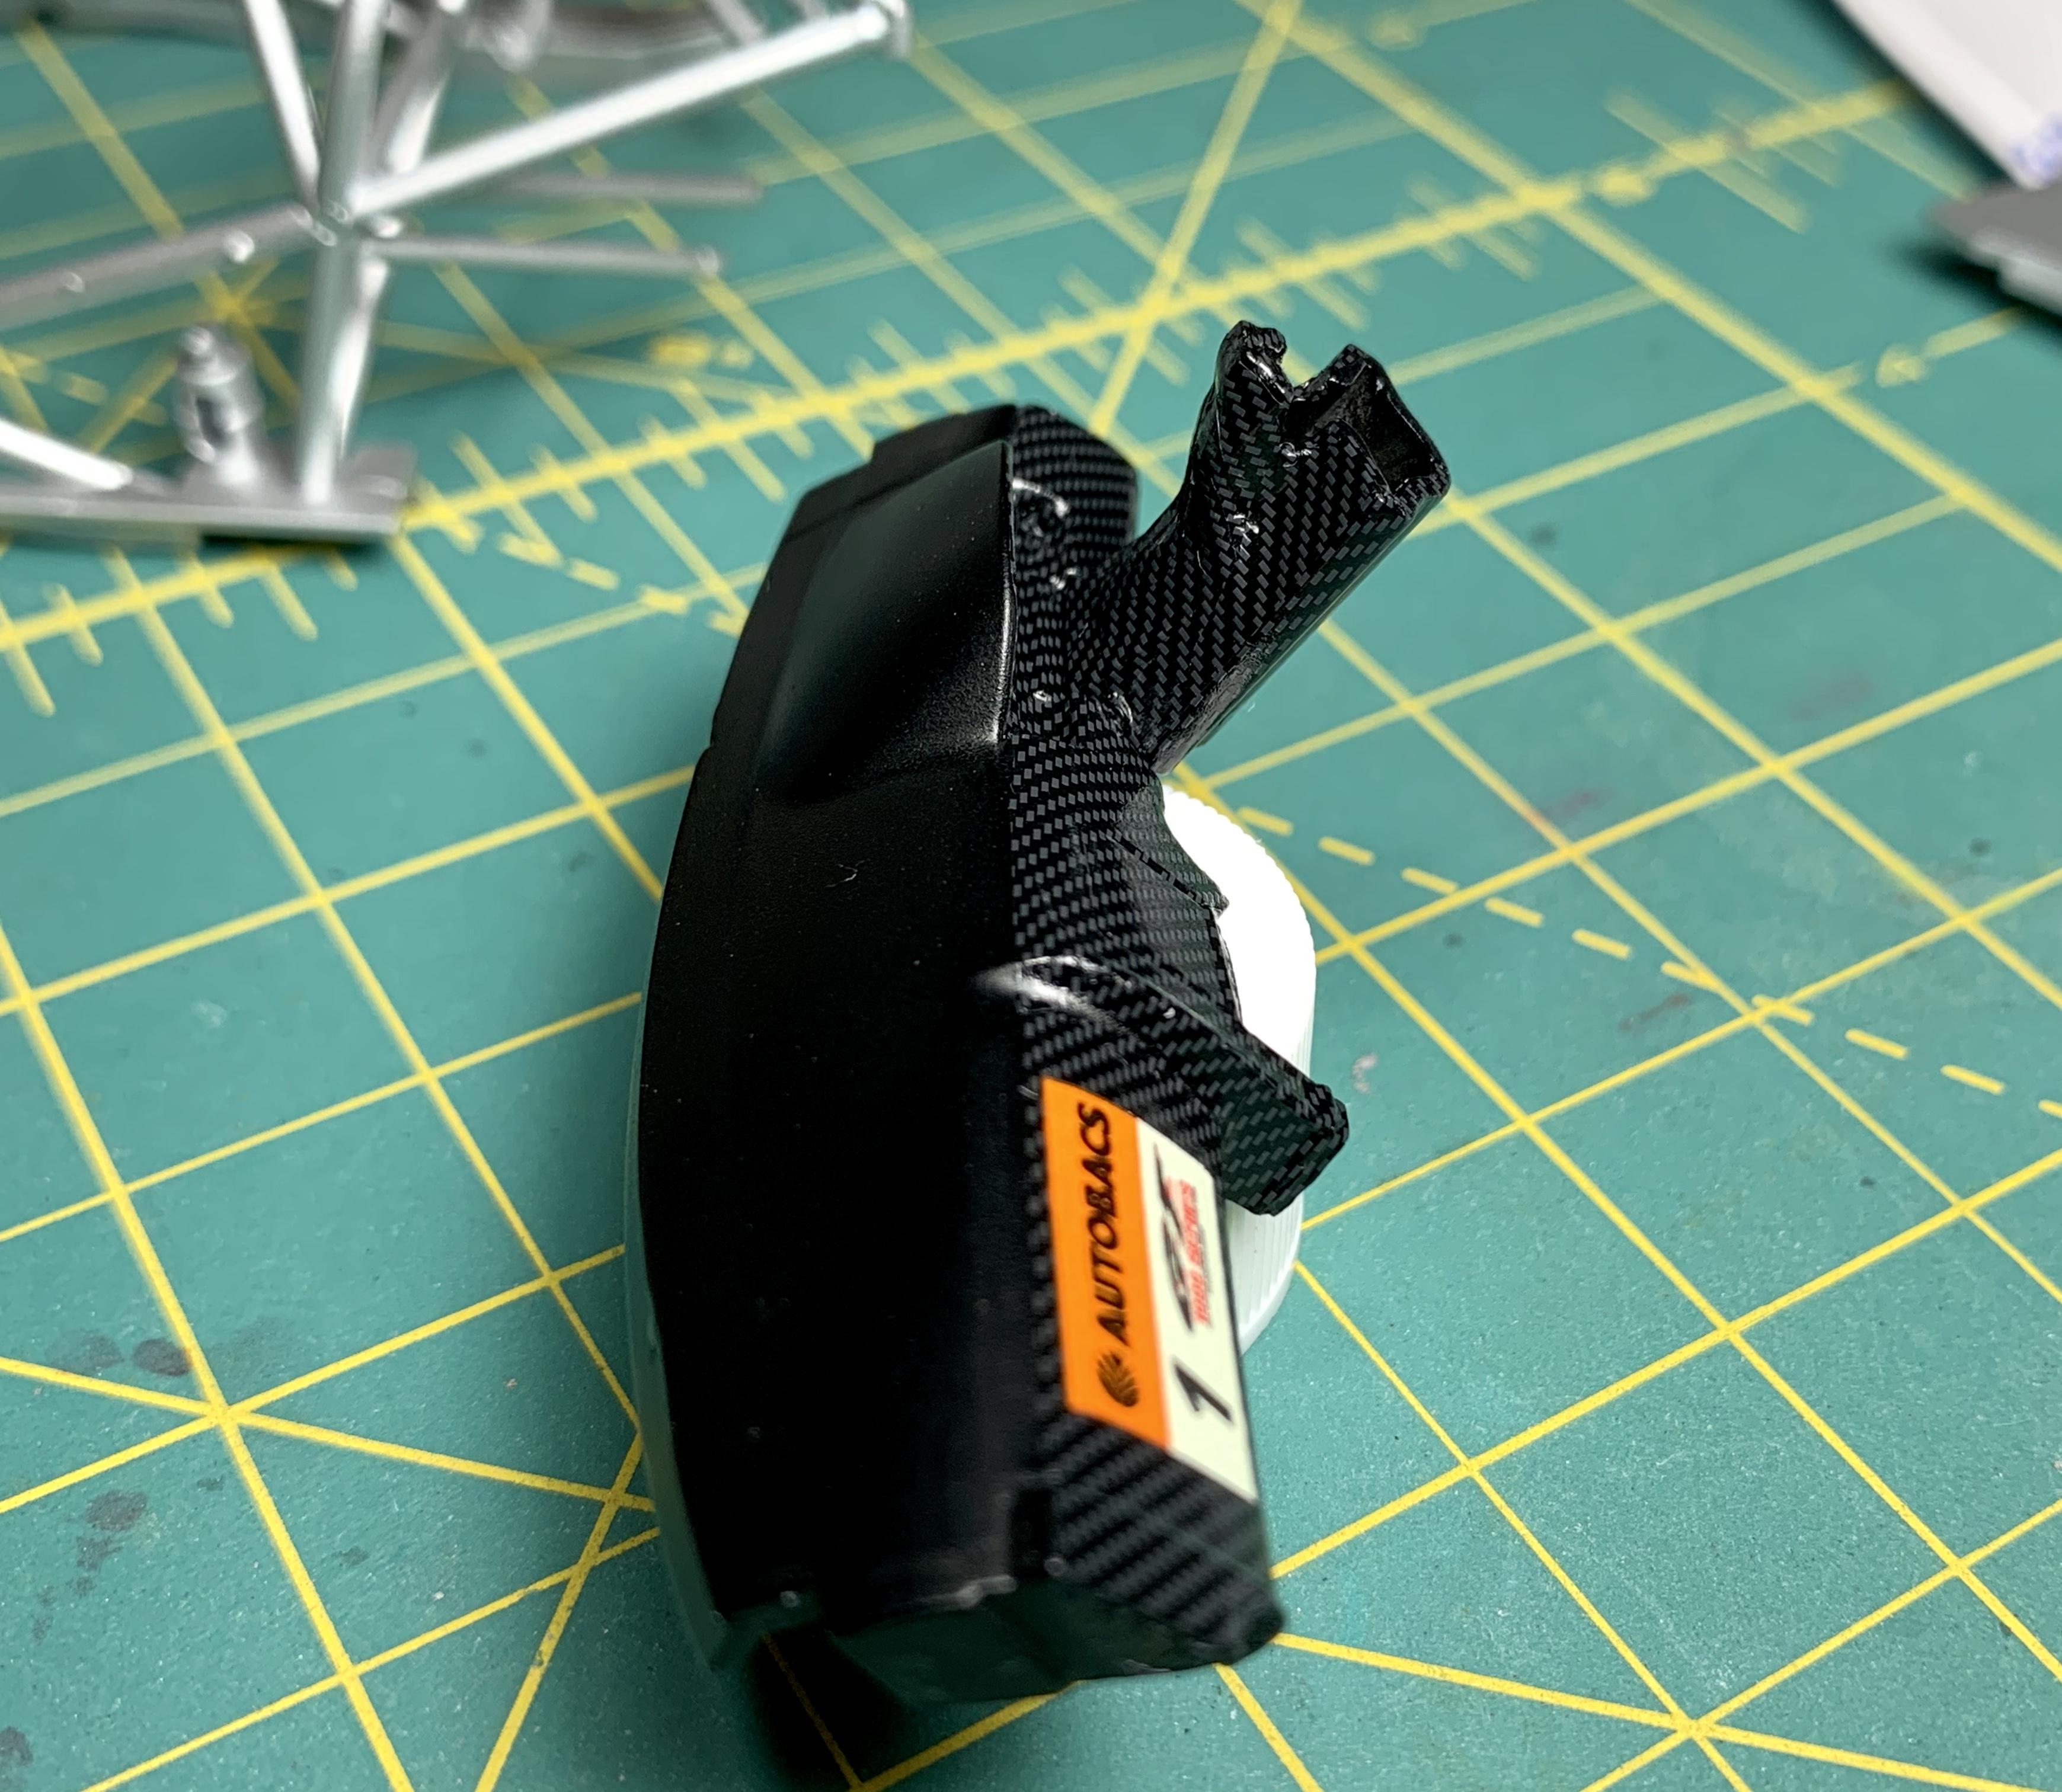
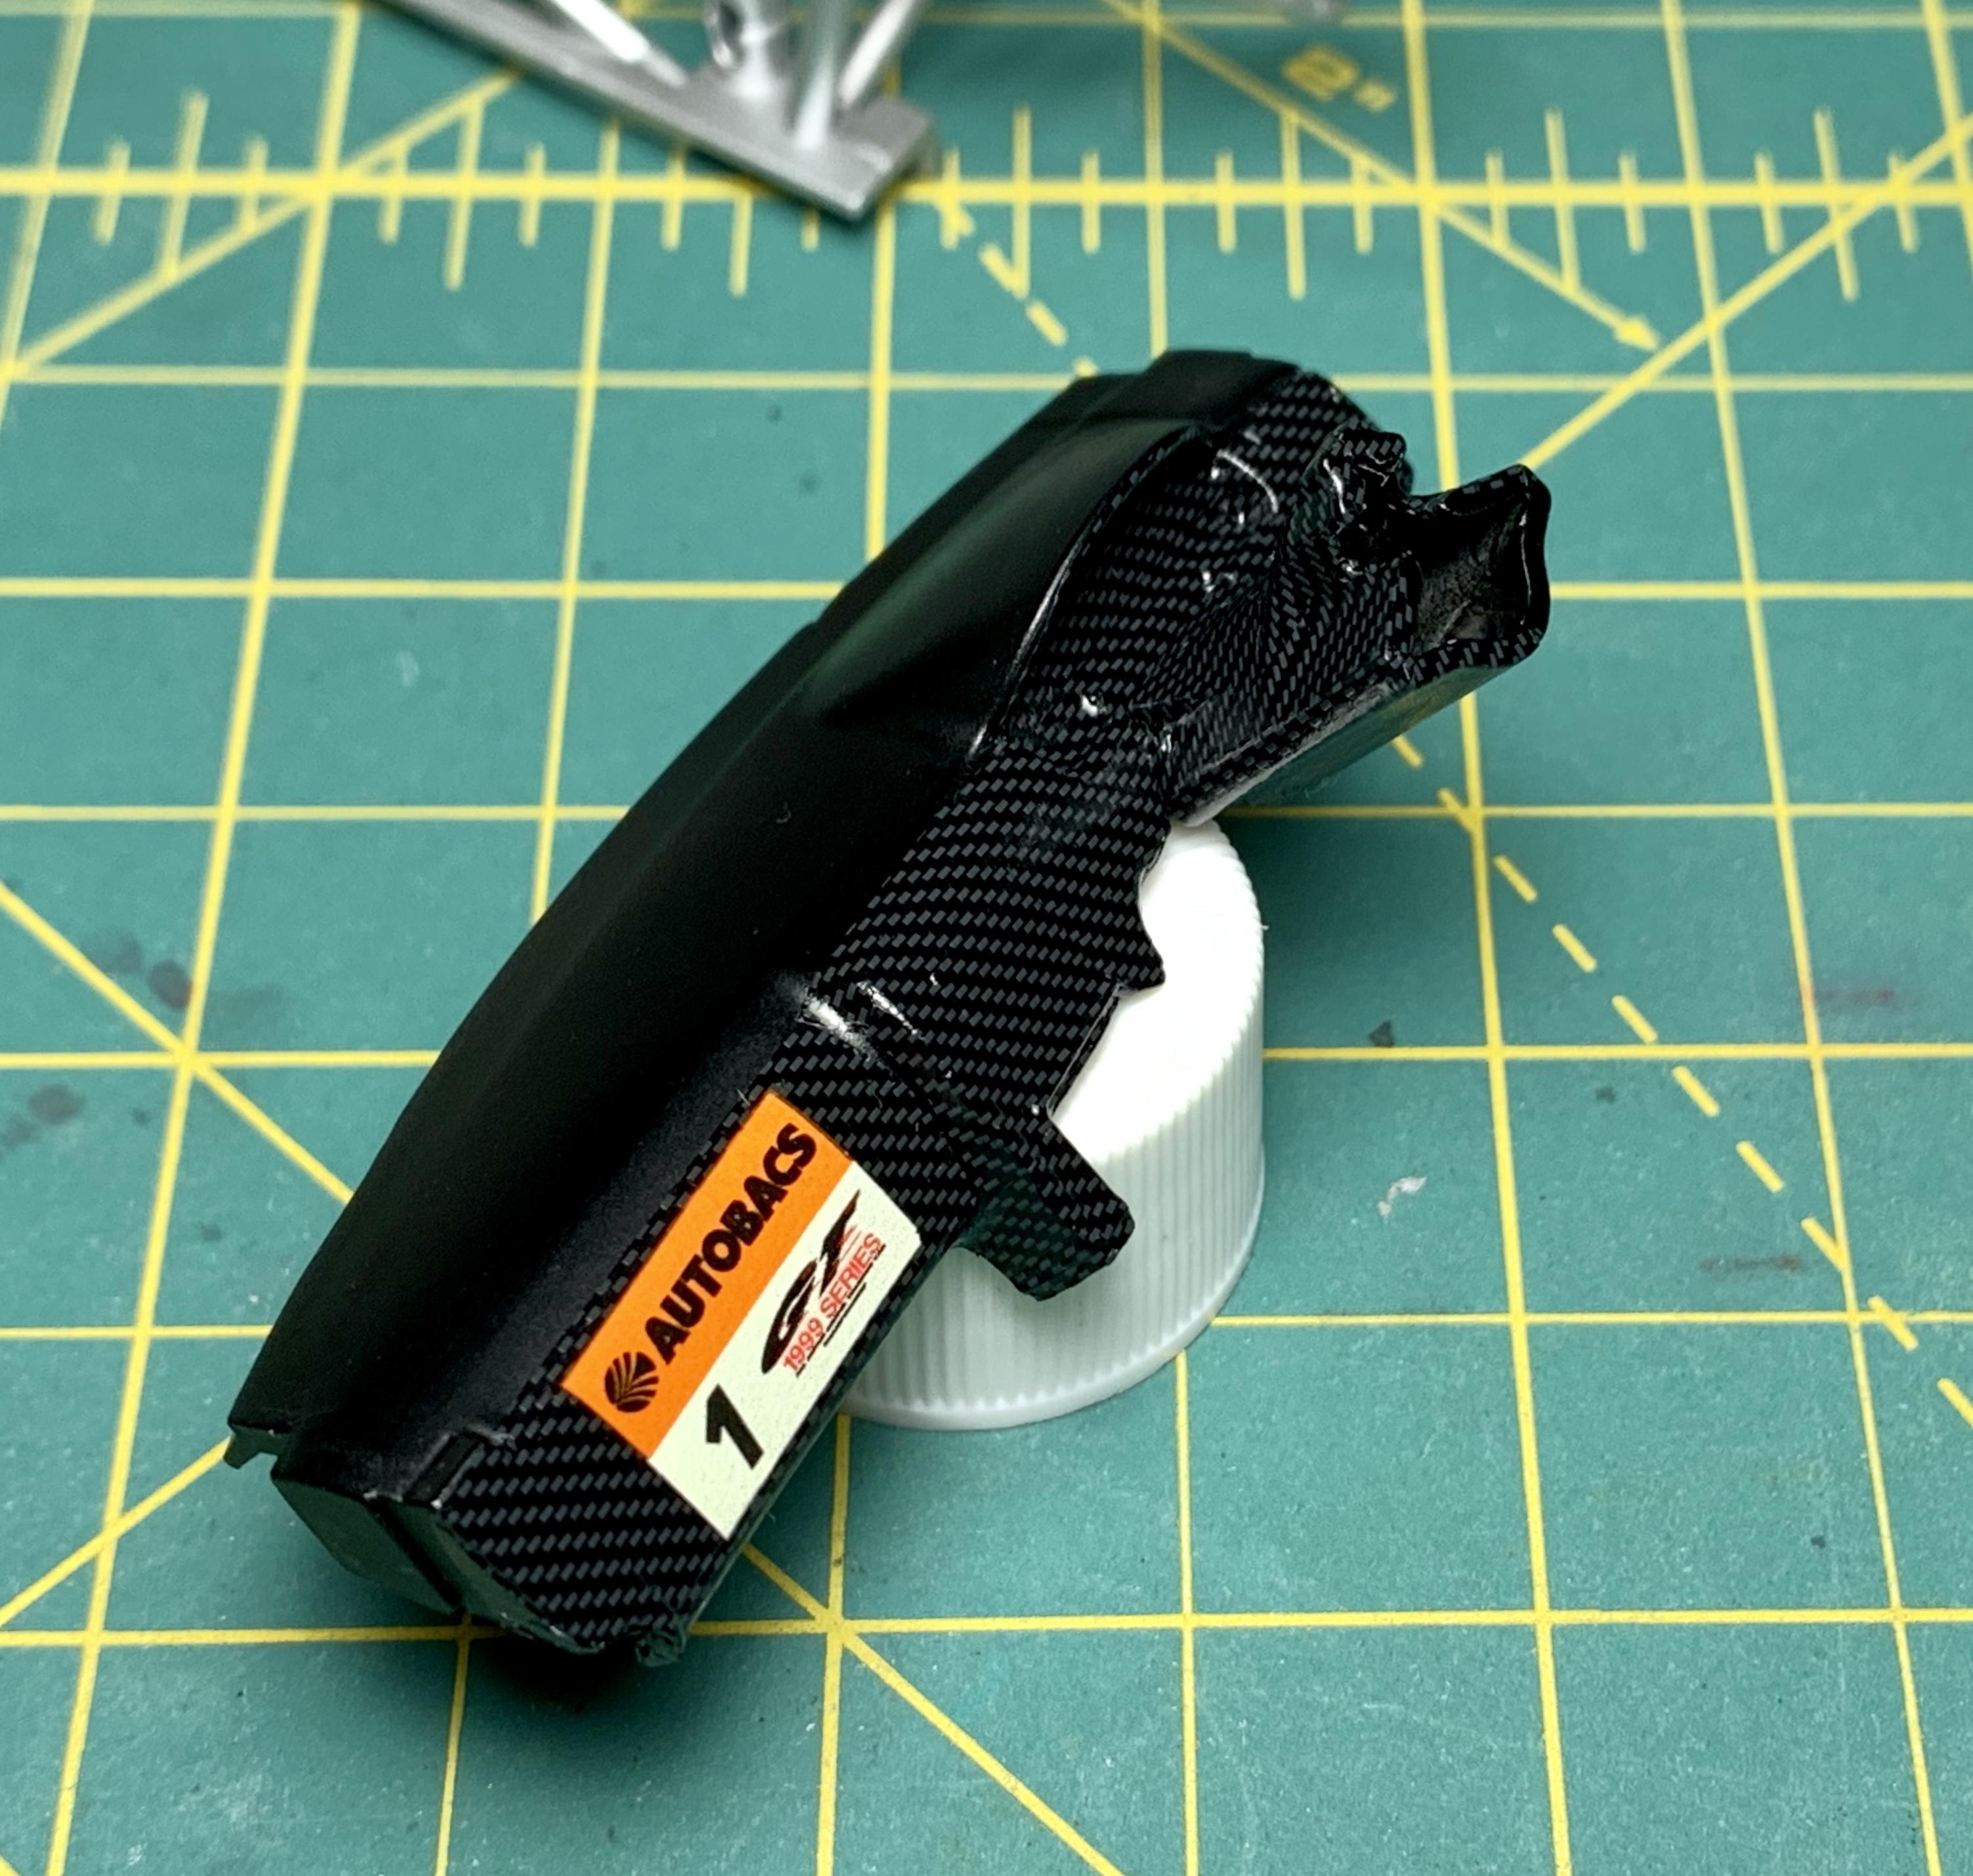
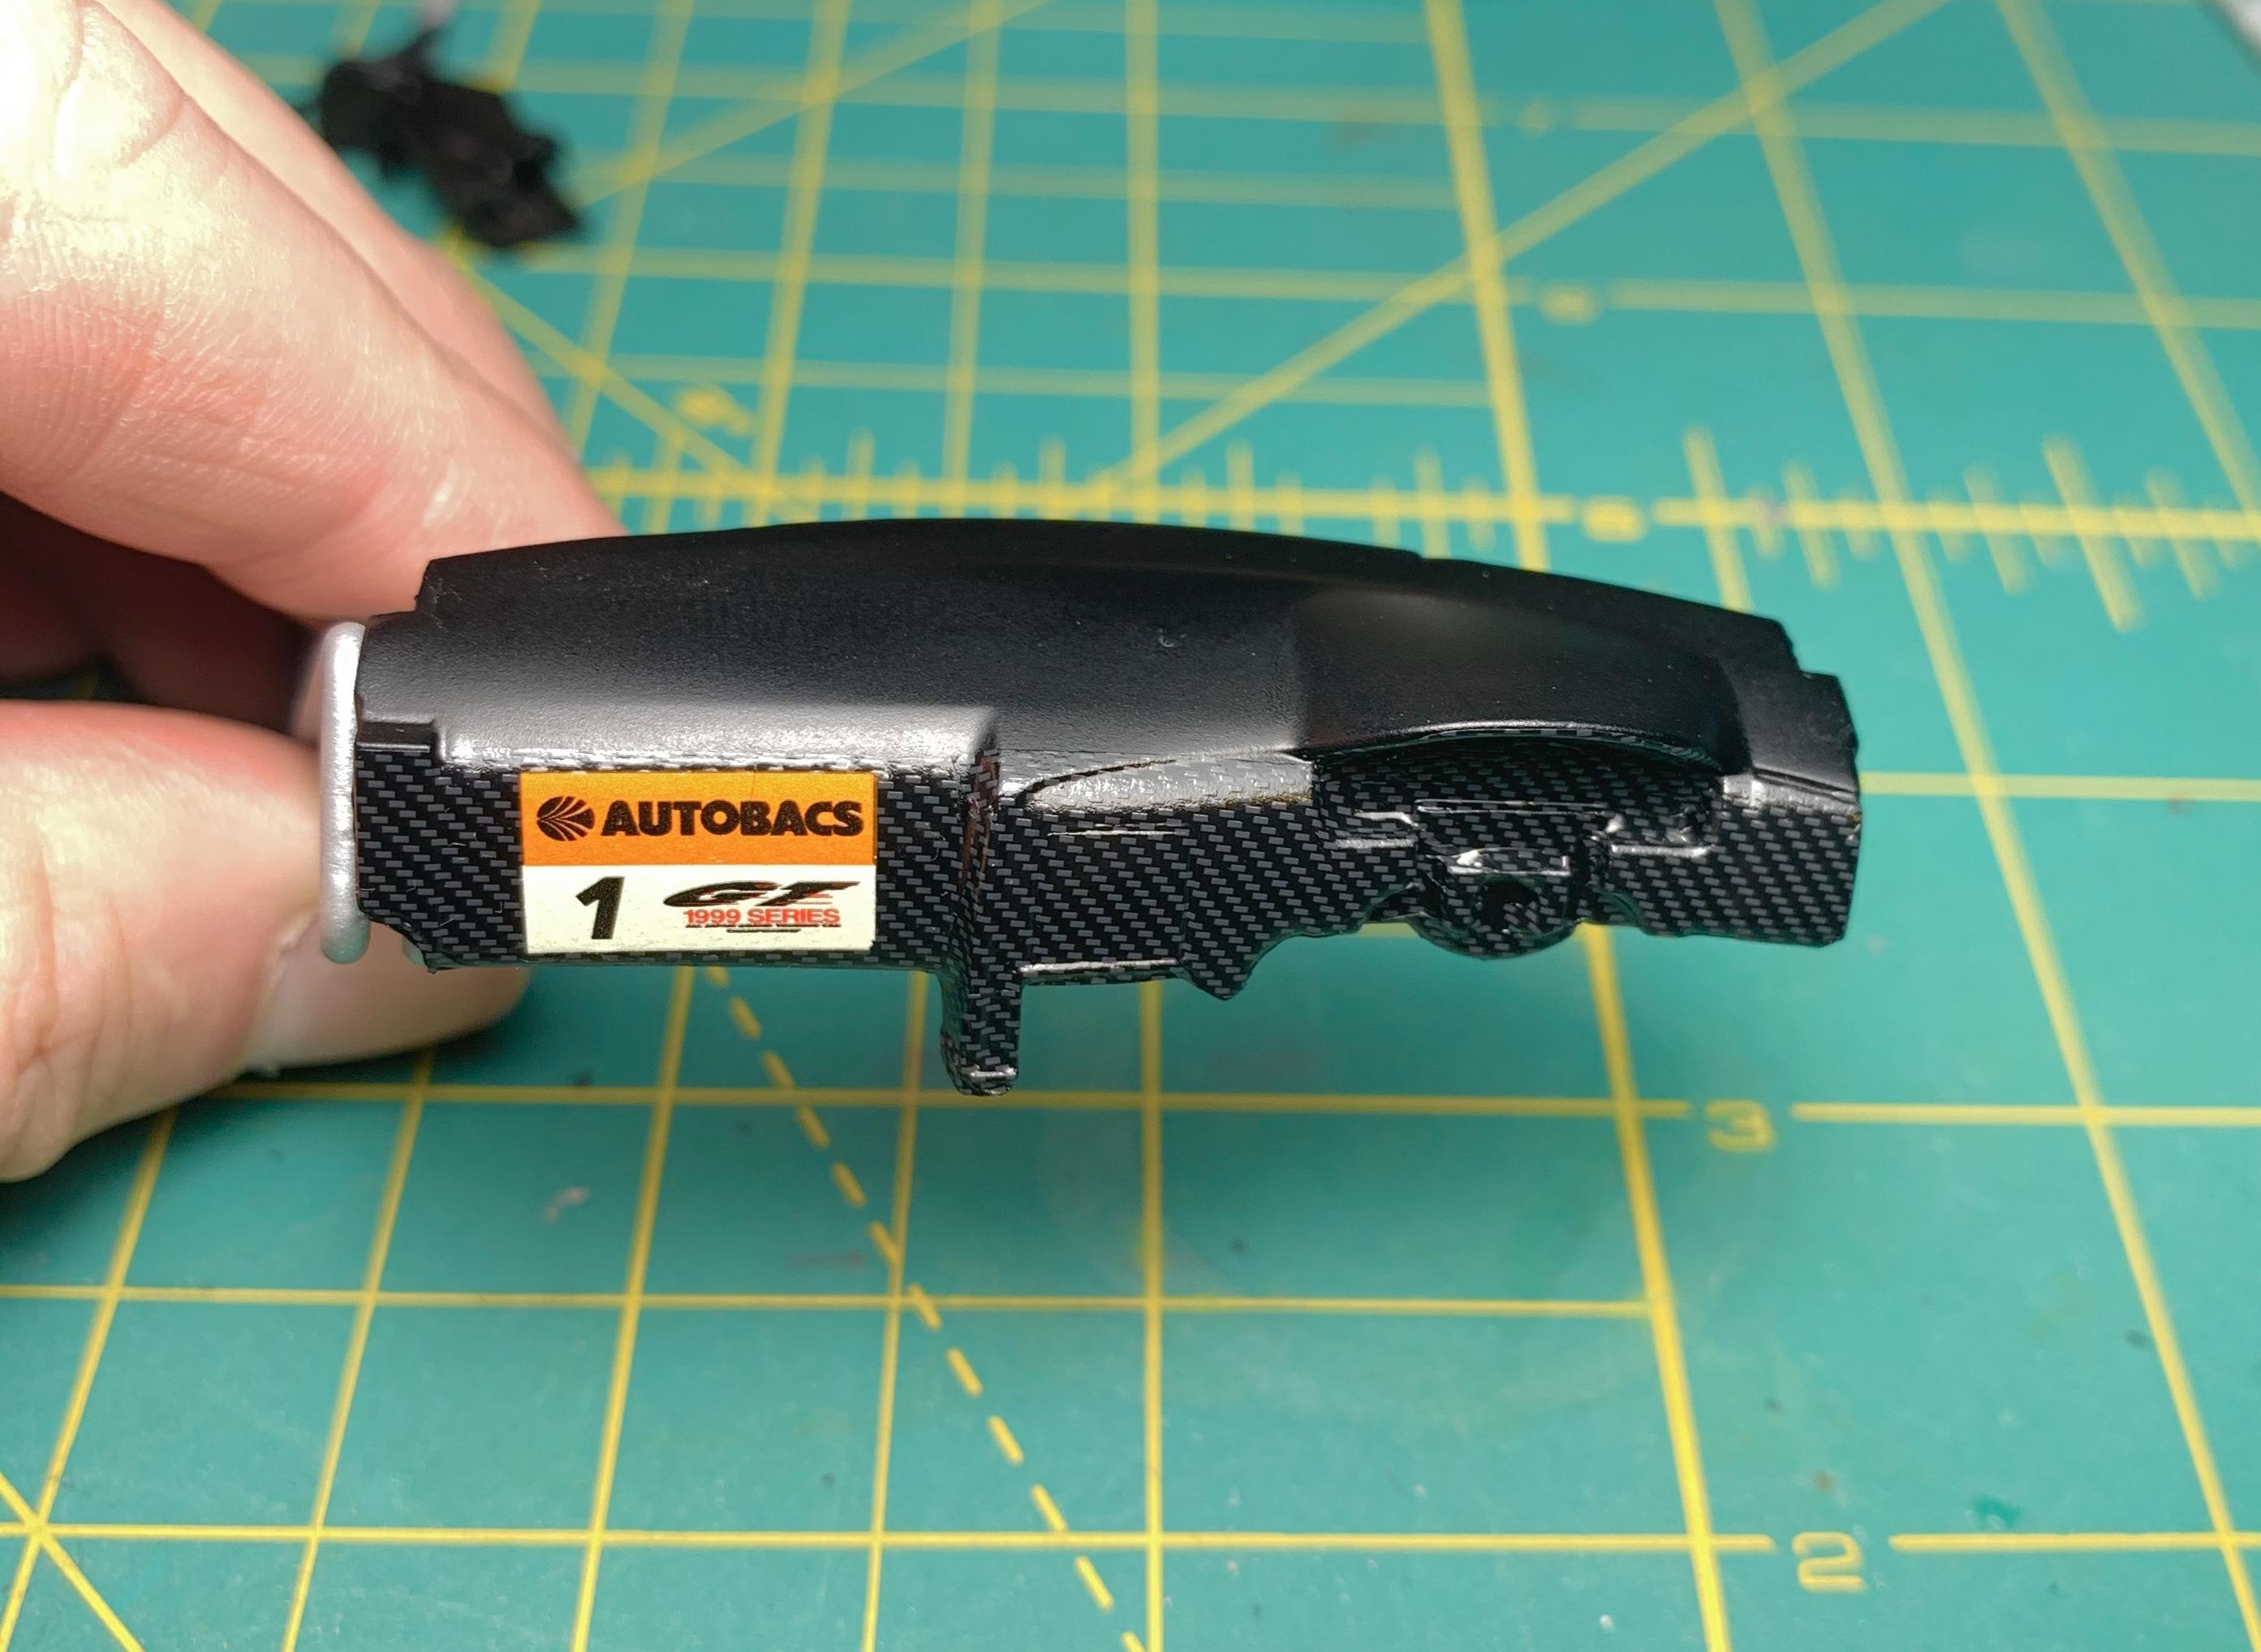
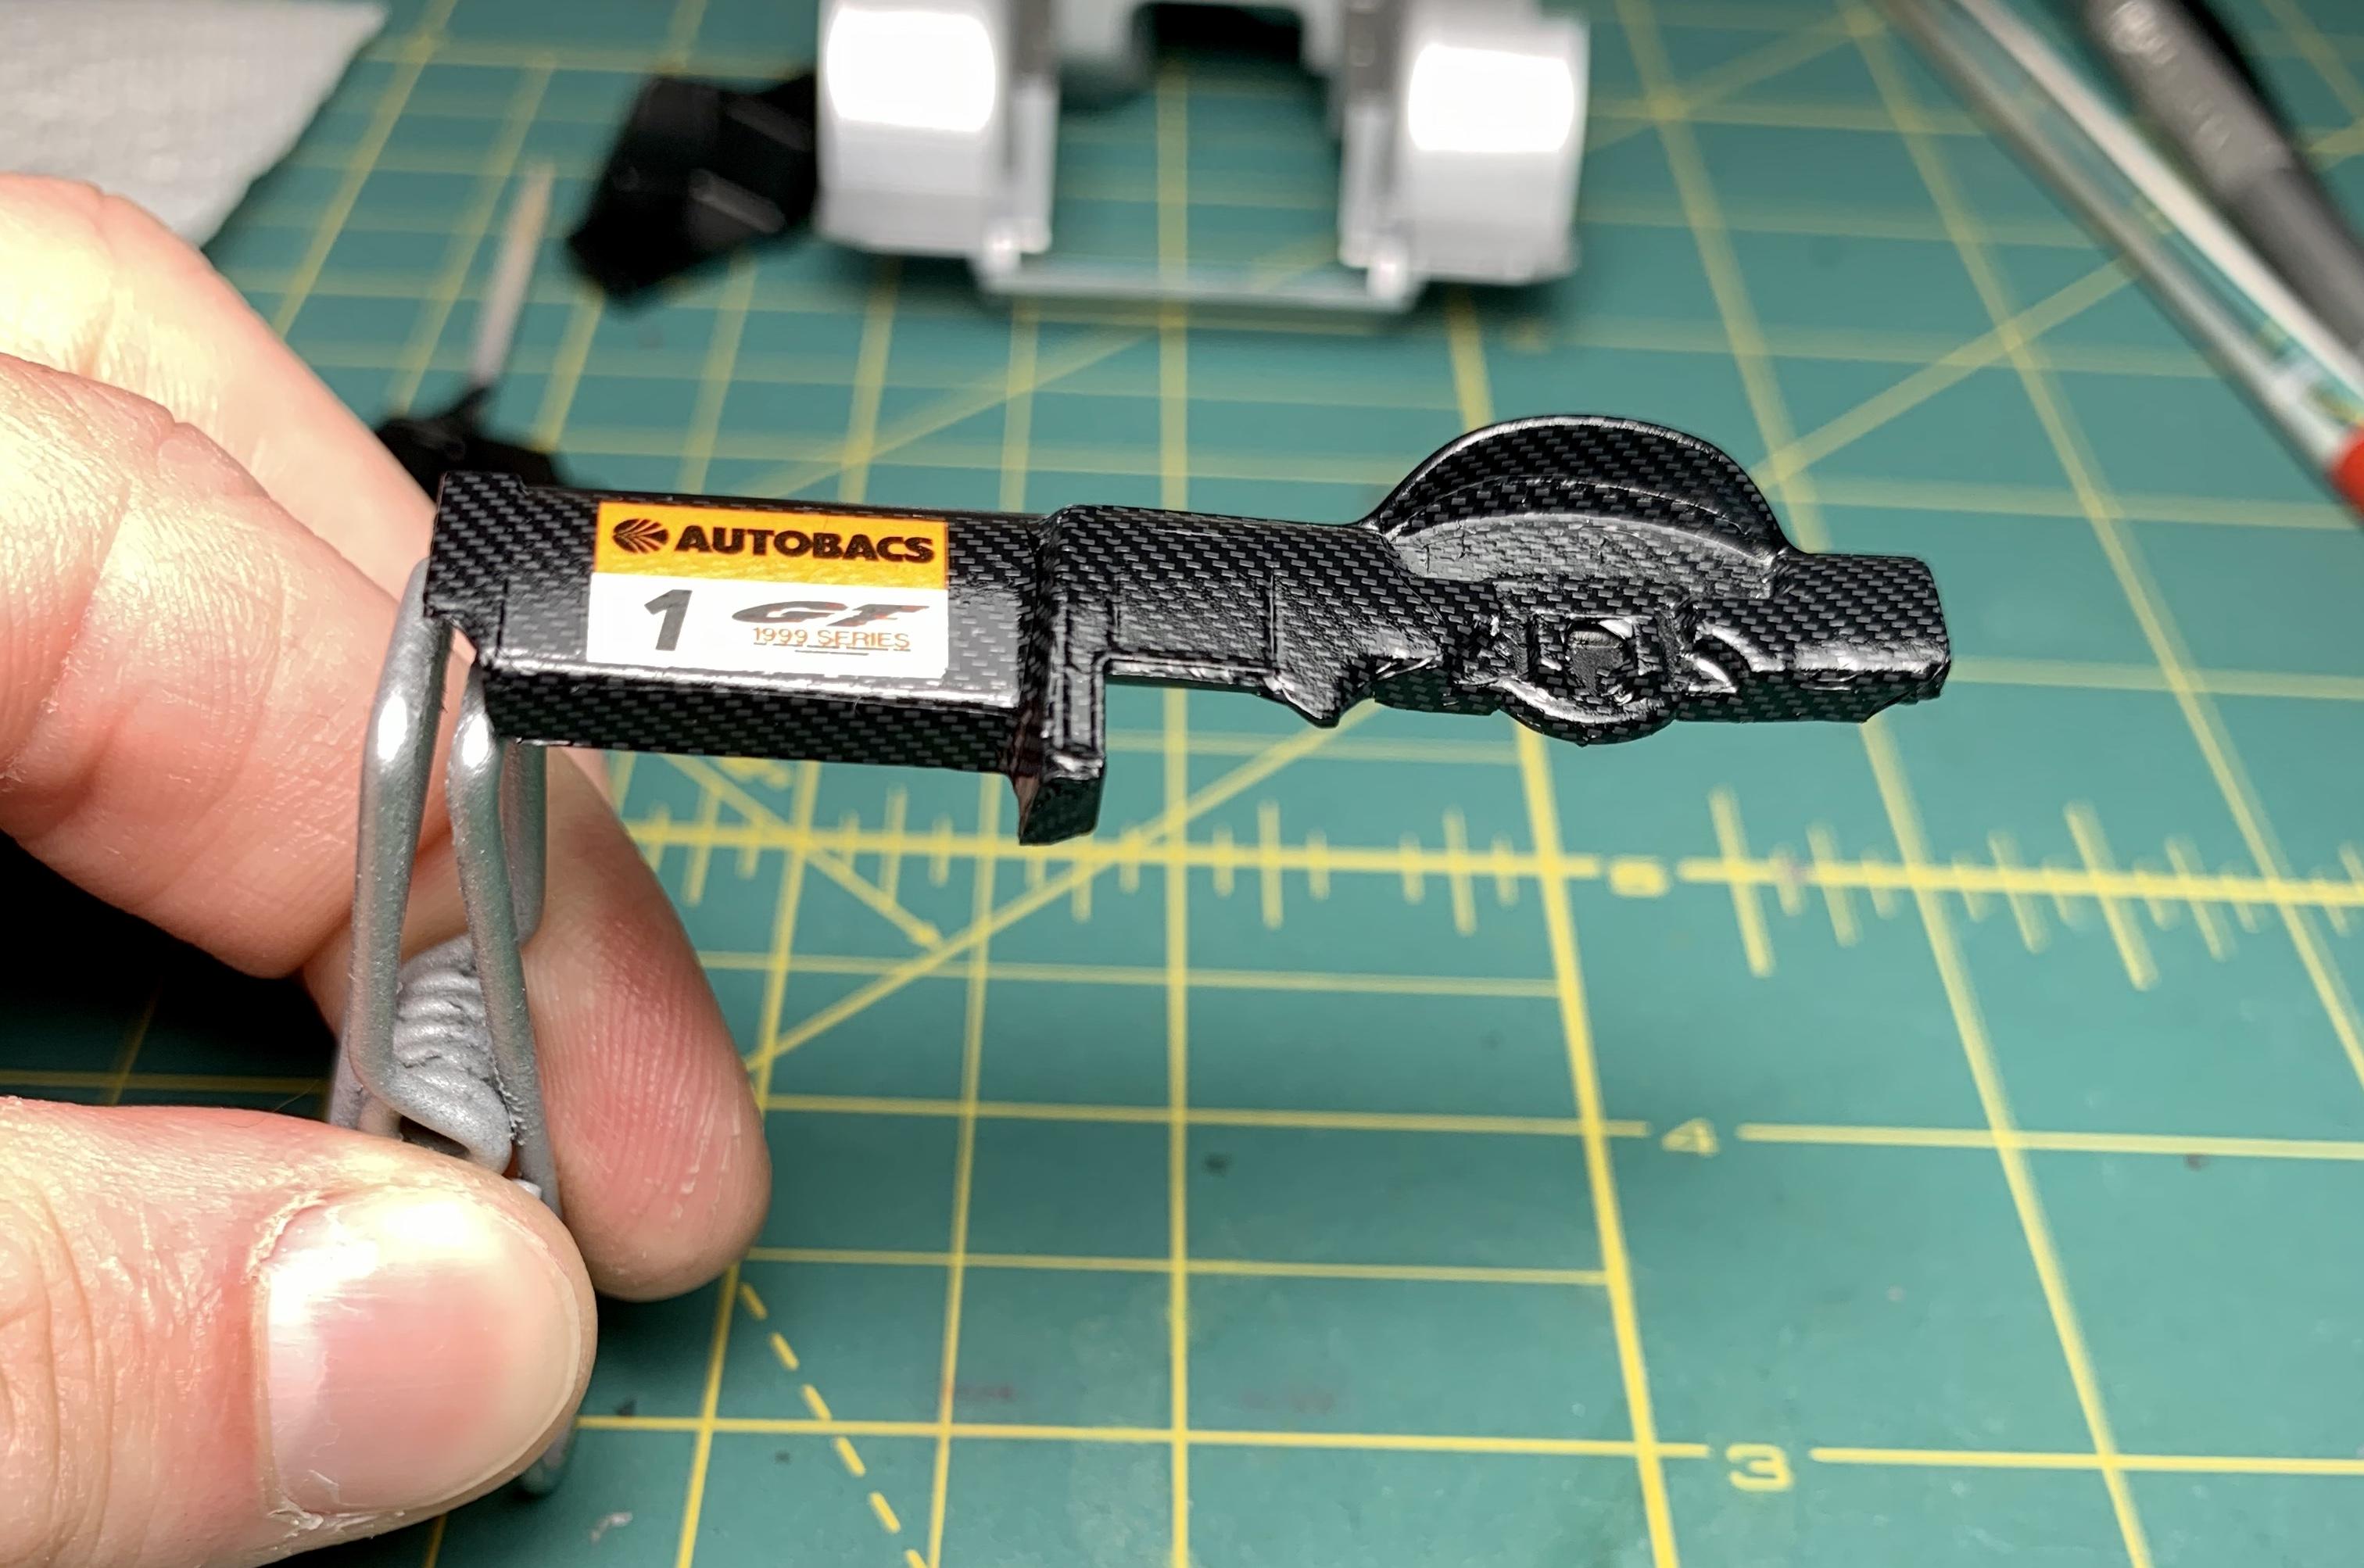
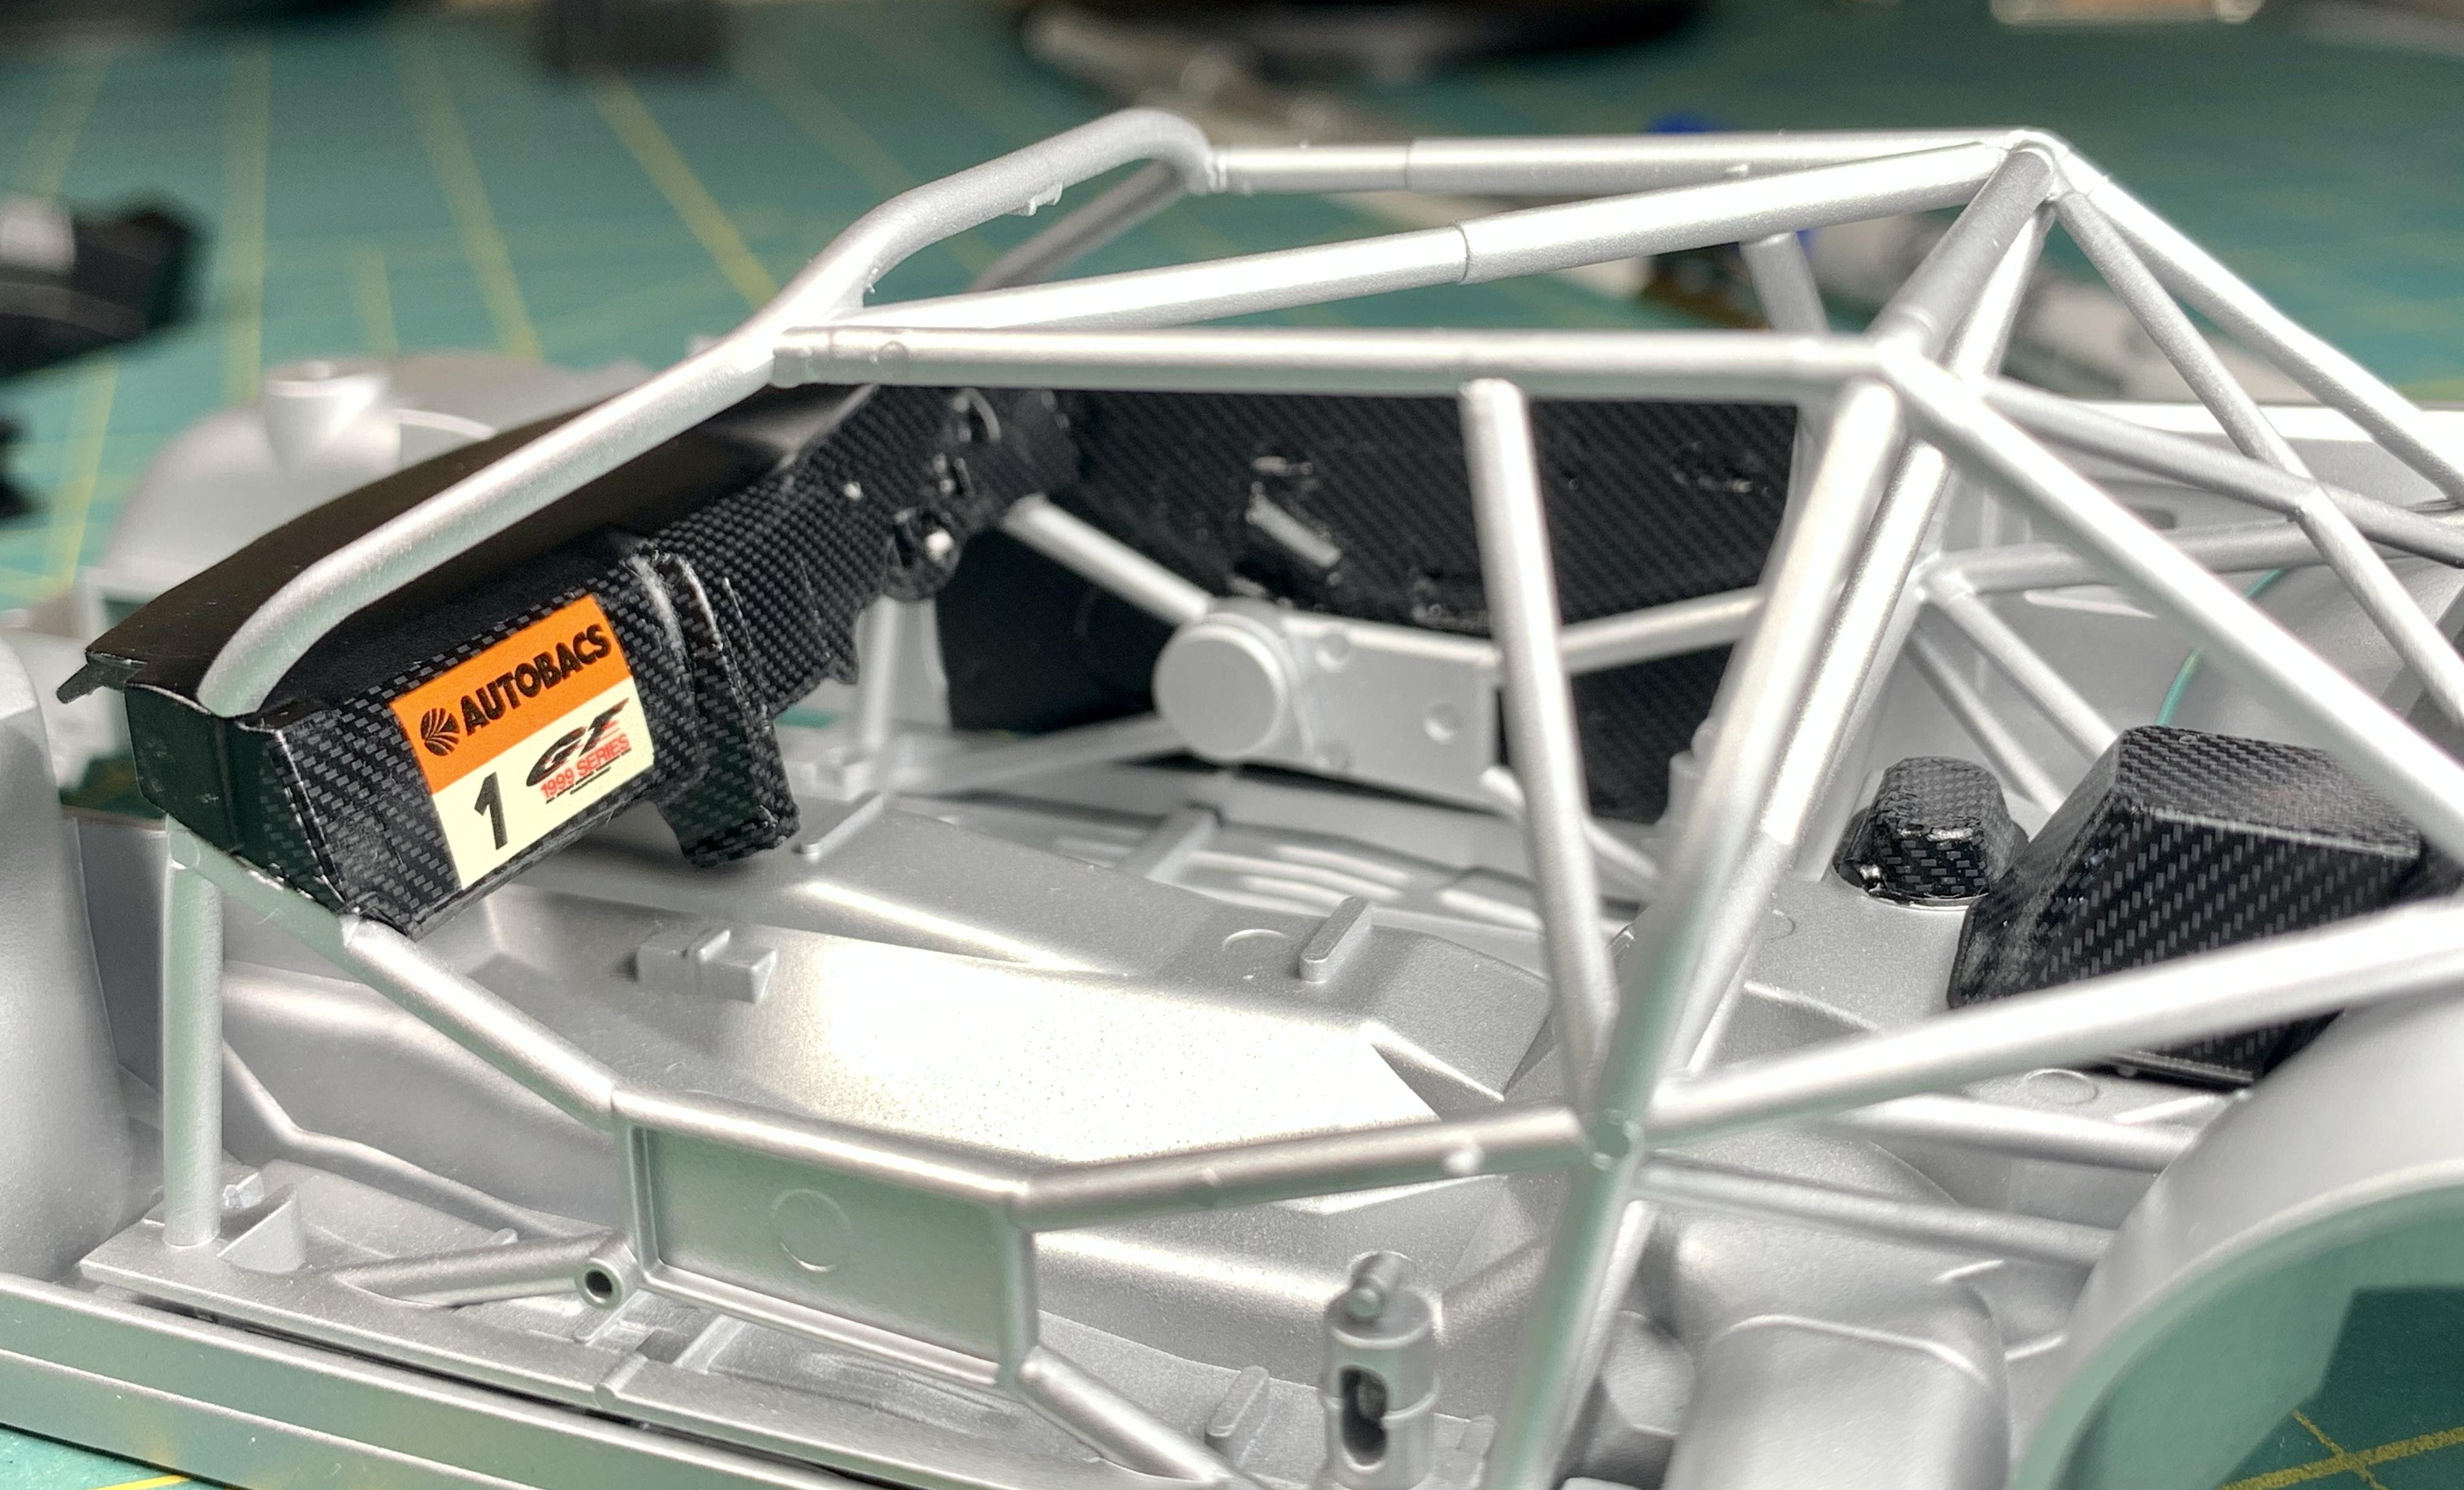
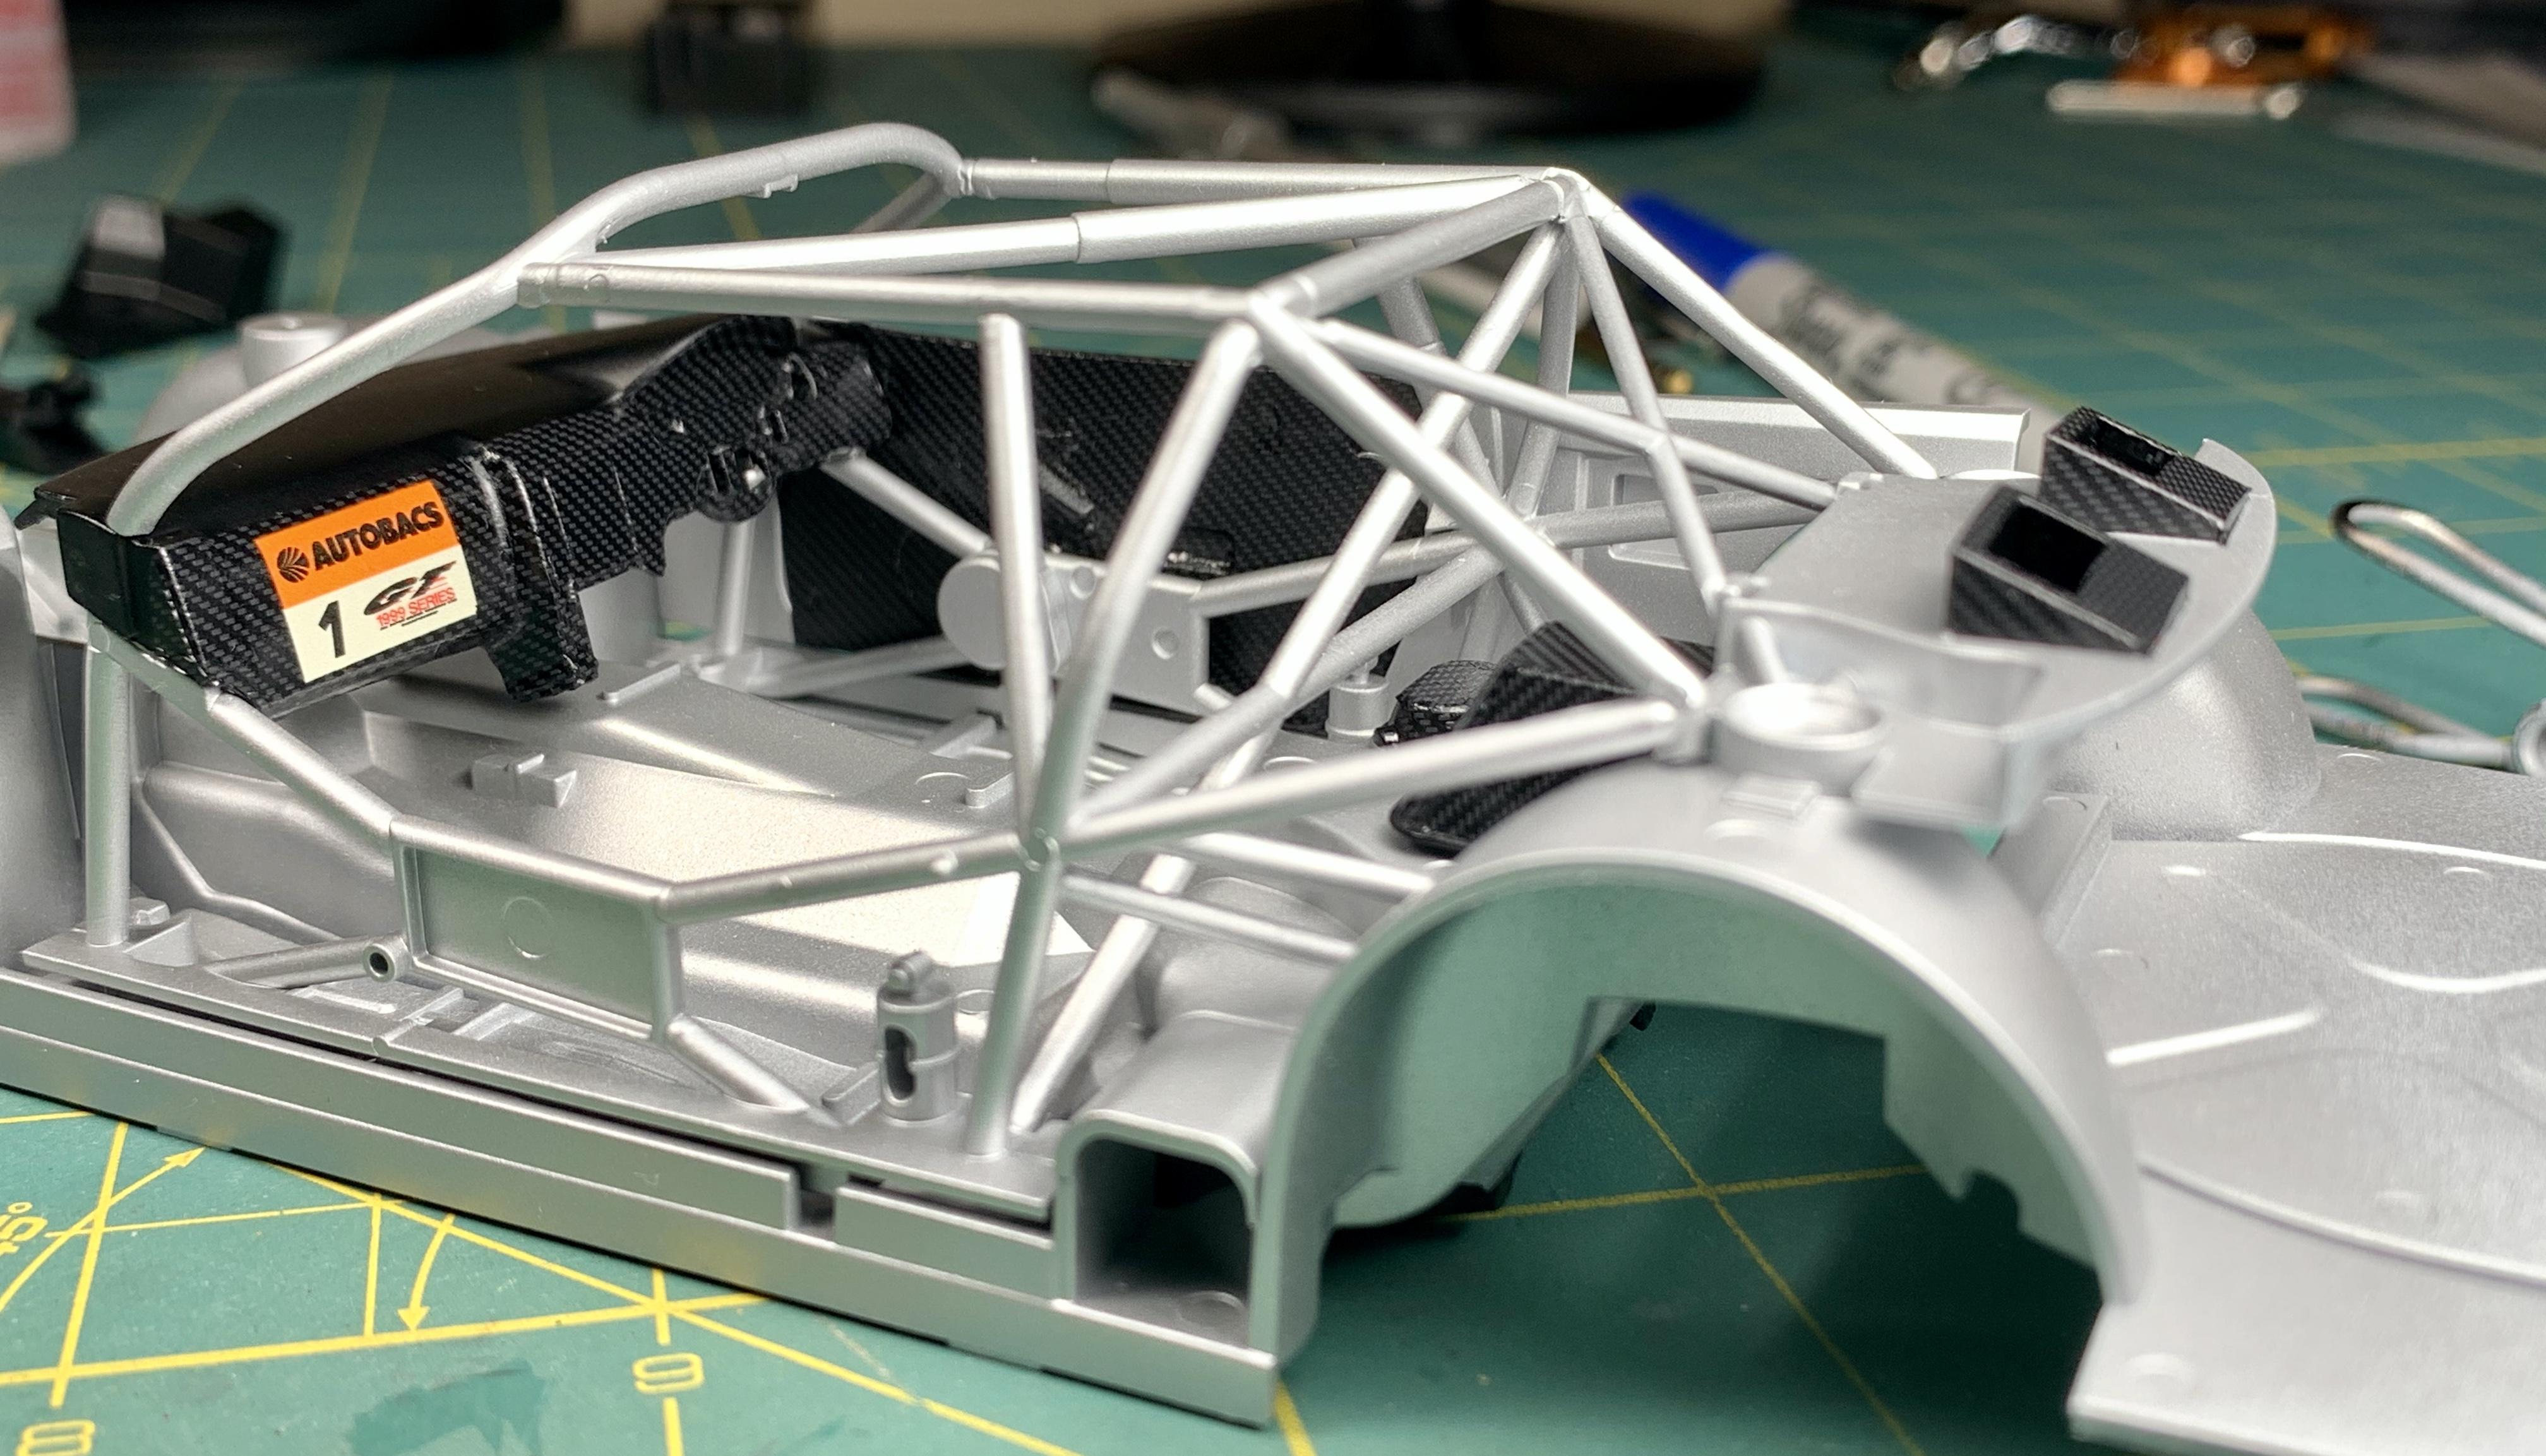
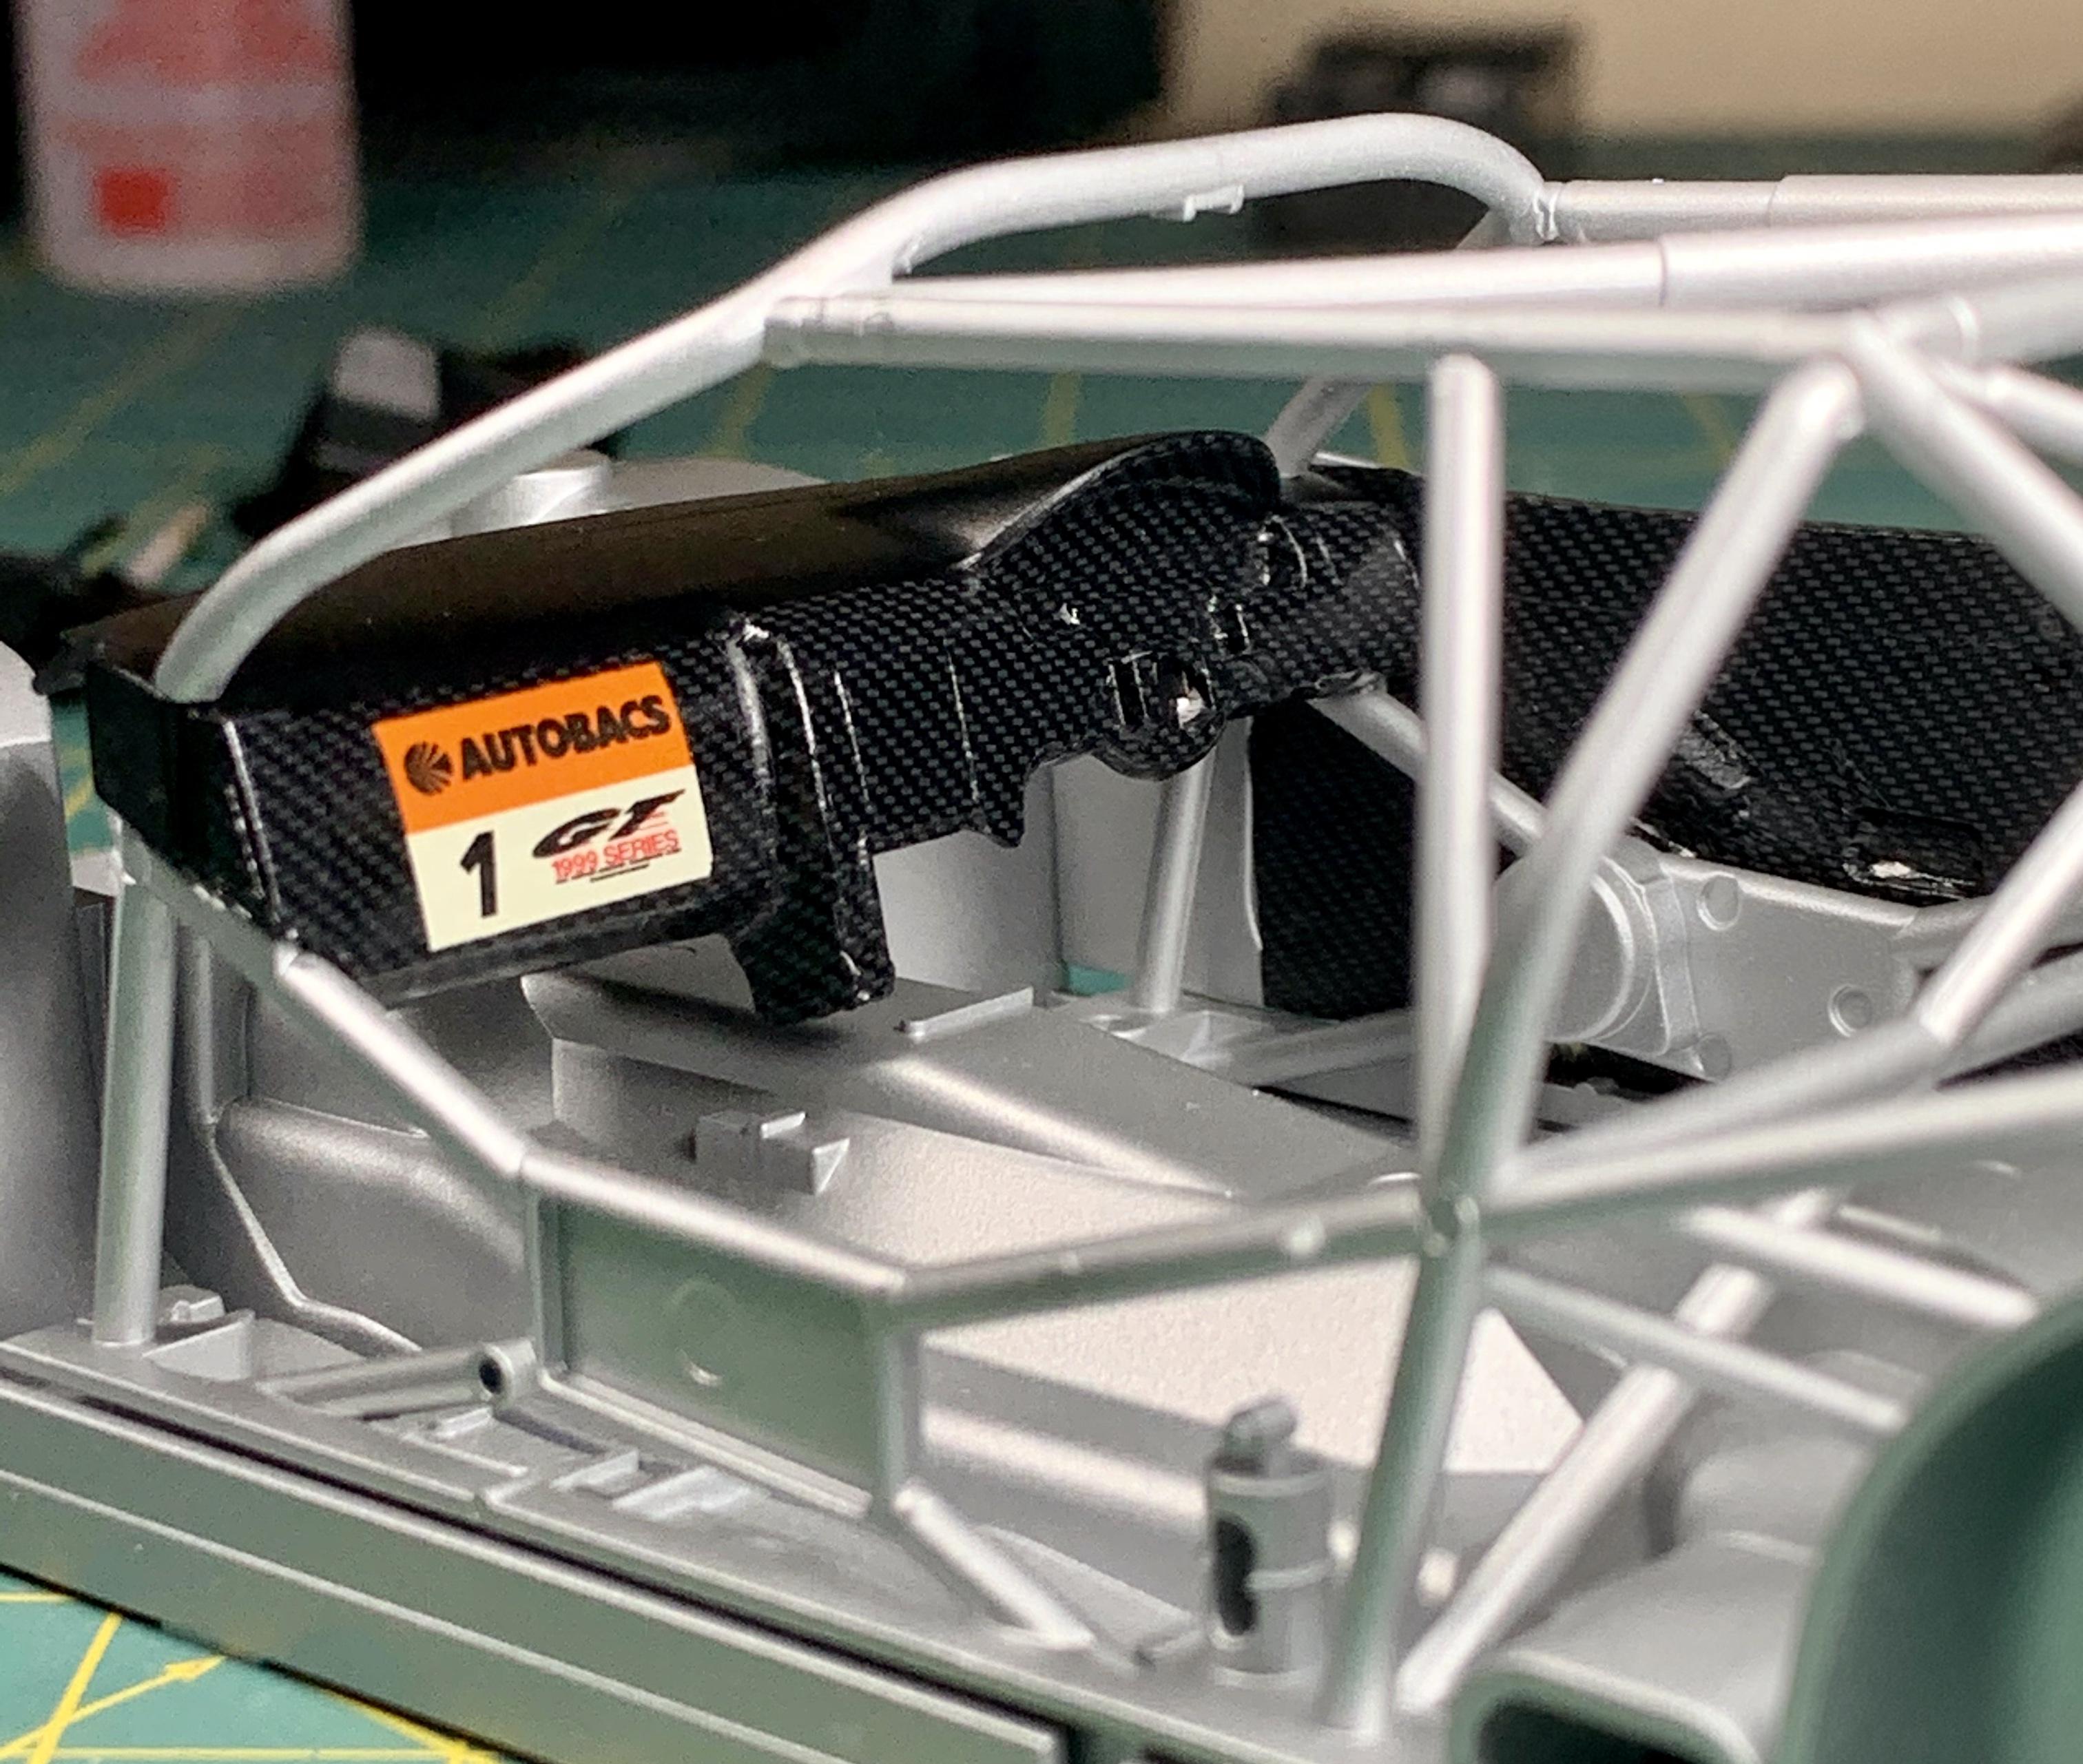
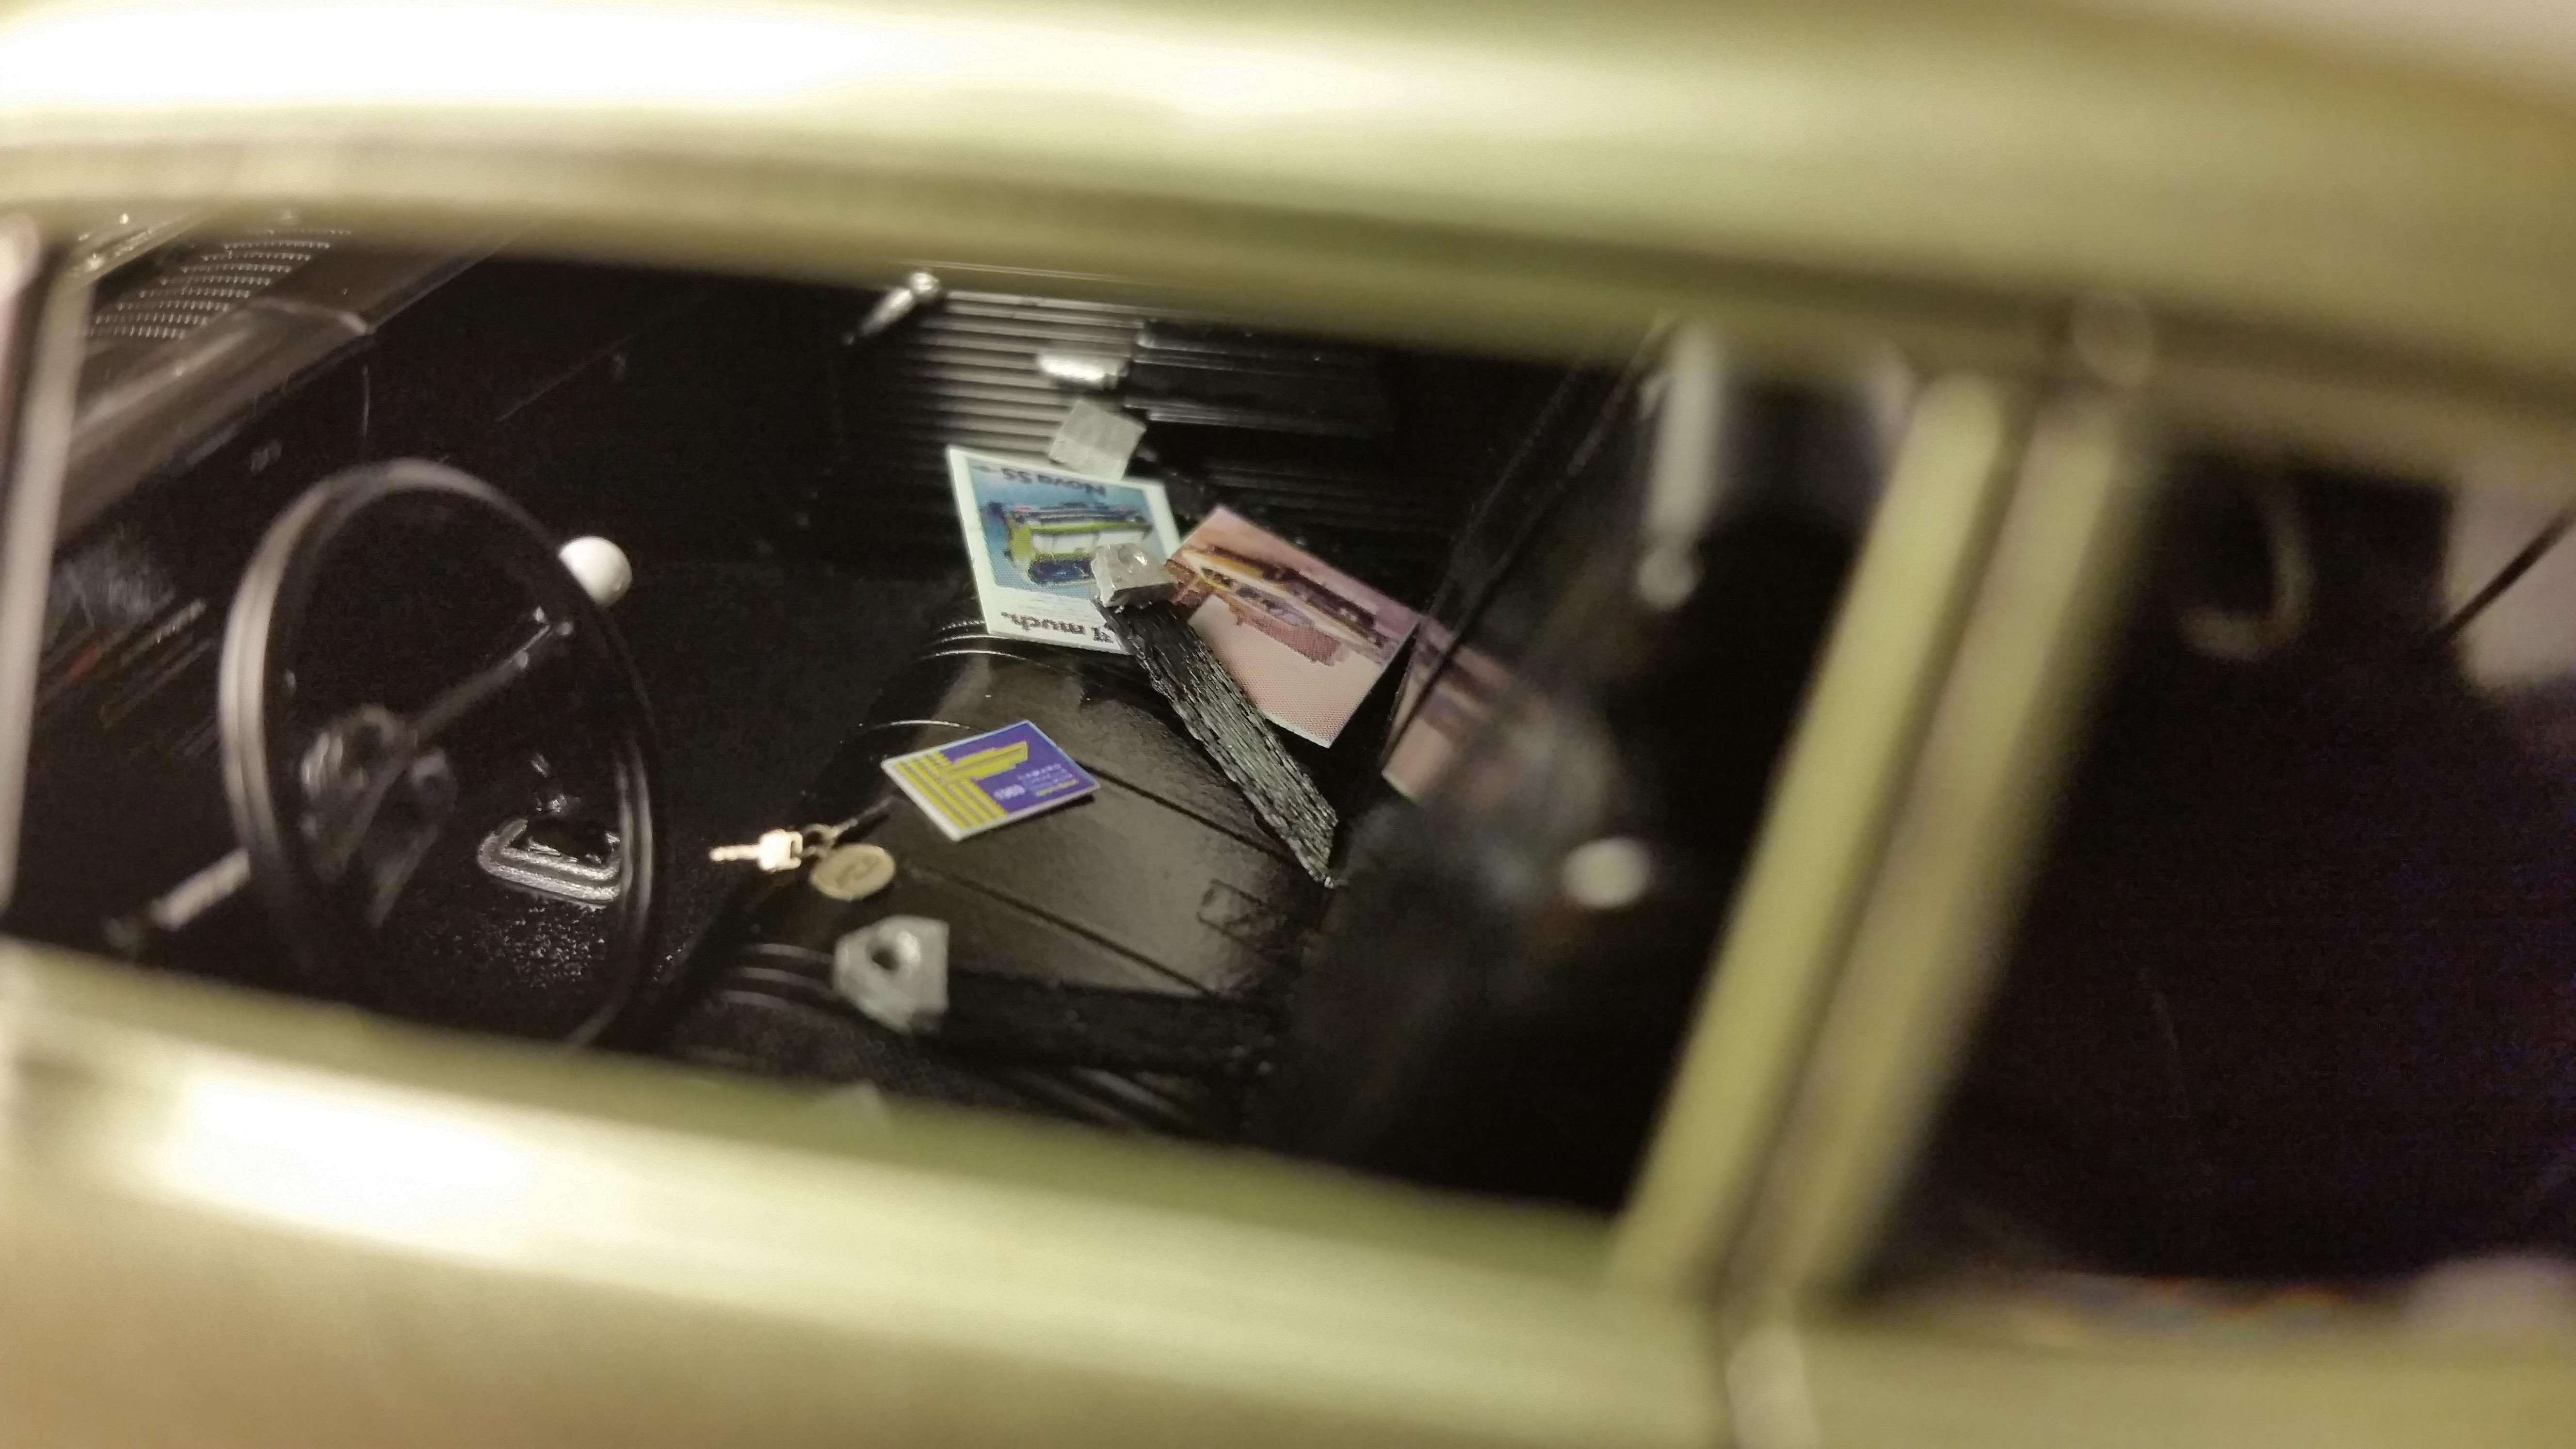
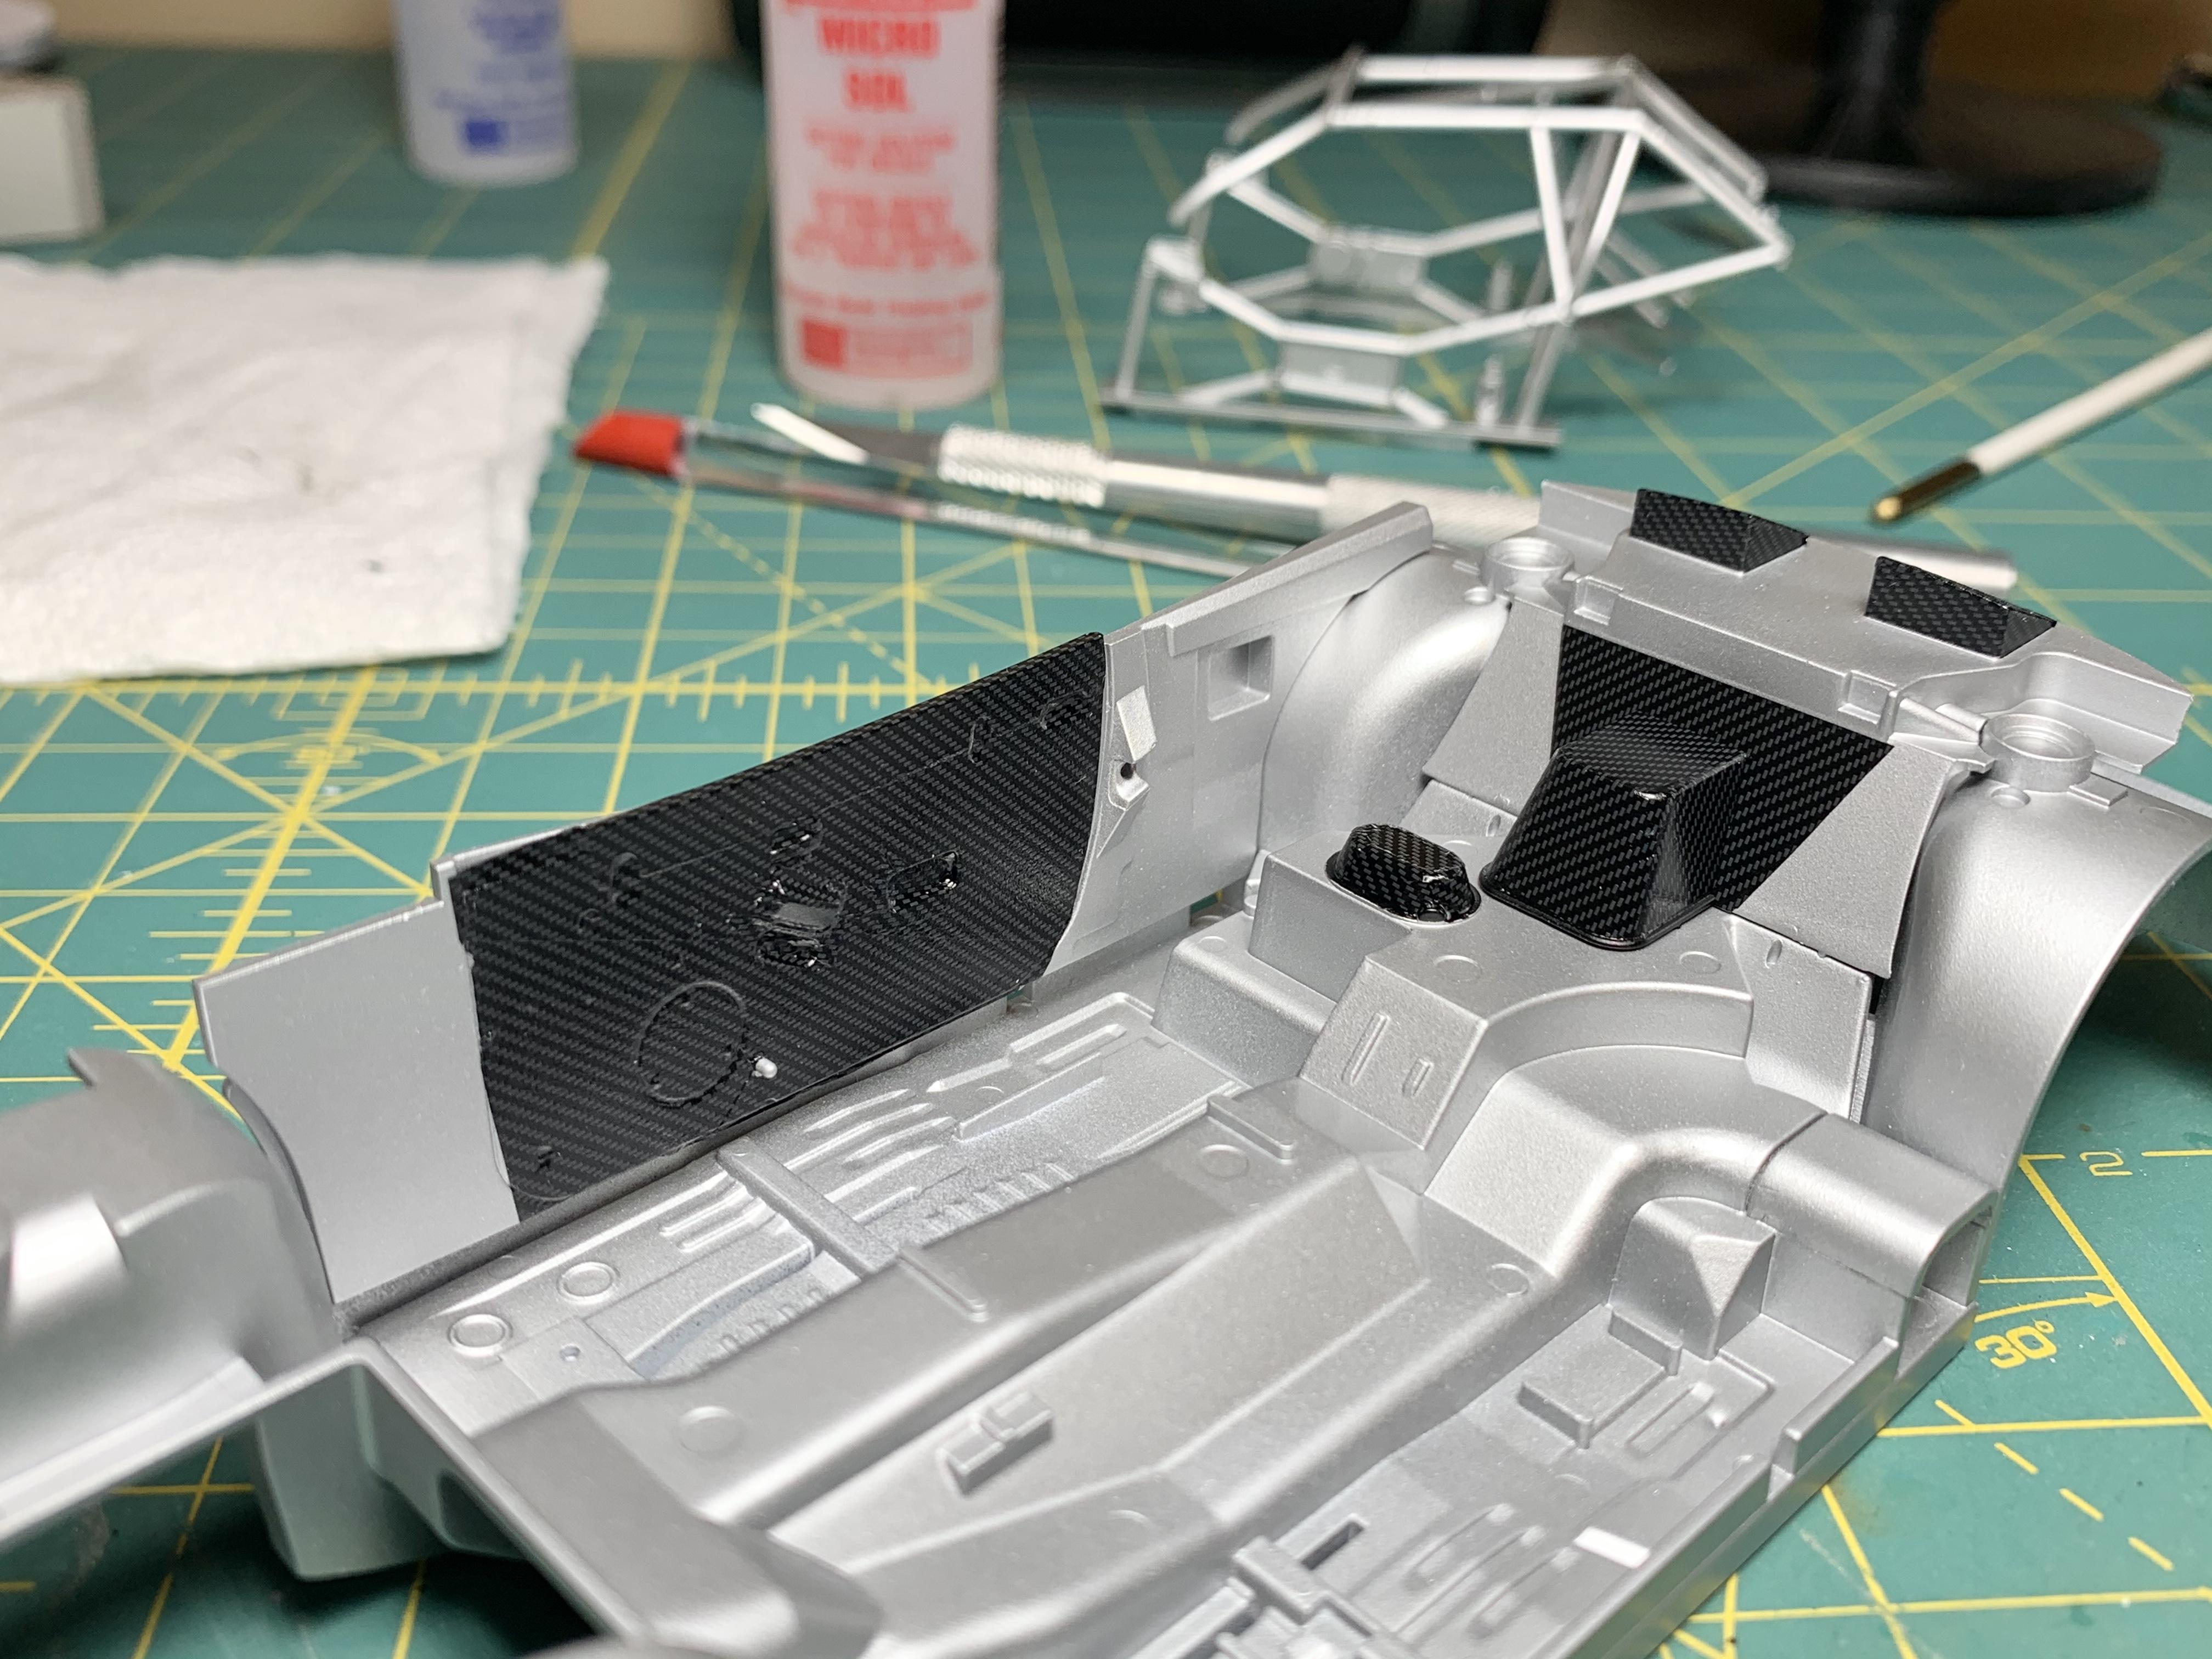
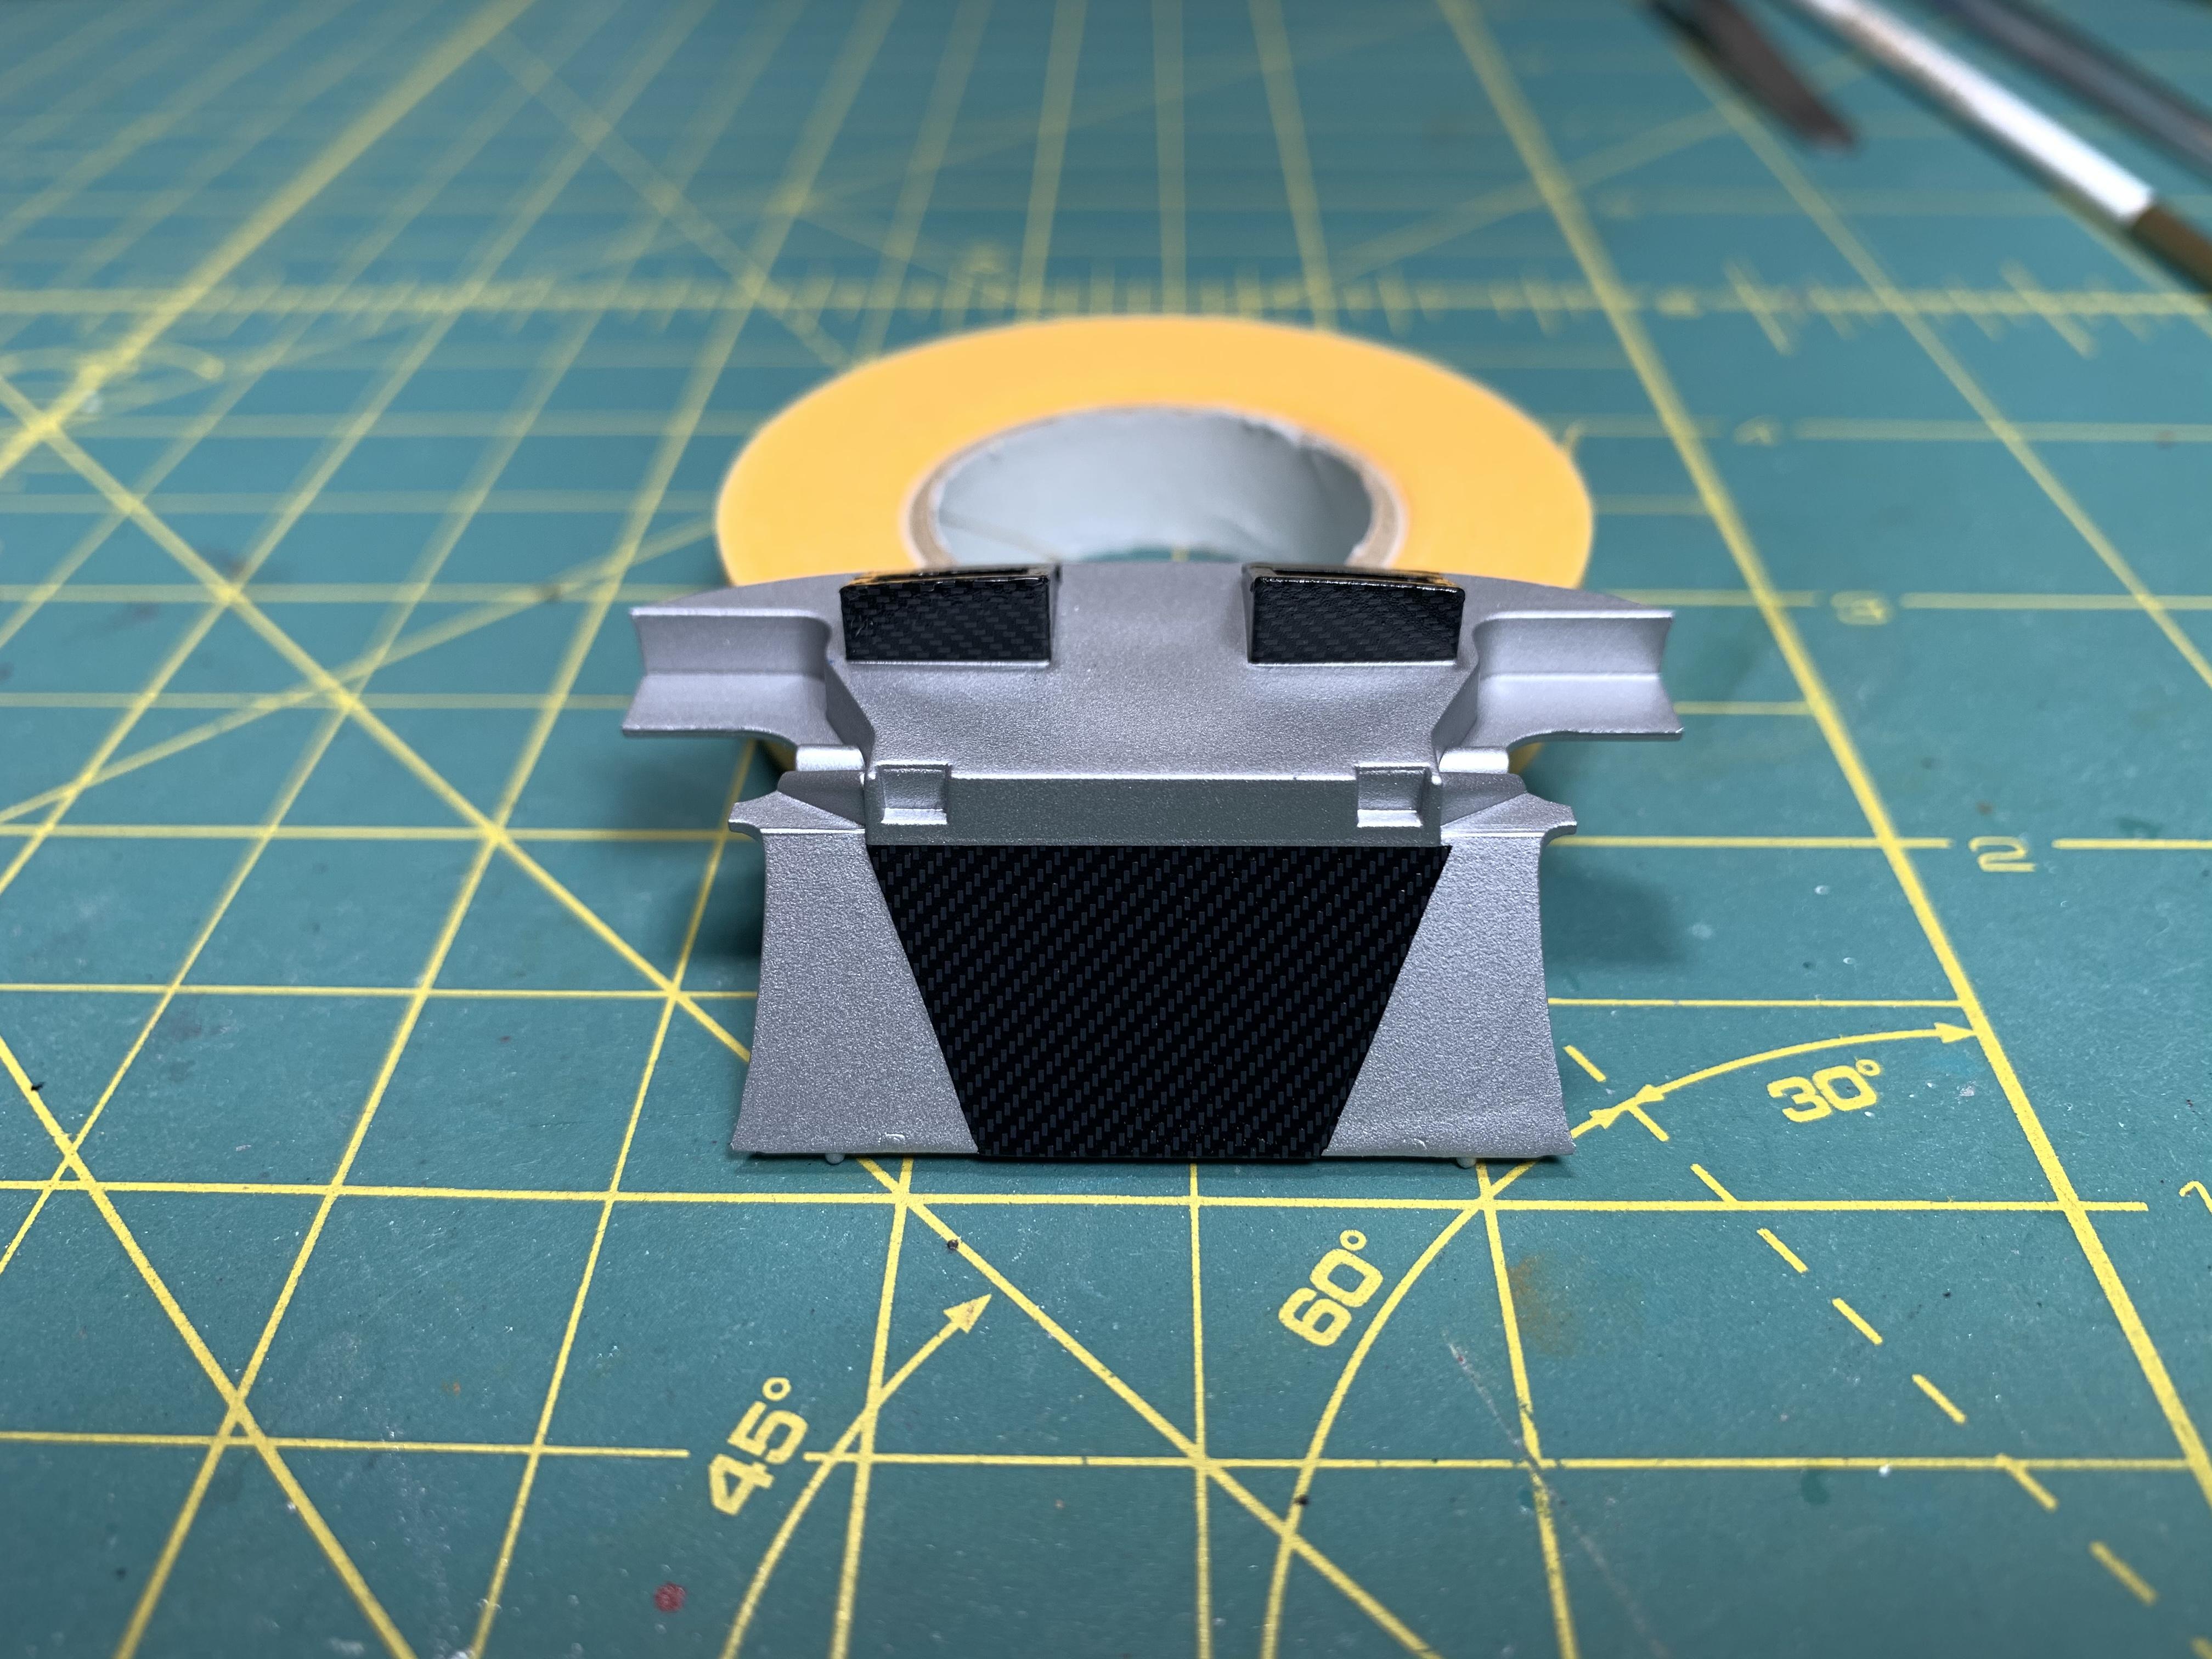
Well this morning I had some more carbon fiber adventures lol. I did the center console. It took 2 hours and has 14 separate pieces that make up the entire part. i also go the steering column completed which is 5 different decals and took about an hr. This stuff is time consuming to say the least. I am waiting on my Shunko decals to get here because the Autobacs decal for the dash almost tore in half yesterday when I put it in the water. However, the largest part of the the interior battle is mostly complete
-
Tamiya Pennzoil Nissan Skyline R34
lghtngyello03 replied to lghtngyello03's topic in WIP: Model Cars
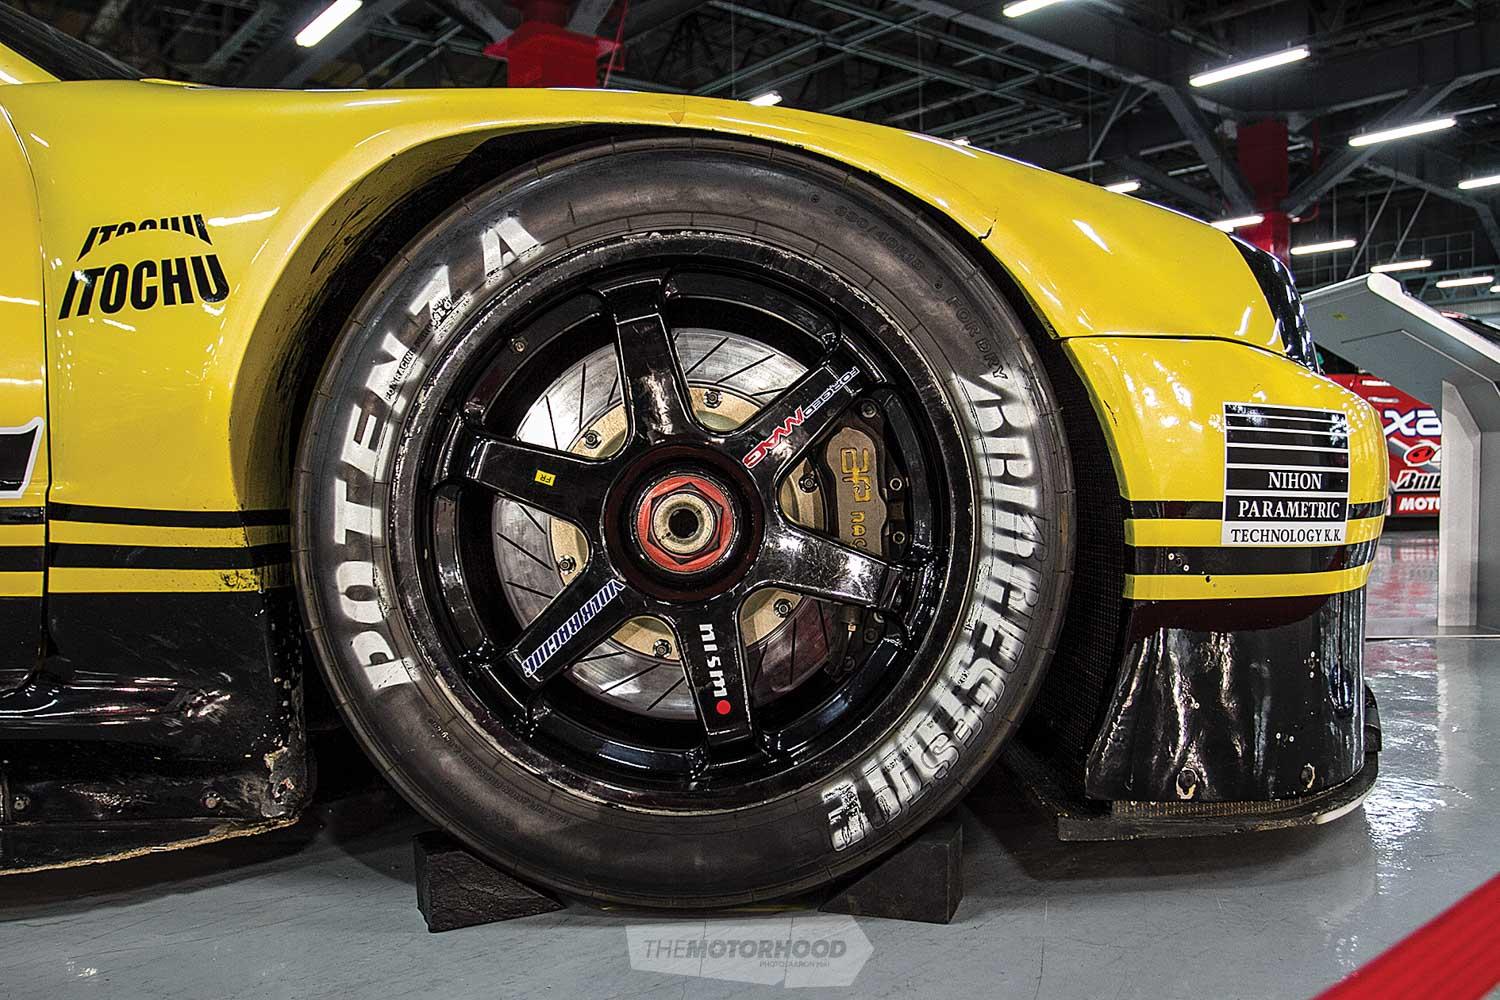
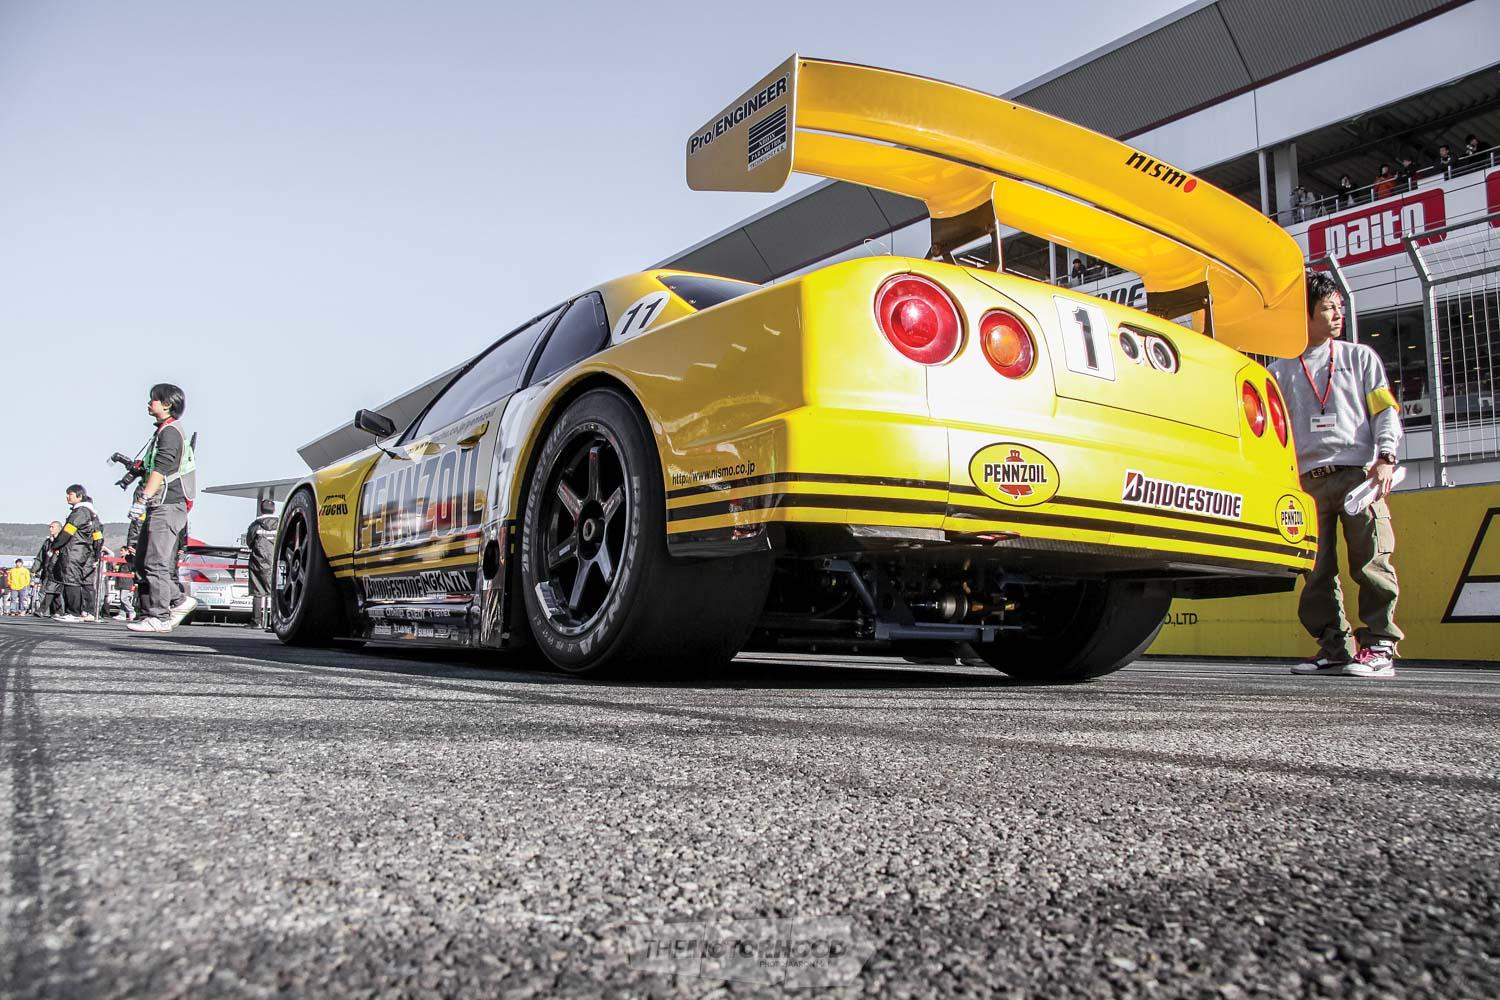
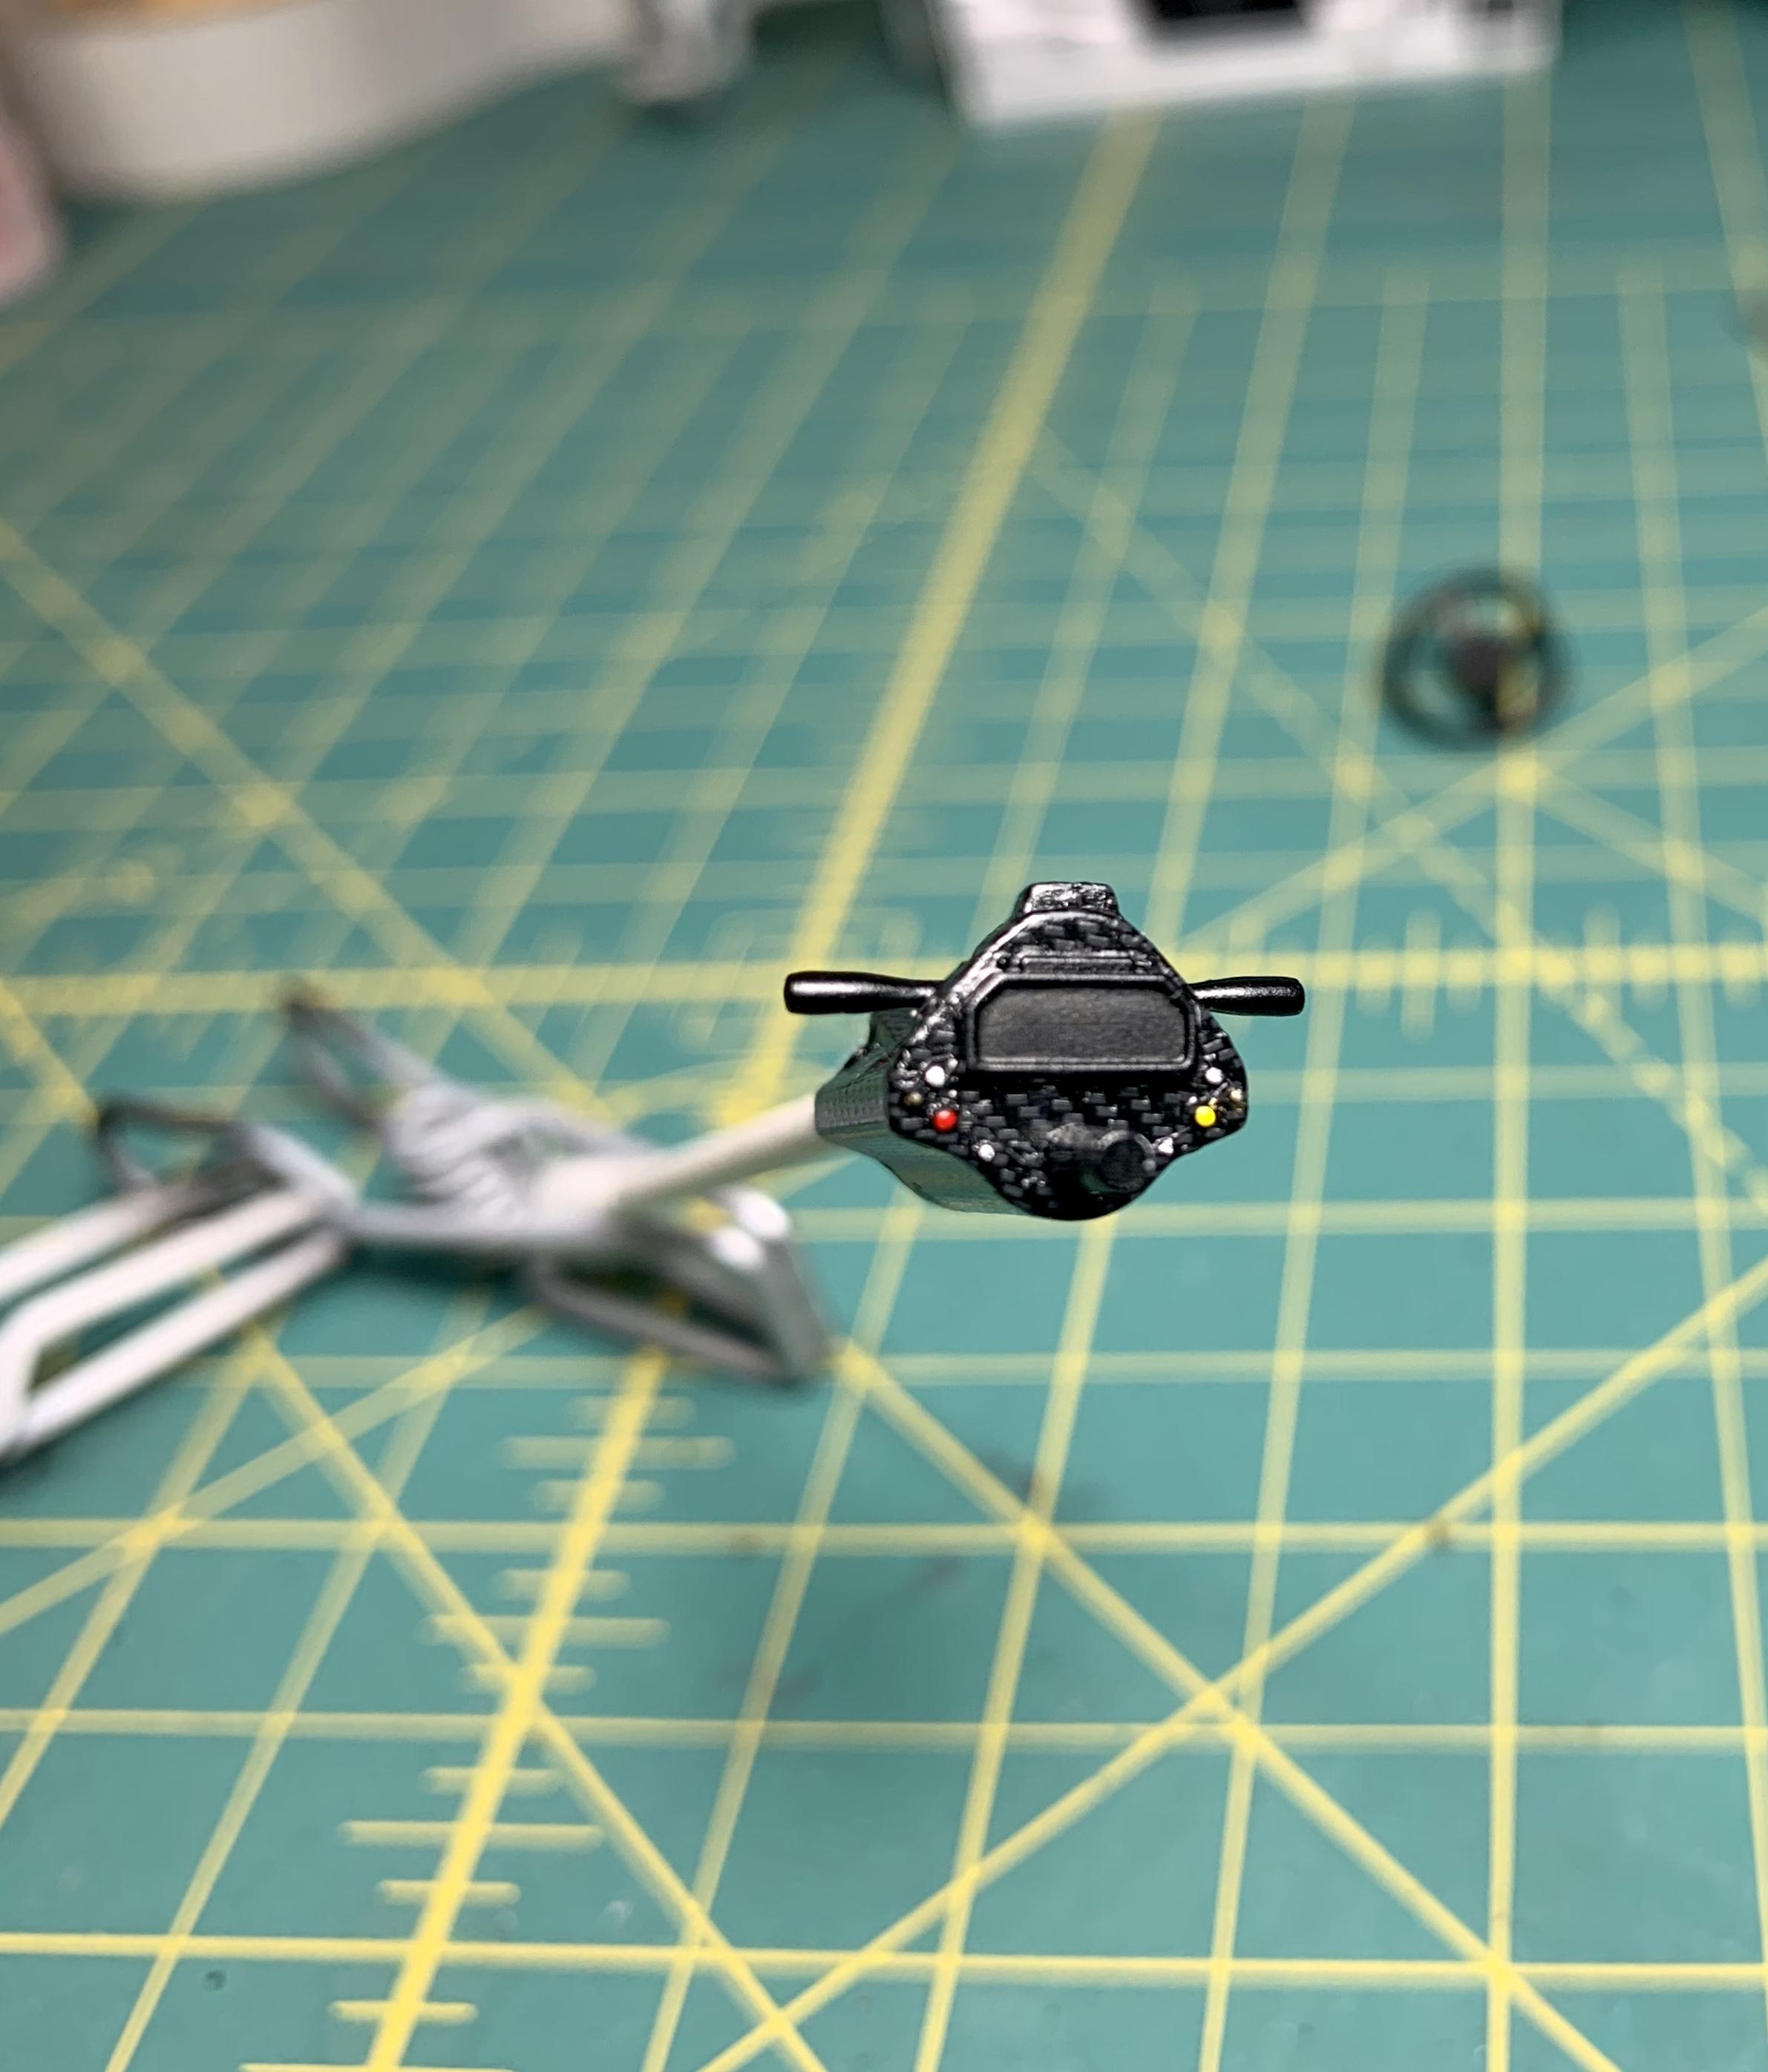
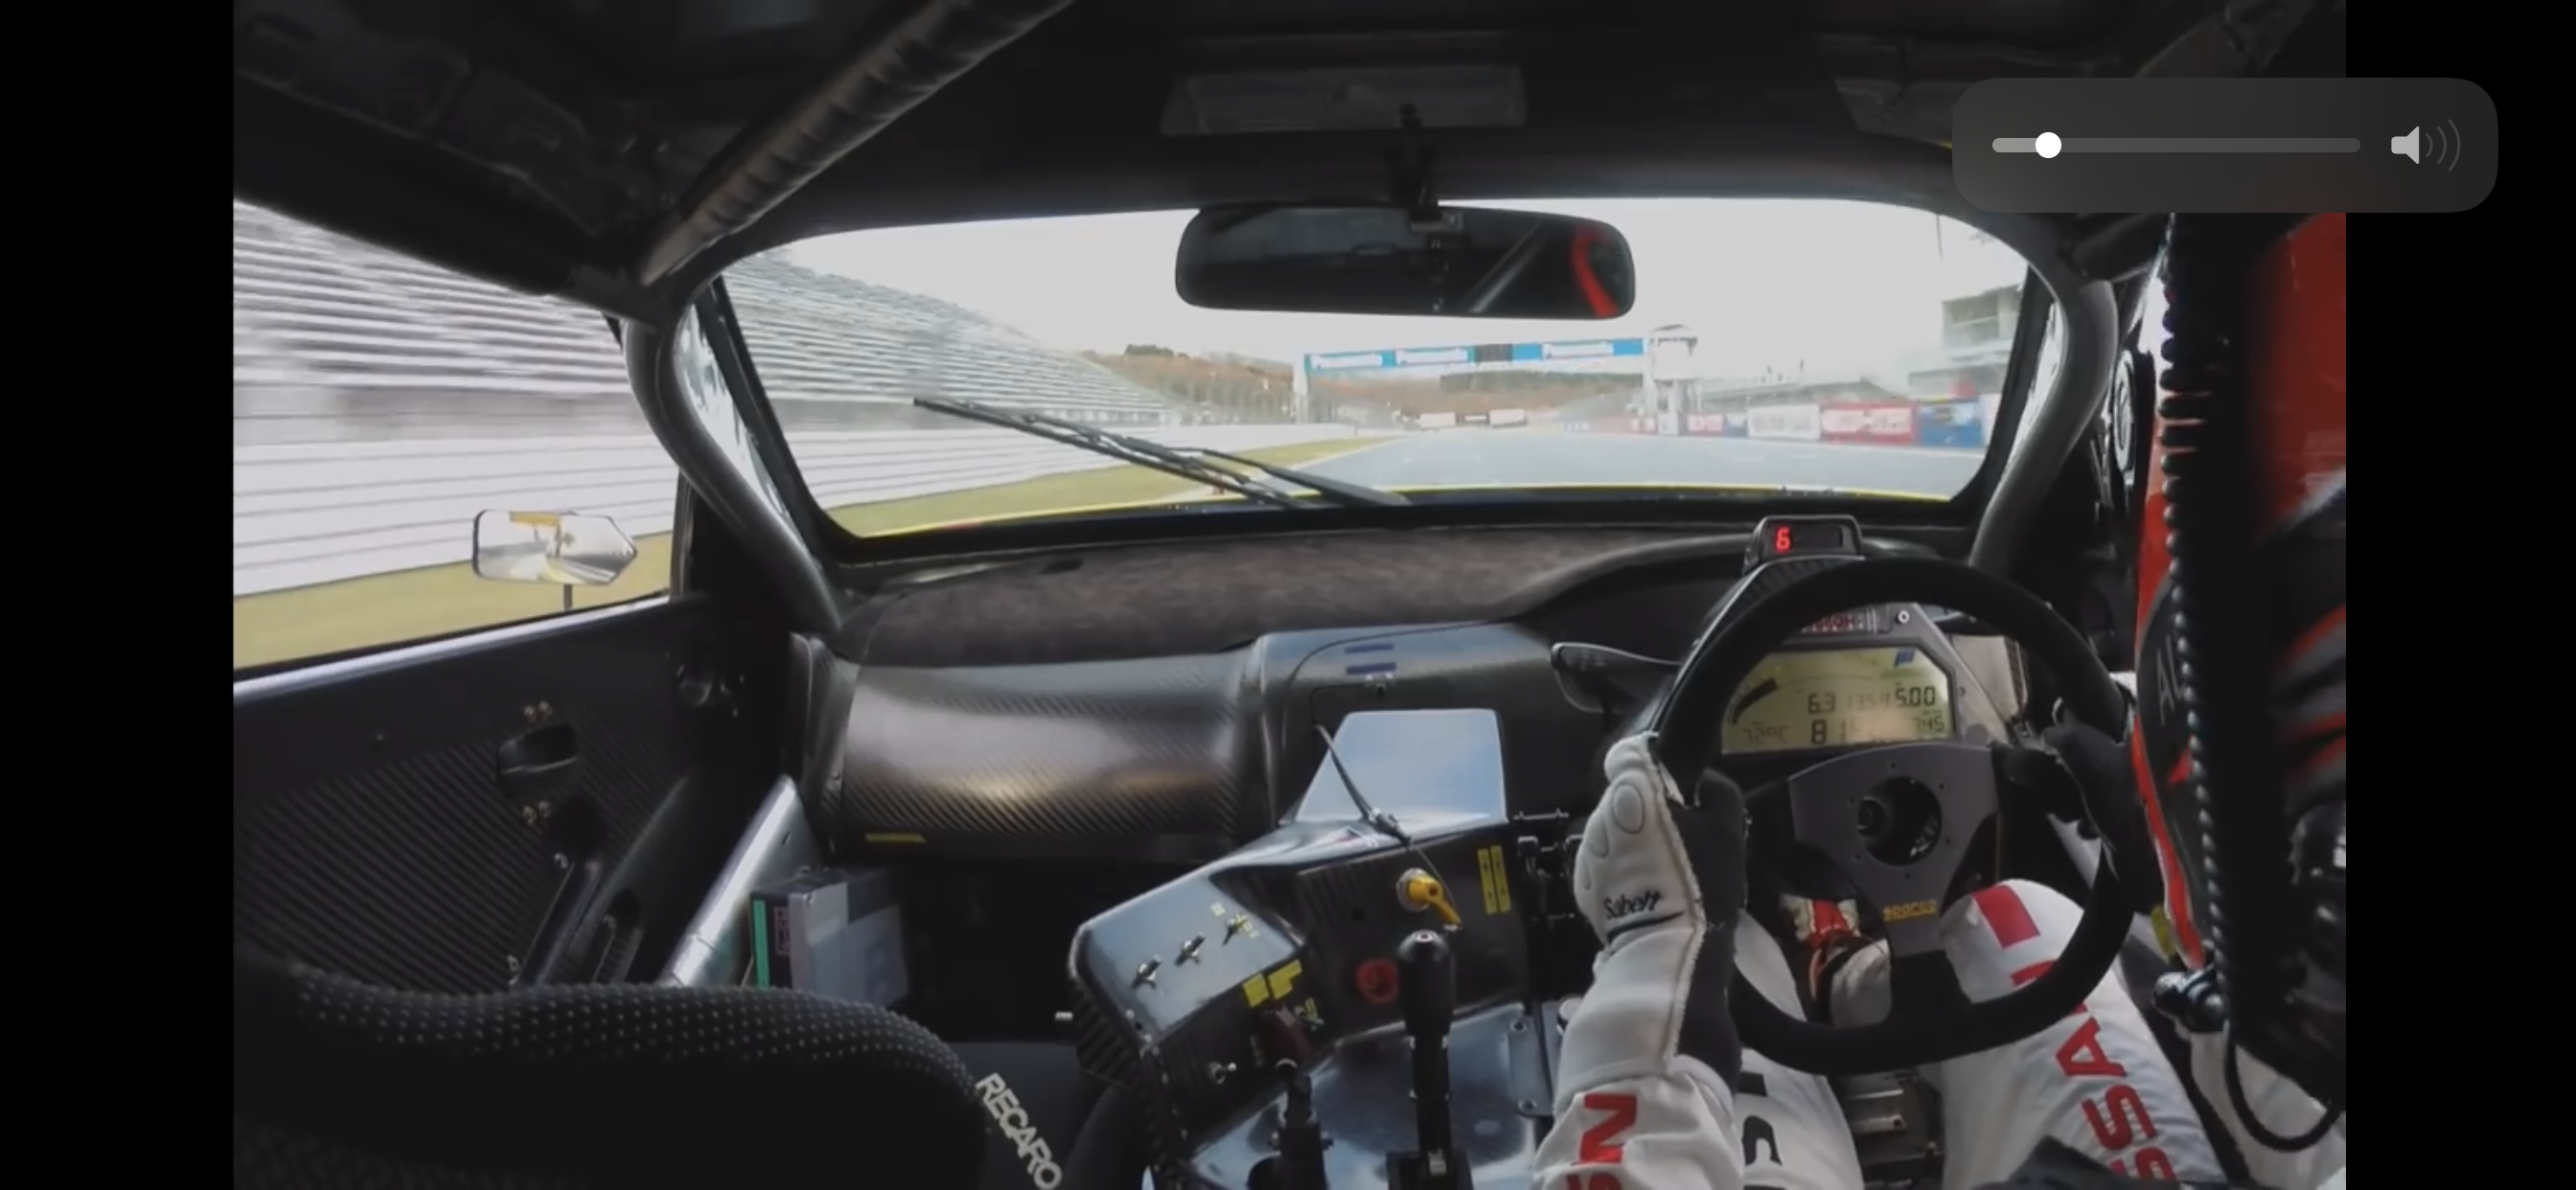
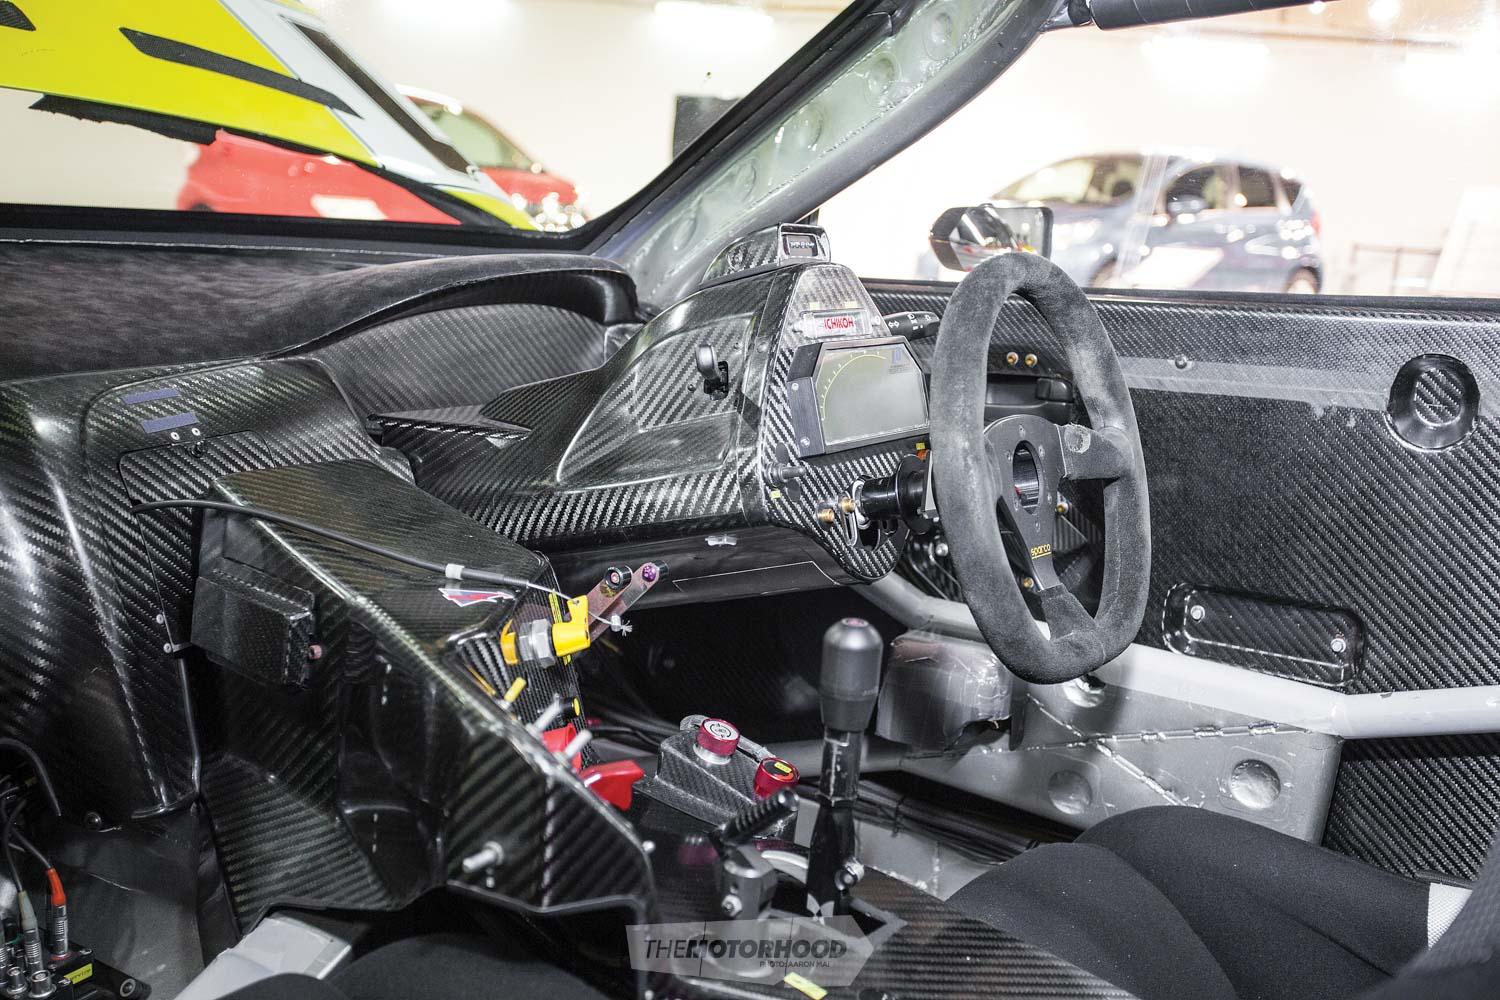
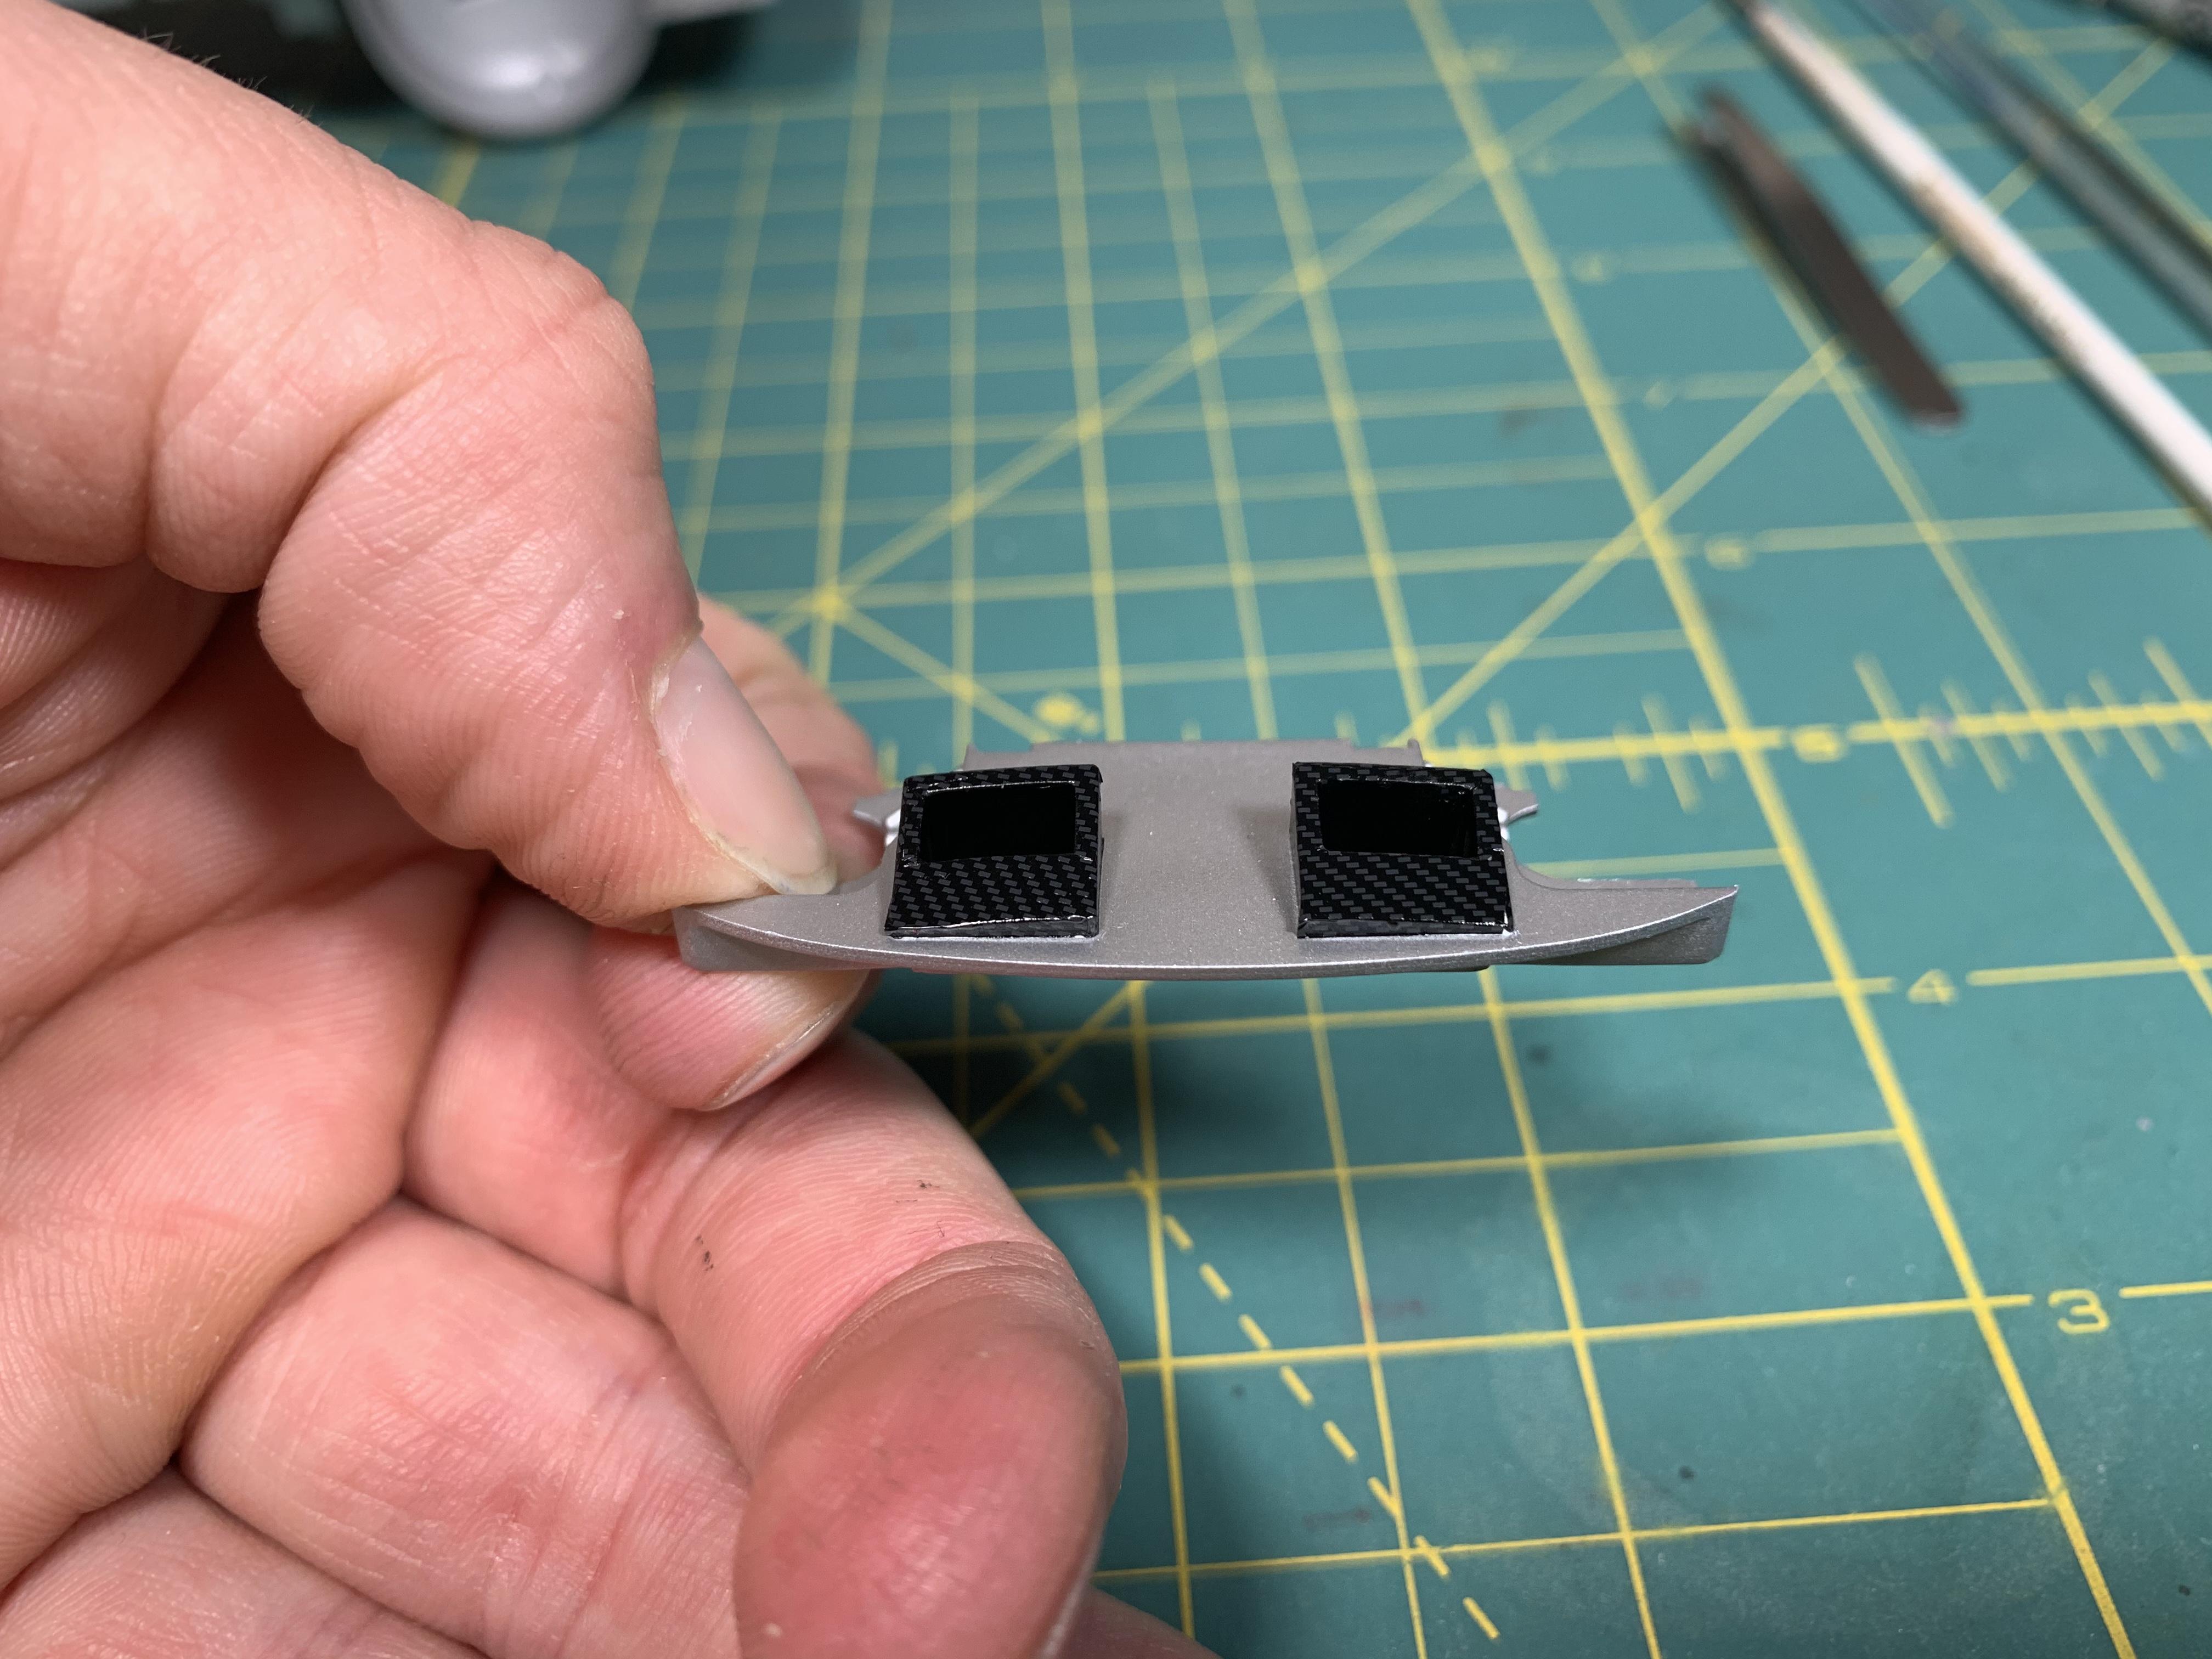
I didn’t get as much done today as I wanted since I had to work. I did however get the dash completed which wasn’t as painstaking as I thought. It is 7 separate pieces and took almost an hour and a half. Attached is also a couple of pictures of the 1:1 dash.
-
Tamiya Pennzoil Nissan Skyline R34
lghtngyello03 replied to lghtngyello03's topic in WIP: Model Cars
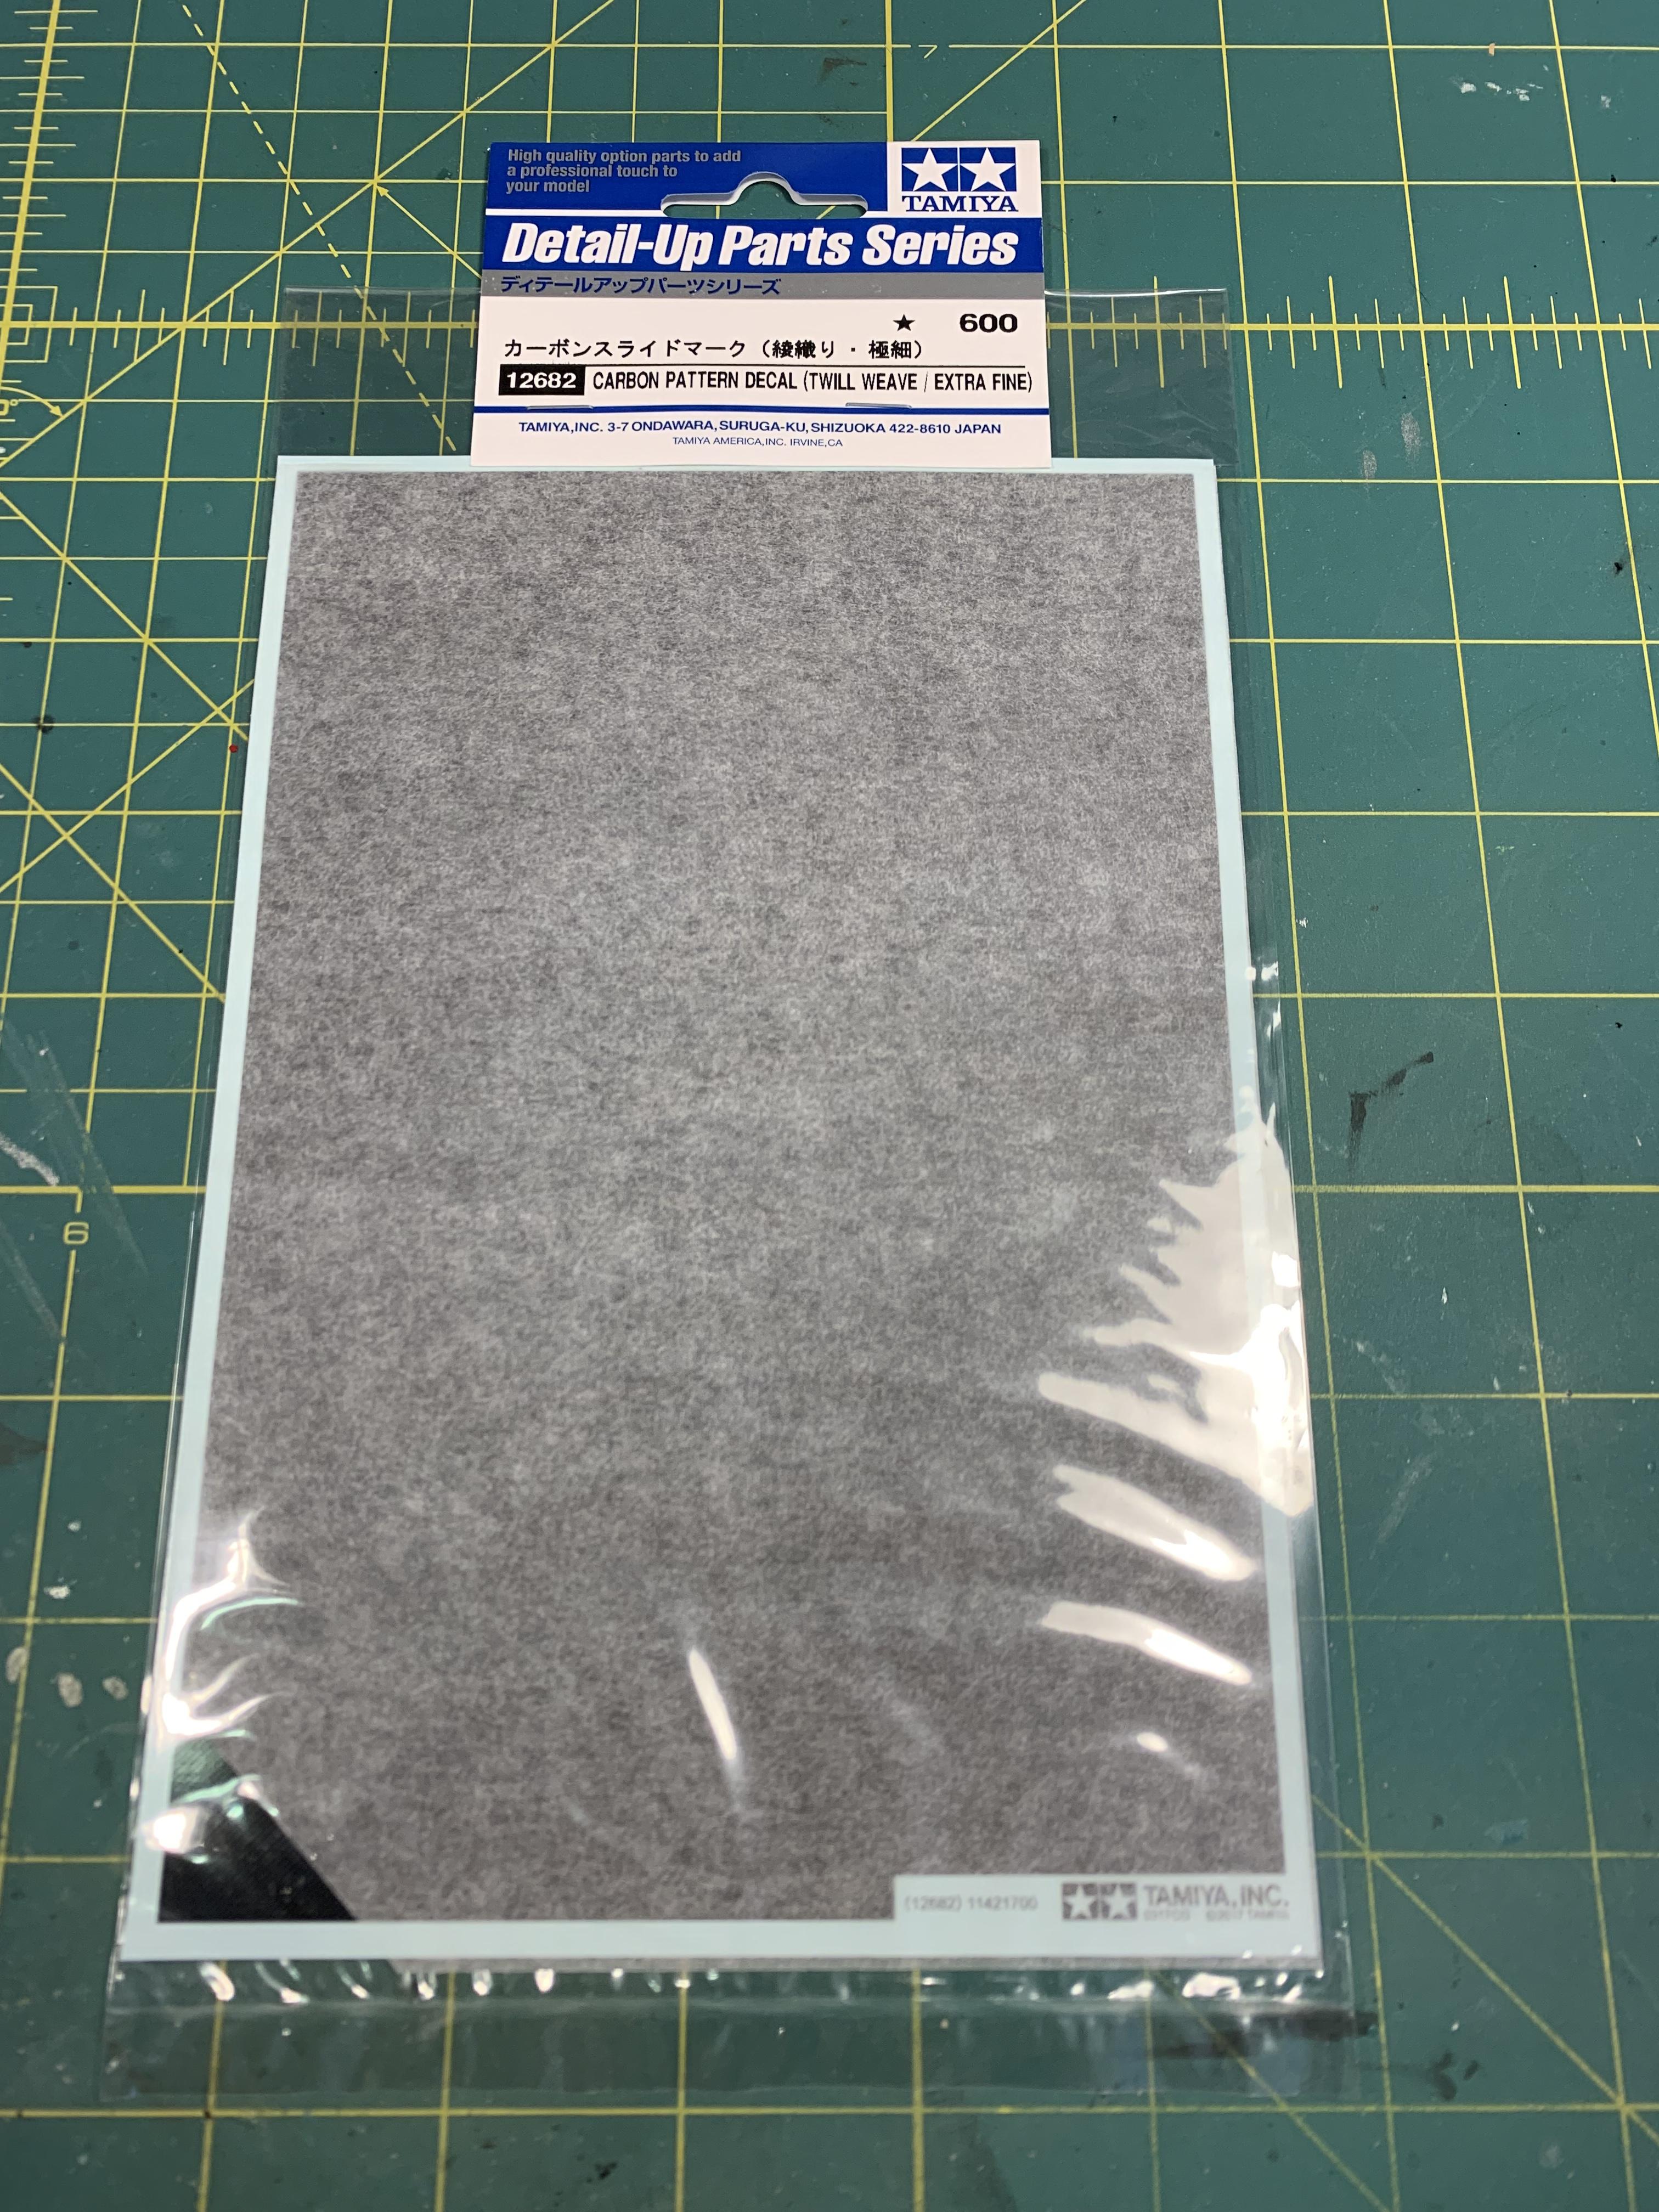
I know lol, it’s kind of aggravating in a way but the end result will be worth It. I’m using Tamiya carbon fiber extra fine weave.
-
Tamiya Pennzoil Nissan Skyline R34
lghtngyello03 replied to lghtngyello03's topic in WIP: Model Cars
Thanks Dann! Lots of work left to do though, lol. -
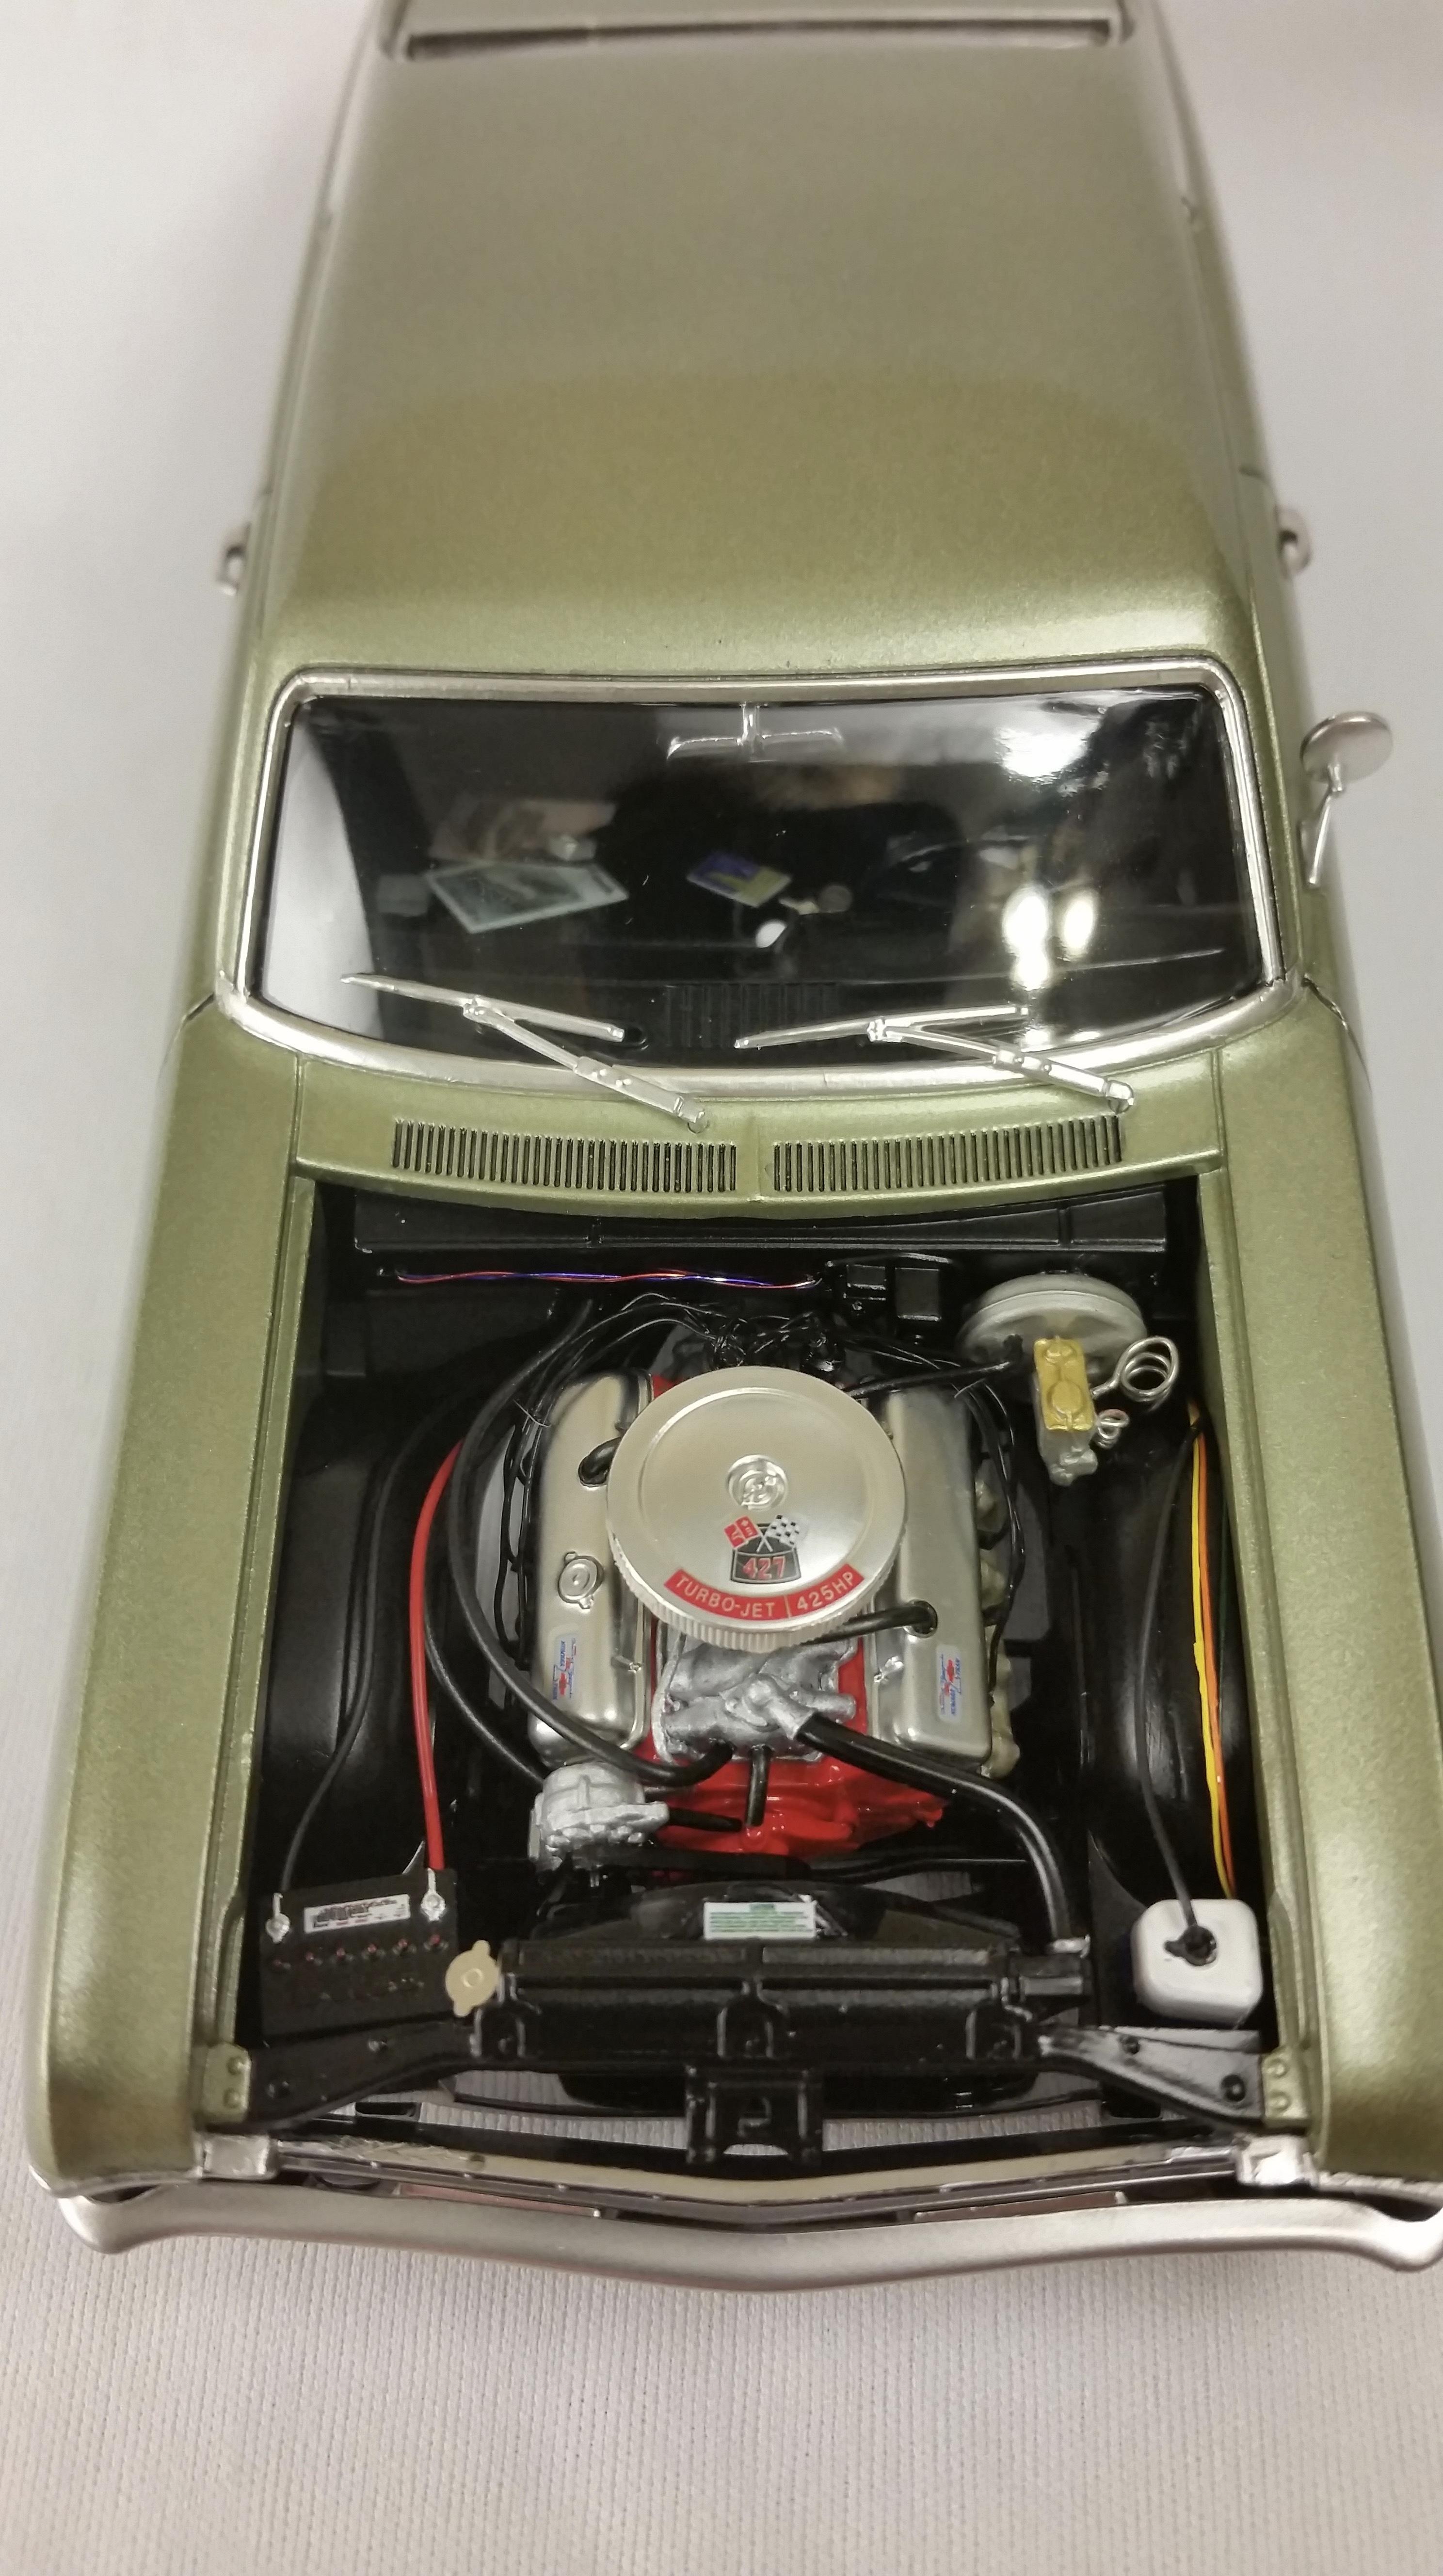
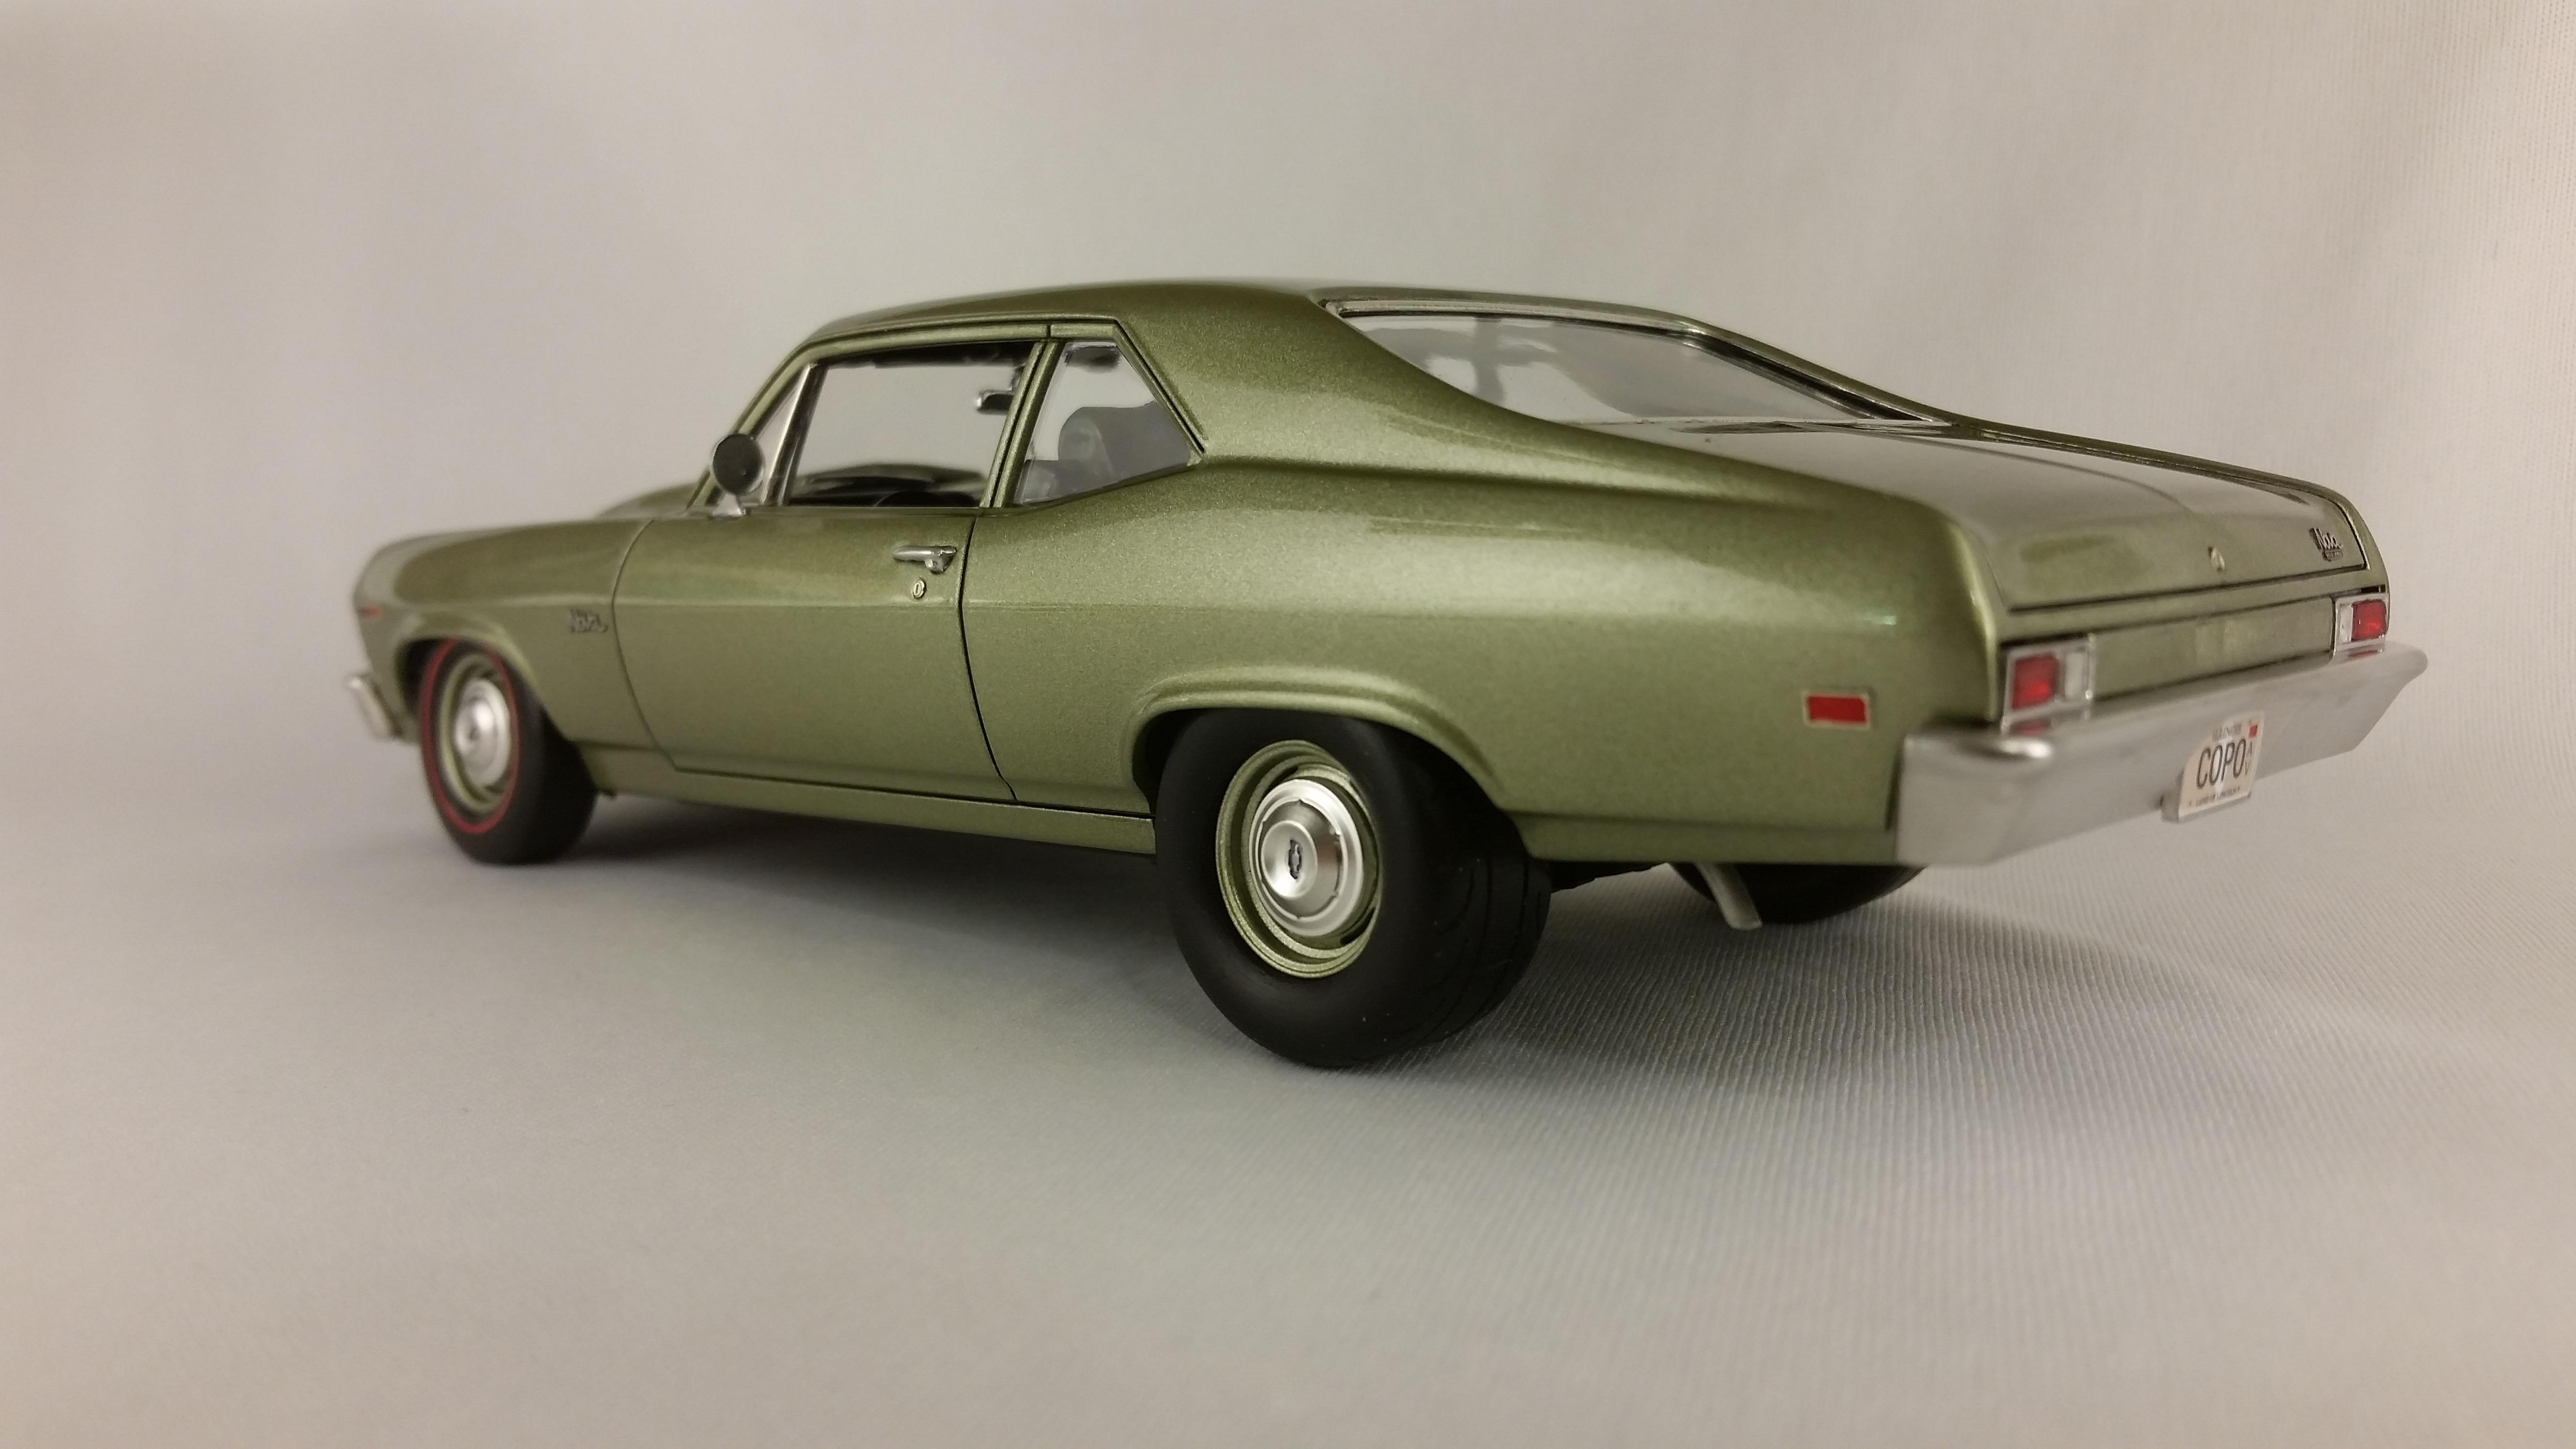
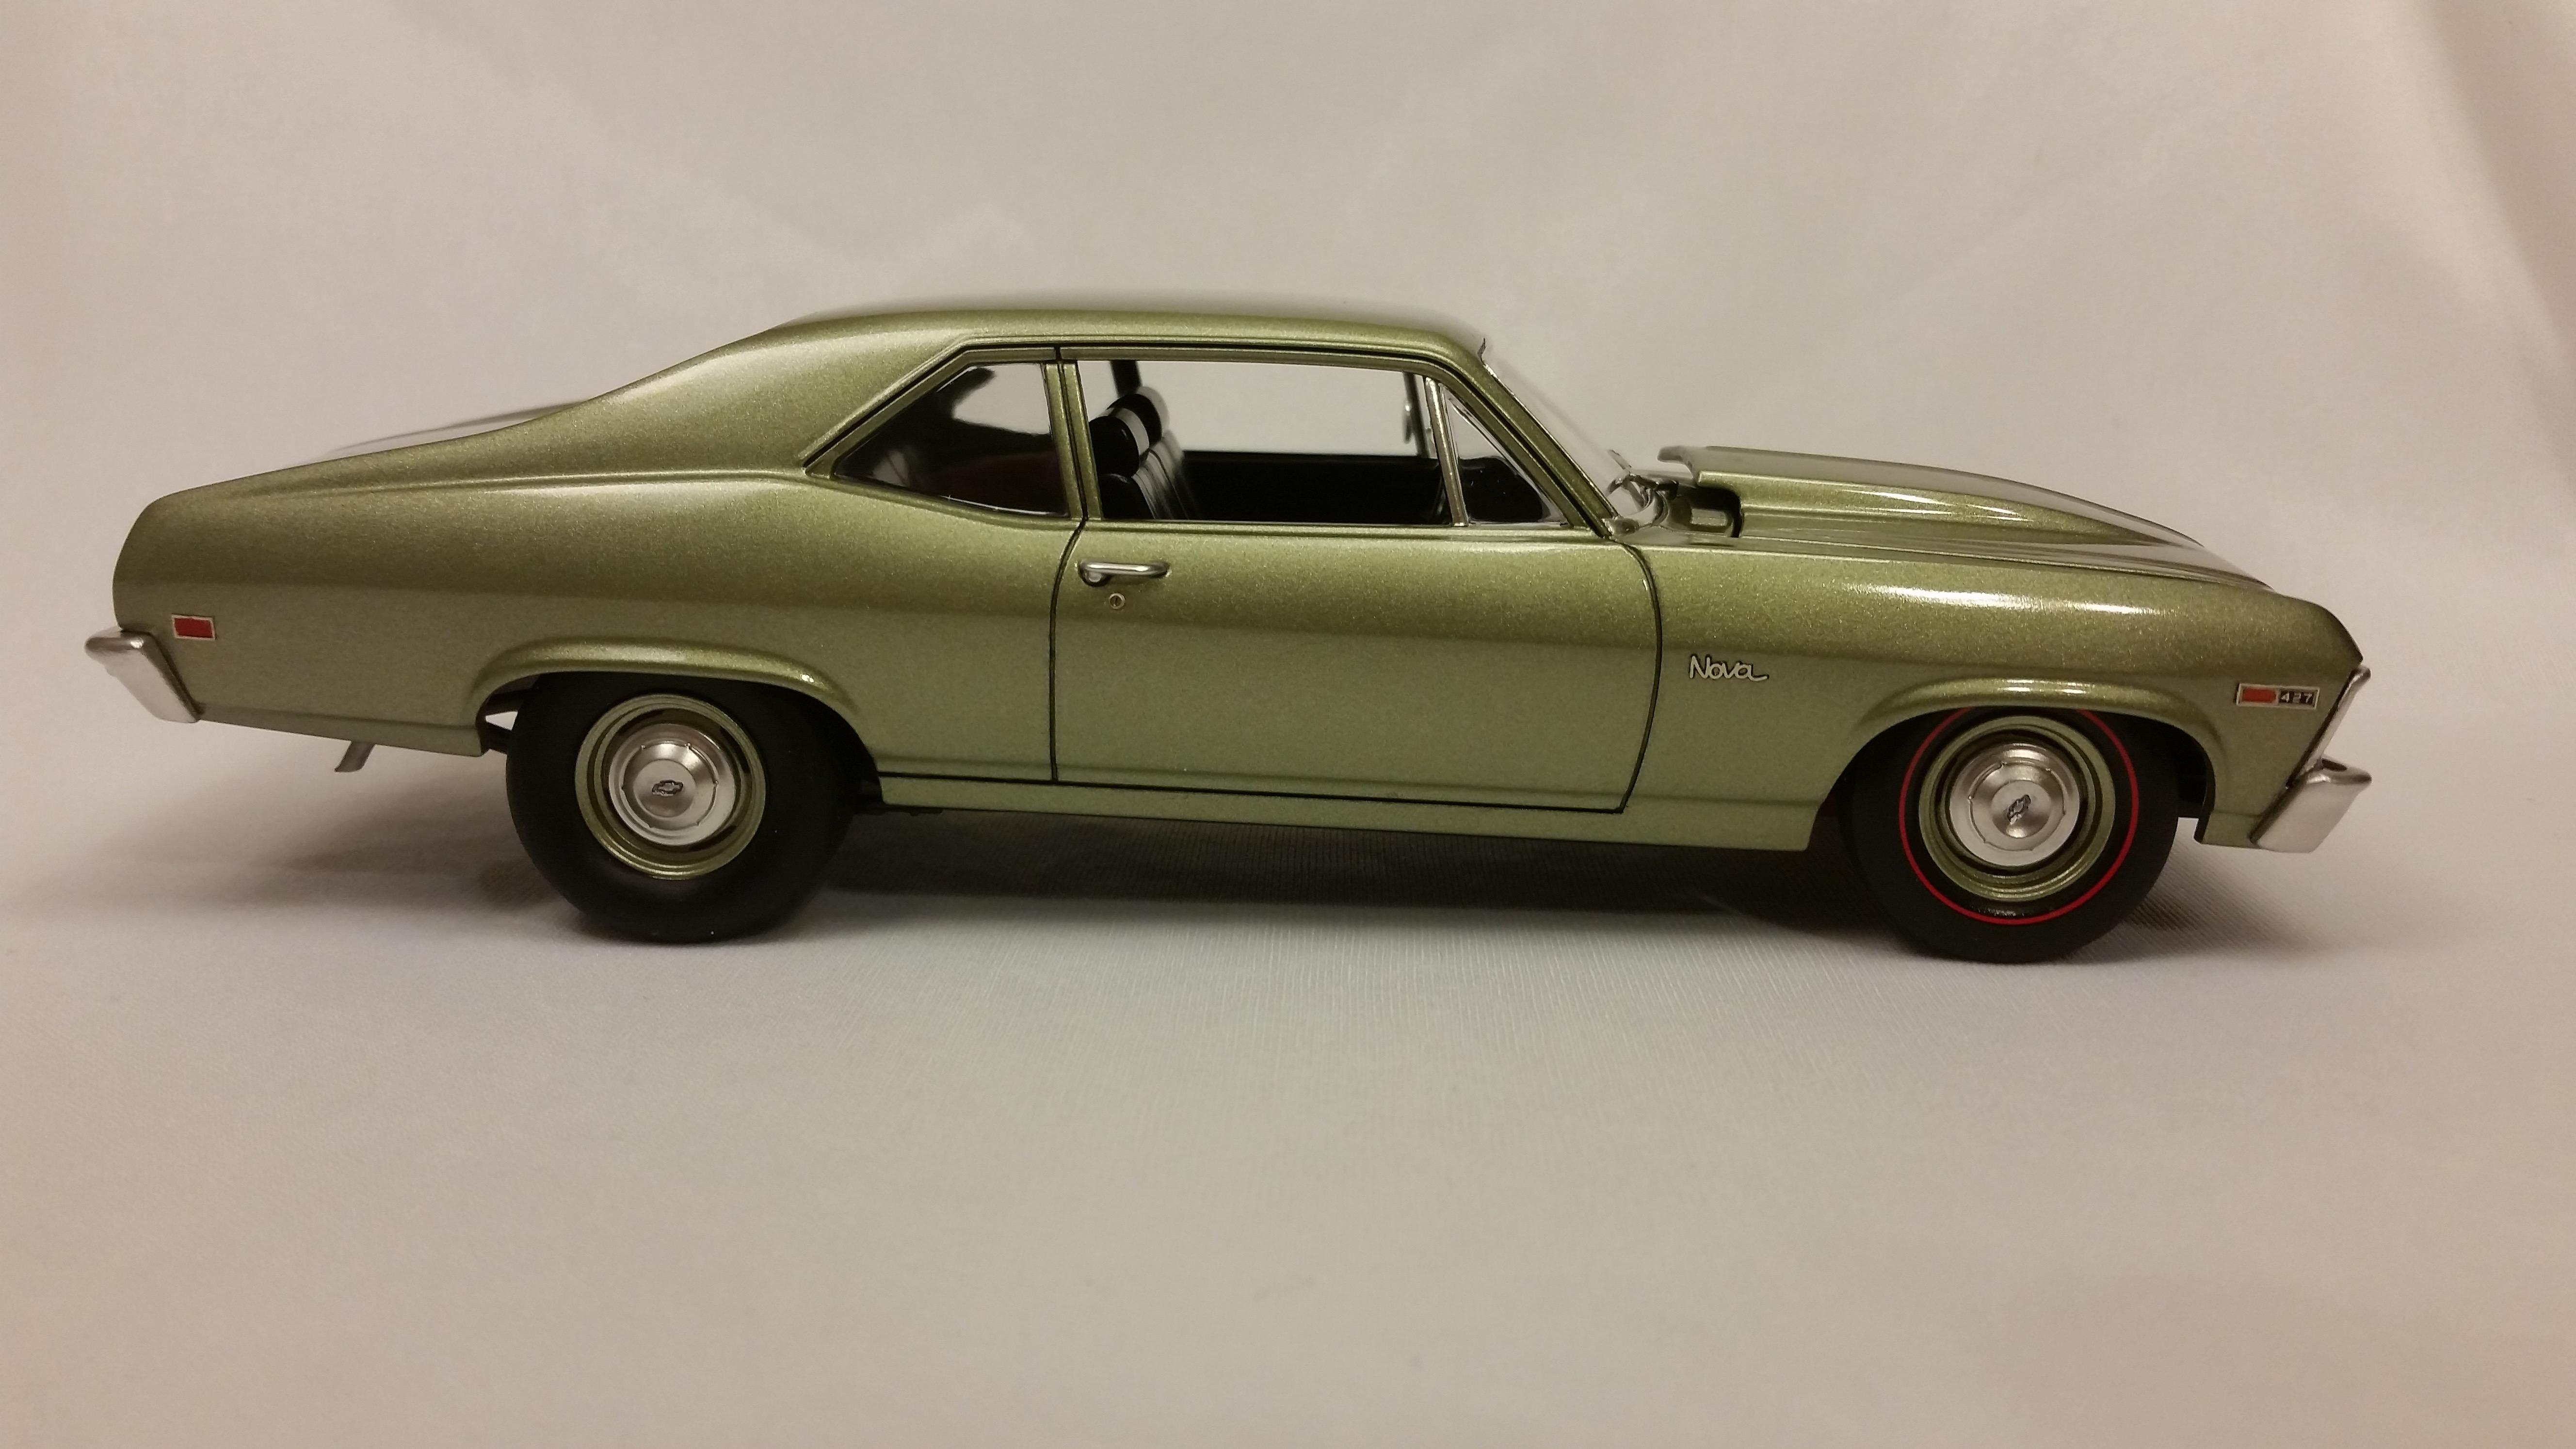
Here is one that I built about 2 years ago. ScaleFinishes green mist metallic with ScaleFinishes super clear.
-
Tamiya Pennzoil Nissan Skyline R34
lghtngyello03 replied to lghtngyello03's topic in WIP: Model Cars
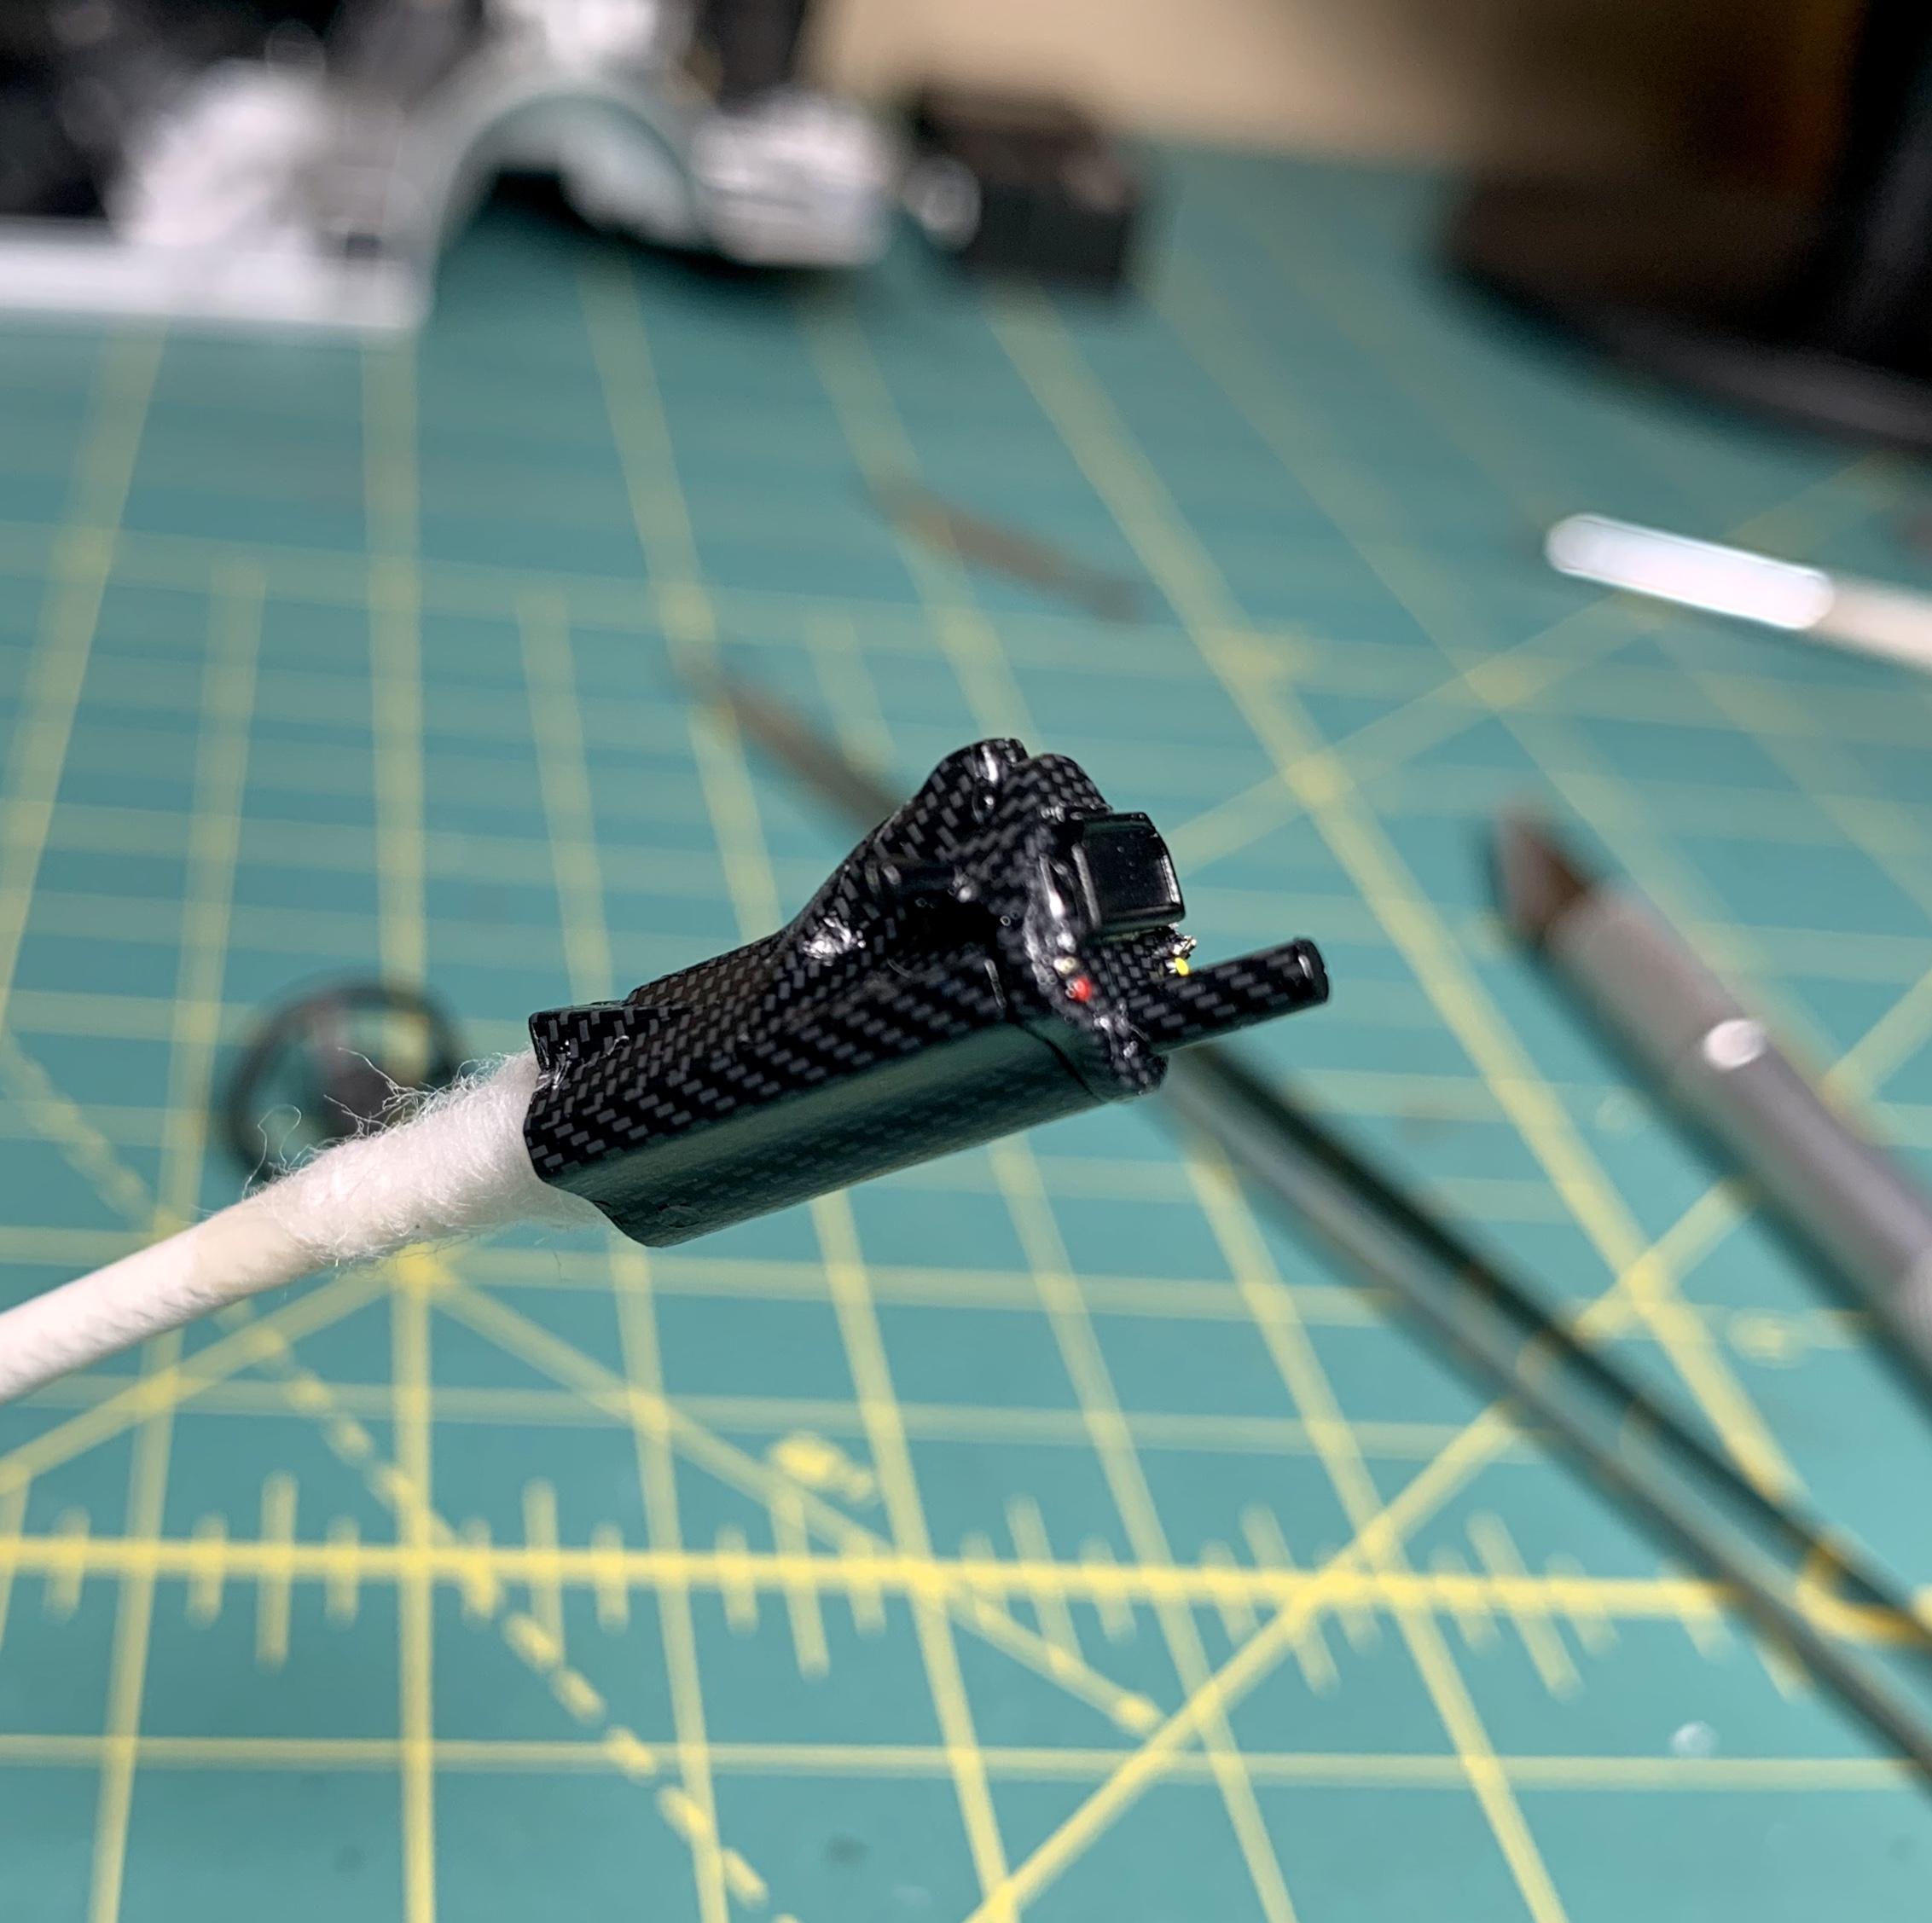
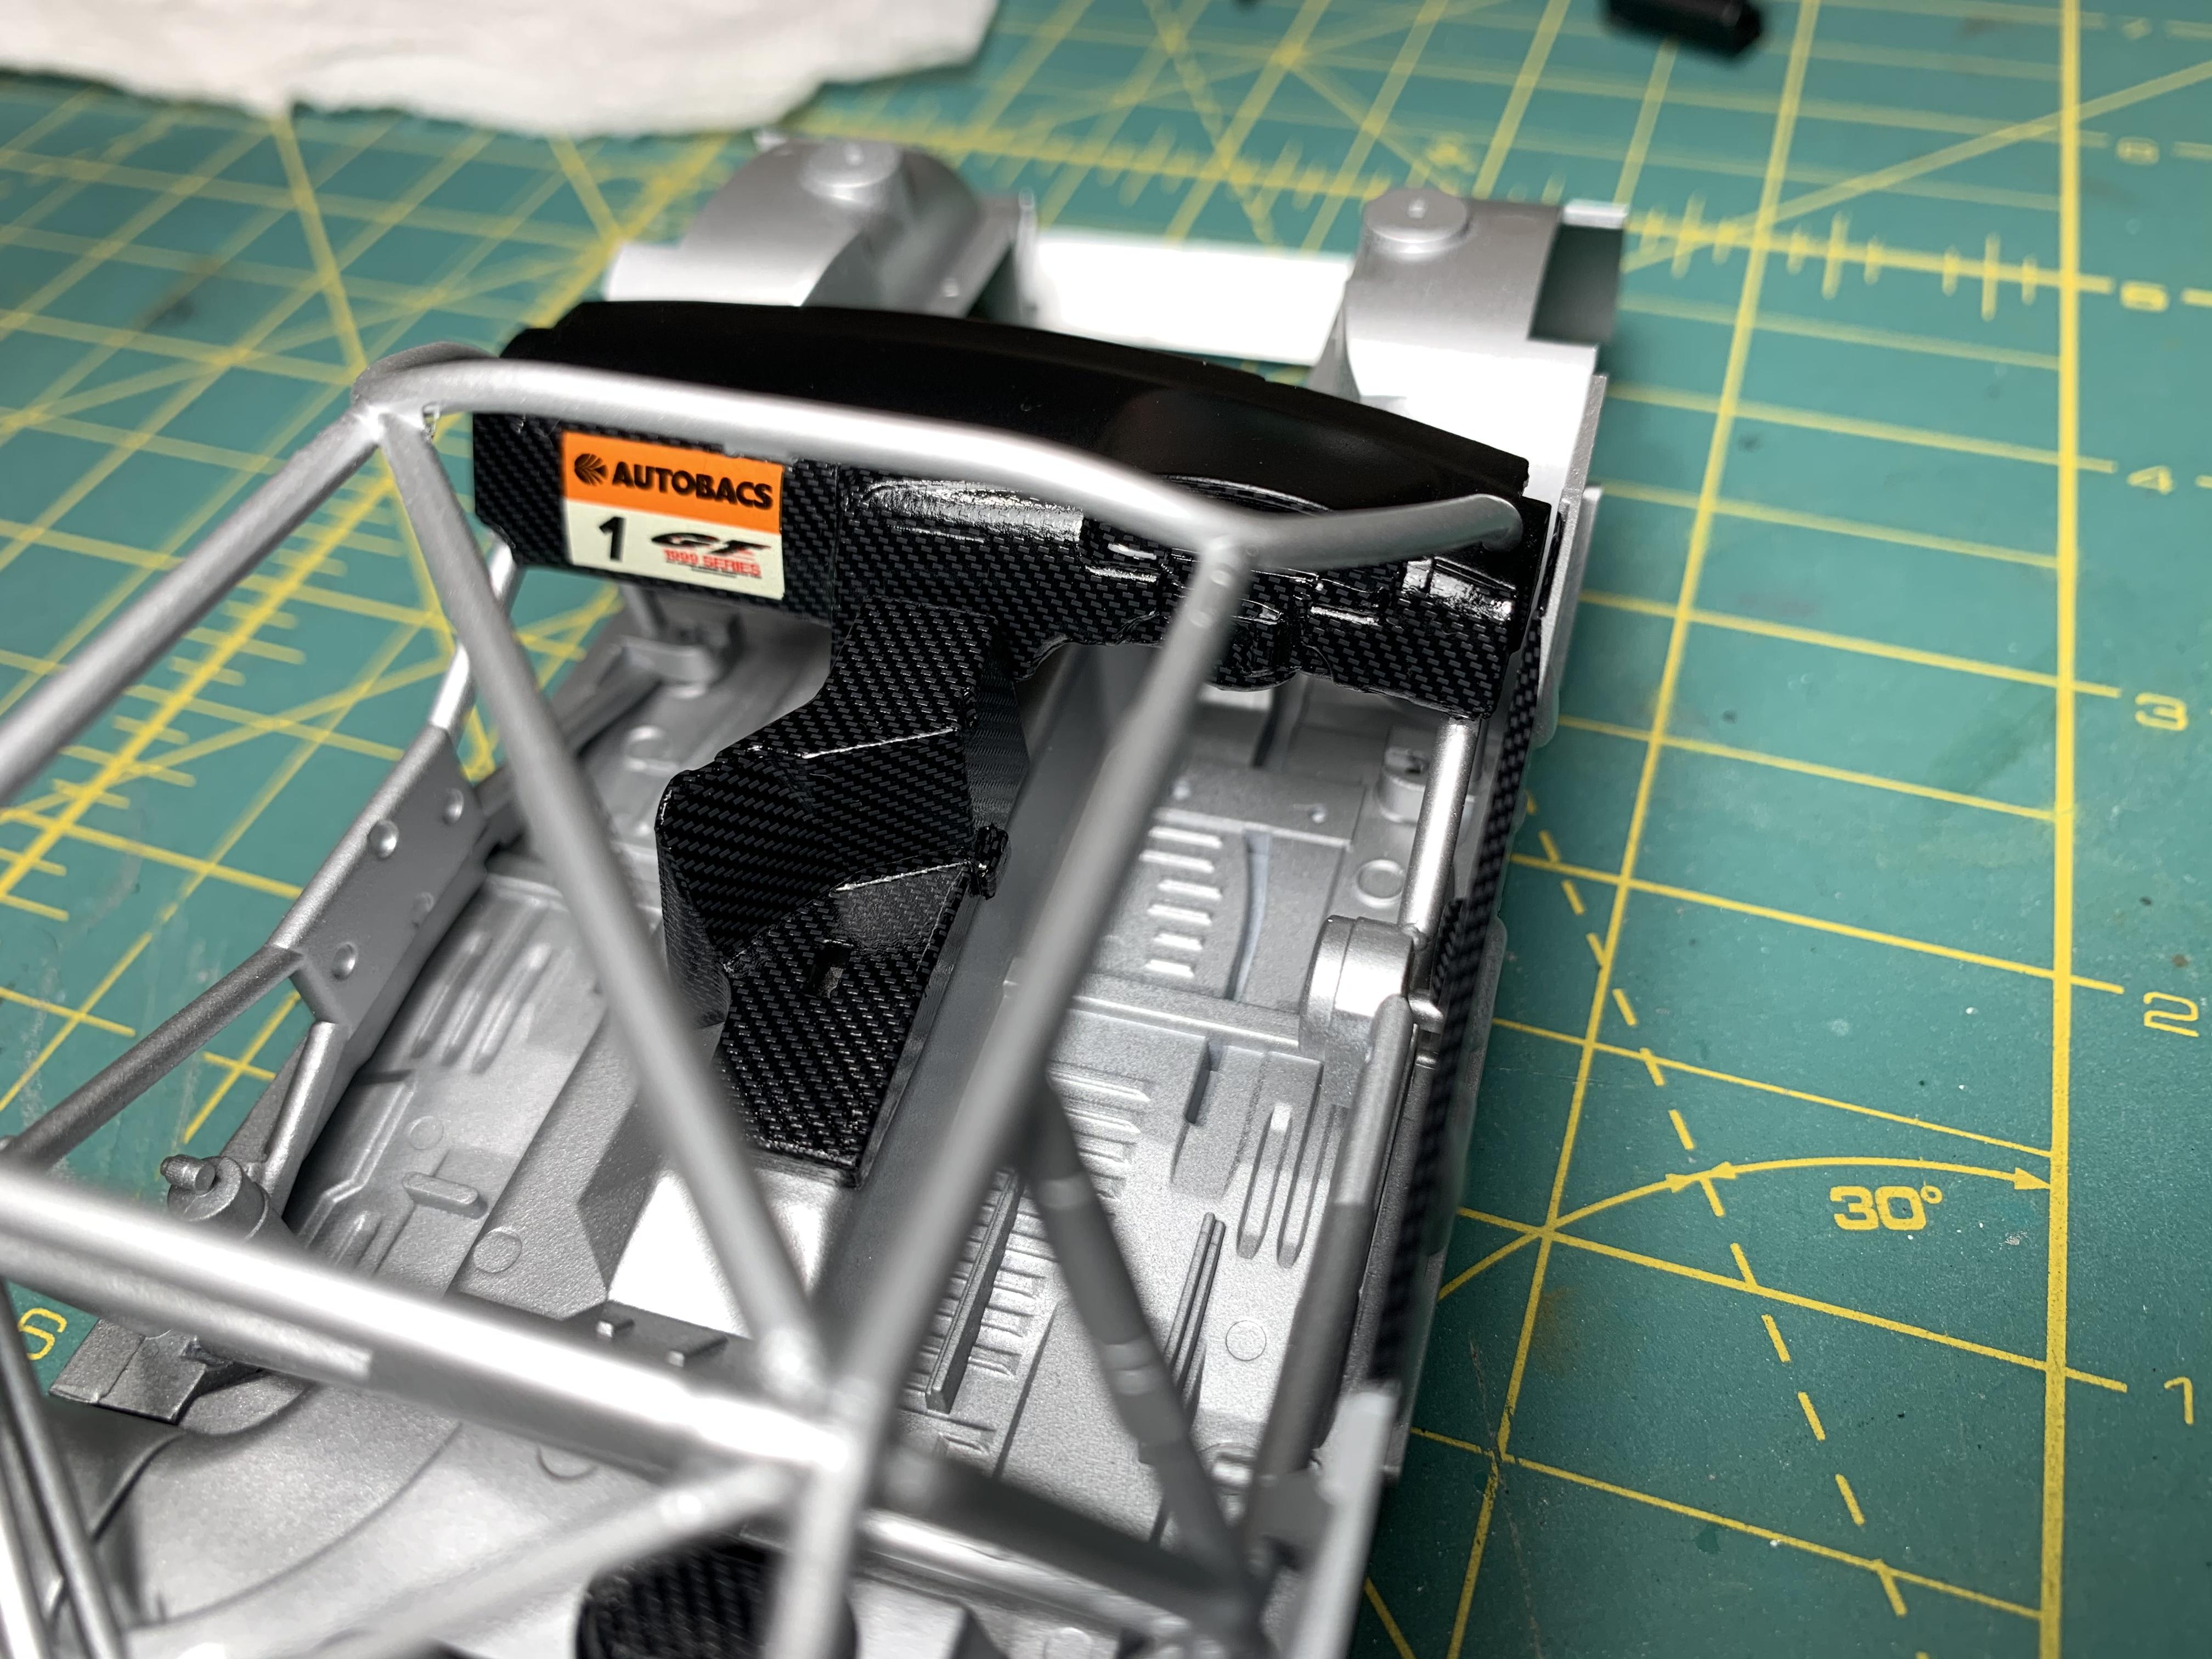
Again this evening, I didn’t get too much time to work. I did get some more tedious carbon work done though. It’s enough to make you go cross eyed. I got the left side door panel done, the fuel pump cover, and the rear trans tunnel cover completed. Nothing is glued In place, just set in for mock up.
-
Tamiya Pennzoil Nissan Skyline R34
lghtngyello03 replied to lghtngyello03's topic in WIP: Model Cars
Thank you! I really hope it continues to go well. -
Tamiya Pennzoil Nissan Skyline R34
lghtngyello03 replied to lghtngyello03's topic in WIP: Model Cars
I didn’t get a chance to work on anything yesterday and only had about an hr or so tonight to work on anything. I did this twice as when I finished I noticed that the passenger side inlet had patterns that did not line up and my ocd got me lol