lghtngyello03
-
Posts
1,246 -
Joined
-
Last visited
Content Type
Profiles
Forums
Events
Gallery
Everything posted by lghtngyello03
-
Thanks again everyone!
-
Thanks guys!
-
Great looking build. I have this kit in my stash As well, I hope I can build it up this nice.
-
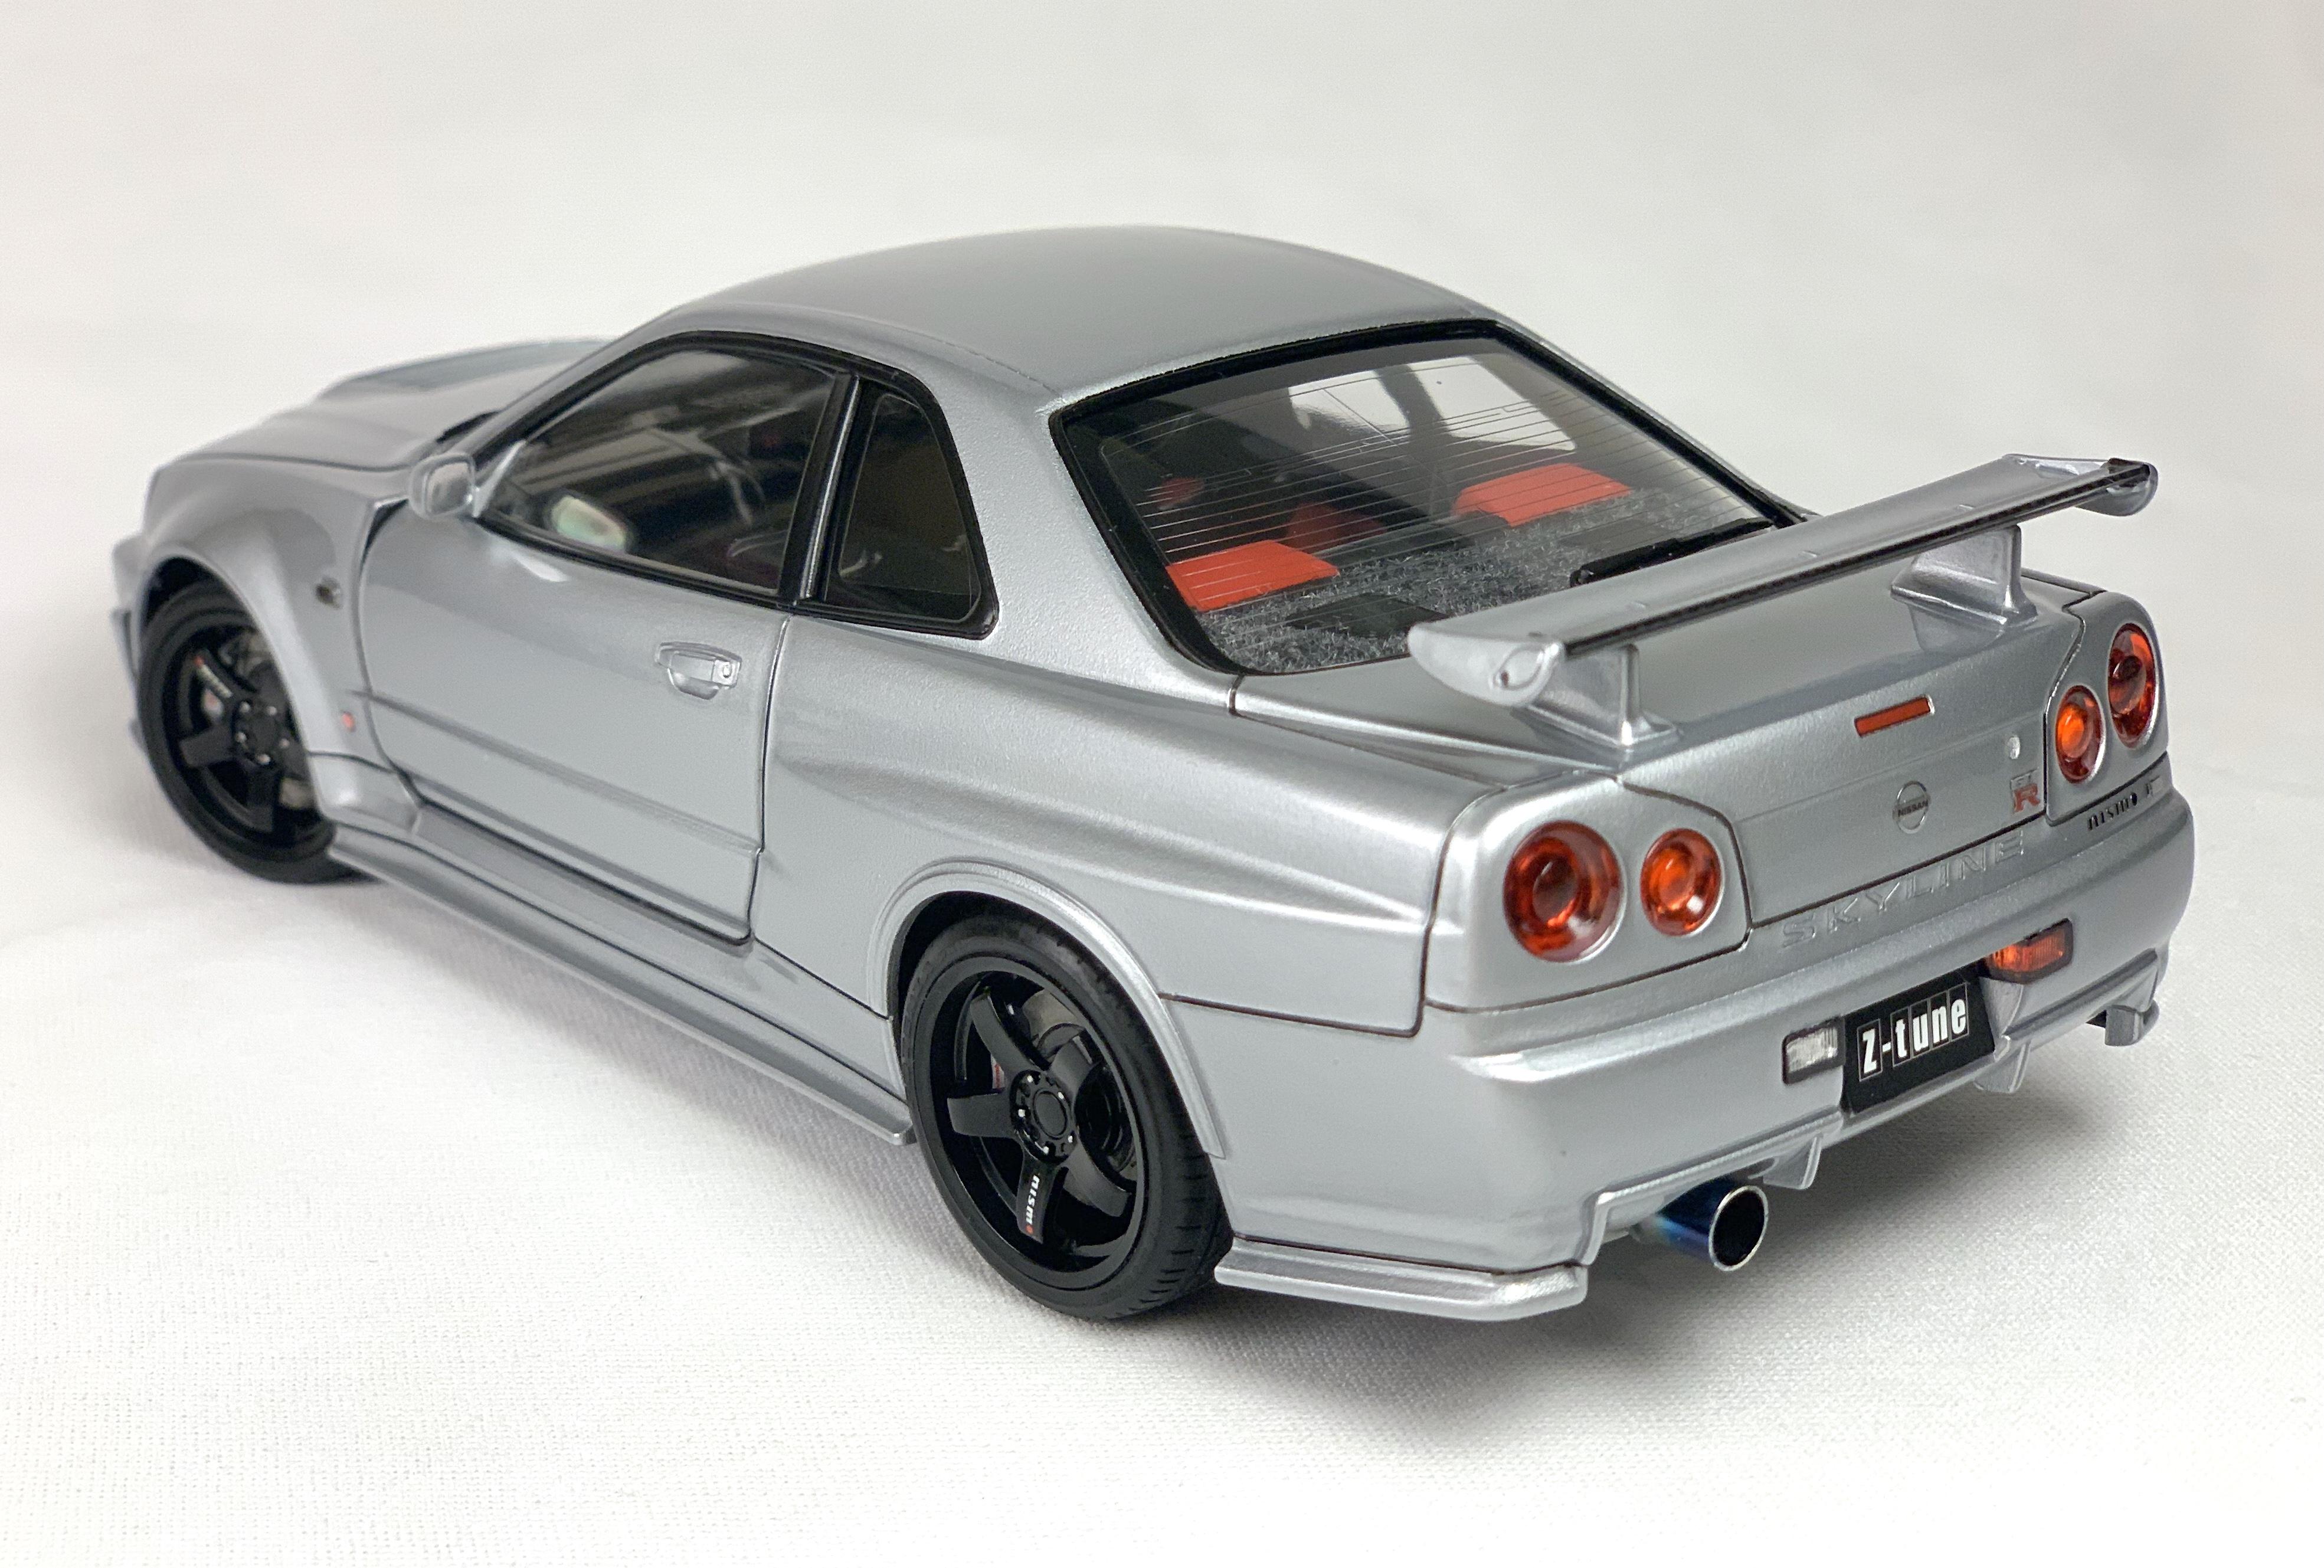
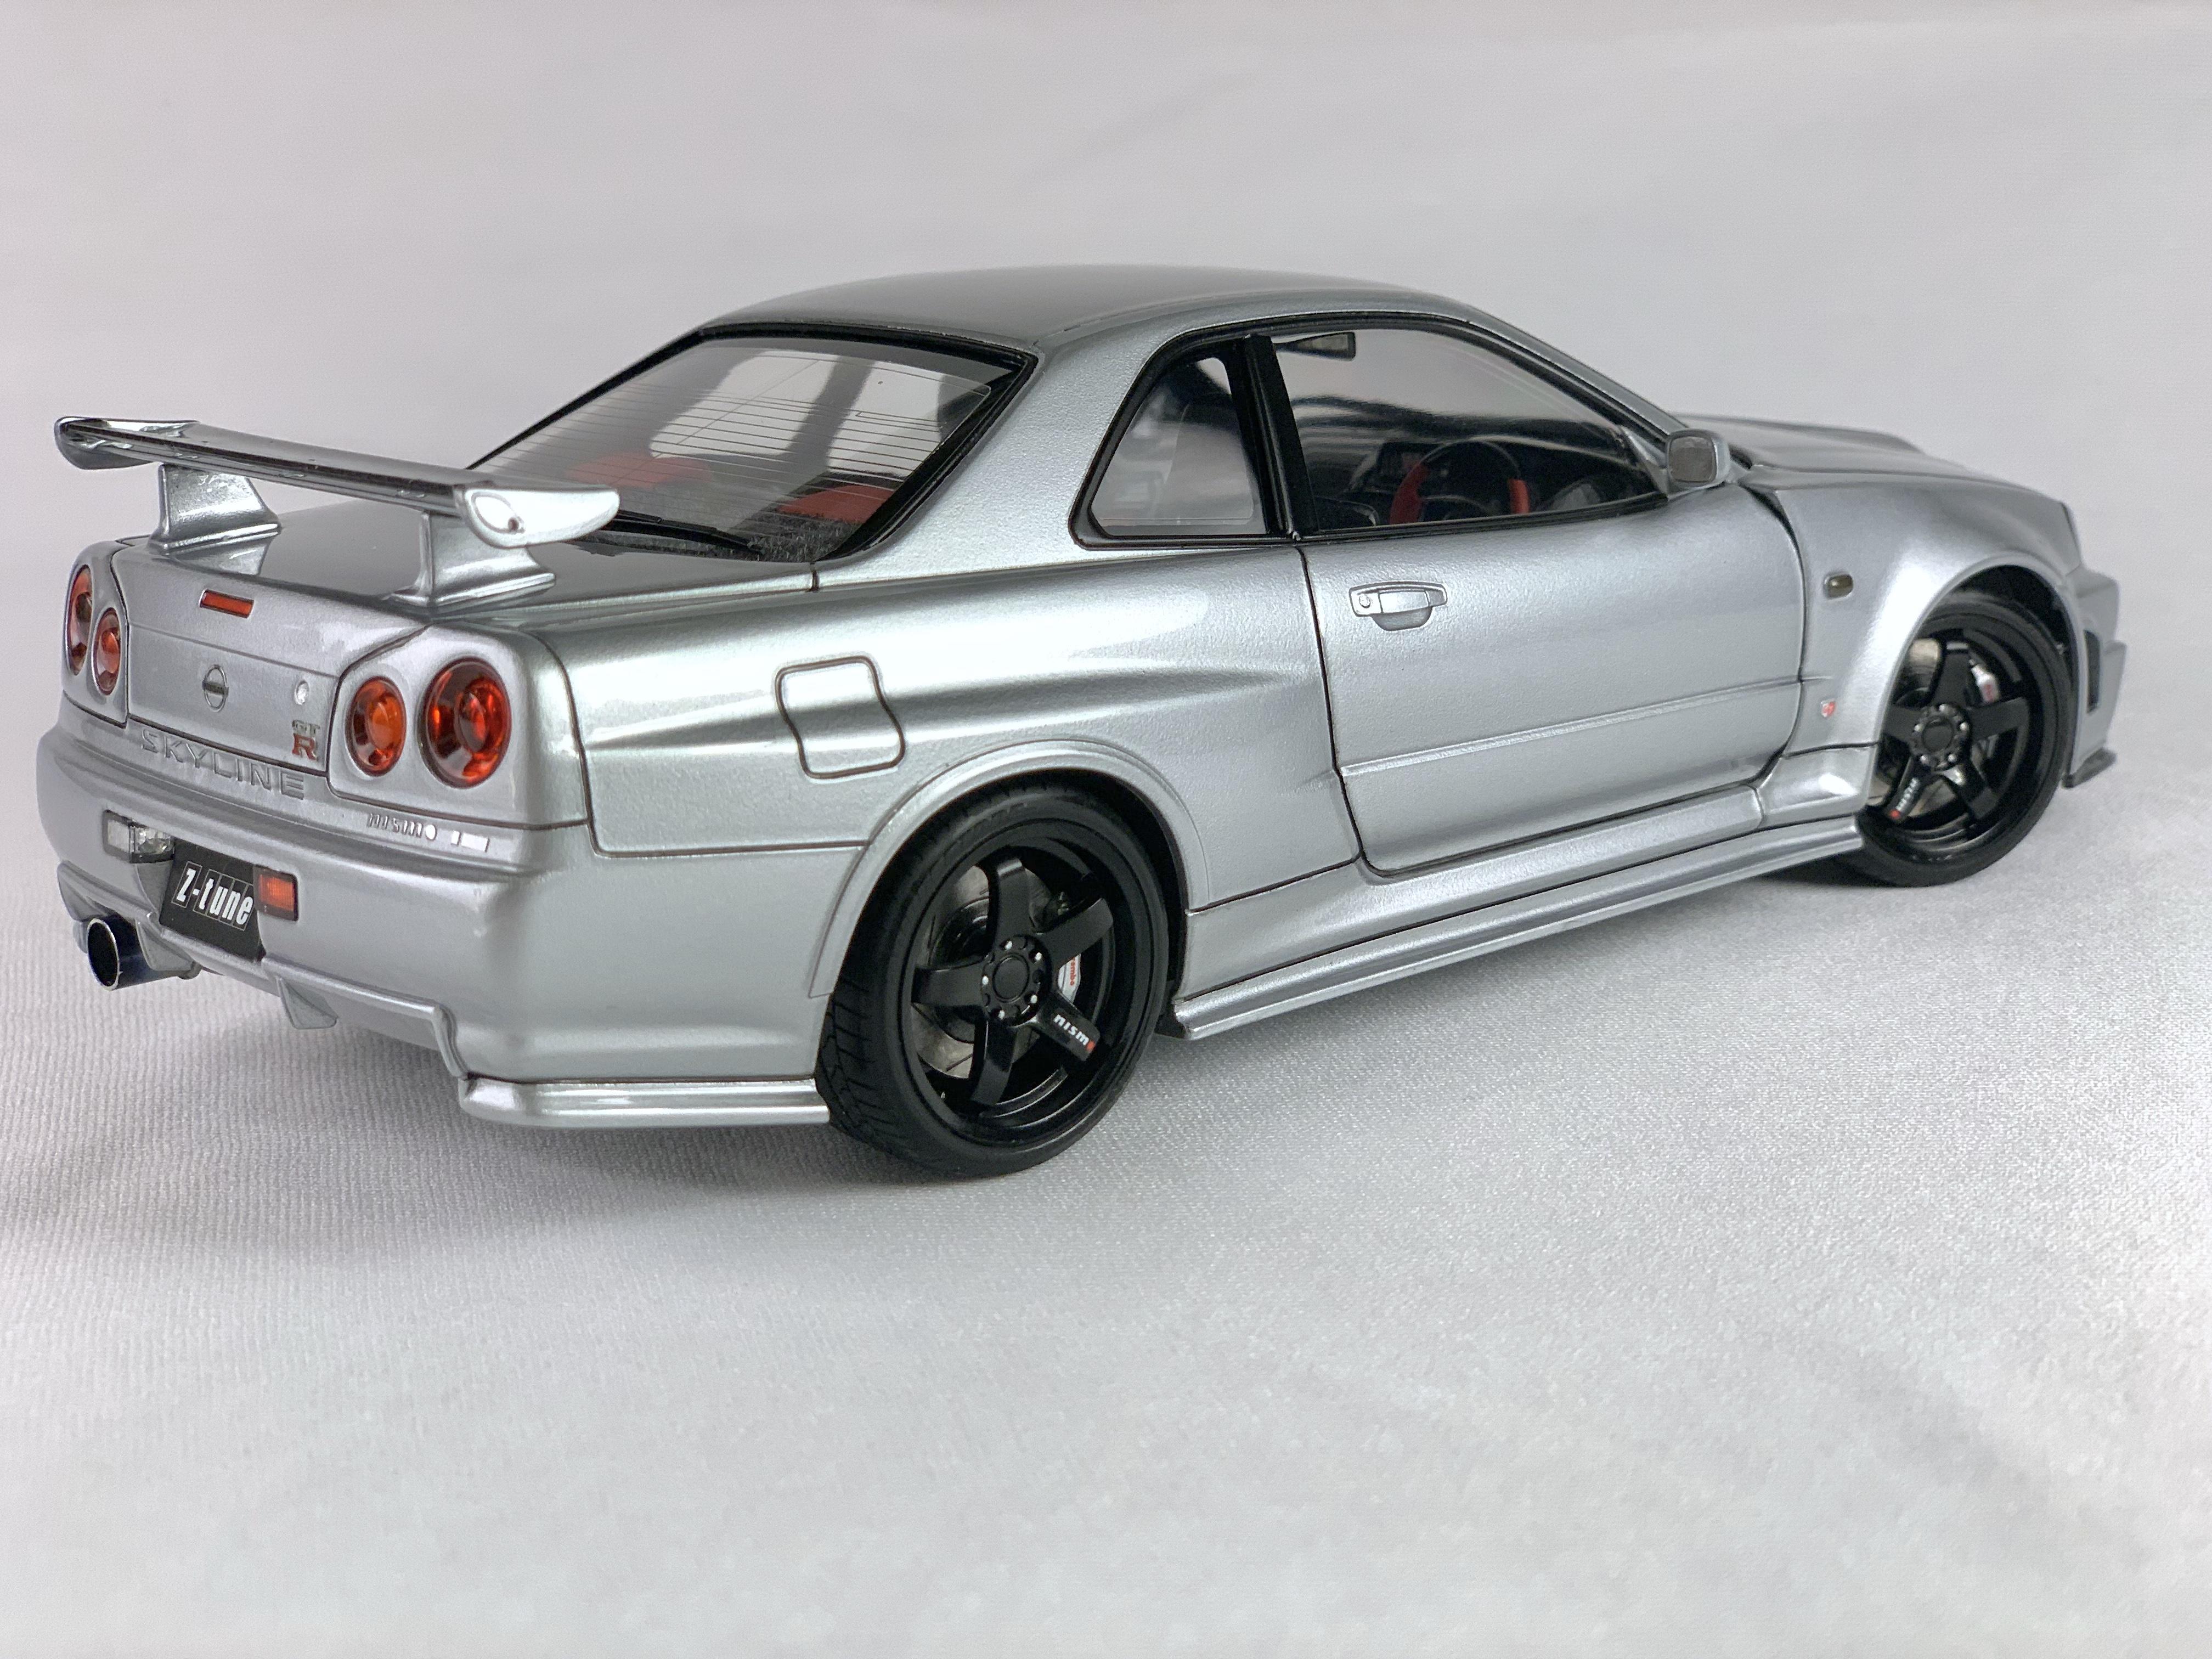
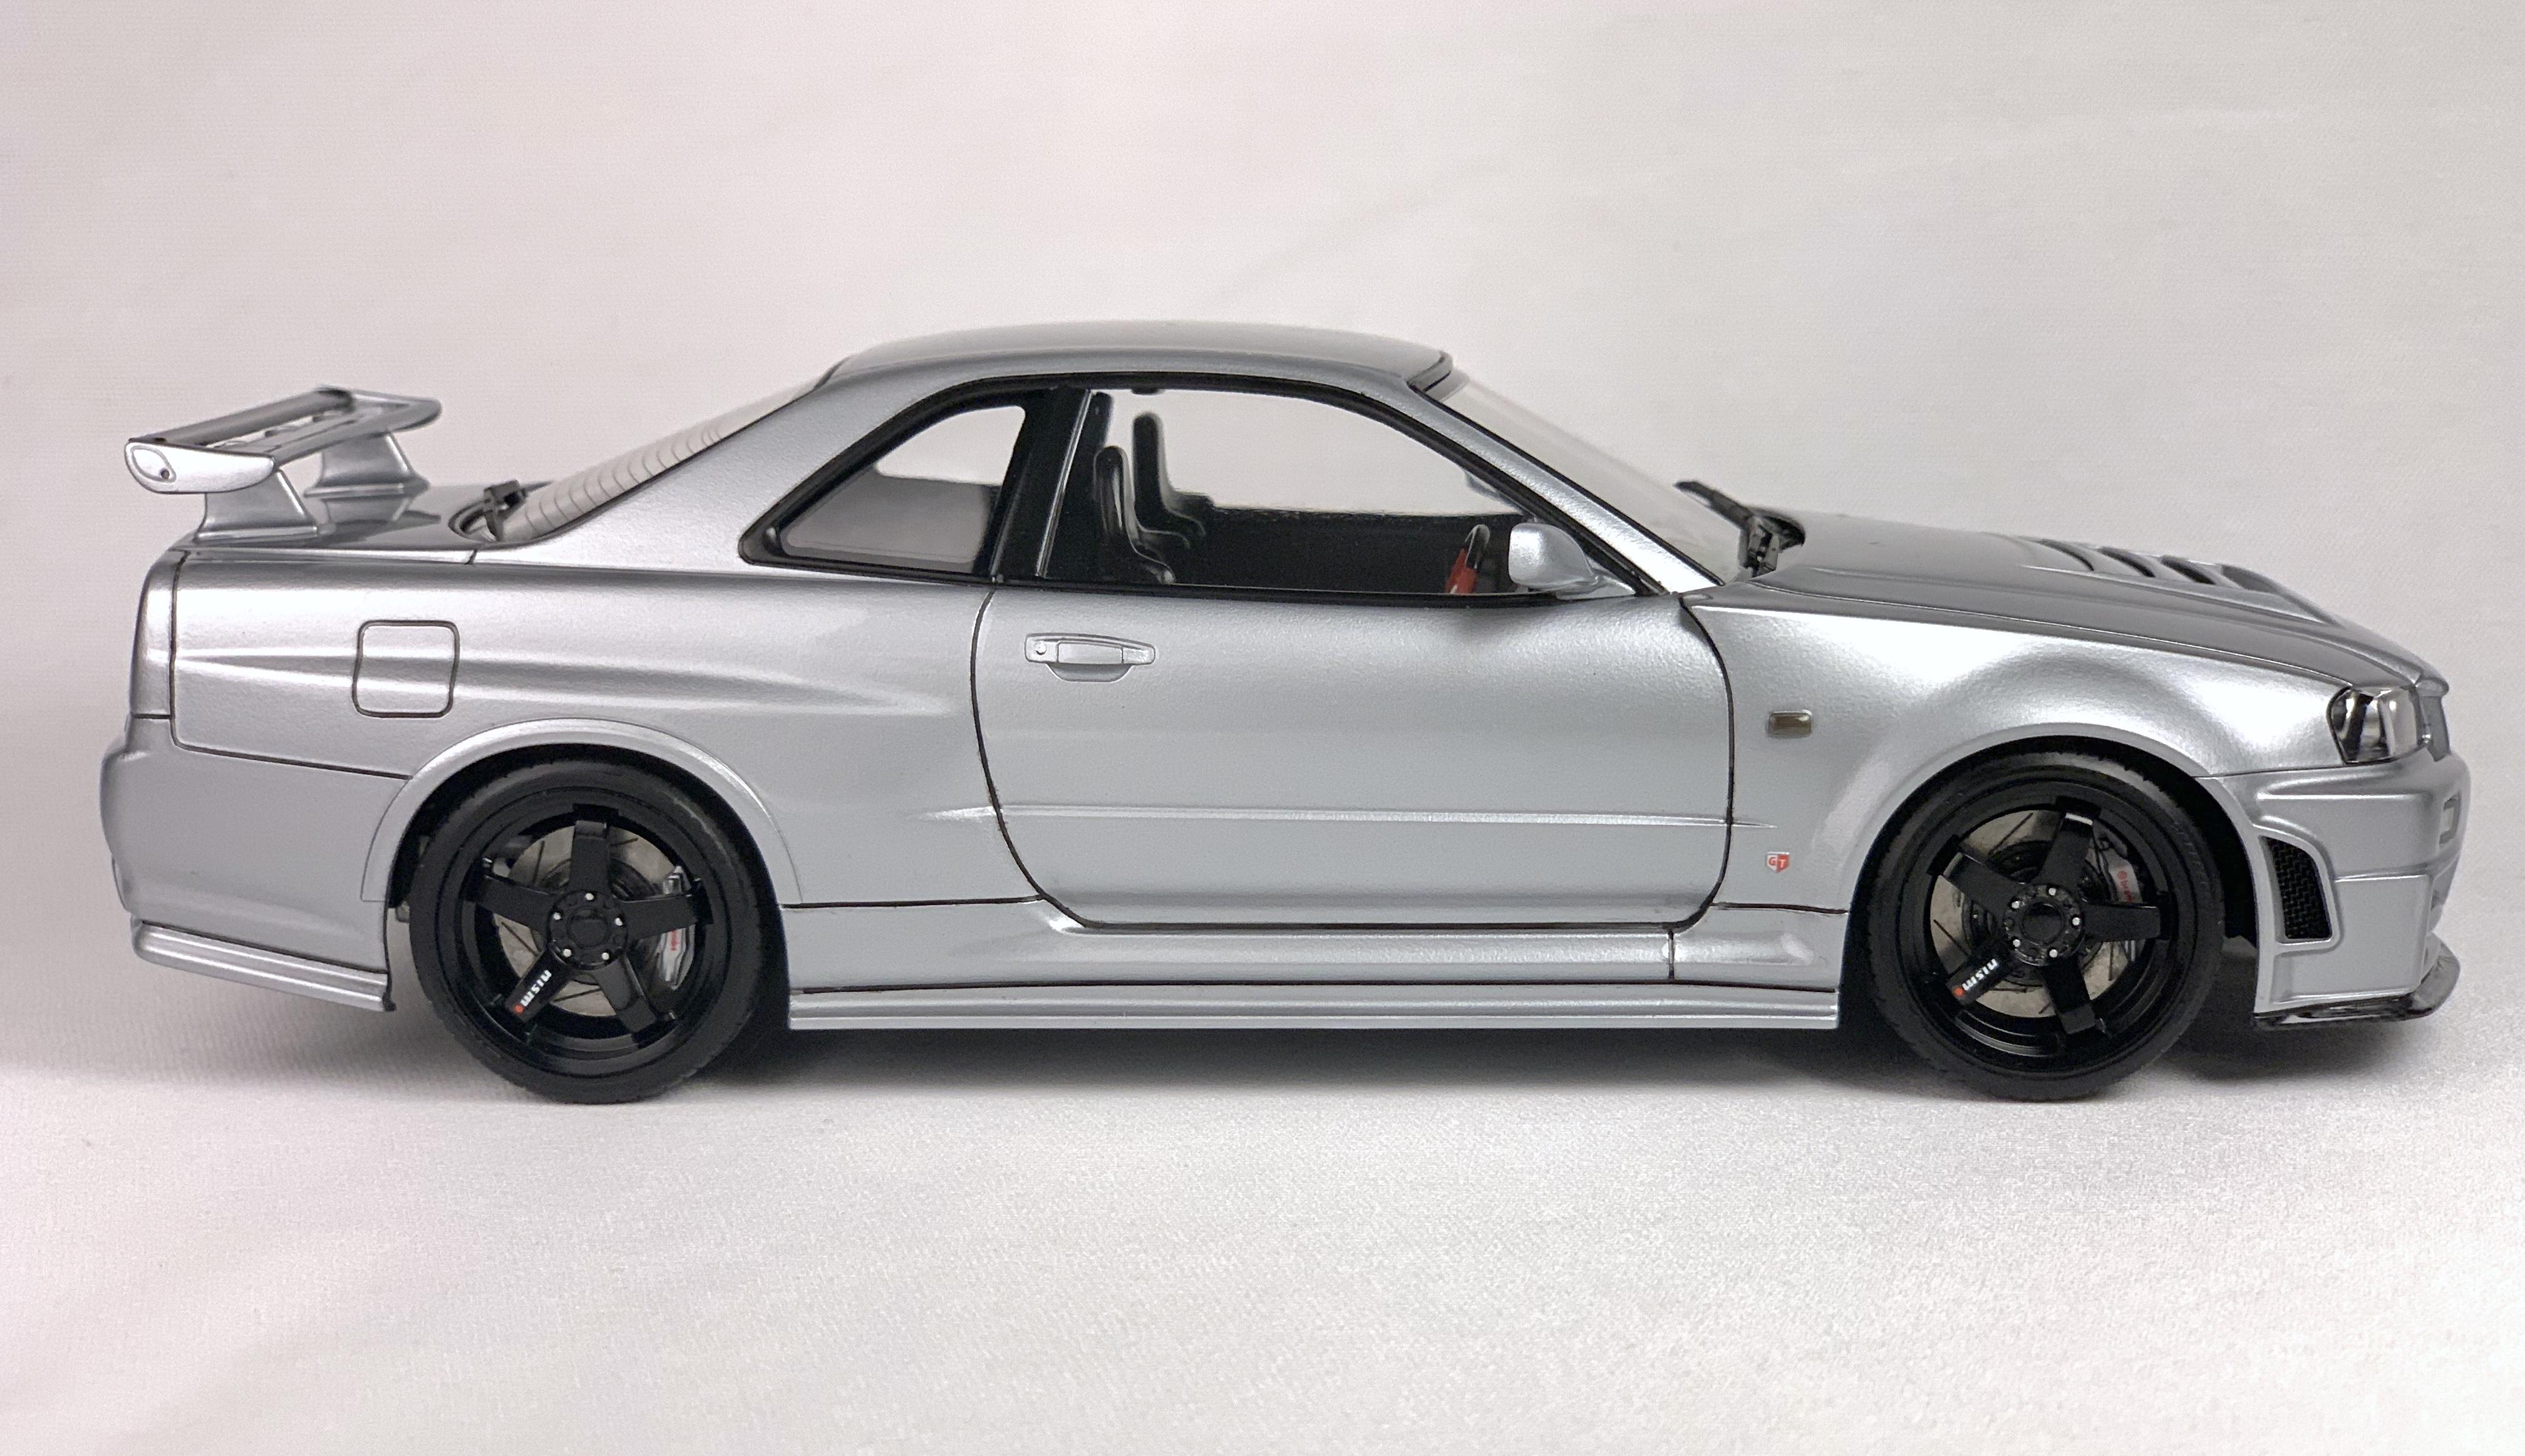
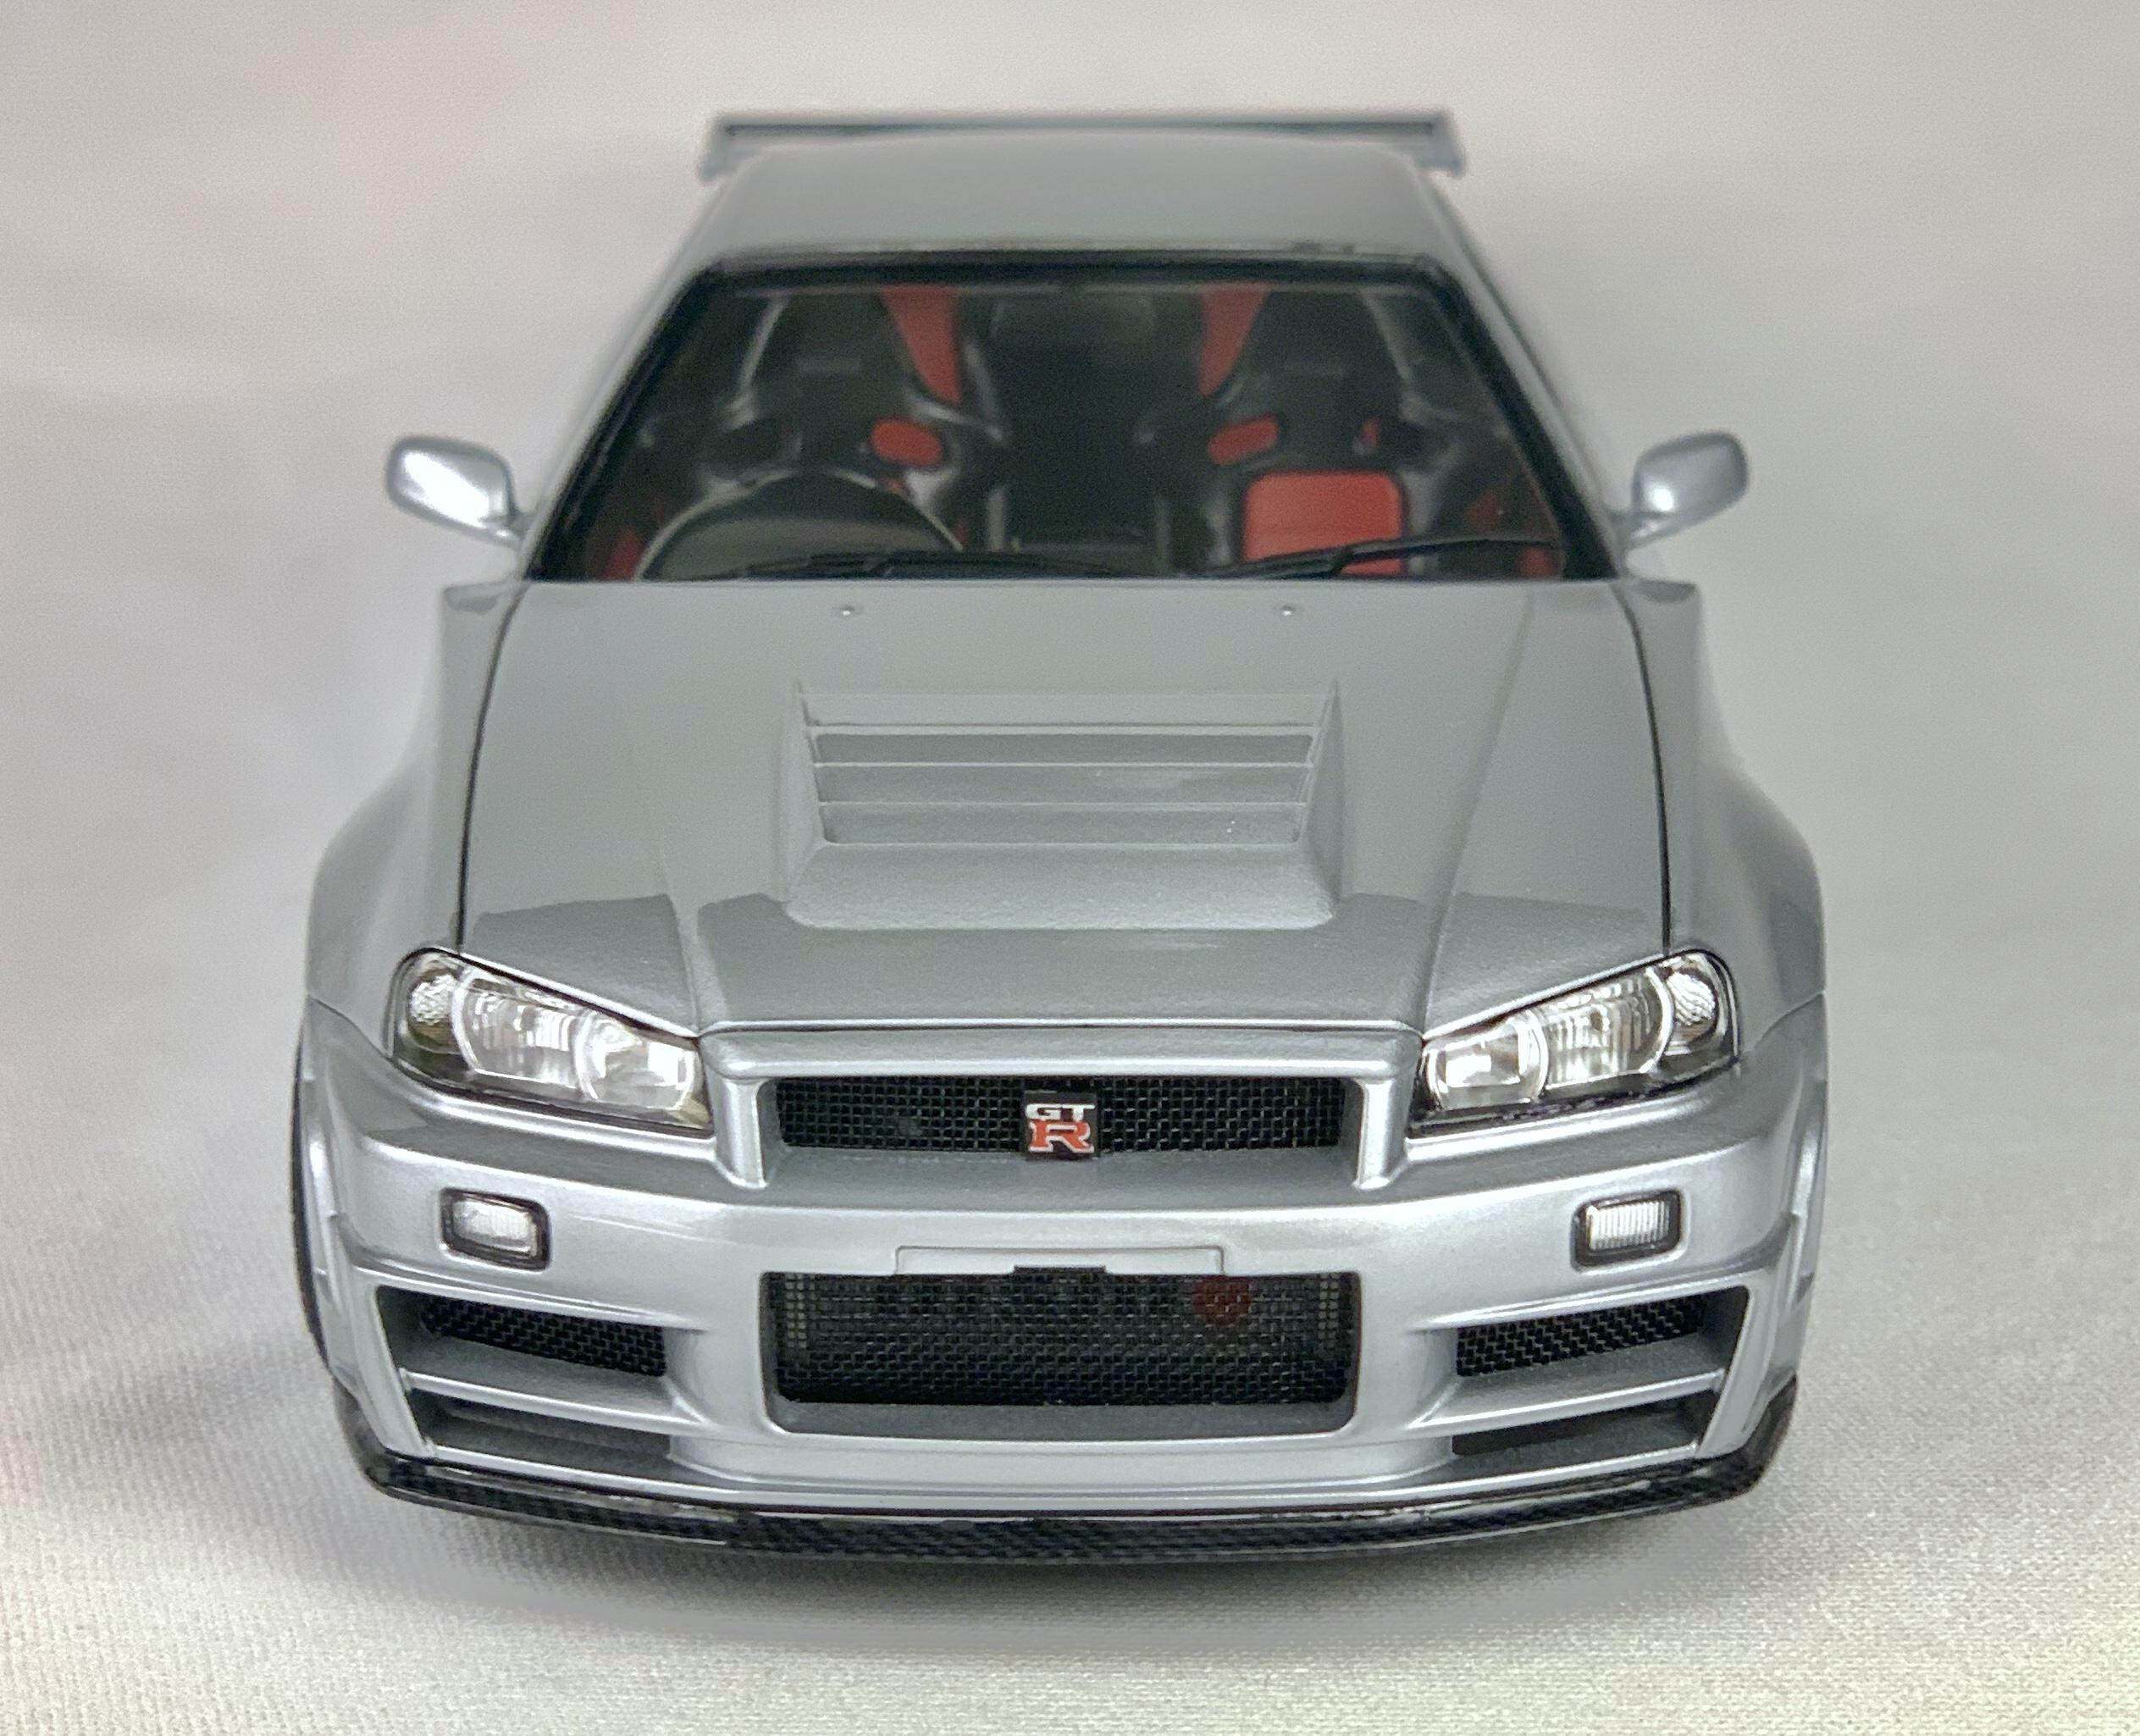
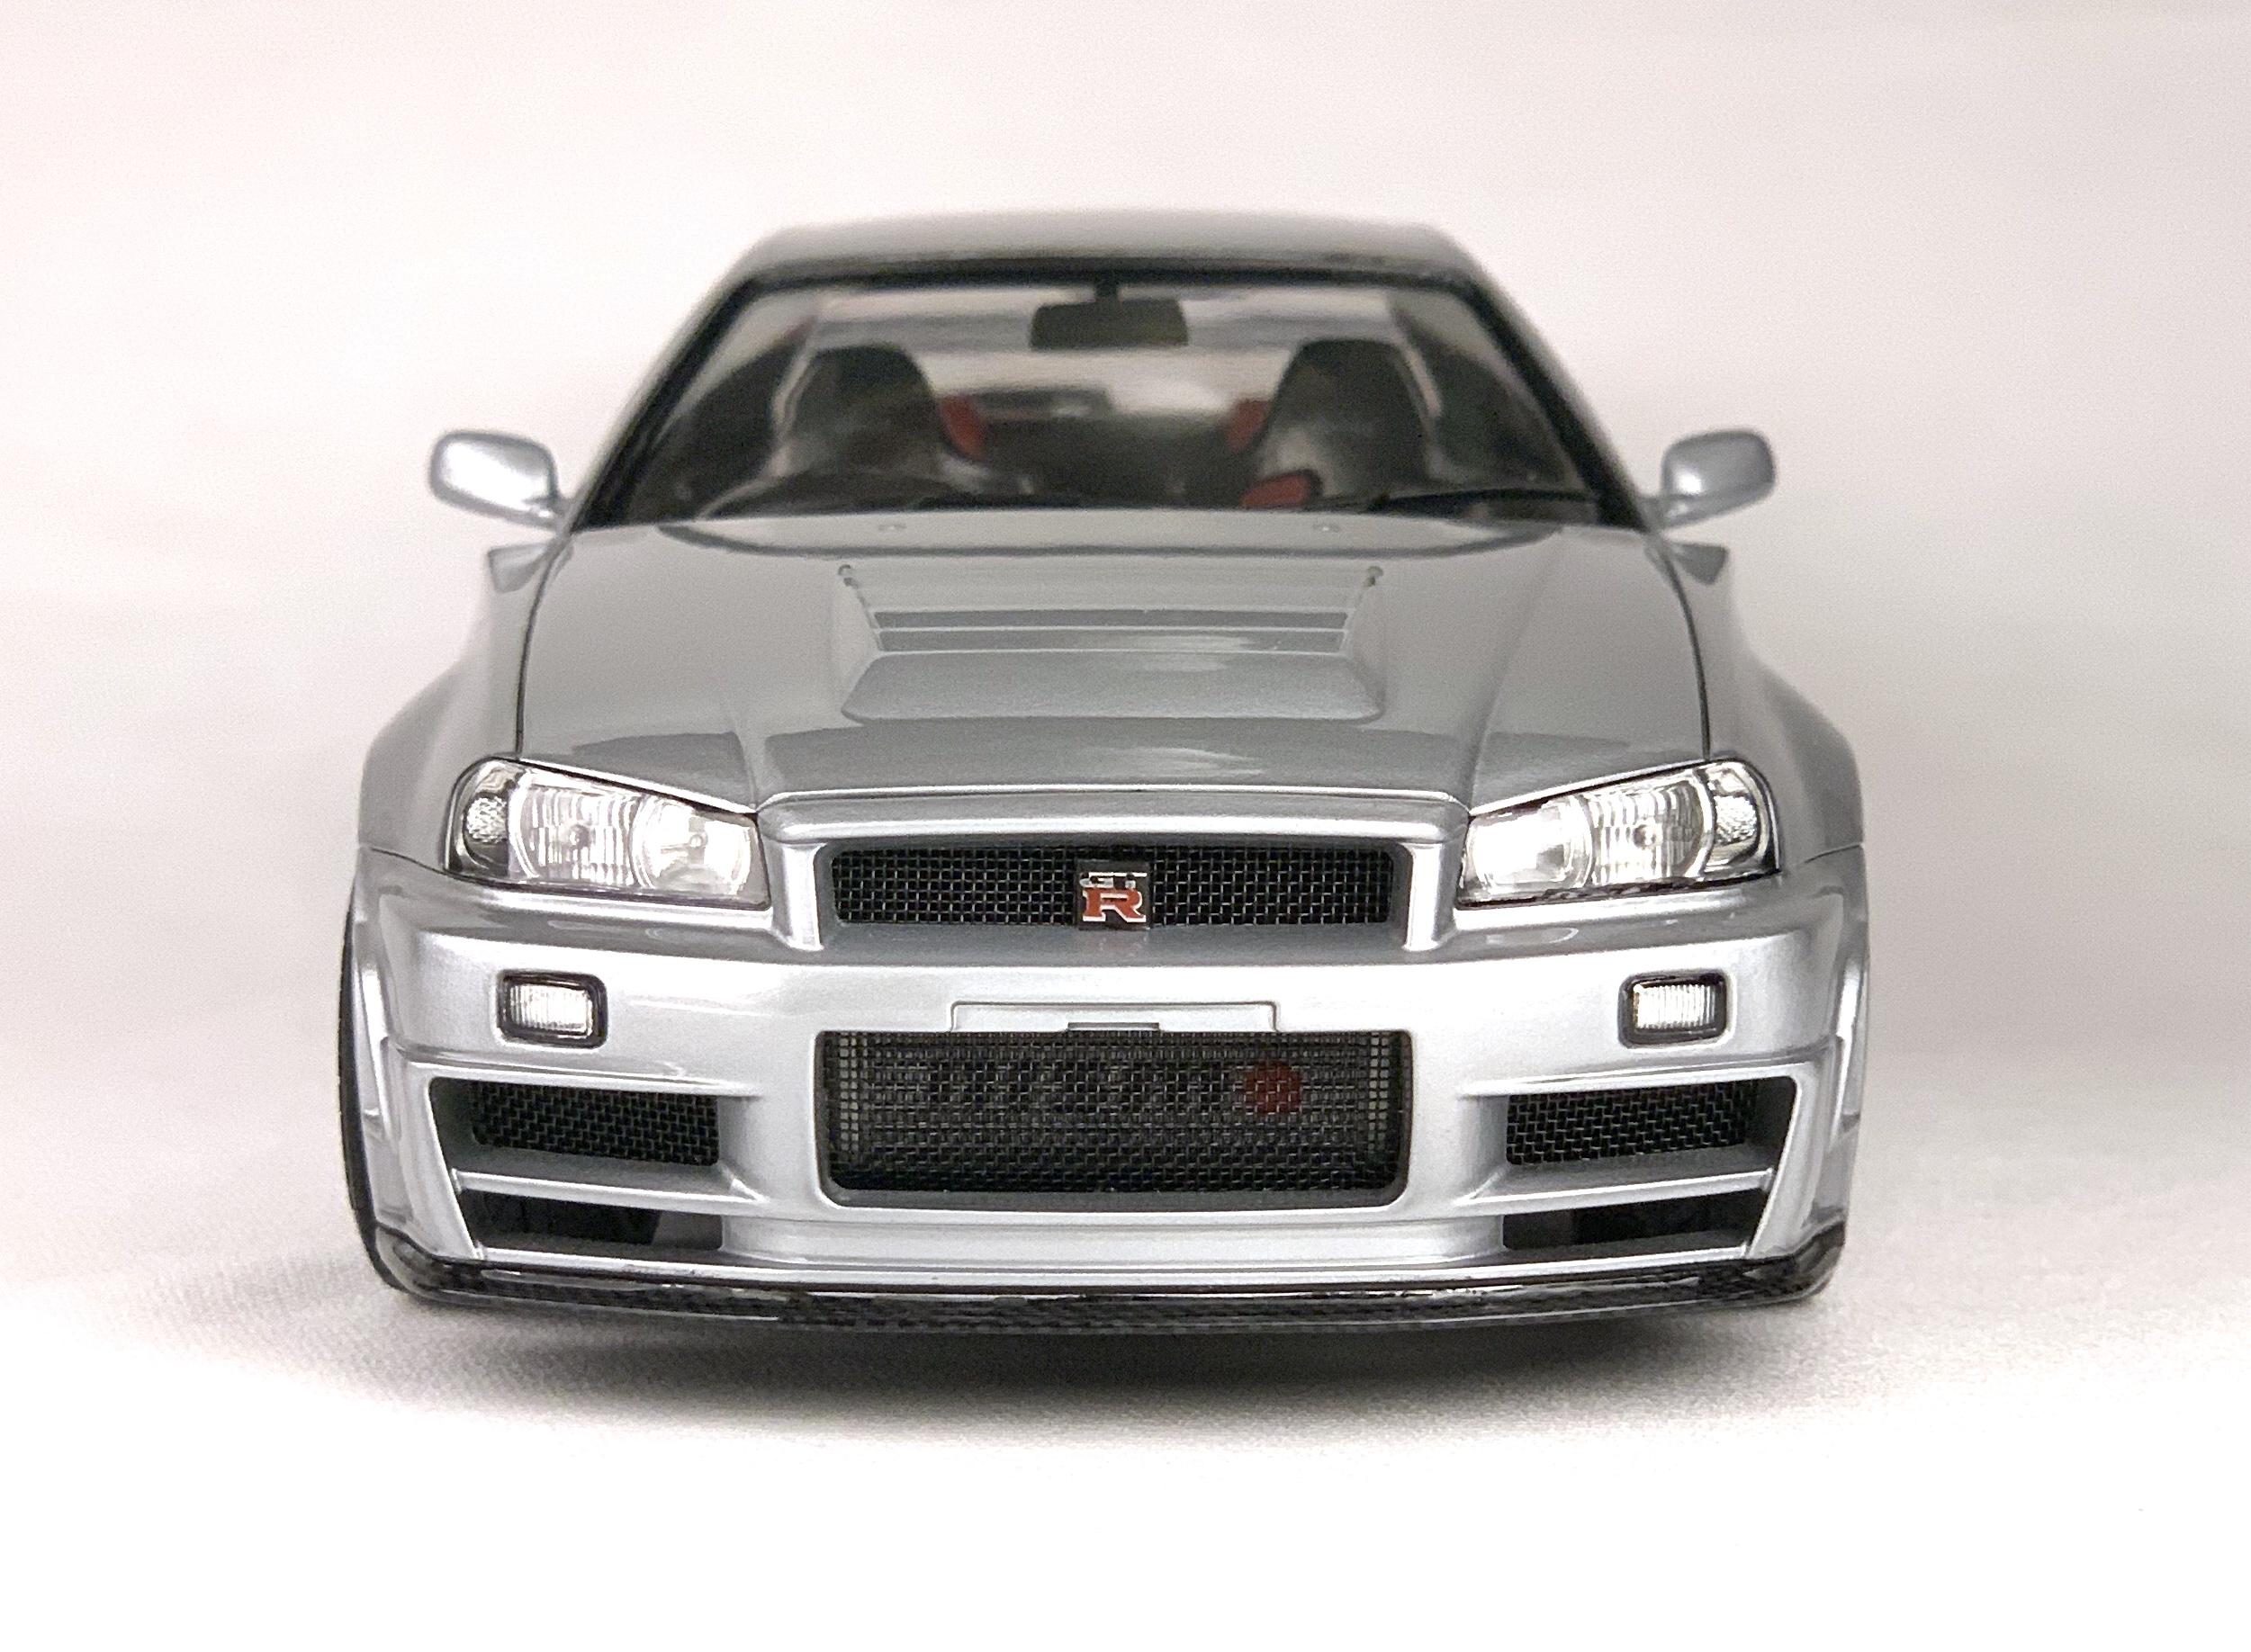
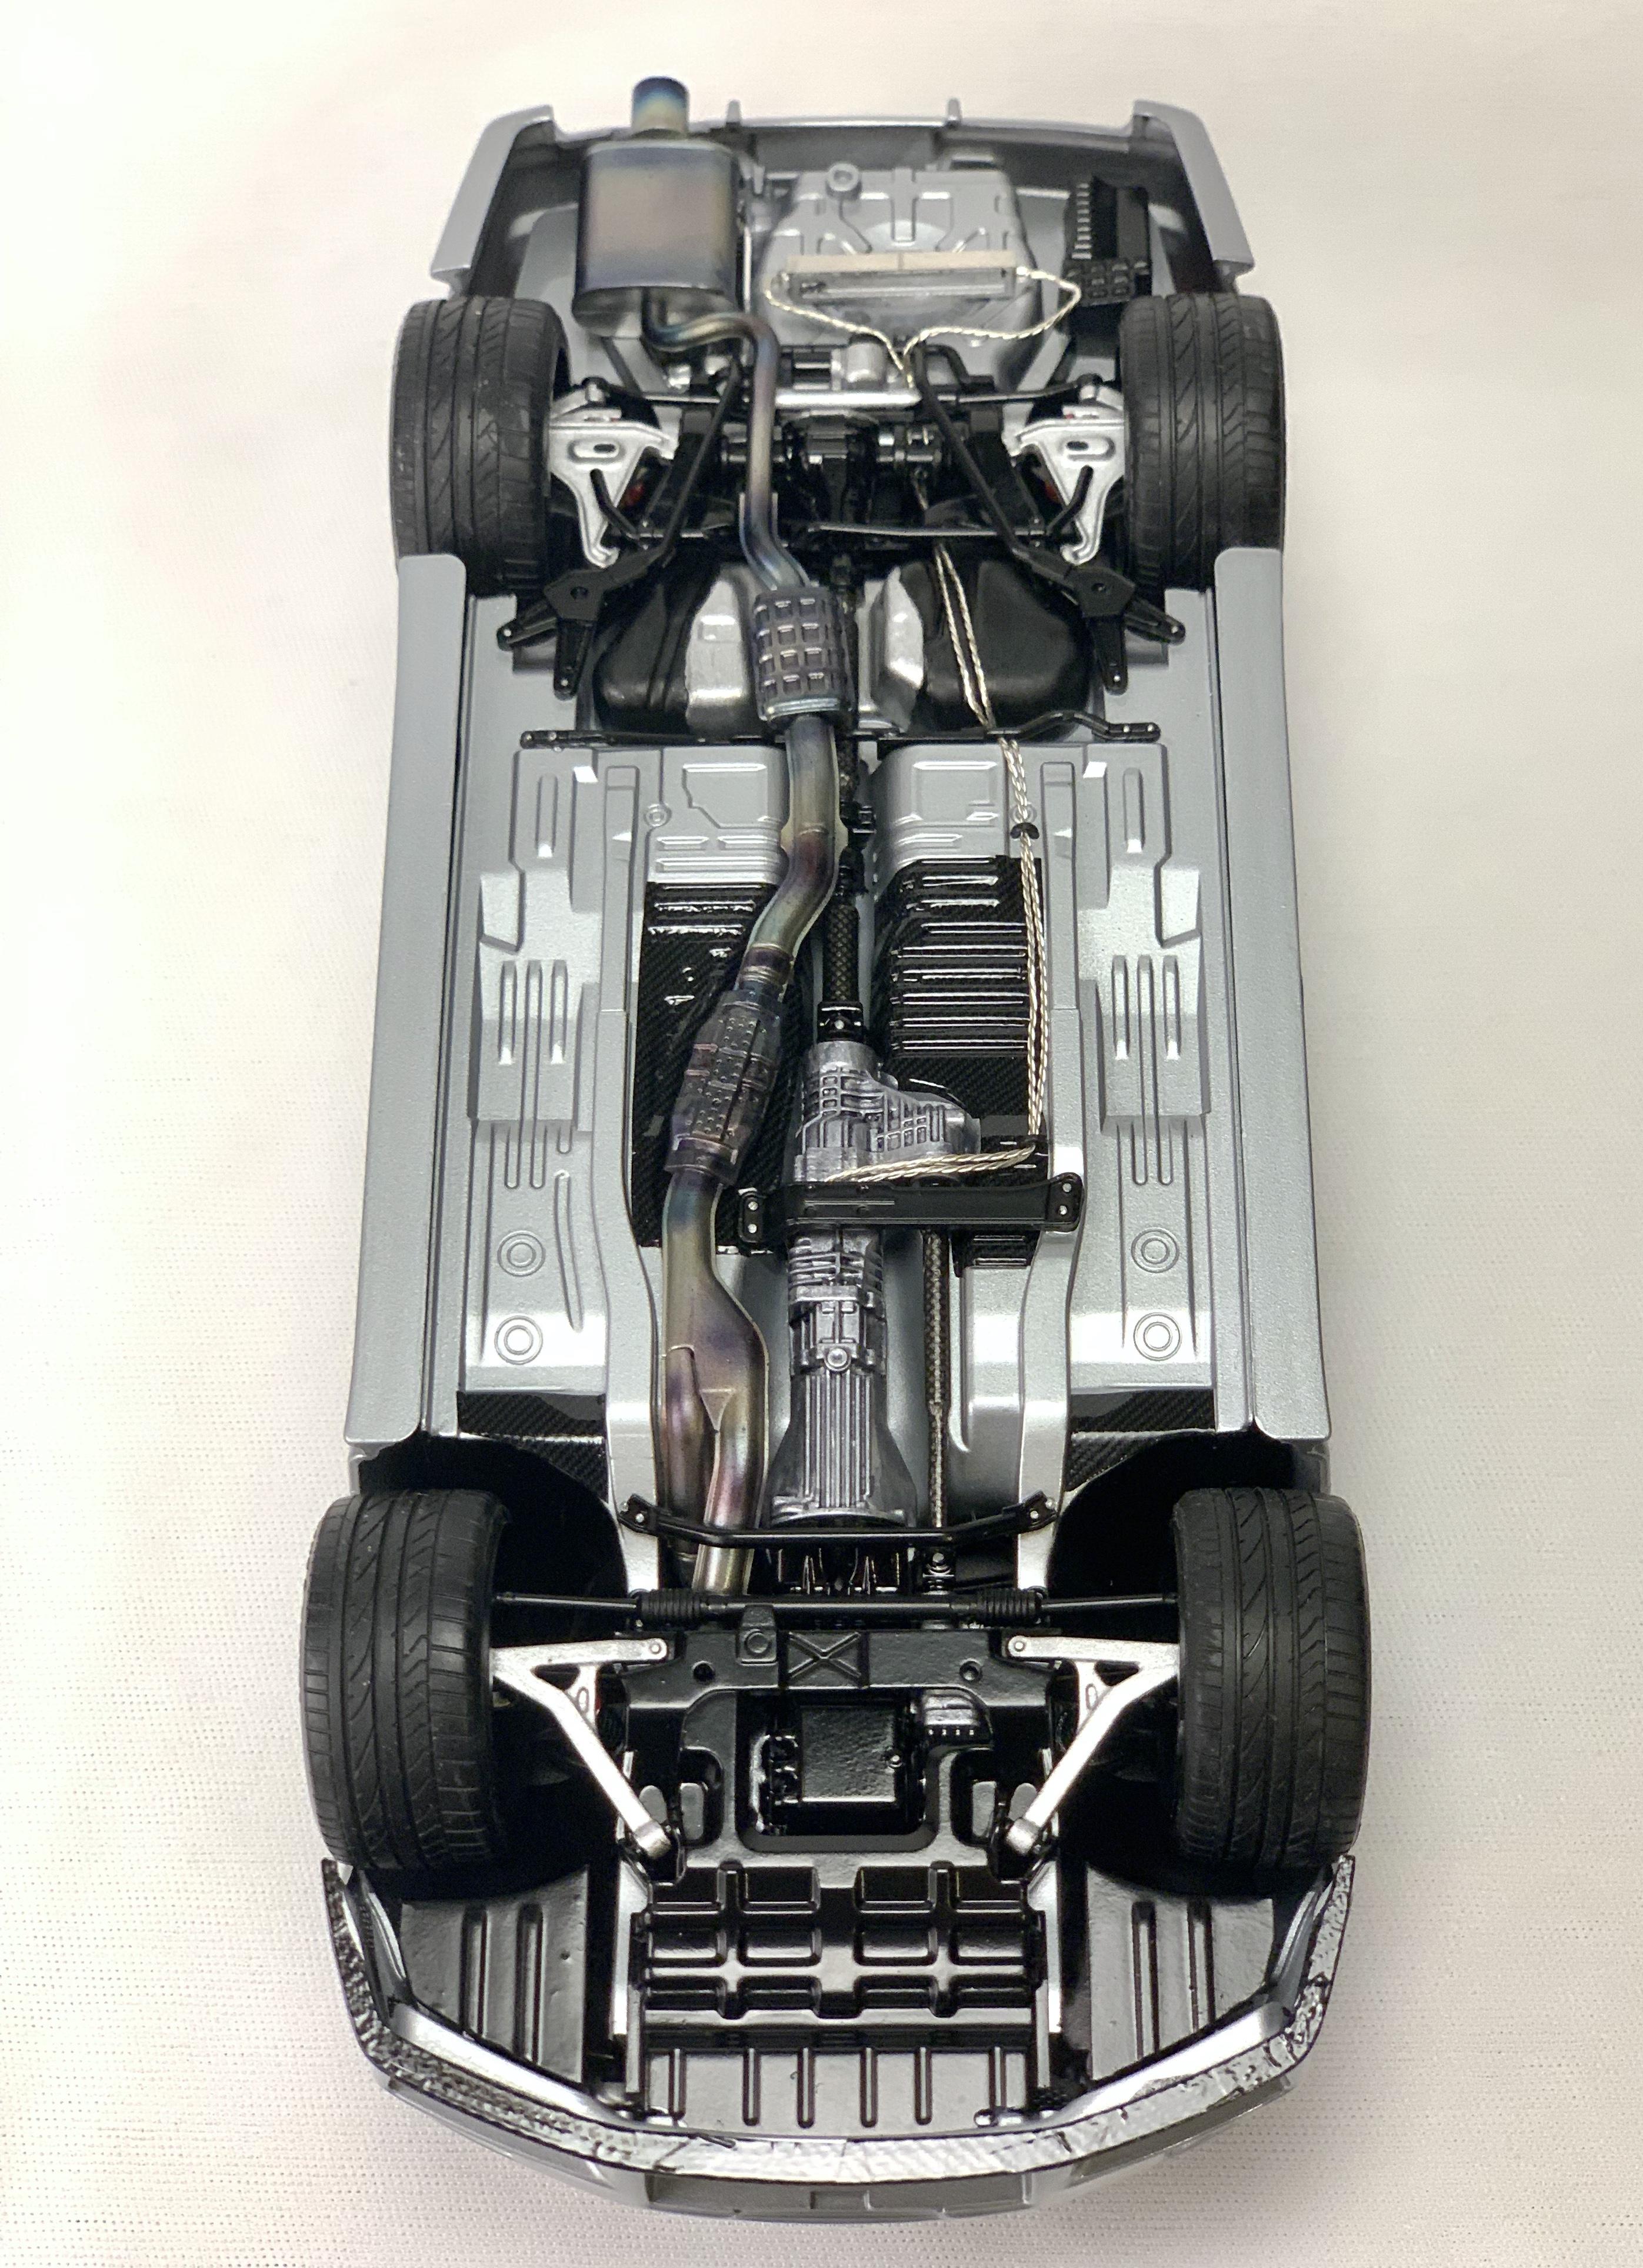
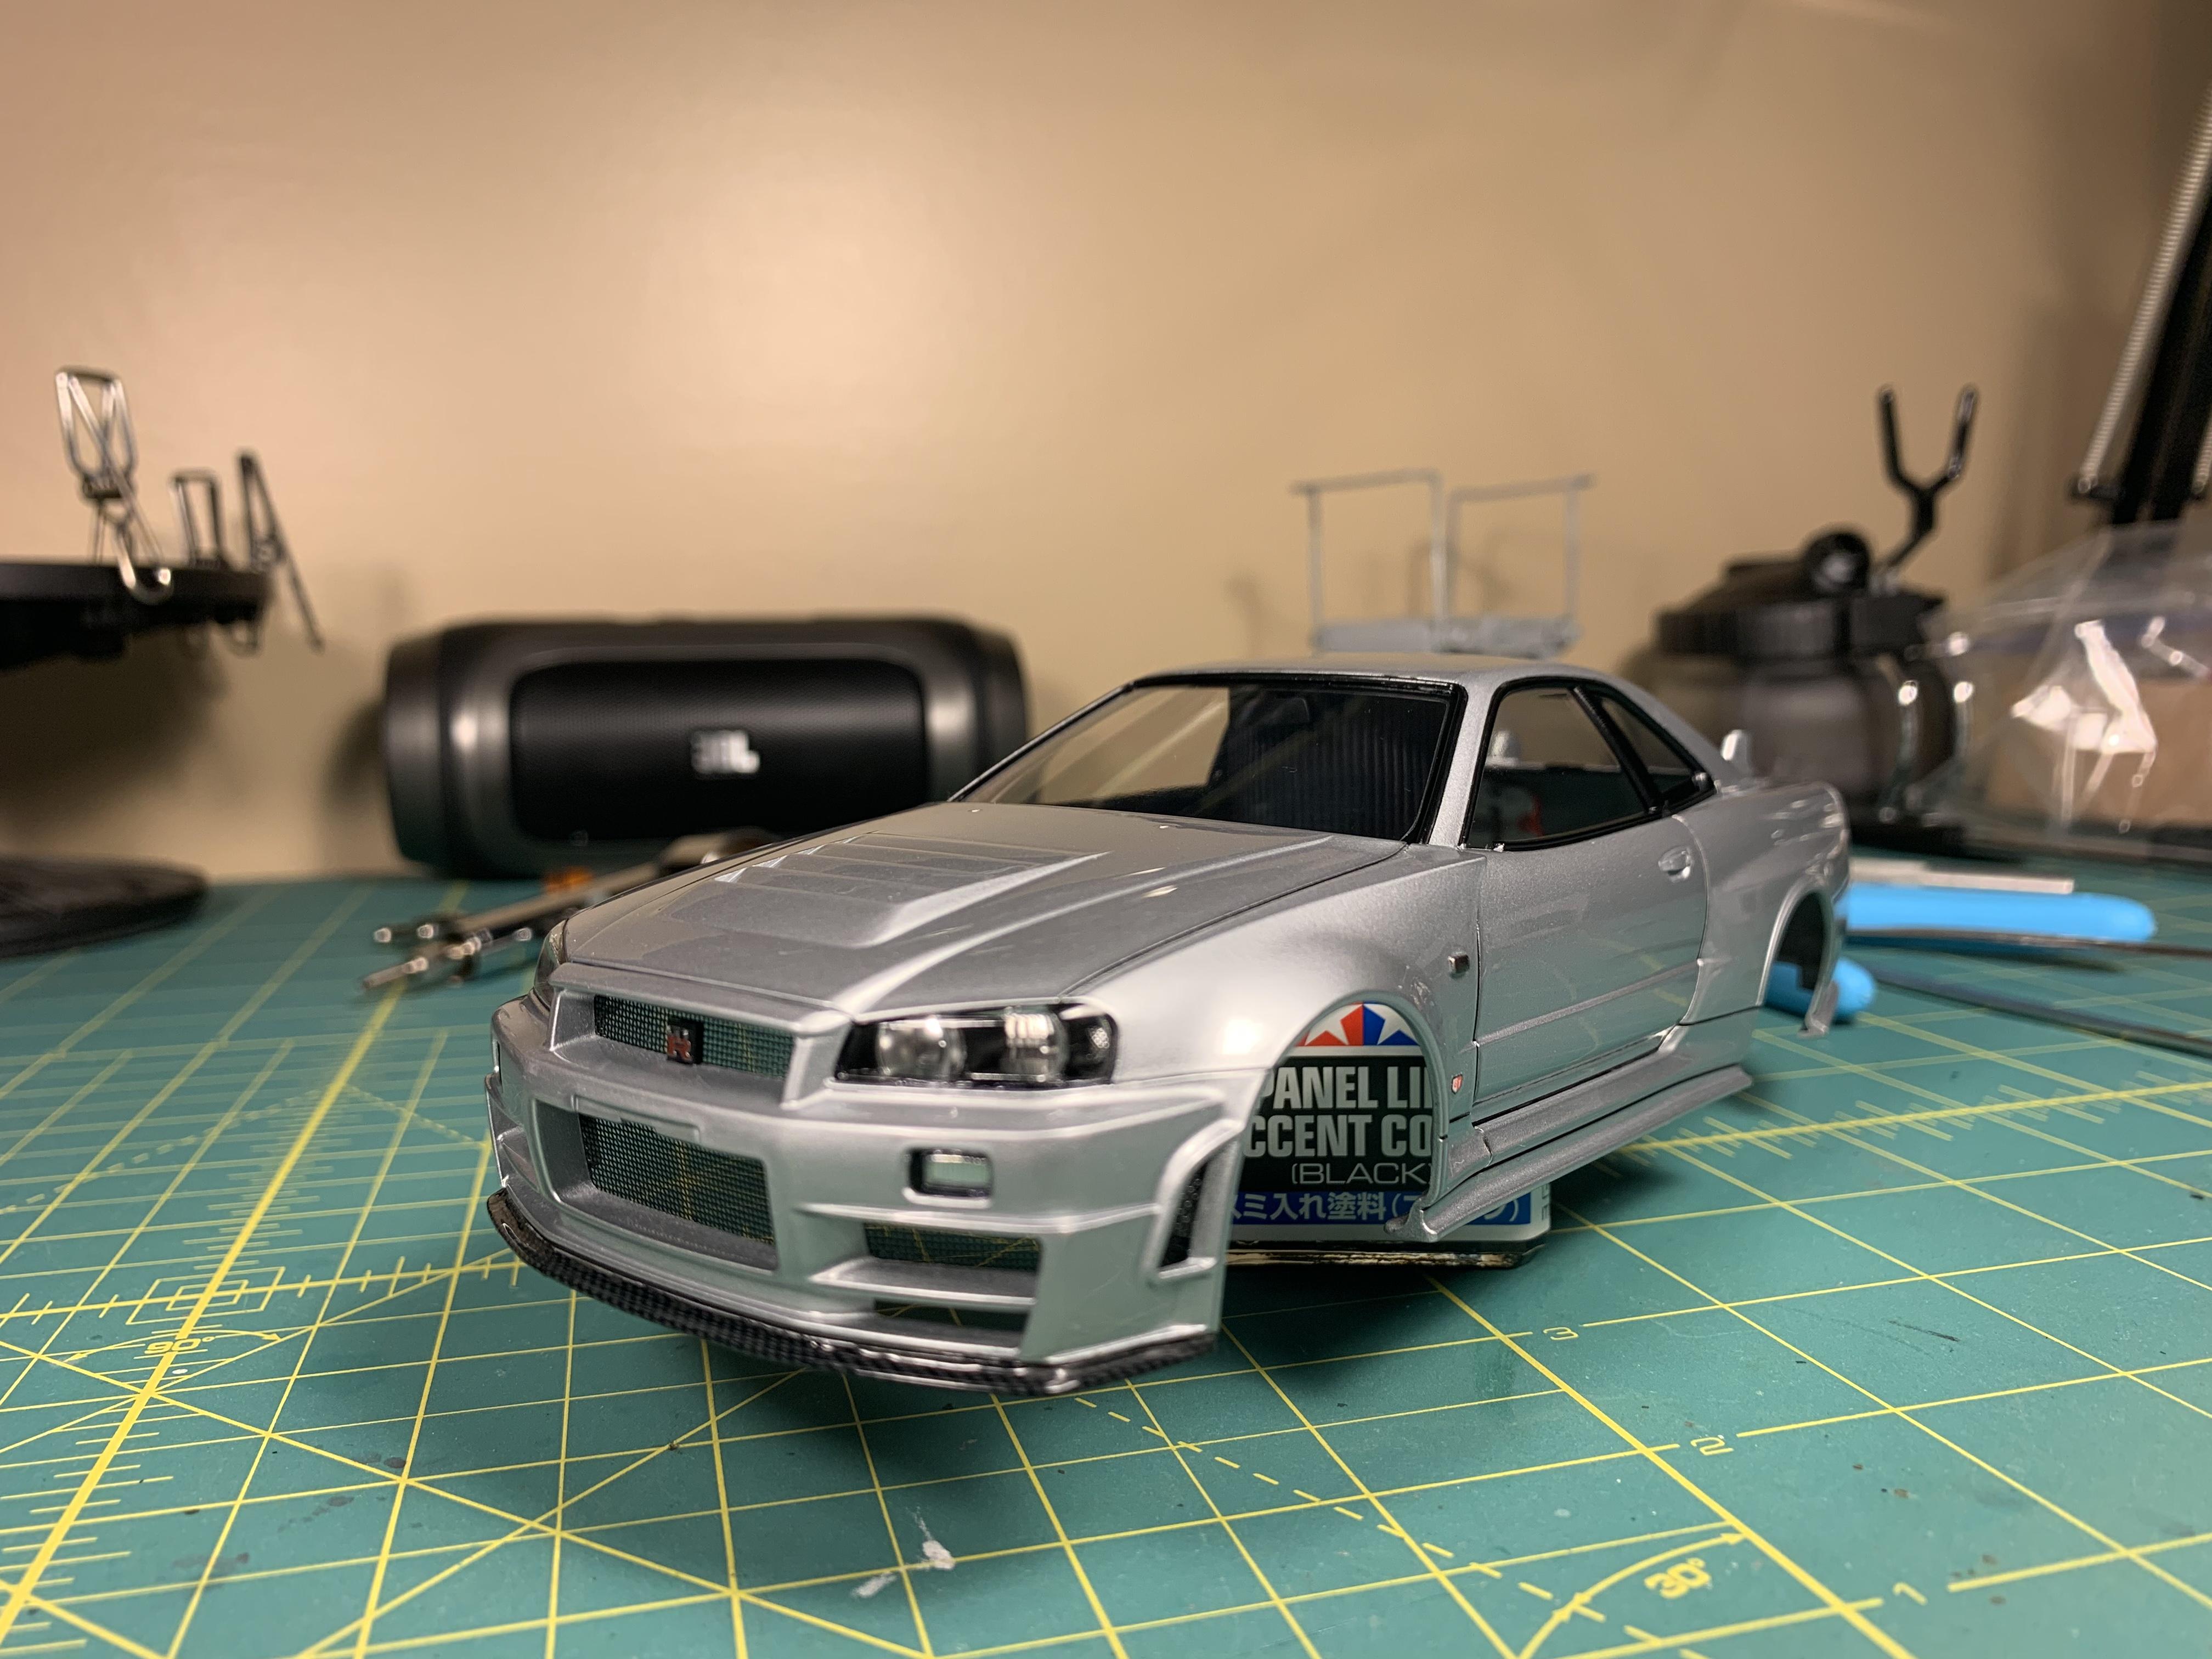
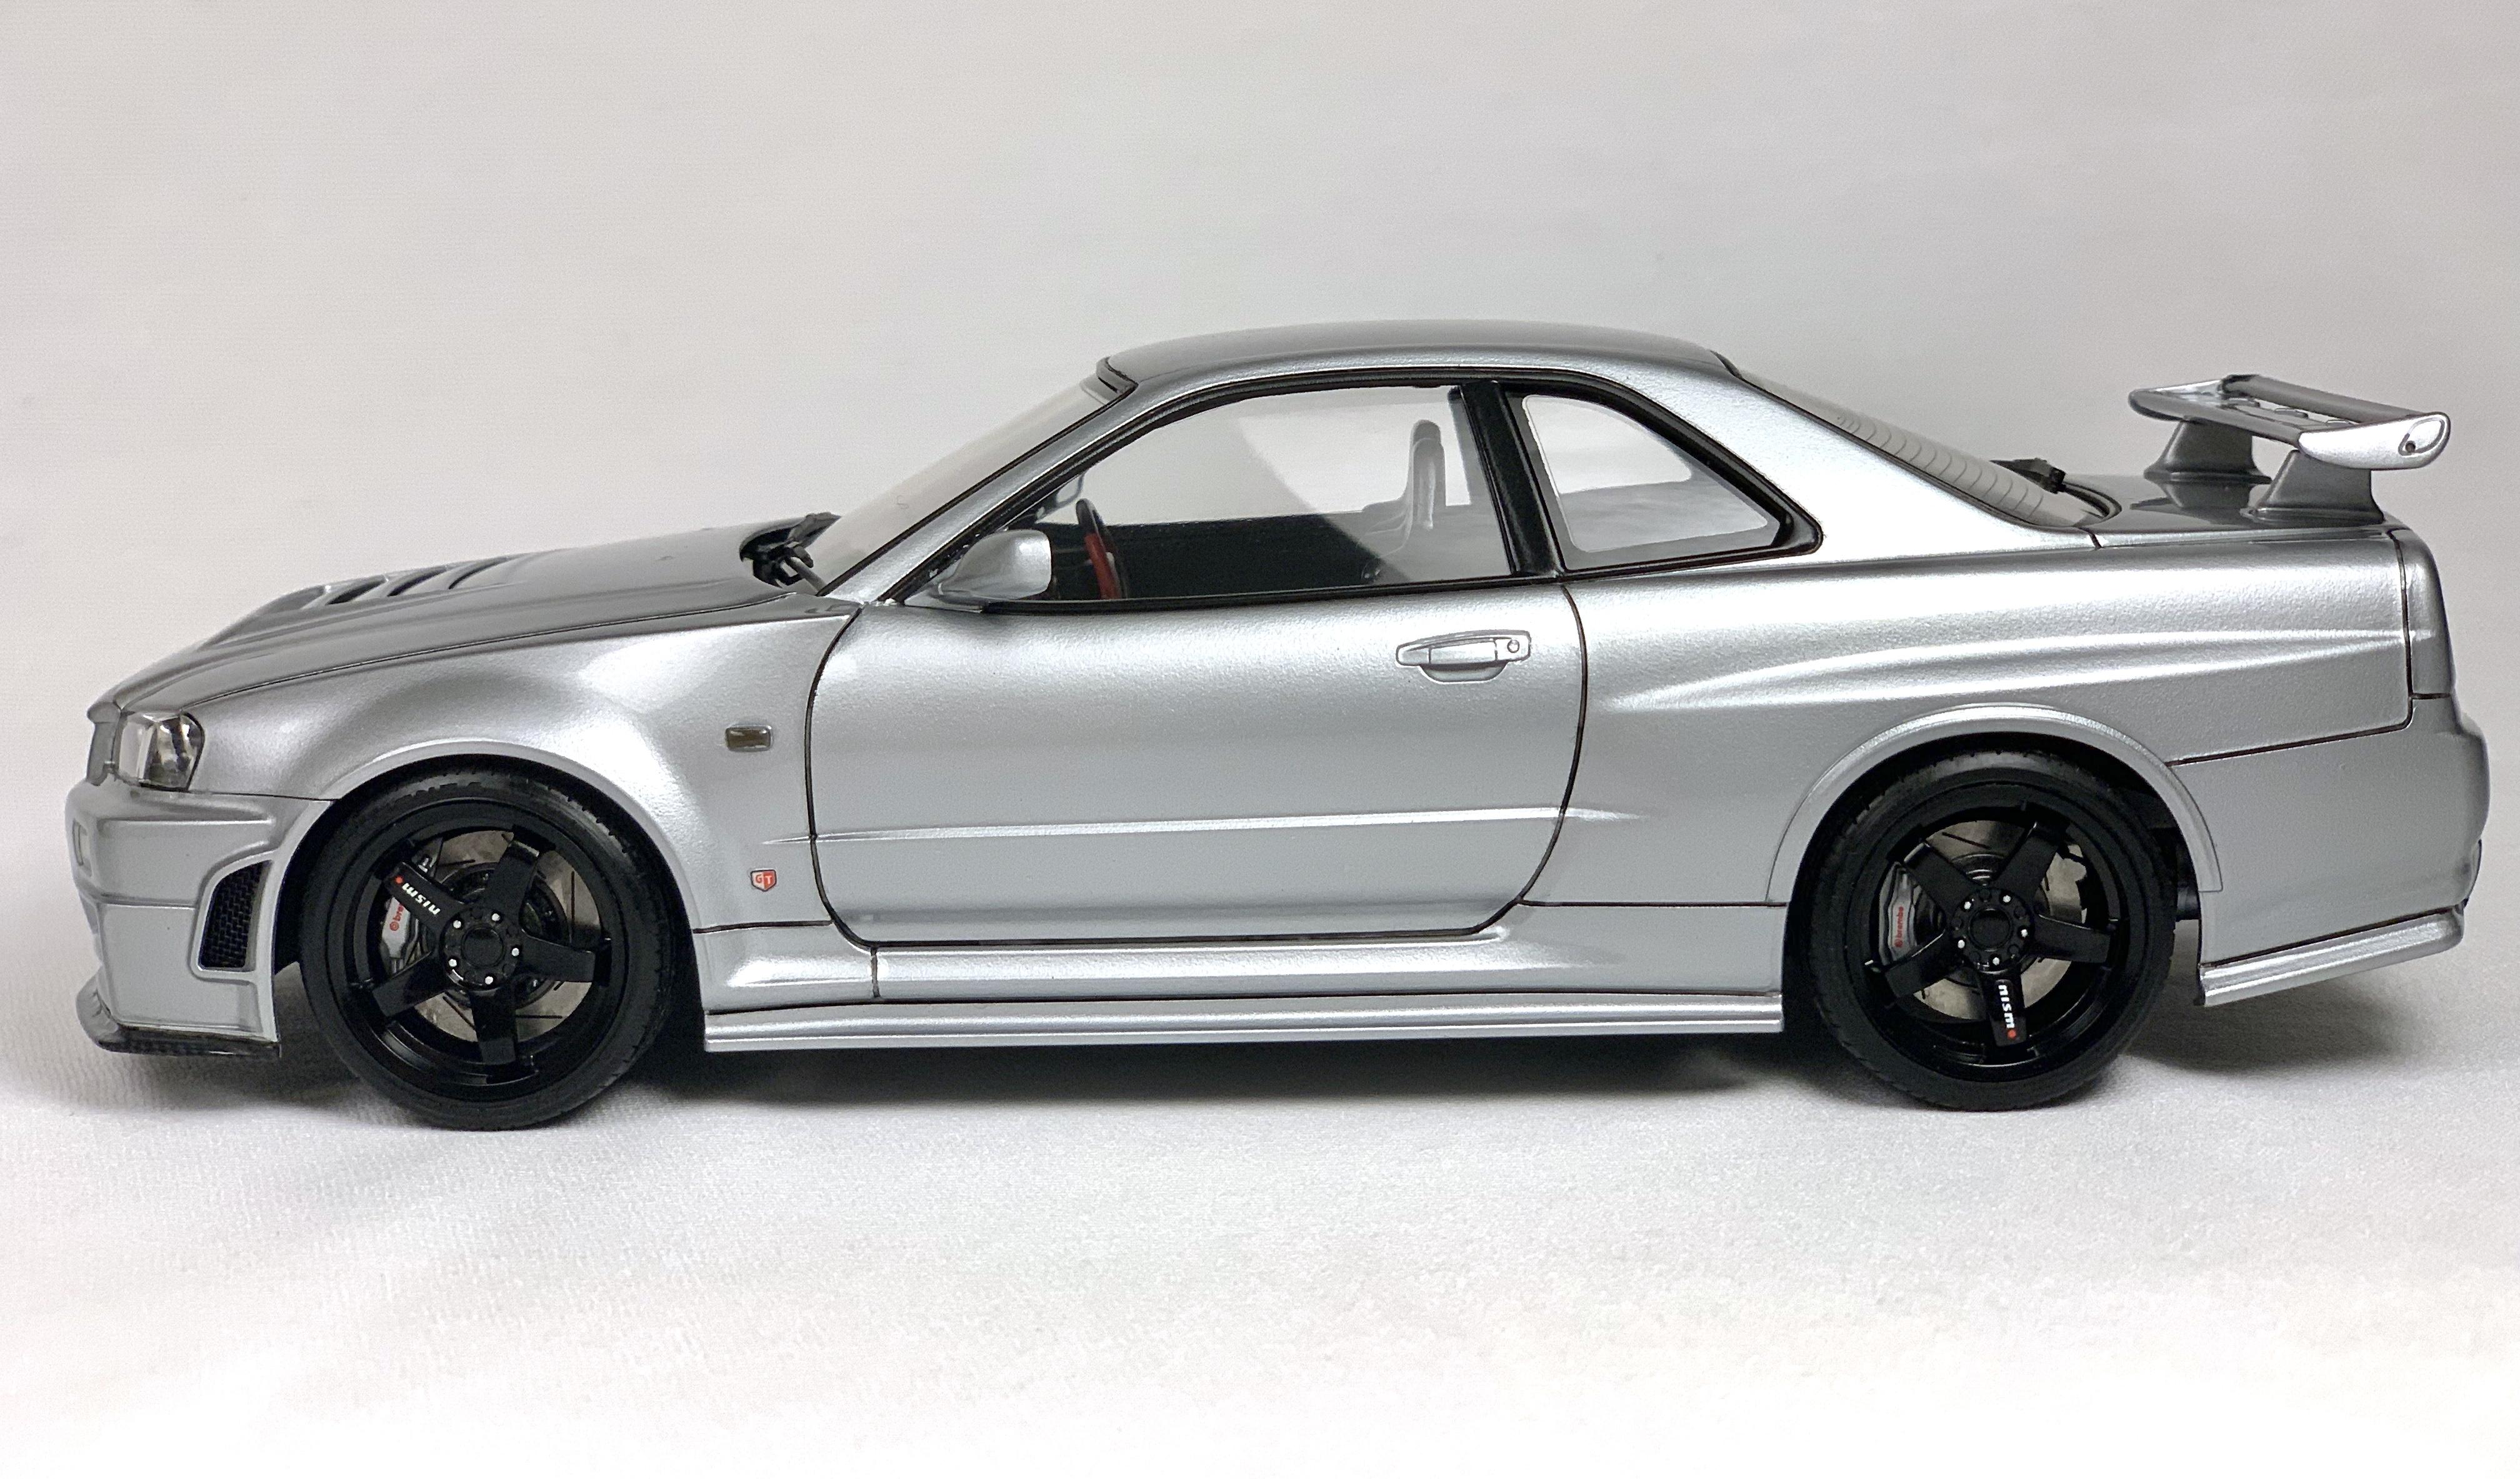
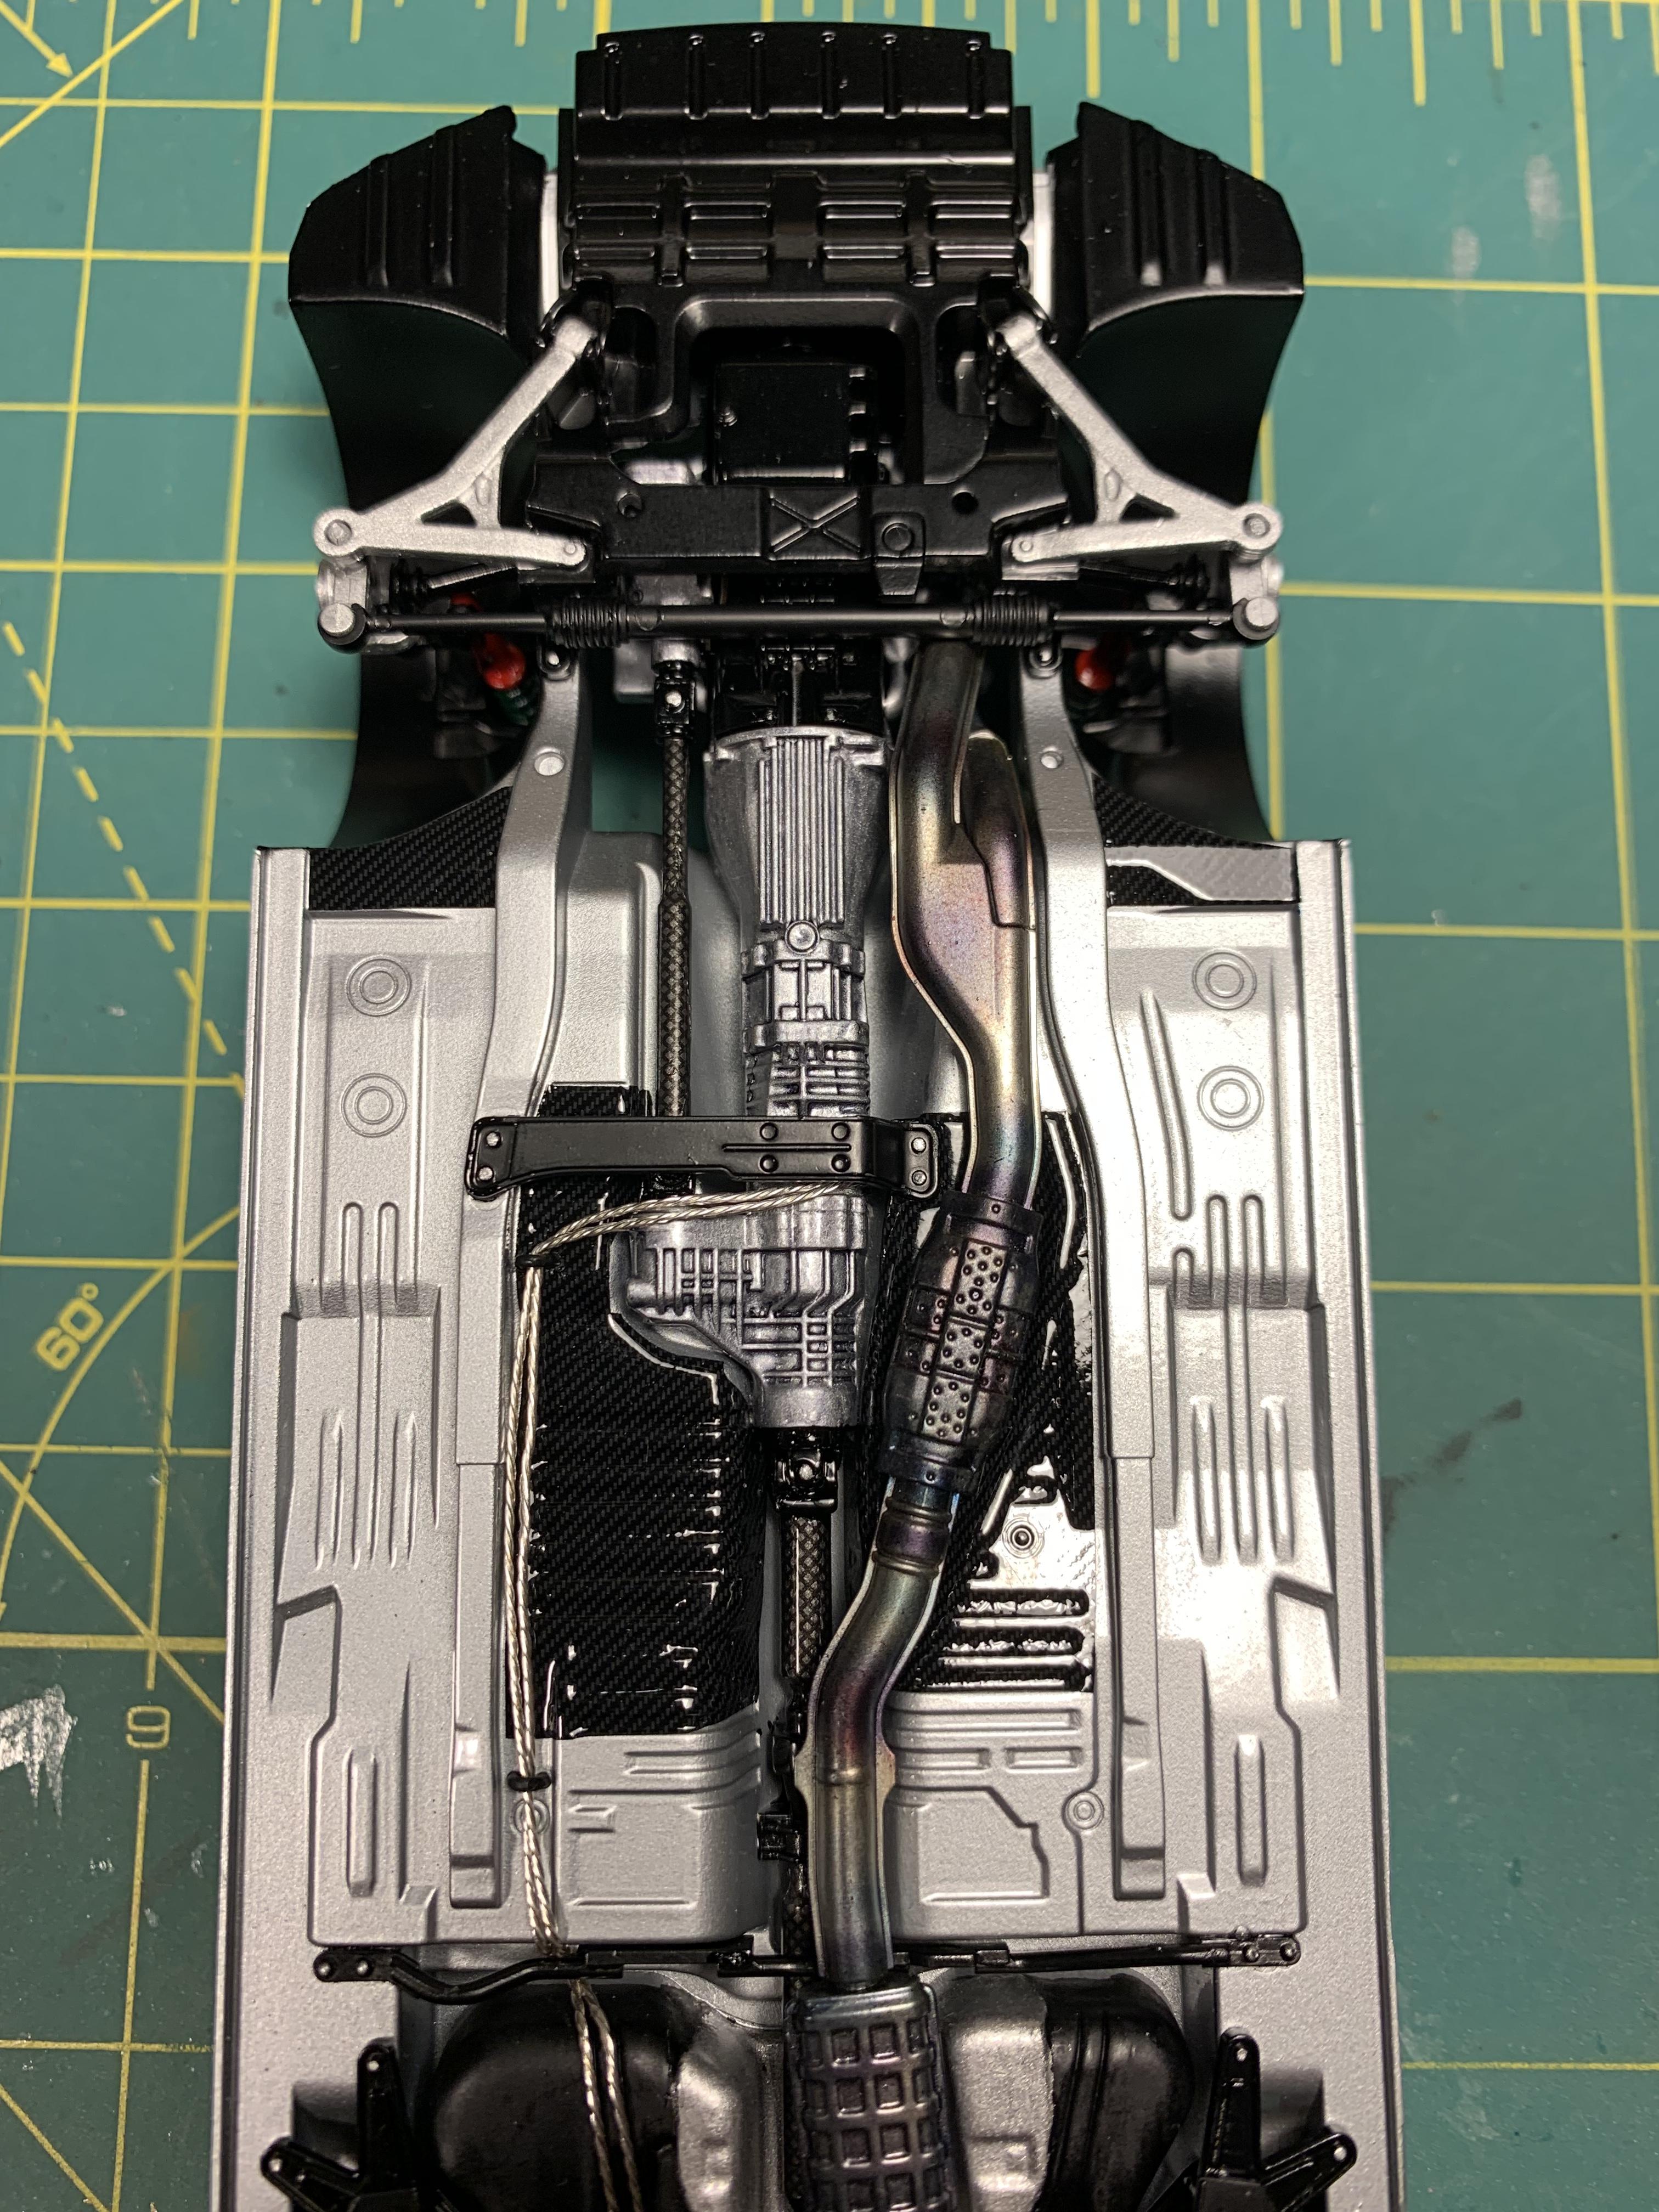
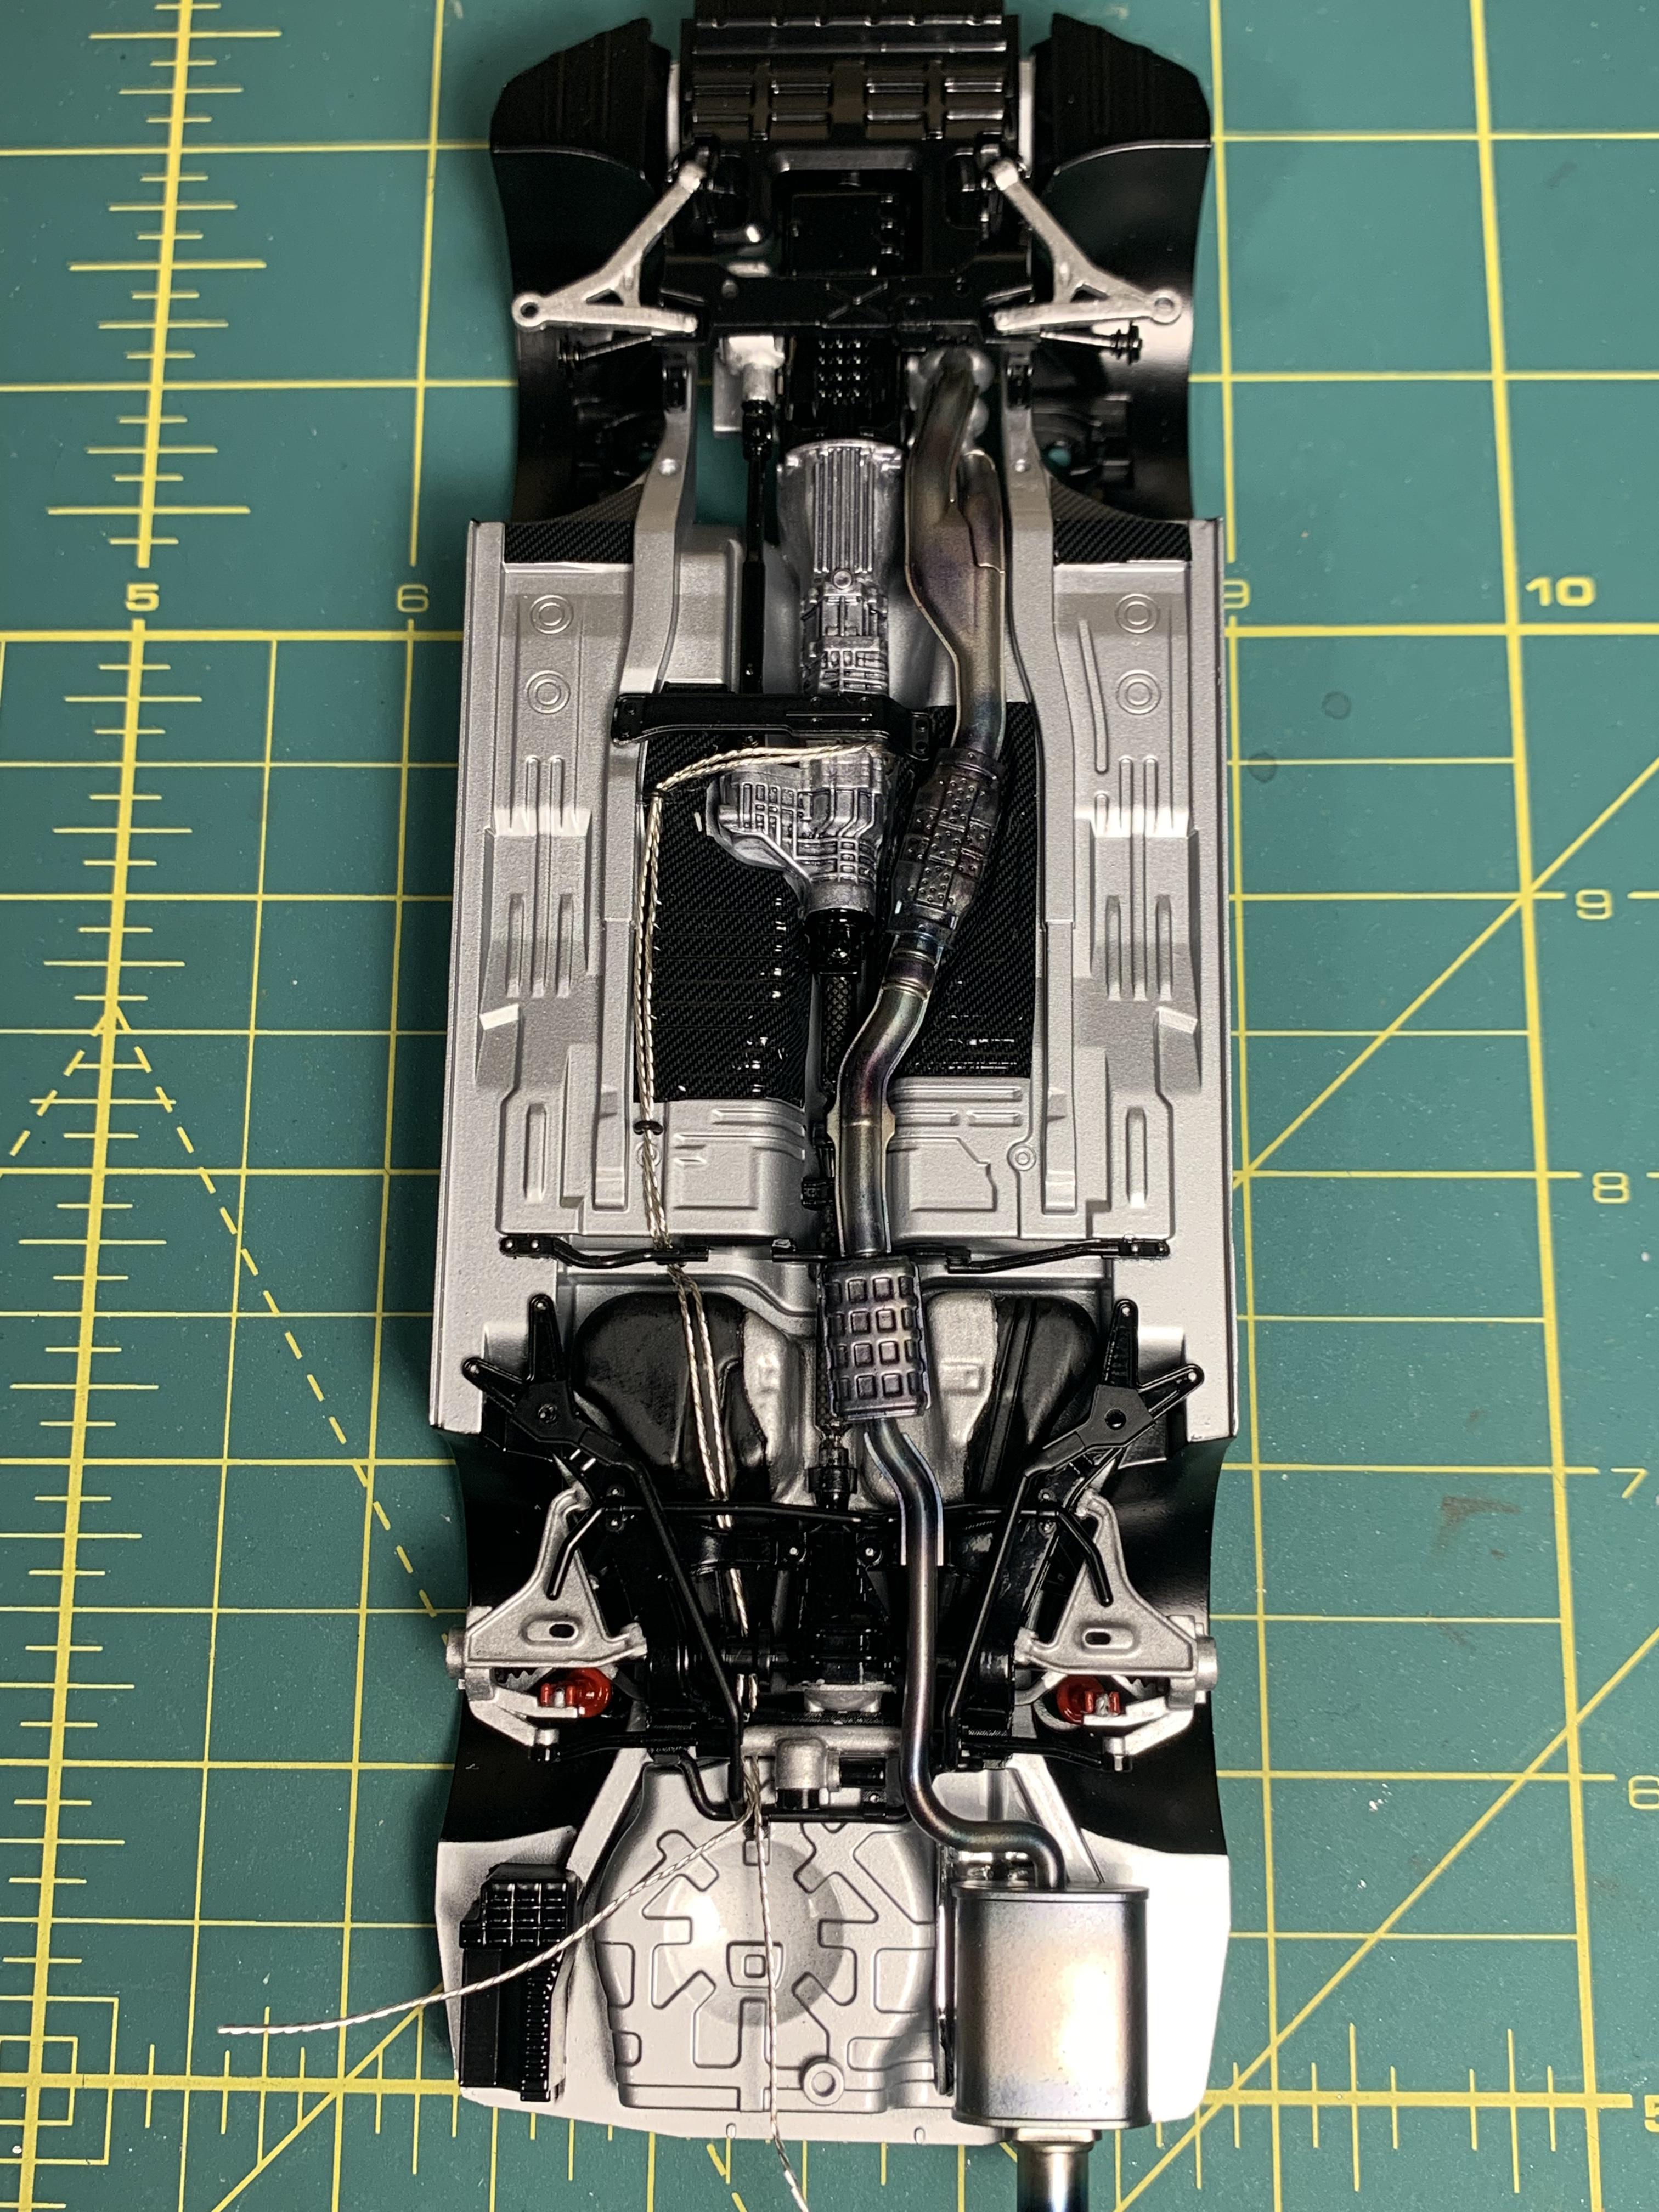
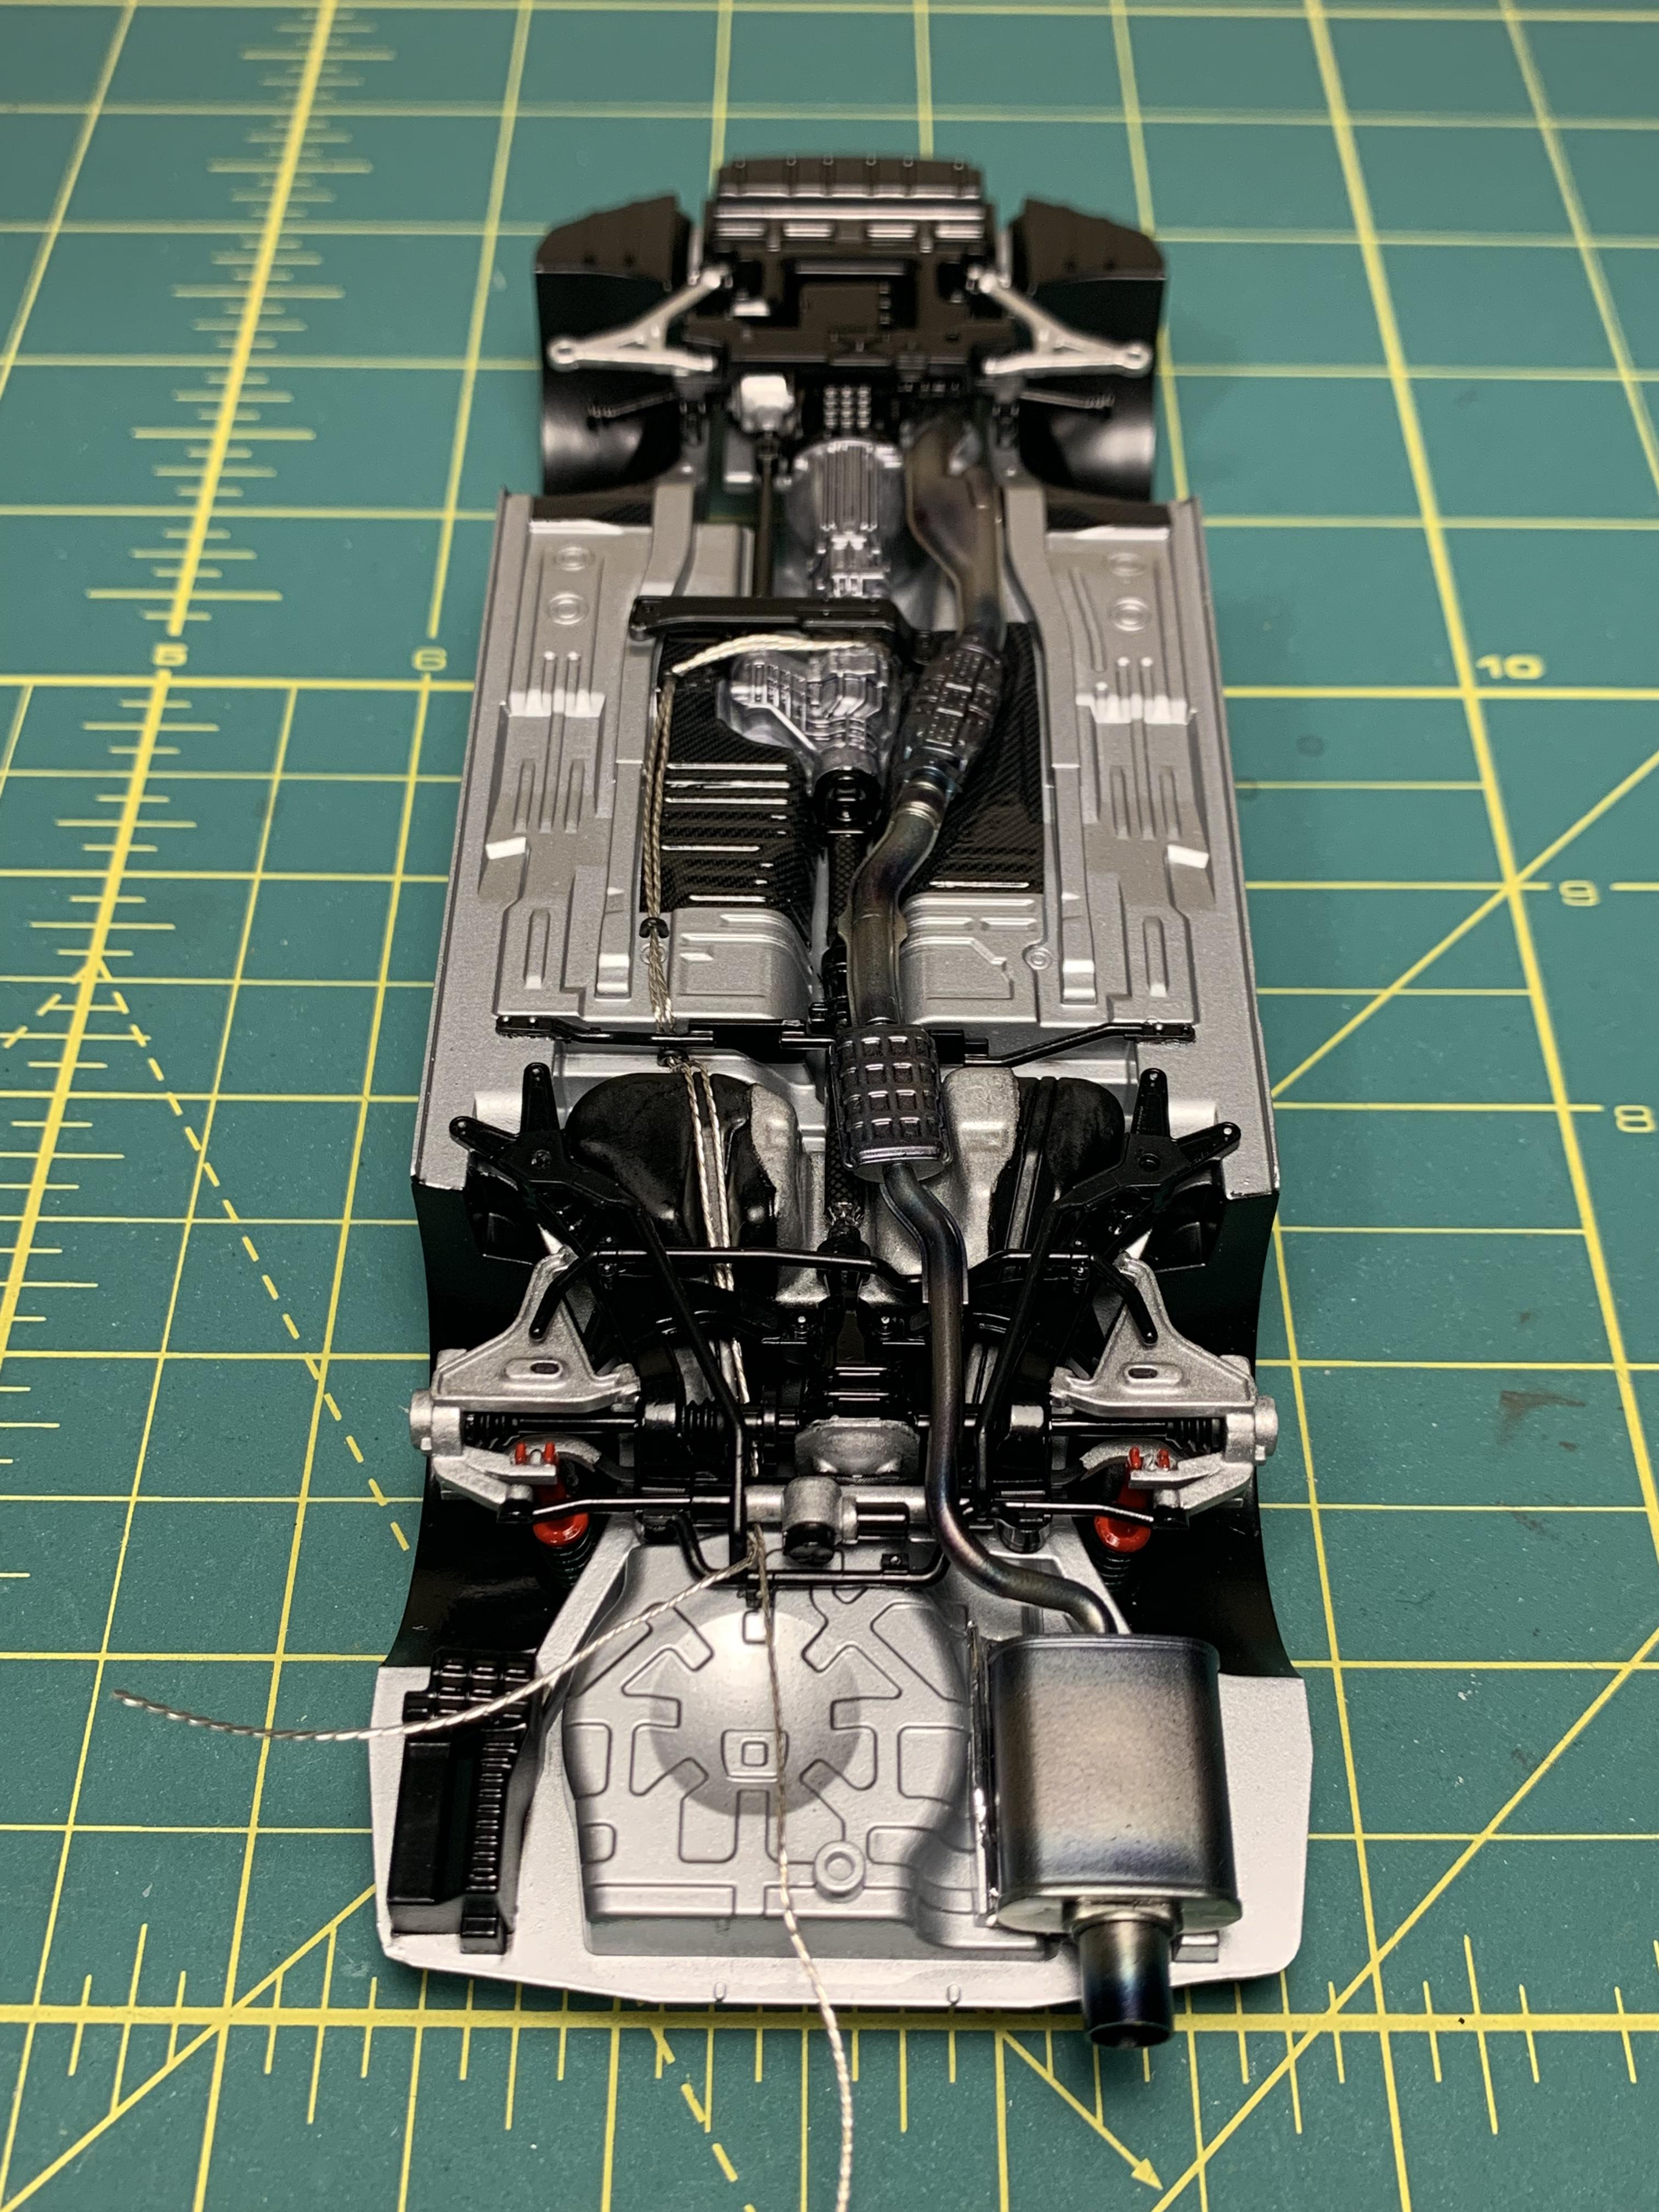
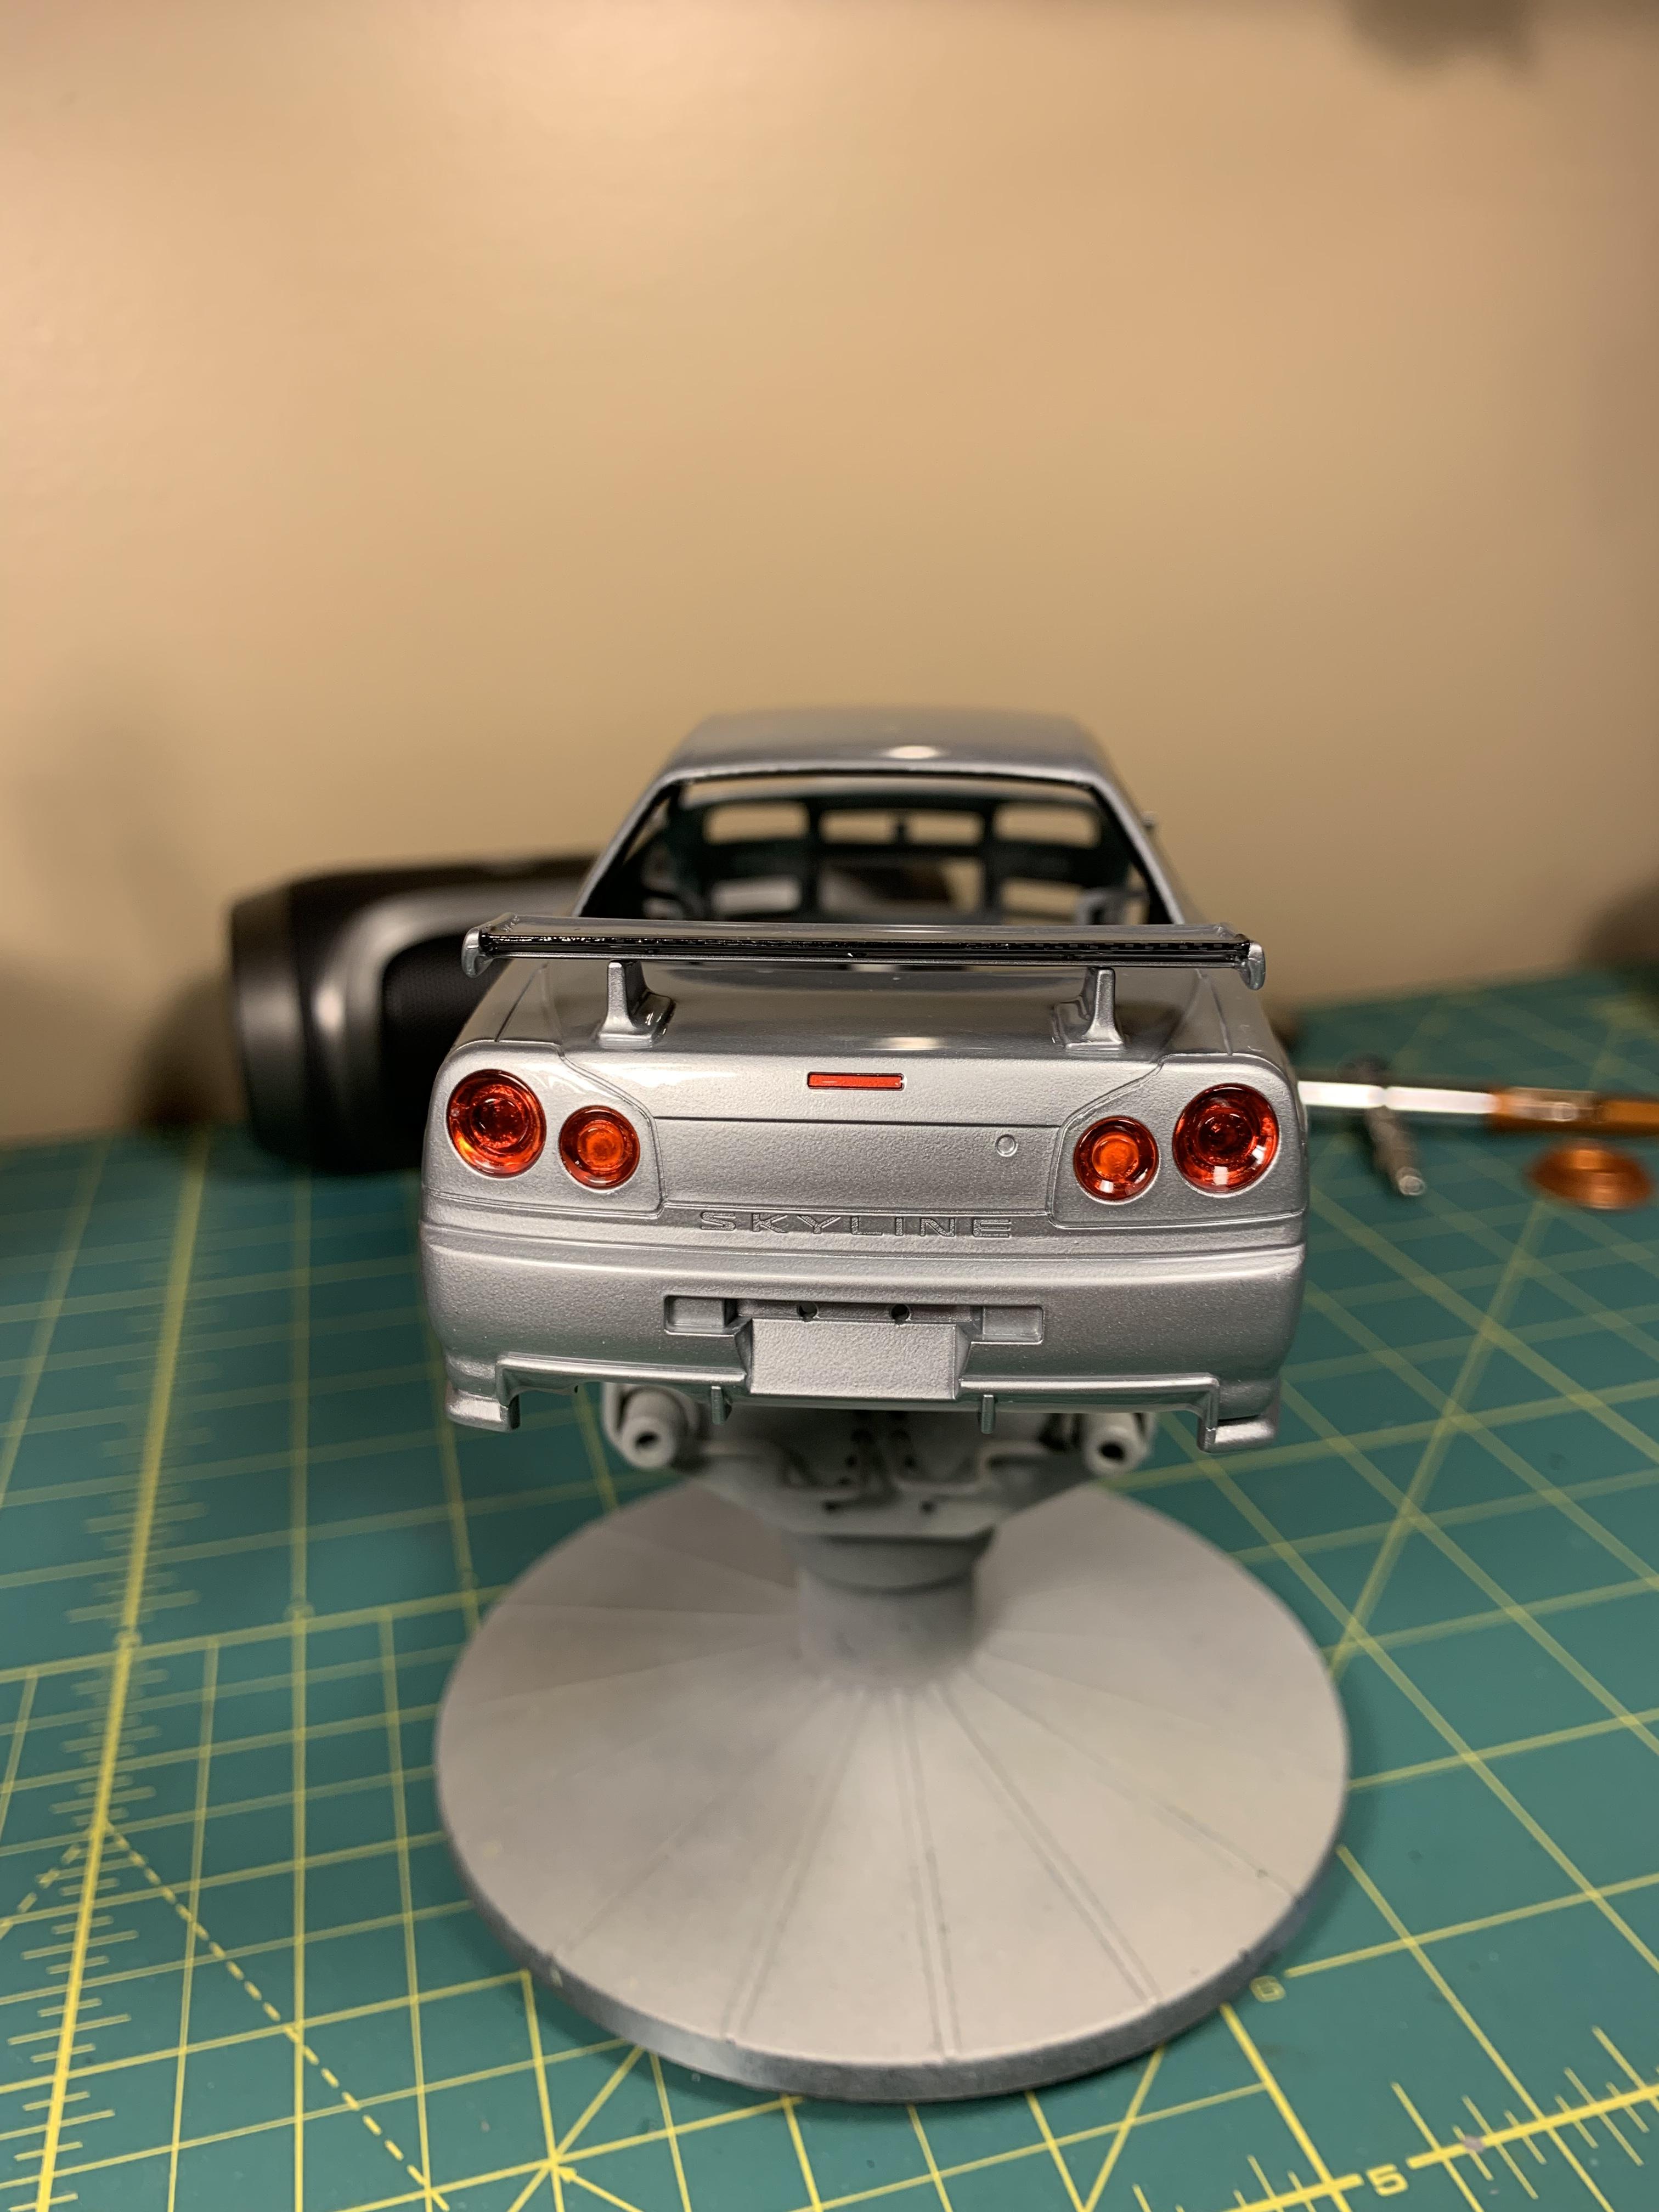
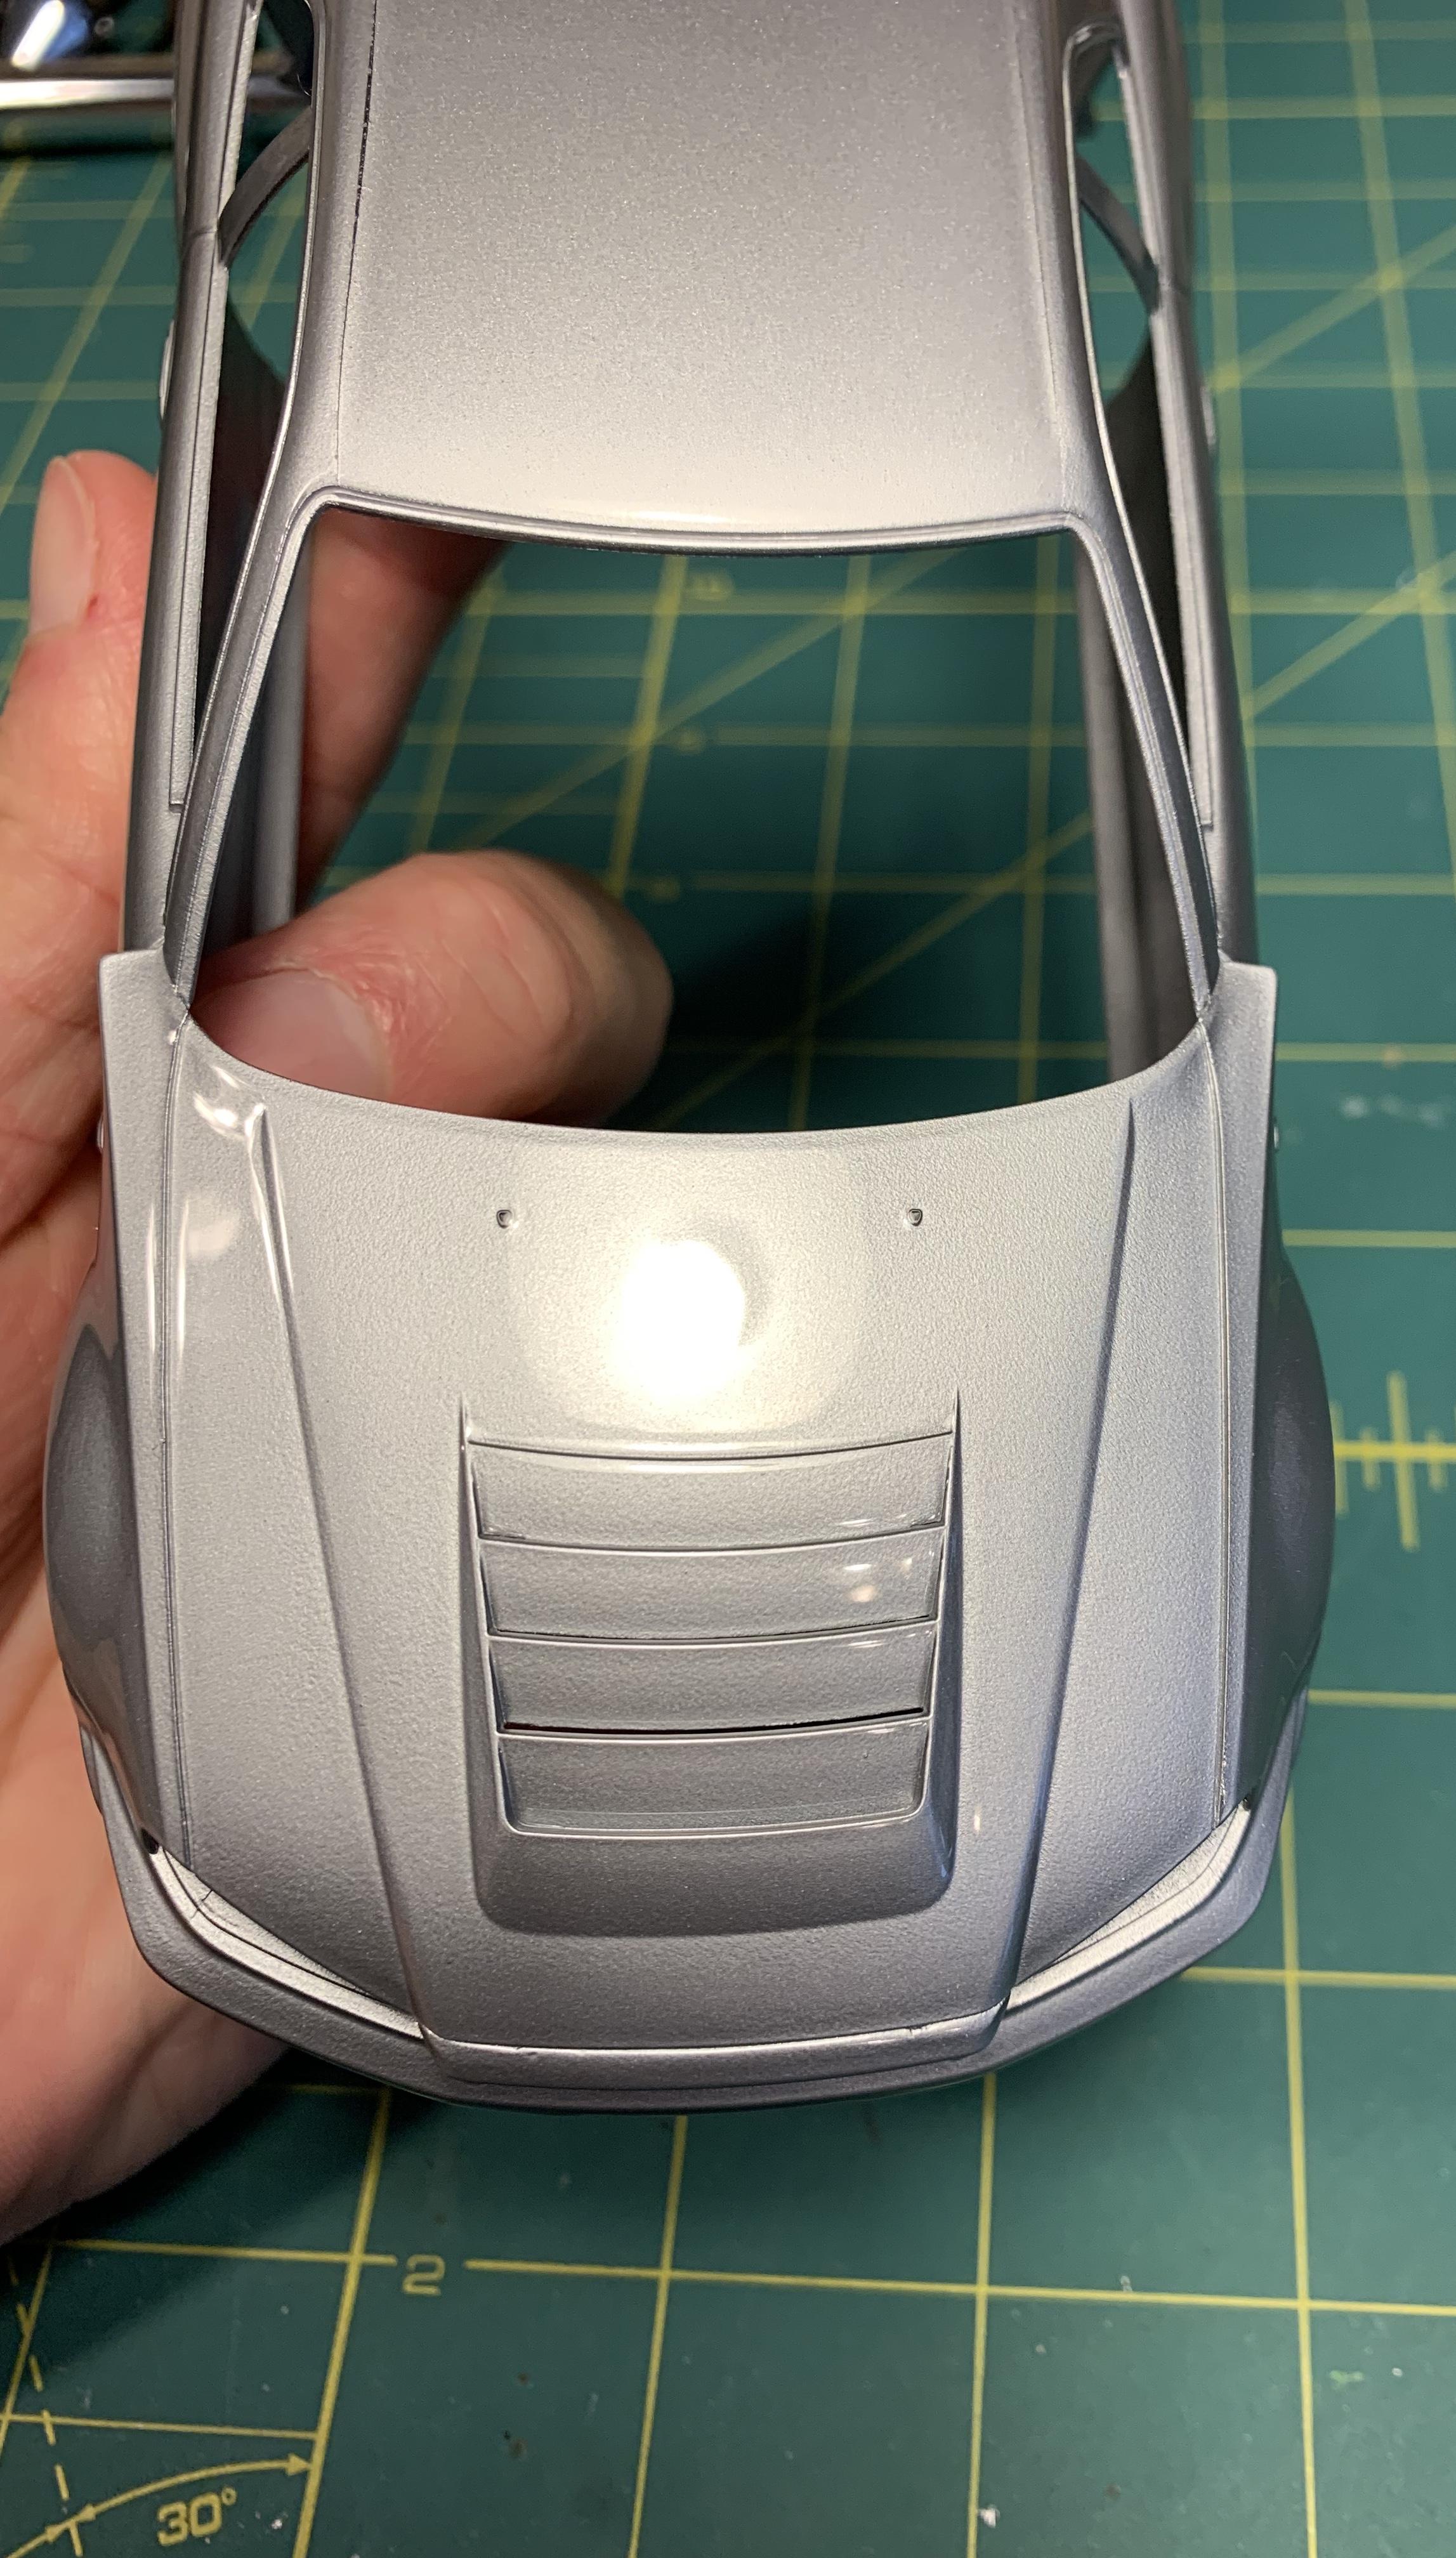
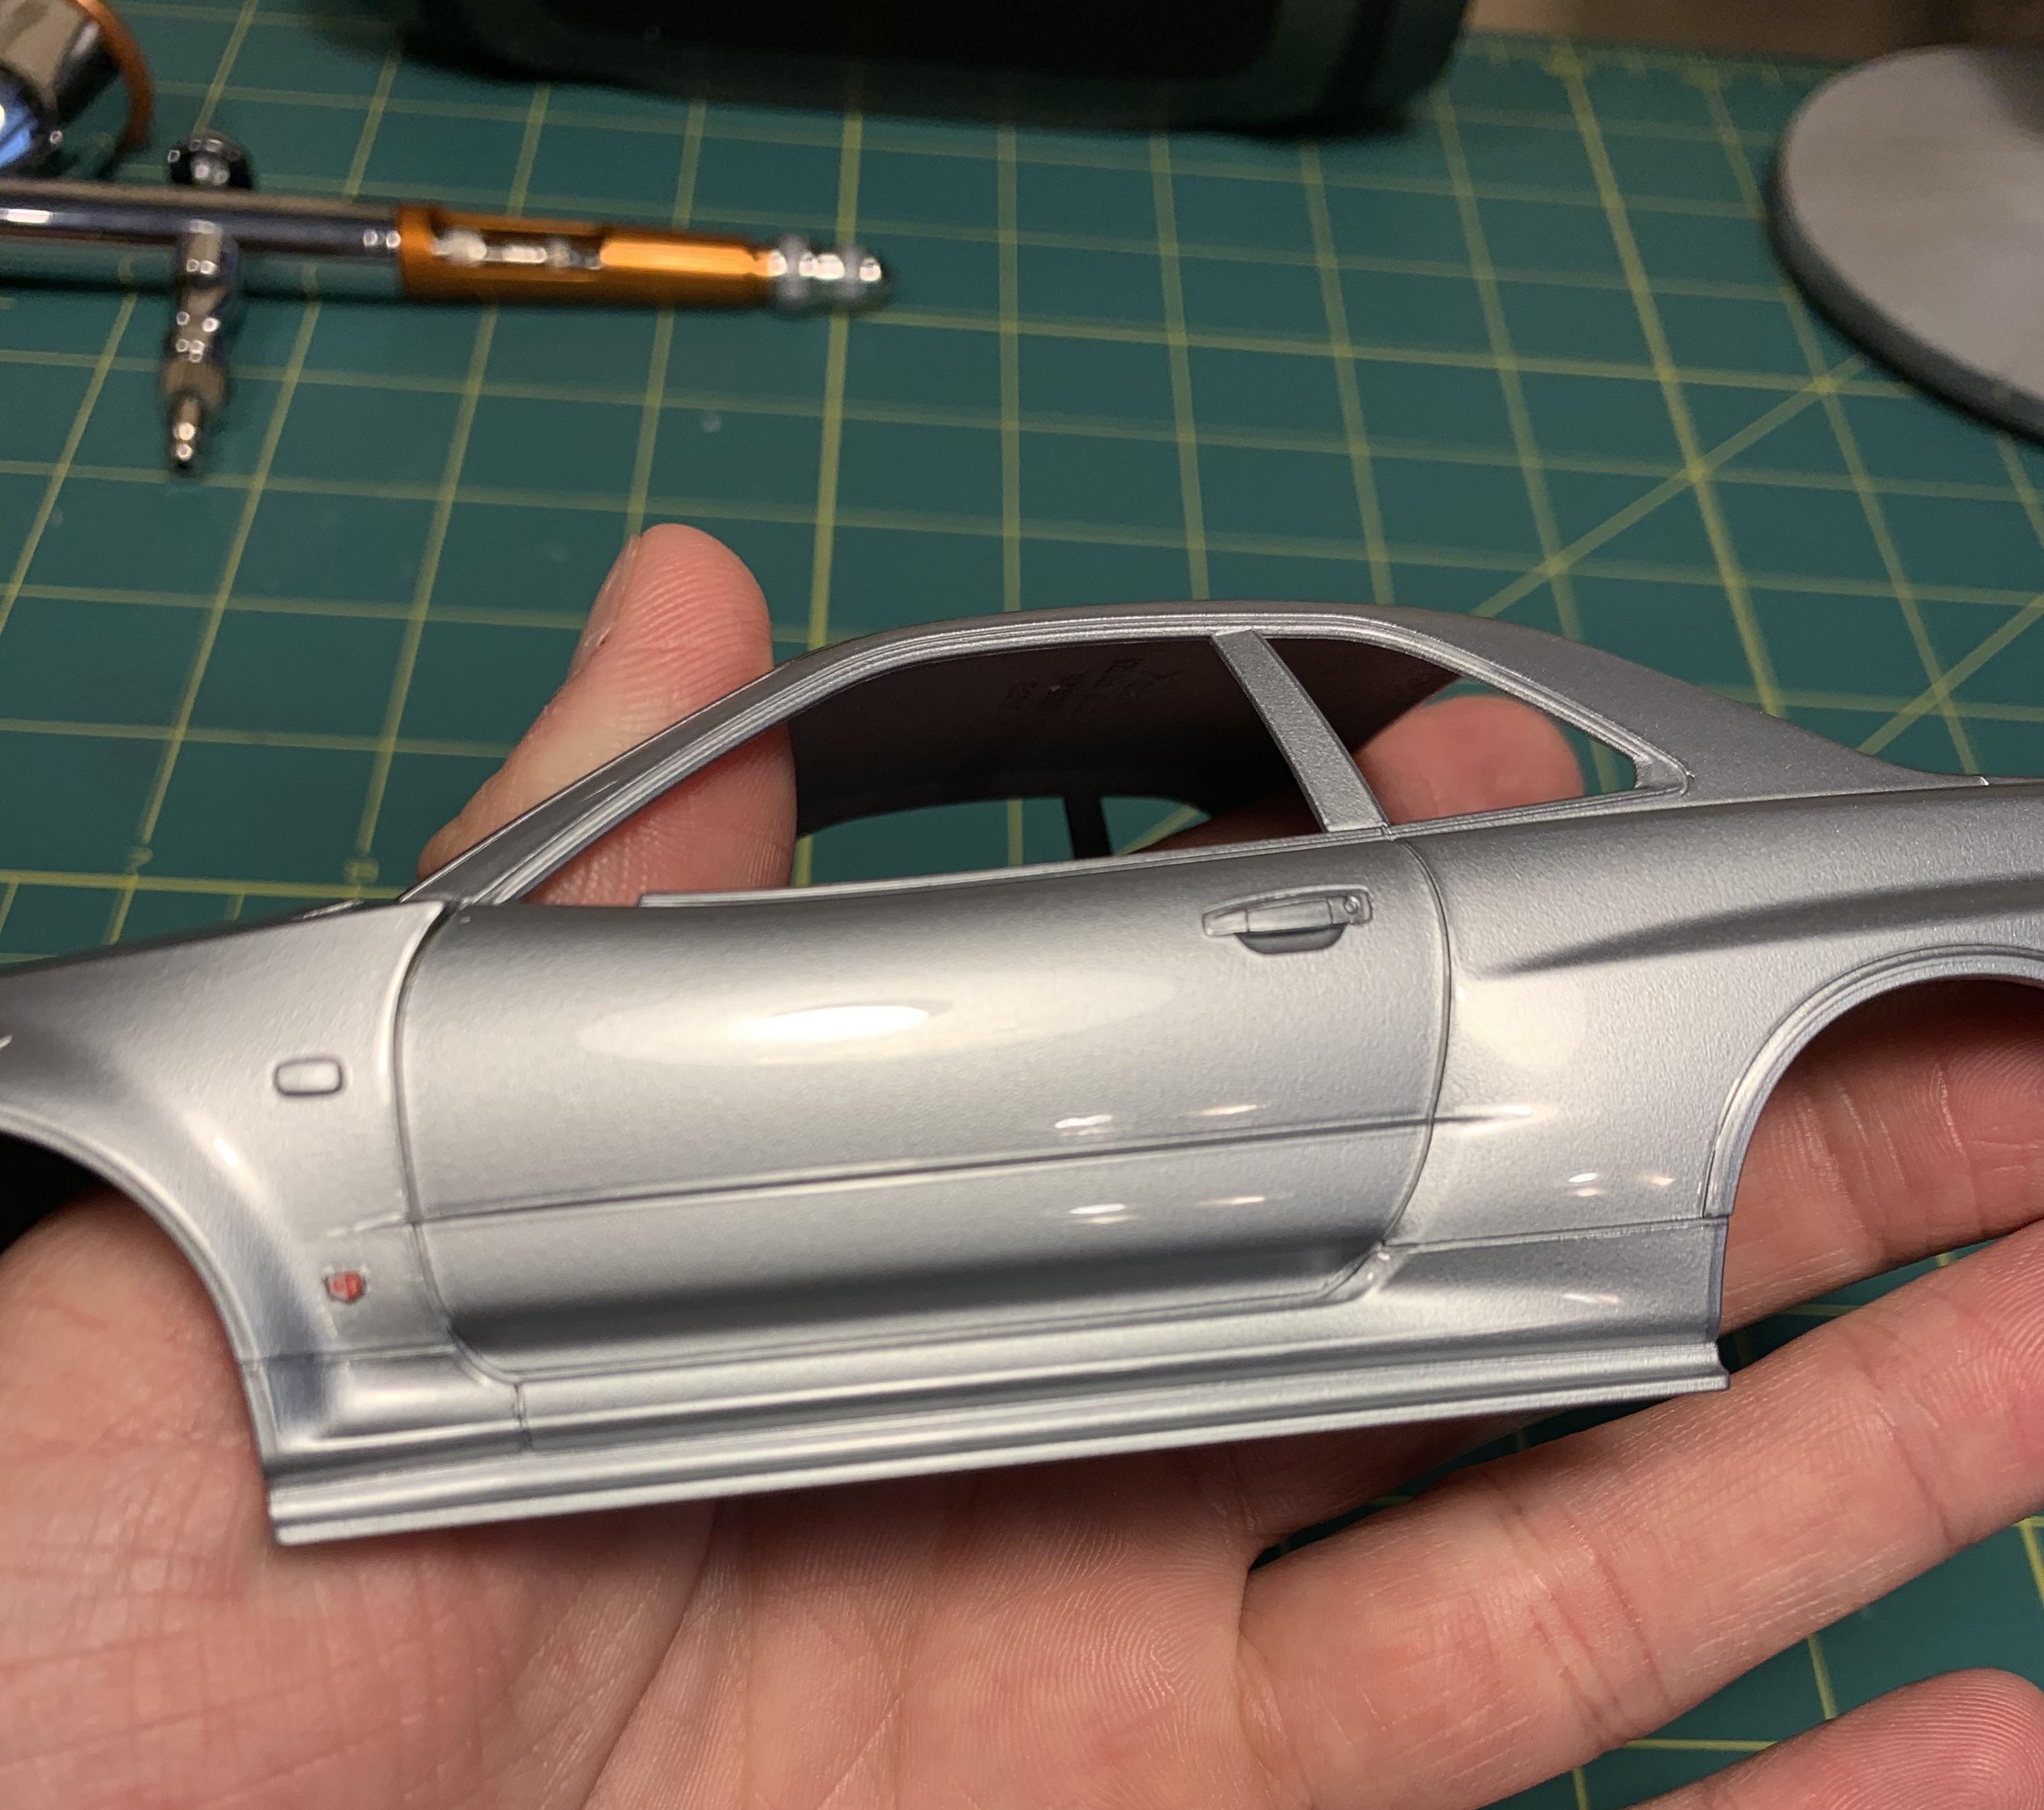
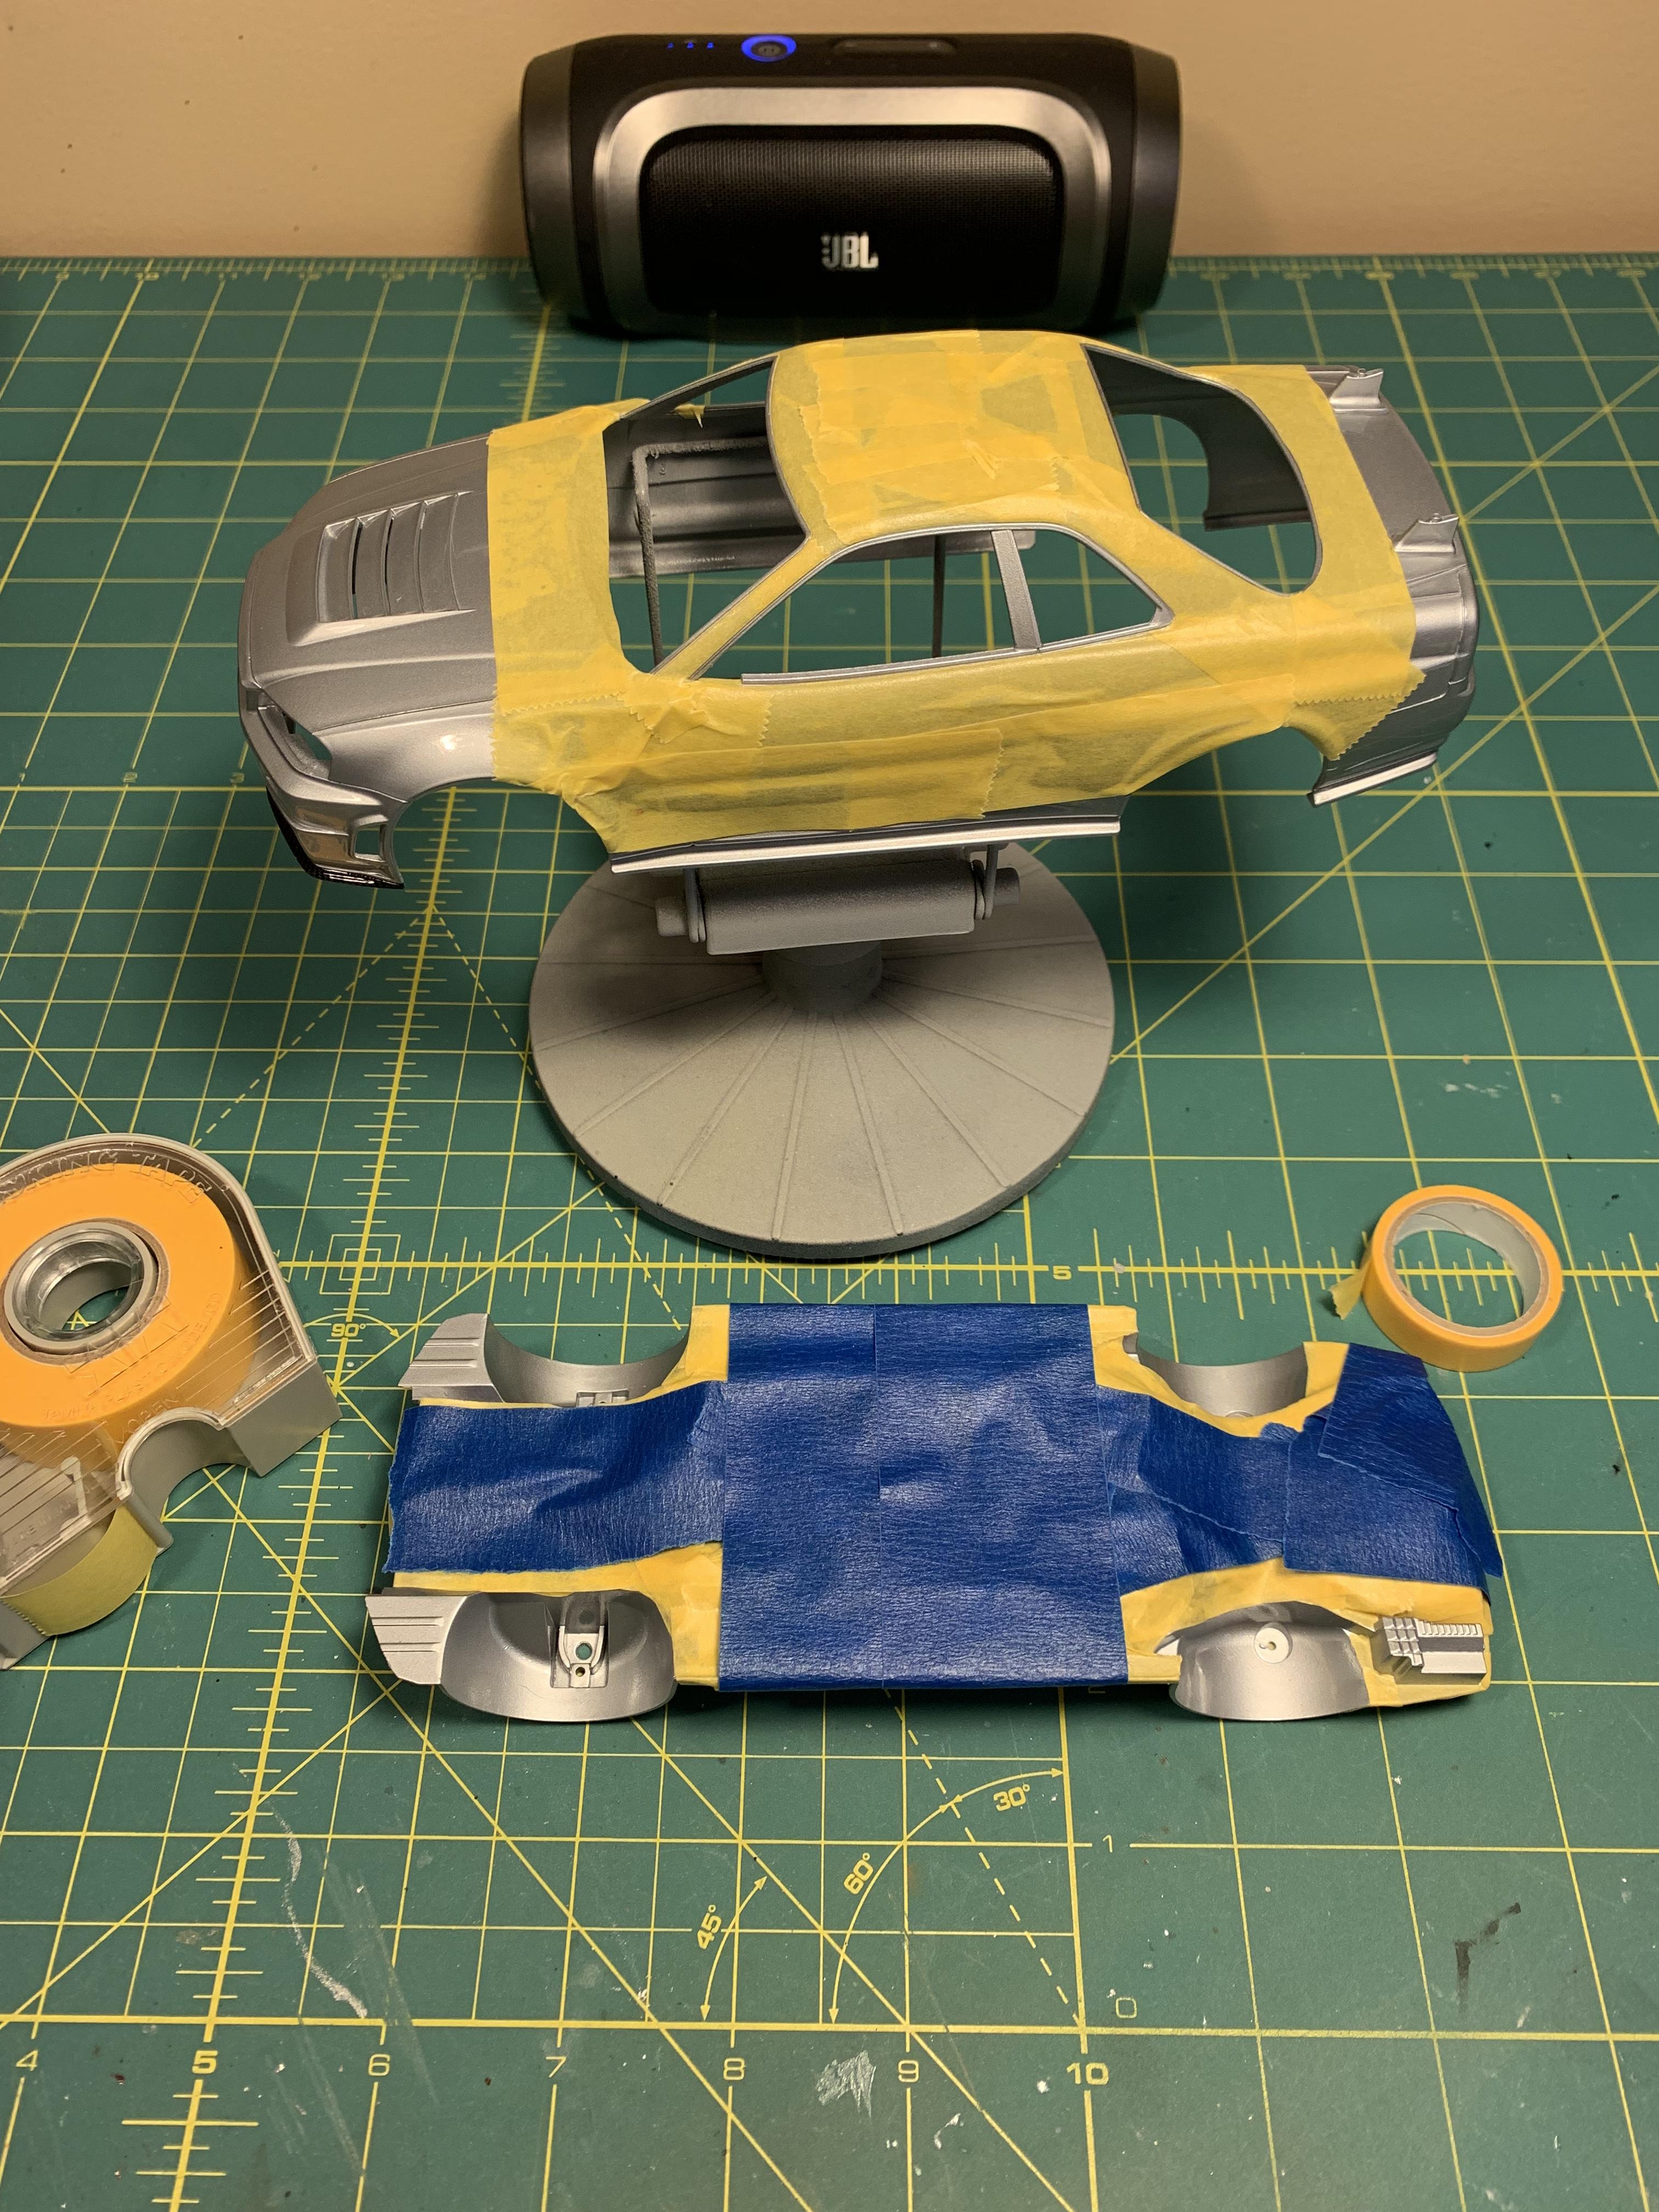
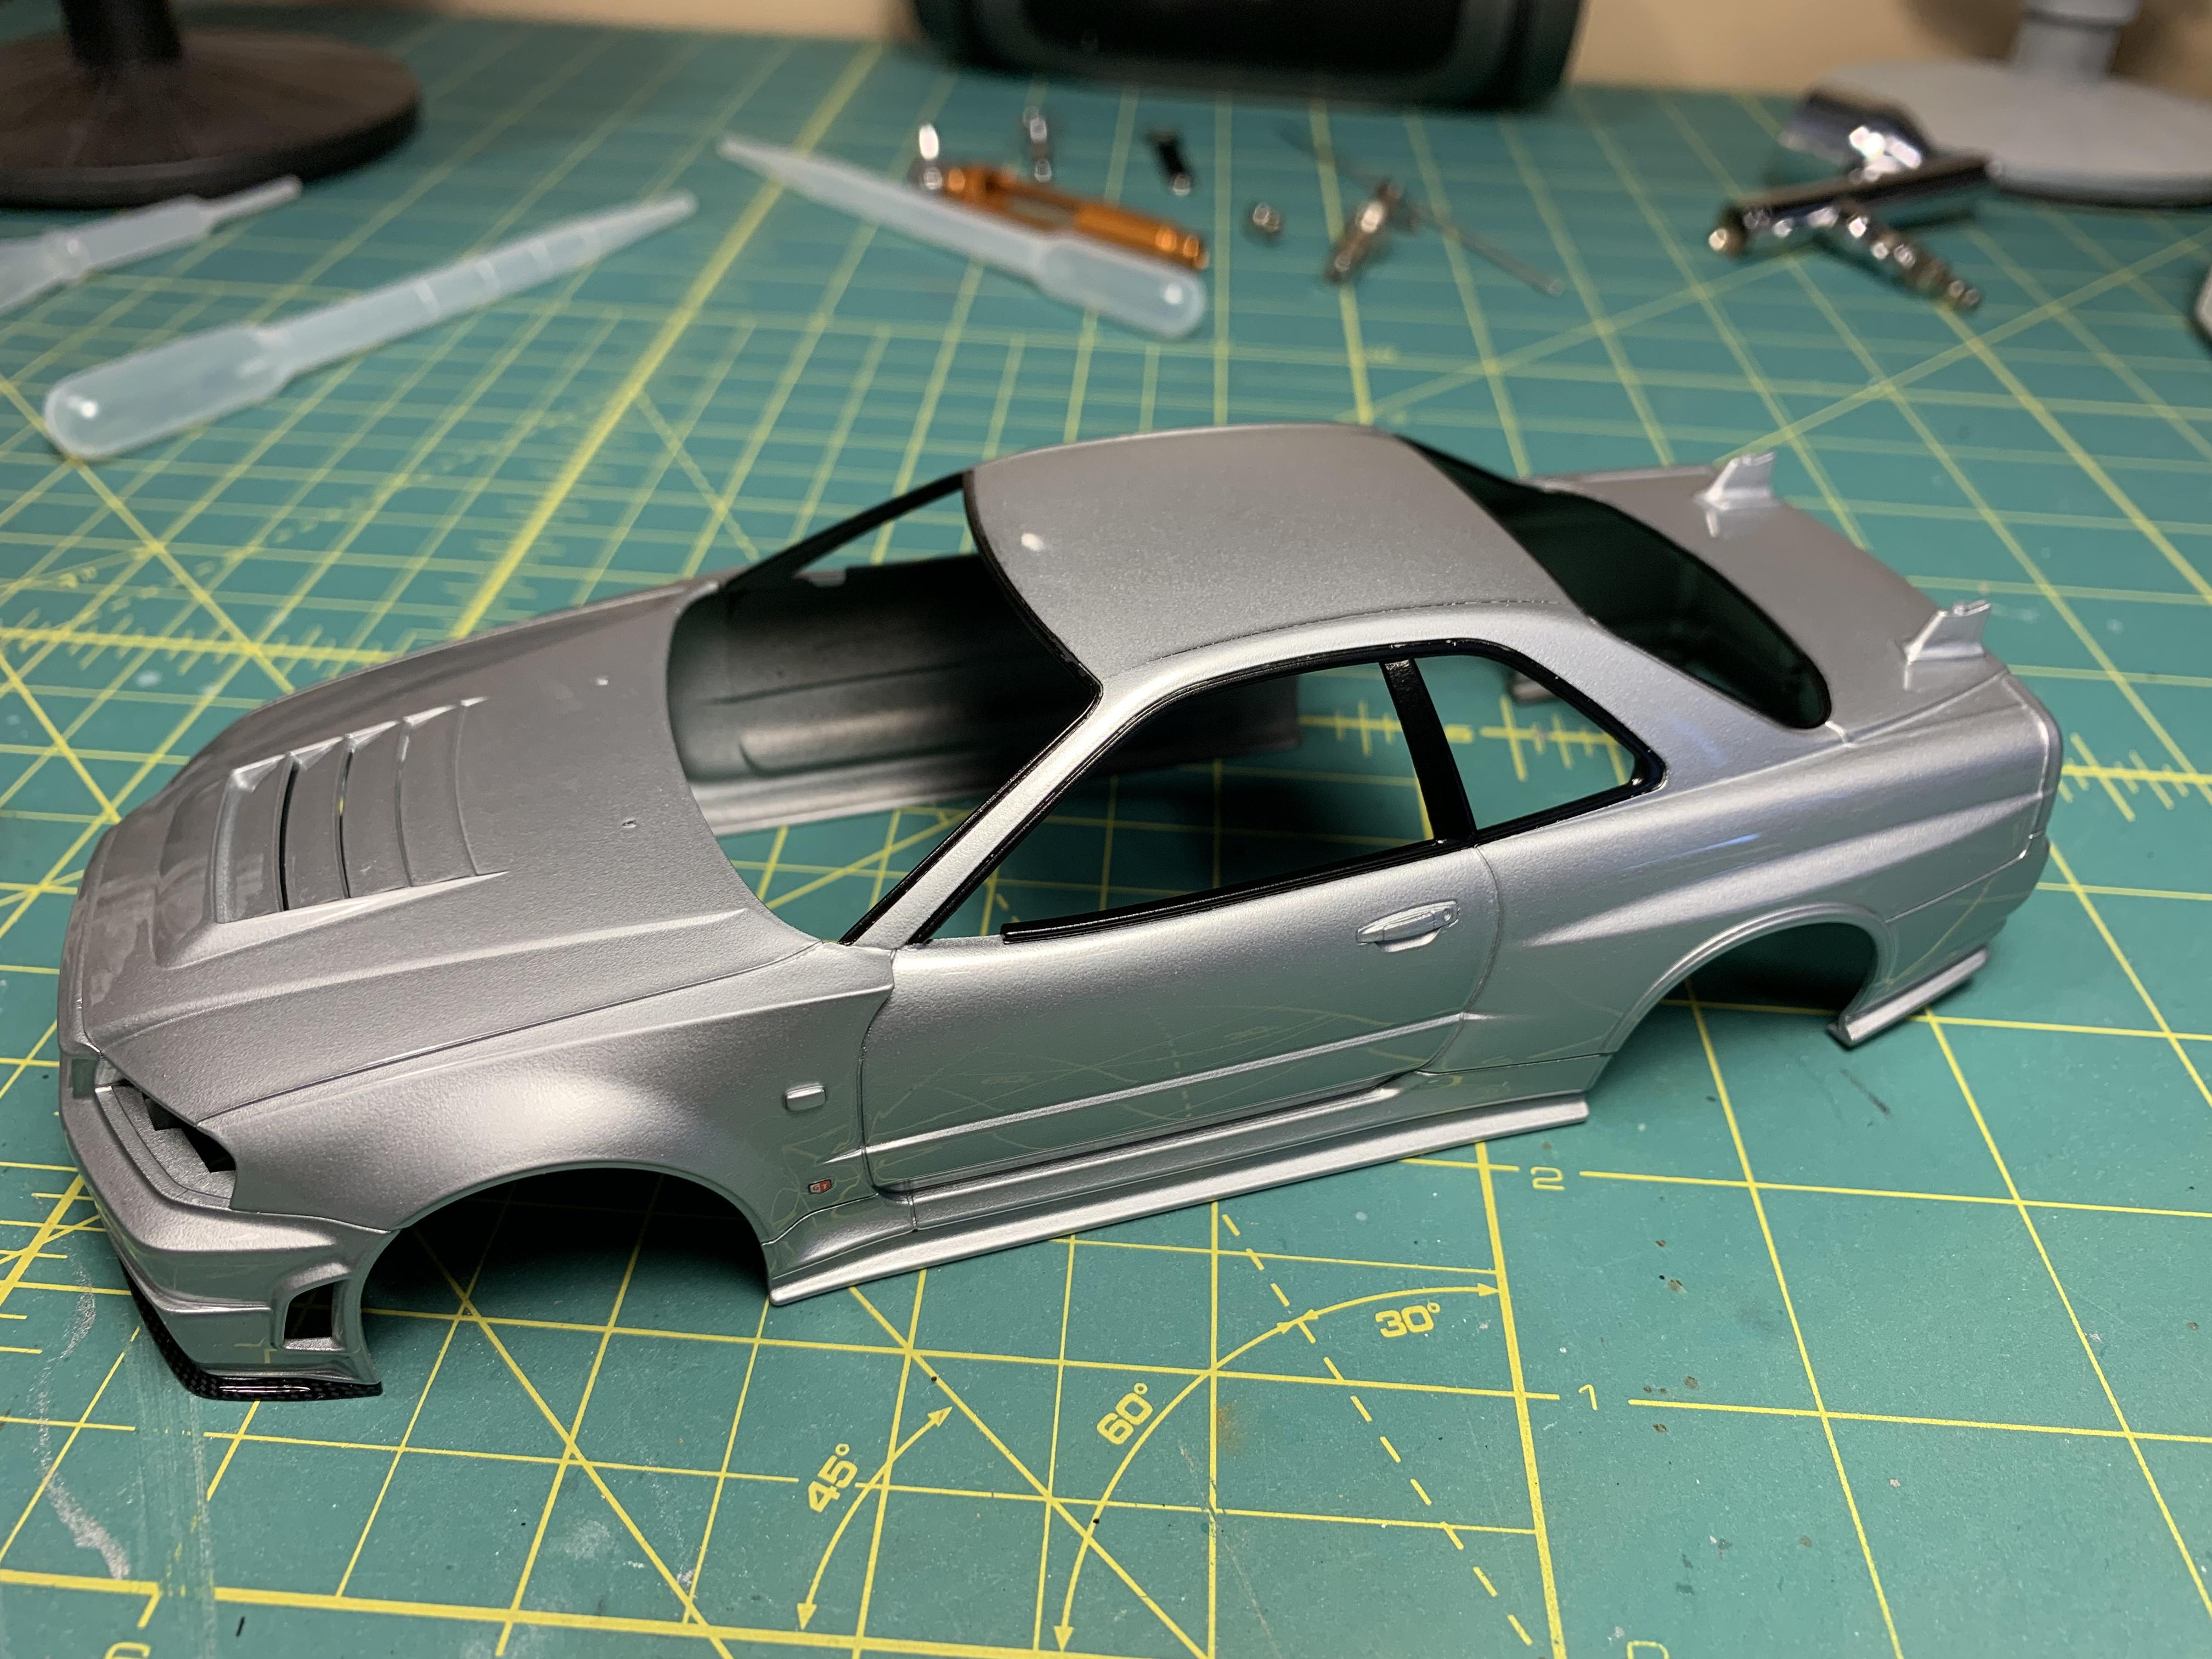
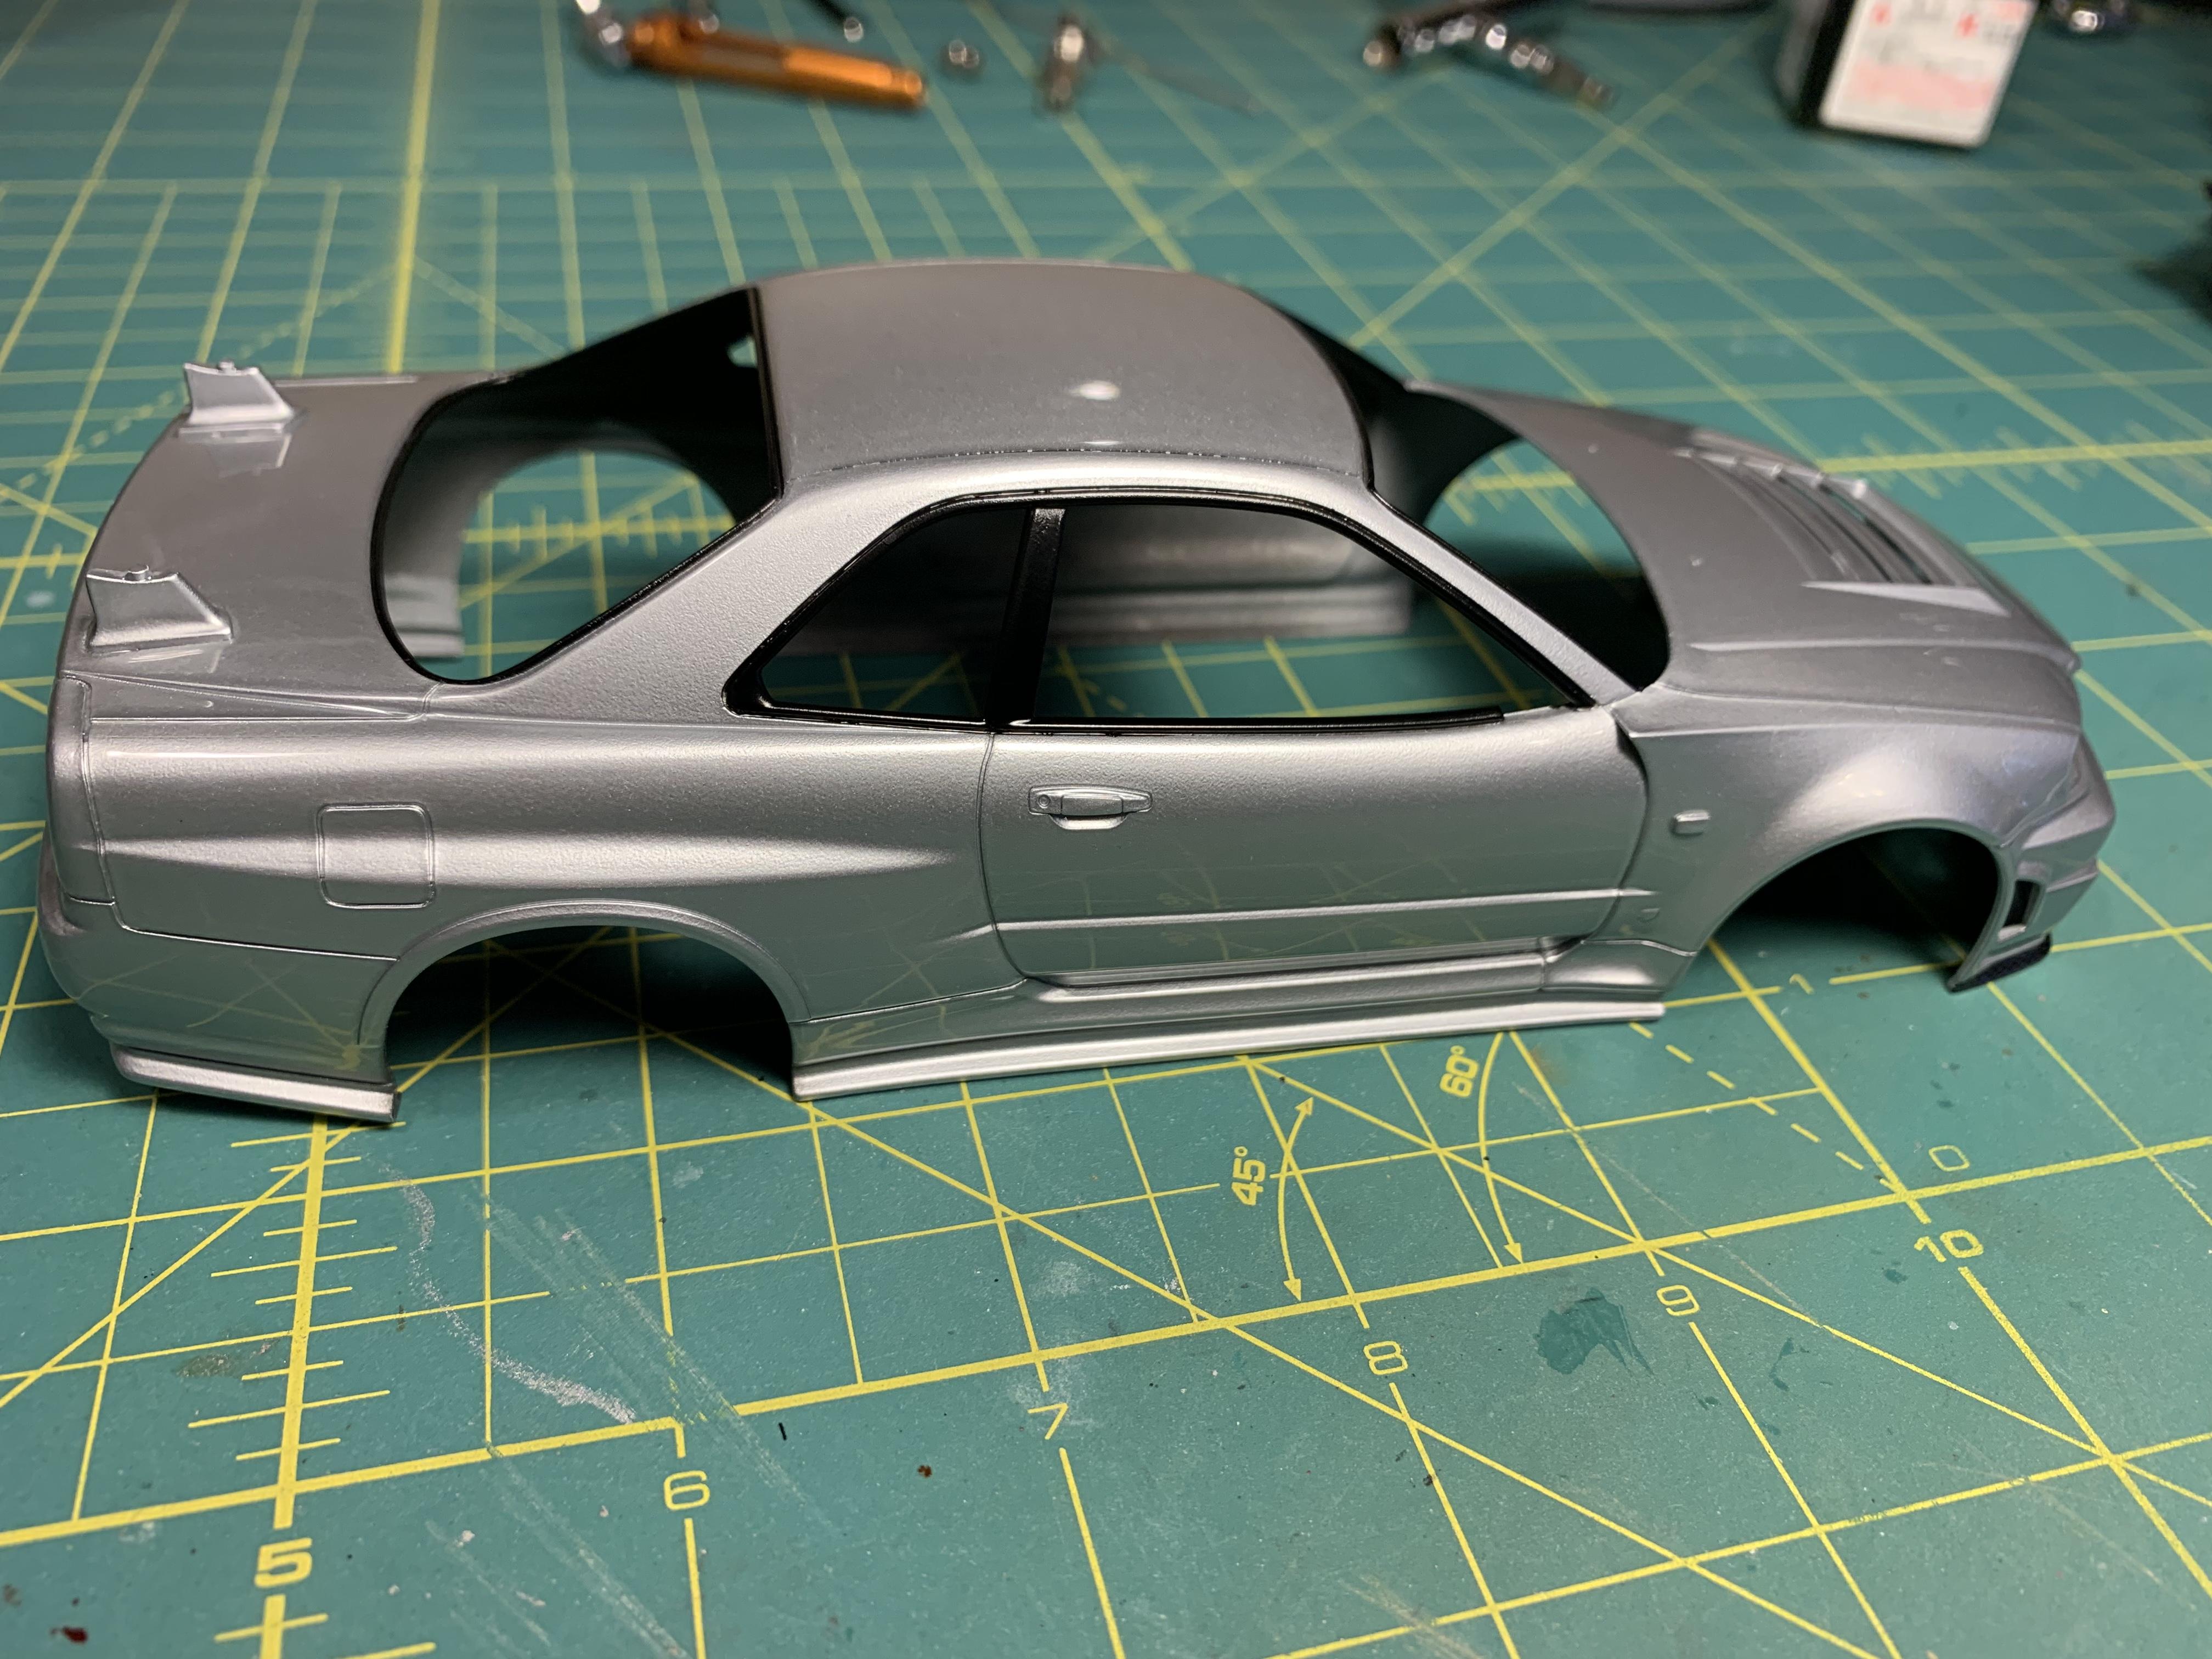
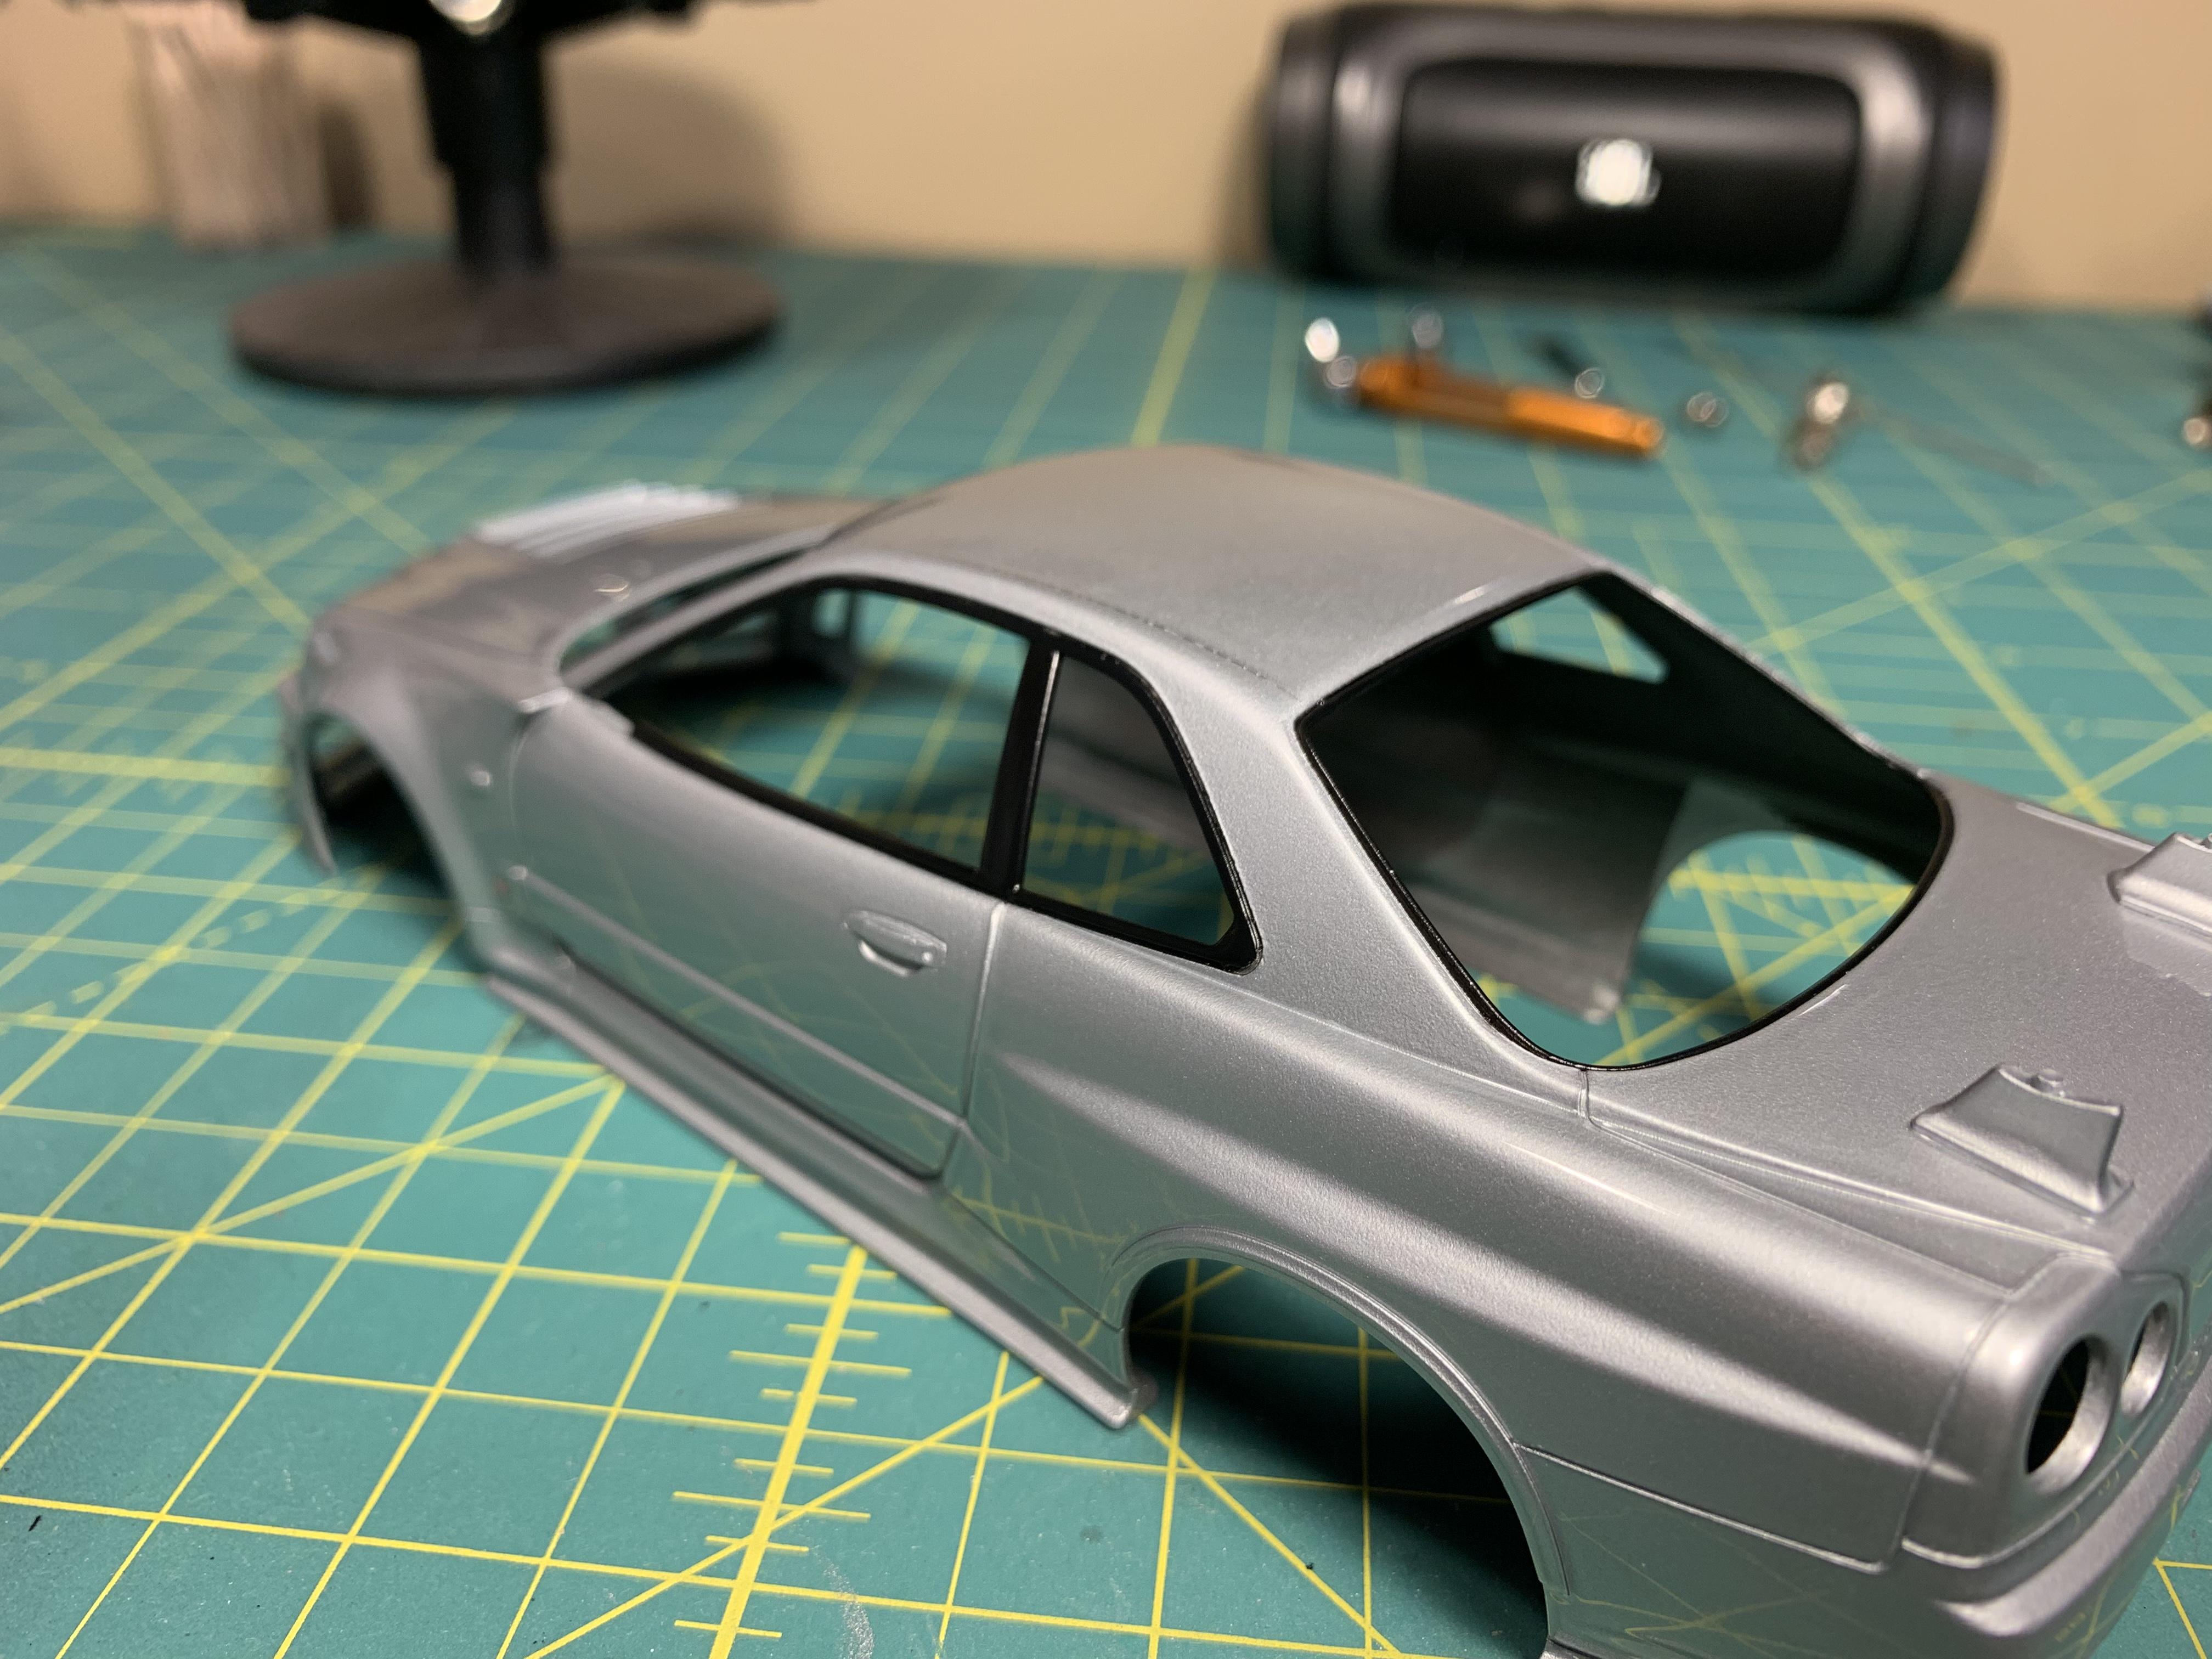
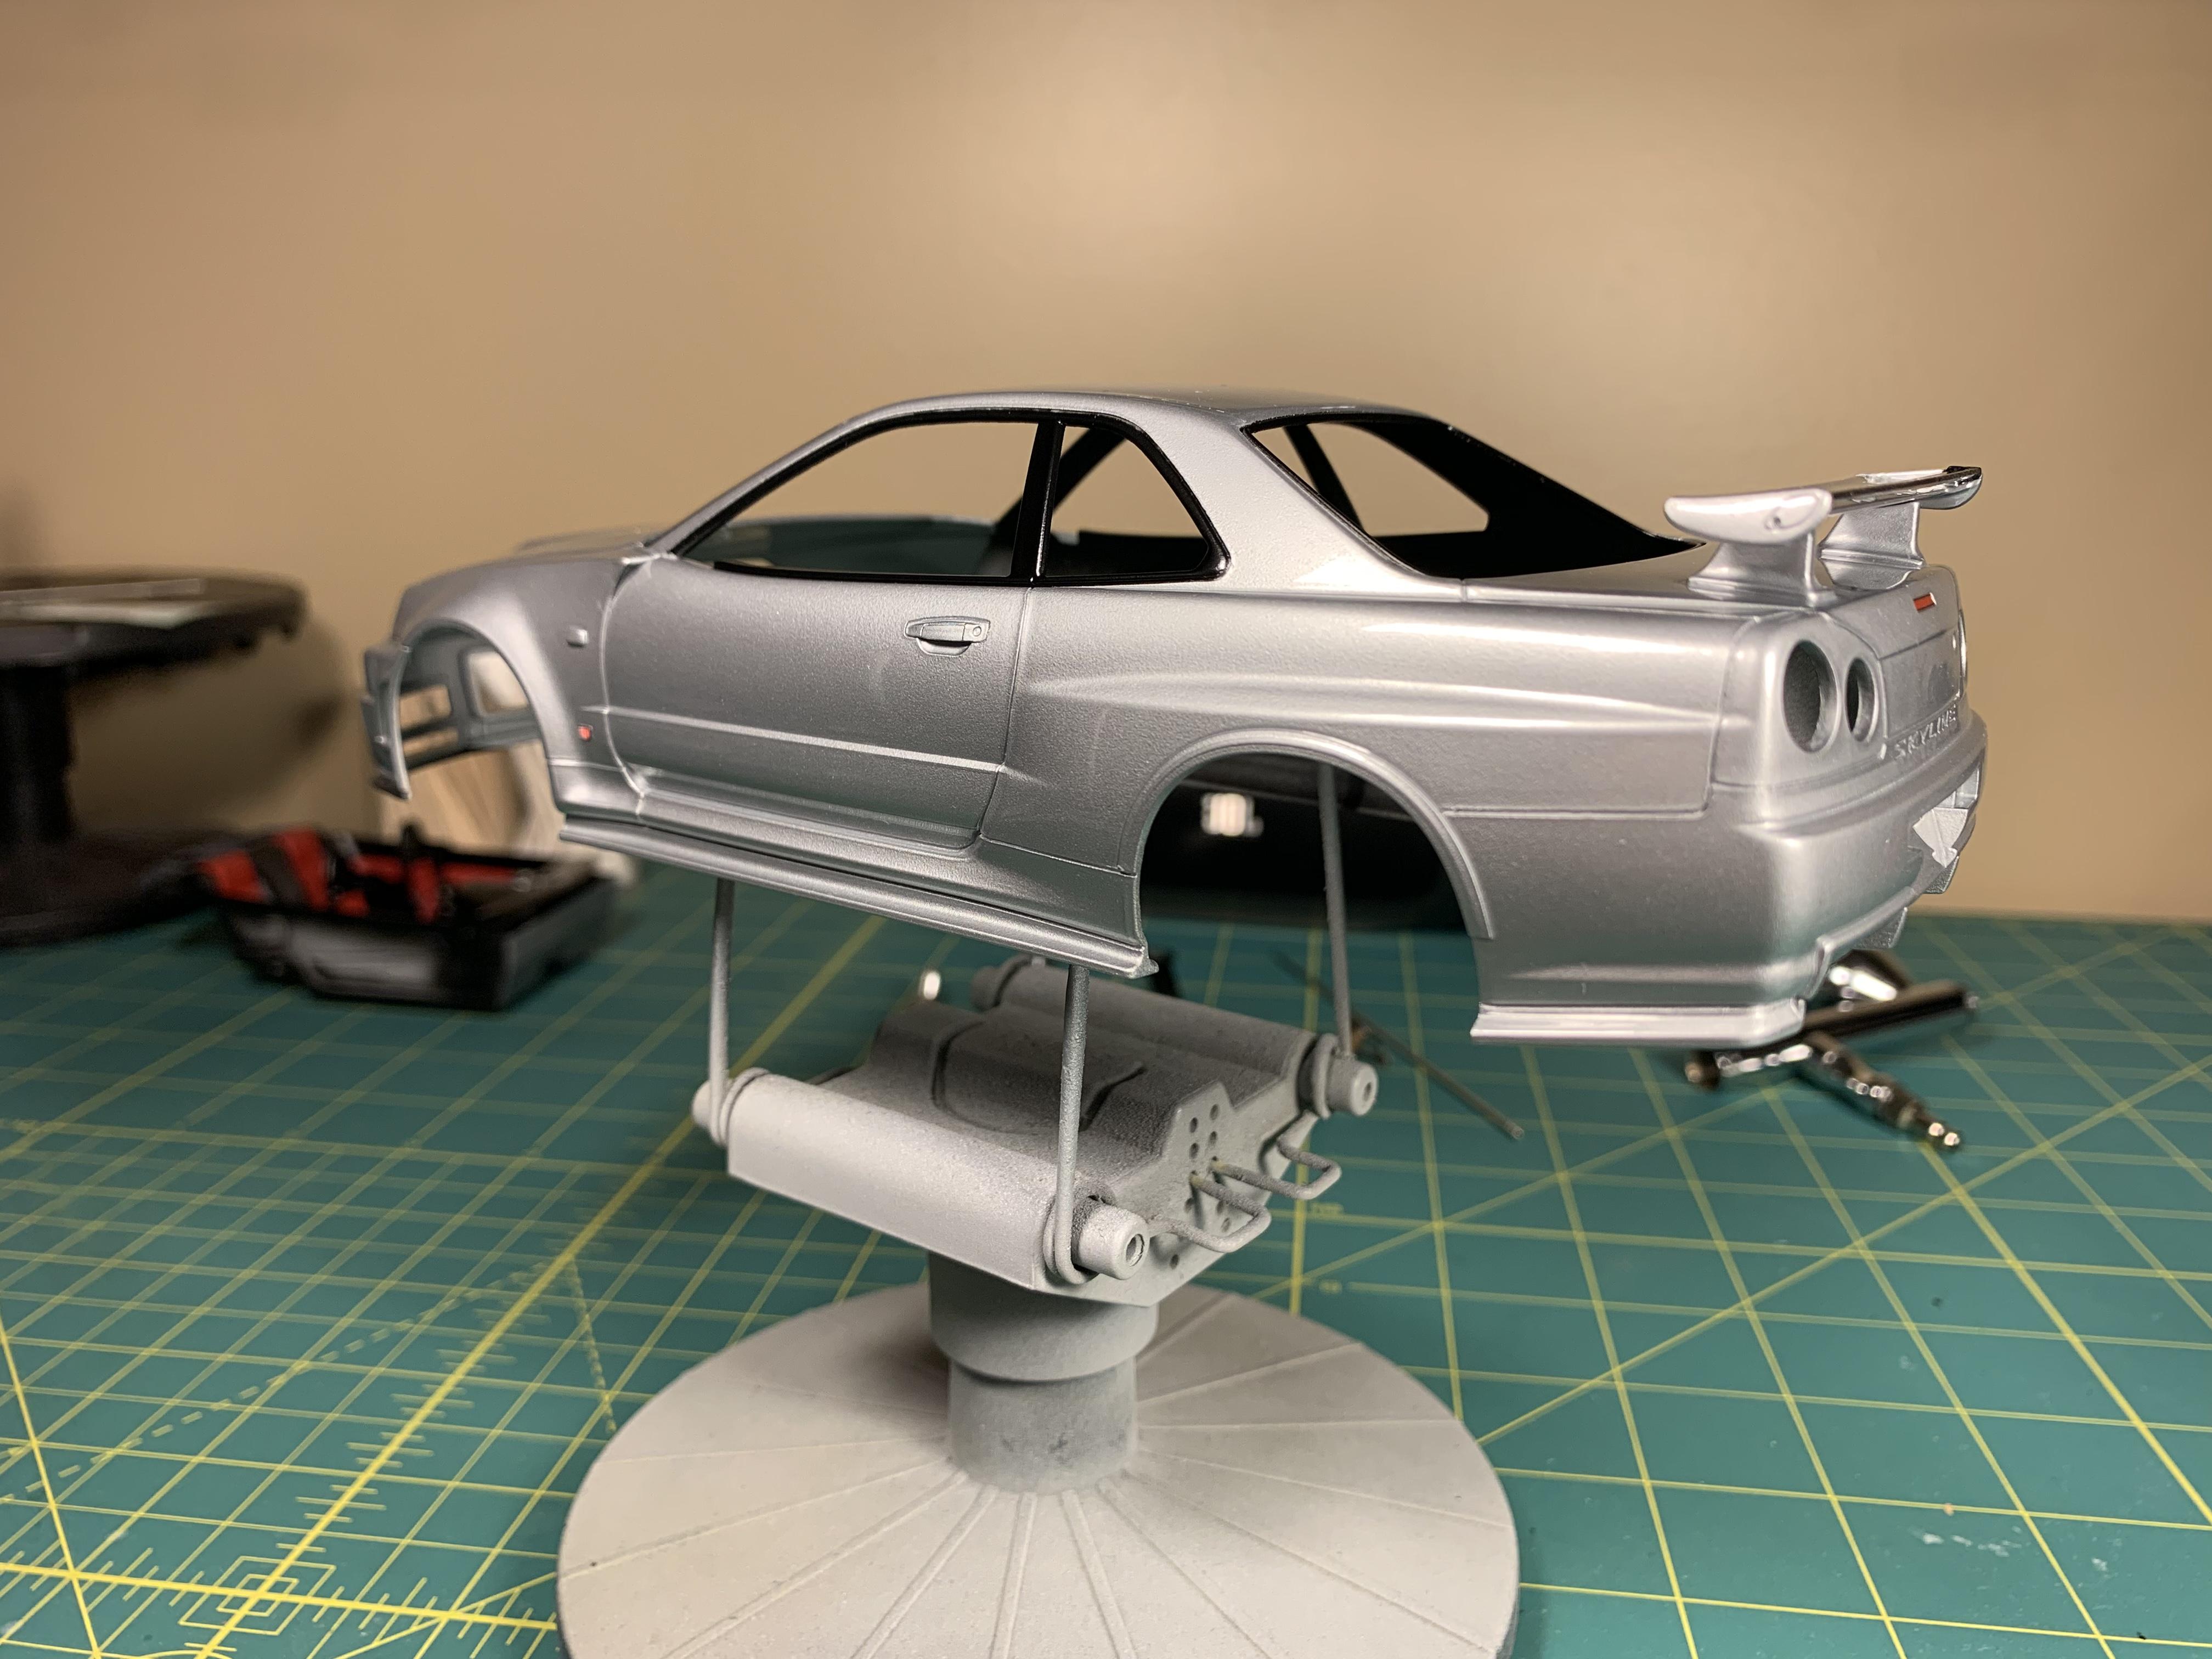
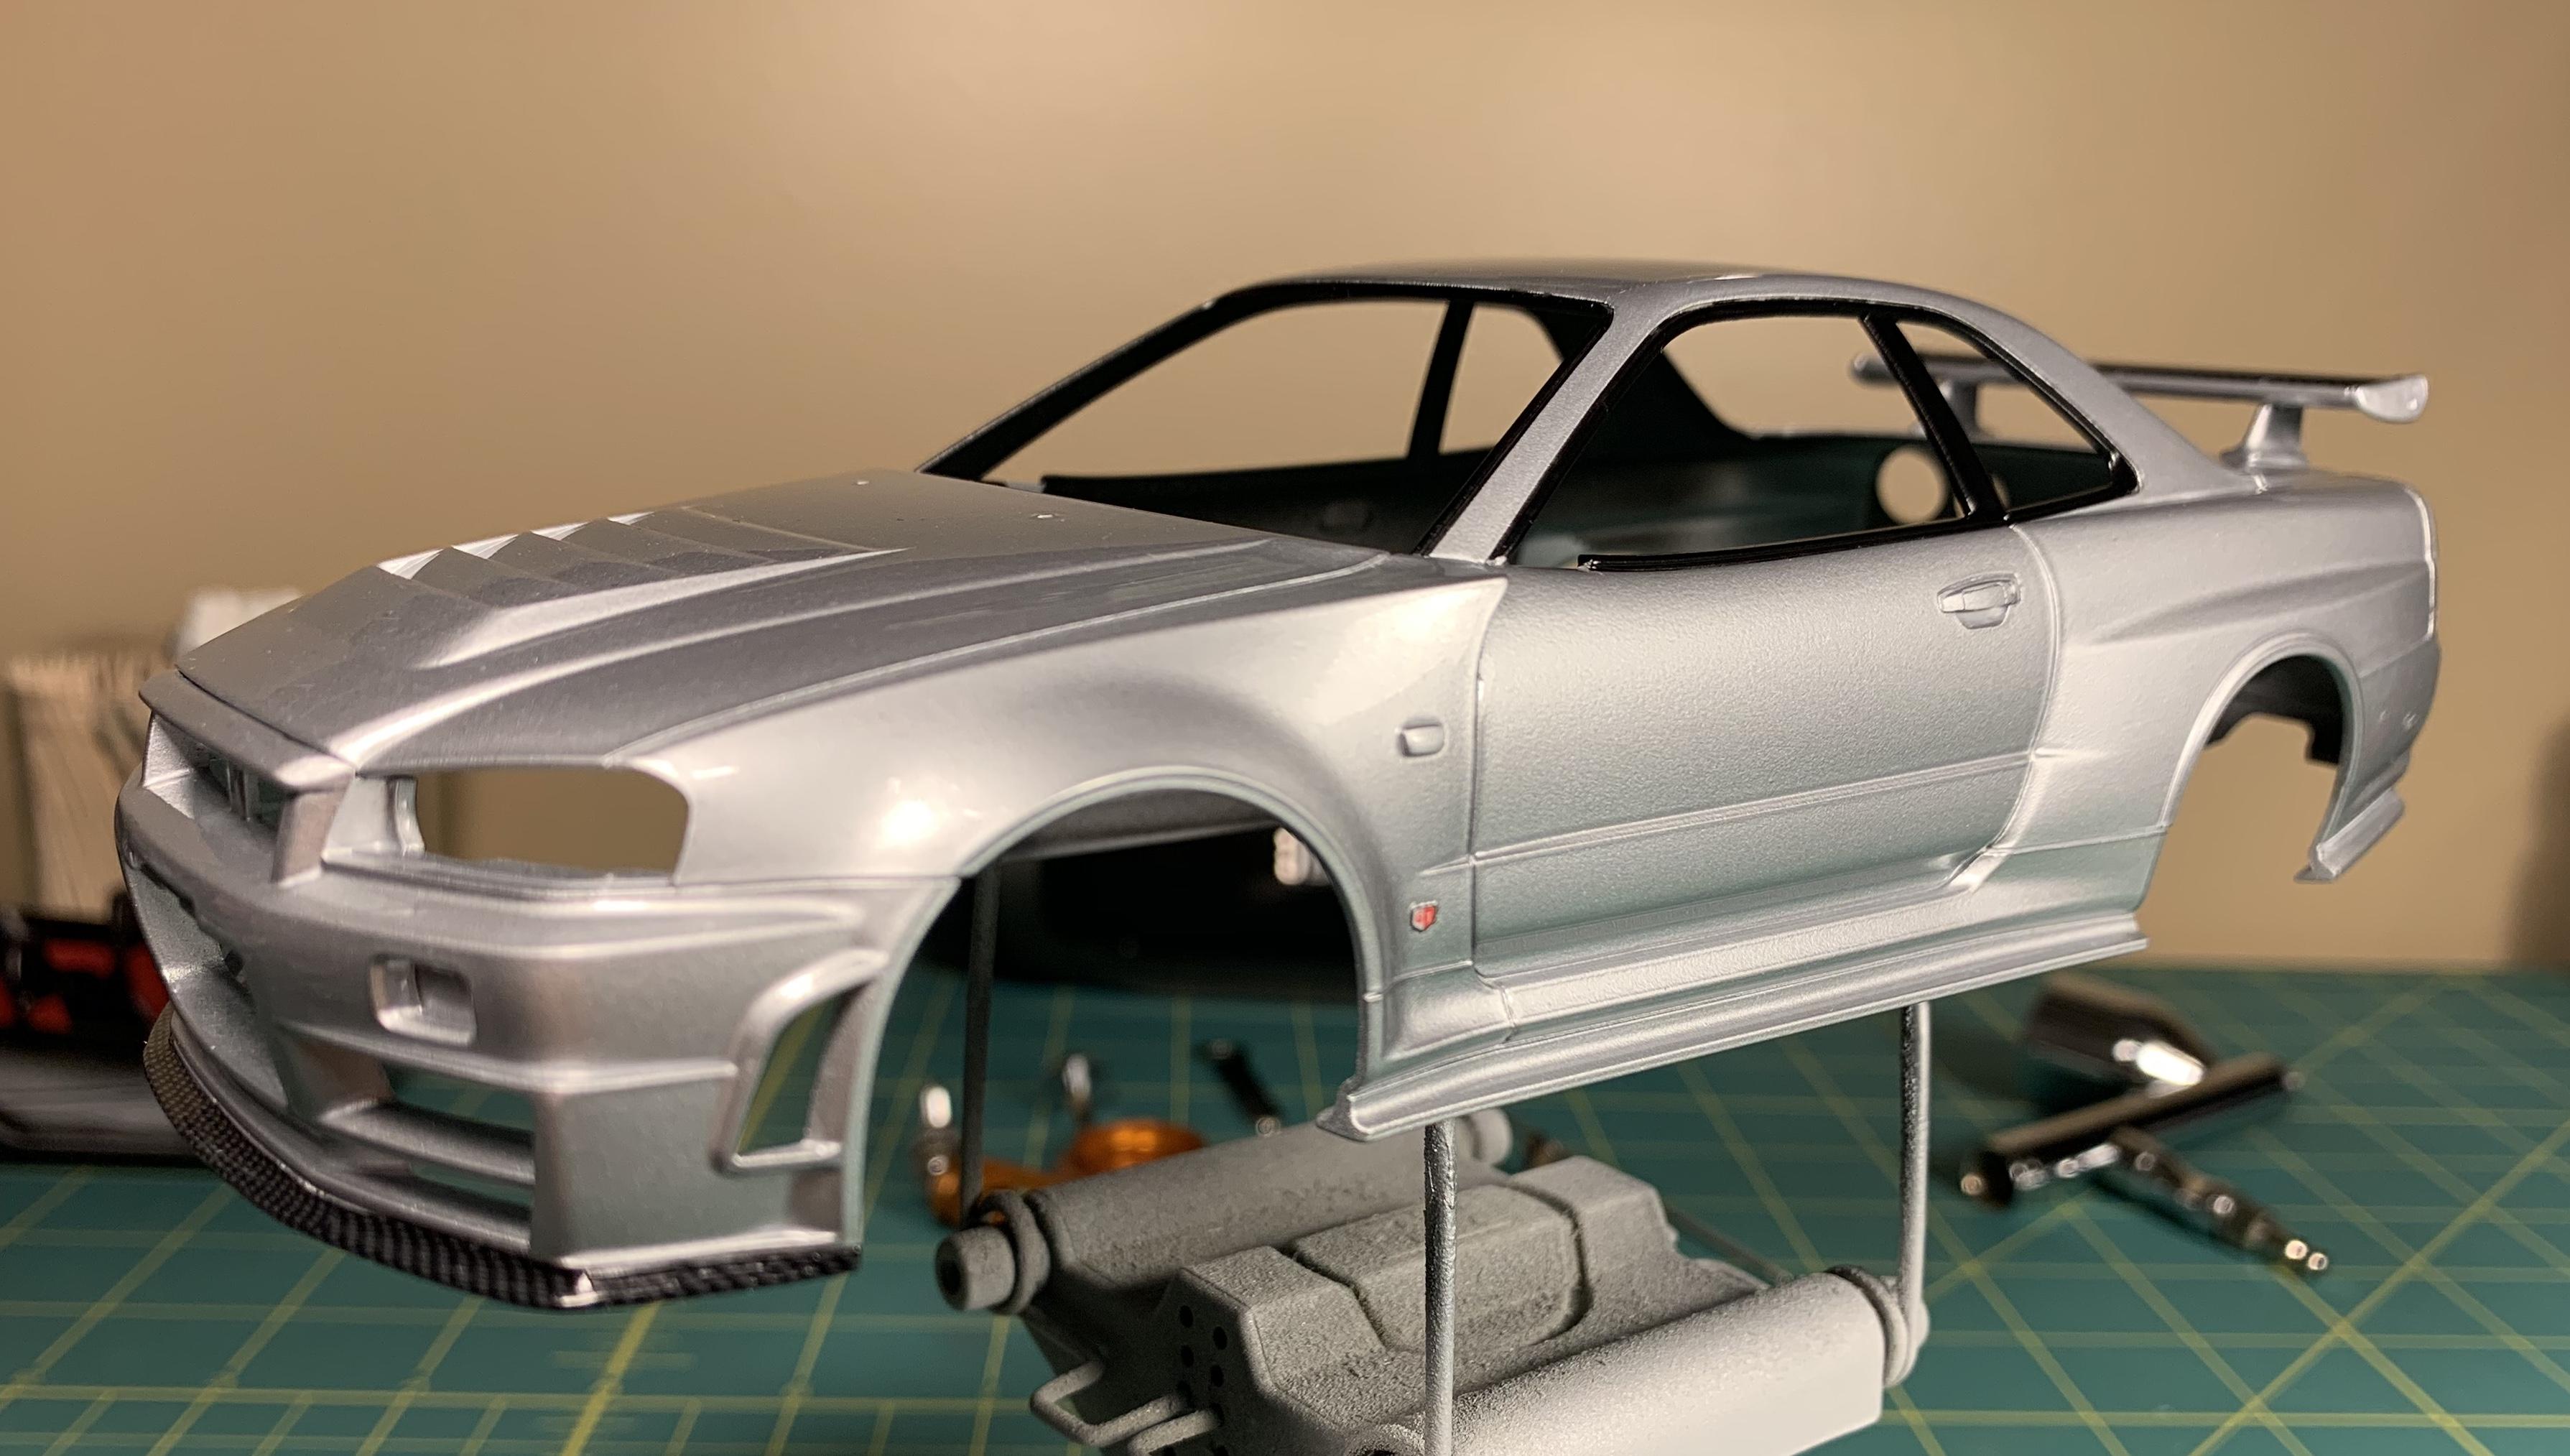
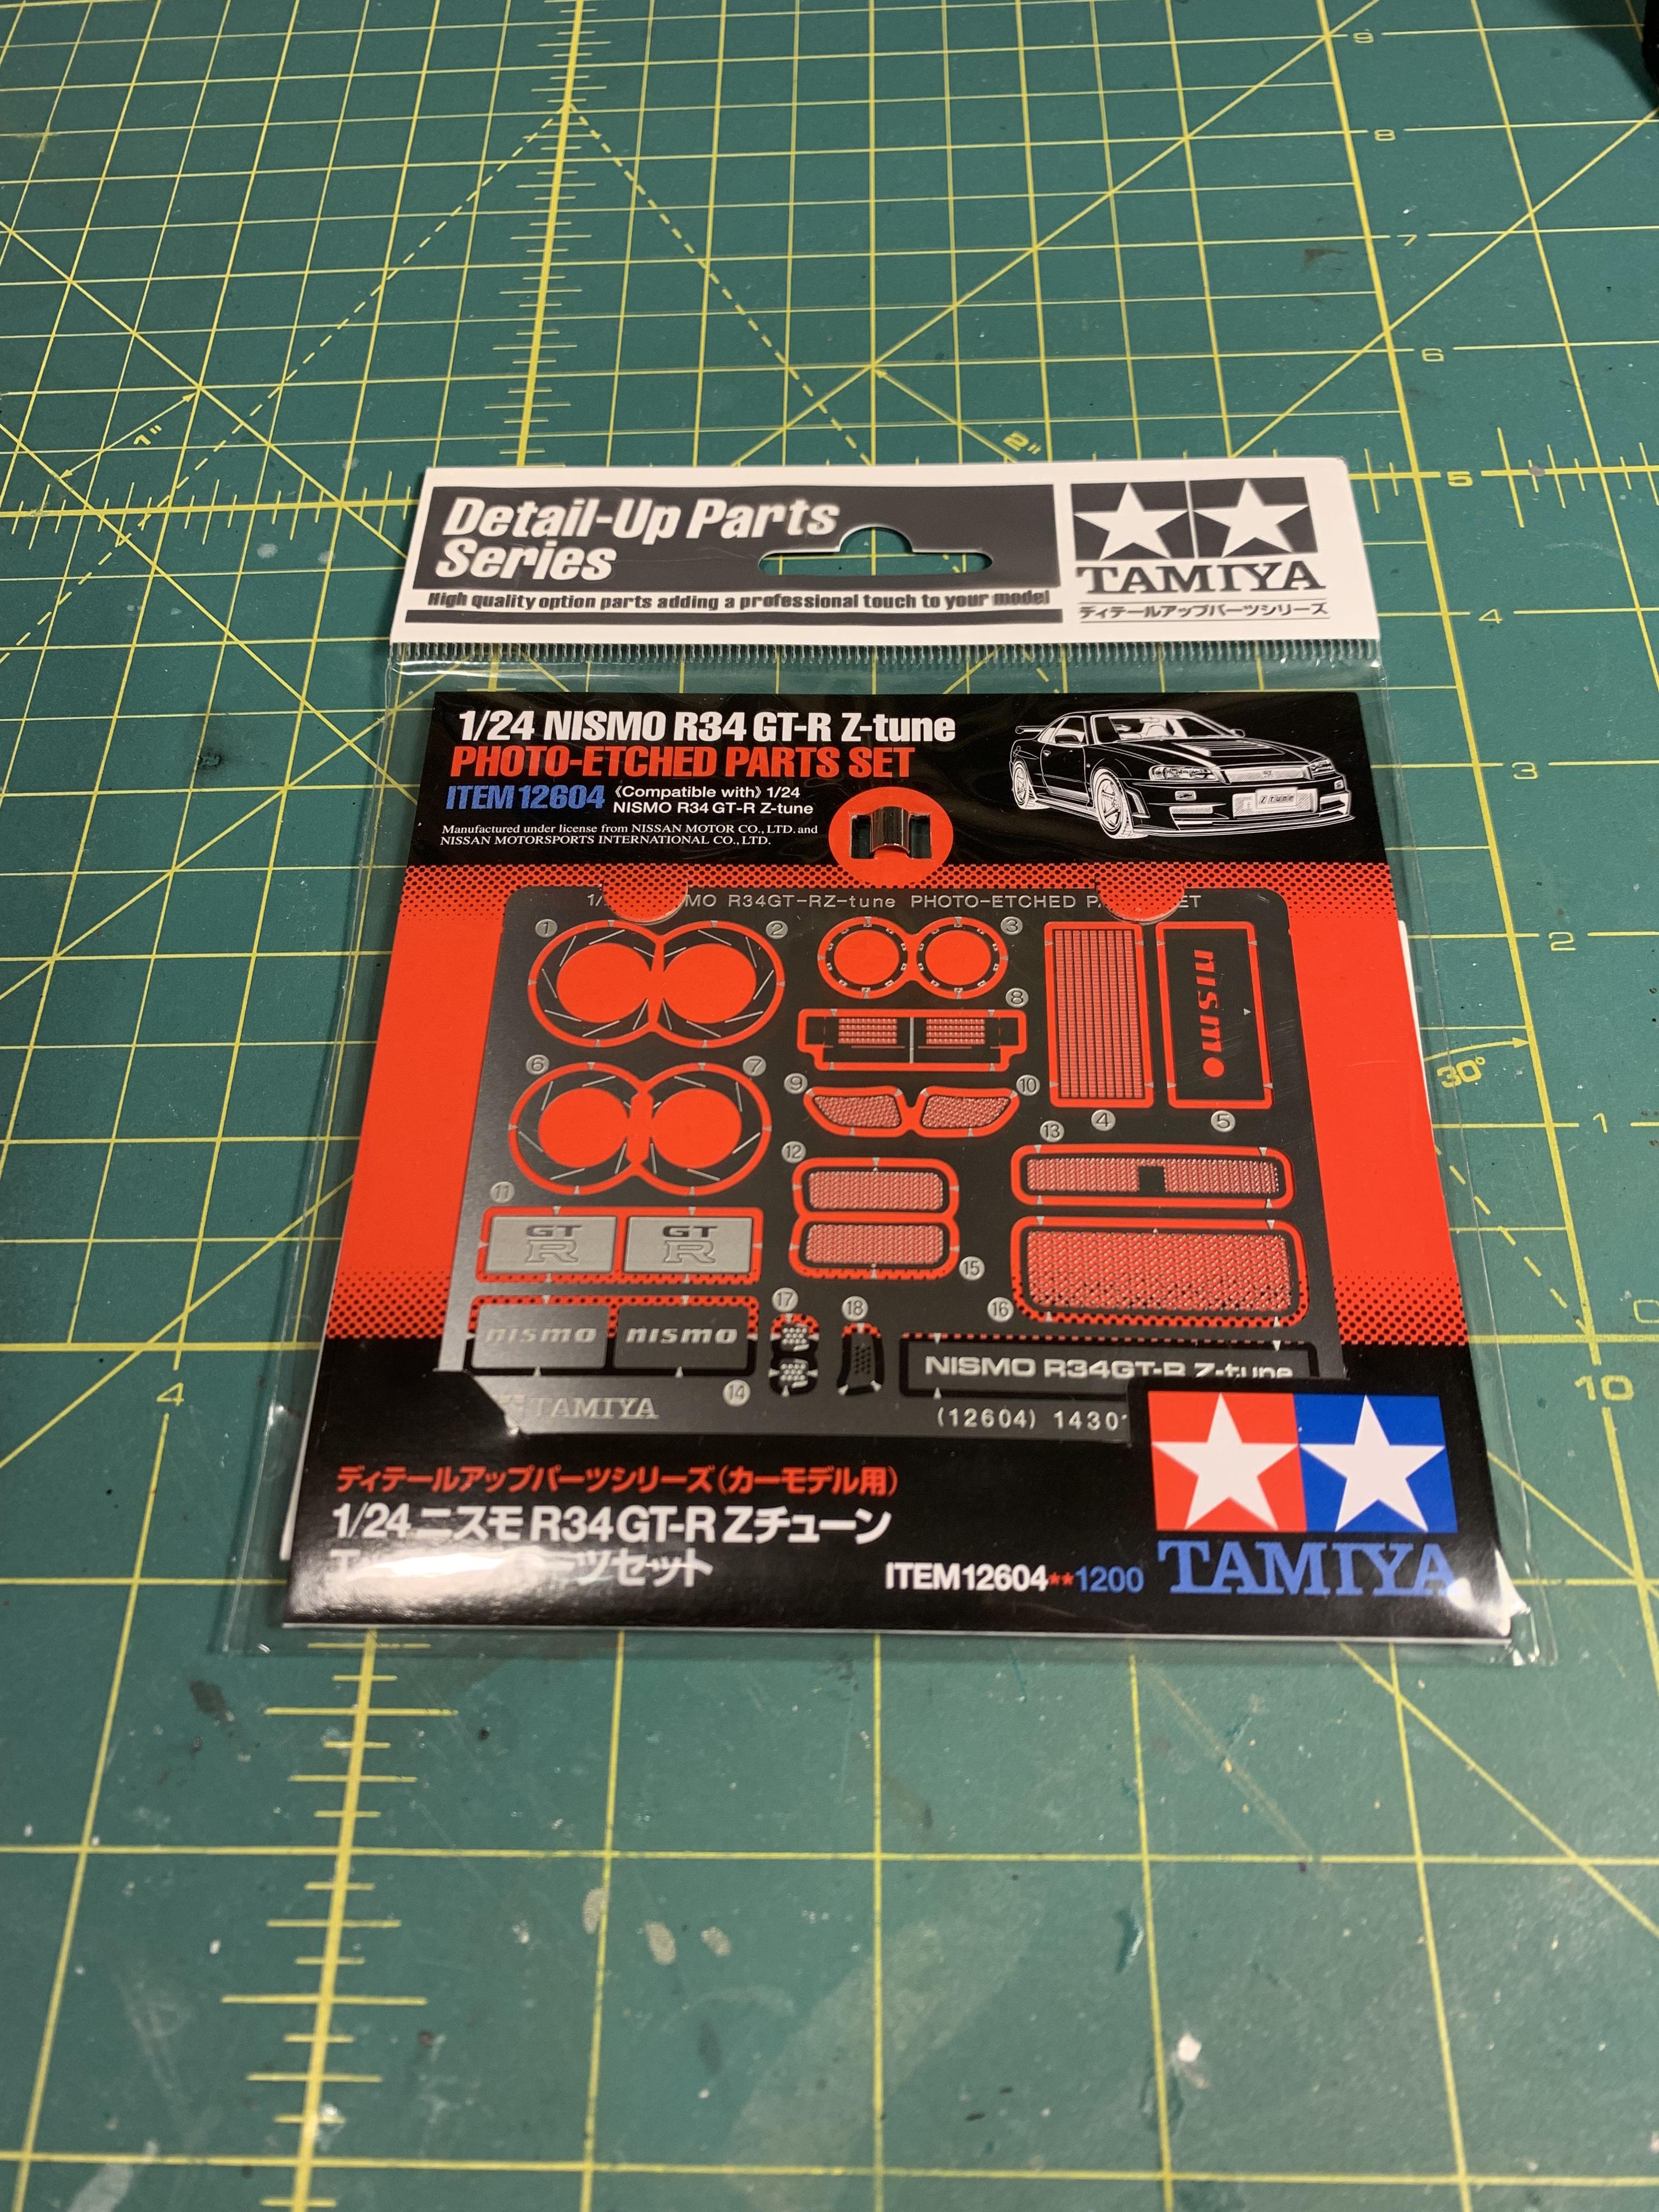
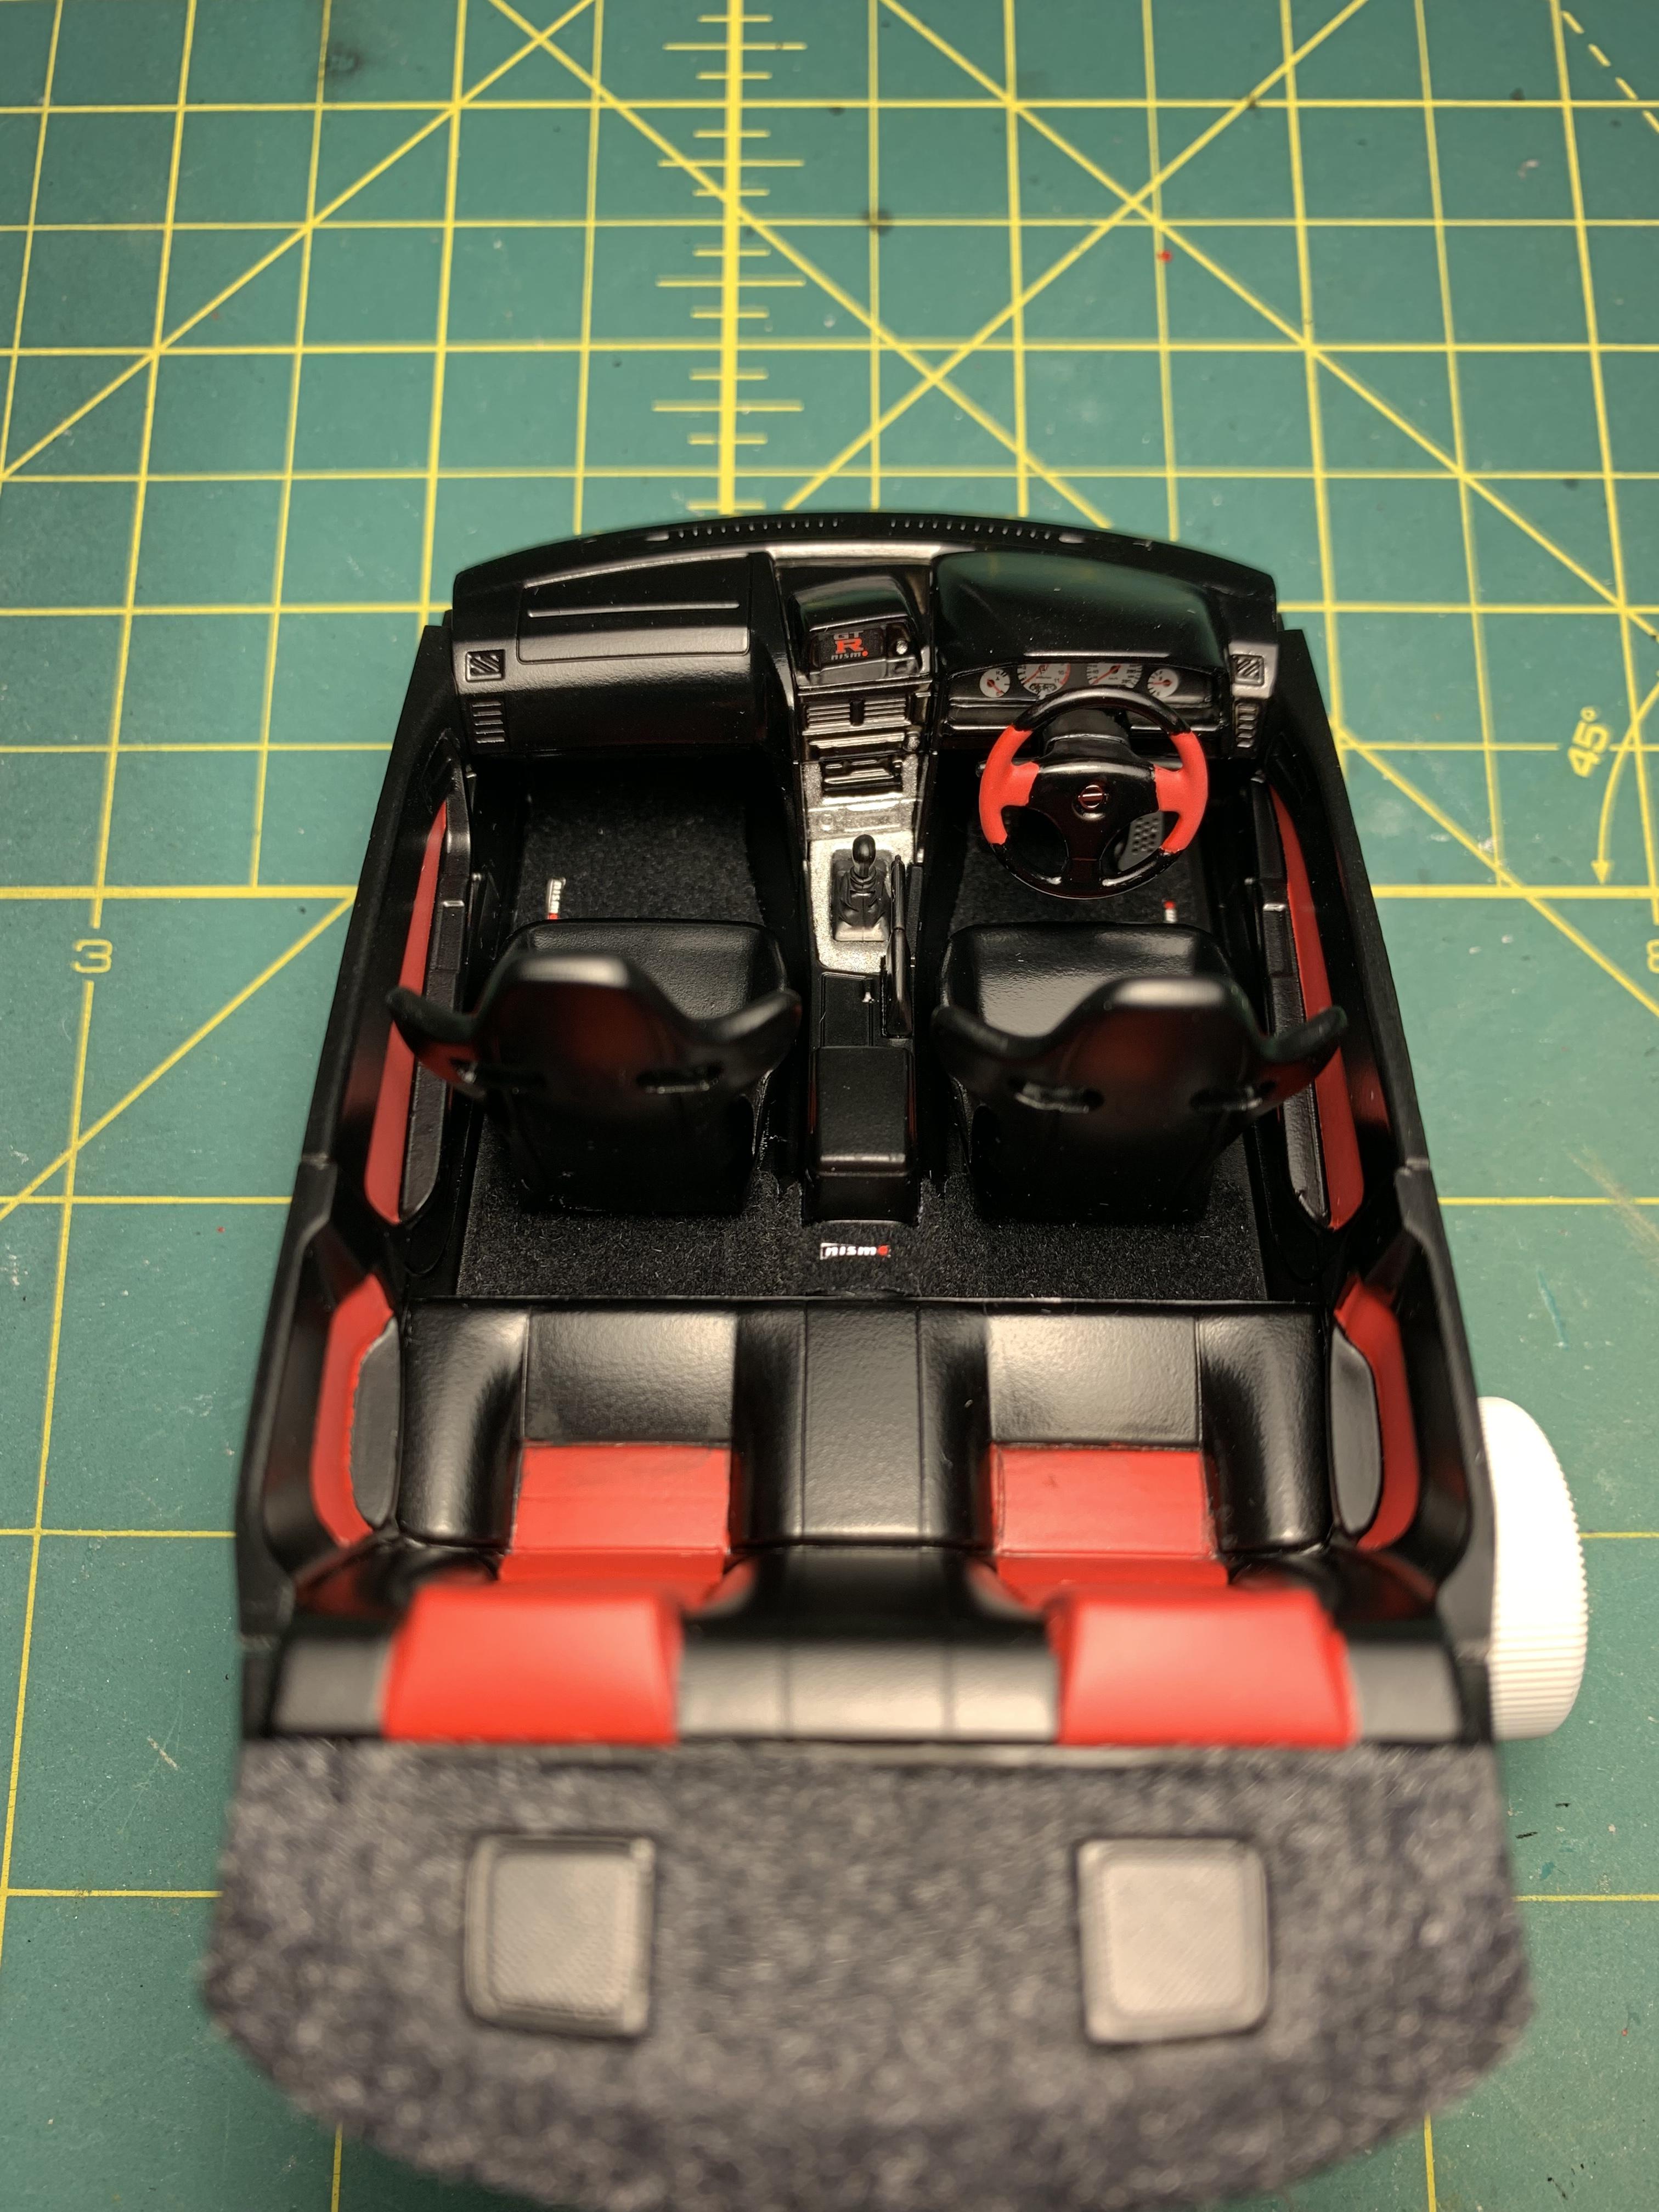
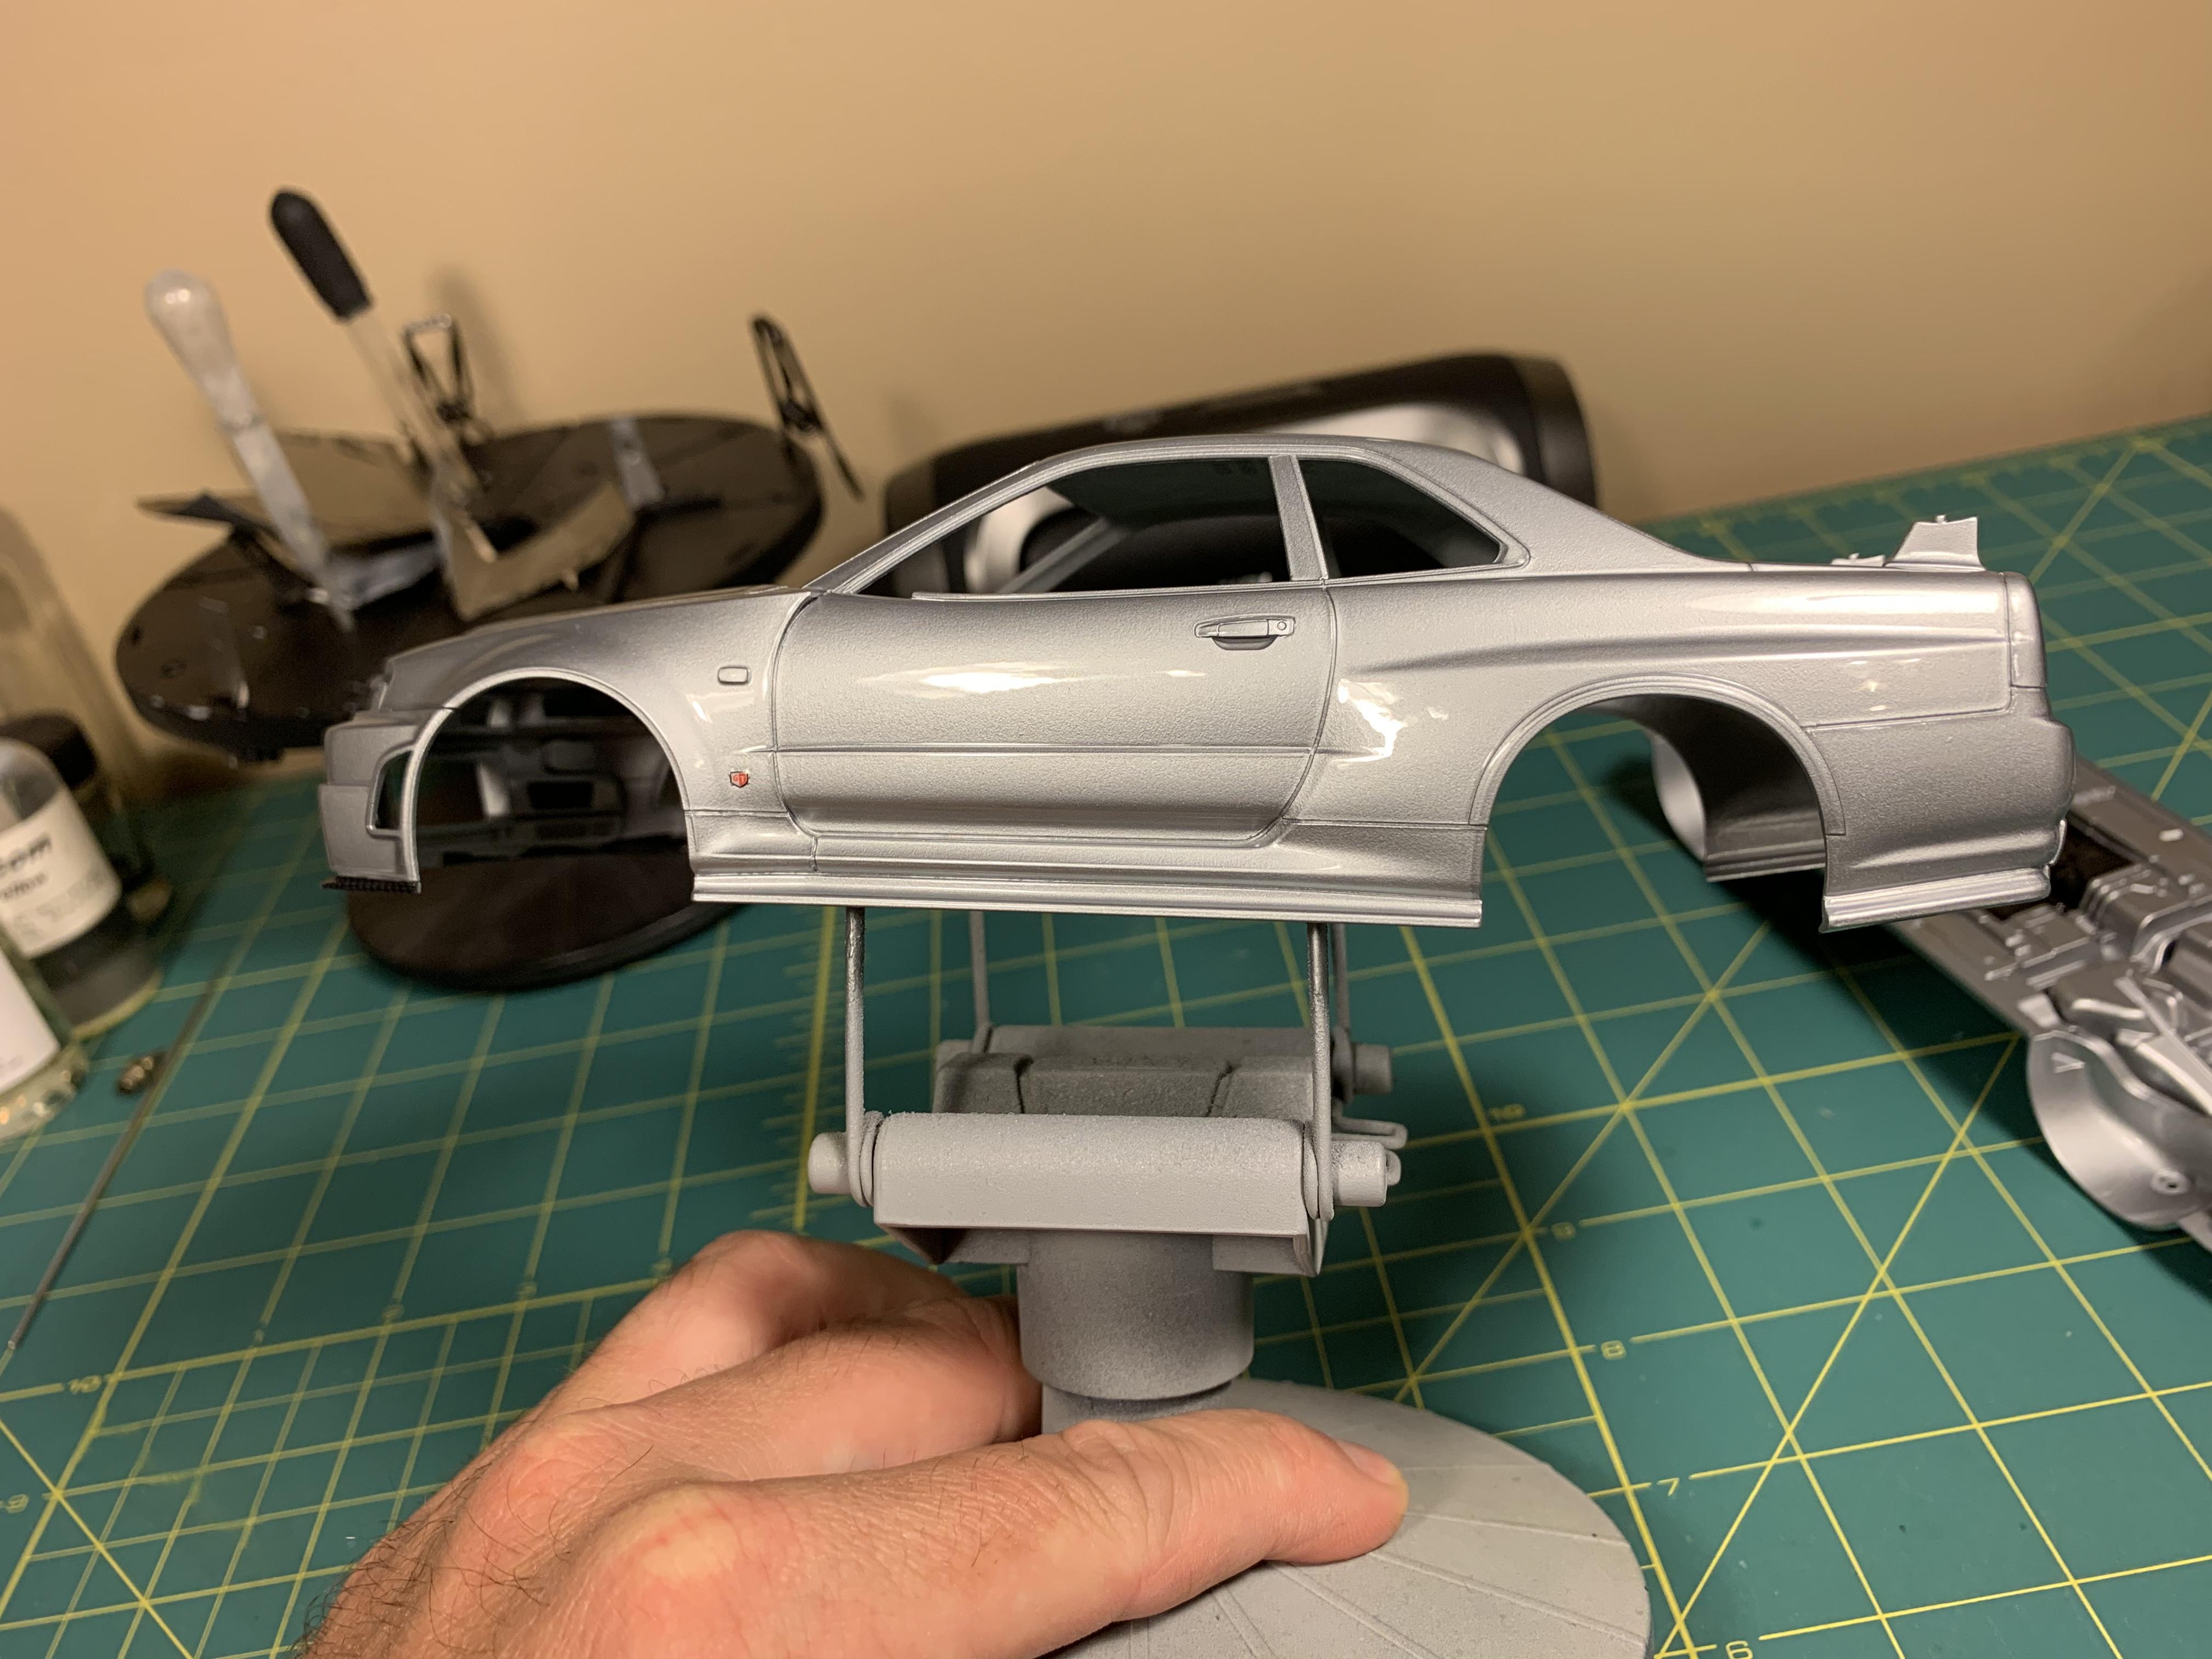
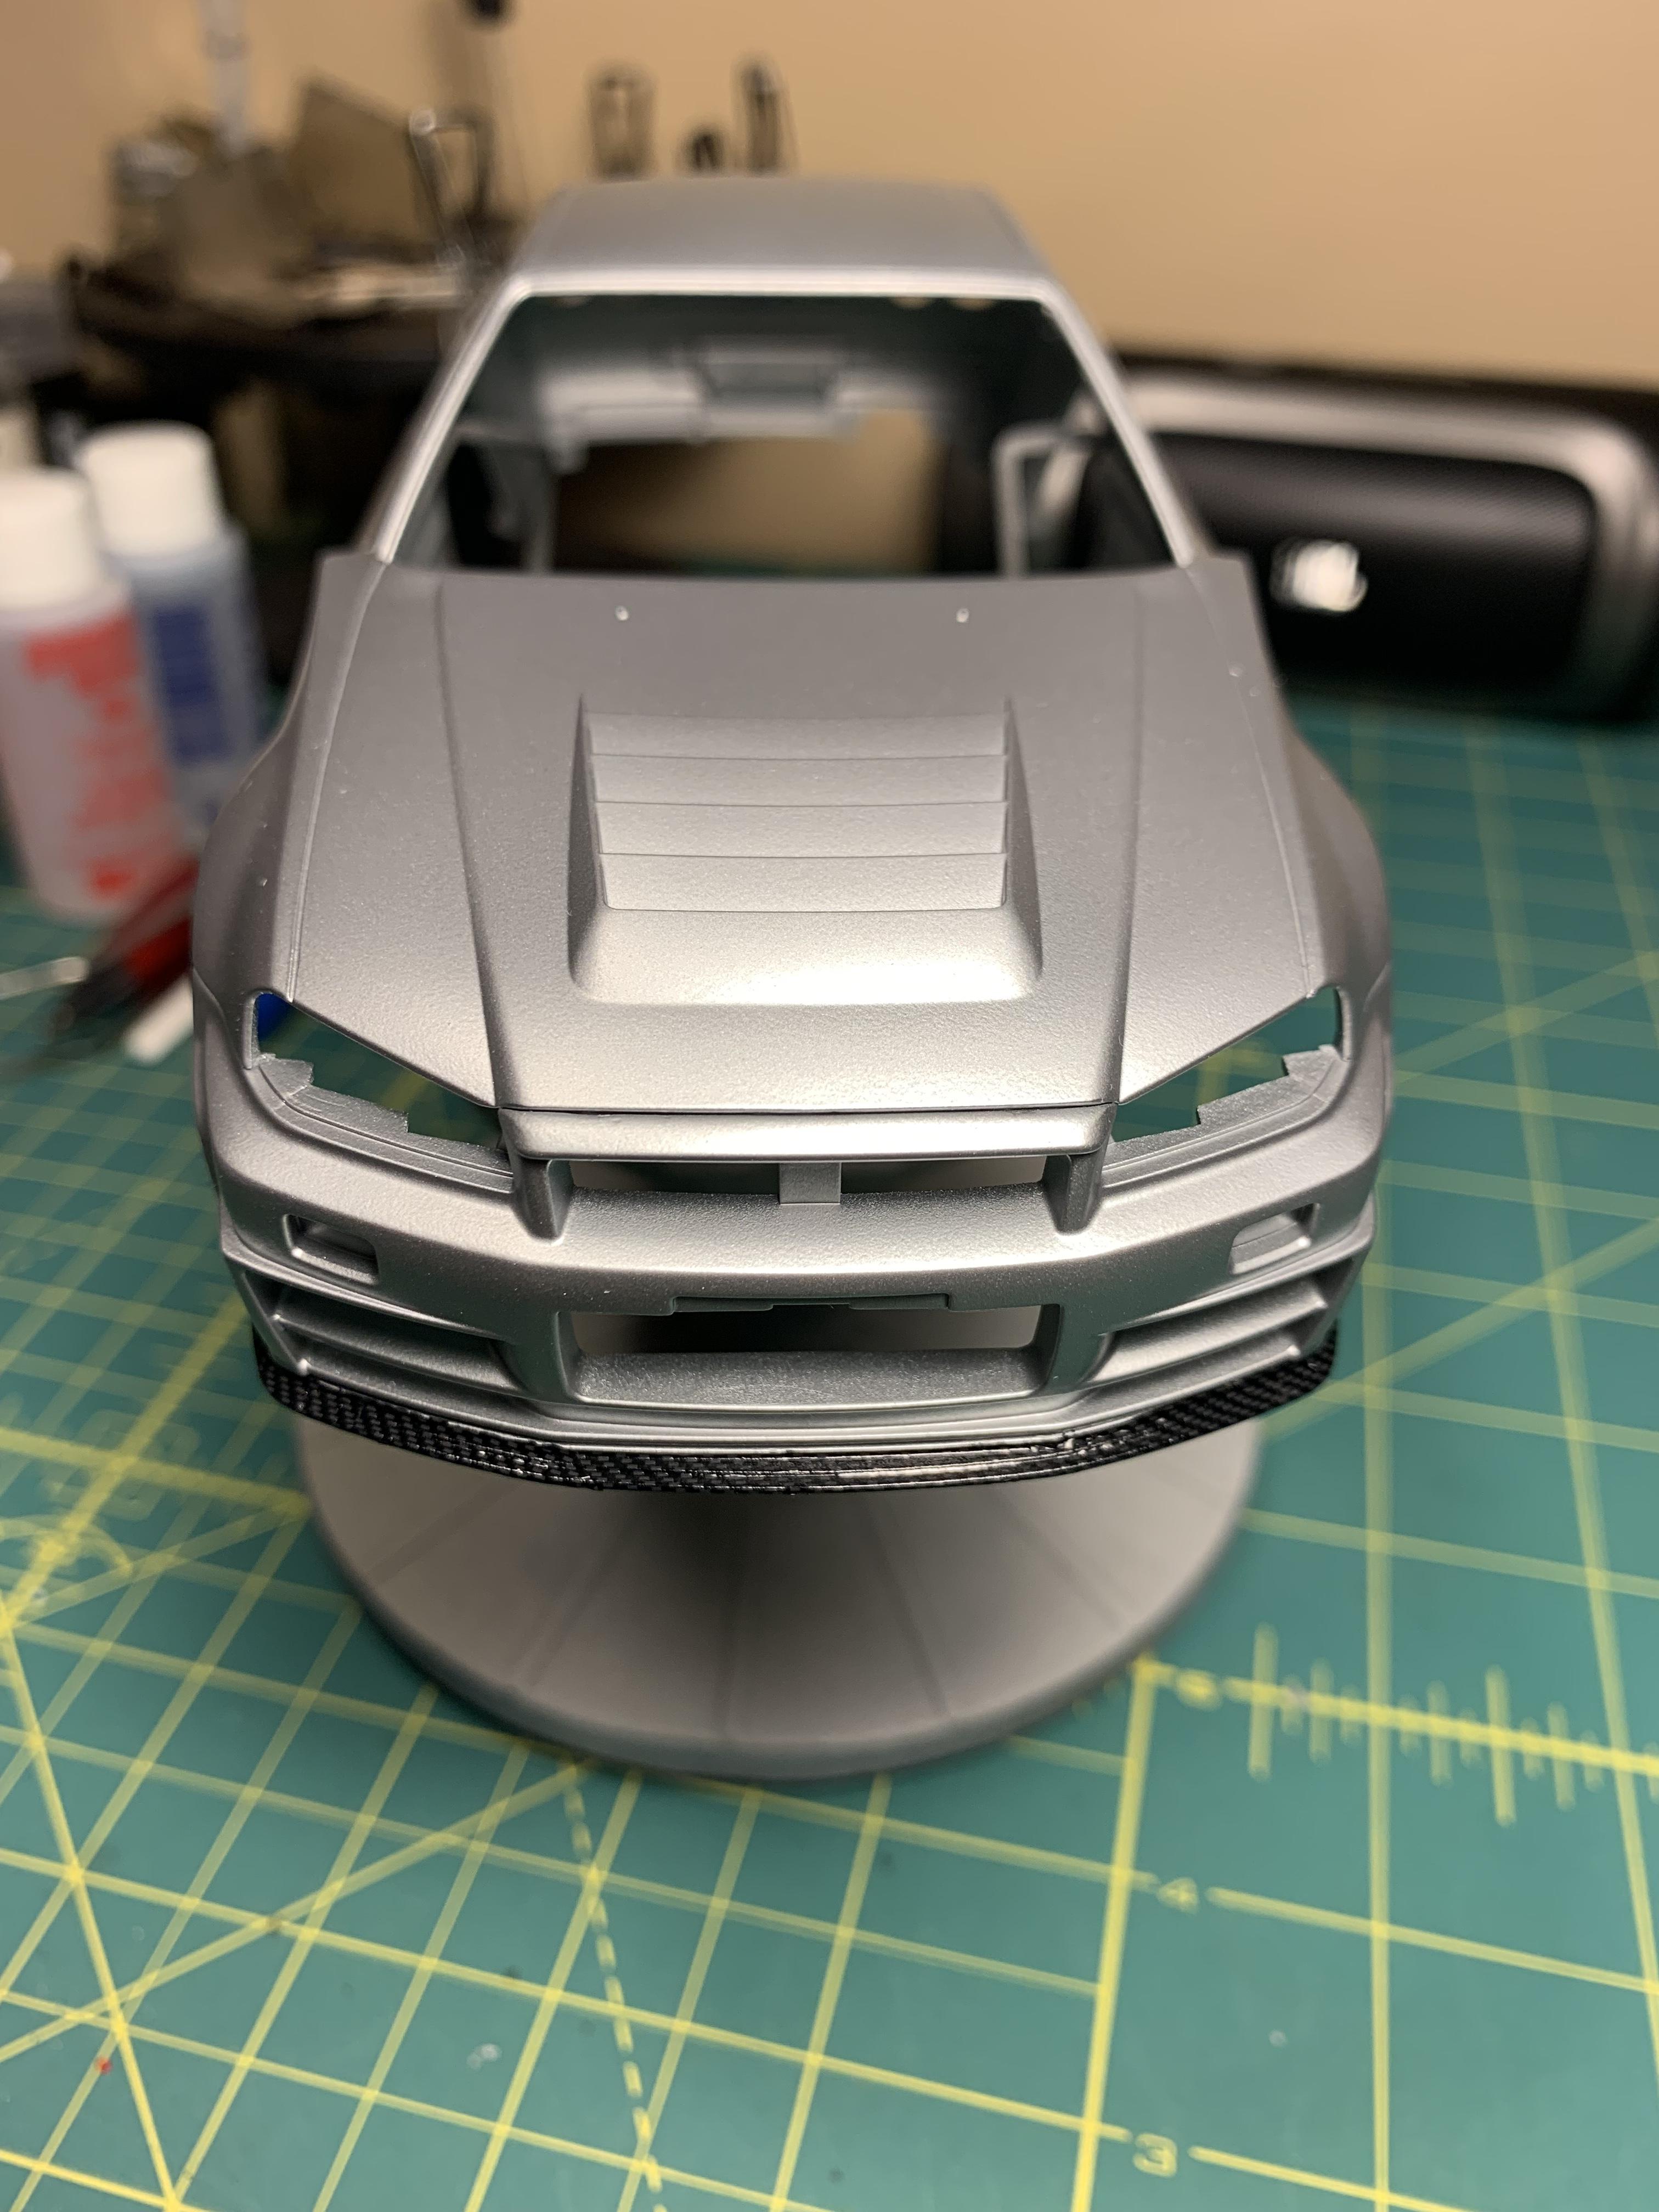
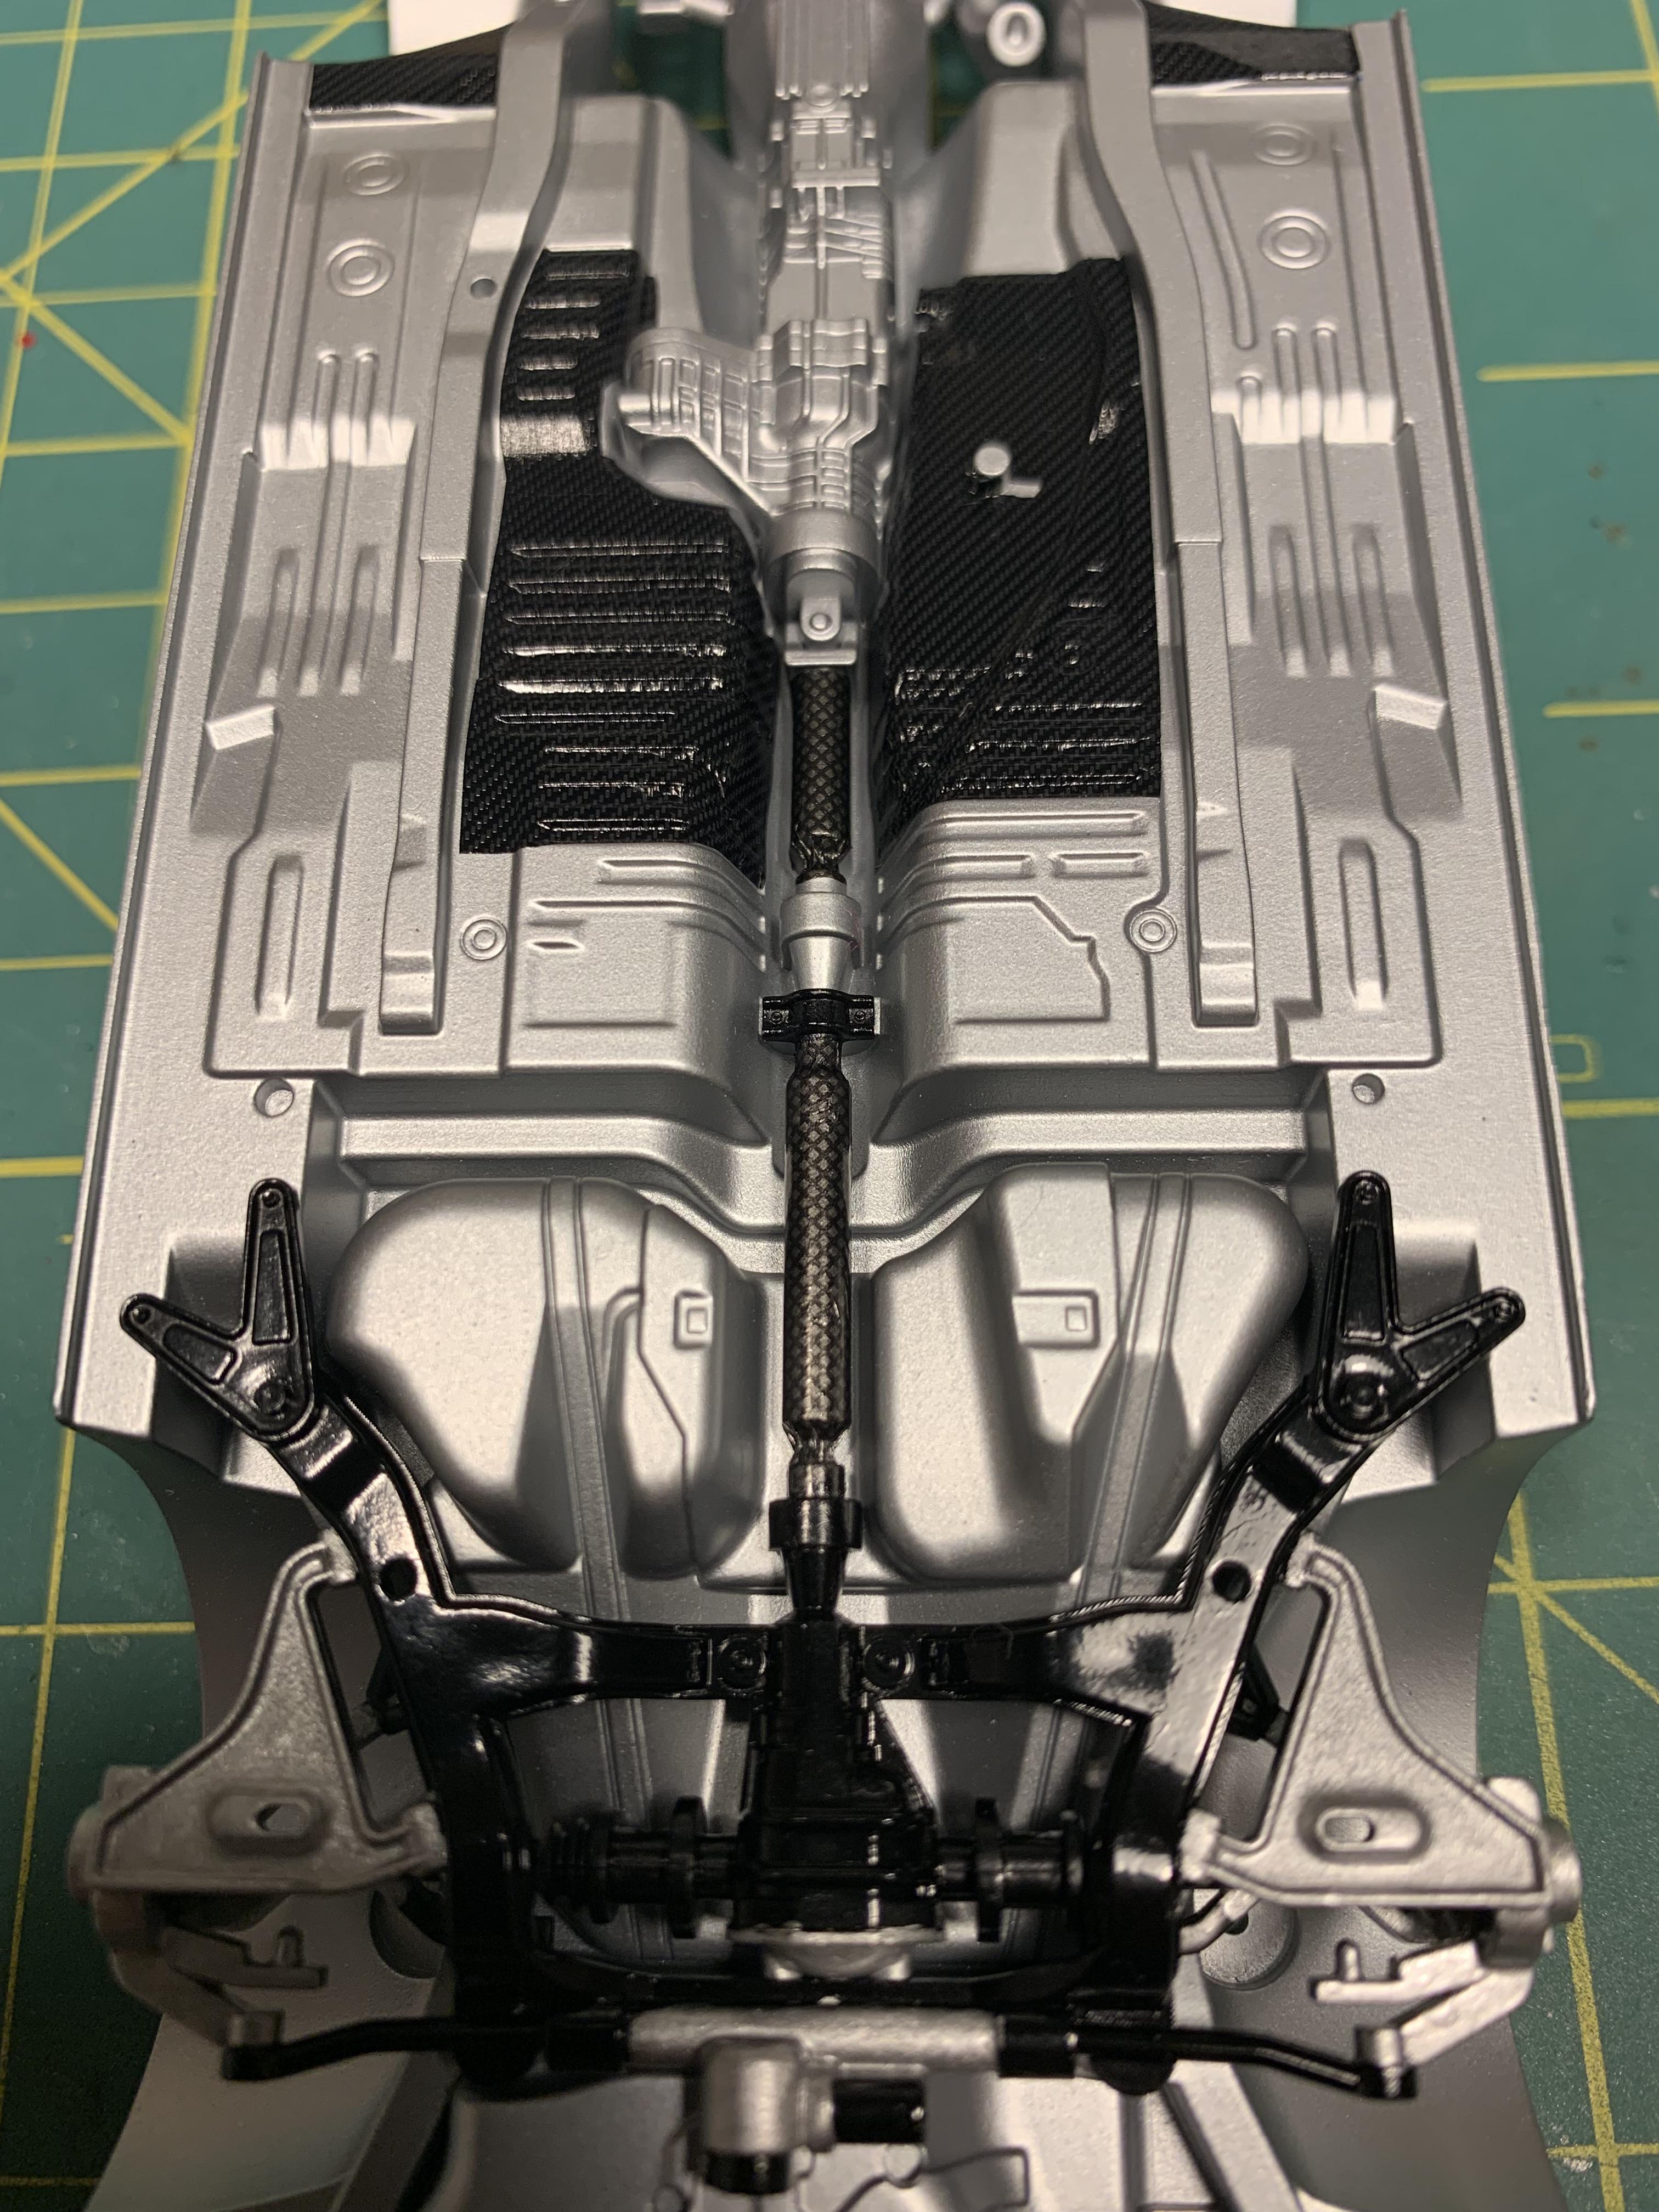
Well this one is finally finished. Super easy, straight forward build as any Tamiya kit is. Built box stock, with just a little more detail. Paint is Gravity Colors Nissan Skyline Z-Tune Silver with Gravity Colors clear coat. I also added the Tamiya Detail-Up set which included a lot of photo-etch stuff. In addition, I added some self made Tamiya Carbon Fiber decals for the floor panels and rockers like on the 1:1 Z-Tune, and some steel braided lines ran for the trans/diff cooler. Thanks for looking.

-
I got all finished up today, and managed to take some pics along the way.
-

1970 Plymouth Superbird in Lemon Twist Yellow
lghtngyello03 replied to roadhawg's topic in Model Cars
This has got to be the cleanest Superbird build. Love the vinyl roof. -
Lots of clean Mopar builds popping up lately. Great work!
-
Super clean build, makes me want to build the one in my stash!
-
That's some awesome work man! Paint and bmf work looks amazing. How did you fix the ride height?
-
Awesome detailing work!! Your decal work looks flawless as well. I'll definitely be watching this one come together.
-
Sorry about that I thought you did. You had commented on the thread. Super looking work so far though
-
Your build on the super bird was clean, and it appears that this will be too. Awesome color and paint work so far. Makes me want to build one. I’m definitely checking out fireball Modelworks parts now!
-
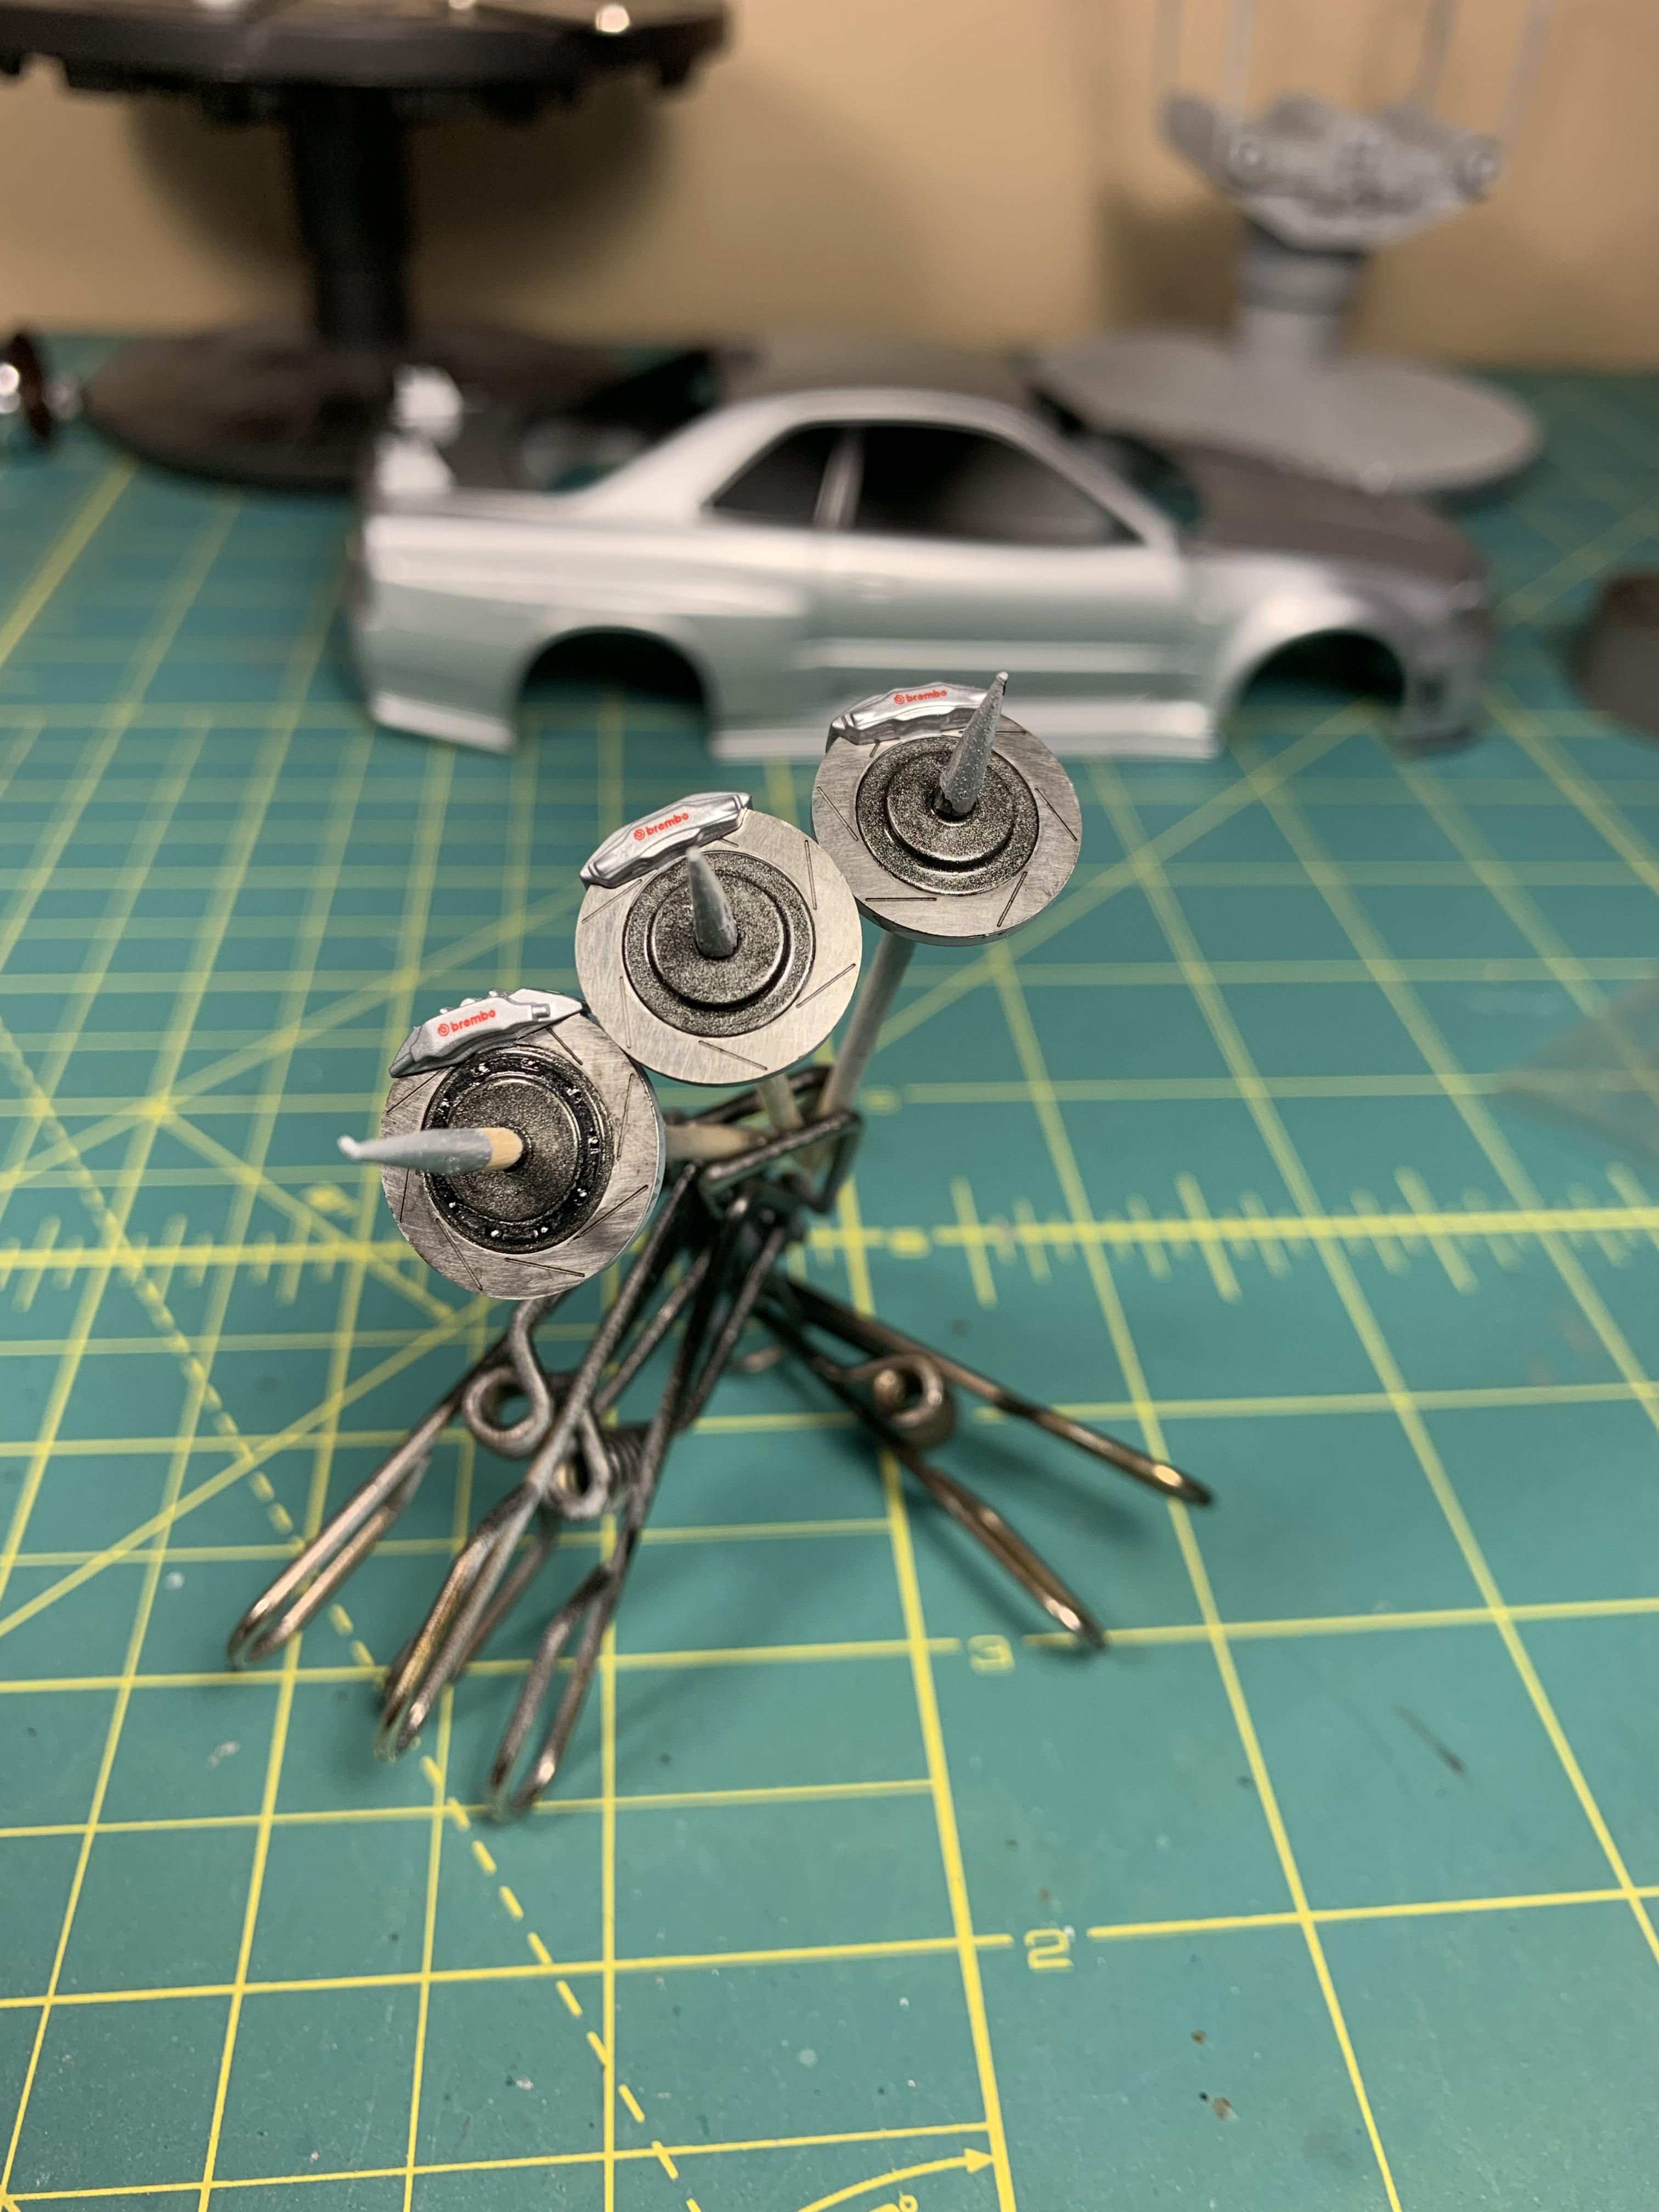
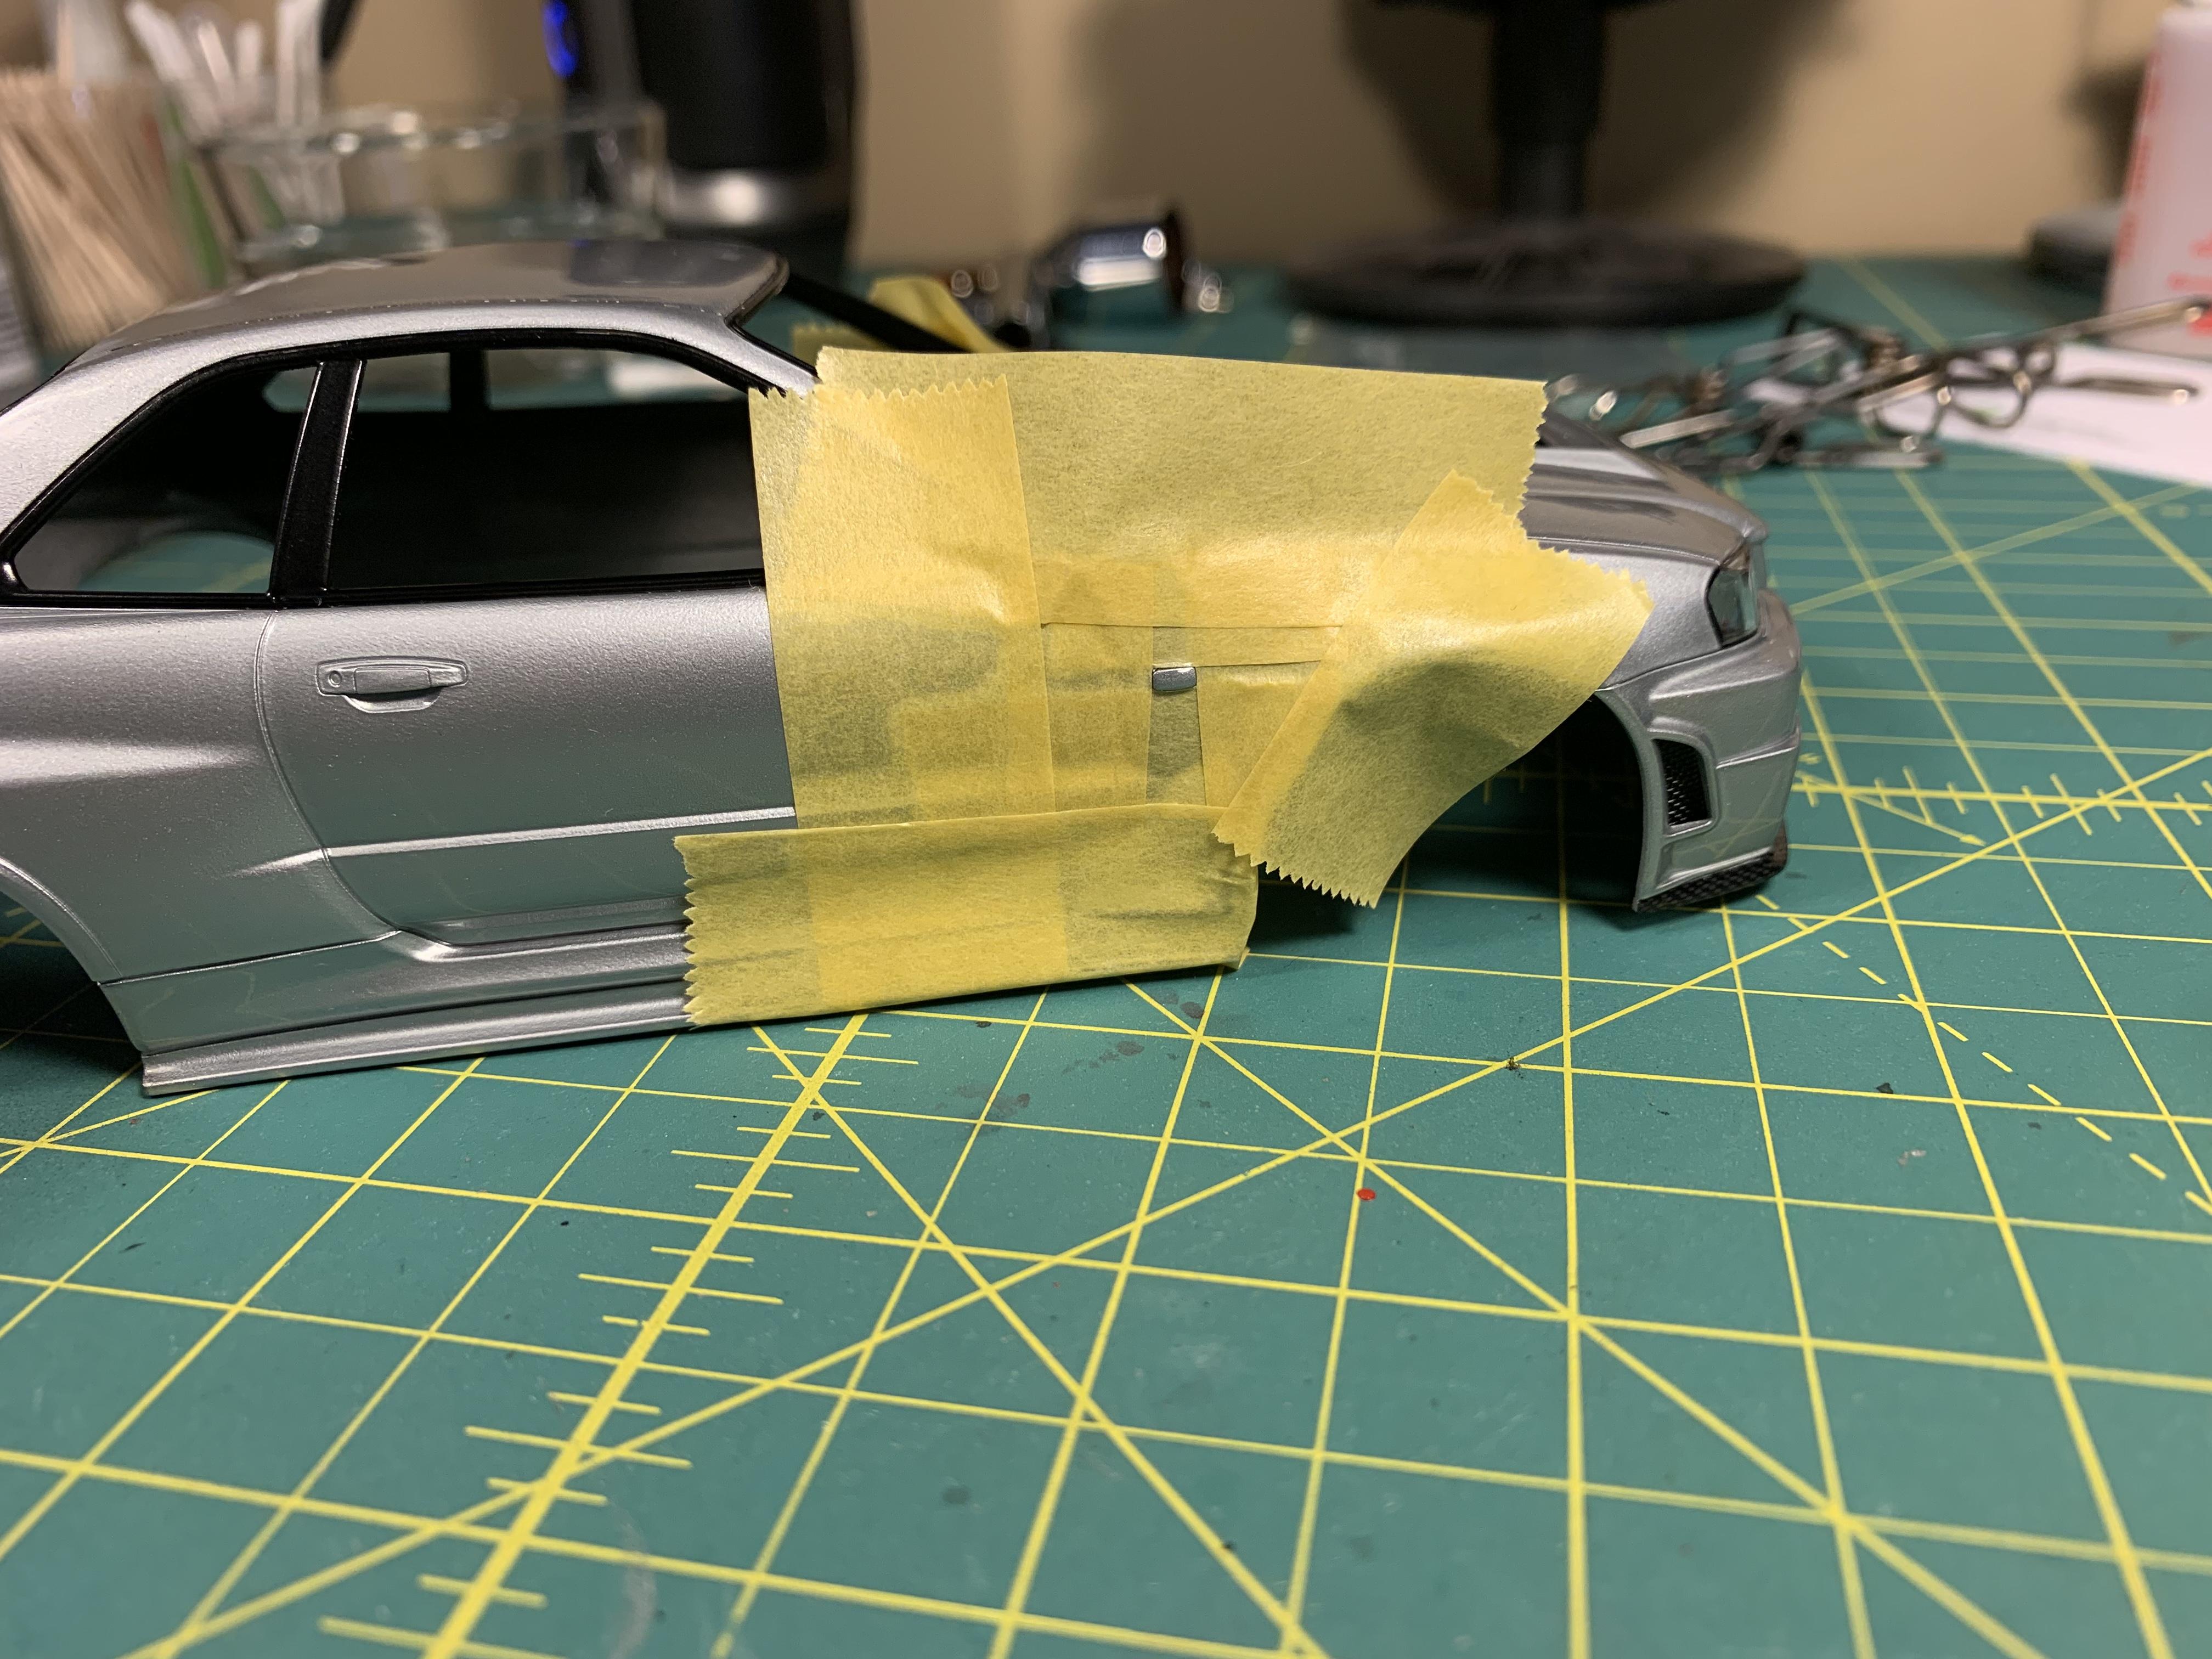
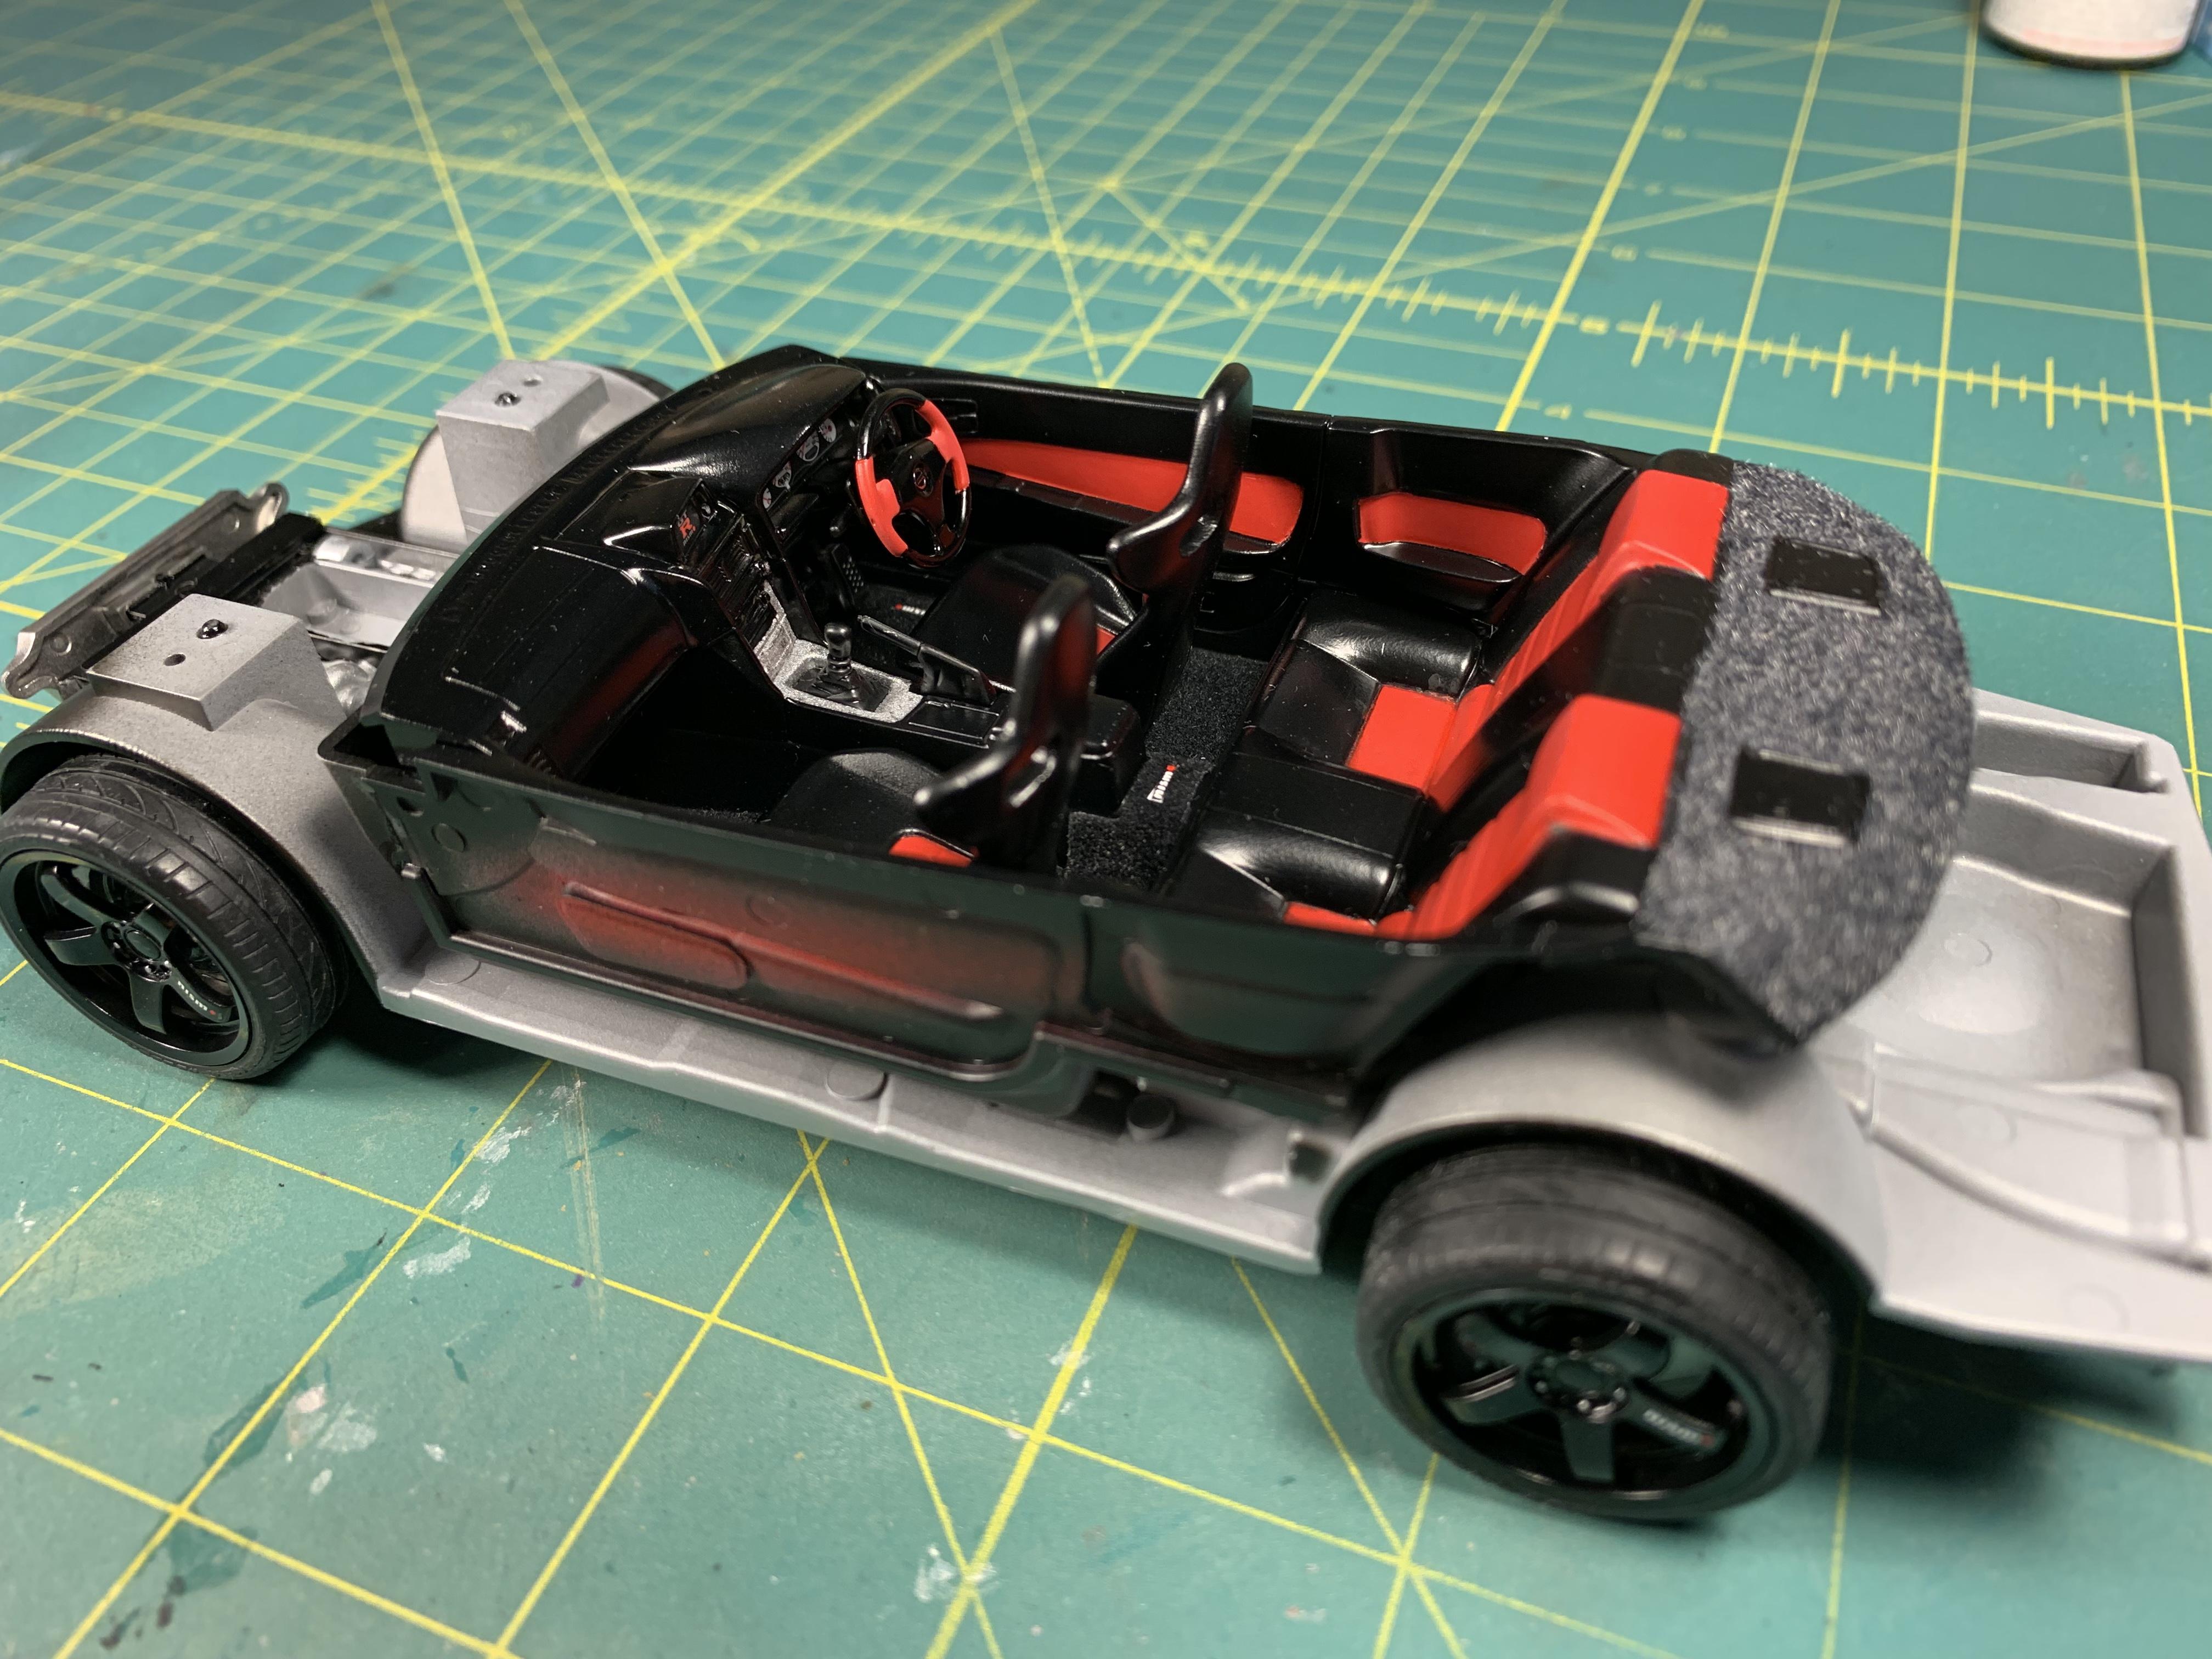
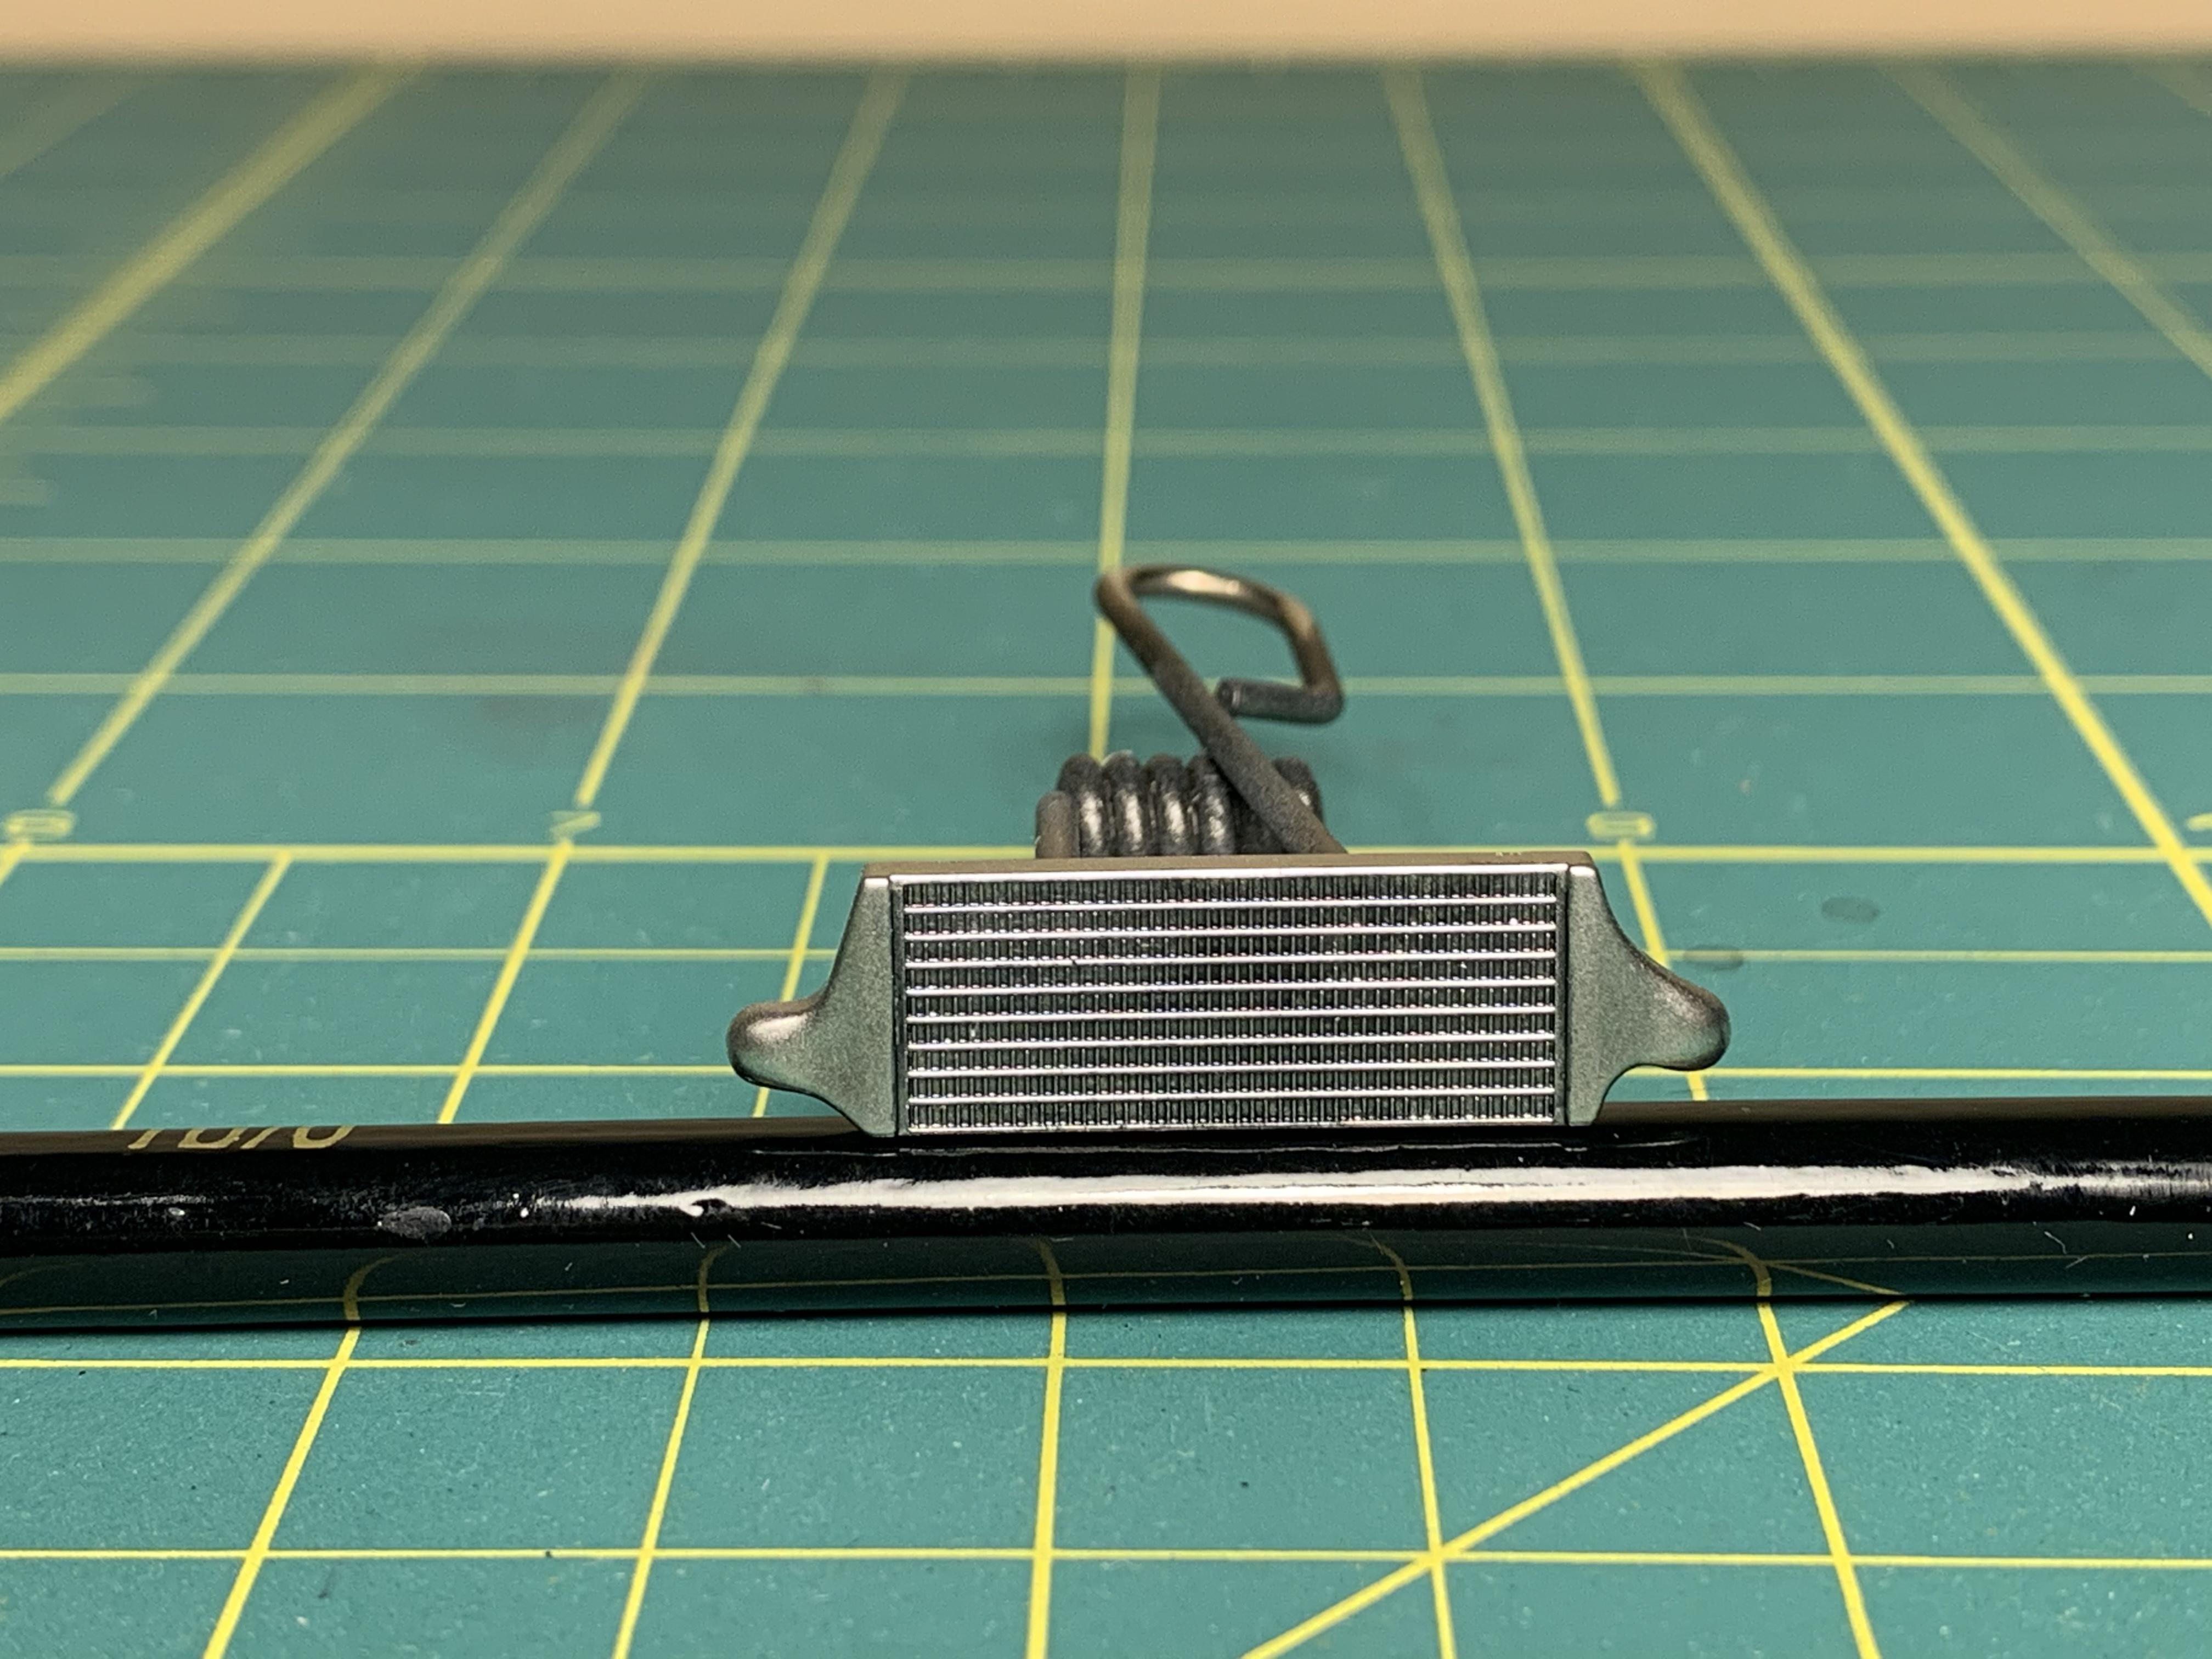
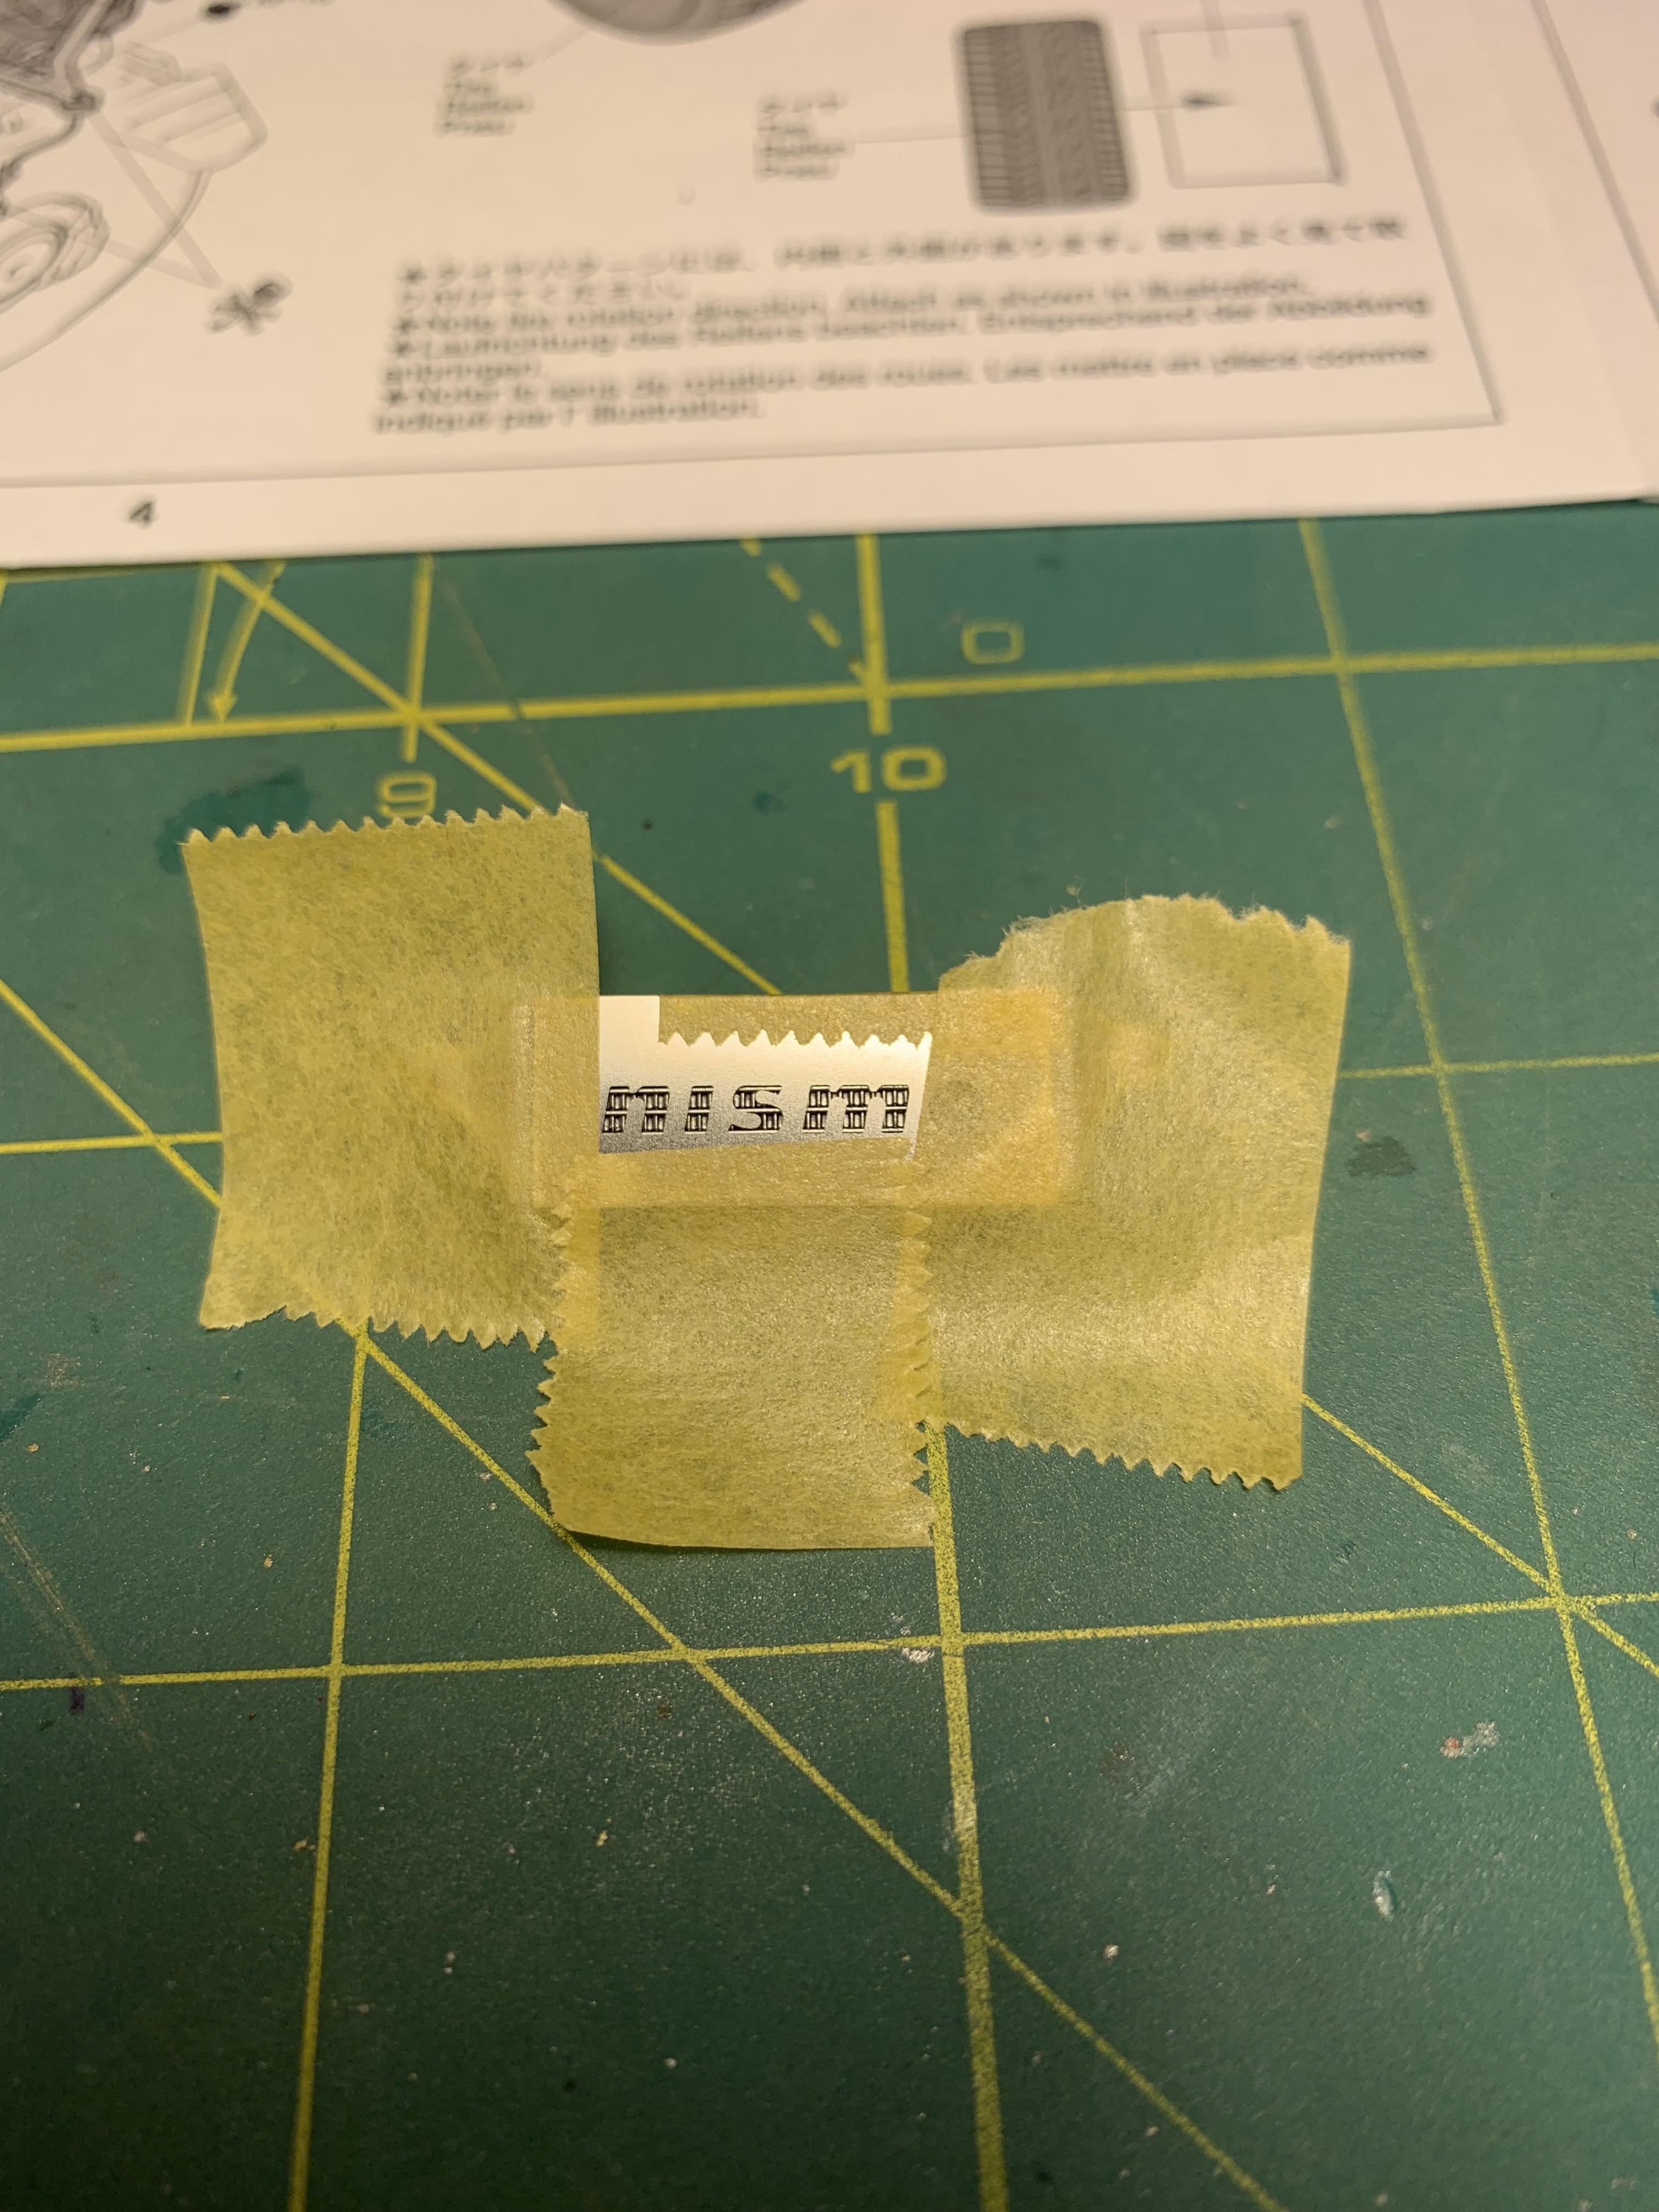
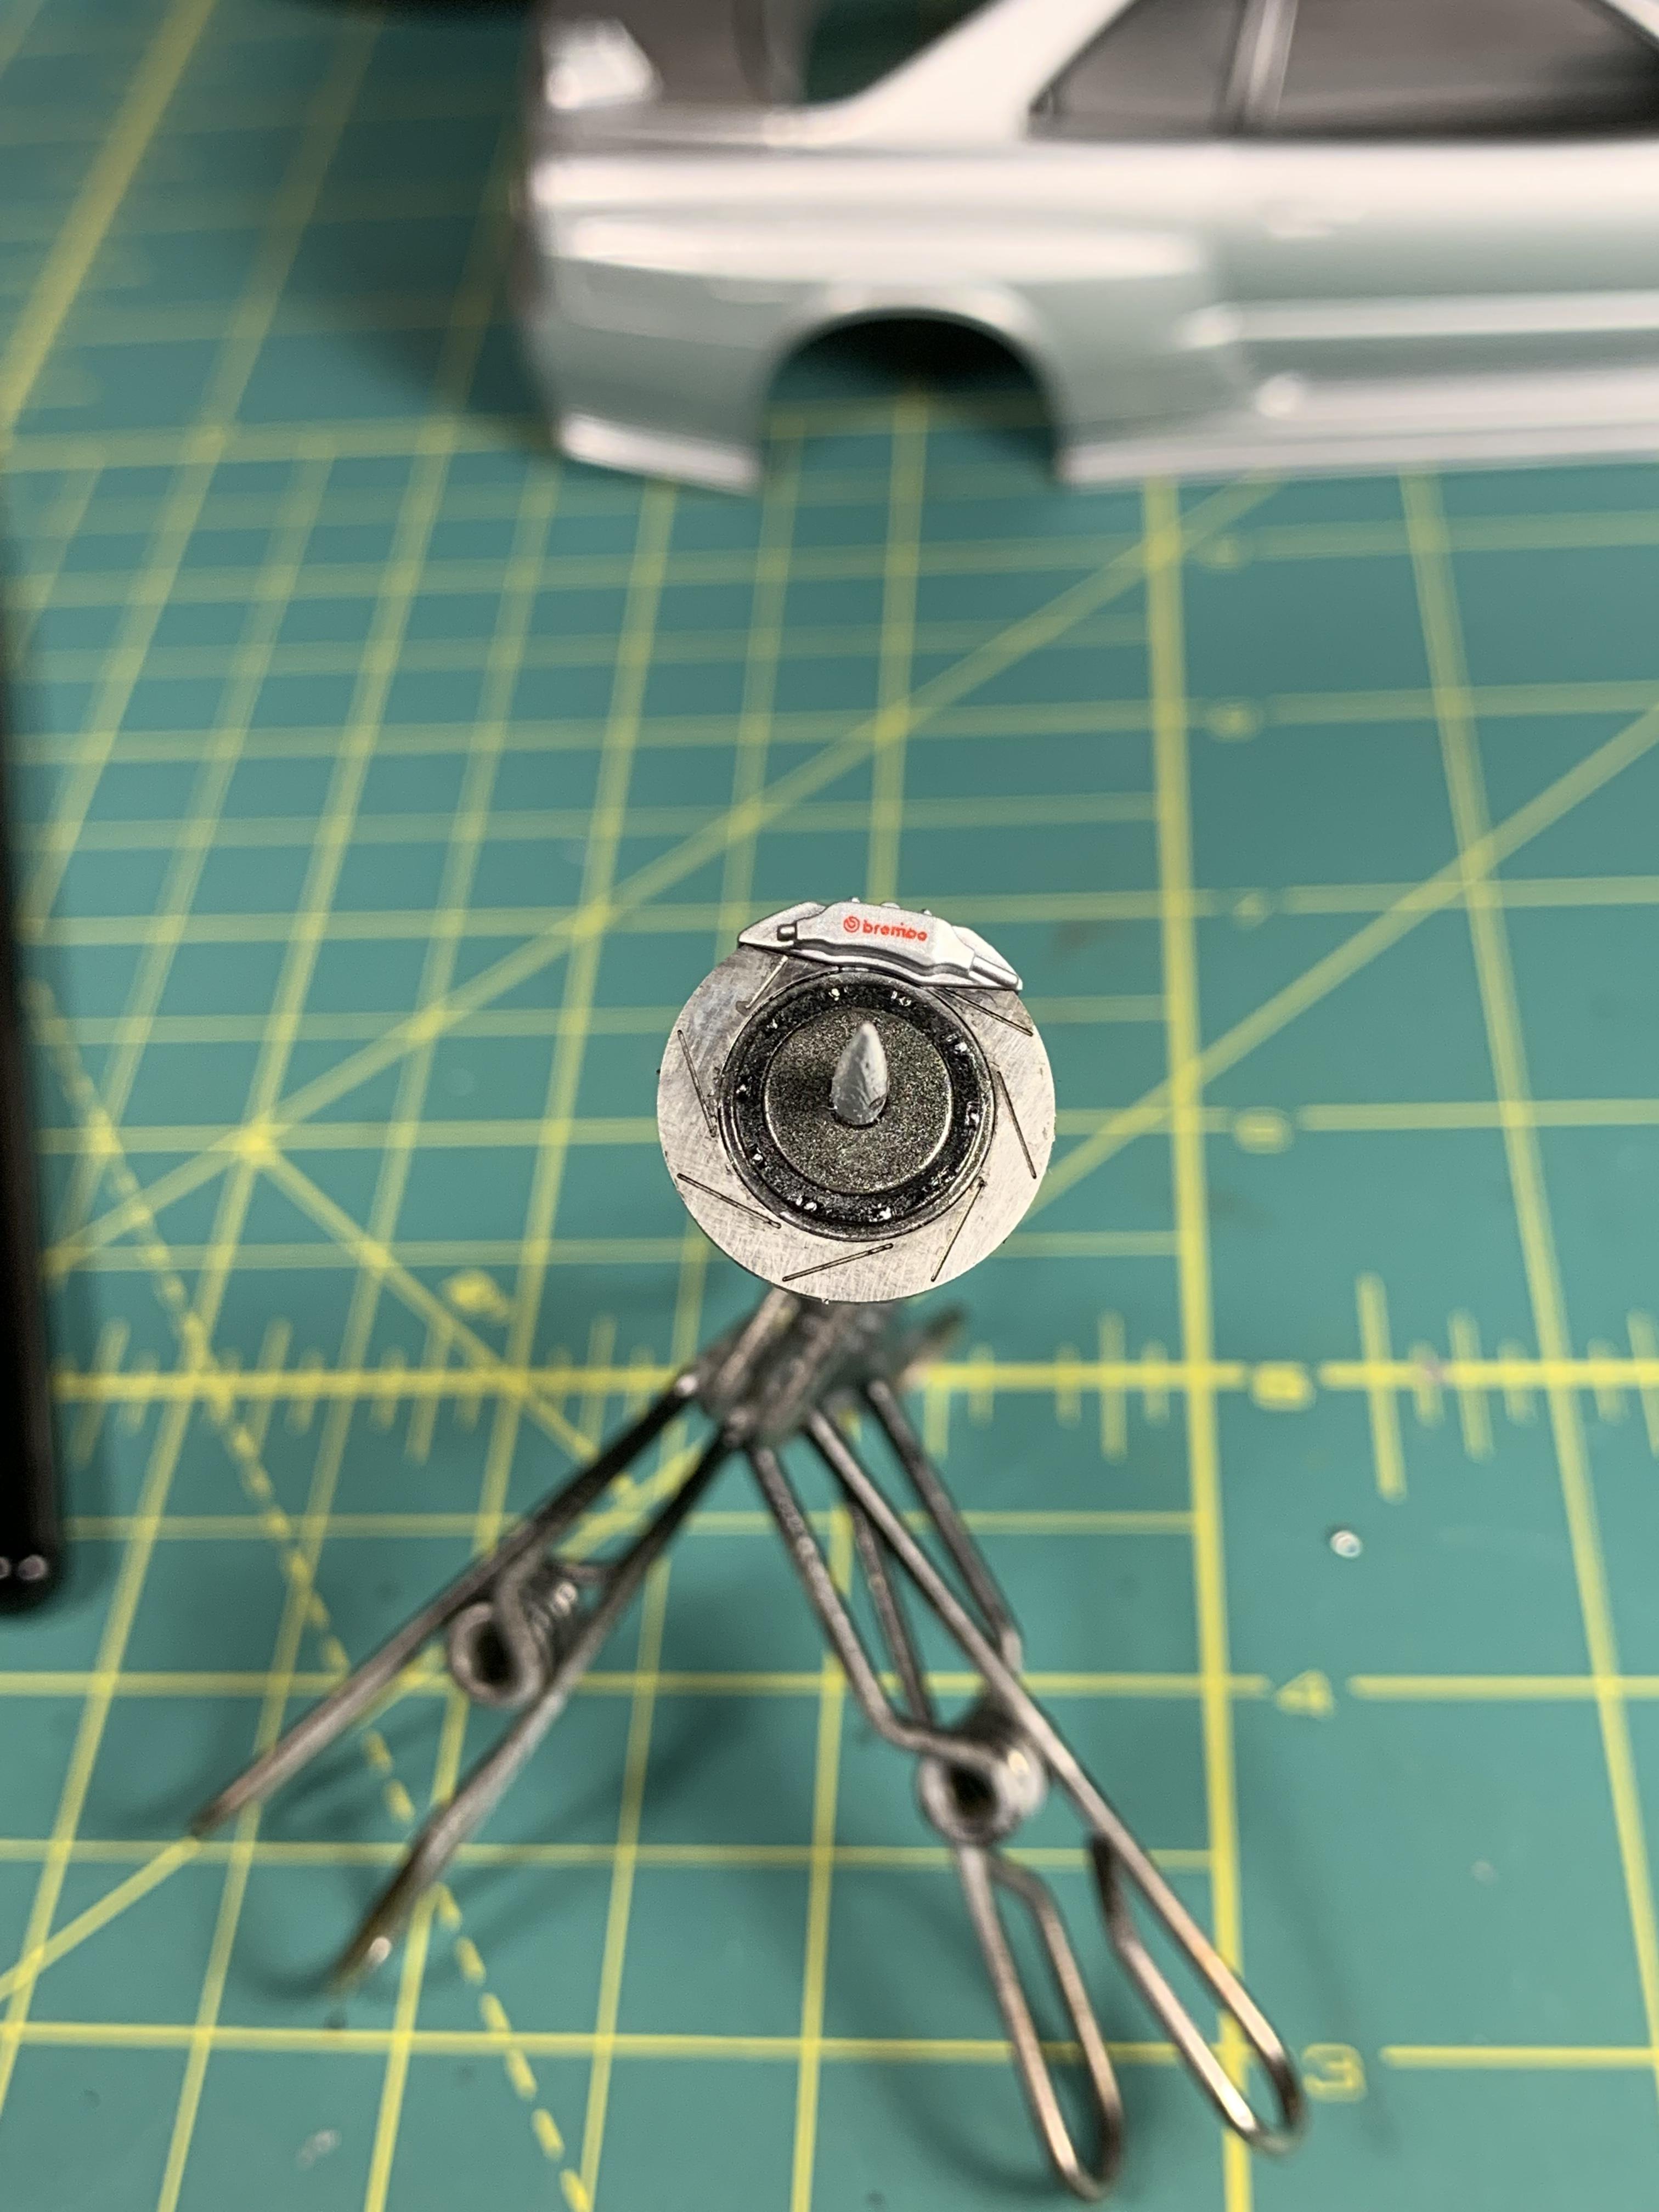
Tonight I got some more detailing work completed. I managed to get the stencil airbrushed on the intercooler and then it mounted, as well as the front driveshaft carbon fiber decal made and applied, front suspension assembled, and one brake caliper photo etch parts applied and detailed.
-
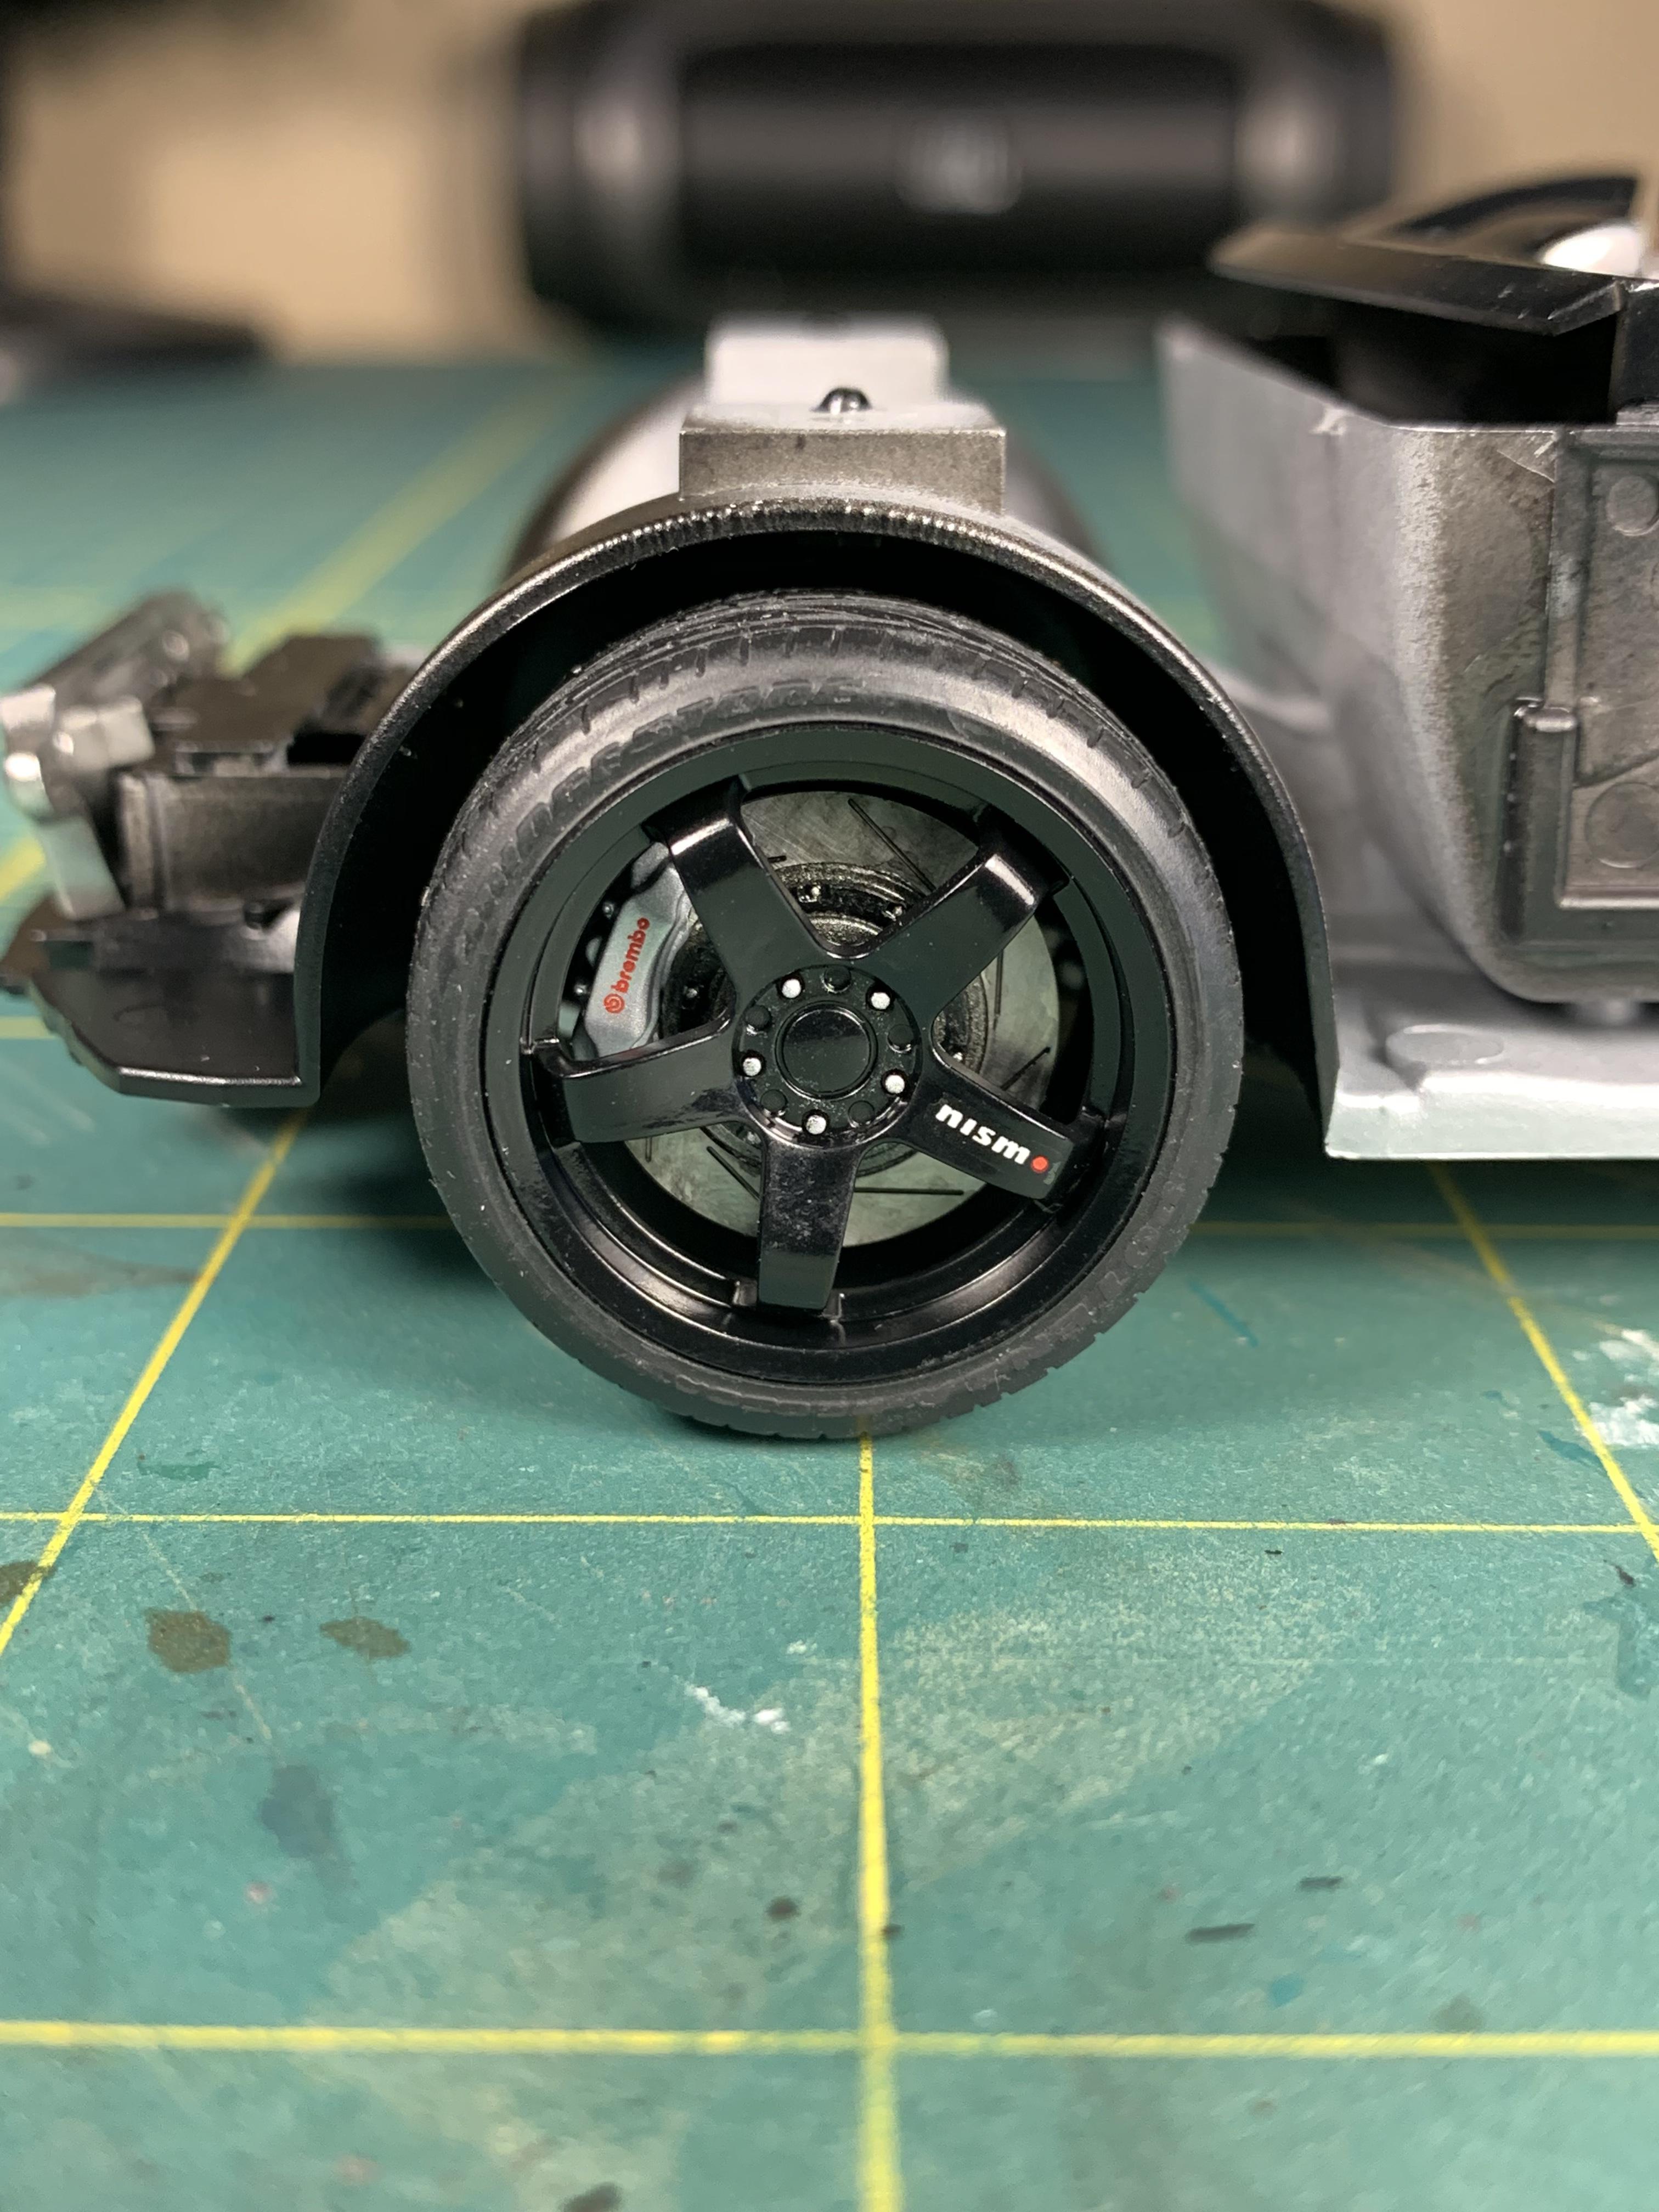
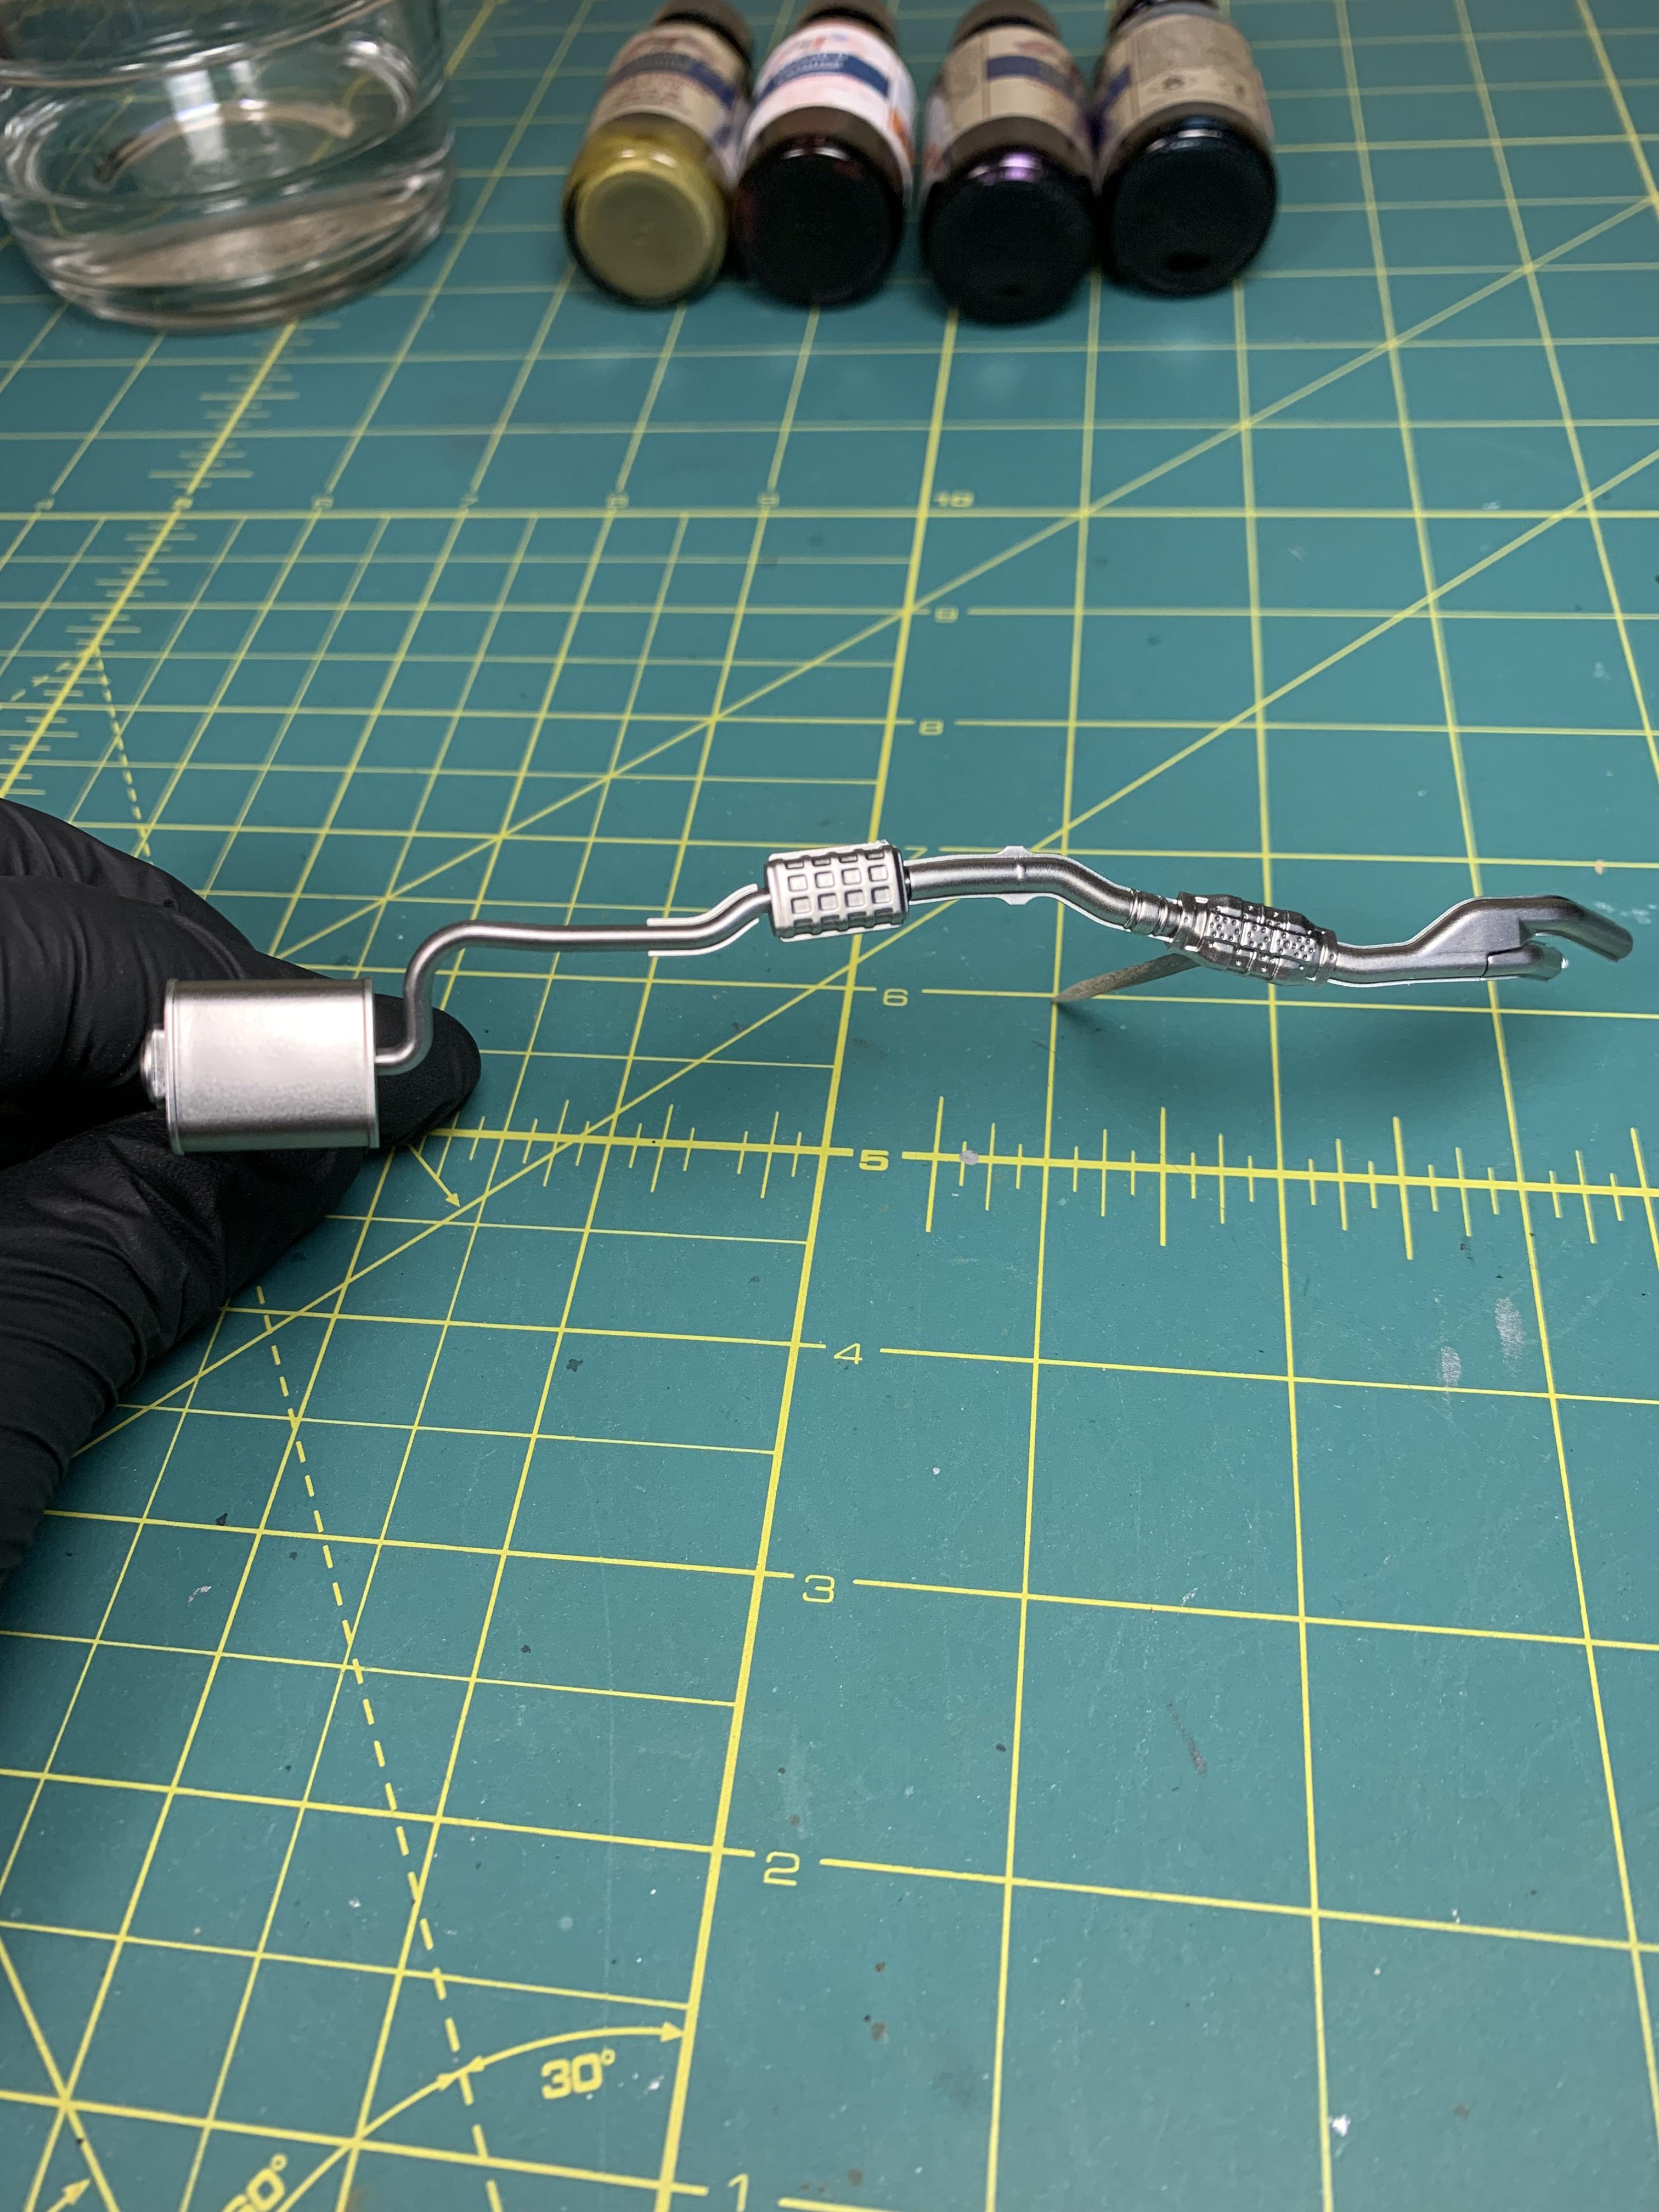
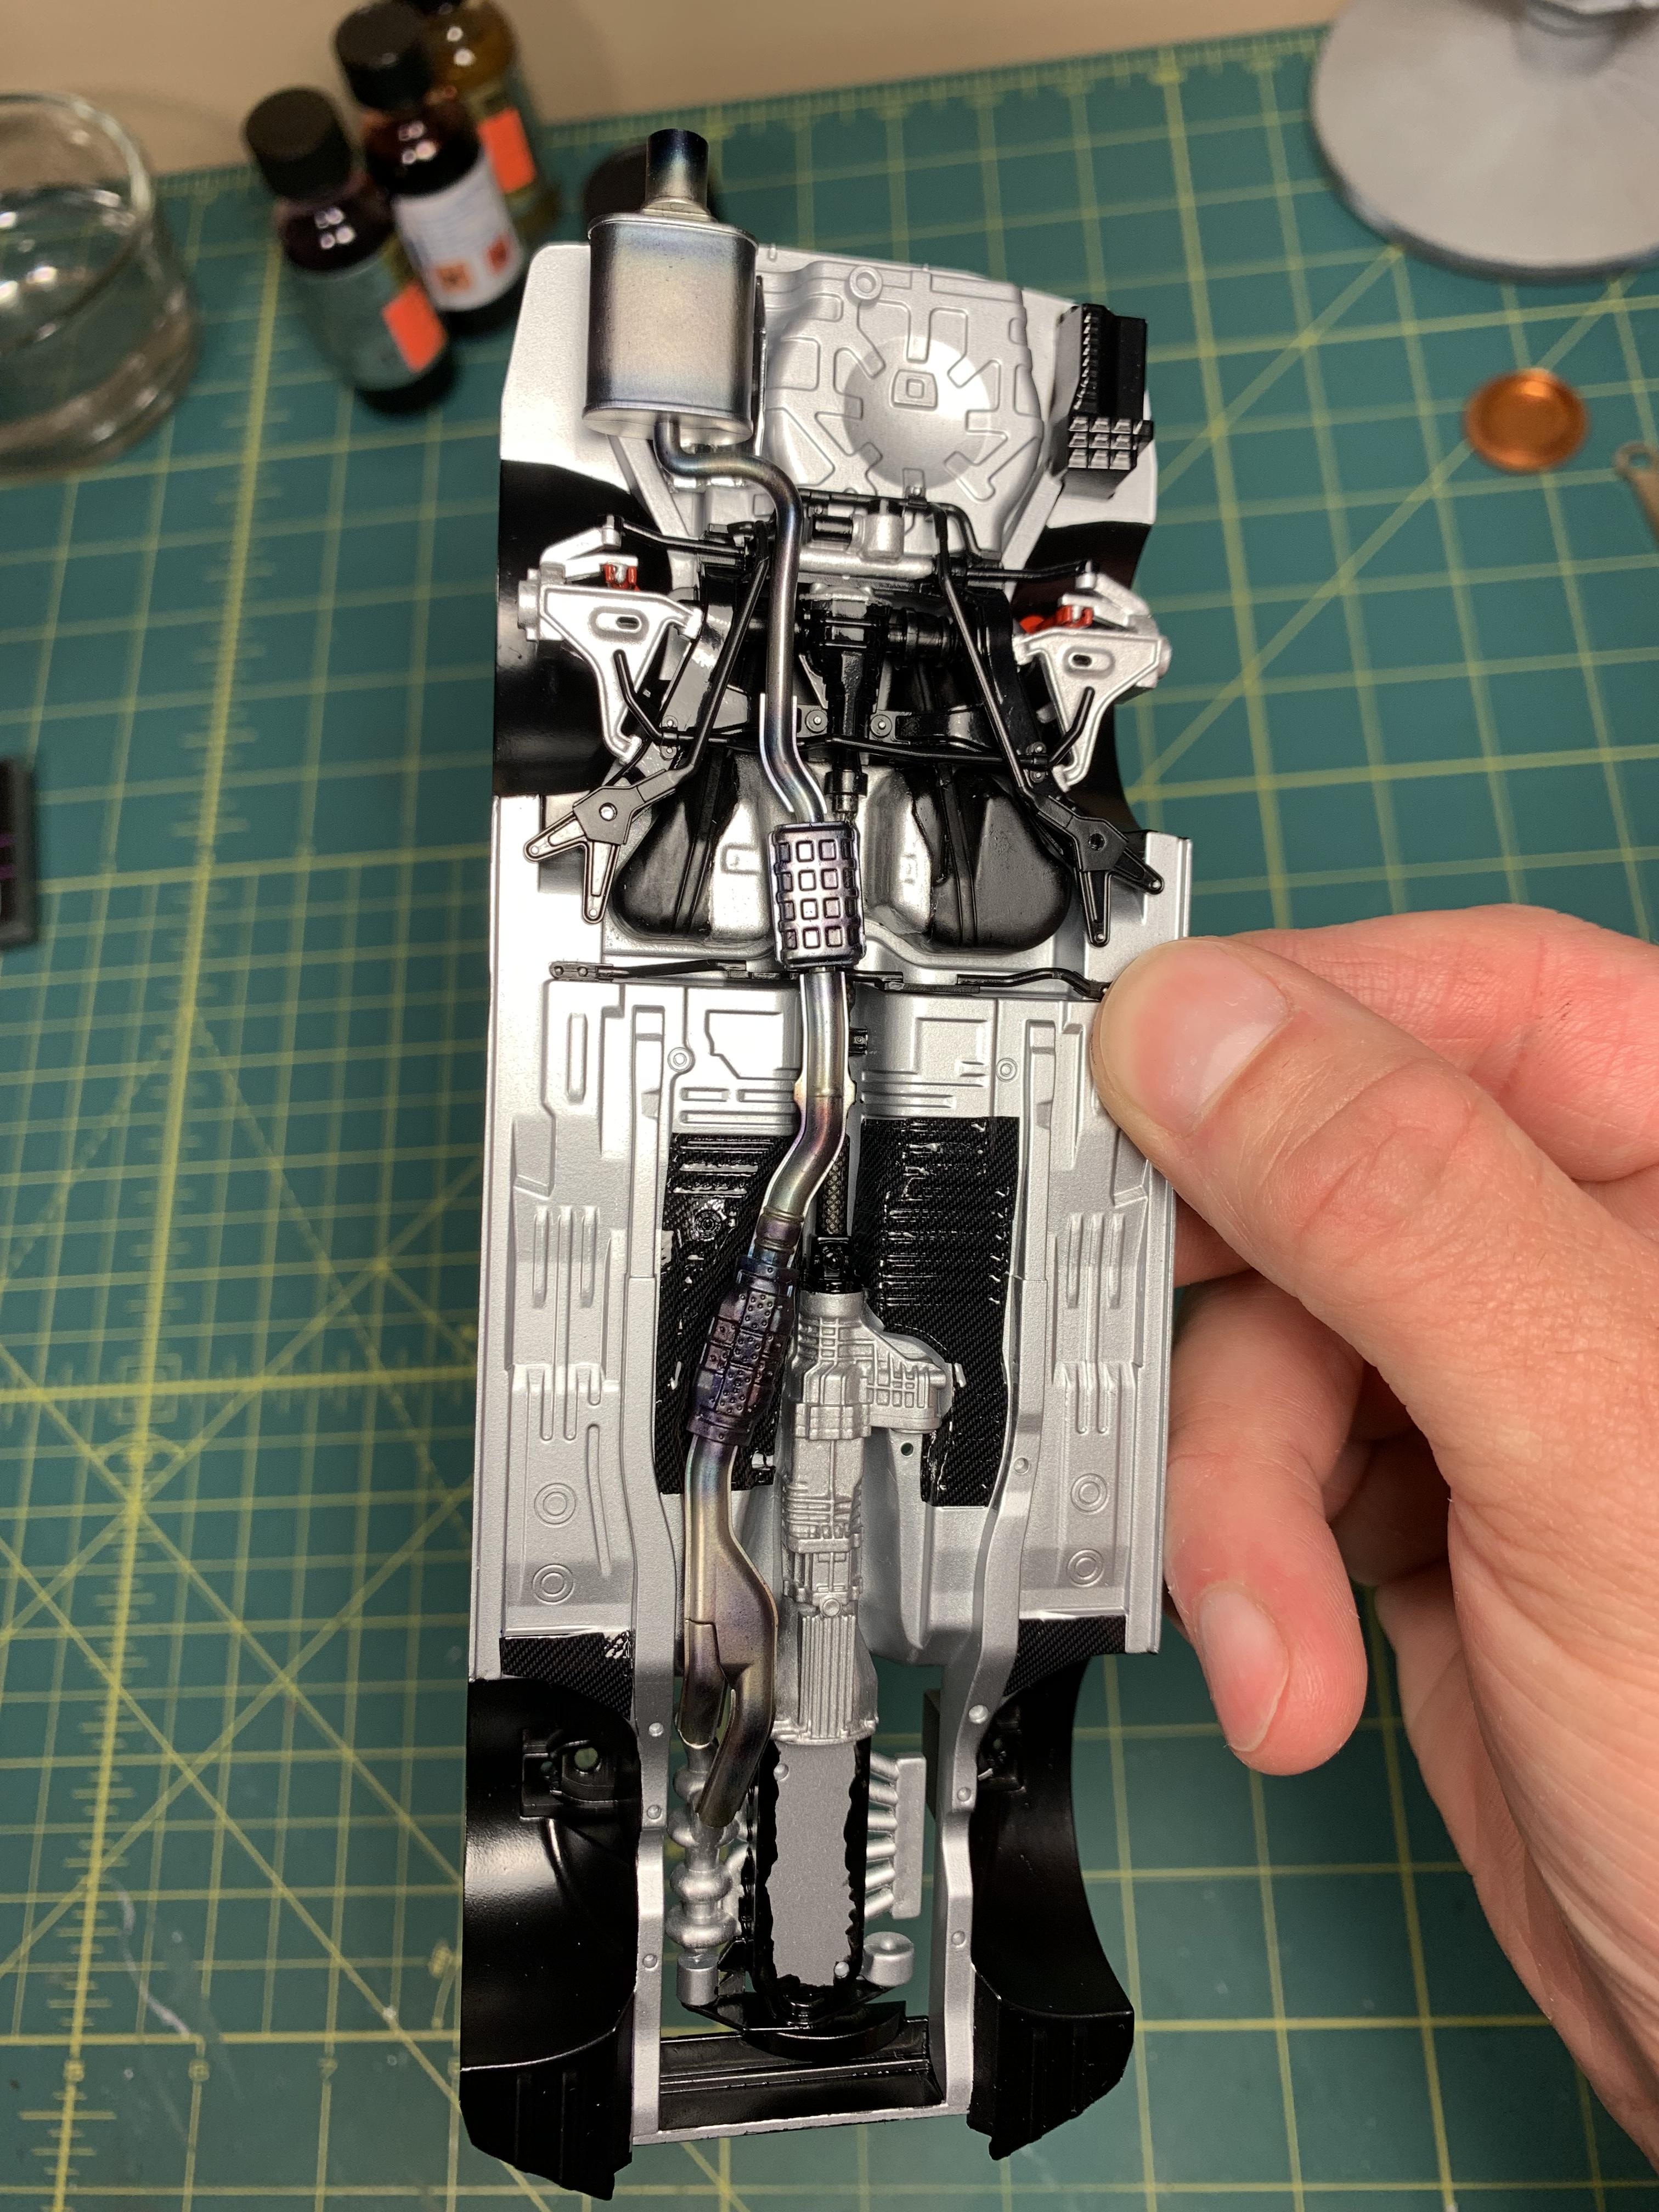
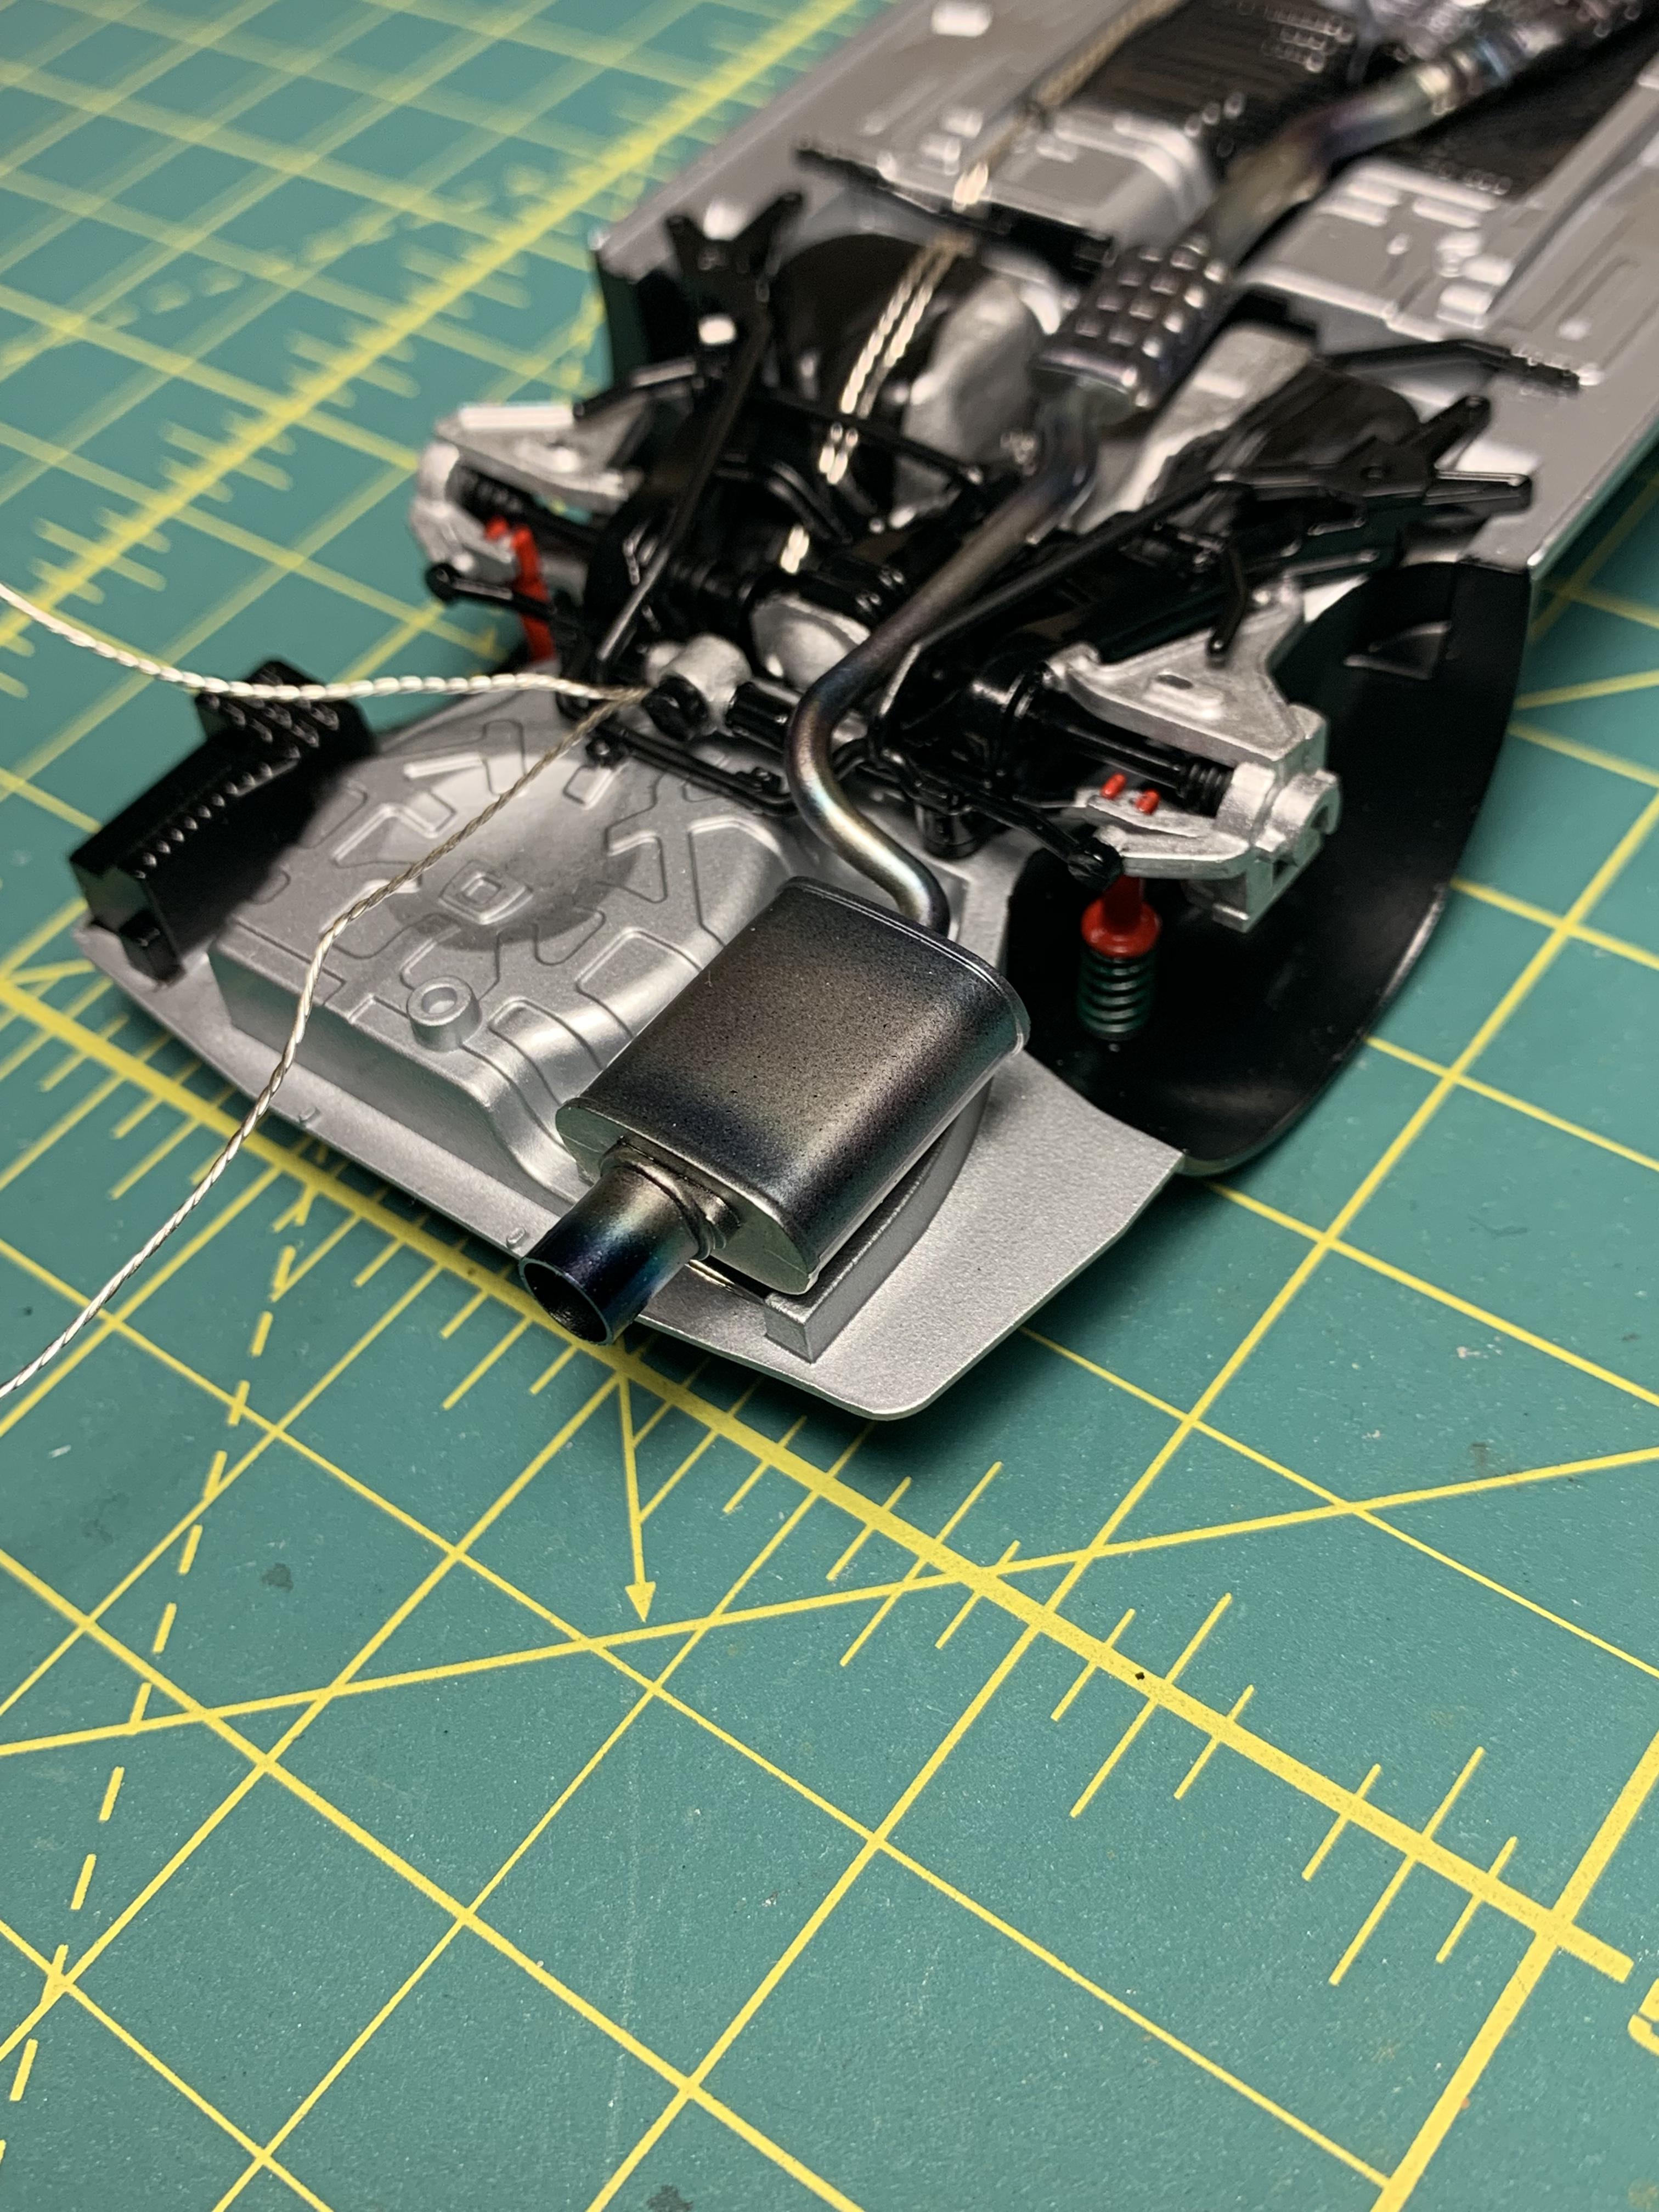
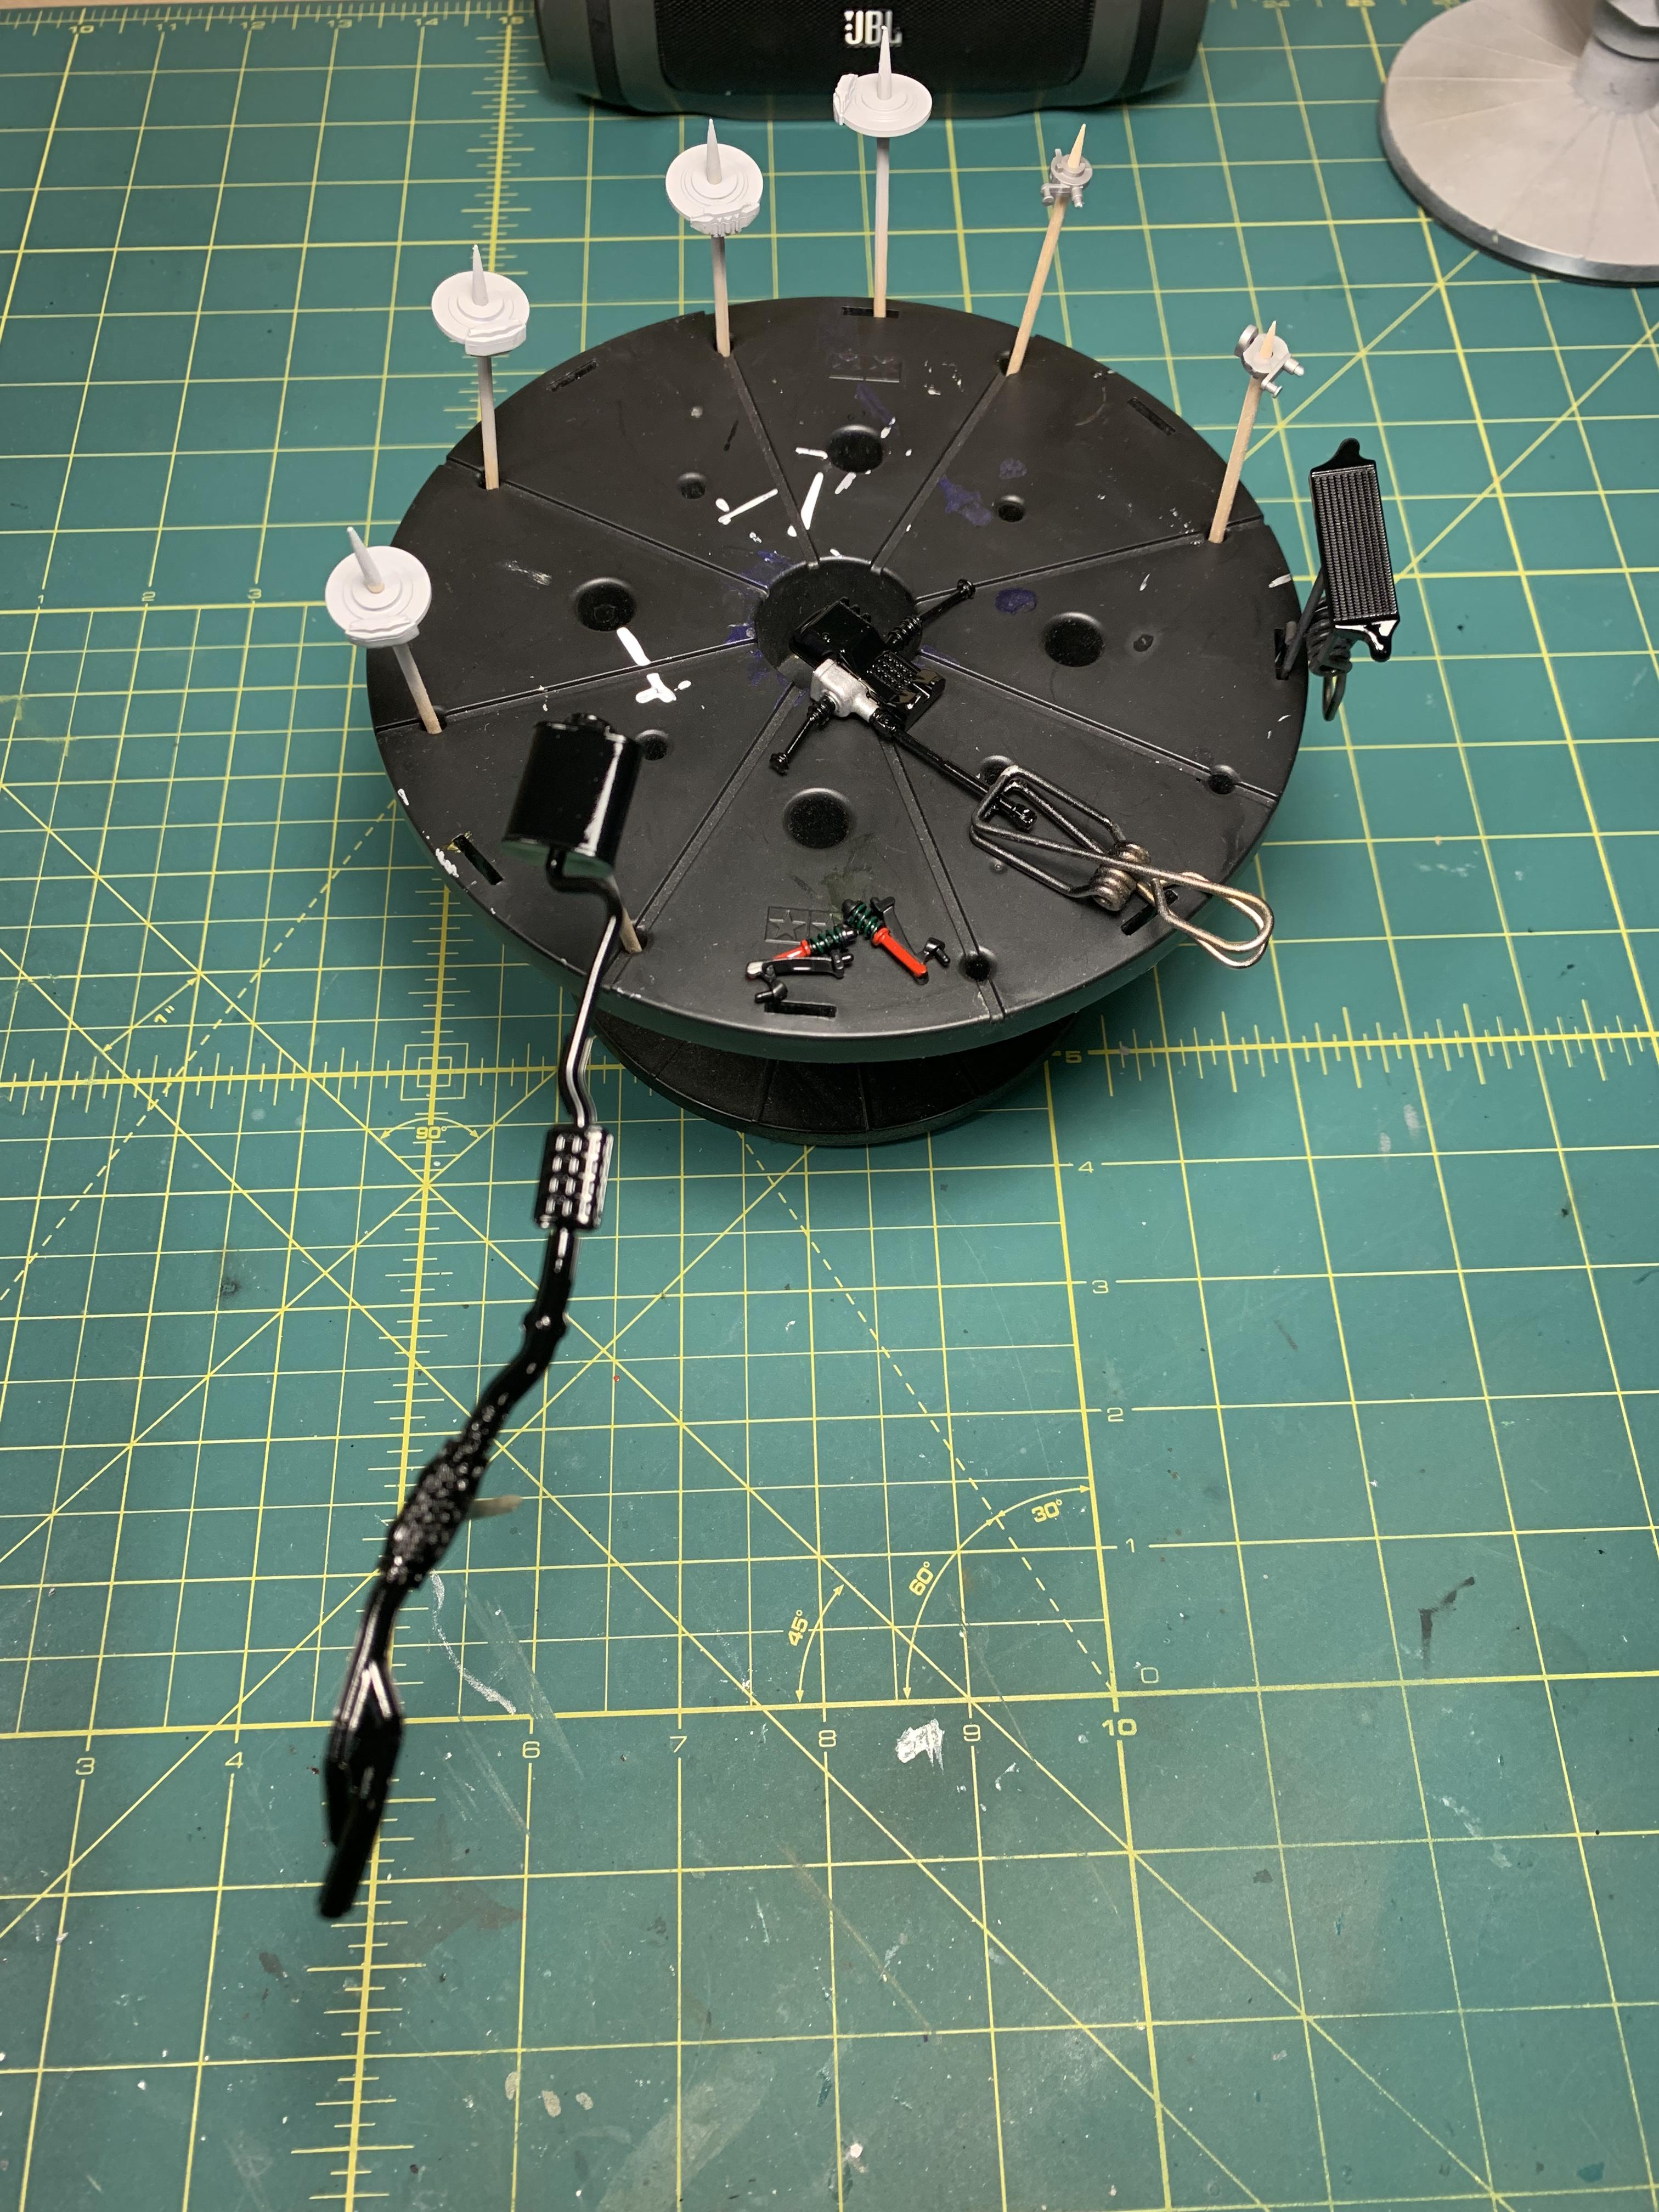
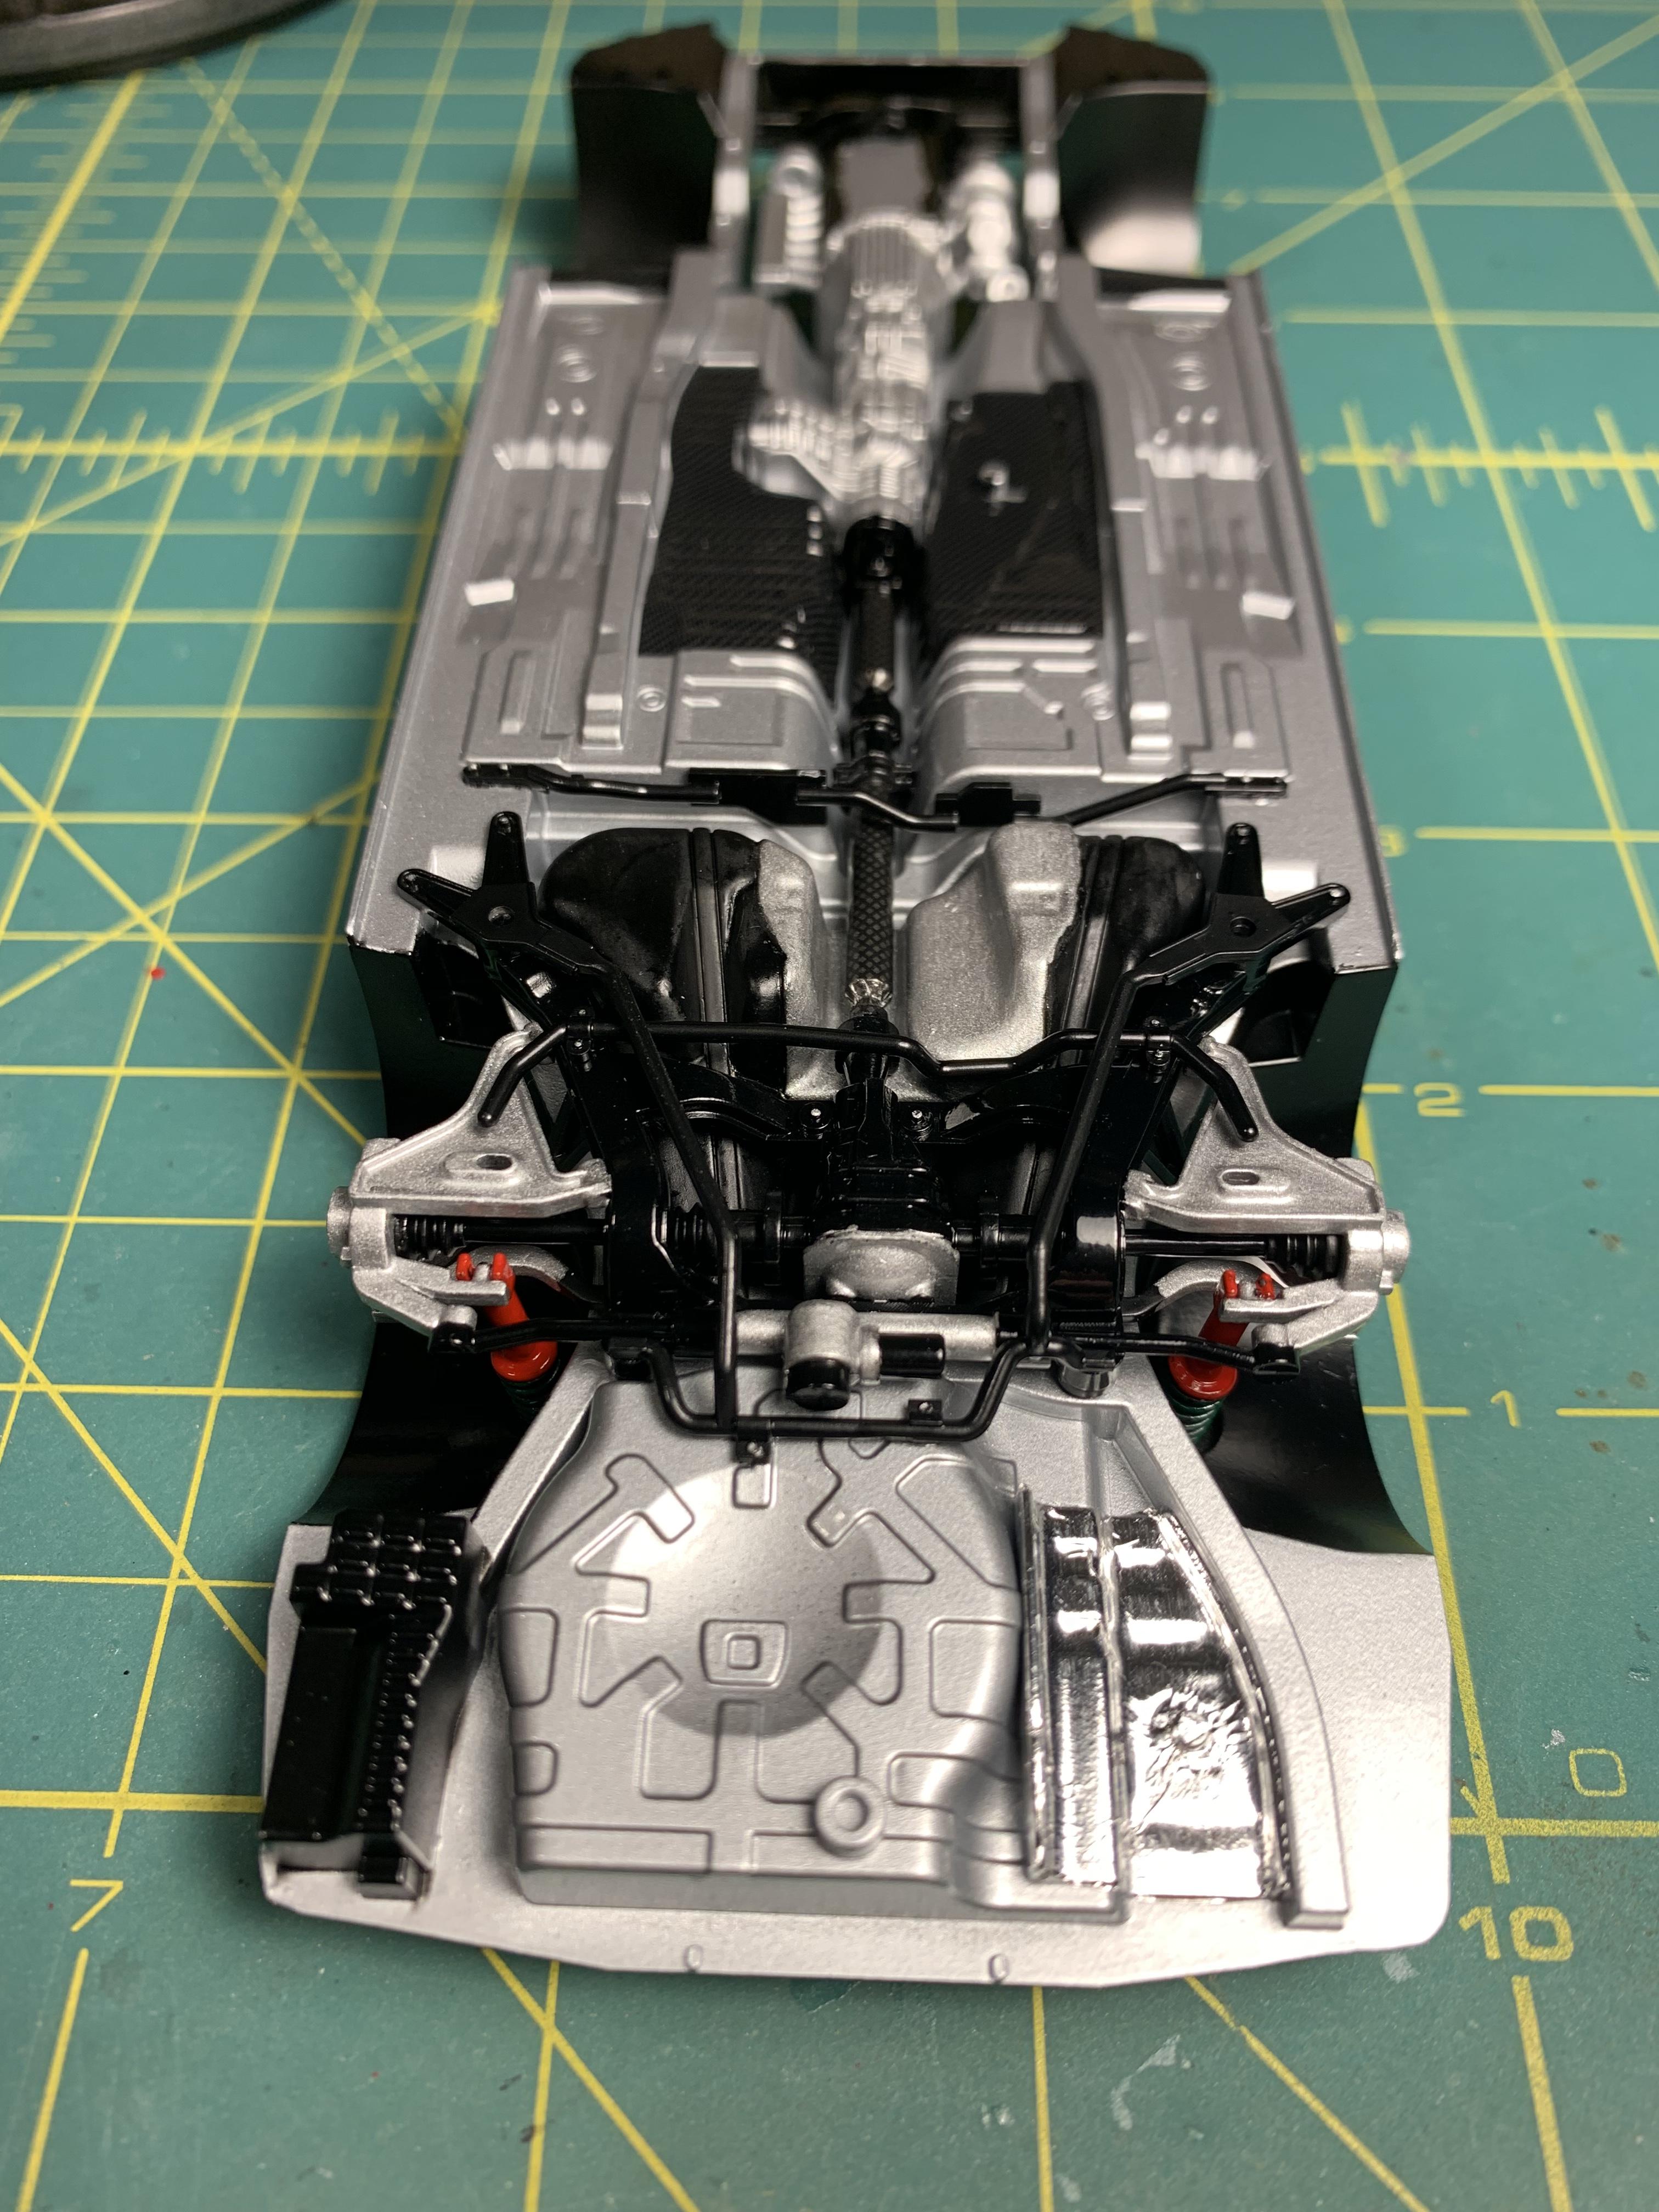
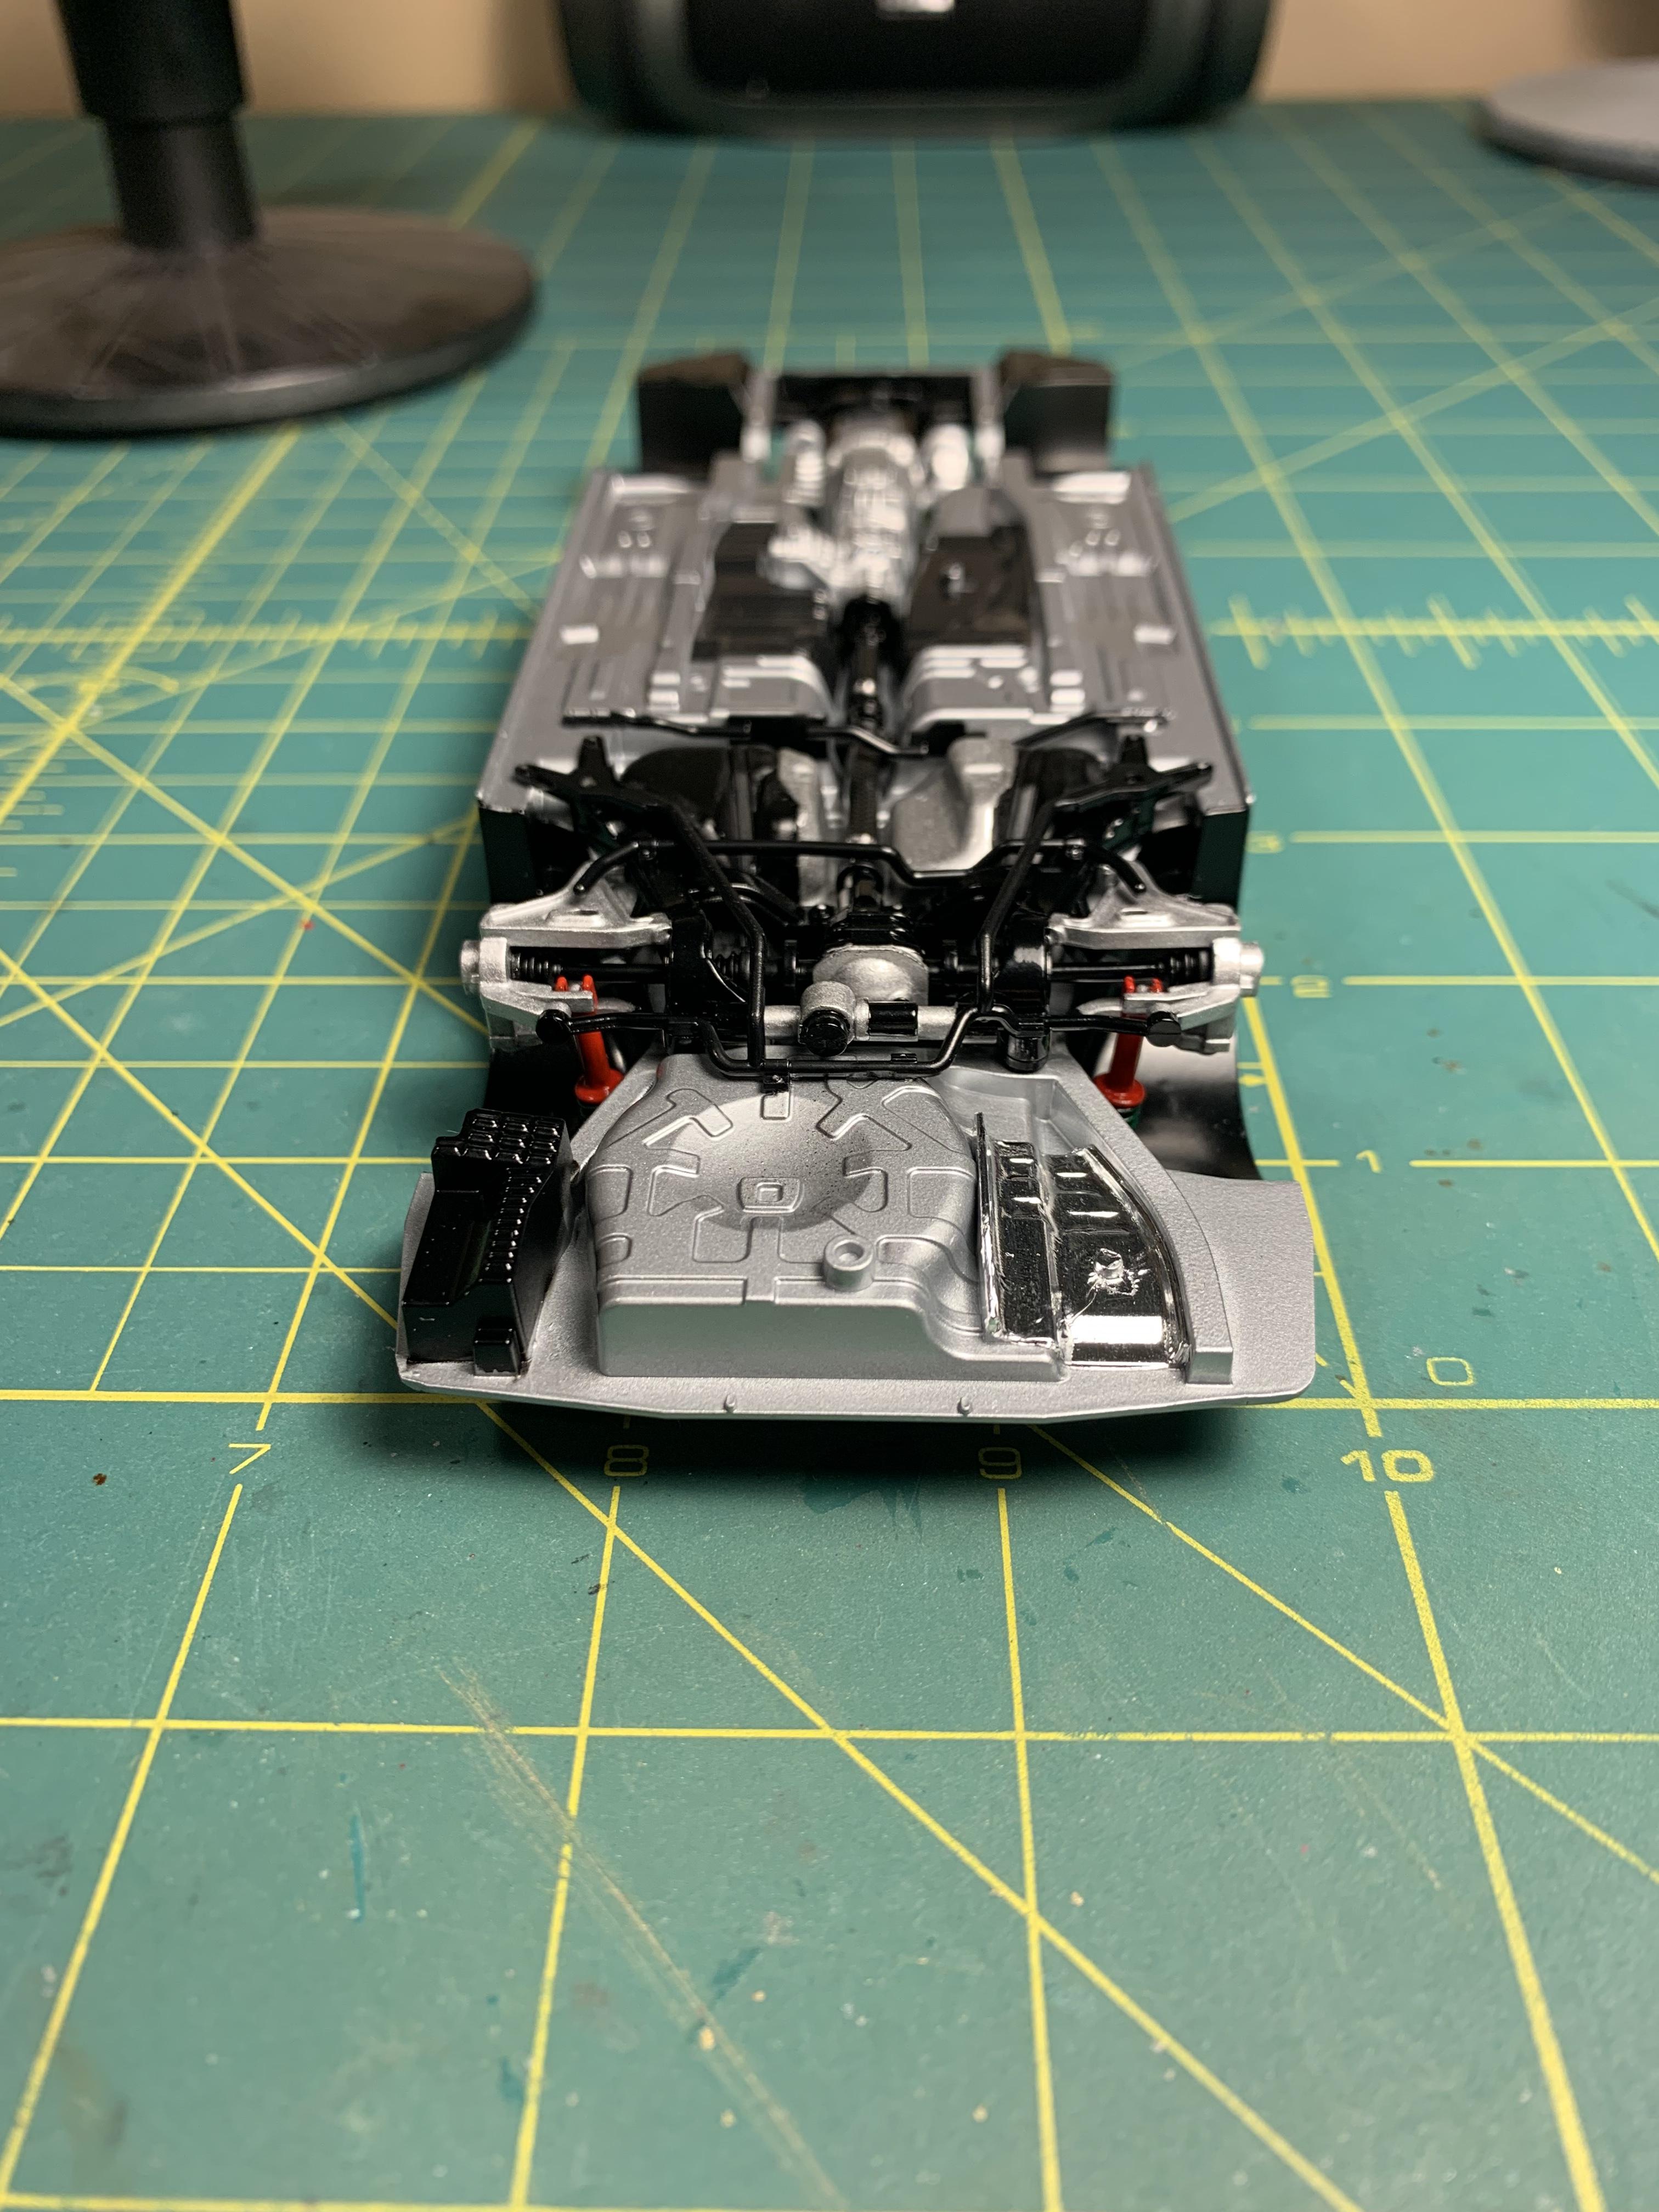
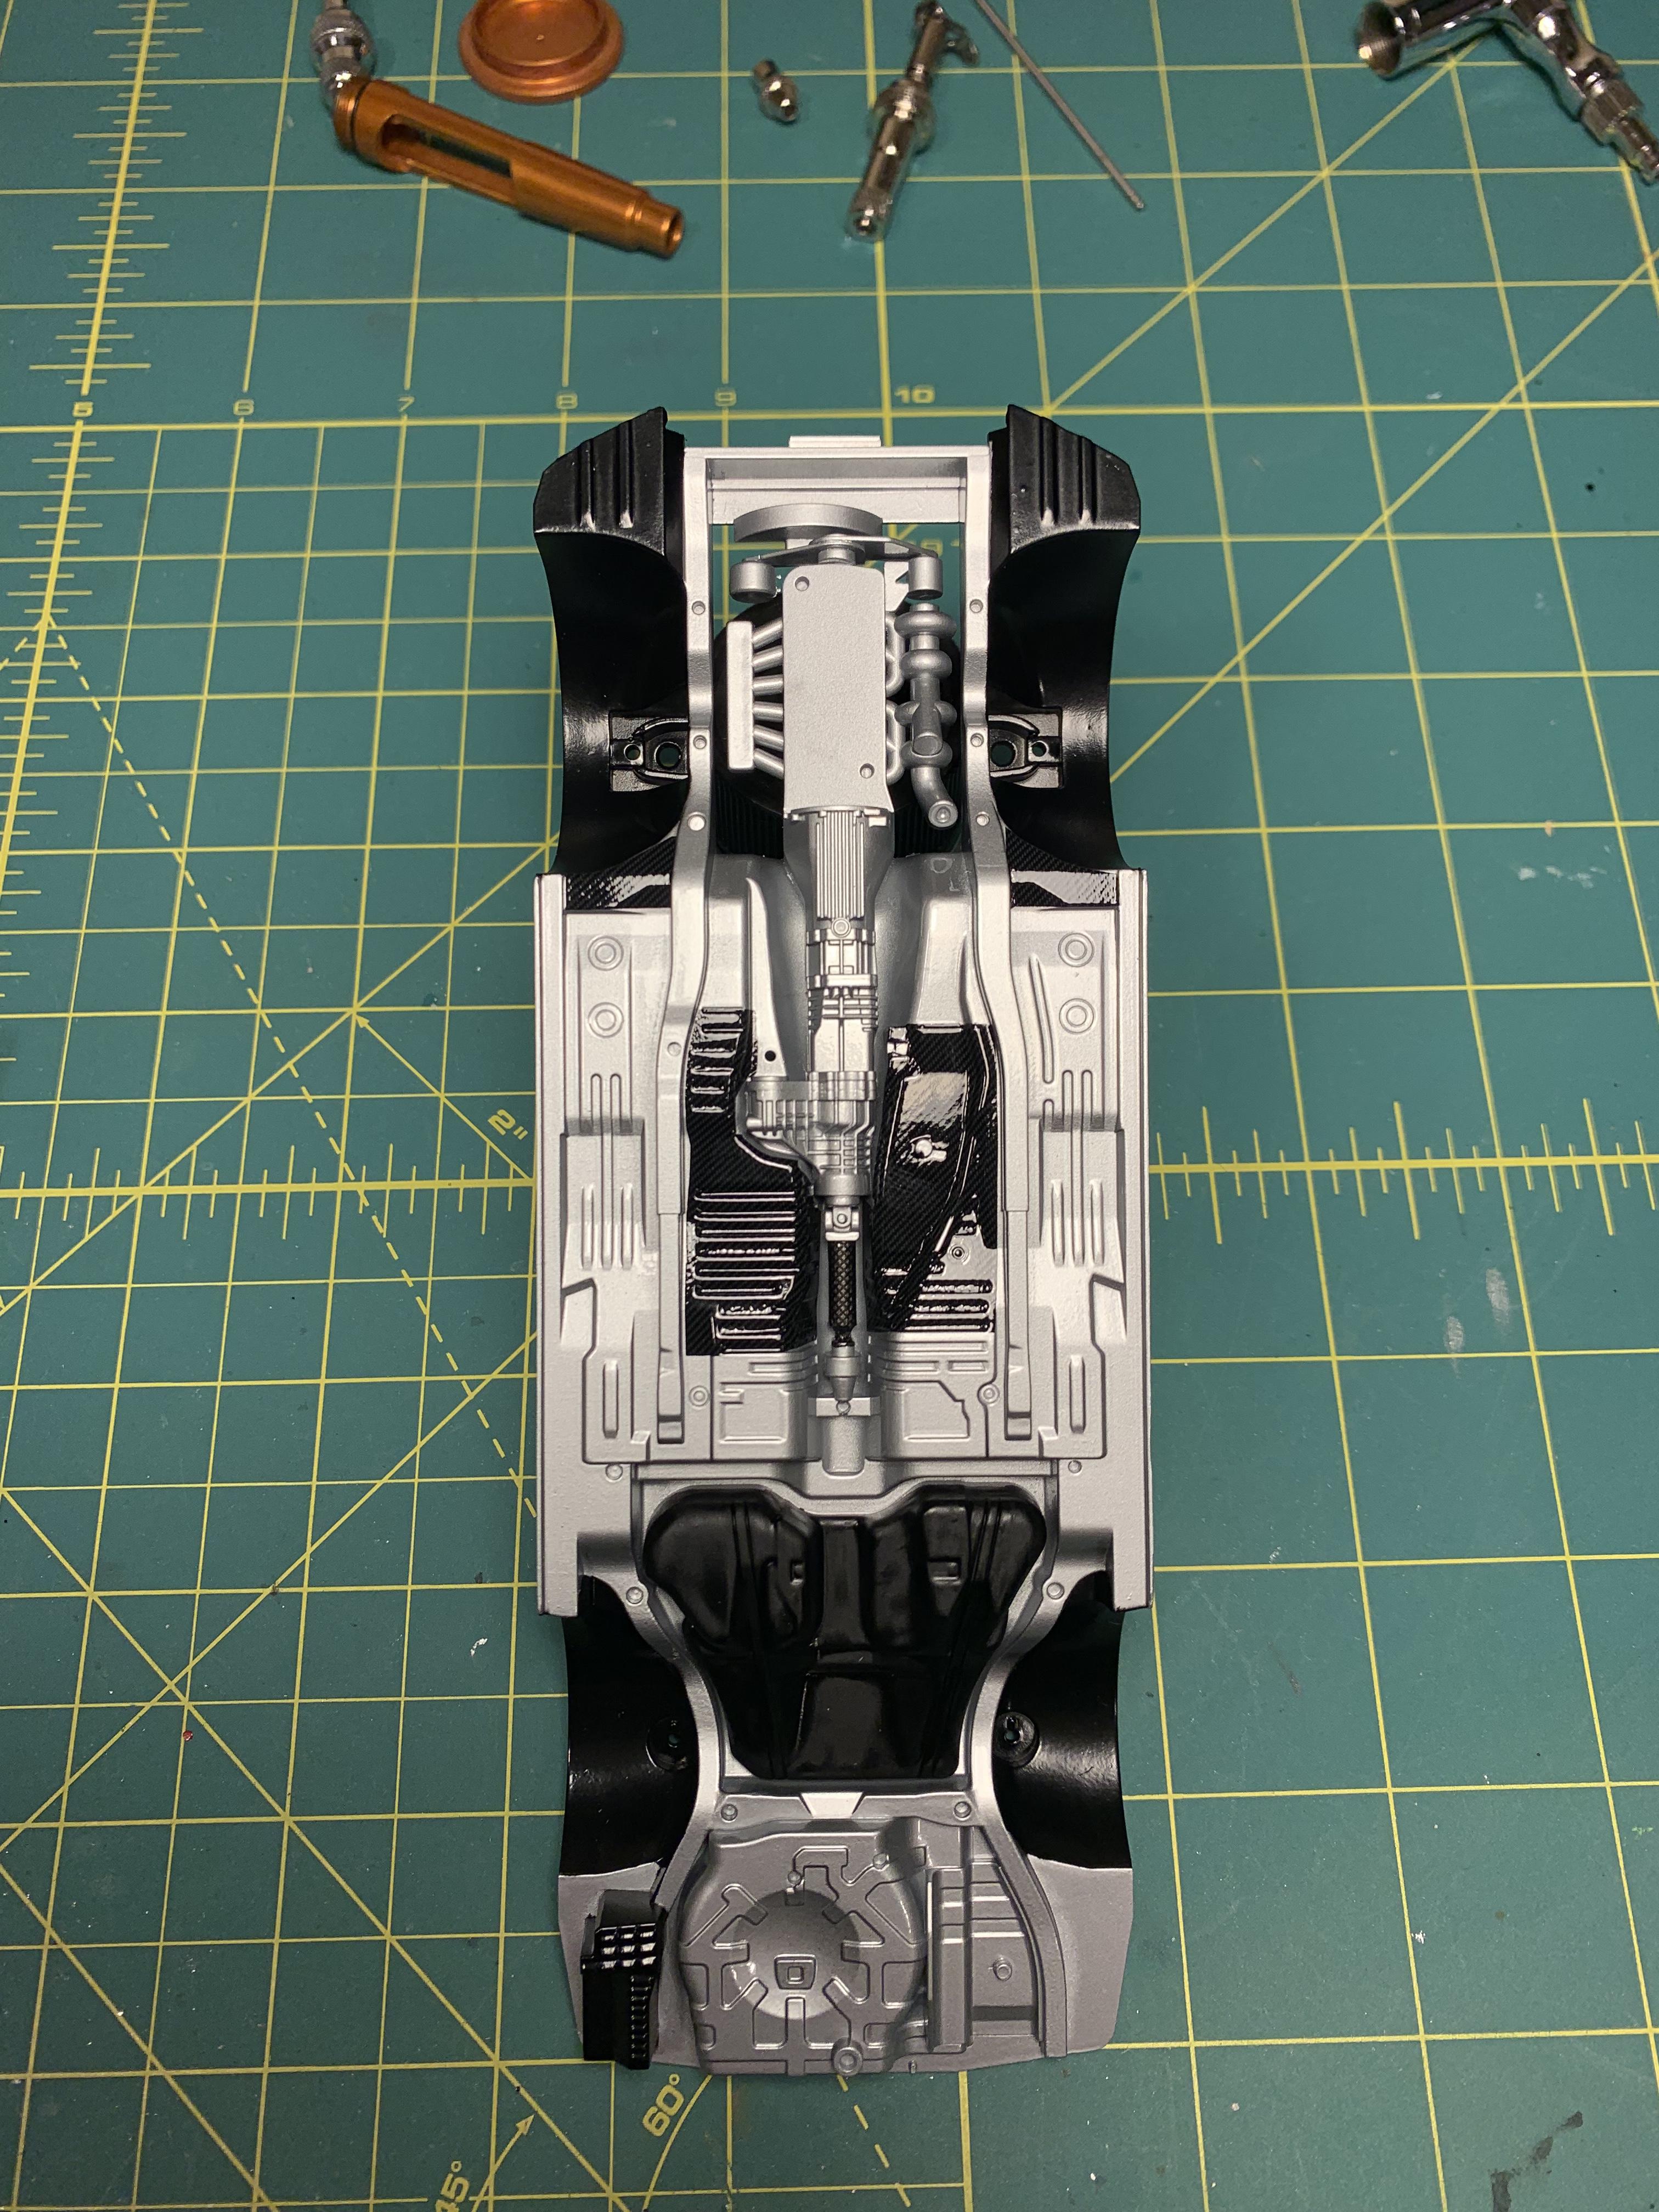
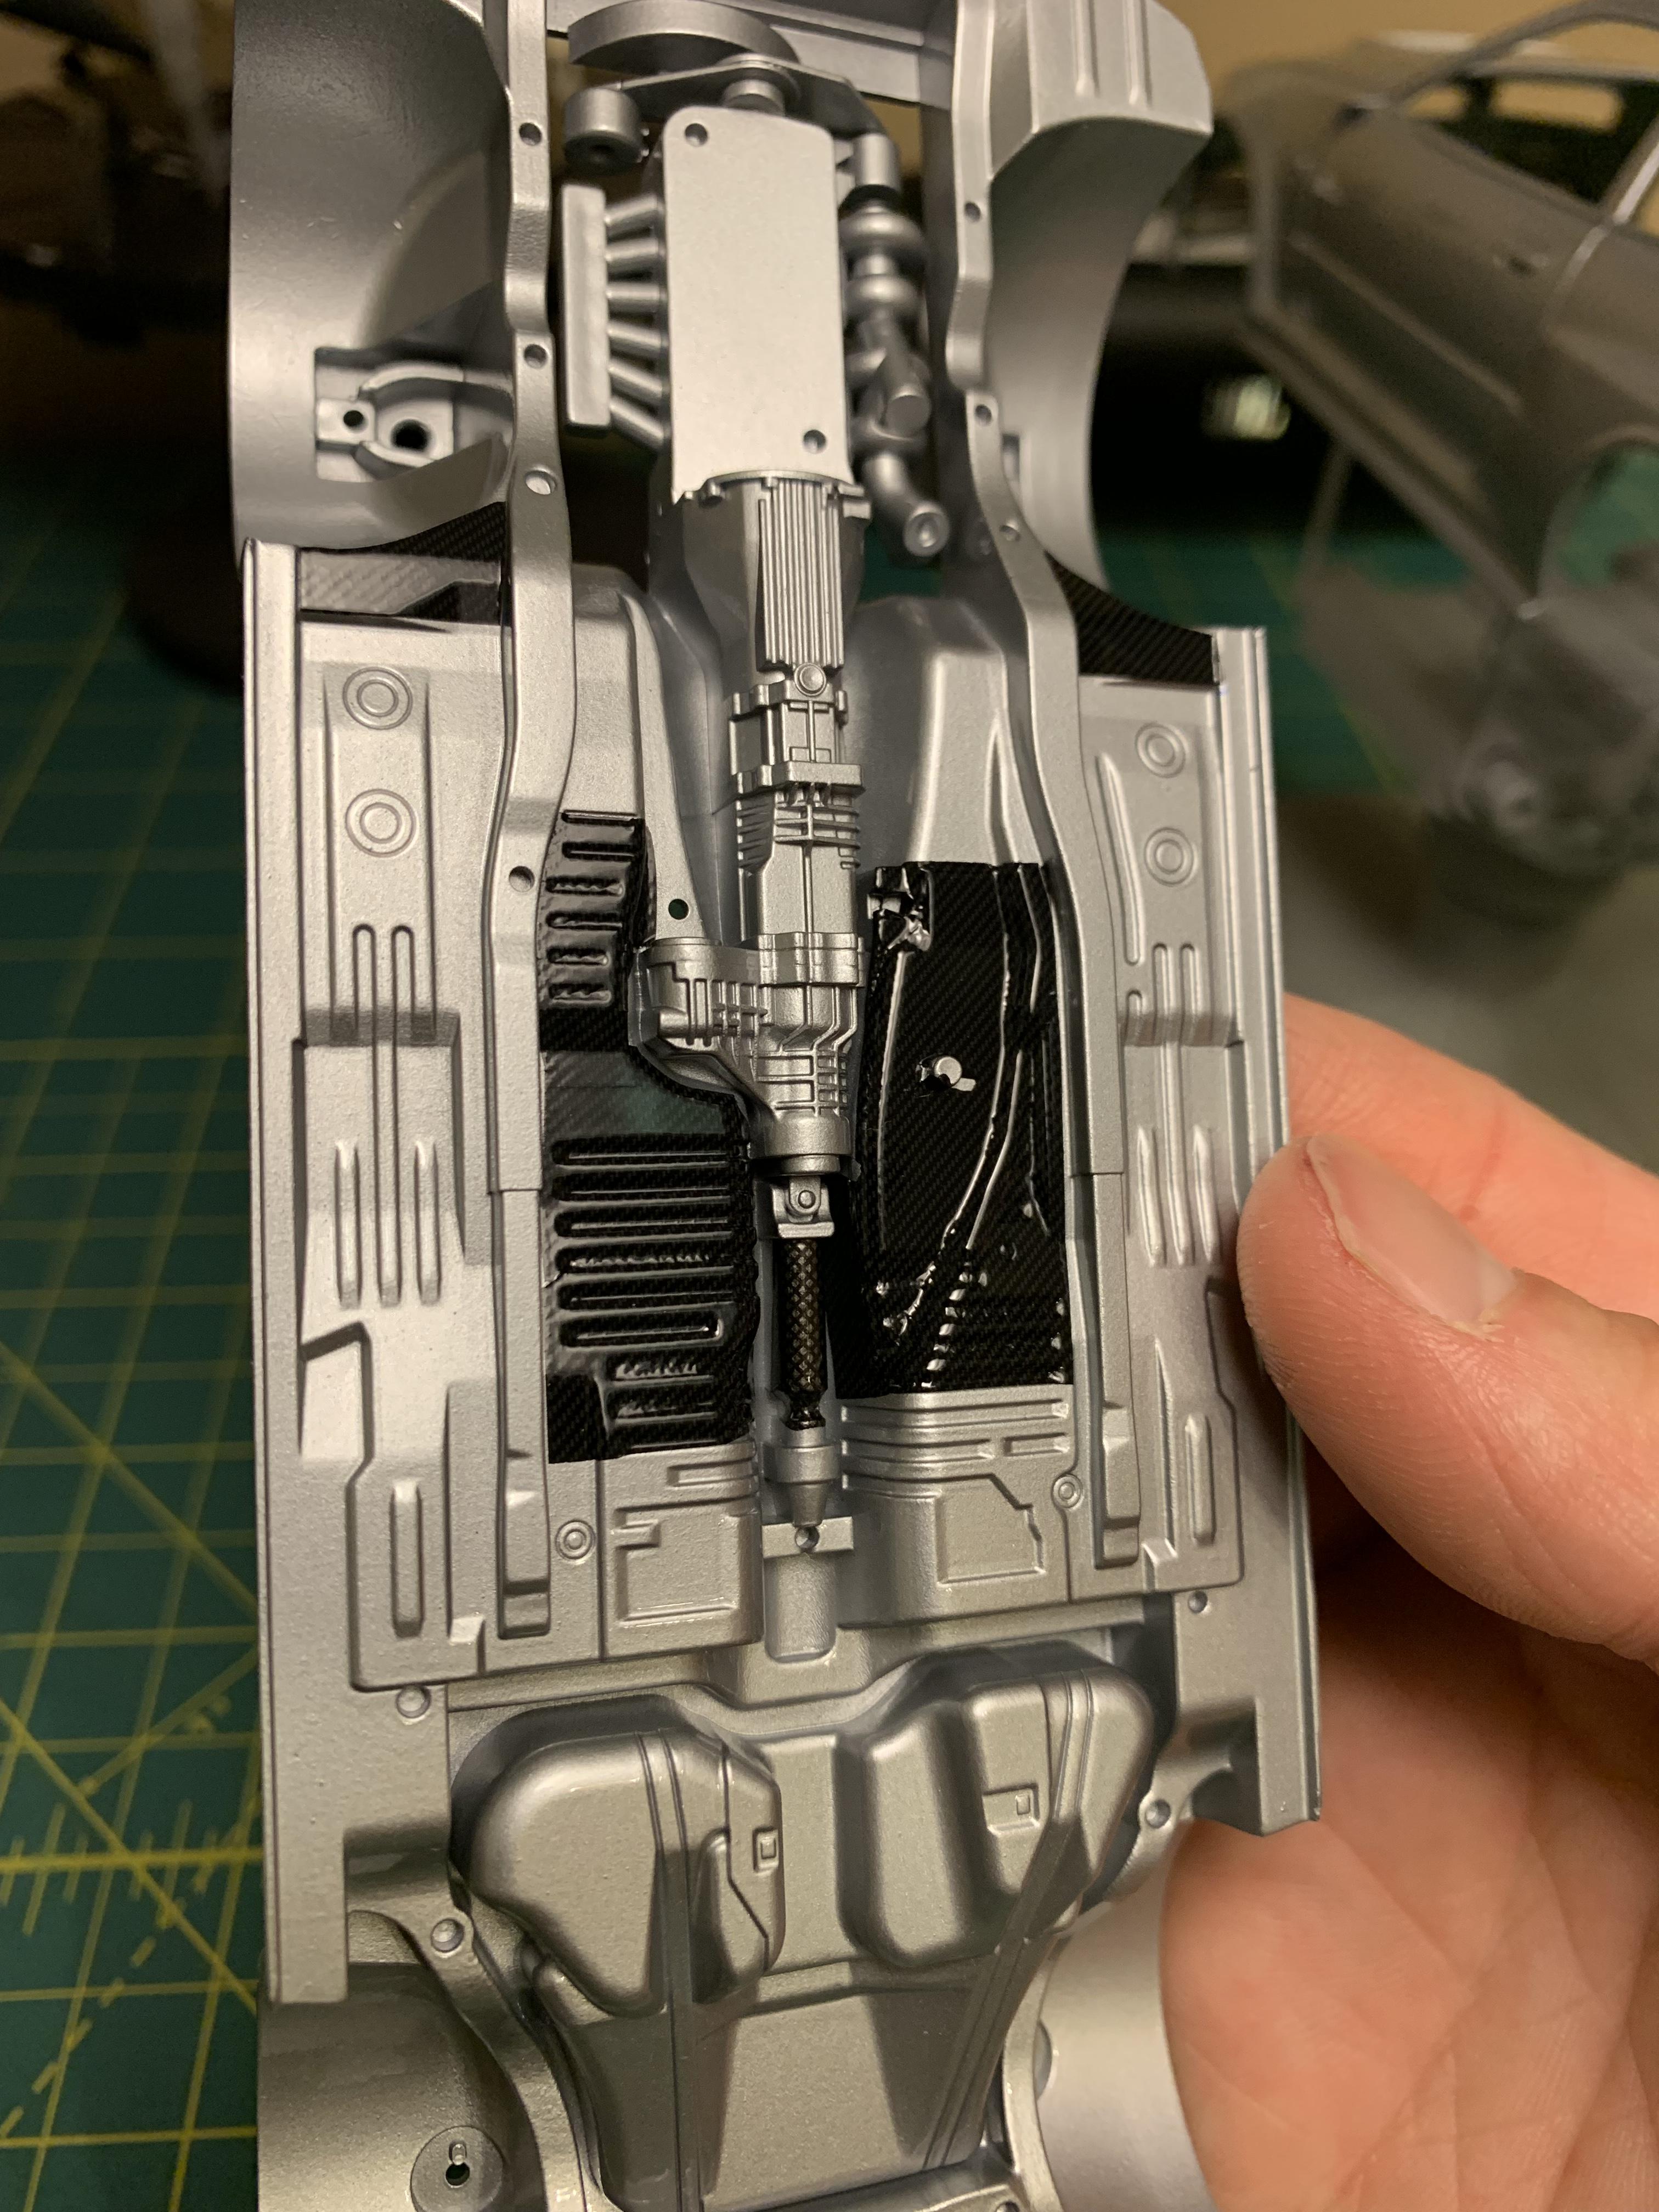
I got some detailing done today after work before I had to fix dinner. I managed to get the calipers sprayed in body color, decals applied, then clear coated and ready to get the photo-etch pieces tomorrow. The Z-Tune cars come with a differential cooler and trans cooler that is rear mounted, so I ran some braided hose up to the trans area for a more realistic look as well. I also added a wash to the trans/transfer case as well. I also sprayed the exhaust and fmic in Spaz Stix Chrome. After I sprayed the exhaust and let it bake in the dehydrator, I tried my hand at a new method (for me anyways) of heat staining the exhaust. I am pretty pleased with the results for my first time, but I hope I didn’t over do it. I will do things a little differently on my next build, as I did learn a lot from doing so this time. I have included pics of everything that I used while doing the exhaust.
-
Thank you!
-
Thanks man, It would look good in a Mica Red. I built a V-Spec R34 years ago in Mica Blue. Very close to the actual Bayside Blue color.
-
I haven’t gotten too much done as of lately. The wife and I took a trip to Indiana to visit my sister-in-law and our niece and nephew, as well as a trip to Don Schumacher Racing for their open house. I did manage to get the exhaust and front mount Intercooler sprayed in Tamiya Gloss Black in preparation for some Spaz Stix Chrome. Going to try my hand at some new exhaust heat staining methods that I’ve been checking out on YouTube with some Alcad paints. I also got the rotors primed to spray the calipers in body color tomorrow, the struts/suspension painted, bare metal foiled the rear heat shield for the exhaust, the tail lights painted and installed, and the rear suspension all assembled and mounted on the chassis.
-
Thank you James! I'm anxious to get this one buttoned up and under glass to start on the next project. I just haven't decided what to build next.
-
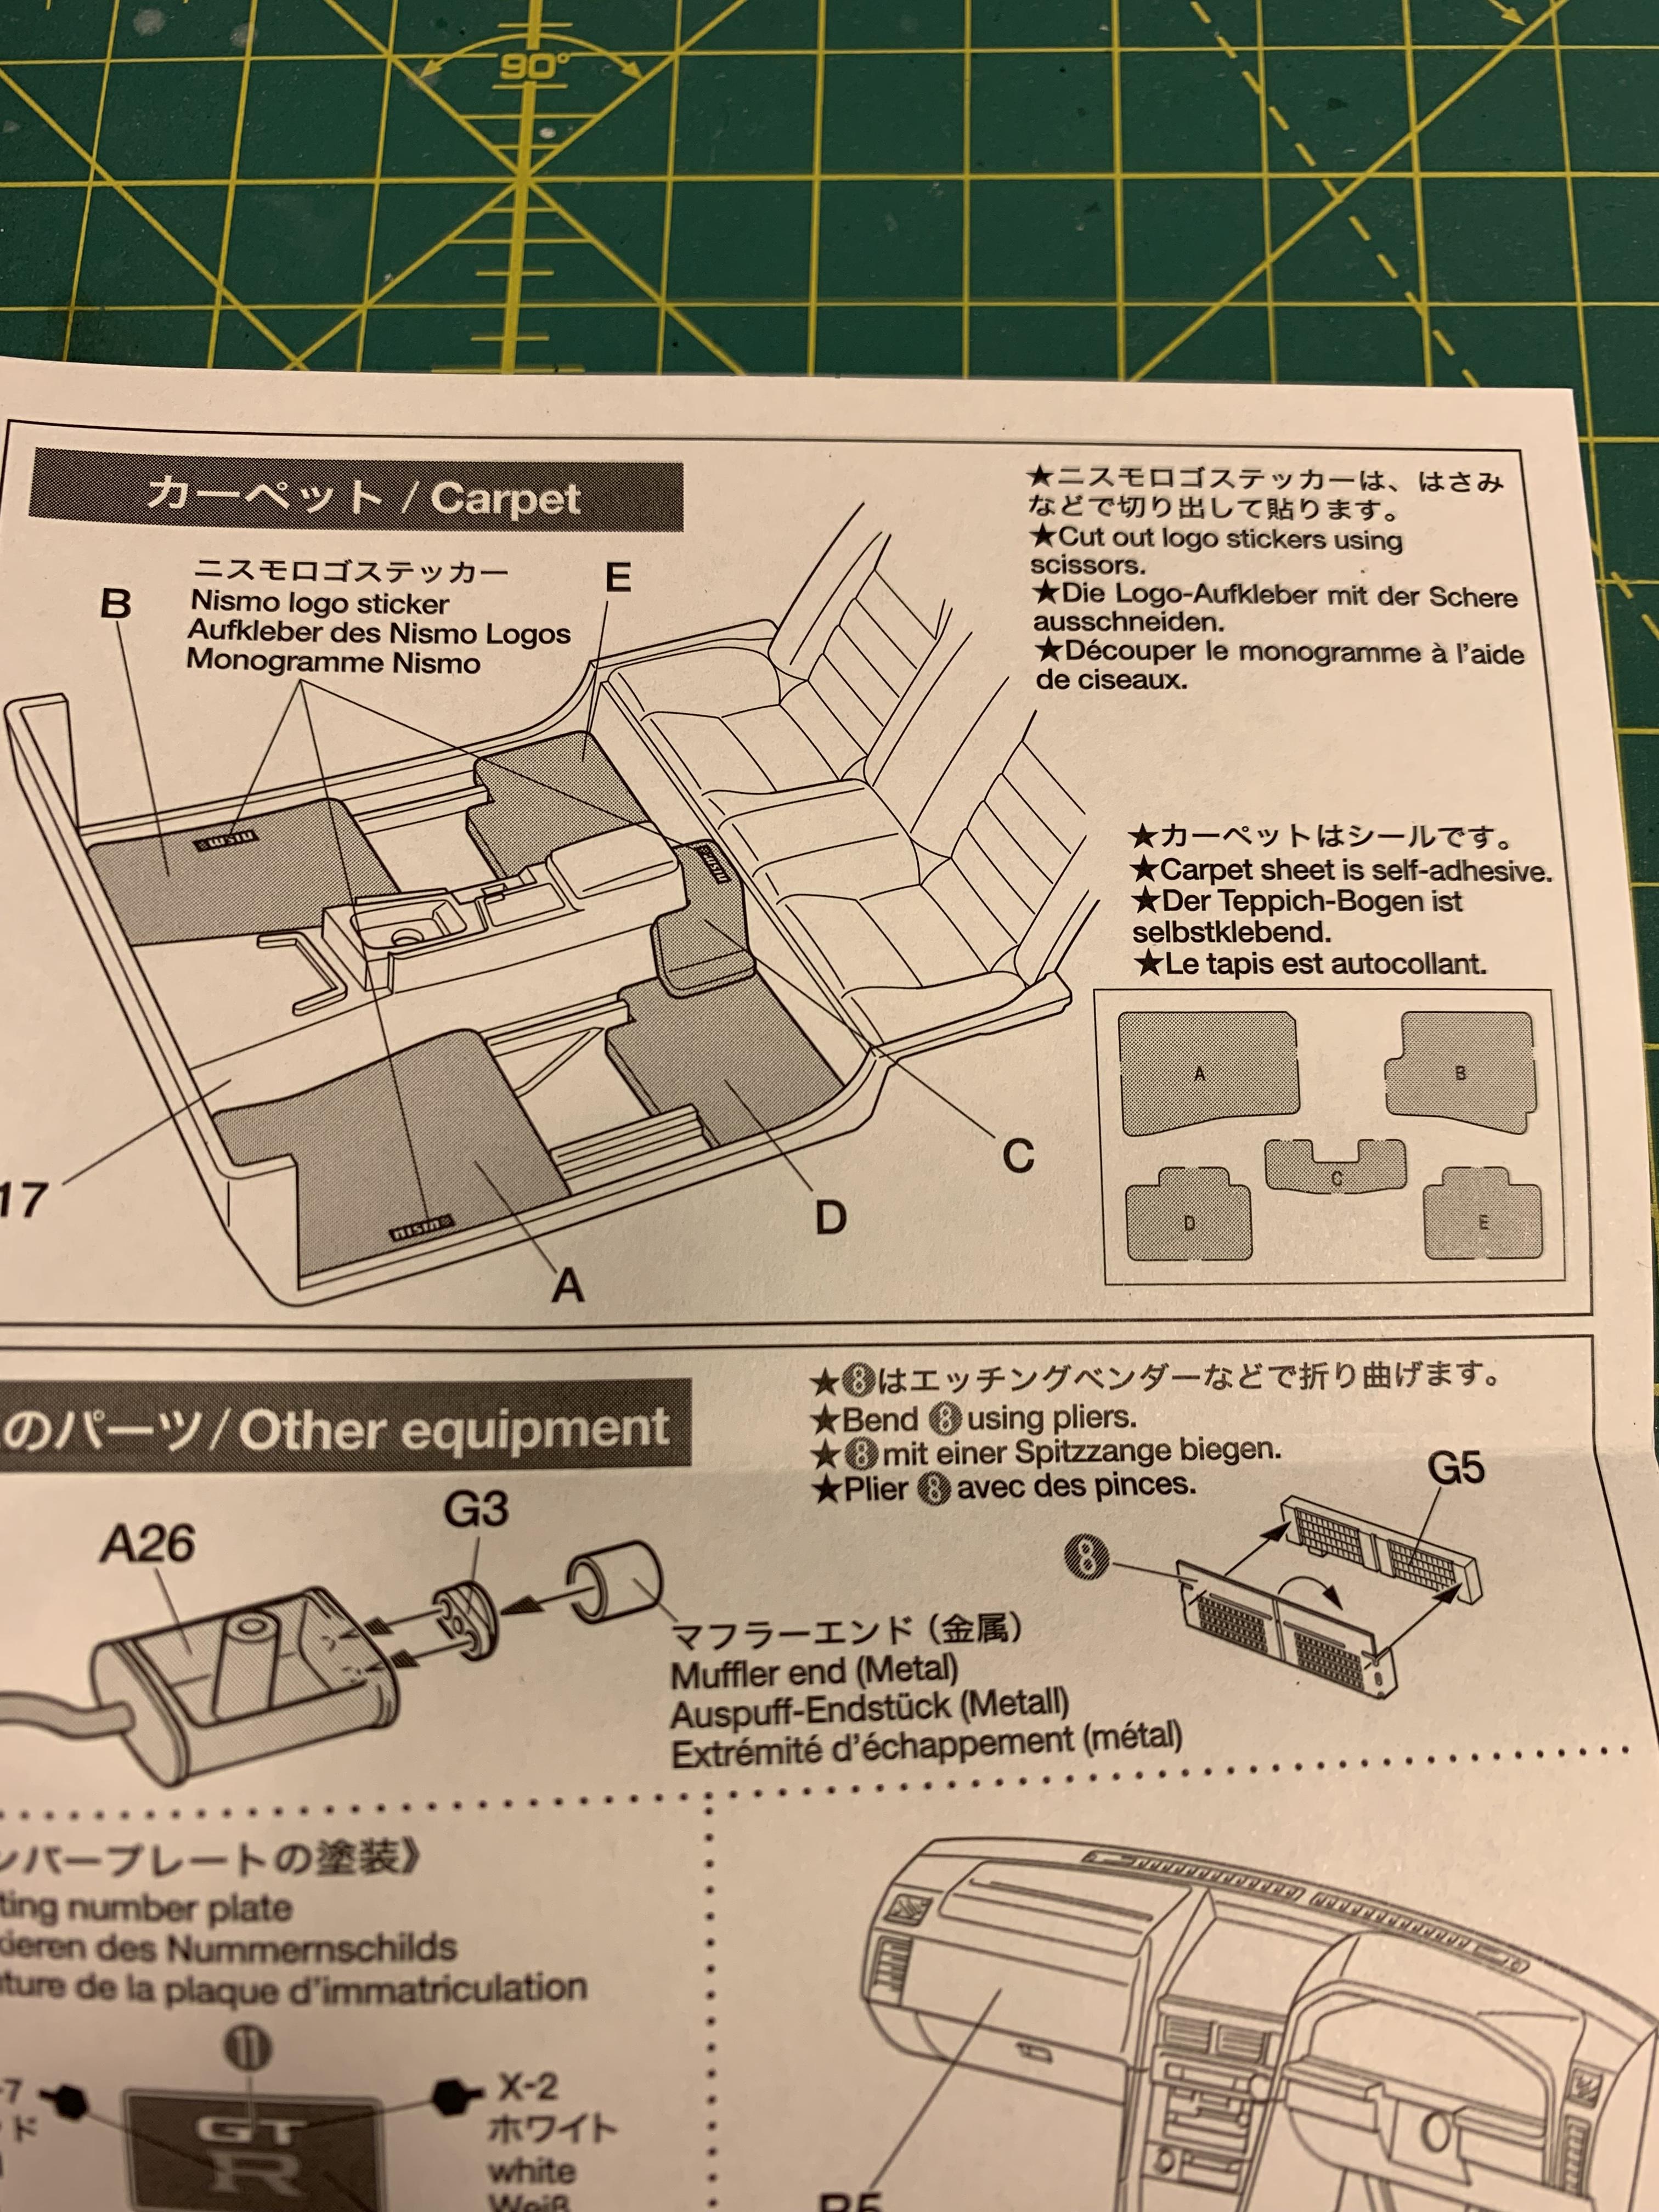
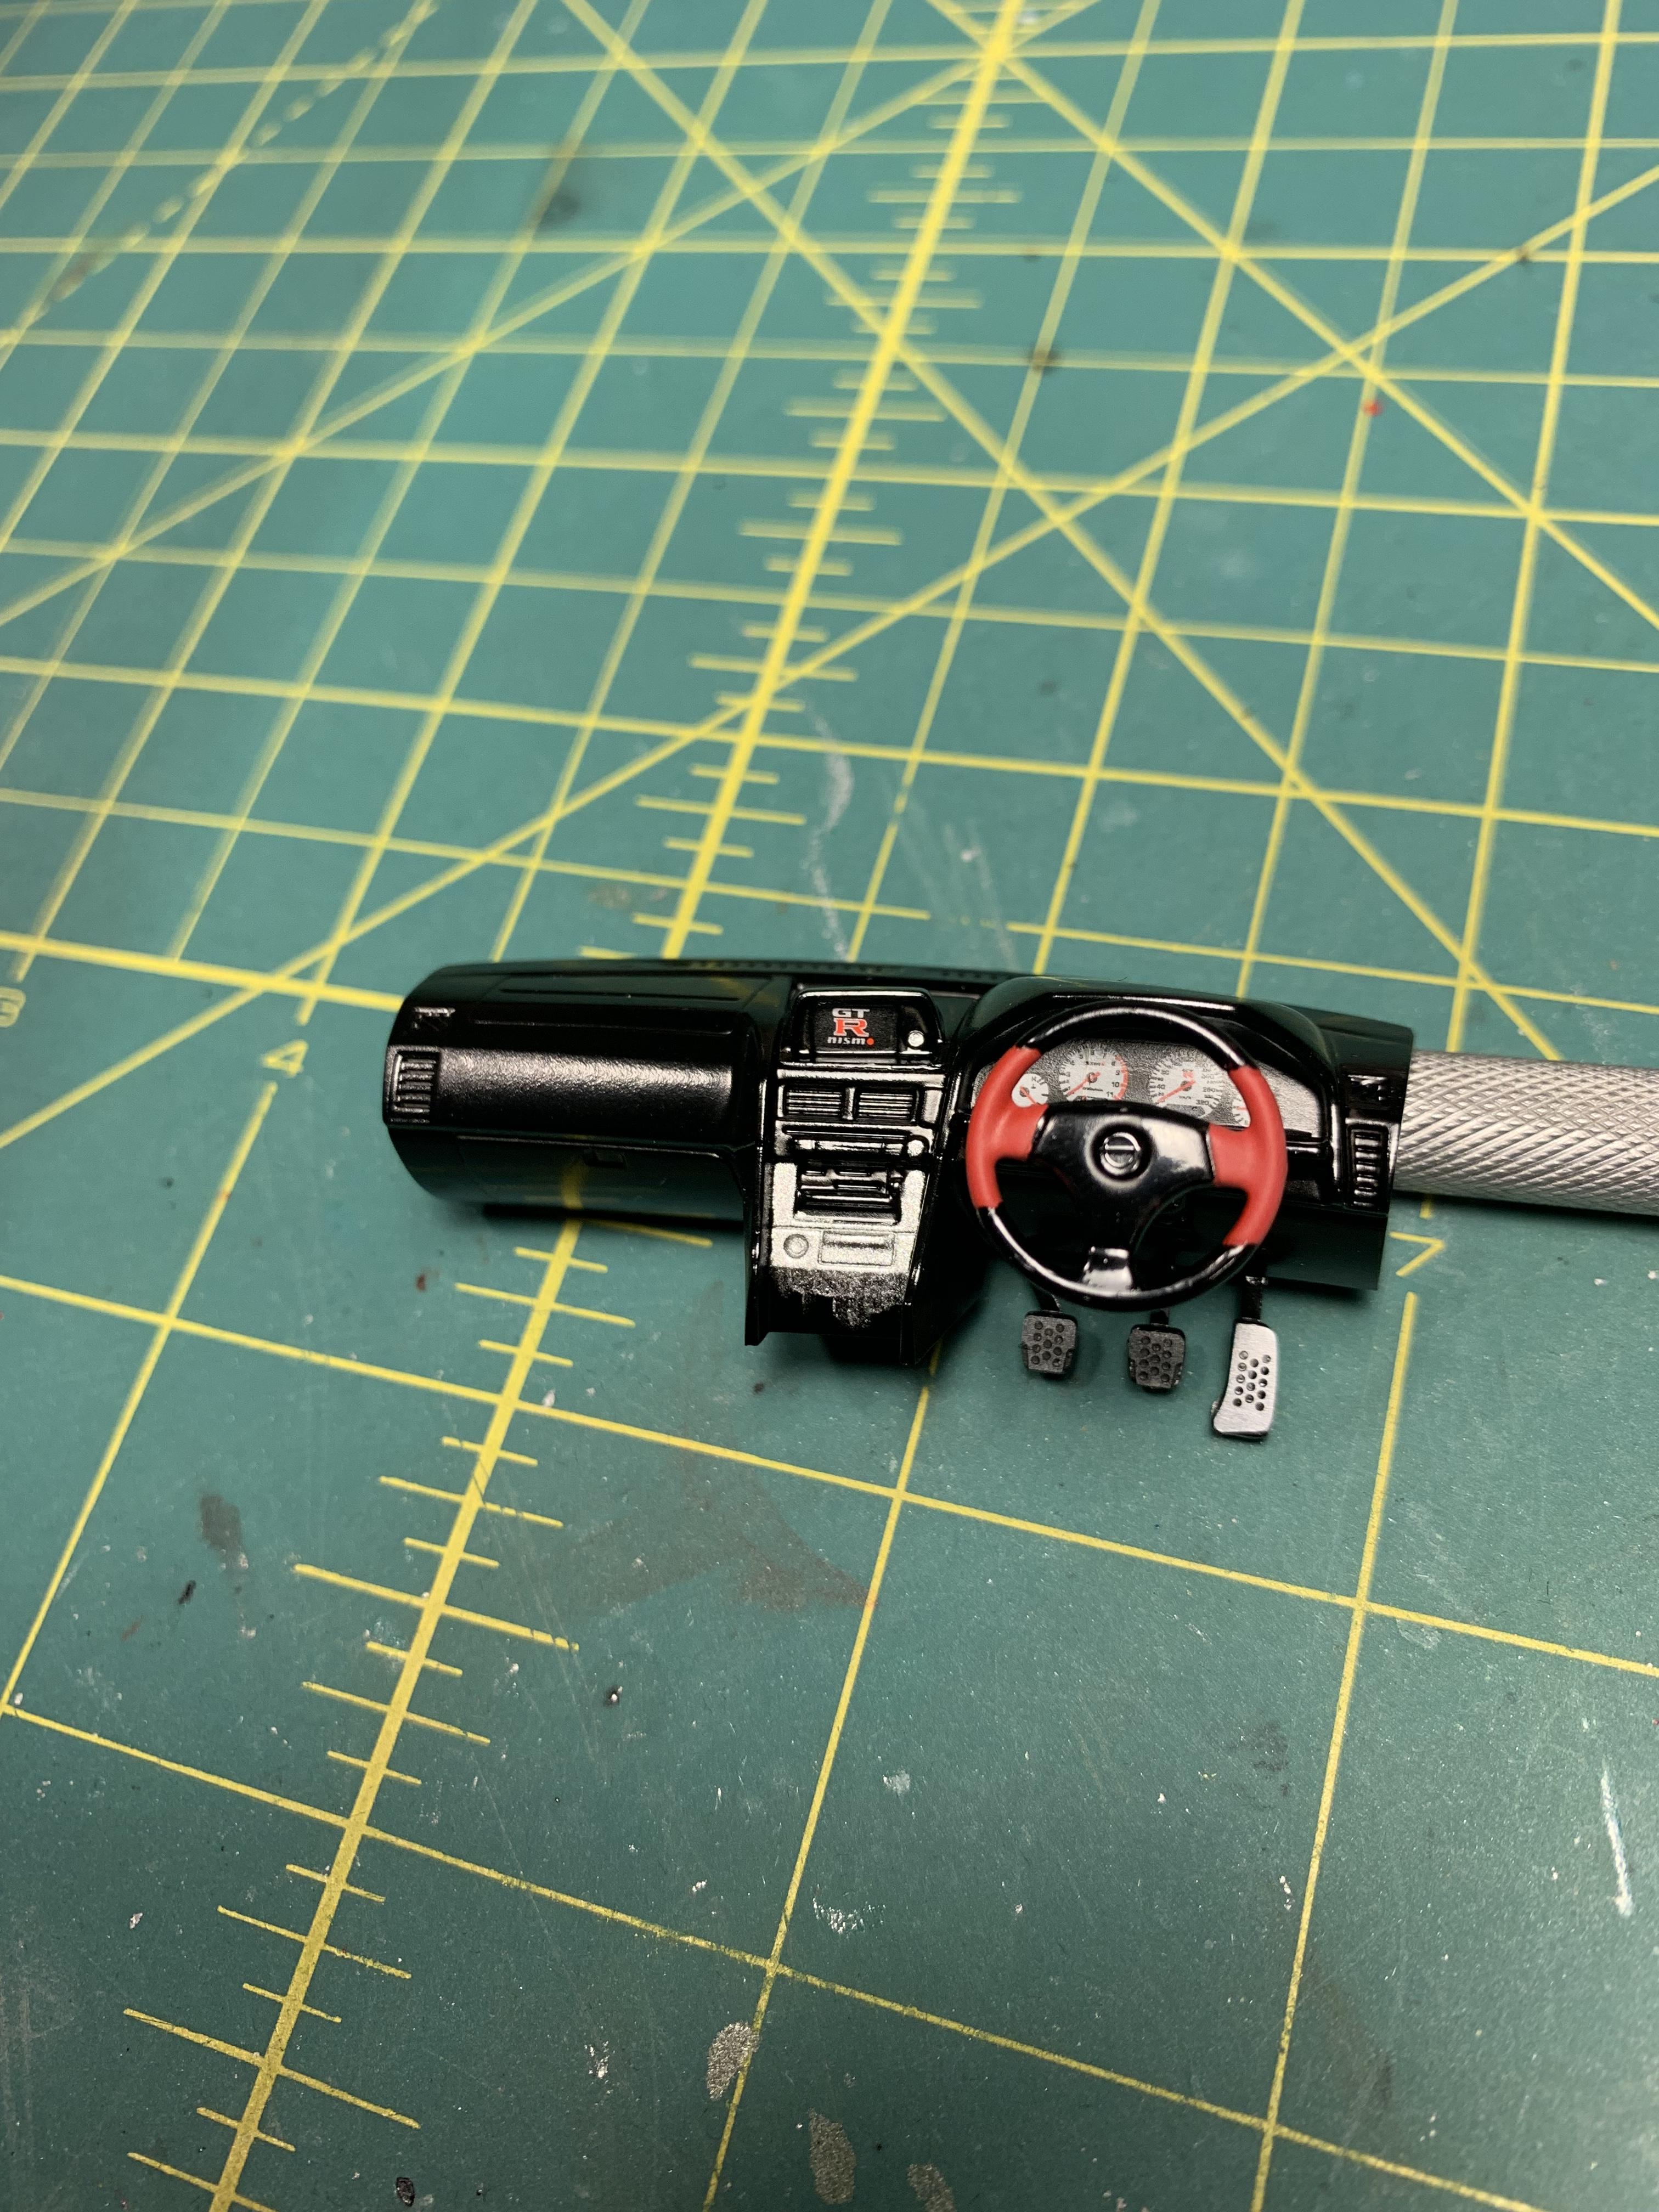
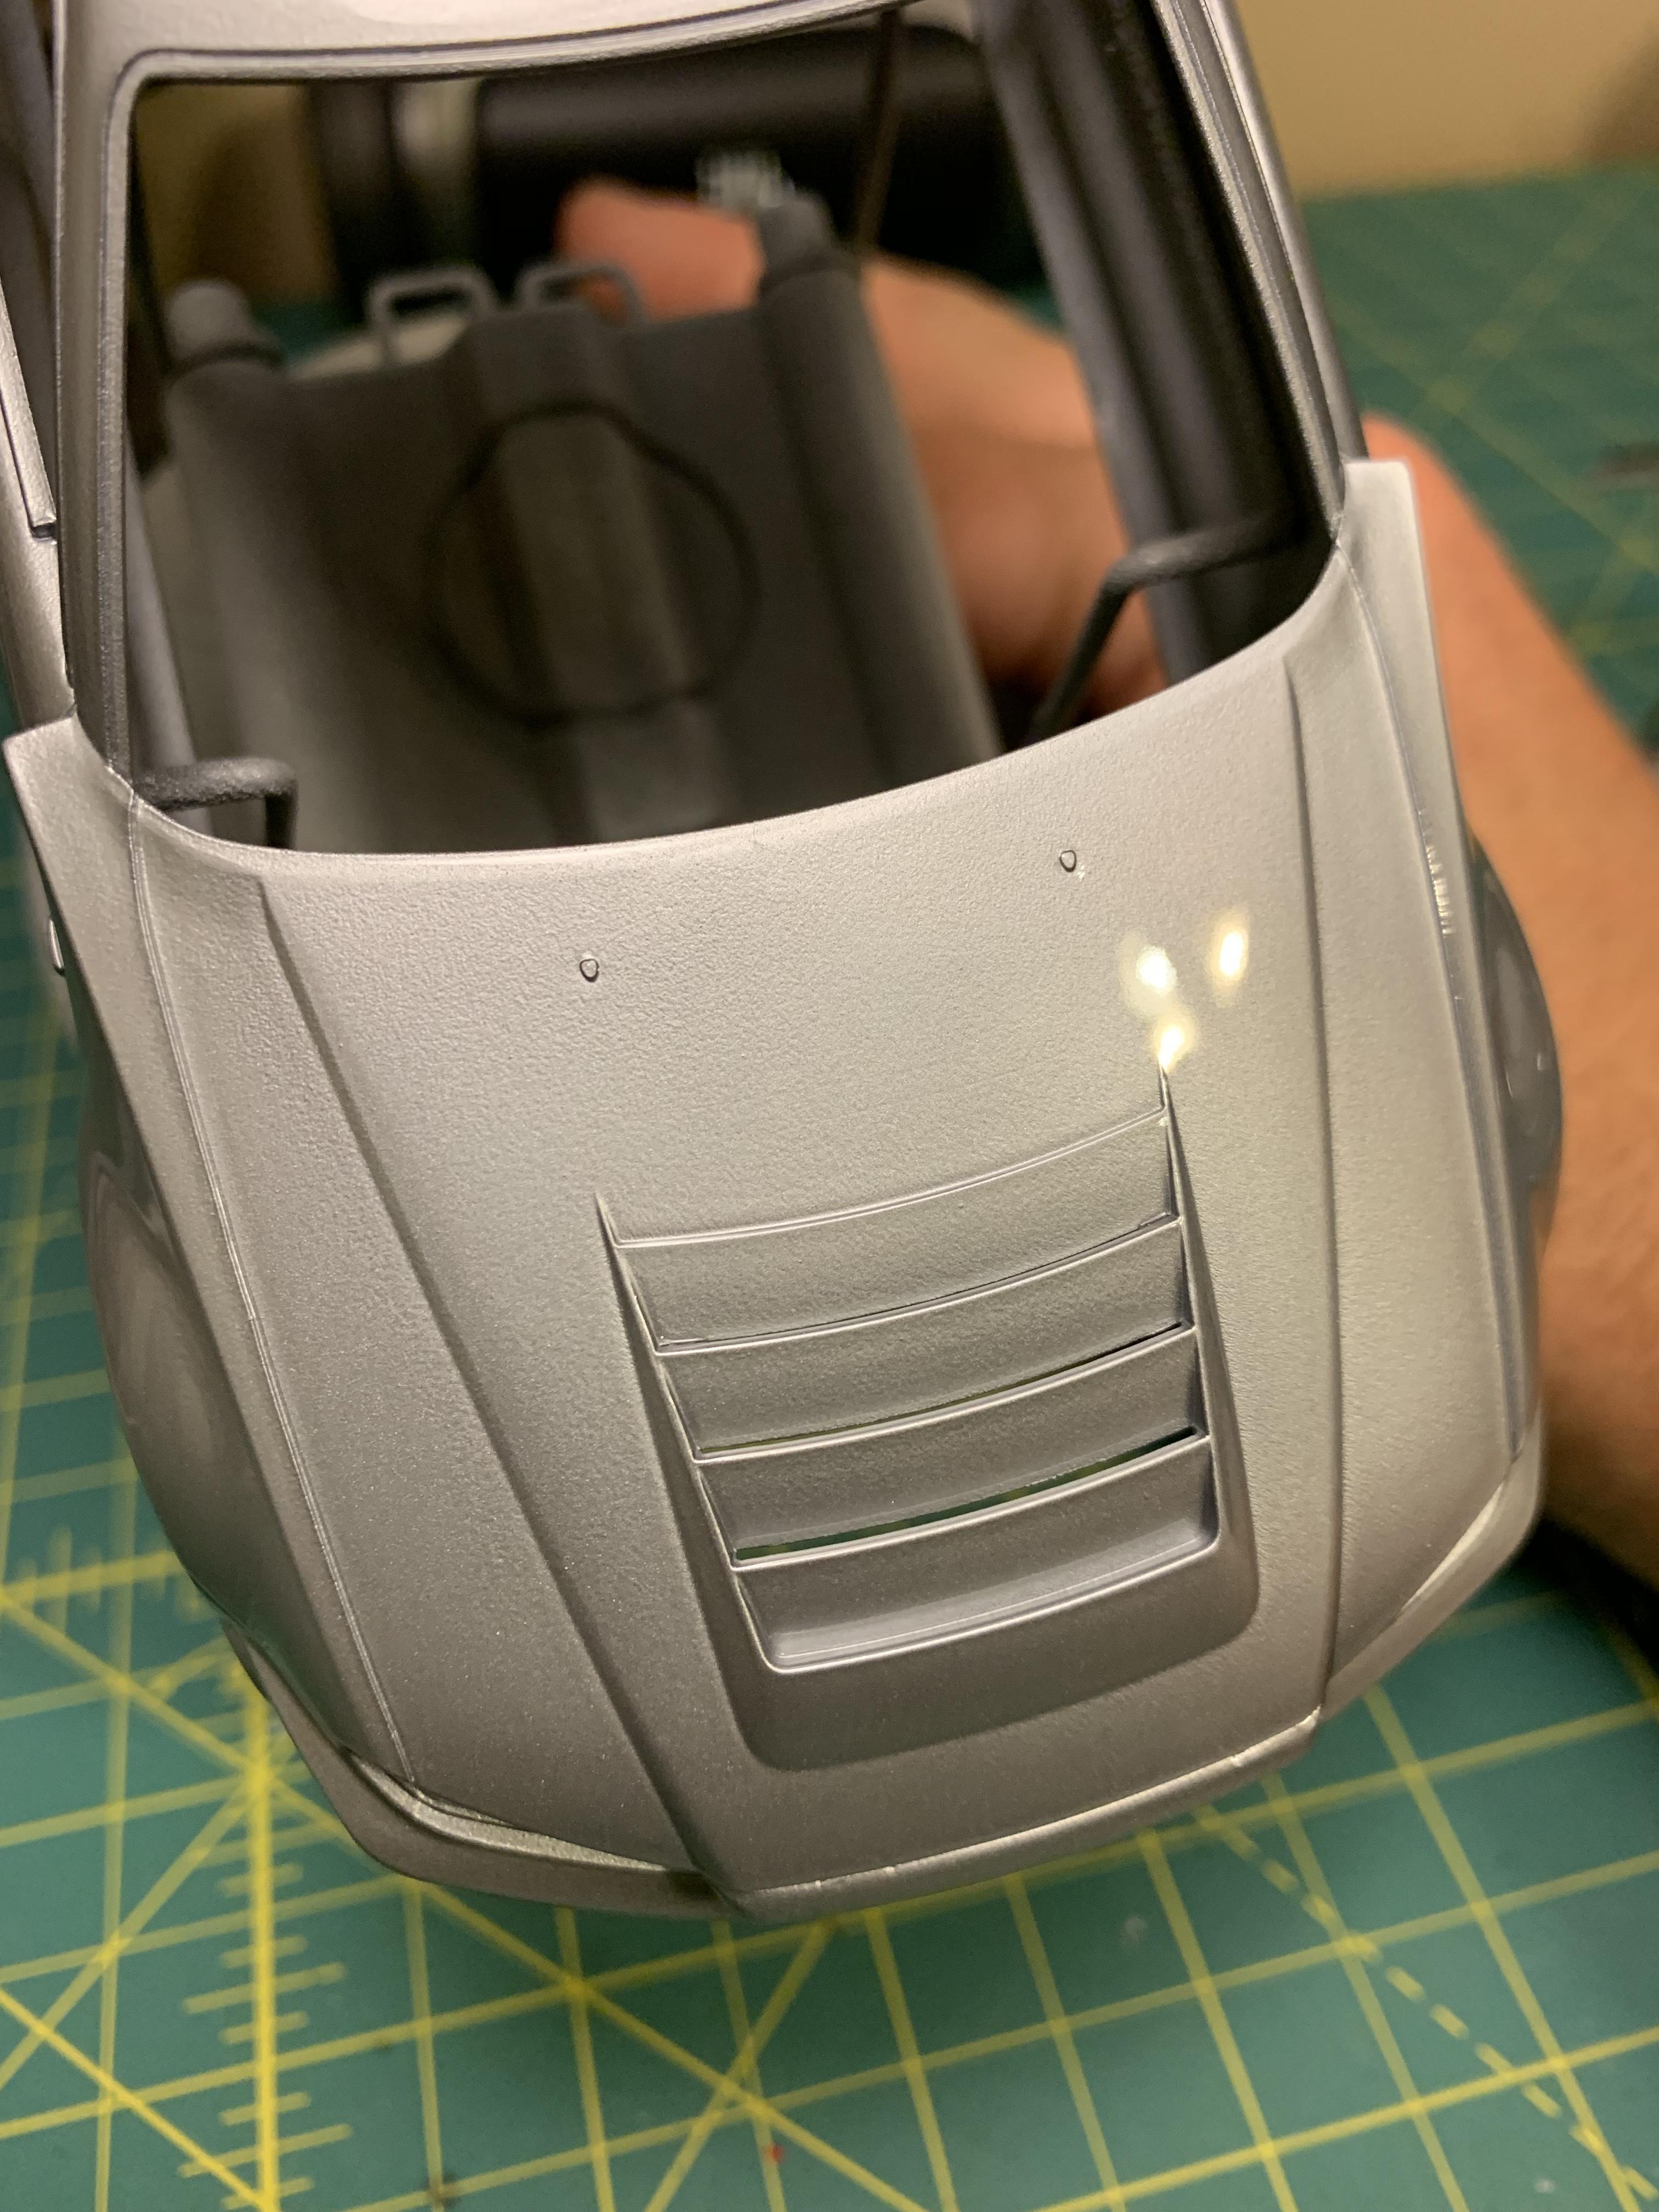
I managed to get a good bit accomplished today since I had a full day dedicated to modeling. I got the complete body wet sanded and polished out which is always time consuming. I also got the trim on the body sprayed, along with the parts of the chassis that needed to be semi-gloss black completed. The last thing I worked on, to feel like I had actually did a good bit of work for the day today, was the interior. I got the Tamiya Photo-etch detail up set for this kit and it is awesome. I had no clue that it included floor mats along with the pedals as well.
-
Thanks Dann, I wish my builds could be as good as yours. Thank you!
-
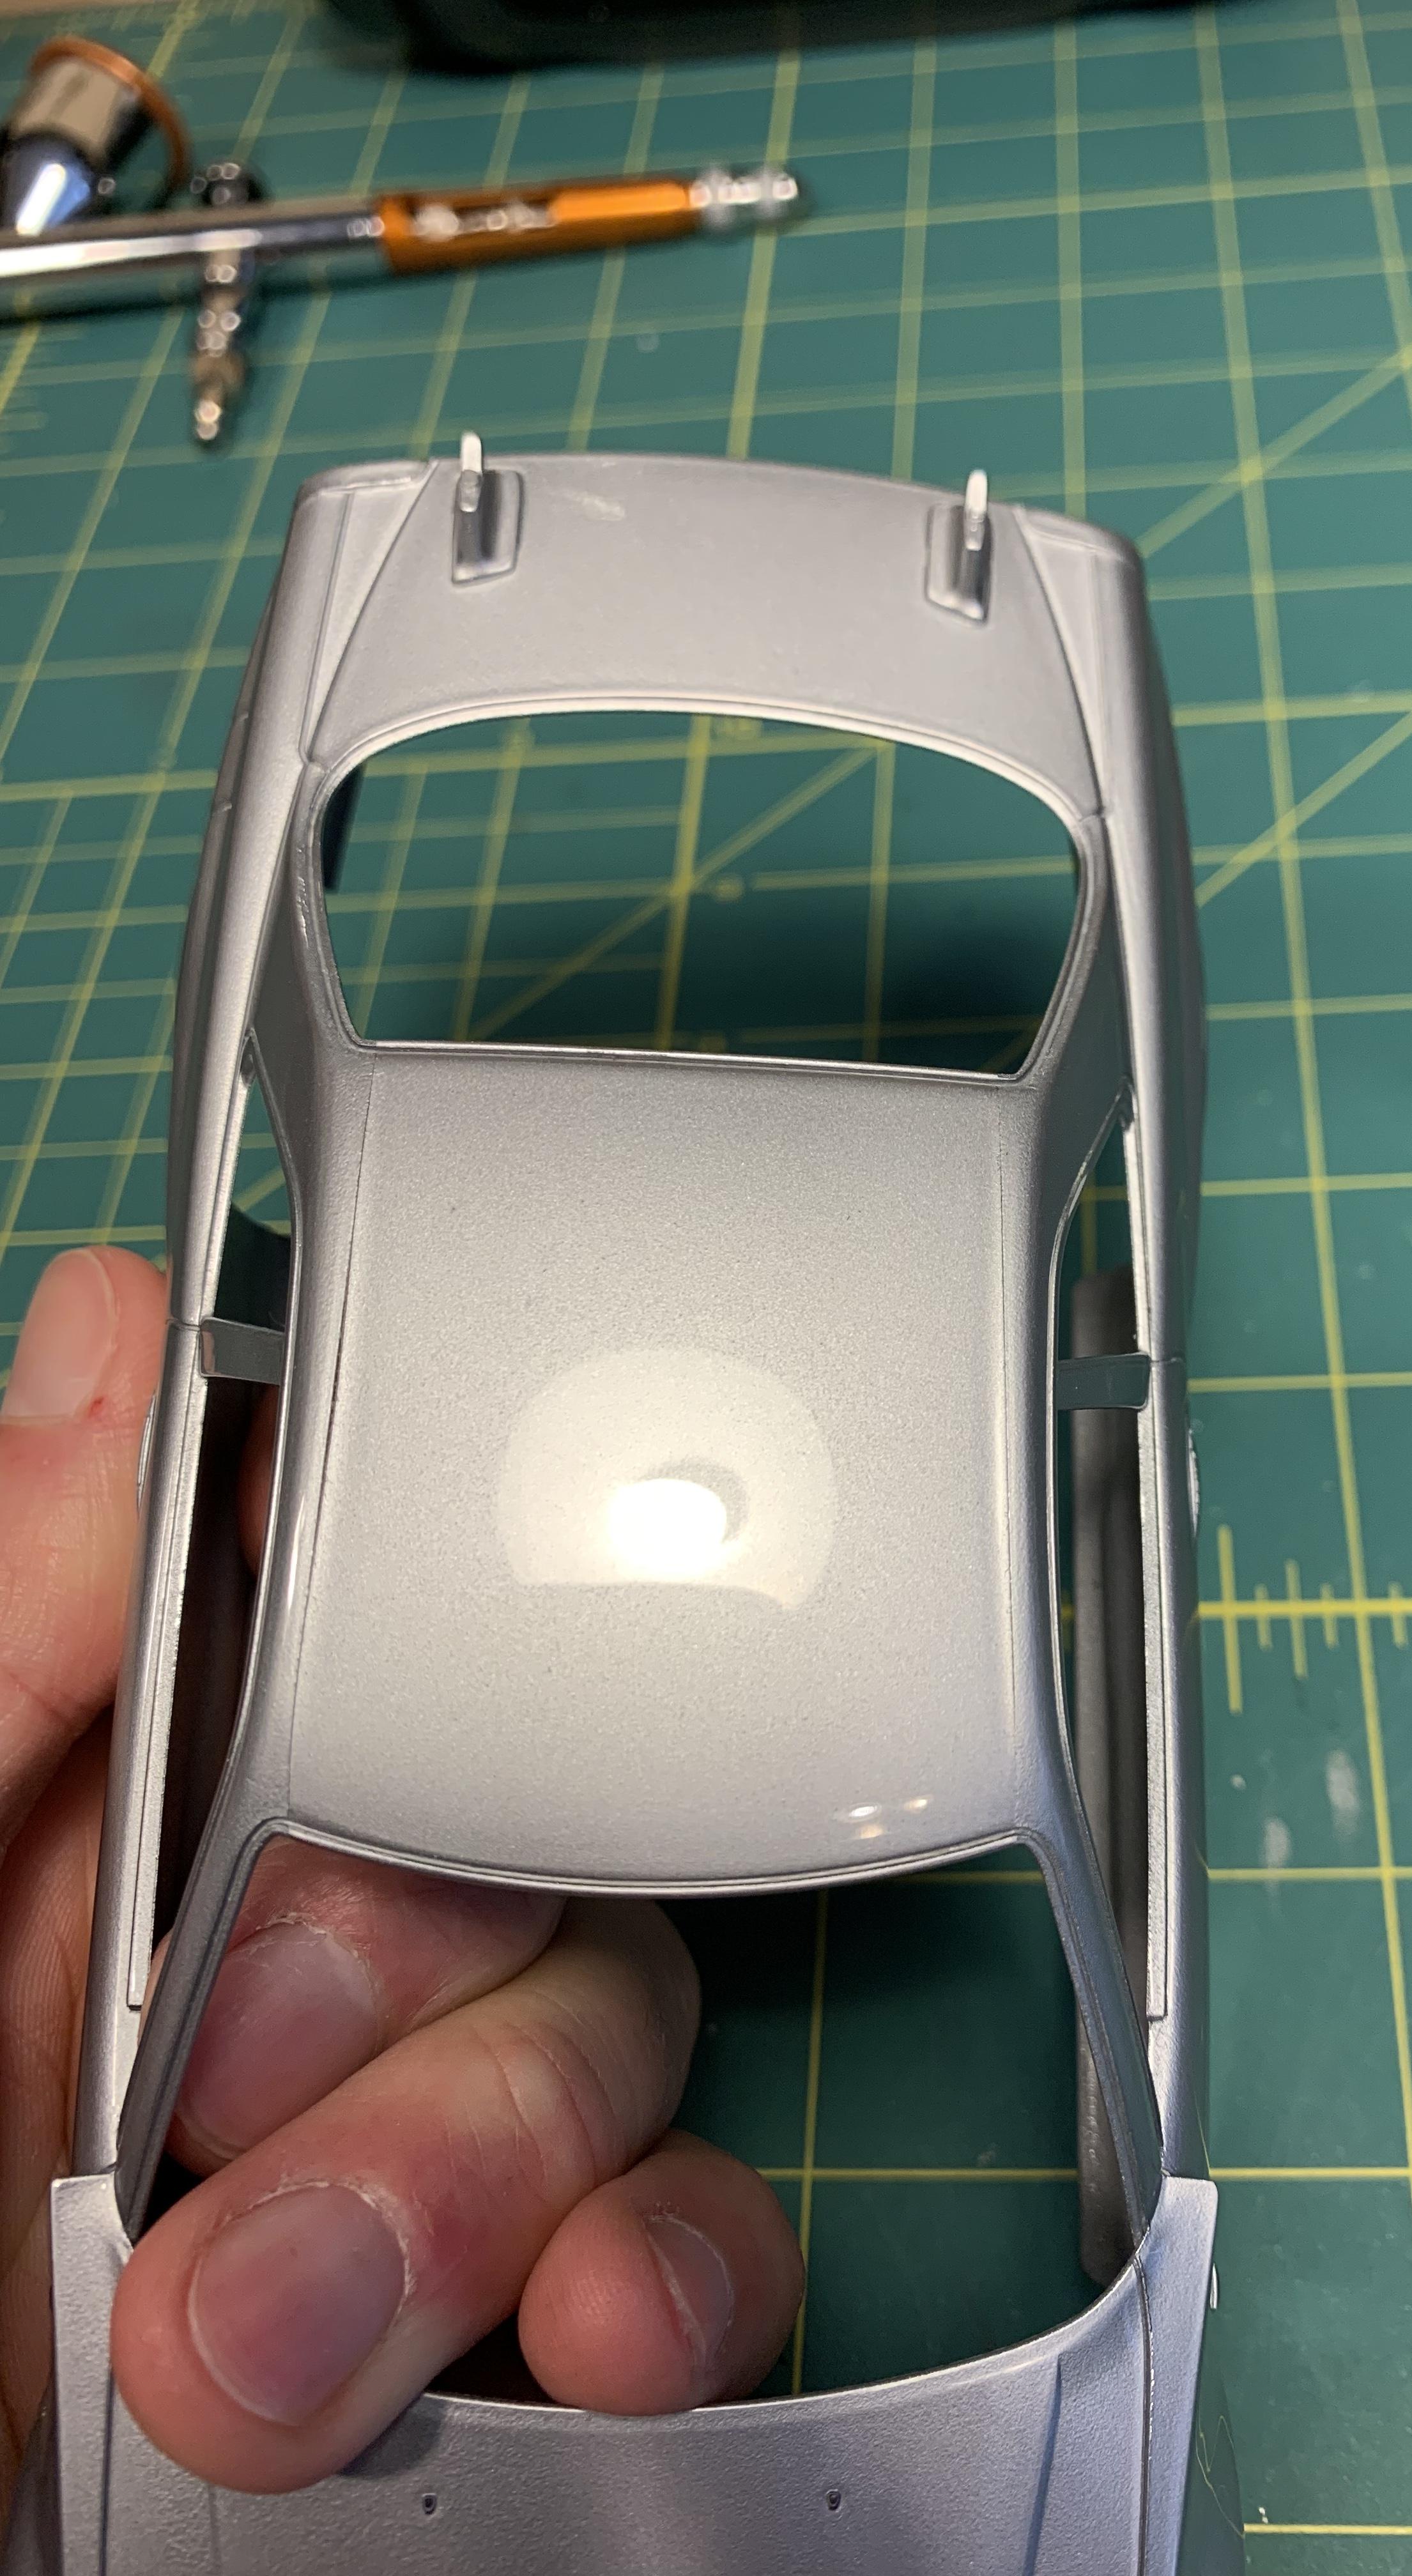
Got the body cleared today. I have to say the Gravity Colors clear is awesome. This is the first time I’ve actually mixed paint and it was simple. I laid down 2 mist coats, then 2 more moderately heavy coats, and finally 2 heavy wet coats. I have to say after 3 hrs in the dehydrator, it has leveled out almost perfect.
-
Who's used Scale Finishes paint?
lghtngyello03 replied to Dave Toups's topic in Model Building Questions and Answers
I haven't used the enamel either so I can't speak of it. But, I have used the lacquer with his 2k clear and it is amazing. -
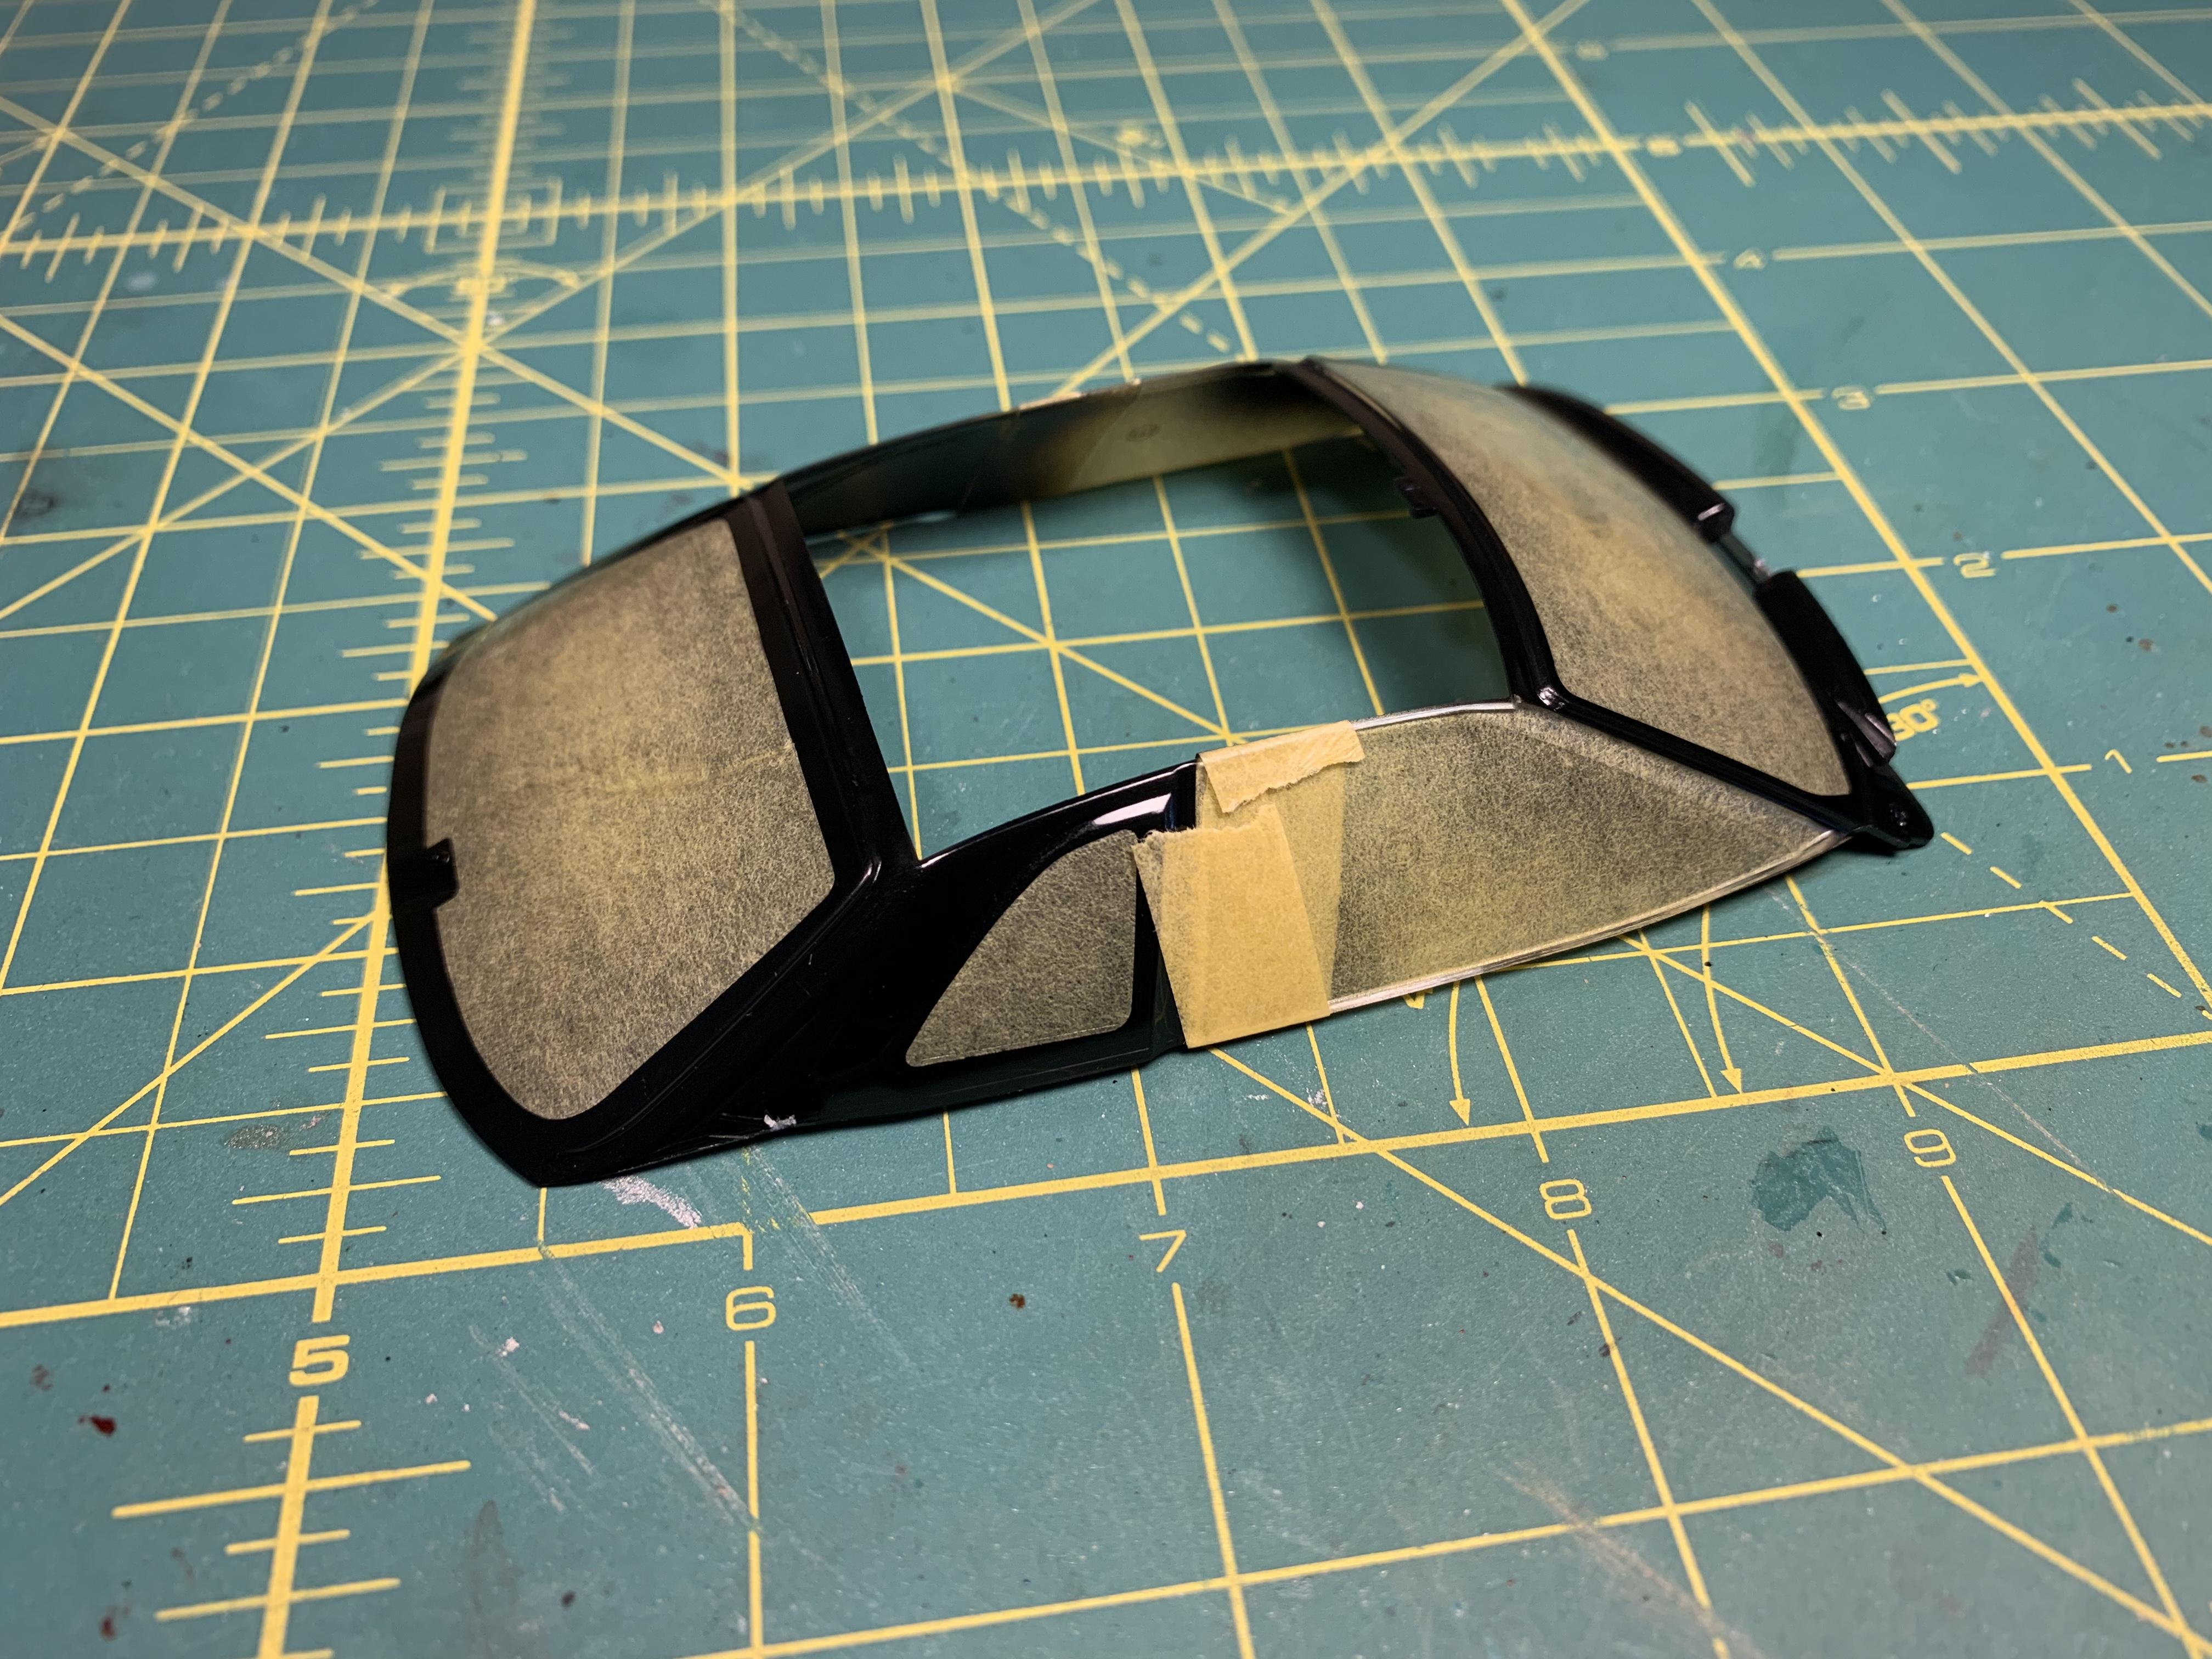
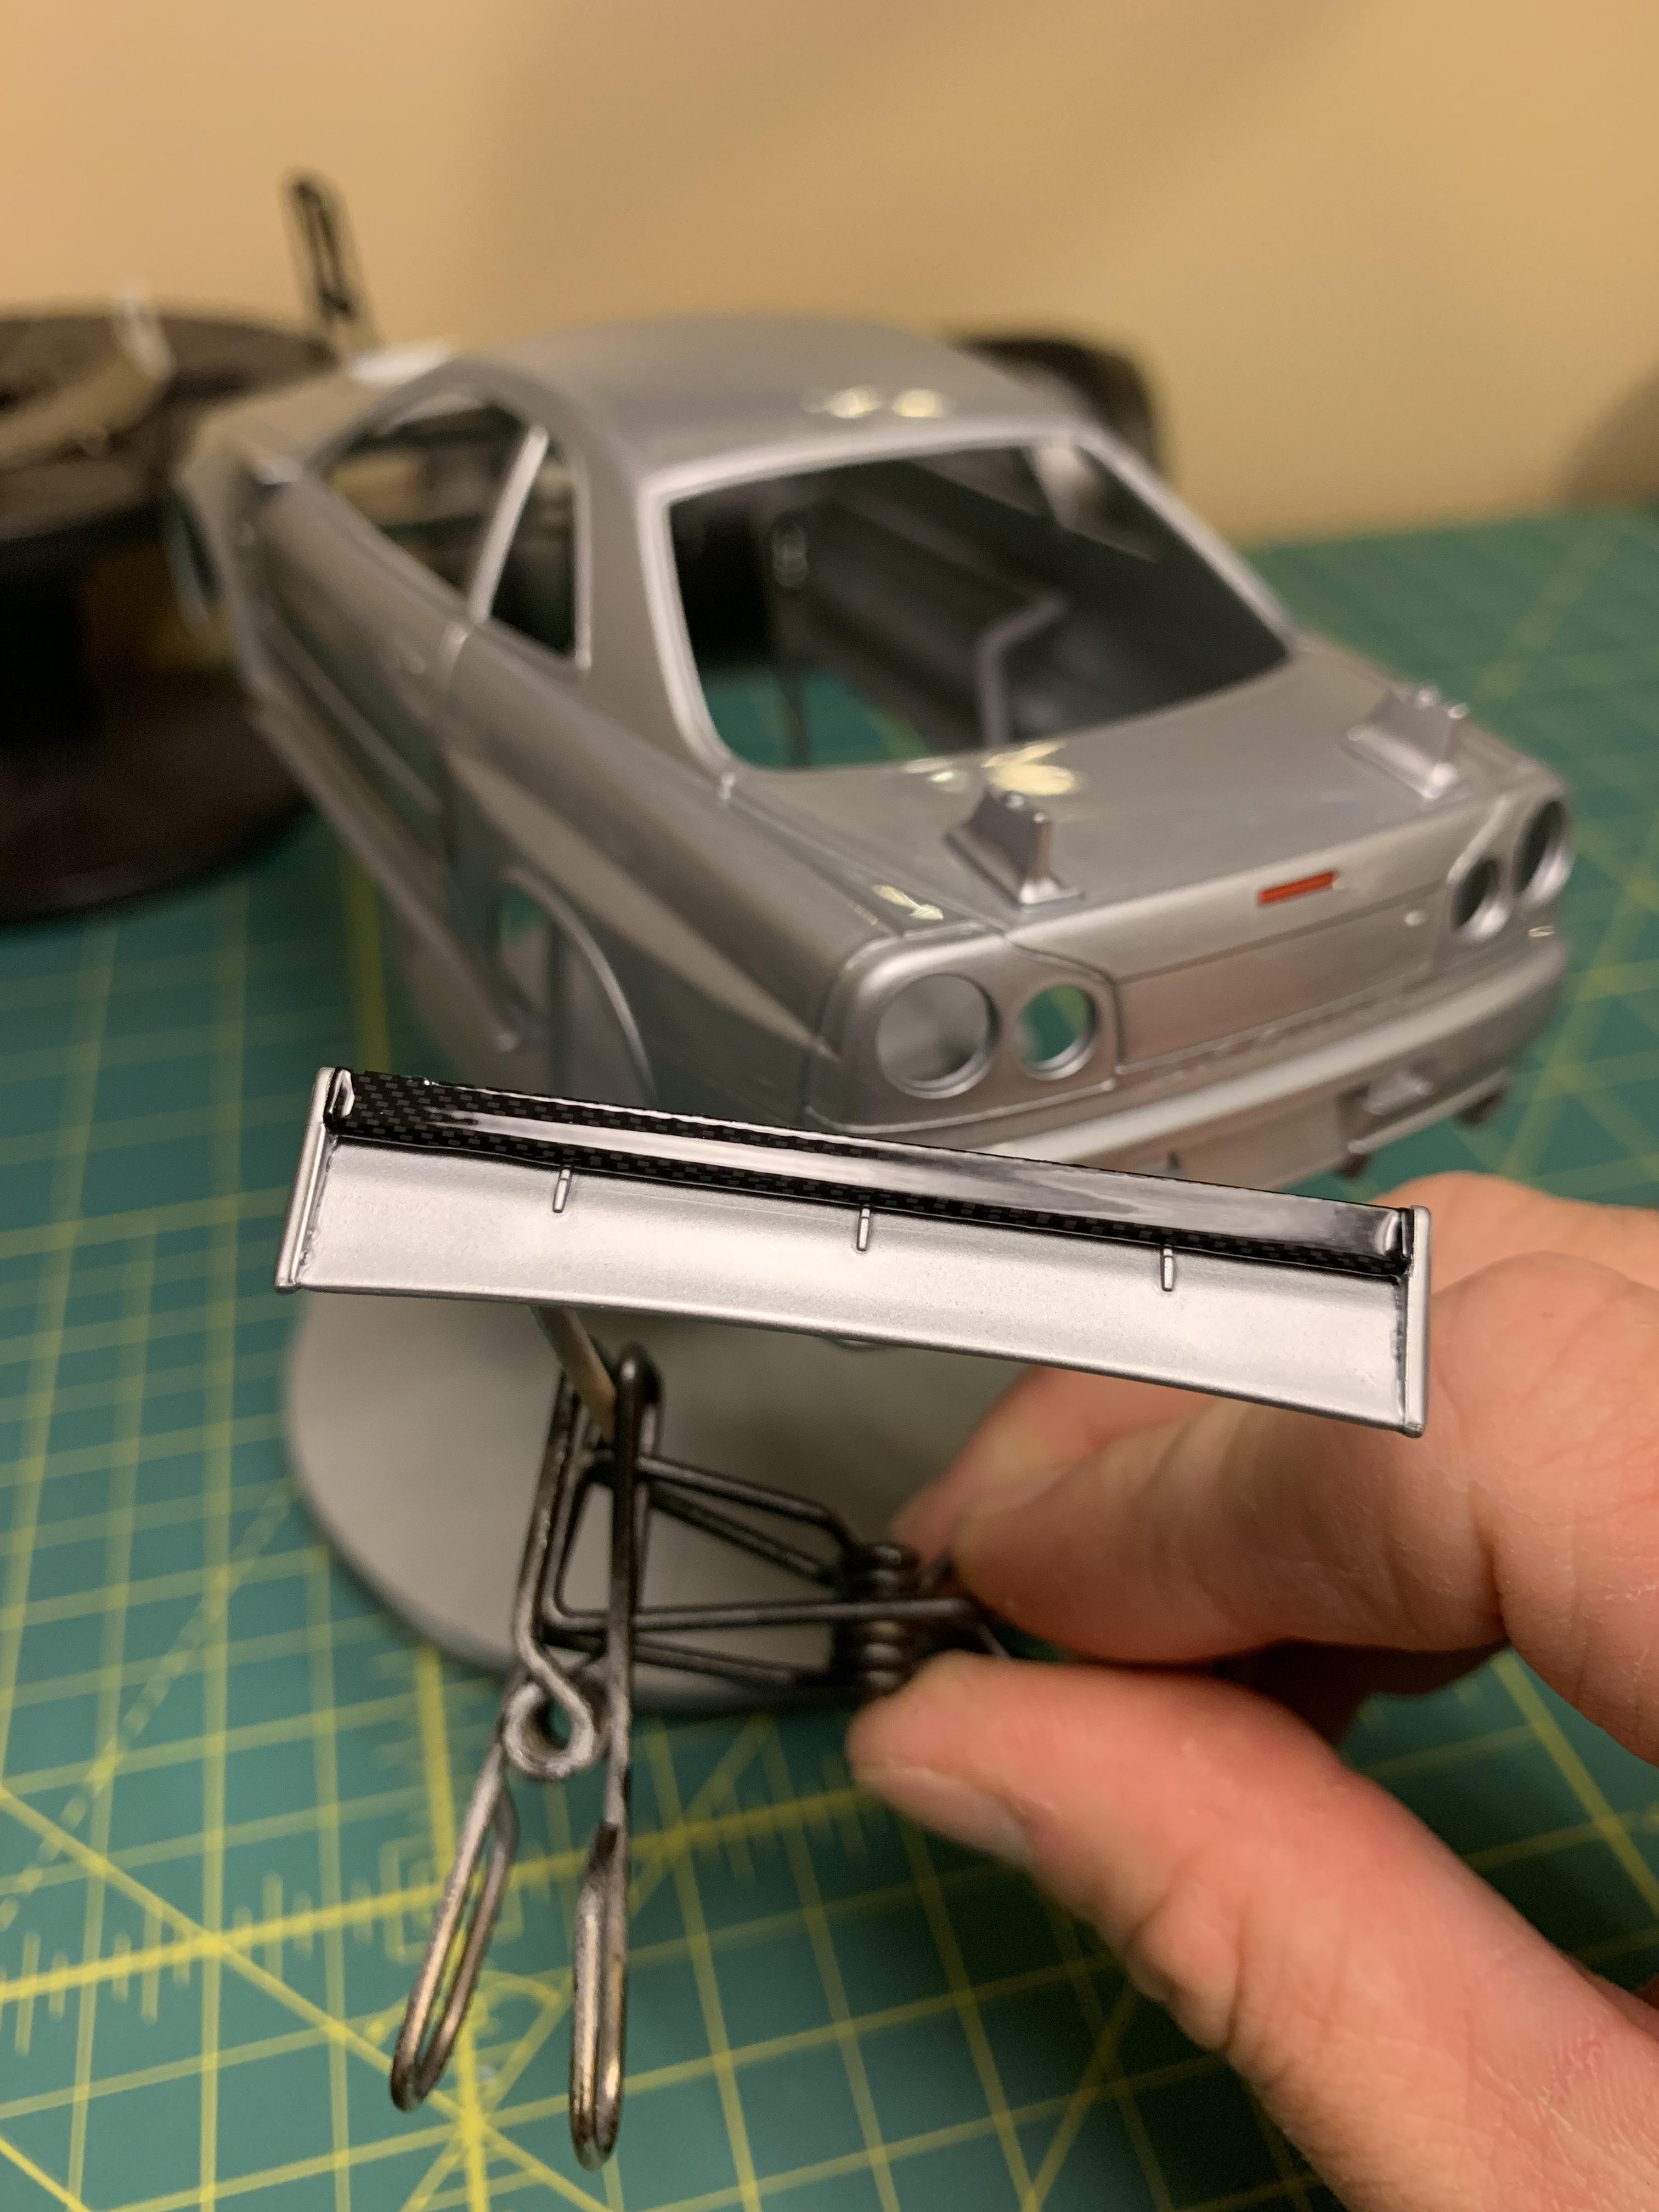
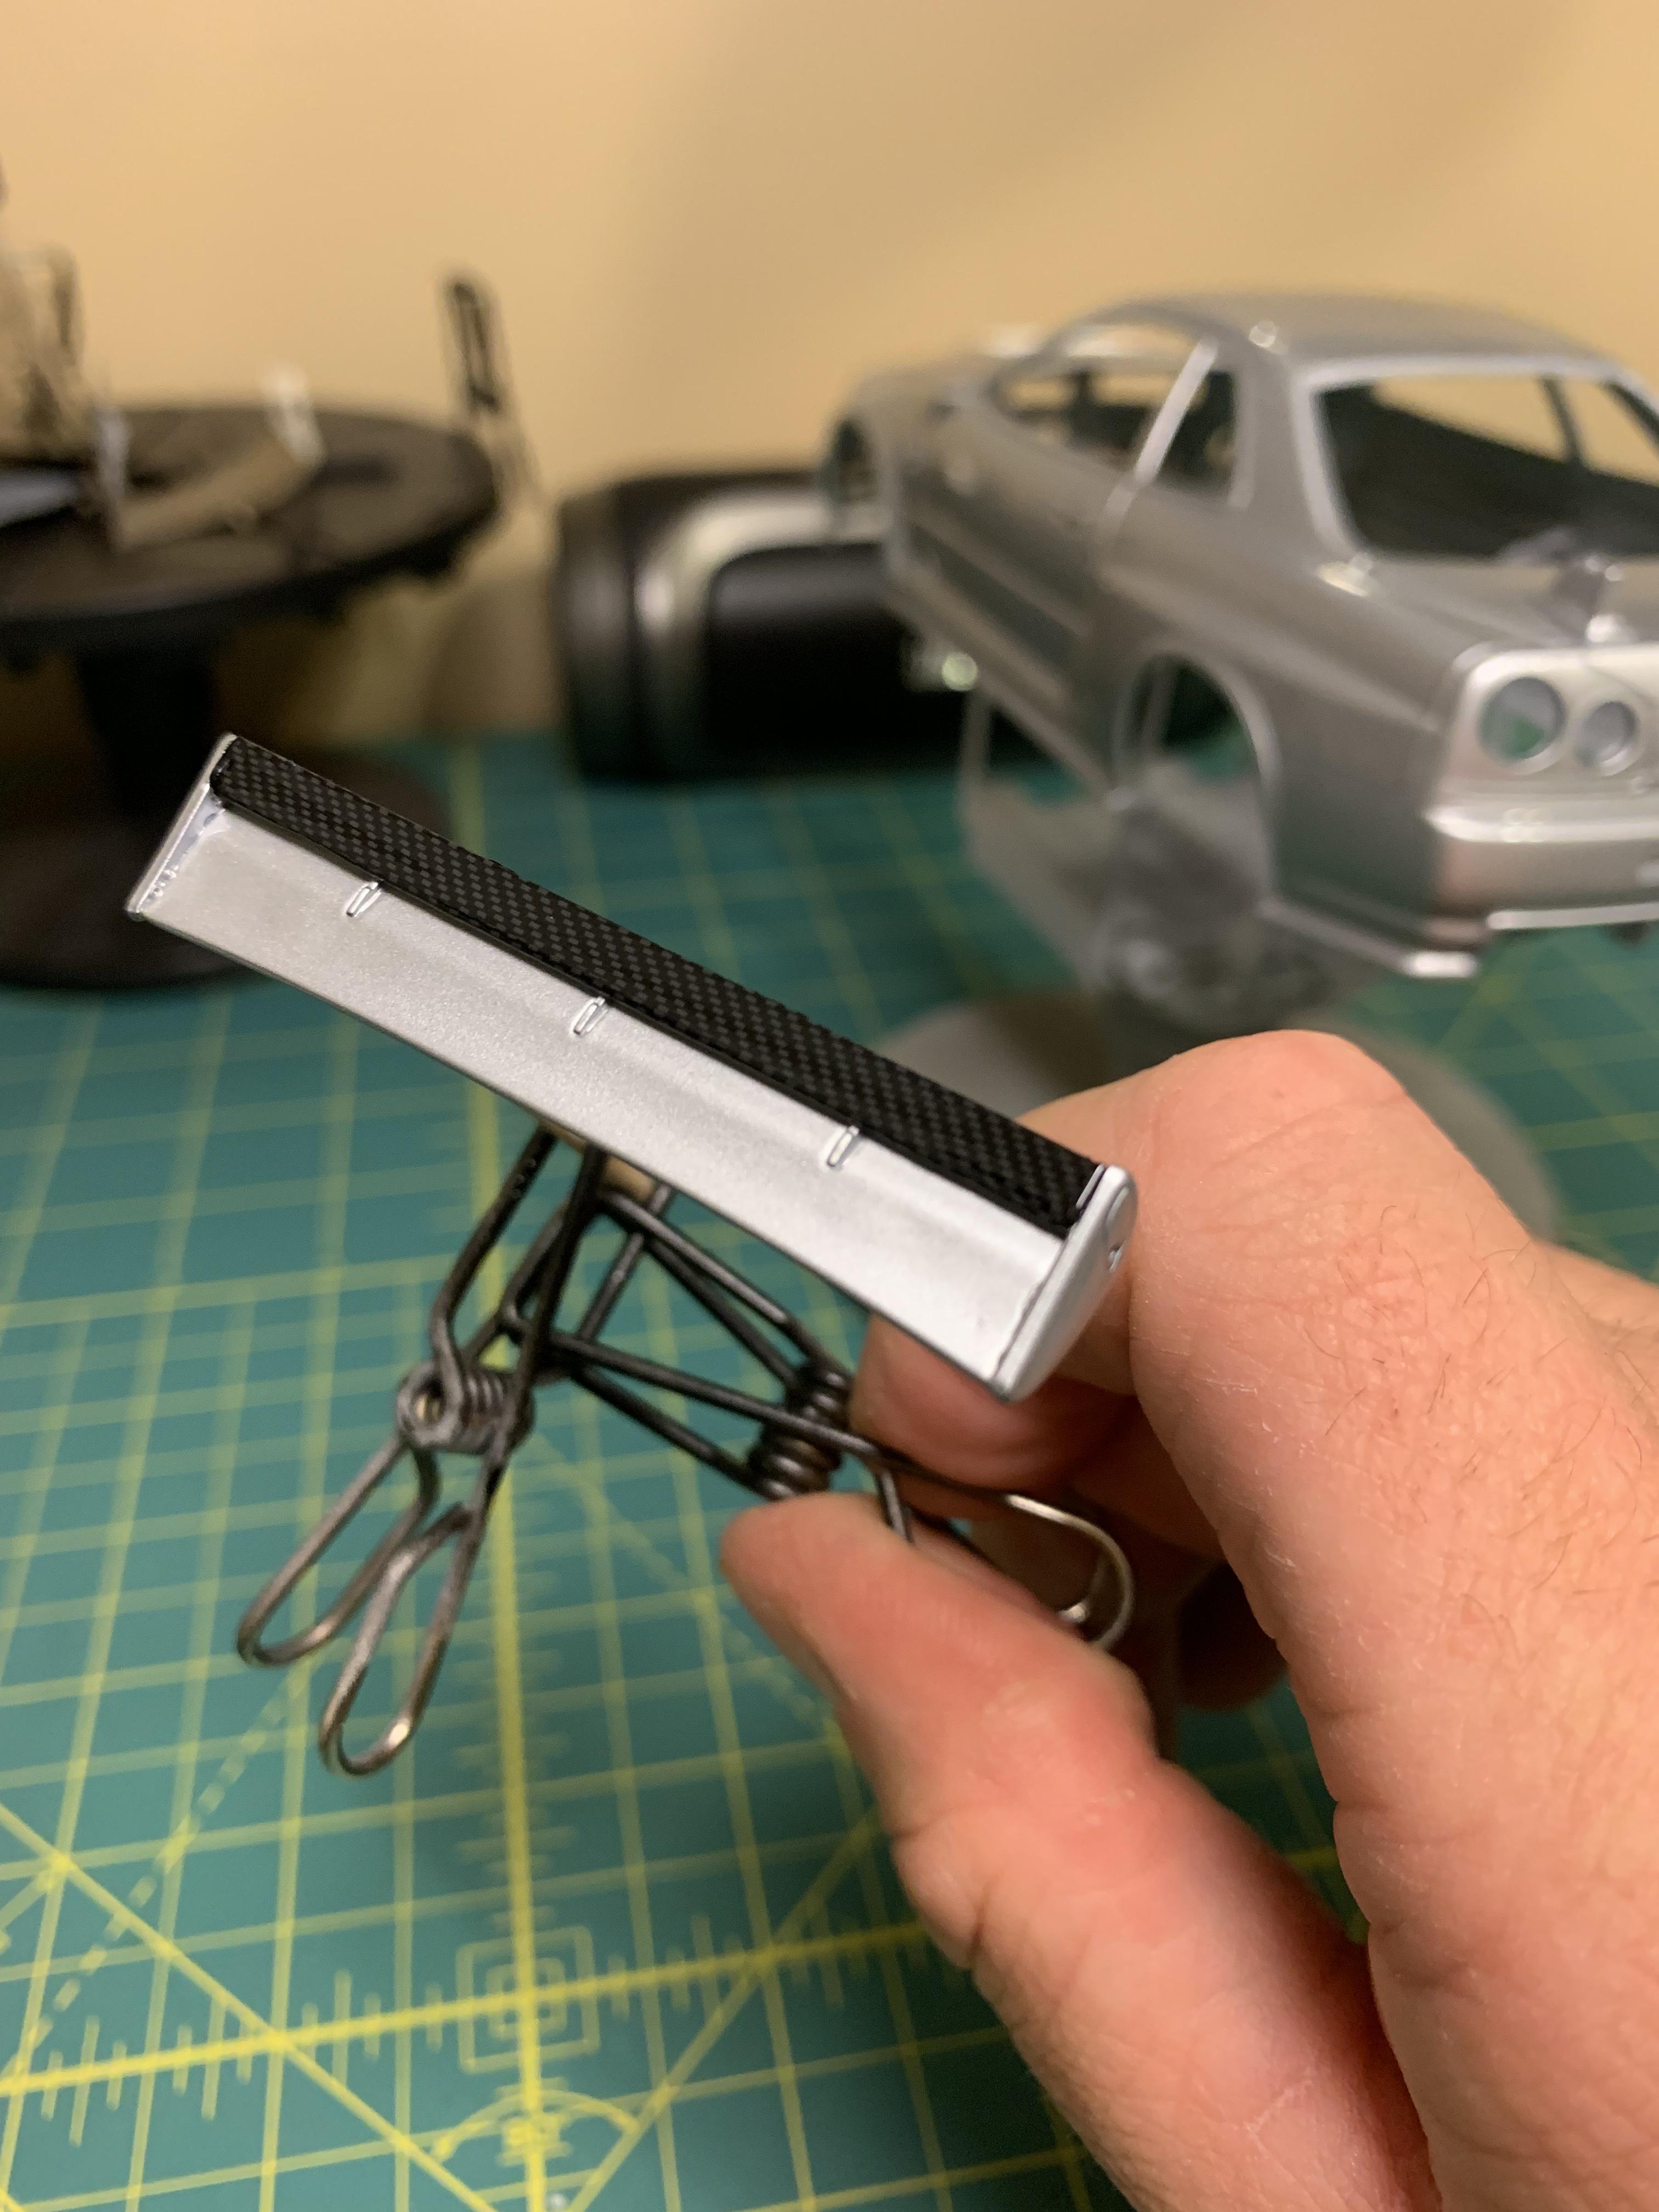
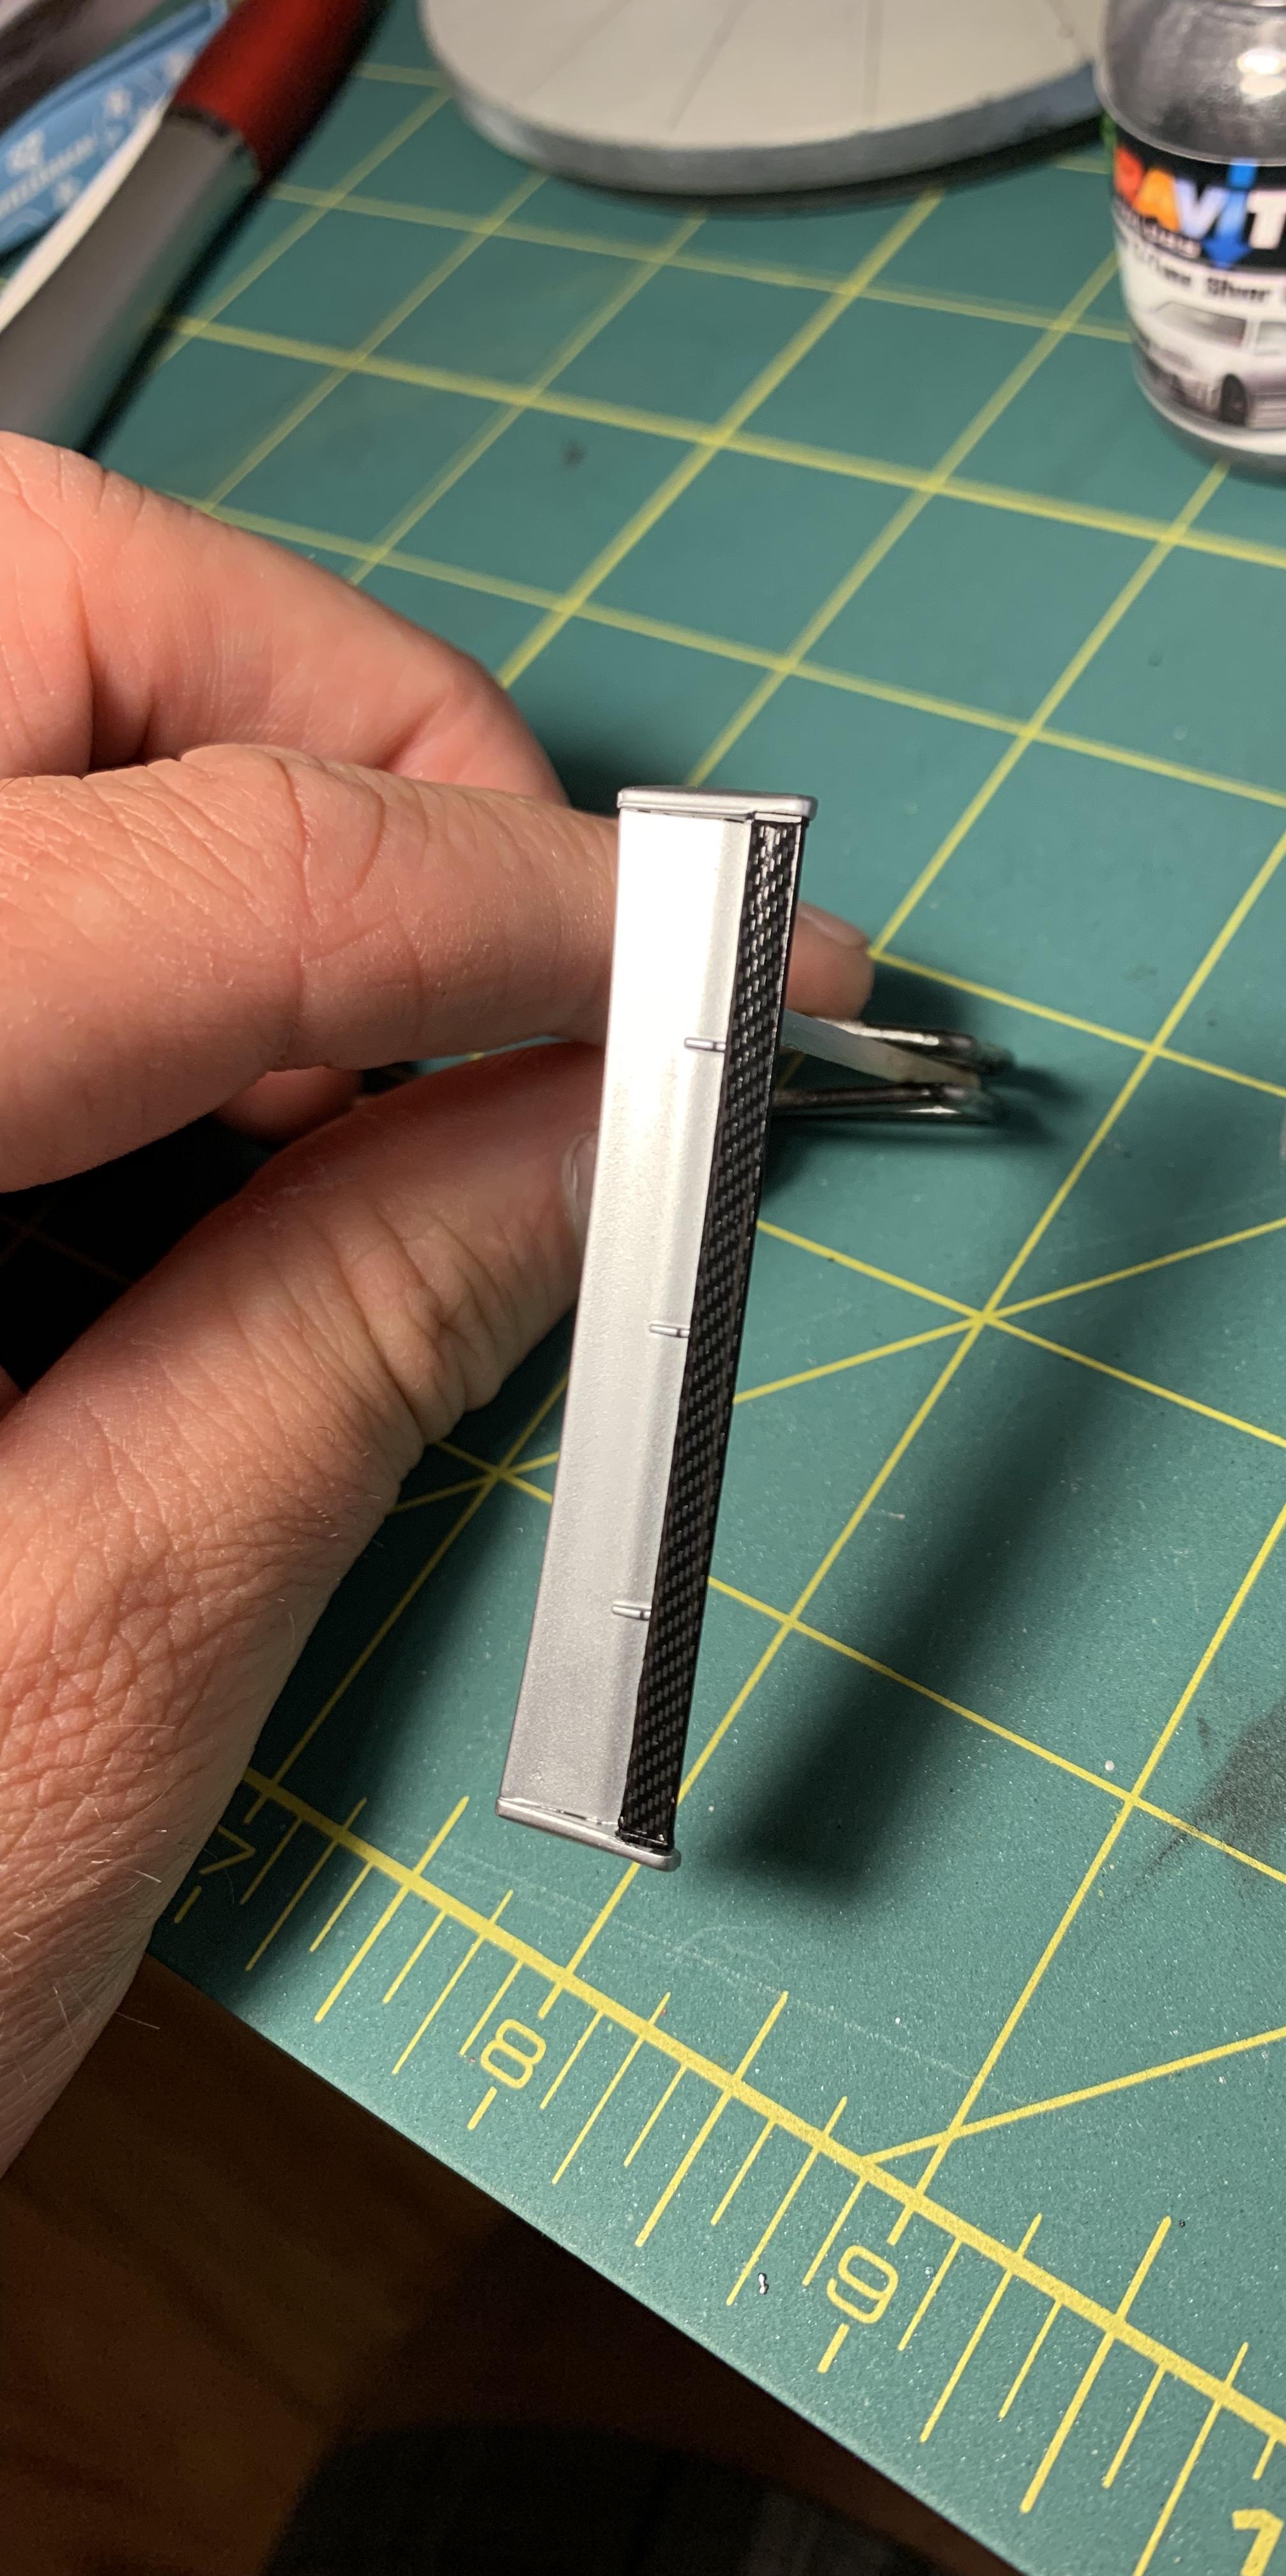
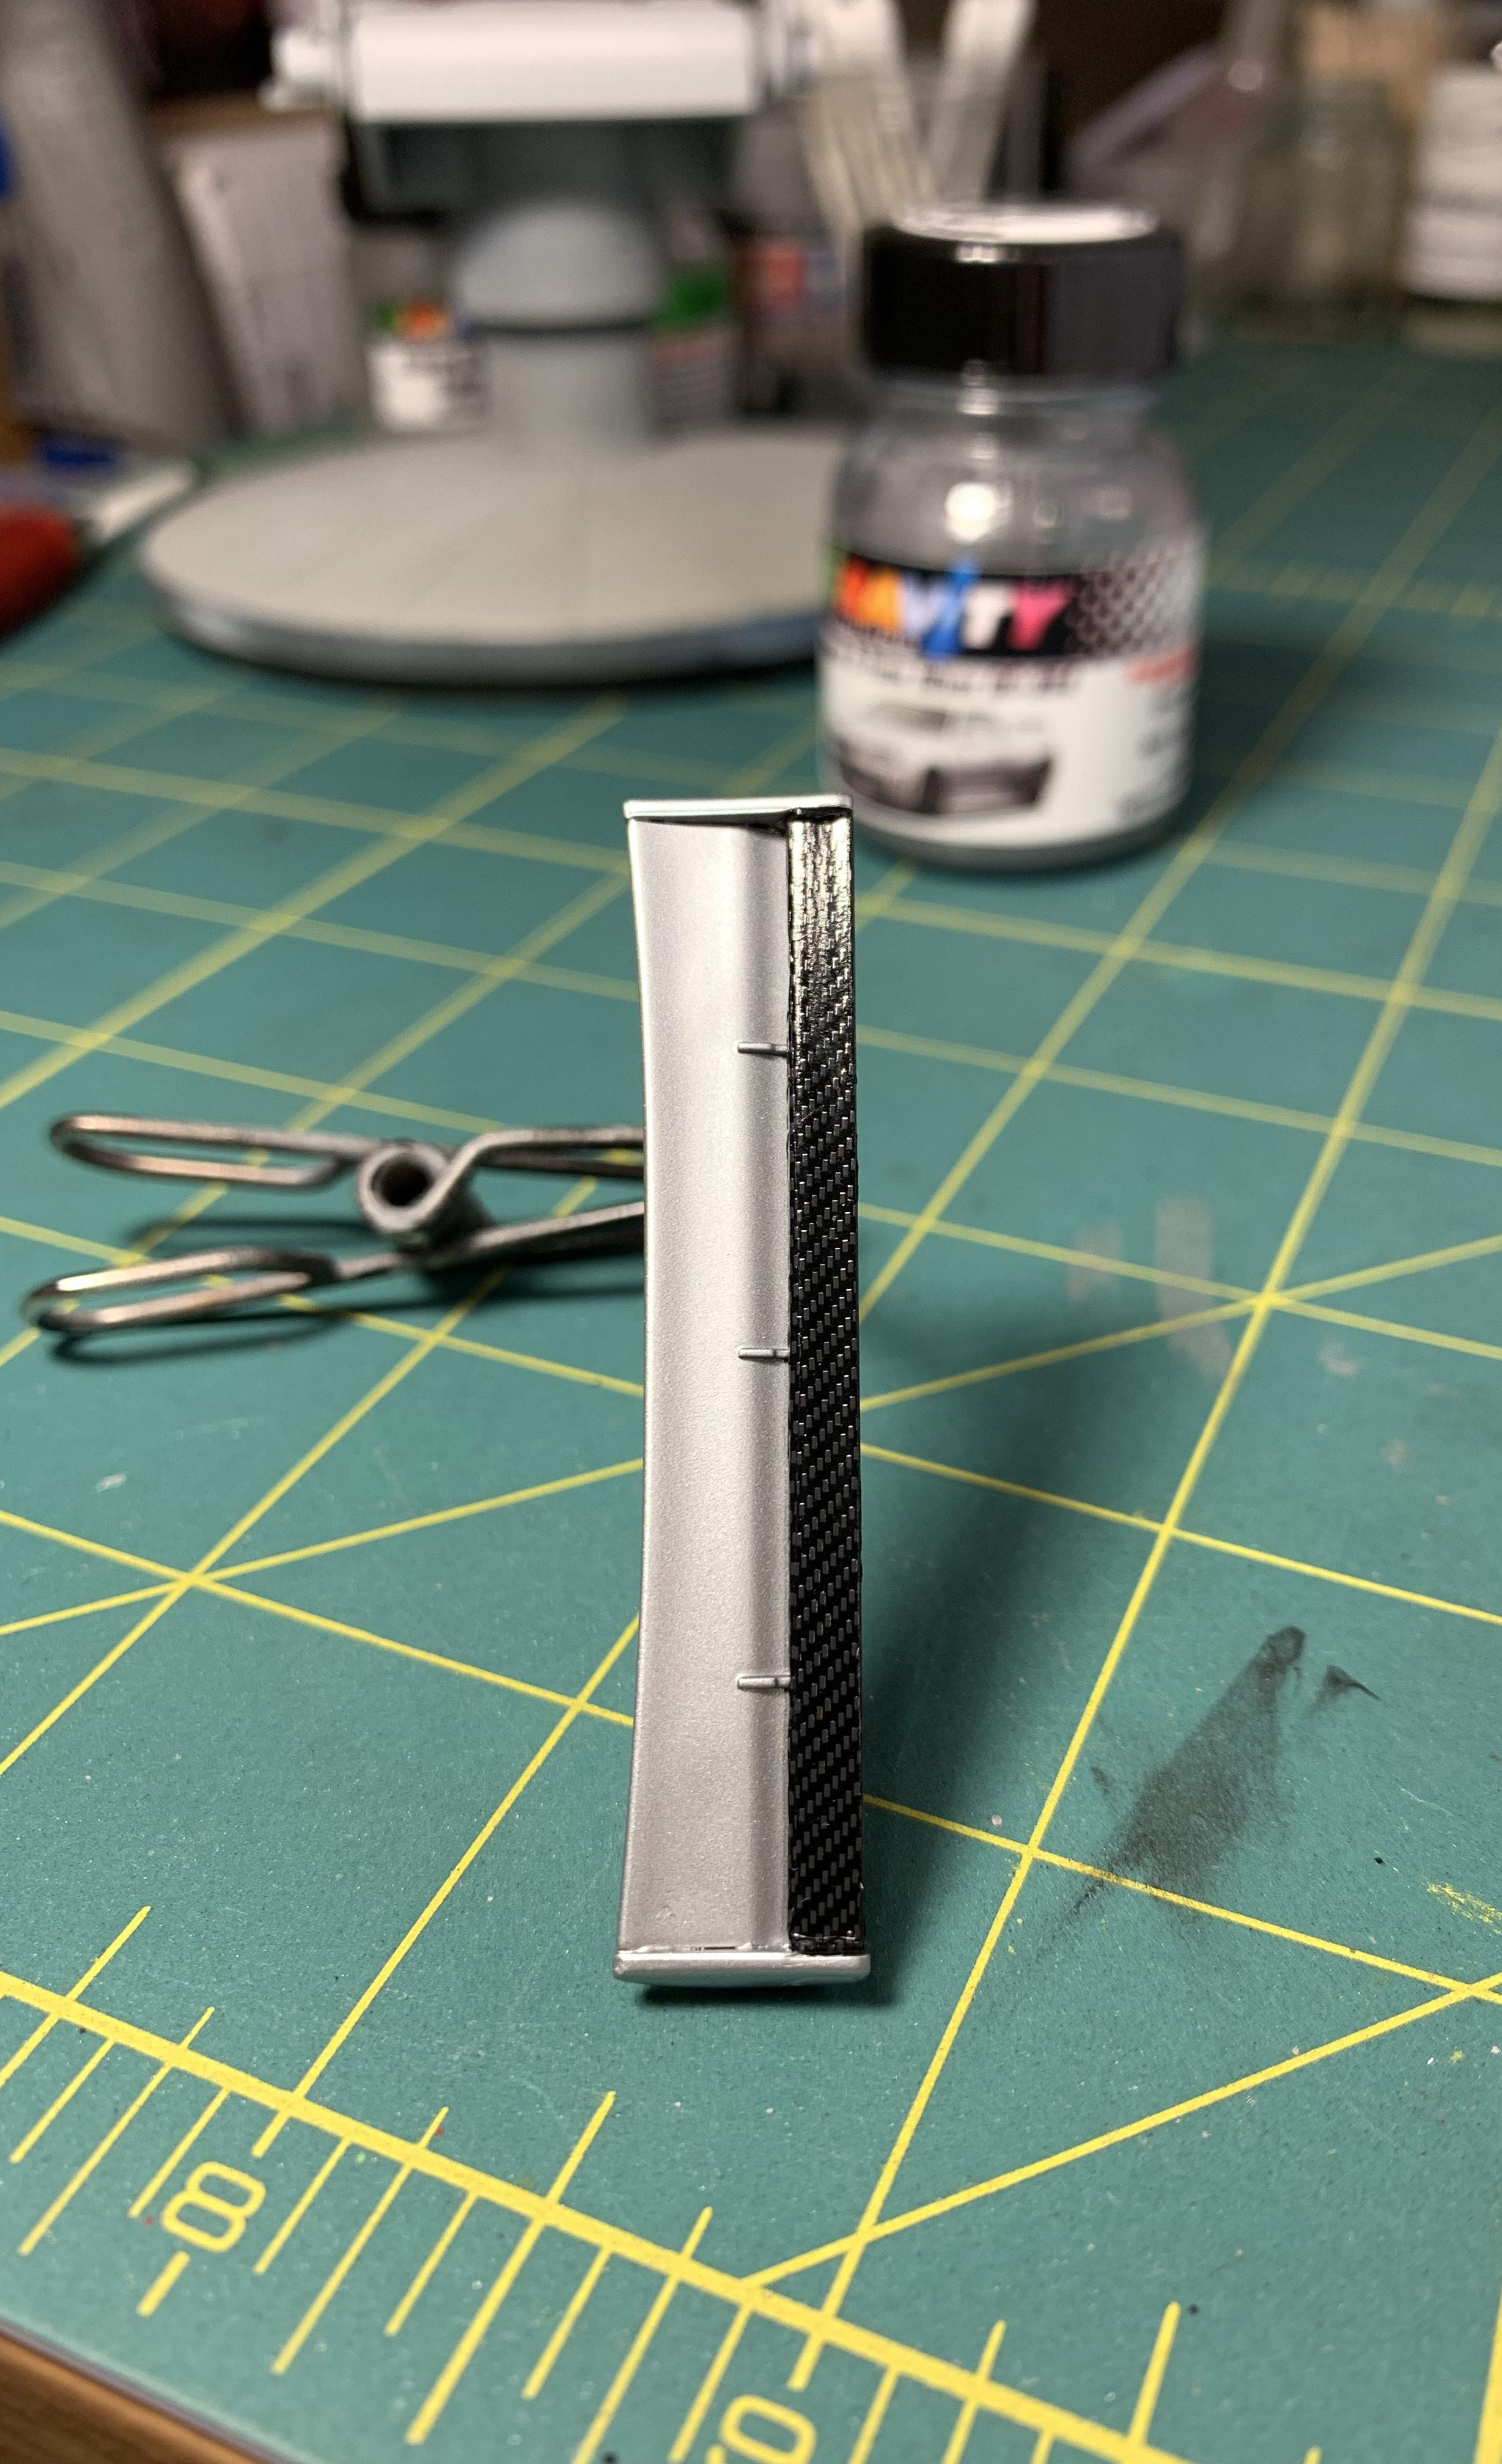
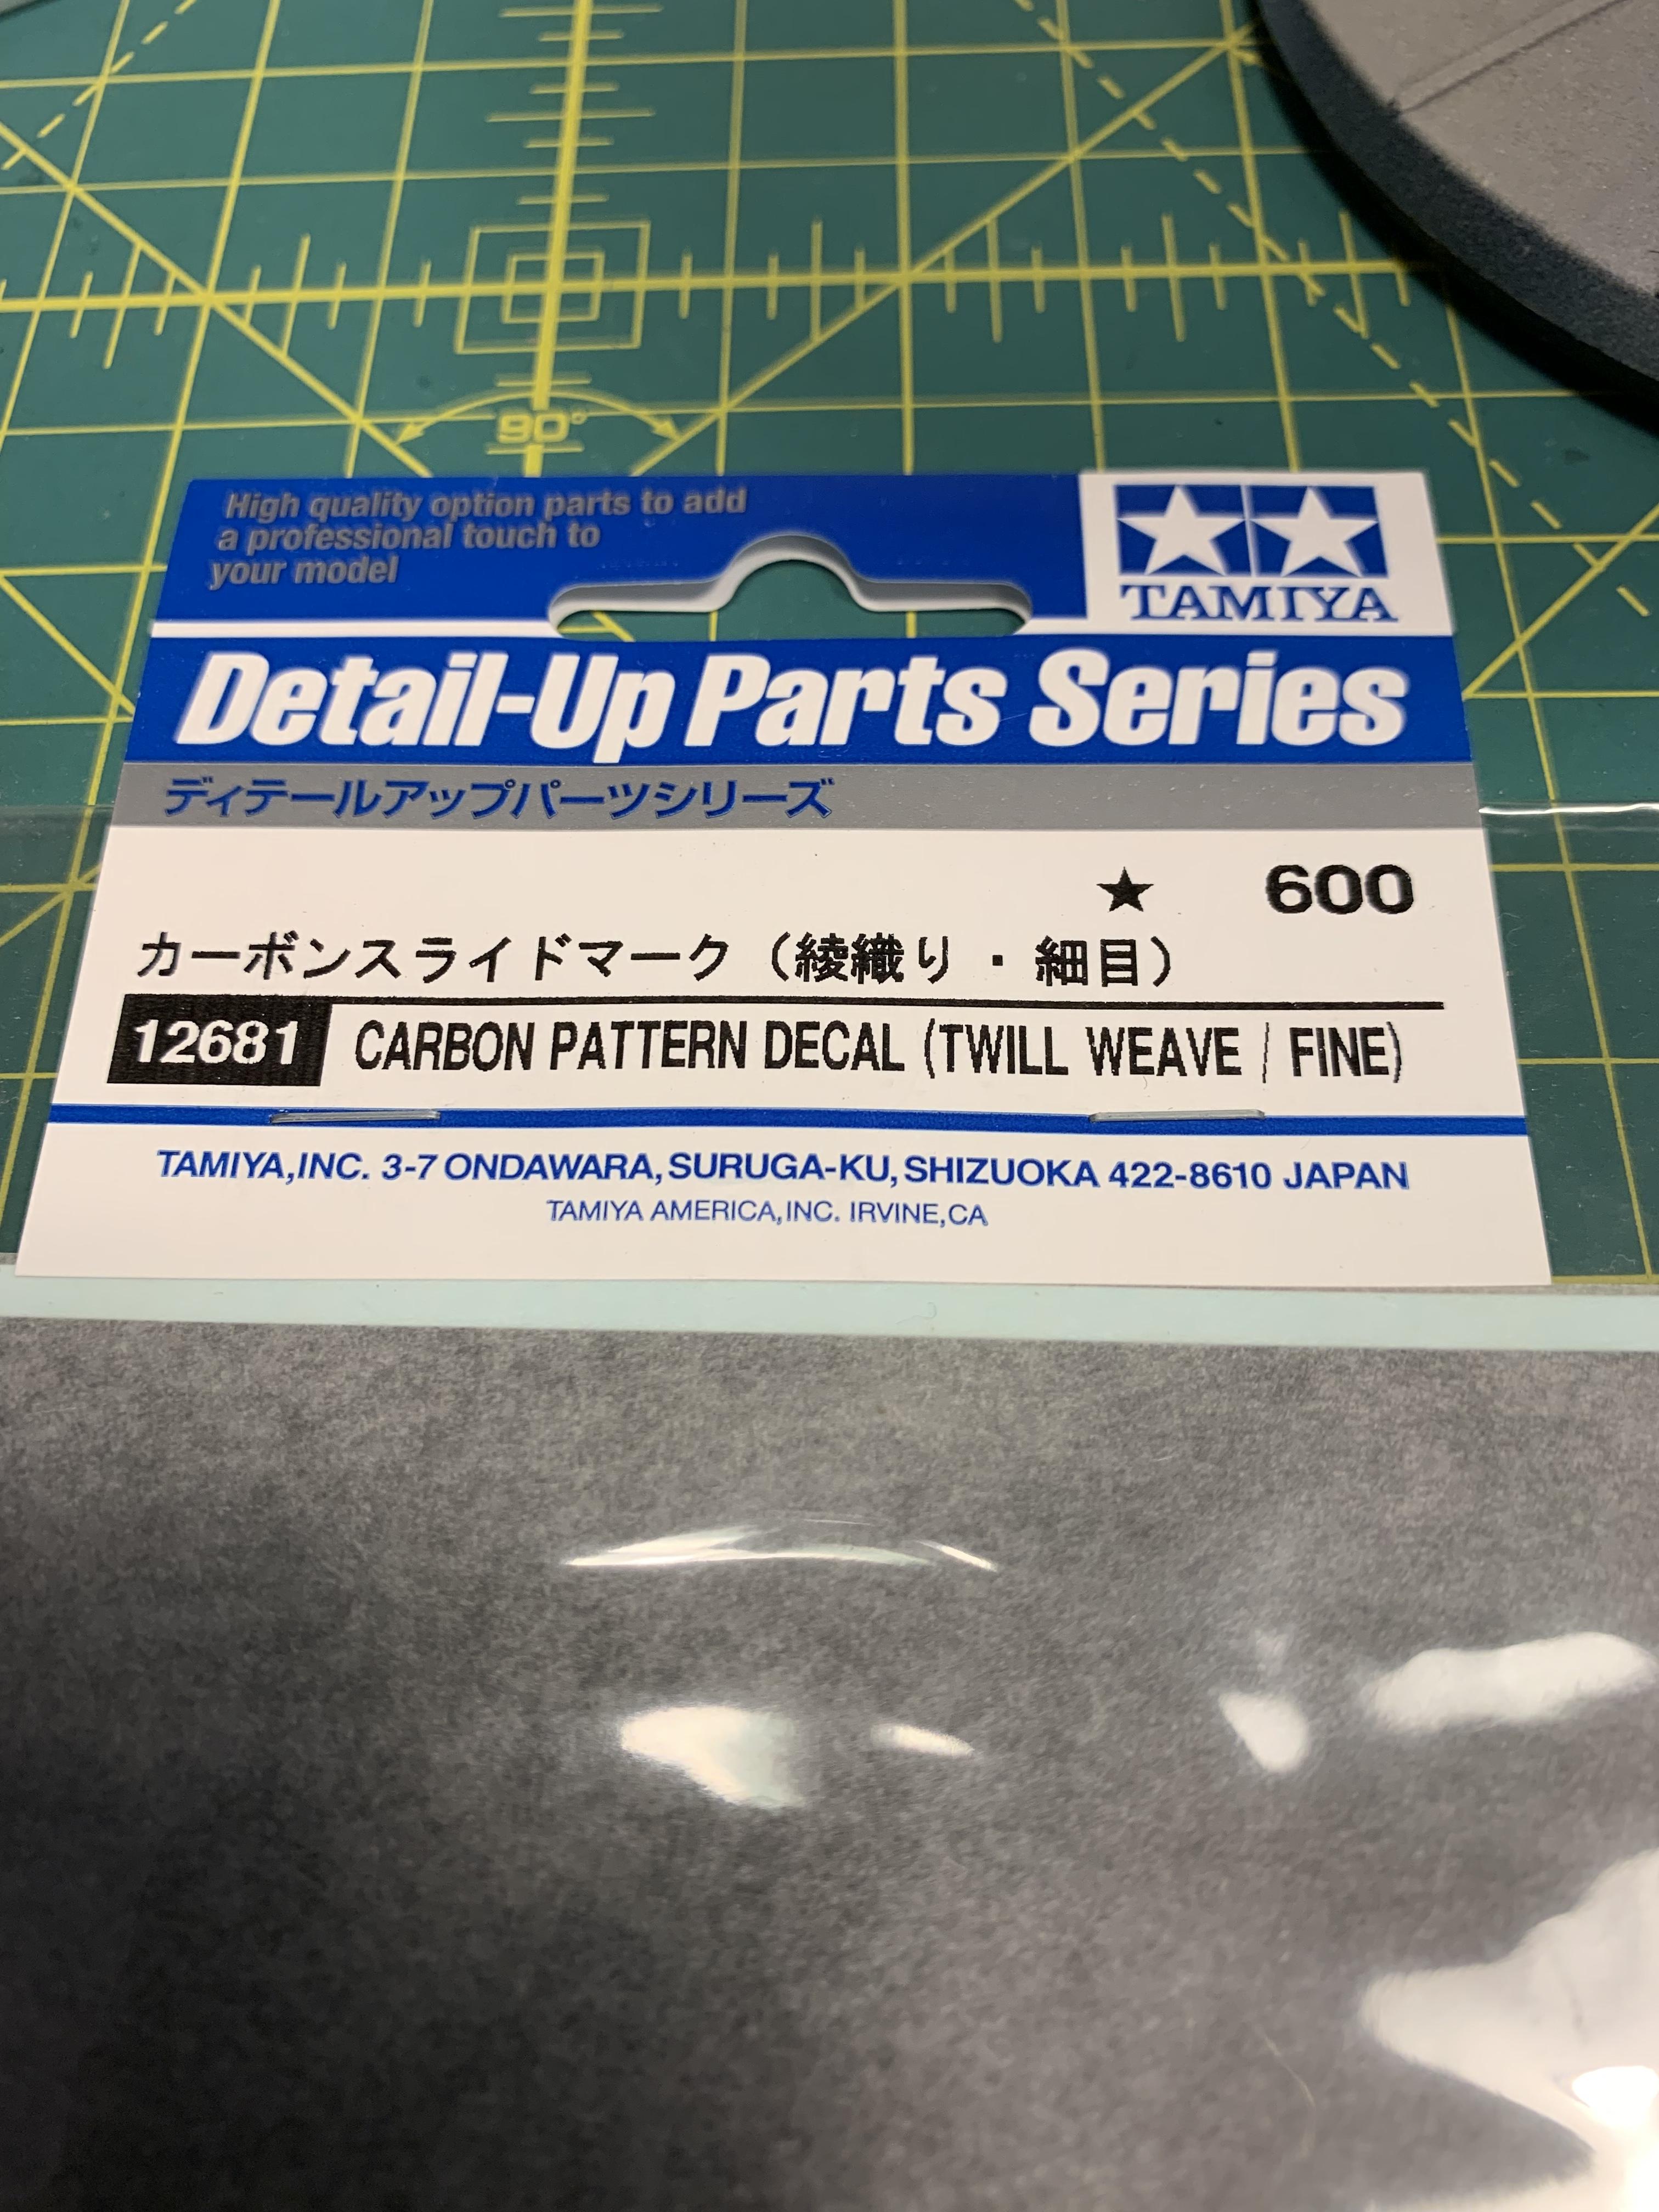
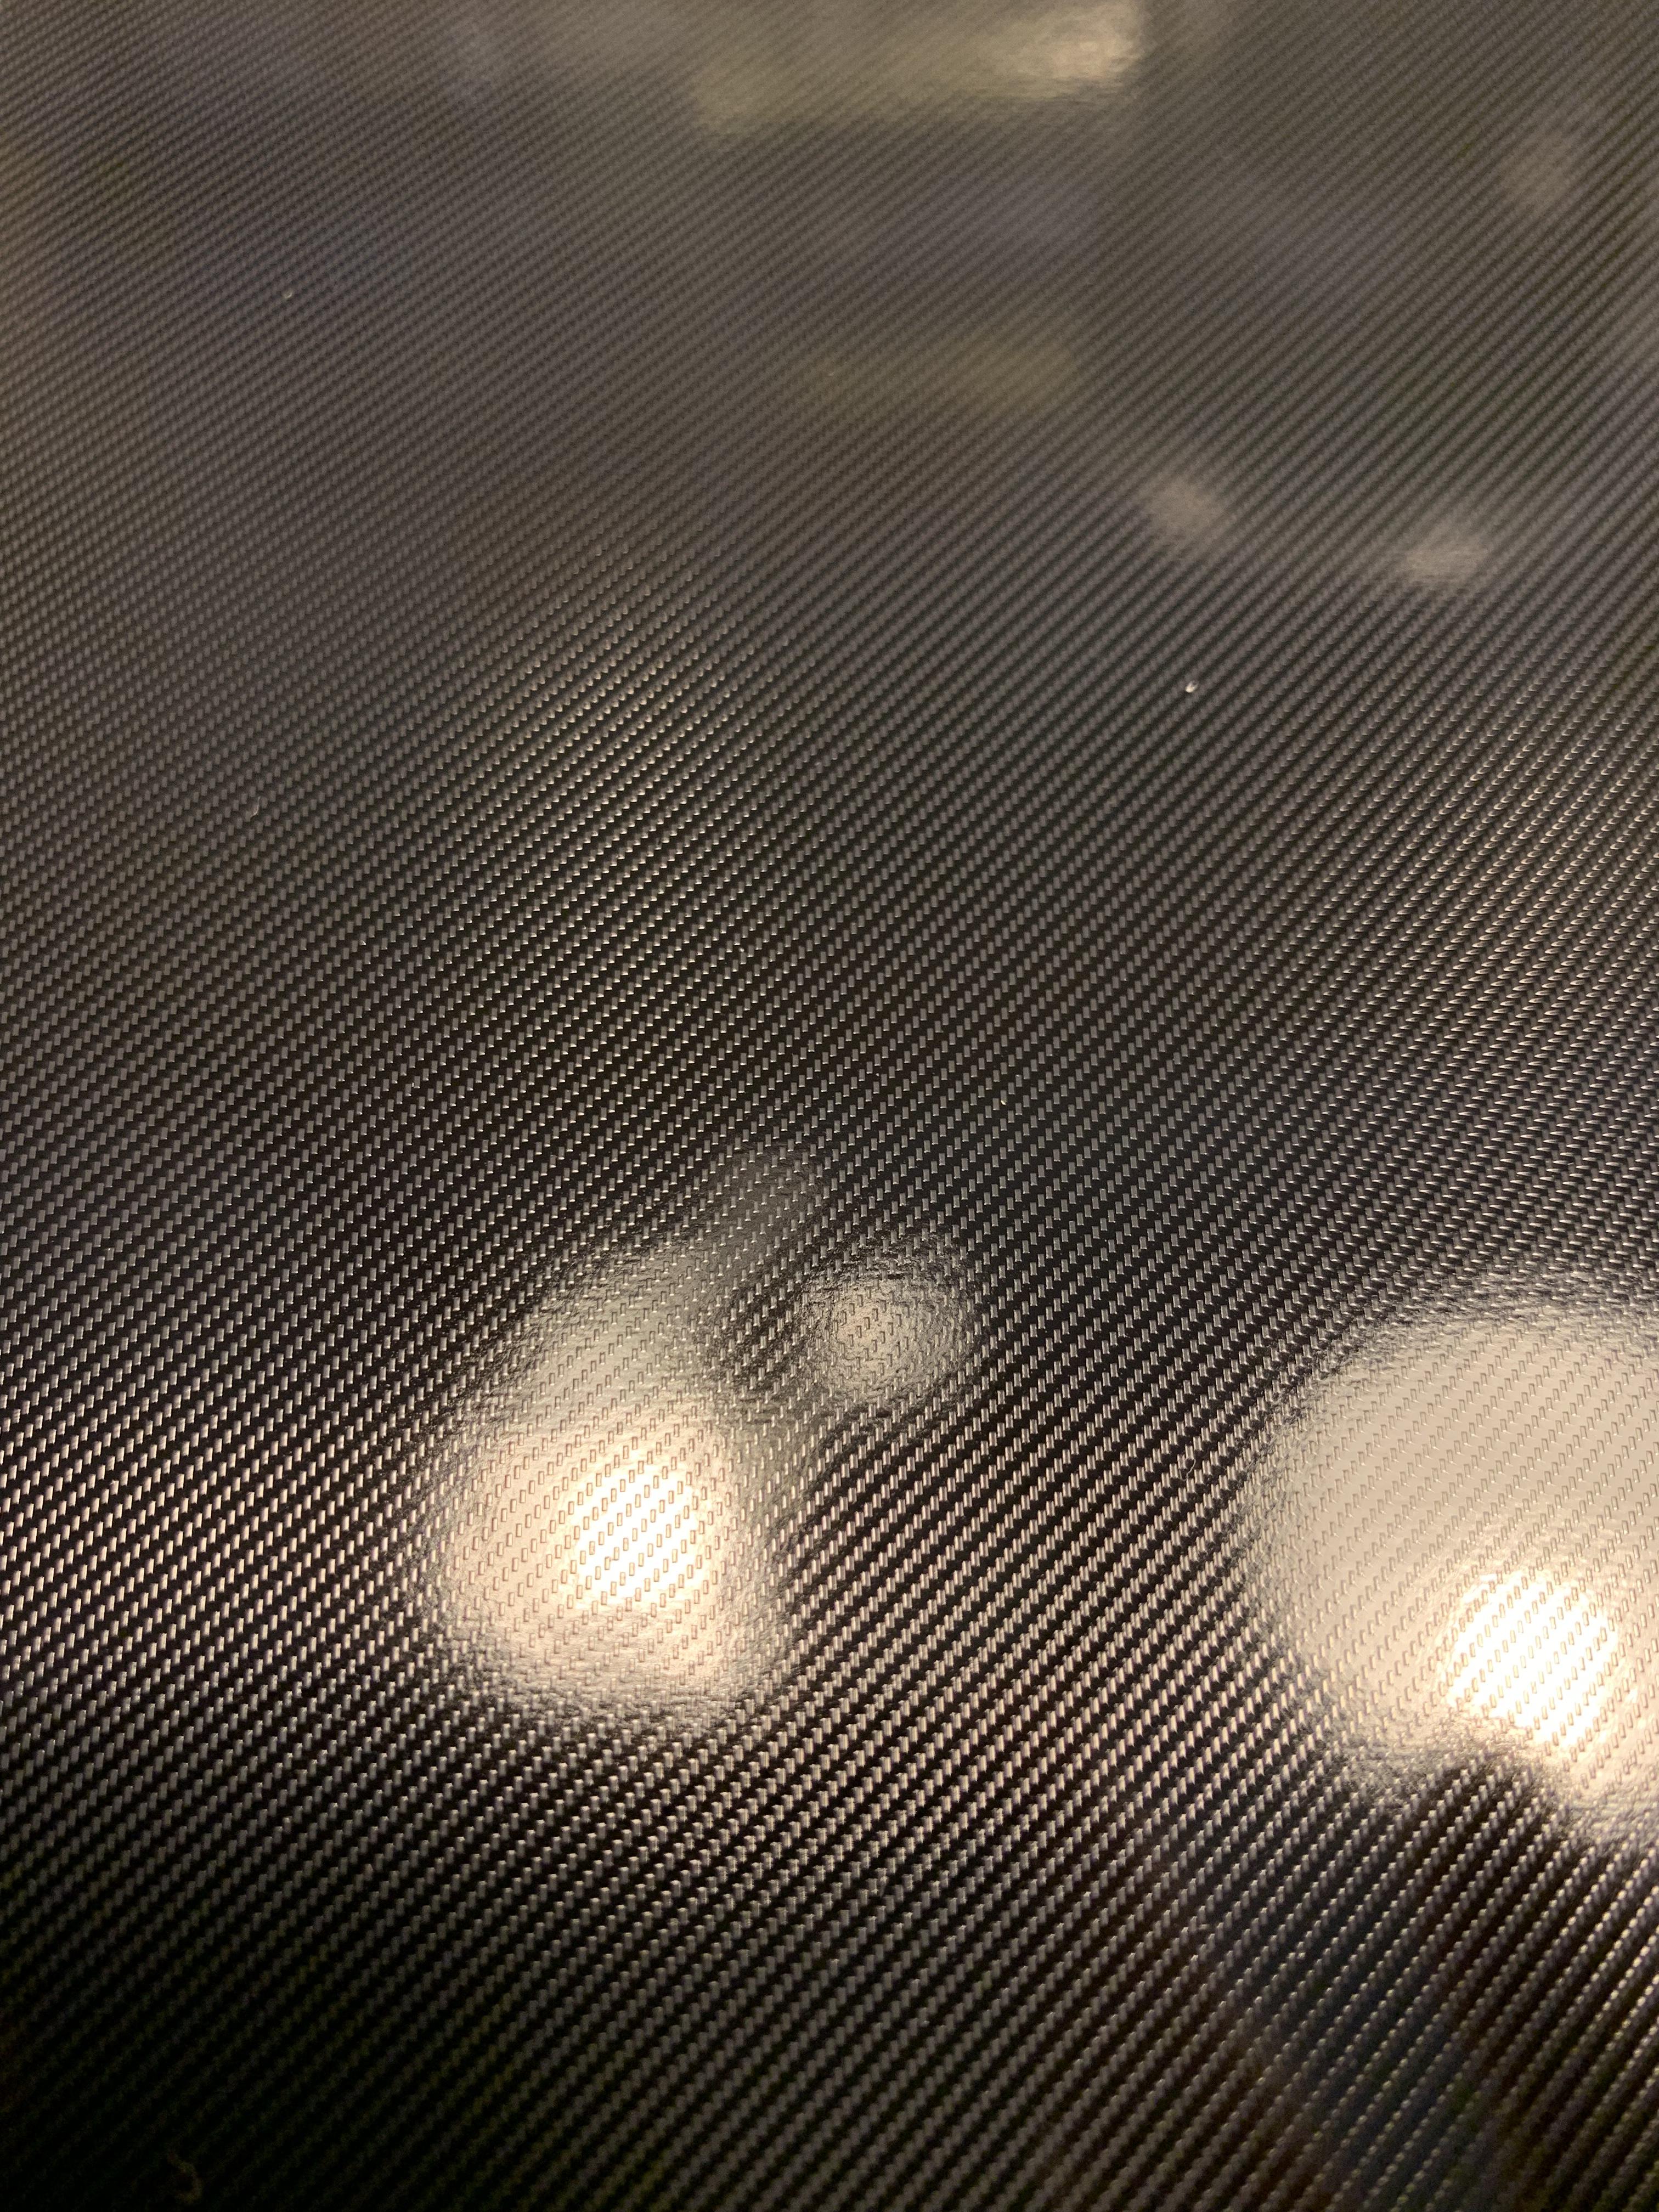
I got some more carbon fiber work done this evening. I also had to repaint my wing due to some trash that had to be sanded out. Not much progress, but I’m going to try to lay some clear coat down tomorrow.
-
So I managed to get the front spoiler done tonight as well as the decals on the body that need to go under The clear coat. Man, the front spoiler was a pain! I did use a larger Tamiya Carbon weave I also got the rear suspension painted and decided to go a different, larger weave of carbon on the driveshaft. It’s Scale Motorsports.
-
Thank you! I hope to get a little more carbon work done this evening.