Sidney Schwartz
-
Posts
418 -
Joined
-
Last visited
Content Type
Profiles
Forums
Events
Gallery
Everything posted by Sidney Schwartz
-
I always remove those hood hinges from a kit...just a useless complication.
-
I struggled at first with getting the paint/thinner ratio right, but with experience it became pretty easy. I spray using a Paasch VLS airbrush with the size 3 (.73mm) tip at 30 psi. I've played around with different tip sizes and psi settings and this is the combination that works for me. Set it and forget it. For thinning I use Vallejo Airbrush Thinner...a bottle lasts me a very long time and I've never had a problem with it. For me the big advantage to using the craft paints is the huge variety of colors available...I can always find exactly what I'm looking for.
-
Thanks, all. ?
-
Excellent work! Love the color...all around beautiful. I ordered this same kit and am hoping to get it tomorrow. Any build issues I should know about?
-
Doesn't someone try building the kit before they put it on the market? I don't get how something like this slips through the cracks.

-
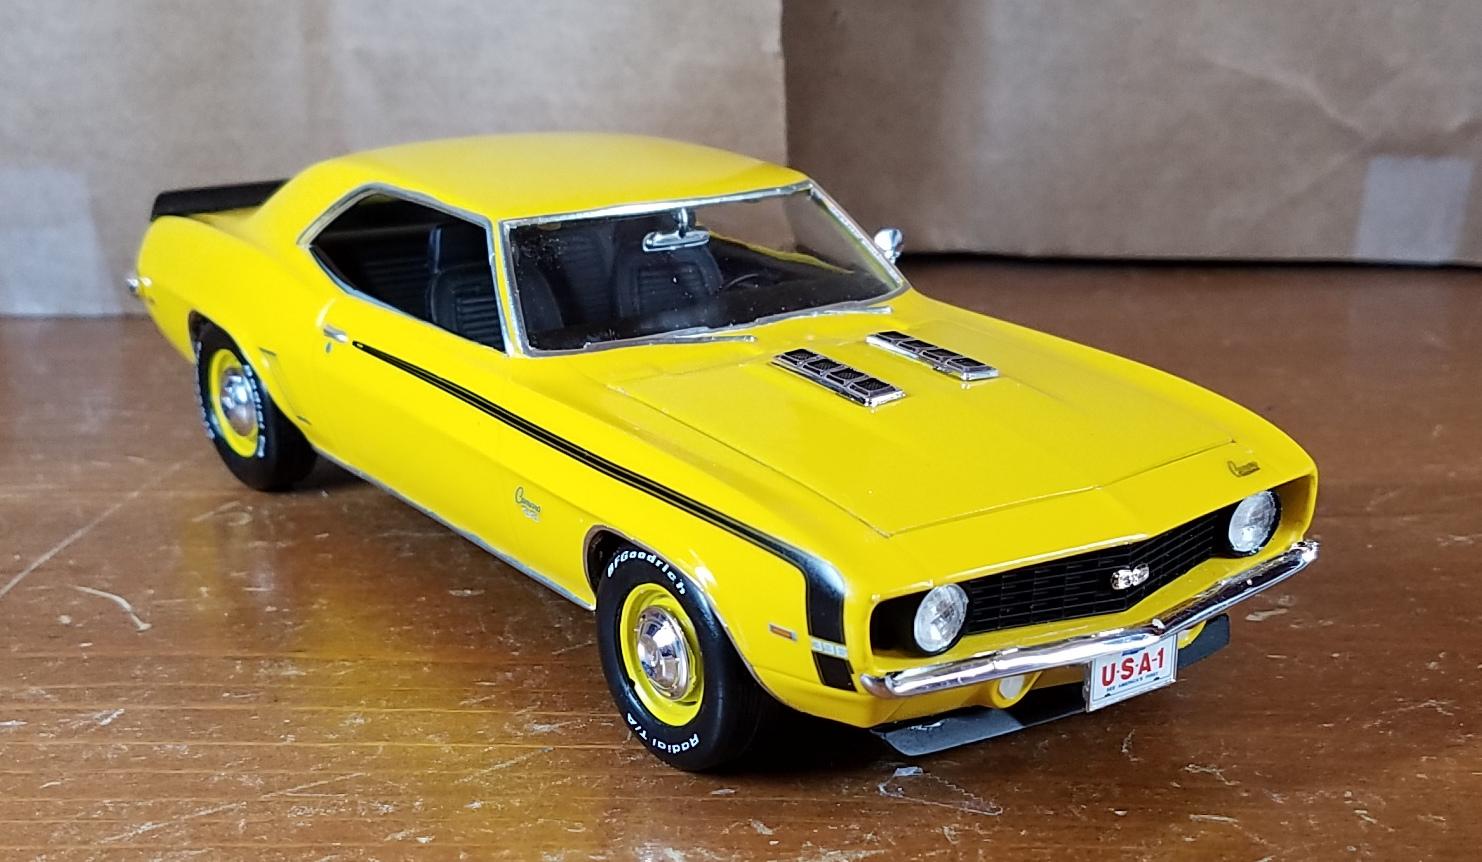
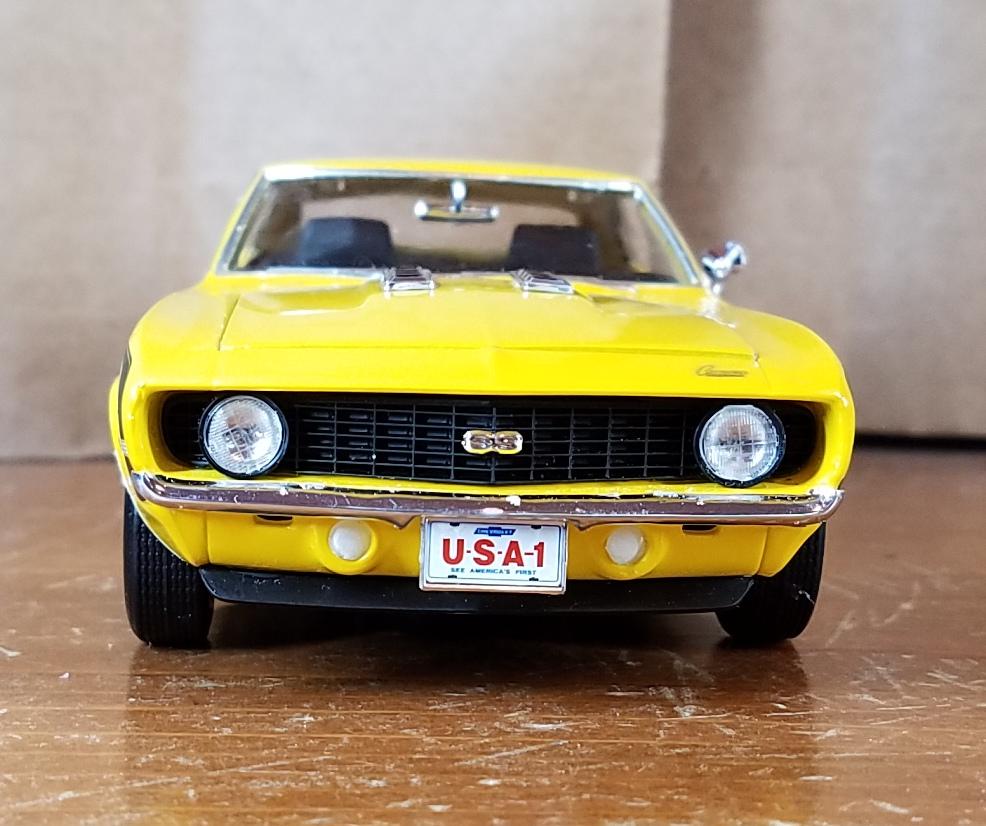
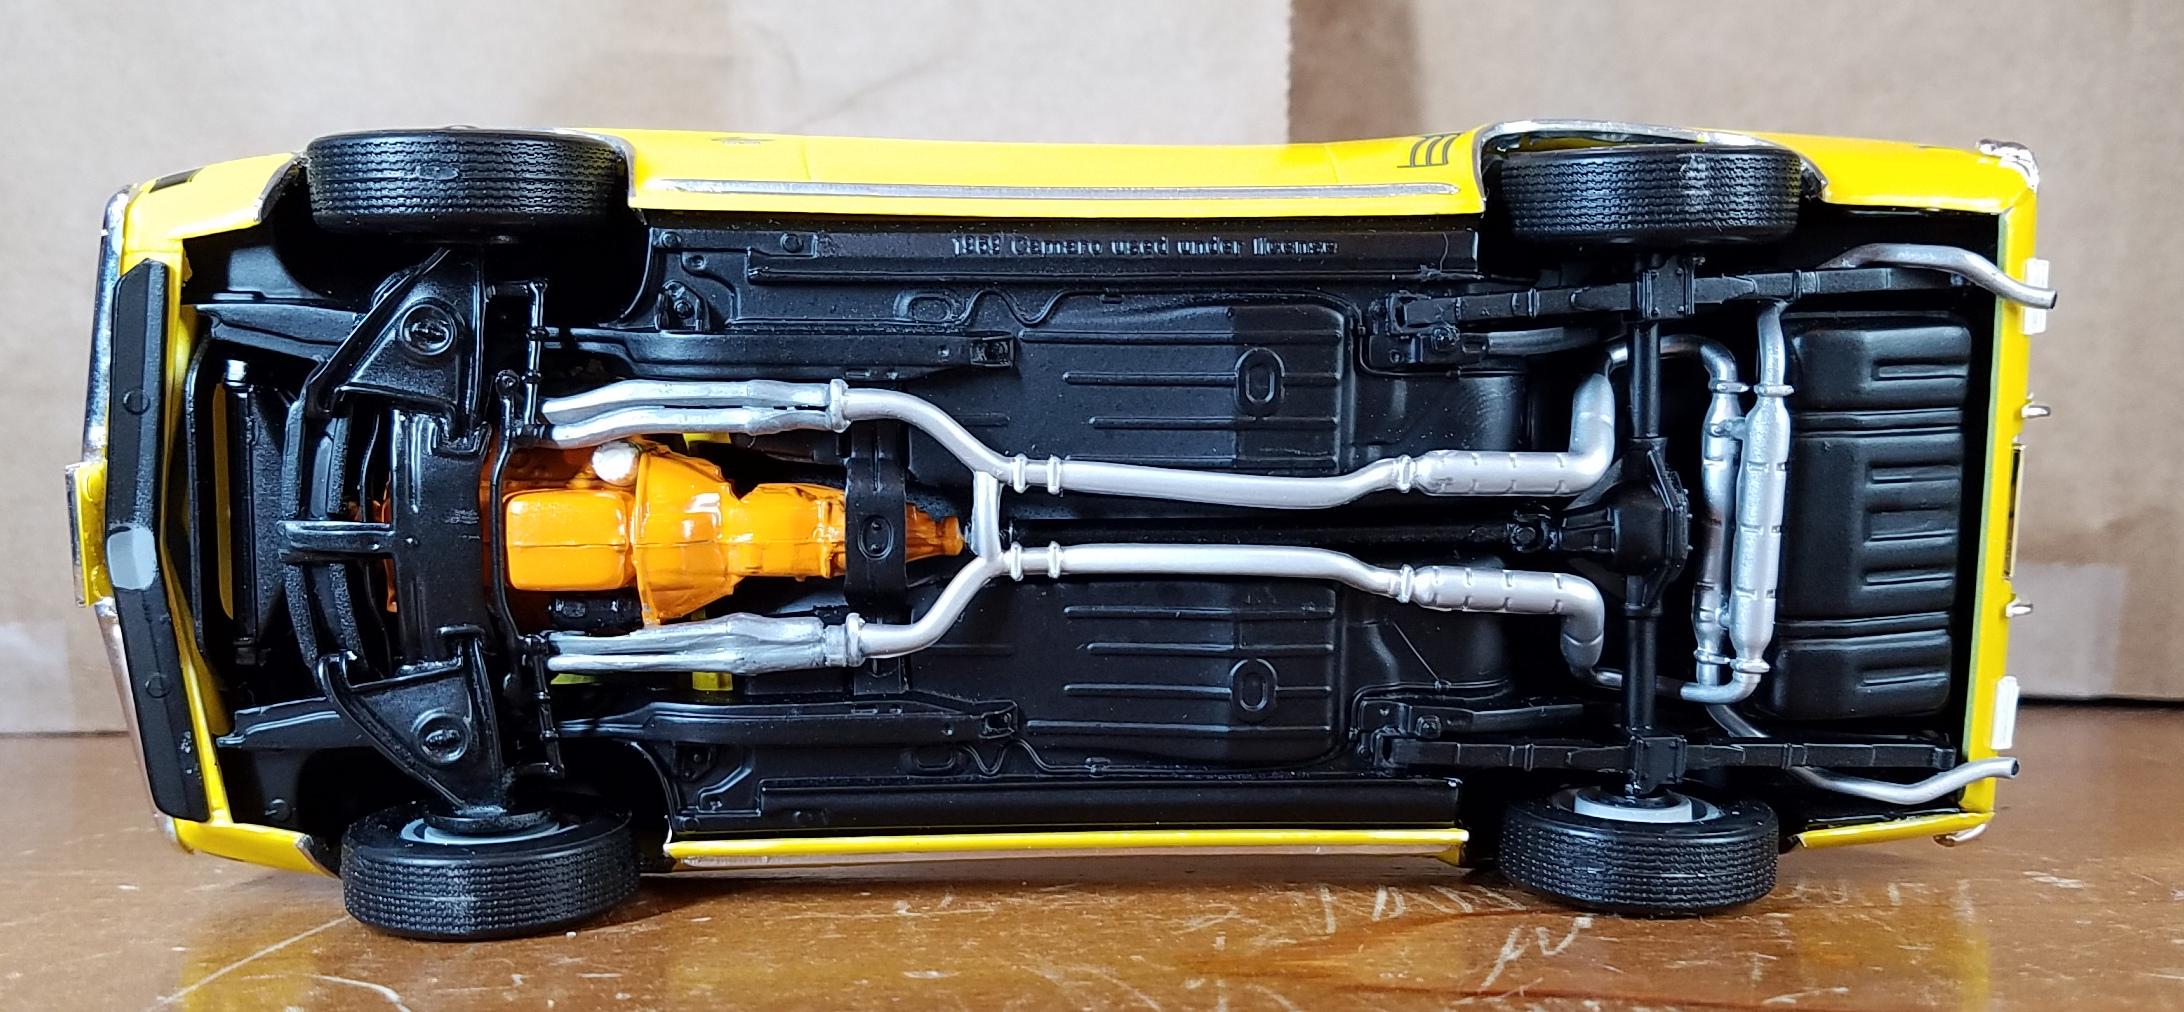
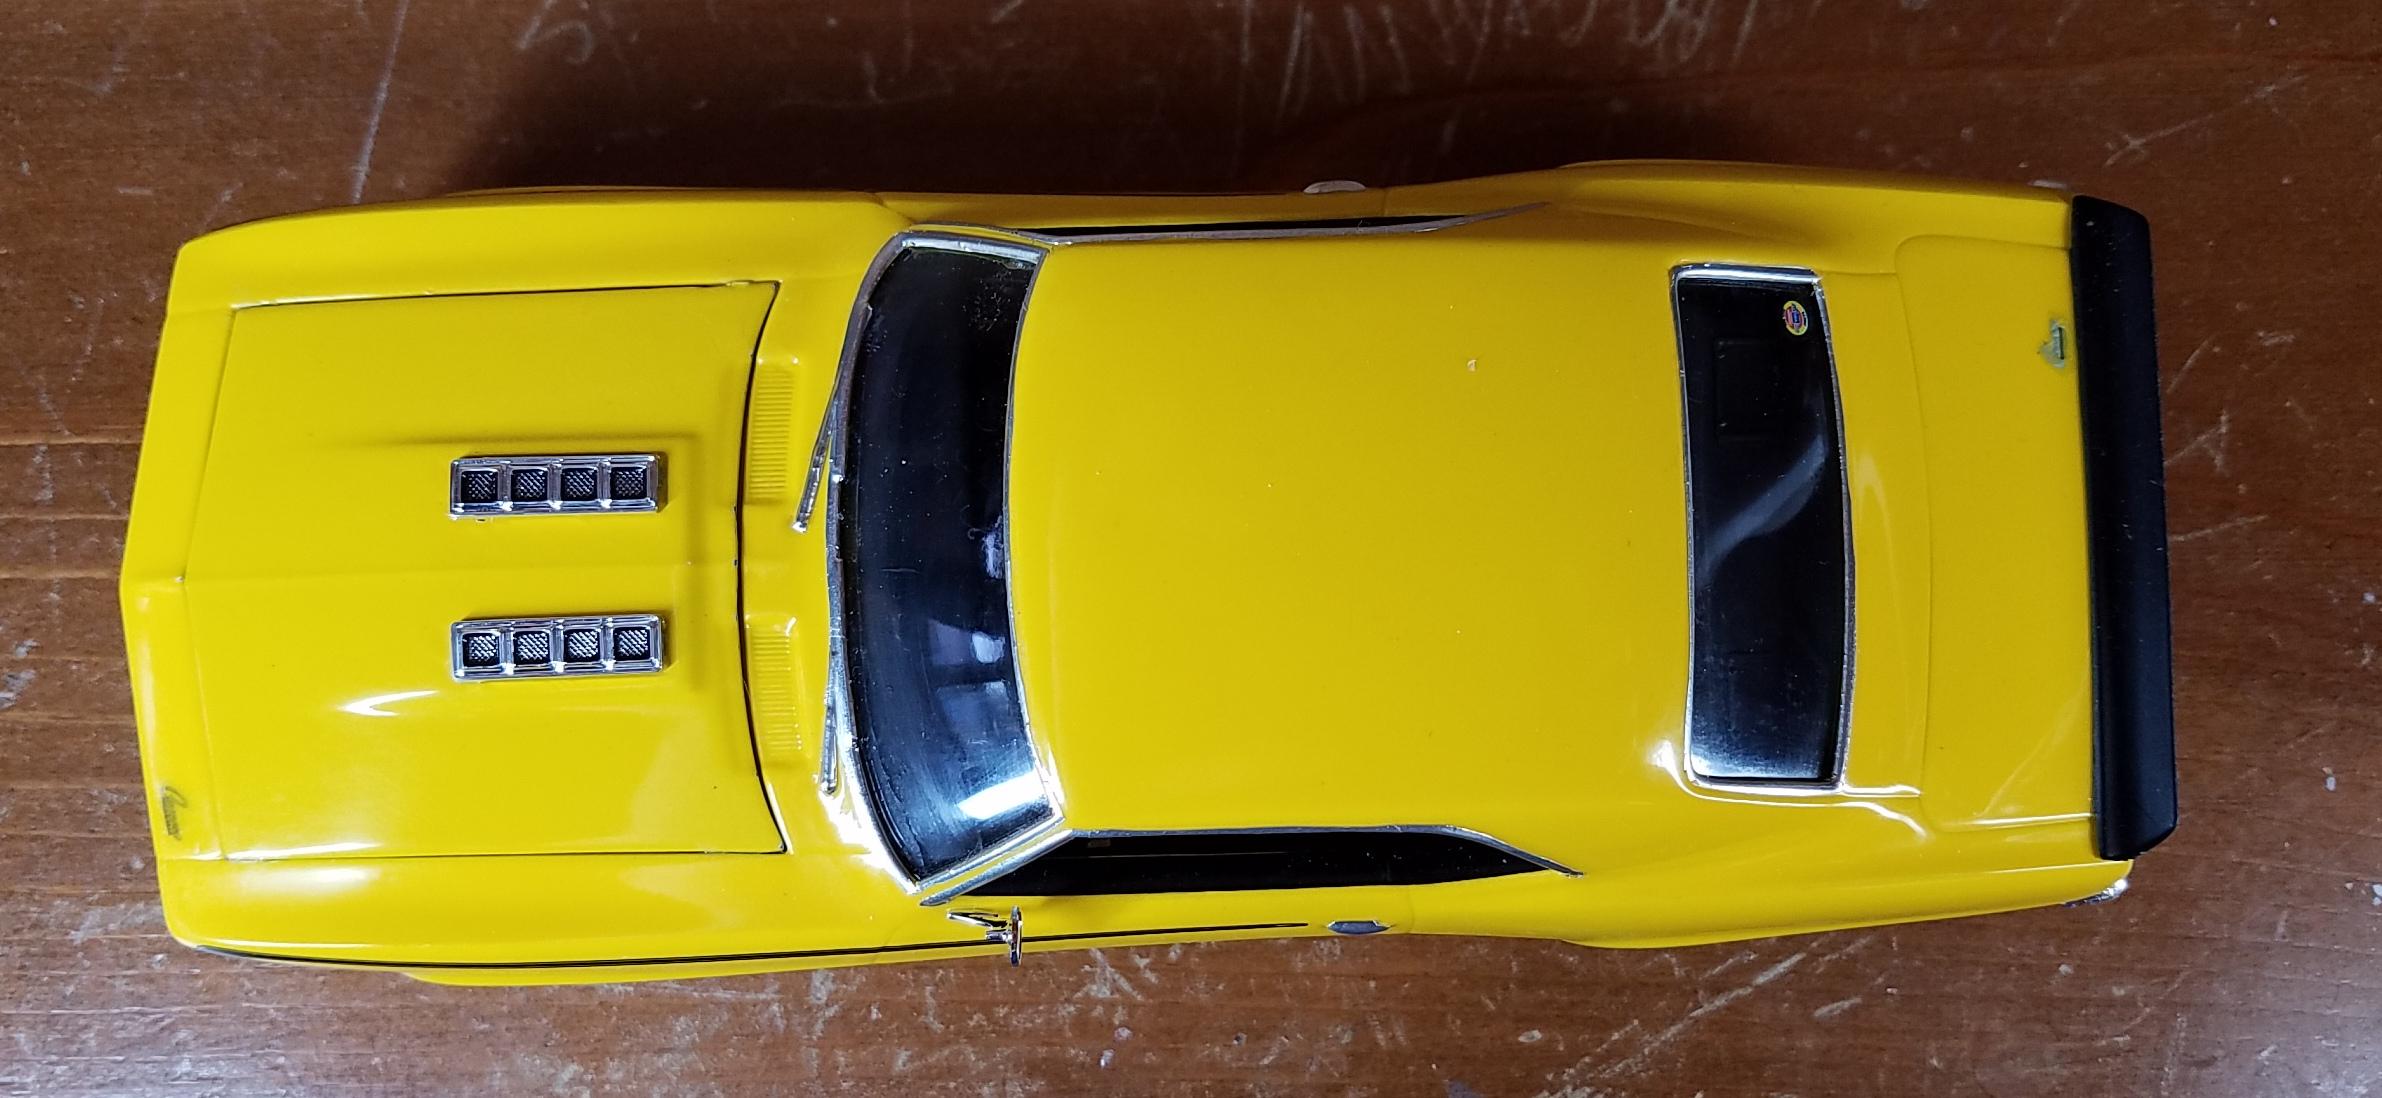
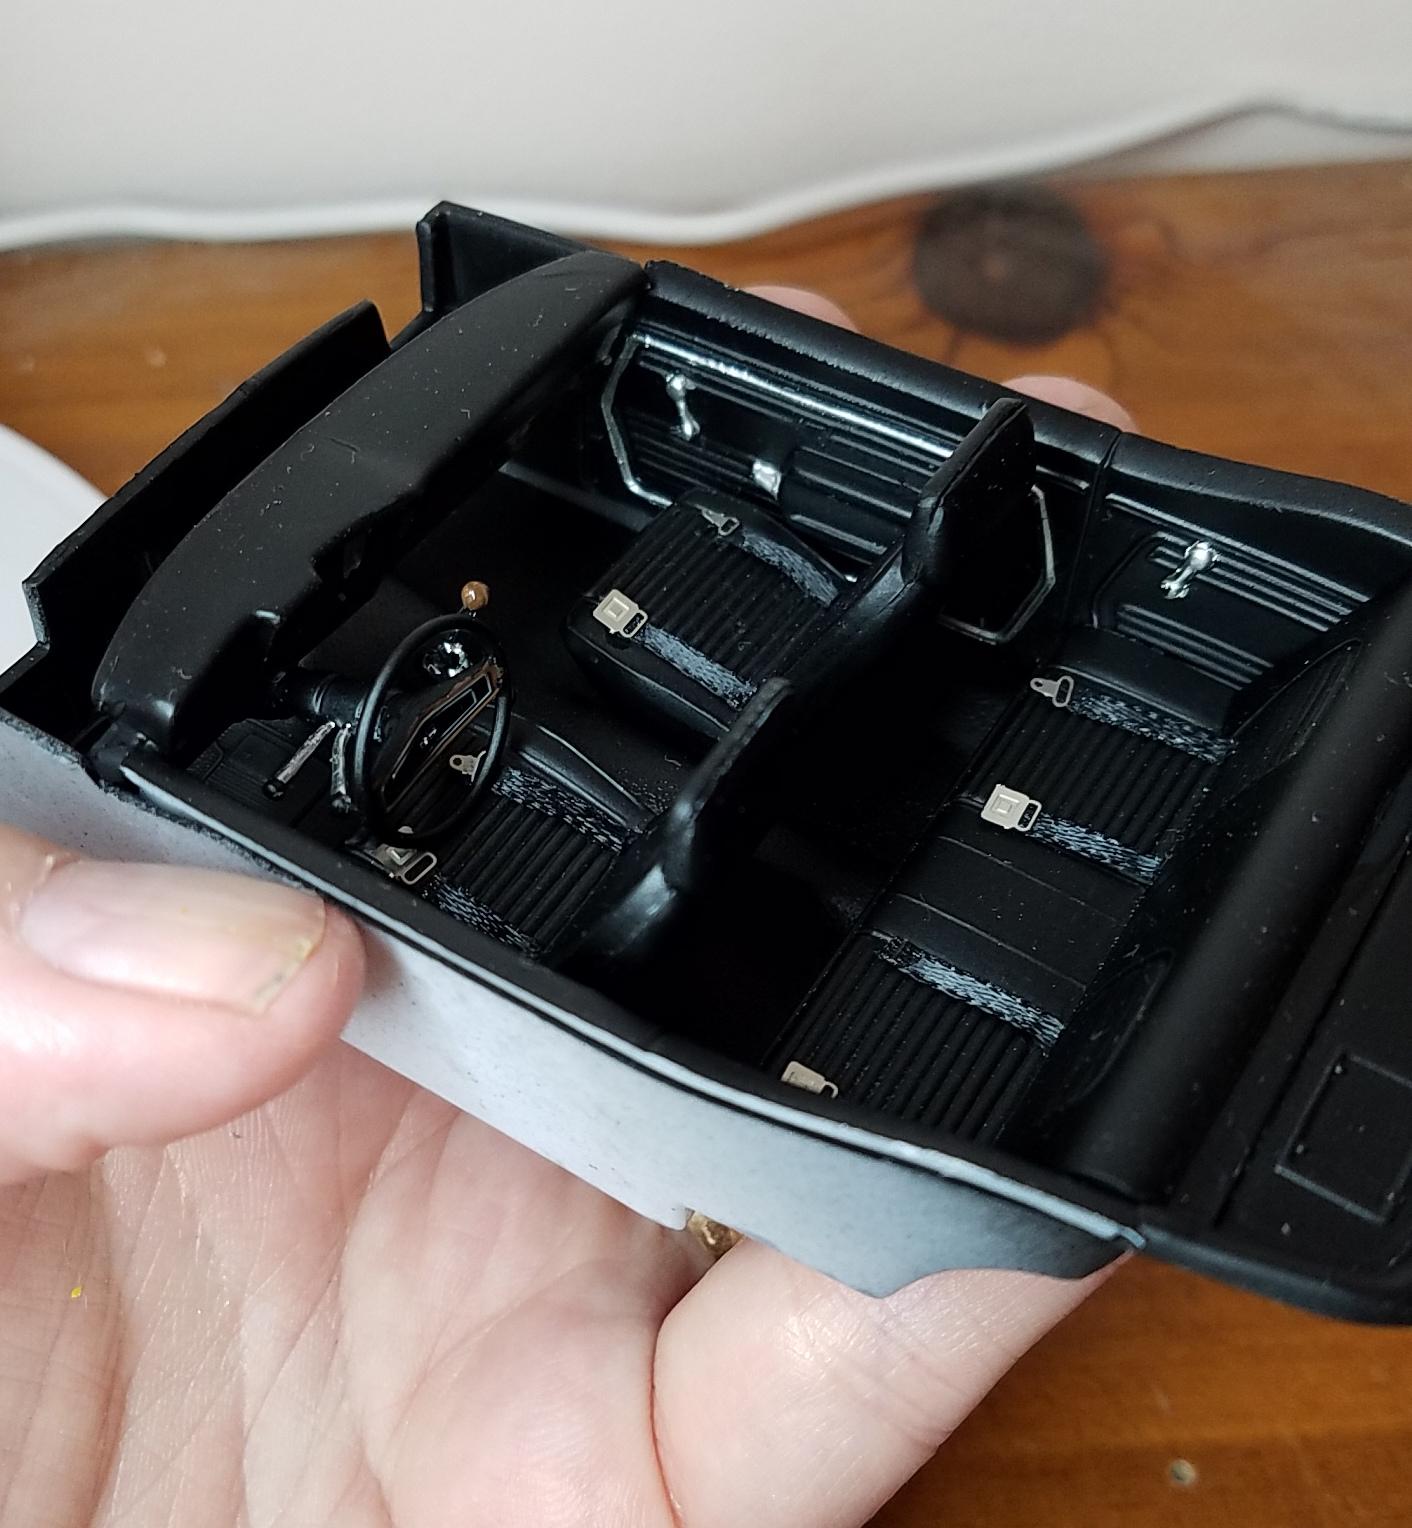
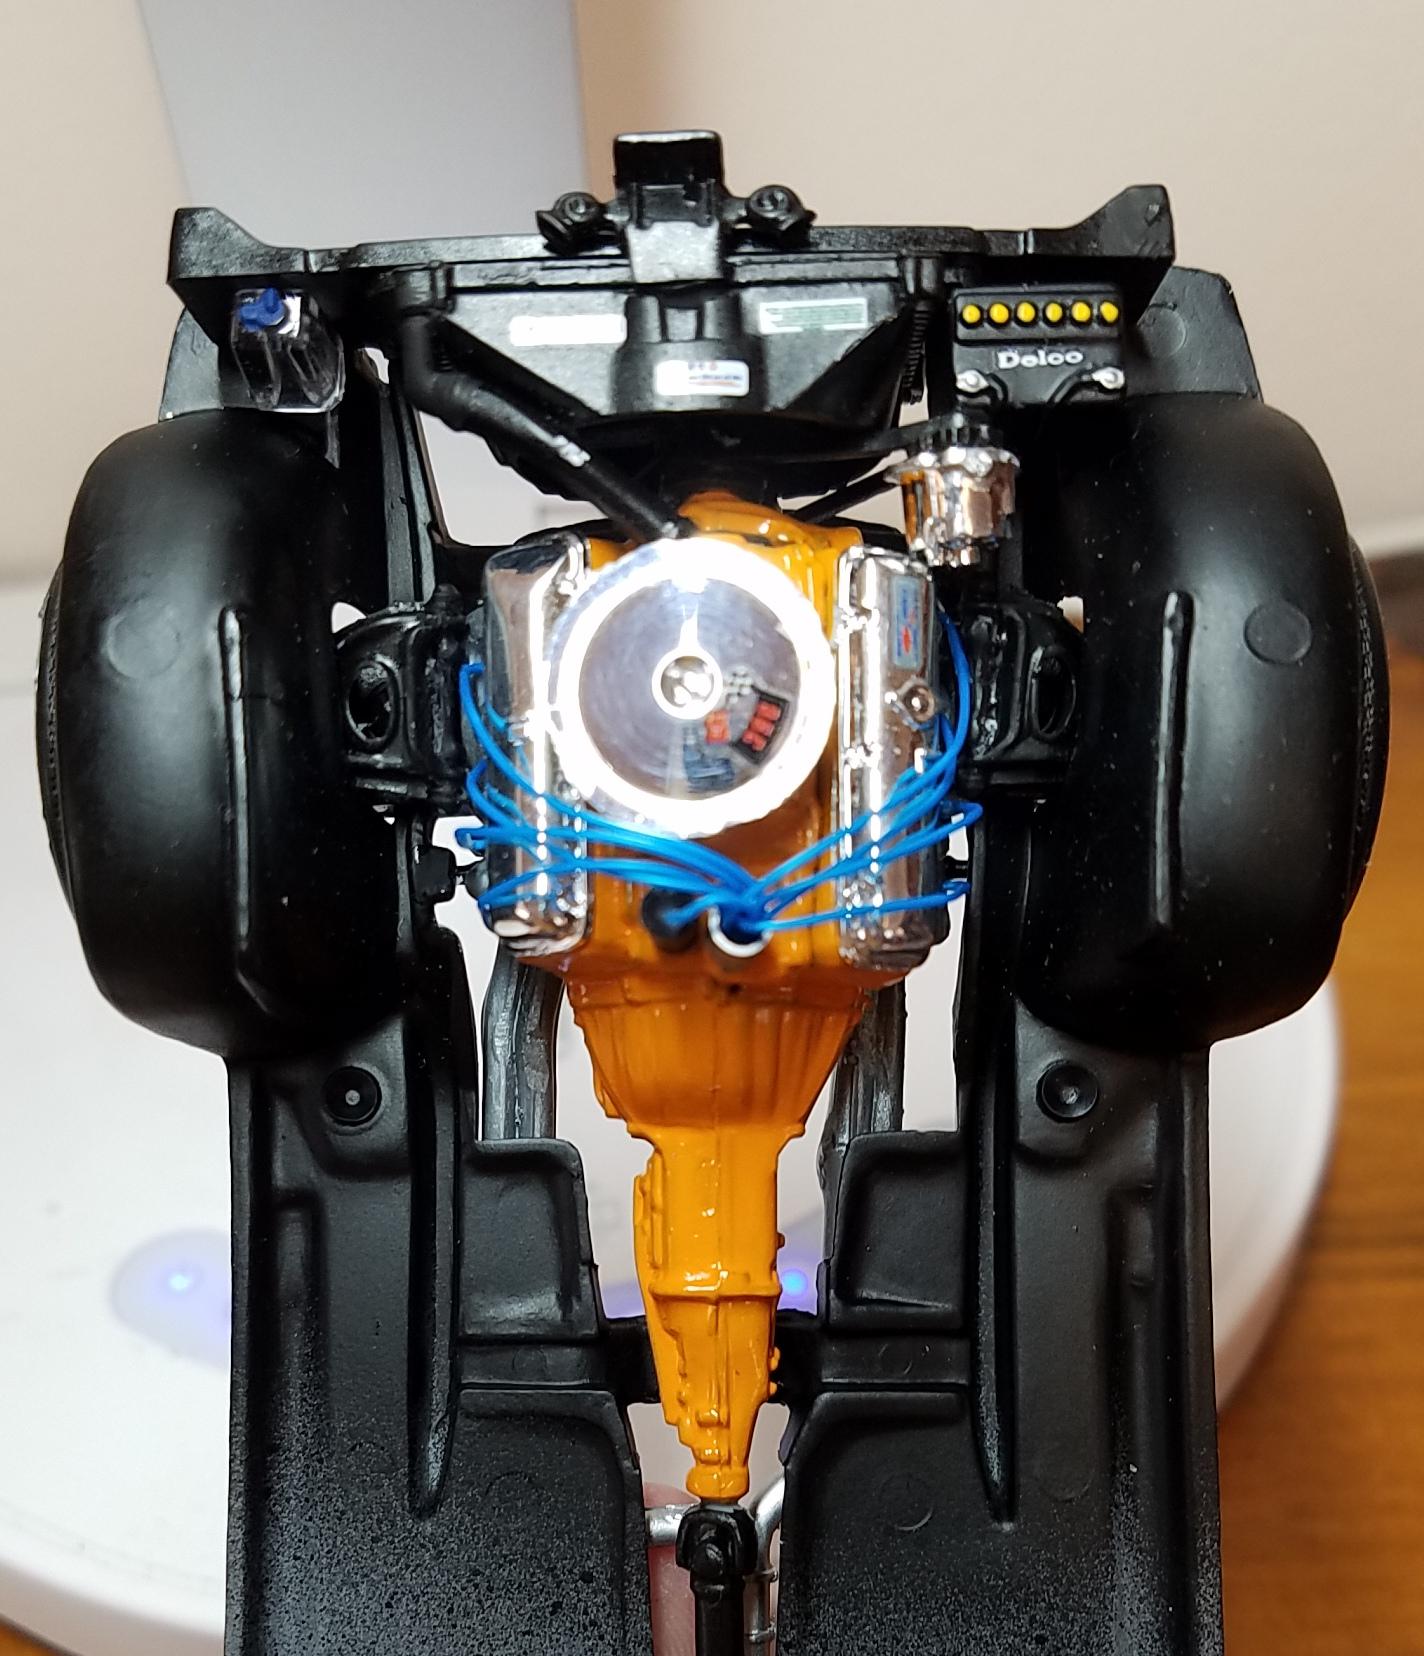
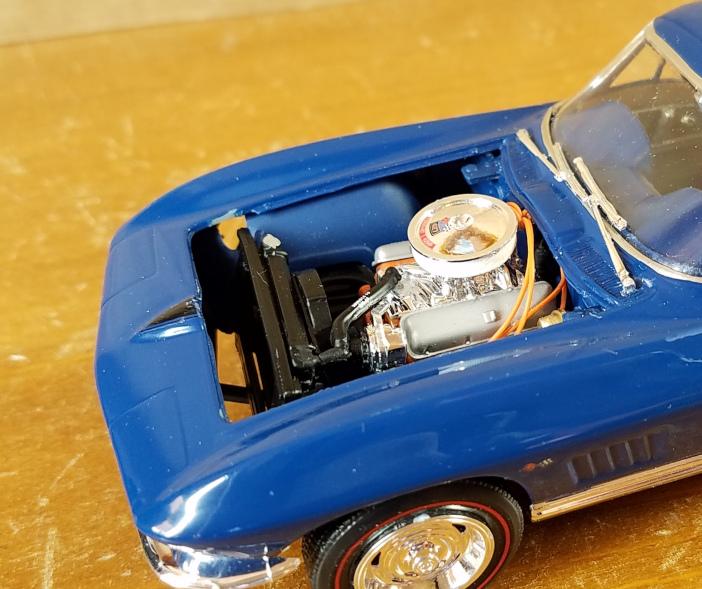
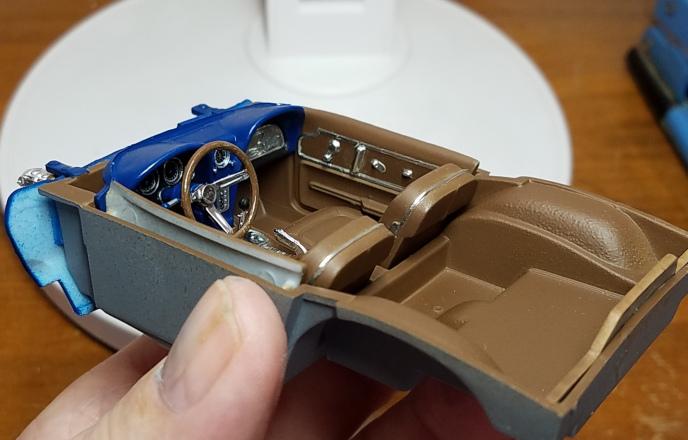
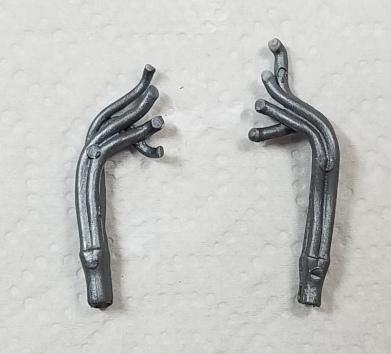
This kit has some issues, but I'm happy with what I was able to do. Good stuff: * Pretty good detail. * Mostly good parts fit. * Parts mostly free from flash & defects. * LOTS of decals, including door & trunk locks. Very nice! Not So Good stuff: * The main problem is the engine sitting too high and preventing the hood from being even close to sitting flush. The last pic shows the part I modified to fix this. * Wheel well trim is not molded very well. * Installation of tail light lens housing doesn't make sense, at least to me. I ended up not using it. * Rear axle sits crooked. Not sure if these was a defect or some mistake that I made. I was able to fix it. Body color is DecoArt craft paint Bright Yellow. This is the nicest yellow I've tried so far. Enjoy and thanks for looking and commenting. ? This is the chassis cross piece that includes the engine mounts. I shaved the undersides of the indicated areas where it attaches to the rest of the chassis. This lets the engine sit lower in the engine bay. I also had to shave down the carburetor under the air cleaner.
-
Sweet! Nice work all around. I see that Monogram also makes (or made) a '64 1/2 Mustang rag top. Does anyone know if Revell's kit is the same one?
-
-
Sorry, no idea. ? Thanks everyone for the comments. ?
-
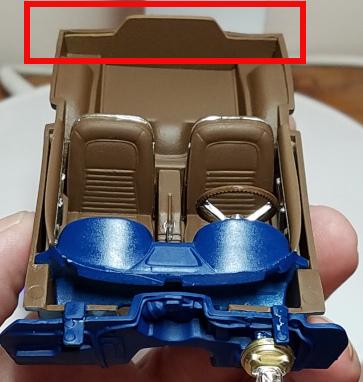
A so-so build of a so-so kit. Mostly it went together well, but getting the chassis/engine into the body was quite difficult. I also had to trim down the indicated piece to get the chassis to sit properly... There's nothing terribly wrong with the kit, but there's nothing great about it either. Enjoy, and thanks for looking.
-
Missing or lost parts
Sidney Schwartz replied to Sidney Schwartz's topic in Model Building Questions and Answers
I'm not very good at fabricating parts, but I was able to do an OK job with this one. The original is on the right side.
-
Very nice! I'm currently working on the Revell '69 SS 396. Hope it comes out as good as yours. ?
-
Super nice!
-
Missing or lost parts
Sidney Schwartz replied to Sidney Schwartz's topic in Model Building Questions and Answers
It's supposed to be the 396. -
Bare metal foil small writing
Sidney Schwartz replied to Ctmodeler's topic in Model Building Questions and Answers
Thanks, Steve. You've been very helpful, as usual.
-
Bare metal foil small writing
Sidney Schwartz replied to Ctmodeler's topic in Model Building Questions and Answers
What is the advantage of applying more primer and color coats than is necessary to cover what's underneath? -
amt car models how to paint
Sidney Schwartz replied to Milo's topic in Model Building Questions and Answers
Well that's just weird. ? -
amt car models how to paint
Sidney Schwartz replied to Milo's topic in Model Building Questions and Answers
I got tired of spraying in my garage, or outside if the weather permitted, and bought one of these... Amazon.com: Anesty Airbrush Spray Booth with Bright LED Lights Turn Table Hose and Extra Replacement Filter, Portable Paint Booth Can be Used with LEDs Only ASPB01 : Arts, Crafts & Sewing Probably the most expensive item I've bought for modeling next to an airbrush and compressor, but well worth it. It eliminates all overspray and much of the odor. I also have an exhaust fan in one the windows that I turn on when spraying. I mostly use Bare Metal Foil (BMF) for chrome trim, and also chrome paint or markers for touch-ups. You can get the BMF here... Bare-Metal Foil, Silicone Mold Rubber, Polyurethane Mold Rubber, Casting Resin ...if you can't find it locally. This is another subject on which you'll find many Youtube videos explaining various options, how they compare, and how to use them. I like the result I get with BMF, but it took me a while to get the hang of applying it. I'm still not great at it, but I get better with time. That's BMF I used in the pic I posted above. -
amt car models how to paint
Sidney Schwartz replied to Milo's topic in Model Building Questions and Answers
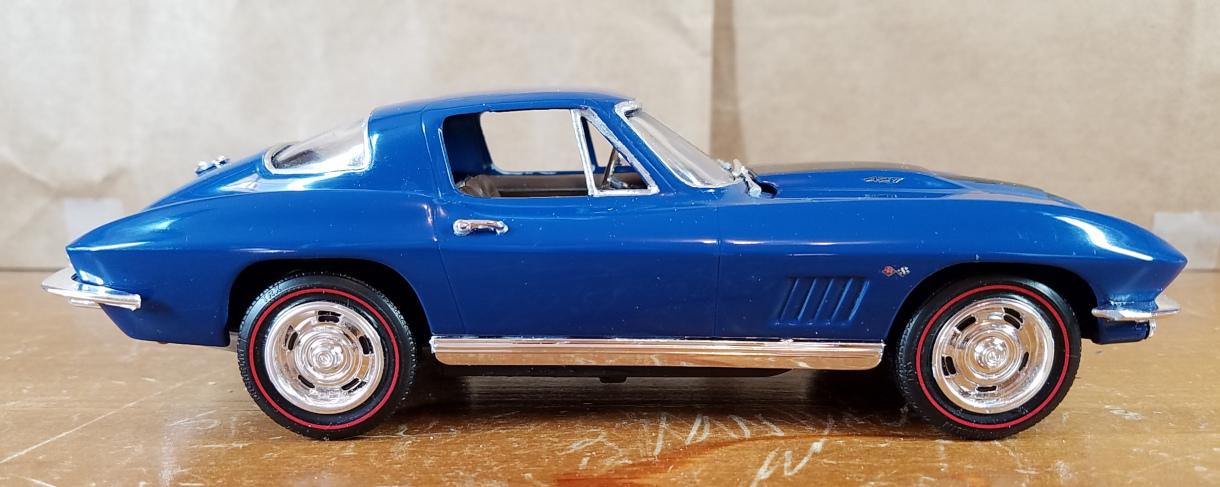
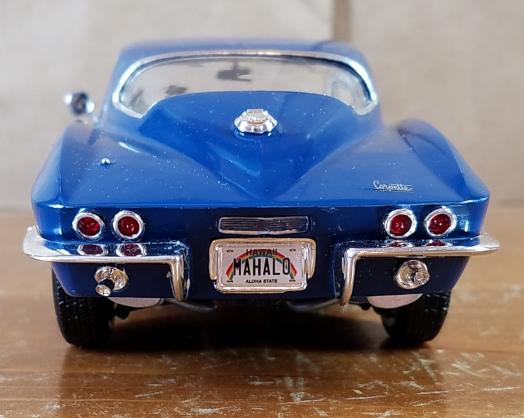
If you ask five modelers a question, you'll get at least eight opinions. This is especially true when it comes to paints. ? You'll find what works best for you by trying various options. I don't care for enamels. I use either acrylics or lacquers. I always use primer. Before painting I always soak the parts in soapy water, rinse and dry. This is because the molding process leaves residue on the plastic. Here are some of the paints I regularly use. 1. For primer I use Krylon grey and white in spray cans. Very fine grained so detail is preserved. Dries almost instantly. Easy to fined. Can't think of a reason to use anything else. 2. Tamiya spray lacquers. Pretty much perfect, except for the odor typical of lacquers. I usually get excellent results. A good selection of colors. Rattle cans in general are the easiest to use. 3. Acrylic craft paints. Advantages are no odor, a staggering array of colors, and low cost. I buy these for around $1 to $3 in 2 ounce bottles...enough for several models. These are thinned and sprayed through an airbrush, so more time consuming than rattle cans. Since they are water based you can thin them with water, but I use Vallejo airbrush thinner. Getting the paint thinned properly so it sprays well is a bit of an art, but I've gotten pretty good at it. This is craft paint with a polished clear coat... 4. Clear coat. My preference here is Krylon Crystal Clear acrylic in a rattle can. Tamiya's clear coat spray also works fine. 5. Sanding/Polishing. I've been using the small foam backed sanding pads, starting with 3200 or 3600 grit, working up to 12000 grit, and finishing with the Novus polishes. Hopes this helps. If you want to start and endless debate, ask about chrome. ?
-
I don't suppose someone has extras of these parts from the Revell 1969 Camero kit? I just submitted a request to Revell, but who knows how long that will take.
-
Another nice one. Any comments on the kit quality?
-
Nice. More pics, please!
-
I'm not a big fan of these types of vehicles, but you did a super job. The only thing that doesn't look so good to me is the plug wires. I prefer something like these... That's a Morgan Automotive Detail pre-wired distributor. It's just thin electrical wire, but IMO it looks quite realistic. There are half dozen or so outfits that make and sell pre-wired distributors...I think these look the best.
-
amt car models how to paint
Sidney Schwartz replied to Milo's topic in Model Building Questions and Answers
There are a couple of ways to deal with paint that may make it difficult to fit parts together for gluing. One, prior to painting you can mask the places where the pieces join so they will not be painted, for example pins and the holes the fit in to. I've used masking fluid for this and it works pretty well. Two, you can skip masking and then scrape the paint off as necessary when gluing parts together. In my experience both methods take about the same amount of time and trouble. These days I usually go with scraping after painting. Elmers should work for clear parts. Or there's something called "canopy glue" which is very similar. I've used both. Keep in mind that parts joined with pretty much any kind of glue will separate if subjected to enough stress. Once parts are glued they should be handled carefully. CA glue ("super glue") is used by many of us, but you have to be very careful using it with clear parts to not get it where it will show. The nice thing about Elmers and other white glues is that they are usually very easy to remove from where you don't want them. Painting is an art in itself and will take time and experimentation to learn. There are hundreds of Youtube videos that teach all aspects of model building. I strongly recommend that you watch some videos that explain how to use different types of paint and methods of applying it. My own preference is to spray everything except for very small parts. I use rattle cans and an airbrush. Which one I use depends on the type of paint I find that is the color I want. Also look for videos on the many different types of glues and how and when to use them. Try not to worry about mistakes. You'll make them, and with experience you'll make fewer of them. Your skills will improve with each model. -
Thanks for the kind words! I've decided to now always test build using tacky glue. Did that with the kit I'm working on now and found a similar fit problem and was able to fix it. Definitely worthwhile! I noticed the wheels sticking out as well. I should have tried to fix it. My bad.