Sidney Schwartz
-
Posts
418 -
Joined
-
Last visited
Content Type
Profiles
Forums
Events
Gallery
Everything posted by Sidney Schwartz
-
A while back I had bought sets of generic dash gauges printed on paper. Now I can't find them. Can someone point me in the right direction? I tried the MCG gauges that are printed on plastic film, but I don't much care for them. Thanks.
-
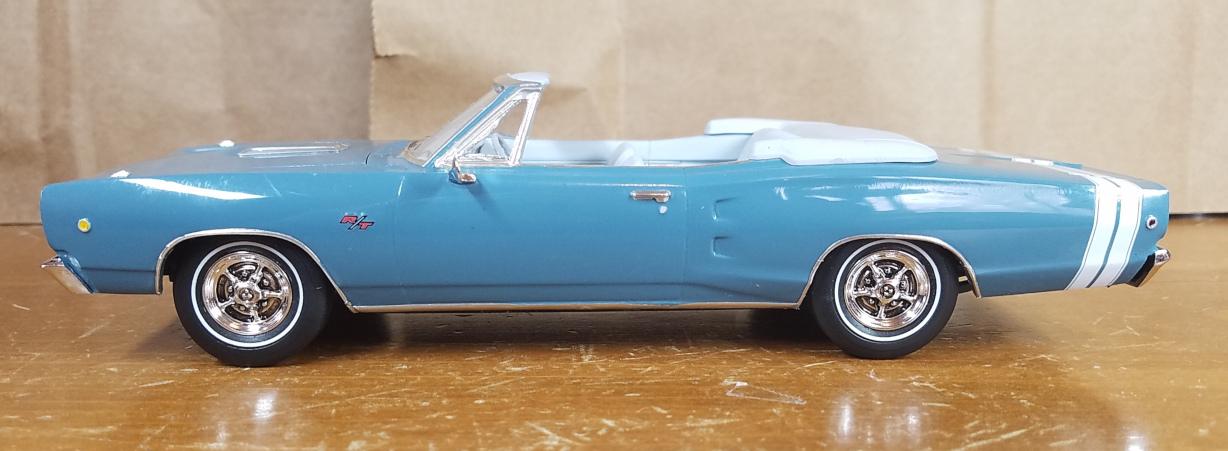
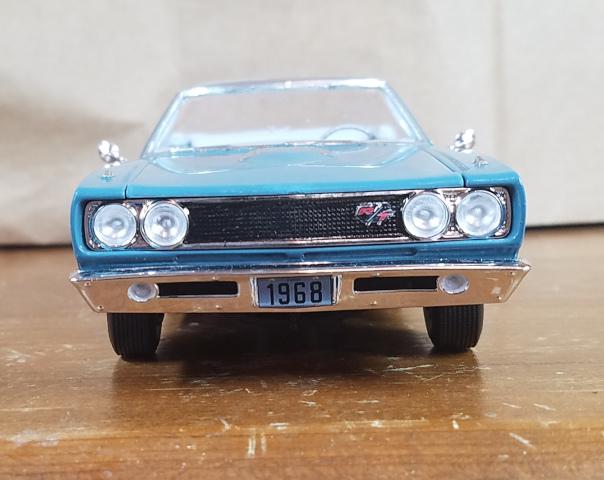
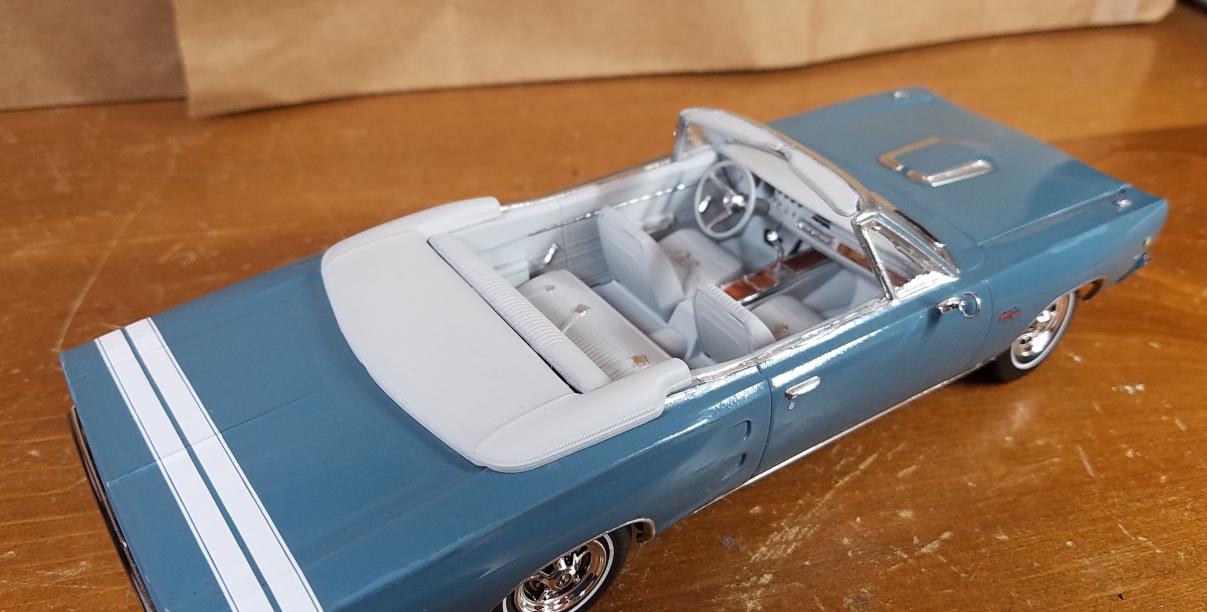
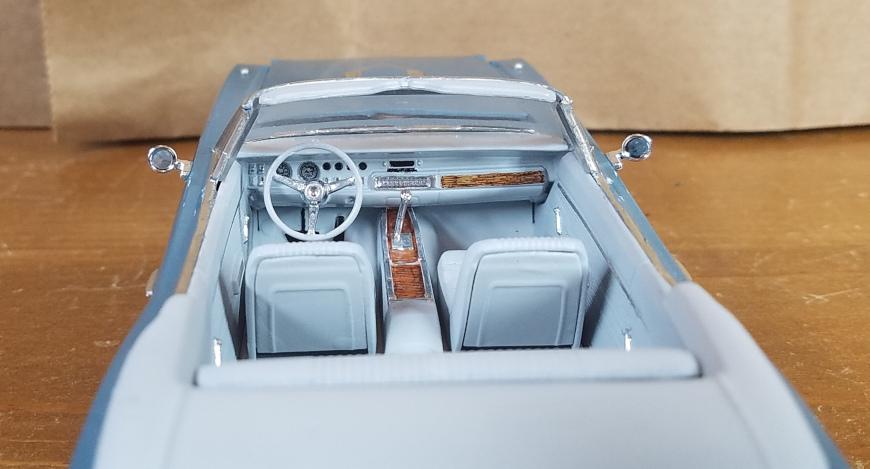
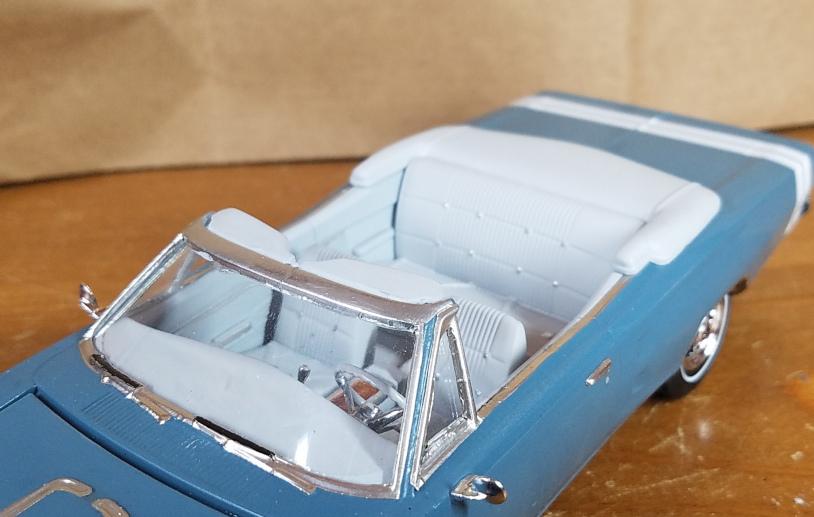
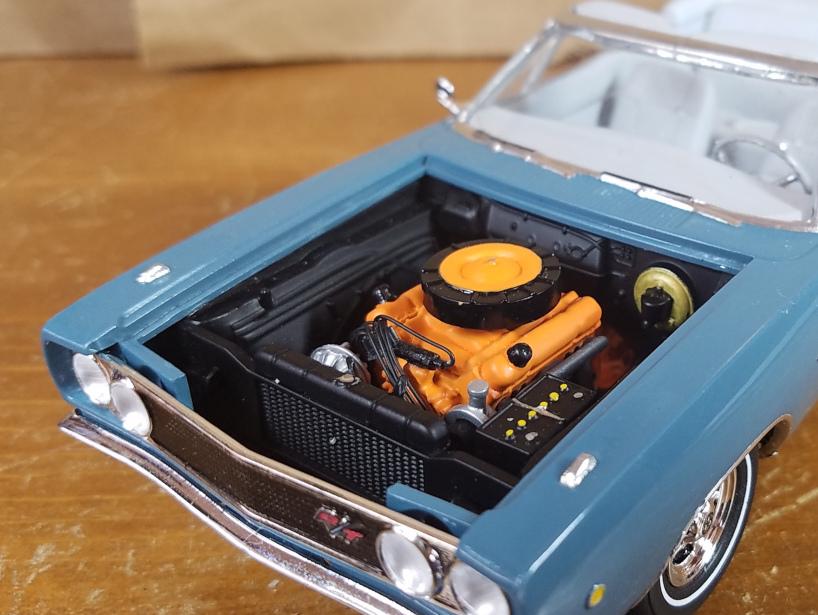
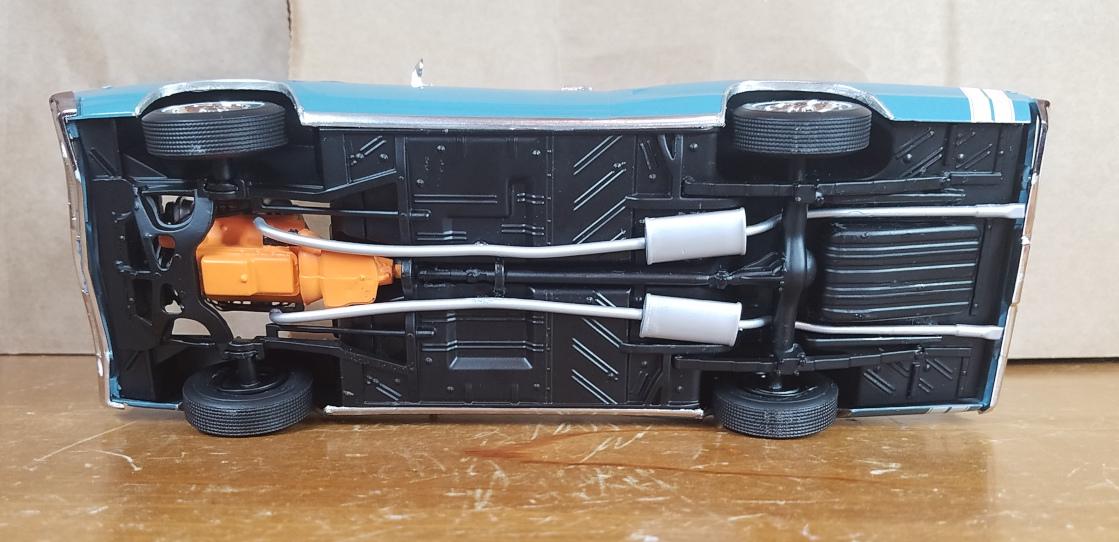
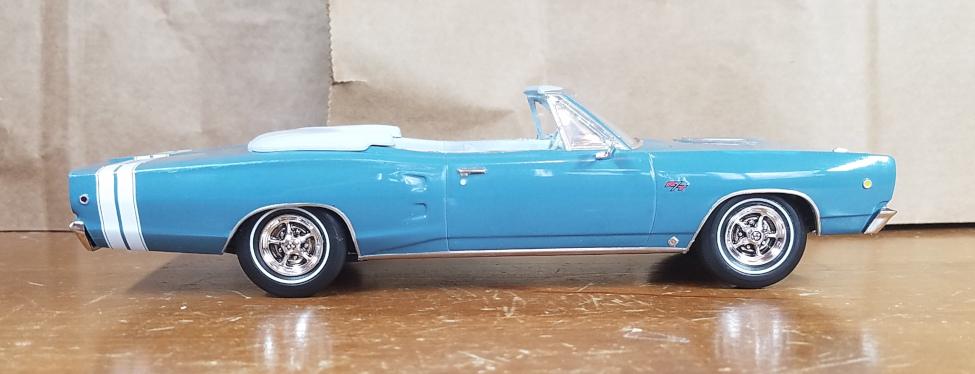
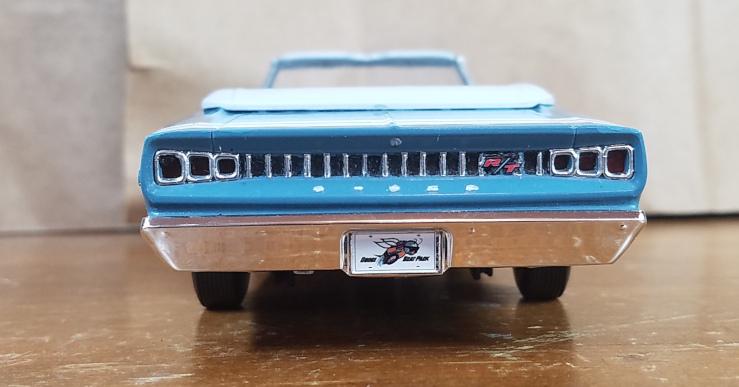
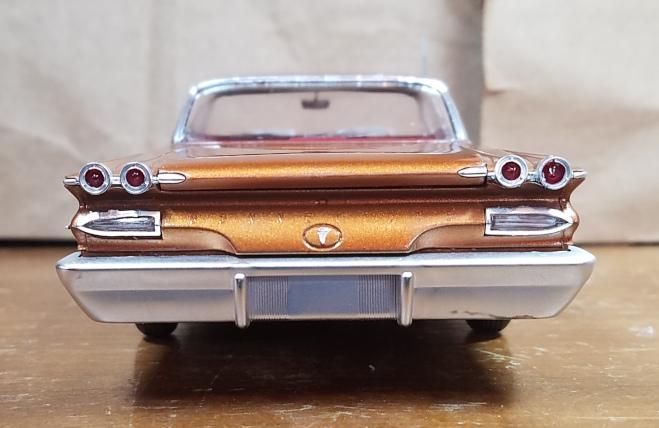
I'm very pleased with how this one came out. Love the color combination, and it's a pretty clean build, for me. This is a well designed kit, I'd buy another one. The "R/T" molded into the sides is not very well defined, but since they include decals to put over it that didn't matter much. Enjoy, and thanks for looking. ?

-
Sanding help
Sidney Schwartz replied to Sidney Schwartz's topic in Model Building Questions and Answers
I've been using 3 coats of clear. I'll try 4 or 5 on my next build. This is a good discussion. My thinking on the color coat is that more than enough to cover the primer completely is wasted. Is there a benefit to putting on additional coats beyond that? Does it make for a better finish after polishing? -
Magnifying Lenses for Myopic Folks
Sidney Schwartz replied to 1972coronet's topic in Model Building Questions and Answers
Another vote for these guys... Amazon.com: YOCTOSUN Rechargeable Magnifying Glasses, Head Magnifier Glasses with 2 LED Lights and Detachable Lenses 1.5X, 2.5X, 3.5X,5X, Best Eyeglasses Magnifier for Reading and Hobby : Health & Household -
I find that the hardest part of sanding is to avoid sanding the paint off edges and protruding bits. The solution I've come up with is to mask these areas off. I start with 3600 grit and progress through 4000, 6000,8000 and 12000 grits. I leave the tape on for the 3600 and 4000, then remove it and continue. It seems safe to use the 6000 and above grits without much risk of sanding the paint off. This method works OK, but it's time consuming. Are there better ways to deal with this issue?
-
Trumpeter 1960 Pontiac Bonneville
Sidney Schwartz replied to Sidney Schwartz's topic in WIP: Model Cars
Finally done, and thank goodness. Pics posted in the Under Glass section of the forum. -
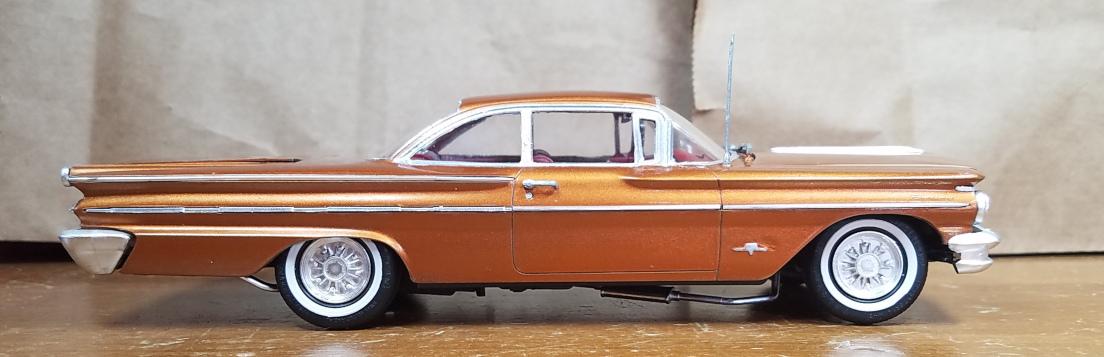
I think the best thing I can say about this one is that I'm glad it's done with. I didn't do a very good job of it, and on top of that the kit has way too many miniscule and/or delicate parts...lots of time spent having to fix broken parts. While the fit was generally very good, I just couldn't get the wheels on straight and as a result the body is not level. There are a number of things that seem unnecessarily complicated, and there seems to be little sense to which chrome parts come already chromed and which have to be painted. I also don't care for the "dull" chrome. The interior came out very nicely but the body not so much, and that's entirely my fault. Anyway, on to the next one. Thanks for looking.
-
Krylon color maxx
Sidney Schwartz replied to Chuckyg1's topic in Model Building Questions and Answers
Krylon's grey primer is my favorite. I use it under different kinds of paints and have never had a problem. It's very fine grained and smooth and dries super quick. I often use craft paints (very inexpensive and tons of color choices) for body color and use Krylon's Crystal Clear over those. -
Trumpeter 1960 Pontiac Bonneville
Sidney Schwartz replied to Sidney Schwartz's topic in WIP: Model Cars
BMF finished. This is the aluminum stuff. I don't much care for it...it's difficult to work with. I ended up using foil adhesive because the foil wasn't sticking very well. I've gotten much better at applying foil, but it still looks too lumpy to me. I may actually finish this today.
-
Trumpeter 1960 Pontiac Bonneville
Sidney Schwartz replied to Sidney Schwartz's topic in WIP: Model Cars
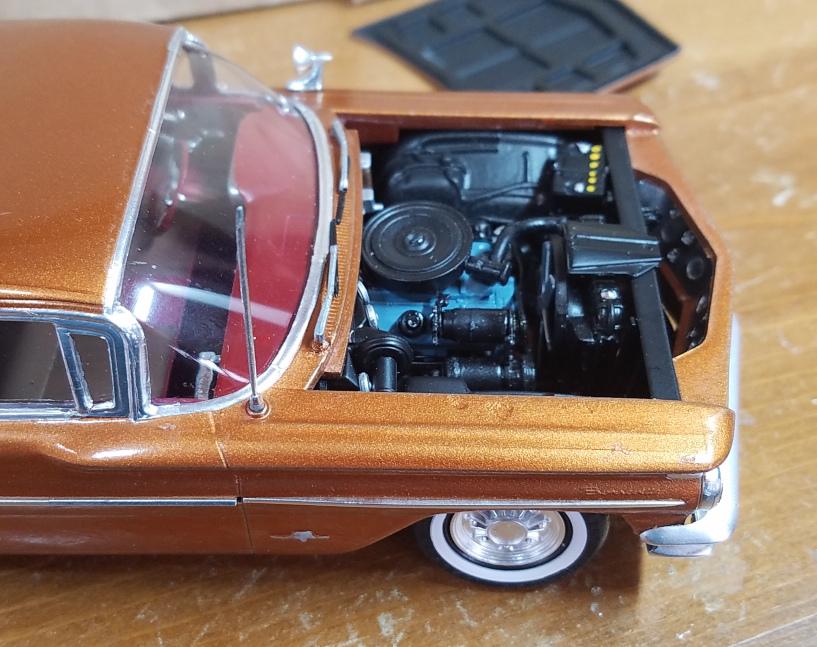
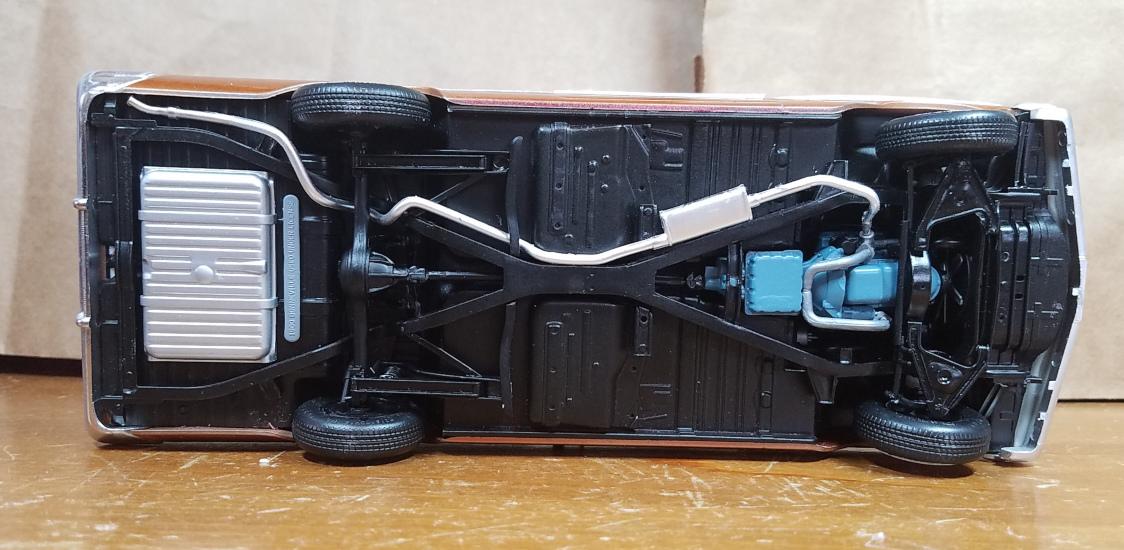
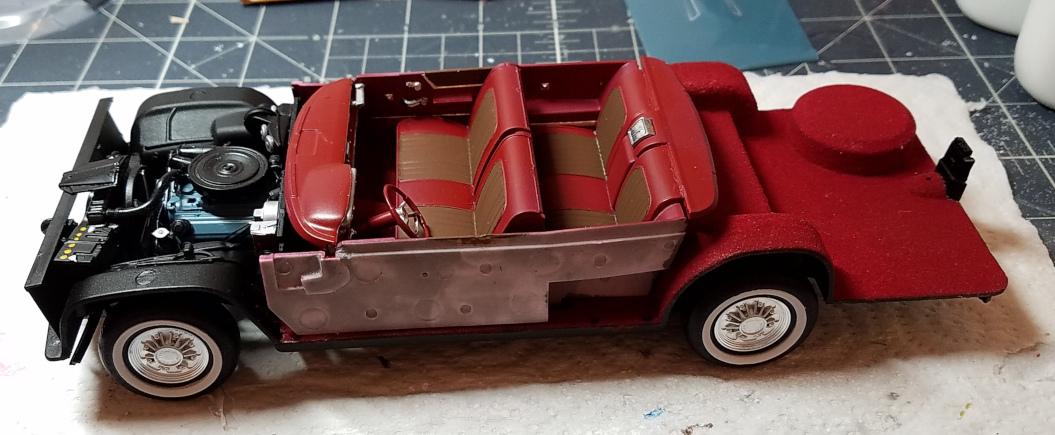
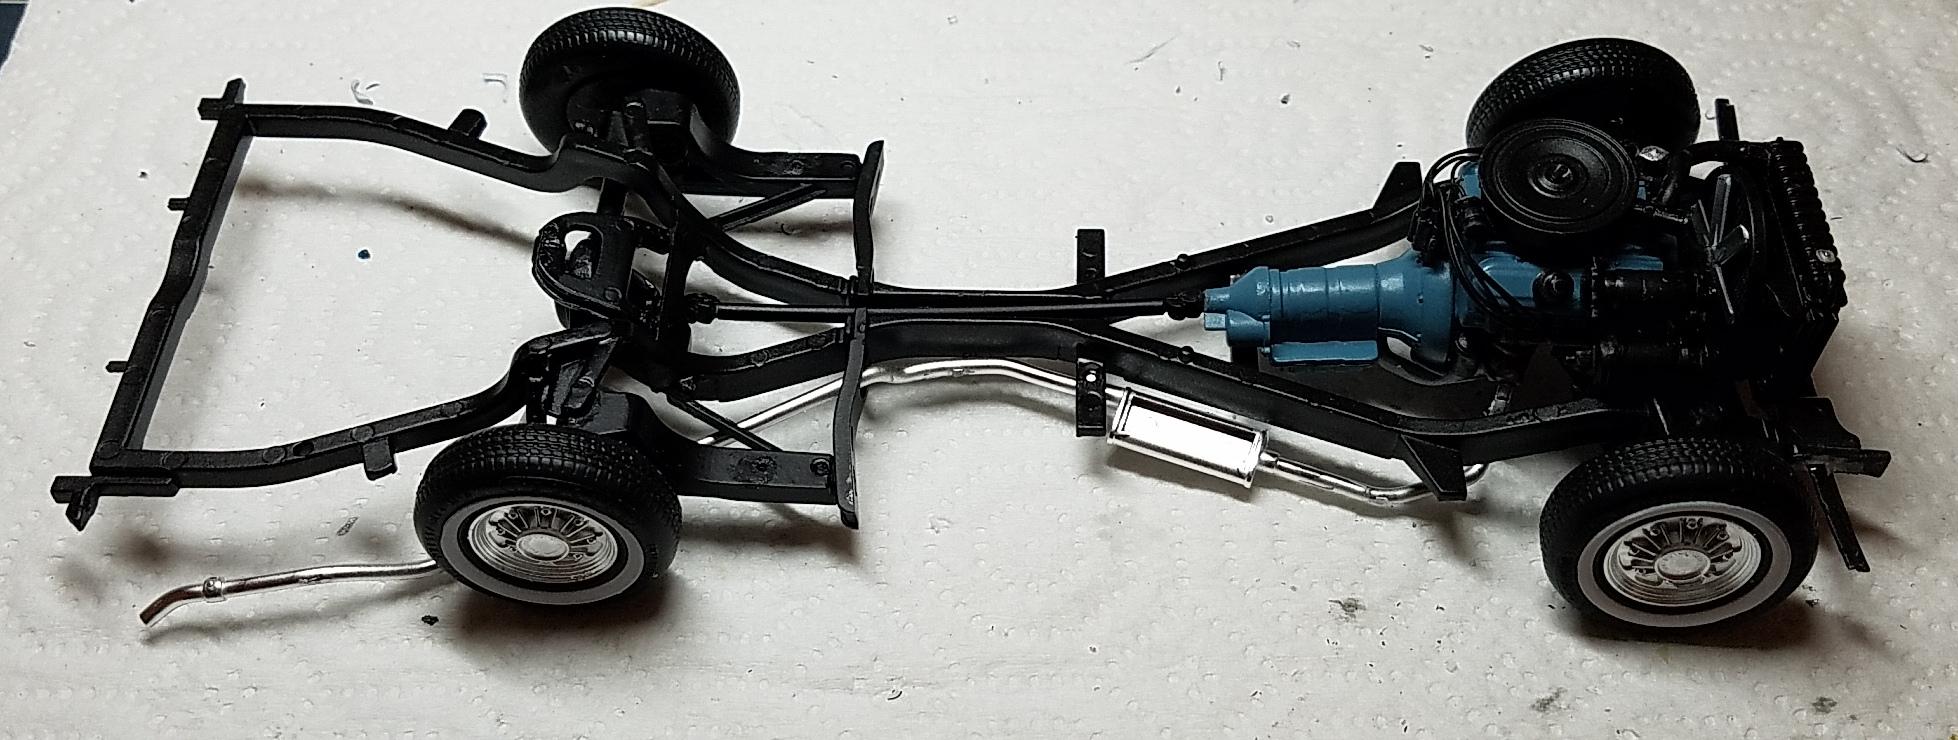
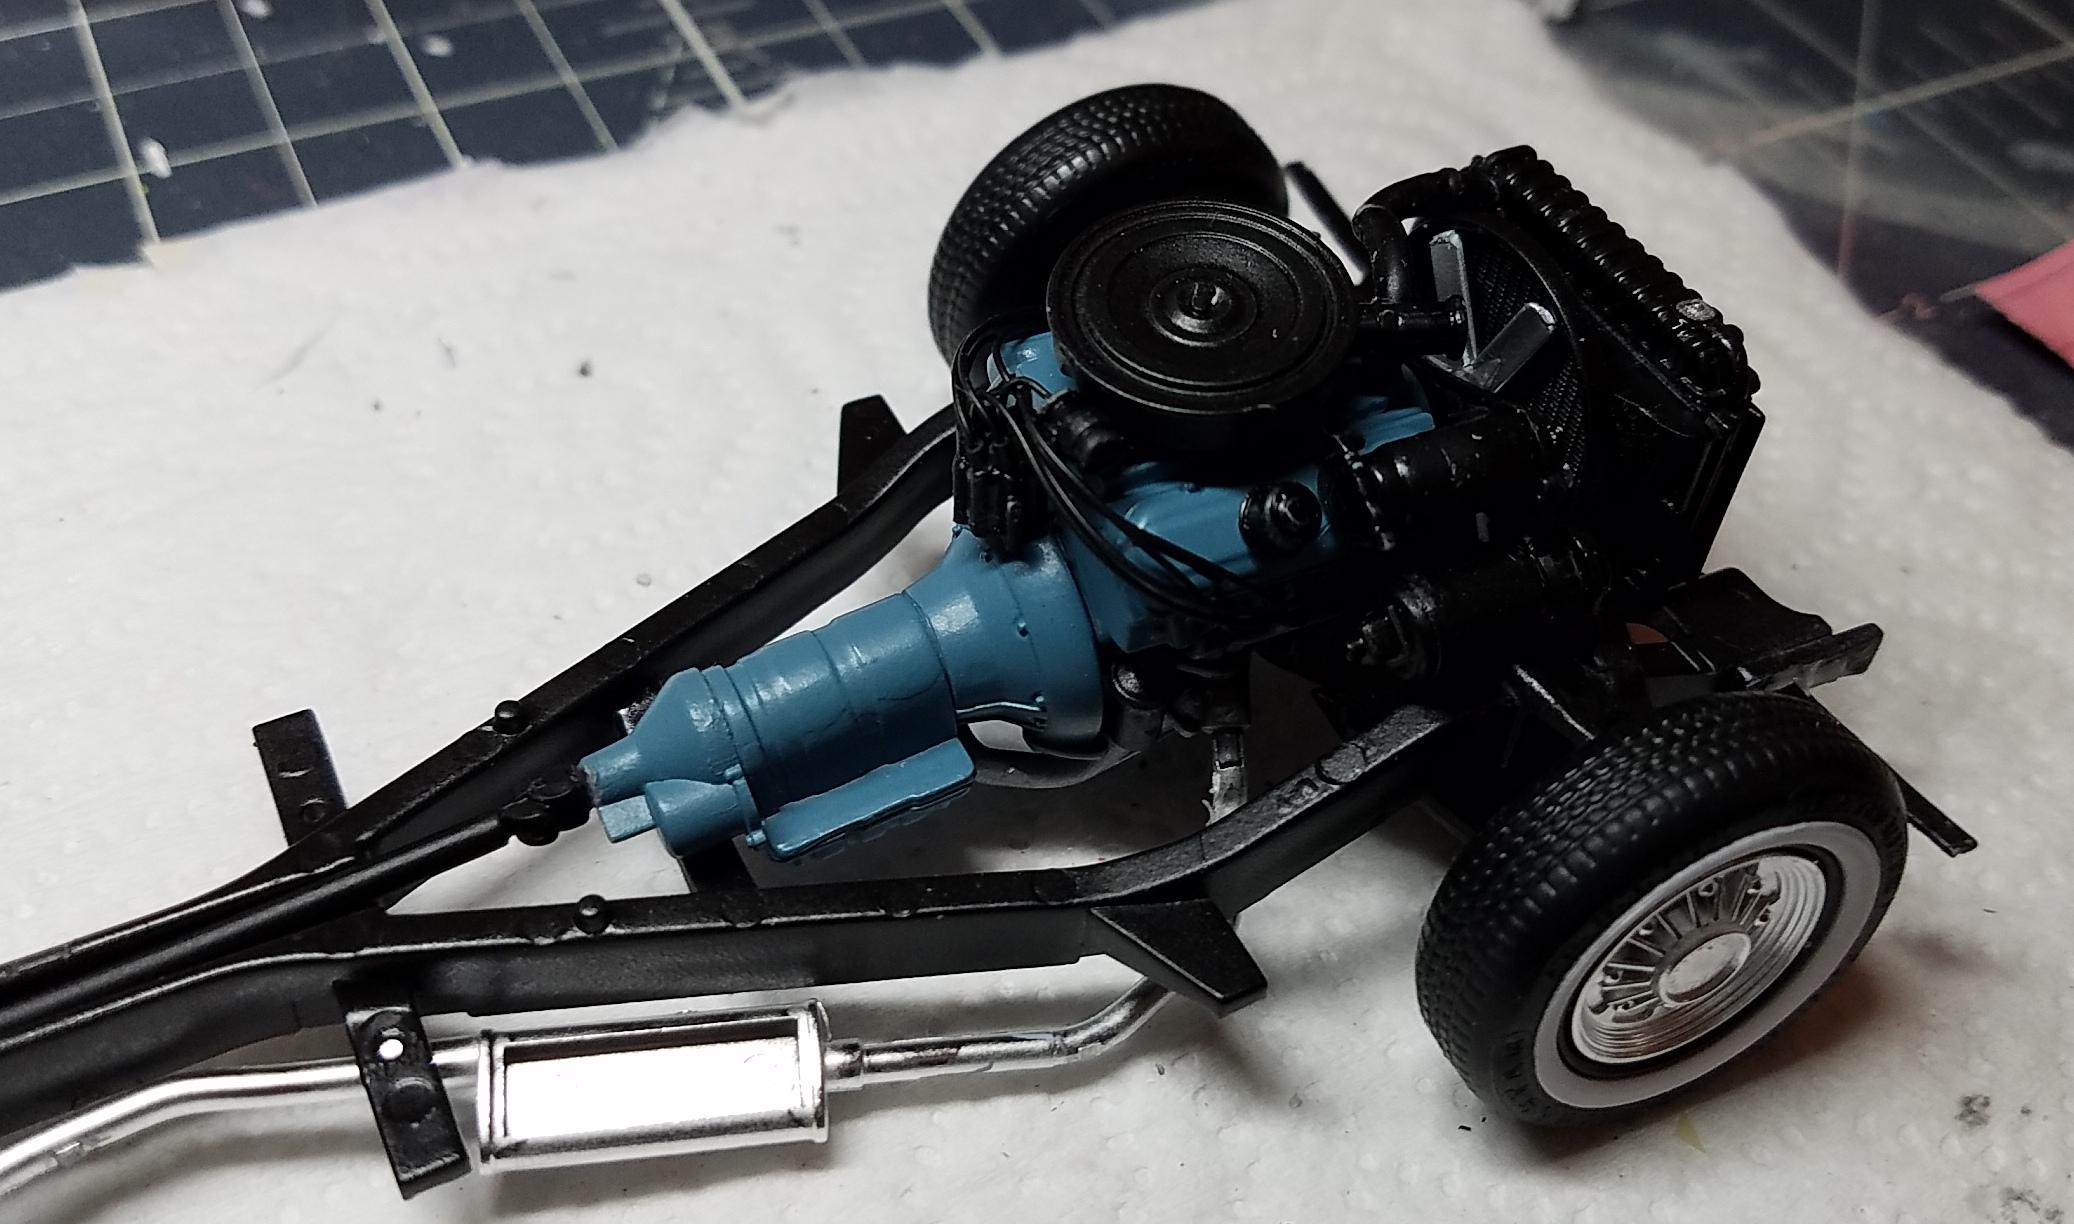
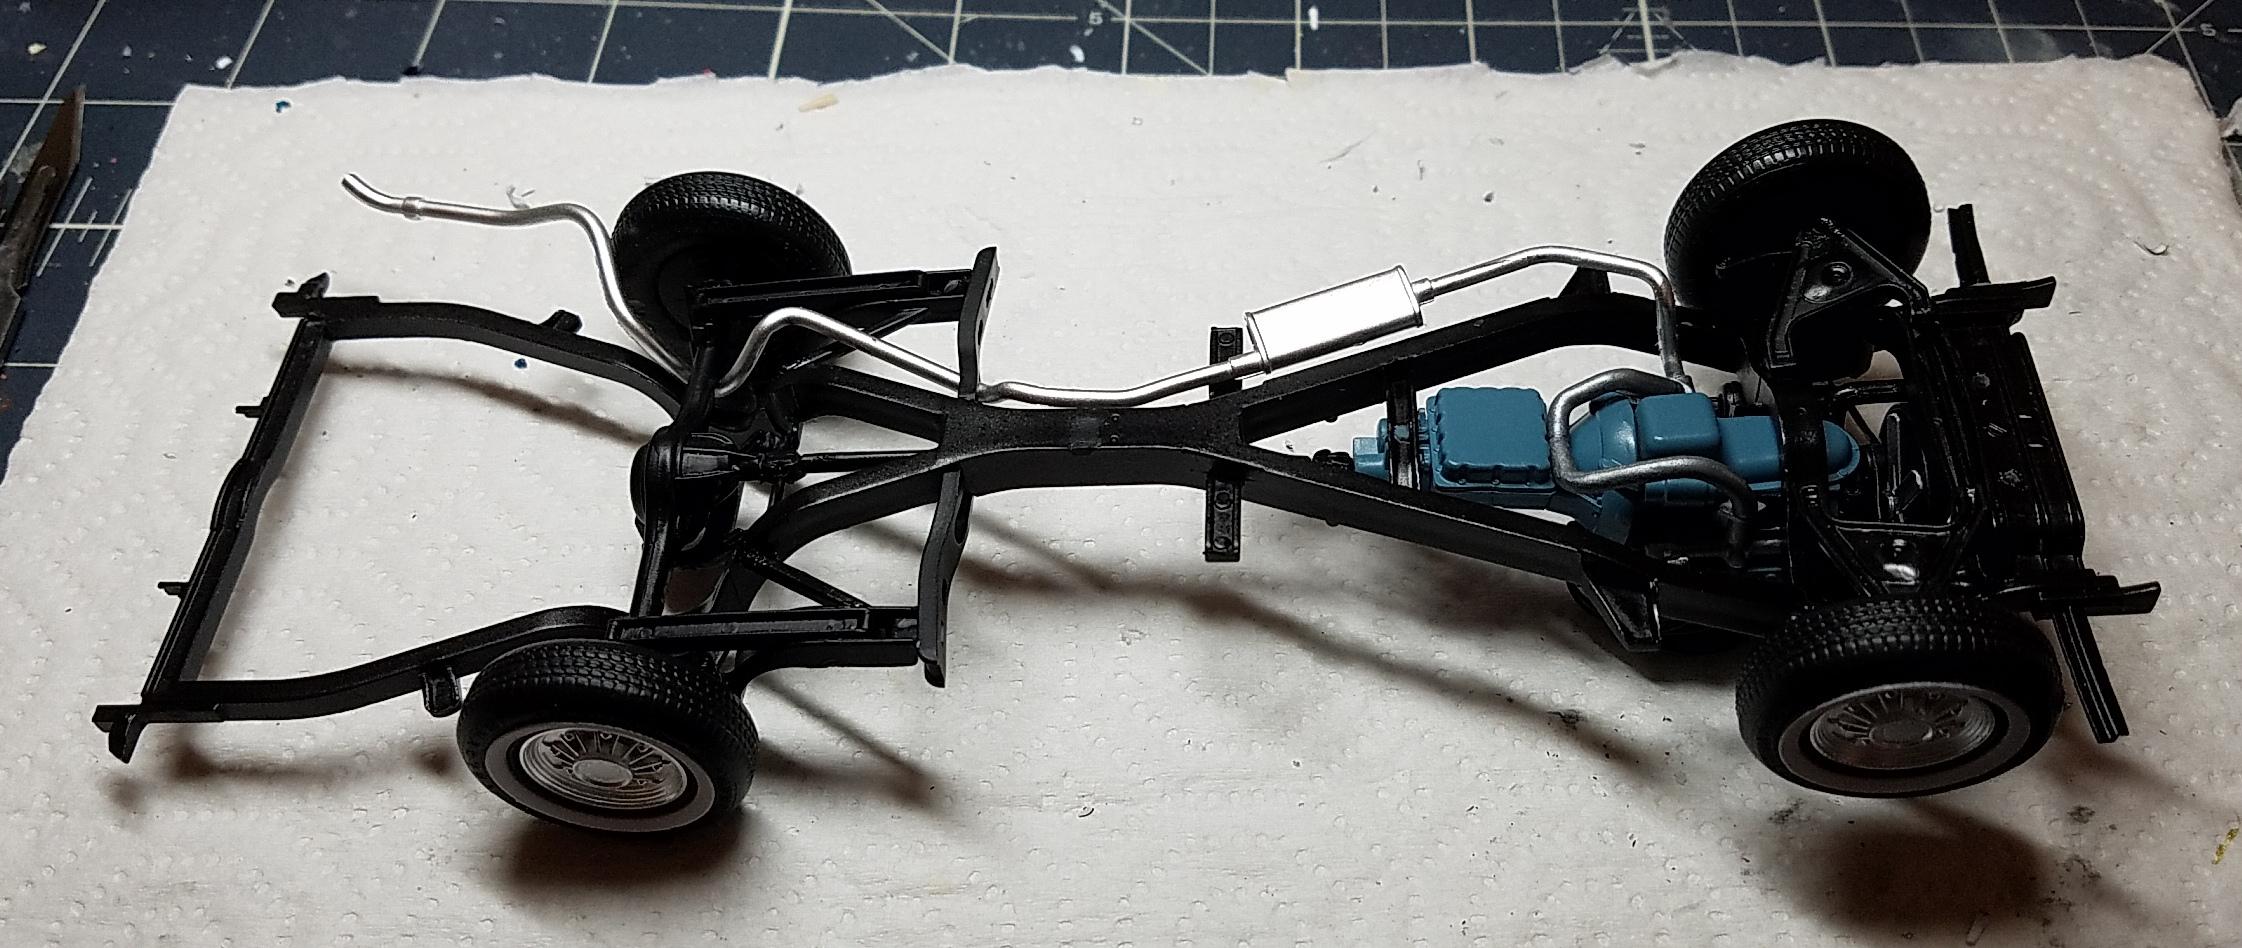
We're in the home stretch. Interior, engine and chassis finished an assembled. All that's left is body detailing and final assembly Still plenty of opportunities to mess something up. ? Polishing has begun.
-
Trumpeter 1960 Pontiac Bonneville
Sidney Schwartz replied to Sidney Schwartz's topic in WIP: Model Cars
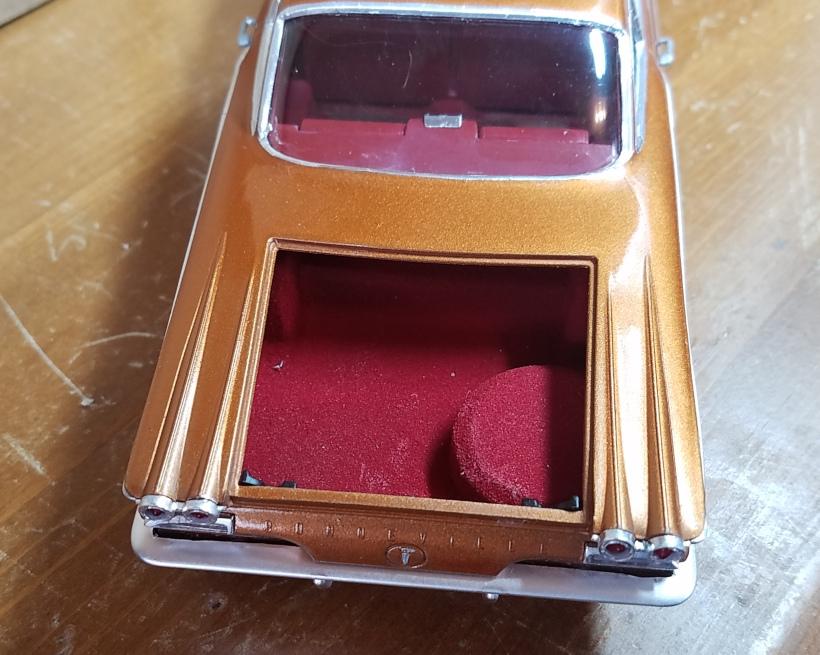
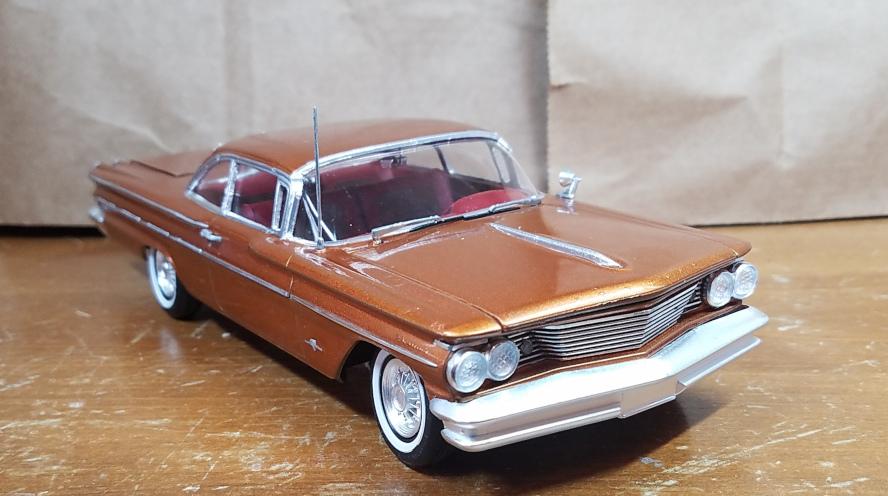
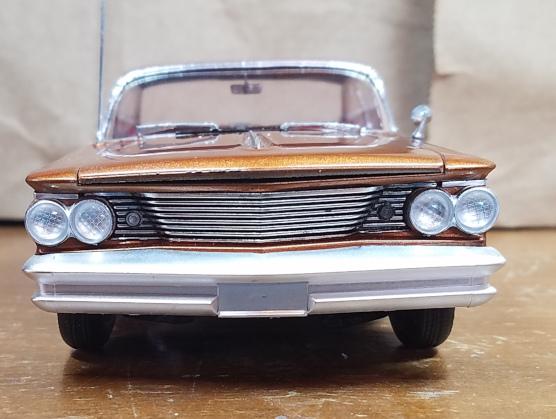
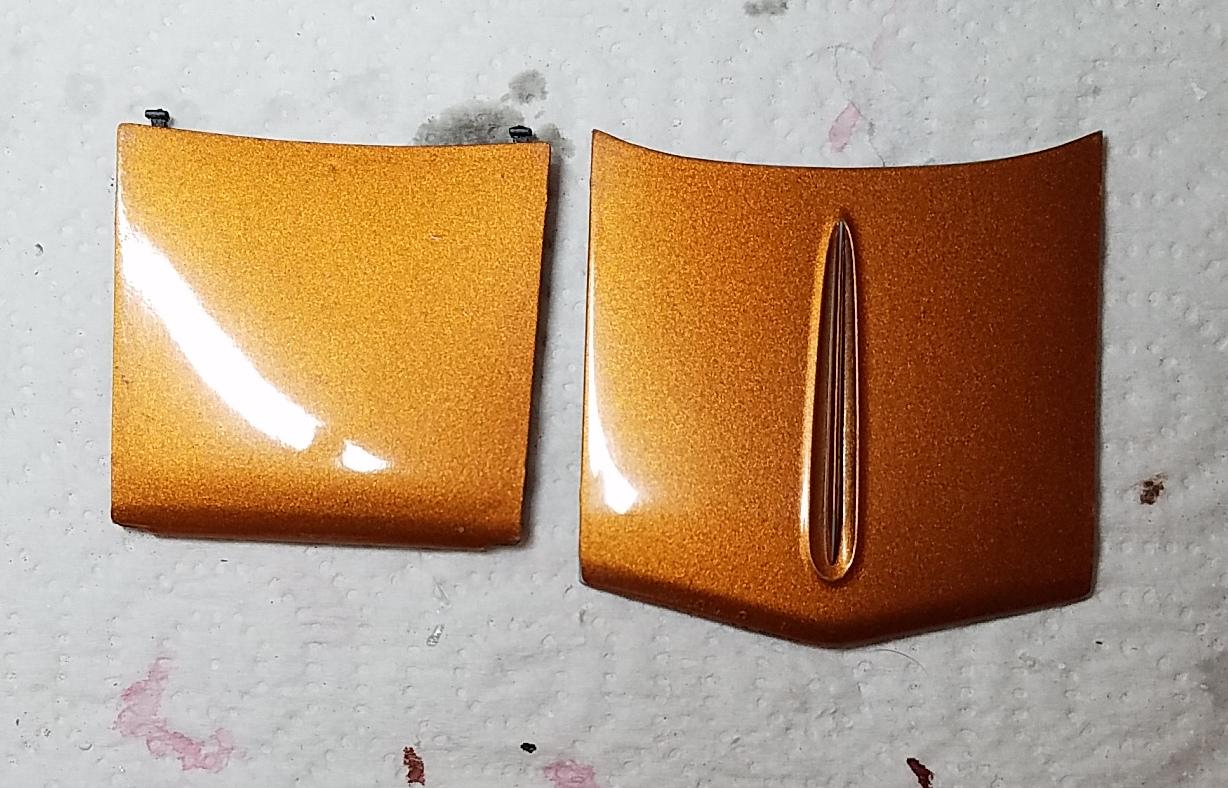
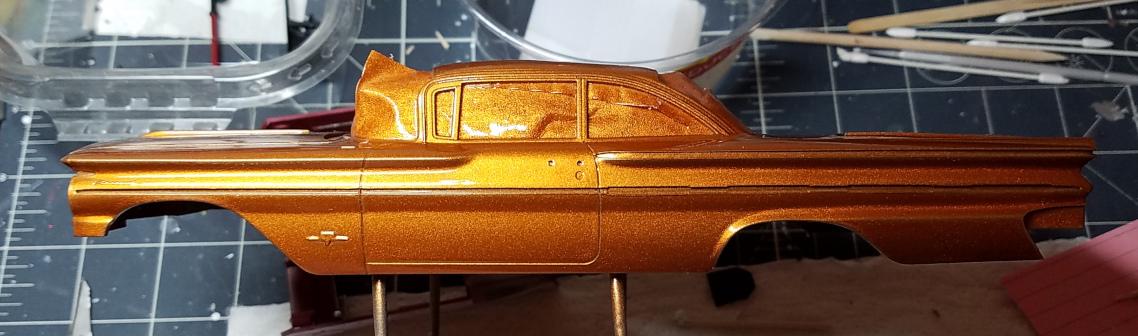
It's nice to get some positive comments on the colors...they're not quite what I had in mind when I started, but that seems to often be how things turn out. The metallic orange was tricky to spray, which seems typical of metallics and pearls. Sure looks nice, though. Tomorrow will be polishing day. ? -
Trumpeter 1960 Pontiac Bonneville
Sidney Schwartz replied to Sidney Schwartz's topic in WIP: Model Cars
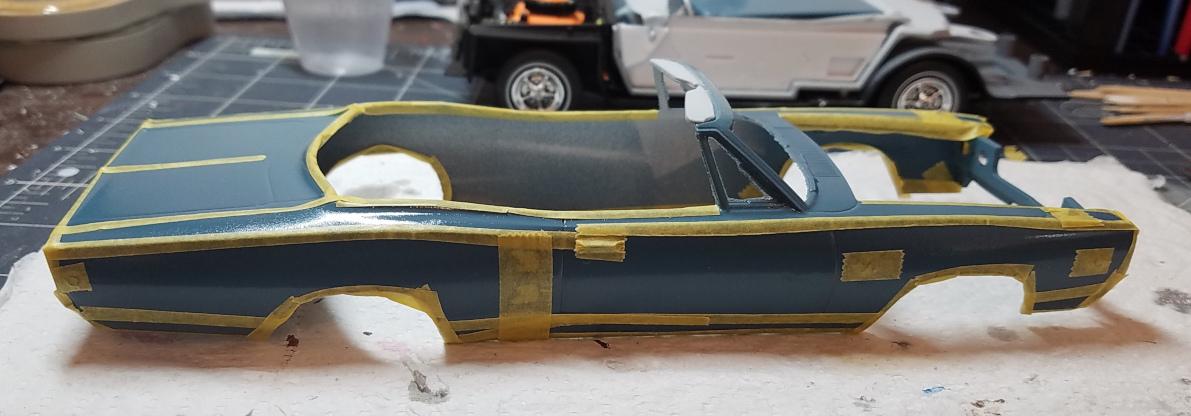
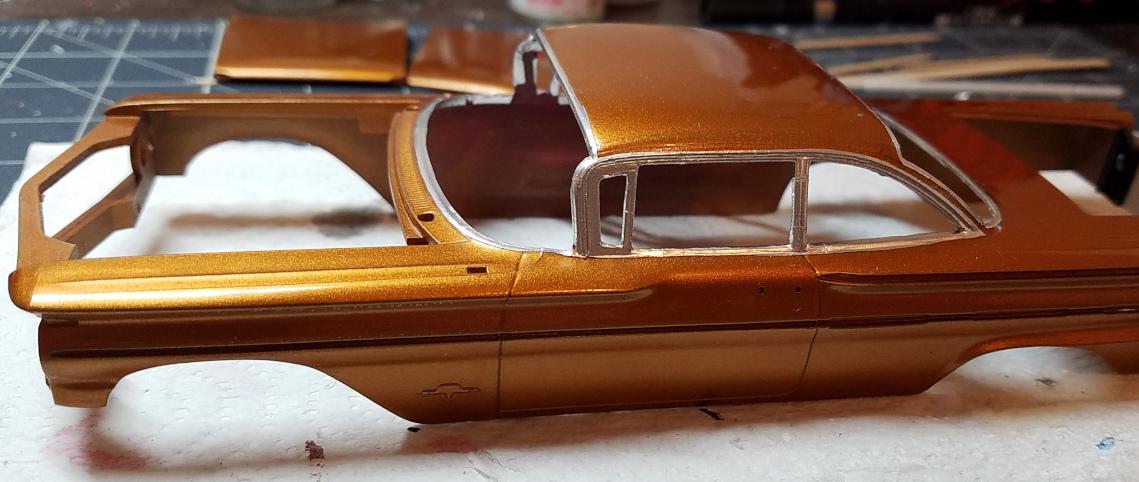
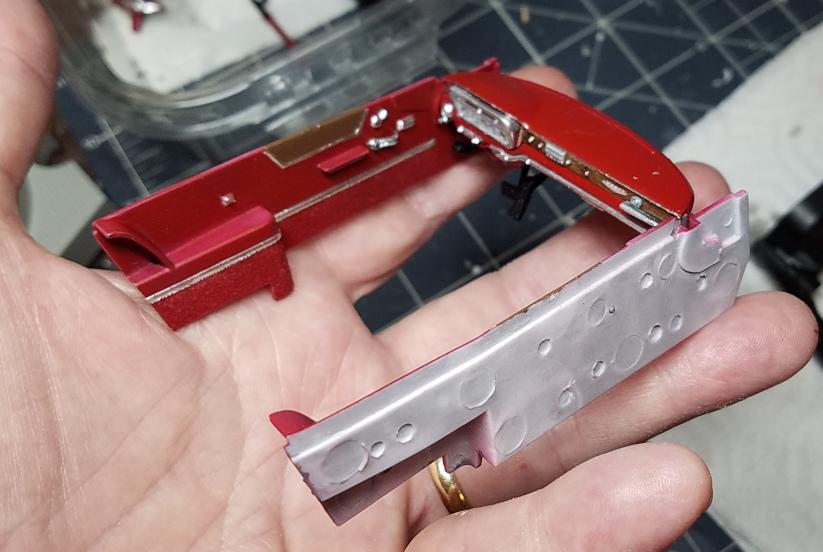
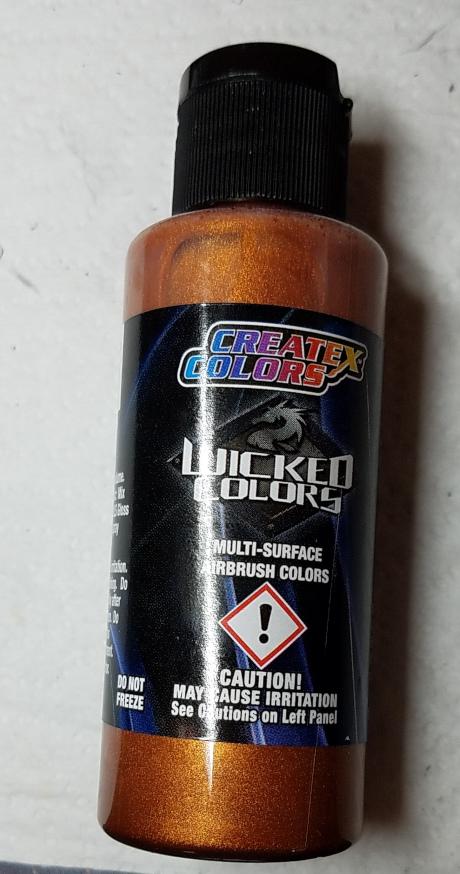
Took a much needed Trumpeter break and am back to it. Body sprayed but not yet polished. Wicked Colors metallic burnt orange under clear lacquer. I'm happy with how the flocking came out. Looking good so far. Dash and side panels assembled and ready to install. I had some bmf aluminum left over from another model and will be using it on this one, hopefully a better match for the "dull" chrome that came with the kit.
-
I'm drooling. Would love one of these kits. Just did a Google search and came up with zilch. ☹️
-
Trumpeter 1960 Pontiac Bonneville
Sidney Schwartz replied to Sidney Schwartz's topic in WIP: Model Cars
I gave up on the hood hinges. Way too difficult and complicated, and also unnecessary. -
Trumpeter 1960 Pontiac Bonneville
Sidney Schwartz replied to Sidney Schwartz's topic in WIP: Model Cars
Perhaps. That sort of thing doesn't bother me. I enjoy the process. ? -
Trumpeter 1960 Pontiac Bonneville
Sidney Schwartz replied to Sidney Schwartz's topic in WIP: Model Cars
At least it works. ? -
Trumpeter 1960 Pontiac Bonneville
Sidney Schwartz replied to Sidney Schwartz's topic in WIP: Model Cars
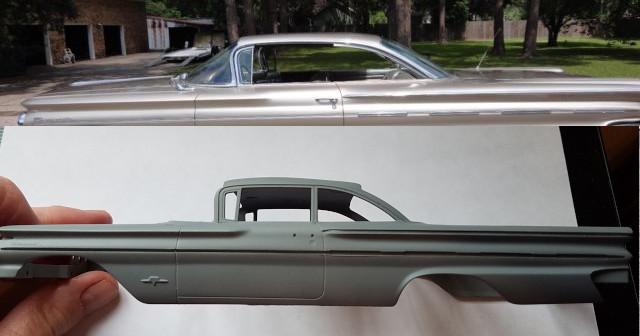
Roof is not exact, but looks OK to me. What am I missing?
-
Trumpeter 1960 Pontiac Bonneville
Sidney Schwartz replied to Sidney Schwartz's topic in WIP: Model Cars
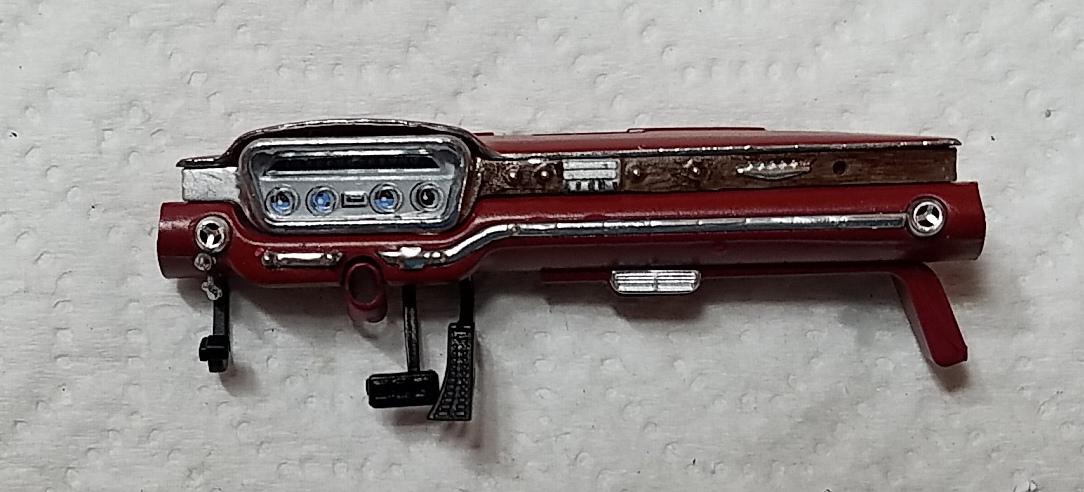
Dash and chassis done. Lots of parts. ? The dash gauge decal tore - probably old - but I managed to put it back together pretty well. Something else I've never seen before is the clear plastic piece that overlays the dash gauges and has gauge rims molded in. Hard to get good pics with almost everything being black. Body color finally arrived.
-
Very cool! Thanks to you I now have the MPC '68 Coronet. Am I going to have to buy one of these too? ?
-
Trumpeter 1960 Pontiac Bonneville
Sidney Schwartz replied to Sidney Schwartz's topic in WIP: Model Cars
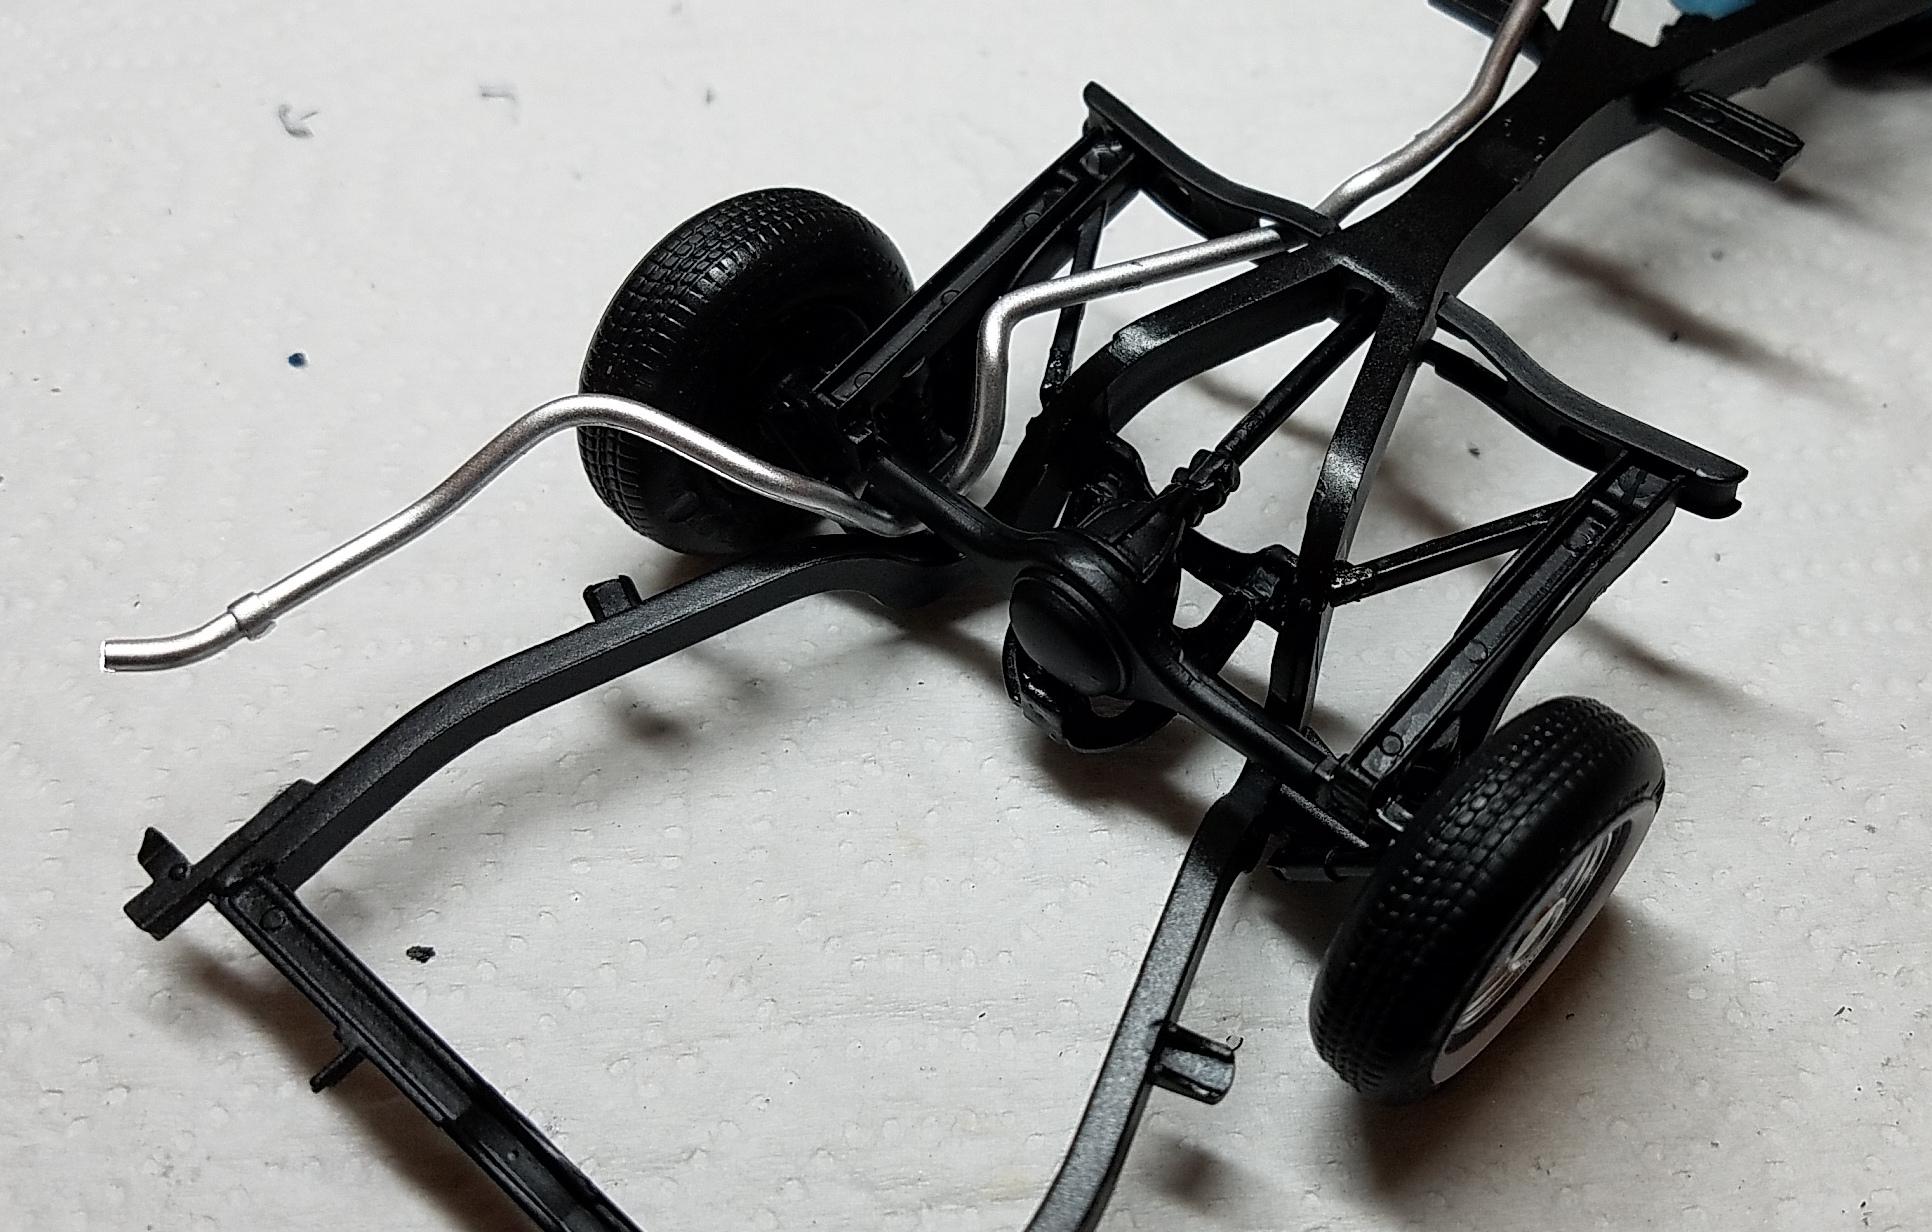
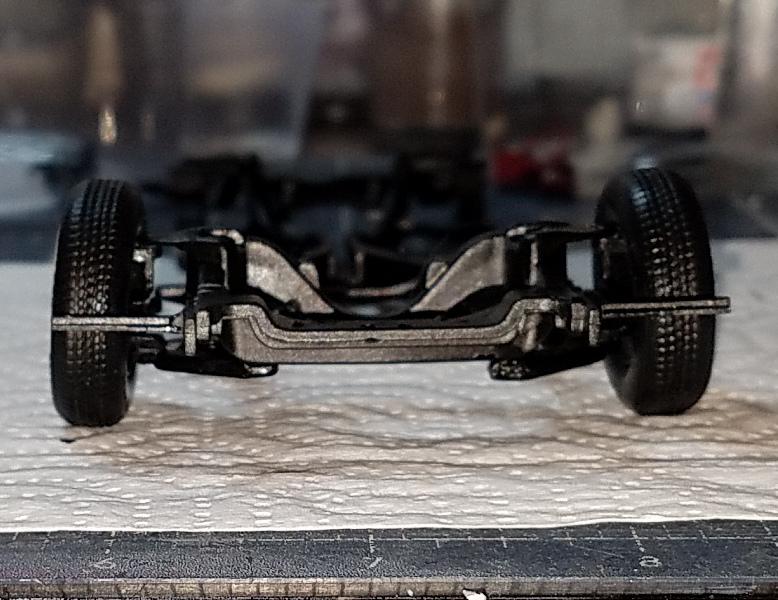
Wow...that's beautiful! Hope mine looks half as good. I was hoping to meet someone else who's built this kit because I seem to have a problem. I just finished the front suspension. It took me a while to figure out the right order to put the pieces together, but I think I got it right. As you can see in the pic, the wheels/tires have a very noticeable camber to them... Do your look like that, or did I mess something up?. The parts fit very well...there's really no wiggle room. It looks deliberate since it affeccts both sides. I'd hate to have to take it apart since some of the part are quite small and may break.
-
Trumpeter 1960 Pontiac Bonneville
Sidney Schwartz replied to Sidney Schwartz's topic in WIP: Model Cars
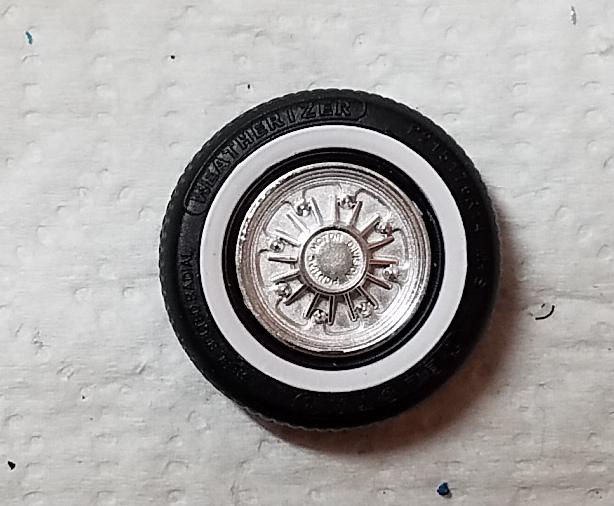
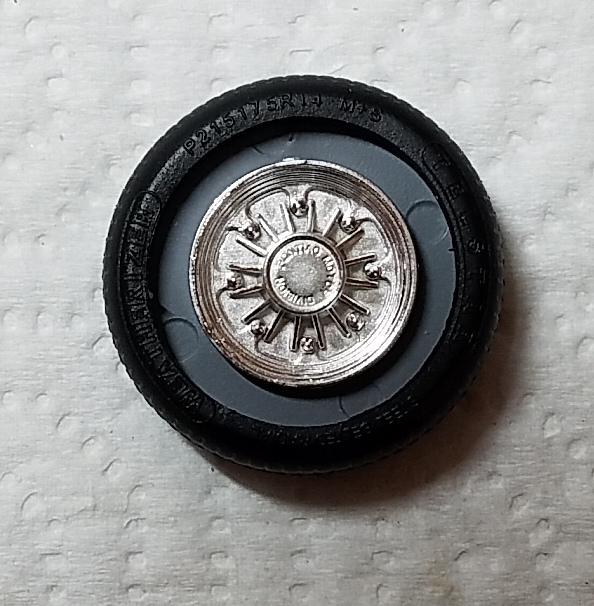
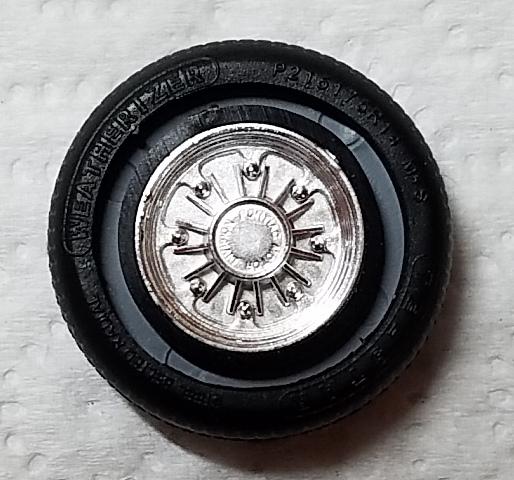
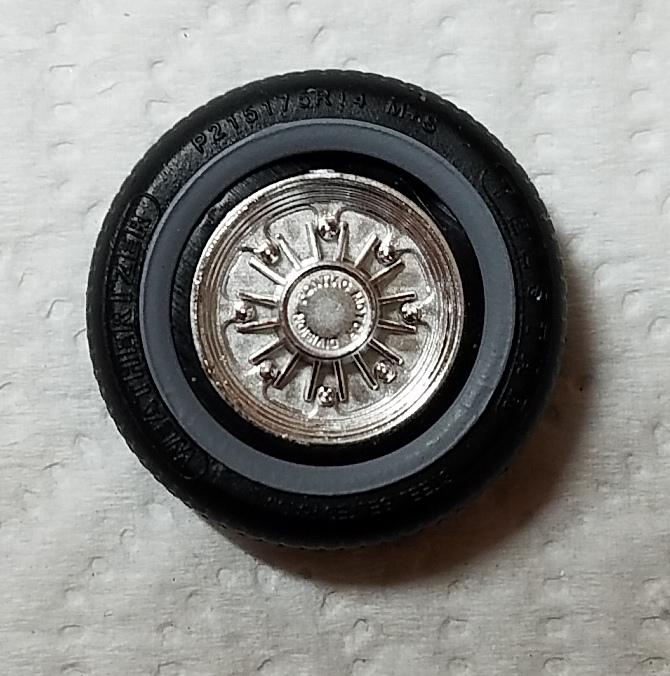
At least they look real good. You can barely make out the "Pontiac Motor Division" on the wheel covers. Nice! So far no tiny parts have been lost! How long can I keep that up...we'll see. ?
-
Trumpeter 1960 Pontiac Bonneville
Sidney Schwartz replied to Sidney Schwartz's topic in WIP: Model Cars
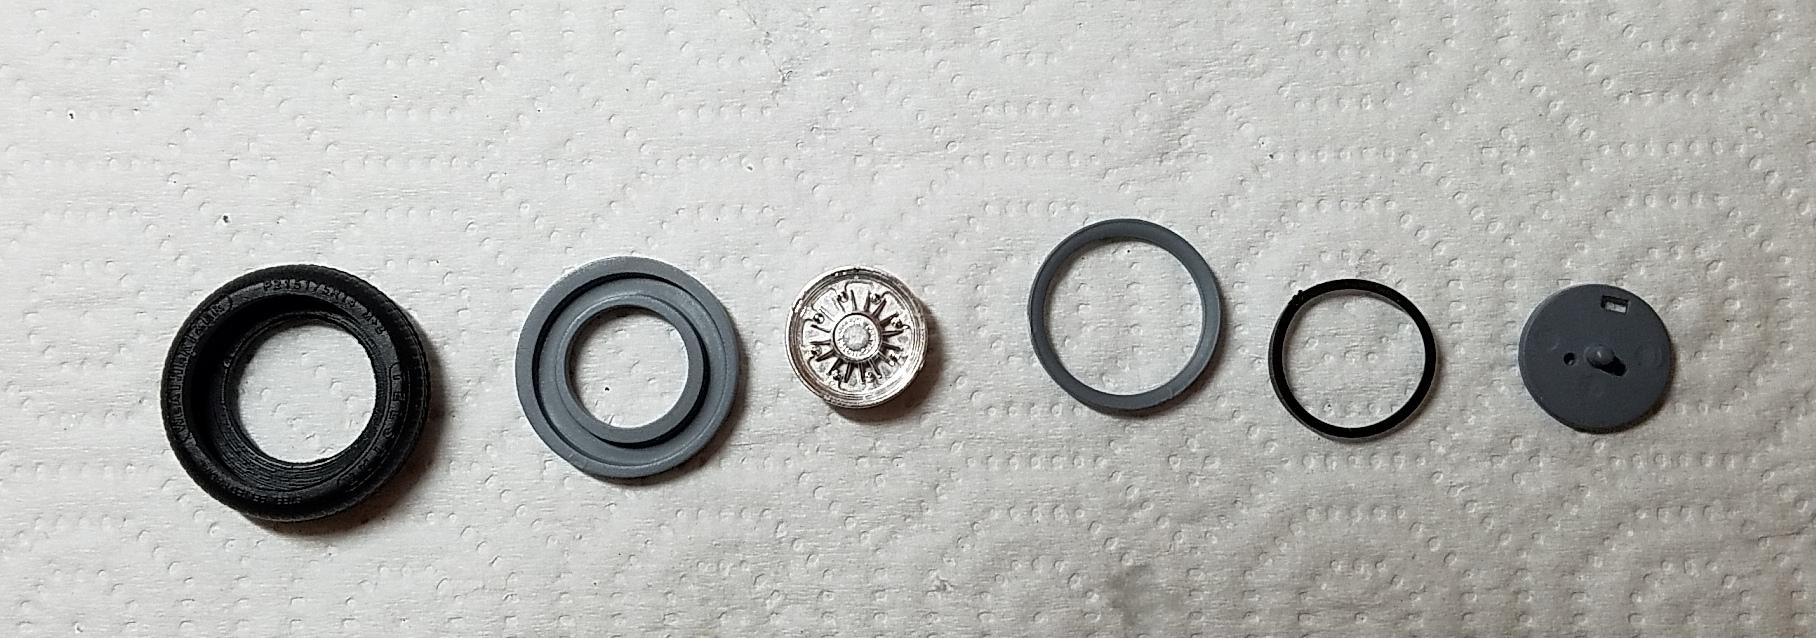
Well this is so odd I had to post it here. I've never seen this method of building wheel/tire before, and never would have thought of doing it this way. Here are the parts for one wheel... Left to right rubber tire, donut thingy, wheel cover, whitewall insert (not painted yet), rubber ring, backing plate. First the donut thingy goes in the tire... Next wheel cover and backing plate sandwich together over donut... Next rubber ring goes in around wheel cover... Lastly the whitewall insert... Can't help thinking someone overthought this one.
-
Trumpeter 1960 Pontiac Bonneville
Sidney Schwartz replied to Sidney Schwartz's topic in WIP: Model Cars
I at least noticed the floating distributor, Bill. ? -
Trumpeter 1960 Pontiac Bonneville
Sidney Schwartz replied to Sidney Schwartz's topic in WIP: Model Cars
Best of luck with that! -
Nice job. I'd probably be too embarrassed to do one of these myself, even though I once did an AMC Gremlin. ?