Sidney Schwartz
-
Posts
418 -
Joined
-
Last visited
Content Type
Profiles
Forums
Events
Gallery
Everything posted by Sidney Schwartz
-
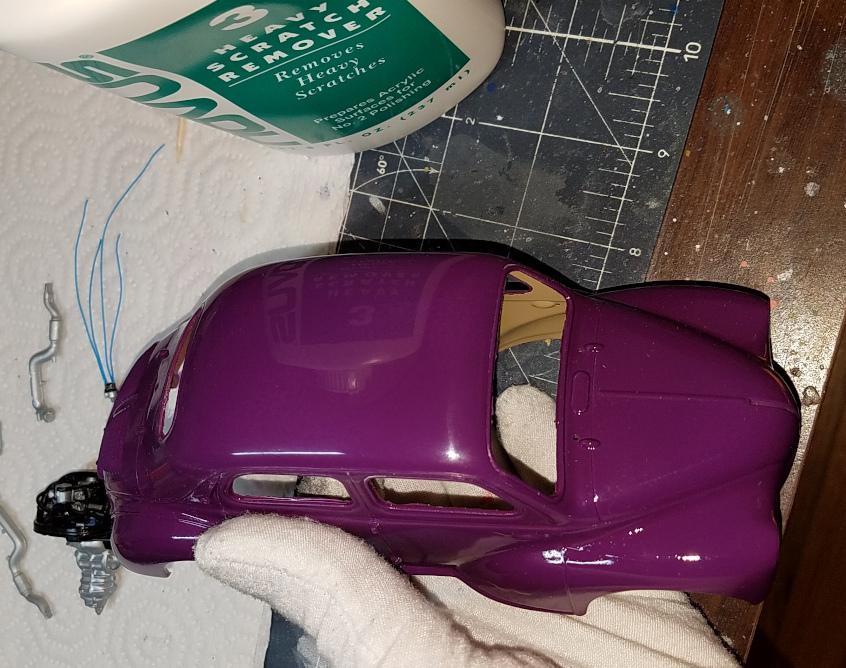
 Wow! Zero bleed through! There are some other imperfections that are my fault, but this plastic tape worked perfectly. Thank you Ace-Garageguy. ?
-
Nice! Whose kit is that? Never saw a convertible version.
-
Whoohoo! Man, that is sweet!
-
I'm about to try out this tape. I'm trying to paint a VW Beetle in this style... For the first attempt I used Tamiya masking tape. I burnished the edges and then brushed 2 layers of clear coat over the edges to try and seal them. The result was so awful that I considered it unfixable and stripped it down to the plastic. It'll probably take me a few days to finish the painting. I'll post the results here.
-
Great job...I didn't think a Lindberg kit could look that good. I'm going to put that one on my "to buy" list.
-
That's very nice of you. I'll keep that in mind. Hopefully I'll love it. ?
-
Ordered it. Spendy, but will probably last a good while. Thanks again.
-
Thanks.
-
Is this the stuff? I'm not happy with the Tamiya masking tape and am looking for something that works better. https://www.amazon.com/Scotch-08987-Performance-Masking-Tape/dp/B002C47XMU/ref=sr_1_8?crid=2BA33TT0O8EQJ&keywords=3m%2Bfine%2Bline%2Bauto%2Bmasking%2Btape&qid=1679678492&sprefix=3m%2Bfine%2Bline%2Bauto%2Bmasking%2Btape%2Caps%2C163&sr=8-8&th=1
-
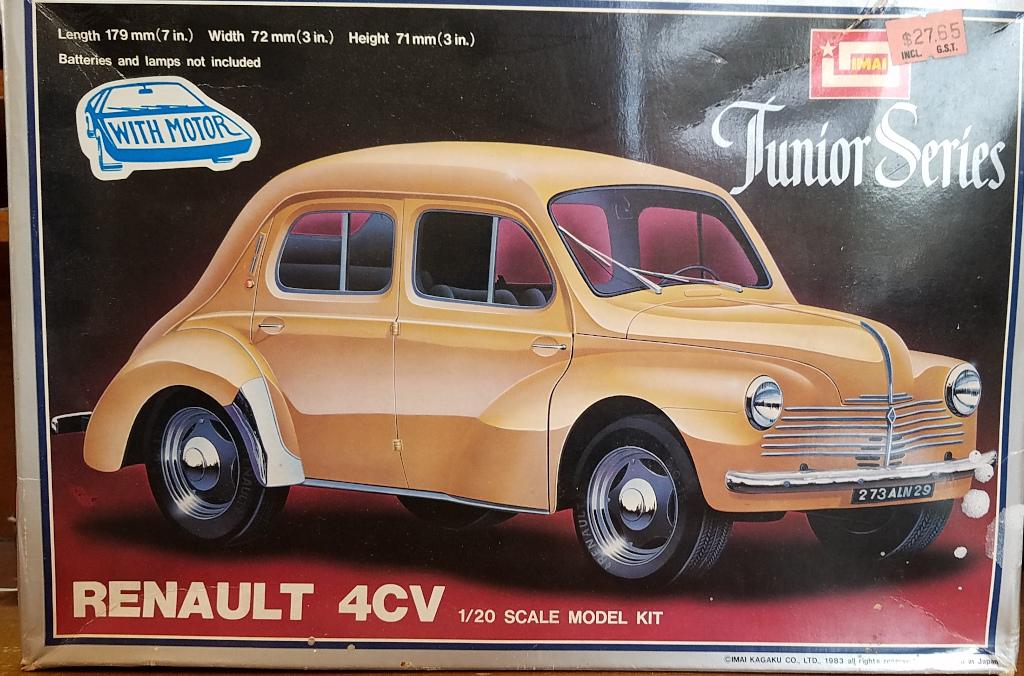
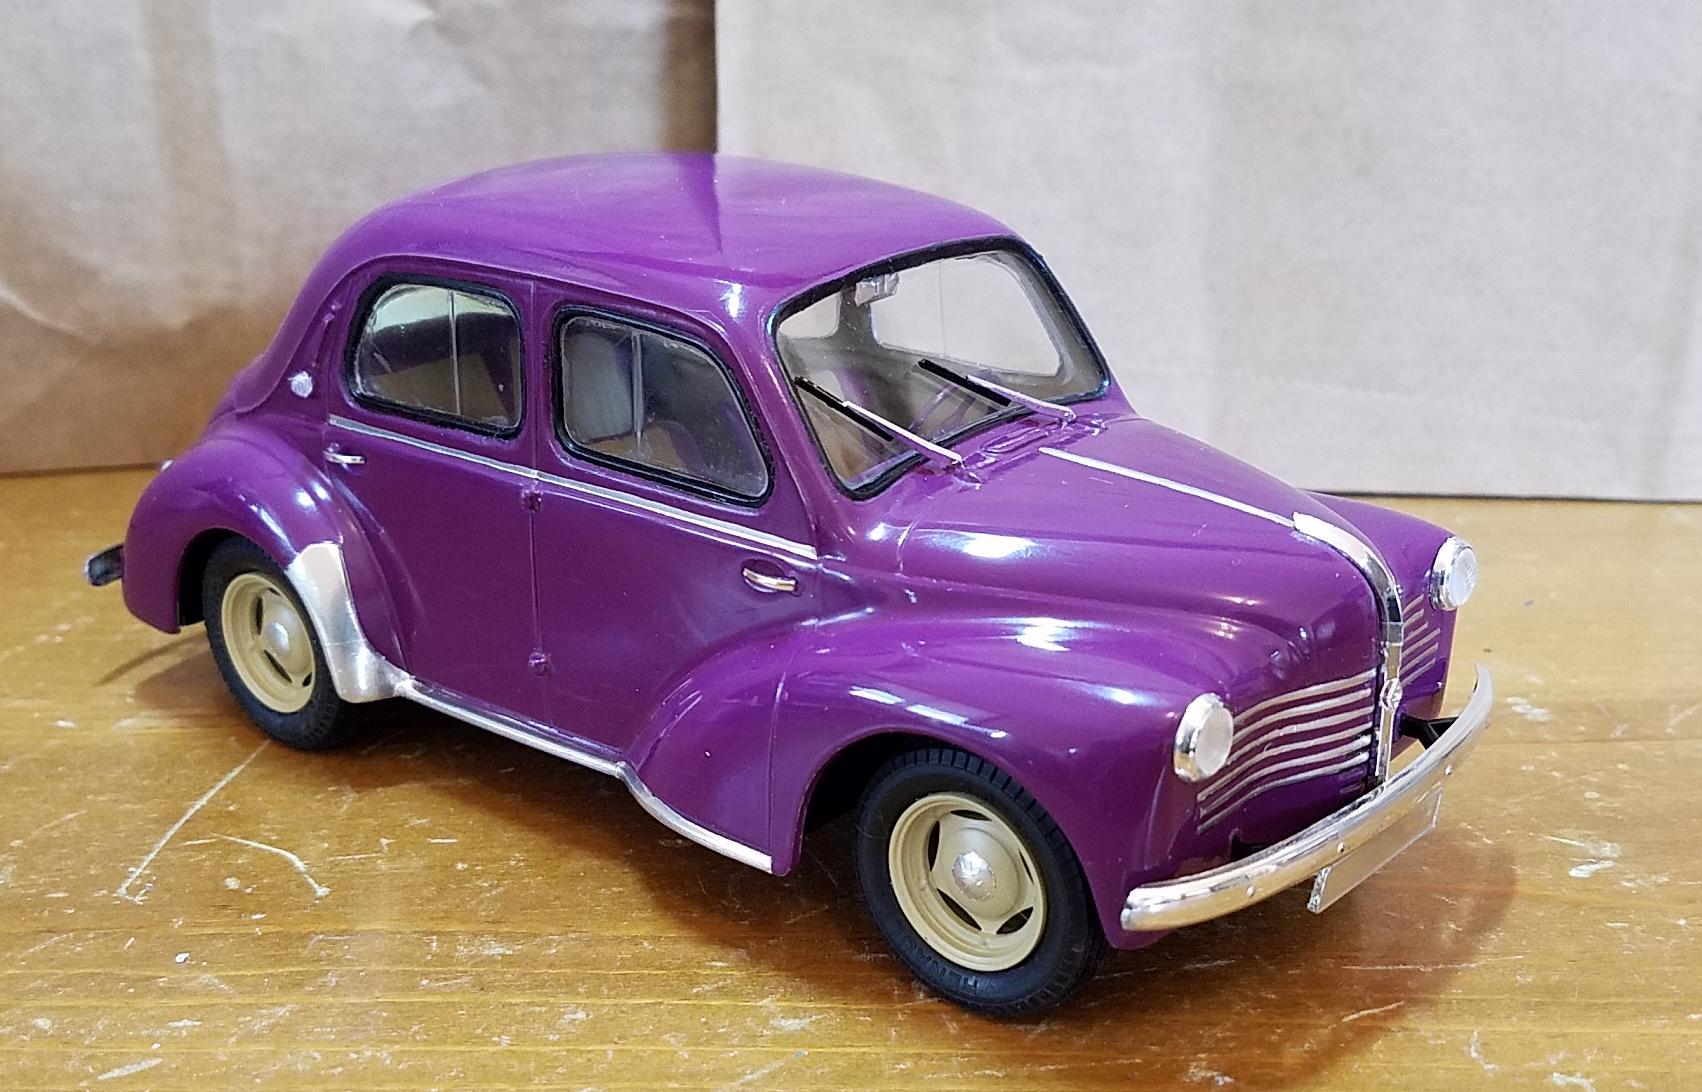
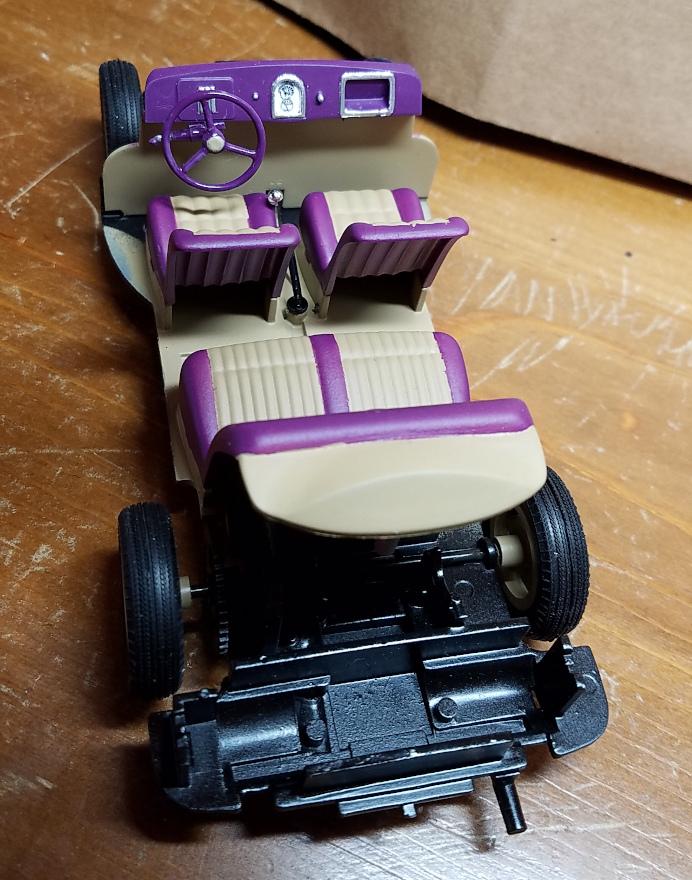
This actually happened to someone I knew! They told me drove a foreign car that was destroyed when a gas station attendent put the gas nozzle in the radiator and it caught fire. Man, I haven't thought about that story for like 40 years! The real car had a gasoline engine, which wasn't modeled in this kit. The kit has a real electric motor like you find in toys, meant to make the model "drive." I get the feeling Imai is no longer around. I googled "Imai model kits" and got some hits, but they all look pretty vintage. Thanks all for the comments. ?
-
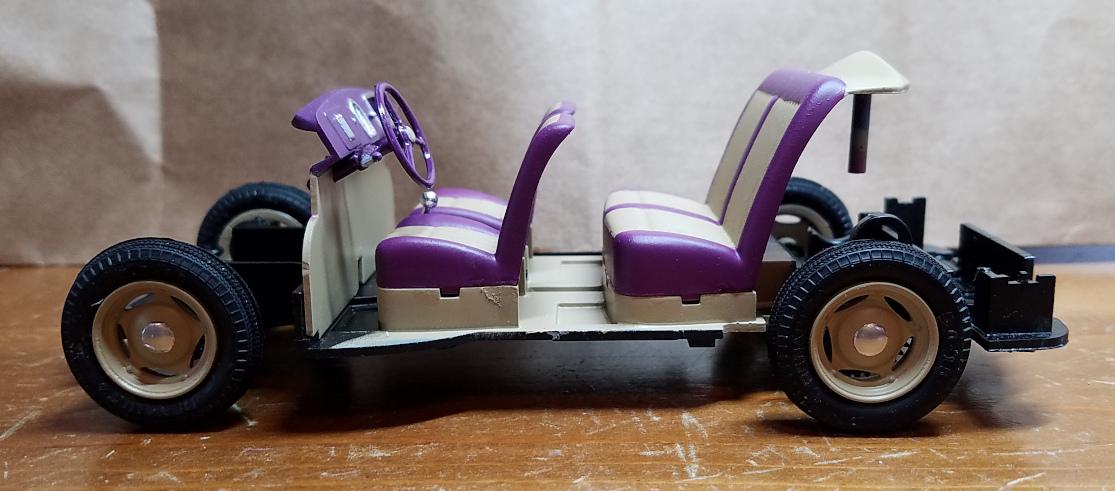
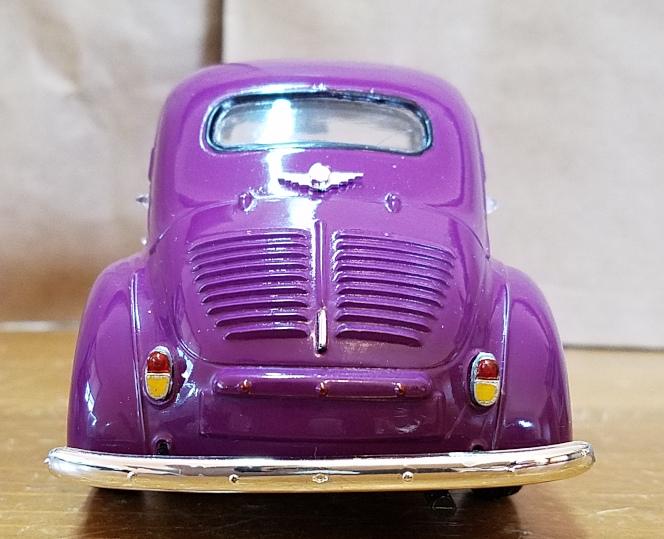
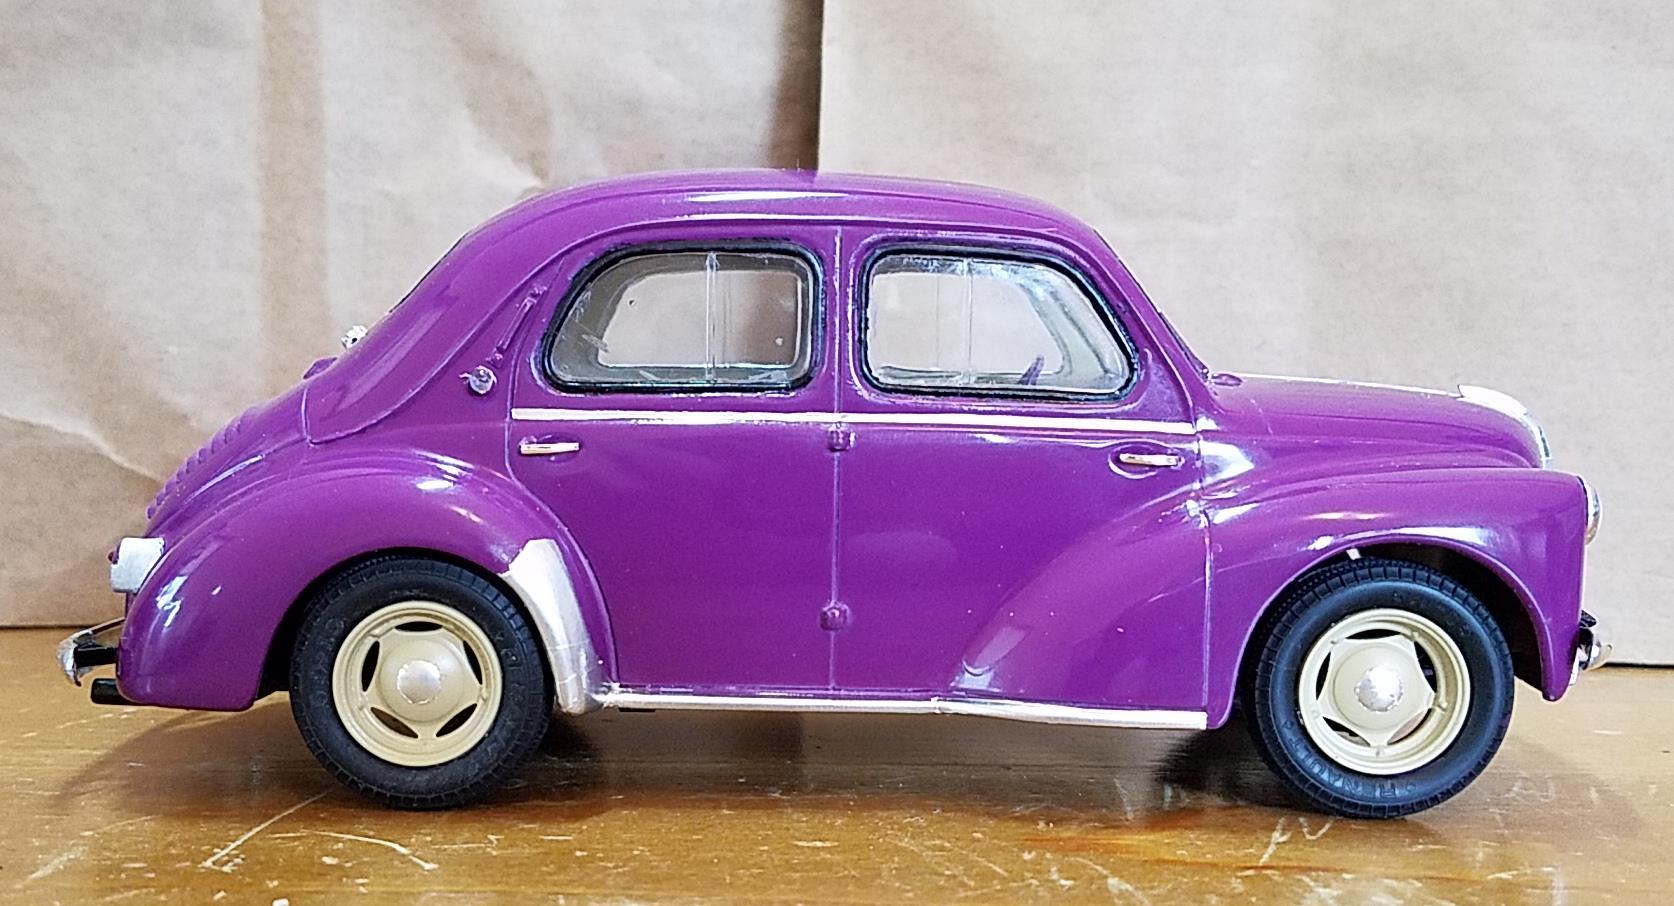
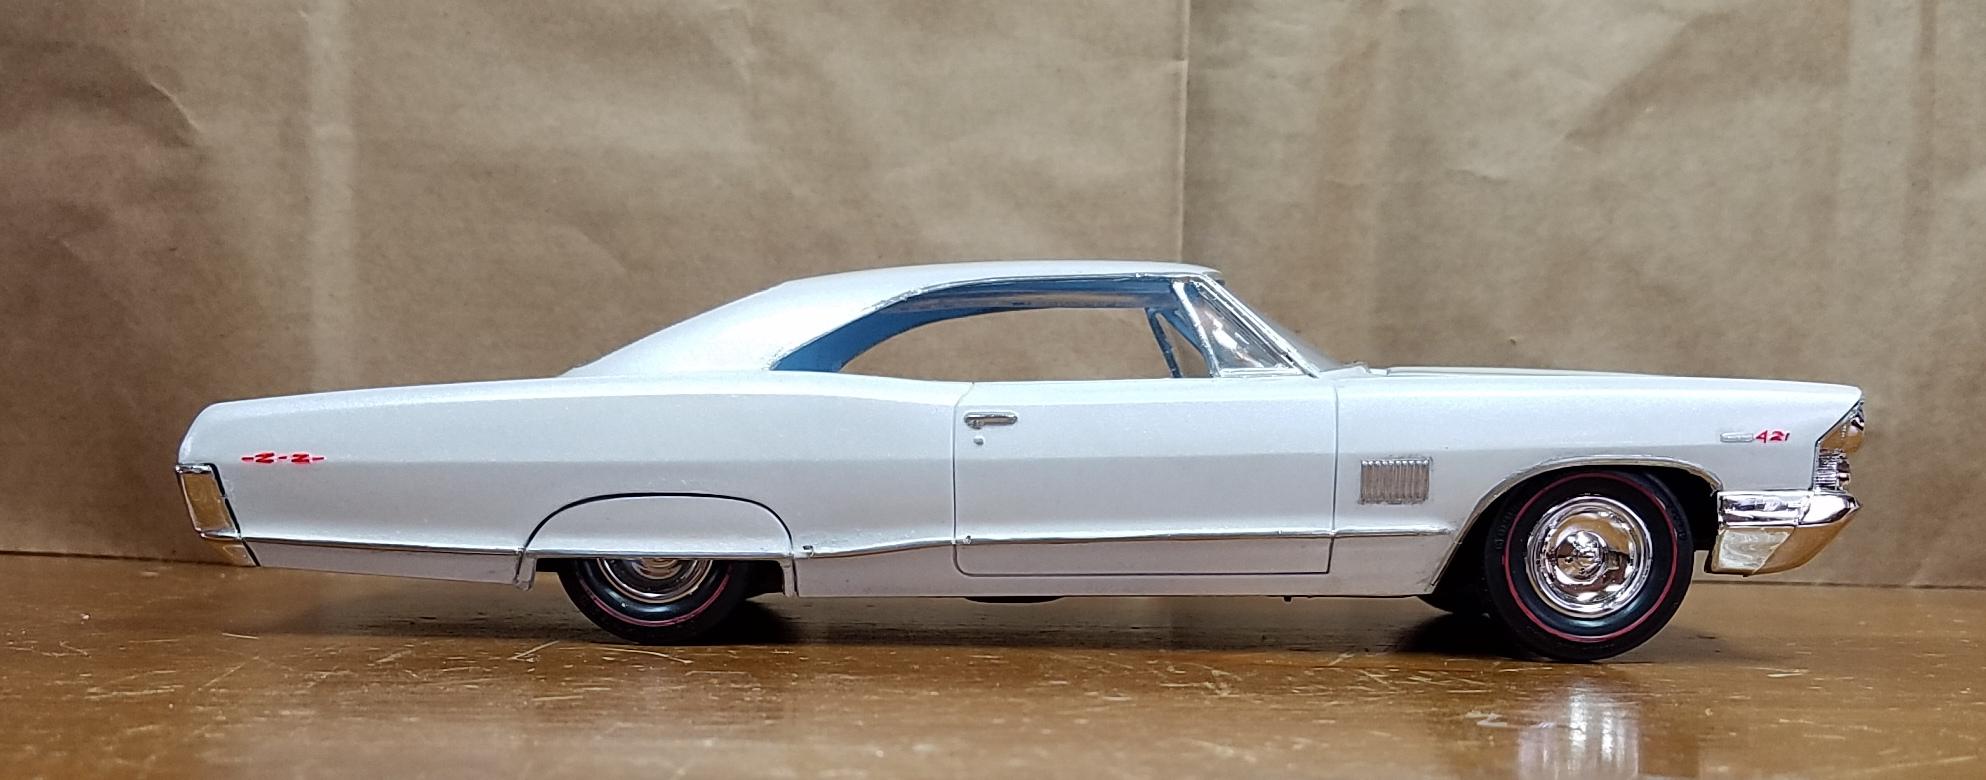
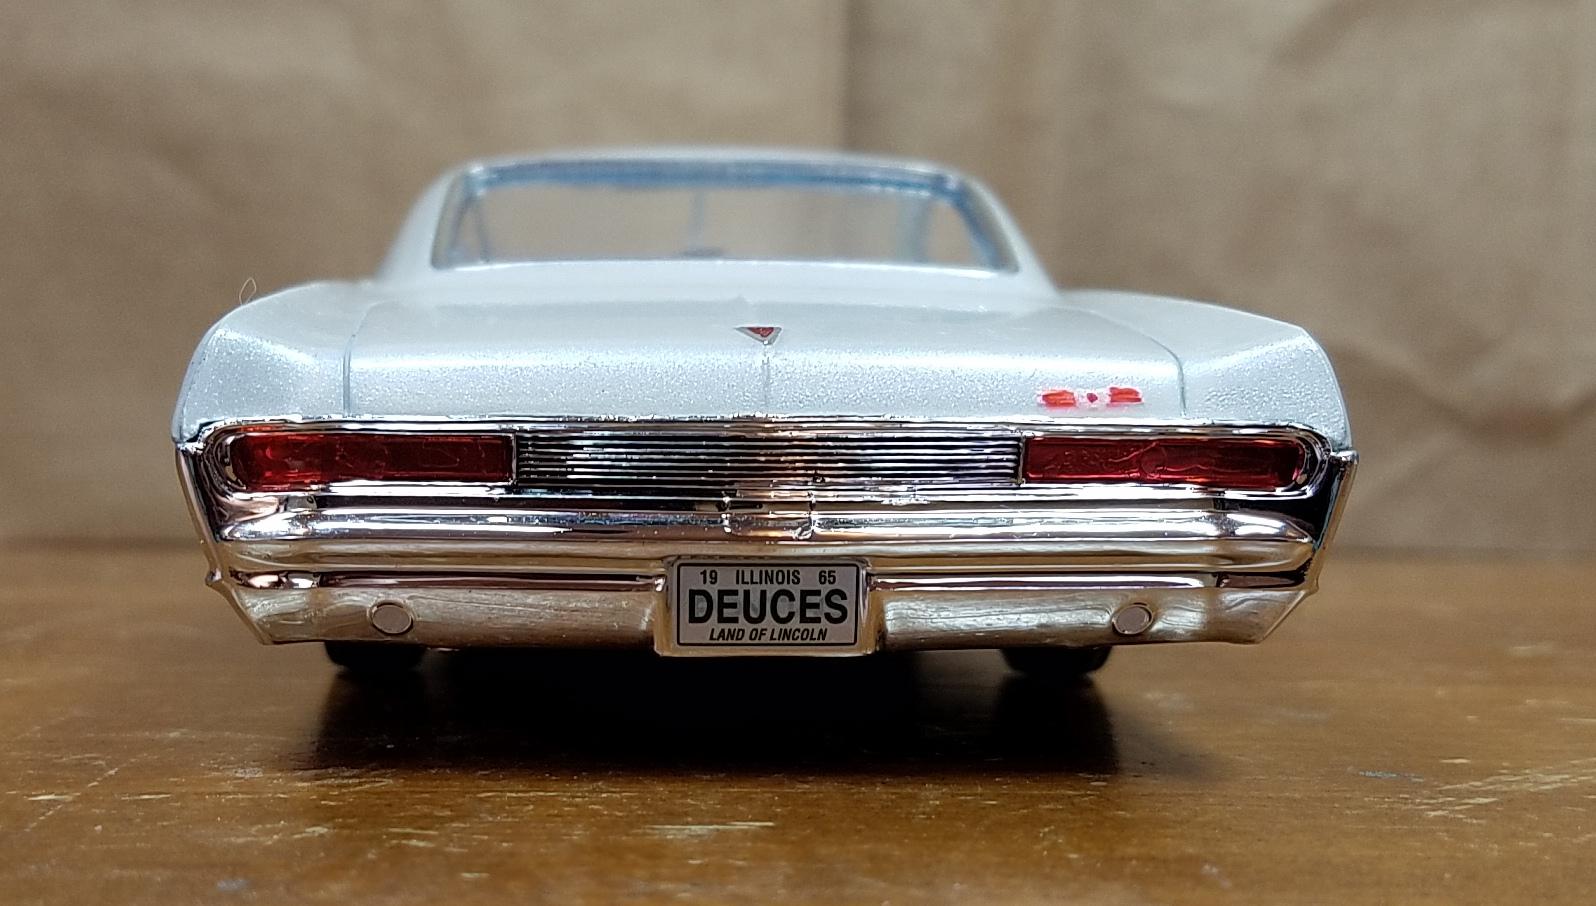
The usual load of mistakes, but enjoyable nonetheless. Never heard of Imai before I bought this. Didn't realize until I got it that it has an electric motor, which I didn't bother to install. This is actually a very nice kit. Theres not much to the interior, but that looks to be true of the real car as well. Nice details on the body, chrome door handles and other stuff. It came with a few decals, but they just dissolved...the kit was probably quite ancient. I'd buy another, but the only ones I found for sale today were going for over $100! I'm sure I didn't pay more than $30 for this one. Paints are Craftsmart Plum, Tamiya Light Sand and Krylon Crystal Clear. Only customization I did was to strip the chrome off the wheels and redo them with paint and bmf. Thanks for looking.
-
Wet vs. dry sand?
Sidney Schwartz replied to Sidney Schwartz's topic in Model Building Questions and Answers
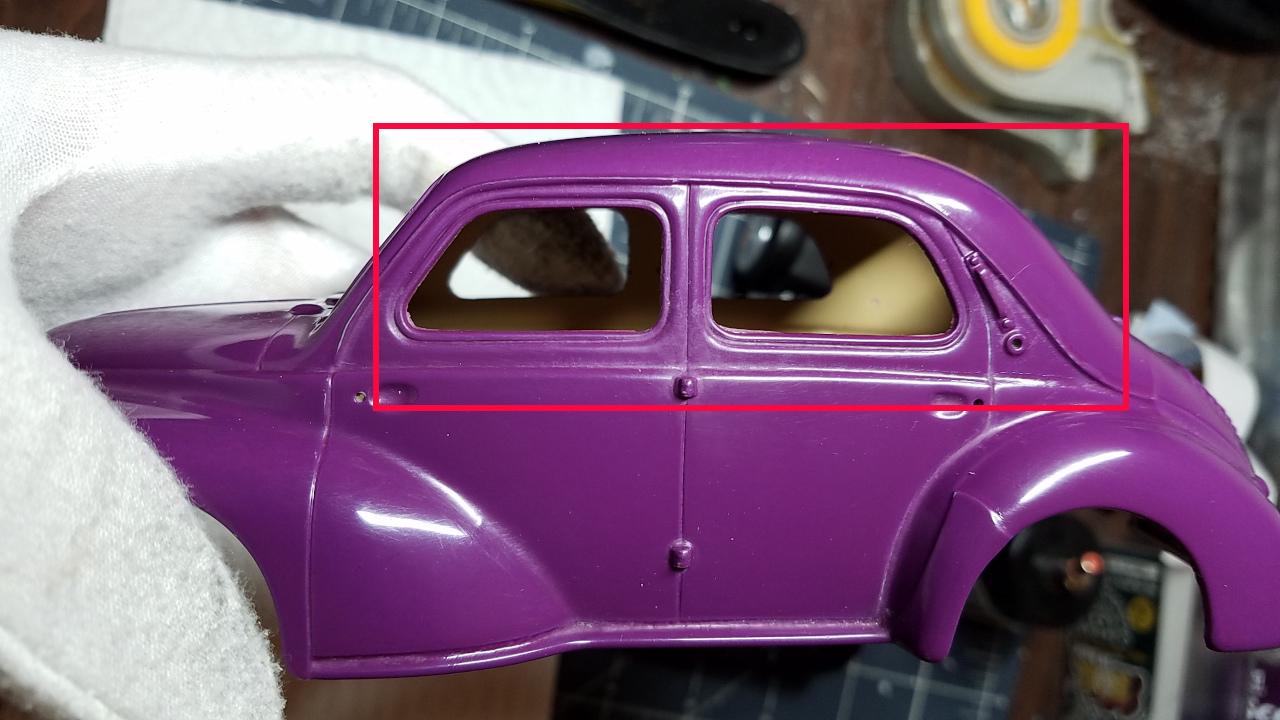
Wow, many Words on sanding. ? I appreciate all the suggestions. What I'm doing doesn't seem to be broke, so I won't try and fix it. There are always more questions, though. A couple of things I haven't quite figured out yet... 1. When sanding, what do you do about areas like those indicated in the pic? Try to sand all the tiny spots, or just not bother? 2. What do you do to keep from sanding the paint off edges and raised bits?
-
I don't use water when sanding. I find that I'm constantly having to wipe away the water to check the progress of the sanding. You can see on the roof the finish I'm typically able to get this way. Am I really going to see any significant improvement by wet sanding, or any improvement at all?
-
Handy BMF trick
Sidney Schwartz replied to Sidney Schwartz's topic in Model Building Questions and Answers
Yes, that too. Very helpful for old eyeballs. Also, if the blade wanders into the tape I can hear it. -
Handy BMF trick
Sidney Schwartz replied to Sidney Schwartz's topic in Model Building Questions and Answers
I've used that method too. I find that putting the tape over the bmf gives me a more well defined edge to work with. -
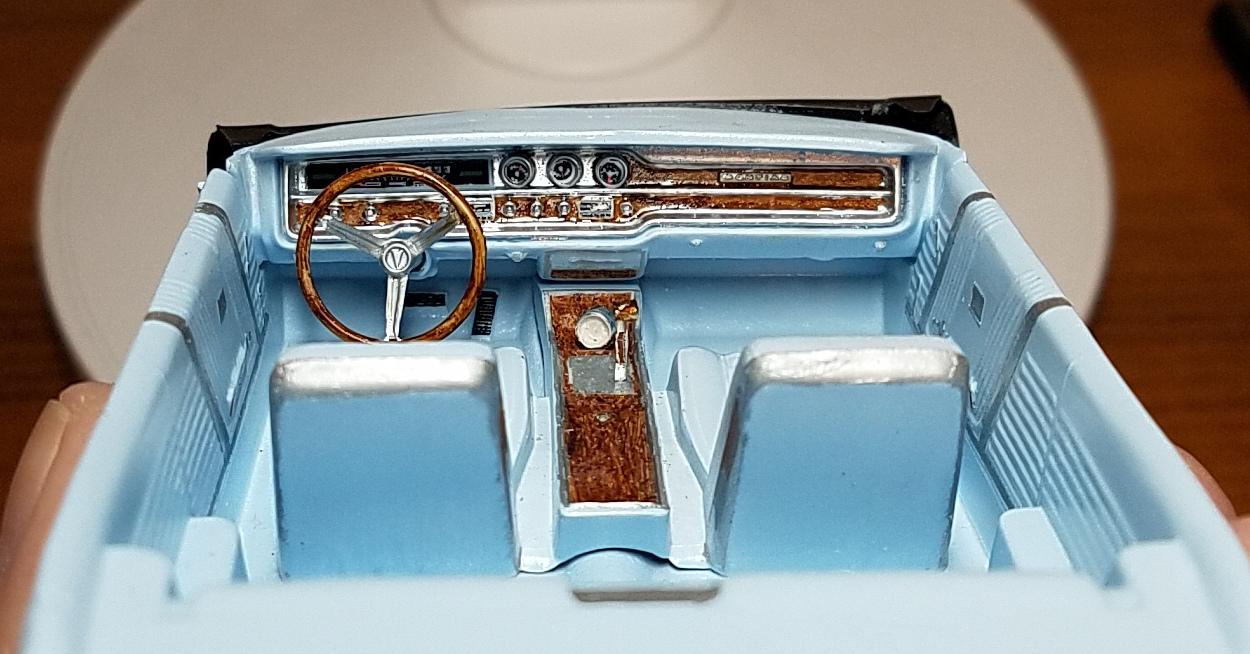
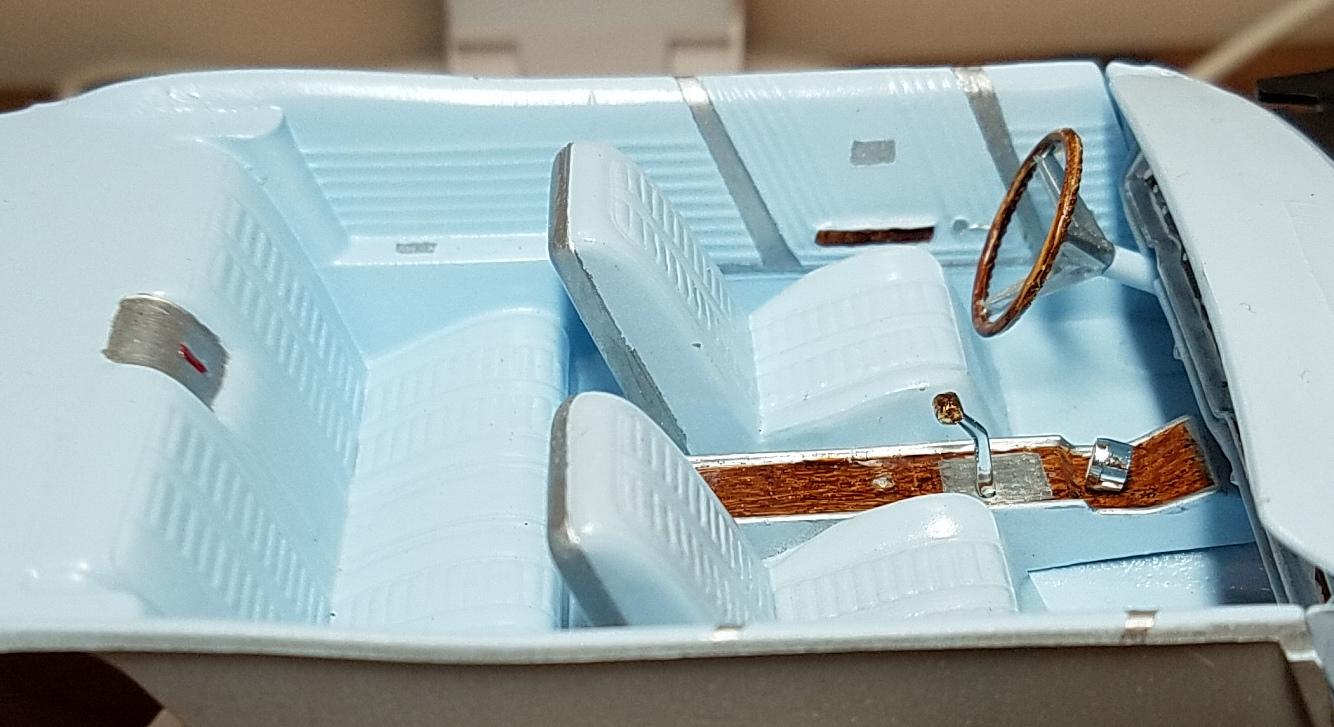
Bestmodelcarparts on eBay sells a set of dash gauges for this car. I used them on mine. https://www.ebay.com/str/bestmodelcarparts Thanks all for the kind words. ?
-
That is simply stunning. One of the best builds I've ever seen. What do you mean when you say you "cracked the fender"?
-
Handy BMF trick
Sidney Schwartz replied to Sidney Schwartz's topic in Model Building Questions and Answers
I did the bmf in pieces rather than one long strip. If you cut completely through the bmf, pulling off the tape should only pull off the bmf that's under the tape, which is what you want. -
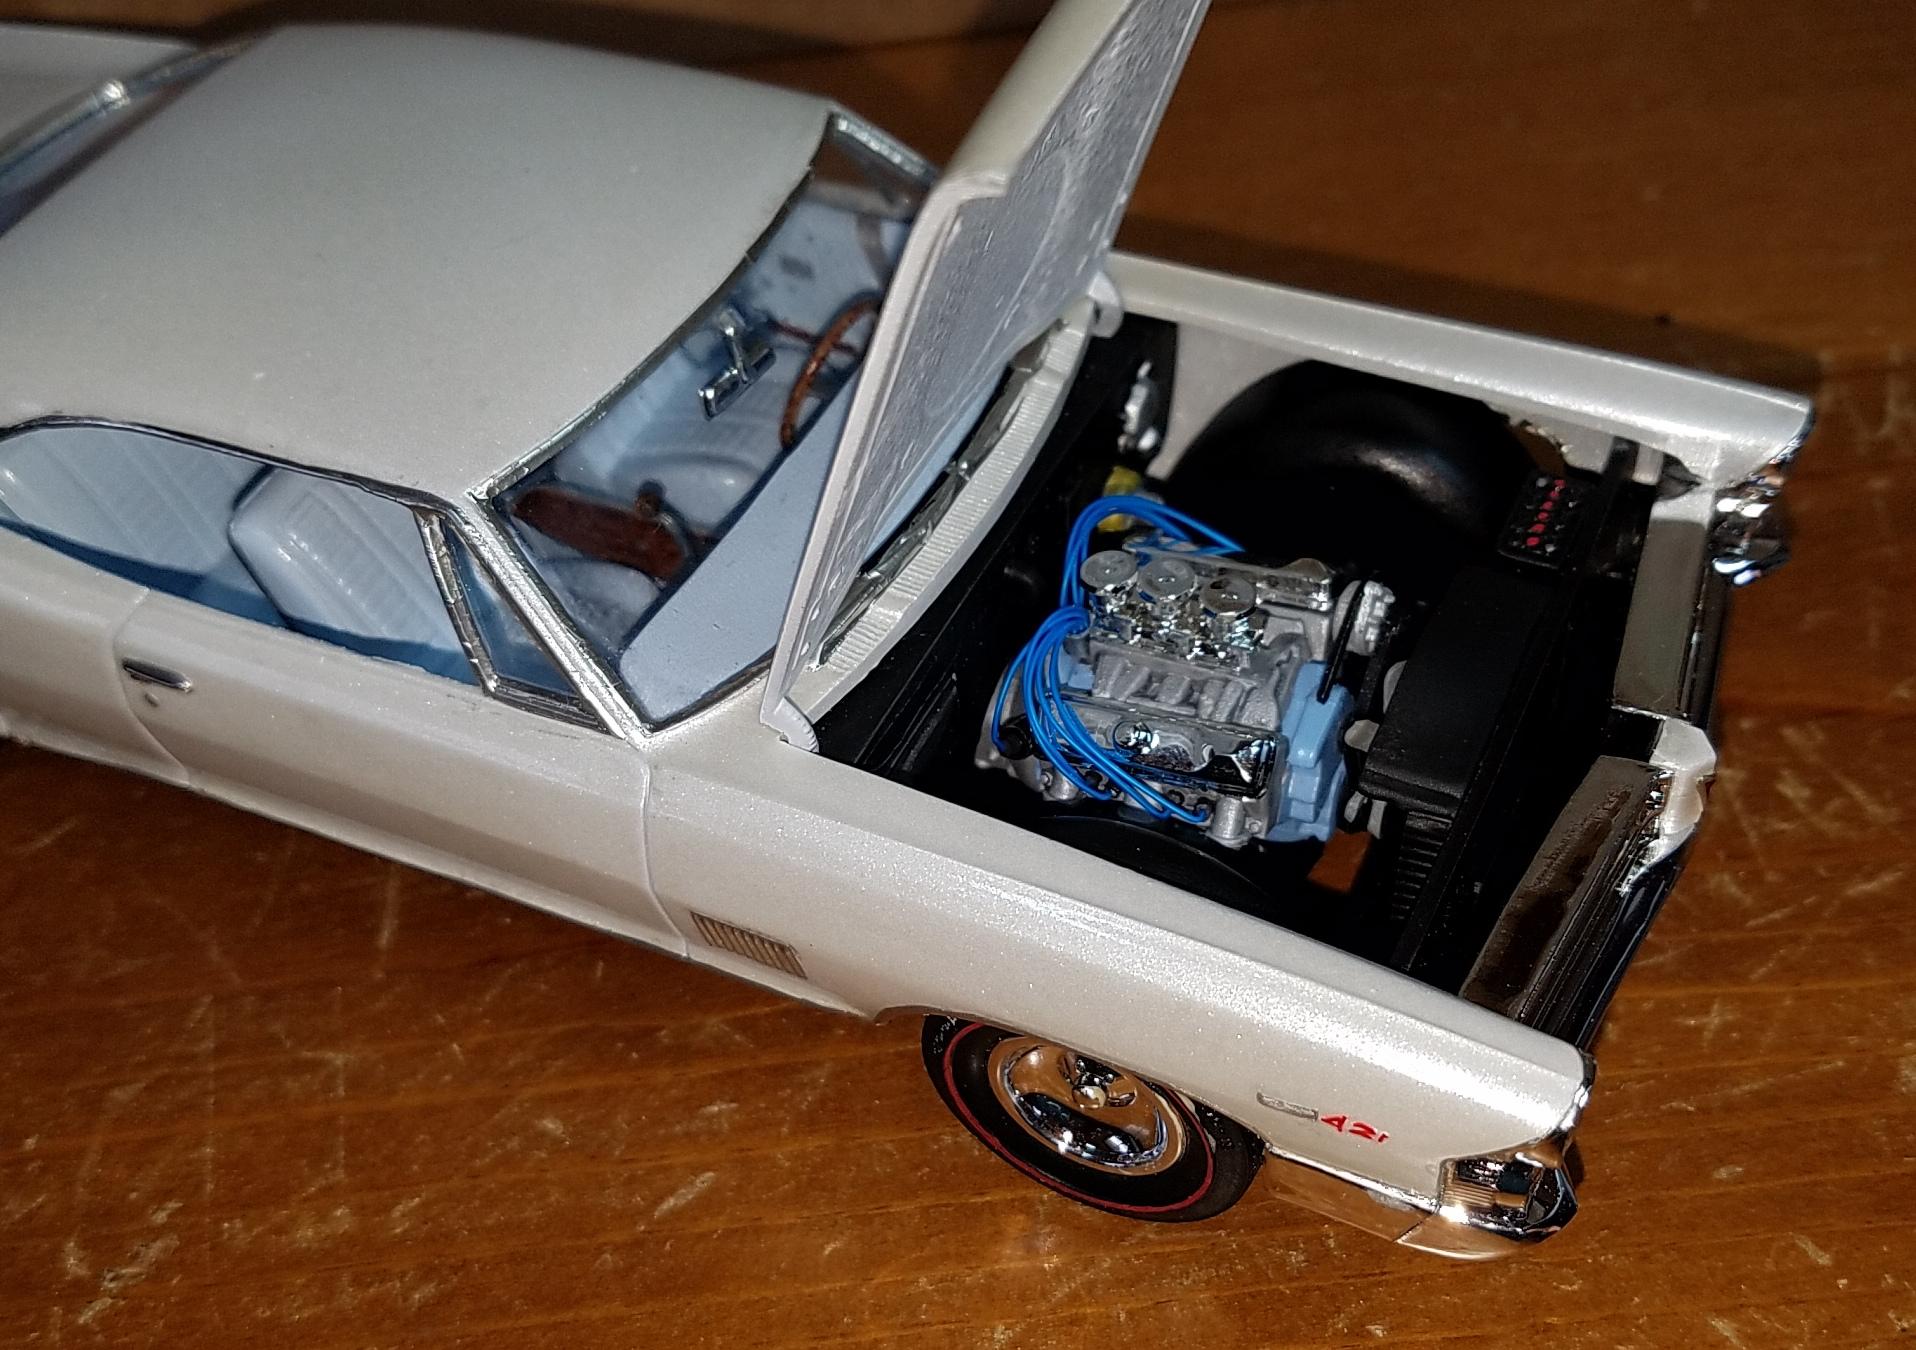
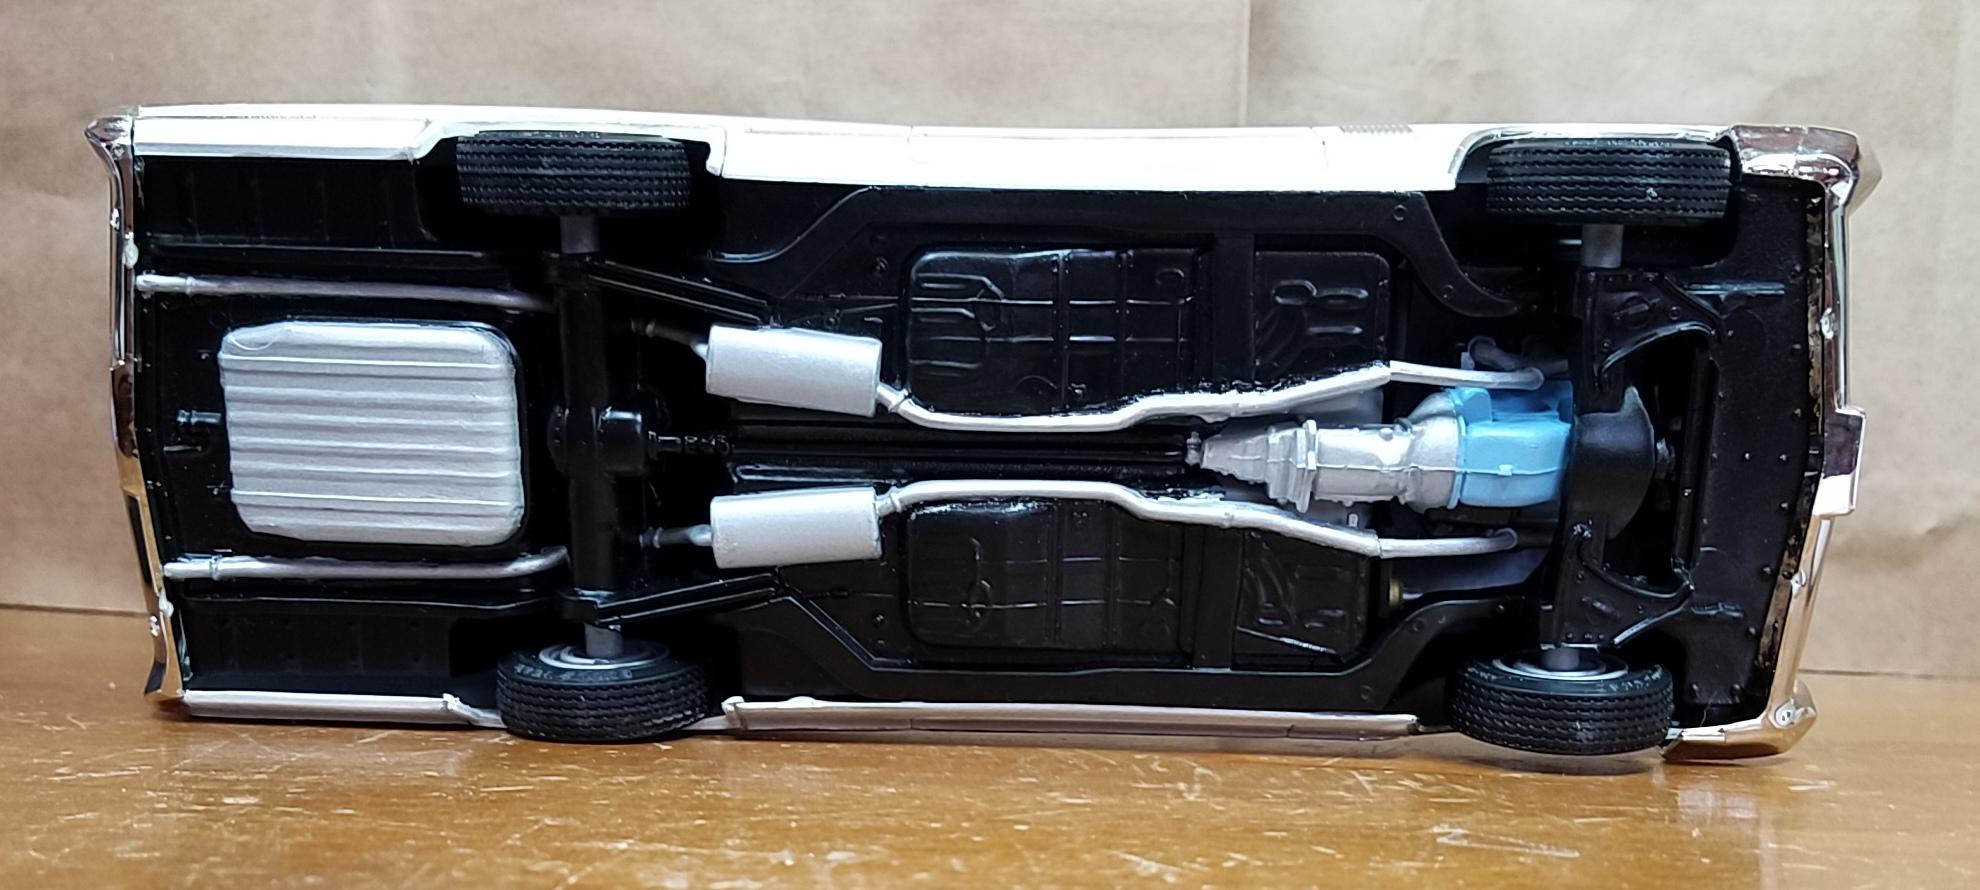
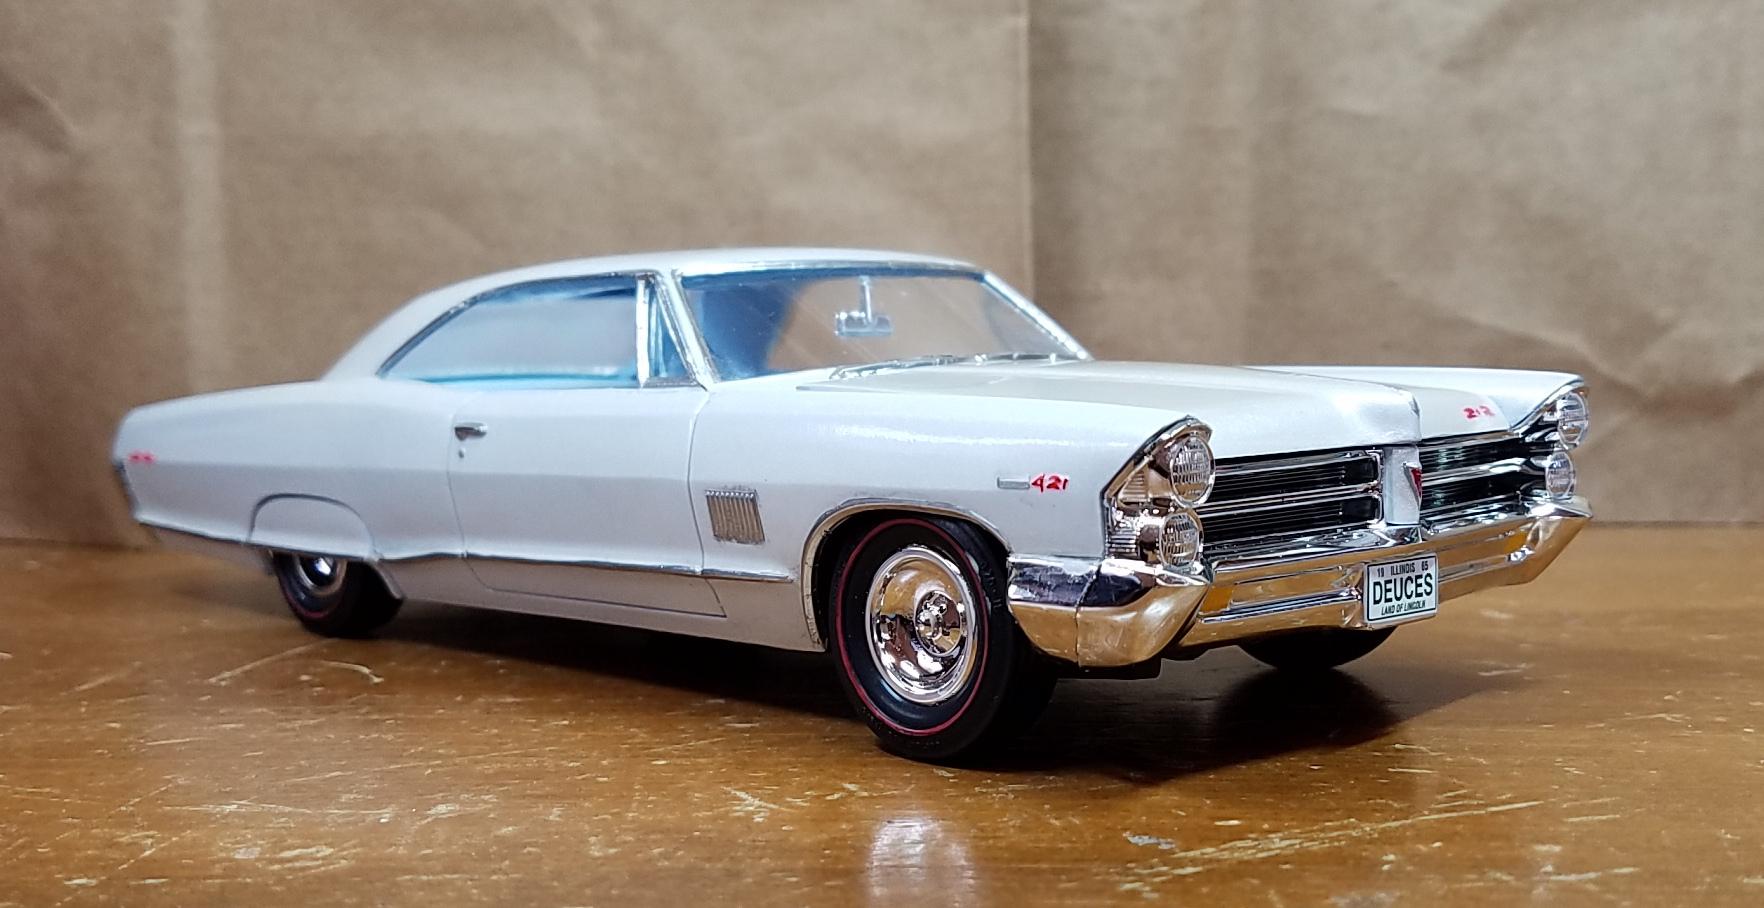
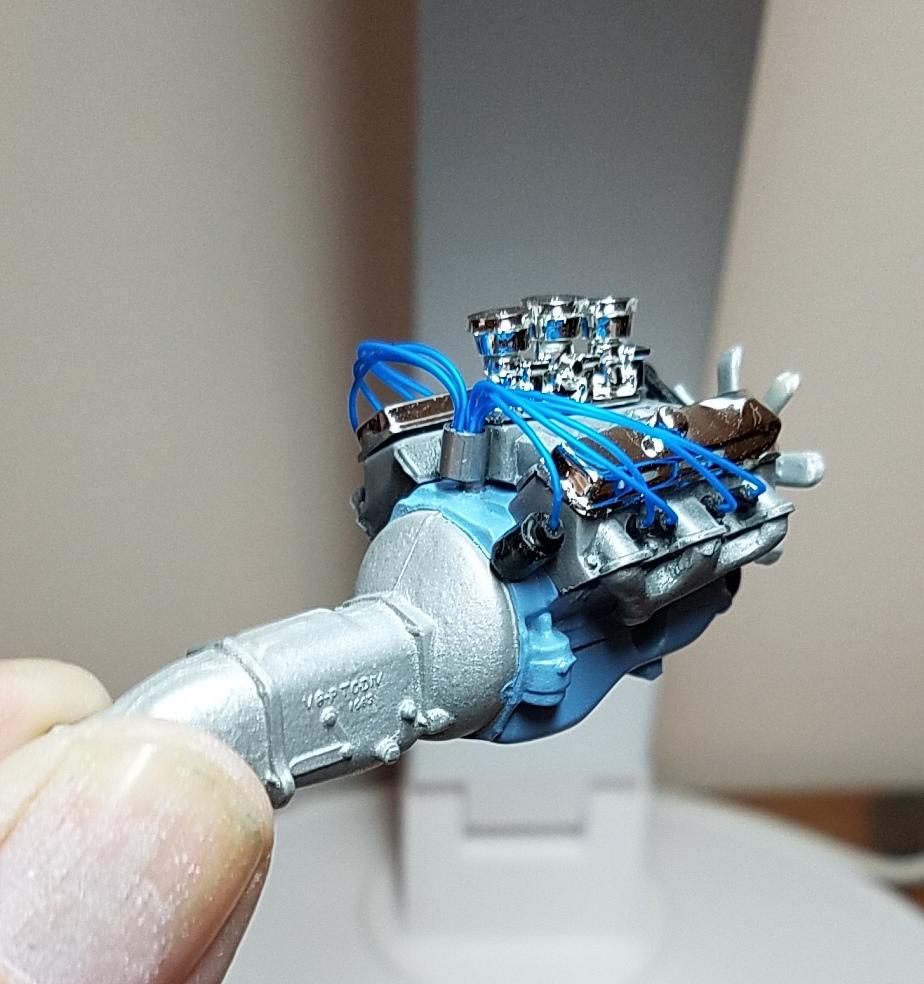
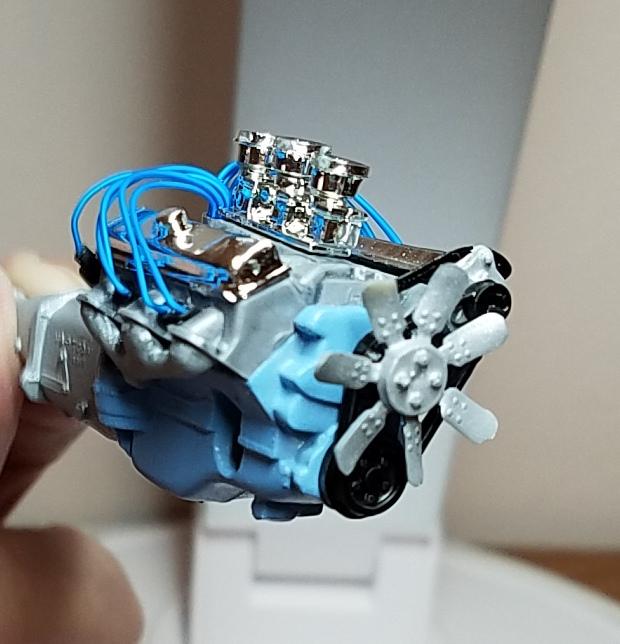
I'm really pleased with this one. The kit is very good to work with...pretty much everything fit where it should. It has a molded in exhaust, which I don't care for, but I did my best to make it look decent. This is the first time I've used a pearl body color, Createx Wicked Colors, with mixed results. There are places with a slight discoloration, and places with some slight crinkling. It also didn't polish up as well as non-pearl paints. Overall it looks pretty good and the pearl shows nicely, though not so much in the pics. I finally feel like I've got the hang of applying BMF...this one came out pretty good. Thanks for looking. ?
-
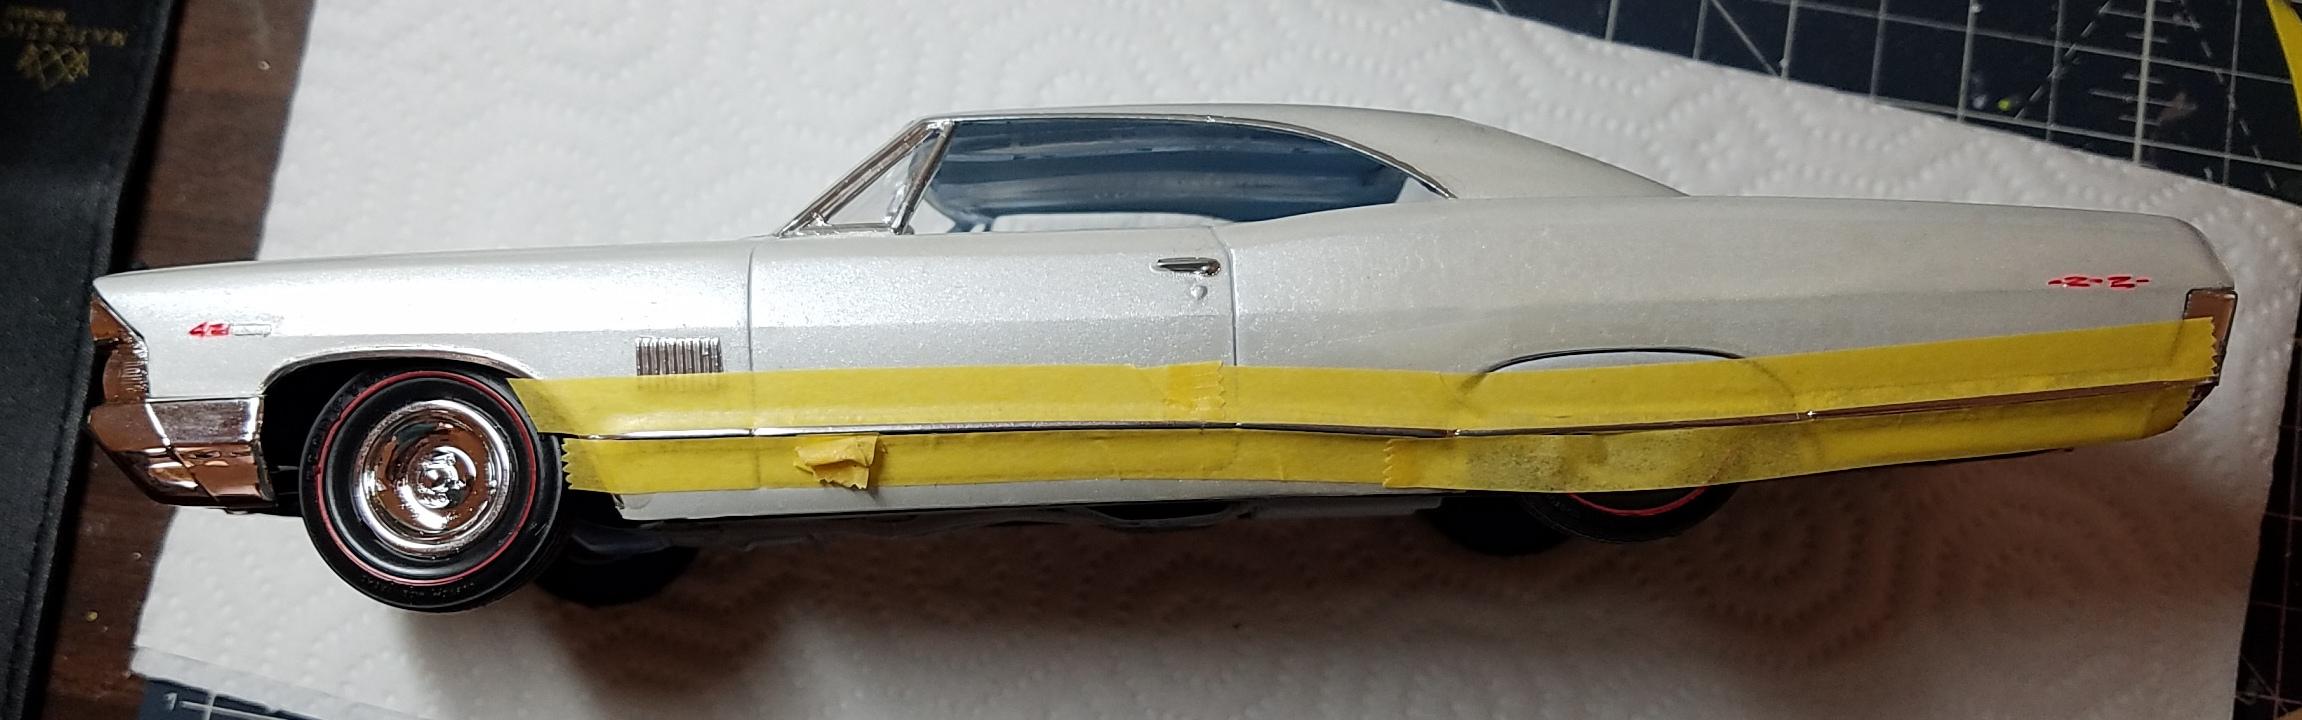
Thought I'd post this for those who haven't already thought of it. Lots of time when applying BMF there's a ridge of some sort to help guide the blade when trimming. In this case I was having to apply the foil on top of a side molding but not on the sides of the molding...a very tricky situation becuase the blade has to be kept on the raised edge. I've often tried taping off an area to be foiled, as if going to paint, and then applying the foil on top of the tape. This time I applied the foil and then taped over it. The tape provided just enough of an edge to make guiding the blade much easier, and I got a much better result than if I'd tried trimming the foil without the tape. I'm likin' it. ?
-
Beautiful. Excellent work! Love the color.
-
Workbench Tool Storage and Organization
Sidney Schwartz replied to ctruss53's topic in Model Building Questions and Answers
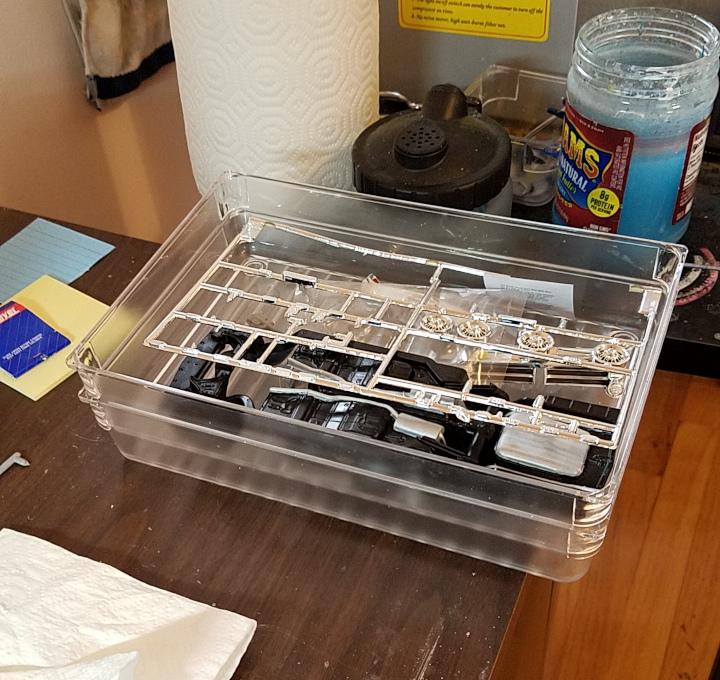
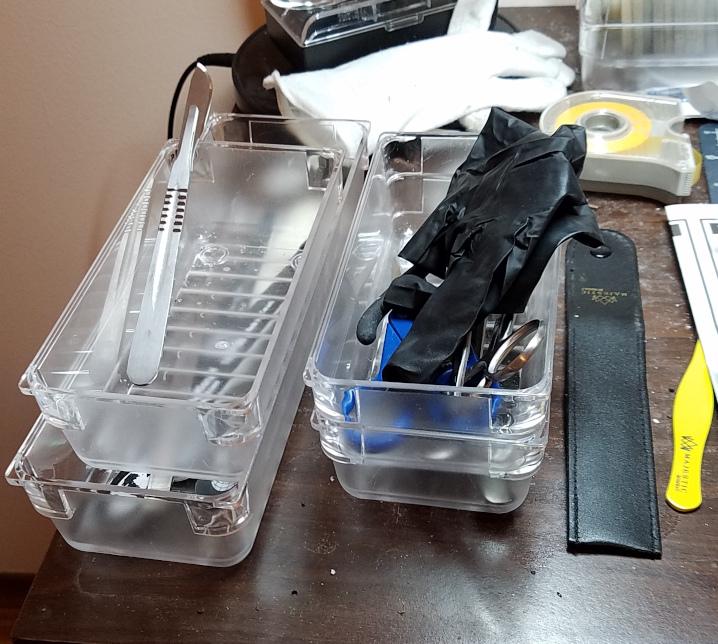
I have a very limited amount of space. I bought a set of these stacking plastic trays on Amazon and love them. Very helpful for keeping things handy and not taking up a lot of real estate. The trays come in a variety of sizes...I think the set I bought had about 30 trays.
-
Building more than one kit at a time.
Sidney Schwartz replied to ctruss53's topic in Model Building Questions and Answers
I like to have two going at a time so there'll almost always be something to do...there's always a time when paint or glue is drying on one or the other. I bought these stacking plastic trays on Amazon and I love them. I use two of the larger ones for each kit. Parts that are painted and ready for assembling go in the top tray, parts not ready to be used yet in the bottom. Also, very small parts that are most likely to get lost are kept in a small glass paint jar...that's saved me a lot of headaches.
-
Revell 1957 Cadillac Eldorado Brougham 2
Sidney Schwartz replied to Sidney Schwartz's topic in Model Cars
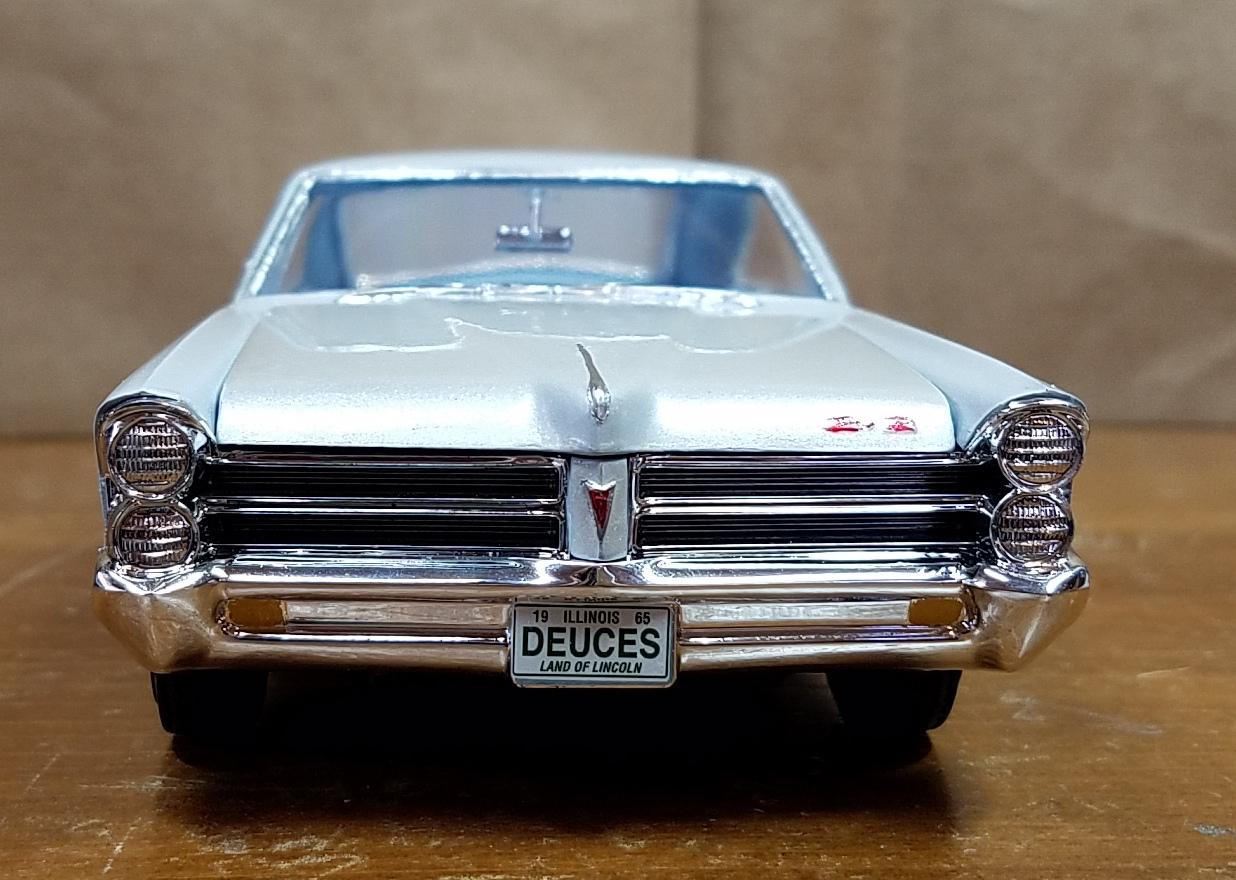
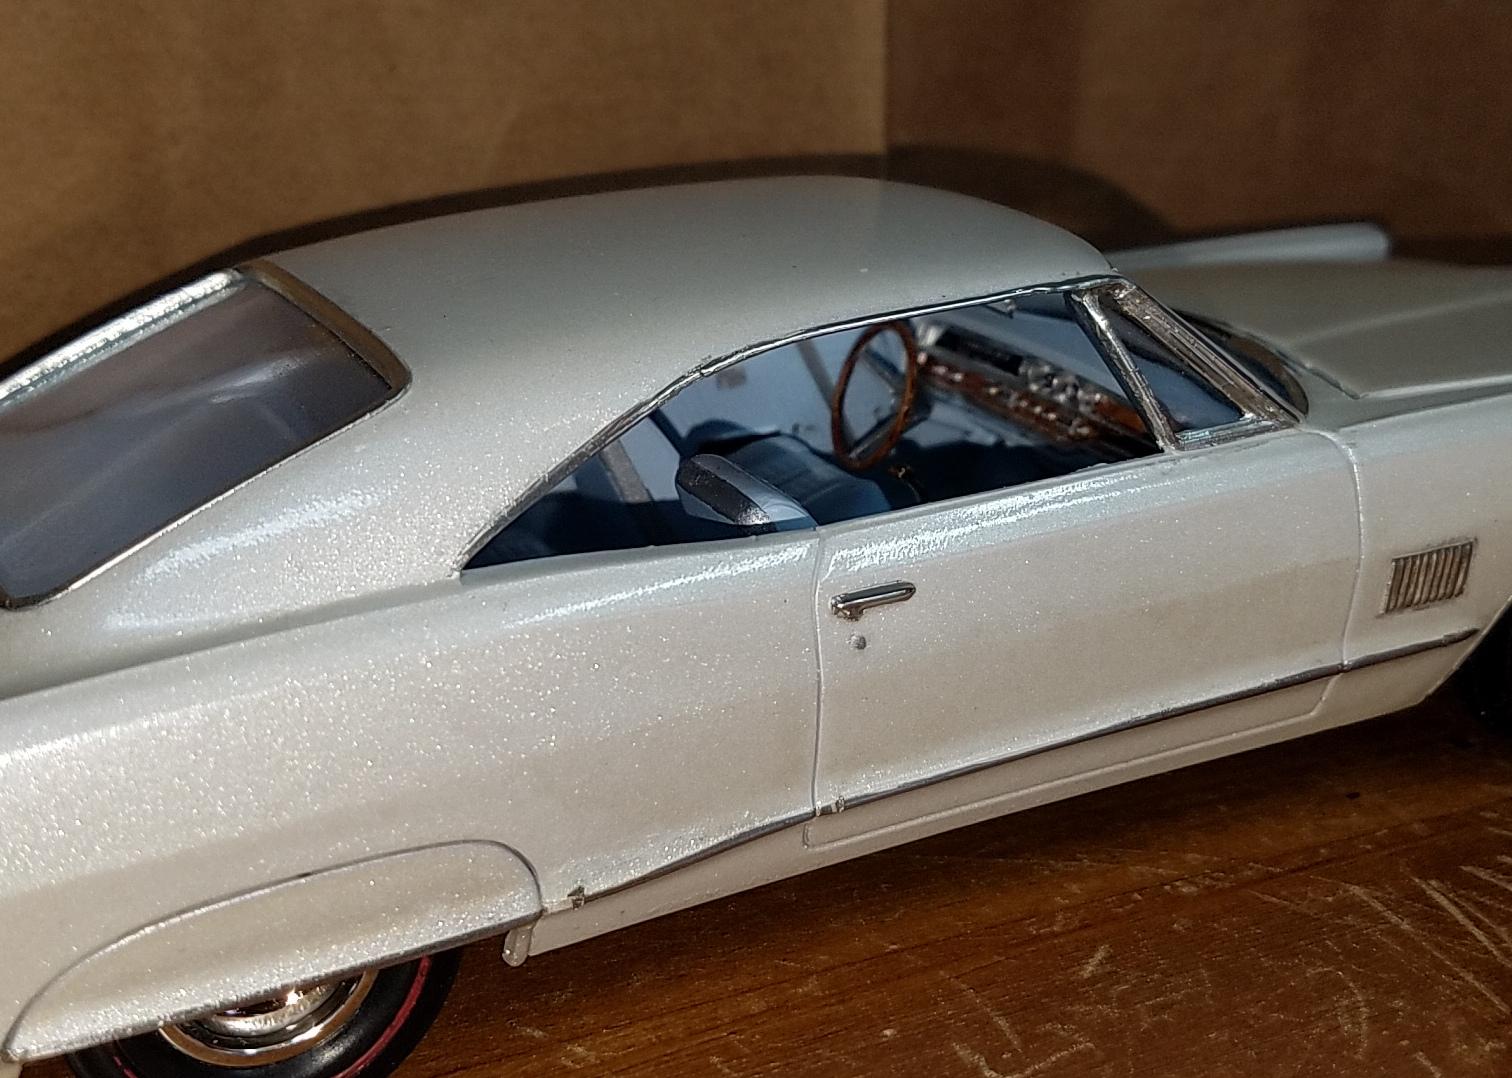
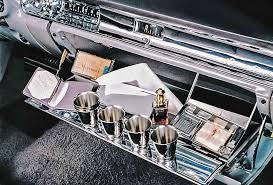
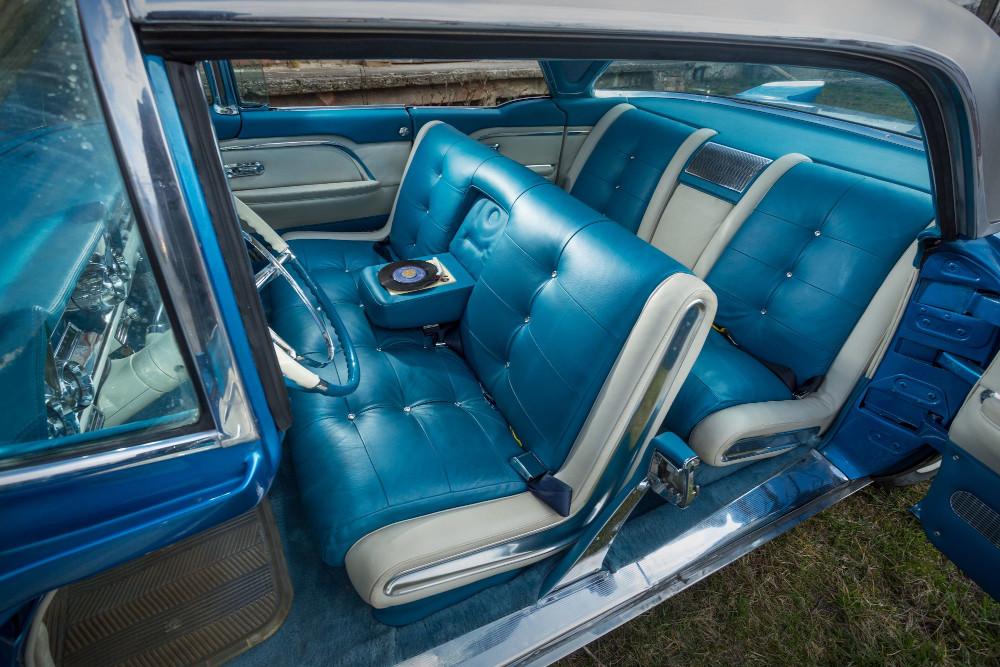
Thanks everyone for the nice comments. Building this is definitely a skills builder. ? Some fun facts: The real car had as an option a bar (liquor) in the dash, and a phonograph in the drop-down front seat arm rest... And I just noticed...seat belts! You certainly want to be safe as you're careening drunkenly down the road while trying to put a record on. And don't forget the pedestrian skewering bumpers. I dub it the "Deathmobile." ?
-
Sweet! I've liked these cars since they first came out, and you did a beautiful job. Who makes the kit?