

Rotorbolt73
-
Posts
404 -
Joined
-
Last visited
Content Type
Profiles
Forums
Events
Gallery
Everything posted by Rotorbolt73
-
After about 5 months of working on this project, I finally have it finished. This is a model of the bad guy's Corvette from the movie " The Wraith". I have seen others start similar projects but no one I know of has ever completed a build of this movie car. So here is probably the first one ever done. I have the entire build details documented over in the workbench section. I built it from 4 different corvette kits. Enjoy.
-
Finished! I'm going to post the completed build pics over in the under glass section.
-
Finishing up the final details on this build. I split the rear exhaust pipes and trimmed down the outlets so they are not as noticeable when viewing the rear. I found some clear square headlight lenses in my parts box I will be using. I'll use some chrome foil on the back sides and superglue them into the buckets in the headlight coves. A lot better than the chrome squares that came with the eckler kit. The 82 vette radiator is kind of plain looking. I like the radiator from the 84 parts vette better as it has an electric fan set up on it. So I will use it instead of the 82 unit. The upper radiator hose is from the eckler kit. I'll also be using the AC lines and canister from the 84 vette as well. That added detail will better balance out the engine bay I think. Its almost finished guys! And it does look great!
-
Cannonball Run 2015 " The Sleeperball"
Rotorbolt73 replied to wagonmaster's topic in Community Builds
Haven't done much to my 76 Caprice other than collect some various pieces for it and brainstorming on color schemes. I've Been involved in another build which i'll be finishing up soon. So I can get to working on this one. I also just obtained a nice partial prebuilt Dodge A100 truck body that I'm considering rebuilding for this thread as well. -
Thanks guys. Still working on it here and there. Bunch of little stuff to do now. I have the glass and interior glued into the body. The monogram 82 kit comes with a smoke tinted glass which isn't correct. But the clear glass from the MPC dragon vette kit has the same dimensions and fit the monogram body fine. So I used that instead but I did have to trim the edges of the rear glass to fit better. Then I moved on the the smaller items . I'm making the front nose cove inset with the tow hooks out of the chrome inset piece from the 84 parts body. I'll also be using the master cylinder and brake booster along with the AC line piece from the 84 firewall. I still have to figure up an exhaust system since the movie car does not use the typical vette side exhaust. I found the rear pipes and mufflers from an AMT 89 vette that I think will work. probably will have to scratch build the head pipes though. When I printed the body stripes, I also made a bunch of license plates for not only Packard's Corvette but for the other cars in the movie as well..Good thing I was able to pause the many you tube movie clips I've been using for referance to get a clear view of the plate numbers on the various cars.
-
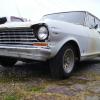
1963 Nova Pro-Street FINISHED 5-8-15
Rotorbolt73 replied to am73grand's topic in WIP: Drag Racing Models
Very nice Ron. -
Well I probably do know you then..I'm good with faces but have a hard time remembering names sometimes..I've known John and James for a long time. Probably going on a decade now.
-
And while the clear coat on the body was drying, I went to work on the wheels. Another member here, Ron Lambert, was kind enough to donate a set of now discontinued BFG tire letters for this project. Thank You Ron! The letters came out beautifully as you can see. I painted the monogram BBS rim centers in red as per the movie car. Also shown is the rear deck spoiler. I made this from the rear spoiler in the eckler vette kit by trimming off the ends.
-
OK. Major milestone accomplished here!! After MUCH work... I finally have the body painted! It came out better than I had hoped.
-
Welcome to the site Harry. I live nearby in your area not far from the city. Hey, if you're looking for some modeling friends to hang out with and share in the hobby, there are several of us auto/ truck model builders in the Memphis area and we are part of the Riff Raff Modelers club of Memphis. We hold a meeting once a month over at the Mid-South Hobbies store over on Old Summer Road. You're probably familiar with it. Our next meeting is this coming saturday ,9th, in the evening and you're welcome to join in.
-
I'm working on it Stephen.. I wet sanded the body and primed it again. I'm in the process now of applying the silver base coat and two toning it with red. The body has a orange/black/yellow stripe where the colors separate that I have to duplicate. Hopefully the stripe decals I made with my Testors decal maker kit will work..Just have to let things dry between applications and coats..Tempted to post a teaser pic, but I want to post the completed paint job. So hold tight..More to come.
-
AHH..I figured you used the aluminum sheet method. Never done it myself but those that I have seen done do coat the backsides of the panels with epoxy or something similar to give it some strength..
-
Sorry to hear that it messed up on you. Been there myself and it will make you mad. I remember when my first clearcoat job ruined the beautiful decal work and paint on a AMT 71 mustang I was building..Got so mad, I immediately threw it in the trash. Didn't know how to strip paint at the time so I thought the whole body was instant junk. It was a mess.. I later learned it was because I put a clear lacquer over my candy enamel and the paint chemistry wasn't compatible. Hard lesson learned and I moved on..Even today all these decades later, Applying clear coat to the body is still the most nerve wracking step for me. Especially, if I've got a bunch of decals on the body..
-
Very nice work. What technique did you use in making the wrecked body panels? Did you make the fender and hood out of aluminum and then "wreck it" or did you modify the kit plastic?. The busted windshield is great too.
-
Still working on the vette here and there. Painted the chassis, wet sanded the hood and primed it again to get the scratches out..Still have to do the body..Not looking forward to that part so I'll have to be in the right mood to tackle it. So I diverted my attention to the engine instead. As mentioned earlier, I'm using the engine from the 84 parts vette because it had an automatic trans. The engine was missing pieces already. namely the induction system. I had a TPI setup in my parts box and decided to use it as I've always liked the looks of that style induction. I also used the optional headers from the dragon vette kit which I modified with collectors made from evergreen tube. So I disassembled the engine to clean it up for reassembly and paint. Wired the ignition up and cut off the molded on intake tube from the upper plenum and replaced it with one of my resin cone air filters. I think the engine came out pretty good..
-
Thats really slick. Love building a junker every now and then..excellent work..
-
Hey David, No, these are a different set I got from someone else. The ones I got from you are still with the Firebird.
-
I've never built this version of the AMT 55 chevy sedan..Am I to assume it comes with the gasser drag parts/ front straight axle setup from the old 55 Nomad kit? The only complaint I ever had with this kit was the molded in single exhaust.
-
Great build! I have a question about the tires..The lettering on them..Is that a decal on them? or are the letters molded into the tire and hand painted? If those are decals, I'd really like to know where you can get them. I need a set of BF Goodrich tire lettering for my wraith corvette build.
-
Thanks guys...Yeah, the movie is a bit "dated" but I think its great still. Probably cause its from an era where things were more original and not one of the many copies, remakes or sequels being churned out today. I'm the same way. I'm not a vette guy and not much into the exotic sports cars so I don't typically build vettes. But I've always like the customs and drag cars built from vettes. That being said, I plan on either selling off or offering up for trade all my leftover vette bodies and parts from this build when i'm done..so if anyone is interested in the whole lot, let me know.. I finally got the interior painted and assembled. Here is the first mock up of the body with interior and chassis/ suspension. It is turning out great and I am pleased with the stance. The rims are the BBS optional rims from the old 1/24 Mongram 78 Camaro kit. The tires are from my parts box. The movie car had white lettering on them. If anyone knows where I can find a set of "BF Goodrich Radial TA" tire letter decals, I would very much appreciate it..
-
This is an AMT kit?? It looks like a new tool kit that I've never seen before...The interior looks great! especially the correct center automatic console with horseshoe shifter. The super charger setup looks cool too. I might have to check into getting one of these.
-
Not sure yet if I'll go that far with detailing. I usually will wire up the engines in my builds. Not going to worry much over things like seatbelts. I still have a lot more to do with this thing.. Ok, One area I have not yet done is the suspension systems. I typically build these up so I can do a mock up of the assembled chassis to check the wheelbase and stance before I paint anything.. Since my 84 parts vette rear chassis clip was missing the rear suspension/ axel, I took the one from the eckler kit to use. The track width is pretty much the same. Heres the pieces laid out. for some reason the eckler kit didn't have the rear differential cover or mount bar. Fortunately I had a partial rear suspension from the AMT 34 Ford street rod kit that I was able to get that piece from. The 84 rear clip section had a lot of open areas and such, so I filled in those with some evergreen sheet. After a little trimming and some fit work, I got the rear suspension glued together and mocked up. Note the slot I had to cut in between the cross member and fuel tank to clear the rear swaybar. I'm using the 82 vette kits basic front suspension as is. However, it does not have any front coil springs or upper A Arms. I dug through my parts box and found what I need that will work. I do not know what kit these pieces are from. I decided not to use the eckler front pieces because I wanted to keep that assembly whole in case I need to use it in another build one day. I trimmed down the coil springs some and drilled a hole through the center of them so that they will slip over the mounting post molded into the 82 front suspension piece. The upper A arms were then trimmed to fit and everything was glued into place.
-
looks nice..I wonder how close this color is to the Lemonwood yellow the 66 Chevelles were originally available in..
-
Ohh... I always thought he was saying "hows the injection line coming?" every time he inquired about it. Well, the vette was in fact damaged when the wraith's car hit him in the rear pushing him into the graveyard..That repaired tail damage can be seen in the final race at the end. Why the front was never busted up from going through all those headstones, not to mention the windshield, is something I've always questioned too.. Messed around with the interior. Decided to use the eckler seats as they were the most correct appearing. I glued a section of evergreen tube to the bottoms that allows them to be positioned so they don't look like they are sitting so low in the interior bucket. I also cut out the rear e brake section of the eckler console and transfered it to the 82 interior. Here is a mock up of the interior. I also used the automatic shifter from the 84 parts vette. I can now start the priming and painting process for it..
-
I did manage to get the body in primer today...Finally! Now to let this coat dry so I can wet sand it for a 2nd coat to get the body surface smoother.
