IJ001
-
Posts
232 -
Joined
-
Last visited
Content Type
Profiles
Forums
Events
Gallery
Everything posted by IJ001
-
Superb build & finish. Hope my ongoing project turns-out as nice as this. Ian.
-
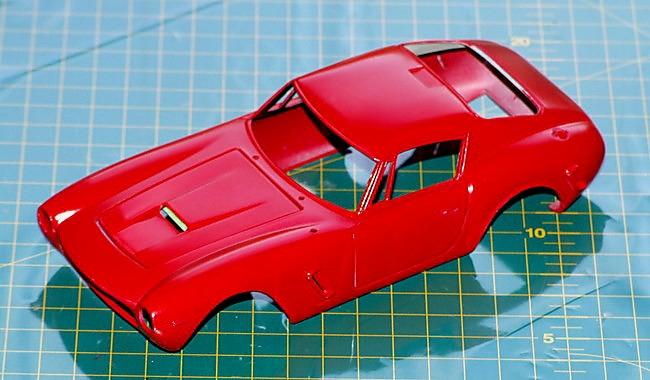
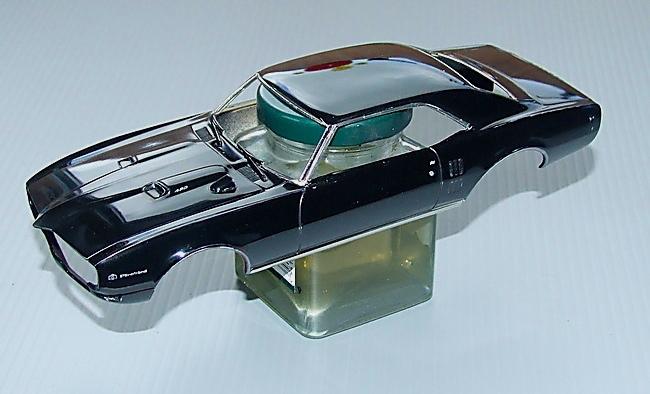
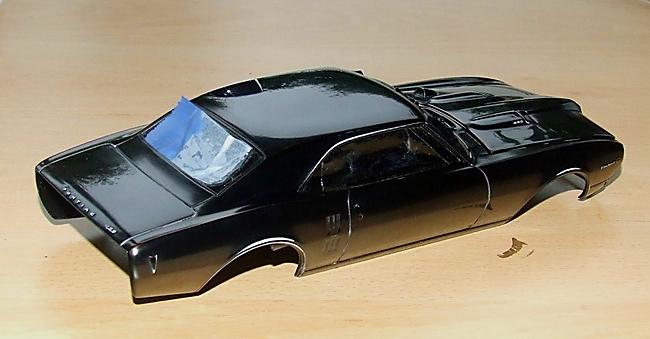
Day Five & Six: Four coats of Tamiyas 'Italian Red' with two coats of Tamiya clear varnish sitting on top to keep it safe and give it depth. N Next I'll leave it to cure, not just dry, at least a week, then start with the 6/8/12k Micro Mesh cloths followed by some auto polish. Thanks for taking the time to look and/or comment. More late next week. Ian.

-
Day Three & Four Wrestled the suspension and steering rack in to submission this morning, followed closely by the poorly fitting pipes... Ughhh, can't wait to start a Fujimi or Revell kit sometime very soon !! Stay tuned folks more soon. Ian.
-
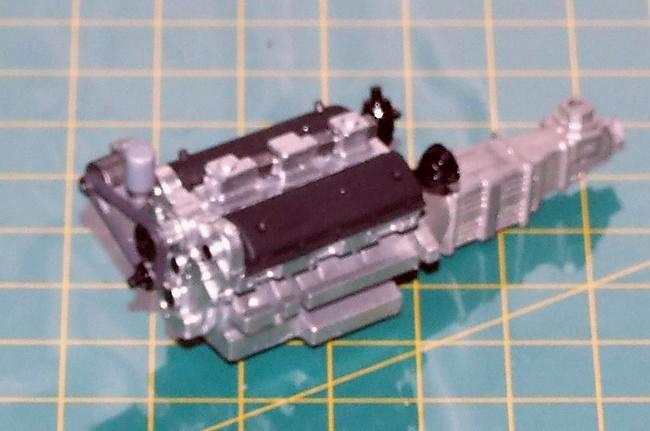
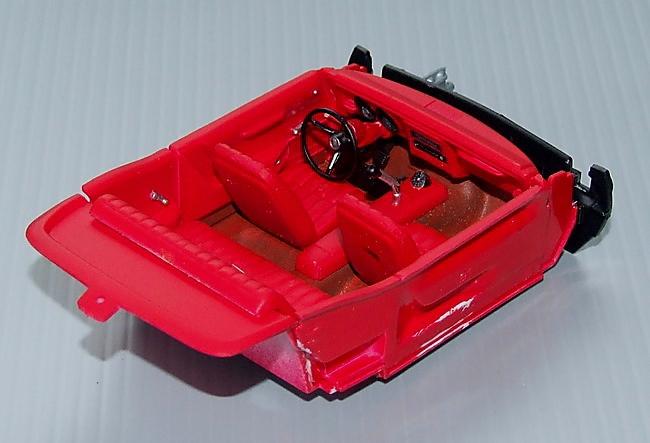
Day Two. Luvvin' the feedback chaps, keep it coming !! - So y'all are enjoying this and that's great. Right here's some self-explanatory progress pics: At this stage the block is a WiP. Because I want to build this one exactly as it comes from the box for a competition further down the line, there's be no wiring and plumbing this time. Tamiya Flat Aluminium for the trans and AK's 'Xtreme Metal' aluminium for the bock - I'm a recent convert to this product and trust me it's bl**dy superb !! I couldn't face wrestling with the interior this afternoon so masked-up the interior (Tamiya 'Deck Tan') and broke-out the Tamiya 'Italian Red' rattle can. Warmed it in a bowl of boiled water then shot two coats and left it in the spring sunshine for 30 mins. So next I'll force myself to finish the interior and then start on the suspension such as it is. Have a great weekend everyone, see you on Monday. Ian.
-
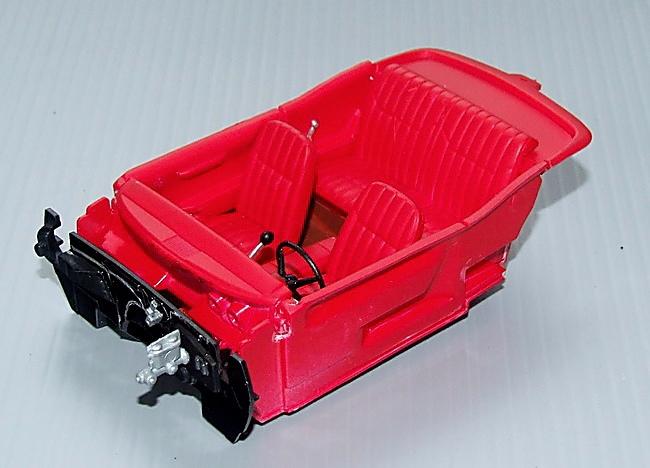
Thanks Shaun (et al) it isn't the easiest of kits but it will be worth the effort. Interesting isn't it that the Esci kit does come-up from time-to-time on eBay but the superior Italeri one almost never... Similarly with their 'Racing' 365 Daytona - I'd sell one of my legs for one of those !!. Today was a relatively dull day at the bench, hence no pics. Got the chassis/pan & engine bay sub-assembly sprayed my own mix of 'iron black'. Fuel cell sprayed dark aluminium, sump guard is now flat aluminium as is the transmission. The headlining and inside of the c pillars was sprayed Tamiya 'Deck Tan'. Also matt blacked the instrument shroud, rocker covers and some other wee bits'n pieces. Tomorrow I'll spray the block, diff etc. Hope to make a start on the interior aswell. Going for classic black like these: Thanks for looking-in. AFN Ian.
-
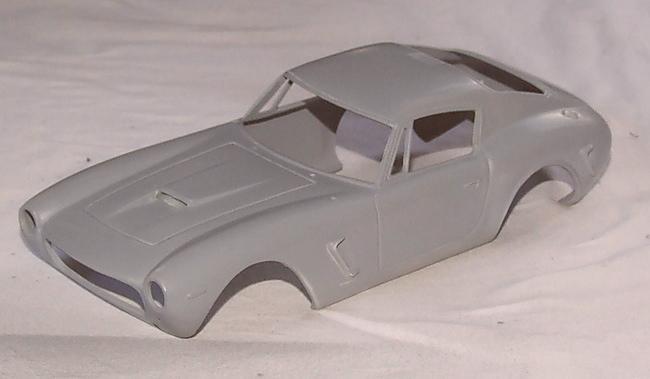
Day One continued... Rubbed down the offending seams and polished the plastic with successive grades of Micro-Mesh cloths. Once I was happy the seams were completely gone, I shot a second primer coat and waited for four hours for it to be dry enough to work on. I then polished the primer coat with 4k - 8k Micro-Mesh cloths. As this is written the car body is as smooth as glass with no flaws at all in the paintwork. A good couple of sessions today and very pleased with the result. If it all goes well, hopefully it will look a little like this one when I'm done. Please feel free to make any comments or ask any questions. More tomorrow Ian.
-
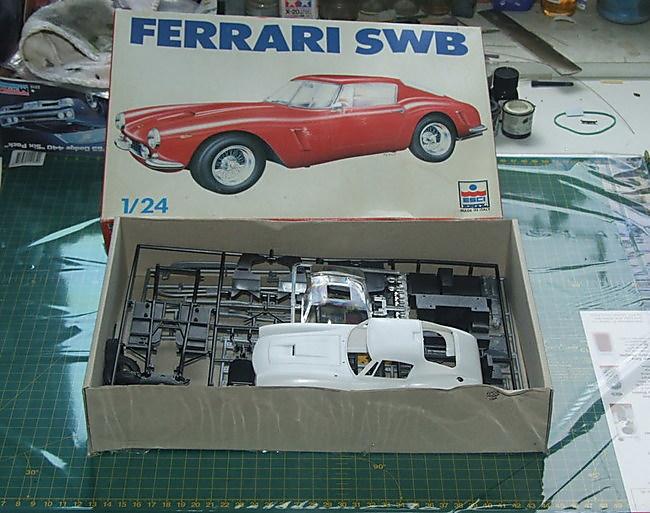
Day one: The usual box & contents shot - The Esci plastic dates back to the mid 1980's and is quite soft, massive mould seams running along the top of the wings, then along the roof gutters down the middle of the C-pillar across the top of the rear wings and through the middle of the tail-light bezels. What a PitA But not as much a pain as the integrally moulded bonnet that you need to cut from the body and that frankly awful thick lip on the bonnet scoop - that will be thinned right down. I built-up the engine & trans which sensibly goes together exactly the same way as a Revell or MPC car kit. Interior is multi-part as is the engine bay. I also assaulted the poor wee thing with a coat of Tamiya grey primer straight from the rattle-can ready for some serious seam-removal. More in a min... Ian.
-

1:24/25 Ferrari (fender) decals ?
IJ001 replied to IJ001's topic in Model Building Questions and Answers
Perfect, thanks, Gerry... No idea how I didn't find the same answer. Think I was too specific in my search parameters. Ian. -
Hey everyone, not been around for a while - been mainly building things with wings recently - Just now got a couple of Ferrari's in the early planning stages but could do with replacing the yellow fender decals in each kit: Does anyone know if there's a sheet of these available from any manufacturer, my 'Googling' has turned-up absolutely nothing !!. Any help or guidance you can give me is very welcome. Thanks in advance. Ian.
-
Yes I know I'm VERY late to this particular party, but I've 'googling' builds of this kit as I've found one for sale here in 'Middle Earth' and I'm trying to decide between this and the 'Revellution Demon'... Really like the whole 'feel' of this build and the paintwork is simply superb. This build has almost made-up my mind for me !! Ian.
-
Magnificent paintwork. Simply superb. Ian.
-
That'll look so right cruisin' into the Bathurst car-park on race day !! Ian.
-
Thanks all very much appreciated, glad I took the advice from folks here about the 'clear'. So pleased with the paint finish on this one. Next will be a re-do of Jeremy Mayfields' '98 Taurus then another 'Bird - The Revell '98 Ram-Air in Sunset Orange, and then the Monogram 70 Boss 302. Stay tuned. Ian.
-
Man, that's a lot of vehicle... Nice model, Al. Ian.
-
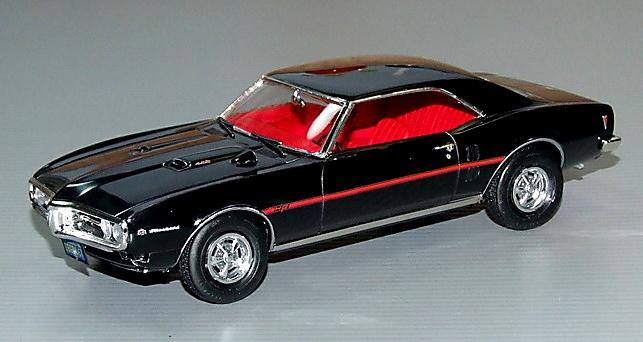
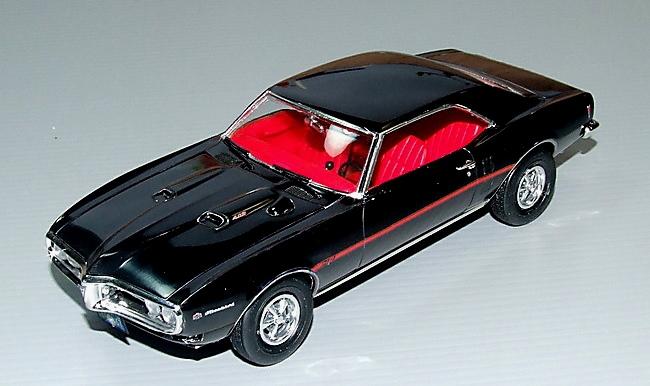
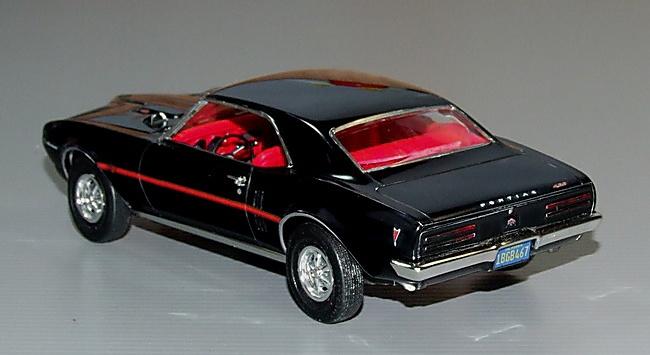
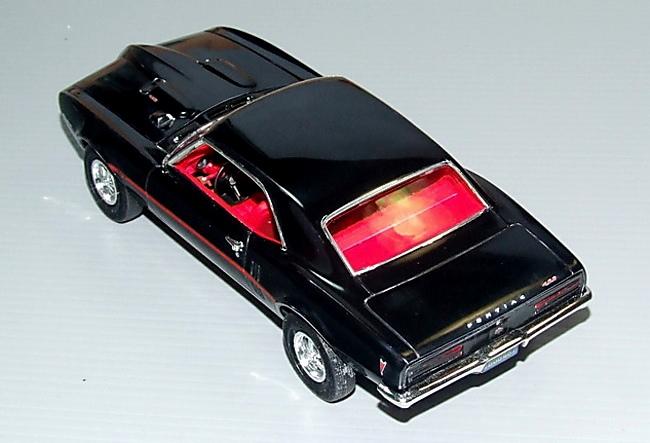
Started just three weeks ago, and here it is 'Under Glass' - Not bragging at all, in the 'workbench' section I did call this a "Clear the bench" build. Part of the reason for the speed of this project is my enthusiasm for the project - I really like Firebirds, the other reason is the quality of the kit, in my opinion Revell produced such a superb quality product it's actually quite difficult for an average modeller like me to scr*w-it-up. Learning points, well I asked here and on another couple of sites about varnishing over an already very smooth & glossy finish, I took the advice from most folks and applied those extra clear coats and it worked-out... so learning point #1, be brave and with the correct tools and a little luck the finish you want, you can achieve !! Learning point #2, I need to re-learn my BMF 'skills' next time around . Thanks for taking the time to look and/or comment, and as ever all comments, criticism and questions welcome. Ian.
-
Progress; But I may go back and re-do some of the foil, it's a lot more difficult to get it right than I recall from years ago !! Ian.
-
Hi Geoff Just spent twenty minutes going through this thread, great wee project and looking like a real 'head-turner' in the making. Looking forward to the next installment. Ian.
-
Thanks for all your replies folks, really appreciate you taking the time to do that. So I took a very deep breath and shot two coats of Tamiya clear. Got relatively light days of work both today and tomorrow so will be spending some time again with the Micro-Mesh cloths, pads and polishing compound. Photos when I'm done. Ian.
-
Revell (Germany) Ferrari 250SWB! New for October
IJ001 replied to Matt Bacon's topic in Car Kit News & Reviews
Was hunting around t'interweb at the weekend to see if there's a release date for this... Only one I found was at 'Creative Hobbies' who claim it will be 'in stock' on December 25th !! Santa is going to have to do some pretty nifty flying to get it to me on Christmas morning, especially as we're 12hrs ahead of GMT here. Ian.. -
Just after me !! Ian.
-
1969 Olds 4-4-2 W30. First finished kit for 3 years...
IJ001 replied to Young iron's topic in Model Cars
Hey folks Hope you don't mind me resurrecting this thread. Benjamin, you mentioned that you've used "Keith Mark decals" - Why ??, are they better than the ones supplied in the kit ??. I have the same kit and plan on building it in the coming months and just wondered, especially if I could get them in red (to go over a silver paint-job). Ian. -
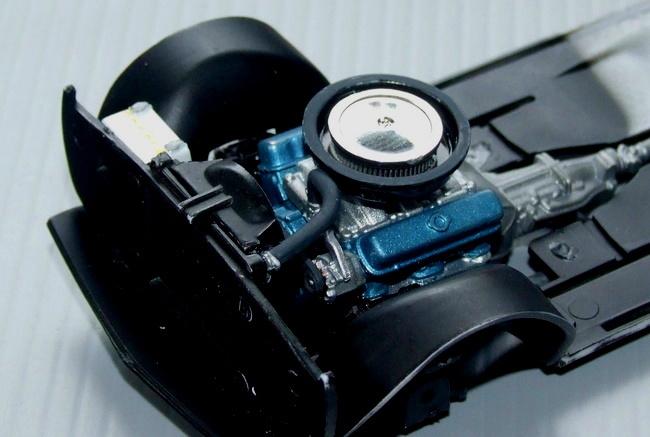
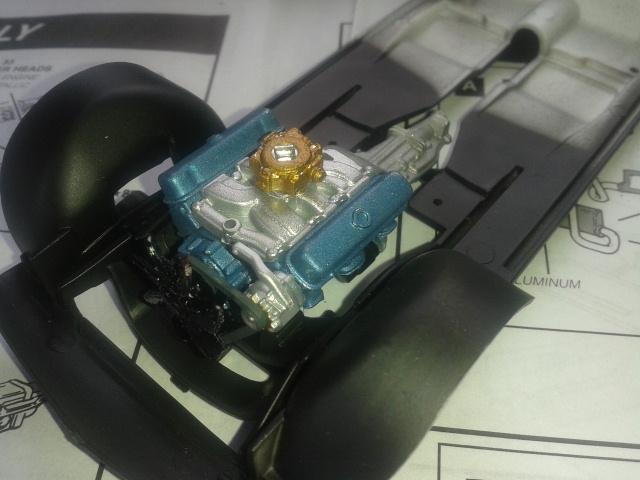
Quick phone-pic of the block in situ. Obviously not wired or plumbed yet. Have to say I'm really impressed with the simplified but very positive locating tabs for the engine assembly on this kit. Much, much better than the old 1970's era Monogram kits !! Ian.
-
Wow !! Ian.
-
Never, I use Tamiya and a local low-tac auto finishers tape. So as this is written, I've rubbed the paintwork back with 6, 8 & 12K Micro-Mesh, then auto-polish, rubbed & buffed. No clear coat as yet, not certain I'll need it, but please tell me what you guys think... Ian.
-
That looks like a good start to me, keep it coming. Ian.