Nytrozilla
-
Posts
744 -
Joined
-
Last visited
Content Type
Profiles
Forums
Events
Gallery
Everything posted by Nytrozilla
-

Stage Coach Wheelsatnder.......On the workbench 8/11/15
Nytrozilla replied to John Teresi's topic in WIP: Drag Racing Models
I know this can only get more amazing as you go my friend. I don't see how, but I know it will happen. I think the use of eyelets for wire guides / hold downs is inspired. Also, I gotta know. What did you use for the battery caps? The whole thing looks real, but they sell it. -
Is Round2 models down?
Nytrozilla replied to Mr mopar's topic in General Automotive Talk (Trucks and Cars)
That's an all new look that wasn't there yesterday. Good score Jesse. Thanx -
Pretty rad Tye. I love the decals. Era correct and not overloaded. There's also a hint of USA 1 going on there, to me. Yes! I would have gone with different wheels and added a parachute. Good thing it's not my model, right? Just funnin' sir. It's a beautiful build.
-
NOMAD WHEELSTANDER - Belated Christmas - 1/13/16
Nytrozilla replied to Nytrozilla's topic in WIP: Drag Racing Models
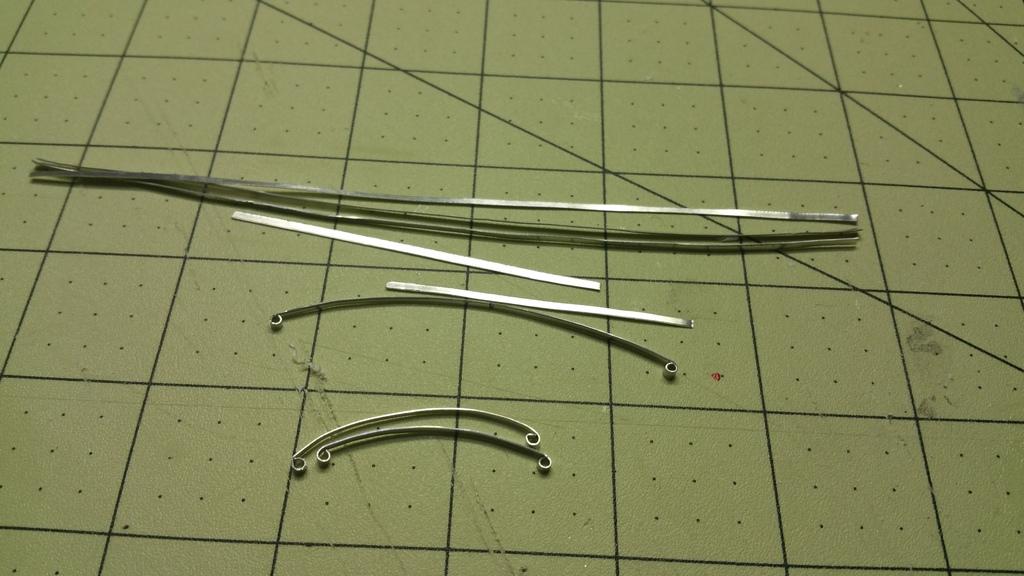
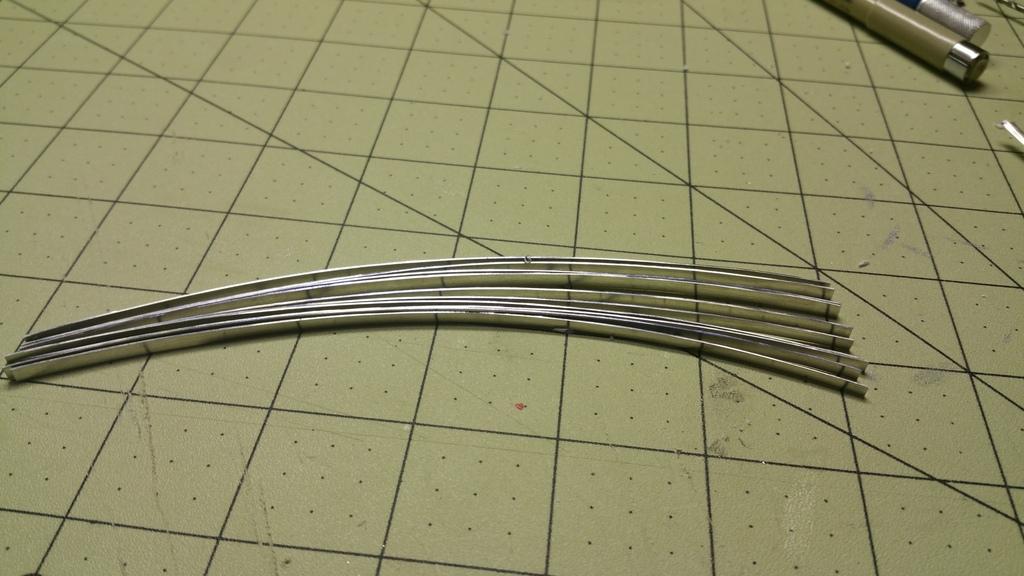
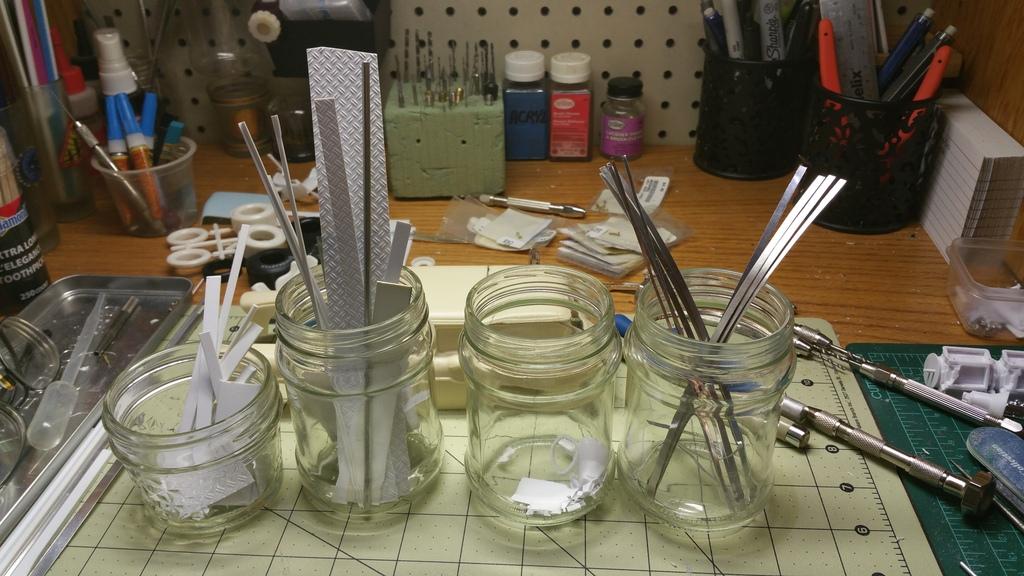
Thanx Stephan. I appreciate you watching. I can't believe it, but here's the second update. I got a great start on the rear leaf springs. About 4 months ago, I picked up a Fiskars Paper Cutter board. Good thing too, because I needed it tonite. The first strips of roof flashing (mentioned previously), were way too thin and the X-Acto cuts were terrible. The paper cutter made plenty of strips with clean edges and they even came out with the right arc !! A jewelers / beaders ring bending plier was used for the main spring ends, then needed to be opened up a little to accept the bolts. The set up will be a 4 leaf system front and rear. Next I'll drill the center holes and put it together with spring retainer clips. After that, I'll make a set of brackets. A quick note on the paper cutter. On the smaller version, there is a wire to show you where the cut will be. Not so on the big'n. Instead, there is a white strip of plastic (?). Run the cutting head along the strip a few times and it will make a black line from the blade edge. That's where the cut will be. A strip of aluminum sacrificed it's oversized life to bring you this information. Use it well. Finally, it takes about 8 to 10 passes to make the cut, but you'll hear it when it happens. ***End Tutorial*** I got to do something fun also. I keep most of my small scrap plastic in mushroom jars. Mmmmmmmm, mushrooms........Huh? Oh, right, plastic. No, wait, jars. Sorry. This evening, I added my first scrap aluminum jar. It's a first step into a larger world. Yay, Me. (Now, if you'll excuse me, I have to go buy 4 more Dremel tools to keep up with Tim.) P. S. I think the small Mason jar was a love child. Don't remember buying it. Hmmmmmmmm
-
NOMAD WHEELSTANDER - Belated Christmas - 1/13/16
Nytrozilla replied to Nytrozilla's topic in WIP: Drag Racing Models
Thanks Bob. It's going to be a challenge on the roof because the body is so thick, but I'm hoping that will also work in my favor. Romell !!!!!!!!!! Nice of you to come up for air. I still have nightmares about showing up at a contest, only to see your Daytona sitting on the table. Might as well go home......... Seriously, I'd love to see it and you in person. It MIGHT be a double update day for me. I got the rear bumper attached to the frame. It's kinda important since that's what's gonna keep the body level in the down position. Later I hope to jump on the leafs.
-
Burns Brothers Racing '41 Willys coupe.
Nytrozilla replied to checkmate's topic in WIP: Drag Racing Models
My guess is that it is a self named car by the builder, Rob Burns. Whatever the case, it's a beautiful build that I would be proud to have on my shelves. Nice work Rob. -
NOMAD WHEELSTANDER - Belated Christmas - 1/13/16
Nytrozilla replied to Nytrozilla's topic in WIP: Drag Racing Models
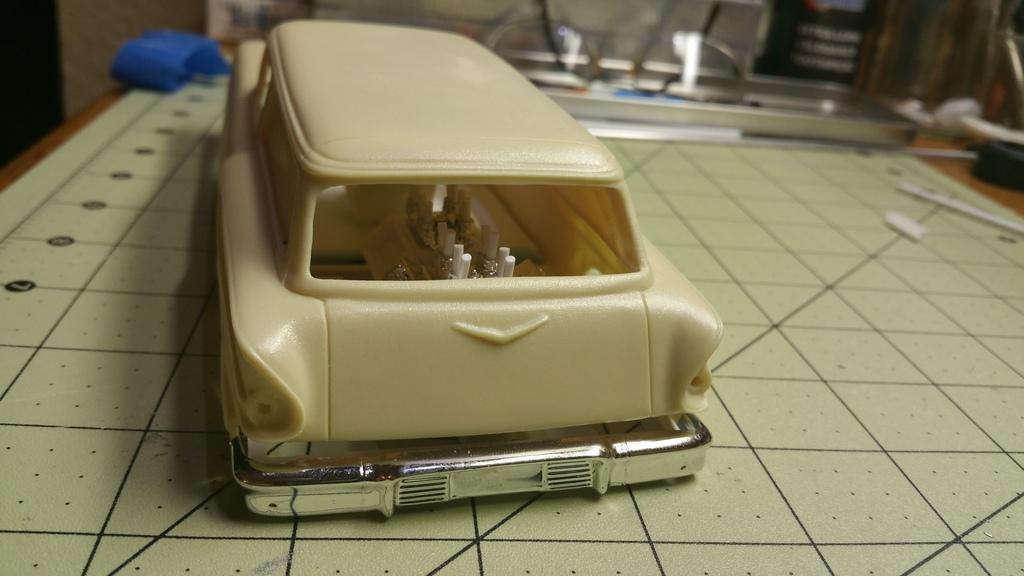
Oh Great Machinist From Afar!!!!! I hear and obaaaaaaaayyyy........ Well, after seeing John's progress on the Stagecoach, I shamed myself into getting back to work. If anyone thinks I'm slow, it's probably because I read my first model box wrong. I took six years to complete it. I figured that was pretty good since the box said 6 to 12 years. Like I was saying, I got some work done today. (I'm sorry. I heard that one at the NNL West and I've been saving it for a special occasion.) I finished prepping the back half. Then I made some main frame mods, removing the exhaust mounts and squaring things up in general before the conjoining.........mating.......attachment..........shoot!!!! I put the frame halves together. To bring the evening's festivities to an end, I marked the roof line where I'll give it the old hack and slash routine. Then I took some pictures of it. See?
-
Henry J Twin Turbo - Didn't see that coming..........
Nytrozilla replied to Codi's topic in WIP: Drag Racing Models
Looks like a half ton of Model Machining & Metal Manipulating Madness to me. You wouldn't even need to add a jewel to it. Besides, there's no room for one. Well maybe a small sapphire to plug the intake when it's not running. WHAT? Oh, yeah......... -
Stage Coach Wheelsatnder.......On the workbench 8/11/15
Nytrozilla replied to John Teresi's topic in WIP: Drag Racing Models
I guess this puts an end to the vacay I took from the Nomad. Time to start playing catch up........ You never cease to amaze, Brother Teresi. -
Stage Coach Wheelsatnder.......On the workbench 8/11/15
Nytrozilla replied to John Teresi's topic in WIP: Drag Racing Models
There's the update we've all been anticipating. I love those floor plates John. Everything else looks great as always, but those really draw the eye. And yes, everybody wishes they could do tires like you Bro. Even the motor mounts look good.......... -
NOMAD WHEELSTANDER - Belated Christmas - 1/13/16
Nytrozilla replied to Nytrozilla's topic in WIP: Drag Racing Models
First of all, Thanks Dan for following along. After you read this I think I'm gonna need a lot of support on this one. Now I'll address my thoughts on Tim & Chris' comments on the frame, headers and intake. On the frame, I've never been shy about dumping a preliminary design if it isn't right for the build. First things first, I'll do everything in my "Basket O' Options" to make it work. I know I'm on the right track. Just not sure if there's another train headed straight for me. My main consideration is, bigger is better supporting two engines and with the wagon body it gives it a beefier look. Also, the paint choice can change how "noticeable" the size is. On the headers, I bought sand today at Home Depot to fill aluminum tubes with for bending purposes. I'll try my bender or a jig, as success dictates. I've also used solder successfully as well. I see the area you're referring to on the HUG Chris and I'll keep that as an option if zoomies don't work. Another possibility to consider is that this is going to be a highboy with leafs front and rear. If the slicks are 3/4 or so under the frame, that might give me more options. Then there's the intakes. As stated previously, the plan is to add individual scoops to the left and right banks. Not sure yet if the scoop intakes will be mounted above the roof or to the firewall. If I have to move the pilot's chair to the left instead of center, firewall intakes don't make sense. I like symmetrical. I also have the option of sending them through the roof a la Boot Hill Express. Another consideration is, If zoomies through the roof works, then I might do the intakes as well. Who, in their right mind, wouldn't want to see 32 pipes sticking up in the air. Awwwwww maaaaaan!!!!! That means I'll have to flare the intakes!!! It also means, on each engine, each pair of center intakes will have to be bent or they will cross each other due to the stagger I set up. I've also said this numerous times. I would love to think that I am in control of how my builds come out. I'm not. It's like the cat or dog thinking, " It's nice to have a pet human." My builds have always taken on a life of their own. I provide the basic concept and materials; after that, it's out of my hands, so to speak. YOU GUYS ARE KILLING ME !!!!!!! (A manly hug ensues) -
NOMAD WHEELSTANDER - Belated Christmas - 1/13/16
Nytrozilla replied to Nytrozilla's topic in WIP: Drag Racing Models
I was thinking the same thing on the headers Brad. Okay, truthfully, I was thinking AAAARRRRGGGGHHHH!!!! -
NOMAD WHEELSTANDER - Belated Christmas - 1/13/16
Nytrozilla replied to Nytrozilla's topic in WIP: Drag Racing Models
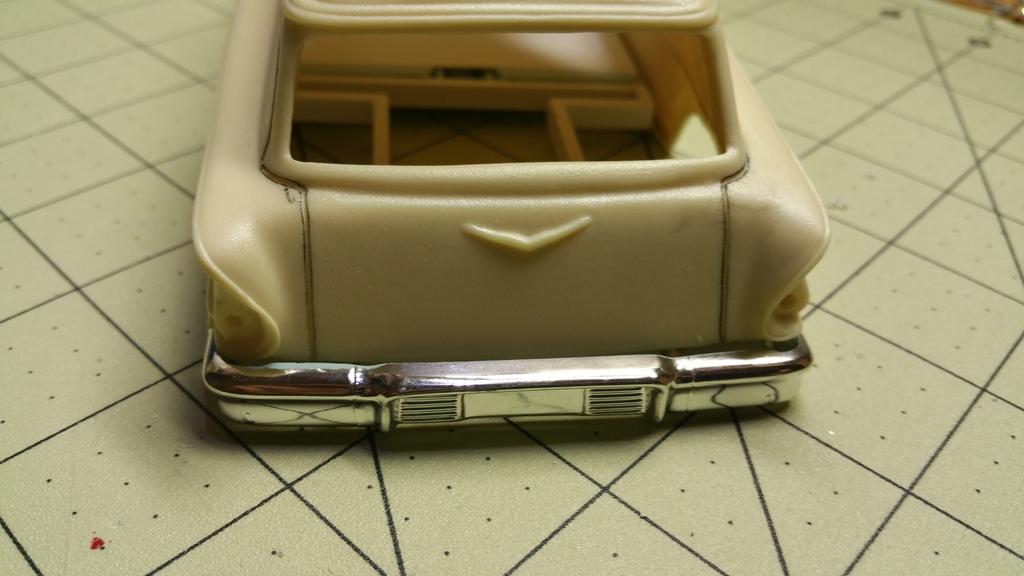
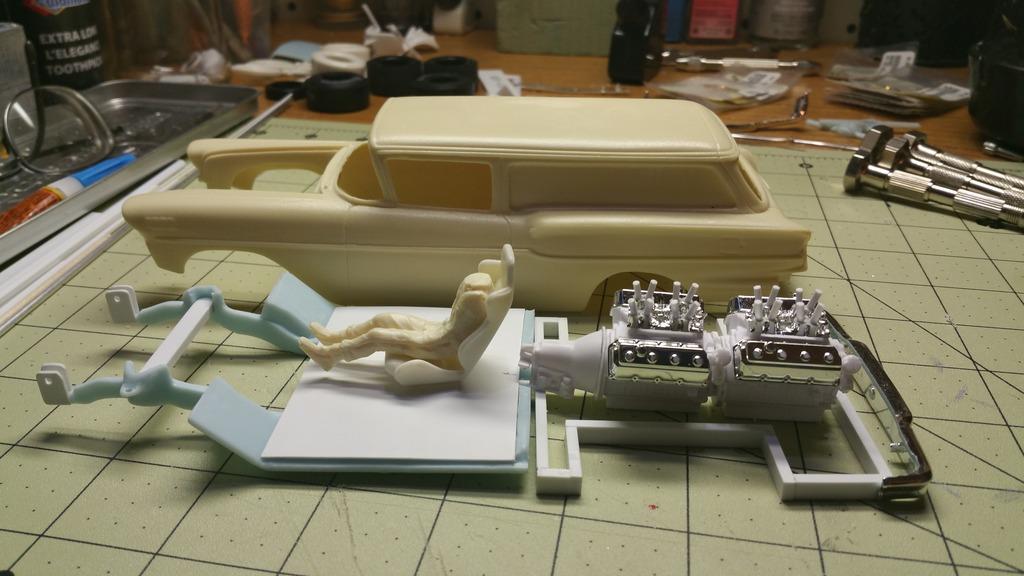
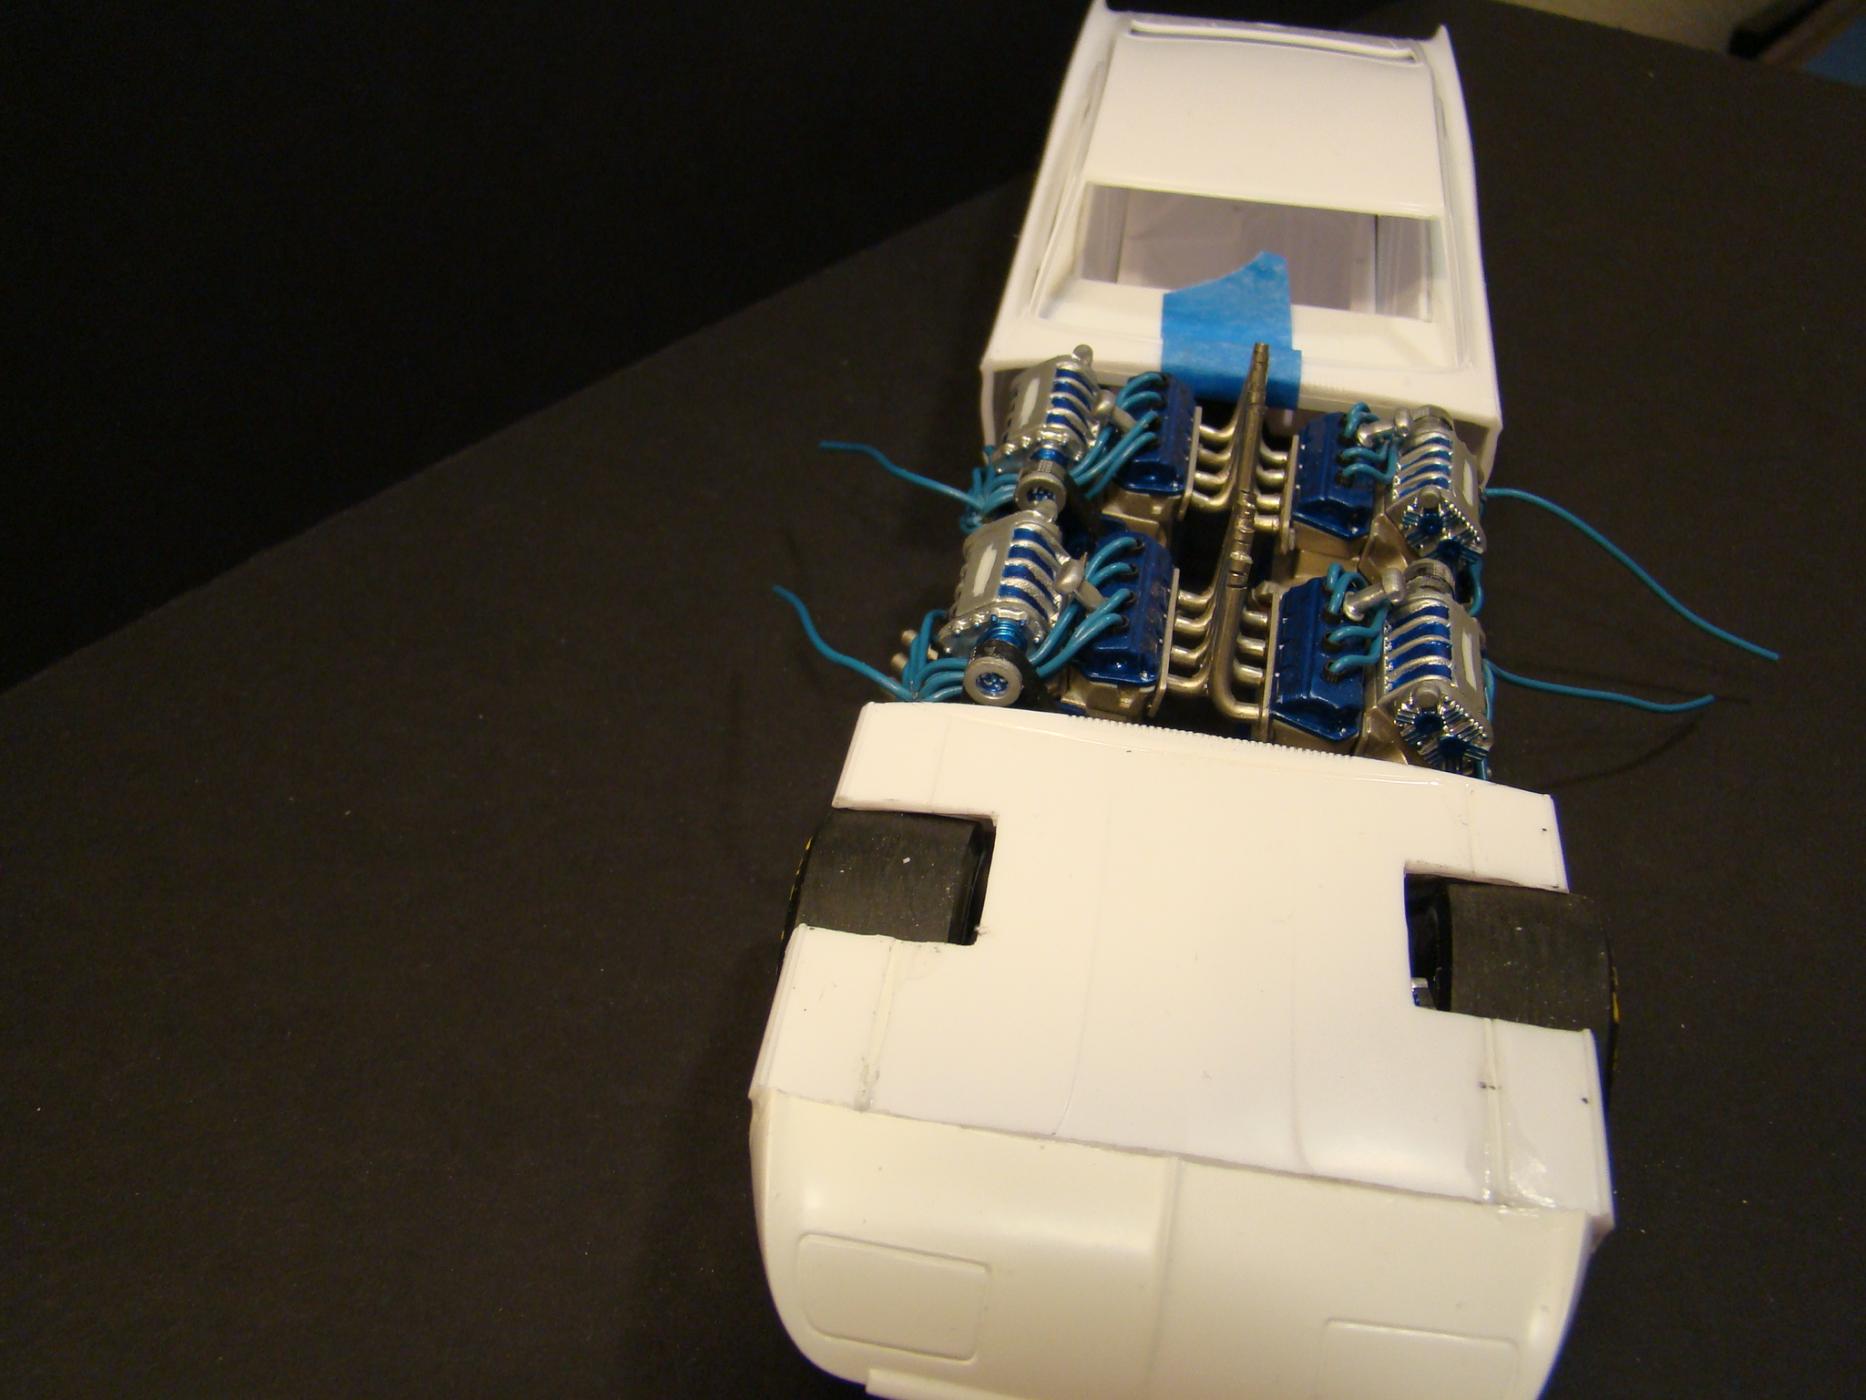
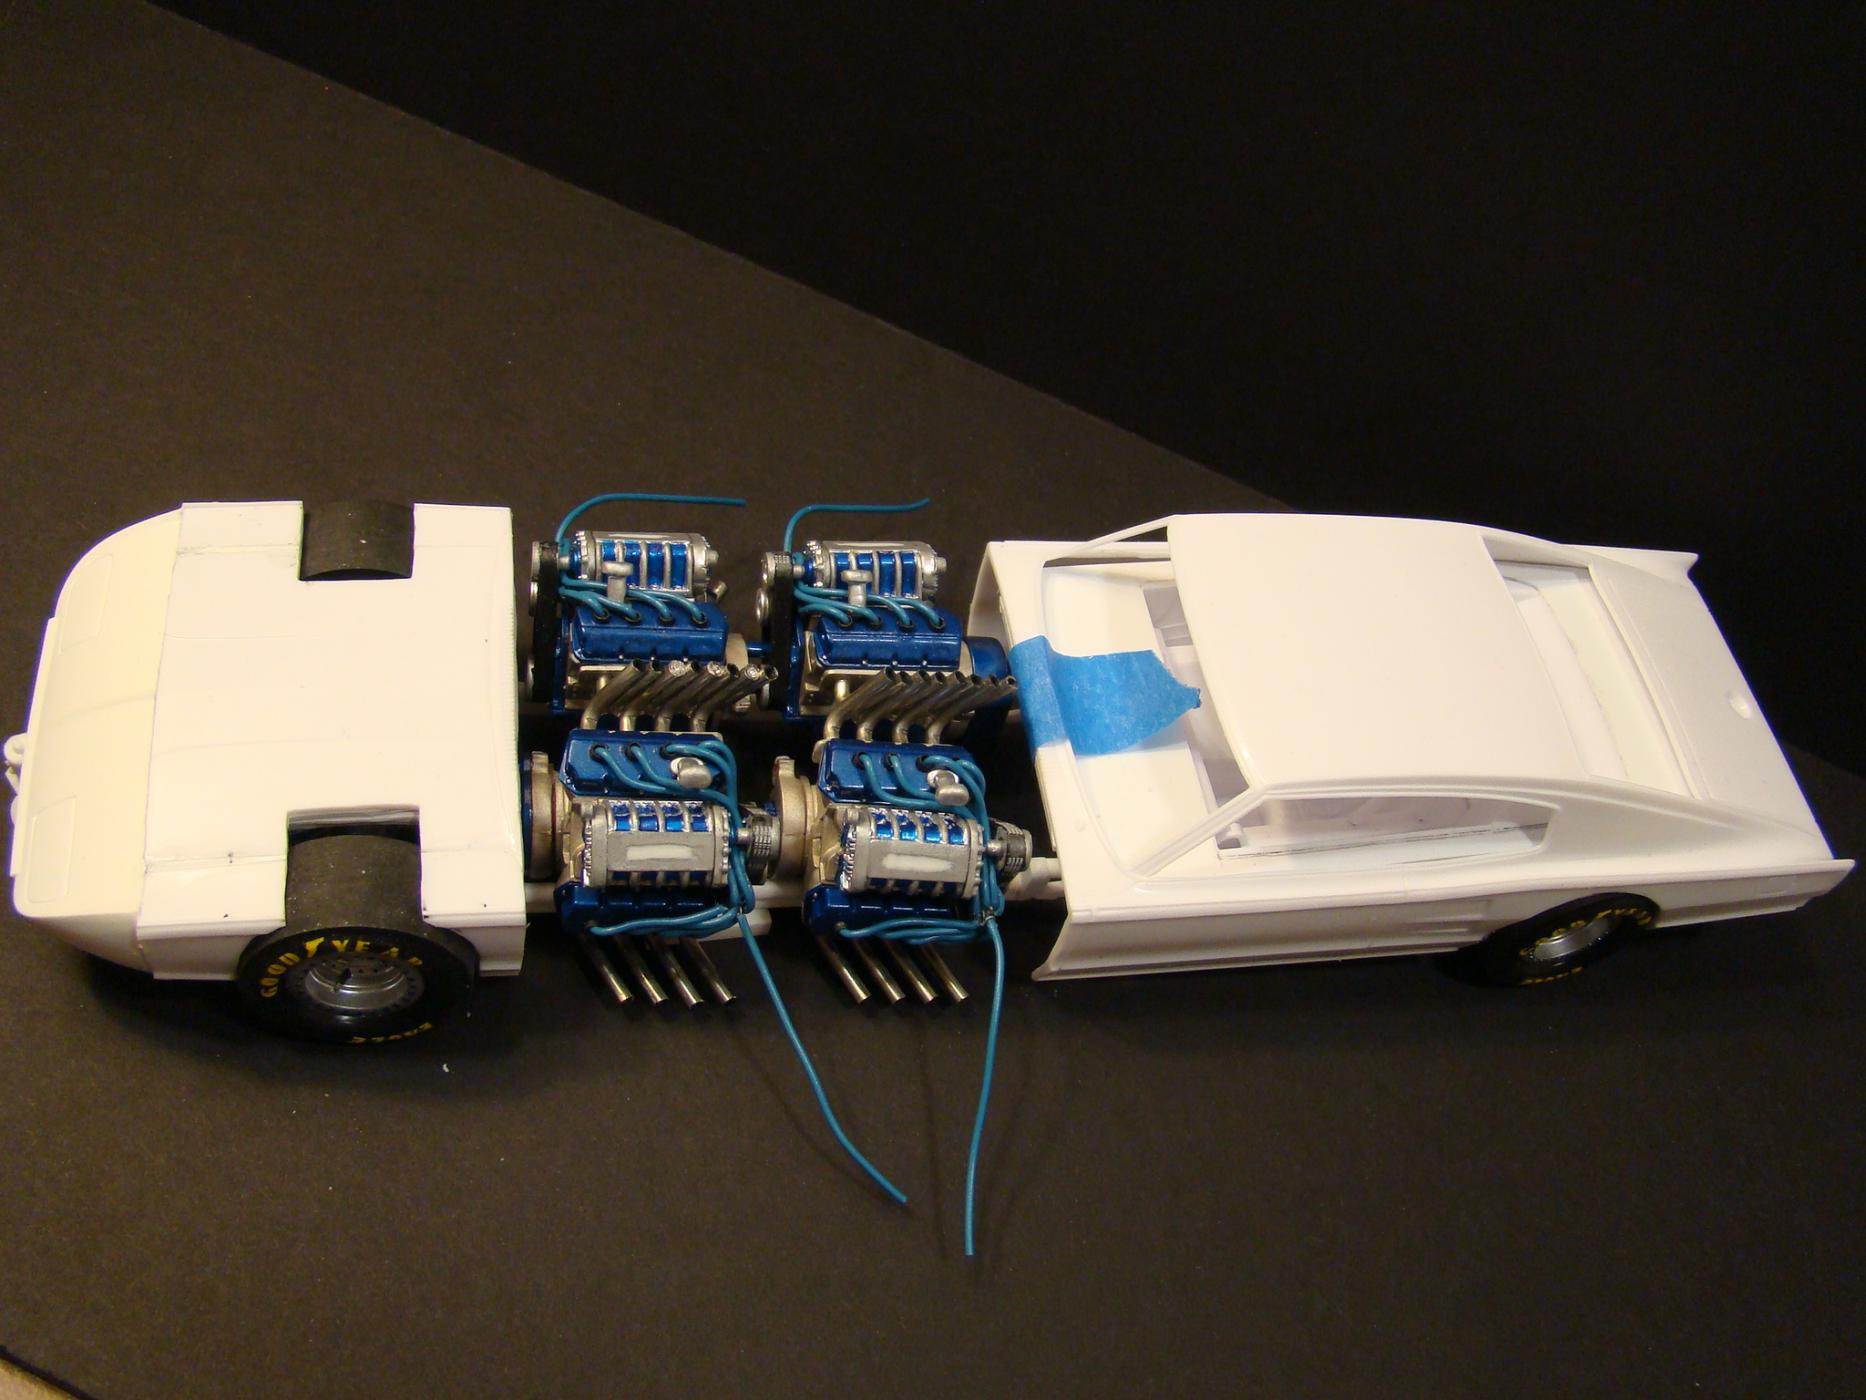
We're getting a little closer to basic frame completion. It's been fun getting the wheel wells and the rear length right. By fun, I mean AAAARRRRGGGGHHHH!!!!!!!! But it's there. Tomorrow I'll sand and attach the rear sub-frame. I also got an idea to attach the rear bumper to the frame, not the body. That took about 2 hours of tweaking the frame and bumper to make that happen, but I believe it will pay off. The engines have their alignment rods too. I might have to go left hand pilot seat if the V-drive takes too much room. Either way, it will have a funny car type roll cage. Also when the frame is together, I can get back on the leaf springs. Hope you enjoy the pics.
-
Stop Motion Build - Hilarious
Nytrozilla replied to Nytrozilla's topic in General Automotive Talk (Trucks and Cars)
You're welcome everybody. I'm a silly person by nature, so it takes something special to trip my trigger. Glad y'all got a giggle out of it.
-
Henry J Twin Turbo - Didn't see that coming..........
Nytrozilla replied to Codi's topic in WIP: Drag Racing Models
John T once complimented me on my posts in my topics because they were composed so well. Then he asked me how long it takes to do a post. I told him a half hour or so. Tim, I spend that much time looking at your pics in awe, trying to put into words the awesomeness that is swelling my brain pan. You haven't missed a single detail (cappuccino maker) on this entire project. AND THERE"S MORE????? I'm looking forward to the brakes (cappuccino maker) and the linkages (cappuccino maker) and the myriad of details (cappuccino maker) yet to come. Not to mention the body and the (cappuccino maker) paint. Don't ask me where I got such a whacked out idea, but have you considered Starbuck's as a sponsor? -
NOMAD WHEELSTANDER - Belated Christmas - 1/13/16
Nytrozilla replied to Nytrozilla's topic in WIP: Drag Racing Models
Thanks for the offer Doc. Mine's going to be a pair actually, that fit over the velocity stacks, one for each side. -
Stop Motion Build - Hilarious
Nytrozilla posted a topic in General Automotive Talk (Trucks and Cars)
I check the IPMS Las Vegas Facebook page from time to time and I want to give credit to James Cozart for posting this. I laughed until something fell off behind me. Crank the volume if yours is low, but it gets loud at the end. Cool what a father will do to entertain and involve his kids. -
NOMAD WHEELSTANDER - Belated Christmas - 1/13/16
Nytrozilla replied to Nytrozilla's topic in WIP: Drag Racing Models
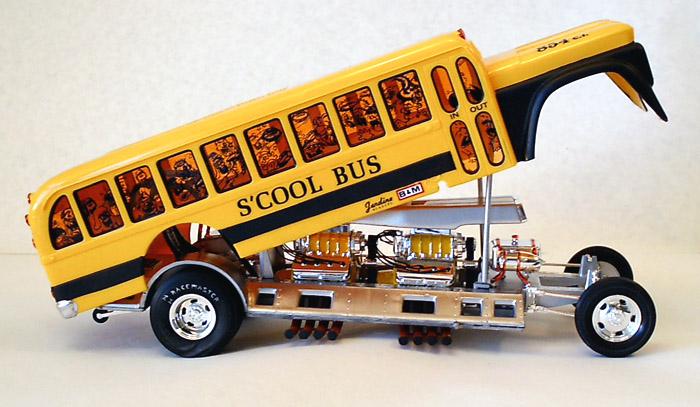
Bob, there's one I haven't seen before. Dr K, yer right, yer right, yer right. I have an idea for the top of the stacks that uses a cover,like the S'COOL BUS, so they'd all have to be the same height. Plus I don't have a way to flare the tips. I got the idea to splay them as I was drilling for the pins. On the other hand, if you can bring me a flaring tool, I'll treat you to a buffet.
-
Walt's Puffer Too T-Bucket Altered
Nytrozilla replied to gasser59's topic in WIP: Drag Racing Models
I might as well chime in too. WHAT THE HECK BRAD!!!???!!! We have to resort to talking about the weather to get an update? "Las Vegas weather today will bring partial clouds with a slight chance of rain in the Henderson area. Otherwise it's a chilly 107 degrees ........" I know some great time management books, but I haven't had an opportunity to read them yet. -
NOMAD WHEELSTANDER - Belated Christmas - 1/13/16
Nytrozilla replied to Nytrozilla's topic in WIP: Drag Racing Models
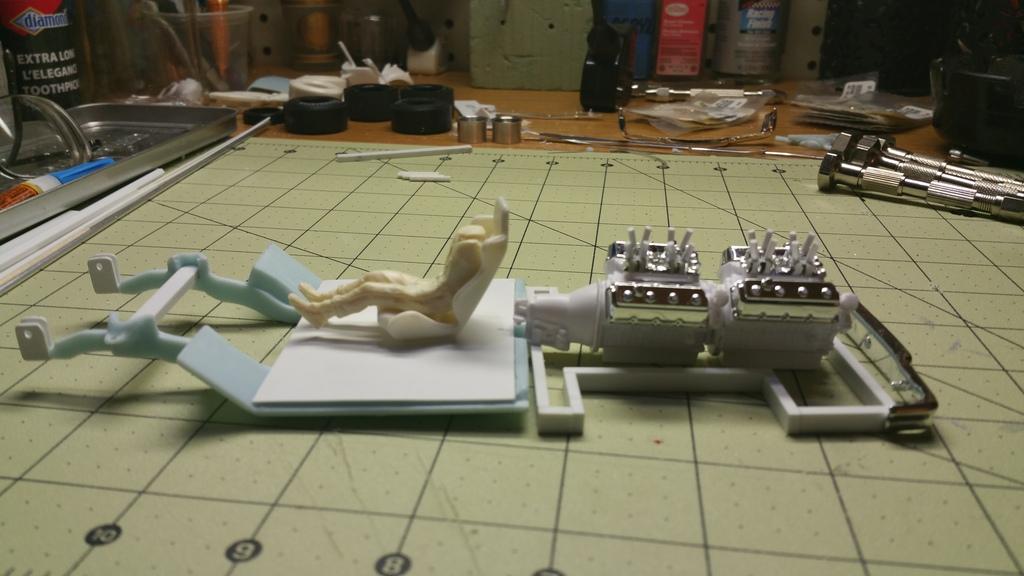
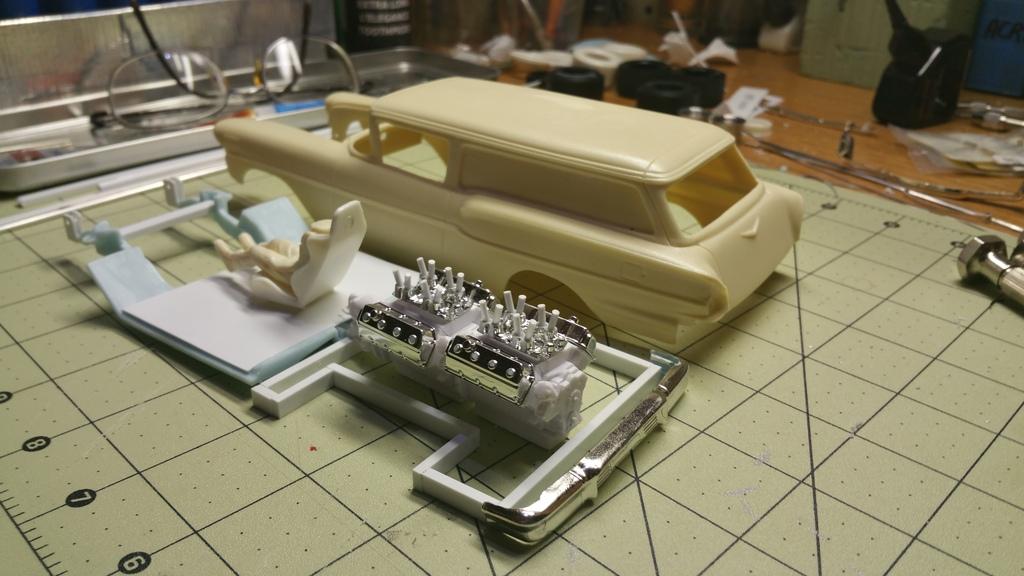
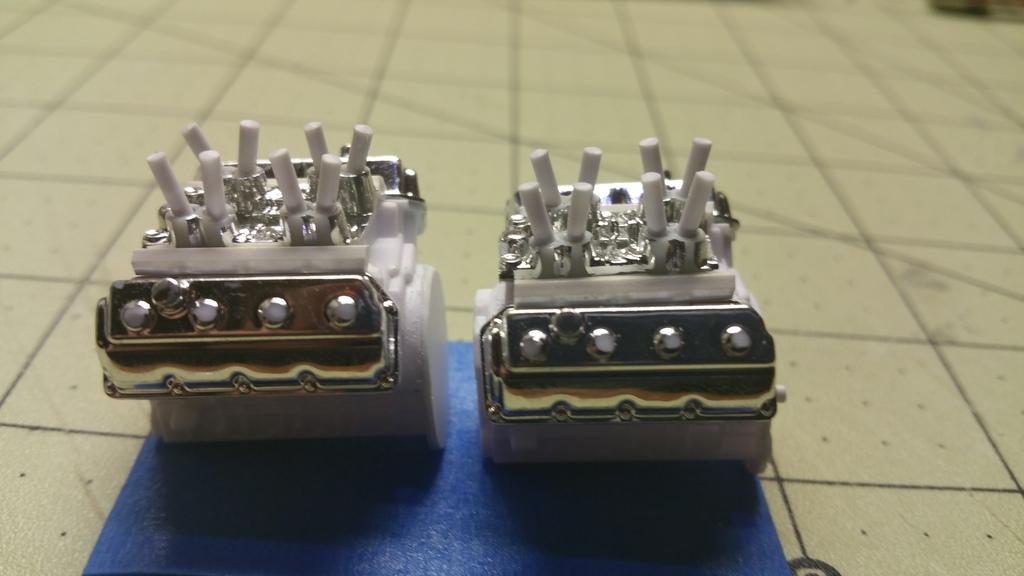
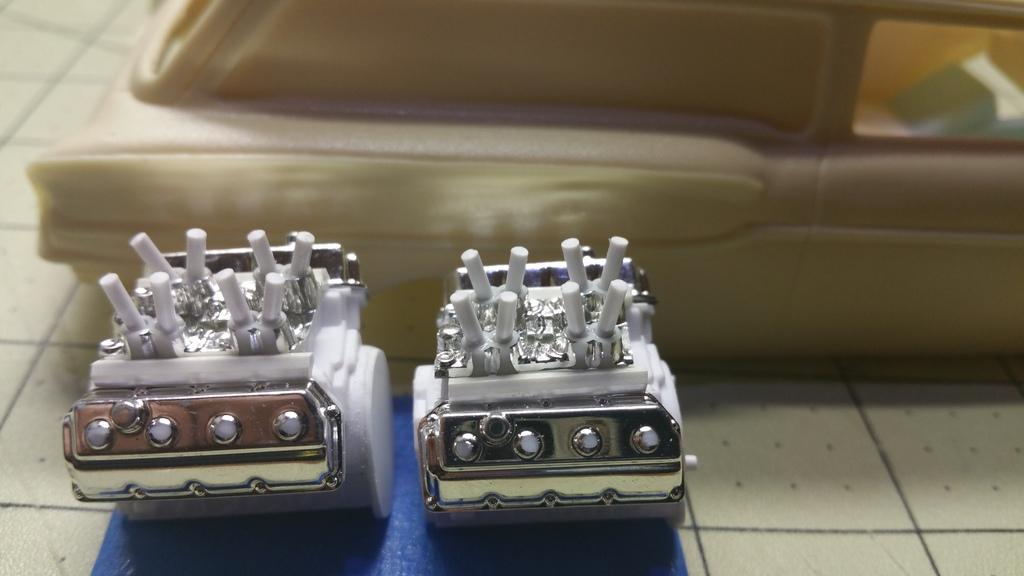
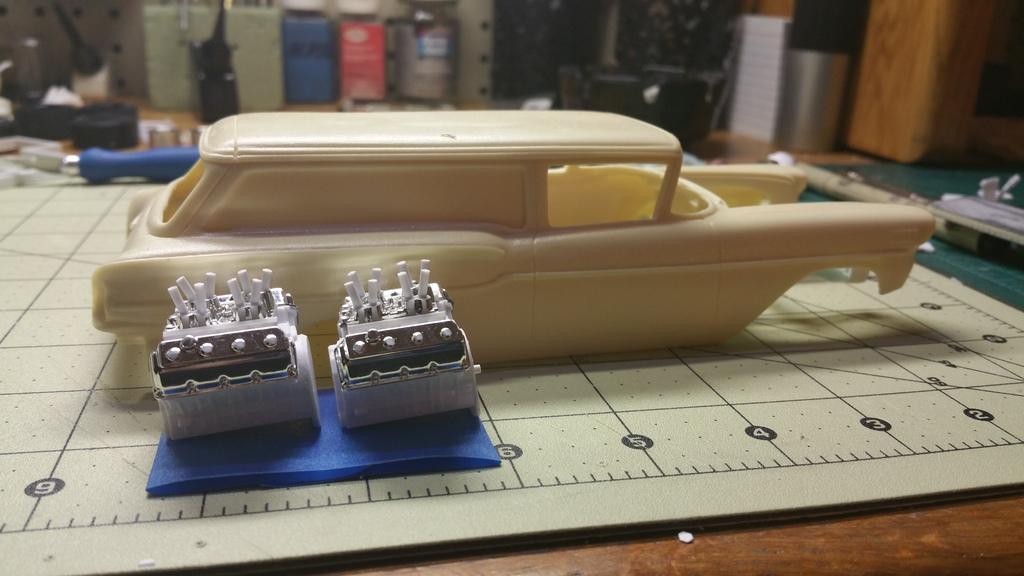
Hey Tim, I've got "willing" down pat. It's the "execution" part that gives me a rumbly in my tumbly. Sometimes I get "In The Zone" and knock out a bunch of work in one day. This is one of those days. When Dr. Kerry's inspiration sent me in the right direction, everything just kinda' gelled and flowed for the engines. I thought I was going to scratch the manifolds, then I remembered I had the AMT Double Dragster that I had robbed parts out of and there were a pair of injected manifolds right there. First I had to grind down the blower manifolds, then I modified the new ones slightly and installed the velocity stack pins and hex rod for the fuel rails. Hopefully, aluminum tubing will work for the stacks with a (later) unique air injection system that will mount onto the firewall. Here's some pics. I hope the picture posting problem gets sorted out soon. I'm gonna run out of allowable forum capacity real quick. I'm using my phone instead of my camera to keep the file size down. Plus I can't post them in the order I want to. I pulled them out of my file one at a time and it swapped the first and second picture positions. Just sayin' in case a Mod is watching. I know we're waiting on an update from Invision. How long has it been now? Enjoy.
-
Henry J Twin Turbo - Didn't see that coming..........
Nytrozilla replied to Codi's topic in WIP: Drag Racing Models
Tim, that is the sweetest looking mock up. I stop to consider the hours and skill put into what you've done so far and I long for the final 2/3rds. Incredible my friend. Incredible. -
NOMAD WHEELSTANDER - Belated Christmas - 1/13/16
Nytrozilla replied to Nytrozilla's topic in WIP: Drag Racing Models
I did everything in my power to maintain the stock wheelbase. It was a miserable failure. Waaaaaaaa!!!!! Still short on room. Got the fix for that too. Going fuel infected instead of super dooper charged. Scratch, of course....... -
NOMAD WHEELSTANDER - Belated Christmas - 1/13/16
Nytrozilla replied to Nytrozilla's topic in WIP: Drag Racing Models
No problem Michael, I'll mount them back to front. Inline. HEMI's can do that. On your other questions, no and no. lol Thanx Doc. Your pic lead me to the idea of running them inline. I have no clue why I didn't think of it on my own. I do have this model to be finished:
-
NOMAD WHEELSTANDER - Belated Christmas - 1/13/16
Nytrozilla replied to Nytrozilla's topic in WIP: Drag Racing Models
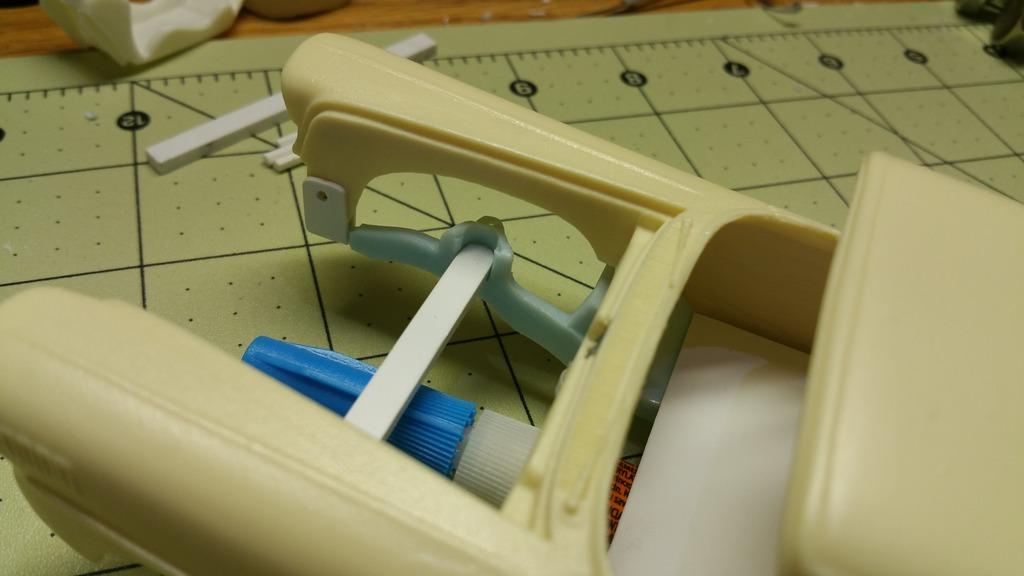
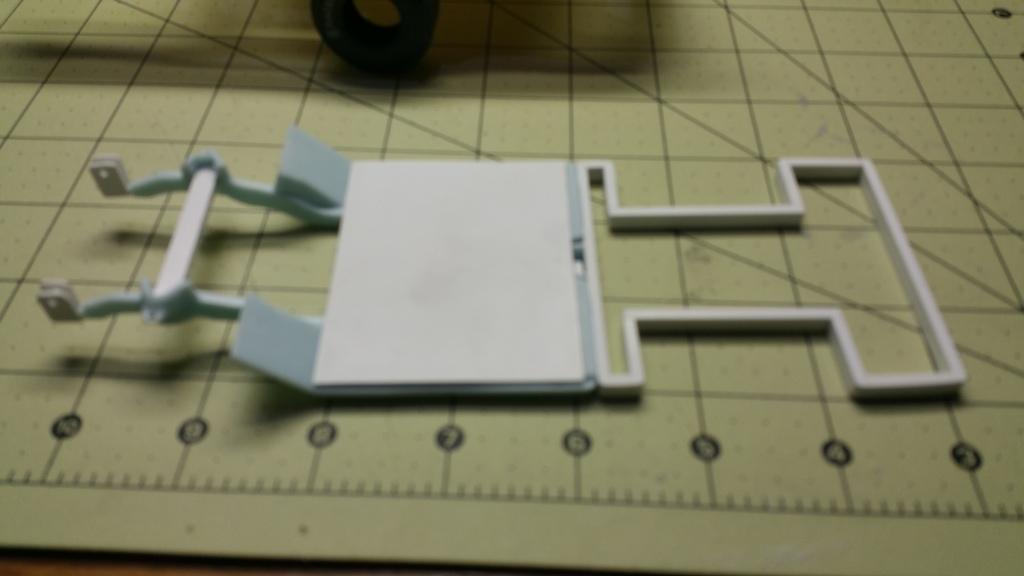
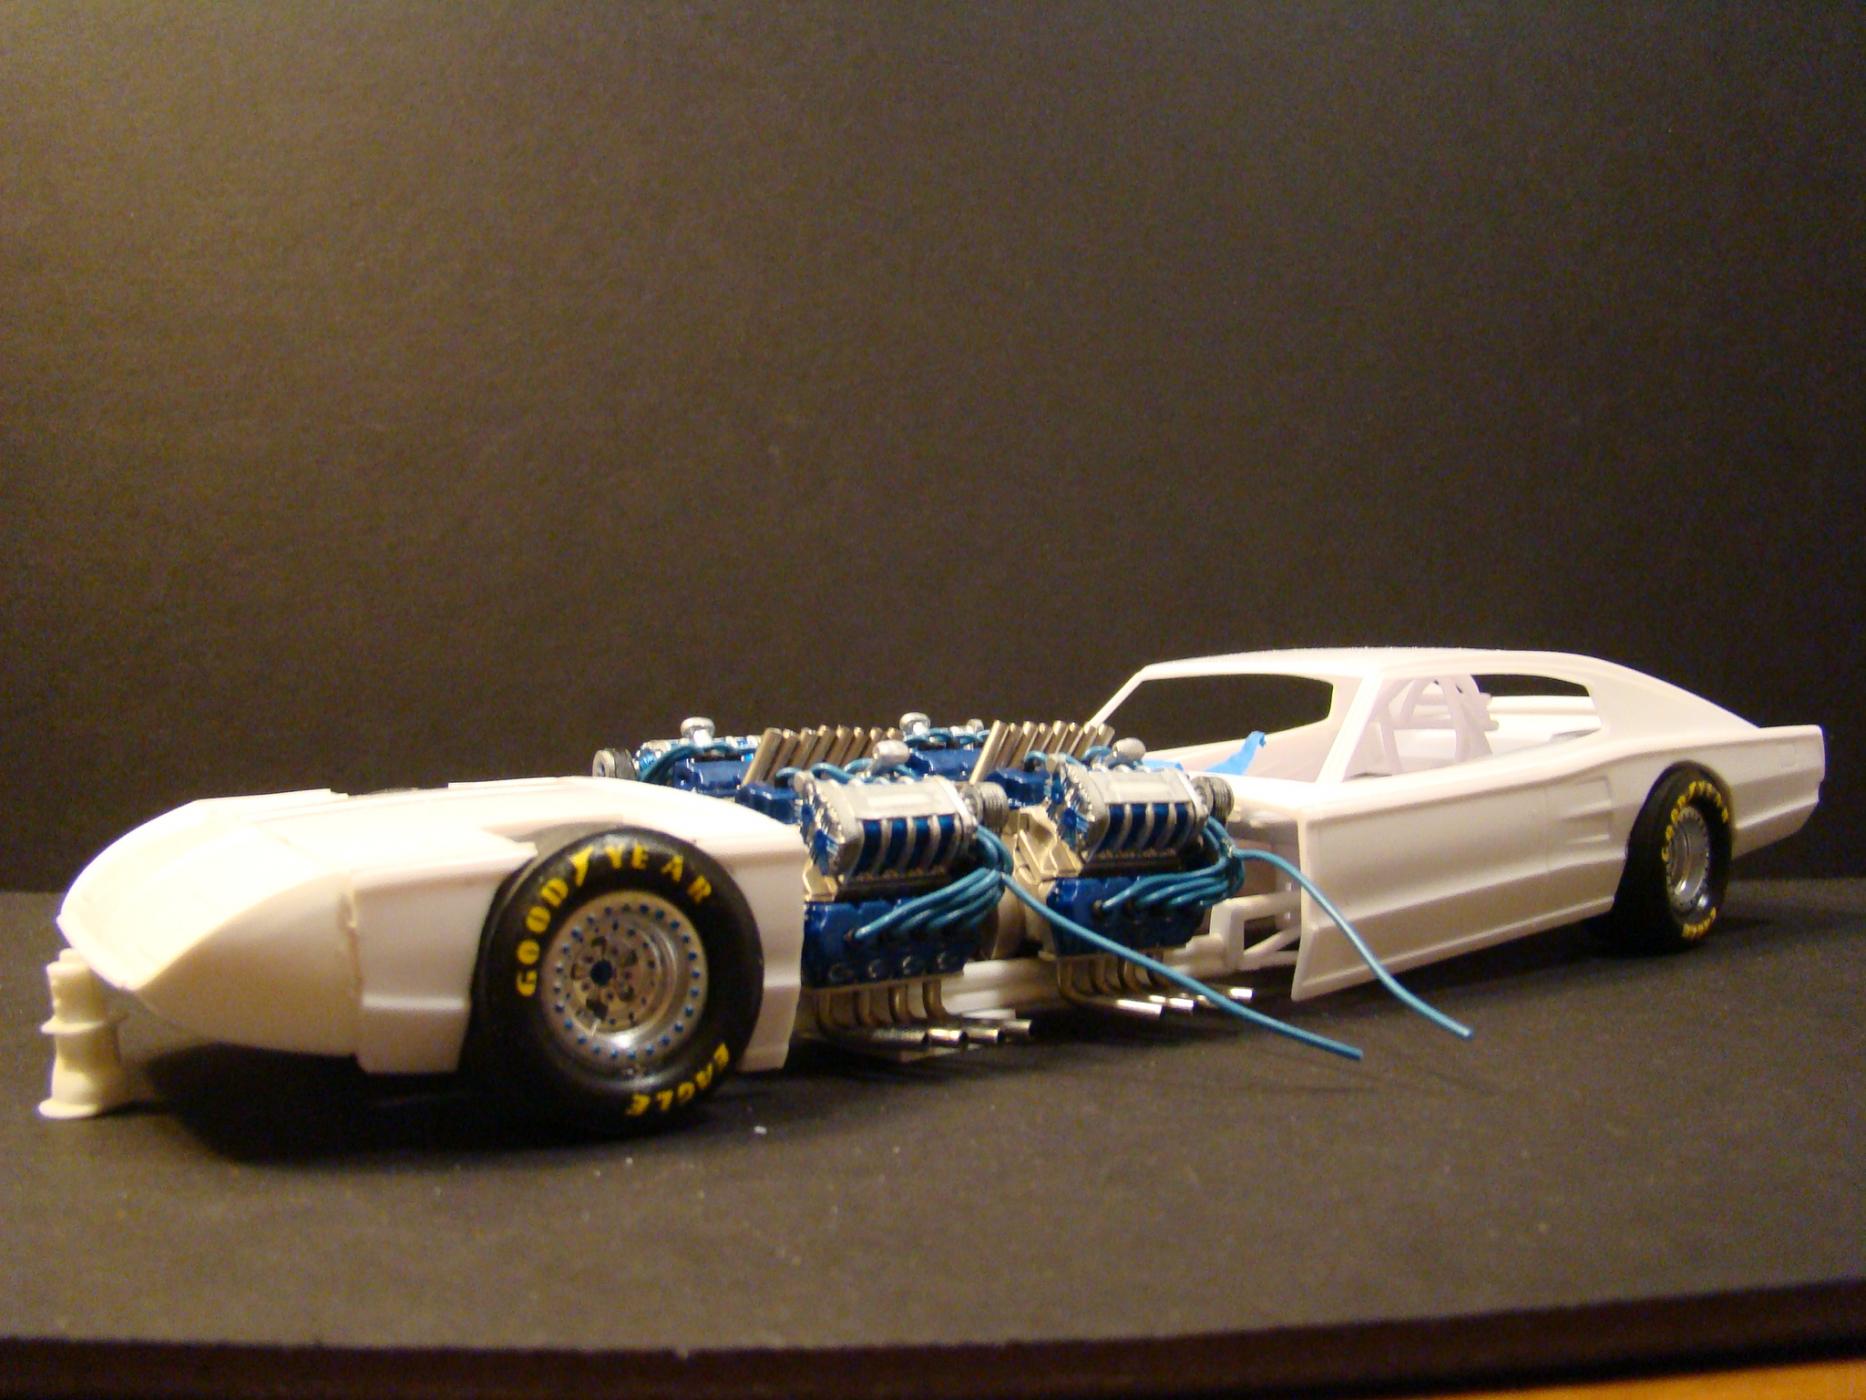
ZILLA !!!! DUDE !!! What's taking so long ??? Well, it's like this. I tried a number of ways to make two engines fit. Only way to do that is a wide rear axle with the tires sticking out. I want to preserve the rear fender well shape. It's kinda' iconic for this car. WAIT !!! What if I use 1/32nd engines ? Naw, I like this set up. I made the frame back half. Still in rough and raw condition, but it'll git 'er done. Then I removed the front cross member and replaced it with a solid piece. NEWS FLASH !!! I am so not ready for aluminum parts, but workin' it anywho. I got these from Micro Nitro about a year ago and it's high time I used them. I did pilot holes for the lug nuts with a pin vise hand drill, then used a portable drill to finish them off. For the center hole, I flipped them over where there is a mound. After using the mound center as a pilot to drill that hole, I ground off the rest with my Dremel, the whole time wishing I has a drill press. I'll be getting one after the first of the month because blower pulleys are next. (Insert laughter here if this is what you did before you got your drill press / mill.) So, that's it for now. Enjoyables.
-
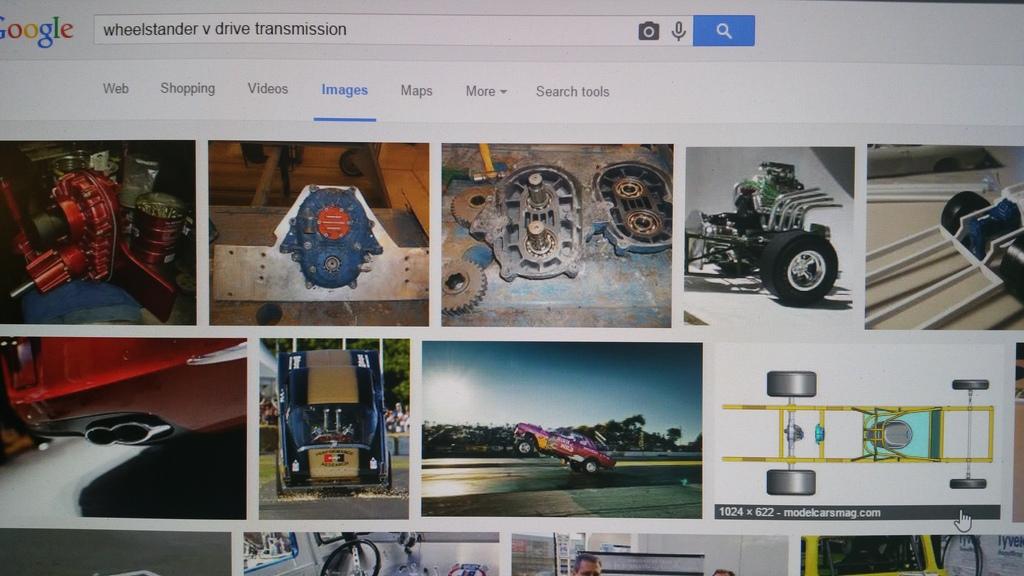
Brother Chris !!! Thought I should let you know that you are famous. I was doing research on V Drives when I noticed the pic on the lower right. I KNOW SOMEBODY FAMOUS !!!!!!!! We miss your updates my friend. Hope all is starting to go your way.