Nytrozilla
-
Posts
744 -
Joined
-
Last visited
Content Type
Profiles
Forums
Events
Gallery
Everything posted by Nytrozilla
-
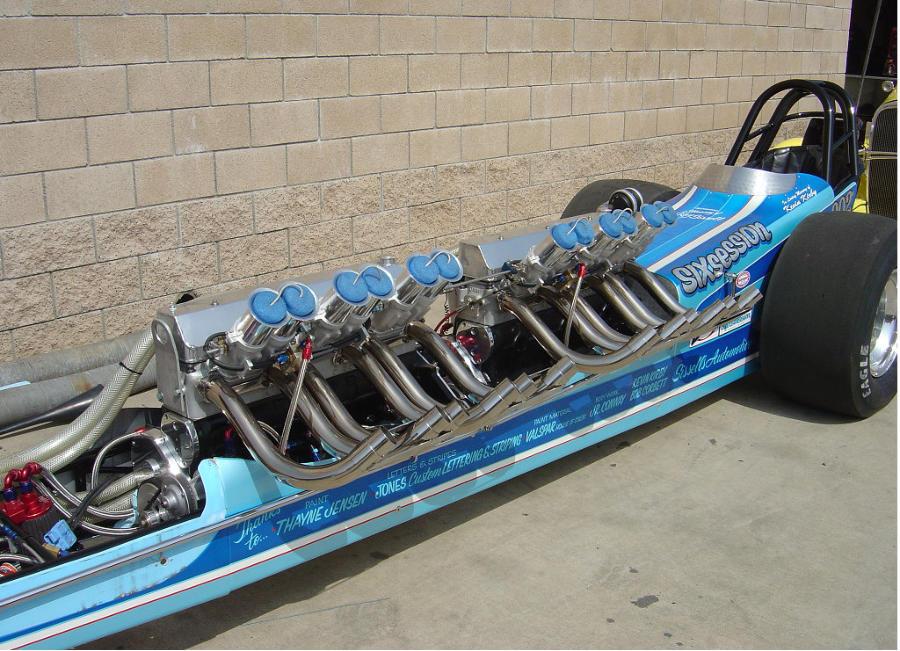
FlashBack: Sissel Automotive, El Monte, CA I grew up in El Monte when Kay Sissel was running the SixSession rail. Thanks for the memory.

-
Note to self: Stick with Funny's and Gassers. Don't even think about T/F 'cuz it's still open wheel category. Brother Art, you are such a CLEAN builder. Thanks for sharing.
-

Henry J Twin Turbo - Didn't see that coming..........
Nytrozilla replied to Codi's topic in WIP: Drag Racing Models
Once upon a time, there was a model builder. Then one day, the model builder saw a perfect replica of a master cylinder and wept. The very next day, he sold his collection of built and unbuilt models and bought a ton of yarn so he could start making ugly Christmas sweaters. The End -
I need to apologize because when I saw the first pic with stripes, I said a bad word. Not just any bad word, but one of the really, really, really bad ones. Speaking of bad John, you're the baddest of the bad Dude. That's going to freak out a lot of people. Magnifico
-
I can already see the chrome around the strip. Excellent execution James.
-
Henry J Twin Turbo - Didn't see that coming..........
Nytrozilla replied to Codi's topic in WIP: Drag Racing Models
Amazing Brother Tim. I'm soaking up every image you post for future reference. NEAR future reference. Sorry to hear you're having to resort to using plastic for the reservoir. I guess the entire build is on Metal Overload as it is, huh? -
Doi. Here I go again "assuming." When you first mentioned chopping it, I was looking at ways to do it that would allow you to save the side molding. My concern was that you would have to replace it if you did the chop lower, as opposed to higher. It didn't occur to me that you might be getting rid of it. But, that's what got stuck in my head. Next time I'll disguise some of my minions to impersonate some of your minions so that they can infiltrate your fortress, steal the plans, then I'll know your evil intentions. Or I could just ask you if you're going to replace them.
-
Sorry about the loss of the belt line details. I was really hoping you wouldn't have to deal with that. Having said that, I have zero doubt that it will be an issue on the finished body. Keep hammering and hacking Brother Chris.
-
Henry J Twin Turbo - Didn't see that coming..........
Nytrozilla replied to Codi's topic in WIP: Drag Racing Models
I'll settle for pictures and an autographed grain of rice. -
NOMAD WHEELSTANDER - Belated Christmas - 1/13/16
Nytrozilla replied to Nytrozilla's topic in WIP: Drag Racing Models
TA-DAAAAAAA!!!!!! I have achieved spindleage. Took all day, but I got there. Next is to determine axle length and how I want to mount the front wheels. Oh, yeah, then I have to assemble the spoke wheels. I may be old, but I'm slow. And next time I'll remember to tighten the spindle nut PRIOR to assembly. Will those of you with actual experience at this sort of thing PLEASE tell me when I start having fun? Edit: Reread my first post, so I thought I'd quote myself: "My build will have a couple of bells and whistles, but I'm going to keep it simple ............" Really Joe? REALLY??????
-
NOMAD WHEELSTANDER - Belated Christmas - 1/13/16
Nytrozilla replied to Nytrozilla's topic in WIP: Drag Racing Models
Delayed by pool algae. Be on it shortly. I thought modelers were supposed to be patient? -
YAAAAAAY, GASSERS !!!!!! That's a sweet ride Ed. I love blue, so you played right into me on that. Also love that you did a wash in the doors and gas filler too.
-
NOMAD WHEELSTANDER - Belated Christmas - 1/13/16
Nytrozilla replied to Nytrozilla's topic in WIP: Drag Racing Models
Thanks for the great idea Tim. I sprayed the mask liberally with the kicker, closed my eyes, then put it on. It's like a time machine. There was a flood of swirling lights, then I opened my eyes, it was 6 hours in the future !!!!! I'm sorry Brad, explains what? Ooooohhhhh, wait. I got it. Doi. Thanks for the tip on the drops Chris. I'm all over trying that after I eat a Jimmy Dean Sausage, Egg & Cheese Biscuit followed by several cups of coffee flavored sugar water. Just messing with you all before I crash. I'll hit it in the A M and we'll see what happens. -
Niko my friend, sorry I missed this but glad to see you building again. The bug never goes away, does it? You are forever afflicted with Styrene Addiction. You are one of the lucky ones who gets to play with 1:1 and scale. I'll be watching.
-
NOMAD WHEELSTANDER - Belated Christmas - 1/13/16
Nytrozilla replied to Nytrozilla's topic in WIP: Drag Racing Models
I've been using a spray kicker. I take it that might be overkill? It evaporates quickly, but is it putting down too much product Chris? Brad, you're not too late and are you available for adoption? You know where I am. You can move in at your convenience. Those plans rock. I love the idea of using vinyl tubing. I'm busy tonite, but I'll be back all over this thang tomorrow armed with the best info my friends can give me. You All Rock!!!!!!!! Here's the kicker I use.
-
Henry J Twin Turbo - Didn't see that coming..........
Nytrozilla replied to Codi's topic in WIP: Drag Racing Models
So let me see if I've got this right. Approximately 10 pieces and, when assembled is still smaller than the tip of a pencil. Did I get that right? If I wasn't familiar with your style, I'd be on the floor. Fortunately, I've learned to be sitting down when I check your progress.
-
NOMAD WHEELSTANDER - Belated Christmas - 1/13/16
Nytrozilla replied to Nytrozilla's topic in WIP: Drag Racing Models
Copy that Big Buddy. Silly thing is, I use a kicker every time on plastic. Never hit me to use it this time. -
NOMAD WHEELSTANDER - Belated Christmas - 1/13/16
Nytrozilla replied to Nytrozilla's topic in WIP: Drag Racing Models
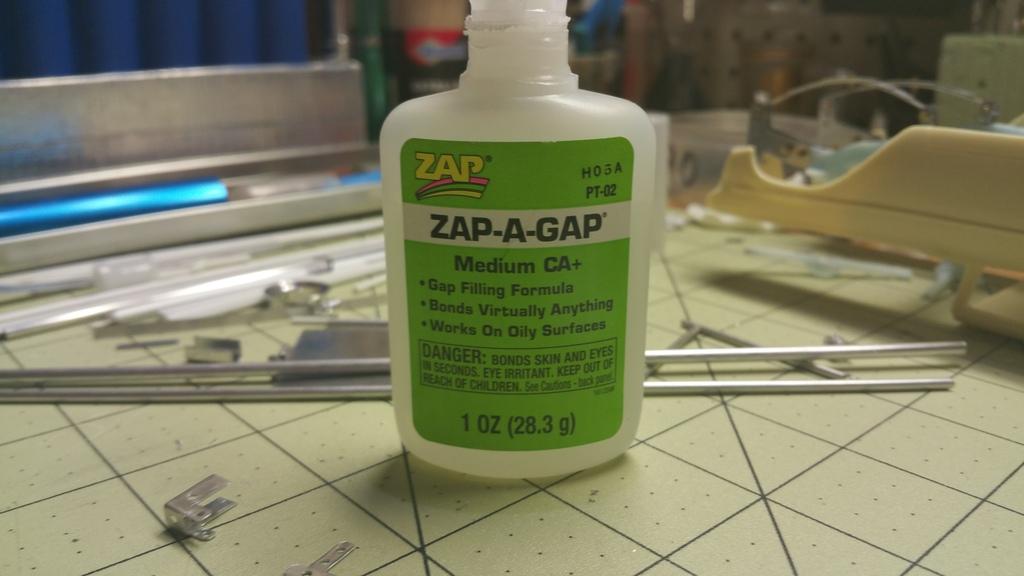
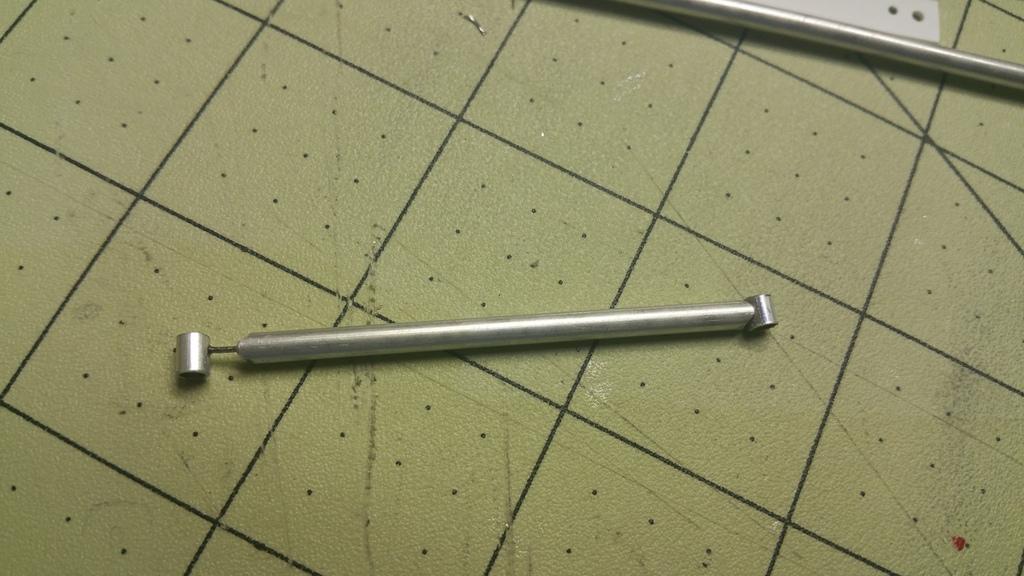
Thanks Karl. I'll be using the JB on this attempt. I have high hopes. I do have an Evergreen tube inside the axle. That's why the pin is so small. I do want to point out that in my testing, the Z A G did the best job of holding and I'd feel comfortable using it in this reinforced configuration. -
NOMAD WHEELSTANDER - Belated Christmas - 1/13/16
Nytrozilla replied to Nytrozilla's topic in WIP: Drag Racing Models
Yes, it is aluminum. -
NOMAD WHEELSTANDER - Belated Christmas - 1/13/16
Nytrozilla replied to Nytrozilla's topic in WIP: Drag Racing Models
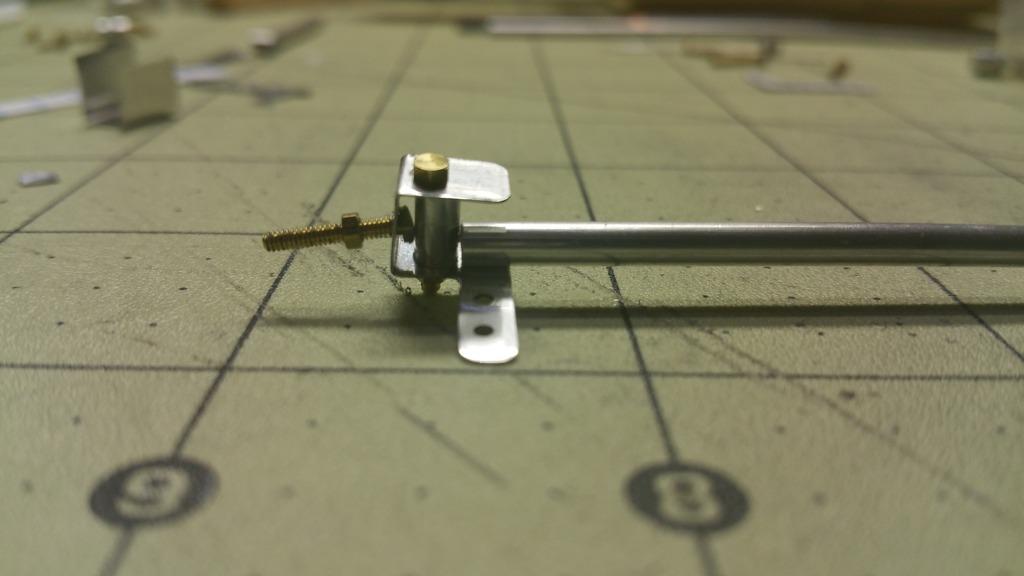
Brad, thanks a lot boy, just the same. I've always wanted to say that. Thanks Gene & Michael. I'm including a pic of the Z-A-G I got. There's no expiration or "use by" date on it so I don't know how fresh it is. I sniffed it real hard and now I can't find my navel. LOL Here's what I'm trying to accomplish. This will be the front axle. The tubes with the pins in them are what I'm calling the spindle tube that will have a bolt running through. That's why I called it "load bearing" earlier. Also here are some preliminary spindle bracket designs. Please keep in mind this is all preliminary, subject to abuse according to the wrath of the builder. Oh, one last thing Brad. Package received. Now I can honestly tell people if they get help from you, you'll give them sheet. Seriously, THANK YOU TOO MUCH. I'll use the thicker one for the new spindle brackets. NICE!!!!
-
NOMAD WHEELSTANDER - Belated Christmas - 1/13/16
Nytrozilla replied to Nytrozilla's topic in WIP: Drag Racing Models
Hi Guys. I'm still working on it. Sad news to report though. I've tried Gorilla CA, Loctite, and Z-A-G. Too bad none of them worked. It took next to zero pressure to pop the connection. I went out this morning and picked up some JB Weld, which I've been wanting to try. I'll let you know the results later, but I'm also going to pin the connection. In other words, I'll be using a larger diameter tube for the spindle bolt, but I'm going to drill a hole in the side of the spindle tube and literally insert a pin through the inside that will insert into the axle. I've already checked to make sure the spindle bolt clears the pin head inside the tube. Pictures will help better than I can explain. Wish me luck..................................where's that stupid mailman? -
It's like a waterfall or a sunset that you can't stop staring at. Brother John, you constantly amaze.
-
Walt's Puffer Too T-Bucket Altered
Nytrozilla replied to gasser59's topic in WIP: Drag Racing Models
So THAT'S what a front axle is supposed to look like. Similar to the one I'm building, only, yours exists and mine doesn't (yet). -
NOMAD WHEELSTANDER - Belated Christmas - 1/13/16
Nytrozilla replied to Nytrozilla's topic in WIP: Drag Racing Models
Thanx Joe, you're right. It is nuts!!! I'm poking my head in to let y'all know I am working on the front axle and spindles. I'm on my fourth different design and praying that Zap-A-Gap 2 is everything it's cracked up to be, MICHAEL!!!. Hope it works on a load bearing joint. I'll have pics as soon as I have a final setup. -
Henry J Twin Turbo - Didn't see that coming..........
Nytrozilla replied to Codi's topic in WIP: Drag Racing Models
You gave me a case of "The Rookie Blues". You work for a few days and have 77 parts. I work for a few days and I'm still figuring out how to scratch out a simple front axle. Gotta start somewhere, right Buddy? BTW, assembled, those parts look like they came out of H. G. Wells Time Machine.