

disconovaman
-
Posts
1,979 -
Joined
-
Last visited
Content Type
Profiles
Forums
Events
Gallery
Everything posted by disconovaman
-
I have an old paint stencil for white walls but I can't get the thing to work right. And other than decals (which I don't have) I don't really know what to do. Any suggestions? I would be grateful. Also I did some engine bay weathering and I moved the firewall closer to the engine (pics to come of that later). I'm gonna make a list of things to do to this kit when I get it built. I'm thinking one of them may be to replace the chassis with the 69 Revell nova? With this kit being reissued in August I'm excited to see if anyone will be building it. MPC kits of the late 70's are pretty crappy but I think it has potential to be pretty cool.
-
So I'm still trucking along on this build, trying to stay focused and finish strong. Got the chassis built... just box stock.... metal rear axel, weird front A arms etc... added some light weathering to make it stand out a bit. I did use a different engine/trans because the Pontiac 400 with the kit just wasn't gonna cut it. Sorry for the lack of updates, just not alot to report and I have other projects goin too. Here is a progress report and some pics. Thanks for the patience.
-
I've had multiple copies of this kit, but I never got one built. way to go on getting it completed. I never could figure out what to do with any of mine, since they were so rare. I would just steal the wheels/tires from the kit and get rid of the rest at swap meets/yard sales. I picked up one the other day, now l am gonna have to challenge my self on creativity. Thanks for the inspiration! Hmmmm... now what to do?
-
This is my favorite kit to build, I use 220 grit sand paper to open the grill on mine takes me about two hours. I like to be in control so as not break the grill and hand sanding seems for me the best way. It's time consuming but the safest way. l'm scared the dremmel would get away from me quickly.
-
I took out some extra Old Pro/ BHC nova wheels that I had and started working on pairing up different trim rings that appear most like of the 1.1 car. & I've come up with the rings from the 69 Revell Z/28 to pair with the nova Rallys from the Amt 72 nova. I'll get started on detailing them now.
-
More detailing progress...
-
An Idea I've had rolling around in my head for awhile, maybe you guys may have already done this... Painting Bare metal foil. Since my bumpers have the impact strips, I thought I'd paint the foil and apply that to the bumpers to give them the rubber look. Turned out ok. Also, I've added some detail to the interior.
-
Alright, so I've been back to work on the nova, I started the BMF stage and it was kinda a waste of time and materials. The silver is so bright that the foil is almost unnoticeable. I did polish the paint pryor to adding BMF, but l desicded to "Dull" it down some to make the trim more noticeable. I planned on doin light weathering on the engine and frame but I'm not sure I want to involve myself anymore. Nevertheless I need to get rollin on it agian.
-
I'm inspired! I want to start building more of these types of builds myself. Looking forward to seeing this complete. It looks like the real car!
-
What cars interest you in resin 1/25
disconovaman replied to 5.0man's topic in Car Aftermarket / Resin / 3D Printed
Lots of good options here and I would like to see any sedans, 2 door or 4 doors. 75-79 nova 4 door sedan or 2 door coupe. I wish model companies (revell amt or lindberg) would seriously look at doing some unpopular bodystyles. -
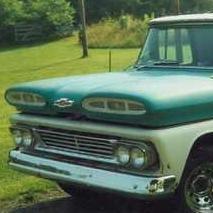
I'd just test some different brands before painting the camaro. Theres a brand by Krylon called Short Cuts it goes on smooth for me and covers real well. You can buy it at Michael's, It's in the big paint section. I painted this Nova with it. Hope it works out for you.
-
Club challange:Optmia Ultimate street car
disconovaman replied to disconovaman's topic in Model Cars
Thanks Guys for all the nice comments! The wheels actually started out as those crappy custom wheels on the AMT 70 chevelle, I'm not a fan of them either but I knew there was potential so I opened up the backs to reveal the brakes which are drilled disc decals from the 66 revell el camino. Then I added the 18 inch aluminum rings to give the modern wheel look. I didn't focus much attention on the chassis because I was in a hurry to finish it for the meet. But I did give the car dropped spindles, a Curry Enterprises coil over rearend, a drive shaft loop and I slightly posed the front wheels in a turning angle.This type of racing is Salom obstacle racing where the cars are constantly turning. Anyway, I printed my own decals, added LS drive train, Some highback racing seats with five point harness, and big suspension to handle all the sudden turns. The show is pretty cool to watch and I guess thats where the inspiration came from. Thanks agian for looking! -
Club challange:Optmia Ultimate street car
disconovaman replied to disconovaman's topic in Model Cars
I used 02 camaro ss engine, the 2011 camaro convertible didn't work out because ran out of time before the club meet. However, I did manage to decal some old builds for the Challenge. Here are some more photos of what I did for the Optmia Ultimate street car challenge. -
I've been working on this 69 camaro for our model car club challange and I'm about 99% complete with the project. It turned out pretty good given the rush I had to put on it. The club meeting is this Saturday. I've had two months to get it finished. I really want to do the AMT 2011 camaro convertible as this style race car. But with only two days left I doubt I'll get it done. We'll see. Stay tuned I'll be adding that car to this thread also, thanks for looking!
-
Ironically I was at my cousin's house yesterday asking about his old model collection and he said "go look up in the barn might be some in there" I found two, a Yenko 69 camaro and this 70 Superbird! It's all here and never been worked on.
-
I'm gonna have to take a break on the nova for a week or so. My club meeting is coming up and I have to finish up the club challange the next couple of weeks. The Theme for the next club meet is the Optmia Ultimate street car challenge, Type of builds based on the MAV TV series. So in the words of Arnold moments before he stuck a 4th gen into a police precinct... I'll be back!
-
I notice the silver doesn't take clear as well but if you clear and wetsand between coats and polish at the end it comes out way shinier. The good thing about the hinges is when the hatch is open the hinges don't hang down, and on display it will always be up. Nice Nova, the color is spot on!
-
More progress on my replica, after letting the primer cure for about 24 hours I wet sanded and smoothed all the dirt out and shot some flat red on the inside, let that dry then taped it up for a coat of diamond dust silver on the body. I'll have to wet sand that so it'll be ready for clearcoat. It doesn't look to bad but I want the silver to shine so I'll have to do alot of sanding between coats.
-
I shot some primer on it to see where I am, lots of wet sanding and smoothing to do.
-
Slow goin, Sorry for that... here's some more progress.
-
More progress on the nova, Painted the interior. I will flock the carpet to get rid of the mold circles for a more realistic look. I'm working on trimming the body with the Concours option. I'll post pics of that soon.
-
I agree, I tried a couple different set ups but I couldn't get it to work properly. It hangs down but the function is great like a toy and I want people to question if it is a toy. I'm painting it red to match and be less visiable from the quarter window. It looks rough now but hopefully it'll start taking shape soon.
-
It doesn't look like much but the tuck and roll seats on the back are complete. I'm taking a break from the interior and moving on to the engine using a revell 69 camaro small block and the turbo automatic from the amt 72 nova. And l also trimmed down the interior tub to fit better with the body.
-
Now I've desided that I want the upholstery on both the seats to match so I'm using half round styrene to achieve a tuck&roll look on the seats. It wont match my 1:1 but aleast it wont look like two different seats were used on the build. Once I get some flat red on it I think it'll look ok. A quick shout out to all who have commented, Thanks for the stories and I hope I've jogged some fond memories of the cars you've owned.
-
I've got a few sets of those amt 72 nova rallys but my car has 14X6 wheels and I think the Amt wheels are supposed to be 14X7 wheels. They seem to be a little too wide. I may be able to cut the trim rings off and glue thinner rings on. I can alter them no problem but I don't think I need to if I use the wheels from the kit. I wish a resin company would tool a 77 9C1 nova I'd build a fleet of them. How would you go about transforming a 2 door coupe into a 4 door sedan? I'd like to do it also.