robdebie
-
Posts
392 -
Joined
-
Last visited
Content Type
Profiles
Forums
Events
Gallery
Everything posted by robdebie
-
I've been slooooowly building mine too, and reported all problems that I found here: https://robdebie.home.xs4all.nl/models/lc2.htm Here's an overview of what I did on the body so far: Rob
-
Another vote for working in layers! Sometimes it helps to 'lock' the layer with the bitmap, since without locking, the 'pen' of your own artwork layer wants to follow the bitmap that you want to copy. I never understood that behaviour though. And another CorelDraw tip: try different view settings under the 'View' menu. Sometimes the 'Wireframe' setting makes for far easier drawing on top of a bitmap. It makes your artwork lines clearer, and softens the bitmap that you're copying. One last tip: for everything that I draw as decals, I set the line thickness to zero. Just use the 'fill color' to create the letters. Otherwise your artwork will look just a little 'fatter' than the original. And if you scale artwork, the line thickness (if not zero) will often not scale accordingly, leading to other surprises. In short, always set the line thickness to zero, for everything you draw. Rob
-
I've been using CorelDraw for some 25 years now, and my methods are 100% identical to Peteski's. This is the way to do it. One thing that I haven't read explicitly in this thread: the signs that you want to duplicate are all handpainted. So you will not find a font that matches them 100%. But by changing the fonts to curves, and the manipulating the control points, you can make them look like the handpainted lettering. Here's one example that I made long time ago. It's a data block as painted on a 1939 Fokker G1 fighter. I started with 'VAG Rounded' and modified nearly each letter to make it look like it was brushpainted. I rotated many letters a bit to add some randomness. Still it might look a bit too perfect. CorelDraw isn't easy to start with, but you need to learn only a few things to do your decals. The program can do 100x more, but you don't have to learn all that. Have fun! Rob
-
Met my first Palmer kit today.....
robdebie replied to JollySipper's topic in General Automotive Talk (Trucks and Cars)
Seeing how far off these models are, I would guess they were mastered in the Far East, where no-one knew these cars for real. We're now seeing the same thing with many Trumpeter models (aircraft mainly) that have lots of shape problems. Rob -
I tried a different approach. I made a line drawing over a nice straight-from-the-side photo. I put it over the only K3 drawing I know, from an old Scale Models International issue. The fit is mediocre, and especially the 'greenhouses' are rather different. Sigh. Then a smart person pointed out that the drawings for the painting instructructions of the kit were probably derived from the 3D CAD model. So I overlayed my line drawing on that. The wheel positions and wheel openings are quite wrong, the skirt too tall, the front headlights too large, but the rest isn't bad. Especially the greenhouse matches pretty well. Amazing!! It's slowly becoming a case of 'man with two watches never knows the time' Ron, I still have to measure the windows on my kits, hopefully later today! Rob
-
Yes, sure, I already felt unconfortable doing a sort-of-review in this section. Rob
-
Gary, another thanks for the straight side photo. I made a drawing of it in CorelDraw, and maybe it will be of use for the kit review. It's not quite finished yet though. I overlayed it on the side view of the Nunu/Platz 935K3 model that I posted earlier, but it's no use, that photo has lots of perspective. Rob
-
Ron, thanks again for your photos! The door problem looks bad.. worse than I thought.. I had spotted it too, but did not try to correct in my 'modified' side view. It (sort of) confirms the feeling that they've been messing with the center section of the car to make the front and rear match in height. I've thought of another way to answer the question of the greenhouse height. If you have calipers, and if you don't mind, could you measure the following dimensions. I will do the same on my Esci 934, Tamiya 934, Tamiya 935-76 and Tamiya 935-78 kits. To my uncalibrated eye, these last four have a similar greenhouse, that looks good to my eye (911-ish) , but maybe the numbers will tell a different story. Rob
-
Ron, many thanks for your kit photos! The greenhouses look reasonable in these views. To be sure, we need telelens photos straight from the side. I've made those kind of photos but it isn't easy. I see something new in your photos: the running board of the K3 is much wider than that of the K2. I will have to start searching for K3 width and track numbers. You're absolutely right that 935 are notoriously difficult because the teams did so many modifications. However the #41 Le Mans winner was the third-built K3, fresh from Kremer in its first race. Also, Kremer built their K3s from factory-supplied bare chassis, and did not lower them, like for example the 935-78. Therefore the greenhouse should be close to the street version. That's my main reference point, together with the wheelbase figure. I'll probably buy the kit too and try to analyze it some more. Rob
-
Gary, many thanks for your search! I tried to overlay it on the 'modified' image that I posted earlier, but it doesn't work . The kit was photographed with much more perspective, i.e. from a smaller (relative) distance. You can see it most clearly on the wing, the shift of the two endplates. Rob
-
Ron, I am also eagerly awaiting this kit! However, someone pointed out that the model looked awkward. I looked into it, and came up with the following quick & dirty shape analysis. I *really* hope that the photo is of a prototype model, not the production kit. Can you compare your model to the photos below and comment? Thanks in advance! Rob
-
Leslie, thanks for the information. I think I found the set at the manufacturer's website: https://www.scaleproduction.de/product_info.php?info=p2259_17--ronal-racing-dtm.html I did not know that they produced such a wide range of wheels, interesting! Rob
-
Can you tell us more about these wheels, like the brand and catalog number? The reason I'm asking is because I've been chasing after Ronal wheels for years, and maybe these are the answer? Thanks in advance! Rob
-
Here are my experiences: https://robdebie.home.xs4all.nl/models/ultrasonic.htm Rob
-
I've done similar repairs - it's not too difficult. Pre-bend the plastic card if necessary, and finish with a bit of filler. The photos below will give you an idea, even if they're 20+ years old. Rob
-
Hi Peteski! Please let me know what's outdated. I recently started to use a strike-through font instead of totally deleting these links, for the sake of history etc. Rob
-
Since your original question wasn't answered, here's a long list of custom decal printers, bit Alps and non-Alps: https://robdebie.home.xs4all.nl/models/decals.htm#custom Rob de Bie
-
Fixing the wide front of the Fujimi 917?
robdebie replied to aurfalien's topic in Model Building Questions and Answers
Here's a drawing of what I described in words regarding the sill shape. Black is original, yellow the first widening, and red the final shape. But usually the sills were one step behind with the widening of the rear bodywork. Rob de Bie -
Fixing the wide front of the Fujimi 917?
robdebie replied to aurfalien's topic in Model Building Questions and Answers
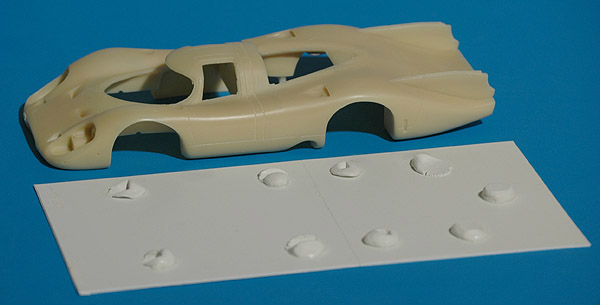
Thanks for the kind words. There's not much more to report on that build. Maybe it's useful to tell that I decided to build it completely different compared to the instructions. I will build it in three big components: the whole body including sills, the engine bay with rear suspension, and the cokpit plus front suspension. In the photos below you can see the sills cut off from the floor panel. I used parts from a second kit to make straight sills. All in all it's a bit of a puzzle, and the project is of the stop-and-go kind that you're all familiar with ? But it's good fun to do this old but detailed kit justice. Rob -
Fixing the wide front of the Fujimi 917?
robdebie replied to aurfalien's topic in Model Building Questions and Answers
Ah yes, of course, Fisher makes nice 917s too. I would appreciate if you could measure the width over the front and rear fenders, plus the windscreen of course. Rob -
Fixing the wide front of the Fujimi 917?
robdebie replied to aurfalien's topic in Model Building Questions and Answers
Fujimi has a habit of doing 'optical corrections' to their models, or they do really bad research. Tamiya also does 'optical corrections', there's the story of ~2 mm being added to the master of their 1/12 Porsche 935. I would rather have a dimensionally correct model. Rob -
Fixing the wide front of the Fujimi 917?
robdebie replied to aurfalien's topic in Model Building Questions and Answers
Of course MFH is the best choice for a 917, but they are very expensive and I would even call them intimidating ? The Heller kit is a bit of a bitch to build. Warped parts were already reported, and here's what mine looked like on the runners. I decided to glue it solidly to the cockpit section. As shown earlier, I narrowed the rear bodywork and added 'straight' sills. I also added 1 mm between the sills and the upper body, to increase the height a bit. I'm now working on the front side. I'm even trying to use the frame parts. I added the bulkhead part in white. One last warning is that the engine is either too tall, or needs to drop down about a millimeter, otherwise the rear body will not fit. The likely cause for the problem is the 'cross' in the bottom side of the frame, something that does not exist on the real car. Rob -
Fixing the wide front of the Fujimi 917?
robdebie replied to aurfalien's topic in Model Building Questions and Answers
Many thanks! I see a huge size difference, and to me it disfigures the shape to such a degree that I don't want to build the Fujimi model. I want to add an observation. In my experience most modelers focus on the details, and don't have an eye for the overall shape. I've tested this theory many times, and roughly there's a 80:20 split between detail-viewers and shape-viewers. Personally I'm still learning to view shapes, and often I can see that something is wrong, but not what's wrong. But I'm slowly developing techniques to help with the shape analysis. One very relevant example is the Profil 24 1969 Porsche 917. I saw something was wrong with the rear side, and after a lot of analysis I found out that the rear wheel opening was 4 mm too far forward. Plus the tail needed to be rotated down. Below you can see a before and after. Whenever I see this model built up without modifications, it looks like it was rear-ended, it really looks weird. Rob
-
Fixing the wide front of the Fujimi 917?
robdebie replied to aurfalien's topic in Model Building Questions and Answers
I can add ~40.3 mm for the MFH 1970 917 Langheck, making 967 mm in real life. Rob -
Fixing the wide front of the Fujimi 917?
robdebie replied to aurfalien's topic in Model Building Questions and Answers
I checked, and the comparison photos in both threads have disappeared. I did not save them either ? Rob