Anglia105E
-
Posts
3,487 -
Joined
-
Last visited
Content Type
Profiles
Forums
Events
Gallery
Everything posted by Anglia105E
-

What do you drive?
Anglia105E replied to gasman's topic in General Automotive Talk (Trucks and Cars)
My daily drive is a 1994 Mitsubishi Pajero 2.8 litre Turbo Diesel Automatic with Overdrive and Super Select 4 wheel drive. She's 24 years old and a grey import, having spent the first 8 years of her life in Japan. This vehicle tows a boat and trailer that is 2 tons fully loaded to Cornwall from Derbyshire which is 350 miles. The Pajero has the full Winter package for extreme Japanese Winters, which includes two batteries. Only does 26 miles per gallon. David
-
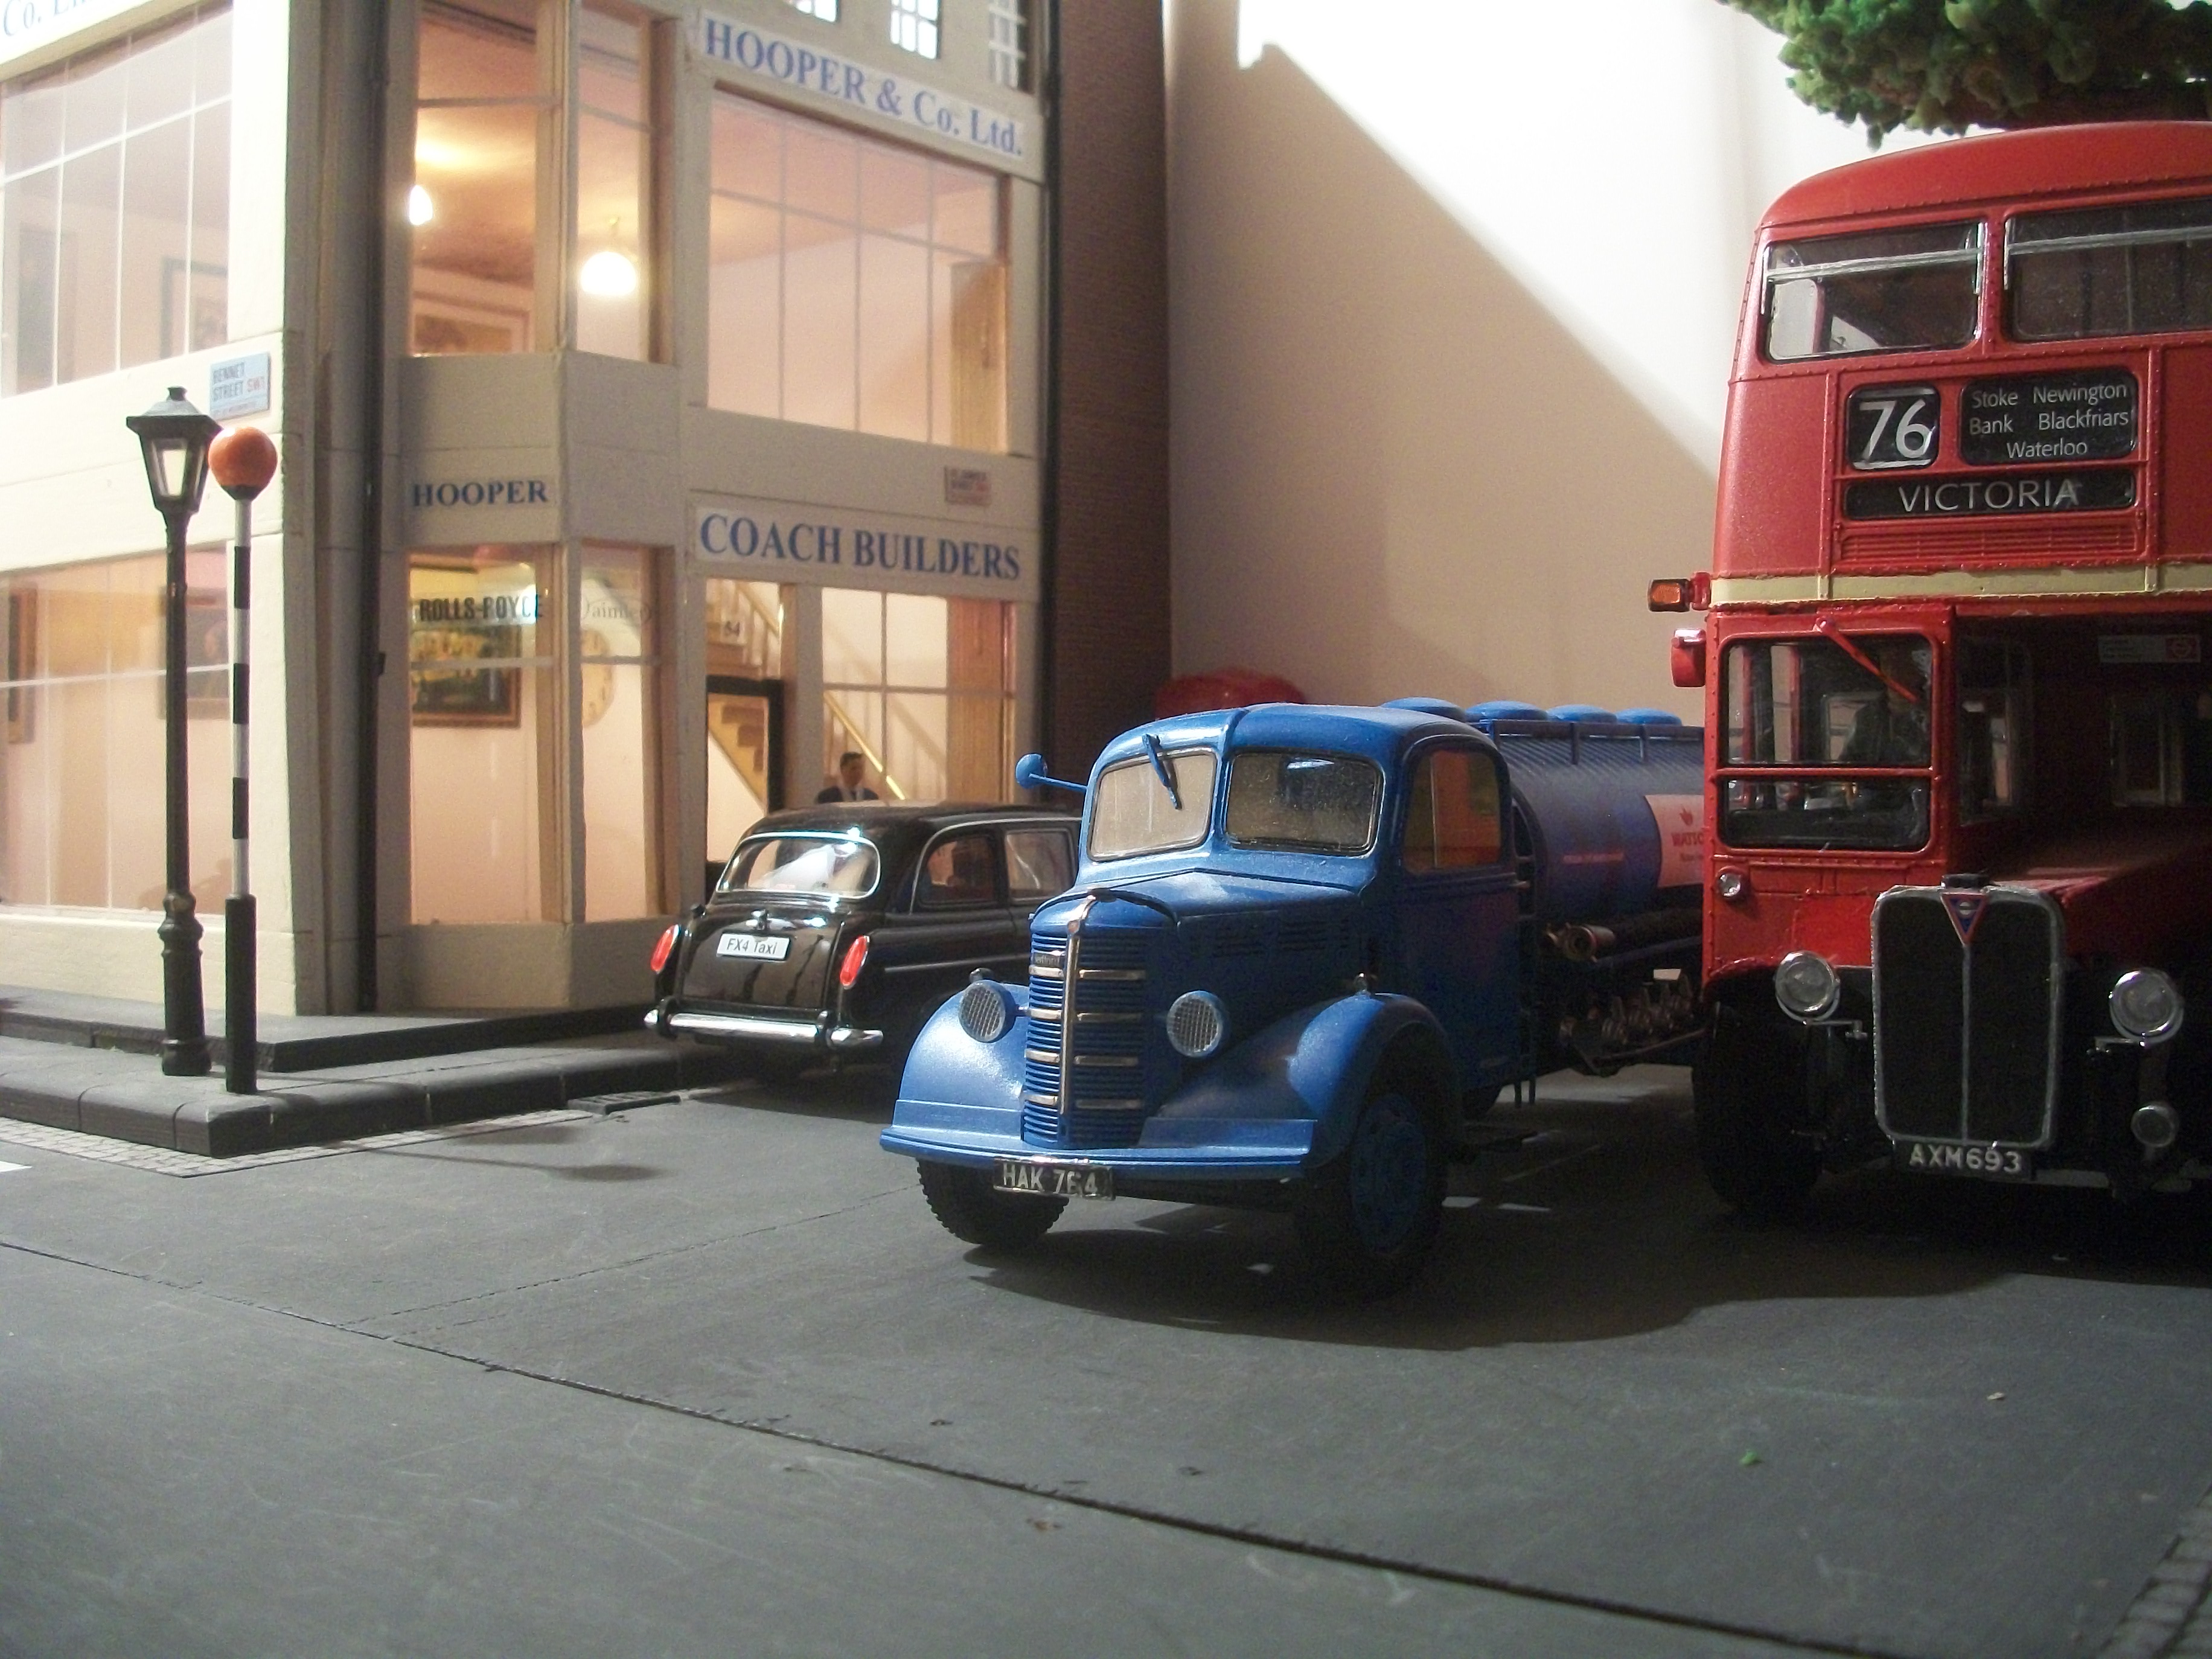
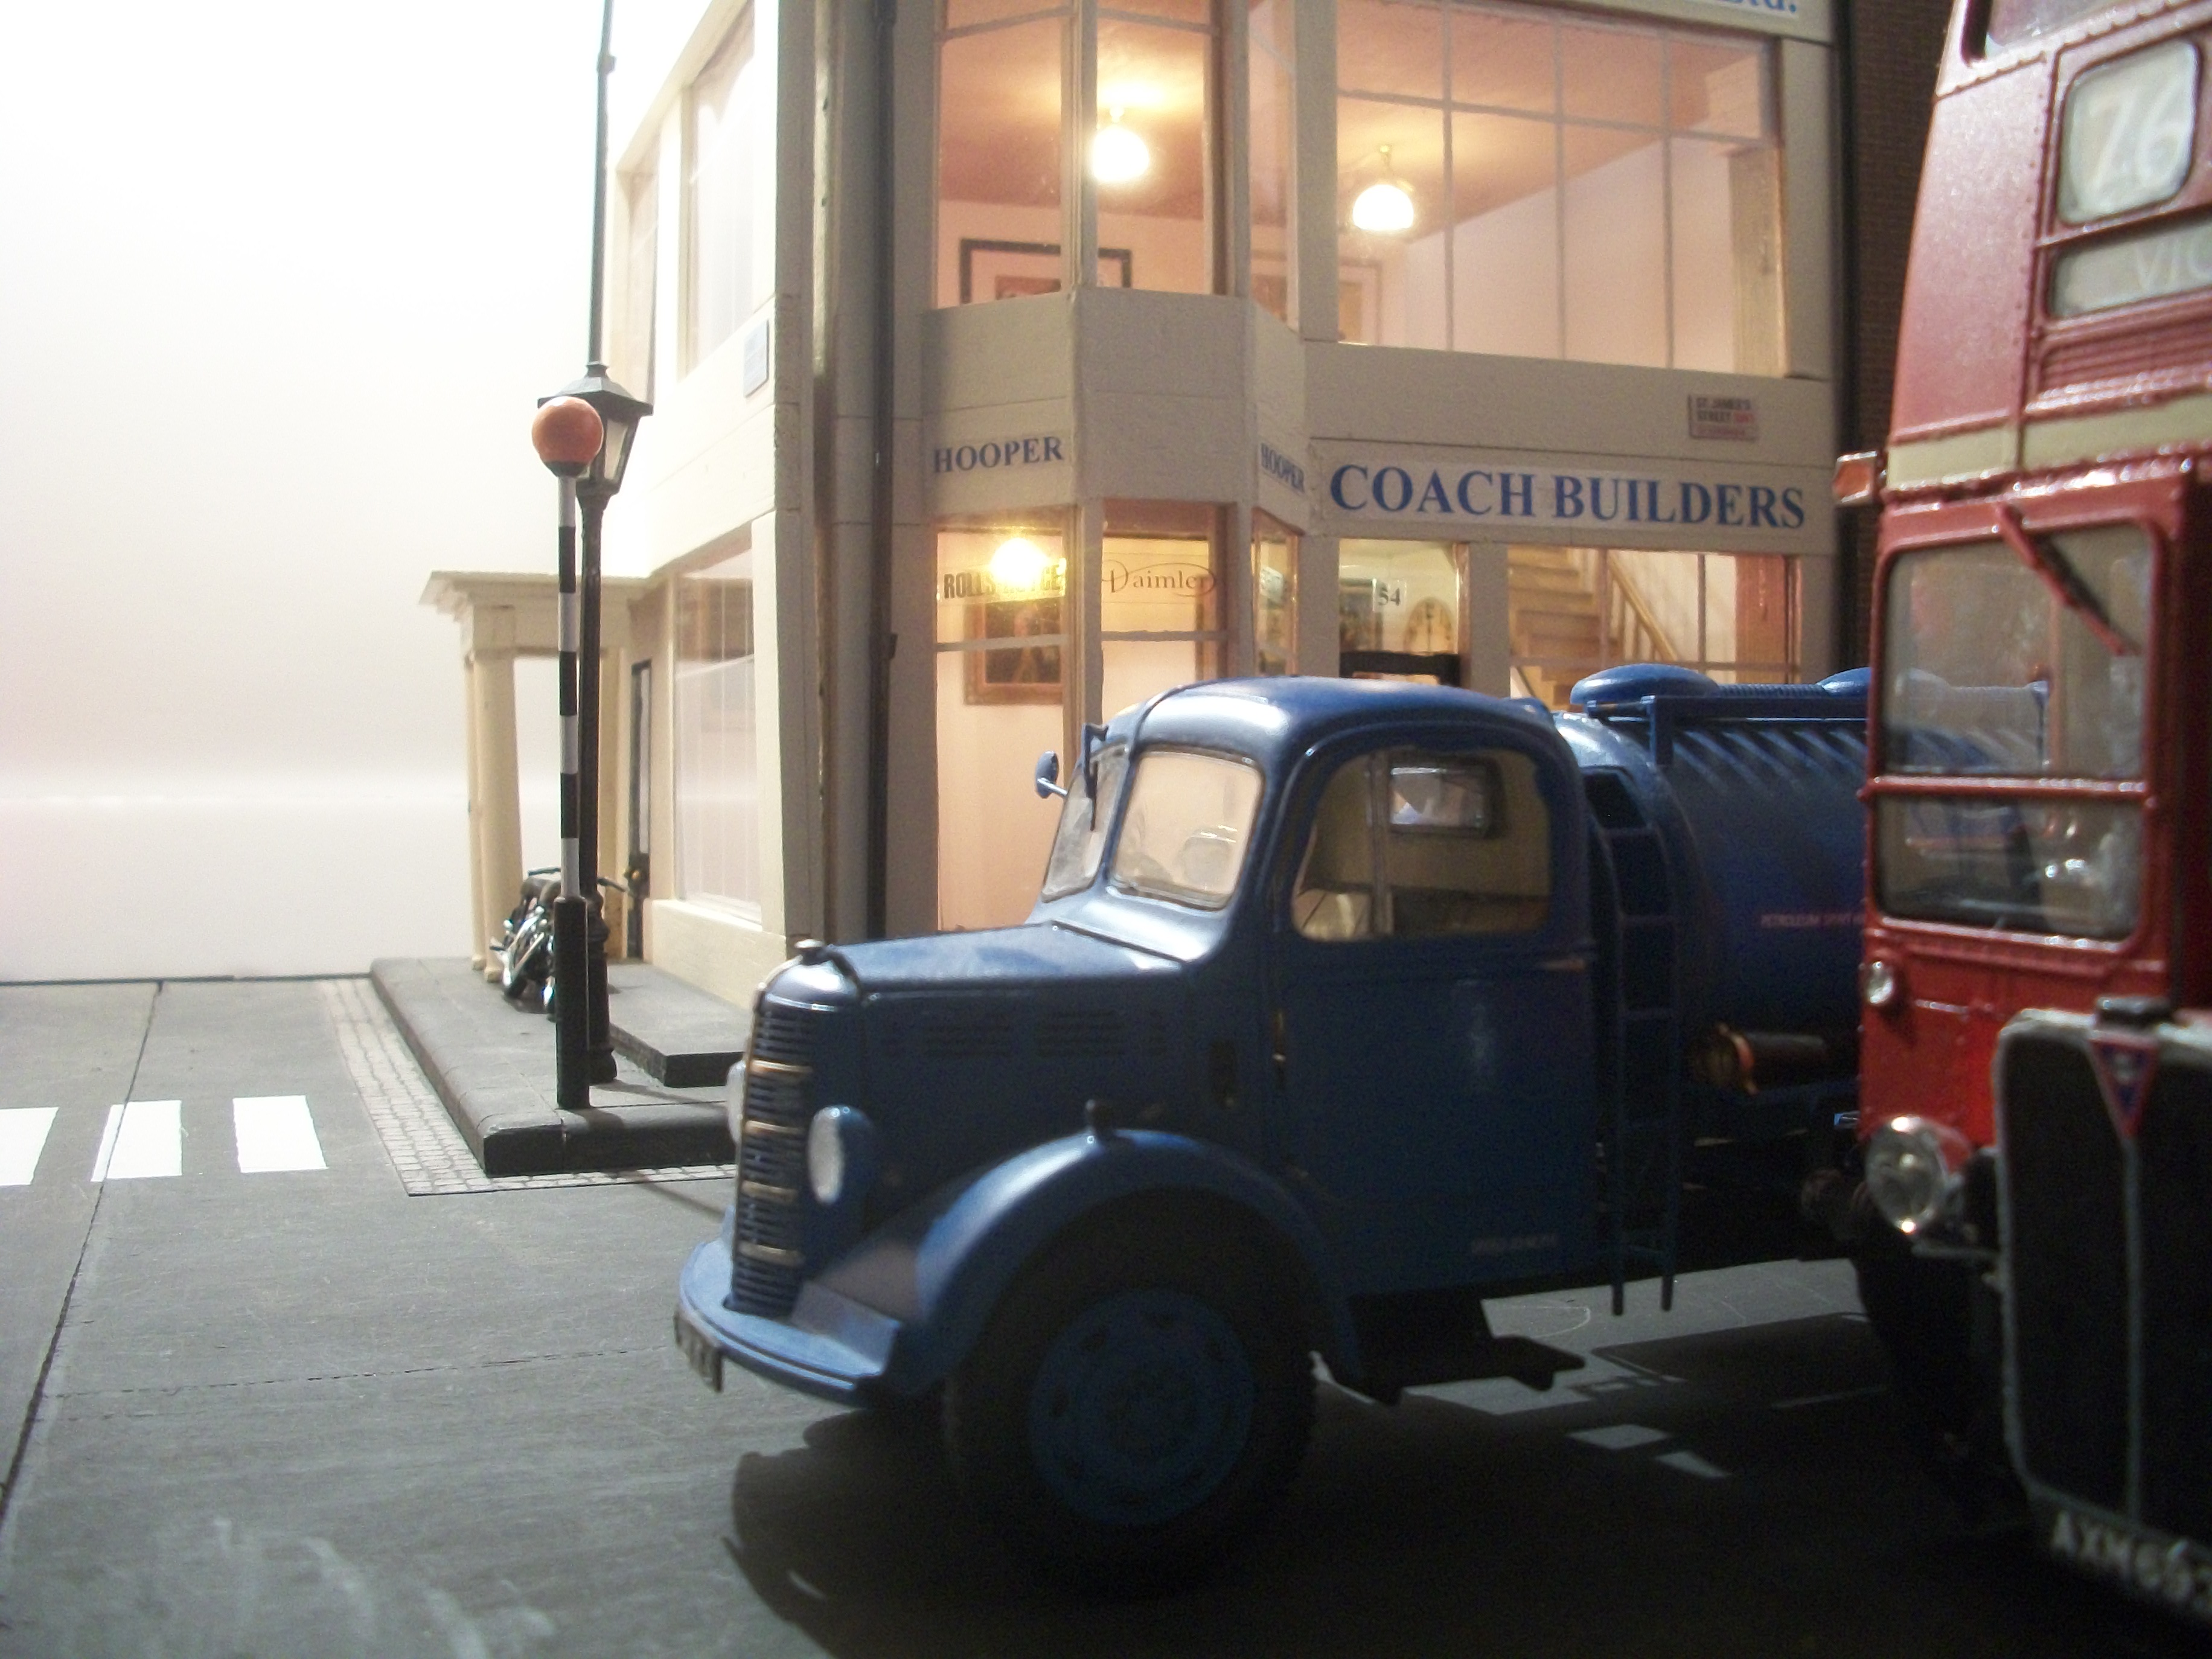
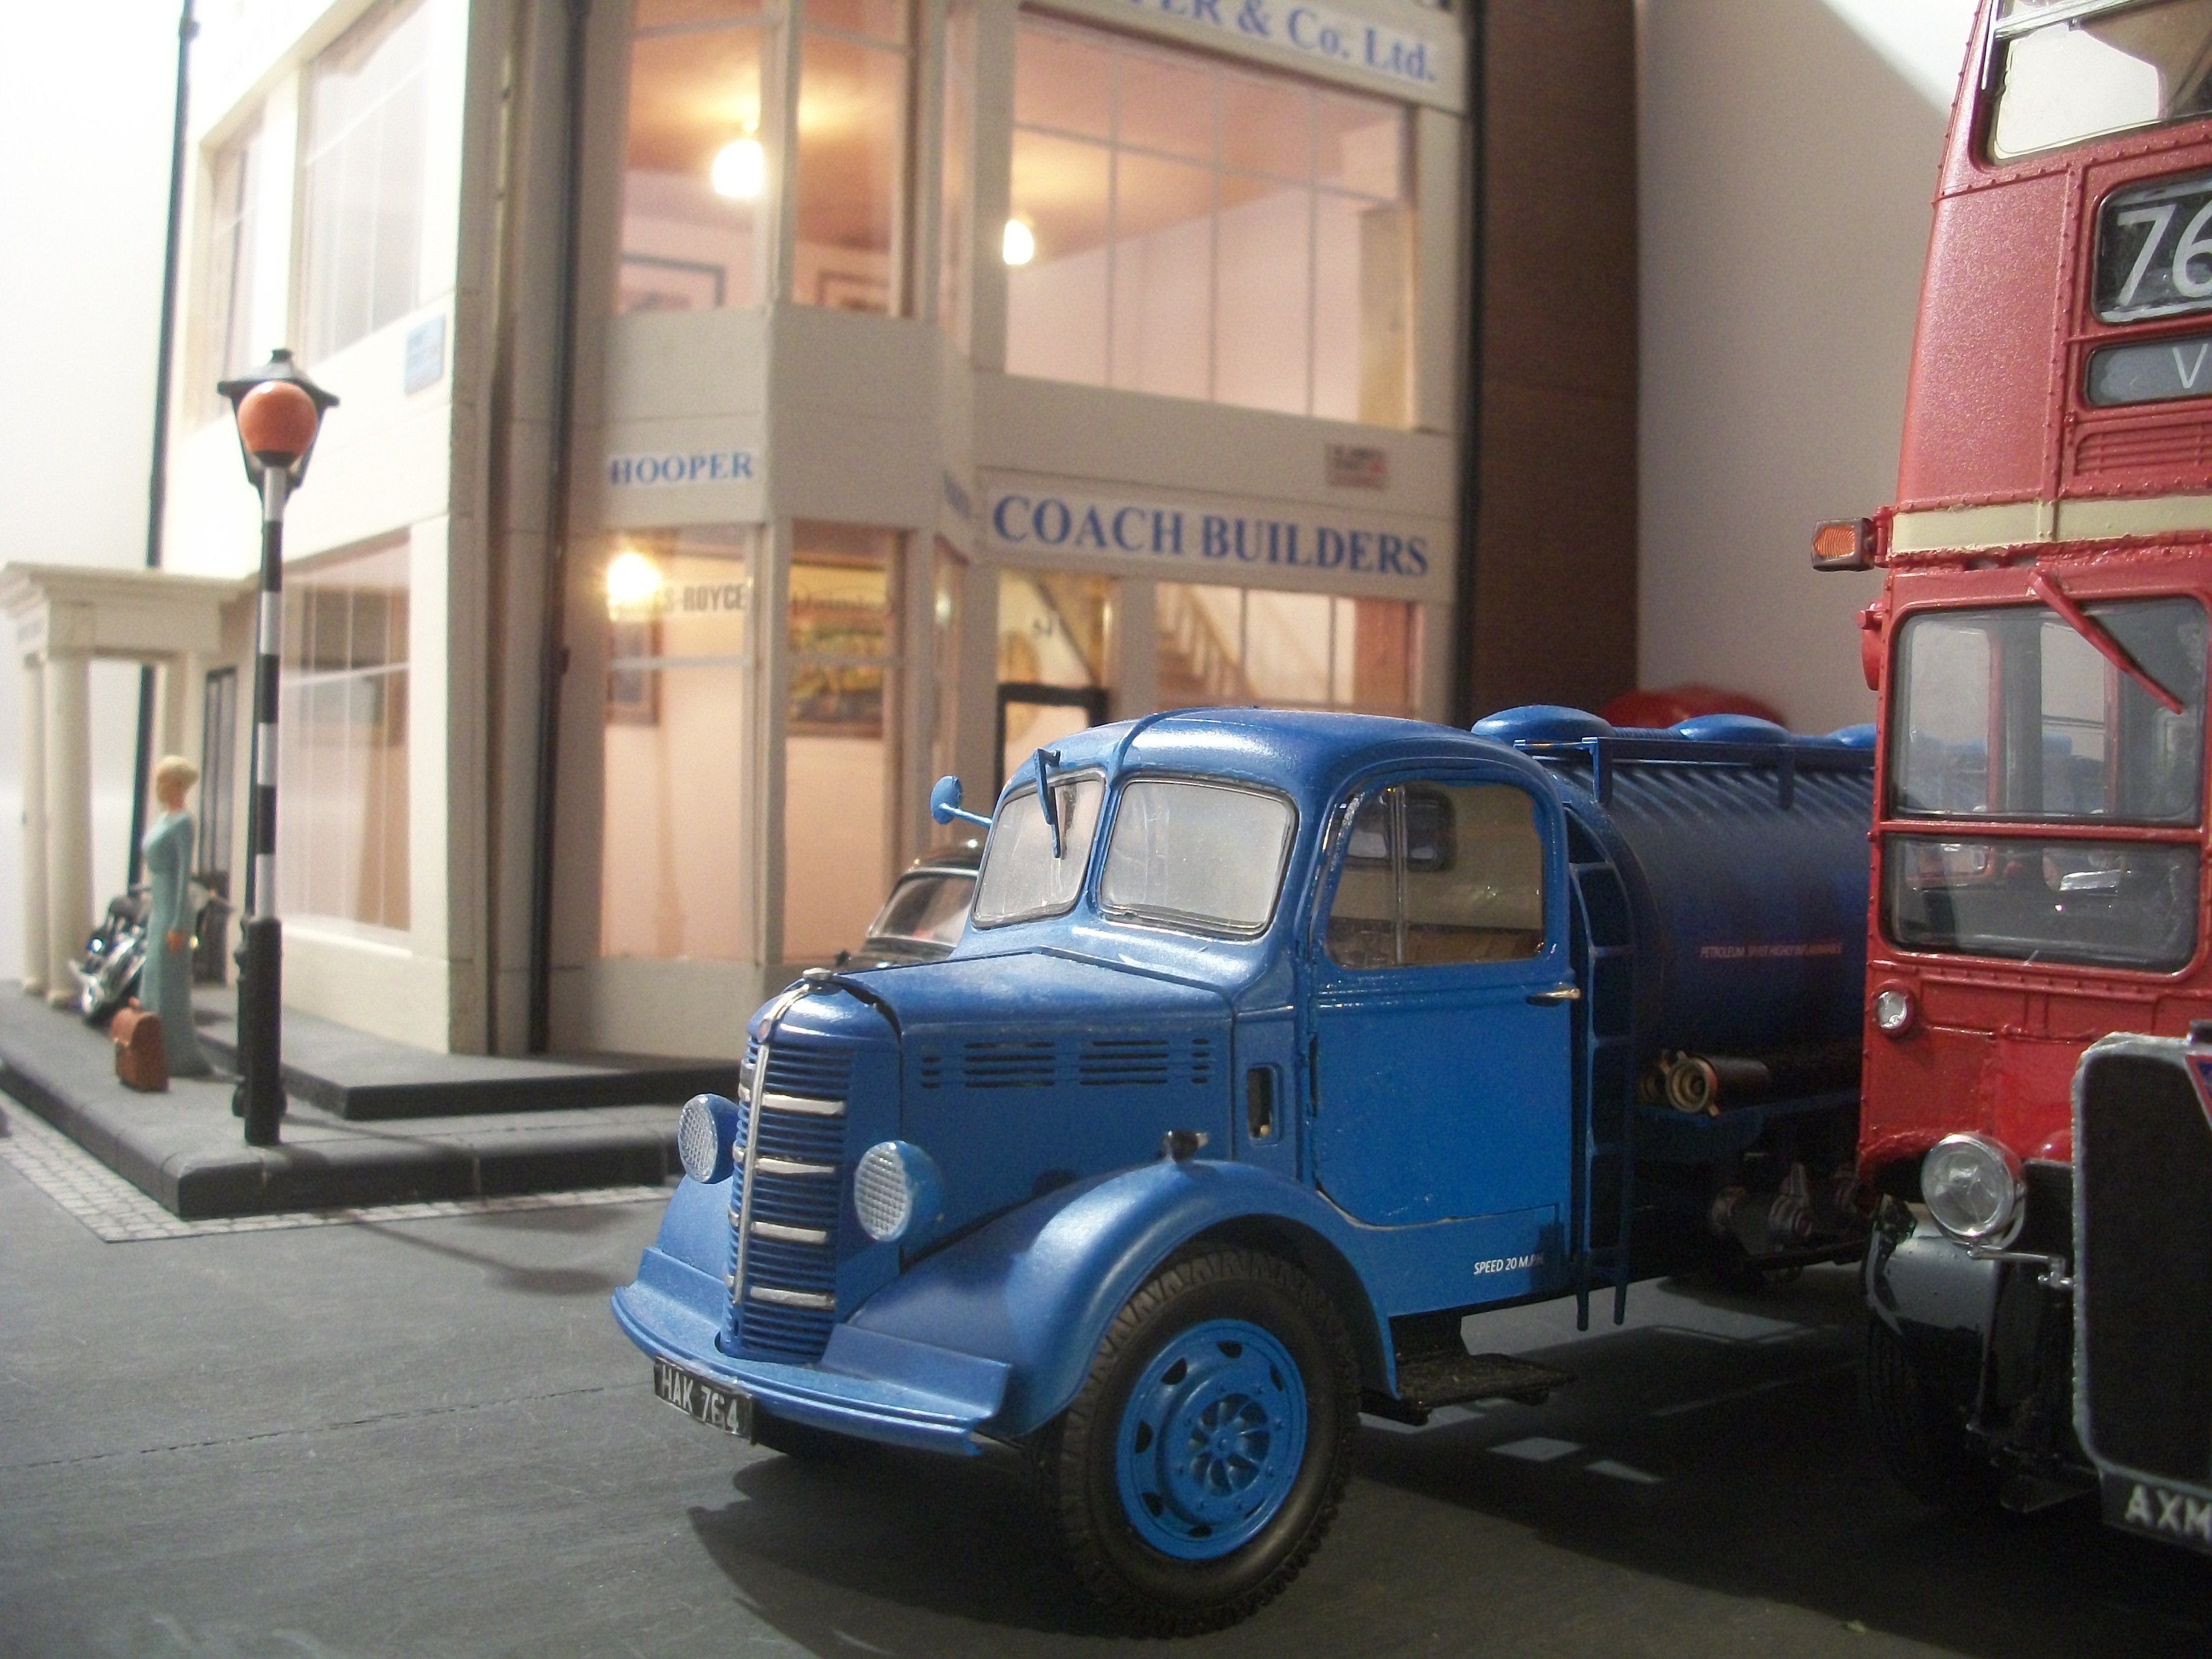
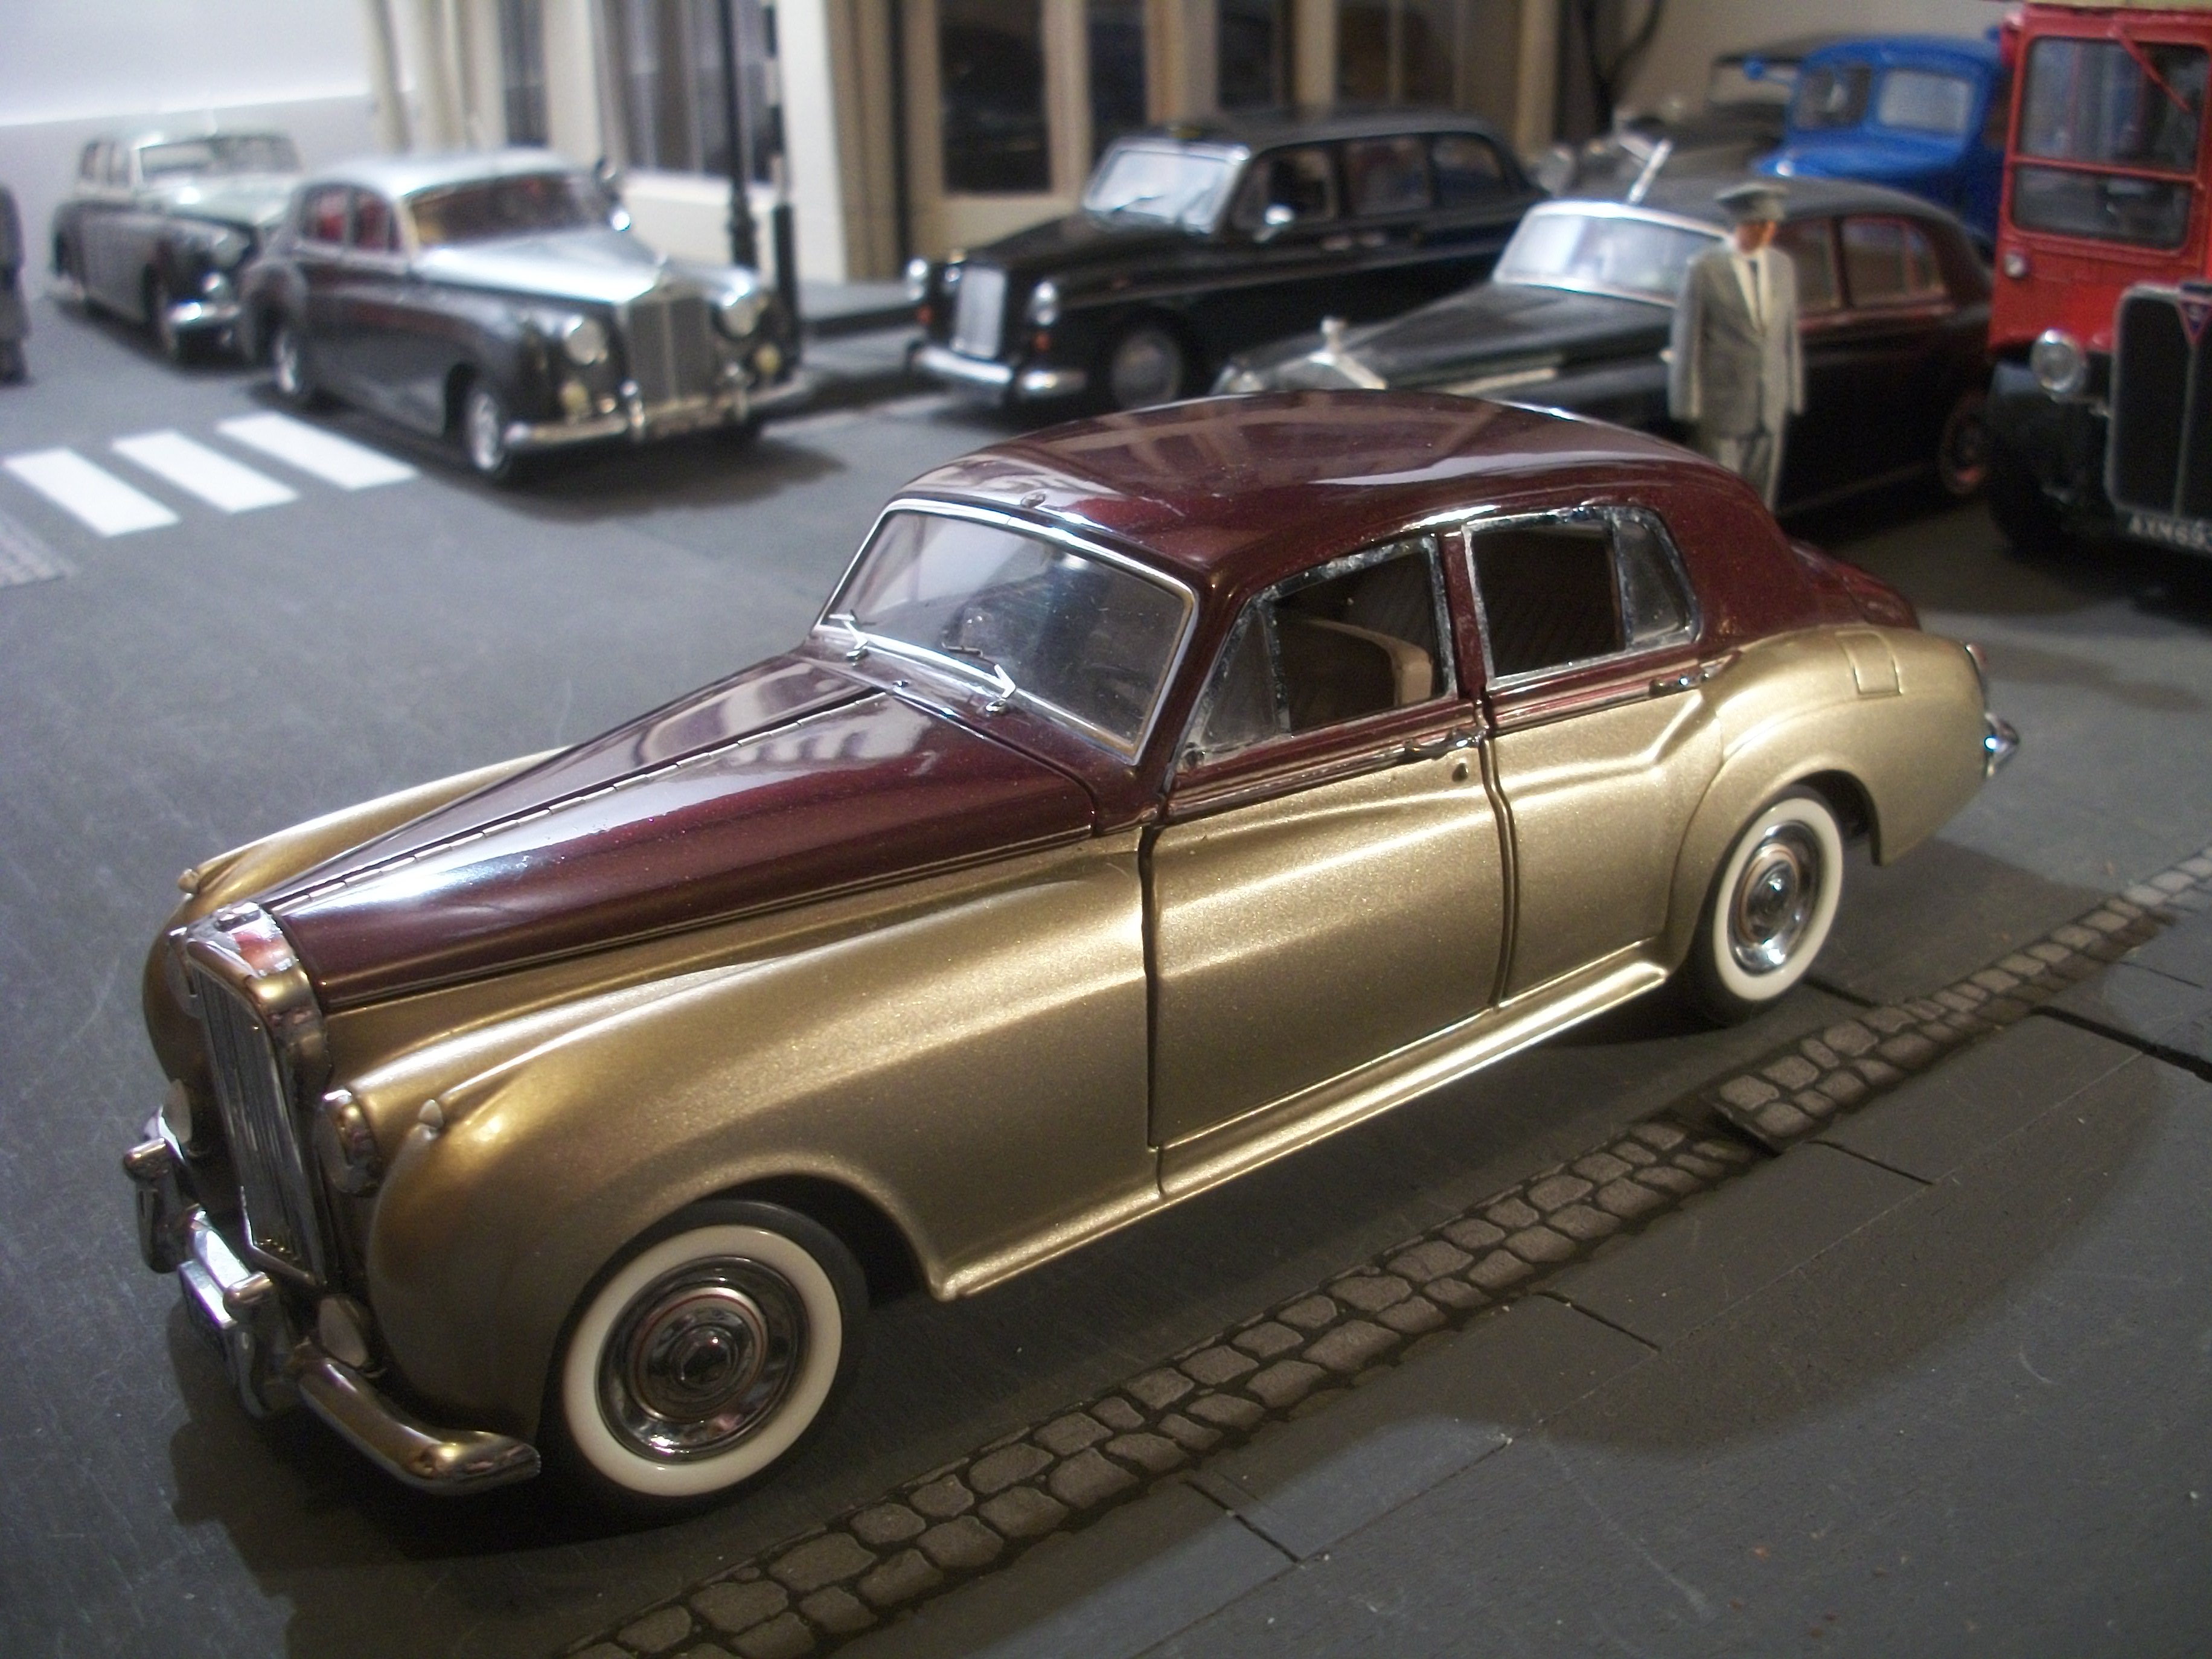
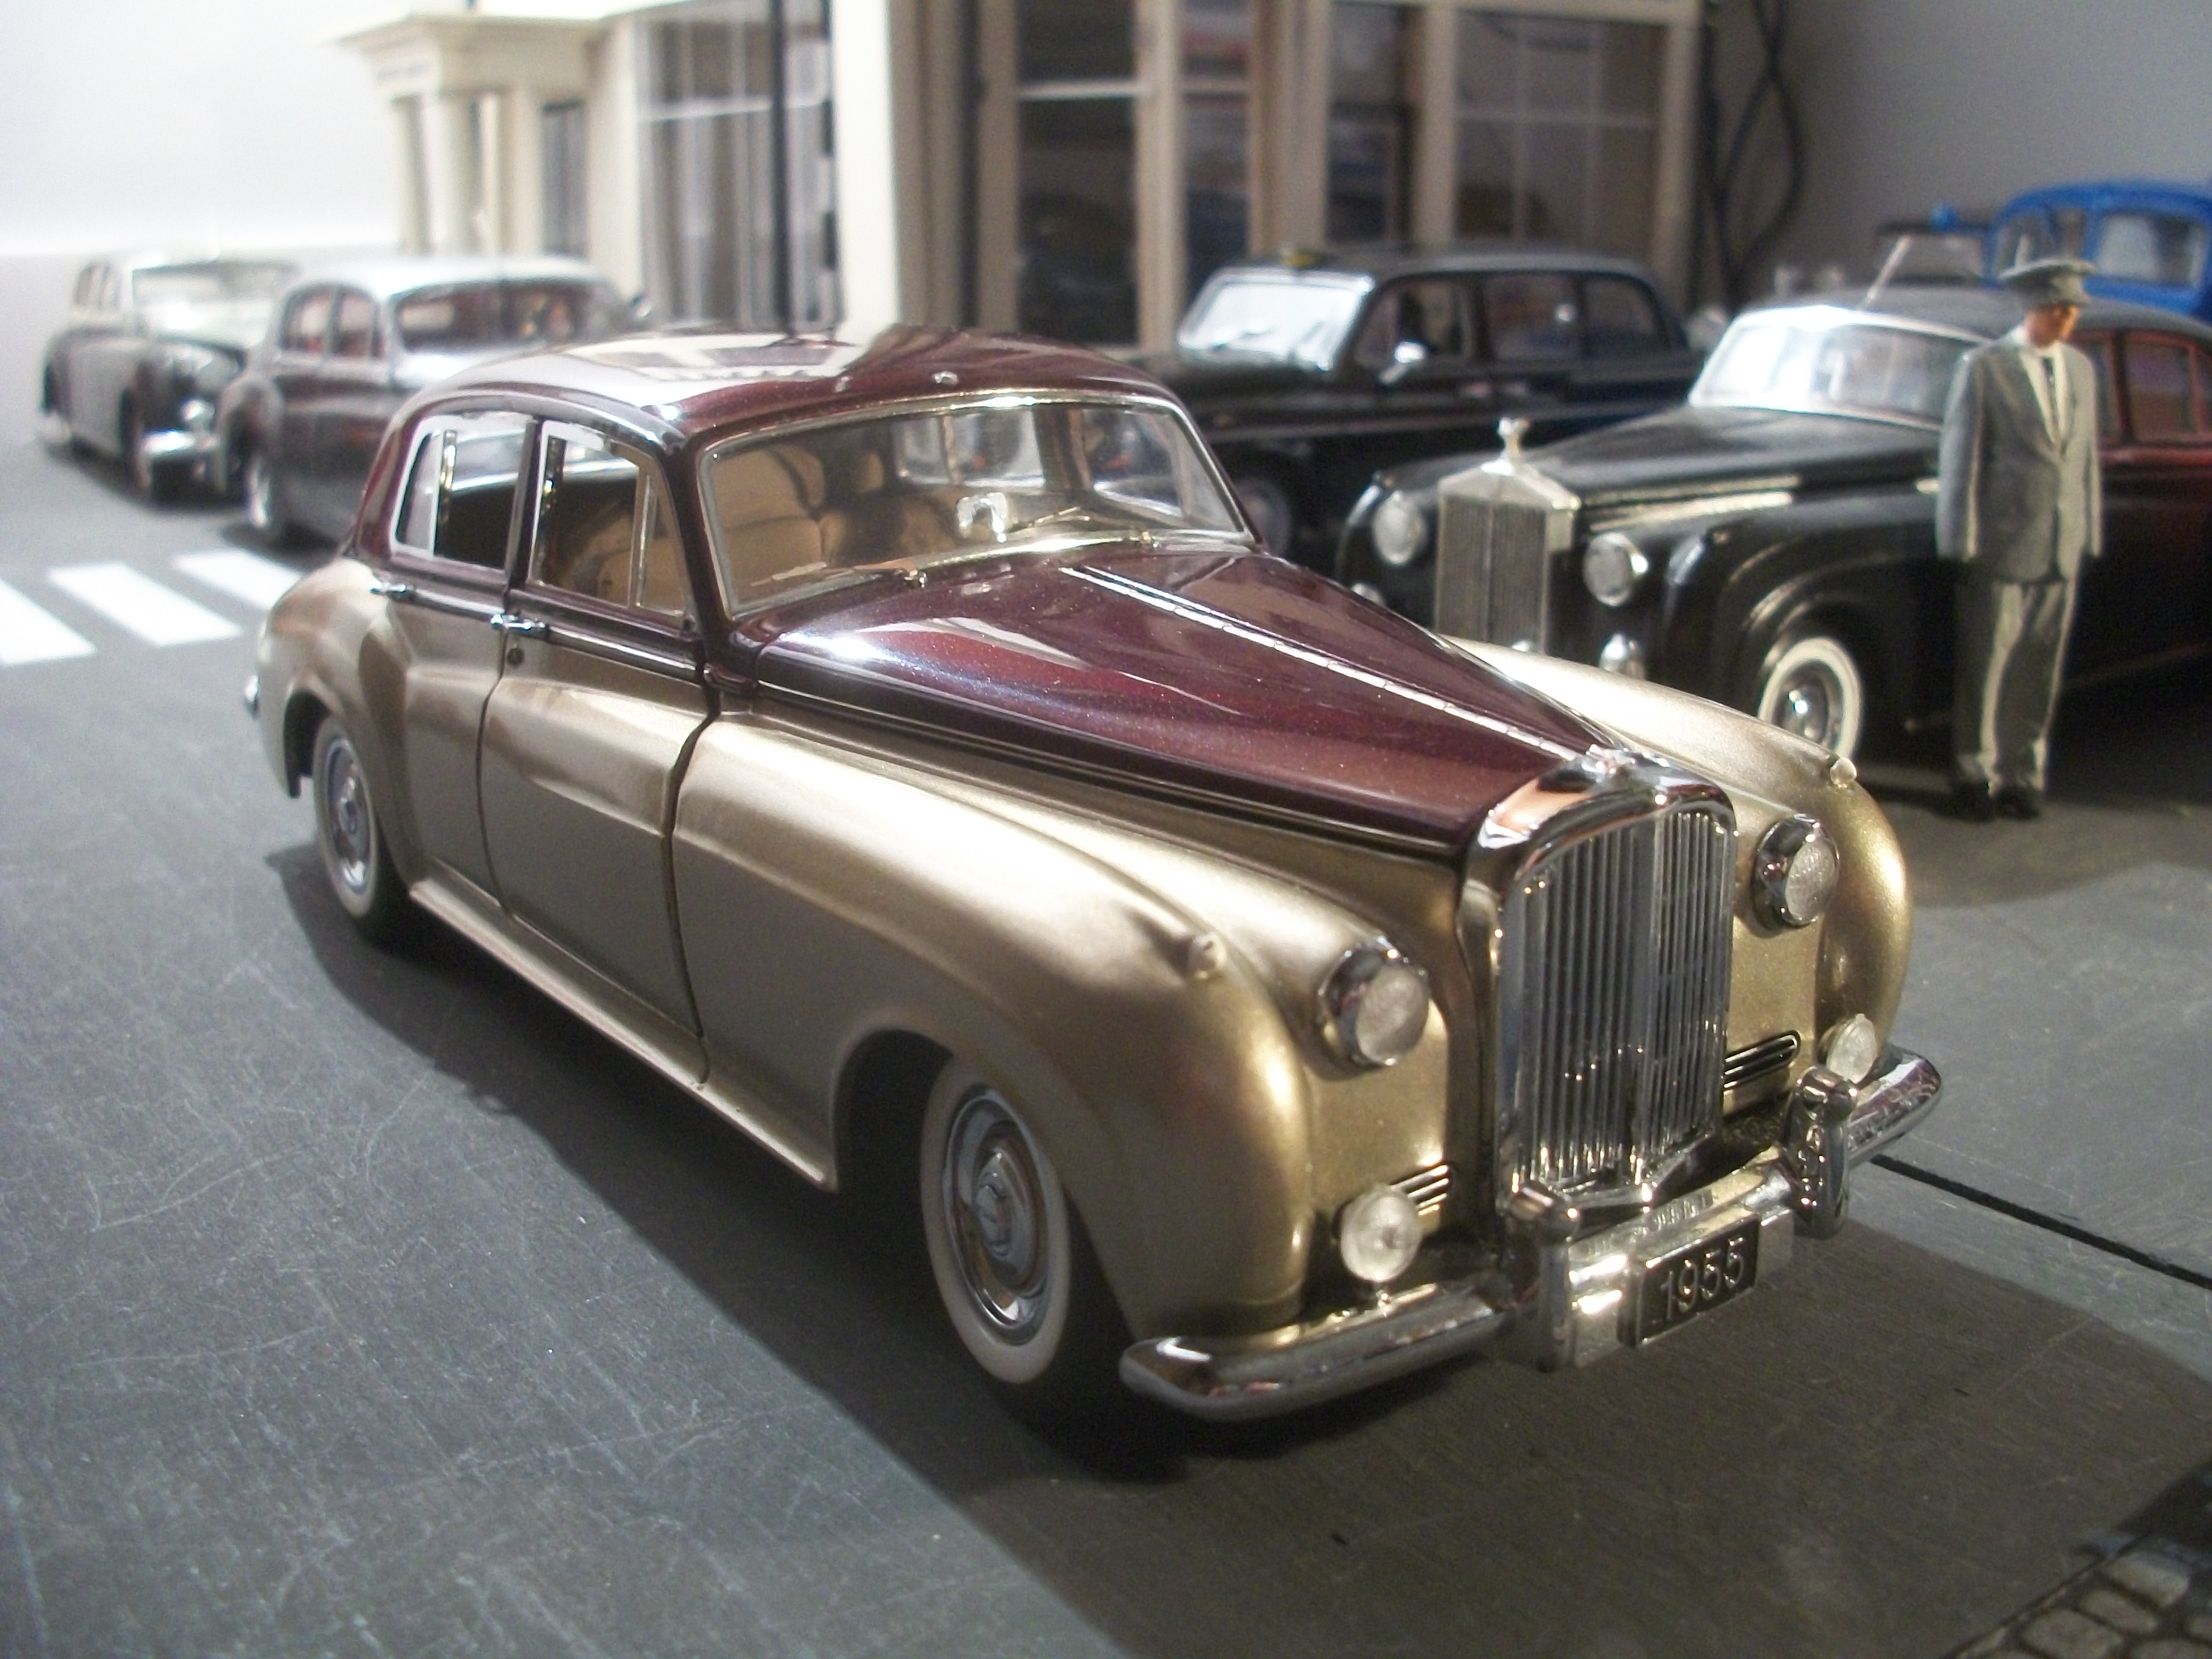
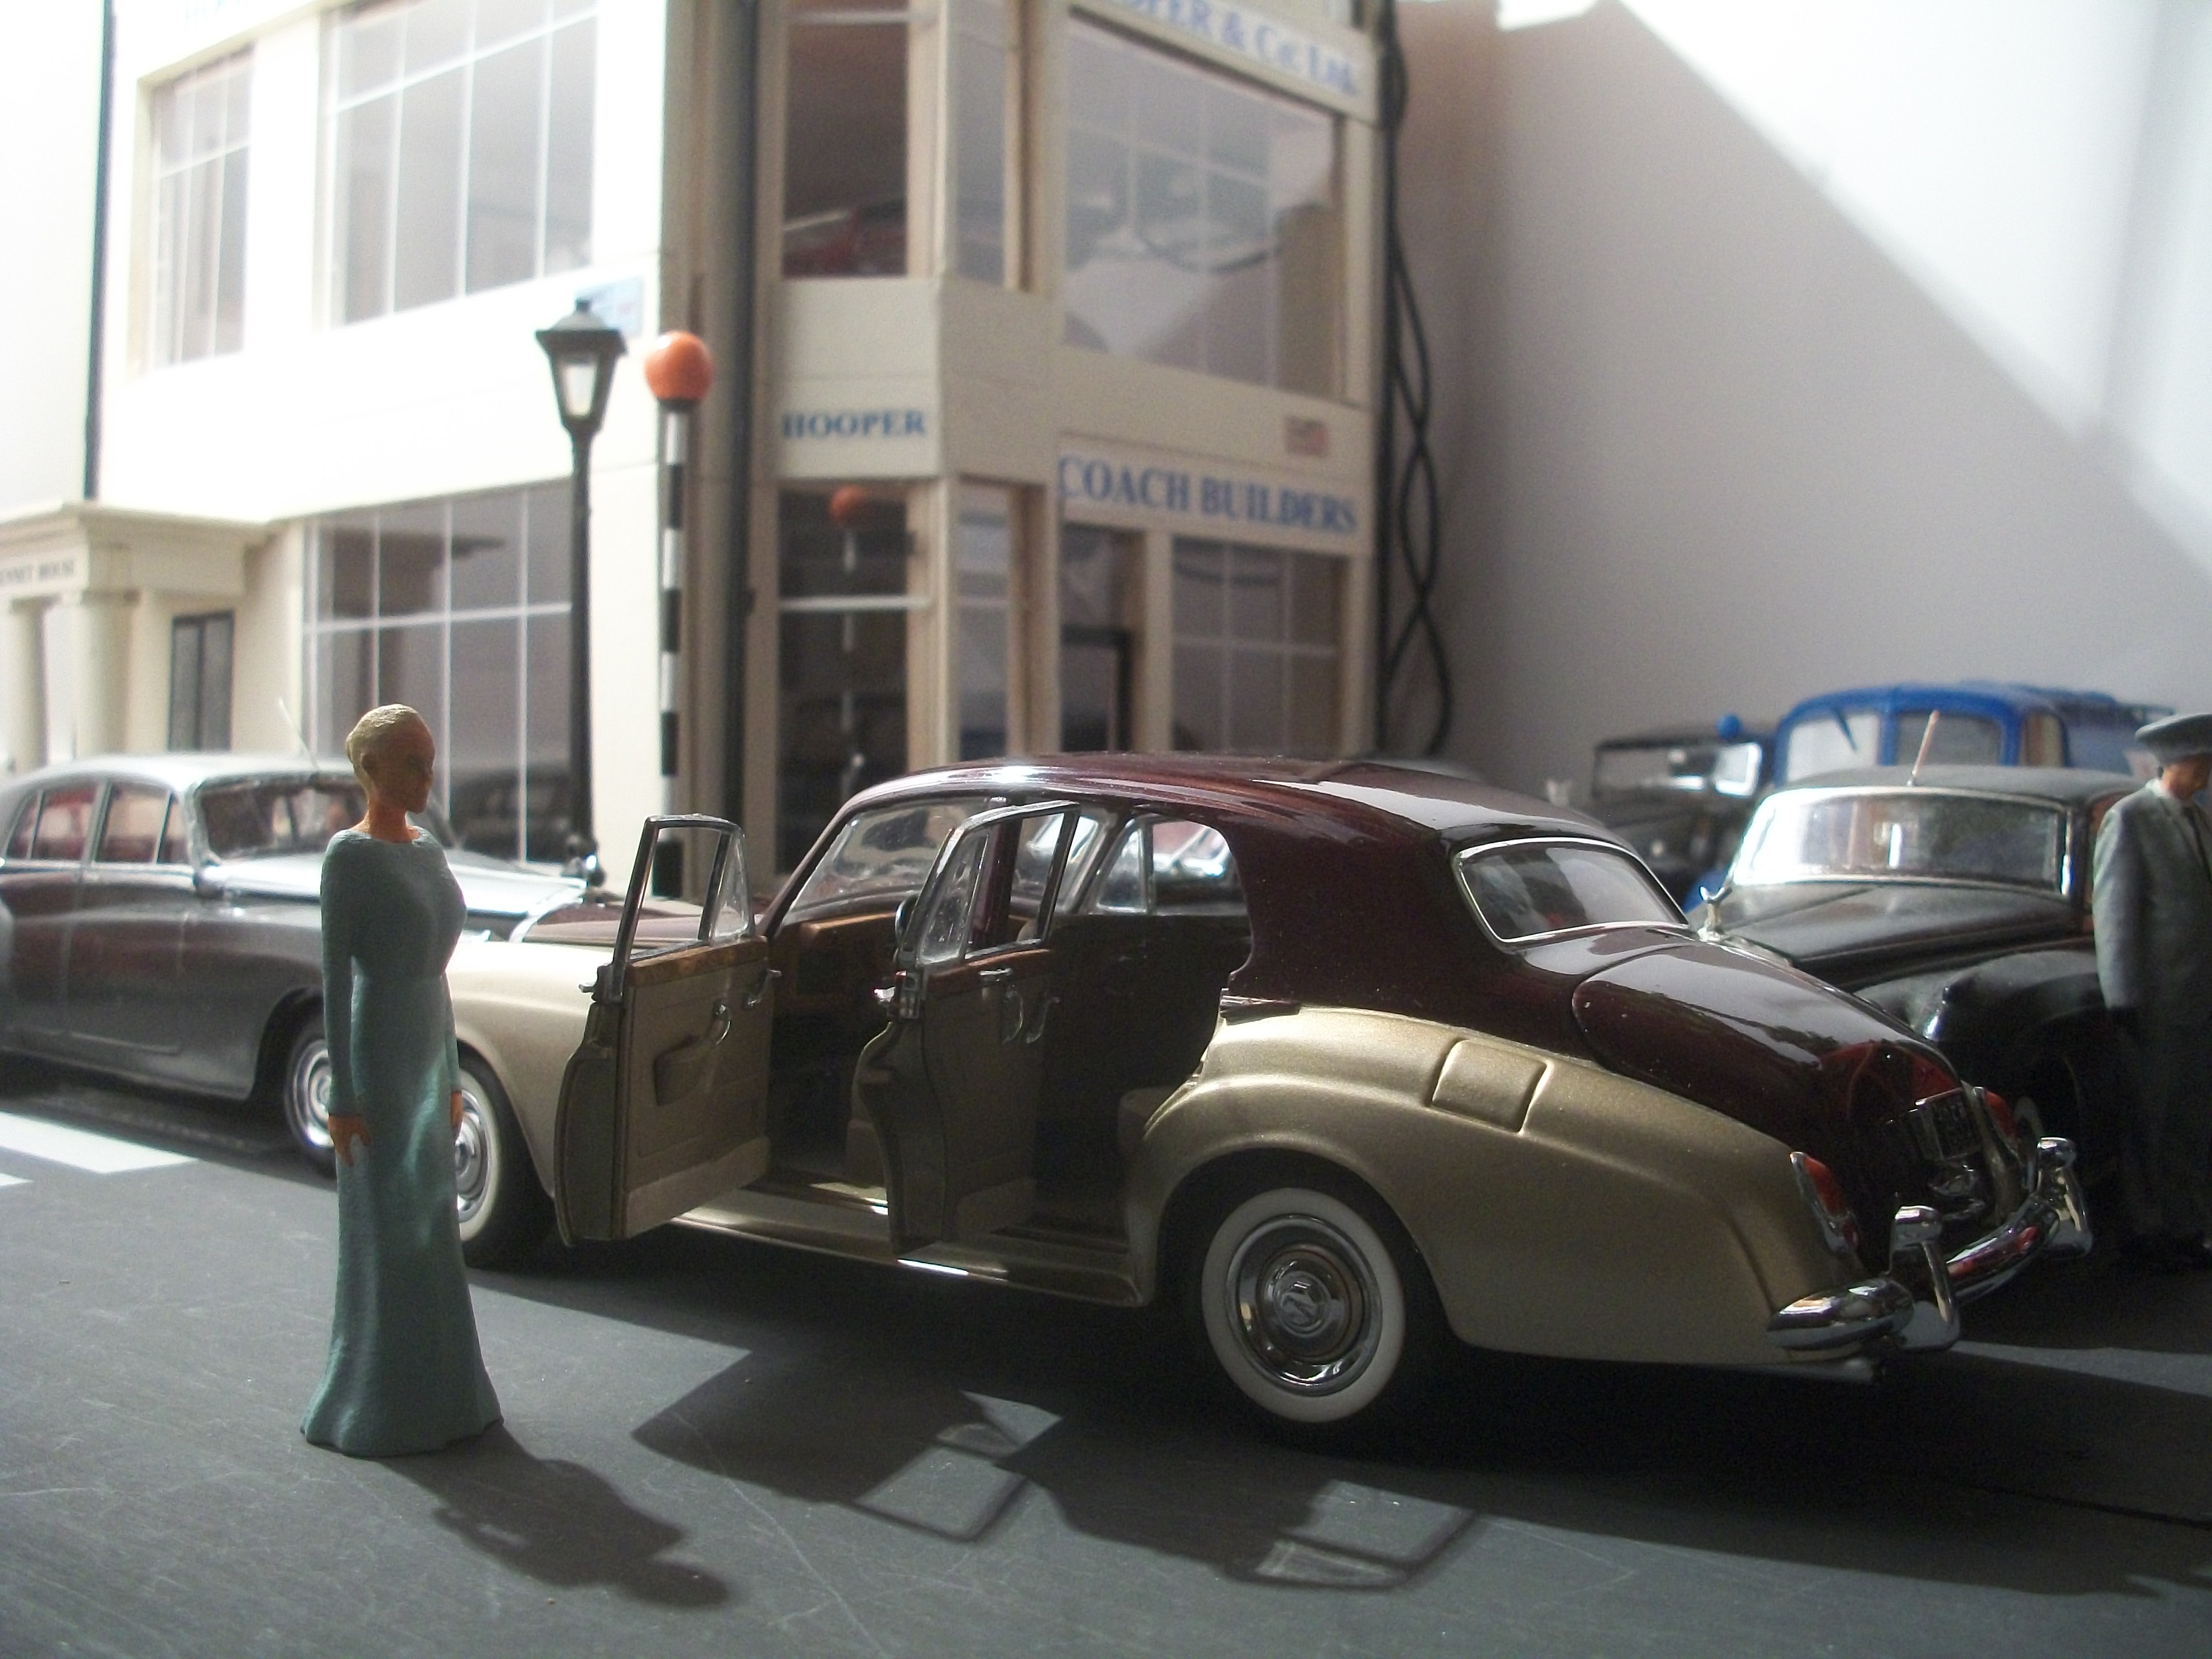
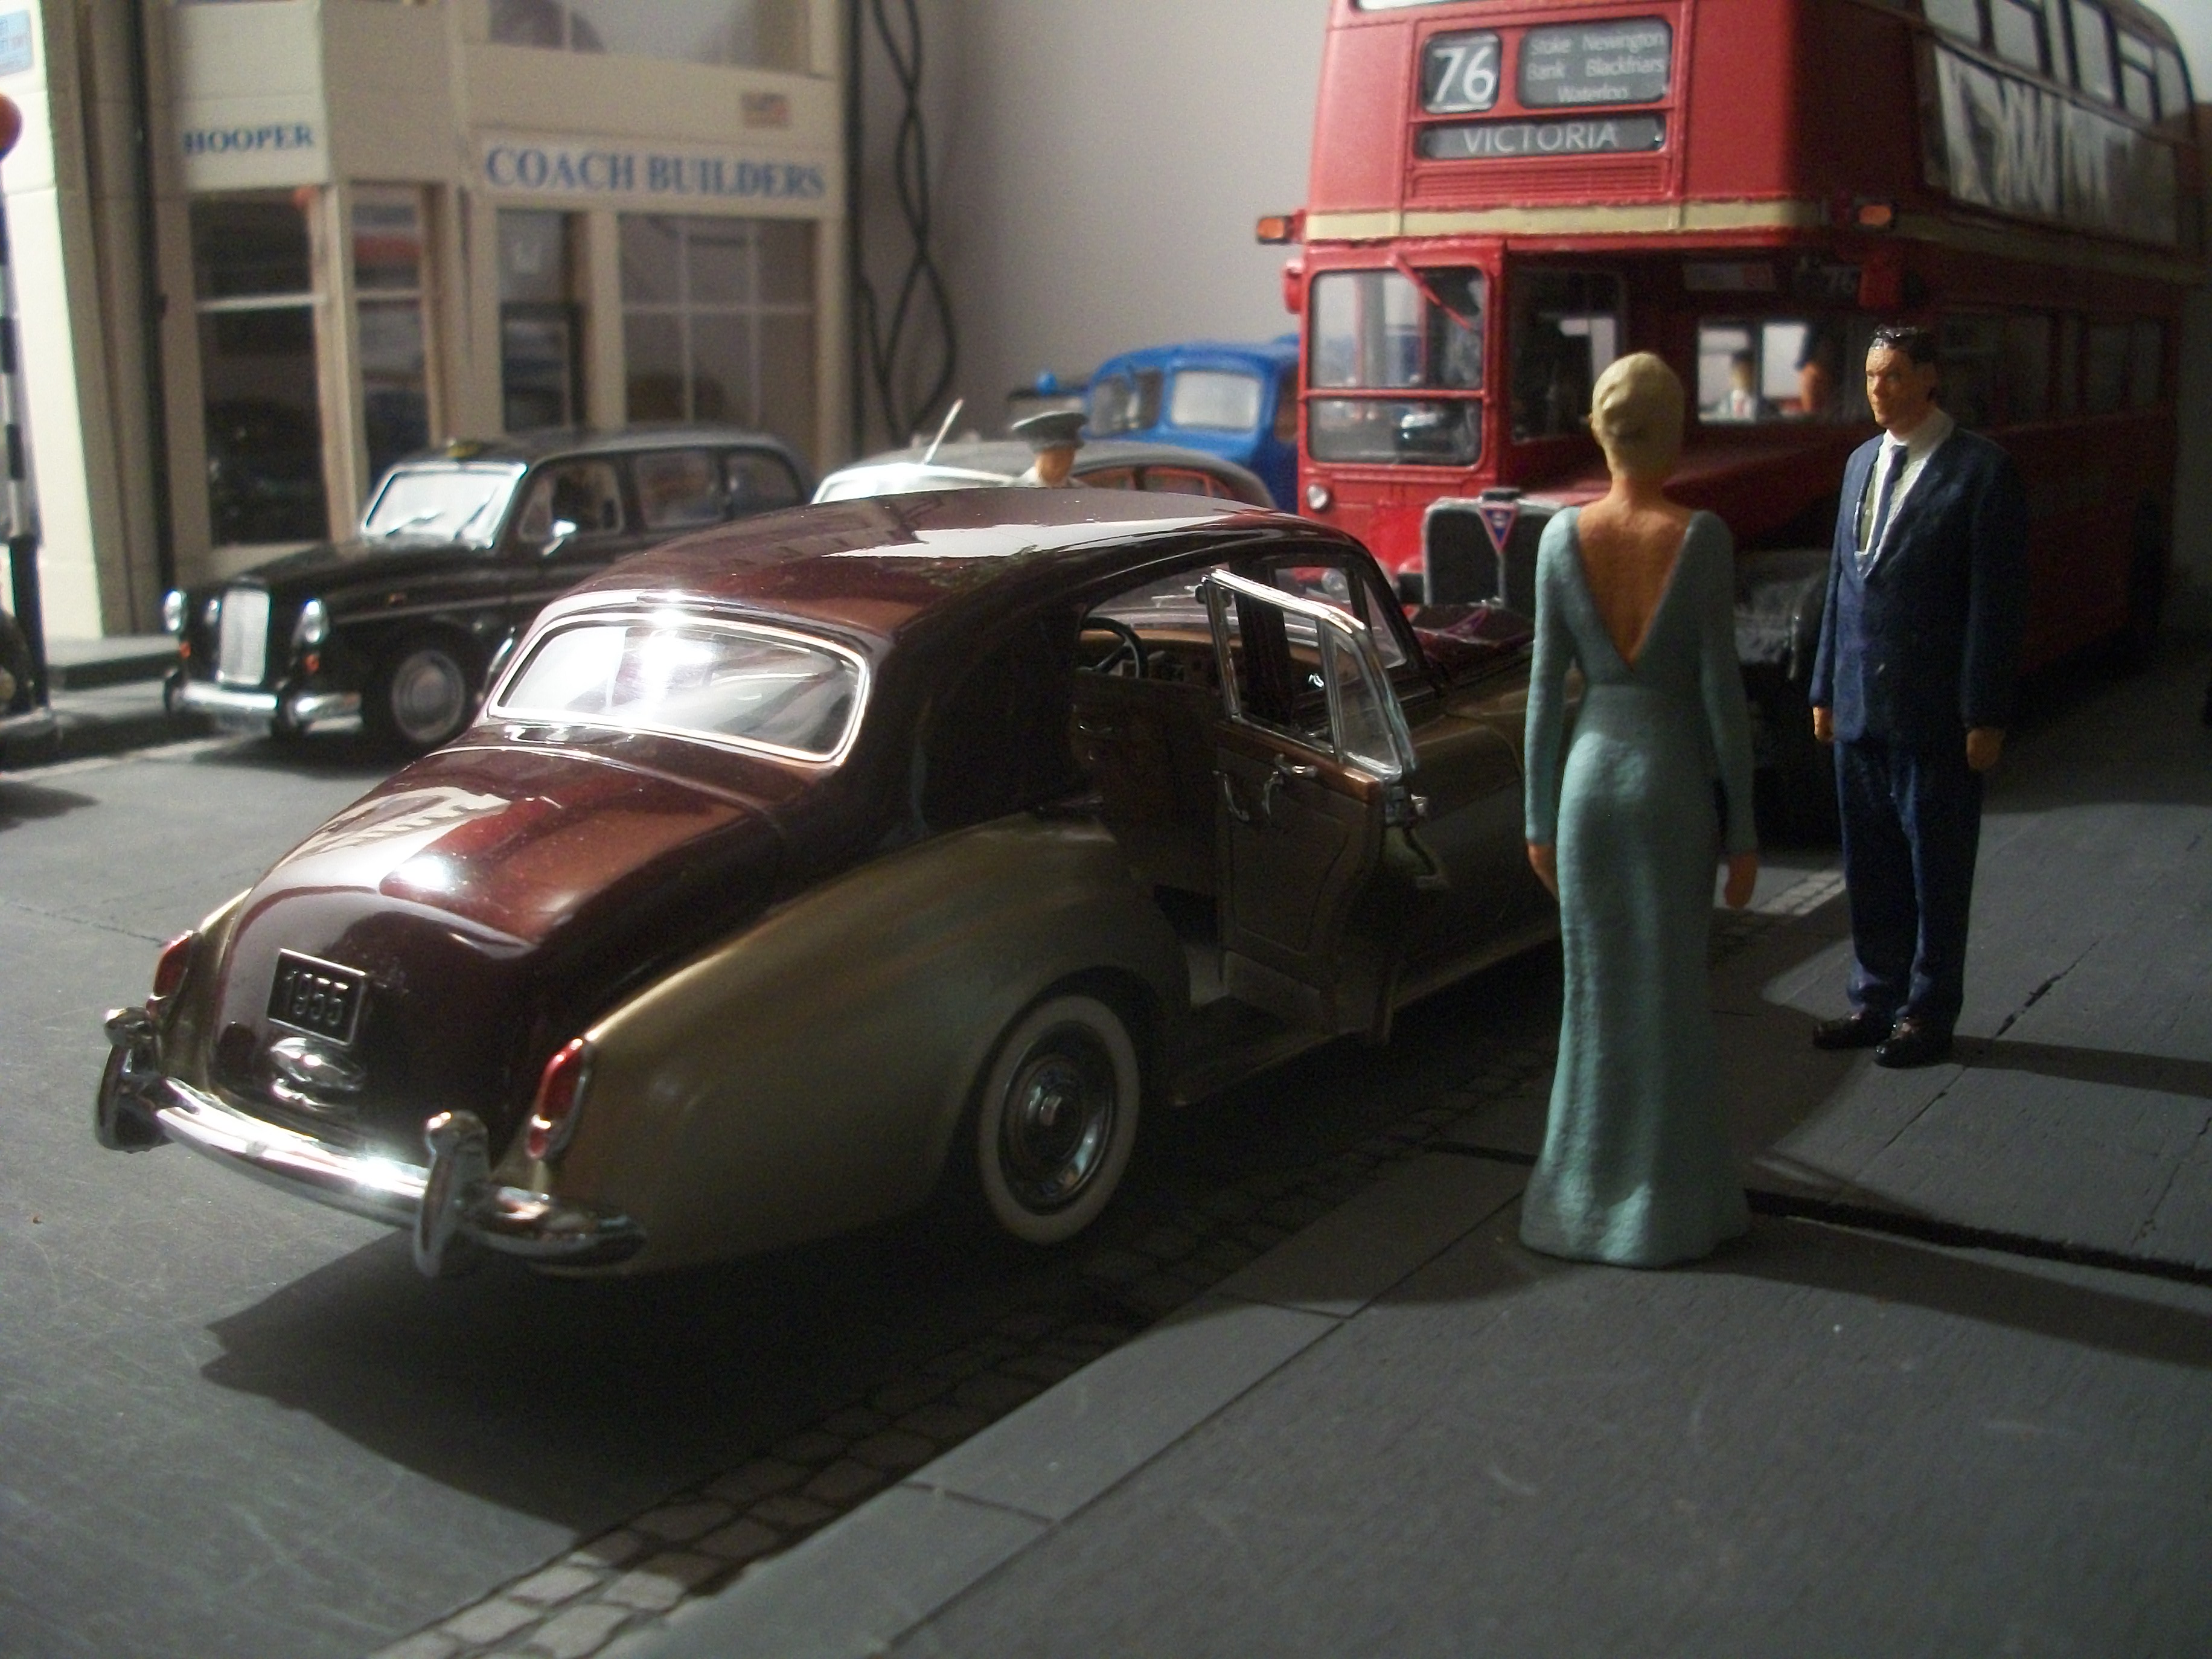
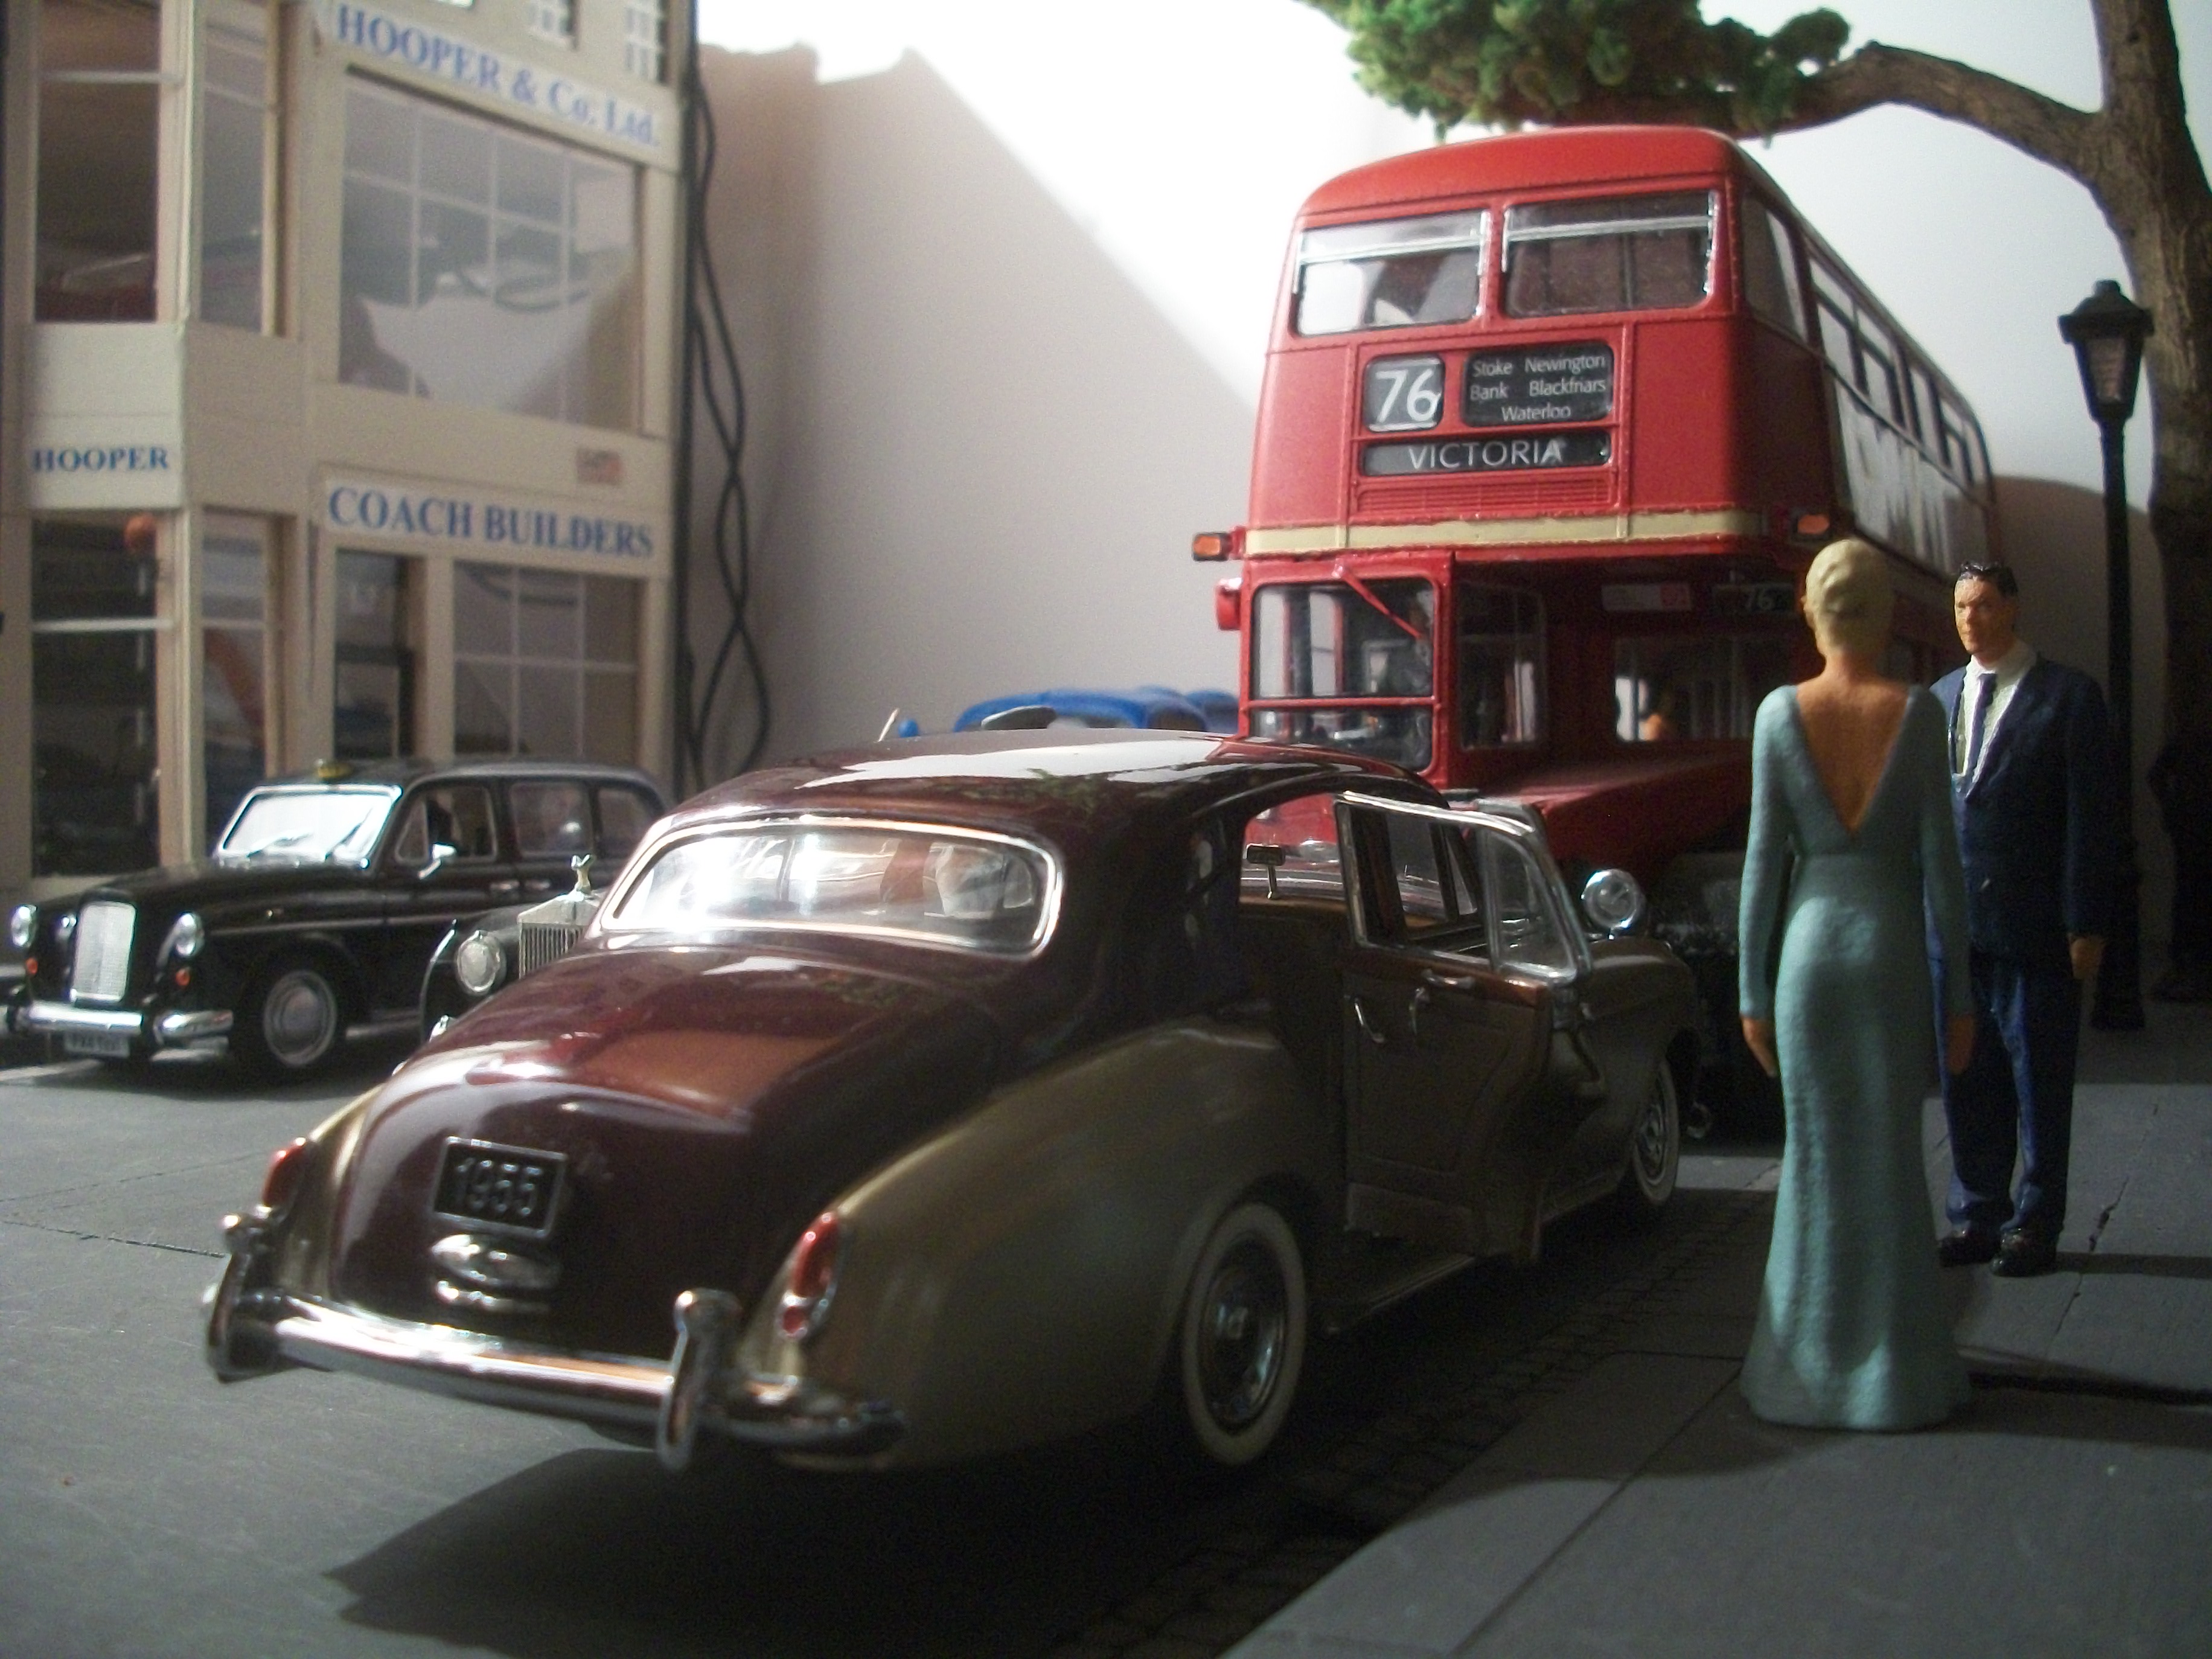
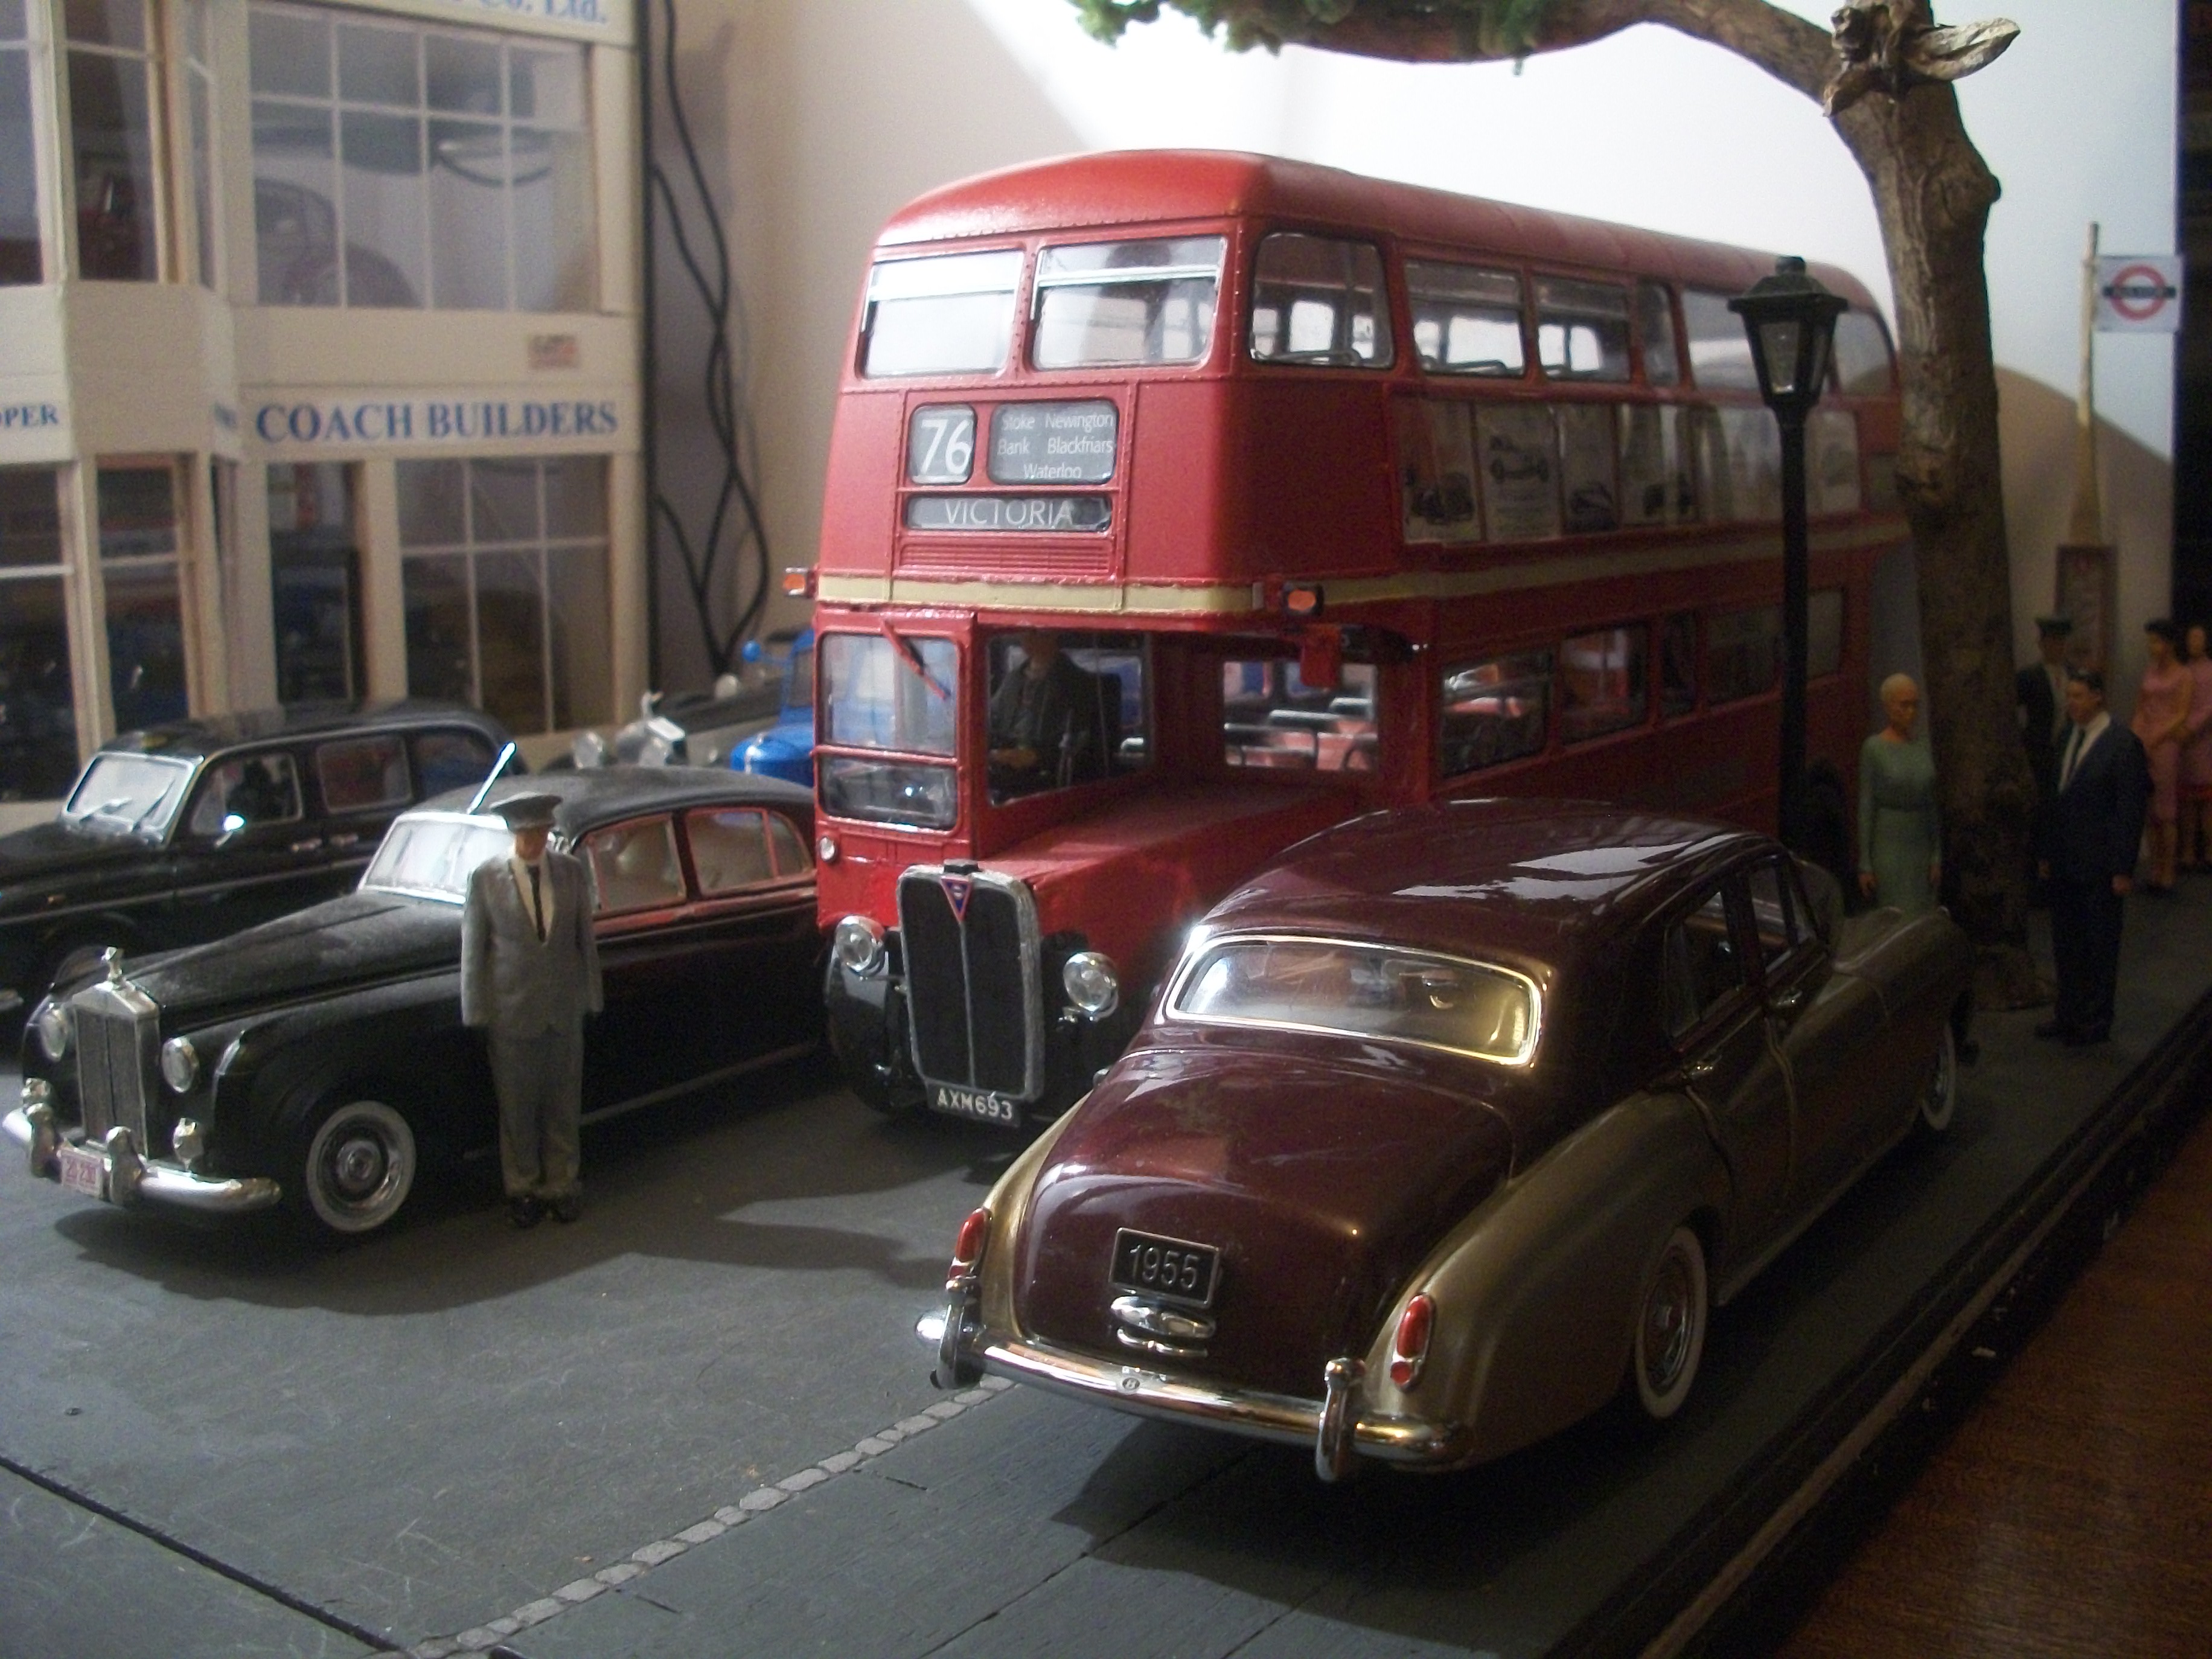
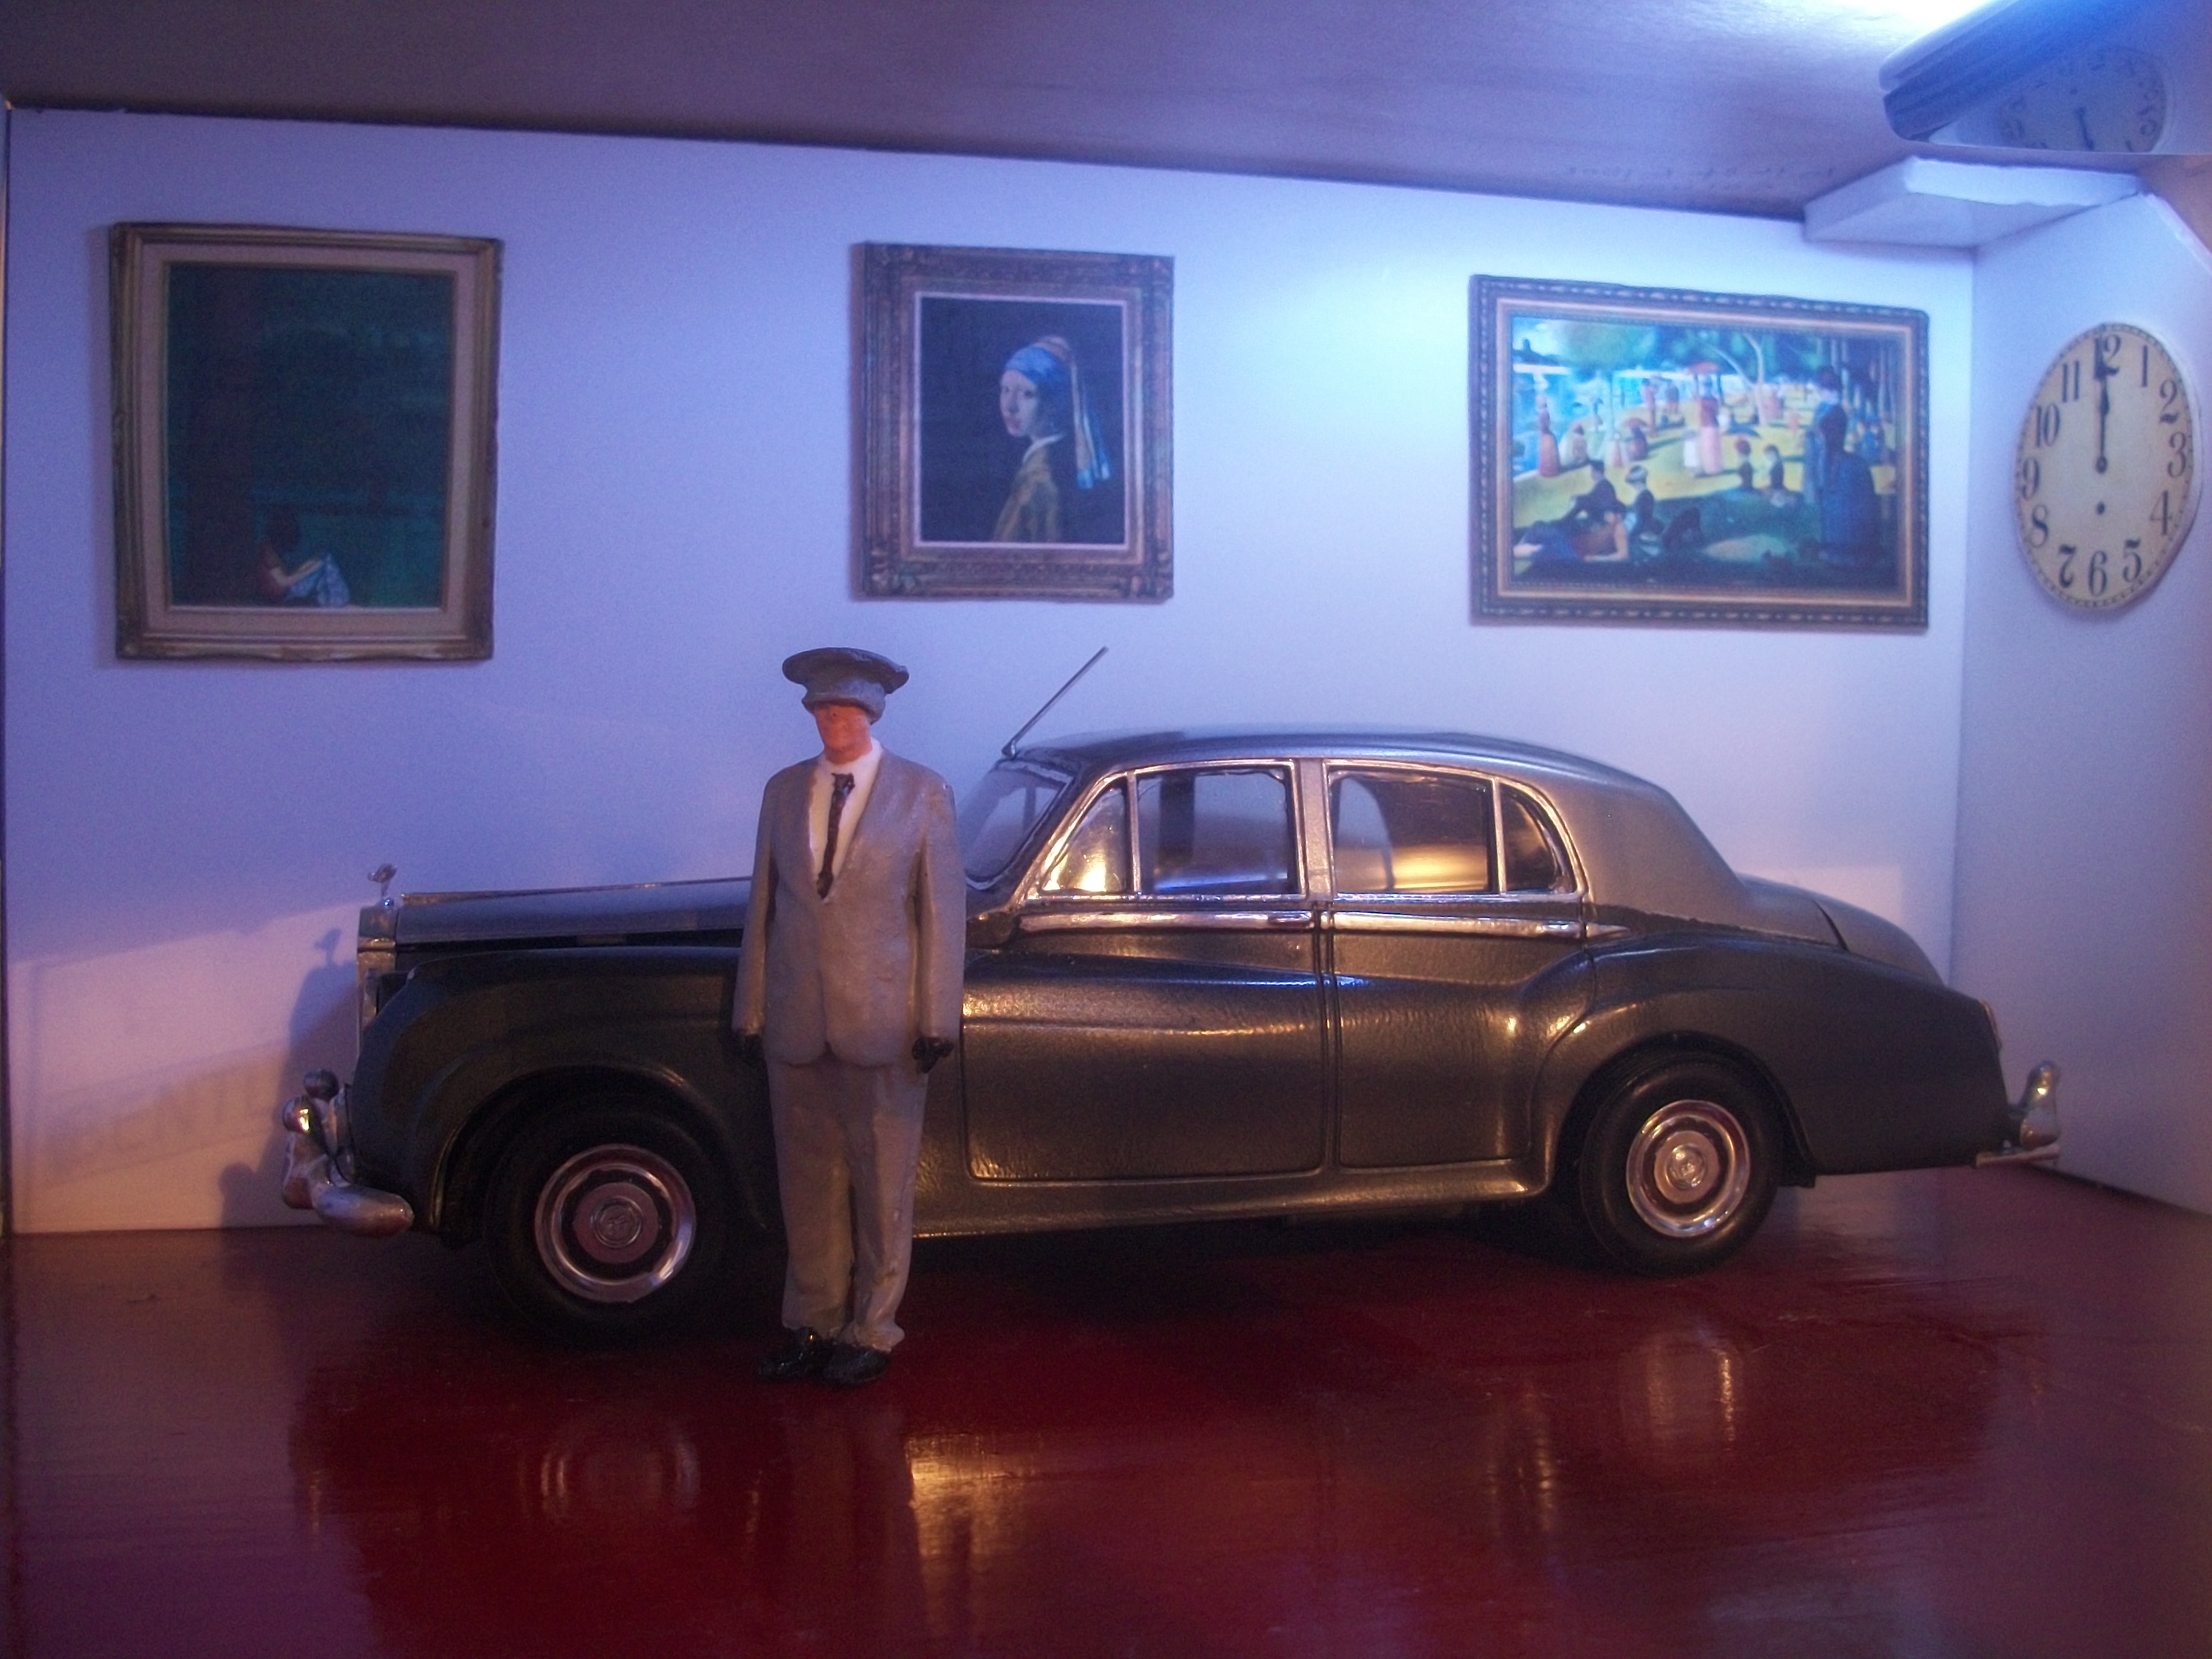
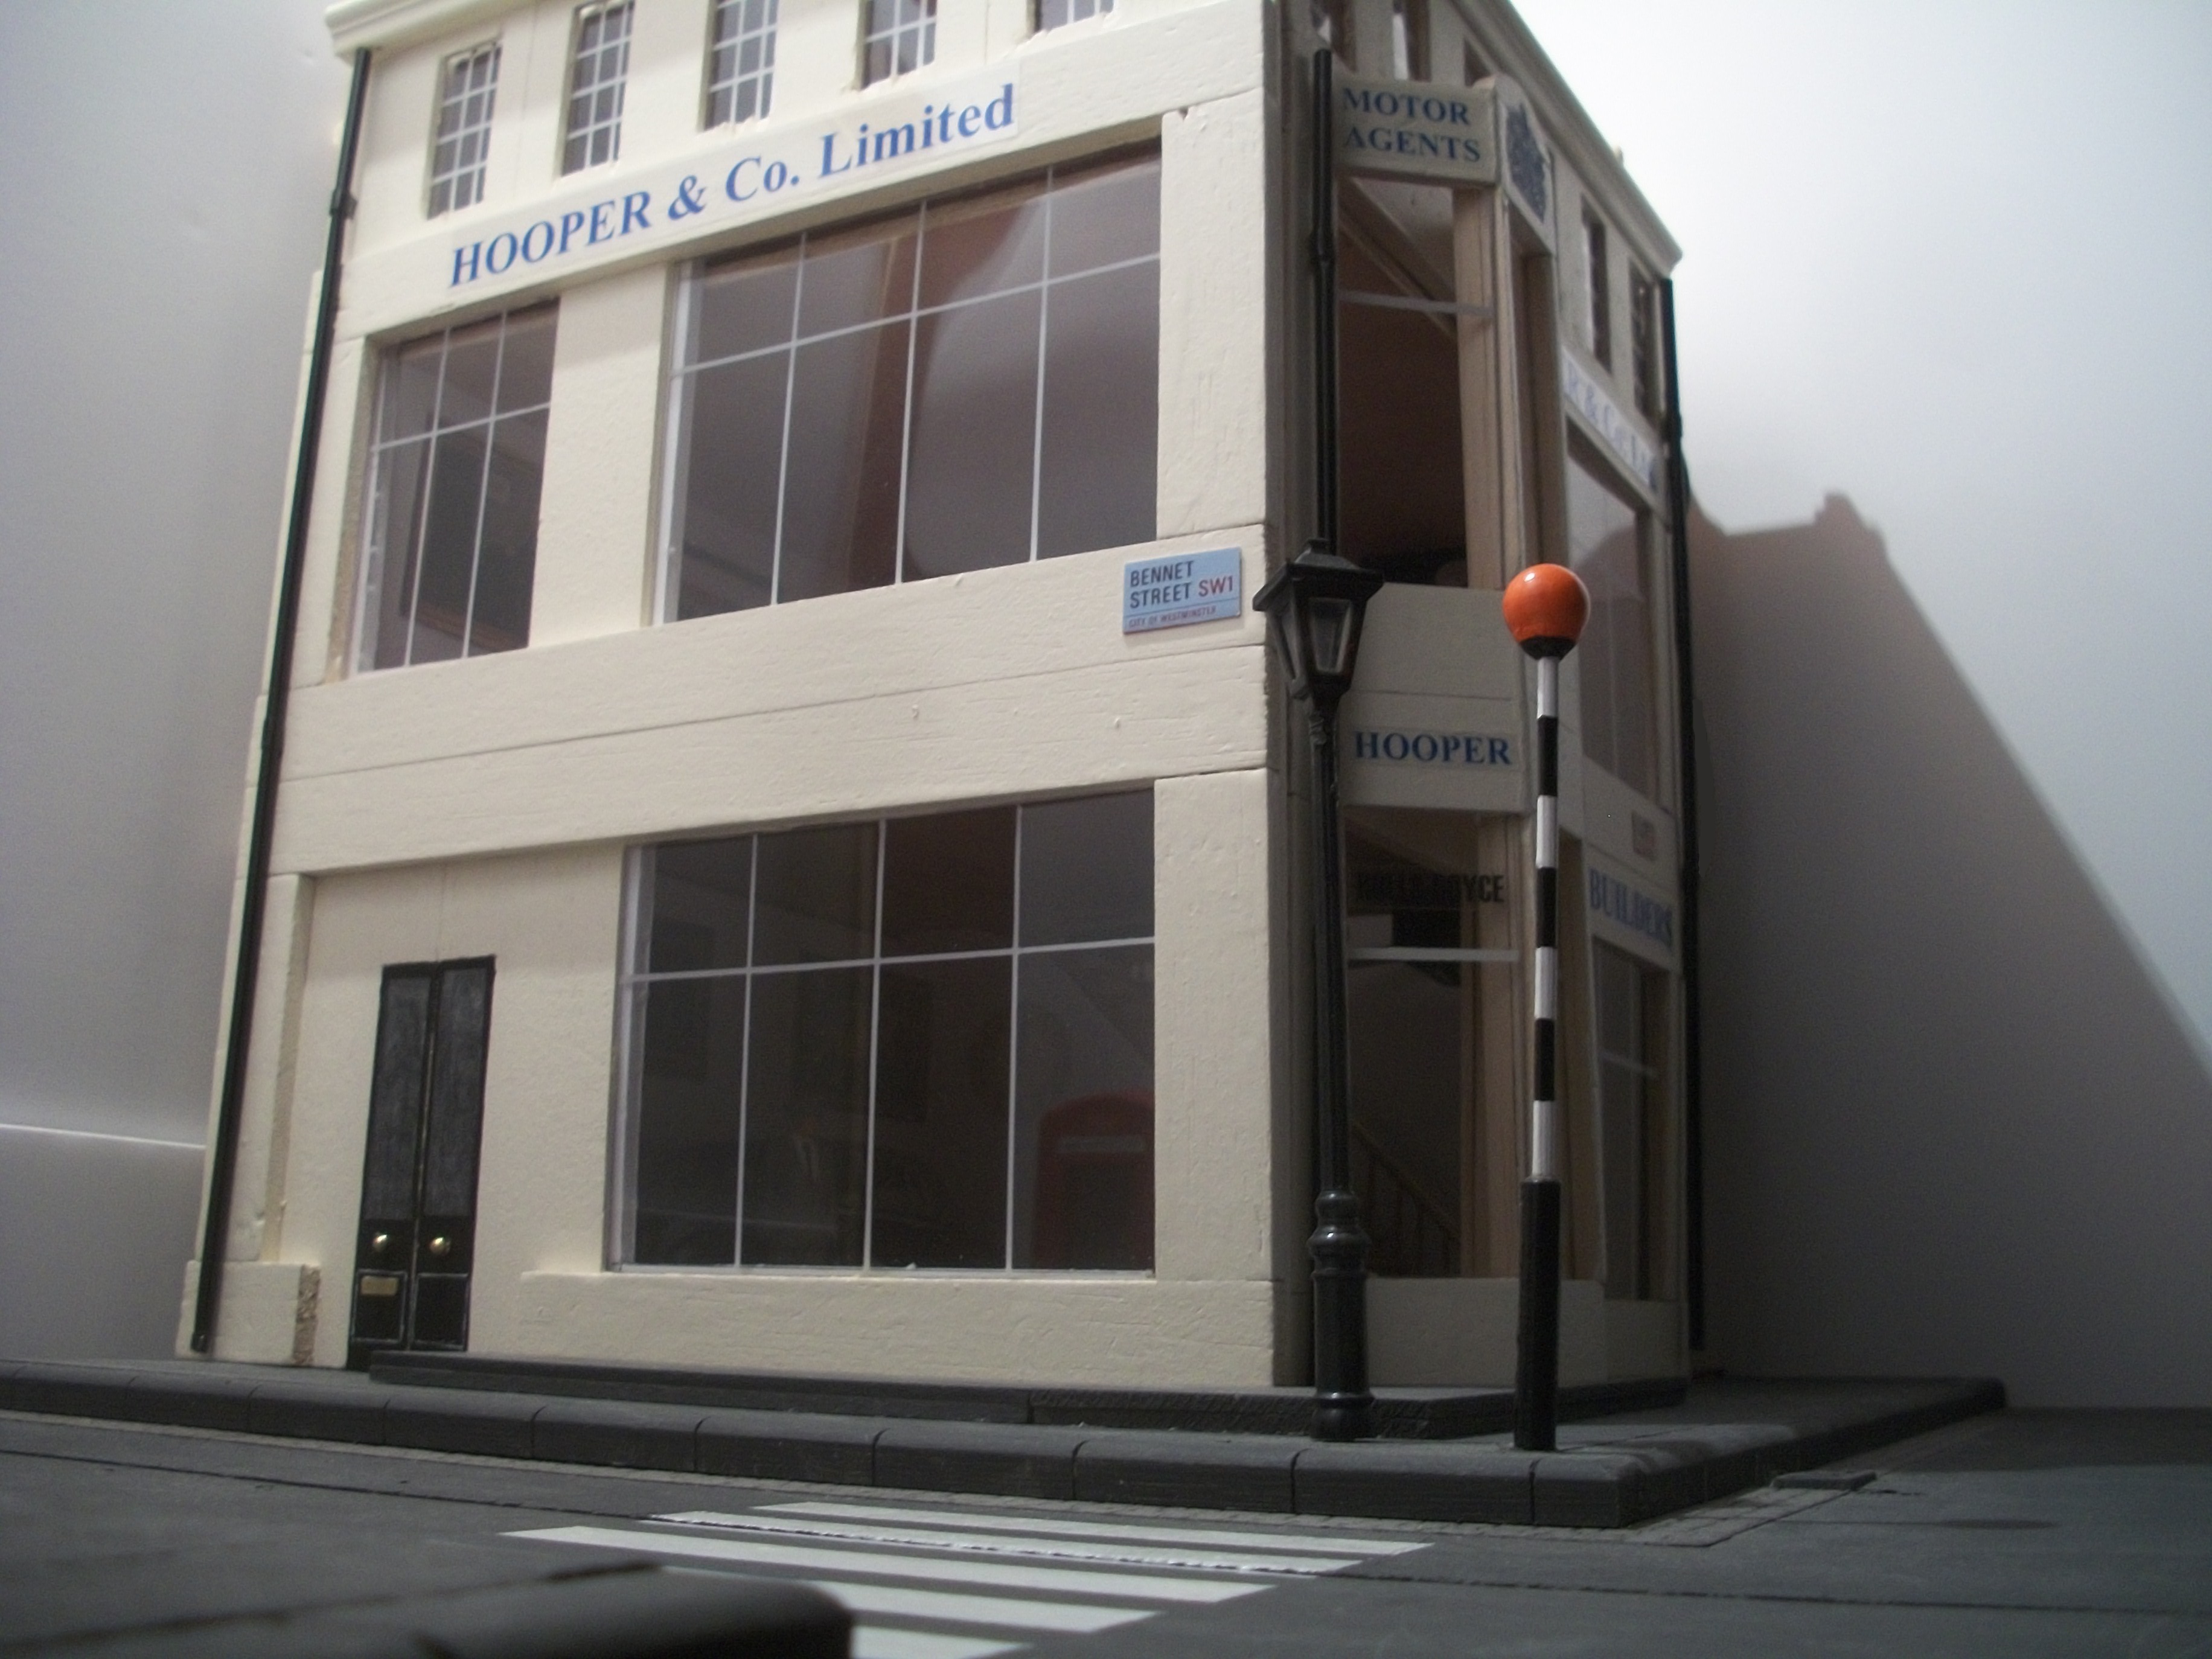
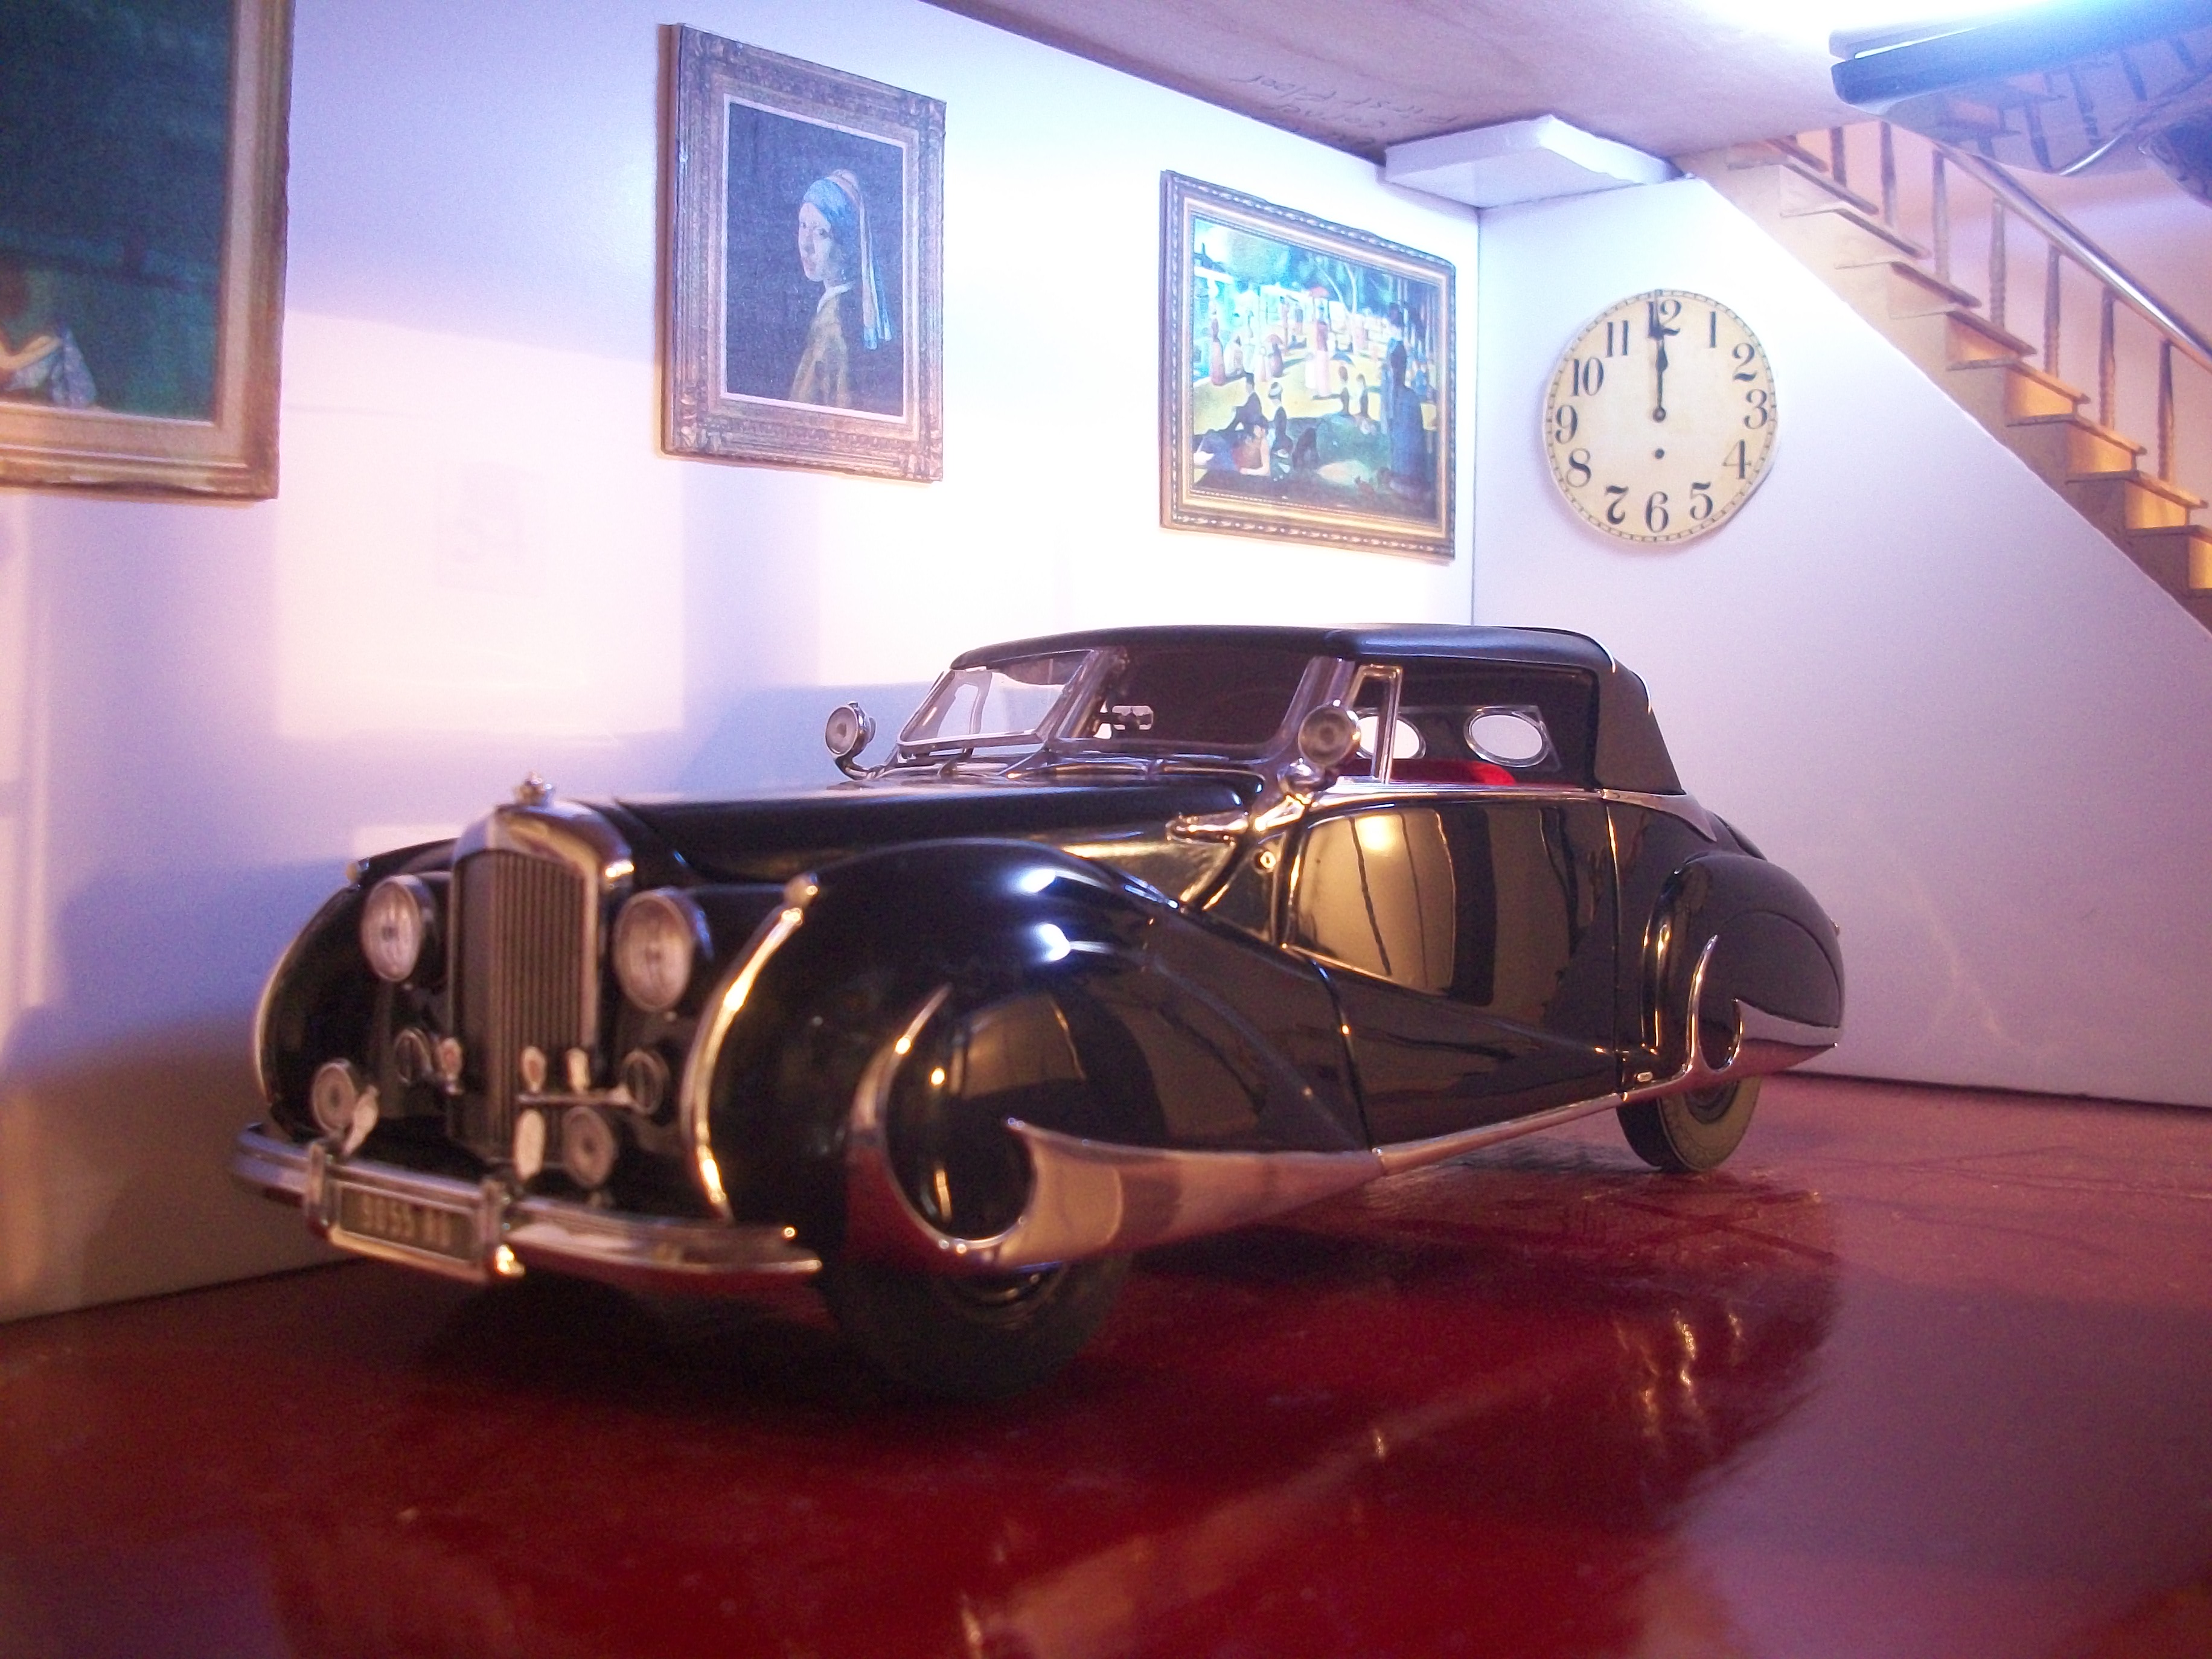
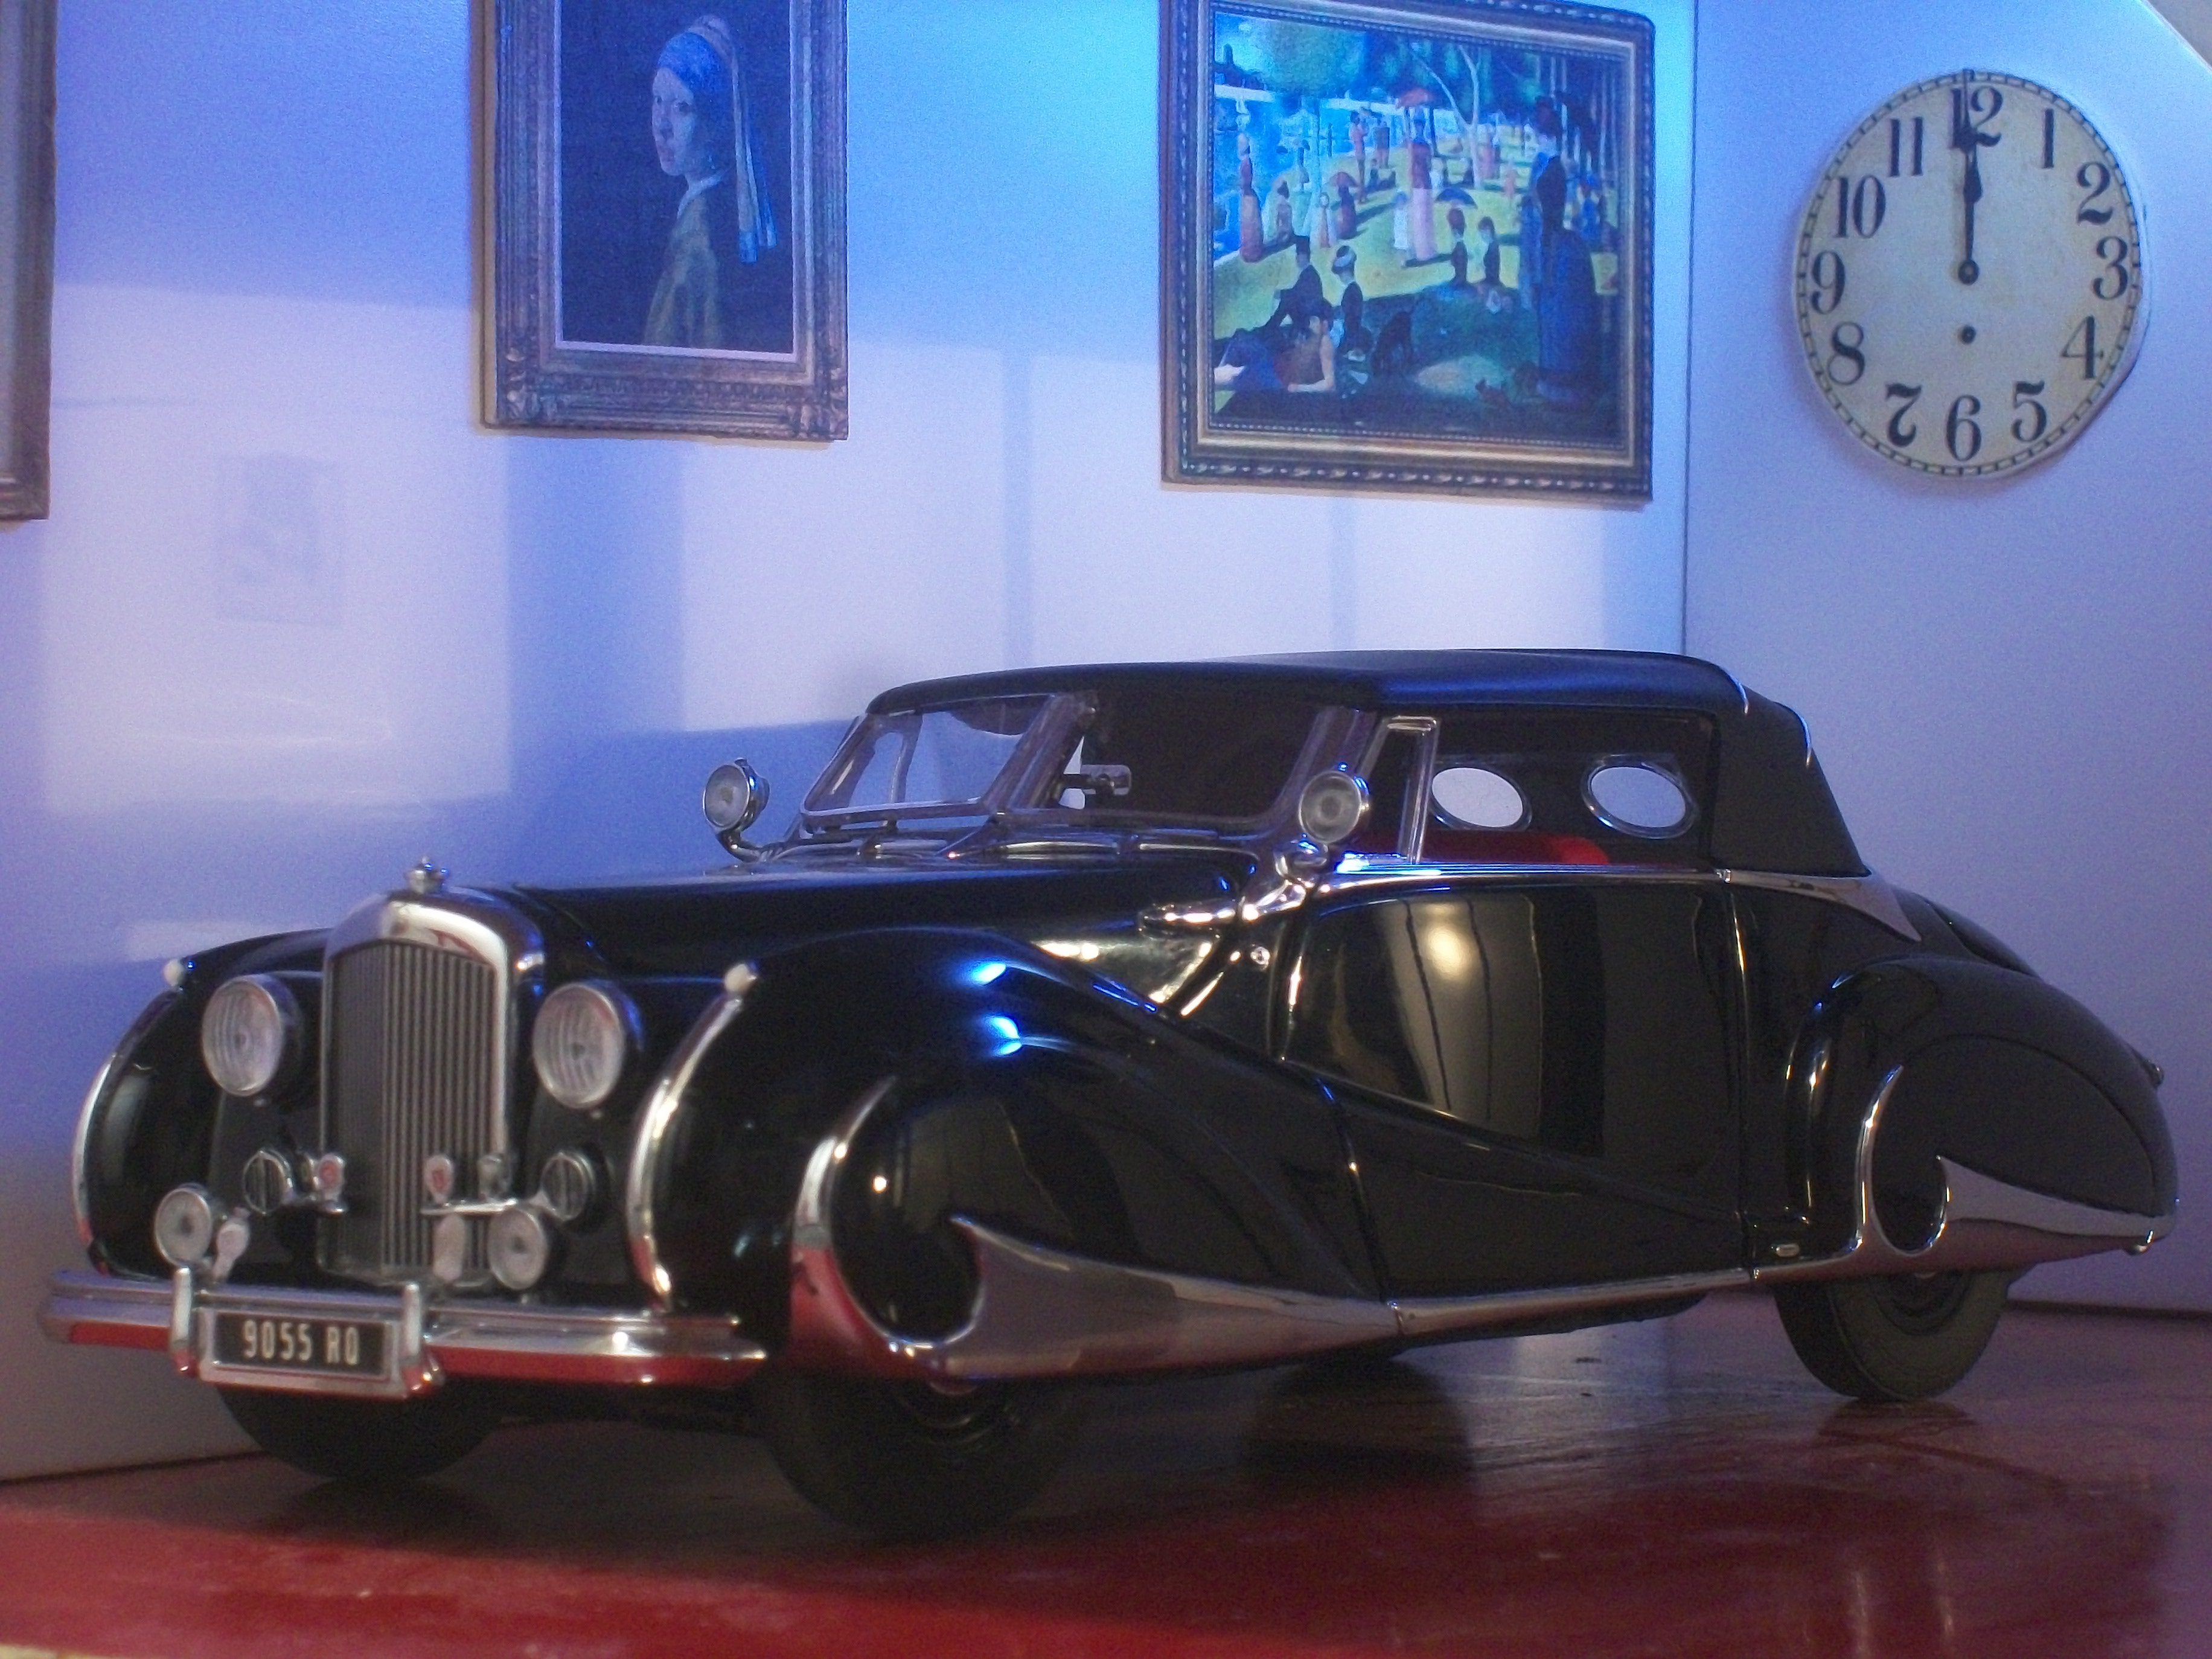
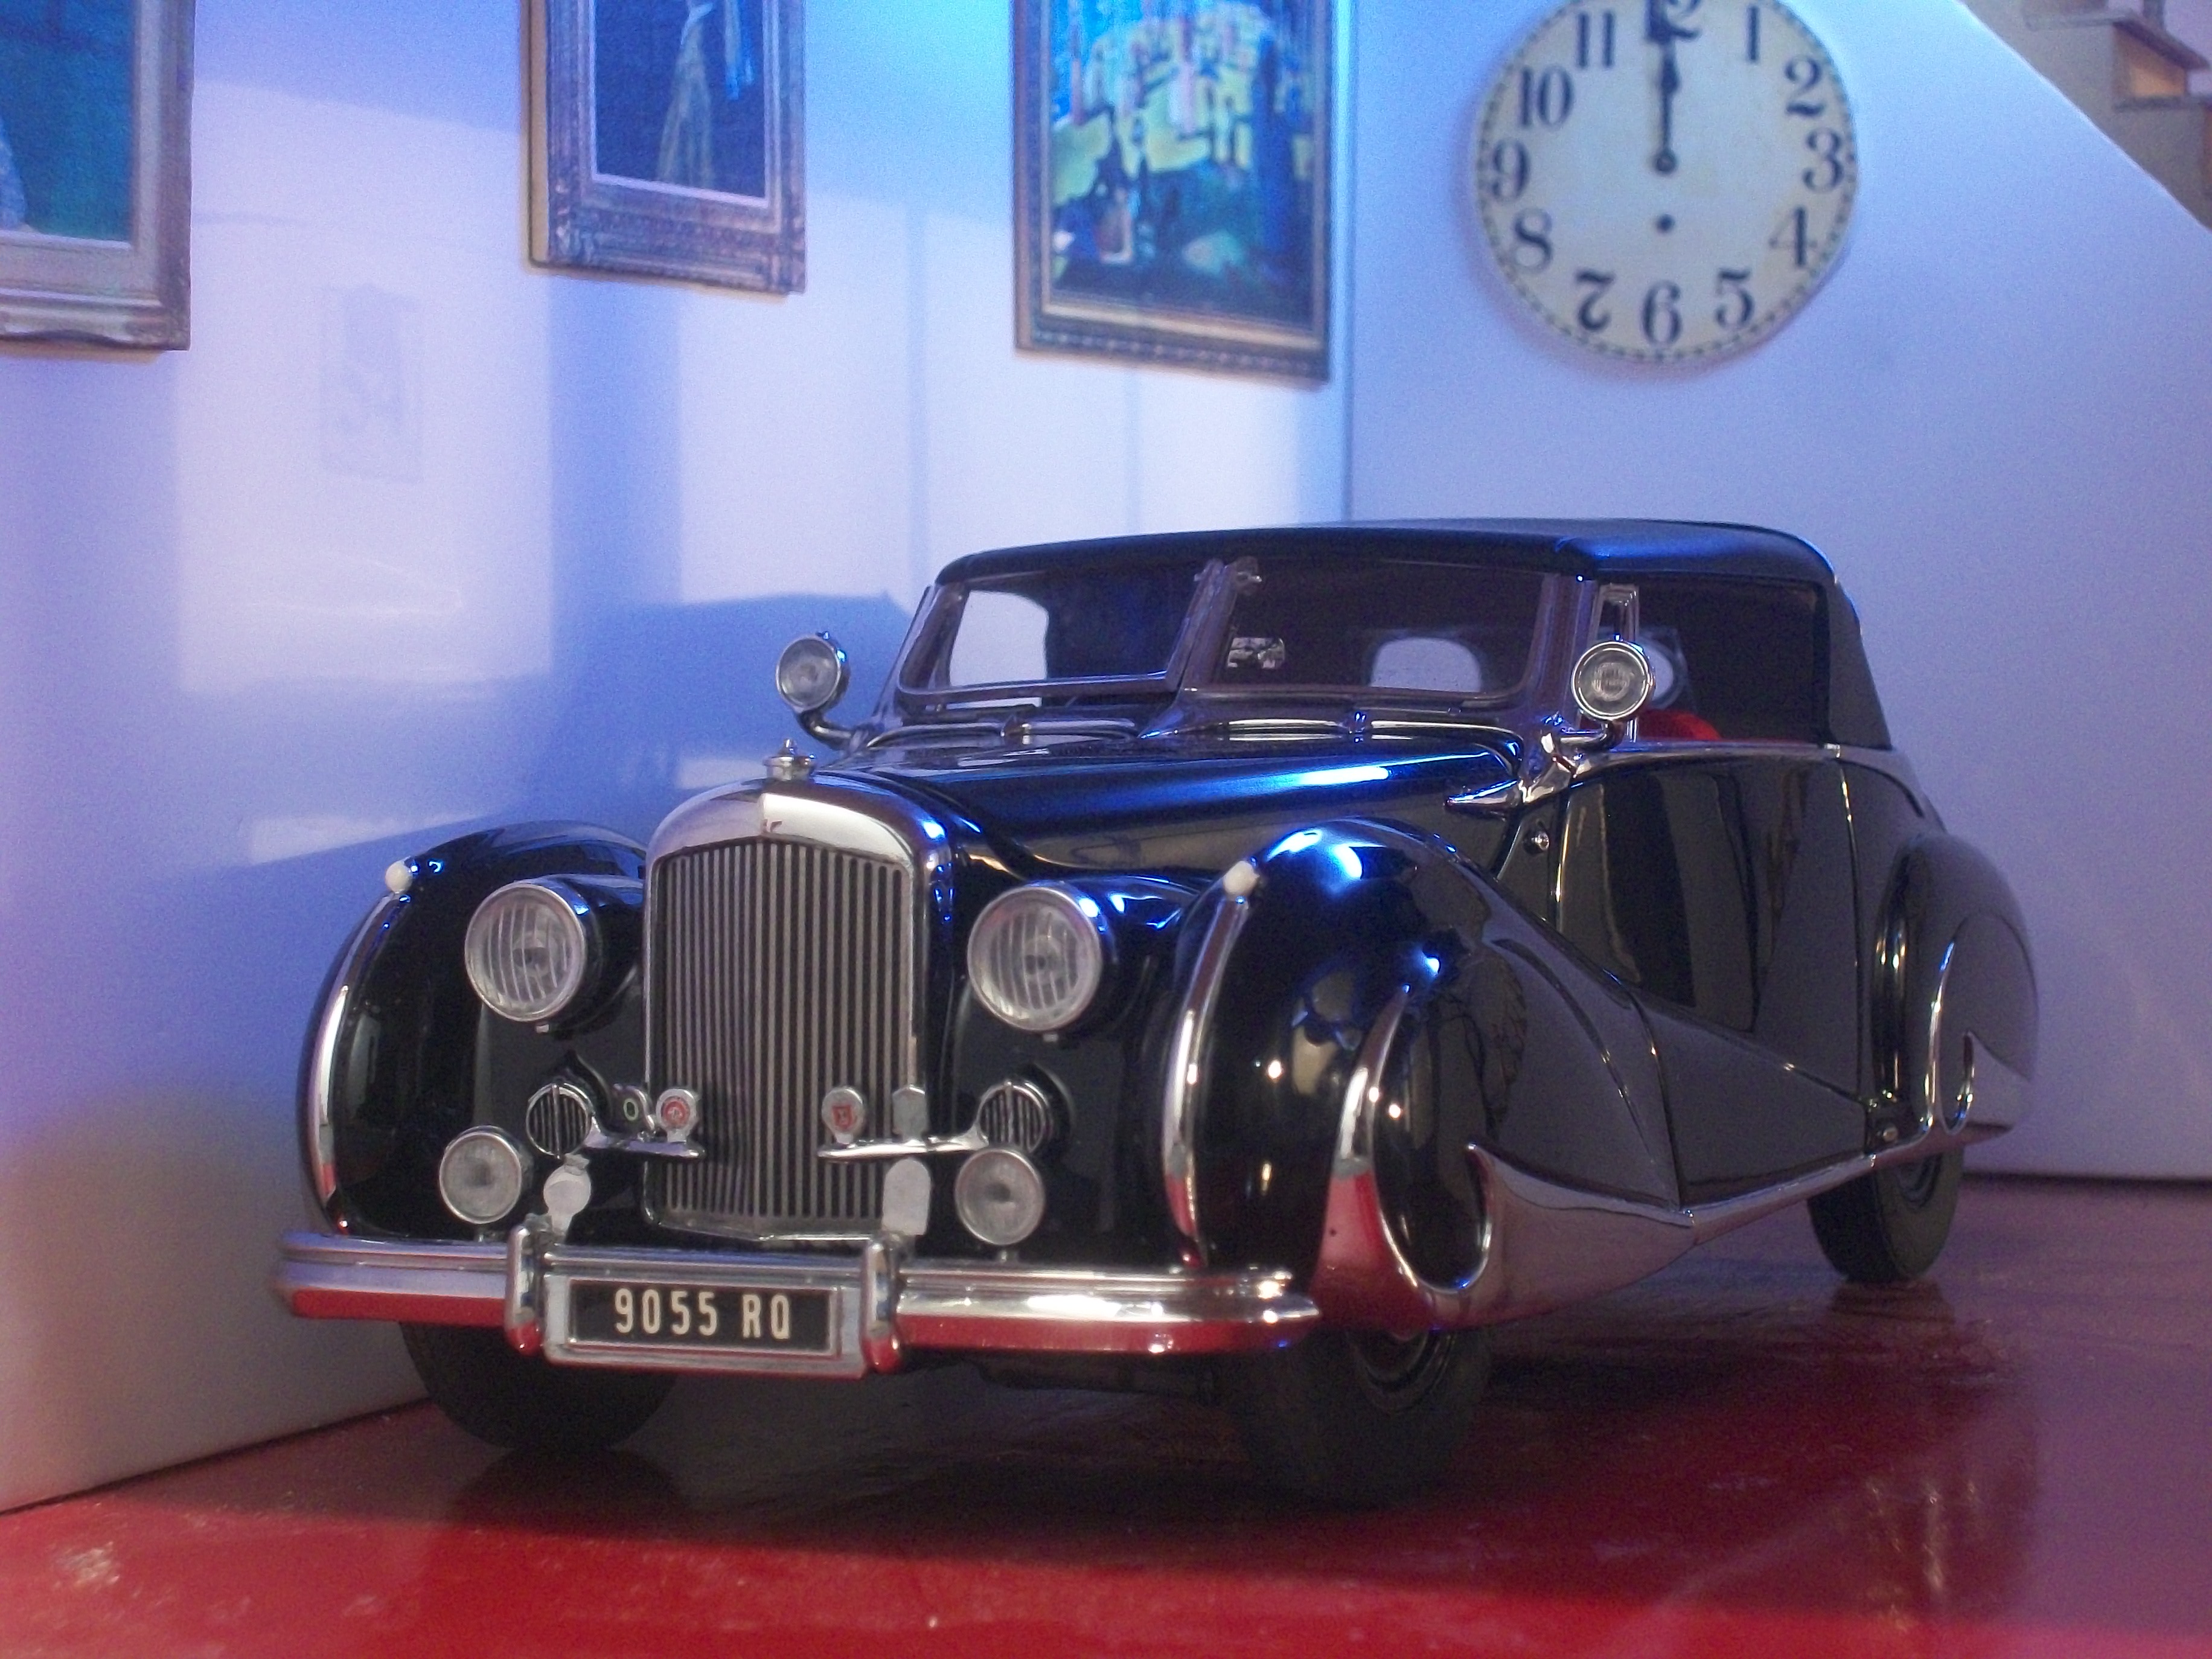
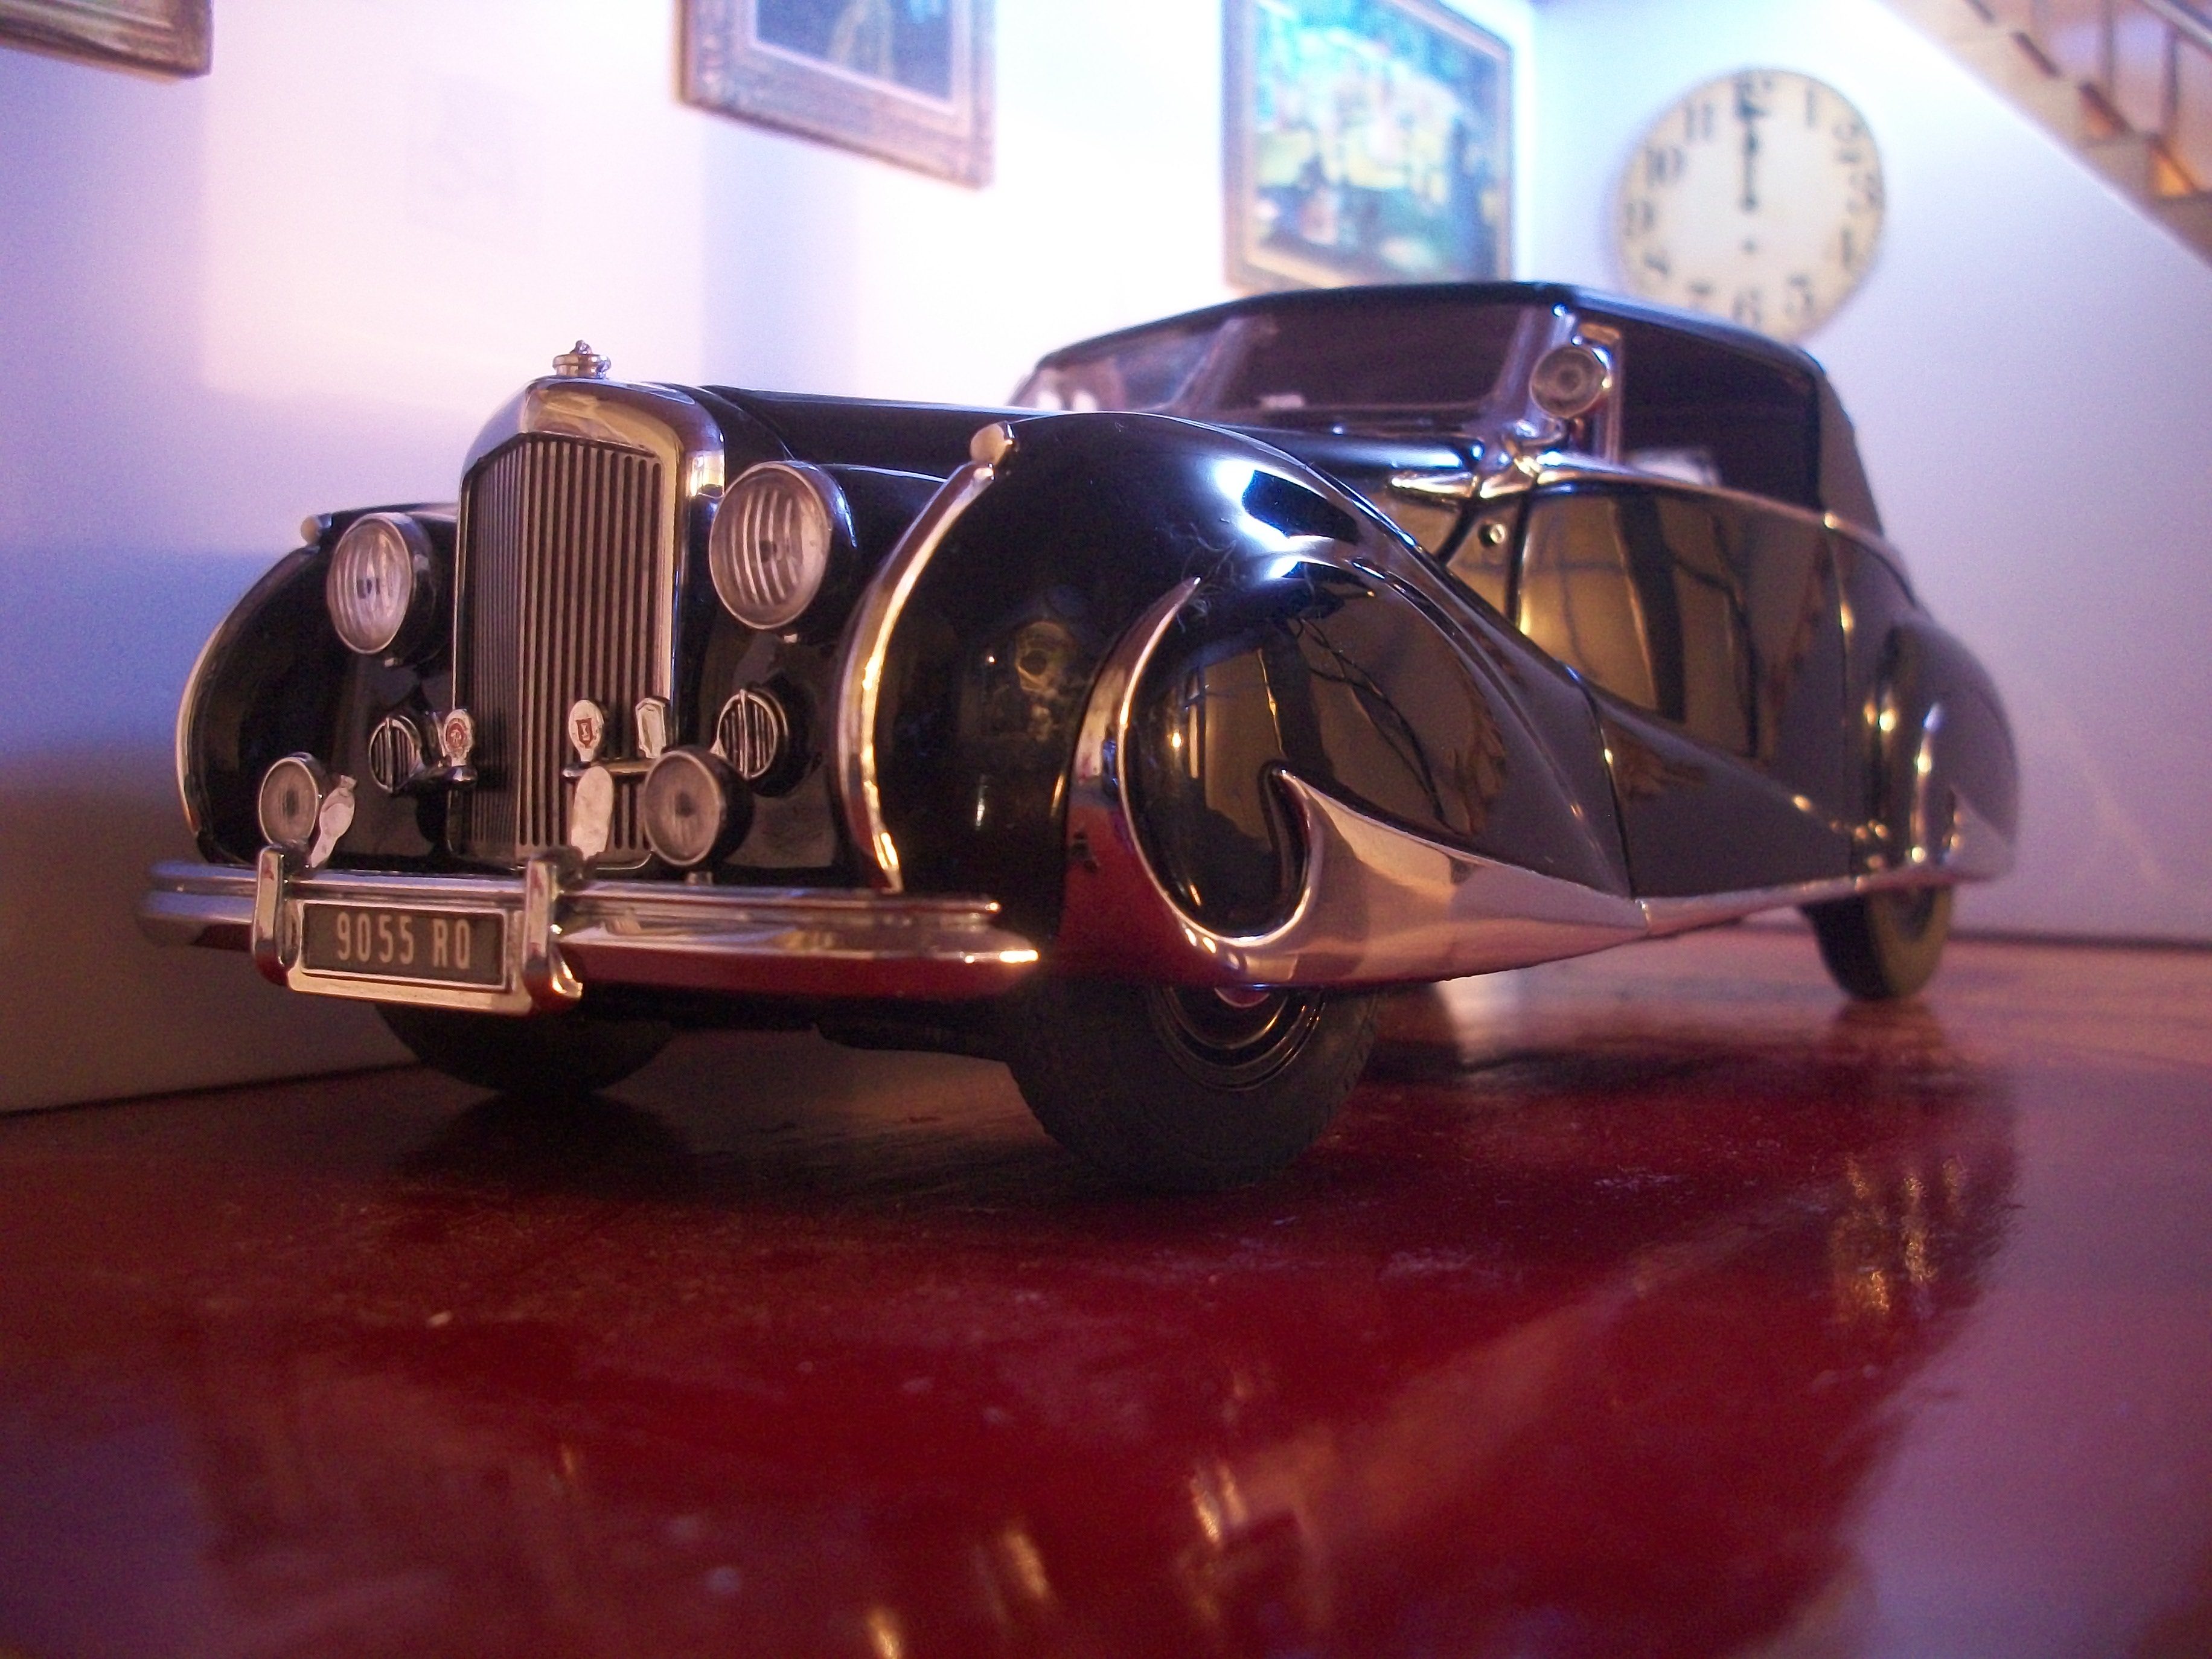
Here is an update on the 1958 Hooper & Co diorama..... the lighting system that I have persevered with over the past year has now been removed completely. In place of this is a proper 1:24 scale dolls house type lighting system. There are two coloured stained glass Tiffany style hanging pendant lamps in the ground floor showroom, which are ideally suited to the 1950's period feel of the building. Upstairs to the first floor showroom there are two white Tiffany style lamps hanging from this ceiling and no lighting on the second floor which is office space. You can see from the photos posted that the system has produced a much warmer yellow / orange glow, rather than the blue tinge of the LED aquarium lamps. This allows me to come up with some more realistic and advanced photography, using the diecast and styrene or resin model motor cars of the period. All the clutter of bulky lamp fittings and cables has been removed from the diorama setting, so the result is a tidy, well concealed layout that is more controlled. I hope you agree that the photos show a marked improvement. Thanks for looking. David
-
Well I can see Bill that you have put in the same amount of work and attention to detail with the license plate as you have with every other aspect of the build. This is why you have created a truly wonderful model and something that most of us scale model car builders can only stand back to gaze upon in awe. Now that is how you do a license plate... you should see my 1:24 scale registration plates, which I thought I had spent a lot of time getting right, but they are not in the same league at all. When you say 20 years in the making, do you mean you started this build 20 years ago and you are still adding to it ? Some model builders have said on this forum that if they don't get a car finished pretty quick, they lose interest and the project never gets finished. David
-
Thanks Phil, the tin I have is Wilko Yacht Varnish and it says Clear / Gloss ( so it's both . David
-
Thanks Joe..... work in progress continues... David
-
The whole concept of a 100% scratch built scale model car is model building on a very high level. Absolutley fascinating to follow your progress. I found myself moulding and casting so many parts for a 1:24 Rolls-Royce about a year ago now, that I began to think in terms of making a boxed kit, complete with my own box art. Further down the line I realised that even if I did manage to mould and cast every part of the scale model car the obvious question would be, what do I do with the finished product? One kit in one box.... where do you go from there? Also, the cost involved to produce that one model meant that the project was never going to be cost effective, not that I fully understand the money side of it all. It was something that I wanted to do, and therefore didn't really see it as a marketable product. David
-
What would YOU like to see as a model
Anglia105E replied to JeroenM3's topic in General Automotive Talk (Trucks and Cars)
That's right Christian, the FX4 taxi is closer to 1:20 than the 1:24 stated on the box, which you and I know does make a difference. Put that taxi next to a BIG car like the Rolls-Royce Silver Cloud and the taxi just looks ridiculous. Would like to see the older Routemaster bus like my conversion below, plus others like the Morris Minor Traveller, van or saloon, Ford Cortina MK1, Ford Anglia 105E as my profile name suggests, and something like the Jaguar MK 7 or MK 9...... David
-
What would YOU like to see as a model
Anglia105E replied to JeroenM3's topic in General Automotive Talk (Trucks and Cars)
I would like to see a 1950's type Austin FX3 London taxi, black cab, in 1:24 scale because this car is available in just about every other smaller scale. It is well known among scale model builders that the Revell 1:24 scale Austin FX4 London taxi is actually too large ( out of scale ) which is a real shame because generally I do like Revell kits. David -
Well done with this excellent build of yours, and the Coral Blue colour really suits this car. Dashboard is stunning and doesn't need the wood grain. Nice model and you must be proud of it. David
-
I would just like to add my comments to this topic regarding Molotow Liquid Chrome pens, based on my experience using two pens so far. This is a truly marvellous product in my opinion, and I am a person who usually swears by Bare Metal Foil. which I also regard as a marvellous product. Whereas BMF takes more time and effort to get it right, I find the pens are much easier on small parts, as long as you don't go over the same area more than once. Here's a magic formula that I discovered by trial and error.... if you coat your scale model car part with Yacht Varnish, then leave it to dry 24 hours, when you apply the liquid chrome by pen the resulting surface is super shiny. So in this case, the varnish is not applied over the liquid chrome but under it. With such good results I shall certainly be ordering a 30 ml refill for my pens. Oh, and the price in England is £5.75 ( around US $. 7.89 ) David
-
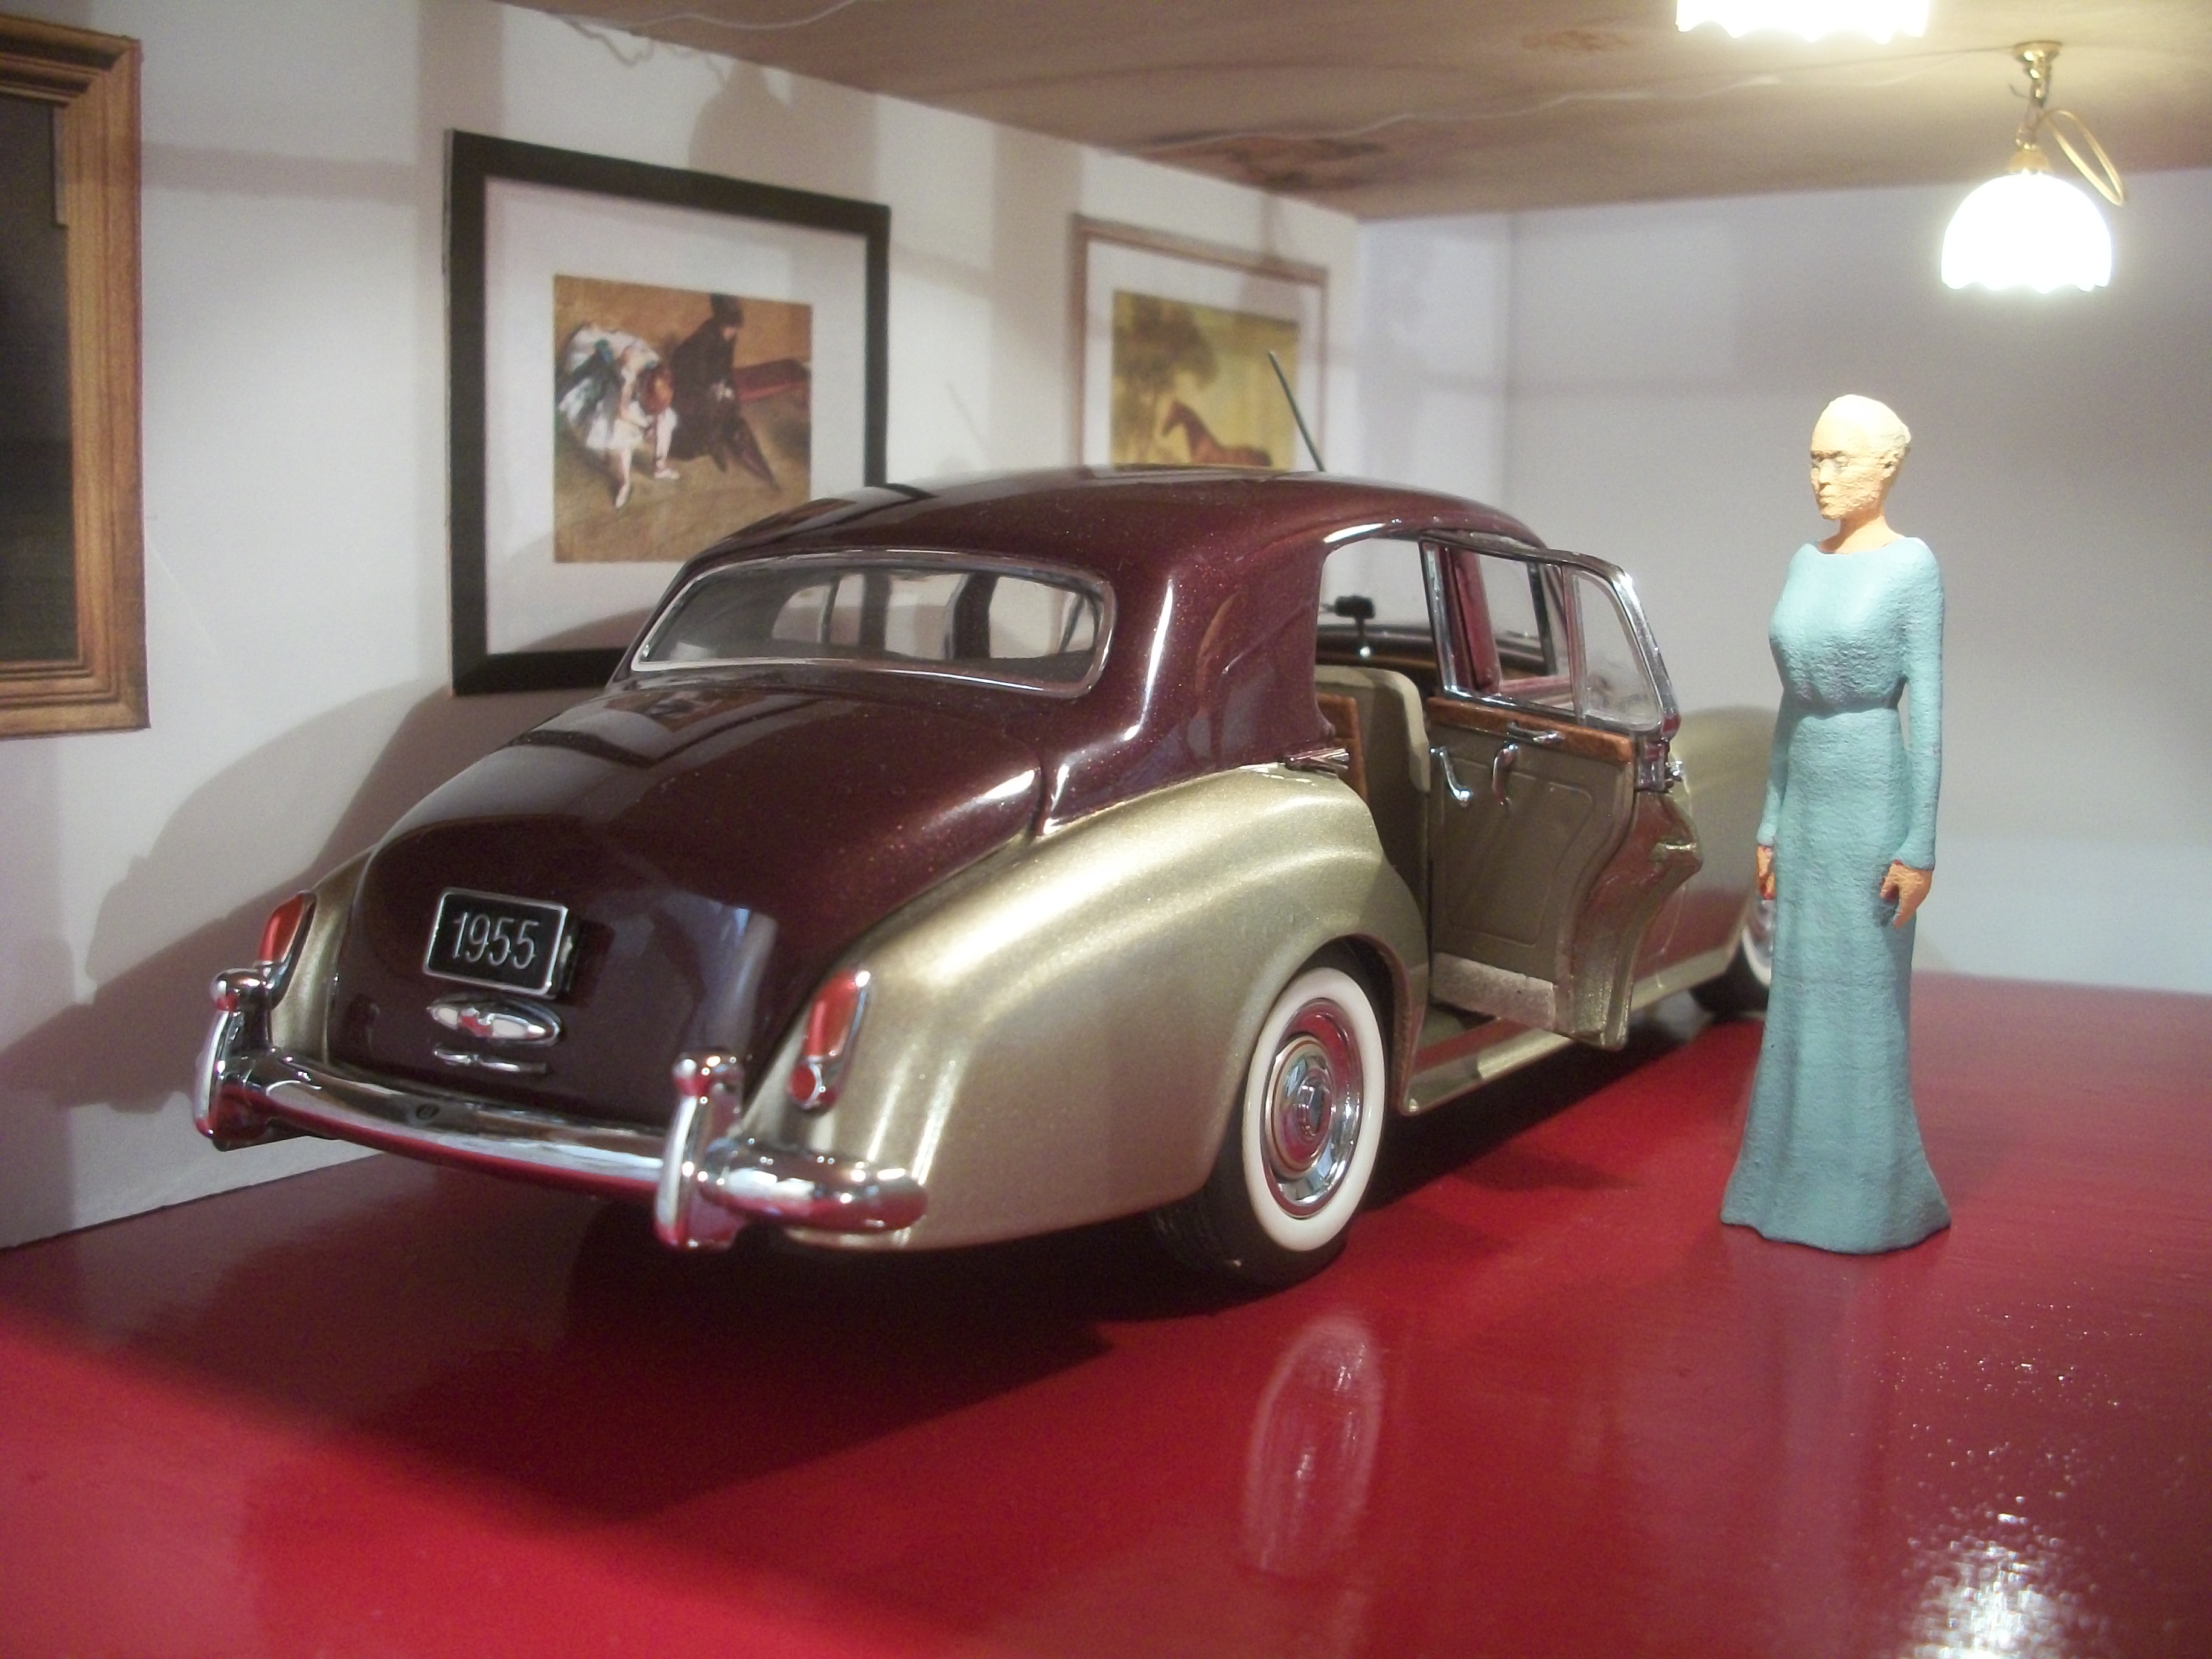
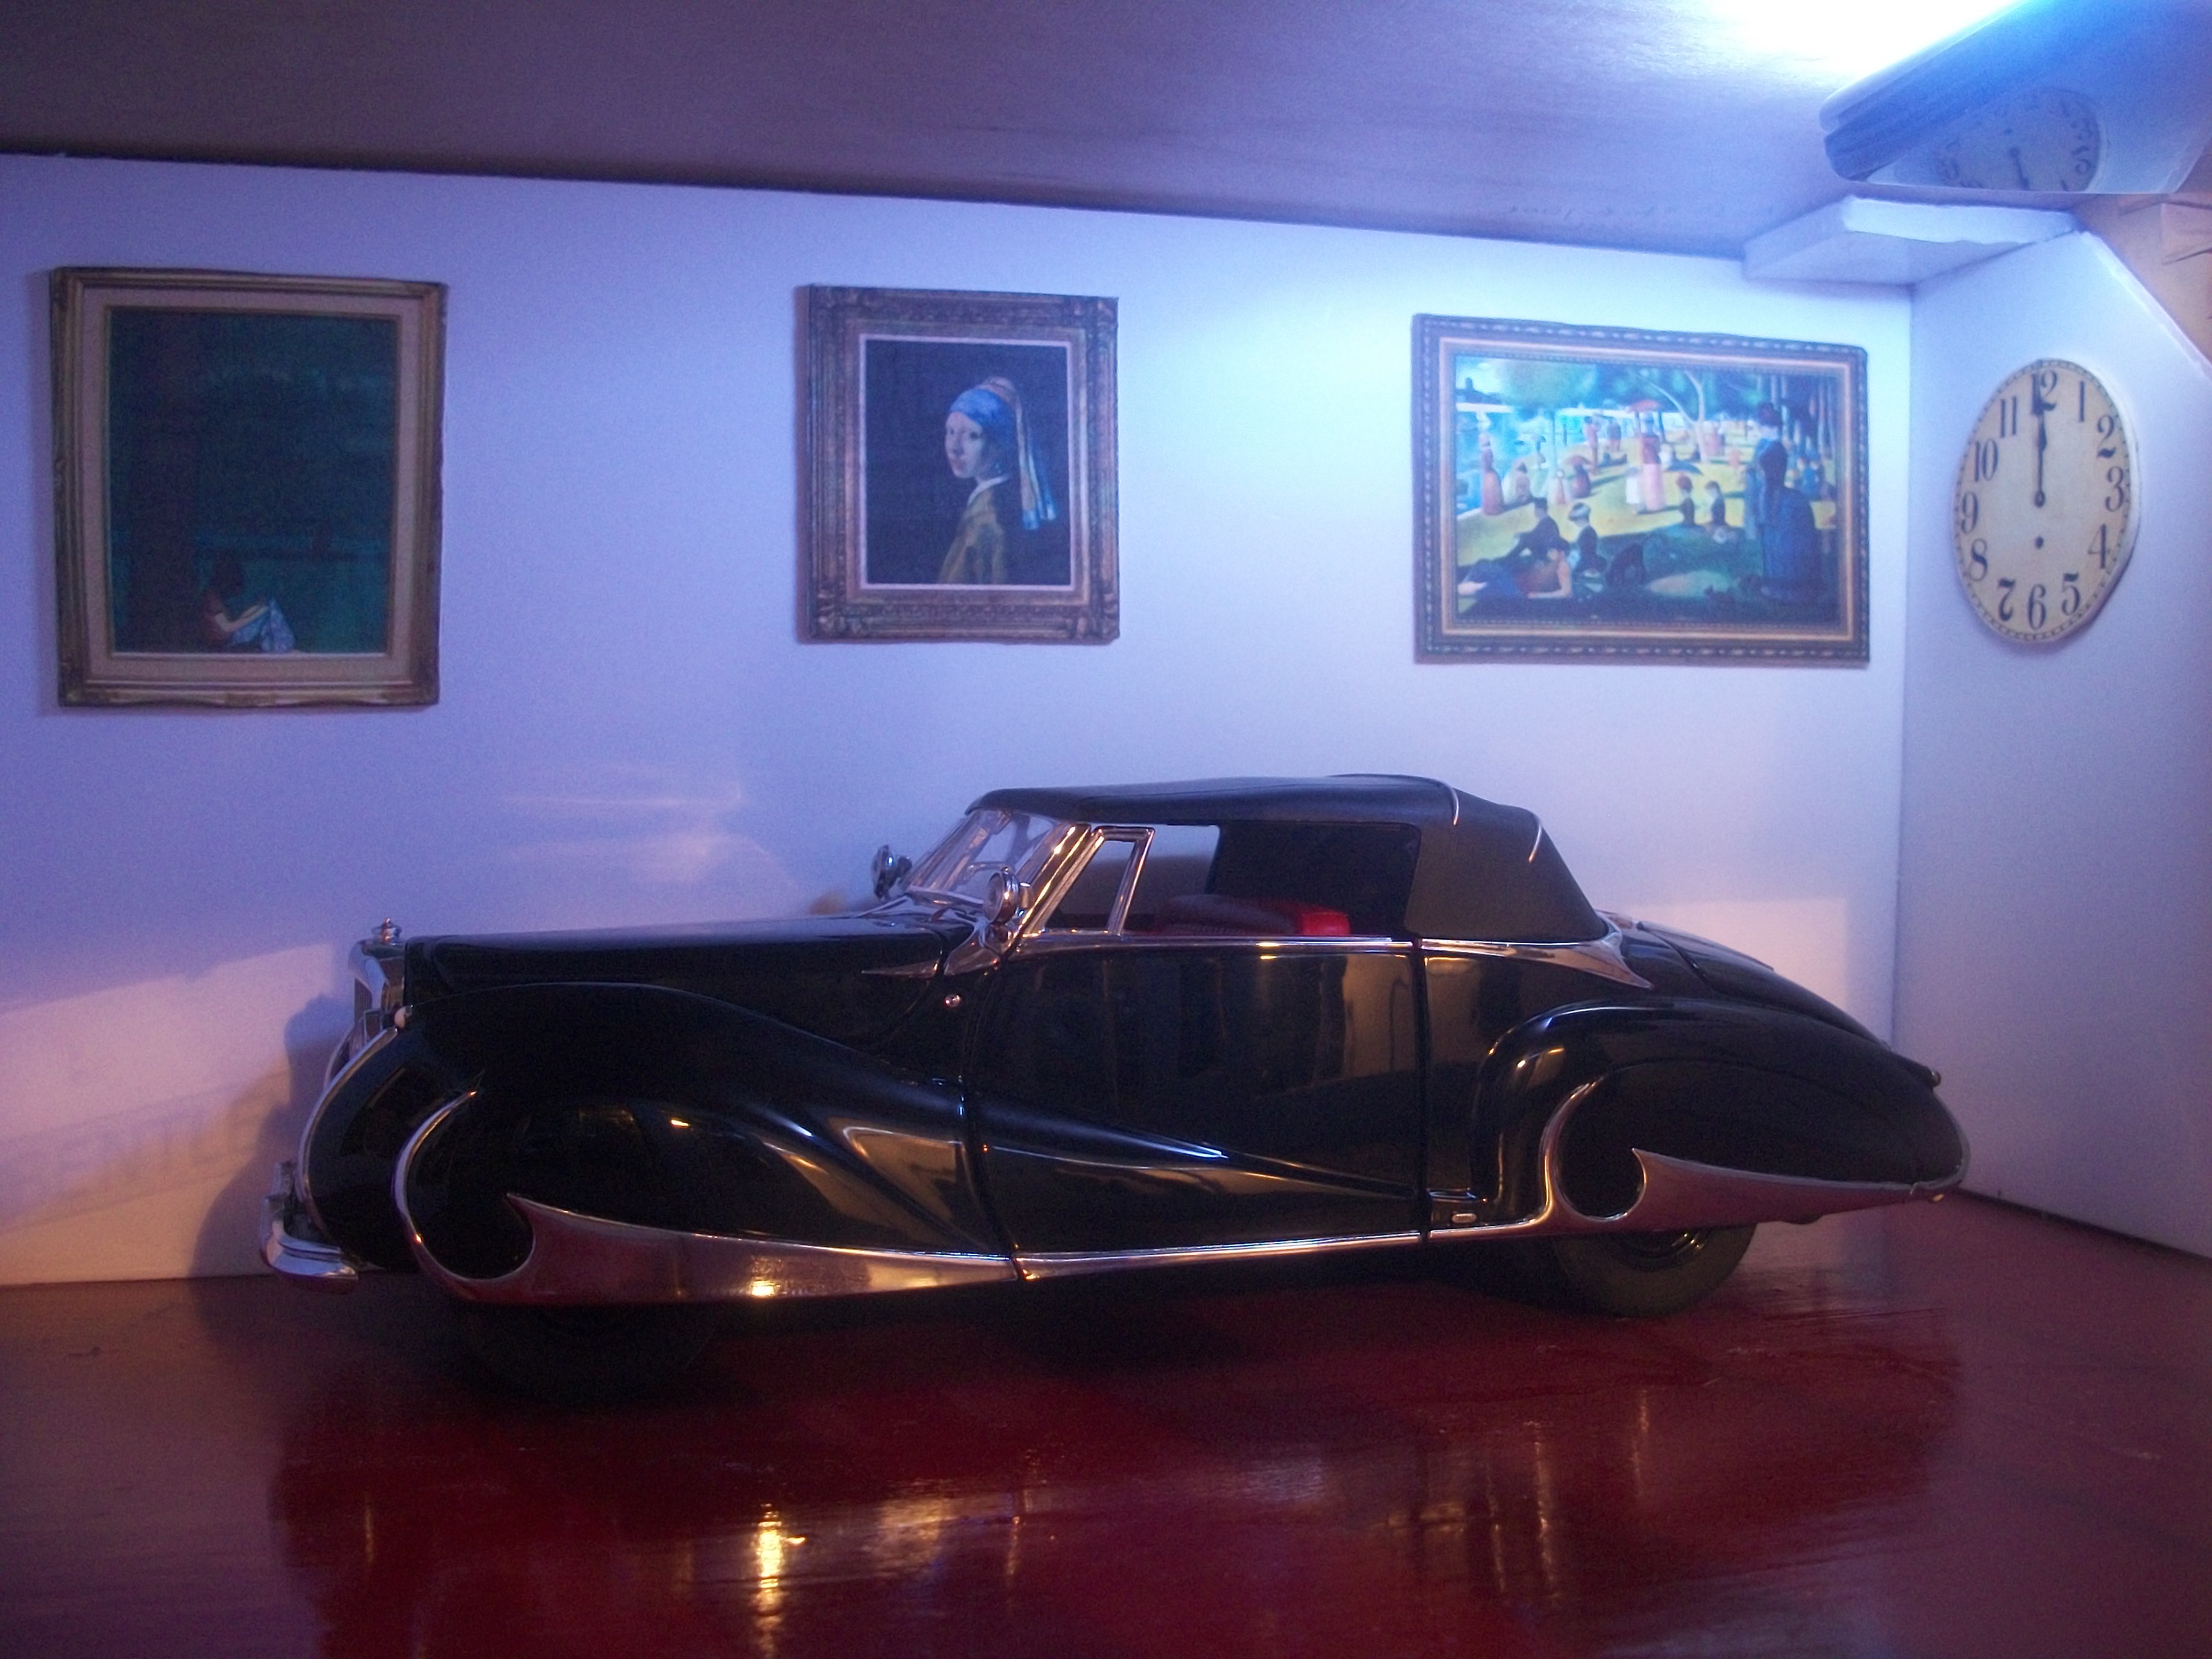
Thanks Phil, and although I wasn't sure if the original Hooper & Co showrooms had framed paintings on the walls, I have seen artwork on the walls of a Rolls-Royce dealership in London. Somehow it is a feature that suits the building in this diorama. David
-
Just realised Tyler that your topic extends to four pages, so my previous comment was after I had viewed the first page only. Excellent build and some very original ideas too. As others have mentioned, your figures show more interesting poses than the commonly found fixed pose. You have put in a huge amount of work on this, and the end result shows the quality of your workmanship. The lighting system is very effective and the welder is a star element. David
-
I am liking the work that you have done on this project, and it's useful to see the photos with the clear explanation of how you did it. David
-
Nice looking seats for the newer Gulf Seven, and it just shows you what can be done with parts from different kits. I find myself sorting through boxed kits on my top shelf, to see I have something that will fit a current build. Very often I come across the perfect part. Like you, if I can't find one.... I make one. David
-
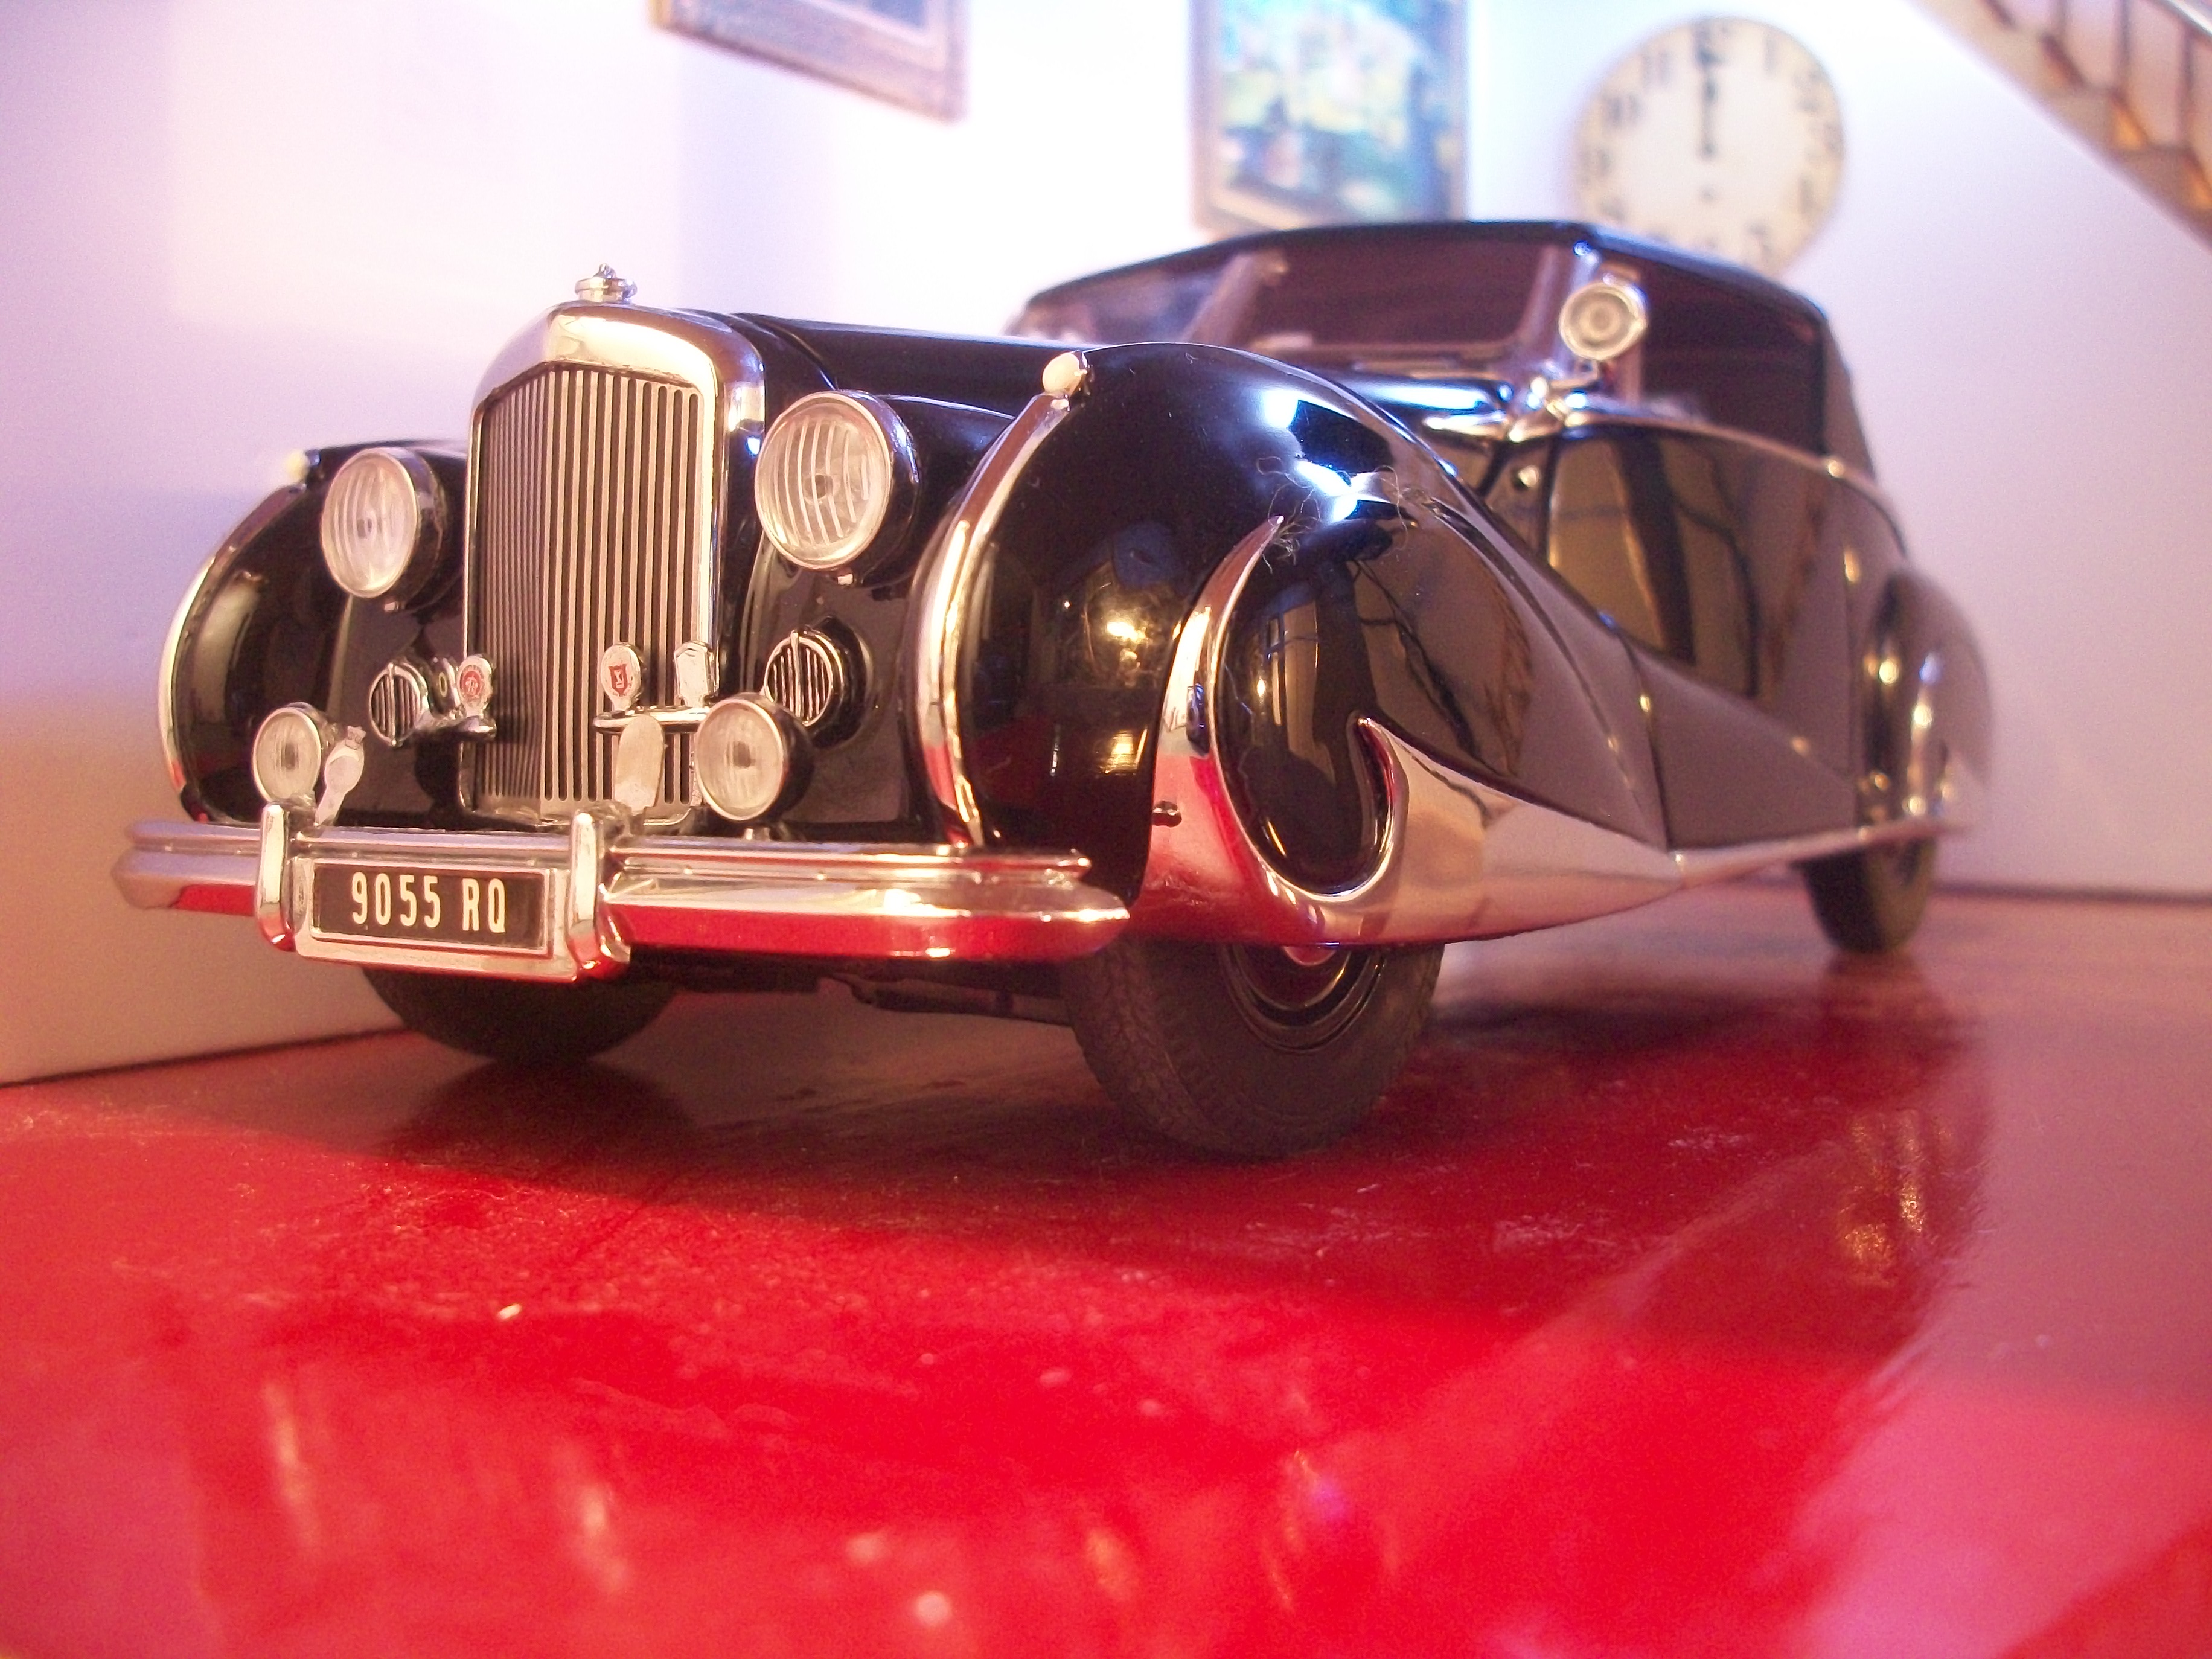
Latest addition to the diorama setting is this Bentley S1 diecast model car from Franklin Mint. Already I have the Rolls-Royce Silver Cloud by Franklin Mint and I had been wanting a Bentley for some time. The car is missing the bonnet / hood mascot, also the roof aerial and door mirrors are missing. I should be able to fabricate a Bentley motif and the roof aerial, while this car should really have wing mounted mirrors and not door mirrors. Now there are two Bentleys in the Hooper & Co showrooms! David
-
Thanks a lot Eric, and I do appreciate your interest in my project. I shall continue to post photos and information as it develops. David
-
What would YOU like to see as a model
Anglia105E replied to JeroenM3's topic in General Automotive Talk (Trucks and Cars)
Thanks Christian for the information about the Hachette Anglia 105E release, which was something that I wasn't aware of. Regarding the possibility of a Cortina, I agree that they would more likely go for the 2-door Lotus or GT version, and not the 4-door. My Dad taught me to drive in his MK1 Ford Cortina 4-door and I passed my driving test at the third attempt.... thanks Dad ! David -
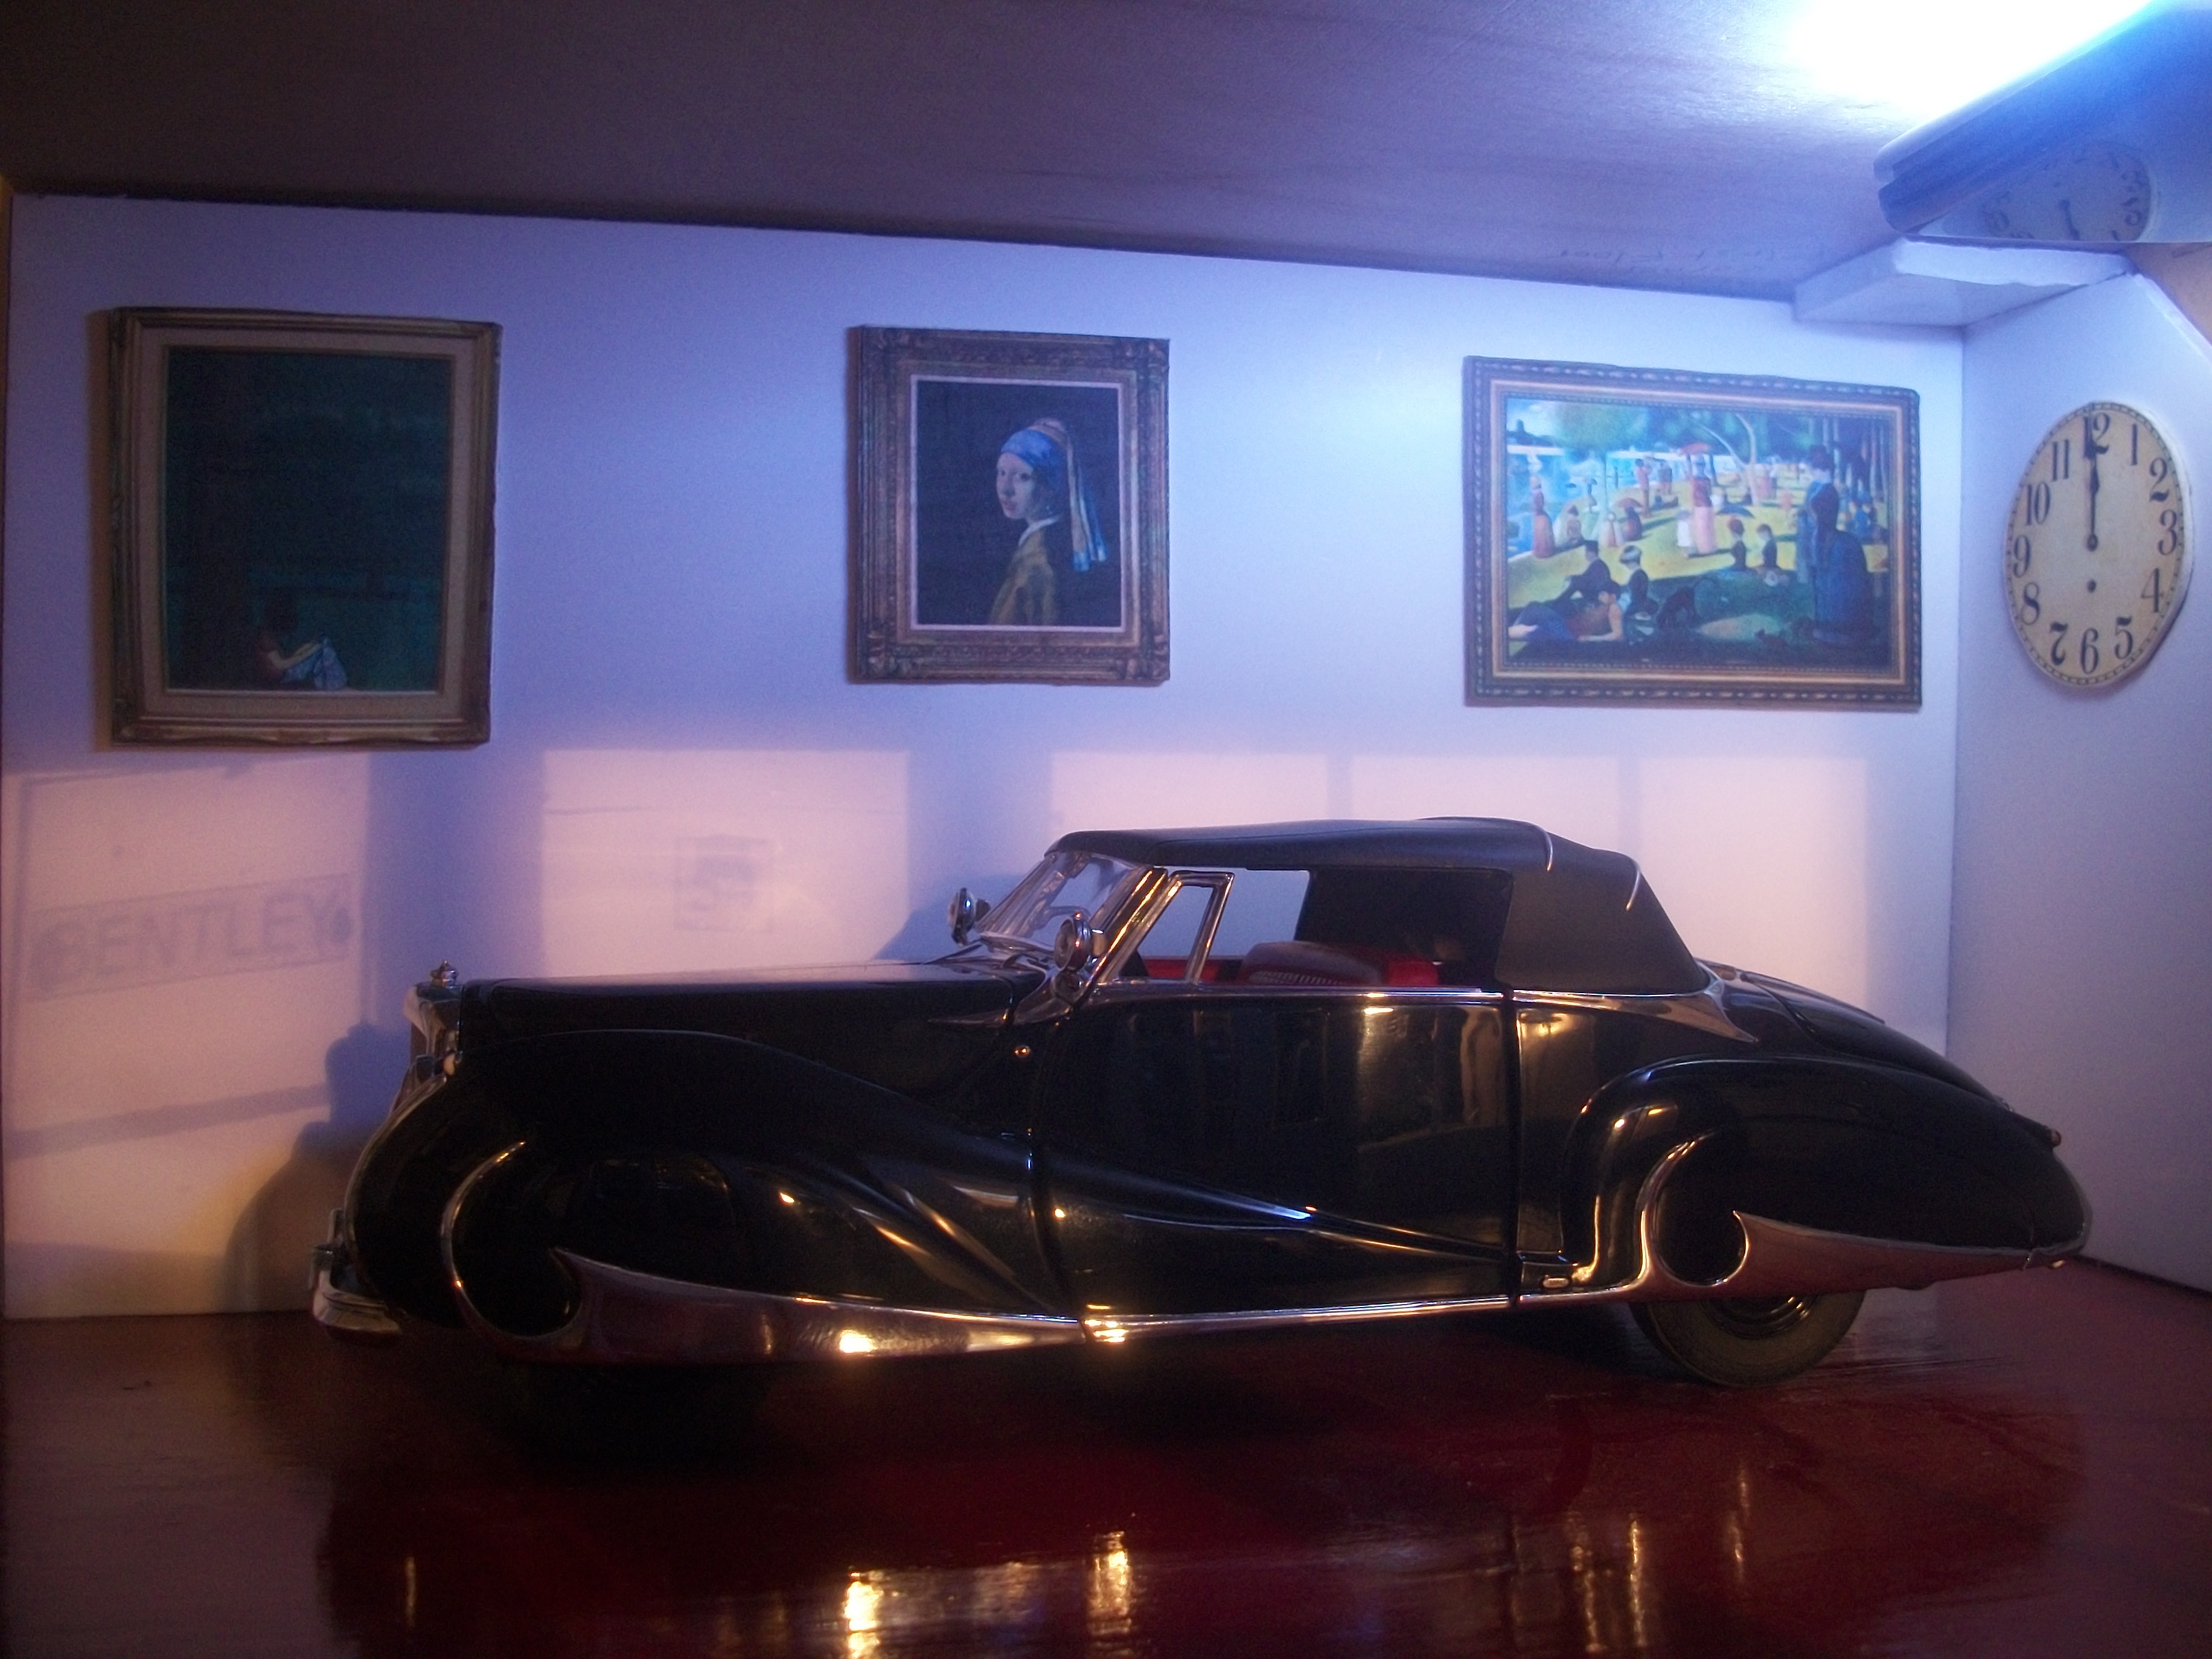
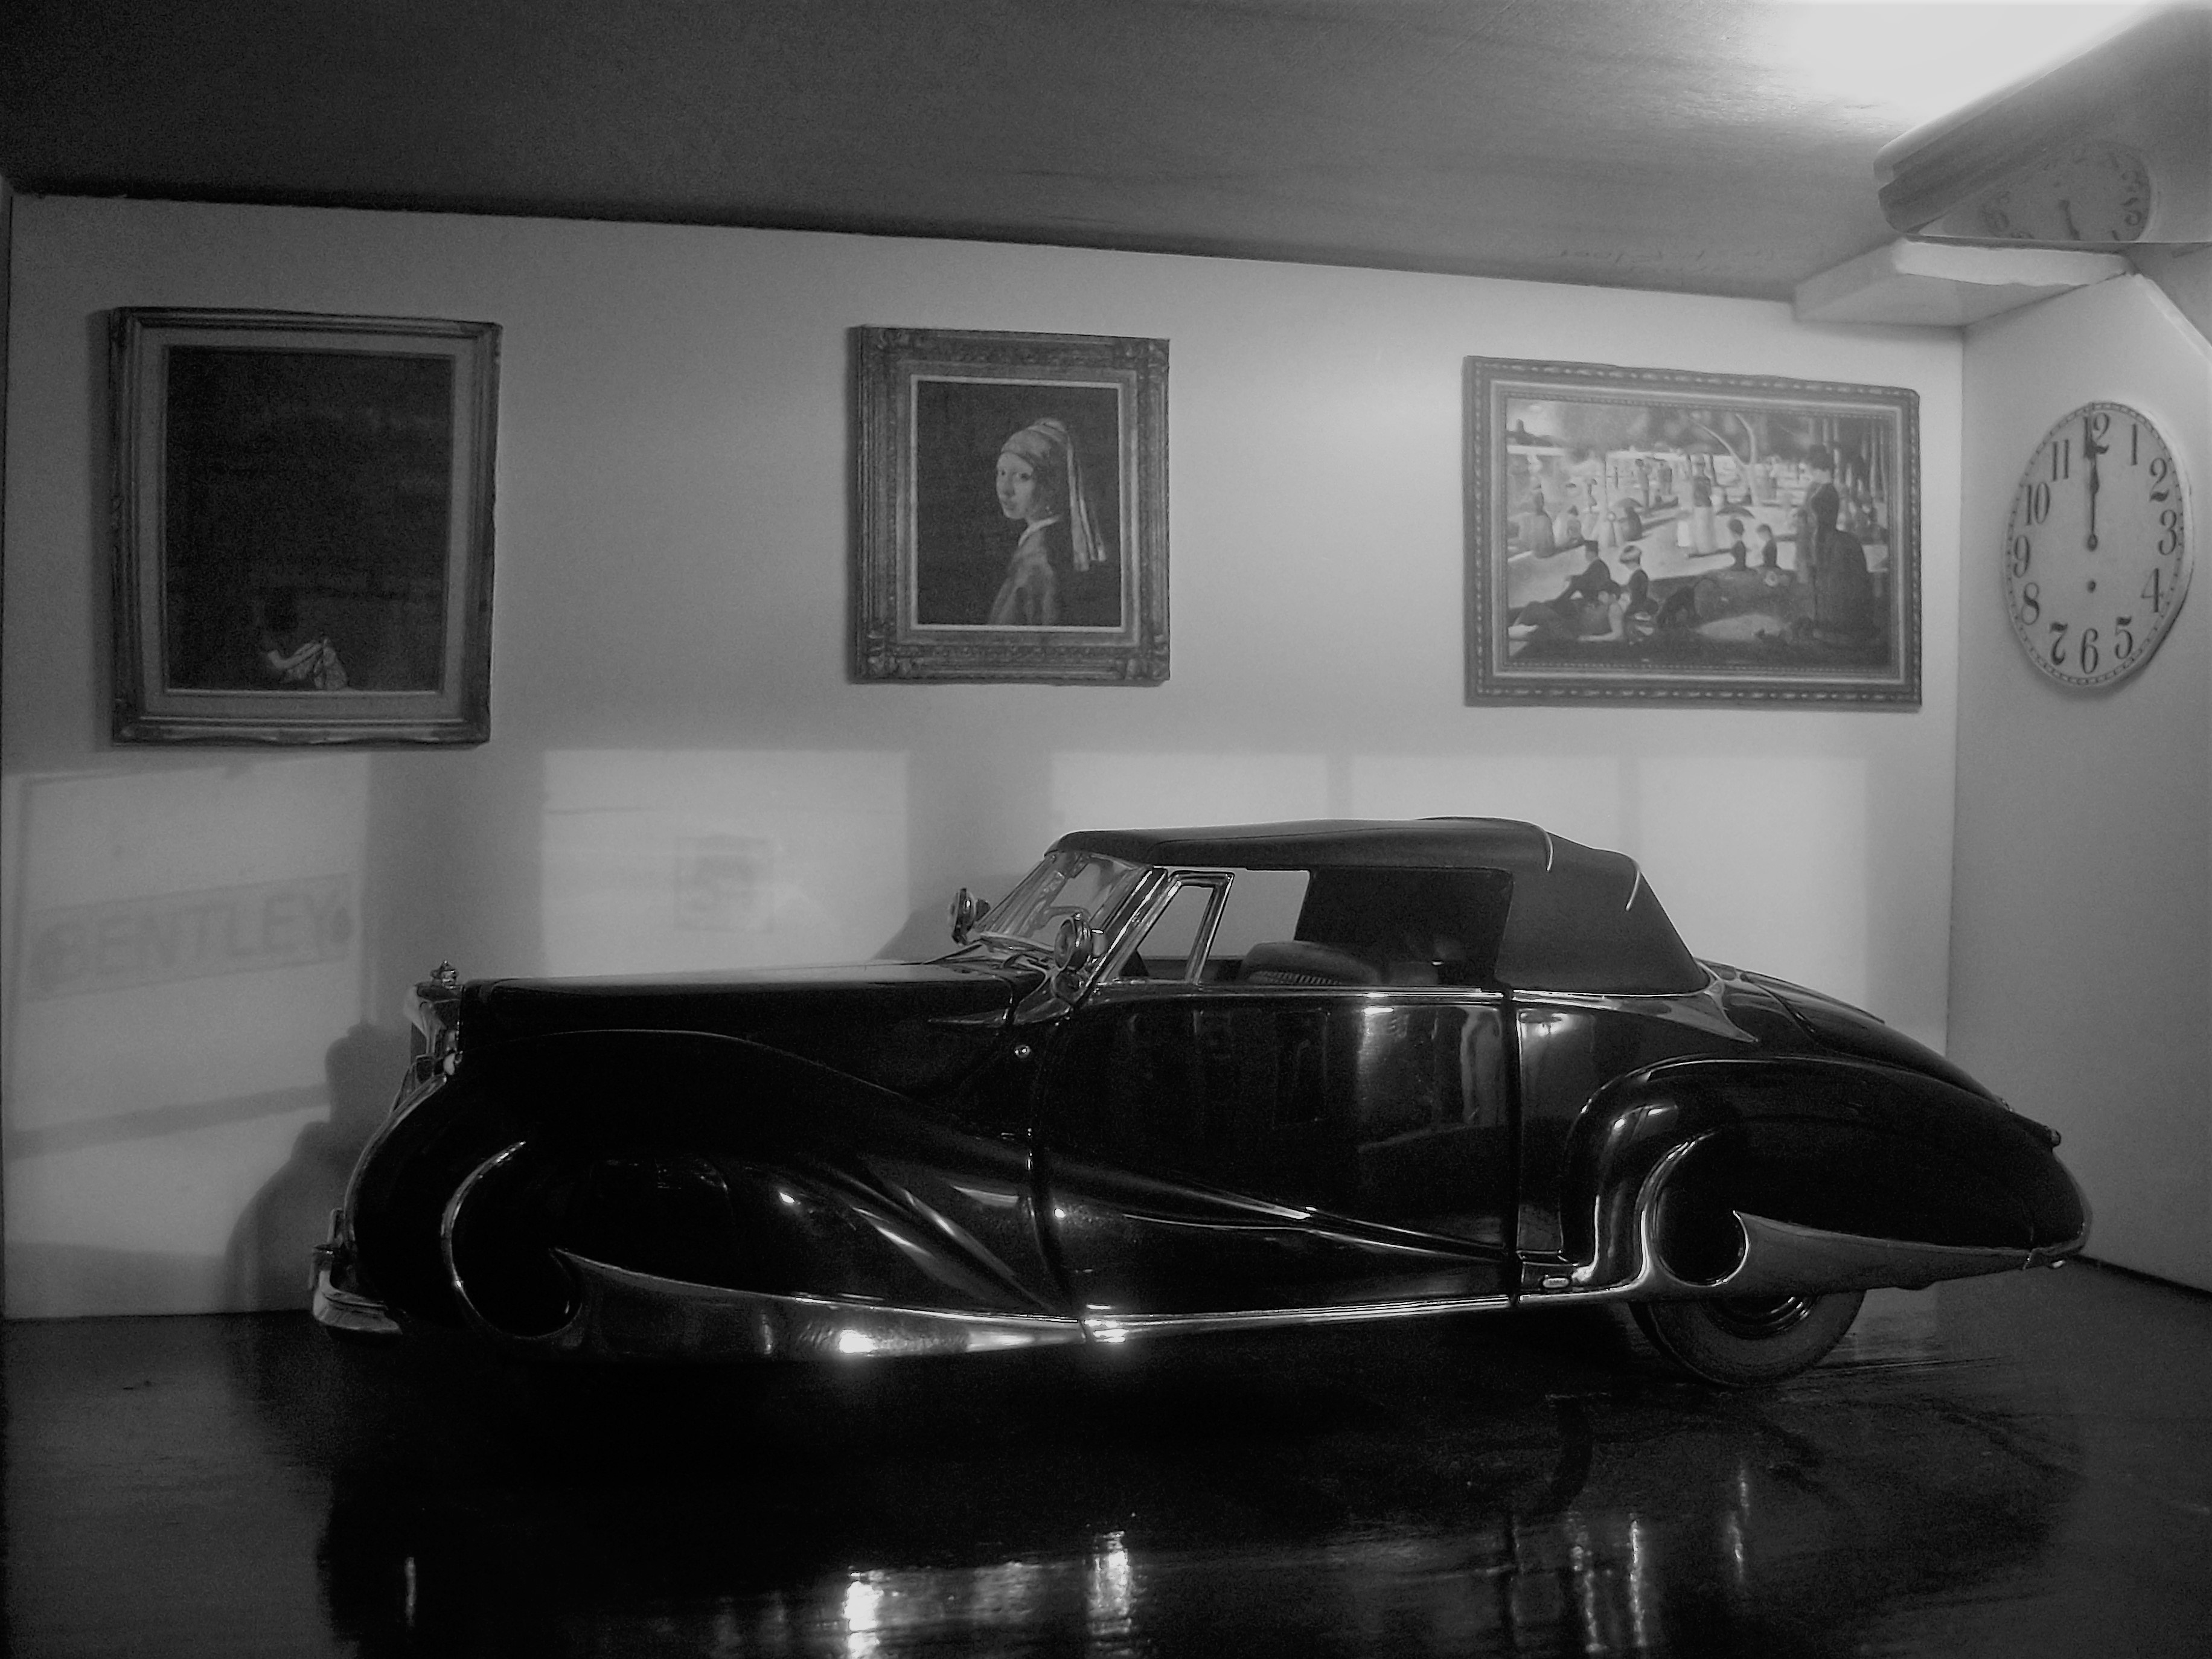
Happy New Year to everyone following this topic and here is a 2018 new year update. These photographs are taken mostly inside the Hooper & Co showrooms, and they feature the 1947 Bentley Franay drophead coupe by Franklin Mint. Experimenting with lighting, camera angles, camera position and composition. Defying the rules to some extent by making use of multiple light sources rather than using only one light source ( the sun ). Using a mix of lighting types and positioning I have managed to create the effect of early morning sunlight, which can also be seen as late afternoon sunlight. Many other photos show the car with the top down, door open and a figure standing alongside. All the photography is carried out indoors, so no natural light is used. Arriving by the end of this week will be a Bentley S1 also by Franklin Mint. David
-
Airfix Bentley Blower in 1/12
Anglia105E replied to maysula's topic in Other Racing: Road Racing, Salt Flat Racers
Really nice build Thomas..... and I think this is one of the finest 1:12 kits ever produced. When I was looking for my first build in 50 years this was the one I almost bought, but it was too expensive and I wasn't absolutely sure I could do it well. Instead I chose 1:24 scale and I haven't gone larger yet..... Your detailing is excellent and as others have commented, your paint finish is extremely authentic. David -
What would YOU like to see as a model
Anglia105E replied to JeroenM3's topic in General Automotive Talk (Trucks and Cars)
Of course, you are right. The Harry Potter films were showing back to back on British TV over Christmas, and this could generate interest in a Ford Anglia scale model kit. Apart from a resin body kit produced by Airtrax in Finland and some diecast models in the wrong scales, there is no 1:24 Anglia. David -
What would YOU like to see as a model
Anglia105E replied to JeroenM3's topic in General Automotive Talk (Trucks and Cars)
Like you Christian, I would like to see a 1:24 scale Ford Cortina MK1, preferably the four-door version. Also the Ford Anglia 105E would be wonderful in 1:24 David -
More Vintage Model Car Ads
Anglia105E replied to unclescott58's topic in General Automotive Talk (Trucks and Cars)
Sorry Scott, I meant to say 1959 Silver Cloud II -
More Vintage Model Car Ads
Anglia105E replied to unclescott58's topic in General Automotive Talk (Trucks and Cars)
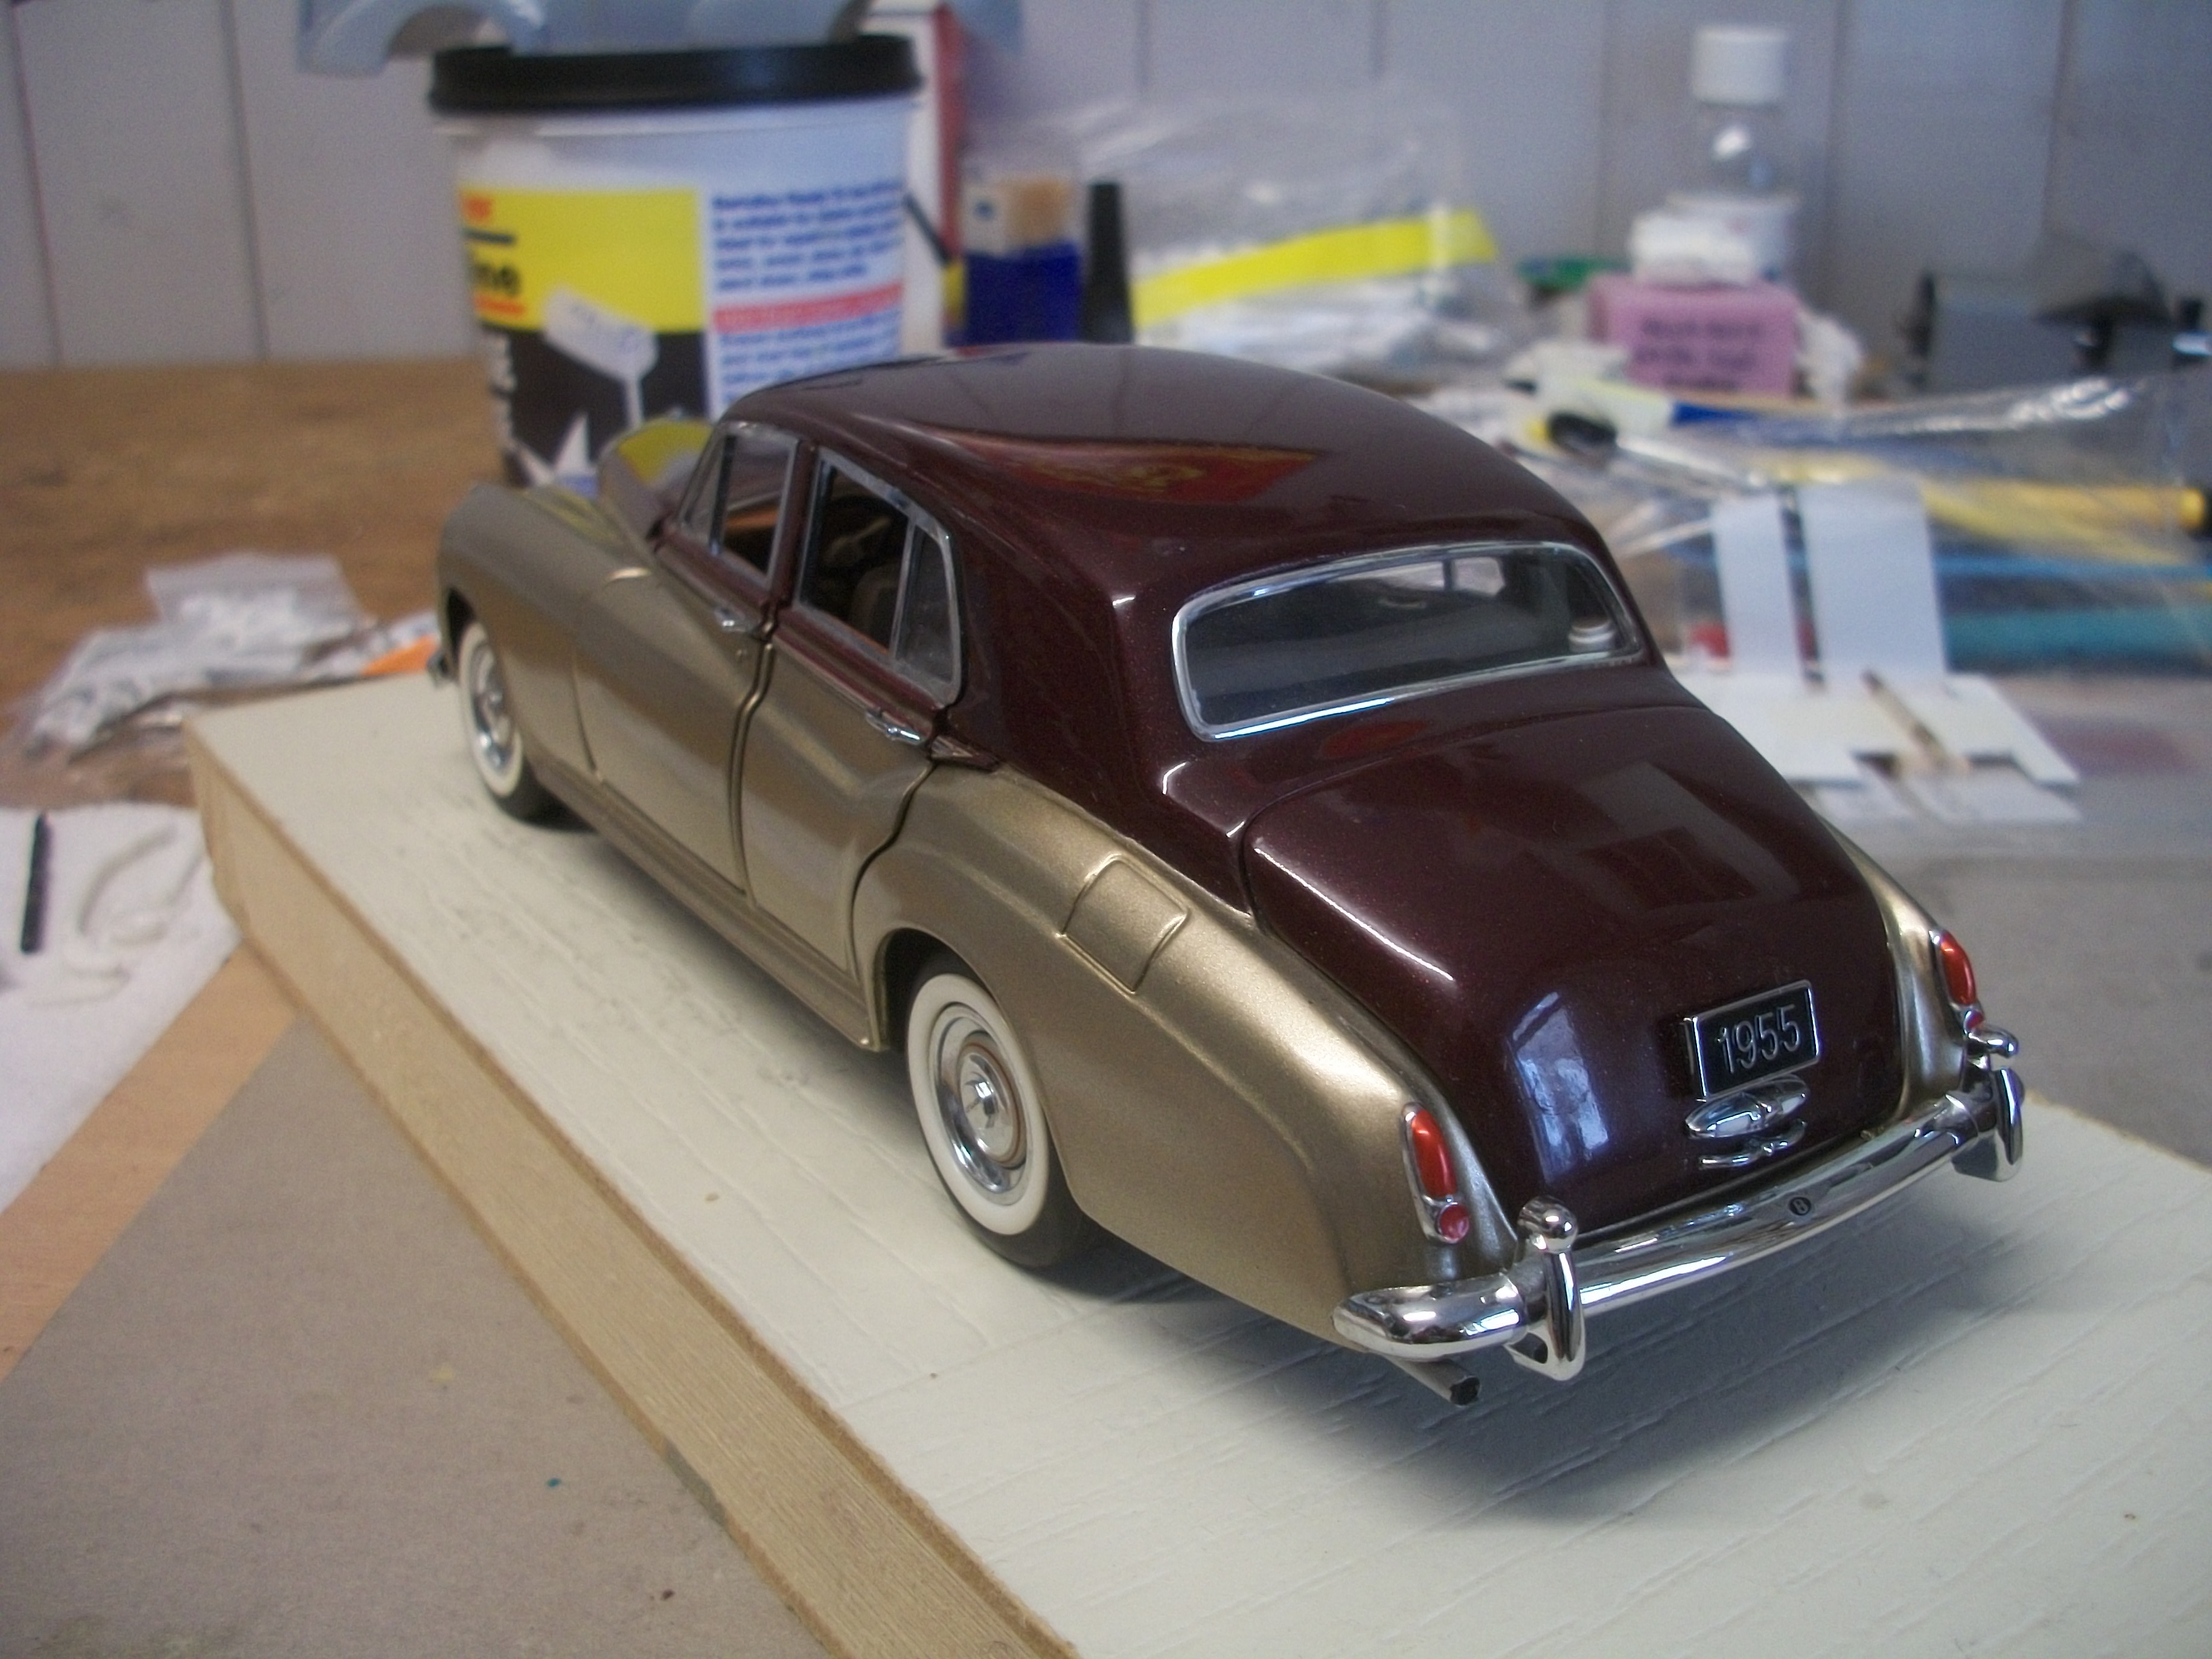
Well Scott, I have to say these vintage scale model car advertisements really appeal to me. I was looking at the Hubley ones, as I have an original Hubley promo model in blue plastic (acetate) of the 1955 Rolls-Royce Silver Cloud II, which does not have the friction motor, but probably did originally. Apart from the ridiculous out of scale Spirit of Ecstasy bonnet (hood) mascot, this is a superb model. The body shell in particular is very accurate and well moulded. As we know, the Minicraft and Revell kits that followed later all have the crude representation of the 6.2 litre V8 engine in one piece, but then there are less than 30 pieces in those kits. I have replaced the V8 engine with a 4.9 litre 6-cylinder engine for my builds of this kit, which was fitted to the Silver Cloud I that was produced from 1955 to 1959. The Hubley version is still interesting and with quite a bit of work from a skilled model builder the car can be made to look much better. David -
Nice Mitsubishi build you got there Scott, and certainly in a diorama setting or an outdoor setup this scale model car would look realistic. David
-
Thanks for the information David