Anglia105E
-
Posts
3,487 -
Joined
-
Last visited
Content Type
Profiles
Forums
Events
Gallery
Everything posted by Anglia105E
-
High appraisal indeed, Eric...... and I do hope that this project turns out to be successful....... thanks very much ! David
-
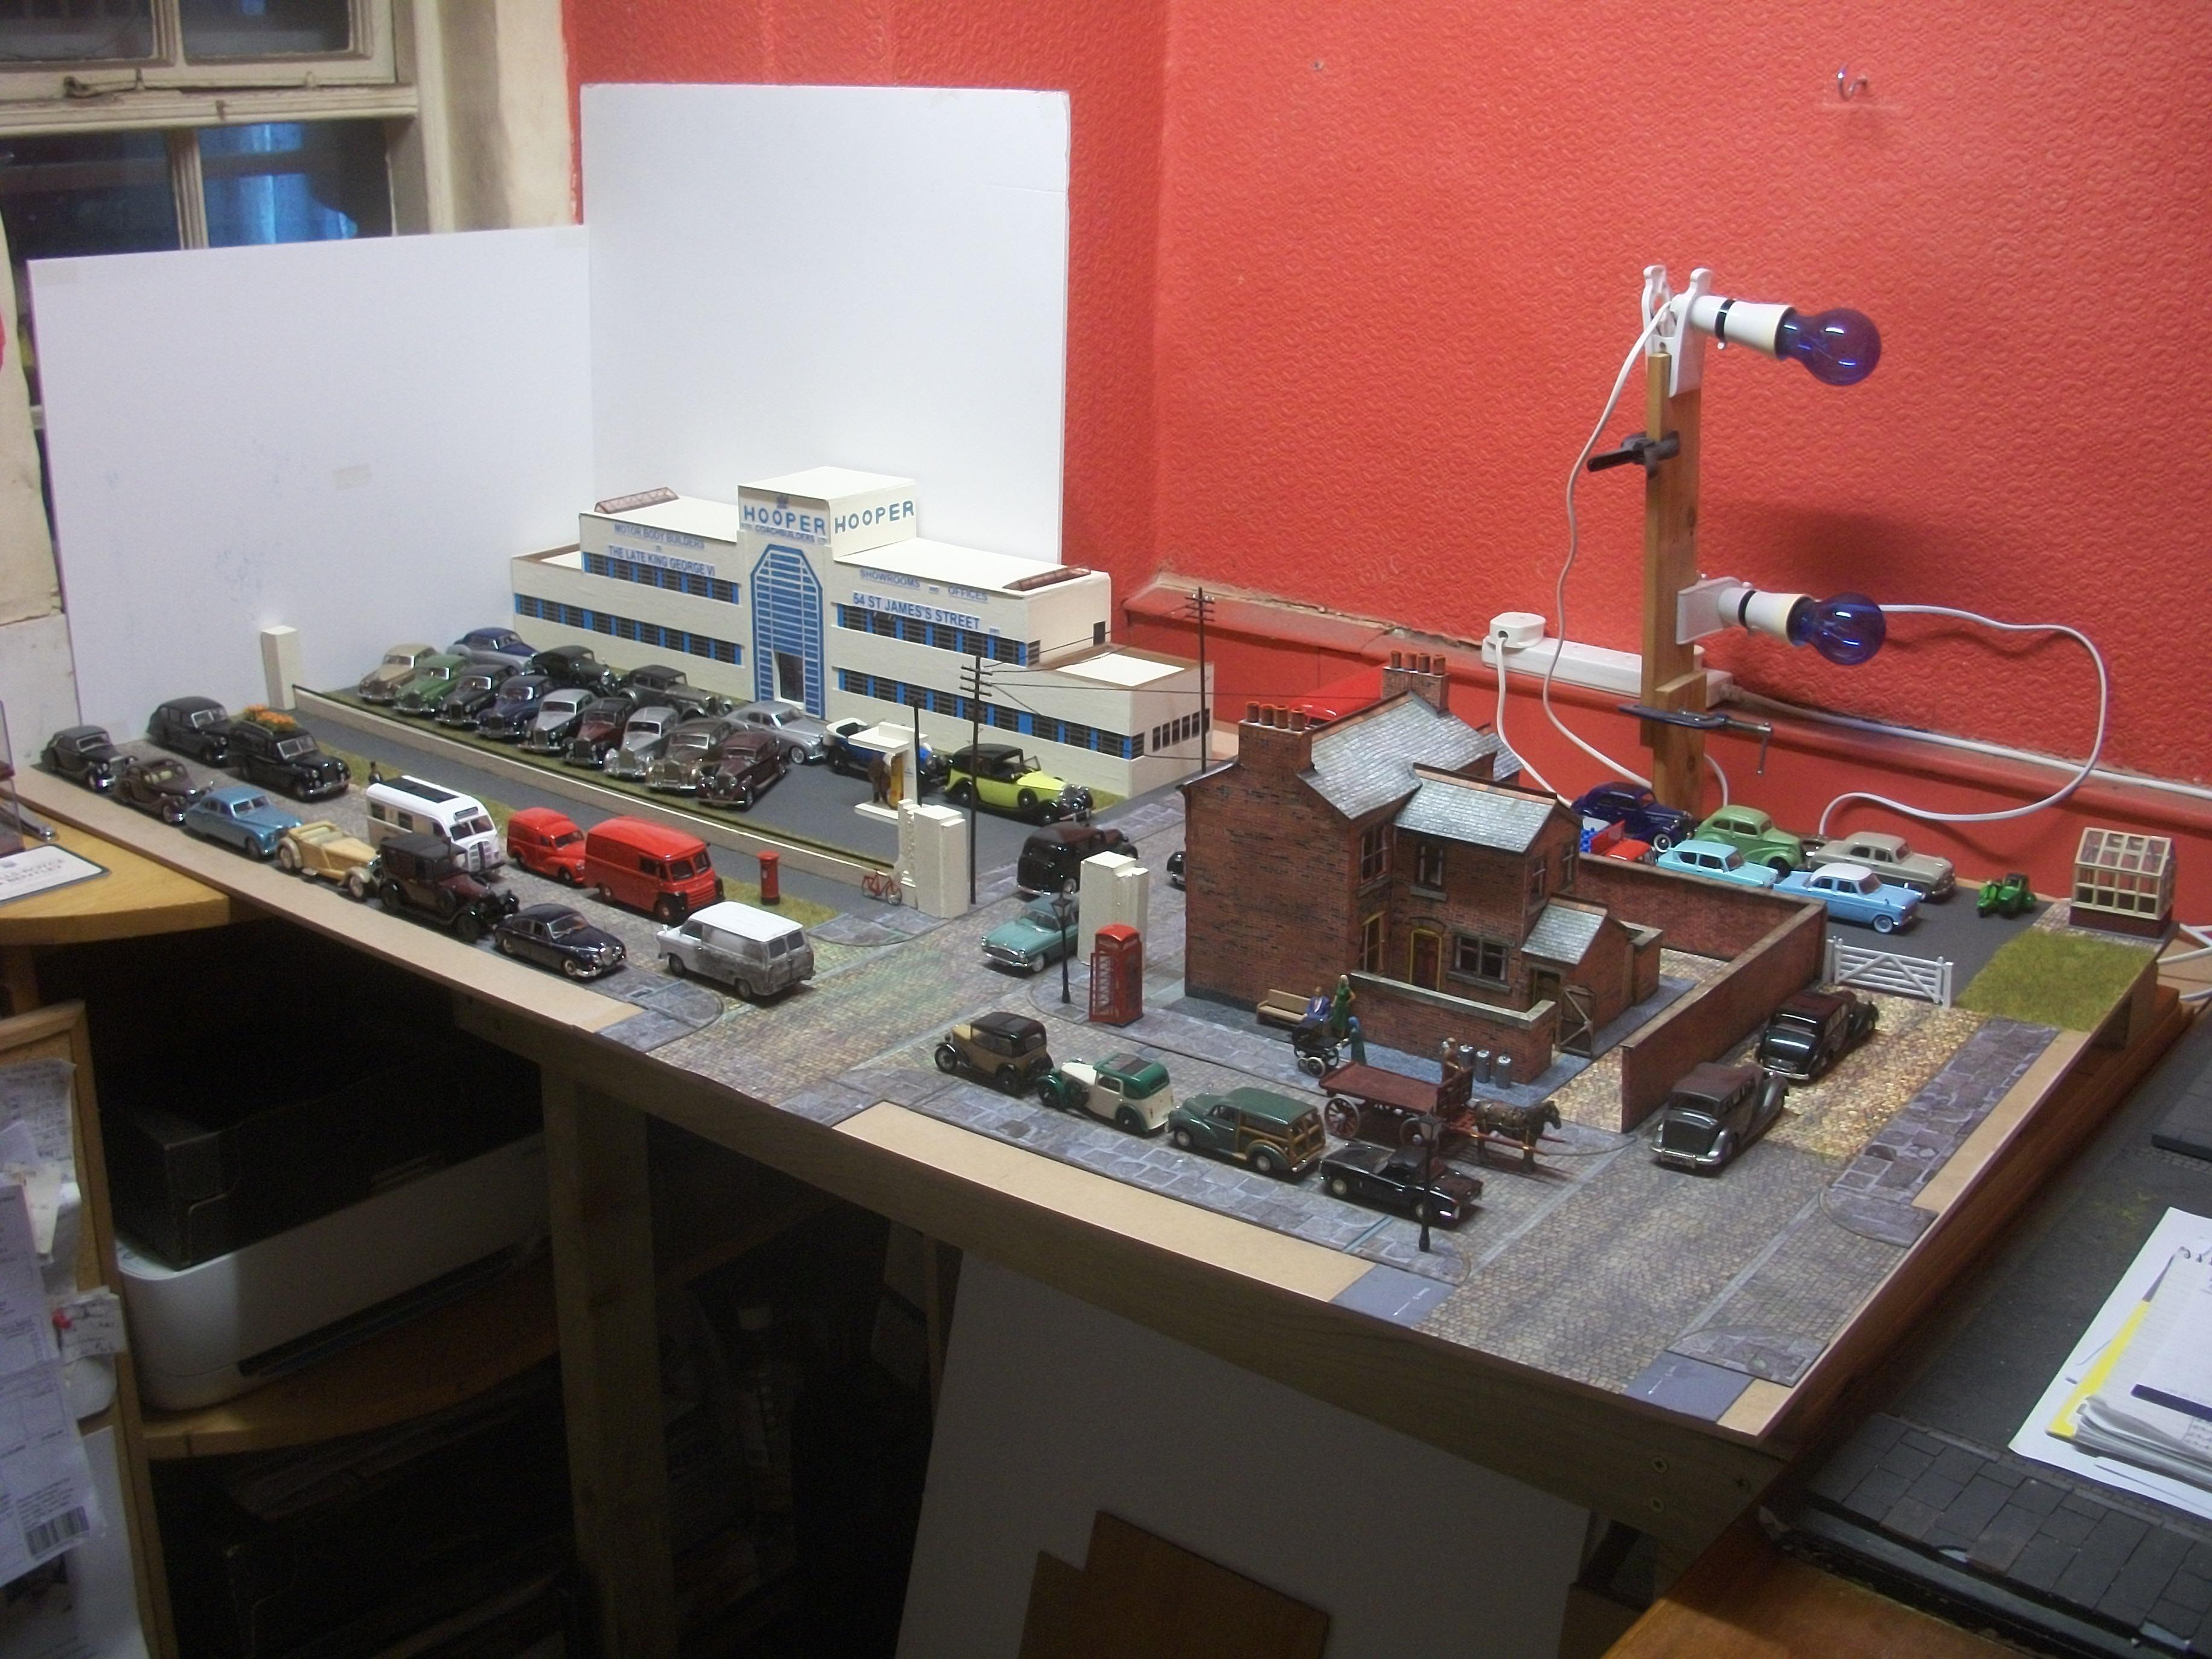
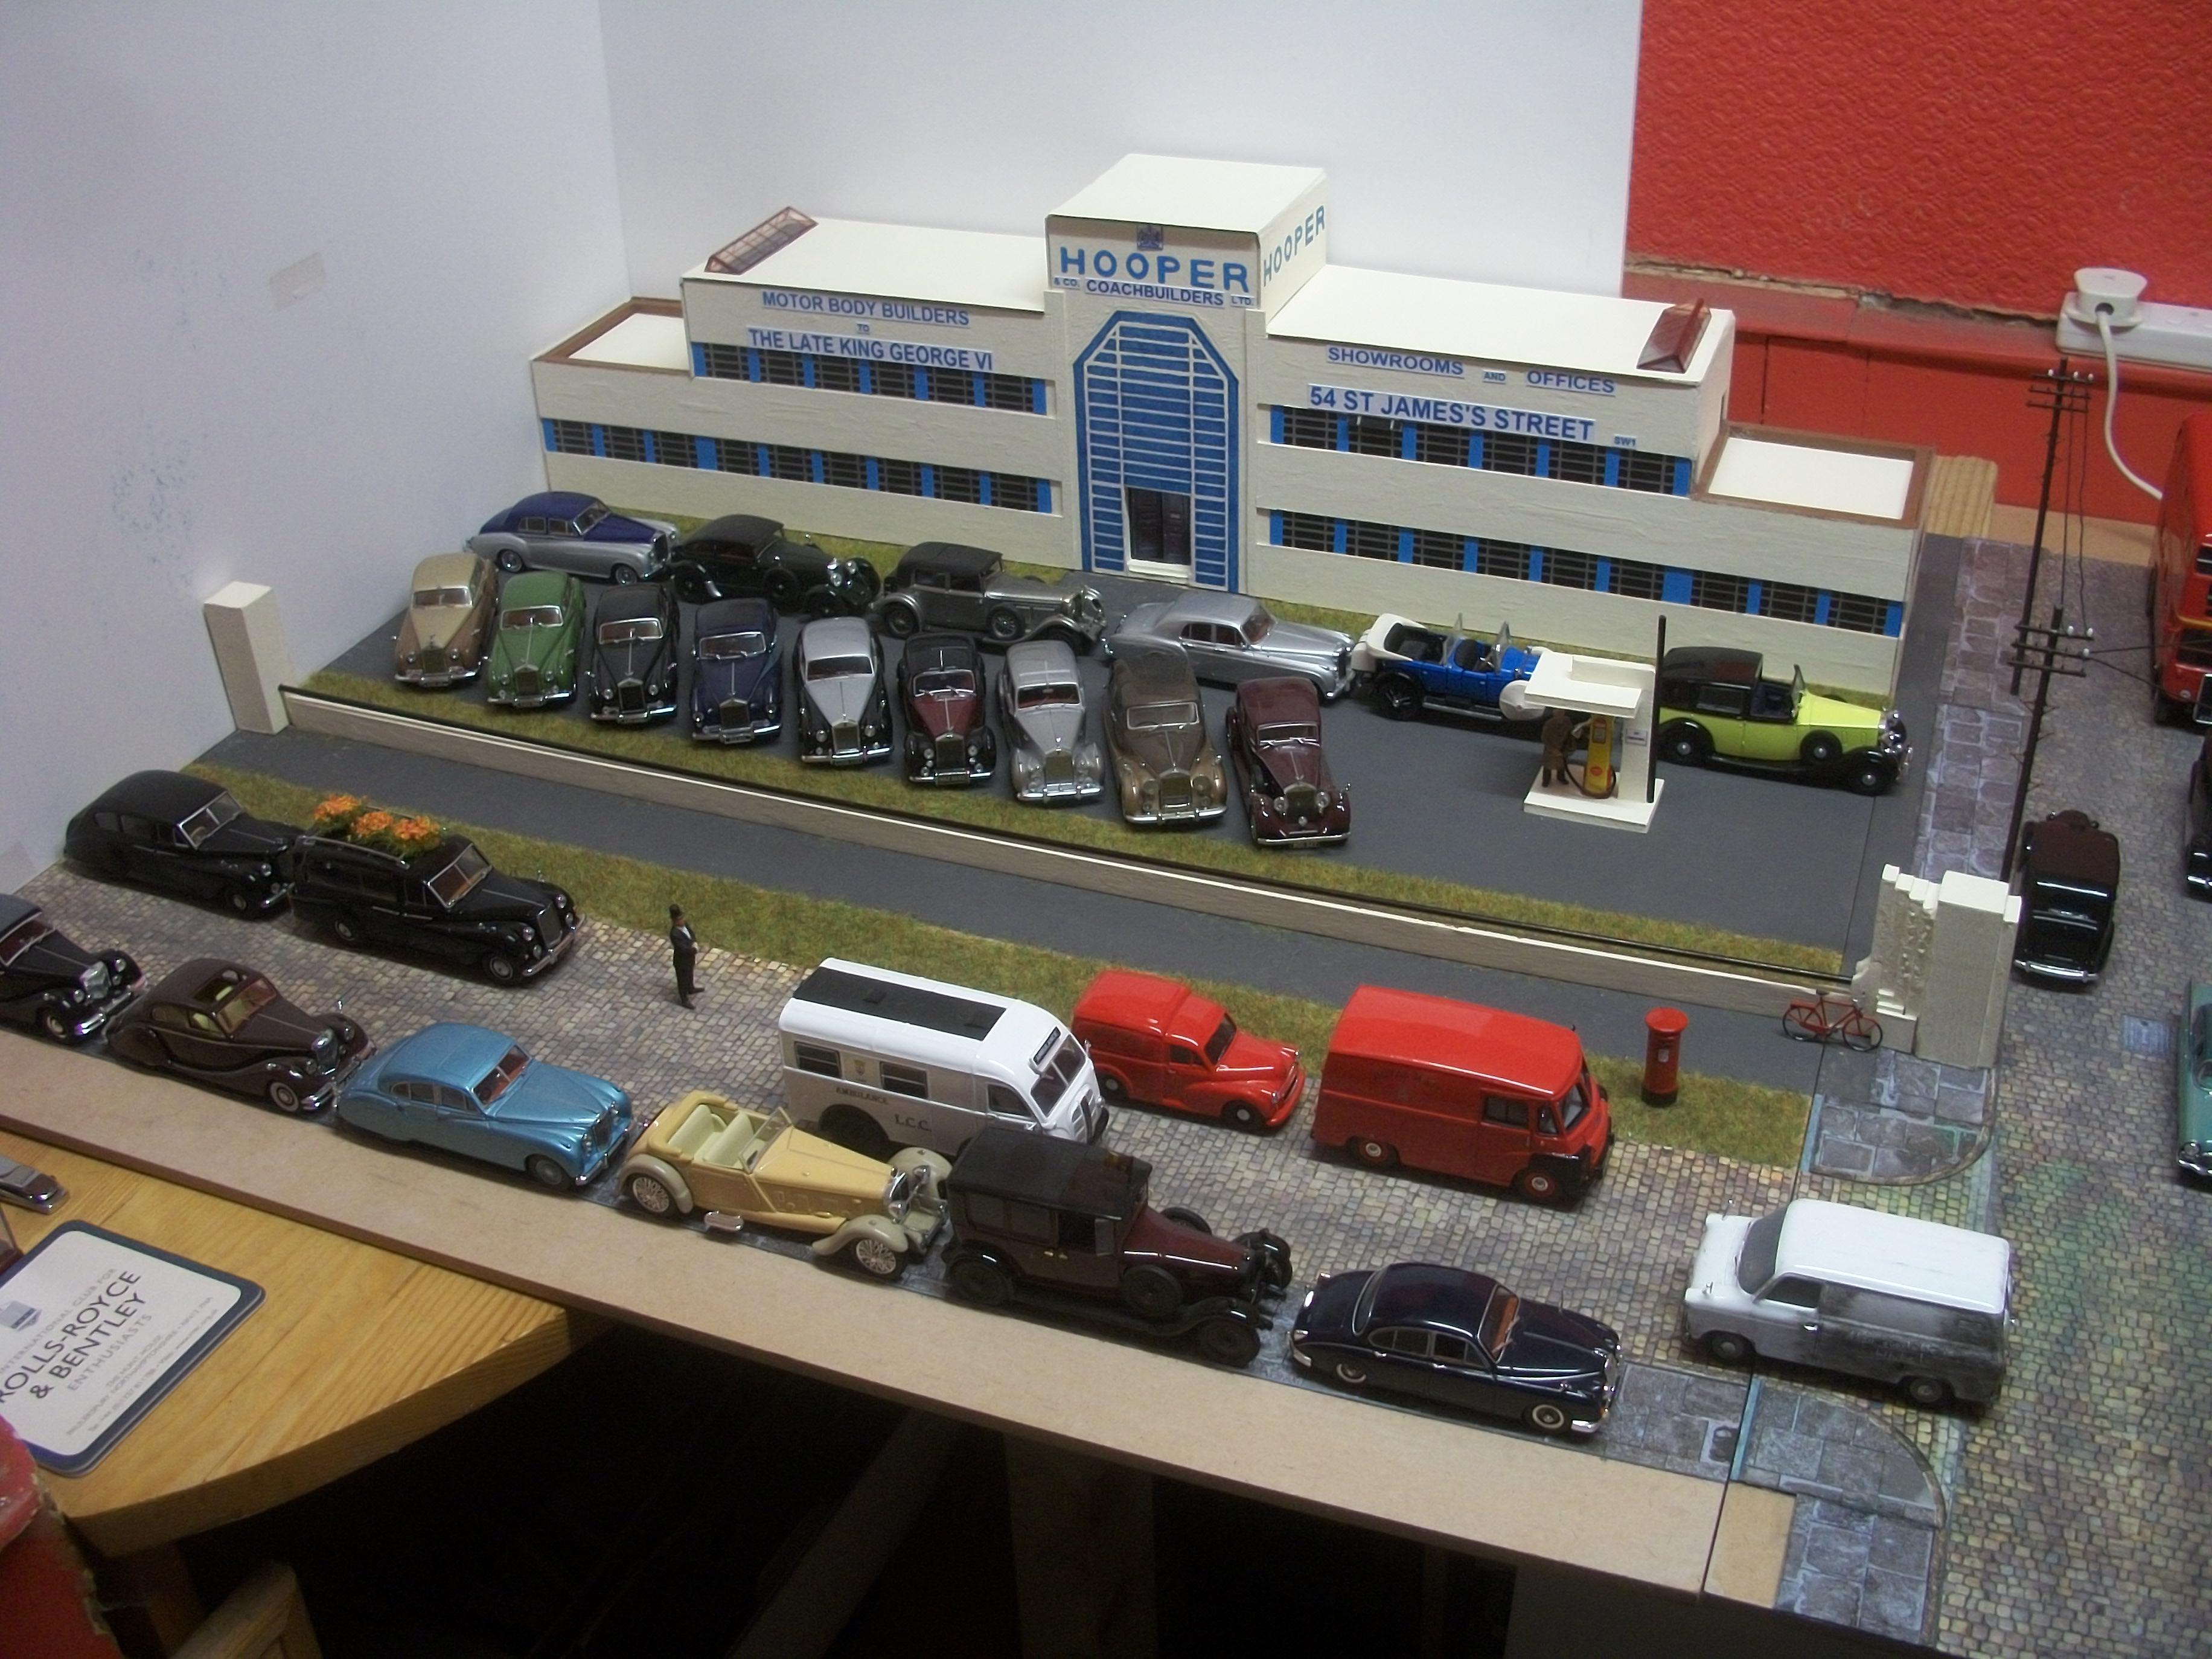
Too many cars ! I would not usually display all of the 45 vehicles in the 1:43 scale diorama setting, so this was just a simple process of getting all the models out of the boxes and taking stock of what we have on the table, as it were. The following photos show the Rolls-Royce and Bentley motor cars on the Hooper & Co factory forecourt, while in the foreground we have the Jaguars and Daimlers....... over to one side there are the Austin, Morris, MG and Triumph cars, while the Ford cars are arranged in the recently added car parking area. Other vehicles include the bus, several vans, an ambulance, a couple of taxi cabs, one lorry, the horse and cart, and last but not least the motor scooter and sidecar combination. David

-
Sure did, Pat...... the static grass applicator was a cheap one, bought on Ebay and it works very well. Once a thin layer of PVA glue and a small amount of water is spread over the area of baseboard that I want to grass, I just load up the hopper with static grass flock and away you go. The crocodile clip on the end of the wire from the applicator needs to be in contact with the baseboard and close to the working area, and the wire mesh of the applicator is almost touching the PVA glued area. Pressing the red button while shaking the hopper against your hand dispenses the grass and the magic of static electricity does the rest. It is wise to wear disposable latex gloves, in case of electric shock. David
-
You are absolutely right there, Gary......... working space is now becoming a real problem, although I do have a second workbench in the loft of my property, which is under-utilised due to lack of heating at the moment. David
-
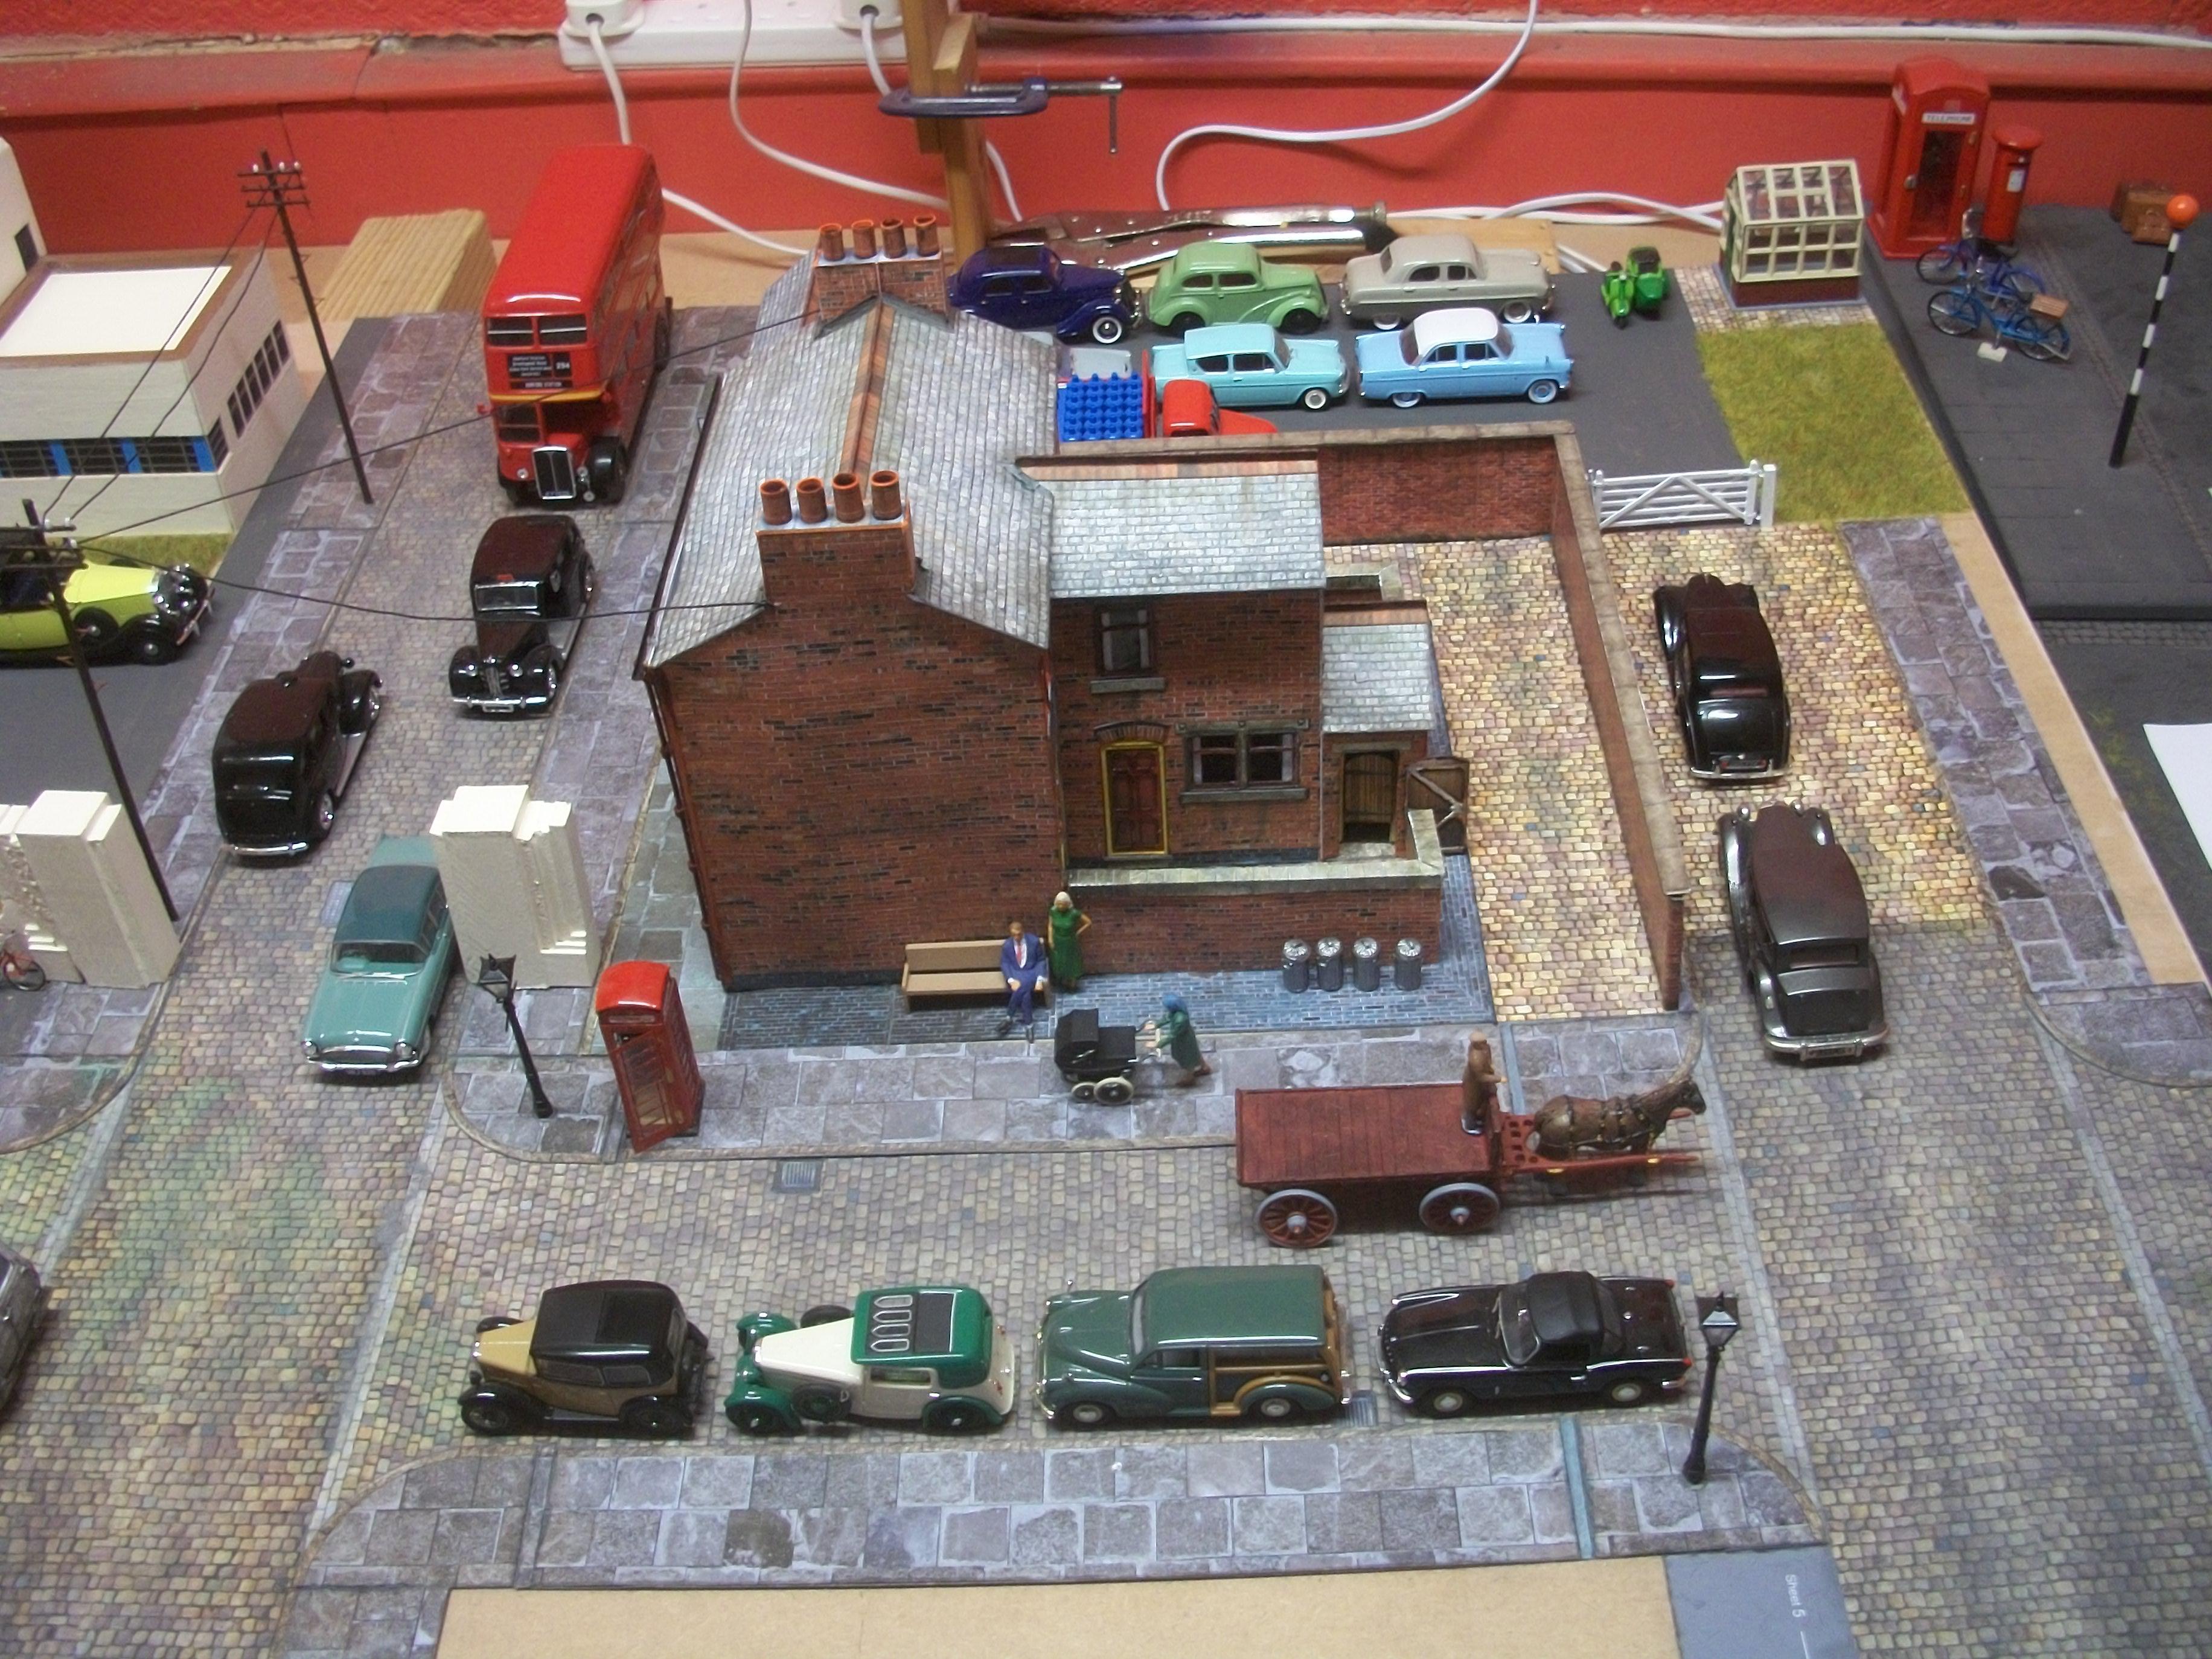
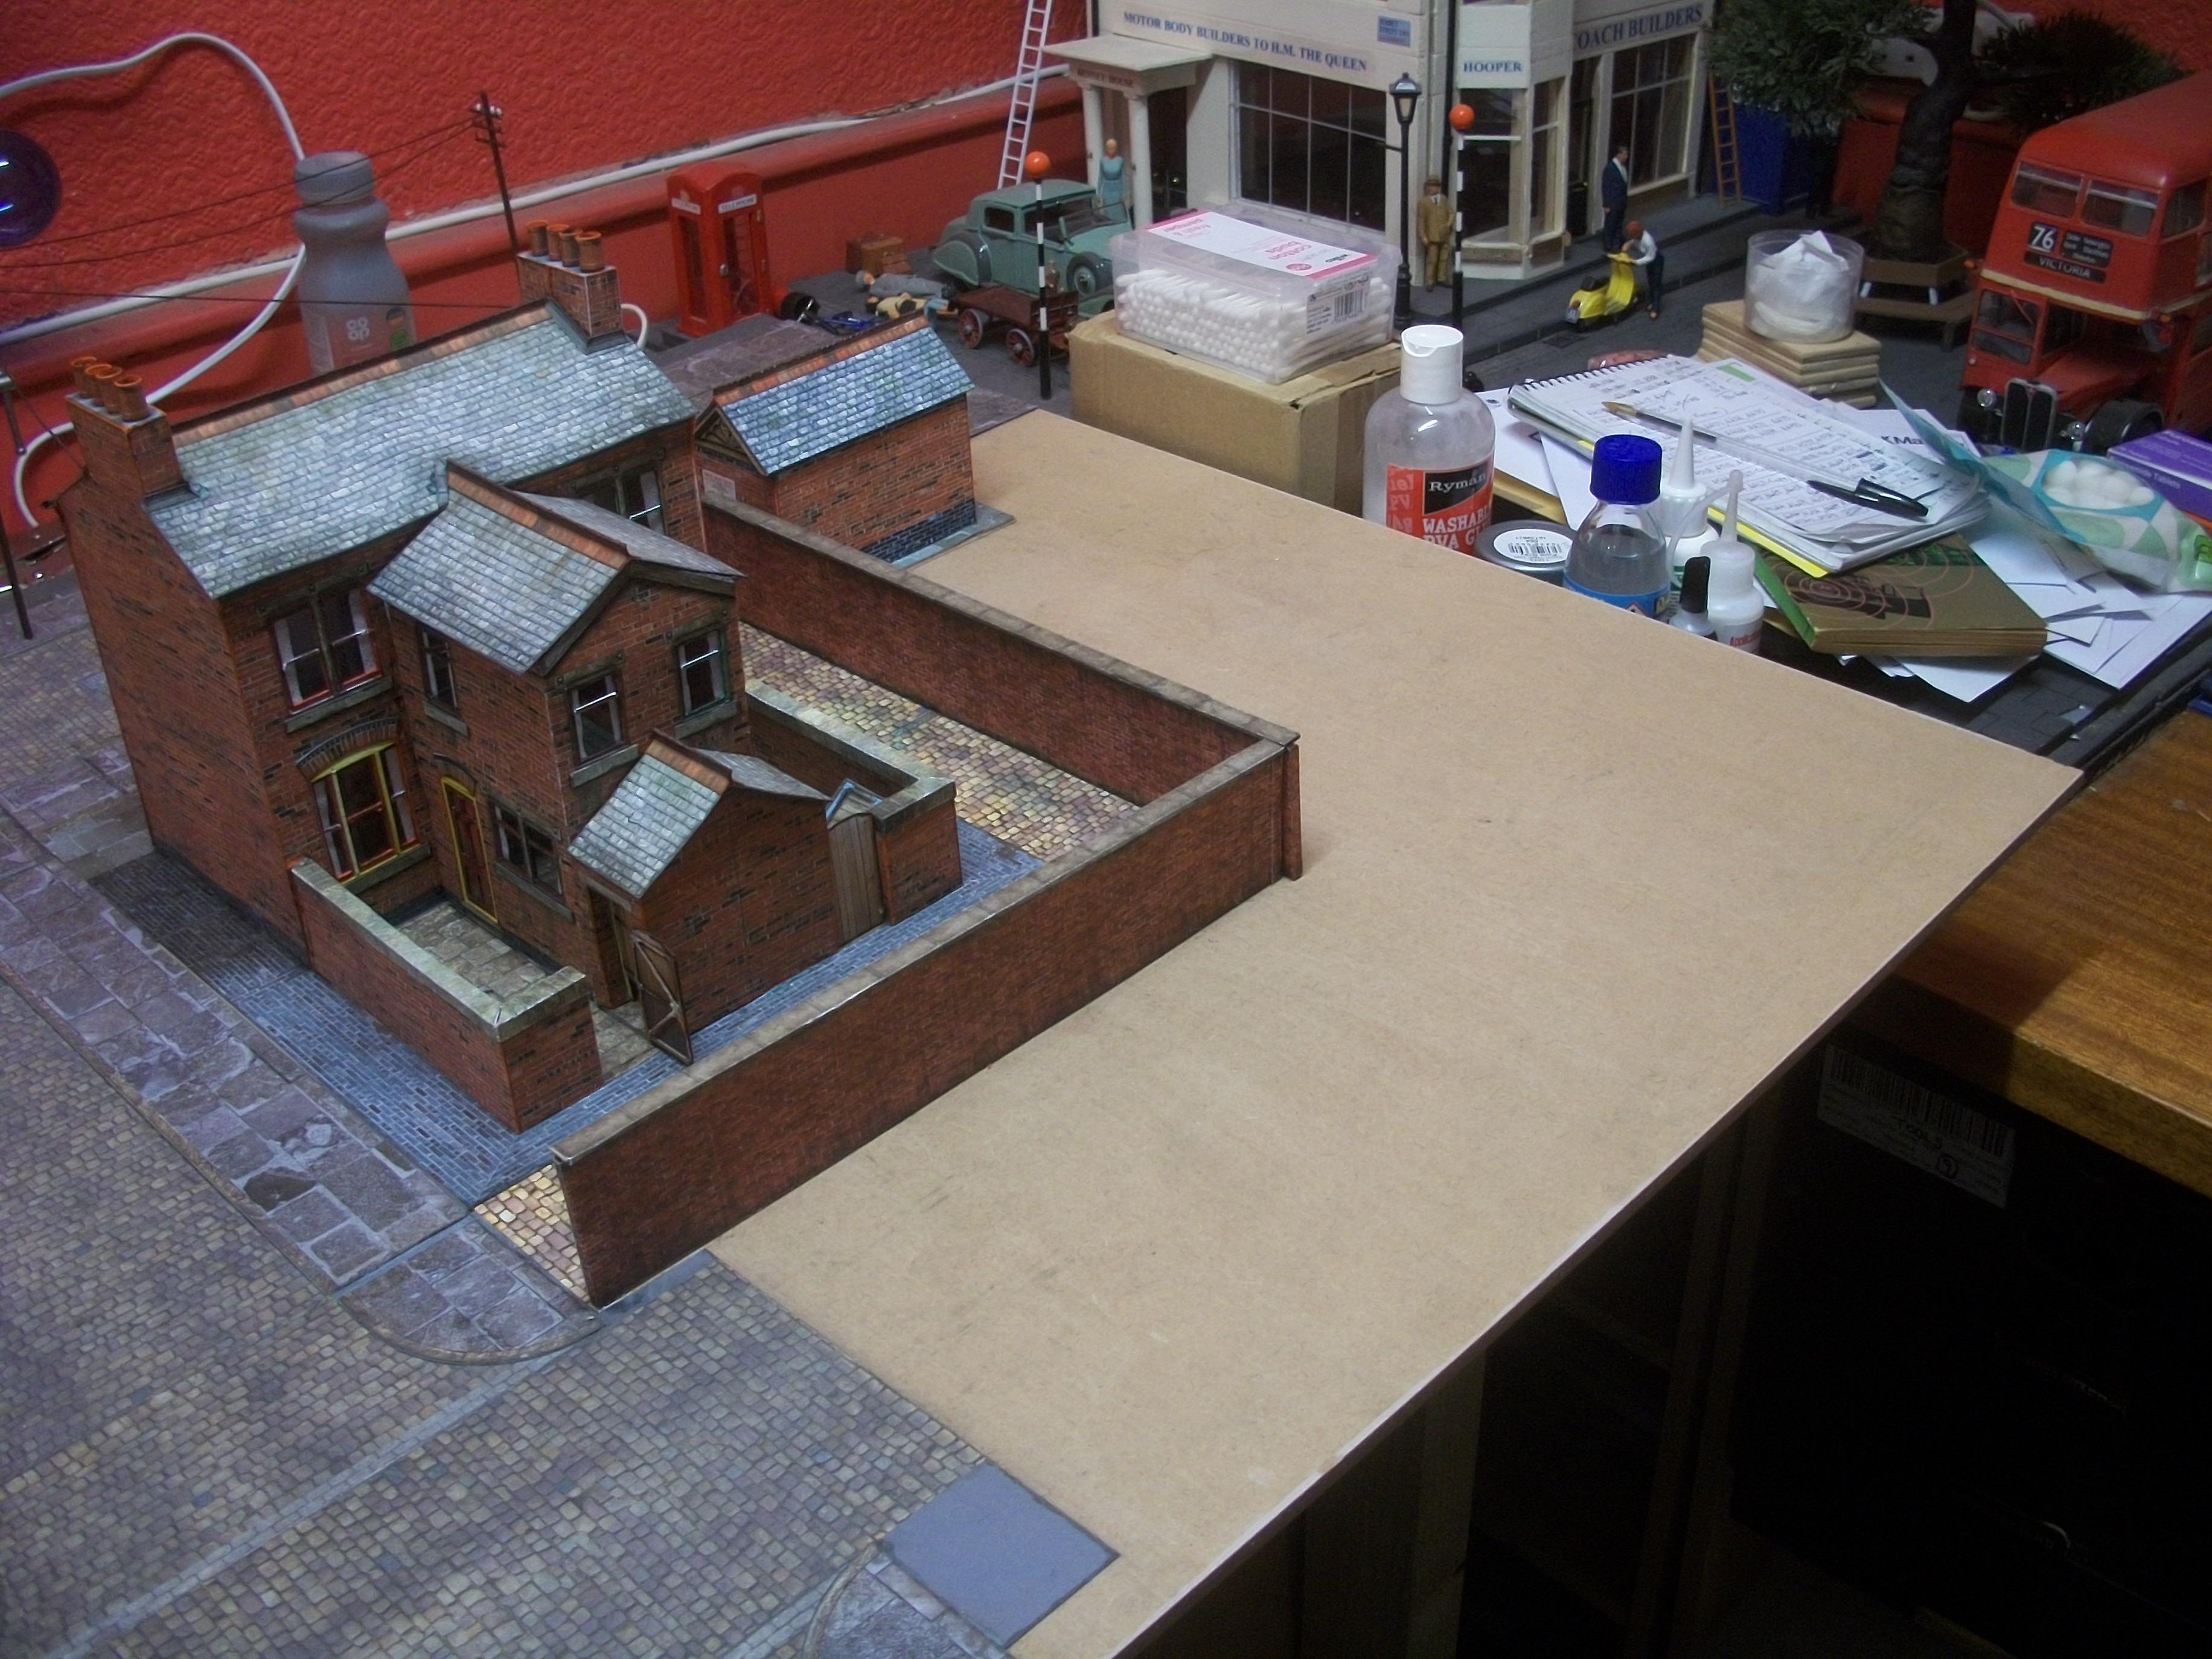
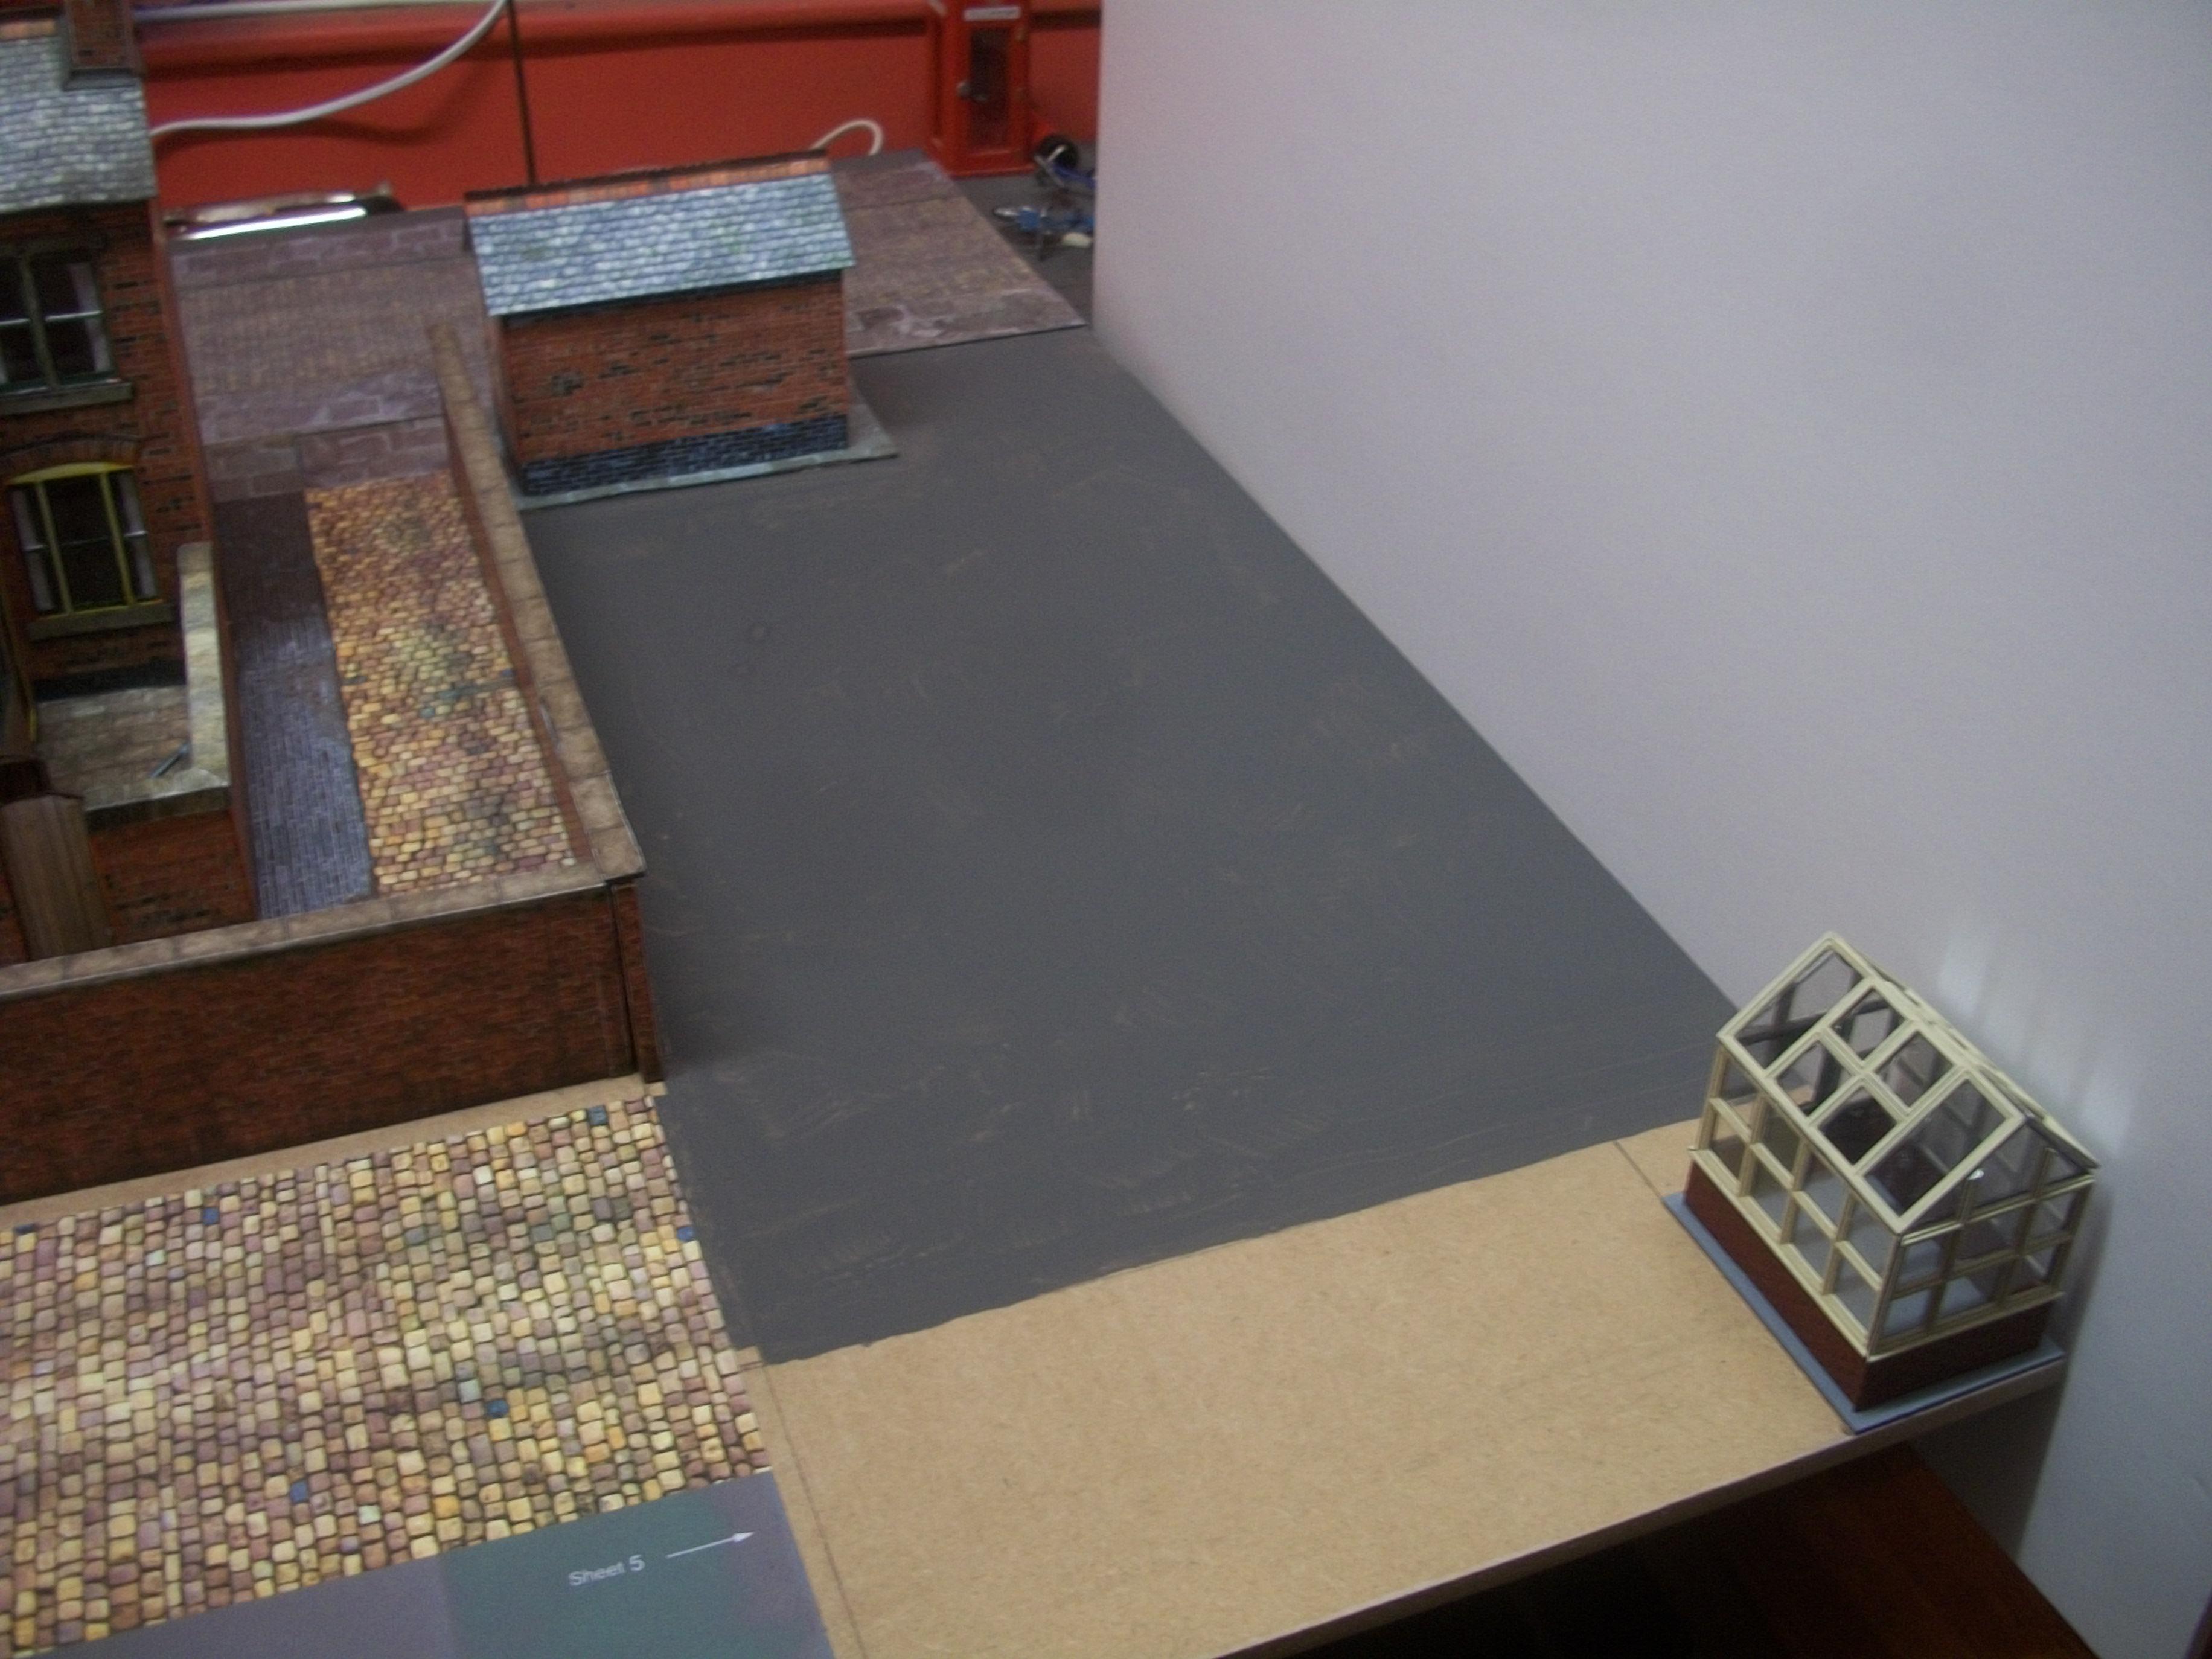
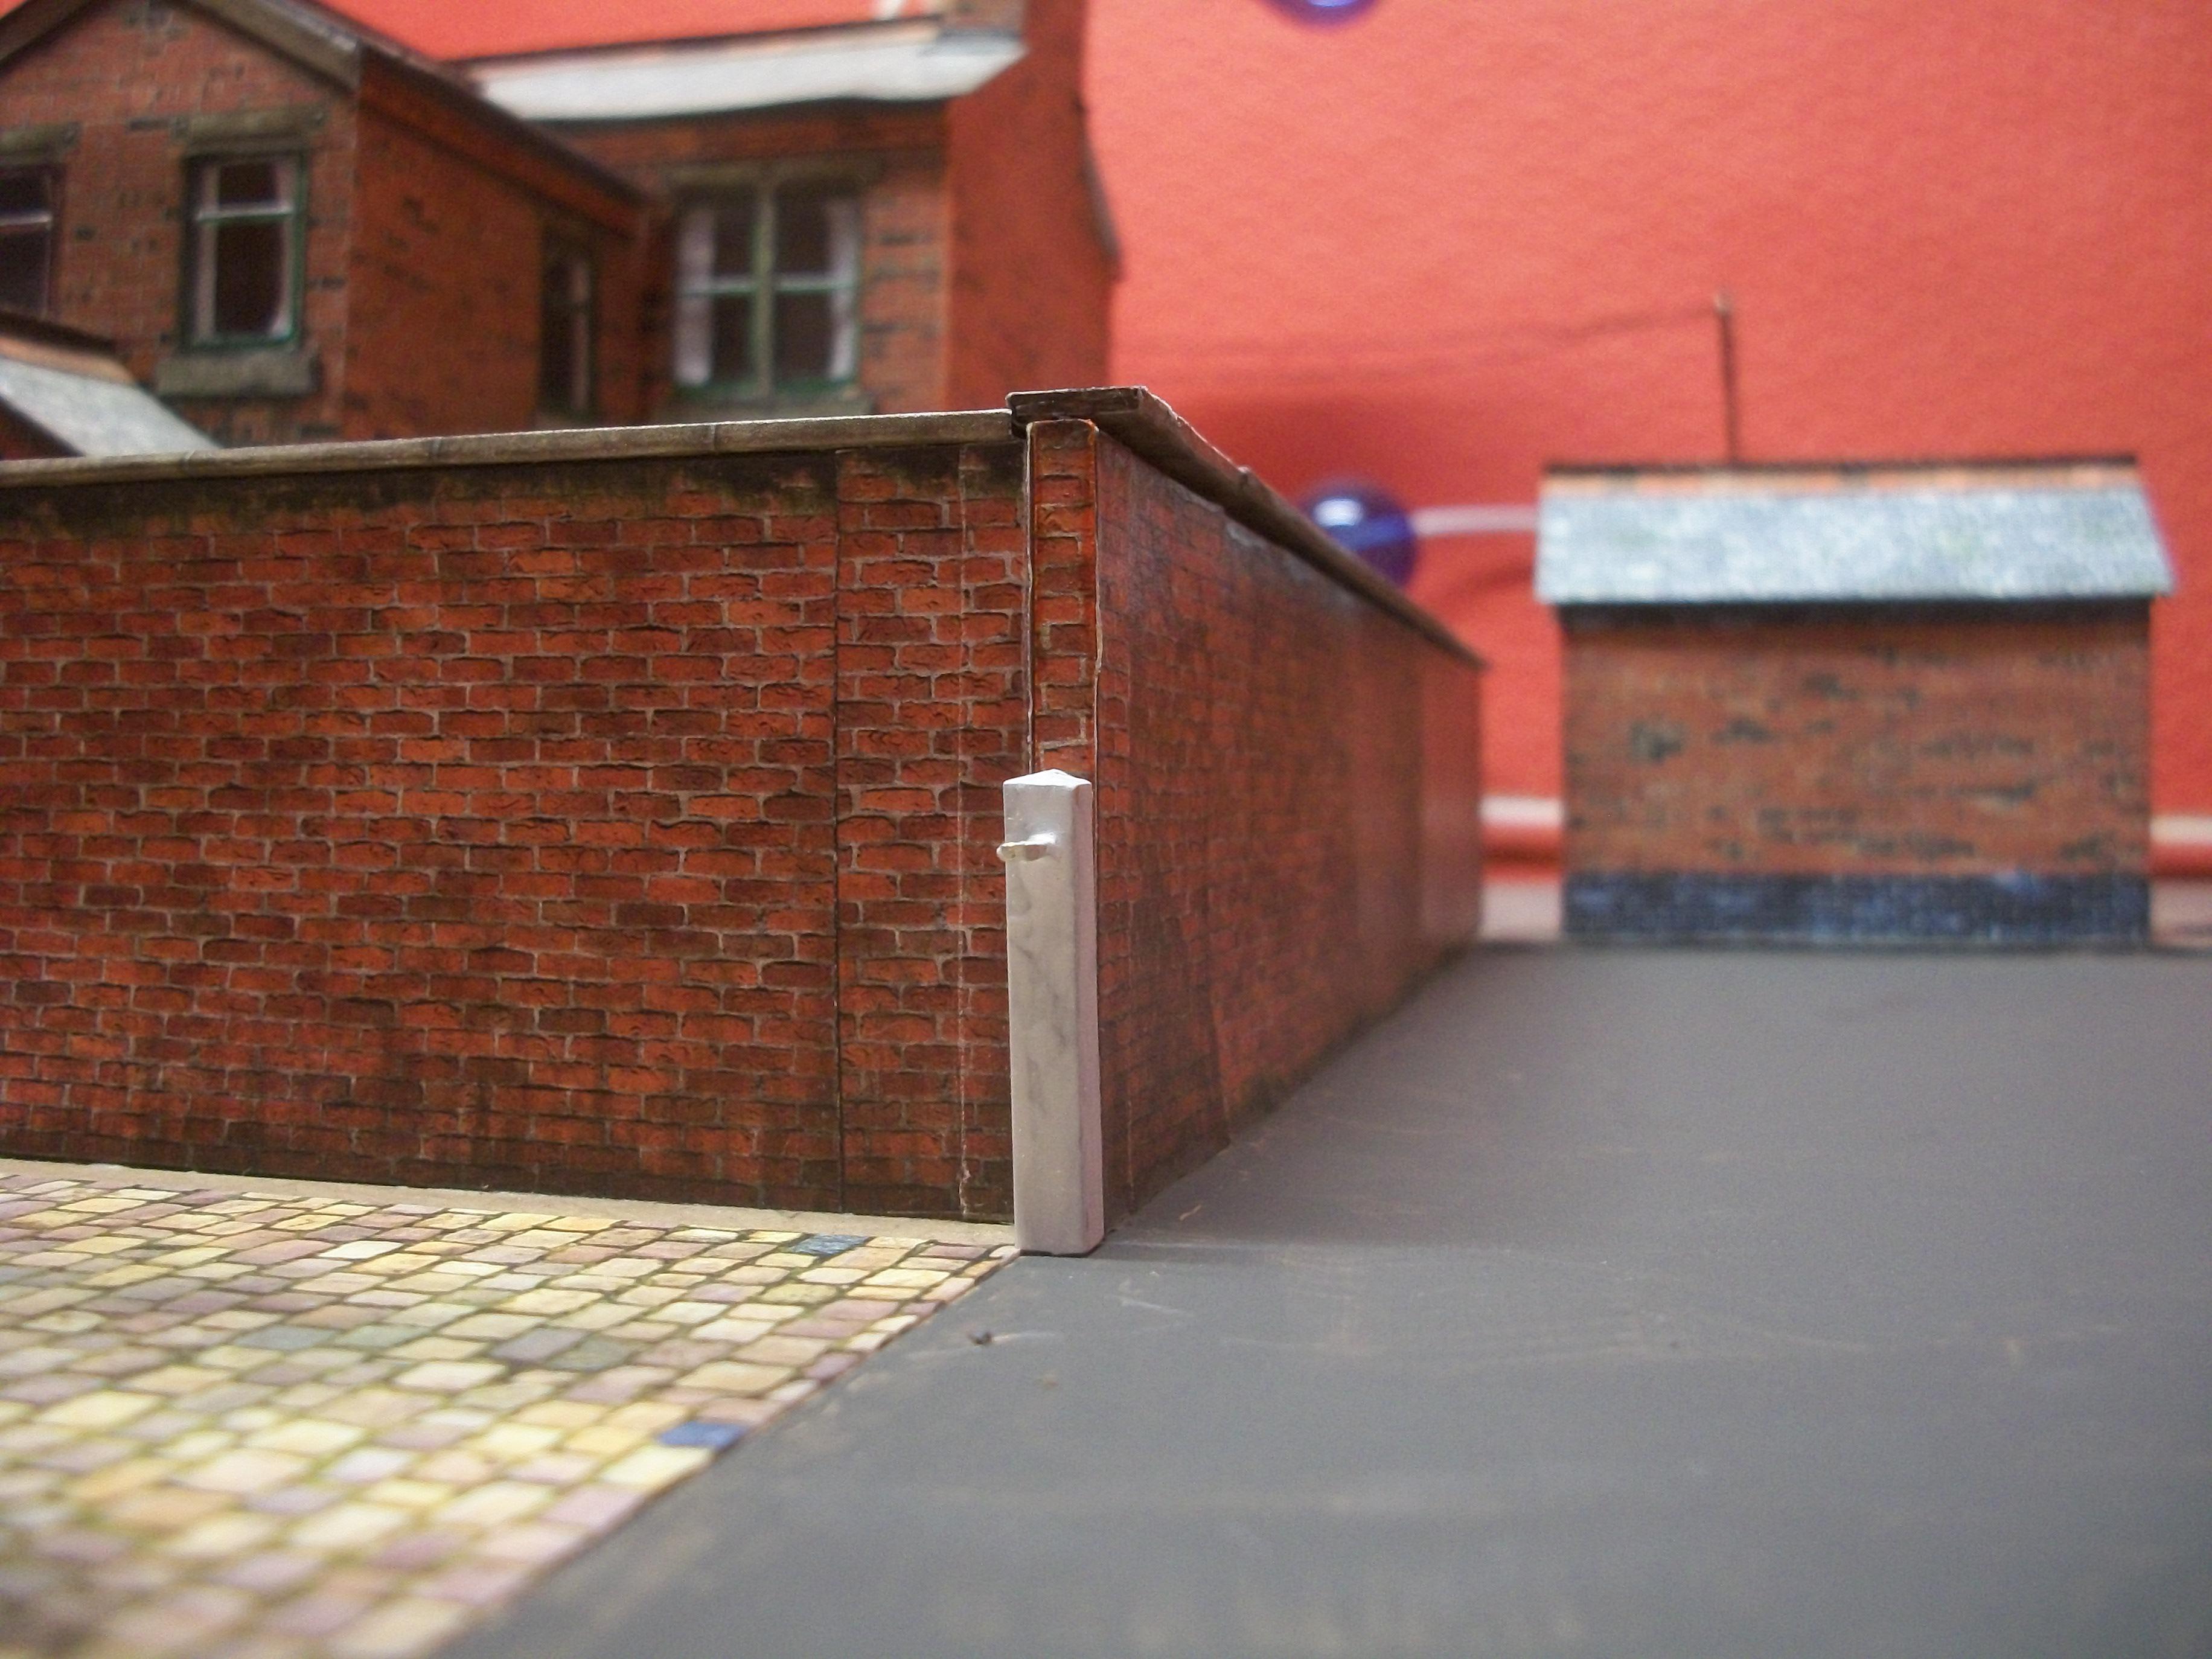
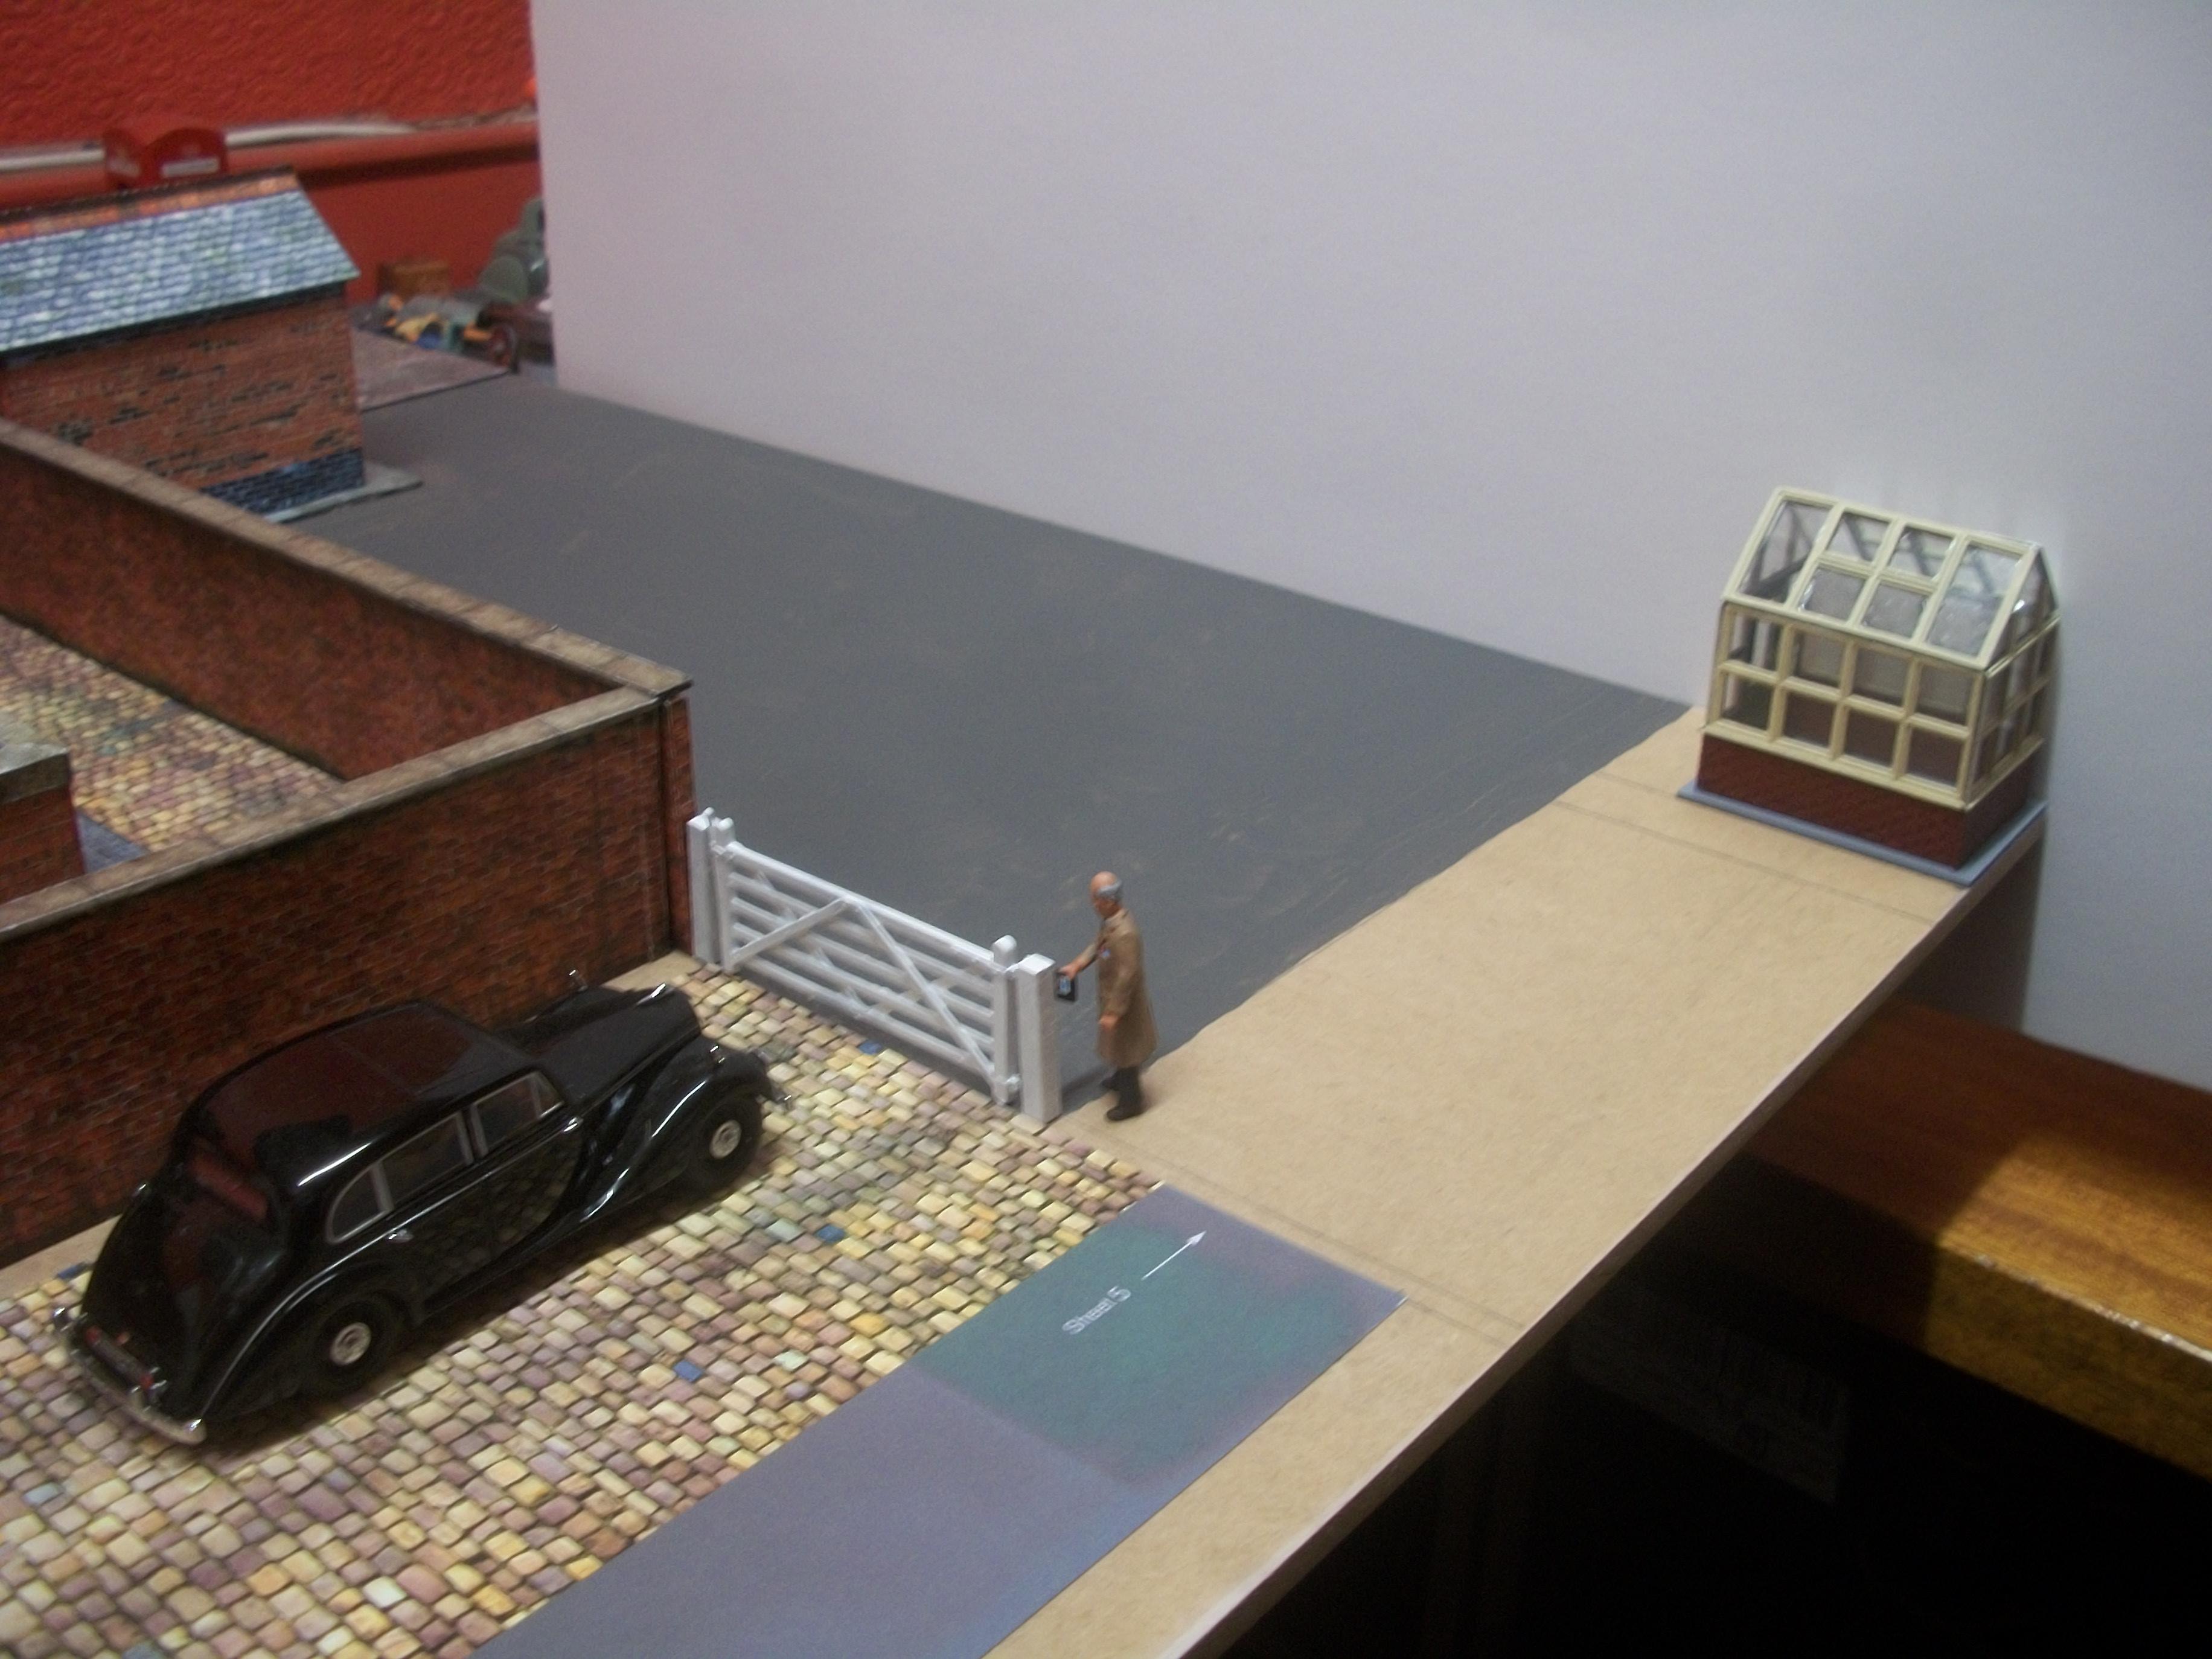
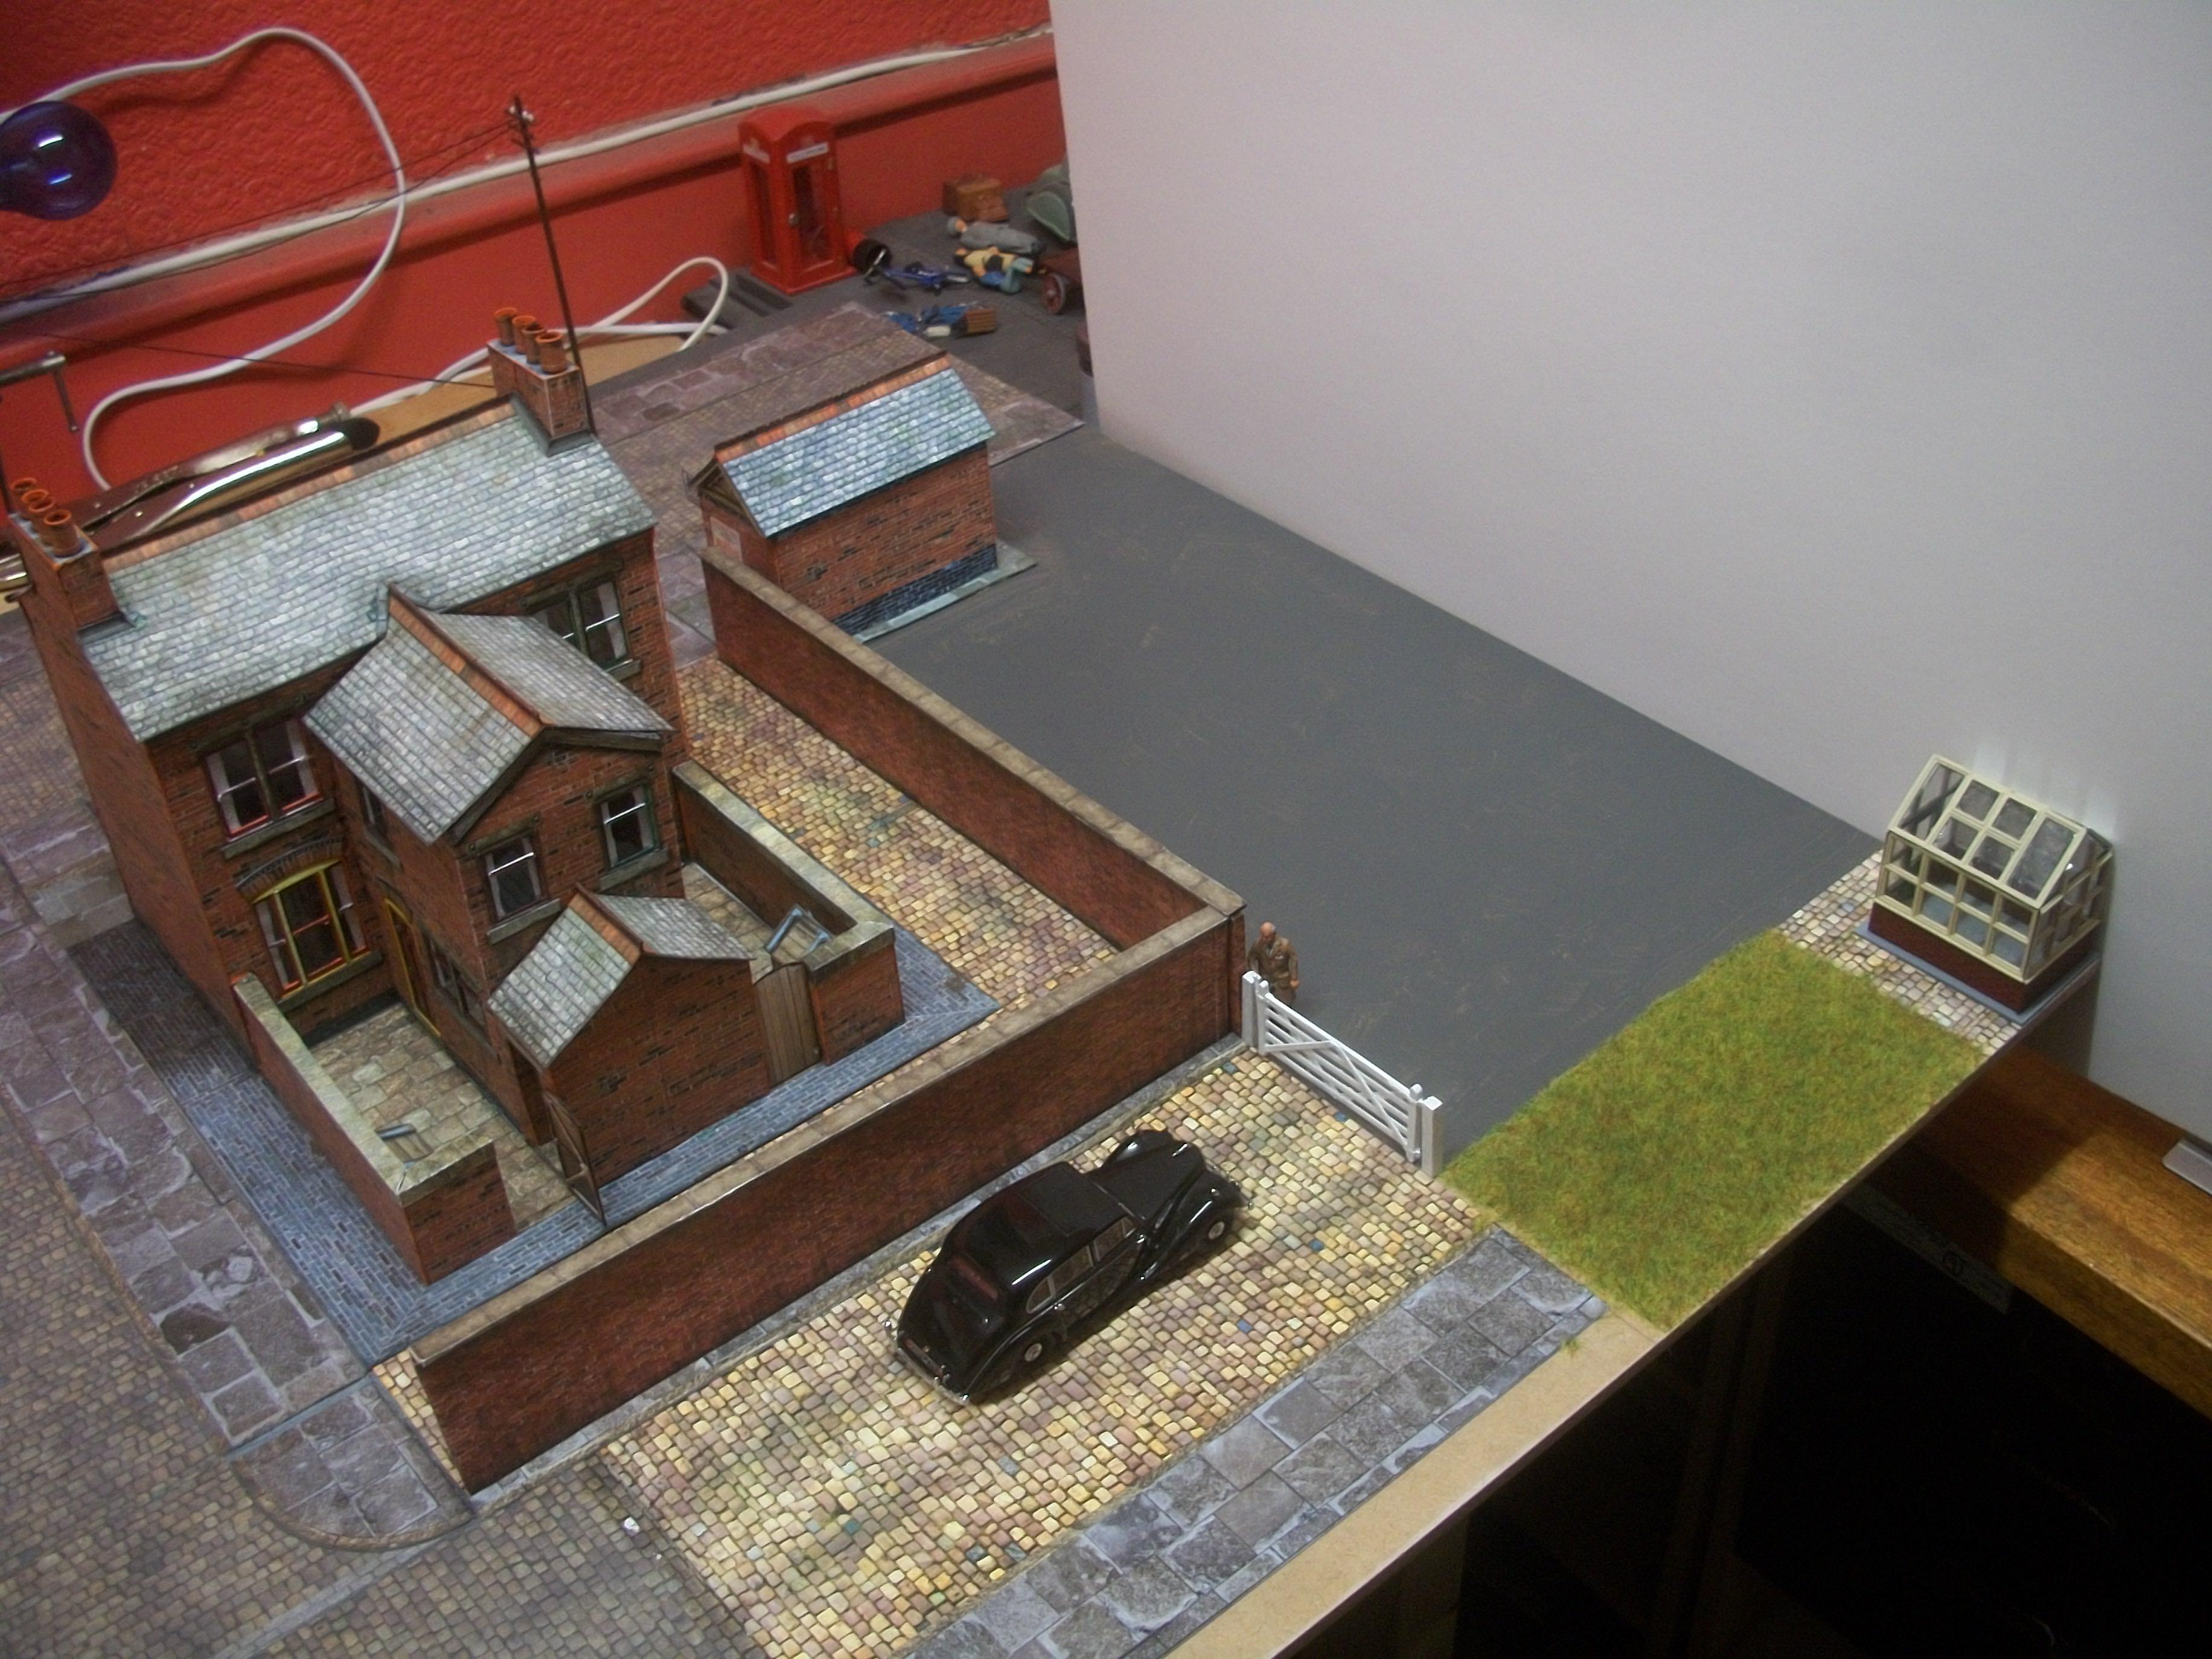
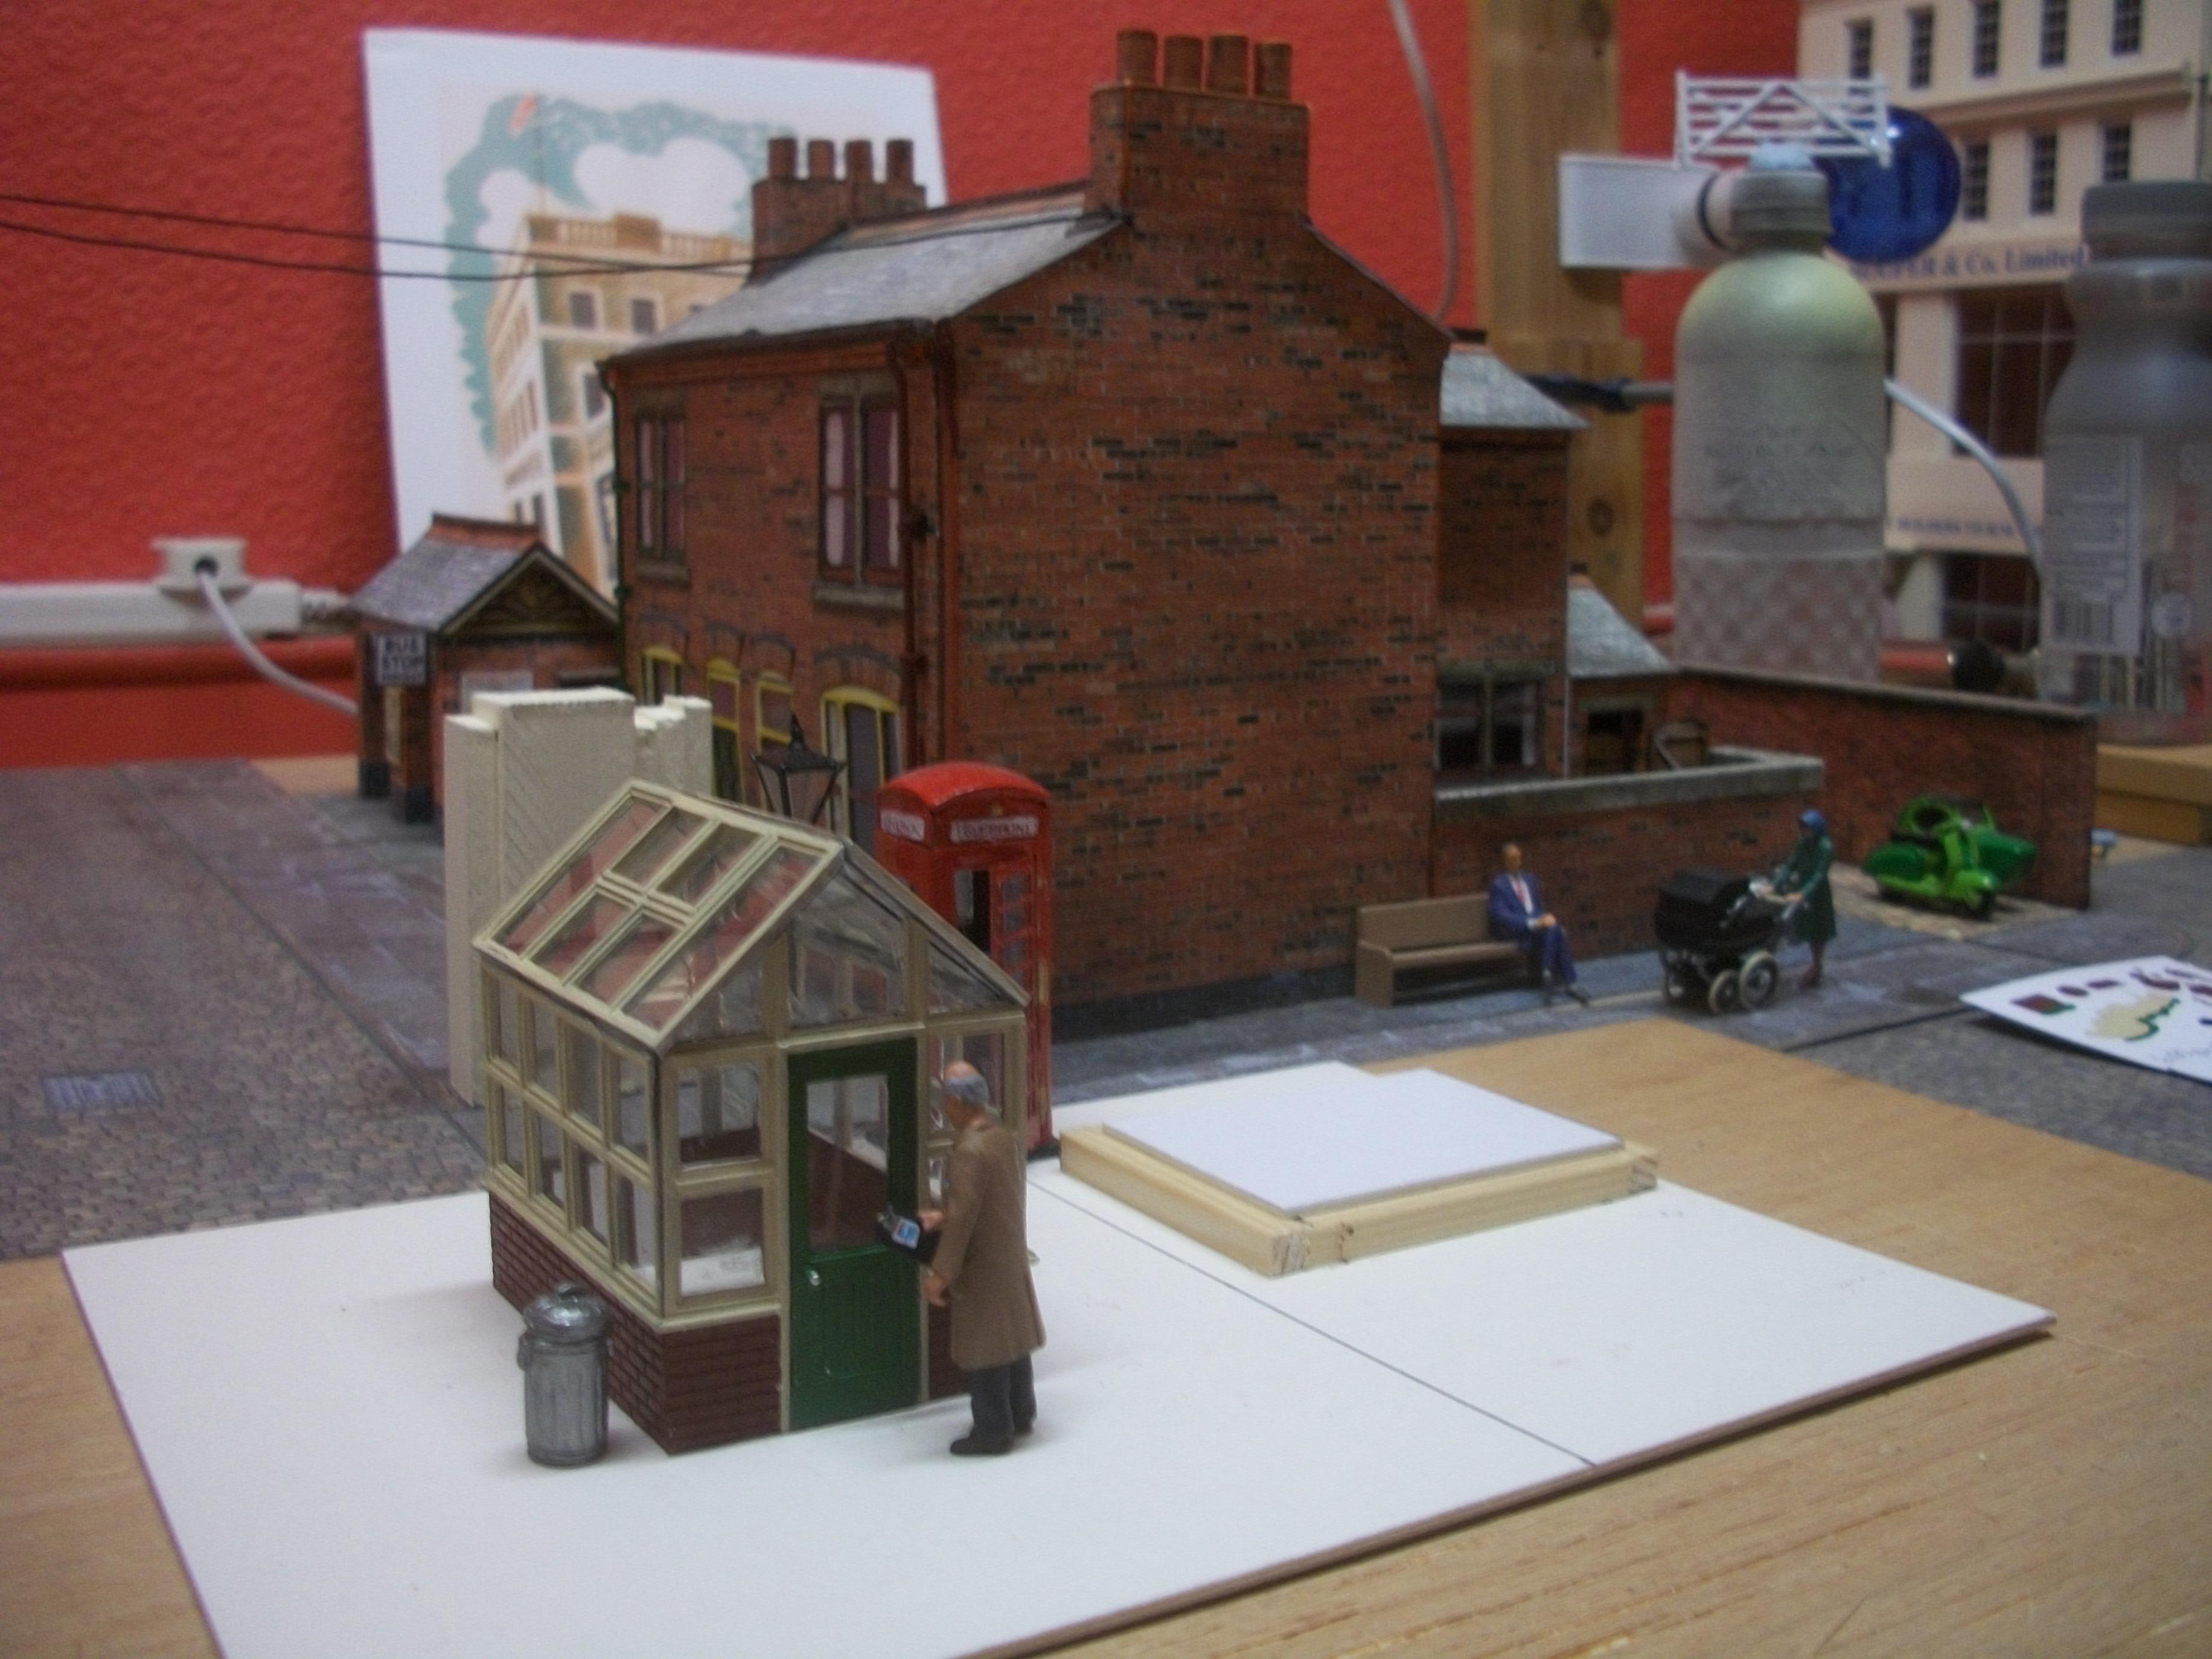
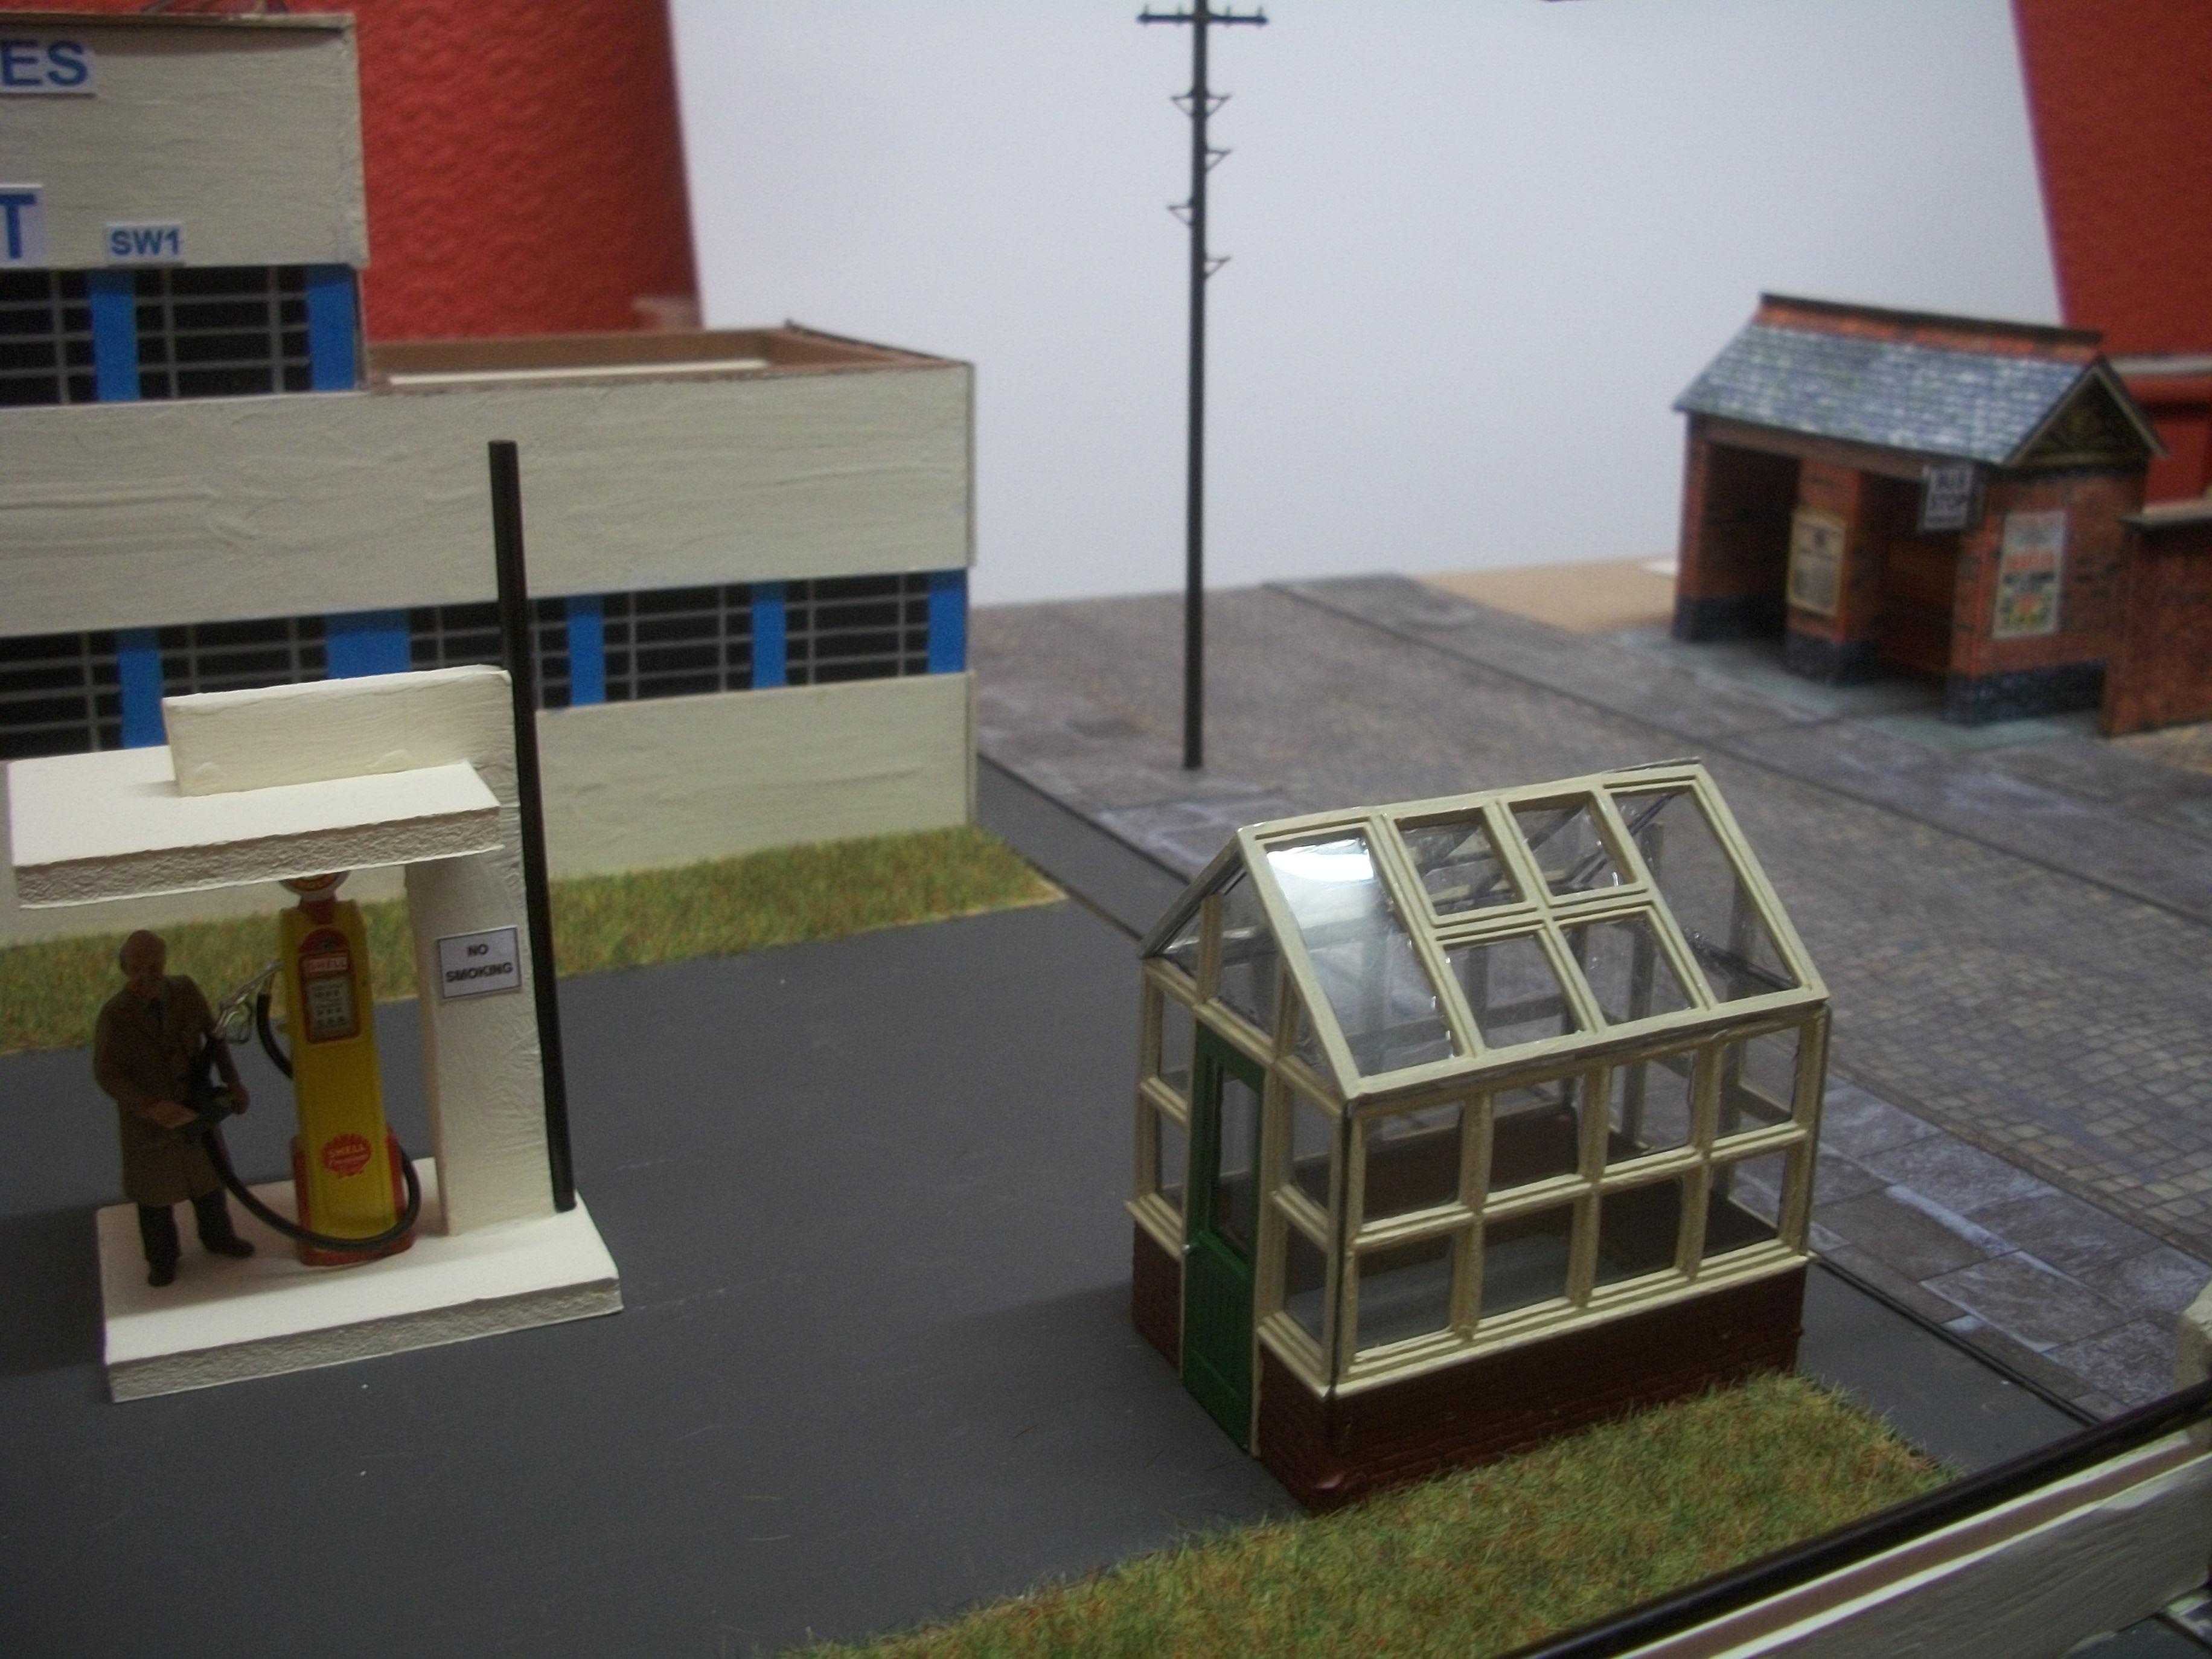
Today was all about filling in the empty space that remains behind the terraced houses, extending into the far corner of the diorama baseboard. First of all, the short stretch of road surface was laid down, immediately followed by a length of curbing along the red brick wall, and also a length of paving on the other side of the road. Then I laid some cobblestones around two sides of the greenhouse, before applying static grass next to the greenhouse area. Two holes were drilled for the gate posts and the white five bar gate was put in place. All looked fine, until I noticed that the end of the long wall has somehow become twisted, and is leaning over alarmingly, The base of this wall is firmly attached to the baseboard, so not sure what's going on here? Something must be done to support the wall vertically at the end. All that is needed to complete this car park area are two short sections of red brick wall, one at the side of the five bar gate, and one at the side of the bus shelter. As always, thanks for looking guys....... David
-
Exactly
-
Thank you, Pat...... and I thought the terraced houses part of the diorama needed a greenhouse, along with a white five bar gate that leads into a small car park, with some more of the static grass where the greenhouse will be located. David
-
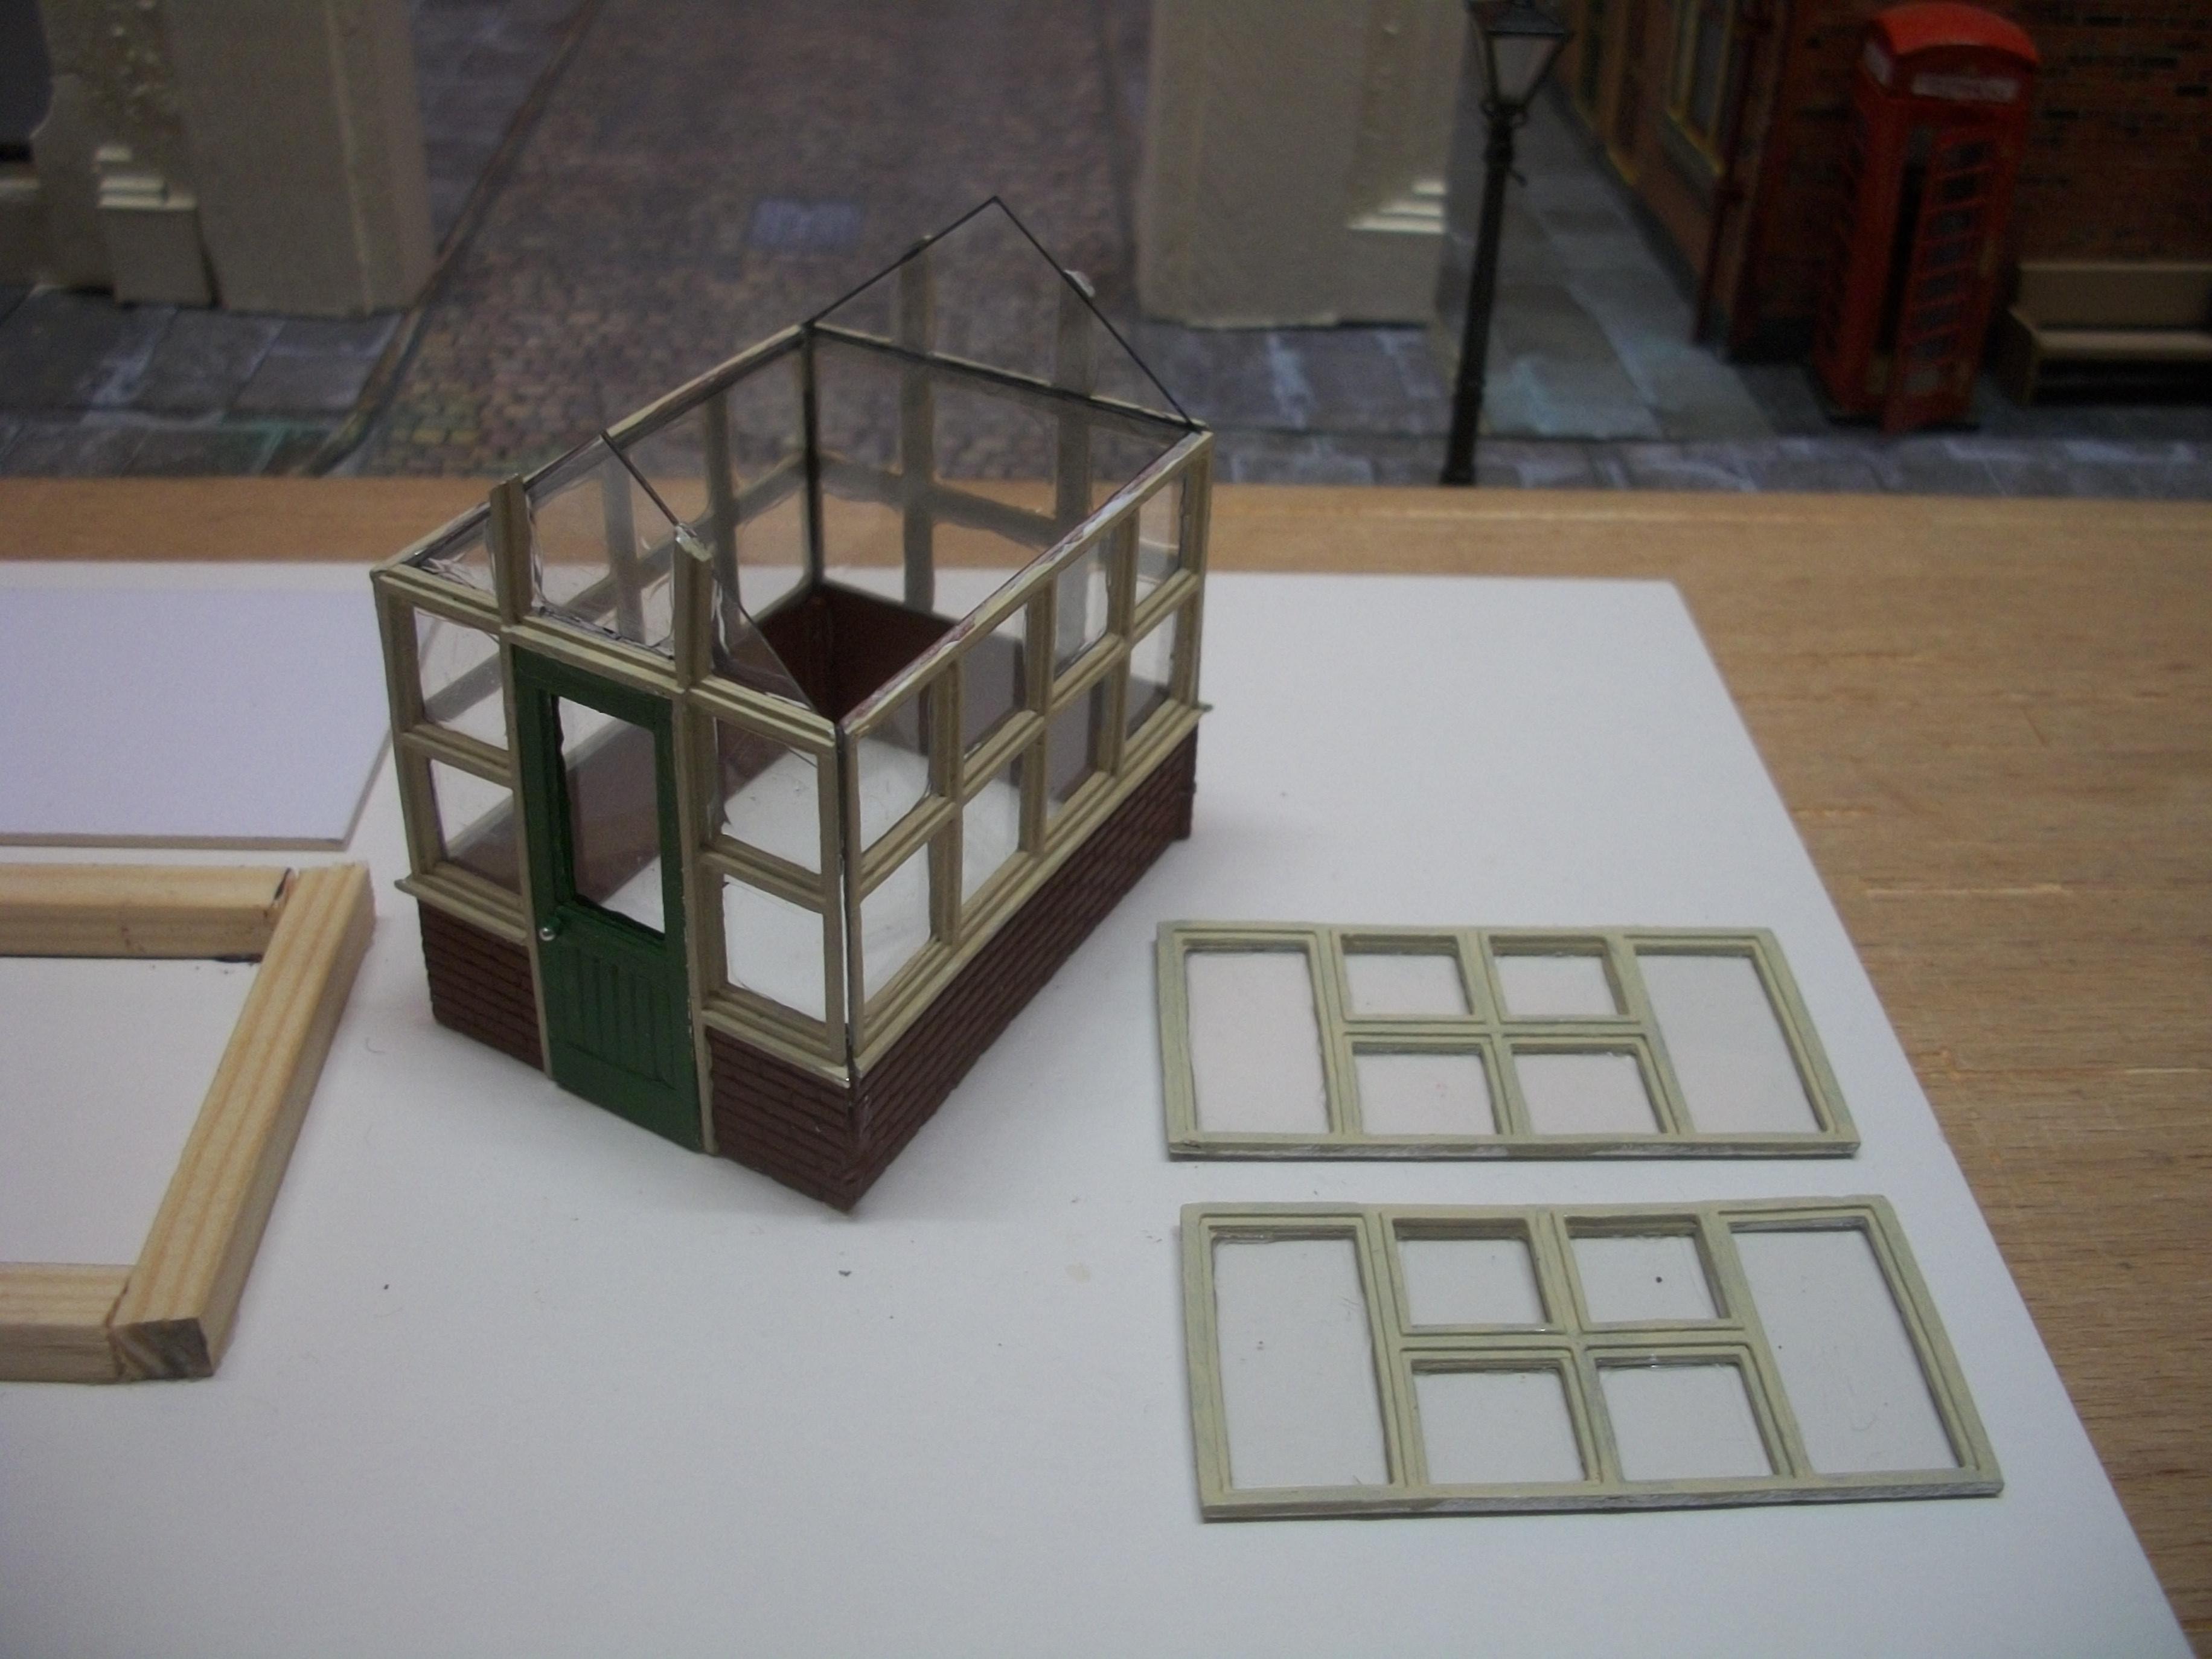
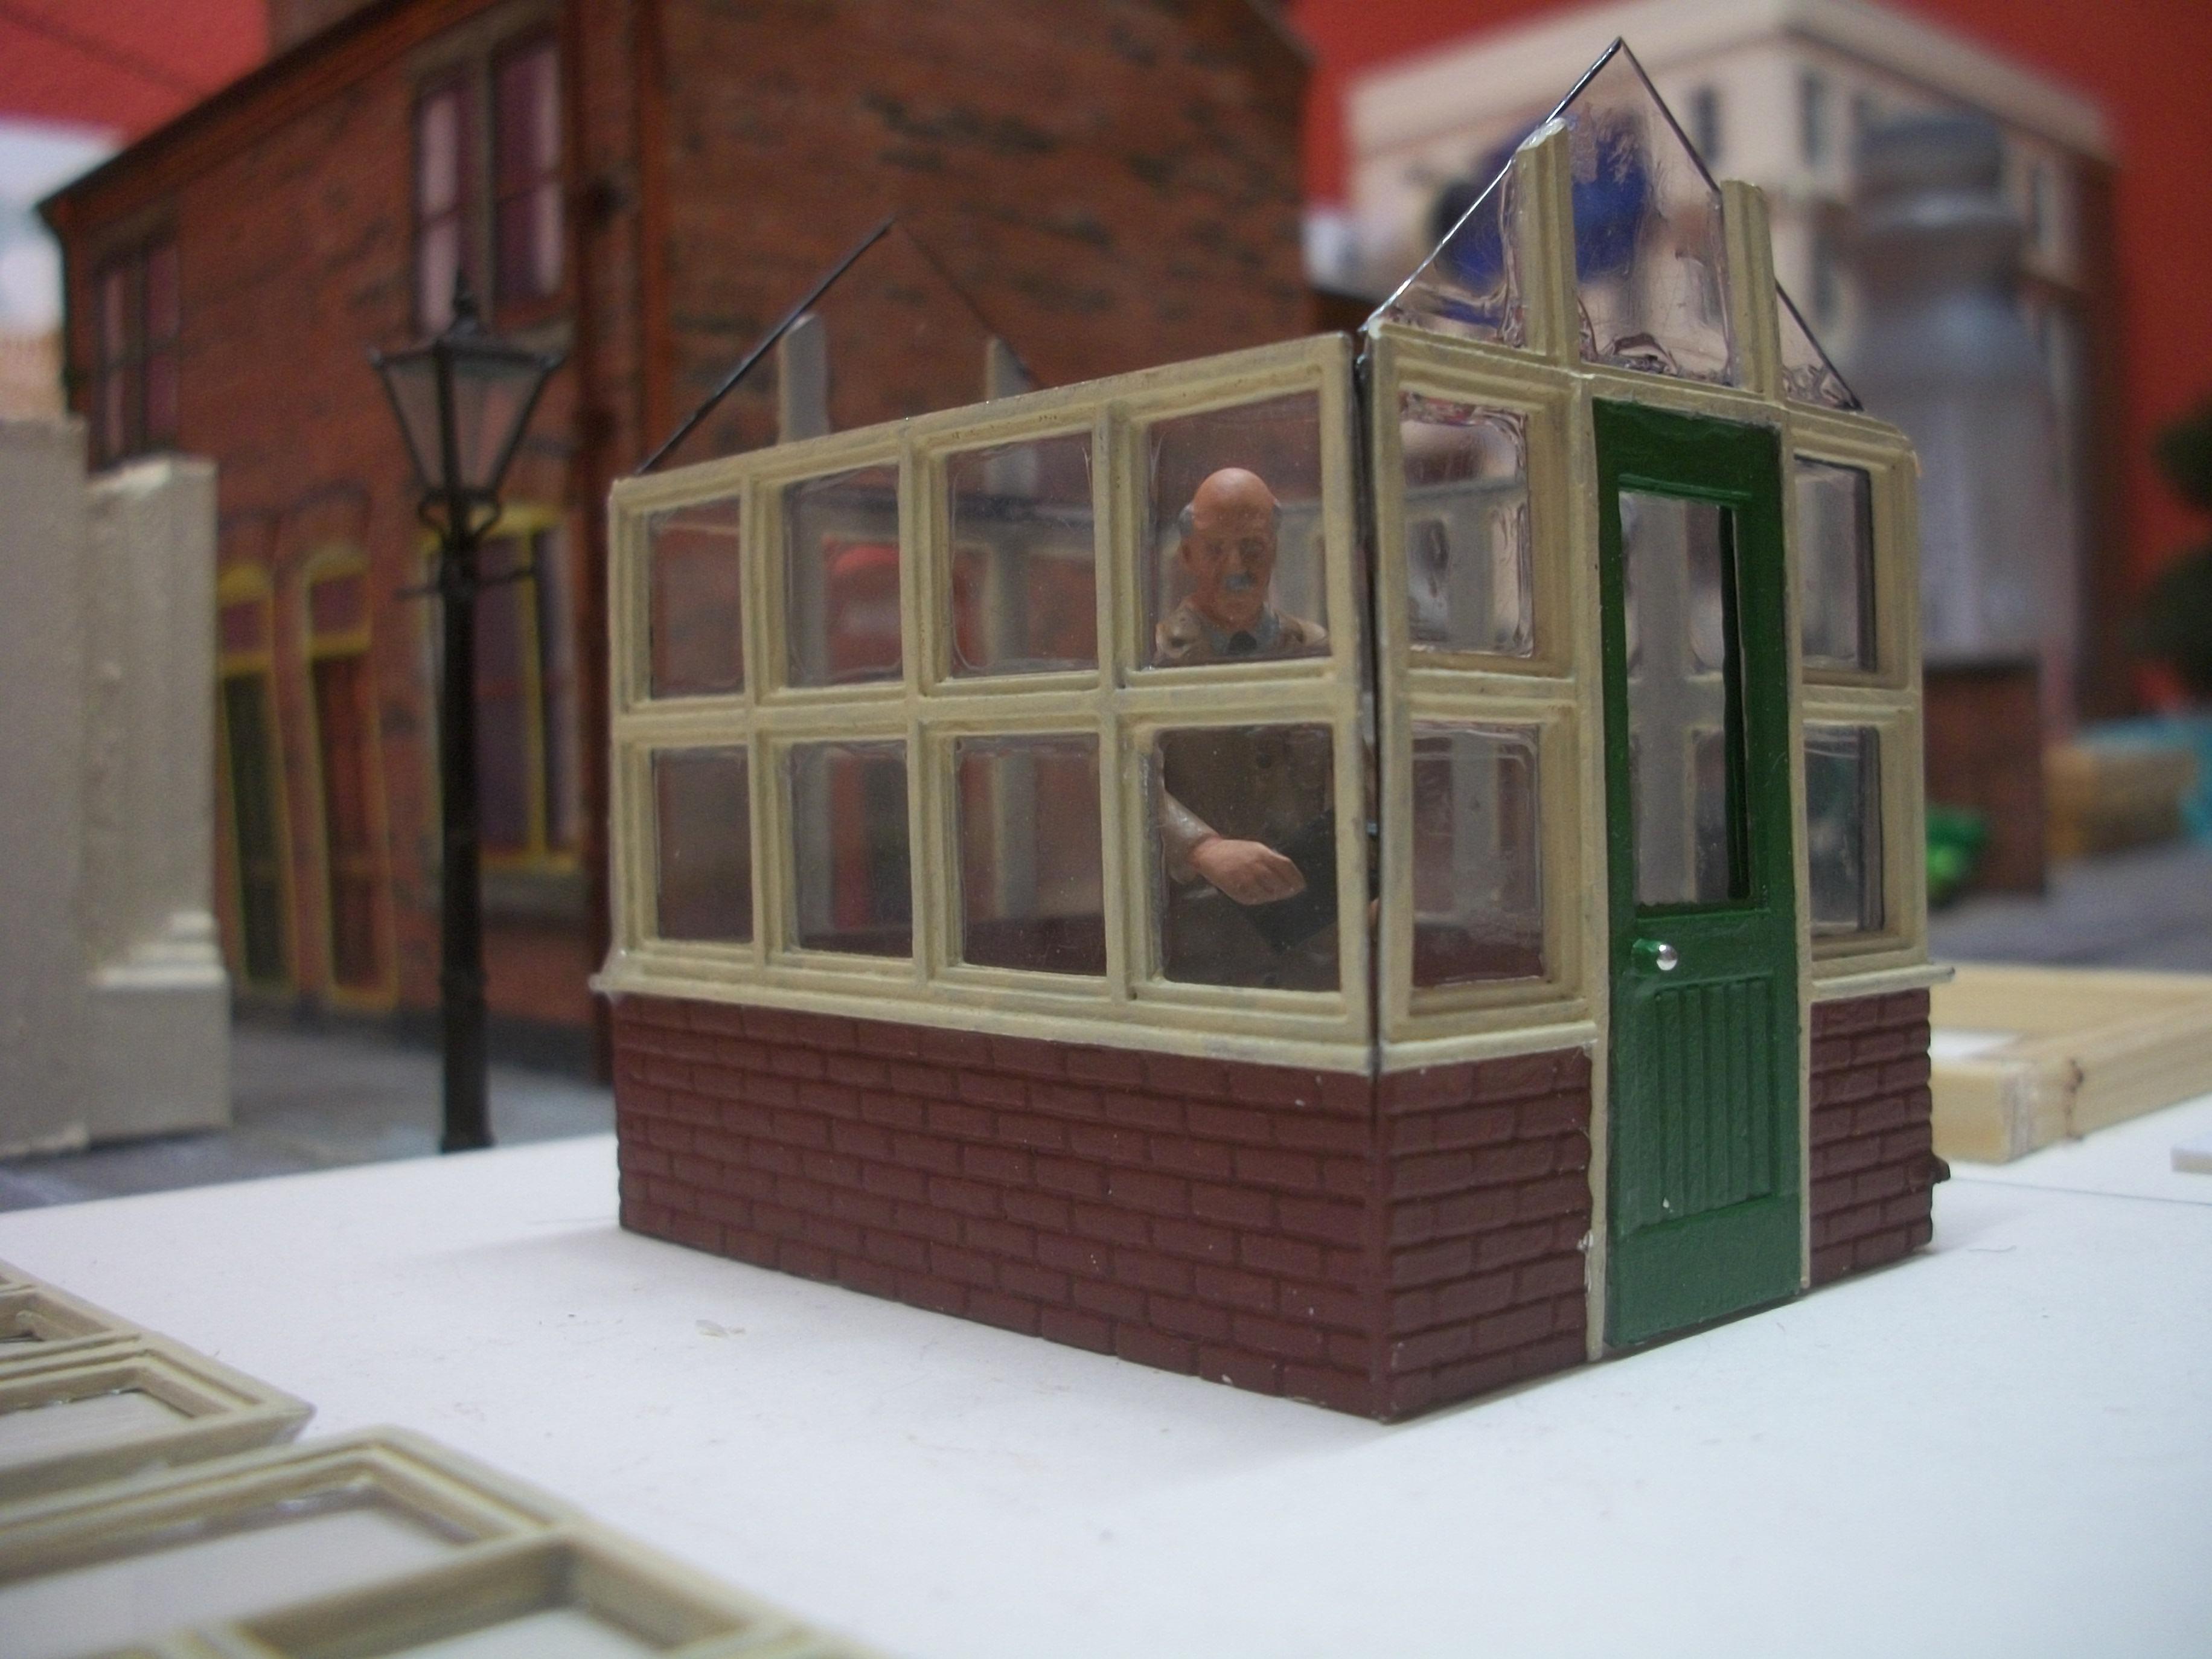
Thanks, Gary....... I thought about a wooden shelf that goes around three sides of the greenhouse inside, and as you suggested, a few plants would be in order...... possibly tomatoes? The roof does not come off, so I would have to push the shelves and tomato plants up from the base, which is still open. David
-
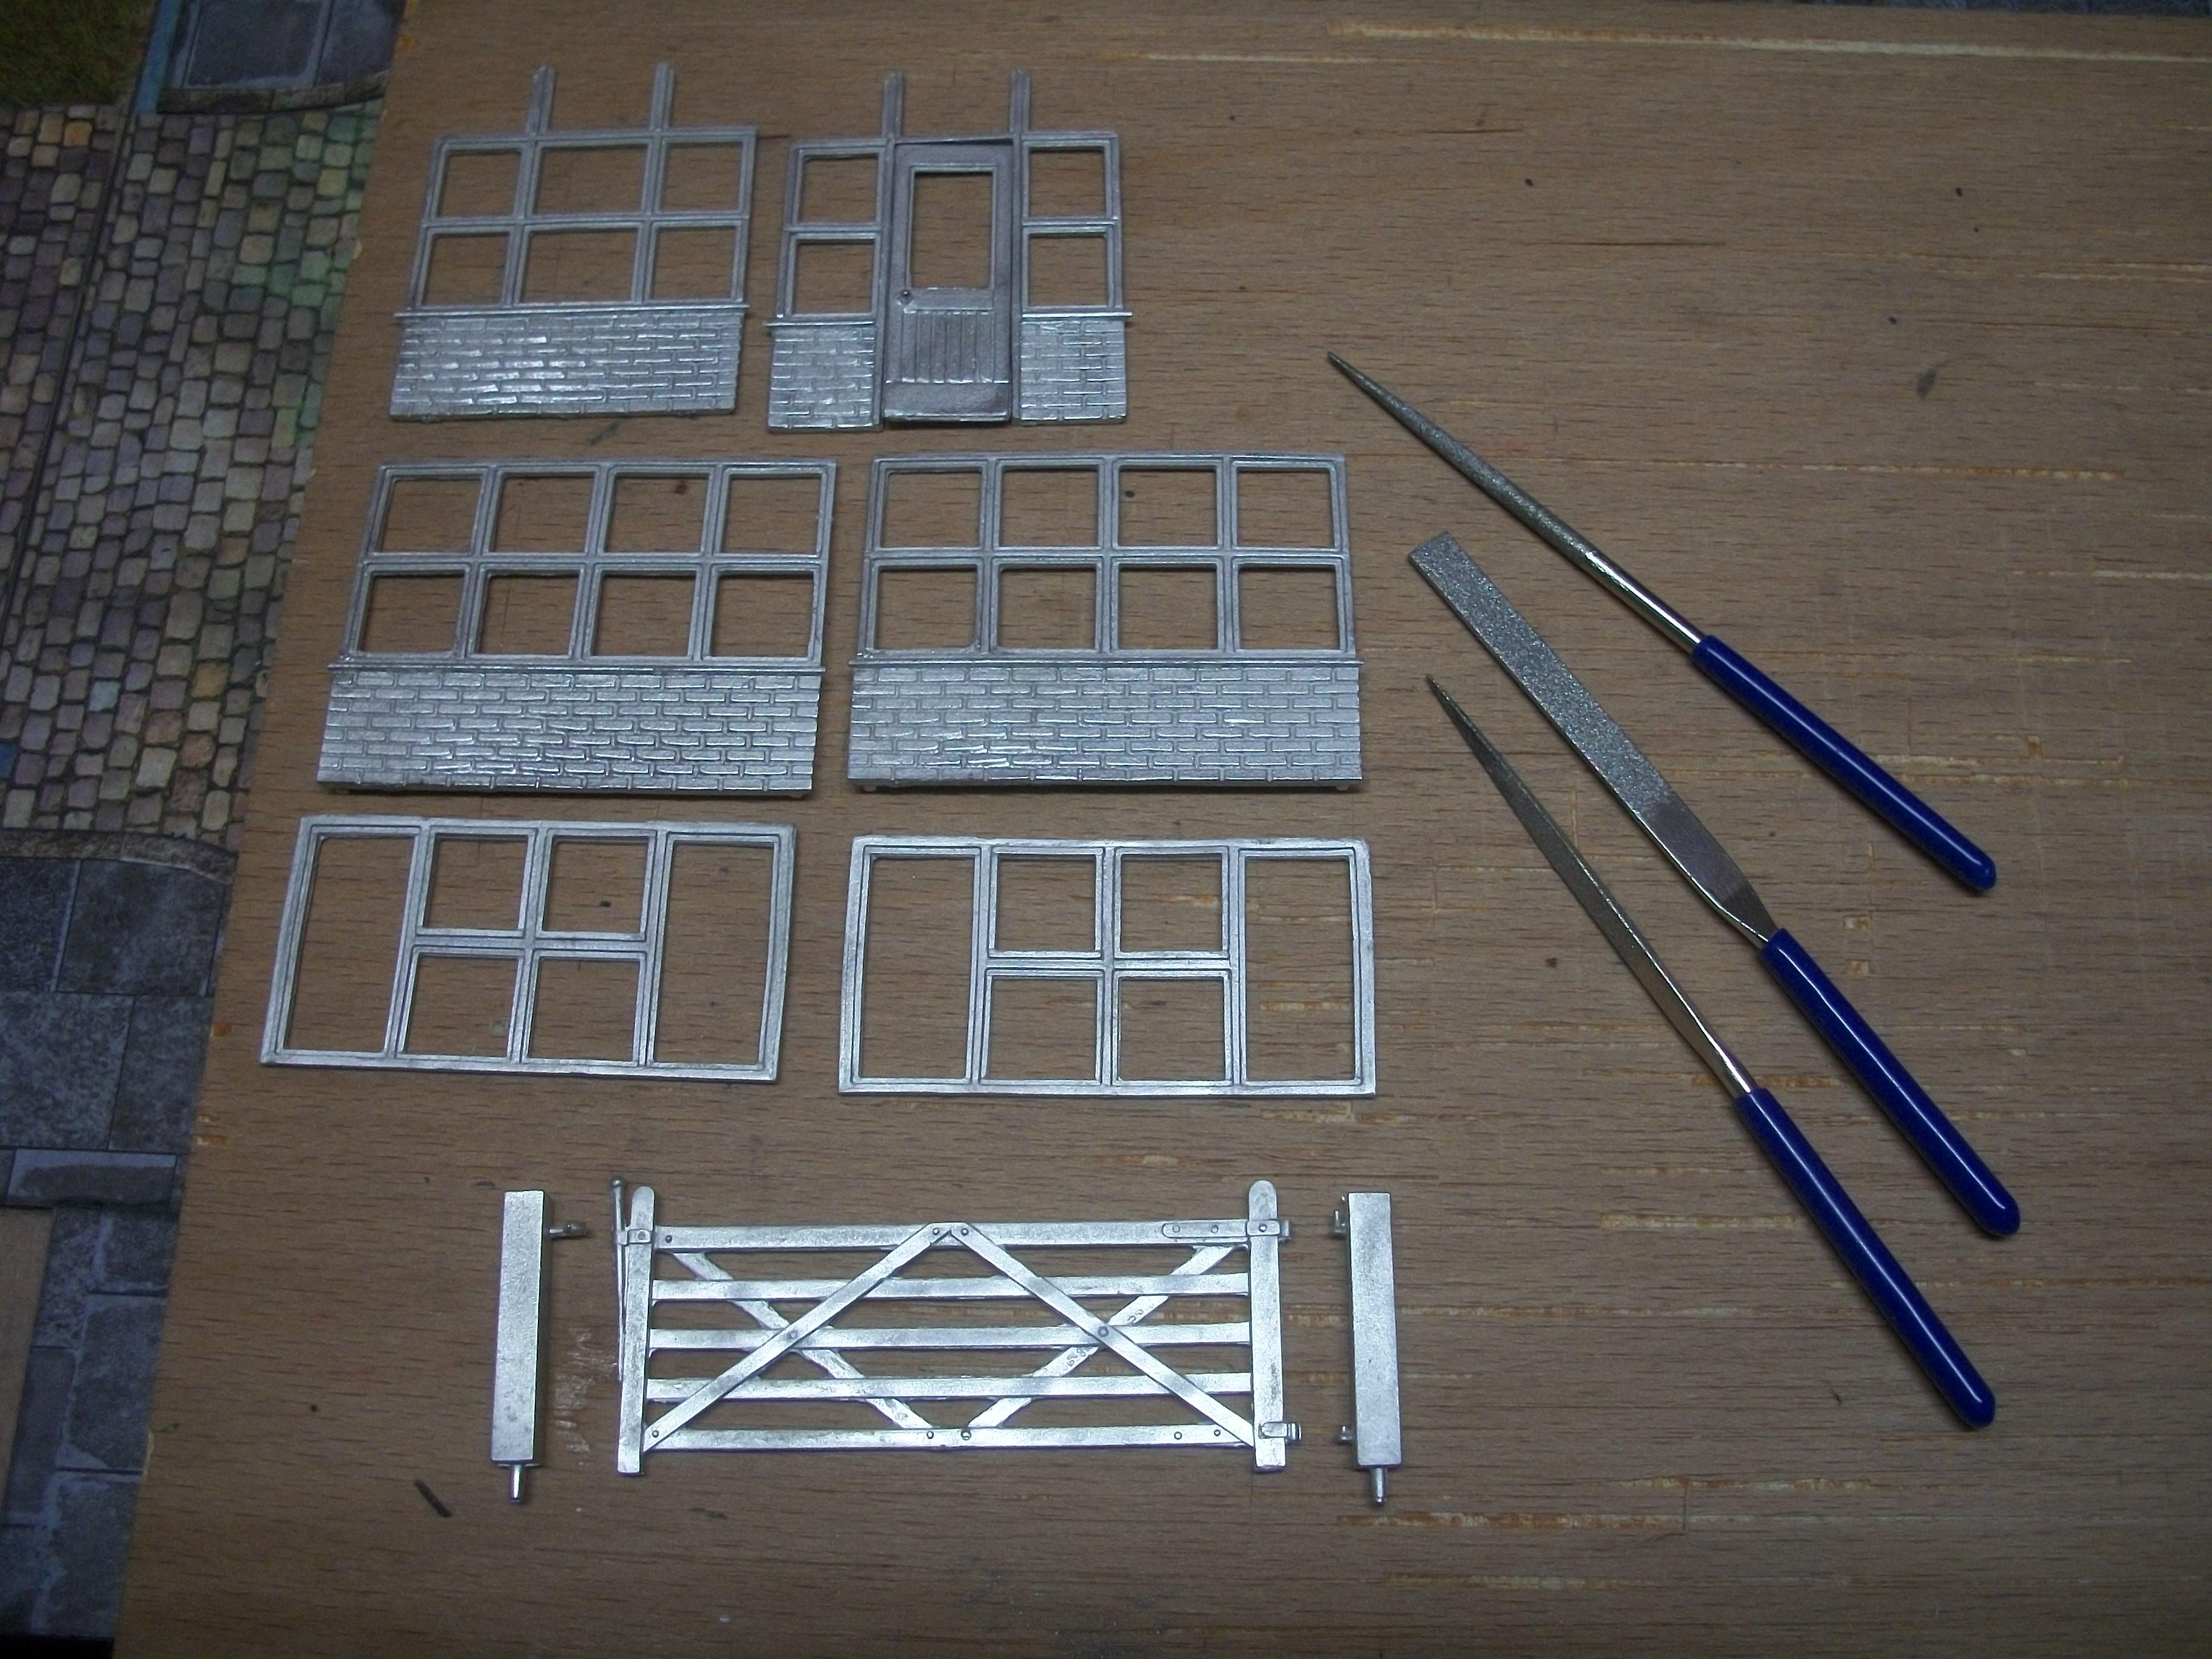
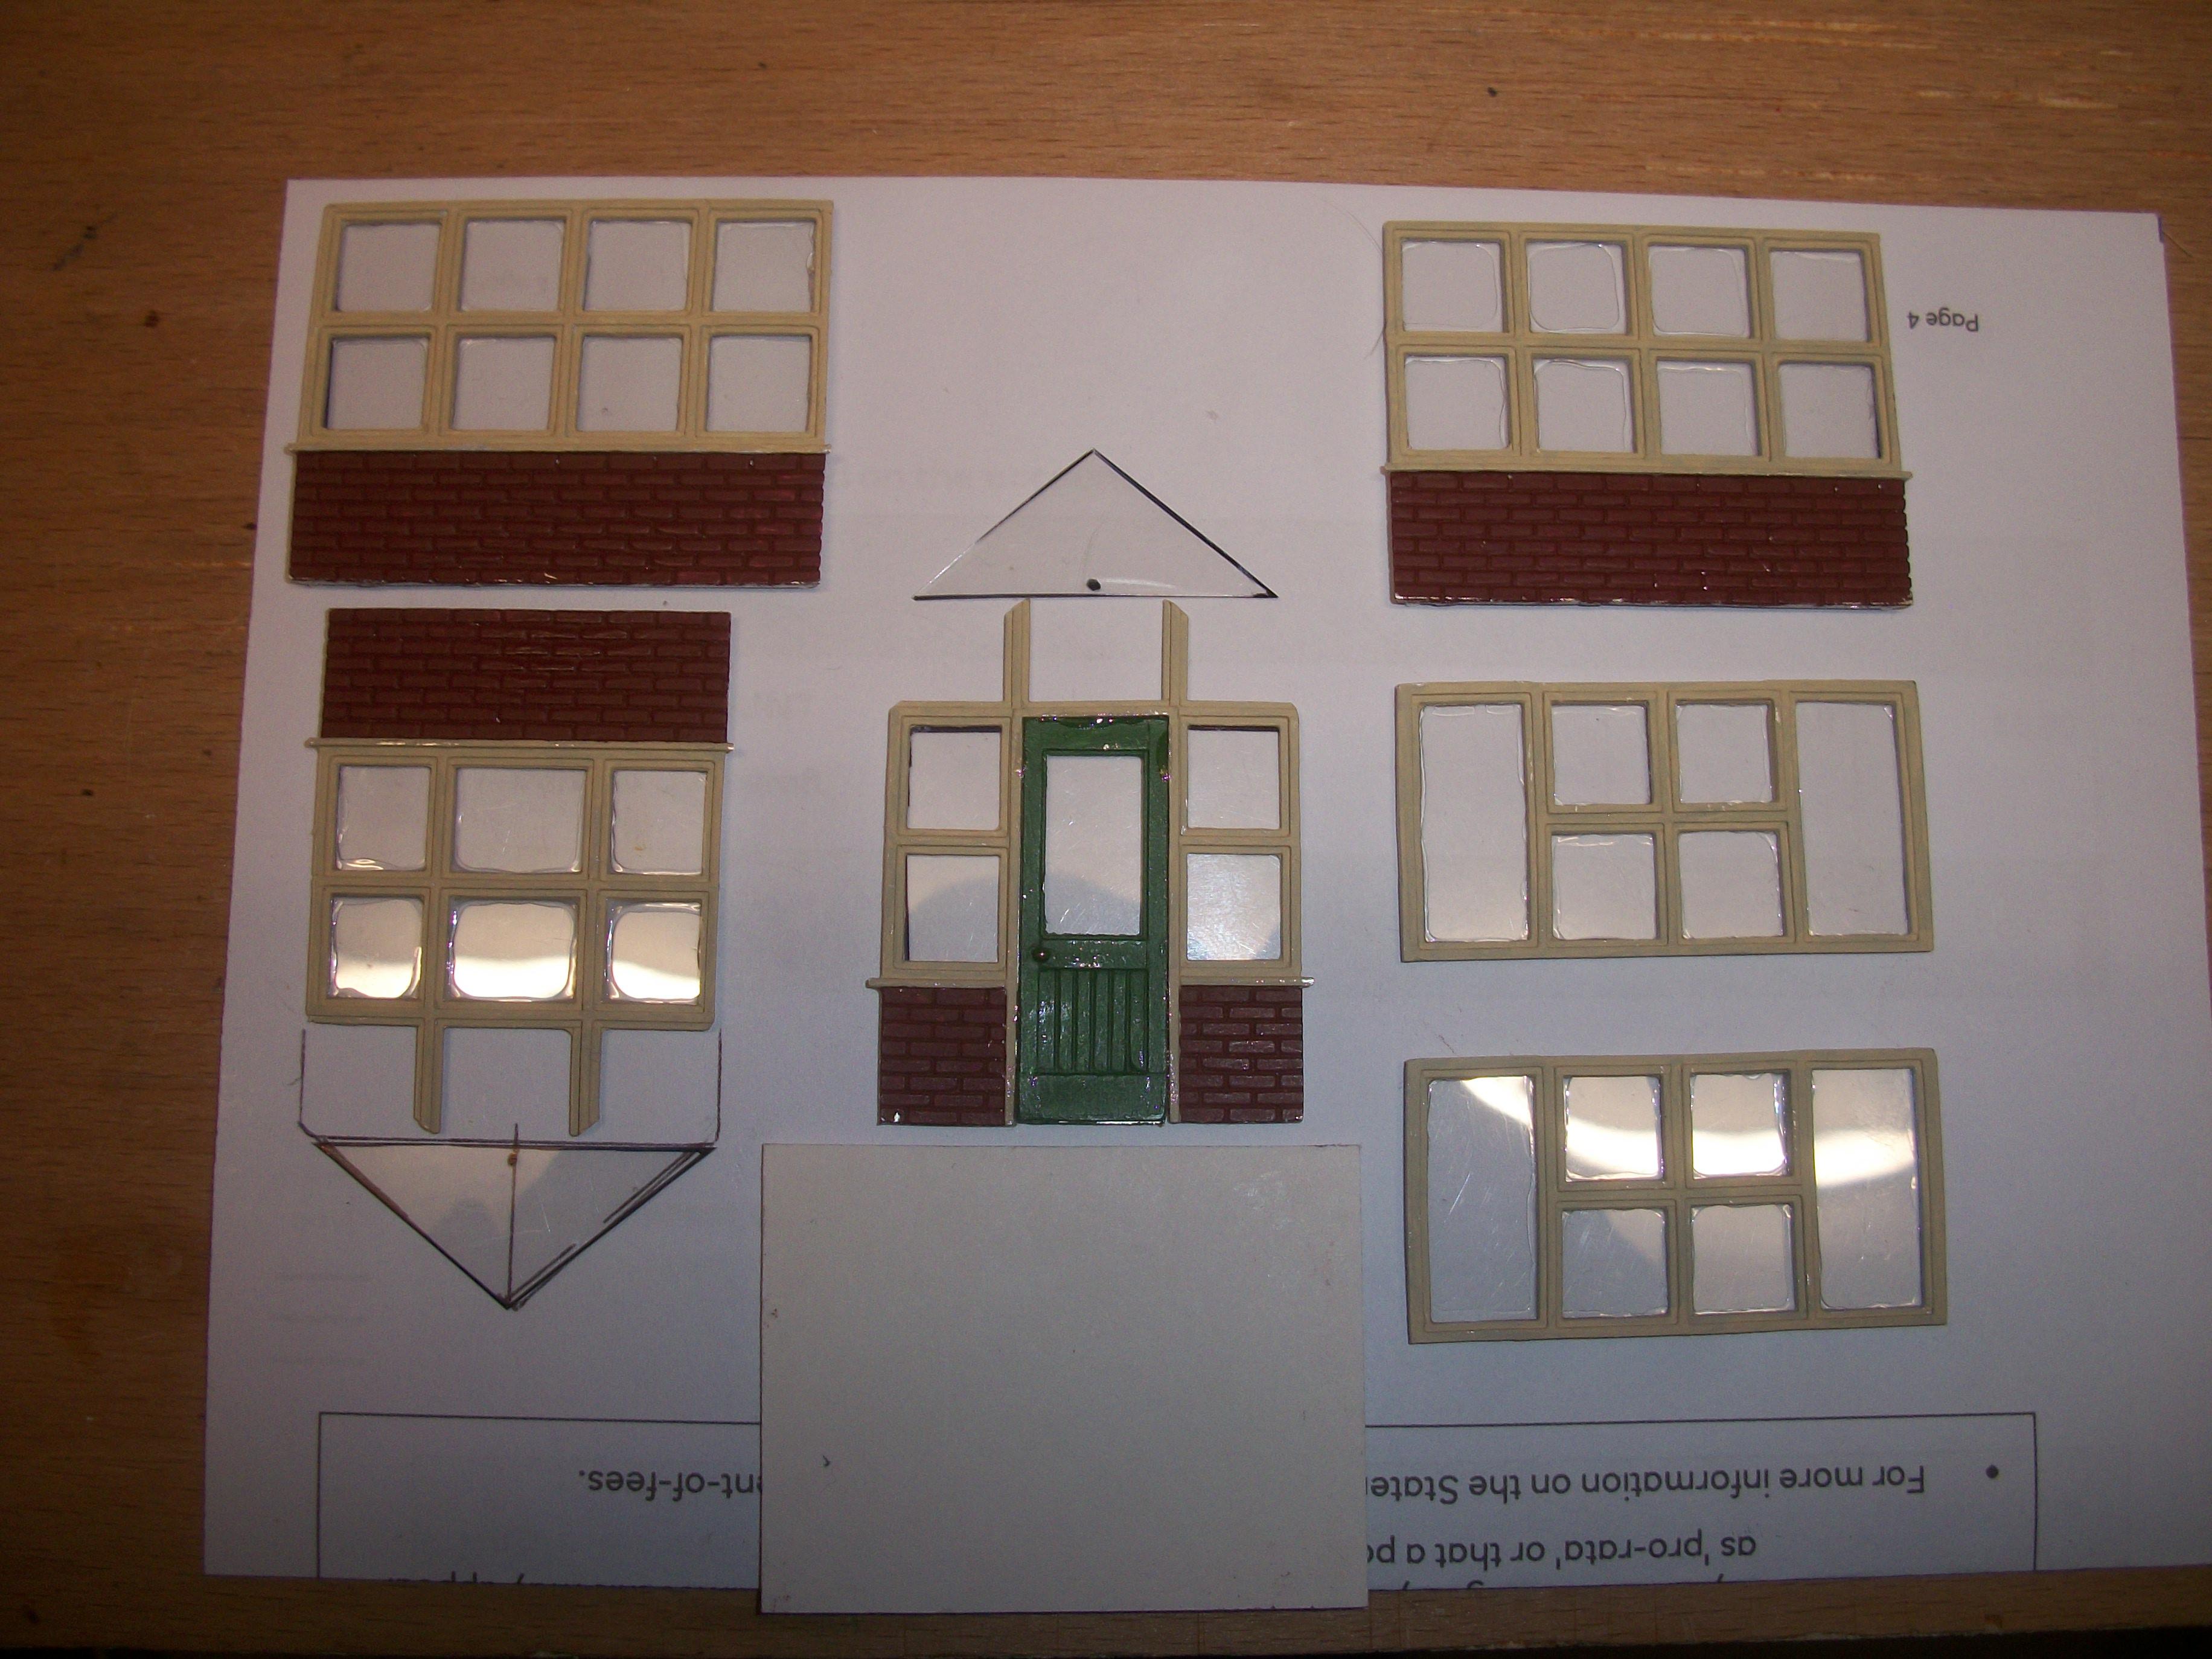
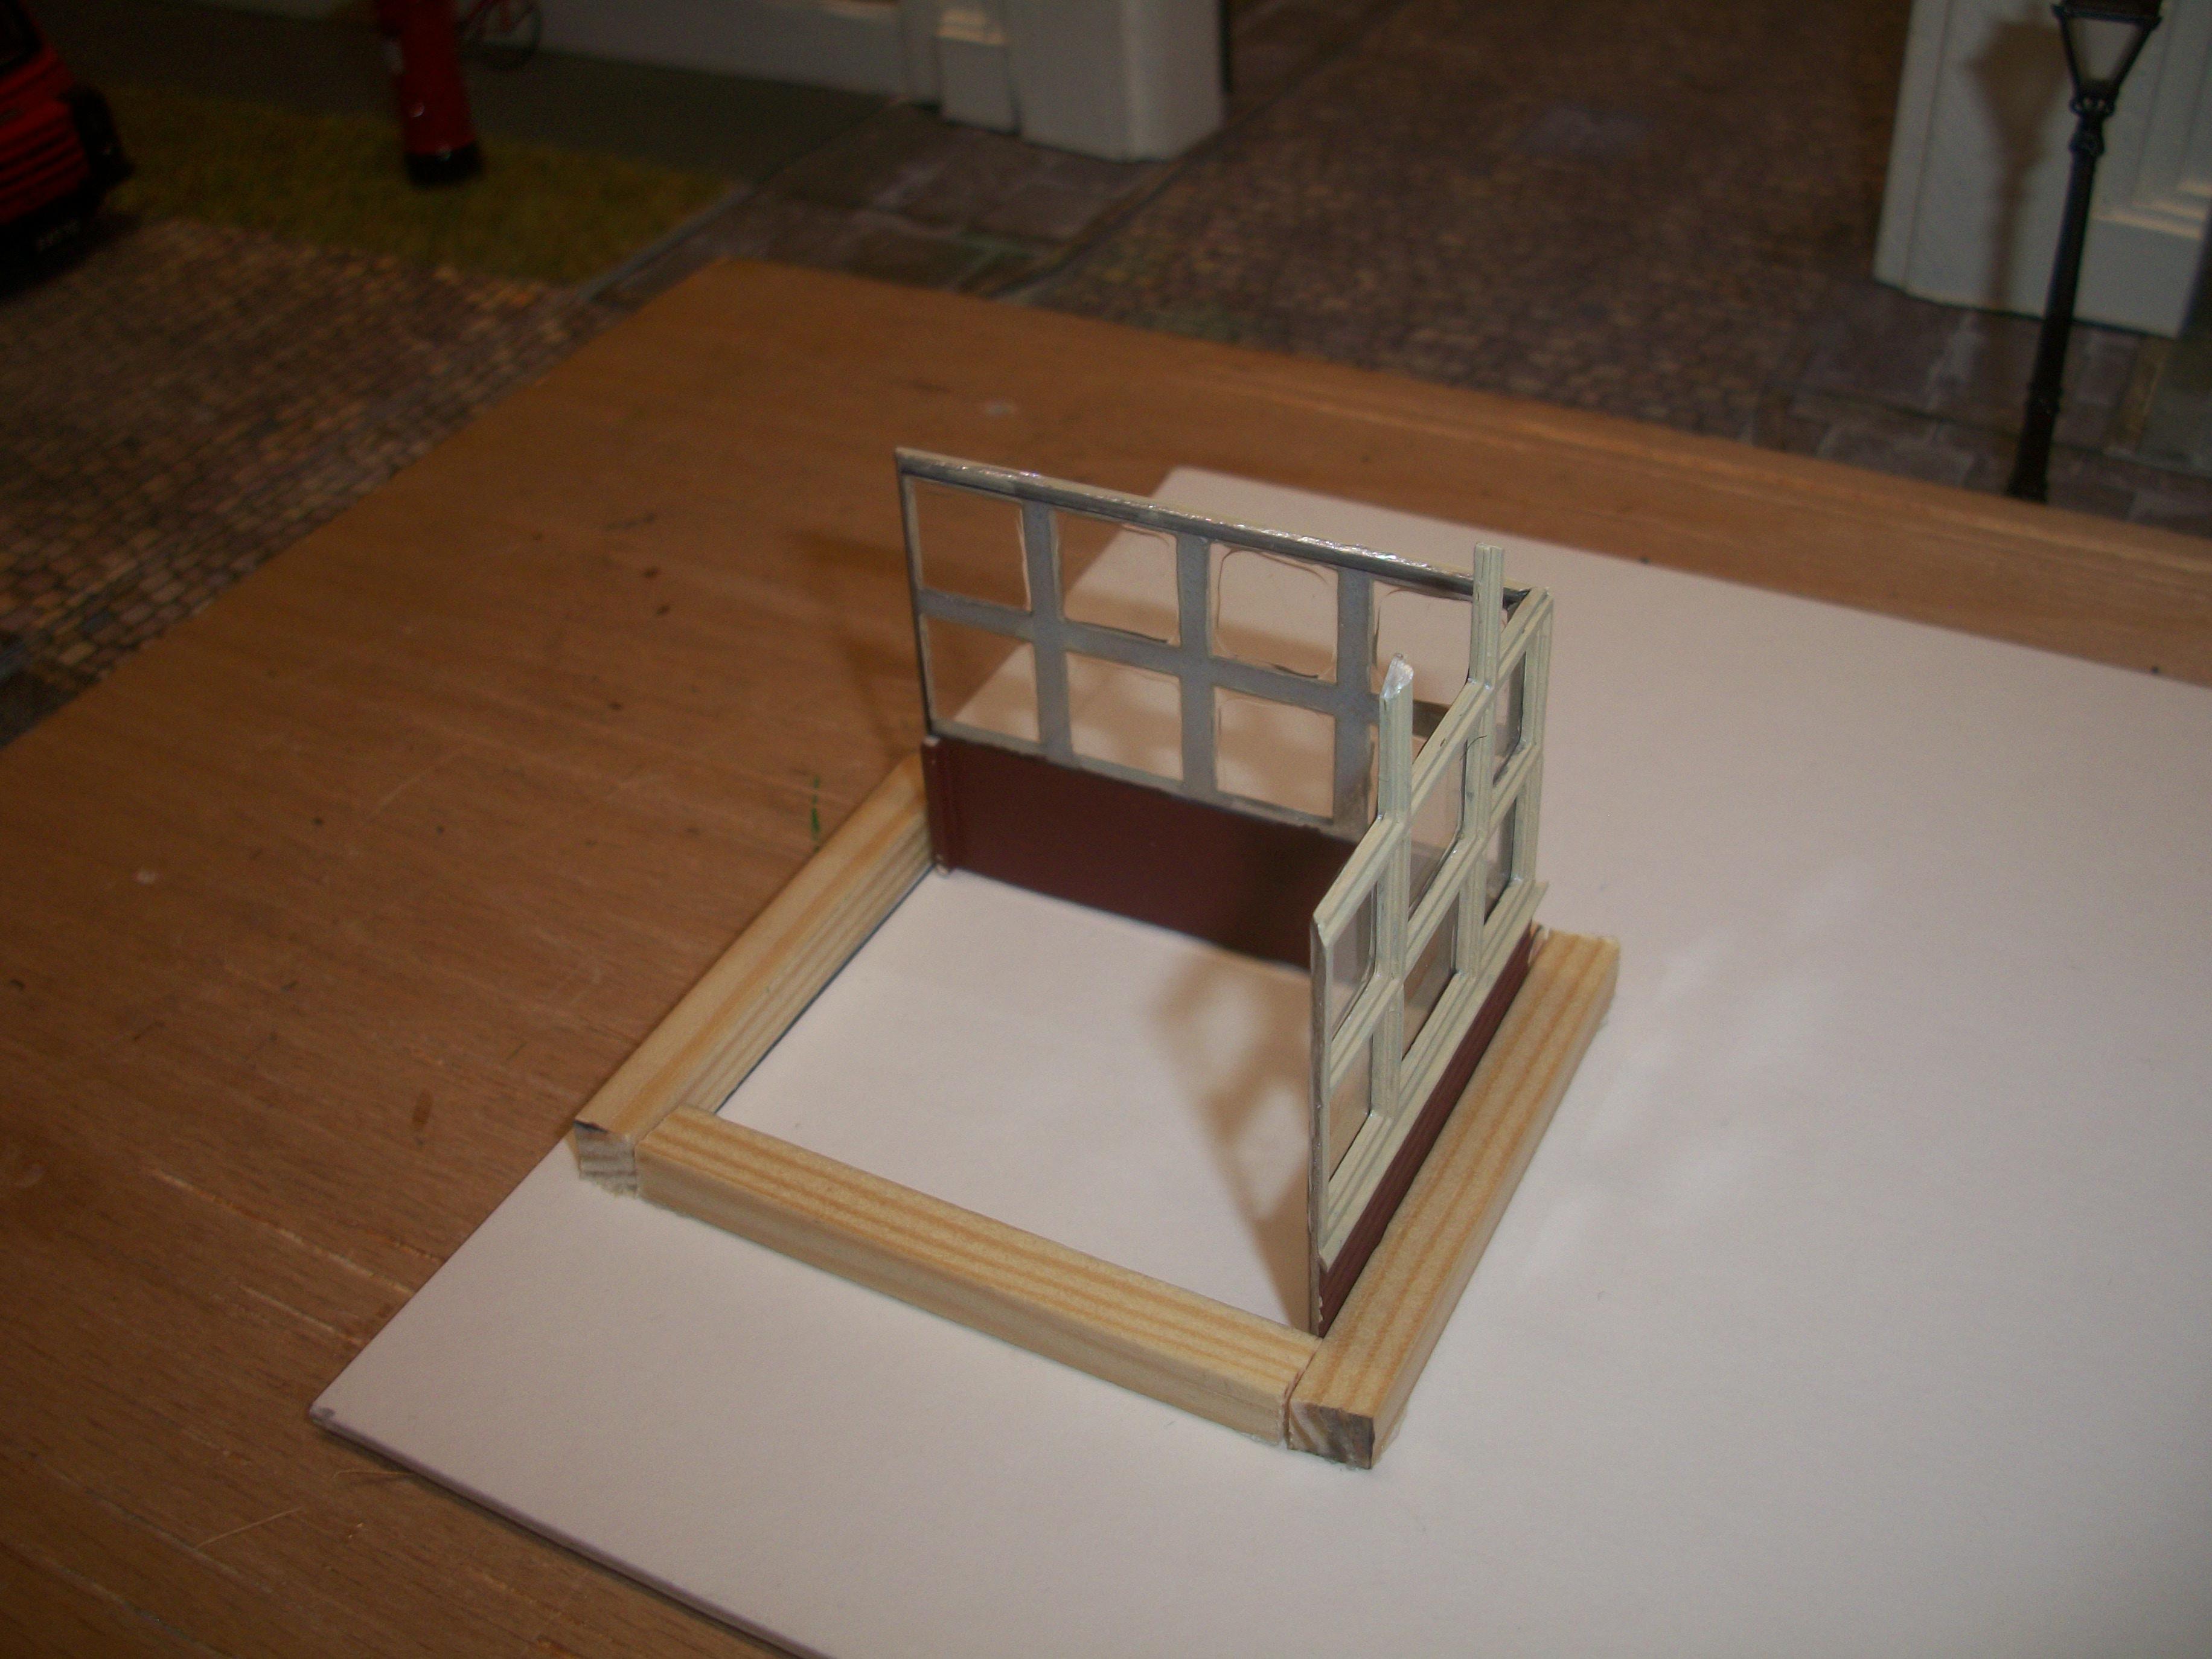
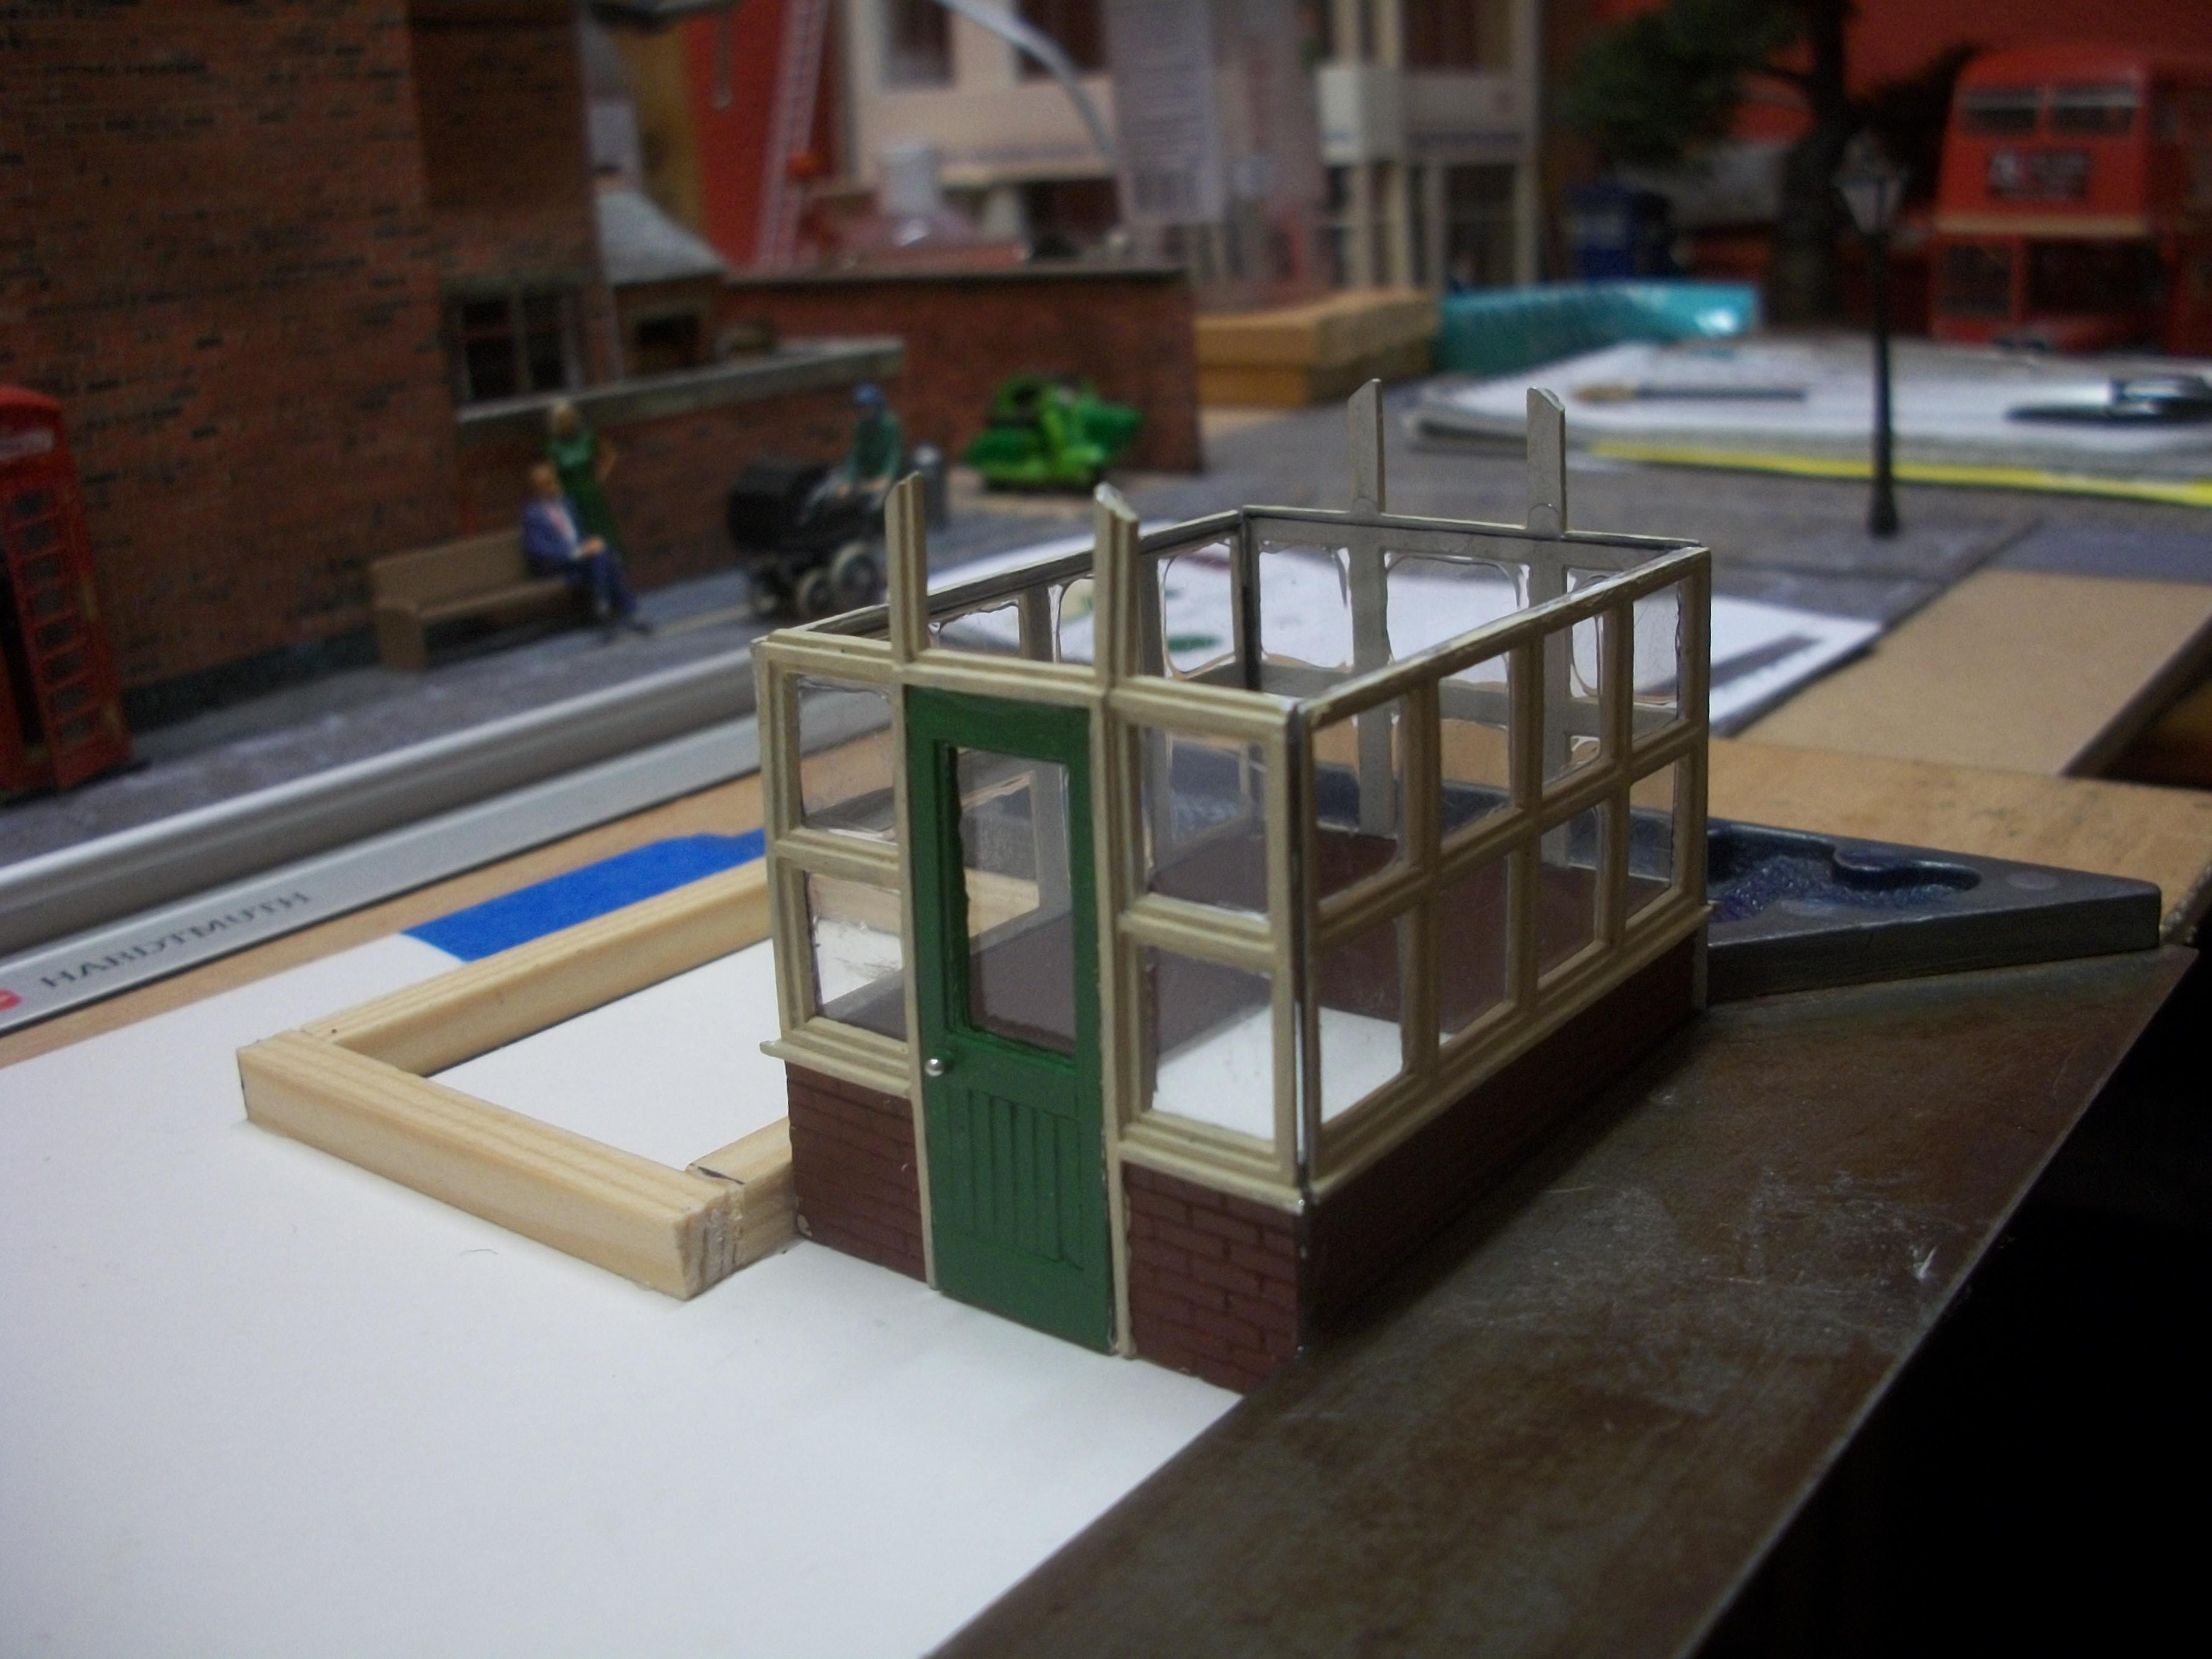
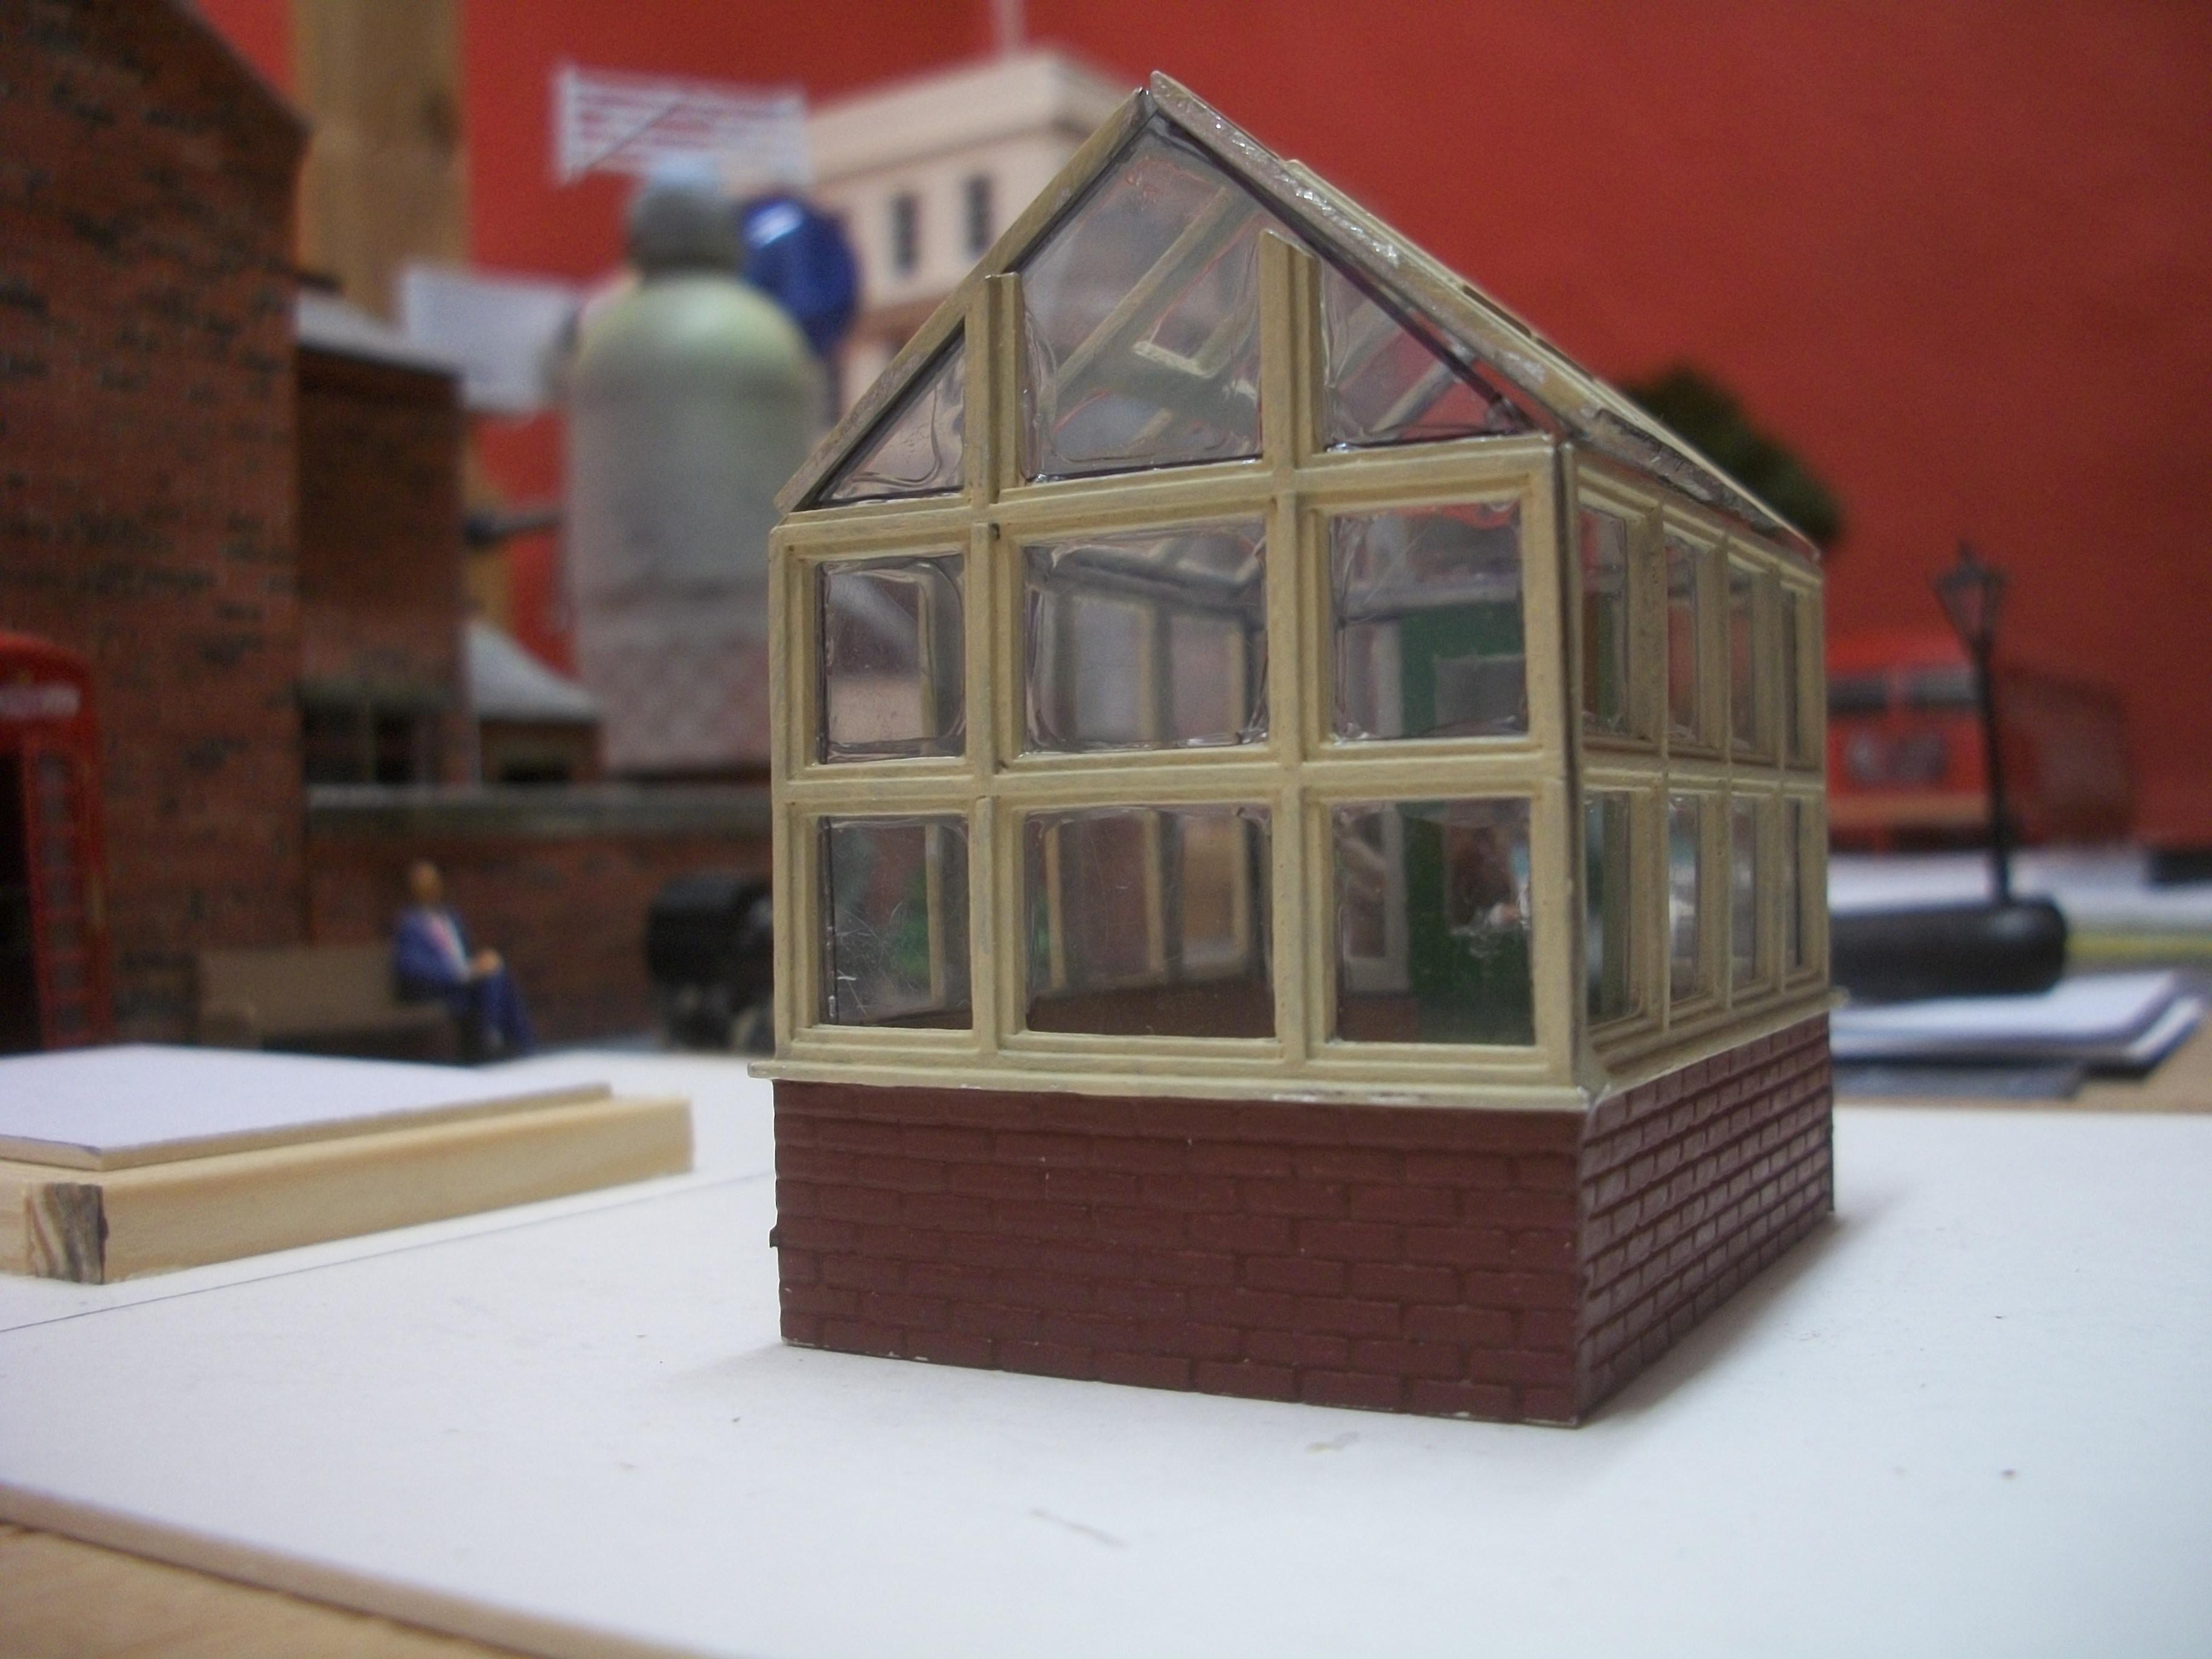
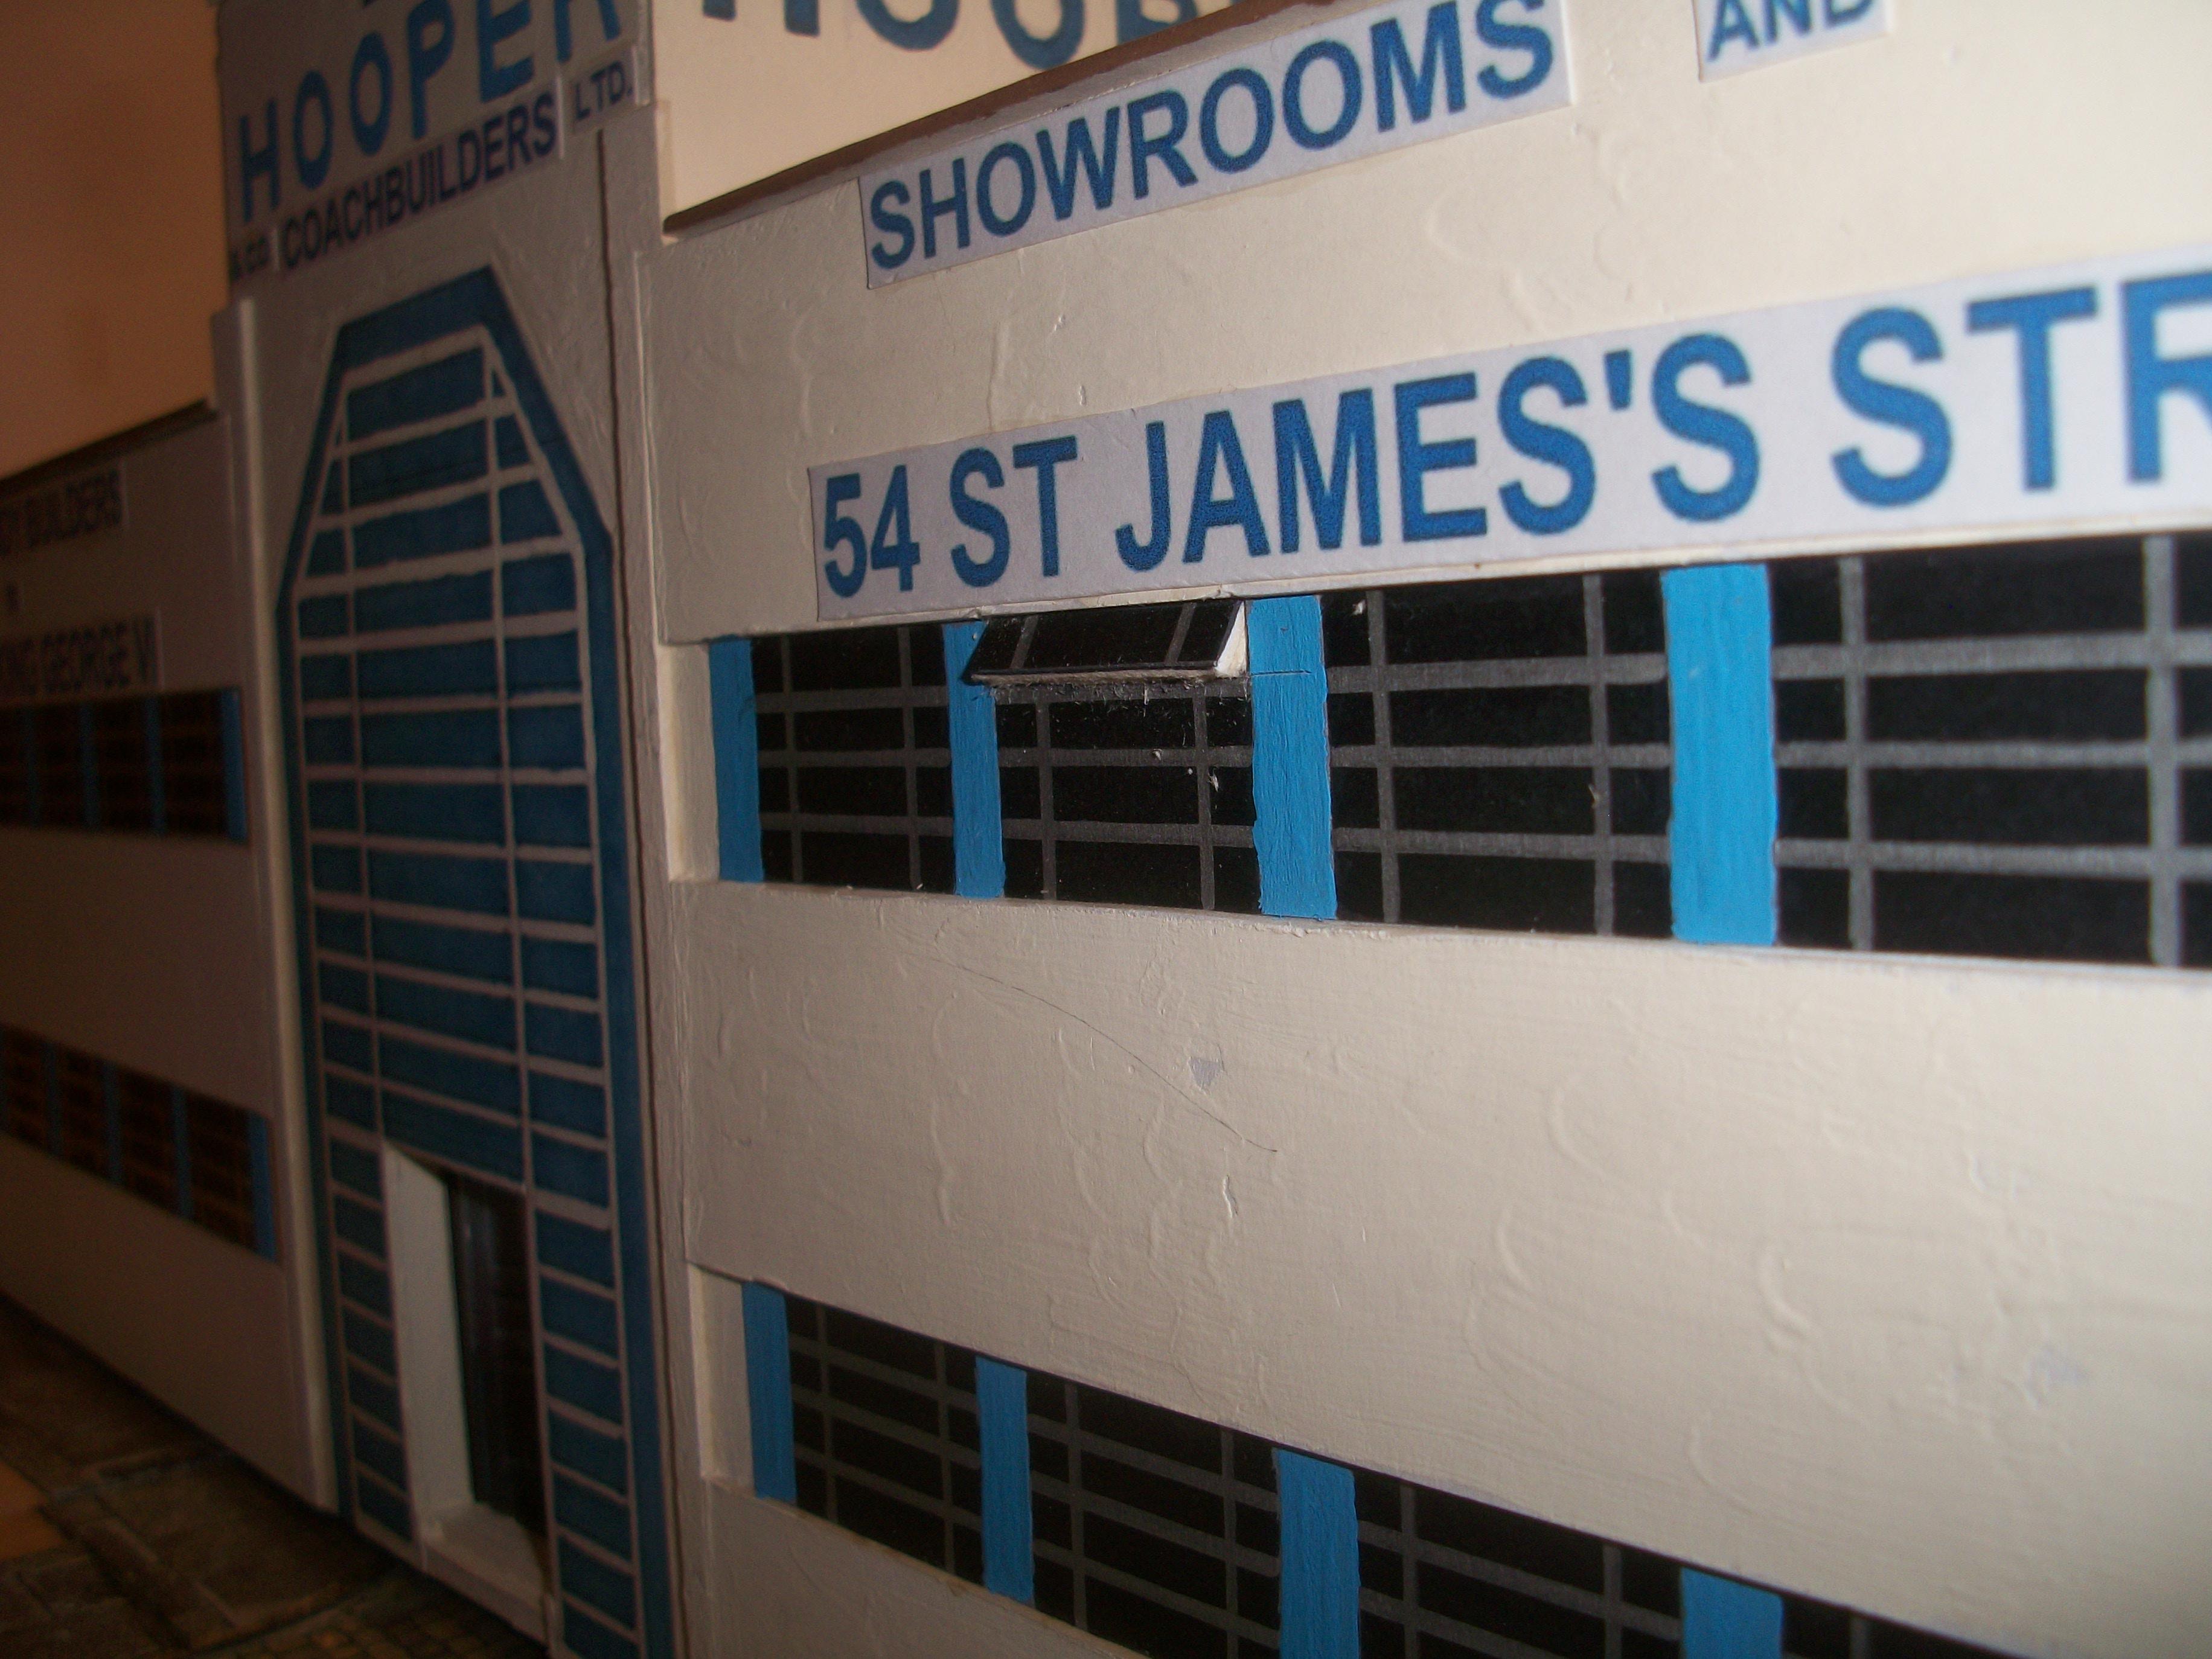
I have assembled and hand painted this 1:43 scale greenhouse, which is a white metal kit by S&D Models....... I made all the glass panes myself, which were not included in the kit, and as you can see, I fabricated a small wooden jig to make sure that the first two sides of the greenhouse were lined up nice and straight. Two part epoxy was used for the white metal parts, and Crystal Clear adhesive was used for the clear acetate parts. There is still some ' pointing ' to add with the mortar between the bricks. There is an area behind the Victorian terraced houses that is bare MDF at the moment, but this will have a short extension to the road, along with a white five bar gate, a short section of red brick wall, a small car parking area of grey tarmac and a grassy area around the greenhouse. David
-

Bentley Blower 1930, Airfix 1:12
Anglia105E replied to primabaleron's topic in Other Racing: Road Racing, Salt Flat Racers
Tomasz...... very good build of your Airfix Bentley Blower......... weathering and detail is brilliant ! David -
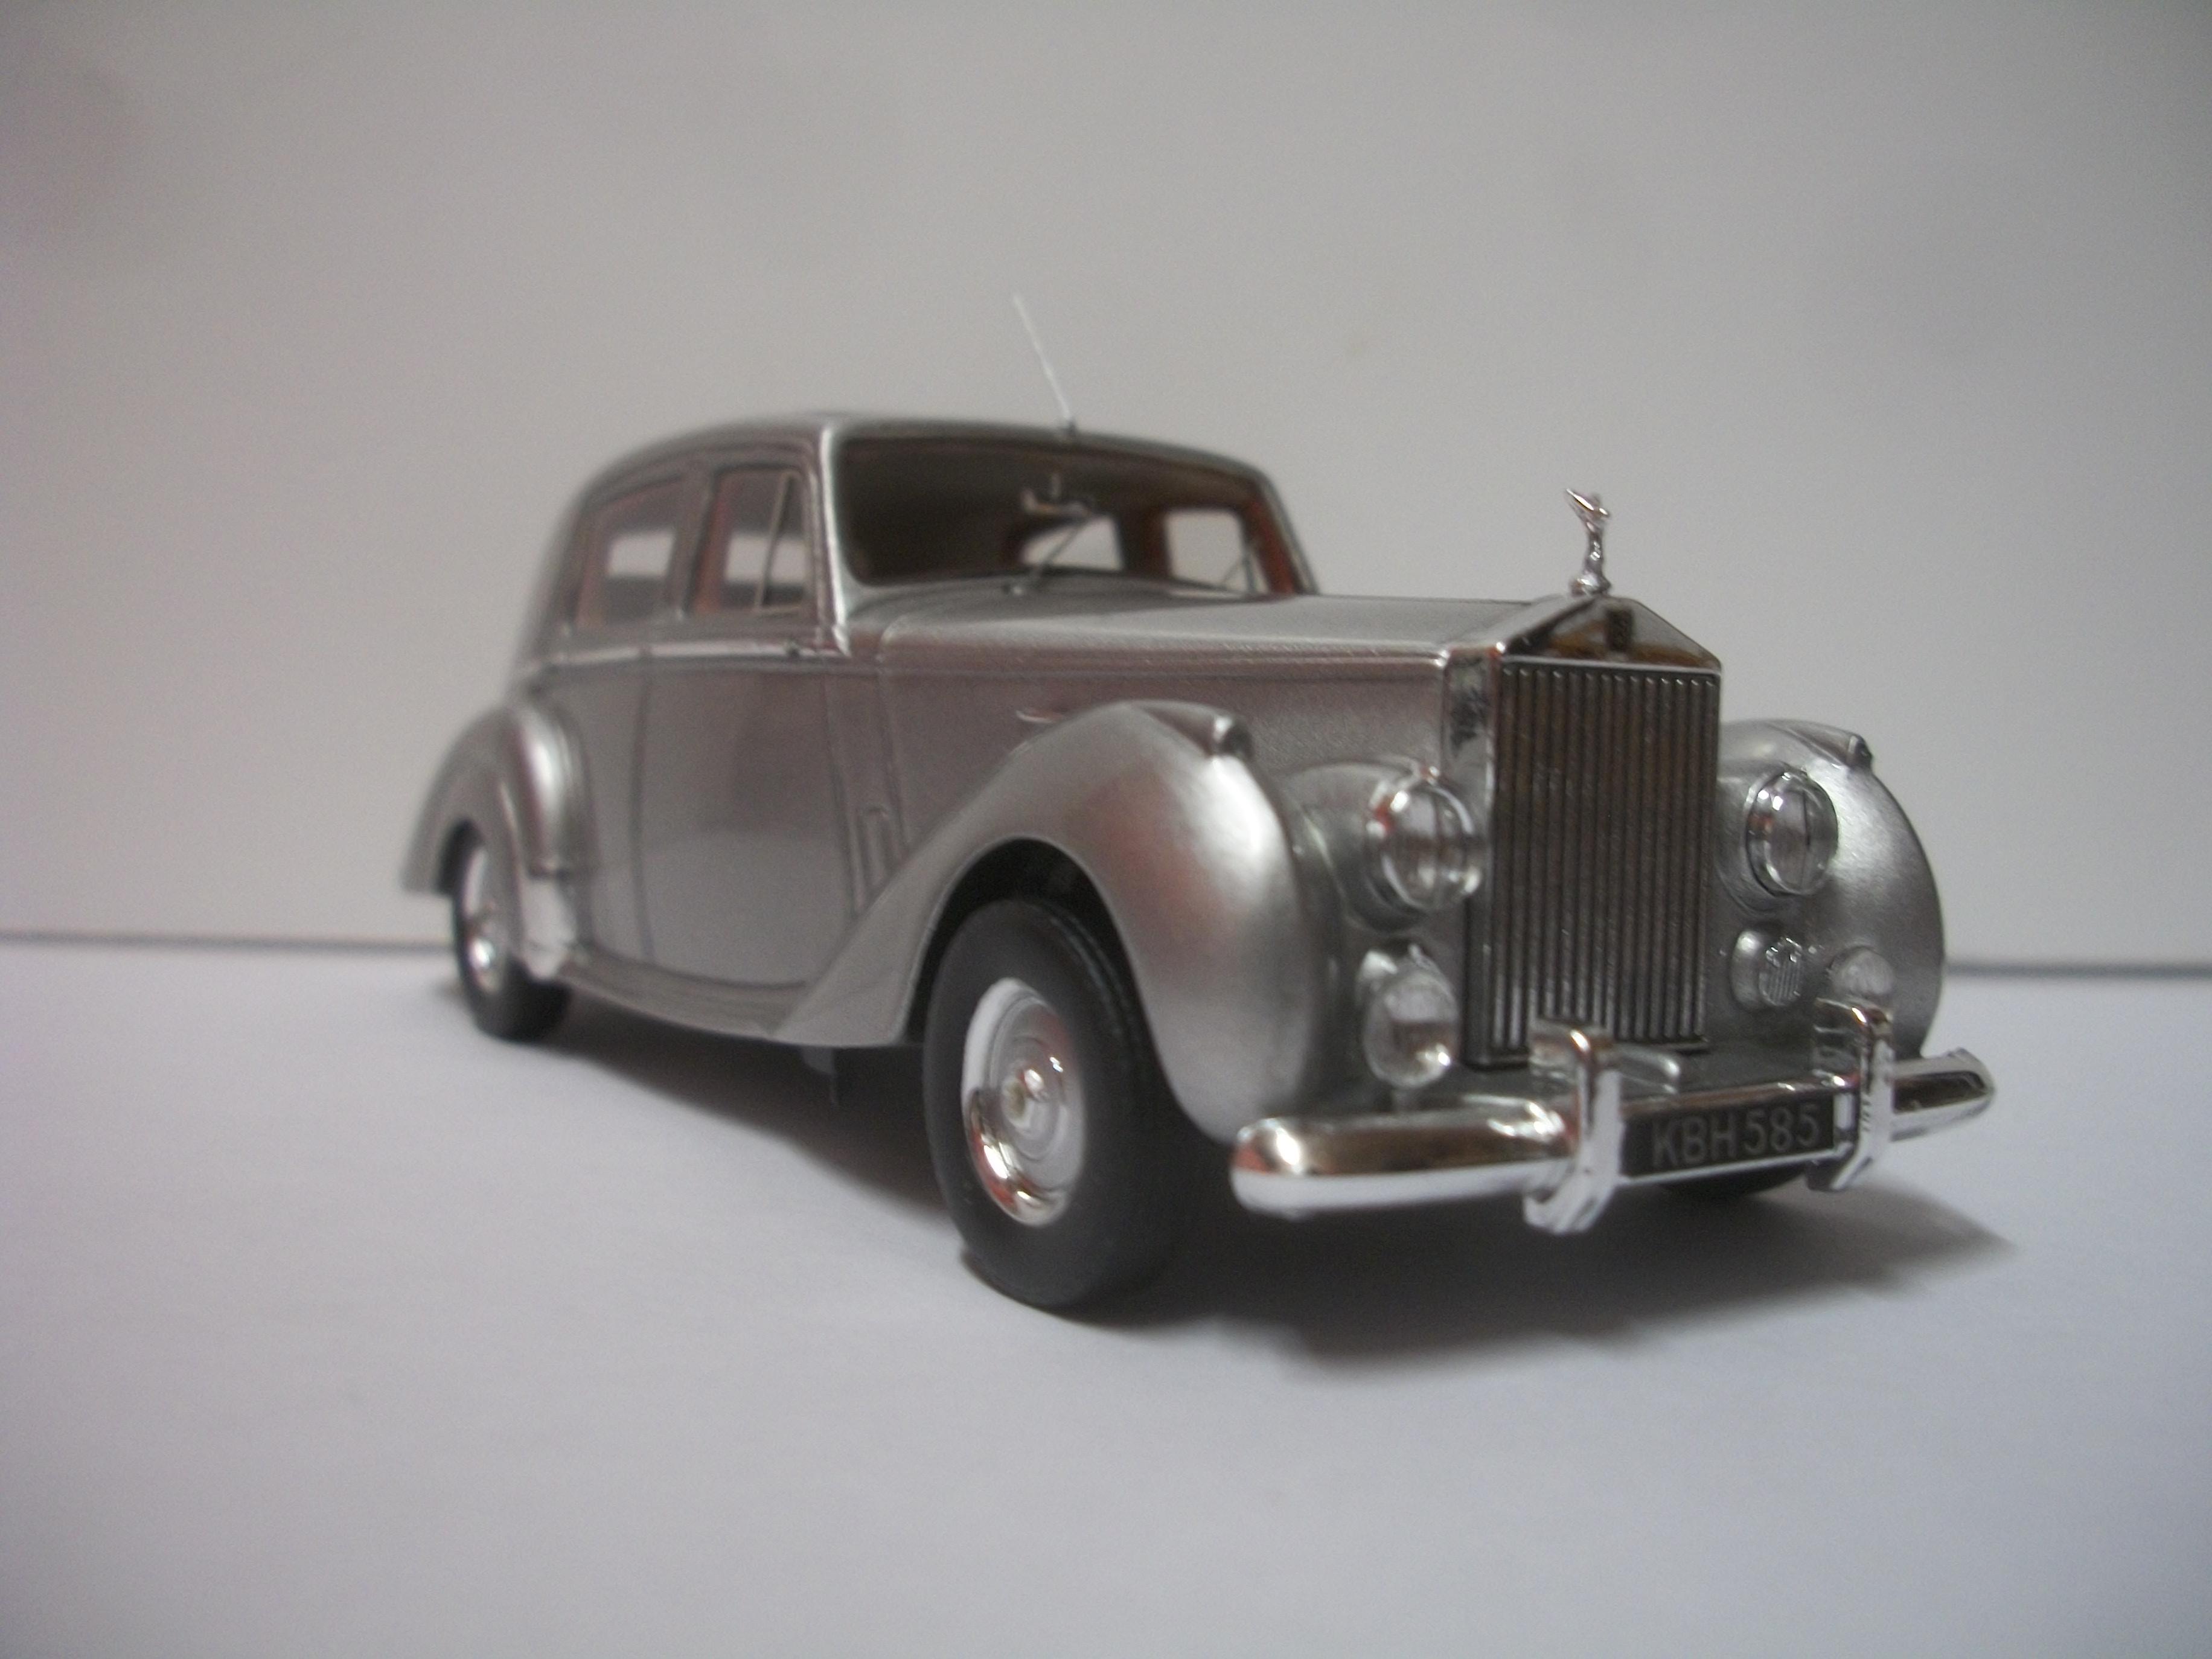
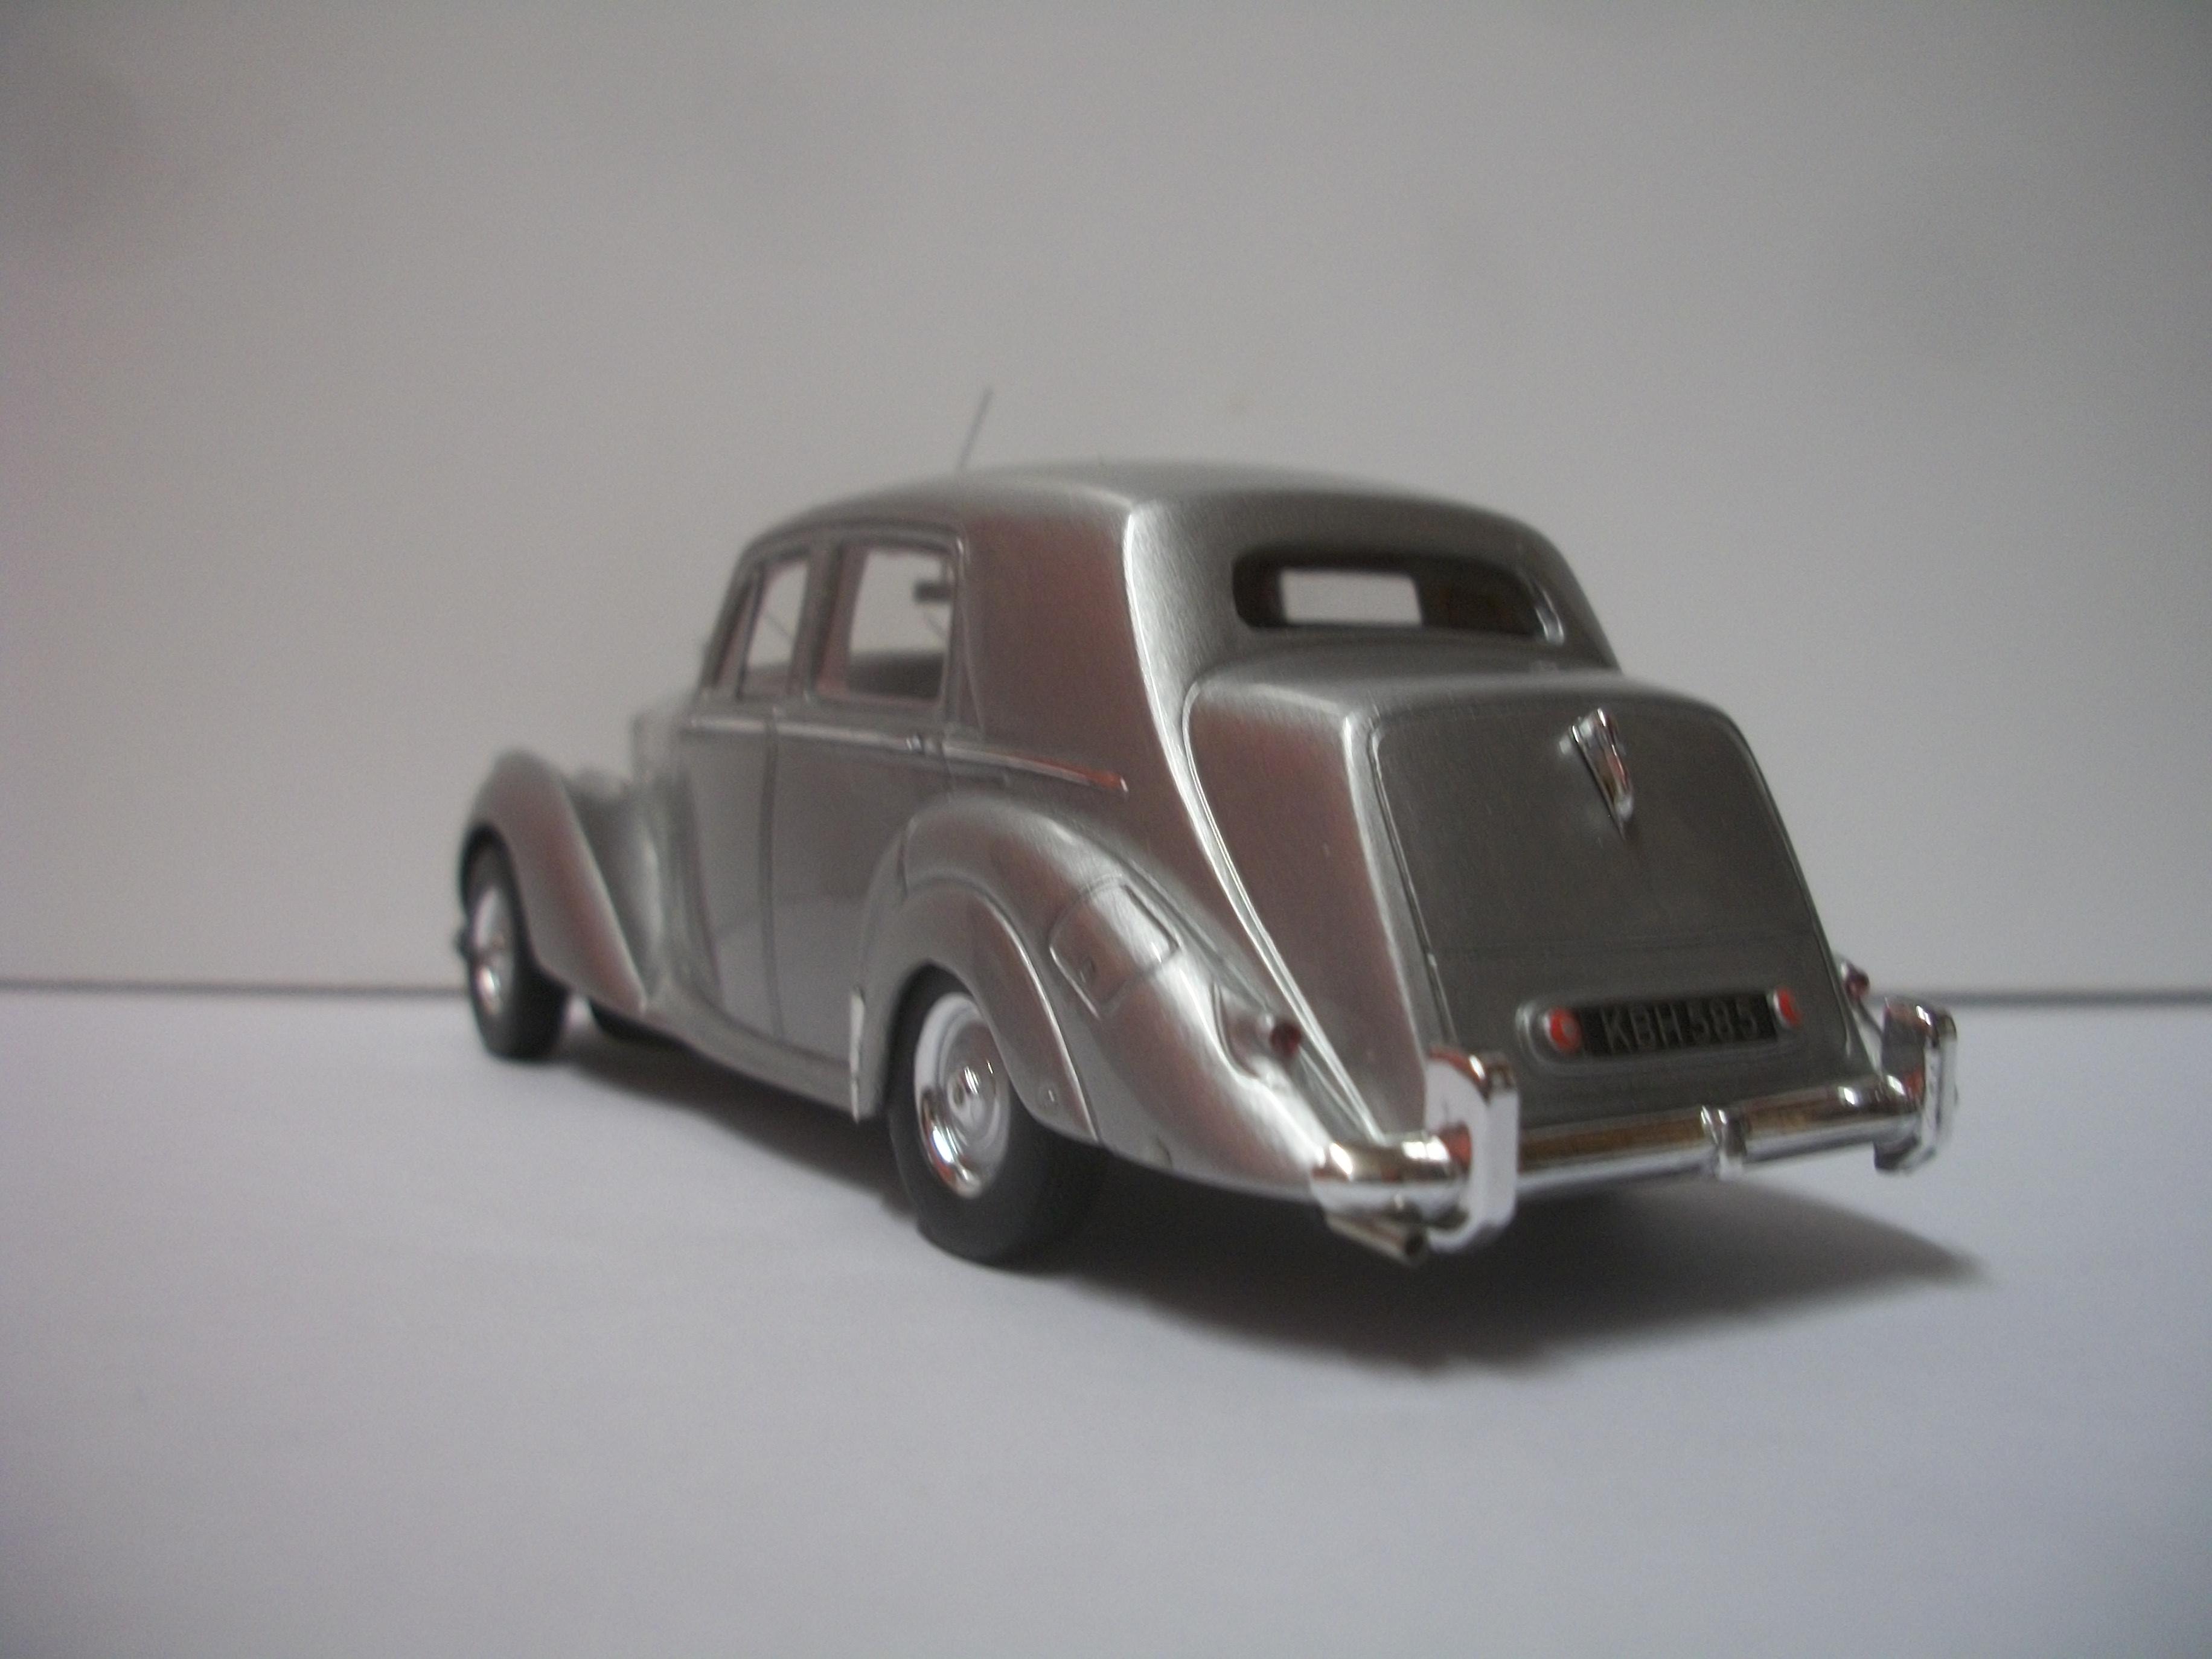
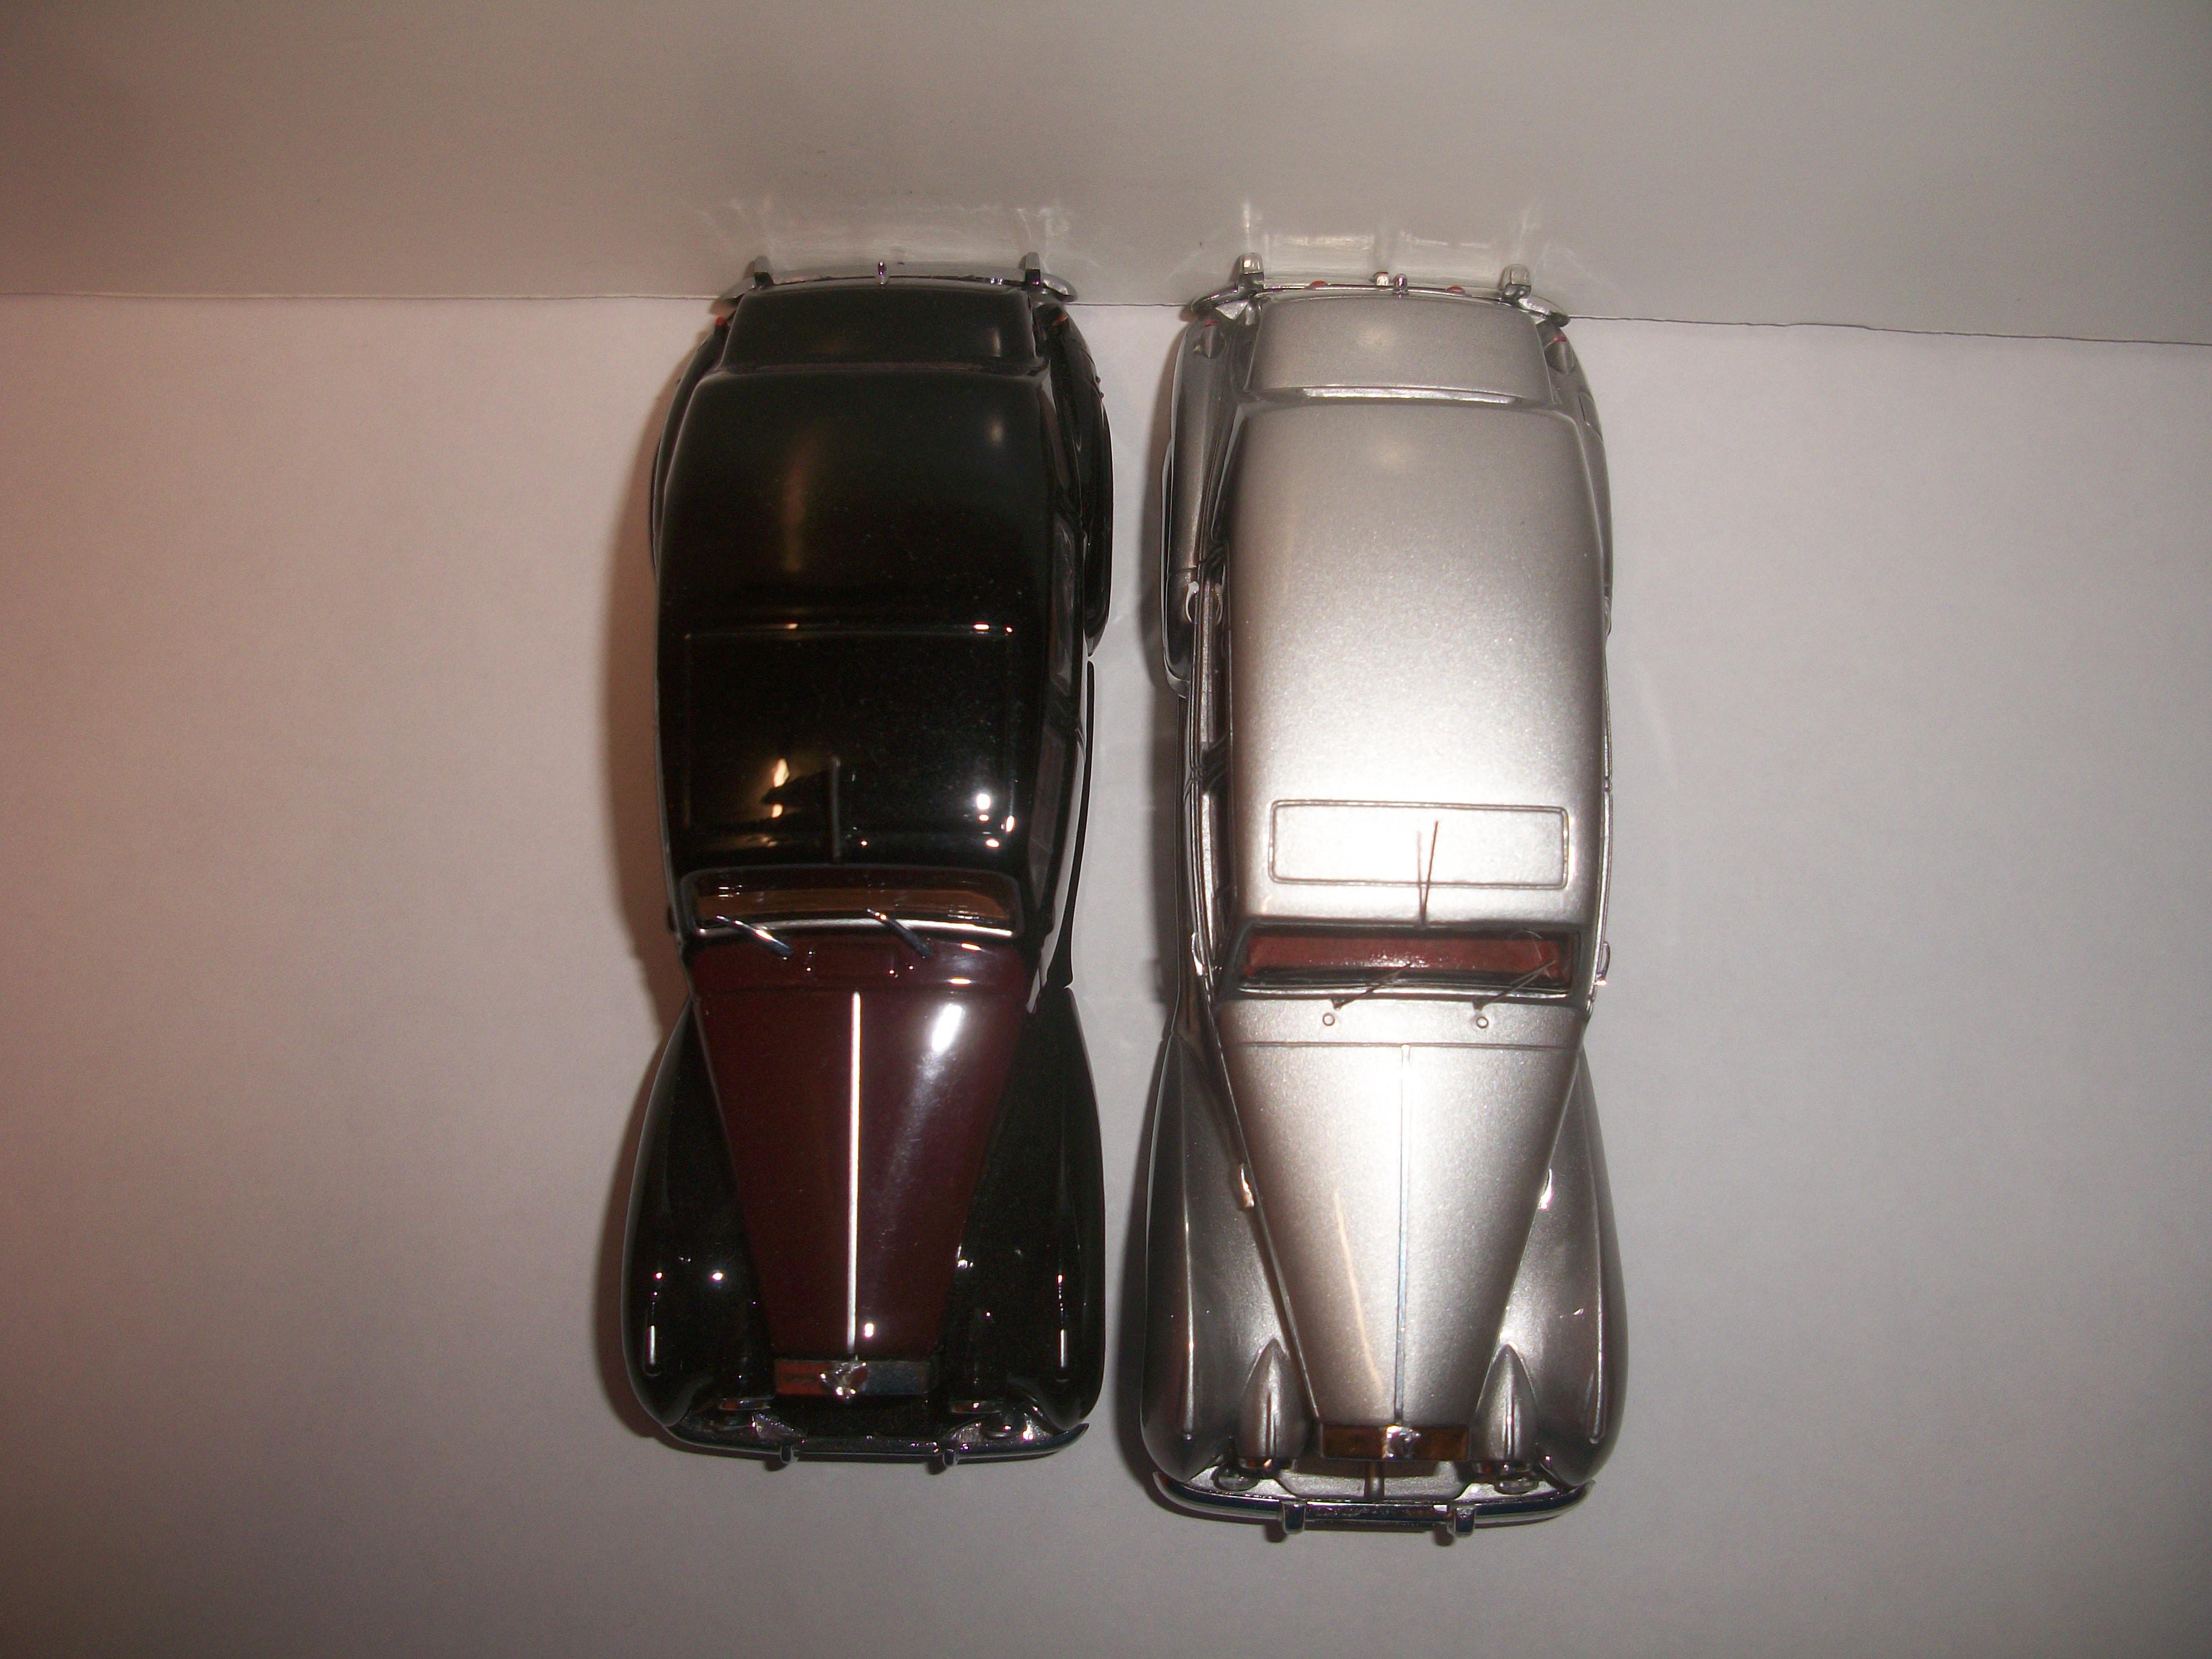
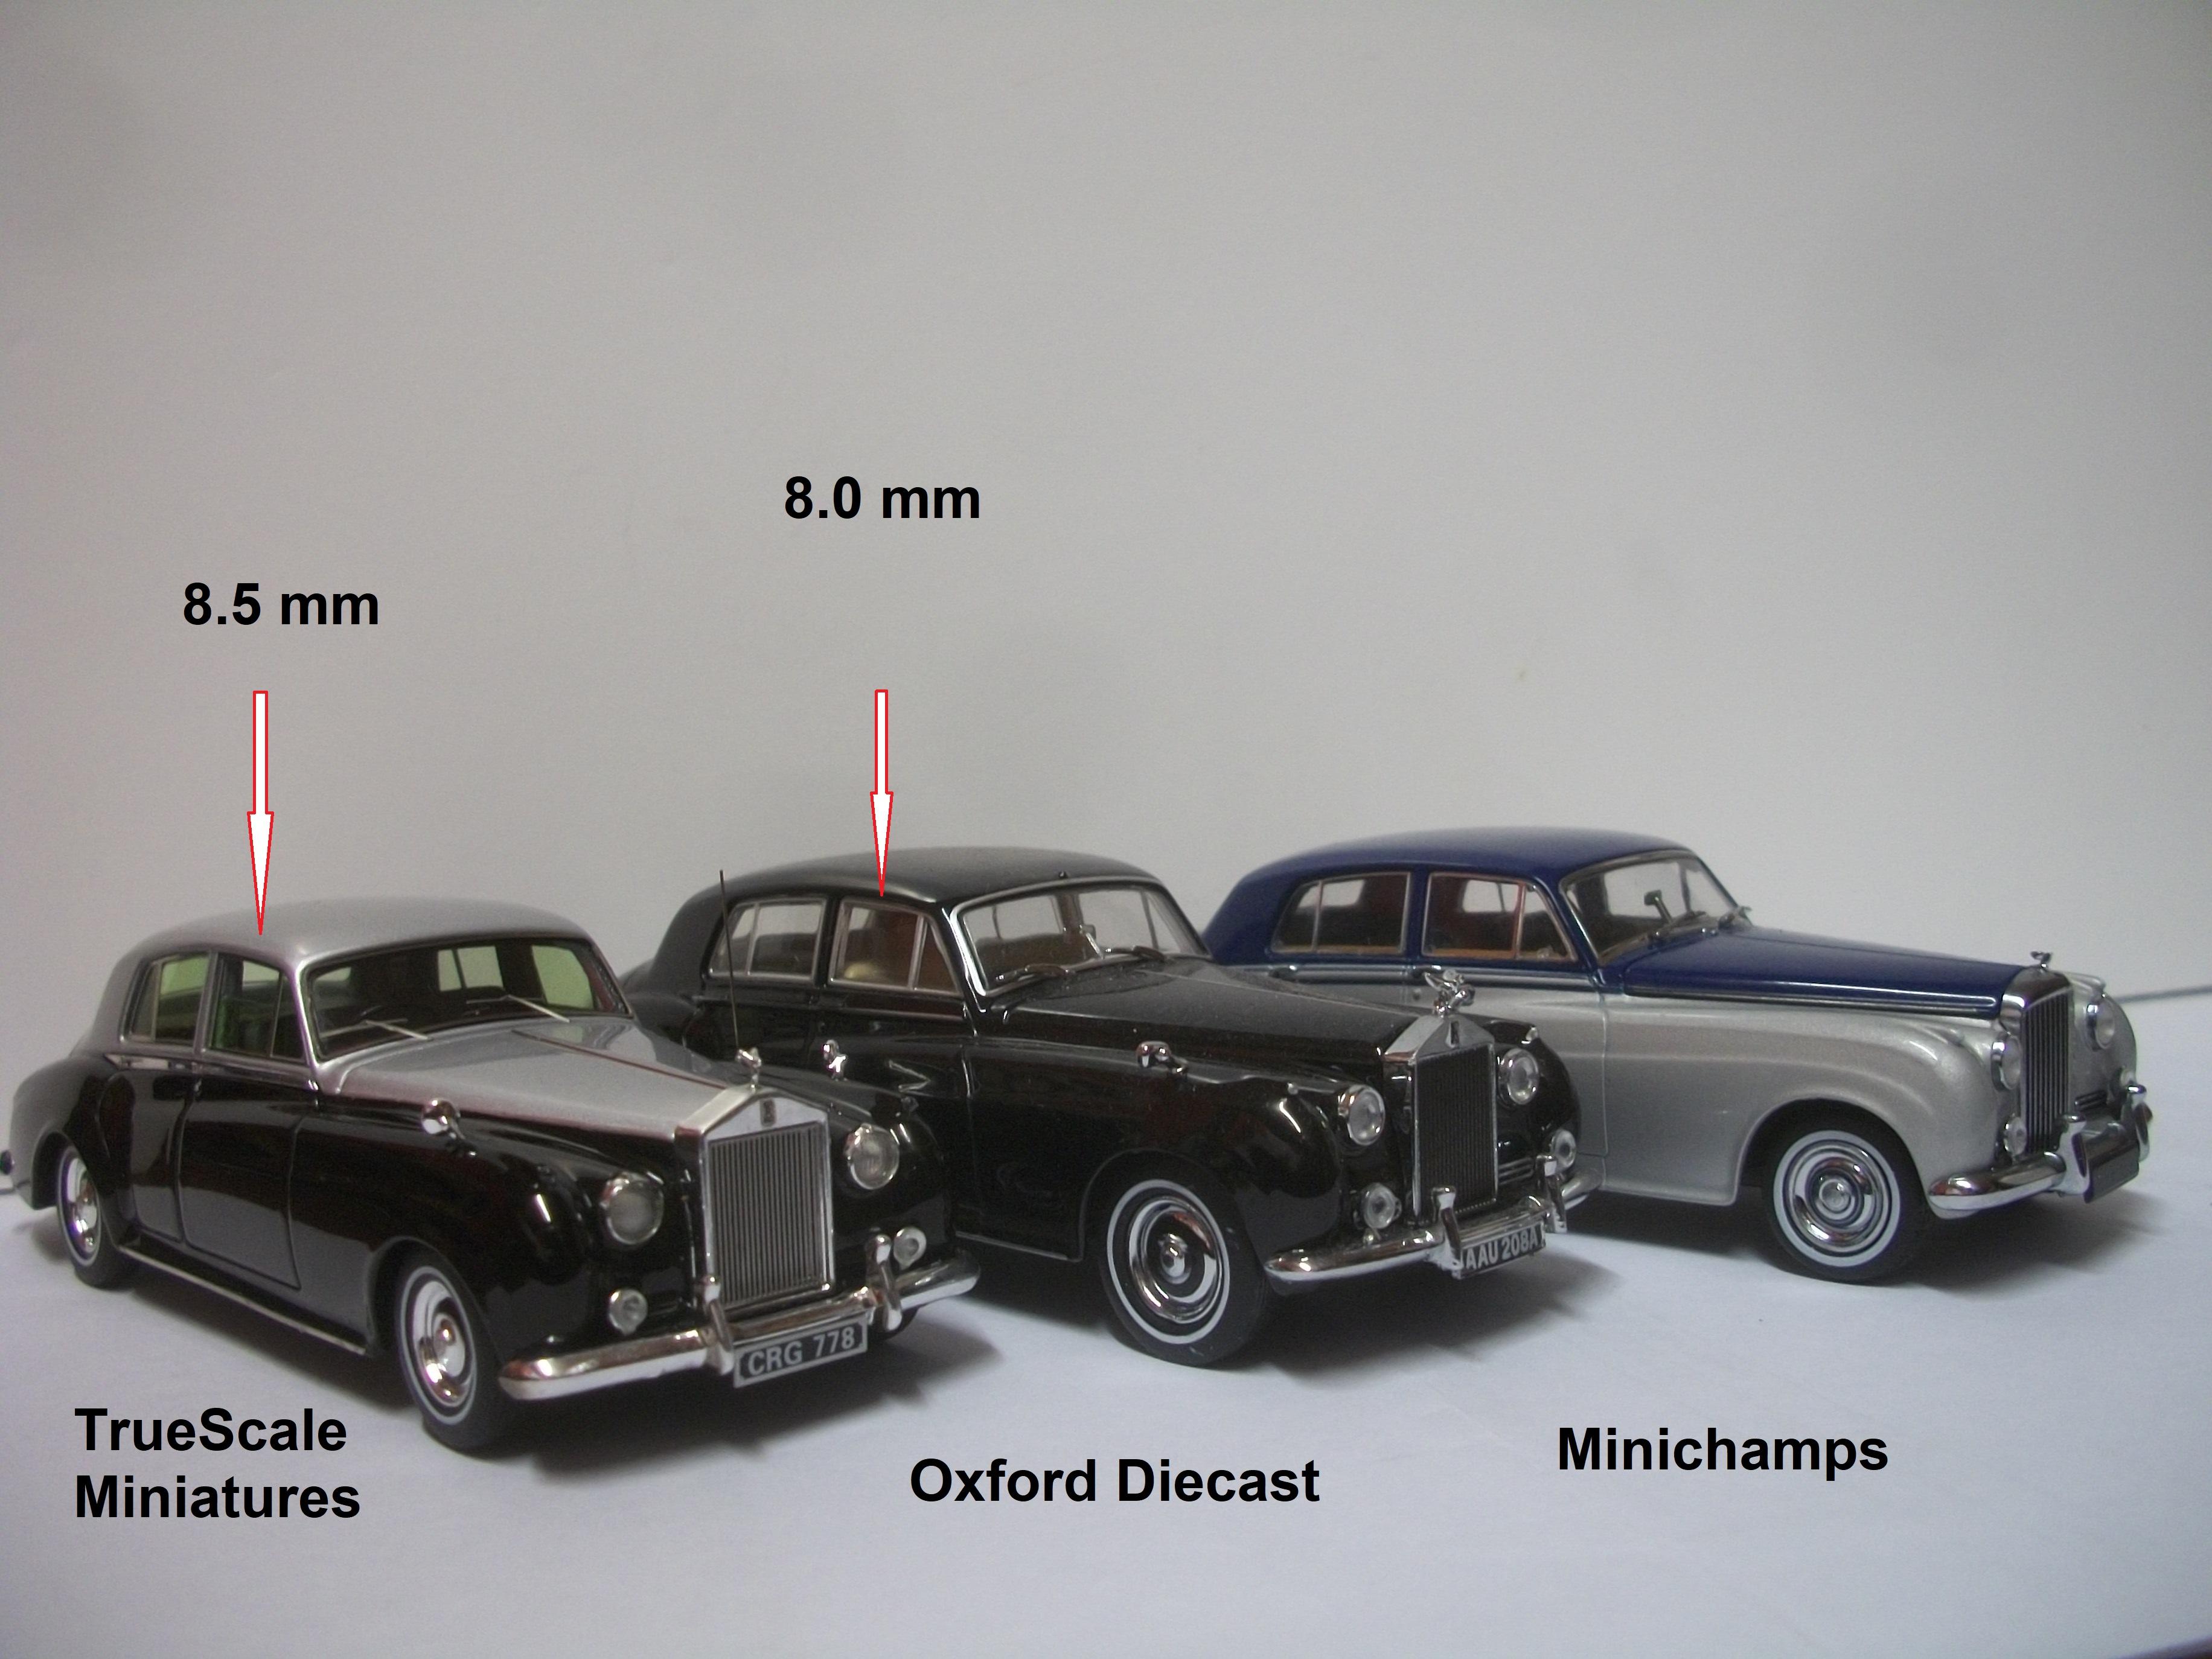
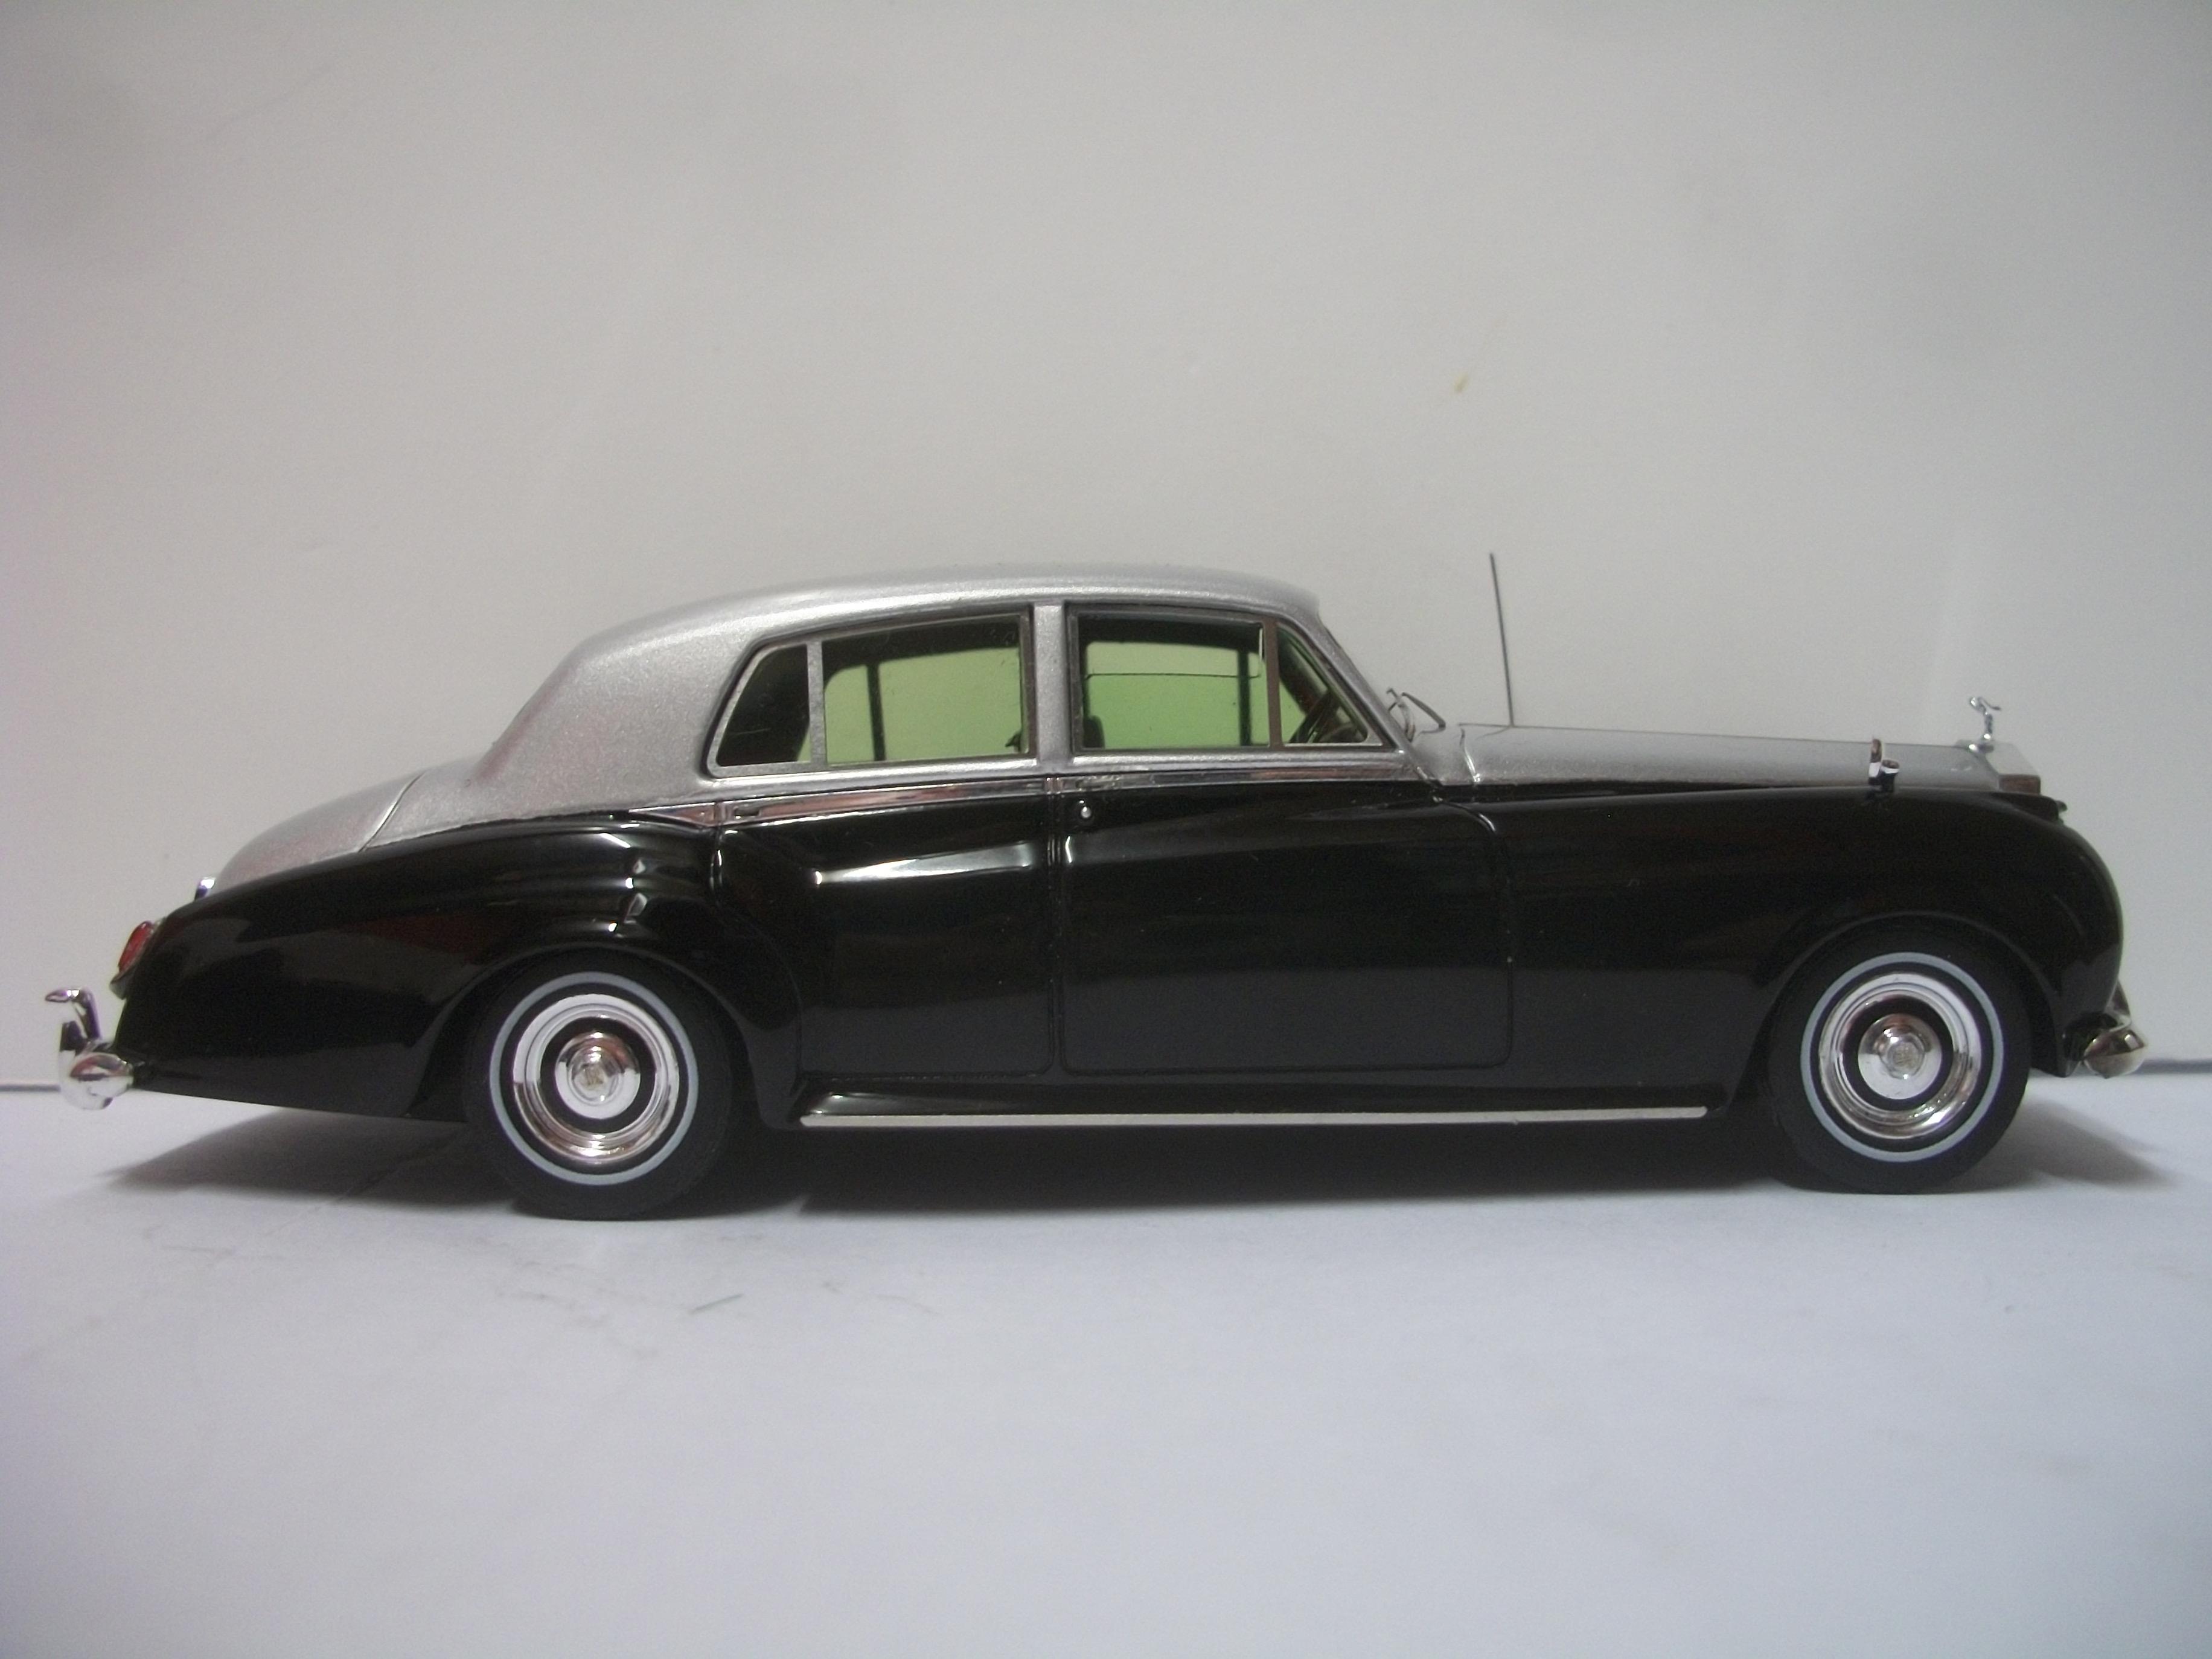
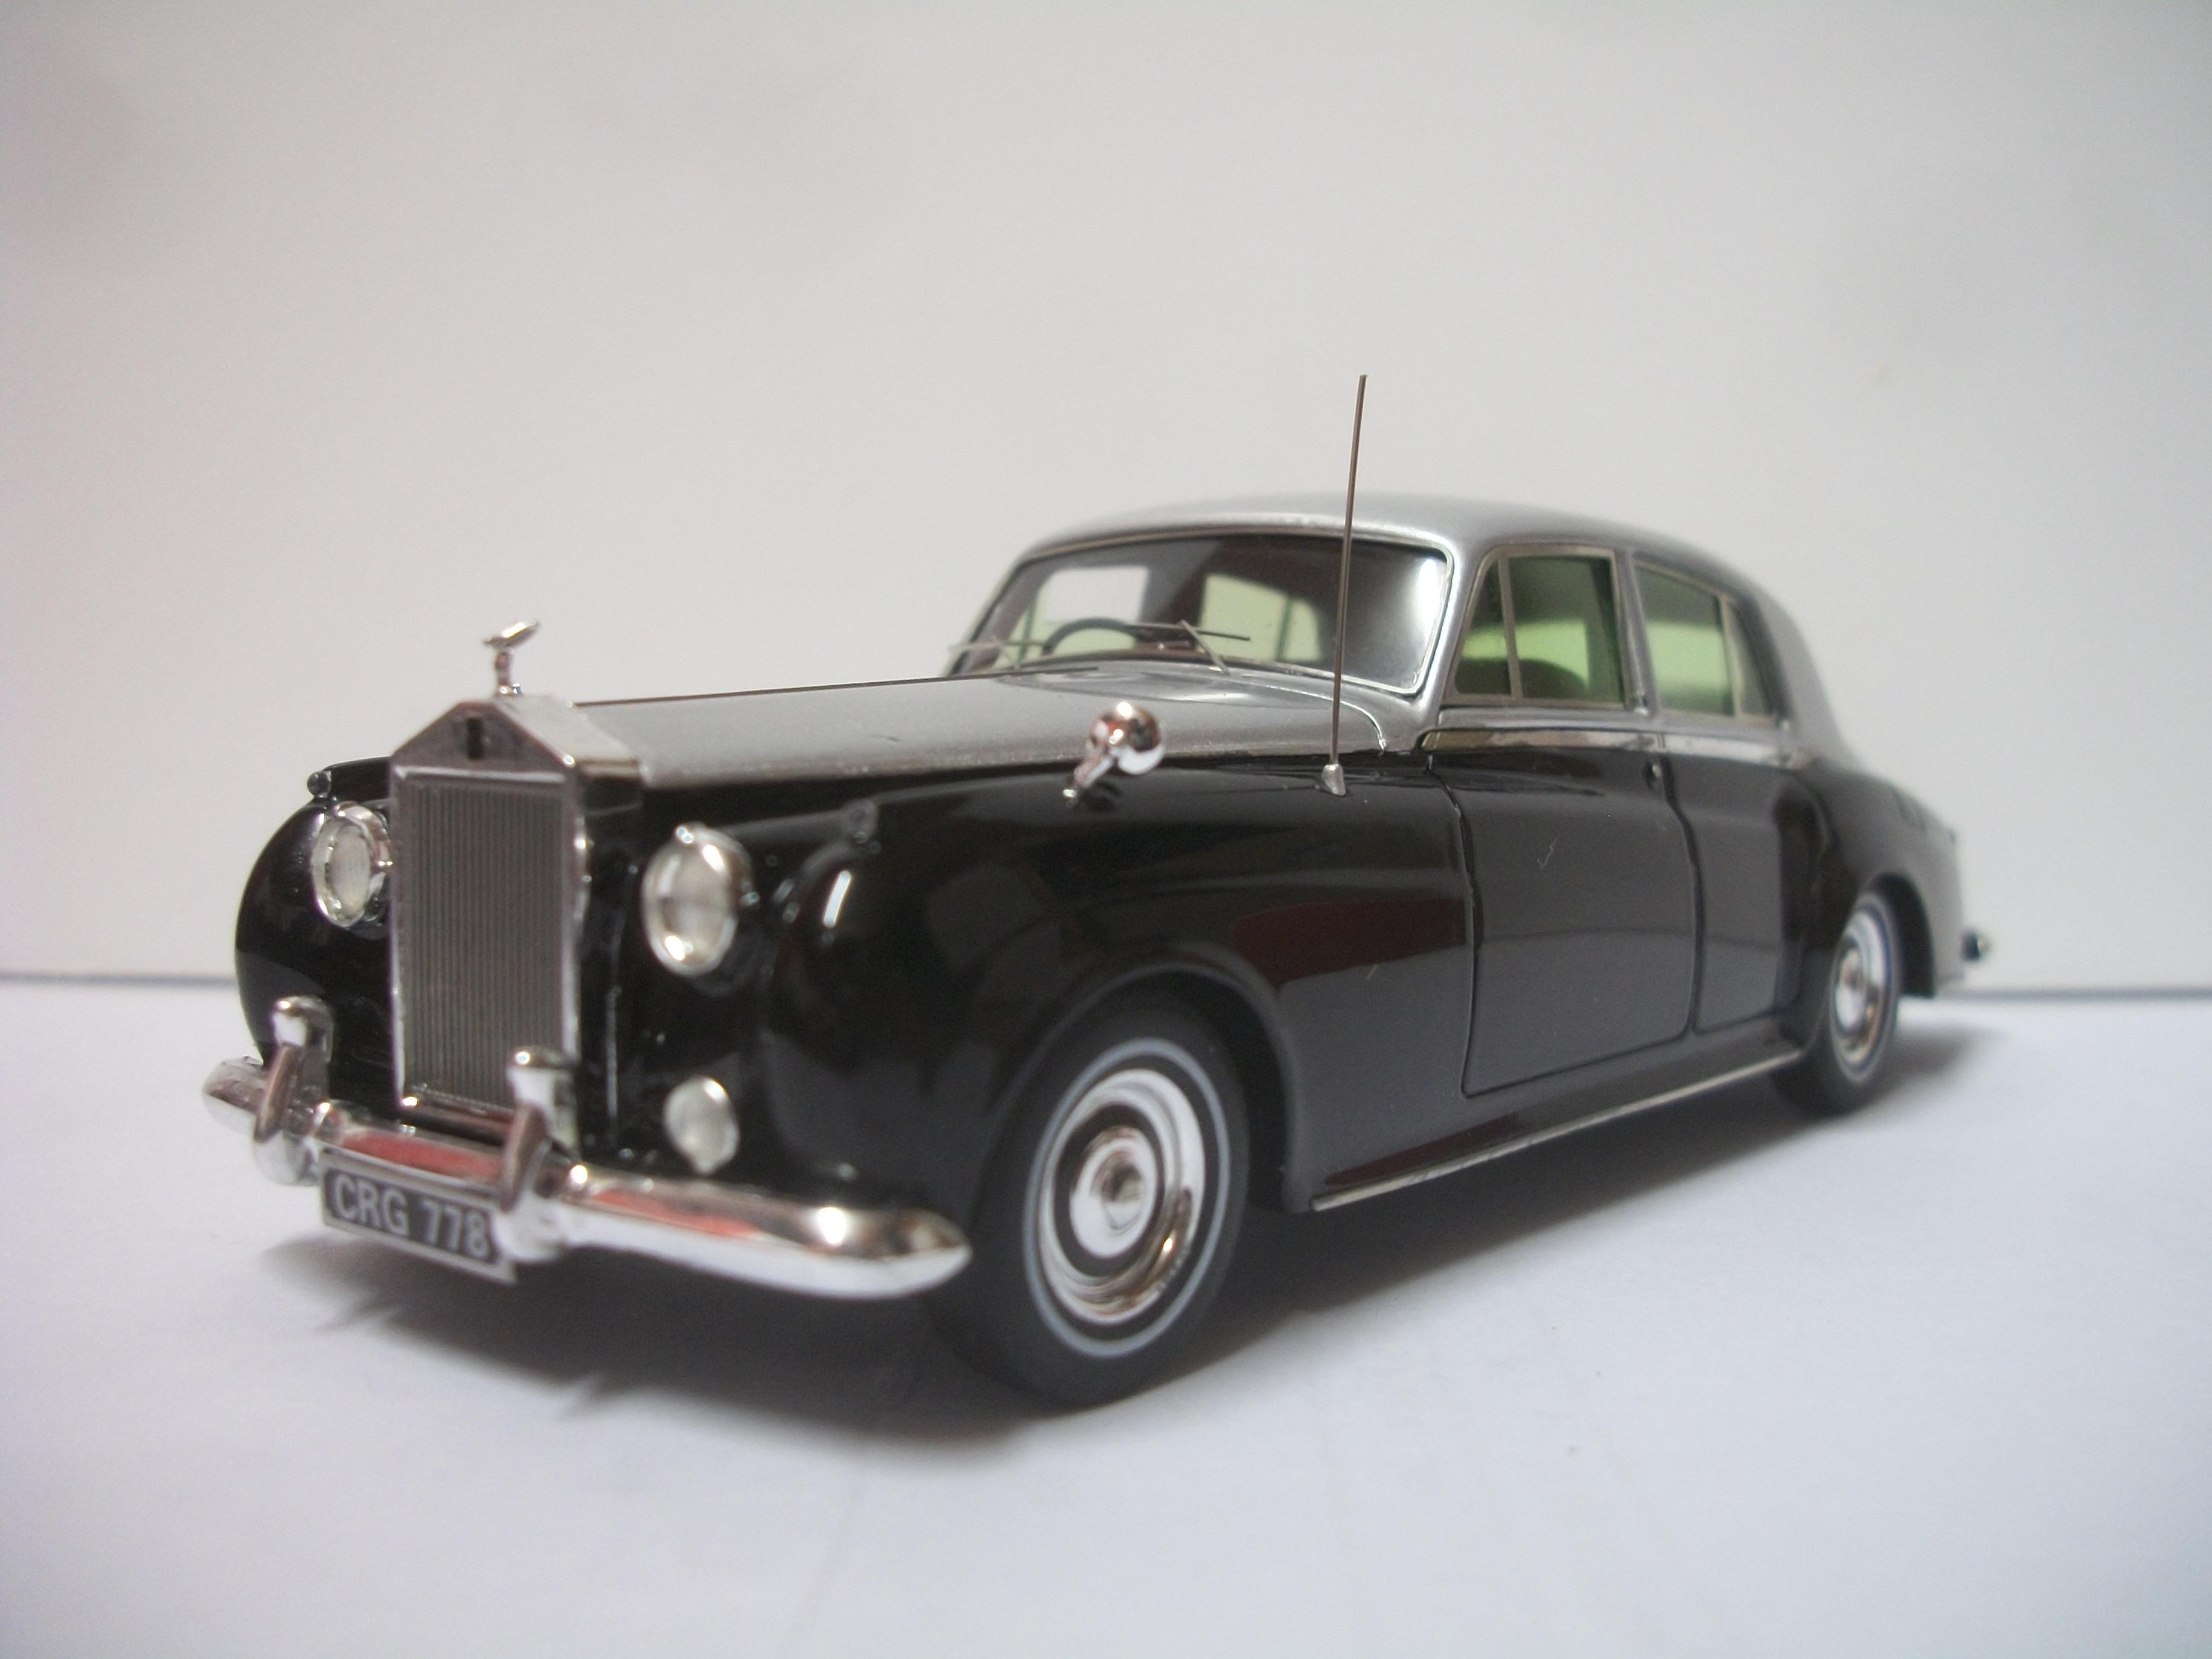
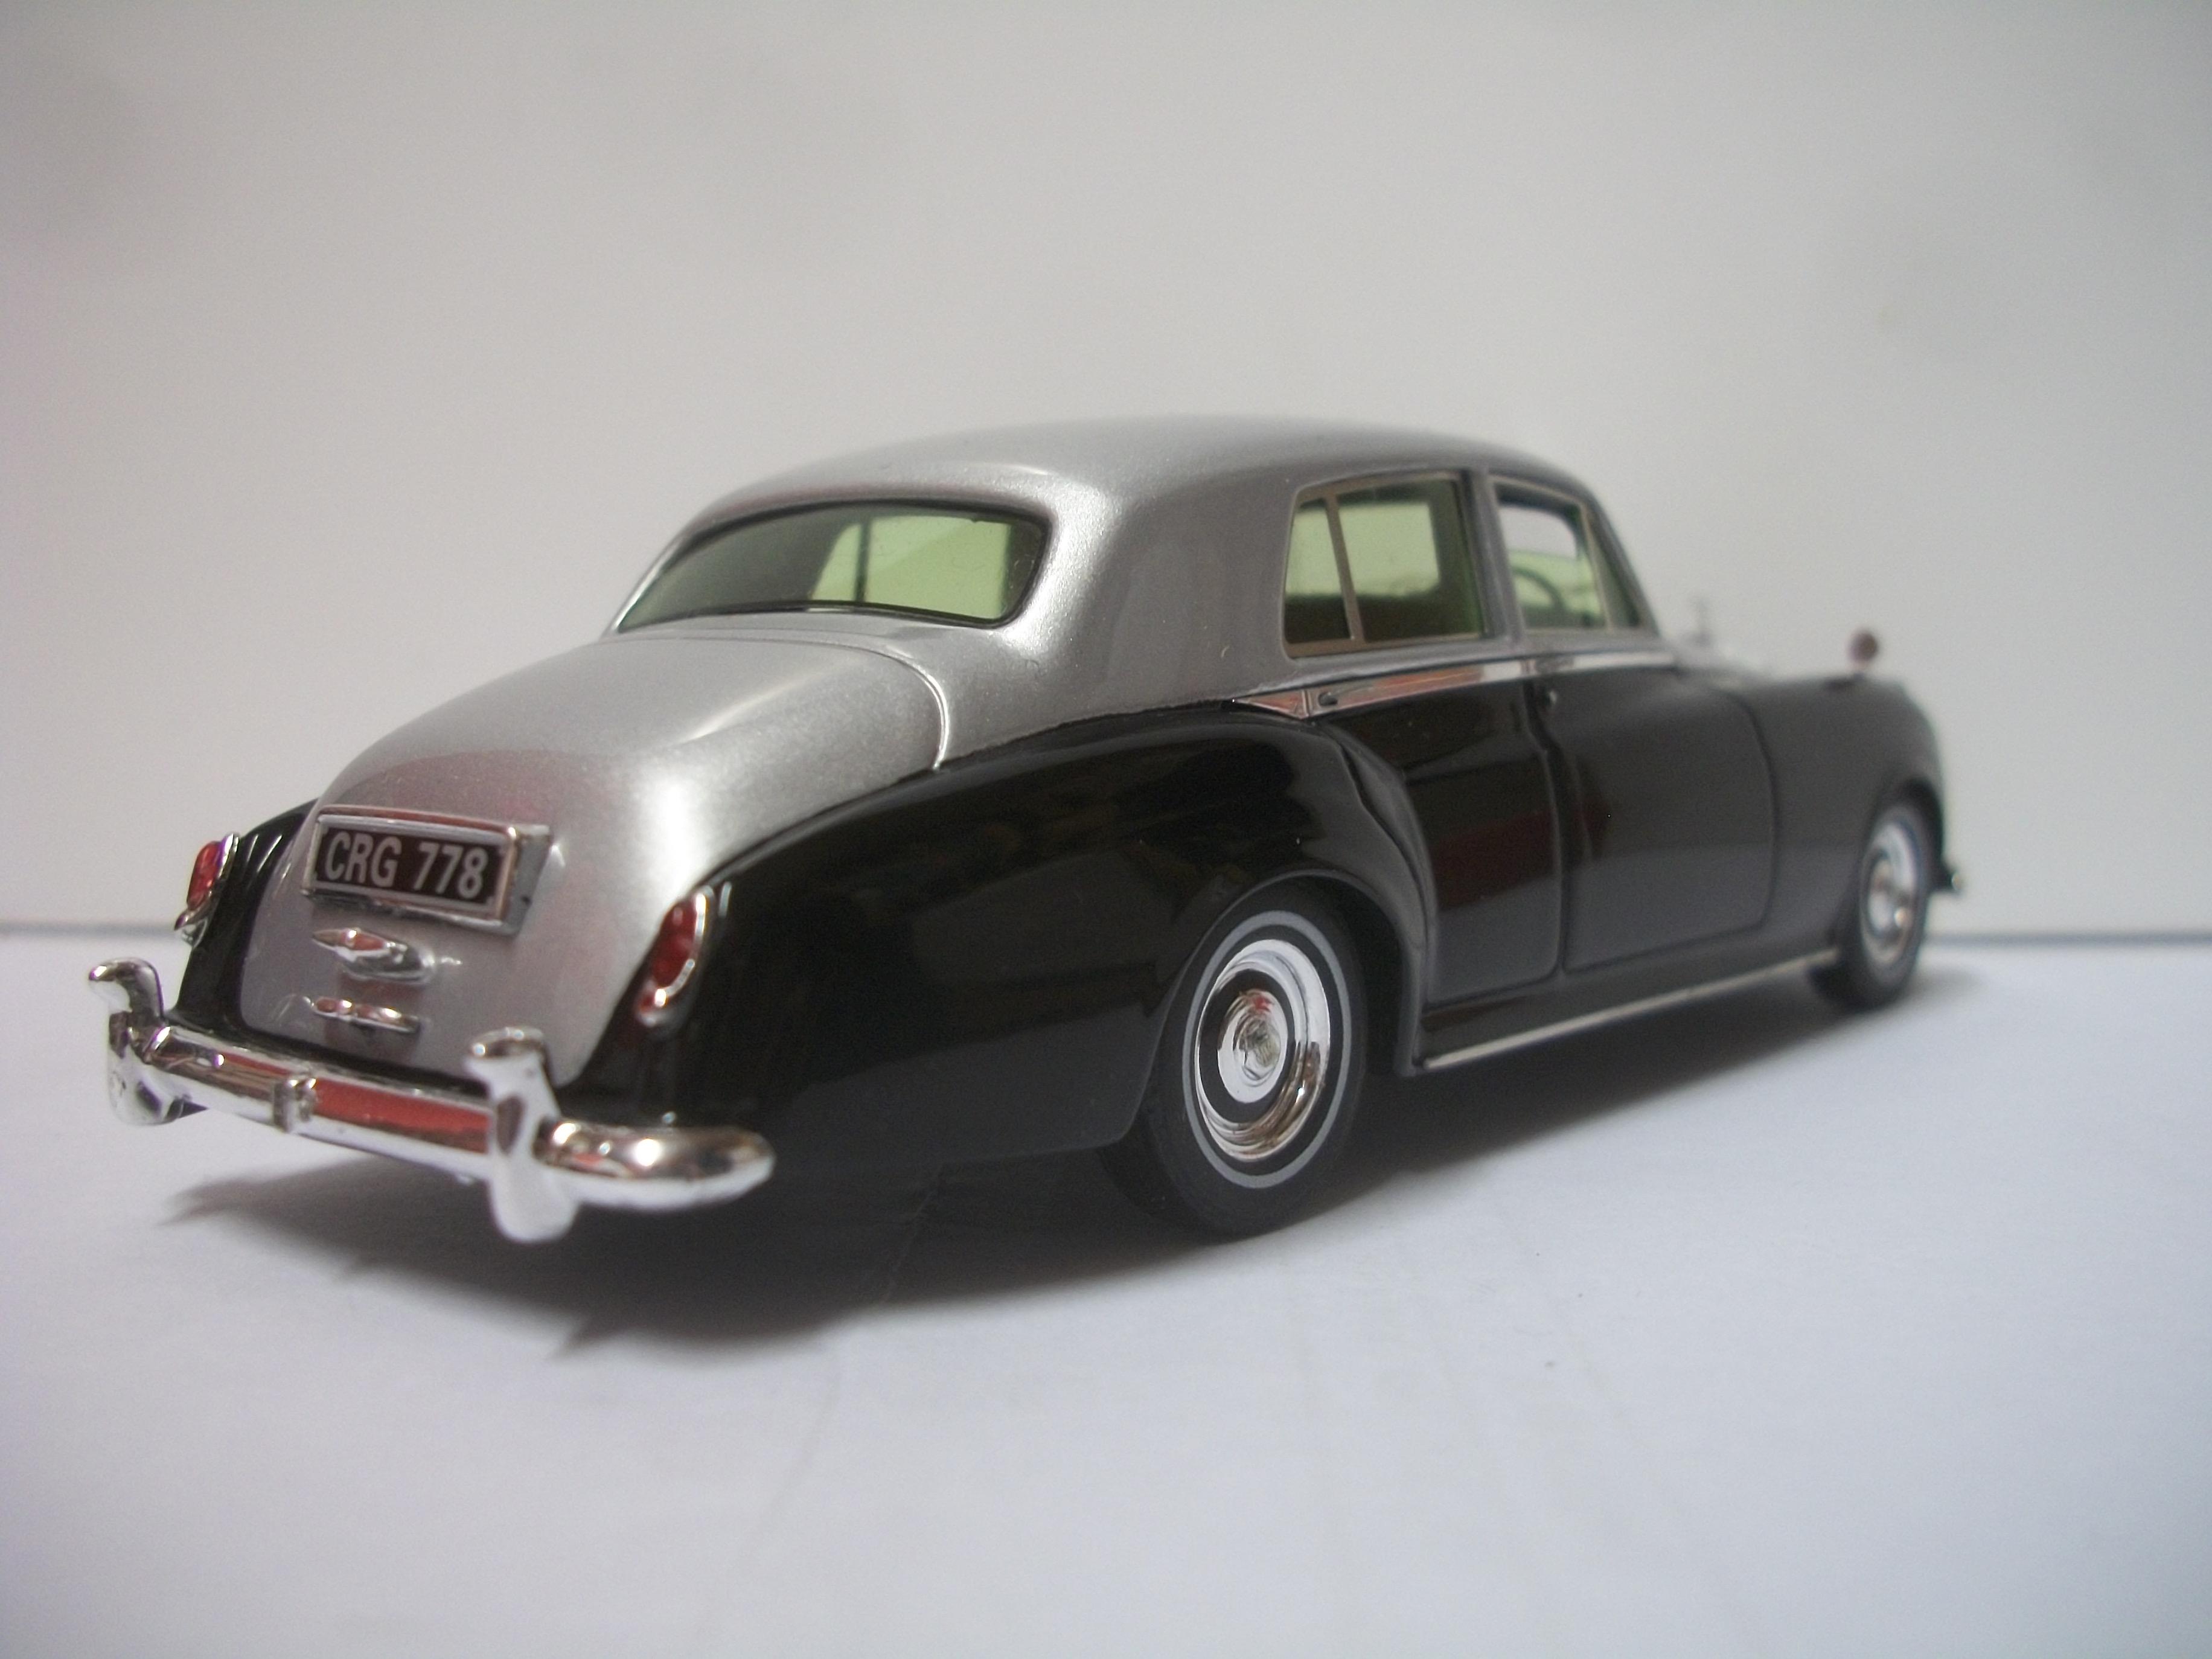
Rolling out of the Hooper & Co factory we have this 1949 Rolls-Royce Silver Dawn in silver, which has been undergoing some routine servicing by the factory engineers. This is the 1:43 scale version of the car, by TrueScale Miniatures, and as can be seen from one of the following photos, the Oxford Diecast version of the same car is a full 5 mm shorter in overall length. David
-
Excellent build of yours, Richard...... and as you say, we don't see many of these '53 Mercury cars in kit form. Your interior and exterior work is exceptional, and the paint colour suits the car and the period. Well done with the BMF and Molotow chrome work. David
-
Maybe also, the Shadows, The Searchers, The Hollies....... they all sounded alright in their day, but now we look back and view them somewhat differently. David
-
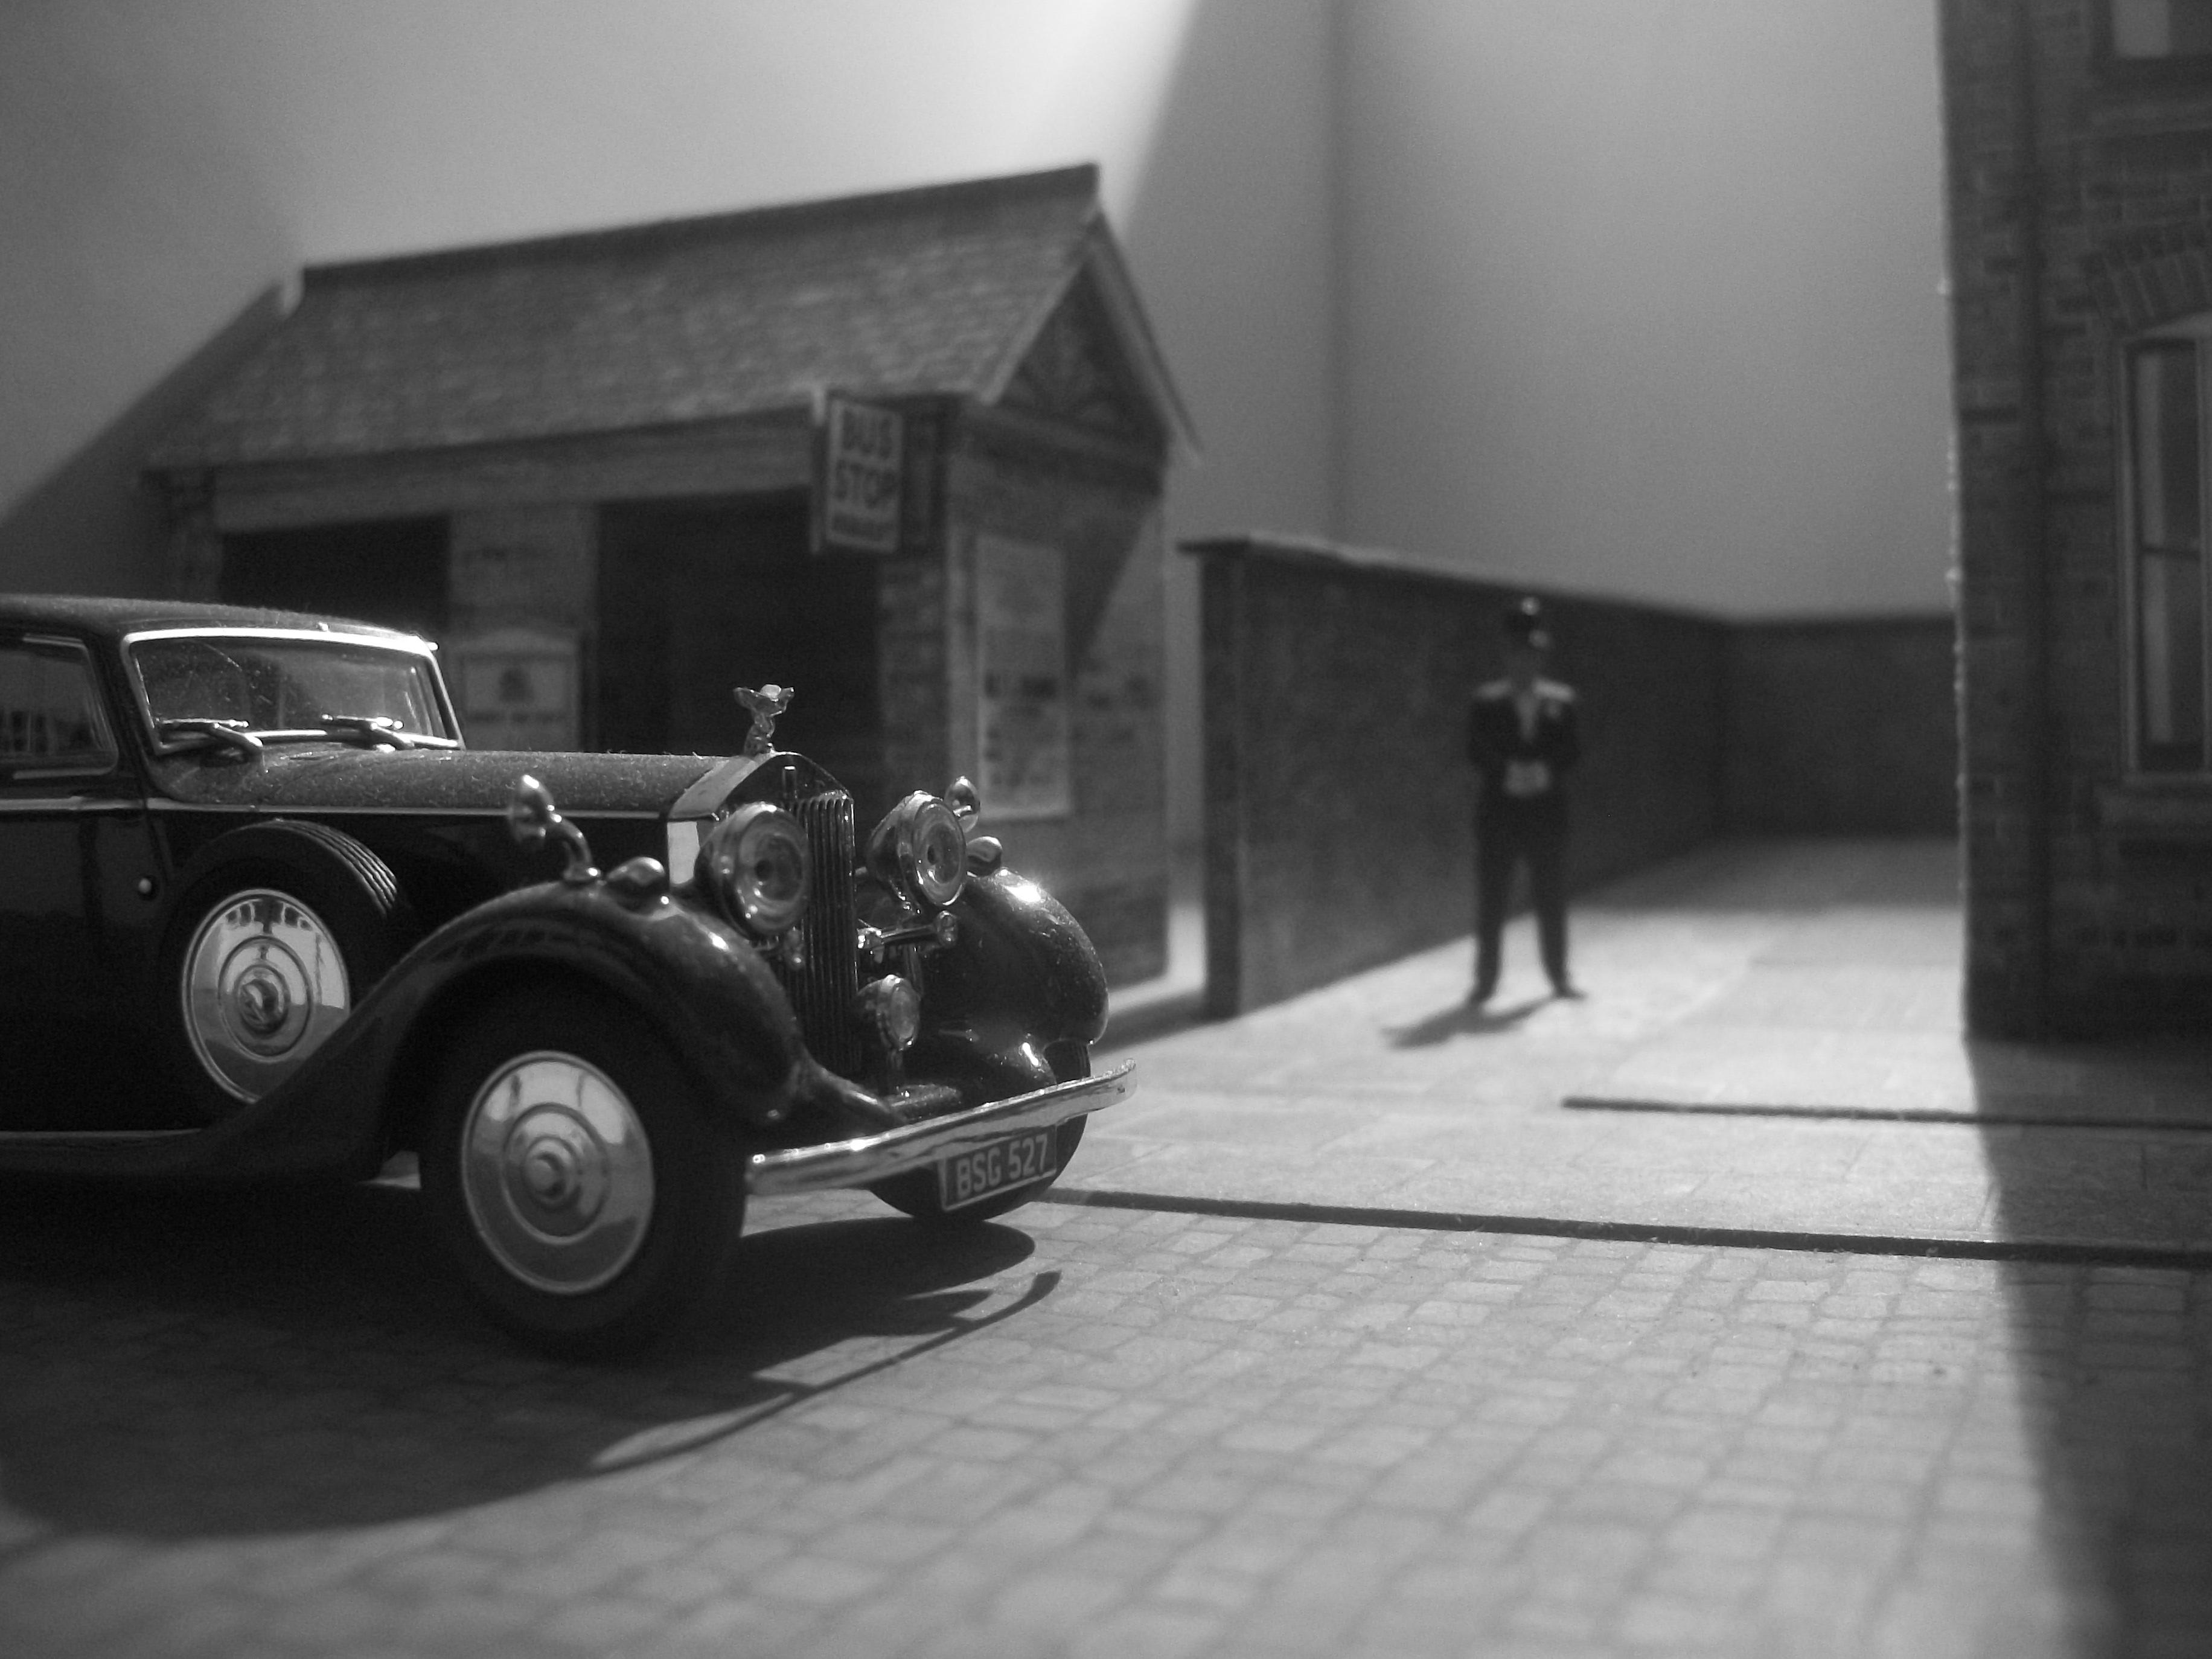
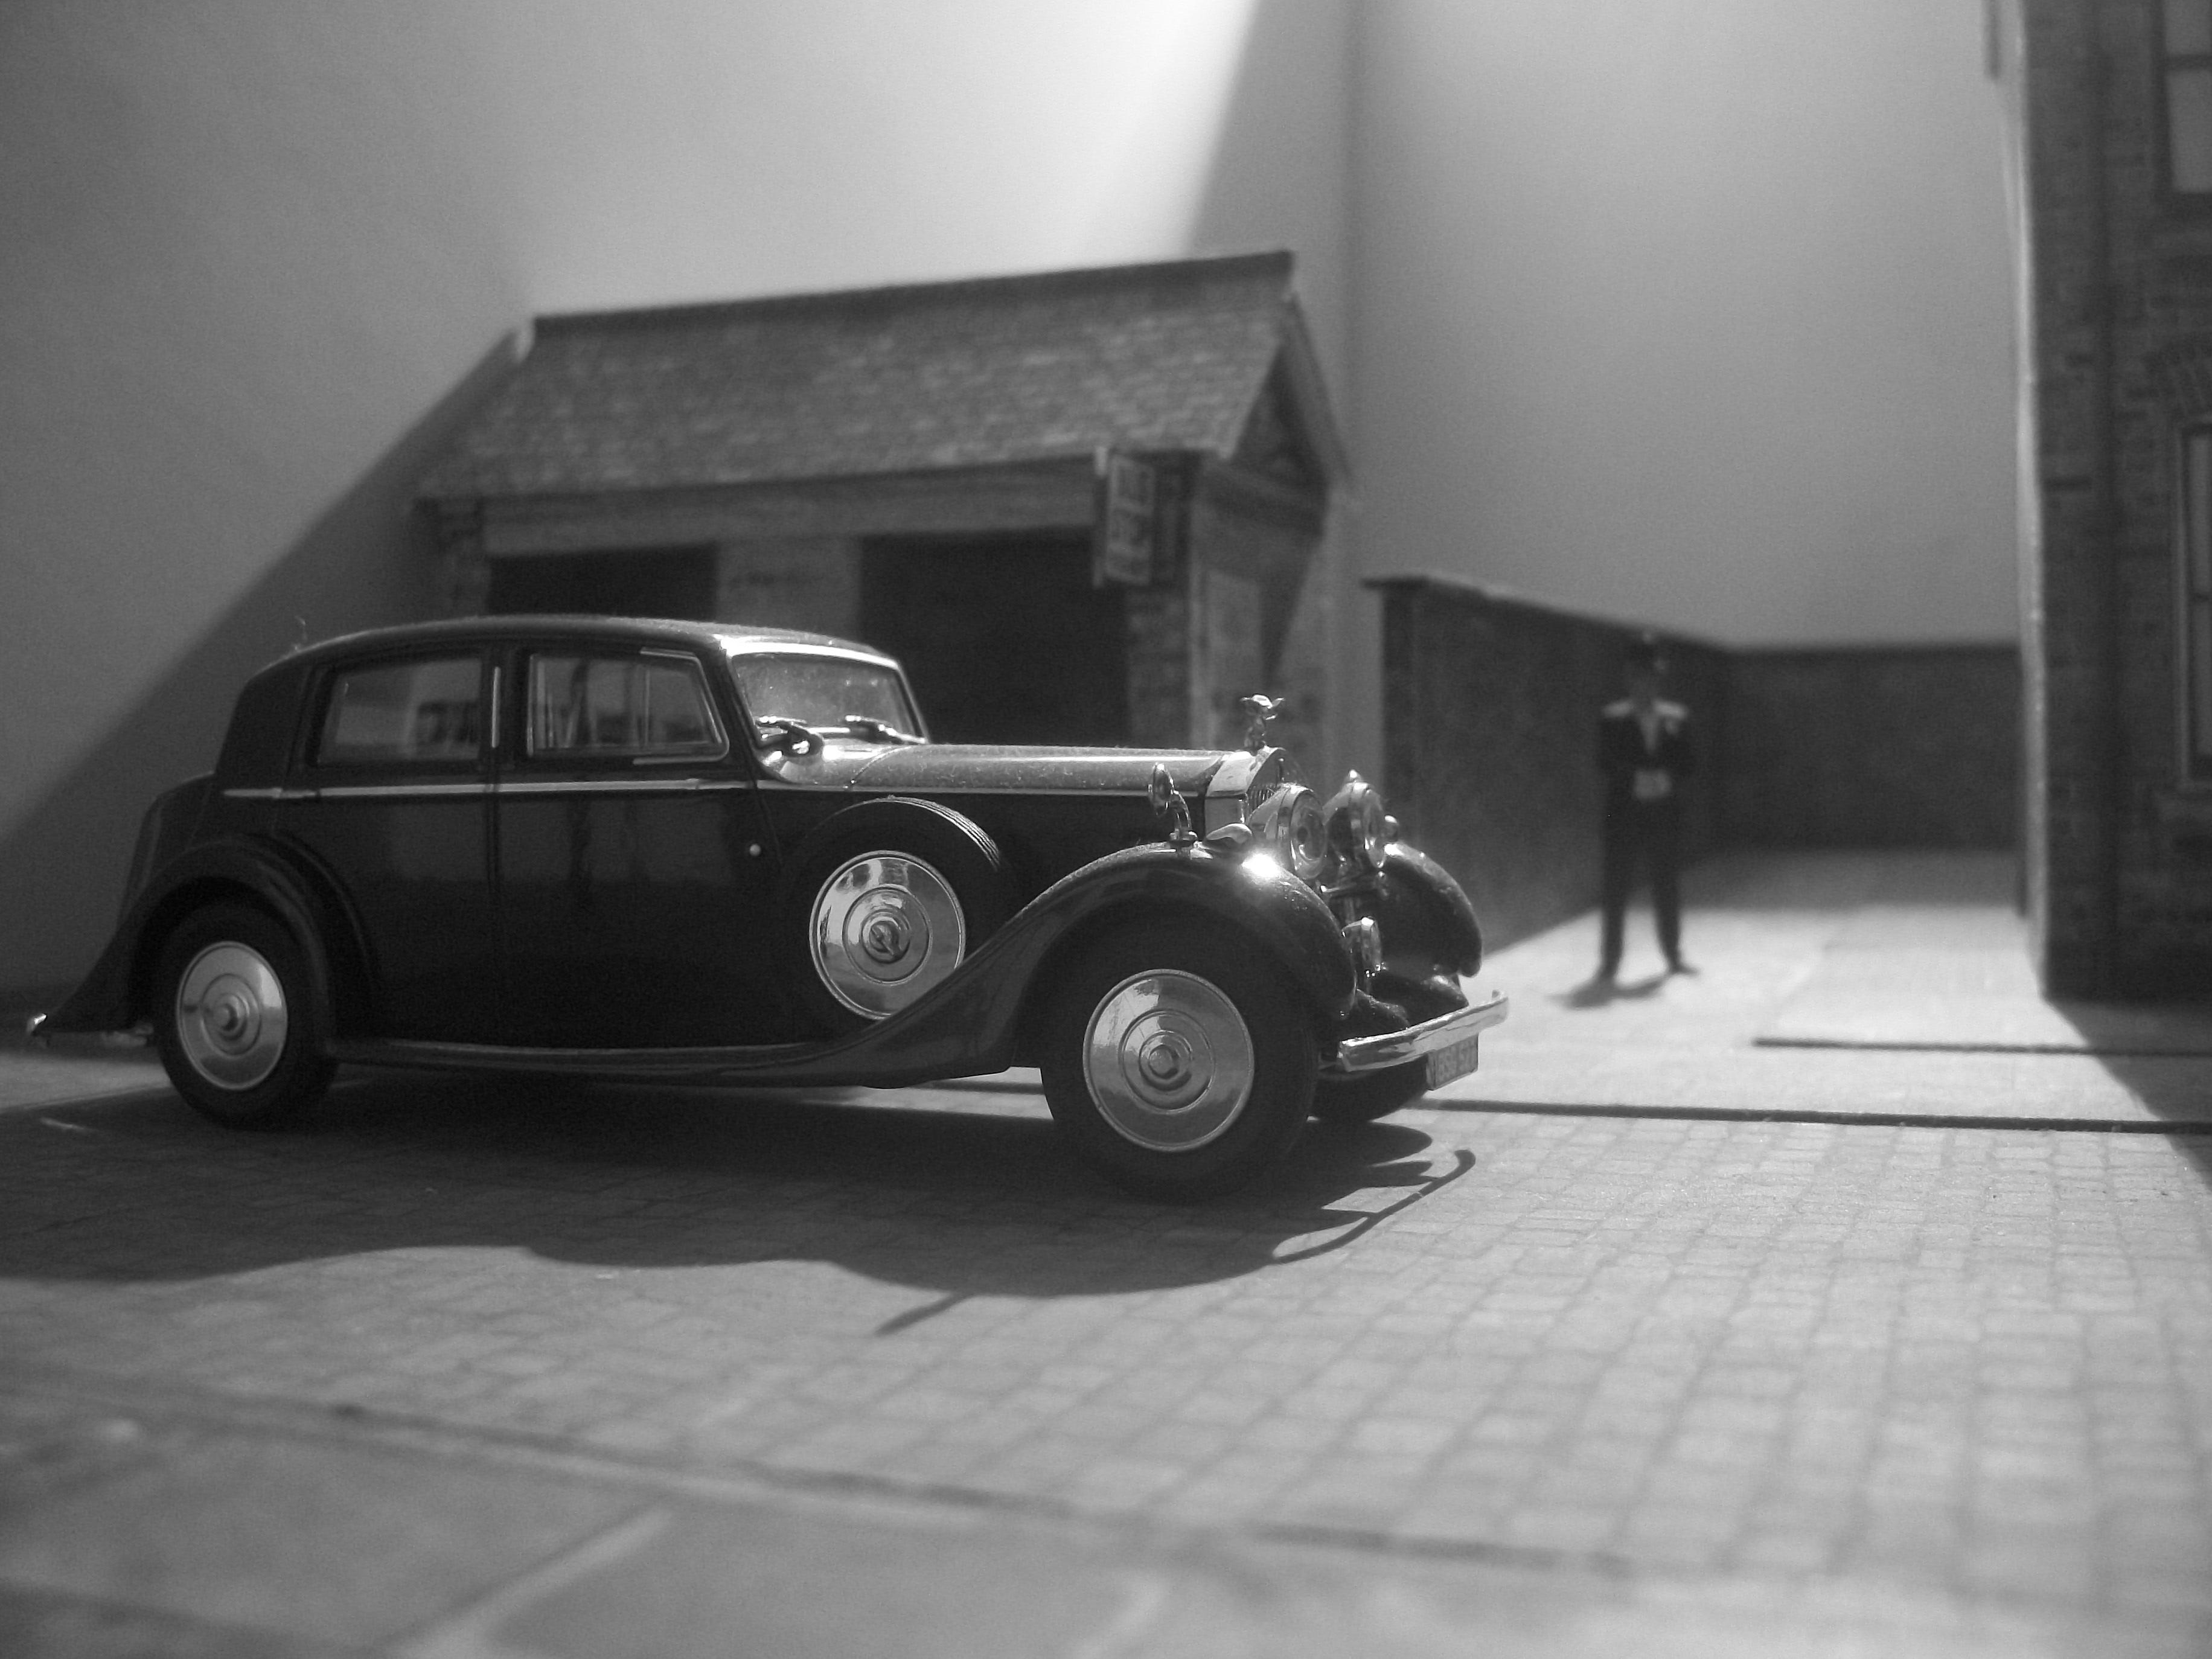
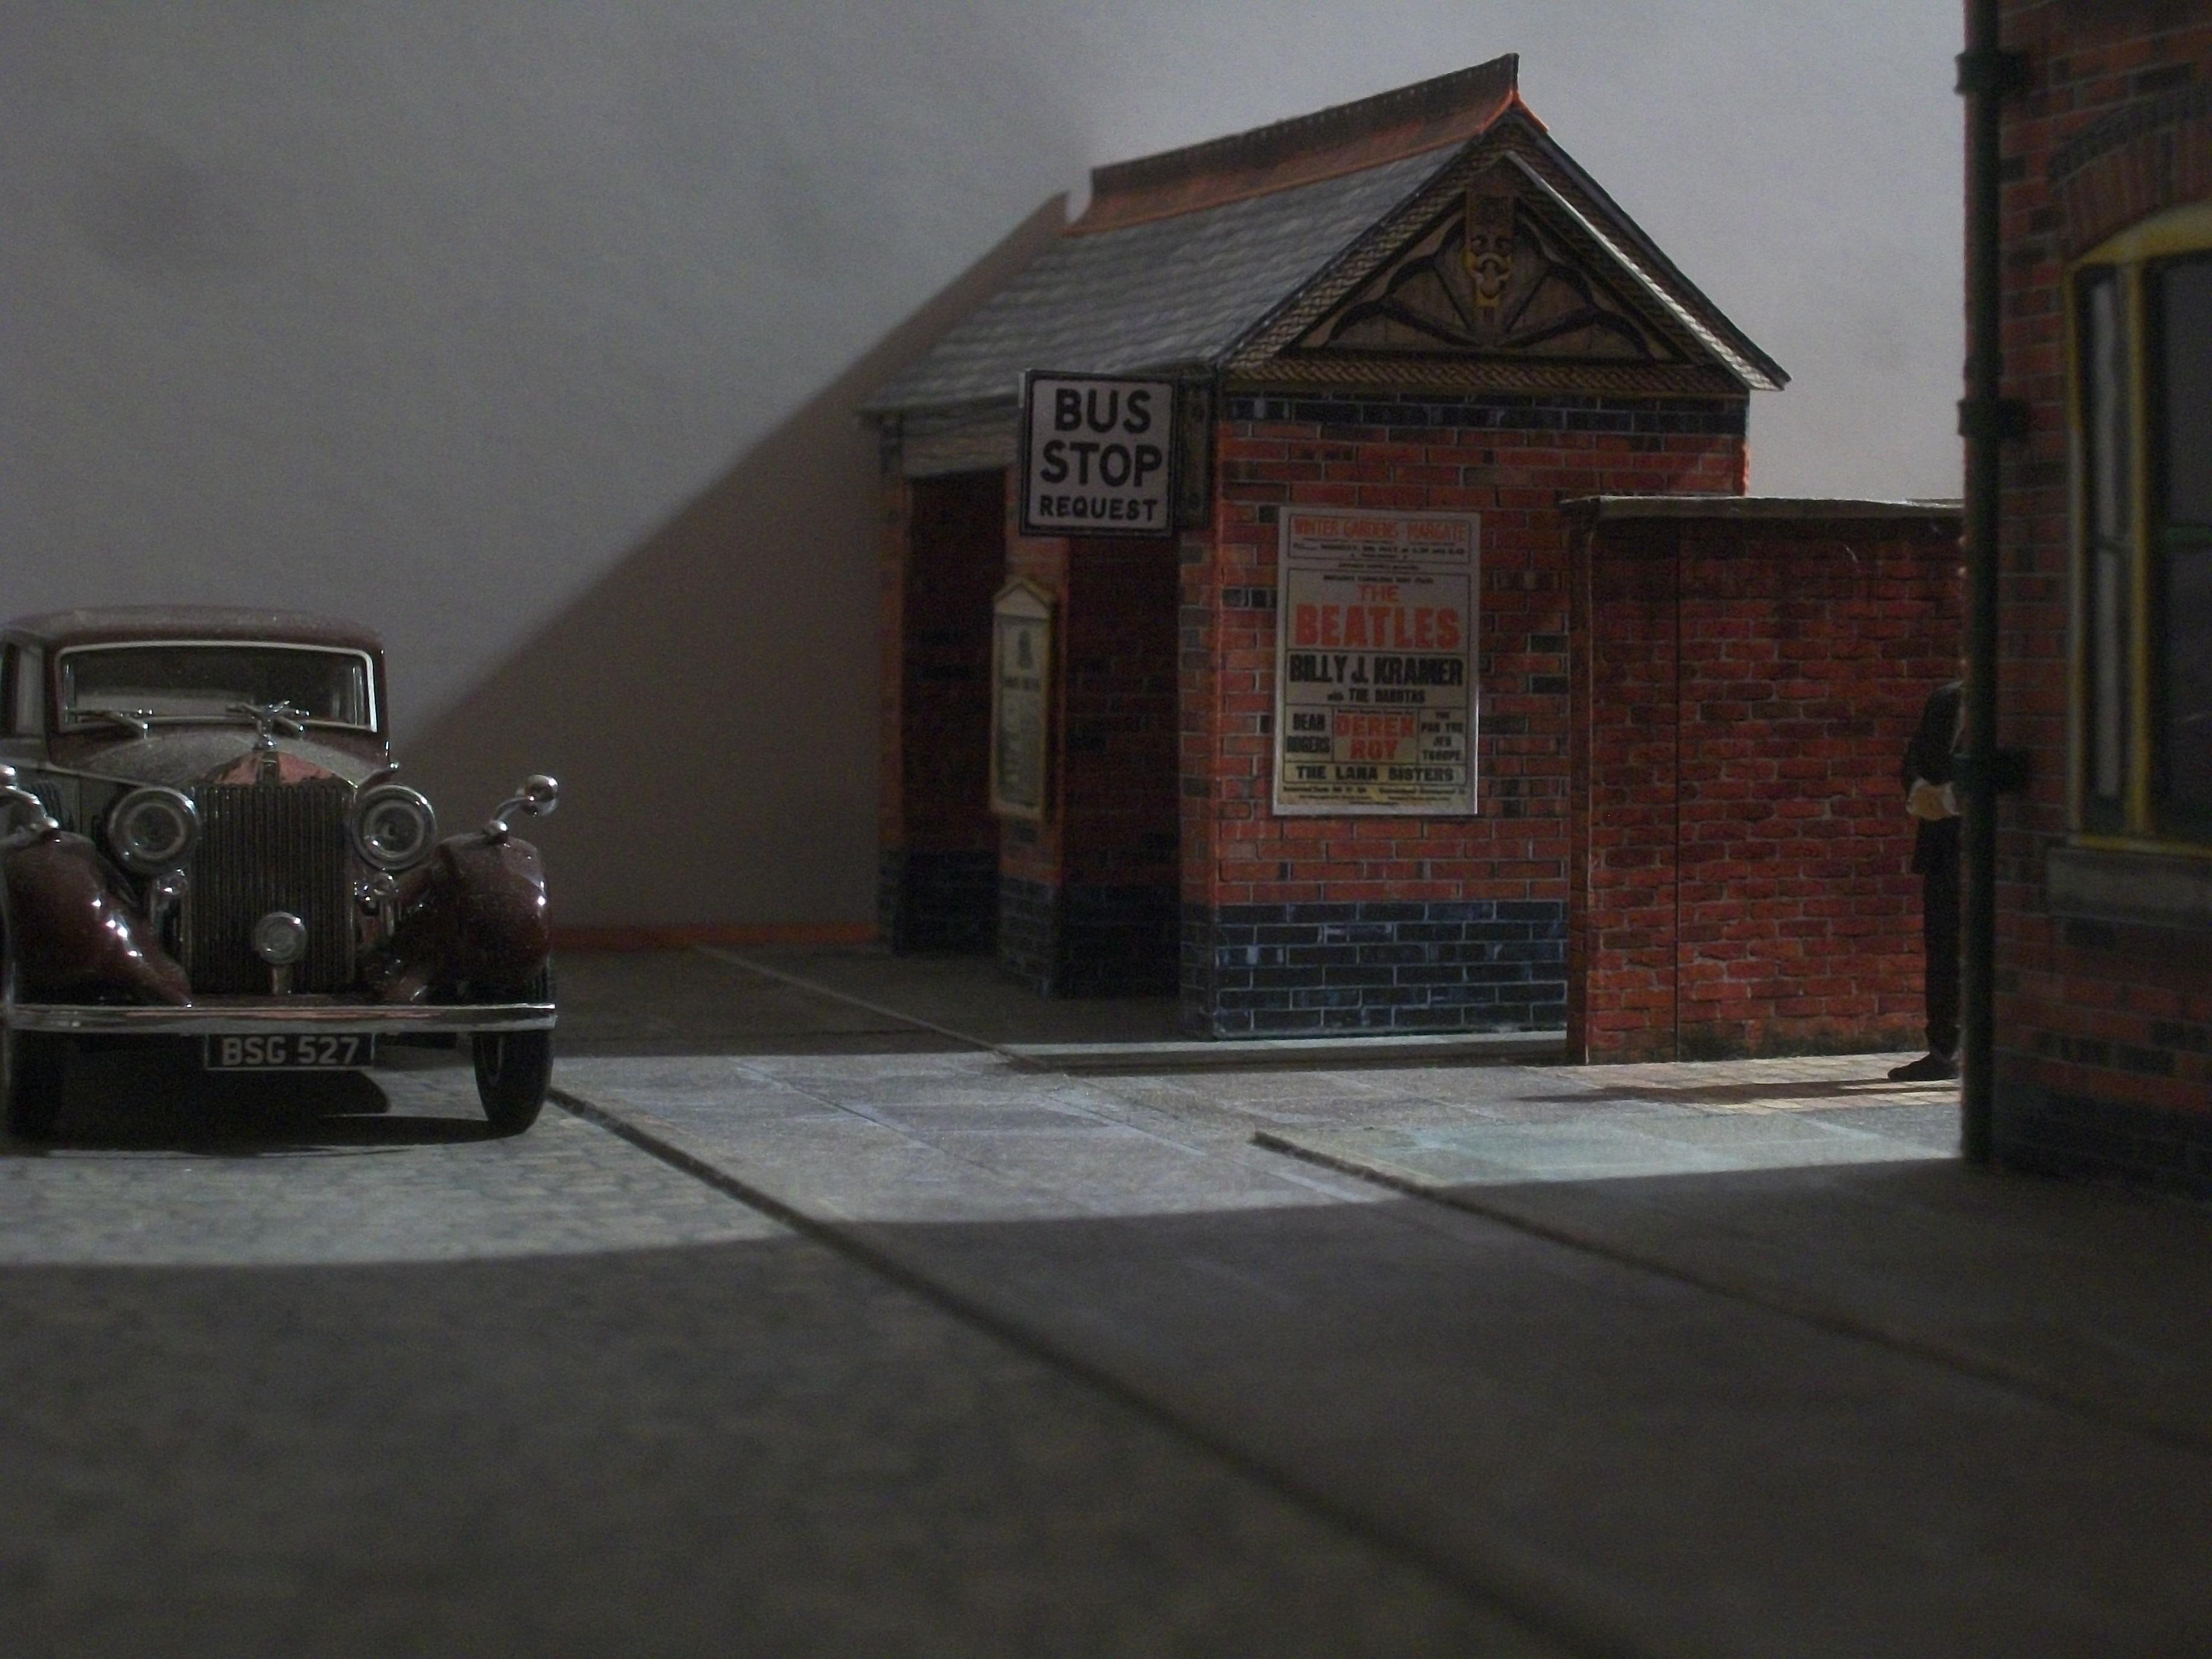
These few black & white photographs show the 1:43 scale Rolls-Royce 25 / 30 Thrupp and Maberly, and this motor car is parked outside some Victorian terraced houses. The driver can be seen keeping a watchful eye on the motor car from an alley that runs around the properties. His boss is visiting a client who lives in one of these houses. Possibly, the driver should have given some thought to his choice of parking place, which appears to be obstructing the bus stop.......... David
-
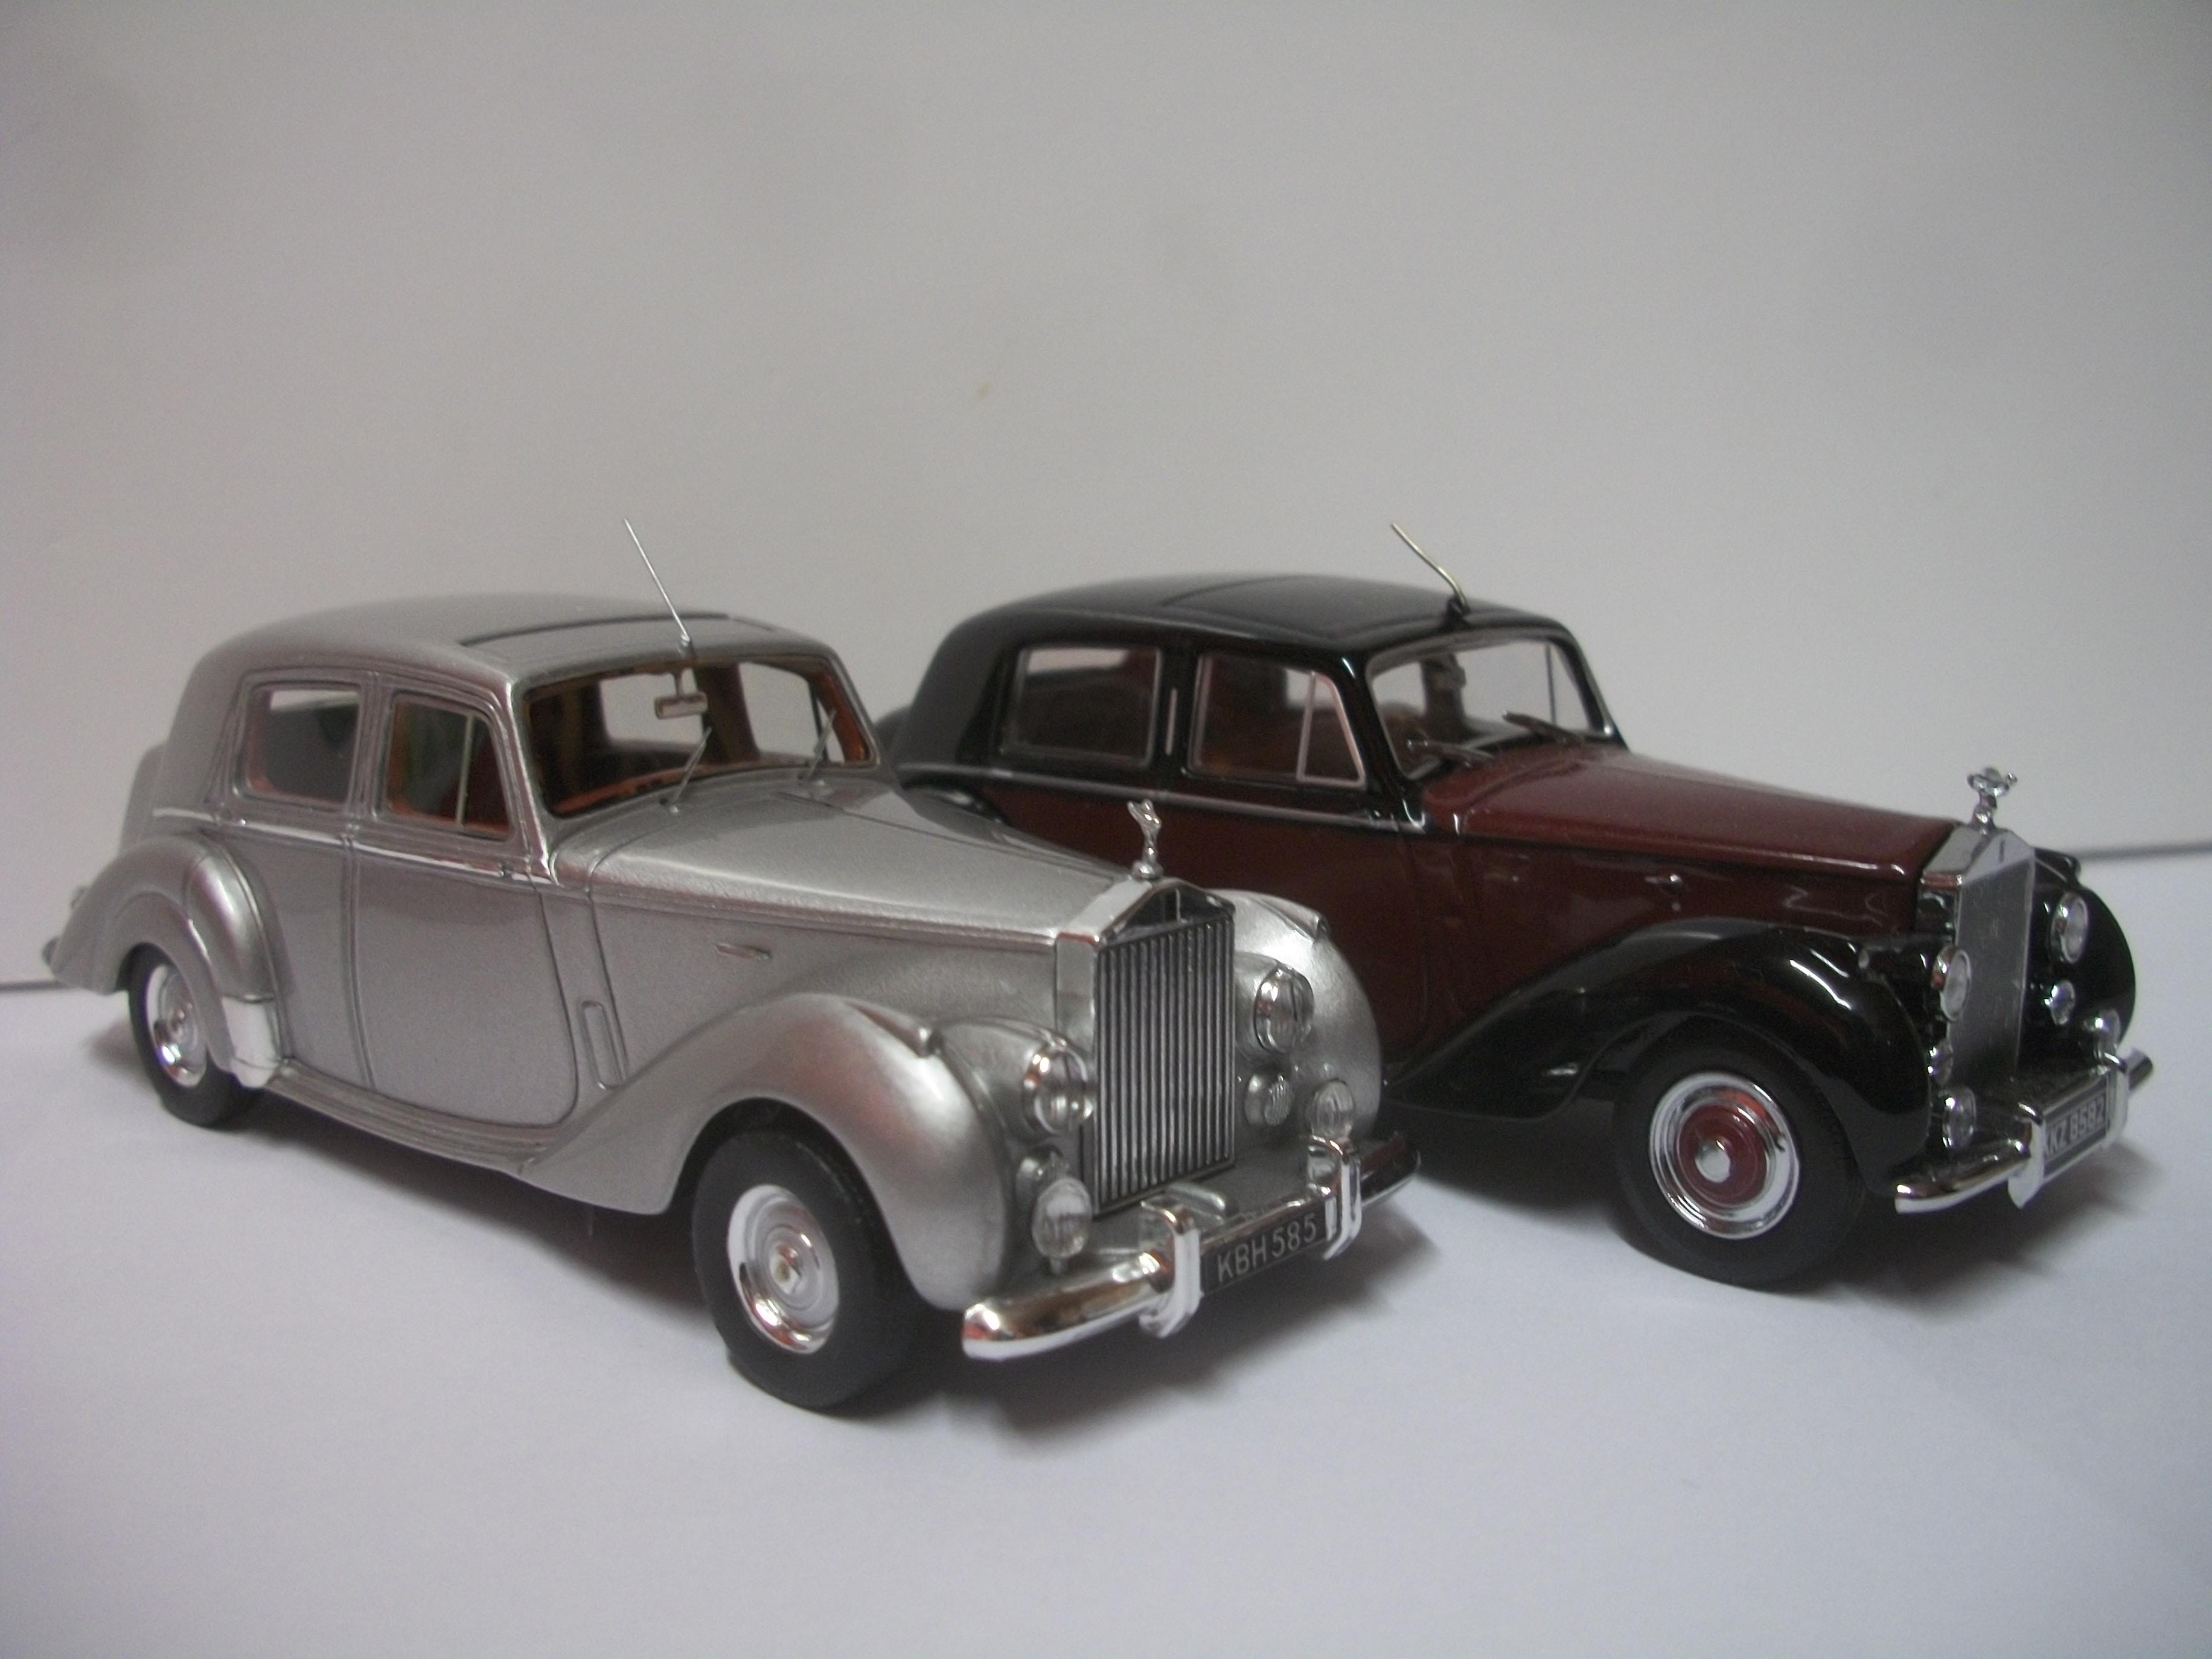
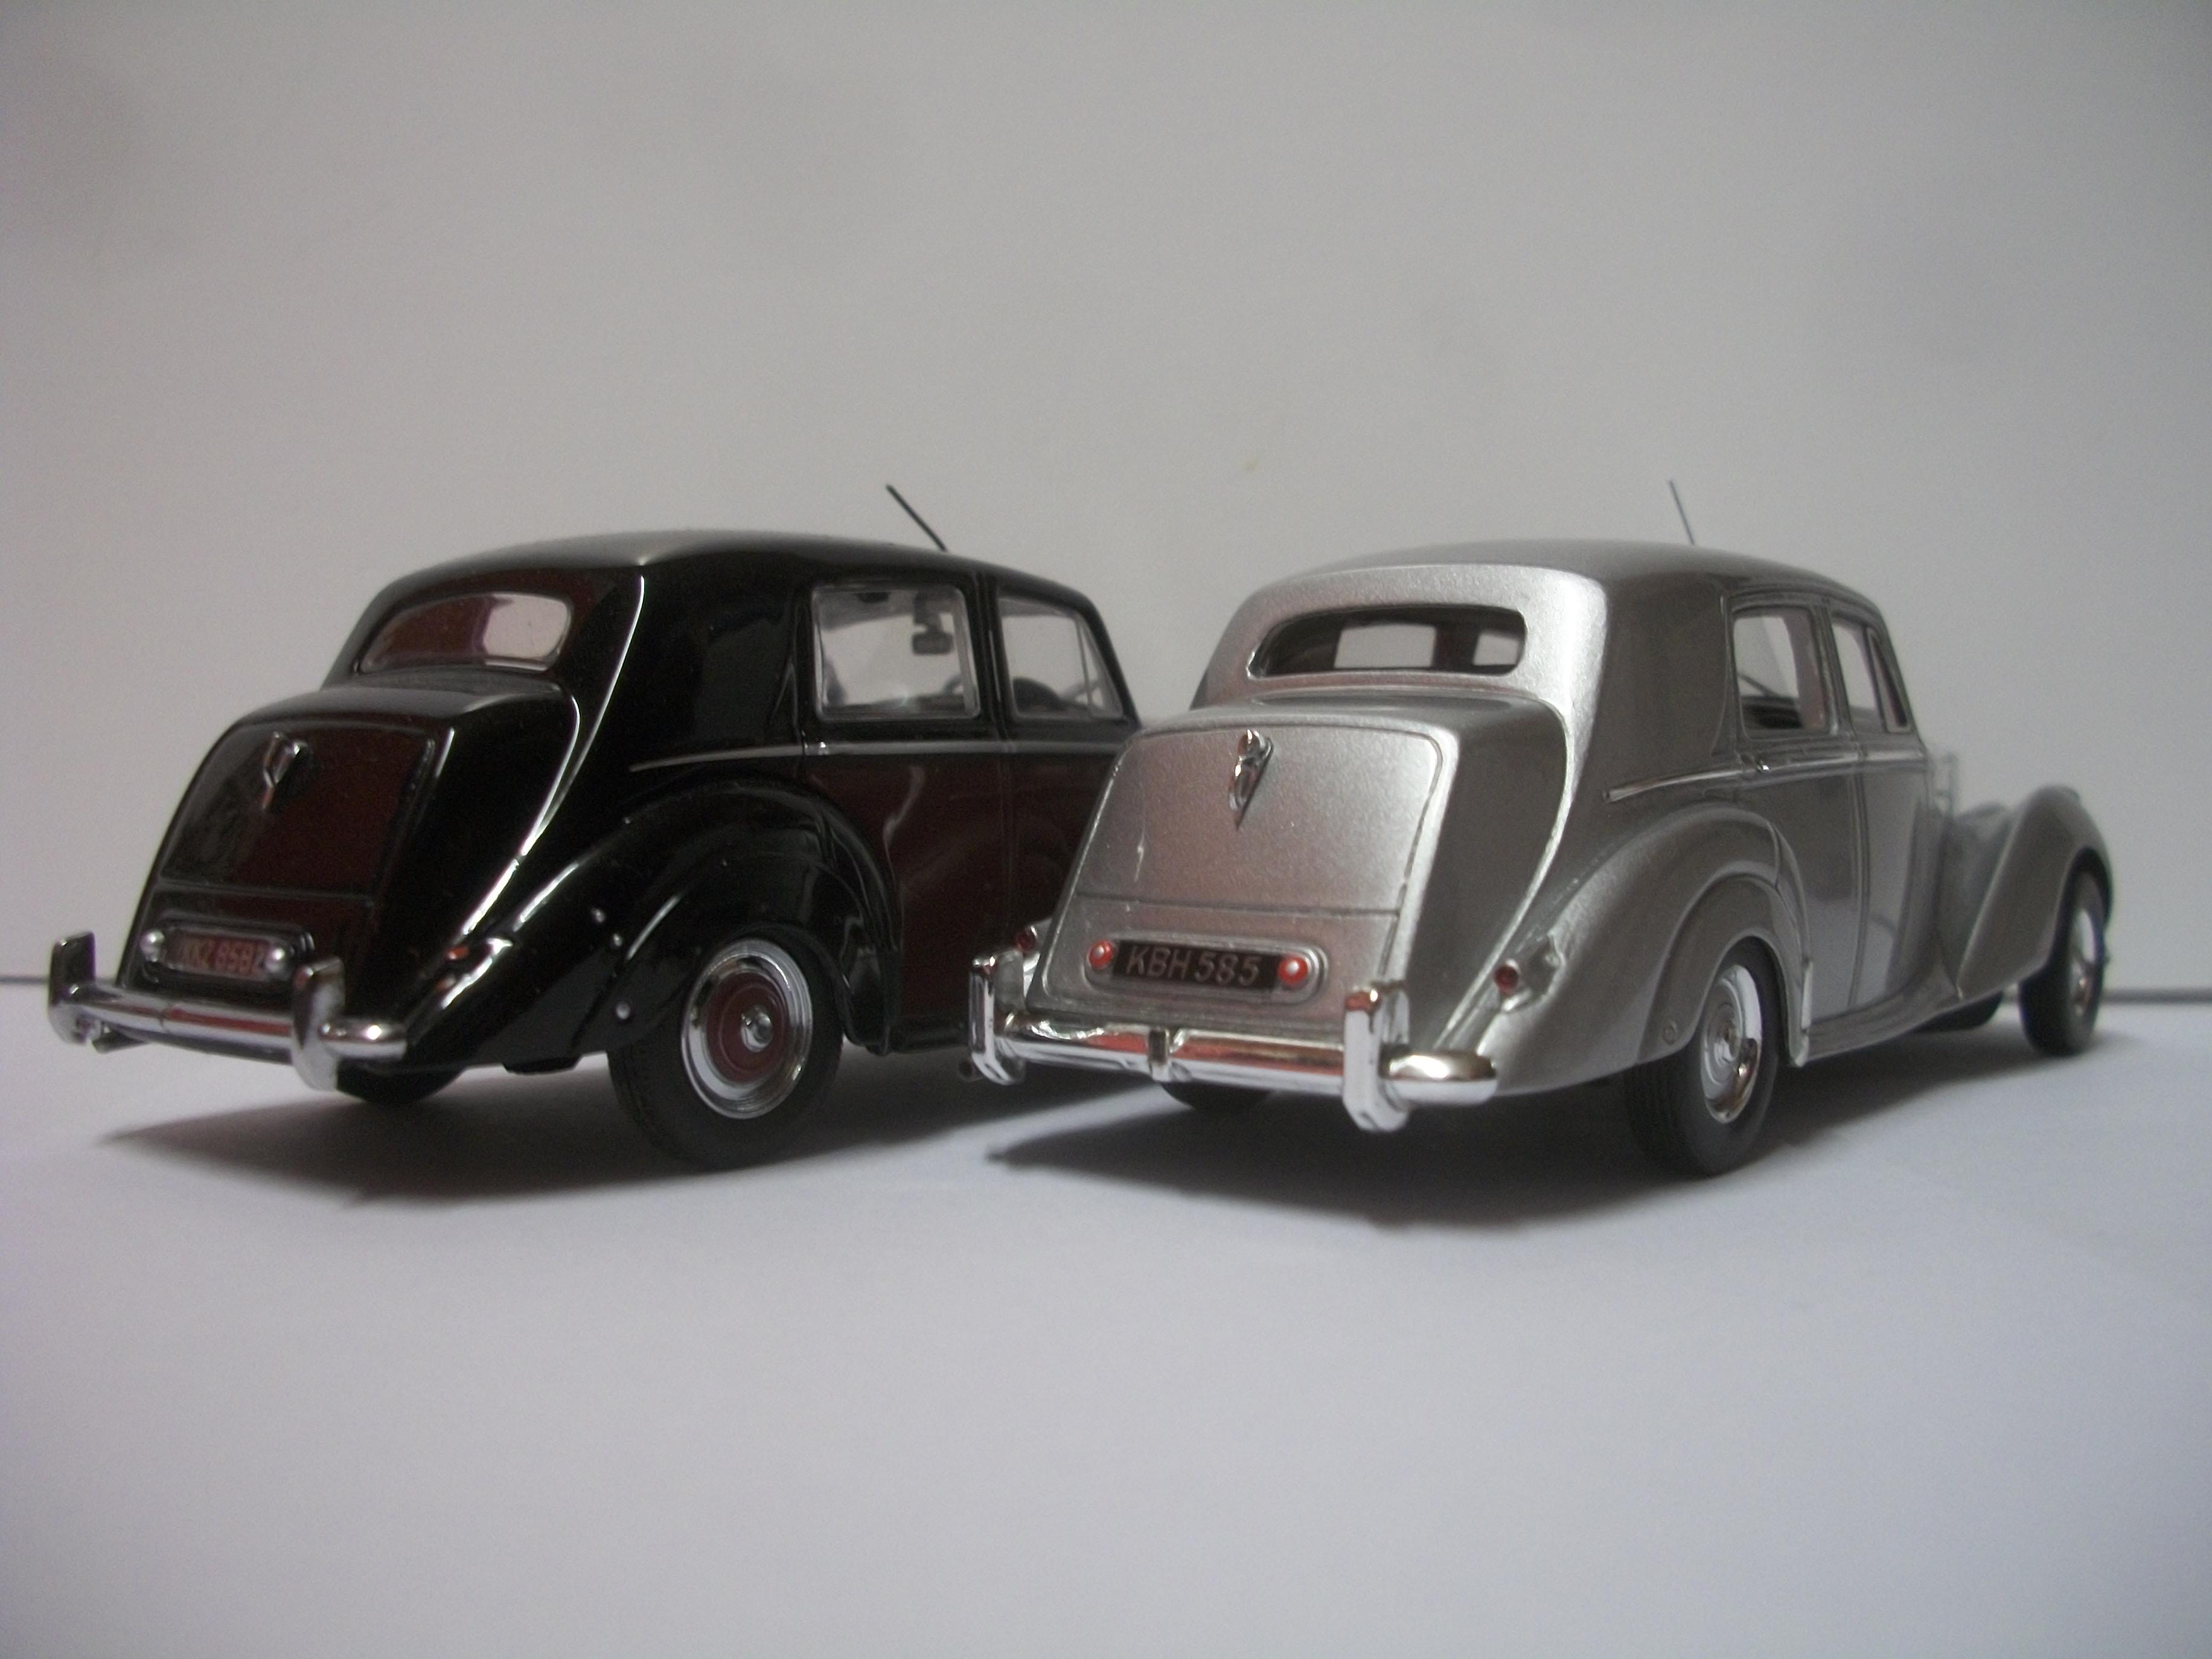
Thank you for your words of encouragement, Tom....... and here is a photo of one of the opening top windows of the factory frontage, along with a photo of the size difference between the driver's side window of the TrueScale Rolls-Royce Silver Cloud, and the Oxford Diecast version of the model car..... the height of the side window is 8.5 mm on the TrueScale version, while it is only 8.0 mm on the Oxford Diecast, which makes a considerable difference to the overall body shape and roof line of the car. In my view, the TrueScale Silver Cloud looks much more realistic and accurate. David
-
Tim...... your 1950 Chevrolet Bel Air is a particularly fine example of Franklin Mint scale model diecast cars. Liking the paint colour, and also the interior detail and trunk interior detail is very well done. David
-
I always like to see a good Pontiac build, Craig...... and this one of yours is truly magnificent. Everything about this model car is excellent, including the paint finish, the headlights, the dashboard, the wheels and of course your photography. All the time and effort that you have put into the dashboard, in particular was clearly well worth it..... you are a dashboard painting genius, Sir ! I built a 1968 Pontiac Parisienne 4-door, RHD, Canadian version from a resin body kit, which turned out quite well, and I used to own the 1:1 full size car when I was much younger. David
-
That is a good way to save decal paper, Mike...... David
-
Thanks very much, Paul....... I shall give it a go then...... if you can print in 1:64 scale, it should be okay in 1:43 scale. David
-
I have no problem with printing out registration number plates / license plates for 1:24 scale model cars, but how do MCM members create / produce these plates for 1:43 scale model cars, please? Not sure if my printer can go that small. David
-
Thanks, Pat....... but I have just noticed, after I had taken these photos, the factory windows are all blacked out. Really, I should have at least some of the windows able to show light from an interior source. The top opening windows could look particularly interesting, and I should be able to cut a few out carefully. Here are a few photos of the TrueScale version of the Silver Cloud...... and the address on the box was Chino, California USA. David
-
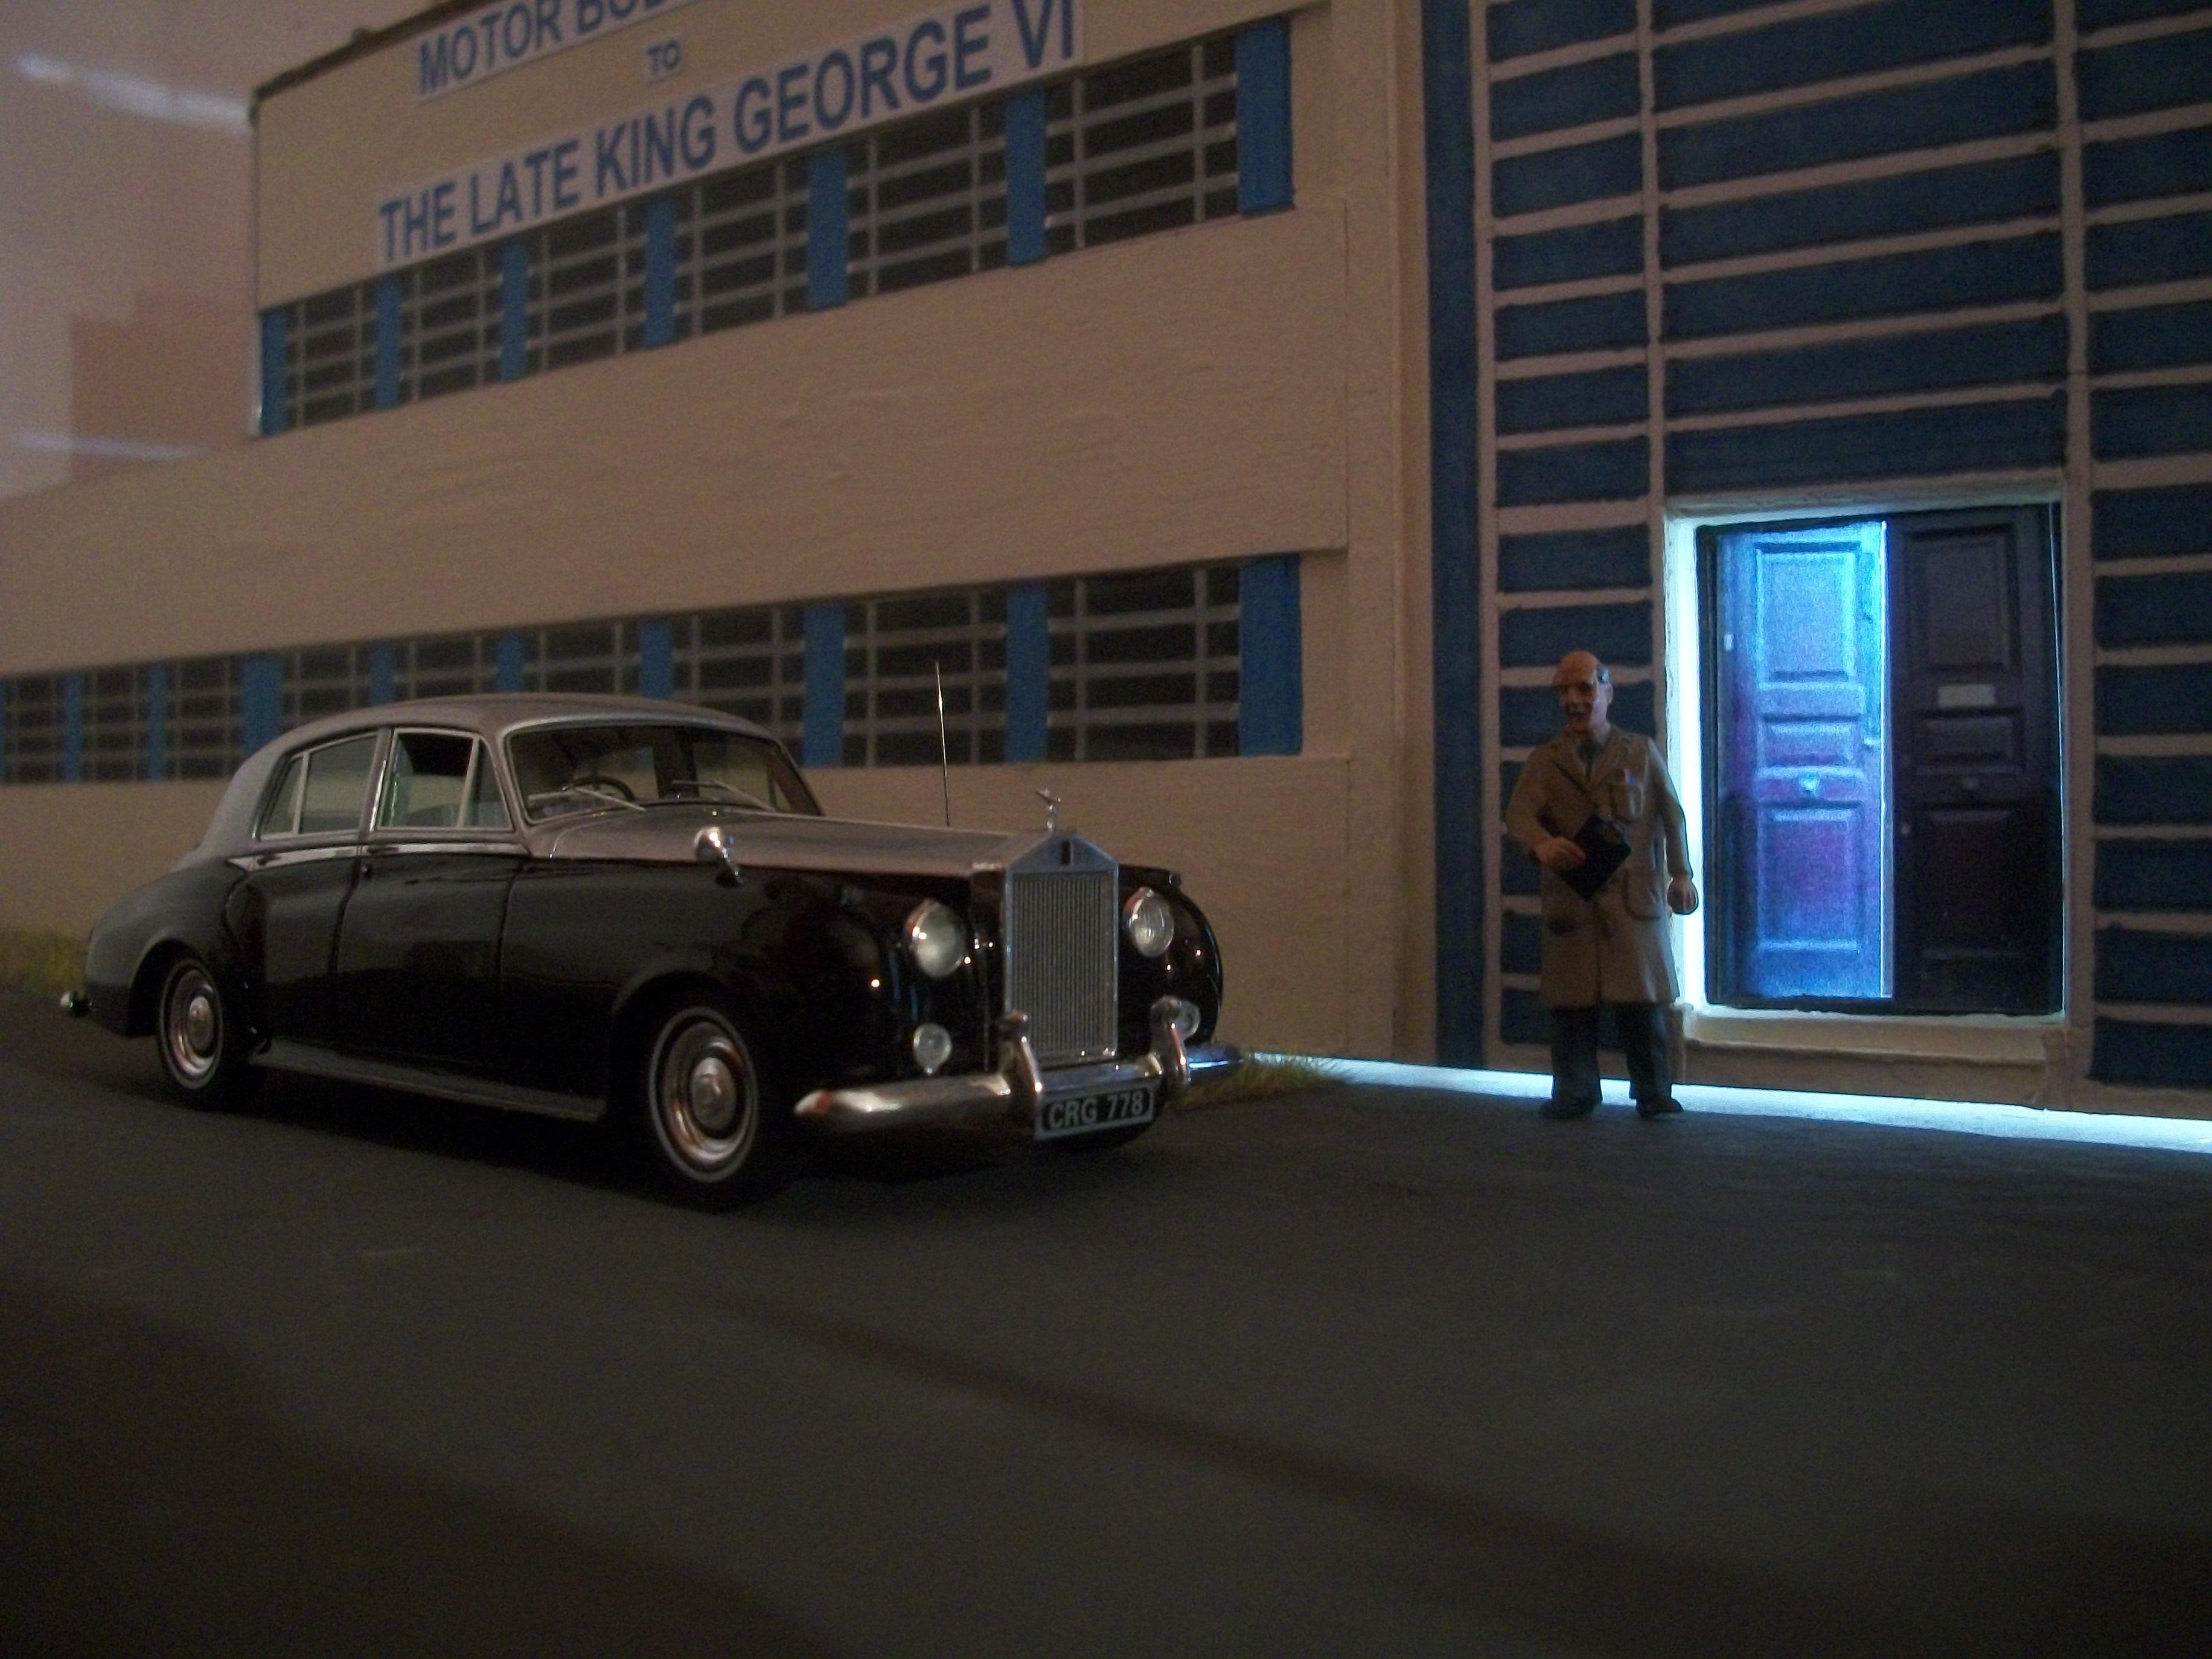
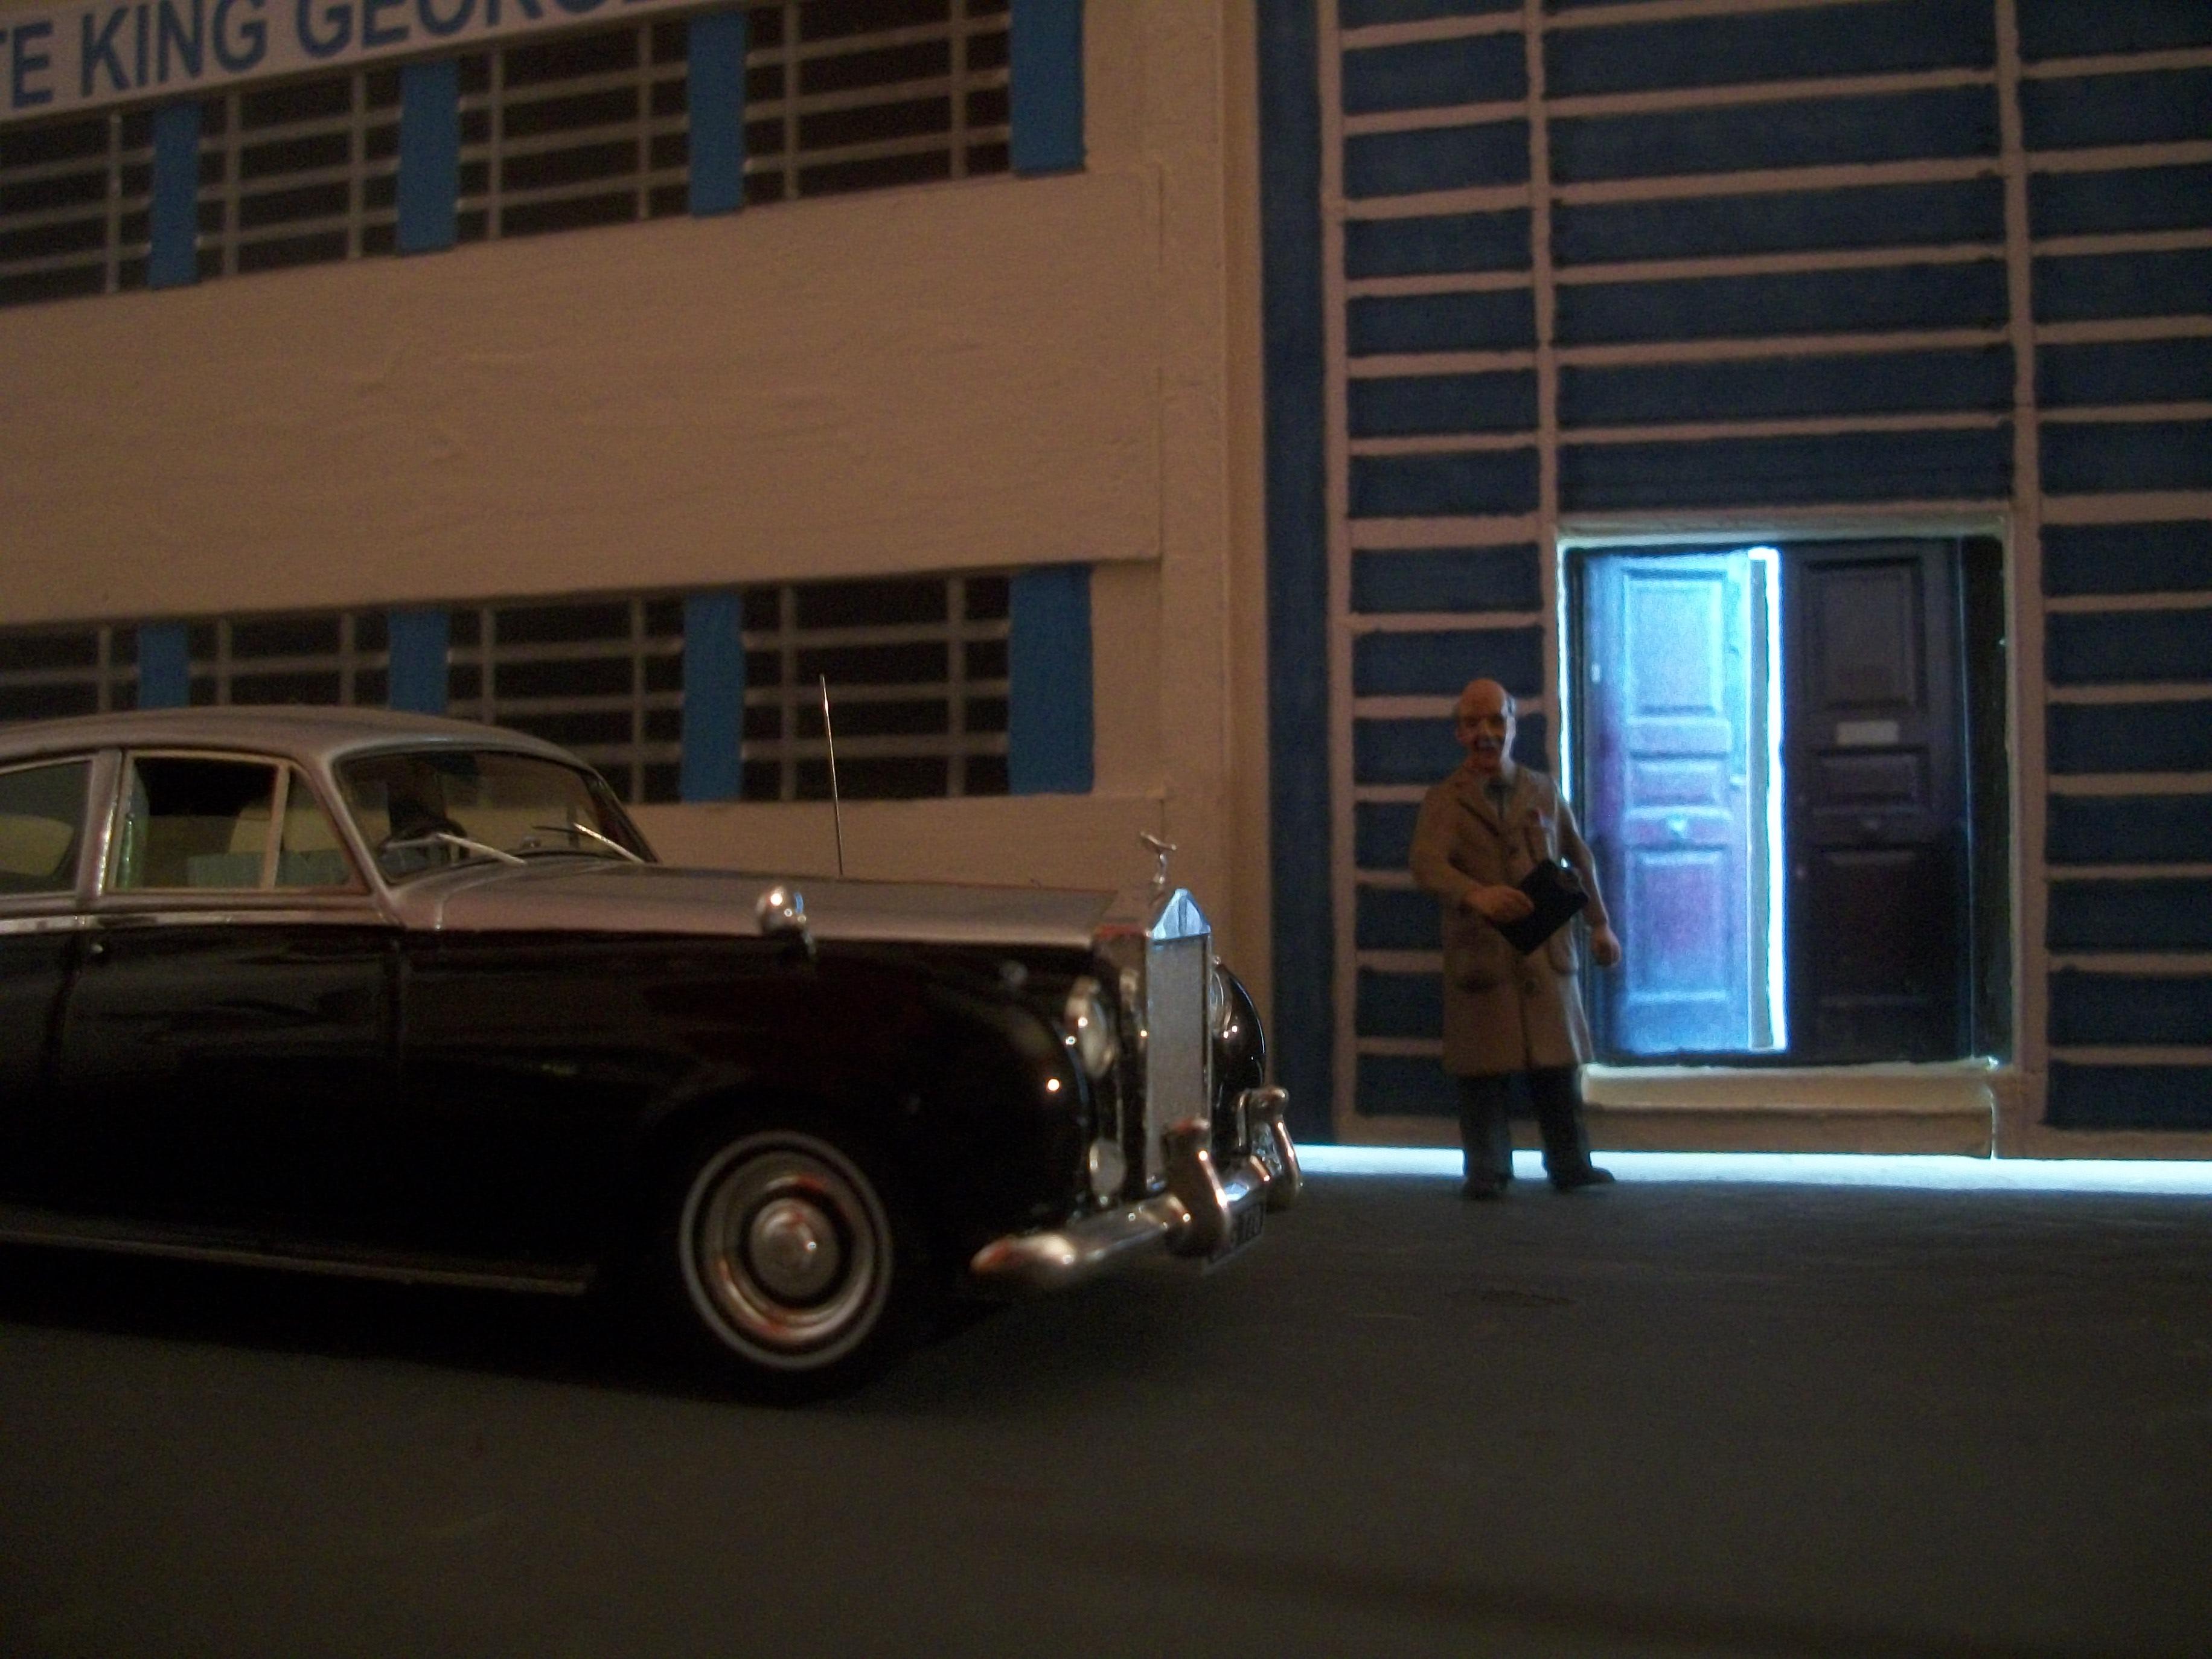
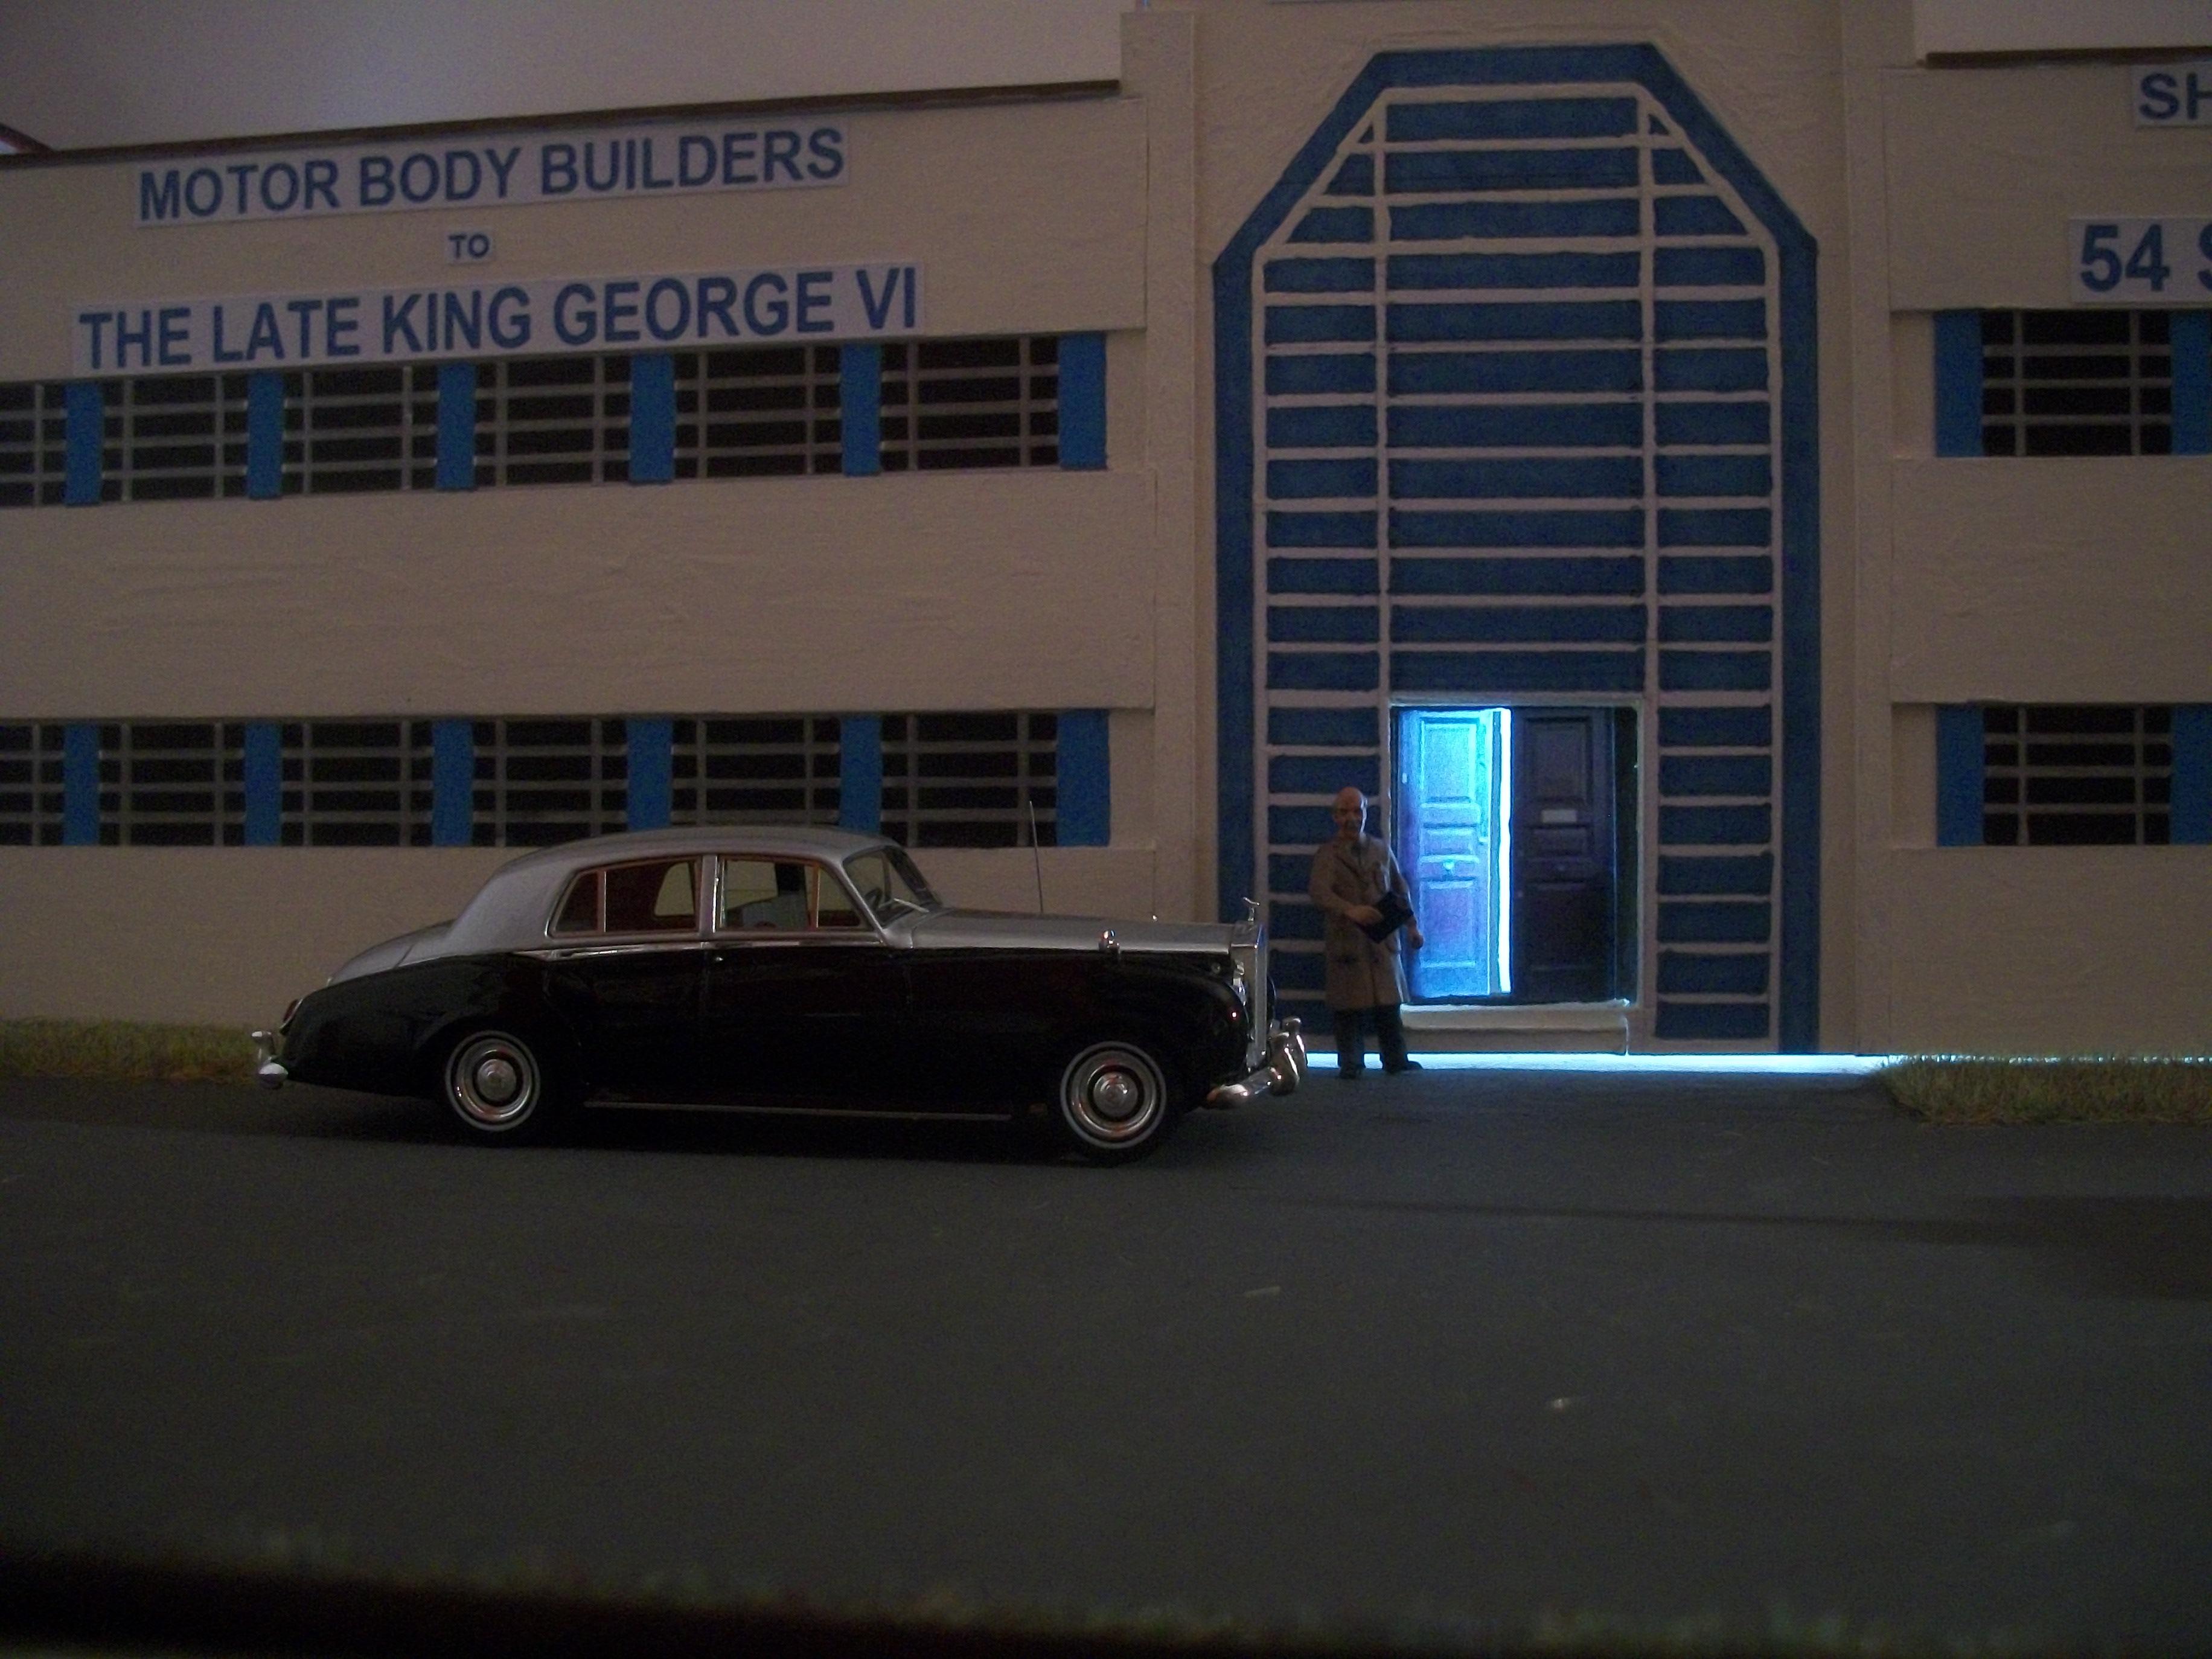
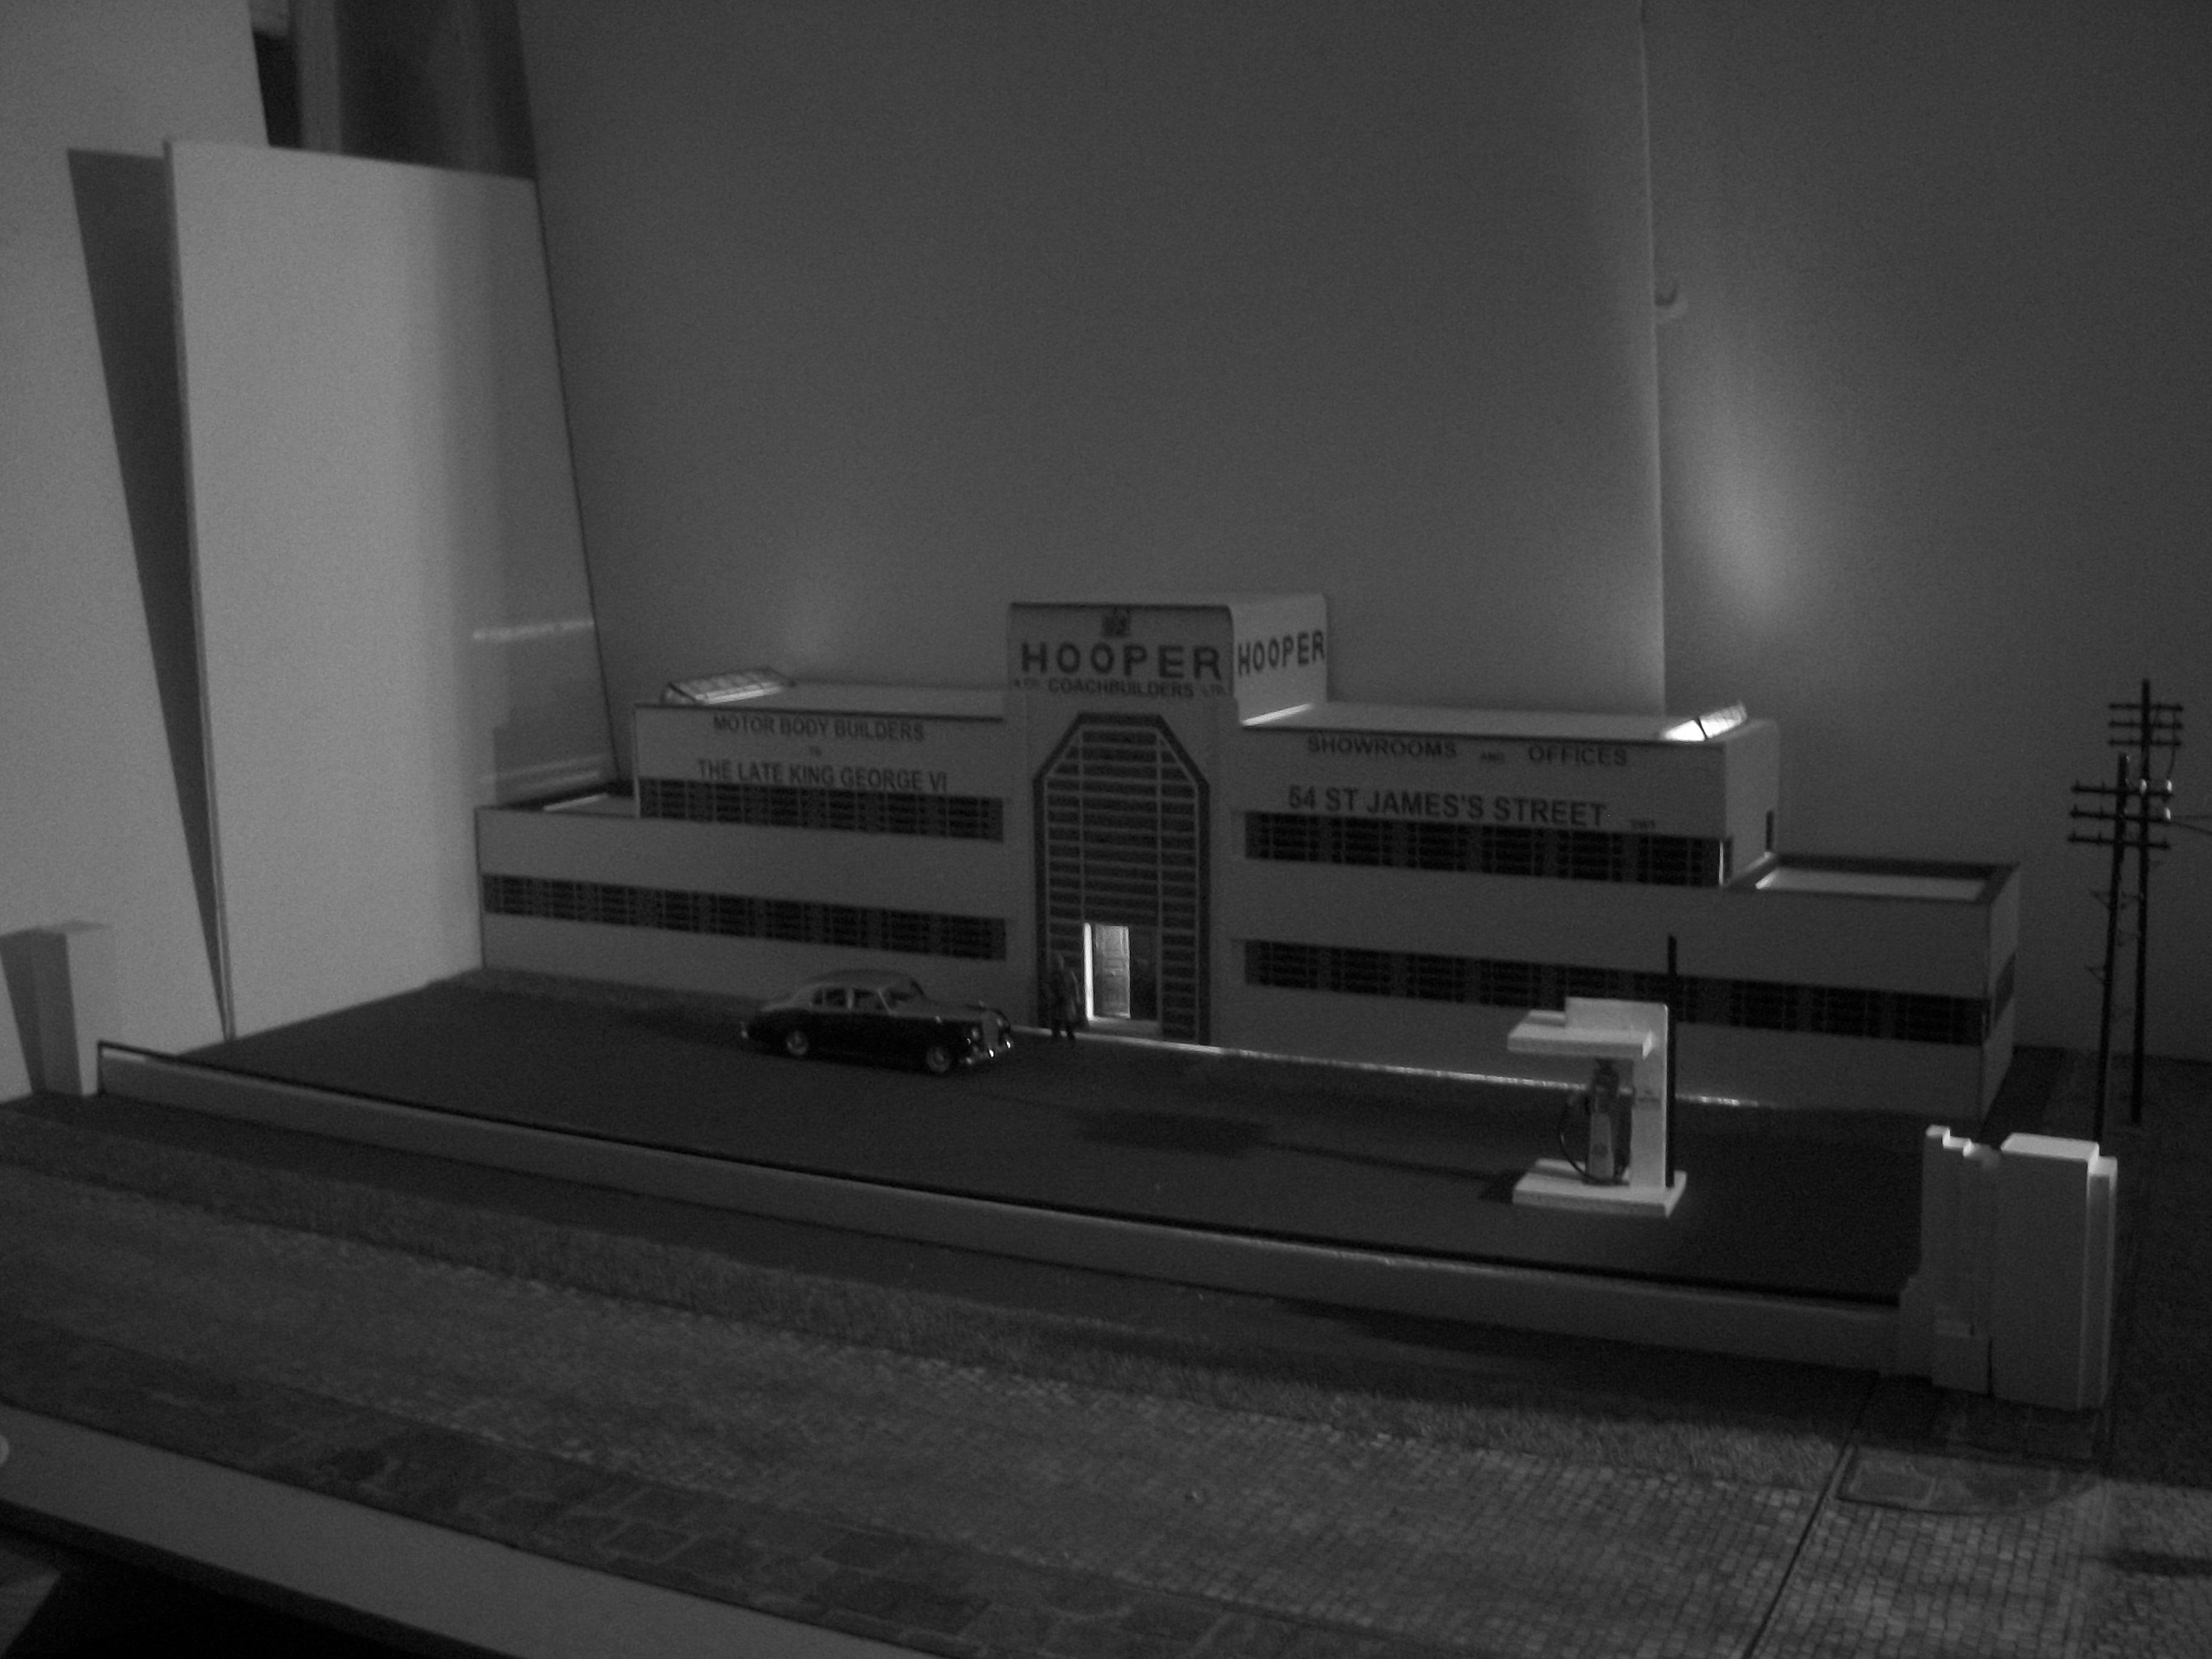
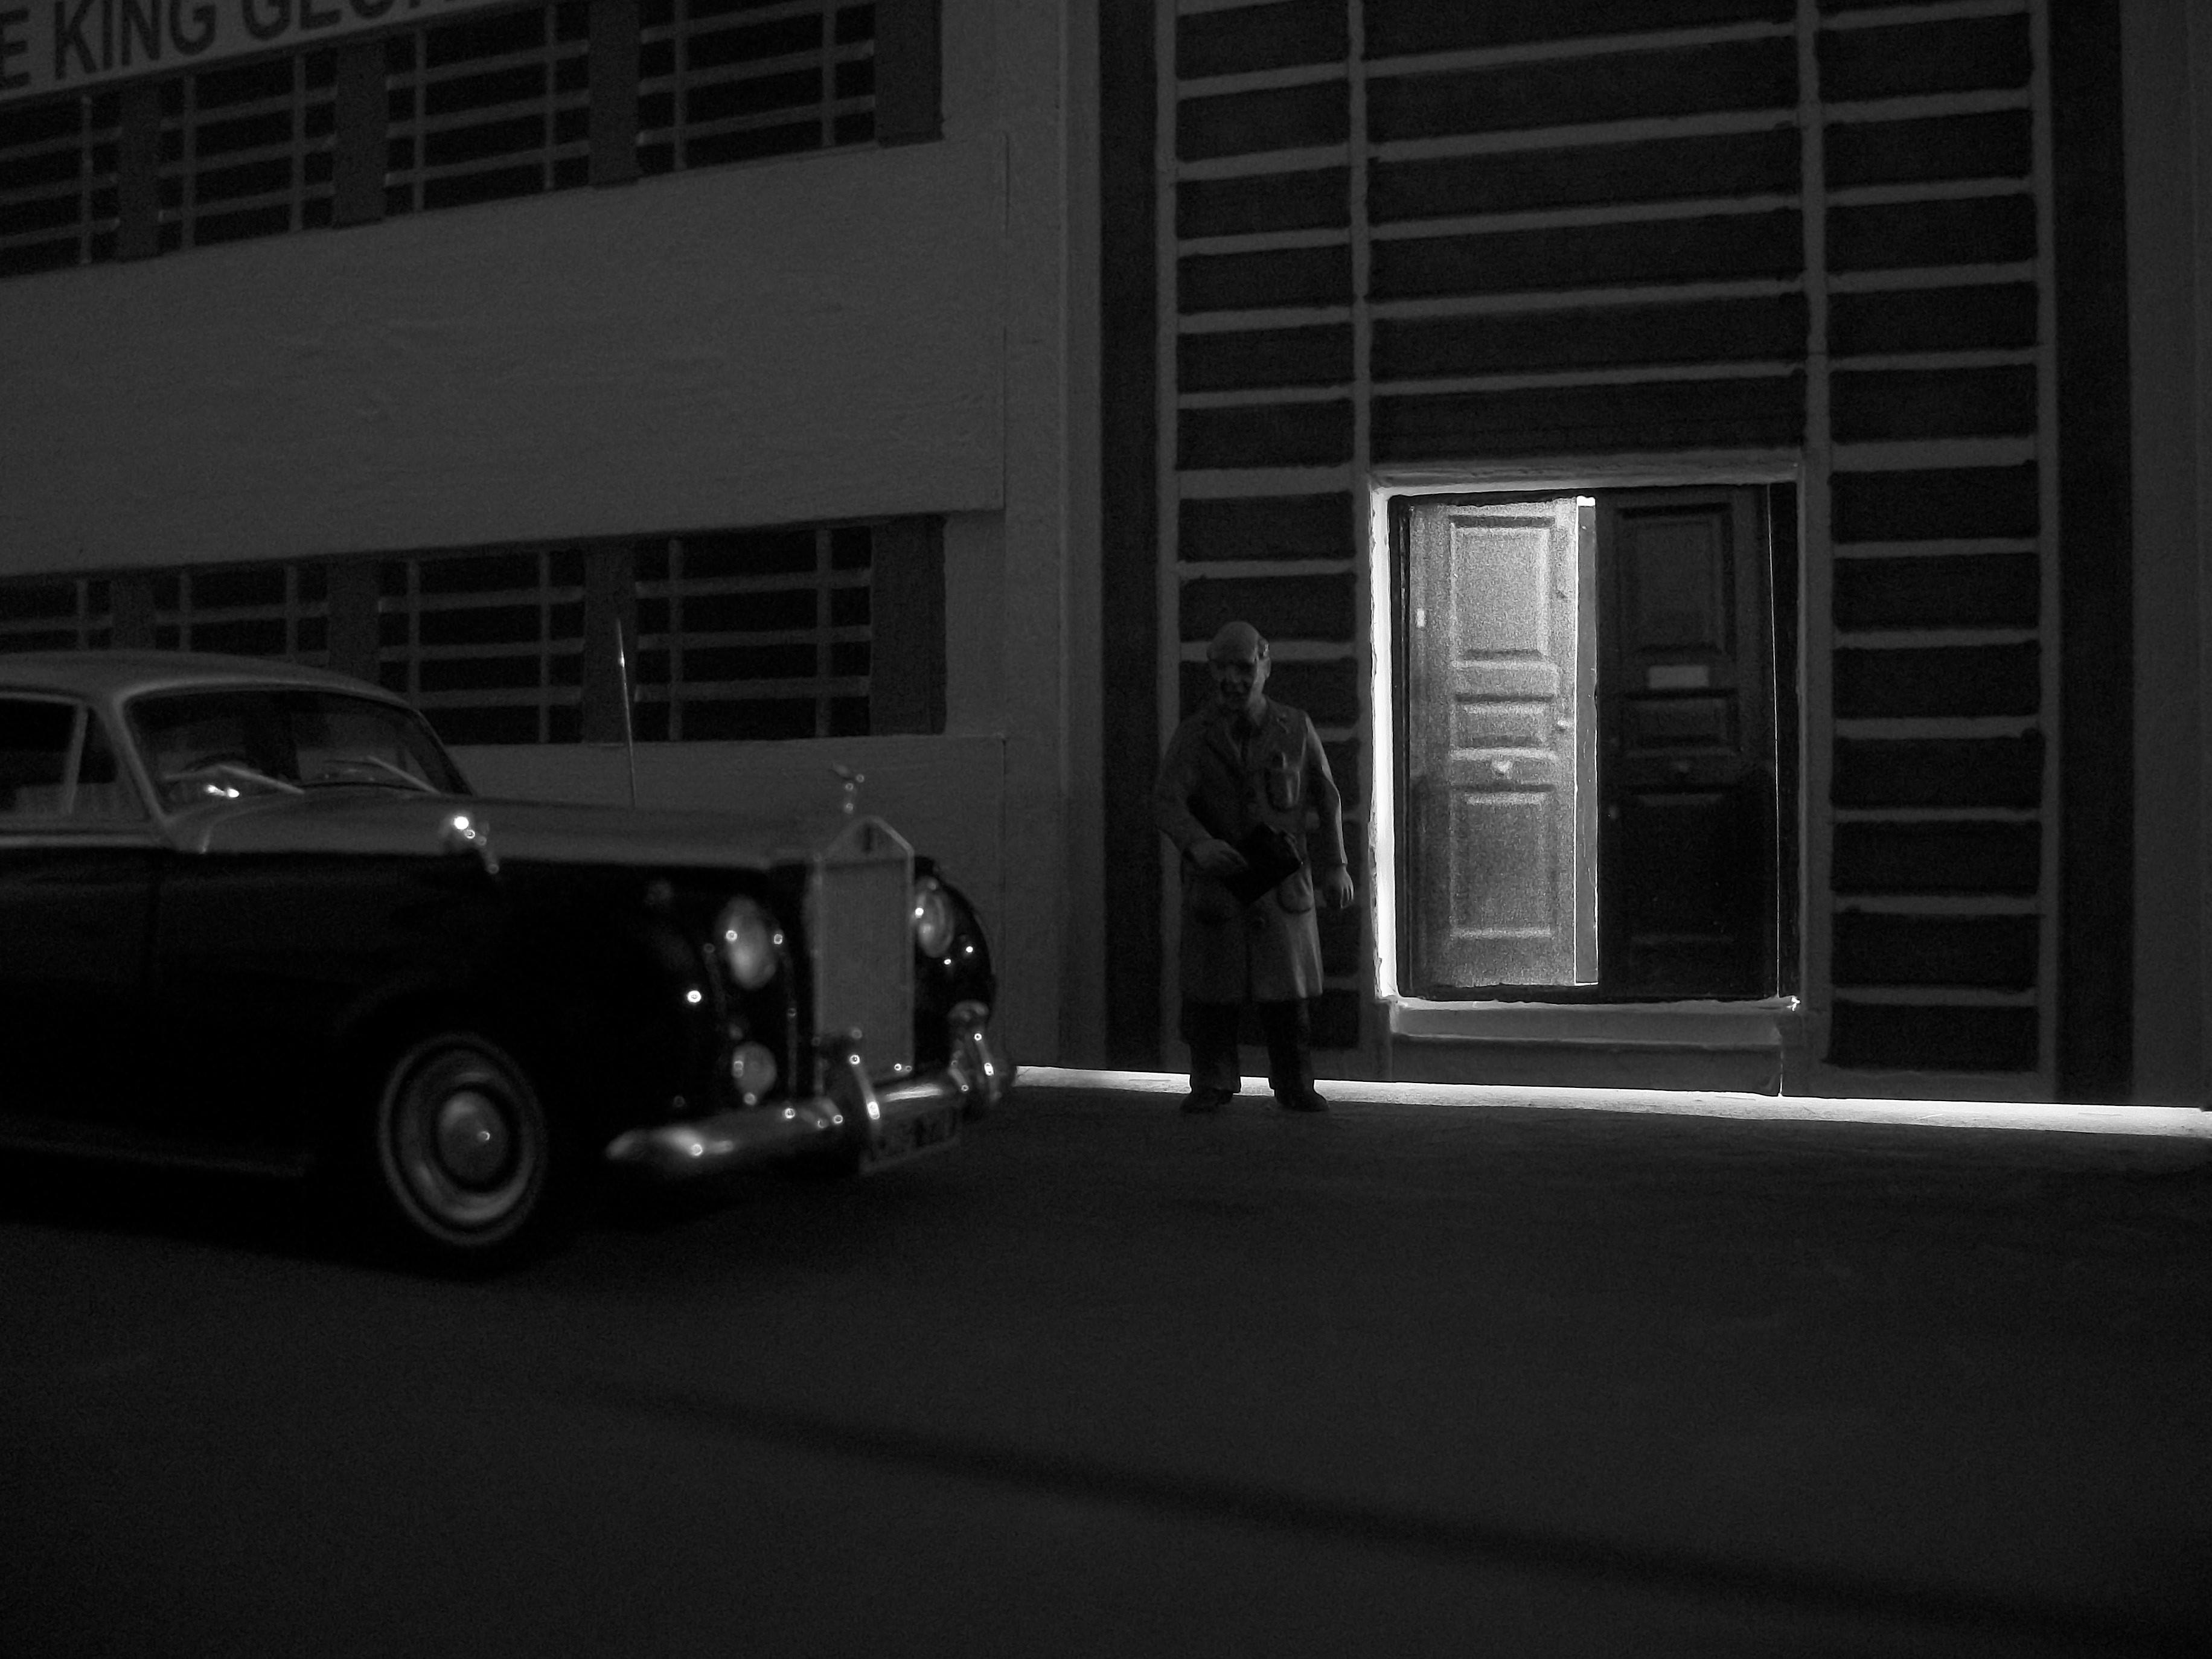
Today, I set up a scene for a photo shoot........ this is nearing the end of a working day at the Hooper & Co factory and the factory manager is making sure that the last Rolls-Royce motor car parked outside is put away for the night. I used a small LED torch, which I placed inside the factory building, and pointing towards the doorway. The model car is a 1:43 TrueScale Miniatures 1955 Rolls-Royce Silver Cloud I in silver over black. This model is more accurate and also more realistic than the Oxford Diecast version of the Silver Cloud. David
-
Chitty Chitty Bang Bang - less than 1/1 scale
Anglia105E replied to 1967RMP's topic in WIP: Model Cars
Well, John.......... just when I thought that scale model cars don't come any bigger than 1:8 or even 1:4...... there you go building this HUGE model car, which is less than 1:1, but KId size ! ( absolutely brilliant ). David -
Hi Rex..... I believe the motor car that you are standing next to, is a Rolls-Royce Phantom III, and it is probably around 1938. David
-
Your build of this Citroen DS 21 is excellent, Bo...... and I know the Ebbro kits are not cheap, but they are well worth the money..... brilliant paint finish also! David