
Anglia105E
-
Posts
3,487 -
Joined
-
Last visited
Content Type
Profiles
Forums
Events
Gallery
Everything posted by Anglia105E
-
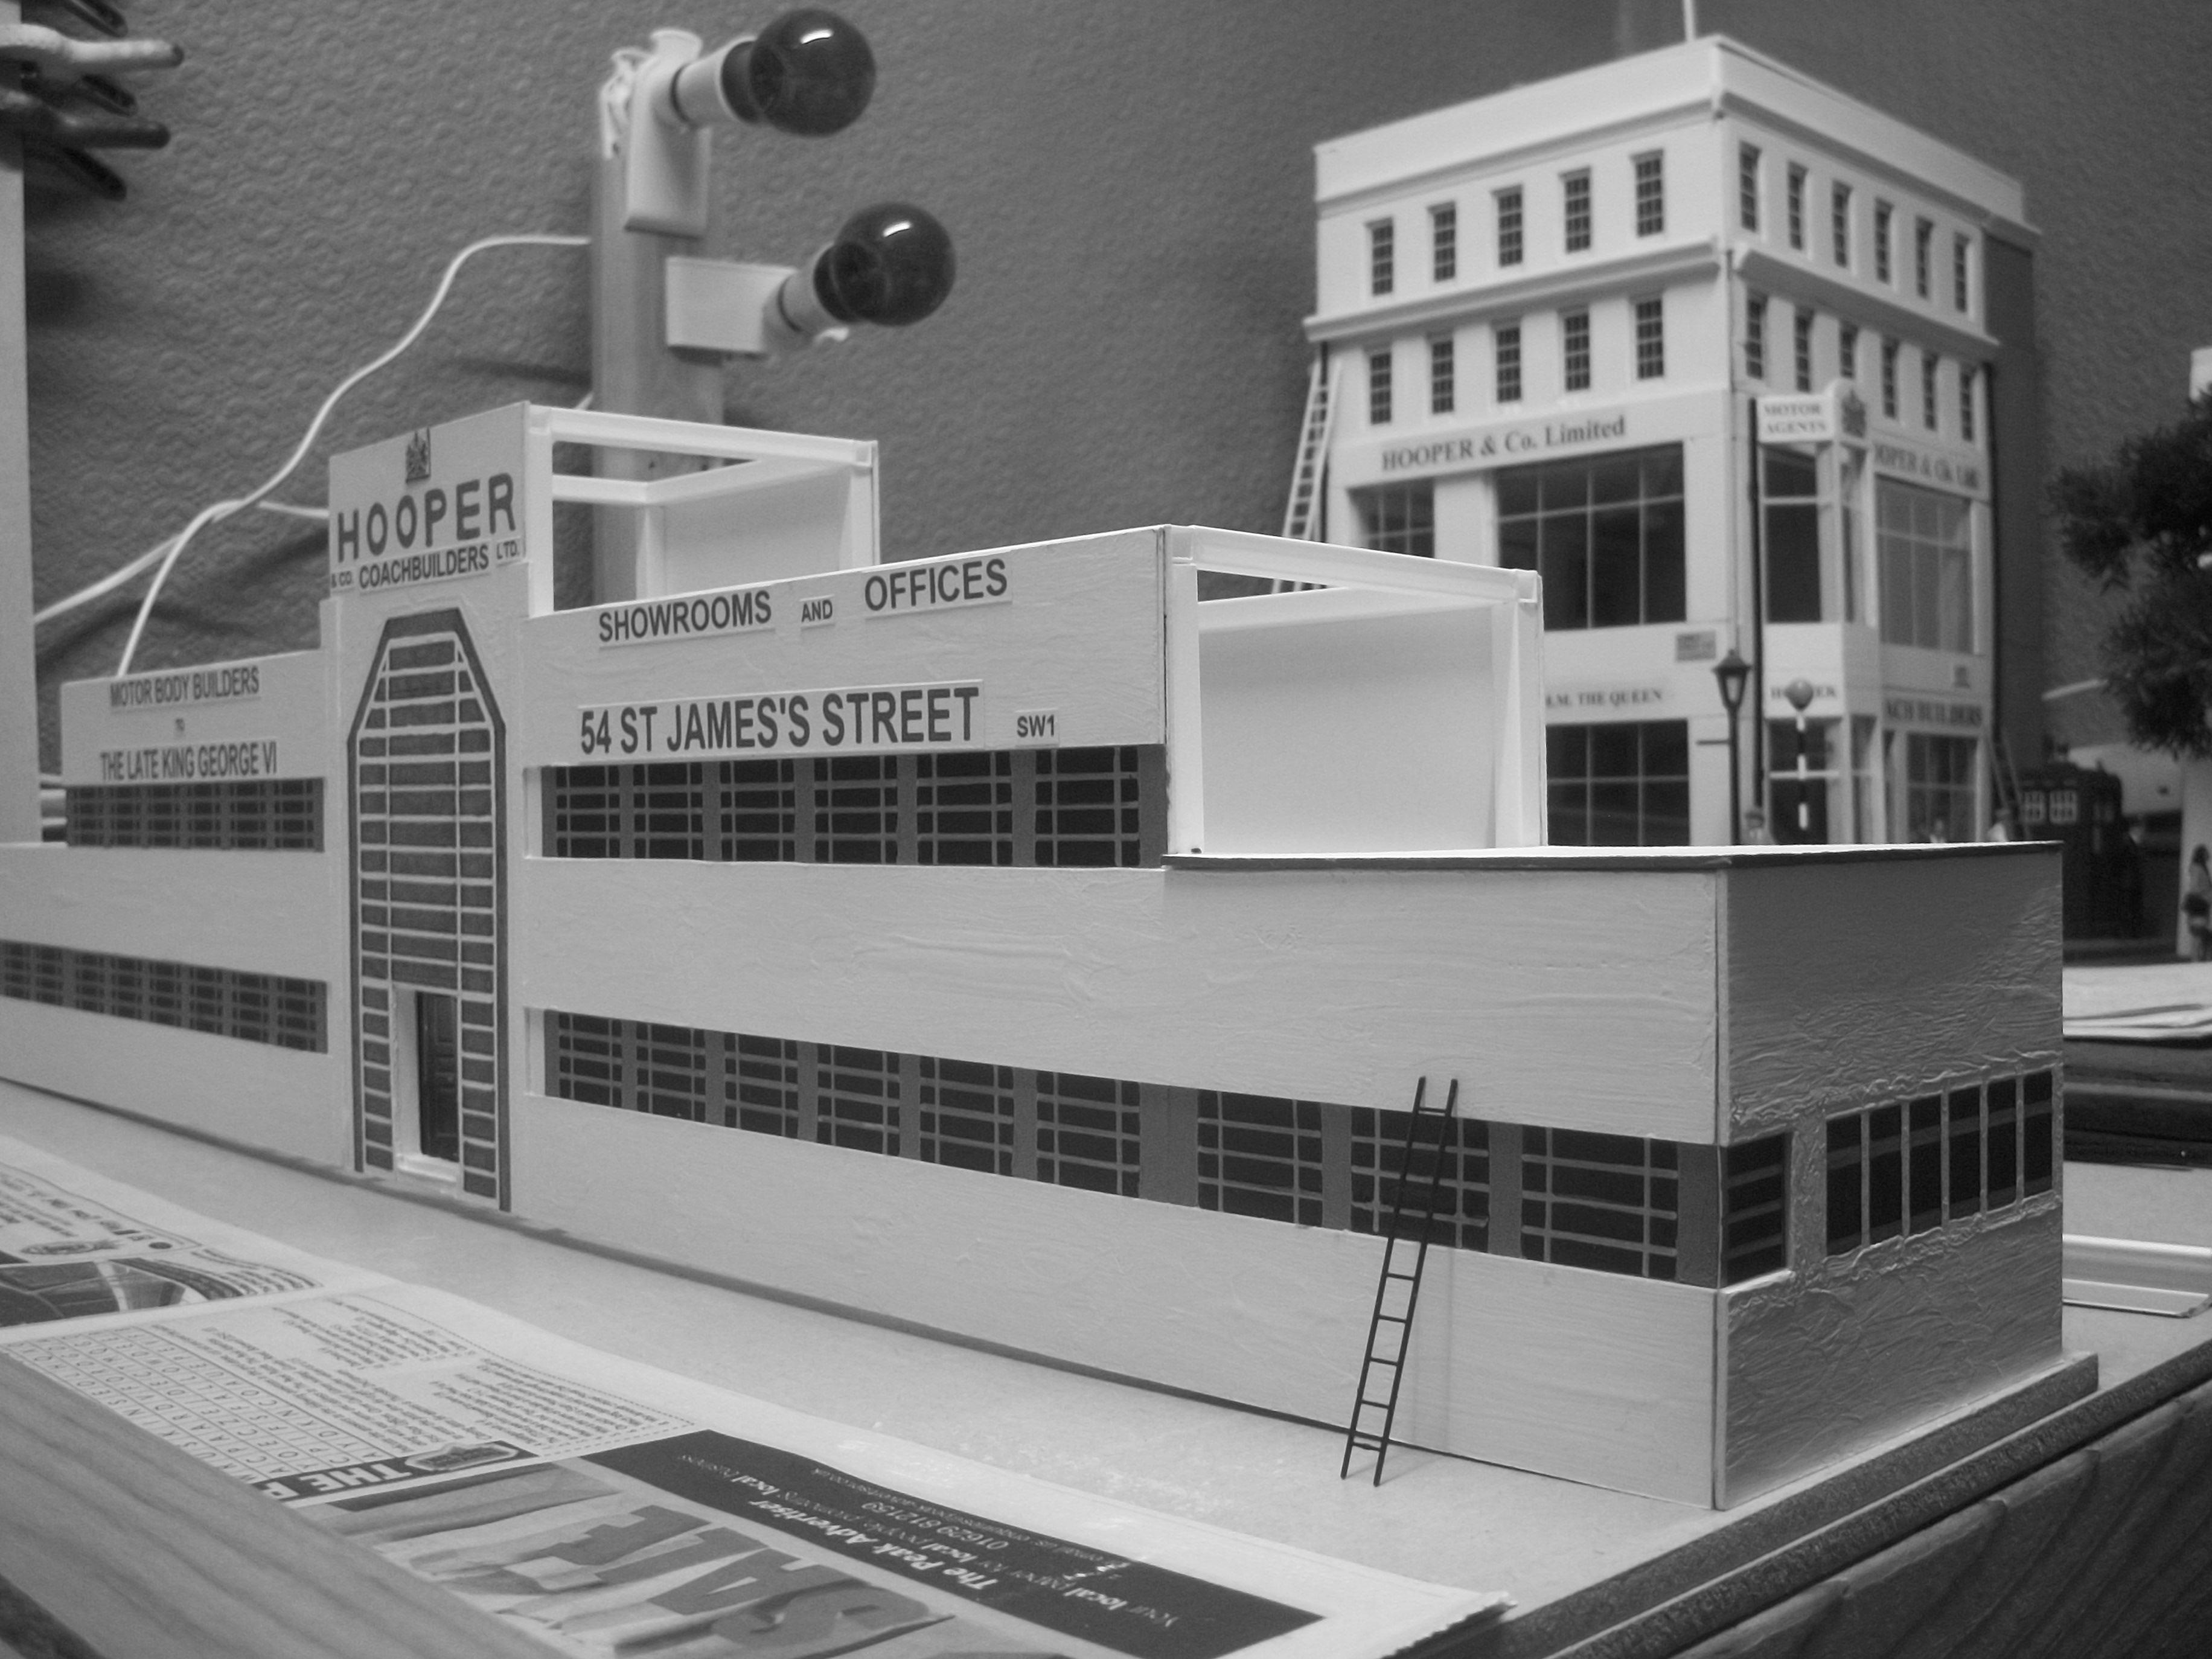
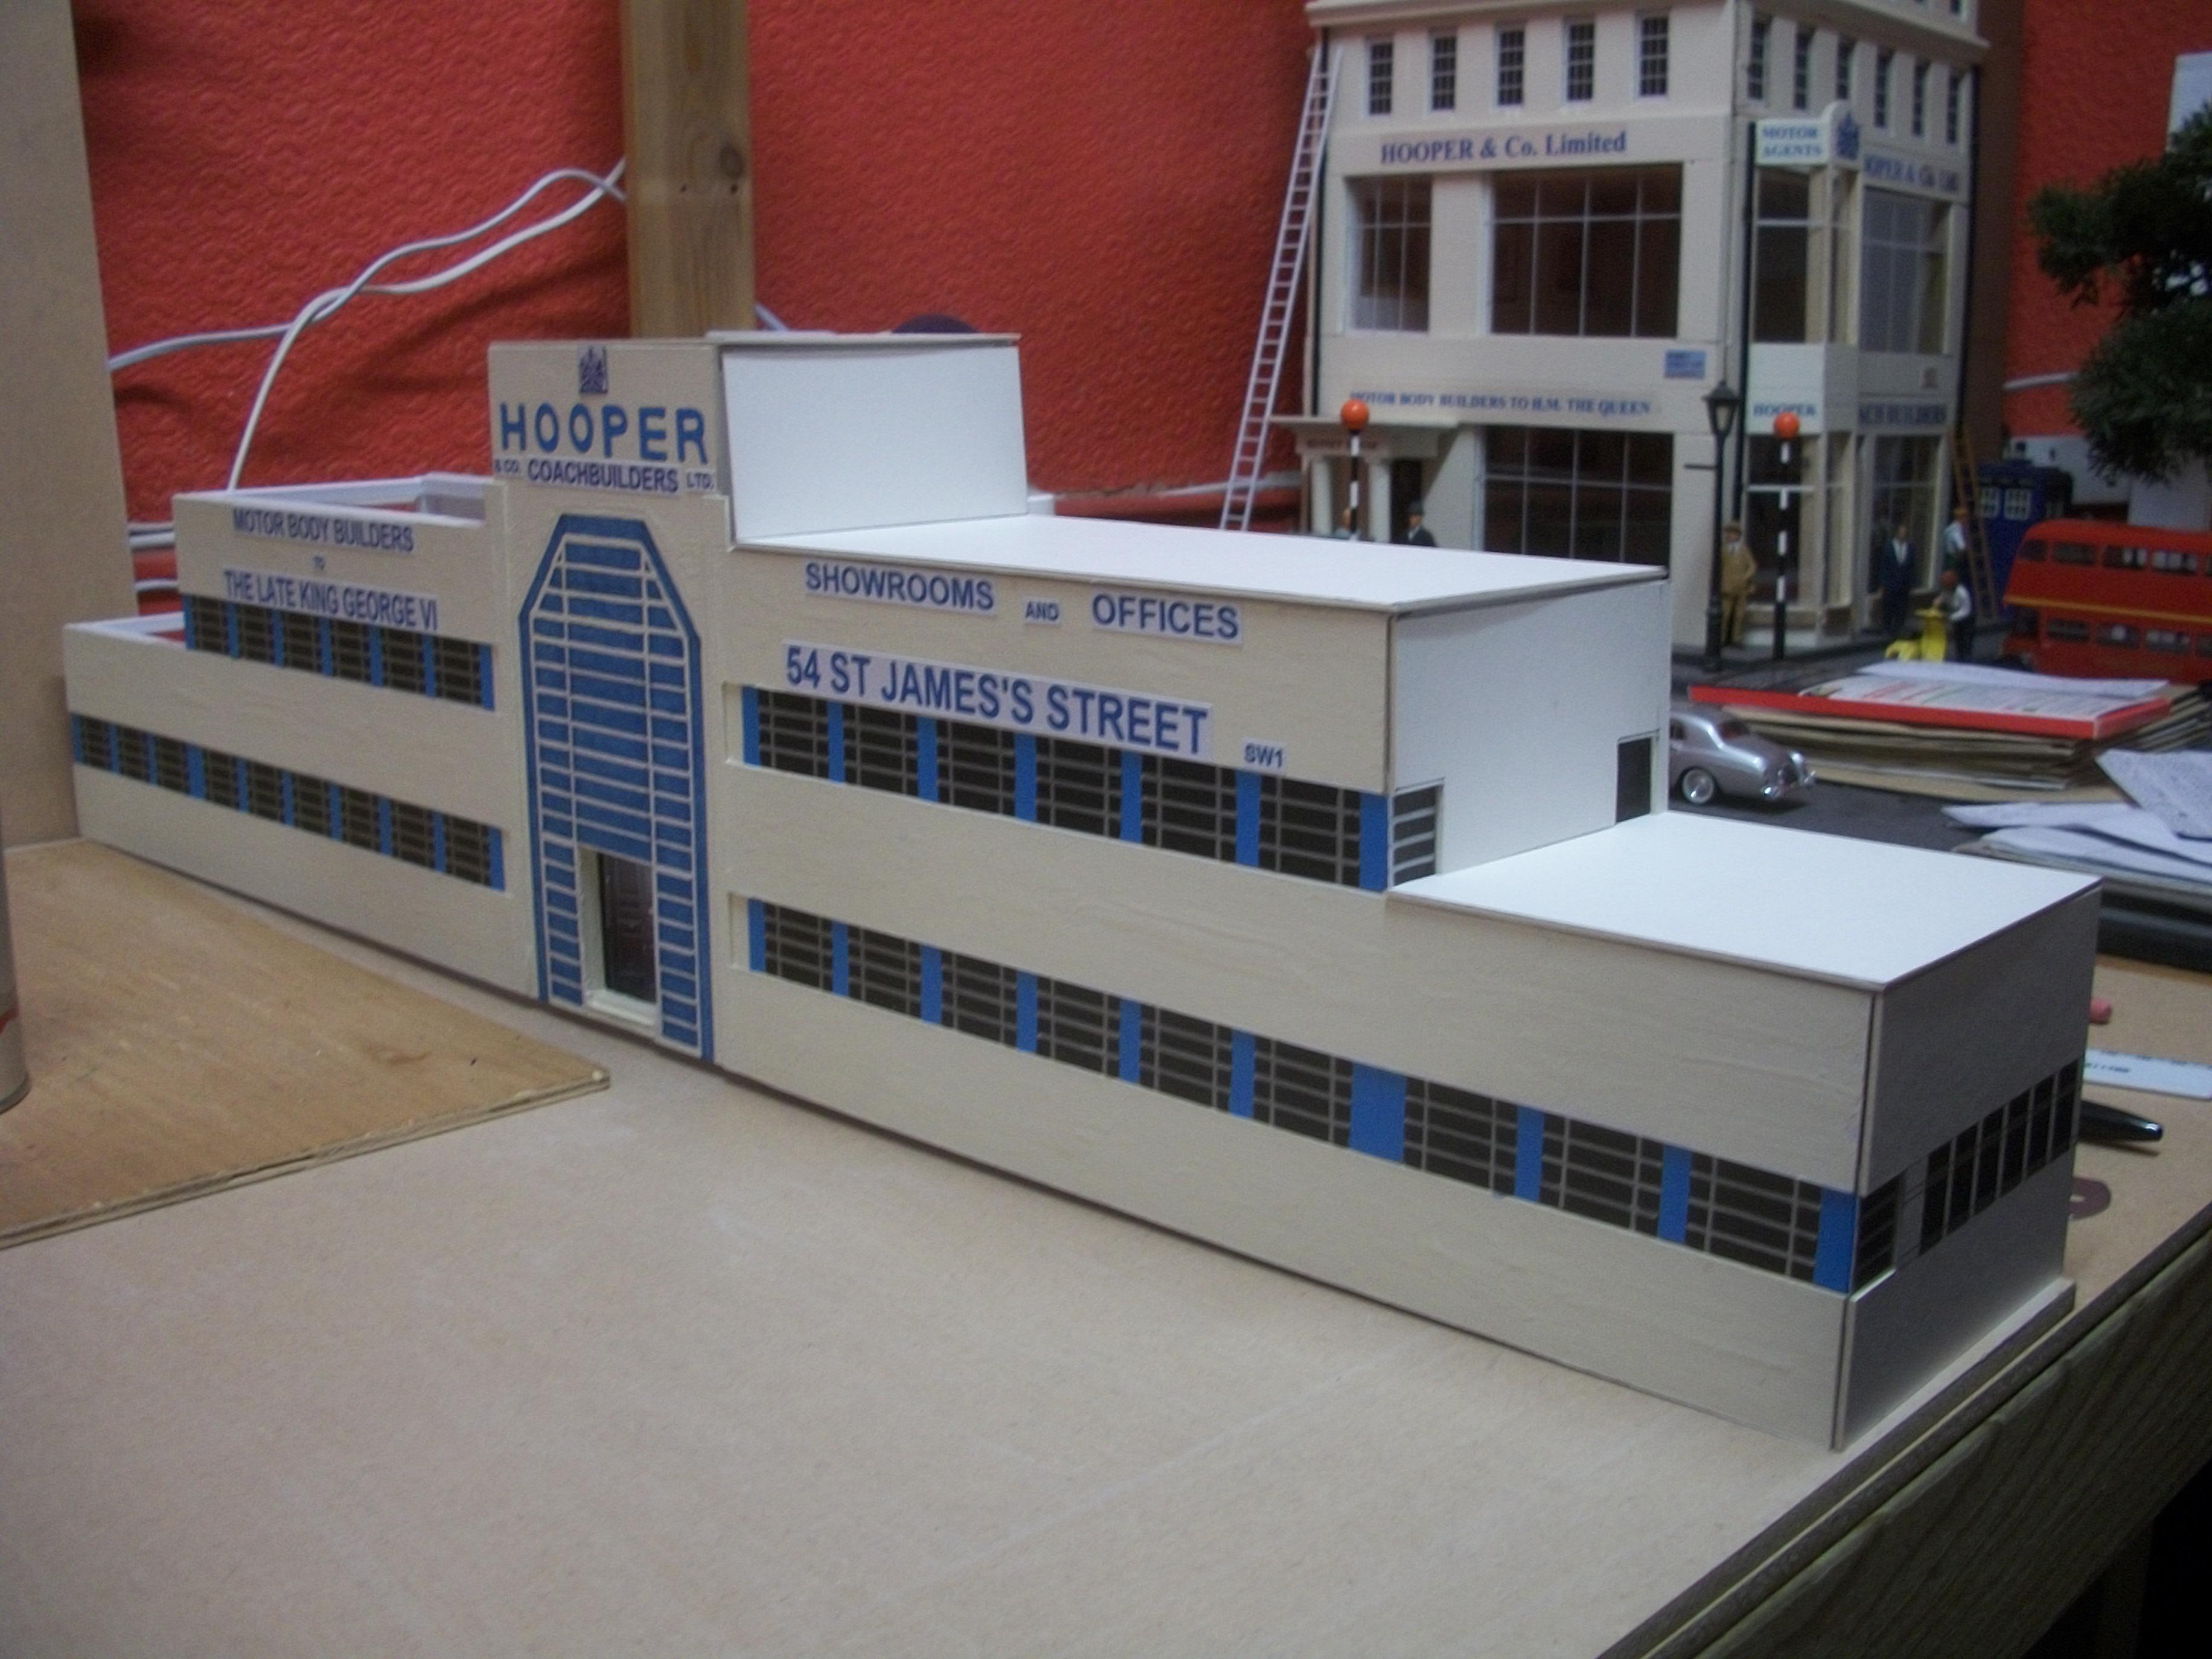
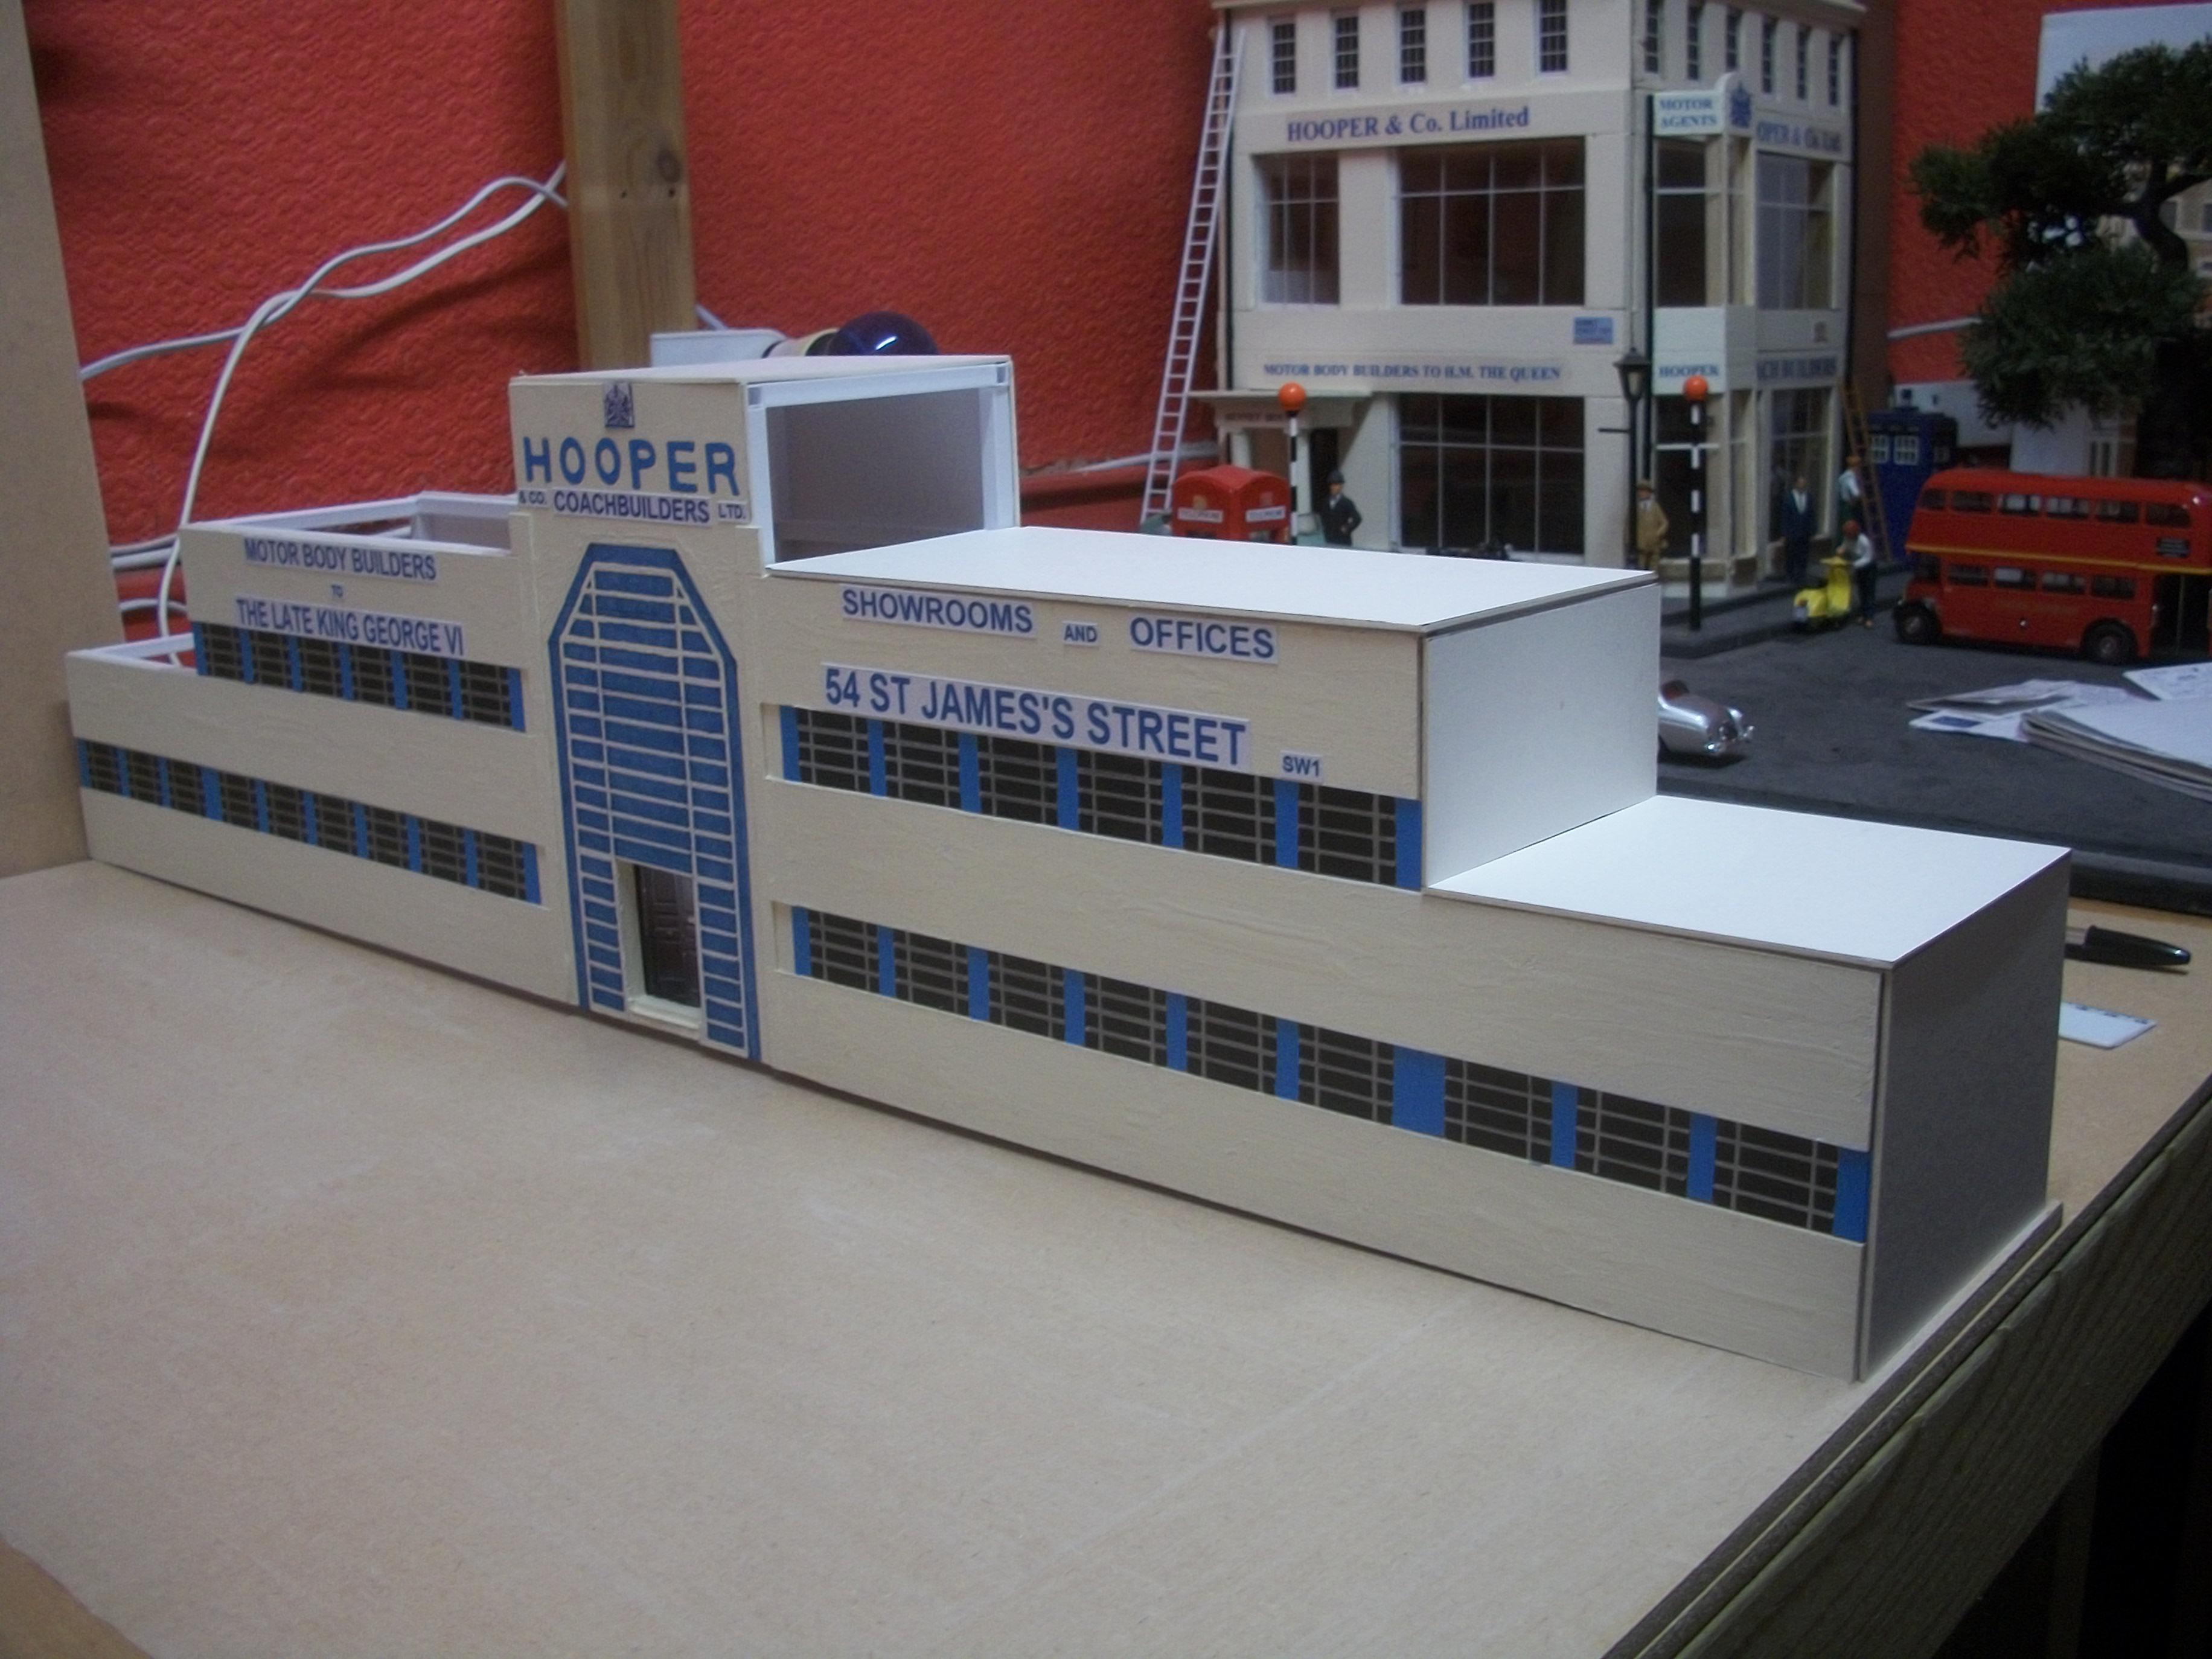
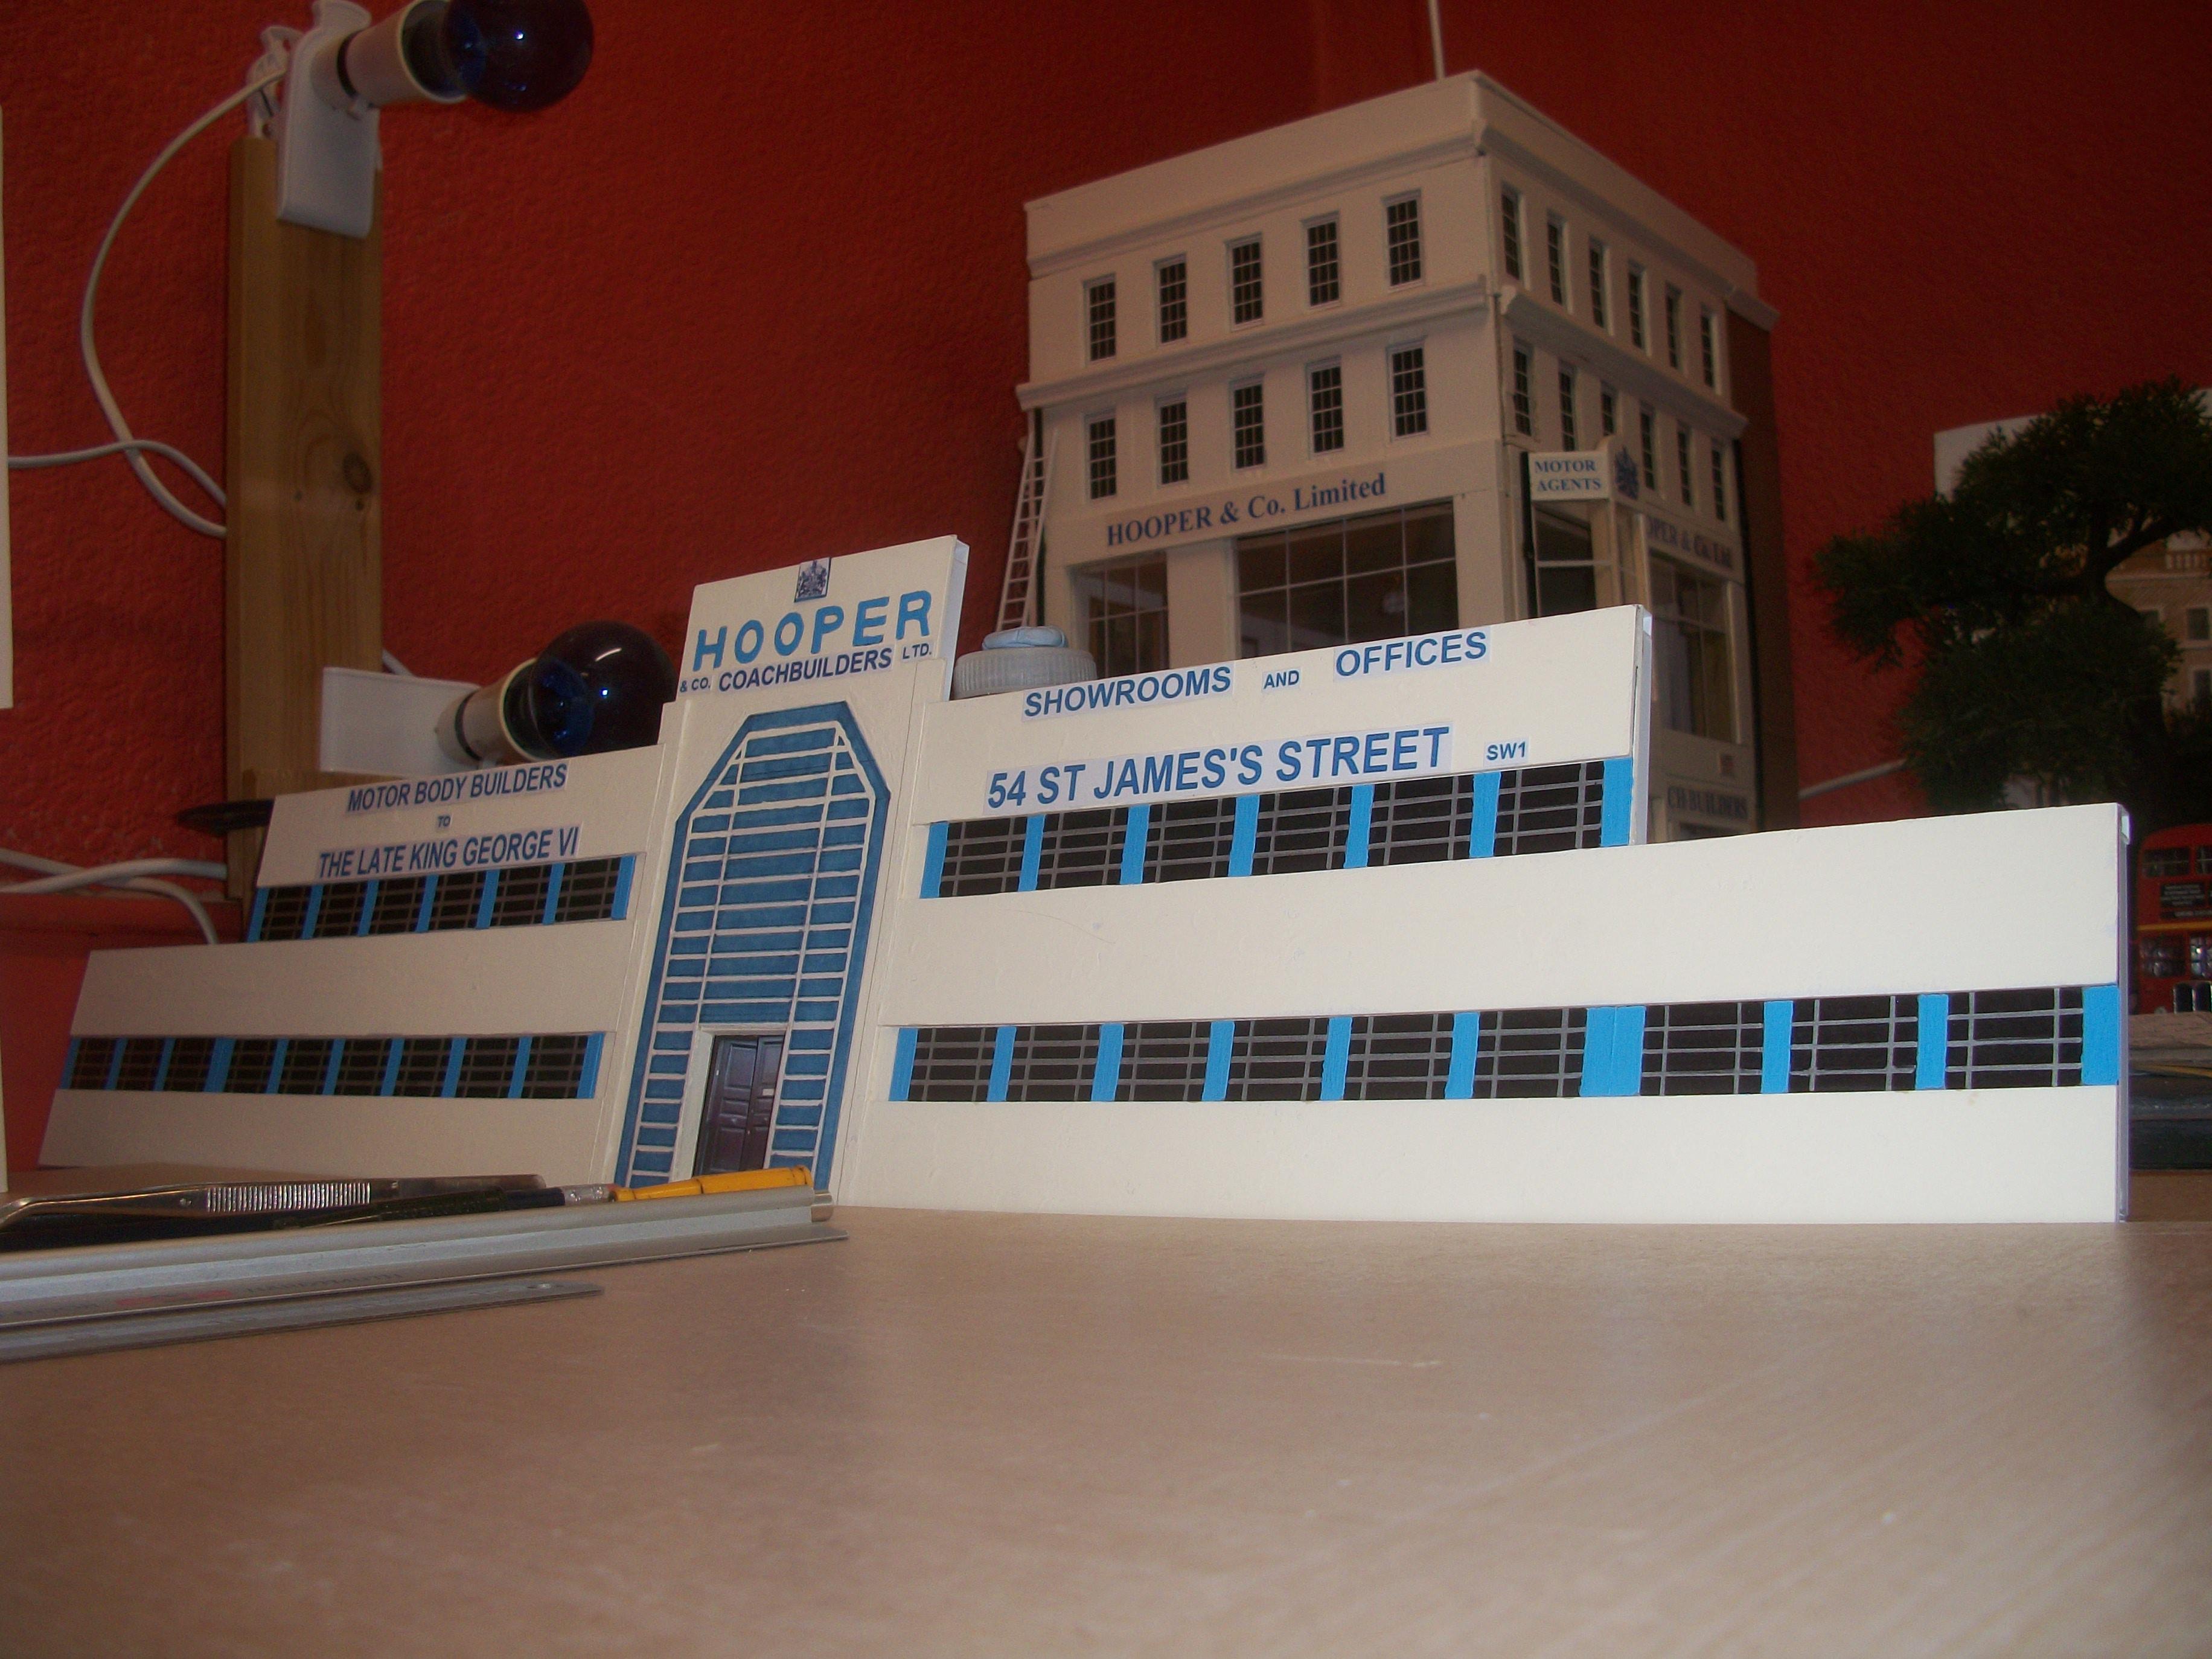
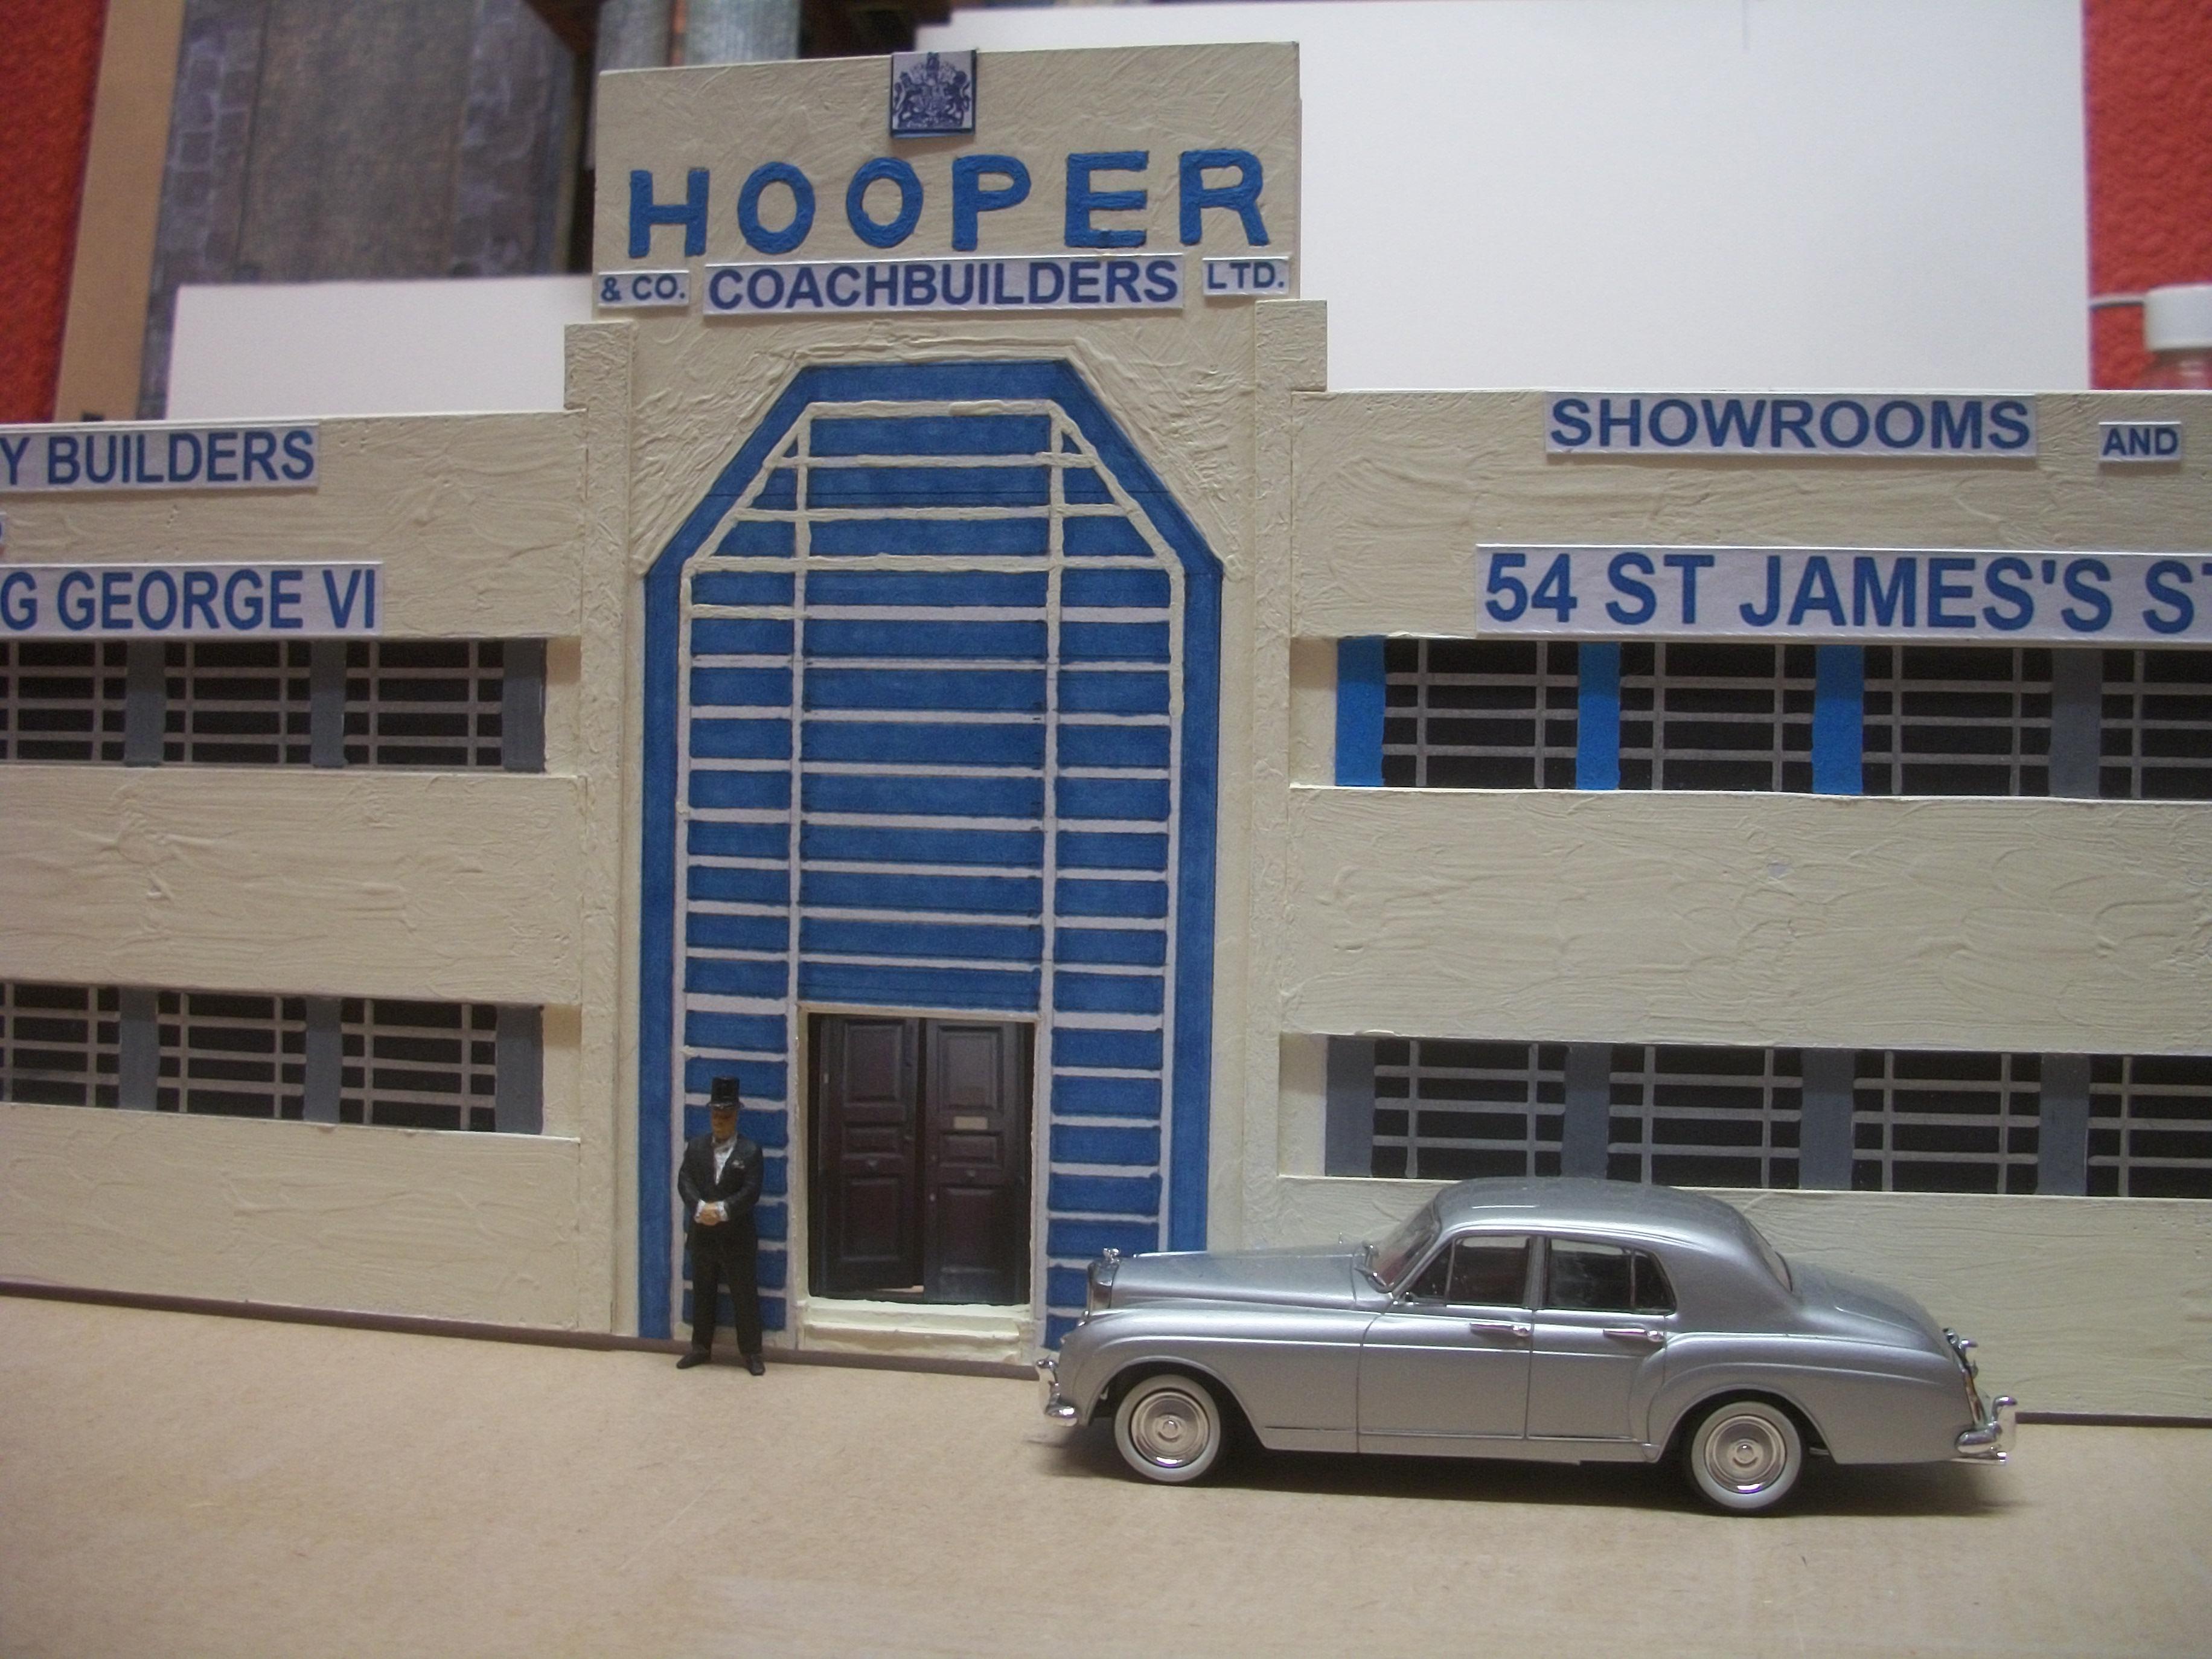
Well spotted, Don....... but please allow me to explain. The diorama that you can see in the background is a 1:24 scale diorama of the Hooper & Co showroom building at 54 St James's Street in London from 1958, while I am working on the 1:43 scale diorama in the foreground...... this one is the Hooper & Co factory building at Western Avenue, Park Royal, Acton in London from 1959. None of the larger scale background models belong to the smaller scale factory project in the foreground, apart from the silver Bentley S1 Continental, which is actually a 1:43 scale model car. Thanks for pointing out the ' scale anomaly ' and I hope my explanation clarifies the scenario for you ! David
-
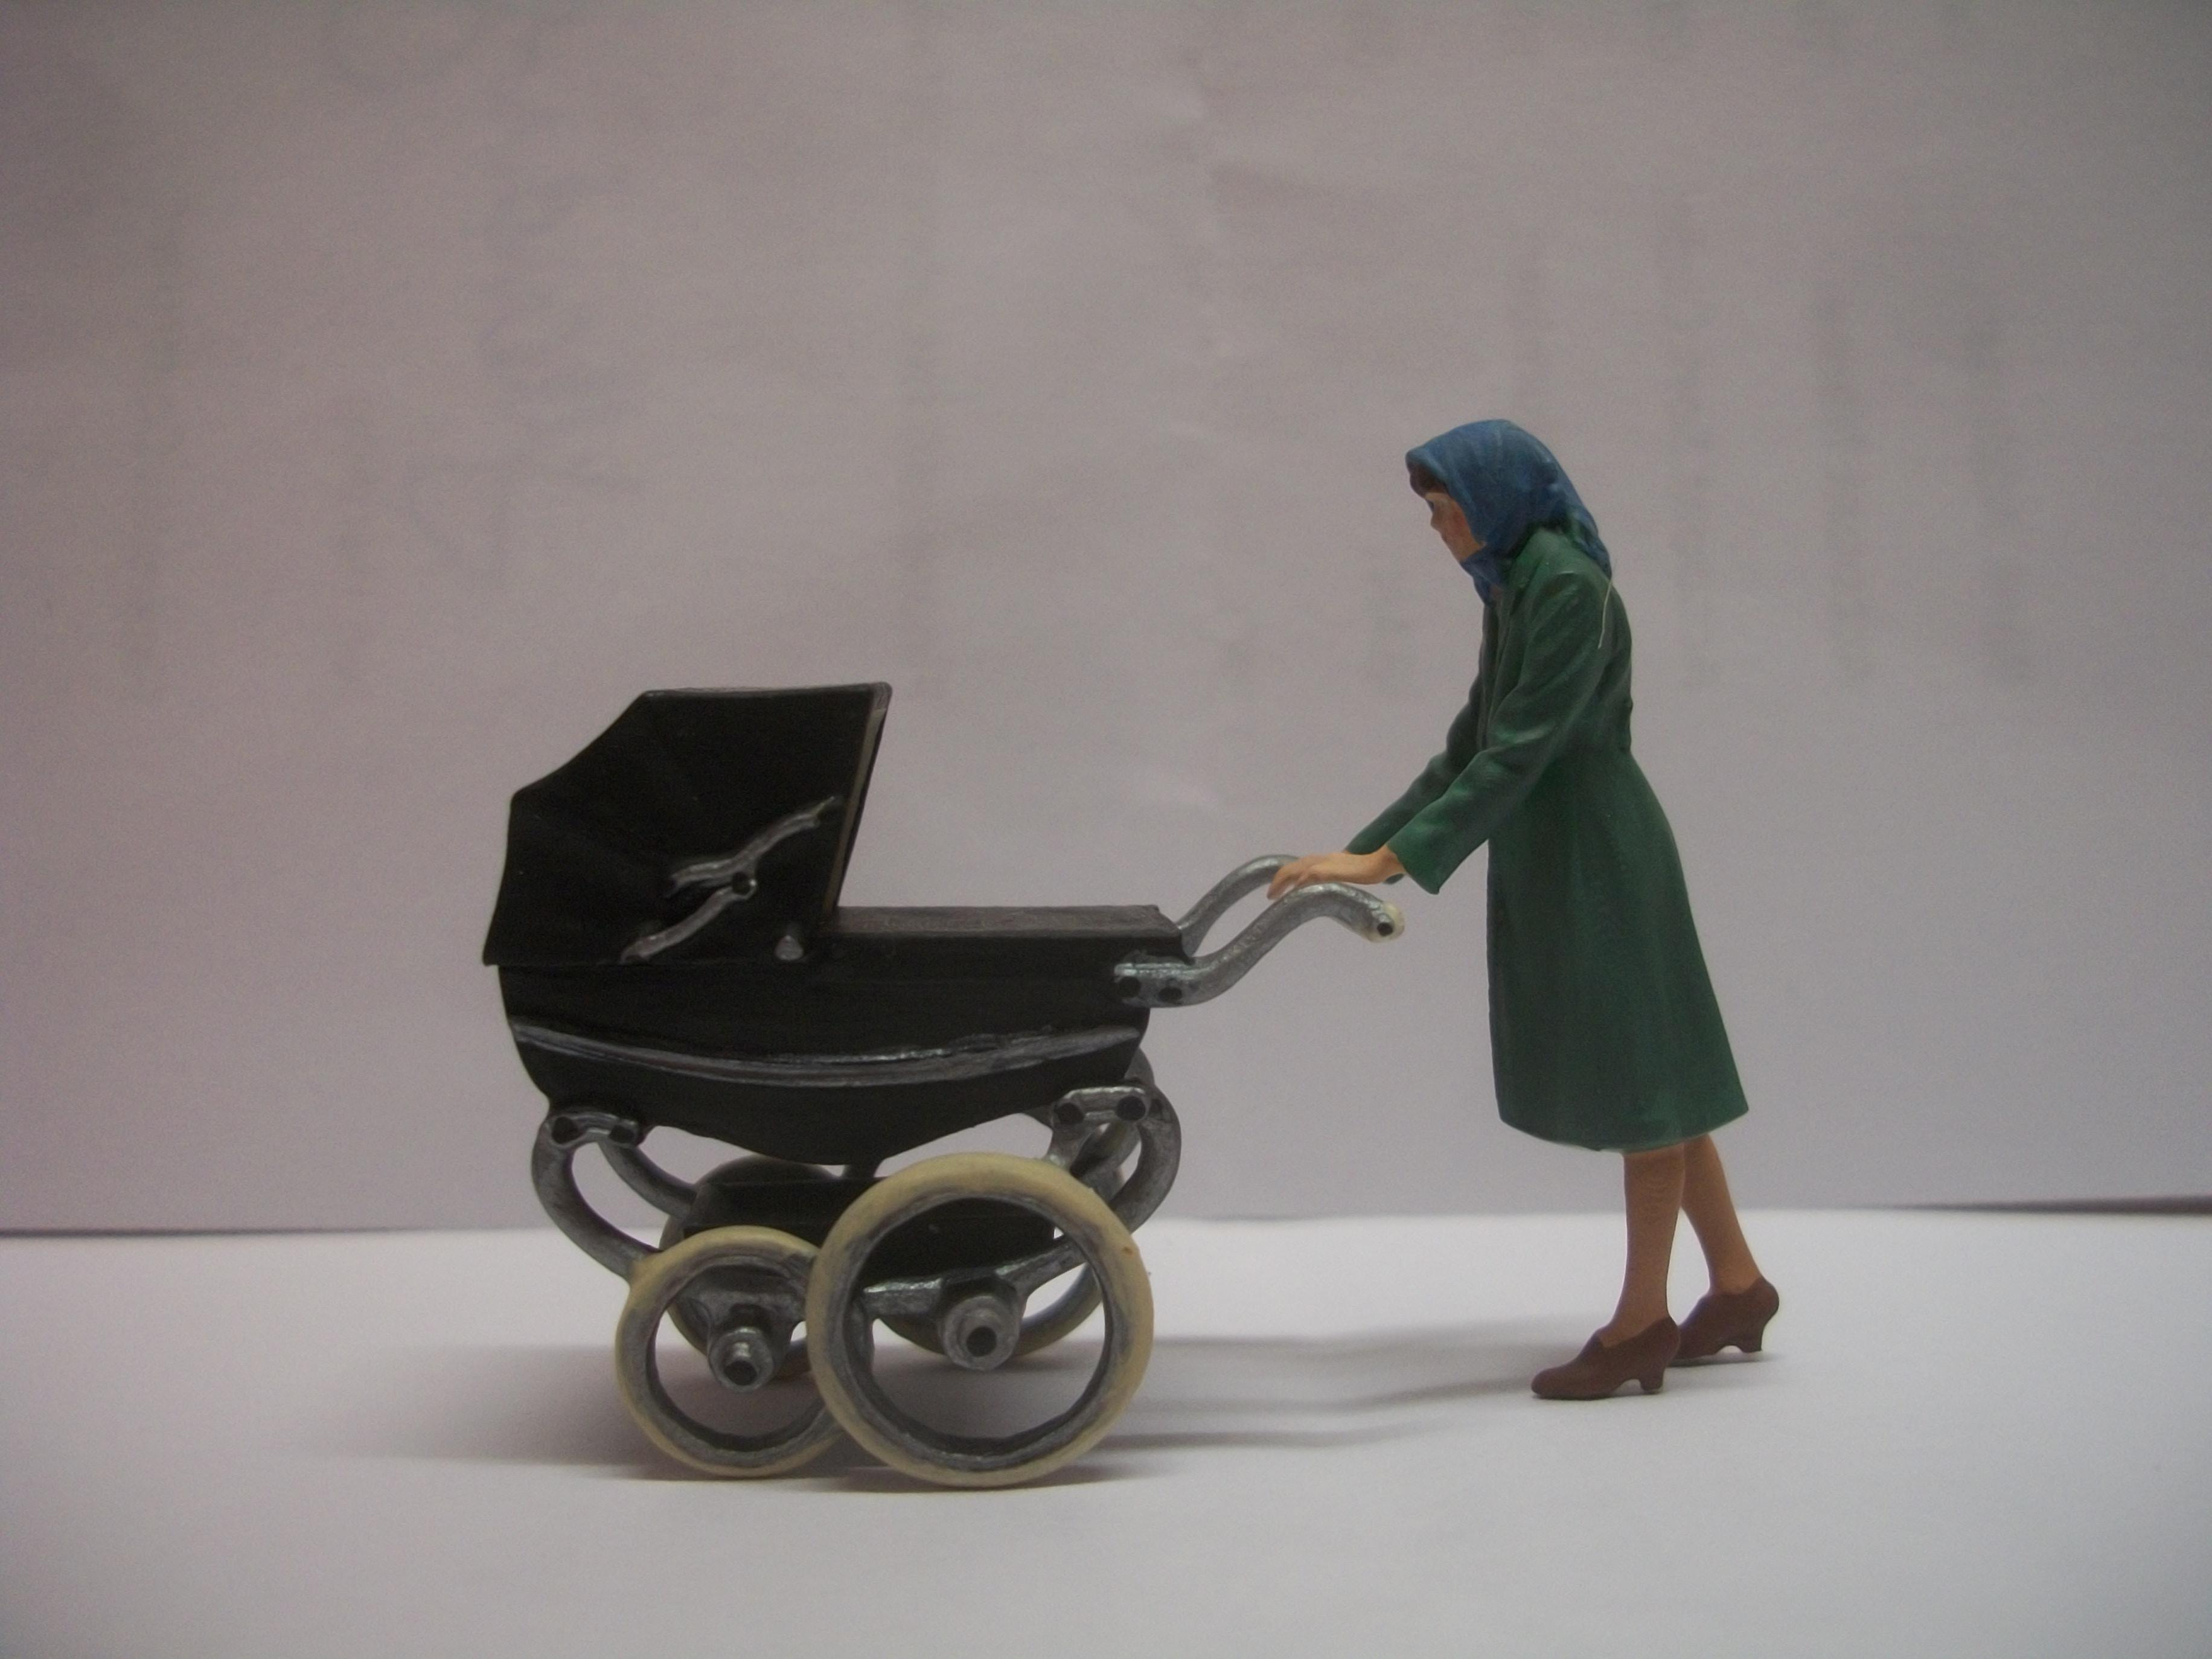
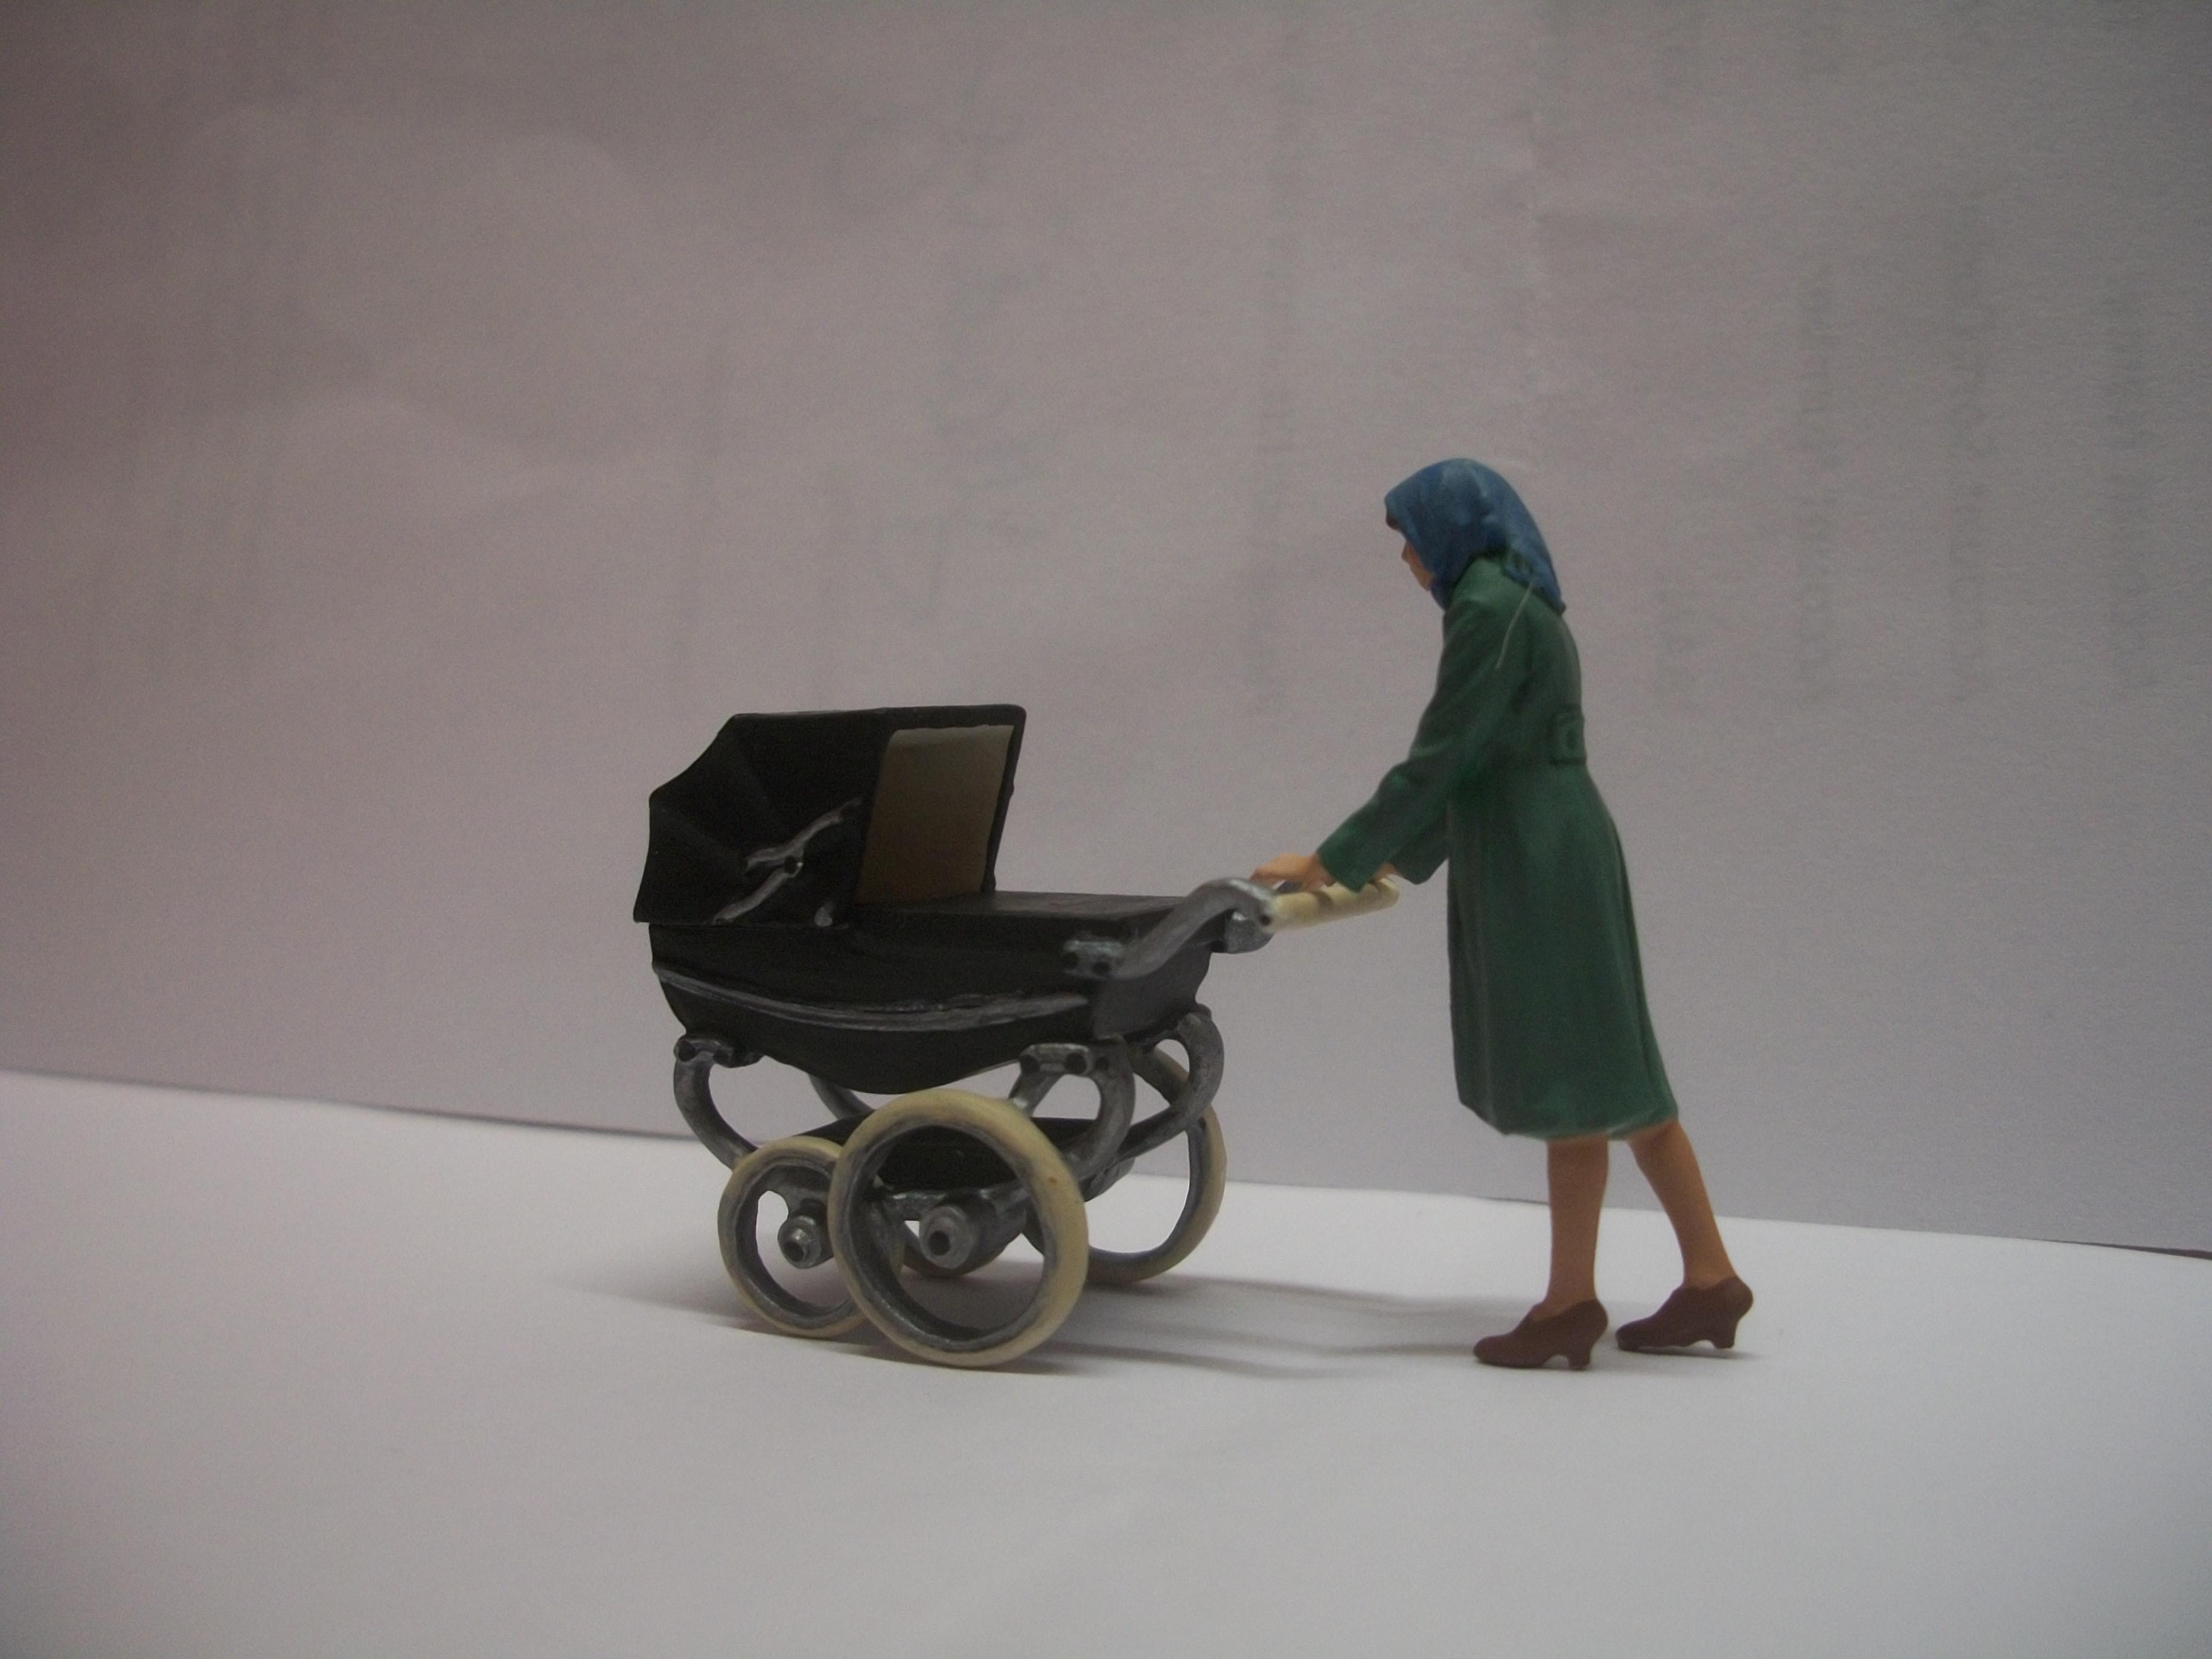
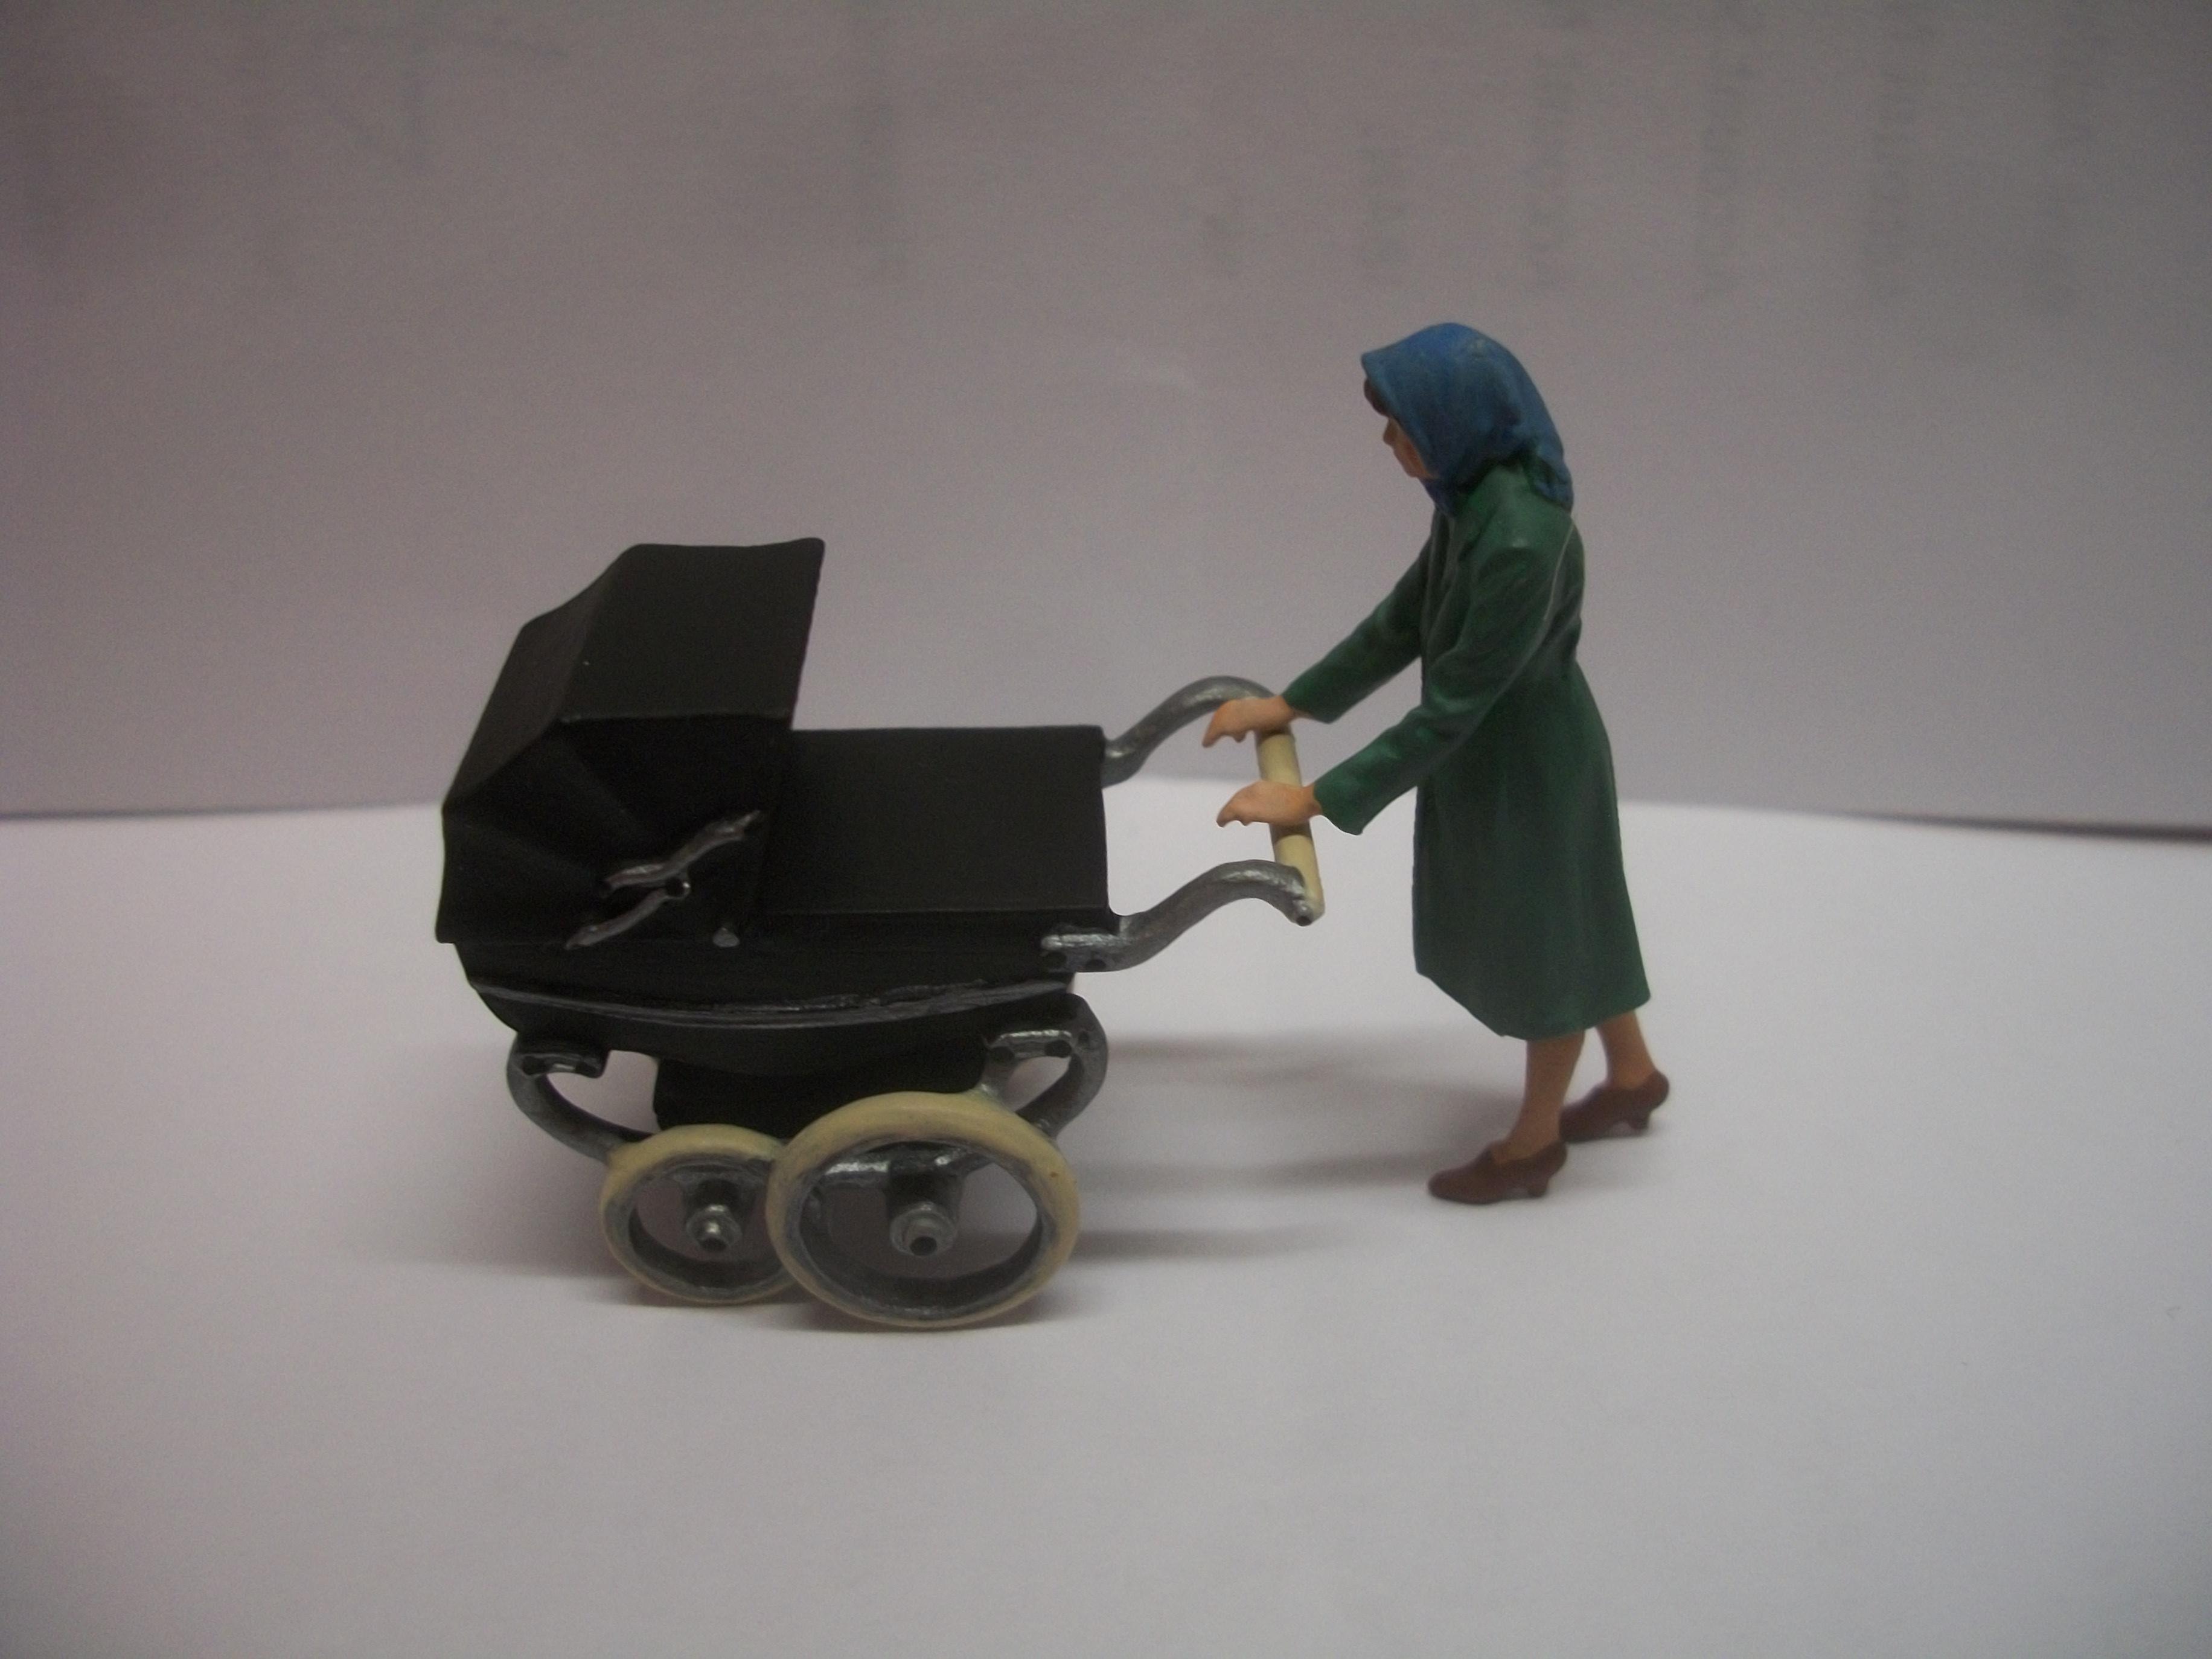
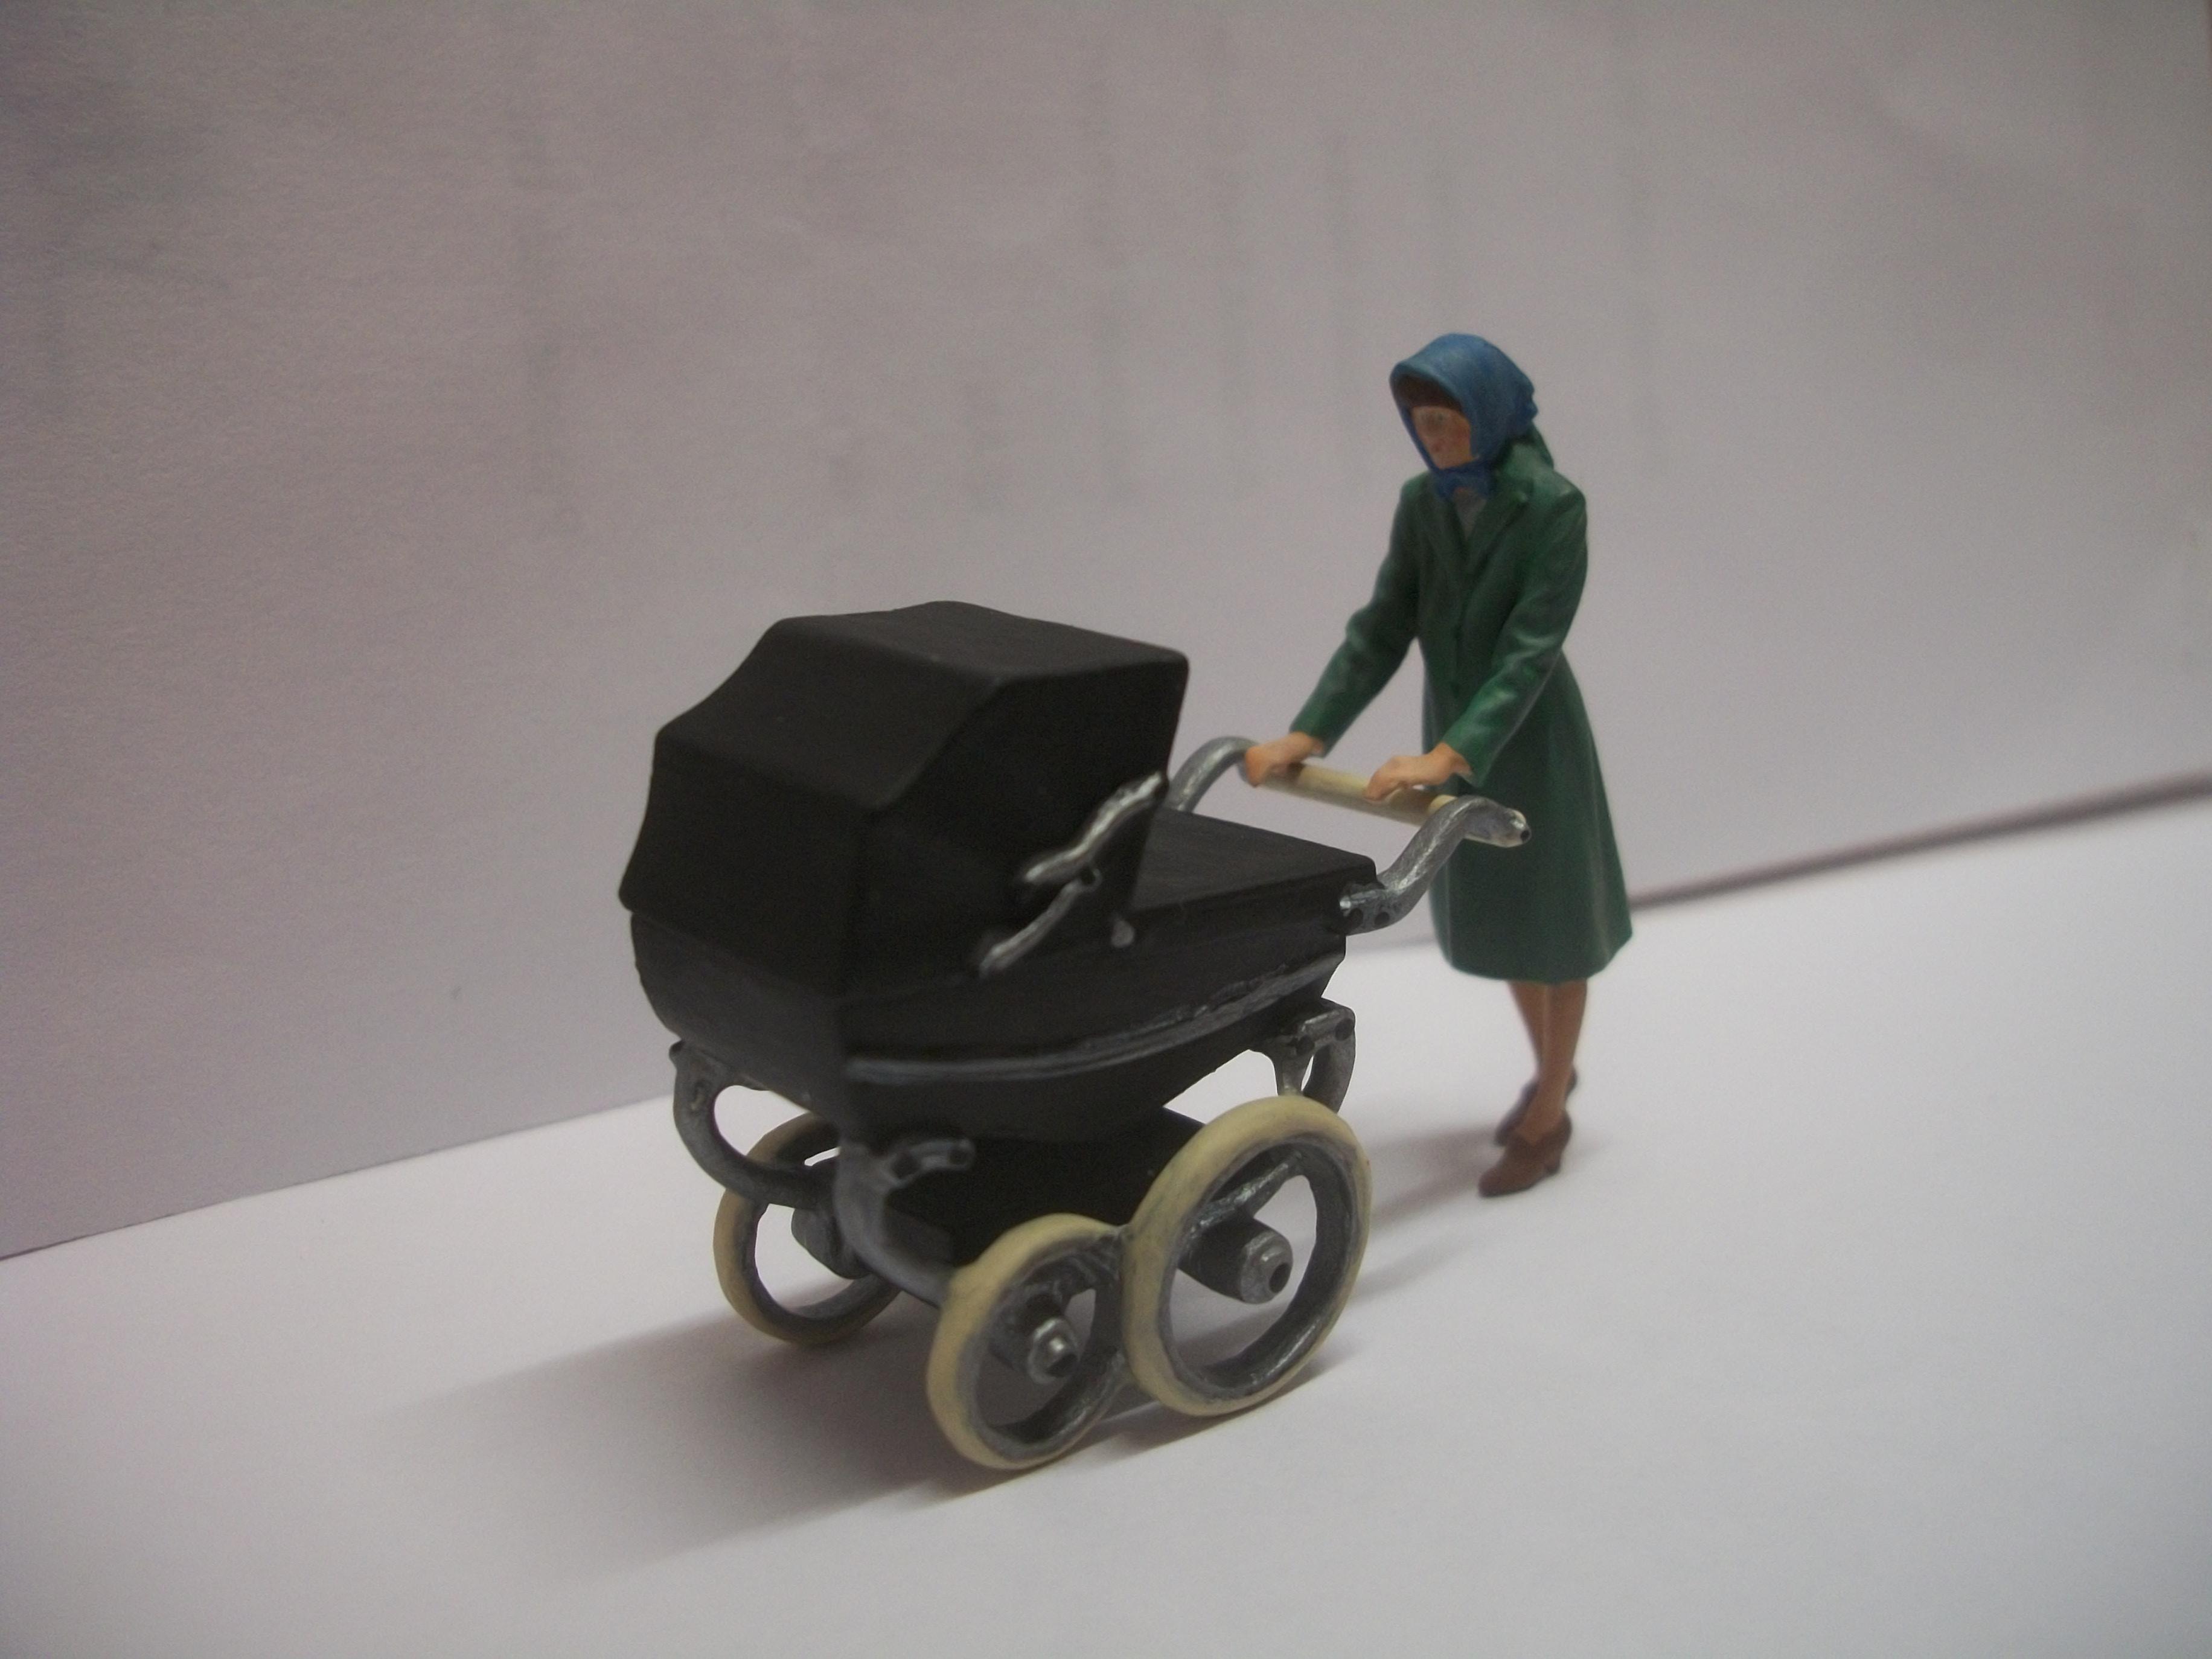
 Received this pair of 1:43 scale figures in the post this morning..... the Mother figure is 3D printed, the Pram and Baby figure is white metal and both are professionally painted in acrylic. These figures are not cheap, but then the standard of the workmanship is very high, in my opinion. Ebay supplier is Detailed Miniatures and their website address is http://www.detailedminiatures.co.uk This Mother and Baby in a Pram figure stands up well and photographs nicely...... it will be interesting to see them in a diorama setting shortly. David
-
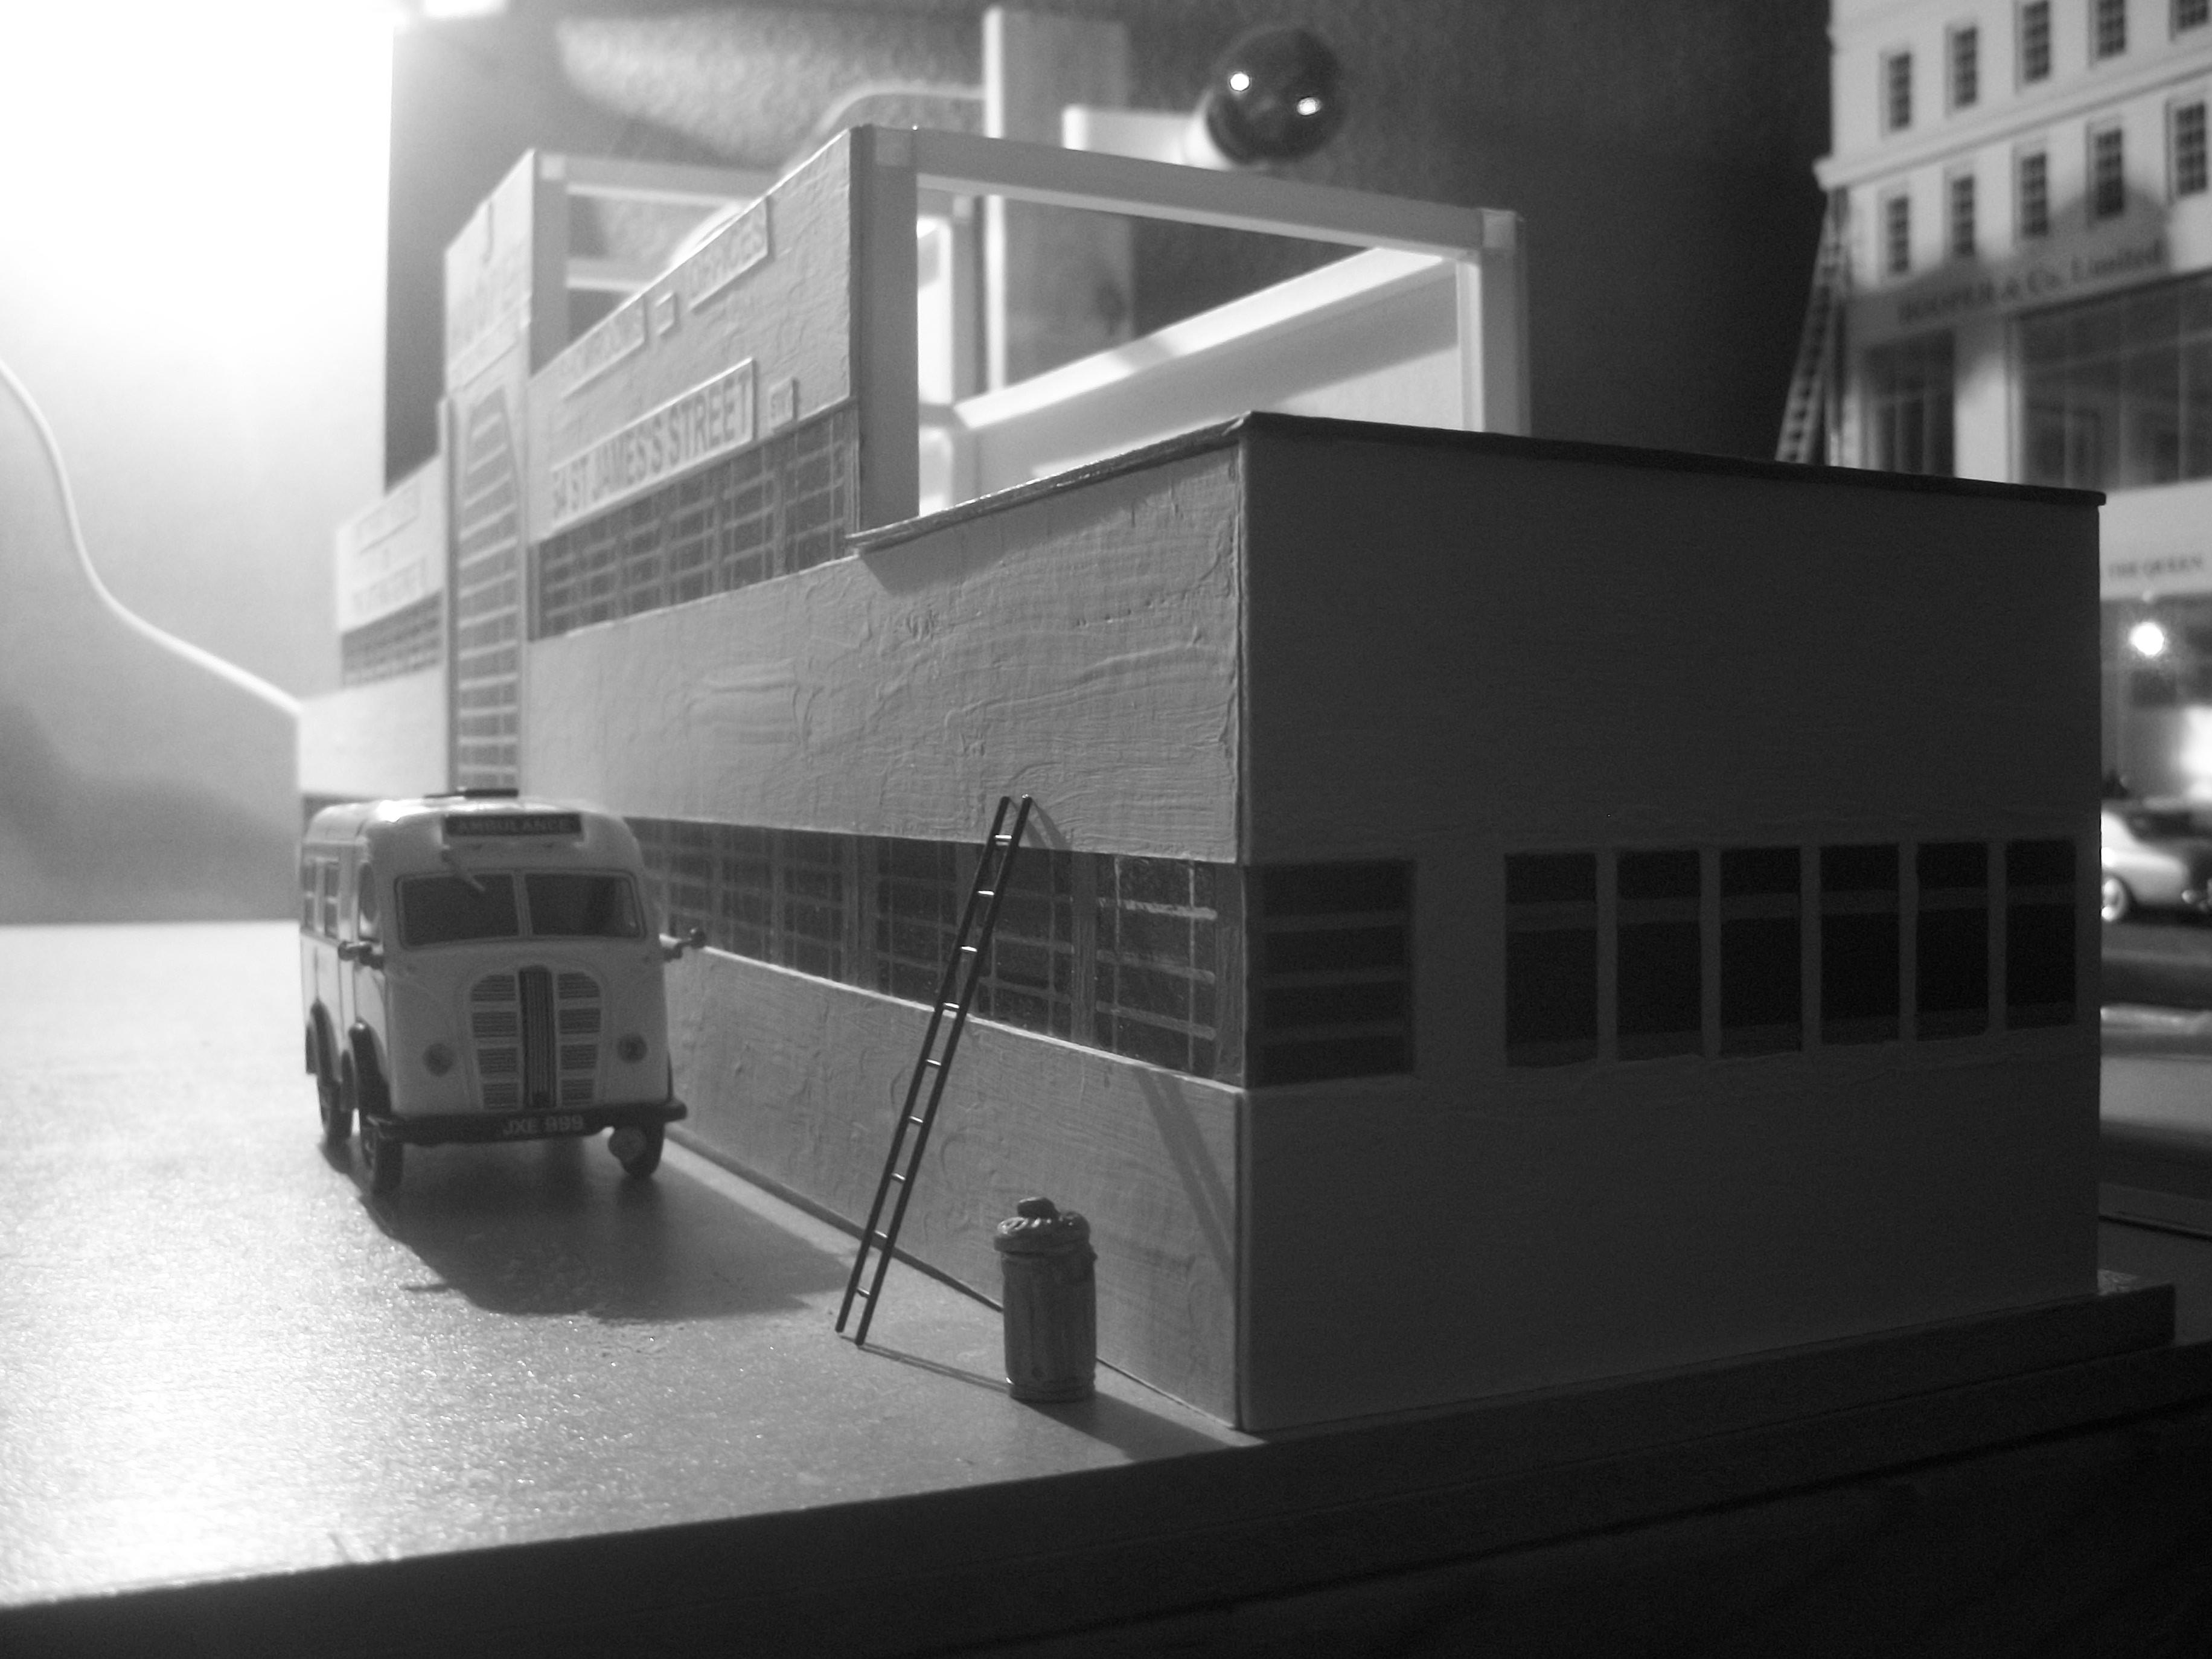
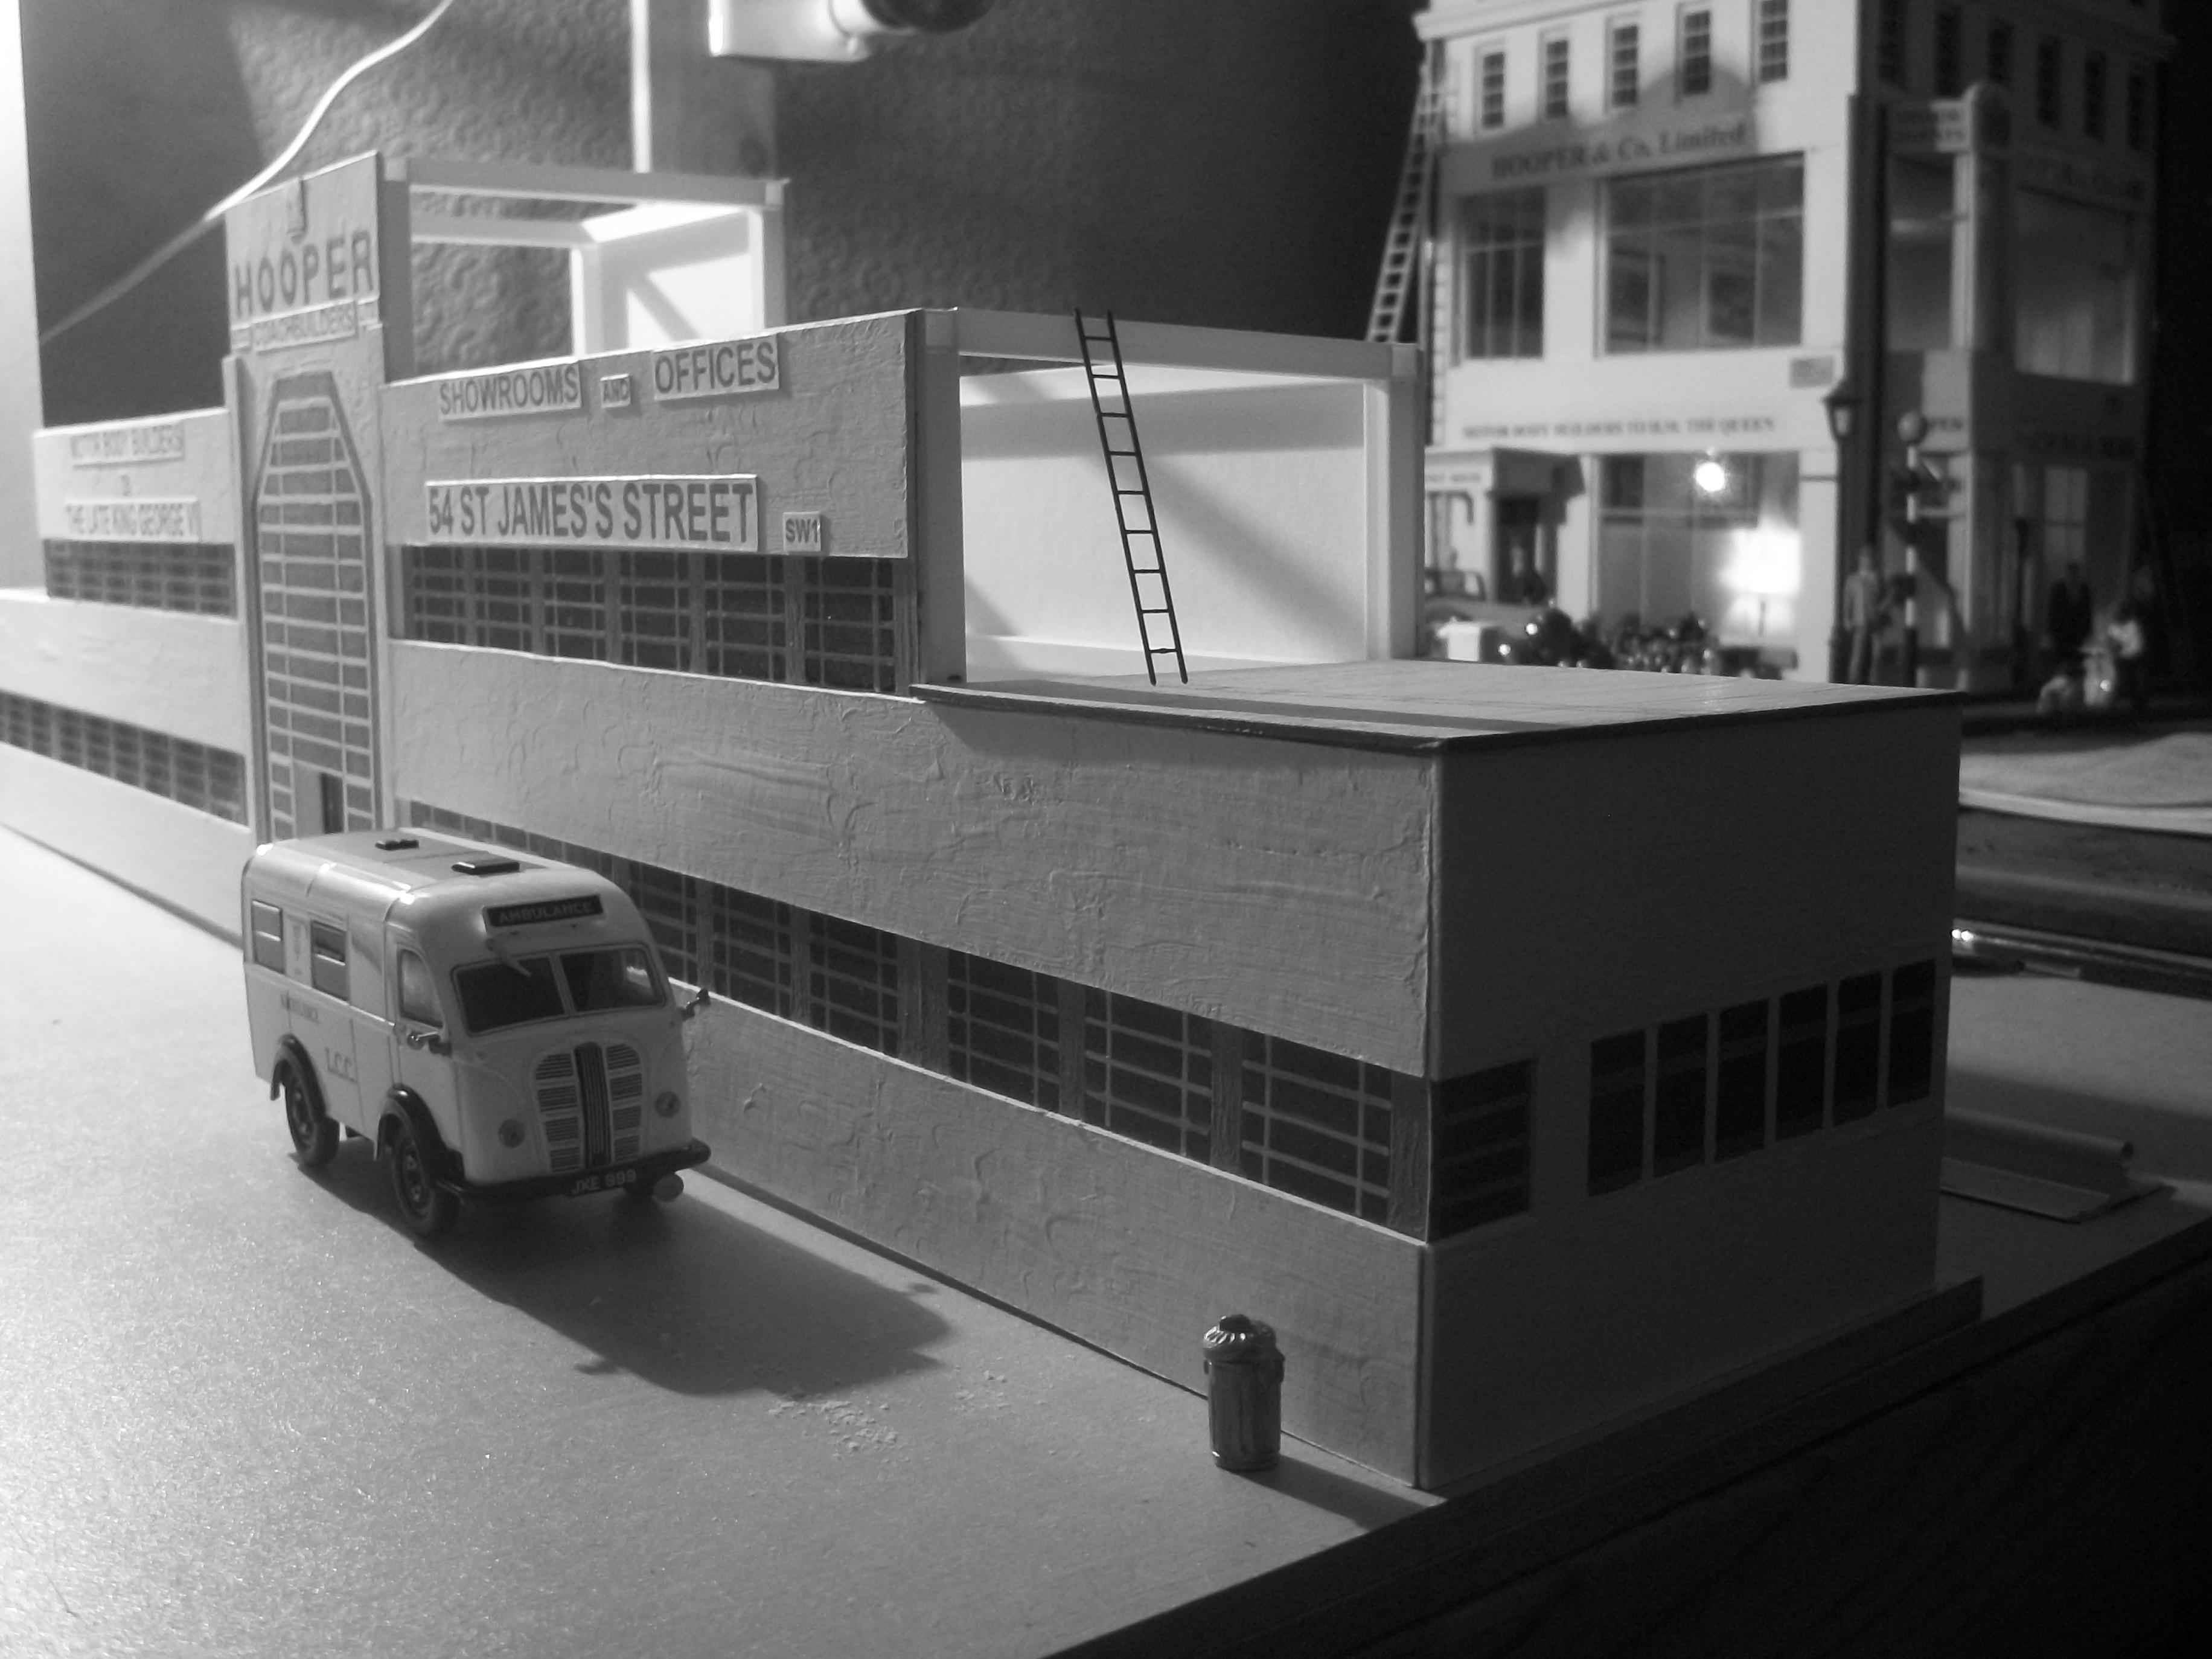
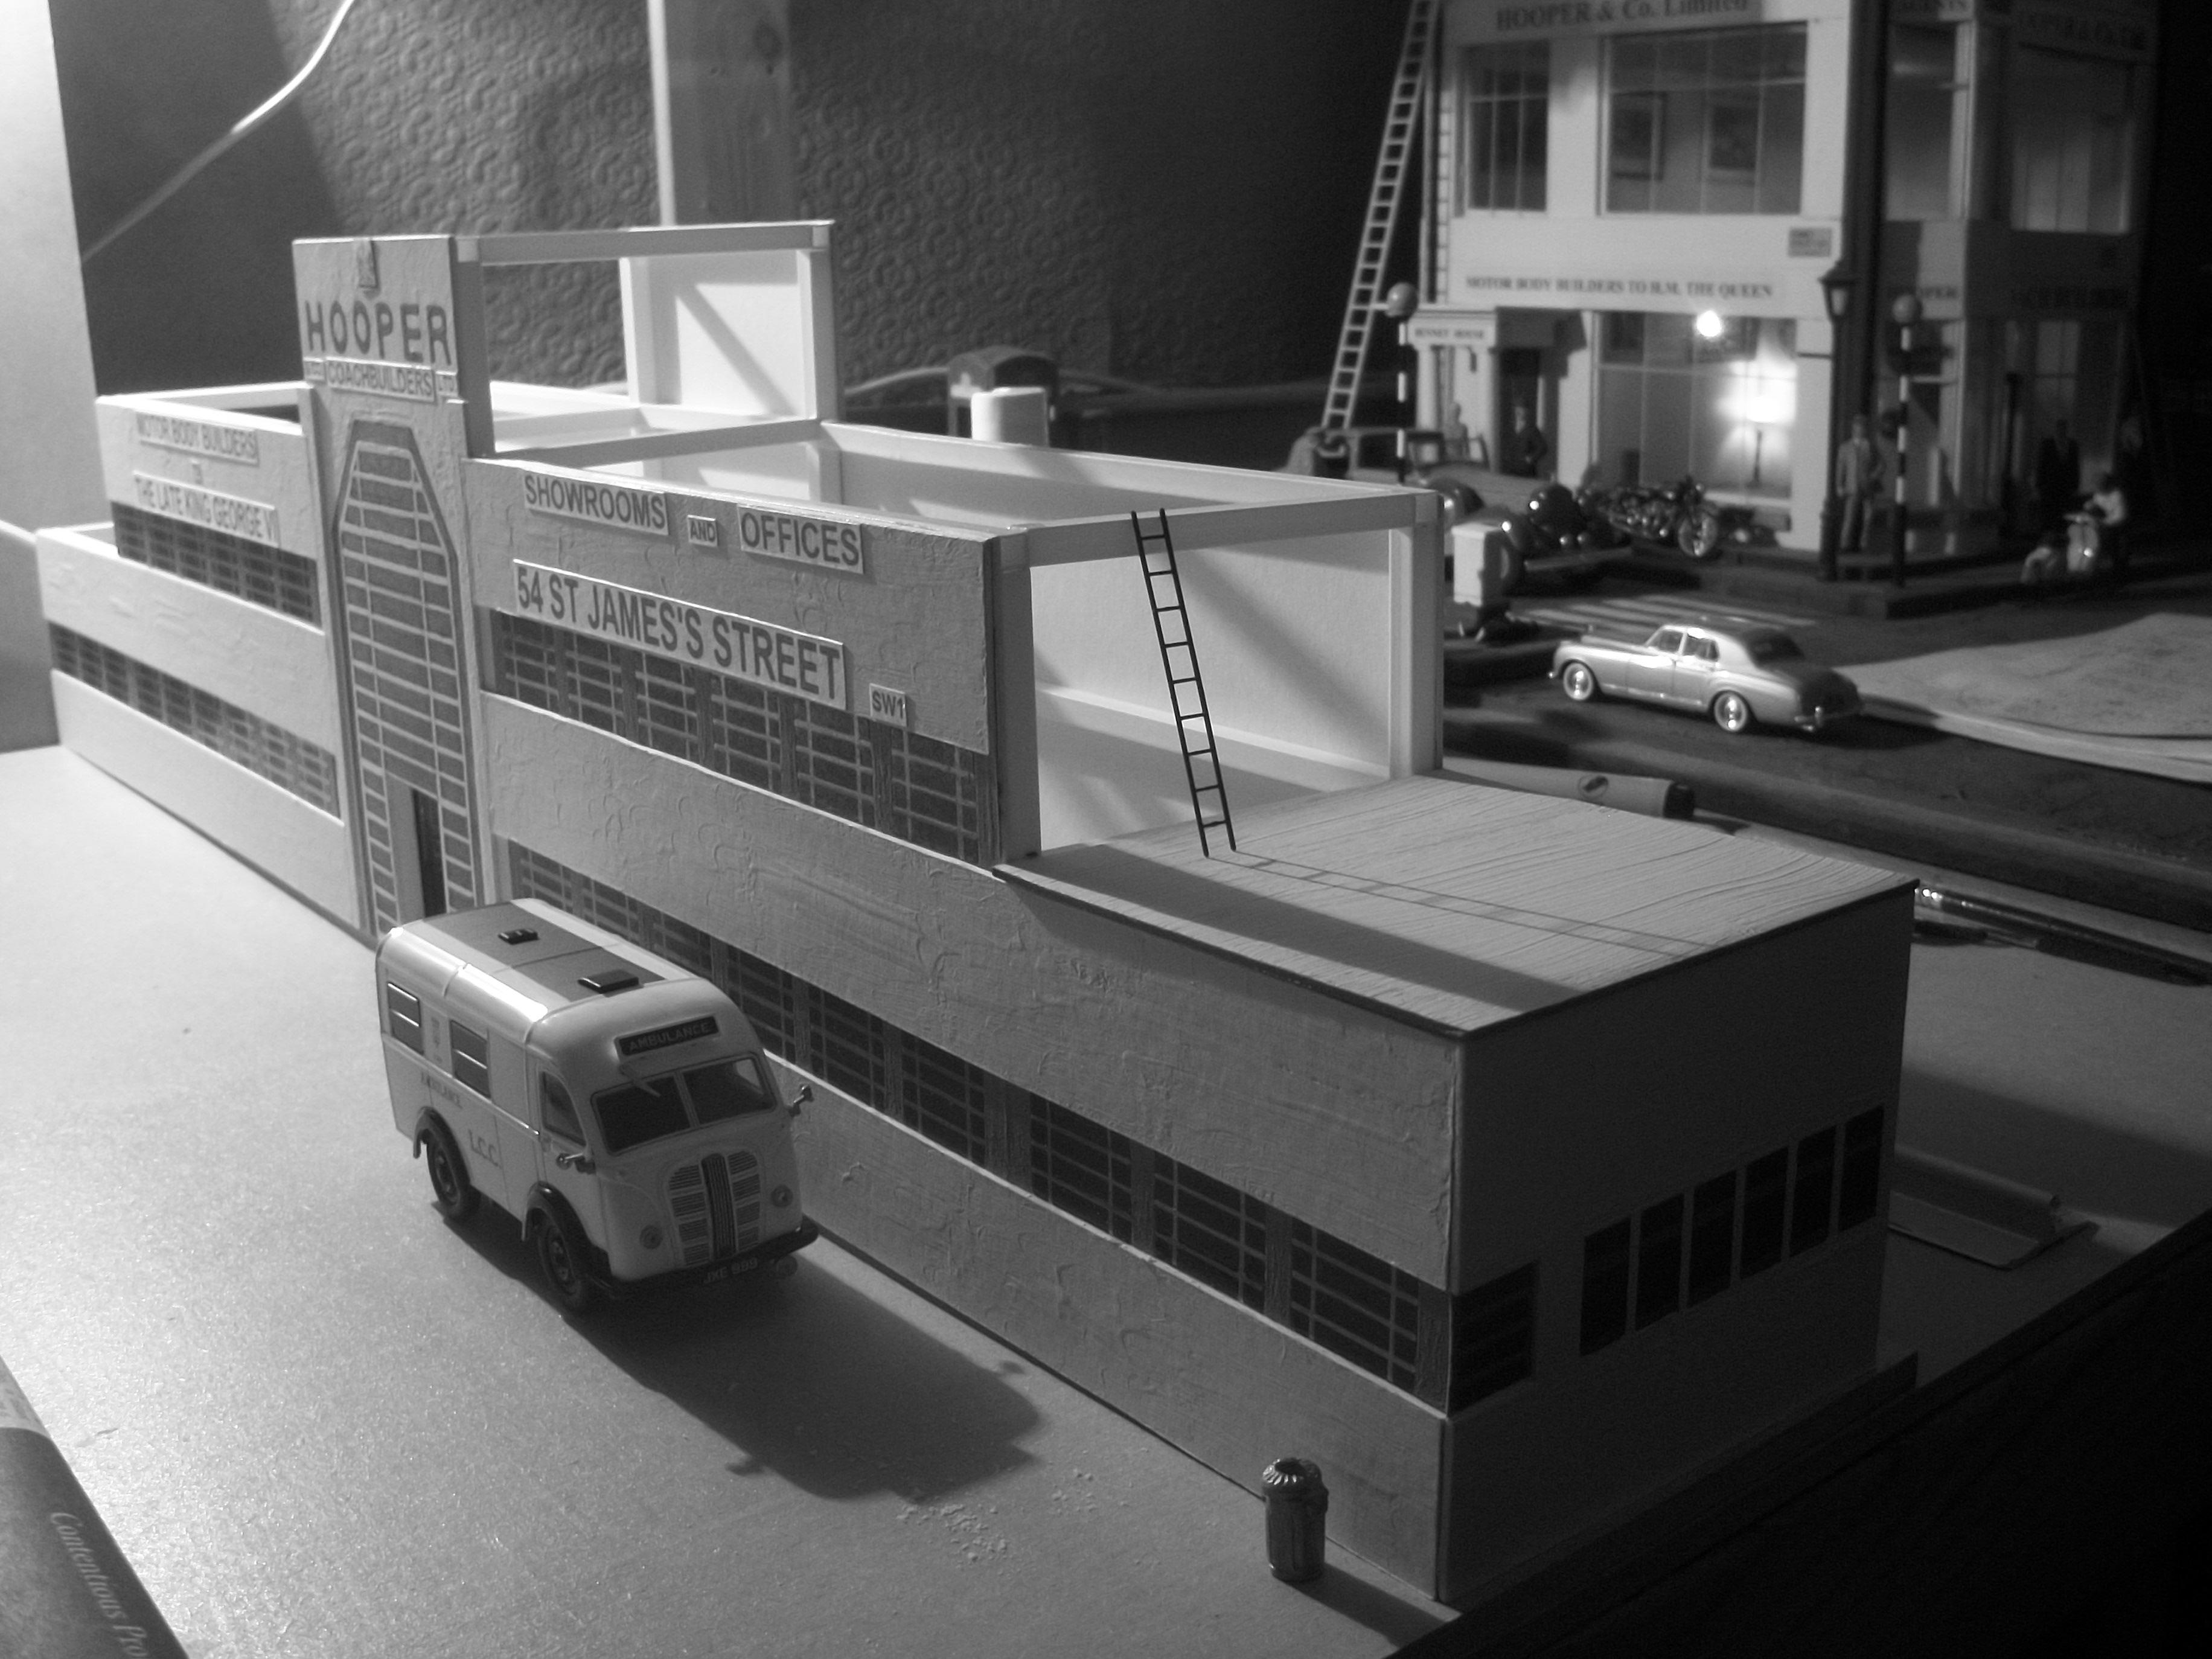
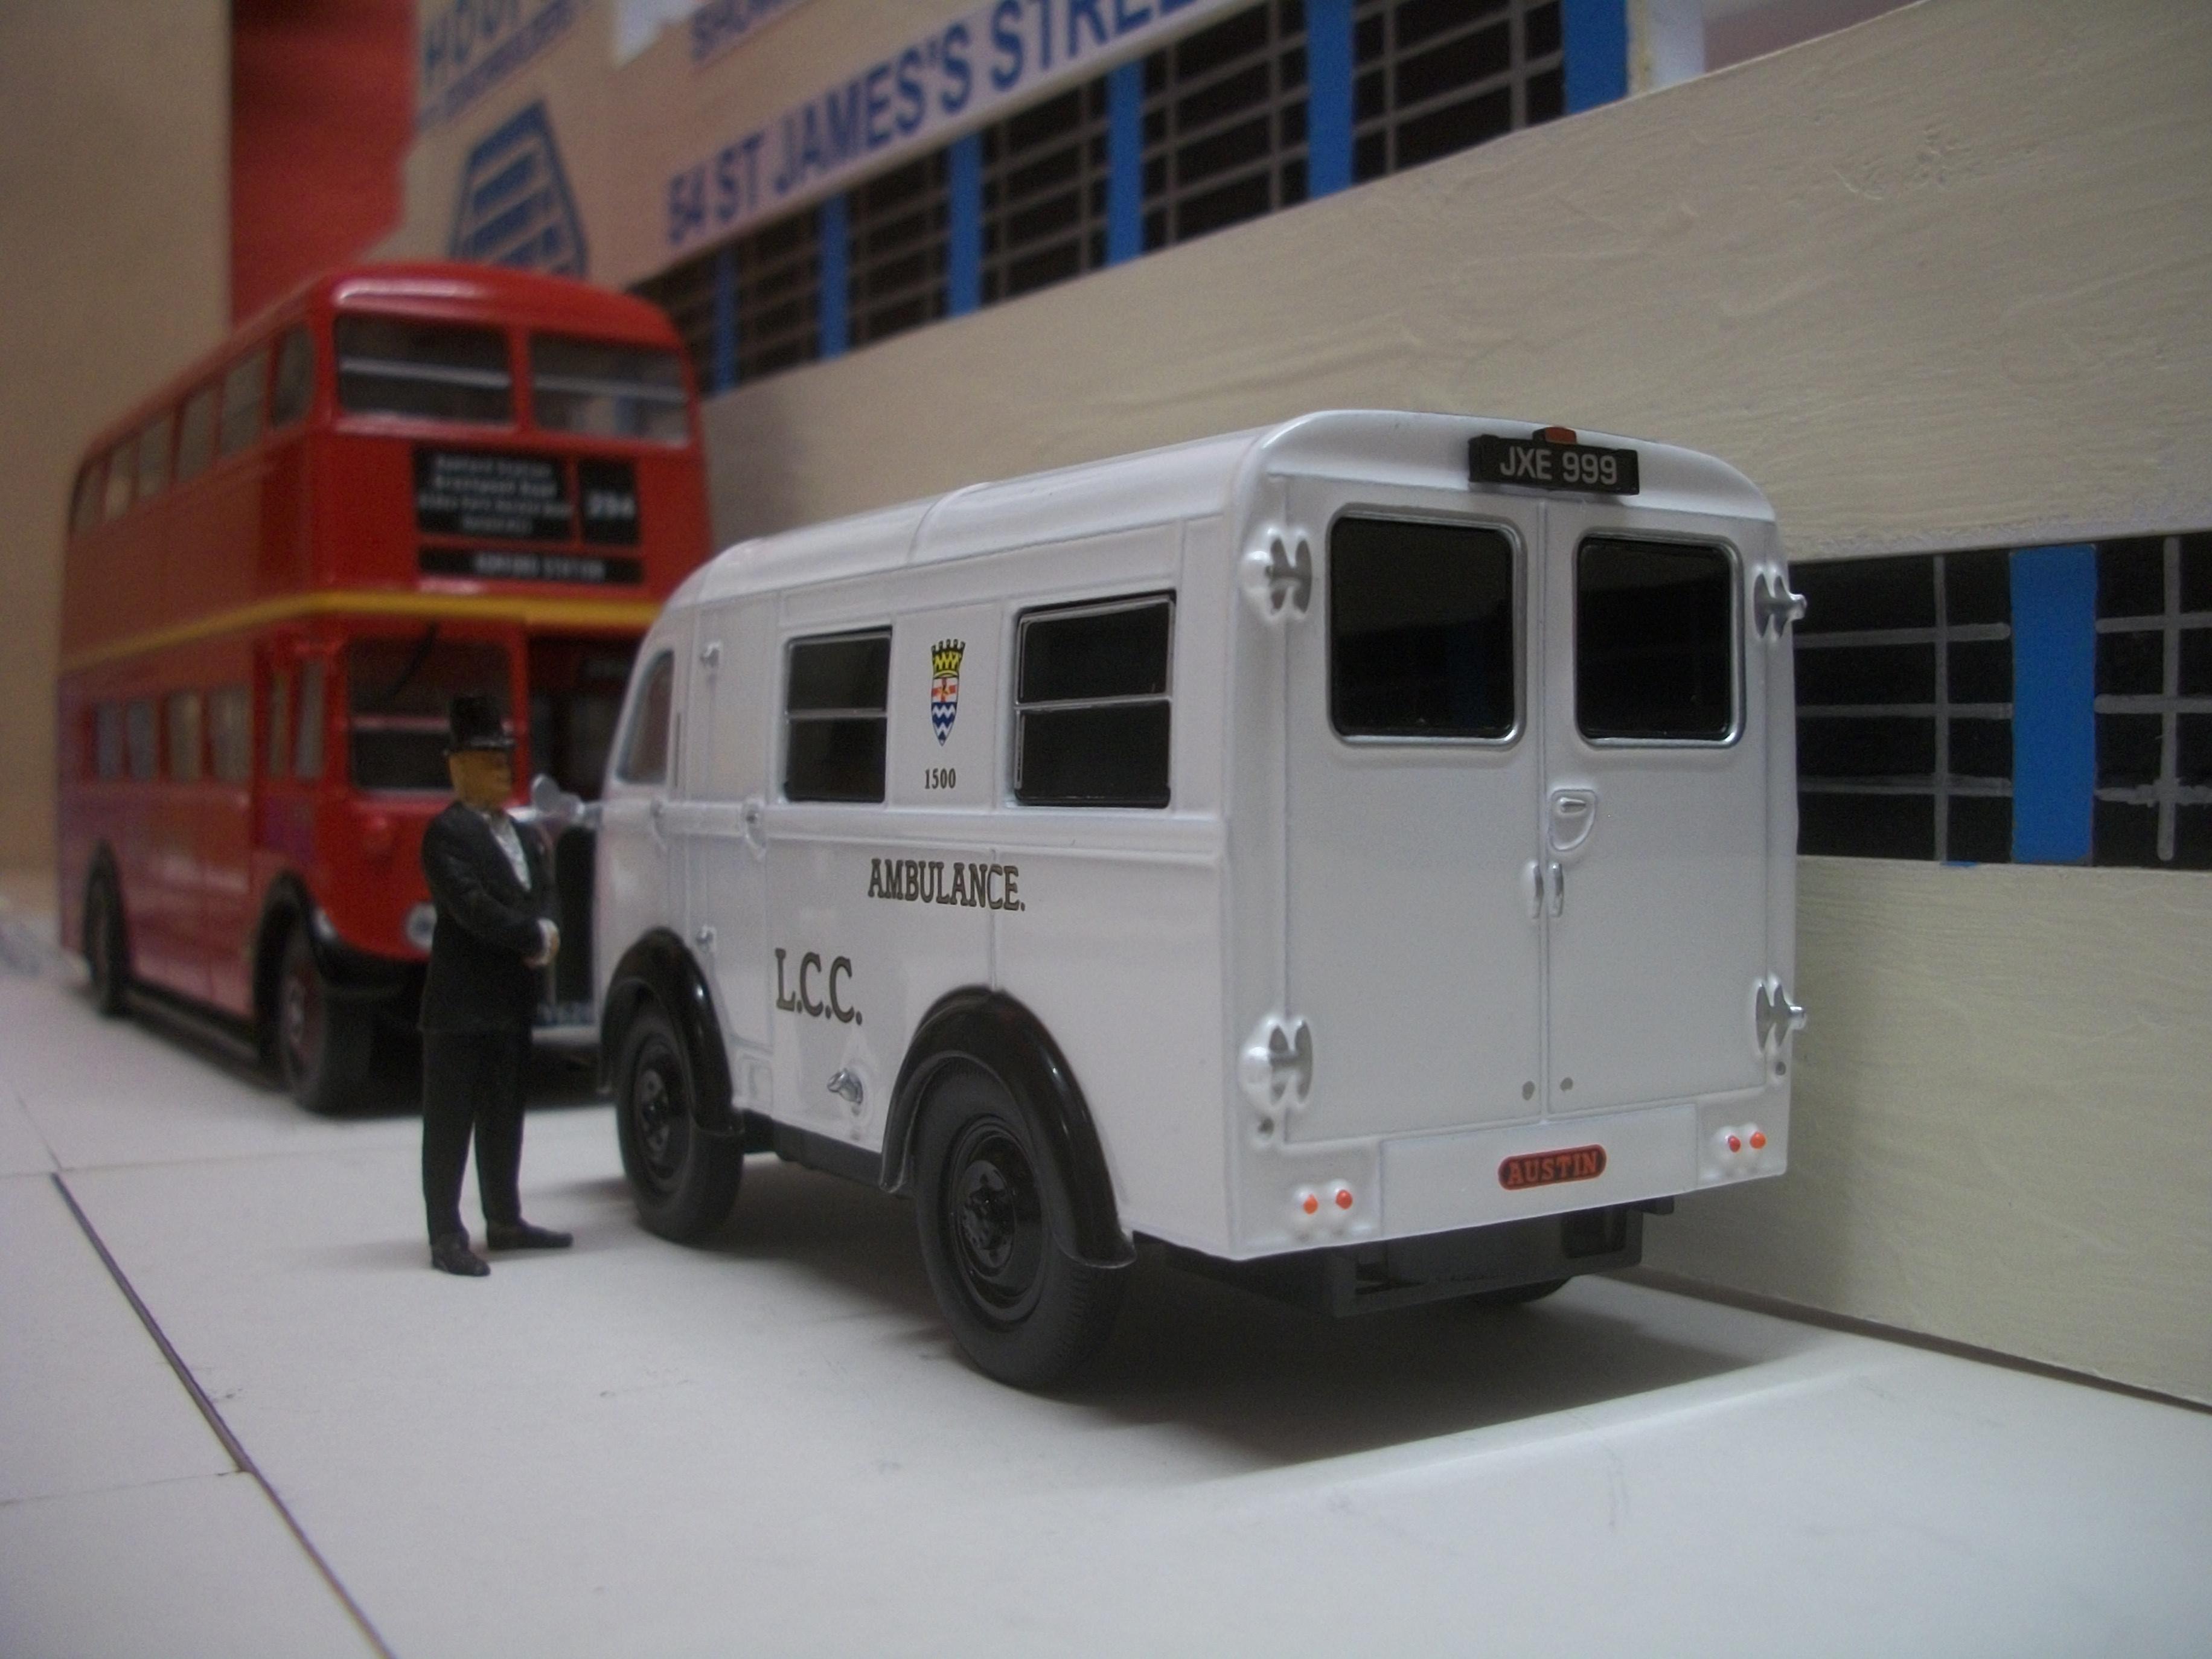
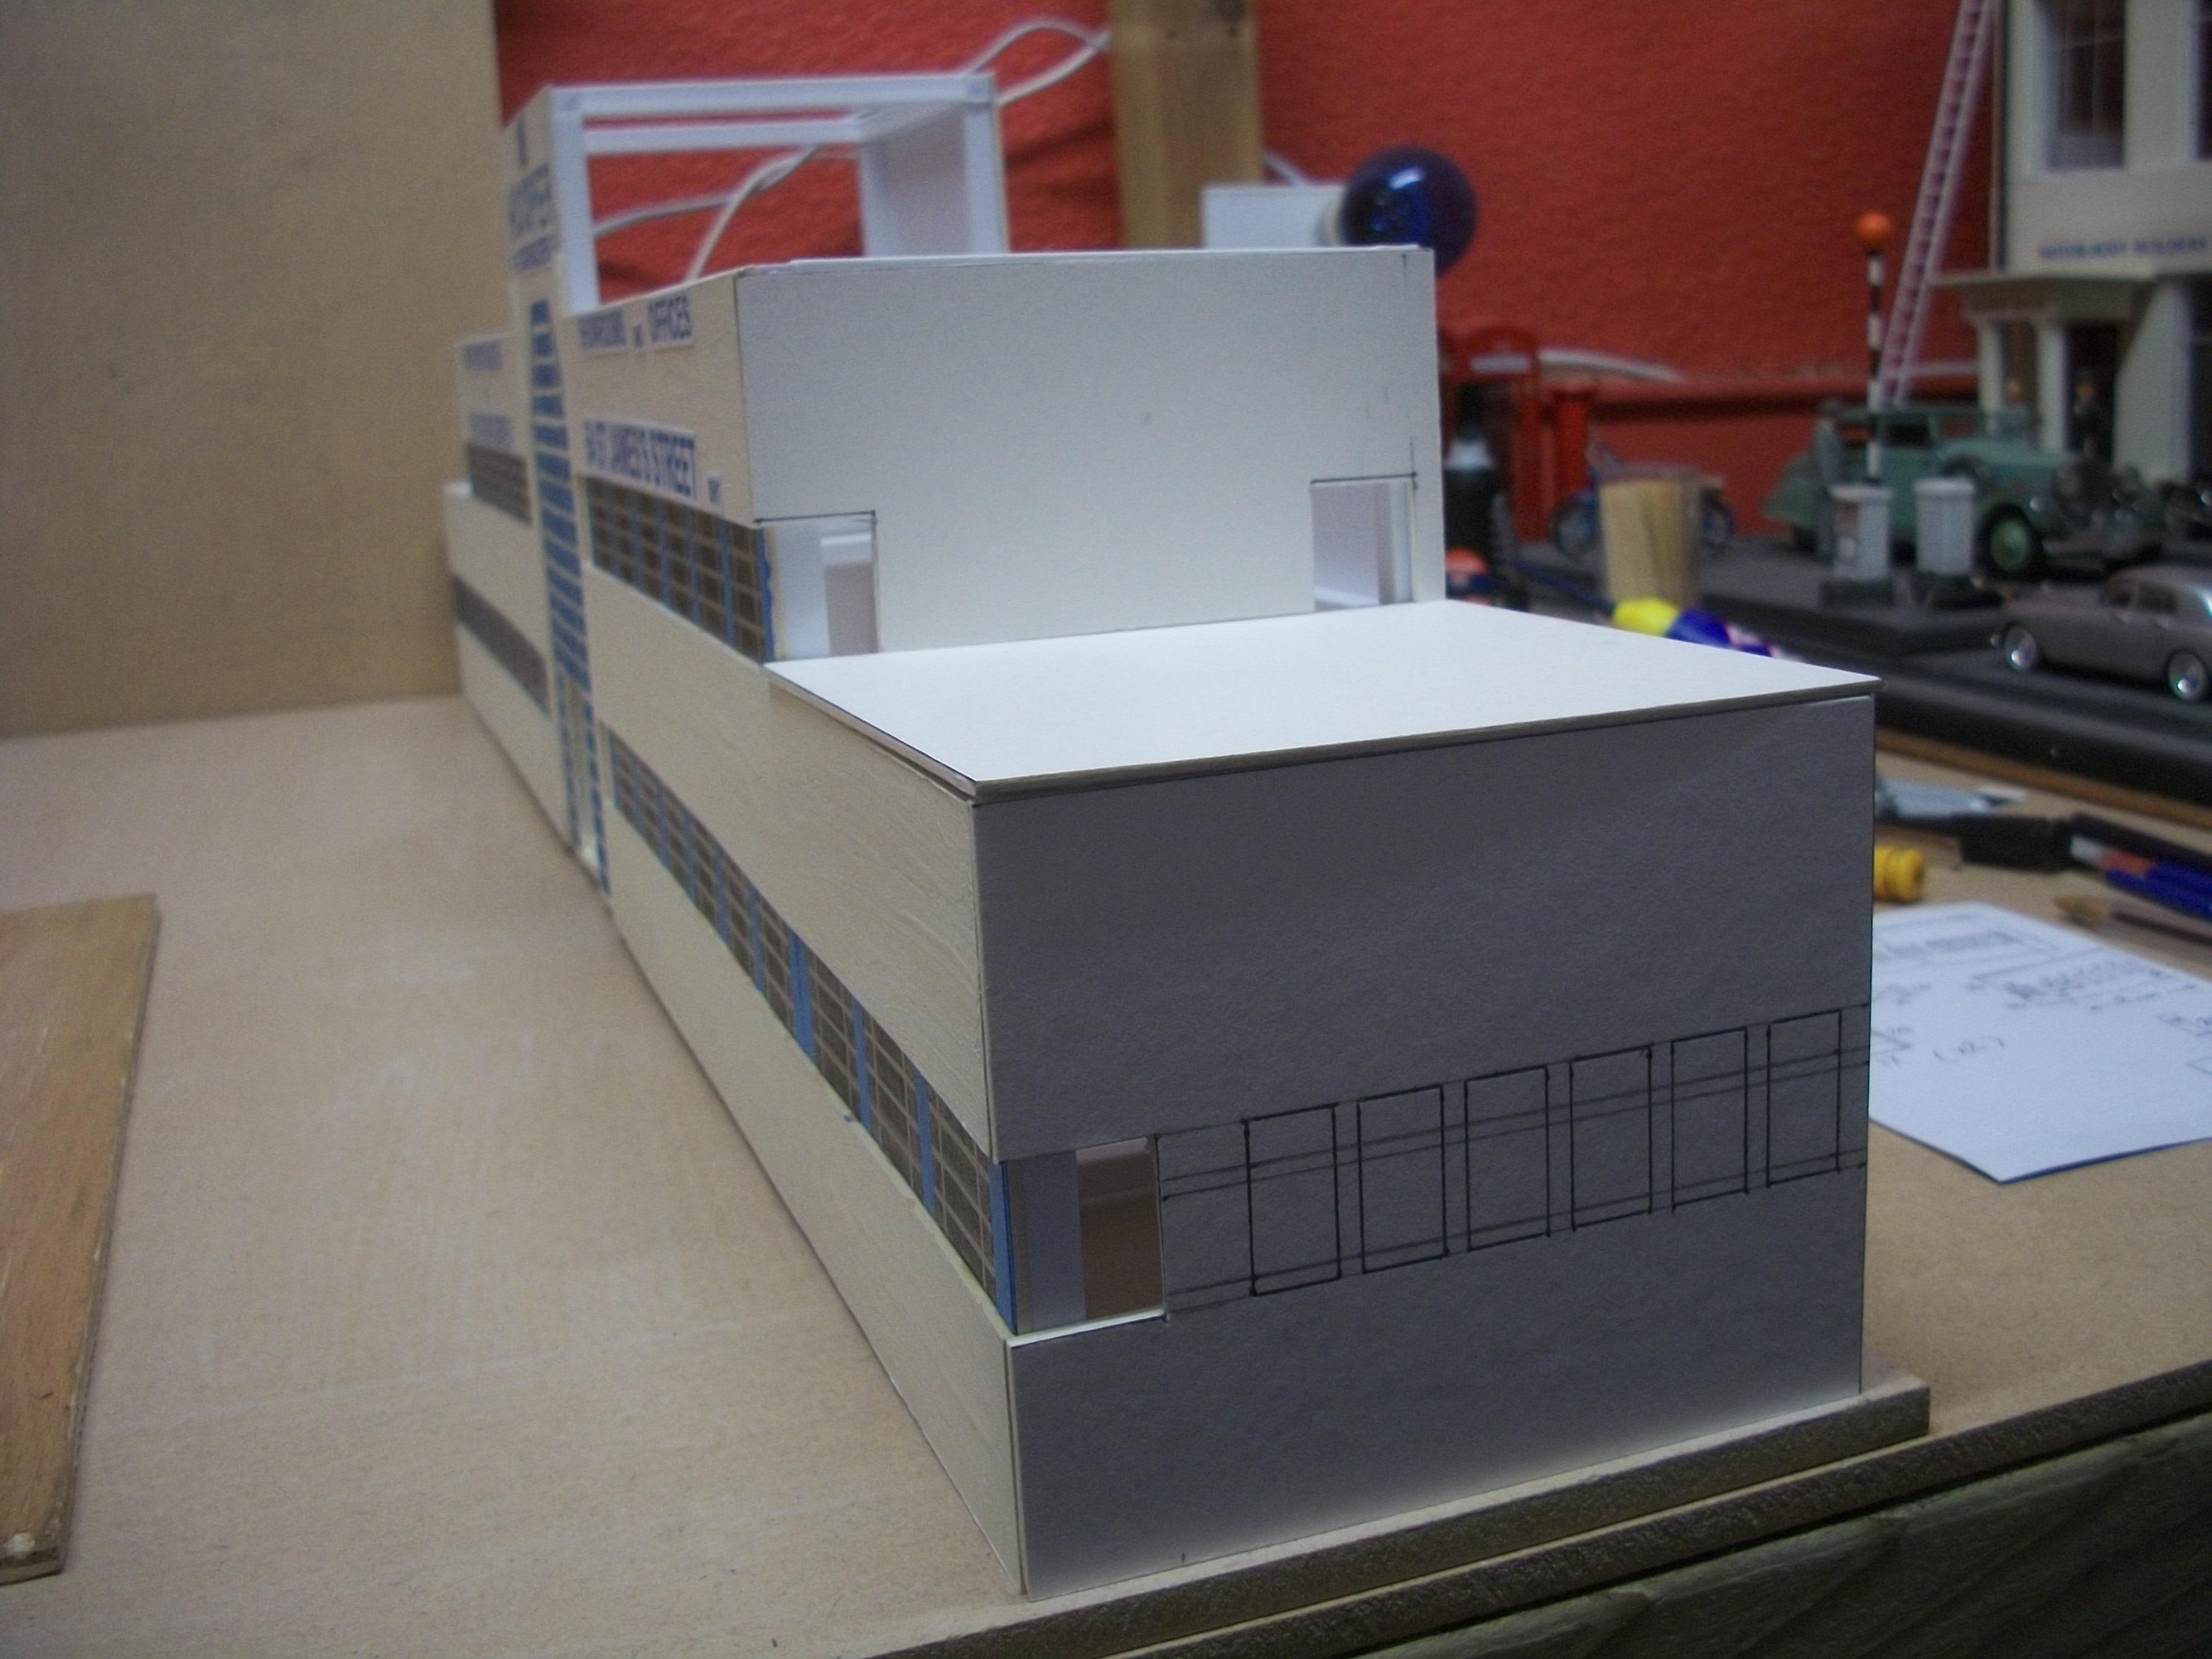
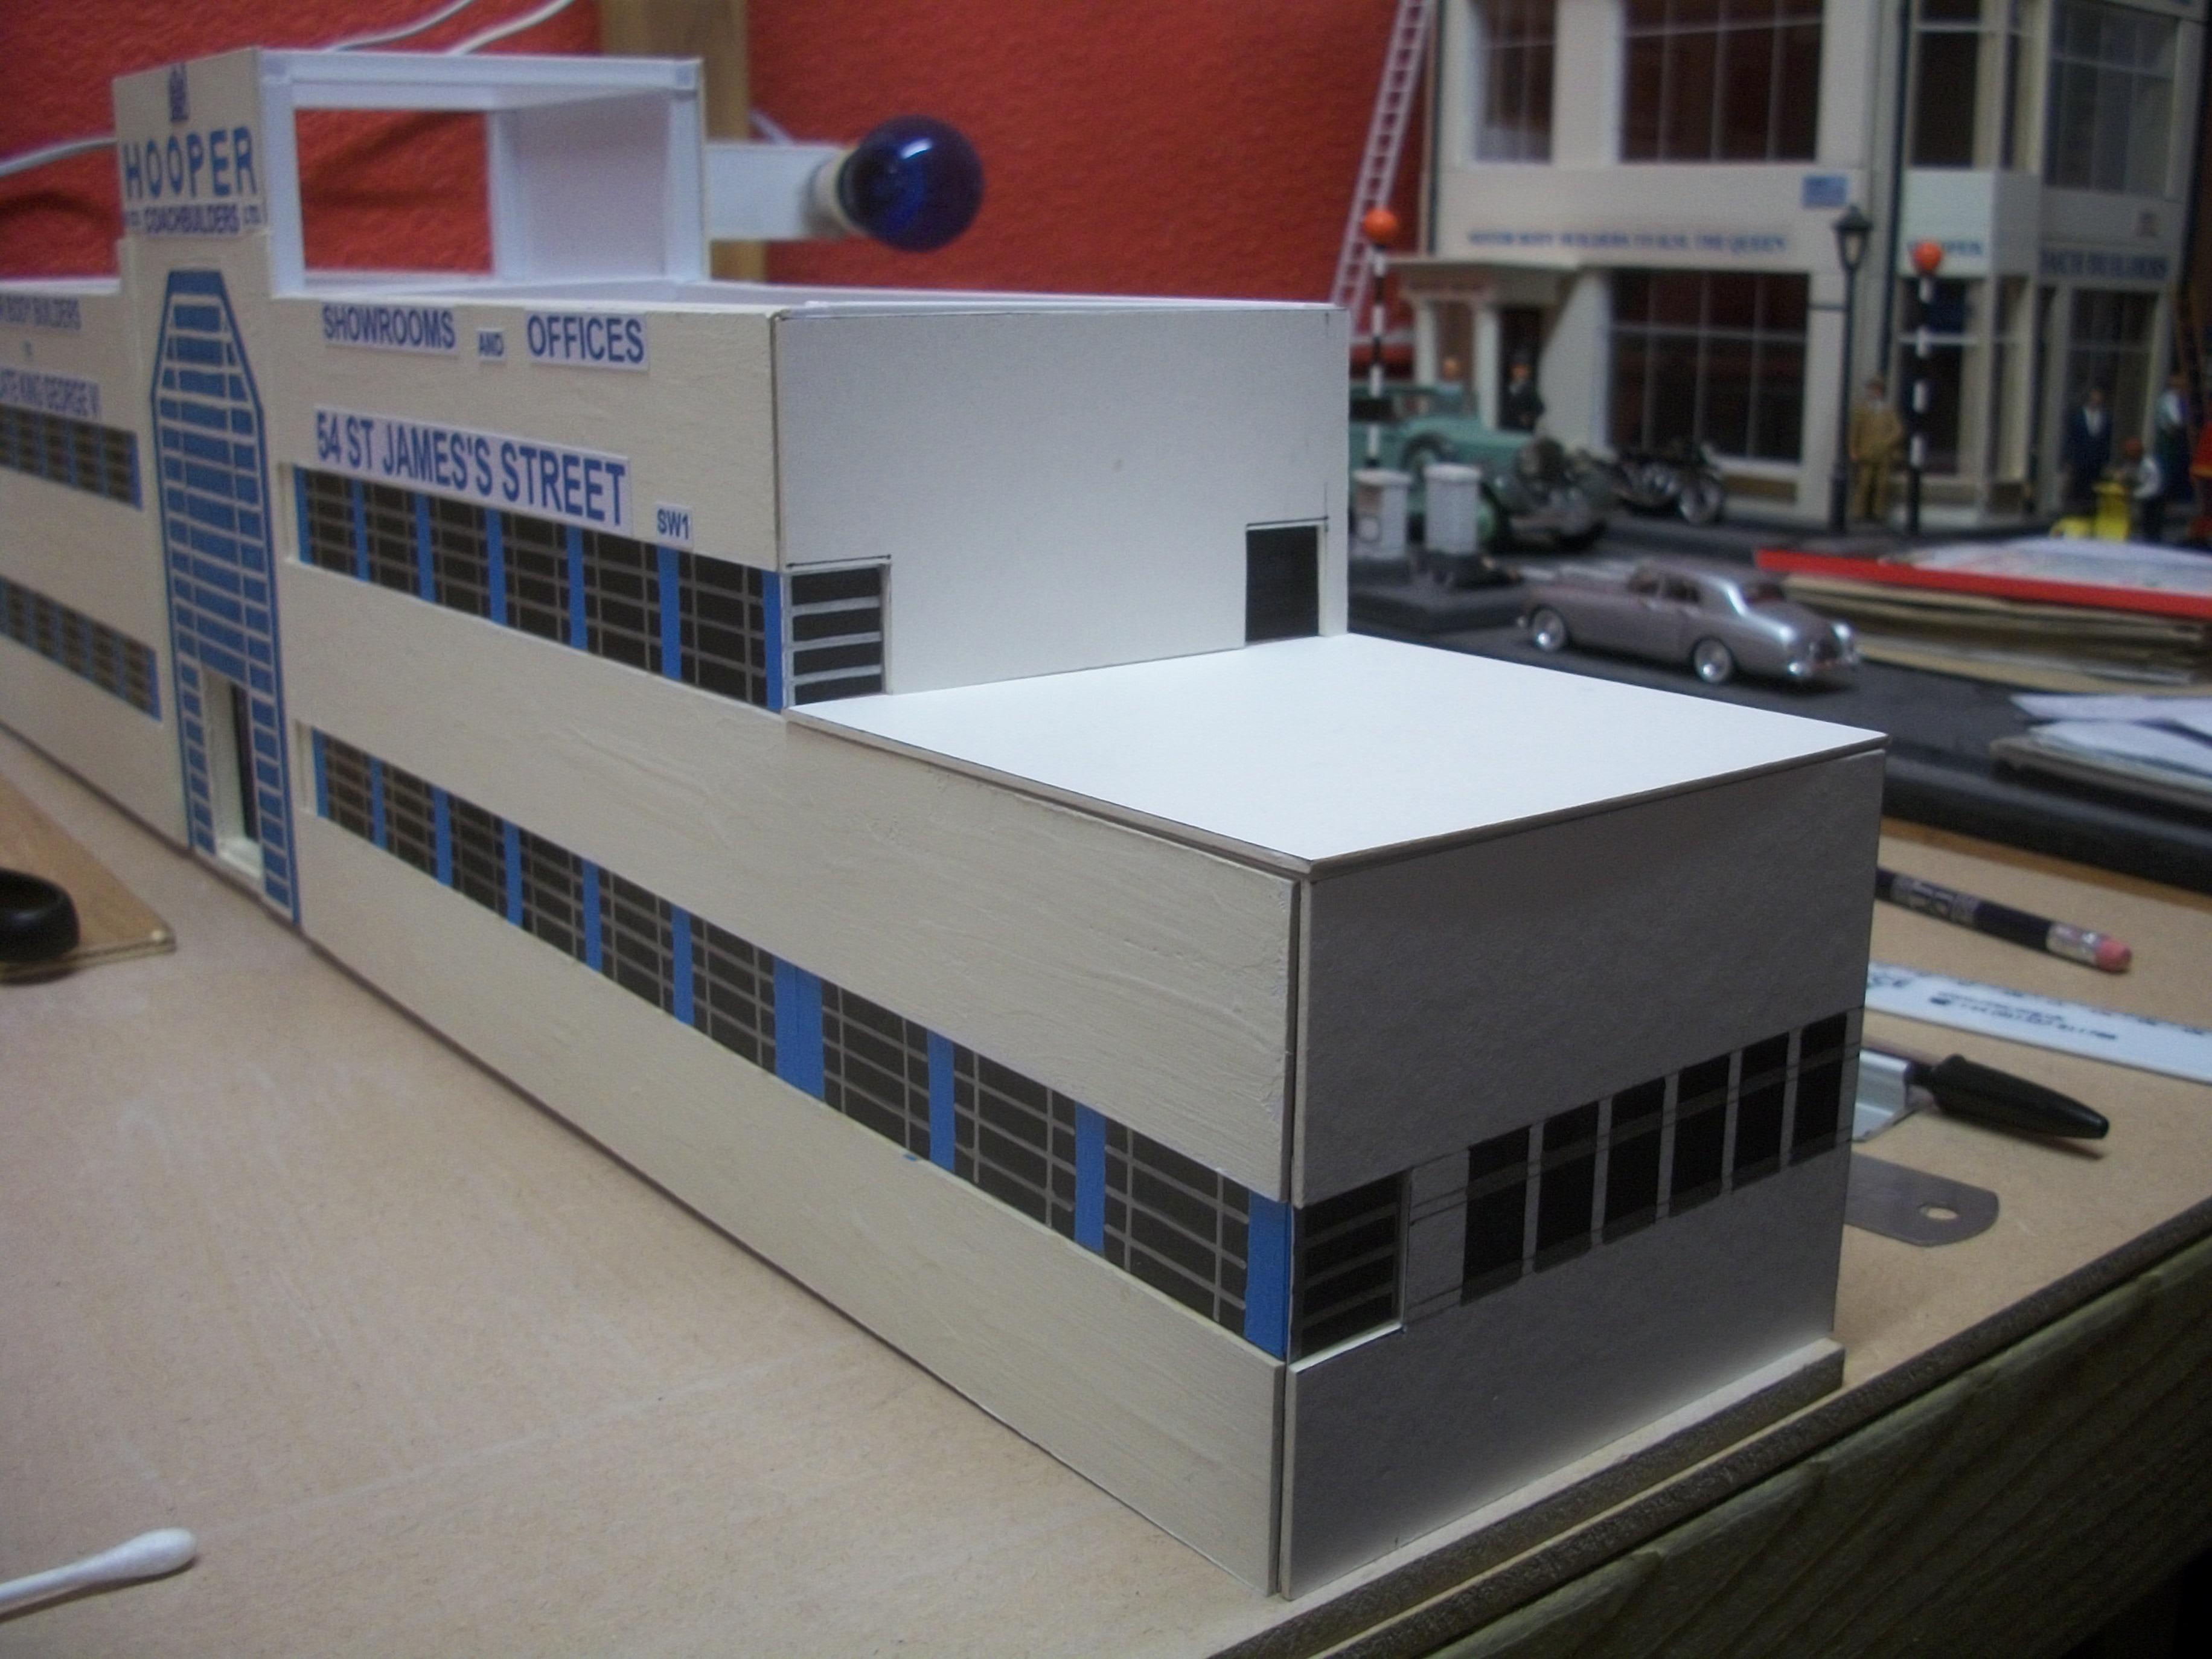
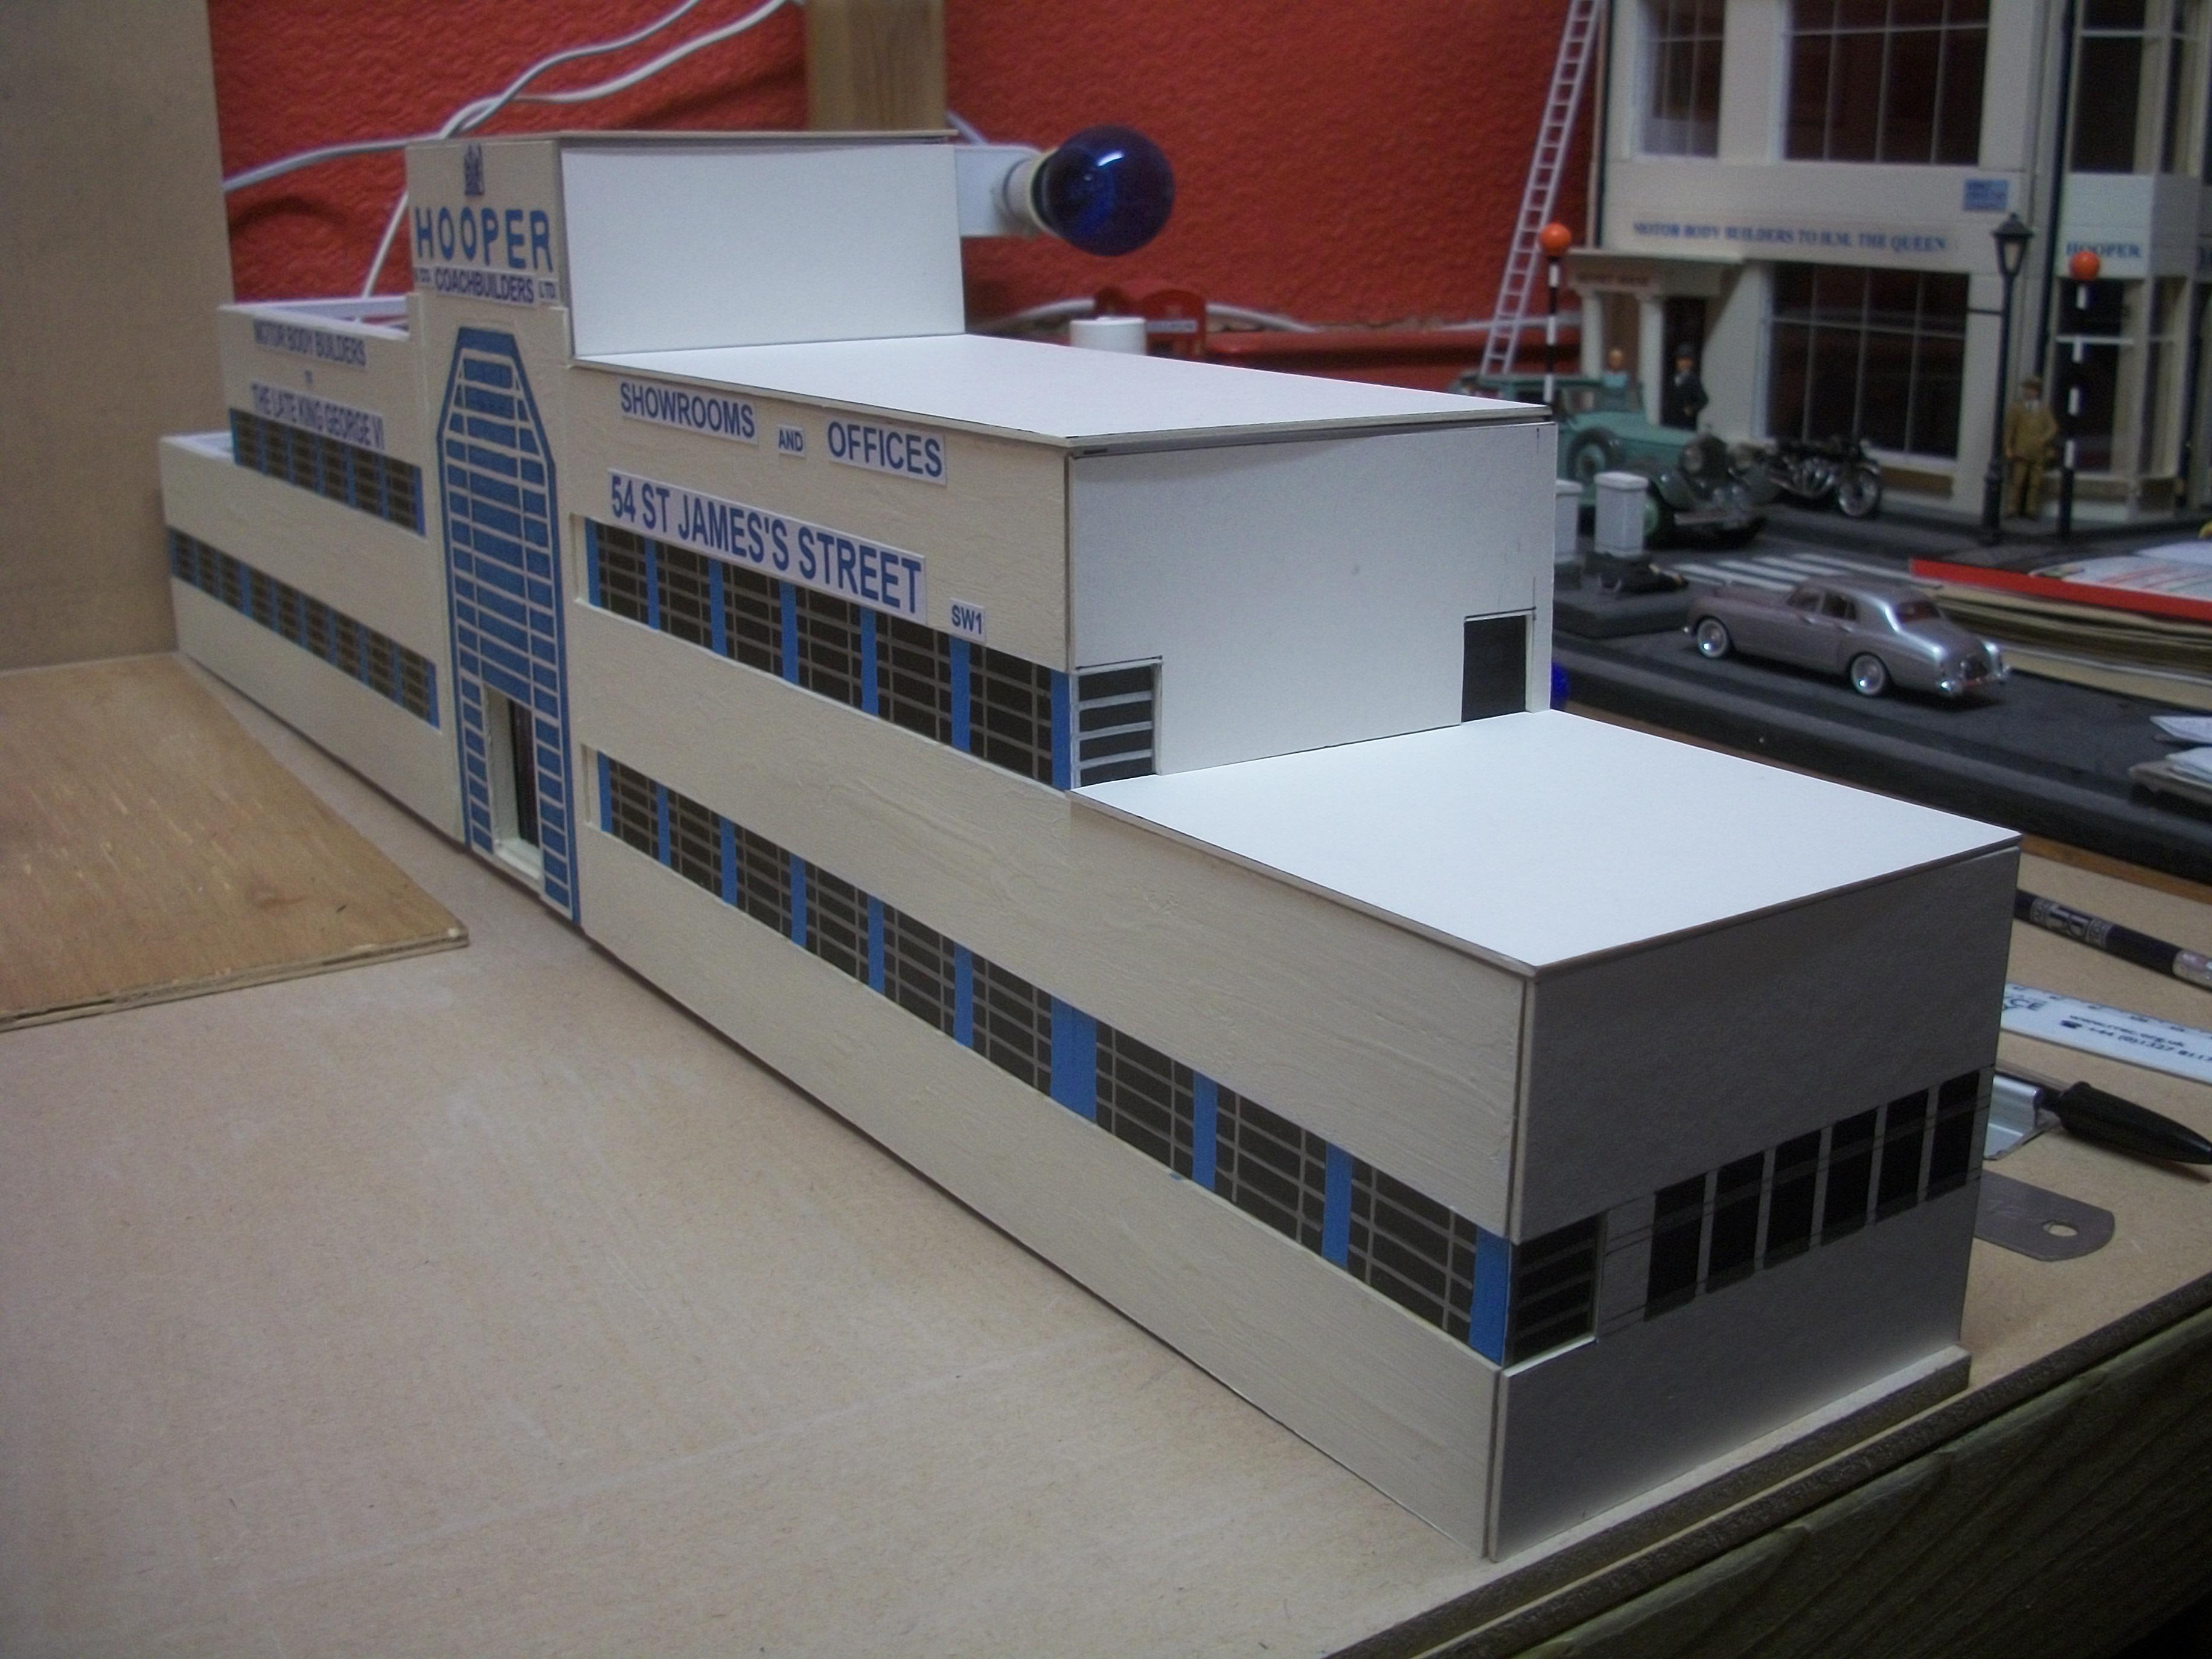
The end wall of the right hand outer wing of the factory building is now in place, and also the roof section panel has been fitted to the same unit. Experimented with a few black & white shots of this end of the factory...... also placing a ladder, a dustbin ( trash can ) and the old Austin ambulance to add some sense of proportion. The daylight bulb is set up low down, to create a more dramatic lighting effect. The resulting photos give me some idea of what potentially could be achieved with this type of composition. David
-
That is an impressive line-up of Testarossa's you have there, Gary ( or Testa Rossa's, as I have seen both spellings on the Internet )...... and as Bill says, the BBrurago is way too large. My wife picked up a 1:18 scale BBurago Ferrari 250 TR very cheaply, and it is HUGE, even for 1:18 scale. You would think the manufacturers of diecasts and kits would take more care to get their calculations right. ( maybe the 1:18 scale version by BBurago is correct, and perhaps it was only the 1:24 scale version that was wrong? ( if so, I stand corrected ). David
-
Well Joe..... I am no expert on Chargers, or General Lee either..... far from it, but that is one superb build that you have there. The paint job, the wheels and the stance, the interior and the engine particularly..... outstanding work. David
-
I see, Tom....... there are various limitations involved with the size of a diorama, like for example I have to be able to get two or even three dioramas into the back of my vehicle for transportation. Also, I need to be able to get those completed projects through the doorway of my house, for loading the vehicle. David
-
What is the footprint of your project, Tom?.........or has it not been finalised yet? David
-
Both of the 1:43 scale dioramas have a baseboard that is 75 cm x 75 cm, so when they are placed together as one diorama effectively, the footprint of the completed project will be 75 cm x 150 cm. The 1:24 scale diorama will be displayed on the same table at the annual RREC show in June 2020, alongside the two 1:43 scale dioramas, with the footprint of the larger scale baseboard being 36 inches x 31 inches. The other 1:43 scale diorama that I built was sold to a French gentleman from Paris, at last year's RREC show. David
-
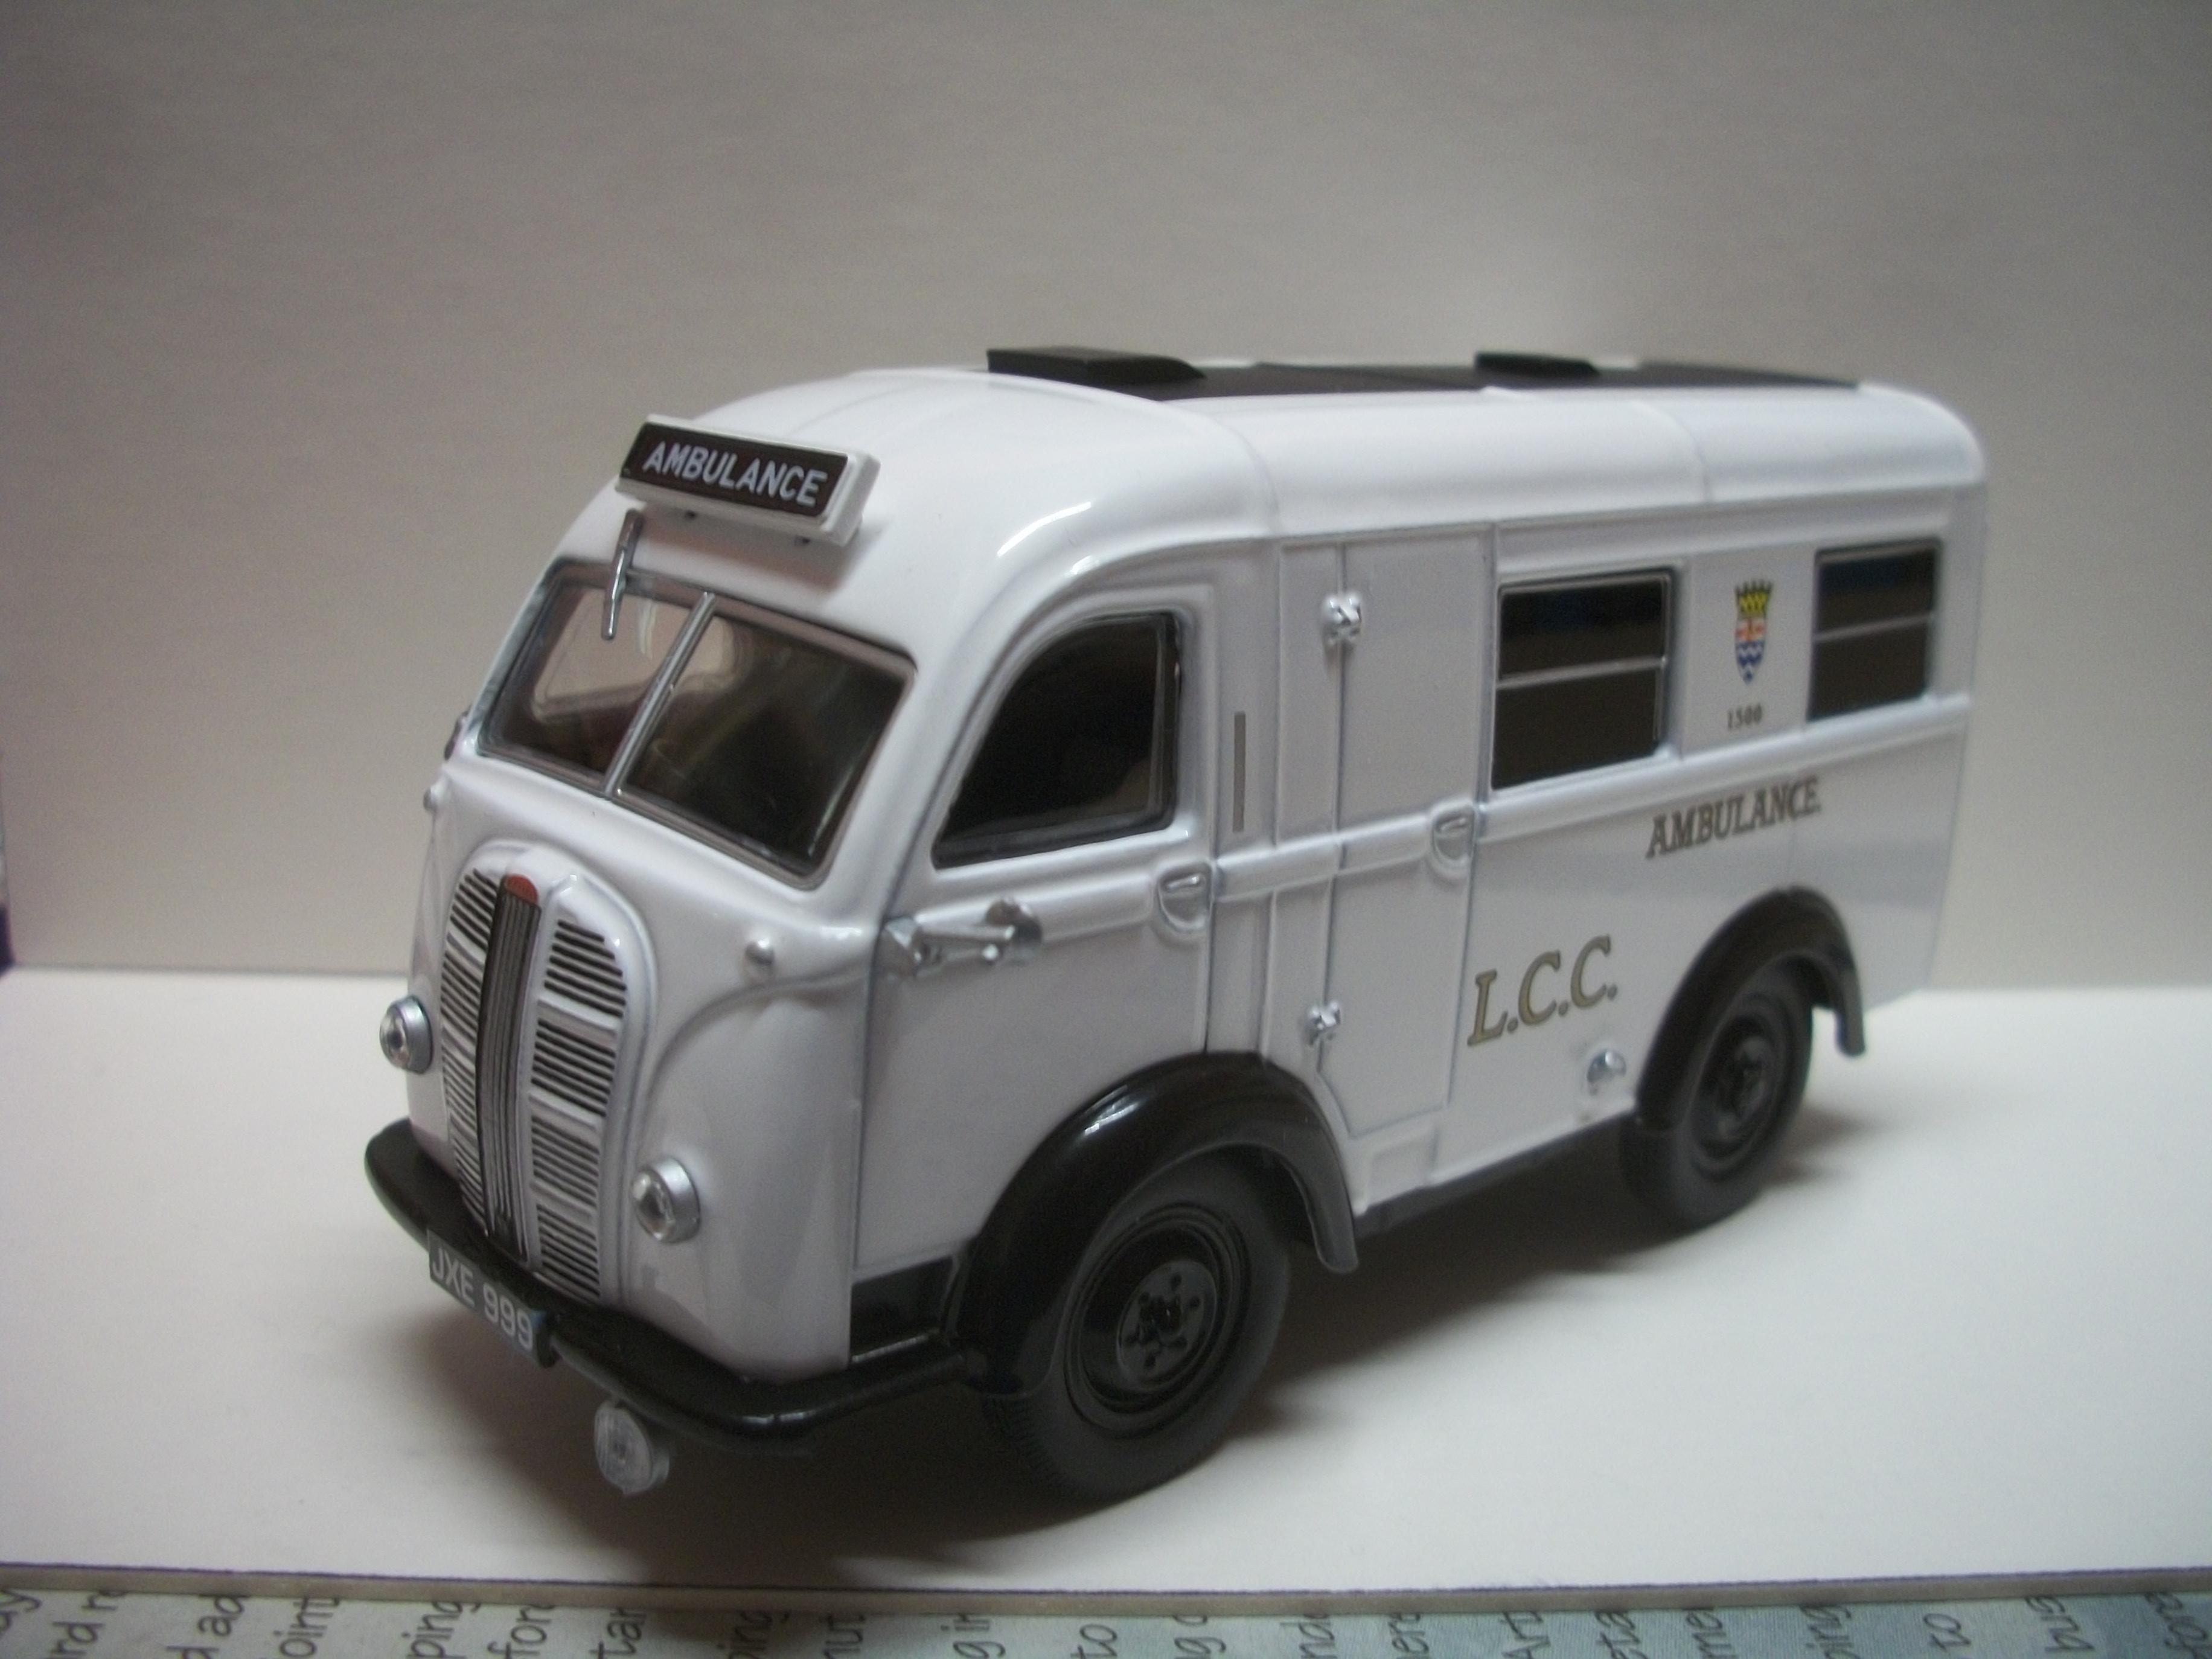
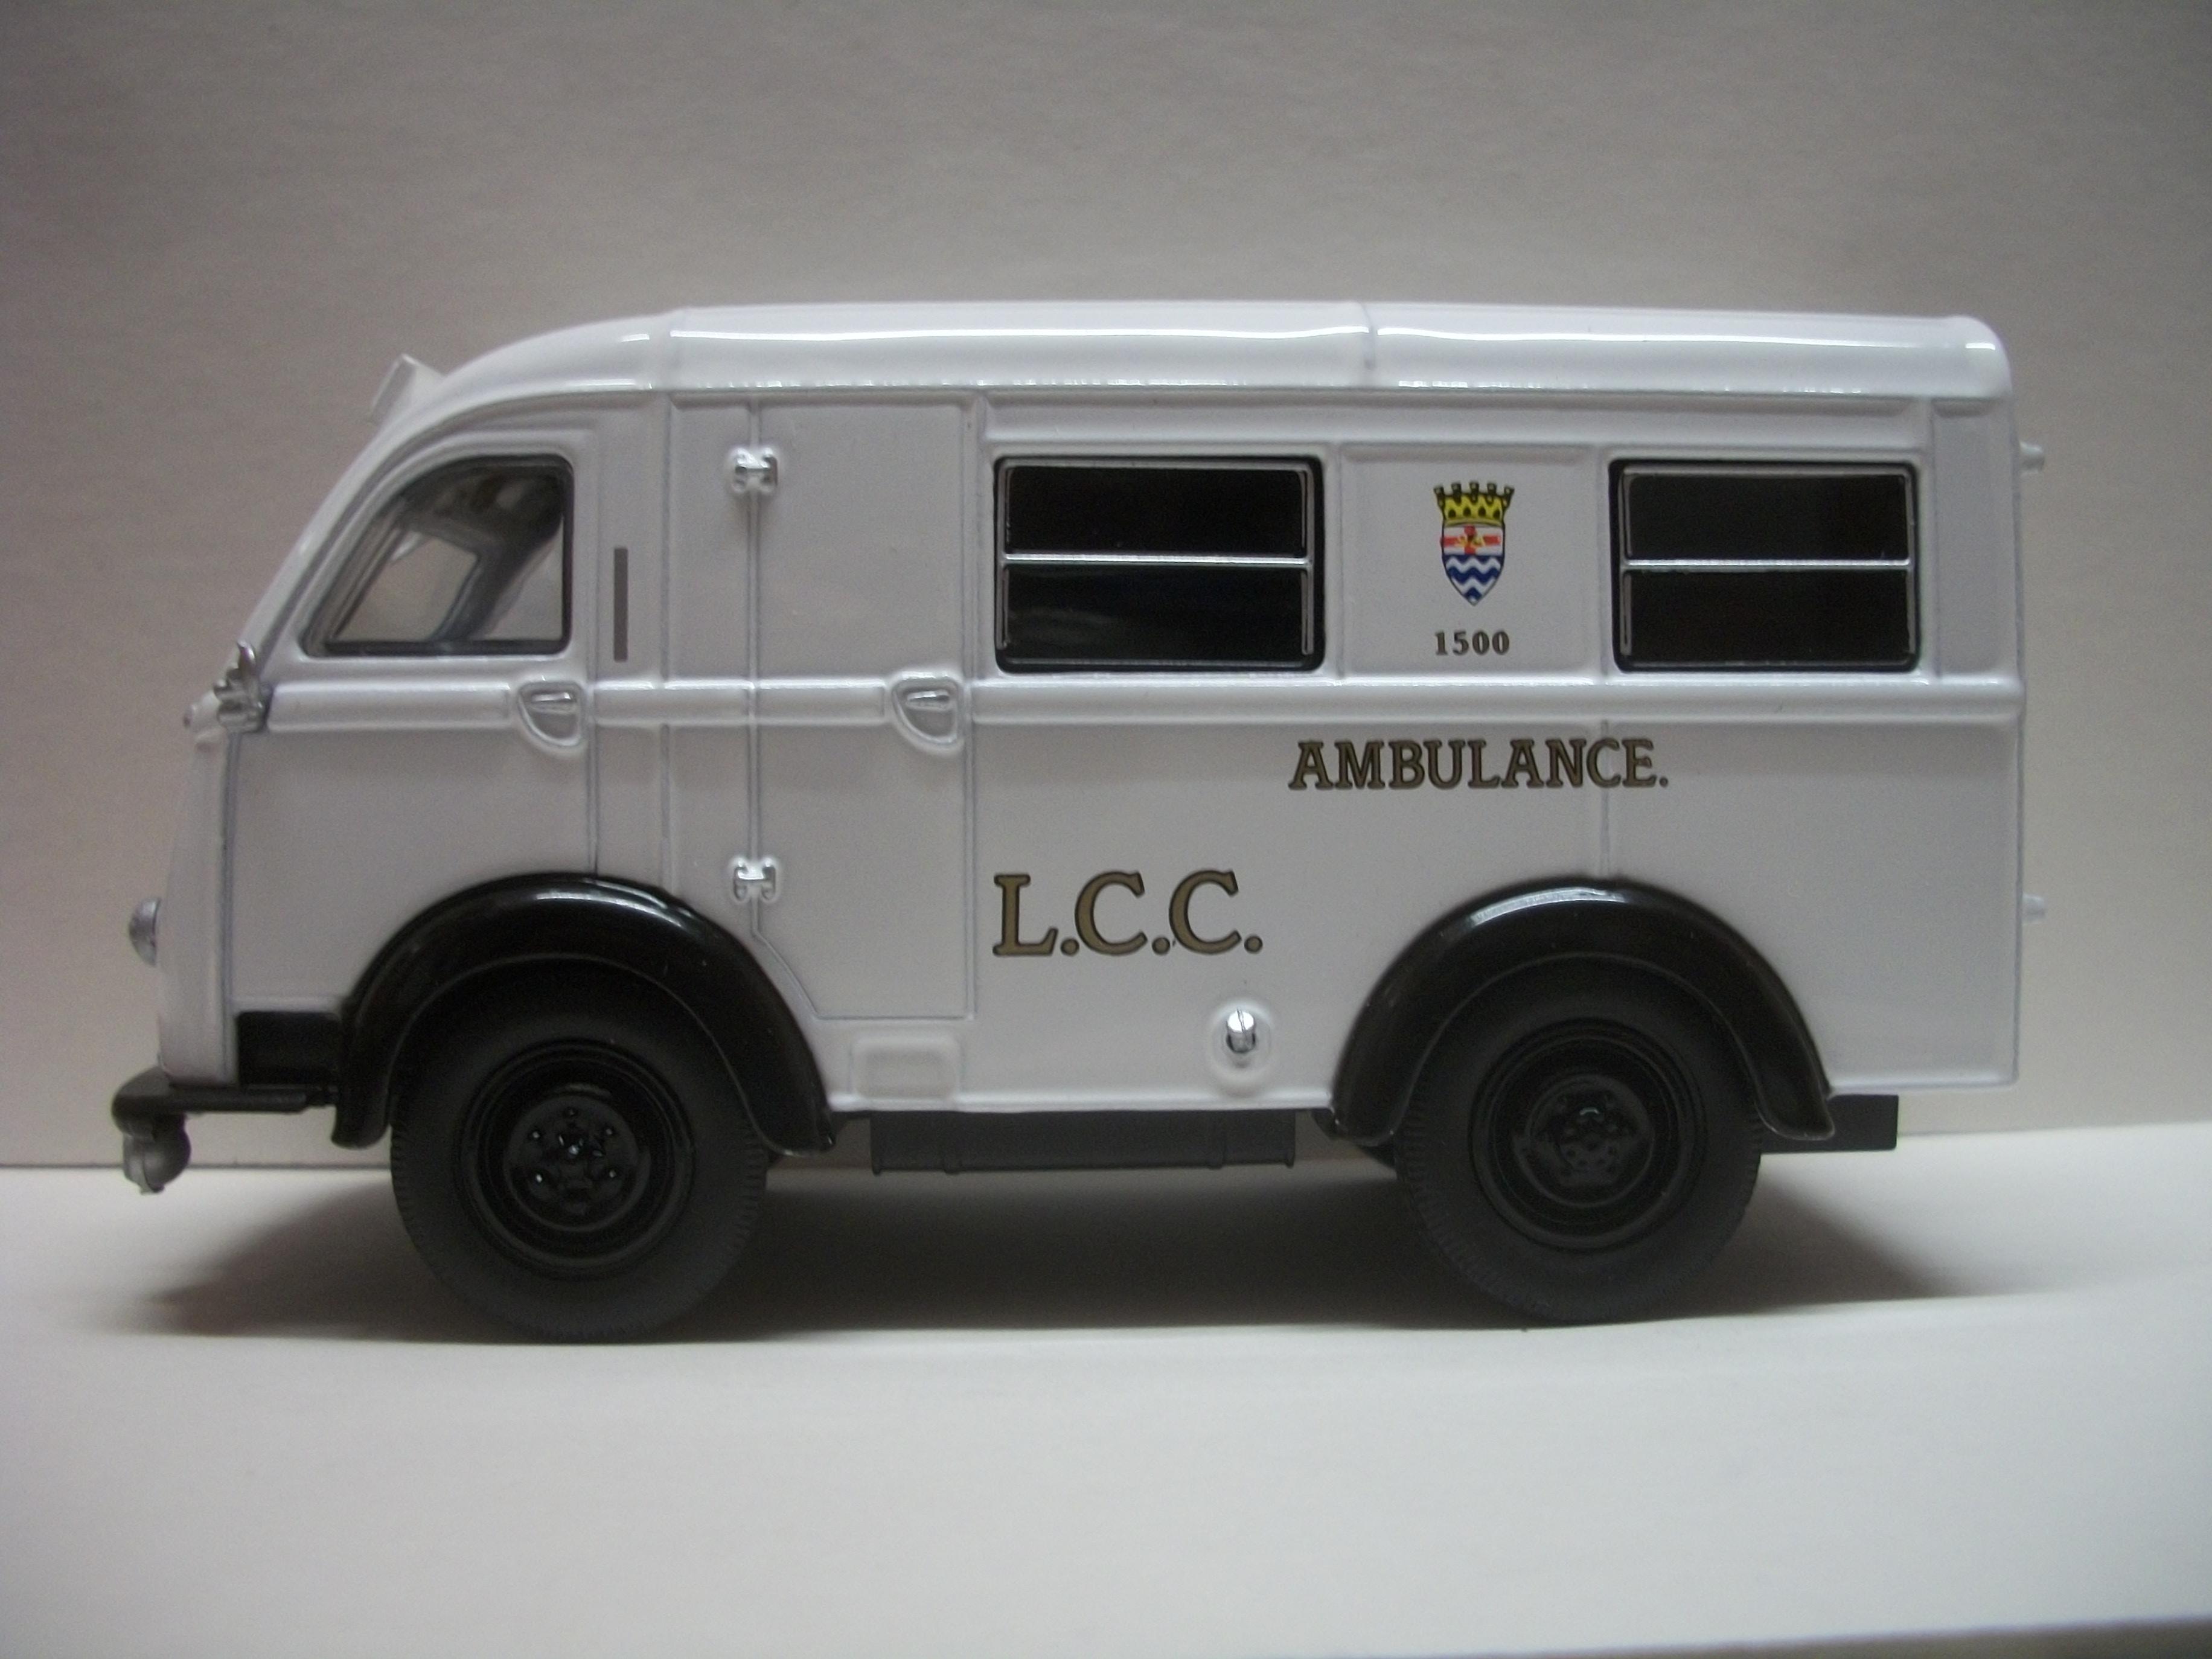
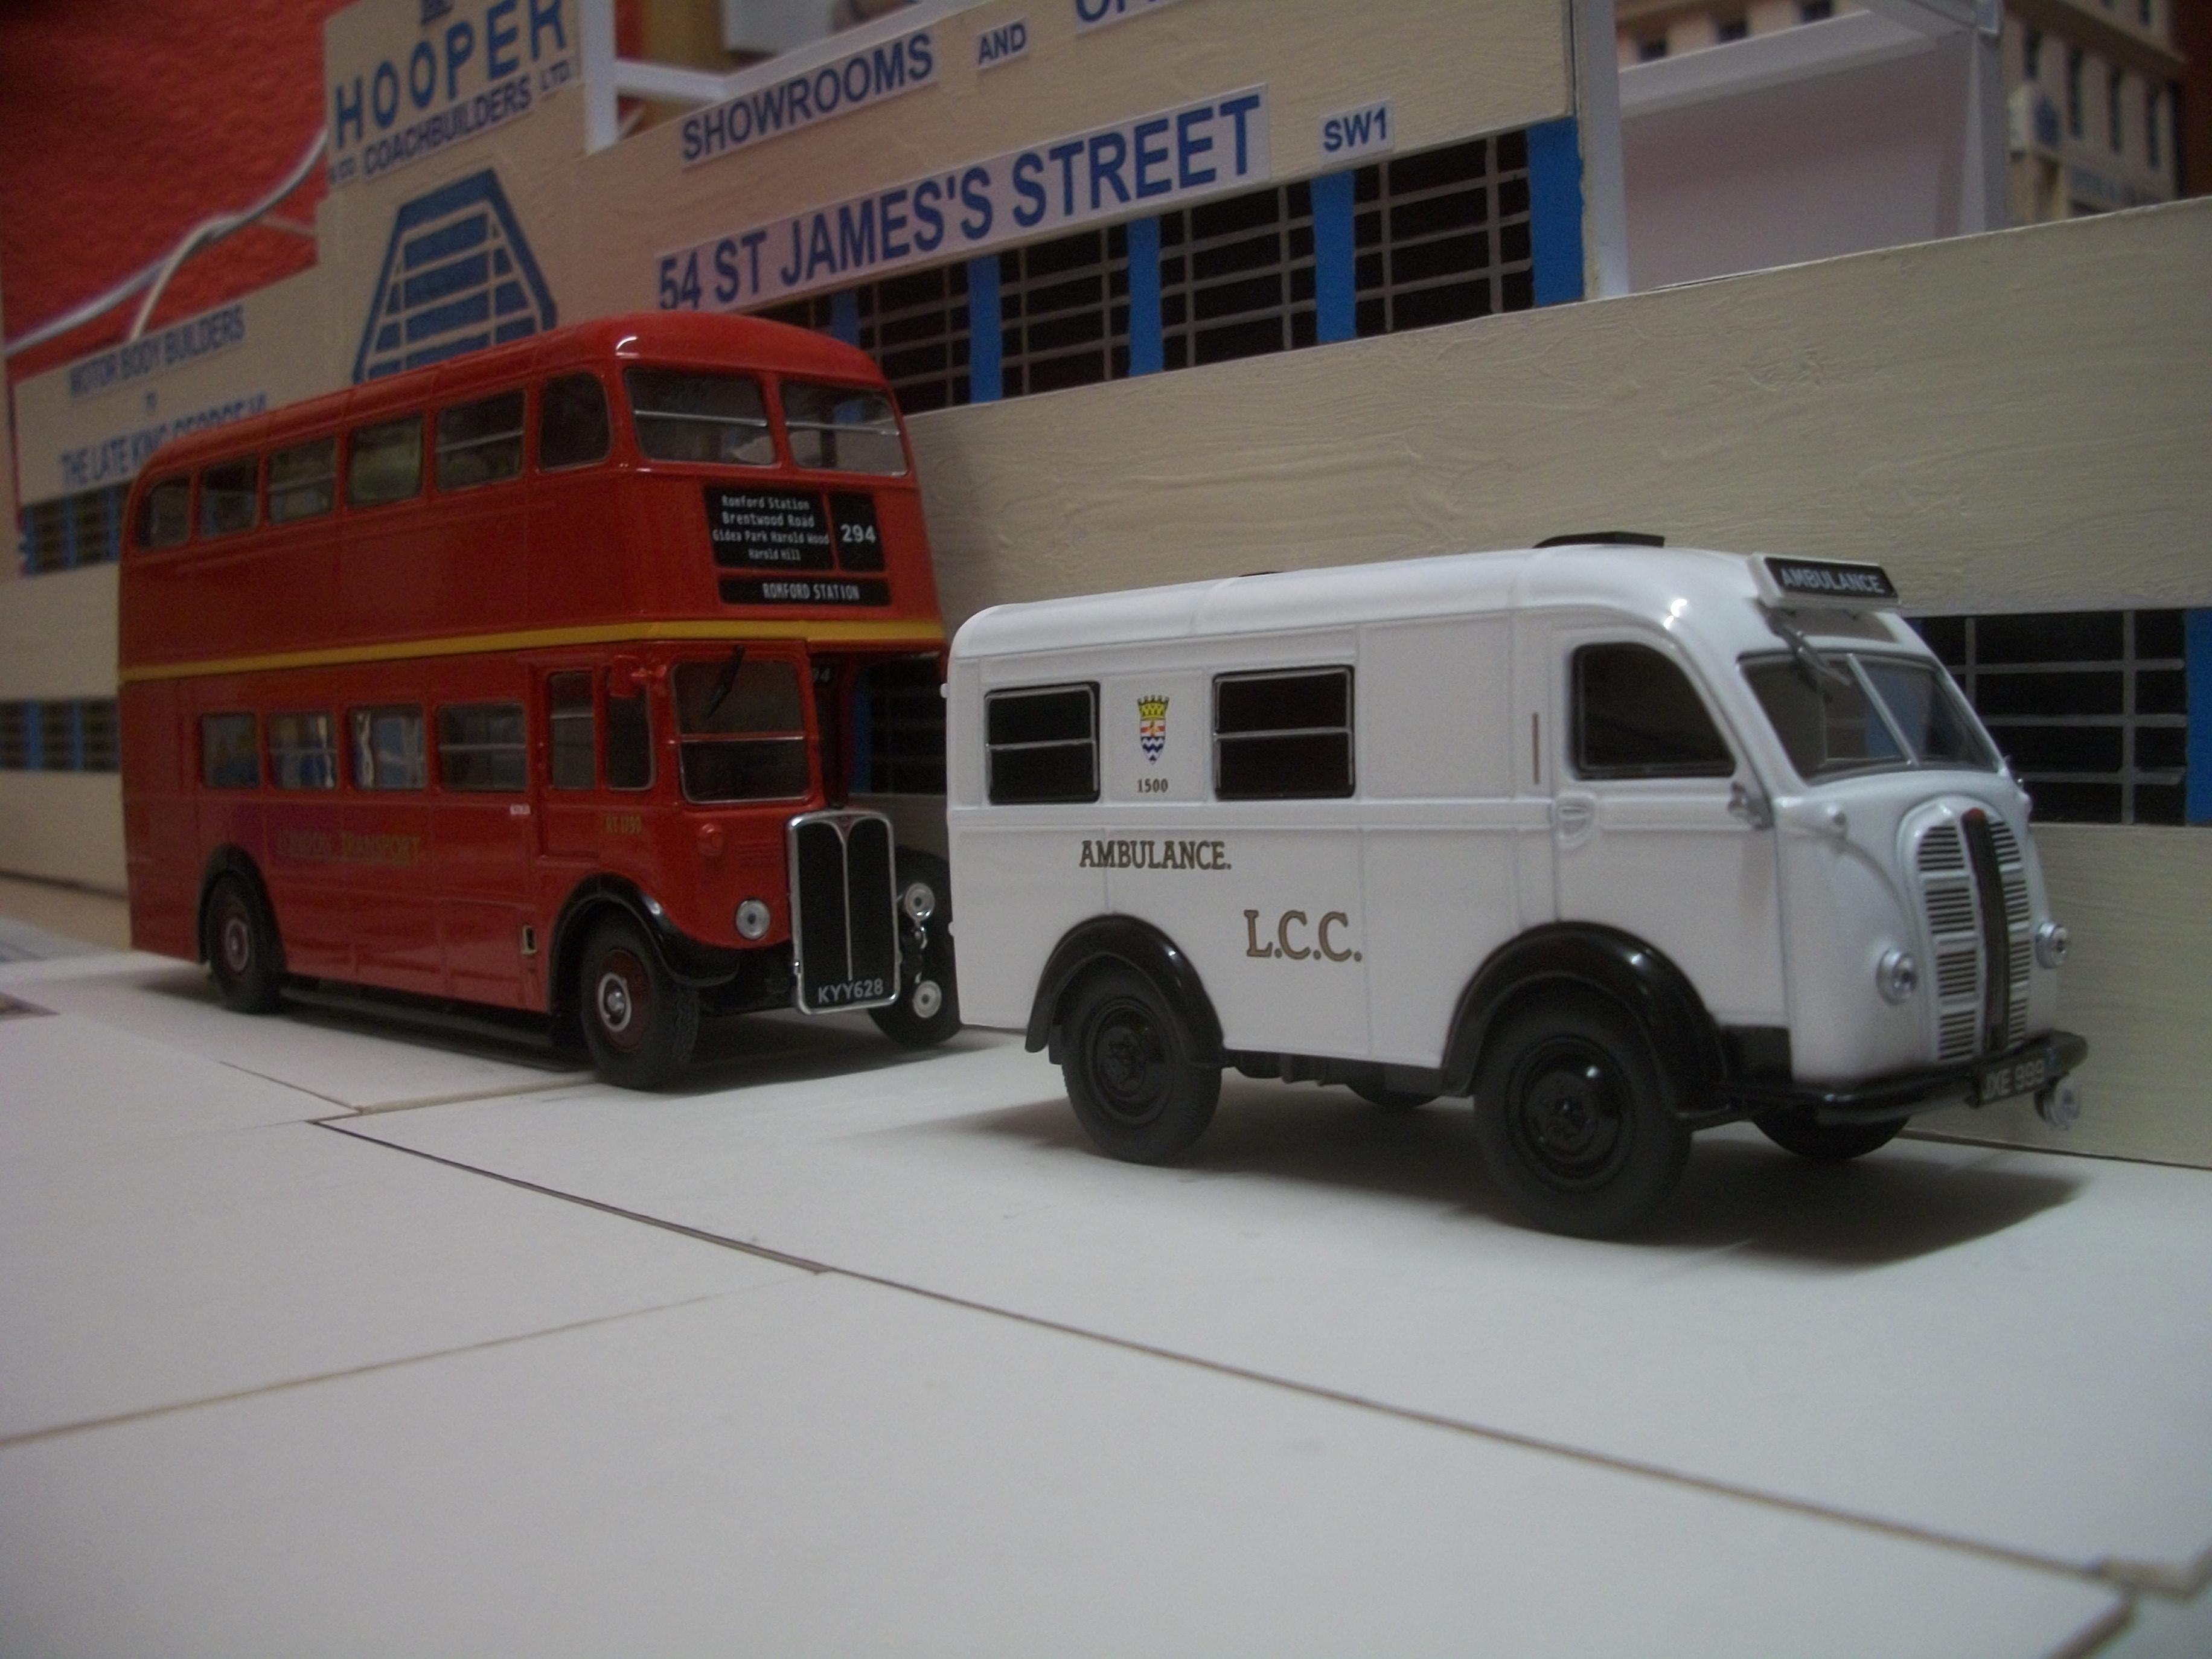
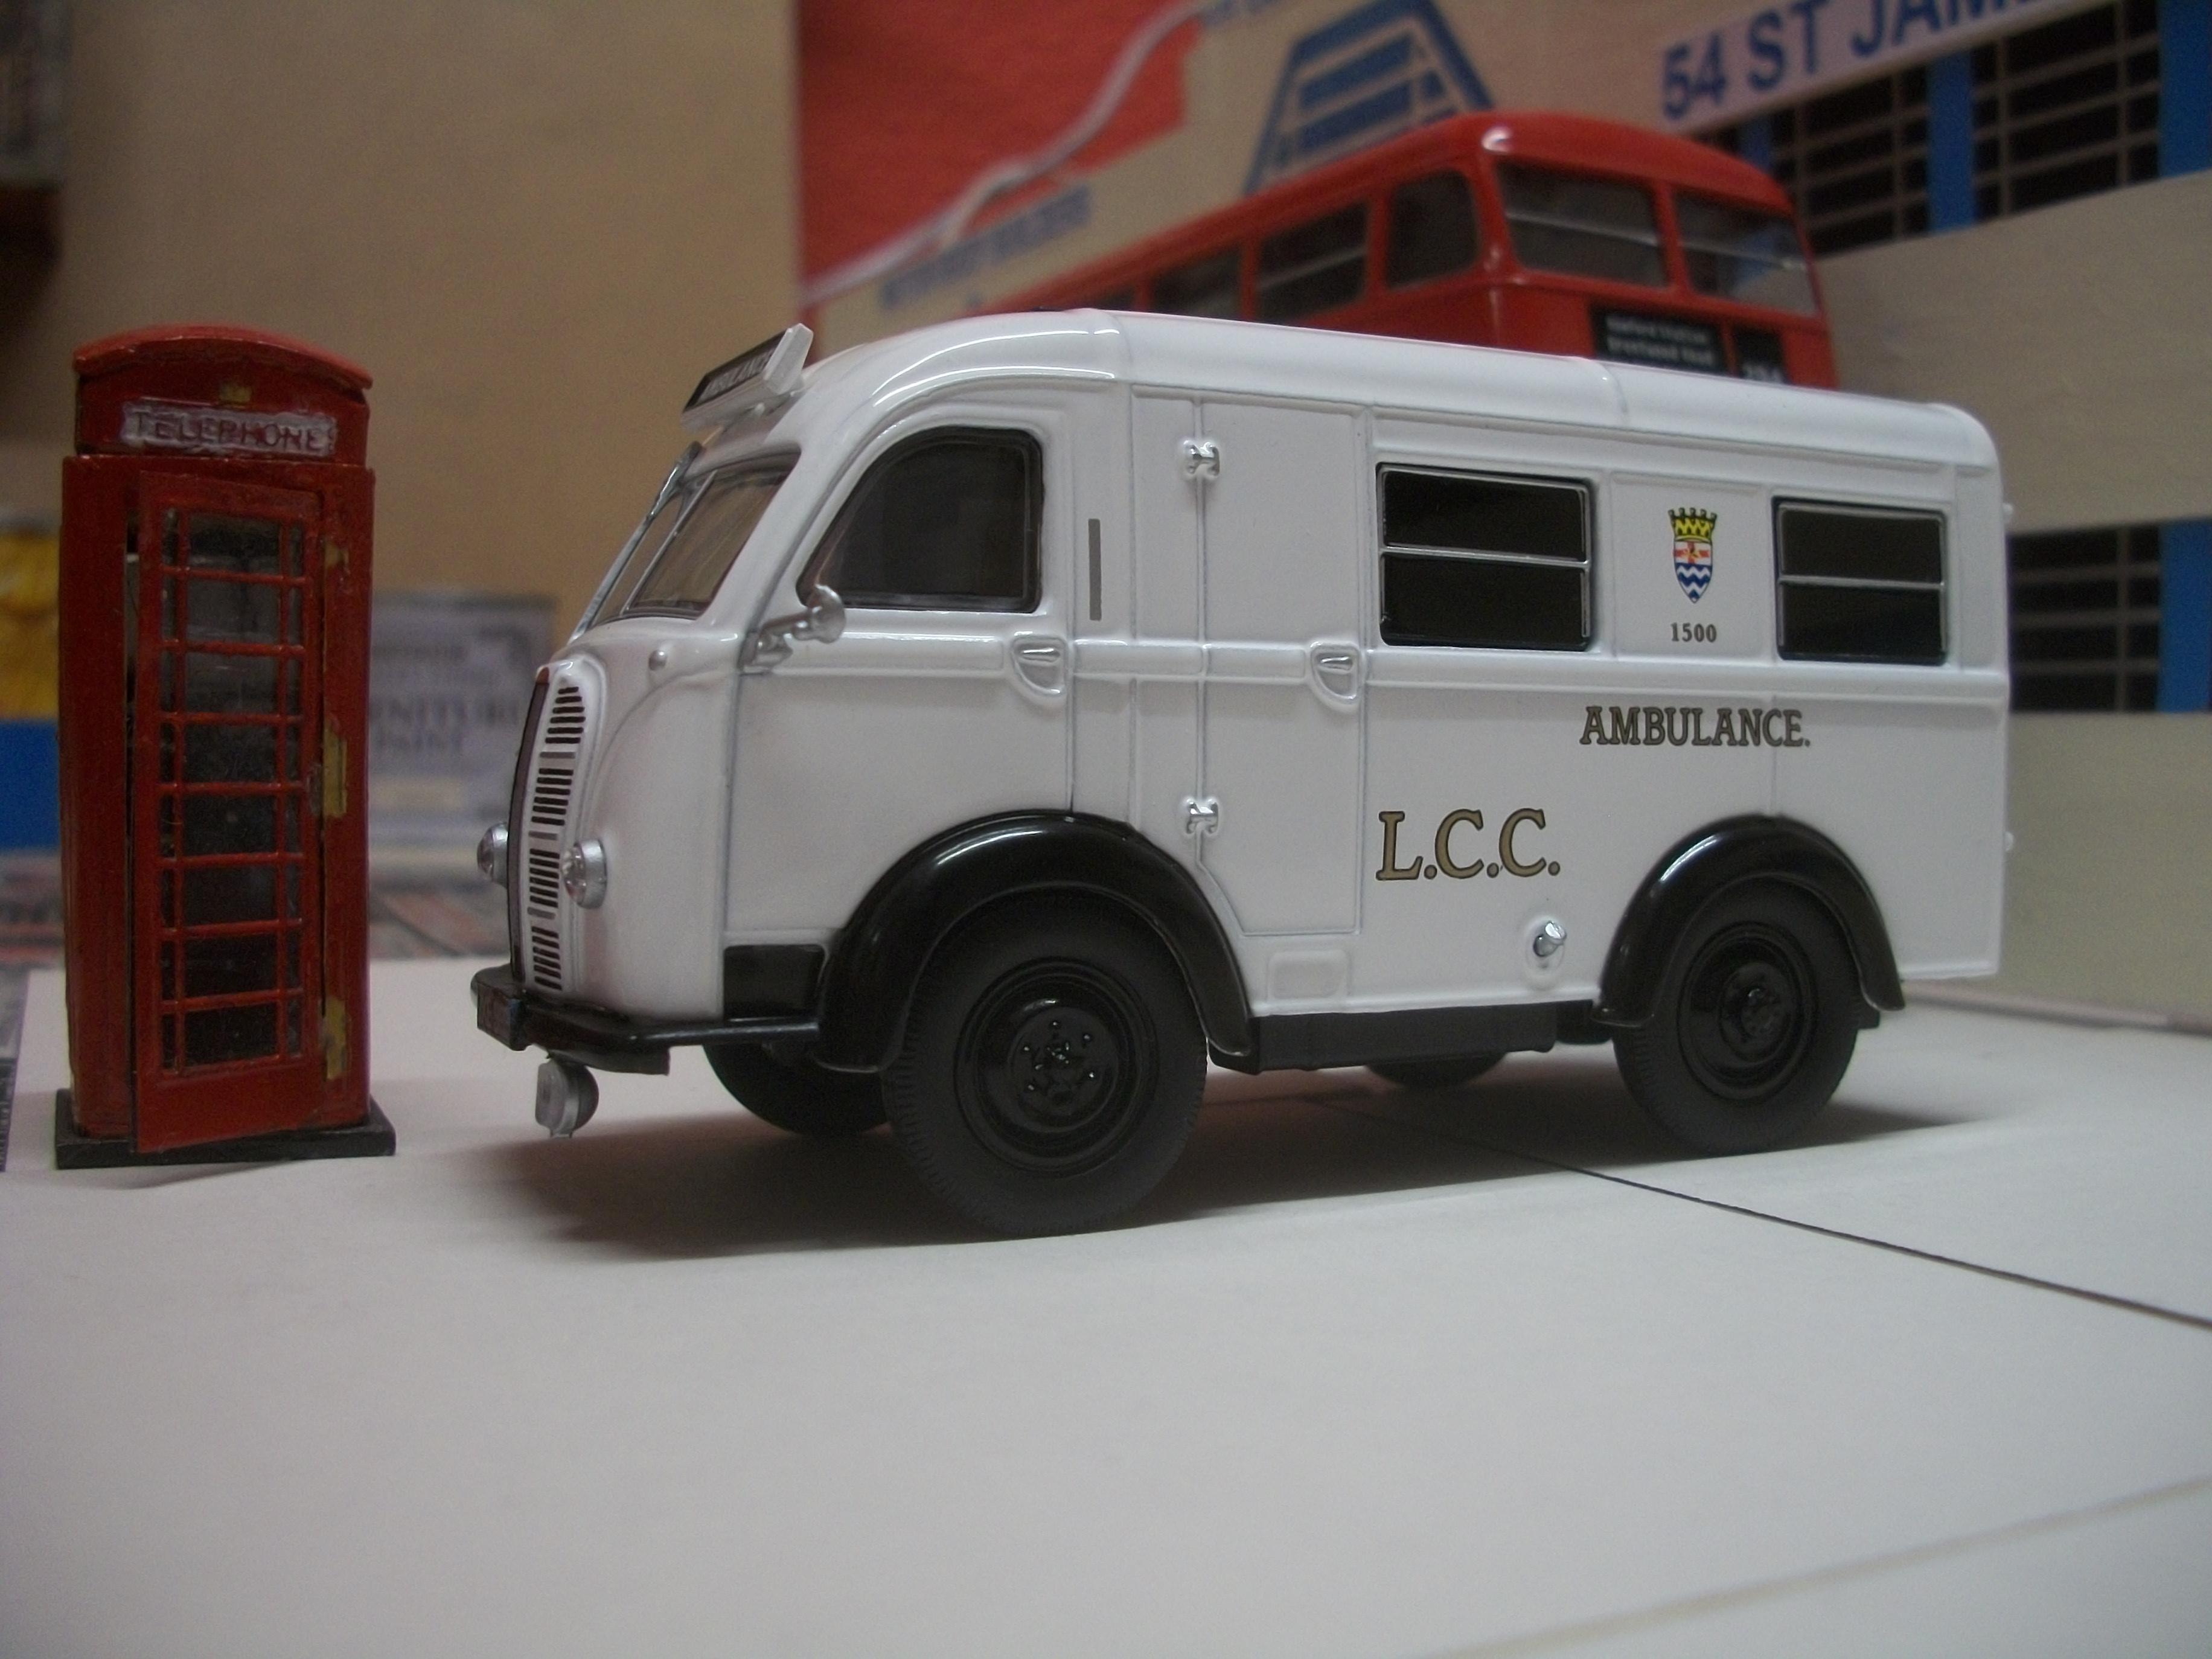
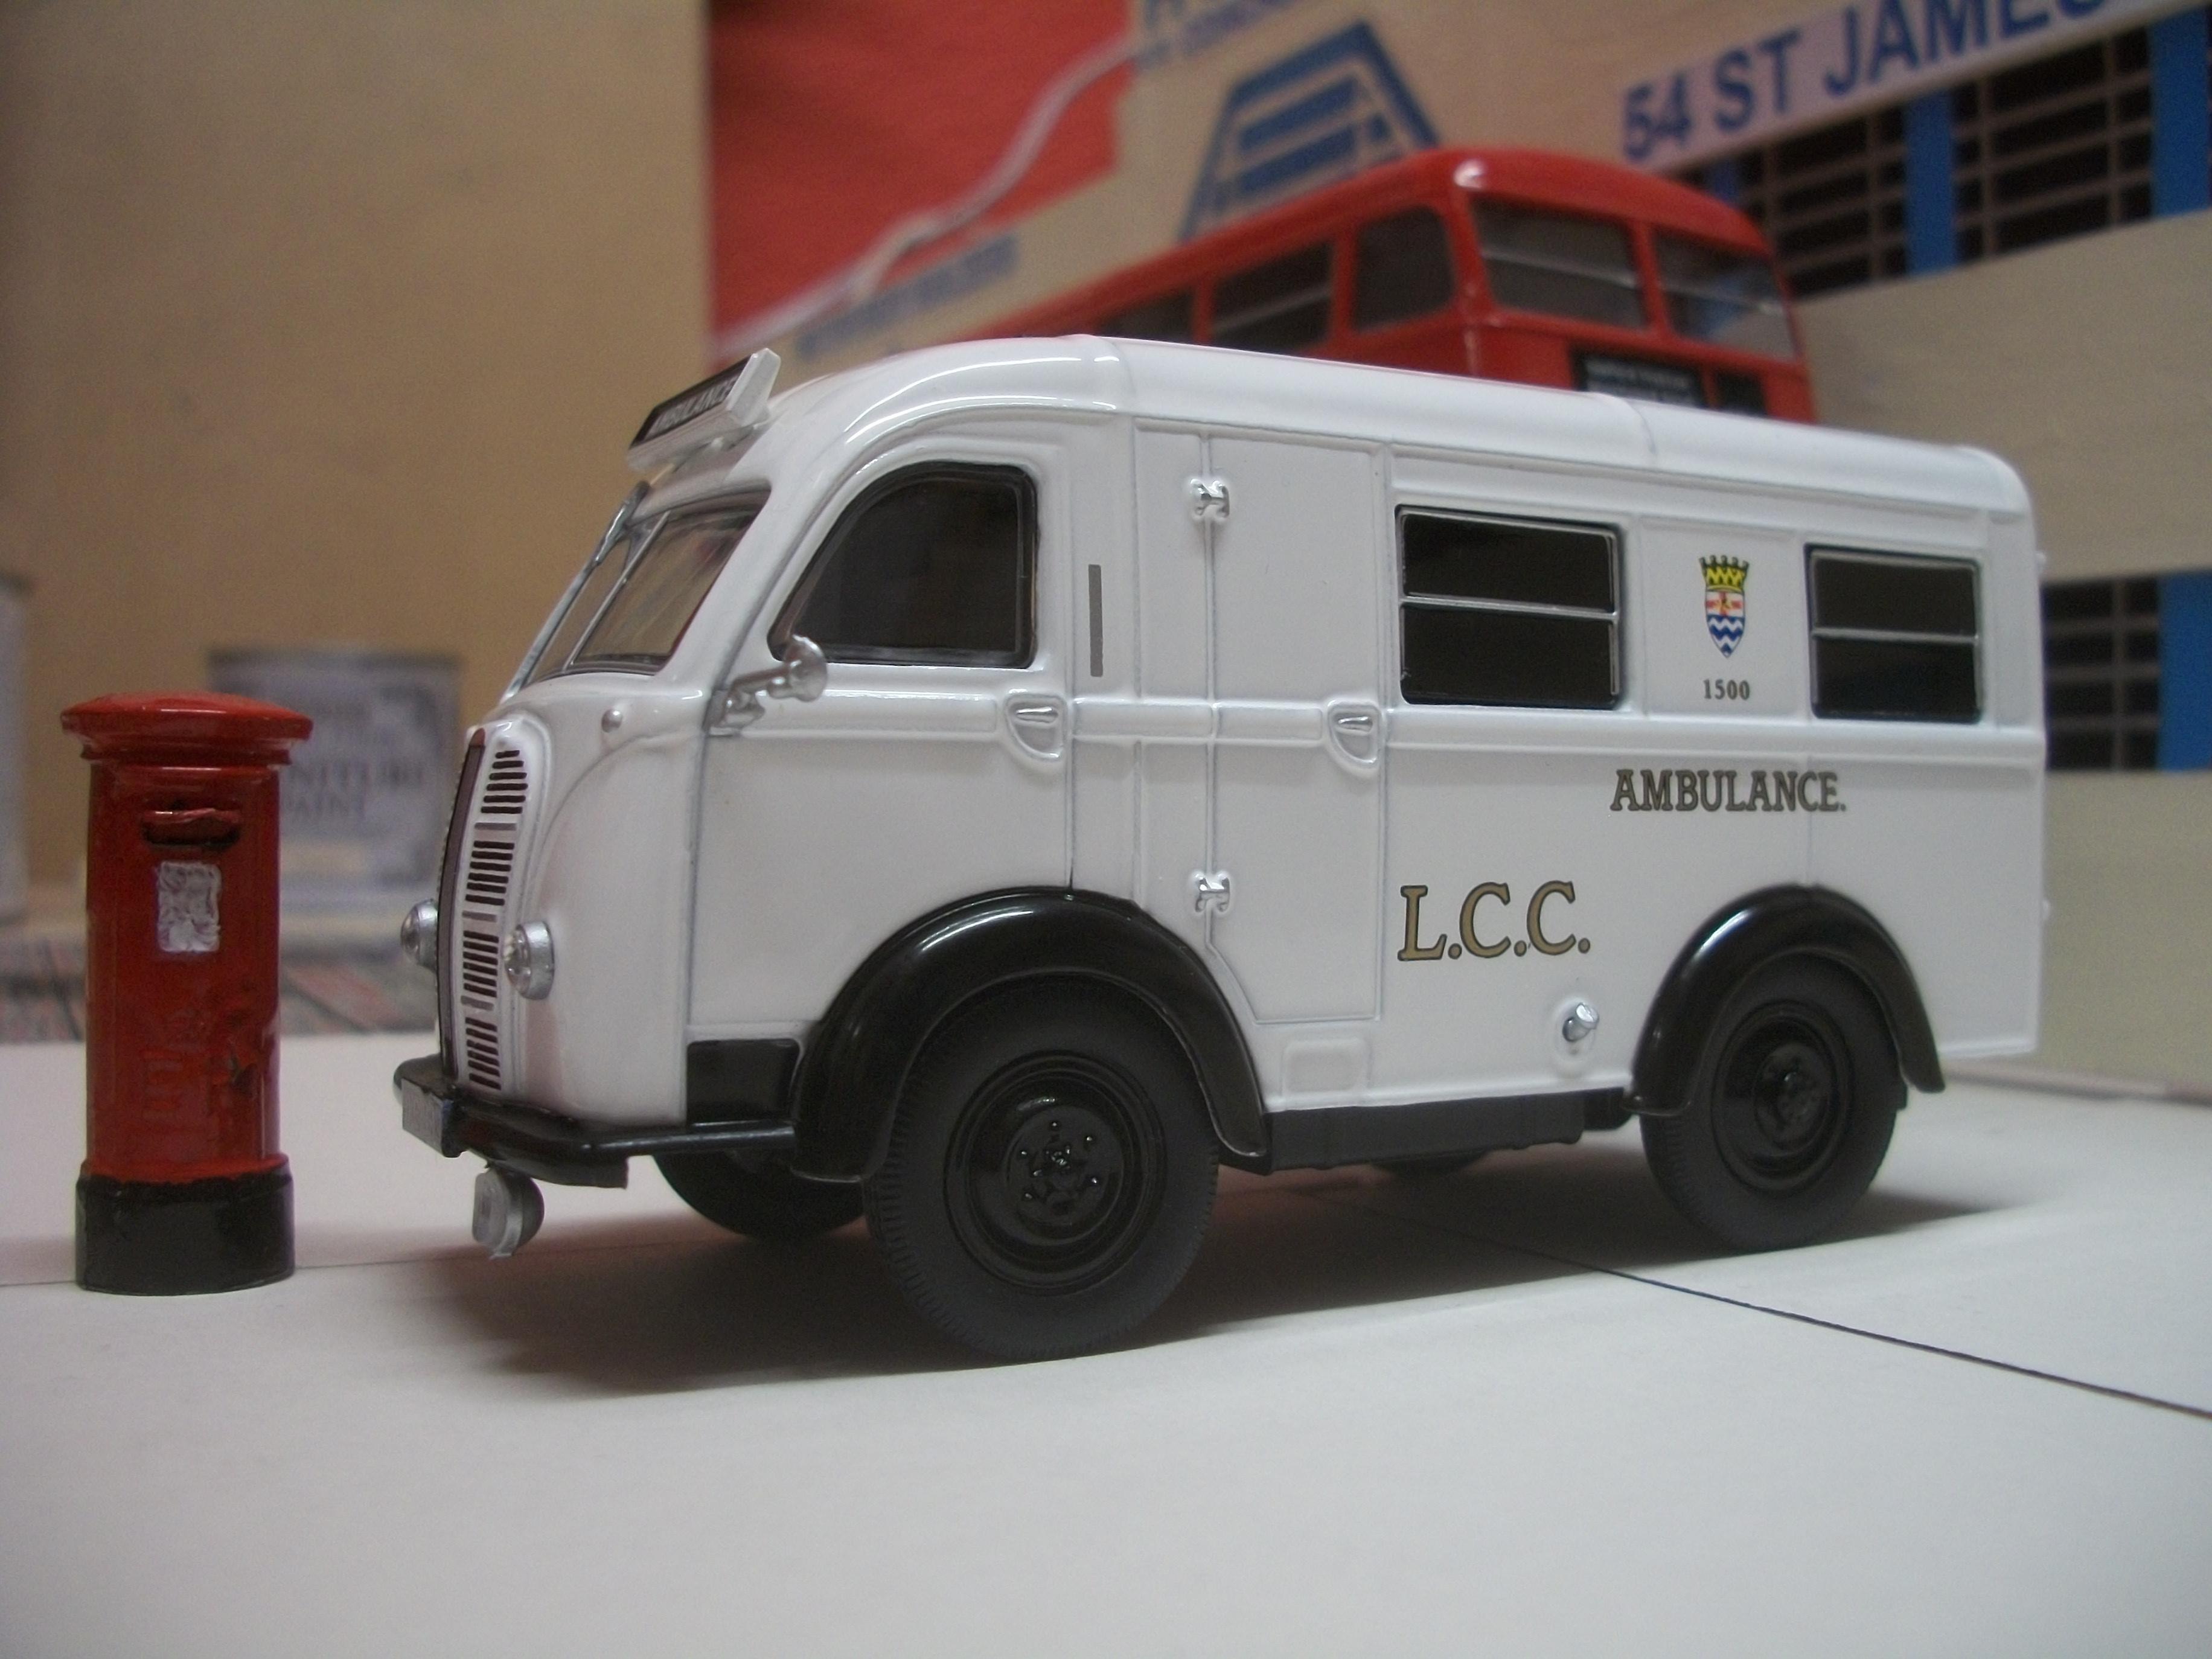
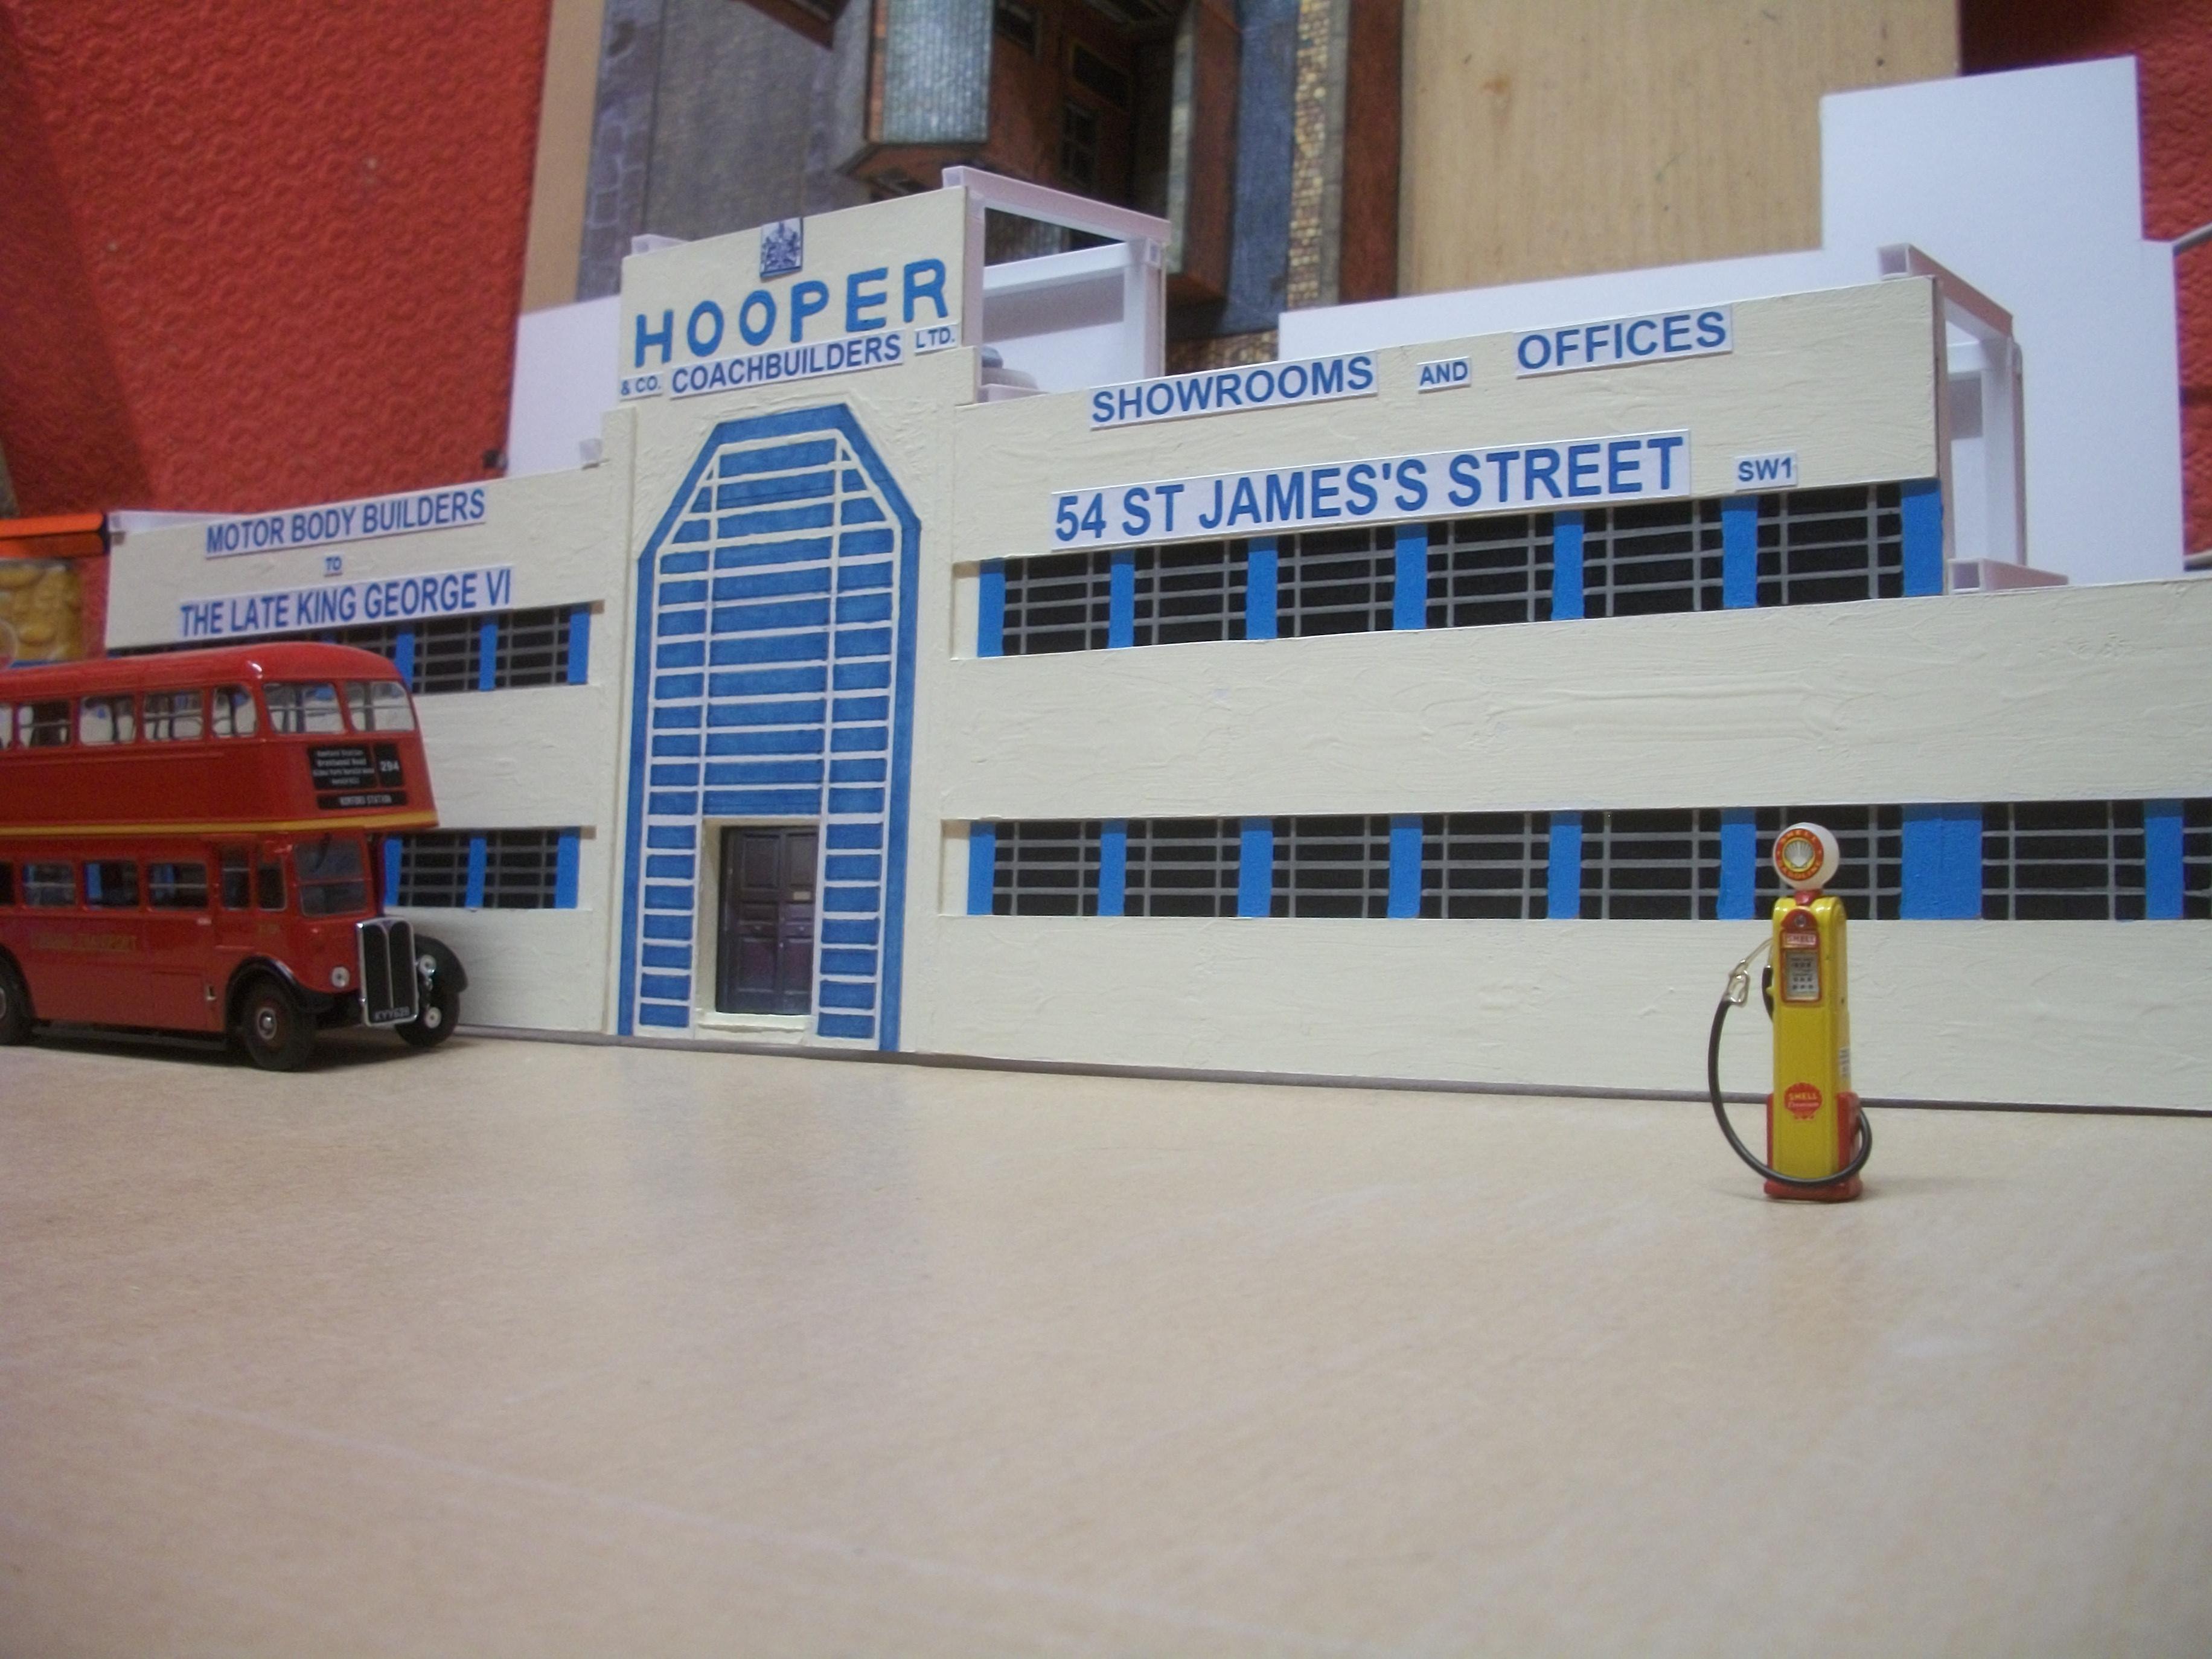
Thanks, Tom...... and here is the latest addition to the 1:43 scale vehicle fleet, which is an Austin Welfarer K8 Ambulance, by Oxford Diecasts and seen here in London County Council livery. This ambulance should photograph quite nicely on both the Victorian terraced houses diorama, as well as the Hooper factory diorama. David
-
Here's a suggestion that is not as crazy as it sounds...... Molotow Liquid Chrome Pen is best applied over a high gloss surface....... for me, the highest gloss surface that I have ever produced is using Yacht Varnish...... which means, what I do is to apply a coat of cheap Wilko yacht varnish over the area of the scale model car that I wish to chrome, then allow to dry for 24 hours and finally apply the Liquid Chrome. The technique that seems to work best, is to ' stroke ' the surface of the plastic or resin part with the tip of the Molotow pen as though you are using a brush, and only brush stroke it once...... you cannot go over the area a second time, or it will spoil the finish. Also, if you store the pens in a vertical upright position, say in a glass jar, there will be no blockages or failure to work. When shaking the pen before use, hold it vertically and keep the cap on ! David
-
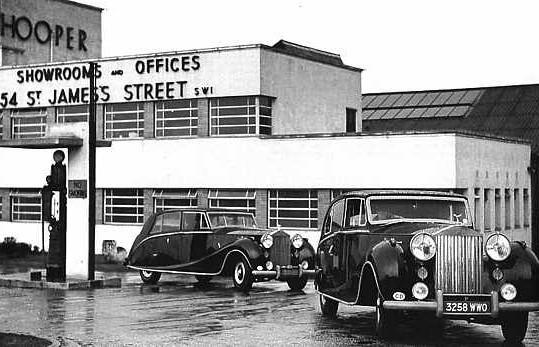
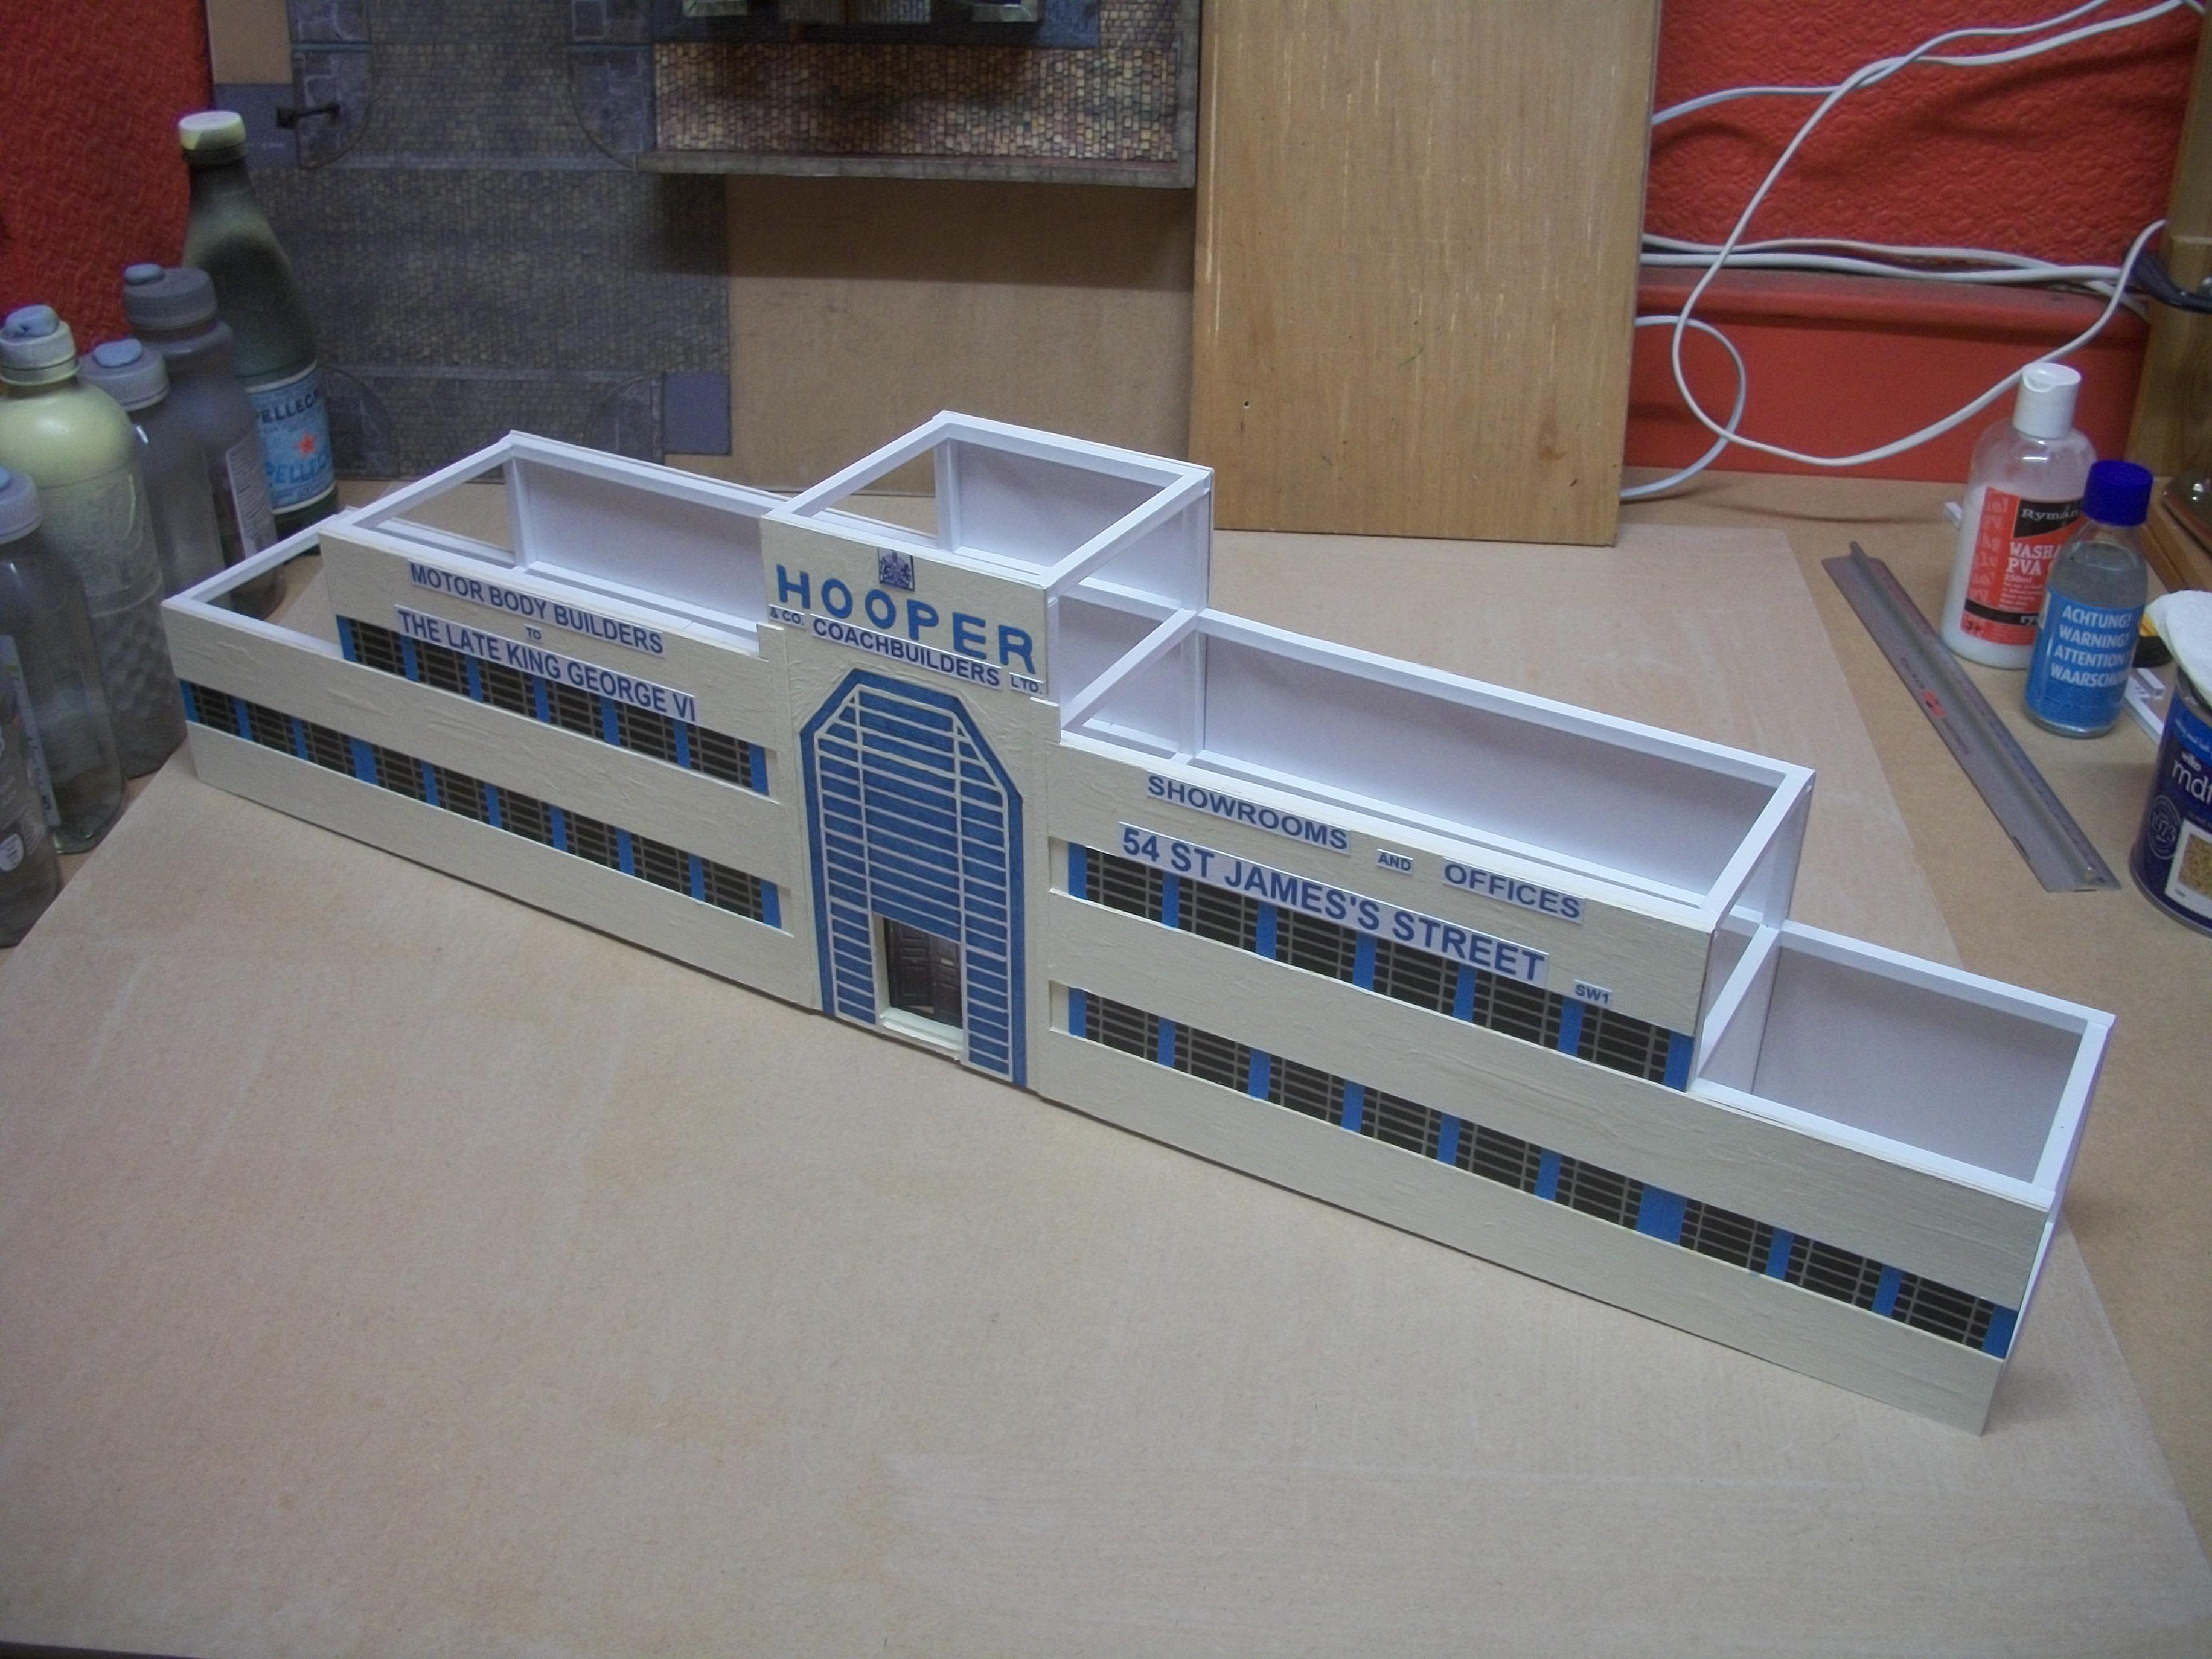
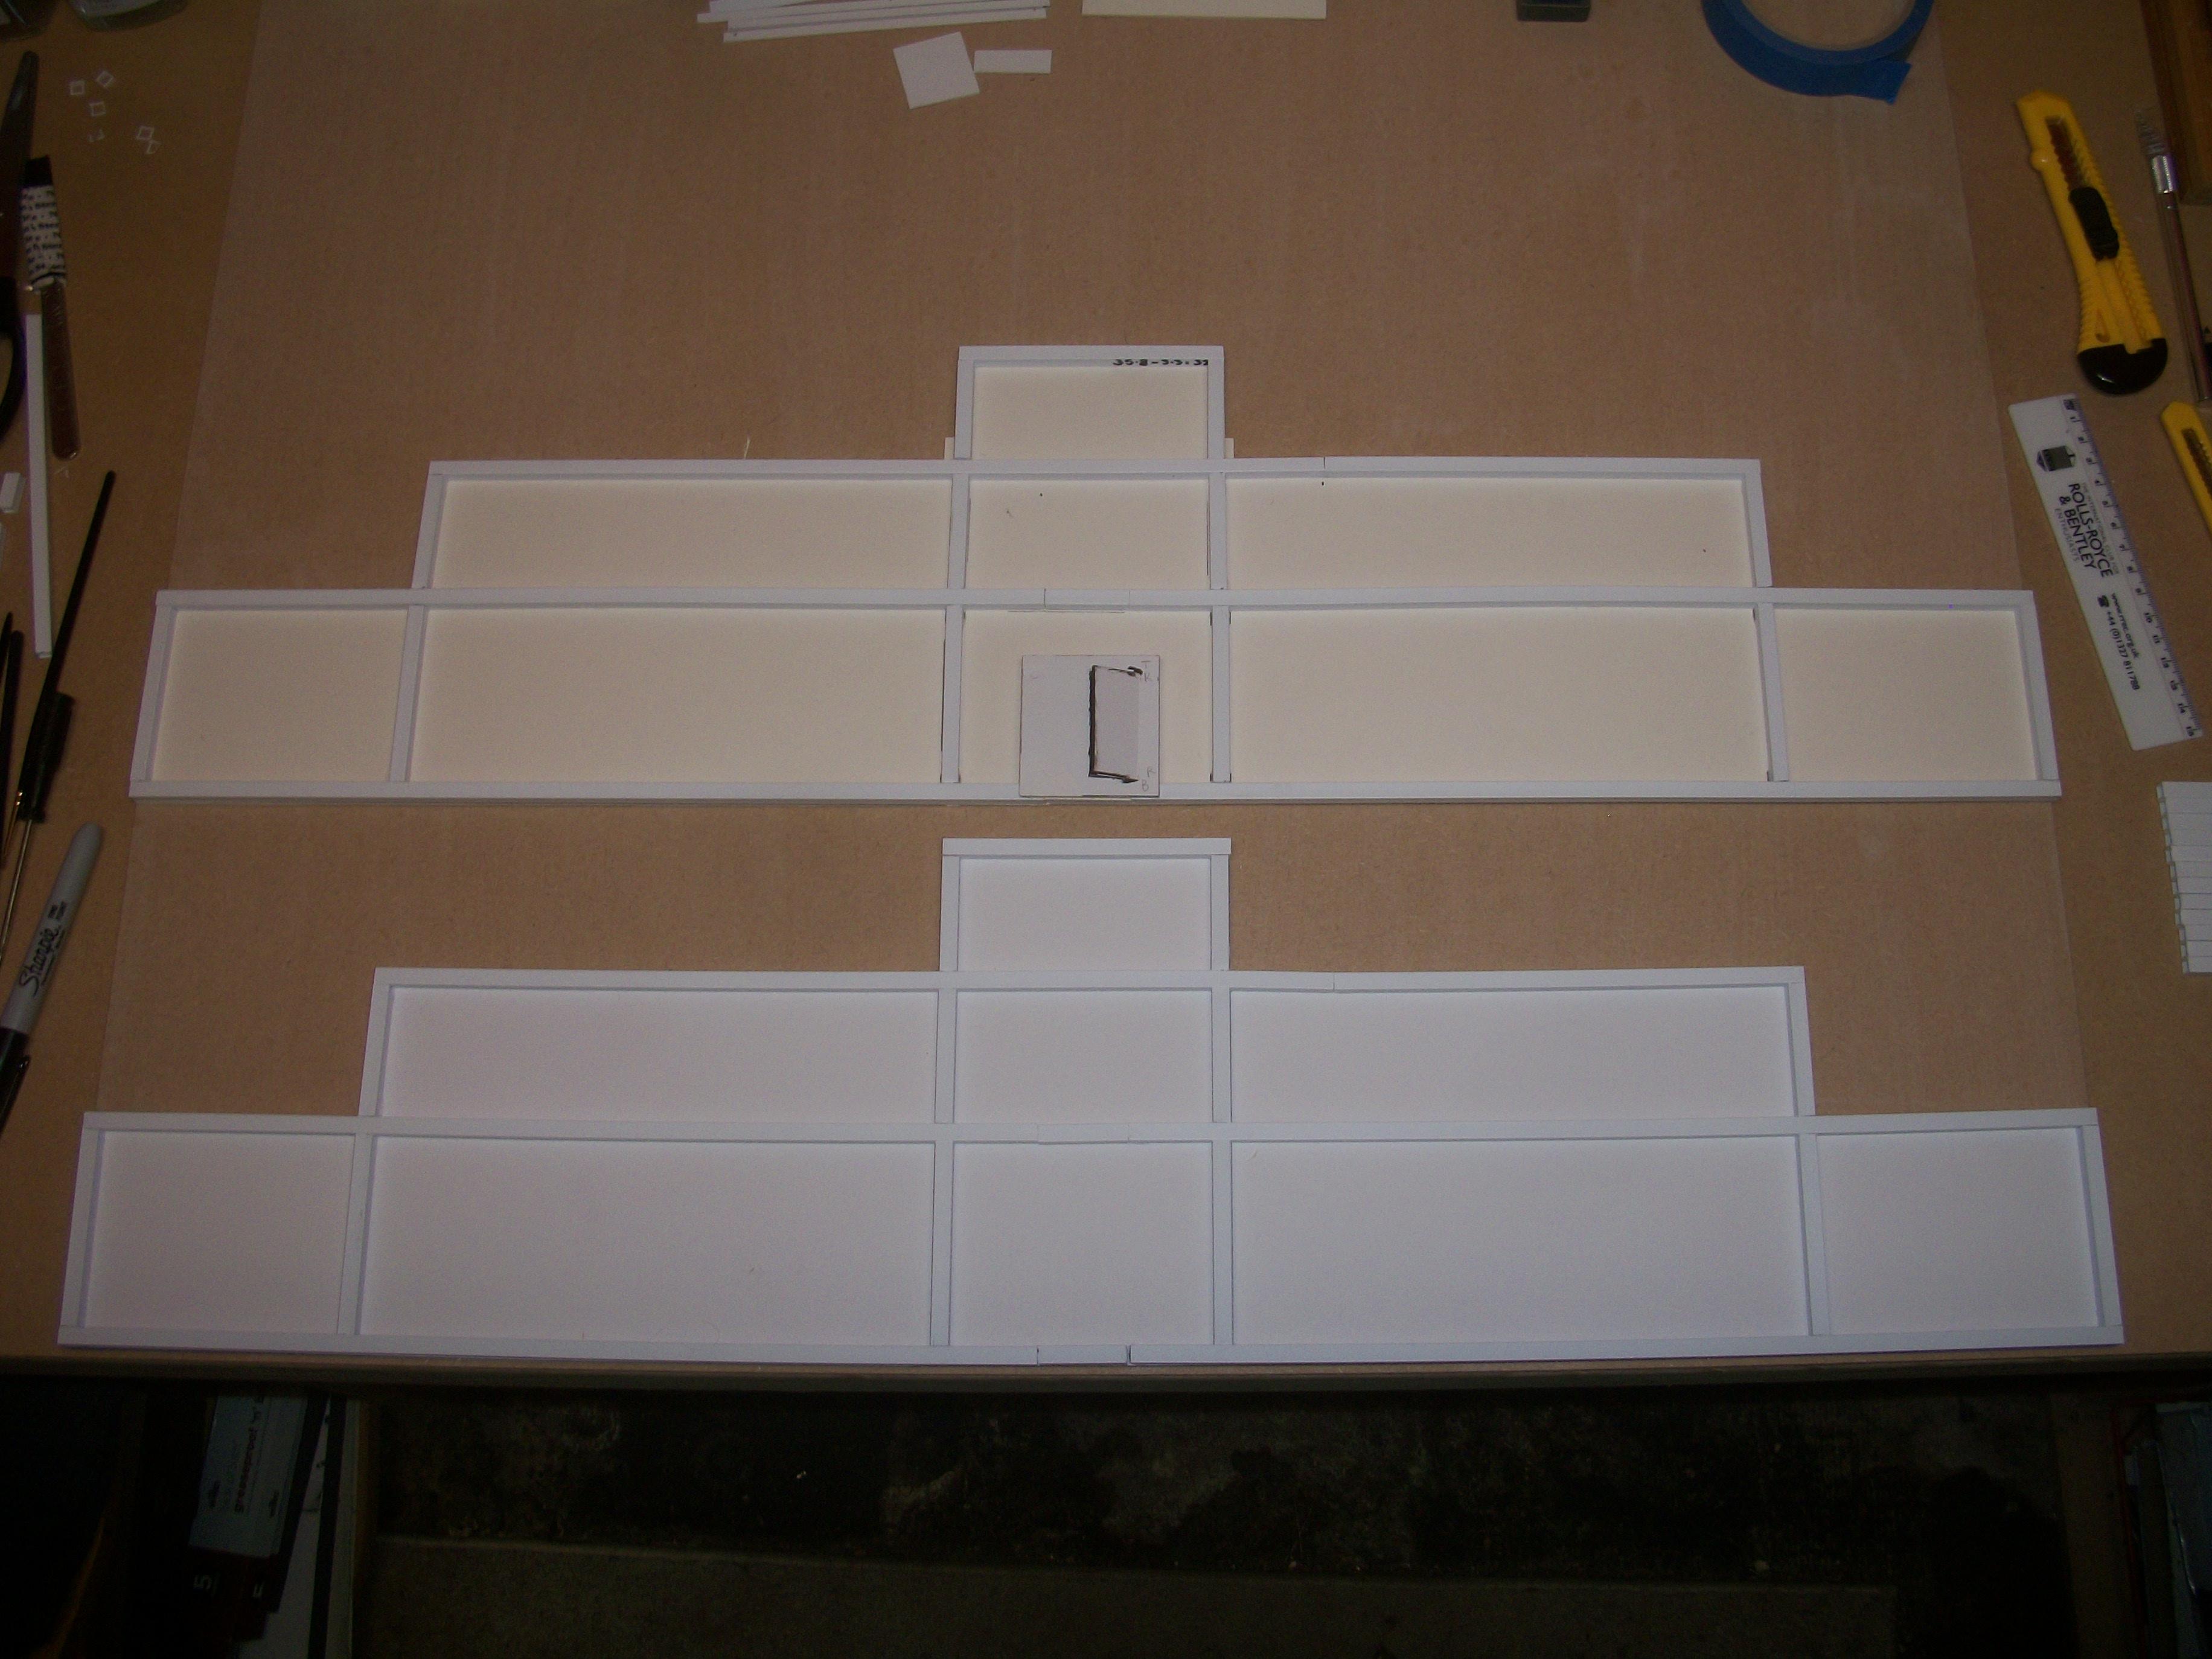
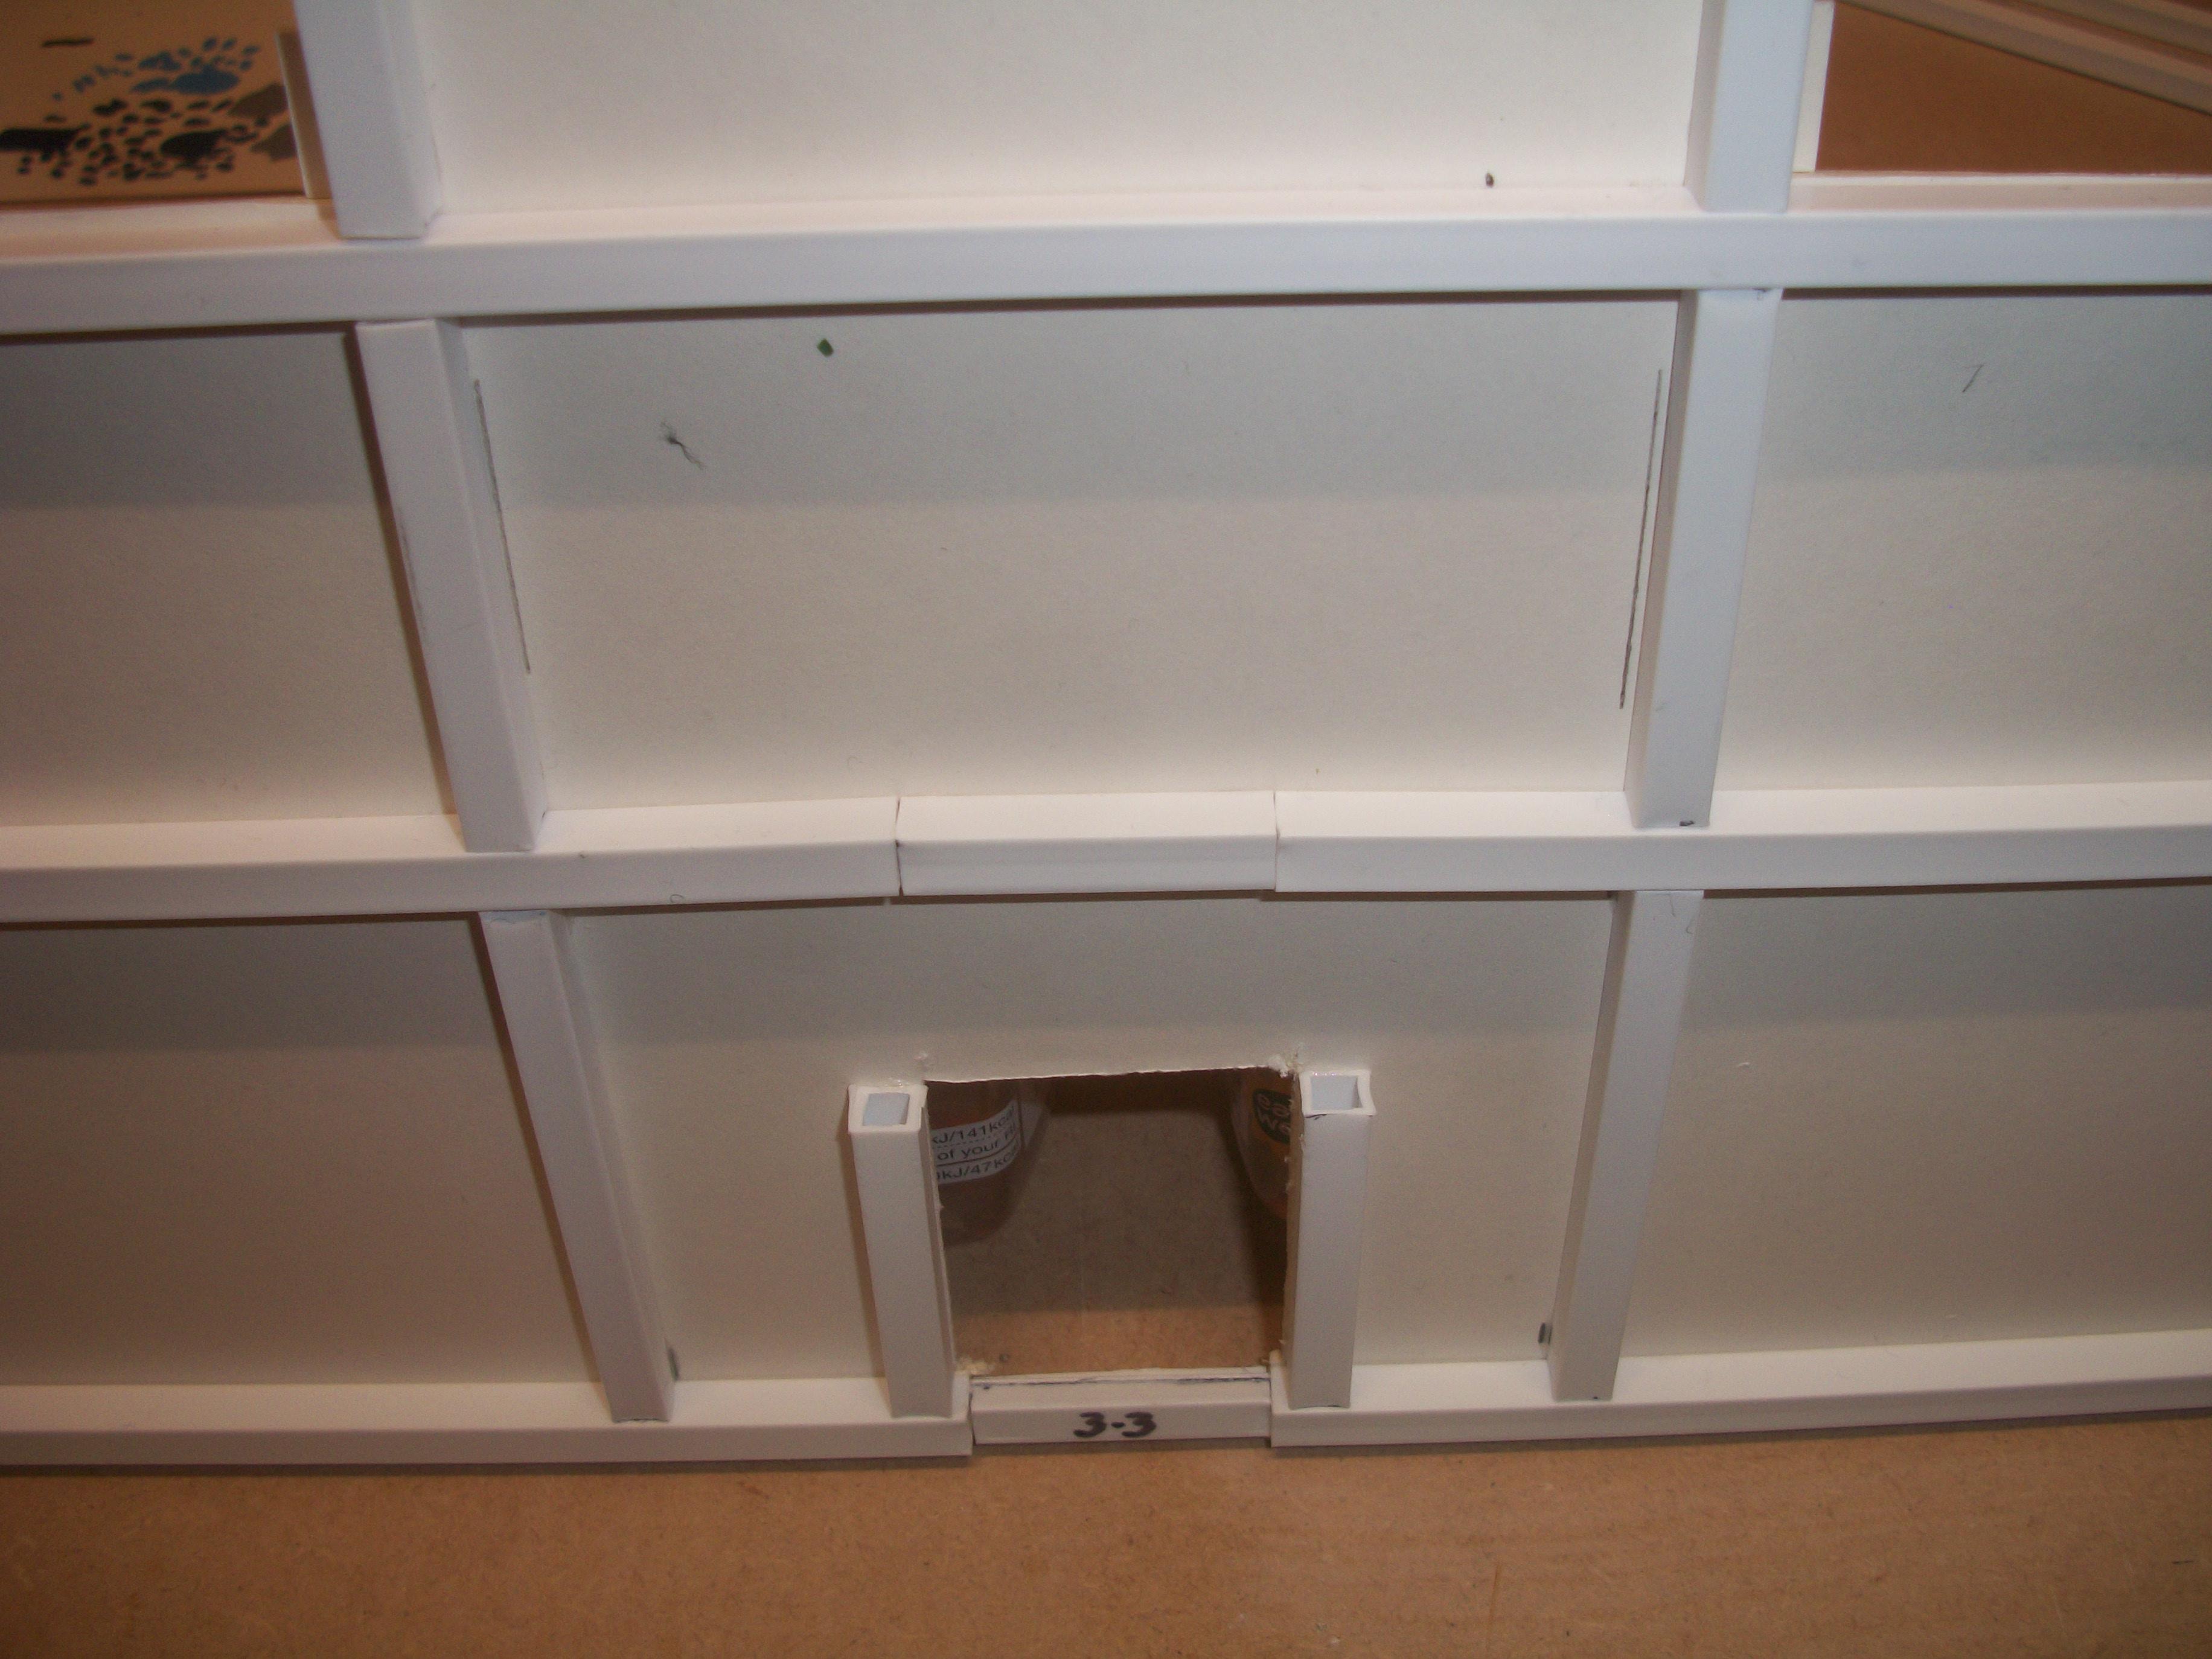
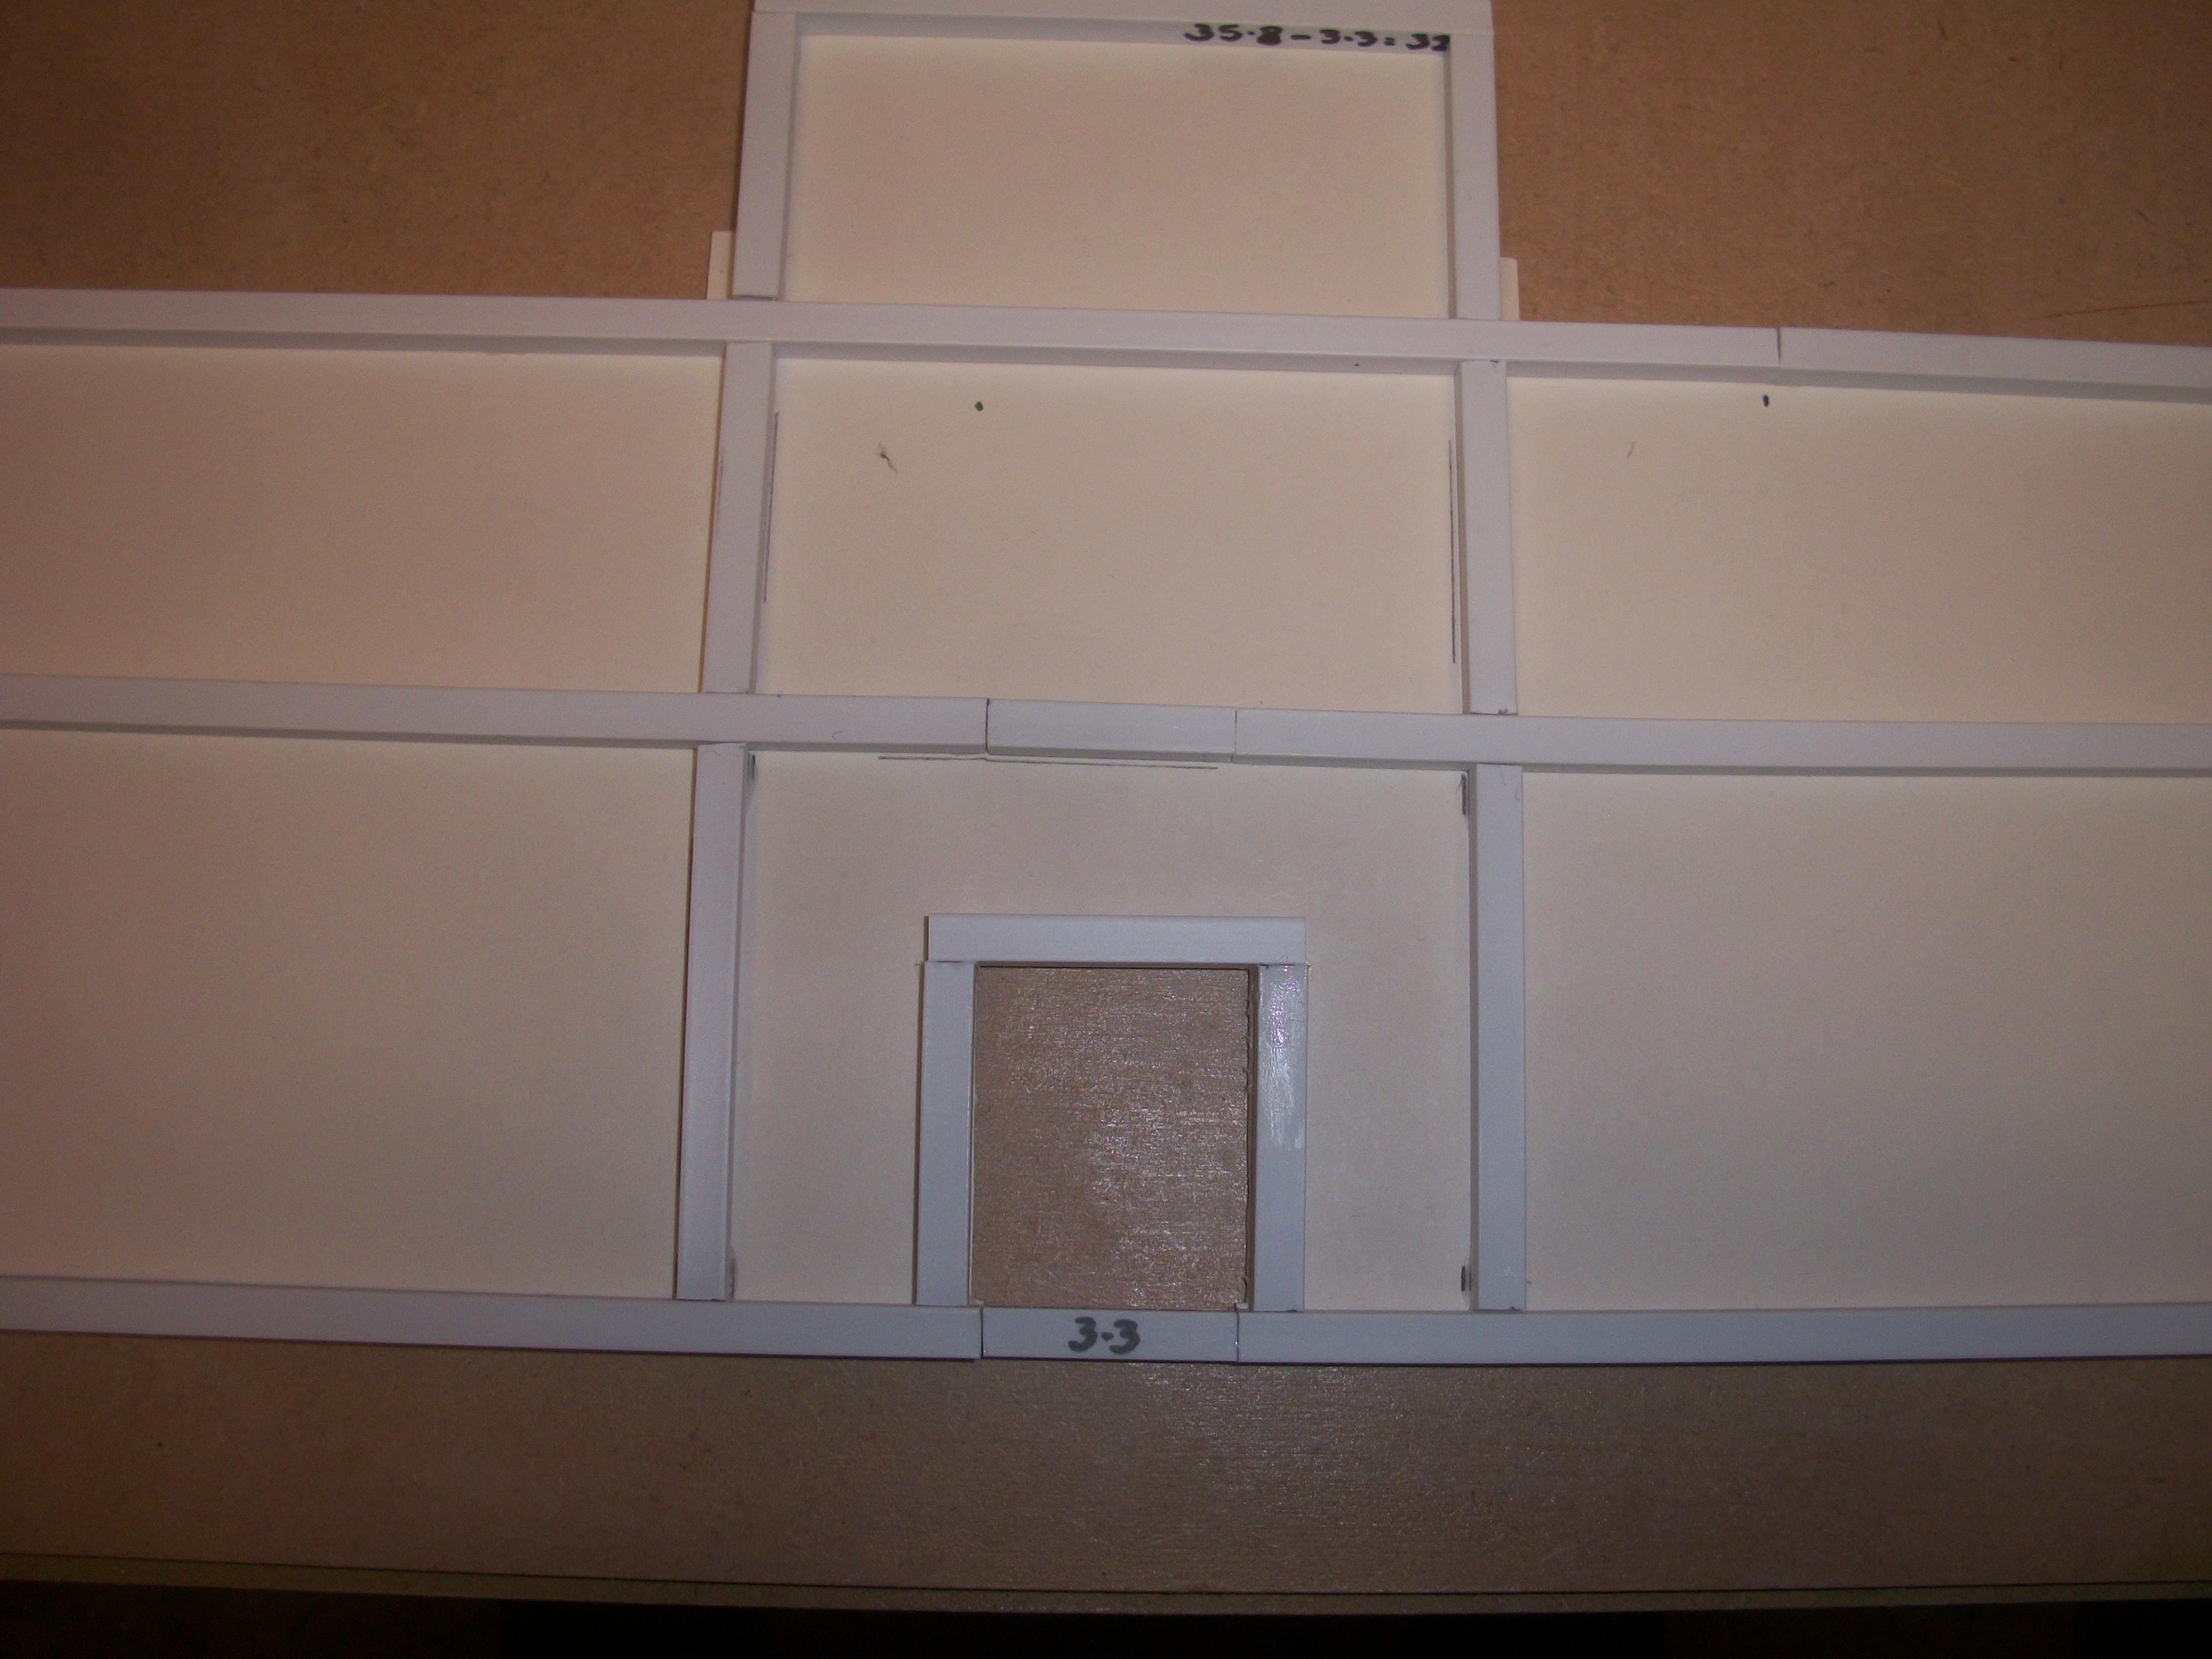
Pretty much a full day's work today, constructing the windows for the right-hand outer wing, and also the right-hand inner wing of the factory building. Those distinctive corner windows of this Art Deco building have turned out rather well, although I say it myself! Hopefully, I have managed to get the spacing and layout of these windows as close to the original full size factory as possible, making best use of the few reference photographs that I have to work from. The next stage will be to paint the panels in clotted cream and fix them in place using super glue. I prefer working with styrene cement and PVA glue, but the super glue will be necessary to achieve the overall strength of this structure. Thanks for looking at my ongoing project, guys........... David
-
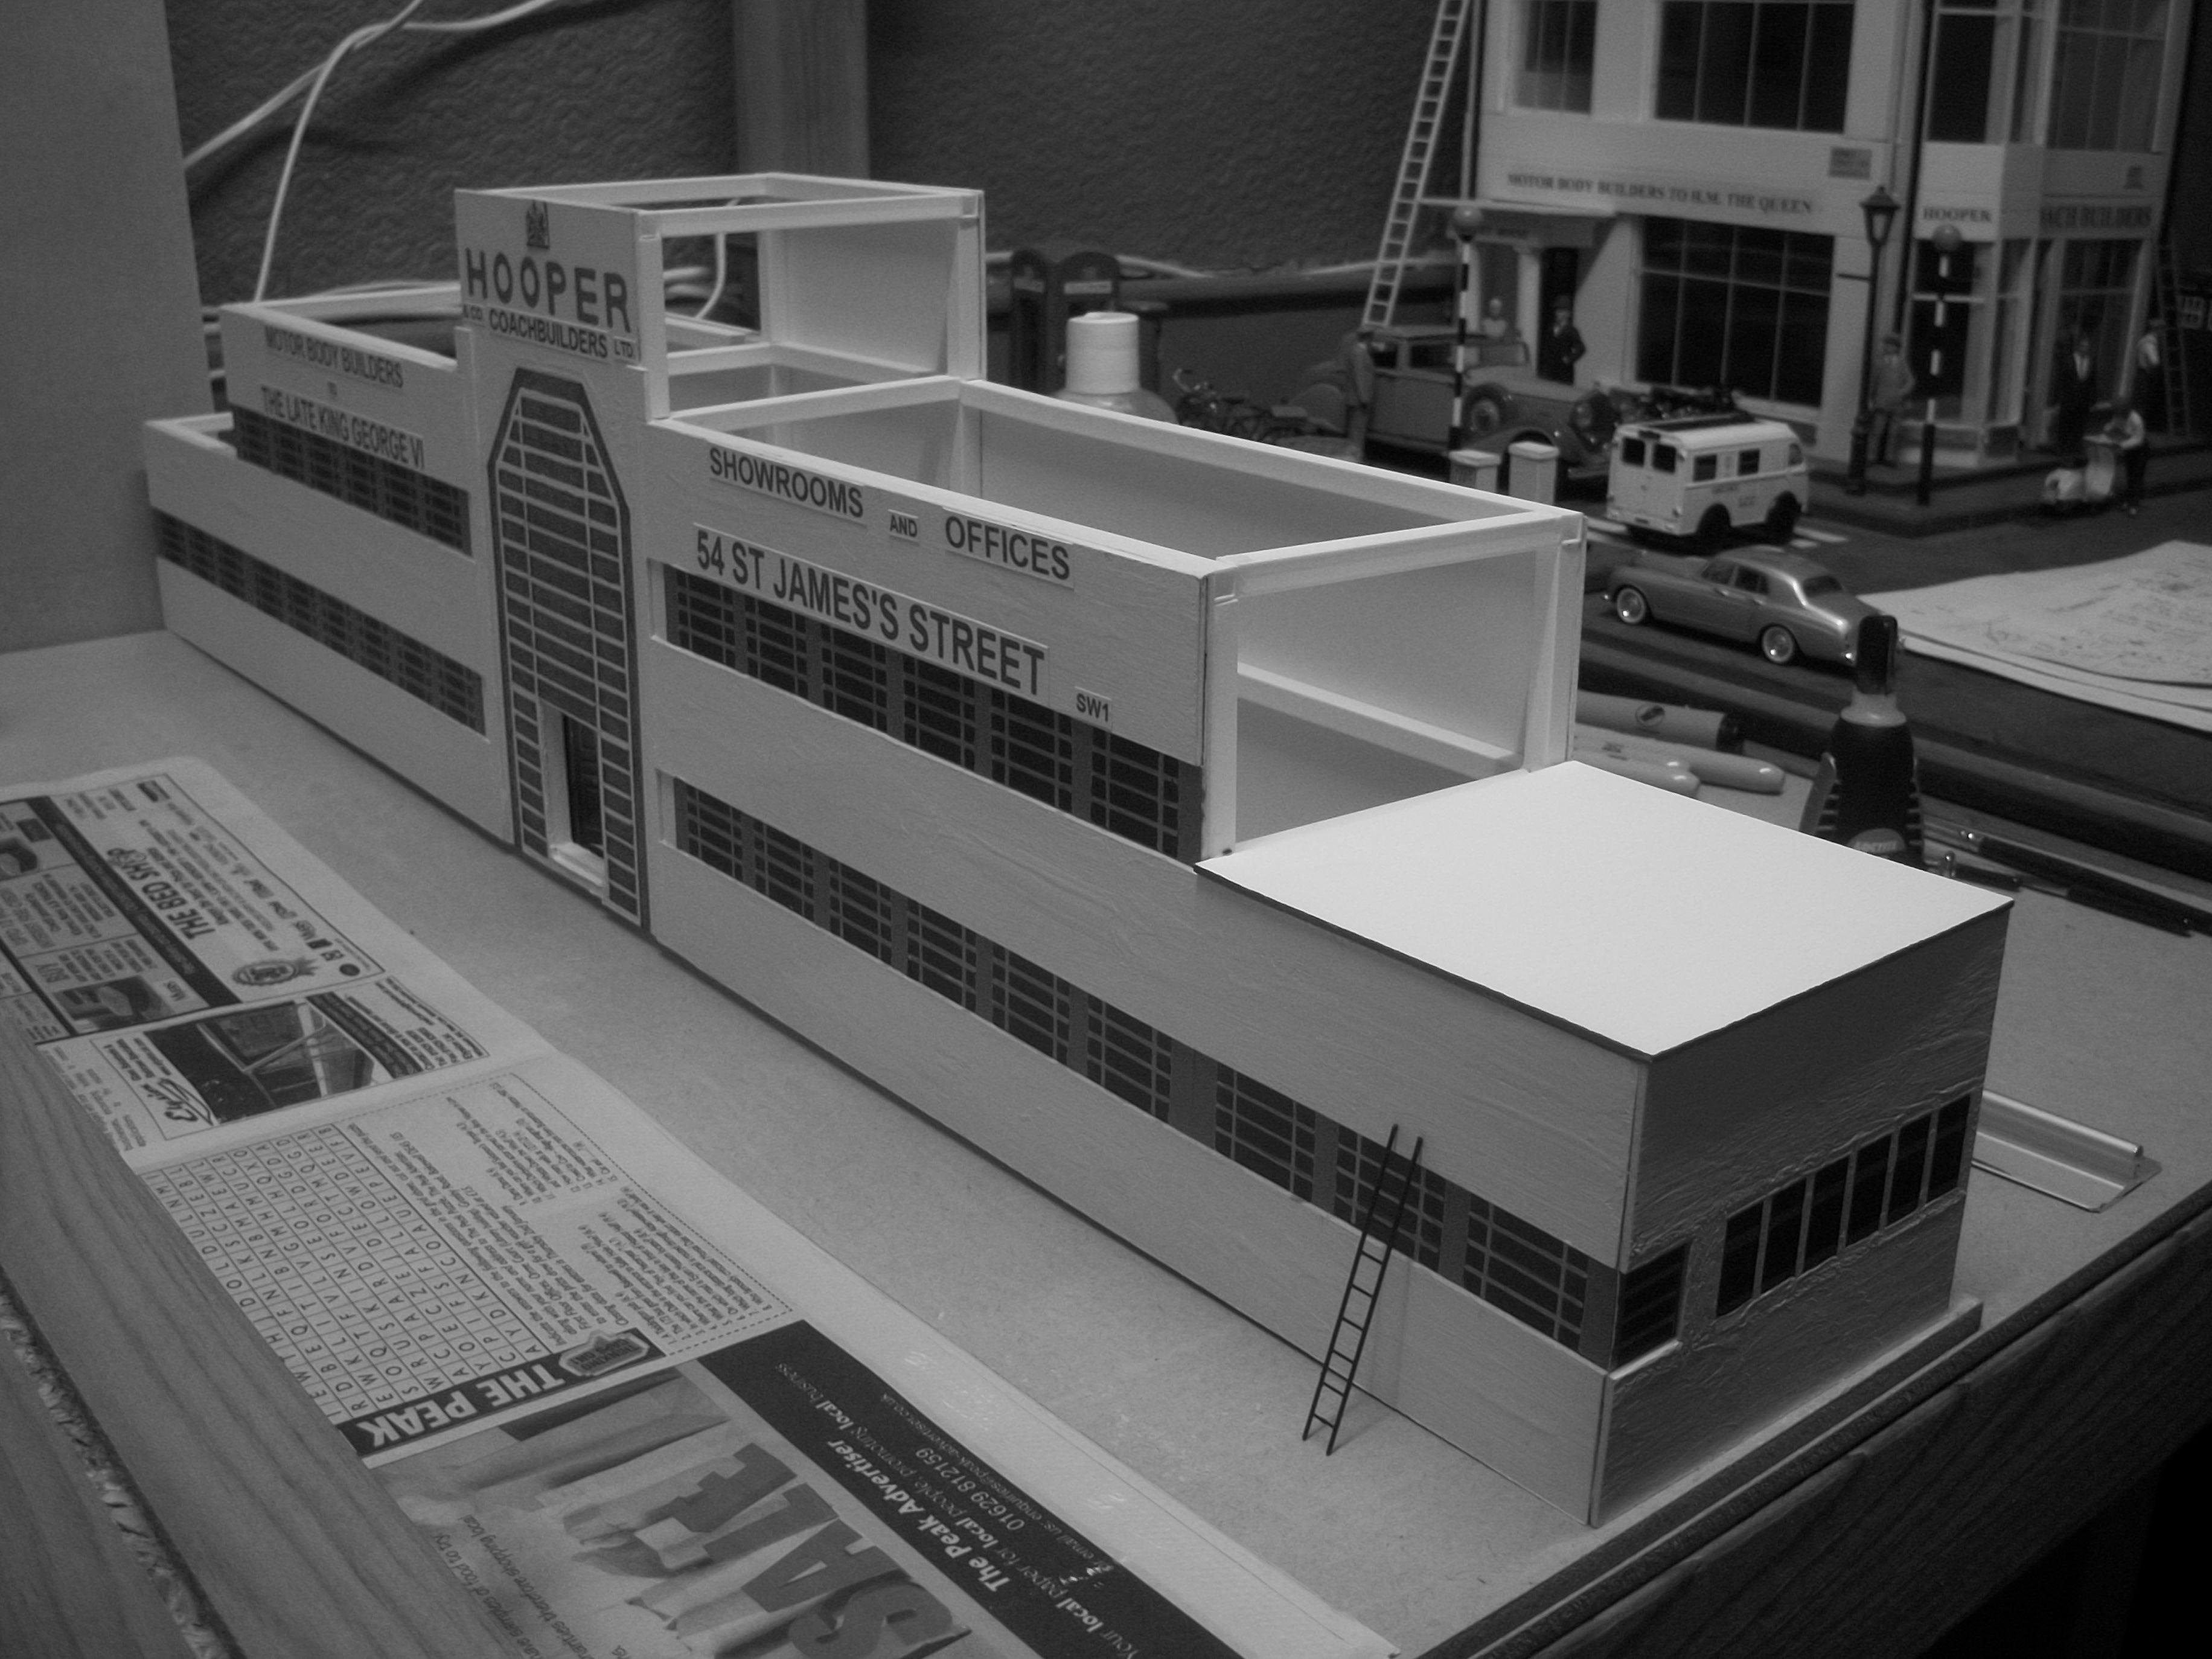
All of the 6 side wall panels, and the 5 roof panels have been carefully measured and cut to size. On the right hand side of the factory building, as you look from the front, there are windows to add at the sides, also a door, some skylights and some lettering. This building feels like I am working on a ship, because it is long and narrow, with a structure comprising girders and panels. The whole structure is light but strong, and probably weighs not much more than a 1:24 scale kit built car. David
-
Just a thought, Pat..... are you wanting to reproduce the biege parched grass that surrounds your old open faced shed, or would you be making the grass green? David
-
Excellent information on the static grass, Bill...... and who would have thought of using a wig? Sounds like static grass is what I shall need for my project. David
-
Assembled the rear wall of the factory building, which is identical to the front wall in construction but with no lettering or doors or windows. There will be styrene square tubing beams inside the building, linking the two walls together in parallel. Need to measure and cut to size, 6 side walls and 5 roofing panels, made from the same thick card that I have used so far. I ended up using super glue and not the hot glue gun, but might have to use hot glue for the cross beams. David
-
I am pondering this very same question, Pat....... as the Hooper factory diorama will be the first one where I have needed to do grass. Not sure how the static grass works, and it is a bit expensive over here in England. David
-
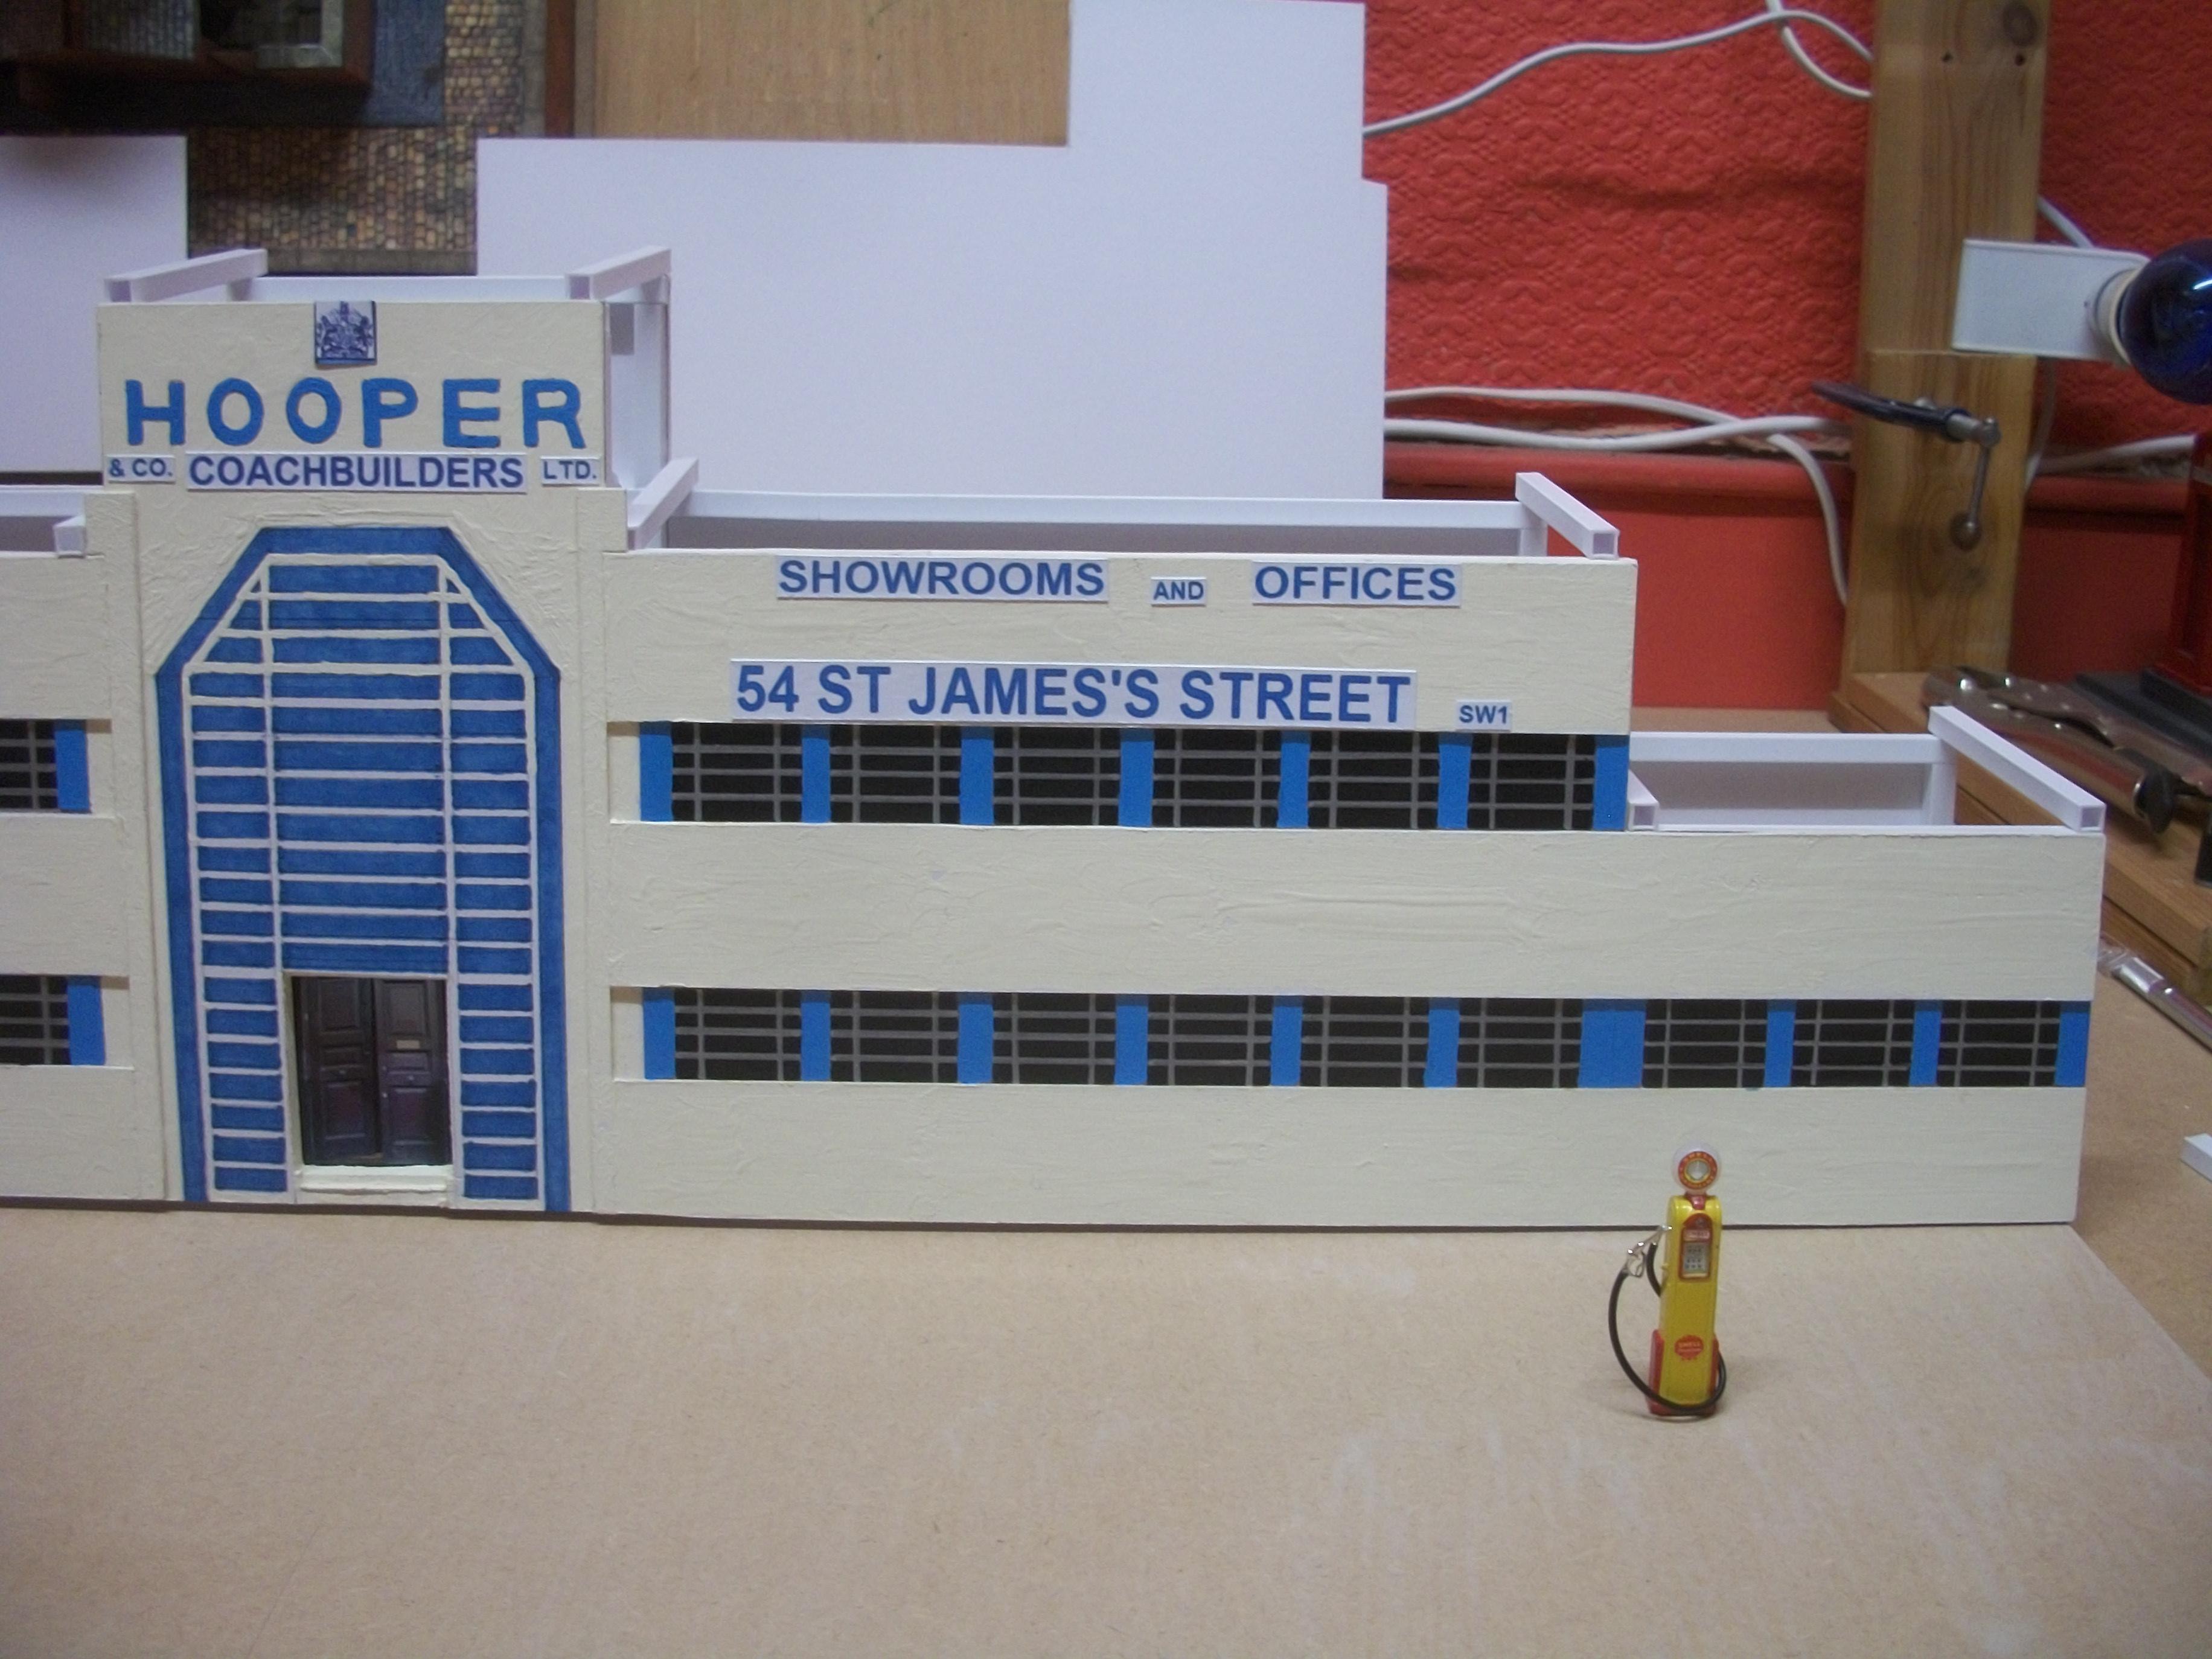
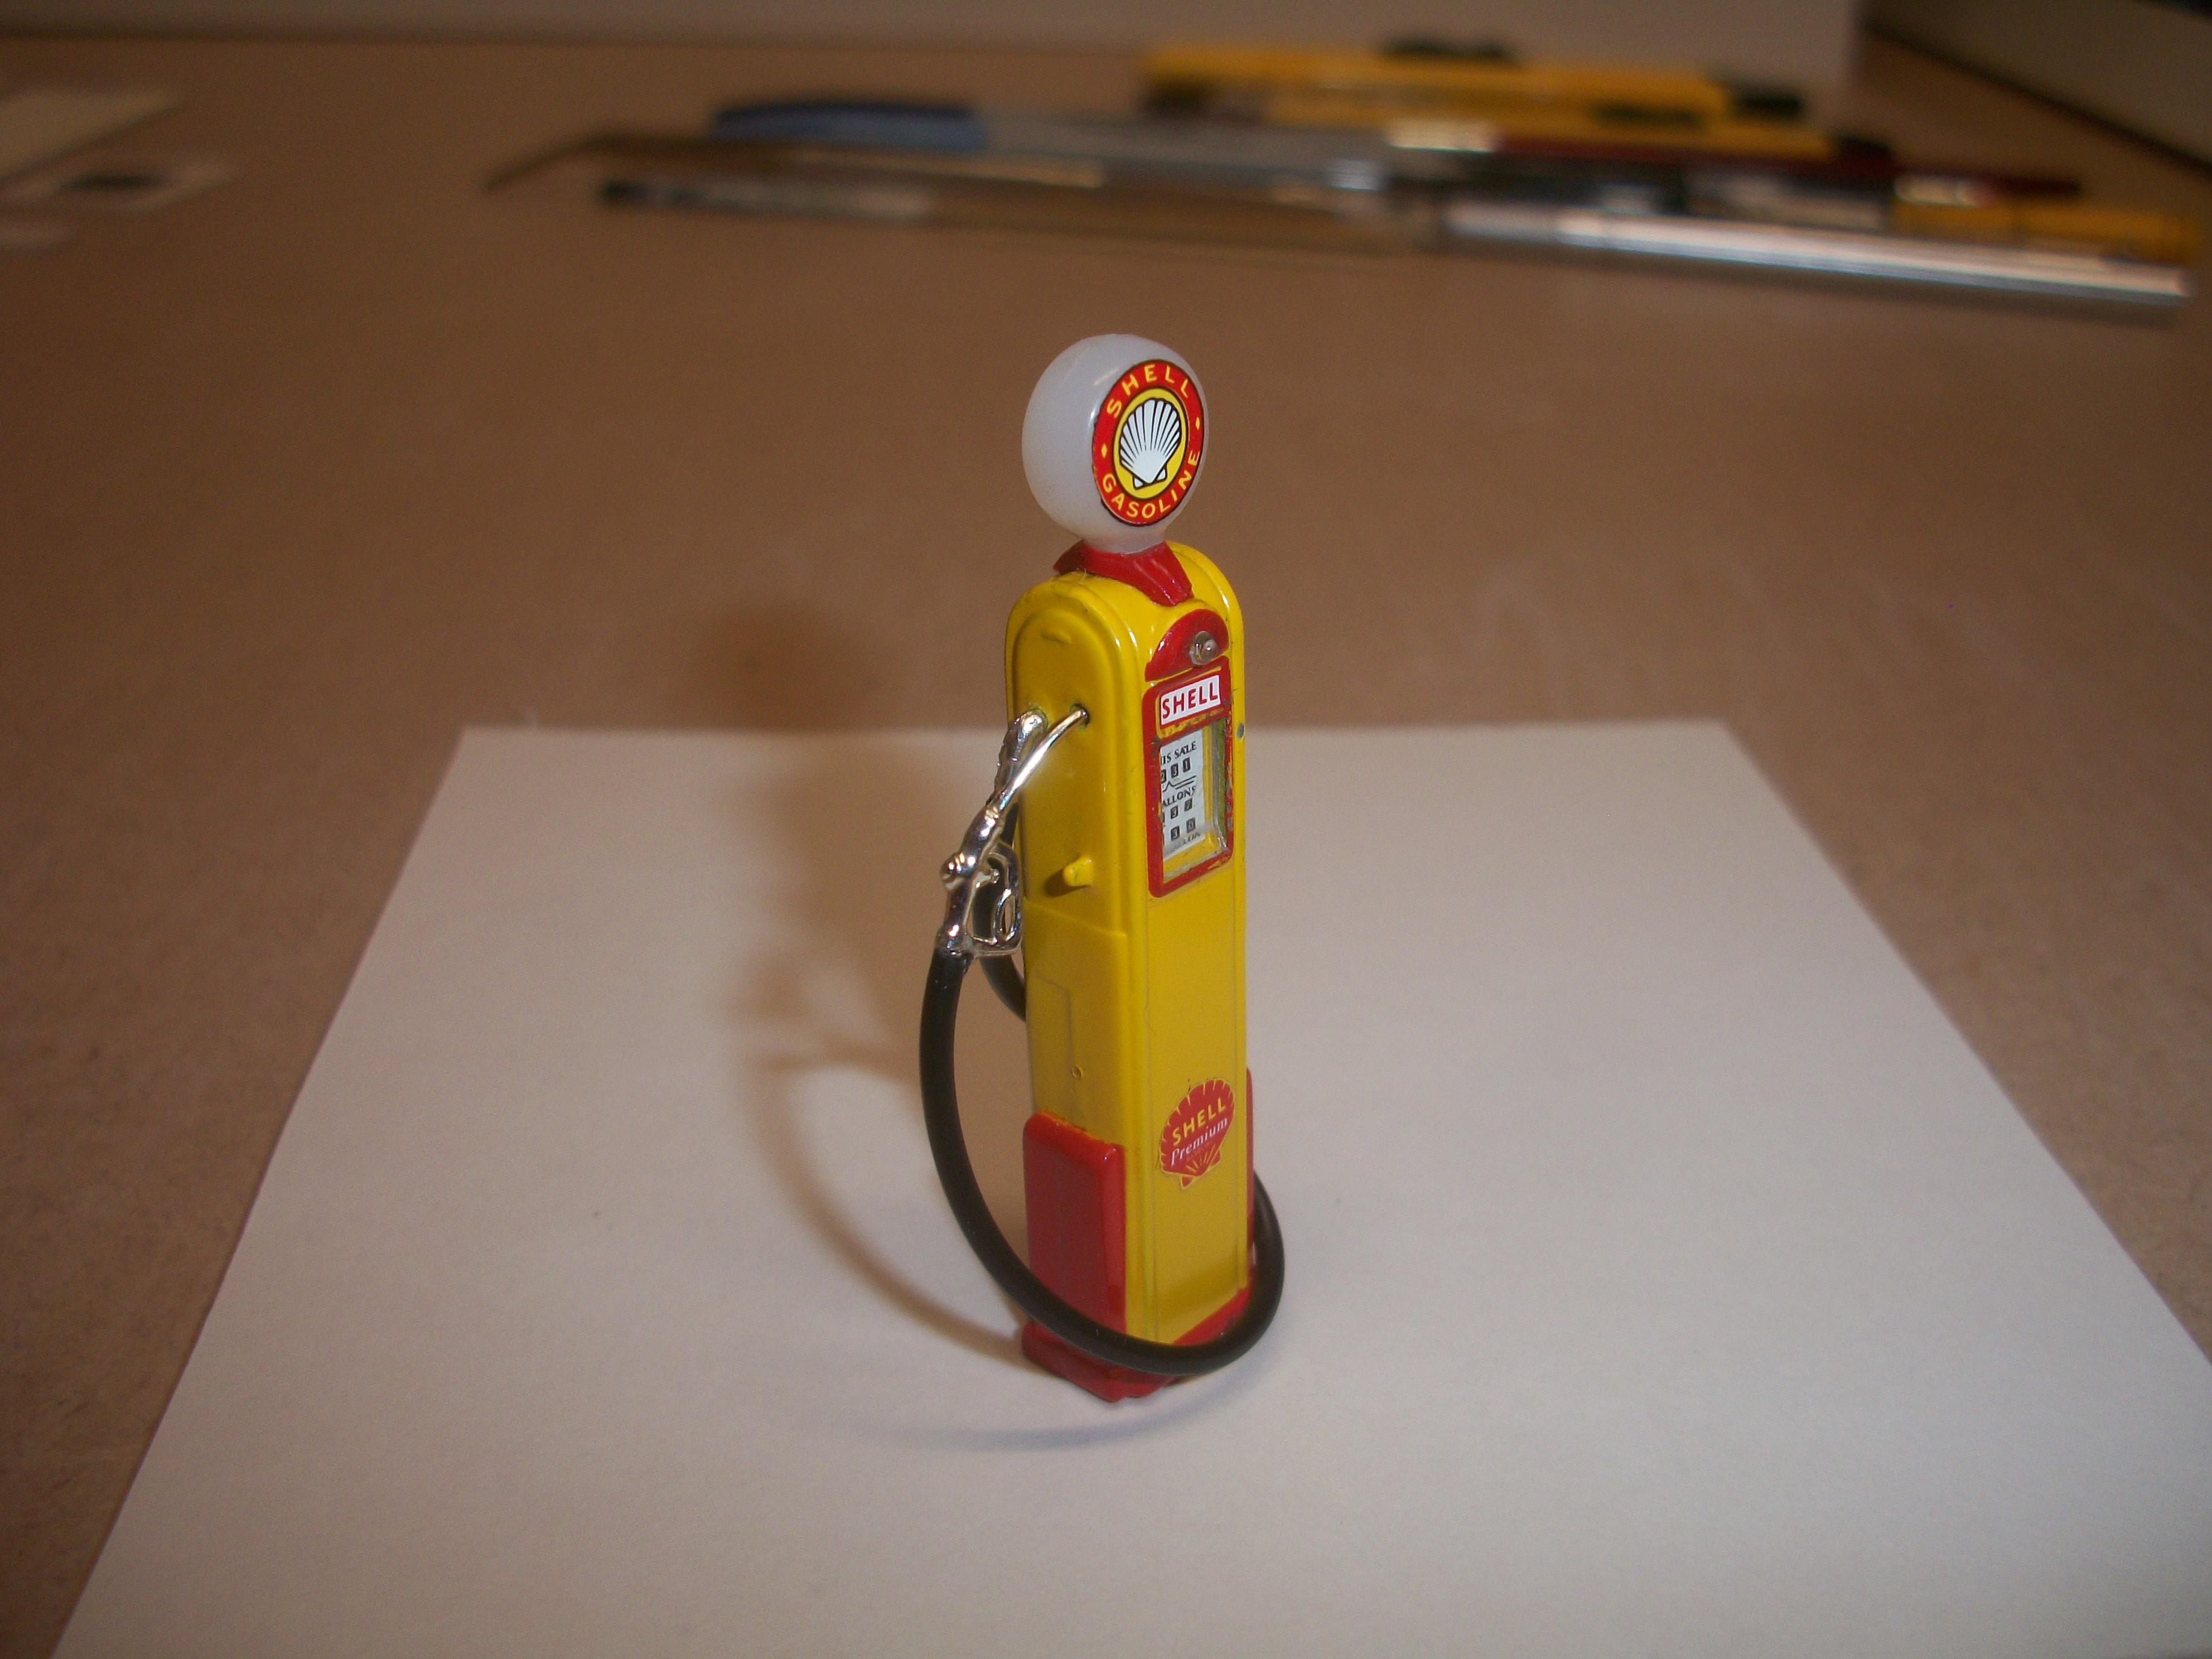
This morning, the 1:43 scale petrol pump arrived from Portugal in the post. The SHELL gasoline pump is actually American, and the company is Vitesse of China, but the product is made in Portugal..... I shall have to change the paint scheme to the British ESSO brand, for petroleum rather than gasoline, and the US $ needs to be in pounds sterling, but otherwise this pump should appear to be period correct for the 1959 factory forecourt. David
-
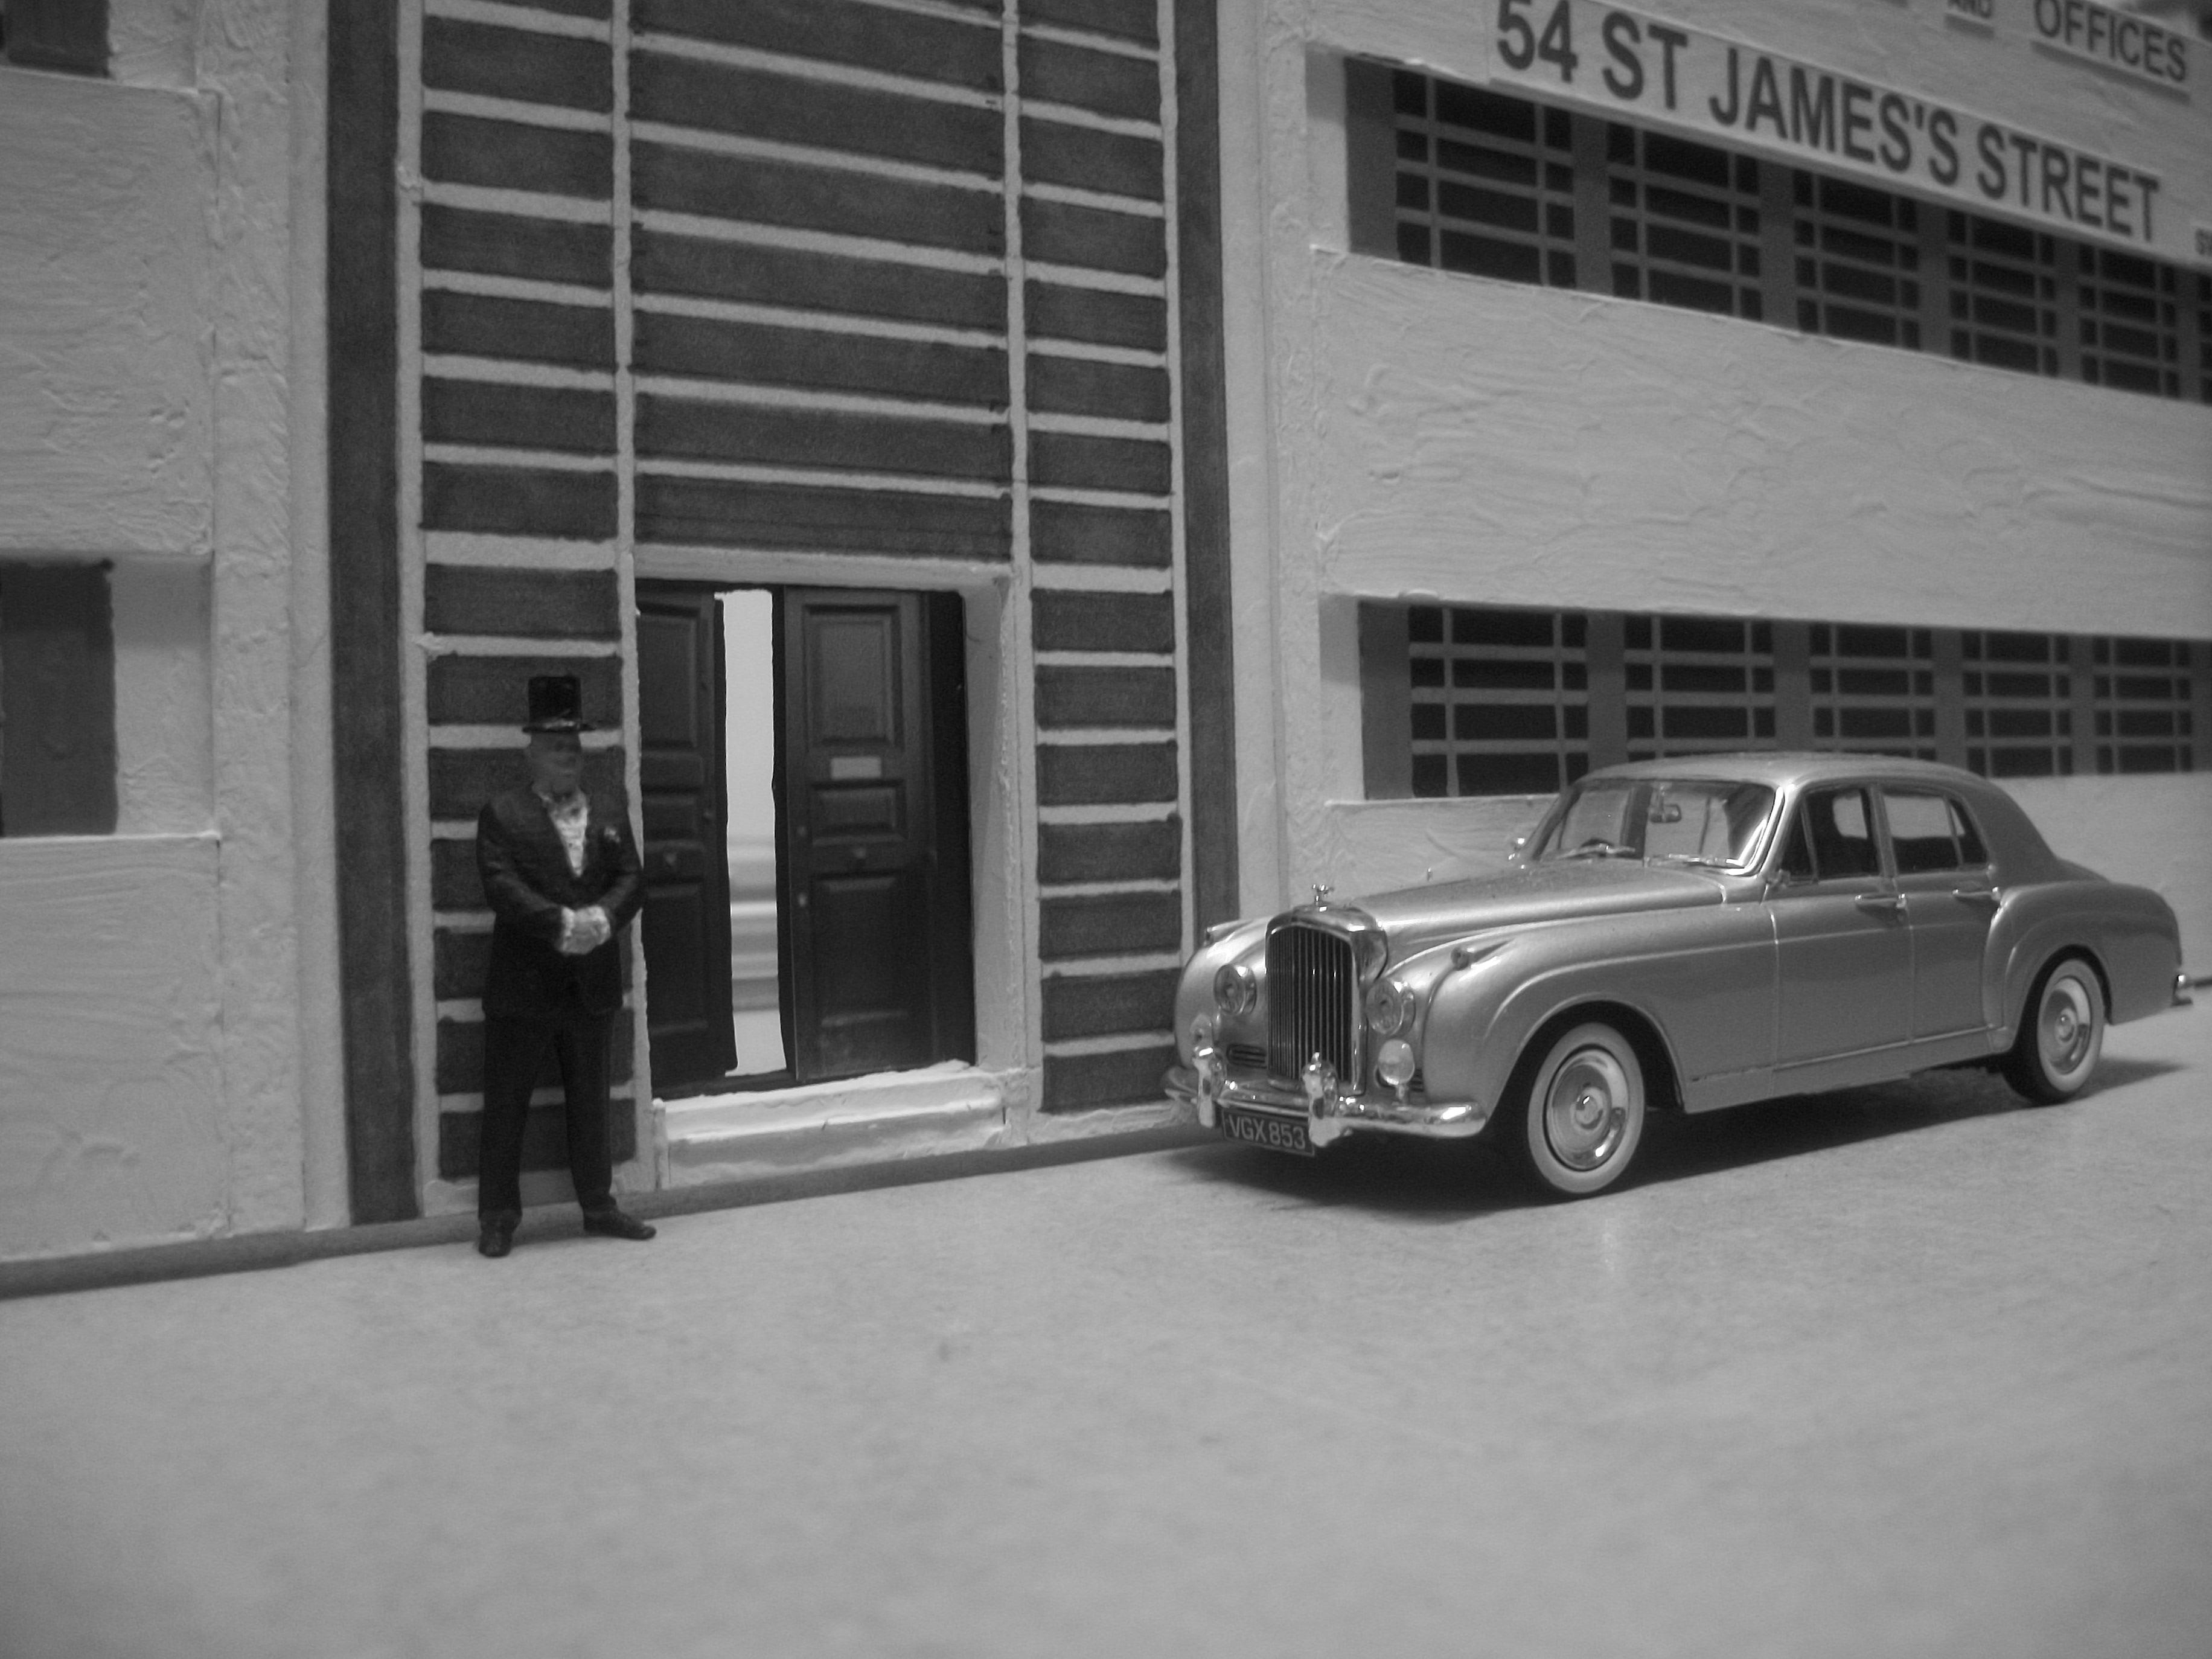
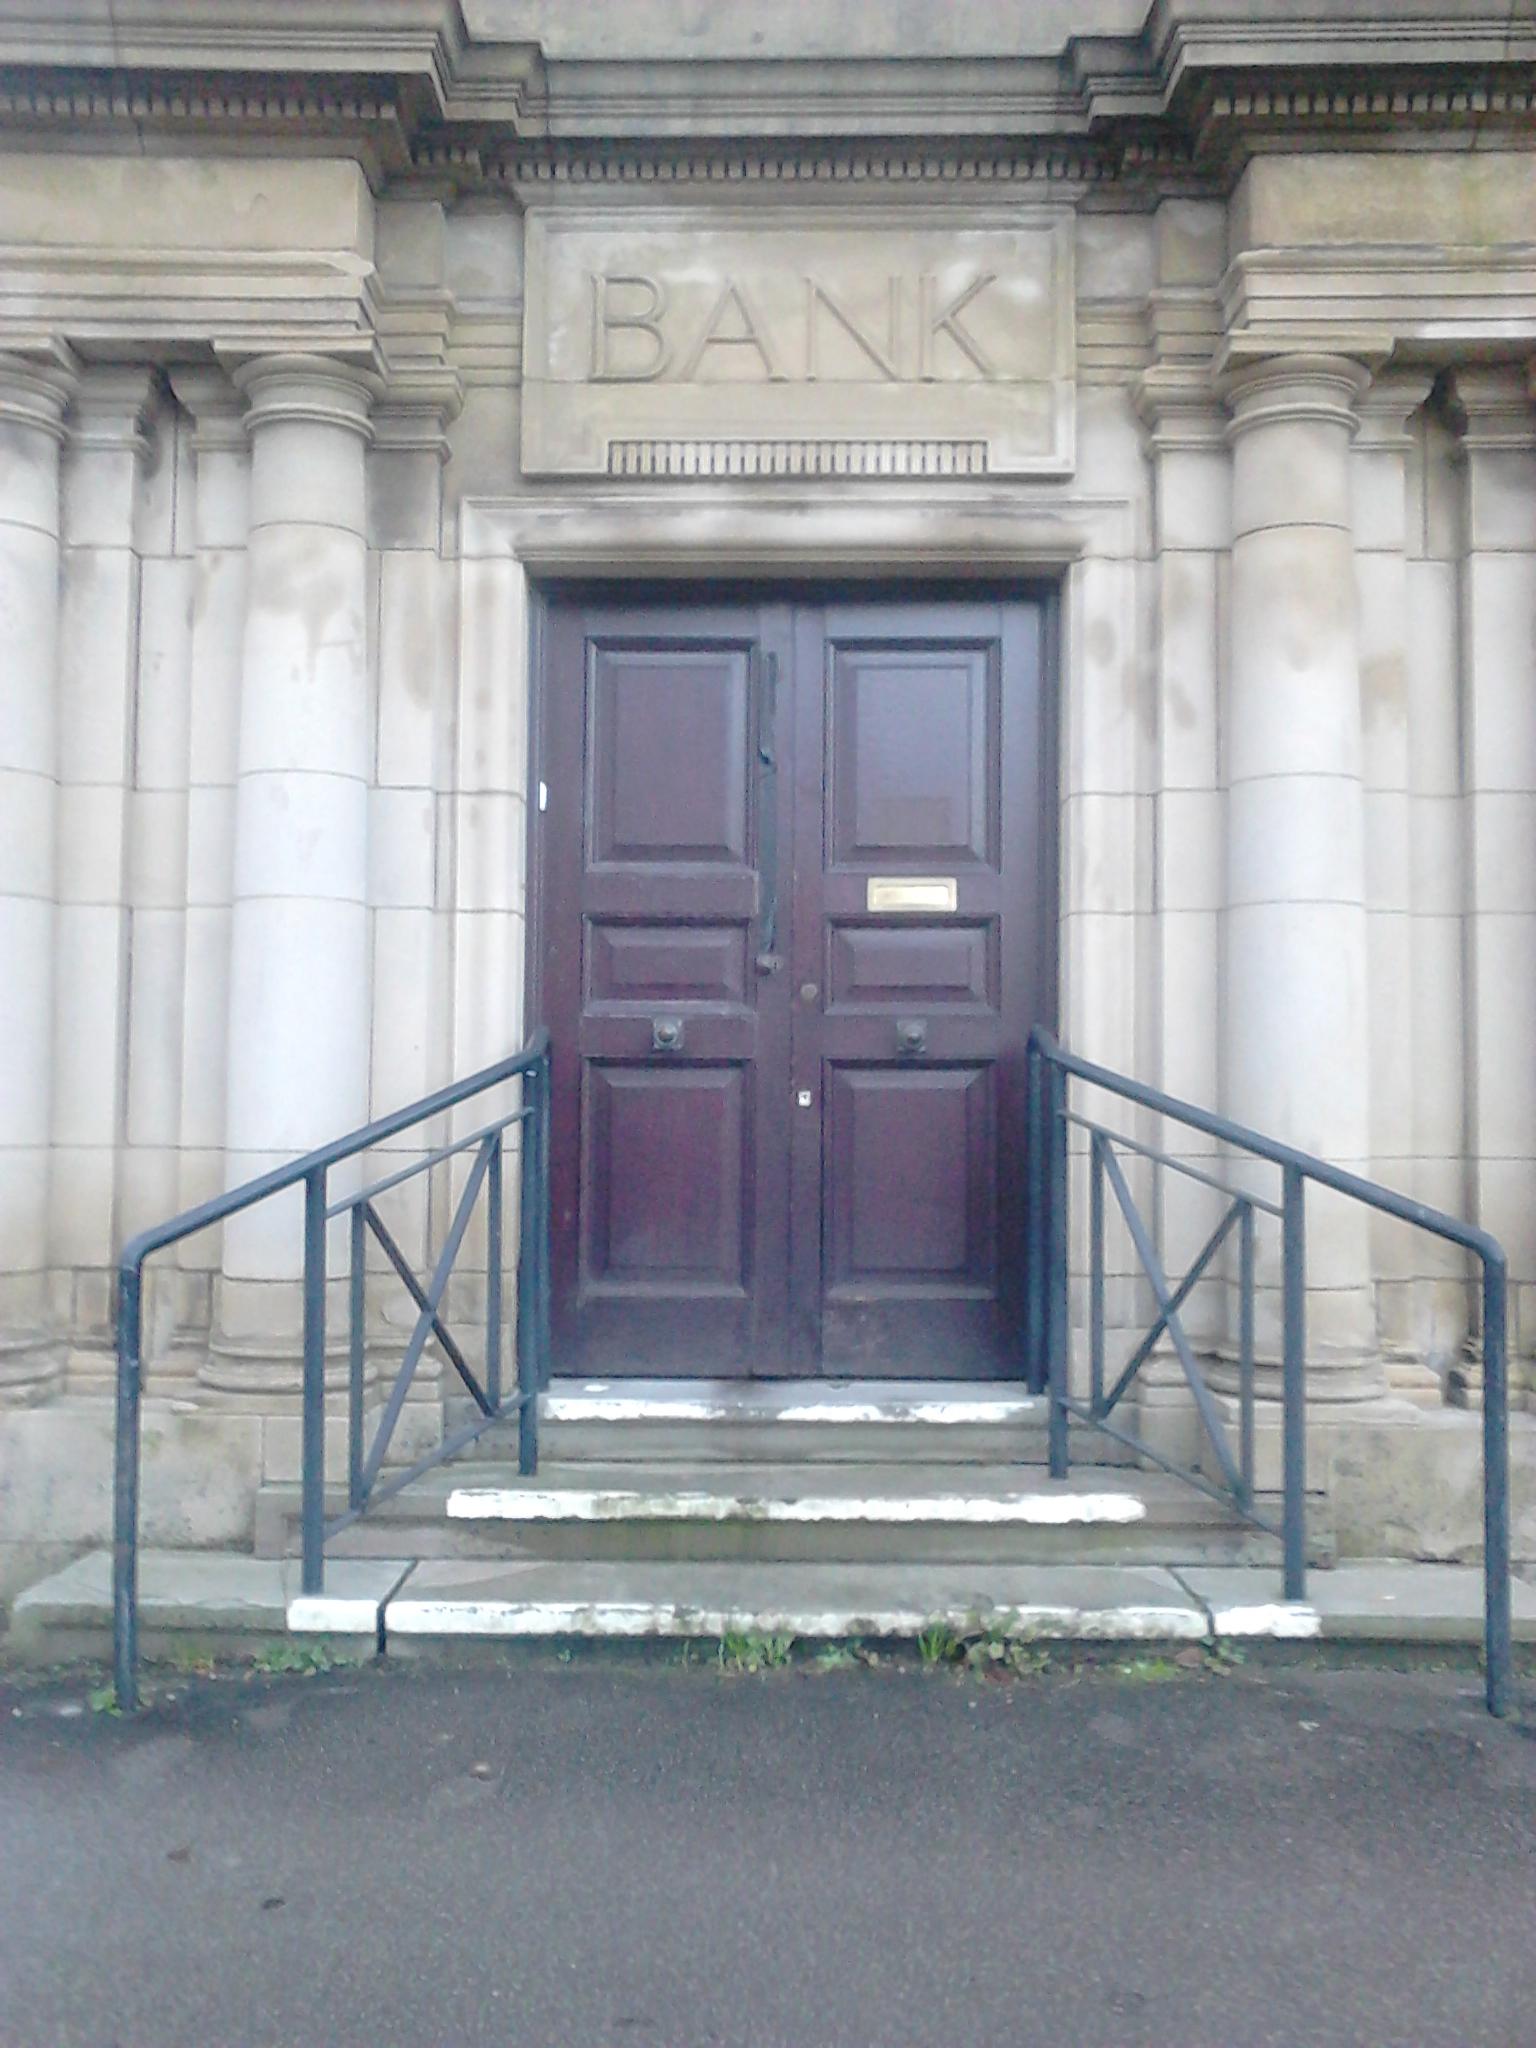
Thanks, Pat..... and in this case the photograph was taken by myself, using the old bank building in my local town. This building is not quite as old as Art Deco, but the doors seemed to be suitable for the Hooper factory entrance. David
-
Thanks, Gary..... the photographic method always feels a bit like cheating, to me..... but in this case the hand painting approach would not have been as effective. David
-
Yes, but he has to get past the tall gentleman in the top hat first..... David
-
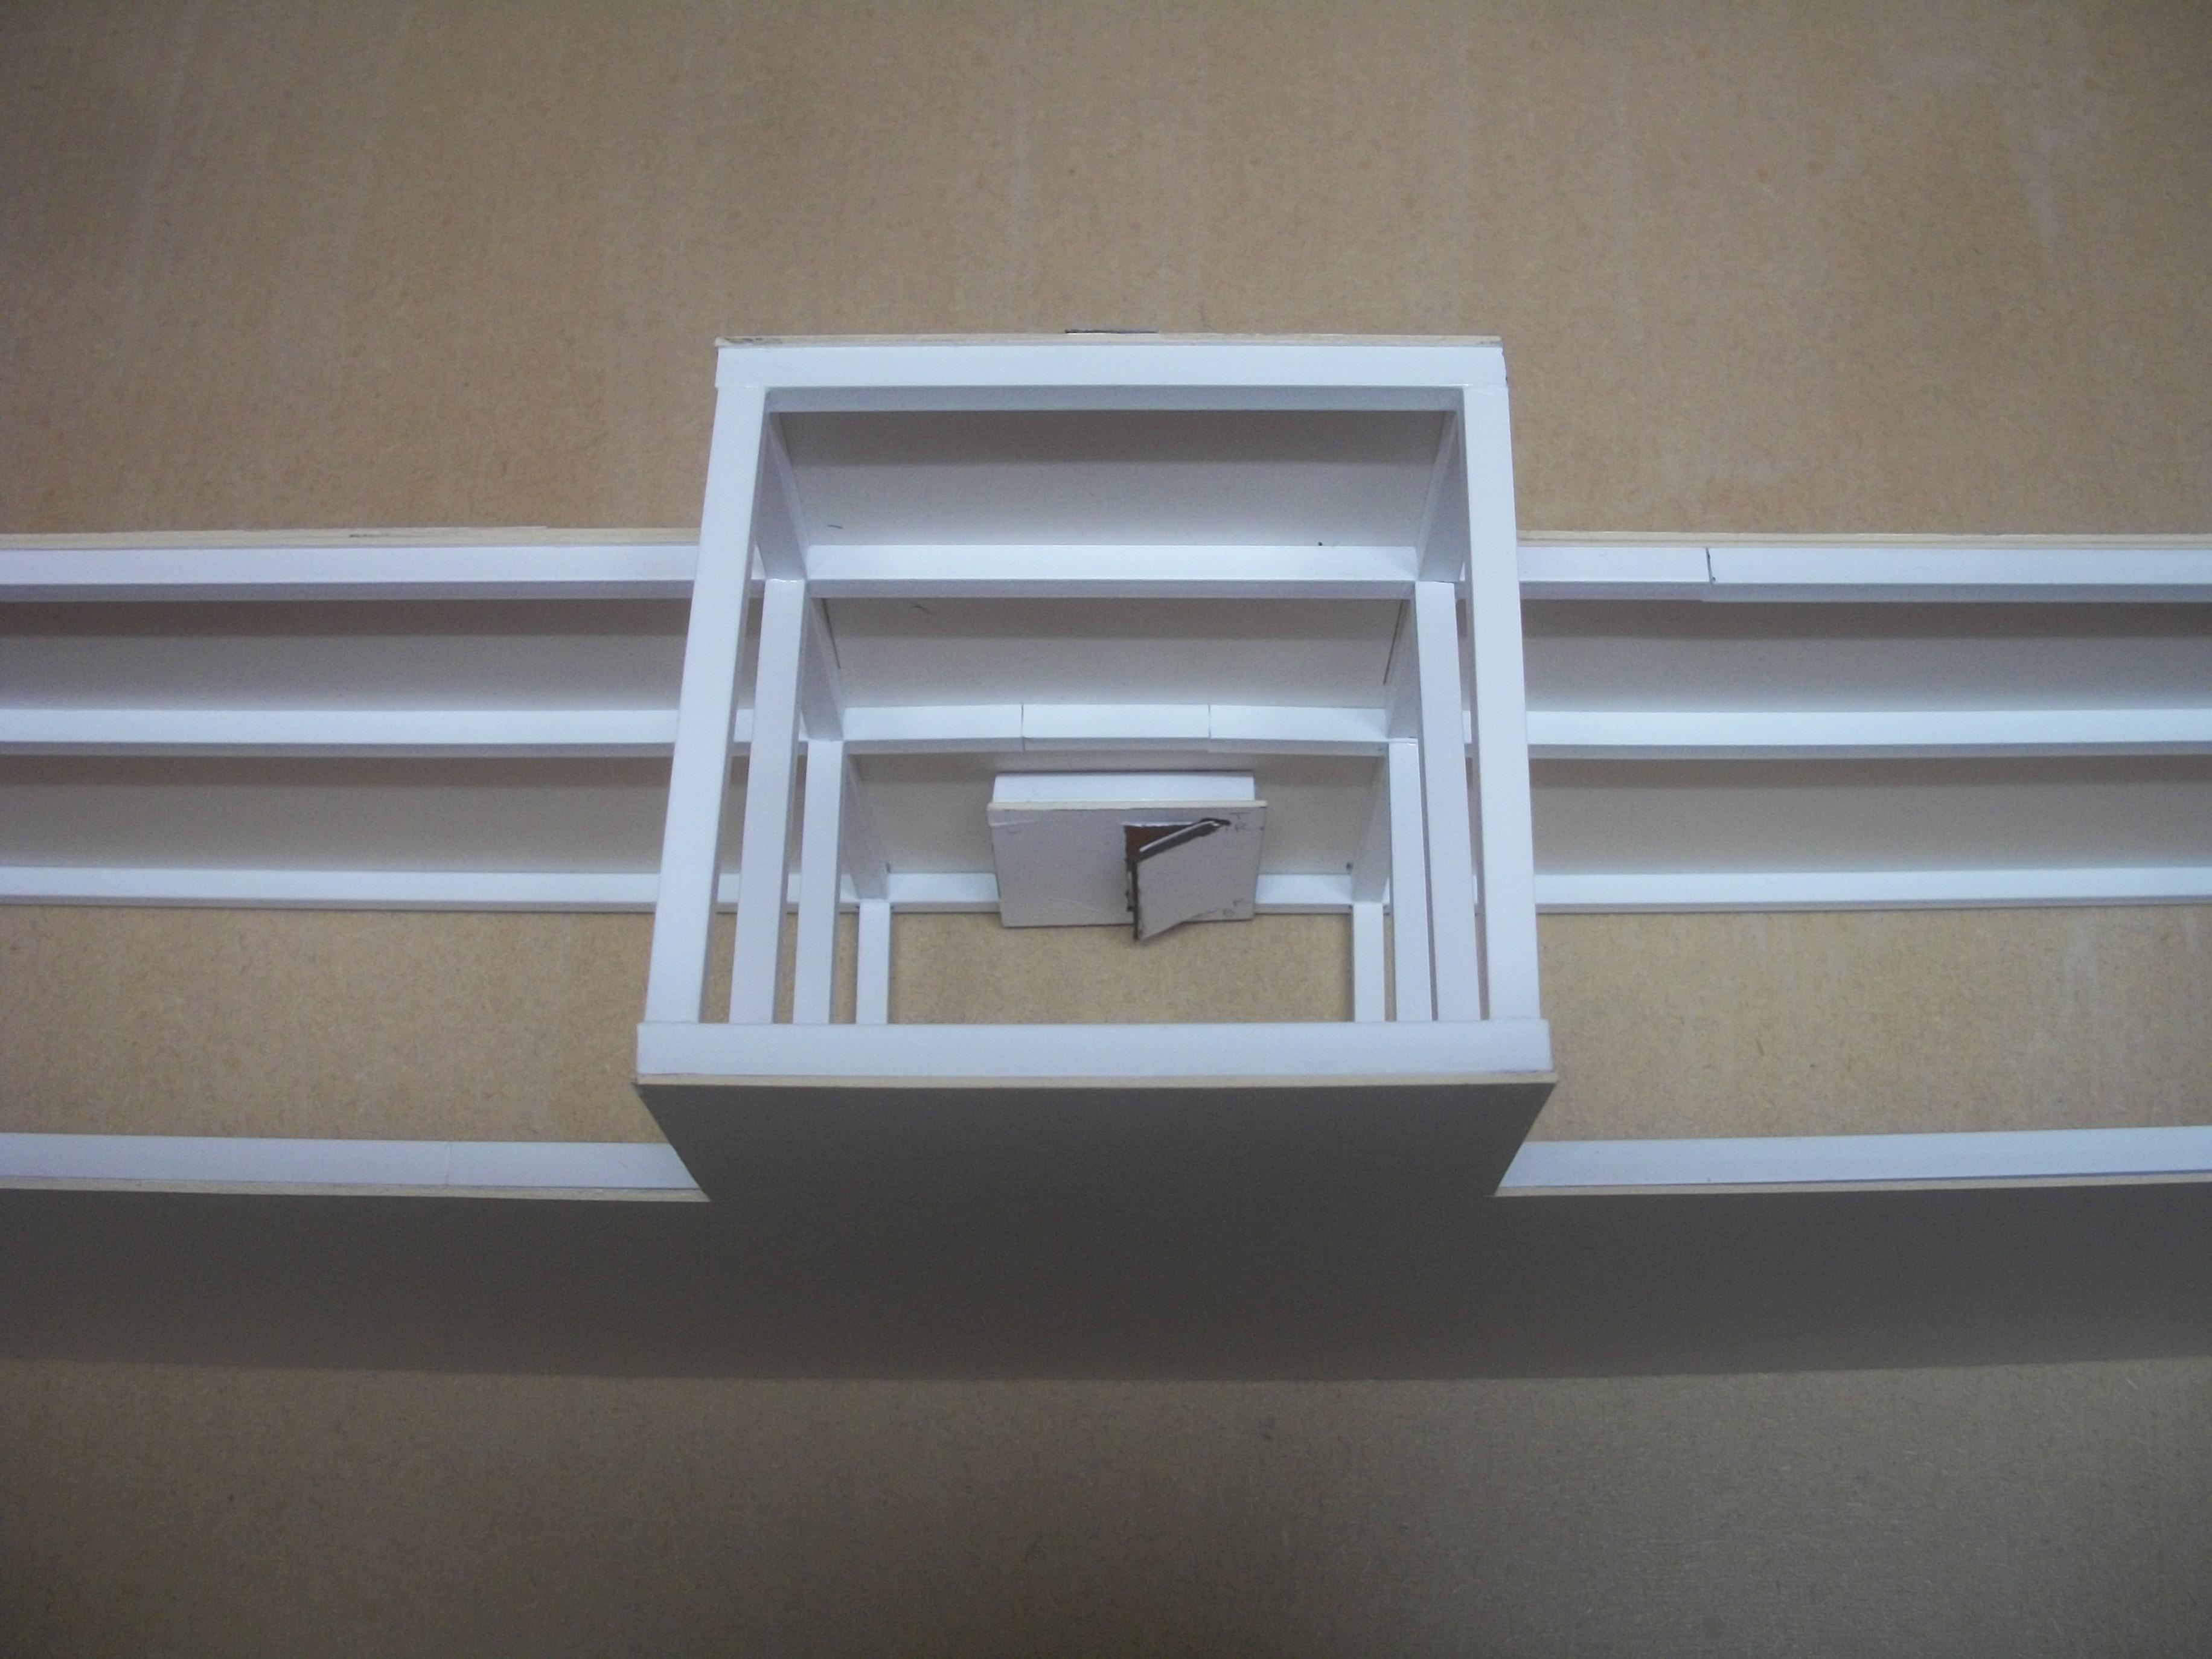
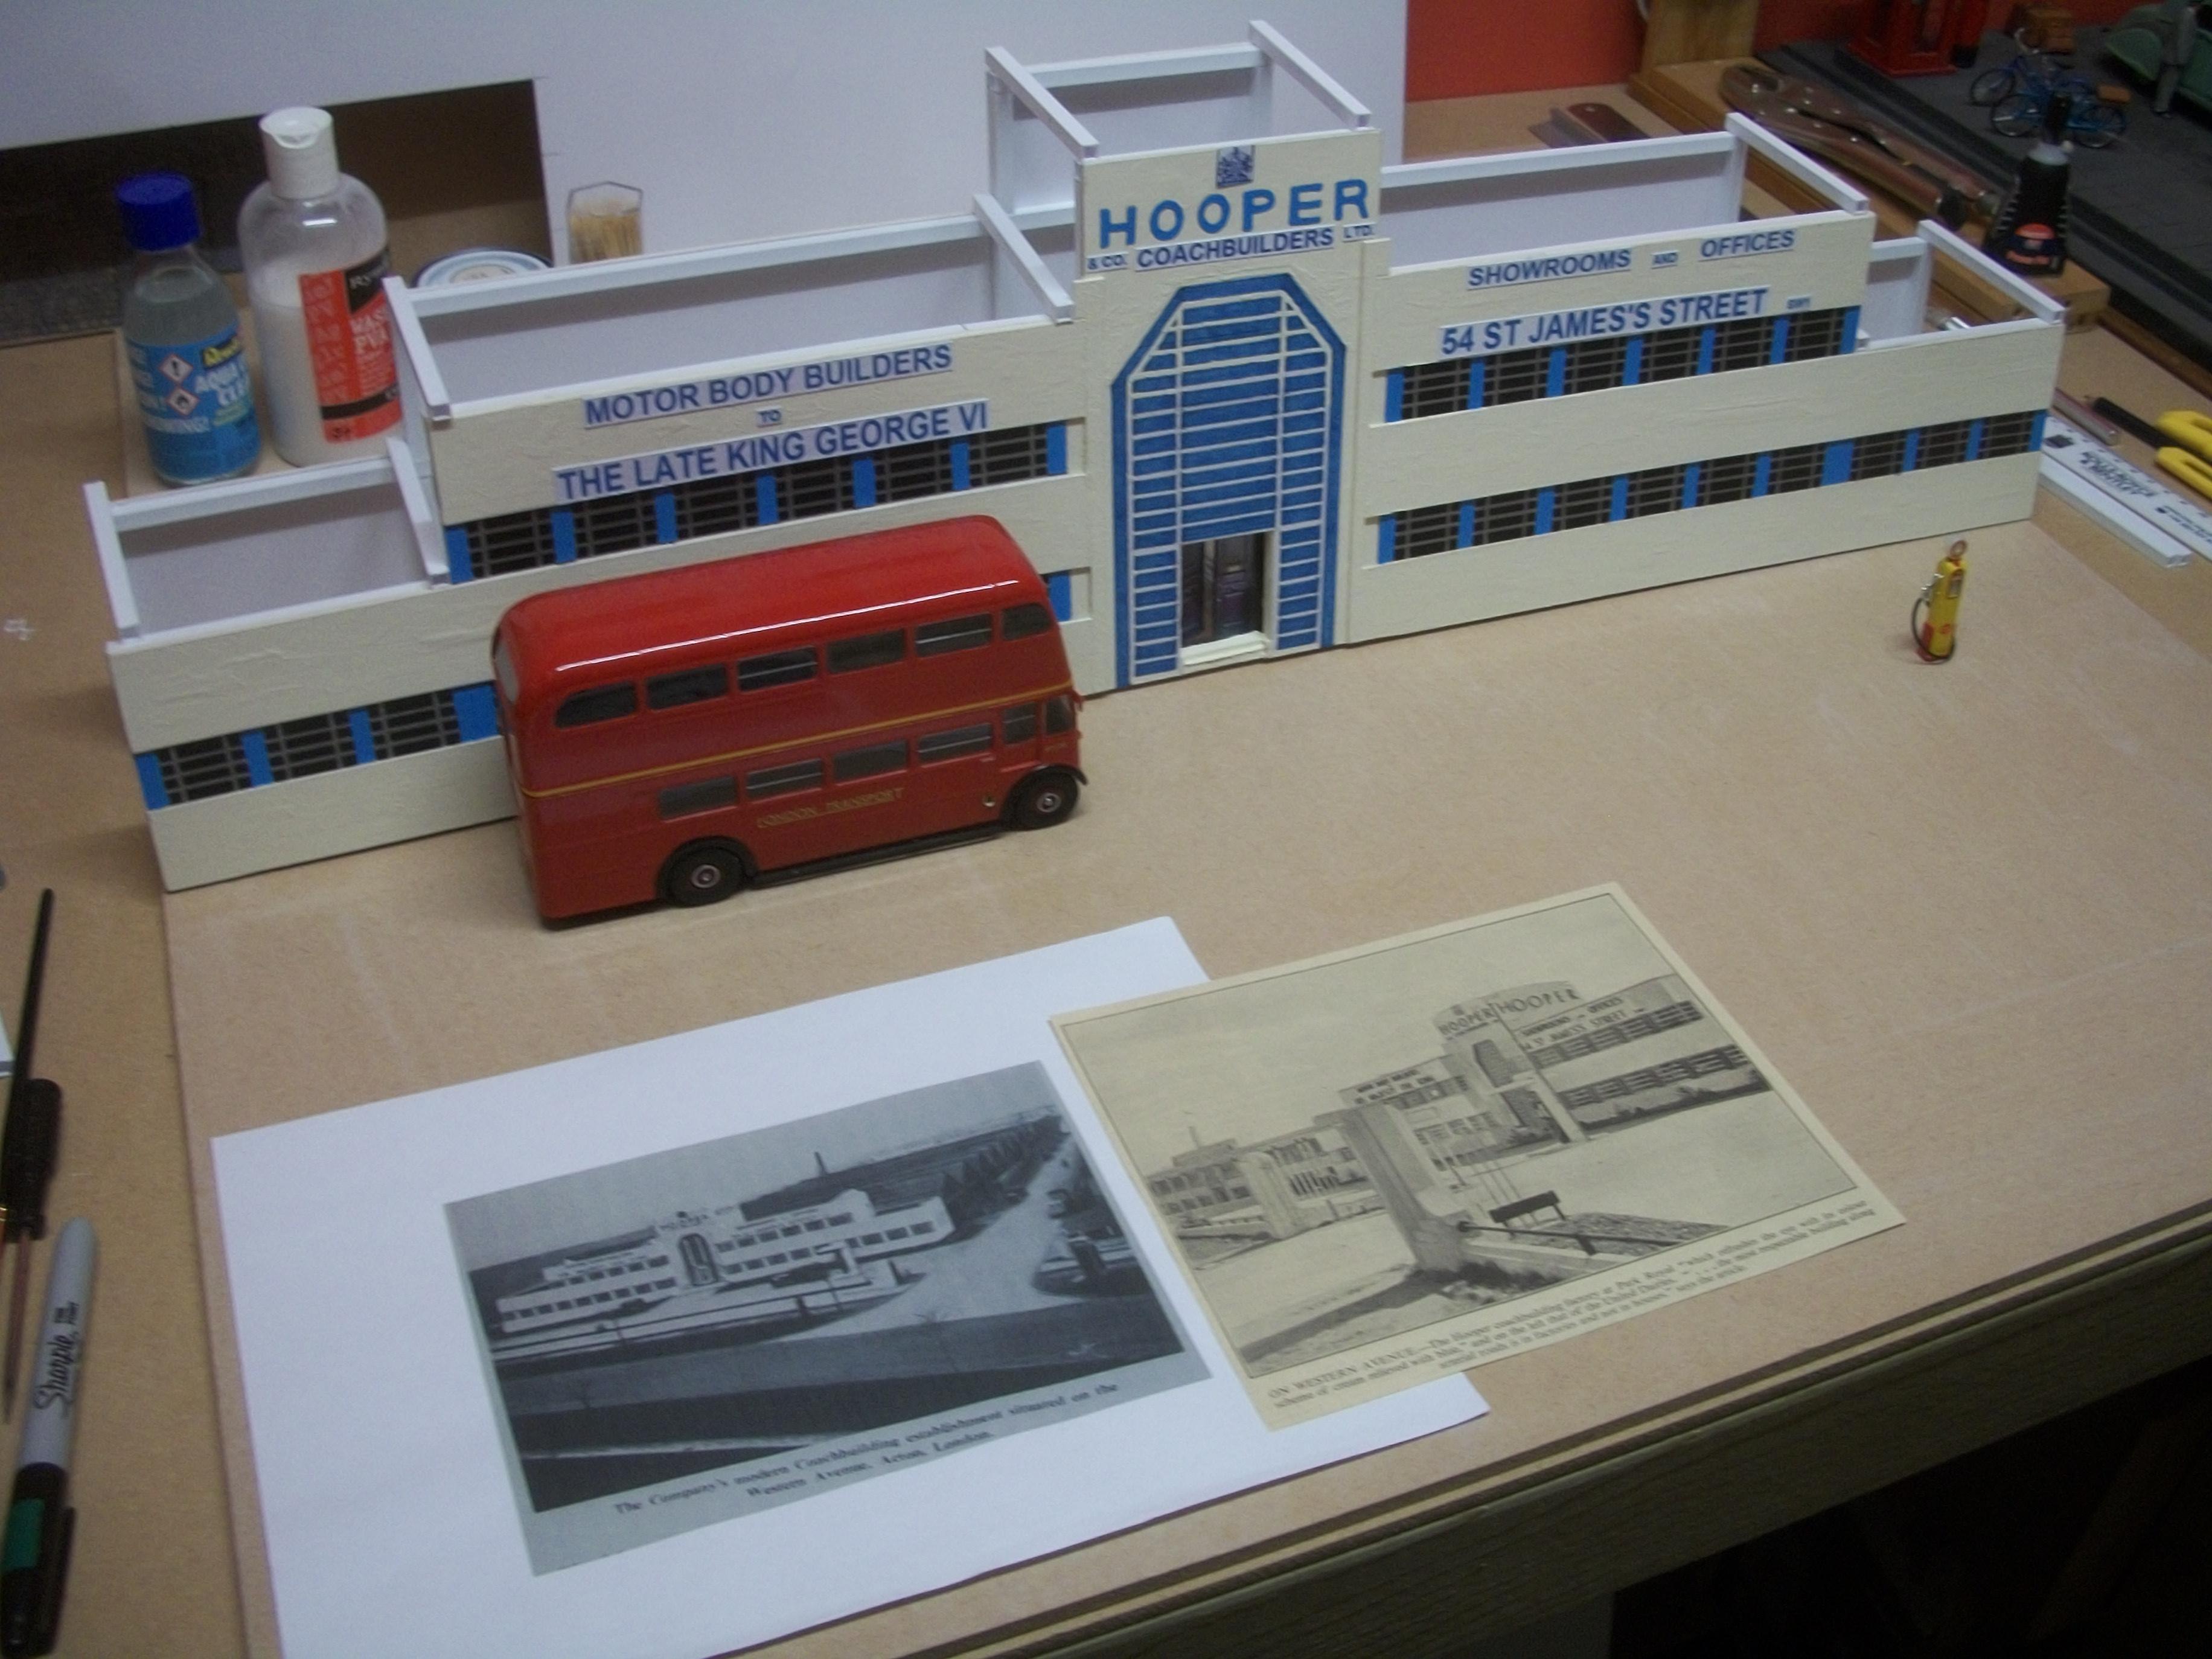
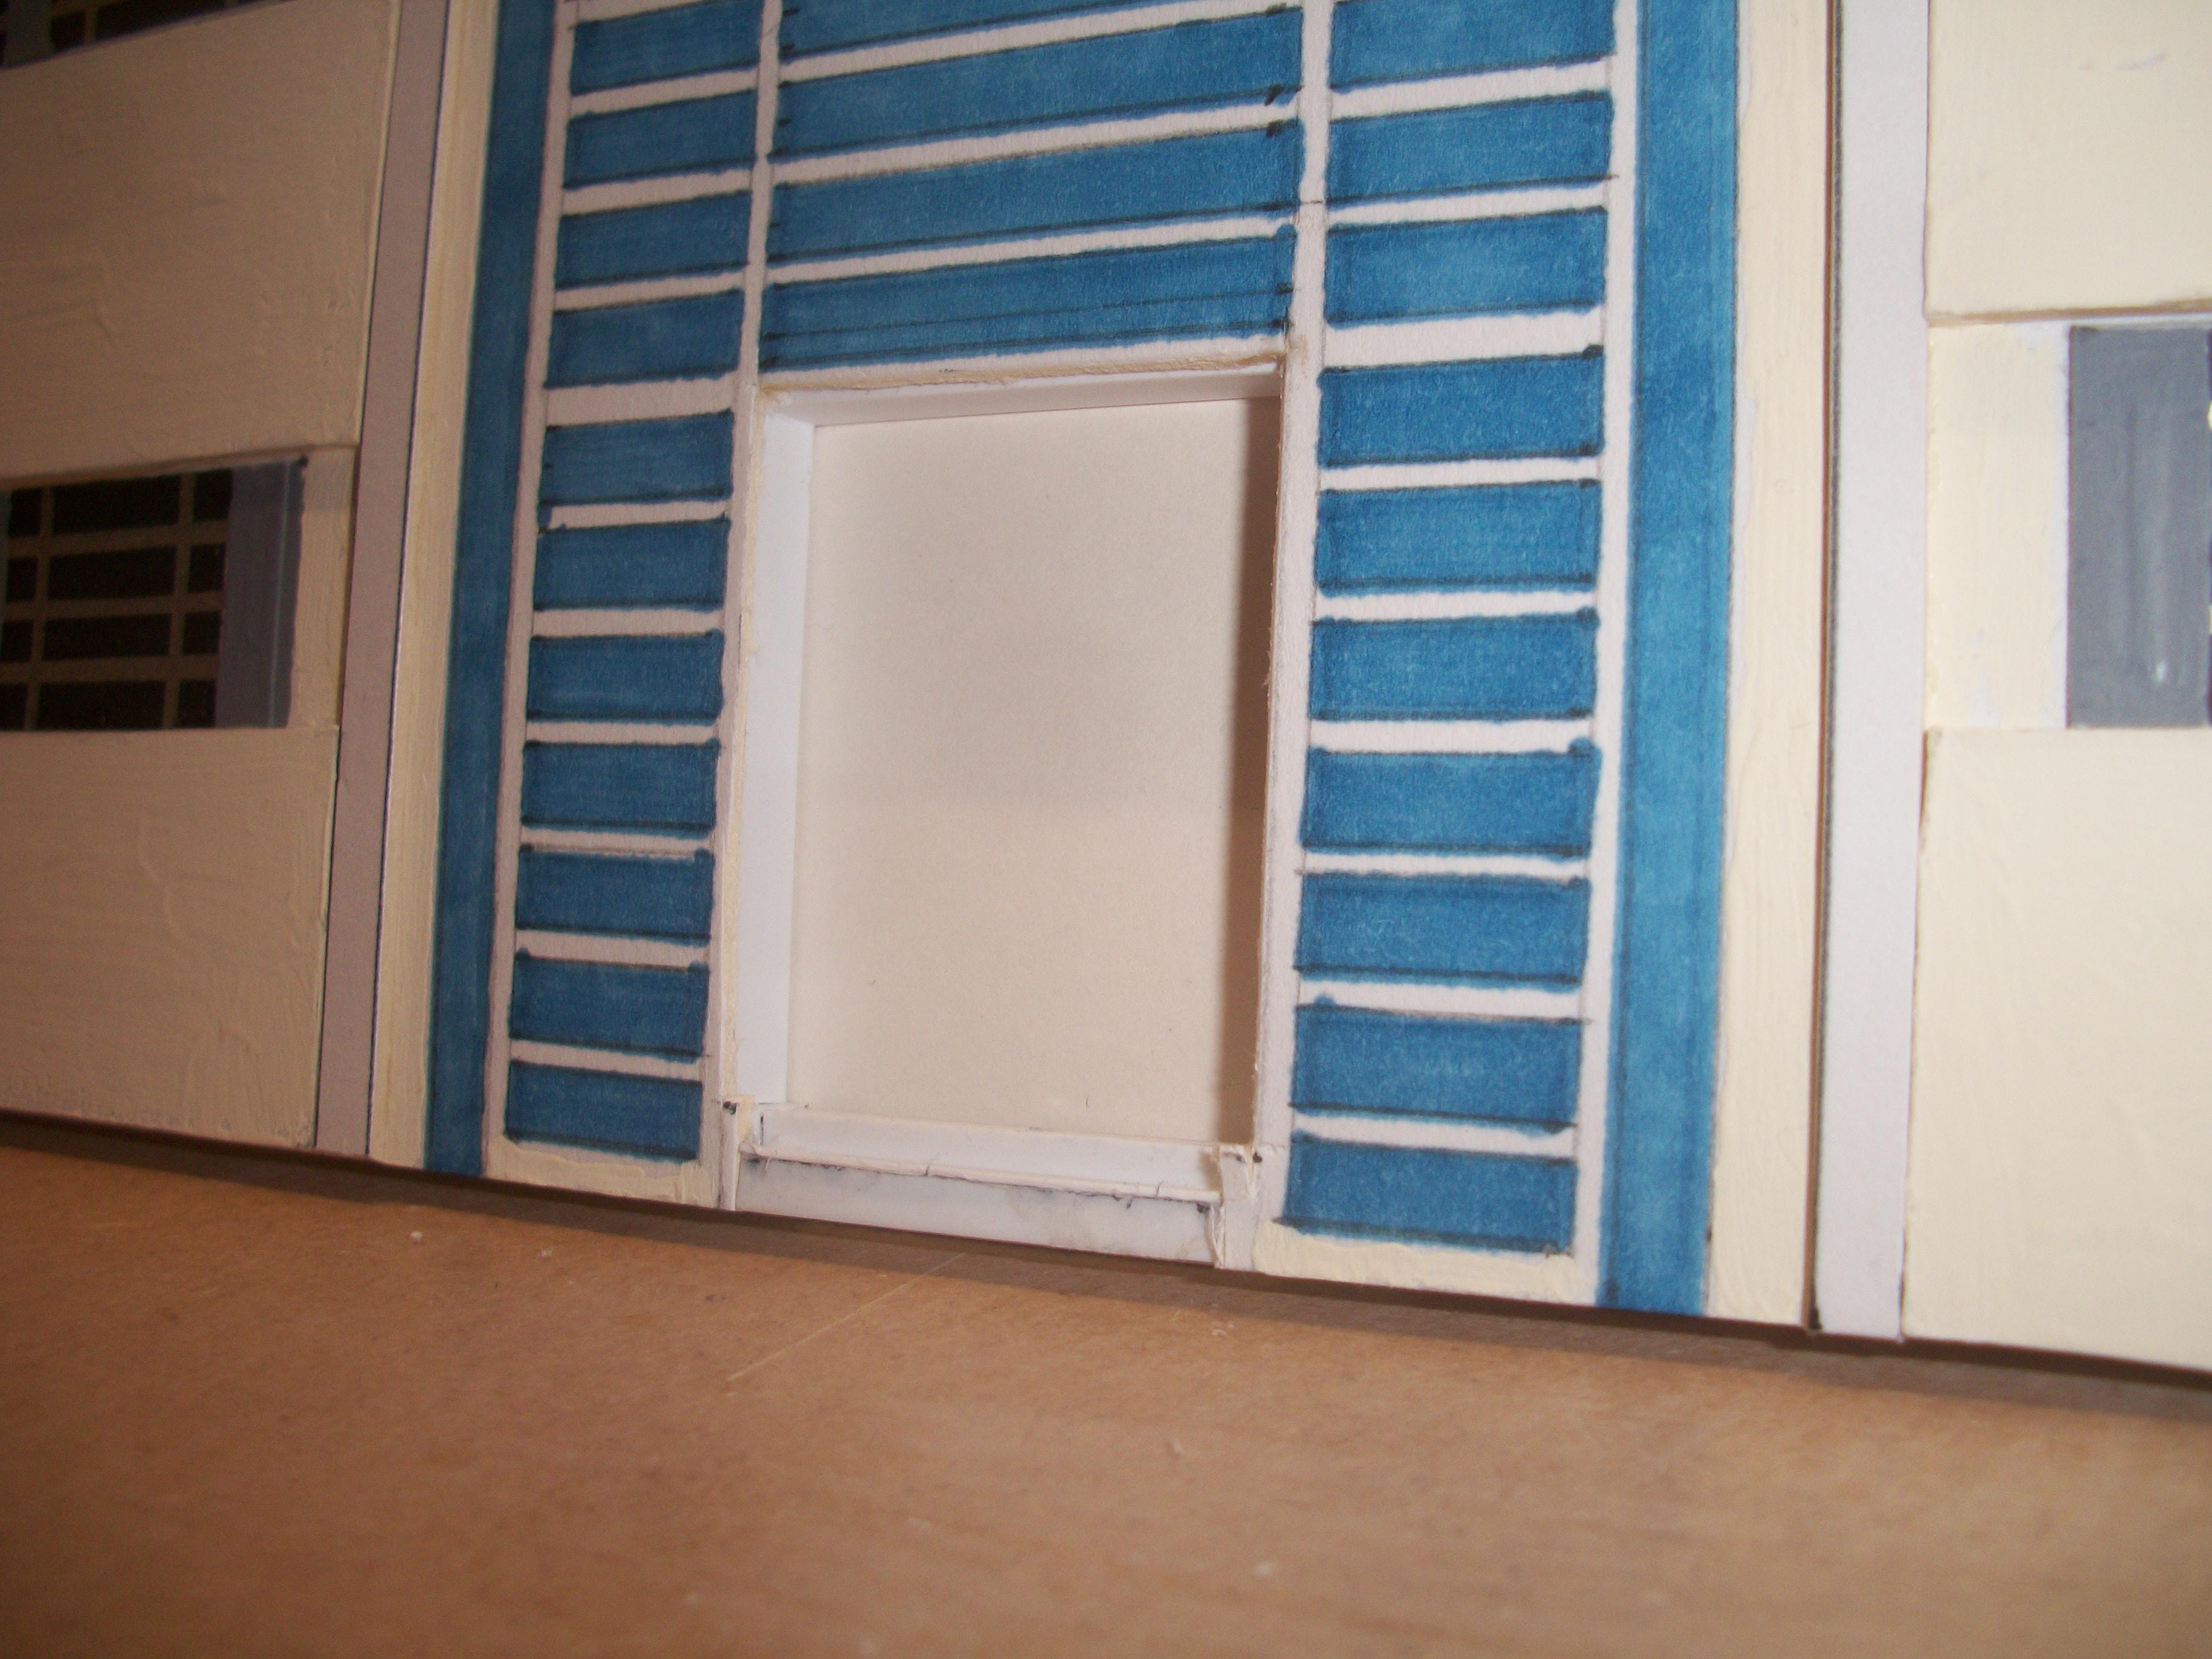
Work continues on the 1st January 2020........ a new year, and a new door for the factory. After careful consideration, I decided not to attempt painting the doors by hand, but instead I photographed the 1:1 door in my local town, using my mobile phone camera. This building used to be a Bank, but is now awaiting it's new owners. I cropped and reduced the photo using Microsoft Paint and Microsoft Word, before printing the image on 210 gsm card. This was cut to the precise size of the doorway and cut into two doors, which were PVA mounted onto my backing card that has one door in the open position. The whole doorway assembly is glued to the rear face of the door aperture. Quite pleased with the result, which I think works. David
-
Your road wheel with the aluminium outer rim looks good, Mark...... thanks for the explanation regarding the clear casting, and clear resin 3D printing ( growing ).. which all makes sense now! David
-
Thanks, Tom........ I am determined that this should be the best of the four dioramas that I have built so far, and the factory diorama baseboard will link up with the terraced houses baseboard to form one diorama in effect. David
-
Good story, John...... the diorama comes alive in this way. Imagination knows no bounds........ David
-
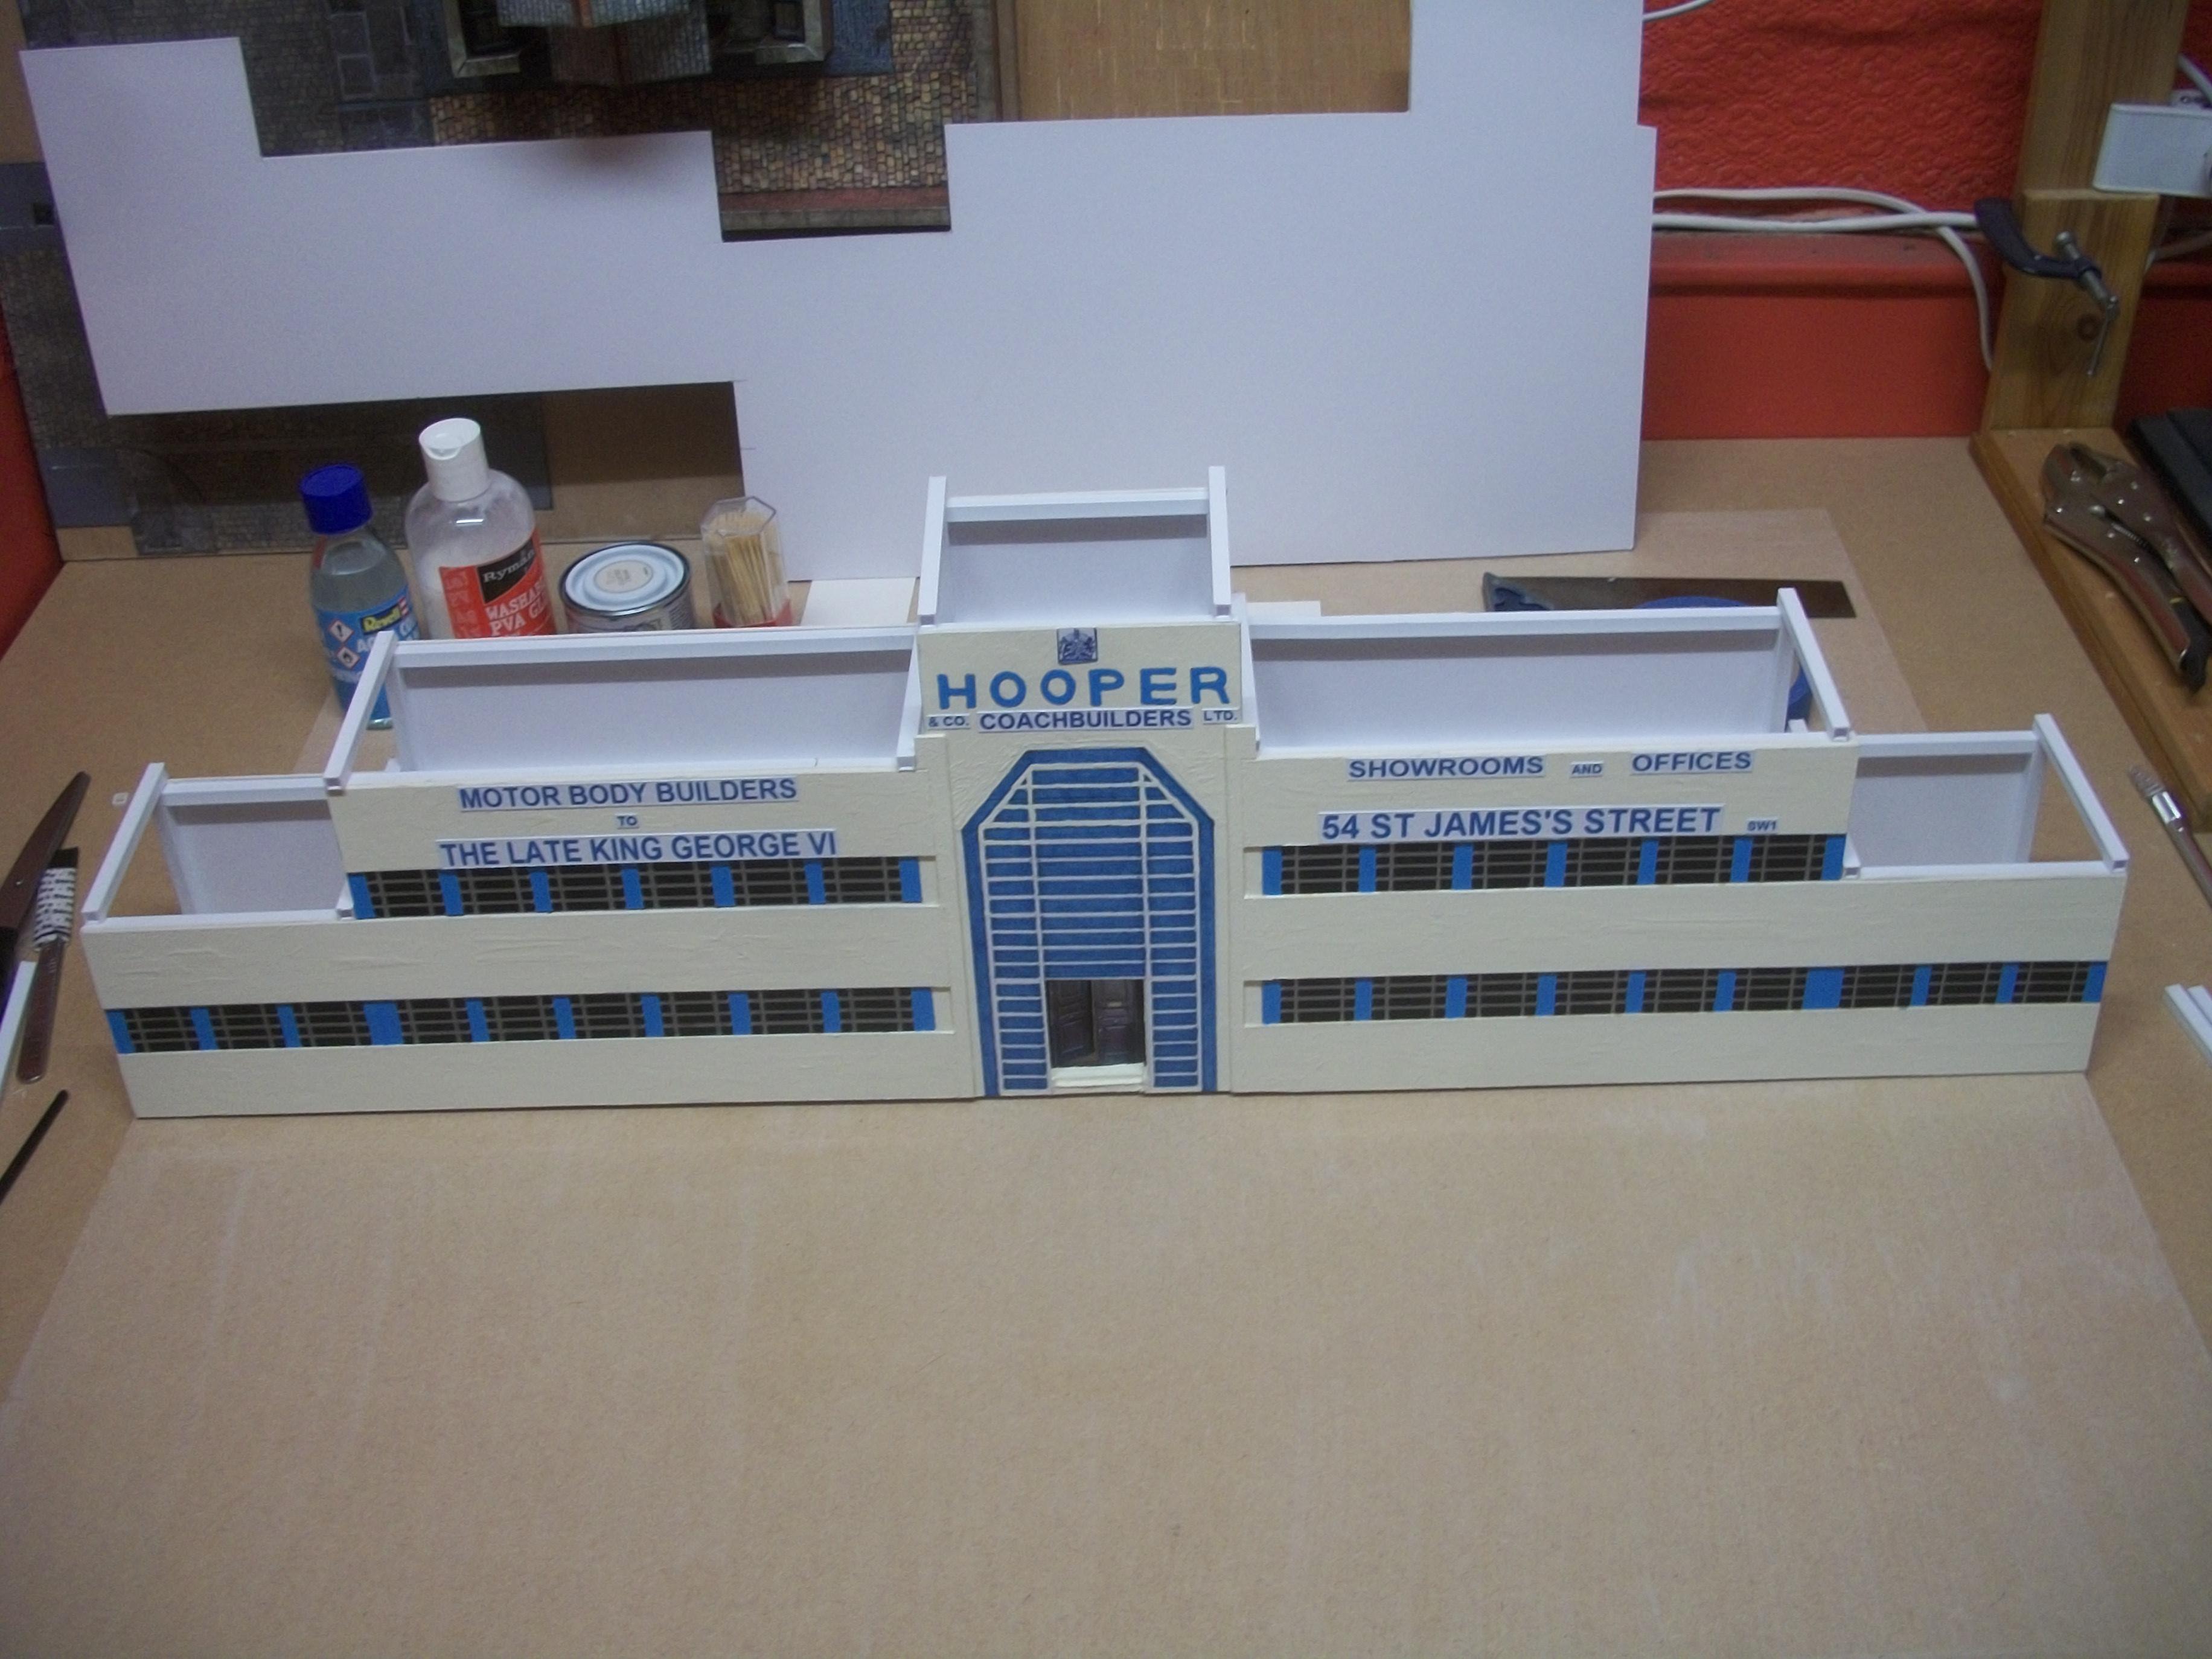
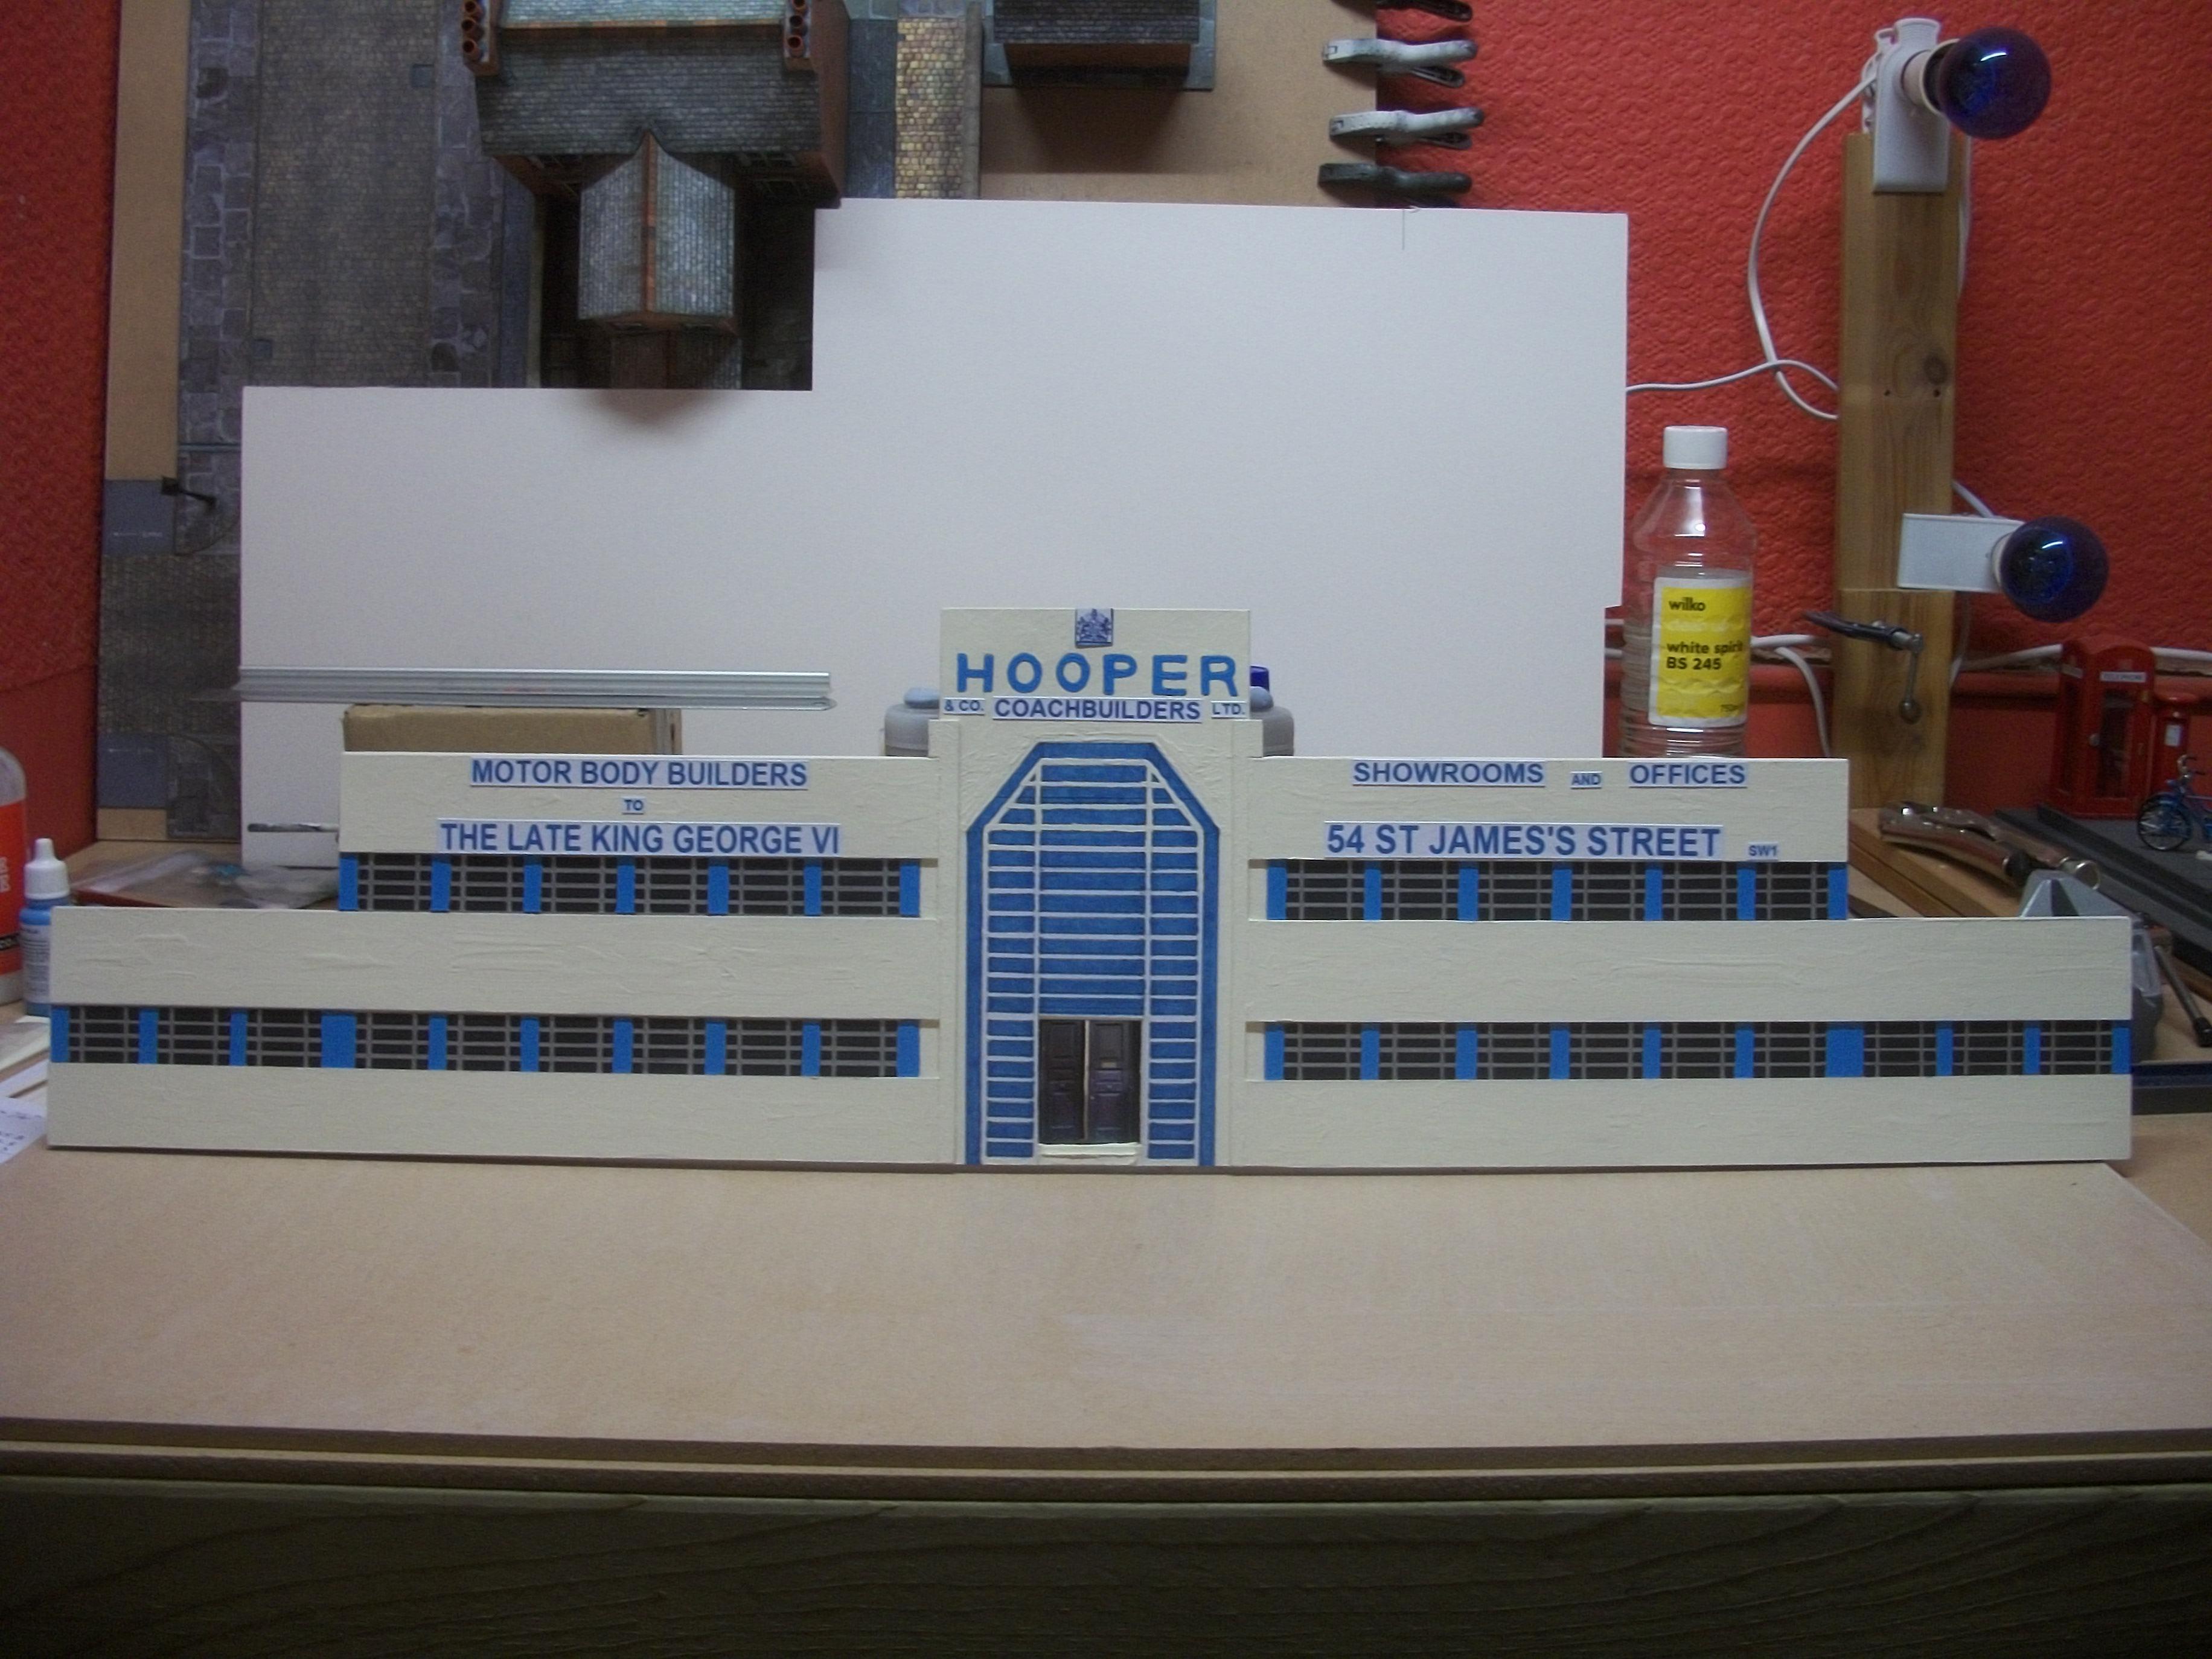
Surprisingly, I did manage to get quite a lot of work done on the Hooper factory front wall........ in between Christmas festivities, of course! The following photos show the lettering and further painting, as well as the doorway and the doorstep for the main entrance...... so now the door can be constructed and fitted. I have placed an order on Ebay for a SHELL gas pump in 1:43 scale by Vitesse, which is being shipped from Portugal, and I shall scratch build a concrete island for the pump to stand on. The pump model will be converted to a British petrol pump for the ESSO company and repainted in the 1950's colours, before placing the concrete island on the forecourt in front of the factory building. David


.jpg.273df7e003c7ffc976406d039a243fb4.jpg)